ENGLISH - Repair - Black and Decker
ENGLISH - Repair - Black and Decker
ENGLISH - Repair - Black and Decker
You also want an ePaper? Increase the reach of your titles
YUMPU automatically turns print PDFs into web optimized ePapers that Google loves.
2<br />
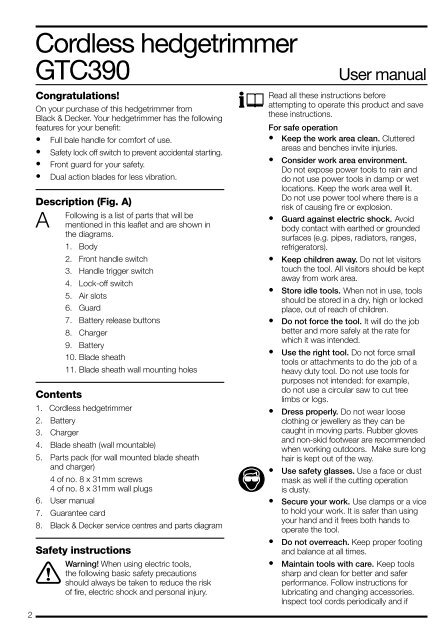
Cordless hedgetrimmer<br />
GTC390<br />
Congratulations!<br />
On your purchase of this hedgetrimmer from<br />
<strong>Black</strong> & <strong>Decker</strong>. Your hedgetrimmer has the following<br />
features for your benefit:<br />
• Full bale h<strong>and</strong>le for comfort of use.<br />
• Safety lock off switch to prevent accidental starting.<br />
• Front guard for your safety.<br />
• Dual action blades for less vibration.<br />
Description (Fig. A)<br />
Following is a list of parts that will be<br />
A mentioned in this leaflet <strong>and</strong> are shown in<br />
the diagrams.<br />
1. Body<br />
2. Front h<strong>and</strong>le switch<br />
3. H<strong>and</strong>le trigger switch<br />
4. Lock-off switch<br />
5. Air slots<br />
6. Guard<br />
7. Battery release buttons<br />
8. Charger<br />
9. Battery<br />
10. Blade sheath<br />
11. Blade sheath wall mounting holes<br />
Contents<br />
1. Cordless hedgetrimmer<br />
2. Battery<br />
3. Charger<br />
4. Blade sheath (wall mountable)<br />
5. Parts pack (for wall mounted blade sheath<br />
<strong>and</strong> charger)<br />
4 of no. 8 x 31mm screws<br />
4 of no. 8 x 31mm wall plugs<br />
6. User manual<br />
7. Guarantee card<br />
8. <strong>Black</strong> & <strong>Decker</strong> service centres <strong>and</strong> parts diagram<br />
Safety instructions<br />
! Warning! When using electric tools,<br />
the following basic safety precautions<br />
should always be taken to reduce the risk<br />
of fire, electric shock <strong>and</strong> personal injury.<br />
User manual<br />
Read all these instructions before<br />
attempting to operate this product <strong>and</strong> save<br />
these instructions.<br />
For safe operation<br />
• Keep the work area clean. Cluttered<br />
areas <strong>and</strong> benches invite injuries.<br />
• Consider work area environment.<br />
Do not expose power tools to rain <strong>and</strong><br />
do not use power tools in damp or wet<br />
locations. Keep the work area well lit.<br />
Do not use power tool where there is a<br />
risk of causing fire or explosion.<br />
• Guard against electric shock. Avoid<br />
body contact with earthed or grounded<br />
surfaces (e.g. pipes, radiators, ranges,<br />
refrigerators).<br />
• Keep children away. Do not let visitors<br />
touch the tool. All visitors should be kept<br />
away from work area.<br />
• Store idle tools. When not in use, tools<br />
should be stored in a dry, high or locked<br />
place, out of reach of children.<br />
• Do not force the tool. It will do the job<br />
better <strong>and</strong> more safely at the rate for<br />
which it was intended.<br />
• Use the right tool. Do not force small<br />
tools or attachments to do the job of a<br />
heavy duty tool. Do not use tools for<br />
purposes not intended: for example,<br />
do not use a circular saw to cut tree<br />
limbs or logs.<br />
• Dress properly. Do not wear loose<br />
clothing or jewellery as they can be<br />
caught in moving parts. Rubber gloves<br />
<strong>and</strong> non-skid footwear are recommended<br />
when working outdoors. Make sure long<br />
hair is kept out of the way.<br />
• Use safety glasses. Use a face or dust<br />
mask as well if the cutting operation<br />
is dusty.<br />
• Secure your work. Use clamps or a vice<br />
to hold your work. It is safer than using<br />
your h<strong>and</strong> <strong>and</strong> it frees both h<strong>and</strong>s to<br />
operate the tool.<br />
• Do not overreach. Keep proper footing<br />
<strong>and</strong> balance at all times.<br />
• Maintain tools with care. Keep tools<br />
sharp <strong>and</strong> clean for better <strong>and</strong> safer<br />
performance. Follow instructions for<br />
lubricating <strong>and</strong> changing accessories.<br />
lnspect tool cords periodically <strong>and</strong> if


