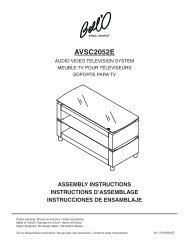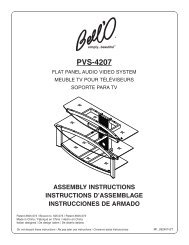
FLAT PANEL TV WALL MOUNT SUPPORT MURAL D ... - Bell'O
FLAT PANEL TV WALL MOUNT SUPPORT MURAL D ... - Bell'O
FLAT PANEL TV WALL MOUNT SUPPORT MURAL D ... - Bell'O

You also want an ePaper? Increase the reach of your titles
YUMPU automatically turns print PDFs into web optimized ePapers that Google loves.
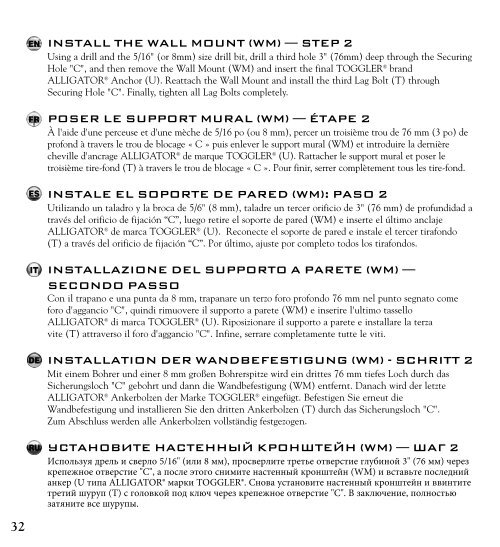
INSTALL THE <strong>WALL</strong> <strong>MOUNT</strong> (WM) — STEP 2<br />
Using a drill and the 5/16" (or 8mm) size drill bit, drill a third hole 3" (76mm) deep through the Securing<br />
Hole "C", and then remove the Wall Mount (WM) and insert the final TOGGLER ® brand<br />
ALLIGATOR ® Anchor (U). Reattach the Wall Mount and install the third Lag Bolt (T) through<br />
Securing Hole "C". Finally, tighten all Lag Bolts completely.<br />
POSER LE <strong>SUPPORT</strong> <strong>MURAL</strong> (WM) — ÉTAPE 2<br />
À l'aide d'une perceuse et d'une mèche de 5/16 po (ou 8 mm), percer un troisième trou de 76 mm (3 po) de<br />
profond à travers le trou de blocage « C » puis enlever le support mural (WM) et introduire la dernière<br />
cheville d'ancrage ALLIGATOR ® de marque TOGGLER ® (U). Rattacher le support mural et poser le<br />
troisième tire-fond (T) à travers le trou de blocage « C ». Pour finir, serrer complètement tous les tire-fond.<br />
INSTALE EL SOPORTE DE PARED (WM): PASO 2<br />
Utilizando un taladro y la broca de 5/6" (8 mm), taladre un tercer orificio de 3" (76 mm) de profundidad a<br />
través del orificio de fijación “C”, luego retire el soporte de pared (WM) e inserte el último anclaje<br />
ALLIGATOR ® de marca TOGGLER ® (U). Reconecte el soporte de pared e instale el tercer tirafondo<br />
(T) a través del orificio de fijación “C”. Por último, ajuste por completo todos los tirafondos.<br />
INSTALLAZIONE DEL <strong>SUPPORT</strong>O A PARETE (WM) —<br />
SECONDO PASSO<br />
Con il trapano e una punta da 8 mm, trapanare un terzo foro profondo 76 mm nel punto segnato come<br />
foro d'aggancio "C", quindi rimuovere il supporto a parete (WM) e inserire l'ultimo tassello<br />
ALLIGATOR ® di marca TOGGLER ® (U). Riposizionare il supporto a parete e installare la terza<br />
vite (T) attraverso il foro d'aggancio "C". Infine, serrare completamente tutte le viti.<br />
INSTALLATION DER WANDBEFESTIGUNG (WM) - SCHRITT 2<br />
Mit einem Bohrer und einer 8 mm großen Bohrerspitze wird ein drittes 76 mm tiefes Loch durch das<br />
Sicherungsloch "C" gebohrt und dann die Wandbefestigung (WM) entfernt. Danach wird der letzte<br />
ALLIGATOR ® Ankerbolzen der Marke TOGGLER ® eingefügt. Befestigen Sie erneut die<br />
Wandbefestigung und installieren Sie den dritten Ankerbolzen (T) durch das Sicherungsloch "C".<br />
Zum Abschluss werden alle Ankerbolzen vollständig festgezogen.<br />
УСТАНОВИТЕ НАСТЕННЫЙ КРОНШТЕЙН (WM) — ШАГ 2<br />
Используя дрель и сверло 5/16" (или 8 мм), просверлите третье отверстие глубиной 3" (76 мм) через<br />
крепежное отверстие "C", а после этого снимите настенный кронштейн (WM) и вставьте последний<br />
анкер (U типа ALLIGATOR® марки TOGGLER®. Снова установите настенный кронштейн и ввинтите<br />
третий шуруп (T) с головкой под ключ через крепежное отверстие "C". В заключение, полностью<br />
затяните все шурупы.<br />
32