MODE D'EMPLOI - inovaxion
MODE D'EMPLOI - inovaxion
MODE D'EMPLOI - inovaxion

You also want an ePaper? Increase the reach of your titles
YUMPU automatically turns print PDFs into web optimized ePapers that Google loves.
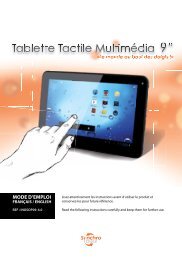
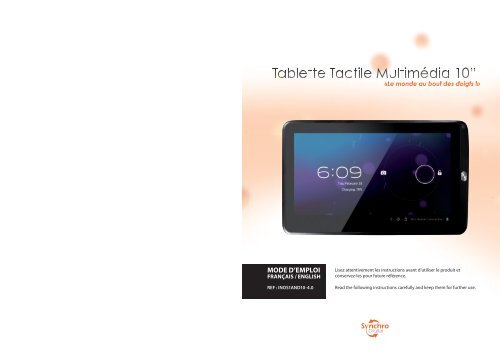
<strong>MODE</strong> D’EMPLOI<br />
FRANÇAIS / ENGLISH<br />
REF : INOS1AND10-4.0<br />
Lisez attentivement les instructions avant d’utiliser le produit et<br />
conservez-les pour future référence.<br />
Read the following instructions carefully and keep them for further use.
<strong>MODE</strong> D’EMPLOI<br />
FRANÇAIS<br />
INSTRUCTIONS<br />
ENGLISH<br />
1. NOTES ............................................ 1<br />
2. ACCESSOIRES ............................................ 2<br />
3. LA TABLETTE ............................................ 2<br />
4. DÉMARRAGE ET ARRÊT ................................ 3<br />
5. BUREAU ............................................ 4<br />
6. BOUTONS ............................................ 5<br />
7. PARAMÈTRES SYSTÈME ................................ 6<br />
8. GESTION DES APPLICATIONS ..................... 10<br />
9. RÉSEAU ............................................ 12<br />
10. MUSIQUE ............................................ 13<br />
11. VIDÉO ............................................ 14<br />
12. FOND D’ÉCRAN ............................................ 15<br />
13. ENREGISTREMENT ................................. 16<br />
14. CAMERA ............................................ 17<br />
15. MARCHE ............................................ 18<br />
16. E-MAIL ............................................ 26<br />
17. PÉRIPHÉRIQUES EXTERNES ..................... 29<br />
18. DÉPANNAGE RAPIDE ................................. 30<br />
1. NOTES ............................................ 31<br />
2. ACCESSORIES ............................................ 32<br />
3. OUTLOOK DESCRIPTION ................................. 32<br />
4. STARTUP AND SHUTDOWN ..................... 33<br />
5. DESKTOP ............................................ 35<br />
6. BUTTONS ............................................ 35<br />
7. SYSTEM SETTINGS ................................ 36<br />
8. APPLICATIONS ............................................ 40<br />
9. NETWORK ............................................ 42<br />
10. MUSIC ............................................ 43<br />
11. VIDEO ............................................ 44<br />
12. WALLPAPER ............................................ 45<br />
13. RECORD ............................................ 46<br />
14. CAMERA ............................................ 47<br />
15. MARKET ............................................ 48<br />
16. E-MAIL ............................................ 55<br />
17. EXTERNAL DEVICES ................................. 59<br />
18. TREATMENT FOR COMMON PROBLEMS 60
1. NOTES<br />
. Ce produit est principalement constitué par des éléments électroniques.<br />
Ne démontez jamais la tablette vous même., ceci annule la garantie de<br />
l’appareil.<br />
. Evitez les chocs et collisions.<br />
. Evitez d’utiliser ce produits dans les situations suivantes : Températures<br />
extrêmes (hautes ou basses), humidité et poussière, expositions<br />
magnétiques et expositions prolongées au soleil.<br />
. Essuyez les parties plastiques uniquement avec un chiffon doux, sec ou<br />
légèrement humide. L’utilisation de produits chimiques risquerait de<br />
l’endommager. Veuillez également maintenir le produit éloigné des sources<br />
d’eau ou des éclaboussures éventuelles, évitez pour cela les récipients tels<br />
que les gobelets et les vases placés à proximité du produit.<br />
. Une écoute de musique prolongé via des casques ou écouteurs peut<br />
causer des dommages permanents à votre audition.<br />
. Il est déconseillé d’utiliser des écouteurs lors de la conduite en voiture ou à<br />
moto afin d’éviter les accidents de la circulation.<br />
. Veuillez n’utilisez que les accessoires autorisés (batterie, adaptateur<br />
et autres,...). Les pannes dûes à l’utilisations d’autres accessoires serait<br />
une violation de la réglementation de garantie et peut-être dangereuse.<br />
Notez que tout appareil ayant une panne pour utilisation innaproprié<br />
n’est pas pris sous garantie.<br />
. La connexion de la tablette au chargeur doit être effectuée avec<br />
précaution, la connectique est fragile. Veuillez noter que la connectique<br />
ainsi que l’adaptateur secteur ne sont pas concernés par la garantie.<br />
. Veuillez recycler la tablette et ses accessoires en tenant compte des<br />
réglementations environnementales locales.<br />
. Si vous avez des questions concernant l’utilisation du produit veuillez<br />
contacter votre revendeur ou contacter le service client.<br />
. Synchro Digital® ne se rend pas responsable en cas de pertes de données<br />
utilisateur causée par des dommages au produit. Veuillez suivre le mode<br />
d’emploi et effectuer des sauvegardes régulièrement de vos données.<br />
. Les images utilisées dans ce manuel ne sont pas contractuelles et sont juste<br />
utilisées comme illustrations. Synchro Digital® se réserve le droit de modifier<br />
le mode d’emploi, les images, les logiciels et le hardware sans préavis.<br />
2. ACCESSOIRES<br />
Vous trouverez avec votre tablette :<br />
1. Adaptateur 5V-2A<br />
2. Mode d’emploi<br />
3. Cable USB<br />
4. Cable HDMI (optionnel)<br />
Veuillez noter que la Carte SD n’est pas fournie, vous pouvez vous en<br />
procurer une dans les magasins multimédias ou en grande surface.<br />
3. LA TABLETTE<br />
Voici votre appareil :<br />
Coté droit :<br />
Dessus :<br />
FR<br />
2
Vue de dos :<br />
FR<br />
4. DÉMARRAGE ET ARRÊT<br />
DÉMARRAGE : Appuyez sur le bouton d’alimentation et l’écran de la tablette<br />
s’allumera comme ci-dessous :<br />
ARRÊT : Appuyez sur le bouton d’alimentation, sur l’écran s’affiche alors une<br />
fenêtre d’options. Sélectionnez alors «Arrêt de la tablette».Puis appuyez sur<br />
OK.<br />
VEILLE : Lorsque la tablette est en marche appuyez sur le bouton<br />
d’alimentation brièvement. La tablette est alors en veille. Un autre appui<br />
bref la fera revenir en fonctionnement.<br />
Suivi de l’écran Android de démarrage :<br />
5. BUREAU<br />
Après le démarrage vous arrivez dans l’interface d’Android 4.0. Cette<br />
interface est constituée des principaux raccourcis.<br />
4
FR<br />
La barre d’état est utilisée pour afficher l’état du réseau, la puissance de la<br />
batterie, l’heure et d’autres informations.<br />
La boîte de recherche rapide est utilisée pour la recherche en tapant des<br />
mots-clés. La balise menu principal se trouve sur le côté du milieu droit de<br />
l’écran, appuyez dessus et la barre de menu par défaut peut être élargie.<br />
6. BOUTONS<br />
Dans le menu principal, vous pouvez configurer le système, lancer une<br />
application, installez une nouvelle application, jouer de la musique,<br />
naviguer dans les pages, lancer un jeu et effectuer bien d’autres opérations.<br />
7. PARAMÈTRES SYSTÈME<br />
Appuyez sur l’icône «Paramètres», pour ouvrir l’interface des réglages du<br />
système. Voyez ci-dessous :<br />
Voici un résumé des touches que vous utiliserez sur Android :<br />
Les touches de Volume «Volume +», «Volume -» sur le coté de la tablette<br />
servent au changement de volume.<br />
Le bouton d’alimentation s’utilise pour éteindre ou allumer l’appareil, vous<br />
pouvez également appuyer sur cette touche de façon brève pour mettre la<br />
tablette en veille.<br />
La touche «Menu» affiche les diverses fonctionnalités du menu.<br />
Le bouton «Home» permet de revenir ou de sélectionner l’interface<br />
principale.<br />
La touche «Retour»permet de revenir a l’écran précédent.<br />
Le Menu<br />
Appuyez sur le bouton «Menu» pour accéder aux applications et paramètres<br />
de la tablette.<br />
Wi-Fi<br />
Appuyez sur la colonne «Wi-Fi» et faites glisser le bouton «OFF» vers la<br />
droite pour activer la fonction comme indiqué sur la page suivante :<br />
6
FR<br />
Dans l’interface «WIFI» (photo ci-dessus), une liste des réseaux disponibles<br />
va s’afficher. Cliquez sur votre réseau pour le sélectionner, la fenêtre de<br />
paramètrage du réseau s’affiche alors, entrez-y les informations nécéssaires.<br />
Certains réseaux cryptés ont besoin d’un mot de passe valide.<br />
Date et l’heure<br />
Dans cette même interface des paramètres système vous pouvez également<br />
paramètrer la date et l’heure.<br />
- Vous pouvez choisir le mode automatique qui se base sur la date et l’heure<br />
de votre réseau.<br />
- Vous pouvez également choisir de fixer la date manuellement, sélectionner<br />
le fuseau horaire, programmer l’heurer, sélectionnez le format de date, etc.<br />
Voici un exemple :<br />
Vous serez alors connecté au Wi-Fi et l’image suivante apparaîtra :<br />
Vous pouvez également choisir les chiffres, modifier les entrées,...<br />
8
Affichage<br />
Sélectionnez «Affichage» dans les paramètres, dans le menu déroulant<br />
sélectionnez «Luminosité». La fenêtre suivante apparaîtra.<br />
Sortie HDMI<br />
Le produit prend en charge une sortie HDMI.<br />
Utilisez le câble HDMI pour relier l’appareil HDMI avec l’entrée dédiée.<br />
Environ 5 secondes plus tard, les deux systèmes seront connectés, un son<br />
et une image seront automatiquement transférés.<br />
Lorsque vous utilisez la sortie HDMI, l’écran LCD se mettra automatiquement<br />
à l’échelle du format de la source externe.<br />
8. GESTION DES APPLICATIONS<br />
Installez l’application: il existe une variété de façons d’installer des<br />
applications, par exemple via connexion USB, via le Market,... Ici, nous vous<br />
présentons l’installation via carte SD.<br />
1- Entrez dans le menu des paramètres système et sélectionnez l’option<br />
«Sécurité».<br />
FR<br />
Ecran de veille<br />
Vous pouvez configurer le délai avant l’écran de verrouillage et la mise en<br />
veille automatique.<br />
Dans le cadre de l’interface sélectionnez «Paramètres d’affichage» dans<br />
les et accèdez au menu déroulant, sélectionnez «écran de veille». Vous<br />
accèderez à l’interface suivante.<br />
Remarque : lors d’une lecture vidéo, l’écran de veille ne se déclenchera pas.<br />
2- Sélectionnez la source inconnue et l’icône suivante apparaîtra.<br />
10
3- Copiez le logiciel .APK sur la carte SD sur le PC, insérez la carte SD,<br />
appuyez sur le menu principal puis appuyez sur «File Manager» puis cliquez<br />
sur carte SD, comme indiqué ci-dessous :<br />
Sélectionnez «Paramètres» / «Apps» /, sélectionnez les applications<br />
correspondantes installées pour vérifier les informations sur le programme,<br />
désinstaller le programme et d’autres opérations.<br />
9. RÉSEAU<br />
Navigation Web<br />
Lorsque le réseau est connecté, ouvrez le navigateur et saisissez l’URL,<br />
vous pouvez parcourir la page web en entrant directement une URL, ou<br />
effectuer une recherche via la barre de recherche sur le bureau principal.<br />
FR<br />
4- Cliquez sur le nom de votre apllication puis enfin cliquez sur installer.<br />
Vous pouvez zoomer et dézoomer sur la page web et l’adapter à n’importe<br />
qu’elle échelle.<br />
Lecture video en ligne<br />
Les utilisateurs peuvent via le «Market» ou autres, télécharger une<br />
application de lecture vidéo en ligne qui permettra de lire des contenus<br />
des pages internet.<br />
L’utilisateur peut faire l’installation en ligne via le «Market», ou téléchargez<br />
et installez via PC, ou via un navigateur intégré en téléchargeant en ligne.<br />
Désinstallez l’application<br />
Vous pouvez utiliser les outils de tiers de logiciels de gestion ou d’utiliser le<br />
logiciel intégré de gestion des applications Android.<br />
12
10. MUSIQUE<br />
Appuyez l’apllication «musique», puis entrez dans le lecteur de musique. Le<br />
système de liste affiche alors tous les morceaux par défault.<br />
11. VIDEO<br />
Appuyez sur l’icône du «Lecteur HD» dans le menu principal, il donnera la<br />
liste de tous les fichiers vidéos et des images. Comme indiqué ci-dessous :<br />
FR<br />
Vous pouvez copier des fichiers audio dans le lecteur en insérant une clé<br />
USB ou une carte SD, vous également télécharger des fichiers audios en<br />
ligne.<br />
Sélectionnez le fichier vidéo et entrez dans l’interface de lecture vidéo,<br />
comme illustré ci-dessous. Sélectionnez «Play», «Stop», «Fast Forward»,<br />
«Rewind», «progrès» et les touches de contrôle d’autres pour contrôler l’horaire<br />
de diffusion.<br />
14
12. FOND-ECRAN<br />
Appuyez sur l’icône du «Lecteur HD» dans le menu principal, il donnera la<br />
liste de tous les fichiers vidéos et des images. Comme indiqué ci-dessous :<br />
Dans la boîte de dialogue ci-dessus, appuyez sur le «fond-écran», il y a les<br />
options suivantes:<br />
Sélectionnez «fond-écran»: change image comme fond-écran.<br />
Sélectionnez «fond-écran dynamique»: utilise les systèmes fournis 3D<br />
comme fond-écran.<br />
Sélectionnez «galerie»: choisi une image fournie par le système comme<br />
fond d’écran statique.<br />
FR<br />
13. RECORD<br />
Appuyez sur le «Hi-Q MP3 Recorder» icône dans le menu principal et entrez<br />
le «Hi-Q MP3 Recorder» interface principale, comme illustré ci-dessous :<br />
Le système prend en charge fond-écran statique, et fond-écran 3D.<br />
Dans l’interface de bureau, appuyez sur la touche menu, sélectionnez des<br />
options de pop-up «fond-écran», et puis «choisir la source fond-écran» de<br />
la boîte de sélection:<br />
Sélectionnez l’option «enregistrement» pour enregistrer, après<br />
l’enregistrement est terminé, appuyez sur bouton «stop».<br />
À ce moment, vous pouvez sélectionner le bouton «play» pour jouer le son<br />
enregistré. vous pouvez trouver les fichiers audio correspondants dans «File<br />
Manager» / «Enregistrements».<br />
16
14. CAMERA<br />
Appuyez sur le «Caméra» icône sur le menu principal et entrez le «appareil<br />
photo», comme indiqué ci-dessous:<br />
15. MARCHE<br />
Appuyez “Play Store» icône sur le menu principal.<br />
Si vous n’avez pas de compte Gmail, vous devez créer un compte Gmail,<br />
cliquez sur «Obtenir un compte Google» l’image suivante apparaîtra:<br />
FR<br />
Appuyez sur l’obturateur de la caméra:<br />
18
Créez un mot de passe:<br />
FR<br />
Ecrivez «Prénom» et «Nom de famille».<br />
Cliquez sur «Suivant», l’entrée compte Gmail, l’image suivante apparaîtra.<br />
20
22<br />
FR
Appuyez sur «Continuer» et vous serez officiellement entrer dans le «Google<br />
Play» de l’image ci-dessous apparaît:<br />
Appuyez sur «7.Angry birds saisons», le tableau suivant apparaîtra:<br />
FR<br />
Appuyez sur «Jeux», l’image suivante apparaîtra:<br />
Appuyez ici pour télécharger et installer le logiciel (photo ci-dessus), prendre<br />
quelques minutes, le logiciel sera installé, comme l’image ci-dessous:<br />
24
16. E-MAIL<br />
Appuyez sur le «e-mail» icône sur le menu principal pour entrer dans le client<br />
e-mail. L’attribution des informations de compte est la première fois nécessaire.<br />
FR<br />
Email nécessite le support réseau, s’il vous plaît faire en sorte que le lien<br />
e-mail du réseau est correct.<br />
Ici nous prennons whhpwjh@126.com comme exemple:<br />
Tapez votre adresse e-mail valide: whhpwjh@126.com<br />
Entrez votre mot de passe dans le champ suivant: * * * * * * * *<br />
Selon les informations de chaque fournisseur de messagerie, réglez le<br />
paramètre différent, tel que:<br />
Le serveur POP3: par défaut est «126.com», et devrait être modifié pour<br />
«pop.126.com»<br />
Le numéro de port est «110»<br />
Ensuite, sélectionnez le «Suivant», vous entrez dans les «paramètres de<br />
contrôle de réception du serveur», si correctement configuré, il y aura un<br />
«paramètres du serveur étrangers» interface comme suit:<br />
Ici, nous utilisons le type de compte POP3. Et les paramètres de service de<br />
réception apparaîtra, interface comme indiqué ci-dessous:<br />
26
Corriger le SMIP serveur «126.com» pour «smtp.126.com»<br />
Modifiez le numéro de port «587» à «25»<br />
Sélectionnez le bouton «Suivant», si configuré correctement, vous entrez<br />
dans l’interface suivante:<br />
Dans la colonne «nom» la saisie du nom que vous souhaitez afficher dans<br />
le message d’accueil, puis appuyez sur «Suivant». Il va charger l’e-mail<br />
automatiquement, il liste sera comme suit:<br />
FR<br />
Sélectionnez l’une de la colonne à l’affichage du message, vous pouvez<br />
faire «Répondre», «Supprimer», «plus la réponse» et d’autres opérations à<br />
la barre d’affichage. t<br />
28
17. LE PERIPHERIQUE EXTERNE :<br />
USB connection<br />
Utiliser USB pour connecter le MID et PC, le mode de connexion par défaut<br />
est un mode synchrone. Vous pouvez faire glisser la barre d’état à la chute,<br />
est apparu l’interface suivante :<br />
18. LE TRAITEMENT DES PROBLEMES COMMUNS :<br />
1: Qu’est-ce qu’un Android ?<br />
Réponse: Android est un nom de système d’exploitation que Google a<br />
annoncé le 5 Novembre 2007, que sur la base du système d’exploitation<br />
open source de la plate-forme Linux.<br />
2: Qu’est-ce qu’un APK?<br />
Réponse: APK est l’acronyme du package Android, Android package<br />
d’installation .<br />
3: Comment obtenir APK?<br />
Réponse: Vous pouvez télécharger et l’installer par le terminal PC en ligne,<br />
vous pouvez aussi téléchargez et installez-le en «Android Market» en ligne<br />
aussi.<br />
4: Quelle est la version du système d’exploitation de la machine ?<br />
Réponse: La machine adopte Android2.3, 3D intégré dans l’accélération<br />
matérielle, peut fonctionner sur la plupart des applications Android.<br />
5: Peut la machine être chargée par USB ?<br />
Réponse: Oui. Recommandez l’utilisation de la DC accessoires, 5V adaptateur<br />
secteur pour charger .<br />
FR<br />
«USB est connecté»: désigne mémoire externe (SD) le chargement est<br />
terminé, et vous pouvez voir la lettre correspondante dans le terminal PC.<br />
OTG utilistaion<br />
Soutenir l’équipement FAT32 format mobile: comme un disque U, mobile<br />
disque dur.<br />
La méthode de connexion plug-and-play: Utilisez le câble OTG pour<br />
connecter le MID USB OTG et de l’équipement externe.<br />
Clavier et souris<br />
Soutien Plug & Play USB de la souris, dispositif de clavier.<br />
Appendix: Les pièces en option et des modèles<br />
30
1. NOTES<br />
. This is a high-density electronic product; please do not dismantle it by<br />
yourself.<br />
. Avoid strong beat and collision.<br />
. Avoid using this product in the following environments: high and low<br />
temperature, humidity, dusty, with strong magnetic and long-term<br />
exposure to the sun.<br />
. Please wipe the product shell use twist dry wet cotton cloth gently; the<br />
use of other chemical cleaning is prohibited. This product should keep away<br />
from water drop and water splash, so cups filled with liquids should not be<br />
placed near the product.<br />
. Use the headset long time, high volume may cause permanent damage to<br />
hearing.<br />
. Do not use headphones when going across a road, driving a motorcycle or<br />
bicycle, in order to avoid traffic accidents.<br />
. Please use permitted battery, charger and accessories only, the use of<br />
any other type of product would be a breach of warranty regulations, and<br />
may be dangerous.<br />
. Please deal with waste machinery and accessories according to local<br />
environmental regulations.<br />
. If you have any questions in the process of using of the product, please<br />
contact the local dealer or contact customer service center of our company<br />
directly.<br />
. For the smeared memory loss that is caused by product damage, repair or<br />
other causes of product damage, repair, the company is not responsible for<br />
it, so please follow the user’s guide and timely backup.<br />
. All pictures display on this manual are just for reference, please<br />
according to actual products. The sellers retain all the rights to<br />
change specs & pictures & softwares & hardwares without notice<br />
2. ACCESSOIRES<br />
With your tablet you will find:<br />
1. 5V 2A Charge<br />
2. User manual<br />
3. USB cable<br />
4. HDMI cable(option)<br />
Please note that the SD card is not provided, you can get one in stores or<br />
in supermarkets multimedia.<br />
3. OUTLOOK DESCRIPTION<br />
Front view:<br />
Right view:<br />
Left view:<br />
EN<br />
32
Back view:<br />
EN<br />
4. STARTUP AND SHUTDOWN<br />
SHUTDOWN: Press the power key then pop-up options will be on the<br />
desktop, choose the option of Power off as shown below<br />
STARTUP: press the power key and the system will enter the process of<br />
Startup, as shown below:<br />
Startup Logo, in the process of startup<br />
SLEEP: in the normal state operation of the machine, press the power<br />
button, enter a state of dormancy, at this time, the screen will be closed.<br />
Another short press on the power button can be resume to normal mode.<br />
When machine is not used you can start this function, in order to reduce<br />
power consumption.<br />
The system has been started and is entering the Android system:<br />
34
5. DESKTOP<br />
After the normal startup of the system is completed, you can see the<br />
Android4.0 desktop (below). The default desktop is consisted by quick<br />
search icon, status bar, menu label icon,etc.<br />
Main menu operation<br />
Press the main menu tag on the screen, as shown below:<br />
EN<br />
5. DESKTOP<br />
Après le démarrage vous arrivez dans l’interface d’Android 4.0. Cette<br />
interface est constituée des principaux raccourcis.<br />
The status bar is used to display the network status of current system,<br />
battery power, time and other information.<br />
Quick search box is used by typing keywords to do the Internet search. The<br />
main menu tag is in the right middle side of the screen, tap it and the default<br />
menu bar can be expanded.<br />
In the main menu, you can set the system, operate the existed application,<br />
install a new application, play music , browse webpage, play game and<br />
other operations.<br />
7. SYSTEM SETTINGS<br />
Tap the «Settings» icon , and then open the system settings interface, as<br />
shown below:<br />
6. BUTTONS<br />
Keys used in Android systems process:<br />
The volume keys: «Volume +», «Volume -» on the shell can be used for<br />
Volume change.<br />
The power button: press long time for switching machine. Press quickly to<br />
enter or leave the state of dormancy.<br />
The key «Menu»: display the current form of the menu item.<br />
The key «Home»: return or select the main interface.<br />
The key «Retour»: return to the last desktop.<br />
36
Wi-Fi<br />
Tap “Wi-Fi” column and right drag the “OFF”, you can open the WIFI function<br />
and into the wi-fi settings interface,as shown below:<br />
EN<br />
Wi-Fi<br />
Appuyez sur la colonne «Wi-Fi» et faites glisser le bouton «OFF» vers la<br />
droite pour activer la fonction comme indiqué sur la page suivante :<br />
Date and time<br />
In the «WIFI» interface (pictured above), it will list the wireless router that<br />
is searched by MID, tap the searched wireless router setup window will<br />
pop-up, please according to the prompts to complete the WIFI network<br />
links. Some encryption network, need to enter a valid key. Link diagram as<br />
follows:<br />
In the interface of the setting to select «Date & time» to enter the date and<br />
time settings interface:<br />
You can choose the automatic mode: using the network time.<br />
You also can choose to set the date, select time zone, set time, select date<br />
format, set date and other information<br />
For example, choose the set date, as shown below:<br />
After you connected WI-FI as shown above, the follow image will appear:<br />
You can also choose the number, enter the input pattern. Directly input the<br />
number, and then select the button done, as shown below:<br />
38
Display<br />
In the setting of the interface to select «Display» into the display settings<br />
interface, rolling drop-down lists, select «Brightness», appeared the<br />
following dialogue.<br />
HDMI output<br />
The product supports HDMI output.<br />
Use the HDMI connecting cable to connect the MID and HDMI device with<br />
input interface. About 5 seconds later, the systems will transfer to HDMI<br />
output, HDMI will automatically output sound and image.<br />
When using the HDMI output, LCD display content will scale the output to<br />
the external device at the same time.<br />
8. APPLICATIONS<br />
Install the application: there are a variety of ways to install applications, for<br />
example by USB setup, third party programs support installation. Here we<br />
introduced the way to install with the TF card.<br />
1- Enter the menu, select Settings - Security.<br />
EN<br />
Screen standby<br />
Screen standby: the delay before the screen standby automatic locking.<br />
In the setting of the interface to select «display settings» into the display<br />
settings interface, rolling drop-down lists, select «screen standby»,<br />
appeared the following interface:<br />
Note: during video broadcast, the screen automatically standby function<br />
is invalid.<br />
2- Press “Unknown sources”and then “OK” the following image will appear<br />
40
3- Copy the APK software program to the TF card on PC, the TF card insert<br />
to MID, tap main menu and then tap “File Manager” into File Manager<br />
interface, tap SD,as shown below:<br />
Uninstall the application<br />
you can use the third party software management tools or use the built-in<br />
Android application management software.<br />
Select «Settings» / «Apps» /, select the corresponding installed applications<br />
to check the program information, uninstall the program and other<br />
operations.<br />
9. NETWORK<br />
Webpaging browsing<br />
When the network is connected, open the browser and enter the URL, you<br />
can browse webpage; or through the main desktop search bar to input the<br />
URL and open the webpage.<br />
EN<br />
4- Tap “angry_birds.apk”, and then tap “Install”, as shown below:<br />
The user can do on-line installation through “Market», or download and<br />
install by the computer, or through a built-in browser download and install<br />
online.<br />
Webpage can be free scaled by the scaling controller.<br />
Online video<br />
Users can through the “Market» or other ways to download online video<br />
player software, online TV player software, online music software, and then<br />
install in the machine. To open the installed software, you can watch online<br />
video or online TV, listen to online radio.<br />
Users can also download other third party network application software,<br />
including the webpage browsing, video player, website client, instant<br />
messaging and other software.<br />
42
10. MUSIC<br />
Tap the «music» icon on the main menu, and then enter the music player<br />
interface. The default list system in the user data area for all audio files as<br />
shown below:<br />
11. VIDEO<br />
Tap the «Super-HD player» icon on the main menu, it will list all video files<br />
and image files. As shown below:<br />
EN<br />
You can through the synchronous USB to input audio file, or by inserting a<br />
SD card with audio file to input audio files, you can also through the network<br />
to download the audio file.<br />
Select the corresponding tag, and check the interface as «artists», «album»,<br />
and “song» and so on to play the song.<br />
Select the video file and enter the video playing interface, as shown below.<br />
Select «play», «stop», «fast forward», «rewind», «progress» and other control<br />
keys to control the broadcast schedule.<br />
44
12. WALLPAPER<br />
The system supports static wallpaper, and 3D wallpaper.<br />
In the desktop interface, press down the Menu key, pop-up menu options,<br />
select «wallpaper”, and pop-up “choose the wallpaper source» selection box:<br />
Into the above dialog box, tap on the «wallpaper» set,<br />
There are the following options:<br />
Select «wallpaper»: can customized using image as wallpaper.<br />
Select the «dynamic wallpaper»: can use the systems supplied 3D wallpaper.<br />
Select the «Gallery»: can choose a picture supplied by the system as the<br />
static wallpaper.<br />
EN<br />
13. RECORD<br />
Tap the «Hi-Q MP3 Recorder» icon in main menu and enter the «Hi-Q MP3<br />
Recorder» main interface as shown below:<br />
There are the following options:<br />
Select «wallpaper»: can customized using image as wallpaper.<br />
Select the «dynamic wallpaper»: can use the systems supplied 3D wallpaper.<br />
Select the «Gallery»: can choose a picture supplied by the system as the<br />
static wallpaper.<br />
Or press on the screen and dialog box will pop up as follows:<br />
Select the «recording» button to record, after recording is completed,<br />
press «stop» button. At this time you can select the «play» button to play<br />
the recorded sound. you can find the corresponding audio files in «File<br />
Manager»/ “Recordings”.<br />
46
14. CAMERA<br />
Tap the «Camera» icon on the main menu and enter the «camera» main<br />
interface as shown below:<br />
15. MARKET<br />
Tap the “Play Store» icon on the main menu,as shown below:<br />
EN<br />
Tap on shutter in the camera:<br />
If you have no Gmail account, you need to create a Gmail account, tap «Get<br />
a Google Account» the following picture will appear:<br />
48
Create a password:<br />
EN<br />
Input “First name” and “Last name”.<br />
Select “Next”, input gmail account, the following picture will appear.<br />
50
52<br />
EN
Tap “Continue” and you will officially enter the «Google Play» the following<br />
picture will appear:<br />
Tap “7.Angry Birds Seasons”, the following picture will appear:<br />
EN<br />
Tap “Games”, the following picture will appear:<br />
Tap to download and install software (pictured above), take a few minutes ,<br />
software will installed, as the following picture:<br />
54
16. E-MAIL<br />
Tap the «e-mail» icon on the main menu to enter email client. Allocation<br />
of account information will be required the first time. As shown below:<br />
Here we are using the POP3 account type. And the receiving service settings<br />
will appear, interface as shown below:<br />
EN<br />
Email requires network support, please ensure that network mail link is<br />
normal.<br />
Here we take whhpwjh@126.com as an example:<br />
In the email address bar, enter your valid email address: whhpwjh@126.com<br />
In the password field to enter your valid password: * * * * * * * *<br />
Then you can choose the «next», account type selection interface will<br />
appear as shown below:<br />
Please according to each email provider’s information, set different<br />
parameter, such as:<br />
The POP3 server: default is «126.com», and should be modified for «pop.126.<br />
com”<br />
The port number is «110»<br />
Then select the «next «, you will enter the «inspection acceptance server<br />
settings», if set up correctly, there will be a «foreign server settings» interface<br />
as follows:<br />
56
Correct the SMIP server «126.com» for «smtp.126.com»<br />
Modify the port number «587» to «25»<br />
select the «Next», If set up correctly, you will enter the following interface:<br />
In the column «name» to input the name you want to display in the outgoing<br />
message, and then tap «Next» button. It will load the mail automatically; it<br />
list will be as follow:<br />
EN<br />
Select one of the column to be viewing the message, you can do «Reply»,<br />
«delete», «more reply» and other operations at the view bar.<br />
58
17. EXTERNAL DEVICE:<br />
USB connection<br />
Using USB to connect the MID and PC, the default connection mode is<br />
a synchronous mode. You can drag the status bar to drop, appeared the<br />
following interface:<br />
18. TREATMENT FOR COMMON PROBLEMS<br />
1: What is an Android?<br />
Answer: Android is an operating system name that Google announced<br />
on November 5, 2007 that based on the open source operating system of<br />
Linux platform.<br />
2: What is a APK?<br />
Answer: APK is Android Package acronym, Android installation package.<br />
3: How to get APK?<br />
Answer: can download and install it by PC terminal online, you can also<br />
download and install it by “Android market» online too.<br />
4: What is the version of machine operating system?<br />
Answer: This machine adopts Android2.3, 3D built-in hardware acceleration,<br />
can run on most Android applications.<br />
5: Can the machine be charged by USB?<br />
Answer: Yes it is. Recommend the use of the accessories DC. 5V adapter to<br />
charge.<br />
EN<br />
«USB is connected»: means external memory (SD) loading is completed, and<br />
you can see the corresponding letter in the PC terminal.<br />
OTG use<br />
Support FAT32 format mobile equipment: such as U disk, mobile hard disk.<br />
The plug-and-play connection method:<br />
Use the OTG wire to connect the MID USB OTG and the external<br />
equipment.<br />
Keyboard and mouse<br />
Support plug and play USB mouse, keyboard device.<br />
Appendix: The original parts and models<br />
60