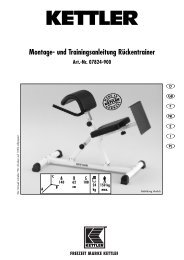
Bauch- und Rückentrainer VARIO - Sportolino.de
Bauch- und Rückentrainer VARIO - Sportolino.de
Bauch- und Rückentrainer VARIO - Sportolino.de
You also want an ePaper? Increase the reach of your titles
YUMPU automatically turns print PDFs into web optimized ePapers that Google loves.
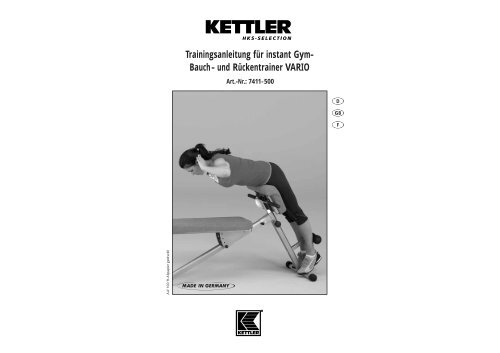
Trainingsanleitung für instant Gym-<br />
<strong>Bauch</strong>- <strong>und</strong> Rückentrainer <strong>VARIO</strong><br />
Art.-Nr.: 7411-500<br />
D<br />
GB<br />
F<br />
Auf 100 % Altpapier gedruckt!
D Trainingsanleitung für die instant gym-Trainingsbank <strong>VARIO</strong> GB Instructions for using the instant gym exercise bench <strong>VARIO</strong><br />
Die Trainingsbank <strong>VARIO</strong> ist ein vielseitiges <strong>und</strong> multifunktionales<br />
Heimsportgerät für ein optimales, kraftbetontes Fitnesstraining insbeson<strong>de</strong>re<br />
mit Kurzhanteln. Für ein ges<strong>und</strong>heitlich wertvolles Training sind<br />
allerdings einige Punkte unbedingt zu beachten, die wir Ihnen kurz darstellen<br />
möchten:<br />
1. Vermei<strong>de</strong>n Sie als Anfänger ein Training mit zu schweren Gewichten.<br />
2. Benutzen Sie in <strong>de</strong>n ersten Trainingseinheiten nur so schwere<br />
Gewichte, die Sie 15 mal ohne Pressatmung bewältigen können.<br />
3. Achten Sie auf regelmäßigen Atemrhythmus: bei <strong>de</strong>r Überwindung<br />
<strong>de</strong>s Wi<strong>de</strong>rstan<strong>de</strong>s (konzentrische Phase) ausatmen, beim Nachgeben<br />
(exzentrische Phase) einatmen. Pressatmung unbedingt vermei<strong>de</strong>n.<br />
4. Führen Sie alle Bewegungen gleichmäßig, nicht ruckhaft <strong>und</strong> schnell<br />
durch.<br />
5. Alle Bewegungen sollten im vollen Bewegungsumfang durchgeführt<br />
wer<strong>de</strong>n, um Verkürzungen <strong>de</strong>r Muskulatur vorzubeugen. Jedoch ist in<br />
<strong>de</strong>n Beuge- <strong>und</strong> Streckpositionen auf ausreichend Muskelspannung zu<br />
achten, um Gelenkbelastungen zu minimieren.<br />
6. Auf Rückenstabilität sollte ein beson<strong>de</strong>res Augenmerk gelegt wer<strong>de</strong>n.<br />
Daher empfiehlt es sich während <strong>de</strong>s Trainings eine konstante<br />
Spannung in <strong>de</strong>r <strong>Bauch</strong>muskulatur zu halten.<br />
7. Be<strong>de</strong>nken Sie stets, dass Ihre Muskulatur <strong>und</strong> Ihre Kraft schneller zunehmen<br />
als die Anpassungen Ihrer Bän<strong>de</strong>r, Sehnen <strong>und</strong> Gelenke.<br />
Fazit: Den Belastungswie<strong>de</strong>rstand im fortlaufen<strong>de</strong>n Trainingsprozess<br />
nur langsam steigern. Steigern Sie daher Ihr Training in folgen<strong>de</strong>r<br />
Reihenfolge:<br />
I. Steigerung <strong>de</strong>r Trainingshäufigkeit (Trainingseinheiten pro Woche)<br />
II. Steigerung <strong>de</strong>s Trainingsumfangs (Anzahl <strong>de</strong>r Sätze pro Übung)<br />
III. Steigerung <strong>de</strong>r Intensität (Erhöhung <strong>de</strong>s Trainingsgewichts)<br />
Wichtiger Hinweis:<br />
Lassen Sie vor Aufnahme <strong>de</strong>s Fitnesstrainings durch Ihren Hausarzt abklären,<br />
ob Sie für das Training mit <strong>de</strong>r Trainingsbank <strong>VARIO</strong> ges<strong>und</strong>heitlich<br />
geeignet sind. Der ärztliche Bef<strong>und</strong> sollte Gr<strong>und</strong>lage für <strong>de</strong>n Aufbau<br />
Ihres Trainingsprogrammes sein.<br />
Die o.g. <strong>und</strong> folgen<strong>de</strong>n Trainingshinweise empfehlen sich nur für ges<strong>und</strong>e<br />
Personen.<br />
Trainingsempfehlung<br />
Für Fitnesstraining bzw. ges<strong>und</strong>heitsorientiertes Krafttraining sind am besten<br />
das Kraftausdauer- <strong>und</strong> das Muskelaufbautraining (Hyper-<br />
trophietraining) geeignet. Beim Kraftausdauertraining wird mit leichten<br />
Gewichten (ca. 40-50% <strong>de</strong>r Maximalkraft*) <strong>und</strong> einer zügigen, aber<br />
kontrollierten Bewegungsgeschwindigkeit trainiert. Die Wie<strong>de</strong>rholungs -<br />
zahl beträgt zwischen 16-20.<br />
Beim Muskelaufbautraining wird mit schwereren Gewichten (ca. 60-80%<br />
<strong>de</strong>r Maximalkraft*) <strong>und</strong> einer mäßig langsamen Bewegungs ge -<br />
schwindigkeit trainiert.<br />
Nach einem Kraftausdauerprogramm von ca. 4 Wochen, ist ein mo<strong>de</strong>rates<br />
Muskelaufbautraining durchaus praktizierbar. Gera<strong>de</strong> im Alter ist es<br />
wichtig Muskelmasse zu erhalten bzw. aufzubauen, um Gelenke zu stabilisieren<br />
<strong>und</strong> zu entlasten.<br />
Beispiele für die Trainingsplanung<br />
Woche 1-4 Kraftausdauer (ca. 40-60% <strong>de</strong>r Maximalkraft)<br />
Sätze Wie<strong>de</strong>rholungen Pause Bewegungs -<br />
geschwindigkeit<br />
2 - 4 16 - 20 60 sec. zügig<br />
Woche 5-8 Muskelaufbautraining (ca. 60-80% <strong>de</strong>r Maximalkraft)<br />
Sätze Wie<strong>de</strong>rholungen Pause Bewegungs -<br />
geschwindigkeit<br />
3 - 4 10 - 14 3 - 4 min. Mäßig langsam<br />
Beginnen Sie Ihr Training stets mit einem Aufwärmsatz. Die Pausen sollten<br />
Sie zu Lockerungsübungen nutzen. Trainieren Sie 2-3 mal pro<br />
Woche mit Ihrem <strong>VARIO</strong> <strong>und</strong> nutzen Sie je<strong>de</strong> Gelegenheit Ihr Training<br />
zu ergänzen, wie z.B. durch ausge<strong>de</strong>hnte Spaziergänge, Joggen,<br />
Radfahren, Schwimmen etc.<br />
Sie wer<strong>de</strong>n feststellen, dass ein regelmäßiges Training Ihre Fitness <strong>und</strong><br />
Ihr Wohlbefin<strong>de</strong>n verbessern wird.<br />
Warnhinweise<br />
Sie trainieren mit einem Gerät, das sicherheitstechnisch nach neuesten<br />
Erkenntnissen konstruiert wur<strong>de</strong>. Mögliche Gefahrenstellen, die Verletzungen<br />
verursachen können, sind bei <strong>de</strong>m Gerät bestmöglich vermie<strong>de</strong>n<br />
<strong>und</strong> abgesichert. Das Gerät ist ausschließlich für die Benutzung von<br />
Erwachsenen konzipiert.<br />
Falsches o<strong>de</strong>r übermäßiges Training kann zu Ges<strong>und</strong>heitsschä<strong>de</strong>n<br />
führen. Lassen Sie vor Aufnahme <strong>de</strong>s Trainings durch Ihren Hausarzt abklären,<br />
ob Sie ges<strong>und</strong>heitlich für das Training mit diesem Gerät geeignet<br />
sind. Der ärztliche Bef<strong>und</strong> sollte Gr<strong>und</strong>lage für <strong>de</strong>n Aufbau Ihres<br />
Trainingsprogrammes sein.<br />
Das Gerät ist als Spielzeug auf keinen Fall geeignet. Be<strong>de</strong>nken Sie, dass<br />
durch das natürliche Spielbedürfnis bzw. Temperament von Kin<strong>de</strong>rn im<br />
Umgang mit <strong>de</strong>m Gerät unvorhersehbare Situationen <strong>und</strong> Gefahren auftreten<br />
können, die eine Verantwortung seitens <strong>de</strong>s Herstellers ausschließen.<br />
Wenn Sie Kin<strong>de</strong>r <strong>de</strong>nnoch an das Gerät lassen, sind diese<br />
auf die richtige Benutzung hinzuweisen <strong>und</strong> zu beaufsichtigen.<br />
Die Montage <strong>de</strong>s Gerätes muss sorgfältig <strong>und</strong> von einer erwachsenen<br />
Person vorgenommen wer<strong>de</strong>n. Stellen Sie sicher, dass <strong>de</strong>r Trainingsbetrieb<br />
nicht vor ordnungsgemäßem Abschluss <strong>de</strong>r Montage aufgenommen<br />
wird. Bei regelmäßigem Trainingsbetrieb empfehlen wir, alle ein bis<br />
zwei Monate eine Kontrolle aller Geräteteile sowie <strong>de</strong>r Befestigungselemente,<br />
insbeson<strong>de</strong>re <strong>de</strong>r Schrauben <strong>und</strong> Bolzen. Damit das konstruktiv<br />
vorgegebene Sicherheitsniveau <strong>de</strong>s Gerätes erhalten bleibt, ist bei<br />
Verschleiß das Gerät <strong>de</strong>r Benutzung zu entziehen <strong>und</strong> die durch<br />
Verschleiß beschädigten Teile sind sofort auszutauschen.<br />
Beim Umgang mit Kurzhanteln sowie Hantelscheiben ist auf <strong>de</strong>n korrekten<br />
Verschluss <strong>de</strong>r Feststellringe zu achten.<br />
The <strong>VARIO</strong> exercise bench is a versatile multi-functional hometraining<br />
unit for optimum fitness training with special emphasis on<br />
muscle-power. To ensure that your exercising is in keeping with your<br />
general health, please read the following instructions and observe them<br />
at all times:<br />
1. Newcomers should avoid using excessively heavy weights.<br />
2. During start-up sessions, use weights that can used for<br />
15 repetitions without gasping for breath.<br />
3. Always breathe regularly: breath out when pushing against the load<br />
(concentric phase) and breath in when releasing it (eccentric phase).<br />
Avoid forced breathing.<br />
4. Carry out all movements evenly and smoothly without jerking.<br />
5. All movements must be carried out to their full extent to avoid contraction<br />
of the muscles. However, in the bending and stretching<br />
positions, sufficient muscular tension is essential to prevent <strong>und</strong>ue<br />
strain on the joints.<br />
6. Special attention must be paid to the stability of the back. For this<br />
reason, the tension on the abdominal muscles should be kept at a<br />
constant level during exercise.<br />
7. Always remember that your tendons and joints do not <strong>de</strong>velop as<br />
quickly as your strength and muscle power. For this reason, increase<br />
the load slowly in the course of your exercise program. Your<br />
training should therefore be increased gradually in the following<br />
sequence:<br />
I. Increase the frequency of exercising (number of sessions per week)<br />
II. Increase the amount of exercising (number of sets per exercise)<br />
III. Increase the difficulty of the exercise (increase exercising weight).<br />
Important before beginning your training program, consult your<br />
doctor to ensure that you are fit enough to use the <strong>VARIO</strong> exercise<br />
bench. Base your program on the result of this medical examination.<br />
The above mentioned and yet to follow training instructions are only suitable<br />
for healthy people.<br />
Recommendation<br />
Exercises <strong>de</strong>signed to increase strength and stamina and to build up muscle<br />
mass (hypertrophy exercising) are the most suitable types of exercise<br />
for improving general health and fitness. To improve stamina and<br />
strength, you should exercise with lighter weights (approx. 40-50% of<br />
maximum force*) and the speed of movement should be fairly rapid but<br />
controlled. The number of repeats should be between 16 and 20.<br />
For exercises <strong>de</strong>signed to increase muscle mass, you should use heavier<br />
weights (approx. 60-80% of maximum force*) and the speed of movement<br />
should be fairly slow.<br />
After about 4-6 weeks' strength and stamina training, a mo<strong>de</strong>rate<br />
program of exercising to increase muscle mass is possible. For ol<strong>de</strong>r<br />
people in particular, it is important to maintain and increase muscle<br />
mass in or<strong>de</strong>r to stabilise and relieve strain on the joints.<br />
*"Maximum individual strength" is <strong>de</strong>fined as the effort which you as an individual must exert to<br />
overcome a heavy load once.<br />
Sample plans for training:<br />
Weeks 1-4: strength-stamina (approx. 40-60% of muscular force)<br />
sets repetitions break speed of<br />
movement<br />
2 - 4 16 - 20 60 sec. brisky<br />
Weeks 5-8: muscle training (approx. 60-80% of muscular force)<br />
sets repetitions break speed of<br />
movement<br />
3 - 4 10 - 14 3 - 4 min. mo<strong>de</strong>rately<br />
Always start your training session with a set of movements to warm up.<br />
Use intervals in exercising to loosen up. Exercise 2-3 times per week with<br />
your <strong>VARIO</strong> and take every opportunity to increase your program of<br />
exercise, e.g. by taking long walks, jogging, cycling, swimming etc.<br />
You will find that regular exercise increases your physical fitness as well<br />
as your feeling of general wellbeing.<br />
Caution!<br />
You are using a machine that has been <strong>de</strong>signed and built to the latest<br />
safety standards. Any possible sources of danger that could lead to injury<br />
have been extensively eliminated. The machine is inten<strong>de</strong>d for use by<br />
adults only.<br />
Wrong or excessive training can damage your health. Before commencing<br />
a course of fitness training, arrange for a medical check-up to see if<br />
you are in a state of health suited to training on the machine. The result<br />
of the check-up should be used as a basis for your training programme.<br />
The machine is never to be looked upon as a toy. Please remember that<br />
the nature of children who are using the machine can lead to unforeseen<br />
situations and hazards for which the manufacturer cannot be held liable.<br />
If children are allowed to use the machine, they should be instructed on<br />
its correct use and dangerous situations explained to them.<br />
The machine must be carefully assembled by an adult. It must be ensured<br />
that the machine is not used until it has been fully assembled.<br />
When used for regular training/exercising, we recommend checking all<br />
parts of the machine (especially screws, nuts, bolts and ropes) every 1 to<br />
2 months. So that the inten<strong>de</strong>d level of safety is maintained, the machine<br />
is to be taken out of use if any parts are worn. The worn parts are to be<br />
exchanged immediately.<br />
When using dumbells with weight disks, make sure that the weight<br />
locking collars are correctly secured.<br />
* Maximalkraft wird hier als maximale persönliche Kraftfähigkeit verstan<strong>de</strong>n, die aufgebracht<br />
wer<strong>de</strong>n kann, um ein schweres Gewicht einmal zu bewältigen.<br />
2<br />
3
F<br />
Instructions pour l'utilisation du banc d’entraînement <strong>VARIO</strong><br />
Le banc d’entraînement <strong>VARIO</strong> est un appareil <strong>de</strong> musculation pour<br />
l’entraînement chez soi. Multi-fonctionnel, il est particulièrement adapté<br />
aux exercices avec haltères. Pour que cet entraînement soit excellent pour<br />
la santé, il convient cependant <strong>de</strong> s'en tenir à quelques points que nous<br />
vous exposons ci-après en bref:<br />
1. Evitez <strong>de</strong> vous entraîner avec <strong>de</strong>s haltères trop lour<strong>de</strong>s si venez <strong>de</strong><br />
débuter.<br />
2. Pendant les premières séances, ne travailler qu´avec <strong>de</strong>s haltères que<br />
l´on puisse déplacer une quinzaine <strong>de</strong> fois sans pression quand on<br />
respire.<br />
3. Veillez à conserver un rythme <strong>de</strong> respiration régulier, expirez en<br />
souevant la charge (phase concentrique), inspirez lorsque vous relâchez<br />
(phase excentrique). Eviter en tout cas la respiration entrecoupée.<br />
4. Effectuez vos mouvements avec régularité, sans à-coups ni gestes<br />
brusques.<br />
5. Tous les mouvements doivent être exécutés sur toute leur amplitu<strong>de</strong><br />
afin d’éviter tout raccourcissement <strong>de</strong>s muscles. Il faut cependant<br />
veiller à ce que les muscles soient suffisamment tendus lorsqu’ils sont<br />
pliés et en extension afin <strong>de</strong> minimiser la sollicitation <strong>de</strong>s articulations.<br />
6. Il faut particulièrement veiller à gar<strong>de</strong>r le dos stable. C’est pourquoi il<br />
est recommandé <strong>de</strong> gar<strong>de</strong>r les muscles abdominaux constamment<br />
tendus pendant l’entraînement.<br />
7. N’oubliez que lors d’un entraînement répété, vos muscles et votre force<br />
augmenteront plus rapi<strong>de</strong>ment que l’adaptation <strong>de</strong> vos ligaments,<br />
tendons et articulations. Dosez la charge et la résistance en conséquence<br />
et au fur et à mesure <strong>de</strong> votre programme d’entraînement.<br />
Ayez donc un entraînement progressif respectant l’ordre suivant :<br />
I. Augmentation <strong>de</strong> la fréquence d’entraînement (nombres <strong>de</strong> séances<br />
d’entraînement par semaine)<br />
II. Augmentation du volume d’entraînement (nombre <strong>de</strong>s répétitions<br />
par exercice)<br />
III. Augmentation <strong>de</strong> l’intensité (augmentation <strong>de</strong>s poids utilisés)<br />
Remarque importante:<br />
Avant <strong>de</strong> commencer, consulter son mé<strong>de</strong>cin pour savoir si l'entraînement<br />
avec le banc d’entraînement <strong>VARIO</strong> convient ou pas. Le diagnostic du<br />
mé<strong>de</strong>cin <strong>de</strong>vrait constituer la base pour la programmation <strong>de</strong>s exercices.<br />
Les conseils d’utilisation et les programmes d’entraînement ci-joint sont<br />
sonnés à titre indicatif pour <strong>de</strong>s personnes avec un bon bilan <strong>de</strong> santé.<br />
Recommandation d’entraînement<br />
C’est l’entraînement d’endurance et <strong>de</strong> musculation (entraînement<br />
d’hypertrophie) qui est le plus adapté pour un entraînement <strong>de</strong> remise en<br />
forme ou visant à rester en bonne santé. Pour l’entraînement<br />
d’endurance, on travaille avec <strong>de</strong>s poids légers (env. 40-50% <strong>de</strong> la force<br />
maximale*) et avec une vitesse <strong>de</strong> mouvement rapi<strong>de</strong>, mais contrôlée. Le<br />
nombre <strong>de</strong> répétitions se situe entre 16 et 20.<br />
Pour l’entraînement <strong>de</strong> musculation, on travaille avec <strong>de</strong>s poids lourds<br />
(env. 60-80% <strong>de</strong> la force maximale*) et une vitesse <strong>de</strong> mouvement relativement<br />
lente.<br />
Il est tout à fait possible <strong>de</strong> pratiquer un entraînement <strong>de</strong> musculation modéré<br />
après un programme d’endurance d’env. 4 semaines. Il est important,<br />
notamment lorsqu’on vieillit, <strong>de</strong> conserver resp. <strong>de</strong> développer <strong>de</strong> la<br />
masse musculaire afin <strong>de</strong> stabiliser et <strong>de</strong> soulager les articulations.<br />
*On entend là par "force maximale", la capacité <strong>de</strong> force personnelle pouvant être appliquée<br />
pour lever une fois une lour<strong>de</strong> charge.<br />
Exemples <strong>de</strong> programme d´entraînement<br />
Semaine 1-4 entraînement d’endurance<br />
(env. 40-60% <strong>de</strong> la force maximale)<br />
Séries Répétitions Récupération Vitessed’excécution<br />
2 - 4 16 - 20 60 sec. Rapi<strong>de</strong><br />
Semaine 5-8 entraînement <strong>de</strong> musculation<br />
(env. 60-80% <strong>de</strong> la force maximale)<br />
Séries Répétitions Récupération Vitessed’excécution<br />
3 - 4 10 - 14 3 - 4 min. Modéré<br />
doucement<br />
Commencez toujours votre entraînement avec une série d’échauffement.<br />
Vous <strong>de</strong>vriez mettre les pauses à profit pour <strong>de</strong>s exercices<br />
d’assouplissement. Entraînez-vous 2 à 3 fois par semaine avec votre<br />
<strong>VARIO</strong> et profitez <strong>de</strong> chaque occasion <strong>de</strong> compléter votre entraînement,<br />
comme par exemple en faisant <strong>de</strong>s promena<strong>de</strong>s prolongées, du jogging,<br />
du vélo, <strong>de</strong> la natation etc.<br />
Vous constaterez qu’un entraînement régulier améliorera votre forme et<br />
votre sentiment <strong>de</strong> bien-être.<br />
Avertissement!<br />
Vous vous entraînez avec un appareil conçu et construit selon les exigences<br />
et principes mo<strong>de</strong>rnes <strong>de</strong> sécurité. Les points dangereux sources<br />
éventuelles <strong>de</strong> blessures, ont été évités ou sécurisés le mieux possible.<br />
L´utilisation <strong>de</strong> l´appareil est exclusivement réservée aux adultes.<br />
L´entraînement excessif ou mal programmé peut nuire à la santé. Avant<br />
<strong>de</strong> s´entraîner, il est vivement conseillé <strong>de</strong> consulter son médicin traitant<br />
afin <strong>de</strong> s´assurer qu´il y a pas <strong>de</strong> contre-indications médicales. Les résultats<br />
<strong>de</strong> l´examen médical <strong>de</strong>vraient servir <strong>de</strong> base pour établir son<br />
programme d´entraînement.Il ne peut, en aucun cas, servir <strong>de</strong> jouet. Il ne<br />
faut jamais perdre <strong>de</strong> vue que, <strong>de</strong> par leur naturel et leur tempérament,<br />
les enfants aiment jouer et qu´avec cet appareil, ils peuvent se trouver<br />
confrontés avec <strong>de</strong>s situations, <strong>de</strong>s dangers imprévus, lesquels excluent<br />
toute responsabilité <strong>de</strong> la part du constructeur. Si vous autorisez cependant<br />
vos enfants à jouer avec l´appareil, il y a lieu <strong>de</strong> leur en apprendre<br />
le mo<strong>de</strong> d´emploi correct et <strong>de</strong> les surveiller.<br />
Le montage <strong>de</strong> l´appareil doit être fait soigneusement par un adulte.<br />
Veiller à ne pas commencer l´entraînement avant que le montage n´ait<br />
été effectué dans toutes les règles <strong>de</strong> l´art.En cas d´emploi régulier <strong>de</strong><br />
l´appareil, nous recommandons d´effectuer, tous les mois ou tous les<br />
<strong>de</strong>ux mois, un contrôle <strong>de</strong> toutes les pièces et <strong>de</strong>s éléments <strong>de</strong> fixation<br />
tels que vis, boulons, axes <strong>de</strong> fixations <strong>de</strong> câbles. Pour que soit maintenu<br />
le haut niveau <strong>de</strong> sécurité <strong>de</strong> l´appareil, il y a lieu d´en interdire<br />
l´utilisation si <strong>de</strong>s pièces sont usées et <strong>de</strong> remplacer ces <strong>de</strong>rnières immédiatement.<br />
Quand on travaille avec les haltères courts, s´assurer <strong>de</strong> la fixation correcte<br />
<strong>de</strong>s bagues <strong>de</strong> serrage.<br />
D 1. Dehnung für <strong>de</strong>n Rückenstrecker<br />
Aus <strong>de</strong>r Rückenlage die Beine anziehen <strong>und</strong> <strong>de</strong>n Kopf Richtung Knie<br />
führen. Die Hän<strong>de</strong> fassen die Unter schenkel.<br />
Ge<strong>de</strong>hnte Muskulatur: Rückenstrecker <strong>und</strong> Gesäß muskulatur<br />
GB 1. Stretching for the back extensor muscle<br />
Draw up your legs from the back position, and push your head towards<br />
your knee. Grip the lower legs with your hands.<br />
Action on: Back extensor muscle and gluteal musculature<br />
F 1. Etirement <strong>de</strong>s muscles dorsaux<br />
Les jambes tendues, ramenez votre tête en direction <strong>de</strong>s genoux, vos<br />
mains s’agrippent <strong>de</strong>rrière vos cuisses.<br />
Muscles sollicités: muscles dorsaux et muscles <strong>de</strong> l’assise.<br />
D 2. Dehnung für die Oberschenkelrückseite<br />
Stand frontal vor einem Hocker. Ein Bein mit <strong>de</strong>r Ferse auf <strong>de</strong>m Hocker<br />
abstützen. Um das Gleichgewicht zu halten, mit <strong>de</strong>r Hand evtl. an einer<br />
Wand abstützen. Das Kniegelenk <strong>de</strong>s aufgestützten Beines ist leicht gebeugt,<br />
die Fußspitze anziehen. Den Oberkörper bei gera<strong>de</strong>m Rücken<br />
langsam nach vorne beugen. An schließend Seitenwechsel.<br />
Ge<strong>de</strong>hnte Muskulatur: Oberschenkelrückseite<br />
GB 2. Stretching for the back of the upper leg<br />
Stand facing a stool. Support one leg with your heel on the stool. To<br />
keep your balance, support yourself against the wall with your hand. The<br />
knee-joint of the supported leg should be slightly bent. Draw up your<br />
toes. Slowly bend the upper part of your body forward with your back<br />
straight. Then change si<strong>de</strong>s.<br />
Action on: Back of upper leg.<br />
F 2. Etirement <strong>de</strong>s muscles <strong>de</strong>s cuisses<br />
Placez vous face à une chaise, une jambe en appui sur l’assise, prenez<br />
éventuellement appui sur un mur pour conserver l’équilibre. Le genou <strong>de</strong><br />
votre jambe en appui est légèrement fléchi. La pointe <strong>de</strong> pied tendue vers<br />
vous, fléchissez lentement votre buste vers l’avant , votre dos reste bien droit.<br />
Muscles sollicités: muscles <strong>de</strong> l’arrière <strong>de</strong> la cuisse.<br />
4<br />
5
D 3. Dehnung für <strong>de</strong>n Hüftbeuger<br />
In weiter Schrittstellung einen Fuß auf einen Hocker stellen. Bei<strong>de</strong><br />
Fußspitzen zeigen nach vorne. Zum Abstützen können die Hän<strong>de</strong> auf das<br />
gebeugte Knie gelegt wer<strong>de</strong>n. Das gebeugte Knie zusammen mit <strong>de</strong>r<br />
Hüfte langsam nach vorne schieben. An schließend Seitenwechsel.<br />
Ge<strong>de</strong>hnte Muskulatur: Hüftbeuger<br />
D 4. Dehnung für die Nackenmuskulatur<br />
Im Stand o<strong>de</strong>r gera<strong>de</strong>m Sitz <strong>de</strong>n rechten Arm Rich tung Bo<strong>de</strong>n ziehen.<br />
Den Kopf zur linken Seite neigen. Der Kopf bleibt dabei mit Blick richtung<br />
nach vorn, so daß das linke Ohr läppchen Richtung Schulter zeigt. Anschlie -<br />
ßend Seiten wechsel.<br />
Ge<strong>de</strong>hnte Muskulatur: Nackenmuskulatur<br />
D 5. Dehnung für die Brustmuskulatur<br />
Seitlicher Stand zur Wand. Mit <strong>de</strong>r rechten Hand <strong>und</strong> leicht im Ellen -<br />
bogen gebeugten Arm an <strong>de</strong>r Wand abstützen. Die Fingerspitzen zeigen<br />
rückwärts. Langsam <strong>de</strong>n Oberkörper nach links drehen. An schließend <strong>de</strong>n<br />
Arm wechseln. Griffhöhe variieren.<br />
Ge<strong>de</strong>hnte Muskulatur: Brustmuskulatur<br />
GB 3. Stretching for the hip flexor muscle<br />
With legs wi<strong>de</strong> apart, place one foot on a stool. Both feet should point<br />
forward. Your hands may be placed on the bent knee for support. Slowly<br />
sli<strong>de</strong> the bent knee forward together with your hip. Then change si<strong>de</strong>s.<br />
Action on: Hip flexor muscle.<br />
F 3. Etirement du fléchisseur <strong>de</strong>s hanches<br />
Toujours face à une chaise, placez un pied sur l ‘assise, les <strong>de</strong>ux pointes<br />
<strong>de</strong> pieds vers l’avant. Les <strong>de</strong>ux mains peuvent venir en appui sur le genou<br />
plié. Fléchissez votre genou et poussez votre hanche vers l’avant.<br />
Changez <strong>de</strong> côté.<br />
Muscles sollicités: fléchisseur <strong>de</strong>s hanches.<br />
GB 4. Stretching for the shoul<strong>de</strong>r musculature<br />
When standing or sitting upright, pull your right arm towards the floor. In<br />
doing so, keep your head looking forward so that your left ear lobe<br />
points in the direction of your shoul<strong>de</strong>r. Then change si<strong>de</strong>s.<br />
Action on: Neck musculature..<br />
F 4. Etirement <strong>de</strong>s muscles <strong>de</strong>s épaules<br />
En position <strong>de</strong>bout ou assis, ten<strong>de</strong>z votre bras droit vers le sol , inclinez<br />
la tête sur le côté gauche, le regard reste fixe vers l’avant, votre oreille<br />
gauche essaie <strong>de</strong> toucher l’épaule. Changez <strong>de</strong> côté une fois le premier<br />
mouvement terminé.<br />
Muscles sollicités: muscles <strong>de</strong> la nuque<br />
GB 5. Stretching for the chest muscles<br />
Stand with your si<strong>de</strong> to the wall. Lean against the wall with your right<br />
hand and with your arm bent slightly at the elbow. Your finger tips<br />
should point backwards. Slowly turn the upper part of your body to the<br />
left. Then change the arm. Vary the grip height.<br />
Action on: Chest muscles.<br />
F 5. Etirement <strong>de</strong>s muscles <strong>de</strong> la poitrine<br />
En position latérale contre un mur. Avec la main droite, le bras légèrement<br />
fléchi au niveau du cou<strong>de</strong>, prendre appui sur le mur. Vos doigts en<br />
appui, effectuez une rotation du buste vers la gauche. Changez <strong>de</strong> côté<br />
et variez la hauteur <strong>de</strong> la prise.<br />
Muscles sollicités: muscles <strong>de</strong> la poitrine.<br />
6<br />
7
1 3<br />
2 4<br />
D Übung 1 - 4 Oberkörperrückheben<br />
Ausgangsposition: Das Gerät standsicher aufstellen. Beinauflagepolster<br />
für das Rückentraining einstellen. Das Beinauflagepolster entsprechend<br />
<strong>de</strong>r Ober schenkel länge justieren, so daß die Oberschenkel knapp unterhalb<br />
<strong>de</strong>r Beckenknochen aufliegen <strong>und</strong> <strong>de</strong>r Oberkörper noch frei beweglich<br />
ist. Die Füße stehen auf <strong>de</strong>n Bo<strong>de</strong>nrohren. Die Hän<strong>de</strong> fassen die<br />
Halte griffe. Die Beine wer<strong>de</strong>n durch die Beinpolster fixiert.<br />
Bewegungsausführung: Die abgebil<strong>de</strong>ten 4 Übungsvarianten stellen die<br />
Rücken übungen in <strong>de</strong>r Reihenfolge ihrer Belastungsintensität (Armhaltung)<br />
dar. Anfänger <strong>und</strong> bewegungsunsichere Personen können zur<br />
Unterstützung <strong>de</strong>r Bewegung die Haltegriffe fassen. Fortgeschrittene nehmen<br />
beim Training die Hän<strong>de</strong> in <strong>de</strong>n Nacken o<strong>de</strong>r in Über-Kopf-Position.<br />
Der Oberkörper wird aus <strong>de</strong>r Schrägstellung langsam nach vorne gebeugt<br />
bis die waagerechte Endposition erreicht ist. Danach <strong>de</strong>n<br />
Oberkörper wie<strong>de</strong>r aufrichten bis zur Körperstreckung, jedoch keinesfalls<br />
in die Überstreckung. Die Wirbelsäule bil<strong>de</strong>t mit <strong>de</strong>r Beinachse eine<br />
Linie. Den Rücken während <strong>de</strong>r gesamten Bewegungsausführung gera<strong>de</strong><br />
halten.<br />
Beanspruchte Muskulatur: Rückenstreckmuskulatur, oberer Rücken, Ge -<br />
säß muskulatur, Muskulatur <strong>de</strong>r Oberschenkelrückseite<br />
D 5. Oberkörperrückheben mit Drehung<br />
Ausgangsposition: wie Übung 1<br />
Bewegungsausführung: wie Übung 1, jedoch beim Auf richten <strong>de</strong>n Ober -<br />
körper langsam wechselseitig nach links <strong>und</strong> rechts drehen.<br />
Beanspruchte Muskulatur: wie Übung 1, zusätzlich die Rückenrotatoren<br />
D<br />
6. Oberkörperseitheben<br />
GB Exercise 1 - 4 Raise the upper body<br />
Starting position: Adjust the length of your upper leg so that your upper<br />
legs lie just below the pelvic bone and the upper part of your body can<br />
still be freely moved. Place your feet on the bottom tubes. Grip the handles<br />
and secure your legs by means of the leg pads.<br />
Performing the movements: The following 4 exercise variations represent<br />
the back exercises in the sequence of their loading intensity (arm position).<br />
Beginners and people with hesitant movements may grip the to support<br />
their movement. The more advanced should place their hands on the<br />
neck or in the over-head position during training. Slowly bend your upper<br />
body forward out of the oblique position until the horizontal end position<br />
is reached. Then straighten your upper body again until the body is<br />
stretched, but do not strain. The vertebral column forms one line with the<br />
leg axis. Keep your back straight throughout these movements.<br />
Action on: Back extensor, gluteal and back of the upper leg muscles.<br />
F Exercice 1 - 4 Relevement du haut du corps<br />
Position initiale: installer l’appareil pour qu‘il soit bien stable . Ajuster la<br />
partie capitonnée pour les jambes en fonction <strong>de</strong> la gran<strong>de</strong>ur <strong>de</strong>s<br />
cuisses, <strong>de</strong> manière à ce que les cuisses reposent plus bas que les os du<br />
bassin. Les pieds reposent sur les marches pieds, les mains saisissent les<br />
poignées, les jambes sont fixées par la partis capitonnée.<br />
Mouvement: Ce qui fait varier les 4 exercices suivants c’est l’intensité <strong>de</strong><br />
l’effort que vous fournirez en changeant la position <strong>de</strong>s bras. Pour soutenir<br />
le mouvement, les débutants et les personnes qui manquent <strong>de</strong><br />
confiance dans leurs mouvement, saisissent les poignées, les personnes<br />
bien entraînées croisent les mains sur la nuque ou <strong>de</strong>rrière la tête. A<br />
partir <strong>de</strong> la position oblique, incliner lentement le tronc vers l’avant,<br />
jusqu’à atteindre la position horizontale. Redresser ensuite le tronc<br />
jusqu’à ce que le corps soit en extension sans toutefois aller au <strong>de</strong>là, la<br />
colonne vertébrale doit former une ligne avec l’axe <strong>de</strong>s jambes. Gar<strong>de</strong>r<br />
le dos bien droit tout le long <strong>de</strong> l’exercice.<br />
Muscles sollicités: les dorsaux, les muscles <strong>de</strong>s fesses, les muscles <strong>de</strong>s cuisses.<br />
GB 5. Raise the upper body, with rotation<br />
Starting position: as Exercise 1<br />
Exercise: as Exercise 1, but slowly rotate the upper part of your body to<br />
the left and right on both si<strong>de</strong>s.<br />
Benefits: as Exercise 1, also the back rotator muscles.<br />
F 5. Relevement du haut du corps oblique<br />
Position initiale: comme dans le premier exercice<br />
Mouvement: comme dans le premier exercice pour le début du mouvement,<br />
mais lors du redressement tourner doucement le haut du corps vers<br />
la droite et vers la gauche<br />
Muscles sollicités: en complément <strong>de</strong> l’exercice numéro 1 pour les<br />
muscles <strong>de</strong> rotation du tronc.<br />
Ausgangsposition: Beinauflagepolster für das Lateral training einstellen. Das<br />
Auflagepolster entsprechend <strong>de</strong>r Oberschenkellänge justieren, so daß <strong>de</strong>r Ober -<br />
schenkel knapp unterhalb <strong>de</strong>s Becken knochens aufliegt <strong>und</strong> <strong>de</strong>r Oberkörper noch<br />
frei be weg lich ist. Die Füße stehen seit lich auf <strong>de</strong>n Bo<strong>de</strong>n rohren. Die Hän<strong>de</strong> fassen<br />
die Halte griffe. Die Beine wer<strong>de</strong>n durch die Beinpolster fixiert.<br />
Bewegungsausführung: Die Hän<strong>de</strong> hinter <strong>de</strong>n Kopf nehmen. Den Ober körper aus<br />
<strong>de</strong>r Schrägstellung seitlich Richtung Rückenauflagepolster beugen <strong>und</strong> danach wie<strong>de</strong>r<br />
anheben. Nach <strong>de</strong>n Übungswie<strong>de</strong>rholungen Seiten wechsel.<br />
Beanspruchte Muskulatur: seitliche Rumpfbeugemuskulatur, Rückenstrecker<br />
GB<br />
6. Raise upper part of body to the si<strong>de</strong><br />
Starting position: Adjust the back support pad for the lateral training. Adjust the<br />
support pad according to the length of your upper leg so that the upper leg lies just<br />
<strong>und</strong>erneath the pelvic bone, and the upper part of your body can be freely moved.<br />
Place your feet on the si<strong>de</strong> of the bottom tubes. Grip the handles with your hands.<br />
Secure your legs using the leg pads.<br />
Exercise: Place your hands behind your head. Bend the upper part of your body<br />
from the oblique position to the si<strong>de</strong> towards the back support pad, then raise<br />
again. Change si<strong>de</strong>s after the exercise repetitions.<br />
Benefits: lateral torso flexor muscles.<br />
F 6. Relevement du haut du corps lateral<br />
Position initiale: placer le coussin capitonné pour l’entraînement latéral et adapté le<br />
à la longueur <strong>de</strong>s jambes pour que la taille et le haut du corps soient libres. La<br />
hanche repose sur le coussin, les pieds sont posés sur le pied du banc, et les<br />
jambes sont maintenues par les rouleaux <strong>de</strong> mousse.<br />
Mouvement: les mains <strong>de</strong>rrière la tête, le haut du corps s’incline en direction du support<br />
<strong>de</strong> mousse et remonte dans la position initiale. Après les séries <strong>de</strong> cette<br />
exercice, changé <strong>de</strong> côté.<br />
Muscles sollicités: muscles le long <strong>de</strong> la colonne vertébrale.<br />
8<br />
NL<br />
6. Zijwaarts opheffen van het bovenlichaam<br />
9
D 7. Crunch<br />
Ausgangsposition: Rücken- <strong>und</strong> Beinauflagepolster in<br />
waagerechter Position einstellen. Rückenlage auf <strong>de</strong>r<br />
Bank. Die Unterschenkel befin<strong>de</strong>n sich auf <strong>de</strong>m Bein -<br />
auf lagepolster <strong>de</strong>ssen Höhe so justiert wird, daß<br />
Hüft- <strong>und</strong> Kniegelenke zu ca. 90° gebeugt sind.<br />
Fußspitzen anziehen. Hän<strong>de</strong> be rühren <strong>de</strong>n Nacken.<br />
Bewegungsausführung: Der Oberkörper wird eingerollt,<br />
leicht angehoben <strong>und</strong> danach wie<strong>de</strong>r gesenkt.<br />
Die Len<strong>de</strong>n wirbel säule <strong>und</strong> das Becken nicht an heben.<br />
Beanspruchte Muskulatur: gera<strong>de</strong> <strong>Bauch</strong>muskulatur<br />
D 8. Crunch zur Seite<br />
Ausgangsposition: wie Übung 7, jedoch befin<strong>de</strong>n sich<br />
die Arme in Vorhalte.<br />
Bewegungsausführung: Der Oberkörper wird eingerollt,<br />
beim Anheben leicht gedreht <strong>und</strong> wie<strong>de</strong>r gesenkt.<br />
Arme wechselseitig links <strong>und</strong> rechts an <strong>de</strong>n<br />
Oberschenkeln vorbeiführen. Die Len<strong>de</strong>nwirbelsäule<br />
<strong>und</strong> das Becken nicht anheben.<br />
Beanspruchte Muskulatur: gera<strong>de</strong> <strong>und</strong> schräge<br />
<strong>Bauch</strong>muskulatur<br />
D 9. Crunch auf <strong>de</strong>r Schrägbank<br />
Ausgangsposition: Rücken- <strong>und</strong> Beinauflagepolster in<br />
schräger Position ein stellen. Rückenlage auf <strong>de</strong>r<br />
Bank. Die Unterschenkel befin<strong>de</strong>n sich auf <strong>de</strong>m Bein -<br />
auf lage polster. Fußspitzen anziehen. Die Hän<strong>de</strong><br />
berühren <strong>de</strong>n Nacken.<br />
Bewegungsausführung: wie Übung 7.<br />
Beanspruchte Muskulatur: gera<strong>de</strong> <strong>Bauch</strong>muskulatur,<br />
Beinstrecker, Hüft beuger<br />
D 10. Beinstrecken aus <strong>de</strong>m Sitz<br />
Ausgangsposition: Auflagepolster in schräger<br />
Position justieren. Sitz auf <strong>de</strong>m Auflagepolster mit<br />
Oberkörper rücklage. Mit <strong>de</strong>n Hän<strong>de</strong>n am<br />
Auflagepolster abstützen. Hüft- <strong>und</strong> Kniegelenke sind<br />
in einem 90° Winkel gebeugt.<br />
Bewegungsausführung: Streckbewegung <strong>de</strong>r Hüfte<br />
<strong>und</strong> <strong>de</strong>r Kniegelenke. Danach beugen <strong>de</strong>r Hüfte <strong>und</strong><br />
Knie in die Ausgangsposition.<br />
Beanspruchte Muskulatur: gera<strong>de</strong> <strong>Bauch</strong>muskulatur,<br />
Hüftbeuger, Beinstrecker<br />
GB 7. Crunch<br />
Starting position: Adjust the back and leg support pad to the horizontal<br />
position. Back position on the bench. Place your lower legs on the leg<br />
support pad, whose height is adjusted so that your hip and knee joints<br />
are bent approx. 90°. Draw up feet. Touch your neck with your hands.<br />
Exercise: The upper part of the body is rolled inwards, raised slightly,<br />
then lowered again. Do not raise the lumbar vertebral column or pelvis.<br />
Benefits: straight abdominal muscles.<br />
F 7. Crunch<br />
Position initiale: mettez le coussin pour le dos et pour les jambes dans la<br />
position horizontale et allongez vous sur le banc. Les jambes doivent reposer<br />
sur le coussin après le réglage en hauteur <strong>de</strong> celui-ci afin que les<br />
mollets et les cuisses fassent un angle à 90 <strong>de</strong>gré. La pointe <strong>de</strong>s pieds<br />
doit être tendue et les mains <strong>de</strong>rrière la nuque.<br />
Mouvement: le haut du corps s’enroule vers l’avant, il faut légèrement tenir<br />
puis abaisser à nouveau le haut du corps. Les reins et le bassin ne<br />
doivent pas se soulever.<br />
Muscles sollicités: abdominaux droit.<br />
GB 8. Crunch, rotated<br />
Starting position: as Exercise 7, but hold up your arms.<br />
Exercise: The upper part of the body is rolled inwards, rotated slightly<br />
whilst raising, and lowered again. Move the arms to the left and right<br />
past the upper leg. Do not raise the lumbar vertebral column or pelvis.<br />
Benefits: oblique abdominal muscles.<br />
F 8. Abdominaux oblique<br />
Position initiale: comme dans l’exercice 7 mais avec les bras tendus<br />
<strong>de</strong>vant soi.<br />
Mouvement: Le haut du corps s’enroule vers l’avant mais lors du retour<br />
dans la position initiale, tournez vous légèrement <strong>de</strong> côté en passant les<br />
bras <strong>de</strong>vant la cuisse droite puis <strong>de</strong>vant la cuisse gauche. Les reins et le<br />
bassin ne doivent pas se soulever.<br />
Muscles sollicités: abdominaux obliques.<br />
GB 9. Crunch on the oblique bench<br />
Starting position: Set back and leg support pad to oblique position. Back<br />
position on the bench. Place your lower legs on the leg support pad.<br />
Raise your toes. Place your hands on your neck.<br />
Exercise: as Exercise 7.<br />
Benefits: straight abdominal, front of upper leg and hip flexor muscles.<br />
F 9. Abdominaux sur planche incliné<br />
Position initiale: mettre les <strong>de</strong>ux coussins en position oblique et s’allonger<br />
sur le banc. Les mollets se trouvent sur le coussin, les pointes <strong>de</strong> pied sont<br />
tirées vers vous et les mains sont placées <strong>de</strong>rrière la tête.<br />
Mouvement: comme l’exercice 7.<br />
Muscles sollicités: abdominaux droits, haut <strong>de</strong>s cuisses.<br />
GB 10. Leg extension from posterior<br />
Starting position: Adjust the support pad to the oblique position. Posterior<br />
on the support pad adopting upper body back position. Support yourself<br />
with your hands on the support pad. Your hip and knee joints must be<br />
bent at an angle of 90°.<br />
Exercise: Stretching movement of the hip and knee joints. Then bend your<br />
hip and knee to the starting position.<br />
Benefits: straight abdominal, hip flexor and leg extensor muscles.<br />
F 10. Lever <strong>de</strong> jambes<br />
Position initiale: ajuster la planche dans la position oblique, asseyez vous<br />
sur le banc en mettant le haut <strong>de</strong> votre corps vers l’arrière tout en vous<br />
soutenant avec les mains. Les hanches et les genoux sont pliés dans un<br />
angle à 90 <strong>de</strong>gré.<br />
Mouvement: faire un mouvement d’extension <strong>de</strong>s jambes puis replier les<br />
genoux dans la position initiale.<br />
Muscles sollicités: abdominaux, muscles <strong>de</strong>s hanches et <strong>de</strong>s jambes.<br />
10<br />
11
D 11. Beinanziehen<br />
Ausgangsposition: Auflagepolster in schräger<br />
Position justieren. Rückenlage auf <strong>de</strong>m Polster, die<br />
Hän<strong>de</strong> fassen die Handgriffe. Die Beine sind in Hüft<strong>und</strong><br />
Kniege lenken zu 90° gebeugt.<br />
Bewegungsausführung: Beine in <strong>de</strong>n Hüft- <strong>und</strong><br />
Kniege lenken beugen, zum Oberkörper anziehen<br />
<strong>und</strong> danach zurück in die Ausgangsposition führen.<br />
Beanspruchte Muskulatur: gera<strong>de</strong> <strong>Bauch</strong>muskulatur<br />
GB 11. Raising legs<br />
Starting position: Adjust support pad to oblique position. Back position<br />
on the pad, grip the handles with your hands. Bend your legs at the hip<br />
and knee joints at an angle of 90°.<br />
Exercise: Bend your legs at the hip and knee joints, raise to your upper<br />
body, then return to the starting position.<br />
Benefits: straight abdominal muscles.<br />
F 11. Extension <strong>de</strong>s jambes<br />
Position initiale: mettre le banc en position oblique et s’allonger. Les<br />
mains prennent les poignées et les jambes sont pliés au niveau <strong>de</strong>s<br />
hanches et <strong>de</strong>s genoux à angle droit.<br />
Mouvement: replier les jambes vers soi pour tendre le haut du corps puis<br />
relacher pour revenir à la position <strong>de</strong> départ.<br />
Muscles sollicités: abdominaux droits<br />
D 12. Beckenanheben<br />
Ausgangsposition: Rückenlage auf <strong>de</strong>m Auflage -<br />
polster. Die Hän<strong>de</strong> umfassen die Handgriffe. Die<br />
Hüfte ist zu 90° gebeugt, die Beine befin<strong>de</strong>n sich in<br />
<strong>de</strong>n Kniege lenken leicht angewinkelt in Hochhalte.<br />
Bewegungsausführung: Becken anheben <strong>und</strong> wie<strong>de</strong>r<br />
senken. Beine dabei senkrecht halten.<br />
Beanspruchte Muskulatur: gera<strong>de</strong> <strong>Bauch</strong>muskulatur<br />
GB 12. Raising pelvis<br />
Starting position: Back position on the support pad. Grip the handles<br />
with your hands. Bend your hip at an angle of 90° with your legs slightly<br />
angled in a raised position at the knee joints.<br />
Exercise: Raise pelvis, lower again. Keep legs vertical whilst doing so.<br />
Benefits: straight abdominal muscles.<br />
F 12. Lever <strong>de</strong> bassin<br />
Position initiale: allonger sur le banc, les mains tiennent les poignées. Les<br />
hanches sont pliées à 90 <strong>de</strong>gré et les jambes sont légèrement pliées au<br />
niveau <strong>de</strong>s genoux.<br />
Mouvement: soulever le bassin et le re<strong>de</strong>scendre les jambes toujours à la<br />
verticale.<br />
Muscles sollicités: abdominaux droits.<br />
D 13. Bankdrücken mit Kurzhanteln<br />
Ausgangsposition: Rückenlage auf <strong>de</strong>m Auflage -<br />
polster. Die Unterschenkel befin<strong>de</strong>n sich auf <strong>de</strong>r<br />
Beinauflage. Die Kurzhanteln wer<strong>de</strong>n von oben gegriffen,<br />
die Arme sind in Hochhalte.<br />
Bewegungsausführung: Die Kurzhanteln in Schulter -<br />
breite herablassen <strong>und</strong> wie<strong>de</strong>r nach oben drücken.<br />
Beanspruchte Muskulatur: große Brustmuskulatur,<br />
vor<strong>de</strong>re Schulter musku latur, Armstrecker<br />
GB 13. Pushing short dumb-bells<br />
Starting position: Back position on the support pad. Place your lower legs<br />
on the leg support. Grip the short dumb-bells from above, your arms<br />
raised.<br />
Exercise: Lower the short dumb-bells to shoul<strong>de</strong>r width, then push them up<br />
again.<br />
Benefits: large chest, front shoul<strong>de</strong>r and arm extensor muscles.<br />
F 13. Developpé couché<br />
Position initiale: coucher vous sur le banc, les jambes reposent sur le<br />
coussin. Les haltères sont tenus en l’air les bras tendus.<br />
Mouvement: Les haltères <strong>de</strong>scen<strong>de</strong>nt dans l’axe <strong>de</strong>s épaules puis sont<br />
repoussées vers le haut.<br />
Muscles sollicités: pectoraux, muscles <strong>de</strong> l’épaule avant et muscle<br />
extenseur du bras.<br />
D 14. Fliegen<strong>de</strong> Bewegung<br />
Ausgangsposition: Rückenlage auf <strong>de</strong>r Bank, die Un -<br />
ter schenkel befin<strong>de</strong>n sich auf <strong>de</strong>r Beinauflage. Die<br />
Kurz hanteln wer<strong>de</strong>n von unten gegriffen. Die leicht<br />
gebeugten Arme befin<strong>de</strong>n sich in Körpervorhalte.<br />
Bewegungsausführung: Mit leicht im Ellen bogen -<br />
gelenk angewinkelten Armen wer<strong>de</strong>n die Kurz -<br />
hanteln zur Seite herabgesenkt <strong>und</strong> wie<strong>de</strong>r nach<br />
oben gebracht.<br />
Beanspruchte Muskulatur: Brustmuskulatur, vor<strong>de</strong>re<br />
Schultermuskulatur<br />
GB 14. Up and down movement<br />
Starting position: Back position on the bench, placing your lower legs on<br />
the leg support. Grip the short dumb-bells from below. Your slightly bent<br />
arms must be in front of your body.<br />
Exercise: With your arms angled slightly at the elbow joint, lower the<br />
short dumb-bells to the si<strong>de</strong> and bring them up again.<br />
Benefits: chest and front shoul<strong>de</strong>r muscles.<br />
F 14. Movement <strong>de</strong> tourbillon<br />
Position initiale: coucher sur le banc les jambes sur le coussin, les<br />
haltères sont tenues en hauteur par les bras légèrement pliés au <strong>de</strong>ssus<br />
du corps tendu.<br />
Mouvement: sans forcer sur les articulations du cou<strong>de</strong>, abaisser les bras<br />
toujours pliés puis les relever.<br />
Muscles sollicités: pectoraux, muscles <strong>de</strong>s épaules avants.<br />
12<br />
13
D 15. Kurzhantel Schulterdrücken<br />
Ausgangsposition: Beinauflagepolster als Rücken -<br />
stütze justieren. Gera<strong>de</strong>r Sitz auf <strong>de</strong>r Bank. Die<br />
Hän<strong>de</strong> fassen die Kurzhanteln von oben. Die<br />
Kurzhanteln wer<strong>de</strong>n auf Schulterhöhe mit gebeugten<br />
Armen gehalten.<br />
Bewegungsausführung: Die Arme wer<strong>de</strong>n im Ellen -<br />
bogen gelenk gestreckt <strong>und</strong> die Kurzhanteln zur<br />
Hoch halte gebracht. Danach Kurzhanteln wie<strong>de</strong>r auf<br />
Schulter höhe absenken.<br />
Beanspruchte Muskulatur: Schultermuskulatur, oberer Rücken, Armstrecker<br />
GB 15. Short dumb-bells, neck pushing<br />
Starting position: Sit upright on the bench. Grip the short dumb-bells from<br />
above. Keep the dumb-bells at shoul<strong>de</strong>r height with bent arms.<br />
Exercise: Stretch your arms at the elbow joint and lift the dumb-bells. Then<br />
lower the dumb-bells to shoul<strong>de</strong>r height again.<br />
Benefits: Shoul<strong>de</strong>r and arm extensor muscles.<br />
F 15. Developpé assis<br />
Position initiale: assis droit sur le banc les mains saisissent les haltères.<br />
Les bras sont légèrement pliés, les mains et les haltères sur les épaules.<br />
Mouvement: Les haltères sont levés au <strong>de</strong>ssus <strong>de</strong>s épaules puis re<strong>de</strong>s -<br />
cen<strong>de</strong>nt dans la position initiale.<br />
Muscles sollicités: muscles <strong>de</strong>s épaules et extenseurs du bras.<br />
D 16. Pull-over<br />
Ausgangsposition: Rückenlage auf <strong>de</strong>r Bank. Die<br />
Unterschenkel befin<strong>de</strong>n sich auf <strong>de</strong>r Beinauflage. Die<br />
Kurzhanteln mit bei<strong>de</strong>n Hän<strong>de</strong>n fassen. Mit leicht gebeugten<br />
Armen die Hantel oberhalb <strong>de</strong>r Brust halten.<br />
Bewegungsausführung: Mit leicht im Ellen bogen -<br />
gelenk angewinkelten Armen wird die Kurzhantel<br />
langsam hinter <strong>de</strong>n Kopf – bis auf Schulterhöhe – gesenkt.<br />
Da nach die Kurzhantel wie<strong>de</strong>r in die Aus -<br />
gangs position zurückführen.<br />
Beanspruchte Muskulatur: Brustmuskulatur, Schultermuskulatur, breiter<br />
Rückenmuskel, Arm strecker<br />
GB 16. Pull-over<br />
Starting position: Lie with your back on the bench. Place your lower legs<br />
on the leg support. Grip the dumb-bells with both hands. Keep the dumbbells<br />
above your chest with slightly bent arms.<br />
Exercise: With your arms angled slightly at the elbow joint, lower the<br />
dumb-bells slowly behind your head - to shoul<strong>de</strong>r height. Then return the<br />
dumb-bells to the starting position.<br />
Benefits: Chest, front shoul<strong>de</strong>r, wi<strong>de</strong> back and arm extensor muscles.<br />
F 16. Pull-over<br />
Position initiale: allonge sur le banc, les mollets reposent sur le coussin<br />
<strong>de</strong>s jambes. L’haltère est saisi avec les <strong>de</strong>ux mains et soulevés par les<br />
bras légèrement pliés au <strong>de</strong>ssus <strong>de</strong> la poitrine.<br />
Mouvement: sans forcer sur les articulations du cou<strong>de</strong>, les bras emmènent<br />
l’haltère <strong>de</strong>rrière la tête jusqu’à la hauteur <strong>de</strong>s épaules pour ensuite<br />
revenir à la position <strong>de</strong> départ.<br />
Muscles sollicités: pectoraux, épaule avant, dorsaux et extenseurs <strong>de</strong>s<br />
bras.<br />
D 17. Fliegen<strong>de</strong> Bewegung rückwärts<br />
Ausgangsposition: <strong>Bauch</strong>lage auf <strong>de</strong>r Bank. Die<br />
Kurz hanteln wer<strong>de</strong>n von oben gegriffen. Die leicht<br />
gebeugten Arme befin<strong>de</strong>n sich in Körpervorhalte<br />
knapp über <strong>de</strong>m Bo<strong>de</strong>n.<br />
Bewegungsausführung: Mit leicht in <strong>de</strong>n Ellenbogen -<br />
gelenken angewinkelten Armen wer<strong>de</strong>n die Kurz -<br />
hanteln in Körperseithalte gebracht <strong>und</strong> wie<strong>de</strong>r herabgesenkt.<br />
Beanspruchte Muskulatur: Breiter Rückenmuskel, Schultermuskulatur,<br />
Armstrecker<br />
GB 17. Up and down movement, backwards<br />
Starting position: Lie on the bench on your stomach. Grip the dumb-bells<br />
from above. Place your slightly bent arms in front of your body just above<br />
the gro<strong>und</strong>.<br />
Exercise: With your arms slightly angled at the elbow joint, bring the<br />
dumb-bells to the si<strong>de</strong> of your body, then lower them again.<br />
Benefits: Wi<strong>de</strong> back, shoul<strong>de</strong>r and arm extensor muscles.<br />
F 17. Mouvements <strong>de</strong>s epaules<br />
Position initiale: coucher sur le ventre les haltères sont tenus par les bras<br />
légèrement pliés au <strong>de</strong>ssus du sol.<br />
Mouvement: sans forcer sur les articulations du cou<strong>de</strong>, soulever les<br />
haltères dans l’axe du corps puis re<strong>de</strong>scendre à nouveau.<br />
Muscles sollicités: muscles dorsaux, muscles <strong>de</strong>s épaules, muscles extenseurs<br />
<strong>de</strong>s bras.<br />
D 18. Bizeps-Curls am Curlpult<br />
Ausgangsposition: Auflagepolster als Bizeps-Curlpult<br />
justieren. Sitz auf <strong>de</strong>r Bank. Kurzhantel von unten<br />
fassen. Der Oberarm liegt fest auf <strong>de</strong>m Curlpult.<br />
Bewegungsausführung: Arm im Ellenbogengelenk<br />
stark anwinkeln <strong>und</strong> wie<strong>de</strong>r bis zur Vorhalte senken.<br />
Beanspruchte Muskulatur: Armbeuger<br />
GB 18. Biceps curl on the curl bench<br />
Starting position: Adjust support pad to form a biceps curl bench. Sit on<br />
the bench.<br />
Grip dumb-bells from below. Place your upper arm firmly on the curl<br />
bench.<br />
Exercise: Angle your arm sharply at the elbow joint, and lower to front of<br />
body.<br />
Benefits: Arm extensor muscle<br />
F 18. Biceps sur coussin<br />
Position initiale: ajuster le coussin pour l’exercice <strong>de</strong>s biceps. Assis sur le<br />
banc, le haut du bras tendu repose sur le coussin tandis que la main tient<br />
l’haltère<br />
Mouvement: replier fortement le bras au niveau du cou<strong>de</strong> et <strong>de</strong> nouveau<br />
déplier jusqu’à l’extension totale du bras.<br />
Muscles sollicités: biceps<br />
14<br />
15
D Trainingstabelle S Satzzahl W Wie<strong>de</strong>rholungen G Gewicht (kg)<br />
GB Training table S Number of sets W Repetitions G Weight (kg)<br />
F Tableau d'entraînement S Nombre <strong>de</strong> séances W Répétitions G Poids (kg)<br />
Übungs-Nr.<br />
Exercise No.<br />
No. d'exercise<br />
Datum<br />
Date<br />
D 19. Bizeps-Curls beidarmig<br />
Ausgangsposition: Auflagepolser als Rückenstütze justieren.<br />
Sitz auf <strong>de</strong>r Bank. Die Kurzhanteln wer<strong>de</strong>n<br />
von unten gegriffen. Die Arme sind fast gestreckt.<br />
Bewegungsausführung: Die Arme wechselseitig in<br />
<strong>de</strong>n Ellenbogen beugen <strong>und</strong> anschließend wie<strong>de</strong>r in<br />
die Ausgangsposition strecken.<br />
Beanspruchte Muskulatur: Armbeuger.<br />
GB 19. Biceps curl- both arms<br />
Starting position: Adjust support pad to provi<strong>de</strong> back support. Sit on the<br />
bench. Grip the dumb-bells from below. Keep the arms stretched.<br />
Exercise: Bend your arms on both si<strong>de</strong>s at the elbows, then stretch them<br />
back to the starting position.<br />
Benefits: Arm flexor muscle.<br />
F 19. Biceps<br />
Position initiale: ajuster le coussin pour soutenir le dos et s’asseoir sur le<br />
banc. Les haltères sont tenus vers le bas et les bras sont presque tendus.<br />
Mouvement: l’un après l’autre, les bras se replient à l’articulation du<br />
cou<strong>de</strong> vers le haut pour ensuite re<strong>de</strong>scendre.<br />
Muscles sollicités: biceps<br />
D 20. Armstrecken sitzend<br />
Ausgangsposition: Auflagepolster als Rückenstütze<br />
justieren. Gera<strong>de</strong>r Sitz auf <strong>de</strong>r Bank. Kurzhantel von<br />
oben fassen. Die Kurzhantel wird bei stark angewinkeltem<br />
Arm hinter <strong>de</strong>m Kopf gehalten.<br />
Bewegungsausführung: Arm in die Hochhalte -<br />
position über <strong>de</strong>n Kopf strecken <strong>und</strong> wie<strong>de</strong>r in die<br />
Ausgangs position absenken. Nach Abschluß <strong>de</strong>r<br />
Übungswie<strong>de</strong>rholungen die Seite wechseln.<br />
Beanspruchte Muskulatur: Armstrecker<br />
GB 20. Stretching arms in sitting position<br />
Starting position: Adjust support pad to provi<strong>de</strong> back support. Sit upright<br />
on the bench. Grip the dumb-bells from above. Keep your arm above<br />
your head.<br />
Exercise: Stretch your arm to the raised position above your head, then<br />
lower it to the starting position. After completing the exercise repetitions<br />
change si<strong>de</strong>s.<br />
Benefits: Arm extensor<br />
F 20. Pectoraux assis<br />
Position initiale: ajuster le coussin comme pour l’exercice 19. Assis droit<br />
sur le banc, saisir vers le haut l'haltère le bras fortement pliés <strong>de</strong>rrière la<br />
tête.<br />
Mouvement: tendre le bras au <strong>de</strong>ssus <strong>de</strong> la tête et revenir à la position <strong>de</strong><br />
départ puis, après quelques séries changer et faire l’exercice avec l’autre<br />
bras.<br />
Muscle sollicités: muscles extenseurs du bras<br />
S<br />
W<br />
G<br />
S<br />
W<br />
G<br />
S<br />
W<br />
G<br />
S<br />
W<br />
G<br />
S<br />
W<br />
G<br />
S<br />
W<br />
G<br />
S<br />
W<br />
G<br />
S<br />
W<br />
G<br />
S<br />
W<br />
G<br />
16<br />
17
D Trainingstabelle S Satzzahl W Wie<strong>de</strong>rholungen G Gewicht (kg)<br />
GB Training table S Number of sets W Repetitions G Weight (kg)<br />
F Tableau d'entraînement S Nombre <strong>de</strong> séances W Répétitions G Poids (kg)<br />
D Trainingstabelle S Satzzahl W Wie<strong>de</strong>rholungen G Gewicht (kg)<br />
GB Training table S Number of sets W Repetitions G Weight (kg)<br />
F Tableau d'entraînement S Nombre <strong>de</strong> séances W Répétitions G Poids (kg)<br />
Übungs-Nr.<br />
Exercise No.<br />
No. d'exercise<br />
Datum<br />
Date<br />
Übungs-Nr.<br />
Exercise No.<br />
No. d'exercise<br />
Datum<br />
Date<br />
S<br />
W<br />
G<br />
S<br />
W<br />
G<br />
S<br />
W<br />
G<br />
S<br />
W<br />
G<br />
S<br />
W<br />
G<br />
S<br />
W<br />
G<br />
S<br />
W<br />
G<br />
S<br />
W<br />
G<br />
S<br />
W<br />
G<br />
S<br />
W<br />
G<br />
S<br />
W<br />
G<br />
S<br />
W<br />
G<br />
S<br />
W<br />
G<br />
S<br />
W<br />
G<br />
S<br />
W<br />
G<br />
S<br />
W<br />
G<br />
S<br />
W<br />
G<br />
S<br />
W<br />
G<br />
18<br />
19
HEINZ KETTLER GmbH & Co. KG · Postfach 1020 · D-59463 Ense-Parsit<br />
www.kettler.net<br />
06 / 09 SCH


