Manitowoc Flockeneisbereiter RF 0399 A - Kälte Berlin
Manitowoc Flockeneisbereiter RF 0399 A - Kälte Berlin
Manitowoc Flockeneisbereiter RF 0399 A - Kälte Berlin

You also want an ePaper? Increase the reach of your titles
YUMPU automatically turns print PDFs into web optimized ePapers that Google loves.
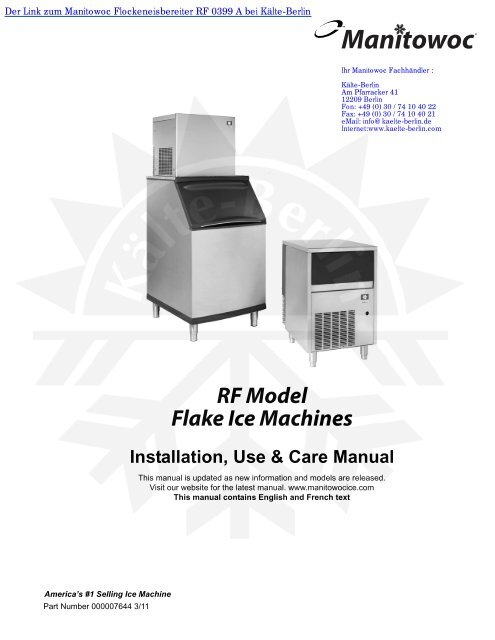
Der Link zum <strong>Manitowoc</strong> <strong>Flockeneisbereiter</strong> <strong>RF</strong> <strong>0399</strong> A bei Kälte-<strong>Berlin</strong><br />
<strong>Manitowoc</strong><br />
Ihr <strong>Manitowoc</strong> Fachhändler :<br />
Kälte-<strong>Berlin</strong><br />
Am Pfarracker 41<br />
12209 <strong>Berlin</strong><br />
Fon: +49 (0) 30 / 74 10 40 22<br />
Fax: +49 (0) 30 / 74 10 40 21<br />
eMail: info@kaelte-berlin.de<br />
Internet:www.kaelte-berlin.com<br />
<strong>RF</strong> Model<br />
Flake Ice Machines<br />
Installation, Use & Care Manual<br />
This manual is updated as new information and models are released.<br />
Visit our website for the latest manual. www.manitowocice.com<br />
This manual contains English and French text<br />
America’s #1 Selling Ice Machine<br />
Part Number 000007644 3/11
Table of Contents<br />
Section 1 <br />
General Information<br />
Model Numbers . . . . . . . . . . . . . . . . . . . . . . . . . . . . . . . . . . . . . . . . . . . . . . . . . . . . . 5<br />
UnderCounter Models . . . . . . . . . . . . . . . . . . . . . . . . . . . . . . . . . . . . . . . . . . . . 5<br />
Modular Models . . . . . . . . . . . . . . . . . . . . . . . . . . . . . . . . . . . . . . . . . . . . . . . . . 5<br />
Section 2 <br />
Installation Instructions<br />
Location of Ice Machine . . . . . . . . . . . . . . . . . . . . . . . . . . . . . . . . . . . . . . . . . . . . . . 6<br />
Clearance Requirements . . . . . . . . . . . . . . . . . . . . . . . . . . . . . . . . . . . . . . . . . . 6<br />
Installation Requirements . . . . . . . . . . . . . . . . . . . . . . . . . . . . . . . . . . . . . . . . . . . . 6<br />
<strong>RF</strong>2300 Bin Adapter Installation . . . . . . . . . . . . . . . . . . . . . . . . . . . . . . . . . . . . . . . 6<br />
Water and Drain Requirements . . . . . . . . . . . . . . . . . . . . . . . . . . . . . . . . . . . . . . . . 7<br />
Potable Water Requirements . . . . . . . . . . . . . . . . . . . . . . . . . . . . . . . . . . . . . . . 7<br />
Water Supply and Drain Line Sizing/Connections . . . . . . . . . . . . . . . . . . . . . . . 7<br />
Drain Connections . . . . . . . . . . . . . . . . . . . . . . . . . . . . . . . . . . . . . . . . . . . . . . . 7<br />
Electrical Service . . . . . . . . . . . . . . . . . . . . . . . . . . . . . . . . . . . . . . . . . . . . . . . . . . . 8<br />
Voltage . . . . . . . . . . . . . . . . . . . . . . . . . . . . . . . . . . . . . . . . . . . . . . . . . . . . . . . 8<br />
Fuse/Circuit Breaker . . . . . . . . . . . . . . . . . . . . . . . . . . . . . . . . . . . . . . . . . . . . . 8<br />
Ground Fault Circuit Interrupter . . . . . . . . . . . . . . . . . . . . . . . . . . . . . . . . . . . . . 9<br />
Minimum Power Cord Specifications . . . . . . . . . . . . . . . . . . . . . . . . . . . . . . . . . 9<br />
For United Kingdom Only . . . . . . . . . . . . . . . . . . . . . . . . . . . . . . . . . . . . . . . . . 9<br />
Maximum Breaker Size & Minimum Circuit Amperage Chart . . . . . . . . . . . . . . . . 10<br />
QuietQube Remote Condensing Unit . . . . . . . . . . . . . . . . . . . . . . . . . . . . . . . . 10<br />
Refrigeration System Installation<br />
Remote Condensing Unit Only . . . . . . . . . . . . . . . . . . . . . . . . . . . . . . . . . . . . . . . . 11<br />
Refrigeration Line Set Installation<br />
Remote Condensing Unit Only . . . . . . . . . . . . . . . . . . . . . . . . . . . . . . . . . . . . . . . . 12<br />
General . . . . . . . . . . . . . . . . . . . . . . . . . . . . . . . . . . . . . . . . . . . . . . . . . . . . . . . 12<br />
A. Line Set Length . . . . . . . . . . . . . . . . . . . . . . . . . . . . . . . . . . . . . . . . . . . . . . . 12<br />
B. Line Set Rise or Drop . . . . . . . . . . . . . . . . . . . . . . . . . . . . . . . . . . . . . . . . . . 12<br />
C. Suction Line Oil Traps . . . . . . . . . . . . . . . . . . . . . . . . . . . . . . . . . . . . . . . . . . 13<br />
Installation Check List . . . . . . . . . . . . . . . . . . . . . . . . . . . . . . . . . . . . . . . . . . . . . . . 16<br />
Additional Checks for QuietQube Models . . . . . . . . . . . . . . . . . . . . . . . . . . . . . . . 17<br />
Section 3 <br />
Operation<br />
Evaporator Low Temperature Safety Thermostat and Bin Thermostat . . . . . . . . 19<br />
<strong>RF</strong>0244/<strong>RF</strong>0266/<strong>RF</strong>0385/<br />
<strong>RF</strong>0388/<strong>RF</strong><strong>0399</strong>/<strong>RF</strong>0644 Operation . . . . . . . . . . . . . . . . . . . . . . . . . . . . . . . . . . . . . 19<br />
<strong>RF</strong>S0300 Operation . . . . . . . . . . . . . . . . . . . . . . . . . . . . . . . . . . . . . . . . . . . . . . . . . 20<br />
<strong>RF</strong>S0650/<strong>RF</strong>1200/<strong>RF</strong>2300 Operation . . . . . . . . . . . . . . . . . . . . . . . . . . . . . . . . . . . . 20<br />
2 Part Number 000007644 3/11
Table of Contents (continued)<br />
Section 4 <br />
Maintenance<br />
Section 5 <br />
Customer Support<br />
Interior Cleaning and Sanitizing . . . . . . . . . . . . . . . . . . . . . . . . . . . . . . . . . . . . . . . 21<br />
Cleaning/Sanitizing Procedure . . . . . . . . . . . . . . . . . . . . . . . . . . . . . . . . . . . . . 21<br />
Heavily Scaled Cleaning Procedure . . . . . . . . . . . . . . . . . . . . . . . . . . . . . . . . . 21<br />
Exterior Cleaning . . . . . . . . . . . . . . . . . . . . . . . . . . . . . . . . . . . . . . . . . . . . . . . . . . . 21<br />
Cleaning/Sanitizing Procedure . . . . . . . . . . . . . . . . . . . . . . . . . . . . . . . . . . . . . . . . 21<br />
Procedure to Clean Heavily Scaled Flake Ice Machines . . . . . . . . . . . . . . . . . . . 22<br />
Removal of Parts for Cleaning/Sanitizing . . . . . . . . . . . . . . . . . . . . . . . . . . . . . . . 23<br />
Ice Chute Removal . . . . . . . . . . . . . . . . . . . . . . . . . . . . . . . . . . . . . . . . . . . . . . 23<br />
Ice Chute Switch Actuator Removal . . . . . . . . . . . . . . . . . . . . . . . . . . . . . . . . . 24<br />
Air-Cooled Condenser Cleaning . . . . . . . . . . . . . . . . . . . . . . . . . . . . . . . . . . . . . . . 24<br />
Arctic Pure Water Filter System . . . . . . . . . . . . . . . . . . . . . . . . . . . . . . . . . . . . . . . 24<br />
<strong>Manitowoc</strong> Cleaner and Sanitizer . . . . . . . . . . . . . . . . . . . . . . . . . . . . . . . . . . . . . . 24<br />
Checklist . . . . . . . . . . . . . . . . . . . . . . . . . . . . . . . . . . . . . . . . . . . . . . . . . . . . . . . . . . 25<br />
Commercial Ice Machine Warranty . . . . . . . . . . . . . . . . . . . . . . . . . . . . . . . . . . . . 27<br />
Residential Ice Machine Limited Warranty . . . . . . . . . . . . . . . . . . . . . . . . . . . . . . 28<br />
Part Number 000007644 3/11 3
Table of Contents (continued)<br />
4 Part Number 000007644 3/11
Section 1<br />
General Information<br />
Model Numbers<br />
This manual covers the following models:<br />
UNDERCOUNTER MODELS<br />
MODULAR MODELS<br />
Self-Contained<br />
Air-Cooled<br />
Self-Contained<br />
Air-Cooled<br />
<strong>RF</strong>0244A<br />
<strong>RF</strong>0266A<br />
<strong>RF</strong>0385A<br />
<strong>RF</strong>0388A<br />
<strong>RF</strong><strong>0399</strong>A<br />
<strong>RF</strong>0644A<br />
Self-Contained<br />
Water-Cooled<br />
Rack Unit<br />
Head Section<br />
QuietQube<br />
Head Section<br />
<strong>RF</strong>2300 Bin Adapter Installation<br />
RCU Remote<br />
Condensing Unit<br />
<strong>RF</strong>S0300A --- --- --- ---<br />
<strong>RF</strong>S0650A <strong>RF</strong>S0650W ---- --- ---<br />
<strong>RF</strong>1200A <strong>RF</strong>1200W <strong>RF</strong>1279R <strong>RF</strong>1278C RCU1075<br />
<strong>RF</strong>2300A <strong>RF</strong>2300W <strong>RF</strong>2379R <strong>RF</strong>2378C RCU2375<br />
! Warning<br />
Remove all ice machine panels before lifting and<br />
installing.<br />
! Warning<br />
PERSONAL INJURY POTENTIAL<br />
Do not operate equipment that has been misused,<br />
abused, neglected, damaged, or altered/modified<br />
from that of original manufactured specifications.<br />
This appliance is not intended for use by persons<br />
(including children) with reduced physical, sensory<br />
or mental capabilities, or lack of experience and<br />
knowledge, unless they have been given<br />
supervision concerning use of the appliance by a<br />
person responsible for their safety.<br />
! Warning<br />
PERSONAL INJURY POTENTIAL<br />
<strong>RF</strong>2300 ice machines are not approved for use on<br />
B970 bins. <strong>RF</strong>2300 ice machines ship with a bracket<br />
that must be used when installing on B1100 and<br />
B1400 Series bins.<br />
1. Refer to diagram. Place bracket on bin top and slide<br />
back to engage.<br />
2. Place ice machine on bin: ice machine must fit<br />
between bracket and front ridge.<br />
! Caution<br />
Flake ice machines must be installed on a bin. Flake<br />
ice machines cannot be installed on dispensers.<br />
5 Part Number 000007644 3/11
Section 2<br />
Installation Instructions<br />
Location of Ice Machine<br />
The location selected for the ice machine must meet the<br />
following criteria. If any of these criteria are not met,<br />
select another location.<br />
• The location must be free of airborne and other<br />
contaminants.<br />
• The air temperature must be at least 50°F (10°C), but<br />
must not exceed 110°F (43°C).<br />
• The water temperature must be at least 40°F (4°C),<br />
but must not exceed 90°F (32°C).<br />
• The location must not be near heat-generating<br />
equipment or in direct sunlight.<br />
• The location must be capable of supporting the<br />
weight of the ice machine and a full bin of ice.<br />
• The location must allow enough clearance for water,<br />
drain and electrical connections in the rear of the ice<br />
machine.<br />
• The location must not obstruct airflow through or<br />
around the ice machine.<br />
CLEARANCE REQUIREMENTS<br />
<strong>RF</strong>0244<br />
<strong>RF</strong>0266<br />
<strong>RF</strong>0385<br />
<strong>RF</strong>0388<br />
Air-Cooled Water-Cooled<br />
<strong>RF</strong><strong>0399</strong><br />
<strong>RF</strong>0644<br />
Top 0” (0 cm) 0” (0 cm)<br />
Sides 2” (5 cm) 2” (5 cm)<br />
Back 8" (20 cm) 8" (20 cm)<br />
NOTE: Allowance must be made for removal when the ice machine is built in.<br />
Monthly removal of the top panel is required for cleaning & sanitizing.<br />
<strong>RF</strong>S0300<br />
<strong>RF</strong>S0650<br />
<strong>RF</strong>1200<br />
<strong>RF</strong>2300<br />
Air-Cooled<br />
Water-<br />
Cooled<br />
QuietQube<br />
Air-Cooled<br />
Top/Sides 8" (20 cm) 8" (20 cm) 0" (0 cm)<br />
Back 5" (13 cm) 5" (13 cm) 0" (0 cm)<br />
Installation Requirements<br />
• The ice machine and bin must be level.<br />
• Vent the ice machine and bin drains separately.<br />
• Bin drain termination must have an air gap.<br />
• A backflow preventer is required on water inlet lines.<br />
• The ice machine and bin must be sanitized after<br />
installation.<br />
• Local water conditions may require treatment of the<br />
water to inhibit scale formation, filter sediment, and<br />
remove chlorine odor and taste.<br />
• Routine adjustments and maintenance procedures<br />
outlined in this manual are not covered by the<br />
warranty.<br />
Ice Machine Heat of Rejection<br />
Series<br />
Heat of Rejection<br />
Ice Machine<br />
Average<br />
<strong>RF</strong>1279R 7850<br />
<strong>RF</strong>2379R 15700<br />
B.T.U./Hour<br />
Because the heat of rejection varies during the ice making cycle<br />
Ice machines, like other refrigeration equipment, reject<br />
heat through the condenser. It is helpful to know the<br />
amount of heat rejected by the ice machine when sizing<br />
air conditioning equipment.<br />
This information is also necessary when evaluating the<br />
benefits of using water-cooled or remote condensers to<br />
reduce air conditioning loads. The amount of heat added<br />
to an air conditioned environment by an ice machine<br />
using a water-cooled or remote condenser is negligible.<br />
Knowing the amount of heat rejected is also important<br />
when sizing a cooling tower for a water-cooled<br />
condenser. Use the peak figure for sizing the cooling<br />
tower.<br />
Rack Unit Connection Size<br />
Suction Line<br />
Liquid Line<br />
RCU Units<br />
Front/Back<br />
Sides/Top<br />
Remote Condensing Unit<br />
24" (61 cm)<br />
6" (15.2 cm)<br />
5/8 inch<br />
(15.9 mm)<br />
3/8 inch<br />
(9.5 mm)<br />
NOTE: Water-cooled/Remote condensing units only - there is no minimum<br />
clearance required. This value is recommended for efficient operation and<br />
servicing only.<br />
Part Number 000007644 3/11 6
Installation Instructions Section 2<br />
Water and Drain Requirements<br />
POTABLE WATER REQUIREMENTS<br />
Follow these guidelines to install water inlet lines:<br />
• Do not connect the ice machine to a hot water<br />
supply. Be sure all hot water restrictors installed for<br />
other equipment are working. (Check valves on sink<br />
faucets, dishwashers, etc.)<br />
• If water pressure exceeds the maximum of 80 psig<br />
(552 kPA) recommended pressure, obtain a water<br />
pressure regulator from your <strong>Manitowoc</strong> distributor.<br />
• Install a water shut-off valve and union for both the<br />
ice making and condenser water lines.<br />
• Insulate water inlet lines to prevent condensation.<br />
• Plumbing must conform to local codes.<br />
WATER SUPPLY AND DRAIN LINE SIZING/<br />
CONNECTIONS<br />
Location<br />
Potable<br />
Water Inlet<br />
Potable<br />
Water Drain<br />
Condenser<br />
Water Inlet<br />
Water Temp<br />
Min/Max<br />
40°/90°F<br />
(4°/32°C)<br />
Water<br />
Pressure<br />
Min/Max<br />
14/80 psi<br />
(100/552 kPA)<br />
Fitting/Min<br />
Tubing<br />
Size<br />
3/8" FPT<br />
--- --- 1/2" MPT<br />
40°/90°F<br />
(4°/32°C)<br />
20/150 psi<br />
(138/1034 kPA)<br />
3/8” FPT<br />
<strong>RF</strong>2300 only<br />
= 1/2" FPT<br />
Condenser<br />
Water Drain<br />
--- --- 1/2" MPT<br />
Bin Drain --- --- 3/4" FPT<br />
Large Capacity Bin Drain --- 1" FPT<br />
VENT TUBE<br />
18" (46 CM)<br />
LONG<br />
WATER SHUT-OFF VALVE<br />
REQUIRED - ICE MAKING<br />
WATER INLET TUBING 3/8"<br />
MIN. I.D. (.95 CM)<br />
ICE MAKING<br />
WATER INLET<br />
TUBING 3/8" MIN.<br />
I.D. (.95 CM)<br />
SEPERATE BIN AND ICE<br />
MACHINE DRAINS ARE<br />
REQUIRED<br />
ROUTE DRAIN TUBING TO<br />
OPEN SITE DRAIN<br />
VENT TUBE<br />
18" (46 CM)<br />
LONG<br />
ROUTE<br />
DRAIN<br />
TUBING TO<br />
OPEN SITE<br />
DRAIN<br />
Typical Water Supply Drain Installation<br />
DRAIN CONNECTIONS<br />
Follow these guidelines when installing drain lines to prevent<br />
drain water from flowing back into the ice machine and storage<br />
bin:<br />
• Drain lines must have a 1.5 inch drop per 5 feet of run (2.5<br />
cm per meter), and must not create traps.<br />
• The floor drain must be large enough to accommodate<br />
drainage from all drains.<br />
• Run separate bin and water-cooled condenser drain lines.<br />
Insulate them to prevent condensation.<br />
• Vent the bin and ice machine drain to the atmosphere. The<br />
ice machine drain requires an 18" (46 cm) vent. Do not<br />
vent the condenser drain on water-cooled models.<br />
• Drains must have a union or other suitable means to allow<br />
in place disconnection from the ice machine when<br />
servicing is required.<br />
7 Part Number 000007644 3/11
Section 2<br />
Installation Instructions<br />
Electrical Service<br />
! Warning<br />
All wiring must conform to local, state and national<br />
codes.<br />
VOLTAGE<br />
The maximum allowable voltage variation is ±10% of the<br />
rated voltage at ice machine start-up (when the electrical<br />
load is highest).<br />
! Warning<br />
The ice machine must be grounded in accordance<br />
with national and local electrical codes.<br />
All electrical work, including wire routing and grounding,<br />
must conform to local, state and national electrical<br />
codes. The following precautions must be observed:<br />
• The ice machine must be grounded.<br />
• A separate fuse/circuit breaker must be provided for<br />
each ice machine.<br />
• A qualified electrician must determine proper wire<br />
size dependent upon location, materials used and<br />
length of run (minimum circuit ampacity can be used<br />
to help select the wire size).<br />
• The maximum allowable voltage variation is +/-10 of<br />
the rated voltage at ice machine start-up (when the<br />
electrical load is highest).<br />
• Check all ground screws in the control box and verify<br />
they are tight before starting the ice machine.<br />
GROUND FAULT CIRCUIT INTERRUPTER<br />
We do not recommend the use of a GFCI/GFI circuit<br />
protection with our equipment. If a GFCI/GFI is required<br />
by code, use a GFCI/GFI breaker rather than outlet<br />
which is more prone to intermittent nuisance trips than<br />
panel circuit breakers.<br />
MINIMUM POWER CORD SPECIFICATIONS<br />
The wire size to the receptacle is dependent upon<br />
location, materials used, length of run, etc., so it must be<br />
determined by a qualified electrician. Local, state or<br />
national requirements will supersede our minimum<br />
requirements.<br />
FOR UNITED KINGDOM ONLY<br />
As the colors of the wires in the mains lead of the appliance may not<br />
correspond with the colored markings identifying the terminals in your plug,<br />
proceed as follows:<br />
• The wire which is colored green and yellow must be connected to the<br />
terminal in the plug which is marked with the letter E or by the earth<br />
ground symbol or colored green or green and yellow.<br />
• The wire colored blue must be connected to the terminal which is marked<br />
with the letter N or colored black.<br />
• The wire colored brown must be connected to the terminal which is<br />
marked with the letter L or colored red.<br />
Important<br />
Observe correct polarity of incoming line voltage.<br />
Incorrect polarity can lead to erratic ice machine<br />
operation.<br />
FUSE/CIRCUIT BREAKER<br />
A dedicated circuit and a separate fuse/circuit breaker<br />
are required for each ice machine.<br />
Part Number 000007644 3/11 8
Installation Instructions Section 2<br />
Maximum Breaker Size & Minimum Circuit Amperage Chart<br />
Important<br />
Due to continuous improvements, this information is for reference only.<br />
Please refer to the ice machine serial number tag to verify electrical data.<br />
Serial tag information overrides information listed on this page.<br />
Series Ice<br />
Machine<br />
Voltage<br />
Phase<br />
Cycle<br />
Max<br />
Fuse/<br />
Circuit<br />
Breaker<br />
QUIETQUBE REMOTE CONDENSING UNIT<br />
Air-Cooled Water-Cooled QuietQube<br />
Min<br />
Circuit<br />
Amps<br />
Total<br />
Circuit<br />
Amps<br />
Max<br />
Fuse/<br />
Circuit<br />
Breaker<br />
Min<br />
Circuit<br />
Amps<br />
Max<br />
Fuse/<br />
Circuit<br />
Breaker<br />
Total<br />
Circuit<br />
Amps<br />
<strong>RF</strong>0244<br />
115/1/60 15 Amp N/A 7.5 N/A N/A — —<br />
230/1/50 10 Amp N/A 0.87 N/A N/A — —<br />
<strong>RF</strong>0266<br />
115/1/60 15 Amp N/A 7.5 N/A N/A — —<br />
230/1/50 10 Amp N/A 0.87 N/A N/A — —<br />
<strong>RF</strong>0385<br />
115/1/60 15 Amp N/A 10.0 N/A N/A — —<br />
230/1/50 N/A N/A N/A N/A N/A — —<br />
<strong>RF</strong>0388<br />
115/1/60 15 Amp N/A 10.0 N/A N/A — —<br />
230/1/50 10 Amp N/A 2.9 N/A N/A — —<br />
<strong>RF</strong><strong>0399</strong><br />
115/1/60 15 Amp N/A 10.0 N/A N/A — —<br />
230/1/50 10 Amp N/A 2.9 N/A N/A — —<br />
<strong>RF</strong>0644 115/1/60 25 Amp N/A 13.5 N/A N/A — —<br />
<strong>RF</strong>S0300 115/1/60 20 Amp 12.8 N/A N/A N/A — —<br />
<strong>RF</strong>S0650<br />
115/60/1 25 Amp 16.3 N/A 25 Amp 15.4 — —<br />
208-230/1/60 15 Amp 8.7 N/A 15 Amp 8.2 — —<br />
<strong>RF</strong>1200<br />
208-230/1/60 15 Amp 15.0 N/A 15 Amp 15.0 15 Amp 1.4<br />
230/1/50 16 Amp 7.3 N/A 16 Amp 7.3 10 Amp 1.4<br />
<strong>RF</strong>2300<br />
208-230/3/60 20 Amp 15.0 N/A 20 Amp 15.0 15 Amp 3.2<br />
400-415/3/50 16 Amp 13.9 N/A 16 Amp 13.9 10 Amp 3.2<br />
<strong>RF</strong>1200R 208-230/1/60 15 Amp 1.4 N/A N/A N/A — —<br />
<strong>RF</strong>2300R 208-230/3/60 15 Amp 3.2 N/A N/A N/A — —<br />
Maximum allowable voltage variation at compressor start-up is ±10% of voltage listed above and on the model/serial plate.<br />
Condensing Unit Voltage Phase Cycle Maximum Fuse/Circuit Breaker Minimum Circuit Amps<br />
208-230/60/1 15 15<br />
RCU1075<br />
208-230/60/3 15 15<br />
208-230/50/1 15 15<br />
208-230/60/1 15 15<br />
RCU2375<br />
208-230/60/3 15 15<br />
208-230/50/1 15 15<br />
9 Part Number 000007644 3/11
Section 2<br />
Installation Instructions<br />
Refrigeration System Installation<br />
Remote Condensing Unit Only<br />
QuietQube®<br />
Ice Machine<br />
<strong>RF</strong>1200C<br />
<strong>RF</strong>2300C<br />
Remote<br />
Condensing Unit<br />
RCU1075C<br />
RCU2375C<br />
USAGE WITH NON-MANITOWOC<br />
CONDENSING UNITS<br />
Line Set*<br />
RC-21<br />
RC-31<br />
RC-51<br />
*Line Set Suction Line Liquid Line<br />
RC 21/31/51<br />
5/8 inch<br />
(15.9 mm)<br />
3/8 inch<br />
(9.5 mm)<br />
Important<br />
<strong>Manitowoc</strong> remote systems are only approved and<br />
warranted as a complete new package. Warranty on<br />
the refrigeration system will be void if a new ice<br />
machine head section is connected to pre-existing<br />
(used) tubing or condensing units or vice versa.<br />
<strong>Manitowoc</strong> Remote Condensing Units are specifically<br />
designed for usage with a QuietQube® Ice Machine<br />
Head Section. Standard condensing units and Non-<br />
<strong>Manitowoc</strong> condensing units are not approved for use<br />
with a QuietQube® Ice Machine Head Section.<br />
! Caution<br />
The 60-month compressor warranty (including the 24-<br />
month labor replacement warranty) will not apply if the<br />
<strong>Manitowoc</strong> Ice Machine and <strong>Manitowoc</strong> Remote<br />
Condensing Unit are not installed according to<br />
specifications. This warranty also will not apply if the<br />
refrigeration system is modified with a condenser,<br />
heat reclaim device, or other parts or assemblies not<br />
manufactured by <strong>Manitowoc</strong> Ice.<br />
Factory Equipment Refrigeration Amounts<br />
ICE MACHINE HEAD SECTION<br />
Each ice machine condensing unit ships from the factory<br />
with a R-404A refrigerant charge appropriate for the<br />
entire system operation. The serial tag on the ice<br />
machine indicates the refrigerant charge. The refrigerant<br />
charge is sufficient to operate the ice machine in<br />
ambient temperatures between -20°F (-28.9°C) and<br />
120°F (48.9°C). With line set lengths of up to 100 feet<br />
(30.5 m).<br />
! Warning<br />
Potential Personal Injury Situation<br />
The QuietQube Condensing Unit contains the<br />
refrigerant charge. Installation and brazing of the line<br />
sets must be performed by a properly trained and<br />
EPA certified refrigeration technician aware of the<br />
dangers of dealing with refrigerant charged<br />
equipment.<br />
! Caution<br />
Never add more than nameplate charge to the<br />
refrigeration system for any application.<br />
REFRIGERATION LINE SETS/TRAP KIT<br />
Refrigeration Rated Tubing and Trap Kits are shipped<br />
capped with atmospheric pressure.<br />
! Warning<br />
Installation of a QuietQube® Condensing Unit may<br />
require the use of special equipment for placement.<br />
Trained and qualified personnel are required for<br />
proper rigging and lifting.<br />
Part Number 000007644 3/11 10
Installation Instructions Section 2<br />
Refrigeration Line Set Installation<br />
Remote Condensing Unit Only<br />
GENERAL<br />
Refrigeration line set installations consist of vertical and<br />
horizontal line set distances between the ice machine<br />
and the condensing unit. The following guidelines,<br />
drawings and calculation methods must be followed to<br />
assure proper oil return and remote condensing unit/ice<br />
machine operation.<br />
The refrigeration line set installer must be USA<br />
Government-Environmental Protection Agency (EPA)<br />
certified in proper refrigerant handling and servicing<br />
procedures.<br />
! Warning<br />
The QuietQube Condensing unit contains refrigerant<br />
charge. The two refrigeration valves must remain<br />
closed until proper installation of the line sets is<br />
completed.<br />
! Warning<br />
Disconnect electrical power to the ice machine head<br />
section and remote condensing unit before<br />
proceeding.<br />
Step 1 Verify Ice Machine and Remote Condensing<br />
Unit Locations Are Within Guidelines<br />
Prior to installation of the ice machine head section and<br />
remote condensing unit be sure that the distance<br />
between them is within the line set routing guidelines<br />
outlined in this manual.<br />
Roof/Wall Penetration<br />
If required, cut a 3-inch (76.2 mm) circular hole in the<br />
wall or roof for routing of refrigeration tubing. A qualified<br />
person must perform all roof penetrations.<br />
Step 2 Route Refrigeration Tubing<br />
Properly route refrigeration tubing between the ice<br />
machine head section and the remote condensing unit.<br />
A. LINE SET LENGTH<br />
100 feet (30.5 m) Length: The maximum measured<br />
length the line set can be.<br />
The receiver is designed to hold a charge sufficient to<br />
operate the ice machine in ambient temperatures<br />
between -20°F (-28.9°C) and 120°F (48.9°C), with line<br />
set lengths of up to 100 feet (30.5 m).The maximum<br />
amount of line set which can be exposed on the rooftop<br />
is 25% of the total length of the line set.<br />
Important<br />
QuietQube® ice machines will not function with line<br />
sets greater than 100 feet (30.5 m). Do not attempt to<br />
go beyond this distance and add refrigerant charge to<br />
compensate!<br />
B. LINE SET RISE OR DROP<br />
35 ft. (10.7 m)<br />
MAX.<br />
DISTANCE<br />
35 feet (10.7 m) Rise: The maximum distance the<br />
remote condensing unit can be above the ice machine.<br />
15 ft. (4.5 m)<br />
MAX.<br />
DISTANCE<br />
SV1751<br />
SV1750<br />
15 feet (4.5 m) Drop: The maximum distance the<br />
remote condensing unit can be below the ice machine.<br />
11 Part Number 000007644 3/11
Section 2<br />
Installation Instructions<br />
C. SUCTION LINE OIL TRAPS<br />
! Caution<br />
Do not form unwanted traps in refrigeration lines.<br />
Never coil excess refrigeration tubing.<br />
0 to 20 feet (0 to 6.1 m) Rise: No oil trap is required<br />
when the condensing unit is located 20 feet (6.1 m) or<br />
less above the ice machine head section.<br />
21 to 35 feet (6.4 to 10.7 m) Rise: The suction line<br />
requires an additional Oil Trap (“S” type) to be installed.<br />
Install the trap as close as possible to midpoint between<br />
the ice machine head section and remote condensing<br />
unit. S-Trap Kits are available from <strong>Manitowoc</strong>.<br />
21 ft. (6.4 m)<br />
OR MORE RISE<br />
ADDITIONAL<br />
TRAP KIT<br />
REQUIRED<br />
Service Loop<br />
A service loop in the line set permits easy access to the<br />
ice machine for cleaning and service.<br />
• A service loop is not considered an oil trap.<br />
• The service loop is not included when calculating<br />
length, rise or drop of the tubing run.<br />
• Do not use hard rigid copper for the service loop.<br />
! Caution<br />
If a line set has a rise followed by a drop, another rise<br />
cannot be made. Likewise, if a line set has a drop<br />
followed by a rise, another drop cannot be made.<br />
Step 3 Lengthening or Reducing Line Set Lengths<br />
! Caution<br />
Do not form unwanted traps in refrigeration lines.<br />
Never coil excess refrigeration tubing.<br />
When the line set requires shortening or lengthening, do<br />
so before connecting the line set to the ice machine<br />
head section or the remote condensing unit.<br />
SV1751<br />
SV1760<br />
Part Number 000007644 3/11 12
Installation Instructions Section 2<br />
Step 4 Connecting the line set<br />
To prevent oxidation of the copper, purge line set and<br />
condensing unit with dry nitrogen while brazing.<br />
A. Connect the Line Set to the Remote Condensing<br />
Unit<br />
! Warning<br />
The QuietQube Condensing unit contains refrigerant<br />
charge. The two refrigeration valves must remain<br />
closed until proper installation of the line sets is<br />
completed.<br />
The line set shut-off valves must remain closed and be<br />
protected from heat during the brazing process. Wrap<br />
the valves in a wet rag or other type of heat sink prior to<br />
brazing. Cool braze joint with water immediately after<br />
brazing to prevent heat migration to the valve.<br />
Step 5 Pressure Test and Evacuate Line Set and<br />
Ice Machine Head Section<br />
• Suction and liquid line set shutoff valves must remain<br />
closed until pressure testing and evacuation are<br />
complete.<br />
• Pressure testing and evacuation can be performed<br />
from the ice machine head section or CVD<br />
condensing unit shut-off valves.<br />
• Schrader valve core removal tools that allow for<br />
removal and installation of the valve cores without<br />
removing manifold gauge set hoses are<br />
recommended to decrease the evacuation time.<br />
• Pressure test @ 150 psi (1000 kPa) for a minimum of<br />
15 minutes.<br />
• Minimum evacuation level is 500 microns.<br />
MINIMIZE THE TIME THE<br />
REFRIGERATION SYSTEM IS<br />
EXPOSED TO THE ATMOSPHERE<br />
(15 MINUTES MAXIMUM)<br />
SUCTION LINE<br />
LIQUID LINE<br />
B. Connect the Line Set to the Ice Machine Head<br />
Section<br />
Suction and liquid line shut-off valves<br />
must remain closed until evacuation and<br />
pressure testing are complete.<br />
! Warning<br />
The ice machine head section ships from the factory<br />
pressurized with R404A refrigerant. Recover the<br />
refrigerant from both suction and liquid line access<br />
ports prior to cutting into refrigeration lines.<br />
• Cut the suction and liquid tubing with a tubing cutter,<br />
leaving enough tubing to easily braze.<br />
• Connect the line set.<br />
• Cool braze joint with water immediately after brazing<br />
to prevent heat migration.<br />
13 Part Number 000007644 3/11
Section 2<br />
Installation Instructions<br />
Step 6 Leak Check The Refrigeration System<br />
Leak check the new line set connections at the ice<br />
machine head section, condensing unit and S trap as<br />
well as all factory joints throughout the entire system.<br />
Disconnect power to the remote condensing unit. Place<br />
the rocker switch into the ON position. This allows the<br />
low side and high side pressures to equalize for leak<br />
checking. Place the rocker switch in the OFF position.<br />
Connect power to the remote condensing unit and allow<br />
system to pump down after leak checking is complete.<br />
Step 7 Open The Valves Prior To Starting The Ice<br />
Machine<br />
A. Slowly backseat (open-turn counterclockwise)<br />
the suction line shutoff valve.<br />
B. Slowly backseat (open-turn counterclockwise)<br />
the liquid line shutoff valve.<br />
Important<br />
All refrigeration valve caps must be reinstalled to<br />
prevent future refrigeration leaks.<br />
Verify O-ring in schrader valve caps are intact and<br />
reinstall on shutoff valves to prevent refrigerant leakage.<br />
Replace shutoff valve access caps and torque to the<br />
following specifications.<br />
Torque Values<br />
Stem<br />
Caps<br />
Schrader Core<br />
Step 8 Insulation Requirements<br />
To prevent condensation the entire suction line must be<br />
insulated. All insulation must be airtight and sealed at<br />
both ends.<br />
The following insulation requirements prevent<br />
condensation at 90°F (32.2°C) ambient 90% Relative<br />
Humidity. If higher humidity is expected, increase<br />
insulation thickness.<br />
The entire suction line set requires:<br />
18-20 ft. lbs. (24.4-27.1 Nm)<br />
12-15 ft. lbs. (16.3-20.3 Nm)<br />
1.5-3 in. lbs. (0.17-0.34 Nm)<br />
Open suction and liquid line<br />
shut-off valves<br />
Suction Line<br />
Liquid Line<br />
5/8 in. (16 mm) 3/8 in. (10 mm)<br />
Min. Insulation<br />
Thickness<br />
1/2 in. (13 mm)<br />
Suction Line<br />
1/4 in. (7 mm)<br />
Liquid Line<br />
Open Valves<br />
Important<br />
To prevent condensation the entire suction line must<br />
be insulated. All insulation must be airtight and<br />
sealed at both ends.<br />
The minimum requirements are for conditions at or<br />
below 90% humidity and 90°F (32°C) ambient. When<br />
higher humidity will be experienced, or local code<br />
requires, insulation wall thickness will need to be<br />
increased.<br />
Part Number 000007644 3/11 14
Installation Instructions Section 2<br />
Installation Check List<br />
All <strong>Manitowoc</strong> ice machines are factory-operated and adjusted before shipment. Adjustments and maintenance<br />
procedures outlined in this manual are the responsibility of the owner/operator and are not covered by the warranty.<br />
<br />
<br />
Is the Ice Machine level?<br />
Is the ice machine and adapter (when used)<br />
secured to the dispenser?<br />
<br />
<br />
Is there a separate drain for the water-cooled<br />
condenser?<br />
Is there a separate drain for the dispenser?<br />
<br />
<br />
<br />
Have all of the electrical and water<br />
connections been made?<br />
Has the supply voltage been tested and<br />
checked against the rating on the nameplate?<br />
Is there proper clearance around the ice<br />
machine for air circulation?<br />
<br />
<br />
<br />
Is the ice making water turned on?<br />
Are all electrical leads free from contact with<br />
refrigeration lines and moving equipment?<br />
Has the owner/operator been instructed<br />
regarding maintenance and the use of<br />
<strong>Manitowoc</strong> Cleaner and Sanitizer?<br />
<br />
Is the ice machine grounded and polarity<br />
correct?<br />
<br />
Has the owner/operator completed the<br />
warranty registration card?<br />
<br />
<br />
Has the ice machine been installed where<br />
ambient temperatures will remain in the range<br />
of 50° - 100°F (14.4° - 37.8°C)?<br />
Has the ice machine been installed where the<br />
incoming water temperature will remain in the<br />
range of 50° - 90°F (14.4° - 32.2°C)?<br />
<br />
<br />
Has the ice machine and bin been sanitized?<br />
Is the rocker switch set to ON?<br />
15 Part Number 000007644 3/11
Section 2<br />
Installation Instructions<br />
Additional Checks for QuietQube Models<br />
<br />
Is the lineset length, rise and drop within the<br />
guidelines?<br />
<br />
Has the condenser/condensing unit been<br />
installed to prevent any roofing damage?<br />
<br />
Are the suction and liquid line shut-off valves<br />
open?<br />
<br />
Have the refrigeration lines been insulated and<br />
secured properly to prevent vibration?<br />
<br />
<br />
<br />
Is the line set routed properly?<br />
Are both refrigeration lines to remote<br />
condensing unit run so they do not lay in water<br />
and are properly insulated?<br />
Does the condenser fan motor(s) operate<br />
properly after start-up?<br />
<br />
<br />
Has the RCU remote condensing unit been<br />
located where ambient temperatures will<br />
remain in the range of -20° to 120°F (-29° to<br />
48.9°C)?<br />
Is a refrigeration oil trap (S-trap) installed if the<br />
condenser is installed 21 to 35 feet (6 to 11 m)<br />
above the ice machine head?<br />
<br />
Have all the refrigeration fittings and joints<br />
been leak checked?<br />
Part Number 000007644 3/11 16
Section 3<br />
Operation<br />
NOTE: Flake ice machines use an auger to remove ice from the evaporator. Occasional noises (creaks, groans,<br />
squeaks, or pops) are a normal part of the ice making process.<br />
Evaporator Low Temperature Safety<br />
Thermostat and Bin Thermostat<br />
The bin thermostat sensing bulb is located in the ice<br />
chute or bin and turns the ice machine on and off as the<br />
level of ice in the ice chute or bin changes.<br />
Model<br />
Bin<br />
Thermostat<br />
Setting<br />
Evaporator<br />
Thermostat<br />
Setting<br />
<strong>RF</strong>0244/<strong>RF</strong>0266 5 5<br />
<strong>RF</strong>0388/<strong>RF</strong><strong>0399</strong>/<br />
<strong>RF</strong>0644<br />
5 7<br />
<strong>RF</strong>S0300 4 7<br />
<strong>RF</strong>S0650 4 N/A<br />
<strong>RF</strong>1200/<strong>RF</strong>2300 5 N/A<br />
<strong>RF</strong>0244/<strong>RF</strong>0266/<strong>RF</strong>0385/<br />
<strong>RF</strong>0388/<strong>RF</strong><strong>0399</strong>/<strong>RF</strong>0644 Operation<br />
The ice machine will not start until:<br />
A. The rocker switch is moved to “ON”.<br />
B. Ice does not contact the bin thermostat bulb.<br />
C. The water reservoir is full of water.<br />
Placing the toggle switch in the ON position starts the<br />
gear motor and refrigeration system. The float valve<br />
controls the water inlet valve and water level. The freeze<br />
cycle ends when ice contacts the bin thermostat. The ice<br />
machine will restart when ice no longer contacts the bin<br />
thermostat.<br />
3<br />
2<br />
4<br />
5<br />
6<br />
BIN THERMOSTAT<br />
SMALL NUMBERS = LESS ICE IN BIN<br />
LARGE NUMBERS = MORE ICE IN BIN<br />
SENSING BULB IS<br />
LOCATED IN BIN<br />
1<br />
7<br />
3<br />
2<br />
1<br />
4<br />
5<br />
6<br />
7<br />
EVAPORATOR LOW TEMPERATURE<br />
SAFETY THERMOSTAT<br />
INCORRECT SETTINGS WILL CAUSE ICE<br />
MACHINE TO SHUT OFF<br />
BIN THERMOSTAT<br />
LOCATION<br />
EVAPORATOR LOW<br />
TEMPERATURE SAFETY<br />
THERMOSTAT LOCATION<br />
19 Part Number 000007644 3/11
Section 3<br />
Operation<br />
<strong>RF</strong>S0300 Operation<br />
The ice machine will not start until:<br />
A. The rocker switch is moved to “ON”.<br />
B. Ice does not contact the bin thermostat bulb.<br />
C. The water reservoir is full of water.<br />
Placing the toggle switch in the ON position starts the<br />
gear motor and a 10 minute compressor time delay. The<br />
compressor starts and the float valve controls the water<br />
inlet valve and water level. The freeze cycle ends when<br />
ice contacts the bin thermostat. The ice machine remains<br />
off until ice no longer contacts the bin thermostat.<br />
<strong>RF</strong>S0650/<strong>RF</strong>1200/<strong>RF</strong>2300 Operation<br />
The ice machine will not start until:<br />
A. The rocker switch is moved to “ON”.<br />
B. Ice does not contact the bin thermostat bulb.<br />
C. The water reservoir is full of water.<br />
Placing the toggle switch in the ON position starts the<br />
gear motor. After the rotation speed sensor verifies<br />
10 minutes of correct rotation, the time delay ends and<br />
the compressor starts. The ice machine will continue to<br />
make ice until ice contacts the bin thermostat. The ice<br />
machine remains off until ice no longer contacts the bin<br />
thermostat.<br />
BIN THERMOSTAT<br />
EVAPORATOR<br />
THERMOSTAT<br />
BIN THERMOSTAT IS<br />
LOCATED ON SIDE OF<br />
CONTROL BOX<br />
Part Number 000007644 3/11 20
Section 4<br />
Maintenance<br />
Interior Cleaning and Sanitizing<br />
Maintenance procedures covered in this manual are not<br />
covered by the warranty.<br />
! Caution<br />
Use only <strong>Manitowoc</strong> approved Nickel Safe Ice<br />
Machine Cleaner (part number 000000084) and<br />
Sanitizer (part number 94-0565-3). Do not mix<br />
Cleaner and Sanitizer solutions together. It is a<br />
violation of Federal law to use these solutions in a<br />
manner inconsistent with their labeling. Read and<br />
understand all labels printed on bottles before use.<br />
! Warning<br />
Wear rubber gloves and safety goggles (and/or face<br />
shield) when handling Ice Machine Cleaner or<br />
Sanitizer.<br />
CLEANING/SANITIZING PROCEDURE<br />
This procedure must be performed once every month.<br />
• All ice must be removed from the bin.<br />
• The ice machine and bin must be disassembled<br />
cleaned and sanitized.<br />
• The ice machine produces ice with the cleaner and<br />
sanitizer solutions.<br />
• All ice produced during the cleaning and sanitizing<br />
procedure must be discarded.<br />
HEAVILY SCALED CLEANING PROCEDURE<br />
Perform this procedure if you have some or all of these<br />
symptoms.<br />
• Grinding, popping or squealing noises from the<br />
evaporator.<br />
• Grinding noise from gearbox.<br />
• Ice machine trips speed sensor.<br />
NOTE: A Cleaning/Sanitizing Procedure must be<br />
performed after this procedure.<br />
Exterior Cleaning<br />
Remove dust and dirt off exterior surfaces with mild<br />
household dishwashing detergent and warm water. Wipe<br />
dry with a clean, soft cloth.<br />
Cleaning/Sanitizing Procedure<br />
Use Nickel Safe Ice Machine Cleaner, part number<br />
000000084.<br />
Use Ice Machine Sanitizer part number 94-0565-3.<br />
Step 1 Remove front and top covers and set the toggle<br />
switch to the OFF position.<br />
Step 2 Remove all ice from the bin.<br />
Step 3 Turn off the ice making water supply and drain<br />
water from evaporator and reservoir.<br />
Step 4 Remove the top cover from water reservoir.<br />
Step 5 Follow the chart and premix cleaner and water.<br />
Amount of Nickel Safe<br />
Amount of Water Cleaner - Part Number<br />
000000084<br />
1 gallon (4 Liters) 3 ounces (90 ml)<br />
Step 6 Fill the evaporator and reservoir with cleaning<br />
solution.<br />
Step 7 Move the toggle switch to the ON position. The<br />
ice machine will make ice with the cleaning solution and<br />
deposit the ice in the bin. Add the remaining cleaner/<br />
water solution as the water level in the reservoir drops.<br />
NOTE: Do not allow the cleaner/water level to drop<br />
below the minimum water level. The ice machine will<br />
discontinue the cleaning cycle if the water float switch<br />
opens.<br />
Step 8 After all of the cleaner/water solution has been<br />
added, turn on the ice making water supply. Continue<br />
the freeze cycle for 10 minutes to remove the cleaning<br />
solution from the water circuit.<br />
Step 9 Place the toggle switch in the OFF position.<br />
21 Part Number 000007644 3/11
Section 4<br />
Maintenance<br />
Step 10 Refer to disassembly for cleaning/sanitizing<br />
and remove parts for hand cleaning/sanitizing.<br />
• Hand clean all parts.<br />
• Rinse all parts with clear potable water.<br />
• Sanitize all parts — do not rinse after sanitizing.<br />
• Spray all interior bin surfaces with sanitizer (do not<br />
rinse sanitized areas).<br />
• Spray evaporator discharge spout.<br />
Procedure to Clean Heavily Scaled Flake<br />
Ice Machines<br />
Step 1 Remove front and top covers and set the toggle<br />
switch to the OFF position.<br />
Step 2 Remove all ice from the bin.<br />
Step 3 Turn off the ice making water supply.<br />
Step 4 Remove the top cover from water reservoir.<br />
Step 5 Refer to chart below:<br />
Premix cleaner with lukewarm water in a nonmetallic<br />
container.<br />
Model<br />
Water<br />
Reservoir<br />
Capacity<br />
Mix Cleaner and Water<br />
Use Ice machine nickel safe<br />
cleaner, part number<br />
000000084 only<br />
Cleaner<br />
Water<br />
Step 11 Reassemble ice machine.<br />
Step 12 Turn off the ice making water supply.<br />
Step 13 Refer to chart and premix water and sanitizer.<br />
Amount of Water<br />
Amount of Sanitizer<br />
1 Gallons (4 L) Water 1/2 ounce (15 ml)<br />
Step 14 Fill the evaporator and reservoir with sanitizer/<br />
water solution.<br />
Step 15 Move the toggle switch to the ON position. The<br />
ice machine will make ice with the sanitizer/water<br />
solution and deposit the ice in the bin. Add the remaining<br />
sanitizer/water solution when the water level in the<br />
reservoir drops.<br />
NOTE: Do not allow the sanitizer/water level to drop<br />
below the minimum water level. The ice machine will<br />
discontinue the cleaning cycle if the water float switch<br />
opens.<br />
Step 16 After all of the sanitizer/water solution has<br />
been added to the reservoir, turn on the ice making<br />
water supply.<br />
<strong>RF</strong>0244<br />
<strong>RF</strong>0266<br />
<strong>RF</strong>0385<br />
<strong>RF</strong>0388<br />
<strong>RF</strong><strong>0399</strong><br />
<strong>RF</strong>0644<br />
<strong>RF</strong>S0300<br />
<strong>RF</strong>S0650<br />
14 oz (400 ml) 9 oz (266 ml) 5 oz (148 ml)<br />
17 oz (500 ml) 11 oz (325 ml) 6 oz (177 ml)<br />
<strong>RF</strong>1200 34 oz (1 L) 23 oz (680 ml) 11 oz (325 ml)<br />
<strong>RF</strong>2300 68 oz (2 L) 46 oz (1.3 L) 22 oz (650 ml)<br />
Step 6 Remove all water from the evaporator and water<br />
reservoir. Add the entire cleaner/water solution and reinstall<br />
the reservoir cover.<br />
Leave the cleaner/water solution in the evaporator<br />
for a minimum of 4 hours.<br />
Step 7 Remove all cleaner/water from the evaporator<br />
and water reservoir.<br />
Step 8 Follow the standard cleaning and sanitizing<br />
procedures.<br />
Step 17 Continue the freeze cycle for 30 minutes and<br />
then discard all ice produced.<br />
Part Number 000007644 3/11 22
Maintenance Section 4<br />
Removal of Parts for Cleaning/Sanitizing<br />
! Warning<br />
Disconnect electric power to the ice machine at the<br />
electric switch box and wear rubber gloves and<br />
safety goggles (or face shield) while handling<br />
cleaner or sanitizer.<br />
! Caution<br />
Do not mix Cleaner and Sanitizer solutions together.<br />
It is a violation of Federal law to use these solutions<br />
in a manner inconsistent with their labeling.<br />
ICE CHUTE REMOVAL<br />
<strong>RF</strong>S0300/<strong>RF</strong>S0650/<strong>RF</strong>1200/<strong>RF</strong>2300 Only<br />
1. Place the toggle switch in the OFF position, turn off<br />
the water supply and disconnect electrical power to<br />
the ice machine.<br />
2. Disconnect water supply.<br />
3. Remove water reservoir cover.<br />
4. Remove microswitch and bin thermostat from the ice<br />
chute.<br />
5. Remove retainer, ice chute elbow and ice chute.<br />
1. Turn off the water supply to the ice machine at the<br />
water service valve.<br />
2. Remove the components listed on the following<br />
pages for cleaning and sanitizing.<br />
3. Soak the removed part(s) in a properly mixed<br />
solution of cleaner and water.<br />
Solution Type Water Mixed With<br />
Cleaner 1 gal. (4 L)<br />
16 oz (500 ml) cleaner<br />
Part Number 000000084<br />
4. Use a soft-bristle brush or sponge (NOT a wire<br />
brush) to carefully clean the parts.<br />
5. Use the solution and a brush or sponge to clean all<br />
disassembled components and the inside of the bin.<br />
6. Rinse all cleaned parts with clear water.<br />
7. Mix a solution of sanitizer and water.<br />
Solution Type Water Mixed With<br />
Sanitizer 3 gal. (11 L)<br />
2 oz (60 ml) sanitizer<br />
Part Number 94-0565-3<br />
8. Soak the parts in the sanitizer/water solution for<br />
10 minutes. Use the sanitizer/water solution and a<br />
sponge to sanitize all removed components and the<br />
inside of the bin. Do not rinse the sanitized parts.<br />
9. Continue with step 11 of the cleaning/sanitizing<br />
procedure.<br />
23 Part Number 000007644 3/11
Section 4<br />
Maintenance<br />
ICE CHUTE REMOVAL<br />
<strong>RF</strong>S0300/<strong>RF</strong>S0650/<strong>RF</strong>1200/<strong>RF</strong>2300 Only<br />
1. Place the toggle switch in the OFF position, turn off<br />
the water supply and disconnect electrical power to<br />
the ice machine.<br />
2. Disconnect water supply.<br />
3. Remove water reservoir cover.<br />
4. Remove bin thermostat from ice chute.<br />
5. Loosen bolts holding cross member.<br />
6. Lift cross member and remove ice chute.<br />
LOOSEN<br />
SUPPORT BOLTS<br />
TIP TOP OF ICE<br />
CHUTE BACK AND<br />
LIFT TO REMOVE<br />
Air-Cooled Condenser Cleaning<br />
! Warning<br />
Disconnect electric power to the ice machine and<br />
the remote condenser at the electric service switch<br />
before cleaning the condenser.<br />
A dirty condenser restricts airflow, resulting in<br />
excessively high operating temperatures and reduced<br />
ice production. Clean the condenser at least every six<br />
months.<br />
! Caution<br />
The condenser fins are sharp. Use care when<br />
cleaning them.<br />
1. Clean the outside of the condenser with a soft brush<br />
or a vacuum with a brush attachment. Shine a<br />
flashlight through the condenser to check for dirt<br />
between the fins. If dirt remains, a method suitable<br />
to remove the contamination must be used to ensure<br />
air flow.<br />
ICE CHUTE SWITCH ACTUATOR REMOVAL<br />
<strong>RF</strong>S0300/<strong>RF</strong>S0650/<strong>RF</strong>1200/<strong>RF</strong>2300 Only<br />
1. Pull to remove nylon end cap.<br />
2. Slide pin to remove.<br />
3. Remove both sections of the pressure switch<br />
bracket.<br />
2. <strong>RF</strong>S0300/<strong>RF</strong>S0650/<strong>RF</strong>1200/<strong>RF</strong>2300 Only. Clean<br />
the washable filter with a mild soap and water<br />
solution.<br />
Arctic Pure Water Filter System<br />
Engineered specifically for <strong>Manitowoc</strong> ice machines.<br />
This water filter is an efficient, dependable, and<br />
affordable method of inhibiting scale formation, filtering<br />
sediment, and removing chlorine taste and odor.<br />
<strong>Manitowoc</strong> Cleaner and Sanitizer<br />
<strong>Manitowoc</strong> Ice Machine Nickel Safe Cleaner is available<br />
in convenient 16 oz. (473 ml) bottles. <strong>Manitowoc</strong> Ice<br />
Machine Sanitizer is available in 16 oz. (473 ml) and<br />
1 gal (3.78 L) bottles.<br />
INCORRECT REASSEMBLY CAN<br />
RESULT IN AN ICE MACHINE<br />
THAT WILL NOT RUN<br />
Cleaner Part Number Sanitizer Part Number<br />
16 oz. 000000084 16 oz. 94-0565-3<br />
1 Gallon 94-0581-3<br />
Part Number 000007644 3/11 24
Section 5<br />
Customer Support<br />
Checklist<br />
If a problem arises during operation of your ice machine, follow the checklist below before calling service. Routine<br />
adjustments and maintenance procedures are not covered by the warranty.<br />
Problem Possible Cause To Correct<br />
Ice machine does not operate.<br />
No electrical power to the ice machine<br />
and/or condensing unit.<br />
Replace the fuse/reset the breaker/turn<br />
on the main switch.<br />
High pressure cutout tripping. Clean condenser coil. (See Section 4)<br />
Power switch set improperly.<br />
Move the switch to the ON position.<br />
Bin Thermostat Open or Ice touching Adjust thermostat or remove ice<br />
thermostat probe.<br />
No water in reservoir<br />
No water to ice machine, plugged filter,<br />
float valve defective<br />
Evaporator safety thermostat open Adjust thermostat<br />
Ice chute switch open<br />
Check for ice or binding and close switch<br />
Low air temperature around ice machine Air temperature must be at least 35°F<br />
(2°C)<br />
Gearmotor runs and no ice is produced Time delay has not expired Wait 10 minutes for time delay to expire<br />
High pressure cutout tripping<br />
Clean condenser coil and reset<br />
Low pressure control open<br />
Thaw evaporator and retest - Call for<br />
service<br />
25 Part Number 000007644 3/11
Section 5<br />
Customer Support<br />
THIS PAGE INTENTIONALLY LEFT BLANK<br />
Part Number 000007644 3/11 26
Customer Support Section 5<br />
Commercial Ice Machine Warranty<br />
LIMITED WARRANTY<br />
<strong>Manitowoc</strong> Ice a division of <strong>Manitowoc</strong> FSG Services, LLC,<br />
(“Company”) warrants that new <strong>RF</strong> Flake Ice Machines sold by<br />
Company shall be free of defects in material or workmanship under<br />
normal and proper use and maintenance as specified by the Company<br />
and upon proper installation and start-up in accordance with the<br />
instruction manual supplied.<br />
WHAT IS COVERED<br />
• Parts for a period of three (3) years.<br />
• Labor for a period of two (2) years.<br />
• Compressor parts for five (5) years and labor for two (2) years.<br />
The <strong>RF</strong> Flake Ice Machine warranty begins on the date of the original<br />
installation. This warranty shall not apply to any ice machine initially<br />
installed more than five (5) years from the serial number production<br />
date.<br />
The obligation of the Company under this warranty is limited to the<br />
repair or replacement of parts, components, or assemblies that in the<br />
sole opinion of the Company are defective. This warranty is further<br />
limited to the cost of parts, components or assemblies and standard<br />
straight time labor charges (excluding the compressor warranty) at the<br />
servicing location.<br />
Time and hourly rate schedules, as published from time to time by the<br />
Company, apply to all service procedures. Additional expenses<br />
including without limitation, travel time, overtime premium, material<br />
cost, accessing or removal of the <strong>RF</strong> Flake Ice Machine, or shipping<br />
are the responsibility of the purchaser, along with all maintenance,<br />
adjustments, cleaning, and ice purchases. Labor covered under this<br />
warranty must be performed by an approved Company contracted<br />
Service Representative or a refrigeration service agency as qualified<br />
and authorized by the Company’s local Distributor. The Company's<br />
liability under this warranty shall in no event be greater than the actual<br />
purchase price paid by purchaser for the <strong>RF</strong> Flake Ice Machine.<br />
EXCLUSIONS FROM COVERAGE<br />
• Repair or replacement of parts required because of misuse,<br />
improper care or storage, negligence, alteration, use of<br />
incompatible supplies or lack of specified maintenance shall be<br />
excluded.<br />
• Normal maintenance items.<br />
• Failures caused by improper or erratic voltages, adverse<br />
environmental or water conditions, improper drainage, interruption<br />
in electrical or water supply.<br />
• Improper or unauthorized repair.<br />
• Any <strong>RF</strong> Flake Ice Machine that has been installed and/or<br />
maintained inconsistent with the instructions provided by the<br />
Company.<br />
• Parts subject to damage beyond the control of Company, or to <strong>RF</strong><br />
Flake Ice Machine’s which have been subject to accidents,<br />
damage in shipment, fire, floods, other hazards or acts of God that<br />
are beyond the control of the Company.<br />
• This Limited Warranty shall not apply if the <strong>RF</strong> Flake Ice Machine's<br />
refrigeration system is modified with a condenser, heat reclaim<br />
device, or parts and assemblies other than those manufactured by<br />
the Company, unless the Company approves these modifications<br />
for specific locations in writing prior to the commencement of such<br />
modification.<br />
LIMITATIONS OF LIABILITY<br />
The preceding paragraphs set forth the exclusive remedy for all claims<br />
based on failure of, or defect in, <strong>RF</strong> Flake Ice Machines sold<br />
hereunder, whether the failure or defect arises before or during the<br />
warranty period, and whether a claim, however instituted, is based on<br />
contract, indemnity, warranty, tort (including negligence), strict liability,<br />
implied by statute, common-law or otherwise, and Company and<br />
agents shall not be liable for any claims for personal injuries or<br />
consequential damages or loss, howsoever caused. Upon the<br />
expiration of the warranty period, all such liability shall terminate. THE<br />
FOREGOING WARRANTIES ARE EXCLUSIVE AND IN LIEU OF ALL<br />
OTHER WARRANTIES, WHETHER WRITTEN, ORAL, IMPLIED OR<br />
STATUTORY NO IMPLIED WARRANTY OF MERCHANTABILITY OR<br />
FITNESS FOR PARTICULAR PURPOSE SHALL APPLY, COMPANY<br />
DOES NOT WARRANT ANY PRODUCTS OR SERVICES OF<br />
OTHERS<br />
REMEDIES<br />
The liability of Company for breach of any warranty obligation<br />
hereunder is limited to: (i) the repair or replacement of the <strong>RF</strong> Flake Ice<br />
Machine on which the liability is based, or with respect to services, reperformance<br />
of the services; or (ii) at Company’s option, the refund of<br />
the amount paid for said equipment or services. Any breach by<br />
Company with respect to any item or unit of equipment or services<br />
shall be deemed a breach with respect to that item or unit or service<br />
only.<br />
WARRANTY CLAIM PROCEDURE<br />
Customer shall be responsible to:<br />
• Complete and return warranty registration card or register on line<br />
within five (5) days from the installation date.<br />
• All warranty service must be preformed by an approved<br />
<strong>Manitowoc</strong> contracted or authorized Service Representative.<br />
GOVERNING LAW<br />
This Limited Warranty shall be governed by the laws of the state of<br />
Wisconsin, USA, excluding their conflicts of law principles. The United<br />
Nations Convention on Contracts for the International Sale of Goods is<br />
hereby excluded in its entirety from application to this Limited<br />
Warranty.<br />
To secure prompt and continuing warranty service, the warranty<br />
registration card must be completed and sent to the COMPANY within<br />
five (5) days from the installation date.<br />
Complete the following and retain for your record:<br />
Distributor/Dealer _____________________________________________________________________________________________________<br />
Model Number ___________________________________________ Serial Number ______________________________________________<br />
Installation Date ______________________________________________________________________________________________________<br />
MANITOWOC ICE, INC. 2110 So. 26th St., P.O. Box 1720, <strong>Manitowoc</strong>, WI 54221-1720<br />
Telephone: 920-682-0161 Fax: 920-683-7585 Web Site - www.manitowocice.com Form 80-0375-3 Rev. 01-02<br />
27 Part Number 000007644 3/11
Section 5<br />
Customer Support<br />
Residential Ice Machine Limited Warranty<br />
WHAT DOES THIS LIMITED WARRANTY COVER?<br />
Subject to the exclusions and limitations below, <strong>Manitowoc</strong><br />
Foodservice (“<strong>Manitowoc</strong>”) warrants to the original consumer<br />
that any new ice machine manufactured by <strong>Manitowoc</strong> (the<br />
“Product”) shall be free of defects in material or workmanship<br />
for the warranty period outlined below under normal use and<br />
maintenance, and upon proper installation and start-up in<br />
accordance with the instruction manual supplied with the<br />
Product.<br />
HOW LONG DOES THIS LIMITED WARRANTY LAST?<br />
Product Covered<br />
Warranty Period<br />
Ice Machine<br />
Twelve (12) months<br />
from the sale date<br />
WHO IS COVERED BY THIS LIMITED WARRANTY?<br />
This limited warranty only applies to the original consumer of<br />
the Product and is not transferable.<br />
WHAT ARE MANITOWOC ICE’S OBLIGATIONS UNDER<br />
THIS LIMITED WARRANTY?<br />
If a defect arises and <strong>Manitowoc</strong> receives a valid warranty<br />
claim prior to the expiration of the warranty period, <strong>Manitowoc</strong><br />
shall, at its option: (1) repair the Product at <strong>Manitowoc</strong>’s cost,<br />
including standard straight time labor charges, (2) replace the<br />
Product with one that is new or at least as functionally<br />
equivalent as the original, or (3) refund the purchase price for<br />
the Product. Replacement parts are warranted for 90 days or<br />
the balance of the original warranty period, whichever is<br />
longer. The foregoing constitutes <strong>Manitowoc</strong>’s sole obligation<br />
and the consumer’s exclusive remedy for any breach of this<br />
limited warranty. <strong>Manitowoc</strong>’s liability under this limited<br />
warranty is limited to the purchase price of Product. Additional<br />
expenses including, without limitation, service travel time,<br />
overtime or premium labor charges, accessing or removing<br />
the Product, or shipping are the responsibility of the<br />
consumer.<br />
HOW TO OBTAIN WARRANTY SERVICE<br />
To obtain warranty service or information regarding your<br />
Product, please contact us at:<br />
MANITOWOC FOODSERVICE<br />
2110 So. 26th St.<br />
P.O. Box 1720,<br />
<strong>Manitowoc</strong>, WI 54221-1720<br />
Telephone: 920-682-0161 Fax: 920-683-7585<br />
www.manitowocice.com<br />
WHAT IS NOT COVERED?<br />
This limited warranty does not cover, and you are solely<br />
responsible for the costs of: (1) periodic or routine<br />
maintenance, (2) repair or replacement of the Product or parts<br />
due to normal wear and tear, (3) defects or damage to the<br />
Product or parts resulting from misuse, abuse, neglect, or<br />
accidents, (4) defects or damage to the Product or parts<br />
resulting from improper or unauthorized alterations,<br />
modifications, or changes; and (5) defects or damage to any<br />
Product that has not been installed and/or maintained in<br />
accordance with the instruction manual or technical<br />
instructions provided by <strong>Manitowoc</strong>. To the extent that<br />
warranty exclusions are not permitted under some state laws,<br />
these exclusions may not apply to you.<br />
EXCEPT AS STATED IN THE FOLLOWING SENTENCE, THIS LIMITED<br />
WARRANTY IS THE SOLE AND EXCLUSIVE WARRANTY OF<br />
MANITOWOC WITH REGARD TO THE PRODUCT. ALL IMPLIED<br />
WARRANTIES ARE STRICTLY LIMITED TO THE DURATION OF THE<br />
LIMITED WARRANTY APPLICABLE TO THE PRODUCTS AS STATED<br />
ABOVE, INCLUDING BUT NOT LIMITED TO, ANY WARRANTY OF<br />
MERCHANTABILITY OR OF FITNESS FOR A PARTICULAR<br />
PURPOSE.<br />
Some states do not allow limitations on how long an implied<br />
warranty lasts, so the above limitation may not apply to you.<br />
IN NO EVENT SHALL MANITOWOC OR ANY OF ITS AFFILIATES BE<br />
LIABLE TO THE CONSUMER OR ANY OTHER PERSON FOR ANY<br />
INCIDENTAL, CONSEQUENTIAL OR SPECIAL DAMAGES OF ANY<br />
KIND (INCLUDING, WITHOUT LIMITATION, LOSS PROFITS,<br />
REVENUE OR BUSINESS) ARISING FROM OR IN ANY MANNER<br />
CONNECTED WITH THE PRODUCT, ANY BREACH OF THIS LIMITED<br />
WARRANTY, OR ANY OTHER CAUSE WHATSOEVER, WHETHER<br />
BASED ON CONTRACT, TORT OR ANY OTHER THEORY OF<br />
LIABILITY.<br />
Some states do not allow the exclusion or limitation of<br />
incidental or consequential damages, so the above limitation<br />
or exclusion may not apply to you.<br />
HOW STATE LAW APPLIES<br />
This limited warranty gives you specific legal rights, and you<br />
may also have rights that vary from state to state or from one<br />
jurisdiction to another.<br />
REGISTRATION CARD<br />
To secure prompt and continuing warranty service, this<br />
warranty registration card must be completed and sent to<br />
<strong>Manitowoc</strong> within thirty (30) days from the sale date. Complete<br />
the following registration card and send it to <strong>Manitowoc</strong>.<br />
Part Number 000007644 3/11 28
Table des matières<br />
Section 1 <br />
Généralités<br />
Références des modèles . . . . . . . . . . . . . . . . . . . . . . . . . . . . . . . . . . . . . . . . . . . . . 32<br />
Integre . . . . . . . . . . . . . . . . . . . . . . . . . . . . . . . . . . . . . . . . . . . . . . . . . . . . . . . . 32<br />
Modulaires . . . . . . . . . . . . . . . . . . . . . . . . . . . . . . . . . . . . . . . . . . . . . . . . . . . . . 32<br />
Section 2 <br />
Instructions d’installation<br />
Emplacement de la machine à glaçons . . . . . . . . . . . . . . . . . . . . . . . . . . . . . . . . . 33<br />
Conditions d’espace requises . . . . . . . . . . . . . . . . . . . . . . . . . . . . . . . . . . . . . . 33<br />
Conditions requises d’installation . . . . . . . . . . . . . . . . . . . . . . . . . . . . . . . . . . . . . 33<br />
<strong>RF</strong>2300 Installation de l’adaptateur de bac . . . . . . . . . . . . . . . . . . . . . . . . . . . . . . 33<br />
Conditions requises en eau et évacuation . . . . . . . . . . . . . . . . . . . . . . . . . . . . . . . 34<br />
Conditions requises pour l’eau potable . . . . . . . . . . . . . . . . . . . . . . . . . . . . . . . 34<br />
Dimensionnement/Raccordement des conduites d’alimentation en eau et d’évacuation<br />
. . . . . . . . . . . . . . . . . . . . . . . . . . . . . . . . . . . . . . . . . . . . . . . . . . . . . . . . . . . 34<br />
Raccordements d’évacuation . . . . . . . . . . . . . . . . . . . . . . . . . . . . . . . . . . . . . . 35<br />
Conditions électriques requises . . . . . . . . . . . . . . . . . . . . . . . . . . . . . . . . . . . . . . . 35<br />
Fusible/Disjoncteur . . . . . . . . . . . . . . . . . . . . . . . . . . . . . . . . . . . . . . . . . . . . . . 35<br />
Différentiel . . . . . . . . . . . . . . . . . . . . . . . . . . . . . . . . . . . . . . . . . . . . . . . . . . . . . 35<br />
Installation du système de réfrigération<br />
Condenseur à distance uniquement . . . . . . . . . . . . . . . . . . . . . . . . . . . . . . . . . . . 36<br />
Installation des conduites de réfrigération<br />
Condenseur à distance uniquement . . . . . . . . . . . . . . . . . . . . . . . . . . . . . . . . . . . . 37<br />
Généralités . . . . . . . . . . . . . . . . . . . . . . . . . . . . . . . . . . . . . . . . . . . . . . . . . . . . 37<br />
A. Longueur des conduites . . . . . . . . . . . . . . . . . . . . . . . . . . . . . . . . . . . . . . . . 37<br />
B. Montée ou descente de conduites . . . . . . . . . . . . . . . . . . . . . . . . . . . . . . . . 37<br />
C. Siphons d’huile de conduite d’aspiration . . . . . . . . . . . . . . . . . . . . . . . . . . . . 38<br />
Liste de vérification d’installation . . . . . . . . . . . . . . . . . . . . . . . . . . . . . . . . . . . . . . 41<br />
Contrôles additionnels pour modèles QuietQube . . . . . . . . . . . . . . . . . . . . . . . . . 42<br />
Section 3 <br />
Fonctionnement<br />
Section 4 <br />
Entretien<br />
Thermostat de sécurité de basse température d’évaporateur et thermostat <br />
de bac . . . . . . . . . . . . . . . . . . . . . . . . . . . . . . . . . . . . . . . . . . . . . . . . . . . . . . . . . . . . 44<br />
<strong>RF</strong>0244/<strong>RF</strong>0266/<strong>RF</strong>0385/<br />
<strong>RF</strong>0388/<strong>RF</strong><strong>0399</strong> Fonctionnement . . . . . . . . . . . . . . . . . . . . . . . . . . . . . . . . . . . . . . 44<br />
<strong>RF</strong>S0300 Fonctionnement . . . . . . . . . . . . . . . . . . . . . . . . . . . . . . . . . . . . . . . . . . . . 45<br />
<strong>RF</strong>S0650/<strong>RF</strong>1200/<strong>RF</strong>2300 Fonctionnement . . . . . . . . . . . . . . . . . . . . . . . . . . . . . . 45<br />
Nettoyage et désinfection intérieurs . . . . . . . . . . . . . . . . . . . . . . . . . . . . . . . . . . . . 46<br />
Procédure de nettoyage et de désinfection . . . . . . . . . . . . . . . . . . . . . . . . . . . . 46<br />
Procédure de nettoyage des machines fortement entartrées . . . . . . . . . . . . . . 46<br />
Nettoyage extérieur . . . . . . . . . . . . . . . . . . . . . . . . . . . . . . . . . . . . . . . . . . . . . . . . . 46<br />
Procédure de nettoyage et de désinfection . . . . . . . . . . . . . . . . . . . . . . . . . . . . . . 46<br />
Procédure de nettoyage des machines à glace en écailles fortement entartrées 47<br />
Retrait des pièces pour le nettoyage/la désinfection . . . . . . . . . . . . . . . . . . . . . . 48<br />
Dépose de la goulotte à glaçons . . . . . . . . . . . . . . . . . . . . . . . . . . . . . . . . . . . . 48<br />
29 Part Number 000007644 3/11
Table des matières (suite)<br />
Dépose de l’actionneur d’interrupteur de goulotte à glaçons . . . . . . . . . . . . . . 49<br />
Nettoyage du condenseur refroidi à l’air . . . . . . . . . . . . . . . . . . . . . . . . . . . . . . . . 49<br />
Système de filtration d’eau Arctic Pure . . . . . . . . . . . . . . . . . . . . . . . . . . . . . . . . . 49<br />
Nettoyant et désinfectant <strong>Manitowoc</strong> . . . . . . . . . . . . . . . . . . . . . . . . . . . . . . . . . . 49<br />
Section 5 <br />
Service clientèle<br />
Liste de vérification . . . . . . . . . . . . . . . . . . . . . . . . . . . . . . . . . . . . . . . . . . . . . . . . . 50<br />
Garantie commerciale de la machine à glaçons . . . . . . . . . . . . . . . . . . . . . . . . . . 52<br />
Garantie limitée résidentielle de la machine à glaçons . . . . . . . . . . . . . . . . . . . . 53<br />
30 Part Number 000007644 3/11
Table des matières (suite)<br />
Part Number 000007644 3/11 31
Section 1<br />
Généralités<br />
Références des modèles<br />
Le présent manuel s’applique aux modèles suivants :<br />
INTEGRE<br />
MODULAIRES<br />
Autonomes<br />
refroidis à l’air<br />
Autonomes<br />
refroidis à l’air<br />
<strong>RF</strong>0244A<br />
<strong>RF</strong>0266A<br />
<strong>RF</strong>0385A<br />
<strong>RF</strong>0388A<br />
<strong>RF</strong><strong>0399</strong>A<br />
<strong>RF</strong>0644A<br />
Autonomes<br />
refroidis à l’eau<br />
À distance<br />
Tête QuietQube<br />
Unité de<br />
condensation à<br />
distance RCU<br />
<strong>RF</strong>S0300A --- --- --- ---<br />
<strong>RF</strong>S0650A <strong>RF</strong>S0650W --- --- ---<br />
<strong>RF</strong>1200A <strong>RF</strong>1200W <strong>RF</strong>1279R <strong>RF</strong>1278C RCU1075<br />
<strong>RF</strong>2300A <strong>RF</strong>2300W <strong>RF</strong>2379R <strong>RF</strong>2378C RCU2375<br />
<strong>RF</strong>2300 Installation de l’adaptateur de bac<br />
! Avertissement<br />
Retirer tous les panneaux de la machine à glaçons<br />
avant de la soulever ou l’installer.<br />
! Avertissement<br />
RISQUE DE BLESSURES CORPORELLES<br />
Ne pas utiliser un équipement qui aura été mal<br />
utilisé, abusé, négligé, endommagé ou dont les<br />
spécifications originales de fabrication auront été<br />
altérées/modifiées.<br />
Le présent appareil ne doit pas être utilisé par des<br />
personnes (enfants y compris) ayant des capacités<br />
physiques, sensorielles ou mentales diminuées, ou<br />
ayant un manque d’expérience et de connaissance,<br />
à moins que celles-ci n’aient reçu une formation sur<br />
l’utilisation de l’appareil par une personne<br />
responsable de leur sécurité.<br />
! Avertissement<br />
RISQUE DE BLESSURES CORPORELLES<br />
Les machines à glaçons <strong>RF</strong>2300 ne sont pas<br />
approuvées pour être utilisées avec les bacs B970.<br />
Les machines à glaçons <strong>RF</strong>2300 sont expédiées<br />
avec un support qui doit être utilisé lors de<br />
l’installation sur les bacs de Séries B1100 et B1400.<br />
1. Consulter le schéma. Placer le support sur le<br />
dessus du bac et le faire glisser en arrière pour<br />
l’enclencher.<br />
2. Placer la machine à glaçons sur le bac : la machine<br />
à glaçons doit rentrer entre le support et la nervure<br />
avant.<br />
32 Part Number 000007644 3/11
Section 2<br />
Instructions d’installation<br />
Emplacement de la machine à glaçons<br />
Le choix de l’emplacement pour la machine à glaçons<br />
doit respecter les critères suivants. Si l’un de ces critères<br />
n’est pas respecté, choisir un autre emplacement.<br />
• L’emplacement doit être exempt d’agents aéroportés<br />
et de toute autre substance contaminante.<br />
• La température de l’air doit être au moins de 10 °C<br />
(50 °F) sans toutefois excéder 43 °C (110 °F).<br />
• La température de l’eau doit être au moins de 4 °C<br />
(40 °F) sans toutefois excéder 32 °C (90 °F).<br />
• L’emplacement ne doit pas se trouver à proximité<br />
d’appareils générateurs de chaleur ou à la lumière<br />
directe du soleil.<br />
• L’emplacement doit pouvoir supporter le poids de la<br />
machine à glaçons et un bac plein de glaçons.<br />
• L’emplacement doit prévoir suffisamment de<br />
dégagement pour les prises d’eau, raccordements<br />
de vidange et raccordements électriques à l’arrière<br />
de la machine à glaçons.<br />
• L’emplacement ne doit pas obstruer l’écoulement<br />
d’air dans la machine ou autour de celle-ci.<br />
Conditions requises d’installation<br />
• La machine à glaçons et le bac doivent être nivelés.<br />
• Ventiler les lignes d’évacuation de la machine à<br />
glaçons et du bac séparément.<br />
• Le raccordement de la ligne d’évacuation du bac doit<br />
comporter un espace d’air.<br />
• Un dispositif anti-refoulement est exigé sur les<br />
conduites d’arrivée d’eau.<br />
• La machine à glaçons et le bac doivent être<br />
aseptisés après l’installation.<br />
• En fonction des conditions d’eau locales, il peut<br />
s’avérer nécessaire de traiter l’eau pour empêcher la<br />
formation de tartre, filtrer les sédiments et éliminer le<br />
goût et l’odeur du chlore.<br />
• Les réglages de routine et les procédures de<br />
maintenance périodique indiqués dans ce manuel ne<br />
sont pas couverts par la garantie.<br />
CONDITIONS D’ESPACE REQUISES<br />
<strong>RF</strong>0244/<strong>RF</strong>0266<br />
<strong>RF</strong>0385/<strong>RF</strong>0388<br />
<strong>RF</strong><strong>0399</strong>/<strong>RF</strong>0644<br />
Refroidissement<br />
à l’air<br />
Machine à glaçons Chaleur de rejet<br />
Refroidissement<br />
à l’eau<br />
Haut 0 cm (0") 0 cm (0"<br />
Côtés 5 cm (2") 5 cm (2")<br />
Arrière 20 cm (8") 20 cm (8")<br />
REMARQUE : Prévoir un espace pour le retrait de la machine à glaçons<br />
lorsqu’elle est encastrée. Il faut déposer le panneau supérieur une fois par<br />
mois pour le nettoyage et la désinfection.<br />
<strong>RF</strong>S0300/<strong>RF</strong>S0650<br />
<strong>RF</strong>1200/<strong>RF</strong>2300<br />
Refroidissement<br />
à l’air<br />
Refroidissement<br />
à l’eau<br />
Haut/Côtés 20 cm (8") 20 cm (8")<br />
Arrière 13 cm (5") 13 cm (5")<br />
Series Machine à<br />
glaçons<br />
Chaleur de rejet<br />
<strong>RF</strong>1279R 7850<br />
<strong>RF</strong>2379R 15700<br />
B.T.U./Heure<br />
Étant donné que le rejet de chaleur varie en fonction du cycle de<br />
fabrication de glaçons, le chiffre indiqué n’est qu’une moyenne.<br />
Les machines à glaçons, tout comme tout autre<br />
équipement de réfrigération, rejettent la chaleur par le<br />
condenseur. Il est utile de connaître la quantité de<br />
chaleur rejetée par la machine à glaçons lors du<br />
dimensionnement du matériel de conditionnement d’air<br />
où sont installées les machines à glaçons autonomes<br />
refroidies par l’air.<br />
Cette information est également nécessaire pour<br />
évaluer les avantages d’utiliser des condenseurs<br />
refroidis par eau ou à distance afin de réduire les<br />
charges de conditionnement d’air. La quantité de<br />
chaleur ajoutée à un environnement climatisé par une<br />
machine à glaçons utilisant un condenseur refroidi par<br />
eau ou à distance est négligeable.<br />
Connaître la quantité de chaleur rejetée est également<br />
important lors du dimensionnement d’une tour de<br />
refroidissement pour un condenseur refroidi par eau.<br />
Utiliser le chiffre de crête pour dimensionner la tour de<br />
refroidissement.<br />
Part Number 000007644 3/11 33
Instructions d’installation Section 2<br />
Conditions requises en eau et évacuation<br />
CONDITIONS REQUISES POUR L’EAU POTABLE<br />
Suivre ces directives pour l’installation des lignes<br />
d’arrivée d’eau :<br />
• Ne pas raccorder la machine à glaçons à une<br />
alimentation en eau chaude. S’assurer que tous les<br />
restricteurs d’eau chaude installés pour les autres<br />
appareils fonctionnent (clapets de non-retour sur<br />
robinets d’éviers, lave-vaisselle, etc.)<br />
• Si la pression de l’eau dépasse la pression maximale<br />
recommandée de 552 kPa (80 psig), se procurer un<br />
régulateur de pression d’eau auprès d’un distributeur<br />
<strong>Manitowoc</strong>.<br />
• Installer un robinet d’arrêt de l’eau et un raccord pour<br />
les lignes d’eau de fabrication de glaçons et d’eau du<br />
condenseur.<br />
• Isoler les lignes d’arrivée d’eau pour éviter les<br />
problèmes de condensation.<br />
• La tuyauterie doit être conforme aux codes locaux.<br />
DIMENSIONNEMENT/RACCORDEMENT DES<br />
CONDUITES D’ALIMENTATION EN EAU ET<br />
D’ÉVACUATION<br />
Emplacement<br />
Arrivée d’eau<br />
potable<br />
Arrivée<br />
d’eau de<br />
potable<br />
Évacuation<br />
d’eau du<br />
condenseur<br />
Évacuation<br />
d’eau du<br />
condenseur<br />
Évacuation<br />
de bac<br />
Évacuation de bac<br />
grande capacité<br />
Temp. de<br />
l’eau<br />
Mini/Maxi<br />
4 à 32 °C<br />
(40 à<br />
90 °F)<br />
4 à 32 °C<br />
(40 à<br />
90 °F)<br />
Pression d’eau<br />
Mini/Maxi<br />
Taille de<br />
raccord/<br />
tubulure<br />
minimum<br />
100/552 kPA<br />
(14/80 psi) 3/8" FPT<br />
138/1034 kPA<br />
(20/150 psi) 1/2" MPT<br />
--- --- 3/8” FPT<br />
<strong>RF</strong>2300 only<br />
= 1/2" FPT<br />
--- ---<br />
1/2" MPT<br />
--- ---<br />
---<br />
3/4" FPT<br />
1" FPT<br />
TUBE<br />
D’AÉRATION<br />
DE 46 CM (18")<br />
DE LONG<br />
ROBINET D’ARRÊT D’EAU<br />
REQUIS – TUBE D’ARRIVÉE<br />
D’EAU DE FABRICATION DE<br />
GLAÇONS DE D.I. MIN. DE<br />
0,95 CM (3/8")<br />
TUBE D’ARRIVÉE<br />
D’EAU DE<br />
FABRICATION DE<br />
GLAÇONS DE D.I.<br />
MIN. DE 0,95 CM (3/8")<br />
DES ÉVACUATIONS<br />
SÉPARÉES DE BAC ET DE<br />
MACHINE À GLAÇONS<br />
SONT REQUISES<br />
ACHEMINER LA<br />
TUBULURE DE VIDANGE<br />
TUBE<br />
D’AÉRATION<br />
DE 46 CM (18")<br />
DE LONG<br />
ACHEMINER<br />
LA<br />
TUBULURE<br />
DE<br />
VIDANGE<br />
VERS LE<br />
DRAIN<br />
OUVERT<br />
SUR SITE<br />
Installation d’évacuation d’alimentation en eau type<br />
<strong>RF</strong>1200R/<strong>RF</strong>2300R Installation de conduites<br />
Conduite de refoulement Conduite de liquide<br />
1.6 cm (5/8 po) 0,95 cm (3/8 po)<br />
34 Part Number 000007644 3/11
Section 2<br />
Instructions d’installation<br />
RACCORDEMENTS D’ÉVACUATION<br />
Suivre ces directives lors de l’installation des conduites<br />
d’évacuation pour empêcher l’eau de retourner s’écouler<br />
dans la machine à glaçons et dans le bac de stockage :<br />
• Les lignes d’évacuation doivent avoir une inclinaison<br />
de 2,5 cm par mètre (1,5 pouce par 5 pieds) et ne<br />
doivent pas créer de siphons.<br />
• Le siphon de sol doit être suffisamment grand pour<br />
recevoir l’eau provenant de toutes les évacuations.<br />
• Faire fonctionner séparément les lignes d’évacuation<br />
du bac et du condenseur refroidi à l’eau. Les isoler<br />
pour prévenir la condensation.<br />
• Ventiler le bac et la ligne d’évacuation de la machine<br />
à glaçons dans l’atmosphère. L’évacuation de la<br />
machine à glaçons requiert une ventilation de 46 cm<br />
(18 po). Ne pas ventiler l’évacuation du condenseur<br />
sur les modèles refroidis par eau.<br />
• Les évacuations doivent être équipées d’un raccordunion<br />
ou de tout autre moyen adapté permettant de<br />
déconnecter la machine à glaçons pour des raisons<br />
de maintenance.<br />
Conditions électriques requises<br />
Machine à<br />
glaçons<br />
Tension/<br />
Phase/<br />
Cycle<br />
Fusible/<br />
Disjoncteur<br />
maximum<br />
Refroidissement à l’air Refroidissement à l’eau QuietQube<br />
Intensité Intensité Fusible/ Intensité Fusible/<br />
minimale totale du Disjoncteur minimale Disjoncteur<br />
du circuit circuit maximum du circuit maximum<br />
Intensité<br />
totale du<br />
circuit<br />
<strong>RF</strong>0244<br />
115/1/60 15 A S/O 7,5 S/O S/O S/O S/O<br />
230/1/50 10 A S/O 0,87 S/O S/O S/O S/O<br />
<strong>RF</strong>0266<br />
115/1/60 15 A S/O 7,5 S/O S/O S/O S/O<br />
230/1/50 10 A S/O 0,87 S/O S/O S/O S/O<br />
<strong>RF</strong>0385<br />
115/1/60 15 A S/O 10,0 S/O S/O S/O S/O<br />
230/1/50 S/O S/O S/O S/O S/O S/O S/O<br />
<strong>RF</strong>0388<br />
115/1/60 15 A S/O 10,0 S/O S/O S/O S/O<br />
230/1/50 10 A S/O 2,9 S/O S/O S/O S/O<br />
<strong>RF</strong><strong>0399</strong><br />
115/1/60 15 A S/O 10,0 S/O S/O S/O S/O<br />
230/1/50 10 A S/O 2,9 S/O S/O S/O S/O<br />
<strong>RF</strong>0644 115/1/60 25 A S/O S/O S/O S/O S/O S/O<br />
<strong>RF</strong>S0300 115/1/60 20 A 12,8 S/O S/O S/O S/O S/O<br />
<strong>RF</strong>S0650<br />
115/60/1 25 A 16,3 S/O 25 A 15,4 S/O S/O<br />
208-230/1/60 15 A 8,7 S/O 15 A 8,2 S/O S/O<br />
<strong>RF</strong>1200<br />
208-230/1/60 15 A 15,0 S/O 15 A 15,0 15 A 1,4<br />
230/1/50 16 A 7,3 S/O 16 A 7,3 10 A 1,4<br />
<strong>RF</strong>2300<br />
208-230/3/60 20 A 15,0 S/O 20 A 15,0 15 A 3,2<br />
400-415/3/50 16 A 13,9 S/O 16 A 13,9 10 A 3,2<br />
<strong>RF</strong>1200R 208-230/1/60 15 A 1,4 S/O S/O S/O S/O S/O<br />
<strong>RF</strong>2300R 208-230/1/60 15 A 3,2 S/O S/O S/O S/O S/O<br />
La variation de tension admissible maximale à la mise en marche du compresseur est de ±10 % de la tension indiquée ci-dessus et sur<br />
la plaque de référence/numéro de série.<br />
FUSIBLE/DISJONCTEUR<br />
Un circuit spécialisé et un fusible/disjoncteur séparé sont<br />
requis pour chaque machine à glaçons.<br />
! Avertissement<br />
La machine à glaçons doit être mise à la terre<br />
conformément aux codes de l’électricité nationaux<br />
et locaux.<br />
DIFFÉRENTIEL<br />
Nous ne recommandons pas l’emploi d’une protection<br />
de circuit GFCI/GFI avec notre équipement. Si un<br />
GFCI/GFI est exigé par le code, utiliser un disjoncteur<br />
GFCI/GFI plutôt qu’une prise qui est plus encline à des<br />
défaillances parasites intermittentes que des<br />
disjoncteurs de panneau.<br />
Part Number 000007644 3/11 35
Instructions d’installation Section 2<br />
Royaume-Uni uniquement<br />
Étant donné que les couleurs de câbles du réseau principal de l’appareil risquent de ne pas correspondre aux marquages en couleur<br />
identifiant les bornes de la prise, procéder comme suit :<br />
• Le câble de couleurs vert et jaune doit être raccordé à la borne de prise marquée de la lettre E ou du symbole de terre vert ou de couleur<br />
verte ou vert et jaune.<br />
• Le câble de couleur bleue doit être raccordé à la borne marquée de la lettre N ou de couleur noire.<br />
• Le câble de couleur marron doit être raccordé à la borne marquée de la lettre L ou de couleur rouge.<br />
36 Part Number 000007644 3/11
Section 2<br />
Instructions d’installation<br />
Installation du système de réfrigération<br />
Condenseur à distance uniquement<br />
Machine à<br />
glaçons<br />
QuietQube®<br />
<strong>RF</strong>1200C<br />
<strong>RF</strong>2300C<br />
*Conduites<br />
RC 21/31/51<br />
Condenseur à<br />
distance<br />
RCU1075C<br />
RCU2375C<br />
Conduite<br />
d’aspiration<br />
15,9 mm<br />
(5/8 po)<br />
Conduites*<br />
RC-21<br />
RC-31<br />
RC-51<br />
Conduite de<br />
liquide<br />
9,5 mm<br />
(3/8 po)<br />
Important<br />
Les systèmes à distance <strong>Manitowoc</strong> ne sont<br />
approuvés et garantie qu’en tant qu’ensemble neuf<br />
complet. La garantie du système de réfrigération sera<br />
nulle si une nouvelle partie principale de machine à<br />
glaçons est raccordée à une tubulure ou à des unités<br />
de condensation préexistantes (usagées) ou vice<br />
versa.<br />
EMPLOI AVEC DES UNITÉS DE CONDENSATION DE<br />
MARQUE AUTRE QUE MANITOWOC<br />
Les unités de condensation à distance <strong>Manitowoc</strong> sont<br />
spécifiquement conçues pour être utilisées avec une<br />
partie principale de machine à glaçons QuietQube®. Les<br />
unités de condensation standard et les unités de<br />
condensation de marque autre que <strong>Manitowoc</strong> ne sont<br />
pas approuvées pour être utilisées avec une partie<br />
principale de machine à glaçons QuietQube®.<br />
! Caution<br />
La garantie de 60 mois du compresseur (y compris la<br />
garantie de remplacement de main d’œuvre de<br />
24 mois) ne s’appliquera pas si la machine à glaçons<br />
<strong>Manitowoc</strong> et le condenseur à distance <strong>Manitowoc</strong> ne<br />
sont pas installées conformément aux spécifications.<br />
La présente garantie ne s’applique pas non plus si le<br />
système de réfrigération est modifié par un<br />
condenseur, un récupérateur de chaleur ou d’autres<br />
pièces ou ensembles non fabriqués par <strong>Manitowoc</strong><br />
Ice.<br />
Montants frigorifiques de l’équipement en usine<br />
PARTIE PRINCIPALE DE LA MACHINE À GLAÇONS<br />
Chaque condenseur de machine à glaçons est expédié<br />
de l’usine avec une charge en liquide frigorigène R-404A<br />
adéquate pour le fonctionnement du système entier.<br />
L’étiquette de série figurant sur la machine à glaçons<br />
indique la charge en liquide frigorigène. La charge en<br />
liquide frigorigène est suffisante pour faire fonctionner la<br />
machine à glaçons dans des températures ambiantes<br />
situées entre -28,9 °C (-20 °F) et 48,9 °C (120 °F), avec<br />
des longueurs de conduites allant jusqu’à 30,5 m<br />
(100 pieds).<br />
! Avertissement<br />
Situation comportant un risque<br />
de blessure corporelle<br />
Le condenseur QuietQube contient la charge en<br />
liquide frigorigène. L’installation et le brasage des<br />
conduites doivent être effectués par un technicien<br />
qualifié et certifié dans le secteur de la réfrigération<br />
par l’EPA, et qui soit informé des dangers que<br />
comportent les équipements chargés de liquide<br />
frigorigène.<br />
! Caution<br />
Ne jamais ajouter plus que la charge de plaque<br />
signalétique dans le système de réfrigération pour<br />
toute application quelle qu’elle soit.<br />
CONDUITES DE RÉFRIGÉRATION/KIT DE SIPHONS<br />
Les conduites de qualité réfrigération et les kits de<br />
siphons sont expédiés bouchés à la pression<br />
atmosphérique.<br />
! Avertissement<br />
L’installation d’un condenseur QuietQube® peut<br />
nécessiter l’utilisation d’un équipement spécial pour<br />
son placement. Un personnel formé et qualifié est<br />
exigé pour des opérations de levage et de manœuvre<br />
appropriées.<br />
Part Number 000007644 3/11 37
Instructions d’installation Section 2<br />
Installation des conduites de réfrigération<br />
Condenseur à distance uniquement<br />
GÉNÉRALITÉS<br />
Les installations de conduites de réfrigération<br />
comportent des conduites verticales et horizontales<br />
entre la machine à glaçons et le condenseur. Les<br />
directives, schémas et méthodes de calcul suivants<br />
doivent être respectés pour assurer un retour d’huile et<br />
un fonctionnement de la machine à glaçons/unité de<br />
condensation à distance appropriés.<br />
L’installateur des conduites de réfrigération doit être<br />
certifié par l’Agence pour la protection de<br />
l’environnement [Environmental Protection Agency]<br />
(EPA) du gouvernement des États-Unis dans les<br />
procédures appropriées de manipulation de liquide<br />
frigorigène et d’entretien.<br />
! Avertissement<br />
Le condenseur QuietQube contient la charge en<br />
liquide frigorigène. Les deux robinets de réfrigération<br />
doivent rester fermés jusqu’à l’installation<br />
appropriée complète des conduites.<br />
! Avertissement<br />
Débrancher l’alimentation électrique à la partie<br />
principale de la machine à glaçons et au condenseur<br />
à distance avant de continuer.<br />
Étape 1:<br />
Vérifier que les emplacements de la<br />
machine à glaçons et du condenseur sont<br />
conformes aux directives<br />
Avant l’installation de la partie principale de la machine à<br />
glaçons et du condenseur à distance, s’assurer que la<br />
distance les écartant est conforme aux directives<br />
d’acheminement des conduites décrites dans le présent<br />
manuel.<br />
Pénétration toiture/mur<br />
Si besoin est, couper un trou circulaire de 76,2 mm<br />
(3 po) dans le mur ou le toit pour l’acheminement des<br />
tuyaux de réfrigération. Une personne qualifiée doit<br />
effectuer toutes les pénétrations de toit.<br />
Étape 2:<br />
Acheminement des tuyaux de<br />
réfrigération<br />
Acheminer correctement les tuyaux de réfrigération<br />
entre la partie principale de la machine à glaçons et le<br />
condenseur à distance.<br />
A. LONGUEUR DES CONDUITES<br />
30,5 m (100 pieds) Longueur : la longueur mesurée<br />
maximum possible des conduites.<br />
Le récepteur est conçu pour contenir une charge<br />
suffisante pour faire fonctionner la machine à glaçons<br />
dans des températures ambiantes situées entre -28,9 °C<br />
(-20 °F) et 48,9 °C (120 °F), avec des longueurs de<br />
conduites allant jusqu’à 30,5 m (100 pieds). La longueur<br />
maximum de conduites pouvant être exposée sur le toit<br />
est égale à 25 % de la longueur totale des conduites.<br />
Important<br />
Les machines à glaçons QuietQube® ne<br />
fonctionneront pas avec des conduites supérieures à<br />
30,5 m (100 pieds). Ne pas tenter d’aller au-delà de<br />
cette distance et d’ajouter une charge liquide<br />
frigorigène pour compenser !<br />
B. MONTÉE OU DESCENTE DE CONDUITES<br />
10,7 m<br />
(35 pieds)<br />
DISTANCE MAXI<br />
Montée de 10,7 m (35 pieds) : distance maximum <br />
à laquelle le condenseur à distance peut se trouver <br />
au-dessus de la machine à glaçons.<br />
4,5 m<br />
(15 pieds)<br />
DISTANCE MAXI<br />
SV1751<br />
SV1750<br />
Descente de 4,5 m (15 pieds) : distance maximum <br />
à laquelle le condenseur à distance peut se trouver <br />
au-dessus de la machine à glaçons.<br />
38 Part Number 000007644 3/11
Section 2<br />
Instructions d’installation<br />
C. SIPHONS D’HUILE DE CONDUITE D’ASPIRATION<br />
! Caution<br />
Ne pas former de siphons indésirables dans les<br />
conduites de réfrigération. Ne jamais embobiner les<br />
tubulures de réfrigération en excès.<br />
Montée de 0 à 6,1 m (0 à 20 pieds) : Aucun siphon<br />
d’huile n’est requis lorsque le condenseur se trouve à<br />
6,1 m (20 pieds) ou moins au-dessus de la partie<br />
principale de la machine à glaçons.<br />
Montée de 6,4 à 10,7 m (21 à 35 pieds) : La conduite<br />
d’aspiration nécessite l’installation d’un siphon d’huile<br />
(type S) supplémentaire. Installer le siphon aussi près<br />
que possible du point milieu entre la partie principale de<br />
la machine à glaçons et le condenseur à distance. Les<br />
kits de siphons en S sont disponibles auprès de<br />
<strong>Manitowoc</strong>.<br />
KIT DE SIPHON<br />
SUPPLÉMENTAIRE<br />
REQUIS POUR<br />
MONTÉE DE 6,4 m<br />
(21 pi) OU PLUS<br />
Boucle de service<br />
Une boucle de service dans les conduites permet un<br />
accès aisé à la machine à glaçons pour le nettoyage et<br />
l’entretien.<br />
• Une boucle de service n’est pas considérée comme<br />
étant un siphon d’huile.<br />
• La boucle de service n’est pas incluse lors du calcul<br />
de la longueur, de la montée ou de la descente des<br />
conduites.<br />
• Ne pas utiliser de cuivre rigide pour la boucle de<br />
service.<br />
! Caution<br />
Si une conduite a une montée suivie par une<br />
descente, une autre montée ne peut être effectuée.<br />
De même, si une conduite a une descente suivie par<br />
une montée, une autre descente ne peut être<br />
effectuée.<br />
Étape 3:<br />
Allongement ou diminution des longueurs<br />
de conduites<br />
! Caution<br />
Ne pas former de siphons indésirables dans les<br />
conduites de réfrigération. Ne jamais embobiner les<br />
tubulures de réfrigération en excès.<br />
Lorsqu’il faut raccourcir ou rallonger les conduites, le<br />
faire avant de raccorder les conduites à la partie<br />
principale de la machine à glaçons ou au condenseur à<br />
distance.<br />
Part Number 000007644 3/11 39
Instructions d’installation Section 2<br />
Étape 4:<br />
Raccordement des conduites<br />
Pour prévenir toute oxydation du cuivre, purger les<br />
conduites et le condenseur avec de l’azote sec lors du<br />
brasage.<br />
A. Connecter les conduites au condenseur à<br />
distance<br />
! Avertissement<br />
Le condenseur QuietQube contient la charge en<br />
liquide frigorigène. Les deux robinets de réfrigération<br />
doivent rester fermés jusqu’à l’installation<br />
appropriée complète des conduites.<br />
Les robinets d’arrêt des conduites doivent rester fermés<br />
et être protégés de la chaleur pendant le processus de<br />
brasage. Enrober les robinets d’un chiffon mouillé ou<br />
tout autre type de dissipateur thermique avant le<br />
brasage. Refroidir le joint brasé à l’eau immédiatement<br />
après le brasage pour prévenir toute migration de<br />
chaleur vers le robinet.<br />
Étape 5: Essais de pression et évacuation des<br />
conduites et de la partie principale de la<br />
machine à glaçons<br />
• Les robinets d’arrêt des conduites d’aspiration et de<br />
liquide doivent rester fermés jusqu’à la fin des essais<br />
de pression et de l’évacuation.<br />
• Les essais de pression et l’évacuation peuvent être<br />
effectués à partir des robinets d’arrêt de la partie<br />
principale de la machine à glaçons ou du condenseur<br />
CVD.<br />
• Il est recommandé d’utiliser des outils permettant de<br />
retirer et d’installer les cartouches des robinets<br />
Schrader sans retirer les tuyaux des manomètres<br />
pour diminuer la durée de l’évacuation.<br />
• Effectuer un essai de pression à 1 000 kPa (150 psi)<br />
pendant 15 minutes minimum.<br />
• Le niveau minimum d’évacuation est de 500 microns.<br />
MINIMISER LE TEMPS<br />
D’EXPOSITION DU SYSTÈME DE<br />
RÉFRIGÉRATION À<br />
L’ATMOSPHÈRE (15 MINUTES<br />
MAXIMUM)<br />
CONDUITE D’ASPIRATION<br />
CONDUITE DE LIQUIDE<br />
Les robinets d’arrêt des conduites d’aspiration<br />
et de liquide doivent rester fermés jusqu’à la fin<br />
des essais de pression et de l’évacuation.<br />
B. Connecter les conduites à la partie principale de<br />
la machine à glaçons<br />
! Avertissement<br />
La partie principale de la machine à glaçons est<br />
expédiée de l’usine pressurisée avec du liquide<br />
frigorigène R404A. Récupérer le liquide frigorigène<br />
des orifices d’accès des conduites d’aspiration et de<br />
liquide avant de couper les conduites de réfrigération.<br />
• Couper les conduites d’aspiration et de liquide à<br />
l’aide d’un coupe-tube, tout en laissant suffisamment<br />
de tubulure pour facilement braser.<br />
• Raccorder le conduites.<br />
• Refroidir le joint brasé à l’eau immédiatement après<br />
le brasage pour prévenir toute migration de chaleur.<br />
40 Part Number 000007644 3/11
Section 2<br />
Instructions d’installation<br />
Étape 6:<br />
Vérification de fuites dans le système de<br />
réfrigération<br />
Vérifier l’absence de fuites dans les raccordements de<br />
conduites au niveau de la partie principale de la machine<br />
à glaçons, du condenseur et du siphon en S ainsi qu’au<br />
niveau de tous les joints d’usine dans tout le système.<br />
Couper l’alimentation au condenseur à distance. Mettre<br />
l'interrupteur basculant en position ON. Ceci permet<br />
l’équilibrage des pressions hautes et basses pour<br />
faciliter le contrôle de fuites. Mettre l’interrupteur<br />
basculant en position OFF. Connecter l’alimentation au<br />
condenseur à distance et laisser le système s’évacuer<br />
une fois le contrôle de fuites terminé.<br />
Étape 7: Ouvrir les robinets avant de mettre la<br />
machine à glaçons en marche<br />
A. Mettre lentement le robinet d’arrêt de la<br />
conduite d’aspiration sur siège arrière (ouvrirtourner<br />
dans le sens contraire des aiguilles<br />
d’une montre).<br />
B. Mettre lentement le robinet d’arrêt de la<br />
conduite de liquide sur siège arrière (ouvrirtourner<br />
dans le sens contraire des aiguilles<br />
d’une montre).<br />
Ouvrir les robinets d’arrêt des<br />
conduites d’aspiration et de liquide<br />
Ouvrir les robinets<br />
Vérifier que les joints toriques dans les chapeaux de<br />
valves Schrader sont intacts et remonter les robinets<br />
d’arrêt pour prévenir toute fuite de liquide frigorigène.<br />
Remettre les bouchons d’accès aux robinets d’arrêt et<br />
serrer aux spécifications suivantes.<br />
Valeurs de couple de serrage<br />
Étape 8:<br />
Tige<br />
Bouchons<br />
Noyau Schrader<br />
Exigences d’isolation<br />
24,4-27,1 Nm (18-20 pi. lb.)<br />
16,3-20,3 Nm (12-15 pi. lb.)<br />
0,17-0,34 Nm (1,5-3 pi. lb.)<br />
Pour éviter la condensation, l’ensemble de la conduite<br />
d’aspiration doit être isolé. Toute l’isolation doit être<br />
étanche à l’air et scellée aux deux extrémités.<br />
Les exigences d’isolation suivantes permettent d’éviter<br />
la condensation à une température ambiante de 32,2 °C<br />
(90 °F) avec 90 % d’humidité relative. En cas d’humidité<br />
plus importante, augmenter l’épaisseur de l’isolation.<br />
L’ensemble des conduites d’aspiration requiert :<br />
Conduite<br />
d’aspiration<br />
Conduite de<br />
liquide<br />
16 mm (5/8 po) 10 mm (3/8 po)<br />
Épaisseur<br />
minimale de<br />
l’isolation<br />
Conduite<br />
d’aspiration<br />
13 mm (1/2 po)<br />
Conduite de<br />
liquide 7 mm<br />
(1/4 po)<br />
Important<br />
Pour éviter la condensation, l’ensemble de la<br />
conduite d’aspiration doit être isolé. Toute l’isolation<br />
doit être étanche à l’air et scellée aux deux<br />
extrémités.<br />
Les exigences minimum renvoient à des conditions à<br />
ou sous 90 % d’humidité et 32 °C (90 °F) de<br />
température ambiante. En cas d’humidité plus<br />
importante ou si le code local l’exige, augmenter<br />
l’épaisseur de l’isolation.<br />
Important<br />
Tous les chapeaux de valves de réfrigération doivent<br />
être réinstallés pour prévenir toute fuite future de<br />
réfrigération.<br />
Part Number 000007644 3/11 41
Instructions d’installation Section 2<br />
Liste de vérification d’installation<br />
Toutes les machines à glaçons <strong>Manitowoc</strong> sont mises en route et ajustées en usine avant l’expédition. Les réglages<br />
et les procédures de maintenance indiqués dans ce manuel sont la responsabilité du propriétaire/de l’opérateur et ne<br />
sont pas couverts par la garantie.<br />
La machine à glaçons est-elle à niveau ?<br />
<br />
<br />
<br />
<br />
<br />
<br />
<br />
La machine à glace et l’adaptateur (le cas<br />
échéant) sont-ils fixés sur le distributeur ?<br />
Tous les raccordements électriques et d’eau<br />
ont-ils été effectués ?<br />
La tension d’alimentation a-t-elle été testée et<br />
vérifiée par rapport à la valeur nominale<br />
indiquée sur la plaque signalétique ?<br />
Y a-t-il un espace approprié autour de la<br />
machine à glaçons pour la circulation d’air ?<br />
La machine à glaçons est-elle mise à la terre<br />
et la polarité est-elle correcte ?<br />
La machine à glaçons a-t-elle été installée là où<br />
des températures ambiantes resteront dans la<br />
fourchette de 14,4 à 37,8 °C (50 à 100 °F) ?<br />
La machine à glaçons a-t-elle été installée là<br />
où la température d’eau entrante restera dans<br />
la fourchette de 14,4 à 32,2 °C (50 à 90 °F) ?<br />
<br />
<br />
<br />
<br />
<br />
<br />
<br />
<br />
Y a-t-il une évacuation séparée pour le<br />
condenseur refroidi par eau ?<br />
Y a-t-il une évacuation séparée pour le<br />
distributeur ?<br />
L’eau de fabrication des glaçons est-elle<br />
allumée ?<br />
Tous les fils électriques sont-ils exempts de<br />
contact des lignes de réfrigération et de<br />
l’équipement mobile ?<br />
Le propriétaire/l’opérateur ont-ils été informés<br />
de l’entretien et de l’utilisation du nettoyant et<br />
du désinfectant <strong>Manitowoc</strong> ?<br />
Le propriétaire/l’opérateur a-t-il rempli la carte<br />
de garantie ?<br />
La machine à glaçons et le bac ont-ils été<br />
désinfectés ?<br />
L’interrupteur basculant est-il en position ON?<br />
42 Part Number 000007644 3/11
Section 2<br />
Instructions d’installation<br />
Contrôles additionnels pour modèles QuietQube<br />
<br />
<br />
<br />
<br />
<br />
<br />
Longueur, montée et descente de conduites<br />
conformes aux directives ?<br />
Les robinets d’arrêt des conduites d’aspiration<br />
et de liquide sont-ils ouverts ?<br />
Les conduites sont-elles acheminées<br />
correctement ?<br />
Les deux lignes de réfrigération vers le<br />
condenseur à distance sont-elles installées de<br />
manière à ce qu’elles ne reposent pas dans<br />
l’eau et qu'elles soient installées correctement ?<br />
Le ou les moteurs de ventilateur du<br />
condenseur à distance fonctionnent-ils<br />
correctement après la mise en marche ?<br />
Tous les raccords et joints de réfrigération ontils<br />
été inspectés pour présence éventuelle de<br />
fuites ?<br />
<br />
<br />
<br />
<br />
Le condenseur/groupe condenseur a-t-il été<br />
installé de manière à prévenir tout dommage<br />
de la toiture ?<br />
Les conduites de réfrigération ont-elles été<br />
isolées et sécurisées correctement pour<br />
prévenir toute vibration ?<br />
Le condenseur à distance RCU a-t-il été<br />
installé là où des températures ambiantes<br />
resteront dans la fourchette de -29 à -48,9 °C<br />
(-20 à 120 °F) ?<br />
Un siphon d’huile de réfrigération (siphon en<br />
S) a-t-il été installé si le condenseur est<br />
installé entre 6 et 11 m (21 et 35 pieds) audessus<br />
de la partie principale de la machine à<br />
glaçons ?<br />
Part Number 000007644 3/11 43
Section 3<br />
Fonctionnement<br />
REMARQUE : Les machines à glace en écailles une tarière pour retirer la glace de l’évaporateur. Des bruits<br />
occasionnels (craquements, grognements, grincements ou bruits secs) sont normaux dans le cours de la fabrication<br />
de glaçons.<br />
Thermostat de sécurité de basse<br />
température d’évaporateur et thermostat <br />
de bac<br />
Le bulbe thermostatique de bac est situé dans la<br />
goulotte à glaçons ou le bac et allume et éteint la<br />
machine à glaçons au fur et à mesure que le niveau de<br />
glaçons dans la goulotte à glaçons ou le bac change.<br />
Modèle<br />
Réglage du<br />
thermostat<br />
de bac<br />
Réglage du<br />
thermostat<br />
d’évaporateur<br />
<strong>RF</strong>0244/<strong>RF</strong>0266 5 5<br />
<strong>RF</strong>0388/<strong>RF</strong><strong>0399</strong>/<br />
<strong>RF</strong>0644<br />
5 7<br />
<strong>RF</strong>S0300 4 7<br />
<strong>RF</strong>S0650 4 S/O<br />
<strong>RF</strong>1200/<strong>RF</strong>2300 5 S/O<br />
2<br />
3<br />
1<br />
4<br />
5<br />
6<br />
7<br />
THERMOSTAT DE BAC<br />
PETITS GLAÇONS = MOINS DE GLAÇONS<br />
DANS LE BAC<br />
GROS GLAÇONS = PLUS DE GLAÇONS<br />
DANS LE BAC<br />
<strong>RF</strong>0244/<strong>RF</strong>0266/<strong>RF</strong>0385/<br />
<strong>RF</strong>0388/<strong>RF</strong><strong>0399</strong>/<strong>RF</strong>0644 Fonctionnement<br />
La machine à glaçons ne se mettra pas en marche avant<br />
ce qui suit :<br />
A. L’interrupteur basculant est mis en position ON.<br />
B. Les glaçons ne sont pas en contact avec le<br />
bulbe thermostatique du bac.<br />
C. Le réservoir d’eau est plein d’eau.<br />
Mettre l’interrupteur à bascule en position ON fait<br />
démarrer le moteur à engrenages et le système de<br />
réfrigération. Le robinet à flotteur contrôle le robinet<br />
d’arrivée d’eau et le niveau d’eau. Le cycle de<br />
congélation se termine lorsque la glace entre en contact<br />
avec le thermostat du bac. La machine à glaçons se<br />
remettra en marche lorsque la glace n’est plus en<br />
contact avec le thermostat de bac.<br />
BULBE<br />
THERMOSTATIQUE SITUÉ<br />
DANS LE BAC<br />
2<br />
3<br />
1<br />
4<br />
5<br />
6<br />
7<br />
TEMPÉRATURE BASSE D’ÉVAPORATEUR<br />
THERMOSTAT DE SÉCURITÉ<br />
DE MAUVAIS RÉGLAGES PROVOQUERONT<br />
L’ARRÊT DE LA MACHINE À GLAÇONS<br />
EMPLACEMENT DU<br />
THERMOSTAT DE BAC<br />
EMPLACEMENT DU<br />
THERMOSTAT DE SÉCURITÉ<br />
DE BASSE TEMPÉRATURE<br />
D’ÉVAPORATEUR<br />
Part Number 000007644 3/11 44
Fonctionnement Section 3<br />
<strong>RF</strong>S0300 Fonctionnement<br />
La machine à glaçons ne se mettra pas en marche avant<br />
ce qui suit :<br />
A. L’interrupteur basculant est mis en position ON.<br />
B. Les glaçons ne sont pas en contact avec le<br />
bulbe thermostatique du bac.<br />
C. Le réservoir d’eau est plein d’eau.<br />
Mettre l’interrupteur à bascule en position ON fait<br />
démarrer le moteur à engrenages et un temporisateur<br />
de compresseur de 10 minutes. Le compresseur se met<br />
en marche et le robinet à flotteur contrôle le robinet<br />
d’arrivée d’eau et le niveau d’eau. Le cycle de<br />
congélation se termine lorsque la glace entre en contact<br />
avec le thermostat du bac. La machine à glaçons ne se<br />
remettra en marche que lorsque la glace n’est plus en<br />
contact avec le thermostat de bac.<br />
<strong>RF</strong>S0650/<strong>RF</strong>1200/<strong>RF</strong>2300 Fonctionnement<br />
La machine à glaçons ne se mettra pas en marche avant<br />
ce qui suit :<br />
A. L’interrupteur basculant est mis en position ON.<br />
B. Les glaçons ne sont pas en contact avec le<br />
bulbe thermostatique du bac.<br />
C. Le réservoir d’eau est plein d’eau.<br />
Mettre l’interrupteur à bascule en position ON fait<br />
démarrer le moteur à engrenages. Une fois que<br />
détecteur de vitesse de rotation vérifier une rotation<br />
correcte de 10 minutes, le temporisateur s’arrête et le<br />
compresseur se met en marche. La machine à glaçons<br />
continuera de fabriquer des glaçons jusqu’à ce que la<br />
glace entre en contact avec le thermostat de bac. La<br />
machine à glaçons ne se remettra en marche que<br />
lorsque la glace n’est plus en contact avec le thermostat<br />
de bac.<br />
THERMOSTAT DE<br />
BAC<br />
THERMOSTAT<br />
D’ÉVAPORATEUR<br />
LE THERMOSTAT DE BAC<br />
EST SITUÉ SUR LE CÔTÉ<br />
DU BOÎTIER DE<br />
COMMANDE<br />
45 Part Number 000007644 3/11
Section 4<br />
Entretien<br />
Nettoyage et désinfection intérieurs<br />
Les procédures de maintenance traitées dans le présent<br />
manuel ne sont pas couvertes par la garantie.<br />
! Attention<br />
Utiliser uniquement le nettoyant (référence<br />
000000084) et le désinfectant (référence 94-0565-3)<br />
pour machine à glaçons Nickel Safe approuvés par<br />
<strong>Manitowoc</strong>. Ne pas mélanger les solutions<br />
nettoyantes et désinfectantes. Utiliser ces solutions<br />
sans tenir compte des instructions figurant sur les<br />
étiquettes est une violation de la loi fédérale. Lire et<br />
comprendre toutes les étiquettes imprimées sur les<br />
flacons avant utilisation.<br />
! Avertissement<br />
Porter des gants en caoutchouc et des lunettes de<br />
sécurité (et/ou un masque) lors de la manipulation<br />
du nettoyant ou du désinfectant pour machine à<br />
glaçons.<br />
PROCÉDURE DE NETTOYAGE ET DE<br />
DÉSINFECTION<br />
Cette procédure doit être effectuée une fois par mois.<br />
• Retirer tous les glaçons du bac.<br />
• La machine à glaçons et le bac doivent être<br />
démontés, nettoyés et désinfectés.<br />
• La machine à glaçons produit des glaçons avec les<br />
solutions nettoyantes et désinfectantes.<br />
• Jeter tous les glaçons produits pendant les<br />
procédures de nettoyage et de désinfection.<br />
PROCÉDURE DE NETTOYAGE DES MACHINES<br />
FORTEMENT ENTARTRÉES<br />
Exécuter cette procédure en présence de l’un ou de tous<br />
les symptômes suivants.<br />
• Grincements, claquements ou sifflements provenant<br />
de l’évaporateur.<br />
• Grincements provenant de la boîte d’engrenages.<br />
• La machine à glaçons déclenche le détecteur de<br />
vitesse.<br />
REMARQUE : Une procédure de nettoyage/désinfection<br />
doit être effectuée après cette procédure.<br />
Nettoyage extérieur<br />
Éliminer la poussière et la saleté des surfaces<br />
extérieures à l’aide d’un détergent à vaisselle ménager<br />
doux et de l’eau chaude. Essuyer à l’aide d’un chiffon<br />
propre et doux.<br />
Procédure de nettoyage et de désinfection<br />
Utiliser le nettoyant pour machines à glaçons Nickel<br />
Safe référence 000000084.<br />
Utiliser le désinfectant pour machine à glaçons<br />
référence 94-0565-3.<br />
Étape 1 Retirer les couvercles avant et supérieurs et<br />
mettre le commutateur à bascule en position OFF.<br />
Étape 2 Retirer tous les glaçons du bac.<br />
Étape 3 Couper l’alimentation en eau de fabrication de<br />
glaçons et vider l’eau de l’évaporateur et du réservoir.<br />
Étape 4 Retirer le couvercle supérieur du réservoir d’eau.<br />
Étape 5 Suivre les instructions du tableau et<br />
prémélanger le nettoyant et l’eau.<br />
Quantité de Nettoyant<br />
Quantité d’eau Nickel Safe - Référence<br />
000000084<br />
4 litres (1 gallon) 90 ml (3 once)<br />
Étape 6 Remplir l’évaporateur et le réservoir de<br />
solution de nettoyage.<br />
Étape 7 Mettre l’interrupteur à bascule en position ON.<br />
La machine à glaçons fabriquera des glaçons avec la<br />
solution de nettoyage et déposera les glaçons dans le<br />
bac. Ajouter la solution restante de nettoyant/eau au fur et<br />
à mesure que le niveau d’eau diminue dans le réservoir.<br />
REMARQUE : Ne pas laisser le niveau de solution<br />
nettoyant/eau baisser en-dessous du niveau d’eau<br />
minimum. La machine à glaçons interrompra le cycle de<br />
nettoyage si le commutateur de flotteur d’eau s’ouvre.<br />
Part Number 000007644 3/11 44
Entretien Section 4<br />
Étape 8 Une fois que toute la solution nettoyant/eau a<br />
été ajoutée, ouvrir l’alimentation en eau de fabrication de<br />
glaçons. Continuer le cycle de congélation pendant 10<br />
minutes pour éliminer la solution de nettoyage du circuit<br />
d’eau.<br />
Étape 9 Mettre l’interrupteur à bascule en position OFF.<br />
Étape 10 Consulter la section Retrait des pieces pour<br />
le nettoyage/la désinfection et retirer les pièces pour le<br />
nettoyage/la désinfection à la main.<br />
• Laver toutes les pièces à la main.<br />
• Rincer toutes les pièces à l’eau potable claire<br />
• Désinfecter toutes les pièces - Ne pas les rincer<br />
après la désinfection.<br />
• Vaporiser toutes les surfaces intérieurs du bac/<br />
distributeur avec le désinfectant (ne pas rincer les<br />
surfaces désinfectées).<br />
• Vaporiser le bec d’évacuation d’évaporateur.<br />
Étape 16 Une fois que toute la solution désinfectant/<br />
eau a été ajoutée, ouvrir l’alimentation en eau de<br />
fabrication de glaçons.<br />
Étape 17 Continuer le cycle de congélation pendant 30<br />
minutes et jeter ensuite tous les glaçons produits.<br />
Procédure de nettoyage des machines à<br />
glace en écailles fortement entartrées<br />
Étape 1 Retirer les couvercles avant et supérieurs et<br />
mettre le commutateur à bascule en position OFF.<br />
Étape 2 Retirer tous les glaçons du bac.<br />
Étape 3 Couper l’alimentation en eau de fabrication de<br />
glaçons.<br />
Étape 4 Retirer le couvercle supérieur du réservoir<br />
d’eau.<br />
Étape 5 Consulter le tableau ci-dessous :<br />
Pré-mélanger le nettoyant avec de l’eau tiède dans<br />
un conteneur non métallique.<br />
Modèle<br />
Capacité de<br />
réservoir<br />
d’eau<br />
Mélanger le nettoyant et l’eau<br />
Utiliser le nettoyant pour<br />
machines à glaçons Nickel<br />
Safe, référence 000000084<br />
uniquement.<br />
Nettoyant<br />
Eau<br />
Étape 11 Remonter la machine à glaçons.<br />
Étape 12 Couper l’alimentation en eau de fabrication<br />
de glaçons.<br />
Étape 13 Consulter le tableau et prémélanger l’eau et<br />
le désinfectant.<br />
Quantité d’eau Quantité de désinfectant<br />
4 litres (1 gallon) d’eau 15 ml (1/2 once)<br />
Étape 14 Remplir le réservoir et l’évaporateur avec la<br />
solution désinfectant/eau.<br />
Étape 15 Mettre l’interrupteur à bascule en position<br />
ON. La machine à glaçons fabriquera des glaçons avec<br />
la solution désinfectant/eau et déposera les glaçons<br />
dans le bac. Ajouter la solution restante de désinfectant/<br />
eau lorsque le niveau d’eau diminue dans le réservoir.<br />
REMARQUE : Ne pas laisser le niveau de solution<br />
désinfectant/eau baisser en-dessous du niveau d’eau<br />
minimum. La machine à glaçons interrompra le cycle de<br />
nettoyage si le commutateur de flotteur d’eau s’ouvre.<br />
<strong>RF</strong>0244<br />
<strong>RF</strong>0266<br />
<strong>RF</strong>0385<br />
<strong>RF</strong>0388<br />
<strong>RF</strong><strong>0399</strong><br />
<strong>RF</strong>0644<br />
<strong>RF</strong>S0300<br />
<strong>RF</strong>S0650<br />
400 ml (14 oz) 266 ml (9 oz) 148 ml (5 oz)<br />
500 ml (17 oz) 325 ml (11 oz) 177 ml (6 oz)<br />
<strong>RF</strong>1200 1 l (34 oz) 680 ml (23 oz) 325 ml (11 oz)<br />
<strong>RF</strong>2300 2 l (68 oz) 1,3 l (46 oz) 650 ml (22 oz)<br />
Étape 6 Retirer toute l’eau de l’évaporateur et du<br />
réservoir d’eau. Ajouter toute la solution nettoyant/eau et<br />
remonter le couvercle de réservoir.<br />
Laisser la solution nettoyant/eau dans l’évaporateur<br />
pendant au moins 4 heures.<br />
Étape 7 Retirer toute la solution nettoyant/eau de<br />
l’évaporateur et du réservoir d’eau.<br />
Étape 8 Suivre les procédures de nettoyage et de<br />
désinfection standard.<br />
45 Part Number 000007644 3/11
Section 4<br />
Entretien<br />
Retrait des pièces pour le nettoyage/la<br />
désinfection<br />
! Avertissement<br />
Déconnecter l’alimentation électrique à la machine<br />
à glaçons au niveau de la boîte d’interrupteurs<br />
électriques et porter des gants en caoutchouc et<br />
des lunettes de sécurité (ou un masque) lors de la<br />
manipulation du nettoyant ou du désinfectant.<br />
! Attention<br />
Ne pas mélanger les solutions nettoyantes et<br />
désinfectantes. Utiliser ces solutions sans tenir<br />
compte des instructions figurant sur les étiquettes<br />
est une violation de la loi fédérale.<br />
DÉPOSE DE LA GOULOTTE À GLAÇONS<br />
<strong>RF</strong>S0300/<strong>RF</strong>S0650/<strong>RF</strong>1200/<strong>RF</strong>2300 uniquement<br />
1. Placer l’interrupteur à bascule en position OFF,<br />
couper l’alimentation en eau et déconnecter<br />
l’alimentation électrique à la machine à glaçons.<br />
2. Déconnecter l’alimentation en eau.<br />
3. Déposer le couvercle du réservoir d’eau.<br />
4. Supprimer microswitch et coffre thermostat de les<br />
glace chute.<br />
5. Supprimer serviteur , glace chute coude et glace<br />
chute.<br />
1. Couper l’alimentation en eau à la machine à glaçons<br />
au niveau de la soupape de service d’eau.<br />
2. Retirer les composants indiqués aux pages<br />
suivantes pour le nettoyage et la désinfection.<br />
3. Faire tremper la ou les pièces déposées dans une<br />
solution correctement mélangée de nettoyant et d’eau.<br />
Type de<br />
solution<br />
Nettoyant<br />
4. Utiliser une brosse en nylon à poils souples ou une<br />
éponge (PAS une brosse métallique) pour nettoyer<br />
soigneusement les pièces.<br />
5. Utiliser la solution et une brosse ou une éponge<br />
pour nettoyer tous les composants démontés et<br />
l’intérieur du bac.<br />
6. Rincer toutes les pièces nettoyées à l’eau claire.<br />
7. Mélanger une solution de désinfectant et d’eau.<br />
Type de<br />
solution<br />
Désinfectant<br />
Eau<br />
4 L (1 gallon)<br />
Eau<br />
11 L (6 gallons)<br />
Mélangée avec<br />
500 ml (16 oz) de<br />
nettoyant<br />
Référence 000000084<br />
Mélangée avec<br />
60 ml (2 oz) de<br />
désinfectant<br />
Référence 94-0565-3<br />
8. Faire tremper les pièces dans la solution<br />
désinfectant/eau pendant 10 minutes. Utiliser la<br />
solution désinfectant/eau et une éponge pour<br />
désinfecter tous les composants déposés et<br />
l’intérieur du bac. Ne pas rincer les pièces<br />
désinfectées.<br />
9. Continuer avec l’etape 11 de la procédure de<br />
nettoyage/désinfection.<br />
Part Number 000007644 3/11 46
Entretien Section 4<br />
DÉPOSE DE LA GOULOTTE À GLAÇONS<br />
<strong>RF</strong>S0300/<strong>RF</strong>S0650/<strong>RF</strong>1200/<strong>RF</strong>2300 uniquement<br />
1. Placer l’interrupteur à bascule en position OFF,<br />
couper l’alimentation en eau et déconnecter<br />
l’alimentation électrique à la machine à glaçons.<br />
2. Déconnecter l’alimentation en eau.<br />
3. 3<br />
4. Déposer le couvercle du réservoir d’eau.<br />
5. Retirer le thermostat de bac de la goulotte à<br />
glaçons.<br />
6. Desserrer les boulons maintenant la traverse.<br />
7. Soulever la traverse et retirer la goulotte à glaçons.<br />
DESSERRER LES<br />
BOULONS DE SUPPORT<br />
INCLINER LE HAUT DE LA GOULOTTE À<br />
GLAÇONS VERS L’ARRIÈRE ET<br />
SOULEVER POUR LA RETIRER<br />
DÉPOSE DE L’ACTIONNEUR D’INTERRUPTEUR DE<br />
GOULOTTE À GLAÇONS<br />
<strong>RF</strong>S0300/<strong>RF</strong>S0650/<strong>RF</strong>1200/<strong>RF</strong>2300 uniquement<br />
1. Tirer pour retirer l’embout en nylon.<br />
2. Faire glisser la goupille pour l’enlever.<br />
3. Retirer les deux sections du support de manostat.<br />
UN REMONTAGE INCORRECT<br />
PEUT PROVOQUER UN NON-<br />
FONCTIONNEMENT DE LA<br />
MACHINE À GLAÇONS<br />
Nettoyage du condenseur refroidi à l’air<br />
! Avertissement<br />
Couper l’alimentation électrique de la machine à<br />
glaçons et le condenseur à distance au niveau des<br />
interrupteurs de distribution électrique avant de<br />
nettoyer le condenseur.<br />
Un condenseur sale restreint le débit d’air, entraînant<br />
ainsi des températures de fonctionnement<br />
excessivement élevées et une production de glaçons<br />
réduite. Nettoyer le condenseur au moins tous les six<br />
mois.<br />
! Attention<br />
Les ailettes du condenseur sont coupantes. Faire<br />
attention en les nettoyant.<br />
1. Nettoyer l’extérieur du condenseur à l’aide d’une<br />
brosse douce ou d’un aspirateur avec une brosse.<br />
Éclairer une lampe de poche dans le condenseur<br />
pour inspecter toute présence éventuelle de saleté<br />
entre les ailettes. S’il reste de la saleté, utiliser une<br />
méthode adéquate pour éliminer la contamination<br />
afin d’assurer un débit d’air.<br />
2. <strong>RF</strong>S0300/<strong>RF</strong>S0650/<strong>RF</strong>1200/<strong>RF</strong>2300 uniquement.<br />
Nettoyer le filtre lavable avec une solution d’eau et<br />
de savon doux.<br />
Système de filtration d’eau Arctic Pure<br />
Conçu spécifiquement pour les machines à glaçons<br />
<strong>Manitowoc</strong>. Ce filtre à eau est une méthode efficace,<br />
fiable et abordable pour empêcher la formation de tartre,<br />
filtrer les sédiments et éliminer le goût et l’odeur du<br />
chlore.<br />
Nettoyant et désinfectant <strong>Manitowoc</strong><br />
Le nettoyant pour machines à glaçons Nickel Safe<br />
<strong>Manitowoc</strong> est disponible en bouteilles pratiques de<br />
473 ml (16 oz). Le désinfectant pour machines à glaçons<br />
<strong>Manitowoc</strong> est disponible en bouteilles de 473 ml (16 oz)<br />
et de 3,78 l (1 gal).<br />
Référence du nettoyant Référence du désinfectant<br />
16 oz 000000084 16 oz 94-0565-3<br />
1 Gallon 94-0581-3<br />
47 Part Number 000007644 3/11
Section 5<br />
Service clientèle<br />
Liste de vérification<br />
En cas de problème pendant le fonctionnement de la machine à glaçons, suivre la liste de vérification ci-dessous<br />
avant de contacter le service technique. Les réglages périodiques et procédures d’entretien ne sont pas couverts par<br />
la garantie.<br />
Problème Cause possible Mesure corrective<br />
La machine à glaçons ne fonctionne Thermostat de bac ouvert ou glace en contact avec Ajuster le thermostat ou retirer les glaçons<br />
pas.<br />
la sonde de thermostat<br />
Pas d’eau dans le réservoir<br />
Pas d’eau dans la machine à glaçons, filtre<br />
colmaté, robinet à flotteur défectueux<br />
Thermostat de sécurité d’évaporateur ouvert Ajuster thermostat<br />
Interrupteur de goulotte de glaçons ouvert<br />
Inspecter présence éventuelle de glaçons ou de<br />
grippage et fermer l’interrupteur<br />
Délai non expiré<br />
Patienter 10 minutes pour l’expiration du délai<br />
Déclenchement de coupure haute pression Nettoyer le serpentin du condenseur et<br />
réinitialiser<br />
Moteur à engrenages fonctionne mais<br />
aucun glaçon n’est produit<br />
Commande basse pression ouverte<br />
Thermostat de bac ouvert ou glace en contact avec<br />
la sonde de thermostat<br />
Pas d’eau dans le réservoir<br />
Décongeler l’évaporateur et retester – Appeler un<br />
réparateur<br />
Ajuster le thermostat ou retirer les glaçons<br />
Pas d’eau dans la machine à glaçons, filtre<br />
colmaté, robinet à flotteur défectueux<br />
Part Number 000007644 3/11 50
Service clientèle Section 5<br />
THIS PAGE INTENTIONALLY LEFT BLANK<br />
51 Part Number 000007644 3/11
Section 5<br />
Service clientèle<br />
Garantie commerciale de la machine à<br />
glaçons<br />
GARANTIE LIMITÉE<br />
<strong>Manitowoc</strong> Ice, une division de <strong>Manitowoc</strong> FSG Services, LLC,<br />
(« Société ») garantit que les Machines à glaçons <strong>RF</strong> Flake neuves<br />
vendues par la Société sont exemptes de tout défaut de matériau ou<br />
de fabrication à condition d’une utilisation et d’un entretien normaux et<br />
appropriés tels que spécifiés par la Société, et avec une installation et<br />
une mise en service appropriées conformes au manuel d’instructions<br />
fourni.<br />
LA GARANTIE COUVRE CE QUI SUIT :<br />
• Pièces pendant une période de trois (3) ans.<br />
• Main d’œuvre pendant une période de deux (2) ans.<br />
• Pièces de compresseur pendant une période de cinq (5) ans et<br />
main d’œuvre pendant une période de deux (2) ans.<br />
La garantie de la Machine à glaçons <strong>RF</strong> Flake entre en vigueur à<br />
compte de la date de l’installation originale. La présente garantie ne<br />
s’applique à aucune machine à glaçons initialement installée pendant<br />
plus de cinq (5) ans à compter de la date de production du numéro de<br />
série.<br />
L’obligation de la Société en vertu de la présente garantie est limitée à<br />
la réparation ou au remplacement des pièces, des composants ou des<br />
ensembles qui, selon la Société uniquement, sont défectueux. La<br />
présente garantie est également limitée au coût des pièces,<br />
composants ou ensembles, et aux frais de main d’œuvre au salaire de<br />
base (à l’exclusion de la garantie sur le compresseur) sur le lieu du<br />
service technique.<br />
Les tarifs de taux de base et horaires, tels que publiés de temps à<br />
autre par la Société, s’appliquent à toutes les procédures de service.<br />
Les frais supplémentaires, y compris mais sans s’y limiter, le temps de<br />
déplacement, la majoration pour travail supplémentaire, le coût des<br />
matériaux, l’accès à la Machine à glaçons <strong>RF</strong> Flake ou son retrait, ou<br />
encore l’expédition, sont à la charge de l’acheteur, tout comme le sont<br />
l’entretien, les réglages, le nettoyage et les achats de glaçons. Le<br />
travail couvert par la présente garantie doit être effectué par un<br />
représentant du service technique sous contrat homologué de la<br />
Société ou par un organisme de service de réfrigération tel que qualifié<br />
et homologué par le distributeur local de la Société. La responsabilité<br />
de la Société en vertu de la présente garantie ne sera en aucun cas<br />
supérieure au prix d’achat réel payé par l’acheteur pour la Machine à<br />
glaçons <strong>RF</strong> Flake.<br />
EXCLUSIONS DE GARANTIE<br />
• La réparation ou le remplacement des pièces requis en raison<br />
d’une mauvaise utilisation, d’un entretien ou d’un entreposage<br />
inadéquat, de négligence, d’altération, d’utilisation de fournitures<br />
incompatibles ou du manque d’entretien spécifié sont exclus.<br />
• Points d’entretien normal.<br />
• Défaillances dues à des tensions inadéquates ou erratiques,<br />
conditions environnementales ou d’eau malsaines, évacuation<br />
inadéquate, interruption d’alimentation en eau ou en courant.<br />
• Réparation incorrecte ou non autorisée.<br />
• Toute Machine à glaçons <strong>RF</strong> Flake qui n’aura pas été installée<br />
conformément aux instructions fournies par la Société.<br />
• Pièces ayant fait l’objet de dommages indépendants de la volonté<br />
de la Société, ou Machine à glaçons <strong>RF</strong> Flake qui a fait l’objet<br />
d’accidents, de dommages pendant l’expédition, un incendie, des<br />
inondations, autres dangers et calamités naturelles indépendants<br />
de la volonté de la Société.<br />
• La présente garantie limitée ne s’applique pas si le système de<br />
réfrigération de la Machine à glaçons <strong>RF</strong> Flake est modifié par un<br />
condenseur, un récupérateur de chaleur ou d’autres pièces ou<br />
ensembles non fabriqués par la Société, sauf en cas de<br />
l’approbation écrite par la Société de ces modifications pour des<br />
emplacements spécifiques avant le début desdites modifications.<br />
LIMITATION DE LA RESPONSABILITÉ<br />
Les paragraphes précédents indiquent le recours exclusif pour toutes<br />
les réclamations basées sur la défaillance de, ou défaut dans, des<br />
Machines à glaçons <strong>RF</strong> Flake vendues ci-dessous, que la défaillance<br />
ou le défaut ait lieu avant ou pendant la période de garantie, et qu’une<br />
réclamation, instituée de quelque manière que ce soit, soit basée sur<br />
contrat, indemnité, garantie, délit civil (y compris négligence),<br />
responsabilité objective, tacite par statut, common law ou autre, et la<br />
Société et ses agents ne seront en aucun cas responsables de toute<br />
réclamations concernant des blessures corporelles ou dommages<br />
consécutifs ou pertes, quelle qu’en soit leur cause. Lors de l’échéance<br />
de la période de garantie, toutes lesdites responsabilités viendront à<br />
échéance. LES GARANTIES PRÉCÉDENTES SONT EXCLUSIVES<br />
ET REMPLACENT TOUTES LES AUTRES GARANTIES, QU’ELLES<br />
SOIENT ÉCRITES, ORALES, TACITES OU LÉGALES. AUCUNE<br />
GARANTIE TACITE DE QUALITÉ MARCHANDE OU D’ADAPTATION<br />
À UN USAGE PARTICULIER NE S’APPLIQUERA. LA SOCIÉTÉ NE<br />
GARANTIT AUCUN PRODUIT OU SERVICE FOURNI PAR AUTRUI.<br />
RECOURS<br />
La responsabilité de la Société dans le cas d’une violation de toute<br />
obligation de garantie ci-dessous se limite à ce qui suit : (i) la<br />
réparation ou le remplacement de la Machine à glaçons <strong>RF</strong> Flake sur<br />
laquelle la responsabilité est basée, ou pour ce qui est des services,<br />
de la nouvelle application de la caractéristique de contrôle des<br />
services ; ou (ii), sur la décision de la Société, le remboursement du<br />
montant payé pour lesdits équipements ou services. Toute violation de<br />
la Société pour ce qui est de tout article ou toute unité d’équipement<br />
ou tous services sera considérée comme une violation par rapport à<br />
cet article, cette unité ou ce service uniquement.<br />
PROCÉDURE DE RÉCLAMATION AU TITRE DE LA GARANTIE<br />
Le client sera responsable de ce qui suit :<br />
• Remplir et renvoyer la carte de garantie ou s’enregistrer en ligne<br />
dans les cinq (5) jours à compter de la date d’installation.<br />
• Tout service au titre de la garantie doit être effectué par un<br />
représentant du service technique sous contrat ou autorisé<br />
homologué de <strong>Manitowoc</strong>.<br />
LOI APPLICABLE<br />
La présente garantie limitée sera régie par les lois de l’État du<br />
Wisconsin (États-Unis), à l’exclusion de leurs conflits des principes de<br />
droit. La Convention des Nations Unies sur les contrats de vente<br />
internationale de marchandises est exclue, par les présentes, dans<br />
son intégralité de l’application à la présente garantie limitée.<br />
Pour assurer un service de garantie prompt et permanent, la carte de<br />
garantie doit être remplie et envoyée à la SOCIÉTÉ dans les cinq (5)<br />
jours suivant la date d’installation.<br />
Remplir ce qui suit et conserver cette information :<br />
Distributeur/Revendeur ________________________________________________________________________________________________<br />
Référence de modèle ______________________________________ Numéro de série ____________________________________________<br />
Date d’installation ____________________________________________________________________________________________________<br />
MANITOWOC ICE, INC.2110 So. 26th St., P.O. Box 1720, <strong>Manitowoc</strong>, WI 54221-1720 USA<br />
Téléphone : 920-682-0161 Fax : 920-683-7585 Web Site - www.manitowocice.com Formulaire 80-0375-3 Rév. 01-02<br />
Part Number 000007644 3/11 52
Service clientèle Section 5<br />
Garantie limitée résidentielle de la machine à glaçons<br />
CE QUE COUVRE LA PRÉSENTE GARANTIE LIMITÉE<br />
Sous réserve des exclusions et limitations ci-dessous,<br />
<strong>Manitowoc</strong> Foodservice (« <strong>Manitowoc</strong> ») garantit au client<br />
d’origine toute nouvelle machine à glaçons fabriquée par<br />
<strong>Manitowoc</strong> (le « Produit ») contre tout défaut de matériau ou<br />
vice de fabrication pendant la période de garantie décrite cidessous<br />
dans des conditions normales d’utilisation et<br />
d’entretien, et suite à une installation et une mise en service<br />
correctes conformément au manuel d’instructions fourni avec<br />
le Produit.<br />
PÉRIODE DE CETTE GARANTIE LIMITÉE<br />
Produit couvert<br />
Période de garantie<br />
Machine à glaçons<br />
Douze (12) mois<br />
à compter de la date de vente<br />
PERSONNES COUVERTES PAR CETTE GARANTIE<br />
LIMITÉE<br />
La présente garantie limitée s’applique uniquement au client<br />
d’origine du Produit et n’est pas transférable.<br />
OBLIGATIONS DE MANITOWOC ICE DANS LE CADRE DE<br />
CETTE GARANTIE LIMITÉE<br />
En cas de défaut et de réception par <strong>Manitowoc</strong> d’une<br />
déclaration de dommage valide avant l’expiration de la<br />
période de garantie, <strong>Manitowoc</strong> doit, sur sa décision : (1)<br />
réparer le Produit à ses frais, y compris les frais de main<br />
d’œuvre standard en heures normales, (2) remplacer le<br />
Produit par un nouveau produit ou un produit équivalent à<br />
l’original ou (3) rembourser le prix d’achat du Produit. Les<br />
pièces de rechange sont garanties pendant 90 jours ou pour<br />
le reste de la période de garantie d’origine, si elle est plus<br />
longue. Les éléments précédents constituent l’unique<br />
obligation de <strong>Manitowoc</strong> et le recours exclusif du client en cas<br />
de rupture de la présente garantie limitée. La responsabilité<br />
de <strong>Manitowoc</strong> dans le cadre de la présente garantie limitée se<br />
limite au prix d’achat du Produit. Toutes dépenses<br />
supplémentaires, y compris mais sans s’y limiter, le temps de<br />
déplacement pour service, les frais de main d’œuvre d’heures<br />
supplémentaires ou de majoration, l’accessibilité au Produit ou<br />
son retrait, ou l’expédition sont à la charge du client.<br />
OBTENTION DE SERVICE DE GARANTIE<br />
Pour obtenir un service de garantie ou toute information<br />
concernant le Produit, veuillez nous contacter :<br />
MANITOWOC FOODSERVICE<br />
2110 So. 26th St.<br />
P.O. Box 1720,<br />
<strong>Manitowoc</strong>, WI 54221-1720 USA<br />
Téléphone : 920-682-0161 Fax : 920-683-7585<br />
www.manitowocice.com<br />
CE QUI N’EST PAS COUVERT<br />
La présente garantie limitée ne couvre pas, et laisse à votre<br />
seule responsabilité, les frais de ce qui suit : (1) maintenance<br />
périodique ou de routine, (2) réparation ou remplacement du<br />
Produit ou des pièces suite à une usure normale, (3) défauts<br />
ou dommages du Produit ou des pièces du fait d’une<br />
mauvaise utilisation, d’une utilisation abusive, de négligences<br />
ou d’accidents, (4) défauts ou dommages du Produit ou des<br />
pièces du fait d’altérations, de modifications ou de<br />
changements incorrects ou non autorisés et (5) défauts ou<br />
dommages d’un Produit non installé et/ou maintenu<br />
conformément au manuel d’instructions ou aux spécifications<br />
techniques fournis par <strong>Manitowoc</strong>. Dans la mesure où ces<br />
exclusions de garantie dépendent des lois nationales, il est<br />
possible qu’elles ne vous concernent pas.<br />
SAUF TEL QU’INDIQUÉ PAR LA PHRASE SUIVANTE, LA PRÉSENTE<br />
GARANTIE LIMITÉE REPRÉSENTE LA SEULE ET UNIQUE GARANTIE<br />
DE MANITOWOC CONCERNANT LE PRODUIT. TOUTES LES<br />
GARANTIES TACITES SONT STRICTEMENT LIMITÉES À LA DURÉE DE<br />
LA GARANTIE LIMITÉE S’APPLIQUANT AUX PRODUITS, COMME<br />
INDIQUÉ PRÉCÉDEMMENT, Y COMPRIS, SANS TOUTEFOIS S’Y<br />
LIMITER, TOUTE GARANTIE DE QUALITÉ MARCHANDE OU<br />
D’ADAPTATION À UN USAGE PARTICULIER.<br />
Certains pays ne permettant pas de limitations sur la durée<br />
d’une garantie tacite, il est possible que la limitation ci-dessus<br />
ne vous concerne pas.<br />
EN AUCUN CAS, MANITOWOC OU UNE DE SES FILIALES, NE PEUT<br />
ÊTRE TENUE POUR RESPONSABLE DU CLIENT OU DE TOUTE AUTRE<br />
PERSONNE EN CAS DE DOMMAGES ACCESSOIRES, CONSÉCUTIFS<br />
OU PARTICULIERS DE TOUTE NATURE (Y COMPRIS, MAIS SANS<br />
TOUTEFOIS S’Y LIMITER, UNE PERTE DE PROFITS, DE REVENUS OU<br />
COMMERCIALE) DÉCOULANT, OU LIÉS DE QUELQUE MANIÈRE QUE<br />
CE SOIT, AU PRODUIT, À UNE RUPTURE DE LA PRÉSENTE<br />
GARANTIE LIMITÉ, OU À TOUTE AUTRE CAUSE, QUELLE QU’ELLE<br />
SOIT, BASÉE SUR LE CONTRAT, SUR LA RESPONSABILITÉ CIVILE OU<br />
TOUTE AUTRE RESPONSABILITÉ.<br />
Certaines juridictions ne permettant pas l’exclusion ou la<br />
limitation de dommages accessoires ou consécutifs, il est<br />
possible que cette limitation ou exclusion ci-dessus ne vous<br />
concerne pas.<br />
APPLICATION DES LOIS NATIONALES<br />
La présente garantie limitée vous offre des droits légaux<br />
spécifiques et il se peut que vous ayez d’autres droits qui<br />
varient d’une juridiction à une autre.<br />
CARTE DE GARANTIE<br />
Pour assurer un service de garantie prompt et permanent,<br />
cette carte de garantie doit être remplie et envoyée à<br />
<strong>Manitowoc</strong> dans les trente (30) jours suivant la date de vente.<br />
Remplir la carte de garantie suivante et l’envoyer à<br />
<strong>Manitowoc</strong>.<br />
53 Part Number 000007644 3/11
Service clientèle Section 5<br />
THIS PAGE INTENTIONALLY LEFT BLANK<br />
54 Part Number 000007644 3/11
Section 5<br />
Service clientèle<br />
THIS PAGE INTENTIONALLY LEFT BLANK<br />
Part Number 000007644 3/11 55
© 2010 <strong>Manitowoc</strong><br />
Continuing product improvements may necessitate change of<br />
specifications without notice.<br />
Part Number 000007644 3/11<br />
<strong>Manitowoc</strong><br />
<strong>Manitowoc</strong> Foodservice<br />
2110 South 26th Street, P.O. Box 1720<br />
<strong>Manitowoc</strong>, WI 54221-1720, USA<br />
Ph: 920-682-0161 Fax: 920-683-7589<br />
Visit us online at: www.manitowocice.com