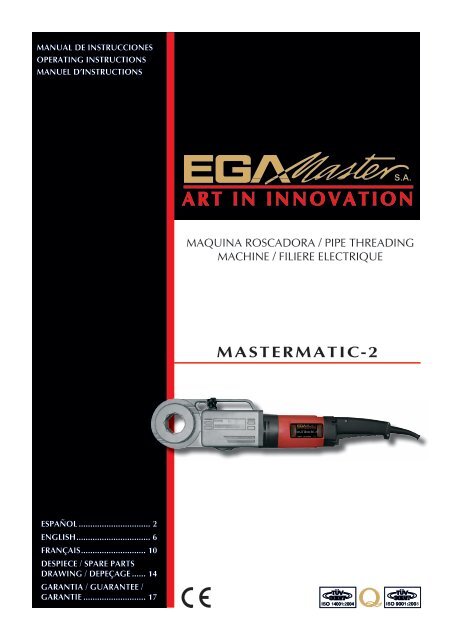
MASTERMATIC-2 - Ega Master
MASTERMATIC-2 - Ega Master
MASTERMATIC-2 - Ega Master
You also want an ePaper? Increase the reach of your titles
YUMPU automatically turns print PDFs into web optimized ePapers that Google loves.
MANUAL DE INSTRUCCIONES<br />
OPERATING INSTRUCTIONS<br />
MANUEL D’INSTRUCTIONS<br />
MAQUINA ROSCADORA / PIPE THREADING<br />
MACHINE / FILIERE ELECTRIQUE<br />
<strong>MASTERMATIC</strong>-2<br />
ESPAÑOL................................ 2<br />
ENGLISH................................. 6<br />
FRANÇAIS............................. 10<br />
DESPIECE / SPARE PARTS<br />
DRAWING / DEPEÇAGE....... 14<br />
GARANTIA / GUARANTEE /<br />
GARANTIE............................ 17
ESPAÑOL<br />
INSTRUCCIONES DE SEGURIDAD<br />
¡Atención! Cuide su seguridad.<br />
1. No utilice prendas colgantes que puedan enganchar en los elementos de rotación.<br />
2. Utilice guantes de goma en los trabajos realizados al exterior.<br />
3. Antes de poner en marcha, compruebe que tanto el cable como el enchufe se encuentran en<br />
condiciones.<br />
4. Para cualquier manipulación sobre la máquina, asegúrese de que ha sido desconectada de la<br />
red.<br />
5. Emplee siempre los accesorios destinados a la máquina ya que sin su utilización puede resultar<br />
lesionado.<br />
MANTENIMIENTO<br />
¡Realice el mantenimiento siempre con la máquina desconectada!<br />
1. Soporte para tubos: Cuide que los dientes de las mordazas de fijación se encuentren en perfecto<br />
estado, si no es así, reemplácelos.<br />
2. Caja reductora: No requiere mantenimiento ya que dispone de una grasa especial de por vida.<br />
3. Escobillas: Límpielas y compruebe el estado de desgaste, cambiándolas cuando este desgaste<br />
llegue a ser 2/3 del total.<br />
4. Interruptor: Asegúrese de que al cesar la acción del dedo, el interruptor retorna a la posición de<br />
reposo, deteniéndose el giro del motor.<br />
Nota: Para cualquier reparación, póngase en contacto con nuestro servicio técnico.<br />
CARACTERISTICAS TECNICAS<br />
Capacidad 1/4" ÷ 2"<br />
Motor<br />
1350 W (230 V / 50-60 Hz) o (110 V / 50-60 Hz)<br />
Velocidad de roscado<br />
28 rpm<br />
Velocidad de retroceso<br />
50 rpm<br />
Peso<br />
8 Kgs.<br />
2
INSTRUCCIONES DE FUNCIONAMIENTO<br />
1. Utilice cabezas y adaptador para cabezas de serie ligera y serie pesada del fabricante.<br />
2. Utilice siempre el soporte fijándolo fuertemente para impedir que la máquina pueda girar alrededor del tubo.<br />
3. Asegúrese de que el interruptor solamente mantenga en funcionamiento el motor mientras se mantiene el<br />
dedo accionado. Debiéndose detener al cesar esta acción.<br />
4. Seleccione el sentido de roscado mediante el interruptor eléctrico.<br />
5. Roscado a derechas (velocidad lenta): el interruptor mecánico deberá estar en posición FOR y el interruptor<br />
eléctrico como la indicación A del punto 4.<br />
Desenroscado a derechas (velocidad rápida): el interruptor mecánico deberá estar en posición REV y el<br />
interruptor eléctrico como la indicación A del punto 4.<br />
Roscado a izquierdas (velocidad lenta): el interruptor mecánico deberá estar en posición FOR y el interruptor<br />
eléctrico como la indicación B del punto 4.<br />
Desenroscado a izquierdas (velocidad rápida): el interruptor mecánico deberá estar en posición REV y el<br />
interruptor eléctrico como la indicación B del punto 4.<br />
6. Aboque la máquina en el tubo, asegurándose de que la barra del soporte se introduzca en su correspondiente<br />
alojamiento en la máquina.<br />
7. Al iniciar el roscado presione ligeramente la cabeza contra el tubo. Rosque hasta que el final de los peines<br />
haya llegado al inicio del tubo.<br />
8. No debe cambiar la marcha durante la operación de roscado, espere a que se detenga una vez finalizada la<br />
rosca invirtiendo para realizar el desenroscado.<br />
9. Utilice lubricante abundante durante el roscado mejorando la vida de la herramienta y la calidad de la rosca.<br />
1<br />
2<br />
3<br />
4<br />
B<br />
5<br />
6<br />
A<br />
7<br />
8<br />
9<br />
3
NOTAS<br />
¡IMPORTANTE!<br />
El fabricante no se responsabiliza de los daños o mal funcionamiento de la máquina en caso de<br />
que no se use correctamente o se haya utilizado para trabajos para los que no está diseñada.<br />
Para pedir cualquier repuesto, mirar en el dibujo de despiece el número de la pieza deseada.<br />
Según la directiva sobre residuos eléctricos de aparatos eléctricos y electrónicos<br />
(RAEE), éstos deberán recogerse y tratarse por separado. Si en el futuro tiene que deshacerse de<br />
este producto, no se deshaga de él junto con la basura doméstica. Póngase en contacto con su<br />
distribuidor para proceder a su reciclaje de manera gratuita cuando sea posible.<br />
GARANTÍA<br />
El fabricante garantiza al comprador de ésta máquina la garantía total durante 12 meses de las<br />
piezas con defectos de fabricación.<br />
Esta garantía no cubre aquellas piezas que por su uso normal tienen un desgaste.<br />
Nota: para obtener la validez de la garantía, es absolutamente imprescindible que complete y<br />
remita al fabricante el documento de “CERTIFICADO DE GARANTIA”, dentro de los siete dias a<br />
partir de la fecha de compra.<br />
4
ENGLISH<br />
SAFETY INSTRUCTIONS<br />
Attention! Be careful.<br />
1. Do not wear loose clothing. They could be caught by moving parts of the machine.<br />
2. For outdoor work, rubber gloves must be worn.<br />
3. Before starting up the machine, check that the electric cable and switch are in optimum<br />
condition.<br />
4. Before carrying out any maintenance work or change of accesories, disconnect the machine<br />
from the mains.<br />
5. Always use the machine´s indicicated accesories because if you don´t, it could lead to risk of<br />
personal injury.<br />
MAINTENANCE<br />
Always carry out any job on the machine with the machine disconnected.<br />
1. Pipe Fastener Support: Check that the teeth of the jaws are in optimum condition; if not, replace<br />
them.<br />
2. Gear Box: Maintenance is not required because it has special grease which is good for life.<br />
3. Brushes: Clean them and check the condition of the slack, changing the brushes when the slack<br />
reaches 2/3 of the total.<br />
4. On switch: Check that the machine switch unblocks automatically when finger pressure is<br />
released, stopping the motor rotation.<br />
Note: For any necessary repairs, contact with our Technical Services.<br />
TECHNICAL CHARACTERISTICS<br />
Threading capacity 1/4 ÷ 2<br />
Motor<br />
1350 W (230 V / 50-60 Hz) or (110 V / 50-60 Hz)<br />
Thread speed<br />
28 rpm<br />
Reverse speed<br />
50 rpm<br />
Weight<br />
8 Kgs.<br />
6
WORKING INSTRUCTIONS<br />
1. Use maker’s threading heads, light series and heavy series.<br />
2. Always use the support; fastening it correctly to avoid the machine from rotating around the pipe (especially<br />
when threading the biggest sizes).<br />
3. Check that the ON switch maintains the motor functioning only when it is pressed; and stops the motor when<br />
it is released.<br />
4. Select the threading direction with the electrical switch.<br />
5. Clockwise direction threading (slow speed): the mechanical switch must be in FOR position and the electrical<br />
switch like in the A indication from point 4.<br />
Clockwise direction unthreading (fast speed): the mechanical switch must be in REV position and the<br />
electrical switch like in the A indication from point 4.<br />
Anti-clockwise direction threading (slow speed): the mechanical switch must be in FOR position and the<br />
electrical switch like in the B indication from point 4.<br />
Anti-clockwise direction unthreading (fast speed): the mechanical switch must be in REV position and the<br />
electrical switch like in the B indication from point 4.<br />
6. Insert the machine on to the pipe and make sure that the support is securely guided into its housing located on<br />
the machine.<br />
7. When starting the threading, push slightly the head against the pipe.<br />
8. As soon as the threading and once the threading length has been achieved stop the motor. Change the position<br />
of the reverse gear and start the motor to begin unscrewing.<br />
9. Use oil abundantly when threading to improve the life and quality of the thread.<br />
1<br />
2<br />
3<br />
4<br />
B<br />
5<br />
6<br />
A<br />
7<br />
8<br />
9<br />
7
NOTES<br />
IMPORTANT!<br />
The maker will not take responsibility for damage or malfunction as a result of the machine<br />
being incorrectly used or, applied for a purpose for which it was not intended.<br />
For ordering spare parts, please refer to the Spare Parts Drawing and note the needed number.<br />
According to Waste Electrical and Electronic Equipment directive (WEEE), these ones must<br />
be collected and arranged separately. If you have to throw them out, please, do not use the usual<br />
rubbish. Please, contact your distributor for free recycling.<br />
GUARANTEE<br />
The maker guarantees to the machine owner 12 months against any manifacture defect.<br />
This guaranteee do not cover the parts wich are consumables.<br />
Note: to apply the guarantee its necesary to send the “GUARANTEE CERTIFICATE” duly filled<br />
within one week after purchased the machine to the maker.<br />
8
FRANÇAIS<br />
INSTRUCTIONS DE SECURITE<br />
Attention! Soyez prudent.<br />
1. N´utilisez pas des vêtements amples Ils pourraient être entrainés dans les parties mobiles de la<br />
machine.<br />
2. Utilisez des gants de travail en caoutchouc, lors de travaux en extérieur.<br />
3. Avant de démarrer la machine, vérifiez le bon état du câble d´alimentation électrique et de<br />
l´interrupteur.<br />
4. Déconnectez la machine du secteur, avant toute intervention d´entretien de la machine ou de<br />
changement d´accesoire.<br />
5. N´utilisez que des accesoires destinés exactement á la machine, afin d´eviter tout risque de<br />
blessure corporelle.<br />
ENTRETIEN<br />
Toujours déconnecter la machine avant d´y entamer un travail d´entretien.<br />
1. Support de fixation de tube : verifiez que la denture des mors soit en parfait état, sinon<br />
remplacez-les.<br />
2. Carter d´engrenages : aucun entretien n´est requis; le carter contient une graisse spéciale<br />
permanente (á vie).<br />
3. Balais : (charbons) nettoyez-les et vérifiez leur état d´usure pério-diquement; ils doivent être<br />
changés lorsque l´usure atteint les 2/3 de leur longueur initiale.<br />
4. Interrupteur de marche : vérifiez que l´interrupteur se relâche automa-tiquement lors du<br />
relâchement de la presión du doight, en arrêtant la rotation du moteur.<br />
Note : pour toute reparation, veullez contacter nos services techniques.<br />
CARACTERISTIQUES TECHIQUES<br />
Capacité de filetage 1/4 ÷ 2<br />
Moteur<br />
1350 W (230 V / 50-60 Hz) ou (110 V / 50-60 Hz)<br />
Vitesse de filetage<br />
28 rpm<br />
Vitesse de recul<br />
50 rpm<br />
Poids<br />
8 Kgs.<br />
10
INSTRUCTIONS D´UTILISATION<br />
1. Utilisez les têtes de filetage du fabricant, serie légère et série lourde.<br />
2. Utilisez toujours le support; le fixer correctemente afin d´eviter que la machine fase une rotation autour du<br />
tube (particulièrement en filetant de gros diamètres).<br />
3. Vérifiez que l´interrupteur de mise en marche ne maintienne le moteur en fonctionnement que lorsqu´il est<br />
enfoncé; et arrête bien le moteur lorsq´il est relâché.<br />
4. Choisissez le sens de rotation du taraud en fonction de l’interrupteur électrique.<br />
5. Taraud à droite (vitesse : lente) : l’interrupteur mécanique doit se trouver en position FOR et l’interrupteur<br />
électrique comme l’indication A de la section 4.<br />
Oter le taraud à droite (vitesse rapide) : l’interrupteur mécanique doit se trouver en position REV et<br />
l’interrupteur électrique comme l’indication A de la section 4.<br />
Taraud à gauche (vitesse : lente) : l’interrupteur mécanique doit se trouver en position FOR et l’interrupteur<br />
électrique comme l’indication B de la section 4.<br />
Oter le taraud à gauche (vitesse : rapide) : l’interrupteur mécanique doit se trouver en position REV et<br />
l’interrupteur électrique comme l’indication B de la section 4.<br />
6. Insérez la machine sur le tube à fileter et assurez-vous que le support est fermement maintenu dans son<br />
emplacement situé sur la machine.<br />
7. Dès que le filetage a comencé, pressez légèremente la tête de filetage contre le tube.<br />
8. Ne changez pas de vitesse pendant le filetage et, dès que le travail de filetage est terminé, arrêtez le moteur.<br />
Changez la position du levier d´inversion du sens de rotation et démarrez le moteur pour commencer le dévissage.<br />
9. Pendant le filetage, utilisez l´huile en abondance, afin d´améliorer la durée de vie et la qualité du filet.<br />
1<br />
2<br />
3<br />
4<br />
B<br />
5<br />
6<br />
A<br />
7<br />
8<br />
9<br />
11
NOTES<br />
IMPORTANT!<br />
Le fabricant ne se responsabilise pas des détériorations ou du mauvais fonctionnement de la<br />
machine dans le cas d’une mauvaise utilisation ou suite á des usages pour lesquels elle n’est pas<br />
concue.<br />
Pour commander les pièces de rechange, regarder le descriptif et le numéro de pièce désiré.<br />
Selon la directive des déchets d’appareils électriques et électroniques (DEEE), ces derniers<br />
devront se ramasser et suivre un traitement séparé. Si dans l’l’avenir vous devez vous débarrasser<br />
de ce produit, ne le faites pas avec le reste d’ordures ménagères. Merci de vous adresser à votre<br />
distributeur pour procéder à son recyclage gratuit si possible<br />
GARANTIE<br />
Le fabricant donne une garantie de 12 mois à l’acquéreur de cette machine, pour les pièces avec<br />
un défaut de fabrication.<br />
La garantie ne s’applique pas aux pièces d’usure normale.<br />
Note : pour obtenir la validité de la garantie, il est obligatoire de compléter et de retourner<br />
au fabricant, le document ‘’CERTIFICAT DE GARANTIE’’ dans les 7 jours d’acquisition de la<br />
machine.<br />
12
14<br />
DESPIECE / SPARE PARTS DRAWING / DEPEÇAGE<br />
POS.<br />
COD.<br />
1<br />
2<br />
3<br />
4<br />
5<br />
6<br />
8<br />
9<br />
10<br />
86139<br />
86140<br />
86141<br />
86142<br />
86143<br />
86144<br />
86146<br />
86147<br />
86148<br />
POS.<br />
COD.<br />
1<br />
2<br />
3<br />
4<br />
5<br />
6<br />
86149<br />
86150<br />
86151<br />
86152<br />
86153<br />
86154<br />
POS.<br />
COD.<br />
1<br />
2<br />
3<br />
4<br />
5<br />
6<br />
7<br />
8<br />
9<br />
10<br />
11<br />
12<br />
13<br />
86098<br />
86099<br />
86100<br />
86101<br />
86102<br />
86103<br />
86104<br />
86105<br />
86106<br />
86107<br />
86108<br />
86109<br />
86110<br />
14<br />
15<br />
16<br />
17<br />
18<br />
19<br />
20<br />
21<br />
22<br />
23<br />
24<br />
25<br />
26<br />
27<br />
28<br />
29<br />
30<br />
31<br />
32<br />
33<br />
34<br />
35<br />
36<br />
37<br />
38<br />
39<br />
40<br />
41<br />
41<br />
86111<br />
86112<br />
86113<br />
86114<br />
86115<br />
86116<br />
86117<br />
86118<br />
86119<br />
86120<br />
86121<br />
86122<br />
86123<br />
86124<br />
86125<br />
86126<br />
86127<br />
86128<br />
86129<br />
86130<br />
86131<br />
86132<br />
86133<br />
86134<br />
86135<br />
86136<br />
86137<br />
86138-230V<br />
86145-110V
15<br />
MOTOR / MOTEUR<br />
POS.<br />
1<br />
2<br />
3<br />
4<br />
5<br />
6<br />
7<br />
7<br />
8<br />
8<br />
9<br />
10<br />
11<br />
12<br />
13<br />
14<br />
15<br />
16<br />
17<br />
COD.<br />
81972<br />
81973<br />
81974<br />
81975<br />
81976<br />
81977<br />
81682-220V<br />
81793-110V<br />
81683-220V<br />
81794-110V<br />
81978<br />
81979<br />
81980<br />
81642<br />
81981<br />
81982<br />
81983<br />
81984<br />
81985<br />
POS.<br />
18<br />
19<br />
20<br />
21<br />
22<br />
23<br />
24<br />
25<br />
26<br />
27<br />
28<br />
29<br />
30<br />
31<br />
32<br />
33<br />
34<br />
35<br />
36<br />
COD.<br />
81986<br />
81987<br />
81988<br />
81770<br />
81640<br />
81989<br />
81990<br />
81991<br />
81992<br />
81993<br />
81994<br />
81995<br />
81996<br />
81815<br />
81997<br />
81813<br />
81814<br />
81998<br />
81999
CERTIFICADO DE GARANTIA<br />
GUARANTEE CERTIFICATE<br />
CERTIFICAT DE GARANTIE<br />
ARTICULO / ITEM / ARTICLE:....................................................................................................................................<br />
Nº DE SERIE / SERIE Nº / Nº SERIE:...........................................................................................................................<br />
DISTRIBUIDOR / DISTRIBUTOR / DISTRIBUTEUR:...................................................................................................<br />
PAIS / COUNTRY / PAYS:.............................................................................................TEL.:....................................<br />
FECHA DE VENTA / SALE DATE / DATE VENTE:.......................................................................................................<br />
NOMBRE DEL COMPRADOR / BUYER NAME / NOM DE L’ACHETEUR:.................................................................<br />
TEL. COMPRADOR / BUYER TEL. / TEL. DE L’ACHETEUR:.......................................................................................<br />
EGA MASTER GARANTIZA AL COMPRADOR DE ESTA MAQUINA LA GARANTIA TOTAL (DURANTE 12 MESES), DE LAS PIEZAS CON DEFECTOS DE FABRICACION. ESTA GARANTIA<br />
NO CUBRE AQUELLAS PIEZAS QUE POR SU USO NORMAL TIENEN UN DESGASTE. PARA OBTENER LA VALIDEZ DE LA GARANTIA , ES ABSOLUTAMENTE IMPRESCINDIBLE QUE<br />
COMPLETE Y REMITA ESTE DOCUMENTO A EGA MASTER , DENTRO DE LOS SIETE DIAS A PARTIR DE LA FECHA DE COMPRA.<br />
EGA MASTER GUARANTEES TO THE BUYER OF THIS MACHINE THE TOTAL WARRANTY (DURING 12 MONTHS), OF THE PIECES WITH MANUFACTURING FAULTS.<br />
THIS GUARANTEE DOES NOT COVER THOSE PIECES WORN OUT DUE TO A NORMAL USE. IN ORDER TO OBTAIN THE VALIDITY OF THIS WARRANTY , IT IS ABSOLUTELY<br />
NECESSARY TO FULFILL THIS DOCUMENT AND RESEND IT TO EGA MASTER WITHIN 7 DAYS FROM SALE DATE.<br />
EGA MASTER GARANTIE A L’ACHETEUR DE CETTE MACHINE LA GARANTIE TOTALE (PENDANT 12 MOIS) DES PIECES AVEC DEFAUTS DE FABRICATION. CETTE GARANTIE NE<br />
COUVRE PAS LES PIECES QUE PAR UN USAGE NORMAL, SOIENT DETERIOREES. POUR OBTENIR LA VALIDITE DE LA GARANTIE, IL EST ABSOLUMENT IMPERATIF COMPLETER ET<br />
ENVOYER CE DOCUMENT EGA MASTER, DANS UN DELAI DE 7 JOURS A PARTIR DE LA DATE D’ACHAT.<br />
SELLO / STAMP / CACHET<br />
EJEMPLAR PARA EGA MASTER / COPY FOR EGA MASTER / EXEMPLAIRE POUR EGA MASTER<br />
CERTIFICADO DE GARANTIA<br />
GUARANTEE CERTIFICATE<br />
CERTIFICAT DE GARANTIE<br />
ARTICULO / ITEM / ARTICLE:....................................................................................................................................<br />
Nº DE SERIE / SERIE Nº / Nº SERIE:...........................................................................................................................<br />
DISTRIBUIDOR / DISTRIBUTOR / DISTRIBUTEUR:...................................................................................................<br />
PAIS / COUNTRY / PAYS:.............................................................................................TEL.:....................................<br />
FECHA DE VENTA / SALE DATE / DATE VENTE:.......................................................................................................<br />
NOMBRE DEL COMPRADOR / BUYER NAME / NOM DE L’ACHETEUR:.................................................................<br />
TEL. COMPRADOR / BUYER TEL. / TEL. DE L’ACHETEUR:.......................................................................................<br />
EGA MASTER GARANTIZA AL COMPRADOR DE ESTA MAQUINA LA GARANTIA TOTAL (DURANTE 12 MESES), DE LAS PIEZAS CON DEFECTOS DE FABRICACION. ESTA GARANTIA<br />
NO CUBRE AQUELLAS PIEZAS QUE POR SU USO NORMAL TIENEN UN DESGASTE. PARA OBTENER LA VALIDEZ DE LA GARANTIA , ES ABSOLUTAMENTE IMPRESCINDIBLE QUE<br />
COMPLETE Y REMITA ESTE DOCUMENTO A EGA MASTER , DENTRO DE LOS SIETE DIAS A PARTIR DE LA FECHA DE COMPRA.<br />
EGA MASTER GUARANTEES TO THE BUYER OF THIS MACHINE THE TOTAL WARRANTY (DURING 12 MONTHS), OF THE PIECES WITH MANUFACTURING FAULTS.<br />
THIS GUARANTEE DOES NOT COVER THOSE PIECES WORN OUT DUE TO A NORMAL USE. IN ORDER TO OBTAIN THE VALIDITY OF THIS WARRANTY , IT IS ABSOLUTELY<br />
NECESSARY TO FULFILL THIS DOCUMENT AND RESEND IT TO EGA MASTER WITHIN 7 DAYS FROM SALE DATE.<br />
EGA MASTER GARANTIE A L’ACHETEUR DE CETTE MACHINE LA GARANTIE TOTALE (PENDANT 12 MOIS) DES PIECES AVEC DEFAUTS DE FABRICATION. CETTE GARANTIE NE<br />
COUVRE PAS LES PIECES QUE PAR UN USAGE NORMAL, SOIENT DETERIOREES. POUR OBTENIR LA VALIDITE DE LA GARANTIE, IL EST ABSOLUMENT IMPERATIF COMPLETER ET<br />
ENVOYER CE DOCUMENT EGA MASTER, DANS UN DELAI DE 7 JOURS A PARTIR DE LA DATE D’ACHAT.<br />
SELLO / STAMP / CACHET<br />
EJEMPLAR PARA EL CLIENTE / COPY FOR THE CUSTOMER / EXEMPLAIRE POUR LE CLIENT
C/ ZORROLLETA 11, POL. IND. JUNDIZ<br />
01015 VITORIA, SPAIN P.O.B. APTDO. 5005<br />
TEL. 34 - 945 290 001 FAX. 34 - 945 290 141<br />
master@egamaster.com<br />
www.egamaster.com


