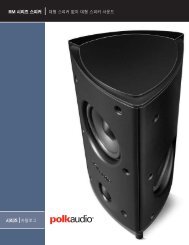
MMC5250 MM6 6.5" System - Polk Audio
MMC5250 MM6 6.5" System - Polk Audio
MMC5250 MM6 6.5" System - Polk Audio

Create successful ePaper yourself
Turn your PDF publications into a flip-book with our unique Google optimized e-Paper software.
O W N E R ’ S M A N U A L<br />
MMC6500 6.5" <strong>System</strong><br />
Système 6,5" MMC6500<br />
<strong>MMC5250</strong> 5.25" <strong>System</strong><br />
Système 5,25" <strong>MMC5250</strong><br />
<strong>MM6</strong> 6.5" <strong>System</strong><br />
Système 6,5" <strong>MM6</strong>
Attach your receipt here and file for<br />
future reference. It maybe required<br />
for warranty service.<br />
Attachez votre facture ici pour référence<br />
future—elle pourrait être requise lors<br />
de service sous garantie.<br />
X<br />
2 POLK/MOMO: CHAMPIONSHIP PERFORMANCE
A Word From Matthew <strong>Polk</strong><br />
Dear Music Lover,<br />
You have just entered a new realm of car<br />
audio! I am extremely excited about these<br />
<strong>Polk</strong> <strong>Audio</strong>/MOMO high performance speakers;<br />
this is the first time that the exclusive<br />
MOMO Design house of Italy has co-branded<br />
a product. We’ve partnered with them to produce<br />
the best sounding, best looking car speakers<br />
ever. They are going to make your car<br />
look and sound great.<br />
They may not look like any other <strong>Polk</strong> <strong>Audio</strong><br />
speaker, but make no mistake: They contain<br />
the latest loudspeaker technology and many<br />
of our exclusive sound innovations, like<br />
Dynamic Balance ® for clean sound and low<br />
distortion. You can be assured of outstanding<br />
performance and unmatched quality, as<br />
well as an exciting new look.<br />
Please take a moment to read through this<br />
manual. It will help you get the greatest<br />
possible enjoyment from these fine instruments.<br />
If you have questions, or would like<br />
more information on building the car audio<br />
system of your dreams, don’t hesitate to<br />
call our Customer Service Department at<br />
800-377-7655 from 9am to 6pm Eastern<br />
Standard Time, Monday through Friday.<br />
Un message de Matthew <strong>Polk</strong><br />
Cher audiophile,<br />
Bienvenue dans une toute nouvelle dimension de<br />
l’audio pour automobile. Je suis absolument ravi<br />
par les nouveaux haut-parleurs <strong>Polk</strong>/MOMO. C’est<br />
la première fois que la maison italienne de design<br />
MOMO consent à cogriffer un produit. MOMO a<br />
travaillé étroitement avec <strong>Polk</strong> <strong>Audio</strong> pour créer de<br />
superbes haut-parleurs pour automobile combinant<br />
ultra-haute performance et design incomparable.<br />
Ils ne ressemblent peut-être pas aux haut-parleurs<br />
<strong>Polk</strong> conventionnels mais sachez bien qu’ils sont<br />
dotés des toutes dernières technologies audioacoustiques<br />
et de plusieurs innovations exclusives<br />
à <strong>Polk</strong>, comme Dynamic Balance ® qui leur confère<br />
fidélité et précision incomparables.<br />
Prenez le temps de lire ce manuel. Il vous permettra<br />
de profiter au maximum de ces superbes instruments.<br />
Si vous avez des questions ou si vous<br />
désirez créer le système audio automobile de vos<br />
rêves, n’hésitez pas à communiquer avec notre<br />
Service à la Clientèle au 800-377-7655 de<br />
9h00 à 18h00 HE du lundi au vendredi.<br />
Grazie!<br />
POLK AUDIO / MOMO DESIGN 3
The Story of Dynamic Balance ®<br />
Your new <strong>Polk</strong> speakers employ Dynamic Balance ® , a technology<br />
that came out of a joint research project between<br />
<strong>Polk</strong> <strong>Audio</strong> and Johns Hopkins University. This laser imaging<br />
research enables us to view the entire vibrating surface of a<br />
driver or tweeter, allowing us to observe the resonances that<br />
develop on speaker cones as they move. These resonances<br />
are the root cause of frequency response distortions.<br />
As an x-ray enables a physician to discover the root cause<br />
of a symptom and thereby prescribe the right treatment<br />
for a cure, this laser imaging technique allows <strong>Polk</strong> engineers<br />
to find the right combination of high-tech materials,<br />
geometry and construction techniques to tune out the<br />
offending resonances. The benefit of Dynamic Balance<br />
is the dramatic improvement in the sound quality of our<br />
speakers, which every listener can appreciate. You no<br />
longer have to choose between excellent bass and smooth,<br />
clear midrange and highs. Now you can have<br />
it all, thanks to Dynamic Balance technology.<br />
L’histoire de Dynamic Balance ®<br />
Votre nouveau haut-parleur <strong>Polk</strong> est doté de la technologie<br />
Dynamic Balance ® , une technologie de pointe issue d’un projet<br />
de recherche conjoint de <strong>Polk</strong> <strong>Audio</strong> et de l’Université<br />
John Hopkins. Ce projet de recherche en imagerie au laser<br />
nous permit de discerner le comportement de toute la surface<br />
vibrante d’un transducteur et de visualiser en temps<br />
réel le dével-oppement des résonances sur leur cône—ces<br />
résonances qui sont la cause fondame-ntale de la distorsion.<br />
Comme le rayon-X permet aux médecins de découvrir la<br />
cause des symptômes et de prescrire les traitements<br />
appropriés, l’imagerie au laser permit aux ingénieurs de<br />
<strong>Polk</strong> <strong>Audio</strong> de visualiser les résonances nuisibles et de déterminer<br />
avec justesse l’équilibre dynamique de matériaux de<br />
haute technologie, de géomét-rie et de techniques de fabrication<br />
qui élimineraient ces résonances. Dynamic Balance<br />
permet une nette amélioration de la qualité sonore de nos<br />
haut-parleurs. Grâce à la technologie Dynamic Balance, les<br />
graves, les médiums et les aigus sont remarquablement<br />
équilibrés. Les audiophiles avertis sauront apprécier<br />
leur fidélité et leur précision incomparables.<br />
Concentric breakup of cone<br />
produces distortion<br />
La perte de cohérence concentrique<br />
du cône génère de la distorsion.<br />
Radial breakup of cone<br />
produces distortion<br />
La perte de cohérence radiale<br />
du cône génère de la distorsion.<br />
<strong>Polk</strong> “Dynamic Balance” design<br />
results in low distortion<br />
La technologie «Dynamic Balance»<br />
de <strong>Polk</strong> réduit la distorsion.<br />
Laser Interferometry tests produced holographic “photos” of drivers in motion. The “bad”<br />
drivers are experiencing modal breakup that results in performance-robbing resonances.<br />
A “perfect” driver would look like a cake (flat on top), more like the photo on the right.<br />
Les tests par interférométrie au laser ont donné des « photos » holographiques des transducteurs en mouvement.<br />
Les «mauvais» transducteurs subissent une perte de cohérence modale qui génère des résonances néfastes.<br />
Un transducteur « parfait » ressemblerait plutôt à un gâteau (plat sur le dessus), comme la photo de droite.<br />
4<br />
POLK/MOMO: CHAMPIONSHIP PERFORMANCE
<strong>Polk</strong> <strong>Audio</strong>—A History of Excellence<br />
Like the way these great new speakers sound in your car?<br />
You’ll love the way <strong>Polk</strong> <strong>Audio</strong> speakers sound in your living<br />
room! <strong>Polk</strong> <strong>Audio</strong> has been making world-class loudspeakers<br />
since 1972. <strong>Polk</strong>’s dedication to fundamental research has<br />
resulted in over 25 patents.<br />
<strong>Polk</strong> loudspeakers have earned the praise of audio experts<br />
the world over, garnering dozens of awards for innovative,<br />
high-quality design. Whether you desire audiophile-quality<br />
sound for your home, car or even your multimedia computer,<br />
<strong>Polk</strong> loudspeakers deliver unmatched performance and value.<br />
See the full line of <strong>Polk</strong> <strong>Audio</strong> loudspeakers at your <strong>Polk</strong><br />
<strong>Audio</strong> dealer, or at www.polkaudio.com<br />
<strong>Polk</strong> <strong>Audio</strong>—Une histoire d’excellence<br />
Si vous aimez ces superbes haut-parleurs <strong>Polk</strong> dans votre<br />
voiture, vous adorerez les enceintes <strong>Polk</strong> dans votre salon!<br />
<strong>Polk</strong> fabrique des haut-parleurs de classe mondiale depuis<br />
1972. Son programme continu de recherche fondamentale<br />
en audio-acoustique lui a permis d’obtenir plus de 55 brevets.<br />
Les haut-parleurs <strong>Polk</strong> se méritent les éloges des experts en<br />
audio de par le monde, récol-tant de nombreux prix pour ses<br />
innovations et sa qualité sonore exceptionnelle. Que vous<br />
désiriez du son de qualité audiophile pour votre domicile,<br />
votre automobile ou votre ordinateur multimédia, <strong>Polk</strong> vous<br />
offre un rapport performance/prix incomparable. Pour découvrir<br />
la ligne complète des haut-parleurs et des ence-intes<br />
<strong>Polk</strong> <strong>Audio</strong>, visitez votre revendeur <strong>Polk</strong> ou visitez notre<br />
site web: www.polkaudio.com.<br />
Product Disposal - Certain international, national and/or local laws and/or regulations may apply regarding<br />
the disposal of this product. For further detailed information, please contact the retailer where you<br />
purchased this product or the <strong>Polk</strong> <strong>Audio</strong> Importer/Distributor in your country. A listing of <strong>Polk</strong> <strong>Audio</strong><br />
Importer/ Distributors can be found on the <strong>Polk</strong> <strong>Audio</strong> website www.polkaudio.com or by contacting<br />
<strong>Polk</strong> <strong>Audio</strong> at 5601 Metro Drive, Baltimore, Maryland 21215, USA— Phone: +1 410 358-3600.<br />
Récupération du produit – Certaines lois ou certains règlements internationaux, nationaux et/ou régionaux<br />
pourraient s’appliquer à la récupération de ce produit. Pour plus d’information, com-muniquez avec le<br />
revendeur de ce produit ou avec l’importateur/ distributeur de ce produit dans votre pays. Vous trouverez<br />
la liste des importateurs/ distributeurs des produits <strong>Polk</strong> <strong>Audio</strong> sur le site www.polkaudio.com ou en communiquant<br />
avec <strong>Polk</strong> <strong>Audio</strong> : 5610 Metro Drive, Baltimore, Maryland 21215, USA – Tél.: +1 410 358-3600.<br />
POLK AUDIO / MOMO DESIGN<br />
5
Getting Started<br />
Please inspect each loudspeaker carefully. Notify your <strong>Polk</strong><br />
dealer if you notice any damaged or missing items. Keep the<br />
carton and packing material. They will do the best job of protecting<br />
your speakers if they need to be transported. Check<br />
that you have the following parts.<br />
Component <strong>System</strong>s Include<br />
• 2 mid/woofers<br />
• 2 tweeters<br />
• 2 crossover networks<br />
• 2 tweeter flush mount cups<br />
• 2 flush mount cup clamps<br />
• 2 tweeter surface mount cups<br />
• 2 grilles<br />
• 8 - #8 screws with 9/16" allen head<br />
• 8 - screw clips<br />
• 2 - #4 Philips head screws<br />
• Tweeter hook-up wire<br />
• Mid/woofer hook-up wire<br />
• Registration card<br />
Guide de démarrage<br />
Inspectez chaque haut-parleur avec soin. Si vous constatez<br />
des dommages ou s’il manque des pièces, contactez votre<br />
revendeur <strong>Polk</strong> <strong>Audio</strong>. Conservez la boîte et l’emballage—<br />
ils assureront la meilleure protection de votre haut-parleur<br />
en cas de transit éventuel. Assurez-vous que toutes les<br />
pièces du système sont contenues dans la boîte.<br />
Le Système de<br />
Composants Comprend<br />
• 2 méd./woofers<br />
• 2 tweeters<br />
• 2 filtres séparateurs de fréquences<br />
• 2 coupelles pour montage encastré du tweeter<br />
• 2 crampons pour les coupelles<br />
de montage encastré<br />
• 2 coupelles pour montage en<br />
surface du tweeter<br />
• 2 grilles<br />
• 8 - vis #8 à tête allen 9/16"<br />
• 8 - agrafes à vis<br />
• 2 - vis #4 à tête Phillips<br />
• Fil de raccord pour les tweeters<br />
• Fil de raccord pour les méd./woofers<br />
• Carte d’enregistrement<br />
6 POLK/MOMO: CHAMPIONSHIP PERFORMANCE
All <strong>Polk</strong> <strong>Audio</strong>/MOMO<br />
Drivers Feature:<br />
• Futuristic cast aluminum baskets that<br />
mimic MOMO wheel designs.<br />
• Elegant matching motor cup conceals<br />
a beefy magnet structure.<br />
• Rugged, highly conductive pro-grade<br />
nickel-plated binding posts.<br />
• Polymer/mica composite cones.<br />
• Aramid fiber spiders for greater<br />
dynamic range.<br />
• 6.5" mid/driver features 1.5" voice coil.<br />
• Woven carbon-fiber dustcaps.<br />
<strong>Polk</strong> <strong>Audio</strong>/MOMO<br />
Tweeters Feature:<br />
• Lightweight fabric dome tweeters for<br />
flat response, great inner detail and<br />
low distortion.<br />
• Neodymium magnets that are small<br />
and powerful.<br />
• Low viscosity ferro-magnetic cooling fluid<br />
for superior power handling.<br />
• Surface and flush-mount swivel cups<br />
allow fine tuning of the tweeter angle<br />
for better soundstaging.<br />
Component <strong>System</strong><br />
Crossovers Feature:<br />
• Nickel plated terminals.<br />
• Air-core inductor for low distortion.<br />
• Mylar capacitors for cleaner, more<br />
transparent highs.<br />
• 3 Level tweeter control to fine-tune<br />
the tonal balance of your system.<br />
• Midrange Extension switch bypasses the<br />
low-pass filter for better driver-to-tweeter<br />
blending when the two components<br />
are separated by a great distance.<br />
• Bi-wirable/biamp input terminals.<br />
Tous les transducteurs <strong>Polk</strong> <strong>Audio</strong>/<br />
MOMO sont munis de:<br />
• Saladiers futuristes en fonte d’aluminium<br />
imitant le design de jantes.<br />
• Cache-aimant apparié abritant une<br />
structure magnétique massive.<br />
• Bornes robustes de type professionnel<br />
plaquées nickel ultra conducteur.<br />
• Cônes en composite polymère/mica.<br />
• Suspension en fibre d’aramide pour<br />
une gamme dynamique étendue.<br />
• Transducteur méd.-graves 6,5"<br />
avec bobine acoustique de 1,5".<br />
• Cache-poussière en fibre de carbone tissé.<br />
Les tweeters <strong>Polk</strong>/MOMO<br />
sont munis de:<br />
• Dômes en tissu ultraléger pour une<br />
réponse uniforme, fidèle et détaillée.<br />
• Aimants Néodyme - petits et puissants.<br />
• Fluide de refroidissement ferromagnétique<br />
à basse viscosité pour une plus grande<br />
capacité de puissance admissible.<br />
• Coupelles pivotantes pour montage encastré<br />
et montage en surface permettant l’orientation<br />
précise des tweeters pour une meilleure<br />
scène sonore.<br />
Les filtres séparateurs du système<br />
de composants sont munis de:<br />
• Bornes plaquées nickel.<br />
• Bobine d’induction à noyau d’air<br />
pour minimiser la distorsion.<br />
• Condensateurs au mylar pour<br />
des aigus précis et transparents.<br />
• Contrôle de tweeter à 3 niveaux pour<br />
peaufiner l’équilibre sonore du système.<br />
• Commutateur dextension des médiums contournant<br />
le filtre passe-bas pour un meilleur<br />
mélange méd./woofer-tweeter lorsque<br />
les composants sont éloignés.<br />
• Bornes d’entrée permettant la<br />
biamplification et le bicâblage.<br />
POLK AUDIO / MOMO DESIGN 7
Read this manual thoroughly first. If you have any doubts<br />
about your ability to execute any of the installation steps,<br />
save yourself a lot of grief and contact a professional<br />
installer (your <strong>Polk</strong> dealer is a good place to find one).<br />
If you intend to do the installation yourself we assume that<br />
you possess some skill in the proper use of hand and power<br />
tools. No matter how much installation experience you have,<br />
it’s always a good idea to:<br />
• Read this manual thoroughly before you begin.<br />
• Plan your installation carefully.<br />
• Allow enough time to complete the<br />
installation without rushing.<br />
• Protect your car from unwanted scratches.<br />
Si après avoir étudié attentivement les instructions contenues<br />
dans ce manuel vous ne croyez pas avoir la compétence nécessaire<br />
pour procéder à l’installation complète de la chaîne,<br />
communiquez avec votre revendeur <strong>Polk</strong> <strong>Audio</strong> ou avec un<br />
installateur professionnel.<br />
Si vous décidez de faire l’installation vous-même, quelles que<br />
soient vos compétences et votre expérience en ce genre<br />
d’installation, il est fortement recommandé de:<br />
• Lire attentivement toutes les pages<br />
de ce manuel avant de débuter.<br />
• Planifier votre installation avec soin.<br />
• Allouer assez de temps pour faire<br />
l’installation sans empressement.<br />
• Protéger votre voiture contre les<br />
égratignures accidentelles.<br />
OUT<br />
IN<br />
0dB<br />
-3dB<br />
-6dB<br />
DUAL<br />
SINGLE<br />
TWEETER LEVEL<br />
INPUT MODE<br />
Figure 1<br />
(Note: Crossover is not weatherproof. Do not install in areas of potential water exposure.)<br />
(Note: Le séparateur n’est pas imperméable. Ne l’installez pas dans un endroit exposé à l’eau.)<br />
8 POLK/MOMO: CHAMPIONSHIP PERFORMANCE
Necessary Tools<br />
• Phillips head screwdriver<br />
• 9/16" allen wrench<br />
• Flat blade screwdriver or door panel removal tool<br />
• Electric drill<br />
• 1/4" and 1/8" drill bits<br />
• Reciprocating saw or razor knife<br />
• Magic marker for marking the cutout (new location only)<br />
• Metal cutting tool (hole saw, if you intend to cut metal<br />
• Metal file<br />
• A supply of solderless connectors<br />
• Safety glasses<br />
• Wire strippers and cutters<br />
• Crimping tool<br />
Installing the Components<br />
The <strong>Polk</strong>/MOMO <strong>System</strong> Crossovers<br />
You will need to make wiring connections from your amp or<br />
radio to the crossovers and from the crossovers to your mid/<br />
woofers and tweeters (Figure 1). Choose crossover box locations<br />
that are convenient for making these connections. As<br />
there are adjustments on and in the crossover networks<br />
which you will need to access during the “fine tuning” stage<br />
of the installation, place them in a spot that’s easy to get to.<br />
Once you’re done fine-tuning the system, the crossovers can<br />
be hidden away and secured. Do not install into doors<br />
due to potential water damage. This is not covered<br />
under Manufacturer’s Warranty.<br />
Your <strong>Polk</strong>/MOMO Series crossovers have clearly marked terminals.<br />
Before making connections between your crossovers,<br />
mid/woofers and tweeters, refer to Figure 1. The wires provided<br />
with your <strong>Polk</strong>/MOMO <strong>System</strong> have one conductor with a<br />
white stripe. Use this wire as the positive (+) lead and connect<br />
it to the positive (+) terminals on your crossovers as well as to<br />
the positive (+) terminals of each speaker.<br />
Outils requis<br />
• Tournevis à tête Phillips<br />
• Clé Allen 9/16"<br />
• Tournevis à lame plate ou outil pour<br />
retirer les panneaux de porte<br />
• Perceuse électrique<br />
• Forets 1/4" et 1/8" (0,125 cm et 0,25 cm)<br />
• Scie alternative ou couteau<br />
• Marqueur pour tracer l’embrasure<br />
(nouvelle installation seulement)<br />
• Outil à couper le métal (scie-cloche—<br />
si vous devez couper du métal)<br />
• Lime pour métal<br />
• Plusieurs connecteurs sans soudure<br />
• Lunettes de sécurité<br />
• Pince à dénuder et à couper le fil<br />
• Pince à sertir<br />
Installation des composants<br />
Les filtres séparateurs<br />
du système <strong>Polk</strong>/MOMO<br />
Vous devrez raccorder votre amplificateur ou radio aux filtres<br />
séparateurs puis raccorder les filtres à vos méd./woofers et<br />
à vos tweeters (Figure 1). Vous devrez aussi régler certains<br />
contrôles situés sur et dans les séparateurs alors placez-les<br />
temporairement à un endroit où ils seront facilement accessibles.<br />
Une foisle réglage final du système terminé, les séparateurs<br />
pourront être dissimulés et fixés solidement. Ne les<br />
installez pas dans les portes où ils pourraient être endommagés<br />
par de l’eau. Ce type de dommage n’est pas<br />
couvert par la garantie du fabricant.<br />
Les bornes des séparateurs <strong>Polk</strong>/MOMO sont bien identifiées.<br />
Avant de raccorder vos séparateurs aux méd./woofers et aux<br />
tweeters, consultez la figure 1. Un des conducteurs des fils<br />
fournis avec votre Système <strong>Polk</strong>/MOMO est identifié avec une<br />
rayure blanche. Utilisez ce fil comme conducteur positif (+) et<br />
connectez-le aux bornes positives (+) de vos séparateurs et<br />
aux bornes positives (+) de vos haut-parleurs.<br />
POLK AUDIO / MOMO DESIGN 9
Installing the <strong>Polk</strong>/MOMO <strong>System</strong><br />
Mid/Woofers in Factory Locations<br />
Most cars have speaker grilles that blend with the rest of<br />
the car’s interior. Sometimes it is difficult to determine how<br />
to remove these grilles to gain access to the speaker that<br />
you intend to replace. If you have one of these grilles, you<br />
may want to consider using a professional installer. On<br />
some cars, the grilles are held by screws or spring clips.<br />
The screws will be obvious, the spring clips won’t.<br />
If there are screws, remove them, put them in a safe spot, and<br />
remove the grilles. To remove a clip-on grille, use your flatblade<br />
screwdriver to gently pry up the grille. If it resists, back<br />
off and think again about the professional install. The cost of<br />
one of these can sometimes be less than the cost of new door<br />
panels. Some grilles are integral parts of the door panel and<br />
are not removable. In these cases you will need to remove<br />
the entire door panel to gain access to the speaker location.<br />
This will usually require removal of door handles, window mechanisms,<br />
and other parts such as door pulls and lock buttons.<br />
1. Once you get the grille off, remove the factory speakers.<br />
Save the hardware. You may be able to reuse it to mount<br />
your new speaker.<br />
2. Cut the supplied driver wire (the heavier gauge of the two<br />
sets of wire) in half.<br />
3. Remove the yellow crossover cover by squeezing the cover<br />
at the tabs. Attach speaker wires to the crossover “woofer”<br />
terminals. Attach the wire with the white stripe to the<br />
positive (+) terminal screw, and the un-striped wire to the<br />
negative (-) terminal screw.<br />
4. Route the driver wire from the crossover location through<br />
grommets to the mid/woofer location.<br />
5. Strip 1/8" – 1/4" (4-6 mm) of plastic insulation from the cut<br />
ends of the driver wire.<br />
6. Unscrew the binding post thumbnuts on the mid/woofers to<br />
fully expose the hole in the terminal shaft and slip the other<br />
end of the wire into the holes in the input terminals. Tighten<br />
the thumbnuts finger-tight (do not over-tighten the nuts as<br />
you may strip the threads). Be sure to attach the wire with<br />
the white stripe to the positive (red) terminal, and the<br />
un-striped wire to the negative (black) terminal.<br />
7. If the factory speaker had three screw holes, you’ll need to<br />
drill additional screw holes to accommodate the four screw<br />
pattern of the <strong>Polk</strong>/MOMO mid/woofer.<br />
8. Using the hardware retained from the factory speaker or the<br />
screw clips supplied with the <strong>Polk</strong>/MOMO speaker, secure<br />
your new speaker to the car panel.<br />
Installation du Transducteur de Méd.-Graves<br />
<strong>Polk</strong>/MOMO Sous une Grille d’Origine<br />
La plupart des voitures sont munies de grilles appariées à<br />
leur intérieur. Il est parfois difficile de savoir comment retirer<br />
ces grilles pour avoir accès au haut-parleur que l’on veut remplacer.<br />
Si votre voiture est munie d’une de ces grilles, vous<br />
devriez peut-être consulter un installateur professionnel.<br />
Ces grilles sont parfois retenues par des vis ou des agrafes<br />
à ressort. Les vis sont apparentes, les agrafes ne le sont pas.<br />
Si la grille est retenue par des vis, retirez-les, mettez-les de<br />
côté puis retirez la grille. Si la grille est retenue par des agrafes<br />
à ressort, utilisez un tournevis à tête plate et dégagez délicatement<br />
la grille avec un mouvement de levier. Si elle ne<br />
se dégage pas, consulter un installateur professionnel—ça<br />
pourrait vous coûter moins cher que de remplacer un panneau<br />
de porte.<br />
Certaines grilles font partie intégrale du panneau de porte et<br />
ne sont pas amovibles; dans un tel cas, vous devez retirer le<br />
panneau de porte pour accéder au haut-parleur—et cela vous<br />
oblige normalement à retirer les poignées de porte, les mécanismes<br />
de fenêtre et autres pièces comme les boutons de<br />
serrure et les manettes de porte.<br />
1. Après avoir retiré la grille, retirez le haut-parleur d’origine.<br />
Conservez la quincaillerie. Vous devrez peut-être l’utiliser<br />
pour installer votre nouveau haut-parleur.<br />
2. Coupez le fil de h.p. fourni (le fil ayant le plus gros<br />
calibre) en deux.<br />
3. Retirez le couvercle jaune du séparateur en comprimant les<br />
languettes. Connectez le fil de h.p. aux bornes «woofer» du<br />
séparateur—le conducteur rayé blanc à la borne à vis<br />
positive (+) et l’autre conducteur à la borne à vis négative (-).<br />
4. Passez le fil de haut-parleur à partir du séparateur, à travers<br />
les rondelles isolantes jusqu’à l’emplacement du méd./woofer.<br />
5. Dénudez 1/8" - 1/4" (4-6 mm) d’isolation de plastique<br />
des bouts du fil de h.p.<br />
6. Dévissez les écrous des bornes des méd./woofers pour<br />
exposer les trous dans la tige des bornes puis insérez les<br />
fils dans les trous. Resserrez les écrous avec les doigts<br />
(mais pas trop pour éviter d’écraser le filetage). Assurezvous<br />
d’insérer le conducteur rayé blanc dans la borne<br />
positive (rouge) et l’autre conducteur dans la borne<br />
négative (noire).<br />
7. Si le haut-parleur d’origine n’a que trois trous de vis, vous<br />
devrez percer d’autres trous pour accommoder les quatre<br />
trous du transducteur <strong>Polk</strong>/MOMO.<br />
8. Utilisant la quincaillerie du haut-parleur d'origine ou les<br />
agrafes à vis fournies avec votre transducteur <strong>Polk</strong>/MOMO,<br />
fixez le nouveau haut-parleur au panneau de la voiture.<br />
10 POLK/MOMO: CHAMPIONSHIP PERFORMANCE
Installing the Mid/Woofers<br />
in Non-Factory Locations<br />
If you have decided to install your <strong>Polk</strong>/MOMO Series<br />
mid/woofers in locations other than those provided by the<br />
automobile manufacturer, make certain that the location<br />
you choose is clear of all obstructions, both in front of and<br />
behind the panel, before you proceed. Pay particular attention<br />
to window mechanisms and any body panels critical to<br />
the structural integrity of the vehicle. The mounting depths<br />
and cutout diameters of your <strong>Polk</strong>/MOMO Series mid/<br />
woofers are listed with all the other important specifications<br />
at the end of this manual.<br />
1. Cut a hole in the panel (5-7/8 inch or 148 mm<br />
hole for the <strong>MM6</strong>).<br />
2. Use the speaker grille as a template for marking<br />
the locations of the four screw holes.<br />
3. Drill the holes with a 1/8" bit.<br />
4. Attach the screw clips to the car panel at the hole locations.<br />
5. Cut the supplied driver wire (the heavier gauge of the two<br />
sets of wire) in half.<br />
6. Remove the yellow crossover cover by squeezing the cover<br />
at the tabs. Attach speaker wires to the crossover “woofer”<br />
terminals. Attach the wire with the white stripe to the<br />
positive (+) terminal screw, and the un-striped wire to the<br />
negative (-) terminal screw.<br />
7. Route the driver wire from the crossover location<br />
through grommets to the mid/woofer location.<br />
8. Strip 1/8" – 1/4" (4-6 mm) of plastic insulation<br />
from the cut ends of the driver wire.<br />
9. Unscrew the binding post thumbnuts on the mid/woofers to<br />
fully expose the hole in the terminal shaft and slip the other<br />
end of the wire into the holes in the input terminals. Tighten<br />
the thumb nuts finger-tight (do not over-tighten the nuts as<br />
you may strip the threads). Be sure to attach the wire with<br />
the white stripe to the positive (red) terminal, and the<br />
un-striped wire to the negative (black) terminal.<br />
10.Place the grille over the driver and line up the screw holes<br />
with the screw clips on the car panel.<br />
11.Secure the speaker/grille assembly to the car panel with<br />
the supplied Allen head screws.<br />
Installation des Méd./Woofers<br />
Ailleurs qu’aux Endroits d’Origine<br />
Si vous avez choisi d’installer vos méd./woofers ailleurs qu’aux<br />
endroits d’origine du fabricant de l’automobile, assurez-vous<br />
que ces endroits sont libres d’obstructions, autant en avant<br />
qu'en arrière du panneau, avant de procéder. Portez une attention<br />
particulière au mécanisme des fenêtres et à tout panneau<br />
de carrosserie essentiel à l’intégrité structurelle de la voiture.<br />
Les profondeurs de montage et les diamètres d’embrasure des<br />
méd./woofers <strong>Polk</strong>/MOMO, de même que toutes leurs spécifications<br />
importantes, sont inscrits dans la fiche technique<br />
présentée à la fin de ce manuel.<br />
1. Pratiquez une embrasure dans le panneau<br />
(5 7/8 po/148 mm pour le <strong>MM6</strong>).<br />
2. Utilisez la grille comme gabarit pour marquer<br />
l’endroit des quatre trous pour les vis.<br />
3. Percez les trous à l’aide d’une perceuse<br />
avec foret de 1/8".<br />
4. Fixez les agrafes à vis au panneau à l’endroit des trous.<br />
5. Coupez le fil de h.p. (le fil ayant le<br />
plus gros calibre) en deux.<br />
6. Retirez le couvercle jaune du séparateur en comprimant<br />
les languettes. Connectez le fil de h.p. aux bornes<br />
«woofer» du séparateur—le conducteur rayé blanc à<br />
la borne à vis positive (+) et l’autre conducteur à la<br />
borne à vis négative (-).<br />
7. Passez le fil de haut-parleur à partir du séparateur, à<br />
travers les rondelles isolantes jusqu’à l’emplacement<br />
du méd./woofer.<br />
8. Dénudez 1/8"-1/4" (4-6 mm) d’isolation de<br />
plastique des bouts du fil de h.p.<br />
9. Dévissez les écrous des bornes des méd./woofers pour exposer<br />
les trous dans la tige des bornes puis insérez les fils<br />
dans les trous. Resserrez les écrous avec les doigts (mais<br />
pas trop pour éviter d’écraser le filetage). Assurez-vous<br />
d’insérer le conducteur rayé blanc dans la borne positive<br />
(rouge) et l’autre conducteur dans la borne négative (noire).<br />
10. Placez la grille au dessus du transducteur et alignez les<br />
trous de vis avec les agrafes à vis fixées au panneau.<br />
11. Fixez l’ensemble transducteur/grille au panneau de la<br />
voiture à l’aide des vis à tête Allen.<br />
POLK AUDIO / MOMO DESIGN 11
<strong>Polk</strong>/MOMO <strong>System</strong> Tweeters<br />
One important advantage of component systems is their ability,<br />
when properly installed, to improve the soundstage created<br />
by the music in your car. The soundstage is the musical<br />
“picture” made up of the instruments and vocalists. The difference<br />
in the soundstage will be dramatic depending on<br />
where you mount your tweeters. We recommend a simple<br />
experiment that will help you decide the best spot for your<br />
tweeters in your car. Here are the steps:<br />
1. Complete the installation of your entire system except for<br />
the MM tweeters.<br />
2. Connect the wires provided with your tweeters to the<br />
tweeter terminals on your <strong>Polk</strong>/MOMO crossovers. (See<br />
detailed instructions below.)<br />
3. Without running the wires through doors or under<br />
upholstered panels, connect your <strong>Polk</strong>/MOMO tweeters<br />
to these wires. (See detailed instructions below.)<br />
4. Have a friend sit in the passenger’s seat while you sit in the<br />
driver’s seat, each holding a tweeter in hand, or use double<br />
stick tape.<br />
5. With music playing, position the tweeters in different<br />
locations around the passenger compartment, listening for<br />
the differences caused from these placements. We recom<br />
mend using vocals for this test. You will be able to deter<br />
mine in a short time the best location for your tweeters.<br />
The soundstage or image should “float” above the dash<br />
and not be localized to the physical location of the drivers<br />
or tweeters. Both passenger and driver should be able to<br />
hear both channels and a stereo image.<br />
Tweeters des Systèmes <strong>Polk</strong>/MOMO<br />
Lorsqu’un système de composants est bien installé, il peut<br />
améliorer sensiblement la scène sonore musicale dans votre<br />
voiture. La scène sonore est «l’image» musicale composée<br />
des instruments et des voix. Le réalisme de la scène sonore<br />
peut être d’un réalisme étonnant lorsque les tweeters sont<br />
bien placés. Pour vous aider à déterminer les meilleurs endroits<br />
pour installer vos tweeters, suivez ces simples étapes:<br />
1. Procédez à l’installation complète de votre système<br />
mais sans monter les tweeters MM.<br />
2. Connectez les fils fournis avec les tweeters aux bornes<br />
«tweeter» des séparateurs <strong>Polk</strong>/MOMO (voir instructions<br />
détaillées ci-dessous).<br />
3. Sans passer les fils à travers les portes ou sous les<br />
panneaux, connectez ces fils à vos tweeters (voir<br />
instructions détaillées ci-dessous).<br />
4. Demandez à un copain de s’asseoir dans le siège du<br />
passager tandis que vous êtes assis dans le siège du<br />
conducteur. Tenez chacun un des tweeters. Vous<br />
pouvez aussi utiliser du ruban adhésif.<br />
5. Faites jouer de la musique, préférablement avec des voix,<br />
et placez les tweeters à différents endroits dans l’habitacle.<br />
Écoutez la différence de son causé par les changements de<br />
position des tweeters. Vous pourrez rapidement déterminer<br />
les meilleures emplacements pour les tweeters. La scène<br />
sonore, ou l’image, devrait «flotter» au dessus du tableau<br />
de bord sans sembler provenir précisément des tweeters<br />
ou des méd./woofers. Le conducteur et le passager devraient<br />
bien entendre les deux canaux et bien percevoir<br />
l’image stéréophonique.<br />
12 POLK/MOMO: CHAMPIONSHIP PERFORMANCE
The <strong>Polk</strong> MM tweeter offers two mounting<br />
options for installation flexibility.<br />
Mounting Option #1—Surface mounting<br />
the MM Tweeter<br />
1. Using the base of the surface mount cup as a template,<br />
mark the screw hole and drill it using a 1/8 inch drill bit.<br />
Mark the wire holes (for the tweeter wires), drill using<br />
the 1/4-inch drill bit.<br />
2. Attach the surface mount cup to the panel<br />
using supplied #4 screw.<br />
3. Cut the supplied tweeter wire (the lighter gauge wire) in half.<br />
4. Strip 1/8-1/4" (4-6 mm) of plastic insulation from the cut<br />
ends of the tweeter wire. Connect this end of the wire to<br />
the tweeter terminals of the crossover. Connect the whitestriped<br />
wire strand to the positive (+) terminal of the<br />
crossover tweeter output and the un-striped wire to<br />
the negative (-) tweeter terminal.<br />
5. Route the tweeter wire from the crossover through grommets<br />
to the tweeter location. Push the red and black<br />
tweeter wires through the holes in the bottom of the<br />
tweeter cup and though the panel.<br />
6. Slip the male fast-on connector on the red tweeter wire<br />
onto the female connector on the white-striped wire from<br />
the crossover and the black tweeter wire to the un-striped<br />
wire (Figure 2). Make sure the clear plastic insulators fully<br />
cover the fast-on connectors otherwise you may short the<br />
tweeter leads and possibly damage your amplifier.<br />
7. Mount the tweeters by gently pushing them into the<br />
surface mount cup. Be careful not to pinch the wires.<br />
8. Once the tweeter is mounted and connected, swivel the<br />
tweeter to fine-tune the soundstage image of the system.<br />
Le tweeter <strong>Polk</strong> MM permet deux options pratiques<br />
de montage.<br />
Option de montage #1—Montage en<br />
surface du tweeter MM<br />
1. Utilisant la base de la coupelle de montage en surface<br />
comme gabarit, marquez les trous de vis puis percez les<br />
trous à l’aide d’une perceuse avec foret 1/8 po.<br />
2. Fixez la coupelle de montage en surface à l’aide<br />
des vis #4 fournies.<br />
3. Coupez le fil de tweeter (le fil de moindre calibre) en deux.<br />
4. Dénudez 1/8-1/4" (4-6 mm) d’isolation de plastique des<br />
bouts du fil de tweeter. Connectez le conducteur rayé blanc<br />
à la borne positive (+) de la sortie tweeter du séparateur et<br />
l’autre conducteur à la borne négative (-) de la sortie<br />
tweeter du séparateur.<br />
5. Passez le fil du tweeter à partir du séparateur, à travers les<br />
rondelles isolantes, jusqu’à l’emplacement du tweeter. Passez<br />
les fils noir et rouge de tweeter à travers le trou situé<br />
à la base de la coupelle et à travers le panneau.<br />
6. Accouplez le connecteur mâle du fil rouge du tweeter avec<br />
le connecteur femelle du fil rayé blanc provenant du séparateur—et<br />
le connecteur mâle du fil noir du tweeter avec le<br />
connecteur femelle du fil non rayé (Figure 2). Assurez-vous<br />
que l’isolation de plastique transparent recouvre complètement<br />
les connecteurs pour éviter les risques de court-circuit<br />
et d’endommagement de votre amplificateur.<br />
7. Montez les tweeters en les poussant délicatement dans la<br />
coupelle de montage en surface. Assurez-vous de ne pas<br />
coincer les fils.<br />
8. Une fois le tweeter monté et connecté, pivotez-le pour<br />
bien positionner la scène sonore du système.<br />
Mounting Option #2—Flush mounting<br />
the MM Tweeter<br />
1. Remove the panel on which you are<br />
going to mount the tweeter and check<br />
for proper clearance behind it. The<br />
flush mount kit is 1-3/16 inch deep.<br />
Measure to make sure there is sufficient<br />
depth behind the spot you<br />
choose the final location.<br />
2. Use the hole that is punched into the<br />
cardboard packing insert as a template<br />
to mark the location and size of the<br />
mounting hole.<br />
Option de montage #2 —Montage<br />
encastré du Tweeter MM<br />
1. Retirez le panneau sur lequel vous désirez<br />
monter le tweeter et évaluez le dégage<br />
ment disponible. Le tweeter encastré a<br />
une profondeur de 1 3/16 po. Mesurez<br />
bien la profondeur de l'espace disponible<br />
derrière l’endroit choisi pour le montage.<br />
2. Utilisez le trou perforé dans la boîte de<br />
carton comme gabarit pour marquer<br />
l’emplacement et la grandeur de<br />
l’embrasure nécessaire au montage.<br />
3. Marquez le centre du cercle et pratiquez<br />
une embrasure avec une perceuse avec<br />
scie-cloche de 2 3/16 po. Procédez lente<br />
ment. Vous pouvez utiliser un couteau<br />
au lieu d’une perceuse.<br />
Figure 2<br />
POLK AUDIO / MOMO DESIGN<br />
13
3. Mark the center of the spot and cut a hole with the<br />
2-3/16-inch hole-saw attachment for your power drill.<br />
Go slow. Or you can use a razor knife instead of a drill.<br />
4. Cut the supplied tweeter wire (the lighter gauge wire)<br />
in half.<br />
5. Strip 1/8" – 1/4" (4-6 mm) of plastic insulation from the<br />
cut ends of the tweeter wire. Connect this end of the wire<br />
to the tweeter terminals of the crossover. Connect the<br />
white-striped wire strand to the positive (+) terminal of<br />
the crossover tweeter output and the un-striped wire to<br />
the negative (-) tweeter terminal.<br />
6. Route the tweeter wire from the crossover through<br />
grommets location to the tweeter location.<br />
7. Assemble cup, clamp, and machine screw loosely.<br />
8. Route the red and black tweeter wires through the<br />
holes in the bottom of the cup.<br />
9. Slip the male fast-on connector on the red tweeter wire<br />
onto the female connector on the white-striped wire from<br />
the crossover and the black tweeter wire to the un-striped<br />
wire (Figure 2). Make sure the clear plastic insulators fully<br />
cover the fast-on connectors otherwise you may short the<br />
tweeter leads and possibly damage your amplifier.<br />
10. Press the assembly into the 2-3/16" hole until the clamp<br />
edge is below the mounting surface, then tighten the<br />
screw. The cup will clamp down to the surface as the<br />
screw is tightened (Figure 3). In the case of a thick mounting<br />
surface, the legs of the clamp can be bent outward by<br />
inserting a screwdriver through the four rectangular holes<br />
in the cup while still mounted (Figure 4).<br />
11. Snap the tweeter into the mounting cup, being careful not<br />
to pinch the wires.<br />
12. Once the tweeter is mounted and connected, swivel the<br />
tweeter by applying firm pressure to the edge of the<br />
tweeter module. DO NOT apply pressure to the grille.<br />
13. Connect positive and negative leads to the crossover.<br />
NOTE: to remove the tweeter assembly, place a small screwdriver<br />
into the side slot and pry carefully upwards (Figure 5).<br />
Damage to the tweeter from thermal overload will<br />
result without the protection provided by a crossover<br />
and will void your warranty.<br />
4. Coupez le fil de tweeter (le fil de moindre calibre) en deux.<br />
5. Dénudez 1/8"-1/4" (4-6 mm) d'isolation de plastique des<br />
bouts du fil de tweeter. Connectez un bout du fil au<br />
tweeter: le conducteur rayé blanc à la borne positive (+)<br />
et l’autre conducteur à la borne négative (-). Connectez<br />
l’autre bout du fil au séparateur: le conducteur rayé blanc<br />
à la borne positive (+) de la sortie tweeter et l’autre conducteur<br />
à la borne négative (-) de la sortie tweeter.<br />
6. Passez le fil du tweeter à partir du séparateur, à travers<br />
les rondelles isolantes, jusqu’à l’emplacement du tweeter.<br />
7. Assemblez une coupelle, un crampon et une vis à<br />
métaux (sans serrer).<br />
8. Passez les fils noir et rouge de tweeter à travers le trou<br />
à la base de la coupelle.<br />
9. Accouplez le connecteur male du fil rouge du tweeter avec<br />
le connecteur femelle du fil rayé blanc provenant du séparateur<br />
- et le connecteur male du fil noir du tweeter avec<br />
le connecteur femelle du fil non rayé (Figure 2). Assurezvous<br />
que l’isolant de plastique transparent recouvre complète<br />
ment les connecteurs pour éviter les risques de<br />
court-circuit et d’endommagement de votre amplificateur.<br />
10. Poussez l’ensemble dans le trou de 2 3/16 po jusqu’à ce<br />
que le rebord du crampon soit sous la surface puis serrez<br />
la vis. À mesure que vous vissez, la coupelle sera gradu<br />
ellement coincée à la surface (Figure 3). En cas de surface<br />
de montage plus épaisse, les pattes des crampons peuvent<br />
être pliées vers l’extérieur en insérant un tournevis dans<br />
les quatre trous de la coupelle déjà montée. (Figure 4)<br />
11. Insérez le tweeter dans la coupelle en faisant<br />
attention de ne pas coincer les fils.<br />
12. Une fois le tweeter monté et connecté, orientez-le en<br />
appuyant sur le cadre du module du tweeter. N’appuyez<br />
PAS sur la grille.<br />
13. Connectez les fils positif et négatif au séparateur.<br />
NOTE: pour retirer le module du tweeter, placez un petit<br />
tournevis dans la fente de côté et soulevez délicatement.<br />
Sans la protection d’un séparateur, le tweeter<br />
sera endommagé par surcharge thermique.<br />
Ceci annulera la garantie.<br />
Figure 3<br />
4<br />
Figure<br />
Figure 5<br />
14 POLK/MOMO: CHAMPIONSHIP PERFORMANCE
Extending Frequency Response<br />
Using Mid-Range Extension<br />
The <strong>Polk</strong> <strong>Audio</strong>/MOMO Crossover features a Mid-Range<br />
Extension option. When placed in the “ON” position, this<br />
removes the low pass crossover filter from the mid/bass<br />
driver, allowing it to run full-range. This may be helpful in<br />
getting a better “blend” between mid/driver and tweeter<br />
when the two are placed some distance from each other.<br />
It works like this: Normally the crossover rolls off the high<br />
frequency response of the driver in a steep slope. But when<br />
a great distance separates a tweeter from the driver (for<br />
example, the driver is on the bottom of the door panel, and<br />
the tweeter is on the top of the door panel or dash) getting<br />
a good driver-to-tweeter blend may be difficult. The Mid-<br />
Range Extension feature bypasses the driver’s crossover,<br />
extending the response of the driver to better meet that of<br />
the tweeter. Experiment to find the setting that best suits<br />
your installation.<br />
Tweeter Level<br />
The slide switch on the side of the crossover box adjusts<br />
the level (volume) of the tweeter relative to the mid/woofer.<br />
Start with the switch in the bottom position and listen. If you<br />
want a “brighter” sound, move the switch to the middle position<br />
and listen again. The “0 dB” setting provides the greatest<br />
amount of tweeter output. -3dB and -6dB reduce output<br />
to a greater degree.<br />
Polarity / Blending<br />
If it seems that the tweeters and mid/woofers are not<br />
“blending” or working together in harmony, try changing the<br />
polarity of both the tweeters by reversing the positive (+) and<br />
negative (-) tweeter wires at the crossover. Reversing the<br />
absolute phase of the tweeters may help the blending or<br />
integration of the system components, particularly if the<br />
tweeters and mid/woofers are on different planes. In your<br />
car, that is, not your plane.<br />
Extension de la réponse en fréquences<br />
par la fonction «Mid-Range Extension».<br />
Le séparateur <strong>Polk</strong> /MOMO est muni d’un commutateur<br />
d’extension des médiums. Lorsqu’en position «ON», le filtre<br />
passe-bas du séparateur est désactivé et le transducteur de<br />
méd.-graves peut ainsi opérer en mode de gamme intégrale.<br />
Ceci peut aider à obtenir un meilleur «mélange» entre le<br />
transducteur et le tweeter lorsqu’ils sont installés à une<br />
certaine distance l’un de l’autre.<br />
Voici pourquoi: Normalement, le séparateur atténue abruptement<br />
les hautes fréquences envoyées au transducteur de<br />
méd.-graves. Mais lorsque le tweeter et le transducteur sont<br />
installés à une certaine distance l’un de l’autre (p. ex. si le<br />
transducteur est situé en bas des panneaux de porte et le<br />
tweeter est situé en haut des panneaux ou sur le tableau de<br />
bord) il peut être difficile d’obtenir un bon mélange méd./<br />
woofer-tweeter. La fonction «Mid-Range Extension» contourne<br />
le séparateur, permettant à la gamme intégrale du<br />
transducteur de mieux se s’harmoniser à la gamme de<br />
fréquences du tweeter. Faites des expériences pour déterminer<br />
le meilleur réglage pour votre propre système.<br />
Niveau du Tweeter (Tweeter Level)<br />
Le commutateur à glissière situé sur le côté du séparateur<br />
ajuste le volume du tweeter en relation au transducteur de<br />
méd.-graves. Commencez avec le commutateur dans la position<br />
inférieure et écoutez. Si vous désirez un son plus «clair»<br />
réglez le commutateur à la position médiane puis écoutez.<br />
Le réglage «0 dB» représente le niveau maximum du tweeter.<br />
Les positions -3dB et -6dB réduisent graduellement le niveau.<br />
Polarité et mélange<br />
Si le son des tweeters et les méd.-graves ne se mélangent<br />
pas de façon harmonieuse, essayez de renverser la polarité<br />
des deux tweeters en inversant les fils positifs (+) et négatifs<br />
(-) des bornes du séparateur. Le fait d’inverser la polarité<br />
absolue des tweeters peut aider au « mélange » ou à<br />
l’intégration des composants, particulièrement si les tweeters<br />
et les transducteurs sont installés à différents niveaux<br />
dans votre voiture.<br />
OUT<br />
IN<br />
0dB<br />
-3dB<br />
-6dB<br />
DUAL<br />
SINGLE<br />
TWEETER LEVEL<br />
INPUT MODE<br />
Figure 6<br />
POLK AUDIO / MOMO DESIGN 15
Tweeter Angle<br />
The MM tweeters may be pivoted to get the best high frequency<br />
response and soundstage. Generally, pointing the<br />
tweeters toward the listening position will yield the best<br />
results. But don’t be afraid to try other angles. Use the<br />
position that sounds best to you. Pivot the tweeter module<br />
by applying firm pressure on the edge of the tweeter module.<br />
DO NOT APPLY PRESSURE TO THE DOME ITSELF.<br />
Amplifier Power Requirements<br />
Your speakers will work well with a variety of electronic<br />
components. As little as 25 watts (RMS) per channel will<br />
deliver adequate listening levels in most cars. If you have<br />
a noisy car or intend to play your system at loud listening<br />
levels, more power is necessary to achieve the best performance.<br />
Consult your <strong>Polk</strong> <strong>Audio</strong> dealer for specific recommendations.<br />
We recommend using an external power amplifier<br />
that has a power rating of 50 - 100 Watts per channel<br />
to get the best possible performance.<br />
Safe Limits Of Operation<br />
Your <strong>Polk</strong> loudspeakers are made with the highest quality<br />
materials for years of trouble-free performance. However,<br />
damage to loudspeakers can occur when an amplifier,<br />
regardless of its wattage, is made to play at higher listening<br />
levels than its power can cleanly produce (usually beyond<br />
the “1 to 2 o’clock” position on the volume control).<br />
This results in very high levels of audible distortion, originating<br />
in the amplifier, which adds a harsh, gritty sound to the<br />
music. Contrary to popular belief, a speaker is more likely<br />
to be damaged by trying to get too much volume from a lowpowered<br />
amp or receiver than from a high-powered one.<br />
Technical Assistance Or Service<br />
If, after following the hook-up directions, you experience<br />
difficulty, please double check all wire connections. Make<br />
sure that your electronic equipment is operating correctly<br />
by hooking up another speaker to the speaker output. For<br />
example, if you are not getting sound from the left channel<br />
speaker, connect the right channel speaker to the left output.<br />
If you still get no sound from that side, the problem is<br />
in your amp or source electronics. Should you isolate the problem<br />
to the speaker, contact the authorized <strong>Polk</strong> <strong>Audio</strong> dealer<br />
where you made your purchase. Authorized <strong>Polk</strong> <strong>Audio</strong><br />
dealers are the best source for advice and assistance.<br />
Call <strong>Polk</strong> <strong>Audio</strong>’s Customer Service Department at<br />
1-800-377-7655 from 9am to 6pm, Eastern Time,<br />
Monday through Friday. Please do not hesitate to call<br />
us if you have questions about your speaker system.<br />
Visit http://www.polkaudio.com.<br />
Angle du Tweeter<br />
Les tweeters MM peuvent être pivotés pour obtenir une<br />
meilleure scène sonore et une meilleure directivité des hautes<br />
fréquences. En général, vous obtiendrez les meilleurs<br />
résultats en orientant les tweeters vers votre position d’écoute.<br />
Mais n’hésitez pas à essayer d'autres angles. Choisissez<br />
l’orientation qui vous donne le meilleur son global.<br />
Faites pivoter le module du tweeter en appuyant sur le<br />
cadre du module.<br />
N’APPUYEZ JAMAIS SUR LE DÔME LUI-MÊME.<br />
Puissance d’Amplification Requise<br />
Vos haut-parleurs fonctionneront très bien avec de nombreux<br />
composants électroniques. Aussi peu que 25 watts (RMS) de<br />
puissance sera suffisant pour reproduire des niveaux d’écoute<br />
adéquats dans la plupart des voitures. Si vous avez une<br />
voiture bruyante ou si vous comptez faire jouer votre système<br />
à volume très élevé, plus de puissance sera requise pour<br />
assurer une bonne performance. Consultez votre revendeur<br />
<strong>Polk</strong> <strong>Audio</strong> pour des recommandations spécifiques. Nous<br />
recommandons l’utilisation d’un amplificateur externe avec<br />
une capacité de puissance nominale de 50 à 100 watts pour<br />
obtenir le meilleur rendement et la meilleure performance.<br />
Limites d’Opération<br />
Les haut-parleurs <strong>Polk</strong> <strong>Audio</strong> sont fabriqués de matériaux de<br />
la plus haute qualité pour leur assurer une grande fiabilité<br />
pour de nombreuses années. Cependant, un haut-parleur<br />
peut être endommagé lorsqu'un amplificateur, quelle que<br />
soit sa puissance, est poussé au delà de ses limites nominales<br />
(typiquement à la position 12h ou 13h du contrôle de<br />
volume). L’amplificateur surchargé génère alors un niveau<br />
élevé de distorsion et le son devient rauque et éraillé.<br />
Contrairement à ce qu’on puisse penser, un haut-parleur<br />
peut-être endommagé plus facilement par un amplificateur<br />
de faible puissance poussé au delà de ses limites que<br />
par un amplificateur de haute puissance à haut volume.<br />
Service ou Assistance Technique<br />
Si, après avoir suivi toutes les instructions, vous éprouvez des<br />
difficultés, vérifiez toutes vos connexions. Assurez-vous que<br />
vos composants électroniques fonctionnent correctement en<br />
connectant un autre haut-parleur aux sorties h.p. Par exemple,<br />
si vous n’obtenez pas de son du haut-parleur du canal gauche,<br />
connectez le haut-parleur du canal droit à la sortie du canal<br />
gauche. Si vous n’obtenez toujours pas de son de ce canal, le<br />
problème provient de votre amplificateur ou d’un autre composant<br />
de source. Si vous concluez que le problème est relié<br />
au haut-parleur, communiquez avec votre revendeur <strong>Polk</strong><br />
<strong>Audio</strong>. Les revendeurs agréés <strong>Polk</strong> <strong>Audio</strong> sont les mieux<br />
qualifiés pour vous offrir des conseils ou de l’assistance.<br />
Contactez le Service à la Clientèle de <strong>Polk</strong> <strong>Audio</strong> au<br />
1-800-377-7655 du lundi au vendredi, de 9h00 à 18h00, HNE.<br />
N’hésitez pas à nous téléphoner si vous avez des questions<br />
sur votre système de haut-parleurs. Visitez<br />
http://www.polkaudio.com.<br />
16 POLK/MOMO: CHAMPIONSHIP PERFORMANCE
Specifications/Spécifications<br />
Recommended Amplification/ 250 Watts 200 Watts<br />
Amplification recommandée<br />
Impedance(DCR)/Impédance (DCR) 4 Ohms 4 Ohms<br />
Frequency Response (+/-3dB)/ 43Hz-25kHz 53Hz-25kHz<br />
Réponse en fréquences (+/-3dB)<br />
Sensitivity (1w/1m)/ 90dB 89dB<br />
Sensibilité (1w/1m)<br />
Cutout Dimensions/<br />
Dimensions de l'embrasure<br />
MMC650 <strong>System</strong><br />
MMC650 <strong>System</strong><br />
<strong>MMC5250</strong> <strong>System</strong><br />
<strong>MMC5250</strong> <strong>System</strong><br />
Driver/Transducteur 5" (127mm) 4 5/8" (117.5mm)<br />
Tweeter 2 3/16" (55.56mm) 2 3/16" (55.56mm)<br />
Mounting Depth 2 7/16" (61.9mm) 2 5/16" (57.96mm)<br />
top mount with grille/ w/o cup w/o cup<br />
Profondeur de montage 2 13/16" (71.4mm) 2 3/4" (69.9mm)<br />
Montage en surface avec grille w/cup w/cup<br />
Mounting Depth bottom mount/ 2 9/16" (65.1mm) 2 1/2" (50.8mm)<br />
Profondeur de montage dessous w/o cup w/o cup<br />
2 13/16" (71.4mm) 2 3/4" (69.9mm)<br />
w/cup<br />
w/cup<br />
Grille Height/Hauteur de la grille .543" (13.8mm) .439" (11.2mm)<br />
Grille Diameter/ Diamètre de la grille 6.575" (167mm) 5.9" (149.9mm)<br />
Crossover Frequency/ 2600Hz 2750Hz<br />
Fréquence de séparation<br />
Crossover/Séparateur 2nd Order (12dB/octave) 2nd Order (12dB/octave)<br />
Tweeter Attenuation/ 0 dB, -3 dB, -6 dB 0 dB, -3 dB, -6 dB<br />
Atténuation du Tweeter<br />
*Midrange extension switch on crossover will bypass driver crossover<br />
*Le commutateur «Mid-Range Extension» contourne le séparateur du transducteur.<br />
POLK AUDIO / MOMO DESIGN 17
<strong>Polk</strong>/MOMO Mid/Woofer Technical Sheet<br />
THIELE / SMALL PARAMETERS/<br />
Fiche technique du transducteur méd.-graves <strong>Polk</strong>/MOMO<br />
PARAMÈTRES THIELE / SMALL<br />
MMC6500 Driver <strong>MMC5250</strong> Driver<br />
Transducteur 6500 Transducteur 5250<br />
Freq. Response/ Freq. Response 43 Hz - 3 kHz 53 Hz - 3 kHz<br />
Resonant Freq. (Fo, Fs) 86 Hz 107 Hz<br />
Fréq. de réson. (Fo, Fs)<br />
Qms 10.95 12.72<br />
Qes 0.98 1.24<br />
Qts 0.90 1.13<br />
Vas 5.52 L 2.43 L<br />
Cms 288 µm/N 240 µm/N<br />
BL 4.6 TM 4.0 TM<br />
Sd 116.9 cm 2 85 cm 2<br />
Mms 11.72 g 9.14 g<br />
Product Disposal - Certain international, national and/or local laws and/or regulations may apply regarding<br />
the disposal of this product. For further detailed information, please contact the retailer where you<br />
purchased this product or the <strong>Polk</strong> <strong>Audio</strong> Importer/Distributor in your country. A listing of <strong>Polk</strong> <strong>Audio</strong><br />
Importer/ Distributors can be found on the <strong>Polk</strong> <strong>Audio</strong> website www.polkaudio.com or by contacting<br />
<strong>Polk</strong> <strong>Audio</strong> at 5601 Metro Drive, Baltimore, Maryland 21215, USA— Phone: +1 410 358-3600.<br />
Récupération du produit – Certaines lois ou certains règlements internationaux, nationaux et/ou régionaux<br />
pourraient s’appliquer à la récupération de ce produit. Pour plus d’information, com-muniquez avec le<br />
revendeur de ce produit ou avec l’importateur/ distributeur de ce produit dans votre pays. Vous trouverez<br />
la liste des importateurs/ distributeurs des produits <strong>Polk</strong> <strong>Audio</strong> sur le site www.polkaudio.com ou en communiquant<br />
avec <strong>Polk</strong> <strong>Audio</strong> : 5610 Metro Drive, Baltimore, Maryland 21215, USA – Tél.: +1 410 358-3600.<br />
18 POLK/MOMO: CHAMPIONSHIP PERFORMANCE
<strong>Polk</strong>/MOMO Series 3 Year Warranty<br />
<strong>Polk</strong> <strong>Audio</strong>, Inc. warrants the original purchaser only that this <strong>Polk</strong><br />
<strong>Audio</strong> <strong>Polk</strong>/MOMO Product (the Product) will be free from defects in<br />
materials and workmanship for a period of (3) three years from the<br />
date of original retail purchase from a <strong>Polk</strong> <strong>Audio</strong> Authorized Dealer.<br />
However, this warranty will automatically terminate prior to the expiration<br />
of the (3) three year period if the original retail purchaser sells or<br />
otherwise transfers the Product to any other party. The original retail<br />
purchaser shall herein after be referred to as “you.” To allow <strong>Polk</strong><br />
<strong>Audio</strong> to offer the best possible warranty service, please fill out the<br />
Product Registration Card(s) and send them to the Factory at the<br />
address provided in the Registration Card within (10) ten days<br />
of the date of purchase.<br />
Defective Products must be shipped, together with a proof of purchase,<br />
prepaid insured to the Authorized <strong>Polk</strong> <strong>Audio</strong> Dealer from whom you<br />
purchased the Product, or to <strong>Polk</strong> <strong>Audio</strong>, 2550 Britannia Blvd., Suite A,<br />
San Diego,CA 92154. Products must be shipped in the original shipping<br />
container or its equivalent; in any case the risk of loss or damage<br />
in transit is to be borne by you. If, upon examination at the Factory or<br />
<strong>Polk</strong> <strong>Audio</strong> Authorized Dealer it is determined that the unit was defective<br />
in materials or workmanship at any time during the Warranty period,<br />
<strong>Polk</strong> <strong>Audio</strong> or the <strong>Polk</strong> <strong>Audio</strong> Dealer will, at its option, repair or<br />
replace this Product at no additional charge, except as set forth below.<br />
All replaced parts and Products become property of <strong>Polk</strong> <strong>Audio</strong>. Products<br />
replaced or repaired under this Warranty will be returned to<br />
you, within a reasonable time, freight prepaid.<br />
This Warranty does not include service or parts to repair damage<br />
caused by accident, disaster, misuse, abuse, negligence, inadequate<br />
packing or shipping procedures, commercial use, voltage inputs in<br />
excess of the rated maximum of the unit, cosmetic appearance of the<br />
cabinetry not directly attributable to defects in materials or workmanship,<br />
or service, repair, or modifications of the Product which has<br />
not been authorized or approved by <strong>Polk</strong> <strong>Audio</strong>.<br />
This Warranty is in lieu of all other expressed Warranties. If this<br />
Product is defective in materials and workmanship as warranted above,<br />
your sole remedy shall be repair or replacement as provided above. In<br />
no event will <strong>Polk</strong> <strong>Audio</strong>, Inc. be liable to you for any incidental or consequential<br />
damages arising out of the use or inability to use the Product,<br />
even if <strong>Polk</strong> <strong>Audio</strong>, Inc. or a <strong>Polk</strong> <strong>Audio</strong> Dealer has been advi-sed<br />
of the possibility of such damages, or any other claim by any other<br />
party. Some states do not allow the exclusion or limitation of consequential<br />
damages, so the above limitation and exclusion may not<br />
apply to you. This Warranty gives you specific legal rights which<br />
may vary from state to state.<br />
This warranty applies only to Products purchased in the United States<br />
of America, its possessions, and U.S. and NATO armed forces exchanges<br />
and audio clubs. The Warranty terms and conditions applicable<br />
to Products purchased in other countries are available from the<br />
<strong>Polk</strong> <strong>Audio</strong> Authorized Distributors in such countries.<br />
Garantie de 3 ans <strong>Polk</strong>/MOMO Series<br />
<strong>Polk</strong> <strong>Audio</strong> Inc. garantit - à l’acheteur au détail original seulement—<br />
que ce produit <strong>Polk</strong> <strong>Audio</strong> sera exempt de défectuosités imputables aux<br />
pièces d'origine et à la main d’oeuvre pour une période de trois (3) ans<br />
à partir de la date de l’achat au détail original chez un revendeur agréé<br />
<strong>Polk</strong> <strong>Audio</strong>. Cependant, cette garantie sera automatiquement annulée<br />
avant l’expiration de la période de (3) trois ans si l’acheteur original<br />
vend ou transfère le produit à tout autre parti. L’acheteur au détail<br />
original sera nommé ci-après «vous». Pour permettre à <strong>Polk</strong> <strong>Audio</strong><br />
de vous offrir le meilleur service de garantie possible, veuillez remplir<br />
la (les) carte(s) d’enregistrement de produit et la (les) poster à l’usine<br />
à l’adresse inscrite sur la (les) carte (s) d’enregistrement dans les<br />
dix (10) jours suivant la date de l'achat original.<br />
Les produits défectueux doivent être expédiés, avec une preuve<br />
d’achat, francs de port et assurés, au revendeur agréé <strong>Polk</strong> <strong>Audio</strong> de<br />
qui vous avez acheté le produit, ou à l’usine <strong>Polk</strong> <strong>Audio</strong>, 2550 Britannia<br />
Boulevard, Suite A, San Diego, California 92154. Les produits doivent<br />
être expédiés dans leur carton d’expédition original ou dans un contenant<br />
équivalent. Le propriétaire doit assumer tout risque de perte ou<br />
de dommage en transit. Si, suite à l’examen du produit à l’usine <strong>Polk</strong><br />
ou chez le marchand agréé <strong>Polk</strong> <strong>Audio</strong>, il est déterminé que la défectuosité<br />
est imputable aux matériaux d’origine ou à la main d’oeuvre au<br />
cours de la période de la garantie spécifiée, <strong>Polk</strong> <strong>Audio</strong> ou le revendeur<br />
<strong>Polk</strong> <strong>Audio</strong>, à sa guise, réparera ou remplacera le produit sans frais<br />
additionnels saufs dans les cas décrits ci-dessous. Toute pièce ou produit<br />
remplacé devient la propriété de <strong>Polk</strong> <strong>Audio</strong>. Les produits réparés<br />
ou remplacés sous la garantie vous seront expédiés francs de port<br />
dans un délai raisonnable.<br />
Cette garantie n’inclut pas le service ou les pièces nécessaires à la<br />
réparation des dommages provoqués par accident, désastre, abus,<br />
négligence, mode d’expédition ou emballage inadéquat, utilisation<br />
commerciale, tensions supérieures au maximum prescrit pour l’unité,<br />
aspect visuel du meuble non directement attribuable à un défaut de<br />
pièces d’origine ou de main d'oeuvre, ou par le service, la réparation,<br />
ou toute modification du produit n’ayant pas été autorisé ou approuvé<br />
par <strong>Polk</strong> <strong>Audio</strong>.<br />
Cette garantie prend préséance sur toutes autres garanties énoncées.<br />
Si la défectuosité de ce produit est imputable aux pièces d’origine ou<br />
à la main d’oeuvre selon les conditions de la garantie exprimées cidessus,<br />
votre seul recourt sera la réparation ou le remplacement selon<br />
les conditions décrites ci-dessus. Dans aucun cas <strong>Polk</strong> <strong>Audio</strong>, Inc. pourra-t-elle<br />
être tenue responsable pour tout dommage accessoire ou indirect<br />
causé par l’utilisation ou par l’incapacité d’utilisation du produit,<br />
même si <strong>Polk</strong> <strong>Audio</strong>, Inc. ou un revendeur agréé <strong>Polk</strong> <strong>Audio</strong>, a été avisé<br />
de la possibilité de tel dommage, ou pour toute réclamation par tout<br />
autre parti. Certains états ne permettant pas l’exclusion ou la limitation<br />
des dommages indirects, les limitations et exclusions exprimées<br />
ci-dessus pourraient ne pas s’appliquer dans votre cas. Cette garantie<br />
vous accorde des droits légaux spécifiques; vous pourriez également<br />
avoir d'autres droits qui pourraient varier d’état en état.<br />
Cette garantie s’applique seulement aux produits achetés au Canada,<br />
aux États-Unis d’Amérique et ses possessions, et dans les clubs audio<br />
et d'échange des forces armées des É.U. et de l’OTAN.<br />
Les modalités et les conditions de garantie applicables aux produits<br />
achetés dans d’autres pays sont disponibles chez les distributeurs<br />
agréés <strong>Polk</strong> <strong>Audio</strong> établis dans ces pays.<br />
POLK AUDIO / MOMO DESIGN 19
5601 Metro Drive<br />
Baltimore, Maryland 21215<br />
(800) 377-7655<br />
www.polkaudio.com<br />
www.polkmomo.com<br />
“<strong>Polk</strong>,” “<strong>Polk</strong> <strong>Audio</strong>,” and “Dynamic Balance” are registered trademarks of<br />
<strong>Polk</strong> Investment Corporation used under license by <strong>Polk</strong> <strong>Audio</strong> Incorporated.<br />
“MOMO” is a registered trademark of MOMO Design, Italy.<br />
“<strong>Polk</strong>,” “<strong>Polk</strong> <strong>Audio</strong>” et “Dynamic Balance” sont des marques de commerce enregistrées<br />
de la <strong>Polk</strong> Investment Corporation utilisées sous licence par <strong>Polk</strong> <strong>Audio</strong> Incorporated.<br />
“MOMO” est une marque de commerce enregistrée de MOMO Design, Italie.