SBM 19 - Sanitas
SBM 19 - Sanitas
SBM 19 - Sanitas

You also want an ePaper? Increase the reach of your titles
YUMPU automatically turns print PDFs into web optimized ePapers that Google loves.
• If the instrument is not used for any length of time, we<br />
recommend removing the batteries.<br />
Advice on batteries<br />
• Batteries can be fatal if swallowed. You should therefore<br />
store the batteries and products where they are inaccessible<br />
to small children. If a battery has been swallowed,<br />
call a doctor immediately.<br />
• Batteries should not be charged or reactivated with any<br />
other means, nor should they be taken apart, thrown in<br />
the fire or short-circuited.<br />
• Remove the batteries from the instrument if they are worn<br />
out or if you are not going to use the instrument for any<br />
length of time. This prevents any damage as a result of<br />
leakage. Always replace all the batteries at the same<br />
time.<br />
• Never use different types of battery, battery brands or<br />
batteries with different capacities. You should preferably<br />
use alkaline batteries.<br />
Repair and disposal<br />
• Batteries do not belong in domestic refuse. Used batteries<br />
should be disposed of at the collection points provided.<br />
• Never open the instrument. If these instructions are not<br />
heeded, the warranty will be null and void.<br />
• Never attempt to repair the instrument or adjust it yourself.<br />
We can no longer guarantee perfect functioning if you do.<br />
• Repairs may only be performed by Customer Service or<br />
authorized dealers. However, always check the batteries<br />
and replace them if necessary prior to making any<br />
complaint.<br />
• The appliance should be disposed of according to Regulation<br />
2002/96/EC-WEEE (Waste Electrical and Electronic<br />
11<br />
Equipment). In case of queries, please contact the<br />
municipal authorities responsible for waste disposal<br />
in your area.<br />
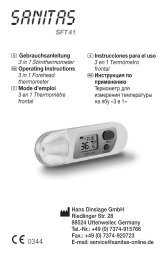
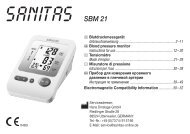
3. Unit description<br />
1<br />
2<br />
3<br />
1. Cuff tube<br />
2. Cuff<br />
3. Cuff connector<br />
4. Cuff connector port (left side)<br />
5. Memory button MEM<br />
6. START/STOP button<br />
7. Display<br />
8. Loudspeaker<br />
Icons in the display:<br />
1. Time and date<br />
2. Systolic pressure<br />
3. Diastolic pressure<br />
4. mmHg unit<br />
5. Measured pulse<br />
6. Pulse icon<br />
5<br />
1<br />
10<br />
9<br />
8<br />
11<br />
7<br />
4 7<br />
8<br />
6<br />
6<br />
2<br />
3<br />
4<br />
5