You also want an ePaper? Increase the reach of your titles
YUMPU automatically turns print PDFs into web optimized ePapers that Google loves.
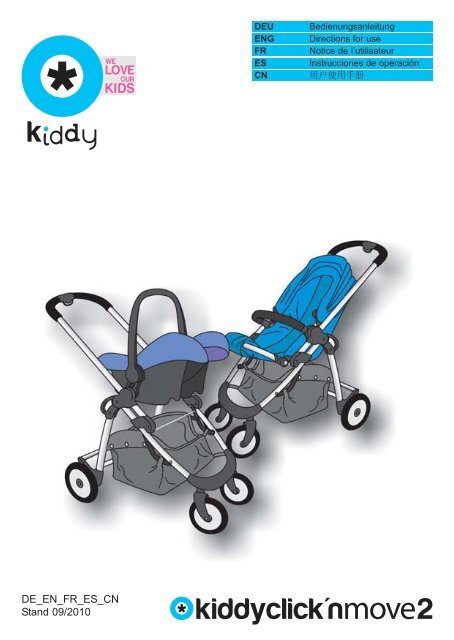
DEU<br />
ENG<br />
FR<br />
ES<br />
CN<br />
Bedienungsanleitung<br />
Directions for use<br />
Notice de l’utilisateur<br />
Instrucciones de operación<br />
用 户 使 用 手 册<br />
DE_EN_FR_ES_CN<br />
Stand 09/2010
DEU<br />
Inhalt<br />
1. Allgemeine Sicherheitshinweise...................................... 2<br />
2. Auspacken......................................................................... 3<br />
3. Montage der Elemente...................................................... 3<br />
4. Auseinanderklappen des „<strong>kiddy</strong> click’n <strong>move</strong> 2”.......... 4<br />
5. Zusammenfalten des „<strong>kiddy</strong> click’n <strong>move</strong> 2”................. 5<br />
6. Fixieren der Vorderräder.................................................. 6<br />
7. Feststellbremse................................................................. 6<br />
8. Verwendung für Babyschalen.......................................... 6<br />
8.1 Aufstecken der Babyschale................................................. 6<br />
8.2 Abnehmen der Babyschale................................................. 7<br />
8.3 Abnehmen der Adapter........................................................ 7<br />
9. Verwendung mit dem Sportwagensitz............................. 8<br />
9.1 Aufstecken bzw. Abnehmen des Sportwagensitzes............ 8<br />
9.2 Sichern des Kindes.............................................................. 8<br />
10. Funktionen des Sportwagensitzes.................................. 9<br />
10.1 Sicherungsbügel................................................................. 9<br />
10.2 Verstellung der Fußstütze.................................................... 10<br />
10.3 Verstellung des Sitzwinkels................................................. 10<br />
10.4 Sonnendach......................................................................... 10<br />
11. Pflege.................................................................................. 11<br />
11.1 Fahrgestell........................................................................... 11<br />
11.2 Sportwagensitz.................................................................... 11<br />
12. Garantie.............................................................................. 12
Bedienungsanleitung „<strong>kiddy</strong> click’n <strong>move</strong> 2”<br />
DEU<br />
Vielen Dank, dass Sie sich für das Travelsystem „click’n <strong>move</strong>“ von <strong>kiddy</strong><br />
entschieden haben.<br />
Ihr Travelsystem „<strong>kiddy</strong> click’n <strong>move</strong> 2” ist ein hochwertiges Produkt, das bei<br />
sachgemäßem Gebrauch eine hohe Nutzungsdauer ermöglicht.<br />
Ihr „<strong>kiddy</strong> click’n <strong>move</strong> 2” wurde nach EN (DIN) 1888 geprüft und zugelassen.<br />
Ihr „<strong>kiddy</strong> click’n <strong>move</strong> 2” ist für Kinder mit einem Körpergewicht von bis zu<br />
15kg (ca. 4 Jahre) geeignet (mit Sportwagensitz).<br />
1. Allgemeine Sicherheitshinweise<br />
Lesen Sie diese Bedienungsanleitung vor dem ersten Gebrauch<br />
sorgfältig durch. Eine falsche Benutzung kann lebensgefährlich sein.<br />
Nehmen Sie keinerlei Änderungen an den Komponenten Ihres „<strong>kiddy</strong><br />
click’n <strong>move</strong> 2” vor.<br />
Überprüfen Sie alle Elemente und Verriegelungen sowie deren<br />
sichere Verrastung vor jeder Benutzung. Achten Sie darauf, dass<br />
sich keine Schrauben oder Nieten lockern oder lösen.<br />
Prüfen Sie die Bremsen und die Räder regelmäßig auf korrekte<br />
Funktion. Falls ein Rad quietscht, kann es mit Silikon- oder<br />
Feinmechaniköl geschmiert werden.<br />
Lassen Sie Ihr Kind niemals unbeaufsichtigt in Ihrem „<strong>kiddy</strong> click’n<br />
<strong>move</strong> 2”.<br />
Verrasten Sie vor dem Hineinsetzen des Kindes (der Babyschale)<br />
und vor dem Herausnehmen immer die Feststellbremse.<br />
Dieses Produkt ist nicht zum Joggen oder Skaten geeignet.<br />
2
DEU<br />
Der Gepäckkorb darf mit maximal 5kg Zusatzgewicht belastet<br />
werden.<br />
Hängen Sie niemals Beutel, Taschen oder sonstige Gegenstände an<br />
den Griff, dies könnte zu einer starken Beeinträchtigung der<br />
Standfestigkeit (Sicherheit) Ihres „<strong>kiddy</strong> click’n <strong>move</strong> 2“ führen.<br />
Verwenden Sie Ihren „<strong>kiddy</strong> click’n <strong>move</strong> 2“ niemals auf Treppen<br />
oder Rolltreppen.<br />
Die Verwendung Ihres „<strong>kiddy</strong> click’n <strong>move</strong> 2“ als Spielzeug ist<br />
strengstens untersagt.<br />
Es dürfen nur vom Hersteller zugelassene Ersatz- sowie<br />
Zubehörteile verwendet werden.<br />
2. Auspacken<br />
Wegen Erstickungsgefahr muss das Verpackungsmaterial<br />
unbedingt von Kindern ferngehalten werden.<br />
3. Montage der Elemente<br />
Stecken Sie die beiden Hinterräder auf die<br />
Hinterachse bis sie mit einem klickenden<br />
Geräusch einrasten (Ziff.1 & 2).<br />
2 3<br />
1<br />
Stecken Sie anschließend die komplette<br />
Hinterachse (Feststellbremsenhebel muss nach<br />
hinten zeigen) auf den Hinterachsträger auf<br />
(Ziff.3).<br />
Schieben Sie die Achse soweit, bis sie mit einem<br />
„Klick“-Geräusch beidseitig einrastet.<br />
Kontrollieren Sie die Räder sowie die<br />
Achse auf vollständige Verrastung.<br />
3
DEU<br />
4. Auseinanderklappen des „<strong>kiddy</strong> click’n <strong>move</strong> 2“<br />
2<br />
3<br />
Zur leichteren Aufbewahrung ist das Fahrgestell so<br />
konstruiert, dass es zusammen geklappt werden<br />
kann. Das ist auch die Position, in der das<br />
Fahrgestell geliefert wird.<br />
1<br />
Geben Sie Acht, dass Sie sich die<br />
Finger während des Auseinanderklappens<br />
des Fahrgestells nicht einklemmen!<br />
Öffnen Sie den Verschlussriegel an der rechten<br />
Seite des Fahrgestells (Ziff.1).<br />
Halten Sie die Sicherungstaste (Ziff.2) unter der<br />
Betätigungstaste am Griffbügel.<br />
4<br />
5<br />
4<br />
Drücken Sie gleichzeitig die Betätigungstaste<br />
(Ziff.3).<br />
Nun halten Sie das Gestell an den Griffen fest<br />
(Ziff.4) und ziehen Sie den Griffbügel nach oben<br />
(Ziff.5), bis er fest einrastet.<br />
Jetzt haben Sie das Fahrgestell aufgebaut.<br />
Testen Sie die sichere Verrastung des<br />
Griffbügels, indem Sie den Wagen<br />
halten und den Griffbügel nach unten<br />
drücken.<br />
4
DEU<br />
5. Zusammenfalten des „<strong>kiddy</strong> click’n <strong>move</strong> 2“<br />
1<br />
3<br />
2<br />
Nehmen Sie, bevor Sie Ihren „<strong>kiddy</strong><br />
click’n <strong>move</strong> 2“ zusammenklappen, die<br />
Babyschale, die Babywanne vom<br />
Fahrgestell ab. Wenn der Sportwagensitz<br />
in Fahrtrichtung montiert ist, kann<br />
er beim Zusammenfalten auf dem<br />
Chassis verbleiben.<br />
Drücken Sie die Sicherungstaste (Ziff.1) unter<br />
der Betätigungstaste am Griffbügel und die<br />
Betätigungstaste (Ziff.2) gleichzeitig.<br />
5<br />
4<br />
Drücken Sie den Griffbügel nach unten (Ziff.3).<br />
Jetzt rastet ein Sicherungshebel ein, der<br />
verhindert, dass Sie sich die Finger<br />
einklemmen.<br />
6<br />
Drücken Sie nun den Sicherungshebel (Ziff.4)<br />
vorsichtig ein wenig nach unten.<br />
Halten Sie den Griffbügel (Ziff. 5) fest und ziehen<br />
Sie nun an den Griffen (Ziff.6) am<br />
Fahrgestell bis der Wagen zusammengeklappt<br />
ist.<br />
7<br />
Um das Fahrgestell im zusammengeklappten<br />
Zustand zu halten, schließen Sie den<br />
seitlichen Verschlussriegel (Ziff.7).<br />
5
DEU<br />
6. Fixieren der Vorderräder<br />
7. Feststellbremse<br />
Stellen Sie die Vorderräder gerade.<br />
Jetzt können Sie die grauen Hebel (links und<br />
rechts) nach oben hin in die Auskerbungen<br />
drücken.<br />
Die Vorderräder lenken nun nicht mehr.<br />
Um die Vorderräder wieder zu entrasten,<br />
Drücken Sie beide Hebel (links und rechts)<br />
wieder nach unten.<br />
Benutzen Sie immer die Feststellbremse wenn Sie Ihr Kind (bzw.<br />
Babyschale) in Ihren „<strong>kiddy</strong> click’n <strong>move</strong> 2“ setzen (bzw.<br />
aufstecken) oder herausnehmen (bzw. abnehmen) wollen.<br />
Um die Bremse zu verrasten, drücken Sie mit dem Fuß den Bremshebel<br />
nach unten. Vergewissern Sie sich, ob die Bremse eingerastet ist.<br />
Um die Bremse zu lösen, drücken Sie den Bremshebel mit Ihrer Fußspitze<br />
wieder nach oben.<br />
Lassen Sie Ihr Kind nie unbeaufsichtigt im Travelsystem, auch<br />
wenn die Bremse eingerastet ist!<br />
8. Verwendung für Babyschalen<br />
8.1 Aufstecken der Babyschale<br />
Klappen Sie Ihren „<strong>kiddy</strong> click’n <strong>move</strong> 2“ wie in Punkt 4 beschrieben auseinander.<br />
6
DEU<br />
Die Babyschale kann in Fahrtrichtung und auch entgegen der<br />
Fahrtrichtung aufgesteckt werden.<br />
Stecken Sie beide Babyschalenadapter auf das Travelsystem,<br />
bis sie einrasten.<br />
Vergewissern Sie sich, dass die Verrastung im<br />
Babyschalenadapter geöffnet ist (rote Hebelstellung).<br />
Stellen Sie sicher, dass Ihr Baby<br />
ordnungsgemäß in der Schale<br />
gesichert und die Feststellbremse<br />
eingerastet ist!<br />
Nun können Sie die Babyschale aufstecken.<br />
Verrasten Sie die Schale durch Druck nach<br />
unten.<br />
Vergewissern Sie sich, ob die Adapter in der<br />
Babyschale verrastet sind. Wenn die<br />
Babyschale verrastet ist, zeigen die Hebel an<br />
beiden Adaptern nach oben (gelbe<br />
Hebelstellung).<br />
8.2 Abnehmen der Babyschale<br />
Um die Schale wieder abnehmen zu können, drücken Sie beide Hebel an<br />
den Adaptern nach unten (rote Hebelstellung). Nun kann die Babyschale<br />
nach oben hin abgenommen werden.<br />
8.3 Abnehmen der Adapter<br />
Drücken Sie den Knopf an der Innenseite der Adapter und ziehen Sie die<br />
Adapter nach oben hin vom Fahrgestell ab.<br />
7
DEU<br />
9. Verwendung mit dem Sportwagensitz<br />
Der Sportwagensitz ist für Kinder mit einem Gewicht von ca. 8<br />
kg bis 15kg (6 Monate - 4 Jahre) geeignet!<br />
Sichern Sie Ihr Kind immer ordnungsgemäß im Sportwagensitz!<br />
Wenn Sie Ihren „<strong>kiddy</strong> click’n <strong>move</strong> 2“ mit dem Sportwagensitz benutzen<br />
wollen, müssen beide Babyschalenadapter abgenommen werden. Drücken<br />
Sie den Knopf an der Innenseite der Adapter und ziehen Sie die Adapter<br />
nach oben hin vom Fahrgestell ab.<br />
9.1 Aufstecken bzw. Abnehmen des Sportwagenaufsatzes<br />
Klappen Sie Ihren „<strong>kiddy</strong> click’n <strong>move</strong> 2“ wie in<br />
Punkt 4 beschrieben auseinander.<br />
Der Sportwagenaufsatz kann in Fahrtrichtung<br />
und entgegen der Fahrtrichtung aufgesteckt<br />
werden.<br />
Rasten Sie die Feststellbremse ein.<br />
Stecken Sie den Sportwagenaufsatz auf das<br />
Fahrgestell auf und achten Sie auf die sichere<br />
Verrastung.<br />
Um den Sportwagenaufsatz abnehmen zu<br />
können, halten Sie die beiden grauen Knöpfe<br />
innen am Sportwagenaufsatz gedrückt und nehmen Sie ihn ab.<br />
9.2 Sichern des Kindes<br />
Um die Sicherheit Ihres Kindes zu gewährleisten, ist der Sportwagensitz mit<br />
einem 5-Punkt-Gurtsystem ausgestattet.<br />
8
DEU<br />
Benutzen Sie das Gurtsystem<br />
immer, wenn Sie Ihr Kind im<br />
Sportwagensitz transportieren.<br />
Stellen Sie das Gurtsystem auf die Größe Ihres<br />
Kindes ein.<br />
Gehen Sie dabei folgendermaßen vor:<br />
Schieben Sie die Gurtpolster nach oben. Nun<br />
liegen die Gurtversteller frei und Sie<br />
können die Schultergurte auf die Körpergröße<br />
Ihres Kindes anpassen. Lassen Sie maximal einen Finger breit Abstand<br />
zwischen den Gurten und Ihrem Kind.<br />
Die Beckengurte sind in der gleichen Art und Weise einstellbar.<br />
10. Funktionen des Sportwagensitzes<br />
10.1 Sicherungsbügel<br />
Der Sicherungsbügel sollte für kleinere Kinder unbedingt in Kombination mit<br />
dem 5-Punkt Gurtsystem benutzt werden. Bei größeren Kindern kann auf<br />
den Sicherungsbügel verzichtet werden.<br />
Montage:<br />
Stecken Sie den Sicherungsbügel (mit den Verrastzapfen nach unten<br />
zeigend) in die dafür vorgesehene Öffnung am Sportwagensitz.<br />
Demontage:<br />
Um den Sicherungsbügel wieder zu entfernen, drücken Sie unten am Bügel<br />
die Federelemente hinein und ziehen Sie anschließend den Bügel heraus.<br />
9
DEU<br />
10.2 Verstellung der Fußstütze<br />
Die Fußstütze ist verstellbar und kann in 3 Stufen an die Körpergröße Ihres<br />
Kindes angepasst werden.<br />
Um die Fußstütze zu verstellen, drücken Sie die beiden grauen Knöpfe<br />
(außen am Drehpunkt der Fußstütze) und drehen Sie gleichzeitig die<br />
Fußstütze in die gewünschte Position.<br />
10.3 Verstellung des Sitzwinkels<br />
Der Winkel des Sportwagensitzes kann in 3 Positionen bis hin in die<br />
Liegestellung verändert werden.<br />
Um den Winkel zu verstellen, drücken Sie die beiden grauen Knöpfe (innen<br />
am Drehpunkt des Sitzes) und drehen Sie gleichzeitig den Sitz in die<br />
gewünschte Position.<br />
10.4 Sonnendach<br />
Zum Schutz Ihres Kindes vor Sonneneinstrahlung ist der Sportwagensitz mit<br />
einem Sonnendach ausgestattet.<br />
Montage:<br />
Stecken Sie die Füßchen des Sonnendachrahmens in die dafür vorgesehen<br />
Führungen. Legen Sie die Hinterseite des Dachs über die Rückenlehne des<br />
Sitzes.<br />
Nun können Sie das Sonnendach benutzen.<br />
Demontage:<br />
Drücken Sie die Hebel links und rechts außen an der Verankerung des<br />
Sonnendachs und ziehen Sie gleichzeitig das Sonnendach nach oben hin<br />
ab.<br />
10
DEU<br />
11. Pflege<br />
11.1 Fahrgestell<br />
Überprüfen Sie das Fahrgestell ständig auf lockere Schrauben, Nieten,<br />
abgenutzte Teile und gebrochenes Material.<br />
Verwenden Sie Ihren „<strong>kiddy</strong> click’n <strong>move</strong> 2“ nicht weiter, wenn Sie einen<br />
Defekt bemerkt haben. Defekte Teile müssen vor der nächsten Benutzung<br />
ersetzt oder repariert werden.<br />
Falls ein Rad quietschen sollte, sprühen Sie ein wenig Silikonöl oder tupfen<br />
Sie etwas Feinmechaniköl auf die Achse. Wischen Sie überschüssiges Öl<br />
ab.<br />
Um Ihren „<strong>kiddy</strong> click’n <strong>move</strong> 2“ zu reinigen, benutzen Sie milde Seifenlauge.<br />
Benutzen Sie keinesfalls scharfe Reinigungs- oder Lösungsmittel.<br />
Bei Problemen kontaktieren Sie Ihren Fachhändler.<br />
11.2 Sportwagensitz<br />
Prüfen Sie den Sitz ständig auf offene Nähte oder sonstige Beschädigungen.<br />
Um das Sitzgestell zu reinigen, benutzen Sie milde Seifenlauge. Benutzen<br />
Sie keinesfalls scharfe Reinigungs- oder Lösungsmittel.<br />
Der Bezug ist abnehmbar und kann bei 30 Grad im Schonwaschgang<br />
gereinigt werden. Der Bezug darf weder geschleudert noch im<br />
Wäschetrockner getrocknet werden.<br />
11
DEU<br />
12. Garantie<br />
Für das Travelsystem leisten wir eine Garantie für Fabrikations- oder<br />
Materialfehler von 2 Jahren. Die Garantiezeit beginnt am Tage des Kaufes.<br />
Grundlage der Reklamation ist der Kaufbeleg.<br />
Die Garantieleistung beschränkt sich auf das Travelsystem, das sachgemäß<br />
behandelt wurde und in sauberem und ordentlichem Zustand zurückgesandt<br />
wird.<br />
Die Garantie erstreckt sich nicht auf:<br />
- natürliche Abnutzungserscheinungen und Schäden durch übermäßige<br />
Beanspruchung<br />
- Schäden durch ungeeignete oder unsachgemäße Verwendung<br />
Stoffe: Alle unsere Stoffe erfüllen hohe Anforderungen in Bezug auf<br />
Farbbeständigkeit gegen UV-Strahlung. Dennoch bleichen alle Stoffe aus,<br />
wenn sie der UV-Bestrahlung ausgesetzt sind. Hierbei handelt es sich um<br />
keinen Materialfehler, sondern um normale Verschleißerscheinungen, für die<br />
keine Garantie übernommen wird.<br />
Im Garantiefall wenden Sie sich unverzüglich an Ihren Fachhändler.<br />
12
ENG<br />
Contents<br />
1. General safety tips............................................................. 14<br />
2. Unpacking........................................................................... 15<br />
3. Assembling......................................................................... 15<br />
4. Setting up the “<strong>kiddy</strong> click’n <strong>move</strong> 2”............................. 16<br />
5. Collapsing the “<strong>kiddy</strong> click’n <strong>move</strong> 2”............................ 17<br />
6. Locking the front wheels.................................................. 18<br />
7. Using the brake................................................................. 18<br />
8. Using the infant carrier...................................................... 18<br />
8.1 Inserting the infant carrier..................................................... 18<br />
8.2 Removing the infant carrier.................................................. 19<br />
8.3 Removing the adapters........................................................ 19<br />
9. Using the pushchair seat.................................................. 20<br />
9.1 Inserting and removing the pushchair seat......................... 20<br />
9.2 Securing the child................................................................ 20<br />
10. Features of the pushchair seat......................................... 21<br />
10.1 Safety bar............................................................................. 21<br />
10.2 Adjustable footrest............................................................... 22<br />
10.3 Adjustable angle.................................................................. 22<br />
10.4 Sun shade........................................................................... 23<br />
11. Maintenance........................................................................ 23<br />
11.1 Frame................................................................................... 23<br />
11.2 Pushchair seat..................................................................... 23<br />
12. Warranty.............................................................................. 24<br />
13
Instructions for using “<strong>kiddy</strong> click’n <strong>move</strong> 2”<br />
Thank you for purchasing the “click‘n <strong>move</strong>” travel system from <strong>kiddy</strong>.<br />
ENG<br />
Your “<strong>kiddy</strong> click’n <strong>move</strong> 2” travel system is a high-quality product that will<br />
give you years of enjoyment with proper use. Your “<strong>kiddy</strong> click’n <strong>move</strong> 2” has<br />
been tested and approved according to EN (DIN) 1888.<br />
Your “<strong>kiddy</strong> click’n <strong>move</strong> 2” ist intended for use with children weighing up to<br />
15 kg (approximately to age 4 using the pushchair seat).<br />
1. General safety tips<br />
Please read these entire instructions carefully before using your<br />
“<strong>kiddy</strong> click’n <strong>move</strong> 2”. Improper use can result in injury.<br />
Do not attempt to alter the components of your “<strong>kiddy</strong> click’n <strong>move</strong><br />
2”.<br />
Check all parts and locks to make sure they are securely in place<br />
before use. Make sure than no screws or rivets are loose or missing.<br />
Check the brakes and wheels regularly to see that they are<br />
functioning properly. If a wheel is squeaking, you can lubricate it with<br />
silicon or machine oil.<br />
Never leave your child unattended in your “<strong>kiddy</strong> click’n <strong>move</strong> 2”.<br />
Lock the emergency brake before seating or removing your child (in<br />
the child seat).<br />
This product is not suitable for using while jogging or skating.<br />
14
ENG<br />
The basket can carry an addtional 5 kg maximum.<br />
Never hang bags, purses or other items on the handle, as this can<br />
impair the stability and therefore safety of your “<strong>kiddy</strong> click’n <strong>move</strong> 2”.<br />
Never use your “<strong>kiddy</strong> click’n <strong>move</strong> 2” on stairs or escalators.<br />
Using the “<strong>kiddy</strong> click’n <strong>move</strong> 2” as a toy is strictly prohibited.<br />
Use only replacement parts or accessories authorized by the<br />
manufacturer.<br />
2. Unpacking<br />
To avoid danger of suffocation, please keep all packing<br />
material out of reach of children.<br />
3. Assembling<br />
Insert the rear axle into both rear wheels until you<br />
hear them snap into place with a click (1 & 2).<br />
Next, slide the the complete rear axle assembly<br />
onto the rear axle carrier (3). The emergency brake<br />
handle should be facing outside.<br />
2 3<br />
1<br />
Slide the axle until it snaps into place on both sides<br />
with a click.<br />
Make sure the wheels and axles are<br />
fully locked in place.<br />
15
ENG<br />
4. Setting up the “<strong>kiddy</strong> click’n <strong>move</strong> 2”<br />
2<br />
3<br />
The frame is designed to be collapsible for easy<br />
storage. This is also the position the frame is in<br />
when it is first delivered.<br />
Be careful not to pinch your finger<br />
while unfolding the frame!<br />
1<br />
Open the locking bar on the right side of the frame<br />
(1).<br />
Press and hold the safety lock (2) under the operation<br />
button on the grip handle.<br />
5<br />
Press the operation button simultaneously (3).<br />
4<br />
4<br />
Hold of the frame still by the side handles (4), and<br />
pull the grip handle (5) up until it engages in place.<br />
The frame is now extended and ready for use.<br />
Test to see that the grip handle is fully<br />
engaged by holding the pram still and<br />
pushing down on the grip handle.<br />
16
ENG<br />
5. Collapsing “<strong>kiddy</strong> click’n <strong>move</strong> 2”<br />
1<br />
3<br />
2<br />
Please re<strong>move</strong> the child seat or carrycot<br />
from the chassis before you are folding<br />
your “<strong>kiddy</strong> click’n <strong>move</strong> 2”. The<br />
seat unit can remain on the chassis, if<br />
it is mounted in driving direction.<br />
Press the safety lock (1) under the operation<br />
button on the grip handle and the operation<br />
button at the same time (2).<br />
Press down on the grip handle (3).<br />
5<br />
6<br />
4<br />
A safety latch snaps into place, preventing you<br />
from pinching your fingers.<br />
Carefully press down slightly on the safety<br />
latch (4).<br />
Hold the grip handle (5) still, and pull on the<br />
side handles on the frame (6) until the pram<br />
collapses.<br />
To keep the frame collapsed for storage, close<br />
the locking bar on the side (7).<br />
7<br />
17
ENG<br />
6. Locking the front wheels<br />
Position the front wheels pointing forward.<br />
Now you can press the grey lock gears into the<br />
square notches. These keep the wheels from<br />
steering.<br />
To unlock the front wheels, simply pull both left<br />
and right lock gears down again.<br />
7. Using the brake<br />
Always use the brake when you wish to place your child (i.e. the<br />
child seat) in or re<strong>move</strong> your child from your “<strong>kiddy</strong> click’n<br />
<strong>move</strong> 2”.<br />
To set the brake, depress the brake lever with your foot. Always check to<br />
make sure the brake has engaged.<br />
To release the brake, lift up on the brake lever with the tip of your foot.<br />
Never leave your child unattended in the travel system, even if<br />
the brake is set!<br />
8. Using the infant carrier<br />
8.1 Inserting the infant carrier<br />
Set up your “<strong>kiddy</strong> click’n <strong>move</strong> 2” as described in Section 4.<br />
18
ENG<br />
The infant carrier may be inserted facing forwards or backwards.<br />
Insert both child seat adapters into the travel system until they<br />
snap in place.<br />
Check to make sure that the adapter locks are open (levers are<br />
in the position indicated in red).<br />
Make certain that your child is<br />
properly secured in the infant<br />
carrier and that the brake is<br />
engaged!<br />
Now you can insert the infant carrier.<br />
Lock the seat in place by pressing down.<br />
Always check to see that the adapters in the<br />
child seat are locked by observing that the<br />
levers on both adapters are now in the upper<br />
position (indicated in yellow).<br />
8.2 Removing the infant carrier<br />
To be able to re<strong>move</strong> the seat, press down on both levers on the adapters<br />
(red position). Now you can pick up the infant carrier.<br />
8.3 Removing the adapters<br />
Press the button on the inner side of the adapter, and pull the adapters up<br />
out of the frame.<br />
19
ENG<br />
9. Using the pushchair seat<br />
The pushchair seat in intended for children weighing<br />
approximately 8 to 15 kg (6 months to 4 years)!<br />
Secure your child properly in the pushchair seat!<br />
When you want to use the pushchair seat with your “<strong>kiddy</strong> click’n <strong>move</strong> 2”,<br />
you must first re<strong>move</strong> both child seat adapters. Press the button on the inner<br />
side of both adapters, and pull them up out of the frame.<br />
9.1 Inserting and removing the pushchair seat<br />
Set up your “<strong>kiddy</strong> click ‘n <strong>move</strong>” as described<br />
in Section 4.<br />
The pushchair seat may be inserted facing forwards<br />
or backwards.<br />
Engage the emergency brake.<br />
Place the the pushchair seat on the frame, and<br />
check ensure that it is securely locked in place.<br />
To re<strong>move</strong> the pushchair seat, press and hold<br />
in both grey buttons on the side of the<br />
pushchair seat, and then pull it up.<br />
9.2 Securing your child<br />
To ensure the safety of your child, the pushchair seat is outfitted with a<br />
five-point restraint system.<br />
20
ENG<br />
Always use the restraint system<br />
whenever you transport your child<br />
in the pushchair seat.<br />
Adjust the belts to fit your child’s size.<br />
To do this:<br />
The seat belts are adjusted in the same manner.<br />
Slide the belt cushion up so you can see the<br />
belt adjustors, and <strong>move</strong> them to fit your child.<br />
There should be at most a finger-width of slack<br />
between the belt and your child.<br />
10. Features of the pushchair seat<br />
10.1 Safety bar<br />
For smaller children, the safety bar should always be used in combination<br />
with the five-point belt restraint system. Larger children do not need the<br />
safety bar.<br />
Installation:<br />
Insert the safety bar (with locking prongs pointed downward) into the<br />
designated sockets on the pushchair seat.<br />
Removal:<br />
To re<strong>move</strong> the safety bar, press in the springs on the underside of the safety<br />
bar, and pull the bar out.<br />
21
ENG<br />
10.2 Adjustable footrest<br />
The footrest can be set in three positions to suit the size of your child.<br />
To adjust the footrest, press both grey buttons (on the outer side of the pivot<br />
point) and simultaneously rotate the footrest to the desired position.<br />
10.3 Adjustable angle<br />
The angle of the pushchair seat can be changed to three different positions,<br />
from upright to nearly lying flat.<br />
To adjust the angle, press the two grey buttons on the inner side of the seat’s<br />
pivot point) and simultaneously rotate the seat to the desired position.<br />
10.4 Sun shade<br />
To protect your child from too much sun exposure, the pushchair seat is<br />
outfitted with a sun shade.<br />
Installation:<br />
Insert the feet of the sun shade frame into the designated sockets. Lay the<br />
back of the shade over the backrest of the seat.<br />
Now you can use the sun shade.<br />
Removal:<br />
Press the levers on the outside left and right of the sun shade mount, and<br />
simultaneously pull the sun shade up and off.<br />
22
ENG<br />
11. Maintenance<br />
11.1 Frame<br />
Check the frame regularly for loose screws and rivets, worn parts and<br />
breakage.<br />
Stop using your “<strong>kiddy</strong> click’n <strong>move</strong> 2” if you discover a defect. Defective<br />
parts must be replaced or repaired before you use the travel system again.<br />
If a wheel begins squeaking, spray a small amount of silicon oil or place a<br />
drop of fine machine oil on the axle. Wipe away any excess oil.<br />
To clean your “<strong>kiddy</strong> click’n <strong>move</strong> 2”, use a mild soap and water. Never use<br />
astringent cleansers or grease-cutters.<br />
If you have problems, please consult your dealer.<br />
11.2 Pushchair seat<br />
Check the seat regularly for splitting seams or other damage.<br />
To clean the seat frame, use a mild soap and water. Never use astringent<br />
cleansers or grease-cutters.<br />
The seat cover is removable and can be washed with delicates at 30°C. Do<br />
not use a spin cycle or a wringer on the seat cover.<br />
23
ENG<br />
12. Warranty<br />
For the travel system we provide a warranty against all defects in materials<br />
or workmanship for up to two years. The warranty period begins from the day<br />
of purchase.<br />
Please present the original purchase receipt for all claims.<br />
The warranty requires that the travel system be properly used and and<br />
returned in good condition.<br />
The warranty does not cover:<br />
- normal wear and tear and damage due to overuse<br />
- damage due to improper and unauthorized use<br />
Material: all our materials meet the highest standards for colourfastness<br />
against UV radiation. Nevertheless, all materials bleach under constant<br />
exposure to UV radiation. Such damage arises not from inferior material but<br />
from normal signs of wear, against such there is no warranty.<br />
For warranty claims, please consult your dealer immediately.<br />
24
FR<br />
Sommaire<br />
1. Informations générales de sécurité................................. 38<br />
2. Ouvrir.................................................................................. 39<br />
3. Montage des éléments...................................................... 39<br />
4. Dépliage la poussette «<strong>kiddy</strong> click’n <strong>move</strong> 2»............... 40<br />
5. Repliage la poussette «<strong>kiddy</strong> click’n <strong>move</strong> 2»............... 41<br />
6. Fixation des roues avant.................................................. 42<br />
7. Frein de stationnement...................................................... 42<br />
8. Utilisation avec siège bébé............................................... 42<br />
8.1 Insérer le siège bébé........................................................... 42<br />
8.2 Retirer le siège bébé........................................................... 43<br />
8.3 Retirer l’adaptateur.............................................................. 43<br />
9. Utilisation avec le siège de la poussette......................... 44<br />
9.1 Insérer et retirer le siège poussette..................................... 44<br />
9.2 Sécuriser l’enfant................................................................. 44<br />
10. Fonctions du siège poussette.......................................... 45<br />
10.1 Arceau de sécurité............................................................... 45<br />
10.2 Réglage du repose-pieds.................................................... 46<br />
10.3 Réglage de l’angle d’assise................................................. 46<br />
10.4 Capote solaire...................................................................... 46<br />
11. Entretien.............................................................................. 47<br />
11.1 Armature.............................................................................. 47<br />
11.2 Siège poussette................................................................... 47<br />
12. Garantie ............................................................................. 48<br />
37
FR<br />
Notice d’utilisation «<strong>kiddy</strong> click’n <strong>move</strong> 2»<br />
Nous sommes très contents que vous ayez choisi d’acheter la poussette<br />
«click’n <strong>move</strong>» de <strong>kiddy</strong>.<br />
Votre poussette «<strong>kiddy</strong> click’n <strong>move</strong> 2» est un produit de haute qualité qui<br />
permet une longue durée d’utilisation pour un usage normal de celui-ci. Votre<br />
«<strong>kiddy</strong> click’n <strong>move</strong> 2» a été contrôlé et homologué pour répondre à la<br />
norme EN (DIN) 1888.<br />
Votre «<strong>kiddy</strong> click’n <strong>move</strong> 2» est conçu pour les enfants (4 ans env.) jusqu’à<br />
15 kilos (avec siège poussette).<br />
1. Informations générales de sécurité<br />
Lisez attentivement la notice de l’utilisateur avant toute première<br />
installation. Une mauvaise utilisation peut être dangereuse pour<br />
votre enfant.<br />
Toute modification apportée aux éléments de votre «<strong>kiddy</strong> click’n<br />
<strong>move</strong> 2» est interdite.<br />
Vérifiez tous les éléments, les verrouillages et si les pièces sont bien<br />
encliquetées avant toute utilisation. Veillez à ce qu’aucune vis ou<br />
rivet ne soit desserré ou débloqué.<br />
Vérifiez que les freins et les roues sont toujours sur leur bon axe de<br />
fonctionnement. Si une roue crisse, graissez-la avec de l’huile de<br />
silicone ou de l’huile de mécanique de précision.<br />
Ne laissez jamais votre bébé sans surveillance dans votre «<strong>kiddy</strong><br />
click’n <strong>move</strong> 2».<br />
Encliquetez le siège bébé avant d’installer l’enfant et mettez toujours<br />
le frein de stationnement lorsque vous sortez l’enfant de la<br />
poussette.<br />
38
FR<br />
Ce produit n’est pas conçu pour le jogging ni le skate.<br />
Le panier à provisions ne doit jamais dépasser 5 kg.<br />
N’accrochez jamais de sacoche, de sac ou d’autres objets à la<br />
poignée, ceci pourrait provoquer une forte défaillance de la stabilité<br />
(sécurité) de votre «<strong>kiddy</strong> click’n <strong>move</strong> 2».<br />
N’utilisez jamais votre «<strong>kiddy</strong> click’n <strong>move</strong> 2» dans les escaliers ni<br />
les escalators.<br />
Il est strictement interdit d’utiliser votre «<strong>kiddy</strong> click’n <strong>move</strong> 2»<br />
comme un jouet.<br />
Seuls les pièces de remplacement et les accessoires autorisés par<br />
votre fabricant peuvent être utilisés.<br />
2. Ouverture<br />
En raison des dangers d’étouffement, l’emballage doit absolument<br />
être mis hors de portée des enfants.<br />
3. Montage des éléments<br />
Insérez les deux roues avant sur l’axe arrière<br />
jusqu’à ce que vous entendiez un clic (N° 1 & 2).<br />
Insérez ensuite l’axe arrière complet (le levier de<br />
frein de stationnement doit être orienté vers<br />
l’arrière) sur le porte moyeu (N° 3).<br />
2 3<br />
1<br />
Enfoncez l’axe jusqu’à ce que celui-ci soit<br />
encliqueté des deux côtés et que vous entendiez<br />
un «clic».<br />
Contrôlez que les roues et l’axe soient<br />
bien encliquetés.<br />
39
FR<br />
4. Dépliage du «<strong>kiddy</strong> click’n <strong>move</strong> 2»<br />
2<br />
3<br />
L’armature a été conçue de manière à ce que vous<br />
puissiez la replier et la ranger facilement.<br />
L’armature est livrée dans cette position.<br />
Attention de ne pas vous coincer les<br />
doigts lorsque vous dépliez la<br />
poussette!<br />
1<br />
Ouvrez le verrou sur le côté droit de l’armature<br />
(N°1).<br />
Appuyez sur le bouton de sécurité (N°2) sous le<br />
bouton d’actionnement sur la poignée centrale.<br />
Appuyez en même temps sur le bouton<br />
d’actionnement (N°3).<br />
4<br />
5<br />
4<br />
Maintenez à présent les petites poignées (N°4) et<br />
tirez la poignée centrale vers le haut (N°5) jusqu’à<br />
ce que vous entendiez un clic.<br />
L’armature est à présent montée.<br />
Vérifiez que la poignée centrale est bien<br />
fixée en appuyant vers le bas de<br />
celle-ci tout en maintenant la poussette<br />
en arrêt.<br />
40
FR<br />
5. Repliage du «<strong>kiddy</strong> click’n <strong>move</strong> 2»<br />
1<br />
3<br />
5<br />
2<br />
6<br />
4<br />
Avant de replier votre «<strong>click'n</strong> <strong>move</strong> 2»<br />
veuillez retirer le siège coque ou la<br />
nacelle du châssis. Pour ce qui est du<br />
siège intégré au châssis, celui-ci peut<br />
rester sur le châssis, si ce siège est<br />
installé en direction de la route (face à<br />
la route).<br />
Appuyez en même temps sur le bouton de<br />
sécurité (N°1) sous le bouton d’actionnement<br />
sur la poignée centrale et le bouton<br />
d’actionnement (N°2).<br />
Tirez la poignée centrale vers le bas (N°3).<br />
Le levier de sécurité s’enclenche à présent,<br />
celui-ci évite de se coincer les doigts.<br />
Appuyez maintenant doucement sur le levier<br />
de sécurité (N°4).<br />
Maintenez la poignée centrale (N° 5) et tirez à<br />
présent sur les poignées (N°6) de l’armature<br />
jusqu’à ce que la poussette se replie.<br />
Pour maintenir la poussette repliée, fermez le<br />
verrou latéral (N°7).<br />
7<br />
41
FR<br />
6. Fixation des roues avant<br />
7. Frein de stationnement<br />
Placez les roues avant parallèlement.<br />
Vous pouvez à présent tirer les leviers jaunes<br />
(à gauche et à droite) vers le haut pour qu’ils<br />
entrent dans les encoches.<br />
Les roues avant ne pivotent plus.<br />
Pour désenclencher les roues avant, baissez à<br />
nouveau les deux leviers (à gauche et à<br />
droite).<br />
Utilisez toujours le frein de stationnement lorsque vous voulez<br />
installer votre enfant (ou le siège bébé) dans votre «<strong>kiddy</strong><br />
click’n <strong>move</strong> 2» (insérer) ou le sortir (retirer).<br />
Pour enclencher le frein, appuyez avec le pied sur le levier de frein vers<br />
l’arrière. Assurez-vous que le frein est bien enclenché.<br />
Pour desserrer le frein relevez avec la pointe du pied le levier de frein.<br />
Ne laissez jamais votre enfant sans surveillance même lorsque<br />
vous avez enclenché le frein!<br />
8. Utilisation avec le siège bébé<br />
8.1 Insertion du siège bébé<br />
Dépliez votre «<strong>kiddy</strong> click’n <strong>move</strong> 2» comme indiqué au point 4.<br />
42
FR<br />
Le siège bébé peut être installé dos à la route ou face à la route.<br />
Enfoncez les deux adaptateurs du siège bébé dans la<br />
poussette jusqu’à ce que ceux-ci s’enclenchent.<br />
Assurez-vous que l’enclencheur de l’adaptateur est ouvert<br />
(position rouge du levier).<br />
Assurez-vous que votre bébé est<br />
correctement sécurisé dans son<br />
siège et que le frein de,<br />
stationnement est enclenché!<br />
Vous pouvez à présent insérer le siège bébé.<br />
Enclenchez le siège bébé en exerçant une<br />
pression vers le bas.<br />
Vérifiez que les adaptateurs sont bien<br />
enclenchés dans le siège bébé. Lorsque le<br />
siège bébé est enclenché, les leviers des deux<br />
adaptateurs sont orientés vers le haut (position<br />
jaune).<br />
8.2 Retirer le siège bébé<br />
Pour retirer le siège bébé appuyez sur les deux leviers des adaptateurs<br />
(position rouge). Vous pouvez ainsi retirer le siège bébé par le haut.<br />
8.3 Retirer les adaptateurs<br />
Appuyez sur le bouton intérieur des adaptateurs et tirez les adaptateurs vers<br />
le haut de l’armature.<br />
43
FR<br />
9. Utilisation avec le siège poussette<br />
Le siège poussette est conçu pour les enfants de 8 à 15 kg env.<br />
(6 mois – 4 ans)!<br />
Sécurisez toujours correctement votre enfant dans le siège<br />
poussette!<br />
Si vous désirez utiliser votre «<strong>kiddy</strong> click’n <strong>move</strong> 2» avec le siège poussette,<br />
vous devez retirer les deux adaptateurs du siège bébé. Appuyez sur le<br />
bouton intérieur des adaptateurs et tirez les adaptateurs par le haut de<br />
l’armature.<br />
9.1 Insérer et retirer le siège poussette<br />
Déplier votre «<strong>kiddy</strong> click’n <strong>move</strong> 2» comme<br />
indiqué au point 4.<br />
Le siège poussette peut être installer face ou<br />
dos à la route.<br />
Mettez le frein de stationnement.<br />
Installez le siège poussette sur l’armature et<br />
veillez à ce que celui-ci soit bien fixé.<br />
Pour retirer le siège poussette, maintenez les<br />
deux boutons gris enfoncés à l’intérieur du<br />
siège poussette et retirez-le.<br />
9.2 Sécuriser l’enfant<br />
Afin de garantir la sécurité de votre enfant, le siège poussette est équipé<br />
d’un harnais à 5 points.<br />
44
FR<br />
Utilisez toujours le harnais lorsque<br />
votre enfant se trouve dans le siège<br />
poussette.<br />
Ajustez le harnais à la taille de votre enfant.<br />
Procédez de la manière suivante:<br />
Relevez les coussinets des bretelles. Les deux<br />
bretelles sont libres et vous pouvez adapter le<br />
harnais à la taille de votre enfant. Laissez au<br />
maximum un doigt entre la ceinture et votre<br />
enfant.<br />
Les bretelles latérales et de l’entrejambe sont réglables de la même<br />
manière.<br />
10. Fonctions du siège poussette<br />
10.1 Arceau de sécurité<br />
L’arceau de sécurité doit être obligatoirement utilisé avec le harnais à 5<br />
points pour les très jeunes enfants. Vous pouvez enlever l’arceau de<br />
sécurité pour les enfants plus âgés.<br />
Montage:<br />
Insérez l’arceau de sécurité (avec les dents d’enclenchement orientées vers<br />
le bas) dans l’ouverture prévue à cet effet dans le siège poussette.<br />
Démontage:<br />
Pour retirer l’arceau de sécurité, appuyez sur les éléments ressort en<br />
dessous de l’arceau et tirez sur l’arceau.<br />
45
FR<br />
10.2 Réglage du repose-pieds<br />
Le repose-pieds est réglable, il peut être mis sur trois positions en fonction<br />
de la taille de l’enfant.<br />
Pour régler le repose-pieds, appuyez sur les deux boutons gris (à l’extérieur<br />
du point de rotation du repose-pieds) et tournez en même temps le<br />
repose-pieds dans la position voulue.<br />
10.3 Réglage de l’angle d’assise<br />
L’angle d’assise peut être réglé sur trois positions pour aller jusqu’à la<br />
position horizontale.<br />
Pour régler l’angle, appuyez sur les deux boutons gris (à l’intérieur du point<br />
de rotation du siège) et placez en même temps le siège dans la position<br />
voulue.<br />
10.4 Capote solaire<br />
Le siège poussette est équipé d’une capote solaire pour protéger votre<br />
enfant des rayons du soleil.<br />
Montage:<br />
Insérez les petits pieds de la capote solaire dans les guides prévus à cet<br />
effet. Placez la partie arrière de la capote au dessus du dossier du siège.<br />
Vous pouvez à présent déplier la capote solaire.<br />
Démontage:<br />
Appuyez sur les leviers à droite et à gauche à l’extérieur de l’ancrage de la<br />
capote solaire et tirez en même temps vers le haut la capote solaire.<br />
46
FR<br />
11. Entretien<br />
11.1 Armature<br />
Vérifiez constamment les vis desserrées, les rivets, les pièces usées et le<br />
matériau endommagé.<br />
N’utilisez plus votre «<strong>kiddy</strong> click’n <strong>move</strong> 2» si vous remarquez une défaillance.<br />
Les pièces endommagées doivent être remplacées ou réparées avant la<br />
prochaine utilisation.<br />
Si une roue crisse, vaporisez un peu d’huile de silicone ou tamponnez l’axe<br />
avec un peu d’huile de mécanique de précision. Retirez l’excédent d’huile.<br />
Pour nettoyer votre «<strong>kiddy</strong> click’n <strong>move</strong> 2», utilisez un liquide vaisselle doux.<br />
N’utilisez en aucun cas de nettoyants agressifs ni de détergents.<br />
En cas de problèmes contactez votre revendeur agréé.<br />
11.2 Siège poussette<br />
Vérifiez constamment si les coutures sont défaites ou s’il y a d’autres<br />
dommages.<br />
Pour nettoyer l’armature du siège, utilisez un liquide vaisselle doux. N’utilisez<br />
en aucun cas de nettoyants agressifs ni de détergents.<br />
La housse est amovible et peut être lavée à 30° (cycle délicat). Pas<br />
d’essorage. Pas de sèche-linge.<br />
47
FR<br />
12. Garantie<br />
Cette poussette est garantie pendant 2 ans contre les vices de fabrication ou<br />
de matériau. La garantie prend effet le jour de l’achat du produit.<br />
Pour toute réclamation, il vous sera exigé un justificatif d’achat.<br />
Cette garantie se limite à la poussette utilisée de manière conforme et<br />
retournée dans un état propre et correct.<br />
La garantie ne s’étend pas:<br />
- aux apparitions d’usure naturelle ni aux dommages liés à une sollicitation<br />
excessive.<br />
- aux dommages liés à une utilisation inappropriée ou non-conforme<br />
Tissus: Tous nos tissus répondent à de hautes exigences en matière de<br />
tenue de couleur contre l’exposition aux UV. Toutefois tous les tissus passent<br />
lorsqu’ils sont soumis aux UV. Il ne s’agit donc pas d’un vice matériel mais<br />
d’une usure normale qui est exclue de la garantie.<br />
Si vous avez un souci lorsque vous êtes sous garantie, veuillez vous<br />
adresser à votre revendeur agréé.<br />
48
ES<br />
Índice<br />
1. Instrucciones generales de seguridad............................ 74<br />
2. Desembalaje....................................................................... 75<br />
3. Montaje de los elementos................................................. 75<br />
4. Desdoblamiento del "<strong>kiddy</strong> click’n <strong>move</strong> 2"................... 76<br />
5. Plegado del "<strong>kiddy</strong> click’n <strong>move</strong> 2"................................. 77<br />
6. Fijación de las ruedas delanteras.................................... 78<br />
7. Freno de estacionamiento................................................. 78<br />
8. Utilización con portabebés............................................... 78<br />
8.1 Encajar el portabebés......................................................... 78<br />
8.2 Retirar el portabebés.......................................................... 79<br />
8.3 Retirada del adaptador........................................................ 79<br />
9. Utilización con el asiento de auto deportivo.................. 80<br />
9.1 Encajar o retirar el asiento de auto deportivo..................... 80<br />
9.2 Aseguramiento del niño....................................................... 80<br />
10. Funciones del asiento de auto deportivo........................ 81<br />
10.1 Arco protector...................................................................... 81<br />
10.2 Ajuste del reposapies.......................................................... 82<br />
10.3 Ajuste del ángulo del asiento............................................... 82<br />
10.4 Techo solar........................................................................... 82<br />
11. Cuidados............................................................................. 83<br />
11.1 Chasis.................................................................................. 83<br />
11.2 Asiento de auto deportivo.................................................... 83<br />
12. Garantia.............................................................................. 84<br />
73
ES<br />
Instrucciones de uso del "<strong>kiddy</strong> click’n <strong>move</strong> 2"<br />
Le agradecemos que se haya decidido por la compra del sistema de viaje<br />
"<strong>click'n</strong> <strong>move</strong>" de <strong>kiddy</strong>.<br />
Su sistema de viaje "<strong>kiddy</strong> click’n <strong>move</strong> 2" es un producto de alta calidad, el<br />
cual, si es usado adecuadamente, tiene larga vida útil. Su "<strong>kiddy</strong> click’n<br />
<strong>move</strong> 2" fue ensayado y homologado según EN (DIN) 1888.<br />
Su "<strong>kiddy</strong> click’n <strong>move</strong> 2" es apropiado para niños con peso corporal de<br />
hasta 15 kg (aprox. 4 años) (cuando usado con asiento de auto deportivo).<br />
1. Instrucciones generales de seguridad<br />
Antes de la primera utilización lea cuidadosamente las instrucciones<br />
de uso. La utilización errónea puede ser peligrosa.<br />
No realice ninguna modificación en los componentes de su "<strong>kiddy</strong><br />
click’n <strong>move</strong> 2".<br />
Antes de cada uso compruebe todos los elementos y cierres, así<br />
como también su encaje seguro. Preste atención que ningún tornillo<br />
o remache se afloje o se suelte.<br />
Compruebe regularmente el correcto funcionamiento de los frenos y<br />
ruedas. En el caso de que una rueda rechine, puede lubricarla con<br />
silicona o aceite fino.<br />
Nunca deje a su niño en el "<strong>kiddy</strong> click’n <strong>move</strong> 2" sin vigilancia.<br />
Antes de sentar al niño (en el portabebés) y antes de retirarlo,<br />
siempre aplique el freno de estacionamiento.<br />
Este producto no es apropiado para usarlo corriendo o con patines.<br />
74
ES<br />
El contenedor de equipaje puede cargarse con sólo 5 kg de peso<br />
adicional.<br />
Nunca cuelgue bolsas, carteras u otros objetos de la manija. Ello<br />
podría perjudicar la estabilidad (seguridad) de su "<strong>kiddy</strong> click’n <strong>move</strong><br />
2".<br />
Nunca utilice su "<strong>kiddy</strong> click’n <strong>move</strong> 2" en escaleras comunes o<br />
rodantes.<br />
El uso de su "<strong>kiddy</strong> click’n <strong>move</strong> 2" como juguete está estrictamente<br />
prohibido.<br />
Sólo deben utilizarse piezas de recambio y accesorios autorizados<br />
por el fabricante.<br />
2. Desembalaje<br />
El material de embalaje debe mantenerse fuera del alcance de<br />
los niños debido al peligro de asfixia.<br />
3. Montaje de los elementos<br />
2 3<br />
1<br />
Introduzca ambas ruedas traseras en el eje<br />
trasero hasta que escuche un nítido clic al encajar<br />
(núm. 1 y 2).<br />
Luego introduzca el eje trasero completo (la<br />
palanca del freno de estacionamiento debe<br />
apuntar hacia atrás) en el soporte del mismo (núm.<br />
3).<br />
Empuje el eje tanto como sea necesario hasta<br />
escuchar un "clic" bien audible en ambos lados.<br />
Controle que las ruedas y el eje estén<br />
totalmente encajados.<br />
75
ES<br />
4. Desdoblamiento del "<strong>kiddy</strong> click’n <strong>move</strong> 2"<br />
2<br />
3<br />
Para facilitar el almacenaje, el chasis está<br />
construido de forma plegable. El chasis se entrega<br />
en esa posición.<br />
Tenga cuidado de no apretarse los<br />
dedos durante el desdoblamiento del<br />
chasis.<br />
1<br />
Abra el pestillo de cierre en el lado derecho del<br />
chasis (núm. 1).<br />
4<br />
5<br />
4<br />
Sujete el botón de aseguramiento (núm. 2) debajo<br />
del botón de accionamiento en el arco de empuñadura.<br />
Simultáneamente presione el botón de accionamiento<br />
(núm. 3).<br />
Ahora sujete el chasis por sus asideros (núm. 4) y<br />
tire del arco de empuñadura hacia arriba (núm. 5)<br />
hasta que encaje con firmeza.<br />
Ahora el chasis está montado.<br />
Compruebe el correcto encaje del arco<br />
de empuñadura sujetando el carro y<br />
presionando el arco hacia abajo.<br />
76
ES<br />
5. Plegado del "<strong>kiddy</strong> click’n <strong>move</strong> 2"<br />
1<br />
3<br />
2<br />
Por favor,extraiga la silla o el capazo<br />
del chasis antes de plegar el “<strong>kiddy</strong><br />
click’n <strong>move</strong> 2”. La silla puede dejarse<br />
montada en el chasis si va colocada<br />
en el sentido de la marcha.<br />
Presione simultáneamente el botón de<br />
aseguramiento (núm. 1) debajo del arco de<br />
empuñadura y el botón de accionamiento<br />
(núm. 2).<br />
Tras ello, presione el arco de empuñadura<br />
hacia abajo (núm. 3).<br />
5<br />
4<br />
Ahora encajará una palanca de<br />
aseguramiento que impide que pueda<br />
apretarse los dedos.<br />
6<br />
Tras ello, presione la palanca de<br />
aseguramiento (núm. 4) un poco hacia abajo.<br />
Sujete el arco de empuñadura (núm. 5) y tire<br />
de los asideros (núm. 6) del chasis hasta que<br />
el carro quede plegado.<br />
Para mantener el chasis plegado, cierre el<br />
pestillo lateral (núm. 7).<br />
7<br />
77
ES<br />
6. Fijación de las ruedas delanteras<br />
7. Freno de estacionamiento<br />
Coloque las ruedas delanteras en posición<br />
recta.<br />
Presione las palancas grises (izquierda y<br />
derecha) hacia arriba, encajándolas en las<br />
entalladuras.<br />
Ahora las ruedas delanteras no pueden girar<br />
más.<br />
Para desbloquear las ruedas delanteras,<br />
presione nuevamente ambas palancas<br />
(izquierda y derecha) hacia abajo.<br />
Siempre utilice el freno de estacionamiento cuando coloque a<br />
su niño (o el portabebés) en su "<strong>kiddy</strong> click’n <strong>move</strong> 2", o lo retire<br />
del mismo.<br />
Para aplicar el freno, presione la palanca de freno hacia abajo con el pie.<br />
Asegúrese de que el freno esté bien encajado.<br />
Para liberar el freno, presione la palanca de freno hacia arriba con la punta<br />
del pie.<br />
Nunca deje a su niño en el Travelsystem sin vigilancia, aun<br />
estando aplicado el freno de mano.<br />
8. Utilización con portabebés<br />
8.1 Encajar el portabebés<br />
Desdoble su "<strong>kiddy</strong> click’n <strong>move</strong> 2" de la forma descrita en el apartado 4.<br />
78
ES<br />
El portabebés puede montarse en el sentido de marcha o en<br />
sentido contrario.<br />
Introduzca los dos adaptadores del portabebés en el<br />
Travelsystem hasta que encajen.<br />
Asegúrese de que el encaje en el adaptador del portabebés<br />
esté abierto (posición en rojo de la palanca).<br />
Compruebe que su niño esté<br />
correctamente asegurado en el<br />
portabebés y que el freno de<br />
estacionamiento esté aplicado.<br />
Tras ello puede encajar el portabebés.<br />
Encaje el portabebés presionándolo hacia<br />
abajo.<br />
Asegúrese de que los adaptadores del<br />
portabebés estén encajados. Cuando el<br />
portabebés está encajado, las palancas de<br />
ambos adaptadores apuntan hacia arriba<br />
(posición en amarillo de la palanca).<br />
8.2 Retirar el portabebés<br />
Para retirar el portabebés, presione ambas palancas de los adaptadores<br />
hacia abajo (posición en rojo de la palanca). Tras ello, el portabebés puede<br />
retirarse tirándolo hacia arriba.<br />
8.3 Retirada del adaptador<br />
Presione el botón en el lado interno del adaptador y tírelo hacia arriba<br />
alejándolo del chasis.<br />
79
ES<br />
9. Utilización con el asiento de auto deportivo<br />
El asiento de auto deportivo sólo es apropiado para niños con<br />
peso corporal de aprox. 8 – 15 kg (6 meses a 4 años).<br />
Siempre asegure correctamente a su niño en el asiento de auto<br />
deportivo.<br />
Para utilizar su "<strong>kiddy</strong> click’n <strong>move</strong> 2" con el asiento de auto deportivo, debe<br />
retirar ambos adaptadores del portabebés. Presione el botón en el lado<br />
interno del adaptador y tírelo hacia arriba alejándolo del chasis.<br />
9.1 Encajar o retirar el accesorio de auto deportivo<br />
Desdoble su "<strong>kiddy</strong> click’n <strong>move</strong> 2" de la forma<br />
descrita en el apartado 4.<br />
El accesorio de auto deportivo puede<br />
montarse en el sentido de marcha o en sentido<br />
contrario.<br />
Aplique el freno de estacionamiento.<br />
Introduzca el accesorio de auto deportivo en el<br />
chasis y compruebe el encaje seguro.<br />
Para retirar el accesorio de auto deportivo,<br />
mantenga presionados los dos botones grises<br />
dentro del accesorio y luego retírelo.<br />
9.2 Aseguramiento del niño<br />
Para garantizar la seguridad de su niño, el asiento de auto deportivo está<br />
equipado con un sistema de cinturón de 5 puntos.<br />
80
ES<br />
Siempre utilice el sistema de<br />
cinturones cuando transporte a su<br />
niño en el asiento de auto<br />
deportivo.<br />
Ajuste el sistema de cinturones de acuerdo<br />
con la altura de su niño.<br />
Proceda como sigue:<br />
Desplace las almohadillas del cinturón hacia<br />
arriba. De esa forma se liberan los reguladores<br />
del cinturón y puede ajustar los cinturones de<br />
hombros según la altura del niño. El espacio libre entre el cinturón y el niño<br />
no debe superar el ancho de un dedo.<br />
Ajuste el cinturón de pelvis de la misma manera.<br />
10. Funciones del asiento de auto deportivo<br />
10.1 Arco protector<br />
Con niños pequeños, el arco protector debe emplearse siempre en<br />
combinación con el sistema de cinturón de 5 puntos. Para niños más<br />
grandes no es necesario emplear el arco protector.<br />
Montaje:<br />
Introduzca el arco protector (con el perno de encaje apuntando hacia abajo)<br />
en la abertura del asiento de auto deportivo prevista con esa finalidad.<br />
Desmontaje:<br />
Para retirar el arco protector, presione los elementos con resorte debajo del<br />
arco y luego extraiga el arco.<br />
81
ES<br />
10.2 Ajuste del reposapies<br />
El reposapies es desplazable y puede ajustarse en 3 medidas de acuerdo<br />
con la altura de su niño.<br />
Para desplazar el reposapies, presione los dos botones grises<br />
(exteriormente en el punto de giro del reposapie) y al mismo tiempo gírelo<br />
hasta la posición deseada.<br />
10.3 Ajuste del ángulo del asiento<br />
El ángulo del asiento de auto deportivo puede regularse en 3 posiciones,<br />
incluyendo la posición acostada.<br />
Para modificar el ángulo, presione los dos botones grises (interiormente en<br />
el punto de giro del asiento) y al mismo tiempo gírelo hasta la posición<br />
deseada.<br />
10.4 Techo solar<br />
El asiento de auto deportivo está equipado con un techo solar para proteger<br />
a su niño de la radiación solar.<br />
Montaje:<br />
Introduzca los extremos del bastidor del techo solar en las guías previstas<br />
con esa finalidad. Coloque la parte trasera del techo por sobre el respaldo<br />
del asiento.<br />
El techo solar está ahora listo para su uso.<br />
Desmontaje:<br />
Presione las palancas exteriores izquierda y derecha en la fijación del techo<br />
solar y, al mismo tiempo, tire del mismo hacia arriba.<br />
82
ES<br />
11. Cuidados<br />
11.1 Chasis<br />
Compruebe regularmente que el chasis no tenga tornillos ni remaches<br />
flojos, piezas desgastadas o materiales rotos.<br />
En el caso de que descubriera algún defecto, no continúe utilizando su<br />
"<strong>kiddy</strong> click’n <strong>move</strong> 2". Antes del próximo uso, las pieza defectuosas deben<br />
ser reparadas o sustituídas.<br />
En el caso de que una rueda rechine, lubrique su eje con un poco de aceite<br />
de silicona o aceite fino. Limpie los restos sobrantes de aceite.<br />
Par limpiar su "<strong>kiddy</strong> click’n <strong>move</strong> 2" utilice una solución jabonosa suave.<br />
Nunca utilice productos de limpieza agresivos o disolventes.<br />
En caso de que hubiera algún problema contacte a su distribuidor.<br />
11.2 Asiento de auto deportivo<br />
Compruebe regularmente que el asiento no tenga costuras abiertas u otros<br />
daños.<br />
Para limpiar el asiento, utilice una solución jabonosa suave. Nunca utilice<br />
productos de limpieza agresivos o disolventes.<br />
Las fundas pueden quitarse y lavarse a 30 °C en modo de lavado suave. La<br />
funda no debe ser centrifugada ni tampoco secada en secaropas.<br />
83
ES<br />
12. Garantia<br />
Garantizamos el Travelsystem contra fallas de fabricación o materiales por<br />
un plazo de 2 años. El período de garantía se inicia el día de la compra.<br />
La factura de compra sirve de comprobante para el reclamo.<br />
La garantía se limita a los Travelsystem usados adecuadamente y devueltos<br />
limpios y en condiciones normales.<br />
La garantía no cubre:<br />
- desgastes naturales y daños causados por sobrecargas excesivas.<br />
- daños causados por utilización inadecuada o incorrecta.<br />
Materiales: Todos nuestros materiales cumplen con exigentes requisitos en<br />
relación con la resistencia del color contra radiación UV. No obstante, todos<br />
los materiales se decoloran cuando son expuestos a la radiación UV. En<br />
tales casos no se trata de fallas de material, sino de un fenómeno normal no<br />
cubierto por la garantía.<br />
Para utilizar la garantía diríjase sin demora a su distribuidor.<br />
84
CN<br />
目 录<br />
1. 通 用 安 全 提 示 ........................................ 182<br />
2. 拆 开 包 装 ............................................ 183<br />
3. 安 装 零 件 ............................................ 183<br />
4. 拆 叠 ”<strong>kiddy</strong> click’n <strong>move</strong> 2”....................... 184<br />
5. 折 叠 ”<strong>kiddy</strong> click’n <strong>move</strong> 2”....................... 185<br />
6. 固 定 前 轮 ............................................ 186<br />
7. 停 车 制 动 器 .......................................... 186<br />
8. 使 用 婴 儿 座 蓝 ........................................ 186<br />
8.1 安 装 婴 儿 座 蓝 ........................................ 186<br />
8.2 拆 卸 婴 儿 座 蓝 ........................................ 187<br />
8.3 拆 卸 适 配 器 .......................................... 187<br />
9. 使 用 儿 童 车 座 位 ...................................... 188<br />
9.1 安 装 或 拆 卸 儿 童 车 座 位 ................................ 188<br />
9.2 儿 童 防 护 ........................................... 188<br />
10. 儿 童 车 座 位 功 能 ...................................... 189<br />
10.1 安 全 环 .............................................. 189<br />
10.2 调 节 脚 支 座 .......................................... 190<br />
10.3 调 节 座 位 角 度 ........................................ 190<br />
10.4 遮 阳 顶 蓬 ............................................ 190<br />
11. 维 护 保 养 ............................................ 191<br />
11.1 车 身 底 盘 / 底 架 ....................................... 191<br />
11.2 儿 童 车 座 位 .......................................... 191<br />
12. 保 修 ............................................... 192<br />
181
CN<br />
产 品 “<strong>kiddy</strong> click’n <strong>move</strong> 2” 使 用 说 明 书<br />
非 常 感 谢 您 订 购 Kiddy ”click’n <strong>move</strong> 2“。<br />
”<strong>kiddy</strong> click’n <strong>move</strong>2“ 移 动 系 统 是 一 种 高 价 值 产 品 ,<br />
在 正 常 情 况 下 , 有 较 长 的 使 用 寿 命 。 “<strong>kiddy</strong> click’n <strong>move</strong><br />
2“ 是 根 据 EN (DIN) 1888 标 准 进 行 检 验 和 许 可 。<br />
”<strong>kiddy</strong> click’n <strong>move</strong> 2“ 适 用 于 体 重 最 大 为 15KG ( 约 4 岁 ) 的 儿 童<br />
( 带 儿 童 车 座 位 )。<br />
1. 通 用 安 全 提 示<br />
在 首 次 使 用 之 前 , 应 仔 细 阅 读 此 使 用 说 明 书 , 误 操 作 可 导 致 儿 童 人 身<br />
伤 害 。<br />
不 可 对 ”<strong>kiddy</strong> click’n <strong>move</strong> 2“ 上 的 零 件 进 行 变 动 。<br />
在 每 次 使 用 之 前 , 应 仔 细 检 查 所 有 的 零 件 和 插 销 以 及 其 安 全 闭 锁 装 置<br />
。 注 意 是 否 有 螺 丝 或 铆 钉 松 动 。<br />
定 期 检 查 制 动 器 和 车 轮 功 能 是 否 正 常 。 如 果 车 轮 发 出 声 响 , 应 使 用 硅<br />
油 或 精 密 机 油 来 进 行 润 滑 。<br />
在 无 人 看 管 的 情 况 下 , 不 可 让 儿 童 在 “<strong>kiddy</strong> click’n <strong>move</strong> 2“<br />
中 。<br />
在 将 小 孩 放 入 “<strong>kiddy</strong> click’n <strong>move</strong> 2“<br />
( 婴 儿 防 护 罩 ) 或 取 出 之 前 , 应 始 终 锁 紧 停 车 制 动 器 .<br />
此 产 品 不 适 合 用 于 摇 动 或 滑 行 。<br />
182
CN<br />
行 李 篮 可 承 受 最 多 为 5KG 的 附 加 物 。<br />
不 可 将 袋 子 , 包 或 其 它 物 品 挂 在 把 手 上 , 这 可 导 致 严 重 损 害 “<strong>kiddy</strong><br />
click’n <strong>move</strong> 2“ 的 稳 定 性 ( 可 靠 性 )。<br />
不 可 在 楼 梯 或 自 动 楼 梯 上 使 用 “<strong>kiddy</strong> click’n <strong>move</strong> 2“。<br />
严 厉 禁 止 将 “<strong>kiddy</strong> click’n <strong>move</strong> 2“ 当 作 玩 具 来 使 用 。<br />
只 可 使 用 由 制 造 商 许 可 的 备 件 以 及 附 件 。<br />
2. 拆 开 包 装<br />
3. 安 装 零 件<br />
由 于 存 在 窒 息 危 险 , 必 须 使 儿 童 远 离 包 装 材 料 。<br />
将 两 个 后 轮 安 装 在 后 轴 上 , 直 到 啮 合 发 出 卡 搭 声 响<br />
。( 数 字 1&2)<br />
随 后 将 整 个 后 轴 ( 停 车 制 动 器 杆 必 须 显 示 向 后 )<br />
安 装 在 后 轴 支 架 上 ( 数 字 3)。<br />
2 3<br />
推 动 此 轴 , 直 到 两 边 啮 合 发 出 卡 搭 声 响 。<br />
检 查 车 轮 以 及 轴 是 否 完 全 锁 紧 。<br />
1<br />
183
CN<br />
4. 拆 叠 “<strong>kiddy</strong> click’n <strong>move</strong> 2“<br />
2<br />
为 了 便 于 保 管 , 如 此 设 计 构 造 车 底 架 , 以 便 可 进 行<br />
折 叠 。 这 是 此 位 置 安 装 车 底 架 。<br />
3<br />
注 意 , 在 拆 叠 车 底 架 时 , 应 小 心 别 夹 伤 手 指 !<br />
1<br />
打 开 位 于 车 底 架 右 侧 的 锁 紧 闩 ( 数 字 1)。<br />
4<br />
5<br />
4<br />
抓 住 位 于 手 柄 环 上 确 认 按 钮 下 方 的 安 全 按 钮<br />
( 数 字 2)。<br />
同 时 按 下 确 认 按 钮 ( 数 字 3)。<br />
这 时 , 可 抓 住 手 柄 上 的 支 架 ( 数 字 4) 并 且 向 上 拉 手<br />
柄 环 ( 数 字 5), 直 到 其 完 全 啮 合 。<br />
现 在 可 安 装 车 底 架 。<br />
通 过 抓 住 车 子 和 向 下 挤 压 手 柄 环 的 方 式 来 检 测 手 柄<br />
环 是 否 完 全 锁 紧 。<br />
184
CN<br />
5. 折 叠 “<strong>kiddy</strong> click’n <strong>move</strong> 2“<br />
1<br />
3<br />
5<br />
2<br />
6<br />
4<br />
请 在 折 叠 推 CLICK’N MOVE 2<br />
推 车 前 将 座 椅 或 提 蓝 取 下 。 如 果 座 椅 面 向 正 前<br />
方 , 则 可 以 不 必 取 下 座 椅 就 能 折 叠 推 车 。<br />
同 时 按 压 手 柄 环 上 确 认 按 钮 下 方 的 安 全 按 钮<br />
( 数 字 1) 和 确 认 按 钮 ( 数 字 2)。<br />
将 手 柄 环 向 下 按 压 ( 数 字 3)。<br />
现 在 可 啮 合 安 全 杠 , 此 安 全 杠 可 防 止 夹 伤 手 指<br />
这 时 可 小 心 将 安 全 杠 ( 数 字 4) 压 入 少 许 。<br />
抓 紧 手 柄 环 ( 数 字 5)<br />
并 且 这 时 抽 出 车 底 架 上 的 手 柄 ( 数 字 6)<br />
直 到 车 子 折 叠 在 一 起 。<br />
为 了 使 车 底 座 保 持 折 叠 状 态 , 可 关 闭 旁 边 的 闭<br />
锁 闩 ( 数 字 7)。<br />
7<br />
185
CN<br />
6. 固 定 前 轮<br />
使 前 轮 竖 直 。<br />
现 在 可 将 灰 色 杆 ( 左 边 和 右 边 )<br />
向 上 按 压 至 切 口 位 置 。<br />
此 时 , 前 轮 不 可 转 向 。<br />
向 下 按 压 两 个 杆<br />
( 左 边 和 右 边 ), 可 将 前 轮 进 行 脱 扣 。<br />
7. 停 车 制 动 器<br />
当 小 孩 ( 或 婴 儿 座 蓝 ) 在 “<strong>kiddy</strong> click’n <strong>move</strong> 2“ 中 ( 或 安 装 )<br />
或 取 出 ( 或 拆 卸 ) 时 , 应 使 用 停 车 制 动 器 。<br />
用 脚 向 下 按 压 制 动 踏 板 , 可 锁 紧 制 动 器 。 应 确 定 , 制 动 器 是 否 啮 合 。<br />
再 用 脚 尖 向 上 按 压 制 动 踏 板 , 可 松 开 制 动 器 。<br />
即 使 制 动 器 已 经 啮 合 , 在 无 人 看 管 的 情 况 下 , 也 决 不 可 将 小 孩 放 置 在<br />
运 输 系 统 中 !<br />
8. 使 用 婴 儿 座 蓝<br />
8.1 安 装 婴 儿 座 蓝<br />
按 条 款 4 中 所 描 述 的 内 容 来 拆 叠 “<strong>kiddy</strong> click’n <strong>move</strong> 2“。<br />
186
CN<br />
可 以 按 行 驶 方 向 和 逆 行 方 向 来 安 装 婴 儿 座 蓝 。<br />
将 两 个 婴 儿 座 蓝 适 配 器 安 装 在 运 输 系 统 上 , 直 到 其 啮 合 为 止 。<br />
应 确 认 , 婴 儿 座 蓝 适 配 器 上 的 紧 锁 装 置 已 打 开 ( 杆 红 色 位 置 )。<br />
应 确 保 , 小 孩 在 座 蓝 内 安 全 , 并 且 停<br />
车 制 动 器 已 啮 合 !<br />
这 时 可 安 装 婴 儿 座 蓝 。<br />
通 过 向 下 按 压 , 可 将 座 蓝 进 行 紧 锁 。<br />
确 定 , 是 否 适 配 器 已 啮 合 在 座 蓝 内 。 若 座 蓝 已<br />
啮 合 , 在 两 个 适 配 器 上 的 杆 指 示 向 上 ( 杆 黄 色 位<br />
置 )。<br />
8.2 拆 卸 婴 儿 座 蓝<br />
向 下 按 压 适 配 器 上 的 两 个 杆 ( 杆 红 色 位 置 ), 可 拆 下 婴 儿 座 蓝 。 这 时 可 向 下 拆<br />
下 婴 儿 座 蓝 。<br />
8.3 拆 卸 适 配 器<br />
按 压 适 配 器 里 面 的 按 钮 , 并 且 从 车 底 架 可 向 上 拔 出 适 配 器 。<br />
187
CN<br />
9. 使 用 儿 童 车 座 位<br />
此 儿 童 车 座 位 适 用 于 体 重 约 为 8KG 至 15KG (6 个 月 - 4 岁 ) 的 儿 童 !<br />
在 儿 童 车 座 位 上 应 确 保 小 孩 安 全 !<br />
若 使 用 带 儿 童 车 座 位 的 ”<strong>kiddy</strong> click’n <strong>move</strong> 2“,<br />
必 须 拆 卸 两 个 婴 儿 座 蓝 适 配 器 。<br />
按 压 适 配 器 里 面 的 按 钮 , 并 且 从 车 底 架 可 向 上 拔 出 适 配 器 。<br />
9.1 安 装 或 拆 卸 儿 童 车 顶 盖<br />
按 条 款 4 中 所 描 述 的 内 容 来 拆 叠 “<strong>kiddy</strong><br />
click’n <strong>move</strong> 2’。<br />
可 以 按 行 驶 方 向 和 逆 行 方 向 来 安 装 儿 童 车 顶 盖<br />
。<br />
啮 合 停 车 制 动 器 。<br />
将 儿 童 车 顶 盖 安 装 在 车 底 架 上 , 并 注 意 要 锁 紧<br />
牢 固 。<br />
抓 住 在 儿 童 车 顶 盖 内 的 两 个 灰 色 按 钮 并 且 将 其<br />
拆 下 , 这 可 将 儿 童 车 顶 盖 拆 下 。<br />
9.2 儿 童 保 护<br />
为 了 确 保 儿 童 安 全 , 儿 童 车 座 位 装 备 了 一 个 五 点 式 皮 带 系 统 。<br />
188
CN<br />
当 小 孩 在 儿 童 车 座 位 上 , 要 进 行 移 动 时<br />
, 应 使 用 此 皮 带 系 统 。<br />
根 据 儿 童 身 体 高 度 可 调 节 皮 带 系 统 。<br />
同 时 采 取 如 下 措 施 :<br />
将 皮 带 衬 垫 向 上 推 移 。 这 时 可 松 开 皮 带 调 节 装<br />
置 , 并 根 据 小 孩 身 高 来 调 节 肩 带 。 在 皮 带 和 小<br />
孩 之 间 最 多 允 许 有 一 个 手 指 的 宽 度 。<br />
以 同 样 的 方 式 来 调 节 骨 盆 皮 带 。<br />
10. 儿 童 车 座 位 的 功 能<br />
10.1 安 全 环<br />
用 于 较 小 儿 童 的 安 全 环 必 须 与 五 点 式 皮 带 系 统 组 合 使 用 。 较 大 的 儿 童 可 不 使<br />
用 安 全 环 。<br />
安 装 :<br />
将 安 全 环 ( 用 紧 锁 栓 向 下 指 示 ) 安 装 在 儿 童 车 座 位 上 预 先 规 定 孔 中 。<br />
拆 卸 :<br />
向 里 按 压 在 安 全 环 下 方 的 弹 簧 元 件 并 且 随 后 拔 出 安 全 环 。<br />
189
CN<br />
10.2 调 节 脚 支 座<br />
脚 支 座 是 可 以 调 节 的 , 根 据 儿 童 身 高 可 在 3 个 等 级 内 进 行 调 节 。<br />
按 压 两 个 灰 色 的 按 钮 ( 在 脚 支 座 支 点 外 ), 并 同 时 将 脚 支 座 旋 转 在 所 想 要 的 位<br />
置 , 才 可 调 节 脚 支 座 。<br />
10.3 调 节 座 位 角 度<br />
儿 童 车 座 位 的 角 度 可 在 3 个 位 置 内 进 行 变 动 , 直 至 平 放 位 置 。<br />
按 压 两 个 灰 色 的 按 钮 ( 在 座 位 支 点 内 ), 并 同 时 将 座 位 旋 转 在 所 想 要 的 位 置 ,<br />
才 可 调 节 此 角 度 。<br />
10.4 遮 阳 顶 蓬<br />
装 备 有 遮 阳 顶 蓬 的 儿 童 车 座 位 可 防 止 儿 童 遭 受 太 阳 光 辐 射 。<br />
安 装 :<br />
将 遮 阳 顶 蓬 框 架 的 基 脚 安 装 在 预 先 规 定 的 导 轨 上 。 将 遮 阳 顶 蓬 的 后 部 放 在 座<br />
位 的 靠 背 之 上 。<br />
现 可 以 使 用 遮 阳 顶 蓬<br />
拆 卸 :<br />
在 遮 阳 顶 蓬 的 固 定 处 外 面 , 按 压 左 右 杆 , 并 且 同 时 向 上 拔 出 此 遮 阳 顶 蓬 。<br />
190
CN<br />
11. 维 护 保 养<br />
11.1 车 底 架<br />
经 常 检 查 车 底 架 , 是 否 存 在 螺 丝 松 动 , 铆 钉 松 动 , 元 件 磨 损 以 及 材 料 破 损 。<br />
若 看 到 受 损 部 件 , 不 可 再 使 用 ”<strong>kiddy</strong> click’n <strong>move</strong> 2“,<br />
受 损 元 件 必 须 在 下 次 使 用 之 前 进 行 更 换 或 维 修 。<br />
若 车 轮 发 出 异 响 , 应 喷 洒 少 许 硅 油 或 轻 涂 一 些 精 密 机 油 在 轴 上 。 然 后 擦 拭 多<br />
余 的 油 迹 。<br />
可 使 用 中 性 的 肥 皂 碱 液 来 清 洗 ”<strong>kiddy</strong> click’n <strong>move</strong> 2“。<br />
决 不 可 使 用 强 性 清 洗 剂 或 溶 剂 来 进 行 清 洗 。<br />
若 有 疑 问 , 可 咨 询 当 地 专 业 经 销 商 。<br />
11.2 儿 童 车 座 位<br />
经 常 检 查 座 位 , 是 否 结 合 线 松 开 或 其 它 损 坏 。<br />
可 使 用 中 性 肥 皂 碱 液 来 清 洗 座 位 支 架 , 决 不 可 使 用 强 性 清 洗 剂 或 溶 剂 来 进 行<br />
清 洗 。<br />
此 外 套 可 拆 卸 , 并 且 可 在 温 度 30 度 情 况 下 , 在 ( 罩 布 清 洗 过 程 ) 中 可 进 行 清 洗<br />
。 此 外 套 既 可 通 过 离 心 分 离 进 行 脱 水 干 燥 , 也 可 在 烘 干 机 中 进 行 烘 干 。<br />
191
CN<br />
12. 保 修<br />
我 们 可 为 运 输 系 统 提 供 2 年 的 制 造 缺 陷 和 材 料 缺 陷 保 修 。 保 修 期 从 采 购 当 日 开<br />
始 。<br />
购 物 凭 证 为 索 赔 的 根 据 。<br />
此 保 修 仅 限 于 运 输 系 统 , 运 输 系 统 经 适 当 处 理 后 , 以 干 净 和 整 齐 的 状 态 送 回<br />
至 我 司 。<br />
此 保 修 没 有 涉 及 到 :<br />
- 自 然 磨 损 现 象 及 由 于 过 量 负 荷 而 导 致 的 损 坏<br />
- 由 于 误 操 作 而 导 致 大 损 坏<br />
材 料 : 所 有 使 用 的 材 料 都 能 满 足 关 于 防 止 UV-<br />
辐 射 的 颜 色 稳 定 性 的 高 要 求 。 当 受 到 UV-<br />
辐 射 后 , 所 有 的 材 料 都 褪 色 了 。 此 时 , 不 涉 及 到 材 料 缺 陷 , 而 是 涉 及 到 正 常<br />
磨 损 现 象 , 对 此 , 不 承 担 保 修 。<br />
在 出 现 保 修 的 情 况 下 , 请 及 时 向 供 应 商 请 求 帮 助 。<br />
192
<strong>kiddy</strong> GmbH<br />
Schaumbergstr. 8<br />
D-95032 Hof / Saale<br />
Phone: 0049 (0)9281 / 7080-0<br />
Fax: 0049 (0)9281 / 7080 -21<br />
E-mail: info@<strong>kiddy</strong>.de


