CentrÃfuga IDEXX StatSpin* VT GuÃa de usuario IDEXX StatSpin* VT ...
CentrÃfuga IDEXX StatSpin* VT GuÃa de usuario IDEXX StatSpin* VT ...
CentrÃfuga IDEXX StatSpin* VT GuÃa de usuario IDEXX StatSpin* VT ...

You also want an ePaper? Increase the reach of your titles
YUMPU automatically turns print PDFs into web optimized ePapers that Google loves.
<strong>IDEXX</strong> <strong>StatSpin*</strong> <strong>VT</strong> Centrifuge<br />
Operator’s Gui<strong>de</strong><br />
Centrifugeuse <strong>IDEXX</strong> <strong>StatSpin*</strong> <strong>VT</strong><br />
Manuel d’utilisation<br />
Centrífuga <strong>IDEXX</strong> <strong>StatSpin*</strong> <strong>VT</strong><br />
Guía <strong>de</strong> <strong>usuario</strong><br />
<strong>IDEXX</strong> <strong>StatSpin*</strong> <strong>VT</strong>-Zentrifuge<br />
Bedienungshandbuch<br />
Centrifuga <strong>VT</strong> <strong>IDEXX</strong> <strong>StatSpin*</strong><br />
Manuale operativo<br />
<strong>IDEXX</strong> スタットスピン* <strong>VT</strong><br />
遠 心 分 離 器<br />
取 扱 説 明 書<br />
06-11290-05
<strong>IDEXX</strong> StatSpin * <strong>VT</strong> Centrifuge<br />
Operator’s Gui<strong>de</strong>—English Version<br />
<strong>IDEXX</strong> StatSpin * <strong>VT</strong> Centrifuge<br />
Operator’s Gui<strong>de</strong><br />
English Version
<strong>IDEXX</strong> <strong>StatSpin*</strong> <strong>VT</strong> Centrifuge<br />
Mo<strong>de</strong>l Number V901<br />
For veterinary use only.<br />
Product Number<br />
SS<strong>VT</strong>-4 <strong>IDEXX</strong> StatSpin <strong>VT</strong> Centrifuge for 100–240 V AC, 50/60 Hz<br />
Proprietary Rights Notice<br />
Information in this document is subject to change without notice. Companies, names and data used in examples<br />
are fictitious unless otherwise noted. No part of this document may be reproduced or transmitted in any form or by<br />
any means, electronic, mechanical or otherwise, for any purpose, without the express written permission of <strong>IDEXX</strong><br />
Laboratories. <strong>IDEXX</strong> may have patents or pending patent applications, tra<strong>de</strong>marks, copyrights or other intellectual or<br />
industrial property rights covering this document or subject matter in this document. The furnishing of this document<br />
does not give a license to these property rights except as expressly provi<strong>de</strong>d in any written license agreement from<br />
<strong>IDEXX</strong> Laboratories.<br />
© 2012 <strong>IDEXX</strong> Laboratories, Inc. All rights reserved.<br />
*StatSpin, StatSampler, LipoClear, PlasmaRotor and SafeCrit are tra<strong>de</strong>marks or registered tra<strong>de</strong>marks of Iris Sample<br />
Processing in the United States and/or other countries. BD and Microtainer are tra<strong>de</strong>marks of Becton, Dickinson<br />
and Company. Eppendorf Tubes is a registered tra<strong>de</strong>mark of Eppendorf North America, Inc. All other product and<br />
company names and logos are tra<strong>de</strong>marks of their respective hol<strong>de</strong>rs.<br />
The StatSpin blood collection <strong>de</strong>vice is covered un<strong>de</strong>r U.S. patent no. 5,257,984.<br />
<strong>IDEXX</strong> StatSpin <strong>VT</strong> Centrifuge Operator’s Gui<strong>de</strong> 2
Contents<br />
Introduction..................................................................................................................................4<br />
Symbols ............................................................................................................................................................5<br />
Set Up...........................................................................................................................................6<br />
Contents............................................................................................................................................................6<br />
Positioning the <strong>IDEXX</strong> StatSpin <strong>VT</strong> Centrifuge..................................................................................................6<br />
Connecting the Power.......................................................................................................................................6<br />
Overview.......................................................................................................................................7<br />
Principle and Inten<strong>de</strong>d Use...............................................................................................................................7<br />
Compatible Rotors for the <strong>IDEXX</strong> StatSpin <strong>VT</strong> Centrifuge.................................................................................7<br />
Using the <strong>IDEXX</strong> <strong>StatSpin*</strong> <strong>VT</strong> Centrifuge...................................................................................8<br />
Opening and Closing the Cover .......................................................................................................................8<br />
Installing a Rotor................................................................................................................................................8<br />
Installing a Shield...............................................................................................................................................9<br />
Selecting Cycle Settings....................................................................................................................................9<br />
Sample Processing......................................................................................................................9<br />
Venous Blood for Coagulation and Chemistry..................................................................................................9<br />
Urine Sediment for Microscopic Examination.................................................................................................10<br />
Lipemic Samples.............................................................................................................................................10<br />
Microhematocrit for Packed Cell Volume........................................................................................................11<br />
Cleaning and Maintenance........................................................................................................12<br />
Cleaning...........................................................................................................................................................12<br />
Checking the Rotor Speed..............................................................................................................................13<br />
Replacing the O-Ring......................................................................................................................................13<br />
Error Indicators................................................................................................................................................13<br />
Maintenance Log.............................................................................................................................................14<br />
Troubleshooting...............................................................................................................................................16<br />
Service.............................................................................................................................................................16<br />
Specifications.............................................................................................................................17<br />
Centrifuge........................................................................................................................................................17<br />
Accessories.....................................................................................................................................................18<br />
<strong>IDEXX</strong> Technical Support Contact Information.........................................................................19<br />
<strong>IDEXX</strong> StatSpin <strong>VT</strong> Centrifuge Operator’s Gui<strong>de</strong> 3
Introduction<br />
This manual, along with information contained on product labels and in package inserts, should<br />
provi<strong>de</strong> you with all the information you need to operate and maintain the <strong>IDEXX</strong> <strong>StatSpin*</strong> <strong>VT</strong><br />
Centrifuge.<br />
When the information requires special attention, either a caution symbol or a !<br />
biohazard symbol appears next to the text.<br />
Caution Biohazard<br />
Please pay close attention to the instructions that accompany the notes and symbols, as well as<br />
the standard laboratory practices outlined by your facility and local regulatory agencies. The table<br />
below lists all the cautions and warnings for the <strong>IDEXX</strong> StatSpin <strong>VT</strong> Centrifuge.<br />
WARNING: North America: Only use the power supply inclu<strong>de</strong>d with the unit. Use of<br />
other power supplies or transformers will damage the <strong>IDEXX</strong> StatSpin <strong>VT</strong> Centrifuge<br />
electronics and void the warranty.<br />
WARNING: Outsi<strong>de</strong> North America: Do not use the power cord supplied. Use a power cord<br />
for at least 1.0 amp or more, with IEC320/CEE22 connectors suitable for the power outlet to<br />
be used.<br />
CAUTION: Do not operate the centrifuge without a shield in place when using an RT12 rotor.<br />
CAUTION: Do not use a shield with the RH12 Microhematocrit rotor.<br />
CAUTION: The cover interlock bypass is for emergency use only. Misuse may expose the<br />
operator to unsafe conditions.<br />
CAUTION: Do not leave any rotor on the rotor-hol<strong>de</strong>r when the <strong>IDEXX</strong> StatSpin <strong>VT</strong> Centrifuge<br />
is not in use for an exten<strong>de</strong>d period of time. Doing so may compress the O-ring, <strong>de</strong>creasing its<br />
ability to hold rotors.<br />
CAUTION: Failure to properly install the rotor may result in damage to the centrifuge not<br />
covered by warranty.<br />
CAUTION: If the rotor is left in place between runs, seat the rotor on the rotor-hol<strong>de</strong>r before<br />
spinning another sample. Failure to properly seat the rotor each time may result in the rotor<br />
becoming loose during centrifugation.<br />
CAUTION: The RT12 and RM02 tube rotors must be balanced before operation. If only one<br />
sample is being processed, a second sample can serve as the balance tube, or use a similar<br />
tube filled with water as a balance.<br />
CAUTION: DO NOT spin glass tubes of any kind in the RT12 rotor.<br />
IMPORTANT: All rotors have a finite lifespan that is <strong>de</strong>pen<strong>de</strong>nt upon usage. Rotors should<br />
be inspected for cracks and should be replaced immediately when any crack or visible wear<br />
occurs. Always install a new shield when installing a new RT12 rotor.<br />
CAUTION: Unplug the <strong>IDEXX</strong> StatSpin <strong>VT</strong> Centrifuge from the wall outlet before cleaning or<br />
performing maintenance.<br />
WARNING: Do not expose the <strong>IDEXX</strong> StatSpin <strong>VT</strong> Centrifuge and its rotor to strong or<br />
concentrated acids; bases or oxidizing agents; aromatic or halogenated hydrocarbons; esters<br />
or ketones.<br />
CAUTION: Do not spray cleaning solutions directly onto the centrifuge bowl or housing;<br />
overspray could reach the motor bearings or internal circuitry. Subsequent damage may not<br />
be covered by warranty.<br />
CAUTION: Follow universal precautions with all biological specimens, regardless of whether<br />
the specimen is known to contain an infectious agent.<br />
Use the centrifuge as inten<strong>de</strong>d. Improper use of the <strong>IDEXX</strong> StatSpin <strong>VT</strong> Centrifuge and/or its<br />
accessories may cause damage to the centrifuge, inaccurate results or potentially nullify warranties.<br />
<strong>IDEXX</strong> StatSpin <strong>VT</strong> Centrifuge Operator’s Gui<strong>de</strong> 4
Symbols<br />
The following table <strong>de</strong>scribes the symbols you see on the outsi<strong>de</strong> of the <strong>IDEXX</strong> StatSpin <strong>VT</strong><br />
Centrifuge or within this gui<strong>de</strong>.<br />
Symbol/Button Name Description<br />
Start<br />
Stop/Open<br />
The Start button initiates a pretimed cycle at a set speed.<br />
NOTE: The <strong>IDEXX</strong> StatSpin <strong>VT</strong> Centrifuge does not have an on/off<br />
switch and is normally left plugged in and “on.”<br />
The Stop/Open button interrupts the cycle and releases the cover<br />
when the rotor has stopped.<br />
SET<br />
Cycle Selector<br />
(SET)<br />
The Cycle Selector (SET) button lets you select a spin cycle.<br />
(red)<br />
24 V – – – 1.7 A<br />
(green)<br />
!<br />
Error/Service<br />
Power Input<br />
Cycle Indicator<br />
Caution<br />
Temperature<br />
Limitation<br />
The Error/Service indicator is illuminated continuously or flashes<br />
when service is required.<br />
The Power Input symbol is located on the back of the <strong>IDEXX</strong><br />
StatSpin <strong>VT</strong> Centrifuge next to the DC power input port. This is where<br />
you plug in the 24 V DC cord.<br />
The Cycle Indicator, when lit a solid green, indicates the spin cycle<br />
selected. One or more cycle indicators flashing green, along with<br />
a flashing error/service indicator, signifies an error. See the Error<br />
Indicator section for more information on these errors.<br />
The Caution symbol appears on top of the cover latch. Do not open<br />
the cover until the rotor has stopped spinning. Within this operator’s<br />
gui<strong>de</strong>, the Caution symbol indicates a statement of caution/warning<br />
that you should read carefully.<br />
The Temperature Limitation symbol indicates storage or operating<br />
temperature restrictions.<br />
IVD<br />
For in-vitro<br />
diagnostic use<br />
The IVD symbol indicates an item that is for use only as an<br />
in-vitro diagnostic <strong>de</strong>vice.<br />
Nonsterile<br />
The Nonsterile symbol indicates a nonsterile product.<br />
NON<br />
STERILE<br />
S N<br />
Serial Number<br />
The S N symbol indicates a serial number.<br />
Consult<br />
Instructions<br />
The Consult Instructions symbol indicates that you should refer to<br />
the operator’s gui<strong>de</strong> or insert for additional information.<br />
Biological Risk<br />
The Biological Risk symbol indicates that universal biological<br />
precautions should be followed on all specimens.<br />
<strong>IDEXX</strong> StatSpin <strong>VT</strong> Centrifuge Operator’s Gui<strong>de</strong> 5
Set Up<br />
The <strong>IDEXX</strong> <strong>StatSpin*</strong> <strong>VT</strong> Centrifuge and its accessories are <strong>de</strong>livered in one carton. If the centrifuge or<br />
accessories have been damaged in transport, inform your carrier immediately.<br />
Contents<br />
• Product Number:<br />
– SS<strong>VT</strong>-4<br />
• The above option contains:<br />
– One universal switching power supply (StatSpin product # 01-005940-001,<br />
<strong>IDEXX</strong> part # 79-17310-00, APS Product # AD-740U-1240)<br />
– One groun<strong>de</strong>d power cord (for use in North America only)<br />
– One <strong>IDEXX</strong> StatSpin <strong>VT</strong> Centrifuge Operator’s Gui<strong>de</strong><br />
Positioning the <strong>IDEXX</strong> StatSpin <strong>VT</strong> Centrifuge<br />
• Place the <strong>IDEXX</strong> StatSpin <strong>VT</strong> Centrifuge on a level surface suitable for operation of laboratory<br />
instrumentation.<br />
• Position the <strong>IDEXX</strong> StatSpin <strong>VT</strong> Centrifuge out of direct sunlight and away from sources of<br />
intense heat or cold.<br />
• Maintain a clearance of 12 in (30 cm) around the centrifuge for ventilation and safety.<br />
Connecting the Power<br />
NOTE: The 24 V DC plug-in and the power cord are attached to a universal switching<br />
power supply.<br />
1. Plug the 24 V DC plug-in into the DC power input port on the back of the <strong>IDEXX</strong> StatSpin<br />
<strong>VT</strong> Centrifuge.<br />
2. Plug the power cord into a groun<strong>de</strong>d outlet supplying the voltage and frequency indicated<br />
on the power supply. When power is connected, the Power On LED illuminates and the cover<br />
lock releases.<br />
!<br />
!<br />
WARNING: North America: Only use the power supply inclu<strong>de</strong>d with the centrifuge. Use<br />
of other power supplies or transformers will damage the <strong>IDEXX</strong> StatSpin <strong>VT</strong> Centrifuge<br />
electronics and void the warranty.<br />
WARNING: Outsi<strong>de</strong> North America: Do not use the power cord supplied. Use a power cord<br />
with at least 1.0 amp or more, with IEC320/CEE22 connectors suitable for the power outlet to<br />
be used.<br />
<strong>IDEXX</strong> StatSpin <strong>VT</strong> Centrifuge Operator’s Gui<strong>de</strong> 6
Overview<br />
Principle and Inten<strong>de</strong>d Use<br />
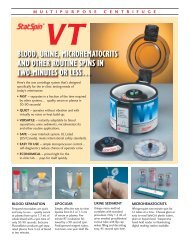
The <strong>IDEXX</strong> <strong>StatSpin*</strong> <strong>VT</strong> Centrifuge is only for invitro diagnostic use to:<br />
• Produce the rapid separation of whole blood<br />
• Prepare urine sediment for microscopic analysis<br />
• Centrifuge microhematocrit tubes for packed cell volume <strong>de</strong>termination<br />
The <strong>IDEXX</strong> StatSpin <strong>VT</strong> Centrifuge is a small, quiet, high-speed centrifuge. Its unique, proprietary<br />
drive and suspension system provi<strong>de</strong> nearly vibration-free operation. Light-weight, low-mass<br />
rotors achieve top speed and full braking in a few seconds. The <strong>IDEXX</strong> StatSpin <strong>VT</strong> Centrifuge is<br />
<strong>de</strong>signed to meet international safety standards.<br />
Safety Notice: It is recommen<strong>de</strong>d to follow good safety practices when working in the<br />
laboratory. This inclu<strong>de</strong>s but is not limited to the use of personal protective equipment<br />
(PPE), such as gloves and protective eyewear, when working with patient samples, reagents<br />
or when operating laboratory equipment such as the StatSpin Centrifuge.<br />
Compatible Rotors for the <strong>IDEXX</strong> StatSpin <strong>VT</strong> Centrifuge<br />
RT12 Tube Rotor<br />
The RT12 Tube Rotor is a two-place rotor <strong>de</strong>signed to accommodate a variety of sample processing<br />
tubes for blood and urine separation, including standard 1.5-mL and 2.0-mL centrifuge tubes with a<br />
maximum diameter of 10.9 mm. These tubes should be supported by the collar of the rotor.<br />
!<br />
CAUTION: DO NOT spin glass tubes of any kind in the RT12 rotor.<br />
CAUTION: DO NOT operate the centrifuge without a shield in place when using an RT12 rotor.<br />
The following tubes are approved for use with the RT12 rotor:<br />
• Prepared microtubes: TP1H, TP1U, TP5G and CH03<br />
• StatSampler*: SS2H, SS2E, SS2U, SS2X, SS1E<br />
• Precalibrated urine tube: TU15-10<br />
• LipoClear* reagent tubes: LC10, LC40 and LC15<br />
• Standard 1.5–2.0-mL microcentrifuge tube (e.g., Eppendorf* tubes)<br />
• Microtainer adapter option: The BD Microtainer Tubes can be used with the RT12 rotor when<br />
used in conjunction with the Microtainer Adapters (StatSpin part # SV12)<br />
RM02 Tube Rotor<br />
Designed specifically for BD Microtainer tubes, this two-place rotor also accepts standard<br />
0.5-mL microcentrifuge tubes. Maximum tube diameter is 8.3 mm. The following tubes are approved<br />
for use in this rotor:<br />
• BD Microtainer Tubes with flow-top collector ONLY<br />
• 0.5-mL microcentrifuge tubes (7.5 mm O.D. x 35 mm L)<br />
RH12 Microhematocrit Rotor<br />
The RH12 Microhematocrit Rotor is a 12-place covered rotor used to centrifuge capillary tubes for<br />
microhematocrit testing. Maximum tube size is 1.7 mm O.D. x 42 mm L. <strong>IDEXX</strong> recommends that the<br />
rubber cushions provi<strong>de</strong>d with the rotor be replaced twice a year, or whenever a tube breaks in the<br />
rotor. Or<strong>de</strong>r part # 01-2002-04 for a replacement set of twelve cushions.<br />
<strong>IDEXX</strong> StatSpin <strong>VT</strong> Centrifuge Operator’s Gui<strong>de</strong> 7
! CAUTION: Do not use a shield with the RH12 Microhematocrit rotor.<br />
The following tubes are approved for use in the rotor:<br />
• Glass capillary tubes: HT9H, HT9U<br />
• SafeCrit* plastic capillary tubes: HP8H, HP8U<br />
IMPORTANT: The RT12, RM02 and RH12 rotors have a finite lifespan that is <strong>de</strong>pen<strong>de</strong>nt upon<br />
usage. The RT12 and RM02 rotors should be replaced after approximately 3600 cycles, which<br />
is equivalent to 18 months of service running an average of 10 cycles per day. The RH12 rotor<br />
should be replaced after approximately 2600 cycles, which is equivalent to 12 months of service<br />
running an average of 10 cycles per day. Rotors should be inspected routinely and replaced<br />
immediately when any crack or visible wear occurs.<br />
Using the <strong>IDEXX</strong> <strong>StatSpin*</strong> <strong>VT</strong> Centrifuge<br />
Opening and Closing the Cover<br />
An electronic-operated cover interlock mechanism prevents operation if the cover is not completely<br />
closed and locked. An operating cycle can be initiated only if the cover latch is engaged.<br />
The centrifuge is also equipped with a manually operated latch that holds the cover down after<br />
spinning is complete. The interlock is automatically released at the end of the operating cycle or<br />
by pushing the Stop/Open button. Squeeze the black latch together to open the cover.<br />
Cover Interlock Bypass<br />
In case of power failure or malfunction, the Stop/Open button may not release the cover. To<br />
recover samples in the rotor, the cover interlock mechanism can be released manually by inserting<br />
the straightened end of a large paper clip or similar object into the small hole located in the front<br />
of the housing above the Cycle Selector button. Push the paper clip inward about 1 inch (25<br />
mm) to release the latch.<br />
!<br />
CAUTION: The cover interlock bypass is <strong>de</strong>signed for emergency use only. Misuse may expose<br />
the operator to unsafe conditions.<br />
Installing a Rotor<br />
All rotor bottoms fit over a rubber O-ring on<br />
the rotor-hol<strong>de</strong>r. The figure on the right shows<br />
a hematocrit rotor cross-section in place<br />
on the rotor-hol<strong>de</strong>r. As the rotor turns, the<br />
O-ring is moved outward by centrifugal force,<br />
enhancing the frictional coupling between the<br />
rotor-hol<strong>de</strong>r and the rotor.<br />
When installing an RT12 rotor, remove the<br />
shield (if present). Once the rotor has been<br />
positioned in the centrifuge, install the shield.<br />
O-ring<br />
hematocrit rotor<br />
rotor-hol<strong>de</strong>r<br />
shield for the RT12 rotor<br />
<strong>IDEXX</strong> StatSpin <strong>VT</strong> Centrifuge Operator’s Gui<strong>de</strong> 8
!<br />
CAUTION: Do not leave a rotor of any type on the rotor-hol<strong>de</strong>r when the <strong>IDEXX</strong> StatSpin <strong>VT</strong><br />
Centrifuge is not in use for an exten<strong>de</strong>d period of time. Doing so can compress the O-ring,<br />
<strong>de</strong>creasing its ability to hold rotors.<br />
! CAUTION: Do not operate the centrifuge without a shield in place when using an RT12 rotor.<br />
! CAUTION: Do not use a shield with the RH12 Microhematocrit rotor.<br />
!<br />
!<br />
!<br />
CAUTION: Failure to properly install the rotor may result in damage to the centrifuge not covered<br />
by the warranty.<br />
CAUTION: If the rotor is left in place between runs, push the rotor down on the rotor-hol<strong>de</strong>r to<br />
ensure it is properly seated before spinning another sample. Failure to properly seat the rotor each<br />
time may result in the rotor becoming loose during centrifugation.<br />
CAUTION: The RT12 and RM02 tube rotors must be balanced before operation. If only one sample<br />
is being processed, a second sample can serve as the balance tube, or use a similar tube filled<br />
with water as a balance.<br />
Installing a Shield<br />
A shield should always be used with the RT12 rotor and should be<br />
replaced when the rotor is replaced.<br />
Procedure<br />
1. Ensure the RT12 rotor is properly seated.<br />
shield<br />
2. Press the shield into the bowl until it makes full contact with the bottom<br />
of the bowl.<br />
Note: To remove the shield, pull up on the center edge of the shield.<br />
Selecting Cycle Settings<br />
You should experiment with different settings to achieve the optimum performance for specific<br />
applications. The following are general gui<strong>de</strong>lines:<br />
Setting rpm/RCF Time Rotor<br />
Quick Spin 15,800/12,000 30 seconds RT12, RM02<br />
Normal 15,800/12,000 90 seconds RT12, RM02<br />
Hard Spin 15,800/12,000 150 seconds RT12, RM02<br />
Urine Sediment 9,800/3,900 45 seconds RT12<br />
Microhematocrit 15,800/13,700 120 seconds RH12<br />
Sample Processing<br />
Venous Blood for Coagulation and Chemistry<br />
The Plasma Rotor provi<strong>de</strong>s a means for the rapid separation of plasma from anticoagulated whole<br />
blood. To prepare plasma for chemistry testing, use the Quick Spin cycle. For coagulation testing,<br />
use the Hard Spin cycle.<br />
<strong>IDEXX</strong> StatSpin <strong>VT</strong> Centrifuge Operator’s Gui<strong>de</strong> 9
Procedure<br />
1. Lift the cover. If necessary, install the applicable rotor for the sample you are running, and<br />
push the rotor down to ensure it is properly seated.<br />
2. Place the sample tube in the rotor. Be sure to balance the rotor, adding a second sample<br />
or a water-filled tube. Close and latch the cover.<br />
3. Select the <strong>de</strong>sired cycle setting by <strong>de</strong>pressing the Cycle Selector (SET) button until the<br />
applicable LED is illuminated.<br />
4. Press the Start button. After the spin cycle has completed, the rotor <strong>de</strong>celerates to a<br />
complete stop in approximately 10 seconds and the latch interlock automatically unlocks.<br />
Squeeze the black latch together to open cover.<br />
Urine Sediment for Microscopic Examination<br />
The <strong>IDEXX</strong> <strong>StatSpin*</strong> <strong>VT</strong> Centrifuge quickly prepares urine<br />
sediment for microscopic examination using precalibrated<br />
urine tubes (StatSpin product # TU15).<br />
Fill to here<br />
Procedure<br />
1. Fill a urine tube to the top mark (representing 1.5 mL) with<br />
fresh urine, and cap the tube using the attached stopper. Empty to here<br />
2. Lift the cover and push the RT12 Tube Rotor down to<br />
ensure it is properly seated.<br />
3. Place the urine tube in the RT12 rotor. Balance the rotor<br />
either with another sample or a water-filled tube. Close and latch the cover.<br />
4. Press the Cycle Selector (SET) button until “Urine Sediment” is selected and then<br />
press Start.<br />
5. When the cycle is complete, the cover automatically releases. Remove the tube from<br />
the rotor and remove the stopper.<br />
6. Invert the tube to drain the fluid to the lower mark.<br />
NOTE: The surface tension will retain 0.1 mL.<br />
7. Recap the tube and resuspend the sediment by gently shaking it.<br />
8. After the sediment has been resuspen<strong>de</strong>d, dispense one drop onto a microscope sli<strong>de</strong>, apply<br />
a cover slip and examine the sli<strong>de</strong>, following the protocol used in your laboratory.<br />
Lipemic Samples<br />
The <strong>IDEXX</strong> StatSpin <strong>VT</strong> Centrifuge can be used to centrifuge samples collected in LipoClear<br />
Reagent Tubes (LC10, LC40, LC15). LipoClear is a nontoxic, noncarcinogenic, lipemia-clearing<br />
reagent that is prefilled in microcentrifuge tubes. The LipoClear kit is available for 0.5-mL and<br />
1.5-mL sample sizes (see below). After the sample is ad<strong>de</strong>d, mixed and allowed to stand for five<br />
minutes, the tubes are spun on the Hard Spin cycle in the RT12 Tube Rotor. Refer to the LipoClear<br />
product insert for additional <strong>de</strong>tails.<br />
Product # Sample Size Package<br />
LC10 0.5 mL 10 tubes/pack<br />
LC40 0.5 mL 40 tubes/pack<br />
LC15 1.5 mL 40 tubes/pack<br />
<strong>IDEXX</strong> StatSpin <strong>VT</strong> Centrifuge Operator’s Gui<strong>de</strong> 10
Procedure<br />
1. Lift the cover. If necessary, install the applicable rotor for the sample you are running, and<br />
push the rotor down to ensure it is properly seated.<br />
2. Place the sample tube in the rotor. Be sure to balance the rotor, adding a second sample<br />
or a water-filled tube. Close and latch the cover.<br />
3. Select the <strong>de</strong>sired cycle setting by <strong>de</strong>pressing the Cycle Selector (SET) button until the<br />
Hard Spin setting LED is illuminated.<br />
4. Press the Start button. After the spin cycle has completed, the rotor <strong>de</strong>celerates to a<br />
complete stop in approximately 10 seconds and the latch interlock automatically unlocks.<br />
Squeeze the black latch together to open cover.<br />
Microhematocrit for Packed Cell Volume<br />
Both glass and plastic microcapillary tubes are available:<br />
• Iris product # HT9H (glass) and HP8H (plastic) have been pretreated with heparin and should<br />
be used for capillary blood.<br />
• Iris product # HT9U (glass) and HP8U (plastic) are untreated and should be used for<br />
venipuncture (anticoagulated) samples.<br />
Procedure<br />
1. Collect your sample:<br />
a. Capillary blood: The sample is collected directly from the puncture site using heparinized<br />
tubes (StatSpin product #HT9H or HP8H).<br />
b. Venous blood: The sample is collected from a well-mixed anticoagulated sample from a<br />
syringe or vacuum blood-collection tube, using untreated tubes (StatSpin product #HT9U<br />
or HP8U).<br />
2. Hold the microcapillary tube by the end with the color-co<strong>de</strong>d band. Fill the capillary tube with<br />
sample to the color-co<strong>de</strong>d band. Remove the tube from the sample and tilt the ban<strong>de</strong>d end<br />
downward until the blood moves halfway between the band and the end of the tube.<br />
3. Hold the tube in a horizontal position and push the dry (ban<strong>de</strong>d) end of the tube fully into the<br />
vertically held sealing compound. Twist and remove.<br />
4. Using a laboratory tissue, wipe off any blood that is forced from the other end.<br />
5. Put the tube, sealed end toward the outer rim, in any of the twelve positions on the RH12<br />
Microhematocrit Rotor. This rotor does not need to be balanced. Screw the rotor’s cover<br />
into place.<br />
filled capillary tube<br />
capillary tube<br />
color-co<strong>de</strong>d band,<br />
hold this end<br />
Tilt the capillary<br />
tube until blood<br />
is positioned as<br />
shown here.<br />
sealing the capillary tube<br />
sealed capillary tube<br />
6. Holding the rotor by the black cover knob, attach the rotor to the rotor-hol<strong>de</strong>r.<br />
Important: Always hold the microhematocrit rotor by the black knob on the rotor cover<br />
when pressing it firmly in a downward motion onto the rotor-hol<strong>de</strong>r and when removing the<br />
<strong>IDEXX</strong> StatSpin <strong>VT</strong> Centrifuge Operator’s Gui<strong>de</strong> 11
otor from the centrifuge. Pressing on the outer edges of the rotor may result in damage to<br />
the rotor.<br />
7. Close and latch the cover. Press the Cycle Selector (SET) button to select the<br />
Microhematocrit setting and then press Start.<br />
8. After the rotor stops, remove it from the centrifuge.<br />
Tubes insi<strong>de</strong> the rotor can be read with the circular<br />
rea<strong>de</strong>r (StatSpin product # HR4C) or removed from<br />
the rotor and read with the card-style rea<strong>de</strong>r<br />
(StatSpin product # HR05).<br />
capillary tube after spinning<br />
top of<br />
plasma<br />
top of<br />
red cells<br />
bottom of<br />
red cells<br />
sealant<br />
Quality Control<br />
• The quality-control procedures established for your laboratory should be followed.<br />
• To verify the a<strong>de</strong>quacy of cell packing, on a daily basis, select one or more tubes (preferably<br />
with a hematocrit over 50%), centrifuge and read. Spin these tubes a second time. The<br />
difference between the initial reading and the second reading should be 1% or less.<br />
Normal Values<br />
The following table represents commonly accepted hematocrit values:<br />
Species % Species %<br />
Adult Canine 37–55 Equine 32–53<br />
Puppy 32–55 Bovine 25–42<br />
Adult Feline 30–45 Porcine 32–50<br />
Kitten 25–45 Ovine 24–45<br />
Cleaning and Maintenance<br />
<strong>IDEXX</strong> recommends that you perform periodic inspections and preventive maintenance on your<br />
<strong>IDEXX</strong> <strong>StatSpin*</strong> <strong>VT</strong> Centrifuge. Contact <strong>IDEXX</strong> Technical Support or your authorized <strong>IDEXX</strong><br />
distributor at any time if the instrument is not functioning properly.<br />
!<br />
!<br />
CAUTION: Unplug the <strong>IDEXX</strong> StatSpin <strong>VT</strong> Centrifuge from the outlet before cleaning or performing<br />
maintenance.<br />
WARNING: Do not expose the <strong>IDEXX</strong> StatSpin <strong>VT</strong> Centrifuge or its rotor to strong or concentrated<br />
acids; bases or oxidizing agents; aromatic or halogenated hydrocarbons; esters or ketones.<br />
Cleaning<br />
Clean the outsi<strong>de</strong> surfaces and switch overlay panel with a water-dampened cloth and mild<br />
<strong>de</strong>tergent. Clean the inner surface, a pow<strong>de</strong>r-coated steel surface, with a mild <strong>de</strong>tergent and,<br />
if necessary, a disinfectant. Wipe all surfaces with a dampened cloth using 70% alcohol or<br />
10% bleach solution.<br />
!<br />
CAUTION: Do not spray cleaning solutions directly onto the centrifuge bowl or housing; overspray<br />
could reach the motor bearings or internal circuitry. Subsequent damage may not be covered by<br />
warranty.<br />
<strong>IDEXX</strong> StatSpin <strong>VT</strong> Centrifuge Operator’s Gui<strong>de</strong> 12
Checking the Rotor Speed<br />
The rated speeds can be checked with a stroboscope or photoelectric tachometer. If the <strong>IDEXX</strong><br />
StatSpin <strong>VT</strong> Centrifuge fails to achieve an operating speed, contact <strong>IDEXX</strong> Technical Support or<br />
your authorized <strong>IDEXX</strong> distributor.<br />
Replacing the O-Ring<br />
The figure on the right illustrates the position of the rubber O-ring that is<br />
attached to the rotor-hol<strong>de</strong>r. If the rotor becomes difficult to install, apply<br />
a very small amount of silicone-type lubricant to the three exposed points<br />
(A) on the O-ring gasket. The O-ring should be inspected regularly and<br />
replaced when it appears flattened or worn. The O-ring should be replaced<br />
as preventive maintenance at least once a year.<br />
A<br />
A<br />
A new O-ring can be installed as shown, by weaving it behind and in front<br />
of the six pins on the rotor-hol<strong>de</strong>r. Extra O-rings are inclu<strong>de</strong>d with<br />
the <strong>IDEXX</strong> StatSpin packaging.<br />
A<br />
Error Indicators<br />
<strong>IDEXX</strong> StatSpin <strong>VT</strong> Centrifuge error conditions are signaled by a flashing red Error/Service<br />
indicator on the control panel. The cause of the error condition can be i<strong>de</strong>ntified by the<br />
combination of cycle indicators that are also flashing.<br />
flashing<br />
green cycle<br />
indicator<br />
QUICK SPIN<br />
NORMAL<br />
QUICK SPIN<br />
NORMAL<br />
QUICK SPIN<br />
NORMAL<br />
QUICK SPIN<br />
NORMAL<br />
HARD SPIN<br />
HARD SPIN<br />
HARD SPIN<br />
HARD SPIN<br />
URINE SEDIMENT<br />
URINE SEDIMENT<br />
URINE SEDIMENT<br />
URINE SEDIMENT<br />
MICROHEMATOCRIT<br />
MICROHEMATOCRIT<br />
MICROHEMATOCRIT<br />
MICROHEMATOCRIT<br />
flashing red<br />
error/service<br />
indicator<br />
SET<br />
Error/Service<br />
SET<br />
Error/Service<br />
SET<br />
Error/Service<br />
SET<br />
Error/Service<br />
The rotor failed to reach<br />
full speed in 30 seconds.<br />
The cover opened or<br />
the cycle changed<br />
during operation.<br />
The rotor speed cannot<br />
be maintained.<br />
The rotor spun backward<br />
during reverse braking.<br />
The Error/Service indicator remains continuously illuminated when the centrifuge has achieved<br />
a total cycle count of 18,000, which is the useful life of the drive system. The drive mechanism<br />
needs replacing. Contact an authorized service center.<br />
<strong>IDEXX</strong> StatSpin <strong>VT</strong> Centrifuge Operator’s Gui<strong>de</strong> 13
<strong>IDEXX</strong> recommends that you perform periodic inspections and<br />
preventive maintenance on your <strong>IDEXX</strong> StatSpin <strong>VT</strong> or<br />
StatSpin MP Centrifuge.<br />
Maintenance Log<br />
Month: ____________________<br />
1 2 3 4 5 6 7 8 9 10 11 12 13 14 15 16 17 18 19 20 21 22 23 24 25 26 27 28 29 30 31<br />
Frequency Maintenance<br />
Required<br />
Daily Inspect lid, latch,<br />
and hinge for<br />
cracks or signs<br />
of wear.<br />
Inspect rotor and<br />
shield for signs<br />
of cracks or<br />
weakness.<br />
Inspect O-ring<br />
for signs of wear<br />
or flattening.<br />
14
Year: ____________________<br />
Frequency Maintenance Required<br />
January February March April May June July August September October November December<br />
Annually † Change the O-ring on the rotor<br />
hol<strong>de</strong>r.<br />
Replace the SV12 BD<br />
Microtainer tube adapters.<br />
As Nee<strong>de</strong>d Replace the RT12 rotor and<br />
shield. †<br />
† The RT12 rotor and shield should be replaced after 3,600 spins. Always install a new shield when installing a new RT12 rotor. Use the chart below to <strong>de</strong>termine how often your rotor and shield should be<br />
replaced based on the average number of samples you centrifuge per day.<br />
Minimum replacement<br />
frequency<br />
Samples per day<br />
(based on a 5-day work week)<br />
15 Annually<br />
10 Every 18 months<br />
5 Every 2.5 years<br />
3 Every 4 years<br />
15
Troubleshooting<br />
Issue<br />
No lights are on<br />
Centrifuge will not spin, or<br />
shuts off prematurely<br />
Centrifuge will not<br />
automatically open at the<br />
end of a cycle<br />
Action<br />
• Check the power cord and ensure it is completely plugged in to the<br />
outlet. If it is, try another outlet.<br />
• Check to ensure that the 24 V DC plug-in is completely plugged in on the<br />
back of the <strong>IDEXX</strong> StatSpin <strong>VT</strong> Centrifuge.<br />
• Contact <strong>IDEXX</strong> Customer Support for assistance.<br />
• Ensure that the cover is completely closed and latched.<br />
• If the Error/Service indicator is flashing, i<strong>de</strong>ntify the source of the error,<br />
correct the error condition and then press the Stop/Open button to clear<br />
the error.<br />
• Contact <strong>IDEXX</strong> Customer Support for assistance.<br />
• To manually open the cover, use the bypass procedure <strong>de</strong>scribed in the<br />
Cover Interlock Bypass section.<br />
• Ensure the bowl gasket on the inner housing is completely seated<br />
and sealing the bowl by pressing the gasket all the way down into the<br />
housing slot.<br />
• Contact <strong>IDEXX</strong> Customer Support for assistance.<br />
Service<br />
Refer all service to <strong>IDEXX</strong> Technical Support or an authorized repair facility.<br />
Decontamination before returning for service<br />
Any instrument or accessory that has been exposed to blood or other biological materials must<br />
be cleaned prior to shipment to the manufacturer or <strong>de</strong>aler for service. This <strong>de</strong>contamination is<br />
required by fe<strong>de</strong>ral law (Titles 48 and 49 of the Fe<strong>de</strong>ral Regulations) and in accordance with the<br />
Environmental Protection Agency’s Regulations for Biohazard Waste Management. <strong>IDEXX</strong> and Iris<br />
Sample Processing personnel cannot perform this <strong>de</strong>contamination.<br />
<strong>IDEXX</strong> StatSpin <strong>VT</strong> Centrifuge Operator’s Gui<strong>de</strong> 16
Specifications<br />
Centrifuge<br />
Product Number<br />
Mo<strong>de</strong>l Number<br />
Cycles<br />
Quick Spin<br />
Normal<br />
Hard Spin<br />
Urine<br />
Hematocrit<br />
Acceleration Time<br />
Deceleration Time<br />
Electrical<br />
Dimensions<br />
Environmental<br />
SS<strong>VT</strong>-4<br />
V901<br />
Speeds<br />
30 seconds at 15,800 rpm/12,000 xg<br />
90 seconds at 15,800 rpm/12,000 xg<br />
150 seconds at 15,800 rpm/12,000 xg<br />
45 seconds at 9,800 rpm/3,900 xg<br />
120 seconds at 15,800 rpm/13,700 xg<br />
Approximately six seconds<br />
Approximately 10 seconds<br />
Specifications are subject to change without notice.<br />
24 volts, DC, 1.7 amp<br />
Inclu<strong>de</strong>s switching power supply for 100–240 V AC, 50–60 Hz<br />
Diameter 6.6 in/16.25 cm<br />
Height 6.3 in/13.2 cm<br />
Weight 5.5 lb/2.5 kg<br />
For indoor use only<br />
Maximum altitu<strong>de</strong> up to 6562 ft/2000 m<br />
Ambient temperature 41°F to 104°F (5°C to 40°C)<br />
Maximum 80% RH up to 31°C <strong>de</strong>creasing to 50% RH at 104°F/40°C<br />
Main supply voltage fluctuations should not exceed ±10%<br />
Transient over-voltages according to installation category II<br />
Pollution <strong>de</strong>gree 2<br />
<strong>IDEXX</strong> StatSpin <strong>VT</strong> Centrifuge Operator’s Gui<strong>de</strong> 17
Accessories<br />
Product # Description Cycle Required<br />
RT12 2 x 1.5 mL fixed-angle rotor Quick, Normal, Hard<br />
SV12 Microtainer adapters (2 pk) Quick, Normal, Hard<br />
TU15-10 1.5-mL precalibrated urine tube (10 bags of 50) Urine<br />
TP1H 1.3-mL lithium-heparin microcentrifuge tube (bag of 100) Quick, Normal, Hard<br />
TP1U 1.3-mL untreated microcentrifuge tube (bag of 100) Quick, Normal, Hard<br />
SS2H<br />
SS2U<br />
SS2X<br />
LC10<br />
LC40<br />
LC15<br />
RM02<br />
StatSampler* (200 µL, lithium heparin) chemistry fingerstick<br />
collection system<br />
StatSampler (200 µL, untreated) chemistry fingerstick<br />
collection system<br />
StatSampler (200 µL, EDTA) hematology fingerstick collection<br />
system with gel<br />
LipoClear: 0.5-mL prefilled reagent tubes for clearing lipemic<br />
serum or plasma (bag of 10)<br />
LipoClear: 0.5-mL prefilled reagent tubes for clearing lipemic<br />
serum or plasma (bag of 40)<br />
LipoClear: 1.5-mL prefilled reagent tubes for clearing lipemic<br />
serum or plasma (bag of 40)<br />
2 x 0.8 mL fixed-angle rotor for BD Microtainer tubes and<br />
0.5 mL microcentrifuge tubes<br />
Quick, Normal, Hard<br />
Quick, Normal, Hard<br />
Quick, Normal, Hard<br />
Hard<br />
Hard<br />
Hard<br />
Quick, Normal, Hard<br />
RH12 12-position microhematocrit rotor with circular rea<strong>de</strong>r (HR4C) Microhematocrit<br />
HP8H-10<br />
HP8U-10<br />
HT9H-10<br />
HT9U-10<br />
SafeCrit Capillary Tube (40 mm, sodium heparin), 100% plastic<br />
microhematocrit tubes for the RH12 rotor (10 vials of 100)<br />
SafeCrit Capillary Tube (40 mm, untreated), 100% plastic<br />
microhematocrit tubes for the RH12 rotor (10 vials of 100)<br />
Glass capillary tube (40 mm, sodium heparin), glass<br />
microhematocrit tubes for the RH12 rotor (10 vials of 100)<br />
Glass capillary tube (40 mm, untreated), glass microhematocrit<br />
tubes for the RH12 rotor (10 vials of 100)<br />
HS24-10 Sealant pad for capillary tubes (10 pads) NA<br />
HR05 Hematocrit Rea<strong>de</strong>r, card style for 40-mm hematocrit tubes NA<br />
HR4C<br />
Hematocrit Rea<strong>de</strong>r, circular, <strong>de</strong>signed to be used in conjunction<br />
with the RH12 rotor<br />
00-Ring Replacement O-rings for the rotor-hol<strong>de</strong>r (five bags of three) NA<br />
Microhematocrit<br />
Microhematocrit<br />
Microhematocrit<br />
Microhematocrit<br />
NA<br />
<strong>IDEXX</strong> StatSpin <strong>VT</strong> Centrifuge Operator’s Gui<strong>de</strong> 18
<strong>IDEXX</strong> Technical Support Contact Information<br />
<strong>IDEXX</strong> Sales Representative:<br />
Telephone/Voice Mail:<br />
United States<br />
<strong>IDEXX</strong> Laboratories, Inc.<br />
One <strong>IDEXX</strong> Drive<br />
Westbrook, Maine 04092 USA<br />
Toll-Free Technical Support......... 1-800-248-2483<br />
Main Telephone Number............. 1-207-556-0300<br />
Toll-Free Fax................................ 1-800-248-3010<br />
i<strong>de</strong>xx.com<br />
Italy<br />
<strong>IDEXX</strong> Laboratories Italia, S.r.l.<br />
Via Canova 27<br />
20145 Milano<br />
Italy<br />
Toll-Free Technical Support......... 00800 1234 3399<br />
Telephone.................................... (39) 02 319 20 31<br />
Fax............................................... (39) 02 319 20 347<br />
www.i<strong>de</strong>xx.it<br />
The Netherlands<br />
<strong>IDEXX</strong> Europe B.V.<br />
Scorpius 60 Building F<br />
2132 LR Hoofddorp<br />
The Netherlands<br />
Toll-Free Technical Support......... 00800 1234 3399<br />
Telephone.................................... (31) 23 558 7000<br />
Toll-Free Fax................................ 00800 1234 3333<br />
Fax............................................... (31) 23 558 7233<br />
www.i<strong>de</strong>xx.nl<br />
Spain<br />
<strong>IDEXX</strong> Laboratorios, S.L.<br />
c/ Plom, n° 2–8, 3°<br />
08038 Barcelona<br />
Spain<br />
Toll-Free Technical Support......... 00800 1234 3399<br />
Telephone.................................... (34) 93 414 26 08<br />
Fax............................................... (34) 93 414 74 78<br />
www.i<strong>de</strong>xx.es<br />
France<br />
<strong>IDEXX</strong> S.A.R.L.<br />
Bâtiment Flori<strong>de</strong> - Eragny Parc<br />
11 Allée Rosa, Luxembourg<br />
95610 Eragny, sur Oise<br />
France<br />
Toll-Free Technical Support......... 00800 1234 3399<br />
Telephone.................................... (33) 1 34 32 62 00<br />
Fax............................................... (33) 1 34 30 02 08<br />
www.i<strong>de</strong>xx.fr<br />
United Kingdom<br />
<strong>IDEXX</strong> Laboratories Ltd.<br />
Milton Court, Churchfield Road<br />
Chalfont St Peter<br />
Buckinghamshire SL9 9EW<br />
United Kingdom<br />
Toll-Free Technical Support......... 00800 1234 3399<br />
Telephone.................................... (44) 01753 891 660<br />
Fax............................................... (44) 01753 891 520<br />
www.i<strong>de</strong>xx.co.uk<br />
Germany<br />
<strong>IDEXX</strong> GmbH<br />
Mörikestraße 28/3<br />
D-71636 Ludwigsburg<br />
Germany<br />
Toll-Free Technical Support....... 00800 1234 3399<br />
Fax............................................. 0800 6645627<br />
www.i<strong>de</strong>xx.<strong>de</strong><br />
Australia<br />
<strong>IDEXX</strong> Laboratories Pty. Ltd.<br />
Metro Centre<br />
Unit 20, 30-46 South Street<br />
Rydalmere, New South Wales 2116<br />
Australia<br />
Toll-Free Technical Support......... 1300 44 33 99<br />
Telephone.................................... (61) 2 9898 7300<br />
Fax............................................... (61) 2 9898 7302<br />
www.i<strong>de</strong>xx.com.au<br />
<strong>IDEXX</strong> StatSpin <strong>VT</strong> Centrifuge Operator’s Gui<strong>de</strong> 19
Canada<br />
<strong>IDEXX</strong> Laboratories Canada Corporation<br />
C/O UPS<br />
4071 North Service Rd<br />
Burlington, ON L7L 4X6<br />
Canada<br />
Toll-Free Technical Support......... 1-800-248-2483<br />
Telephone.................................... 1-905-602-9499<br />
Toll-Free Fax................................ 1-800-248-3010<br />
Fax............................................... 1-905-602-6640<br />
www.i<strong>de</strong>xx.ca<br />
Japan<br />
<strong>IDEXX</strong> Laboratories KK<br />
3-3-7 Kitano, Mitaka-shi, Tokyo<br />
181-8608 Japan<br />
Toll-Free Technical Support......... 0120-71-4921<br />
Telephone.................................... (81) 422 71 4921<br />
Fax............................................... (81) 422 71 4922<br />
www.i<strong>de</strong>xx.co.jp<br />
<strong>IDEXX</strong> StatSpin <strong>VT</strong> Centrifuge Operator’s Gui<strong>de</strong> 20
Manufactured for <strong>IDEXX</strong> Laboratories, Inc. by<br />
A Division of Iris International, Inc<br />
Westwood, MA 02090 USA<br />
Phone: 1-800-782-8774<br />
or 1-781-551-0100<br />
Fax: 1-781-551-0036<br />
proiris.com
Centrifugeuse <strong>IDEXX</strong> StatSpin * <strong>VT</strong><br />
Manuel d’utilisation<br />
Manuel d’utilisation—Version Française<br />
Centrifugeuse <strong>IDEXX</strong> StatSpin * <strong>VT</strong><br />
Version Française
Centrifugeuse <strong>IDEXX</strong> <strong>StatSpin*</strong> <strong>VT</strong><br />
Numéro du modèle V901<br />
À usage vétérinaire uniquement.<br />
Numéro du produit<br />
SS<strong>VT</strong>-4 Centrifugeuse <strong>IDEXX</strong> StatSpin <strong>VT</strong> fonctionnant sur courant alternatif 100–240 V, 50/60 Hz<br />
Notice concernant les droits <strong>de</strong> propriété<br />
L’information contenue dans ce document peut faire l’objet <strong>de</strong> modifications sans préavis. Sauf mention contraire,<br />
les sociétés, noms et données utilisés dans les exemples sont fictifs. Aucune partie <strong>de</strong> ce document ne peut être<br />
reproduite ni transmise à quelque fin, sous quelque forme ou par quelque moyen (électronique, mécanique ou autre)<br />
que ce soit sans l’autorisation expresse écrite d’<strong>IDEXX</strong> Laboratories. Ce document et les produits mentionnés peuvent<br />
être couverts par <strong>de</strong>s brevets, <strong>de</strong>s <strong>de</strong>man<strong>de</strong>s <strong>de</strong> brevets en cours, <strong>de</strong>s marques <strong>de</strong> fabrique, <strong>de</strong>s droits d’auteurs ou<br />
d’autres titres <strong>de</strong> propriété intellectuelle ou industrielle d’<strong>IDEXX</strong>. À l’exception <strong>de</strong>s droits expressément visés dans un<br />
contrat <strong>de</strong> licence écrit émanant d’<strong>IDEXX</strong> Laboratories, la possession <strong>de</strong> ce document ne confère aucun titre sur ces<br />
droits <strong>de</strong> propriété.<br />
© 2012 <strong>IDEXX</strong> Laboratories, Inc. Tous droits réservés.<br />
*StatSpin, StatSampler, LipoClear, PlasmaRotor et SafeCrit sont <strong>de</strong>s marques <strong>de</strong> fabrique ou <strong>de</strong>s marques déposées<br />
par Iris Sample Processing aux États-Unis et/ou dans d’autres pays. BD et Microtainer sont <strong>de</strong>s marques <strong>de</strong> fabrique<br />
<strong>de</strong> Becton, Dickinson and Company. Tubes Eppendorf est une marque déposée par Eppendorf North America, Inc.<br />
Tous les autres produits et noms et logos <strong>de</strong> sociétés sont <strong>de</strong>s marques déposées par leurs détenteurs respectifs.<br />
Le dispositif <strong>de</strong> prélèvement sanguin StatSpin est couvert par le brevet américain n° 5 257 984.<br />
Manuel d’utilisation <strong>de</strong> la centrifugeuse <strong>IDEXX</strong> StatSpin <strong>VT</strong> 23
Table <strong>de</strong>s matières<br />
Introduction................................................................................................................................25<br />
Symboles ........................................................................................................................................................26<br />
Installation..................................................................................................................................27<br />
Matériel fourni..................................................................................................................................................27<br />
Emplacement <strong>de</strong> la centrifugeuse <strong>IDEXX</strong> StatSpin <strong>VT</strong> ...................................................................................27<br />
Raccor<strong>de</strong>ment au secteur ..............................................................................................................................27<br />
Vue d’ensemble..........................................................................................................................28<br />
Principe <strong>de</strong> fonctionnement et applications....................................................................................................28<br />
Rotors compatibles avec la centrifugeuse <strong>IDEXX</strong> StatSpin <strong>VT</strong> ......................................................................28<br />
Utilisation <strong>de</strong> la centrifugeuse <strong>IDEXX</strong> StatSpin <strong>VT</strong> ..................................................................29<br />
Ouverture et fermeture du couvercle ..............................................................................................................29<br />
Mise en place d’un rotor .................................................................................................................................30<br />
Installation d’un écran <strong>de</strong> protection...............................................................................................................30<br />
Sélection <strong>de</strong>s réglages d’un cycle .................................................................................................................31<br />
Traitement <strong>de</strong> l’échantillon ........................................................................................................31<br />
Préparation d’un échantillon <strong>de</strong> sang veineux pour les tests <strong>de</strong> coagulation et les analyses biochimiques .31<br />
Préparation d’un culot urinaire pour examen microscopique ........................................................................31<br />
Elimination <strong>de</strong>s lipi<strong>de</strong>s.....................................................................................................................................32<br />
Mesure <strong>de</strong> l’hématocrite ou réalisation d’un microhématocrite......................................................................32<br />
Nettoyage et entretien ...............................................................................................................34<br />
Nettoyage........................................................................................................................................................34<br />
Vérification <strong>de</strong> la vitesse du rotor ...................................................................................................................34<br />
Remplacement du joint torique d’étanchéité .................................................................................................34<br />
Témoins d’erreurs ...........................................................................................................................................35<br />
Fiche <strong>de</strong> maintenance.....................................................................................................................................36<br />
Diagnostics d’erreurs .....................................................................................................................................38<br />
Entretien...........................................................................................................................................................38<br />
Spécifications.............................................................................................................................38<br />
Centrifugeuse..................................................................................................................................................38<br />
Accessoires.....................................................................................................................................................39<br />
Informations <strong>de</strong> contact du Support technique <strong>IDEXX</strong>............................................................41<br />
Manuel d’utilisation <strong>de</strong> la centrifugeuse <strong>IDEXX</strong> StatSpin <strong>VT</strong> 24
Introduction<br />
Grâce à ce manuel d’utilisation, et en conjonction avec l’information fournie sur les étiquettes du produit<br />
et notices contenues dans l’emballage, vous <strong>de</strong>vriez avoir à votre disposition tous les renseignements<br />
dont vous avez besoin pour l’utilisation et l’entretien <strong>de</strong> la centrifugeuse <strong>IDEXX</strong> <strong>StatSpin*</strong> <strong>VT</strong>.<br />
Quand l’information requiert une vigilance particulière, le symbole<br />
« Attention ! » ou celui <strong>de</strong> « Risque biologique » apparaît en marge<br />
du texte.<br />
Veuillez prêter l’attention qui se doit aux instructions fournies dans les<br />
remarques et les symboles, et respecter les normes <strong>de</strong> laboratoire habituellement pratiquées sur votre<br />
lieu <strong>de</strong> travail et décrites par les agences réglementaires locales. Au tableau qui suit sont répertoriés<br />
les messages d’attention et ceux <strong>de</strong> mise en gar<strong>de</strong> concernant la centrifugeuse <strong>IDEXX</strong> StatSpin <strong>VT</strong>.<br />
!<br />
Attention<br />
Danger<br />
biologique<br />
!<br />
MISE EN GARDE : Amérique du Nord : Utilisez uniquement le bloc d’alimentation<br />
fourni avec l’unité. L’utilisation d’autres blocs d’alimentation ou d’autres transformateurs<br />
endommagera les composants électroniques <strong>de</strong> la centrifugeuse <strong>IDEXX</strong> StatSpin <strong>VT</strong> et<br />
annulera la garantie.<br />
MISE EN GARDE : En <strong>de</strong>hors <strong>de</strong> l’Amérique du Nord : N’utilisez pas le cordon <strong>de</strong><br />
raccor<strong>de</strong>ment fourni. Employez un cordon <strong>de</strong> raccor<strong>de</strong>ment pouvant tolérer 1A au minimum<br />
et <strong>de</strong>s connecteurs IEC320/CEE22 appropriés à la prise <strong>de</strong> courant utilisée.<br />
ATTENTION ! ne faites pas fonctionner la centrifugeuse sans écran <strong>de</strong> protection lors <strong>de</strong><br />
l’utilisation du rotor RT12.<br />
ATTENTION ! n’utilisez pas d’écran <strong>de</strong> protection avec le rotor pour microhématocrite RH12.<br />
ATTENTION ! : La procédure d’annulation du mécanisme <strong>de</strong> verrouillage du couvercle doit<br />
être utilisée uniquement en cas d’urgence. Son usage impropre risque d’exposer l’opérateur<br />
à <strong>de</strong>s conditions dangereuses.<br />
ATTENTION ! : Ne laissez aucun rotor dans le support <strong>de</strong> rotor <strong>de</strong> la centrifugeuse <strong>IDEXX</strong><br />
StatSpin <strong>VT</strong> s’il est prévu <strong>de</strong> ne pas l’utiliser pendant une pério<strong>de</strong> prolongée. Sinon, le joint torique<br />
d’étanchéité risque <strong>de</strong> subir une compression, ce qui diminue sa capacité à soutenir les rotors.<br />
ATTENTION ! : Une mise en place incorrecte du rotor peut endommager la centrifugeuse, ce<br />
qui n’est pas couvert par la garantie.<br />
ATTENTION ! : Si le rotor est laissé en place entre <strong>de</strong>ux cycles, vérifiez qu’il est bien arrimé<br />
sur le support <strong>de</strong> rotor avant <strong>de</strong> centrifuger un autre échantillon. Un décrochage du rotor<br />
risque <strong>de</strong> se produire durant la centrifugation s’il n’a pas été arrimé correctement.<br />
ATTENTION ! : Les rotors pour tubes RT12 et RM02 doivent être équilibrés avant l’utilisation.<br />
Si vous souhaitez centrifuger un seul échantillon, utilisez un tube similaire contenant un<br />
second échantillon ou rempli d’eau pour effectuer l’équilibrage.<br />
ATTENTION ! : N’UTILISEZ PAS <strong>de</strong> tubes <strong>de</strong> centrifugation en verre <strong>de</strong> quelque type que ce<br />
soit dans le rotor RT12.<br />
IMPORTANT : Tous les rotors ont une durée <strong>de</strong> vie limitée qui dépend <strong>de</strong> l’utilisation. Il<br />
convient d’inspecter les rotors pour vérifier qu’ils ne présentent pas <strong>de</strong> fissures et les remplacer<br />
immédiatement si <strong>de</strong>s défauts ou signes d’usure manifestes sont détectés. Installez toujours un<br />
nouvel écran <strong>de</strong> protection lors <strong>de</strong> la mise en place d’un nouveau rotor RT12.<br />
ATTENTION ! : Débranchez la centrifugeuse <strong>IDEXX</strong> StatSpin <strong>VT</strong> <strong>de</strong> la prise <strong>de</strong> courant<br />
murale avant d’effectuer toute procédure <strong>de</strong> nettoyage ou d’entretien.<br />
MISE EN GARDE : N’exposez pas la centrifugeuse <strong>IDEXX</strong> StatSpin <strong>VT</strong> ni son rotor à <strong>de</strong>s<br />
aci<strong>de</strong>s forts ou concentrés, bases ou agents oxydants, hydrocarbures aromatiques ou<br />
halogénés, esters ou cétones.<br />
ATTENTION ! : Ne pulvérisez pas <strong>de</strong>s solutions <strong>de</strong> nettoyage directement sur la cuve la<br />
centrifugeuse ou son boîtier. Si la quantité pulvérisée est excessive, la solution pourrait<br />
atteindre les roulements du moteur ou la circuiterie interne. Les dommages qui en<br />
résulteraient ne seront pas nécessairement couverts par la garantie.<br />
Manuel d’utilisation <strong>de</strong> la centrifugeuse <strong>IDEXX</strong> StatSpin <strong>VT</strong> 25
ATTENTION ! : Respectez les précautions universelles durant la manipulation <strong>de</strong> tout<br />
spécimen biologique, que vous sachiez ou non s’il contient un agent infectieux.<br />
Utilisez la centrifugeuse conformément aux applications prévues. Un usage incorrect <strong>de</strong> la<br />
centrifugeuse <strong>IDEXX</strong> StatSpin <strong>VT</strong> et/ou <strong>de</strong> ses accessoires peut résulter en un endommagement <strong>de</strong><br />
l’appareil, <strong>de</strong>s résultats inexacts ou une éventuelle annulation <strong>de</strong>s garanties.<br />
Symboles<br />
Vous trouverez dans le tableau suivant tous les symboles qui figurent sur la centrifugeuse <strong>IDEXX</strong><br />
StatSpin <strong>VT</strong> ou dans ce manuel d’utilisation.<br />
Symbole/<br />
Touche<br />
Dénomination<br />
Mise en route<br />
Arrêt/Ouverture<br />
Description<br />
La touche <strong>de</strong> mise en route lance un cycle d’une durée fixe prédéfinie<br />
à une vitesse donnée.<br />
REMARQUE : La centrifugeuse <strong>IDEXX</strong> StatSpin <strong>VT</strong> ne comporte pas<br />
une touche marche/arrêt et elle est normalement laissée branchée et<br />
prête à fonctionner.<br />
La touche « Arrêt/Ouverture » interrompt le cycle et relâche le<br />
couvercle à l’arrêt du rotor.<br />
SET<br />
(rouge)<br />
24 V – – – 1.7 A<br />
Sélecteur <strong>de</strong><br />
cycle<br />
Error/Service<br />
Puissance<br />
consommée<br />
La touche « SET » vous permet <strong>de</strong> sélectionner un cycle <strong>de</strong><br />
centrifugation.<br />
Le témoin « Error/Service » (« Erreur/Entretien ») reste<br />
continuellement allumé ou clignote quand une procédure d’entretien<br />
est requise.<br />
Le symbole <strong>de</strong> puissance consommée est situé à l’arrière <strong>de</strong> la<br />
centrifugeuse <strong>IDEXX</strong> StatSpin <strong>VT</strong> à côté <strong>de</strong> la borne d’entrée du<br />
courant continu dans laquelle le cordon <strong>de</strong> raccor<strong>de</strong>ment CC 24 V<br />
est branché.<br />
(vert)<br />
Témoin <strong>de</strong> cycle Quand il est vert en continu, ce témoin indique que le cycle<br />
<strong>de</strong> centrifugation correspondant est sélectionné. Une erreur s’est<br />
produite si un ou plusieurs témoins <strong>de</strong> cycle verts clignotent alors<br />
que le témoin « Error/Service » clignote également. Reportez-vous à<br />
la section Diagnostics d’erreurs pour plus <strong>de</strong> renseignements sur ces<br />
erreurs.<br />
!<br />
Attention !<br />
Températures<br />
limites<br />
Le symbole « Attention ! » apparaît sur le loquet du couvercle.<br />
N’ouvrez pas le couvercle avant l’arrêt complet du rotor. Dans ce<br />
mo<strong>de</strong> d’emploi, le symbole « Attention ! » est utilisé en référence à<br />
une précaution/mise en gar<strong>de</strong> que vous <strong>de</strong>vriez lire attentivement.<br />
Le symbole <strong>de</strong>s températures limites indique les limites<br />
températures maximales <strong>de</strong> stockage ou <strong>de</strong> fonctionnement.<br />
IVD<br />
Réservé à<br />
un usage<br />
diagnostique<br />
in vitro<br />
Le symbole IVD (pour « in-vitro diagnostic ») indique qu’un appareil<br />
est réservé à un usage diagnostique in vitro.<br />
Manuel d’utilisation <strong>de</strong> la centrifugeuse <strong>IDEXX</strong> StatSpin <strong>VT</strong> 26
Symbole/<br />
Touche<br />
Dénomination<br />
Non stérile<br />
Description<br />
Ce symbole indique qu’un produit n’est pas stérile<br />
NON<br />
STERILE<br />
S N<br />
Numéro <strong>de</strong><br />
série<br />
Consultez les<br />
instructions<br />
Risque<br />
biologique<br />
Le symbole « S N » indique un numéro <strong>de</strong> série.<br />
Ce symbole signifie que vous <strong>de</strong>vriez vous référer aux consignes<br />
fournies dans le mo<strong>de</strong> d’emploi ou la notice jointe pour plus <strong>de</strong><br />
renseignements.<br />
Le symbole <strong>de</strong> risque biologique indique que les précautions<br />
universelles doivent être appliquées pour la manipulation <strong>de</strong> tous les<br />
échantillons.<br />
Installation<br />
La centrifugeuse <strong>IDEXX</strong> StatSpin <strong>VT</strong> et ses accessoires sont fournis dans un carton. Si la<br />
centrifugeuse ou <strong>de</strong>s accessoires ont été endommagés durant la livraison, veuillez en informer le<br />
transporteur immédiatement.<br />
Matériel fourni<br />
• Numéro du produit :<br />
– SS<strong>VT</strong>-4<br />
• L’option susmentionnée comprend :<br />
– Un bloc d’alimentation universelle avec commutation (produit StatSpin N° 01-005940-001,<br />
pièce <strong>IDEXX</strong> N° 79-17310-00, produit APS N° AD-740U-1240)<br />
– Un cordon <strong>de</strong> raccor<strong>de</strong>ment avec prise <strong>de</strong> terre (à utiliser uniquement en Amérique du Nord)<br />
– Le manuel d’utilisation <strong>de</strong> la centrifugeuse <strong>IDEXX</strong> StatSpin <strong>VT</strong><br />
Emplacement <strong>de</strong> la centrifugeuse <strong>IDEXX</strong> StatSpin <strong>VT</strong><br />
• Placez la centrifugeuse <strong>IDEXX</strong> StatSpin <strong>VT</strong> sur une surface plate appropriée à l’utilisation d’un<br />
appareil <strong>de</strong> laboratoire.<br />
• Positionnez la centrifugeuse <strong>IDEXX</strong> StatSpin <strong>VT</strong> <strong>de</strong> sorte qu’elle ne soit pas directement exposée<br />
à la lumière du soleil et qu’elle soit à l’abri <strong>de</strong> sources <strong>de</strong> chaleur ou <strong>de</strong> froid intense.<br />
• Maintenez un espace d’au moins 30 cm autour <strong>de</strong> la centrifugeuse pour assurer la ventilation<br />
et délimiter un périmètre <strong>de</strong> sécurité.<br />
Raccor<strong>de</strong>ment au secteur<br />
REMARQUE : La fiche 24 V CC et le cordon <strong>de</strong> raccor<strong>de</strong>ment sont branchés à un bloc<br />
d’alimentation universelle avec commutateur.<br />
1. Branchez la fiche 24 V CC dans la borne d’entrée du courant continu située à l’arrière <strong>de</strong> la<br />
centrifugeuse <strong>IDEXX</strong> StatSpin <strong>VT</strong>.<br />
2. Branchez le cordon <strong>de</strong> raccor<strong>de</strong>ment à une prise mise à la terre adaptée au voltage et à la<br />
fréquence indiqués sur le bloc d’alimentation. Une fois l’appareil branché, la LED ou dio<strong>de</strong><br />
Manuel d’utilisation <strong>de</strong> la centrifugeuse <strong>IDEXX</strong> StatSpin <strong>VT</strong> 27
électroluminescente « Power On » (appareil sous tension) s’allume et le verrou du couvercle<br />
est relâché.<br />
!<br />
!<br />
MISE EN GARDE : Amérique du Nord : Utilisez uniquement le bloc d’alimentation fourni avec<br />
l’unité. L’utilisation d’autres blocs d’alimentation ou d’autres transformateurs endommagera<br />
les composants électroniques <strong>de</strong> la centrifugeuse <strong>IDEXX</strong> StatSpin <strong>VT</strong> et annulera la garantie.<br />
MISE EN GARDE : En <strong>de</strong>hors <strong>de</strong> l’Amérique du Nord : N’utilisez pas le cordon <strong>de</strong><br />
raccor<strong>de</strong>ment fourni. Employez un cordon <strong>de</strong> raccor<strong>de</strong>ment pouvant tolérer 1 A au minimum<br />
et <strong>de</strong>s connecteurs IEC320/CEE22 appropriés à la prise <strong>de</strong> courant utilisée.<br />
Vue d’ensemble<br />
Principe <strong>de</strong> fonctionnement et applications<br />
La centrifugeuse <strong>IDEXX</strong> StatSpin <strong>VT</strong> est réservée à un usage diagnostique in vitro pour :<br />
• Produire la séparation rapi<strong>de</strong> du sang total<br />
• Préparer un culot urinaire pour analyse microscopique<br />
• Centrifuger <strong>de</strong>s tubes à microhématocrite pour mesurer l’hématocrite<br />
La centrifugeuse <strong>IDEXX</strong> StatSpin <strong>VT</strong> est une centrifugeuse à haute vitesse compacte et silencieuse.<br />
Son système d’entraînement et <strong>de</strong> suspension unique est breveté et assure un fonctionnement<br />
essentiellement sans vibrations. Les rotors sont légers et <strong>de</strong> faible masse, la vitesse maximale<br />
et l’arrêt total sont ainsi obtenus en quelques secon<strong>de</strong>s. De par sa conception, la centrifugeuse<br />
<strong>IDEXX</strong> StatSpin <strong>VT</strong> répond aux normes <strong>de</strong> sécurité internationales.<br />
Avis <strong>de</strong> sécurité : il est recommandé <strong>de</strong> se conformer aux bonnes pratiques <strong>de</strong> sécurité lors<br />
d’un travail en laboratoire. Celles-ci comprennent, sans toutefois s’y limiter, l’utilisation d’un<br />
équipement <strong>de</strong> protection individuel (EPI), tel que <strong>de</strong>s gants et <strong>de</strong>s lunettes <strong>de</strong> protection,<br />
lors <strong>de</strong> la manipulation d’échantillons prélevés sur les patients, <strong>de</strong> réactifs ou <strong>de</strong> matériel <strong>de</strong><br />
laboratoire comme la centrifugeuse StatSpin.<br />
Rotors compatibles avec la centrifugeuse <strong>IDEXX</strong> StatSpin <strong>VT</strong><br />
Rotor pour tubes RT12<br />
Le rotor pour tubes RT12 est un rotor à <strong>de</strong>ux positions conçu pour recevoir une gran<strong>de</strong> variété<br />
<strong>de</strong> tubes utilisés pour la séparation <strong>de</strong>s échantillons <strong>de</strong> sang ou d’urine, y compris les tubes <strong>de</strong><br />
centrifugation conventionnels <strong>de</strong> 1,5 ml ou 2 ml d’un diamètre maximal <strong>de</strong> 10,9 mm. Ces tubes<br />
<strong>de</strong>vraient être supportés par l’épaulement du rotor.<br />
!<br />
ATTENTION ! : N’UTILISEZ PAS <strong>de</strong> tubes <strong>de</strong> centrifugation en verre <strong>de</strong> quelque type que ce soit<br />
dans le rotor RT12.<br />
ATTENTION ! : ne faites pas fonctionner la centrifugeuse sans écran <strong>de</strong> protection lors <strong>de</strong><br />
l’utilisation du rotor RT12.<br />
Voici une liste <strong>de</strong>s tubes approuvés qui peuvent être utilisés avec le rotor RT12<br />
• Microtubes préparés : TP1H, TP1U, TP5G et CH03<br />
• StatSampler* : SS2H, SS2E, SS2U, SS2X, SS1E<br />
• Tubes gradués pour urine : TU15-10<br />
• Tubes pré-remplis <strong>de</strong> réactif LipoClear* : LC10, LC40 et LC15<br />
• Tubes <strong>de</strong> microcentrifugation conventionnels <strong>de</strong> 1,5–2 ml (par ex., tubes Eppendorf*)<br />
• En option, tubes Microtainer avec adaptateurs : Le rotor RT12 peut recevoir <strong>de</strong>s tubes BD<br />
Microtainer s’ils sont utilisés en conjonction avec <strong>de</strong>s adaptateurs pour tubes Microtainer<br />
(pièce StatSpin N° SV12)<br />
Manuel d’utilisation <strong>de</strong> la centrifugeuse <strong>IDEXX</strong> StatSpin <strong>VT</strong> 28
Rotor pour tubes RM02<br />
Conçu spécifiquement pour la centrifugation <strong>de</strong> tubes BD Microtainer, ce rotor à <strong>de</strong>ux loges<br />
accepte également les tubes <strong>de</strong> microcentrifugation conventionnels <strong>de</strong> 0,5 ml. Le diamètre<br />
maximal <strong>de</strong>s tubes est <strong>de</strong> 8,3 mm. Voici une liste <strong>de</strong>s tubes approuvés qui peuvent être utilisés<br />
avec ce rotor :<br />
• Tubes BD Microtainer à collecteurs FloTop intégrés SEULEMENT<br />
• Tubes <strong>de</strong> microcentrifugation <strong>de</strong> 0,5 ml (7,5 mm <strong>de</strong> diam. ext. x 35 mm <strong>de</strong> long)<br />
Rotor pour tubes à microhématocrite RH12<br />
Le Rotor pour tubes à microhématocrite RH12 est un rotor à 12 positions muni d’un couvercle qui<br />
est utilisé pour centrifuger <strong>de</strong>s tubes capillaires à microhématocrite. Les dimensions maximales<br />
<strong>de</strong>s tubes sont les suivantes : 1,7 mm <strong>de</strong> diam. ext. x 42 mm <strong>de</strong> long. <strong>IDEXX</strong> recomman<strong>de</strong> <strong>de</strong><br />
remplacer les coussinets en caoutchouc fournis avec le rotor <strong>de</strong>ux fois par an ou chaque fois<br />
qu’un tube casse dans le rotor. Comman<strong>de</strong>z la pièce N° 01-2002-04 pour obtenir un jeu <strong>de</strong> douze<br />
coussinets <strong>de</strong> remplacement.<br />
! ATTENTION ! : n’utilisez pas d’écran <strong>de</strong> protection avec le rotor pour microhématocrite RH12.<br />
Voici une liste <strong>de</strong>s tubes approuvés qui peuvent être utilisés avec ce rotor :<br />
• Tubes capillaires en verre : HT9H, HT9U<br />
• Tubes capillaires en plastique SafeCrit* : HP8H, HP8U<br />
IMPORTANT : Les rotors RT12, RM02 et RH12 ont une durée <strong>de</strong> vie limitée qui dépend <strong>de</strong> leur<br />
utilisation. Les rotors pour tubes RT12 et RM02 <strong>de</strong>vraient être remplacés après approximativement<br />
3 600 cycles, ce qui équivaut à 18 mois d’utilisation à 10 cycles par jour en moyenne. Le rotor<br />
RH12 <strong>de</strong>vrait être remplacé après approximativement 2 600 cycles, ce qui équivaut à 12 mois<br />
d’utilisation à 10 cycles par jour en moyenne. Il convient d’inspecter les rotors pour vérifier qu’ils<br />
ne présentent pas <strong>de</strong> fissures et les remplacer immédiatement si <strong>de</strong>s défauts ou signes d’usure<br />
manifestes sont détectés.<br />
Utilisation <strong>de</strong> la centrifugeuse <strong>IDEXX</strong> StatSpin <strong>VT</strong><br />
Ouverture et fermeture du couvercle<br />
Le mécanisme <strong>de</strong> verrouillage du couvercle à comman<strong>de</strong> électronique empêche le<br />
fonctionnement si le couvercle n’est pas complètement fermé et verrouillé. Un cycle <strong>de</strong><br />
centrifugation ne peut être lancé que si le loquet du couvercle est enclenché.<br />
La centrifugeuse est également équipée d’un loquet à comman<strong>de</strong> manuelle qui maintient<br />
le couvercle abaissé une fois la centrifugation terminée. Le mécanisme <strong>de</strong> verrouillage est<br />
automatiquement relâché à la fin du cycle <strong>de</strong> centrifugation ou en appuyant sur la touche « Arrêt/<br />
Ouverture. » Pour ouvrir le couvercle, levez le loquet noir.<br />
Annulation du mécanisme <strong>de</strong> verrouillage du couvercle<br />
En cas <strong>de</strong> panne <strong>de</strong> courant ou <strong>de</strong> fonctionnement défectueux, la touche « Arrêt/Ouverture » ne<br />
permettra peut-être pas <strong>de</strong> relâcher le couvercle. Pour récupérer les échantillons contenus dans le<br />
rotor, il est possible d’annuler manuellement le verrouillage du couvercle en introduisant la portion<br />
redressée d’un gros trombone ou tout autre objet similaire dans le petit trou situé sur le <strong>de</strong>vant<br />
du boîtier au-<strong>de</strong>ssus <strong>de</strong> la touche « SET ». Pour dégager le loquet, enfoncez le trombone sur une<br />
profon<strong>de</strong>ur <strong>de</strong> 25 mm environ.<br />
Manuel d’utilisation <strong>de</strong> la centrifugeuse <strong>IDEXX</strong> StatSpin <strong>VT</strong> 29
!<br />
ATTENTION ! : La procédure d’annulation du mécanisme <strong>de</strong> verrouillage du couvercle doit être<br />
utilisée uniquement en cas d’urgence. Son usage impropre risque d’exposer l’opérateur à <strong>de</strong>s<br />
conditions dangereuses.<br />
Mise en place d’un rotor<br />
La base <strong>de</strong> tous les rotors s’adapte sur un<br />
joint torique d’étanchéité sur le support <strong>de</strong><br />
rotor. La figure <strong>de</strong> droite est la représentation<br />
en coupe transversale d’un rotor pour tubes<br />
à hématocrite en place sur le support <strong>de</strong><br />
rotor. Avec la rotation du rotor, le joint torique<br />
d’étanchéité est déplacé vers l’extérieur par la<br />
force centrifuge, augmentant l’adhérence par friction entre le support <strong>de</strong><br />
rotor et le rotor.<br />
Retirez l’écran <strong>de</strong> protection (le cas échéant) lors <strong>de</strong> l’installation d’un<br />
rotor RT12. Une fois le rotor positionné dans la centrifugeuse, installez<br />
l’écran <strong>de</strong> protection.<br />
!<br />
!<br />
Joint torique<br />
d’étanchéité<br />
Support <strong>de</strong> rotor<br />
Rotor pour tubes à<br />
hématocrite<br />
écran <strong>de</strong> protection pour le rotor RT12<br />
ATTENTION ! : Ne laissez aucun rotor dans le support <strong>de</strong> rotor <strong>de</strong> la<br />
centrifugeuse <strong>IDEXX</strong> StatSpin <strong>VT</strong> s’il est prévu <strong>de</strong> ne pas l’utiliser pendant une pério<strong>de</strong> prolongée.<br />
Sinon, le joint torique d’étanchéité risque <strong>de</strong> subir une compression, ce qui diminue sa capacité à<br />
soutenir les rotors.<br />
ATTENTION ! : ne faites pas fonctionner la centrifugeuse sans écran <strong>de</strong> protection lors <strong>de</strong> l’utilisation<br />
du rotor RT12.<br />
! ATTENTION ! : n’utilisez pas d’écran <strong>de</strong> protection avec le rotor pour microhématocrite RH12.<br />
!<br />
!<br />
!<br />
ATTENTION ! : Une mise en place incorrecte du rotor peut endommager la centrifugeuse, ce qui<br />
n’est pas couvert par la garantie.<br />
ATTENTION ! : Si le rotor est laissé en place entre <strong>de</strong>ux cycles, vérifiez qu’il est bien arrimé sur<br />
le support <strong>de</strong> rotor avant <strong>de</strong> centrifuger un autre échantillon. Un décrochage du rotor risque <strong>de</strong> se<br />
produire durant la centrifugation s’il n’a pas été arrimé correctement.<br />
ATTENTION ! : Les rotors pour tubes RT12 et RM02 doivent être équilibrés avant l’utilisation.<br />
Si vous souhaitez centrifuger un seul échantillon, utilisez un tube similaire contenant un second<br />
échantillon ou rempli d’eau pour effectuer l’équilibrage.<br />
Installation d’un écran <strong>de</strong> protection<br />
Il est indispensable d’utiliser un écran <strong>de</strong> protection avec le rotor RT12. Il doit<br />
être remplacé lors du changement <strong>de</strong> rotor.<br />
écran <strong>de</strong> protection<br />
Procédure<br />
1. Assurez-vous que le rotor RT12 est correctement positionné.<br />
2. Enfoncez l’écran <strong>de</strong> protection à l’intérieur <strong>de</strong> la cuve jusqu’à ce qu’il touche<br />
complètement le fond <strong>de</strong> cette <strong>de</strong>rnière.<br />
Remarque : pour retirer l’écran <strong>de</strong> protection, tirez sur l’arête centrale <strong>de</strong> l’écran.<br />
Manuel d’utilisation <strong>de</strong> la centrifugeuse <strong>IDEXX</strong> StatSpin <strong>VT</strong> 30
Sélection <strong>de</strong>s réglages d’un cycle<br />
Vous <strong>de</strong>vriez essayer différents réglages pour déterminer quels sont les paramètres optimaux<br />
pour <strong>de</strong>s applications spécifiques. Les réglages qui suivent sont fournis à titre générale :<br />
Réglage tpm/FCR Durée Rotor<br />
Centrifugation rapi<strong>de</strong> 15 800/12 000 30 secon<strong>de</strong>s RT12, RM02<br />
Centrifugation normale 15 800/12 000 90 secon<strong>de</strong>s RT12, RM02<br />
Centrifugation primaire 15 800/12 000 150 secon<strong>de</strong>s RT12, RM02<br />
Culot urinaire 9 800/3 900 45 secon<strong>de</strong>s RT12<br />
Microhématocrite 15 800/13 700 120 secon<strong>de</strong>s RH12<br />
Traitement <strong>de</strong> l’échantillon<br />
Préparation d’un échantillon <strong>de</strong> sang veineux pour les tests <strong>de</strong> coagulation et<br />
les analyses biochimiques<br />
Le rotor pour tubes <strong>de</strong> plasma offre un moyen <strong>de</strong> séparer rapi<strong>de</strong>ment le plasma du sang total<br />
anticoagulé. Pour préparer l’échantillon <strong>de</strong> plasma <strong>de</strong>stiné à une analyse <strong>de</strong> biochimie sanguine,<br />
utilisez le cycle « Quick Spin » (« Centrifugation rapi<strong>de</strong> »). Pour les tests <strong>de</strong> la coagulation, utilisez<br />
le cycle « Hard Spin » (« Centrifugation primaire »).<br />
Procédure<br />
1. Soulevez le couvercle. Si nécessaire, mettez en place le rotor approprié à votre échantillon et<br />
poussez-le vers le bas pour vous assurer qu’il est correctement arrimé.<br />
2. Placez le tube contenant l’échantillon dans le rotor. Veillez à équilibrer le rotor en<br />
utilisant un tube contenant un second échantillon ou rempli d’eau. Fermez et verrouillez<br />
le couvercle.<br />
3. Sélectionnez le cycle désiré en appuyant sur la touche « SET » jusqu’à ce que la dio<strong>de</strong><br />
électroluminescente correspondante s’allume.<br />
4. Appuyez sur la touche <strong>de</strong> mise en route. Une fois le cycle <strong>de</strong> centrifugation terminé, le rotor<br />
ralentit et s’arrête complètement en l’espace <strong>de</strong> 10 secon<strong>de</strong>s environ. Le mécanisme <strong>de</strong><br />
verrouillage du loquet est alors automatiquement relâché. Pour ouvrir le couvercle, levez le<br />
loquet noir.<br />
Préparation d’un culot urinaire pour examen microscopique<br />
La centrifugeuse <strong>IDEXX</strong> StatSpin <strong>VT</strong> permet <strong>de</strong> préparer<br />
rapi<strong>de</strong>ment un culot urinaire pour examen microscopique.<br />
Cette procédure fait appel à <strong>de</strong>s tubes gradués pour urine<br />
(produit StatSpin N° TU15).<br />
Remplir jusqu’au trait<br />
Procédure<br />
1. Remplissez un tube pour urine jusqu’au repère du Enlever du liqui<strong>de</strong> jusqu’au trait<br />
haut (correspondant à un volume <strong>de</strong> 1,5 ml) avec<br />
une urine récoltée récemment et scellez le tube au<br />
moyen du bouchon fourni.<br />
2. Soulevez le couvercle et mettez en place le rotor pour tubes RT12 en le poussant vers le bas<br />
pour vous assurer qu’il est correctement arrimé.<br />
3. Placez le tube d’urine dans le rotor RT12. Veillez à équilibrer le rotor en utilisant un tube<br />
contenant un autre échantillon ou rempli d’eau. Fermez et verrouillez le couvercle.<br />
Manuel d’utilisation <strong>de</strong> la centrifugeuse <strong>IDEXX</strong> StatSpin <strong>VT</strong> 31
4. Appuyez sur la touche « SET » jusqu’à ce que le cycle « Urine Sediment » (« Culot urinaire »)<br />
soit sélectionné puis appuyez sur la touche <strong>de</strong> mise en route.<br />
5. Le couvercle est automatiquement relâché une fois le cycle terminé. Retirez le tube du rotor et<br />
enlevez le bouchon.<br />
6. Retournez le tube pour éliminer le liqui<strong>de</strong> jusqu’au repère du bas.<br />
REMARQUE : Un volume <strong>de</strong> 0,1 ml sera conservé sous l’effet <strong>de</strong> la tension superficielle.<br />
7. Rebouchez le tube et remettez le culot en suspension en agitant délicatement le tube.<br />
8. Après avoir remis le culot en suspension, déposez une goutte sur une lame <strong>de</strong> microscope.<br />
Recouvrez la préparation d’une lamelle et examinez-la conformément au protocole utilisé<br />
dans votre laboratoire.<br />
Elimination <strong>de</strong>s lipi<strong>de</strong>s<br />
La centrifugeuse <strong>IDEXX</strong> StatSpin <strong>VT</strong> peut être utilisée pour centrifuger <strong>de</strong>s échantillons lipémiques<br />
recueillis dans <strong>de</strong>s tubes contenant le réactif LipoClear (LC10, LC40, LC15). Le réactif LipoClear<br />
est une solution non toxique et non carcinogène produisant une élimination <strong>de</strong>s lipoprotéines, qui<br />
est fournie dans <strong>de</strong>s tubes <strong>de</strong> microcentrifugation pré-remplis. Des tubes <strong>de</strong> 0,5 ml et 1,5 ml préremplis<br />
<strong>de</strong> réactif LipoClear sont disponibles (voir ci-<strong>de</strong>ssous). Après avoir transféré l’échantillon<br />
dans le tube, mélangez la préparation et laissez-la reposer pendant cinq minutes avant <strong>de</strong> la<br />
soumettre à une centrifugation primaire en utilisant le rotor pour tubes RT12. Reportez-vous à la<br />
notice fournie avec le réactif LipoClear pour <strong>de</strong> plus amples informations.<br />
N° du Produit Volume <strong>de</strong> l’échantillon Conditionnement<br />
LC10 0,5 ml 10 tubes/sachet<br />
LC40 0,5 ml 40 tubes/sachet<br />
LC15 1,5 ml 40 tubes/sachet<br />
Procédure<br />
1. Soulevez le couvercle. Si nécessaire, mettez en place le rotor approprié à votre échantillon et<br />
poussez-le vers le bas pour vous assurer qu’il est correctement arrimé.<br />
2. Placez le tube contenant l’échantillon dans le rotor. Veillez à équilibrer le rotor en utilisant un<br />
tube contenant un second échantillon ou rempli d’eau. Fermez et verrouillez le couvercle.<br />
3. Sélectionnez le cycle désiré en appuyant sur la touche « SET » jusqu’à ce que la dio<strong>de</strong><br />
électroluminescente correspondant au cycle « Hard spin » (« Centrifugation primaire ») s’allume.<br />
4. Appuyez sur la touche <strong>de</strong> mise en route. Une fois le cycle <strong>de</strong> centrifugation terminé, le rotor<br />
ralentit et s’arrête complètement en l’espace <strong>de</strong> 10 secon<strong>de</strong>s environ. Le mécanisme <strong>de</strong><br />
verrouillage du loquet est alors automatiquement relâché. Pour ouvrir le couvercle, levez le<br />
loquet noir.<br />
Mesure <strong>de</strong> l’hématocrite ou réalisation d’un microhématocrite<br />
Des tubes microcapillaires sont disponibles en verre ou en plastique :<br />
• Les tubes <strong>de</strong> type HT9H (verre) et HP8H (plastique) sont <strong>de</strong>s tubes héparinés, et ils <strong>de</strong>vraient<br />
donc être utilisés pour les échantillons <strong>de</strong> sang capillaire.<br />
• Les tubes <strong>de</strong> type HT9U (verre) et HP8U (plastique) ne sont pas traités, et ils <strong>de</strong>vraient donc<br />
être utilisés pour les échantillons <strong>de</strong> sang (anticoagulé) prélevés par ponction veineuse.<br />
Manuel d’utilisation <strong>de</strong> la centrifugeuse <strong>IDEXX</strong> StatSpin <strong>VT</strong> 32
Procédure<br />
1. Recueillez l’échantillon :<br />
a. Sang capillaire : L’échantillon est recueilli directement sur tubes héparinés (produit<br />
StatSpin N° HT9H ou HP8H) au point <strong>de</strong> ponction.<br />
b. Sang veineux : L’échantillon est préparé dans un tube non traité (produit StatSpin N°<br />
HT9U ou HP8U) à partir d’un sang anticoagulé bien homogénéisé prélevé à la seringue<br />
ou dans un tube <strong>de</strong> recueil sous vi<strong>de</strong>.<br />
2. Tenez le tube microcapillaire par l’extrémité portant la ban<strong>de</strong> à co<strong>de</strong> <strong>de</strong> couleurs. Remplissez<br />
le tube capillaire avec l’échantillon jusqu’à la ban<strong>de</strong> à co<strong>de</strong> <strong>de</strong> couleurs. Retirez le tube <strong>de</strong><br />
l’échantillon et inclinez-le, l’extrémité portant la ban<strong>de</strong> étant dirigée vers le bas, jusqu’à ce que<br />
le sang migre à mi-hauteur entre la ban<strong>de</strong> et le fond du tube.<br />
3. Maintenez le tube en position horizontale et insérez à fond l’extrémité sèche (portant la<br />
ban<strong>de</strong>) du tube dans la plaque <strong>de</strong> cire <strong>de</strong> cachet maintenue à la verticale. Faites tourner le<br />
tube et retirez-le.<br />
4. Utilisez un morceau <strong>de</strong> papier essuie-tout pour essuyer le sang qui s’est éventuellement<br />
échappé à l’autre extrémité.<br />
5. Placez le tube, extrémité scellée en direction <strong>de</strong> l’épaulement extérieur, dans l’une <strong>de</strong>s douze<br />
loges du rotor pour tubes à microhématocrite RH12. Il n’est pas nécessaire d’équilibrer ce<br />
rotor. Vissez le couvercle du rotor.<br />
tube capillaire rempli<br />
tube capillaire<br />
ban<strong>de</strong> à co<strong>de</strong> <strong>de</strong> couleurs<br />
tenez cette extrémité<br />
Inclinez le tube<br />
capillaire jusqu’à<br />
ce que le sang ait<br />
migré à la position<br />
illustrée ici.<br />
scellement du tube capillaire<br />
tube capillaire scellé<br />
6. Tenez le rotor par le bouton du couvercle noir et mettez-le en place dans le support <strong>de</strong> rotor.<br />
IMPORTANT : Tenez toujours le rotor pour tubes à microhématocrite par le bouton noir <strong>de</strong><br />
son couvercle quand vous appliquez une pression forte vers le bas pour l’arrimer dans le<br />
support et quand vous le retirez <strong>de</strong> la centrifugeuse. Vous risquez d’endommager le rotor si<br />
vous le mettez en place en appuyant sur les bords extérieurs.<br />
7. Fermez et verrouillez le couvercle <strong>de</strong> la centrifugeuse. Appuyez sur la touche « SET » pour<br />
sélectionner le cycle « Microhematocrit » (« Microhématocrite ») puis appuyez sur la touche <strong>de</strong><br />
mise en route.<br />
8. À l’arrêt du rotor, retirez-le <strong>de</strong> la centrifugeuse. La<br />
lecture <strong>de</strong>s tubes contenus dans le rotor peut être<br />
effectuée au moyen <strong>de</strong> l’abaque circulaire du rotor<br />
(produit StatSpin N° HR4C). Sinon, retirez les tubes du<br />
rotor et déterminez les résultats au moyen <strong>de</strong> la carte<br />
<strong>de</strong> lecture (produit StatSpin N° HR05).<br />
Tube capillaire après centrifugation<br />
sommet du<br />
plasma<br />
sommet <strong>de</strong>s<br />
hématies<br />
fond <strong>de</strong>s<br />
hématies<br />
sceau<br />
d’étanchéité<br />
Contrôle <strong>de</strong> qualité<br />
• Il convient <strong>de</strong> respecter les procédures <strong>de</strong> contrôle <strong>de</strong> qualité appliquées dans votre laboratoire.<br />
• Pour vérifier quotidiennement que le taux d’hématocrite est approprié, sélectionnez un ou<br />
plusieurs tubes (dans lequel le taux d’hématocrite <strong>de</strong> l’échantillon dépasse <strong>de</strong> préférence<br />
Manuel d’utilisation <strong>de</strong> la centrifugeuse <strong>IDEXX</strong> StatSpin <strong>VT</strong> 33
50 %), centrifugez-les et effectuez les lectures. Centrifugez ces tubes une secon<strong>de</strong> fois. La<br />
différence entre la première lecture et la secon<strong>de</strong> <strong>de</strong>vrait être inférieure ou égale à 1 %.<br />
Fourchettes <strong>de</strong> référence<br />
Vous trouverez dans les tableaux suivants les taux d’hématocrite qui sont communément<br />
acceptés dans diverses espèces :<br />
Espèce % Espèce %<br />
Canine (adulte) 37–55 Équine 32–53<br />
Canine (chiot) 32–55 Bovine 25–42<br />
Féline (adulte) 30–45 Porcine 32–50<br />
Féline (chaton) 25–45 Ovine 24–45<br />
Nettoyage et entretien<br />
<strong>IDEXX</strong> vous recomman<strong>de</strong> d’inspecter périodiquement votre centrifugeuse <strong>IDEXX</strong> StatSpin <strong>VT</strong> et<br />
d’appliquer <strong>de</strong>s mesures d’entretien préventif. N’hésitez pas à vous mettre en rapport avec le<br />
support technique <strong>IDEXX</strong> ou votre distributeur agréé à tout moment si l’appareil ne fonctionne pas<br />
correctement.<br />
!<br />
!<br />
ATTENTION ! : Débranchez la centrifugeuse <strong>IDEXX</strong> StatSpin <strong>VT</strong> <strong>de</strong> la prise <strong>de</strong> courant murale<br />
avant d’effectuer toute procédure <strong>de</strong> nettoyage ou d’entretien.<br />
MISE EN GARDE : N’exposez pas la centrifugeuse <strong>IDEXX</strong> StatSpin <strong>VT</strong> ni son rotor à <strong>de</strong>s aci<strong>de</strong>s<br />
forts ou concentrés, bases ou agents oxydants, hydrocarbures aromatiques ou halogénés, esters<br />
ou cétones.<br />
Nettoyage<br />
Nettoyez les surfaces extérieures et le tableau <strong>de</strong> comman<strong>de</strong> à touches intégrées au moyen d’un<br />
chiffon humidifié avec <strong>de</strong> l’eau et d’un détergent doux. La surface intérieure est un revêtement<br />
en acier pulvérisé. Pour la nettoyer, utilisez un détergent doux et un désinfectant si nécessaire.<br />
Essuyez toutes les surfaces avec un chiffon humidifié avec <strong>de</strong> l’alcool à 70 % ou une solution<br />
d’eau <strong>de</strong> Javel à 10 %.<br />
!<br />
ATTENTION ! : Ne pulvérisez pas <strong>de</strong>s solutions <strong>de</strong> nettoyage directement sur la cuve la<br />
centrifugeuse ou son boîtier. Si la quantité pulvérisée est excessive, la solution pourrait atteindre les<br />
roulements du moteur ou la circuiterie interne. Les dommages qui en résulteraient ne seront pas<br />
nécessairement couverts par la garantie.<br />
Vérification <strong>de</strong> la vitesse du rotor<br />
Les vitesses <strong>de</strong> rotation indiquées peuvent être vérifiées au moyen d’un stroboscope ou d’un<br />
compteur <strong>de</strong> tours photoélectrique. Si la centrifugeuse <strong>IDEXX</strong> StatSpin <strong>VT</strong> n’atteint pas une vitesse<br />
opérationnelle, mettez-vous en rapport avec le service d’assistance technique d’<strong>IDEXX</strong> ou votre<br />
distributeur agréé.<br />
Remplacement du joint torique d’étanchéité<br />
La figure <strong>de</strong> droite illustre la position du joint torique d’étanchéité qui est<br />
rattaché au support <strong>de</strong> rotor. Si la mise en place du rotor <strong>de</strong>vient difficile,<br />
appliquez une très petite quantité d’un lubrifiant <strong>de</strong> type silicone sur les trois<br />
A<br />
A<br />
A<br />
Manuel d’utilisation <strong>de</strong> la centrifugeuse <strong>IDEXX</strong> StatSpin <strong>VT</strong> 34
points (A) <strong>de</strong> la garniture d’étanchéité où le joint torique est positionné. Il convient d’inspecter<br />
le joint torique d’étanchéité régulièrement et <strong>de</strong> le remplacer s’il est aplati ou usé. Le joint<br />
torique d’étanchéité <strong>de</strong>vrait être remplacé au moins une fois par an dans le cadre <strong>de</strong>s mesures<br />
d’entretien préventif.<br />
La mise en place d’un nouveau joint torique d’étanchéité peut être effectuée comme indiqué, en<br />
faisant passer ce joint en alternance <strong>de</strong>rrière et <strong>de</strong>vant les six broches sur le support <strong>de</strong> rotor. Des<br />
joints toriques d’étanchéité <strong>de</strong> réserve sont fournis avec la centrifugeuse <strong>IDEXX</strong> StatSpin.<br />
Témoins d’erreurs<br />
Sur la centrifugeuse <strong>IDEXX</strong> StatSpin <strong>VT</strong>, les situations d’erreurs sont signalées par un témoin «<br />
Error/Service » (Erreur/Entretien) clignotant sur le tableau <strong>de</strong> comman<strong>de</strong>. La cause <strong>de</strong> l’erreur peut<br />
être i<strong>de</strong>ntifiée sur la base <strong>de</strong> la combinaison <strong>de</strong> témoins <strong>de</strong> cycle qui clignotent également.<br />
témoin <strong>de</strong> cycle<br />
vert clignotant<br />
QUICK SPIN<br />
QUICK SPIN<br />
QUICK SPIN<br />
QUICK SPIN<br />
NORMAL<br />
NORMAL<br />
NORMAL<br />
NORMAL<br />
HARD SPIN<br />
HARD SPIN<br />
HARD SPIN<br />
HARD SPIN<br />
URINE SEDIMENT<br />
URINE SEDIMENT<br />
URINE SEDIMENT<br />
URINE SEDIMENT<br />
MICROHEMATOCRIT<br />
MICROHEMATOCRIT<br />
MICROHEMATOCRIT<br />
MICROHEMATOCRIT<br />
témoin « Error/<br />
Service » rouge<br />
clignotant<br />
SET<br />
Error/Service<br />
SET<br />
Error/Service<br />
SET<br />
Error/Service<br />
SET<br />
Error/Service<br />
Le rotor n’a pas atteint pas<br />
la vitesse maximale en<br />
l’espace <strong>de</strong> 30 secon<strong>de</strong>s.<br />
Le couvercle a été ouvert<br />
ou le cycle modifié durant le<br />
fonctionnement.<br />
La vitesse <strong>de</strong> rotation du<br />
rotor ne peut pas être<br />
maintenue.<br />
Le rotor a tourné en<br />
sens inverse durant la<br />
décélération.<br />
Le témoin « Error/Service » reste continuellement allumé quand le nombre total <strong>de</strong> cycles<br />
effectués par la centrifugeuse atteint 18 000, ce qui correspond à la durée <strong>de</strong> vie utile du système<br />
d’entraînement. Le mécanisme <strong>de</strong> comman<strong>de</strong> <strong>de</strong>vra être remplacé. Mettez-vous en rapport avec<br />
un service d’entretien agréé.<br />
Manuel d’utilisation <strong>de</strong> la centrifugeuse <strong>IDEXX</strong> StatSpin <strong>VT</strong> 35
<strong>IDEXX</strong> vous recomman<strong>de</strong> d’inspecter régulièrement votre centrifugeuse<br />
<strong>IDEXX</strong> StatSpin <strong>VT</strong> ou StatSpin MP, et d’effectuer les opérations<br />
préventives <strong>de</strong> maintenance qui sont conseillées.<br />
Fiche <strong>de</strong> maintenance<br />
Mois : ____________________<br />
1 2 3 4 5 6 7 8 9 10 11 12 13 14 15 16 17 18 19 20 21 22 23 24 25 26 27 28 29 30 31<br />
Fréquence Maintenance<br />
à faire<br />
Vérifiez le<br />
couvercle, le verrou<br />
et l’articulation afin<br />
<strong>de</strong> vous assurer<br />
<strong>de</strong> l’absence <strong>de</strong><br />
fissures ou <strong>de</strong><br />
signes d’usure.<br />
Tous les<br />
jours<br />
Vérifiez le rotor<br />
et l’écran <strong>de</strong><br />
protection afin <strong>de</strong><br />
vous assurer <strong>de</strong><br />
l’absence <strong>de</strong> signes<br />
<strong>de</strong> fissures ou <strong>de</strong><br />
vulnérabilité.<br />
Inspectez le joint<br />
torique pour<br />
détecter d’éventuels<br />
signes d’usure ou<br />
<strong>de</strong> dilatation.<br />
36
Année : ____________________<br />
Fréquence Maintenance à faire<br />
Janvier Février Mars Avril Mai Juin Juillet Août Septembre Octobre Novembre Décembre<br />
Tous les Changez le joint torique sur le<br />
ans † support du rotor.<br />
Remplacez le rotor RT12 et l’écran<br />
<strong>de</strong> protection. †<br />
Lorsque<br />
c’est<br />
nécessaire<br />
† Le rotor RT12 et l’écran <strong>de</strong> protection doivent être remplacés après 3 600 rotations. Installez toujours un nouvel écran <strong>de</strong> protection lors <strong>de</strong> la mise en place d’un nouveau rotor RT12. Utilisez le tableau ci<strong>de</strong>ssous<br />
pour définir la fréquence <strong>de</strong> remplacement <strong>de</strong> votre rotor et <strong>de</strong> votre écran <strong>de</strong> protection en fonction du nombre moyen d’échantillons centrifugés par jour.<br />
Fréquence minimale<br />
<strong>de</strong> remplacement<br />
Échantillons par jour<br />
(semaine <strong>de</strong> 5 jours <strong>de</strong> travail)<br />
15 Annuellement<br />
10 Tous les 18 mois<br />
5 Tous les 2,5 ans<br />
3 Tous les 4 ans<br />
37
Diagnostics d’erreurs<br />
Problème<br />
Le témoin <strong>de</strong> mise sous<br />
tension <strong>de</strong>meure éteint<br />
La centrifugeuse ne<br />
tourne pas ou s’arrête<br />
prématurément<br />
La centrifugeuse ne s’ouvre<br />
pas automatiquement à la<br />
fin d’un cycle<br />
Mesure<br />
• Vérifiez le cordon <strong>de</strong> raccor<strong>de</strong>ment et assurez-vous qu’il est<br />
complètement enfoncé dans la prise. Le cas échéant, essayez une autre<br />
prise.<br />
• Vérifiez que la fiche 24 V CC est complètement enfoncée à l’arrière <strong>de</strong> la<br />
centrifugeuse <strong>IDEXX</strong> StatSpin <strong>VT</strong>.<br />
• Mettez-vous en rapport avec le support technique <strong>IDEXX</strong>.<br />
• Vérifiez que le couvercle est complètement fermé et verrouillé..<br />
• Si le témoin « Error/Service » clignote, i<strong>de</strong>ntifiez la source <strong>de</strong> l’erreur.<br />
Corrigez cette erreur puis appuyez sur la touche « Arrêt/Ouverture » pour<br />
remettre le système à l’état initial.<br />
• Mettez-vous en rapport avec le support technique <strong>IDEXX</strong>.<br />
• Pour ouvrir le couvercle manuellement, utilisez la procédure d’annulation<br />
du verrouillage du couvercle.<br />
• Assurez-vous que la garniture d’étanchéité <strong>de</strong> la cuve est bien en place<br />
dans la rainure intérieure du boîtier et scelle intégralement la cuve. Pour<br />
cela, pressez sur cette garniture pour l’enfoncer aussi complètement que<br />
possible dans la rainure du boîtier.<br />
• Mettez-vous en rapport avec le support technique d’<strong>IDEXX</strong>.<br />
Entretien<br />
Adressez toutes les procédures d’entretien au support technique d’<strong>IDEXX</strong> ou à un service <strong>de</strong><br />
réparations agréé.<br />
Décontamination avant l’expédition pour une procédure d’entretien<br />
Tout appareil ou accessoire qui a été exposé à du sang ou à d’autres matériaux biologiques doit<br />
être nettoyé avant son envoi au fabricant ou à un fournisseur pour une procédure d’entretien.<br />
Cette décontamination est requise par la loi fédérale (Articles 48 et 49 <strong>de</strong>s lois fédérales) et dans<br />
le respect <strong>de</strong>s règlements <strong>de</strong> l’Agence <strong>de</strong> protection <strong>de</strong> l’environnement concernant la gestion<br />
<strong>de</strong>s déchets biologiques dangereux. Les membres du personnel d’<strong>IDEXX</strong> et d’Iris Sample<br />
Processing ne peuvent pas effectuer cette décontamination.<br />
Spécifications<br />
Centrifugeuse<br />
Numéro du produit<br />
Numéro du modèle<br />
Cycles<br />
Centrifugation rapi<strong>de</strong><br />
Centrifugation<br />
normale<br />
Centrifugation<br />
primaire<br />
SS<strong>VT</strong>-4<br />
V901<br />
Vitesses<br />
30 secon<strong>de</strong>s à 15 800 tpm/12 000 xg<br />
90 secon<strong>de</strong>s à 15 800 tpm/12 000 xg<br />
150 secon<strong>de</strong>s à 15 800 tpm/12 000 xg<br />
Culot urinaire 45 secon<strong>de</strong>s à 9 800 tpm/3 900 xg<br />
Hématocrite<br />
120 secon<strong>de</strong>s à 15 800 rpm/13 700 xg<br />
Temps d’accélération Approximativement six secon<strong>de</strong>s<br />
Manuel d’utilisation <strong>de</strong> la centrifugeuse <strong>IDEXX</strong> StatSpin <strong>VT</strong> 38
Temps <strong>de</strong><br />
décélération<br />
Caractéristiques<br />
électriques<br />
Dimensions<br />
Caractéristiques<br />
ambiantes<br />
Approximativement 10 secon<strong>de</strong>s<br />
24 volts, DC, 1,7 A<br />
Fournie avec un bloc d’alimentation avec commutation pour un courant d’entrée<br />
<strong>de</strong> 100–240 V CA, 50–60 Hz<br />
Diamètre 16,25 cm<br />
Hauteur 13,2 cm<br />
Poids 2,5 kg<br />
Réservé à un usage à l’intérieur<br />
Altitu<strong>de</strong> maximale : 2 000 m<br />
Fourchette <strong>de</strong>s températures ambiantes : 5 °C à 40 °C<br />
Humidité relative maximale : 80 % à 31 °C, diminuant à 50 % à 40 °C<br />
Les fluctuations du voltage du courant secteur ne <strong>de</strong>vraient pas dépasser ±10 %<br />
Surtension transitoire conforme à la catégorie d’installation II<br />
Degré <strong>de</strong> pollution 2<br />
Les spécifications peuvent faire l’objet <strong>de</strong> modifications sans préavis.<br />
Accessoires<br />
Produit N° Description Cycle requis<br />
RT12 Rotor à angle fixe à 2 loges x 1,5 ml Rapi<strong>de</strong>, Normal, Primaire<br />
SV12 Adaptateurs pour tubes Microtainer (2 paquets) Rapi<strong>de</strong>, Normal, Primaire<br />
TU15-10 Tubes gradués pour urine, 1,5 ml (10 sachets <strong>de</strong> 50) Culot urinaire<br />
TP1H Tubes héparinate <strong>de</strong> lithium pour microcentrifugation, 1,3 ml<br />
(sachet <strong>de</strong> 100)<br />
Rapi<strong>de</strong>, Normal, Primaire<br />
TP1U Tubes non traités pour microcentrifugation, 1,3 ml (sachet <strong>de</strong> 100) Rapi<strong>de</strong>, Normal, Primaire<br />
SS2H<br />
SS2U<br />
SS2X<br />
LC10<br />
LC40<br />
LC15<br />
RM02<br />
RH12<br />
HP8H-10<br />
StatSampler* (200 µl, héparinate <strong>de</strong> lithium) : système <strong>de</strong><br />
ponction capillaire pour analyses biochimiques d’échantillons<br />
sanguins<br />
StatSampler (200 µl, non traité) : système <strong>de</strong> ponction capillaire<br />
pour analyses biochimiques d’échantillons sanguins<br />
StatSampler (200 µl, EDTA) : système <strong>de</strong> ponction capillaire avec<br />
gel pour le prélèvement d’échantillons pour hématologie<br />
LipoClear : tubes <strong>de</strong> 0,5-ml pré-remplis <strong>de</strong> réactif pour l’élimination <strong>de</strong>s<br />
lipoprotéines du sérum ou du plasma (sachet <strong>de</strong> 10)<br />
LipoClear : tubes <strong>de</strong> 0,5-ml pré-remplis <strong>de</strong> réactif pour l’élimination <strong>de</strong>s<br />
lipoprotéines du sérum ou du plasma (sachet <strong>de</strong> 40)<br />
LipoClear : tubes <strong>de</strong> 1,5-ml pré-remplis <strong>de</strong> réactif pour l’élimination <strong>de</strong>s<br />
lipoprotéines du sérum ou du plasma (sachet <strong>de</strong> 40)<br />
Rotor à angle fixe à 2 loges x 0,8 ml pour tubes BD Microtainer et<br />
tubes <strong>de</strong> microcentrifugation <strong>de</strong> 0,5 ml<br />
Rotor à 12 loges pour tubes à microhématocrite avec abaque<br />
circulaire (HR4C)<br />
Tubes capillaires SafeCrit (40 mm, héparine sodique) : tubes à<br />
microhématocrite composés à 100 % <strong>de</strong> plastique pour le rotor<br />
RH12 (10 boîtes of 100)<br />
Rapi<strong>de</strong>, Normal, Primaire<br />
Rapi<strong>de</strong>, Normal, Primaire<br />
Rapi<strong>de</strong>, Normal, Primaire<br />
Primaire<br />
Primaire<br />
Primaire<br />
Rapi<strong>de</strong>, Normal, Primaire<br />
Microhématocrite<br />
Microhématocrite<br />
Manuel d’utilisation <strong>de</strong> la centrifugeuse <strong>IDEXX</strong> StatSpin <strong>VT</strong> 39
Produit N° Description Cycle requis<br />
HP8U-10<br />
HT9H-10<br />
HT9U-10<br />
Tubes capillaires SafeCrit (40 mm, non traités) : tubes à<br />
microhématocrite composés à 100 % <strong>de</strong> plastique pour le rotor<br />
RH12 (10 boîtes of 100)<br />
Tubes capillaires en verre (40 mm, héparine sodique) tubes à<br />
microhématocrite en verre pour le rotor RH12 (10 boîtes of 100)<br />
Tubes capillaires en verre (40 mm, non traités) : tubes à<br />
microhématocrite en verre pour le rotor RH12 (10 boîtes of 100)<br />
HS24-10 Cire <strong>de</strong> cachet pour scellement <strong>de</strong> tubes capillaires (10 plaques) S/O<br />
HR05<br />
HR4<br />
00-Ring<br />
Carte <strong>de</strong> lecture <strong>de</strong>s taux d’hématocrite pour tubes à hématocrite<br />
<strong>de</strong> 40 mm<br />
Abaque circulaire <strong>de</strong> lecture <strong>de</strong>s taux d’hématocrite, à utiliser en<br />
conjonction avec le rotor RH12<br />
Joints toriques <strong>de</strong> remplacement pour le support <strong>de</strong> rotor (cinq<br />
sachets <strong>de</strong> trois)<br />
Microhématocrite<br />
Microhématocrite<br />
Microhématocrite<br />
S/O<br />
S/O<br />
S/O<br />
Manuel d’utilisation <strong>de</strong> la centrifugeuse <strong>IDEXX</strong> StatSpin <strong>VT</strong> 40
Informations <strong>de</strong> contact du Support technique <strong>IDEXX</strong><br />
Votre représentant <strong>IDEXX</strong> :<br />
Téléphone/messagerie vocale :<br />
États-Unis<br />
<strong>IDEXX</strong> Laboratories, Inc..<br />
One <strong>IDEXX</strong> Drive<br />
Westbrook, Maine 04092<br />
États-Unis<br />
Numéro gratuit<br />
du Support technique................. 1-800-248-2483<br />
Numéro <strong>de</strong> téléphone principal.. 1-207-556-0300<br />
Numéro <strong>de</strong> fax gratuit................. 1-800-248-3010<br />
www.i<strong>de</strong>xx.com<br />
Italie<br />
<strong>IDEXX</strong> Laboratories Italia, S.r.l.<br />
Via Canova 27<br />
20145 Milano<br />
Italie<br />
Numéro gratuit<br />
du Support technique................. 00800 1234 3399<br />
Téléphone.................................... (39) 02 319 20 31<br />
Fax............................................... (39) 02 319 20 347<br />
www.i<strong>de</strong>xx.it<br />
Pays-Bas<br />
<strong>IDEXX</strong> Europe B.V.<br />
Scorpius 60 Building F<br />
2132 LR Hoofddorp<br />
Pays-Bas<br />
Numéro gratuit<br />
du Support technique................. 00800 1234 3399<br />
Téléphone.................................... (31) 23 558 7000<br />
Numéro <strong>de</strong> fax gratuit................. 00800 1234 3333<br />
Fax............................................... (31) 23 558 7233<br />
www.i<strong>de</strong>xx.nl<br />
Espagne<br />
<strong>IDEXX</strong> Laboratorios, S.L.<br />
C/ Plom 2-8, 3 º<br />
08038 Barcelona<br />
Espagne<br />
Numéro gratuit<br />
du Support technique................. 00800 1234 3399<br />
Téléphone.................................... (34) 93 414 26 08<br />
Fax............................................... (34) 93 414 74 78<br />
www.i<strong>de</strong>xx.es<br />
France<br />
<strong>IDEXX</strong> S.A.R.L.<br />
Bâtiment Flori<strong>de</strong> - Eragny Parc<br />
11 Allée Rosa, Luxembourg<br />
95610 Eragny, sur Oise<br />
France<br />
Numéro gratuit<br />
du Support technique................. 00800 1234 3399<br />
Téléphone.................................... (33) 1 34 32 62 00<br />
Fax............................................... (33) 1 34 30 02 08<br />
www.i<strong>de</strong>xx.fr<br />
Royaume-Uni<br />
<strong>IDEXX</strong> Laboratories Ltd.<br />
Milton Court, Churchfield Road<br />
Chalfont St Peter<br />
Buckinghamshire SL9 9EW<br />
Royaume-Uni<br />
Numéro gratuit<br />
du Support technique................. 00800 1234 3399<br />
Téléphone.................................... (44) 01753 891 660<br />
Fax............................................... (44) 01753 891 520<br />
www.i<strong>de</strong>xx.co.uk<br />
Allemagne<br />
<strong>IDEXX</strong> GmbH<br />
Mörikestraße 28/3<br />
D-71636 Ludwigsburg<br />
Allemagne<br />
Numéro gratuit<br />
du Support technique............... 00800 1234 3399<br />
Téléphone.................................. (49) 067 32-9 4420<br />
Fax............................................. 0800 6645627<br />
www.i<strong>de</strong>xx.<strong>de</strong><br />
Australie<br />
<strong>IDEXX</strong> Laboratories Pty. Ltd.<br />
Metro Centre<br />
Unit 20, 30-46 South Street<br />
Rydalmere, New South Wales 2116<br />
Australie<br />
Numéro gratuit<br />
du Support technique................. 1800 655 978<br />
Téléphone.................................... (61) 2 9898 7300<br />
Fax............................................... (61) 2 9898 7302<br />
www.i<strong>de</strong>xx.com.au<br />
Manuel d’utilisation <strong>de</strong> la centrifugeuse <strong>IDEXX</strong> StatSpin <strong>VT</strong> 41
Canada<br />
<strong>IDEXX</strong> Laboratories Canada Corporation<br />
C/O UPS<br />
4071 North Service Rd<br />
Burlington, ON L7L 4X6<br />
Canada<br />
Numéro gratuit<br />
du Support technique................. 1-800-248-2483<br />
Téléphone.................................... 1-905-602-9499<br />
Numéro <strong>de</strong> fax gratuit................. 1-800-248-3010<br />
Fax............................................... 1-905-602-6640<br />
www.i<strong>de</strong>xx.com<br />
Japon<br />
<strong>IDEXX</strong> Laboratories KK<br />
3-3-7 Kitano, Mitaka-shi, Tokyo<br />
181-8608 Japon<br />
Numéro gratuit<br />
du Support technique................. 0120-71-4921<br />
Téléphone.................................... (81) 422 71 4921<br />
Fax............................................... (81) 422 71 4922<br />
www.i<strong>de</strong>xx.co.jp<br />
Manuel d’utilisation <strong>de</strong> la centrifugeuse <strong>IDEXX</strong> StatSpin <strong>VT</strong> 42
Fabriqué pour <strong>IDEXX</strong> Laboratories, Inc., par :<br />
une division d’Iris International Inc.<br />
Westwood, MA 02090, États-Unis<br />
Téléphone : 800-782-8774<br />
ou 781-551-0100<br />
Fax : 781-551-0036<br />
proiris.com
Centrífuga <strong>IDEXX</strong> StatSpin * <strong>VT</strong><br />
Guía <strong>de</strong> <strong>usuario</strong><br />
Versión Española<br />
Centrífuga <strong>IDEXX</strong> StatSpin * <strong>VT</strong><br />
Guía <strong>de</strong> <strong>usuario</strong>—Versión Española
Centrífuga <strong>IDEXX</strong> <strong>StatSpin*</strong> <strong>VT</strong><br />
Número <strong>de</strong> mo<strong>de</strong>lo V901<br />
Solo para uso veterinario.<br />
Número <strong>de</strong> producto<br />
SS<strong>VT</strong>-4 Centrífuga <strong>IDEXX</strong> StatSpin <strong>VT</strong> para 100-240 V CA, 50/60 Hz<br />
Aviso sobre los <strong>de</strong>rechos <strong>de</strong> propiedad registrada<br />
La información <strong>de</strong> este documento está sujeta a cambios sin previo aviso. A menos que se indique lo contrario, las<br />
compañías, nombres y datos utilizados en los ejemplos son ficticios. Ninguna parte <strong>de</strong> este documento pue<strong>de</strong> ser<br />
reproducida o transmitida en manera alguna ni por ningún medio, ya sea electrónico, mecánico o <strong>de</strong> otro tipo, sea<br />
cual sea el objetivo, sin el permiso por escrito <strong>de</strong> <strong>IDEXX</strong> Laboratories. <strong>IDEXX</strong> pue<strong>de</strong> tener patentes o solicitu<strong>de</strong>s <strong>de</strong><br />
patentes en tramitación, marcas, <strong>de</strong>rechos <strong>de</strong> reproducción u otros <strong>de</strong>rechos <strong>de</strong> propiedad intelectual o industrial<br />
que contemplen este documento o contenidos <strong>de</strong>l mismo. La aportación <strong>de</strong> este documento no confiere ninguna<br />
licencia sobre estos <strong>de</strong>rechos <strong>de</strong> propiedad a menos que se indique por escrito en un acuerdo <strong>de</strong> licencia <strong>de</strong> <strong>IDEXX</strong><br />
Laboratories.<br />
© 2012 <strong>IDEXX</strong> Laboratories, Inc. Todos los <strong>de</strong>rechos reservados.<br />
*StatSpin, StatSampler, LipoClear, PlasmaRotor y SafeCrit son marcas o marcas registradas <strong>de</strong> Iris Sample<br />
Processing en los Estados Unidos y/o en otros países. BD y Microtainer son marcas <strong>de</strong> Becton, Dickinson and<br />
Company. Los tubos Eppendorf son una marca registrada <strong>de</strong> Eppendorf North America, Inc. El resto <strong>de</strong> productos y<br />
nombres <strong>de</strong> compañías y logos son marcas <strong>de</strong> sus respectivos titulares.<br />
El dispositivo <strong>de</strong> extracción sanguínea StatSpin está protegido por la patente <strong>de</strong> EE.UU. núm. 5.257.984.<br />
Centrífuga <strong>IDEXX</strong> StatSpin <strong>VT</strong> Guía <strong>de</strong> Usuario 45
Índice<br />
Introducción...............................................................................................................................47<br />
Símbolos .........................................................................................................................................................48<br />
Montaje.......................................................................................................................................49<br />
Contenido........................................................................................................................................................49<br />
Colocación <strong>de</strong> la Centrífuga <strong>IDEXX</strong> StatSpin <strong>VT</strong> ............................................................................................49<br />
Conexión <strong>de</strong> la alimentación...........................................................................................................................49<br />
Consi<strong>de</strong>raciones generales.......................................................................................................50<br />
Fundamentos y objetivo <strong>de</strong> su uso.................................................................................................................50<br />
Rotores compatibles para la Centrífuga <strong>IDEXX</strong> StatSpin <strong>VT</strong> ..........................................................................50<br />
Utilización <strong>de</strong> la Centrífuga <strong>IDEXX</strong> StatSpin <strong>VT</strong> .......................................................................51<br />
Apertura y cierre <strong>de</strong> la cubierta .....................................................................................................................51<br />
Instalación <strong>de</strong> un rotor ....................................................................................................................................51<br />
Instalación <strong>de</strong>l protector..................................................................................................................................52<br />
Selección <strong>de</strong> los ajustes <strong>de</strong> ciclo....................................................................................................................52<br />
Procesamiento <strong>de</strong> muestras .....................................................................................................53<br />
Preparación <strong>de</strong> sangre venosa para pruebas <strong>de</strong> coagulación y bioquímica.................................................53<br />
Preparación <strong>de</strong> sedimento urinario para el examen microscópico ...............................................................53<br />
Clarificación <strong>de</strong> la lipemia...............................................................................................................................53<br />
Determinación <strong>de</strong>l valor <strong>de</strong> hematocrito o microhematocrito.........................................................................54<br />
Limpieza y mantenimiento ........................................................................................................56<br />
Limpieza..........................................................................................................................................................56<br />
Comprobación <strong>de</strong> la velocidad <strong>de</strong>l rotor ........................................................................................................56<br />
Sustitución <strong>de</strong> la junta tórica...........................................................................................................................56<br />
Indicadores <strong>de</strong> error .......................................................................................................................................56<br />
Registro <strong>de</strong> mantenimiento.............................................................................................................................58<br />
Resolución <strong>de</strong> problemas ..............................................................................................................................60<br />
Revisión...........................................................................................................................................................60<br />
Especificaciones........................................................................................................................61<br />
Centrífuga........................................................................................................................................................61<br />
Accesorios.......................................................................................................................................................62<br />
Información <strong>de</strong> contacto <strong>de</strong>l Servicio Técnico <strong>de</strong> <strong>IDEXX</strong>........................................................63<br />
Centrífuga <strong>IDEXX</strong> StatSpin <strong>VT</strong> Guía <strong>de</strong> Usuario 46
Introducción<br />
Este manual, junto con la información contenida en las etiquetas <strong>de</strong> los productos y en los<br />
folletos <strong>de</strong> los envases, le proporcionarán toda la información necesaria para manejar y mantener<br />
la Centrífuga <strong>IDEXX</strong> <strong>StatSpin*</strong> <strong>VT</strong>.<br />
Cuando un punto requiera especial atención, junto al texto aparecerá un !<br />
símbolo <strong>de</strong> precaución o un símbolo <strong>de</strong> riesgo biológico.<br />
Precaución Riesgo biológico<br />
Por favor preste mucha atención a las instrucciones que acompañan a las notas y símbolos, así<br />
como a las prácticas laboratoriales estándar establecidas por sus instalaciones y agencias <strong>de</strong><br />
regulación local. La siguiente tabla enumera todas las precauciones y advertencias que <strong>de</strong>ben<br />
tomarse con la Centrífuga <strong>IDEXX</strong> StatSpin <strong>VT</strong>.<br />
!<br />
ADVERTENCIA: Norteamérica: Utilice únicamente la fuente <strong>de</strong> alimentación que se incluye<br />
con la unidad. El uso <strong>de</strong> cualquier otra fuente <strong>de</strong> energía o transformador dañará los<br />
componentes electrónicos <strong>de</strong> la Centrífuga <strong>IDEXX</strong> StatSpin <strong>VT</strong> e invalidará la garantía.<br />
ADVERTENCIA: Fuera <strong>de</strong> Norteamérica: No utilice el cable <strong>de</strong> alimentación que se le<br />
proporciona. Utilice un cable <strong>de</strong> alimentación <strong>de</strong> al menos 1,0 amp o más, con conectores<br />
IEC320/CEE22 a<strong>de</strong>cuados para la toma <strong>de</strong> corriente que vaya a utilizarse.<br />
PRECAUCIÓN: Cuando utilice un rotor RT12, no haga funcionar la centrífuga sin que se<br />
encuentre instalado un protector.<br />
PRECAUCIÓN: No utilice protector con el rotor RH12 Microhematocrito.<br />
PRECAUCIÓN: El mecanismo <strong>de</strong> <strong>de</strong>rivación para el bloqueo <strong>de</strong> la cubierta sólo se utilizará<br />
en caso <strong>de</strong> emergencia. Un uso ina<strong>de</strong>cuado pue<strong>de</strong> exponer al <strong>usuario</strong> a unas condiciones<br />
<strong>de</strong> trabajo inseguras.<br />
PRECAUCIÓN: No <strong>de</strong>je ningún rotor sobre el soporte para el rotor cuando la Centrífuga <strong>IDEXX</strong><br />
StatSpin <strong>VT</strong> no vaya a utilizarse durante un periodo prolongado <strong>de</strong> tiempo. Haciendo esto pue<strong>de</strong><br />
comprimir la junta tórica, disminuyendo su capacidad para soportar los rotores.<br />
PRECAUCIÓN: Una mala instalación <strong>de</strong>l rotor pue<strong>de</strong> producir una avería en la centrífuga no<br />
contemplada en la garantía.<br />
PRECAUCIÓN: Si se <strong>de</strong>ja colocado el rotor entre los distintos análisis, fije el rotor sobre el<br />
soporte para el rotor antes <strong>de</strong> centrifugar otra muestra. Una mala fijación continuada <strong>de</strong>l rotor<br />
pue<strong>de</strong> hacer que el rotor se afloje durante la centrifugación.<br />
PRECAUCIÓN: Antes <strong>de</strong> su uso, los rotores para tubos RT12 y RM02 <strong>de</strong>ben equilibrarse. Si sólo<br />
se procesa una muestra, una segunda muestra pue<strong>de</strong> servir como tubo <strong>de</strong> equilibrio. Para equilibrar<br />
también pue<strong>de</strong> utilizarse un tubo similar relleno <strong>de</strong> agua.<br />
PRECAUCIÓN: NO centrifugue tubos <strong>de</strong> vidrio <strong>de</strong> ningún tipo en el rotor RT12.<br />
IMPORTANTE: Todos los rotores tienen una vida útil limitada que <strong>de</strong>pen<strong>de</strong> <strong>de</strong>l uso. Los<br />
rotores <strong>de</strong>ben inspeccionarse por si tuvieran grietas y sustituirse inmediatamente cuando<br />
aparezca cualquier grieta o <strong>de</strong>sgaste visible. Instale siempre un protector sin usar cuando<br />
monte un rotor RT12 nuevo.<br />
PRECAUCIÓN: Antes <strong>de</strong> la limpieza o el mantenimiento <strong>de</strong>senchufe la Centrífuga <strong>IDEXX</strong><br />
StatSpin <strong>VT</strong> <strong>de</strong> la toma <strong>de</strong> corriente.<br />
ADVERTENCIA: No exponga la centrífuga <strong>IDEXX</strong> StatSpin <strong>VT</strong>, ni su rotor, a ácidos fuertes<br />
o concentrados, ni a bases, agentes oxidantes, hidrocarburos halogenados o aromáticos,<br />
ésteres o cetonas.<br />
PRECAUCIÓN: No pulverice soluciones limpiadoras directamente sobre el alojamiento o<br />
recipiente <strong>de</strong> centrifugación, ya que el material pulverizado podría alcanzar el circuito interno o los<br />
cojinetes <strong>de</strong>l motor. La avería posterior pue<strong>de</strong> que no se contemple en la garantía.<br />
PRECAUCIÓN: Siga las precauciones generales con todas las muestras biológicas,<br />
in<strong>de</strong>pendientemente <strong>de</strong> si la muestra contiene o no un agente infeccioso.<br />
NOTA: Véase la lista <strong>de</strong> referencias <strong>de</strong> la siguiente página para obtener más información sobre las precauciones generales a seguir.<br />
Centrífuga <strong>IDEXX</strong> StatSpin <strong>VT</strong> Guía <strong>de</strong> Usuario 47
Utilice la centrífuga tal y como se recomienda. Una utilización ina<strong>de</strong>cuada <strong>de</strong> la Centrífuga <strong>IDEXX</strong><br />
StatSpin <strong>VT</strong> y/o sus accesorios pue<strong>de</strong> hacer que la centrífuga se averíe, que se obtengan resultados<br />
erróneos o que se anulen potencialmente las garantías.<br />
Símbolos<br />
La siguiente tabla <strong>de</strong>scribe los símbolos que encontrará en el exterior <strong>de</strong> la Centrífuga <strong>IDEXX</strong><br />
StatSpin <strong>VT</strong> o en esta guía.<br />
Símbolo/Botón Nombre Descripción<br />
SET<br />
Start (Inicio)<br />
Stop/Open<br />
(Parada/<br />
Apertura)<br />
Selector <strong>de</strong><br />
ciclo (SET)<br />
El botón Start (Inicio) da comienzo a un ciclo fijado previamente a<br />
una velocidad establecida.<br />
NOTA: La Centrífuga <strong>IDEXX</strong> StatSpin <strong>VT</strong> no tiene un interruptor <strong>de</strong><br />
encendido/apagado y normalmente se <strong>de</strong>ja enchufada y “encendida”.<br />
El botón Stop/Open (Parada/Apertura) interrumpe el ciclo y libera la<br />
cubierta cuando el rotor ha parado.<br />
El botón <strong>de</strong> Selector <strong>de</strong> Ciclo (SET) le permite seleccionar un ciclo<br />
<strong>de</strong> centrifugación<br />
(rojo)<br />
24 V – – – 1.7 A<br />
(ver<strong>de</strong>)<br />
!<br />
Error/Service<br />
(Error/Revisión)<br />
Entrada <strong>de</strong><br />
corriente<br />
Indicador <strong>de</strong><br />
ciclo<br />
Precaución<br />
Limitación <strong>de</strong><br />
temperatura<br />
El indicador Error/Service (Error/Revisión) se ilumina <strong>de</strong> manera<br />
continua o parpa<strong>de</strong>a cuando se necesita una revisión.<br />
El símbolo <strong>de</strong> Entrada <strong>de</strong> Corriente se localiza en la parte posterior<br />
<strong>de</strong> la Centrífuga <strong>IDEXX</strong> StatSpin <strong>VT</strong> junto al puerto <strong>de</strong> entrada <strong>de</strong> la<br />
CC. Aquí es don<strong>de</strong> <strong>de</strong>be enchufar el cable <strong>de</strong> CC <strong>de</strong> 24 V.<br />
Cuando el Indicador <strong>de</strong> ciclo se encien<strong>de</strong> en ver<strong>de</strong> <strong>de</strong> manera continua,<br />
indica que se ha seleccionado el ciclo <strong>de</strong> centrifugación. Uno o más<br />
indicadores <strong>de</strong> ciclo que parpa<strong>de</strong>an en ver<strong>de</strong>, junto con un indicador <strong>de</strong><br />
error/revisión parpa<strong>de</strong>ando, significa que existe un error. Véase la sección <strong>de</strong><br />
indicadores <strong>de</strong> error para obtener más información sobre estos errores.<br />
El símbolo <strong>de</strong> Precaución aparece en la parte superior <strong>de</strong>l seguro <strong>de</strong> la<br />
cubierta. No abra la cubierta hasta que el rotor haya parado <strong>de</strong> girar. En<br />
este manual <strong>de</strong> <strong>usuario</strong>, el símbolo <strong>de</strong> precaución indica una instrucción<br />
<strong>de</strong> precaución/advertencia que <strong>de</strong>be leer atentamente.<br />
El símbolo <strong>de</strong> Limitación <strong>de</strong> temperatura indica restricciones <strong>de</strong><br />
temperatura para el almacenamiento o para el funcionamiento.<br />
IVD<br />
Para utilizar en<br />
el diagnóstico<br />
in vitro<br />
El símbolo IVD indica una pieza que sólo pue<strong>de</strong> utilizarse como un<br />
dispositivo para el diagnóstico in vitro.<br />
NON<br />
STERILE<br />
Non sterile<br />
(No estéril)<br />
El símbolo <strong>de</strong> Non sterile (no estéril) indica un producto no estéril.<br />
S N<br />
Número <strong>de</strong><br />
serie<br />
El símbolo <strong>de</strong> S N indica un número <strong>de</strong> serie.<br />
Consultar<br />
instrucciones<br />
El símbolo <strong>de</strong> Consultar instrucciones indica que para obtener<br />
más información <strong>de</strong>berá dirigirse a la guía <strong>de</strong> <strong>usuario</strong> o al folleto.<br />
Centrífuga <strong>IDEXX</strong> StatSpin <strong>VT</strong> Guía <strong>de</strong> Usuario 48
Símbolo/Botón Nombre Descripción<br />
Riesgo<br />
biológico<br />
El símbolo <strong>de</strong> Riesgo biológico indica que <strong>de</strong>ben seguirse las<br />
precauciones biológicas generales para todas las muestras.<br />
Montaje<br />
La Centrífuga <strong>IDEXX</strong> StatSpin <strong>VT</strong> y sus accesorios se facilitan en un envase <strong>de</strong> cartón. Si la<br />
centrífuga o accesorios se han dañado durante el transporte, informe inmediatamente a <strong>IDEXX</strong>.<br />
Contenido<br />
• Número <strong>de</strong> producto:<br />
– SS<strong>VT</strong>-4<br />
• La opción anterior contiene:<br />
– Una fuente <strong>de</strong> alimentación <strong>de</strong> conmutación universal (producto StatSpin nº 01-005940-001,<br />
pieza <strong>IDEXX</strong> nº 79-17310-00, producto APS nº AD-740U-1240)<br />
– Un cable <strong>de</strong> alimentación conectado a tierra (utilizar sólo en Norteamérica)<br />
– Una guía <strong>de</strong> <strong>usuario</strong> para la Centrífuga <strong>IDEXX</strong> StatSpin <strong>VT</strong><br />
Colocación <strong>de</strong> la Centrífuga <strong>IDEXX</strong> StatSpin <strong>VT</strong><br />
• Coloque la Centrífuga <strong>IDEXX</strong> StatSpin <strong>VT</strong> sobre una superficie estable indicada para el<br />
funcionamiento <strong>de</strong> instrumental <strong>de</strong> laboratorio.<br />
• Mantenga la Centrífuga <strong>IDEXX</strong> StatSpin <strong>VT</strong> alejada <strong>de</strong> la luz solar directa y lejos <strong>de</strong> fuentes <strong>de</strong><br />
calor o frío intenso.<br />
• Mantenga un espacio <strong>de</strong>spejado <strong>de</strong> 12 pulgadas (30 cm) alre<strong>de</strong>dor <strong>de</strong> la centrífuga por<br />
razones <strong>de</strong> ventilación y seguridad.<br />
Conexión <strong>de</strong> la alimentación<br />
NOTA: La extensión <strong>de</strong> CC <strong>de</strong> 24 V y el cable <strong>de</strong> alimentación están unidos a una fuente <strong>de</strong><br />
alimentación <strong>de</strong> conmutación universal.<br />
1. Enchufe la extensión <strong>de</strong> CC <strong>de</strong> 24 V en el puerto <strong>de</strong> entrada <strong>de</strong> CC que se encuentra en la<br />
parte posterior <strong>de</strong> la Centrífuga <strong>IDEXX</strong> StatSpin <strong>VT</strong>.<br />
2. Enchufe el cable <strong>de</strong> alimentación en una toma conectada a tierra que suministre el voltaje y la<br />
frecuencia indicados en la fuente <strong>de</strong> alimentación. Cuando la alimentación está conectada, el<br />
LED <strong>de</strong> encendido se ilumina y el cierre <strong>de</strong> la cubierta se libera.<br />
!<br />
!<br />
ADVERTENCIA: Norteamérica: Utilice únicamente la fuente <strong>de</strong> alimentación que se incluye<br />
con la centrífuga. El uso <strong>de</strong> cualquier otra fuente <strong>de</strong> energía o transformador dañará los<br />
componentes electrónicos <strong>de</strong> la Centrífuga <strong>IDEXX</strong> StatSpin <strong>VT</strong> e invalidará la garantía.<br />
ADVERTENCIA: Fuera <strong>de</strong> Norteamérica: No utilice el cable <strong>de</strong> alimentación que se le<br />
proporciona. Utilice un cable <strong>de</strong> alimentación <strong>de</strong> al menos 1,0 amp o más, con conectores<br />
IEC320/CEE22 a<strong>de</strong>cuados para la toma <strong>de</strong> corriente que vaya a utilizarse.<br />
Centrífuga <strong>IDEXX</strong> StatSpin <strong>VT</strong> Guía <strong>de</strong> Usuario 49
Consi<strong>de</strong>raciones generales<br />
Fundamentos y objetivo <strong>de</strong> su uso<br />
La Centrífuga <strong>IDEXX</strong> StatSpin <strong>VT</strong> sólo se utiliza para el diagnóstico in-vitro para:<br />
• Producir la rápida separación <strong>de</strong> la sangre completa<br />
• Preparar un sedimento urinario para el análisis microscópico<br />
• Centrifugar tubos <strong>de</strong> microhematocrito para la <strong>de</strong>terminación <strong>de</strong>l valor <strong>de</strong> hematocrito<br />
La Centrífuga <strong>IDEXX</strong> StatSpin <strong>VT</strong> es una centrífuga pequeña, silenciosa y <strong>de</strong> alta velocidad.<br />
Su sistema <strong>de</strong> suspensión y accionamiento único y patentado proporciona un funcionamiento<br />
prácticamente libre <strong>de</strong> vibraciones. Los rotores, ligeros y <strong>de</strong> poco volumen, alcanzan en pocos<br />
segundos la velocidad máxima y el frenado completo. La Centrífuga <strong>IDEXX</strong> StatSpin <strong>VT</strong> ha sido<br />
diseñada para cumplir con las normas <strong>de</strong> seguridad internacionales.<br />
Aviso <strong>de</strong> seguridad: Se recomienda seguir las buenas prácticas <strong>de</strong> seguridad cuando<br />
se realicen tareas <strong>de</strong> laboratorio, prácticas que compren<strong>de</strong>n, entre otras, la utilización<br />
<strong>de</strong> equipos <strong>de</strong> protección individual (EPI), como guantes y gafas protectoras, cuando<br />
se trabaje con muestras <strong>de</strong> pacientes o reactivos o cuando se manipulen aparatos <strong>de</strong><br />
laboratorio tales que la centrífuga StatSpin.<br />
Rotores compatibles para la Centrífuga <strong>IDEXX</strong> StatSpin <strong>VT</strong><br />
Rotor para tubos RT12<br />
El rotor para tubos RT12 es un rotor <strong>de</strong> dos plazas diseñado para alojar una variedad <strong>de</strong> tubos<br />
para el procesamiento <strong>de</strong> muestras para la separación <strong>de</strong> sangre y orina, incluyendo tubos <strong>de</strong><br />
centrífuga convencionales <strong>de</strong> 1,5 ml y 2,0 ml con un diámetro máximo <strong>de</strong> 10,9 mm. Estos tubos<br />
<strong>de</strong>ben sostenerse mediante la abraza<strong>de</strong>ra <strong>de</strong>l rotor.<br />
!<br />
PRECAUCIÓN: NO centrifugue tubos <strong>de</strong> vidrio <strong>de</strong> ningún tipo en el rotor RT12.<br />
PRECAUCIÓN: Cuando utilice un rotor RT12, no haga funcionar la centrífuga sin que se<br />
encuentre instalado un protector.<br />
Con el rotor RT12 está aprobado el uso <strong>de</strong> los siguientes tubos:<br />
• Microtubos preparados: TP1H, TP1U, TP5G y CH03<br />
• StatSampler*: SS2H, SS2E, SS2U, SS2X, SS1E<br />
• Tubo para orina precalibrado: TU15-10<br />
• Tubos con reactivo LipoClear*: LC10, LC40 y LC15<br />
• Tubos convencionales <strong>de</strong> microcentrífuga <strong>de</strong> 1,5–2,0-ml (por ejemplo, tubos Eppendorf*)<br />
• Opción <strong>de</strong> adaptador Microtainer: Los tubos Microtainer BD pue<strong>de</strong>n utilizarse con el rotor<br />
RT12 cuando se utilicen junto con los adaptadores Microtainer (pieza StatSpin nº SV12)<br />
Rotor para tubos RM02<br />
Diseñado específicamente para los tubos Microtainer BD, este rotor <strong>de</strong> dos plazas también<br />
admite tubos convencionales <strong>de</strong> microcentrífuga <strong>de</strong> 0,5 ml. El diámetro <strong>de</strong> tubo máximo es <strong>de</strong> 8,3<br />
mm. Con este rotor, está aprobado el uso <strong>de</strong> los siguientes tubos:<br />
• Tubos BD Microtainer ÚNICAMENTE con colector superior <strong>de</strong> flujo<br />
• Tubos <strong>de</strong> microcentrífuga <strong>de</strong> 0,5-ml (diámetro exterior <strong>de</strong> 7,5 mm x 35 mm <strong>de</strong> largo)<br />
Centrífuga <strong>IDEXX</strong> StatSpin <strong>VT</strong> Guía <strong>de</strong> Usuario 50
Rotor para microhematocrito RH12<br />
El rotor para microhematocrito RH12 es un rotor cubierto <strong>de</strong> 12 plazas utilizado para centrifugar<br />
tubos capilares para el análisis <strong>de</strong>l microhematocrito. Las dimensiones máximas <strong>de</strong>l tubo son: un<br />
diámetro exterior <strong>de</strong> 1,7 mm x 42 mm <strong>de</strong> largo. <strong>IDEXX</strong> recomienda que los cojinetes <strong>de</strong> caucho<br />
proporcionados con el rotor se cambien dos veces al año, o siempre que un tubo se rompa en el<br />
rotor. Solicite la pieza nº 01-2002-04 para la sustitución <strong>de</strong> un juego <strong>de</strong> doce cojinetes.<br />
! PRECAUCIÓN: No utilice protector con el rotor RH12 Microhematocrito.<br />
Con el rotor, está aprobado el uso <strong>de</strong> los siguientes tubos:<br />
• Tubos capilares <strong>de</strong> vidrio: HT9H, HT9U<br />
• Tubos capilares plásticos SafeCrit*: HP8H, HP8U<br />
IMPORTANTE: Los rotores RT12, RM02 y RH12 tienen una vida útil limitada que <strong>de</strong>pen<strong>de</strong> <strong>de</strong>l<br />
uso. Los rotores RT12 y RM02 <strong>de</strong>ben sustituirse <strong>de</strong>spués <strong>de</strong> unos 3.600 ciclos, lo que equivale<br />
a 18 meses <strong>de</strong> funcionamiento realizando, como media, unos 10 ciclos por día. El rotor RH12<br />
<strong>de</strong>be sustituirse <strong>de</strong>spués <strong>de</strong> unos 2.600 ciclos, lo que equivale a 12 meses <strong>de</strong> funcionamiento<br />
realizando, como media, unos 10 ciclos por día. Los rotores <strong>de</strong>ben inspeccionarse rutinariamente<br />
y sustituirse inmediatamente cuando se observe cualquier grieta o <strong>de</strong>sgaste visible.<br />
Utilización <strong>de</strong> la Centrífuga <strong>IDEXX</strong> StatSpin <strong>VT</strong><br />
Apertura y cierre <strong>de</strong> la cubierta<br />
Un mecanismo <strong>de</strong> bloqueo <strong>de</strong> la cubierta, que se activa <strong>de</strong> manera electrónica, evita el<br />
funcionamiento si la cubierta no está completamente cerrada y bloqueada. Un ciclo <strong>de</strong><br />
funcionamiento sólo pue<strong>de</strong> iniciarse si el seguro <strong>de</strong> la cubierta está engranado.<br />
La centrífuga también está equipada con un seguro que se activa manualmente y que mantiene<br />
la cubierta bajada una vez que la centrifugación ha finalizado. El dispositivo <strong>de</strong> bloqueo se libera<br />
automáticamente al final <strong>de</strong>l ciclo <strong>de</strong> funcionamiento o presionando el botón <strong>de</strong> Parada/Apertura.<br />
Presione el seguro negro para abrir la cubierta.<br />
Mecanismo <strong>de</strong> <strong>de</strong>rivación para el bloqueo <strong>de</strong> la cubierta<br />
En el caso <strong>de</strong> un corte <strong>de</strong>l suministro eléctrico o un mal funcionamiento, pue<strong>de</strong> que el botón <strong>de</strong><br />
Parada/Apertura no libere la cubierta. Para recuperar las muestras <strong>de</strong>l rotor, pue<strong>de</strong> liberarse<br />
manualmente el mecanismo <strong>de</strong> bloqueo <strong>de</strong> la cubierta insertando la punta estirada <strong>de</strong> un clip<br />
gran<strong>de</strong>, o un objeto similar, en el pequeño orificio localizado en la parte frontal, por encima <strong>de</strong>l<br />
botón Selector <strong>de</strong> Ciclo (SET). Empuje el clip hacia <strong>de</strong>ntro aproximadamente 1 pulgada (25<br />
mm) para liberar el seguro.<br />
!<br />
PRECAUCIÓN: El mecanismo <strong>de</strong> <strong>de</strong>rivación para el bloqueo <strong>de</strong> la cubierta está diseñado sólo<br />
para casos <strong>de</strong> emergencia. Un uso ina<strong>de</strong>cuado pue<strong>de</strong> exponer al <strong>usuario</strong> a unas condiciones <strong>de</strong><br />
trabajo inseguras.<br />
Instalación <strong>de</strong> un rotor<br />
Todas las partes inferiores <strong>de</strong> los rotores encajan<br />
en una junta tórica sobre el soporte para el rotor.<br />
La figura <strong>de</strong> la <strong>de</strong>recha muestra una sección<br />
transversal <strong>de</strong>l rotor para hematocrito colocado<br />
sobre el soporte para el rotor. A medida que el<br />
rotor gira, la junta tórica se mueve hacia fuera por<br />
Junta tórica<br />
Rotor para<br />
hematocrito<br />
Soporte para el rotor<br />
Centrífuga <strong>IDEXX</strong> StatSpin <strong>VT</strong> Guía <strong>de</strong> Usuario 51
la fuerza centrífuga, favoreciendo el acoplamiento por fricción entre el<br />
soporte para el rotor y el rotor.<br />
Extraiga el protector (si está presente) cuando instale un rotor RT12.<br />
Instale el protector una vez que el rotor ya esté colocado en la<br />
centrífuga.<br />
protector para el rotor RT12<br />
!<br />
!<br />
PRECAUCIÓN: No <strong>de</strong>je ningún tipo <strong>de</strong> rotor sobre el soporte para el rotor cuando la Centrífuga<br />
<strong>IDEXX</strong> StatSpin <strong>VT</strong> no se vaya a utilizar durante un periodo prolongado <strong>de</strong> tiempo. Haciendo esto<br />
pue<strong>de</strong> comprimir la junta tórica, disminuyendo su capacidad para soportar los rotores.<br />
PRECAUCIÓN: Cuando utilice un rotor RT12, no haga funcionar la centrífuga sin que se<br />
encuentre instalado un protector.<br />
! PRECAUCIÓN: No utilice protector con el rotor RH12 Microhematocrito.<br />
!<br />
!<br />
!<br />
PRECAUCIÓN: Una mala instalación <strong>de</strong>l rotor pue<strong>de</strong> producir una avería en la centrífuga no<br />
contemplada en la garantía.<br />
PRECAUCIÓN: Si se <strong>de</strong>ja colocado el rotor entre los distintos análisis, antes <strong>de</strong> centrifugar otra<br />
muestra, empuje hacia abajo el rotor sobre el soporte para el rotor para garantizar que se fija<br />
<strong>de</strong> manera apropiada. Una mala fijación continuada <strong>de</strong>l rotor pue<strong>de</strong> hacer que el rotor se afloje<br />
durante la centrifugación.<br />
PRECAUCIÓN: Antes <strong>de</strong> su uso, los rotores para tubos RT12 y RM02 <strong>de</strong>ben equilibrarse. Si<br />
sólo se procesa una muestra, una segunda muestra pue<strong>de</strong> servir como tubo <strong>de</strong> equilibrio. Para<br />
equilibrar también pue<strong>de</strong> utilizarse un tubo similar relleno <strong>de</strong> agua.<br />
Instalación <strong>de</strong>l protector<br />
Se <strong>de</strong>berá utilizar siempre el rotor RT12 con un protector y este habrá <strong>de</strong><br />
cambiarse cuando se sustituya el rotor.<br />
protector<br />
Procedimiento<br />
1. Asegúrese <strong>de</strong> que el rotor RT12 esté asentado correctamente.<br />
2. Meta a presión el protector en el bol hasta que se encuentre totalmente en<br />
contacto con la parte inferior <strong>de</strong> este.<br />
Nota: Para extraer el protector, tire hacia arriba <strong>de</strong> su bor<strong>de</strong> central.<br />
Selección <strong>de</strong> los ajustes <strong>de</strong> ciclo<br />
Debe experimentar con distintos ajustes con el fin <strong>de</strong> lograr un rendimiento óptimo para una<br />
aplicación en concreto. Lo que sigue a continuación son unas directrices generales:<br />
Ajuste rpm/FCR Tiempo Rotor<br />
Quick Spin<br />
(Centrifugación rápida)<br />
15.800/12.000 30 segundos RT12, RM02<br />
Normal (Normal) 15.800/12.000 90 segundos RT12, RM02<br />
Hard Spin (Centrifugación<br />
fuerte)<br />
Urine Sediment<br />
(Sedimento urinario)<br />
Microhematocrit<br />
(Microhematocrito)<br />
15.800/12.000 150 segundos RT12, RM02<br />
9.800/3.900 45 segundos RT12<br />
15.800/13.700 120 segundos RH12<br />
Centrífuga <strong>IDEXX</strong> StatSpin <strong>VT</strong> Guía <strong>de</strong> Usuario 52
Procesamiento <strong>de</strong> muestras<br />
Preparación <strong>de</strong> sangre venosa para pruebas <strong>de</strong> coagulación y bioquímica<br />
El rotor para plasma proporciona un medio para una separación rápida <strong>de</strong>l plasma a partir <strong>de</strong><br />
sangre completa a la que se ha añadido anticoagulantes. Para preparar plasma para las pruebas<br />
<strong>de</strong> bioquímica, utilice un ciclo <strong>de</strong> centrifugación rápida. Para las pruebas <strong>de</strong> coagulación, utilice<br />
un ciclo <strong>de</strong> centrifugación fuerte.<br />
Procedimiento<br />
1. Levante la cubierta. Si fuera necesario, instale el rotor pertinente para la muestra que va a<br />
analizar, y empuje hacia abajo el rotor para garantizar que se fija <strong>de</strong> manera apropiada.<br />
2. Coloque el tubo <strong>de</strong> muestra en el rotor. Asegúrese <strong>de</strong> equilibrar el rotor, añadiendo una<br />
segunda muestra o un tubo relleno <strong>de</strong> agua. Cierre y asegure la cubierta.<br />
3. Seleccione los ajustes <strong>de</strong> ciclo <strong>de</strong>seados pulsando el botón Selector <strong>de</strong> Ciclo (SET) hasta<br />
que se ilumine el LED que corresponda.<br />
4. Pulse el botón Inicio. Una vez que se haya finalizado el ciclo <strong>de</strong> centrifugación, el rotor se<br />
<strong>de</strong>sacelera hasta una parada completa en aproximadamente 10 segundos y el seguro <strong>de</strong><br />
bloqueo se <strong>de</strong>sbloquea automáticamente. Presione el seguro negro para abrir la cubierta.<br />
Preparación <strong>de</strong> sedimento urinario para el examen microscópico<br />
La Centrífuga <strong>IDEXX</strong> StatSpin <strong>VT</strong> prepara rápidamente el<br />
sedimento urinario para el examen microscópico utilizando<br />
tubos para orina precalibrados (producto StatSpin nº TU15).<br />
llene hasta aquí<br />
Procedimiento<br />
1 Rellene un tubo para orina hasta la marca superior (que<br />
representa los 1,5 ml) con una muestra <strong>de</strong> orina reciente, y<br />
vacíe hasta aquí<br />
tape el tubo utilizando el tapón adjunto.<br />
2. Levante la cubierta y empuje hacia bajo el rotor para tubos<br />
RT12 para garantizar que se fija <strong>de</strong> manera apropiada.<br />
3. Coloque el tubo <strong>de</strong> muestra en el rotor RT12. Equilibre el rotor con otra muestra o con un<br />
tubo relleno <strong>de</strong> agua. Cierre y asegure la cubierta.<br />
4. Pulse el botón Selector <strong>de</strong> Ciclo (SET) hasta seleccionar “Urine Sediment” “Sedimento<br />
Urinario” y, a continuación, pulse Inicio.<br />
5. Cuando el ciclo se complete, la cubierta se libera automáticamente. Retire el tubo <strong>de</strong>l rotor y<br />
retire el tapón.<br />
6. Invierta el tubo para drenar el fluido hasta la marca inferior.<br />
NOTA: La tensión superficial retendrá 0,1 ml.<br />
7. Vuelva a tapar el tubo y resuspenda el sedimento agitándolo con suavidad.<br />
8. Una vez que se haya vuelto a suspen<strong>de</strong>r el sedimento, dispense una gota sobre un<br />
portaobjetos para microscopio, coloque un cubre y observe la muestra, siguiendo el<br />
protocolo utilizado en su laboratorio.<br />
Clarificación <strong>de</strong> la lipemia<br />
La Centrífuga <strong>IDEXX</strong> StatSpin <strong>VT</strong> pue<strong>de</strong> utilizarse para centrifugar las muestras lipémicas<br />
recogidas en tubos con reactivo LipoClear (LC10, LC40, LC15). LipoClear es un reactivo no tóxico<br />
y no carcinogénico, para la clarificación <strong>de</strong> la lipemia con el que se rellenan previamente los<br />
Centrífuga <strong>IDEXX</strong> StatSpin <strong>VT</strong> Guía <strong>de</strong> Usuario 53
tubos <strong>de</strong> microcentrífuga. El kit LipoClear está disponible para tamaños <strong>de</strong> muestra <strong>de</strong> 0,5 ml y<br />
1,5 ml (véase a continuación). Una vez que se haya añadido, mezclado y <strong>de</strong>jado reposar durante<br />
cinco minutos la muestra, los tubos se centrifugan en un ciclo <strong>de</strong> centrifugación fuerte con el rotor<br />
para tubos RT12. Diríjase al folleto <strong>de</strong>l producto LipoClear para más <strong>de</strong>talles.<br />
Producto nº Tamaño <strong>de</strong> muestra Envase<br />
LC10 0,5 ml 10 tubos/envase<br />
LC40 0,5 ml 40 tubos/envase<br />
LC15 1,5 ml 40 tubos/envase<br />
Procedimiento<br />
1. Levante la cubierta. Si fuera necesario, instale el rotor pertinente para la muestra que va a<br />
analizar, y empuje hacia abajo el rotor para garantizar que se fija <strong>de</strong> manera apropiada.<br />
2. Coloque el tubo <strong>de</strong> muestra en el rotor. Asegúrese <strong>de</strong> equilibrar el rotor, añadiendo una<br />
segunda muestra o un tubo relleno <strong>de</strong> agua. Cierre y asegure la cubierta.<br />
3. Seleccione los ajustes <strong>de</strong> ciclo <strong>de</strong>seados pulsando el botón Selector <strong>de</strong> Ciclo (SET) hasta<br />
que se ilumine el LED <strong>de</strong> Hard Spin (centrifugación fuerte).<br />
4. Pulse el botón Inicio. Una vez que se haya completado el ciclo <strong>de</strong> centrifugación, el rotor se<br />
<strong>de</strong>sacelera hasta una parada completa en aproximadamente 10 segundos y el seguro <strong>de</strong><br />
bloqueo se <strong>de</strong>sbloquea automáticamente. Presione el seguro negro para abrir la cubierta.<br />
Determinación <strong>de</strong>l valor <strong>de</strong> hematocrito o microhematocrito<br />
Hay disponibles tanto tubos microcapilares <strong>de</strong> vidrio, como <strong>de</strong> plástico:<br />
• Los productos <strong>de</strong> Iris nº HT9H (vidrio) y HP8H (plástico) se han tratado previamente con<br />
heparina y <strong>de</strong>ben utilizarse para sangre capilar.<br />
• Los productos <strong>de</strong> Iris nº HT9U (vidrio) y HP8U (plástico) no están tratados y <strong>de</strong>ben utilizarse<br />
para muestras <strong>de</strong> venopunción (con productos anticoagulantes).<br />
Procedimiento<br />
1. Recoja su muestra:<br />
a. Sangre capilar: La muestra se recoge directamente <strong>de</strong>l sitio <strong>de</strong> punción utilizando tubos<br />
heparinizados (producto StatSpin nº HT9H o HP8H).<br />
b. Sangre venosa: La muestra se recoge <strong>de</strong> una muestra con anticoagulante bien mezclada<br />
a partir <strong>de</strong> una jeringuilla o un tubo <strong>de</strong> recogida <strong>de</strong> sangre mediante vacío, utilizando<br />
tubos sin tratar (producto StatSpin nº HT9U o HP8U).<br />
2. Mantenga el tubo microcapilar por el extremo con la banda codificada por colores. Rellene<br />
el tubo capilar con la muestra hasta la banda codificada por colores. Retire el tubo <strong>de</strong> la<br />
muestra e incline el extremo con banda hacia abajo hasta que la sangre se mueva a medio<br />
camino entre la banda y el extremo <strong>de</strong>l tubo.<br />
3. Mantenga el tubo en posición horizontal y empuje hasta el fondo el extremo seco <strong>de</strong>l tubo<br />
(con banda) <strong>de</strong>ntro <strong>de</strong>l material <strong>de</strong> sellado mantenido en vertical. Gire el tubo y retírelo.<br />
4. Utilizando un pañuelo <strong>de</strong> laboratorio, limpie cualquier rastro <strong>de</strong> sangre que salga <strong>de</strong>s<strong>de</strong> el<br />
otro extremo.<br />
5. Coloque el tubo, con el extremo sellado hacia el bor<strong>de</strong> exterior, en cualquiera <strong>de</strong> las doce<br />
posiciones <strong>de</strong>l rotor para microhematocrito RH12. Este rotor no necesita equilibrarse. Enrosque<br />
la cubierta <strong>de</strong>l rotor.<br />
Centrífuga <strong>IDEXX</strong> StatSpin <strong>VT</strong> Guía <strong>de</strong> Usuario 54
tubo capilar relleno<br />
tubo capilar<br />
banda codificada por colores,<br />
mantenga por este extremo<br />
inclinación <strong>de</strong>l tubo<br />
capilar hasta que la<br />
sangre se coloque<br />
tal y como se<br />
muestra aquí.<br />
sellado <strong>de</strong>l tubo capilar<br />
tubo capilar sellado<br />
6. Manteniendo el rotor por el mango negro <strong>de</strong> la cubierta, una el rotor al soporte para el rotor.<br />
IMPORTANTE: Mantenga el rotor para microhematocrito siempre por el mango negro <strong>de</strong><br />
la cubierta <strong>de</strong>l rotor, tanto al presionarlo firmemente en un movimiento hacia abajo sobre el<br />
soporte para el rotor, como al retirarlo rotor <strong>de</strong> la centrífuga. La presión sobre los bor<strong>de</strong>s<br />
exteriores <strong>de</strong>l rotor pue<strong>de</strong> resultar en una avería <strong>de</strong>l rotor.<br />
7. Cierre y asegure la cubierta. Pulse el botón Selector <strong>de</strong> Ciclo (SET) para seleccionar los<br />
ajustes para Microhematocrit (microhematocrito) y, a continuación, pulse Inicio.<br />
8. Después <strong>de</strong> que pare el rotor, retírelo <strong>de</strong> la centrífuga.<br />
Los tubos <strong>de</strong>l interior <strong>de</strong>l rotor pue<strong>de</strong>n leerse con el<br />
lector circular (producto StatSpin nº HR4C) o retirarse<br />
<strong>de</strong>l rotor y leerse con el lector <strong>de</strong> tipo tarjeta (producto<br />
StatSpin nº HR05).<br />
Control <strong>de</strong> calidad<br />
• Deben seguirse los procedimientos para el control <strong>de</strong> calidad establecidos por su laboratorio.<br />
• Para verificar la a<strong>de</strong>cuación <strong>de</strong>l empaquetamiento celular, seleccione diariamente uno o<br />
más tubos (preferiblemente con un hematocrito superior al 50%), centrifúguelos y léalos.<br />
Centrifugue estos tubos una segunda vez. La diferencia entre la lectura inicial y la segunda<br />
lectura <strong>de</strong>be ser <strong>de</strong>l 1% o inferior.<br />
Valores normales<br />
La siguiente tabla representa los valores comúnmente aceptados <strong>de</strong> hematocrito:<br />
Especie % Especie %<br />
Perro adulto 37–55 Equina 32–53<br />
Cachorro 32–55 Bovina 25–42<br />
Gato adulto 30–45 Porcina 32–50<br />
Gatito 25–45 Ovina 24–45<br />
tubo capilar tras la centrifugación<br />
Parte<br />
superior <strong>de</strong>l<br />
plasma<br />
Parte<br />
superior<br />
<strong>de</strong> los<br />
eritrocitos<br />
Parte<br />
inferior<br />
<strong>de</strong> los<br />
eritrocitos<br />
sellador<br />
Centrífuga <strong>IDEXX</strong> StatSpin <strong>VT</strong> Guía <strong>de</strong> Usuario 55
Limpieza y mantenimiento<br />
<strong>IDEXX</strong> recomienda que lleve a cabo inspecciones periódicas y un mantenimiento preventivo <strong>de</strong> su<br />
Centrífuga <strong>IDEXX</strong> StatSpin <strong>VT</strong>. Si el equipo no funciona <strong>de</strong> manera apropiada, contacte en cualquier<br />
momento con el Servicio Técnico <strong>de</strong> <strong>IDEXX</strong> o con su distribuidor autorizado <strong>de</strong> <strong>IDEXX</strong>.<br />
!<br />
!<br />
PRECAUCIÓN: Antes <strong>de</strong> la limpieza o el mantenimiento <strong>de</strong>senchufe la Centrífuga <strong>IDEXX</strong> StatSpin<br />
<strong>VT</strong> <strong>de</strong> la toma <strong>de</strong> corriente.<br />
ADVERTENCIA: No exponga la centrífuga <strong>IDEXX</strong> StatSpin <strong>VT</strong>, ni su rotor, a ácidos fuertes o<br />
concentrados, ni a bases, agentes oxidantes, hidrocarburos halogenados o aromáticos, ésteres o<br />
cetonas.<br />
Limpieza<br />
Limpie las superficies exteriores y el revestimiento <strong>de</strong>l panel <strong>de</strong> conmutación con un paño<br />
hume<strong>de</strong>cido en agua y un <strong>de</strong>tergente suave. Limpie la superficie interna, <strong>de</strong> acero con cubierta<br />
pulverizada, con un <strong>de</strong>tergente suave y, si fuera necesario, con un <strong>de</strong>sinfectante. Limpie todas<br />
las superficies con un paño hume<strong>de</strong>cido utilizando una disolución <strong>de</strong> alcohol al 70% o <strong>de</strong> lejía al<br />
10%.<br />
!<br />
PRECAUCIÓN: No pulverice soluciones limpiadoras directamente sobre el alojamiento o<br />
recipiente <strong>de</strong> centrifugación, ya que el material pulverizado podría alcanzar el circuito interno o los<br />
cojinetes <strong>de</strong>l motor. La avería posterior pue<strong>de</strong> que no se contemple en la garantía.<br />
Comprobación <strong>de</strong> la velocidad <strong>de</strong>l rotor<br />
Las velocida<strong>de</strong>s nominales pue<strong>de</strong>n comprobarse mediante un estroboscopio o un tacómetro<br />
fotoeléctrico. Si la Centrífuga <strong>IDEXX</strong> StatSpin <strong>VT</strong> no logra alcanzar una velocidad operativa,<br />
contacte con el Servicio Técnico <strong>de</strong> <strong>IDEXX</strong> o con su distribuidor autorizado <strong>de</strong> <strong>IDEXX</strong>.<br />
Sustitución <strong>de</strong> la junta tórica<br />
La figura <strong>de</strong> la <strong>de</strong>recha ilustra la posición <strong>de</strong> la junta tórica <strong>de</strong> caucho que se<br />
une al soporte para el rotor. Si la instalación <strong>de</strong>l rotor se vuelve difícil, aplique una<br />
cantidad muy pequeña <strong>de</strong> lubricante <strong>de</strong> tipo silicona a los tres puntos expuestos<br />
(A) <strong>de</strong> la junta tórica. La junta tórica <strong>de</strong>be inspeccionarse con regularidad,<br />
y sustituirse cuando aparezca aplanada o <strong>de</strong>sgastada. La junta tórica <strong>de</strong>be<br />
sustituirse como medida <strong>de</strong> mantenimiento preventivo al menos una vez al año.<br />
La nueva junta tórica pue<strong>de</strong> instalarse tal y como se muestra en la figura,<br />
haciendo que pase por <strong>de</strong>trás y por <strong>de</strong>lante <strong>de</strong> las seis clavijas <strong>de</strong>l soporte<br />
para el rotor. En el envase <strong>de</strong> la <strong>IDEXX</strong> StatSpin se incluyen juntas tóricas<br />
adicionales.<br />
A<br />
A<br />
A<br />
Indicadores <strong>de</strong> error<br />
Los distintos errores <strong>de</strong> la Centrífuga <strong>IDEXX</strong> StatSpin <strong>VT</strong> los señala un indicador <strong>de</strong> Error/Revisión<br />
que parpa<strong>de</strong>a en rojo sobre el panel <strong>de</strong> control. La causa <strong>de</strong>l error pue<strong>de</strong> i<strong>de</strong>ntificarse mediante<br />
la combinación <strong>de</strong> los indicadores <strong>de</strong> ciclo que también estén parpa<strong>de</strong>ando.<br />
Centrífuga <strong>IDEXX</strong> StatSpin <strong>VT</strong> Guía <strong>de</strong> Usuario 56
indicador<br />
<strong>de</strong> ciclo<br />
parpa<strong>de</strong>ando<br />
en ver<strong>de</strong><br />
QUICK SPIN<br />
NORMAL<br />
HARD SPIN<br />
QUICK SPIN<br />
NORMAL<br />
HARD SPIN<br />
QUICK SPIN<br />
NORMAL<br />
HARD SPIN<br />
QUICK SPIN<br />
NORMAL<br />
HARD SPIN<br />
URINE SEDIMENT<br />
URINE SEDIMENT<br />
URINE SEDIMENT<br />
URINE SEDIMENT<br />
MICROHEMATOCRIT<br />
MICROHEMATOCRIT<br />
MICROHEMATOCRIT<br />
MICROHEMATOCRIT<br />
indicador<br />
<strong>de</strong> error/service<br />
(error/revisión)<br />
parpa<strong>de</strong>ando<br />
en rojo<br />
SET<br />
Error/Service<br />
SET<br />
Error/Service<br />
SET<br />
Error/Service<br />
SET<br />
Error/Service<br />
El rotor no llegó a la<br />
velocidad máxima en 30<br />
segundos<br />
La cubierta está abierta o<br />
el ciclo cambió durante el<br />
funcionamiento.<br />
La velocidad <strong>de</strong>l rotor no<br />
pue<strong>de</strong> mantenerse.<br />
El rotor giró hacia atrás<br />
durante el frenado a<br />
contracorriente.<br />
El indicador <strong>de</strong> Error/Service (Error/Revisión) permanece iluminado continuamente cuando la<br />
centrífuga ha alcanzado un total <strong>de</strong> 18.000 ciclos, lo cual coinci<strong>de</strong> con la vida útil <strong>de</strong>l mecanismo<br />
<strong>de</strong> accionamiento. El mecanismo <strong>de</strong> accionamiento necesita sustituirse. Contacte con un centro<br />
<strong>de</strong> revisión autorizado.<br />
Centrífuga <strong>IDEXX</strong> StatSpin <strong>VT</strong> Guía <strong>de</strong> Usuario 57
<strong>IDEXX</strong> recomienda realizar inspecciones periódicas y mantenimiento<br />
preventivo en su centrífuga <strong>IDEXX</strong> StatSpin <strong>VT</strong> o StatSpin MP.<br />
Registro <strong>de</strong> mantenimiento<br />
Mes: ____________________<br />
1 2 3 4 5 6 7 8 9 10 11 12 13 14 15 16 17 18 19 20 21 22 23 24 25 26 27 28 29 30 31<br />
Frecuencia Mantenimiento<br />
necesario<br />
Diario Compruebe si hay<br />
grietas o indicios<br />
<strong>de</strong> <strong>de</strong>sgaste en<br />
la tapa, cierre y<br />
bisagra.<br />
Compruebe si hay<br />
indicios <strong>de</strong> grietas<br />
o <strong>de</strong> <strong>de</strong>bilidad<br />
en el rotor y en el<br />
protector.<br />
Inspeccione la junta<br />
tórica para <strong>de</strong>tectar<br />
signos <strong>de</strong> <strong>de</strong>sgaste<br />
o dilatación.<br />
58
Año: ____________________<br />
Frecuencia Mantenimiento necesario<br />
Enero Febrero Marzo Abril Mayo Junio Julio Agosto Septiembre Octubre Noviembre Diciembre<br />
Anual † Sustituya la junta tórica <strong>de</strong>l<br />
soporte <strong>de</strong>l rotor.<br />
Sustituya el rotor RT12 y el<br />
protector. †<br />
Según se<br />
requiera<br />
† El rotor RT12 y el protector se <strong>de</strong>berán sustituir <strong>de</strong>spués <strong>de</strong> 3600 ciclos. Instale siempre un protector sin usar cuando monte un rotor RT12 nuevo. Utilice la tabla siguiente para <strong>de</strong>terminar la frecuencia con la que se<br />
<strong>de</strong>berán sustituir el rotor y el protector en función <strong>de</strong> la cantidad media <strong>de</strong> muestras que centrifugue en un día.<br />
Frecuencia mínima<br />
<strong>de</strong> sustitución<br />
Muestras por día<br />
(durante una semana<br />
<strong>de</strong> 5 días laborables)<br />
15 Anualmente<br />
10 Cada 18 meses<br />
5 Cada 2,5 años<br />
3 Cada 4 años<br />
59
Resolución <strong>de</strong> problemas<br />
Problema<br />
No hay luz <strong>de</strong> encendido<br />
La centrífuga no centrifuga,<br />
o se apaga <strong>de</strong> manera<br />
prematura<br />
La centrífuga no se abre<br />
automáticamente al final <strong>de</strong><br />
un ciclo<br />
Medidas<br />
• Compruebe el cable <strong>de</strong> alimentación y asegúrese <strong>de</strong> que está bien enchufado<br />
en la toma <strong>de</strong> corriente. Si lo está, pruebe otra toma <strong>de</strong> corriente.<br />
• Compruebe que la extensión <strong>de</strong> CC <strong>de</strong> 24 V está bien enchufada en la<br />
parte posterior <strong>de</strong> la Centrífuga <strong>IDEXX</strong> StatSpin <strong>VT</strong>.<br />
• Para obtener asistencia, contacte con el servicio <strong>de</strong> atención al cliente<br />
<strong>de</strong> <strong>IDEXX</strong>.<br />
• Asegúrese <strong>de</strong> que la cubierta está completamente cerrada y tiene el<br />
seguro.<br />
• Si el indicador <strong>de</strong> Error/Service (Error/Revisión) está parpa<strong>de</strong>ando,<br />
i<strong>de</strong>ntifique el origen <strong>de</strong>l error, corrija la condición que produce el error y, a<br />
continuación, pulse el botón <strong>de</strong> Parada/Apertura para eliminar el error.<br />
• Para obtener asistencia, contacte con el servicio <strong>de</strong> atención al cliente<br />
<strong>de</strong> <strong>IDEXX</strong>.<br />
• Para abrir manualmente la cubierta, utilice el procedimiento <strong>de</strong><br />
<strong>de</strong>rivación <strong>de</strong>scrito en la sección <strong>de</strong>l mecanismo <strong>de</strong> <strong>de</strong>rivación para el<br />
bloqueo <strong>de</strong> la cubierta.<br />
• Asegúrese <strong>de</strong> que la junta <strong>de</strong>l recipiente que se encuentra en el<br />
alojamiento interno está bien fijada y selle el recipiente apretando la<br />
junta hacia abajo hasta la ranura <strong>de</strong>l alojamiento.<br />
• Para obtener asistencia, contacte con el servicio <strong>de</strong> atención al cliente<br />
<strong>de</strong> <strong>IDEXX</strong>.<br />
Revisión<br />
Derive todas las revisiones al Servicio Técnico <strong>de</strong> <strong>IDEXX</strong> o a un centro <strong>de</strong> reparaciones<br />
autorizado.<br />
Descontaminación <strong>de</strong>l equipo antes <strong>de</strong> su envío para una revisión<br />
Cualquier equipo o accesorio que haya estado expuesto a sangre u otro material biológico<br />
<strong>de</strong>be limpiarse antes <strong>de</strong> su envío al fabricante o al representante para una revisión. Esta<br />
<strong>de</strong>scontaminación es <strong>de</strong> obligado cumplimiento tal y como lo establece la ley fe<strong>de</strong>ral (Títulos 48 y<br />
49 <strong>de</strong> las Regulaciones Fe<strong>de</strong>rales), y <strong>de</strong> acuerdo a las Regulaciones <strong>de</strong> la Agencia <strong>de</strong> Protección<br />
Medioambiental para la gestión <strong>de</strong> residuos con riesgo biológico. El personal <strong>de</strong> <strong>IDEXX</strong> y Iris<br />
Sample Processing no pue<strong>de</strong>n llevar a cabo esta <strong>de</strong>scontaminación.<br />
Centrífuga <strong>IDEXX</strong> StatSpin <strong>VT</strong> Guía <strong>de</strong> Usuario 60
Especificaciones<br />
Centrífuga<br />
Número <strong>de</strong> producto<br />
Número <strong>de</strong> mo<strong>de</strong>lo<br />
Ciclos<br />
Quick Spin<br />
(Centrifugación rápida)<br />
SS<strong>VT</strong>-4<br />
V901<br />
Velocida<strong>de</strong>s<br />
30 segundos a 15.800 rpm/12.000 xg<br />
Normal (Normal) 90 segundos a 15.800 rpm/12.000 xg<br />
Hard Spin<br />
(Centrifugación fuerte)<br />
Urine (Orina)<br />
Hematocrit<br />
(Hematocrito)<br />
Tiempo <strong>de</strong> aceleración<br />
Tiempo <strong>de</strong><br />
<strong>de</strong>saceleración<br />
Componentes<br />
eléctricos<br />
Dimensiones<br />
Entorno<br />
150 segundos a 15.800 rpm/12.000 xg<br />
45 segundos a 9.800 rpm/3.900 xg<br />
120 segundos a 15.800 rpm/13.700 xg<br />
Aproximadamente 6 segundos<br />
Aproximadamente 10 segundos<br />
Las especificaciones están sujetas a cambios sin previo aviso.<br />
24 voltios, CC, 1,7 amp<br />
Incluye una fuente <strong>de</strong> alimentación <strong>de</strong> conmutación para 100-240V CA,<br />
50-60 Hz<br />
Diámetro 6,6 pulgadas/16,25 cm<br />
Altura 6,3 pulgadas/13,2 cm<br />
Peso 5,5 libras/2,5 kg<br />
Utilizar sólo en instalaciones <strong>de</strong> interior<br />
Altitud máxima hasta 6.562 pies/2.000 m<br />
Temperatura ambiente <strong>de</strong> 41ºF a 104ºF (<strong>de</strong> 5ºC a 40ºC)<br />
HR máxima <strong>de</strong>l 80% hasta 31ºC, disminuyendo hasta una HR <strong>de</strong>l 50% a<br />
104°F/40°C<br />
Las fluctuaciones <strong>de</strong>l voltaje en la alimentación <strong>de</strong> la red no <strong>de</strong>ben exce<strong>de</strong>r<br />
±10%<br />
Sobretensiones transitorias según la categoría <strong>de</strong> instalación II<br />
Grado <strong>de</strong> contaminación 2<br />
Centrífuga <strong>IDEXX</strong> StatSpin <strong>VT</strong> Guía <strong>de</strong> Usuario 61
Accesorios<br />
Producto nº Descripción Ciclo requerido<br />
RT12 2 x 1,5 ml rotor <strong>de</strong> ángulo fijo Rápido, Normal, Fuerte<br />
SV12 Adaptadores Microtainer (2 pk) Rápido, Normal, Fuerte<br />
TU15-10 Tubo <strong>de</strong> orina precalibrado <strong>de</strong> 1,5 ml (10 bolsas <strong>de</strong> 50) Orina<br />
TP1H Tubo <strong>de</strong> microcentrífuga <strong>de</strong> heparina-litio <strong>de</strong> 1,3 ml (bolsa <strong>de</strong> 100) Rápido, Normal, Fuerte<br />
TP1U Tubo <strong>de</strong> microcentrífuga sin tratar <strong>de</strong> 1,3 ml (bolsa <strong>de</strong> 100) Rápido, Normal, Fuerte<br />
SS2H<br />
SS2U<br />
SS2X<br />
LC10<br />
LC40<br />
LC15<br />
RM02<br />
RH12<br />
HP8H-10<br />
HP8U-10<br />
HT9H-10<br />
HT9U-10<br />
StatSampler* (200 µl, heparina litio) sistema <strong>de</strong> recogida <strong>de</strong><br />
punción digital para bioquímica<br />
StatSampler (200 µl, sin tratar) sistema <strong>de</strong> recogida <strong>de</strong> punción<br />
digital para bioquímica<br />
StatSampler (200 µl, EDTA) sistema <strong>de</strong> recogida <strong>de</strong> punción<br />
digital con gel para hematología<br />
LipoClear: tubos <strong>de</strong> reactivo rellenos previamente <strong>de</strong> 0,5 ml<br />
para la clarificación <strong>de</strong>l suero o plasma lipémico (bolsa <strong>de</strong> 10)<br />
LipoClear: tubos <strong>de</strong> reactivo rellenos previamente <strong>de</strong> 0,5 ml<br />
para la clarificación <strong>de</strong>l suero o plasma lipémico (bolsa <strong>de</strong> 40)<br />
LipoClear: tubos <strong>de</strong> reactivo rellenos previamente <strong>de</strong> 1,5 ml<br />
para la clarificación <strong>de</strong>l suero o plasma lipémico (bolsa <strong>de</strong> 40)<br />
2 x 0,8 ml rotor <strong>de</strong> ángulo fijo para tubos BD Microtainer y<br />
tubos <strong>de</strong> microcentrífuga <strong>de</strong> 0,5 ml<br />
Rotor para microhematocrito <strong>de</strong> 12 posiciones con lector circular<br />
(HR4C)<br />
Tubo capilar SafeCrit (40 mm, heparina sodio), tubos <strong>de</strong><br />
microhematocrito 100% plásticos para el rotor RH12<br />
(10 viales <strong>de</strong> 100)<br />
Tubo capilar SafeCrit (40 mm, sin tratar), tubos <strong>de</strong><br />
microhematocrito 100% plásticos para el rotor RH12<br />
(10 viales <strong>de</strong> 100)<br />
Tubo capilar <strong>de</strong> vidrio (40 mm, heparina sodio), tubos <strong>de</strong><br />
microhematocrito <strong>de</strong> vidrio para el rotor RH12 (10 viales<br />
<strong>de</strong> 100)<br />
Tubo capilar <strong>de</strong> vidrio (40 mm, sin tratar), tubos <strong>de</strong><br />
microhematocrito <strong>de</strong> vidrio para el rotor RH12 (10 viales<br />
<strong>de</strong> 100)<br />
Rápido, Normal, Fuerte<br />
Rápido, Normal, Fuerte<br />
Rápido, Normal, Fuerte<br />
Fuerte<br />
Fuerte<br />
Fuerte<br />
Rápido, Normal, Fuerte<br />
Microhematocrito<br />
Microhematocrito<br />
Microhematocrito<br />
Microhematocrito<br />
Microhematocrito<br />
HS24-10 Relleno sellador para tubos capilares (10 rellenos) No correspon<strong>de</strong><br />
HR05<br />
HR4C<br />
00-Ring<br />
Lector <strong>de</strong> hematocrito <strong>de</strong> tipo tarjeta para tubos <strong>de</strong> hematocrito<br />
<strong>de</strong> 40-mm<br />
Lector <strong>de</strong> hematocrito, circular, diseñado para utilizarse junto<br />
con el rotor RH12<br />
Sustitución <strong>de</strong> las juntas tóricas para el soporte para el rotor<br />
(cinco bolsas <strong>de</strong> tres)<br />
No correspon<strong>de</strong><br />
No correspon<strong>de</strong><br />
No correspon<strong>de</strong><br />
Centrífuga <strong>IDEXX</strong> StatSpin <strong>VT</strong> Guía <strong>de</strong> Usuario 62
Información <strong>de</strong> contacto <strong>de</strong>l Servicio Técnico <strong>de</strong> <strong>IDEXX</strong><br />
Representante <strong>de</strong> ventas <strong>de</strong> <strong>IDEXX</strong>:<br />
Teléfono/Buzón <strong>de</strong> voz:<br />
Estados Unidos<br />
<strong>IDEXX</strong> Laboratories, Inc.<br />
One <strong>IDEXX</strong> Drive<br />
Westbrook, Maine 04092 USA<br />
Número gratuito<br />
<strong>de</strong>l Servicio Técnico.................... 1-800-248-2483<br />
Número <strong>de</strong> teléfono principal...... 1-207-556-0300<br />
Fax gratuito.................................. 1-800-248-3010<br />
i<strong>de</strong>xx.com<br />
Italia<br />
<strong>IDEXX</strong> Laboratories Italia, S.r.l.<br />
Via Canova 27<br />
20145 Milano<br />
Italia<br />
Número gratuito<br />
<strong>de</strong>l Servicio Técnico.................... 00800 1234 3399<br />
Teléfono....................................... (39) 02 319 20 31<br />
Fax............................................... (39) 02 319 20 347<br />
www.i<strong>de</strong>xx.it<br />
Países Bajos<br />
<strong>IDEXX</strong> Europe B.V.<br />
Scorpius 60 Building F<br />
2132 LR Hoofddorp<br />
The Netherlands<br />
Número gratuito<br />
<strong>de</strong>l Servicio Técnico.................... 00800 1234 3399<br />
Teléfono....................................... (31) 23 558 7000<br />
Fax gratuito.................................. 00800 1234 3333<br />
Fax............................................... (31) 23 558 7233<br />
www.i<strong>de</strong>xx.nl<br />
España<br />
<strong>IDEXX</strong> Laboratorios, S.L.<br />
C/ Plom 2-8, 3º a<br />
08038 Barcelona<br />
España<br />
Número gratuito<br />
<strong>de</strong>l Servicio Técnico.................... 00800 1234 3399<br />
Teléfono....................................... (34) 93 414 26 08<br />
Fax............................................... (34) 93 414 74 78<br />
www.i<strong>de</strong>xx.es<br />
Francia<br />
<strong>IDEXX</strong> S.A.R.L.<br />
Bâtiment Flori<strong>de</strong> - Eragny Parc<br />
11 Allée Rosa, Luxembourg<br />
95610 Eragny, sur Oise<br />
Francia<br />
Número gratuito<br />
<strong>de</strong>l Servicio Técnico.................... 00800 1234 3399<br />
Teléfono....................................... (33) 1 34 32 62 00<br />
Fax............................................... (33) 1 34 30 02 08<br />
www.i<strong>de</strong>xx.fr<br />
Reino Unido<br />
<strong>IDEXX</strong> Laboratories Ltd.<br />
Milton Court, Churchfield Road<br />
Chalfont St Peter<br />
Buckinghamshire SL9 9EW<br />
Reino Unido<br />
Número gratuito<br />
<strong>de</strong>l Servicio Técnico.................... 00800 1234 3399<br />
Teléfono....................................... (44) 01753 891 660<br />
Fax............................................... (44) 01753 891 520<br />
www.i<strong>de</strong>xx.co.uk<br />
Alemania<br />
<strong>IDEXX</strong> GmbH<br />
Mörikestraße 28/3<br />
D-71636 Ludwigsburg<br />
Alemania<br />
Número gratuito<br />
<strong>de</strong>l Servicio Técnico.................. 00800 1234 3399<br />
Teléfono..................................... (49) 067 32-9 4420<br />
Fax............................................. 0800 6645627<br />
www.i<strong>de</strong>xx.<strong>de</strong><br />
Australia<br />
<strong>IDEXX</strong> Laboratories Pty. Ltd.<br />
Metro Centre<br />
Unit 20, 30-46 South Street<br />
Rydalmere, New South Wales 2116<br />
Australia<br />
Número gratuito<br />
<strong>de</strong>l Servicio Técnico.................... 1800 655 978<br />
Teléfono....................................... (61) 2 9898 7300<br />
Fax............................................... (61) 2 9898 7302<br />
www.i<strong>de</strong>xx.com.au<br />
Centrífuga <strong>IDEXX</strong> StatSpin <strong>VT</strong> Guía <strong>de</strong> Usuario 63
Canadá<br />
<strong>IDEXX</strong> Laboratories Canada Corporation<br />
C/O UPS<br />
4071 North Service Rd<br />
Burlington, ON L7L 4X6<br />
Canadá<br />
Número gratuito<br />
<strong>de</strong>l Servicio Técnico ................... 1-800-248-2483<br />
Teléfono....................................... 1-905-602-9499<br />
Fax gratuito.................................. 1-800-248-3010<br />
Fax............................................... 1-905-602-6640<br />
i<strong>de</strong>xx.com<br />
Japón<br />
<strong>IDEXX</strong> Laboratories KK<br />
3-3-7 Kitano, Mitaka-shi, Tokyo<br />
181-8608 Japón<br />
Número gratuito<br />
<strong>de</strong>l Servicio Técnico.................... 0120-71-4921<br />
Teléfono....................................... (81) 422 71 4921<br />
Fax............................................... (81) 422 71 4922<br />
www.i<strong>de</strong>xx.co.jp<br />
Centrífuga <strong>IDEXX</strong> StatSpin <strong>VT</strong> Guía <strong>de</strong> Usuario 64
Fabricado para <strong>IDEXX</strong> Laboratories, Inc. por<br />
División <strong>de</strong> Iris International Inc.<br />
Westwood, MA 02090 (EE. UU.)<br />
Teléfono: 800-782-8774<br />
o 781-551-0100<br />
Fax: 781-551-0036<br />
proiris.com
<strong>IDEXX</strong> StatSpin * <strong>VT</strong>-Zentrifuge<br />
Bedienungshandbuch—Deutsche Version<br />
<strong>IDEXX</strong> StatSpin * <strong>VT</strong>-Zentrifuge<br />
Bedienungshandbuch<br />
Deutsche Version
<strong>IDEXX</strong> <strong>StatSpin*</strong> <strong>VT</strong>-Zentrifuge<br />
Mo<strong>de</strong>ll-Nummer V901<br />
Nur für die veterinärmedizinische Verwendung.<br />
Produktnummer<br />
SS<strong>VT</strong>-4 <strong>IDEXX</strong> StatSpin <strong>VT</strong>-Zentrifuge für 100–240 V WS, 50/60 Hz<br />
Urheberrechtsvermerk<br />
Die in diesem Dokument enthaltenen Informationen können unangekündigten Än<strong>de</strong>rungen unterliegen. Die in<br />
Beispielen genannten Unternehmen, Namen und Daten sind fiktiv, sofern nichts An<strong>de</strong>rweitiges angegeben ist. Kein<br />
Teil dieses Dokuments darf in irgen<strong>de</strong>iner Form o<strong>de</strong>r auf irgen<strong>de</strong>ine Weise, we<strong>de</strong>r elektronisch, mechanisch noch<br />
an<strong>de</strong>rweitig, zu irgen<strong>de</strong>inem Zweck ohne die ausdrückliche schriftliche Genehmigung von <strong>IDEXX</strong> Laboratories<br />
vervielfältigt o<strong>de</strong>r in Umlauf gebracht wer<strong>de</strong>n. Es ist möglich, dass <strong>IDEXX</strong> Rechte an Patenten bzw. angemel<strong>de</strong>ten<br />
Patenten, an Marken, Urheberrechten o<strong>de</strong>r sonstigem geistigen o<strong>de</strong>r gewerblichen Eigentum besitzt, die sich auf<br />
dieses Dokument bzw. auf seinen fachlichen Inhalt beziehen. Durch die Beibringung dieses Dokuments wird keine<br />
Lizenz an diesen Eigentumsrechten vergeben, sofern diese nicht ausdrücklich in einer schriftlichen Lizenzvereinbarung<br />
von <strong>IDEXX</strong> Laboratories zur Verfügung gestellt wird.<br />
© 2012 <strong>IDEXX</strong> Laboratories, Inc. Alle Rechte vorbehalten.<br />
*StatSpin, StatSampler, LipoClear, PlasmaRotor und SafeCrit sind Marken o<strong>de</strong>r eingetragene Marken von Iris Sample<br />
Processing in <strong>de</strong>n Vereinigten Staaten und/o<strong>de</strong>r an<strong>de</strong>ren Län<strong>de</strong>rn. BD und Microtainer sind Warenzeichen von Becton,<br />
Dickinson and Company. Eppendorf Tubes ist eine eingetragene Marke von Eppendorf North America, Inc. Alle<br />
an<strong>de</strong>ren Produkt- und Firmennamen und Logos sind Marken ihrer jeweiligen Besitzer.<br />
Das StatSpin-System zur Überführung von Blutproben ist durch das US-Patent Nr. 5 257 984 geschützt.<br />
<strong>IDEXX</strong> StatSpin <strong>VT</strong>-Zentrifuge - Bedienungshandbuch 67
Inhalt<br />
Einführung..................................................................................................................................69<br />
Symbole ..........................................................................................................................................................70<br />
Aufstellen <strong>de</strong>r <strong>IDEXX</strong> StatSpin <strong>VT</strong>-Zentrifuge............................................................................71<br />
Inhalt................................................................................................................................................................71<br />
Aufstellen <strong>de</strong>r <strong>IDEXX</strong> StatSpin <strong>VT</strong>-Zentrifuge ..................................................................................................71<br />
Stromanschluss...............................................................................................................................................71<br />
Überblick über die <strong>IDEXX</strong> StatSpin <strong>VT</strong>-Zentrifuge....................................................................72<br />
Prinzip und bestimmungsgemäße Verwendung.............................................................................................72<br />
Kompatible Rotoren für die <strong>IDEXX</strong> StatSpin <strong>VT</strong>-Zentrifuge RT12-Röhren-Rotor ............................................72<br />
Verwendung <strong>de</strong>r <strong>IDEXX</strong> StatSpin <strong>VT</strong>-Zentrifuge .......................................................................73<br />
Öffnen und Schließen <strong>de</strong>s Deckels ...............................................................................................................73<br />
Installation eines Rotors .................................................................................................................................73<br />
Montieren einer Schutzab<strong>de</strong>ckung..................................................................................................................74<br />
Auswahl <strong>de</strong>r Zykluseinstellungen ...................................................................................................................74<br />
Verarbeitung von Proben ..........................................................................................................75<br />
Vorbereitung von venösem Blut für Koagulation und Bestimmung blutchemischer Parameter.....................75<br />
Vorbereitung von Urinsediment für die mikroskopische Untersuchung ........................................................75<br />
Klärung lipämischer Proben ...........................................................................................................................76<br />
Bestimmung <strong>de</strong>s Hämatokritwerts o<strong>de</strong>r <strong>de</strong>s Mikrohämatokrits .....................................................................76<br />
Reinigung und Wartung ............................................................................................................78<br />
Reinigung.........................................................................................................................................................78<br />
Prüfen <strong>de</strong>r Rotorgeschwindigkeit....................................................................................................................78<br />
Auswechseln <strong>de</strong>s O-Rings .............................................................................................................................78<br />
Fehleranzeige..................................................................................................................................................79<br />
Wartungsprotokoll............................................................................................................................................80<br />
Fehlersuche.....................................................................................................................................................82<br />
Wartung...........................................................................................................................................................82<br />
Technische Daten.......................................................................................................................83<br />
Gerätedaten.....................................................................................................................................................83<br />
Zubehör...........................................................................................................................................................84<br />
<strong>IDEXX</strong> Kontaktinformationen <strong>de</strong>s Technischen Kun<strong>de</strong>ndienstes............................................85<br />
<strong>IDEXX</strong> StatSpin <strong>VT</strong>-Zentrifuge - Bedienungshandbuch 68
Einführung<br />
Dieses Handbuch stellt Ihnen gemeinsam mit <strong>de</strong>n auf Produktetiketten und Packungsbeilagen<br />
enthaltenen Angaben alle Informationen zur Verfügung, die Sie zum Betrieb und zur Wartung <strong>de</strong>r<br />
<strong>IDEXX</strong> <strong>StatSpin*</strong> <strong>VT</strong>-Zentrifuge benötigen.<br />
Wenn bestimmte Informationen beson<strong>de</strong>re Aufmerksamkeit verdienen,<br />
erscheint entwe<strong>de</strong>r ein Warnsymbol o<strong>de</strong>r ein Biohazard-Symbol neben <strong>de</strong>m<br />
!<br />
Vorsicht Biohazard<br />
Text.<br />
Bitte beachten Sie die Erklärungen zu <strong>de</strong>n unten aufgeführten Symbolen und Warnhinweisen und<br />
befolgen Sie die für Sie gültigen offiziellen Laborvorschriften. In <strong>de</strong>r nachfolgen<strong>de</strong>n Tabelle sind<br />
alle Vorsichts- und Warnhinweise für die <strong>IDEXX</strong> StatSpin <strong>VT</strong>-Zentrifuge aufgeführt.<br />
!<br />
WARNUNG: Nordamerika: Verwen<strong>de</strong>n Sie nur das mit <strong>de</strong>r Einheit gelieferte Netzgerät. Durch<br />
die Verwendung an<strong>de</strong>rer Netzgeräte o<strong>de</strong>r Transformatoren wird die Elektronik <strong>de</strong>r <strong>IDEXX</strong><br />
StatSpin <strong>VT</strong>-Zentrifuge beschädigt, und die Garantie verliert ihre Gültigkeit.<br />
WARNUNG: Außerhalb von Nordamerika: Verwen<strong>de</strong>n Sie nicht das mitgelieferte Netzkabel.<br />
Verwen<strong>de</strong>n Sie ein Netzkabel für min<strong>de</strong>stens 1,0 Amp o<strong>de</strong>r mehr, mit IEC320/CEE22-<br />
Anschlüssen, die für die zu verwen<strong>de</strong>n<strong>de</strong> Steckdose geeignet sind.<br />
VORSICHT: Bei Verwendung eines RT12-Rotors die Zentrifuge nicht ohne montierte<br />
Schutzab<strong>de</strong>ckung in Betrieb nehmen.<br />
VORSICHT: Mit <strong>de</strong>m Mikrohämatokritrotor RH12 darf keine Schutzab<strong>de</strong>ckung verwen<strong>de</strong>t wer<strong>de</strong>n.<br />
VORSICHT: Die Umgehung für die Deckelverriegelung ist nur in Notfällen zu benutzen. Bei<br />
unsachgemäßer Verwendung besteht Verletzungsgefahr.<br />
VORSICHT: Lassen Sie <strong>de</strong>n Rotor nicht auf <strong>de</strong>m Rotorhalter, wenn die <strong>IDEXX</strong> StatSpin<br />
<strong>VT</strong>-Zentrifuge für längere Zeit nicht benutzt wird. Der O-Ring wird durch das Gewicht<br />
zusammengedrückt und seine Fähigkeit, <strong>de</strong>n Rotor zu halten, wird beeinträchtigt.<br />
VORSICHT: Wenn <strong>de</strong>r Rotor nicht korrekt installiert wird, kann dies zu Schä<strong>de</strong>n an <strong>de</strong>r<br />
Zentrifuge führen, die nicht von <strong>de</strong>r Garantie abge<strong>de</strong>ckt sind.<br />
VORSICHT: Wenn <strong>de</strong>r Rotor zwischen Zentrifugenläufen an Ort und Stelle gelassen wird, muss er<br />
vor <strong>de</strong>m Zentrifugieren einer weiteren Probe neu auf <strong>de</strong>m Rotorhalter aufgesetzt wer<strong>de</strong>n. Wenn <strong>de</strong>r<br />
Rotor nicht je<strong>de</strong>s Mal korrekt aufgesetzt wird, kann er sich bei <strong>de</strong>r Zentrifugation lösen.<br />
VORSICHT: Die RT12- und RM02-Rotoren müssen vor <strong>de</strong>m Betrieb ausbalanciert wer<strong>de</strong>n.<br />
Wenn nur eine Probe zentrifugiert wer<strong>de</strong>n soll muss gegenüber dieser Probe ein zweites,<br />
ungefähr gleich schweres Probenröhrchen plaziert wer<strong>de</strong>n.<br />
VORSICHT: NIEMALS Glasröhrchen irgendwelcher Art im RT12-Rotor zentrifugieren.<br />
WICHTIG: Alle Rotoren haben eine begrenzte Lebensdauer, die von ihrem Einsatz abhängig<br />
ist. Rotoren sollten regelmäßig nach Rissen untersucht und sofort ausgetauscht wer<strong>de</strong>n, wenn<br />
Schä<strong>de</strong>n o<strong>de</strong>r sichtbare Abnutzungserscheinungen festgestellt wer<strong>de</strong>n. Bei <strong>de</strong>r Installation eines<br />
neuen RT12-Rotors muss auch immer eine neue Schutzab<strong>de</strong>ckung montiert wer<strong>de</strong>n.<br />
VORSICHT: Die <strong>IDEXX</strong> StatSpin <strong>VT</strong>-Zentrifuge muss vor <strong>de</strong>m Ausführen von Reinigungs- o<strong>de</strong>r<br />
Wartungsarbeiten aus <strong>de</strong>r Steckdose gezogen wer<strong>de</strong>n.<br />
WARNUNG: Das Netzkabel <strong>de</strong>r <strong>IDEXX</strong> StatSpin <strong>VT</strong>-Zentrifuge und ihr Rotor dürfen keinen<br />
starken o<strong>de</strong>r konzentrierten Säuren, Basen o<strong>de</strong>r Oxidationsmitteln, aromatischen o<strong>de</strong>r<br />
halogenierten Kohlenwasserstoffen, Estern o<strong>de</strong>r Ketonen ausgesetzt wer<strong>de</strong>n.<br />
VORSICHT: Sprühen Sie Reinigungslösungen nicht direkt auf die Zentrifugenschale o<strong>de</strong>r das<br />
Gehäuse, da diese sonst an die Motorenlager o<strong>de</strong>r die interne Schaltung gelangen können.<br />
Sich daraus ergeben<strong>de</strong> Schä<strong>de</strong>n sind nicht von <strong>de</strong>r Garantie abge<strong>de</strong>ckt.<br />
VORSICHT: Befolgen Sie bei allen biologischen Proben die allgemeinen<br />
Sicherheitsvorschriften, auch wenn nicht bekannt ist, ob die Probe einen infektiösen<br />
Stoff enthält.<br />
<strong>IDEXX</strong> StatSpin <strong>VT</strong>-Zentrifuge - Bedienungshandbuch 69
Verwen<strong>de</strong>n Sie die Zentrifuge nur ihrem Zweck entsprechend. Die unsachgemäße Verwendung<br />
<strong>de</strong>r <strong>IDEXX</strong> StatSpin <strong>VT</strong>-Zentrifuge und/o<strong>de</strong>r ihres Zubehörs kann zu Schä<strong>de</strong>n an <strong>de</strong>r Zentrifuge<br />
und ungenauen Ergebnissen führen und Garantien ungültig machen.<br />
Symbole<br />
In <strong>de</strong>r folgen<strong>de</strong>n Tabelle wer<strong>de</strong>n die Symbole beschrieben, die an <strong>de</strong>r Außenseite <strong>de</strong>r <strong>IDEXX</strong><br />
StatSpin <strong>VT</strong>-Zentrifuge o<strong>de</strong>r in dieser Anleitung abgebil<strong>de</strong>t sind.<br />
Symbol/Taste Name Beschreibung<br />
Start<br />
Stopp/Öffnen<br />
Die Starttaste leitet einen zeitlich festgelegten Zyklus bei einer<br />
festgelegten Geschwindigkeit ein. HINWEIS: Die <strong>IDEXX</strong><br />
StatSpin <strong>VT</strong>-Zentrifuge hat keinen Ein-/Aus-Schalter und wird<br />
normalerweise an das Netz angeschlossen und „an” gelassen.<br />
Die Taste „Stopp/Öffnen“ unterbricht <strong>de</strong>n Zyklus und gibt <strong>de</strong>n<br />
Deckel frei, sobald sich <strong>de</strong>r Rotor nicht mehr bewegt.<br />
SET<br />
Zykluswahl(SET)<br />
Mit <strong>de</strong>r Taste „Zykluswahl“ (SET) können Sie einen<br />
Zentrifugationszyklus auswählen.<br />
(rot)<br />
24 V – – – 1.7 A<br />
(grün)<br />
!<br />
„Error/Service“<br />
(Fehler/Wartung)<br />
(Netzeingang)<br />
Zyklusanzeige<br />
Vorsicht<br />
Eingeschränkte<br />
Betriebstemperatur<br />
Die Fehler-Wartungs-Anzeige („Error/Service“) leuchtet<br />
kontinuierlich o<strong>de</strong>r blinkt, wenn eine Wartung erfor<strong>de</strong>rlich ist.<br />
Das Symbol „Netzeingang“ befin<strong>de</strong>t sich an <strong>de</strong>r Rückseite <strong>de</strong>r<br />
<strong>IDEXX</strong> StatSpin <strong>VT</strong>-Zentrifuge neben <strong>de</strong>m Gleichstromanschluss.<br />
Dort wird das 24-V- Gleichstromkabel eingesteckt.<br />
Die Zyklusanzeige zeigt bei grünem, kontinuierlichem Licht<br />
<strong>de</strong>n ausgewählten Zentrifugationszyklus an. Wenn ein o<strong>de</strong>r<br />
mehrere Zyklusanzeigen grün blinken und wenn die Fehler-/<br />
Wartungs-Anzeige ebenfalls blinkt, liegt eine Störung vor.<br />
Weitere Informationen zu diesen Störungen sind im Abschnitt<br />
„Fehleranzeige“ zu fin<strong>de</strong>n.<br />
Das Symbol „Vorsicht“ erscheint auf <strong>de</strong>m Deckelverschluss.<br />
Öffnen Sie <strong>de</strong>n Deckel erst, wenn <strong>de</strong>r Rotor zum Stillstand<br />
gekommen ist. In diesem Bedienungshandbuch weist das<br />
Symbol „Vorsicht“ auf Vorsichts-/Warnhinweise hin, die Sie sich<br />
sorgfältig durchlesen müssen.<br />
Das Symbol „eingeschränkte Betriebstemperatur“ zeigt an, dass<br />
die Betriebstemperatur über- o<strong>de</strong>r unterschritten ist.<br />
IVD<br />
Für In-Vitro-Diagnostik<br />
Das IVD-Symbol zeigt an, dass ein Artikel nur zur Benutzung in<br />
einer In-Vitro-Diagnose-Vorrichtung vorgesehen ist.<br />
Nicht steril<br />
Das Symbol „Nicht steril” zeigt ein nicht steriles Produkt an<br />
NON<br />
STERILE<br />
S N<br />
Seriennummer<br />
Das Symbol „SN“ gibt die Seriennummer an<br />
Anleitungen einsehen<br />
Das Symbol „Anleitungen einsehen“ zeigt an, dass die<br />
Bedienungsanleitung eingesehen wer<strong>de</strong>n muss o<strong>de</strong>r zusätzliche<br />
Informationen erfor<strong>de</strong>rlich sind.<br />
<strong>IDEXX</strong> StatSpin <strong>VT</strong>-Zentrifuge - Bedienungshandbuch 70
Symbol/Taste Name Beschreibung<br />
Biologisches Risiko<br />
Das Symbol „Biologisches Risiko“ zeigt an, dass bei allen<br />
Proben allgemeine biologische Sicherheitsvorschriften befolgt<br />
wer<strong>de</strong>n müssen<br />
Aufstellen <strong>de</strong>r <strong>IDEXX</strong> StatSpin <strong>VT</strong>-Zentrifuge<br />
Die <strong>IDEXX</strong> StatSpin <strong>VT</strong>-Zentrifuge und ihr Zubehör wer<strong>de</strong>n in einer Kartonverpackung geliefert.<br />
Wenn die Zentrifuge o<strong>de</strong>r das Zubehör beim Transport beschädigt wor<strong>de</strong>n sind, informieren Sie<br />
bitte unverzüglich Ihr Transportunternehmen.<br />
Inhalt<br />
• Produktnummer:<br />
– SS<strong>VT</strong>-4<br />
• Das obige Produkt enthält:<br />
– Ein universelles Schaltnetzteil (StatSpin Produkt-Nr. 01-005940-001,<br />
<strong>IDEXX</strong> Art.-Nr. 79-17310-00, APS Produkt-Nr. AD-740U-1240)<br />
– Ein geer<strong>de</strong>tes Stromkabel (nur zur Benutzung in Nordamerika)<br />
– Eine Bedienungshandbuch für die <strong>IDEXX</strong> StatSpin <strong>VT</strong>-Zentrifuge<br />
Aufstellen <strong>de</strong>r <strong>IDEXX</strong> StatSpin <strong>VT</strong>-Zentrifuge<br />
• Die <strong>IDEXX</strong> StatSpin <strong>VT</strong>-Zentrifuge muss auf einer horizontalen und ebenen Oberfläche<br />
aufgestellt wer<strong>de</strong>n, die zum Betrieb von Laborinstrumenten geeignet ist.<br />
• Die <strong>IDEXX</strong> StatSpin <strong>VT</strong>-Zentrifuge muss von direktem Sonnenlicht und starken Hitze- o<strong>de</strong>r<br />
Kältequellen ferngehalten wer<strong>de</strong>n.<br />
• Zur Belüftung muss ein Sicherheitsabstand von 30 cm um die Zentrifuge herum eingehalten<br />
wer<strong>de</strong>n.<br />
Stromanschluss<br />
HINWEIS: Das 24-V-GS-Steckteil und das Netzkabel wer<strong>de</strong>n an einem universellen Schaltnetzteil<br />
angeschlossen.<br />
1. Stecken Sie das 24-V-GS-Steckteil in <strong>de</strong>n Gleichstromanschluss an <strong>de</strong>r Rückseite <strong>de</strong>r <strong>IDEXX</strong><br />
StatSpin <strong>VT</strong>-Zentrifuge.<br />
2. Schließen Sie das Netzkabel an einer geer<strong>de</strong>ten Steckdose an, welche die auf <strong>de</strong>m Netzteil<br />
angegebene Spannung und Frequenz liefert. Wenn <strong>de</strong>r Strom angeschlossen ist, leuchtet die<br />
Betriebsanzeige-LED auf und die Deckelverriegelung wird freigegeben.<br />
!<br />
!<br />
WARNUNG: Nordamerika: Verwen<strong>de</strong>n Sie nur das mit <strong>de</strong>r Zentrifuge gelieferte Netzgerät.<br />
Durch die Verwendung an<strong>de</strong>rer Netzgeräte o<strong>de</strong>r Transformatoren wird die Elektronik <strong>de</strong>r<br />
<strong>IDEXX</strong> StatSpin <strong>VT</strong>-Zentrifuge beschädigt, und die Garantie verliert ihre Gültigkeit.<br />
WARNUNG: Außerhalb von Nordamerika: Verwen<strong>de</strong>n Sie nicht das mitgelieferte Netzkabel.<br />
Verwen<strong>de</strong>n Sie ein Netzkabel für min<strong>de</strong>stens 1,0 Amp o<strong>de</strong>r mehr, mit IEC320/CEE22-<br />
Anschlüssen, die für die zu verwen<strong>de</strong>n<strong>de</strong> Steckdose geeignet sind.<br />
<strong>IDEXX</strong> StatSpin <strong>VT</strong>-Zentrifuge - Bedienungshandbuch 71
Überblick über die <strong>IDEXX</strong> StatSpin <strong>VT</strong>-Zentrifuge<br />
Prinzip und bestimmungsgemäße Verwendung<br />
Die <strong>IDEXX</strong> StatSpin <strong>VT</strong>-Zentrifuge ist nur für die In-Vitro-Diagnostik in <strong>de</strong>n folgen<strong>de</strong>n<br />
Anwendungsbereichen vorgesehen:<br />
• Schnelle Trennung von Vollblut<br />
• Gewinnung von Urinsediment zur mikroskopischen Analyse<br />
• Zentrifugation von Mikrohämatokrit-Röhrchen zur Bestimmung <strong>de</strong>s Hämatokritwerts<br />
Die <strong>IDEXX</strong> StatSpin <strong>VT</strong>-Zentrifuge ist eine kleine, geräuscharme Hochgeschwindigkeitszentrifuge.<br />
Ihr einzigartiges Antriebs- und Fe<strong>de</strong>rungssystem sorgt für einen fast vibrationslosen Betrieb. Leichte<br />
Rotoren von geringer Masse erzielen die Höchstgeschwindigkeit und eine vollständige Bremsung<br />
innerhalb weniger Sekun<strong>de</strong>n. Die <strong>IDEXX</strong> StatSpin <strong>VT</strong>-Zentrifuge entspricht <strong>de</strong>n internationalen<br />
Sicherheitsnormen.<br />
Sicherheitshinweis: Bei <strong>de</strong>r Arbeit im Labor sollte stets nach anerkannten Sicherheitspraktiken<br />
verfahren wer<strong>de</strong>n. Das schließt u. a. die Verwendung persönlicher Schutzausrüstung (PSA)<br />
ein, wie Schutzhandschuhe und Schutzbrille, wenn mit Patientenproben, Reagenzien o<strong>de</strong>r<br />
Laborgeräten, wie <strong>de</strong>r StatSpin-Zentrifuge, gearbeitet wird.<br />
Kompatible Rotoren für die <strong>IDEXX</strong> StatSpin <strong>VT</strong>-Zentrifuge RT12-Röhren-Rotor<br />
RT12-Röhren-Rotor<br />
Der RT12-Röhren-Rotor ist ein 2-Platz-Rotor für eine Vielfalt von Probenröhrchen für die Blut- und<br />
Urintrennung, einschließlich standardgemäßer 1,5-ml- und 2,–ml-Zentrifugenröhrchen mit einem<br />
maximalen Durchmesser von 10,9 mm. Diese Röhrchen müssen vom Bund <strong>de</strong>s Rotors gehalten<br />
wer<strong>de</strong>n.<br />
!<br />
VORSICHT: NIEMALS Glasröhrchen irgen<strong>de</strong>iner Art im RT12-Rotor zentrifugieren.<br />
VORSICHT: Bei Verwendung eines RT12-Rotors die Zentrifuge nicht ohne montierte<br />
Schutzab<strong>de</strong>ckung in Betrieb nehmen.<br />
Die folgen<strong>de</strong>n Röhrchen sind zur Benutzung mit <strong>de</strong>m RT12-Rotor zugelassen:<br />
• Vorbereitete Mikroröhrchen: TP1H, TP1U, TP5G und CH03<br />
• StatSampler*: SS2H, SS2E, SS2U, SS2X, SS1E<br />
• Vorkalibrierte Urinröhrchen: TU15-10<br />
• LipoClear* Reagenzröhrchen: LC10, LC40 und LC15<br />
• Standardgemäße 1,5-ml- - 2,0-ml-Mikrozentrifugen-Röhrchen (z. B. Eppendorf*-Röhrchen)<br />
• Microtainer-Adapter-Option: Die BD-Microtainer-Röhrchen können mit <strong>de</strong>m RT12- Rotor in<br />
Verbindung mit <strong>de</strong>n Microtainer-Adaptern verwen<strong>de</strong>t wer<strong>de</strong>n (StatSpin Art.-Nr. SV12)<br />
RM02-Röhren-Rotor<br />
Dieser speziell für BD-Microtainer-Röhrchen entwickelte 2-Platz-Rotor ist auch für standardgemäße<br />
0,5-ml-Mikrozentrifugen-Röhrchen geeignet. Der maximale Röhrchendurchmesser beträgt 8,3 mm. Die<br />
folgen<strong>de</strong>n Röhrchen sind zur Verwendung in diesem Rotor zugelassen:<br />
• BD-Microtainer-Röhrchen (NUR mit FloTop-Kollektor)<br />
• 0,5-ml-Mikrozentrifugen-Röhrchen (7,5 mm Außendurchmesser x 35 mm Länge)<br />
<strong>IDEXX</strong> StatSpin <strong>VT</strong>-Zentrifuge - Bedienungshandbuch 72
RH12-Mikrohämatokrit-Rotor<br />
Der RH12-Mikrohämatokrit-Rotor ist ein be<strong>de</strong>ckter 12-Platz-Rotor, <strong>de</strong>r zur Zentrifugation von<br />
Kapillarröhrchen für Mikrohämatokrit-Tests verwen<strong>de</strong>t wird. Die maximale Röhrchengröße beträgt<br />
1,7 mm Außendurchmesser x 42 mm Länge. <strong>IDEXX</strong> empfiehlt, die mit <strong>de</strong>m Rotor gelieferten<br />
Gummipolster zweimal pro Jahr o<strong>de</strong>r je<strong>de</strong>s Mal, wenn ein Röhrchen im Rotor zerbricht,<br />
auszuwechseln (Bestell-Nr. 01-2002-04 für einen Satz von zwölf Ersatzpolstern).<br />
! VORSICHT: Mit <strong>de</strong>m Mikrohämatokritrotor RH12 darf keine Schutzab<strong>de</strong>ckung verwen<strong>de</strong>t wer<strong>de</strong>n.<br />
Die folgen<strong>de</strong>n Röhrchen sind zur Verwendung in diesem Rotor zugelassen:<br />
• Kapillarröhrchen aus Glas: HT9H, HT9U<br />
• SafeCrit* Kapillarröhrchen aus Kunststoff: HP8H, HP8U<br />
WICHTIG: Die RT12-, RM02- und RH12-Rotoren haben eine begrenzte Lebensdauer, die<br />
von ihrem Einsatz abhängig ist. Die RT12- und RM02-Rotoren sollten nach etwa 3600 Zyklen<br />
ausgewechselt wer<strong>de</strong>n, was einer Betriebszeit von 18 Monaten bei durchschnittlich 10 Zyklen<br />
pro Tag entspricht. Der RH12-Rotor sollte nach circa 2600 Zyklen ausgewechselt wer<strong>de</strong>n, was<br />
einer Betriebszeit von 12 Monaten bei durchschnittlich 10 Zyklen pro Tag entspricht. Rotoren<br />
müssen regelmäßig überprüft und sofort ausgewechselt wer<strong>de</strong>n, wenn Risse o<strong>de</strong>r sichtbare<br />
Abnutzungserscheinungen festgestellt wer<strong>de</strong>n.<br />
Verwendung <strong>de</strong>r <strong>IDEXX</strong> StatSpin <strong>VT</strong>-Zentrifuge<br />
Öffnen und Schließen <strong>de</strong>s Deckels<br />
Ein elektronisch betriebener Verriegelungsmechanismus verhin<strong>de</strong>rt <strong>de</strong>n Betrieb <strong>de</strong>r Zentrifuge,<br />
wenn <strong>de</strong>r Deckel nicht vollständig geschlossen und verriegelt ist. Ein Betriebszyklus kann nur<br />
dann eingeleitet wer<strong>de</strong>n, wenn die Deckelverriegelung eingeschaltet ist.<br />
Die Zentrifuge ist außer<strong>de</strong>m mit einer manuellen Sperre ausgestattet, die <strong>de</strong>n Deckel verschlossen<br />
hält, wenn die Zentrifugation abgeschlossen ist. Die Verriegelung wird automatisch nach<br />
Beendigung <strong>de</strong>s Betriebszyklus o<strong>de</strong>r durch Betätigen <strong>de</strong>r Taste „Stopp/Öffnen“ gelöst. Drücken<br />
Sie die schwarze Sperre zusammen, um <strong>de</strong>n Deckel zu öffnen.<br />
Umgehung <strong>de</strong>r Deckelverriegelung<br />
Im Falle einer Störung o<strong>de</strong>r eines Stromausfalls kann <strong>de</strong>r Deckel meist nicht durch die<br />
Taste „Stopp/Öffnen“ freigegeben wer<strong>de</strong>n. Um die Proben zu entnehmen, kann <strong>de</strong>r<br />
Verriegelungsmechanismus <strong>de</strong>s Deckels manuell gelöst wer<strong>de</strong>n. Dies erfolgt durch Einführen<br />
<strong>de</strong>s gera<strong>de</strong> gebogenen En<strong>de</strong>s einer großen Büroklammer o<strong>de</strong>r eines ähnlichen Objektes in das<br />
kleine Loch an <strong>de</strong>r Vor<strong>de</strong>rseite <strong>de</strong>s Gehäuses über <strong>de</strong>r Taste zur Zykluswahl. Schieben Sie die<br />
Büroklammer etwa 25 mm nach innen, um die Sperre zu lösen.<br />
!<br />
VORSICHT: Die Umgehung <strong>de</strong>r Deckelverriegelung ist nur für Notfälle vorgesehen. Bei<br />
unsachgemäßer Verwendung besteht Verletzungsgefahr.<br />
Installation eines Rotors<br />
Alle Rotoren passen auf einen Gummi-O-Ring<br />
auf <strong>de</strong>m Rotorhalter. Die Abbildung rechts zeigt<br />
<strong>de</strong>n Querschnitt eines Hämatokrit-Rotors auf<br />
<strong>de</strong>m Rotorhalter. Wenn sich <strong>de</strong>r Rotor dreht, wird<br />
<strong>de</strong>r O-Ring durch die Zentrifugalkraft nach außen<br />
O-Ring<br />
Rotorhalter<br />
Hämatokrit-Rotor<br />
<strong>IDEXX</strong> StatSpin <strong>VT</strong>-Zentrifuge - Bedienungshandbuch 73
ewegt, was die Reibungskopplung zwischen <strong>de</strong>m Rotorhalter und <strong>de</strong>m<br />
Rotor verstärkt.<br />
Zur Installation eines RT12-Rotors die Schutzab<strong>de</strong>ckung abnehmen (falls<br />
angebracht). Nach<strong>de</strong>m <strong>de</strong>r Rotor in <strong>de</strong>r Zentrifuge positioniert wur<strong>de</strong>, kann<br />
die Schutzab<strong>de</strong>ckung angebracht wer<strong>de</strong>n.<br />
Schutzab<strong>de</strong>ckung für <strong>de</strong>n RT12-Rotor<br />
!<br />
!<br />
VORSICHT: Lassen Sie <strong>de</strong>n Rotor nicht auf <strong>de</strong>m Rotorhalter, wenn die <strong>IDEXX</strong> StatSpin<br />
<strong>VT</strong>-Zentrifuge für längere Zeit nicht benutzt wird. Der O-Ring wird durch das Gewicht<br />
zusammengedrückt und seine Fähigkeit, <strong>de</strong>n Rotor zu halten, wird beeinträchtigt.<br />
VORSICHT: Bei Verwendung eines RT12-Rotors die Zentrifuge nicht ohne montierte<br />
Schutzab<strong>de</strong>ckung in Betrieb nehmen.<br />
! VORSICHT: Mit <strong>de</strong>m Mikrohämatokritrotor RH12 darf keine Schutzab<strong>de</strong>ckung verwen<strong>de</strong>t wer<strong>de</strong>n.<br />
!<br />
!<br />
!<br />
VORSICHT: Wenn <strong>de</strong>r Rotor nicht korrekt installiert wird, kann dies zu Schä<strong>de</strong>n an <strong>de</strong>r Zentrifuge<br />
führen, die nicht von <strong>de</strong>r Garantie abge<strong>de</strong>ckt sind.<br />
VORSICHT: Wenn <strong>de</strong>r Rotor zwischen Zentrifugenläufen an Ort und Stelle gelassen wird, muss er<br />
vor <strong>de</strong>m Zentrifugieren einer weiteren Probe neu auf <strong>de</strong>m Rotorhalter aufgesetzt wer<strong>de</strong>n. Wenn <strong>de</strong>r<br />
Rotor nicht je<strong>de</strong>s Mal korrekt aufgesetzt wird, kann er sich bei <strong>de</strong>r Zentrifugation lösen.<br />
VORSICHT: Die RT12- und RM02-Rotoren müssen vor <strong>de</strong>m Betrieb ausbalanciert wer<strong>de</strong>n. Wenn<br />
nur eine Probe zentrifugiert wer<strong>de</strong>n soll muss gegenüber dieser Probe ein zweites, ungefähr gleich<br />
schweres Probenröhrchen plaziert wer<strong>de</strong>n.<br />
Montieren einer Schutzab<strong>de</strong>ckung<br />
Mit <strong>de</strong>m RT12-Rotor sollte immer eine Schutzab<strong>de</strong>ckung verwen<strong>de</strong>t wer<strong>de</strong>n; diese<br />
sollte zusammen mit <strong>de</strong>m Rotor ausgetauscht wer<strong>de</strong>n.<br />
Schutzab<strong>de</strong>ckung<br />
Verfahren<br />
1. Vergewissern Sie sich, dass <strong>de</strong>r RT12-Rotor richtig sitzt.<br />
2. Drücken Sie die Schutzab<strong>de</strong>ckung in die Schüssel, bis sie vollständig mit <strong>de</strong>m<br />
Schüsselbo<strong>de</strong>n in Kontakt ist.<br />
Hinweis: Zum Entfernen <strong>de</strong>r Schutzab<strong>de</strong>ckung ziehen Sie am mittleren Rand <strong>de</strong>r<br />
Schutzab<strong>de</strong>ckung.<br />
Auswahl <strong>de</strong>r Zykluseinstellungen<br />
Experimentieren Sie mit unterschiedlichen Einstellungen, um eine optimale Leistung für<br />
spezifische Anwendungen zu erzielen. Es folgen einige allgemeine Richtlinien:<br />
Einstellung Drehzahl/RCF Zeit Rotor<br />
Quick Spin 15 800/12 000 30 Sekun<strong>de</strong>n RT12, RM02<br />
Normal 15 800/12 000 90 Sekun<strong>de</strong>n RT12, RM02<br />
Hard Spin 15 800/12 000 150 Sekun<strong>de</strong>n RT12, RM02<br />
Urine Sediment 9 800/3 900 45 Sekun<strong>de</strong>n RT12<br />
Microhematocrit 15 800/13 700 120 Sekun<strong>de</strong>n RH12<br />
<strong>IDEXX</strong> StatSpin <strong>VT</strong>-Zentrifuge - Bedienungshandbuch 74
Verarbeitung von Proben<br />
Vorbereitung von venösem Blut für Koagulation und Bestimmung<br />
blutchemischer Parameter<br />
Der Plasma-Rotor ist dazu geeignet, Plasma aus antikoaguliertem Vollblut zu trennen. Verwen<strong>de</strong>n<br />
Sie <strong>de</strong>n Quick-Spin-Zyklus, um Plasma für die Bestimmung blutchemischer Parameter<br />
vorzubereiten. Für Koagulationstests wird <strong>de</strong>r Hard-Spin-Zyklus verwen<strong>de</strong>t.<br />
Verfahren<br />
1. Öffnen Sie <strong>de</strong>n Deckel. Installieren Sie, falls nötig, <strong>de</strong>n geeigneten Rotor für die entsprechen<strong>de</strong><br />
Probe und drücken Sie <strong>de</strong>n Rotor nach unten, um sicherzustellen, dass er richtig sitzt.<br />
2. Platzieren Sie das Probenröhrchen in <strong>de</strong>n Rotor. Wenn nur eine Probe zentrifugiert wer<strong>de</strong>n soll<br />
muss gegenüber dieser Probe ein zweites, ungefähr gleich schweres Probenröhrchen plaziert<br />
wer<strong>de</strong>n. Schließen Sie <strong>de</strong>n Deckel und verriegeln Sie ihn.<br />
3. Wählen Sie die gewünschte Zykluseinstellung aus, in<strong>de</strong>m Sie die Taste Zykluswahl (SET)<br />
drücken, bis die entsprechen<strong>de</strong> LED leuchtet.<br />
4. Drücken Sie die Taste Start. Nach<strong>de</strong>m <strong>de</strong>r Zentrifugationszyklus abgeschlossen ist, gelangt<br />
<strong>de</strong>r Rotor nach circa 10 Sekun<strong>de</strong>n zum völligen Stillstand, und die Sperre entriegelt sich<br />
automatisch. Drücken Sie die schwarze Sperre zusammen, um <strong>de</strong>n Deckel zu öffnen.<br />
Vorbereitung von Urinsediment für die mikroskopische Untersuchung<br />
Die <strong>IDEXX</strong> StatSpin <strong>VT</strong>-Zentrifuge bereitet<br />
Urinsediment schnell für die mikroskopische<br />
Probe bis hier einfüllen<br />
Untersuchung vor. Dazu wer<strong>de</strong>n vorkalibrierte<br />
Urinröhrchen verwen<strong>de</strong>t (StatSpin Produkt-Nr.<br />
TU15).<br />
Verfahren<br />
Überstand bis hier abgießen<br />
1. Füllen Sie ein Urinröhrchen bis zur obersten<br />
Markierung (entspricht 1,5 ml) mit frischem<br />
Urin und schließen Sie das Röhrchen mit <strong>de</strong>m<br />
beigefügten Stöpsel.<br />
2. Öffnen Sie <strong>de</strong>n Deckel und drücken Sie <strong>de</strong>n RT12 Röhren-Rotor herunter, damit er richtig sitzt.<br />
3. Platzieren Sie das Urinröhrchen in <strong>de</strong>n RT12-Rotor. Balancieren Sie <strong>de</strong>n Rotor entwe<strong>de</strong>r mit<br />
einer weiteren Probe o<strong>de</strong>r mit einem wassergefüllten Röhrchen aus. Schließen Sie <strong>de</strong>n Deckel<br />
und verriegeln Sie ihn.<br />
4. Wählen Sie die gewünschte Zykluseinstellung aus, in<strong>de</strong>m Sie die Taste Zykluswahl (SET)<br />
herunterdrücken, bis die LED „Urine Sediment“ leuchtet und drücken Sie dann Start.<br />
5. Wenn <strong>de</strong>r Zyklus abgeschlossen ist wird <strong>de</strong>r Deckel automatisch freigegeben. Nehmen Sie<br />
das Röhrchen aus <strong>de</strong>m Rotor und entfernen Sie <strong>de</strong>n Stöpsel.<br />
6. Kippen Sie das Röhrchen, um die Flüssigkeit bis zur unteren Markierung abfließen zu lassen.<br />
HINWEIS: Durch die Oberflächenspannung wer<strong>de</strong>n 0,1 ml zurückbehalten.<br />
7. Verstöpseln Sie das Röhrchen wie<strong>de</strong>r und schütteln Sie die Lösung leicht auf.<br />
8. Nach<strong>de</strong>m das Sediment aufgeschüttelt wur<strong>de</strong> geben Sie einen Tropfen auf einen Objektträger, legen<br />
ein Deckglas auf und untersuchen <strong>de</strong>n Urin gemäß <strong>de</strong>m in Ihrem Labor angewandten Protokoll.<br />
<strong>IDEXX</strong> StatSpin <strong>VT</strong>-Zentrifuge - Bedienungshandbuch 75
Klärung lipämischer Proben<br />
Die <strong>IDEXX</strong> StatSpin <strong>VT</strong>-Zentrifuge kann zur Zentrifugation von lipämischen Proben in LipoClear-<br />
Reagenzröhrchen (LC10, LC40, LC15) verwen<strong>de</strong>t wer<strong>de</strong>n. LipoClear ist ein nicht toxisches, nicht<br />
karzinogenes, lipämisch klären<strong>de</strong>s Reagenz, das in Mikrozentrifugen-Röhrchen vorgefüllt ist. Der<br />
LipoClear-Satz ist für Probengrößen von 0,5 ml und 1,5 ml erhältlich (siehe unten). Nach<strong>de</strong>m eine<br />
Probe in ein Röhrchen gegeben, gemischt und für fünf Minuten stehen gelassen wur<strong>de</strong>, wird das<br />
Röhrchen im Hard-Spin-Zyklus im RT12-Röhren-Rotor zentrifugiert. Weitere Angaben fin<strong>de</strong>n Sie in<br />
<strong>de</strong>r Beilage für das LipoClear-Produkt.<br />
Produkt Probengröße Packung<br />
LC10 0,5 ml 10 Röhrchen/Packung<br />
LC40 0,5 ml 40 Röhrchen/Packung<br />
LC15 1,5 ml 40 Röhrchen/Packung<br />
Verfahren<br />
1. Öffnen Sie <strong>de</strong>n Deckel. Installieren Sie, falls nötig, <strong>de</strong>n geeigneten Rotor für die entsprechen<strong>de</strong><br />
Probe und drücken Sie <strong>de</strong>n Rotor nach unten, um sicherzustellen, dass er richtig sitzt.<br />
2. Platzieren Sie das Probenröhrchen in <strong>de</strong>n Rotor. UWenn nur eine Probe zentrifugiert wer<strong>de</strong>n<br />
soll muss gegenüber dieser Probe ein zweites, ungefähr gleich schweres Probenröhrchen<br />
plaziert wer<strong>de</strong>n. Schließen Sie <strong>de</strong>n Deckel und verriegeln Sie ihn.<br />
3. Wählen Sie die gewünschte Zykluseinstellung aus, in<strong>de</strong>m Sie die Taste Zykluswahl (SET)<br />
herunterdrücken, bis die LED „Hard Spin“ leuchtet.<br />
4. Drücken Sie die Taste Start. Nach<strong>de</strong>m <strong>de</strong>r Zentrifugationszyklus abgeschlossen ist, gelangt<br />
<strong>de</strong>r Rotor nach circa 10 Sekun<strong>de</strong>n zum völligen Stillstand, und die Sperre entriegelt sich<br />
automatisch. Drücken Sie die schwarze Sperre zusammen, um <strong>de</strong>n Deckel zu öffnen.<br />
Bestimmung <strong>de</strong>s Hämatokritwerts o<strong>de</strong>r <strong>de</strong>s Mikrohämatokrits<br />
Es sind Mikrokapillar-Röhrchen aus Glas und Kunststoff erhältlich:<br />
• Iris Produkt-Nr. HT9H (Glas) und HP8H (Kunststoff) sind mit Heparin vorbehan<strong>de</strong>lt und sollten<br />
für Kapillarblut verwen<strong>de</strong>t wer<strong>de</strong>n.<br />
• Iris Produkt-Nr. HT9U (Glas) und HP8U (Kunststoff) sind unbehan<strong>de</strong>lt und sollten für<br />
Venenpunktionsproben (antikoaguliert) verwen<strong>de</strong>t wer<strong>de</strong>n.<br />
Verfahren<br />
1. Entnehmen Sie Ihre Probe:<br />
a. Kapillarblut: Die Probe wird <strong>de</strong>r Punktionsstelle direkt mit einem heparinisierten Röhrchen<br />
(StatSpin Produkt-Nr. HT9H o<strong>de</strong>r HP8H) entnommen.<br />
b. Venöses Blut: Antikoaguliertes Blut wird in ein unbehan<strong>de</strong>ltes Probenröhrchen umgefüllt<br />
(StatSpin Produkt-Nr. HT9U o<strong>de</strong>r HP8U).<br />
2. Halten Sie das Mikrokapillar-Röhrchen an <strong>de</strong>m En<strong>de</strong> mit <strong>de</strong>m farbcodierten Band. Füllen Sie<br />
das Kapillarröhrchen bis zum farbcodierten Band mit <strong>de</strong>r Probe. Neigen Sie das Röhrchen<br />
mit <strong>de</strong>m Band nach unten, bis sich das Blut halb zwischen <strong>de</strong>m Band und <strong>de</strong>m En<strong>de</strong> <strong>de</strong>s<br />
Röhrchens bewegt.<br />
3. Halten Sie das Röhrchen horizontal und drücken Sie mit <strong>de</strong>m Band markierte En<strong>de</strong> fest in die<br />
vertikal gehaltene Dichtungsmasse. Entfernen Sie das Röhrchen mit einer Drehbewegung aus<br />
<strong>de</strong>r Dichtungsmasse.<br />
<strong>IDEXX</strong> StatSpin <strong>VT</strong>-Zentrifuge - Bedienungshandbuch 76
4. Wischen Sie mit einem fusselfreien Tuch das an<strong>de</strong>re En<strong>de</strong> <strong>de</strong>s Röhrchens ab, falls etwas Blut<br />
ausgetreten ist.<br />
5. Platzieren Sie das Röhrchen mit <strong>de</strong>m abgedichteten En<strong>de</strong> nach außen in eine <strong>de</strong>r zwölf<br />
Positionen auf <strong>de</strong>m RH12-Mikrohämatokrit-Rotor. Dieser Rotor muss nicht ausbalanciert<br />
wer<strong>de</strong>n. Schrauben Sie die Ab<strong>de</strong>ckung <strong>de</strong>s Rotors fest.<br />
Gefülltes Kapillarröhrchen<br />
Kapillarröhrchen<br />
Farbcodiertes Band<br />
an diesem En<strong>de</strong><br />
halten<br />
Kapillarröhrchen<br />
neigen, bis sich<br />
Blut hier befin<strong>de</strong>t<br />
Kapillarröhrchen versiegeln<br />
Versiegeltes Kapillarröhrchen<br />
6. Halten Sie <strong>de</strong>n Rotor an <strong>de</strong>m schwarzen Deckelgriff und befestigen Sie ihn am Rotorhalter.<br />
WICHTIG: Halten Sie <strong>de</strong>n Mikrohämatokrit-Rotor immer an <strong>de</strong>m schwarzen Griff auf <strong>de</strong>r<br />
Rotorab<strong>de</strong>ckung, während Sie ihn fest in einer Abwärtsbewegung auf <strong>de</strong>n Rotorhalter drücken<br />
o<strong>de</strong>r wenn Sie <strong>de</strong>n Rotor von <strong>de</strong>r Zentrifuge entfernen. Wenn Sie Druck auf die äußeren<br />
Kanten <strong>de</strong>s Rotors ausüben, kann dies zur Beschädigung <strong>de</strong>s Rotors führen.<br />
7. Schließen Sie <strong>de</strong>n Deckel und verriegeln Sie ihn. Drücken Sie die Taste Zykluswahl (SET),<br />
um die Einstellung „Microhematocrit“ auszuwählen, und drücken Sie dann Start.<br />
8. Entfernen Sie <strong>de</strong>n Rotor aus <strong>de</strong>r Zentrifuge, nach<strong>de</strong>m er zum<br />
Stillstand gekommen ist. Die Röhrchen im Rotor können mit<br />
<strong>de</strong>m Rundleser (StatSpin Produkt-Nr. HR4C) gelesen o<strong>de</strong>r<br />
aus <strong>de</strong>m Rotor entfernt und mit <strong>de</strong>m Kartenleser (StatSpin<br />
Produkt-Nr. HR05) gelesen wer<strong>de</strong>n.<br />
Kapillarröhrchen nach <strong>de</strong>m Zentrifugieren<br />
Oberes En<strong>de</strong><br />
Plasma<br />
Oberes En<strong>de</strong><br />
Erythrozyten<br />
Unteres En<strong>de</strong><br />
Erythrozyten<br />
Dichtungsmittel<br />
Qualitätskontrolle<br />
• Es müssen die für Ihr Labor festgelegten Qualitätskontrollverfahren befolgt wer<strong>de</strong>n.<br />
• Um die Genauigkeit Ihrer Ergebnisse zu prüfen, wählen Sie täglich ein o<strong>de</strong>r mehrere Röhrchen<br />
aus (möglichst mit einem Hämatokrit über 50 %), zentrifugieren sie und lesen <strong>de</strong>n Wert ab.<br />
Zentrifugieren Sie diese Röhrchen ein zweites Mal. Der Unterschied zwischen <strong>de</strong>m ersten und<br />
zweiten Wert sollte 1 % o<strong>de</strong>r weniger betragen.<br />
Normale Werte<br />
Die folgen<strong>de</strong> Tabelle enthält die üblicherweise angegebenen Hämatokritwerte:<br />
Tierart % Tierart %<br />
Adulter Hund 37–55 Pferd 32–53<br />
Welpe 32–55 Rind 25–42<br />
Adulte Katze 30–45 Schwein 32–50<br />
Kätzchen 25–45 Schaf 24–45<br />
<strong>IDEXX</strong> StatSpin <strong>VT</strong>-Zentrifuge - Bedienungshandbuch 77
Reinigung und Wartung<br />
<strong>IDEXX</strong> empfiehlt, regelmäßige Prüfungen und vorbeugen<strong>de</strong> Wartungsmaßnahmen an Ihrer<br />
<strong>IDEXX</strong> StatSpin <strong>VT</strong>-Zentrifuge durchzuführen. Setzen Sie sich je<strong>de</strong>rzeit mit <strong>de</strong>m technischen<br />
Kun<strong>de</strong>ndienst von <strong>IDEXX</strong> o<strong>de</strong>r Ihrem autorisierten <strong>IDEXX</strong> Händler in Verbindung, wenn das Gerät<br />
nicht richtig funktioniert.<br />
!<br />
!<br />
VORSICHT: Das Netzkabel <strong>de</strong>r <strong>IDEXX</strong> StatSpin <strong>VT</strong>-Zentrifuge muss vor <strong>de</strong>m Ausführen von<br />
Reinigungs- o<strong>de</strong>r Wartungsarbeiten aus <strong>de</strong>r Steckdose gezogen wer<strong>de</strong>n.<br />
WARNUNG: Die <strong>IDEXX</strong> StatSpin <strong>VT</strong>-Zentrifuge und ihr Rotor dürfen keinen starken o<strong>de</strong>r<br />
konzentrierten Säuren, Basen o<strong>de</strong>r Oxidationsmitteln, aromatischen o<strong>de</strong>r halogenierten<br />
Kohlenwasserstoffen, Estern o<strong>de</strong>r Ketonen ausgesetzt wer<strong>de</strong>n.<br />
Reinigung<br />
Reinigen Sie die Außenfläche und das Schaltfeld mit einem mit Wasser befeuchteten Tuch und<br />
einem mil<strong>de</strong>n Reinigungsmittel. Reinigen Sie die Innenfläche (eine pulverbeschichtete Stahlfläche)<br />
mit einem mil<strong>de</strong>n Reinigungsmittel und, falls nötig, mit einem Desinfektionsmittel. Wischen Sie alle<br />
Flächen mit einem feuchten Tuch ab. Verwen<strong>de</strong>n Sie dazu eine Lösung mit 70%igem Alkohol o<strong>de</strong>r<br />
10%igem Bleichmittel.<br />
!<br />
VORSICHT: Sprühen Sie Reinigungslösungen nicht direkt auf die Zentrifugenschale o<strong>de</strong>r das<br />
Gehäuse, da diese sonst an die Motorenlager o<strong>de</strong>r die interne Schaltung gelangen kann. Sich<br />
daraus ergeben<strong>de</strong> Schä<strong>de</strong>n sind nicht von <strong>de</strong>r Garantie abge<strong>de</strong>ckt.<br />
Prüfen <strong>de</strong>r Rotorgeschwindigkeit<br />
Die Nenngeschwindigkeiten können mit einem Stroboskop o<strong>de</strong>r einem photoelektrischen<br />
Drehzahlmesser geprüft wer<strong>de</strong>n. Wenn die <strong>IDEXX</strong> StatSpin <strong>VT</strong>- Zentrifuge nicht die erfor<strong>de</strong>rliche<br />
Betriebsgeschwindigkeit erreicht, setzen Sie sich bitte mit <strong>de</strong>m <strong>IDEXX</strong> Kun<strong>de</strong>ndienst o<strong>de</strong>r Ihrem<br />
autorisierten <strong>IDEXX</strong>-Händler in Verbindung.<br />
Auswechseln <strong>de</strong>s O-Rings<br />
Die Abbildung rechts illustriert die Position <strong>de</strong>s Gummidichtrings, <strong>de</strong>r am<br />
A<br />
Rotorhalter befestigt ist. Wenn <strong>de</strong>r Rotor sich nur schwer installieren lässt,<br />
tragen Sie eine geringe Menge Silikonschmiermittel auf die drei offengelegten<br />
Stellen (A) auf <strong>de</strong>r O-Ring-Dichtung auf. Der O-Ring muss regelmäßig<br />
untersucht und ausgewechselt wer<strong>de</strong>n, sobald er abgeflacht o<strong>de</strong>r abgenutzt<br />
erscheint. Der O-Ring sollte als vorbeugen<strong>de</strong> Wartungsmaßnahme min<strong>de</strong>stens<br />
einmal pro Jahr ausgewechselt wer<strong>de</strong>n.<br />
A<br />
Ein neuer O-Ring kann wie dargestellt angebracht wer<strong>de</strong>n, in<strong>de</strong>m er vor bzw. hinter <strong>de</strong>n sechs<br />
Stiften <strong>de</strong>s Rotorhalters eingefä<strong>de</strong>lt wird. Zusätzliche O-Ringe sind in <strong>de</strong>r <strong>IDEXX</strong> StatSpin-Packung<br />
enthalten.<br />
A<br />
<strong>IDEXX</strong> StatSpin <strong>VT</strong>-Zentrifuge - Bedienungshandbuch 78
Fehleranzeige<br />
Die Fehler <strong>de</strong>r <strong>IDEXX</strong> StatSpin <strong>VT</strong>-Zentrifuge wer<strong>de</strong>n durch die blinken<strong>de</strong> Fehler-/Wartungs-<br />
Anzeige auf <strong>de</strong>m Bedienfeld angezeigt. Die Fehlerursache kann durch die Kombination mit <strong>de</strong>r<br />
Zyklusanzeigen bestimmt wer<strong>de</strong>n, die ebenfalls blinken.<br />
blinken<strong>de</strong><br />
grüne Zyklusanzeige<br />
QUICK SPIN<br />
NORMAL<br />
QUICK SPIN<br />
NORMAL<br />
QUICK SPIN<br />
NORMAL<br />
QUICK SPIN<br />
NORMAL<br />
HARD SPIN<br />
HARD SPIN<br />
HARD SPIN<br />
HARD SPIN<br />
URINE SEDIMENT<br />
URINE SEDIMENT<br />
URINE SEDIMENT<br />
URINE SEDIMENT<br />
MICROHEMATOCRIT<br />
MICROHEMATOCRIT<br />
MICROHEMATOCRIT<br />
MICROHEMATOCRIT<br />
SET<br />
SET<br />
SET<br />
SET<br />
blinken<strong>de</strong> rote<br />
Fehler-/<br />
Wartungs-<br />
Anzeige<br />
(„Error/Service“)<br />
Error/Service<br />
Error/Service<br />
Error/Service<br />
Error/Service<br />
Der Rotor hat innerhalb von<br />
30 Sekun<strong>de</strong>n nicht die volle<br />
Geschwindigkeit erreicht<br />
Der Deckel hat sich geöffnet<br />
o<strong>de</strong>r <strong>de</strong>r Zyklus hat sich<br />
während <strong>de</strong>s Betriebs<br />
geän<strong>de</strong>rt.<br />
Die Rotorgeschwindigkeit<br />
kann nicht aufrechterhalten<br />
wer<strong>de</strong>n.<br />
Der Rotor hat sich<br />
beim Rücklaufbremsen<br />
rückwärts bewegt.<br />
Die Fehler-/Wartungs-Anzeige („Error/Service“) leuchtet kontinuierlich, wenn die Zentrifuge eine<br />
Gesamtzykluszahl von 18 000 erreicht hat, was <strong>de</strong>r Nutzlebensdauer <strong>de</strong>s Antriebssystems<br />
entspricht. In diesem Fall muss <strong>de</strong>r Antriebsmechanismus ausgewechselt wer<strong>de</strong>n. Setzen Sie<br />
sich bitte mit einem autorisierten Servicezentrum in Verbindung.<br />
<strong>IDEXX</strong> StatSpin <strong>VT</strong>-Zentrifuge - Bedienungshandbuch 79
<strong>IDEXX</strong> empfiehlt Ihnen, Ihre <strong>IDEXX</strong> StatSpin <strong>VT</strong>- o<strong>de</strong>r StatSpin<br />
MP-Zentrifuge regelmäßig zu überprüfen und vorbeugend zu warten.<br />
Wartungsprotokoll<br />
Monat: ____________________<br />
1 2 3 4 5 6 7 8 9 10 11 12 13 14 15 16 17 18 19 20 21 22 23 24 25 26 27 28 29 30 31<br />
Häufigkeit Erfor<strong>de</strong>rliche<br />
Wartung<br />
Täglich Inspizieren Sie<br />
<strong>de</strong>n Deckel, Riegel<br />
und das Scharnier<br />
auf Anzeichen<br />
von Rissen o<strong>de</strong>r<br />
Verschleiß.<br />
Inspizieren Sie<br />
<strong>de</strong>n Rotor und die<br />
Schutzab<strong>de</strong>ckung<br />
auf Anzeichen<br />
von Rissen und<br />
Verschleiß.<br />
O-Ring auf Anzeichen<br />
von Abnutzung<br />
o<strong>de</strong>r Aufquellen<br />
überprüfen.<br />
80
Jahr: ____________________<br />
Häufigkeit Erfor<strong>de</strong>rliche Wartung<br />
Januar Februar März April Mai Juni Juli August September Oktober November Dezember<br />
Jährlich † O-Ring auf <strong>de</strong>m Rotorhalter<br />
ersetzen.<br />
Bei Bedarf Ersetzen Sie <strong>de</strong>n RT12-Rotor und<br />
die Schutzab<strong>de</strong>ckung. †<br />
† Der RT12-Rotor und die Schutzab<strong>de</strong>ckung sollten nach 3.600 Zentrifugationen ersetzt wer<strong>de</strong>n. Bei <strong>de</strong>r Installation eines neuen RT12-Rotors muss auch immer eine neue Schutzab<strong>de</strong>ckung montiert wer<strong>de</strong>n.<br />
Verwen<strong>de</strong>n Sie die Tabelle unten, um die Ersatzintervalle für Rotor und Schutzab<strong>de</strong>ckung auf Basis <strong>de</strong>r durchschnittlichen Anzahl von Probenzentrifugationen pro Tag zu ermitteln.<br />
Maximales<br />
Austauschintervall<br />
Proben pro Tag<br />
(ausgehend von einer<br />
5-Tage-Woche)<br />
15 Jährlich<br />
10 Alle 18 Monate<br />
5 Alle 2,5 Jahre<br />
3 Alle 4 Jahre<br />
81
Fehlersuche<br />
Problem<br />
Stromlampe leuchtet nicht<br />
Zentrifuge dreht sich nicht<br />
o<strong>de</strong>r schaltet sich vorzeitig<br />
ab<br />
Zentrifuge öffnet sich nicht<br />
automatisch am En<strong>de</strong> eines<br />
Zyklus<br />
Maßnahme<br />
• Prüfen Sie das Stromkabel und stellen Sie sicher, dass es korrekt an die<br />
Steckdose angeschlossen ist. Wenn dies <strong>de</strong>r Fall ist, probieren Sie eine<br />
an<strong>de</strong>re Steckdose.<br />
• Stellen Sie sicher, dass das 24-V-GS-Steckteil vollständig in die Rückseite<br />
<strong>de</strong>r <strong>IDEXX</strong> StatSpin <strong>VT</strong>-Zentrifuge eingesteckt ist.<br />
• Kontaktieren Sie <strong>de</strong>n <strong>IDEXX</strong> Kun<strong>de</strong>ndienst.<br />
• Stellen Sie sicher, dass <strong>de</strong>r Deckel vollständig geschlossen und<br />
verriegelt ist.<br />
• Wenn die Fehler-/Wartungs-Anzeige („Error/Service“) blinkt, stellen Sie<br />
die Fehlerursache fest, beheben <strong>de</strong>n Fehlerzustand und drücken dann die<br />
Taste „Stopp/Öffnen“, um <strong>de</strong>n Fehler zu beheben.<br />
• Kontaktieren Sie <strong>de</strong>n <strong>IDEXX</strong> Kun<strong>de</strong>ndienst.<br />
• Um <strong>de</strong>n Deckel manuell zu öffnen, verwen<strong>de</strong>n Sie das im Abschnitt<br />
„Umgehung <strong>de</strong>r Deckelverriegelung“ beschriebene Verfahren.<br />
• Stellen Sie sicher, dass die Schalendichtung am Innengehäuse gut sitzt<br />
und die Schale abdichtet, in<strong>de</strong>m Sie die Dichtung vollständig in <strong>de</strong>n<br />
Gehäuseschlitz drücken.<br />
• Kontaktieren Sie <strong>de</strong>n <strong>IDEXX</strong> Kun<strong>de</strong>ndienst.<br />
Wartung<br />
Wen<strong>de</strong>n Sie sich mit allen Wartungsanfor<strong>de</strong>rungen an <strong>de</strong>n <strong>IDEXX</strong> Kun<strong>de</strong>ndienst o<strong>de</strong>r an eine<br />
autorisierte Reparatureinrichtung.<br />
Dekontaminierung vor <strong>de</strong>m Einsen<strong>de</strong>n zu Wartungszwecken<br />
Je<strong>de</strong>s Gerät o<strong>de</strong>r Zubehör, das mit Blut o<strong>de</strong>r biologischem Material in Kontakt gekommen ist,<br />
muss gereinigt wer<strong>de</strong>n, bevor es zur Ausführung von Wartungsarbeiten an <strong>de</strong>n Hersteller o<strong>de</strong>r<br />
Händler geschickt wird. Diese Dekontaminierung ist laut Bun<strong>de</strong>sgesetz (Titel 48 und 49 <strong>de</strong>r<br />
Bun<strong>de</strong>srichtlinien) und in Übereinstimmung mit <strong>de</strong>n Richtlinien zur Behandlung biogefährlicher<br />
Abfälle <strong>de</strong>r Umweltschutzbehör<strong>de</strong> vorgeschrieben. Das Personal von <strong>IDEXX</strong> und Iris Sample<br />
Processing kann diese Dekontaminierung nicht durchführen.<br />
<strong>IDEXX</strong> StatSpin <strong>VT</strong>-Zentrifuge - Bedienungshandbuch 82
Technische Daten<br />
Gerätedaten<br />
Produkt-Nummer<br />
Mo<strong>de</strong>ll-Nummer<br />
Zyklen<br />
Quick Spin<br />
Normal<br />
Hard Spin<br />
Urine<br />
Hematocrit<br />
Beschleunigungszeit<br />
Bremszeit<br />
Stromversorgung<br />
Abmessungen<br />
Umwelt<br />
SS<strong>VT</strong>-4<br />
V901<br />
Geschwindigkeiten<br />
30 Sekun<strong>de</strong>n bei 15 800 U/min/12 000 xg<br />
90 Sekun<strong>de</strong>n bei 15 800 U/min/12 000 xg<br />
150 Sekun<strong>de</strong>n bei 15 800 U/min/12 000 xg<br />
45 Sekun<strong>de</strong>n bei 9 800 U/min/3 900 xg<br />
120 Sekun<strong>de</strong>n bei 15 800 U/min/13 700 xg<br />
Circa 6 Sekun<strong>de</strong>n<br />
Circa 10 Sekun<strong>de</strong>n<br />
24 Volt, GS, 1,7 Amp<br />
Enthält Schaltnetzteil für 100–240 V WS, 50–60 Hz<br />
Durchmesser 16,25 cm<br />
Höhe 13,2 cm<br />
Gewicht 2,5 kg<br />
Nur zur Benutzung in einem Gebäu<strong>de</strong><br />
Einsatz nur bis 2000 m über <strong>de</strong>m Meer<br />
Umgebungstemperatur 5 °C bis 40 °C<br />
Maximal 80 % RH bis zu 31 °C, abnehmend auf 50 % RH bei 40 °C<br />
Spannungsschwankungen <strong>de</strong>r Hauptversorgung dürfen ±10 % nicht<br />
überschreiten<br />
Transiente Überspannungen gemäß Installationskategorie II<br />
Verschmutzungsgrad 2<br />
Technische Daten können ohne Vorankündigung geän<strong>de</strong>rt wer<strong>de</strong>n.<br />
<strong>IDEXX</strong> StatSpin <strong>VT</strong>-Zentrifuge - Bedienungshandbuch 83
Zubehör<br />
Produkt-Nr Beschreibung Erfor<strong>de</strong>rlicher Zyklus<br />
RT12 2 x 1,5 ml Festwinkelrotor Quick, Normal, Hard<br />
SV12 Microtainer-Adapter (2-St.-Packung) Quick, Normal, Hard<br />
TU15-10 1,5 ml vorkalibrierte Urinröhrchen (10 Beutel per 50 Stück) Urin<br />
TP1H<br />
TP1U<br />
SS2H<br />
SS2U<br />
SS2X<br />
LC10<br />
LC40<br />
LC15<br />
1,3 ml Lithium-Heparin-Mikrozentrifugen-Röhrchen (100 Stück<br />
pro Beutel)<br />
1,3 ml unbehan<strong>de</strong>lte Mikrozentrifugen-Röhrchen (100 Stück pro<br />
Beutel)<br />
StatSampler* Chemietest-Fingerstick-Entnahmesystem (200 µl,<br />
Lithium-Heparin)<br />
StatSampler Chemietest-Fingerstick-Entnahmesystem (200 µl,<br />
unbehan<strong>de</strong>lt)<br />
StatSampler (200 µl, EDTA) Hämatologie-Fingerstick-<br />
Entnahmesystem mit Gel<br />
LipoClear: 0,5 ml vorgefüllte Reagenzröhrchen zur Klärung von<br />
lipämischem Serum o<strong>de</strong>r Plasma (10 Stück pro Beutel)<br />
LipoClear: 0,5 ml vorgefüllte Reagenzröhrchen zur Klärung von<br />
lipämischem Serum o<strong>de</strong>r Plasma (40 Stück pro Beutel)<br />
LipoClear: 1,5 ml vorgefüllte Reagenzröhrchen zur Klärung von<br />
lipämischem Serum o<strong>de</strong>r Plasma (40 Stück pro Beutel)<br />
RM02 2 x 0,8 ml Festwinkelrotor für BD-Microtainer-Röhrchen und 0,5<br />
ml Mikrozentrifugen-Röhrchen<br />
Quick, Normal, Hard<br />
Quick, Normal, Hard<br />
Quick, Normal, Hard<br />
Quick, Normal, Hard<br />
Quick, Normal, Hard<br />
Hard<br />
Hard<br />
Hard<br />
Quick, Normal, Hard<br />
RH12 Mikrohämatokrit-Rotor (12 Positionen) mit Rundleser (HR4C) Mikrohämatokrit<br />
HP8H-10<br />
HP8U-10<br />
HT9H-10<br />
HT9U-10<br />
SafeCrit Capillary Tube (40 mm, sodium heparin), 100% plastic<br />
microhematocrit tubes for the RH12 rotor (10 vials of 100)<br />
SafeCrit Kapillarröhrchen (40 mm, Sodium-Heparin),<br />
Mikrohämatokrit-Röhrchen aus 100%igem Kunststoff für <strong>de</strong>n<br />
RH12-Rotor (10 Sammelröhrchen per 100 Stück)<br />
Kapillarröhrchen aus Glas (40 mm, Sodium-Heparin),<br />
Mikrohämatokrit-Röhrchen aus Glas für <strong>de</strong>n RH12-Rotor (10<br />
Sammelröhrchen per 100 Stück)<br />
Kapillarröhrchen aus Glas (40 mm, unbehan<strong>de</strong>lt),<br />
Mikrohämatokrit-Röhrchen aus Glas für <strong>de</strong>n RH12-Rotor (10<br />
Sammelröhrchen per 100 Stück)<br />
Mikrohämatokrit<br />
Mikrohämatokrit<br />
Mikrohämatokrit<br />
Mikrohämatokrit<br />
HS24-10 Dichtungsblock für Kapillarröhrchen (10 Blöcke) Nicht zutreffend<br />
HR05 Hämatokrit-Leser, Kartenart, für 40-mm-Hämatokrit- Röhrchen Nicht zutreffend<br />
HR4C Hämatokrit-Leser (rund), zur Verwendung mit <strong>de</strong>m RH12-Rotor Nicht zutreffend<br />
00-Ring Ersatz-O-Ringe für <strong>de</strong>n Rotorhalter (fünf Beutel per drei Stück) Nicht zutreffend<br />
<strong>IDEXX</strong> StatSpin <strong>VT</strong>-Zentrifuge - Bedienungshandbuch 84
<strong>IDEXX</strong> Kontaktinformationen <strong>de</strong>s Technischen Kun<strong>de</strong>ndienstes<br />
<strong>IDEXX</strong>-Außendienstmitarbeiter:<br />
Telefon/Mailbox:<br />
USA<br />
<strong>IDEXX</strong> Laboratories, Inc.<br />
One <strong>IDEXX</strong> Drive<br />
Westbrook, Maine 04092 USA<br />
Gebührenfreier<br />
Technischer Kun<strong>de</strong>ndienst.......... 1-800-248-2483<br />
Haupttelefonnummer.................. 1-207-556-0300<br />
Gebührenfreie Faxnummer......... 1-800-248-3010<br />
i<strong>de</strong>xx.<strong>de</strong><br />
Italien<br />
<strong>IDEXX</strong> Laboratories Italia, S.r.l.<br />
Via Canova 27<br />
20145 Milano<br />
Italien<br />
Gebührenfreier<br />
Technischer Kun<strong>de</strong>ndienst ......... 00800 1234 3399<br />
Telefonnummer............................ (39) 02 319 20 31<br />
Faxnummer................................. (39) 02 319 20 347<br />
www.i<strong>de</strong>xx.it<br />
Nie<strong>de</strong>rlan<strong>de</strong><br />
<strong>IDEXX</strong> Europe B.V.<br />
Scorpius 60 Building F<br />
2132 LR Hoofddorp<br />
Nie<strong>de</strong>rlan<strong>de</strong><br />
Gebührenfreier<br />
Technischer Kun<strong>de</strong>ndienst ......... 00800 1234 3399<br />
Telefonnummer............................ (31) 23 558 7000<br />
Gebührenfreie Faxnummer......... 00800 1234 3333<br />
Faxnummer................................. (31) 23 558 7233<br />
www.i<strong>de</strong>xx.nl<br />
Spanien<br />
<strong>IDEXX</strong> Laboratorios, S.L.<br />
C/ Plom 2-8, 3 º<br />
08038 Barcelona<br />
Spanien<br />
Gebührenfreier<br />
Technischer Kun<strong>de</strong>ndienst ......... 00800 1234 3399<br />
Telefonnummer............................ (34) 93 414 26 08<br />
Faxnummer................................. (34) 93 414 74 78<br />
www.i<strong>de</strong>xx.es<br />
Frankreich<br />
<strong>IDEXX</strong> S.A.R.L.<br />
Bâtiment Flori<strong>de</strong> - Eragny Parc<br />
11 Allée Rosa, Luxembourg<br />
95610 Eragny, sur Oise<br />
Frankreich<br />
Gebührenfreier<br />
Technischer Kun<strong>de</strong>ndienst ......... 00800 1234 3399<br />
Telefonnummer............................ (33) 1 34 32 62 00<br />
Faxnummer................................. (33) 1 34 30 02 08<br />
www.i<strong>de</strong>xx.fr<br />
UK<br />
<strong>IDEXX</strong> Laboratories Ltd.<br />
Milton Court, Churchfield Road<br />
Chalfont St Peter<br />
Buckinghamshire SL9 9EW<br />
England<br />
Gebührenfreier<br />
Technischer Kun<strong>de</strong>ndienst ......... 00800 1234 3399<br />
Telefonnummer............................ (44) 01753 891 660<br />
Faxnummer................................. (44) 01753 891 520<br />
www.i<strong>de</strong>xx.co.uk<br />
Deutschland/Österreich/Schweiz<br />
<strong>IDEXX</strong> GmbH<br />
Mörikestraße 28/3<br />
D-71636 Ludwigsburg<br />
Deutschland<br />
Technischer Kun<strong>de</strong>ndienst (kostenfrei)<br />
Tel:............................................. 00 800 1234 3399<br />
Fax:............................................ 00 800 1234 3333<br />
www.i<strong>de</strong>xx.<strong>de</strong> / www.i<strong>de</strong>xx.at / www.i<strong>de</strong>xx.ch<br />
Australien<br />
<strong>IDEXX</strong> Laboratories Pty. Ltd.<br />
Metro Centre<br />
Unit 20, 30-46 South Street<br />
Rydalmere, New South Wales 2116<br />
Australien<br />
Gebührenfreier<br />
Technischer Kun<strong>de</strong>ndienst.......... 1800 655 978<br />
Telefonnummer............................ (61) 2 9898 7300<br />
Faxnummer................................. (61) 2 9898 7302<br />
www.i<strong>de</strong>xx.com.au<br />
<strong>IDEXX</strong> StatSpin <strong>VT</strong>-Zentrifuge - Bedienungshandbuch 85
Kanada<br />
<strong>IDEXX</strong> Laboratories Canada Corporation<br />
C/O UPS<br />
4071 North Service Rd<br />
Burlington, ON L7L 4X6<br />
Kanada<br />
Gebührenfreier<br />
Technischer Kun<strong>de</strong>ndienst.......... 1-800-248-2483<br />
Telefonnummer............................ 1-905-602-9499<br />
Gebührenfreie Faxnummer......... 1-800-248-3010<br />
Faxnummer................................. 1-905-602-6640<br />
i<strong>de</strong>xx.<strong>de</strong><br />
Japan<br />
<strong>IDEXX</strong> Laboratories KK<br />
3-3-7 Kitano, Mitaka-shi, Tokyo<br />
181-8608 Japan<br />
Gebührenfreier<br />
Technischer Kun<strong>de</strong>ndienst.......... 0120-71-4921<br />
Telefonnummer............................ (81) 422 71 4921<br />
Faxnummer................................. (81) 422 71 4922<br />
www.i<strong>de</strong>xx.co.jp<br />
<strong>IDEXX</strong> StatSpin <strong>VT</strong>-Zentrifuge - Bedienungshandbuch 86
Hergestellt im Auftrag von <strong>IDEXX</strong> Laboratories, Inc. von:<br />
Eine Division <strong>de</strong>r Iris International Inc<br />
Westwood, MA 02090 USA<br />
Telefon: 800-782-8774<br />
o<strong>de</strong>r 781-551-0100<br />
Fax: 781-551-0036<br />
proiris.com
Centrifuga <strong>VT</strong> <strong>IDEXX</strong> StatSpin *<br />
Manuale operativo<br />
Manuale operativo—Versione Italiana<br />
Centrifuga <strong>VT</strong> <strong>IDEXX</strong> StatSpin *<br />
Versione Italiana
Centrifuga <strong>VT</strong> <strong>IDEXX</strong> <strong>StatSpin*</strong><br />
Numero mo<strong>de</strong>llo V901<br />
Solo per uso veterinario.<br />
Numero <strong>de</strong>l prodotto<br />
SS<strong>VT</strong>-4 Centrifuga <strong>VT</strong> <strong>IDEXX</strong> StatSpin per 100–240 V CA, 50/60 Hz<br />
Avviso sui diritti di proprietà<br />
Le informazioni contenute in questo documento sono soggette a modifica senza preavviso. Le società, i nomi e i dati<br />
utilizzati negli esempi sono fittizi a meno di indicazione contraria. Non è consentito riprodurre né trasmettere alcuna<br />
parte di questo documento, in alcuna forma o con alcun mezzo, sia esso elettronico, meccanico o altri, per alcuno<br />
scopo, senza l’esplicito consenso scritto di <strong>IDEXX</strong> Laboratories. È possibile che <strong>IDEXX</strong> abbia brevetti o richieste in<br />
corso di brevetti, marchi commerciali, copyright o altri diritti di proprietà intellettuale o industriale che coprano questo<br />
documento o l’argomento di questo documento. La fornitura di questo documento non fornisce una licenza a tali diritti<br />
di proprietà, tranne quanto esplicitamente indicato in qualsiasi contratto scritto di licenza da <strong>IDEXX</strong> Laboratories.<br />
© 2012 <strong>IDEXX</strong> Laboratories, Inc. Tutti i diritti riservati.<br />
*StatSpin, StatSampler, LipoClear, PlasmaRotor e SafeCrit sono marchi commerciali o marchi registrati di Iris Sample<br />
Processing negli Stati Uniti e/o in altri Paesi. BD e Microtainer sono marchi di fabbrica di Becton, Dickinson and<br />
Company. Eppendorf Tubes è un marchio registrato di Eppendorf North America, Inc. Tutti gli altri nomi di prodotti e<br />
società sono logo e marchi di fabbrica <strong>de</strong>i rispettivi <strong>de</strong>tentori.<br />
Il dispositivo per la raccolta di sangue StatSpin è coperto dal brevetto U.S.A n. 5 257 984.<br />
Manuale operativo <strong>de</strong>lla centrifuga <strong>VT</strong> <strong>IDEXX</strong> StatSpin 89
Sommario<br />
Introduzione...............................................................................................................................91<br />
Simboli ............................................................................................................................................................92<br />
Impostazione..............................................................................................................................93<br />
Contenuto........................................................................................................................................................93<br />
Posizionamento <strong>de</strong>lla centrifuga <strong>VT</strong> <strong>IDEXX</strong> StatSpin......................................................................................93<br />
Connessione <strong>de</strong>ll’alimentazione......................................................................................................................93<br />
Panoramica.................................................................................................................................94<br />
Principio e utilizzo previsto..............................................................................................................................94<br />
Rotori compatibili per la centrifuga <strong>VT</strong> <strong>IDEXX</strong> StatSpin ..................................................................................94<br />
Utilizzo <strong>de</strong>lla centrifuga <strong>VT</strong> <strong>IDEXX</strong> StatSpin..............................................................................95<br />
Apertura e chiusura <strong>de</strong>l coperchio .................................................................................................................95<br />
Installazione di un rotore.................................................................................................................................95<br />
Installazione di uno schermo...........................................................................................................................96<br />
Selezione <strong>de</strong>lle impostazioni <strong>de</strong>l ciclo.............................................................................................................96<br />
Trattamento <strong>de</strong>i campioni..........................................................................................................97<br />
Preparazione <strong>de</strong>l sangue venoso per la coagulazione e le analisi biochimiche............................................97<br />
Preparazione <strong>de</strong>l sedimento urinario per l’esame microscopico....................................................................97<br />
Smaltimento <strong>de</strong>lla lipemia...............................................................................................................................97<br />
Determinazione <strong>de</strong>l volume <strong>de</strong>gli eritrociti ammassati o microematocrito.....................................................98<br />
Pulizia e manutenzione..............................................................................................................99<br />
Pulizia.............................................................................................................................................................100<br />
Controllo <strong>de</strong>lla velocità <strong>de</strong>l rotore..................................................................................................................100<br />
Sostituzione <strong>de</strong>ll’O-Ring................................................................................................................................100<br />
Indicatori di errore..........................................................................................................................................100<br />
Registro di manutenzione..............................................................................................................................101<br />
Risoluzione <strong>de</strong>i problemi...............................................................................................................................103<br />
Assistenza......................................................................................................................................................103<br />
Specifiche.................................................................................................................................104<br />
Centrifuga......................................................................................................................................................104<br />
Accessori.......................................................................................................................................................105<br />
Contatti per l’Assistenza tecnica <strong>IDEXX</strong> ................................................................................106<br />
Manuale operativo <strong>de</strong>lla centrifuga <strong>VT</strong> <strong>IDEXX</strong> StatSpin 90
Introduzione<br />
Questo manuale, assieme alle informazioni contenute nelle etichette <strong>de</strong>i prodotti e nei foglietti<br />
illustrativi, fornisce tutte le informazioni necessarie per il funzionamento e la manutenzione <strong>de</strong>lla<br />
centrifuga <strong>VT</strong> <strong>IDEXX</strong> <strong>StatSpin*</strong>.<br />
Quando le informazioni richiedono speciale attenzione, accanto al testo<br />
!<br />
appare un simbolo di attenzione o un simbolo di pericolo biologico.<br />
Attenzione Rischio biologico<br />
Prestare particolare attenzione alle istruzioni che accompagnano le<br />
note e i simboli, nonché alle procedure standard di laboratorio <strong>de</strong>scritte dalla propria struttura e<br />
dalle agenzie locali ad<strong>de</strong>tte alle normative. La tabella seguente elenca tutti messaggi di attenzione<br />
e di avvertenza per la centrifuga <strong>VT</strong> <strong>IDEXX</strong> StatSpin.<br />
!<br />
AVVERTENZA: America settentrionale: utilizzare solo l’alimentatore fornito assieme all’unità.<br />
L’utilizzo di altri alimentatori o trasformatori danneggerebbe l’elettronica <strong>de</strong>lla centrifuga <strong>VT</strong><br />
<strong>IDEXX</strong> StatSpin e violerebbe la garanzia.<br />
AVVERTENZA: All’esterno <strong>de</strong>ll’America settentrionale: Non utilizzare il cavo di alimentazione<br />
fornito. Utilizzare un cavo di alimentazione per almeno 1,0 A, con connettori IEC320/CEE22<br />
a<strong>de</strong>guati alla presa di alimentazione da utilizzare.<br />
ATTENZIONE: durante l’utilizzo di un rotore RT12, non attivare la centrifuga senza avere<br />
prima installato uno schermo protettivo.<br />
ATTENZIONE: non utilizzare uno schermo con il rotore RH12 per microematocrito.<br />
ATTENZIONE: Il bypass di interblocco <strong>de</strong>l coperchio va utilizzato solo in caso di emergenza.<br />
L’utilizzo improprio potrebbe esporre l’operatore a condizioni poco sicure.<br />
ATTENZIONE: Non lasciare alcun rotore sul supporto <strong>de</strong>l rotore quando la centrifuga<br />
<strong>VT</strong> <strong>IDEXX</strong> StatSpin non è utilizzata per un periodo di tempo prolungato. Ciò potrebbe<br />
comprimere l’O-ring, riducendone la capacità di sostenere i rotori.<br />
ATTENZIONE: La mancata installazione corretta <strong>de</strong>l rotore potrebbe comportare danni alla<br />
centrifuga non coperti dalla garanzia.<br />
ATTENZIONE: Se il rotore è lasciato in posizione tra i cicli, alloggiare il rotore sul relativo<br />
supporto prima di sottoporre a rotazione un altro campione. Il mancato alloggiamento<br />
corretto <strong>de</strong>l rotore ogni volta potrebbe fare sì che il rotore si allenti durante la centrifuga.<br />
ATTENZIONE: I rotori per provette RT12 e RM02 <strong>de</strong>vono essere bilanciati prima <strong>de</strong>l<br />
funzionamento. Se viene analizzato un solo campione, un secondo campione può servire<br />
da provetta di bilanciamento, oppure utilizzare una simile provetta riempita di acqua come<br />
bilanciamento.<br />
ATTENZIONE: NON ruotare provette di vetro di alcun tipo nel rotore RT12.<br />
IMPORTANTE: Tutti i rotori hanno una durata finita, che dipen<strong>de</strong> dal loro utilizzo. I rotori<br />
vanno esaminati per rilevare eventuali incrinature e vanno sostituiti immediatamente in caso<br />
di incrinature o usura visibile. Quando si installa un nuovo rotore RT12, montare sempre uno<br />
schermo nuovo.<br />
ATTENZIONE: Scollegare la centrifuga <strong>VT</strong> <strong>IDEXX</strong> StatSpin dalla presa a parete prima <strong>de</strong>lla<br />
pulizia o <strong>de</strong>ll’esecuzione <strong>de</strong>lla manutenzione.<br />
AVVERTENZA: Non esporre la centrifuga <strong>VT</strong> <strong>IDEXX</strong> StatSpin e il suo rotore ad acidi forti o<br />
concentrati; basi o agenti ossidanti; idrocarburi aromatici o alogenati; esteri o chetoni.<br />
ATTENZIONE: Non spruzzare soluzioni <strong>de</strong>tergenti direttamente sulla vaschetta <strong>de</strong>lla centrifuga<br />
o sull’alloggiamento; uno spruzzo eccessivo potrebbe raggiungere i cuscinetti <strong>de</strong>l motore o i<br />
circuiti interni. I danni susseguenti potrebbero non essere coperti da garanzia.<br />
ATTENZIONE: Seguire le precauzioni universali con tutti i campioni biologici,<br />
indipen<strong>de</strong>ntemente dal fatto che il campione sia noto o meno come contenente un<br />
agente infettivo.<br />
Manuale operativo <strong>de</strong>lla centrifuga <strong>VT</strong> <strong>IDEXX</strong> StatSpin 91
Utilizzare la centrifuga come previsto. L’utilizzo improprio <strong>de</strong>lla centrifuga <strong>VT</strong> <strong>IDEXX</strong> StatSpin e/o<br />
<strong>de</strong>i suoi accessori potrebbe causare danni alla centrifuga, risultati inaccurati o potenzialmente<br />
annullare le garanzie.<br />
Simboli<br />
La tabella seguente <strong>de</strong>scrive i simboli visibili all’esterno <strong>de</strong>lla centrifuga <strong>VT</strong> <strong>IDEXX</strong> StatSpin o in<br />
questa guida.<br />
Simbolo/<br />
pulsante<br />
Nome<br />
Avvia<br />
Arresta/Apri<br />
Descrizione<br />
Il pulsante Avvia consente di avviare un ciclo pretemporizzato ad una<br />
velocità stabilita. NOTA: La centrifuga <strong>VT</strong> <strong>IDEXX</strong> StatSpin non ha un<br />
interruttore di accensione/spegnimento ed è normalmente lasciata<br />
collegata all’alimentazione e “accesa”.<br />
Il pulsante Arresta/Apri interrompe il ciclo e rilascia il coperchio<br />
quando il rotore si è arrestato.<br />
SET<br />
Selettore <strong>de</strong>l<br />
ciclo (SET)<br />
Il pulsante <strong>de</strong>l selettore <strong>de</strong>l ciclo (SET) consente di selezionare un<br />
ciclo di rotazione.<br />
(rosso)<br />
24 V – – – 1.7 A<br />
(ver<strong>de</strong>)<br />
!<br />
Error/Service<br />
(Errore/<br />
Assistenza)<br />
Ingresso<br />
<strong>de</strong>ll’alimentazione<br />
Indicatore <strong>de</strong>l<br />
ciclo<br />
Attenzione<br />
Limiti di<br />
temperatura<br />
L’indicatore Error/Service (Errore/Assistenza) è illuminato<br />
continuamente o lampeggia quando è richiesta assistenza.<br />
Il simbolo di ingresso <strong>de</strong>ll’alimentazione si trova sul retro <strong>de</strong>lla<br />
centrifuga <strong>VT</strong> <strong>IDEXX</strong> StatSpin accanto alla porta <strong>de</strong>ll’ingresso di<br />
alimentazione CC. È qui che si inserisce il cavo da 24 V CC.<br />
L’indicatore <strong>de</strong>l ciclo, quando è illuminato costantemente in ver<strong>de</strong>,<br />
indica il ciclo di rotazione selezionato. Uno o più indicatori di ciclo<br />
che lampeggiano in ver<strong>de</strong>, assieme ad un indicatore lampeggiante<br />
di Error/Service (Errore/Assistenza), indicano un errore. Ve<strong>de</strong>re la<br />
sezione Indicatore di errore per maggiori informazioni su tali errori.<br />
Il simbolo Attenzione appare nella parte superiore <strong>de</strong>l dispositivo<br />
di blocco <strong>de</strong>l coperchio. Non aprire il coperchio fino all’arresto <strong>de</strong>lla<br />
rotazione <strong>de</strong>l rotore. Nell’ambito di questo Manuale operativo, il<br />
simbolo Attenzione indica un messaggio di attenzione/avvertenza che<br />
va letto con attenzione.<br />
Il simbolo Limiti di temperatura indica limiti alla temperatura di<br />
conservazione o di funzionamento.<br />
IVD<br />
Per uso<br />
diagnostico in<br />
vitro<br />
Non sterile<br />
Il simbolo IVD indica un elemento che va utilizzato solo come<br />
dispositivo diagnostico in-vitro.<br />
Il simbolo Non sterile indica un prodotto non sterile.<br />
NON<br />
STERILE<br />
S N<br />
Numero di<br />
serie<br />
Consultare le<br />
istruzioni<br />
Il simbolo S N indica un numero di serie.<br />
Il simbolo Consultare le istruzioni indica che va fatto riferimento al<br />
Manuale operativo o al foglietto per ulteriori informazioni.<br />
Manuale operativo <strong>de</strong>lla centrifuga <strong>VT</strong> <strong>IDEXX</strong> StatSpin 92
Simbolo/<br />
pulsante<br />
Nome<br />
Rischio<br />
biologico<br />
Descrizione<br />
Il simbolo Rischio biologico indica che le precauzioni biologiche<br />
universali vanno seguite per tutti i campioni.<br />
Impostazione<br />
La centrifuga <strong>VT</strong> <strong>IDEXX</strong> StatSpin e i suoi accessori sono forniti in una sola confezione. Se la<br />
centrifuga o i suoi accessori hanno subito danni durante il trasporto, informare immediatamente il<br />
corriere.<br />
Contenuto<br />
• Numero <strong>de</strong>l prodotto:<br />
– SS<strong>VT</strong>-4<br />
• L’opzione prece<strong>de</strong>nte contiene:<br />
– Un alimentatore universale a commutazione (n. prodotto StatSpin 01-005940-001,<br />
n. parte <strong>IDEXX</strong> 79-17310-00, n. prodotto APS AD-740U-1240)<br />
– Un cavo di alimentazione collegato a massa (per il solo uso nell’America Settentrionale)<br />
– Un manuale operativo <strong>de</strong>lla centrifuga <strong>VT</strong> <strong>IDEXX</strong> StatSpin<br />
Posizionamento <strong>de</strong>lla centrifuga <strong>VT</strong> <strong>IDEXX</strong> StatSpin<br />
• Collocare la centrifuga <strong>VT</strong> <strong>IDEXX</strong> StatSpin su una superficie piana, adatta per l’utilizzo <strong>de</strong>lla<br />
strumentazione di laboratorio.<br />
• Posizionare la centrifuga <strong>VT</strong> <strong>IDEXX</strong> StatSpin in un luogo non colpito dalla luce solare diretta e<br />
lontano dalle sorgenti di caldo o freddo intenso.<br />
• Mantenere uno spazio libero di 30 cm attorno alla centrifuga per la ventilazione e<br />
la sicurezza.<br />
Connessione <strong>de</strong>ll’alimentazione<br />
NOTA: La spina a 24 V CC e il cavo di alimentazione sono collegati all’alimentatore universale a<br />
commutazione.<br />
1. Inserire la spina a 24 V CC nella porta di ingresso <strong>de</strong>ll’alimentazione CC sul retro <strong>de</strong>lla<br />
centrifuga <strong>VT</strong> <strong>IDEXX</strong> StatSpin.<br />
2. Inserire il cavo di alimentazione in una presa collegata a terra che fornisce la tensione e la<br />
frequenza indicate sull’alimentatore. Quando l’alimentazione è connessa, il LED di accensione<br />
si illumina e il blocco <strong>de</strong>l coperchio è rilasciato.<br />
!<br />
AVVERTENZA: America settentrionale: utilizzare solo l’alimentatore fornito assieme alla<br />
centrifuga. L’utilizzo di altri alimentatori o trasformatori danneggerebbe l’elettronica <strong>de</strong>lla<br />
centrifuga <strong>VT</strong> <strong>IDEXX</strong> StatSpin e violerebbe la garanzia.<br />
AVVERTENZA: All’esterno <strong>de</strong>ll’America settentrionale: Non utilizzare il cavo di alimentazione<br />
fornito. Utilizzare un cavo di alimentazione con almeno 1,0 A, con connettori IEC320/CEE22<br />
a<strong>de</strong>guati alla presa di alimentazione da utilizzare.<br />
Manuale operativo <strong>de</strong>lla centrifuga <strong>VT</strong> <strong>IDEXX</strong> StatSpin 93
Panoramica<br />
Principio e utilizzo previsto<br />
La centrifuga <strong>VT</strong> <strong>IDEXX</strong> StatSpin è solo per uso diagnostico in-vitro per:<br />
• Produrre la separazione rapida <strong>de</strong>l sangue intero<br />
• Preparare il sedimento urinario per l’analisi microscopica<br />
• Centrifugare i capillari da microematocrito per la <strong>de</strong>terminazione <strong>de</strong>l volume di globuli rossi<br />
rispetto al volume totale <strong>de</strong>l campione di sangue<br />
La centrifuga <strong>VT</strong> <strong>IDEXX</strong> StatSpin è una centrifuga piccola, silenziosa, ad alta velocità. Il suo<br />
esclusivo sistema brevettato di gui<strong>de</strong> e sospensioni consente un funzionamento praticamente<br />
esente da vibrazioni. I rotori leggeri e di massa ridotta raggiungono una velocità elevata e una<br />
frenata completa in pochi secondi. La centrifuga <strong>VT</strong> <strong>IDEXX</strong> StatSpin è progettata in modo da<br />
soddisfare gli standard internazionali di sicurezza.<br />
Avviso di sicurezza: si raccomanda di attenersi a <strong>de</strong>lle buone norme di sicurezza. Tali norme<br />
comprendono, a titolo esemplificativo e non limitativo, l’uso di dispositivi di protezione<br />
individuale (personal protective equipment, PPE) come guanti e occhiali di sicurezza<br />
durante lo svolgimento di operazioni su campioni prelevati ai pazienti, l’uso di reagenti o il<br />
funzionamento di apparecchiature di laboratorio come la centrifuga StatSpin.<br />
Rotori compatibili per la centrifuga <strong>VT</strong> <strong>IDEXX</strong> StatSpin<br />
Rotore per provette RT12<br />
Il rotore per provette RT12 è un rotore a due posizioni progettato per ospitare varie provette<br />
di trattamento di campioni per la separazione <strong>de</strong>l sangue e <strong>de</strong>ll’urina, comprese provette di<br />
centrifuga standard da 1,5 ml e 2,0 ml con un diametro massimo di 10,9 mm. Tali provette vanno<br />
sostenute dal collare <strong>de</strong>l rotore.<br />
!<br />
ATTENZIONE: NON ruotare provette di vetro di alcun tipo nel rotore RT12.<br />
ATTENZIONE: durante l’utilizzo di un rotore RT12, non attivare la centrifuga senza avere prima<br />
installato uno schermo protettivo.<br />
Le seguenti provette sono approvate per l’utilizzo col rotore RT12:<br />
• Microprovette preparate: TP1H, TP1U, TP5G e CH03<br />
• StatSampler*: SS2H, SS2E, SS2U, SS2X, SS1E<br />
• Provetta precalibrata per urina: TU15-10<br />
• Provette con reagenti LipoClear*: LC10, LC40 e LC15<br />
• Provette per microcentrifuga standard da 1,5–2,0-ml (ad es. provette Eppendorf*)<br />
• Opzione adattatore Microtainer: Le provette BD Microtainer possono essere utilizzate col<br />
rotore RT12 se utilizzate assieme agli adattatori Microtainer (n. parte StatSpin SV12)<br />
Rotore per provette RM02<br />
Progettato specificamente per provette BD Microtainer, questo rotore a due posizioni accetta<br />
anche provette per microcentrifuga standard da 0,5 ml. Il diametro massimo <strong>de</strong>lle provette è di<br />
8,3 mm. Le seguenti provette sono approvate per l’utilizzo in questo rotore:<br />
• Provette BD Microtainer con SOLO collettore a flusso superiore<br />
• Provette per microcentrifuga da 0,5 ml (diam. est. 7,5 x lungh. 35 mm)<br />
Manuale operativo <strong>de</strong>lla centrifuga <strong>VT</strong> <strong>IDEXX</strong> StatSpin 94
Rotore per microematocrito RH12<br />
Il rotore per microematocrito RH12 è un rotore coperto a 12 posizioni utilizzato per centrifugare<br />
le provette capillari per i test <strong>de</strong>l microematocrito. La dimensione massima <strong>de</strong>lle provette è diam.<br />
est. 1,7 mm x lungh. 42 mm. <strong>IDEXX</strong> consiglia di sostituire le imbottiture in gomma fornite col rotore<br />
due volte all’anno, oppure ogni volta che una provetta si rompe nel rotore. Ordinare il n. parte 01-<br />
2002-04 per un set di ricambio di dodici imbottiture.<br />
! ATTENZIONE: non utilizzare uno schermo con il rotore RH12 per microematocrito.<br />
Le seguenti provette sono approvate per l’utilizzo nel rotore:<br />
• Provette capillari in vetro: HT9H, HT9U<br />
• Provette capillari in plastica SafeCrit*: HP8H, HP8U<br />
IMPORTANTE: I rotori RT12, RM02 e RH12 hanno una durata finita, che dipen<strong>de</strong> dal loro utilizzo.<br />
I rotori RT12 e RM02 vanno sostituiti dopo circa 3600 cicli, il che è equivalente a 18 mesi di<br />
funzionamento operando con una media di 10 cicli al giorno. Il rotore RH12 va sostituito dopo<br />
circa 2600 cicli, il che è equivalente a 12 mesi di funzionamento operando con una media di 10<br />
cicli al giorno. I rotori vanno esaminati normalmente e vanno sostituiti immediatamente in caso di<br />
incrinature o usura visibile.<br />
Utilizzo <strong>de</strong>lla centrifuga <strong>VT</strong> <strong>IDEXX</strong> StatSpin<br />
Apertura e chiusura <strong>de</strong>l coperchio<br />
Un meccanismo di interblocco <strong>de</strong>l coperchio azionato elettronicamente impedisce il<br />
funzionamento se il coperchio non è completamente chiuso e bloccato. Un ciclo operativo<br />
può essere avviato solo se il blocco <strong>de</strong>l coperchio è azionato.<br />
La centrifuga è anche dotata di un blocco azionato manualmente che tiene il coperchio chiuso<br />
dopo il completamento <strong>de</strong>lla rotazione. L’interblocco è automaticamente rilasciato alla fine <strong>de</strong>l<br />
ciclo operativo o premendo il pulsante Arresta/Apri. Premere il dispositivo di blocco nero per<br />
aprire il coperchio.<br />
Bypass di interblocco <strong>de</strong>l coperchio<br />
In caso di interruzione <strong>de</strong>ll’alimentazione o di malfunzionamenti, è possibile che il pulsante<br />
Arresta/Apri non rilasci il coperchio. Per recuperare i campioni nel rotore, il meccanismo di<br />
interblocco <strong>de</strong>l coperchio può essere rilasciato manualmente inserendo l’estremità raddrizzata<br />
di un gran<strong>de</strong> fermaglio per la carta o di un oggetto simile nel piccolo foro che si trova nella parte<br />
anteriore <strong>de</strong>ll’alloggiamento al di sopra <strong>de</strong>l pulsante Selettore <strong>de</strong>l ciclo. Premere verso l’interno il<br />
fermaglio per la carta di circa 25 mm per rilasciare il dispositivo di blocco.<br />
!<br />
ATTENZIONE: Il bypass di interblocco <strong>de</strong>l coperchio è progettato per essere utilizzato solo in<br />
caso di emergenza. L’utilizzo improprio potrebbe esporre l’operatore a condizioni poco sicure.<br />
Installazione di un rotore<br />
Tutte le parti inferiori <strong>de</strong>l rotore si adattano ad<br />
un O-ring in gomma sul supporto <strong>de</strong>l rotore. La<br />
figura sulla <strong>de</strong>stra mostra la sezione trasversale<br />
di un rotore per ematocrito in posizione sul<br />
supporto <strong>de</strong>l rotore. Quando il rotore gira, l’O-ring<br />
è spostato verso l’esterno dalla forza centrifuga, il<br />
O-ring<br />
rotore per ematocrito<br />
supporto <strong>de</strong>l rotore<br />
Manuale operativo <strong>de</strong>lla centrifuga <strong>VT</strong> <strong>IDEXX</strong> StatSpin 95
che aumenta l’ attrito tra il supporto <strong>de</strong>l rotore e il rotore per ematocrito.<br />
Quando si installa un rotore RT12, togliere lo schermo (se presente). Una<br />
volta posizionato il rotore nella centrifuga, installare lo schermo.<br />
schermo per il rotore RT12<br />
!<br />
!<br />
ATTENZIONE: Non lasciare alcun tipo di rotore sul supporto <strong>de</strong>l rotore quando la centrifuga<br />
<strong>VT</strong> <strong>IDEXX</strong> StatSpin non è utilizzata per un periodo di tempo prolungato. Ciò può comprimere l’Oring,<br />
riducendone la capacità di sostenere i rotori.<br />
ATTENZIONE: durante l’utilizzo di un rotore RT12, non attivare la centrifuga senza avere prima<br />
installato uno schermo protettivo.<br />
! ATTENZIONE: non utilizzare uno schermo con il rotore RH12 per microematocrito.<br />
!<br />
!<br />
!<br />
ATTENZIONE: La mancata installazione corretta <strong>de</strong>l rotore potrebbe comportare danni alla<br />
centrifuga non coperti dalla garanzia.<br />
ATTENZIONE: Se il rotore è lasciato in posizione tra i cicli, premere il rotore sul relativo supporto<br />
per accertarsi che sia correttamente alloggiato prima di sottoporre a rotazione un altro campione. Il<br />
mancato alloggiamento corretto <strong>de</strong>l rotore ogni volta potrebbe fare sì che il rotore si allenti durante<br />
la centrifuga.<br />
ATTENZIONE: I rotori per provette RT12 e RM02 <strong>de</strong>vono essere bilanciati prima <strong>de</strong>l<br />
funzionamento. Se viene analizzato un solo campione, un secondo campione può servire<br />
da provetta di bilanciamento, oppure utilizzare una simile provetta riempita di acqua come<br />
bilanciamento.<br />
Installazione di uno schermo<br />
Quando si utilizza il rotore RT12 è necessario che sia installato uno schermo; in<br />
caso di sostituzione <strong>de</strong>l rotore, sostituire anche lo schermo.<br />
schermo<br />
Procedura<br />
1. Accertarsi che il rotore RT12 sia correttamente inserito nel suo<br />
alloggiamento.<br />
2. Premere lo schermo all’interno <strong>de</strong>lla coppa facendo in modo che sia<br />
completamente a contatto con il fondo <strong>de</strong>lla stessa.<br />
Nota: per estrarre lo schermo tirarlo verso l’alto dal bordo centrale.<br />
Selezione <strong>de</strong>lle impostazioni <strong>de</strong>l ciclo<br />
È opportuno sperimentare diverse impostazioni per ottenere le prestazioni ottimali per applicazioni<br />
specifiche. Le seguenti sono indicazioni generali:<br />
Impostazione Giri al minuto/RCF Tempo Rotore<br />
Quick Spin<br />
(Rotazione veloce)<br />
Normal<br />
(Normale)<br />
Hard Spin<br />
(Rotazione forte)<br />
Urine Sediment<br />
(Sedimento urinario)<br />
15.800/12.000 30 secondi RT12, RM02<br />
15.800/12.000 90 secondi RT12, RM02<br />
15.800/12.000 150 secondi RT12, RM02<br />
9.800/3.900 45 secondi RT12<br />
Microhematocrit 15.800/13.700 120 secondi RH12<br />
Manuale operativo <strong>de</strong>lla centrifuga <strong>VT</strong> <strong>IDEXX</strong> StatSpin 96
Trattamento <strong>de</strong>i campioni<br />
Preparazione <strong>de</strong>l sangue venoso per la coagulazione e le analisi biochimiche<br />
Il rotore per plasma offre uno strumento per la separazione rapida <strong>de</strong>l plasma dal sangue intero non<br />
coagulato. Per preparare il plasma per le analisi biochimiche, utilizzare il ciclo Quick Spin (Rotazione<br />
veloce). Per i test di coagulazione, utilizzare il ciclo Hard Spin (Rotazione forte).<br />
Procedura<br />
1. Sollevare il coperchio. Se necessario, installare il rotore applicabile per il campione che si sta<br />
utilizzando e spingere il rotore verso il basso per accertarsi che sia correttamente alloggiato.<br />
2. Collocare la provetta di campione nel rotore. Accertarsi di bilanciare il rotore, aggiungendo un<br />
secondo campione o una provetta riempita d’acqua. Chiu<strong>de</strong>re e bloccare il coperchio.<br />
3. Selezionare l’impostazione <strong>de</strong>si<strong>de</strong>rata <strong>de</strong>l ciclo premendo il pulsante Selettore <strong>de</strong>l ciclo<br />
(SET) fino a quando il LED relativo si illumina.<br />
4. Premere il pulsante Avvia. Dopo il completamento <strong>de</strong>l ciclo di rotazione, il rotore <strong>de</strong>celera fino<br />
ad un arresto completo in circa 10 secondi e l’interblocco <strong>de</strong>l dispositivo di blocco si sblocca<br />
automaticamente. Premere il dispositivo di blocco nero per aprire il coperchio.<br />
Preparazione <strong>de</strong>l sedimento urinario per l’esame microscopico<br />
La centrifuga <strong>VT</strong> <strong>IDEXX</strong> StatSpin prepara rapidamente il<br />
sedimento urinario per l’esame microscopico utilizzando riempire fino qui<br />
provette per urina precalibrate (n. di prodotto StatSpin TU15).<br />
Procedura<br />
1. Riempire una provetta di urina fino al contrassegno<br />
superiore (che rappresenta 1,5 ml) di urina fresca e<br />
vuotare fino qui<br />
tappare la provetta utilizzando il tappo allegato.<br />
2. Sollevare il coperchio e premere il rotore per provette RT12<br />
per accertarsi che sia completamente alloggiato.<br />
3. Collocare la provetta di urina nel rotore RT12. Bilanciare il rotore con un altro campione o con<br />
una provetta riempita di acqua. Chiu<strong>de</strong>re e bloccare il coperchio.<br />
4. Premere il pulsante Selettore <strong>de</strong>l ciclo (SET) fino a selezionare Urine Sediment (Sedimento<br />
urinario), quindi premere Avvia.<br />
5. Quando il ciclo è completo, il coperchio è automaticamente rilasciato. Rimuovere la provetta<br />
dal rotore e rimuovere il tappo.<br />
6. Invertire la provetta per trasferire il fluido fino al contrassegno inferiore.<br />
NOTA: La tensione superficiale trattiene 0,1 ml.<br />
7. Richiu<strong>de</strong>re nuovamente la provetta e scuoterla <strong>de</strong>licatamente al fine di riportare in<br />
sospensione il sedimento urinario.<br />
8. Dopo aver riportato in sospensione il sedimento, erogare una goccia su un vetrino per<br />
microscopio, applicare un vetrino di copertura ed esaminare il vetrino, seguendo il protocollo<br />
utilizzato nel proprio laboratorio.<br />
Smaltimento <strong>de</strong>lla lipemia<br />
La centrifuga <strong>VT</strong> <strong>IDEXX</strong> StatSpin può essere utilizzata per centrifugare campioni lipemici prelevati<br />
in provette di reagente LipoClear (LC10, LC40, LC15). LipoClear è un reagente non tossico, non<br />
cancerogeno, per lo smaltimento <strong>de</strong>lla lipemia, che è precaricato in provette per microcentrifuga.<br />
Il kit LipoClear è disponibile per dimensioni <strong>de</strong>i campioni di 0,5 ml e 1,5 ml (ve<strong>de</strong>re nel seguito).<br />
Manuale operativo <strong>de</strong>lla centrifuga <strong>VT</strong> <strong>IDEXX</strong> StatSpin 97
Dopo che il campione è aggiunto, mescolato e lasciato riposare per cinque minuti, le provette<br />
sono sottoposte a rotazione col ciclo Hard Spin (Rotazione forte) nel rotore per provette RT12. Fare<br />
riferimento al foglietto illustrativo <strong>de</strong>l LipoClear per ulteriori <strong>de</strong>ttagli.<br />
N. <strong>de</strong>l prodotto Dimensione <strong>de</strong>l campione Confezione<br />
LC10 0,5 ml 10 provette/confezione<br />
LC40 0,5 ml 40 provette/confezione<br />
LC15 1,5 ml 40 provette/confezione<br />
Procedura<br />
1. Sollevare il coperchio. Se necessario, installare il rotore applicabile per il campione che si sta<br />
utilizzando e spingere il rotore verso il basso per accertarsi che sia correttamente alloggiato.<br />
2. Collocare la provetta di campione nel rotore. Accertarsi di bilanciare il rotore, aggiungendo un<br />
secondo campione o una provetta riempita d’acqua. Chiu<strong>de</strong>re e bloccare il coperchio.<br />
3. Selezionare l’impostazione <strong>de</strong>si<strong>de</strong>rata <strong>de</strong>l ciclo premendo il pulsante Selettore <strong>de</strong>l ciclo<br />
(SET) fino a quando il LED <strong>de</strong>ll’impostazione Hard Spin (Rotazione forte) si illumina.<br />
4. Premere il pulsante Avvia. Dopo il completamento <strong>de</strong>l ciclo di rotazione, il rotore <strong>de</strong>celera fino<br />
ad un arresto completo in circa 10 secondi e l’interblocco <strong>de</strong>l dispositivo di blocco si sblocca<br />
automaticamente. Premere il dispositivo di blocco nero per aprire il coperchio.<br />
Determinazione <strong>de</strong>l volume <strong>de</strong>gli eritrociti ammassati o microematocrito<br />
Sono disponibili provette microcapillari sia in vetro sia in plastica:<br />
• I prodotti numero HT9H (vetro) e HP8H (plastica) sono stati pretrattati con eparina e vanno<br />
utilizzati per il sangue capillare.<br />
• I prodotti numero HT9H (vetro) e HP8U (plastica) non sono trattati e vanno utilizzati per<br />
campioni di venopuntura (anticoagulati).<br />
Procedura<br />
1. Prelevare il campione:<br />
a. Sangue capillare: il sangue è prelevato direttamente dal sito di puntura utilizzando<br />
provette eparinizzate (prodotti StatSpin numero HT9H o HP8H).<br />
b. Sangue venoso: il sangue è prelevato da un campione anticoagulato ben miscelato da<br />
una siringa o una provetta sotto vuoto per il prelievo di sangue, utilizzando provette non<br />
trattate (prodotti StatSpin numero HT9H o HP8H).<br />
2. Tenere la provetta microcapillare per un’estremità con la banda codificata a colori. Riempire la<br />
provetta capillare con campione fino alla banda codificata a colori. Rimuovere la provetta dal<br />
campione e inclinare l’estremità a ban<strong>de</strong> verso il basso fino a quando il sangue si sposta a<br />
metà strada tra la banda e l’estremità <strong>de</strong>lla provetta.<br />
3. Tenere la provetta in posizione orizzontale e spingere l’estremità asciutta (a ban<strong>de</strong>) <strong>de</strong>lla<br />
provetta completamente nel cuscinetto di tenuta tenuto verticalmente. Ruotare<br />
e rimuovere.<br />
4. Utilizzando un tessuto di laboratorio, rimuovere strofinando l’eventuale sangue forzato<br />
dall’altra estremità.<br />
5. Collocare la provetta, con l’estremità sigillata verso il bordo esterno, in una <strong>de</strong>lle dodici posizioni<br />
sul rotore per microematocrito RH12. Non è necessario che questo rotore sia bilanciato. Avvitare<br />
il coperchio <strong>de</strong>l rotore in posizione.<br />
Manuale operativo <strong>de</strong>lla centrifuga <strong>VT</strong> <strong>IDEXX</strong> StatSpin 98
provetta capillare riempita<br />
provetta capillare<br />
banda codificata a<br />
colori, tenere questa<br />
estremità<br />
Inclinare la<br />
provetta capillare<br />
fino a posizionare<br />
il sangue come<br />
mostrato qui.<br />
sigillare la provetta capillare<br />
provetta capillare sigillata<br />
6. Tenendo il rotore per l’impugnatura nera <strong>de</strong>l coperchio, fissare il rotore al relativo supporto.<br />
IMPORTANTE: Tenere sempre il rotore per microematocrito per l’impugnatura nera sul<br />
coperchio <strong>de</strong>l rotore quando lo si preme fermamente con un movimento verso il basso sul<br />
supporto <strong>de</strong>l rotore e quando si rimuove il rotore dalla centrifuga. La pressione sui bordi<br />
esterni <strong>de</strong>l rotore potrebbe comportare danni al rotore.<br />
7. Chiu<strong>de</strong>re e bloccare il coperchio. Premere il pulsante Selettore <strong>de</strong>l ciclo (SET) per<br />
selezionare l’impostazione Microhematocrit (Microematocrito), quindi premere Avvia.<br />
8. Dopo l’arresto <strong>de</strong>l rotore, rimuoverlo dalla centrifuga.<br />
Le provette all’interno <strong>de</strong>l rotore possono essere lette<br />
col lettore circolare (prodotto StatSpin numero HR4C)<br />
o rimosse dal rotore e lette col lettore di tipo scheda<br />
(prodotti StatSpin numero HR05).<br />
Provetta capillare dopo la rotazione<br />
parte<br />
superiore<br />
<strong>de</strong>l plasma<br />
parte<br />
superiore<br />
<strong>de</strong>gli<br />
eritrociti<br />
parte<br />
inferiore<br />
<strong>de</strong>gli<br />
eritrociti<br />
sigillante<br />
Controllo di qualità<br />
• Le procedure di controllo di qualità stabilite per il laboratorio vanno seguite.<br />
• Per verificare che i globuli rossi vengano a<strong>de</strong>guatamente raggruppati, selezionare<br />
quotidianamente una o più provette, (preferibilmente con un ematocrito superiore al 50%),<br />
centrifugare e leggere. Ricentrifugare i microcapillari una seconda volta. La differenza tra la<br />
lettura iniziale e la seconda lettura dovrebbe essere non superiore all’1%.<br />
Valori normali<br />
La tabella seguente rappresenta valori di ematocrito comunemente accettati:<br />
Specie % Specie %<br />
Cani adulti 37–55 Equini 32–53<br />
Cuccioli di cane 32–55 Bovini 25–42<br />
Felini adulti 30–45 Suini 32–50<br />
Cuccioli di gatto 25–45 Ovini 24–45<br />
Pulizia e manutenzione<br />
<strong>IDEXX</strong> consiglia di eseguire esami periodici e la manutenzione preventiva sulla centrifuga <strong>VT</strong><br />
<strong>IDEXX</strong> StatSpin. Rivolgersi all’assistenza tecnica <strong>IDEXX</strong> o al distributore autorizzato <strong>IDEXX</strong> ogni<br />
volta che lo strumento non dovesse funzionare correttamente.<br />
!<br />
!<br />
ATTENZIONE: Scollegare la centrifuga <strong>VT</strong> <strong>IDEXX</strong> StatSpin dalla presa prima <strong>de</strong>lla pulizia o<br />
<strong>de</strong>ll’esecuzione <strong>de</strong>lla manutenzione.<br />
AVVERTENZA: Non esporre la centrifuga <strong>VT</strong> <strong>IDEXX</strong> StatSpin o il suo rotore ad acidi forti o<br />
concentrati; basi o agenti ossidanti; idrocarburi aromatici o alogenati; esteri o chetoni.<br />
Manuale operativo <strong>de</strong>lla centrifuga <strong>VT</strong> <strong>IDEXX</strong> StatSpin 99
Pulizia<br />
Pulire le superfici esterne e il pannello di sovrapposizione <strong>de</strong>gli interruttori con un panno inumidito<br />
con acqua e un <strong>de</strong>tersivo <strong>de</strong>licato. Pulire la superficie interna, una superficie in acciaio rivestita<br />
di polvere, con un <strong>de</strong>tersivo <strong>de</strong>licato e, se necessario, con un disinfettante. Strofinare tutte le<br />
superfici con un panno inumidito utilizzando una soluzione di 70% di alcool o 10% di can<strong>de</strong>ggina.<br />
!<br />
ATTENZIONE: Non spruzzare soluzioni <strong>de</strong>tergenti direttamente sulla vaschetta <strong>de</strong>lla centrifuga o<br />
sull’alloggiamento; uno spruzzo eccessivo potrebbe raggiungere i cuscinetti <strong>de</strong>l motore o i circuiti<br />
interni. I danni susseguenti potrebbero non essere coperti da garanzia.<br />
Controllo <strong>de</strong>lla velocità <strong>de</strong>l rotore<br />
Le velocità nominali possono essere controllate con uno stroboscopio o un tachimetro<br />
fotoelettrico. Se la centrifuga <strong>VT</strong> <strong>IDEXX</strong> StatSpin non dovesse raggiungere una velocità di<br />
funzionamento, rivolgersi all’assistenza tecnica <strong>IDEXX</strong> o al distributore autorizzato <strong>IDEXX</strong>.<br />
Sostituzione <strong>de</strong>ll’O-Ring<br />
La figura sulla <strong>de</strong>stra illustra la posizione <strong>de</strong>ll’O-ring in gomma che è<br />
collegato al supporto <strong>de</strong>l rotore. Se il rotore dovesse diventare difficile<br />
da installare, applicare una quantità molto piccola di lubrificante di tipo<br />
siliconico ai tre punti esposti (A) sulla guarnizione <strong>de</strong>ll’O-ring. L’O-ring va<br />
ispezionato regolarmente e sostituito quando appaia appiattito o usurato.<br />
L’O-ring va sostituito, come misura di manutenzione preventiva, almeno<br />
una volta all’anno.<br />
Un nuovo O-ring può essere installato come mostrato, inserendolo dietro e davanti ai sei pin sul<br />
supporto <strong>de</strong>l rotore. Altri O-ring sono inclusi nella confezione <strong>IDEXX</strong> StatSpin.<br />
A<br />
A<br />
A<br />
Indicatori di errore<br />
Le condizioni di errore <strong>de</strong>lla centrifuga <strong>VT</strong> <strong>IDEXX</strong> StatSpin sono segnalate da un indicatore<br />
lampeggiante rosso Error/Service (Errore/Assistenza) sul pannello di controllo. La causa <strong>de</strong>lla<br />
condizione di errore può essere i<strong>de</strong>ntificata dalla combinazione di indicatori <strong>de</strong>l ciclo che<br />
lampeggiano.<br />
indicatore<br />
di ciclo<br />
lampeggiante in<br />
ver<strong>de</strong><br />
QUICK SPIN<br />
NORMAL<br />
HARD SPIN<br />
QUICK SPIN<br />
NORMAL<br />
HARD SPIN<br />
QUICK SPIN<br />
NORMAL<br />
HARD SPIN<br />
QUICK SPIN<br />
NORMAL<br />
HARD SPIN<br />
URINE SEDIMENT<br />
URINE SEDIMENT<br />
URINE SEDIMENT<br />
URINE SEDIMENT<br />
MICROHEMATOCRIT<br />
MICROHEMATOCRIT<br />
MICROHEMATOCRIT<br />
MICROHEMATOCRIT<br />
SET<br />
SET<br />
SET<br />
SET<br />
indicatore<br />
lampeggiante in<br />
rosso di Error/<br />
Service (Errore/<br />
Assistenza)<br />
Error/Service<br />
Error/Service<br />
Error/Service<br />
Error/Service<br />
Il rotore non raggiungeva<br />
la velocità completa in 30<br />
secondi.<br />
Il coperchio si è aperto o il<br />
ciclo è cambiato durante il<br />
funzionamento.<br />
La velocità <strong>de</strong>l rotore non<br />
può essere mantenuta.<br />
Il rotore ruotava all’indietro<br />
durante la frenata inversa.<br />
L’indicatore Error/Service (Errore/Assistenza) resta continuamente illuminato quando la centrifuga<br />
ha raggiunto un conteggio totale <strong>de</strong>i cicli di 18.000, che è la vita utile <strong>de</strong>l sistema <strong>de</strong>lla guida. Il<br />
meccanismo <strong>de</strong>lla guida <strong>de</strong>ve essere sostituito. Rivolgersi ad un centro di assistenza autorizzato.<br />
Manuale operativo <strong>de</strong>lla centrifuga <strong>VT</strong> <strong>IDEXX</strong> StatSpin 100
<strong>IDEXX</strong> raccomanda di eseguire ispezioni periodiche e la manutenzione<br />
preventiva sulla centrifuga <strong>IDEXX</strong> StatSpin <strong>VT</strong> o StatSpin MP.<br />
Registro di manutenzione<br />
Mese: ____________________<br />
1 2 3 4 5 6 7 8 9 10 11 12 13 14 15 16 17 18 19 20 21 22 23 24 25 26 27 28 29 30 31<br />
Frequenza Eseguire<br />
la manutenzione<br />
Giornaliera Ispezionare il<br />
coperchio, la<br />
chiusura e la<br />
cerniera per<br />
individuare<br />
eventuali crepe o<br />
segni di usura.<br />
Ispezionare il<br />
rotore e lo schermo<br />
per individuare<br />
eventuali crepe o<br />
cedimenti.<br />
Ispezionare l’anello<br />
di tenuta per<br />
verificare l’assenza<br />
di segni di usura<br />
o di ispessimento.<br />
101
Anno: ____________________<br />
Frequenza Eseguire la manutenzione<br />
Gennaio Febbraio Marzo Aprile Maggio Giugno Luglio Agosto Settembre Ottobre Novembre Dicembre<br />
Annuale † Sostituire l’anello di tenuta sul<br />
supporto <strong>de</strong>l rotore.<br />
Sostituire il rotore RT12 e lo<br />
schermo. †<br />
Quando<br />
necessario<br />
† Sostituire il rotore RT12 e lo schermo dopo 3.600 centrifugazioni. Quando si installa un nuovo rotore RT12, montare sempre uno schermo nuovo. Servendosi <strong>de</strong>lla tabella seguente, stabilire la frequenza di sostituzione <strong>de</strong>l rotore e<br />
<strong>de</strong>llo schermo in base al numero medio giornaliero di campioni centrifugati.<br />
Frequenza minima<br />
di sostituzione<br />
Numero di campioni al giorno<br />
(in base ad una settimana<br />
di 5 giorni lavorativi)<br />
15 Annuale<br />
10 Ogni 18 mesi<br />
5 Ogni 2,5 anni<br />
3 Ogni 4 anni<br />
102
Risoluzione <strong>de</strong>i problemi<br />
Problema<br />
Assenza di spia<br />
<strong>de</strong>ll’alimentazione<br />
La centrifuga non ruota o si<br />
spegne prematuramente<br />
La centrifuga non si apre<br />
automaticamente alla fine di<br />
un ciclo<br />
Azione<br />
• Controllare il cavo di alimentazione e accertarsi che sia completamente<br />
inserito nella presa. In caso positivo, provare un’altra presa.<br />
• Accertarsi che la spina a 24 V CC sia completamente inserita sul retro<br />
<strong>de</strong>lla centrifuga <strong>VT</strong> <strong>IDEXX</strong> StatSpin.<br />
• Rivolgersi all’Assistenza clienti <strong>IDEXX</strong> per assistenza.<br />
• Accertarsi che il coperchio sia completamente chiuso e bloccato<br />
• Se l’indicatore Error/Service (Errore/Assistenza) lampeggia,<br />
i<strong>de</strong>ntificare la sorgente <strong>de</strong>ll’errore, correggere la condizione di errore e<br />
quindi premere il pulsante Arresta/Apri per cancellare l’errore.<br />
• Rivolgersi all’Assistenza clienti <strong>IDEXX</strong> per assistenza<br />
• Per aprire manualmente il coperchio, utilizzare la procedura di bypass<br />
<strong>de</strong>scritta nella sezione Bypass di interblocco <strong>de</strong>l coperchio.<br />
• Accertarsi che la guarnizione <strong>de</strong>lla vaschetta sull’alloggiamento<br />
interno sia completamente alloggiata e sigillare la vaschetta premendo<br />
la guarnizione completamente verso il basso nella scanalatura<br />
<strong>de</strong>ll’alloggiamento.<br />
• Rivolgersi all’Assistenza clienti <strong>IDEXX</strong> per assistenza.<br />
Assistenza<br />
Per tutta l’assistenza fare riferimento all’assistenza tecnica <strong>IDEXX</strong> o ad una struttura autorizzata<br />
alle riparazioni.<br />
Decontaminazione prima <strong>de</strong>lla restituzione per l’assistenza<br />
Qualsiasi strumento o accessorio esposto al sangue o ad altri materiali biologici <strong>de</strong>ve essere pulito<br />
prima <strong>de</strong>lla spedizione al produttore o al concessionario per l’assistenza. Questa <strong>de</strong>contaminazione<br />
è richiesta dalla legge fe<strong>de</strong>rale <strong>de</strong>gli Stati Uniti (Titoli 48 e 49 <strong>de</strong>lle normative fe<strong>de</strong>rali) ed è conforme<br />
alle normative <strong>de</strong>ll’Agenzia per la protezione ambientale per il trattamento <strong>de</strong>i rifiuti pericolosi dal<br />
punto di vista biologico. Il personale di <strong>IDEXX</strong> e di Iris Sample Processing non è in grado di eseguire<br />
questa <strong>de</strong>contaminazione.<br />
Manuale operativo <strong>de</strong>lla centrifuga <strong>VT</strong> <strong>IDEXX</strong> StatSpin 103
Specifiche<br />
Centrifuga<br />
Numero <strong>de</strong>l prodotto<br />
Numero <strong>de</strong>l mo<strong>de</strong>llo<br />
Cicli<br />
Quick Spin<br />
(Rotazione veloce)<br />
Normal (Normale)<br />
Hard Spin<br />
(Rotazione forte)<br />
Tempo di<br />
accelerazione<br />
Tempo di<br />
<strong>de</strong>celerazione<br />
Dati elettrici<br />
Dimension<br />
Dati ambientali<br />
Urine (Urina)<br />
Hematocrit<br />
(Ematocrito)<br />
SS<strong>VT</strong>-4<br />
V901<br />
Velocità<br />
30 secondi a 15.800 giri al minuto/12.000 g<br />
90 secondi a 15.800 giri al minuto/12.000 g<br />
150 secondi a 15.800 giri al minuto/12.000 g<br />
45 secondi a 9.800 giri al minuto/3.900 g<br />
120 secondi a 15.800 giri al minuto/13.700 g<br />
Circa sei secondi<br />
Circa 10 secondi<br />
24 volt, CC, 1,7 A<br />
Compren<strong>de</strong> un alimentatore a commutazione per 100–240 V CA, 50–60 Hz<br />
Diametro 16,25 cm<br />
Altezza 13,2 cm<br />
Peso 2,5 kg<br />
Solo per uso al chiuso<br />
Altitudine massima 2000 m<br />
Temperatura ambiente da 5°C a 40°C<br />
Umidità relativa massima 80% fino a 31°C, che si riduce al 50% a 40°C<br />
Le fluttuazioni <strong>de</strong>lla tensione di alimentazione principale non dovranno superare<br />
±10%<br />
Sovratensioni transienti secondo la categoria di installazione II<br />
Grado di inquinamento 2<br />
Le caratteristiche tecniche sono soggette a cambiamenti senza preavviso.<br />
Manuale operativo <strong>de</strong>lla centrifuga <strong>VT</strong> <strong>IDEXX</strong> StatSpin 104
Accessori<br />
N. <strong>de</strong>l<br />
prodotto<br />
Descrizione<br />
Ciclo richiesto<br />
RT12 2 rotori ad angolo fisso da 1,5 ml Veloce, Normale, Forte<br />
SV12 Adattatori Microtainer (2 conf.) Veloce, Normale, Forte<br />
TU15-10 Provetta per urina precalibrata da 1,5 ml (10 buste di 50) Urina<br />
TP1H<br />
Provetta per microcentrifuga con litio-eparina da 1,3 ml (busta<br />
di 100)<br />
Veloce, Normale, Forte<br />
TP1U Provetta per microcentrifuga non trattata da 1,3 ml (busta di 100) Veloce, Normale, Forte<br />
SS2H<br />
SS2U<br />
Sistema di prelievo StatSampler* (200 µl, litio eparina) per<br />
analisi biochimiche ad astina<br />
Sistema di prelievo per analisi biochimiche StatSampler ad<br />
astina (200 µl, non trattato)<br />
SS2X Sistema di prelievo per ematologia StatSampler ad astina (200<br />
µl, EDTA) con gel<br />
LC10<br />
LC40<br />
LC15<br />
RM02<br />
RH12<br />
HP8H-10<br />
HP8U-10<br />
HT9H-10<br />
HT9U-10<br />
LipoClear: provette di reagente precaricate da 0,5 ml per lo<br />
smaltimento <strong>de</strong>l siero o plasma forte lipemico (busta di 10)<br />
LipoClear: provette di reagente precaricate da 0,5 ml per lo<br />
smaltimento <strong>de</strong>l siero o plasma forte lipemico (busta di 40)<br />
LipoClear: provette di reagente precaricate da 1,5 ml per lo<br />
smaltimento <strong>de</strong>l siero o plasma forte lipemico (busta di 40)<br />
2 rotori ad angolo fisso da 0,8 ml per provette BD Microtainer e<br />
provette per microcentrifuga da 0,5 ml<br />
Rotore per microematocrito a 12 posizioni con lettore circolare<br />
(HR4C)<br />
Provetta capillare SafeCrit (40 mm, sodio eparina), provette per<br />
microematocrito al 100% in plastica per il rotore RH12 (10 fiale di<br />
100)<br />
Provetta capillare SafeCrit (40 mm, non trattata), provette per<br />
microematocrito al 100% in plastica per il rotore RH12 (10 fiale<br />
di 100)<br />
Provetta capillare in vetro (40 mm, sodio eparina), provette per<br />
microematocrito in vetro per il rotore RH12 (10 fiale di 100)<br />
Provetta capillare in vetro (40 mm, non trattata), provette per<br />
microematocrito in vetro per il rotore RH12 (10 fiale di 100)<br />
HS24-10 Cuscinetto di tenuta per provette capillari (10 cuscinetti) NA<br />
HR05<br />
HR4<br />
Lettore per ematocrito, tipo a scheda per provette per<br />
ematocrito da 40 mm<br />
Lettore per ematocrito, circolare, progettato per essere<br />
utilizzato assieme al rotore RH12<br />
00-Ring O-ring di ricambio per il supporto <strong>de</strong>l rotore (cinque buste di tre) NA<br />
Veloce, Normale, Forte<br />
Veloce, Normale, Forte<br />
Veloce, Normale, Forte<br />
Forte<br />
Forte<br />
Forte<br />
Veloce, Normale, Forte<br />
Microematocrito<br />
Microematocrito<br />
Microematocrito<br />
Microematocrito<br />
Microematocrito<br />
NA<br />
NA<br />
Manuale operativo <strong>de</strong>lla centrifuga <strong>VT</strong> <strong>IDEXX</strong> StatSpin 105
Contatti per l’Assistenza tecnica <strong>IDEXX</strong><br />
Rappresentante <strong>IDEXX</strong>:<br />
Telefono/posta vocale:<br />
Stati Uniti<br />
<strong>IDEXX</strong> Laboratories, Inc.<br />
One <strong>IDEXX</strong> Drive<br />
Westbrook, Maine 04092 Stati Uniti<br />
Numero ver<strong>de</strong> per<br />
l’assistenza tecnica .................... 1-800-248-2483<br />
Numero di telefono principale..... 1-207-556-0300<br />
Numero ver<strong>de</strong> fax ....................... 1-800-248-3010<br />
i<strong>de</strong>xx.com<br />
Italia<br />
<strong>IDEXX</strong> Laboratories Italia, S.r.l.<br />
Via Canova 27<br />
20145 Milano<br />
Italia<br />
Numero ver<strong>de</strong> per<br />
l’assistenza tecnica..................... 00800 1234 3399<br />
Telefono....................................... (39) 02 319 20 31<br />
Fax............................................... (39) 02 319 20 347<br />
www.i<strong>de</strong>xx.it<br />
Paesi Bassi<br />
<strong>IDEXX</strong> Europe B.V.<br />
Scorpius 60 Building F<br />
2132 LR Hoofddorp<br />
Paesi Bassi<br />
Numero ver<strong>de</strong> per<br />
l’assistenza tecnica..................... 00800 1234 3399<br />
Telefono....................................... (31) 23 558 7000<br />
Numero ver<strong>de</strong> fax........................ 00800 1234 3333<br />
Fax............................................... (31) 23 558 7233<br />
www.i<strong>de</strong>xx.nl<br />
Spagna<br />
<strong>IDEXX</strong> Laboratorios, S.L.<br />
C/ Plom 2-8, 3º a<br />
08038 Barcellona<br />
Spagna<br />
Numero ver<strong>de</strong> per<br />
l’assistenza tecnica..................... 00800 1234 3399<br />
Telefono....................................... (34) 93 414 26 08<br />
Fax............................................... (34) 93.414 74 78<br />
www.i<strong>de</strong>xx.es<br />
Francia<br />
<strong>IDEXX</strong> S.A.R.L.<br />
Bâtiment Flori<strong>de</strong> - Eragny Parc<br />
11 Allée Rosa, Luxembourg<br />
95610 Eragny, sur Oise<br />
Francia<br />
Numero ver<strong>de</strong> per<br />
l’assistenza tecnica..................... 00800 1234 3399<br />
Telefono....................................... (33) 1 34 32 62 00<br />
Fax............................................... (33) 1 34 30 02 08<br />
www.i<strong>de</strong>xx.fr<br />
Regno Unito<br />
<strong>IDEXX</strong> Laboratories Ltd.<br />
Milton Court, Churchfield Road<br />
Chalfont St Peter<br />
Buckinghamshire SL9 9EW<br />
Regno Unito<br />
Numero ver<strong>de</strong> per<br />
l’assistenza tecnica..................... 00800 1234 3399<br />
Telefono....................................... (44) 01753 891 660<br />
Fax............................................... (44) 01753 891.520<br />
www.i<strong>de</strong>xx.co.uk<br />
Germania<br />
<strong>IDEXX</strong> GmbH<br />
Mörikestraße 28/3<br />
D-71636 Ludwigsburg<br />
Germania<br />
Numero ver<strong>de</strong> per<br />
l’assistenza tecnica................... 00800 1234 3399<br />
Telefono..................................... (49) 067 32-9 4420<br />
Fax............................................. 0800 6645627<br />
www.i<strong>de</strong>xx.<strong>de</strong><br />
Australia<br />
<strong>IDEXX</strong> Laboratories Pty. Ltd.<br />
Metro Centre<br />
Unit 20, 30-46 South Street<br />
Rydalmere, New South Wales 2116<br />
Australia<br />
Numero ver<strong>de</strong> per<br />
l’assistenza tecnica..................... 1800 655.978<br />
Telefono....................................... (61) 2 9898 7300<br />
Fax............................................... (61) 2 9898 7302<br />
www.i<strong>de</strong>xx.com.au<br />
Manuale operativo <strong>de</strong>lla centrifuga <strong>VT</strong> <strong>IDEXX</strong> StatSpin 106
Canada<br />
<strong>IDEXX</strong> Laboratories Canada Corporation<br />
C/O UPS<br />
4071 North Service Rd<br />
Burlington, ON L7L 4X6<br />
Canada<br />
Numero ver<strong>de</strong> per<br />
l’assistenza tecnica..................... 1-800-248-2483<br />
Telefono....................................... 1-905-602-9499<br />
Numero ver<strong>de</strong> fax........................ 1-800-248-3010<br />
Fax............................................... 1-905-602-6640<br />
i<strong>de</strong>xx.com<br />
Giappone<br />
<strong>IDEXX</strong> Laboratories KK<br />
3-3-7 Kitano, Mitaka-shi, Tokyo<br />
181-8608 Giappone<br />
Numero ver<strong>de</strong> per<br />
l’assistenza tecnica..................... 0120-71-4921<br />
Telefono....................................... (81) 422 71 4921<br />
Fax............................................... (81) 422 71 4922<br />
www.i<strong>de</strong>xx.co.jp<br />
Manuale operativo <strong>de</strong>lla centrifuga <strong>VT</strong> <strong>IDEXX</strong> StatSpin 107
Prodotto per <strong>IDEXX</strong> Laboratories, Inc. da:<br />
Una divisione di Iris International Inc<br />
Westwood, Massachusetts 02090 USA<br />
Tel.: 800-782-8774<br />
oppure +1 781-551-0100<br />
Fax: +1 781-551-0036<br />
proiris.com
<strong>IDEXX</strong> スタットスピン * <strong>VT</strong><br />
遠 心 分 離 器<br />
取 扱 説 明 書<br />
日 本 語 版<br />
取 扱 説 明 書 — 日 本 語 版<br />
<strong>IDEXX</strong> スタットスピン * <strong>VT</strong> 遠 心 分 離 器
<strong>IDEXX</strong> スタットスピン * <strong>VT</strong> 遠 心 分 離 器<br />
モデル 番 号 V901<br />
獣 医 専 用 。<br />
製 品 番 号<br />
SS<strong>VT</strong>-4 <strong>IDEXX</strong> スタットスピン <strong>VT</strong> 遠 心 分 離 器 (AC 100~240 V、50/60 Hz 用 )<br />
所 有 権 について<br />
本 書 の 情 報 は、 将 来 予 告 なしに 変 更 することがあります。 本 書 で 使 用 する 会 社 名 、 名 前 およびデータは 特 に 断 りのない<br />
限 り 架 空 のものです。 本 書 のすべての 情 報 はアイデックス ラボラトリーズ 株 式 会 社 の 書 面 による 事 前 の 許 可 なしに、 いか<br />
なる 目 的 においても、 また 電 子 的 、 機 械 的 、 その 他 のいかなる 手 段 によっても、 コピーまたは 伝 送 を 行 うことができません。<br />
アイデックス ラボラトリーズ 株 式 会 社 は、 本 書 または 本 書 の 主 題 をカバーする 特 許 または 特 許 出 願 中 のアプリケーション、<br />
商 標 、 著 作 権 、 その 他 の 知 的 所 有 権 または 工 業 所 有 権 を 所 有 していることがあります。 本 書 をご 提 供 することでこれらの<br />
所 有 権 を 与 えることになりません。 ただし、 アイデックス ラボラトリーズ 株 式 会 社 からの 書 面 によるライセンス 契 約 書 に 明<br />
示 的 に 記 載 されている 場 合 を 除 きます。<br />
© 2012 <strong>IDEXX</strong> Laboratories, Inc. All rights reserved.<br />
*<br />
StatSpin、 StatSampler、 LipoClear、 PlasmaRotor、 SafeCrit は 米 国 およびその 他 の 国 々における Iris Sample Processing<br />
の 商 標 または 登 録 商 標 です。 その 他 の 製 品 名 と 会 社 名 およびロゴはすべて、 それぞれの 所 有 者 の 商 標 です。<br />
スタットスピン 遠 心 器 の 付 属 品 は 米 国 特 許 ( 特 許 登 録 番 号 第 5,257,984 号 ) により 保 護 されています。<br />
<strong>IDEXX</strong> スタットスピン <strong>VT</strong> 遠 心 分 離 器 取 扱 説 明 書 110
目 次<br />
はじめに........................................................................... 112<br />
記 号 とその 名 称 ......................................................................................................................................................................................... 113<br />
<strong>IDEXX</strong> スタットスピン <strong>VT</strong> 遠 心 分 離 器 のセットアップ................................... 114<br />
製 品 本 体 と 付 属 品 .................................................................................................................................................................................... 114<br />
<strong>IDEXX</strong> スタットスピン <strong>VT</strong> 遠 心 分 離 器 の 設 置 ............................................................................................................................... 114<br />
電 源 の 接 続 ................................................................................................................................................................................................. 114<br />
<strong>IDEXX</strong> スタットスピン <strong>VT</strong> 遠 心 分 離 器 の 概 要 ........................................... 115<br />
製 品 概 要 と 使 用 目 的 ............................................................................................................................................................................... 115<br />
<strong>IDEXX</strong> スタットスピン <strong>VT</strong> 遠 心 分 離 器 で 使 用 するローターについて .................................................................................. 115<br />
<strong>IDEXX</strong> スタットスピン <strong>VT</strong> 遠 心 分 離 器 の 操 作 方 法 ....................................... 116<br />
カバーの 開 閉 ............................................................................................................................................................................................. 116<br />
ローターの 取 り 付 け................................................................................................................................................................................. 116<br />
シールドの 取 り 付 け................................................................................................................................................................................. 117<br />
遠 心 モードの 選 択 ..................................................................................................................................................................................... 117<br />
サンプル 準 備 のための 操 作 手 順 ....................................................... 117<br />
血 液 化 学 検 査 ............................................................................................................................................................................................ 117<br />
顕 微 鏡 による 尿 検 査 ............................................................................................................................................................................... 118<br />
ヘマトクリット 検 査 ..................................................................................................................................................................................... 118<br />
品 質 管 理 ...................................................................................................................................................................................................... 119<br />
基 準 値 ........................................................................................................................................................................................................... 119<br />
クリーニングとメンテナンス......................................................... 119<br />
クリーニング................................................................................................................................................................................................ 120<br />
ローター 速 度 のチェック.......................................................................................................................................................................... 120<br />
O-リングの 交 換 ........................................................................................................................................................................................ 120<br />
エラー 表 示 ................................................................................................................................................................................................... 120<br />
メンテナンス 記 録 ...................................................................................................................................................................................... 121<br />
故 障 かな?と 思 ったら ............................................................................................................................................................................ 123<br />
修 理 について ............................................................................................................................................................................................. 123<br />
製 品 仕 様 ........................................................................... 124<br />
<strong>IDEXX</strong> スタットスピン <strong>VT</strong> 遠 心 分 離 器 本 体 ................................................................................................................................ 124<br />
消 耗 品 ・ 専 用 オプションパーツ............................................................................................................................................................ 125<br />
<strong>IDEXX</strong> テクニカルサポート 問 い 合 わせ 先 ............................................... 126<br />
<strong>IDEXX</strong> スタットスピン <strong>VT</strong> 遠 心 分 離 器 取 扱 説 明 書 111
はじめに<br />
本 書 および、 製 品 ラベルとパッケージの 差 し 込 みページに 含 まれる 情 報 は、 <strong>IDEXX</strong> スタットスピン * <strong>VT</strong><br />
遠 心 分 離 器 の 操 作 、 保 守 に 必 要 なすべての 情 報 です。<br />
作 業 に 特 別 な 注 意 が 必 要 な 場 合 、 「 注 意 」 記 号 または 「バイオハザード」 記 号<br />
が 本 文 中 に 表 示 されます。<br />
注 記 と 記 号 をともなう 本 文 中 の 表 記 には 特 に 注 意 してください。 同 様 に、 各 施 設 や 各 自 治 体 における<br />
規 制 機 関 が 策 定 したラボ 実 施 基 準 に 従 ってください。<br />
以 下 の 表 に、 <strong>IDEXX</strong> スタットスピン <strong>VT</strong> 遠 心 分 離 器 に 関 するすべての 注 意 と 警 告 を 一 覧 表 示 します。<br />
!<br />
注 意<br />
バイオハザード<br />
警 告 : 日 本 国 内 では、 本 製 品 に 付 属 する 電 源 装 置 のみ 使 用 してください。 それ 以 外 の 電 源 装 置<br />
やトランスを 使 用 すると <strong>IDEXX</strong> スタットスピン <strong>VT</strong> 遠 心 分 離 器 の 電 子 部 品 が 損 傷 し、 また 保 証 も 無<br />
効 となります。<br />
注 意 : RT12 ローターを 用 いて 遠 心 する 場 合 は、 必 ずシールドをセットしてご 使 用 ください。<br />
注 意 : RH12 Microhematocrit ローターを 用 いて 遠 心 する 場 合 は、 シールドを 使 用 しないでください。<br />
注 意 : カバーのインターロックバイパスは、 異 常 時 使 用 のためにのみ 設 計 されています。 遠 心<br />
回 転 中 や 通 常 時 には 絶 対 に 使 用 しないでください。<br />
注 意 : <strong>IDEXX</strong> スタットスピン <strong>VT</strong> 遠 心 分 離 器 を 長 期 間 使 用 しないときは、 ロータのタイプを 問 わず<br />
ローターを 必 ずローターホルダーより 取 り 外 してください。 装 着 したままにすると O- リングが 長 期<br />
間 圧 迫 し 続 けられることになり、 結 果 ローターを 保 持 する 機 能 が 低 下 し 危 険 です。<br />
注 意 : ローターを 正 しく 設 置 しないと、 遠 心 分 離 器 が 損 傷 し、 保 証 も 無 効 となります。<br />
注 意 : サンプルの 遠 心 前 にはその 都 度 ローターをローターホルダーにしっかり 取 り 付 けてくださ<br />
い。 サンプルを 連 続 で 遠 心 するとローターホルダーがローターを 定 着 させる 力 が 低 下 して 危 険 で<br />
す。<br />
注 意 : RT12 ローターは 遠 心 前 にバランスを 取 る 必 要 があります。 1 つのサンプルだけを 処 理 す<br />
る 場 合 、 2 番 目 のサンプルをバランスチューブの 代 わりにしたり、 バランスのために 水 を 入 れた<br />
同 様 のチューブをご 使 用 ください。<br />
注 意 : RT12 ローターでは、 すべてのガラス 製 のチューブのご 使 用 はお 止 めください。<br />
重 要 : すべてのローターは、 使 用 頻 度 に 応 じて 耐 年 数 が 定 められています。 ローターは 亀 裂 がな<br />
いか 点 検 し、 亀 裂 や 目 に 見 える 摩 耗 が 生 じている 場 合 直 ちに 交 換 する 必 要 があります。 新 しい<br />
RT12 ローターを 取 り 付 ける 際 には、 必 ず 新 しいシールドを 取 り 付 けてください。<br />
注 意 : クリーニングやメンテナンスを 行 う 際 は、 必 ず 本 体 の 電 源 プラグをコンセントから 外 して 行 って<br />
ください。<br />
警 告 : 遠 心 分 離 器 本 体 又 はローターへは、 強 酸 や 高 濃 度 酸 、 基 剤 や 酸 化 剤 、 芳 香 族 炭 化 水 素 、<br />
ハロゲン 化 炭 化 水 素 、 エステル、 ケトン 等 をご 使 用 にならないでください。<br />
注 意 : クリーニングの 際 、 遠 心 分 離 器 本 体 に 洗 浄 剤 を 直 接 吹 きかけるとモーターなど 本 体 内 部<br />
の 部 品 に 洗 浄 液 が 付 着 し 故 障 の 原 因 となりますのでお 止 めください。 もし 故 障 が 発 生 しても 保 証<br />
対 象 外 となります。<br />
注 意 : 検 体 が 感 染 物 質 に 汚 染 されているかどうかにかかわらず、 検 体 の 取 扱 において 一 般 的 な<br />
注 意 義 務 事 項 を 遵 守 してください。<br />
注 : 検 体 取 扱 における 注 意 義 務 事 項 の 情 報 については、 次 ページの 参 照 リストをご 覧 ください。<br />
通 常 の 用 途 以 外 には、ご 使 用 にならないでください。 不 適 切 なご 使 用 は、 不 正 確 な 結 果 の 他 、 機 器 の 破 損 、<br />
保 証 の 無 効 につながる 場 合 があります。<br />
<strong>IDEXX</strong> スタットスピン <strong>VT</strong> 遠 心 分 離 器 取 扱 説 明 書 112
記 号 とその 名 称<br />
次 の 表 に、 <strong>IDEXX</strong> スタットスピン <strong>VT</strong> 遠 心 分 離 器 の 外 部 や 本 書 内 で 表 示 される 記 号 について 説 明 し<br />
ます。<br />
記 号 / ボタン 名 称 説 明<br />
スタート<br />
停 止 / 開 く<br />
[スタート] ボタンは 指 定 の 遠 心 モードにて 遠 心 器 を 始 動 させます。<br />
注 : <strong>IDEXX</strong> スタットスピン <strong>VT</strong> 遠 心 分 離 器 に 電 源 スイッチはありません。<br />
プラグをコンセントに 差 し 込 むと 電 源 が 入 ります。 電 源 を 切 る 時 はプラグ<br />
をコンセントから 抜 いて 下 さい。<br />
[ 停 止 / 開 く] ボタンは 遠 心 を 中 断 します。 また、 ローターが 停 止 して<br />
いる 状 態 でカバーのロックを 解 除 します。<br />
SET<br />
モードセレクタ<br />
[モードセレクタ] ボタンにより、 遠 心 モードを 選 択 できます。<br />
( 赤 )<br />
Error/Service<br />
修 理 が 必 要 になると、 [Error/Service] ランプが 点 灯 または 点 滅 します。<br />
24 V – – – 1.7 A<br />
電 源 投 入<br />
[ 電 源 投 入 ] 記 号 は 遠 心 器 本 体 の 背 面 にあり 電 源 プラグの 差 込 口 を 示<br />
します。 ここに 24 V 側 のコードを 差 し 込 んでください。 ( 円 柱 状 のプラグ)<br />
( 緑 )<br />
遠 心 モードランプ<br />
[ 遠 心 モードランプ] 記 号 は、 緑 色 に 点 灯 し 選 択 した 遠 心 モードを 表 示 し<br />
ます。 1 つ 以 上 遠 心 モードランプが 緑 色 に 点 滅 し、 同 時 に [Error/<br />
Service] ランプも 点 滅 している 場 合 、 エラーがあることを 示 しています。<br />
これらのエラーの 詳 細 については、「エラーランプ」 項 を 参 照 してください。<br />
!<br />
注 意<br />
[ 注 意 ] 記 号 は、 カバーラッチ 上 部 に 表 示 されています。 ローターが 回<br />
転 を 停 止 するまで、 カバーを 開 けないでください。 本 書 の [ 注 意 ] 記 号<br />
は、 注 意 / 警 告 事 項 を 示 します。<br />
温 度 制 限<br />
[ 温 度 制 限 ] 記 号 は、 保 管 温 度 および 動 作 温 度 の 制 限 を 示 します。<br />
IVD<br />
生 体 外 診 断<br />
使 用<br />
[IVD] 記 号 は、 生 体 外 診 断 装 置 としてのみ 使 用 するためのアイテムを<br />
示 します。<br />
NON<br />
STERILE<br />
非 滅 菌<br />
[ 非 滅 菌 ] 記 号 は、 非 滅 菌 製 品 を 示 します。<br />
S N<br />
シリアル 番 号<br />
[シリアル 番 号 ] 記 号 は、 シリアル 番 号 を 示 します。<br />
参 照 指 示<br />
[ 参 照 指 示 ] 記 号 の 詳 細 については、 本 取 扱 説 明 書 または 添 付 の 説 明<br />
書 を 参 照 してください。<br />
生 態 学 的 リスク<br />
[ 生 態 学 的 リスク] 記 号 は、 すべての 標 本 に 関 して 一 般 的 な 生 態 学 的 予<br />
防 措 置 に 従 う 必 要 があることを 示 します。<br />
<strong>IDEXX</strong> スタットスピン <strong>VT</strong> 遠 心 分 離 器 取 扱 説 明 書 113
<strong>IDEXX</strong> スタットスピン <strong>VT</strong> 遠 心 分 離 器 のセットアップ<br />
製 品 本 体 と 付 属 品<br />
・ 製 品 本 体<br />
- <strong>IDEXX</strong> スタットスピン <strong>VT</strong> 遠 心 分 離 器 ( 製 品 番 号 : SS<strong>VT</strong>-4) (1)<br />
・ 付 属 品<br />
- 専 用 電 源 アダプター (1)<br />
- アース 付 き 電 源 コード (100V ~ 240V 仕 様 ) (1)<br />
- スタートアップキット<br />
(1.3mL 血 液 遠 心 分 離 チューブ (5) , 交 換 用 O- リング)<br />
- <strong>IDEXX</strong> スタットスピン <strong>VT</strong> 遠 心 分 離 器 取 扱 説 明 書 ( 本 書 ) (1)<br />
- 保 証 書 (1)<br />
<strong>IDEXX</strong> スタットスピン <strong>VT</strong> 遠 心 分 離 器 の 設 置<br />
• <strong>IDEXX</strong> スタットスピン <strong>VT</strong> 遠 心 分 離 器 を 実 験 室 器 具 の 操 作 に 適 した 水 平 面 に 設 置 します。<br />
• <strong>IDEXX</strong> スタットスピン <strong>VT</strong> 遠 心 分 離 器 を 直 射 日 光 に 当 てたり、 極 度 に 高 温 ・ 低 温 な 環 境 に 設 置 し<br />
ないでください。<br />
• 換 気 と 安 全 のために、 遠 心 分 離 器 の 周 囲 30cm 以 内 に 物 を 置 かないでください。<br />
電 源 の 接 続<br />
注 : DC 24V プラグインと 電 源 コードは、 専 用 電 源 アダプターに 接 続 します。<br />
1. DC 24V プラグインを、 <strong>IDEXX</strong> スタットスピン <strong>VT</strong> 遠 心 分 離 器 背 面 の DC 電 源 入 力 ポートに 差 し 込<br />
みます。<br />
2. 専 用 電 源 アダプターに 示 された 電 圧 と 周 波 数 を 供 給 するアース 付 きコンセントに 電 源 コードを 差 し<br />
込 みます。 電 源 を 接 続 すると、 電 源 オンランプが 点 灯 し、 カバーロックが 解 除 されます。<br />
!<br />
警 告 : 日 本 国 内 では、 本 製 品 に 付 属 する 電 源 装 置 のみ 使 用 してください。 それ 以 外 の 電 源 装 置<br />
やトランスを 使 用 すると <strong>IDEXX</strong> スタットスピン <strong>VT</strong> 遠 心 分 離 器 の 電 子 部 品 が 損 傷 し、 また 保 証 も<br />
無 効 となります。<br />
<strong>IDEXX</strong> スタットスピン <strong>VT</strong> 遠 心 分 離 器 取 扱 説 明 書 114
<strong>IDEXX</strong> スタットスピン <strong>VT</strong> 遠 心 分 離 器 の 概 要<br />
製 品 概 要 と 使 用 目 的<br />
<strong>IDEXX</strong> スタットスピン <strong>VT</strong> 遠 心 分 離 器 は、 以 下 の 目 的 で 生 体 外 診 断 でのみ 使 用 できます。<br />
• 全 血 の 血 漿 又 は 血 清 の 分 離<br />
• 顕 微 鏡 分 析 のための 尿 沈 殿 物 の 準 備<br />
• マイクロヘマトクリットチューブでの 全 血 の 遠 心 分 離<br />
<strong>IDEXX</strong> スタットスピン <strong>VT</strong> 遠 心 分 離 器 は 小 型 、 静 音 、 高 速 な 遠 心 分 離 器 です。 独 自 に 開 発 したドライブ<br />
とサスペンションシステムにより、ほとんど 振 動 のない 動 作 が 可 能 です。 軽 量 、 低 質 量 ローターは、 数<br />
秒 で 最 高 速 度 に 達 するとともに、 数 秒 で 完 全 に 停 止 します。<strong>IDEXX</strong> スタットスピン <strong>VT</strong> 遠 心 分 離 器 は、<br />
国 際 安 全 基 準 を 満 たすように 設 計 されています。<br />
安 全 に 関 する 注 意 事 項 : 研 究 所 で 作 業 する 際 には、 適 切 な 安 全 作 業 の 手 引 きに 従 うことをお 勧 めしま<br />
す。これには、 患 者 の 検 体 や 試 薬 を 取 り 扱 うときまたはStatSpin 遠 心 分 離 機 などの 研 究 所 の 機 器 を 操<br />
作 しているときに 手 袋 やアイウェアなどの 個 人 用 保 護 具 (PPE)を 使 用 することが 含 まれますが、これに<br />
限 定 されません。<br />
<strong>IDEXX</strong> スタットスピン <strong>VT</strong> 遠 心 分 離 器 で 使 用 するローターについて<br />
RT12チューブローター<br />
RT12チューブローターは、カラー2 箇 所 の 部 分 でチューブを 支 える 設 計 になっており 直 径 10.9mmの<br />
1.5mL・2.0mL 血 液 遠 心 分 離 チューブを 含 め 尿 分 離 用 などのチューブにも 適 合 します。<br />
!<br />
注 意 :RT12ローターでは、すべてのガラス 製 のチューブのご 使 用 はお 止 めください。<br />
注 意 : RT12ローターを 用 いて 遠 心 する 場 合 は、 必 ずシールドをセットしてご 使 用 ください。<br />
RT12ローターでは 次 のチューブが 使 用 できます。<br />
• <strong>IDEXX</strong> 血 清 分 離 用 チューブ( 赤 キャップ)(1.3mL/0.5mL)<br />
• <strong>IDEXX</strong> リチウムヘパリンチューブ( 緑 キャップ)(1.3mL/0.5mL)<br />
• 事 前 調 整 済 み 尿 チューブ: TU15-10<br />
RH12マイクロヘマトクリットローター ( 専 用 オプションパーツ)<br />
RH12 マイクロヘマトクリットローターは 12 面 のカバーのあるローターで、 ヘマトクリット 検 査 の 際 にキャピラ<br />
リチューブを 遠 心 分 離 するために 使 用 されます。 最 大 のチューブサイズは 1.7mm ( 外 径 ) x 42mm ( 長 )<br />
です。 アイデックス ラボラトリーズ 株 式 会 社 では、 ローターに 付 属 するラバークッションを 年 に 2 度 、 さ<br />
らにローターのチューブが 破 損 したときにはその 都 度 交 換 することをお 勧 めします。<br />
注 意 : RH12 Microhematocritローターを 用 いて 遠 心 する 場 合 は、シールドを 使 用 しないでく<br />
ださい。<br />
!<br />
RH12 マイクロヘマトクリットローターでは 次 のチューブが 使 用 できます。<br />
• ガラス 毛 細 キャピラリチューブ : HT9H、 HT9U<br />
• SafeCrit* プラスチックキャピラリチューブ : HP8H、 HP8U<br />
重 要 :RT12 および RH12 ローターは、 使 用 頻 度 に 応 じて 耐 久 年 数 が 定 められています。 RT12 ローター<br />
は、 約 3600 サイクルごとに 交 換 する 必 要 があります。 この 遠 心 のサイクルは、 平 均 して 毎 日 10 サイ<br />
クル 作 動 させた 場 合 、 18 ヶ 月 間 に 相 当 します。 RH12 ローターは、 約 2600 サイクルごとに 交 換 する 必<br />
要 があります。 この 遠 心 のサイクルは、 平 均 して 毎 日 10 サイクル 作 動 させた 場 合 、 12 ヶ 月 間 に 相 当<br />
します。 ローターに 亀 裂 がないか 定 期 的 に 点 検 し、 亀 裂 や 摩 耗 が 認 められる 場 合 は 直 ちに 交 換 する<br />
必 要 があります。<br />
<strong>IDEXX</strong> スタットスピン <strong>VT</strong> 遠 心 分 離 器 取 扱 説 明 書 115
<strong>IDEXX</strong> スタットスピン <strong>VT</strong> 遠 心 分 離 器 の 操 作 方 法<br />
カバーの 開 閉<br />
電 子 的 に 作 動 するカバーインターロック ・ メカニズムでは、 カバーが 完 全 に 閉 まりロックされない 限 り<br />
遠 心 が 作 動 されないようになっています。カバーラッチがかかっているときのみ、 遠 心 が 開 始 されます。<br />
遠 心 分 離 器 には、 回 転 が 完 了 した 後 でカバーを 押 し 下 げるための 手 動 操 作 用 ラッチも 装 備 されてい<br />
ます。 インターロックは 遠 心 の 終 了 とともに 自 動 的 に、 または [ 停 止 / 開 く] ボタンを 押 すことで 解 除<br />
されます。 黒 いラッチを 強 くつまむと、 カバーが 開 きます。<br />
カバーインターロックバイパス<br />
電 源 障 害 または 電 源 異 常 の 場 合 、 [ 停 止 / 開 く] ボタンを 押 してもカバーは 解 除 されない 場 合 があり<br />
ます。 サンプルをローターから 取 り 出 すには、 伸 ばしたゼムクリップなどの 先 端 を [モードセレクタ]<br />
ボタン 上 のハウジング 前 面 にある 小 さな 穴 に 差 込 み、 約 25mm 内 側 に 押 すことによってカバーインター<br />
ロック ・ メカニズムを 手 動 で 解 除 します。 その 結 果 、 ラッチが 解 除 されます。<br />
!<br />
注 意 : カバーのインターロックバイパスは、 異 常 時 使 用 のためにのみ 設 計 されています。 遠 心 回 転 中<br />
や 通 常 時 には 絶 対 に 使 用 しないでください。<br />
ローターの 取 り 付 け<br />
すべてのローター 底 面 は、 ローターホルダーの<br />
ゴム 製 O- リングにぴったり 適 合 させてください。<br />
右 の 図 は、 ローターホルダー 上 に 適 切 な 位 置<br />
に 置 かれた RH12 ヘマトクリットローターの 切 断<br />
面 を 示 します。 ローターが 回 転 すると、 O- リン<br />
グは 遠 心 力 によって 外 側 に 働 き、 ローターホル<br />
ダーとローター 間 の 摩 擦 結 合 が 強 まります。<br />
O-リング<br />
RH12ヘマトクリットローター<br />
ローターホルダー<br />
RT12 ローターを 取 りつける 際 は、 最 初 にシールドを 取 り 外 します。 そして、<br />
ローターを 取 りつけ、 シールドを 取 り 付 けます。<br />
RT12ローターのシールド<br />
!<br />
注 意 : <strong>IDEXX</strong> スタットスピン <strong>VT</strong> 遠 心 分 離 器 を 長 期 間 使 用 しないときは、 タイプを 問 わずローターを 必<br />
ずローターホルダーより 取 り 外 してください。 装 着 したままにすると O- リングが 長 期 間 圧 迫 し 続 けられ<br />
ることになり、 結 果 ローターを 保 持 する 機 能 が 低 下 します。<br />
! 注 意 : RT12 ローターを 用 いて 遠 心 する 場 合 は、 必 ずシールドをセットしてご 使 用 ください。<br />
! 注 意 : RH12 Microhematocrit ローターを 用 いて 遠 心 する 場 合 は、 シールドを 使 用 しないでください。<br />
! 注 意 : ローターを 正 しく 設 置 しないと、 遠 心 分 離 器 が 損 傷 し、 保 証 も 無 効 となります。<br />
!<br />
!<br />
注 意 : サンプルの 遠 心 前 にはその 都 度 ローターをローターホルダーにしっかり 取 り 付 けてください。 サンプ<br />
ルを 連 続 で 遠 心 するとローターホルダーがローターを 定 着 させる 力 が 低 下 して 危 険 です。<br />
注 意 : RT12 ローターは 遠 心 の 前 にバランスを 取 る 必 要 があります。 1 つのサンプルだけを 処 理 する 場<br />
合 、 2 番 目 のサンプルをバランスチューブの 代 わりにしたり、 水 を 入 れた 同 様 のチューブをご 使 用 して<br />
バランスを 取 ってください。<br />
<strong>IDEXX</strong> スタットスピン <strong>VT</strong> 遠 心 分 離 器 取 扱 説 明 書 116
シールドの 取 り 付 け<br />
シールドは 常 にRT12ローターと 合 わせて 使 用 し、ローターの 交 換 時 にはシールド<br />
も 交 換 する 必 要 があります。<br />
シールド<br />
手 順<br />
1. RT12 ローターが 適 切 に 取 り 付 けられていることを 確 認 してください。<br />
2. シールドが 回 転 部 の 下 部 に 完 全 に 接 するまで、しっかりと 取 りつけてください。<br />
注 :このシールドを 取 り 外 すには、シールドの 中 央 の 端 を 引 き 上 げてください。<br />
遠 心 モードの 選 択<br />
下 記 のガイドラインを 参 考 に、 用 途 にあった 遠 心 モードでご 使 用 ください。<br />
遠 心 モード rpm/RCF 遠 心 時 間 ローター<br />
クイックスピン 15,800/12,000 30 秒 RT12<br />
標 準 15,800/12,000 90 秒 RT12<br />
ハードスピン 15,800/12,000 150 秒 RT12<br />
尿 9,800/3,900 45 秒 RT12<br />
ヘマトクリット 15,800/13,700 120 秒 RH12<br />
サンプル 準 備 のための 操 作 手 順<br />
血 液 化 学 検 査<br />
RT12 ローターおよびプラズマローターは、 抗 凝 固 処 理 全 血 から 血 清 および 血 漿 を 分 離 するために 使<br />
用 します。<br />
血 液 化 学 検 査 用 の 検 体 を 準 備 するには、 クイック、 標 準 、 ハードの 各 モードをご 使 用 いただけますが、<br />
より 良 質 の 検 体 をご 準 備 いただくためには、 標 準 もしくはハードスピンモードの 選 択 をお 奨 めいたしま<br />
す。 凝 固 試 験 の 場 合 、 ハードスピンモードを 使 用 します。<br />
手 順<br />
1. カバーを 持 ち 上 げます。 必 要 に 応 じて、 作 動 中 のサンプルに 対 して 適 用 可 能 なローターを 装 着 し、<br />
ローターを 押 し 下 げて 正 しく 据 え 付 けられていることを 確 認 します。<br />
2. ローターにサンプルチューブを 設 置 します。 RT12 ローターの 場 合 、 バランスをとるために 2 番 目<br />
のサンプルや 水 を 入 れたチューブを 設 置 します。 ローターのバランスが 取 れていることを 確 認 しま<br />
す。 カバーを 閉 じ、 ラッチをかけます。<br />
3. 該 当 するランプが 点 灯 するまで、 [モードセレクタ] ボタンを 押 し 目 的 の 遠 心 モードを 選 択 します。<br />
4. [スタート] ボタンを 押 します。 遠 心 が 完 了 すると、ローターは 約 10 秒 で 停 止 し、ラッチインターロッ<br />
クが 自 動 的 に 解 除 されます。 黒 いラッチを 強 くつまむと、 カバーが 開 きます。<br />
<strong>IDEXX</strong> スタットスピン <strong>VT</strong> 遠 心 分 離 器 取 扱 説 明 書 117
顕 微 鏡 による 尿 検 査<br />
<strong>IDEXX</strong> スタットスピン <strong>VT</strong> 遠 心 分 離 器 では、 事 前 調 整 済 み 尿 チューブ この 線 までいれる<br />
(StatSpin 製 品 # TU15) を 使 用 して、 顕 微 鏡 検 査 のための 尿 沈 殿 物<br />
を 素 早 く 準 備 することが 出 来 ます。<br />
手 順<br />
1. 尿 チューブに 新 鮮 な 尿 を 一 番 上 のマーク (1.5mL を 表 す) まで 満<br />
下 限<br />
たし、 添 付 のストッパを 使 用 してチューブにキャップをします。<br />
2. カバーを 持 ち 上 げ、RT12 チューブローターを 装 着 します。ローター<br />
を 押 し 下 げて 正 しく 据 え 付 けられていることを 確 認 します。<br />
3. RT12 ローターに 尿 チューブを 設 置 します。 ローターのバランスをとるために 2 番 目 のサンプルや<br />
水 を 入 れたチューブを 設 置 します。 ローターのバランスが 取 れていることを 確 認 したら、 カバーを<br />
閉 じ、 ラッチをかけます。<br />
4. 「 尿 の 沈 殿 物 」 が 選 択 されるまで、 [モードセレクタ] ボタンを 押 します。<br />
5. 遠 心 が 完 了 すると、 カバーロックが 自 動 的 に 解 除 されます。 ローターからチューブを 取 り 外 し、 ス<br />
トッパを 外 します。<br />
6. チューブを 逆 さまにし、 下 側 のマーク 位 置 まで 排 液 を 行 います。 注 : 表 面 張 力 によって、 0.1mL<br />
ほど 排 液 が 残 ることがあります。<br />
7. チューブに 再 びキャップをし、 軽 く 振 って 沈 殿 物 を 再 び 浮 遊 させます。<br />
8. 沈 殿 物 が 再 び 浮 遊 したら、 その 1 滴 を 顕 微 鏡 用 スライドに 落 とし、 通 常 の 検 査 手 順 に 従 って、 カ<br />
バースリップを 載 せてスライドを 検 査 します。<br />
ヘマトクリット 検 査<br />
ガラス 製 とプラスチック 製 のマイクロキャピラリチューブを 使 用 できます。<br />
• StatSpin 製 品 # HT9H (ガラス) と HP8H (プラスチック) はヘパリンで 前 処 理 されており、 毛 細<br />
血 管 サンプル 用 に 使 用 されます。<br />
• StatSpin 製 品 # HT9U (ガラス) と HP8U (プラスチック) は 未 処 理 で、 静 脈 穿 刺 ( 抗 凝 固 処 理 )<br />
サンプルで 使 用 されます。<br />
手 順<br />
1. サンプルの 収 集 :<br />
a. 毛 細 血 管 : サンプルはヘパリン 処 理 されたマイクロキャピラリーチューブ (StatSpin 製 品<br />
#HT9H または HP8H) を 使 用 して 切 開 部 から 直 接 収 集 を 行 います。<br />
b. 静 脈 血 : サンプルは、 注 射 器 や 真 空 採 血 用 チューブから 得 られる 対 凝 固 処 理 されたサンプ<br />
ルから 収 集 します。 サンプルには、 未 処 理 のマイクロキャピラリーチューブ (StatSpin 製 品<br />
#HT9U または HP8U) を 使 用 します。<br />
2. 色 分 けされたバンドの 端 を 持 って、 マイクロキャピラリチューブをつかみます。 サンプルをキャピラ<br />
リチューブの 色 分 けされたバンドのところまで 入 れます。 サンプルからチューブを 取 り 外 し、 血 液<br />
がバンドとチューブの 端 の 間 を 半 分 ほど 移 動 するまで、 バンドの 付 いた 端 を 下 方 に 傾 けます。<br />
3. チューブを 水 平 位 置 のままで 支 え、 チューブの 乾 いた (バンドの 付 いた) 端 を 垂 直 に 支 えられた<br />
キャピラリチューブ 用 封 止 剤 パッドに 押 し 込 みます。 ねじって 取 り 外 します。<br />
4. ラボ 用 ティッシュを 使 用 して、 他 の 端 から 漏 れ 出 た 血 液 を 拭 き 取 ります。<br />
5. チューブの 密 封 された 側 の 端 を 外 枠 の 方 へ 押 し、 RH12 マイクロヘマトクリットローターにセットしてく<br />
ださい。 このローターはバランスを 取 る 必 要 がありません。 ローターのカバーを 適 切 な 位 置 にネジで<br />
固 定 します。<br />
<strong>IDEXX</strong> スタットスピン <strong>VT</strong> 遠 心 分 離 器 取 扱 説 明 書 118
充 填 されたキャピラリチューブ<br />
キャピラリチューブ<br />
色 分 けされたバンド、 この 端 をつかむ<br />
血 液 がここに 示<br />
す 位 置 にくるま<br />
で、 キャピラ<br />
リチューブを<br />
傾 ける<br />
キャピラリチューブを<br />
密 閉 する<br />
キャピラリ<br />
チューブ 用<br />
封 止 剤 パッド<br />
密 閉 されたキャピラリチューブ<br />
6. 黒 いカバーノブを 持 ち、 ローターホルダーに 取 り 付 けます。<br />
重 要 : ローターホルダーへのローターの 着 脱 は、 常 にローターカバーの 黒 いノブを 持 って 行 って<br />
ください。 ローターの 外 縁 を 押 すと、 ローターが 破 損 することがあります。<br />
7. カバーを 閉 じ、ラッチをかけます。 [モードセレクタ] ボタンを 押 し、ヘマトクリットモードを 選 択 し [ス<br />
タート] を 押 します。<br />
8. ローターが 停 止 したら、 遠 心 分 離 器 から 取 り 外 します。ローター<br />
内 部 のチューブは 円 形 リーダー (StatSpin 製 品 # HR4C) で<br />
読 み 取 ったり、 ローターから 取 り 外 しカードスタイルリーダー<br />
(StatSpin 製 品 # HR05) で 読 み 取 ることができます。<br />
回 転 後 のキャピラリチューブ<br />
プラズマの<br />
上 端<br />
赤 血 球 の<br />
上 端<br />
赤 血 球 の<br />
下 端<br />
封 止 剤<br />
品 質 管 理<br />
・ 予 め 策 定 されたラボ 実 施 のための 品 質 管 理 手 順 に 従 ってください。<br />
・ 血 球 の 充 填 の 正 確 性 を 評 価 するため、 毎 日 1 個 かそれ 以 上 のチューブを 遠 心 、 数 値 を 一 度 読 み<br />
取 り、 さらに 2 回 続 けて 同 じチューブを 遠 心 させて 下 さい。 1 回 目 と 2 回 目 の 数 値 の 誤 差 は 1% 以<br />
内 でなければなりません。<br />
基 準 値<br />
下 記 はヘマクトリット 検 査 における、 動 物 種 毎 のおおよその 基 準 値 です。<br />
動 物 種 %<br />
成 犬 37–55<br />
子 犬 32–55<br />
成 猫 30–45<br />
子 猫 25–45<br />
クリーニングとメンテナンス<br />
<strong>IDEXX</strong> スタットスピン <strong>VT</strong> 遠 心 分 離 器 の 定 期 的 な 機 器 点 検 とメンテナンスを 行 うようにお 勧 めします。<br />
機 器 が 正 しく 機 能 しない 場 合 、 <strong>IDEXX</strong> テクニカルサポートにお 問 い 合 わせください。<br />
!<br />
!<br />
注 意 : 洗 浄 や 保 守 を 行 う 際 は、 必 ず 本 体 の 電 源 プラグをコンセントから 外 して 行 ってください。<br />
警 告 : 遠 心 分 離 器 本 体 又 はローターへは、 強 酸 や 高 濃 度 酸 、 基 剤 や 酸 化 剤 、 芳 香 族 炭 化 水 素 、 ハ<br />
ロゲン 化 炭 化 水 素 、 エステル、 ケトン 等 をご 使 用 にならないでください。<br />
<strong>IDEXX</strong> スタットスピン <strong>VT</strong> 遠 心 分 離 器 取 扱 説 明 書 119
クリーニング<br />
外 側 やスイッチパネル、 内 部 など、 本 体 のクリーニングを 行 う 際 は、 洗 浄 剤 等 の 液 体 を 本 体 に 直 接 塗<br />
布 せず 布 などに 湿 らせて 汚 れを 拭 き 取 るようにしてください。<br />
外 部 は 水 又 は 中 性 洗 剤 、 内 側 は、 中 性 洗 剤 又 は 消 毒 液 をご 使 用 いただけます。 70% のアルコール 又 は、<br />
10% の 漂 白 剤 は、 内 外 部 ともにご 使 用 いただけます。<br />
!<br />
注 意 : 洗 浄 の 際 、 遠 心 器 本 体 に 洗 浄 剤 を 直 接 吹 きかけるとモーターなど 本 体 内 部 の 部 品 に 洗 浄 液 が 付<br />
着 し 故 障 の 原 因 となりますのでお 止 めください。 もし 故 障 が 発 生 しても 保 障 の 対 象 外 となります。<br />
ローター 速 度 のチェック<br />
定 格 回 転 数 は、 ストロボスコープまたは 光 電 子 タコメータでチェックできます。 <strong>IDEXX</strong> スタットスピン<br />
<strong>VT</strong> 遠 心 分 離 器 が 動 作 速 度 を 得 られない 場 合 、 <strong>IDEXX</strong> テクニカルサポートにお 問 い 合 わせください。<br />
O-リングの 交 換<br />
右 の 図 は、 ローターホルダーに 取 り 付 けられたゴム 製 の O- リングの 位 置 を 示 し<br />
ています。 ローターをローターホルダーにうまく 取 り 付 けられない 場 合 、 シリコンタ<br />
イプの 潤 滑 剤 をほんの 少 量 O- リングガスケットの 3 つの 露 出 部 (A) に 塗 布 し<br />
ます。 O- リングは 定 期 的 に 点 検 し、 平 らになったり 摩 耗 しているように 見 えたら<br />
すぐに 交 換 する 必 要 があります。 O- リングは、 少 なくとも 半 年 に 1 度 は 事 故 防<br />
止 のために 交 換 する 必 要 があります。<br />
新 しい O- リングは 右 図 に 示 すように、 ローターホルダーの 背 部 および 6 つのピン<br />
の 前 面 に 編 み 込 むようにして 取 り 付 けます。 本 製 品 の 付 属 である 交 換 用 O- リング<br />
は 大 切 に 保 管 してください。<br />
A<br />
A<br />
A<br />
エラー 表 示<br />
<strong>IDEXX</strong> スタットスピン <strong>VT</strong> 遠 心 分 離 器 のエラー 状 態 は、 コントロールパネル 上 の 「Error/Service」 ラ<br />
ンプと 他 の 赤 いランプの 点 滅 で 示 されます。 エラー 状 態 の 原 因 は、 点 滅 する 遠 心 モードランプの 組 み<br />
合 わせによって 識 別 できます。<br />
「 遠 心 モード」<br />
ランプ ( 赤 )<br />
QUICK SPIN<br />
NORMAL<br />
HARD SPIN<br />
URINE SEDIMENT<br />
MICROHEMATOCRIT<br />
QUICK SPIN<br />
NORMAL<br />
HARD SPIN<br />
URINE SEDIMENT<br />
MICROHEMATOCRIT<br />
QUICK SPIN<br />
NORMAL<br />
HARD SPIN<br />
URINE SEDIMENT<br />
MICROHEMATOCRIT<br />
QUICK SPIN<br />
NORMAL<br />
HARD SPIN<br />
URINE SEDIMENT<br />
MICROHEMATOCRIT<br />
SET<br />
SET<br />
SET<br />
SET<br />
「Error/Service」<br />
ランプ ( 緑 )<br />
Error/Service<br />
Error/Service<br />
Error/Service<br />
Error/Service<br />
ローターが 30 秒 以 内 に 最 高<br />
速 度 に 達 しなかった。<br />
カバーが 開 いているか、 動 作<br />
中 に 遠 心 モードが 変 わった。<br />
ローター 速 度 を 維 持 できない。<br />
ブレーキ 中 に 回 転 が 作 動 し<br />
た。<br />
遠 心 分 離 器 の 合 計 の 遠 心 カウントが 18,000 サイクルに 達 すると、「Error/Service」 ランプが 絶 えず 点<br />
滅 するようになりますが、 これはドライブシステムの 耐 年 数 に 達 したことを 意 味 し、 ドライブメカニズム<br />
を 交 換 する 必 要 があります。 <strong>IDEXX</strong> テクニカルサポートにお 問 い 合 わせください。<br />
<strong>IDEXX</strong> スタットスピン <strong>VT</strong> 遠 心 分 離 器 取 扱 説 明 書 120
<strong>IDEXX</strong> StatSpin <strong>VT</strong>、StatSpin MP 遠 心 分 離 器 では 定 期 的 に 機 器 点<br />
検 とメンテナンスを 行 ってください。<br />
メンテナンス 記 録<br />
実 施 月 : ____________________<br />
1 2 3 4 5 6 7 8 9 10 11 12 13 14 15 16 17 18 19 20 21 22 23 24 25 26 27 28 29 30 31<br />
実 施 頻 度 必 要 なメンテナ<br />
ンス<br />
毎 日 蓋 、ラッチ、お<br />
よびヒンジに 亀<br />
裂 や 磨 耗 がない<br />
ことを 確 認 して<br />
ください。<br />
ローターやシー<br />
ルドに 亀 裂 や 磨<br />
耗 がないことを<br />
確 認 してくださ<br />
い。<br />
O-リングの 平 坦<br />
化 、 摩 耗 度 の<br />
点 検<br />
121
実 施 年 : ____________________<br />
実 施 頻 度 必 要 なメンテナンス<br />
1 月 2 月 3 月 4 月 5 月 6 月 7 月 8 月 9 月 10 月 11 月 12 月<br />
†<br />
年 1 回 ローターホルダーの<br />
Oリングの 交 換<br />
RT12ローターとシールドを 交 換<br />
してください。 †<br />
必 要 に<br />
応 じて<br />
† RT12ローターとシールドは、3,600 回 転 に1 回 を 目 安 に 交 換 してください。 新 しいRT12ローターを 取 り 付 ける 際 には、 必 ず 新 しいシールドを 取 り 付 けてください。 以 下 のチャートを 使 用 して、1 日 当<br />
たりの 平 均 遠 心 検 体 数 に 基 づいて、ローターとシールドを 交 換 する 頻 度 を 決 めてください。<br />
最 低 限 必 要 な 交 換 頻 度<br />
一 日 あたりのサンプル 数<br />
(1 週 間 が5 営 業 日 である 場 合 )<br />
15 年 1 回<br />
10 18か 月 ごと<br />
5 2.5 年 ごと<br />
3 4 年 ごと<br />
122
故 障 かな?と 思 ったら<br />
問 題<br />
電 源 ランプが 付 かない<br />
遠 心 分 離 機 が 回 転 しない、<br />
またはすぐに 電 源 が 切 れる<br />
遠 心 終 了 後 、 カバーロックが<br />
自 動 的 に 解 除 されない。<br />
対 処 法<br />
• 電 源 コードをチェックし、 コンセントに 完 全 に 差 し 込 まれていることをご 確 認 く<br />
ださい。 また、 他 のコンセントに 差 し 替 えてお 試 しください。<br />
• 電 源 コードのプラグインが 遠 心 器 本 体 に 正 しく 取 り 付 けてあるかご 確 認 くだ<br />
さい。<br />
• <strong>IDEXX</strong> テクニカルサポートにご 相 談 ください。<br />
• カバーが 完 全 に 閉 じていて、 ラッチがかかっていることをご 確 認 ください。<br />
• [Error/Service] ランプが 点 滅 している 場 合 、エラーの 原 因 を 特 定 し、エラー<br />
状 態 を 修 正 し、 [ 停 止 / 開 く] ボタンを 押 してエラーを 解 除 します。<br />
• <strong>IDEXX</strong> テクニカルサポートにご 相 談 ください。<br />
・ <strong>IDEXX</strong> テクニカルサポートにご 相 談 ください。<br />
※カバーのロックは、 手 動 で 解 除 できます。 詳 細 は 本 書 P5 「カバーの 開<br />
(カバーインターロック ・ バイパス)」 ページをご 参 照 ください。<br />
※LC10、LC40、LC15 製 品 の 取 り 扱 いは 現 在 ございません<br />
修 理 について<br />
すべての 修 理 は、 <strong>IDEXX</strong> テクニカルサポートにお 問 い 合 わせください。<br />
修 理 でご 返 却 いただく 際 、 汚 染 除 去 にご 協 力 ください。<br />
修 理 機 器 をお 送 り 頂 く 際 は、 機 器 に 付 着 した 血 液 や 尿 等 の、 汚 染 除 去 にご 協 力 いただけますよう<br />
よろしくお 願 い 申 し 上 げます。<br />
<strong>IDEXX</strong> スタットスピン <strong>VT</strong> 遠 心 分 離 器 取 扱 説 明 書 123
製 品 仕 様<br />
<strong>IDEXX</strong> スタットスピン <strong>VT</strong> 遠 心 分 離 器 本 体<br />
製 品 番 号<br />
モデル 番 号<br />
遠 心 モード<br />
加 速 時 間<br />
減 速 時 間<br />
SS<strong>VT</strong>-4<br />
V901<br />
遠 心 時 間<br />
クイックスピン 15,800 rpm/12,000 xg (30 秒 )<br />
標 準 15,800 rpm/12,000 xg (90 秒 )<br />
ハードスピン 15,800 rpm/12,000 xg (150 秒 )<br />
尿 9,800 rpm/3,900 xg (45 秒 )<br />
ヘマトクリット 15,800 rpm/13,700 xg (120 秒 )<br />
約 6 秒<br />
約 10 秒<br />
電 気 出 力 : DC ( 直 流 ) 24V / 1.7A<br />
入 力 : AC ( 交 流 ) 100 ~ 240V / 50 ~ 60Hz<br />
寸 法<br />
環 境<br />
直 径 : 16.25cm<br />
高 さ : 13.2cm<br />
重 量 : 2.5kg<br />
室 内 使 用 専 用<br />
最 大 順 応 高 度 : 2000m<br />
周 囲 温 度 : 5° C~40° C<br />
相 対 湿 度 : 50% (40℃) ~ 80% (31℃)<br />
主 供 給 電 圧 の 変 動 は± 10% 以 内<br />
主 電 源 過 渡 電 圧 : 設 置 カテゴリⅡ<br />
汚 染 度 2<br />
上 記 仕 様 は 将 来 、 予 告 なしに 変 更 することがあります。<br />
<strong>IDEXX</strong> スタットスピン <strong>VT</strong> 遠 心 分 離 器 取 扱 説 明 書 124
消 耗 品 ・ 専 用 オプションパーツ<br />
製 品 コード 仕 様 遠 心 モード<br />
RT12 2 x 1.5mL 固 定 角 ローター クイック、 標 準 、 ハード<br />
TU15-10 1.5mL 事 前 調 整 済 み 尿 チューブ 50 個 入 / パック 尿<br />
LC10 0.5mL 脂 肪 血 検 体 用 ( 血 清 ・ 血 漿 ) 試 薬 入 りチューブ 10 個 入 / パック ハード<br />
LC40 0.5mL 脂 肪 血 検 体 用 ( 血 清 ・ 血 漿 ) 試 薬 入 りチューブ 40 個 入 / パック ハード<br />
LC15 1.5mL 脂 肪 血 検 体 用 ( 血 清 ・ 血 漿 ) 試 薬 入 りチューブ 40 個 入 / パック ハード<br />
RH12 12 ポジションマイクロヘマトクリットローター ( 円 形 リーダー 「HR4C」 付 き) ヘマトクリット<br />
HP8H-10<br />
HP8U-10<br />
HT9H-10<br />
HT9U-10<br />
SafeCrit キャピラリチューブ (40mm、 ヘパリンナトリウム)、<br />
100% プラスチックマイクロヘマトクリットチューブ 100 本 入 / 瓶<br />
SafeCrit キャピラリチューブ (40mm、 未 処 理 )、 100% プラスチックマイク<br />
ロヘマトクリットチューブ 100 本 入 / 瓶<br />
ガラスキャピラリチューブ (40mm、 ヘパリンナトリウム)、 ガラスマイクロ<br />
ヘマトクリットチューブ 100 本 入 / 瓶<br />
ガラスキャピラリチューブ (40mm、 未 処 理 )、 ガラスマイクロヘマトクリッ<br />
トチューブ 100 本 入 / 瓶<br />
ヘマトクリット<br />
ヘマトクリット<br />
ヘマトクリット<br />
ヘマトクリット<br />
HS24-10 キャピラリチューブ 用 封 止 剤 パッド -<br />
HR05 ヘマトクリットリーダー、 (カードスタイル、 40mm ヘマトクリットチューブ 用 ) -<br />
HR4C ヘマトクリットリーダー ( 円 形 、 RH12 ローター 用 ) -<br />
00 リング ローターフォルダ 用 交 換 用 O ‐ リング -<br />
<strong>IDEXX</strong> スタットスピン <strong>VT</strong> 遠 心 分 離 器 取 扱 説 明 書 125
<strong>IDEXX</strong> テクニカルサポート 問 い 合 わせ 先<br />
<strong>IDEXX</strong> 担 当 者 名 :<br />
電 話 / 内 線 :<br />
米 国<br />
<strong>IDEXX</strong> Laboratories, Inc.<br />
One <strong>IDEXX</strong> Drive<br />
Westbrook, Maine 04092 USA<br />
フリーダイヤル .....................................1-800-248-2483<br />
代 表 電 話 ..................................................1-207-556-0300<br />
通 話 料 無 料 Fax......................................1-800-248-3010<br />
www.i<strong>de</strong>xx.com<br />
イタリア<br />
<strong>IDEXX</strong> Laboratories Italia, S.r.l.<br />
Via Canova 27<br />
20145 Milano<br />
Italy<br />
フリーダイヤル .....................................00800 1234 3399<br />
電 話 ............................................................(39) 02 319 20 31<br />
Fax...............................................................(39) 02 319 20 347<br />
www.i<strong>de</strong>xx.it<br />
オランダ<br />
<strong>IDEXX</strong> Europe B.V.<br />
Scorpius 60 Building F<br />
2132 LR Hoofddorp<br />
The Netherlands<br />
フリーダイヤル .....................................00800 1234 3399<br />
電 話 ............................................................(31) 23 558 7000<br />
通 話 料 無 料 Fax......................................00800 1234 3333<br />
Fax...............................................................(31) 23 558 7233<br />
www.i<strong>de</strong>xx.nl<br />
スペイン<br />
<strong>IDEXX</strong> Laboratorios, S.L.<br />
c/ Plom, n°2–8, 3°<br />
08038 Barcelona<br />
Spain<br />
フリーダイヤル .....................................00800 1234 3399<br />
電 話 ............................................................(34) 93 414 26 08<br />
Fax...............................................................(34) 93 414 74 78<br />
www.i<strong>de</strong>xx.es<br />
フランス<br />
<strong>IDEXX</strong> S.A.R.L.<br />
Bâtiment Flori<strong>de</strong> - Eragny Parc<br />
11 Allée Rosa, Luxembourg<br />
95610 Eragny, sur Oise<br />
France<br />
フリーダイヤル .....................................00800 1234 3399<br />
電 話 ............................................................(33) 1 34 32 62 00<br />
Fax...............................................................(33) 1 34 30 02 08<br />
www.i<strong>de</strong>xx.fr<br />
英 国<br />
<strong>IDEXX</strong> Laboratories Ltd.<br />
Milton Court, Churchfield Road<br />
Chalfont St Peter<br />
Buckinghamshire SL9 9EW<br />
United Kingdom<br />
フリーダイヤル .....................................00800 1234 3399<br />
電 話 ............................................................(44) 01753 891 660<br />
Fax...............................................................(44) 01753 891 520<br />
www.i<strong>de</strong>xx.co.uk<br />
ドイツ<br />
<strong>IDEXX</strong> GmbH<br />
Mörikestraße 28/3<br />
D-71636 Ludwigsburg<br />
Germany<br />
フリーダイヤル ..................................00800 1234 3399<br />
Fax............................................................0800 6645627<br />
www.i<strong>de</strong>xx.<strong>de</strong><br />
オーストラリア<br />
<strong>IDEXX</strong> Laboratories Pty. Ltd.<br />
Metro Centre<br />
Unit 20, 30-46 South Street<br />
Rydalmere, New South Wales 2116<br />
Australia<br />
フリーダイヤル .....................................1300 44 33 99<br />
電 話 ............................................................(61) 2 9898 7300<br />
Fax...............................................................(61) 2 9898 7302<br />
www.i<strong>de</strong>xx.com.au<br />
<strong>IDEXX</strong> スタットスピン <strong>VT</strong> 遠 心 分 離 器 取 扱 説 明 書 126
カナダ<br />
<strong>IDEXX</strong> Laboratories Canada Corporation<br />
C/O UPS<br />
4071 North Service Rd<br />
Burlington, ON L7L 4X6<br />
Canada<br />
フリーダイヤル .....................................1-800-248-2483<br />
電 話 ............................................................1-905-602-9499<br />
通 話 料 無 料 Fax......................................1-800-248-3010<br />
Fax...............................................................1-905-602-6640<br />
www.i<strong>de</strong>xx.com<br />
日 本<br />
アイデックス ラボラトリーズ 株 式 会 社<br />
181-8608<br />
東 京 都 三 鷹 市 北 野 3-3-7<br />
フリーダイヤル .....................................0120-71-4921<br />
電 話 ............................................................0422-71-4921<br />
Fax...............................................................0120-71-3922<br />
www.i<strong>de</strong>xx.co.jp<br />
<strong>IDEXX</strong> スタットスピン <strong>VT</strong> 遠 心 分 離 器 取 扱 説 明 書 127
販 売 元 :<strong>IDEXX</strong> Laboratories, Inc.<br />
製 造 元 :Iris International Inc<br />
Westwood, MA 02090 USA<br />
電 話 : 800-782-8774<br />
または: 781-551-0100<br />
ファックス: 781-551-0036<br />
proiris.com