Manual de instrucciones - Triton Tools
Manual de instrucciones - Triton Tools
Manual de instrucciones - Triton Tools

You also want an ePaper? Increase the reach of your titles
YUMPU automatically turns print PDFs into web optimized ePapers that Google loves.
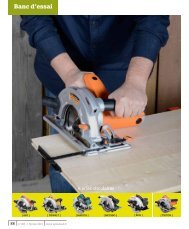
• Do not operate the saw upsi<strong>de</strong> down unless<br />
securely mounted and guar<strong>de</strong>d in a reputable<br />
saw bench (eg. a <strong>Triton</strong> Workcentre or <strong>Triton</strong><br />
Compact Saw Table).<br />
SAW BENCH MOUNTING ALIGNMENT<br />
The <strong>Triton</strong> Precision Power Saw has been<br />
specifically <strong>de</strong>signed to easily fit all mo<strong>de</strong>l <strong>Triton</strong><br />
Workcentres (MK3 and Series 2000), and Compact<br />
Saw Tables. Follow the saw mounting and alignment<br />
procedures outlined in the instruction manual for<br />
the bench you have purchased.<br />
SERIES 2000 WORKCENTRES<br />
If you have a Series 2000 Workcentre with a Serial<br />
No. of 335,000 onwards, the saw sli<strong>de</strong> chassis is<br />
ma<strong>de</strong> of pressed steel, painted silver. It has facilities<br />
for attaching two alignment cams for easy mounting<br />
and positioning of the <strong>Triton</strong> Precision Power Saw.<br />
The cams (which are inclu<strong>de</strong>d with the Workcentre<br />
sli<strong>de</strong> chassis) allow the front and rear of the saw to<br />
be si<strong>de</strong>-shifted by up to 1.5mm in either direction to<br />
ensure perfect alignment with the overhead guard<br />
support and the rip fence.<br />
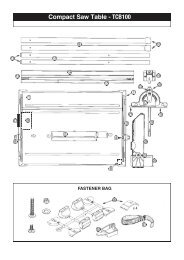
TRITON COMPACT SAW TABLES<br />
The <strong>Triton</strong> saw is easily fitted to all <strong>Triton</strong> Compact<br />
Saw Tables. Compacts with a Serial No. of 8,000<br />
onwards can utilise the above-mentioned saw<br />
alignment feature. The alignment cams are inclu<strong>de</strong>d<br />
with the Compact Saw Table. This feature cannot<br />
be used on Compacts with a Serial No. less than<br />
8,000.<br />
GB<br />
MAINTENANCE<br />
• Regularly check that the saw arbor, arbor<br />
washers and bore reducing spacer are clean,<br />
and free of built-up gum <strong>de</strong>posits or caked-on<br />
sawdust. Check that the faces of the arbor<br />
washers are smooth and free from burrs.<br />
Check that the bla<strong>de</strong> retaining bolt is correctly<br />
tightened.<br />
• Check the operation of the spring-loa<strong>de</strong>d guard.<br />
It must close quickly and without scraping<br />
against any part of the machine. Remove the<br />
bla<strong>de</strong> and clean accumulated sawdust or wood<br />
slivers from the guard area.<br />
• Occasionally check the tension of the Micro-<br />
Adjustment Knob, (13) and if necessary tighten<br />
or loosen the Nyloc nut near the base of the<br />
assembly.<br />
• The saw ventilation slots should be kept clean<br />
and clear of any foreign matter. Use a lightly<br />
dampened cloth to wipe the saw clean - do not<br />
use solvents.<br />
• Regularly check the saw bla<strong>de</strong> for flatness. Use<br />
of the saw with a buckled bla<strong>de</strong> places excessive<br />
load on the motor and gearbox assembly, and<br />
may affect your warranty.<br />
BRUSH REPLACEMENT<br />
• The carbon brushes are a consumable item<br />
which should be inspected periodically and<br />
replaced when worn.<br />
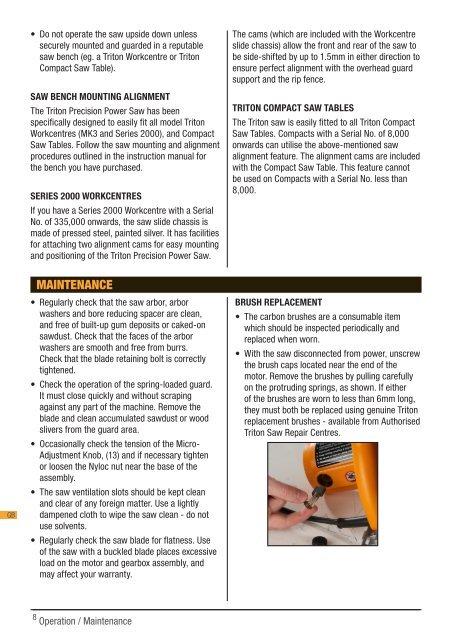
• With the saw disconnected from power, unscrew<br />
the brush caps located near the end of the<br />
motor. Remove the brushes by pulling carefully<br />
on the protruding springs, as shown. If either<br />
of the brushes are worn to less than 6mm long,<br />
they must both be replaced using genuine <strong>Triton</strong><br />
replacement brushes - available from Authorised<br />
<strong>Triton</strong> Saw Repair Centres.<br />
8<br />
Operation / Maintenance