Balais et commutation - T-T Electric
Balais et commutation - T-T Electric
Balais et commutation - T-T Electric

Create successful ePaper yourself
Turn your PDF publications into a flip-book with our unique Google optimized e-Paper software.
Instructions de mise en<br />
service <strong>et</strong> maintenance<br />
Moteurs à courant continu<br />
Operating and maintenance<br />
instructions<br />
DC machines<br />
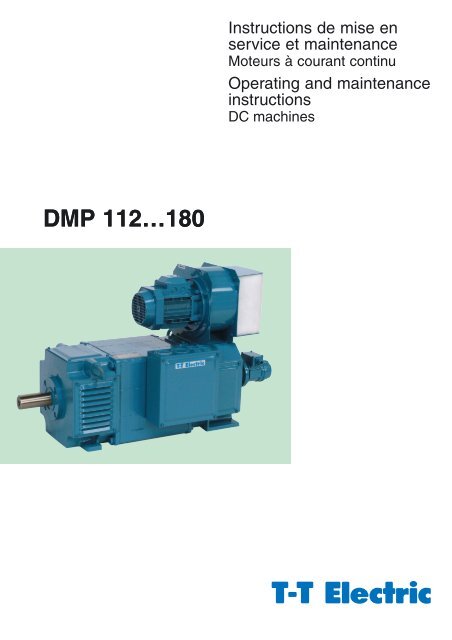
DMP 112…180
Sommaire<br />
Précautions générales de stockage ..................... 5<br />
Stockage ........................................................................................................................ 5<br />
Protection de l’arbre du rotor contre la rouille ........................................ 6<br />
Unités de mesure ..................................................................................................... 6<br />
Installation <strong>et</strong> montage ............................................................... 7<br />
Fondations - Généralités ..................................................................................... 7<br />
Levage de la machine ........................................................................................... 8<br />
Montage de l’accouplement ............................................................................... 8<br />
Montage sur les fondations ............................................... 9<br />
Inspection ...................................................................................................................... 9<br />
Scellement .................................................................................................................... 9<br />
Travaux après scellement ................................................................................... 9<br />
Couple de serrage des boulons de fondation ...................................... 10<br />
Alignement ................................................................................................................ 10<br />
Alignement ................................................................................................... 11<br />
Vérification de l’alignement ............................................................................. 11<br />
Alignement avec transmission à courroies trapézoïdales ............ 12<br />
Charges aux paliers avec transmission<br />
à courroies trapézoïdales ................................................................................. 13<br />
Effort admissible sur l’arbre ............................................................................ 14<br />
Mise en service ..................................................................................... 18<br />
Contrôles avant la mise en service ............................................................ 18<br />
Contrôles pendant la mise en service ...................................................... 19<br />
Surveillance <strong>et</strong> entr<strong>et</strong>ien ....................................................... 20<br />
Inspection après 100 heures de service ................................................. 20<br />
Maintenance ............................................................................................................. 21<br />
Mesure de la résistance d’isolement ......................................................... 22<br />
Exemple ...................................................................................................................... 23<br />
Séchage des enroulements ............................................................................ 23<br />
<strong>Balais</strong> <strong>et</strong> <strong>commutation</strong> ............................................................. 24<br />
Généralités ................................................................................................................ 24<br />
Formation d’étincelles ........................................................................................ 24<br />
Porte-balais ............................................................................................................... 25<br />
Mauvais contact des balais ............................................................................. 25<br />
<strong>Balais</strong> coincés ......................................................................................................... 25<br />
Doigts de pression coincés ............................................................................. 25<br />
<strong>Balais</strong> usés ................................................................................................................ 26<br />
Huile sur les surfaces de contact ................................................................ 26<br />
Surface de contact rayée .................................................................................. 26<br />
Mica ............................................................................................................................... 26<br />
Vibrations ................................................................................................................... 26<br />
Formation de la patine sur le collecteur .................................................. 27<br />
Frottement <strong>et</strong> usure des balais ..................................................................... 28<br />
Longue durée de vie du collecteur ............................................................. 28<br />
Ne pas détériorer une bonne patine .......................................................... 28<br />
Traitement de la surface du collecteur ..................................................... 29<br />
Remplacement des balais usés ................................................................... 29<br />
Rodage des balais ................................................................................................ 30<br />
Réglage du porte-balais sur la ligne neutre .......................................... 30<br />
Tournage du collecteur ...................................................................................... 32<br />
Balai de terre ............................................................................................................ 33<br />
Niveau de vibrations ............................................................................................ 34<br />
Roulements (inspection des roulements) ............................................... 34<br />
Graissage ....................................................................................................... 35<br />
Graissage ................................................................................................................... 36<br />
Graissage à la mise en service .................................................................... 36<br />
Graissage pendant la marche ....................................................................... 36<br />
N<strong>et</strong>toyage ....................................................................................................... 37<br />
Généralités ................................................................................................................ 37<br />
N<strong>et</strong>toyage des bobines ...................................................................................... 37<br />
N<strong>et</strong>toyage de l’échangeur air/air (IC 6 66) ............................................. 38<br />
N<strong>et</strong>toyage de l’échangeur air/eau (IC 86 W) ........................................ 38<br />
Inspection intérieure de la machine<br />
en cours de fonctionnement ........................................................................... 39<br />
Remplacement du filtre ...................................................................................... 39<br />
Raccordement des câbles ................................................. 40<br />
Schéma de bornes ............................................................................................... 40<br />
Démontage <strong>et</strong> remontage .................................................... 42<br />
Démontage ................................................................................................................ 42<br />
Remontage ................................................................................................................ 43<br />
Pièces de rechange ....................................................................... 44<br />
Pièces de rechange conseillées .................................................................. 44<br />
Nomenclature DMP ............................................................................................. 44<br />
Contents<br />
General storage precautions ........................................... 5<br />
Storage ........................................................................................................................... 5<br />
Rust protection of the rotor shaft .................................................................... 6<br />
Units of measure ...................................................................................................... 6<br />
Installation and erection .......................................................... 7<br />
Foundations - General .......................................................................................... 7<br />
Lifting of machine ..................................................................................................... 8<br />
Mounting of coupling .............................................................................................. 8<br />
Erection on the foundation ................................................. 9<br />
Inspection ...................................................................................................................... 9<br />
Grouting ......................................................................................................................... 9<br />
Work after grouting .................................................................................................. 9<br />
Tightening torque of foundation bolts ....................................................... 10<br />
Alignment ................................................................................................................... 10<br />
Alignment ....................................................................................................... 11<br />
Measurement of parallel deviation .............................................................. 11<br />
Alignment with V-belt drive .............................................................................. 12<br />
Bearing loads with V-belt drive ...................................................................... 13<br />
Permissible bearing load .................................................................................. 14<br />
Commissioning .................................................................................... 18<br />
Checks before commissioning ...................................................................... 18<br />
Checks during commissioning ...................................................................... 19<br />
Inspection and maintenance ......................................... 20<br />
Inspection after 100 operating hours ........................................................ 20<br />
Maintenance ............................................................................................................. 21<br />
Measuring of insulation resistance ............................................................. 22<br />
Example ...................................................................................................................... 23<br />
Drying of windings ................................................................................................ 23<br />
Brushes and <strong>commutation</strong> ............................................... 24<br />
General ........................................................................................................................ 24<br />
Sparking ...................................................................................................................... 24<br />
Brush holders .......................................................................................................... 25<br />
Poor brush contact ............................................................................................... 25<br />
Stuck brushes .......................................................................................................... 25<br />
Stuck pressure fingers ....................................................................................... 25<br />
Worn brushes .......................................................................................................... 26<br />
Oil on contact surfaces ...................................................................................... 26<br />
Scratched contact surface ............................................................................... 26<br />
Protruding mica ...................................................................................................... 26<br />
Vibrations ................................................................................................................... 26<br />
How the patina is formed .................................................................................. 27<br />
Brush friction and brush wear ....................................................................... 28<br />
Long commutator life limit ................................................................................ 28<br />
Do not touch a good patina ............................................................................. 28<br />
Treatment of commutator surface ............................................................... 29<br />
Exchanging the worn brushes ....................................................................... 29<br />
Embedding of brushes ....................................................................................... 30<br />
Adjustment of brush gear to neutral position ....................................... 30<br />
Turning of commutator ....................................................................................... 32<br />
Earthing brush ........................................................................................................ 33<br />
Vibration level .......................................................................................................... 34<br />
Bearings (bearing inspection) ....................................................................... 34<br />
Lubrication ................................................................................................... 35<br />
Lubrication ................................................................................................................. 35<br />
Lubrication during commissioning .............................................................. 36<br />
Lubrication during operation ........................................................................... 36<br />
Cleaning ............................................................................................................ 37<br />
General ........................................................................................................................ 37<br />
Cleaning of windings ........................................................................................... 37<br />
Cleaning of air/air cooler (IC 6 66) ............................................................. 38<br />
Cleaning of air/water cooler (IC 86 W) ..................................................... 38<br />
Internal machine inspection during operation ..................................... 39<br />
Filter change ............................................................................................................ 39<br />
Connection of cables ................................................................. 40<br />
Terminal diagram ................................................................................................... 40<br />
Dismantling and reassembling .................................. 42<br />
Dismantling ............................................................................................................... 42<br />
Reassembling .......................................................................................................... 43<br />
Spare parts .................................................................................................. 44<br />
Recommended spare parts ............................................................................ 44<br />
Nomenclature DMP ............................................................................................. 44<br />
1
Instructions de sécurité<br />
pour l’utilisation de machines<br />
à courant continu<br />
(conformes à la directive Basse Tension 73/23/CEE)<br />
1. Généralités<br />
Les machines à courant continu comportent des parties<br />
tournantes, éventuellement sous tension même à l’arrêt,<br />
ainsi que, le cas échéant, des surfaces chaudes.<br />
L’ensemble des opérations relatives au transport, au raccordement,<br />
à la mise en service <strong>et</strong> à la maintenance régulière<br />
doivent être effectuées par du personnel qualifié habilité<br />
<strong>et</strong> responsable (respecter les normes EN 60034; EN 50110-<br />
1/ VDE 0105). Tout comportement ou maniement inapproprié<br />
est susceptible de causer des dommages corporels <strong>et</strong><br />
matériels graves. Les prescriptions <strong>et</strong> exigences nationales,<br />
locales <strong>et</strong> spécifiques à l’installation considérée doivent être<br />
prises en considération.<br />
Les auto-collants d’avertissements <strong>et</strong> d’instructions fixées<br />
sur les machines doivent obligatoirement être respectées.<br />
Pour information complémentaire, se référer à nos<br />
instructions d’emploi <strong>et</strong> de maintenance que nous vous<br />
transm<strong>et</strong>trons sur demande pour le type <strong>et</strong> le numéro de<br />
machine que vous nous indiquerez.<br />
Pour information supplémentaire <strong>et</strong> assurer un fonctionnement<br />
correct <strong>et</strong> sans trouble, consulter la documentation.<br />
2. Utilisation conforme à la destination<br />
Ces machines sont destinées à être utilisées dans des<br />
installations à usage industriel ou commercial. Elles répondent<br />
aux normes de la série EN 60034 (VDE 0530). Leur<br />
utilisation dans des atmosphères explosives est interdite,<br />
à moins d’être expressément conçues pour c<strong>et</strong>te utilisation<br />
(respecter les indications supplémentaires). Dans le cas<br />
exceptionnel où leur utilisation dans des installations à usage<br />
autre qu’industriel ou commercial impliquerait des exigences<br />
plus sévères (par exemple protection contre les contacts<br />
avec des doigts d’enfant), les conditions requises doivent<br />
être réalisées du côté de l’installation lors de la mise en<br />
place de la machine.<br />
Les machines sont conçues pour des températures ambiantes<br />
de – 5 °C à + 40 °C <strong>et</strong> des altitudes ne dépassant pas<br />
1000 m au-dessus du niveau de la mer. D’éventuelles<br />
indications divergentes sur la plaque signalétique doivent<br />
impérativement être respectées. Les conditions sur le site<br />
doivent correspondre à la totalité des indications de la<br />
plaque signalétique.<br />
Les machines à courant continu sont des composants<br />
destinés à être incorporés dans les machines au sens de la<br />
directive sur les machines 89/392/CEE. Leur mise en service<br />
est interdite tant que la conformité du produit final avec c<strong>et</strong>te<br />
directive n’a pas été établie (respecter la norme EN 60204-1).<br />
Les machines à courant continu répondent aux exigences de<br />
la Directive Basse Tension 73/23/CEE.<br />
Le fonctionnement de la machine utilisée conformément à sa<br />
destination doit satisfaire aux exigences en matière de<br />
protection de la directive sur la compatibilité électromagnétique<br />
89/336/CEE. L’installation adéquate (par exemple<br />
distance physique entre conducteurs de signalisation <strong>et</strong><br />
câbles d’énergie, utilisation de câbles <strong>et</strong> conducteurs<br />
blindés) est de la responsabilité du constructeur de l’installation.<br />
Dans les installations comportant des convertisseurs,<br />
respecter également des indications en matière de CEM<br />
fournies par le constructeur de convertisseurs.<br />
3. Transport, stockage<br />
D’éventuels dommages constatés après la livraison doivent<br />
être signalés immédiatement à l’entreprise de transport; si<br />
nécessaire, la mise en service doit être annulée. Les<br />
oeill<strong>et</strong>s de transport vissés doivent être bien serrés. Ils sont<br />
dimensionnés en fonction du poids de la machine; par<br />
conséquent, aucune charge supplémentaire ne doit leur<br />
Saf<strong>et</strong>y instructions<br />
for the operation<br />
of direct-current machines<br />
(in conformity with the low-voltage directive 73/23/EEC)<br />
1. General<br />
DC machines have rotating parts and parts which may be<br />
live even at rest, as well as possibly hot surfaces.<br />
All operations serving transport, connection, commissioning<br />
and periodic maintenance shall be carried out by skilled,<br />
responsible technical personnel (observe EN 60034; EN<br />
50110-1/ VDE 0105). Improper handling can cause serious<br />
personal injury and damage to property.<br />
The applicable national, local and installation-specific<br />
regulations and requirements shall be taken into account.<br />
Warning stickers and signs affixed to the machine must, on<br />
all accounts, be observed. For d<strong>et</strong>ails see our operating<br />
and maintenance instructions. These will be sent to you<br />
on request, subject to indication of the machine type and<br />
serial number.<br />
To guarantee trouble-free operation the manufacturers<br />
documentation shall be followed.<br />
2. Intended use<br />
These machines are intended for industrial and commercial<br />
installations. They comply with the standards series EN<br />
60034 (VDE 0530). Their use in hazardous areas is<br />
prohibited unless they are expressly intended for such use<br />
(observe additional instructions). Where, in exceptional<br />
cases, - use in non-commercial installations - more stringent<br />
requirements are to be m<strong>et</strong> (e.g. protection against contact<br />
with children’s fingers), these conditions must be ensured by<br />
the customer when the machine is installed.<br />
The machines are rated for ambient temperatures of – 5 to<br />
+ 40 °C and altitudes of
être appliquée. En cas de besoin, utiliser des moyens<br />
auxiliaires de transport appropriés de dimensions adéquates<br />
(par ex. guidage par câbles).<br />
Lorsque les machines sont stockées, veiller à ce que<br />
l’environnement soit sec, exempt de poussières <strong>et</strong>, autant<br />
que possible, de vibrations (V eff<br />
≤ 0,2 mm/s). Danger<br />
d’endommagement des paliers suite à l’arrêt prolongé des<br />
machines ! Des durées de stockage prolongées réduisent la<br />
durée d’emploi du lubrifiant des paliers.<br />
(Se reporter au chapitre «précautions générales de stockage»<br />
du manuel d’instruction).<br />
4. Installation<br />
Veiller à une surface d’appui plane, une bonne fixation des<br />
pattes ou, selon le cas, des brides, <strong>et</strong> un alignement précis<br />
en cas d’accouplement direct.<br />
Eviter que le montage ne soit à l’origine de résonances dans<br />
la plage des vitesses de service <strong>et</strong> avec le sextuple (en cas<br />
d’alimentation en monophasé, le double) de la fréquence du<br />
réseau. Pour les machines de puissance inférieure ou égale<br />
à 100 kW, faire tourner le rotor manuellement pour détecter<br />
d’éventuels bruits de frottement anormaux. Contrôler le<br />
sens de rotation à l’état non couplé (tenir compte de ce qui<br />
est dit sous 5). Ne monter <strong>et</strong> démonter les éléments entraînants<br />
(poulie, accouplement) qu’avec les dispositifs appropriés<br />
(chauffés !) <strong>et</strong> les protéger contre les contacts par un<br />
recouvrement. Eviter des tensions de courroies inadmissibles<br />
(catalogue, liste technique).<br />
L’équilibrage de la machine est indiqué sur la face du bout<br />
d’arbre ou la plaque signalétique (H = demi-clav<strong>et</strong>te, F =<br />
clav<strong>et</strong>te entière). Lors du montage de l’élément entraînant,<br />
tenir compte de l’équilibrage.<br />
Pour les modèles avec bout d’arbre dirigé vers le bas, il est<br />
recommandé de prévoir un toit de protection. Les modèles<br />
avec bout d’arbre dirigé vers le haut doivent faire l’obj<strong>et</strong> de<br />
mesures empêchant la pénétration d’eau dans les paliers.<br />
Veiller à ce que la ventilation ne soit pas entravée. L’air<br />
d’évacuation de la machine - de même que celui provenant<br />
de groupes voisins - ne doit pas pouvoir être aspiré directement.<br />
Un air de refroidissement chimiquement pollué ou<br />
contenant des poussières, ainsi qu’une durée prolongée de<br />
fonctionnement à faible charge peuvent provoquer une<br />
dégradation de la <strong>commutation</strong> <strong>et</strong> réduire la durée de vie des<br />
balais.<br />
5. Raccordement électrique <strong>et</strong> mise en service<br />
Les travaux ne doivent être effectués que par des personnes<br />
qualifiées <strong>et</strong> habilitées, la machine étant au repos,<br />
séparée de l’alimentation <strong>et</strong> protégée contre tout<br />
réenclenchement intempestif. Ceci vaut également pour les<br />
circuits auxiliaires (par exemple chauffage à l’arrêt). Avant la<br />
mise en service, enlever les arrêts de transport.<br />
Vérifier l’absence de tension!<br />
Tout dépassement des tolérances selon la EN 60034 (VDE<br />
0530), c’est-à-dire tout dépassement de la tension de plus<br />
de ± 5%, ou un facteur de forme moins favorable du fait de la<br />
nature de l’alimentation par convertisseur, a pour eff<strong>et</strong> une<br />
augmentation de l’échauffement <strong>et</strong> une réduction de la durée<br />
de vie.<br />
Les indications de la plaque signalétique ainsi que le schéma<br />
de raccordement dans la boîte de connexions doivent être<br />
respectés.<br />
Le raccordement doit être réalisé de manière à assurer une<br />
liaison électrique durable <strong>et</strong> sûre (pas de brins effilochés);<br />
utiliser les embouts prévus à c<strong>et</strong> eff<strong>et</strong>. Réaliser une connexion<br />
du conducteur de protection sûre.<br />
Les distances dans l’air entre les parties nues sous tension<br />
<strong>et</strong> entre celles-ci <strong>et</strong> la terre doivent être respectées.<br />
La boîte de connexions ne doit contenir ni corps étrangers,<br />
ni sal<strong>et</strong>és ou humidité. Les entrées de câbles non utilisées<br />
doivent être obturées, la boîte elle-même devant être fermée<br />
de façon à être étanche à l’eau <strong>et</strong> à la poussière.<br />
When machines are stored, make sure of dry, dust-free,<br />
low-vibration (V rms<br />
≤ 0.2 mm/s) environment (danger of<br />
bearing damage at rest). Long storage periods reduce the<br />
grease service life of the bearings. (Refer to the chapter<br />
«general storage precautions» of the maintenance instruction<br />
manual).<br />
4. Installation<br />
Make sure of even supporting surface, of solid foot or flange<br />
mounting and of exact alignment in case of direct coupling.<br />
Avoid resonances in operating speed range and with the<br />
sixfold (or, in case of single-phase supply, the double) mains<br />
frequency which may be caused by the assembly. In case of<br />
machines ≤ 100 kW, turn rotor by hand, listen for abnormal<br />
slipping noises. Check direction of rotation in uncoupled<br />
state (follow Section 5.) Mount or remove output elements<br />
(pulley, coupling) only using appropriate means (heat!) and<br />
cover them with a touch guard. Avoid excessive belt tensions<br />
(catalogue, technical list).<br />
The balance is indicated on the shaft end face or on the<br />
rating plate (H = half, F = full key). When mounting the output<br />
element, take care of balance!<br />
For models with shaft ends pointing downward, a canopy is<br />
recommended; for models with shaft ends pointing upward,<br />
measures are needed to protect against ingress of water into<br />
the bearing.<br />
Do not obstruct ventilation. Exhaust air, also from<br />
neighbouring s<strong>et</strong>s, must not be drawn in again directly.<br />
Chemically polluted air or dust-containing cooling air or lowload<br />
operation for a prolonged period of time may negatively<br />
affect the <strong>commutation</strong> and brush life.<br />
5. <strong>Electric</strong>al connection and commissioning<br />
All operations may be carried out only by skilled technical<br />
personnel on machines at rest and de-energized and<br />
provided with a safeguard to prevent unintentional reclosing.<br />
This applies also to auxiliary circuits (e.g. anti-condensation<br />
heating). Remove shipping brace before commissioning.<br />
Check safe isolation from supply!<br />
Exceeding of the tolerances according to EN 60034 (VDE<br />
0530), i.e. voltage ± 5%, or an unfavourable form factor<br />
resulting from the type of converter used leads to increased<br />
heating and shortens the life of the machine. Pay attention to<br />
rating plate markings as well as to the connection diagram in<br />
the terminal box.<br />
The connection must be so made that a permanent and<br />
safe electrical connection is ensured (no loose wire ends).<br />
Use correct cable terminals. Establish safe protective<br />
conductor connection.<br />
Maintain clearances b<strong>et</strong>ween live, uninsulated parts and<br />
b<strong>et</strong>ween such parts and earth.<br />
No presence of foreign objects, dirt and moisture is admitted<br />
in the terminal box.<br />
Close unused cable entrance holes and the box itself in a<br />
dust- and watertight manner.<br />
For the trial run without output elements, lock key.<br />
For the connection and installation of accessories (e.g.<br />
tacho-generators, pulse generators, brakes, temperature<br />
3
Pour l’essai de mise en marche sans éléments entraînants,<br />
veiller à ce que la clav<strong>et</strong>te soit immobilisée.<br />
Pour le raccordement <strong>et</strong> l’installation d’accessoires (par<br />
exemple génératrice tachymétrique, freins, sondes de<br />
température, dispositif de contrôle des balais), les informations<br />
s’y référant doivent être respectées; le cas échéant,<br />
consulter le constructeur de la machine.<br />
Pour les machines munies de freins, vérifier le bon état de<br />
fonctionnement des freins avant la mise en service de la<br />
machine.<br />
Avant la mise en service, mesurer la résistance d’isolement.<br />
La résistance d’isolement mesurée sous 500 V ne doit pas<br />
être inférieure à 1 MΩ. Pour y remédier, voir la notice<br />
d’emploi.<br />
6. Fonctionnement<br />
Le fonctionnement sans excitation <strong>et</strong>, par analogie, la<br />
marche à vide d’un moteur série peuvent générer des<br />
survitesses dangereuses <strong>et</strong> doivent donc être exclus au<br />
moyen d’un vérouillage.<br />
Des vibrations de vitesse V eff<br />
≤ 3,5 mm/s (P N<br />
≤ 15 kW) ou<br />
V eff<br />
≤ 4,5 mm/s (P N<br />
>15 kW) aux emplacements des paliers<br />
sont sans conséquence pour le fonctionnement à l’état<br />
couplé.<br />
En cas de déviation par rapport au fonctionnement normal -<br />
par exemple températures élevées, bruits, vibrations -<br />
arrêter <strong>et</strong> déconnecter la machine <strong>et</strong> rechercher la cause des<br />
anomalies ; le cas échéant, consulter le constructeur.<br />
Les dispositifs de protection ne doivent pas être mis hors<br />
état de fonctionner même lors de l’essai de mise en marche.<br />
Pour tous travaux d’inspection <strong>et</strong> d’entr<strong>et</strong>ien, <strong>et</strong> notamment<br />
pour l’inspection des balais, tenir compte de ce qui est<br />
dit sous le chapitre «surveillance <strong>et</strong> entr<strong>et</strong>ien» de l’instruction<br />
de maintenance.<br />
En cas d’atmosphères à poussières abondantes, n<strong>et</strong>toyer<br />
régulièrement les canalisations <strong>et</strong> ouïes de ventilation.<br />
Ouvrir, de temps en temps, les trous obturés prévus pour<br />
l’écoulement de l’eau de condensation.<br />
Dans le cas des machines sans dispositif de regraissage,<br />
changement des paliers ou de la graisse selon les indications<br />
du constructeur, mais au moins tous les trois ans.<br />
Les paliers avec dispositifs de regraissage doivent être<br />
regraissés lorsque la machine est en marche. Tenir compte<br />
du plan de lubrification.<br />
7. Entr<strong>et</strong>ien <strong>et</strong> maintenance<br />
La documentation du constructeur doit être prise en considération.<br />
sensors, air-flow monitors, brush monitors), strictly follow the<br />
corresponding instructions. In case of doubt, consult machine<br />
manufacturer.<br />
For machines with brakes, check satisfactory functioning of<br />
brake before commissioning.<br />
Before commissioning, measure insulation resistance. With<br />
500 V applied, the insulation resistance value measured<br />
should not be lower than 1 MΩ. For corrective measures, see<br />
operating instructions.<br />
6. Operation<br />
Operation without excitation (and, by analogy, also the noload<br />
operation of a series-wound motor) can lead to<br />
dangerous overspeeds and must be prevented by<br />
interlocking.<br />
Vibration severities V rms<br />
≤ 3.5 mm/s (P N<br />
≤ 15 kW) or<br />
V rms<br />
≤ 4.5 mm/s (P N<br />
>15 kW) at the bearings are acceptable<br />
in the coupled state. In case of deviations from normal<br />
operation - e.g. elevated temperatures, noise, vibrations -<br />
switch off machine in case of doubt. Establish cause, consult<br />
manufacturer, if necessary.<br />
Do not defeat protective devices, not even in trial runs.<br />
For all inspection and maintenance operations, especially<br />
for brush inspection, follow Section «inspection and<br />
maintenance»of the d<strong>et</strong>ailed operating instruction<br />
manual.<br />
In case of heavy dirt deposits, periodically clean air<br />
channels. Open from time to time closed condensate drain<br />
holes.<br />
For machines without relubricating device, replace<br />
bearings or change grease according to manufacturer’s<br />
instructions, but no later than after three years.<br />
Regrease bearing assembly with relubricating device while<br />
machine is running. Refer to the chapter «lubrication» of the<br />
maintenance instruction manual.<br />
7. Maintenance and servicing<br />
The manufacturer’s documentation shall be followed.<br />
CONSERVER CES INSTRUCTIONS<br />
DE SECURITE!<br />
KEEP THESE SAFETY INSTRUCTIONS !<br />
4
Précautions générales<br />
de stockage<br />
General storage<br />
precautions<br />
Stockage<br />
Des soins particuliers doivent être accordés aux<br />
machines qui doivent être stockées pendant une durée<br />
prolongée avant d’être mises en service. Dans ce cas, la<br />
machine doit être placée dans un local ou un bâtiment où<br />
la température varie aussi peu que possible.<br />
Si cela n’est pas possible <strong>et</strong> si la machine doit être<br />
stockée dans un local non chauffé, des éléments chauffants<br />
doivent être prévus pour maintenir une température<br />
constante.<br />
L’élément chauffant doit être tel que la température de la<br />
machine soit toujours au moins 5° C au-dessus de la<br />
température ambiante. On constate généralement qu’une<br />
puissance de 100 W par m 2 de superficie de machine est<br />
suffisante.<br />
Grâce à c<strong>et</strong>te précaution, on élimine les risques de<br />
condensation. Une autre solution possible consiste à<br />
alimenter sous tension réduite le bobinage d’excitation. La<br />
corrosion des collecteurs se produit même en atmosphère<br />
«normale» (air ambiant).<br />
Les choses se compliquent s’il y a présence de gaz<br />
corrosifs. Les gaz qui causent le plus de problèmes sont<br />
les gaz sulfureux, le chlore <strong>et</strong> l’ammoniac. Les gaz<br />
sulfureux réagissent facilement avec le cuivre <strong>et</strong> le bronze<br />
pour former du sulfate de cuivre qui a un eff<strong>et</strong> isolant.<br />
Lors de la mise en marche d’une machine ainsi affectée,<br />
il se produit une répartition inégale du courant entre<br />
balais en parallèles, ce qui entraîne l’usure du collecteur<br />
<strong>et</strong> celle des balais, <strong>et</strong> peut causer des problèmes de<br />
<strong>commutation</strong>, c’est-à-dire étincelage important.<br />
En présence de chlore ou d’ammoniac, il y a formation<br />
d’un composé qui a tendance à se détacher du collecteur.<br />
Ces gaz causent aussi l’usure du collecteur <strong>et</strong> l’usure des<br />
balais, ainsi que des problèmes de <strong>commutation</strong> quand le<br />
moteur est en marche.<br />
Storage<br />
Special attention must be given to machines which are<br />
to be stored for a long period of time before<br />
commissioning. In such a case, the machine should be<br />
placed in a room or in a building where the temperature<br />
varies as little as possible.<br />
If this is not possible and the machine is to be stored in an<br />
unheated room, heating elements must be provided to<br />
maintain a constant temperature.<br />
The heating element should be such that the temperature<br />
of the machine is always at least 5° C above the ambient<br />
temperature. It is generally found that an output of 100 W<br />
per m 2 of machine surface area is adequate.<br />
As an alternative the heating can be accomplished by<br />
supplying reduced voltage to the excitation winding.<br />
Corrosion on commutators occurs even in a «normal»<br />
atmosphere (surrounding air).<br />
There are added complications if corrosive gases are<br />
present. The gases which cause the greatest amount of<br />
problems are sulphurous gases, chlorine and ammonia.<br />
Sulphurous gas easily reacts with copper and bronze to<br />
form copper sulphide, which acts as an isolator.<br />
When starting such a machine an uneven current distribution<br />
is obtained in parallel b<strong>et</strong>ween brushes, resulting in<br />
commutator wear as well as brush wear and it may cause<br />
commutating problems, e.g. sparking.<br />
Chlorine and ammonia in conjunction with copper form a<br />
compound which tends to loosen from the commutator.<br />
These gases also cause commutator wear and brush<br />
wear as well as <strong>commutation</strong> problems when the motor is<br />
in operation.<br />
Précaution<br />
Précautions recommandées pendant le stockage :<br />
• relever tous les balais,<br />
•envelopper le collecteur de ruban ou de papier<br />
protecteur,<br />
• remiser/stocker le moteur dans un local exempt de<br />
gaz.<br />
Caution<br />
Recommended cautions during storage :<br />
• Lift all brushes,<br />
•Wrap tape or protective paper around the<br />
commutator,<br />
• Store the motor in a gas-free room.<br />
5
Précautions générales<br />
de stockage<br />
General storage<br />
precautions<br />
Précaution<br />
Pendant le stockage, la machine doit être placée dans<br />
un endroit exempt de vibrations.<br />
Caution<br />
During storage the machine is to be placed in a vibration-free<br />
area.<br />
Les roulements peuvent être endommagés si la machine<br />
est stockée sur une surface vibrante. Dans ce cas, il se<br />
pourrait que les roulements aient besoin d’être remplacés<br />
avant même que la machine ne soit mise en service. Pour<br />
éliminer ce risque, tourner l’induit plusieurs fois par mois.<br />
The anti-friction bearings are subject to damage if the<br />
machine is stored on a vibrating surface. If such is the<br />
case the bearings may have to be replaced before the<br />
machine can be put into operation. To eliminate this<br />
possibility, turn the armature several times per month.<br />
Protection de l’arbre du rotor<br />
contre la rouille<br />
Toutes les machines quittent l’usine avec un revêtement<br />
anti-corrosion sur le bout d’arbre. Le revêtement doit être<br />
inspecté par le client <strong>et</strong> renouvelé si nécessaire.<br />
Rust protection of the rotor shaft<br />
All machines leave the factory with an anti-corrosion<br />
coating at the shaft extension.<br />
The coating should be inspected by the customer and<br />
reapplied if necessary.<br />
DANGER<br />
Les hautes tensions <strong>et</strong> les pièces en rotation sont<br />
dangereuses.<br />
Le contact avec des pièces sous tension ou en<br />
rotation peut provoquer des blessures.<br />
L’entr<strong>et</strong>ien <strong>et</strong> la maintenance ne doivent être<br />
effectués que par du personnel qualifié.<br />
DANGER<br />
High voltages as well as rotating parts are<br />
dangerous.<br />
Contact with live or rotating parts can cause<br />
injury.<br />
Service and maintenance should only be carried<br />
out by qualified personnel.<br />
Unités de mesure<br />
Les facteurs de conversion sont donnés ci-dessous pour<br />
faciliter les calculs.<br />
1 kg = 2,20 lb<br />
1 kgm 2 = 23,73 Ib ft 2<br />
1 kW = 1,34 HP<br />
1 Nm = 0,7375 Ibf. ft<br />
1 m 3 /s = 35,31 cu. ft/s<br />
1 m 3 /h = 0,59 cu ft/min (CFM)<br />
1 Pa = 1 N/m 2 = 0,1 mm H 2<br />
O<br />
= 1,45 x 10 -4 Ibf/sq.in (PSI)<br />
1 atm = 1,0 x 10 5 Pa<br />
Units of measure<br />
Comma signs (,) are used throughout the tables to<br />
indicate decimals.<br />
Conversion factors are given below in order to facilitate<br />
calculations.<br />
1 kg = 2,20 Ib<br />
1 kgm 2 = 23,73 Ib ft 2<br />
1 kW = 1,34 HP<br />
1 Nm = 0,7375 Ibf. ft<br />
1 m 3 /s = 35,31 cu. ft/s<br />
1 m 3 /h = 0,59 cu ft/min (CFM)<br />
1 Pa = 1 N/m 2 = 0,1 mm H 2<br />
O<br />
= 1,45 x 10 -4 Ibf/sq.in (PSI)<br />
1 atm = 1,0 x 10 5 Pa<br />
6
Installation <strong>et</strong> montage<br />
Installation and erection<br />
Fondations - Généralités<br />
Le montage des machines chez le client peut être<br />
effectué par lui-même ou par le personnel d’entr<strong>et</strong>ien de<br />
T-T <strong>Electric</strong>.<br />
Les informations nécessaires concernant les contraintes,<br />
les forces, <strong>et</strong>c. peuvent être obtenues sur le plan des<br />
fondations ou auprès de T-T <strong>Electric</strong>.<br />
T-T <strong>Electric</strong> décline toute responsabilité concernant les<br />
fondations, car elles peuvent être influencées par des<br />
facteurs qui ne dépendent pas de T-T <strong>Electric</strong>.<br />
La surface de montage de la machine doit être de niveau<br />
<strong>et</strong> exempte de vibrations. C’est pourquoi une fondation en<br />
béton est fortement conseillée.<br />
Le client est responsable de l’étude <strong>et</strong> des calculs de<br />
fondation. Les facteurs suivants doivent être pris en<br />
compte au stade de l’étude:<br />
• Stabilité suffisante pour supporter les forces dues<br />
au court-circuit éventuel.<br />
• Stabilité suffisante pour absorber les pulsations de<br />
couple <strong>et</strong> le déséquilibre résiduel de l’induit.<br />
• La fondation doit être dimensionnée de telle sorte<br />
que sa fréquence naturelle propre, conjuguée à<br />
celle du moteur, n’égale pas les fréquences perturbatrices<br />
qui existent normalement dans un moteur<br />
c.c. alimenté par thyristor. La fréquence naturelle <strong>et</strong><br />
les fréquences perturbatrices qui coïncident peuvent<br />
causer des vibrations <strong>et</strong> un bruit indésirable.<br />
• Les fondations doivent être conçues de telle sorte<br />
que les vibrations soient isolées <strong>et</strong> ne puissent pas<br />
atteindre d’autres parties du bâtiment, par exemple<br />
en se propageant dans la structure du bâtiment.<br />
Foundations - General<br />
The erection of machines at the customers site can be<br />
made by the customer himself or by T-T <strong>Electric</strong> service<br />
personnel.<br />
Necessary information with regard to stresses, forces <strong>et</strong>c.<br />
can be obtained from the foundation drawing or from<br />
T-T <strong>Electric</strong>.<br />
T-T <strong>Electric</strong> does not accept any responsibility regarding<br />
the foundation, as this can be influenced by factors which<br />
are not controllable by T-T <strong>Electric</strong>.<br />
The mounting area of the machine must be level and free<br />
from vibrations. For these reasons a concr<strong>et</strong>e foundation<br />
is strongly recommended.<br />
The customer is responsible for the design and the design<br />
calculations of the foundation. The following<br />
considerations should be evaluated in the design stage:<br />
• Enough stability to withstand possible shortcircuiting<br />
forces.<br />
• Enough stability to take up torque pulsations and the<br />
remaining imbalance of the armature.<br />
• The foundation should be dimensioned in such a<br />
way that its own natural frequency, tog<strong>et</strong>her with the<br />
motor, does not equal those disturbing frequencies<br />
which normally exist in a thyristor-fed d.c. motor.<br />
Natural frequency and disturbing frequencies can<br />
result in vibrations and undesirable noise.<br />
• The foundation should be designed in such a way<br />
that vibrations are isolated and prevented from<br />
reaching other parts of the building, e.g. through the<br />
beam and girder structure of the building.<br />
Remarque<br />
Un espace suffisant doit être prévu pour l’inspection,<br />
l’entr<strong>et</strong>ien, les câbles électriques <strong>et</strong> les conduits de<br />
refroidissement.<br />
Remark<br />
Adequate space for inspection, maintenance,<br />
electrical cables and cooling ducts must be provided.<br />
7
Installation <strong>et</strong> montage<br />
Installation and erection<br />
Levage de la machine<br />
Lifting of machine<br />
Avertissement<br />
Toujours soulever la machine par ses anneaux de<br />
levage. Pour lever une machine équipée d’un échangeur,<br />
employer un palonnier de levage pour éviter tout<br />
endommagement.<br />
Warning<br />
Always use the lifting eyes of the machine. When<br />
lifting machines with built-on coolers, a lifting yoke<br />
should be used to prevent damage.<br />
DMP Poids (sans accessoire) Montage à pattes<br />
DMP Weight (excluding accessories) Foot mounting<br />
kg kg kg kg<br />
112-2MA 90 132-2M 132 160-4S/SO 190 180-4A 290<br />
112-2LA 96 132-4S 115 160-4M/MO 220 180-4B/S 315<br />
112-4M 103 132-4M 135 160-4L/LO 265 180-4C/M 365<br />
112-4L 110 132-4L 160 160-4LB 360 180-4L 425<br />
132-4LB 220 180-4D/LB 455<br />
180-4E/LC 500<br />
180-4F/LD 630<br />
Montage de l’accouplement<br />
Inspecter les surfaces de portée de l’arbre <strong>et</strong> de l’accouplement<br />
avant assemblage. La procédure normale<br />
d’assemblage consiste à chauffer l’accouplement. La<br />
température de chauffage requise dépend du serrage de<br />
l’ajustement entre arbre <strong>et</strong> accouplement. C’est pourquoi<br />
il n’est pas possible de donner une température précise.<br />
Veiller à ce que les accouplements soient équilibrés avant<br />
assemblage. Noter que l’induit est équilibré dynamiquement<br />
avec demi-clav<strong>et</strong>te.<br />
Un jeu de 0,2-0,3 mm est suffisant pendant l’assemblage.<br />
Faire tourner l’arbre d’induit pendant la durée de refroidissement<br />
de l’accouplement afin d’éviter des contraintes<br />
thermiques, <strong>et</strong> par là des moments de flexion sur l’arbre.<br />
N’utiliser en aucun cas des outils de frappe.<br />
Mounting of coupling<br />
Inspect the mating surfaces of shaft and coupling before<br />
assembling. The normal procedure of assembling is by<br />
heating the coupling. The required heating temperature<br />
depends on the interference fit b<strong>et</strong>ween shaft and<br />
coupling. For this reason a specific temperature cannot be<br />
given.<br />
Make sure that the couplings are balanced before<br />
assembling. Note, that the armature is dynamically<br />
balanced with its half key.<br />
A clearance of 0,2-0,3 mm is sufficient during assembling.<br />
The armature shaft should be rotated during the time the<br />
coupling bending moments on the shaft.<br />
Under no circumstances are stamp tap tools allowed.<br />
8
Montage sur les fondations<br />
Erection on the foundation<br />
Inspection<br />
Il est conseillé de procéder aux contrôles suivants:<br />
• Les fondations correspondent au plan de fondation<br />
certifié.<br />
• Le site de montage est propre.<br />
• Le site de montage est préparé pour le montage, ce<br />
qui signifie que des conduits de câbles <strong>et</strong> de refroidissement<br />
ont été prévus dans les fondations.<br />
•L’accès est prévu pour l’inspection <strong>et</strong> l’entr<strong>et</strong>ien de<br />
la machine.<br />
• S’assurer que l’air de refroidissement du moteur<br />
peut circuler librement.<br />
Scellement<br />
Pour assurer des résultats satisfaisants, il est conseillé<br />
d’utiliser du béton sans r<strong>et</strong>rait, par exemple EMBECO<br />
636. Toujours suivre le mode d’emploi fourni par le<br />
fabricant du béton sans r<strong>et</strong>rait. Les blocs de montage ou<br />
les boulons de fondation qui sont boulonnés à la machine<br />
doivent prendre librement dans les trous de montage<br />
pendant le scellement. Vérifier qu’il n’y a pas de poches<br />
d’air dans le béton coulé. Vérifier que la résistance du<br />
béton à la compression <strong>et</strong> le temps de prise sont conformes<br />
aux instructions du fabricant. Ne pas effectuer le<br />
scellement si la température ambiante est inférieure à<br />
+5° C.<br />
Inspection<br />
The following inspections are recommended:<br />
• The foundation corresponds to the certified<br />
foundation drawing.<br />
• The erection site is clean.<br />
• The erection site is prepared for installation, which<br />
means that cable and cooling ducts have been<br />
provided in the foundation.<br />
• Accessibility is provided for inspection and maintenance<br />
of the machine.<br />
• Make sure that cooling air can freely circulate.<br />
Grouting<br />
To ensure satisfactory results, it is recommended to use<br />
shrink-free concr<strong>et</strong>e, for example EMBECO 636. The<br />
instructions supplied by the manufacturer of the shrinkfree<br />
concr<strong>et</strong>e should be followed. Mounting blocks or<br />
foundation bolts which are bolted to the machine hang<br />
freely in the mounting holes during grouting. Make sure<br />
that there are no air pock<strong>et</strong>s in the poured concr<strong>et</strong>e.<br />
Check that the compression strength of the concr<strong>et</strong>e and<br />
the curing time are in accordance with the manufacturers<br />
instructions. Grouting is not permitted if the ambient<br />
temperature is below + 5 °C.<br />
DMP A H P<br />
112 90 8 200<br />
132 90 8 200<br />
160 110 10 220<br />
180 110 10 220<br />
180-4F/LC/LD 140 10 250<br />
Béton armé<br />
Steel reinforced concr<strong>et</strong>e<br />
Béton sans r<strong>et</strong>rait<br />
Non-shrinking concr<strong>et</strong>e<br />
Travaux après scellement<br />
Vérifier que tous les conduits d’air <strong>et</strong> autres cavités, qui<br />
font partie de l’installation de la machine, sont exempts de<br />
béton <strong>et</strong> d’autres corps étrangers qui pourraient être<br />
aspirés dans la machine lors de la mise en marche. Les<br />
conduits d’air à parois en béton doivent être revêtus d’une<br />
peinture appropriée qui fixe la poussière de béton <strong>et</strong><br />
autres particules.<br />
Work after grouting<br />
Check that all air ducts and other cavities, which are part<br />
of the machine installation, are free from concr<strong>et</strong>e and<br />
other foreign matter which could be sucked into the<br />
machine during start-up. Air ducts with concr<strong>et</strong>e walls<br />
should be painted with suitable paint to bind the concr<strong>et</strong>e<br />
dust and other particles.<br />
9
Montage sur les fondations<br />
Couple de serrage des boulons de<br />
fondation<br />
Erection on the foundation<br />
Tightening torque of foundation bolts<br />
Boulon de fondation<br />
DMP Couple de serrage<br />
Tightening torque<br />
112 45 Nm<br />
132 45 Nm<br />
Machine<br />
Machine<br />
Foundation bolt<br />
Goujon conique,<br />
écrou <strong>et</strong> rondelle<br />
Taper in,<br />
nut and washer<br />
160 80 Nm<br />
180 80 Nm<br />
180-4F/LC/LD<br />
140 Nm<br />
Valeurs ci-dessus sans lubrification.<br />
Above values without lubrication<br />
Cale 1 mm<br />
Shim 1 mm<br />
Bloc de montage<br />
Mounting block<br />
Alignement<br />
• Alignement des machines à accouplement direct.<br />
Un bon alignement assure la sécurité du fonctionnement<br />
<strong>et</strong> une longue durée de service de la machine. On peut<br />
utiliser plusieurs méthodes pour déterminer si la partie<br />
menante <strong>et</strong> la partie menée ont la même hauteur d’axe,<br />
<strong>et</strong> s’il y a une déviation angulaire entre les deux (Cf. Fig. 1<br />
<strong>et</strong> 2).<br />
Alignment<br />
• Alignment of direct coupled machines<br />
Good alignment assures safe operation and long machine<br />
life. Several m<strong>et</strong>hods can be used to find out if the driving<br />
and the driven machine have the same centre height, and<br />
to find out if there is an angular deviation b<strong>et</strong>ween the two<br />
(refer to fig. 1 and fig. 2).<br />
max. 0,05 mm<br />
Fig. 1<br />
Fig. 1<br />
Fig. 2<br />
Fig. 2<br />
A - B = max. 0,05 mm<br />
10
Alignement<br />
Alignment<br />
Vérification de l’alignement<br />
La méthode normale fait usage de comparateurs montés<br />
conformément à la figure 3.<br />
Measurement of parallel deviation<br />
A normal m<strong>et</strong>hod is the use of dial indicators, which are<br />
mounted according to fig. 3.<br />
Fig. 3<br />
Fig. 3<br />
Mesure de la déviation angulaire<br />
Measurement of angular deviation<br />
Les comparateurs montrent la différence initiale entre les<br />
deux accouplements, axialement <strong>et</strong> radialement. En<br />
tournant lentement les arbres d’un tour compl<strong>et</strong> (chacun<br />
de 90° à la fois) <strong>et</strong> en notant en même temps les indications<br />
des comparateurs, on peut obtenir une bonne<br />
indication des points où des réglages sont nécessaires.<br />
L’alignement de la machine doit être poursuivi jusqu’à ce<br />
que les indications des comparateurs ne dépassent pas<br />
0,05 mm. Pour assurer l’alignement correct de la machine,<br />
placer des cales métalliques entre les pieds de la<br />
machine <strong>et</strong> les blocs de montage.<br />
Les tolérances d’alignement excessives provoqueront des<br />
vibrations, des avaries de paliers, <strong>et</strong>c.<br />
C’est pourquoi les tolérances ci-dessus de 0,05 mm<br />
doivent être obtenues, même si les fabricants des accouplements<br />
autorisent des tolérances plus larges.<br />
Pour aligner le moteur par rapport à un obj<strong>et</strong> entraîné qui<br />
fonctionne à une température beaucoup plus élevée, il<br />
faut tenir compte de la différence de hauteur des axes<br />
dans les conditions de marche.<br />
Dans ce cas, demander conseil à T-T <strong>Electric</strong>. Les<br />
instructions d’installation des fournisseurs de pompes,<br />
engrenages, <strong>et</strong>c., spécifient souvent le déplacement<br />
vertical <strong>et</strong> latéral de l’arbre d’entraînement à la température<br />
de fonctionnement.<br />
The dial indicators show the initial difference b<strong>et</strong>ween the<br />
two couplings, axially as well as radially. By slowly<br />
rotating the shafts one compl<strong>et</strong>e revolution (both in steps<br />
of 90°) and at the same time writing down the indicator<br />
readings, a good indication can be obtained of where<br />
adjustments must be made.<br />
Machine alignment must be continued until dial indicator<br />
readings of max. 0,05 mm are obtained.<br />
To ensure correct alignment of machine, place suitable<br />
m<strong>et</strong>al shims b<strong>et</strong>ween machine fe<strong>et</strong> and mounting blocks.<br />
Alignment tolerances which are too large will lead to<br />
vibrations, bearing damage <strong>et</strong>c. It is for this reason that<br />
the above mentioned tolerances of max. 0,05 mm should<br />
be obtained, even if coupling manufacturers allow larger<br />
tolerances.<br />
When aligning the motor against a driven object which<br />
runs at a much higher temperature, the difference in<br />
centre height under running conditions must be taken<br />
into consideration.<br />
In such a case contact T-T <strong>Electric</strong> for advise. Installation<br />
instructions from the suppliers of pumps, gear drives <strong>et</strong>c.<br />
often specify the vertical and lateral displacement of the<br />
driving shaft at operating temperature.<br />
Remarque<br />
Il importe que ces instructions soient observées<br />
pendant l’alignement afin d’éviter des vibrations <strong>et</strong><br />
autres perturbations pendant la marche, notamment<br />
le respect de la directive CEM.<br />
Remark<br />
It is important that these instructions are observed<br />
during the alignment in order to avoid vibrations and<br />
other disturbances during operation, in respect of<br />
EMC directive.<br />
11
Alignement<br />
Alignment<br />
Alignement avec transmission<br />
à courroies trapézoidales<br />
La transmission doit être agencée de telle sorte que les<br />
courroies proches du moteur soient tendues. Les glissières<br />
(accessoires) doivent être boulonnées au pied de la<br />
machine <strong>et</strong> positionnées de telle sorte que les vis de<br />
tension soient opposées diagonalement entre elles <strong>et</strong> que<br />
la vis de tension à l’extrémité de l’entraînement soit<br />
positionnée entre le moteur <strong>et</strong> l’obj<strong>et</strong> entraîné.<br />
Alignment with V-belt drive<br />
The drive should be arranged in such a way that the lower<br />
belts are the driving ones, i. e. that the slack is at the<br />
upper belts. The slide rails (accessories) are to be bolted<br />
to the machine fe<strong>et</strong> and positioned in such a way that the<br />
tensioning screws are diagonally opposite each other and<br />
the tensioning screw at the D-end is located b<strong>et</strong>ween the<br />
motor and the driven object.<br />
Glissières<br />
Slide rails<br />
Cornière<br />
Angle Iron<br />
Machine<br />
Machine<br />
Fig. 4<br />
Agencement à glissières <strong>et</strong> vis de tension<br />
Slide rail and tensioning screw arrangement<br />
Fig. 5<br />
Entr<strong>et</strong>oise<br />
Distance piece<br />
Le moteur, muni des glissières, est posé sur des plaques<br />
de réglage temporaires qui sont placées à côté des trous<br />
de fondation. Les boulons de fondation sont placés dans<br />
leurs trous respectifs dans les glissières <strong>et</strong> pendent<br />
librement dans les logements de fondation.<br />
Le moteur doit alors être aligné de telle sorte que les<br />
axes du moteur <strong>et</strong> de l’arbre mené soient parallèles <strong>et</strong><br />
que poulie menante <strong>et</strong> poulie menée soient alignées (Cf.<br />
Fig. 6). A l’aide d’un niveau à bulle, les glissières sont<br />
alors mises de niveau dans les directions longitudinale <strong>et</strong><br />
transversale par des cales sous les plaques de réglage.<br />
Après avoir terminé les opérations d’alignement, sceller<br />
les boulons de fondation des glissières. Voir section<br />
«scellement».<br />
The motor, with slide rails mounted, is put onto temporary<br />
s<strong>et</strong>ting plates which are placed beside the foundation<br />
holes. The foundation bolts are put into their respective<br />
holes in the slide rails and hang freely in the foundation<br />
holes.<br />
The motor is now to be aligned so that the centre lines of<br />
the motor and of the driven shaft are parallel to each<br />
other and that driving and driven pulley are exactly in line<br />
(see fig. 6). Using a spirit level, the slide rails are now<br />
brought into level in longitudinal and transvers direction by<br />
shimming under the s<strong>et</strong>-up plates. After compl<strong>et</strong>ing the<br />
alignment procedures grout the slide rail foundation bolts.<br />
Refer to section «Grouting».<br />
Correct - Right Incorrect - Wrong Incorrect - Wrong<br />
Fig. 6 : Alignement correct <strong>et</strong> incorrect des poulies - Correct versus incorrect pulley alignment<br />
12
Alignement<br />
Charges aux paliers avec transmission<br />
à courroies trapézoïdales<br />
Les moteurs DMP sont prévus pour supporter un effort Fr<br />
dû à la transmission <strong>et</strong> appliqué sur le bout de l’arbre. Le<br />
diamètre minimum de poulie D (mm) peut être obtenu par<br />
la formule suivante:<br />
Alignment<br />
Bearing loads<br />
with V-belt drive<br />
Motors for belt drives must be ordered with a roller<br />
bearing at the D-end, instead of a ball bearing which is<br />
standard. The minimum belt pulley diam<strong>et</strong>er D (mm) can<br />
be obtained from the formula:<br />
D = 19,1 x 10 6 . P . Kc<br />
n Fr<br />
Fr = effort radial autorisé sur l’arbre, en N,<br />
suivant les diagrammes des pages 14 à 17<br />
D = 19,1 x 10 6 . P . Kc<br />
n Fr<br />
Fr = Permissible radial shaft load, in N,<br />
acc. to diagrams on pages 14-17.<br />
P = puissance nominale du moteur en kW<br />
P<br />
= rated output of motor, in kW<br />
n = régime du moteur en tr/mn<br />
n<br />
= motorspeed, in rpm<br />
D = diamètre minimum de poulie en mm<br />
D<br />
= minimum pulley diam<strong>et</strong>er, in mm<br />
K C<br />
=<br />
facteur de tension de courroie fournie par le<br />
fabricant, normalement :<br />
courroies plates = 3,5<br />
K C<br />
= belt tension factor from the belt manufacturer,<br />
normally:<br />
for flat belts = 3,5<br />
courroies trapézoïdales = 2,5<br />
for V-belts = 2,5<br />
La charge autorisée sur l’arbre Fr est basée sur une<br />
durée de vie des roulements de<br />
L 10h<br />
= 20 000 heures<br />
X = code de positionnement de l’effort Fr<br />
The permissible shaft load Fr is based on a bearing life of<br />
L 10h<br />
= 20 000 hours<br />
X = Dimension for load center<br />
DMP<br />
X<br />
max<br />
112 80<br />
132 80<br />
160 110<br />
180-4A/B/S/M/L 110<br />
180-4C/D/E/F/LB/LC/LD 140<br />
13
Alignement<br />
Effort admissible sur l’arbre<br />
Alignment<br />
Permissible bearing load<br />
DMP 112<br />
Roulement à billes<br />
Ball bearing<br />
Roulement à rouleaux<br />
Roller bearing<br />
14
Alignement<br />
Effort admissible sur l’arbre<br />
Alignment<br />
Permissible bearing load<br />
DMP 132<br />
Roulement à billes<br />
Ball bearing<br />
Roulement à rouleaux<br />
Roller bearing<br />
DMP 160<br />
Roulement à billes<br />
Ball bearing<br />
Roulement à rouleaux<br />
Roller bearing<br />
15
Alignement<br />
Effort admissible sur l’arbre<br />
Alignment<br />
Permissible bearing load<br />
DMP 180-4S, -4M <strong>et</strong>/and -4L<br />
Roulement à billes<br />
Ball bearing<br />
Roulement à rouleaux<br />
Roller bearing<br />
DMP 180-4A/B/C/D/E/LB<br />
Roulement à billes<br />
Ball bearing<br />
Roulement à rouleaux<br />
Roller bearing<br />
16
Alignement<br />
Effort admissible sur l’arbre<br />
Alignment<br />
Permissible bearing load<br />
DMP 180-4F/LC/LD<br />
Roulement à billes<br />
Ball bearing<br />
Roulement à rouleaux<br />
Roller bearing<br />
17
Mise en service<br />
Commissioning<br />
Contrôles avant la mise en service<br />
Les contrôles suivants doivent être effectués avant la<br />
mise en service d’un moteur s’il s’agit :<br />
• d’un démarrage initial,<br />
• d’un démarrage après une immobilisation prolongée,<br />
• d’un démarrage après réparations ou remise en état<br />
du moteur.<br />
Vérifiez que :<br />
• I’induit tourne librement <strong>et</strong> qu’il n’y a pas de bruit de<br />
frottement,<br />
• Ies accouplements <strong>et</strong> autres organes mécaniques<br />
sont bien serrés,<br />
• Ies ventilateurs tournent dans le bon sens,<br />
• Ies raccordements pour l’air <strong>et</strong> l’eau de refroidissement<br />
sont étanches,<br />
Checks before commissioning<br />
The following points should be checked before<br />
commissioning a motor, if it is:<br />
• an initial commissioning,<br />
• after a longer period of stand-still,<br />
• after repairs or motor overhaul.<br />
Check that:<br />
• the armature turns freely and no scraping noise can<br />
be heard,<br />
• the couplings and other mechanical components are<br />
safely tightened,<br />
• the fans rotate in the right direction,<br />
• the connections for cooling air and cooling water are<br />
tight,<br />
Précaution<br />
Les conduits acheminant l’air au moteur ne doivent<br />
pas être scellés avec des produits contenant des<br />
silicones, car les particules siliconées causeront une<br />
usure importante des balais.<br />
Caution<br />
Air ducts to the motor must not be sealed with<br />
products containing silicons, as silicon oil<br />
particles will adhere to the surface of the<br />
commutator and cause a heavy brush wear.<br />
• I’air de refroidissement circule librement dans le<br />
moteur,<br />
• tous les balais, y compris le balai de terre (le cas<br />
échéant) sont en position. Les doigts de pression à<br />
ressort sont en appui contre les balais <strong>et</strong> ceux-ci<br />
peuvent se déplacer librement dans les porte-balais,<br />
• Ia surface du collecteur a été n<strong>et</strong>toyée, si elle a été<br />
exposée à des gaz corrosifs en cours de stockage<br />
(cf. section «traitement de la surface du collecteur»<br />
p.29),<br />
• Ies connexions électriques sont bien serrées <strong>et</strong><br />
conformes au schéma de branchement joint au<br />
moteur à la livraison),<br />
• I’équipement de protection fonctionne correctement,<br />
notamment pour les montées de température dans<br />
le moteur ainsi que d’autres équipements de contrôle,<br />
• Ia résistance d’isolement a été mesurée <strong>et</strong> le<br />
résultat des mesures a été accepté (cf. section<br />
«mesure de la résistance d’isolement» p. 22). Il est<br />
recommandé de contacter T-T <strong>Electric</strong> en cas<br />
d’observations anormales,<br />
• Ies roulements sont remplis de graisse (cf. section<br />
graissage p. 35).<br />
• the cooling air has free access into and out of the<br />
motor,<br />
• all brushes, including the earthing brush (if ordered),<br />
are in position.The spring loaded pressure fingers<br />
are snapped against the brushes and the brushes<br />
can move freely in their pock<strong>et</strong>s,<br />
• the commutator surface has been cleaned, if it has<br />
been exposed to corrosive gases during storage<br />
(refer to section «Treatment of commutator surface»<br />
p. 27),<br />
• the electrical connections are securely tightened<br />
and in agreement with the terminal diagram,<br />
• the protective equipment is functioning properly,<br />
e. g. for temperature rise in the motor as well as<br />
other monitoring equipment,<br />
• the insulation resistance has been measured and<br />
the measurements have been accepted (refer to<br />
section «Measuring of insulation resistance» p. 22).<br />
It is recommended to contact T-T <strong>Electric</strong> if<br />
abnormal observations are recorded,<br />
• the bearing are filled with grease (refer to section<br />
«lubrication» p. 35).<br />
18
Mise en service<br />
Commissioning<br />
Contrôles pendant la mise en service<br />
Les contrôles suivants doivent être effectués pendant la<br />
mise en service.<br />
Vérifier :<br />
• que les températures des roulements sont normales<br />
après quelques heures de fonctionnement. A la<br />
température ambiante normale, les valeurs doivent<br />
être inférieures à 70 ° C.<br />
• qu’il n’y a pas de bruit de roulements anormal<br />
• que tous les instruments de mesure donnent des<br />
indications normales.<br />
• Ies commandes de régulation du convertisseur.<br />
• Ia forme <strong>et</strong> la courbe de réponse de courant (valeur<br />
réelle).<br />
• Ia <strong>commutation</strong> de la machine.<br />
• qu’il n’y a pas de vibrations anormales<br />
(Cf. section «vibrations» p. 34).<br />
• I’état du collecteur de la machine.<br />
Checks during commissioning<br />
The following checks are to be made during<br />
commissioning.<br />
Check:<br />
• that the bearing temperatures show normal values<br />
after a few running hours. At normal ambient<br />
temperature the values should be under 70° C.<br />
• that no unusual bearing noise is noticed.<br />
• that all instruments show normal readings.<br />
• the regulating controls of the thyristor convertor.<br />
• the shape and form of the current response (actual<br />
value).<br />
• the <strong>commutation</strong> of the machine.<br />
• that no abnormal vibrations are present (refer to<br />
section «Vibrations» p. 34 ).<br />
• the surface condition of the commutator.-<br />
Inspection des machines à ventilateur<br />
de refroidissement extérieur, IC 06<br />
Inspection of machine with externally<br />
mounted cooling fan, IC 06<br />
Précaution<br />
Si l’un des carters proches du ventilateur de refroidissement<br />
doit être ouvert pour l’inspection du moteur<br />
pendant la marche de la machine, les précautions<br />
suivantes doivent être prises:<br />
• fermer l’entrée d’air (pour éviter la surchauffe du<br />
moteur de ventilateur),<br />
• ouvrir le carter d’inspection,<br />
• à partir de la ferm<strong>et</strong>ure de l’entrée d’air, I’inspection<br />
ne doit pas durer plus de 5 minutes (en raison du<br />
manque d’air de refroidissement). C<strong>et</strong>te stipulation<br />
est valide aux caractéristiques nominales de la<br />
machine.<br />
Caution<br />
If one of the covers close to the cooling fan is to be<br />
opened for motor inspection while the machine is<br />
running, the following must be observed :<br />
• close off the air intake (to avoid overheating of the<br />
fan motor),<br />
• open the inspection cover,<br />
• from the time the air intake was closed there are<br />
max. 5 minutes for inspection (due to lack of cooling<br />
air). This stipulation is valid at rated machine data.<br />
19
Surveillance <strong>et</strong> entr<strong>et</strong>ien<br />
Inspection après 100 heures de service<br />
Inspection and maintenance<br />
Inspection after 100 operating hours<br />
Remarque<br />
Après 100 heures de service, le collecteur <strong>et</strong> les<br />
balais doivent être inspectés pendant que la machine<br />
est à l’arrêt. La surface du collecteur doit présenter<br />
une pellicule homogène (patine). La surface de<br />
contact des balais doit être homogène, sans décoloration<br />
inégale. Si les résultats de l’inspection ne sont<br />
pas satisfaisants, contacter T-T <strong>Electric</strong>.<br />
Remark<br />
After 100 operating hours the commutator and the<br />
brushes should be inspected while the machine is at<br />
rest. The surface of the commutator must show a<br />
homogenous film (patina). The brush contact surface<br />
must be homogenous without patchy discoloring. If<br />
the results of the inspection are not satisfactory<br />
T-T <strong>Electric</strong> should be consulted.<br />
20
Surveillance <strong>et</strong> entr<strong>et</strong>ien<br />
Inspection and maintenance<br />
Remarque<br />
Un programme d’entr<strong>et</strong>ien scrupuleusement appliqué<br />
est la meilleure assurance contre les pannes <strong>et</strong> les<br />
arrêts de fonctionnement.<br />
C’est pourquoi nous vous conseillons vivement de<br />
suivre le programme de maintenance proposé ciaprès.<br />
Remark<br />
Careful maintenace is the best insurance against<br />
failures and interruption of operation.<br />
This is the reason why we advise you to follow the<br />
maintenance schedule shown below.<br />
Maintenance<br />
500 heures de service ou 1 mois max.<br />
• Contrôler l’usure <strong>et</strong> la liberté de mouvement des<br />
balais.<br />
• Contrôler l’état des porte-balais <strong>et</strong> du collecteur.<br />
• Contrôler la <strong>commutation</strong>.<br />
• Vérifier les vibrations. Mesurer près du couvercle de<br />
palier extérieur. Vérifier également les vibrations au<br />
niveau des balais à l’aide d’un outil isolé.<br />
• Vérifier l’état des roulements.<br />
• Vérifier s’il n’y a pas de vibrations aux roulements<br />
des ventilateurs.<br />
• Vérifier le fonctionnement des régulateurs thermostatiques<br />
des refroidisseurs.<br />
• Si nécessaire, éliminer l’huile ou la graisse qui a fini<br />
par pénétrer dans le moteur.<br />
• Remplacer les filtres à air principaux ainsi que le<br />
filtre à air de fuite dans les échangeurs.<br />
• Pour les ventilateurs séparés, le remplacement des<br />
filtres dépend du milieu ambiant.<br />
• Voir chapitre «remplacement du filtre p. 39».<br />
2000 heures de service ou 4 mois max.<br />
• N<strong>et</strong>toyer l’intérieur du moteur avec un aspirateur,<br />
conjointement à un j<strong>et</strong> d’air propre <strong>et</strong> sec, ou en<br />
enlevant la contamination avec un chiffon.<br />
• Mesurer la résistance d’isolement des bobinages à<br />
l’aide d’un mégohmmètre de 500 V (avant <strong>et</strong> après<br />
le n<strong>et</strong>toyage).<br />
• Inspecter toutes les connexions, y compris les câble<br />
des balais.<br />
• Lubrifier les roulements ou les n<strong>et</strong>toyer.<br />
• Voir chapitre «graissage p. 35» pour regraissage.<br />
Maintenance<br />
500 duty hours or max. 1 month<br />
• Inspect brush for wear and freedom of movement.<br />
• Inspect the condition of brush-holders and the<br />
commutator.<br />
• Check the <strong>commutation</strong>.<br />
• Check for vibrations. Measure near the outer<br />
bearing cover. Vibrations are also checked at the<br />
brush using an insulated stick.<br />
• Check bearing condition.<br />
• Check fans regarding bearing vibrations.<br />
• Check the function of thermostat regulators for<br />
coolers<br />
• If necessary clean away oil or grease which<br />
eventually has entered into the motor.<br />
• Exchange main air filters as well as air leakage filter<br />
in coolers.<br />
• For separate fans, filter exchange depends upon the<br />
environment.<br />
• See chapter «filter change p.39».<br />
2000 duty hours or max. 4 months<br />
• Clean the motor inside using a vacuum cleaner in<br />
combination with clean, dry pressure air or by wiping<br />
off the contamination.<br />
• Measure the insulation resistance of the windings<br />
using a 500 V megger (both before and after<br />
cleaning).<br />
• Inspect all connections including the brush flexibles.<br />
• Lubricate or wash out bearings and repack with<br />
grease.<br />
• See chapter «lubrication p. 35».<br />
21
Surveillance <strong>et</strong> entr<strong>et</strong>ien<br />
Mesure de la résistance d’isolement<br />
Inspection and maintenance<br />
Measuring of insulation resistance<br />
Précaution<br />
Avant qu’une machine ne soit mise en service pour la<br />
première fois ou après une période de repos prolongée,<br />
il faut vérifier l’isolement des enroulements pour<br />
s’assurer qu’il ne présente pas de défaut.<br />
Caution<br />
Before an electric machine is taken into operation for<br />
the first time or after a long period of stand-still, the<br />
winding insulation should be checked to see that<br />
there is no risk of an insulation defect.<br />
Utiliser à c<strong>et</strong> eff<strong>et</strong> un mégohmmètre de 500 V. Il n’est pas<br />
possible de préciser une valeur minimum absolue de<br />
résistance d’isolement. Dans certains cas, les machines<br />
peuvent fonctionner de façon satisfaisante à des valeurs<br />
inférieures au minimum recommandé. La résistance<br />
d’isolement minimum recommandée peut être obtenue<br />
par la formule (1) :<br />
R m = kV+1<br />
R m = résistance d’isolement recommandée<br />
en MΩ à 40 °C<br />
kV = la tension nominale de la machine en kV<br />
Pour recalculer la résistance d’isolement mesurée à<br />
40 °C, il faut tenir compte de ce qui suit : la résistance<br />
d’isolement est fonction de la température. Lorsqu’on<br />
mesure la résistance d’isolement, mesurer en même<br />
temps la température de l’enroulement pour pouvoir<br />
recalculer la résistance d’isolement correspondant à<br />
une température de 40°C. Pour ce faire, utiliser la formule<br />
suivante (2) :<br />
R 40°C = Kt 40°C x Rt<br />
R 40°C = résistance d’isolement corrigée à 40°C<br />
Rt = résistance d’isolement mesurée en MΩ à t°C<br />
Kt 40°C = facteur de correction suivant diagramme<br />
This should be done with a 500 V megger.<br />
It is not pratical to state a definite minimum value of the<br />
insulation resistance. In some cases the machines can<br />
operate satisfactorily with lower values than the<br />
recommended minimum value. The recommended<br />
minimum insulation resistance can be obtained from the<br />
formula (1):<br />
R m = kV+1<br />
R m = the lowest recommended insulation resistance in<br />
MΩ at 40 °C<br />
kV = the rated voltage of the machine in kV<br />
For recalculation of the measured insulation resistance to<br />
40 °C, the following must be taken into consideration:<br />
Temperature dependence of the insulation resistance.<br />
When measuring the insulation resistance, the<br />
temperature of the winding should be measured at the<br />
same time to enable the insulation resistance to be<br />
recalculated to correspond to a temperature of 40 °C. This<br />
can be accomplished by using the following formula (2):<br />
R 40°C = Kt 40°C x Rt<br />
R 40°C = insulation resistance corrected to 40 °C<br />
Rt = measured insulation resistance in MΩ at t°C<br />
Kt 40°C = correction factor acc. to the diagram<br />
Facteur de correction jusqu’à 40° C pour résistance d’isolement<br />
Correction factor to 40° C for insulation resistance<br />
Température de l’enroulement lors de la mesure<br />
Winding temperature at the time of measurement<br />
22
Surveillance <strong>et</strong> entr<strong>et</strong>ien<br />
Inspection and maintenance<br />
Exemple :<br />
Dans l’enroulement d’un moteur de 460 V, la résistance<br />
d’isolement mesurée est de 100 MΩ à 30° C.<br />
D’après le diagramme :<br />
Kt 40°C à 30 °C = 0,1<br />
La résistance d’isolement minimum recommandée R m’<br />
selon la formule (1), est:<br />
R m = 0,460 + 1,0 = 1,46 MΩ<br />
Selon la formule (2):<br />
R 40°C = 0,1x100 = 10 MΩ<br />
CONCLUSION :<br />
R 40°C est supérieure à R m <strong>et</strong> la résistance d’isolement<br />
est acceptable.<br />
Example:<br />
In the winding of a 460V motor, the insulation resistance<br />
has been measured to 100 MΩ at 30 °C. We obtain from<br />
the diagram:<br />
Kt 40°C at 30 °C = 0.1.<br />
The recommended minimum insultation resistance R m’<br />
according to formula (1 ) is:<br />
R m = 0.460 + 1.0 = 1,46 MΩ<br />
According to formula (2):<br />
R 40°C = 0.1 x 100 = 10 MΩ<br />
CONCLUSION :<br />
R 40°C is larger than R m and the insulation resistance<br />
is approved.<br />
Séchage des enroulements<br />
Le séchage des enroulements doit être effectué avec<br />
soin. La montée de température ne doit pas dépasser<br />
5 °C par heure, <strong>et</strong> la température finale ne doit pas<br />
dépasser 100 °C.<br />
Si la température monte trop rapidement, ou trop haut,<br />
I’enroulement atteint une température où l’humidité se<br />
vaporise à l’intérieur de l’isolement, ce qui peut endommager<br />
ce dernier.<br />
Remarque<br />
La température doit être soigneusement contrôlée<br />
pendant le cycle de séchage.<br />
La résistance de l’isolement tombe au début par suite de<br />
l’augmentation de température, mais elle remonte à<br />
mesure que l’isolant sèche.<br />
Remarque<br />
Le processus de séchage ne doit pas être interrompu<br />
tant que la résistance de l’isolant n’est pas restée<br />
stable au cours de plusieurs mesures. Une bonne<br />
ventilation doit être assurée pour éliminer complètement<br />
l’humidité. Lors du séchage en étuve, il faut<br />
surveiller la montée de température <strong>et</strong> la température<br />
maximum. La température de l’étuve doit être d’environ<br />
90 °C pendant 12-16 heures, puis d’environ<br />
100 °C pendant 6-8 heures.<br />
Drying of windings<br />
The drying of windings should be done with care.<br />
The temperature increase should not be more than about<br />
5 °C per hour and the final temperature should not<br />
exceed about 100 °C.<br />
If the temperature is increased too quickly, or too high, a<br />
winding temperature is reached, where the moisture<br />
vaporizes inside the insulation which can result in<br />
damage of the insulation.<br />
Remark<br />
The temperature should be carefully supervised<br />
during the drying cycle.<br />
The insulation resistance will drop to start with as a result<br />
of the temperature increase, but will rise again when the<br />
insulation g<strong>et</strong>s dryer.<br />
Remark<br />
The drying process should not be interrupted until the<br />
insulation resistance has remained the same on<br />
several measuring occasions. Good ventilation must<br />
be ensured to remove the moisture compl<strong>et</strong>ely.<br />
With oven drying, the only task is the supervision of<br />
the temperature increase and the peak temperature.<br />
The goods temperature should be about 90 °C for 12-<br />
16 hours and then about 100 °C for 6-8 hours.<br />
La puissance de chauffe totale requise peut être calculée<br />
à partir de la formule suivante :<br />
P a = M kW<br />
1000<br />
où :<br />
P a = puissance totale en kW<br />
M = poids du moteur en kg<br />
The total required heating power can be calculated from<br />
the following formula:<br />
P a = M kW<br />
1000<br />
Where:<br />
P a = total power in kW<br />
M = motor weight in kg<br />
23
<strong>Balais</strong> <strong>et</strong> <strong>commutation</strong><br />
Brushes and <strong>commutation</strong><br />
Généralités<br />
Le fonctionnement du collecteur <strong>et</strong> des balais est affecté<br />
par de nombreux facteurs, notamment l’humidité, les<br />
impur<strong>et</strong>és dans l’air sous forme de gaz, de brouillard<br />
d’huile, de particules de poussière, <strong>et</strong>c. Une température<br />
d’air de refroidissement anormalement basse, une charge<br />
très réduite pendant une période prolongée ou des<br />
vibrations de la machine peuvent aussi avoir une influence.<br />
Une condition indispensable au bon fonctionnement<br />
des balais (en écartant l’usure normale du collecteur<br />
<strong>et</strong> des balais) est le choix d’un matériau approprié<br />
pour les balais, convenant à l’application de la machine. T-<br />
T <strong>Electric</strong> possède de nombreuses années d’expérience<br />
dans le choix des balais pour adapter la machine à<br />
l’application. Malgré c<strong>et</strong>te expérience, des facteurs<br />
imprévisibles, comme une humidité anormalement haute<br />
ou basse, peuvent rendre nécessaire l’adoption d’un<br />
matériau de préférence à un autre. Prendre contact avec<br />
T-T <strong>Electric</strong> si un tel changement est prévu.<br />
General<br />
The performance of the commutator and the brushes is<br />
influenced by many factors, such as humidity, impurities in<br />
the air in form of gases, oil mist, dust particles <strong>et</strong>c.<br />
Other factors can be unusually low cooling air<br />
temperature, low load during a long period of time or<br />
machine vibrations.<br />
A pre-requisite for good brush performance (i.e. normal<br />
commutator and brush wear) is the right choice of brush<br />
material, which has to suit the motor application.<br />
T-T <strong>Electric</strong> has many years of experience in selecting<br />
suitable brushes to match the machine to the application.<br />
Despite this experience, unexpected factors such as<br />
abnormally high or low humidity, can make it necessary to<br />
change from one material to another.<br />
Contact T-T <strong>Electric</strong> if such a change is planned.<br />
Formation d’étincelles<br />
La cause la plus courante des étincelles est un mauvais<br />
contact entre la surface des balais <strong>et</strong> la surface du<br />
collecteur. Il est également possible que certains balais,<br />
qui ont un meilleur contact que d’autres, tirent davantage<br />
de courant <strong>et</strong> de ce fait donnent des étincelles de surcharges.<br />
La formation d’étincelles peut être progressive,<br />
c’est-àdire commencer par de p<strong>et</strong>ites étincelles, apparemment<br />
inoffensives, puis augmenter lentement ou<br />
rapidement pour produire des étincelles plus graves,<br />
surtout si la surface du collecteur a été brûlée. Il est donc<br />
important de vérifier régulièrement la surface du collecteur<br />
<strong>et</strong> de noter tous signes d’augmentation d’étincelles<br />
aux bords des balais. De faibles étincelles peuvent donc<br />
se produire <strong>et</strong> être acceptables si cela ne s’amplifie pas. Il<br />
peut aussi arriver que certaines lames uniformément<br />
espacées, par exemple une sur trois, acquièrent une<br />
patine sombre ou noircissent légèrement par endroit sur<br />
le bord des lames. Habituellement on peut considérer qu’il<br />
ne s’agit que d’un défaut esthétique, mais dans certains<br />
cas il peut entraîner la formation de fac<strong>et</strong>tes <strong>et</strong> des<br />
dégâts à la surface du collecteur. Dans certaines applications,<br />
il y a souvent des variations rapides de courant <strong>et</strong><br />
de vitesse. Les étincelles qui se produisent dans ce cas,<br />
ne présentent généralement aucun danger.<br />
Sparking<br />
The most common reason for sparking is poor contact<br />
b<strong>et</strong>ween the brush surface and the commutator surface. It<br />
is also possible that certain brushes which have b<strong>et</strong>ter<br />
contact than others, take on more current and therefore<br />
spark due to overloading.<br />
Sparking may be progressive, i. e. start with small sparks,<br />
seemingly harmless, and then slowly or quickly progress<br />
to more serious sparking, especially if the commutator<br />
surface has been burnt. It is important that the<br />
commutator surface is inspected regularly and any sign of<br />
increased sparking at the brush edges is noted.<br />
Faint sparking may occur and can be accepted if it does<br />
not go any further than that.<br />
So called patterning may also occur, which means that<br />
certain evenly spaced laminations, for instance every<br />
third, acquires a dark patina or becomes slightly<br />
blackened in parts on the edge of the lamination. Usually<br />
this may be considered merely as a blemish, but in some<br />
cases it may lead to flattening and damage on the<br />
commutator surface. In certain applications there are<br />
often rapid current and speed fluctuations. The sparking<br />
occurring in this case is usually quite harmless.<br />
24
<strong>Balais</strong> <strong>et</strong> <strong>commutation</strong><br />
Si un moteur alimenté par un convertisseur se m<strong>et</strong> à<br />
produire des étincelles sans raison apparente, on peut<br />
soupçonner un défaut dans le convertisseur.<br />
La cause peut en être une défaillance dans l’équipement<br />
de régulation, un fusible, <strong>et</strong>c.<br />
Porte-balais<br />
Les balais doivent pouvoir coulisser dans leurs cages. Il<br />
est évident que, si la poussière s’accumule dans l’espace<br />
étroit entre porte-balais <strong>et</strong> balais, le mouvement sera<br />
réduit <strong>et</strong> il en résultera un mauvais contact dû à la pression<br />
insuffisante du balai. La poussière peut provenir de<br />
l’usure des balais ou du milieu ambiant. Tant que la<br />
poussière est sèche, on peut empêcher le balai de se<br />
coincer dans le logement en «pompant», c’est-à-dire en<br />
tirant sur le fil du balai pour le déplacer de quelques<br />
millimètres. S’il y a présence d’humidité ou d’huile, le<br />
n<strong>et</strong>toyage est nécessaire <strong>et</strong> le «pompage» n’aura aucun<br />
eff<strong>et</strong>.<br />
Brushes and <strong>commutation</strong><br />
If a motor supplied by a convertor begins to spark without<br />
apparent reason, a fault in the convertor may be<br />
suspected. Possible reasons might be a fault in the<br />
control equipment, a fuse <strong>et</strong>c.<br />
Brush holders<br />
The brushes must be able to move in their holders. It is<br />
obvious, if dust collects in the narrow space b<strong>et</strong>ween<br />
holder and brush, movement will be impeded and the<br />
result is poor contact due to insufficient brush pressure.<br />
The dust may come from brush wear or from the<br />
surroundings. As long as the dust is dry, the brush can be<br />
prevented from sticking in the holder by «pumping», i. e.<br />
pulling on the brush wire so that the movement is a few<br />
millim<strong>et</strong>ers. If there is moisture or oil present cleaning is<br />
necessary and «pumping» will be to no avail.<br />
Avertissement<br />
Toujours déconnecter électriquement la machine pour<br />
effectuer ces mesures correctives.<br />
Mauvais contact des balais<br />
Comme indiqué plus haut, un mauvais contact provoque<br />
des étincelles qui peuvent brûler le collecteur aggravant<br />
ainsi le défaut. La formation d’étincelles peut être due à<br />
l’une des raisons suivantes :<br />
<strong>Balais</strong> coincés<br />
S’il arrive parfois qu’un seul balai se déplace trop lentement<br />
ou se coince dans le porte-balai, la formation<br />
d’étincelles ne sera généralement pas grave. Mais si<br />
plusieurs balais sont coincés, la situation peut devenir<br />
plus sérieuse car les autres balais sont alors surchargés.<br />
Warning<br />
Ensure that the machine is electrically disconnected<br />
when performing such corrective measures.<br />
Poor brush contact<br />
As pointed out earlier, poor contact causes sparking<br />
which may burn the commutator, which in turn causes<br />
further sparking. One of the following points can be the<br />
reason for sparking:<br />
Stuck brushes<br />
If a single brush occasionally moves sluggish in the<br />
brush holder or g<strong>et</strong>s stuck, sparking usually will not be<br />
serious. But if several brushes g<strong>et</strong> stuck, the others g<strong>et</strong><br />
overloaded and the sparking is more serious.<br />
Remarque<br />
Noter que les balais ne doivent pas être soumis à une<br />
force de contact telle qu’ils soient difficiles à r<strong>et</strong>irer.<br />
Remark<br />
Note that the brushes need not sit so hard that they<br />
are difficult to remove.<br />
Si les balais se déplacent trop lentement, leur contact<br />
avec le collecteur est réduit.<br />
Good brush contact is reduced if brushes move<br />
sluggishly.<br />
Doigts de pression coincés<br />
Le mécanisme à doigts de pression du porte-balais peut<br />
se coincer. C’est un défaut grave car il élimine pratiquement<br />
la pression des balais.<br />
Stuck pressure fingers<br />
The pressure finger mechanism of the brush holders may<br />
jam. This is a serious fault since the brush pressure then<br />
more or less disappears.<br />
25
<strong>Balais</strong> <strong>et</strong> <strong>commutation</strong><br />
Brushes and <strong>commutation</strong><br />
<strong>Balais</strong> usés<br />
Si les balais ne sont pas remplacés en temps voulu, la<br />
pression risque de disparaître, ce qui causera un mauvais<br />
contact.<br />
Précaution<br />
Ne pas laisser s’user les balais au point que le shunt<br />
noyé dans le balai entre en contact avec la surface<br />
tournante, car cela peut avoir de graves conséquences<br />
(rainures sur le collecteur).<br />
Worn brushes<br />
If worn brushes are not replaced in time the pressure<br />
may cease to exist which results in poor brush contact.<br />
Caution<br />
Do not l<strong>et</strong> the brush wear down so much that the flex<br />
attachment embedded in the brush comes into<br />
contact with the rotating surface. This can have<br />
serious consequences.<br />
Huile sur les surfaces de contact<br />
Si, pour une raison ou une autre de l’huile atteint la<br />
surface du collecteur, <strong>et</strong> par suite la surface de contact<br />
des balais, il peut se produire des étincelles. Les étincelles<br />
brûlent la pellicule d’huile, ce qui entraîne la formation<br />
de tâches noires rugueuses à la surface du collecteur.<br />
L’huile forme une mince pellicule isolante qui oblige le<br />
courant à passer en p<strong>et</strong>its arcs électriques.<br />
Surface de contact rayée<br />
Les particules de poussière de ciment ou de matières<br />
analogues peuvent s’incruster sous la surface des balais<br />
<strong>et</strong> provoquer des griffes.<br />
Précaution<br />
Si des travaux de construction ont lieu à proximité de<br />
la machine, prévoir un écran anti-poussière efficace,<br />
surtout pour les balais <strong>et</strong> les enroulements. Le carter<br />
de protection doit cependant perm<strong>et</strong>tre l’inspection.<br />
Oil on contact surfaces<br />
If oil should appear on the commutator surface, and thus<br />
on the brush contact surface, sparking can occur. The<br />
sparks burn the oil film which results in coarse, black<br />
patches on the commutator surface. The oil forms a thin<br />
insulating film which causes the current to pass over as<br />
small electric arcs.<br />
Scratched contact surface<br />
Hard particles of concr<strong>et</strong>e dust or the like may g<strong>et</strong> under<br />
the brush surface and cause scratches.<br />
Caution<br />
If construction work is going on in the vicinity of the<br />
machine, an efficient dust shield must be provided,<br />
particularly for brush gear and windings. The shield<br />
should however permit inspection.<br />
Mica<br />
A mesure que le collecteur s’use avec le temps, le mica<br />
séparant les lames finit par dépasser progressivement, ce<br />
qui peut faire sauter les balais. On peut observer ce<br />
phénomène en tenant un p<strong>et</strong>it outil isolé sur le dessus du<br />
balai. L’apparition de mica en saillies pourra se manifester<br />
par des projections d’étincelles dues aux particules de<br />
balais brûlées.<br />
Vibrations<br />
Les vibrations ont un eff<strong>et</strong> nocif sur le contact des balais,<br />
elles peuvent induire des perturbations électromagnétiques.<br />
Des perturbations sous forme de vibrations peuvent<br />
être causées par un déséquilibre de la machine entraînée.<br />
Par exemple, dans l’industrie du ciment, des dépôts<br />
peuvent s’accumuler sur les aubes des ventilateurs <strong>et</strong><br />
provoquer un balourd. Des vibrations peuvent aussi être<br />
dues à un mauvais alignement ou à un mauvais équilibre<br />
de la machine. Des perturbations mécaniques peuvent<br />
aussi provenir des balais, par exemple sous l’eff<strong>et</strong> de<br />
variations du frottement. Un frottement élevé des balais<br />
dû à une atmosphère sèche ou froide <strong>et</strong> à un courant<br />
élevé peut aussi causer des étincelles. Ce phénomène<br />
est décrit plus en détail à la page 28.<br />
Protruding mica<br />
As the commutator g<strong>et</strong>s worn with time, the mica<br />
b<strong>et</strong>ween the laminations will gradually begin to protrude<br />
and may cause the brushes to jump. This can be seen by<br />
holding an insulated pin against the top of the brush. One<br />
sign that mica is sticking up may be jumping sparks<br />
caused by burning brush particles.<br />
Vibrations<br />
Vibrations have a d<strong>et</strong>rimental effect on brush contact.<br />
Disturbances in the form of vibrations may be caused by<br />
an unbalance of the driven object, for instance fans in the<br />
cement industry can acquire deposits on the blades which<br />
result in an out-of-balance condition.<br />
Vibration can also be caused by poor machine alignment<br />
or by an unbalance of the machine.<br />
Mechanical disturbances may also come from the<br />
brushes which could be caused by varying friction.<br />
High brush friction due to dry or cold atmosphere and low<br />
current load may also cause sparking. This is described in<br />
more d<strong>et</strong>ail on page 28.<br />
26
<strong>Balais</strong><br />
<strong>et</strong> <strong>commutation</strong><br />
Brushes<br />
and <strong>commutation</strong><br />
Formation de la patine sur le collecteur<br />
Un collecteur neuf présente une surface de cuivre propre.<br />
Après un certain temps de fonctionnement, il se forme<br />
une patine constituée d’oxydes de cuivre mélangés à des<br />
particules des balais. En principe, la patine se forme<br />
comme suit:<br />
un mince coussin d’air adhérant à la surface en rotation<br />
fournit continuellement de l’oxygène à la surface de<br />
contact sous le balai. Dans des conditions de température<br />
favorables <strong>et</strong> en présence de vapeur d’eau, il se forme<br />
des oxydes de cuivre. Les particules de balais (graphite)<br />
sont mélangées à une couche d’oxyde <strong>et</strong> elles produisent<br />
ensemble un revêtement dur <strong>et</strong> résistant qui protège le<br />
collecteur.<br />
Il est important que la température de la surface de<br />
contact soit suffisamment élevée pour activer le processus<br />
chimique. La température dépend principalement de<br />
la densité du courant dans les balais <strong>et</strong> des pertes dues<br />
au frottement.<br />
How the patina is formed<br />
A new commutator has a clean copper surface. After<br />
some time of operation a patina is formed, consisting of<br />
copper oxides mixed with particles from the brushes. In<br />
principle the patina is formed as follows:<br />
A thin cushion of air adhering to the rotating surface<br />
continuously supplies oxygen to the contact surface<br />
below the brush. Under favorable temperature conditions<br />
and in the presence of water vapor, copper oxides are<br />
formed.<br />
Brush particles (graphite) are mixed with a layer of oxide<br />
and tog<strong>et</strong>her produce a hard, resistant coating which<br />
protects the commutator.<br />
It is important that the temperature of the contact surface<br />
is sufficiently high to activate the chemical process. The<br />
temperature is primarily dependent on the current density<br />
in the brush and the frictional losses.<br />
Oxyde de cuivre<br />
Copper oxide<br />
Balai<br />
Brush<br />
Cuivre<br />
Copper<br />
Particule détachée<br />
Loose particles<br />
Graphite<br />
Graphite<br />
Un autre facteur important est l’humidité de l’air environnant<br />
car l’humidité est un élément nécessaire dans le<br />
processus chimique.<br />
Si l’air est extrêmement sec, avec une teneur en eau<br />
inférieure à 3-4 grammes/m 3 d’air, il ne se formera pas de<br />
patine.<br />
Une teneur en eau favorable pour une patine satisfaisante<br />
est d’environ 10 grammes/m 3 , tandis qu’une teneur en<br />
eau supérieure pourra donner une patine trop épaisse.<br />
Another important factor is the humidity of the<br />
surrounding air since moisture is a necessary element in<br />
the chemical process.<br />
If the air is extremely dry, with a water content of less<br />
than 3-4 gram/m 3 air, no patina will be formed.<br />
A favorable water content for a satisfactory patina is about<br />
10 gram/m 3 , whereas a higher content may give a patina<br />
which is too thick.<br />
27
<strong>Balais</strong><br />
<strong>et</strong> <strong>commutation</strong><br />
Brushes<br />
and <strong>commutation</strong><br />
Frottement <strong>et</strong> usure des balais<br />
Pour un contact de glissement satisfaisant, il est nécessaire<br />
que le lieu où fonctionne le moteur soit suffisamment<br />
humide <strong>et</strong> que la température à la surface des<br />
balais soit appropriée. Un balai qui fonctionne bien ne doit<br />
avoir aucun contact mécanique avec le collecteur. Il doit<br />
reposer sur un «coussin» de molécules d’eau. Le courant<br />
est transmis à un certain nombre de points qui se déplacent<br />
rapidement à travers toute la surface du balai.<br />
Si l’une des conditions ci-dessus manque, une bonne<br />
patine de collecteur peut être facilement endommagée ou<br />
brisée, ce qui a pour eff<strong>et</strong> d’accroître le frottement <strong>et</strong><br />
l’usure des balais. Si la machine fonctionne un certain<br />
temps sous faible courant, ou si l’air de refroidissement<br />
est plus froid que de coutume, la température à la surface<br />
des balais peut rester trop basse. Si, pour une raison<br />
quelconque, la machine doit fonctionner pendant un<br />
certain temps à un courant de charge beaucoup plus bas<br />
que la valeur nominale, il est conseillé de r<strong>et</strong>irer certains<br />
des balais pour augmenter ainsi la densité du courant<br />
dans les autres.<br />
Toutefois, il est cependant conseillé de n’entreprendre ce<br />
type de changement qu’après avoir consulté T-T <strong>Electric</strong>.<br />
Brush friction and brush wear<br />
A condition for satisfactory gliding contact is, that the<br />
location where the motor is operating is sufficiently humid<br />
and the temperature at the brush surface is suitable. A<br />
brush which is operating well should have no mechanical<br />
contact with the commutator. It should «ride» on a<br />
«cushion» of water molecules. The current is transmitted<br />
at a number of points moving rapidly across the entire<br />
brush surface.<br />
If one of the above pre-requisites is missing, a good<br />
commutator patina can easily be damaged or break<br />
down, resulting in increased brush friction and wear. Low<br />
temperature at the brush surface may occur if the machine<br />
is run for some time with low load current or if the<br />
cooling air is colder than usual.<br />
If for some reason the machine is to operate at<br />
considerably lower load current than stipulated by the<br />
rated data for any length of time, it is advisable to remove<br />
some of the brushes thus increasing the current density in<br />
the rest. If possible however, such a change should be<br />
undertaken in consultation with T-T <strong>Electric</strong>.<br />
A change of brush grade may also be considered.<br />
Longue durée de vie du collecteur<br />
Une bonne patine, même présentant des teintes variées,<br />
perm<strong>et</strong> aux balais de glisser régulièrement avec un<br />
minimum d’usure.<br />
Le collecteur n’a généralement pas besoin d’être usiné<br />
avant plusieurs années de service. Cependant, lorsqu’il<br />
est usé au point que le mica séparateur fait saillie, le<br />
tournage est alors nécessaire.<br />
Long commutator life limit<br />
A good patina, even with varying colors, makes the brush<br />
run smoothly and with minimum wear. The commutator<br />
does not usually need to be machined until it has been in<br />
operation for several years. However, when it has become<br />
so worn that the mica b<strong>et</strong>ween the lamination protrudes,<br />
turning is necessary.<br />
Ne pas détériorer une bonne patine<br />
Un commutateur couvert d’une bonne patine doit être<br />
laissé tel quel <strong>et</strong> ne pas être rectifié, <strong>et</strong>c.<br />
Do not touch a good patina<br />
A commutator which is covered by a good patina should<br />
be left alone and should not be subjected to grinding, <strong>et</strong>c.<br />
28
<strong>Balais</strong><br />
<strong>et</strong> <strong>commutation</strong><br />
Brushes<br />
and <strong>commutation</strong><br />
Traitement de la surface du collecteur<br />
La mesure à prendre, en cas de défaut du collecteur, doit<br />
être décidée au cas par cas. Nous ne pouvons donner ici<br />
que des conseils généraux.<br />
Remarque<br />
Si des défauts sont légers, essayer d’abord d’utiliser<br />
une toile émeri fine ou une gomme à polir, pour éviter<br />
d’enlever plus de patine que nécessaire.<br />
Si la patine est de mauvaise qualité, il est préférable de<br />
l’enlever complètement en espérant en obtenir une<br />
meilleure par la suite. Si la surface est brûlée au point que<br />
des cratères sont apparus, on pourra utiliser une toile<br />
abrasive ou une meule fine, mais il faut bien prendre soin<br />
d’éviter de causer des court-circuits entre les lames. Le<br />
meulage doit être effectué à tension réduite. Inspecter la<br />
surface du collecteur avant de commencer pour voir si la<br />
machine a été exposée à des gaz corrosifs. Si c’est le<br />
cas, enlever le revêtement à la toile émeri fine, à la<br />
gomme à polir ou à la pierre fine.<br />
Treatment of commutator surface<br />
The action to be taken, in case of a defect arising from<br />
the commutator, must be d<strong>et</strong>ermined from case to case.<br />
We can only give general advise.<br />
Remark<br />
If the defects are slight, fine emery cloth or a rubber<br />
polishing block should be tried first so as not to<br />
remove more of the patina than necessary.<br />
If the patina is of poor quality it is b<strong>et</strong>ter to remove it<br />
compl<strong>et</strong>ely and hope for a b<strong>et</strong>ter result later. If the surface<br />
is burnt to the extent that craters have appeared, an<br />
abrasive cloth or a fine grindstone may be used, but great<br />
care must be taken to avoid short-circuiting in the<br />
laminations. Grinding should be performed at reduced<br />
voltage. Inspect the commutator surface before start-up to<br />
see if the machine has been exposed to corrosive gases.<br />
If this has happened remove the coating with fine emery<br />
cloth, a rubber polishing block or a fine stone.<br />
Remplacement des balais usés<br />
Les balais doivent être remplacés par jeu compl<strong>et</strong>.<br />
Tous les balais doivent être placés dans leur logement<br />
(Cf. Ia section «Rodage des balais» p. 30).<br />
Ce n’est qu’après ce rodage <strong>et</strong> après n<strong>et</strong>toyage de<br />
l’ensemble porte-balais que la machine peut être mise en<br />
marche.<br />
Précaution<br />
Les balais doivent obligatoirement être remplacés<br />
lorsqu’ils ont atteint une longueur minimum de 15 mm<br />
(Cf. figure ci-dessous).<br />
Ne pas mélanger différents types de balais possédant<br />
des qualités variables.<br />
La pression des balais recommandée est 2,5 N/cm 2 .<br />
Exchanging the worn brushes<br />
Worn brushes must be exchanged as a compl<strong>et</strong>e<br />
s<strong>et</strong>. All brushes must be embedded after they have<br />
been placed into their holders (refer to section<br />
«Embedding of brushes» p. 30).<br />
Only after embedding and cleaning of the entire brush<br />
gear may the machine be started.<br />
Caution<br />
The brushes must be exchanged when they have<br />
reached a min. length of 15 mm (see figure below).<br />
Do not mix different types of brushes which have varying<br />
qualities.<br />
The recommended brush pressure is 2,5 N/cm 2 .<br />
Balai à dessus droit<br />
Brush with straight top<br />
Balai à tampon amortisseur<br />
Brush with dampening pad<br />
29
<strong>Balais</strong><br />
<strong>et</strong> <strong>commutation</strong><br />
Brushes<br />
and <strong>commutation</strong><br />
Rodage des balais<br />
On utilise une toile émeri de rugosité moyenne pour roder<br />
les balais de carbone.<br />
Avertissement<br />
C<strong>et</strong>te opération s’effectue sur la machine arrêtée.<br />
Embedding of brushes<br />
A medium-coarse emery cloth is used for embedding the<br />
carbon brushes.<br />
Warning<br />
This is done when the machine is stationary.<br />
On insère la toile émeri entre les balais <strong>et</strong> le collecteur,<br />
surface abrasive côté balais, <strong>et</strong> on la fait glisser sur la<br />
courbure du collecteur.<br />
The emery cloth is inserted b<strong>et</strong>ween brushes and<br />
commutator with the abrasive surface facing the brushes<br />
and should slide over the curvature of the commutator.<br />
1 Balai<br />
1 Brush<br />
2 Toile émeri<br />
2 Emery cloth<br />
3 Collecteur<br />
3 Commutator<br />
Après le rodage, le collecteur <strong>et</strong> le porte-balais doivent<br />
être n<strong>et</strong>toyés, les balais r<strong>et</strong>irés de leurs logements <strong>et</strong><br />
n<strong>et</strong>toyés à l’air comprimé, <strong>et</strong> l’on doit alors vérifier qu’il ne<br />
reste pas de particules abrasives à la surface des balais.<br />
After embedding, the commutator and the brush gear<br />
must be cleaned, the brushes removed from their<br />
pock<strong>et</strong>s, blown clean and checked to see that there are<br />
no abrasive particles on the brush surface.<br />
Réglage du porte-balais<br />
sur la ligne neutre<br />
Le porte-balais est réglé sur la ligne neutre <strong>et</strong> repéré en<br />
usine. Si la ligne neutre est changée, un nouveau repère<br />
doit être pratiqué pour indiquer la nouvelle position.<br />
Adjustment of brush gear<br />
to neutral position<br />
The brush gear is s<strong>et</strong> and marked at its neutral position at<br />
the factory. If the neutral position is changed, a new<br />
marking must be made to indicate the new position.<br />
Remarque<br />
Lorsqu’un nouvel induit de rechange est monté, le<br />
repère doit toujours être vérifié. Ce contrôle doit être<br />
effectué selon le schéma ci-après.<br />
Remark<br />
When a new replacement armature is installed,<br />
the neutral position must always be checked. This<br />
check can be made acc.to the following sk<strong>et</strong>ch.<br />
30
<strong>Balais</strong><br />
<strong>et</strong> <strong>commutation</strong><br />
Brushes<br />
and <strong>commutation</strong><br />
Voltmètre<br />
Voltm<strong>et</strong>er<br />
Plage de mesure appropriée 0 - 1,5 V <strong>et</strong> 0 - 60 mV<br />
Suitable measurement range 0 - 1,5 V and 0 - 60 mV<br />
Variante<br />
alternativ<br />
Lorsqu’on établit le circuit d’excitation, on obtient un flux<br />
qui induit une tension entre les balais s’ils ne sont pas<br />
réglés en ligne neutre. La source d’excitation peut être le<br />
convertisseur ou une batterie de 12-24 V.<br />
When switching on the field circuit, a flux is obtained<br />
which induces a voltage b<strong>et</strong>ween the brushes if they are<br />
not in neutral position. The power source can be from the<br />
convertor or from a battery with 12-24 V.<br />
Remarque<br />
Noter que la gamme de mesure plus élevée sur le<br />
voltmètre doit être utilisée pour un réglage approximatif,<br />
<strong>et</strong> la gamme inférieure pour le réglage final.<br />
Remark<br />
Note that the higher measuring range on the<br />
voltm<strong>et</strong>er should be used for rough s<strong>et</strong>ting and the<br />
lower for final adjustment.<br />
Le porte-balais doit être tourné jusqu’à ce que la tension<br />
induite soit aussi près que possible de 0 Volt.<br />
Avertissement<br />
Débrancher le voltmètre avant de couper la tension<br />
d’excitation, sinon il pourra être endommagé.<br />
The brush gear should be rotated until the induced<br />
voltage is as close to 0 Volt as possible.<br />
Caution<br />
The voltm<strong>et</strong>er should be disconnected before the field<br />
voltage is cut, otherwise the instrument can be<br />
damaged.<br />
Avant d’utiliser c<strong>et</strong>te méthode de réglage, il faut avoir rodé<br />
correctement le balai, c’est-à-dire que la surface de<br />
contact des balais doit avoir le même rayon que le<br />
collecteur. Comme contrôle final du point neutre, tourner<br />
l’induit de quelques tours, si possible dans le sens normal<br />
de rotation. Cela amène le balai le plus près possible de<br />
la position réelle de fonctionnement.<br />
Before using this m<strong>et</strong>hod of adjustment, the brushes must<br />
be embedded correctly, i. e. the contact surface of the<br />
brush must have the same radius as the commutator. As<br />
a final check of the neutral position, rotate the armature a<br />
few turns, if possible in the direction of rotation. This<br />
brings the brushes as close as possible to the actual<br />
operating position.<br />
31
<strong>Balais</strong><br />
<strong>et</strong> <strong>commutation</strong><br />
Brushes<br />
and <strong>commutation</strong><br />
Tournage du collecteur<br />
Lorsqu’il devient nécessaire de rem<strong>et</strong>tre en état par<br />
tournage un collecteur dont la surface est usée, irrégulière<br />
ou endommagée, il faut disposer d’un tour convenable.<br />
Il est extrêmement important d’effectuer très soigneusement<br />
le tournage <strong>et</strong> le rainurage des micas.<br />
Si la vitesse de tournage est trop basse, le tour ne<br />
donnera pas une taille n<strong>et</strong>te <strong>et</strong> les lames pourront prendre<br />
une forme incorrecte, ce qui perturbe la <strong>commutation</strong> de<br />
manière inacceptable.<br />
Il est conseillé d’utiliser un outil en carbure <strong>et</strong> une vitesse<br />
de coupe de 200 m/mn minimum.<br />
Le collecteur peut être tourné comme suit:<br />
Turning of commutator<br />
When it becomes necessary to restore a worn, uneven or<br />
damaged commutator surface by turning, a suitable lathe<br />
must be available.<br />
It is extremely important that the turning and the<br />
undercutting of the mica are performed very carefully. If<br />
the turning speed is too slow the lathe will not cut clean<br />
and the laminations can g<strong>et</strong> a wrong shape. This disturbs<br />
the <strong>commutation</strong> extremely and cannot be tolerated.<br />
A carbide tool is recommended with a minimum cutting<br />
speed of 200 m/min.<br />
The commutator can be turned down as follows:<br />
Type de<br />
moteur<br />
Diamètre du collecteur D (mm)<br />
Commutator dia., D (mm)<br />
Motor type Neuf Min Profondeur d’usure<br />
au rayon<br />
DMP New Min Depth of wear<br />
112-2 95 89 3<br />
112-4 105 99 3<br />
132-2 120 114 3<br />
132-4 124 118 3<br />
160 160 154 3<br />
180 170 164 3<br />
180-4F/LC/LD 175 169 3<br />
La rugosité de surface doit être Ra = 1,6 µm<br />
L’arrondi est très important. La déviation totale au<br />
comparateur sur un collecteur qui vient d’être tourné ne<br />
doit pas dépasser 0,03 mm par rapport aux portées de<br />
roulement.<br />
Moteur monté, le même battement de 0,04 mm est<br />
acceptable.<br />
De plus, une rampe maxi de 15 µm sur 1/10 du périmètre<br />
du collecteur est admissible.<br />
The surface roughness should be Ra = 1,6 µm.<br />
Roundness is very important. The total indicator reading<br />
(TIR) on a newly turned commutator must not exceed<br />
0.03 mm with reference to the bearing surfaces.<br />
For an assembled motor, a runout of 0,04 mm is<br />
acceptable.<br />
In addition a maximum ramp of 15 µm over 1/10 of the<br />
commutator perim<strong>et</strong>er is acceptable.<br />
32
<strong>Balais</strong><br />
<strong>et</strong> <strong>commutation</strong><br />
Brushes<br />
and <strong>commutation</strong><br />
Suivant le type de profil de lame, I’écart maximum<br />
autorisé est le suivant:<br />
Ecart de hauteur maximum autorisé = 4 µm<br />
Les séparations en mica du collecteur doivent être<br />
creusées à une profondeur de 1,5 ± 0,2 mm. Tout le mica<br />
doit être enlevé des bords des lames. Des perturbations<br />
sous forme d’étincelles peuvent être causées par un<br />
enlèvement inadéquate du mica.<br />
Après avoir creusé le mica, il faut chanfreiner toutes les<br />
arêtes vives des lames. Un chanfrein de 0,1 mm est<br />
conseillé.<br />
Max. permitted height deviation = 4 µm<br />
The mica laminations of the commutator should be<br />
undercut to a depth of 1,5 + 0,2 mm.<br />
All mica must be removed from the edges of the<br />
laminations.<br />
Disturbance in the form of sparking may be caused by<br />
mica which has not been properly removed. After<br />
undercutting, all sharp edges must be chamfered. A<br />
chamfer of 0,1 mm is recommended.<br />
La distance entre le portebalais <strong>et</strong> la surface du collecteur<br />
doit être de 2,5 + 0,5 mm. Si elle dépasse c<strong>et</strong>te tolérance,<br />
le porte-balais doit être repositionné.<br />
The distance b<strong>et</strong>ween the brush holder and the<br />
commutator surface should be 2,5 + 0,5 mm. If the<br />
distance has become larger than stated, the brush holder<br />
must be res<strong>et</strong>.<br />
Balai de terre<br />
Certaines machines à c.c. sont équipées d’un balai de<br />
terre. Ce balai est situé entre le roulement <strong>et</strong> le dispositif<br />
tachymétrique.<br />
Earthing brush<br />
Some DC-machines are equipped with an earthing brush.<br />
The brush is located b<strong>et</strong>ween the bearing shield and the<br />
tacho-generator.<br />
Remarque<br />
L’usure du balai <strong>et</strong> son contact doivent être contrôlés<br />
au moins deux fois par an, <strong>et</strong> le balai doit être remplacé<br />
suivant nécessité.<br />
Remark<br />
Brush wear and brush contact are to be inspected at<br />
least twice a year and replaced if necessary.<br />
33
<strong>Balais</strong><br />
<strong>et</strong> <strong>commutation</strong><br />
Brushes<br />
and <strong>commutation</strong><br />
Niveau de vibrations<br />
Précaution<br />
Le niveau de vibrations de la machine doit être vérifié<br />
à intervalles réguliers.<br />
Vibration level<br />
Caution<br />
The vibration level of the machine is to be checked at<br />
regular intervals.<br />
Un niveau de vibrations élevé est nocif pour la machine <strong>et</strong><br />
réduira sa durée de service.<br />
Le niveau de vibration normal est d’environ 2-3 mm/s. Si<br />
le niveau mesuré dépasse 4,5 mm/s, des mesures<br />
appropriées doivent être prises pour réduire ce niveau.<br />
A high vibration level is d<strong>et</strong>rimental to the machine and<br />
will shorten its service life. The normal vibration level is<br />
about 2-3 mm/sec. If the measured level exceeds 4,5 mm/<br />
sec, appropriate measures must be taken to reduce the<br />
level of vibration.<br />
Roulements (Inspection des roulements)<br />
Ecouter attentivement les roulements. S’ils sont en bon<br />
état, on entend un ronronnement doux, <strong>et</strong> la cause de<br />
tout autre bruit doit être déterminée. Cependant, une<br />
longue expérience est nécessaire pour juger de l’état des<br />
roulements au bruit seulement.<br />
Bearings (Bearing inspection)<br />
Listen carefully to the bearings. If everything is in order, a<br />
soft purring sound should be heard. Be suspicious if other<br />
noises are noticeable. However, to be able to judge the<br />
condition of the bearings by listening requires long<br />
experience.<br />
Remarque<br />
Il est préférable d’utiliser un capteur de roulement à<br />
titre préventif.<br />
Remark<br />
It is preferable to use a bearing sensor as a<br />
preventive maintenance.<br />
C’est un accessoire qui peut être livré avec le moteur sur<br />
demande.<br />
This accessory can be delivered with the motor on<br />
request.<br />
34
Graissage<br />
Lubrication<br />
Graissage<br />
On peut graisser les moteurs DMP avec une pompe à<br />
graisse pendant la marche de la machine. Les intervalles<br />
de graissage <strong>et</strong> la quantité de graisse sont indiqués dans<br />
le tableau ci-dessous.<br />
Le roulement de l’extrémité collecteur est soit muni d’un<br />
graisseur pour lubrification, soit graissé de façon permanente.<br />
Précaution<br />
Quelles que soient les heures de service, la graisse<br />
doit néanmoins être remplacée au moins tous les<br />
cinq ans.<br />
Lubrication<br />
DMP motors can be lubricated while the machine is<br />
running by using a grease gun. Lubrication intervals and<br />
amount of grease are listed in the table below.<br />
The bearing on the ND-end either has a grease nipple for<br />
lubrication, or it is permanently greased.<br />
Caution<br />
Irrespective of the duty time the grease must be<br />
replaced at least every fifth year.<br />
Type DMP Vitesse du moteur Intervalles de graissage en mois - Marche Quantité de graisse<br />
Type DMP Motor speed Intervalls for regreasing in months en gramme<br />
t/min/rpm 24H/j 8 H/j Amount of grease in g<br />
- 1000 12 12<br />
(1000) - 1500 10 12<br />
112 (1500) - 2000 8 12 10<br />
(2000) - 2500 6 12<br />
(2500) - 3000 5 12<br />
- 1000 10 12<br />
(1000) - 1500 8 12<br />
132 (1500) - 2000 7 12 12<br />
(2000) - 2500 5 12<br />
(2500) - 3000 3 10<br />
- 1000 12 12<br />
(1000) - 1500 8 12<br />
160 (1500) - 2000 5 12 15<br />
(2000) - 2500 4 12<br />
(2500) - 3000 3 9<br />
- 1000 11 12<br />
(1000) - 1500 7 12<br />
180 (1500) - 2000 5 12 25<br />
(2000) - 2500 4 12<br />
(2500) - 3000 3 9<br />
- 1000 12 12<br />
(1000) - 1500 11 12<br />
180-4F/LC/LD (1500) - 2000 8 12 30<br />
(2000) - 2500 5 12<br />
(2500) - 3000 4 11<br />
35
Graissage<br />
Lubrication<br />
Graissage à la mise en service<br />
(ne s’applique pas aux roulements<br />
à graissage permanent)<br />
Immédiatement après la mise en service d’une machine<br />
qui vient d’être installée ou d’une machine qui est restée<br />
au repos pendant une durée prolongée, de la graisse<br />
neuve doit être injectée dans les roulements. Suivre les<br />
instructions de graissage qui figurent sur l’instruction<br />
livrée avec la machine. La température du roulement<br />
augmente au début en raison d’un excédent de graisse<br />
dans le couvercle de roulement. Une fois que l’excédent<br />
de graisse s’est écoulé du couvercle de roulement, la<br />
température doit redescendre à des valeurs normales<br />
(< 70 °C). Cela demande normalement quelques heures.<br />
Remarque<br />
Ne graisser que pendant le fonctionnement de la<br />
machine, à plus de 300 tr/mn.<br />
Lubrication during commissioning<br />
(not valid for permanently lubricated<br />
bearings)<br />
Immediately after commissioning of a newly installed<br />
machine or of a machine which has been standing for a<br />
longer period, new grease must be pressed into the<br />
bearings. Follow the lubricating instructions supplied with<br />
the DC machine. The bearing temperature increases in<br />
the beginning due to a surplus of grease in the bearing<br />
housing. After the surplus grease has run out of the<br />
bearing housing, the temperature should reach normal<br />
running values (< 70 °C) again. Normally this takes a few<br />
hours.<br />
Remark<br />
Lubricate only when the machine is running<br />
preferably over 300 r/min.<br />
Si la machine est graissée à l’arrêt, la graisse usagée ne<br />
passe pas par l’orifice de décharge. Au lieu de cela, elle<br />
s’introduit entre la bague d’étanchéité <strong>et</strong> l’arbre <strong>et</strong> pénètre<br />
dans la machine où elle cause une contamination grave.<br />
N’utiliser qu’une graisse de haute qualité.<br />
If the machine is lubricated while standing still, the old<br />
grease does not pass out through the discharge opening.<br />
Instead it squeezes b<strong>et</strong>ween the seal ring and the shaft<br />
into the machine and causes serious contamination.<br />
Use only high quality grease as recommended below.<br />
Graissage pendant la marche<br />
Remarque<br />
Graisser à l’aide d’une pompe de graissage pendant<br />
la marche de la machine,avec la quantité exacte <strong>et</strong><br />
aux intervalles spécifiés sur le tableau page précédente.<br />
Précaution<br />
N<strong>et</strong>toyer le graisseur avant d’injecter la graisse, afin<br />
d’éviter la pénétration d’impur<strong>et</strong>és dans les roulements.<br />
Les intervalles de graissage sont indiqués sur le tableau<br />
page précédente. N’utiliser que de la graisse de bonne<br />
qualité. La graisse T-T <strong>Electric</strong> correspond à :<br />
Elf = Epexelf 2<br />
BP: Energrease L S 2<br />
Castrol: Spheerol SW 2<br />
Esso: Beacon, 2<br />
Nynas: L 42 EP<br />
Optimol: Longtime PD 2<br />
Shell: Alvania Grease R3<br />
SKF: Alfalub LGMT 2<br />
Texaco: Regal Starfak 3<br />
Imperial OIL: Unirex N3<br />
Chrevron: Dura-Lith Grease 2<br />
A Christiernssson: Alexol 408<br />
Mobil Oil: Mobilux 2<br />
Molub-Alloy: BRB 572 (avec MoS2)<br />
Lubrication during operation<br />
Remark<br />
Use a manual grease gun and lubricate while the<br />
machine is running with the exact amount and within<br />
the intervals as specified on the instruction on<br />
previous page.<br />
Caution<br />
Clean the grease nipples prior to lubrication to<br />
prevent any impurities from being pressed into the<br />
bearings.<br />
Lubricating intervals are stated on the chapter<br />
«lubrication». Use only high quality grease.<br />
T-T <strong>Electric</strong> grease, corresponds to :<br />
Elf = Epexelf 2<br />
BP : Energrease L S 2<br />
Castrol : Spheerol SW 2<br />
Esso : Beacon 2<br />
Nynäs : L 42 EP<br />
Optimol : Longtime PD 2<br />
Shell : Alvania Grease R3<br />
SKF : Alfalub LGMT 2<br />
Texaco : Regal Starfak 3<br />
Imperial OIL : Unirex N3<br />
Chrevron : Dura-Lith Grease 2<br />
A Christiernsson : Alexol 408<br />
Mobil Oil : Mobilux 2<br />
Molub-Alloy: BRB 572 (with MoS2)<br />
36
N<strong>et</strong>toyage<br />
Cleaning<br />
Généralités<br />
Le facteur le plus important dans l’entr<strong>et</strong>ien préventif est<br />
la propr<strong>et</strong>é générale.<br />
General<br />
The most important factor in preventive maintenance is<br />
that everything is clean.<br />
Remarque<br />
La machine proprement dite <strong>et</strong> son environnement<br />
doivent être exempts de poussière, d’huile <strong>et</strong> d’autres<br />
matières pouvant provenir de la machine entraînée ou<br />
pénétrer par les orifices de ventilation, <strong>et</strong>c.<br />
Remark<br />
The machine itself and the surroundings are to be<br />
kept free from dust, oil and other matter, which can<br />
come from the driven object or which can enter<br />
through ventilation openings, <strong>et</strong>c.<br />
N<strong>et</strong>toyage des bobinages<br />
Comme le degré de contamination peut varier considérablement<br />
d’un lieu à un autre, les intervalles entre n<strong>et</strong>toyages<br />
compl<strong>et</strong>s doivent être déterminés pour chaque cas<br />
individuel.<br />
Si les bobinages sont secs, on peut utiliser un aspirateur<br />
muni d’un embout approprié.<br />
De l’air sous pression, qui doit être propre <strong>et</strong> sec, peut<br />
être utilisé conjointement à un aspirateur. Si la surface<br />
des bobinages est couverte d’un revêtement poisseux,<br />
elle doit être essuyée avec un chiffon. Si nécessaire,<br />
imbiber le chiffon d’un produit approprié, comme la<br />
«Formule 602». La «Formule 602» est une marque<br />
commerciale.<br />
La «Formule 602» dissout l’huile <strong>et</strong> la majorité des<br />
impur<strong>et</strong>és mais peut endommager le bobinage. Ce<br />
produit doit être utilisé en p<strong>et</strong>ite quantité de manière à ne<br />
pas couler dans les fentes de l’induit ou d’autres cavités.<br />
Les surfaces n<strong>et</strong>toyées à la «Formule 602» ne seront pas<br />
complètement sèches. Pour les sécher, laver alors les<br />
surfaces à l’lnhibisol», au «Chorothène NU» ou avec un<br />
liquide équivalent. Conjointement au n<strong>et</strong>toyage pour<br />
réimprégnation, il faut traiter le bobinage avec le solvant<br />
ci-dessus pour donner une bonne base au nouveau<br />
vernis d’imprégnation .<br />
Si les bobinages sont très contaminés, il peut être nécessaire<br />
de les n<strong>et</strong>toyer en pulvérisant la solution sous<br />
pression sur les bobinages. Surtout dans le cas des<br />
induits, pulvériser si possible de l’intérieur vers l’extérieur<br />
pour éviter que la sal<strong>et</strong>é dissoute ne soit introduite dans<br />
le creux de l’induit. Une autre bonne méthode consiste à<br />
plonger ou rouler l’induit dans le solvant. Si le n<strong>et</strong>toyage<br />
doit être effectué de façon répétée, il sera peut-être utile<br />
de prévoir un système spécial à c<strong>et</strong>te fin.<br />
Cleaning of windings<br />
As the degree of contamination can vary considerably<br />
b<strong>et</strong>ween different localities, the intervals b<strong>et</strong>ween more<br />
thorough cleaning is required must be d<strong>et</strong>ermined from<br />
case to case. If the windings are dry, a vacuum cleaner<br />
fitted with a suitable nozzle can be used for cleaning.<br />
Pressurized air, which must be clean and dry, can be<br />
used in combination with vacuum cleaning.<br />
If the winding surfaces have a sticky coating, it should be<br />
wiped off with a rag. If necessary, the rag can be dipped<br />
in a suitable solution, such as «Formula 602».<br />
«Formula 602» is a trade name.<br />
Formula 602 dissolves oil and the majority of impurities<br />
without damaging the actual winding. This solution must<br />
be used sparingly so it will not run down into the armature<br />
slots or into other cavities.<br />
Surfaces cleaned with»Formula 602" will not be<br />
compl<strong>et</strong>ely dry. To obtain a dry surface, the surfaces<br />
should then be washed with «Inhibisol», «Chlorothene<br />
NU» or equivalent. In conjunction with cleaning for reimpregnation,<br />
it is necessary to treat the windings with the<br />
above mentioned solvent to provide a good base for the<br />
new impregnating varnish. Heavily contaminated windings<br />
may need cleaning by pressure feeding the solution onto<br />
the windings. Especially with armatures, where possible,<br />
spraying should be performed from the inside and<br />
outwards to prevent dissolved dirt from being forced into<br />
hollows of the armature.<br />
Another good m<strong>et</strong>hod is to dip or roll the armature in the<br />
solvent. If cleaning is to be performed repeatedly it may<br />
be worthwhile making a special arrangement for this<br />
purpose.<br />
37
N<strong>et</strong>toyage<br />
Après ce n<strong>et</strong>toyage au solvant, les bobinages doivent être<br />
séchés en étuve (Cf. «Séchage des enroulements» p. 23).<br />
Si le vernis d’imprégnation est endommagé, il devra être<br />
réparé de temps en temps.<br />
Cleaning<br />
The windings must be heat dried after such a solvent<br />
cleaning procedure (refer to section «Drying of windings»<br />
p. 23). Damaged impregnation should be patched up from<br />
time to time.<br />
Remarque<br />
Avant <strong>et</strong> après le n<strong>et</strong>toyage au solvant, les bobinages<br />
doivent toujours être soumis à un contrôle de l’isolement<br />
(avec un mégohmmètre).<br />
N<strong>et</strong>toyage de l’échangeur air/air<br />
(IC 6 66)<br />
Déposer le carter de tôle de l’extrémité collecteur. Enlever<br />
la poussière <strong>et</strong> les autres impur<strong>et</strong>és en passant dans les<br />
tubes un goupillon rond <strong>et</strong> doux en fil de laiton.<br />
Remark<br />
The windings must always be insulation tested<br />
(meggar) both before and after washing with solvent.<br />
Cleaning of air/air cooler<br />
(IC 6 66)<br />
Remove the she<strong>et</strong> m<strong>et</strong>al cover at the ND-end. Remove<br />
dust and dirt by drawing a soft, round brush, made of<br />
brass wire, through the tubes.<br />
Remarque<br />
Ne pas utiliser une brosse en fil d’acier.<br />
Remark<br />
Do not use a steel wire brush.<br />
N<strong>et</strong>toyage de l’échangeur air/eau<br />
(IC 86 W)<br />
Un certain encrassement de la surface de refroidissement<br />
<strong>et</strong> de l’intérieur des tubes est inévitable. C<strong>et</strong> encrassement<br />
réduit la capacité de refroidissement. L’échangeur<br />
doit donc être n<strong>et</strong>toyé à intervalles devant être déterminés<br />
dans chaque cas particulier en fonction de la qualité<br />
de l’air <strong>et</strong> de l’eau de refroidissement.<br />
Enlever toute l’eau <strong>et</strong> démonter l’échangeur de chaleur<br />
avant le n<strong>et</strong>toyage. N<strong>et</strong>toyer les tubes avec un goupillon<br />
rond <strong>et</strong> doux en fil de laiton, tout en rinçant le système à<br />
l’eau.<br />
Si nécessaire, découper de nouveaux joints en caoutchouc<br />
<strong>et</strong> les placer entre l’échangeur de chaleur <strong>et</strong> la face<br />
de montage.<br />
Remarque<br />
Si l’extérieur du faisceau de l’échangeur de chaleur<br />
doit être n<strong>et</strong>toyé, l’échangeur doit être entièrement<br />
démonté de la machine.<br />
Cleaning of air/water cooler<br />
(IC 86 W)<br />
A certain amount of dirt on the cooling surface and on the<br />
inside of the tubes can not be avoided. This accumulation<br />
of dirt reduces the cooling capacity. The cooler must<br />
therefore be cleaned at intervals, which are d<strong>et</strong>ermined in<br />
each individual case depending on the condition of the air<br />
and the cooling water.<br />
Remove all water and disassemble the heat exchanger<br />
before cleaning. The tubes are to be cleaned by using a<br />
soft, round brush, made of brass wire, tog<strong>et</strong>her with<br />
rinsing the system with water. If necessary new rubber<br />
gask<strong>et</strong>s must be cut out and placed b<strong>et</strong>ween the heat<br />
exchanger and the mounting area.<br />
Remark<br />
If the outside of the heat exchanger battery is to be<br />
cleaned, the entire cooler must be removed from the<br />
machine.<br />
Ajouter du détergent à l’eau. N<strong>et</strong>toyer <strong>et</strong> rincer l’extérieur<br />
de l’échangeur de chaleur.<br />
Pendant la période initiale de fonctionnement, vérifier<br />
l’étanchéité de l’échangeur.<br />
Add d<strong>et</strong>ergent to the water.<br />
Clean and rinse the outside of the heat exchanger.<br />
During the first period of running, the cooler should be<br />
inspected for leakage.<br />
38
N<strong>et</strong>toyage<br />
Cleaning<br />
Inspection intérieure de la machine<br />
en cours de fonctionnement<br />
(machines à ventilateur de refroidissement,<br />
IC 06)<br />
Internal machine inspection during<br />
operation<br />
(machine with cooling fan, IC 06)<br />
Précaution<br />
Si l’un des carters proches du ventilateur de refroidissement<br />
doit être ouvert pour l’inspection du moteur<br />
pendant la marche de la machine, les précautions<br />
suivantes doivent être prises :<br />
• fermer l’entrée d’air (pour éviter la surchauffe du<br />
moteur de ventilateur),<br />
• ouvrir le carter d’inspection,<br />
• à partir du moment de la ferm<strong>et</strong>ure de l’entrée d’air,<br />
on dispose d’un maximum de 5 minutes pour<br />
l’inspection (en raison du manque d’air de refroidissement).<br />
Ces consignes sont applicables aux caractéristiques<br />
nominales de la machine.<br />
Caution<br />
If one of the covers close to the cooling fan is to be<br />
opened for motor inspection while the machine is<br />
running, the following must be observed :<br />
• Close off the air intake (to avoid overheating of the<br />
fan motor),<br />
• Open the inspection cover,<br />
• From the time the air intake was closed there are<br />
max. 5 minutes for inspection (due to lack of cooling<br />
air).<br />
This stipulation is valid at rated machine data.<br />
Remplacement du filtre<br />
Filter change<br />
Remarque<br />
Les machines munies d’un filtre à air doivent être<br />
inspectées à intervalles réguliers, <strong>et</strong> les filtres doivent<br />
être remplacés si nécessaire.<br />
Remark<br />
Machines which have fans with air filters must be<br />
checked at regular intervals and the filters are to be<br />
exchanged if necessary.<br />
Le filtre peut être démonté en appuyant simultanément<br />
sur les deux côtés de l’ensemble tout en le tirant vers<br />
l’extérieur. Séparer le média filtrant de son support <strong>et</strong> le<br />
remplacer par un neuf. S’assurer que le media est<br />
correctement maintenu sur son support par les ergots<br />
puis repositionner l’ensemble sur le carter.<br />
Le média filtrant peut être n<strong>et</strong>toyé dans une solution eau<br />
+ détergent. Il doit être impérativement sec avant d’être<br />
réutilisé.<br />
The filter is removed by pushing simultaneously at both<br />
lateral sides of the filter and pulling it off.<br />
Remove the filter mat from the filter support and apply a<br />
new filter mat. Make sure that the filter mat is maintained<br />
on the filter support by the pins before pushing the filter<br />
unit back in place.<br />
The filter mat can be washed in a water d<strong>et</strong>ergent<br />
solution. The filter must be absolutely dry before it is being<br />
used again.<br />
Remarque<br />
La chute de pression à travers un filtre propre ne doit<br />
pas être supérieure à 50 Pa.<br />
Remark<br />
The pressure drop through a clean filter is to be less<br />
than 50 Pa.<br />
Le filtre doit absorber plus de 85 % de matières<br />
polluantes.<br />
The filter is to absorb more than 85% of contamination.<br />
39
Raccordement des câbles<br />
Les moteurs DMP peuvent être fournis avec boîte à<br />
bornes montée soit sur l’un des côtés, soit sur le dessus<br />
de la machine.<br />
Les couples de serrage des cosses de connexion des<br />
câbles à l’intérieur de la boîte à borne sont les suivants :<br />
Connection of cables<br />
DMP motors are supplied with the terminal box mounted<br />
on either side or on top of the machine.<br />
Tightening torques for cable connections inside the<br />
terminal box are:<br />
25 Nm pour/for M 10<br />
7,5 Nm pour/for M 8<br />
5,3 Nm pour/for M 6<br />
1,2 Nm pour/for M 4<br />
Schéma de bornes<br />
Se reporter au schéma des moteurs à courant continu à<br />
enroulement en dérivation shunt.<br />
Terminal diagram<br />
Refer to diagram for shunt wound DC motors.<br />
Enroulements standards<br />
Terminal diagram, DMP Standard design<br />
Induit<br />
Armature<br />
Excitation<br />
Shunt<br />
Shunt Dérivation<br />
DC Motor DC Generator DC Motor DC Generator<br />
Fig. 1 Fig. 2 Fig. 3 Fig. 4<br />
1 protection (déclenchement)<br />
1 protection (trip) interpoles<br />
Repérage des protections thermiques des bobinages<br />
Marking of windings temperature protection<br />
Sonde positionnée dans Protection par contact Protection par PT 100<br />
Protection fitted in bimétallique thermitance<br />
Bi-métal (klixon type) Thermistor protection<br />
max 250 V AC max 2,5 V DC max 2,5 V DC<br />
2 protections 1 in interpoles<br />
(2 déclenchements ou 2 alarmes)<br />
2 protections Pôle principal 2 en série 2 en série<br />
(2 trips or 2 alarms) 1 in main poles 2 in series 2 in series<br />
2 protections (alarme + déclenchement) Pôle auxiliaire<br />
2 protections (alarm + trip) 2 in interpoles<br />
Autres accessoires - Other accessories<br />
Résistance de réchauffage<br />
Heating element<br />
Frein<br />
Brake control<br />
Indicateur de position du disque du frein<br />
Brake disk position indicator<br />
Témoin d’usure du balai<br />
Brush wear sensor<br />
Mesure FEM / FEM measurement<br />
Repérage - Marking<br />
Observations - Observations<br />
110 V ou 220 V (± 5 %) - 110 V ou 220 V (± 5 %)<br />
24 V ou 207 V (DC) comme standard (+ 5 % / - 10 %) autre tensions sur demande<br />
24 V or 207 V (DC) as standard (+ 5 % / - 10 %) other voltages on request<br />
Max 308 V, 10 A (AC) / 487 V, 1 A (DC)<br />
Charge résistive / Resistive load : max 3 A, 220 V (AC) / 7 A, 28 V (DC)<br />
Charge inductive / Inductive load : max 2 A, 220 V (AC) / 4 A, 28 V (DC)<br />
40
Excitation double <strong>et</strong> enroulement de stabilisation<br />
Double field and stabilization winding<br />
Induit<br />
Armature<br />
Excitation<br />
Shunt<br />
Stabilisation - Stabilization<br />
DC Motor<br />
Shunt Dérivation<br />
V f/2 DC Generator DC Motor Vf<br />
DC Generator<br />
Fig. 1 Fig. 2 Fig. 3 Fig. 4<br />
Fig. 5 Fig. 6<br />
Enroulement de stabilisation - Stabilization winding<br />
Induit<br />
Armature<br />
Excitation<br />
Shunt<br />
Stabilisation - Stabilization<br />
Shunt Dérivation<br />
DC Motor<br />
DC Generator<br />
DC Motor<br />
DC Generator<br />
Fig. 1 Fig. 2 Fig. 4<br />
Fig. 5<br />
Excitation double - Double field winding<br />
Induit<br />
Armature<br />
Excitation<br />
Shunt<br />
Shunt Dérivation<br />
DC Motor<br />
DC Generator<br />
DC Motor<br />
DC Generator<br />
Fig. 1 Fig. 2 Fig. 3 Fig. 4<br />
Fig. 5<br />
Fig. 6<br />
41
Démontage <strong>et</strong> remontage<br />
Dismantling and reassembling<br />
Démontage<br />
• S’assurer que la machine <strong>et</strong> le moteur du ventilateur<br />
sont électriquement déconnectés.<br />
• Démonter les canalisations d’air (si elles existent<br />
dans l’installation), déconnecter l’accouplement ou<br />
les courroies trapézoïdales <strong>et</strong> enlever la machine de<br />
ses fondations.<br />
• Démonter les accessoires si nécessaire, ainsi que<br />
les couvercles d’inspection.<br />
• Desserrer à l’intérieur de la boîte à bornes les<br />
conducteurs <strong>et</strong> câbles allant vers le stator.<br />
• Desserrer les conducteurs allant vers le stator à<br />
partir de la couronne porte-balais.<br />
• Démonter les balais <strong>et</strong> enrouler une feuille de carton<br />
sur le collecteur à titre de protection.<br />
• Placer des cales sous le stator de telle manière que<br />
les deux plateaux d’extrémité ne soient pas soutenus.<br />
• Démonter la boîte à bornes.<br />
• Démonter le garde-graisse de roulement extérieur<br />
du côté collecteur.<br />
• Dévisser les vis de fixation qui maintiennent le<br />
plateau-palier sur le stator, du côté collecteur.<br />
• Démonter le plateau-palier sur le côté collecteur. Ne<br />
pas endommager le joint principal entre le plateaupalier<br />
<strong>et</strong> le stator. Ne pas utiliser d’outils à bord<br />
tranchant.<br />
• Placer un morceau prespahn entre l’induit <strong>et</strong> le<br />
stator.<br />
• Démonter le garde-graisse de roulement extérieur à<br />
l’extrémité BA. (Dans le cas d’un moteur à fixation<br />
par bride, démonter le tube de graissage).<br />
• Dévisser les vis de fixation du côté BA. Prendre les<br />
mêmes précautions que précédemment en ce qui<br />
concerne le joint principal.<br />
• Lever l’induit <strong>et</strong> l’extraire du stator (si nécessaire,<br />
employer un tube prolongateur que l’on glisse sur<br />
l’arbre de l’induit).<br />
• Protéger les roulements contre la contamination, par<br />
des moyens appropriés.<br />
• Démonter avec soin les joints principaux du stator.<br />
• N<strong>et</strong>toyer les garde-graisses <strong>et</strong> éliminer la graisse<br />
usée.<br />
Dismantling<br />
• Make sure the machine and fan motor are<br />
electrically disconnected.<br />
• Remove air ducts (if present at installation),<br />
disconnect coupling or V-belts and dismantle the<br />
machine from the foundation.<br />
• Remove accessories if necessary as well as inspection<br />
covers.<br />
• Loosen leads and cables inside the terminal box<br />
which go to the stator.<br />
• Loosen leads which go to the stator from the brush<br />
rocker.<br />
• Remove the brushes and wrap a piece of 1 mm<br />
thick insulating material around the commutator.<br />
• Put blocks underneath the stator so that both end<br />
shields are unsupported.<br />
• Remove the terminal box.<br />
• Remove ND-end outer bearing cover.<br />
• Unscrew the fixing bolts which tie stator and end<br />
shield tog<strong>et</strong>her at the ND-end.<br />
• Remove the end shield at the ND-end. Do not<br />
damage the main gask<strong>et</strong> b<strong>et</strong>ween end shield and<br />
stator. Do not use sharp edged tools.<br />
• Place a piece of insulating material b<strong>et</strong>ween armature<br />
and stator.<br />
• Remove the outer bearing cover at the D-end. (In<br />
case of a flange mounted motor, remove the<br />
lubrication tube).<br />
• Unscrew the end shield fixing bolts at the D-end.<br />
Use same precautions regarding the main gask<strong>et</strong>.<br />
• Lift the armature out of the stator (if necessary use<br />
an extension tube which is slipped over the armature<br />
shaft).<br />
• Protect the bearings against contamination by<br />
suitable means.<br />
• Remove the main gask<strong>et</strong> very carefully from the<br />
stator.<br />
• Clean the bearing covers and remove the old<br />
grease.<br />
42
Démontage <strong>et</strong> remontage<br />
Dismantling and reassembling<br />
Remontage<br />
• Enrouler un carton de 1 mm sur le collecteur.<br />
• Placer un morceau convenable de presspahn à la<br />
partie inférieure du stator.<br />
• Inspecter les joints principaux <strong>et</strong> appliquer une<br />
couche mince de graisse au silicone avant de les<br />
replacer sur le stator. S’assurer que les surfaces de<br />
contact du stator <strong>et</strong> des plateaux-paliers sont<br />
propres.<br />
• Vérifier que les roulements sont garnis de graisse<br />
fraîche.<br />
• Lever l’induit <strong>et</strong> l’introduire dans le stator.<br />
• Remonter le plateau-palier du côté BA.<br />
• Remonter les garde-graisses du côté BA.<br />
• Enlever le presspahn.<br />
• Remonter le plateau-palier du côté collecteur.<br />
• Engager les câbles dans le presse-étoupe de la<br />
boîte à bornes.<br />
• Remonter les garde-graisses du côté collecteur.<br />
• Vérifier que l’induit tourne librement.<br />
• Bloquer les conducteurs sur la couronne portebalais.<br />
• Remonter la boîte à bornes <strong>et</strong> fixer les câbles <strong>et</strong><br />
conducteurs conformément au schéma des bornes.<br />
• Enlever le carton de protection du collecteur.<br />
• Insérer les balais dans les porte-balais <strong>et</strong> vérifier<br />
qu’ils se déplacent librement dans les cages des<br />
porte-balais.<br />
• Lubrifier la machine.<br />
• Remonter les couvercles d’inspection avec leurs<br />
joints.<br />
• Remonter tous les accessoires.<br />
Reassembling<br />
• Wrap a piece of 1 mm thick insulating material<br />
around the commutator.<br />
• Place a suitable piece of insulating material into the<br />
lower part of the stator.<br />
• Inspect the main gask<strong>et</strong>s and apply a thin coat of<br />
silicon before they are put into the stator. Make sure<br />
that the mating surfaces of stator and end shields<br />
are clean.<br />
• Do not forg<strong>et</strong> to fill the bearing parts with grease<br />
during assembly.<br />
• Lift the armature into the stator.<br />
• Assemble the end shield at the D-end.<br />
• Assemble the bearing covers at the D-end.<br />
• Remove the piece of insulating material.<br />
• Assemble the end shield at the ND-end.<br />
• Thread the cables through the seal into the terminal<br />
box.<br />
• Assemble the bearing covers at the ND-end.<br />
• Check that the armature turns easily.<br />
• Fasten the leads to the brush gear.<br />
• Assemble the terminal box and attach cables and<br />
leads according to the terminal diagram.<br />
• Remove the protective insulating material from the<br />
commutator.<br />
• Insert brushes into brush holders and check that<br />
they can move freely in their brush holder pock<strong>et</strong>s.<br />
• Lubricate the machine.<br />
• Assemble inspection covers including gask<strong>et</strong>s.<br />
• Assemble all accessories.<br />
43
Pièces de rechange<br />
Pièces de rechange conseillées<br />
Spare parts<br />
Recommended spare parts<br />
Remarque<br />
Prière de spécifier à la commande : le type du<br />
moteur, le numéro de la pièce.<br />
Remark<br />
Please state when ordering : motor type, motor serial<br />
number, part number.<br />
Nombre de moteurs identiques<br />
Number of identical motors<br />
1 2-4 5-9 10-20<br />
<strong>Balais</strong> (nombre de jeux) 1 2-4 5-9 10-20<br />
Brushes (number of s<strong>et</strong>s)<br />
Porte-balais (nombre de jeux) - 1 1 1<br />
Brush holders (number of s<strong>et</strong>s)<br />
Roulements (nombre de jeux) 1 1 1 2<br />
Bearings (number of s<strong>et</strong>s)<br />
Moteur compl<strong>et</strong> - - - 1<br />
Motor, compl<strong>et</strong>e<br />
Nomenclature DMP<br />
Numéros de roulements pour moteurs DMP standard<br />
Bearing numbers for standart DMP motors<br />
Position<br />
Mounted at<br />
112 132 160 180-4S/M/L 180-4A/B/C/D/E 180-4LB 180-4F/LC/LD<br />
Côté collecteur 6208 6307 6309 6310 6312 6311 6312<br />
ND-end -2RS1-C3 -2RS1-C3 -2RS1-C3 -2RS1-C3 -2RS1-C3 -2RS1-C3 -2RS1-C3<br />
Côté entraînement<br />
D-end<br />
6308-C3 6309-C3 6310-C3 6312-C3 6215-C3 6313-C3 6315-C3<br />
Côté entraînement<br />
(transmission par courroies<br />
trapézoïdales)<br />
D-end when V-belt drive<br />
NU308-ECP NU309-ECP NU310-ECP NU312-ECP NU2215-ECP NU313-ECP NU315-ECP<br />
44
Nomenclature DMP<br />
Description des pièces<br />
Réf.<br />
n°<br />
Description<br />
1 Stator compl<strong>et</strong><br />
2 Stator soudé<br />
3 Bobine de <strong>commutation</strong><br />
5 Bobine d’excitation<br />
10 Rotor compl<strong>et</strong><br />
11 Rotor nu<br />
12 Collecteur<br />
13 Jeu de bobines d’induit<br />
15 Cale d’encoche<br />
16 Disque d’équilibrage côté bout d’arbre<br />
17 Disque d’équilibrage côté collecteur<br />
(non-entraînement)<br />
18 Turbine pour mode de refroidissement IC 01<br />
20 Ensemble, couronne porte-balais<br />
21 Porte-balais<br />
22 Vis de fixation, couronne porte-balais<br />
23 Rondelle-frein<br />
25 <strong>Balais</strong>, jeu compl<strong>et</strong><br />
26 Couronne nue<br />
30 Eléments de palier côté bout d’arbre<br />
31 Garde-graisse intérieur - bout d’arbre<br />
32 Roulement à billes - bout d’arbre<br />
33 Roulement à rouleaux<br />
34 Goupilles de positionnement<br />
35 Garde-graisse extérieur - bout d’arbre<br />
36 Vis de fixation de garde-graisse<br />
37 Graisseur<br />
39 Tube de lubrification<br />
40 Eléments de palier côté collecteur<br />
41 Garde-graisse intérieur collecteur<br />
42 Roulement à billes - collecteur<br />
43 Rondelle d’appui<br />
44 Circlips<br />
45 Garde-graisse extérieur - collecteur<br />
46 Vis de fixation - Garde-graisse<br />
50 Plateau-palier - bout d’arbre<br />
51 Plateau-palier- collecteur<br />
52 Vis de fixation - Plateau-palier<br />
53 Rondelle<br />
54 Joint<br />
55 Bride<br />
56 Vis<br />
57 Rondelle<br />
58 Ecrou<br />
59 Déflecteur de turbine<br />
60 Boîte à bornes complète<br />
61 Caisson<br />
Réf.<br />
n°<br />
Description<br />
63 Plaque à bornes<br />
64 Couvercle de boîte à bornes<br />
65 Joint pour couvercle de boîte à bornes<br />
66 Porte de boîte à bornes<br />
67 Joint de porte de boîte à bornes<br />
68 Vis de fixation - Caisson <strong>et</strong> couvercle<br />
69 Vis de fixation - Plaque à bornes<br />
70 Porte pleine d’inspection<br />
71 Porte à ouïes - Moteur en position horizontale IC 06<br />
72 Porte à ouïes - Moteur en position verticale IC 06<br />
73 Joint pour portes de ventilation <strong>et</strong> inspection<br />
(non-entraînement)<br />
74 Couvercle pour montage latéral de boîte à bornes<br />
75 Joint de couvercle<br />
76 Clav<strong>et</strong>te d’entraînement sur bout d’arbre<br />
79 Anneau de levage<br />
80 Vis de fixation des capots (portes à ouïes)<br />
90 Génératrice tachymétrique<br />
92 Axe<br />
93 Accouplement Bowex pour génératrice<br />
tachymétrique standard REO N/R<br />
94 Accouplement Rotex pour génératrice tachymétrique<br />
standard REO<br />
95 Accouplement Thomas pour génératrice<br />
tachymétrique standard REO N<br />
96 Accouplement Thomas pour génératrice<br />
tachymétrique renforcée REO R<br />
ou générateur d’impulsion<br />
97 Lanterne<br />
98 Bouchon<br />
99 Génératrice tachymétrique standard REO 444<br />
à 1 collecteur<br />
100 Génératrice tachymétrique standard REO 444<br />
à 2 collecteurs<br />
101 Génératrice tachymétrique renforcée REO 444<br />
à 1 collecteur<br />
102 Vis de fixation - Lanterne <strong>et</strong> génératrice<br />
103 Vis pour accouplement<br />
105 Joint<br />
110 Ensemble moto-ventilateur (IC 06)<br />
111 Ventilateur<br />
112 Moteur alternatif asynchrone pour ventilateur<br />
113 Capot d’aspiration à ouïes<br />
114 Joint<br />
115 Filtre compl<strong>et</strong><br />
116 Cartouche filtrante<br />
117 Couvercle pour cartouche filtrante<br />
120 Manostat<br />
46
Nomenclature DMP<br />
Explanation of d<strong>et</strong>ails<br />
Part D<strong>et</strong>ail<br />
n°<br />
1 Stator, compl<strong>et</strong>e<br />
2 Welded stator frame<br />
3 Interpole coil<br />
5 Shunt field coil<br />
10 Armature compl<strong>et</strong>e<br />
11 Armature core<br />
12 Commutator<br />
13 Rotor coils<br />
15 Slot wedge<br />
16 Balancing disk D-end<br />
17 Balancing disk ND-end<br />
18 Internal cooling fan for cooling form IC01<br />
20 Brush device, assembly<br />
21 Brush-holder<br />
22 Screw for brush-rocher<br />
23 Washer<br />
25 S<strong>et</strong> of brushes<br />
26 Brush-rocker<br />
30 Bearing end-shield, D-end<br />
31 Inner bearing cover, D-end<br />
32 Ball-bearing D-end<br />
33 Roller bearing D-end<br />
34 Spacing pin<br />
35 Outer bearing cover, D-end<br />
36 Screw for end-shield<br />
37 Lubricating nipple<br />
39 Lubrication duct<br />
40 Bearing end-shield ND-end<br />
41 Inner bearing cover ND-end<br />
42 Ball-bearing ND-end<br />
43 Washer<br />
44 Locking ring<br />
45 Outer bearing cover, ND-end<br />
46 Screw for end-shield<br />
50 End-shield, D-end<br />
51 End-shield - ND-end<br />
52 Screw<br />
53 Washer<br />
54 Gask<strong>et</strong><br />
55 Flange<br />
56 Screw<br />
57 Washer<br />
58 Nut<br />
59 Air deflector<br />
60 Terminal box<br />
Part<br />
n°<br />
D<strong>et</strong>ail<br />
61 Terminal box housing<br />
63 Terminal board<br />
64 Covering plate for terminal box<br />
65 Gask<strong>et</strong> for terminal box covering plate<br />
66 Front for terminal box cover<br />
67 Gask<strong>et</strong> for terminal box housing & covers<br />
68 Screw for terminal box housing & covers<br />
69 Screw for terminal board<br />
70 Inspection cover<br />
71 Louvers for motor in horizontal mounting IC 06<br />
72 Louvers for motor in vertical mounting IC 06<br />
73 Gask<strong>et</strong> for louvers & inspection covers<br />
74 Cover used when terminal box sidely mounted<br />
75 Gask<strong>et</strong> for cover (item 74)<br />
76 Key on the free shaft end<br />
79 Eye bolt<br />
80 Screw for louvers & inspection covers<br />
90 Tachogenerator<br />
92 Stub shaft<br />
93 Bowex coupling for standard tachogenerator<br />
type REO 444 N or R<br />
94 Rotex coupling for standard tachogenerator REO<br />
95 Thomas coupling for standard tachogenerator<br />
type REO 444 N or R<br />
96 Mechanical coupling Thomas for reinforced<br />
tachogenerator or pulse generator<br />
97 Intermediate housing<br />
98 Inspection cover<br />
99 Standard tachogenerator type REO 444,<br />
1 collector<br />
100 Standard tachogenerator type REO 444,<br />
2 collectors<br />
101 Reinforced tachogenerator type REO 444,<br />
1 collector<br />
102 Fixing screw for intermediate housing<br />
& for tachogenerator<br />
103 Screw for coupling<br />
105 Gask<strong>et</strong><br />
110 Compl<strong>et</strong>e motor fan (IC06)<br />
111 Fan unit<br />
112 Fan AC motor<br />
113 Louver for fan unit<br />
114 Gask<strong>et</strong><br />
115 Compl<strong>et</strong>e filter assembly<br />
116 Filter cartridge<br />
117 Cover for filter cartridge<br />
120 Pressure relay<br />
47
Certificate of Incorporation<br />
(Directive 89/392/EEC, Art. 4.2 and Annex II, Sub B)<br />
The manufacturer :<br />
THRIGE ELECTRIC<br />
22, rue du 8 Mai 1945<br />
BP 112<br />
95340 Persan<br />
France<br />
hereby declares that the products :<br />
DC Motors<br />
series DMP<br />
of center heights : 112, 132, 160, 180.<br />
must be installed in accordance with our installation instructions and must not be put into<br />
service until the machinery into which it is to be incorporated has been declared in conformity<br />
with the Machinery Directive.<br />
Persan, 22 December 2003<br />
M.PEDERSEN<br />
Quality<br />
M. PEDERSEN<br />
Manager<br />
Persan, France<br />
Quality Manager<br />
Persan, France<br />
Ce document est la propriété de THRIGE ELECTRIC <strong>et</strong> ne doit pas être copié sans une autorisation écrite.
PERSAN<br />
N°Q410I044-01<br />
EC DECLARATION OF CONFORMITY<br />
Date : 04/03/04<br />
The manufacturer :<br />
THRIGE ELECTRIC<br />
22, rue du 8 mai 1945<br />
95340 Persan<br />
France<br />
hereby declares under his sole responsibility that the products :<br />
DC industrial motors<br />
Series DMP<br />
Of center heights : 112, 132, 160, 180.<br />
are in conformity with provisions of the following Council Directives :<br />
Low Voltage Directive 73/23/ECC (amended by 93/68/EEC),<br />
And, as components, with the essential requirements of the following :<br />
EMC directive 89/336/EEC (amended by 92/31/EEC and 93/68/EEC) regarding<br />
the intrinsic characteristics to emission and immunity levels,<br />
And are in conformity with:<br />
Additional information:<br />
EN 60 034-1<br />
HD 53<br />
EN 55011<br />
By design, the machines, considered as components, comply with essential<br />
requirements of :<br />
Machinery Directive : 89/392/EEC and its modifications, provided that the<br />
installation be correctly realised by the manufacturer of the machinery (for<br />
example: in compliance with our installation instructions and EN 60 204 “<br />
<strong>Electric</strong>al Equipment of industrial machines).<br />
Marking year CE 96<br />
M. PEDERSEN<br />
Quality Manager<br />
Persan, France<br />
Ce document est la propriété de THRIGE ELECTRIC <strong>et</strong> ne doit pas être copié sans une autorisation écrite.
Danger<br />
Les hautes tensions <strong>et</strong> les pièces en rotation sont<br />
dangereuses.<br />
Le contact avec des pièces sous tension ou en<br />
rotation peut provoquer des blessures.<br />
L’entr<strong>et</strong>ien <strong>et</strong> la maintenance ne doivent être effectués<br />
que par du personnel qualifié.<br />
Danger<br />
High voltages as well as rotating parts are dangerous.<br />
Contact with live or rotating parts can cause injury.<br />
Service and maintenance should only be carried out<br />
by qualified personnel.
France<br />
T-T <strong>Electric</strong><br />
22, rue du 8 Mai 1945<br />
95340 Persan<br />
Tel. : +33 (0) 1 30 28 61 00<br />
Fax : +33 (0) 1 34 70 21 79<br />
info@t-telectric.fr<br />
Denmark<br />
T-T <strong>Electric</strong><br />
Thomas B. Thriges Gade 36<br />
5000 Odense C<br />
Tel. : +45 (0) 63 13 06 30<br />
Fax : +45 (0) 63 13 06 35<br />
sales@t-telectric.dk<br />
www.t-telectric.com<br />
Germany<br />
T-T <strong>Electric</strong><br />
Helgolandstr. 67<br />
70439 Stuttgart<br />
Tel. : +49 (0) 711 38 04 410<br />
Fax : +49 (0) 711 38 04 411<br />
info@t-telectric.de<br />
Sweden<br />
Thrige <strong>Electric</strong><br />
Lefflersgatan 1<br />
75450 Uppsala<br />
Tel. : +46 (0) 18 65 70 10<br />
Fax : +46 (0) 18 10 74 78<br />
info@thrige-electric.se<br />
United Kingdom<br />
T-T <strong>Electric</strong><br />
7AWaterloo Park<br />
Upper Brookre<strong>et</strong><br />
Stockport SK1 3BP<br />
Tel. : +44 (0) 161 480 0037<br />
Fax : +44 (0) 161 476 4390<br />
info@t-t-electric.co.uk<br />
TT - DMP - F/E - 07/2007 - Imprimé en CEE - HELPHI’COM : +33 (0)4 78 62 80 30