Téléchargez le mode d'emploi Au format PDF - Nespresso
Téléchargez le mode d'emploi Au format PDF - Nespresso
Téléchargez le mode d'emploi Au format PDF - Nespresso

You also want an ePaper? Increase the reach of your titles
YUMPU automatically turns print PDFs into web optimized ePapers that Google loves.
ht by<br />
*<br />
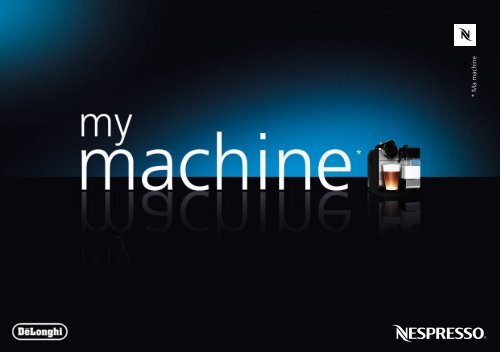
* Ma machine
* Ma machine<br />
<strong>Nespresso</strong>, un système exclusif pour reproduire à l’infini un espresso parfait.<br />
Toutes <strong>le</strong>s machines <strong>Nespresso</strong> sont équipées d’un système d’extraction breveté à très haute pression (jusqu’à 19 bar). Chaque paramètre a été calculé avec précision pour exprimer la richesse des arômes de<br />
chaque Grand Cru de café, lui donner du corps et créer une crema d’une densité et d’une onctuosité exceptionnel<strong>le</strong>s.<br />
CONTENT/ CONTENU<br />
Caution - When you see this sign, p<strong>le</strong>ase refer to the safety precautions to avoid possib<strong>le</strong> harm and damage.<br />
Sécurité - Lire <strong>le</strong>s consignes de sécurité afin d’éviter tout accident corporel ou dégât matériel<br />
In<strong>format</strong>ion - When you see this sign, p<strong>le</strong>ase take note of the advice for the correct and safe usage of your coffee machine.<br />
In<strong>format</strong>ion - Lire <strong>le</strong>s instructions pour une utilisation appropriée et en toute sécurité de votre machine.<br />
Overview/Présentation de la machine 4<br />
Safety precautions/Consignes de sécurité 5–6<br />
First use or after a long period of non-use/<br />
Première utilisation ou après une période de non-utilisation prolongée 7<br />
Coffee preparation/Préparation du café 8<br />
Assembling/Disassembling of the Rapid Cappuccino System (R.C.S)/<br />
Assemblage / Démontage du «Rapid Cappuccino System» (R.C.S.) 8<br />
Preparing a Cappuccino and Latte Macchiato/<br />
Préparation d’un Cappuccino ou d’un Latte Macchiato 9<br />
Programming the water volume/Programmation du volume d’eau 10<br />
Programming Cappuccino/Latte Macchiato volume/<br />
Programmation de la quantité de Cappuccino/Latte Macchiato 10<br />
Rinsing after each milk recipe preparation/<br />
Nettoyage après chaque préparation de recette à base de lait 11<br />
Daily c<strong>le</strong>aning/Nettoyage au quotidien 11<br />
Cutting mark<br />
NESPRESSO, an exclusive system creating the perfect espresso, time after time.<br />
All <strong>Nespresso</strong> machines are equipped with a patented extraction system that guarantees up to 19 bar pressure. Each parameter has been calculated with great precision to ensure that all the aromas from each<br />
Grand Cru can be extracted, to give the coffee body and create an exceptionally thick and smooth crema.<br />
2<br />
EN INSTRUCTION MANUAL FR MODE D’EMPLOI 4<br />
DE BEDIENUNGSANLEITUNG IT ISTRUZIONI PER L’USO 18<br />
NL GEBRUIKSAANWIJZING GR ΕΓΧΕΙΡΙ∆ΙΟ Ο∆ΗΓΙΩΝ 32<br />
Care of the Rapid Cappuccino System (R.C.S.) twice a week/Entretien du «Rapid<br />
Cappucino System» (R.C.S) deux fois par semaine 11<br />
Emptying system before a period of non-use, for frost protection or before a<br />
repair/Vider l’appareil après un période de non-utilisation, contre <strong>le</strong> gel ou avant<br />
une réparation 12<br />
Energy saving concept/Mode économie d’énergie 12<br />
Descaling/Détartrage 13–14<br />
Water hardness setting/Rég<strong>le</strong>r la dureté de l’eau 14<br />
Restoring volumes to factory settings/Revenir à la programmation initia<strong>le</strong> 14<br />
Troub<strong>le</strong>shooting/Pannes 15<br />
Specifications/Spécificités techniques 15<br />
Contact the <strong>Nespresso</strong> Club/Contactez <strong>le</strong> Club <strong>Nespresso</strong> 15<br />
Disposal and environmental concerns/<br />
Elimination et protection de l’environnement 15<br />
Warranty/Garantie 16<br />
EN<br />
FR
Cutting mark<br />
4<br />
A B C<br />
3<br />
2<br />
1<br />
11<br />
10<br />
7<br />
8<br />
9<br />
24<br />
6<br />
5<br />
25<br />
26<br />
17<br />
21<br />
16<br />
15<br />
22<br />
18<br />
19<br />
12<br />
14<br />
13<br />
20<br />
23<br />
P<br />
1<br />
1<br />
B<br />
4
Packaging content/Ce carton contient :<br />
A Machine without the Rapid<br />
Cappuccino System<br />
Machine sans <strong>le</strong><br />
“Rapid Cappuccino System”<br />
B Machine with the Rapid Cappuccino<br />
System (for Cappuccino)<br />
Machine avec <strong>le</strong> “Rapid Cappuccino<br />
System” (pour Cappuccino)<br />
C Machine with the Rapid Cappuc-<br />
13 Cappuccino<br />
Cappuccino<br />
14 Latte Macchiato<br />
Latte Macchiato<br />
Coffee machine<br />
Machine à café <strong>Nespresso</strong><br />
OVERVIEW/ VUE D’ENSEMBLE<br />
cino System (for Latte Macchiato)<br />
Machine avec <strong>le</strong> “Rapid Cappuccino<br />
System” (pour Latte<br />
Macchiato)<br />
1 Lever<br />
Levier<br />
2 Coffee out<strong>le</strong>t<br />
Sortie café<br />
3 Water tank (0.9 l)<br />
Backlight Buttons indication/Signification des boutons rétroéclairés<br />
Réservoir d’eau (0,9L)<br />
4 Used capsu<strong>le</strong> container<br />
Bac à capsu<strong>le</strong>s usagées<br />
5 Drip tray (push inside for Latte<br />
Macchiato glass)<br />
Bac de récupération (faire<br />
coulisser à l’intérieur pour un<br />
verre Macchiato)<br />
6 Left Grid<br />
Backlight Buttons/Boutons rétroéclairés Rapid Cappuccino System (R.C.S.)/Rapid Cappuccino System (R.C.S.)<br />
4<br />
15 Espresso<br />
Espresso<br />
16 Lungo<br />
Lungo<br />
16 Capsu<strong>le</strong> Set<br />
Set de 16 capsu<strong>le</strong>s<br />
<strong>Nespresso</strong><br />
17 Milk container (0.35 l)<br />
Bac à lait (0,35L)<br />
18 Milk container Lid<br />
Couverc<strong>le</strong> du pot à lait<br />
19 Lid detach button<br />
Bouton de déclipage du couverc<strong>le</strong><br />
“Welcome to<br />
<strong>Nespresso</strong> folder”<br />
“Pochette de bienvenue<br />
<strong>Nespresso</strong>“<br />
20 Rinsing button<br />
Bouton de rinçage<br />
21 Milk Froth regulator knob<br />
Bouton de réglage de la mousse<br />
de lait<br />
Energy saving settings, refer to page 12<br />
Mode économie d’énergie, se référer à la page 12<br />
When the machine is switched on, buttons light for 2sec: Lorsque la machine est allumée , <strong>le</strong>s boutons restent allumés<br />
Lungo= power off after 9 min<br />
pendant 2 secondes :<br />
Espresso= power off after 30 min<br />
Bouton Lungo allumé = arrêt de la machine après 9 minutes<br />
Both Lungo+Espresso = power off after 8 h<br />
Bouton Espresso allumé = arrêt de la machine après 30 minutes<br />
Boutons Lungo et Espresso allumés = arrêt après 8 heures<br />
Water hardness settings, refer to page 14<br />
Mode Dureté de l’eau, se référer à la page 14<br />
When the machine is switched on, buttons light for 2sec: Lorsque la machine est allumée, <strong>le</strong>s boutons restent allumés pen-<br />
Latte Macchiato= Soft water hardness<br />
dant 2 secondes : Bouton Latte Macchiato allumé = faib<strong>le</strong> dureté<br />
Cappuccino= Medium water hardness<br />
de l’eau ; Bouton Cappuccino allumé = moyenne dureté de l’eau ;<br />
Latte Macchiato+Cappuccino= Hard water hardness Boutons Latte Macchiato + Cappuccino = forte dureté de l’eau<br />
User manual<br />
Mode d’emploi<br />
Gril<strong>le</strong> gauche<br />
7 Right Grid<br />
Gril<strong>le</strong> droite<br />
8 Descaling pipe storage door (pull<br />
to open)<br />
Trappe d’accès à la buse de<br />
détartrage (tirer pour ouvrir)<br />
9 Descaling pipe<br />
Buse de détartrage<br />
22 Min. froth<br />
Mousse minima<strong>le</strong><br />
23 Max. froth<br />
Mousse maxima<strong>le</strong><br />
24 Rapid Cappuccino System<br />
connector<br />
Coffee <strong>mode</strong> is ready<br />
Coffee and milk recipe<br />
<strong>mode</strong>s are ready<br />
Descaling a<strong>le</strong>rt, refer to<br />
page 13<br />
Warranty card<br />
la garantie de la machine<br />
10 Steam connector door<br />
Trappe d’accès au connecteur<br />
vapeur<br />
11 Steam connector<br />
Connecteur vapeur<br />
12 ON/OFF button<br />
Bouton ON/OFF<br />
Connecteur du RCS<br />
25 Milk spout<br />
Buse de lait<br />
26 Milk aspiration tube<br />
Tuyau d’aspiration du lait<br />
Le <strong>mode</strong> Café (Espresso et<br />
Lungo) est prêt à être utilisé.<br />
Les <strong>mode</strong>s Café et Recettes à<br />
base de lait sont prêts à être<br />
utilisé.<br />
A<strong>le</strong>rte de détartrage, se référer<br />
à la page 13
SAFETY PRECAUTIONS<br />
Avoid risks of fatal e<strong>le</strong>ctric shock and fire<br />
1. Only plug the appliance into suitab<strong>le</strong>, earthed mains connections. Make sure that the voltage of the<br />
power source is the same as that specified on the rating plate. The use of an incorrect connection<br />
voids warranty.<br />
2. If an extension <strong>le</strong>ad is required, use only an earthed cab<strong>le</strong> with a conductor cross-section of at <strong>le</strong>ast<br />
1.5 mm 2 .<br />
3. Do not pull the cab<strong>le</strong> over sharp edges. Clamp it or allow it to hang down. Keep the cab<strong>le</strong> away from<br />
heat and damp.<br />
4. If the cab<strong>le</strong> is damaged, do not operate the appliance. Return appliance to the manufacturer‘s service,<br />
the <strong>Nespresso</strong> Club or similarly qualified persons for repair.<br />
5. To avoid hazardous damage, never place the appliance on or beside hot surfaces such as radiators,<br />
cooking rings, gas burners, open flames, or similar.<br />
6. Always place it on a stab<strong>le</strong> and even surface. The surface must be resistant to heat and fluids, like<br />
water, coffee, desca<strong>le</strong>r, or similar.<br />
7. Disconnect the appliance from the mains when not in use for a long period.<br />
8. Disconnect by pulling out the plug and not pulling the cab<strong>le</strong> itself or the cab<strong>le</strong> may be damaged.<br />
Never touch the cab<strong>le</strong> with wet hands.<br />
9. Never immerse the appliance or part of it in water. Never put the appliance or part of it into a dishwasher,<br />
except the Rapid Cappuccino System (R.C.S.). E<strong>le</strong>ctricity and water together is dangerous and<br />
can <strong>le</strong>ad to deadly e<strong>le</strong>ctrical shocks.<br />
10. Do not open the appliance. Hazardous voltage inside!<br />
11. Do not put anything into openings. Doing so may cause fire or e<strong>le</strong>ctrical shock!<br />
Avoid possib<strong>le</strong> harm when operating the appliance<br />
12. This product has been designed for domestic use only. Any commercial use, inappropriate use or<br />
failure to comply with the instructions, the manufacturer accepts no responsibility and the warranty<br />
will not apply.<br />
13. This is a household appliance only. It is not intended to be used in:<br />
– staff kitchen areas in shops, offices and other working environments;<br />
– farm houses;<br />
– by clients in hotels, motels and other residential type environments;<br />
– bed and breakfast type environments;<br />
– planes, boats, trains and automobi<strong>le</strong>s.<br />
14. Do not use the appliance if it is damaged or not operating perfectly. Immediately remove the plug<br />
from the power socket. Call the <strong>Nespresso</strong> Club for a diagnosis. A damaged appliance can cause<br />
e<strong>le</strong>ctrical shocks, burns and fire.<br />
15. The appliance is not intended for use by persons (including children) with reduced physical, sensory<br />
or mental capabilities, or lack of experience and know<strong>le</strong>dge, un<strong>le</strong>ss they have been given supervision<br />
or instruction concerning use of the appliance by a person responsib<strong>le</strong> for their safety. Children<br />
should be supervised to ensure that they do not play with the appliance.<br />
16. Always close the <strong>le</strong>ver and never lift it during or immediately after operation. Risk of scalding! Do not<br />
put fingers into the capsu<strong>le</strong> compartment or the capsu<strong>le</strong> shaft. Danger of injury!<br />
17. Do not put fingers under the coffee out<strong>le</strong>t or milk spout. Risk of scalding!<br />
18. Never use a damaged or deformed capsu<strong>le</strong>. Water could flow around the capsu<strong>le</strong> when not perforated<br />
by the blades and damage appliance.<br />
19. Do not use the appliance without drip tray and drip grid to avoid spilling any liquid on surrounding<br />
surfaces.<br />
20. Always use the milk container (Rapid Cappuccino System) supplied with the machine. Risk of scalding<br />
if milk container is not inserted properly.<br />
21. The milk spout gets hot. Risk of burns! Use with care.<br />
22. If coffee volumes higher than 150 ml are programmed: Let the machine cool down for 5 minutes<br />
before making the next coffee. Risk of overheating!<br />
23. Do not use any strong c<strong>le</strong>aning agent or solvent c<strong>le</strong>aner. Use a damp cloth and mild c<strong>le</strong>aning agent<br />
to c<strong>le</strong>an the surface of the machine.<br />
24. Desca<strong>le</strong> the machine when you see the descaling a<strong>le</strong>rt. Read the safety precautions on the descaling<br />
package carefully. The descaling solution can be harmful. Avoid contact with eyes, skin and surfaces. We<br />
recommend the <strong>Nespresso</strong> descaling kit availab<strong>le</strong> from the <strong>Nespresso</strong> Club as it is specifically adapted<br />
to your machine. Do not use other products (such as vinegar) that would affect the taste of the coffee.<br />
For any additional questions you may have regarding descaling, p<strong>le</strong>ase contact the <strong>Nespresso</strong> Club<br />
25. This machine works with <strong>Nespresso</strong> capsu<strong>le</strong>s availab<strong>le</strong> exclusively through the <strong>Nespresso</strong> Club.Your<br />
<strong>Nespresso</strong> machine’s proper functioning and lifetime are only guaranteed with the usage of <strong>Nespresso</strong><br />
capsu<strong>le</strong>s.<br />
SAVE THESE INSTRUCTIONS<br />
Pass them on to any subsequent user<br />
This instruction manual is also availab<strong>le</strong> as a <strong>PDF</strong> at nespresso.com.<br />
5<br />
EN<br />
FR
CONSIGNES DE SÉCURITÉ<br />
Évitez <strong>le</strong>s risques d’é<strong>le</strong>ctrocution mortel<strong>le</strong> et d’incendie<br />
1. Brancher uniquement l’appareil sur des prises é<strong>le</strong>ctriques adaptées et reliées à la terre. Vérifier que la tension<br />
d’alimentation é<strong>le</strong>ctrique est la même que cel<strong>le</strong> indiquée sur la plaque signalétique. L’utilisation d’un branchement<br />
inapproprié annu<strong>le</strong> la garantie.<br />
2. Si une rallonge é<strong>le</strong>ctrique est nécessaire, utiliser uniquement un câb<strong>le</strong> de terre d’une section de fil de 1,5 mm 2<br />
au moins.<br />
3. Ne pas ranger <strong>le</strong> câb<strong>le</strong> sur des arêtes tranchantes. L’attacher ou <strong>le</strong> laisser pendre. Le tenir éloigné de la cha<strong>le</strong>ur<br />
et de l’humidité.<br />
4. Si <strong>le</strong> câb<strong>le</strong> est endommagé, ne pas faire fonctionner l’appareil. Renvoyer l’appareil au service après-vente du<br />
fabricant, au Club <strong>Nespresso</strong> ou à d’autres personnes qualifiées pour la réparation.<br />
5. Pour éviter tout accident dangereux, ne jamais placer l’appareil sur ou à proximité de surfaces chaudes tel<strong>le</strong>s que<br />
des radiateurs, des plaques de cuisson, des brû<strong>le</strong>urs à gaz, des flammes nues et autres sources de cha<strong>le</strong>ur.<br />
6. Toujours placer l’appareil sur une surface stab<strong>le</strong> et plane. La surface doit être résistante à la cha<strong>le</strong>ur et aux liquides<br />
comme l’eau, <strong>le</strong> café, <strong>le</strong> détartrant ou des produits similaires.<br />
7. Si l’appareil reste inutilisé pendant une longue période, débrancher l’appareil de la fiche de la prise é<strong>le</strong>ctrique.<br />
8. Débrancher <strong>le</strong> câb<strong>le</strong> en tirant sur la fiche de la prise et non sur <strong>le</strong> cab<strong>le</strong> lui-même afin de ne pas l’endommager.<br />
Ne jamais toucher <strong>le</strong> câb<strong>le</strong> avec des mains mouillées.<br />
9. Ne jamais plonger l’appareil ou une pièce de celui-ci dans l’eau. Ne jamais mettre l’appareil ou une pièce de<br />
celui-ci dans <strong>le</strong> lave-vaissel<strong>le</strong>, exception fait du “Rapid Cappucino System” (R.C.S). L’association de l’é<strong>le</strong>ctricité et<br />
de l’eau est dangereuse et peut conduire à des é<strong>le</strong>ctrocutions mortel<strong>le</strong>s.<br />
10. Ne pas ouvrir l’appareil. Tension dangereuse à l’intérieur !<br />
11. Ne rien introduire dans <strong>le</strong>s ouvertures au risque de provoquer un incendie ou une é<strong>le</strong>ctrocution !<br />
Évitez <strong>le</strong>s éventuels accidents corporels lors de l’utilisation de l’appareil<br />
12. Ce produit a été conçu uniquement pour un usage domestique. En cas d’utilisation professionnel<strong>le</strong>, inappropriée<br />
ou de non-respect des instructions, <strong>le</strong> fabricant n’assume aucune responsabilité et la garantie devient caduque.<br />
13. Cet appareil est un appareil é<strong>le</strong>ctroménager uniquement. Il n’est pas prévu pour être utilisé :<br />
– dans <strong>le</strong>s cuisines des magasins, des bureaux et d’autres environnements de travail ;<br />
– dans <strong>le</strong>s fermes ;<br />
– par <strong>le</strong>s clients dans <strong>le</strong>s hôtels, motels et autres environnements de type résidentiel ;<br />
– dans <strong>le</strong>s environnements de type chambre d’hôtes.<br />
14. Ne pas utiliser l’appareil s’il est endommagé ou s’il ne fonctionne pas correctement. Contacter <strong>le</strong> club <strong>Nespresso</strong><br />
pour effectuer un diagnostic. Un appareil endommagé peut provoquer des é<strong>le</strong>ctrocutions, des brûlures ou un<br />
incendie.<br />
15. L’appareil n’est pas prévu pour être utilisé par des personnes (y compris <strong>le</strong>s enfants) dont <strong>le</strong>s capacités phy-<br />
6<br />
siques, sensoriel<strong>le</strong>s ou menta<strong>le</strong>s sont limitées, ou qui manquent d’expérience ou de connaissances, à moins<br />
qu’ils ne soient sous surveillance ou n’aient reçu des instructions sur l’utilisation de l’appareil par une personne<br />
responsab<strong>le</strong> de <strong>le</strong>ur sécurité. Les enfants doivent être surveillés par un adulte afin qu’ils ne jouent pas avec<br />
l’appareil.<br />
16. Toujours fermer <strong>le</strong> <strong>le</strong>vier et ne jamais la sou<strong>le</strong>ver pendant <strong>le</strong> fonctionnement de l’appareil ou juste après son<br />
utilisation. Des brûlures peuvent survenir. Ne pas mettre ses doigts dans <strong>le</strong> compartiment à capsu<strong>le</strong>s ou dans<br />
<strong>le</strong> bac à capsu<strong>le</strong>s. Risque d’accident !<br />
17. Ne jamais placer ses mains sous la sortie du café ou la buse à lait. Risque de brûlure !<br />
18. Ne jamais utiliser une capsu<strong>le</strong> endommagée ou déformée. Quand la capsu<strong>le</strong> n’est pas perforée par <strong>le</strong>s lames,<br />
l’eau peut s’écou<strong>le</strong>r autour de la capsu<strong>le</strong> et endommager l’appareil.<br />
19. Ne pas utiliser l’appareil sans <strong>le</strong> bac et la gril<strong>le</strong> d’égouttage pour éviter de renverser du liquide sur <strong>le</strong>s surfaces<br />
environnantes.<br />
20. Toujours utiliser <strong>le</strong> réservoir de lait (Rapid Cappuccino Sytem) fourni avec la machine. Si <strong>le</strong> réservoir à lait n’est<br />
pas correctement emboîté, un risque de brûlure existe.<br />
21. Lors de l’utilisation de la machine, la buse de lait devient chaud. À utiliser avec précaution pour éviter toute<br />
brûlure.<br />
22. Si <strong>le</strong> volume du café programmé est de plus de 150 ml, il est obligatoire d’attendre 5 minutes avant de préparer<br />
<strong>le</strong> café suivant. Risque de surchauffe !<br />
23. Ne jamais nettoyer votre appareil avec un produit d’entretien ou un nettoyage au solvant. Utiliser un chiffon<br />
humide et un produit d’entretien doux pour nettoyer la surface de la machine.<br />
24. Détartrer la machine dès l’a<strong>le</strong>rte détartrage. Lire attentivement <strong>le</strong>s instructions du kit détartrage. La solution<br />
de détartrage peut endommager <strong>le</strong>s surfaces et présenter un risque. Éviter tout contact avec <strong>le</strong>s yeux et la<br />
peau. L’utilisation du kit détartrage <strong>Nespresso</strong> disponib<strong>le</strong> à travers <strong>le</strong> Club <strong>Nespresso</strong> est recommandé. Ce kit a<br />
spécia<strong>le</strong>ment été créé pour <strong>le</strong>s machines <strong>Nespresso</strong>.<br />
25. Cette machine fonctionne avec <strong>le</strong>s capsu<strong>le</strong>s <strong>Nespresso</strong>, disponib<strong>le</strong> exclusivement à travers <strong>le</strong> Club <strong>Nespresso</strong>. Le<br />
bon fonctionnement et la durée de vie de votre machine <strong>Nespresso</strong> sont garantis par l’utilisation de capsu<strong>le</strong>s<br />
<strong>Nespresso</strong>.<br />
CONSERVER CES INSTRUCTIONS.<br />
Les transmettre à tout utilisateur extérieur.<br />
Ce manuel d’utilisation est éga<strong>le</strong>ment disponib<strong>le</strong> en pdf sur nespresso.com
FIRST USE OR AFTER A LONG PERIOD OF NON-USE/<br />
PREMIÈRE UTILISATION OU APRÈS UNE PÉRIODE DE NON-UTILISATION PROLONGÉE<br />
1 2 3 4<br />
Remove the plastic film from both the <strong>le</strong>ft and<br />
right grid, and machine panels.<br />
Retirer <strong>le</strong> film plastique des gril<strong>le</strong>s gauche<br />
et droit et des panneaux latéraux.<br />
5 6 7 8<br />
Rinse the water tank before filling with potab<strong>le</strong><br />
water up to the maximum <strong>le</strong>vel.<br />
Rincer <strong>le</strong> réservoir d’eau avant de <strong>le</strong> remplir<br />
d’eau potab<strong>le</strong> jusqu’au niveau maximum.<br />
Remove the water tank, drip tray, and<br />
capsu<strong>le</strong> container. Adjust the cab<strong>le</strong><br />
<strong>le</strong>ngth and store the excess in the cab<strong>le</strong><br />
guide under the machine.<br />
Retirer <strong>le</strong> réservoir d’eau, la gril<strong>le</strong> d’égouttage<br />
et <strong>le</strong> réservoir à capsu<strong>le</strong>s. Ajuster la longueur du<br />
câb<strong>le</strong> d’alimentation et ranger l’excès de câb<strong>le</strong><br />
dans <strong>le</strong> range-câb<strong>le</strong> situé sous la machine.<br />
Switch the machine on.<br />
Blinking light: heating up for approximately 40 sec.<br />
Steady light: ready<br />
Refer to the button indications on page 4.<br />
Allumer la machine. Les boutons Espresso et<br />
Lungo clignotent. Le temps de chauffe de la machine<br />
est estimé à 40 secondes. Quand la lumière<br />
des boutons est fixe, la machine est prête.<br />
Se référer au chapitre Signification des<br />
boutons rétroéclairés page 4<br />
First read the safety precautions to avoid risks of fatal e<strong>le</strong>ctrical<br />
shock and fire/ Commencer par lire attentivement <strong>le</strong>s consignes de sécurité pour éviter tout accident<br />
corporel ou dégât matériel.<br />
Put the machine in the upright position and plug<br />
it into the mains.<br />
Redresser la machine en position droite et la<br />
brancher sur l’alimentation du secteur.<br />
Rinsing: Place a container under the coffee out<strong>le</strong>t<br />
and press the Lungo button. Repeat three times.<br />
Machines are fully tested after being<br />
produced. Some traces of coffee powder could be<br />
found in the rinsing water.<br />
Rinçage : placer un récipient sous la sortie Café<br />
et appuyer sur <strong>le</strong> bouton Lungo sans utiliser de<br />
capsu<strong>le</strong>. Répéter trois fois l’opération.<br />
Des tests sont réalisés sur <strong>le</strong>s machines en<br />
fin de production. Des traces de café en poudre<br />
peuvent donc apparaitre dans l’eau de rinçage.<br />
The water tank can be carried<br />
by its cover.<br />
Le réservoir d’eau peut être<br />
sou<strong>le</strong>vé par son couverc<strong>le</strong>.<br />
Rinse the Rapid Cappuccino System (R.C.S.) by<br />
following the section “Care of the Rapid Cappuccino<br />
System (R.C.S) twice a week”, p. 11<br />
Rincer <strong>le</strong> “Rapid Cappuccino System” (R.C.S) en<br />
suivant <strong>le</strong> chapitre Entretien du “Rapid Capuccino<br />
System (R.C.S) deux fois par semaine, page 11<br />
7<br />
EN<br />
FR
COFFEE PREPARATION/<br />
PRÉPARATION DU CAFÉ<br />
Refer to safety precautions (16)/Lire <strong>le</strong>s consignes de sécurité (16)<br />
1 2<br />
3 4<br />
Lift the <strong>le</strong>ver comp<strong>le</strong>tely and insert a <strong>Nespresso</strong><br />
capsu<strong>le</strong>.<br />
Close the <strong>le</strong>ver and place a cup under the<br />
coffee out<strong>le</strong>t.<br />
Sou<strong>le</strong>ver <strong>le</strong> <strong>le</strong>vier et insérer la capsu<strong>le</strong><br />
<strong>Nespresso</strong>. Baisser <strong>le</strong> <strong>le</strong>vier et positionner une<br />
tasse sous la sortie Café.<br />
For a Latte Macchiato glass, push the drip tray<br />
inside the machine.<br />
Pour un verre Latte Macchiato, pousser <strong>le</strong> bac de<br />
récupération à l’intérieur de la machine.<br />
ASSEMBLING / DISASSEMBLING OF THE RAPID CAPPUCCINO SYSTEM (R.C.S)/<br />
MONTAGE/DÉMONTAGE DU “RAPID CAPPUCCINO SYSTEM” (R.C.S)<br />
Press the Espresso (40 ml / 1.35 oz) or the<br />
Lungo (110 ml / 3.7 oz) button. Preparation will<br />
stop automatically. To stop the coffee flow or<br />
top up your coffee, press again.<br />
Appuyer sur <strong>le</strong> bouton Espresso (40ml) ou <strong>le</strong><br />
bouton Lungo (110ml). La préparation du café<br />
s’arrêtera automatiquement. Pour arrêter la<br />
préparation du café ou la redémarrer, appuyer<br />
une nouvel<strong>le</strong> fois.<br />
1 2 3 4<br />
Remove the milk container lid and unplug the<br />
milk aspiration tube.<br />
Retirer <strong>le</strong> couverc<strong>le</strong> du bac à lait et<br />
débrancher <strong>le</strong> tuyau d’aspiration du lait.<br />
8<br />
Remove the milk froth regulator knob by<br />
turning it to ( ) and pulling it up.<br />
Retirer <strong>le</strong> bouton de réglage de la mousse de<br />
lait en <strong>le</strong> tournant jusqu’au ( ) et en <strong>le</strong> tirant<br />
vers <strong>le</strong> haut.<br />
Unlock and remove the Rapid Cappuccino System<br />
connector by turning it from ( ) to ( ) and<br />
pulling it off.<br />
Retirer <strong>le</strong> connecteur du “Rapid Cappuccino<br />
System” verrouillé en <strong>le</strong> tournant vers la gauche<br />
et en <strong>le</strong> tirant vers l’extérieur.<br />
Take the cup. Lift and close the <strong>le</strong>ver to eject the<br />
capsu<strong>le</strong> into the used capsu<strong>le</strong> container.<br />
Prenez votre tasse. Sou<strong>le</strong>ver puis baisser <strong>le</strong> <strong>le</strong>vier<br />
pour éjecter la capsu<strong>le</strong> usagée dans <strong>le</strong> bac à<br />
capsu<strong>le</strong>s usagées.<br />
Remove the milk spout by<br />
pulling it off.<br />
Retirer la buse de lait en la tirant<br />
vers l’extérieur.
PREPARING A CAPPUCCINO AND LATTE MACCHIATO/<br />
PRÉPARATION D’UN CAPPUCCINO OU<br />
D’UN LATTE MACCHIATO<br />
Refer to safety precautions (16) (20) (21)/Se référer aux conditions de sécurité (16) (20) (21)<br />
For perfect milk froth, use skimmed or semi-skimmed milk at refrigerator temperature (about 4° C)/Pour une mousse<br />
de lait parfaite, utiliser du lait écrémé et demi-écrémé conservé à température réfrigérée (env 4°C).<br />
1 2 3 4<br />
Fill the milk container with your desired quantity<br />
of milk.<br />
When the milk container is empty, before<br />
refilling, thoroughly rinse it and the milk aspiration<br />
tube with potab<strong>le</strong> water.<br />
Remplir <strong>le</strong> bac à lait avec la quantité de lait voulue.<br />
Lorsque <strong>le</strong> pot à lait est vide et avant de <strong>le</strong><br />
remplir de nouveau, rincer minutieusement <strong>le</strong> pot<br />
à lait et <strong>le</strong> tuyau d’aspiration du lait avec de l’eau<br />
potab<strong>le</strong>.<br />
Refermer <strong>le</strong> pot à lait. Ouvrir la trappe d’accès au<br />
connecteur vapeur en la faisant glisser sur la droite.<br />
Connecter <strong>le</strong> “Rapid Cappuccino System” (R.C.S) à l’appareil.<br />
Les boutons des recettes à base de lait clignotent:<br />
<strong>le</strong> Rapid Cappuccino se met en <strong>mode</strong> chauffe. Quand la<br />
lumière des boutons est fixe, la machine est prête.<br />
Lift the <strong>le</strong>ver comp<strong>le</strong>tely and insert a<br />
<strong>Nespresso</strong> capsu<strong>le</strong>.<br />
Sou<strong>le</strong>ver <strong>le</strong> <strong>le</strong>vier et insérer une capsu<strong>le</strong><br />
<strong>Nespresso</strong>.<br />
5 6 7 8<br />
Adjust the milk froth regulator knob according<br />
to the quantity of froth you want.<br />
Ajuster <strong>le</strong> tuyau d’aspiration du lait selon la<br />
quantité de mousse désirée.<br />
Close the milk container. Open the steam connector<br />
door by sliding it to the right. Connect<br />
the Rapid Cappuccino System to the machine.<br />
Milk recipe buttons blink: the Rapid<br />
Cappuccino heats up. Steady light: ready<br />
Press the Cappucino or Latte Macchiato button.<br />
The preparation starts after a few seconds (first<br />
milk and then coffee) and will stop automatically.<br />
Appuyer sur <strong>le</strong> bouton Cappuccino ou Macchiato.<br />
La préparation commence après quelques secondes<br />
(<strong>le</strong> lait puis <strong>le</strong> café) et s’arrêtera automatiquement.<br />
At the end of the preparation, lift and close the<br />
<strong>le</strong>ver to eject the capsu<strong>le</strong> into the used capsu<strong>le</strong><br />
container.<br />
A la fin de la préparation, sou<strong>le</strong>ver et baisser<br />
<strong>le</strong> <strong>le</strong>vier pour éjecter la capsu<strong>le</strong> dans <strong>le</strong> bac à<br />
capsu<strong>le</strong>s usagées.<br />
Close the <strong>le</strong>ver, place a Cappuccino cup or a<br />
Latte Macchiato glass under the coffee out<strong>le</strong>t<br />
and adjust the position of the milk spout.<br />
Baisser <strong>le</strong> <strong>le</strong>vier, placer une tasse Cappuccino<br />
ou un verre à Latte Macchiato sous la sortie<br />
Café et ajuster la position de la buse de lait.<br />
Rinse after each use as described in the section<br />
“Rinsing after each milk recipe preparation”.<br />
Rincer après chaque utilisation comme cela est<br />
décrit dans <strong>le</strong> chapitre “Nettoyage après chaque<br />
recette à base de lait”.<br />
9<br />
EN<br />
FR
PROGRAMMING THE WATER VOLUME/<br />
PROGRAMMATION DU VOLUME D’EAU<br />
1 2 3 4<br />
Fill the water tank, switch the machine on and<br />
insert a <strong>Nespresso</strong> capsu<strong>le</strong>.<br />
Close the <strong>le</strong>ver and place a cup under the coffee<br />
out<strong>le</strong>t.<br />
Remplir <strong>le</strong> réservoir d’eau, allumer la<br />
machine et insérer une capsu<strong>le</strong> <strong>Nespresso</strong>.<br />
Baisser <strong>le</strong> <strong>le</strong>vier et placer une tasse sous la<br />
sortie Café.<br />
1<br />
Refer to safety precautions (22)/Lire <strong>le</strong>s consignes de sécurité (22).<br />
Press and hold the Espresso or Lungo button.<br />
Brewing starts.<br />
Button blinks quickly: programming <strong>mode</strong>.<br />
Appuyer et maintenir appuyé <strong>le</strong> bouton<br />
Espresso ou Lungo. L’extraction du café<br />
commence. Le bouton clignote rapidement :<br />
<strong>mode</strong> programmation.<br />
PROGRAMMING CAPPUCCINO/LATTE MACCHIATO VOLUME/<br />
PROGRAMMATION DE LA QUANTITÉ DE CAPPUCCINO/LATTE MACCHIATO<br />
Follow the steps 1-5 of section “Preparing a<br />
Cappuccino and Latte Macchiato”<br />
Suivre <strong>le</strong>s étapes 1 à 5 du chapitre<br />
“Préparation du Cappuccino et du Lait<br />
Macchiato”<br />
Milk: min 20 ml/max 300 ml.<br />
Coffee: min 20 ml/max 300 ml<br />
Lait : min 20 ml / max 300 ml<br />
Café : min 20 ml / max 300 ml<br />
10<br />
Press and hold the Cappuccino or Latte Macchiato<br />
button. Milk frothing starts.<br />
Button blinks quickly: programming <strong>mode</strong>.<br />
Appuyer et maintenir appuyé <strong>le</strong> bouton Cappuccino<br />
ou Latte Macchiato. La préparation de<br />
la mousse de lait commence. Le bouton clignote<br />
rapidement : <strong>mode</strong> programmation.<br />
Re<strong>le</strong>ase the button when the desired volume is<br />
reached.<br />
Lâcher <strong>le</strong> bouton lorsque <strong>le</strong> volume désiré est<br />
atteint.<br />
Refer to safety precautions (20) (21) (22)/Lire <strong>le</strong>s consignes de sécurité (20) (21) (22).<br />
2 3<br />
Re<strong>le</strong>ase the button when your desired volume of<br />
milk froth is reached.<br />
Button blinks quickly: programming <strong>mode</strong>.<br />
Lâcher <strong>le</strong> bouton lorsque la quantité de mousse<br />
désirée est atteinte. Le bouton clignote rapidement<br />
: <strong>mode</strong> programmation.<br />
The water volume is now stored for future coffee<br />
preparations.<br />
Button blinks 3 times: confirm the new water volume<br />
min 20 ml / max 300 ml.<br />
Le volume d’eau est enregistré pour <strong>le</strong>s prochaines<br />
préparations de café. Le bouton clignote 3 fois : <strong>le</strong><br />
nouveau volume d’eau est enregistré.<br />
min. 20 ml / max. 300 ml<br />
Press and hold the same button. Brewing starts. Re<strong>le</strong>ase the<br />
button when your desired coffee volume is reached. The recipe volume<br />
is now stored for future preparations. Button blinks 3 times: confirm the<br />
new recipe volume. Eject the capsu<strong>le</strong> and press the c<strong>le</strong>an button.<br />
Appuyer et maintenir appuyé <strong>le</strong> même bouton. L’extraction<br />
commence. Lâcher <strong>le</strong> bouton lorsque la quantité de café désiré est<br />
atteinte. Le bouton clignote 3 fois : <strong>le</strong> nouveau volume de la recette<br />
est enregistré.
e<br />
the<br />
n<br />
RINSING AFTER EACH MILK RECIPE PREPARATION/<br />
NETTOYAGE APRÈS CHAQUE PRÉPARATION DE RECETTE À BASE DE LAIT<br />
1<br />
Place a container under the milk spout.<br />
Placer un récipient sous la buse de lait.<br />
Refer to safety precautions (17) (20) (21)/<br />
Lire <strong>le</strong>s consignes de sécurité (17) (20) (21).<br />
2 3 4<br />
Press and hold the ”CLEAN” button until<br />
machine stops pumping automatically.<br />
Milk recipe buttons blink: rinsing process<br />
approximately 10 sec.<br />
Steady light: rinsing process finished.<br />
Appuyer et maintenir appuyé <strong>le</strong> bouton<br />
“C<strong>le</strong>an” jusqu’à ce que la machine s’arrête<br />
automatiquement de pomper (environ 10<br />
secondes). La lumière est fixe : processus de<br />
rinçage terminé.<br />
DAILY CLEANING/ CARE OF RAPID CAPPUCCINO SYSTEM (R.C.S.) TWICE A WEEK/<br />
NETTOYAGE AU QUOTIDIEN ENTRETIEN DU “RAPID CAPPUCINO SYSTEM” (R.C.S) DEUX FOIS PAR SEMAINE<br />
1 Do not use any strong c<strong>le</strong>aning agent or solvent c<strong>le</strong>aner. Use a damp Disassemb<strong>le</strong> the Rapid Cappuccino<br />
1<br />
cloth and mild c<strong>le</strong>aning agent to c<strong>le</strong>an the surface of the machine. Do not System. Refer to section ”Assembling/<br />
put in a dishwasher.<br />
Disassembling of Rapid Cappuccino<br />
Ne pas utiliser de détartrant ou de solvant. Utiliser un chiffon<br />
System (R.C.S)”.<br />
humide et un produit d’entretien doux pour nettoyer la surface de la Démonter <strong>le</strong> “Rapid Cappucino Sys-<br />
machine. Ne pas mettre au lave-vaissel<strong>le</strong>.<br />
tem”. Se référer au chapitre Montage/<br />
Démontage du “Rapid Cappucino<br />
System” (R.C.S)<br />
Remove the drip tray, capsu<strong>le</strong> container and water tank. Empty and rinse. Both <strong>le</strong>ft and right grid<br />
can be removed for easy c<strong>le</strong>aning. C<strong>le</strong>an the coffee out<strong>le</strong>t regularly with a damp cloth.<br />
Retirer <strong>le</strong> bac de récupération, <strong>le</strong> bac à capsu<strong>le</strong>s usagées et <strong>le</strong> réservoir d’eau. Vider et rincer. Les<br />
gril<strong>le</strong>s gauche et droite doivent être retirés de la machine pour être faci<strong>le</strong>ment lavés. Laver la sortie<br />
Café régulièrement avec un chiffon humide.<br />
Disconnect the R.C.S. from the machine and place<br />
it in the refrigerator. Close the machine steam<br />
connector door.<br />
This milk should not be kept for more than<br />
2 days.<br />
Déconnecter la R.C.S de la machine et <strong>le</strong> placer<br />
au réfrigérateur. Fermer la trappe d’accès au<br />
connecteur vapeur.<br />
Le lait ne doit pas être conservé plus de 2<br />
jours.<br />
All the milk container components are dishwasherproof.<br />
Twice a week, follow the section “Care of<br />
Rapid Cappuccino System twice a week”.<br />
Tous <strong>le</strong>s composants du bac à lait peuvent être lavés<br />
au lave-vaissel<strong>le</strong>. Deux fois par semaine, suivre <strong>le</strong><br />
chapitre Entretien du “Rapid Cappucino System”<br />
(R.C.S) deux fois par semaine<br />
C<strong>le</strong>an all components in the upper <strong>le</strong>vel<br />
of a dishwasher at <strong>le</strong>ast twice a week.<br />
Mettre tous <strong>le</strong>s composants dans la partie<br />
haute du lave vaissel<strong>le</strong> au moins deux fois<br />
par semaine.<br />
11<br />
EN<br />
FR
EMPTYING THE SYSTEM BEFORE A PERIOD OF NON-USE, FOR FROST PROTECTION OR BEFORE A REPAIR/<br />
VIDER L’APPAREIL AVANT UN PÉRIODE DE NON-UTILISATION, CONTRE LE GEL OU AVANT UNE RÉPARATION<br />
1 2 3 4<br />
Switch on the machine.<br />
Allumer la machine.<br />
ENERGY SAVING CONCEPT/<br />
MODE ÉCONOMIE D’ÉNERGIE<br />
Cette machine consomme moins d’énergie grâce notamment à un arrêt automatique (0W).<br />
L’appareil s’éteind après 9 minutes de non-utilisation.<br />
Activation power off after 9min (factory setting) Activation power off <strong>mode</strong> after 30min Activation power off <strong>mode</strong> after 8h<br />
Activer <strong>le</strong> <strong>mode</strong> arrêt automatique après 9 mn (réglage d’usine) Activer <strong>le</strong> <strong>mode</strong> arrêt automatique après 30 mn Activer <strong>le</strong> <strong>mode</strong> arrêt automatique après 8h<br />
1 A B C<br />
Switch the machine off.<br />
Eteindre la machine<br />
Remove the water tank. Close the <strong>le</strong>ver (without<br />
a capsu<strong>le</strong> inside). Place a container under the<br />
coffee out<strong>le</strong>t.<br />
Retirer <strong>le</strong> réservoir d’eau. Baisser <strong>le</strong> <strong>le</strong>vier (sans<br />
capsu<strong>le</strong> à l’intérieur). Placer un récipient sous la<br />
sortie Café.<br />
Press and hold the Lungo button and switch the<br />
machine on.<br />
Appuyer et maintenir appuyé sur <strong>le</strong> bouton Lungo<br />
et allumer la machine.<br />
Press the Cappuccino and Espresso buttons simultaneously<br />
for 5 seconds. Preparation buttons blink<br />
alternately: emptying <strong>mode</strong> is in progress.<br />
Appuyer simultanément sur <strong>le</strong>s boutons Cappuccino<br />
et Espresso pendant 5 secondes. Les boutons<br />
de préparation clignotent alternativement : <strong>le</strong><br />
<strong>mode</strong> vidange est en marche.<br />
Press and hold the Espresso button and switch<br />
the machine on.<br />
Appuyer et maintenir appuyé <strong>le</strong> bouton Espresso<br />
et allumer la machine.<br />
When the process is finished, the machine switches<br />
off automatically.<br />
Lorsque l’opération est terminée, la machine<br />
s’éteint automatiquement.<br />
This machine has an excel<strong>le</strong>nt energy consumption profi<strong>le</strong> as well as an automatic power off function (0W) which enab<strong>le</strong>s you to save energy. The appliance switches off 9 minutes after the last use.<br />
12<br />
Press and hold both the Lungo and Espresso button<br />
and switch machine on.<br />
Appuyer et maintenir appuyé <strong>le</strong>s boutons Lungo et<br />
Espresso et allumer la machine.