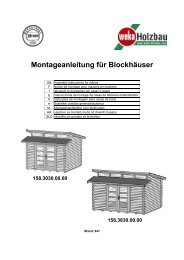
400x610- H120 cm - La Maison du Jardin
400x610- H120 cm - La Maison du Jardin
400x610- H120 cm - La Maison du Jardin

You also want an ePaper? Increase the reach of your titles
YUMPU automatically turns print PDFs into web optimized ePapers that Google loves.
SUMMARY:<br />
- Preparing the ground<br />
- Erecting the sides of the pool<br />
- Console screwing and wall reinforcements<br />
- Putting up the supports for the sides of the pool<br />
- Installing the felt underlay and the liner<br />
- Cutting out the liner to fit the backwash inlet<br />
nozzle and the skimmer<br />
- Assembly of the pine edging<br />
- The ladders<br />
1a - Installing the structure on a concrete slab base is obligatory. The slab should be at least 20 <strong>cm</strong><br />
thick. Ensure that the base is completely flat and level. Be sure to make a reentrant for the metal cradle.<br />
For the warranty to be valid, a concrete slab must be in place.<br />
1b - Swimming pool should be oriented so that skimmer inlet face prevailing wind, in order to optimise surface particle<br />
filtration. For this, use temporarily the first row of planks. One half plank must be directly below the skimmer.<br />
1c - Assemble the horizontal brace to the two vertical posts.<br />
1d - Position of the metal cradle. Fill the reentrant with concrete.<br />
1e - Fill the reentrant with concrete. Putting on the finishing profiles<br />
2 scenarios:<br />
1- You do not have the metal cradle (waiting for the swimming pool to be delivered) when<br />
the slab is laid. In this case, you can prepare the concrete slab leaving an empty trench<br />
in it which is 18 <strong>cm</strong> deep and 10 <strong>cm</strong> wide. Once the pool has been delivered, position the<br />
metal cradle in the trench and fill in with concrete, ensuring that it is level<br />
(illustration 1e).<br />
2 - You already have the metal cradle when the slab is laid. In this case, embed it into<br />
it, ensuring that it is level (illustration 1e). Ensure that you provide between 1 and 3,<br />
depending on the model of the swimming pool.<br />
2* - IMPORTANT: It is important that the planks are correctly interlocked, especially those at the<br />
bottom (where the pressure of the water will be greatest).<br />
TO INTERLOCK A WARPED PLANK:<br />
Even if they are on a pallet and wrapped in packaging, it is possible that some planks may be<br />
warped. This is entirely normal in view of the fact that wood is a living material.<br />
In order to install a warped plank, engage one of the two sides of the plank in position.<br />
Straighten the other side using 2 wooden wedges and the clamp. Use the hammer and the<br />
sacrifice piece to engage it in position.<br />
2a - Assembly principle. For this, use the sacrifice part for fitting together all the planks.<br />
2b - Make the first row of planks level.<br />
2c - Push on the ends of the walls to press the structure onto the cradle.<br />
2d - Control the shape using a tape measure (10m).<br />
2e - Position the water jet plank on the 6th row. This can be either to the right or the left of the skimmer.<br />
2f - Position the lower skimmer plank on the 8th full row. Ensure that the upper and lower skimmer planks are properly<br />
aligned.<br />
3a - Positioning the brackets. If you are using wood composite coping, lower the bracket by 2 mm.<br />
3b - Mark in the position of the brackets according to their height on the sides of the pool.<br />
3c - Mark in the pre-drilling points on the side where the skimmer goes.<br />
3d - Drill the holes for screwing in all the brackets.<br />
3e - Put in the brackets and screw them in so that the screw heads are fully embedded into the wood.<br />
3f - Fix on the wooden stops for the skimmer flaps.<br />
3g - Cut the 45x135 cross-section post to size for the skimmer.<br />
3h - Cut the wall reinforcement posts (cross-section 45x135) to the height of the swimming pool.<br />
3i - Mark the position of the holes and arrange the posts. Drill through the walls on each plank.<br />
3j - Screw all planks and countersink all screw heads.<br />
3k - Note the placing of the brace covers.<br />
3l - Mark in the points where the brace covers will be screwed in and drill the sides of the structure.<br />
3m - Screw in the supports, fully embedding the screw heads.<br />
3n - Nail the 3 sections of the brace cover together.<br />
4a - Screw in the skimmer intake in the upper plank using the two screws provided in the skimmer box.<br />
4b - Install the outer seal of the skimmer and the skimmer itself.<br />
4c -Fix on the whole unit tightening it really well to ensure it is completely waterproof.<br />
4d - Cover the threaded part of the hose connector with teflon tape, winding anti-clockwise (min. 20 layers). Screw this end into the valve<br />
4e - Drill the tracks according to the measurements (3 <strong>cm</strong> from the ends and then approximately every 20 <strong>cm</strong>).<br />
4f - Screw in the first track of the liner.<br />
4g - Mark out where the corner cut is to be made.<br />
4h - Cut the corners according to the diagram.<br />
4i - Fit one of the skimmer seals.<br />
4j - Fit a seal for the backwash inlet. It must make contact with the wood.<br />
5a - Mettre en place le feutre de protection pour le sol, de dimension 2 x 7 m.<br />
5b - Cut out the protective felt underlay using a Stanley knife or a pair of scissors.<br />
5c - Put the liner in place.<br />
5d - Fit the corners of the liner into the corners of the pool.<br />
5e - Hook the liner on to the lip of the track<br />
5f - Check the position of the liner and smooth out the biggest creases.<br />
5g - Adjust the corners of the liner to fit the frame of the pool.<br />
5h - Fill the pool with water to a depth of 2 <strong>cm</strong>.<br />
5i - Smooth out any creases and resume filling with water.<br />
6a - Stop filling when the water is just below the backwash inlet nozzle.<br />
6b - Position the backwash inlet nozzle from the inside of the pool.<br />
6c - Cut a hole in the liner at the level of the nozzle, leaving approx. 2mm clearance. Put the joint and the delivery nozzle in place.<br />
6d - Tighten the nut on the backwash inlet pipe enough to make sure it is waterproof.<br />
6e - Bind the ends of the fittings that have been fed through with Teflon tape, working in an anti-clockwise direction. Wrap round at least 20 times.<br />
6f - Install one of the 4m pipes and secure it using a metal collar.<br />
6g - Put the other end of the pipe into the swimming pool and resume filling with water.<br />
6h - Mark in the position of the skimmer seal.<br />
6i - Put in the skimmer seal and frame.<br />
6j - Cut out the liner on the inside of the skimmer frame. Then put in place and clip in the flange cover.<br />
6k - The water is at the correct level when it is halfway up the skimmer (after you have put in the filter).<br />
6l - Arrange the finishing profiles at each corner of the pool. Cut these off at the height of the swimming pool, making sure to leave 2<strong>cm</strong> clearance between the end of the finishing<br />
profile and the edging.<br />
6m - Fix the finishing profiles using the nails provided.<br />
7 • (see page 32/33)<br />
8<br />
The ladders should not be used for any other purpose<br />
The maximum weight limit is 150 kg<br />
The means of access should be put in a safe place when not in use<br />
8a - Put the ladder in position. To do that, expel the air from the steps if necessary.<br />
8b - It can only be placed at certain points. See instructions for the cover.<br />
8c - Secure the stainless steel supports using the bolts provided in the stainless steel ladder box.<br />
If using a safety tarpaulin, make sure to centre<br />
the stainless steel ladder on the edging<br />
17