12-1522 Vorwerk Verlegeempfehlung ... - Vorwerk Teppich
12-1522 Vorwerk Verlegeempfehlung ... - Vorwerk Teppich
12-1522 Vorwerk Verlegeempfehlung ... - Vorwerk Teppich

You also want an ePaper? Increase the reach of your titles
YUMPU automatically turns print PDFs into web optimized ePapers that Google loves.
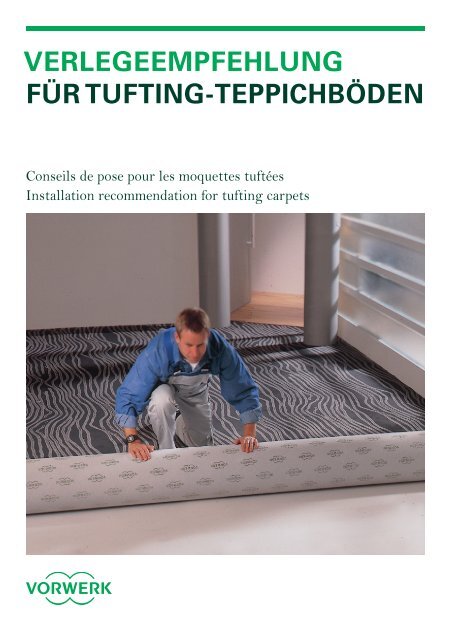
VERLEGEempfehlung<br />
FÜR TUFTING-TEPPICHBÖDEN<br />
Conseils de pose pour les moquettes tuftées<br />
Installation recommendation for tufting carpets
<strong>Verlegeempfehlung</strong><br />
für das Verlegen von<br />
<strong>Vorwerk</strong> TUFTING-TEPPICHBÖDEN<br />
Welche Rückenausstattung hat mein <strong>Teppich</strong>boden:<br />
<strong>Vorwerk</strong> texback® super:<br />
<strong>Vorwerk</strong> texback® contract:<br />
ecoback:<br />
comfortback 500:<br />
Jute-Rücken:<br />
Beigefarbener Vliesrücken.<br />
Beigefarbene Gitterstruktur.<br />
Graues, voluminöses Vlies.<br />
Graues, verdichtetes, voluminöses Vlies.<br />
Beigefarbene, grobe Gitterstruktur<br />
Unter Nennung der <strong>Vorwerk</strong> Auftragsnummer können Sie bei uns auch die Rückenvariante des Ihnen<br />
vorliegenden <strong>Vorwerk</strong> <strong>Teppich</strong>bodens erfragen.<br />
• Deutschland Tel. 01805 - 600 753<br />
(Anruf 14 ct/min. aus dem dt. Festnetz/ Mobil funkpreise können abweichen)<br />
• Österreich/Schweiz: +49 5151 - 103 734<br />
Prüfpflicht<br />
Vor dem Verlegen ist die Ware auf Maßgenauigkeit<br />
in Länge und Breite, Farbausfall und Fehlerfreiheit<br />
zu kontrollieren. Nach begonnener Verlegung sowie<br />
erfolgtem Zuschnitt der gelieferten Ware ist<br />
die Beanstandung offener Mängel ausgeschlossen.<br />
Vorbereitung<br />
Die <strong>Teppich</strong>bahnen sind vor Verlegung dem<br />
Raumklima anzupassen (Akklimatisierung).<br />
Die <strong>Teppich</strong>bahnen innerhalb einer in sich geschlossenen<br />
Raumeinheit müssen Richtungsgleich<br />
gelegt werden und aus einer Charge stammen.<br />
Dabei ist auf die Fabrikationsfolge zu achten. Die<br />
Fabrikationsfolge kann neben den Rollenpapieren<br />
auf dem Rückendruck nachvollzogen werden.<br />
Jede Charge beginnt mit 0 Meter, alle 2 Meter<br />
erfolgt ein Aufdruck der aktuellen Chargen /Rollenlänge<br />
auf dem Rücken. Die Beachtung dieser<br />
Längenangaben ist besonders Wichtig im Hinblick<br />
auf Farb- sowie Musterverlauf der Charge.<br />
Die Fabrikationskanten müssen vor Verlegung<br />
grundsätzlich beschnitten werden. Es werden nur<br />
Fabrikationskanten aneinander gelegt. Dieses gilt<br />
besonders für Ansatzstücke sowie Restbahnen.<br />
Linear verlaufende Schlingenqualitäten sind grundsätzlich<br />
mit einem geeigneten Nahtschneider einzeln<br />
zwischen den Polnoppenreihen ( in der Florgasse<br />
) zu beschneiden.<br />
Vor Beginn der Verklebung sind die Bahnen auf<br />
Farbgleichheit zu prüfen.<br />
Untergrundeigenschaften/<br />
Vorbehandlungen<br />
Bitte beachten Sie im Vorfeld, dass im Inland der<br />
Unterboden nach ATV/DIN 18365 VOB Teil C<br />
„Bodenbelagsarbeiten“ sowie gemäß den jeweiligen<br />
Aufbau e mpfehlungen der Werkstofflieferanten<br />
vorbereitet wird. Die zu belegenden Flächen<br />
müssen fest, eben, staubfrei sowie frei von Rissen<br />
sein. Sie müssen den geltenden Baunormen und<br />
Vorschriften bei Beachtung der Regeln des Fachs<br />
sowie den jeweils gültigen TKB-Merkblättern<br />
entsprechen.<br />
Im Ausland gelten die jeweiligen Bestimmungen<br />
des betreffenden Landes.<br />
Verarbeitungstemperaturen/<br />
Klimatisierung<br />
Die Mindestanforderungen an das Raumklima<br />
müssen während der Verlegung beachtet werden.<br />
Die Raumtemperatur muss mindestens 18 °C bei<br />
einer relativen Luftfeuchtigkeit von maximal 65 %<br />
betragen. Die Oberflächentemperatur des zu belegenden<br />
Untergrundes darf 15 °C nicht unterschreiten.<br />
Verlegewerkstoffe<br />
Um Reklamationen aufgrund von Geruchsbeanstandungen<br />
sowie gesund heitliche Risiken zu<br />
vermeiden, ist es wichtig, dass das gesamte<br />
Unterbodensystem, also Grundierung, Spachtelmasse<br />
und Dispersionskleber, EC 1 entspricht<br />
und aus einem System stammt.<br />
Daher sollten sehr emissionsarme Verlegewerkstoffe<br />
eingesetzt werden. Diese<br />
müssen den Anforderungen und Kriterien der<br />
Gemeinschaft umweltfreundlicher <strong>Teppich</strong>böden<br />
e.V. (G.u.T.) sowie der Gemeinschaft Emissionskontrollierter<br />
Verlegewerkstoffe e.V. (GEV) entsprechen<br />
und nach EMICODE EC1/EC1Plus<br />
gekennzeichnet sein.<br />
Ebenso können alle Verlegewerkstoffe, welche<br />
mit dem Signet „Der Blaue Engel“ ausgelobt<br />
sind, eingesetzt werden.<br />
2 3 <strong>Verlegeempfehlung</strong> Tufting
1. Welche Klebstoffe<br />
kommen in Frage<br />
Die Verlegung von Flächen<br />
Für Verlegungen in der Fläche können grundsätzlich<br />
alle von <strong>Vorwerk</strong> angebotenen<br />
Rückenausstattungen mit für Textilbeläge vorgesehenen<br />
Dispersionsklebstoffen verlegt werden,<br />
die eine EMICODE EC1/EC1Plus Einstufung<br />
oder aber den „Blauen Engel“ aufweisen.<br />
Alternativ zur Verlegung mit Dispersionsklebstoffen<br />
ist auch der Einsatz von Trockenklebstoffen<br />
unter Beachtung des TKB-Merkblatts <strong>12</strong> möglich.<br />
Bei beheizten Fußbodenkonstruktionen sind nur<br />
dafür geeignete Dispersions klebstoffe einzusetzen.<br />
Die Verlegung von Treppenstufen<br />
Für die Verlegung auf Treppen werden im Markt<br />
verschiedene Systeme angeboten. Diese reichen<br />
von Dispersions-Kontaktklebstoffen, Schmelzklebern<br />
und Trockenklebstoffen bis hin zu Sprüh-<br />
Kontaktklebersystemen. Für den Einsatz dieser<br />
Systeme können wir keine Gewährleistung auf<br />
Grund der vielfachen unterschiedlichen Einflussfaktoren<br />
übernehmen. Bei Einsatz dieser Systeme<br />
sind vorhergehende Eigenversuche daher unerlässlich.<br />
Als besonders geeignet hat sich in der jüngsten<br />
Vergangenheit ein Dispersions- Kontaktklebstoff<br />
der Firma UZIN herausgestellt ( UZIN WK 222 ).<br />
Somit ist der Einsatz von lösemittelhaltigen Klebstoffen<br />
nicht mehr zwingend notwendig.<br />
Achtung!<br />
Sollten dennoch lösemittelhaltige Kontaktklebstoffe<br />
zum Einsatz kommen, ist zu berücksichtigen,<br />
daß solche Klebstoffe Gefahrstoffe (Lösungsmittel<br />
) enthalten.<br />
Hier sind besonders die Ablüftzeiten zu beachten,<br />
sowie für eine ausreichende Belüftung der Räumlichkeiten<br />
zu sorgen.<br />
Es sind die Verarbeitungsanleitung und Gewährleistungen<br />
der Kleb stoffhersteller zu berücksichtigen.<br />
Grundsätzlich muss die Polstrichlage auf einer<br />
Treppe immer von oben nach unten verlaufen.<br />
1.1. Verlegung<br />
von texback ® contract<br />
1.1.1 Dispersionsklebstoffe:<br />
Bei der Auswahl des Klebstoffes sollte bei gemusterten<br />
Qualitäten zusätzlich auf die Möglichkeit<br />
der eventuell erforderlichen Rapportierbarkeit des<br />
Belages im Klebstoffbett geachtet werden. Bei Verarbeitung<br />
auf nicht bzw. schwach saugenden Untergründen<br />
eine ausreichende Ablüftzeit nach Herstellerangaben<br />
einhalten.<br />
1.1.2 Trockenklebstoffe:<br />
Hier ist der Einsatz nur bei Uni-Qualitäten beziehungsweise<br />
rapportfreien Musterungen zu empfehlen,<br />
da hier eine eventuell erforderliche Musterkorrektur<br />
nur bedingt möglich ist.<br />
1.2. Verlegung von texback ®<br />
super, ecoback, comfortback<br />
500 und Jute-Rücken<br />
1.2.1. Dispersionsklebstoffe:<br />
Bei der Verklebung dieser Rückenausstattungen<br />
mit Dispersionsklebstoffen ist unbedingt auf die<br />
Einhaltung der Herstellerangaben zu achten. Dazu<br />
zählen die Auftragsmenge, Zahnspachtelgröße<br />
(z. B. B1, B2, A2), Ablüftzeit sowie das gewissenhafte<br />
Anreiben der gesamten Fläche nach Einlegen<br />
des Belages in das Klebstoffbett. Diese Faktoren<br />
sind unter anderem besonders wichtig für eine<br />
spätere Wiederaufnahme des Belages.<br />
1.2.2. Universalfixierung:<br />
Bei der Verlegung von texback ® super, ecoback<br />
und comfortback 500 mit einer Universalfixierung<br />
gilt ebenfalls das genaue Einhalten der Klebstoff-<br />
Herstellerempfehlungen, insbesondere die Einhaltung<br />
der erforderlichen Ablüftzeiten, besonders bei<br />
nicht saugenden Untergründen, sowie das anschließende<br />
gewissenhafte Anreiben des Belages.<br />
Ausnahmen hiervon sind Nahtverlegungen von<br />
geometrischen Designs. In diesem Fall ist eine<br />
Verklebung mit Dispersionsklebstoff zu empfehlen,<br />
da eventuell notwendige Muster korrekturen<br />
nur bedingt möglich sind.<br />
1.2.3. Haft-/Kontaktklebstoffe:<br />
Eine weitere Möglichkeit zur Verlegung bilden die<br />
von verschiedenen Klebstoffherstellern angebotenen,<br />
speziell auf Vliesrücken eingestellten Haft-/<br />
Kontaktklebstoffe. Der Auftrag des Klebstoffes erfolgt<br />
in der Regel mittels einer kurzflorigen Walze.<br />
Diese Klebstoffe lassen sich in der Regel sehr<br />
leicht verarbeiten und eig nen sich besonders zur<br />
späteren einfachen und unproblematischen<br />
Wiederaufnahme der verlegten Beläge. Unsere<br />
Rückenvarianten texback ® super, ecoback und<br />
comfortback 500 sind für diese Verlegevariante<br />
geeignet.<br />
Ausnahmen hiervon sind Nahtverlegungen von<br />
geometrischen Designs. In diesem Fall ist eine<br />
Verklebung mit Dispersionsklebstoff zu empfehlen,<br />
da eventuell notwendige Musterkorrekturen<br />
nur bedingt möglich sind.<br />
Bei dieser Verlegemethode ist unbedingt auf die<br />
Einhaltung der jeweiligen Hersteller angaben zu<br />
achten. Dazu zählen die Auftragsmenge, Ablüft-/<br />
Trocknungszeit sowie das gewissenhafte Anreiben<br />
der gesamten Fläche nach Einlegen des Belages<br />
ins Klebstoffbett.<br />
Je nach Saugfähigkeit des Unterbodens kann ein<br />
erhöhter Klebstoffauftrag erforderlich werden.<br />
Unter Umständen ist es notwendig, die Flächen<br />
vor dem Klebstoffauftrag entsprechend zu grundieren.<br />
4 5 <strong>Verlegeempfehlung</strong> Tufting
2. Elastische Unterlagen<br />
4. Konfektionieren<br />
der <strong>Teppich</strong>bahnen<br />
Bei der Vielzahl der am Markt angebotenen Qualitäten<br />
können wir keine allgemeingültige Gewährleistung<br />
für die zugesicherten Eigenschaften unserer<br />
Produkte übernehmen. Wir müssen darauf<br />
hinweisen, dass die zugesicherten Eigenschaften<br />
des Brandverhaltens bei einer Verlegung auf einer<br />
Unterlage immer ihre Gültigkeit verlieren, da die<br />
Unterlage nicht Gegenstand der Brandprüfung<br />
war.<br />
Konfektionieren Sie die Nähte mit dem mit einer<br />
Wärmeschutzplatte ausgerüsteten Konfektioniereisen<br />
unter Verwendung eines hierfür geeigneten<br />
Konfektionsbandes.<br />
Das Erstellen der Konfektionsnaht erfolgt immer<br />
in Polstrichrichtung.<br />
3. Verspanntechnik<br />
5. Wiederaufnahme<br />
bei Renovierung<br />
Eine fachgerechte Verspannung mit professionellem<br />
Werkzeug ist mit den <strong>Vorwerk</strong> Rückenausstattungen<br />
texback® super und ecoback nur<br />
bei einer Verlegung ohne Nähte innerhalb einer<br />
abgeschlossenen Raumeinheit möglich, da unter<br />
der notwendigen Spannung der Vliesrücken im<br />
Bereich der konfektionierten Naht nachgibt.<br />
Dadurch kann sich die vorher dicht geschlossene<br />
Naht öffnen.<br />
Für die Verspannung von texback contract gelten<br />
diesbezüglich keine Einschränkungen. Bei dem<br />
Verspannvorgang ist darauf zu achten, dass der<br />
<strong>Teppich</strong>boden nicht überdehnt wird.<br />
3.1. Auswahl der Nagelleisten<br />
Bitte setzen Sie je nach Gesamtdicke des <strong>Teppich</strong>bodens<br />
die passenden Nagelleisten mit den notwendigen<br />
Stiftlängen ein.<br />
Empfohlene Vorgehensweise bei Verklebung mit<br />
Dispersionsklebstoff/ Universalfixierungen:<br />
Wenn bei der Verlegung auf die Ablüftzeiten sowie<br />
die aufzutragenden Klebstoffmengen mit dem<br />
entsprechenden Zahnspachtel (z. B. B1, B2, A2)<br />
geachtet wurde, bleiben die Klebstoffriefen nach<br />
Einlegen der Ware erhalten.<br />
Dieses ist wichtig für die spätere Wiederaufnahme,<br />
da diese Klebstoffriefen als Soll-Bruchstelle<br />
dienen. Wurde der Belag in das noch nasse Klebstoffbett<br />
verlegt, bleiben diese Riefen nicht erhalten.<br />
Es bildet sich stattdessen ein Film, der unter<br />
Umständen bei Wiederaufnahme des <strong>Teppich</strong>bodens<br />
nicht aufreißen kann. Die Trennung kann die<br />
Spachtelmasse oder den Untergrund beschädigen,<br />
im ungünstigsten Fall im Rücken des <strong>Teppich</strong>bodens<br />
erfolgen.<br />
Bei Trennung im <strong>Teppich</strong>bodenrücken empfehlen<br />
wir folgende Arbeitsschritte:<br />
1. Den <strong>Teppich</strong>boden in ca. 30 cm breite<br />
Streifen schneiden.<br />
2. Die gesamte <strong>Teppich</strong>bodenfläche mit durch<br />
Geschirrspülmittel entspanntem Wasser<br />
möglichst gleichmäßig befeuchten (z. B. mit<br />
einer Gießkanne) und mindestens 30 Min.<br />
einwirken lassen. (Im Extremfall kann die<br />
angefeuchtete Fläche mit einer Folie über<br />
Nacht abgedeckt werden, um den Klebstoff<br />
anzulösen).<br />
3. Der <strong>Teppich</strong>boden kann dann deutlich leichter<br />
aufgenommen werden.<br />
Diese Vorgehensweise ist für Verklebungen mit<br />
lösungsmittelhaltigen Kontaktklebstoffen (Neoprene)<br />
nicht geeignet!<br />
Änderungen vorbehalten, Stand Juli 20<strong>12</strong><br />
6 7 <strong>Verlegeempfehlung</strong> Tufting
Conseils de pose<br />
pour moquettes TUFTÉES:<br />
Quelles sont les qualités de dossier de ma moquette:<br />
<strong>Vorwerk</strong> texback® super:<br />
<strong>Vorwerk</strong> texback® contract:<br />
ecoback:<br />
comfortback 500:<br />
Dossier en jute :<br />
Dossier Textile beige.<br />
Structure tissée beige.<br />
Structure feutrée à haute densité.<br />
Feutre à haute densité, calandré,<br />
dimensionnellement stable, haute performance<br />
acoustique.<br />
Dossier en jute.<br />
Sur indication du numéro de commande, nos services vous indiqueront aussi, si vous le souhaitez, le<br />
type de dossier utilisé sur la moquette qui vous a été livrée. Tél.: + 49 5151 – 103734<br />
Qualités du support/<br />
préparation<br />
Avant de commencer la pose, la préparation des<br />
supports est à réaliser conformé-ment aux Directives<br />
Techniques Unifiées (D.T.U. 53.1) publiées<br />
par le CSTB. Il convient également d’observer les<br />
règles générales en vigueur dans la profession.<br />
Les supports doivent être solides, planes, exempts<br />
de poussière et de fissures. Ils correspondront aux<br />
normes BTP, aux réglementations professionnelles<br />
ainsi qu’aux fiches TKB (Allemagne : commission<br />
technique des colles industrielles).<br />
Dans les autres pays s’appliquent les réglementations<br />
nationales respectives.<br />
Matériaux de pose<br />
Pour éviter des plaintes à cause d’odeurs et de<br />
risques pour la santé, il est impératif<br />
que le support dans son ensemble - apprêt, mastic<br />
et colle à dispersion - soit issu<br />
d’un même système et conforme à la norme EC 1.<br />
Il est donc préférable d’utiliser, autant que possible,<br />
des colles à faible taux d’émission.<br />
Elles doivent répondre aux exigences et être<br />
conformes aux critères de l’association allemande<br />
des moquettes écologiques (G.u.T. e.V) ainsi que<br />
de l’association ‘produits de pose à émissions<br />
contrôlées’ (GEV e.V.) ; qui plus est, elles doivent<br />
avoir reçu l’appréciation EMICODE EC1/<br />
EC1Plus.<br />
Obligation de contrôle<br />
Avant la pose, vérifiez la stabilité dimensionnelle<br />
(largeur et longueur), la couleur et l’absence de<br />
défauts. Après le début de la pose et de la découpe,<br />
une réclamation de défauts évidents est exclue.<br />
Préparation<br />
Avant la pose, déroulez les lés de moquette pour<br />
qu‘ils se stabilisent en fonction de la température.<br />
Veillez au sens correct de tous les lés pour un seul<br />
et même espace.<br />
Ils doivent provenir d’un même rouleau. Vérifiezen<br />
le numéro !<br />
Vous trouverez ce numéro sur les papiers des rouleaux<br />
et sur l’imprimé du dossier. Avec 0 mètre au<br />
départ, le dossier de chaque rouleau comporte tous<br />
les deux mètres un imprimé qui indique à chaque<br />
fois la longueur restante du lot. Ces numéros se<br />
trouvent toujours du même côté du rouleau. Le<br />
respect de ces précisions de longueur s’impose<br />
aussi pour des raisons d’homogénéité de couleur et<br />
de dessin. Les joints de fabrication nécessitent<br />
une rectification. Ne sont raccordés que ces joints.<br />
Notamment lorsqu’il s’agit d’ajouts et de lés<br />
restants.<br />
Pour découper des bouclés linéaires, servez vous<br />
toujours d‘un couteau à raser et découpez une à<br />
une dans le creux entre les lignes de boucles. Ne<br />
coupez jamais dans les bouclés linéaires.<br />
Avant l’encollage, vérifiez que les lés présentent<br />
une couleur homogène et, au besoin, le bon ajustement<br />
des raccords.<br />
Températures de travail/<br />
climatisation<br />
Les conditions pour une bonne pose :<br />
une température ambiante de 18°C minimum<br />
et une humidité relative ne dépassant pas 65%.<br />
La température en surface du sol ne doit pas être<br />
inférieure à 15°C.<br />
Les colles ayant bénéficié du label „Der Blaue<br />
Engel“ (l’ange bleu) peuvent également être<br />
utilisées.<br />
8 9 Conseils de pose tufting
1. Choisir le type de colle<br />
Les surfaces<br />
Tous les dossiers que propose <strong>Vorwerk</strong> peuvent<br />
être posés avec des colles à dispersion pour produits<br />
textiles, à condition qu’elles aient reçu<br />
l’appréciation EMICODE EC1/EC1Plus ou le<br />
label « ange bleu ».<br />
A la place des colles à dispersion, on peut également<br />
utiliser des rubans double face<br />
s’ils correspondent à la fiche TKB <strong>12</strong>.<br />
En cas de chauffage par le sol, n’utilisez que des<br />
colles à dispersion appropriées.<br />
La pose sur des marches<br />
d’escalier<br />
En cas de chauffage par le sol, n’utilisez que des<br />
colles à dispersion appropriées. Il existe sur le<br />
marché différents systèmes pour ce type de pose:<br />
colles poissantes, colles fusibles, rubans double<br />
face, pulvérisateurs de colles poissantes. Tenant<br />
compte de la multitude de facteurs pouvant intervenir,<br />
nous n’assurons aucune garantie quant à ces<br />
systèmes. Il nous semble inévitable de procéder<br />
préalablement à des essais sur place.<br />
Récemment, une colle en dispersion aqueuse,<br />
fabriquée par UZIN UZIN WK 222), s’est avérée<br />
particulièrement efficace. Ainsi,<br />
l’utilisation de colles à base de solvants n’est plus<br />
indispensable.<br />
Attention:<br />
Si toutefois de telles colles étaient utilisées, il faut<br />
savoir qu’elles contiennent des substances dangereuses<br />
(des solvants).<br />
Dans ces cas, il faut surtout respecter scrupuleusement<br />
les délais d’évacuation de l’air vicié, donc<br />
de prévoir une aération suffisante des locaux.<br />
Il est nécessaire de tenir compte des conseils de<br />
mise en oeuvre et des garanties fournies par les<br />
fabricants de colles.<br />
Dans les escaliers, le sens du bouclé ira toujours du<br />
haut vers le bas.<br />
1.1. Pose de texback ®<br />
contract<br />
1.1.1.Colles à dispersion<br />
Lors du choix de la colle, tenir compte pour les<br />
moquettes à dessins de l‘ajustement des raccords<br />
de dessin sur le support encollé (ne pas choisir une<br />
colle à piégeant trop rapide). Lors de la pose sur<br />
support peu ou non absorbant, il est impératif de<br />
respecter le temps de gommage préconisé par le<br />
fabricant.<br />
1.1.2 Rubans double face<br />
L’usage n’en est recommandé que s’il s’agit de<br />
qualités unies voire de dessins sans besoin<br />
d’ajustement, cet ajustement n’étant possible que<br />
sous certaines conditions.<br />
1.2. Pose de texback ® super,<br />
ecoback, comfortback 500<br />
et dossiers en jute<br />
1.2.1. Colle à moquette<br />
Lors de la pose de ces dossiers avec une colle à<br />
dispersion, il est impératif de respecter les recommandations<br />
de pose du fabricant, en prenant en<br />
compte la quantité de colle à appliquer, la spatule à<br />
utiliser (par exemple: B1, B2, A2), le temps de<br />
gommage ainsi qu‘un bon marouflage de la totalité<br />
du revêtement après la pose sur le support encollé.<br />
Le respect de ces consignes est particulièrement<br />
important dans la perspective d’un décollage<br />
ultérieur de la moquette.<br />
1.2.2. Colle de fixation universelle<br />
Pour l’enduction de texback®super, d’ecoback et<br />
de comfortback ces dossiers de colles à dispersion,<br />
il faut également respecter scrupuleusement les<br />
recommandations du fabricant des produits de<br />
colle, surtout les temps de gommage, notamment<br />
sur des supports non absorbants, ainsi qu’un<br />
marouflage en bonne et due forme du revêtement.<br />
Le raccord des moquettes avec des dessins géométriques<br />
ne répond pas à cette règle. Dans ce cas, il<br />
convient de procéder à un encollage intégral avec<br />
des colles à dispersion, l’ajustement des dessins<br />
n’étant possible que sous certaines conditions.<br />
1.2.3. Colles poissantes<br />
Les colles poissantes conçues pour les dossiers textiles<br />
et proposées par différents fabricants représentent<br />
une autre possibilité. Appliqués en général<br />
au moyen d’un rouleau à poils courts, ces produits<br />
sont d’une très grande facilité d‘utilisation et particulièrement<br />
indiqués pour permettre plus tard<br />
d‘enlever sans problèmes ces revêtements. Nos<br />
dossiers texback ® super et comfortback 500 sont<br />
particulièrement conçus pour ce type de pose.<br />
Le raccord des moquettes avec des dessins géométriques<br />
ne répond pas à cette règle. Dans ce cas,<br />
il convient de procéder à un encollage intégral<br />
avec des colles à dispersion, l’ajustement des dessins<br />
n’étant possible que sous certaines conditions.<br />
Cette méthode d’encollage exige le respect<br />
impératif des recommandations du fabricant.<br />
Parmi celles-ci figurent la quantité de colle à<br />
appliquer, le temps de séchage ainsi que le marouflage<br />
en bonne et due forme de toute la surface<br />
après la pose du revêtement sur le support enduit<br />
de colle poissante.<br />
Selon la capacité d’absorption du support, une<br />
plus forte enduction de colle peut s’imposer. Il va<br />
peut-être même falloir mettre une couche d’apprêt<br />
sur ces surfaces avant de les encoller.<br />
10 11 Conseils de pose tufting
2. Thibaudes résiliantes<br />
4. Soudage des lés<br />
de moquette<br />
Le grand nombre des produits proposés sur le<br />
marché ne nous permet pas d’octroyer une garantie<br />
générale correspondant aux qualités initiales de<br />
nos produits.<br />
Nous sommes tenus de préciser que les qualités<br />
ignifuges attestées perdent toute validité en cas<br />
de pose sur un support, ce dernier n’ayant pas<br />
été soumis aux tests d’ignifugeage.<br />
Pour les moquettes soudez les joints à l’aide d’un<br />
fer avec plaque de protection (téflon), en utilisant<br />
les bandes thermo-adhésives appropriées.<br />
La soudure du joint se fera toujours dans le sens<br />
du bouclé.<br />
3. Pose tendue<br />
5. Décollage de la moquette<br />
pour rénovation<br />
Une pose tendue fiable les moquettes équipées des<br />
dossiers texback® super et ecoback n’est possible<br />
qu’avec un outillage professionnel et en cas de<br />
pose sur une surface définie et sans joints. Sinon,<br />
le dossier risque de céder sous la tension générée<br />
au niveau du joint. Lors de la pose de la moquette,<br />
veiller à ce que celle-ci ne soit pas surtendue.<br />
3.1. Choix des bandes d’ancrage<br />
En fonction de l’épaisseur totale de la moquette,<br />
utilisez les bandes d’encrage appropriées, avec la<br />
longueur de pointe requise.<br />
Procédé recommandé pour décoller des moquettes<br />
posées avec une colle à dispersion ou une colle de<br />
fixation universelle.<br />
Lorsque le temps de gommage et les quantités recommandés<br />
par le fabricant de colle ont été respectés,<br />
et que la colle a été correctement appliquée<br />
à l’aide de la spatule crantée (p. ex. B1, B2, A2), le<br />
rainurage de la colle n’aura pas souffert de la pose<br />
de la moquette.<br />
Cela est important pour la dépose ultérieure, étant<br />
donné que les sommets des rainures de colle serviront<br />
alors de zone de rupture.<br />
Par contre, si le revêtement a été posé dans la<br />
colle encore humide, le rainurage ne sera pas<br />
préservé. A la place, il s’est constitué un film qui,<br />
le cas échéant, ne cèdera pas. Désolidariser la<br />
moquette du sol risque alors d’endommager le<br />
mastic, le support et, dans le pire des cas, le<br />
dossier de la moquette.<br />
En cas de désolidarisation au niveau du dossier<br />
de la moquette, nous recommandons de procéder<br />
selon les étapes décrites ci-dessous:<br />
1. Couper la moquette en bandes de 30 cm de<br />
large environ<br />
2. Mouillez toute la surface avec de l’eau détendue<br />
avec du produit vaisselle (utilisez éventuellement<br />
un arrosoir) et laisser agir environ 30 minutes.<br />
(Dans un cas extrême, recouvrez la surface<br />
mouillée d’une feuille (bâche) pendant la nuit<br />
afin de bien détacher la colle).<br />
Sous réserve de modifications, édité en Juillet 20<strong>12</strong><br />
<strong>12</strong> 13 Conseils de pose tufting
Installation recommendation<br />
for laying <strong>Vorwerk</strong> TUFTING<br />
CARPETS:<br />
Which backing does my carpet have<br />
<strong>Vorwerk</strong> texback ® super:<br />
<strong>Vorwerk</strong> texback ® contract:<br />
ecoback:<br />
comfortback 500:<br />
jute backings:<br />
beige-coloured fabric backing<br />
beige-coloured grid structure<br />
grey voluminous fabric<br />
grey compacted voluminous fabric<br />
beige-coloured coarse grid structure<br />
With us, you can also enquire about the backing variety used on the <strong>Vorwerk</strong> carpet in question by<br />
stating the <strong>Vorwerk</strong> order number. Tel. +49 5151 - 103 734<br />
next to each other. This applies particularly for<br />
extensions, skirting and remnant lengths. Loop<br />
carpet lengths running in a linear direction are<br />
fundamentally to be cut individually between the<br />
nap rows (in the pile’s alignment) using an appropriate<br />
seam cutter. Do not cut across the nap<br />
rows.<br />
The roll lengths are to be inspected for identical<br />
colouring and, as the case requires, a matched fitting<br />
of repeat patterns.<br />
Temperatures to work with/<br />
Climatisation<br />
The minimum requirements placed on room<br />
climate must be observed during carpet-laying.<br />
The room temperature must be at least 18 °C at a<br />
maximum relative humidity of 65 %. The surface<br />
temperature of the subflooring to be covered may<br />
not be less than 15 °C.<br />
Inspection obligation<br />
The merchandise is to be inspected prior to installation<br />
as to dimensional precision in terms of its<br />
length and width, as well as regarding correctness<br />
of the colour delivered and any presence of flaws<br />
or defects in the merchandise. Complaint pertaining<br />
to unresolved deficiencies is ruled out once<br />
laying has begun, as well as when any cutting of<br />
the delivered merchandise for fitting has already<br />
occurred.<br />
Preparation<br />
The lengths of broadloom carpet are to be adapted<br />
to the room climate prior to installation<br />
(acclimatisation).<br />
The lengths of broadloom carpet within an<br />
enclosed spatial unit must be laid in the same<br />
direction and must all come from one production<br />
batch. Attention is to be paid to the fabrication sequence.<br />
This fabrication sequence can be reconstructed by<br />
looking at the printing on the back and at the papers<br />
for the rolls of carpet.<br />
Each batch begins with 0 metres. Every 2 metres<br />
after that there is an imprint on the back of the<br />
carpet bearing the current batch length for the<br />
roll. This sequence of numbers is located on one<br />
side for all rolls. Paying attention to these indications<br />
about the length is very important with respect<br />
to the way the colour(s) and patterns are<br />
graduated within the batch.<br />
The fabrication edges must always be cut prior to<br />
installation. Only trimmed outer edges are laid<br />
Subflooring properties/<br />
Preliminary treatments<br />
In Germany, please ensure beforehand that the<br />
subflooring is being prepared in compliance with<br />
the ATV/DIN 18365 VOB standard (regulations<br />
for awarding building contracts and for contract<br />
performance), Part C, “Work on floor coverings”,<br />
as well as in accordance with the respective recommendations<br />
for setup issued by the vendors<br />
and suppliers of the materials. The areas to be covered<br />
must be solid, level, free of dust and may<br />
not have any cracks. The areas must comply with<br />
the construction standards in force while observing<br />
the rules of the profession, and must also<br />
comply with the respectively valid briefing notes<br />
from TKB (German Technical Commission on<br />
Construction Adhesives).<br />
The respective provisions of the country in question<br />
apply abroad.<br />
Materials for installation<br />
It is important that the entire subflooring<br />
system, in other words the primer, filler and<br />
dispersion adhesive, comply with the EC 1 rating<br />
and comes from one system in order to avoid<br />
complaints due to objectional odours, as well as<br />
to prevent risks to health.<br />
This is why materials for installation should be<br />
used that have a very low level of emissions.<br />
They must comply with the specifications and<br />
criteria issued by G.u.T (German Association of<br />
Environmentally Friendly Carpets) and GEV e.V.<br />
(German Association of Emission-Controlled<br />
Materials for Installation), and be properly labelled<br />
in accordance with the EMICODE EC 1/<br />
EC 1Plus rating.<br />
All materials for installation bearing the “Blaue<br />
Engel” (‘Blue Angel’) seal of approval can equally<br />
be used.<br />
14 15 Installation Recommendation Tufting
1. Which adhesives can be used<br />
Laying areas<br />
For laying areas, basically all of the backings offered<br />
by <strong>Vorwerk</strong> can be installed using dispersion<br />
adhesives envisaged for textile floor coverings that<br />
display an EMICODE EC 1/EC 1Plus rating or<br />
the “Blaue Engel” (‘Blue Angel’) seal of approval.<br />
As an alternative to installation using dispersion<br />
adhesives, the usage of dry adhesives is also possible<br />
while taking Briefing Note No. <strong>12</strong> from TKB<br />
(German Technical Commission on Construction<br />
Adhesives) into consideration.<br />
In the case of heated subflooring construction designs,<br />
only dispersion adhesives suitable for such<br />
designs are to be used.<br />
Laying stairways<br />
Different systems are offered on the market for<br />
installation on stairs. They range from dispersion<br />
contact adhesives, hot-melt adhesives and dry<br />
adhesives all the way to spray-contact adhesives<br />
systems. Due to the large number of different influencing<br />
factors involved, we are unable to assume<br />
any guarantee whatsoever when these systems are<br />
used. In the event that these systems are utilised,<br />
preliminary tests made on one’s own are therefore<br />
imperative.<br />
A dispersion contact adhesive from the firm UZIN<br />
( UZIN WK 222 ) has most recently emerged as<br />
particularly suitable. As a result, the use of<br />
adhesives containing solvents is no longer mandatory.<br />
Caution!<br />
If contact adhesives containing solvents are used<br />
despite this, consideration is to be given that<br />
these kinds of adhesives contain hazardous<br />
substances (industrial solvents).<br />
Special attention is to be paid to the times for<br />
airing here while ensuring sufficient ventilation<br />
of the rooms involved.<br />
The instructions for use and any guarantees<br />
issued by the adhesive manufacturers are to be<br />
taken into consideration.<br />
When laying stairways, the position of the pile<br />
nap must always run from top to bottom.<br />
1.1. Laying texback ® contract<br />
1.1.1. Dispersion adhesives:<br />
In the case of patterned carpets, when choosing<br />
the adhesive additional attention ought to be given<br />
to the possibility that when a patterned covering is<br />
being laid it may be necessary to adjust its position<br />
on the adhesive bed to ensure that the pattern<br />
matches properly.<br />
When working on non-absorbent or weakly absorbent<br />
subflooring surfaces, a sufficient amount of<br />
time for airing in accordance with the adhesive<br />
manufacturer’s recommendations is to be complied<br />
with.<br />
1.1.2. Dry adhesive:<br />
Here usage is recommended only in the case of<br />
plain, single-hued carpets or carpets with patterns<br />
that do not require a matching of repeat patterns,<br />
because in this case correction that may prove to<br />
be necessary is possible only to a limited extent.<br />
1.2. Laying texback ® super,<br />
ecoback, comfortback 500<br />
and jute backings<br />
1.2.1. Dispersion adhesives:<br />
When gluing these backings using dispersion adhesives,<br />
it is imperative that the manufacturer’s<br />
instructions are complied with.<br />
These include the quantity to be applied, notched<br />
trowel size (e.g. B1, B2, A2), amount of time for<br />
airing and a thorough pressing-smooth of the<br />
carpet onto the entire area after the floor covering<br />
has been laid on the adhesive bed.<br />
Among other reasons, these factors are particularly<br />
important for taking up the carpet again at a<br />
later date.<br />
1.2.2. Universal adhesive:<br />
Precise compliance with the manufacturer’s recommendations<br />
equally applies when laying texback ®<br />
super, ecoback and comfortback 500 using a universal<br />
adhesive. This applies in particular to compliance<br />
with the required amounts of time for<br />
airing, and especially in the case of non-absorbent<br />
subfloorings and the subsequent thorough<br />
pressing-smooth of the floor covering.<br />
Exceptions to this are seam-to-seam installations<br />
of carpets displaying geometric patterns. In this<br />
case gluing using dispersion adhesives is recommended<br />
because pattern corrections that may<br />
prove to be necessary are possible only to a limited<br />
extent.<br />
1.2.3. Pressure-sensitive/Contact adhesives:<br />
The pressure-sensitive and contact adhesives<br />
specially formulated for fabric backings provide<br />
yet another option for laying and are offered by<br />
various adhesives manufacturers. Application of<br />
the adhesive usually takes place using a short-pile<br />
roller. As a rule these adhesives are very easy to<br />
work with and are particularly suitable for taking<br />
up installed floor coverings again simply and<br />
unproblematically at a later date. Our backing<br />
varieties texback ® super, ecoback and comfortback<br />
500 are especially suitable for this method of<br />
laying.<br />
Exceptions to this are seam-to-seam installations<br />
of carpets displaying geometric patterns. In this<br />
case gluing using a dispersion adhesive is recommended<br />
because pattern corrections that may prove<br />
to be necessary are possible only to a limited<br />
extent.<br />
Compliance with the respective adhesive<br />
manufacturer’s instructions is imperative with<br />
this method of laying. These include the amount<br />
applied, the periods of time for airing and drying,<br />
as well as the thorough pressing-smooth of the<br />
entire surface area after laying the floor covering<br />
onto the adhesive bed.<br />
A greater amount of applied adhesive may be<br />
required depending on the subflooring’s degree of<br />
absorption. In certain situations it is necessary to<br />
prime the floor areas appropriately before applying<br />
the adhesive.<br />
16 17 Installation Recommendation Tufting
2. Elastic underlays<br />
4. Joining lengths<br />
of broadloom carpet<br />
In light of the large number of articles offered<br />
on the market, we are unable to assume any universally<br />
valid guarantee whatsoever for assured<br />
attributes as applied towards our products.<br />
In the case of installation on an underlay, we must<br />
point out that any assured attributes regarding fire<br />
behaviour always lose their validity because the<br />
respective underlay was not the subject of inspection<br />
when testing fire behaviour.<br />
Join the seams with a carpet seaming iron<br />
equipped with a heat shield using an appropriately<br />
suitable seaming tape.<br />
Creation of the joining seam always occurs in the<br />
direction of the pile nap alignment.<br />
3. Stretching method<br />
5. Taking up carpeting again<br />
when renovating<br />
As regards the <strong>Vorwerk</strong> backings texback ® super<br />
and ecoback, properly executed stretching using<br />
professional tools is possible only when laying is<br />
performed without seams inside an enclosed<br />
spatial unit because the fabric backing gives way<br />
in the region of the finished seam under the<br />
tension required for stretching. What was<br />
previously a tightly sealed seam may open as a<br />
result.<br />
No restrictions with regard to the above apply for<br />
stretching texback ® contract backing.<br />
When stretching, attention must be paid that the<br />
carpet is not overstretched.<br />
3.1. Selecting edge battens<br />
Depending on the carpet’s total thickness, please<br />
use appropriate edge battens with the required<br />
brad or pin lengths.<br />
Recommended procedure when gluing was performed<br />
using dispersion adhesives/universal<br />
adhesives:<br />
When due attention has been given to the periods<br />
of time for airing and the quantities of adhesive<br />
to be applied using the corresponding notched<br />
trowel (e.g. B1, B2, A2), the serrations in the<br />
adhesive remain intact even after the carpet has<br />
been laid. This is important for taking up the<br />
carpet again at a later date because the serrations<br />
in the adhesive serve as the predetermined<br />
breaking point.<br />
If the carpet was laid while the adhesive bed was<br />
still wet, these serrations do not remain intact.<br />
What happens instead is that a film forms which,<br />
under certain conditions, may not be able to be<br />
split apart when taking up the carpet again. The<br />
separation process may damage the filler or the<br />
subflooring, and in the worst case the carpet’s<br />
backing might split apart.<br />
In the event that the carpet’s backing has split<br />
apart, we recommend the following steps:<br />
1. Cut the carpet into strips approx. 30 cm wide.<br />
2. Dampen the entire area of the carpeting as<br />
evenly as possible (e.g. using a wate ring can)<br />
with a solution of water whose surface<br />
tension has been dissipated by adding<br />
dishwashing liquid, and allow this to soak in<br />
for at least 30 minutes. (In an extreme case,<br />
the dampened area can be left covered with<br />
sheeting overnight in order to loosen the<br />
adhesive.)<br />
3. The carpeting can be taken up considerably<br />
easier afterwards.<br />
This course of action is not suitable when<br />
gluing has been performed using contact<br />
adhesives containing solvents (neoprene)!<br />
The right to make changes is reserved.<br />
Status: July 20<strong>12</strong><br />
18 19 Installation Recommendation Tufting
Verlegeart:<br />
Verlegedatum:<br />
Verlegte Qualität:<br />
Farb-Nr., Farbe:<br />
________________________________________________________________<br />
________________________________________________________________<br />
________________________________________________________________<br />
________________________________________________________________<br />
<strong>Teppich</strong>bodenrücken:<br />
❏ texback ® super ❏ texback ® contract ❏ ecoback<br />
❏ comfortback 500 ❏ Jute-Rücken / Dossier en jute / jute backings<br />
Händlerstempel<br />
<strong>Vorwerk</strong> & Co.<br />
<strong>Teppich</strong>werke GmbH & Co. KG<br />
Kuhlmannstraße 11<br />
31785 Hameln<br />
Tel.: +49 (0) 51 51/103–0<br />
Fax: +49 (0) 51 51/1 03–3 77<br />
www.vorwerk-teppich.de<br />
www.vorwerk-carpet.com<br />
www.vorwerk-moquettes.com<br />
VKF-Nr. 900180 06/20<strong>12</strong>