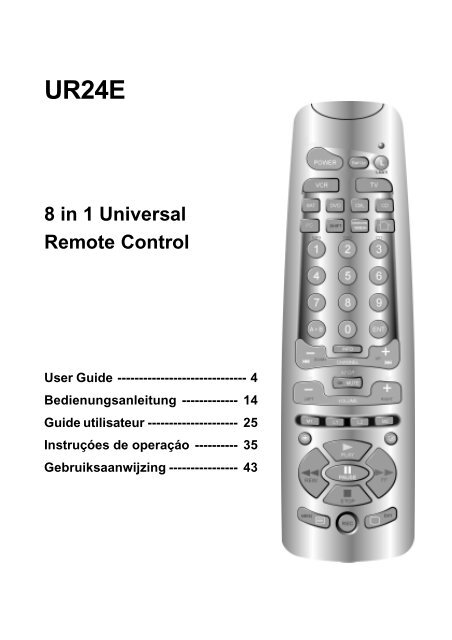
UR24E 8 in 1 Universal Remote Control - ClickHome
UR24E 8 in 1 Universal Remote Control - ClickHome
UR24E 8 in 1 Universal Remote Control - ClickHome

Create successful ePaper yourself
Turn your PDF publications into a flip-book with our unique Google optimized e-Paper software.
<strong>UR24E</strong><br />
8 <strong>in</strong> 1 <strong>Universal</strong><br />
<strong>Remote</strong> <strong>Control</strong><br />
User Guide ------------------------------ 4<br />
Bedienungsanleitung ------------- 14<br />
Guide utilisateur --------------------- 25<br />
Instruçóes de operaçáo ---------- 35<br />
Gebruiksaanwijz<strong>in</strong>g ---------------- 43
CE DECLARATION OF CONFORMITY<br />
UK<br />
We, X10 Europe, 3 Rue de Penthièvre - 75008 Paris - France, herewith declare that the<br />
follow<strong>in</strong>g designated product : 8 <strong>in</strong> 1 <strong>Universal</strong> <strong>Remote</strong> <strong>Control</strong> <strong>UR24E</strong>,is <strong>in</strong> compliance<br />
with the essential requirements and other relevant provisions of Directive 1999/5/EC.<br />
DE<br />
Hierbij verklaart X10 Europe, 3 Rue de Penthièvre - 75008 Paris - France - dat het toestel :<br />
8 <strong>in</strong> 1 <strong>Universal</strong>-Fernbedienung <strong>UR24E</strong> <strong>in</strong> overeenstemm<strong>in</strong>g is met de essentiële eisen en<br />
de andere relevante bepal<strong>in</strong>gen van richtlijn 1999/5/EG.<br />
FR<br />
Nous, X 10 Europe, 3 Rue de Penthièvre - 75008 Paris - France, déclarons que le produit<br />
suivant :Télécommande Universelle 8 en 1 <strong>UR24E</strong> est en conformité avec les exigences<br />
essentielles et aux autres dispositions pert<strong>in</strong>entes de la directive 1999/5/CE.<br />
S<br />
Por medio de la presente X10 Europe, 3 Rue de Penthièvre - 75008 Paris - France, declara<br />
que el 8 <strong>in</strong> 1 Mando a Distancia <strong>Universal</strong> <strong>UR24E</strong> cumple con los requisitos esenciales y<br />
cualesquiera otras disposiciones aplicables o exigibles de la Directiva 1999/5/CE.<br />
NL<br />
Hierbij verklaart X 10 Europe, 3 Rue de Penthièvre - 75008 Paris - France dat het toestel 8<strong>in</strong>1<br />
Afstandsbedien<strong>in</strong>g <strong>UR24E</strong> <strong>in</strong> overeenstemm<strong>in</strong>g is met de essentiële eisen en de andere<br />
relevante bepal<strong>in</strong>gen van richtlijn 1999/5/EG<br />
0889
2<br />
4<br />
6<br />
8<br />
10<br />
12<br />
14<br />
16<br />
18<br />
20<br />
22<br />
24<br />
1<br />
3<br />
5<br />
7<br />
9<br />
11<br />
13<br />
15<br />
17<br />
19<br />
21<br />
23
8 <strong>in</strong> 1 <strong>Remote</strong> <strong>Control</strong><br />
General Security Note :<br />
Technical manipulation of the product or any changes to the product are forbidden, because<br />
of security and approval issues.<br />
Take care of proper start<strong>in</strong>g up the device - consult your user guide. Children should use the<br />
device only under adult supervision.<br />
Avoid the follow<strong>in</strong>g :<br />
· strong mechanical tear and wear<br />
· high temperature<br />
· strong vibrations<br />
· high humidity<br />
Please also respect the additional security notes <strong>in</strong> the various user guide chapters. For<br />
questions not covered <strong>in</strong> the user guide please contact your seller. To <strong>in</strong>sure a proper set up<br />
please read the manual and security notes carefully.<br />
Battery change :<br />
The device may only be used with 4 AAA batteries - never try to connect to another power<br />
supply. When <strong>in</strong>sert<strong>in</strong>g batteries be sure the polarity is respected. Remove the batteries<br />
when the device is not used for a long period. Make sure that the batteries are not short<br />
circuited and are not disposed <strong>in</strong> fire (danger of explosion)<br />
Batteries do not belong <strong>in</strong> children hands. Don't let batteries lay around openly - they might<br />
be swallowed by children or animals. If this happens see a doctor immediately.<br />
Leak<strong>in</strong>g or damaged batteries can upon contact with sk<strong>in</strong> cause burn<strong>in</strong>g or acid damage -<br />
use suitable gloves if necessary.<br />
Disposal of batteries :<br />
Batteries are special waste and do not belong <strong>in</strong> general household waste disposal.<br />
The end-user is by law required to dispose of used batteries by return<strong>in</strong>g them - disposal with<br />
or through household waste is forbidden. Your used batteries can be returned <strong>in</strong> any of our<br />
shops or <strong>in</strong> our headquarters, as well to all local authorised collection po<strong>in</strong>ts.<br />
Keep the environment safe.<br />
4
Quick start guide<br />
1) Put the batteries <strong>in</strong><br />
1.Open the cover on the back of the 8 <strong>in</strong> 1 remote control<br />
2. Insert 4 batteries (LR03 alkal<strong>in</strong>e). Make sure the batteries are the same brand and are<br />
NEW<br />
2) Program your 8 <strong>in</strong> 1 remote control<br />
1. Turn on the equipment that you wish to control (TV, VCR, DVD, SAT, CD etc ...)<br />
2. Take the code book supplied with the remote control and f<strong>in</strong>d the brand of the equipment<br />
you wish to control. E.g. if you have a Thomson TV look for Thomson under the TV<br />
section.<br />
3. Press on the key marked " SETUP " (4) press<strong>in</strong>g the key until the red LED stays<br />
permanently bright. This takes about 3 seconds.<br />
4. Press on the TV, VCR, DVD, SAT... mode key (5), <strong>in</strong> accordance with the appliance you<br />
wish to control.<br />
5. From the code book take the first number correspond<strong>in</strong>g to your equipment and enter the<br />
number by press<strong>in</strong>g the 0-9 key pad (10). Each time you press a key the red LED (1) will<br />
flash.<br />
6. If the number is correctly entered the red LED will switch off. If the number is <strong>in</strong>correct<br />
then the red LED will flash fast. If <strong>in</strong>correct you will need to beg<strong>in</strong> at 1.<br />
7. Alternative to 5: If your brand is listed hereafter:<br />
BRAND CODE BRAND CODE<br />
Philips/Radiola 1 Telefunken/Saba/Normende 4<br />
Sony/Panasonic/JVC/ 2 Grundig/Blaupunkt 5<br />
Sharp/Akai/Toshiba/Daewoo<br />
Thomson/Brandt 3 Nokia/ ITT 6<br />
Enter the code correspond<strong>in</strong>g to your brand, po<strong>in</strong>t the remote control <strong>in</strong> the direction of your<br />
equipment, press once only CHANNEL+(14) cont<strong>in</strong>ue to po<strong>in</strong>t the remote control at your<br />
equipment until the equipment changes channel. (The remote control sends an IR signal<br />
every second. So please wait until your equipment reacts). When your equipment does<br />
react, press on the key ENT (11) to confirm. If accidentally you miss the code, you can stop<br />
the autosearch by press<strong>in</strong>g CHANNEL - (14) and by repeatedly press<strong>in</strong>g this key return to the<br />
right code. Press ENT (11) to confirm.<br />
8. Press on the key POWER (2). If your equipment switches off you have found the right<br />
code. If it does not switch off, you will need to re-start from 3.<br />
Sometimes there are several codes which have similar features. If you f<strong>in</strong>d that your 8 <strong>in</strong><br />
1 does not work for some functions, you may need to search for another code.<br />
5
<strong>Universal</strong> <strong>Remote</strong> 8 <strong>in</strong> 1 - UR24<br />
Contents<br />
1) Introduction<br />
2) Put <strong>in</strong> the batteries<br />
3) General po<strong>in</strong>t<br />
4) Functions of the key<br />
5) Programm<strong>in</strong>g for the TV, VCR, Satellite, CD, DVD and CBL<br />
6) Manual code search " AUTOSEARCH "<br />
7) Automatic code search<br />
8) Identify<strong>in</strong>g codes found<br />
9) Learn<strong>in</strong>g commands<br />
10) Clear<strong>in</strong>g learned commands<br />
11) Macro function<br />
12) <strong>Control</strong>l<strong>in</strong>g your house with X10 home automation modules<br />
13) Chang<strong>in</strong>g the X10 House Code<br />
14) Troubleshoot<strong>in</strong>g<br />
1) Introduction<br />
The 8 <strong>in</strong> 1 remote control is designed to control up to 8 devices (TV, VCR, DVD, Satellite, CD,<br />
CBL and PC, plus X10 modules). The remote control conta<strong>in</strong>s a library of codes which are<br />
pre-programmed <strong>in</strong>to the remote control. This library covers nearly all the audio video products<br />
on the market today.<br />
To make it easy for you to f<strong>in</strong>d the right code for your audio video equipment, we advise to use<br />
the AUTOSEARCH feature.<br />
2) Put <strong>in</strong> the batteries (always use NEW alkal<strong>in</strong>e batteries LR03)<br />
1.Open the cover on the back of the remote.<br />
2.Insert 4 AAA batteries - LR03 alkal<strong>in</strong>e, verify that they are placed correctly with the + on the<br />
battery <strong>in</strong> the same position as marked <strong>in</strong>side the battery compartment.<br />
3) General Po<strong>in</strong>t<br />
The RF transmission: It is simultaneous to the IR signal. It allows you to control your TV,<br />
VCR ... through walls and floors, thanks to the Power Mid (optional).<br />
The double function : it allows you to control the volume and the " mute " button of your TV<br />
even when you are <strong>in</strong> VCR, DVD, SAT or CD or SAT mode.<br />
4) Functions of the keys<br />
[1] LED <strong>in</strong>dicator : The <strong>in</strong>dicator light flashes when the remote is operat<strong>in</strong>g or lights<br />
cont<strong>in</strong>uously while you are programm<strong>in</strong>g the remote.<br />
[2] POWER / ALL LIGHTS ON:<br />
For A/V applications : Allows you to switch off the last selected appliance.<br />
In Home Automation Mode : allows you to switch ON all the lights connected to an X10<br />
module.<br />
6
[3] LEARN: Lets you learn IR commands from an exist<strong>in</strong>g remote, that might not be <strong>in</strong> the 8<br />
<strong>in</strong> 1 library<br />
[4] SETUP: This allows you to program your remote before the first use.<br />
[5] TV, VCR, SAT, DVD, CBL and CD : These keys allow you to select the appliance you<br />
wish to control.<br />
[6] PC: In comb<strong>in</strong>ation with the optional USB-RF receiver, this key will allow you to control<br />
MP3, DVD and CD function on your PC. Ask your dealer for more <strong>in</strong>formation.<br />
[7] X10 mode: To control the lights/appliances connected to an X10 module<br />
[8] SHIFT: Lets you have access to secundary function like: menu, exit, ok, left, right, up,<br />
down,etc.In the Shift mode, the LED is ON cont<strong>in</strong>uously. To end the SHIFT mode press the<br />
SHIFT key once more.<br />
[9] Showview:<br />
In VCR mode: Programm<strong>in</strong>g of a ShowView or VIDEOPLUS+ record<strong>in</strong>g (see equipment<br />
manuals).<br />
In TV, CAB, SAT and CD mode: allows to sequentially scan up available program channels<br />
[10] Numeric keys 0 - 9 : To enter device code<br />
For A/V applications: Work the same way as your orig<strong>in</strong>al remote<br />
In Home Automation Mode: to select one X10 module, to change the X10 House code<br />
[11] ENT: If you are <strong>in</strong> programm<strong>in</strong>g mode - automatic code search - you can confirm the<br />
code of the device you want to control. In connection with the numeric keys (11) this button<br />
allows you, with some equipment, to select directly channels higher than 9.<br />
[12] A.B: Selection of the SCART plug to view DVD, SAT, VCR, … on your TV screen.<br />
[13] INFO : Displays <strong>in</strong>formation of the selected appliance, work the same way as your<br />
orig<strong>in</strong>al remote<br />
[14] Channel + / - :<br />
For A/V applications : Selects the next or the previous channel of the last selected mode,<br />
<strong>in</strong> Shift mode: lets you navigate up and down <strong>in</strong> the menu of the selected equipment.<br />
In Home Automation Mode : allows you to turn ON / OFF any light / appliance connected<br />
to an X10 module.<br />
[15] Mute / OK / ALL OFF:<br />
For A/V applications : Allows you to turn ON/OFF the sound of the last selected appliance,<br />
<strong>in</strong> Shift mode: confirm the menu selection of the selected equipment.<br />
In Home Automation Mode : allows you to switch OFF all the lights and appliances<br />
connected to an X10 module.<br />
[16] Volume + / -:<br />
For A/V applications : <strong>Control</strong>s the volume <strong>in</strong> VCR, TV , DVD, SAT, CD mode, <strong>in</strong> Shift<br />
mode:lets you navigate Left and Right <strong>in</strong> the menu of the selected appliance.<br />
In Home Automation Mode : allows you to DIM / BRIGHT a light connected to an X10<br />
module.<br />
[17] M1 M2: Macro key. Lets you execute pre-programmed sequence of IR commands.<br />
7
[18] L1 L2: Spare learn Keys. These keys are not pre-programmed and lets you learn additional<br />
key from an orig<strong>in</strong>al remote control<br />
[19] Teletext Mix : Allows to mix the Teletext and the picture of the selected channel<br />
[20] Teletext Hold : Stops page change <strong>in</strong> teletext mode<br />
[21] VCR button Play , FF , Stop, Rew , Pause :<br />
In VCR CD & DVD mode: These buttons work directly for the majority of the available brands<br />
and work the same way as <strong>in</strong> your orig<strong>in</strong>al remotes<br />
In TV mode: Fast text function.<br />
[22] Teletext ON, <strong>in</strong> Shift mode: turn on the menu of the selected appliance<br />
[23] Teletext OFF, <strong>in</strong> Shift mode: turn off the menu of the selected appliance<br />
[24] REC (record ): This key works the same way as the one on your orig<strong>in</strong>al remote for your<br />
VCR. In order to avoid a mistake you have to press this key twice to activate this feature.<br />
Default Volume <strong>Control</strong><br />
Because some satellite decoder does not have volume control, the 8 <strong>in</strong> 1 remote can control<br />
the television’s volume <strong>in</strong> SAT mode. (No need to select TV mode). To choose the equipment<br />
that the Mute and Volume keys will control <strong>in</strong> SAT mode, just proceed as follow :<br />
1. Press and release the TV Mode button (5) - remote must be <strong>in</strong> TV mode for this procedure.<br />
2. Press and hold SETUP (4) button until LED rema<strong>in</strong>s on.<br />
3. Release SETUP button.<br />
4. Press and hold the Mute (15) key for approximately 8 seconds : dur<strong>in</strong>g this period, the<br />
LED will stay off or 8 seconds, then bl<strong>in</strong>k once more to <strong>in</strong>dicate volume default acceptance.<br />
The LED will rema<strong>in</strong> off. Release the Mute key.<br />
5. <strong>Remote</strong> volume default is now set. If the 8 <strong>in</strong> 1 remote control was previously controll<strong>in</strong>g<br />
the television volume <strong>in</strong> SAT mode, it will now control the volume of the satellite decoder.<br />
If it was previously controll<strong>in</strong>g the volume of the satellite decoder, it will now control the<br />
volume of the television.<br />
5) Programm<strong>in</strong>g your TV, VCR , DVD, SAT, CD and CBL<br />
Note : you can dedicate any appliance (TV, DVD,SAT...) to the VCR, DVD, SAT, CD, CBL<br />
and PC keys: you need first to enter the 3 digit code of the appliance you wish to control<br />
(found <strong>in</strong> the code book). In any case, follow the method below:<br />
1. Press and hold the SETUP (4) key until the LED <strong>in</strong>dicator lights cont<strong>in</strong>uously. Release<br />
the SETUP key.<br />
2. Press and release the mode key (5) of the device you want to control (for example TV).<br />
3. Make sure your equipment is switched on (for example TV)<br />
4. Enter the 3 digit code (10) from the library table. The LED (1) turns off after the last digit is<br />
entered. If you entered a wrong code the LED bl<strong>in</strong>ks for 3 seconds and then goes off. You<br />
have to repeat from step 2.<br />
5. Po<strong>in</strong>t the remote <strong>in</strong> the direction of your TV and press the POWER button (2). Your device<br />
should turn off. Check other functions (for example for a VCR: FF or REW etc.). If certa<strong>in</strong><br />
functions are not respond<strong>in</strong>g this <strong>in</strong>dicates that the entered code is not the correct one. In<br />
8
that case repeat the above procedure with the next correspond<strong>in</strong>g code of your brand.<br />
6. Repeat this procedure for the other equipment you want to control (TV, VCR, DVD, SAT,<br />
CD, and CBL)<br />
6) Manual code search<br />
If your equipment (TV, SAT etc...) does not respond, try the other codes for your brand. If it<br />
still does not respond, try the Code Search method.<br />
If you wish to dedicate another appliance to the VCR, DVD, SAT, CBL or CD keys you need<br />
first to enter the 3 digit code of an appliance similar to the appliance you want to control. i.e.:<br />
to search for a SAT code first enter the code (found <strong>in</strong> the code book) of any SAT as described<br />
<strong>in</strong> § 5. Then follow the steps below :<br />
1. Make sure your equipment is switched on. If not switch it on manually<br />
2. Press and hold SETUP (4) until the LED <strong>in</strong>dicator lights steadily. Release SETUP<br />
3. Press the mode key (5) that matches the equipment you want to control (for example TV).<br />
4. Press Channel +(14) repeatedly until the channel changes. If you step past the correct<br />
code, use Channel - (14) to go back to the right code<br />
5. When the equipment you want to control reacts press ENT (11) to confirm the code.<br />
That's all !<br />
Note : If your equipment doesn't have Channel + you can use PLAY (VCR or DVD) (21) or<br />
POWER (2) key<br />
The search starts after the last registered code. If that was 030, the search starts at 031 until<br />
the last possible code and then goes from 000 to 029.<br />
Note : if certa<strong>in</strong> functions of your equipment can't be controlled you have to f<strong>in</strong>d a different<br />
code for your brand<br />
7) Automatic code search<br />
When search<strong>in</strong>g an unknown code, you can step through the library automatically<br />
(AutoSearch). When your equipment responds, you can stop the search<strong>in</strong>g process and<br />
store the code you have found.<br />
If you wish to dedicate another appliance to the VCR, DVD, SAT, CBL or CD keys you need<br />
first to enter the 3 digit code of an appliance similar to the appliance you want to control. i.e.:<br />
to search for a SAT code first enter the code (found <strong>in</strong> the code book) of any SAT as described<br />
<strong>in</strong> § 5. Then follow the steps below :<br />
1. Turn on the device you want to control.<br />
2. Press and hold SETUP (4) until the LED <strong>in</strong>dicator (1) lights steadily. Release SETUP<br />
button.<br />
3. Press the mode button (5) that matches the equipment you wish to control. The LED (1)<br />
bl<strong>in</strong>ks once.<br />
4. Press CHANNEL+ (14) once. After a few seconds the remote starts stepp<strong>in</strong>g through the<br />
code library (fast search, 1 code per second). You can press CHANNEL+ (14) to switch<br />
to slow search (1 code per 3 seconds). You can step back by press<strong>in</strong>g CHANNEL- (14)<br />
9
(you can step forward by press<strong>in</strong>g CHANNEL+(14) <strong>in</strong> case you went too far back). As<br />
soon as the device responds aga<strong>in</strong>, press the ENT key (11) to store the code you found.<br />
8) Identify<strong>in</strong>g codes found us<strong>in</strong>g the search procedure<br />
1. Press and hold SETUP (4) until the LED <strong>in</strong>dicator (1) lights steadily. Release SETUP<br />
2. Press the mode key (5) for the equipment you want to identify (TV, VCR, DVD, SAT, CD,<br />
CBL). The LED bl<strong>in</strong>ks once.<br />
3. Press aga<strong>in</strong> SETUP. The LED bl<strong>in</strong>ks once.<br />
4. To identify the first digit press each number button from 0 - 9 (10) until the LED bl<strong>in</strong>ks. The<br />
number you pressed is the first digit of the code.<br />
5. Press each number key from 0 - 9 as above to f<strong>in</strong>d the second digit.<br />
6. Press each number key from 0 - 9 as above to f<strong>in</strong>d the third digit. When the third digit has<br />
been found the LED will go off. Don't forget to write down the code on the label of the<br />
battery compartment.<br />
9) Learn<strong>in</strong>g commands<br />
Your 8 <strong>in</strong> 1 remote has the codes for most TVs, VCRs etc. <strong>in</strong> its code library. However, if the<br />
code for your particular device is not found <strong>in</strong> the library, you can learn these codes from your<br />
exist<strong>in</strong>g remote. Or if you f<strong>in</strong>d a code from the tables <strong>in</strong> this manual that "almost" matches<br />
your device, but a few buttons are miss<strong>in</strong>g, you can learn just those buttons.<br />
1. Po<strong>in</strong>t your exist<strong>in</strong>g remote at the 8 <strong>in</strong>1 remote control (front to front) with a distance of<br />
about 2,5 centimeters between the remotes.<br />
2. Press and hold SETUP (4) until the LED <strong>in</strong>dicator lights steadily.<br />
3. Press the MODE button (TV, CD, SAT, etc.) that matches the equipment you wish to<br />
learn. The LED (1) bl<strong>in</strong>ks once.<br />
4. Press and release the LEARN button (3) . The LED (1) bl<strong>in</strong>ks once.<br />
5. Press and release the button on the 8<strong>in</strong>1 remote control which will learn the function. The<br />
LED bl<strong>in</strong>ks once.<br />
6. Press the function key on your exist<strong>in</strong>g remote that you want to transmit. Hold the button<br />
until the LED on the 8 <strong>in</strong> 1 remote control bl<strong>in</strong>ks off shortly.<br />
7. Repeat steps 5 and 6 for each function you want to learn.<br />
8. When you've f<strong>in</strong>ished learn<strong>in</strong>g all the keys, press SETUP (4).<br />
10) Clear<strong>in</strong>g learned commands to free up memory<br />
To Clear all stored Learned Commands under a Mode :<br />
You can clear learned commands for each device <strong>in</strong>dividually (TV, VCR. Etc.):<br />
1. Press and hold SETUP (4) until the LED <strong>in</strong>dicator light steadily. Release the SETUP<br />
button.<br />
2. Press the desired mode button (TV, VCR, etc.) (5). The LED flashes once.<br />
3. Press and release the LEARN (3) key twice.<br />
4. Press the SETUP (4) key. The LED (1) will turn off after a few seconds.<br />
5. All learned commands entries under that mode are now cleared.<br />
10
Master Clear - To Clear all stored Learned Commands (recommended on first time<br />
Learn<strong>in</strong>g) :<br />
1. Press and hold SETUP (4) until the Visible LED (1) rema<strong>in</strong>s on (approximately 2-3 seconds)<br />
2. Release SETUP button.<br />
3. Press and release the Learn key (3) twice. LED (1) will bl<strong>in</strong>k off to <strong>in</strong>dicate the keypress<br />
acceptance.<br />
4. Press and release the SETUP (4) key. Visible LED will turn off after a few seconds.<br />
5. All Learned Command entries are now cleared.<br />
Notes for learn<strong>in</strong>g your remote:<br />
- Make sure you have fresh batteries <strong>in</strong> both remotes before learn<strong>in</strong>g.<br />
- Take care not to move either remote while press<strong>in</strong>g the buttons.<br />
- No functions may be stored under the Learn, Setup, TV, VCR, CBL, SAT, CD, CBL, PC or<br />
any of the X10 control keys.<br />
- Experiment by learn<strong>in</strong>g 2 or 3 keys <strong>in</strong>itially (to ensure compatibility) and then clear the<br />
stored learned commands before completely learn<strong>in</strong>g your orig<strong>in</strong>al remote's keyboard.<br />
- Experiment with the distance between the remotes if you have a problem learn<strong>in</strong>g.<br />
- Some remotes do not have their IR sender LED <strong>in</strong> the centre so you might need to<br />
experiment with the side-to-side position of the remotes relative to each other.<br />
- Do not proceed <strong>in</strong> direct sunlight, under a fluorescent or <strong>in</strong>candescent lamp while teach<strong>in</strong>g<br />
the 8 <strong>in</strong> 1 remote.<br />
- If you have problems learn<strong>in</strong>g keys, try clear<strong>in</strong>g the memory and try learn<strong>in</strong>g them aga<strong>in</strong>.<br />
- Use button L to learn code for which the 8 <strong>in</strong> 1 does not have a correspond<strong>in</strong>g button.<br />
11) Macro function<br />
Your 8 <strong>in</strong> 1 remote control has 2 Macro keys M1 and M2. You can program these 2 keys to<br />
execute a series of commands with one press of these buttons. This feature is ideal for<br />
switch<strong>in</strong>g on all your audio and video equipment or choose a preferred sett<strong>in</strong>g of your Home<br />
Theatre System.<br />
Programm<strong>in</strong>g the macro key M1 and M2<br />
1. Press and hold Setup (4) until the LED <strong>in</strong>dicator lights steadily. Release the Setup key<br />
2. Press the Macro key you want to program (17)<br />
3. Press the keys on your 8<strong>in</strong>1 remote control which you want to store under the Macro key<br />
(the maximum is 14 commands). The first key stored <strong>in</strong> a Macro must be a Mode key.<br />
The order of programm<strong>in</strong>g is also the order of execution of the Macro. The <strong>in</strong>dicator light<br />
(1) bl<strong>in</strong>k at each keypress. Use the mode keys (5) for any mode changes.<br />
4. To store the macro, press the Macro key once more. If you reach the maximum of 14<br />
commands the Macro will be automatically stored on the 14th keypress and the Visible<br />
11
LED (1) will turn off.<br />
Note for programm<strong>in</strong>g Macro's:<br />
It may be necessary to have "delays" <strong>in</strong>cluded <strong>in</strong> the Macro sequence (e.g. to allow your TV<br />
warm-up time). Delays can be achieved by us<strong>in</strong>g the Pause key followed by the number of<br />
seconds delay required e.g. to enter a delay of 4 seconds, press and release Pause followed<br />
by 4. Maximum delay is 9 seconds. It is not possible to have a "0" digit entered after Pause<br />
i.e. there is no zero delay.<br />
There is an automatic delay of 1 second between each IR transmission <strong>in</strong> the sequence<br />
To Delete a Macro :<br />
1. Press and hold the Setup (4) button until the Visible LED rema<strong>in</strong>s on. Release Setup.<br />
2. Press and release the Macro key (M1 or M2) you want to delete. The LED will bl<strong>in</strong>k off to<br />
<strong>in</strong>dicate the keypress acceptance.<br />
3. Press and release the Setup key. The LED will turn off and the Macro is deleted.<br />
12) <strong>Control</strong>l<strong>in</strong>g your house with home automation modules from X10<br />
The 8<strong>in</strong>1 remote control allows you to command all electric appliances you have <strong>in</strong> your<br />
house. In addition to transmitt<strong>in</strong>g <strong>in</strong>frared signals, which control your TV, VCR, SAT, CD,<br />
DVD and CBL, your remote is equiped with a radio transmitter send<strong>in</strong>g X10 signals, which<br />
will enable you to control from a distance lamps and electric appliances.<br />
Here are some examples that you can do with your 8 <strong>in</strong> 1 remote us<strong>in</strong>g X10:<br />
- Switch on/off , dim lights while you watch TV.<br />
- Switch on the lights at night to frighten <strong>in</strong>truders when you detect someth<strong>in</strong>g suspicious<br />
- Switch on your electric blanket before the film ends to have it warm when you go to sleep<br />
For controll<strong>in</strong>g your lamps or appliances, you will need additional X10 home modules. The<br />
modules are simply plugged <strong>in</strong>to a/c outlet with no additional wir<strong>in</strong>g required. Contact your<br />
retailer for additional <strong>in</strong>formation.<br />
- To switch on/ off an appliance plugged <strong>in</strong>to an X10 module : Press the X10 key (7), then<br />
press the unit code of the X10 module on the key pad (10) and then press CHAN+ / - (14)<br />
- To dim/bright a light plugged <strong>in</strong>to an X10 module : press its unit code on the key pad (16)<br />
and then press VOL+ / - (16)<br />
- To turn ON all the X10 Lamp modules: Press the Power key (2)<br />
- To turn Off all the X10 modules (Lamp and appliance): press the Mute key (15)<br />
13) Chang<strong>in</strong>g the X10 House Code<br />
The preset house code is A and <strong>in</strong> the majority of cases it is not necessary to change this<br />
sett<strong>in</strong>g except if there is <strong>in</strong>terference from neighbour<strong>in</strong>g X10 systems. In that case :<br />
1- Press X10 key (7)<br />
2- Press and hold SETUP (4) until the LED lights cont<strong>in</strong>uously<br />
12
3- Release the SETUP (4) button<br />
4- Use the digit keys to enter the number equivalent to the chosen home code (1=A, 2=B, ...<br />
16=P).<br />
5- Press the ENT (11) to confirm your command. The LED will turn off<br />
Note : The code you have chosen has to be the same as the one selected on the Transceiver<br />
module TM13 or the security console, which you control with your remote.<br />
14) Problems and troubleshoot<strong>in</strong>g<br />
The remote doesn’t work or looses codes entered :<br />
· Confirm with your orig<strong>in</strong>al remote that the equipment works correctly<br />
· Make sure that you have pressed the correspond<strong>in</strong>g mode key of the equipment or device<br />
that you want to control.<br />
· If the listed code does not work, try the AUTOSEARCH method or enter the next code of<br />
that brand.<br />
· To f<strong>in</strong>d the correspond<strong>in</strong>g code for your equipment use the automatic search.<br />
· Check that the batteries respect the polarity of the battery compartment.<br />
· The programm<strong>in</strong>g of the remote requires 4 AAA batteries (new). If the remote looses codes<br />
with<strong>in</strong> a few days/weeks the problem can be solved by us<strong>in</strong>g 4 new batteries of the same<br />
brand.<br />
· If the LED is lit permanently, it will generally be necessary to replace the batteries.<br />
13
8 <strong>in</strong>1 <strong>Universal</strong>-Fernbedienung - <strong>UR24E</strong><br />
Allgeme<strong>in</strong>e Sicherheitsh<strong>in</strong>weise<br />
Wegen Sicherheits- und Zulassungsbestimmungen ist jegliche technische Manipulation oder<br />
Veränderung des Geräts verboten.<br />
Achten Sie bitte auf korrekte E<strong>in</strong>stellung des Geräts - lesen Sie die Gebrauchsanleitung.<br />
K<strong>in</strong>der dürfen das Gerät nur unter elterlicher Aufsicht benutzen.<br />
Unbed<strong>in</strong>gt vermeiden:<br />
- starke mechanische Abnutzung<br />
- hohe Temperaturen<br />
- starke Vibrationen<br />
- hohe Luftfeuchtigkeit<br />
Beachten Sie bitte auch die zusätzlichen Sicherheitsh<strong>in</strong>weise <strong>in</strong> den verschiedenen Kapiteln<br />
der Gebrauchsanleitung. Bei von der Gebrauchsanleitung nicht beantworteten Fragen wenden<br />
Sie sich bitte an Ihren Verkäufer<br />
Um die richtige E<strong>in</strong>stellung des Geräts sicherzustellen, lesen Sie die Gebrauchsanleitung<br />
und die Sicherheitsh<strong>in</strong>weise bitte sorgfältig.<br />
Batteriewechsel:<br />
Das Gerät darf nur mit 4 AAA-Alkalibatterien benutzt werden - versuchen Sie niemals, es an<br />
e<strong>in</strong>e andere Stromversorgung anzuschließen ! Wenn Sie die Batterien e<strong>in</strong>legen, achten Sie<br />
bitte auf die richtige Polarität. Nehmen Sie die Batterien heraus, wenn das Gerät längere Zeit<br />
nicht benutzt wird. Vergewissern Sie sich, dass die Batterien nicht kurzgeschlossen s<strong>in</strong>d<br />
und nicht <strong>in</strong>s Feuer geworfen werden (Explosionsgefahr).<br />
Batterien gehören nicht <strong>in</strong> K<strong>in</strong>derhände. Lassen Sie Batterien nicht offen herumliegen - sie<br />
könnten von K<strong>in</strong>dern oder Tieren verschluckt werden. In diesem Fall sofort e<strong>in</strong>en Arzt<br />
h<strong>in</strong>zuziehen.<br />
Leckende oder beschädigte Batterien können bei Hautkontakt Brand- oder Säureverletzungen<br />
hervorrufen - wenn erforderlich, geeignete Handschuhe benutzen.<br />
Beseitigen Sie Batterien bitte gemäß den örtlichen Vorschriften.<br />
14
Anleitung zum Schnellstart<br />
1) E<strong>in</strong>legen der Batterien<br />
1. Öffnen Sie die Abdeckung auf der Rückseite der <strong>UR24E</strong>.<br />
2. Legen Sie 4 Batterien (LR03 Alkali) e<strong>in</strong>. Vergewissern Sie sich, dass die Batterien die<br />
gleiche Marke haben und dass sie NEU s<strong>in</strong>d.<br />
2) Programmieren der <strong>UR24E</strong><br />
1. Schalten Sie das Gerät, das Sie bedienen möchten e<strong>in</strong> (TV, Videorecorder usw.)<br />
2. Nehmen Sie das mitgelieferte Code Buch zur Hand und suchen Sie die entsprechende<br />
Marke des zu bedienenden Gerätes. Wenn Sie z. B. e<strong>in</strong>en Thomson Fernseher haben,<br />
sehen Sie unter Thomson im TV Abschnitt nach.<br />
3. Drücken Sie die " Setup " (4) Taste bis die rote LED Anzeige ununterbrochen aufleuchtet.<br />
Das dauert ungefähr 3 Sekunden.<br />
4. Drücken Sie TV, VCR, SAT, DVD, CBL oder CD (5) je nachdem welches Gerät Sie<br />
bedienen möchten.<br />
5. Entnehmen Sie dem Code Buch die erste Nummer entsprechend der Marke Ihres Gerätes<br />
und geben Sie die Nummer auf dem Tastenfeld (0 - 9) e<strong>in</strong> (10). Bei jedem Drücken e<strong>in</strong>er<br />
Taste leuchtet die rote LED (1) Anzeige auf.<br />
6. Wenn die Nummer richtig e<strong>in</strong>gegeben ist, schaltet die LED Anzeige aus. Wenn die Nummer<br />
falsch e<strong>in</strong>gegeben wurde, leuchtet die LED Anzeige schnell. Wenn Sie die Nummer falsch<br />
e<strong>in</strong>gegeben haben, müssen Sie wieder bei 1. anfangen.<br />
7. Alternative zu 5: Wenn Ihre Marke im Folgenden angegeben ist:<br />
MARKE CODE MARKE CODE<br />
Philips/Radiola 1 Telefunken/Saba/Normende 4<br />
Sony/Panasonic/JVC/ Sharp 2 Grundig/Blaupunkt 5<br />
Akai/Toshiba/Daewoo<br />
Thomson/Brandt 3 Nokia/ ITT 6<br />
Geben Sie den der Marke entsprechenden Code e<strong>in</strong>, zeigen Sie mit der <strong>UR24E</strong> Fernbedienung<br />
<strong>in</strong> Richtung des Gerätes, drücken Sie nur e<strong>in</strong>mal CHANNEL+ (14), zeigen Sie weiterh<strong>in</strong> mit<br />
der <strong>UR24E</strong> Fernbedienung auf Ihr Gerät bis das Gerät den Kanal wechselt. (Die Fernbedienung<br />
sendet jede Sekunde e<strong>in</strong> IR Signal. Also warten Sie bitte bis Ihr Gerät reagiert.) Sobald Ihr<br />
Gerät reagiert drücken Sie bitte ENT (11) zur Bestätigung. Falls Sie aus Versehen den Code<br />
verpassen, drücken Sie CHANNEL - (14) und durch wiederholtes Drücken dieser Taste können<br />
Sie zum richtigen Code zurückgehen. Drücken Sie ENT (11) zur Bestätigung.<br />
8. Drücken Sie POWER (2). Wenn Ihr Gerät sich abschaltet haben Sie den richtigen Code<br />
gefunden. Falls es nicht abschaltet, müssen wieder mit 3. beg<strong>in</strong>nen.<br />
Manchmal gibt es e<strong>in</strong>ige Codes, die ähnliche Funktionen haben. Wenn Sie feststellen,<br />
dass Ihre <strong>UR24E</strong> Fernbedienung e<strong>in</strong>ige Funktionen nicht ausführt, müssen Sie nach<br />
e<strong>in</strong>em anderen Code suchen.<br />
15
8<strong>in</strong>1 <strong>Universal</strong> Fernbedienung <strong>UR24E</strong><br />
Inhalt<br />
1. E<strong>in</strong>leitung<br />
2. E<strong>in</strong>legen der Batterien<br />
3. Allgeme<strong>in</strong><br />
4. Funktionstasten<br />
5. Programmierung der TV, VCR, SAT, DVD, CBL und CD<br />
6. Manuelle Code Suche " AUTOSEARCH "<br />
7. Automatische Code Suche<br />
8. Identifizierung der gefundenen Codes<br />
9. E<strong>in</strong>geben von Befehlen<br />
10. Löschen von e<strong>in</strong>gegebenen Befehlen<br />
11. Macro Funktionen<br />
12. Kontrollieren Sie Ihr Haus mit X10 Home Automation Modulen<br />
13. Ändern des X10 Haus Codes<br />
14. Problemlösung<br />
1) E<strong>in</strong>leitung<br />
Die <strong>UR24E</strong> Fernbedienung wurde entwickelt um bis zu 8 Geräte (TV, VCR, SAT, DVD, CBL,<br />
CD, PC, sowie X10 Module) zu bedienen. Man kann damit auch elektrische Geräte, z.B.<br />
Lampen und Anwendungen, <strong>in</strong> Verb<strong>in</strong>dung mit X10 Modulen bedienen. Die <strong>UR24E</strong><br />
Fernbedienung enthält e<strong>in</strong>e Liste mit vorab e<strong>in</strong>programmierten Codes. Diese Liste deckt fast<br />
alle Audio-Video Geräte ab, die heutzutage auf dem Markt s<strong>in</strong>d.<br />
Um es für Sie e<strong>in</strong>fach zu machen, den richtigen Code für Ihre Audio-Video Ausrüstung zu<br />
f<strong>in</strong>den, empfehlen wir Ihnen, die AUTOSEARCH Funktion zu nutzen.<br />
2) E<strong>in</strong>legen der Batterien (benutzen Sie immer NEUE Alkali Batterien LR03)<br />
1. Öffnen Sie die Abdeckung auf der Rückseite der <strong>UR24E</strong> Fernbedienung.<br />
2. Legen Sie 4 AAA Batterien - LR03 Alkali e<strong>in</strong>, vergewissern Sie sich, dass diese<br />
entsprechend der Markierung (+ und - Pol) e<strong>in</strong>gelegt s<strong>in</strong>d.<br />
3) Allgeme<strong>in</strong>e Punkte<br />
Die RF Übertragung: mit dem Power Mid auch durch Wände und Stockwerke h<strong>in</strong>durch<br />
ausführen.<br />
Doppelfunktion: Sie ermöglicht Ihnen die Lautstärke und die " Mute" Taste Ihres Fernsehers<br />
zu betätigen, auch wenn Sie im VCR oder SAT Modus s<strong>in</strong>d.<br />
4) Funktionstasten<br />
[1] LED Anzeige: Die Anzeige leuchtet kurz auf, wenn die Fernbedienung <strong>in</strong> Betrieb ist oder<br />
leuchtet permanent wenn Sie die Fernbedienung programmieren<br />
16
[2] POWER / ALL LIGHTS ON:<br />
Für A/V Anwendungen: Schaltet das zuletzt ausgewählte Gerät<br />
Im Home Automation Modus: schaltet alle mit e<strong>in</strong>em X10 Modul verbundenen Lichter an<br />
[3] LEARN : Mit dieser Taste können Sie IR Befehle von e<strong>in</strong>er bereits vorhandenen<br />
Fernbedienung übernehmen, die nicht <strong>in</strong> der <strong>UR24E</strong> Liste enthalten s<strong>in</strong>d<br />
[4] SETUP : Ermöglicht Ihnen die Programmierung Ihrer Fernbedienung vor dem ersten E<strong>in</strong>satz<br />
[5] TV, VCR, SAT, DVD, CBL und CD : Mit diesen Tasten wählen Sie das zu bedienende<br />
Gerät.<br />
[6] PC: Mit dem zusätzlich erhältlichen RF-USB Empfänger können Sie mit ihrer Fernbedienung<br />
auch MP3, DVD und CD Funktionen Ihres Computer bedienen. Bei Ihrem Händler erhalten<br />
Sie mehr Information.<br />
[7] X10 mode: Um Lichter und Geräte <strong>in</strong> Verb<strong>in</strong>dung mit e<strong>in</strong>em X10 Modul zu schalten<br />
[8] SHIFT: Hiermit können Sie auf sekundäre Funktionen bei bestimmten Audio-Video-Geräten<br />
zugreifen (z. B. Menu E<strong>in</strong>, Menu Aus...). In Shift modus, die LED erleuchtet bleibt.Drücken<br />
Sie die Shift Taste um Shift Modus zu verlassen.<br />
[9] Showview:<br />
In VCR Modus: Mit dieser Taste können Sie die Showview oder Videoplus Funktionen Ihres<br />
Videorecorders benutzen (wenn Ihr Videorecorder diese Funktionen besitzt).<br />
Im TV, CAB, CD und SAT Modus: Scan-Funktion.<br />
[10] Numeric keys 0 - 9:<br />
For A/V applications: Gleiche Funktion wie bei der orig<strong>in</strong>al Fernbedienung<br />
Im Home Automation Modus: zur Auswahl e<strong>in</strong>es X10 Moduls, um den X10 Haus Code zu<br />
ändern<br />
[11] ENT: Wenn Sie im Programmiermodus s<strong>in</strong>d - automatische Code Suche - können Sie<br />
den Code des zu bedienenden Gerätes bestätigen. In Verb<strong>in</strong>dung mit den Nummerntasten<br />
(11) können Sie bei e<strong>in</strong>igen älteren Geräten direkt <strong>in</strong> Kanäle höher als 9 schalten.<br />
[12] A-B: Auswahl der SCART Buchse um DVD, SAT, VCR auf dem Fernsehmonitor zu<br />
sehen<br />
[13] Info: Vermittelt Informationen über das gewählte Gerät.<br />
[14] Channel + / - , Up/Down, On/Off:<br />
Für A/V Anwendungen: Wählen Sie den nächsten oder vorhergehenden Kanal Ihres TV,<br />
SAT, <strong>in</strong> Shift modus: Menü-Navigationstasten; Sie können damit im Menü nach oben und<br />
nach unten navigieren.<br />
In Home Automation Mode: erlaubt Ihnen das EIN/AUS Schalten der mit e<strong>in</strong>em X10 Modul<br />
verbundenen Geräte<br />
[15] Mute / OK / ALL OFF:<br />
Für A/V Anwendungen: schaltet den Ton e<strong>in</strong> oder aus.<br />
17
Sie können die "Mute"-Funktion Ihres Fernsehapparats selbst dann bedienen, wenn Sie sich<br />
im Modus VCR, DVD oder SAT bef<strong>in</strong>den. Wahl des TV-Modus nicht erforderlich.<br />
<strong>in</strong> Shift-Modus: OK-Taste; bestätigt Menü-Auswahl.<br />
Im Home Automation Modus: schaltet alle mit e<strong>in</strong>em X10 Modul verbundenen Geräte/<br />
Lampen "aus"<br />
[16] Volume + / -, Left/Right, Bright/Dim:<br />
Für A/V Anwendungen: Kontrolliert die Lautstärke im TV, VCR, SAT, DVD, CBL, CD<br />
Modus, <strong>in</strong> Shift-Modus: Menü-Navigationstasten; Sie können damit im Menü l<strong>in</strong>ks und rechts<br />
navigieren.<br />
In Home Automation Modus: Dimmen +/- der mit e<strong>in</strong>em X10 Modul verbundenen Lichter<br />
[17] M1 M2: E<strong>in</strong>stellungstasten. Mit diesen Tasten können mit e<strong>in</strong>em Tastendruck e<strong>in</strong>e Reihe<br />
vorprogrammierter Befehle ausgeführt werden.<br />
[18] L1 L2: Ermöglicht das E<strong>in</strong>lernen von anderen Funktionen Ihrer Orig<strong>in</strong>alfernbedienung.<br />
[19] Teletext Mix: Gleichzeitige Ansicht von Teletext und Bild des gewählten Kanals<br />
[20] Teletext Hold: Behält den Teletext Modus<br />
[21] VCR button Play , FF , Stop, Rew , Pause:<br />
Im VCR CD & DVD Modus: Diese Tasten funktionieren mit den meisten zur Zeit erhältlichen<br />
Marken und haben die gleiche Funktion wie die auf Ihrer Orig<strong>in</strong>al Fernbedienung<br />
Im TV Modus: Schnelltext Funktion<br />
[22] Teletext ON, Menu: Teletext Start/Stopp, Im Shift-Modus: Menü E<strong>in</strong>.<br />
[23] Teletext OFF, Exit: Teletext Stopp, Im Shift-Modus: Menü Aus.<br />
[24] REC (record ): Diese Taste hat die gleiche Funktion wie die auf Ihrer orig<strong>in</strong>al<br />
Fernbedienung. Um Fehler zu vermeiden, müssen Sie diese Taste zweimal drücken, um die<br />
Funktion zu aktivieren.<br />
"Default" Lautstärken Kontrolle<br />
Da e<strong>in</strong>ige Satelliten-Decodierer ke<strong>in</strong>en Pegelregler besitzen, kann die 8-<strong>in</strong>-1-<strong>Universal</strong>-<br />
Fernbedienung den TV-Lautstärkepegel im SAT-Modus steuern (Wahl des TV-Modus nicht<br />
erforderlich). Um das Gerät auszuwählen, welches von den Mute- und Volume-Tasten im<br />
SAT-Modus gesteuert werden soll, gehen Sie wie folgt vor:<br />
1. Drücken und lassen Sie die Taste TV Mode (5) los - die Fernbedienung muss sich für<br />
diese Prozedur im TV-Modus bef<strong>in</strong>den.<br />
2. Drücken und halten Sie die Taste SETUP (4), bis die LED erleuchtet bleibt.<br />
3. SETUP-Taste loslassen.<br />
4. Drücken und halten Sie die Taste Mute (15) für circa 8 Sekunden. Die LED bl<strong>in</strong>kt und<br />
bleibt während des 8-Sekunden-Zeitraums weg, bl<strong>in</strong>kt dann noch e<strong>in</strong>mal, um die Erfassung<br />
des Pegelreglermangels anzuzeigen und erlischt anschließend. Lassen Sie die Mute<br />
Taste los.<br />
5. Der per Fernbedienung ausgeglichene Pegelreglermangel ist jetzt e<strong>in</strong>gestellt.<br />
18
6. Wenn die 8-<strong>in</strong>-1-<strong>Universal</strong>-Fernbedienung vorher den TV-Lautstärkepegel im SAT-Modus<br />
gesteuert hat, so steuert sie jetzt den Pegel des Satelliten-Decodierers. Wenn sie vorher<br />
den Pegel des Satelliten-Decodierers gesteuert hat, so steuert sie jetzt den TV-<br />
Lautstärkepegel.<br />
5) Programmieren Ihres TV, VCR, SAT, DVD, CBL und CD<br />
H<strong>in</strong>weis: Sie können dem VCR , SAT, CD, DVD und CBL Modus Key auch e<strong>in</strong> anderes Gerät<br />
zuordnen (z.B. SAT): geben Sie dazu den entsprechenden 3-stelligen Code für das Gerät<br />
(Sie f<strong>in</strong>den diesen im Code Buch). Gehen Sie dabei wie nachstehend beschrieben vor.<br />
1. Vergewissern Sie sich, dass das Gerät e<strong>in</strong>geschalten ist. (z.B. TV)<br />
2. Halten Sie die Setup (4) Taste gedrückt bis die LED Anzeige permanent aufleuchtet.<br />
Lassen Sie die Setup (4) Taste los.<br />
3. Drücken Sie die Modus Taste auf dem Gerät, das Sie kontrollieren wollen und lassen Sie<br />
sie wieder los (z.B. TV).<br />
4. Geben Sie den dreistelligen Code (10) aus der Übersicht e<strong>in</strong>. Die LED (1) Anzeige hört<br />
nach E<strong>in</strong>gabe der letzten Zahl auf zu bl<strong>in</strong>ken. Wenn Sie e<strong>in</strong>en falschen Code e<strong>in</strong>gegeben<br />
haben, bl<strong>in</strong>kt die LED Anzeige für 3 Sekunden und geht danach aus. Sie müssen mit<br />
Schritt 2 fortfahren.<br />
5. Zeigen Sie mit der Fernbedienung <strong>in</strong> Richtung Ihres Fernsehers und drücken Sie die<br />
POWER (2) Taste. Das Gerät sollte abschalten. Prüfen Sie andere Funktionen (z.B. beim<br />
Videorecorder Vor- oder Rücklauf etc.). Wenn e<strong>in</strong>ige Anwendungen nicht funktionieren<br />
bedeutet das, dass der e<strong>in</strong>gegebene Code nicht richtig ist. In diesem Fall müssen Sie<br />
den oben genannten Vorgang mit dem nächsten Ihrer Marke entsprechenden Code<br />
wiederholen.<br />
6. Wiederholen Sie den Vorgang für andere Geräte, die Sie fernsteuern möchten (TV, VCR,<br />
SAT, DVD, CBL und CD )<br />
6) Manuelle Code Suche<br />
Wenn Ihr Gerät (TV, SAT etc.) nicht reagiert, probieren Sie die anderen Codes für Ihre Marke.<br />
Wenn es immer noch nicht reagiert, versuchen Sie es mit der Code Such Methode.<br />
Anmerkung: da Sie jedes Gerät (TV, DVD, SAT usw.) den Tasten VCR , SAT, DVD, CBL oder<br />
CD zuordnen können, müssen Sie zuerst irgende<strong>in</strong>en 3-Ziffer-Code für die Art des Geräts<br />
e<strong>in</strong>geben, das Sie steuern möchten (aus dem Code-Buch), z. B.: Wenn Sie e<strong>in</strong>en<br />
Satellitenempfänger (SAT) mit der CBL-Taste programmieren wollen, so geben Sie irgende<strong>in</strong>en<br />
SAT-Code aus dem Code-Buch e<strong>in</strong> und gehen dann <strong>in</strong> folgenden Schritten vor:<br />
1. Vergewissern Sie sich, dass Ihr Gerät e<strong>in</strong>geschalten ist. Falls nicht, schalten Sie es e<strong>in</strong>.<br />
2. Halten Sie die Setup (4) Taste gedrückt bis die LED Anzeige permanent aufleuchtet.<br />
Lassen Sie die Taste los.<br />
3. Drücken Sie die Modus Taste (5), die dem Gerät entspricht, das Sie bedienen wollen<br />
(z.B. TV).<br />
4. Drücken Sie Channel + (14) so oft bis der Kanal wechselt. Wenn Sie den richtigen Code<br />
verpassen drücken Sie Channel - (14) um zum richtigen Code zurückzugehen.<br />
5. Wenn das Gerät, das Sie kontrollieren wollen reagiert, drücken Sie ENT (11) um den<br />
Code zu bestätigen. Das ist alles. 19
Achtung: Falls Ihr Gerät ke<strong>in</strong>e Channel + Taste hat, können Sie PLAY (21) (VCR/DVD) oder<br />
die POWER (2) Taste verwenden.<br />
Die Suche beg<strong>in</strong>nt nach dem zuletzt registrierten Code. Wenn das 030 war, beg<strong>in</strong>nt die<br />
Suche mit 031 bis zum letzten möglichen Code und danach von 000 bis 029.<br />
Achtung: Wenn e<strong>in</strong>ige Funktionen an Ihrem Gerät nicht reagieren, müssen Sie e<strong>in</strong>en anderen<br />
Code für Ihre Marke f<strong>in</strong>den<br />
7) Automatische Code Suche (autosearch):<br />
Wenn Sie nach e<strong>in</strong>em unbekannten Code suchen, können Sie die Liste automatisch<br />
durchsuchen lassen (AutoSearch). Wenn Ihr Gerät antwortet, können Sie den Suchprozess<br />
anhalten und den gefundenen Code speichern.<br />
Anmerkung: da Sie jedes Gerät (TV, DVD, SAT usw.) den Tasten VCR , SAT, DVD, CBL oder<br />
CD zuordnen können, müssen Sie zuerst irgende<strong>in</strong>en 3-Ziffer-Code für die Art des Geräts<br />
e<strong>in</strong>geben, das Sie steuern möchten (aus dem Code-Buch), z. B.: Wenn Sie e<strong>in</strong>en<br />
Satellitenempfänger (SAT) mit der CBL-Taste programmieren wollen, so geben Sie irgende<strong>in</strong>en<br />
SAT-Code aus dem Code-Buch e<strong>in</strong> und gehen dann <strong>in</strong> folgenden Schritten vor:<br />
1. Schalten Sie das zu bedienende Gerät an.<br />
2. Halten Sie SETUP (4) gedrückt bis die LED Anzeige permanent aufleuchtet. Lassen Sie<br />
die Setup Taste los.<br />
3. Drücken Sie die Mode Taste (5) (TV, VCR, etc.) die dem Gerät entspricht, das Sie<br />
bedienen möchten. Die LED Anzeige bl<strong>in</strong>kt e<strong>in</strong>mal.<br />
4. Drücken Sie CHANNEL+ (14). Nach e<strong>in</strong> paar Sekunden beg<strong>in</strong>nt die Fernbedienung die<br />
Code Liste zu durchsuchen (schnelle Suche, 1 Code pro Sekunde). Wenn das Gerät<br />
reagiert, können Sie CHANNEL+ (14) e<strong>in</strong> zweites Mal drücken, um zur langsamen Suche<br />
umzuschalten (1 Code <strong>in</strong> 3 Sekunden). Sie können zurückschalten <strong>in</strong>dem Sie CHANNEL-<br />
(14) drücken (Sie können vorwärts schalten <strong>in</strong>dem Sie CHANNEL+ (14) drücken, falls Sie<br />
zu weit zurück geschaltet haben). Sobald das Gerät wieder antwortet, drücken Sie ENT<br />
(11), um den gefundenen Code zu speichern.<br />
8) Identifizierung der gefundenen Codes durch den Suchvorgang<br />
1. Halten Sie SETUP (4) gedrückt bis die LED Anzeige permanent aufleuchtet. Lassen Sie<br />
die Setup Taste los.<br />
2. Drücken Sie die Mode Taste (5) (TV, VCR, DVD, SAT, CD, CBL) die dem Gerät entspricht,<br />
das Sie identifizieren möchten. Die LED Anzeige bl<strong>in</strong>kt e<strong>in</strong>mal<br />
3. Drücken Sie noch e<strong>in</strong>mal Setup taste (4). Die LED Anzeige bl<strong>in</strong>kt e<strong>in</strong>mal.<br />
4. Um die erste Zahl zu identifizieren drücken Sie jede Taste auf dem Nummernfeld (10) von<br />
0 - 9 bis die LED Anzeige bl<strong>in</strong>kt. Die gedrückte Nummer entspricht der ersten Zahl des<br />
Codes.<br />
5. Drücken Sie jede Taste auf dem Nummernfeld von 0 - 9 wie oben beschrieben, um die<br />
zweite Zahl zu f<strong>in</strong>den.<br />
6. Drücken Sie jede Taste auf dem Nummernfeld von 0 - 9 wie oben beschrieben, um die<br />
dritte Zahl zu f<strong>in</strong>den. Wenn die dritte Zahl gefunden wurde, hört die LED Anzeige auf zu<br />
bl<strong>in</strong>ken. Vergessen Sie nicht, den Code auf das Etikett des Batteriefaches zu schreiben.<br />
20
9) Befehle e<strong>in</strong>geben<br />
Ihre 8-<strong>in</strong>-1 Fernbedienung hat die Codes für die meisten Fernseher, Videorecorder etc. <strong>in</strong><br />
ihrer Liste. Wenn aber der Code für e<strong>in</strong> bestimmtes Gerät nicht gefunden wird, können Sie<br />
diesen von der vorhandenen Fernbedienung übernehmen. Oder wenn Sie e<strong>in</strong>en Code <strong>in</strong> der<br />
Liste dieser Anleitung f<strong>in</strong>den, der dem Ihres Gerätes "fast" entspricht und nur e<strong>in</strong> paar Stellen<br />
anders s<strong>in</strong>d, können Sie auch nur diese Stellen übernehmen:<br />
1. Zeigen Sie mit den Vorderseiten Ihrer vorhandenen Fernbedienung und der <strong>UR24E</strong><br />
Fernbedienung mit e<strong>in</strong>em Abstand von ungefähr 2,5 cm aufe<strong>in</strong>ander.<br />
2. Halten Sie SETUP (4) gedrückt bis die LED Anzeige permanent aufleuchtet.<br />
3. Drücken Sie die Mode Taste (5) (TV, CD, SAT, etc.) die dem Gerät entspricht, das Sie<br />
identifizieren möchten. Die LED Anzeige bl<strong>in</strong>kt e<strong>in</strong>mal.<br />
4. Drücken Sie die L (3) Taste und lassen Sie wieder los. Die LED (1) leuchtet e<strong>in</strong>mal auf.<br />
5. Drücken Sie die Taste auf der <strong>UR24E</strong> Fernbedienung, die die Funktion übernehmen soll<br />
und lassen Sie wieder los. Die LED Anzeige leuchtet e<strong>in</strong>mal.<br />
6. Drücken Sie die Funktionstaste auf Ihrer vorhandenen Fernbedienung, die Sie übertragen<br />
möchten. Halten Sie die Taste gedrückt bis die LED Anzeige auf der <strong>UR24E</strong> Fernbedienung<br />
e<strong>in</strong>mal kurz aufbl<strong>in</strong>kt.<br />
7. Wiederholen Sie die Schritte 5 und 6 für jede weitere Funktion, die Sie übernehmen<br />
möchten.<br />
8. Wenn Sie mit der Übertragung aller Tasten fertig s<strong>in</strong>d, drücken Sie SETUP (4).<br />
10) Löschen übernommener Funktionen, um mehr Speicherplatz zu haben<br />
Sie können übertragene Funktionen für jedes Gerät e<strong>in</strong>zeln löschen(TV, VCR. etc.):<br />
1. Halten Sie SETUP (4) gedrückt bis die LED Anzeige permanent aufleuchtet. Lassen Sie<br />
die Setup (4) Taste los<br />
2. Drücken Sie die gewünschte Modus Taste (5) (TV, VCR, etc.). Die LED Anzeige bl<strong>in</strong>kt<br />
e<strong>in</strong>mal.<br />
3. Drücken und lassen Sie die LEARN (3) Taste wieder los (zweimal).<br />
4. Drücken Sie die SETUP (4) Taste. Die LED Anzeige schaltet sich nach e<strong>in</strong> paar Sekunden<br />
ab.<br />
5. Alle übertragenen Befehle <strong>in</strong> diesem Modus s<strong>in</strong>d nun gelöscht.<br />
Master Clear - Um alle "erlernten" Kommandos zu löschen (empfohlen vor dem<br />
ersten "Lernen")<br />
1. Halten Sie den SETUP Knopf (4) solange gedrückt bis die LED (1) dauernd leuchtet (cca<br />
2 Sekunden).<br />
2. Lassen Sie den SETUP Knopf los.<br />
3. Drücken Sie den LEARN Knopf (3) zweimal. LED (1) bl<strong>in</strong>kt zur Bestätigung<br />
4. Drücken Sie den SETUP (4) Knopf und lassen Sie ihn wieder los. LED erlischt nach<br />
e<strong>in</strong>igen Sekunden.<br />
5. Alle erlernten Kommandos s<strong>in</strong>d jetzt gelöscht<br />
21
Anmerkungen zum Übertragen e<strong>in</strong>zelner Funktionen:<br />
- Vergewissern Sie sich, dass <strong>in</strong> beiden Fernbedienungen neue Batterien e<strong>in</strong>gelegt wurden.<br />
- Bewegen Sie während der Übertragung ke<strong>in</strong>e der beiden Fernbedienungen.<br />
- Auf den Learn, Setup, TV, VCR, CBL, SAT, CD, PC oder X-10 Funktionstasten können<br />
ke<strong>in</strong>e Funktionen gespeichert werden.<br />
- Probieren Sie zuerst 2 oder 3 Tasten zu übertragen (um die Kompatibilität zu überprüfen)<br />
und löschen Sie diese dann wieder bevor Sie die komplette Tastatur Ihrer orig<strong>in</strong>al<br />
Fernbedienung übertragen.<br />
- Verändern Sie den Abstand zwischen den beiden Fernbedienungen, falls Sie bei<br />
derÜbertragung Probleme haben.<br />
- E<strong>in</strong>ige Fernbedienungen haben den IR Sender nicht <strong>in</strong> der Mitte; also ist es möglich,<br />
dass Sie versuchen müssen, die Fernbedienungen seitlich ane<strong>in</strong>ander zu halten bzw.<br />
gegene<strong>in</strong>ander.<br />
- Führen Sie die Übertragung nicht im direkten Sonnenlicht durch, unter Leuchtstoff- oder<br />
Glühlampen.<br />
- Falls Sie Probleme bei der Übertragung haben, versuchen Sie den Speicher zu löschen<br />
und die Tasten neu e<strong>in</strong>zugeben<br />
11) Macro Funktionen<br />
Ihre 8-<strong>in</strong>-1Fernbedienung besitzt zwei E<strong>in</strong>stellungstasten: M1 und M2 (17). Sie können diese<br />
Tasten derart programmieren, dass diese mit e<strong>in</strong>em Tastendruck e<strong>in</strong>e Reihe von Befehlen<br />
ausführen. Diese starke Funktion ist ideal, um z.B. all Ihre Audio- und Videogeräte<br />
e<strong>in</strong>zuschalten oder für bestimmte Vorzugse<strong>in</strong>stellungen bei Heimk<strong>in</strong>o-Anwendungen.<br />
Programmieren der E<strong>in</strong>stellungstasten M1 und M2<br />
1. Drücken Sie die Setup-Taste (4) bis die LED Anzeige anbleibt. Lassen Sie die Setup-<br />
Taste los.<br />
2. Drücken Sie die E<strong>in</strong>stellungstaste die Sie programmieren wollen: M1 oder M2 (17).<br />
3. Drücken Sie die Tasten die Sie unter der E<strong>in</strong>stellungstaste speichern wollen (max14<br />
Befehle). Die erste <strong>in</strong> e<strong>in</strong>em Macro gespeicherte Taste muss e<strong>in</strong>e Modus Taste se<strong>in</strong>. Die<br />
Reihenfolge des Programmierens wird genau bei der Ausführung der E<strong>in</strong>stellung<br />
übernommen.<br />
4. Um die E<strong>in</strong>stellung zu speichern, drüken Sie nochmals die E<strong>in</strong>stellungstaste. Wenn die<br />
maximal 14 Befehle erricht s<strong>in</strong>d, wird das Programmieren automatisch beendet und werden<br />
diese 14 Befehle unter der E<strong>in</strong>stellungstaste gespeichert, die Sie gerade programmieren<br />
22
Anmerkungen beim programmieren von E<strong>in</strong>stellungen<br />
Es gibt e<strong>in</strong>e automatische Verzögerung von 1 Sekunden zwischen jeder IR Übertragung im<br />
Ablauf.<br />
Es könnte nötig se<strong>in</strong>, im Macro Ablauf "Verzögerungen" e<strong>in</strong>zubauen (z.B. um Ihrem Fernseher<br />
e<strong>in</strong>e Aufwärmphase zu geben). Drücken Sie die Pause Taste (21) und dann drücken Sie die<br />
Zahl für die entsprechende Verzögerung (<strong>in</strong> Sekunden) z.B. zum E<strong>in</strong>geben e<strong>in</strong>er 4 Sekunden<br />
Verzögerung drücken Sie kurz Pause und dann 4. E<strong>in</strong>e Verzögerung von “0” Sekunde ist<br />
nicht möglich. Die längste Verzögerung ist 9 Sekunden.<br />
Löschen von E<strong>in</strong>stellungstasten<br />
1. Drücken Sie die Setup-Taste (4) bis die LED-Anzeige (1) brennt. Lassen Sie die Setup<br />
Taste los.<br />
2. Drücken Sie die Macro taste (17), die Sie löschen wollen.<br />
3. Drücken Sie die Setup-Taste (4). Die E<strong>in</strong>stellungstaste ist gelöscht.<br />
12) Kontrollieren Sie Ihr Haus mit Hilfe des Home Automation Moduls von X10<br />
Die 8-<strong>in</strong>-1 Fernbedienung ermöglicht es Ihnen, alle elektrischen Geräte <strong>in</strong> Ihrem Haus zu<br />
bedienen. Außer Infrarotsignale zu übertragen, die TV, VCR, SAT, DVD, CBL und CD<br />
fernsteuern, ist die Fernbedienung auch mit e<strong>in</strong>em Radiosender ausgestattet, der X10 Signale<br />
überträgt, durch die Sie aus der Ferne Lampen und elektrische Geräte bedienen können.<br />
Hier s<strong>in</strong>d e<strong>in</strong>ige Beispiele, was Sie mit Ihrer 8 <strong>in</strong> 1 Fernbedienung tun können, wenn Sie X10<br />
verwenden:<br />
- Lichter an- und ausschalten bzw. dimmen während Sie fernsehen.<br />
- Schalten Sie Ihre Kaffeemasch<strong>in</strong>e von Ihrem Schlafzimmer aus e<strong>in</strong>, direkt nach dem<br />
Aufwachen.<br />
- Schalten Sie die Lichter nachts an, wenn Sie etwas Verdächtiges entdecken, um E<strong>in</strong>brecher<br />
abzuschrecken.<br />
- Schalten Sie Ihre Heizdecke an bevor der Film zu Ende ist, damit Sie es schön warm<br />
haben, wenn Sie zu Bett gehen.<br />
Um Ihre Lampen und Geräte zu bedienen, brauchen Sie zusätzliche X10 Home Module. Die<br />
Module werden e<strong>in</strong>fach <strong>in</strong> e<strong>in</strong>en AC Ausgang gesteckt; ohne zusätzliches Kabel. Wenden<br />
Sie sich an e<strong>in</strong>en Händler <strong>in</strong> Ihrer Nähe für weitere Informationen.<br />
EIN/AUS Schalten von mit X10 Modulen verbundenen Geräten: Drücken Sie den X10<br />
Knopf (7), dann über das Zahlenfeld (10) den "Unit Code" des X10 Moduls und dann CHAN+<br />
/ - (14)<br />
DIMMEN e<strong>in</strong>es mit X10 Modulen verbundenen Lichts: drücken Sie den "Unit"Code auf<br />
dem Zahlenfeld (10) und dann VOL+ / - (16)<br />
EINSCHALTEN aller X10 Lampen Module: Drücken Sie den Power Knopf (2)<br />
AUSCHALTEN aller X10 Module (Lampen & Geräte): drücken Sie den Mute Knopf (15)<br />
23
13) Ändern des X10 Haus Codes<br />
Der vore<strong>in</strong>gestellte Haus Code ist A und <strong>in</strong> der Mehrheit der Fälle ist es nicht nötig, diese<br />
E<strong>in</strong>stellung zu ändern, außer benachbarte X10 Systeme bee<strong>in</strong>flussen Ihr System. In diesem<br />
Fall müssen Sie:<br />
1- Drücken Sie X10 (7)<br />
2- Halten Sie SETUP (4) gedrückt bis die LED Anzeige permanent bl<strong>in</strong>kt.<br />
3- Lassen Sie die Setup (4)Taste los.<br />
4- Benutzen Sie die Zahlentasten, um die entsprechende Nummer des gewählten Haus<br />
Codes e<strong>in</strong>zugeben (1=A, 2=B, ... 16=P).<br />
5- Drücken Sie ENT (11), um Ihre E<strong>in</strong>gabe zu bestätigen. Die LED Anzeige schaltet ab.<br />
Achtung: Der von Ihnen gewählte Code muss der gleiche se<strong>in</strong> wie am Transceiver Modul<br />
TM13 oder der Sicherheitskonsole, mit der Sie Ihre Fernbedienung benutzen.<br />
14) Probleme und Problemlösungen:<br />
Die Fernbedienung funktioniert nicht oder "vergisst" e<strong>in</strong>gegebene Codes.<br />
- Vergewissern Sie sich mit der orig<strong>in</strong>al Fernbedienung, dass das Gerät funktioniert.<br />
- Vergewissern Sie sich, dass Sie die entsprechende Modus Taste des Gerätes, das Sie<br />
bedienen wollen, gedrückt haben.<br />
- Wenn der angegebene Code nicht funktioniert, versuchen Sie Autosearch oder geben Sie<br />
den nächsten Code dieser Marke e<strong>in</strong>.<br />
- Um den entsprechenden Code für Ihr Gerät zu f<strong>in</strong>den, verwenden Sie die automatische<br />
Suche.<br />
- Überprüfen Sie die Polarität der Batterien.<br />
- Zum Programmieren der Fernbedienung werden 2 AAA Batterien (neu). Wenn die<br />
Fernbedienung Codes <strong>in</strong>nerhalb e<strong>in</strong>iger Tage/Wochen "vergisst", kann das Problem durch<br />
E<strong>in</strong>setzen 2 neuer Batterien e<strong>in</strong>er Marke gelöst werden.<br />
- Wenn die LED Anzeige permanent aufleuchtet, ist es normalerweise notwendig, die<br />
Batterien auszutauschen.<br />
WICHTIG:<br />
Die <strong>UR24E</strong> Fernbedienung darf nur <strong>in</strong> der <strong>in</strong> dieser Bedienungsanleitung dargestellten Art<br />
und Weise benutzt werden und darf nicht für e<strong>in</strong>en nicht vorgesehenen Zweck verwendet<br />
werden.<br />
24
Télécommande 8 en 1<br />
Consignes de sécurité<br />
Toute manipulation technique du produit ou toute modification du produit sont <strong>in</strong>terdits, à<br />
cause des normes de sécurité et de conformité.<br />
Veuillez <strong>in</strong>staller correctement le produit - pour se faire, consultez le guide d’utilisation. Ne<br />
pas laisser les enfants utiliser ce produit sans la surveillance d’un adulte.<br />
Evitez d’exposer le produit aux situations suivantes :<br />
- frottement mécanique excessif<br />
- température élevée<br />
- vibrations importantes<br />
- humidité élevée<br />
Veuillez également respecter toute autre consigne de sécurité comprise dans les chapitres<br />
suivants de ce guide. Pour toute <strong>in</strong>formation complémentaire, contactez votre vendeur.<br />
Pour garantir une programmation correcte, lisez ce manuel a<strong>in</strong>si que les consignes de sécurité<br />
avec attention.<br />
Changement des piles :<br />
Cette télécommande ne peut fonctionner qu’avec 4 piles alcal<strong>in</strong>es AAA. Ne tentez jamais de<br />
l’utiliser avec une autre alimentation. Lorsque vous <strong>in</strong>sérez les piles, faites en sorte que la<br />
polarité soit respectée. Otez les piles lorsque la télécommande ne doit pas être utilisée<br />
pendant une longue période. Veillez à ce que les piles ne soient pas court-circuitées ou<br />
exposées au feu (danger d’explosion).<br />
Ne pas laissez les piles à la portée des enfants. Un animal ou un enfant pourrait les avaler.<br />
Dans ce cas, consultez immédiatement un médec<strong>in</strong>.<br />
Des piles endommagées ou qui fuiraient peuvent provoquer des lésions sur la peau, telles<br />
que des brûlures, notamment à cause de l’acide. Utilisez des gants si nécessaire.<br />
Mise au rebut des piles :<br />
Les piles ne peuvent être jetées dans les ordures ménagères de la maison.<br />
Si la loi l’exige dans son pays, l’utilisateur doit retourner les piles usagées chez le distributeur<br />
ou chez n’importe lequel de nos po<strong>in</strong>ts de vente.<br />
Veuillez préserver l’environnement.<br />
25
Pour démarrer sans attendre<br />
1) Mettez les piles<br />
1. Retirez le couvercle au dos de votre télécommande 8 en 1<br />
2. Insérez 4 piles LR03 alcal<strong>in</strong>es, neuves et de même marque.<br />
2) Ma<strong>in</strong>tenant programmez votre télécommande 8 en 1<br />
1. Mettez en marche l’appareil souhaité (TV, VCR, SAT, DVD, CBL, CD etc… ).<br />
2. Prenez la bibliothèque de codes fournie avec votre 8 en 1 et cherchez la marque de<br />
l’équipement que vous souhaitez contrôler. Par exemple si vous avez un téléviseur<br />
Thomson, recherchez Thomson dans la section TV.<br />
3. Appuyez sur la touche « SET UP » (4) de la télécommande jusqu’à ce que la LED (voyant<br />
rouge) reste allumée en permanence. Cela prend environ 3 secondes.<br />
4. Appuyez sur la touche mode TV, VCR, SAT, DVD, CBL, ou CD (5), selon l’appareil que<br />
vous désirez contrôler.<br />
5. Prenez le premier code correspondant à votre équipement et rentrez le code en appuyant<br />
sur les touches de 0 à 9 (10). A chaque pression de touche, le voyant (1) clignote.<br />
6. Si le code saisi est correct, la LED s’éte<strong>in</strong>t. Si le code n’existe pas, la LED clignotera<br />
rapidement. Vous devez alors retourner à l’étape 1.<br />
7. Alternative à l’étape 5 : Votre marque se trouve dans la liste ci-dessous :<br />
MARQUE CODE MARQUE CODE<br />
Philips/Radiola 1 Telefunken/Saba/Normende 4<br />
Sony/Panasonic/JVC/<br />
Sharp/Akai/Toshiba/Daewoo<br />
2 Grundig/Blaupunkt 5<br />
Thomson/Brandt 3 Tokia/ ITT 6<br />
Entrez le code correspondant à la marque, po<strong>in</strong>tez la télécommande vers l’appareil et<br />
enfoncez la touche CHANNEL+ (14) par pressions successives, jusqu’à ce que celui-ci<br />
change automatiquement de chaîne (la télécommande envoie un signal <strong>in</strong>frarouge toutes les<br />
secondes donc laissez le temps à l’appareil de réagir). Lorsque l’appareil audio-vidéo réagit,<br />
confirmez l’encodage en appuyant sur la ENT (11). Si accidentellement vous avez passé le<br />
code recherché, vous pourrez utiliser CHANNEL – (14) pour revenir en arrière. Appuyez sur<br />
ENT (11) pour confirmer.<br />
8. Appuyez sur la touche POWER (2). Si l’appareil s’éte<strong>in</strong>t, votre 8 en 1 est prête à l’emploi.<br />
S<strong>in</strong>on, recommencer à partir de l’étape 3.<br />
Si certa<strong>in</strong>es fonctions manquent, recommencez à partir de l’étape 1 avec le code suivant<br />
correspondant à la marque de votre appareil.<br />
26
Télécommande Universelle 8 en 1 - UR24<br />
Contenu<br />
1) Introduction<br />
2) Mise en place des piles<br />
3) Généralités<br />
4) Description des touches<br />
5) Programmation pour les appareils de TV, VCR, SAT, DVD, CBL, et CD<br />
6) Recherche manuelle d’un code « autosearch »<br />
7) Recherche automatique du code<br />
8) Identification du code mémorisé dans votre télécommande<br />
9) Commande d’apprentissage<br />
10) Supprimer les commandes apprises<br />
11) Fonction Macro<br />
12) Contrôle de votre maison à l’aide de modules domotiques X10<br />
13) Modification du code X10 de la maison<br />
14) Pannes et problèmes de fonctionnement<br />
1) Introduction<br />
La Télécommande 8 en 1 a été conçue pour contrôler jusqu’à 8 appareils (TV, VCR, SAT, DVD,<br />
CBL, CD, PC plus les modules X10). La télécommande contient une bibliothèque de codes<br />
<strong>in</strong>frarouges préprogrammés couvrant la majorité des équipements audiovisuels du marché.<br />
Af<strong>in</strong> de faciliter la recherche de votre code, nous vous conseillons d’utiliser la fonction<br />
Recherche Automatique « autosearch ».<br />
2) Mise en place des piles (utilisez toujours des piles alcal<strong>in</strong>es LRO3 neuves)<br />
1. Retirez le couvercle du logement au dos de votre télécommande.<br />
2. Insérez 4 piles de même marque, neuves et alcal<strong>in</strong>es LR03 (AAA), en respectant la<br />
polarité des piles (signes + et - gravés dans le logement).<br />
3) Généralités<br />
La radio transmission : elle se fait parallèlement à la transmission <strong>in</strong>fra rouge. Elle permet<br />
de contrôler vos appareils vidéos ( téléviseurs, de magnétoscope, …) à travers murs et plafonds,<br />
grâce au récepteur PowerMid (en option).<br />
La double fonction : elle vous permet de contrôler le volume et la touche mute de votre<br />
téléviseur même si vous êtes en mode TV, VCR, SAT, DVD, ou CBL.<br />
4) Description des fonctions de la télécommande<br />
[1] Voyant lum<strong>in</strong>eux (LED) :<br />
Le voyant lum<strong>in</strong>eux clignote pendant le fonctionnement de la télécommande, ou reste<br />
constamment allumé lors de la programmation.<br />
[2] Power/ All Lights On :<br />
Pour les appareils A/V : Permet d’éte<strong>in</strong>dre le dernier appareil sélectionné<br />
En mode Domotique : Permet d’allumer toutes les lumières connectées à un module X10<br />
27
[3] LEARN :<br />
Permet à la télécommande d’apprendre des fonctions <strong>in</strong>frarouges qui ne seraient pas <strong>in</strong>cluses<br />
dans aucun code de la bibliothèque.<br />
[4] SETUP : Permet de programmer la télécommande avant sa première utilisation.<br />
[5] TV, VCR, SAT, DVD, CBL et CD : Permettent de sélectionner l’appareil que l’on souhaite<br />
télécommander<br />
[6] PC : Comb<strong>in</strong>é avec le récepteur RF-USB (en option), cette touche commande les fonctions<br />
MP3, DVD et CD de votre PC. Pour de plus amples renseignements veuillez contacter votre<br />
revendeur.<br />
[7] Mode X10 : Permet de contrôler les lumières ou appareils connectés à un module X10<br />
[8] SHIFT :<br />
Permet d’accéder à des fonctions secondaires telles que : menu, exit, ok, gauche, droite,<br />
haut, bas etc. En mode Shift, la LED est cont<strong>in</strong>uellement allumée. Pour sortir du mode Shift,<br />
pressez la touche Shift de nouveau.<br />
[9] Showview:<br />
En mode VCR : Permet d’accéder au fonction Showview ou Videoplus de votre<br />
magnétoscope (voir le guide utilisateur du VCR).<br />
En mode TV, SAT et CAB : Fonction scan (sélectionne le canal suivant toutes les 3<br />
secondes).<br />
[10] Clavier touches numériques 0 - 9 : Permettent de saisir le code de l’appareil lors de<br />
la programmation manuelle de la télécommande<br />
Pour les appareils A/V : Elles fonctionnent de la même manière que celles de votre<br />
télécommande d’orig<strong>in</strong>e.<br />
En mode Domotique : Permet de sélectionner un module X10 et de changer le code Maison.<br />
[11] ENT: En mode programmation par recherche automatique du code, cette touche vous<br />
permet de confirmer le code de l’appareil que vous souhaitez commander. Utilisée avec les<br />
touches numériques (11), elle permet, sur certa<strong>in</strong>s appareils, de sélectionner directement<br />
les chaînes supérieures à 9.<br />
[12] A-B : Sélection de la sortie péritel pour visualiser le film du DVD, du satellite,<br />
magnétoscope… sur l’écran de votre téléviseur.<br />
[13] INFO : Permet d’avoir des <strong>in</strong>formations sur l’appareil sélectionné.<br />
[14]Chaîne + / - :<br />
Pour les appareils A/V : Sélection de la chaîne précédente ou suivante, en mode Shift :<br />
vous permet de naviguer en haut et en bas dans le menu du mode sélectionné.<br />
En mode Domotique : Permet d’allumer ou d’éte<strong>in</strong>dre toute lumière ou appareil connectés<br />
à un module X10.<br />
[15] Mute/OK/All Off :<br />
Pour les appareils A/V : Permet de couper ou de remettre le son de l’appareil pré-sélectionné,<br />
en mode Shift, permet de confirmer l’option Menu de l’appareil sélectionné.<br />
En mode Domotique : Ete<strong>in</strong>t toutes les lumières et appareils connectés à un module X10.<br />
28
[16] Volume + / -:<br />
Pour les appareils A/V : Réglage du volume sonore en mode TV, VCR, SAT , CD, DVD,<br />
CBL. En mode Shift, permet de naviguer à droite et à gauche dans le Menu de l’appareil<br />
sélectionné.<br />
En mode Domotique : Permet d’augmenter ou de baisser l’<strong>in</strong>tensité lum<strong>in</strong>euse d’une lumière<br />
connectée à un module X10.<br />
[17] M1 M2: Touches Macros. Permettent de lancer l’exécution de séquence de<br />
commandes <strong>in</strong>fra-rouges pré-enregistrées<br />
[18] L1 L2: Touches d’apprentissage supplémentaires. Elles ne sont pas programmées et<br />
peuvent apprendre une fonction supplémentaire provenant d’une de vos télécommandes<br />
d’orig<strong>in</strong>e.<br />
[19] Télétexte MIX : Permet d’afficher le Télétexte et l’image en même temps<br />
[20] Ma<strong>in</strong>tien du télétexte : Fige la page du Télétexte à l’écran<br />
[21] Touches VCR : Marche, Avance rapide, Stop, Retour, Pause :<br />
En mode VCR et DVD : correspondent aux fonctions Marche, Avance rapide, Stop,<br />
Retour, Pause pour la très grande majorité des marques disponibles sur le marché<br />
En mode TV : correspondent au mode Fast Text<br />
[22] Teletext ON : Affiche le Menu. En mode Shift : affiche le menu du mode<br />
sélectionné.<br />
[23] Teletext OFF: Efface le Menu. En mode Shift : efface le menu du mode<br />
sélectionné.<br />
[24] REC (record) : Permet d’enregistrer un film en mode VCR. Af<strong>in</strong> d’éviter toute erreur, vous<br />
devez appuyer 2 fois sur cette touche pour déclencher l’enregistrement<br />
Contrôle par défaut du volume :<br />
Certa<strong>in</strong>s décodeurs satellites ne possédant de contrôle de volume, votre télécommande<br />
universelle 8 en 1 vous offre la possibilité de contrôler le volume du téléviseur même lorsqu'elle<br />
est en mode SAT (nul beso<strong>in</strong> de sélectionner le mode TV). Pour choisir l'équipement que les<br />
touches Mute (15) et VOL+/- (16) doivent commander en mode satellite, suivez la procédure<br />
suivante :<br />
1. Appuyez et relâchez la touche TV (5) (la télécommande doit être en mode TV pour<br />
effectuer cette procédure).<br />
2. Appuyez et ma<strong>in</strong>tenez la touche SETUP (4) enfoncée (env.3 sec) jusqu’à ce que la LED<br />
(1) demeure allumée.<br />
3. Relâchez la touche SETUP.<br />
4. Appuyez et ma<strong>in</strong>tenez la touche Mute (15) enfoncée pendant environ 8 secondes. Le<br />
voyant lum<strong>in</strong>eux s’éte<strong>in</strong>t pendant ces 8 secondes puis clignote une fois pour <strong>in</strong>diquer que<br />
la commande a été acceptée. La LED (1) reste alors éte<strong>in</strong>te. Relâchez la touche Mute.<br />
5. Si en mode SAT ou CBL, la télécommande contrôlait le volume de la télévision, elle<br />
contrôlera désormais le volume du décodeur satellite ou du câble; si elle contrôlait le<br />
volume du décodeur satellite ou du câble, elle contrôlera désormais le volume de la<br />
télévision.<br />
29
5) Programmation de la 8 en 1 pour les appareils de TV, VCR, DVD, SAT, CD et CBL<br />
NB : vous pouvez commander un appareil de n’importe quel type (TV, DVD, SAT...) à partir<br />
des touches VCR, DVD, SAT, CD, CBL et PC : vous devez d’abord entrer le code d’un<br />
appareil similaire à celui que vous souhaitez commander. Dans tous les cas, suivez la méthode<br />
ci-après :<br />
1. Appuyez et ma<strong>in</strong>tenez la touche SETUP (4) enfoncée jusqu’à ce que la LED demeure<br />
allumée en permanence. La relâcher.<br />
2. Appuyez sur la touche de l’équipement souhaité (5) (par exemple TV pour un téléviseur).<br />
3. Vérifiez que votre équipement est en marche (exemple TV)<br />
4. A l’aide de la liste de codes, composez le premier code à 3 chiffres (10) correspondant à<br />
la marque de votre téléviseur. Après avoir entré le code, la LED (1) s’éte<strong>in</strong>t. Si le code<br />
entré est erroné, la LED clignote 3 secondes puis s’éte<strong>in</strong>t, et vous devez reprendre la<br />
procédure à partir de l’étape 2.<br />
5. Dirigez la télécommande vers votre téléviseur, puis appuyez sur la touche POWER (2). Si<br />
l’équipement s’éte<strong>in</strong>t, vérifiez les autres fonctions (exemple pour un VCR : avance, retour,<br />
etc.). Si certa<strong>in</strong>es fonctions ne répondent pas, alors le code entré n’est pas le bon. Dans<br />
ce cas, répétez la procédure ci-dessus avec le code suivant correspondant à votre marque.<br />
6. Procédez de la même manière pour les autres équipements que vous désirez contrôler<br />
(TV, VCR, SAT, DVD, CBL, et CD)<br />
6) Recherche manuelle d’un code<br />
Au cas où l’ensemble des codes proposés dans la liste ne permettrait pas de commander<br />
vos appareils audiovisuels (TV, VCR, SAT…), nous vous conseillons de procéder par la méthode<br />
de recherche ci-dessous.<br />
NB : vous pouvez commander un appareil de n’importe quel type (TV, DVD, SAT...) à partir<br />
des touches VCR, DVD, SAT, CD et CBL: vous devez d’abord entrer le code d’un appareil<br />
similaire à celui que vous souhaitez commander, par ex: si vous souhaitez programmer un<br />
SAT sous la touche VCR, entrez d’abord le code d’un satellite de n’importe quelle marque,<br />
selon la procédure décrite dans le § 5, puis suivez la démarche suivante:<br />
1. Vérifiez que votre équipement est en marche. S<strong>in</strong>on allumez le manuellement.<br />
2. Appuyez et ma<strong>in</strong>tenez la touche SET UP (4) enfoncée jusqu’à ce que le voyant LED (1)<br />
demeure allumé en permanence.<br />
3. Appuyez sur le MODE (5) de l’équipement souhaité (par exemple TV).<br />
4. Appuyer plusieurs fois sur la touche CHANNEL + (14) jusqu’à ce que l’appareil s’éteigne.<br />
Si vous dépassez le code recherché vous pouvez retourner en arrière avec la touche<br />
CHANNEL– (14).<br />
5. Dès que l’appareil que vous souhaitez commander s’éte<strong>in</strong>t, appuyez sur la touche ENT<br />
(11) pour enregistrer le code. C’est tout !<br />
Note : Si votre appareil ne possède pas de touche CHANNEL +, utilisez à la place la touche<br />
PLAY (VCR, DVD) (21) ou bien la touche POWER (2).<br />
La recherche commence par le dernier code enregistré. Si celui-ci est 030, la recherche<br />
commencera à 031 jusqu’au dernier code possible, puis recommencera de 000 jusqu’à 029.<br />
Remarque : Si des fonctions de votre appareil ne peuvent être commandées , vous devez<br />
entrer un autre code.<br />
30
7) Recherche automatique de codes «autosearch»<br />
Plutôt que de chercher un code dans la liste, vous pouvez utiliser la méthode de recherche<br />
automatique ci-dessous.<br />
NB : vous pouvez commander un appareil de n’importe quel type (TV, DVD, SAT...) à partir<br />
des touches VCR, SAT, DVD, CBL, et CD: vous devez d’abord entrer le code d’un appareil<br />
similaire à celui que vous souhaitez commander; par ex: si vous souhaitez programmer un<br />
SAT sous la touche VCR, entrez d’abord le code d’un satellite de n’importe quelle marque,<br />
selon la procédure décrite dans le § 5, puis suivez la démarche suivante:<br />
1. Vérifiez que votre équipement est en marche. S<strong>in</strong>on allumez le manuellement.<br />
2. Appuyez et ma<strong>in</strong>tenez la touche SETUP (4) enfoncée jusqu’à ce que le voyant LED (1)<br />
demeure allumé en permanence.<br />
3. Appuyez sur le MODE (5) de l’équipement souhaité (par exemple TV).<br />
4. Appuyer une seule fois sur la touche CHANNEL + (14). Après quelques secondes la<br />
télécommande commence de dérouler toute la liste de codes <strong>in</strong>clus dans la bibliothèque<br />
(environ 1 par seconde). Appuyer une deuxième fois sur CHANNEL + (14) pour réduire la<br />
vitesse de test (1 code toutes les 3 secondes). Si vous n’avez pas réagi assez vite, vous<br />
avez la possibilité de revenir au code précédent en appuyant sur CHANNEL- (14) (vous<br />
pouvez réavancer de nouveau en appuyant sur CHANNEL+(14) si vous êtes allés trop<br />
lo<strong>in</strong>). Dès que l’appareil répond, vous devez appuyer immédiatement sur ENT (11) pour<br />
enregistrer le code.<br />
8) Vérification du code mémorisé dans votre télécommande<br />
1. Appuyez et ma<strong>in</strong>tenez la touche SET UP (4) enfoncée jusqu’à ce que le voyant LED (1)<br />
reste allumé en permanence.<br />
2. Appuyez sur le MODE (5) correspondant au type d’équipement dont vous souhaitez<br />
identifier le code (TV, VCR ,SAT… ). Le voyant clignote une fois.<br />
3. Appuyez de nouveau sur la touche SET UP (4). Le voyant clignote une fois.<br />
4. Pour identifier le premier chiffre appuyez sur chaque touche de 0 à 9 (10) jusqu’à ce que<br />
le voyant s’éteigne. La dernière touche sur laquelle vous avez appuyé correspond au<br />
premier chiffre du code.<br />
5. Appuyez sur chaque touche de 0 à 9, comme <strong>in</strong>diqué ci-dessus, pour identifier le deuxième<br />
chiffre.<br />
6. Appuyez sur chaque touche de 0 à 9, comme <strong>in</strong>diqué ci-dessus, pour identifier le troisième<br />
chiffre. Quand le troisième chiffre est trouvé, le voyant s’éte<strong>in</strong>t. N’oubliez pas de noter le<br />
code trouvé au dos du compartiment à piles.<br />
9) Fonction d’apprentissage pour les appareils audio/vidéo<br />
Votre télécommande 8 en 1 dispose des codes permettant de commander la très grande<br />
majorité des TV, VCR… dans sa bibliothèque. Cependant, si votre appareil ne marche toujours<br />
pas, vous pouvez enseigner son code de fonctionnement à votre télécommande. De même si<br />
certa<strong>in</strong>es fonctions de commande demeurent <strong>in</strong>opérantes malgré le test de tous les codes<br />
disponibles, vous pouvez enseigner ces fonctions à votre télécommande 8 en 1.<br />
1. Placez votre télécommande d’orig<strong>in</strong>e en face de la télécommande 8 en 1 (elles doivent<br />
se faire face par l’avant) à une distance de 2.5 centimètres.<br />
31
2. Ma<strong>in</strong>tenez enfoncée la touche SETUP (4) jusqu’à ce que le témo<strong>in</strong> rouge s’allume<br />
3. Pressez la touche mode (TV,CD…) selon l’appareil que vous souhaitez contrôler. La<br />
LED clignote 1 fois<br />
4. Appuyez puis relâchez la touche LEARN (3). La LED (1) clignote une fois.<br />
5. Appuyez et relâchez la touche de la télécommande 8 en 1 à laquelle vous souhaitez<br />
transmettre la fonction. La LED clignote une fois.<br />
6. Enfoncez le bouton de votre télécommande d’orig<strong>in</strong>e dont vous souhaitez récupérer la<br />
fonction. Ma<strong>in</strong>tenez le bouton enfoncé jusqu’à ce que la LED clignote une fois rapidement.<br />
7. Répétez l’opération 5 et 6 pour chaque touche que vous souhaitez enseigner à votre<br />
télécommande 8 en 1<br />
8. Lorsque vous avez f<strong>in</strong>i d’enseigner toutes les commandes, appuyez sur SETUP (4).<br />
10) Effacement des fonctions apprises<br />
Effacement des fonctions apprises sous un mode:<br />
Vous pouvez effacer les fonctions apprises pour chaque appareil audio-vidéo de salon (TV,<br />
VCR etc…)<br />
1. Ma<strong>in</strong>tenez enfoncée la touche SETUP (4) jusqu’à ce que le voyant rouge (1). s’allume.<br />
Relâchez le bouton SETUP (4).<br />
2. Pressez la touche mode (TV, CD…) (5) selon l’appareil que vous souhaitez contrôler. La<br />
LED clignote une fois<br />
3. Appuyez puis relâchez la touche LEARN (3) deux fois.<br />
4. Enfoncez la touche SETUP. Le témo<strong>in</strong> lum<strong>in</strong>eux s’éte<strong>in</strong>t au bout de quelques secondes.<br />
5. Toutes les commandes apprises pour cet appareil sont effacées.<br />
Effacement des fonctions apprises sous tous les modes:<br />
Vous pouvez effacer toutes les fonctions apprises pour tous les appareils audio/vidéo.<br />
1. Ma<strong>in</strong>tenez enfoncée la touche SETUP (4) jusqu’à ce que le voyant rouge (1) s’allume<br />
(env. 3 s.).<br />
2. Relâchez le bouton SETUP.<br />
3. Appuyez et relâchez la touche LEARN (3) 2 fois. La LED clignote à chaque fois.<br />
4. Appuyez et relâchez la touche SETUP (4). Le voyant s’éte<strong>in</strong>t après quelques secondes.<br />
5. Toutes les fonctions apprises sont effacées.<br />
Notes Importantes:<br />
- Vérifiez que les piles dans les 2 télécommandes soient récentes.<br />
- Veillez à ne pas bouger aucune des 2 télécommandes pendant l’opération<br />
- On ne peut pas enseigner des fonctions aux touches LEARN, SET UP, TV, VCR, CBL,<br />
SAT, CD, PC, a<strong>in</strong>si qu’à aucune touche de domotique X10.<br />
- Commencez par enseigner une ou deux fonctions, pour vérifier la compatibilité entre les 2<br />
télécommandes, effacez alors toutes les fonctions apprises et recommencez la procédure<br />
d’apprentissage pour toutes les fonctions qui vous <strong>in</strong>téressent.<br />
- Modifiez la distance entre les télécommandes en cas de problème.<br />
- Certa<strong>in</strong>es télécommandes n’ont pas leur transmetteur IR sur le devant mais sur le côté.<br />
Faites en sorte que les 2 LED soient face à face.<br />
- Evitez d’effectuer l’apprentissage sous la lumière directe du soleil ou des néons.<br />
- Si vous avez des difficultés à transmettre des fonctions, videz la mémoire puis<br />
recommencez la procédure.<br />
32
- Utilisez la touche Learn pour mémoriser une fonction pour laquelle la 8 en 1 ne possède<br />
pas de touche équivalente.<br />
11) Fonction Macro<br />
Votre télécommande 8 en 1 possède 2 touches macro : M1 et M2. Vous pouvez programmer<br />
ces touches pour exécuter une série d’ordre. Cette fonctionnalité est idéale pour allumer et/<br />
ou éte<strong>in</strong>dre simultanément pr l”<strong>in</strong>termédaire d’1 touche tous vos équipements audio-vidéo et<br />
choisir votre réglage préféré pour votre Home C<strong>in</strong>éma.<br />
Programmation des touches M1 et M2 :<br />
1. Appuyez et ma<strong>in</strong>tenez la touche SETUP (4) enfoncée jusqu’à ce que le voyant reste<br />
allumé en permanence.<br />
2. Appuyez sur la touche M1 ou M2 (17) que vous souhaitez programmer.<br />
3. Appuyez sur la série de touches que vous voulez enregistrer sous la touche Macro (<br />
maximum de 14 touches). La 1ère touche d’une série de Macro doit toujours être une<br />
touche Mode (5). L’ordre de programmation est identique à l’ordre d’exécution des touches.<br />
La LED (1) clignotera à chaque pression de boutton. Vous pouvez changer de mode lors<br />
de la programmation d’une macro.<br />
4. Pour enregistrer la macro appuyez une nouvelle fois sur la touche MACRO. Si vous<br />
atteignez le maximum de 14 touches (ou commandes), le mode de programmation de la<br />
macro s’arrête automatiquement et la macro est mémorisée.<br />
Note pour la programmation :<br />
Il peut être nécessaire d’avoir un délai plus grand pour par exemple permettre à la télé de<br />
s’allumer. Pour programmer une pause dans la séquence, appuyez sur la touche Pause (21)<br />
suivi de la temporisation désirée (1 à 9s max.), par ex. pour programmer une pause de 4<br />
secondes ; appuyez sur Pause (21) suivi de 4 (10). On ne peut entrer «0» après Pause, il ne<br />
peut y avoir de délai égal à «0»<br />
Il existe une pause de 1 seconde entre chaque transmission <strong>in</strong>frarouge de la séquence<br />
Macro.<br />
Pour Effacer une Macro :<br />
1. Ma<strong>in</strong>tenez enfoncée puis relâchez la touche SETUP (4) jusqu’à ce que la LED (1) s’allume.<br />
Relâchez la touche SETUP (4).<br />
2. Pressez sur la touche MACRO ( 17) que vous souhaitez effacer. La LED (1) clignotera.<br />
3. Pressez sur la touche SETUP (4). La LED (1) s’éte<strong>in</strong>dra.<br />
12) Contrôle de votre maison à l’aide de modules domotiques X10<br />
La télécommande 8 en 1 vous permet de commander tous les appareils électriques se<br />
trouvant dans votre maison. En effet, en plus de transmettre les signaux <strong>in</strong>frarouges qui<br />
commandent votre TV, VCR, SAT, DVD, CD et CBL, elle est équipée d’un transmetteur radio<br />
capable d’émettre les signaux X10 et a<strong>in</strong>si de pouvoir commander à distance les lampes et<br />
les appareils électriques se trouvant dans votre maison. Voici quelques exemples de ce que<br />
vous pouvez faire avec les fonctions X10 de votre télécommande 8 en 1 :<br />
· Allumer, éte<strong>in</strong>dre ou faire varier la lum<strong>in</strong>osité de votre éclairage pendant que vous regardez<br />
la télévision.<br />
· Allumez votre couverture chauffante avant la f<strong>in</strong> du film, pour que votre lit soit chaud au<br />
33
moment où vous allez vous coucher.<br />
· Allumer la cafetière, depuis votre chambre, quand vous vous réveillez.<br />
· Allumer les lumières durant la nuit, pour faire fuir les rôdeurs, en cas de bruit suspect<br />
Pour contrôler vos lampes et appareils électriques, vous avez beso<strong>in</strong> des modules domotiques<br />
X10. Ces modules se branchent simplement dans une prise électrique, aucun câblage<br />
supplémentaire n’est nécessaire. Consultez votre revendeur pour plus d’<strong>in</strong>formation.<br />
Allumer/éte<strong>in</strong>dre des appareils branchés à un module X10 : Pressez la touche X10<br />
(7), tapez son code grâce aux touches numériques (10) puis appuyer sur Channel+/- (14)<br />
Varier l’<strong>in</strong>tensité d’une lumière branchée à un module X10 : tapez son code grâce aux<br />
touches numériques (10) puis appuyer sur Volume+/- (16)<br />
Allumer toutes les lampes branchées dans un module Lampe : Pressez la touche<br />
POWER (2)<br />
Ete<strong>in</strong>dre tous les modules (lampes ou appareils) : enfoncez la touche Mute (15)<br />
13) Changement du “code maison” X10 (House Code)<br />
Le code maison par défaut est A et, dans la majorité des cas, ne nécessite pas de changement<br />
sauf si des <strong>in</strong>terférences se produisent avec un système X10 vois<strong>in</strong>. Dans ce cas :<br />
1. Appuyez et relâchez la touche X10 (7)<br />
2. Appuyez et ma<strong>in</strong>tenez la touche SET UP (4) enfoncée jusqu’à ce que le voyant reste<br />
allumé en permanence.<br />
3. Relâchez le bouton SET UP<br />
4. Utilisez les touches numériques (10) pour entrer le nombre équivalent au code maison<br />
choisi (1=A, 2=B, ... 16=P), le voyant clignote à chaque chiffre.<br />
5. Appuyez sur la touche ENT (11) pour confirmer votre code maison. Le voyant s’éte<strong>in</strong>t.<br />
Note : Le code que vous avez choisi pour la télécommande doit être identique à celui du<br />
module Transmetteur TM13 ou de la console de sécurité, que vous commandez avec votre<br />
télécommande.<br />
14) Pannes et problèmes de fonctionnement<br />
La Télécommande ne marche pas ou a tendance à perdre les codes entrés:<br />
· Vérifiez avec la télécommande d’orig<strong>in</strong>e que l’équipement fonctionne correctement<br />
· Vérifiez que vous avez tout d’abord appuyé sur la touche mode correspondant au téléviseur<br />
TV, magnétoscope VCR, satellite SAT, etc. de l’équipement que vous désirez commander<br />
· Si le code de la liste que vous avez entré ne fonctionne pas, essayez le code suivant, ou<br />
bien utilisez la recherche automatique AUTOSEARCH.<br />
· Vérifiez la polarité de vos piles (<strong>in</strong>dications +/-) et qu’elles soient correctement <strong>in</strong>sérées<br />
dans le compartiment (voir le contact des piles sur les ressorts logés dans le compartiment).<br />
· La programmation de la télécommande nécessite l’<strong>in</strong>sertion de 4 piles LR 03 alcal<strong>in</strong>es<br />
neuves. Si la télécommande a tendance à perdre les codes au bout de quelques jours/<br />
sema<strong>in</strong>es, le problème sera résolu par l’<strong>in</strong>sertion de 2 piles neuves et de marque identique.<br />
· Si le voyant lum<strong>in</strong>eux LED reste constamment allumé, généralement après plusieurs<br />
mois d’utilisation, cela signifie que les piles sont à remplacer.<br />
Important: La télécommande universelle ne doit être utilisée que de la façon décrite dans<br />
ce manuel.<br />
34
1) Introducción<br />
8 <strong>in</strong> 1 Mando a Distancia <strong>Universal</strong> <strong>UR24E</strong><br />
El Mando a distancia 8 en 1 controlará la mayoría de los equipos de video y audio. Reemplaza<br />
hasta siete mandos a distancia, así que solo necesitará un mando a distancia para controlar<br />
todos sus equipos. Además con este mando podrá controlar las luces y las aplicaciones<br />
situadas en cualquier lugar de su vivienda cuando utilicen el sistema de Módulos Domóticos<br />
X-10. Cuando se utiliza con un receptor del sistema Powermid, usted podrá <strong>in</strong>cluso controlar<br />
sus equipos desde cualquier lugar de su casa. De forma añadida a todas estas características<br />
únicas, es muy fácil de usar este mando universal. Está preprogramado en fábrica para la<br />
mayoría de las marcas y modelos de equipos. Simplemente <strong>in</strong>troducir el código<br />
correspondiente a su equipo, y su mando estará listo para su uso. Si quiere añadir más<br />
comandos el mando es capaz de aprender las ordenes IR de casi todos los mandos a<br />
distancia IR<br />
2) Como <strong>in</strong>stalar las pilas<br />
1. Empuje la lengüeta de la tapa del alojamiento de las pilas en la parte posterior del mando<br />
y retire la tapa.<br />
2. Coloque cuatro pilas nuevas del tipo AAA , tenga cuidado de hacer co<strong>in</strong>cidir las marcas +<br />
y – de las pilas con las del <strong>in</strong>terior del alojamiento.<br />
Configurando su Mando a distancia 8 en 1<br />
3) Descripción de los botones:<br />
[1] Piloto Indicador (LED):<br />
El <strong>in</strong>dicador parpadeará cuando el mando esté funcionando.<br />
[2] Power / All lights on:<br />
Funciona de la misma forma que en su mando a distancia orig<strong>in</strong>al. También se usa para<br />
encender todos los Módulos de Lámpara del sistema X-10.<br />
[3] Learn:<br />
Le permitirá que el mando aprenda ordenes de cualquier mando a distancia, que pudiera<br />
no estar <strong>in</strong>cluido en la librería del 8 en 1.<br />
[4] Set Up : Se utiliza para <strong>in</strong>troducir los códigos de números que emparejarán el mando<br />
con la TV, VCR u otros equipos.<br />
[5] TV, VCR, SAT, DVD, CBL, CD : Usado para seleccionar el dispositivo a controlar.<br />
[6] PC: En comb<strong>in</strong>ación con el receptor opcional USB-RF, esta tecla le permitirá controlar<br />
las funciones MP3, DVD y CD de su PC. Para más <strong>in</strong>formación pregunte a su distribuidor.<br />
[7] Botón X-10: Le permitirá controlar los Módulos del Sistema Domótico X-10 para<br />
hacer funcionar lámparas y aplicaciones repartidas por toda la casa.<br />
35
[8] SHIFT: le permite acceder a funciones secundarias como: menu, salir, ok, izquierda,<br />
derecha, arriba, abajo,etc. En el mod Shift, el LED permanecerá en ON de forma cont<strong>in</strong>uada.<br />
Para f<strong>in</strong>alizar el modo SHIFT púlse una vez más la tecla SHIFT.<br />
[9] Showview:<br />
En modo VCR: Programación del ShowView o grabación de VIDEOPLUS+ (Ver el manual<br />
del aparato).<br />
En modo TV, CAB, SAT y CD mode: le permite escanear secuencialmente los canales<br />
disponibles<br />
[10] 0 .. 9: Usadas como en el mando a distancia orig<strong>in</strong>al y para <strong>in</strong>troducir los códigos de<br />
dispositivo.<br />
[11] Ent (Enter): Usada junto a las teclas numéricas para la s<strong>in</strong>tonización directa de<br />
canales. En el modo de configuración se usa para confirmar.<br />
[12] A · B: Usadas para seleccionar funciones (Modo preprogramado).<br />
[13] Info: Funciona de la misma manera que en su mando orig<strong>in</strong>al.<br />
[14] Channel: Funciona como en su mando orig<strong>in</strong>al. También se usa para encender y<br />
apagar los Módulos del Sistema X-10.<br />
[15] Mute: Funciona como en su mando orig<strong>in</strong>al. También se usa para apagar todos los<br />
Módulos del Sistema X-10.<br />
[16] Volume: Funciona como en su mando orig<strong>in</strong>al. También se usa para regular la luz de<br />
las lámparas conectadas a los módulos de lámpara X-10.<br />
[17] M1 M2: Tecla de Macro. Le permite ejecutar secuencias IR preprogramadas.<br />
[18] L1, L2: Le permite aprender nuevas teclas del mando orig<strong>in</strong>al.<br />
[19] Teletext MIX: Mezcal el texto con la emisión de TV en el fondo.<br />
[20] Teletext HOLD: Mantiene la pág<strong>in</strong>a actual del teletexto.<br />
[21] Play, FF, Stop, Rew, Pause: Funciona como en su mando orig<strong>in</strong>al. También funcionan<br />
como teclas de color de acceso rápido al teletexto.<br />
[22] Teletext ON.<br />
[23] Teletext OFF.<br />
[24] REC: Tecla de grabación. Funciona como en el mando orig<strong>in</strong>al del VCR. Usted<br />
deberá pulsar la tecla REC dos veces para comenzar a grabar.<br />
36
4) Configuración para TV, VCR, DVD, Receptor de Satélite, CD, CBL<br />
Si desea dedicar otra aplicación a las teclas VCR, DVD, SAT, CBL o CD necesitará primero<br />
<strong>in</strong>troducir un código de 3 dígitos de una aparato similar a la aplicación que quiere controlar.<br />
A cont<strong>in</strong>uación siga los siguientes pasos:<br />
1. Encienda el dispositivo que quiera controlar (TV, VCR, receptor de satélite, CD etc.).<br />
2. Pulse y mantenga la tecla SETUP (4) hasta que el LED <strong>in</strong>dicador (1) luzca de cont<strong>in</strong>uo.<br />
Suelte la tecla SETUP.<br />
3. Pulse y suelte la tecla que se corresponda con el dispositivo que quiere controlar (TV,<br />
VCR, CD, etc.)(5).<br />
4. Introduzca el código de 3 dígitos de la tabla (10). El LED se apagará después de <strong>in</strong>troducir<br />
el último dígito.<br />
5. Apunte con el mando hacia el dispositivo y pulse la tecla POWER (2). Su dispositivo<br />
deberá apagarse.<br />
6. Encienda el dispositivo y pulse POWER (2). Si el dispositivo responde, la configuración<br />
ya se ha completado. Si algunas teclas no activan nada en su dispositivo, pruebe con<br />
algún otro código de la misma marca.<br />
NOTAS:<br />
Si su TV, VCR, Receptor de Satélite no responden, trate con otros códigos de la misma<br />
marca. Si aun así no responde, trate de hacerlo mediante el Método de búsqueda de código.<br />
Si el LED parpadea rápidamente cuando usted <strong>in</strong>troduce el código, probablemente usted ha<br />
<strong>in</strong>troducido un código no válido. Vuelva a comprobar el código en la lista e <strong>in</strong>téntelo de nuevo.<br />
5) Buscando los códigos:<br />
Cuando no pueda encontrar su aparato en la lista de códigos, o no responda a n<strong>in</strong>guno de<br />
los códigos que usted <strong>in</strong>troduzca usted puede tratar de encontrar el código necesario<br />
mediante la utilización del método de “Búsqueda de códigos”.<br />
Si desea dedicar otra aplicación a las teclas VCR, DVD, SAT, CBL o CD necesitará primero<br />
<strong>in</strong>troducir un código de 3 dígitos de una aparato similar a la aplicación que quiere controlar.<br />
Por ejemp. Para buscar un código de SAT primero <strong>in</strong>troduzca el código (buscado en el libro)<br />
de cualquier aparato de SAT como de ha descrito en § 5. A cont<strong>in</strong>uación siga los siguientes<br />
pasos:<br />
1. Encienda el dispositivo a controlar.<br />
2. Presione y mantenga SETUP (4) hasta que el <strong>in</strong>dicador LED luzca permanentemente.<br />
Suelte la tecla SETUP.<br />
3. Presione la tecla de modo (5) que co<strong>in</strong>cida con el equipo que quiere controlar. El LED<br />
parpadeará una vez.<br />
4. Pulse CHANNEL+ (14) repetidamente hasta que el dispositivo a ser controlado cambie<br />
de canal. Si se pasa de largo el código de forma accidental, pulse CHANNEL- (14)<br />
para retroceder (Pulse dos veces para el primer retroceso).<br />
5. Presione y suelte la tecla ENT (11) para completar la configuración.<br />
Nota: Posiblemente tenga que pulsar CHANNEL+ muchas veces (50+). Si el dispositivo<br />
no dispone de la función Channel Up, use la tecla PLAY [>] (solo VCR) o la tecla<br />
POWER(2).<br />
37
6) Busqueda automatica de códigos “autosearch”<br />
Cuando se busca un código desconocido, usted puede buscar en la librería de forma automatica<br />
(Autosearch). Cuando su equipo responda, podrá parar la busqueda y almacenar el código<br />
encontrado.<br />
Si desea dedicar otra aplicación a las teclas VCR, DVD, SAT, CBL o CD necesitará primero<br />
<strong>in</strong>troducir un código de 3 dígitos de una aparato similar a la aplicación que quiere controlar.<br />
Por ejemp. Para buscar un código de SAT primero <strong>in</strong>troduzca el código (buscado en el libro)<br />
de cualquier aparato de SAT como de ha descrito en § 5. A cont<strong>in</strong>uación siga los siguientes<br />
pasos:<br />
1. Encienda el aparato que quiere controlar.<br />
2. Pulse y mantega pulsado SETUP (4) Hasta que el <strong>in</strong>dicador LED (1) luzca de cont<strong>in</strong>uo.<br />
Suelte el botón SETUP.<br />
3. Pulse el botón de modo (5) que co<strong>in</strong>cida con el equipo que quiere controlar. El LED (1)<br />
parpadeará 1 vez.<br />
4. Pulse CHANNEL+ (14) una vez. Despues de unos pocos segundos el mando empezará<br />
a avanzar a traves de la librería de códigos (busqueda rápida, 1 por segundo). Usted<br />
puede pulsar CHANNEL+ (14) para conmutar a una busqueda lenta (1 codigo cada 3<br />
segundos). Podrá buscar hacia atras pulsando CHANNEL- (14) (podrá buscar hacia delante<br />
pulsando CHANNEL+(14) en caso de haber ido demasiado atras). Tan pronto como el<br />
dispositivo responda de nuevo, pulse la tecla ENT (11) para almacenar el código encontrado.<br />
7) Identificando los códigos encontrados en el procedimiento de búsqueda:<br />
1. Pulse y mantenga la tecla SETUP (4) que el <strong>in</strong>dicador LED (1) luzca permanentemente.<br />
Suelte la tecla SETUP.<br />
2. Pulse la tecla de modo (5) que co<strong>in</strong>cida con el equipo que quiere identificar. El LED<br />
parpadeará una vez.<br />
3. Presione y suelte SETUP. El LED parpadeará una vez.<br />
4. Para encontrar el primer dígito, pulse cada tecla de dígito desde 0 a 9 hasta que el LED<br />
parpadee. El número que ha presionado es el primer dígito del código.<br />
5. Presione cada tecla de dígitos 0 a 9 como se ha descrito para encontrar el segundo<br />
dígito.<br />
6. Presione cada tecla de dígitos 0 a 9 para encontrar el tercer dígito. Cuando haya sido<br />
encontrado el tercer dígito el LED se apagará. Anote el código que acaba de encontrar en<br />
la pegat<strong>in</strong>a del <strong>in</strong>terior del compartimento de pilas.<br />
38
8) Aprendiendo<br />
Su Mando a distancia 8 en 1 tiene códigos para la mayoría de los TV, VCR etc. en su libro<br />
de códigos. En cualquier caso si el código de su aparato en particular no se encuentra en la<br />
lista usted puede aprenderlo desde su mando a distancia orig<strong>in</strong>al. O si encuentra un código<br />
en las tablas que casi se ajusta a su aparato, pero algunos botones no están disponibles,<br />
usted podrá aprender solamente estos botones.<br />
Aprendiendo las ordenes:<br />
1. Apunte su mando a distancia orig<strong>in</strong>al hacia su Mando 8 en 1 (frente a frente) con una<br />
distancia entre ambos de unos 5 centímetros.<br />
2. Presione y mantenga SETUP (4) hasta que el <strong>in</strong>dicador LED (1) luzca permanentemente.<br />
3. Presione la tecla de modo (5) que se ajuste con el equipo del que quiere aprender. El LED<br />
parpadeará una vez.<br />
4. Presione y suelte la tecla LEARN (3). El LED parpadeará una vez.<br />
5. Presione y suelte la tecla del Mando a distancia 8 en 1 que quiera que aprenda. El LED<br />
parpadeará una vez. (Presione primero SHIFT para aprender una función alternativa).<br />
6. Presione la tecla del mando orig<strong>in</strong>al de la que quiera aprender. Mantenga pulsada la tecla<br />
hasta que el LED del mando 8 en 1 parpadee rápidamente y se apague.<br />
7. Repita los pasos 5 y 6 para cada tecla de la que quiera aprender.<br />
8. Cuando term<strong>in</strong>e de aprender todas las teclas, pulse SETUP.<br />
9) Borrando todas las ordenes almacenadas en un modo determ<strong>in</strong>ado:<br />
1. Presione y mantenga SETUP (4) hasta que el <strong>in</strong>dicador LED luzca permanentemente.<br />
Suelte la tecla SETUP.<br />
2. Presione la tecla correspondiente al modo deseado (5) (TV, VCR, CBL, SAT, AUX, etc.).<br />
3. Presione y suelte la tecla LEARN (3) dos vece.<br />
4. Presione la tecla SETUP. El LED se apagará después de unos pocos segundos.<br />
5. Todas las ordenes aprendidas en ese modo se habrán borrado.<br />
Borrado de la memoria (recomendado en la primera configuración):<br />
1. Presione y Mantenga pulsado SETUP (4) hasta que el <strong>in</strong>dicador luzca constantemente.<br />
Suelte la tecla SETUP.<br />
2. Pulse y suelte la tecla LEARN (3) dos veces.<br />
3. Pulse la tecla SETUP ( 4). El LED (1) se apagará a los pocos segundos.<br />
4. Todas las entradas de códigos y ordenes memorizadas ahora ya están borradas.<br />
Notas para aprender en su mando a distancia:<br />
- Asegúrese de que las pilas tienen un buen estado de carga antes del proceso de<br />
aprendizaje.<br />
- Tenga cuidado de no mover n<strong>in</strong>guno de ambos mandos durante el proceso de pulsado de<br />
las teclas.<br />
- No se pueden almacenar funciones en las siguientes teclas Learn, Setup, TV, VCR, CBL,<br />
SAT, CD, PC, X-10<br />
39
- Experimente aprendiendo 2 ó 3 teclas <strong>in</strong>icialmente (para asegurarse de la compatibilidad)<br />
y entonces borre loas ordenes aprendidas antes de proceder al aprendizaje completo del<br />
teclado de su mando a distancia orig<strong>in</strong>al.<br />
- Cuando la memoria está llena, el LED parpadea durante tres segundos. No será posible<br />
aprender n<strong>in</strong>guna tecla adicional pero podrá “sobrescribir” las teclas aprendidas<br />
previamente.<br />
- Experimente con la distancia entre los mandos a distancia si tiene problemas en el<br />
proceso de aprendizaje.<br />
- Algunos mandos a distancia no tienen el LED de <strong>in</strong>frarrojos en el centro, así que pudiera<br />
ser necesario experimentar sobre la posición de enfrentamiento de uno con el otro.<br />
- Durante el proceso de aprendizaje del mando 8 en 1 no se coloque delante de una<br />
lámpara <strong>in</strong>candescente o de la luz del sol.<br />
- Use las teclas L1 y L2 para aprender los códigos para los que el mando 8 en 1 no tiene<br />
una tecla especifica.<br />
- Si tiene problemas en el proceso de aprendizaje, trate de borrar la memoria y volver al<br />
proceso de aprendizaje.<br />
<strong>Control</strong>ando sus equipos desde cualquier lugar de la vivienda<br />
Su mando a distancia esta preparado para trabajar junto al receptor del sistema Powermid.<br />
Con este receptor es posible controlar equipos de Video y Audio desde otra habitación o<br />
<strong>in</strong>cluso desde fuera de la vivienda mediante el mando a distancia 8 en 1. Solamente es<br />
necesario enchufar a le red eléctrica el receptor y situarlo a la vista del equipo. Pida a su<br />
distribuidor más <strong>in</strong>formación.<br />
10) Función Macro<br />
Su mando a distancia 8 en 1 tiene 2 teclas de Macro M1 y M2. Puede programar esta teclas<br />
para ejecutar series de ordenes con solo pulsar una de estas teclas. Esta caracteristica es<br />
ideal para encender todos los equipos de audio-video o seleccionar la configuración preferida<br />
de su sistema Home Theatre.<br />
Programación de la teclas de macro M1 y M2<br />
1. Pulse y mantega pulsado SETUP (4) Hasta que el <strong>in</strong>dicador LED (1) luzca de cont<strong>in</strong>uo.<br />
Suelte el botón SETUP<br />
2. Pulse la tecla Macro que desee programar (17)<br />
3. Pulse las teclas del mando 8 en 1 que quiera almacenar en la tecla de Macro (El máximo<br />
son 14 ordenes). La primera tecla almacenada en Macro deberá ser una tecla de Mode.<br />
El orden en la programación deberá ser el de la ejecución de la macro. El <strong>in</strong>dicador LED<br />
(1) parpadeará en cada pulsación. Utilice las teclas de modo (5) para cualquier cambio de<br />
modo.<br />
4. Para almacenar la macro, pulse la tecla de Macro una vez mas. Si alcanza el máximo de<br />
14 ordenes la macro se almacenará de forma automatica en la pulsación 14 y se apagará<br />
el LED (1).<br />
40
Nota para la programación de Macros:<br />
Podrá ser necesario tener <strong>in</strong>cluidos en la secuencia de la macro «retrasos» (Por ejemp.<br />
para permitir al TV el calentamiento). Los retrasos pueden conseguirse mediante la utilización<br />
de la tecla Pause seguida por del número de segundos de retraso requerido, por ejemplo<br />
para <strong>in</strong>troducir un retraso de 4 sg, pulsar y soltar pause seguido de 4. El retraso máximo son<br />
9 Sg. No es posible <strong>in</strong>troducir un dígito «0» despues de una pausa, por ejemplo, no es<br />
posible tener un retraso de 0. Hay un retraso automatico de 1 sg. entre cada transmisión IR<br />
de la secuencia<br />
Para elim<strong>in</strong>ar una Macro :<br />
1. Pulse y mantenga pulsado la tecla Setup (4) hasta que el LED (1) se quede encendido.<br />
Suelte la tecla Setup.<br />
2. Pulse y suelte la tecla Macro (17) que quiera elim<strong>in</strong>ar. El led visible o de Mode parpadeará<br />
y se apagará para <strong>in</strong>dicar la aceptación de la pulsación.<br />
3. Pulse y suelte la tecla Setup. El LED Visible o de Modo se apagará y la macro quedará<br />
elim<strong>in</strong>ada.<br />
11) <strong>Control</strong> de su vivienda utilizando Módulos del sistema Domótico X10<br />
El mando a distancia 8 en 1 le permite controlar prácticamente todos los dispositivos eléctricos<br />
de su vivienda. Junto a la tecnología IR que le permite controlar todos sus TV, VCR, Cable y<br />
receptores Satélite dispone de tecnología RF X-10 que le permitirá controlar de forma remota<br />
lámparas y aplicaciones situadas en cualquier lugar de su vivienda.<br />
Para controlar sus lámparas y aplicaciones necesita los Módulos Domóticos X10, que<br />
solamente es necesario conectarlos a los enchufes de la red eléctrica. No se necesita<br />
cableado adicional. Para mas <strong>in</strong>formación consulte a su distribuidor.<br />
Aquí tiene algunas de las cosas que puede hacer con su mando 8 en 1 utilizando las<br />
propiedades X-10:<br />
· Apagar, encender o regular las luces mientras ve la TV<br />
· Encender la cafetera desde el dormitorio al levantarse de la cama<br />
· Encender las luces por la noche si oye un ruido para ahuyentar a los <strong>in</strong>trusos<br />
· Encender su manta eléctrica antes de term<strong>in</strong>ar de ver la película, para que la cama esté<br />
agradable<br />
41
<strong>Control</strong> de los Módulos X-10<br />
Usted puede controlar los Módulos X-10 de la siguiente forma:<br />
1. Pulse y suelte la tecla X-10.<br />
2. Use las teclas numéricas para <strong>in</strong>troducir el Código de Unidad del Módulo que desee (No<br />
es necesario <strong>in</strong>troducir ‘0’ primero sí se trata de un número de 1 digito).<br />
3. Presione la tecla apropiada para la función que desee (Ver a cont<strong>in</strong>uación).<br />
Funciones X-10:<br />
On: CHANNEL +<br />
Off: CHANNEL -<br />
Bright: VOLUME +<br />
Dim: VOLUME -<br />
All Lights On: Power<br />
All Units Off: Mute<br />
12) Cambio del House Code de X-10<br />
El mando 8 en 1 por defecto está en House Code A, y en la mayoría de los casos no será<br />
necesario cambio salvo que se experimenten <strong>in</strong>terferencias de algún sistema X-10 vec<strong>in</strong>o.<br />
1. Pulse y suelte la tecla X-10.<br />
2. Pulse y mantenga SETUP (4) hasta que el <strong>in</strong>dicador LED luzca permanentemente. Suelte<br />
la tecla de setup.<br />
3. Utilice la tecla correspondiente numérica (10) correspondiente al House Code (1=A, 2=B,<br />
.... 16=P).<br />
4. Pulse la tecla ENT (11) para confirmar el House Code. El LED se apagará.<br />
Nota: El House Code seleccionado deberá co<strong>in</strong>cidir con el House Code del Módulo Transceptor<br />
(TM12 o Consola de seguridad ) que usted está utilizando.<br />
13) Problemas<br />
El mando a distancia no controla sus equipos de A&V, o no funciona del todo.<br />
· Utilice los mandos manuales del equipo para confirmar que el equipo trabaja de forma<br />
adecuada.<br />
· Asegúrese de que pulsó la tecla correspondiente al equipo que quería controlar.<br />
· Trate de encontrar el código de su equipo utilizando el método de “búsqueda de códigos”.<br />
· Verifique la polaridad de las pilas.<br />
· Sustituya las pilas.<br />
42
Veiligheidsvoorschrift<br />
8 <strong>in</strong> 1 Afstandsbedien<strong>in</strong>g <strong>UR24E</strong><br />
Om de veiligheid te waarborgen zijn technische aanpass<strong>in</strong>gen aan het product, of gebruik<br />
buiten het toepass<strong>in</strong>gsgebied verboden. Dit apparaat is gefabriceerd en goedgekeurd <strong>in</strong><br />
overeenstemm<strong>in</strong>g met de CE-richtlijnen. De veiligheids- en gebruiksvoorschriften dienen <strong>in</strong><br />
acht genomen te worden.<br />
Raadpleeg voor correct gebruik deze gebruikershandleid<strong>in</strong>g. K<strong>in</strong>deren dienen dit product alleen<br />
te gebruiken onder toezicht van volwassenen.<br />
De 8<strong>in</strong>1 Afstandsbedien<strong>in</strong>g dient uitsluitend gebruikt te worden <strong>in</strong> droge ruimten. Vermijd<br />
hoge luchtvochtigheid en extreem hoge temperaturen, alsook ruw gebruik.<br />
Neem de veiligheidsvoorschriften uit de handleid<strong>in</strong>g <strong>in</strong> acht. Voor opkomende vragen die niet<br />
vanuit de gebruikershandleid<strong>in</strong>g beantwoordt kunnen worden, kunt u contact opnemen met<br />
uw dealer.<br />
Om een juiste <strong>in</strong>stallatie te waarborgen dient u de gebruikershandleid<strong>in</strong>g goed door te nemen.<br />
Garantie<br />
Er mogen geen verander<strong>in</strong>gen aan het product aangebracht worden, en het is verboden het<br />
product te openen. Vervang defecte onderdelen alleen met orig<strong>in</strong>ele reserve onderdelen. Laat<br />
reparatie of service alleen over aan deskundig personeel.<br />
Bij oneigenlijk gebruik, zelf aangebrachte verander<strong>in</strong>gen en/of reparaties, komen alle<br />
garantiebepal<strong>in</strong>gen te vervallen.<br />
Wanneer er problemen zijn met de werk<strong>in</strong>g van het apparaat, kunt U contact opnemen met<br />
uw dealer om het apparaat ter reparatie aan te bieden.<br />
Vervangen van batterijen<br />
Het produkt mag alleen gebruikt worden met 4 AAA batterijen. Bij het <strong>in</strong>stalleren van de<br />
batterijen dient u te letten op de polariteit (+ en -). Verwijder de batterijen uit de afstandsbedien<strong>in</strong>g<br />
wanneer deze voor langere tijd niet gebruikt wordt. Let er op dat de batterijen niet kortgesloten<br />
worden of blootgesteld aan vuur (<strong>in</strong> verband met ontploff<strong>in</strong>gsgevaar).<br />
Batterijen zijn niet bedoeld voor k<strong>in</strong>deren. Laat geen batterijen sl<strong>in</strong>geren - k<strong>in</strong>deren en huisdieren<br />
kunnen deze <strong>in</strong> de mond nemen en doorslikken. Neem direct contact op met een dokter<br />
wanneer dit gebeurt. Lekkende of beschadigde batterijen kunnen huid irritaties – gebruik<br />
handschoenen <strong>in</strong>dien noodzakelijk.<br />
Batterijen weggooien<br />
Lege batterijen behoren bij het chemisch afval en niet bij het reguliere huisvuil. De gebruiker<br />
wordt verzocht de batterijen <strong>in</strong> te leveren bij de bekende <strong>in</strong>leverpunten. Denk aan het milieu.<br />
43
Installatie voor een snelle start<br />
1) Het <strong>in</strong>stalleren van de batterijen<br />
1. Verwijder het klepje van het batterijvak aan de achterzijde van de afstandsbedien<strong>in</strong>g<br />
2. Installeer vier volle AAA batterijen. Let daarbij op de + en – tekens <strong>in</strong> het batterijvak.<br />
2) Programmeren van de 8<strong>in</strong>1 afstandsbedien<strong>in</strong>g<br />
1. Zet het apparaat aan wat u wilt gaan bedienen (TV, Video, CD etc.).<br />
2. Raadpleeg het codeboek wat meegeleverd is met de afstandsbedien<strong>in</strong>g en kies het merk<br />
van het apparaat dat u wilt bedienen. Bijvoorbeeld: al heeft u een Philips Televisie, kijk dan<br />
onder Philips <strong>in</strong> de TV sectie.<br />
3. Druk op de SETUP toets (4) totdat de rode LED aanblijft. Laat de SETUP toets los.<br />
4. Druk op de functietoets (5) welke overeen komt met het type apparaat wat u wilt gaan<br />
bedienen (TV, Video, CD etc.).<br />
5. Geef met de cijfertoetsen (10) de 3 cijferige code uit de code Bibliotheek <strong>in</strong>. De LED<br />
flikkert bij iedere toets en gaat uit na het <strong>in</strong>geven van het derde cijfer.<br />
6. Wanneer de LED snel beg<strong>in</strong>t te knipperen is de <strong>in</strong>gegeven code onjuist en dient u opnieuw<br />
te beg<strong>in</strong>nen bij 1.<br />
7. Alternatief voor stap 5; wanneer het merk van uw apparatuur hier vermeld is:<br />
Merk Code Merk Code<br />
Philips/Radiola 1 Telefunken/Saba/Normende 4<br />
Sony/Panasonic/JVC/<br />
Sharp / Akai/Toshiba/Daewoo<br />
2 Grundig/Blaupunkt 5<br />
Thomson/Brandt 3 Nokia/ ITT 6<br />
Geef de code <strong>in</strong> die overeenkomt met het merk van uw apparaat, richt de afstandsbedien<strong>in</strong>g<br />
op het apparaat en druk op de CHANNEL+ toets (14). De afstandsbedien<strong>in</strong>g gaat nu<br />
automatisch zoeken en zend iedere seconde een ander <strong>in</strong>frarood code, dus wacht totdat het<br />
apparaat reageert. Wanneer het apparaat reageert, drukt u de ENT toets (11) <strong>in</strong> om te<br />
bevestigen. Wanneer de juiste code reeds gepasseerd is en u hebt deze gemist kunt u stap<br />
voor stap terug door het herhaaldelijk <strong>in</strong>drukken van de CHANNEL- toets (14). Druk ENT (11)<br />
om te bevestigen.<br />
8. Richt de afstandsbedien<strong>in</strong>g op het apparaat en druk op de POWER (2) toets. Uw apparaat<br />
zou nu uit moeten gaan. Zet uw apparaat aan en druk op CHANNEL+. Wanneer het<br />
apparaat reageert, dan is de <strong>in</strong>stallatie voltooid. Wanneer sommige toetsen niet werken,<br />
dan dient u de andere codes uit de code bibliotheek voor uw merk proberen.<br />
44
Universele Afstandsbedien<strong>in</strong>g <strong>UR24E</strong><br />
Inhoud<br />
1) Introductie<br />
2) Batterijen plaatsen<br />
3) Algemeen<br />
4) Beschrijv<strong>in</strong>g van de toetsen<br />
5) De afstandsbedien<strong>in</strong>g <strong>in</strong>stellen voor TV, VCR, DVD, SAT, CD en CBL<br />
6) Handmatig zoeken naar codes<br />
7) Automatisch zoeken naar codes<br />
8) Identificatie van de gevonden codes<br />
9) Inleren van commando’s<br />
10) Wissen van <strong>in</strong>geleerde commando’s om geheugenruimte vrij te maken<br />
11) Macro functie<br />
12) Uw huis besturen door het gebruik van X-10 Home Automation Modules<br />
13) De X-10 HuisCode veranderen<br />
14) Problemen oplossen<br />
1) Introductie<br />
De 8<strong>in</strong>1 afstandsbedien<strong>in</strong>g is bedoeld om tot maximaal 8 apparaten te kunnen bedienen (TV,<br />
VCR, DVD, SAT, CD, CBL en PC, plus X-10 Modules). De afstandsbedien<strong>in</strong>g bevat een<br />
voorgeprogrammeerde bibliotheek van codes. Deze bibliotheek bevat vrijwel alle codes van<br />
audio/video produkten van de huidige markt. Voor een eenvoudige <strong>in</strong>stallatie raden wij u aan<br />
de AUTOSEARCH functionaliteit te gebruiken.<br />
2) Het <strong>in</strong>stalleren van de batterijen (gebruik alleen nieuwe LR03 AAA batterijen)<br />
1. Verwijder het klepje van het batterijvak aan de achterzijde van de afstandsbedien<strong>in</strong>g<br />
2. Installeer vier volle AAA batterijen. Let daarbij op de + en – tekens <strong>in</strong> het batterijvak.<br />
3) Algemeen<br />
De 8<strong>in</strong>1 afstandsbedien<strong>in</strong>g is voorzien van een UHF zender en kan daardoor samenwerken<br />
met de Powermid ontvanger. Met deze ontvanger wordt het mogelijk om uw audio en video<br />
apparatuur vanuit elke plaats <strong>in</strong> huis en zelfs buiten huis te bedienen met behulp van uw 8<strong>in</strong>1<br />
afstandsbedien<strong>in</strong>g.<br />
De volumebedien<strong>in</strong>g (VOL+ / VOL- / MUTE) van de TV kan ook vanuit andere modes (bv. SAT,<br />
DVD, CBL, etc.) gebruikt worden.<br />
4) Beschrijv<strong>in</strong>g van de toetsen<br />
[1] Indicatielampje (LED): Het <strong>in</strong>dicatielampje is aan wanneer de afstandsbedien<strong>in</strong>g actief<br />
is.<br />
[2] Power / All Lights On: Werkt op dezelfde wijze als uw orig<strong>in</strong>ele afstandsbedien<strong>in</strong>g.<br />
Wordt ook gebruikt om alle X-10 Lamp Modules aan te schakelen.<br />
45
[3] Learn: Laat u codes <strong>in</strong>leren van een bestaande afstandsbedien<strong>in</strong>g, die niet <strong>in</strong> de 8<strong>in</strong>1<br />
bibliotheek aanwezig zijn.<br />
[4] Setup: Wordt gebruikt om de apparaatcode voor uw TV, Video of ander apparaat <strong>in</strong> te<br />
geven.<br />
[5] VCR, TV, SAT, DVD, CBL, CD, Functietoetsen voor het kiezen van het apparaat wat u wilt<br />
bedienen. CBL = decoder, VCR = video.<br />
[6] PC : Met de optioneel verkrijgbare Mouse <strong>Remote</strong> Receiver kunt u met uw afstandsbedien<strong>in</strong>g<br />
ook MP3, DVD en CD functies van uw PC bedienen. Vraag uw dealer om meer <strong>in</strong>formatie.<br />
[7] X10 mode: Functie toets om X-10 commando’s te activeren en lamp en apparaat modules<br />
te kunnen bedienen<br />
[8] SHIFT: Extra toegevoegde functies bij voorgeprogrammeerde codes. Er kunnen functies<br />
op uw orig<strong>in</strong>ele afstandsbedien<strong>in</strong>g zitten, welke niet aanwezig zijn op het toetsenbord van de<br />
8<strong>in</strong>1 afstandsbedien<strong>in</strong>g. Dit betekent echter niet dat deze niet beschikbaar zijn. Het is mogelijk<br />
dat de functies beschikbaar zijn via de SHIFT toets. Wanneer u een functie mist, druk dan<br />
één keer op de SHIFT toets, en zoek de functie door op de toetsen te drukken. In de Shift<br />
functie is de LED cont<strong>in</strong>u aan. Om de Shift functie te beë<strong>in</strong>digen drukt u nogmaals op de Shift<br />
toets. De SHIFT toets kan ook worden gebruikt om een nieuwe functie onder dezelfde toets<br />
<strong>in</strong> te leren.<br />
[9] Showview / V+: Met deze toets kunt u de ShowView of Video+ functie van uw videorecorder<br />
gebruiken (mits uw videorecorder deze functie ondersteunt). Wanneer uw video deze functie<br />
niet heeft, dan kan de toets toegang geven tot de timer functie of het menu van de videorecorder.<br />
Wanneer de Showview / V+ toets wordt gebruikt <strong>in</strong> andere modes dan de VCR mode (TV,<br />
CBL, SAT, CD), dan wordt de toets vaak gebruikt voor de Scan functie. Hiermee kunt u b.v. <strong>in</strong><br />
de TV mode automatisch zappen tussen de zenders of bij een CD luisteren naar het <strong>in</strong>tro van<br />
de nummers. De toets zorgt ervoor dat elke 3 seconden een kanaal of nummer opgeschakeld<br />
wordt. U stopt de Scan functie door het <strong>in</strong>drukken van een willekeurige toets. De Scan functie<br />
stopt automatisch na 2 m<strong>in</strong>uten.<br />
[10] Numerieke toetsen 0 - 9: Zelfde functie als op uw orig<strong>in</strong>ele afstandsbedien<strong>in</strong>g, en voor<br />
het <strong>in</strong>geven van de apparaatcode bij X-10 gebruik.<br />
[11] Ent (Enter): Wordt gebruikt <strong>in</strong> samenwerk<strong>in</strong>g met de numerieke toetsen voor direct<br />
kiezen van kanalen. Wordt bij programmeren gebruikt voor bevestig<strong>in</strong>g.<br />
[12] A · B: Wordt gebruikt voor wissel functies (voorgeprogrammeerde codes).<br />
[13] Info: Werkt op dezelfde wijze als uw orig<strong>in</strong>ele afstandsbedien<strong>in</strong>g.<br />
[14] Channel: Zelfde functie als op uw orig<strong>in</strong>ele afstandsbedien<strong>in</strong>g. Ook gebruikt om X-10<br />
Home Automation Modules aan en uit te schakelen. In SHIFT mode werkt deze toets als<br />
navigatie cursor <strong>in</strong> het menu (UP / DOWN).<br />
[15] OK / Mute / All Off: Zelfde functie als op uw orig<strong>in</strong>ele afstandsbedien<strong>in</strong>g. Ook gebruikt<br />
om alle X-10 Home Automation Modules uit te schakelen. In SHIFT mode werkt deze toets<br />
als bevestig<strong>in</strong>gstoets <strong>in</strong> het menu.<br />
46
[16] Volume: Zelfde functie als op uw orig<strong>in</strong>ele afstandsbedien<strong>in</strong>g. Ook gebruikt om lampen<br />
te dimmen die op X-10 Lamp Modules aangesloten zijn. In SHIFT mode werkt deze toets als<br />
navigatietoets <strong>in</strong> het menu (LINKS / RECHTS).<br />
[17] M1, M2: Macro toetsen. Met deze toetsen kunt met een druk op de toets een serie<br />
vooraf gekozen commando’s uitvoeren.<br />
[18] L1, L2: Extra toetsen voor het <strong>in</strong>leren van functies van uw orig<strong>in</strong>ele afstandsbedien<strong>in</strong>g.<br />
[19] Teletekst MIX. Mixt de tekst met het TV programma op de achtergrond.<br />
[20] Teletekst HOLD. Zet de huidige pag<strong>in</strong>a vast.<br />
[21] VCR buttons Play, FF, Stop, Rew, Pause: Werkt op dezelfde wijze als uw orig<strong>in</strong>ele<br />
afstandsbedien<strong>in</strong>g. Werken ook als Teletekst kleurentoetsen.<br />
[22] Teletekst AAN: Schakelt Teletekst <strong>in</strong>. In SHIFT mode werkt deze toets als menu selectie<br />
AAN voor het gekozen apparaat.<br />
[23] Teletekst UIT: Schakelt Teletekst uit. In SHIFT mode werkt deze toets als menu selectie<br />
UIT voor het gekozen apparaat.<br />
[24] REC: Opname toets. Werkt op dezelfde wijze als uw orig<strong>in</strong>ele afstandsbedien<strong>in</strong>g van de<br />
Video. U moet de REC toets twee maal <strong>in</strong>drukken om het opnemen te laten starten.<br />
Algemene Volume bedien<strong>in</strong>g<br />
Omdat sommige typen Satellietontvangers, VCR’s etc geen volume bedien<strong>in</strong>g ondersteunen,<br />
kan de 8<strong>in</strong>1 afstandsbedien<strong>in</strong>g het TV volume bedienen <strong>in</strong> een andere mode (zonder de TV<br />
mode te selecteren). Om het apparaat te kiezen wat de volume bedien<strong>in</strong>g <strong>in</strong> een bepaalde<br />
mode overneemt, hanteert u de volgende procedure:<br />
1. Druk op de functietoets voor de TV (5)<br />
2. Druk op de SETUP toets (4) totdat de LED aanblijft.<br />
3. Laat de SETUP toets los.<br />
4. Druk de Mute toets (15) <strong>in</strong> en houdt deze ongeveer 8 seconden <strong>in</strong>gedrukt. De LED zal een<br />
keer oplichten wanneer de toets <strong>in</strong>gedrukt wordt, en dan na 8 seconden oplichten als<br />
bevestig<strong>in</strong>g. Hierna zal de LED uitgaan.<br />
5. Volume bedien<strong>in</strong>g vanuit andere Mode is nu gerealiseerd<br />
6. U kunt de mode-volumebedien<strong>in</strong>g uitschakelen door dezelfde procedure te hanteren.<br />
5) De afstandsbedien<strong>in</strong>g <strong>in</strong>stellen voor TV, VCR, DVD, SAT, CD en CBL<br />
OPMERKING: U kunt de Mode toetsen (TV, VCR, DVD etc.) willekeurig toewijzen aan<br />
apparaten zolang de bijbehorende 3 cijferige code overeenkomt met het te bedienen apparaat.<br />
Gebruik hiervoor de volgende methode:<br />
1. Zet het apparaat aan wat u wilt gaan bedienen (TV, Video, CD etc.).<br />
2. Druk op de SETUP toets (4) totdat de LED aanblijft. Laat de SETUP toets los.<br />
47
3. Druk op de functietoets (5) welke overeen komt met het type apparaat wat u wilt gaan<br />
bedienen (TV, Video, CD etc.).<br />
4. Geef de 3 cijferige code (10) uit de code Bibliotheek <strong>in</strong>. De LED gaat uit na het <strong>in</strong>geven van<br />
het derde cijfer.<br />
5. Richt de afstandsbedien<strong>in</strong>g op het apparaat en druk op de POWER (2) toets. Uw apparaat<br />
zou nu uit moeten gaan. Zet uw apparaat aan en druk op CHANNEL+ (14). Wanneer het<br />
apparaat reageert, dan is de <strong>in</strong>stallatie voltooid. Wanneer sommige toetsen niet werken,<br />
dan dient u de andere codes uit de code bibliotheek voor uw merk proberen.<br />
6. Herhaal deze procedure voor alle apparaten die u wilt bedienen ( TV, Video, CD etc.).<br />
6) Handmatig zoeken naar codes<br />
Wanneer uw TV, Video of Satellietontvanger niet reageert, probeer dan de andere codes voor<br />
uw merk. Wanneer dit ook niet werkt probeer dan de ‘Handmatig zoeken naar codes’ methode.<br />
Om het juiste deel uit de code bibliotheek te selecteren voor het handmatig of automatisch<br />
zoeken naar codes, dient u altijd eerst een code te kiezen uit de codelijst welke bestemd is<br />
voor het type apparaat wat u zoekt (b.v. code uit lijst VCR voor video, lijst Sat voor<br />
satellietontvangers, etc.). Vervolg de handmatige programmer<strong>in</strong>g als volgt:<br />
1. Zet de apparatuur aan die u wilt gaan bedienen.<br />
2. Druk op SETUP toets (4) totdat de LED aanblijft. Laat de SETUP toets los.<br />
3. Druk op de functietoets (TV, VCR, etc.) (5) welke overeenkomt met het type apparaat wat<br />
u wilt gaan bedienen. De LED knippert eenmalig.<br />
4. Druk telkens op CHANNEL+ (14) totdat het apparaat wat u wilt bedienen van zender<br />
wisselt. Wanneer u per ongeluk een stap te ver doet, dan kunt stappen terug doen door op<br />
CHANNEL -te drukken.<br />
5. Druk op de ENT toets (11) om de <strong>in</strong>stallatie te voltooien.<br />
NB: Het kan zijn dat u CHANNEL+ (14)vaak <strong>in</strong> moet drukken (50+). Wanneer uw apparaat<br />
geen kanaal+, kanaal- functie heeft, dan gebruikt u voor een video de PLAY toets (21) en bij<br />
andere apparaten de POWER toets (2).<br />
Het zoeken start bij de laatst geregistreerde code. Wanneer dit bijvoorbeeld code 030 was,<br />
zal het zoeken beg<strong>in</strong>nen bij 031 en doorlopen tot aan het e<strong>in</strong>de van de reeks, waarna opnieuw<br />
begonnen wordt bij 000 tot code 029.<br />
OPMERKING: Mochten sommige functies van de afstandsbedien<strong>in</strong>g niet werken, dan dient u<br />
een andere code voor het apparaat te zoeken.<br />
48
7) Automatisch zoeken naar codes<br />
Wanneer u codes zoekt voor een onbekend apparaat, of een apparaat dat niet <strong>in</strong> de lijst<br />
voorkomt kunt u gebruik maken van de automatische zoekfunctie (Autosearch). Hierbij loopt<br />
de afstandbedien<strong>in</strong>g automatisch door de code bibliotheek. Wanneer het apparaat reageert,<br />
kunt u het zoeken stopzetten en de code opslaan.<br />
Om het juiste deel uit de code bibliotheek te selecteren voor het handmatig of automatisch<br />
zoeken naar codes, dient u altijd eerst een code te kiezen uit de codelijst welke bestemd is<br />
voor het type apparaat wat u zoekt (b.v. code uit lijst VCR voor video, lijst Sat voor<br />
satellietontvangers, etc.). Vervolg de handmatige programmer<strong>in</strong>g als volgt:<br />
1. Zet de apparatuur aan die u wilt gaan bedienen.<br />
2. Druk op SETUP toets (4) totdat de LED aanblijft. Laat de SETUP toets los.<br />
3. Druk op de functietoets (TV, VCR, etc.) (5) welke overeenkomt met het type apparaat dat<br />
u wilt gaan bedienen. De LED knippert eenmalig.<br />
4. Druk één keer op CHANNEL+ (14). Na enkele seconden gaat de afstandsbedien<strong>in</strong>g zelf<br />
door de code bibliotheek lopen (snel zoeken). Wanneer het apparaat dat u wilt bedienen<br />
op de afstandsbedien<strong>in</strong>g reageert, drukt u op CHANNEL- om over te schakelen naar<br />
langzaam zoeken. U kunt eventueel handmatig een aantal codes terugstappen door<br />
meerdere malen op CHANNEL- te drukken (wanneer u te ver terug stapt, kunt u weer<br />
omhoog schakelen met CHANNEL+). Op het moment dat uw apparaat nu weer op de<br />
afstandsbedien<strong>in</strong>g reageert, drukt op de ENT toets (11) om de <strong>in</strong>stallatie te voltooien.<br />
8) Identificatie van de gevonden codes<br />
1. Druk op SETUP toets (4) totdat de LED aanblijft. Laat de SETUP toets los.<br />
2. Druk op de functietoets (5) van het apparaat waarvan u de code wilt identificeren (TV,<br />
VCR, etc.). De LED knippert eenmalig.<br />
3. Druk op SETUP (4). De LED knippert eenmalig.<br />
4. Om het eerste cijfer te v<strong>in</strong>den drukt u op de toetsen 0 tot 9 (10) totdat de LED knippert.<br />
Het nummer wat u het laatst <strong>in</strong>gedrukt heeft is het eerste cijfer van de code.<br />
5. Druk op de toetsen van 0 tot 9 (10)zoals boven beschreven om het tweede cijfer te v<strong>in</strong>den.<br />
6. Druk op de toetsen van 0 tot 9 (10) om het derde cijfer te v<strong>in</strong>den. Wanneer het derde cijfer<br />
gevonden is, gaat de LED uit. U kunt de gevonden code op het daarvoor bestemde etiket<br />
van de afstandsbedien<strong>in</strong>g schrijven (batterijvakje).<br />
9) Inleren van commando’s<br />
Uw 8<strong>in</strong>1 afstandsbedien<strong>in</strong>g heeft de codes van de meeste TV’s, Video’s etc. <strong>in</strong> zijn code<br />
bibliotheek. Wanneer echter een bepaald apparaat niet <strong>in</strong> deze bibliotheek voorkomt, dan<br />
kunt u de codes <strong>in</strong>leren van uw bestaande afstandsbedien<strong>in</strong>g. Het kan ook zijn dat u een<br />
code v<strong>in</strong>dt welke nagenoeg overeenkomt met de functionaliteit van uw apparaat, maar<br />
waarbij een paar toetsen ontbreken. Deze toetsen kunt u dan eenvoudig <strong>in</strong>leren.<br />
49
1. Richt uw bestaande afstandsbedien<strong>in</strong>g op de 8<strong>in</strong>1 afstandsbedien<strong>in</strong>g (voorkant naar<br />
voorkant) met een afstand van ongeveer 2,5 centimeter tussen de afstandsbedien<strong>in</strong>gen.<br />
2. Druk op SETUP toets (4) totdat de LED aanblijft. Laat de SETUP toets los.<br />
3. Druk op de functietoets (TV, CD, SAT, etc.) welke overeenkomt met het apparaat wat u<br />
wilt <strong>in</strong>leren. De LED knippert eenmalig.<br />
4. Druk op de L(EARN)(3) toets. De LED knippert eenmalig.<br />
5. Druk op de toets op de 8<strong>in</strong>1 afstandsbedien<strong>in</strong>g waaronder u een nieuw commando wilt<br />
<strong>in</strong>leren. De LED knippert eenmalig (druk eerst op SHIFT wanneer u een Shifted functie wilt<br />
gebruiken).<br />
6. Afhankelijk van het type orig<strong>in</strong>ele afstandsbedien<strong>in</strong>g welke u heeft zijn twee methodes<br />
mogelijk:<br />
a. Druk op de toets van uw bestaande afstandsbedien<strong>in</strong>g welke u wilt <strong>in</strong>leren. Houd de toets<br />
van uw orig<strong>in</strong>ele afstandsbedien<strong>in</strong>g <strong>in</strong>gedrukt totdat de LED op de 8<strong>in</strong>1 afstandsbedien<strong>in</strong>g<br />
kort uit gaat. Wanneer de LED niet kort uitgaat maar knippert dient u bij uw<br />
afstandsbedien<strong>in</strong>g methode b toe te passen (n.b. als u net methode a heeft geprobeerd<br />
en u wilt nu methode b proberen ga dan eerst verder met stap 5).<br />
b. Druk op de toets van uw bestaande afstandsbedien<strong>in</strong>g welke u wilt <strong>in</strong>leren. Houdt de toets<br />
van uw orig<strong>in</strong>ele afstandbedien<strong>in</strong>g net zo lang <strong>in</strong>gedrukt als u dit bij de normale bedien<strong>in</strong>g<br />
van uw apparatuur zou doen<br />
7. Herhaal stap 5 en 6 voor elke toets die u wilt <strong>in</strong>leren.<br />
8. Wanneer u klaar bent met het <strong>in</strong>leren van de toetsen, drukt u op SETUP (4)<br />
10) Wissen van <strong>in</strong>geleerde commando’s om geheugenruimte vrij te maken.<br />
U kunt de opgeslagen <strong>in</strong>geleerde commando’s voor elke functie apart wissen (TV, VCR,<br />
etc.):<br />
1. Druk op de SETUP toets (4) totdat de LED aanblijft. Laat de SETUP toets los.<br />
2. Druk op de functietoets (5)van uw keuze (TV, VCR, etc.). De LED knippert eenmalig.<br />
3. Druk twee maal op de L(EARN)(3) toets.<br />
4. Druk op SETUP (4). De LED gaat na een paar seconden uit.<br />
5. Alle opgeslagen <strong>in</strong>geleerde commando’s van de door u gekozen functies zijn nu gewist.<br />
Wissen van het geheugen – aanbevolen bij eerste setup van de afstandsbedien<strong>in</strong>g<br />
1. Druk op de SETUP toets (4) totdat de LED aanblijft. Laat de SETUP toets los.<br />
2. Druk twee maal op de L(EARN) toets (3).<br />
3. Druk op de SETUP toets (4). De LED gaat na een paar seconden uit.<br />
4. Het geheugen van de afstandsbedien<strong>in</strong>g is nu gewist.<br />
Opmerk<strong>in</strong>gen bij het <strong>in</strong>leren:<br />
- Zorg ervoor dat u <strong>in</strong> beide afstandsbedien<strong>in</strong>gen volle batterijen gebruikt, voordat u start<br />
met <strong>in</strong>leren.<br />
- Let erop dat u de afstandsbedien<strong>in</strong>gen niet beweegt bij het <strong>in</strong>drukken van de toetsen.<br />
- Er kunnen geen commando’s geleerd worden onder de Learn, Setup, TV, VCR, CBL,<br />
SAT, CD, PC, M1, M2, ShowView/V+, X-10 toetsen, of direct onder de SHIFT toets.<br />
50
- Experimenteer door <strong>in</strong> eerste <strong>in</strong>stantie 2 of 3 toetsen <strong>in</strong> te leren (om compatibiliteit te<br />
testen) alvorens het volledige toetsenbord van uw orig<strong>in</strong>ele afstandsbedien<strong>in</strong>g <strong>in</strong> te leren.<br />
- Experimenteer met de afstand tussen de afstandsbedien<strong>in</strong>gen wanneer u problemen heeft<br />
bij het <strong>in</strong>leren.<br />
- Bij sommige afstandsbedien<strong>in</strong>gen zit de LED niet <strong>in</strong> het midden. Probeer dan te<br />
experimenteren met het zijdel<strong>in</strong>gs verschuiven t.o.v. elkaar.<br />
- Zorg ervoor dat u niet direct onder een TL buis of <strong>in</strong> direct <strong>in</strong>vallend zonlicht zit bij het<br />
<strong>in</strong>leren van de afstandsbedien<strong>in</strong>g.<br />
- Gebruik de toetsen L1 en L2 om codes <strong>in</strong> te leren waarvoor de 8<strong>in</strong>1 afstandsbedien<strong>in</strong>g<br />
geen overeenkomstige toets heeft.<br />
- Wanneer u problemen heeft bij het <strong>in</strong>leren van toetsen, wis dan het geheugen en probeer<br />
het <strong>in</strong>leren opnieuw.<br />
11) Macro functie<br />
Uw afstandsbedien<strong>in</strong>g heeft twee Macro toetsen: M1 en M2. U kunt deze toetsen zo<br />
programmeren dat ze een serie commando’s met één druk op de knop uitvoeren. Deze<br />
krachtige functie is ideaal voor b.v. het <strong>in</strong>schakelen van al uw audio- en videoapparatuur of<br />
het kiezen van bepaalde voorkeurs<strong>in</strong>stell<strong>in</strong>gen <strong>in</strong> Home Theatre toepass<strong>in</strong>gen.<br />
Programmeren van de Macrotoetsen M1 en M2<br />
1. Druk op de SETUP toets (3) totdat de LED aanblijft. Laat de SETUP toets los.<br />
2. Druk op de Macrotoets (17) die u wilt <strong>in</strong>stellen (M1 of M2)<br />
3. Druk op de toetsen van de afstandsbedien<strong>in</strong>g welke u onder de Macro toets wilt opslaan<br />
(maximaal 14 commando’s). De volgorde van programmeren wordt exact overgenomen bij<br />
het uitvoeren van het Macro. De LED (1) zal oplichten bij elek toets. Toets de functietoets<br />
(5) <strong>in</strong> voor gebruik van een andere mode.<br />
4. Om het Macro op te slaan drukt u nogmaals op de Macrotoets. Wanneer u het maximum<br />
van 14 commando’s bereikt, wordt het programmeren automatisch beë<strong>in</strong>digd en worden<br />
de 14 commando’s opgeslagen onder de Macrotoets welke u aan het <strong>in</strong>stellen bent.<br />
Opmerk<strong>in</strong>gen bij het <strong>in</strong>stellen van macro’s<br />
Voor sommige toepass<strong>in</strong>gen kan het noodzakelijk zijn om delays <strong>in</strong> de Macro te plaatsen (bv<br />
om de TV de tijd te geven om op te warmen). Delays kunnen worden tussengevoegd door de<br />
PAUSE toets <strong>in</strong> te drukken, gevolgd door het cijfer voor het gewenste aantal seconden. Dus<br />
wanneer beijvoorbeeld een delay van 4 seconden gewenst is, toets u PAUSE gevolgd door 4.<br />
Het is niet mogelijk om 0 te kiezen na de PAUSE toets, omdat er geen delay bestaat van 0<br />
seconden. Er is een standaard delay aanwezig tussen de codes van 1 seconde.<br />
De Macrotoetsen kunnen zowel Infrarood als Hoogfrequent commando’s uitvoeren. Zo kunt u<br />
uw audio en video apparatuur <strong>in</strong>schakelen en daarbij gelijktijdig de verlicht<strong>in</strong>g regelen (met<br />
behulp van optionele X-10 modules). Ideaal voor Home Theatre toepass<strong>in</strong>gen.<br />
51
Wissen van een Macrotoets<br />
1. Druk op de SETUP toets (4) totdat de LED aanblijft. Laat de SETUP toets los.<br />
2. Druk op de Macrotoets (M1 of M2) die u wilt wissen<br />
3. Druk nogmaals op de SETUP toets. De LED zal uitgaan en de Macro is verwijderd.<br />
12) Uw huis besturen door het gebruik van X-10 Home Automation Modules<br />
De 8<strong>in</strong>1 afstandsbedien<strong>in</strong>g geeft u de mogelijkheid om praktisch alles wat elektrisch is te<br />
besturen. Naast de IR technologie waarmee u uw TV, Video, etc. bedient heeft deze<br />
afstandsbedien<strong>in</strong>g X-10 HF technologie die het mogelijk maakt verlicht<strong>in</strong>g en apparaten, waar<br />
dan ook <strong>in</strong> huis, op afstand te bedienen.<br />
Hier zijn enkele toepass<strong>in</strong>gen wanneer u de X-10 technologie gebruikt:<br />
Verlicht<strong>in</strong>g uit- of aanschakelen en dimmen terwijl u TV zit te kijken<br />
‘s Nachts uw verlicht<strong>in</strong>g aanschakelen om <strong>in</strong>dr<strong>in</strong>gers af te schrikken wanneer u geluiden<br />
hoort<br />
Uw elektrische deken <strong>in</strong>schakelen voordat de film e<strong>in</strong>digt, zodat u na de film <strong>in</strong> een warm<br />
bed kunt kruipen.<br />
Om uw verlicht<strong>in</strong>g en apparaten te kunnen besturen heeft u X-10 Home Automation Modules<br />
nodig, welke gewoon <strong>in</strong> het stopcontact worden gestoken. Extra bedrad<strong>in</strong>g is niet nodig.<br />
Vraag uw dealer om meer <strong>in</strong>formatie.<br />
U bedient de X-10 Modules op de volgende wijze:<br />
1. Druk op de X-10 toets [geel huisje (5)].<br />
2. Gebruik de numerieke toetsen om de Unit Code van de Module van uw keuze <strong>in</strong> te geven<br />
(ééncijferige codes hoeven niet vooraf te worden gegaan door een ‘0’).<br />
3. Gebruik de toets van de functie die u wilt uitvoeren (zie onderstaand overzicht).<br />
Voor het aan en uitschakelen van modules:<br />
Aan = CHANNEL + en Uit = CHANNEL – (14)<br />
Het veranderen van de verlicht<strong>in</strong>gssterkte:<br />
Helderder = VOLUME + en Dimmen = VOLUME – (16)<br />
Alle verlicht<strong>in</strong>g (Lamp-modules) aan = Power (2) = All Lights On<br />
Alle modules uit: Mute (15) = All Units Off<br />
13) De X-10 HuisCode veranderen<br />
De 8<strong>in</strong>1 afstandsbedien<strong>in</strong>g is standaard <strong>in</strong>gesteld op huiscode A. In de meeste gevallen<br />
hoeft u dit niet te wijzigen, tenzij u <strong>in</strong>vloed onderv<strong>in</strong>dt van een naburig X-10 systeem.<br />
1. Druk op SETUP (4) toets totdat de LED aanblijft.<br />
2. Laat de SETUP (4) toets los.<br />
3. Gebruik de numerieke toetsen (10) om het nummer gelijk aan de gekozen Huiscode<br />
(1=A, 2=B, ...... 16=P).<br />
4. Druk op de ENT (11) toets om de Huiscode te bevestigen. De LED gaat uit.<br />
52
Opmerk<strong>in</strong>g: De huiscode die u heeft gekozen moet overeenstemmen met de Huiscode van<br />
de Transceiver Module (TM13 of X-10 Alarm Console) die u gebruikt.<br />
14) Problemen Oplossen<br />
Met uw afstandsbedien<strong>in</strong>g is de apparatuur niet te bedienen, of werkt geheel niet<br />
Gebruik handmatige bedien<strong>in</strong>g of de orig<strong>in</strong>ele afstandsbedien<strong>in</strong>g om uzelf ervan te overtuigen<br />
dat uw apparatuur naar behoren functioneert.<br />
Zorg ervoor dat u de functietoets (TV, VCR, etc.) <strong>in</strong>getoetst heeft van het apparaat wat u<br />
wit bedienen.<br />
Probeer de code voor uw apparaat te v<strong>in</strong>den door gebruik te maken van de methode<br />
Handmatig zoeken naar codes of Automatisch zoeken naar codes.<br />
<strong>Control</strong>eer de polariteit van de batterijen (+ en -).<br />
Vervang de batterijen.<br />
53