ALBRECHT DR 460 - Alan-Albrecht Service-Homepage - ALAN ...
ALBRECHT DR 460 - Alan-Albrecht Service-Homepage - ALAN ...
ALBRECHT DR 460 - Alan-Albrecht Service-Homepage - ALAN ...

Create successful ePaper yourself
Turn your PDF publications into a flip-book with our unique Google optimized e-Paper software.
Internet-Radio<br />
Adapter<br />
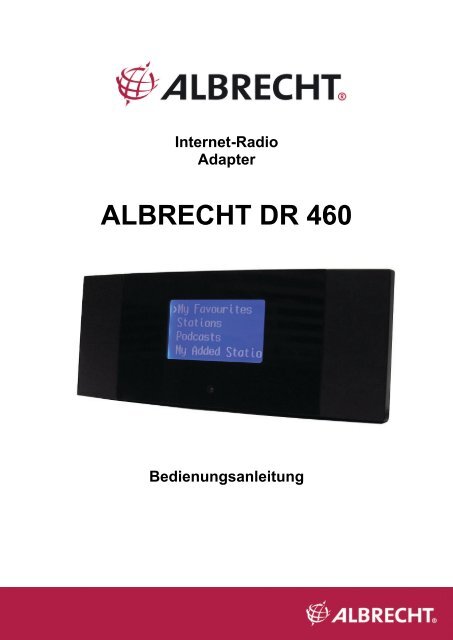
<strong>ALBRECHT</strong> <strong>DR</strong> <strong>460</strong><br />
Bedienungsanleitung
VORSICHT<br />
ZUR VERMEIDUNG VON FEUER UND STROMSCHLAG BENUTZEN SIE DAS STECKER-<br />
NETZTEIL NICHT MIT VERLÄNGERUNGSKABEL, MEHRFACHSTECKDOSEN ODER<br />
ANDEREN NICHT GENORMTEN STECKDOSEN, ES SEI DENN, DER STECKER KANN<br />
VOLLSTÄNDIG EINGESTECKT WERDEN. ZUR VERMEIDUNG VON FEUER UND<br />
STROMSCHLAG SETZEN SIE DAS GERÄT NICHT REGEN ODER FEUCHTIGKEIT AUS.<br />
Der Blitz im Piktogramm weist<br />
auf mögliche gefährliche<br />
Hochspannung im Gerät hin,<br />
die zu Stromschlag führen<br />
kann.<br />
VORSICHT STROMSCHLAGGEFAHR<br />
NICHT ÖFFNEN !<br />
Zur Vermeidung von Stromschlaggefahren<br />
oder technischen Defekten öffnen Sie bitte<br />
keinesfalls das Steckernetzteil oder das<br />
Radiogehäuse. Es befinden sich keine<br />
Bauteile im Inneren, die einer Wartung durch<br />
den Benutzer bedürfen! Reparaturen am<br />
Radiogerät dürfen nur von Fachpersonal<br />
durchgeführt werden. Ein beschädigtes oder<br />
defektes Steckernetzteil darf nicht repariert<br />
werden, es ist zu entsorgen und durch ein<br />
baugleiches neues Netzteil zu ersetzen.<br />
WICHTIGE SICHERHEITSHINWEISE<br />
• Lesen Sie alle Anleitungen.<br />
• Bewahren Sie die Anleitungen auf.<br />
• Lesen Sie alle Warnhinweise.<br />
• Befolgen Sie alle Anleitungen.<br />
• Benutzen Sie das Gerät nicht in unmittelbarer Nähe von Wasser.<br />
• Reinigung nun mit einem trockenen Tuch.<br />
• Blockieren Sie keine Lüftungsschlitze. Installieren Sie das Gerät entsprechend der<br />
Herstellerangaben.<br />
• Das Gerät sollte fern von Wärmequellen wie Radiatoren, Heizkörpern, Öfen und anderen<br />
Wärme erzeugenden Geräten (einschließlich Verstärkern) aufgestellt werden.<br />
• Netzkabel sollten so verlegt werden, dass möglichst nicht darauf getreten wird und dass<br />
sie nicht eingeklemmt werden, mit besonderer Beachtung der Kabel an Steckern,<br />
Verlängerungskabeln und dem Austritt des Kabels aus dem Gerät.<br />
• Benutzen sie nur vom Hersteller empfohlenes Zubehör.<br />
• Ziehen Sie während eines Gewitters und bei längerer Nichtbenutzung den Netzstecker<br />
ab.<br />
• Wenden Sie sich mit Wartungsarbeiten stets an einen autorisierten Kundendienst. Das ist<br />
erforderlich, wenn Gerät oder Netzkabel/Stecker beschädigt wurden, Wasser oder<br />
Fremdkörper eingedrungen sind, das Gerät Regen oder Feuchtigkeit ausgesetzt war,<br />
nicht wie gewöhnlich funktioniert oder fallen gelassen wurde.<br />
• Setzen Sie das Gerät nicht Spritz- oder Tropfwasser aus. Stellen Sie keine mit Wasser<br />
gefüllten Gegenstände (wie Vasen) auf dem Gerät ab.<br />
• Überlasten Sie Steckdosen nicht. Benutzen Sie nur eine Spannungsversorgung, wie auf<br />
dem Typenschild angegeben.<br />
• Benutzen Sie nur vom Hersteller empfohlene Ersatzteile.<br />
1<br />
Das Warnzeichen im<br />
Piktogramm weist auf<br />
wichtige Bedienungs-<br />
Hinweise und ggf. auf<br />
Wartungsanleitungen hin.
Willkommen<br />
Herzlichen Glückwunsch zum Erwerb des <strong>ALBRECHT</strong> <strong>DR</strong> <strong>460</strong>. Ihr <strong>DR</strong> <strong>460</strong> ist als<br />
digitaler Musikadapter zur Einfügung in Ihr bestehendes Audiosystem für viele<br />
Stunden Musikgenuss mit einfachem, bequemem Zugriff auf Tausende Internet-<br />
Radiosender weltweit sowie Optionen für Musik-Streaming konzipiert. Ganz egal, ob<br />
Sie in Zürich sind und brasilianische Musik hören möchten, oder ein Genre wie<br />
Klassik, Hard Rock oder Jazz wählen, der <strong>DR</strong> <strong>460</strong> Internetradio-Adapter bringt den<br />
Radiosender Ihrer Wahl ins Haus.<br />
Inhalt<br />
1. Lieferumfang ·····························································································Seite 3<br />
2. Erste Schritte·····························································································Seite 3<br />
2.1 Unterschied zwischen Internet-Radioportal und Radiosendern ·············Seite 4<br />
3. Überblick <strong>DR</strong> <strong>460</strong> ······················································································Seite 5<br />
3.1 Frontblende ·········································································Seite 5<br />
3.2 Fernbedienung ···································································Seite 5<br />
3.3 Geräterückseite ···································································Seite 6<br />
4. Allgemeine Menünavigation / Menüstruktur··············································Seite 6<br />
5. Menüstruktur ·····························································································Seite 7<br />
6. ALLGEMEINE INFORMATIONEN und EINSTELLUNGEN······················Seite 8<br />
7. <strong>DR</strong> <strong>460</strong> einschalten·················································································Seite 10<br />
8. Einstellungen <strong>DR</strong> <strong>460</strong> ·············································································Seite 10<br />
8.1 Sprache einstellen·····························································Seite 10<br />
8.2 Uhrzeit/Datum einstellen ···················································Seite 10<br />
8.3 Anschluss an einem Netzwerk ··········································Seite 11<br />
8.4 Internet-Radioportal Registrierung ····································Seite 13<br />
8.5 Musicserver einstellen·······················································Seite 14<br />
8.6 Media Sharing mit Windows Media Player························Seite 14<br />
8.7 Gemeinsame Nutzung von Ordnern auf Windows PC Seite 15<br />
8.8 Gemeinsame Nutzung von Ordnern auf Nicht-Windows Computer<br />
·································································································Seite 16<br />
8.9 <strong>DR</strong> <strong>460</strong> zum Arbeiten mit Share-Ordnern einstellen·········Seite 16<br />
9. Internet-Radiomodus···············································································Seite 17<br />
9.1 Zuletzt gehört·····································································Seite 18<br />
9.2 Senderspeicher ·································································Seite 18<br />
9.3 Favoriten············································································Seite 18<br />
9.4 Sendersuche ·····································································Seite 18<br />
9.5 Suche·················································································Seite 19<br />
9.6 Meine hinzugefügten Sender ············································Seite 20<br />
9.7 Informationen zur aktuellen Wiedergabe ··························Seite 20<br />
10. Musicplayermodus ················································································Seite 21<br />
10.1 Share Media (vom Mediaserver)·····································Seite 21<br />
10.2 Share-Ordner (Netzwerk oder USB-Massenspeicher)····Seite 22<br />
10.3 Informationen zur aktuellen Wiedergabe ························Seite 23<br />
11. Informationen und Fehlermeldungen ····················································Seite 24<br />
12. Störungserkennung – Verbindung mit einem Internetsender ···············Seite 25<br />
13. FAQ – Häufig gestellte Fragen…………………………………………....Seite 26<br />
14-17. Gewährleistung, <strong>Service</strong>hinweise, Entsorgungsinfo, CE.................Seite 28<br />
2
1. Lieferumfang<br />
Bitte achten Sie darauf, dass alle Zubehörteile mitgeliefert wurden:<br />
1. <strong>DR</strong> <strong>460</strong> Internet-Radio-Adapter<br />
2. NF-Anschlusskabel mit Cynch/RCA Steckern<br />
3. Spannungsversorgung (Steckernetzteil nach Öko-Norm)<br />
4. Fernbedienung<br />
5. <strong>DR</strong> <strong>460</strong> Bedienungsanleitung<br />
2. Erste Schritte<br />
Bevor Sie Ihr Internet-Radio in Betrieb nehmen können, benötigen Sie folgenden<br />
Aufbau Ihres Internetzugangs:<br />
1. Einen Breitband-Internetanschluss (DSL, ADSL oder VDSL).<br />
2. Einen Kabel-Ethernet (LAN) Anschluss oder kabellosen WLAN<br />
Zugangspunkt, welcher an Ihrem Breitband-Internet angeschlossen ist.<br />
Meistens wird in Deutschland ein DSL-WLAN Router installiert, der alles in<br />
einem Gerät enthält (z.B. Fritz!box).<br />
3. Ist Ihr kabelloses Netzwerk zur Nutzung von WEP (Wired Equivalent Privacy)<br />
oder WPA (Wi-Fi Protected Access) Datenverschlüsselung konfiguriert, so<br />
müssen Sie Ihren WEP- oder WPA-Code zum Anschluss an Ihre Netzwerk<br />
kennen. Bei modernen Geräten ist der werkseitig eingestellte Code auf dem<br />
Typenschild des WLAN Geräts bereits aufgedruckt (falls Sie ihn nicht<br />
geändert haben).<br />
4. vernetzter Windows PC als Musikserver (falls gewünscht)<br />
• Der Windows Media Player (WMP) 11 kann zum Streaming von<br />
Musikdateien vom PC auf das Radio eingestellt werden.<br />
• Alternativ können Windows Share-Ordner (mit Ordnerfreigabe<br />
über Windows) benutzt werden, sofern WMP nicht auf dem PC<br />
installiert ist.<br />
• Der PC kann ebenfalls zur Individualisierung der Radiofavoriten<br />
über das Frontier Silicon Internetradio - Portal benutzt werden.<br />
Sie können sich auf dieser Webseite anmelden und Ihre<br />
Einstellungen dort verwalten- diese werden dann automatisch von<br />
der Webseite auf Ihr Radio übertragen. Infos dazu auf der<br />
nächsten Seite!<br />
3
2.1 Unterschied zwischen Internet-Radioportal und Radiosendern<br />
Es kann etwas Verwirrung zum Unterschied zwischen dem Internet-Radioportal und<br />
den Radiosendern herrschen.<br />
Internet-Radioportal Das Portal ist die quasi das „Inhaltsverzeichnis“ oder eine<br />
“Suchmaschine“: ein Server, der vom Chipsatzhersteller<br />
betrieben wird und Links zu allen verfügbaren Internet-<br />
Radiosendern pflegt. Man kann es als „Adressbuch“<br />
betrachten, welches die Adressen aller Internet-Radiosender<br />
listet und regelmäßig aktualisiert. Beim Navigieren der<br />
Radiomenüs wird die Senderliste durch das Portal an Ihr<br />
Radio zurückgeliefert, falls Sie sich dort angemeldet haben.<br />
Die benutzte Portaladresse ist:<br />
http://www.wifiradio-frontier.com<br />
Internet-Radiosender Der Sender ist die tatsächliche Website, welche den<br />
gewählten Sender- Audiostream enthält. Nach der Auswahl<br />
eines Senders über das Portal verbindet sich das Radio dann<br />
direkt mit dem Sender.<br />
Abhängig von Ihrem kabellosen Router sollte das Internet-Radio überall im Umkreis<br />
von bis zu 20-30 Metern des kabellosen Zugangspunktes arbeiten.<br />
Alternativ können Sie beim <strong>DR</strong> <strong>460</strong> auch einen verkabelten LAN Zugang über die<br />
Ethernetbuchse benutzen. Das ist immer dann empfehlenswert, wenn Sie z.B. in der<br />
Nähe Ihrer Musikanlage über einen Netzwerkanschluss verfügen. Ein verkabeltes<br />
4<br />
alternativ auch über LAN Kabel
Netzwerk ist nicht störanfällig und in unmittelbarer Nachbarschaft anderer<br />
elektronischer Geräte meist besser zu benutzen als ein drahtloses Netzwerk.<br />
Bitte vergewissern Sie sich bitte, dass Ihr kabelloses WLAN Netzwerk auch<br />
eingeschaltet ist und am Breitband-Internet angeschlossen ist (Manche Router<br />
haben eine Tag-Nachtschaltung und schalten WLAN Nachts ab!). Bitte lesen Sie<br />
Einzelheiten in der Bedienungsanleitung Ihres kabellosen Netzwerks nach.<br />
3. Überblick <strong>DR</strong> <strong>460</strong><br />
Nach dem Auspacken Ihres <strong>DR</strong> <strong>460</strong> machen Sie sich bitte zunächst mit seinen<br />
Funktionen vertraut.<br />
3.1 Frontblende<br />
Es befinden sich keine Tasten oder Knöpfe auf Ihrem <strong>DR</strong> <strong>460</strong>. Alles wird<br />
ausschließlich über die mitgelieferte Fernbedienung gesteuert. Das Design ist<br />
einfach und benutzerfreundlich, die gesamte Navigation kann mit der Fernbedienung<br />
durchgeführt werden.<br />
3.2 Fernbedienung<br />
5
Die Tastenfunktionen der Fernbedienung sind selbsterklärend, wobei die Tasten 1<br />
bis 5 Speichertasten für bevorzugte Sender sind.<br />
3.3 Geräterückseite<br />
RCA-<br />
Audiobuchsen<br />
DC-Buchse für<br />
Steckernetzteil<br />
4. Allgemeine Menünavigation / Menüstruktur<br />
Das WLAN-Radio verfügt über drei Arten von Menüs. Diese sind:<br />
• Das Hauptmenü<br />
Dies ist das Menü der obersten Ebene, in welchem Sie die unterschiedlichen<br />
Modi aufrufen, Einstellungen für das Radio vornehmen und Informationen<br />
zum Radio (beispielsweise Software-Version, Produkt-ID, Uhrzeit, Sleepzeit,<br />
Alarme(Wecker) usw.) anzeigen können.<br />
• Das Internet-Radio Senderlistenmenü<br />
Dieses Menü ermöglicht Ihnen den Zugriff auf die unterschiedlichen Internet-<br />
Radiodienste. Dieses Menü kommt direkt vom Internet-Radioportal.<br />
• Die Modusmenüs für die unterschiedlichen Modi<br />
Die Modusmenüs haben Ihre Bezeichnung, weil sie die verfügbaren<br />
Funktionen im Kontext des jeweiligen Modus zeigen. Mit Tastendruck auf<br />
MENU kommen Sie jederzeit in das Modusmenü des entsprechenden Modus,<br />
in welchem sich das Radio derzeit befindet. Jedes Kontextmenu bietet einen<br />
Eintrag mit der Bezeichnung Hauptmenü, der Sie zurück in das Hauptmenü<br />
bringt.<br />
Zur Navigation der unterschiedlichen Menüs benutzen Sie die Navi-Tasten auf der<br />
Fernbedienung. Dies gilt für alle Menüelemente. Mit den Navigationstasten finden<br />
Sie das Menü, in welchem Sie zu dem gewünschten Menüelement navigieren<br />
möchten. Zur Auswahl drücken Sie ENTER. Nach der Auswahl des Menüelements<br />
drücken Sie die Navi-Taste rechts zur Bestätigung.<br />
Navigieren Sie beispielsweise in das Hauptmenü, während Sie sich im Internet-<br />
Radio Modus befinden, so drücken Sie die Navi-Taste links zur Anzeige des<br />
Menüs. Mit den Navi-Tasten auf / abwärts zeigen Sie das Hauptmenü an. Mit<br />
Enter wählen Sie das Hauptmenü. Mit Menu auf der Fernbedienung gelangen Sie<br />
in das Kontextmenü des aktuellen Modus des <strong>DR</strong> <strong>460</strong> (Internet-Radio usw.) Dort<br />
wählen Sie Funktionen wie Schlummer Timer (zum Einschlafen mit Musik) oder<br />
Wecker (Alarm) Einstellungen aus.<br />
6<br />
LAN<br />
(Ethernet)-<br />
Buchse für<br />
verkabeltes<br />
Netzwerk
5. Menüstruktur (bitte beachten: nicht alle gezeigten Funktionen stehen Im <strong>DR</strong> <strong>460</strong> zur<br />
Verfügung),die folgende Übersicht zeigt alle Modi und Menüs, die der Controller prinzipiell beherscht,<br />
auch wenn Optionen, wie DAB, DAB + oder FM UKW Radio nur in anderen Gerätetypen des<br />
Herstellers implementiert sind)<br />
7
6. ALLGEMEINE INFORMATIONEN und EINSTELLUNGEN<br />
Erscheinungsformen in dieser Bedienungsanleitung<br />
Taste (drücken) Taste auf der Tastatur<br />
Option (wählen) im Display angezeigte Menüoption<br />
Name Menü, Bildschirm oder sonstiger Name<br />
Das <strong>DR</strong> <strong>460</strong> hat eine Vielzahl von Funktionen, welche eingestellt werden müssen,<br />
bevor Sie alle Funktionen des Radios ausschöpfen können. Das Hauptmenü �<br />
Systemeinstellungsmenü hat eine Reihe von Optionen, mit welchen Einstellungen<br />
für das gesamte System geändert werden können.<br />
Diese Einstellungen sind:<br />
Das <strong>DR</strong> <strong>460</strong> hat drei grundlegende Arten von Menüs. Mit Select gehen Sie<br />
schrittweise durch die Auswahloptionen. Ein Scrollbalken rechts auf dem<br />
Bildschirm zeigt an, ob weitere Optionen oberhalb oder unterhalb des<br />
sichtbaren Bereichs vorhanden sind.<br />
Zusätzlich hat jedes Modusmenü zwei<br />
letzte Optionen:<br />
Systemeinstellungen > und<br />
Hauptmenü >. Das Symbol > steht für<br />
Optionen, welche zu weiteren Menüs<br />
führen.<br />
Das Systemeinstellungsmenü<br />
ermöglicht den Zugriff auf<br />
Systemeinstellungen sowie<br />
Informationen wie Netzwerk, Zeit,<br />
Sprache und Software Update.<br />
Menüs mit mehr Optionen, als auf den<br />
Bildschirm passen, haben rechts einen<br />
Scrollbalken.<br />
Das Hauptmenü ermöglicht Zugriff auf<br />
alle Modi plus Einschlaf-Timer (OFF,<br />
15. 20. 45 Minuten) und Alarm<br />
(Weckerradio). Zum Wecken stehen<br />
Ihnen zwei verschiedene Weckzeiten<br />
zur Verfügung, Sie können sich von<br />
vorprogrammierten Stationen wecken<br />
lassen (dazu muss mindestens eine<br />
der 5 Stationstasten belegt sein)<br />
Einige Menüs, beispielsweise das Systemeinstellungsmenü, haben mehrere<br />
Untermenüs.<br />
8
Dialogbildschirme<br />
Dialogbildschirme werden angezeigt,<br />
um Ihnen die Änderung von<br />
Einstellungen zu ermöglichen. Sie<br />
unterscheiden sich in ihrer Komplexität<br />
von einfachen Ja/Nein Optionen bis zu<br />
dem scrollbaren Netzwerk-<br />
Passworteingabebildschirm.<br />
Wie bei Menüs wird das gewählte<br />
Element mit einem weißen Hintergrund<br />
angezeigt.<br />
Dialogbildschirme markieren die<br />
aktuelle Einstellung mit einem<br />
Sternchen (*).<br />
Das <strong>DR</strong> <strong>460</strong> hat drei Arten von Displaybildschirmen:<br />
Der Stand-by-Bildschirm zeigt Uhrzeit,<br />
Datum und aktive Alarmzeiten.<br />
Beim Durchlaufen der Wiedergabemodi<br />
mit Mode zeigt der <strong>DR</strong> <strong>460</strong> einen<br />
Startbildschirm für jeden Modus. Nach<br />
einer Sekunde ruft der <strong>DR</strong> <strong>460</strong> den<br />
gewählten Modus auf und versucht, den<br />
zuletzt eingestellten Sender oder Track in<br />
diesem Modus abzuspielen. Ist das nicht<br />
möglich, so versucht der <strong>DR</strong> <strong>460</strong>, sich an<br />
der gewählten Quelle mit der Sender- oder<br />
Netzwerksuche anzuschließen, oder<br />
fordert Sie zur entsprechenden Eingabe<br />
auf.<br />
Der Aktuelle Wiedergabe-Bildschirm<br />
zeigt Informationen zur derzeit spielenden<br />
Audioquelle und zum Track, sofern<br />
verfügbar.<br />
9<br />
Hinweis: Im deutschen Menü wird<br />
Sommerzeit mit DST abgekürzt.<br />
Zusätzlich gibt es Informationsbildschirme für Lautstärke, Stummschaltung und<br />
Informationen/Fehlermeldungen.
7. <strong>DR</strong> <strong>460</strong> einschalten<br />
<strong>DR</strong> <strong>460</strong> zum Betrieb vorbereiten:<br />
1. Stellen Sie das <strong>DR</strong> <strong>460</strong> auf eine ebene Fläche.<br />
2. Schließen Sie das Stromkabel an und schalten Sie das Radio ein.<br />
8. Einstellungen<br />
8.1 Sprache einstellen<br />
Die Standarsprache ist Englisch. Zur Änderung wählen Sie Menu ><br />
Systemeinstellungen > Sprachen > Ihre Sprache.<br />
8.2 Uhrzeit/ Datum/ Schlummer- und Weckzeiten einstellen<br />
Uhrzeit und Datum können manuell oder automatisch aktualisiert werden.<br />
Die manuelle Einstellung ist einfacher, Uhrzeit und Datum gehen jedoch<br />
verloren, wenn das Gerät von der Spannungsversorgung getrennt wird.<br />
Die Einstellung zur automatischen Aktualisierung ist zunächst etwas<br />
komplizierter, jedoch werden Uhrzeit und Datum automatisch synchronisiert,<br />
daher muss es nur einmal erfolgen. Die automatische Zeitaktualisierung ist<br />
gewöhnlich genauer.<br />
Zum Aufrufen des Zeiteinstellungsmenüs wählen Sie Menu ><br />
Systemeinstellungen > Uhrzeit/Datum ><br />
Manuelle Zeit-Aktualisierung<br />
Wählen Sie Uhrzeit/Datum einstellen ><br />
Datum und Uhrzeit werden als TT-MM-JJJJ<br />
und HH:MM AM/PM mit dem ersten Wert, TT<br />
aktiv (blinkend) angezeigt.<br />
Stellen Sie jeden Wert mit Select ein. Nach<br />
der Einstellung eines Wertes wird der<br />
nächste Wert aktiv und blinkt.<br />
Bei Auswahl des letzten Wertes (Minuten<br />
oder AM/PM, abhängig von der Einstellung<br />
auf 12- oder 24-Stundenformat) kehrt das<br />
Display zum Bildschirm Aktuelle Wiedergabe<br />
zurück und zeigt die aktualisierte Zeit an.<br />
Automatische Zeit- Aktualisierung<br />
Die automatische Aktualisierung erfolgt über die Daten, welche über das<br />
Netzwerk gesendet werden (diese Funktion haben Sie nur bei bestimmten<br />
Modellen). Die Uhr wird nur in einem entsprechenden Modus aktualisiert, daher<br />
sollten Sie einen Modus wählen, welchen Sie regelmäßig benutzen.<br />
10
o Das Netzwerk benutzt ein Zeitsignal, welches vom Frontier Silicon<br />
Internet-Radioportal gesendet wird, wenn Sie sich im Internet-Radiooder<br />
Musicplayermodus befinden.<br />
1. Wählen Sie Automatische Aktualisierung > dann wählen Sie<br />
Aktualisierung durch Netzwerk.<br />
2. Stellen Sie Ihre Zeitzone in Zeitzone einstellen > ein.<br />
3. Hat Ihr Land die Umstellung zur Sommerzeit, so ist die aktualisierte Zeit<br />
möglicherweise um eine Stunde falsch. Während der Sommerzeit<br />
aktivieren Sie bitte die Sommerzeitoption mit Sommerzeit (DST) > EIN<br />
Das <strong>DR</strong> <strong>460</strong> aktualisiert automatisch von der gewählten Quelle, wenn die<br />
Zeitinformationen verfügbar sind.<br />
12/24-Stundenformat<br />
Zum Umschalten zwischen 12- und 24-Stundenformat wählen Sie 12/24<br />
Stunden einstellen, danach treffen Sie Ihre Auswahl.<br />
Zum Einstellen von Einschlafzeiten (Schlummer) und des Weckers (Alarm)<br />
gehen Sie bitte in das Hauptmenü und wählen die Einstellungen für den<br />
Einschlaftimer (Aus, 15 min, 30 min oder 45 min mit den Auf-.Ab Tasten)<br />
oder die Uhrzeit und das gewünschte Programm zum Wecken (Alarm) aus.<br />
Zum Wecken über Musik ist es wichtig, vorher mindestens ein<br />
Radioprogramm abgespeichert zu haben (auf Tasten 1-5), oder Sie wählen<br />
einfach das zuletzt gehörte Programm.<br />
Hinweis: Achten Sie darauf, dass Sie die Stereoanlage, an der das Gerät<br />
angeschlossen ist, auch eingeschaltet lassen, wenn Sie die Schlummer- oder<br />
Alarmfunktionen nutzen möchten.<br />
8.3 Anschluss an einem Netzwerk<br />
Für Internet-Radio- und Musicplayermodi benötigen Sie einen<br />
Netzwerkanschluss. Zum Anschluss das <strong>DR</strong> <strong>460</strong> an Ihrem Netzwerk<br />
benötigen Sie einen kabellosen WLAN-Router und den dazugehörigen<br />
Passwortschlüssel, sorfern eingestellt, oder ein verdrahtetes Ethernet<br />
Netzwerk (LAN).<br />
Für Internet-Radio, Internet Software und automatische Uhrzeit/Datum-<br />
Aktualisierungen muss der Router über einen Breitband-Internetanschluss<br />
verfügen.<br />
Bei Auswahl des Internet-Radio- oder Musicplayermodi versucht das <strong>DR</strong> <strong>460</strong>,<br />
sich mit einem Netzwerk zu verbinden. Ist dies nicht der erste<br />
Verbindungsversuch oder sind die gespeicherten Netzwerke nicht erreichbar,<br />
so startet der Netzwerkassistent. Zum manuellen Ablauf des<br />
Netzwerkassistenten wählen Sie Menu > Systemeinstellungen ><br />
Netzwerk > Netzwerkassistent.<br />
Sobald der Assistent startet, geben Sie folgende Informationen ein:<br />
o Falls noch nicht eingestellt, die WLAN-Region (wählen Sie Land/Region<br />
aus der Liste),<br />
o Netzwerkname (wählen Sie Ihr Netzwerk aus der Liste),<br />
o Bei Anschluss an ein verschlüsseltes kabelloses Netzwerk, den<br />
Schlüssel (Passwort).<br />
11
Zur Eingabe Ihres Schlüssels benutzen<br />
Sie Select zur Bewegung des Cursors<br />
durch die Schriftzeichen und zur<br />
Auswahl. Mit der Auswahl jedes<br />
Schriftzeichens baut sich der Schlüssel<br />
oben im Display auf.<br />
Sie haben drei Optionen zur Rückkehr<br />
mit Select vor die ersten Schriftzeichen<br />
(0123…) – Rückschritt, OK und Cancel.<br />
Sie können Schriftzeichen ebenfalls<br />
mit Back löschen.<br />
Nach der Eingabe des Schlüssels wählen<br />
Sie OK, <strong>DR</strong> <strong>460</strong> versucht nun, sich mit<br />
dem gewählten Netzwerk zu verbinden.<br />
Ist die Verbindung erfolglos, so kehrt <strong>DR</strong><br />
<strong>460</strong> zum Passworteingabebildschirm<br />
zurück.<br />
Geht die Netzwerkverbindung verloren, so versucht <strong>DR</strong> <strong>460</strong> automatisch den<br />
Neuaufbau der Verbindung.<br />
Netzwerkprofile<br />
Das <strong>DR</strong> <strong>460</strong> speichert die letzten vier kabellosen Netzwerke, mit denen es sich<br />
verbunden hat und versucht automatisch, sich mit einem dieser Netzwerke zu<br />
verbinden.<br />
Sie können die Liste der registrierten Netzwerke mit Menu ><br />
Systemeinstellungen > Netzwerk > Netzwerkprofil > anzeigen. Hier<br />
löschen Sie ungewollte Netzwerke mit Select und bestätigen Sie mit Ja.<br />
Sonstige Optionen<br />
Sie haben weitere Optionen zur Anzeige und manuellen Umstellung der<br />
Netzwerkeinstellungen in Menu > Systemeinstellungen > Netzwerk >.<br />
Diese Optionen sind normalerweise nicht notwendig, jedoch Networkingerfahrene<br />
Nutzer finden diese Einstellungen hilfreich bei der Diagnose und<br />
Behebung von Netzwerkproblemen.<br />
12
8.4 Internetradio - Portal und Registrierung<br />
Das <strong>DR</strong> <strong>460</strong> arbeitet mit der Website des Frontier Silicon Internetradio Portals,<br />
womit Sie Ihre Favoritenlisten organisieren und ebenfalls Internet-Radio auf<br />
einem Computer hören können.<br />
Zur Registrierung des <strong>DR</strong> <strong>460</strong> mit dem<br />
Portal, zeigen Sie zunächst den<br />
eindeutigen Portal-Zugriffscode (Access-<br />
Code) Ihres Radios mit Menu ><br />
Senderliste > Hilfe > Zugriffscode<br />
erhalten > an.<br />
Notieren Sie den Zugriffscode.<br />
Hinweis: Bitte verwechseln Sie nicht den Portal-Zugriffscode mit der Radio-ID (in Menu<br />
> Systemeinstellungen > Info).<br />
Auf einem am Internet angeschlossenen Computer rufen Sie die Website des<br />
Portals auf:<br />
www.wifiradio-frontier.com<br />
Ist dies Ihr erster Besuch bei dem Portal, so registrieren Sie einen neuen<br />
Account, geben Sie die nachstehenden Informationen ein:<br />
o Zugriffscode,<br />
o Ihre E-Mail-Adresse,<br />
o Passwort,<br />
o Radio Modell (<strong>DR</strong> <strong>460</strong>).<br />
Haben Sie bereits einen Account und möchten Sie ein weiteres Radio<br />
hinzufügen, so loggen Sie Ihren Account ein und wählen Sie<br />
Meine Präferenzen > Neues WLAN-Radio hinzufügen<br />
13
Nachdem Ihr Radio mit dem Portal registriert ist, können Sie gleich die<br />
Funktionen für Ihre Favoritensender und zugefügte Sender benutzen.<br />
8.5 Musicserver einstellen<br />
Damit das <strong>DR</strong> <strong>460</strong> Musikdateien von einem Computer wiedergeben kann,<br />
muss der Computer zur gemeinsamen Nutzung von Dateien oder Medien<br />
eingestellt sein.<br />
UPnP Media Sharing ermöglicht Geräten, wie dem <strong>DR</strong> <strong>460</strong>, Musik von einer<br />
Share-Medienbibliothek abzuspielen und die Navigation durch Registermenüs<br />
wie Interpret, Album oder Genre. Haben Sie ein geeignetes Serversystem, wie<br />
beispielsweise einen PC mit Windows Media Player 10 oder später (WMP) und<br />
Ihre Musikbibliothek ist gut markiert, so wird Media Sharing empfohlen. Nur der<br />
UpnP-Server muss eingestellt werden.<br />
Hinweis: iTunes funktioniert derzeit nicht als UpnP-Mediaserver, es gibt jedoch Add-ons,<br />
um mit einer iTunes-Bibliothek zu arbeiten.<br />
Ordner-Sharing (CIFS) ermöglicht Geräten, wie dem <strong>DR</strong> <strong>460</strong>, Ordner auf<br />
einem Netzwerklaufwerk nach Audiodateien zu durchsuchen. Dies ist eine gute<br />
Alternative, falls Sie Media Sharing nicht benutzen können und eine alternative<br />
Möglichkeit Dateien zu finden, selbst wenn Sie Media Sharing eingestellt<br />
haben. Der Computer muss zur gemeinsamen Nutzung von Ordnern eingestellt<br />
werden und falls dies mit Passwortsteuerung erfolgt ist, müssen Sie ggf.<br />
Username und Passwort eingeben.<br />
8.6 Media Sharing mit Windows Media Player<br />
Der häufigste UpnP-Server ist Windows Media Player (10 oder später). Zur<br />
Einstellung des WMP für Media Sharing folgen Sie bitte den nachstehenden<br />
Schritten:<br />
1. Vergewissern Sie sich, dass der PC am Netzwerk angeschlossen ist.<br />
2. Vergewissern Sie sich, dass das Radio eingeschaltet und am gleichen<br />
Netzwerk angeschlossen ist.<br />
3. In WMP fügen Sie der Medienbibliothek jene Audiodateien und Ordner<br />
hinzu, welche Sie mit dem <strong>DR</strong> <strong>460</strong> gemeinsam nutzen wollen<br />
(Bibliothek > Zur Bibliothek hinzufügen…).<br />
4. In WMP aktivieren Sie Media Sharing (Bibliothek > Media Sharing…).<br />
14
<strong>DR</strong> <strong>460</strong> wird als „Unbekanntes Gerät“ gelistet. Achten Sie darauf, dass das<br />
Radio Zugriff auf die Share-Medien hat, wählen Sie es und klicken Sie<br />
Erlauben. Sie können für die Share-Medien ebenfalls einen Namen in<br />
Einstellungen… einstellen. Klicken Sie OK zum Schließen des Dialogfensters.<br />
Der PC ist nun zum Streaming der Musik zum Radio vorbereitet.<br />
8.7 Gemeinsame Nutzung von Ordnern auf Windows PC<br />
Zur gemeinsamen Nutzung von Ordnern in Windows muss der PC zunächst<br />
ein Mitglied einer Domain oder Arbeitsgruppe sein. Sobald dies eingestellt ist,<br />
können Ordner vom Windows Explorer (Arbeitsplatz) gemeinsam genutzt<br />
werden.<br />
Konfiguration Domain/Arbeitsgruppe<br />
Die Domainkonfiguration finden Sie auf einem Windows XP Rechner wie unten<br />
beschrieben. Beachten Sie bitte, dass bei den meisten in Deutschland<br />
betriebenen privaten Computern keine keine Domain – Zuordnung üblich ist,<br />
sondern lediglich eine Arbeitsgruppe (Domain-Zuordnungen werden in<br />
grösseren Firmen-Netzwerken benutzt)<br />
1. Im Startmenü wählen Sie Systemsteuerung > System > Computername.<br />
In diesem Register werden Domain oder Arbeitsgruppe des Computers<br />
angezeigt.<br />
2. Ist der PC kein Mitglied einer Domain oder Arbeitsgruppe, so muss einer<br />
beigetreten werden. Hierzu klicken Sie die Schaltfläche Ändern und geben<br />
Sie den Namen der Domain bzw. Arbeitsgruppe ein (Standard für Windows<br />
XP ist MSHEIMNETZ oder ähnlich).<br />
3. Nach der Änderung Domain oder Arbeitsgruppe werden Sie<br />
möglicherweise zum Neustart des PC aufgefordert.<br />
Neuen Nutzeraccount einstellen (Windows XP)<br />
Das WLAN-Radio benötigt einen Nutzeraccount, welcher auf jedem PC<br />
eingestellt werden muss, der durchsucht werden soll. Standardgemäß haben<br />
die meisten PCs wenigstens einen Nutzeraccount. Username und Passwort<br />
(optional) müssen auf allen PCs gleich sein, da das Internet-Radio nur einen<br />
15
Usernamen und ein Passwort speichert. Für Windows XP kann dies wie folgt<br />
eingestellt werden:<br />
1. Im Startmenü wählen Sie Systemsteuerung > Nutzeraccounts.<br />
2. In diesem Bildschirm klicken Sie „Hinzufügen …“ und geben Sie den<br />
neuen Username und die oben erwähnte Einstellung für<br />
Domain/Arbeitsgruppe ein. Wählen Sie die Art des Nutzers (beschränkt)<br />
und wählen Sie anschließend Fertigstellen.<br />
3. Wählen Sie den gerade erstellten Nutzer, wählen Sie „Passwort<br />
zurückstellen …“ und geben Sie das Passwort für diesen Nutzer ein.<br />
4. Notieren Sie Username und Passwort.<br />
Hinweis: Für Windows Vista: Sie müssen den Gästeaccount über Nutzeraccounts<br />
verwalten in den Systemsteuerungen aktivieren, dann Zugriff auf den Share-<br />
Laufwerk entweder für „Alle“ oder „Gast“ hinzufügen. Sie können einen neuen<br />
Account für das Internet-Radio mit Passwort erstellen, falls Sie<br />
Sicherheitsbedenken haben. Der Gästeaccount hat standardgemäß kein<br />
Passwort, daher verbindet sich das <strong>DR</strong> <strong>460</strong> über die Werkseinstellungen.<br />
Share-Laufwerk konfigurieren<br />
Im Startmenü wählen Sie Arbeitsplatz oder Windows Explorer und navigieren<br />
Sie in das gemeinsam zu nutzende Verzeichnis. Rechtsklicken Sie den Ordner<br />
und wählen Sie Sharing und Sicherheit. Konfigurieren Sie das Share-Laufwerk<br />
als Nur-Lese-Laufwerk und achten Sie darauf, dass der oben erstellte Nutzer<br />
Lesezugriff auf den Share-Ordner hat.<br />
8.8 Gemeinsame Nutzung von Ordnern auf Nicht-Windows- Computer<br />
Es geht weit über den Bereich dieser Bedienungsanleitung hinaus, die<br />
gemeinsame Nutzung von Ordner auf allen Computersystemen zu<br />
beschreiben. Bitte werfen Sie einen Blick in die Dokumentation des<br />
Betriebssystems, wie sie Ordner auf Nicht-Windows Computersystemen<br />
gemeinsam nutzen. Haben Sie Share-Ordner mit Username und Passwort<br />
konfiguriert, so notieren Sie bitte diese Angaben.<br />
8.9 <strong>DR</strong> <strong>460</strong> zum Arbeiten mit Share-Ordnern einstellen<br />
Zum Einstellen des <strong>DR</strong> <strong>460</strong> zur Audiowiedergabe von passwortgeschützten<br />
Share-Netzwerk-Laufwerken müssen Sie Username und Passwort eingeben.<br />
Hierzu wählen sie im Musicplayermodus Menu > PC-Einstellungen ><br />
Username und geben Sie den Usernamen ein, dann PC-Einstellungen ><br />
Passwort und geben Sie das Passwort ein.<br />
Geben Sie ein Passwort durch Auswahl der<br />
Schriftzeichen und OK ein. Username- und<br />
Passworteingabebildschirme gleichen dem<br />
WLAN-Passworteingabebildschirm.<br />
Der Standard-Username ist „Gast“.<br />
16
9. Internet-Radiomodus<br />
Das <strong>DR</strong> <strong>460</strong> kann Tausende von<br />
Radiosendern und Podcasts aus aller Welt<br />
über einen Breitband-Internetanschluss<br />
wiedergeben. Bei Auswahl des Internet-<br />
Radiomodus spricht das <strong>DR</strong> <strong>460</strong> das Frontier<br />
Silicon Internet-Radioportal an, um eine<br />
Senderliste zu erhalten, welche in<br />
unterschiedliche Kategorien, wie<br />
beispielsweise Country, Populär und Genre<br />
unterteilt ist. Nach Auswahl eines Senders<br />
verbindet sich das <strong>DR</strong> <strong>460</strong> direkt mit dem<br />
Sender.<br />
Das Portal ermöglicht ebenfalls vielfache Listen bevorzugter Sender, welche Sie<br />
personalisieren können, beispielsweise Andys Sender, Jos Favoriten, Talkshows.<br />
Zur Nutzung der Favoritenfunktion registrieren Sie Ihr Radio mit der Website des<br />
Portals, wie auf Seite 13 beschrieben. Haben Sie mehrere über Frontier Silicon<br />
betriebene Radios, so können Sie alle auf dem gleichen Account registrieren, damit<br />
jedes Radio Zugriff auf Ihre Favoritelisten hat. Sie können Favoriten entweder direkt<br />
durch <strong>DR</strong> <strong>460</strong> oder durch einen Computer mit Webbrowser hinzufügen.<br />
Zum Aufrufen des Internet-Radiomodus drücken Sie entweder Mode , bis im<br />
Display Internet-Radio angezeigt wird oder wählen Sie Menu > Hauptmenü ><br />
Internet-Radio.<br />
Hinweis: Das Senderlistenmenü wird vom Internet-Radioportal zur Verfügung gestellt,<br />
es ist also nur verfügbar, wenn <strong>DR</strong> <strong>460</strong> am Internet angeschlossen ist.<br />
Senderlisten und Untermenüs können sich von Zeit zu Zeit ändern.<br />
Es gibt verschiedene Möglichkeiten, einen Sender zu wählen.<br />
Direkt über das Radio:<br />
o Zuletzt gehört,<br />
o Senderspeicher.<br />
Über das Portal über Menu > Senderliste ><br />
Menü:<br />
o Favoritenlisten,<br />
o Suche nach Land, Genre, Populär,<br />
Neuheiten<br />
o Suche nach Schlüsselwort,<br />
o Meine hinzugefügten Sender.<br />
Hören Sie bereits einen Internet-Radiosender, so drücken Sie<br />
besser Back anstatt Menu , um schnell zum zuletzt besuchten Zweig des<br />
Menübaums zurückzukehren. Sie hören beispielsweise den Sender New<br />
Orleans Radio durch die Suchfunktion, wie nachstehend in Abschnitt 0<br />
beschrieben. Mit Back kehren Sie in das Markierte Bluessender Menü zurück.<br />
17
Mit erneutem Tastendruck auf Back kehren Sie in das Blues Menü zurück und<br />
so weiter.<br />
9.1 Zuletzt gehört<br />
Beim Neustart des Internet-Radiomodus wird der zuletzt gehörte Sender<br />
gewählt. Zur Auswahl eines anderen kürzlich gehörten Senders wählen Sie<br />
Menu > Zuletzt gehört und dann einen der aufgeführten Sender. Der letzte<br />
Sender steht oben in der Liste.<br />
9.2 Senderspeicher<br />
Senderspeicher sind im Radio gespeichert und auf sie kann nicht von anderen<br />
Radios zugegriffen werden.<br />
Zur Speicherung eines Internet-Radio Senderspeichers halten Sie eine der<br />
Tasten 1 - 5 gedrückt, bis im Display der Bildschirm Senderspeicher<br />
angezeigt wird. Wählen sie einen der 5 Senderspeicher für den aktuellen<br />
Sender.<br />
Zum Aufrufen eines Senderspeichers drücken Sie kurz eine der Tasten<br />
9.3 Favoriten<br />
1 - 5 . Während der Wiedergabe eines gespeicherten Senders wird Pn (P1,<br />
P2 usw.) unten auf dem Bildschirm angezeigt. Das Abspeichern von<br />
mindestens 1 Sender im Senderspeicher ist wichtig, wenn Sie sich über das<br />
Radio wecken lassen wollen.<br />
Favoriten werden im Internet-Radioportal gespeichert und sind über alle auf<br />
dem gleichen Account registrierten Internet-Radios verfügbar. Vor der Nutzung<br />
von Favoriten muss das Radio mit dem Internet-Radioportal registriert werden<br />
(siehe Seite 13).<br />
Zur Speicherung eines aktuellen Senders als Favorit des <strong>DR</strong> <strong>460</strong> drücken Sie<br />
einfach Select . Der gewählte Sender wird in der Standard-Favoristenliste<br />
Sender angezeigt.<br />
Zum Aufrufen eines Favoriten wählen Sie<br />
Menu > Senderliste > Meine Favoriten > [Favoritenliste] > [Sender].<br />
9.4 Sendersuche<br />
Zur Suche nach Internetsendern wählen<br />
Sie Menu > Senderliste > und dann<br />
entweder Sender > oder Podcasts >.<br />
Durchsuchen Sie die Menüs nach<br />
Sendungen.<br />
18
9.5 Suche<br />
Sie können Internetübertragungen auch mit bestimmten Suchbegriffen im Titel<br />
nach Sendern oder Podcasts durchsuchen.<br />
Wählen sie zur Suche Menu ><br />
Senderliste > und dann entweder Sender ><br />
oder Podcasts >.<br />
19
Geben Sie einen Schlüsselbegriff durch<br />
Auswahl der Schriftzeichen und OK ein. Die<br />
Suchbegriffbildschirme sind ähnlich wie der<br />
WLAN-Passworteingabebildschirm.<br />
Wählen Sie eine Sendung aus der Liste.<br />
Für Podcasts können Sie eine bestimmte<br />
Episode wählen.<br />
9.6 Meine hinzugefügten Sender<br />
Obwohl das Internet-Radioportal Tausende von Sendern enthält, möchten Sie<br />
möglicherweise einen Sender hören, welcher nicht gelistet ist. Sie können Ihre<br />
eigenen Sender über das Portal hinzufügen. Diese hinzugefügten Sender sind<br />
vom <strong>DR</strong> <strong>460</strong> durch Auswahl von Menu > Senderliste > Meine<br />
hinzugefügten Sender > [Sender] erreichbar.<br />
9.7 Informationen zur aktuellen Wiedergabe<br />
Während des Streams werden auf dem Bildschirm Name und Beschreibung<br />
angezeigt. Zur Anzeige weiterer Informationen zu dem Stream drücken<br />
Sie Info .<br />
Mit jedem Tastendruck auf Info wird ein anderer Informationssatz angezeigt,<br />
durchlaufen Sie Beschreibung, Format/Standort, Zuverlässigkeit,<br />
Bitrate/Codec/Abtastrate, Wiedergabe-Pufferspeicher und<br />
Tagesdatum.Musicplayermodus (Netzwerk und USB)<br />
20
10. Music Player Mode<br />
Der Musicplayermodus spielt<br />
Audiodateien wie MP3 oder WMA von<br />
einem Computer auf dem lokalen<br />
Netzwerk oder von einem USB-Stick<br />
oder einer USB-Festplatte ab.<br />
Zum Aufrufen des Musicplayermodus drücken Sie entweder Mode , bis im<br />
Display Musicplayer angezeigt wird oder wählen Sie Menu > Hauptmenü ><br />
Musicplayer.<br />
Im Musicplayermodus drücken Sie Menu , danach wählen Sie entweder Share<br />
Medien, Share-Ordner oder USB-Massenspeicher.<br />
Spielen Sie bereits eine Musikdatei ab, so drücken Sie<br />
besser Back anstatt Menu , um schnell zum zuletzt besuchten Zweig des<br />
Menübaums zurückzukehren. Sie hören beispielsweise den Track Heat von<br />
dem Interpreten 50 Cent über das Durchsuchen von Share Medien, wie<br />
nachstehend in Abschnitt 0 beschrieben. Mit Back kehren Sie in die Trackliste<br />
für das Album Get Rich or Die Tryin’ zurück. Mit erneutem Tastendruck<br />
auf Back listen Sie alle 50 Cent-Alben. Mit erneutem Tastendruck<br />
auf Back listen Sie alle Albuminterpreten aus und so weiter.<br />
10.1 Share Media (vom Mediaserver)<br />
Wählen Sie Menu > Share Media ><br />
Haben Sie Share Media eingestellt (wie auf Seite 14 beschrieben), so sehen<br />
Sie einen Eintrag bestehend aus : ,<br />
beispeilsweise JB-Laptop: Audio. Haben Sie mehr als einen Computer zur<br />
gemeinsamen Nutzung von Medien, so sind die Alternativen aufgeführt.<br />
Wählen Sie mit Select die Share Medien zur Wiedergabe.<br />
Ab diesem Punkt werden die Menüs vom<br />
Share Media-Server erstellt (gewöhnlich<br />
Windows Media Player). Das erste Menü<br />
zeigt eine Liste der Medientypen,<br />
beispielsweise Musik, Video, Bilder und<br />
Playlists. <strong>DR</strong> <strong>460</strong> kann nur Musik und<br />
Playlists wiedergeben.<br />
Sie haben ebenfalls eine Suchfunktion,<br />
welche Tracks auf ähnliche Weise wie die<br />
Internet-Radio Suche findet (siehe<br />
betreffender Abschnitt).<br />
21
In Musik haben Sie mehrere Möglichkeiten,<br />
Tracks zu wählen, einschließlich:<br />
o Genre,<br />
o Interpret,<br />
o Album,<br />
o Komponist,<br />
o Bewertung.<br />
Haben Sie einen Track zur Wiedergabe gefunden, so drücken Sie Select . <strong>DR</strong><br />
<strong>460</strong> spielt den gewählten Track und anschließend alle weiteren auf dem<br />
Bildschirm gelisteten Tracks, das ist gewöhnlich der Rest des Albums.<br />
10.2 Share-Ordner (Netzwerk oder USB-Massenspeicher)<br />
Share-Ordner wählen<br />
Zur Audiowiedergabe von Share-Ordnern wählen Sie<br />
Menu > Share-Ordner >.<br />
Haben Sie Share-Ordner eingestellt, so sollten Sie einen Eintrag bestehend<br />
aus : sehen, beispielsweise<br />
JB-Laptop: Audio. Haben Sie mehr als einen Share-Ordner, so sind die<br />
Alternativen aufgeführt. Wählen Sie den gewünschten Ordner.<br />
USB-Massenspeicher wählen<br />
Zur Audiowiedergabe von einem USB-Massenspeicher, wie beispielsweise<br />
USB-Stick oder USB-Festplatte wählen Sie Menu > USB-Massenspeicher.<br />
Ordner durchsuchen<br />
Ab diesem Punkt werden die Menüs von den<br />
Share-Ordnern auf dem entfernten<br />
Computer erstellt. Durchsuchen Sie die<br />
Musikbibliothek durch ihren Ordnerbaum<br />
mit Select und Back . Das Display zeigt<br />
Ordner- und Dateinamen (nicht unbedingt<br />
Tracknamen) an.<br />
22
Haben Sie einen Track zur Wiedergabe<br />
gefunden, so drücken Sie Select . <strong>DR</strong> <strong>460</strong><br />
spielt den gewählten Track und dann alle<br />
weiteren Tracks im gleichen Verzeichnis in<br />
alphanumerischer Reihenfolge.<br />
10.3 Informationen zur aktuellen Wiedergabe<br />
Während der Trackwiedergabe werden Track und Interpret (UPnP) oder<br />
Dateiname und Ordner (CIFS/USB) auf dem Bildschirm angezeigt. Unten auf<br />
dem Bildschirm identifiziert ein Symbol UPnP, CIFS oder USB als Quelle. Zur<br />
Anzeige weiterer Informationen zu diesem Stream drücken Sie Info .<br />
Mit jedem Tastendruck auf Info wird ein anderer Informationssatz angezeigt,<br />
Sie durchlaufen:<br />
o UPnP: Interpret, Album, URL, Bitrate/Codec/Abtastrate, Wiedergabe-<br />
Pufferspeicher und Tagesdatum,<br />
o CIFS/USB: Ordner, Pfad, Bitrate/Codec/Abtastrate, Wiedergabe-<br />
Pufferspeicher und Tagesdatum,<br />
23
11. Informationen und Fehlermeldungen<br />
Nachstehend eine Beschreibung der Informationen und Fehlermeldungen, welche<br />
möglicherweise auf Ihrem WLAN-Radio angezeigt werden.<br />
Meldung Typ Beschreibung<br />
Anschluss<br />
nicht<br />
erfolgreich<br />
Netzwerk-<br />
Fehler<br />
Fehler Anzeige, wenn ein mit dem WLAN-Netzwerk zusammenhängender<br />
Fehler auftritt. Einige Beispiele für „Anschluss nicht erfolgreich“ sind:<br />
- Radio verbindet sich nicht mit WLAN-Netzwerk<br />
- Falscher Netzwerk-Sicherheitsschlüssel eingegeben<br />
Fehler Anzeige, wenn ein mit dem Server/Anschluss zusammenhängender<br />
Fehler auftritt. Einige Beispiele für „Netzwerkfehler“ sind:<br />
- Radio verbindet sich nicht mit WLAN-Netzwerk<br />
- Radio verbindet sich nicht mit Internet-Radioportal<br />
- Radio verbindet sich nicht mit einem Radiosender<br />
- Radio hat einen Sender übertragen, die Verbindung wurde<br />
jedoch unterbrochen<br />
- Radio verbindet sich nicht mit PC zum Musik-Streaming<br />
Formatfehler Fehler Anzeige, wenn das Radio ein Problem mit der Wiedergabe von Medien<br />
aufgrund eines nicht unterstützten Formats oder Typs hat. Einige<br />
Beispiele für „Formatfehler“ sind:<br />
- Radio stellt sich auf einen Internet-Radiosender ein, welcher mit<br />
einem nicht vom Radio unterstützten Codec übertragen wird<br />
(beispielsweise AAC+)<br />
- Radio versucht die Wiedergabe einer Musikdatei von einem PC,<br />
deren Format nicht unterstützt wird<br />
Verbinde… Info Anzeige, wenn das Radio versucht, eine Verbindung mit einem<br />
Netzwerk, Server, Portal oder Sender herzustellen<br />
Lade… Info Anzeige, wenn das Radio eine Verbindung hergestellt hat und mit der<br />
Pufferung des Senders/Streams beginnt<br />
Wiedergabe Info Anzeige, wenn das Radio eine Verbindung hergestellt hat und lädt und<br />
mit der Wiedergabe des Streams beginnt. An diesem Punkt wird der<br />
Sender für Sie hörbar.<br />
24
12. Störungserkennung – Verbindung mit einem Internetsender<br />
Radio attempts to connect to the wifi network<br />
[Connecting… ]<br />
Connected?<br />
yes<br />
Radio attempts to connect to internet portal to<br />
get internet radio listings<br />
[Please Wait ]<br />
[Loading… ]<br />
Connected?<br />
yes<br />
Show Internet radio top-level menu<br />
-------------------<br />
My Favourites<br />
Stations<br />
Podcast<br />
My Added Stations<br />
-------------------<br />
User selects a station to be played<br />
Radio attempts to connect to the internet radio<br />
station<br />
[Connecting… ]<br />
Connected?<br />
yes<br />
Radio attempts to play the radio stream<br />
[Loading… ]<br />
Successful ?<br />
yes<br />
[Playing ]<br />
no<br />
no<br />
no<br />
no<br />
Mögliche Ursache Checkliste<br />
Keine Verbindung<br />
1. WLAN-Router heruntergefahren<br />
2. Falscher Netzwerkschlüssel<br />
eingegeben<br />
Netzwerkfehler<br />
1.Breitband-Internetanschluss<br />
möglicherweise gestört<br />
2. Internetportal (fs.vtuner.com)<br />
möglicherweise gestört<br />
Netzwerkfehler<br />
1. Gewählter Internet-<br />
Radiosender möglicherweise<br />
gestört<br />
Formatfehler<br />
1. Radio unterstützt das vom<br />
Internet-Radiosender benutzte<br />
Format nicht<br />
- 25 -<br />
Überprüfen Sie, ob sich der<br />
PC am WLAN-Netzwerk<br />
anschließen kann und dass<br />
der Netzwerkschlüssel<br />
(sofern benutzt)<br />
korrekt ist<br />
Überprüfen Sie, ob der PC<br />
Zugriff auf das Internet-<br />
Radioportal (http://wifiradio<br />
portal-frontier.com) hat,<br />
wenn er am gleichen<br />
WLAN-Netzwerk<br />
angeschlossen ist<br />
Gehen Sie zum Internet-<br />
Radioportal (http://fs.vtuner.com)<br />
und versuchen Sie, den Sender<br />
über Ihren PC<br />
wiederzugeben, um zu sehen,<br />
ob das Problem auf den<br />
Sender oder Ihr Netzwerk<br />
zurückzuführen ist<br />
Gehen Sie zum Internet-<br />
Radioportal (http://wifiradio<br />
portal-frontier.com) und<br />
versuchen Sie, den Sender<br />
über Ihren PC wiederzugeben,<br />
um zu sehen, ob das Problem<br />
auf den Sender oder Ihr<br />
Netzwerk zurückzuführen ist
13. FAQ – Häufig gestellte Fragen<br />
Was benötige ich, um das Radio<br />
benutzen zu können?<br />
Frage: Antwort:<br />
Wie schließe ich das Radio an meinem<br />
kabellosen Netzwerk an?<br />
Mein Verschlüsselungspasswort wird<br />
nicht anerkannt.<br />
Das Radio verbindet sich nicht zu<br />
meinem kabellosen Netzwerk?<br />
Zum Zugriff auf den Internet-Radiomodus stellen Sie diesen<br />
mit „MODE“ ein. Danach folgen Sie den<br />
Bildschirmanweisungen zur Auswahl von GENRE oder<br />
STANDORT.<br />
Wichtiger Hinweis: Sie benötigen einen ADSL<br />
Breitbandanschluss für den Internet-Radiomodus. So<br />
benötigen ebenfalls einen kabellosen Router/Zugangspunkt,<br />
um sich kabellos zu verbinden.<br />
Bei Erstgebrauch fordert Sie das Radio auf, „nach<br />
Netzwerken zu suchen“. Nach einer kurzen Suche wird eine<br />
Liste aller verfügbaren Netzwerke angezeigt und Sie treffen<br />
die Wahl, zu welchem Sie verbinden.<br />
Ist das gewählte Netzwerk nicht mit Passwort konfiguriert, so<br />
haben Sie sofortigen Zugriff auf Ihr kabelloses Netzwerk.<br />
Ist das gewählte Netzwerk mit Passwort konfiguriert (WEP-<br />
Schlüssel), so werden Sie an dieser Stelle zur Eingabe<br />
aufgefordert.<br />
Achten Sie auf Groß- und Kleinschreibung.<br />
Bei Problemen mit der Verbindung zu Ihrem kabellosen<br />
Netzwerk gehen Sie wie folgt vor:<br />
Vergewissern Sie sich, dass Sie den korrekten WEP-<br />
Schlüssel / Passwort haben, achten Sie auf Groß- und<br />
Kleinschreibung. Stellen Sie notfalls Ihren WLAN Router<br />
versuchsweise auf eine andere Verschlüsselung ein (z.B.<br />
statt WPA versuchsweise WEP oder gar keine<br />
Verschlüsselung, um herauszufinden, wo der Fehler weiter<br />
zu suchen ist.<br />
Funktioniert das Internetradio mit einer anderen<br />
Verschlüsselung, dann benutzen Sie diese, sie müssen aber<br />
dann auch alle anderen WLAN Teilnehmer im Netz auf diese<br />
andere Verschlüsselung umstellen. Inkompatibilitäten dürften<br />
zwar nach WLAN Normen nicht vorkommen, aber im Alltag<br />
kommt es immer wieder gelegentlich einmal vor, dass eine<br />
bestimmte Verschlüsselung<br />
bei einem Gerät einfach nicht funktioniert. Auch ein Update<br />
beim WLAN Router auf die neueste Firmware kann helfen!<br />
Achten Sie auch möglichst darauf, keine „exotischen“<br />
Zeichen für die WLAN Netznamen (SSID) zu benutzen.<br />
Verwenden Sie möglichst nur Buchstaben und / oder Zahlen.<br />
Vergewissern Sie sich, dass Ihr Router am Internet<br />
angeschlossen ist. Am einfachsten überprüfen Sie das mit<br />
einem Computer auf dem gleichen Netzwerk. Haben Sie<br />
Internetzugang, so ist Ihr Router am Internet angeschlossen.<br />
Vergewissern Sie sich, dass Ihr WLAN-Netzwerk anderen<br />
Geräten Zugriff gestattet. Danach rebooten Sie das Radio<br />
und versuchen Sie es erneut.<br />
- 26 -
Kann ich Radio hören, wenn mein Radio<br />
nicht am Internet angeschlossen ist?<br />
Warum spielt mein Radio meine<br />
Mediendateien nicht ab?<br />
Ich sehe, dass meine Musik in der<br />
Albumliste des Radios aufgeführt ist,<br />
kann sie aber nicht abspielen.<br />
Hat das Radio Senderspeicher für meine<br />
Lieblingssender?<br />
Ich bekomme eine Fehlermeldung bei<br />
Eingabe der Radio-ID auf<br />
http://www.wifiradio-frontier.com.<br />
Ich habe die IP usw. manuell<br />
eingegeben, werde aber nicht<br />
verbunden.<br />
Ich benutze einen MAC. Wie kann ich<br />
Musik vom MAC zum Radio streamen?<br />
Ist dieses Radio mit Windows PCs und<br />
Apple Macs kompatibel?<br />
Kann ich einen MAC Airport Router<br />
benutzen?<br />
Nein. Dies ist nur ein Internet-Radio und es ist leider nicht<br />
möglich, normale Rundfunksender zu empfangen.<br />
Haben Sie Schwierigkeiten bei der Wiedergabe von<br />
Mediendateien, so überprüfen Sie bitte auf Folgendes:<br />
• Sind Sie als Gast eingeloggt, so haben Sie<br />
möglicherweise keine Zugriffsrechte auf alle Share-<br />
Dateien, welche möglicherweise die Mediendateien<br />
enthalten.<br />
• Sind die Dateien, auf welche Sie zugreifen möchten, der<br />
korrekte Dateityp, so denken Sie bitte daran, dass dieses<br />
Radio nur MP3, WMA und AAC Dateien abspielt.<br />
• Benutzen Sie Mac OS X, so achten Sie bitte darauf, dass<br />
Sie Windows Datei-Sharing aktiviert haben.<br />
Bitte überprüfen Sie, ob die Medien, auf welche Sie<br />
zugreifen möchten, kopiergeschützt sind. Das Radio kann<br />
keine <strong>DR</strong>M oder kopiergeschützten Mediendateien<br />
abspielen.<br />
Ja, Sie können 5 Internet-Radiosender im Gerät speichern.<br />
Dies ist nicht die Radio-ID, welche eingegeben werden<br />
muss, sondern der Zugriffscode. Um den Zugriffscode zu<br />
erhalten, spielen Sie bitte einen Internet-Radiosender und<br />
drücken Sie MENU. Mit SELECT wählen Sie die Senderliste.<br />
Dann wählen Sie mit Turn SELECT Hilfe. Wählen Sie<br />
Zugriffscode erhalten. Diesen Code geben Sie auf<br />
http://www.wifiradio-frontier.com ein.<br />
Es ist manchmal notwendig, die Spannungsversorgung des<br />
Radios nach manueller Einstellung abzutrennen. Fahren Sie<br />
das Radio wieder hoch.<br />
Sie können Musik von Ihrem MAC/iTunes zu Ihrem Radio<br />
über die „Share-Ordner-Bibliothek“ streamen. Bitte achten<br />
Sie auch darauf, dass Ihr Musikordner auf Ihrem MAC<br />
„gemeinsam genutzt“ ist. Einzelheiten hierzu finden Sie in<br />
der Bedienungsanleitung Ihres MAC.<br />
HINWEIS: Haben Sie weiterhin Probleme, so können Sie<br />
auch Drittsoftware installieren, beispielsweise Twonky<br />
Media.<br />
Ja, es kann auf PCs oder Macs zugreifen, die an Ihrem<br />
kabellosen Netzwerk angeschlossen sind. MP3, WMA und<br />
AAC Mediendateien können also abgespielt werden.<br />
Weiterhin, falls Sie einen PC mit Windows XP oder Vista<br />
haben, können Sie Windows Media Player 11 (WMP11) als<br />
UpnP-Server benutzen. Dies gestattet Pico Wi-Fi Zugriff auf<br />
Alben, Genres, Tracks und Playlists, wie auf WMP11<br />
gelistet.<br />
Verbinden Sie sich mit einem Mac Airport kabellosen<br />
Netzwerk, so achten Sie darauf, dass Ihr benutztes Passwort<br />
für Nicht-Mac-Geräte ist. Dieses Passwort weicht wohl vom<br />
Passwort für andere Geräte auf Ihrem Airport Netzwerk ab.<br />
Ihr Passwort für Nicht-Mac-Geräte finden Sie im<br />
Anwendungsordner. Unter Utilities wählen Sie Airport Admin,<br />
wo Sie dann auf das Passwortsymbol zur Anzeige des<br />
Passwortes klicken können.<br />
- 27 -
Firewall verhindert Zugriff?<br />
Bestimmte Internet-Radiosender können<br />
nicht wiedergegeben werden.<br />
(Sender sendet nicht, überlastet oder<br />
unzureichende Bandbreite. Sender<br />
benutzt unbekanntes Codec. Link<br />
besteht nicht mehr.)<br />
Überprüfen Sie, ob die folgenden Ports offen sind: UDP- und<br />
TCP-Ports 80 und 123;<br />
DNS-Port 53.<br />
Windows Shares: Ports 135 – 139 und 445.<br />
Windows Media Player: unterschiedlich – Nicht-Microsoft<br />
Firewalls benötigen möglicherweise Konfiguration für UPnP.<br />
Versuchen Sie andere Sender; versuchen Sie, über<br />
Computer und Internet-Radioportal Website zu hören;<br />
versuchen Sie es später noch einmal<br />
14. Europäische Garantiebestimmungen<br />
Großhändler, Fachhändler oder Geschäft, in welchem Sie das Funkgerät gekauft haben, garantieren dem<br />
Erwerber dieses Produkts, dass dieses Produkt oder ein Teil davon, sofern es unter normalen Bedingungen<br />
benutzt wird, im Fall eines nachweislichen material- oder Fertigungsfehlers innerhalb von 2 Jahren nach<br />
Erwerb ohne Berechnung für Teile oder Arbeitslohn repariert oder durch neue oder generalüberholte Teile<br />
ersetzt wird. Zur Durchsetzung der Garantieansprüche muss das Produkt mit Kaufbeleg und Beschreibung<br />
des Defekts an den Großhändler, Fachhändler oder seinen autorisierten Kundendienst geliefert werden.<br />
Eine Haftung für die Reichweite der WLAN Verbindung dieses Produkts ist ausgeschlossen. Die Garantie<br />
bezieht sich nicht auf Produkte oder Teile davon, welche durch Veränderung, nicht ordnungsgemäße<br />
Installation, Falschbehandlung, Fahrlässigkeit, Unfall oder durch Entfernen oder Unkenntlichmachung der<br />
Seriennummer beschädigt wurden. Die Garantie bezieht sich nicht auf Zubehörteile oder Probleme, welche<br />
durch nicht autorisierte oder nicht empfohlene Zubehörteile, wie das mitgelieferte Netzteil oder<br />
Überspannung durch externe Spannungsversorgungen, Blitzschlag oder Überspannungsdefekte über<br />
Kabelverbindungen oder sonstige Weise, zerbrochene oder beschädigte Acrylglasfenster und Gehäuseteilen<br />
verursacht wurden.<br />
15. Wartungshinweise und Dokumentationen<br />
Die vollständige technische Dokumentation wird regelmäßig aktualisiert. Laden Sie die neueste Version der<br />
Bedienungsanleitungen, technischen Dokumente und Konformitätserklärungen sowie Wartungshinweise<br />
oder FAQs herunter bei http://www.hobbyradio.de<br />
Bei Problemen werfen Sie bitte einen Blick auf die Wartungshinweise oder häufig gestellt Fragen (FAQs),<br />
bevor Sie Ihr Funkgerät an den Kundendienst einsenden. Bitte beachten Sie, dass nicht alle WLAN Kanäle<br />
überall auf der Welt freigegeben sind. Solange Ihr Router korrekt eingestellt werden, wird Ihr <strong>DR</strong> <strong>460</strong><br />
Adapter keine nicht zugelassenen Einstellungen benutzen.<br />
16. Entsorgung<br />
Dieses Gerät wurde entsprechend der europäischen ROHS-Richtlinie gefertigt und<br />
enthält keine verbotenen Gefahrstoffe. Bitte entsorgen Sie defekte und nicht mehr<br />
nutzbare elektronische Geräte nur über die entsprechenden Sammelstellen.<br />
Die neue europäische EAG-Richtlinie verbietet die Entsorgung mit dem Hausmüll. Bitte<br />
tragen Sie zum effizienten Recycling elektronischer Altgeräte bei!<br />
- 28 -
17. EG Konformitätserklärung<br />
Wir erklären hiermit, dass unser Produkt: Internetradio-Adapter<br />
<strong>DR</strong> <strong>460</strong><br />
allen technischen Anforderungen, welche auf dieses Produkt innerhalb der EU-Richtlinien und<br />
harmonisierten europäischen Normen anwendbar sind, entspricht:<br />
EU-Richtlinien: 73 / 23 / EEC, 2004 / 108 / EG und 99 / 5 EC ;<br />
Europäische Normen: EN 301 489 -1 V 1.1.8, EN 301 489 -17 V 1.2.1,<br />
EN 300 328 - 2 V 1.7.1<br />
EN 60 950 - 1 : 2006<br />
Alle notwendigen Funktests wurden durchgeführt.<br />
<strong>Alan</strong> Electronics GmbH<br />
Daimlerstr. 1 k<br />
63303 Dreieich<br />
GERMANY<br />
Diese Erklärung liegt in der alleinigen Verantwortung des Herstellers entsprechend<br />
der Vorgehensweise in Anhang III R&TTE-Richtlinie.<br />
Bitte beachten Sie: Die neueste Ausgabe dieser Konformitätserklärung sowie weitere Informationen zu<br />
diesem WLAN Gerät und mögliche Nutzungseinschränkungen können von unserer Website<br />
heruntergeladen werden:<br />
Kontaktperson: Wolfgang Schnorrenberg<br />
Ort und Datum:<br />
Dreieich, 05. 08. 2009<br />
http://www.hobbyradio.de<br />
(Unterschrift)<br />
Dipl.-Phys. Wolfgang Schnorrenberg<br />
<strong>Alan</strong> Electronics GmbH<br />
- 29 -
- 30 -
© August 2009 <strong>Alan</strong> Electronics GmbH – Daimlerstr. 1 k - D 63303 Dreieich<br />
Hotline / technische Informationen:<br />
Technische Anfragen: 01805-012204 (14 Cent/min, Mobiltelefongebühren können<br />
abweichen)<br />
E-Mail: alan-service@ps-tech.de<br />
<strong>Service</strong>-Fax: 06103-9481-60<br />
Ersatzteile 06103 9481-22<br />
Reparatureinsendungen: PST professional support technologies GmbH<br />
Breitscheider Weg 117a - 40885 Ratingen<br />
Technische <strong>Homepage</strong>: www.hobbyradio.de, www.service.alan-electronics.de<br />
<strong>Homepage</strong> & Internetshop www.alan-electronics.de<br />
- 31 -
Internet Radio<br />
ADAPTOR<br />
<strong>ALBRECHT</strong> <strong>DR</strong> <strong>460</strong><br />
Instruction Manual
C A U T I O N<br />
TO PREVENT FIRE OR SHOCK HAZARD, DO NOT USE THIS PLUG WITH AN<br />
EXTENSION CORD, RECEPTACLE OR OTHER OUTLET UNLESS THE BLADES<br />
CAN BE FULLY INSERTED TO PREVENT BLADE EXPOSURE. TO PREVENT FIRE OR<br />
SHOCK HAZARD, DO NOT EXPOSE THIS APPLIANCE TO RAIN OR MOISTURE.<br />
This lightning flash symbol is<br />
intended to alert the user to the<br />
presence of insulated ‘dangerous<br />
voltage’ within the product’s<br />
enclosure that may be of sufficient<br />
magnitude to constitute a risk of<br />
electric shock to persons.<br />
WARNING:<br />
To reduce the risk of electric<br />
shock, do not remove cover (or<br />
back). No user serviceable parts<br />
are inside. Refer servicing to<br />
qualified personnel.<br />
IMPORTANT SAFETY INSTRUCTIONS<br />
• Read these instructions.<br />
• Keep these instructions with the adapter.<br />
• Read all warnings.<br />
• Follow all instructions.<br />
• Do not use this apparatus near water or in wet rooms.<br />
• Clean only with dry cloth.<br />
• Do not block any ventilation openings. Install in accordance with the manufacturer’s<br />
instructions.<br />
• Do not install near any heat sources such as radiators, heat registers, stoves, or other<br />
apparatus (including amplifiers) that produce heat.<br />
• Protect the power cord from being walked on or pinched particularly at plugs,<br />
convenience receptacles, and the point where they exit from the apparatus.<br />
• Only use attachments / accessories specified by the manufacturer.<br />
• Unplug this apparatus during lightning storms or when unused for long periods of time.<br />
• Refer all servicing to qualified service personnel. Servicing is required when the<br />
apparatus has been damaged in any way, such as power-supply cord or plug is<br />
damaged, liquid has been spilled or objects have fallen into the apparatus, the apparatus<br />
has been exposed to rain or moisture, does not operate normally, or has been dropped.<br />
• This appliance shall not be exposed to dripping or splashing water and no object filled<br />
with liquids such as vases shall be placed on the apparatus.<br />
• Do not overload wall outlet. Use only power source as indicated.<br />
• Use replacement parts as specified by the manufacturer.<br />
1<br />
This warning symbol is intended to<br />
alert the user to the presence of<br />
important operating and<br />
maintenance (servicing)<br />
instructions in the user manual.
Welcome<br />
Thank you for purchasing <strong>ALBRECHT</strong> <strong>DR</strong> <strong>460</strong>. Your <strong>DR</strong> <strong>460</strong> is designed as a digital<br />
music adaptor to add to your existing Audio system and to provide you with hours of<br />
music enjoyment with simple, convenient access to thousands of Internet radio<br />
stations worldwide and furthermore music streaming options. No matter whether you<br />
are in Zürich and want to listen to Brazilian music, or select a genre such as classical<br />
music, hard rock or jazz, the <strong>DR</strong> <strong>460</strong> Adaptor brings you home the radio station of<br />
your choice.<br />
Table of contents<br />
1. Content of package ···················································································Page 3<br />
2. Before you start ·························································································Page 4<br />
2.1 Difference between the Internet Radio Portal and Radio Station···········Page 4<br />
3. Overview of <strong>DR</strong> <strong>460</strong> ··················································································Page 5<br />
3.1 Front panel ··········································································Page 5<br />
3.2 Remote control ···································································Page 5<br />
3.3 Back panel···········································································Page 6<br />
4. General menu navigation / Menu Structure ··············································Page 7<br />
5. Menu structure ··························································································Page 8<br />
6. General info and settings ··········································································Page 9<br />
7. Turning on <strong>DR</strong> <strong>460</strong>····················································································Page 9<br />
8. Setting up the <strong>DR</strong> <strong>460</strong>·············································································Page 10<br />
8.1 Setting up the language ····················································Page 10<br />
8.2 Setting up the time and date ·············································Page 10<br />
8.3 Connecting to a network····················································Page 11<br />
8.4 Internet radio portal registration ········································Page 13<br />
8.5 Setting up Music server·····················································Page 14<br />
8.6 Sharing media from Windows Media Player ·····················Page 14<br />
8.7 Sharing folders on a Windows PC·····································Page 15<br />
8.8 Sharing folders on a non-Windows computer ···················Page 16<br />
8.9 Setting up <strong>DR</strong> <strong>460</strong> to work with shared folders·················Page 16<br />
9. Internet radio mode ·················································································Page 17<br />
9.1 Last listened ······································································Page 18<br />
9.2 Presets···············································································Page 18<br />
9.3 Favourites··········································································Page 18<br />
9.4 Browse···············································································Page 19<br />
9.5 Search ···············································································Page 20<br />
9.6 My added stations ·····························································Page 20<br />
9.7 Now playing information ····················································Page 20<br />
10. Music player mode ················································································Page 21<br />
10.1 Shared Media (from media server) ·································Page 21<br />
10.2 Shared Folders (from media server) ·······························Page 22<br />
10.3 Now playing information ··················································Page 23<br />
11. Info and Error Messages·······································································Page 24<br />
12. Troubleshooting – connecting to an internet station·····························Page 25<br />
13. FAQ…………………………………………………………………………..Page 26<br />
14. EU Warranty Regulations………………………………………………….Page 28<br />
15. / 16. <strong>Service</strong> Hints, Recycling and declaration of Conformity…....Pages 29..30<br />
2
1. Content of package<br />
Please make sure that the following contents are included in the package:<br />
1. <strong>DR</strong> <strong>460</strong> Adaptor - Main unit<br />
2. Audio connecting cable (Cynch type)<br />
3. Power supply adaptor (conform to new European ECO requirements)<br />
4. Remote control<br />
5. <strong>DR</strong> <strong>460</strong> User Manual<br />
2. Before you start<br />
Before you can use your internet radio, you need the following installations:<br />
1. A broadband internet connection (DSL).<br />
2. A wireless access point connected to your broadband internet. In most cases,<br />
this will be a DSL-WLAN Router, where everything is combined.<br />
3. If your wireless network is configured to use WEP (Wired Equivalent Privacy)<br />
or WPA (Wi-Fi Protected Access) data encryption, it is important that you<br />
know your WEP or WPA code to connect to your network. In many cases you<br />
find the factory preset code on the rear or bottom side of the WLAN Router.<br />
4. A Computer ( a Windows ® PC in case You want to share music files or have<br />
access to the online portal website for the Internet radio adaptor<br />
• Windows Media Player (WMP) 11 can be set up to<br />
enable streaming music files from the PC to the radio.<br />
• Alternatively, Windows shared folders can be used if<br />
WMP is not installed in the PC.<br />
• The PC can also be used to customise the radio’s<br />
favourites via the Frontier Silicon internet radio portal.<br />
3
2.1 Difference between the Internet Radio Portal and Radio Station<br />
There might be some confusion with regards to the difference between the Internet<br />
radio portal and the actual internet radio stations.<br />
Internet Radio Portal The portal is the content aggregator which maintains links to<br />
all the available internet radio stations. It can be considered<br />
to be an ‘address book’, listing the address of all the internet<br />
radio stations and regularly updated with new ones. When a<br />
user navigates through the radio menus, the list of stations<br />
is returned by the Portal. The portal used is :<br />
http://www.wifiradio-frontier.com<br />
Internet Radio Station The station is the actual website which contains the selected<br />
station audio stream. Once a user has selected a station<br />
through the Portal, the radio then connects directly to the<br />
station.<br />
Depending on your wireless router the internet radio should work anywhere within up<br />
to 20-30 meters of the wireless access point.<br />
Before continuing, make sure that your wireless access point is turned on and<br />
connected to your broadband internet. Please refer to your wireless access point<br />
manual to get this part working.<br />
4
3. Overview of your <strong>DR</strong> <strong>460</strong><br />
After taking your <strong>DR</strong> <strong>460</strong> out of the package, please spend some time to familiarize<br />
yourself with its features.<br />
3.1 Front Panel<br />
There are no keypad and no buttons on your <strong>DR</strong> <strong>460</strong>. All is working entirely from the<br />
enclosed remote control. The design is made simple and user-friendly so all<br />
navigation is handling by the R/C.<br />
3.2 Remote control (R/C)<br />
The functions are self explaining, where Key 1 to Key 5 work as preset keys to memorize<br />
certain stations.<br />
5
3.3 Back Panel<br />
RCA-(Cynch)<br />
Audio<br />
Sockets<br />
DC-Socket for<br />
AC Power<br />
Adaptor<br />
4. General menu navigation / Menu Structure<br />
The Wi-Fi radio features three types of menu. These are:<br />
• The Main menu<br />
This is the top level menu which allows users to enter the different modes,<br />
setup the radio, and view information about the radio (for example software<br />
version, product ID, Sleep and Alarm settings).<br />
• The Internet Radio Station List menu<br />
This is the menu that allows users to access the different internet radio<br />
services. This menu comes direct from the Internet Radio portal.<br />
• The Mode menus for the various modes<br />
The mode menus are so called because they show the functions available<br />
within the context of each of the modes. Pressing the MENU button anytime<br />
will take you the mode menu of the relevant mode the radio is currently in.<br />
Each context menu provides an entry called main menu which takes you back<br />
to the MAIN menu.<br />
To navigate to the different menus you must use the ARROW buttons on the remote<br />
control. This is general for all menu items. Use ARROW keys to find the menu you<br />
wish to navigate to the desired menu item. Then press ENTER to select. When<br />
menu item is selected pressing right ARROW key will also confirm selection.<br />
For example to navigate to the MAIN MENU while in INTERNET RADIO MODE<br />
press left ARROW button and the Menu is showing on display. Push the keys<br />
UP/DOWN until MAIN MENU is selected. Press ENTER Key to select MAIN MENU.<br />
Pressing MENU on front panel will take you to the Context Menu of the present<br />
mode of <strong>DR</strong> <strong>460</strong> (Internet radio, Sleep Timer, Alarm etc.)<br />
6<br />
LAN (Ethernet)-<br />
Connector for<br />
wired Network
5. Menu Structure Flow Chart (not all features shown are available for this model)<br />
7
6. GENERAL INFO and SETTINGS<br />
Conventions used in this manual<br />
Button (press) Physical button on the keypad<br />
Option (select) Menu option shown on the display<br />
Name Menu, screen or other name<br />
<strong>DR</strong> <strong>460</strong> has numerous features which require a small degree of setup before users<br />
are able to fully use all the functionalities of the radio. The Main Menu � System<br />
Setup menu has a series of options that allow system-wide settings to be altered.<br />
These settings are:<br />
<strong>DR</strong> <strong>460</strong> has basically three types of menu. Use the Select control to<br />
step through and select options. A scroll bar on the right of the screen<br />
shows if there are further options above or below those visible.<br />
In addition, each mode menu has two<br />
final options: System settings > and<br />
Main menu >. The ‘>’ indicates options<br />
leading to further menus.<br />
The System settings menu allows<br />
access to system settings and<br />
information such as network, time,<br />
language and software update.<br />
Menus with more options than will fit on<br />
one screen have a scroll bar to the right.<br />
The Main menu allows access to all<br />
modes plus sleep timer functions and<br />
different Alarm settings.<br />
Some menus, for example the System settings and the Main menu,<br />
have several submenus.<br />
As Sleep timer you can choose OFF, 15, 30, 45 Minutes with UP/Down<br />
keys<br />
The Alarm settings can be programmed with Alarm Time and Radio<br />
Programms (store radio stations as PRESET buttons 1-5 before or use<br />
the last heared radio station for wake up alarm. Please do not forget to<br />
let the stereo system switched on where you have connected the <strong>DR</strong><br />
8
<strong>460</strong>- otherwise you cannot hear the sleep timer music or the radio<br />
stations played as alarm wake up music.<br />
Dialogue screens<br />
Dialogue screens are shown to allow the<br />
user to change settings. They vary in<br />
complexity from simple Yes/No options<br />
up to the scrollable network password<br />
input screen.<br />
As with menus, the selected item is<br />
shown with a white background.<br />
Dialogue screens mark the current<br />
setting with an asterisk (*).<br />
<strong>DR</strong> <strong>460</strong> has basically three types of display screen:<br />
The Standby screen shows the time,<br />
date and any active alarm times.<br />
As you cycle through the play modes<br />
using Mode , <strong>DR</strong> <strong>460</strong> shows a splash<br />
screen for each mode. After one<br />
second, <strong>DR</strong> <strong>460</strong> enters the selected<br />
mode and tries to start playing the last<br />
station or track that was playing in that<br />
mode. If this is not possible, <strong>DR</strong> <strong>460</strong> will<br />
try to connect to the selected source by<br />
scanning for stations, networks, or<br />
prompting for user input as appropriate.<br />
The Now playing screen shows<br />
information about the audio source and<br />
track now playing, where available.<br />
In addition, there are screens for information such as volume, mute and<br />
information/error messages.<br />
7. Turning on <strong>DR</strong> <strong>460</strong><br />
Preparing <strong>DR</strong> <strong>460</strong> for operation:<br />
9
1. Place <strong>DR</strong> <strong>460</strong> on a flat surface.<br />
2. Connect power cable and turn on the radio.<br />
8. Setup<br />
8.1 Setting the language<br />
The default language is English. To change this, select Menu ><br />
System settings > Languages > then select your language.<br />
8.2 Setting the time/date<br />
The time and date can be updated manually or automatically.<br />
Setting manually is simpler, but the time and date are lost when power is<br />
removed.<br />
Setting to update automatically is a little more complicated at first, but<br />
the time and date are automatically synchronised with external clocks,<br />
so it should only need to be done once. Auto update is generally more<br />
accurate.<br />
To enter the Time settings menu, select Menu > System settings ><br />
Time/date ><br />
Manual time setting update<br />
Select Set time/date ><br />
The date and time are displayed as ddmm-yyyy<br />
and hh:mm AM/PM with the first<br />
value, dd active (flashing).<br />
Adjust each value with the Select<br />
control. As each value is adjusted, the<br />
next value becomes active and flashes.<br />
When you select the final value (minutes<br />
or AM/PM, depending on whether the<br />
clock is set to 12 or 24 hour mode), the<br />
display reverts to the now playing screen<br />
and shows the newly updated time.<br />
Auto time setting update<br />
Auto update works with data sent over the network (This function is only<br />
available in specific models). The clock is only updated when in a<br />
corresponding mode, so it is best to select a mode you use regularly.<br />
o Network uses a time signal sent from the Frontier Silicon Internet<br />
radio portal when in Internet radio or Music player modes.<br />
10
1. Select Auto update > then select Update from Network.<br />
2. Set your time zone through Set timezone >.<br />
3. If your country uses daylight saving, the automatically updated time<br />
may be wrong by one hour. When daylight savings are in effect<br />
(during the summer), turn on the Daylight savings option through<br />
Daylight savings > ON<br />
<strong>DR</strong> <strong>460</strong> will auto-update from the selected source when time information<br />
is available.<br />
12/24 hour time display<br />
To change between 12 and 24 hour display, select Set 12/24 hour and<br />
then select your preference.<br />
8.3 Connecting to a network<br />
For Internet radio and Music player modes, you need a network<br />
connection. To connect <strong>DR</strong> <strong>460</strong> to your network, you need a Wi-Fi<br />
wireless router, together with password key if set.<br />
For Internet radio, Internet software and automatic time/date updates,<br />
the router must have a broadband Internet connection.<br />
When you select Internet radio or Music player mode, <strong>DR</strong> <strong>460</strong> tries to<br />
connect to a network. If this is the first time it has tried to connect, or if<br />
the stored networks are not accessible, the Network wizard starts. To<br />
run the Network wizard manually, select Menu > System settings ><br />
Network > Network wizard.<br />
Once the wizard starts, enter the following information:<br />
o If not already set, WLAN region (select country/region from list),<br />
o Network name (select your network from the list),<br />
o If connecting to an encrypted wireless network, the key<br />
(password).<br />
To enter your key, use the Select control<br />
to move the cursor through the characters<br />
and select. As each character is selected,<br />
the key is built up near the top of the<br />
display.<br />
There are three options accessible by<br />
turning Select back before the first<br />
characters (0123…) – Backspace, OK<br />
and Cancel. You can also use<br />
the Back button to erase characters.<br />
11
Once you have completed entering the<br />
key, select OK, and <strong>DR</strong> <strong>460</strong> will try to<br />
connect to the selected network.<br />
If connecting fails, <strong>DR</strong> <strong>460</strong> returns to the<br />
password entry screen.<br />
If the network connection is lost, <strong>DR</strong> <strong>460</strong> automatically tries to reconnect.<br />
Network profiles<br />
<strong>DR</strong> <strong>460</strong> remembers the last four wireless networks it has connected to,<br />
and automatically tries to connect to whichever one of them it can find.<br />
You can see the list of registered networks through Menu > System<br />
settings > Network > Network profile >. From here you can delete<br />
unwanted networks by turning and pressing Select then confirming<br />
delete Yes.<br />
Other options<br />
There are also other options for viewing and manually altering network<br />
settings from Menu > System settings > Network >. These options<br />
are not normally necessary, but users experienced with networking may<br />
find them useful for diagnosing and fixing network problems.<br />
12
8.4 Internet radio portal registration<br />
<strong>DR</strong> <strong>460</strong> operates with The Frontier Silicon Internet radio portal website<br />
which allows you to organise your favourites lists and also listen to Internet<br />
radio on a computer.<br />
To register your <strong>DR</strong> <strong>460</strong> with the portal,<br />
first get your radio’s unique portal access<br />
code by selecting Menu > Station list ><br />
Help > Get access code >.<br />
Write down the access code.<br />
Note: Do not confuse the portal access code with the Radio ID (from Menu ><br />
System settings > Info.)<br />
On an internet-connected computer, access the portal website at<br />
www.wifiradio-frontier.com<br />
If this is your first visit to the portal, register for a new account, entering<br />
the following information:<br />
o access code,<br />
o your e-mail address,<br />
o password,<br />
o radio model (<strong>DR</strong> <strong>460</strong>).<br />
13
If you already have an account and wish to add an additional radio, log<br />
in to your account and select My preferences > Add another Wi-Fi<br />
radio.<br />
Once your radio is registered with the portal, you can immediately use<br />
the favourites and added stations features.<br />
8.5 Setting up a music server<br />
In order for <strong>DR</strong> <strong>460</strong> to play music files from a computer, the computer<br />
must be set up to share files or media.<br />
UPnP media sharing allows devices like <strong>DR</strong> <strong>460</strong> to play music from a<br />
shared media library, navigating through tag menus such as Artist,<br />
Album or Genre. If you are running a suitable server system such as a<br />
PC with Windows Media Player 10 or later (WMP), and your music<br />
library is well-tagged, then it is recommended to use media sharing. Only<br />
the UPnP server needs to be set up.<br />
Note: iTunes does not currently work as a UPnP media server, but there are<br />
add-ons available to work with an iTunes library.<br />
Folder sharing (CIFS) allows devices like <strong>DR</strong> <strong>460</strong> to browse folders on<br />
a network drive for audio files. This is a good alternative if you cannot<br />
use media sharing, and an alternative way to find files even if you have<br />
media sharing set up. The computer needs to be set up to share folders,<br />
and if this is done with password control, you also need to enter the user<br />
name and password.<br />
8.6 Sharing media with Windows Media Player<br />
The most common UPnP server is Windows Media Player (10 or later).<br />
To set up WMP for media sharing, perform the following steps:<br />
1. Ensure that the PC is connected to the network.<br />
2. Ensure that the radio is powered on and connected to the same<br />
network.<br />
3. In WMP, add to the media library the audio files and folders you<br />
want to share with <strong>DR</strong> <strong>460</strong> (Library > Add to Library…).<br />
4. In WMP, enable media sharing (Library > Media sharing…).<br />
14
<strong>DR</strong> <strong>460</strong> is listed as “Unknown Device”. Make sure that the radio has<br />
access to the shared media by selecting it and clicking Allow. You can<br />
also set a name for the shared media in Settings… Click OK to close<br />
the dialogue boxes.<br />
The PC is now ready to stream the music to the radio.<br />
8.7 Sharing folders on a Windows PC<br />
To share folders in Windows, the PC must first be a member of a domain<br />
or workgroup. Once this is setup, folders can be shared from Windows<br />
Explorer (My Computer).<br />
Domain/workgroup configuration<br />
The Domain configuration item can be found on a Windows XP machine<br />
as follows:<br />
1. From the start menu, select Control Panel > System > Computer<br />
Name tab.<br />
The Computer’s Domain or Workgroup is displayed in this tab.<br />
2. If the PC is not a member of any Domain or Workgroup then one<br />
must be joined. To do this click on the change button and enter the<br />
name of the domain (the default for Windows XP is MSHOME). In<br />
most cases, home computers & home networks only use<br />
WORKGROUP and only larger company networks use DOMAIN<br />
settings.<br />
3. A reboot of the PC may be prompted if the Domain or Workgroup has<br />
been changed.<br />
15
Setting up a new user account (Windows XP)<br />
The Wi-Fi Radio requires a user account to be set up on each PC that<br />
you wish to browse. By default most PCs have at least one user<br />
account. The user name and password (optional) need to be the same<br />
on each PC, as the Internet Radio only stores one user name and one<br />
password. For windows XP this can be set up as follows:<br />
1. From the start menu, select Control Panel > User accounts.<br />
2. From this screen click ‘Add …’, and enter the new user name and the<br />
Domain/Workgroup setting noted above. Select the type of user<br />
(restricted) and then select finish.<br />
3. Select the user just created, select ‘Reset Password …’ and enter a<br />
password for this user.<br />
4. Note the user name and password.<br />
Note: For Windows Vista: Users have to turn on the Guest account via<br />
manage user accounts in the control panel, then add access to either<br />
‘Everyone’ or ‘Guest’ on the shared drive. You could create a new<br />
account for the internet radio, with a password, if you are concerned<br />
about security. The Guest account has no password by default, so <strong>DR</strong><br />
<strong>460</strong> will connect to it from its factory default settings.<br />
Configuring a shared drive<br />
From the Start menu select My Computer or Windows Explorer and<br />
navigate to the directory you wish to share. Right click on the folder and<br />
select Sharing and Security. Configure the shared drive as read-only,<br />
and ensure that the user created above has read access to the share.<br />
8.8 Sharing folders on non-Windows computers<br />
It is beyond the scope of this manual to describe how to share folders on<br />
all computer systems. Please refer to your operating system<br />
documentation to find out how to share folders on non-Windows<br />
computer systems. If you configure shared folders with user name and<br />
password security, note these values.<br />
8.9 Setting up <strong>DR</strong> <strong>460</strong> to work with shared folders<br />
To set up <strong>DR</strong> <strong>460</strong> to playback audio stored on password-protected<br />
shared network drives, you need to enter a user name and password. To<br />
do this, from Music player mode, select Menu > PC settings ><br />
Username and enter the user name then PC settings > Password and<br />
enter the password.<br />
16
Enter a keyword by selecting characters<br />
then OK. The user name and password<br />
entry screens are similar in operation to<br />
the Wi-Fi password entry screen.<br />
The default user name is ‘guest’.<br />
9. Internet Radio Mode<br />
<strong>DR</strong> <strong>460</strong> can play thousands of radio<br />
stations and podcasts from around the<br />
world though a broadband Internet<br />
connection. When you select Internet<br />
radio mode, <strong>DR</strong> <strong>460</strong> contacts the Frontier<br />
Silicon Internet radio portal to get a list of<br />
stations, organised into different<br />
categories like Country, Most popular and<br />
Genre. Once you select a station, <strong>DR</strong><br />
<strong>460</strong> connects directly to that station.<br />
The portal also enables multiple lists of favourite stations that you can<br />
personalise, for example Andy’s stations, Jo’s favourites, Talkshows. To use<br />
the favourites feature, register your radio with the portal website as described<br />
on page 13. If you have several Frontier Silicon opeated radios, you can<br />
register them all on the same account so that each radio has access to your<br />
favourites lists. It is possible to add favourites either directly through <strong>DR</strong> <strong>460</strong> or<br />
through any computer with a web browser.<br />
To enter Internet Radio mode, either press Mode until the display shows<br />
Internet Radio or select Menu > Main menu > Internet Radio.<br />
Note: The station list menu is provided from the Internet radio portal, so it is<br />
only accessible when <strong>DR</strong> <strong>460</strong> is connected to the Internet. Station lists<br />
and submenus may change from time to time.<br />
There are several ways of selecting stations.<br />
Directly from the radio:<br />
o Last listened,<br />
o Presets.<br />
17
From the portal through the Menu<br />
> Station list > menu:<br />
o Favourites lists,<br />
o Browse by Country, Genre,<br />
Most popular, Newest,<br />
o Search by keyword,<br />
o My added stations.<br />
If you are already listening to an Internet radio station, you can<br />
press Back rather than Menu to quickly return to the last visited<br />
branch of the menu tree. For example, suppose you were listening to<br />
New Orleans Radio through the browse facility as described in section 0<br />
below. Pressing Back would return you to the Highlighted Blues<br />
stations menu. Pressing Back again would return you to the Blues<br />
menu, and so on.<br />
9.1 Last listened<br />
When Internet radio mode restarts, the last-listened station is selected.<br />
To select another recenly used station, select Menu > Last listened<br />
then one of the stations listed. Most recent stations appear at the top of<br />
the list.<br />
9.2 Presets<br />
Presets are stored in the radio and cannot be accessed from other<br />
radios.<br />
To store an Internet radio preset, press and hold one of the 5 Preset<br />
keys 1-5 1-5 until the display shows the Save preset screen. Select one<br />
of the 5 presets to save the currently playing station.<br />
To select a preset, press 1-5 briefly, then select one of the listed preset<br />
stations. When a preset station is playing, it shows Pn (P1, P2 etc) in the<br />
bottom of the screen.<br />
Note: Setting at least one radio station as preset station is necessary for using<br />
a station as wake up alerm!<br />
9.3 Favourites<br />
Favourites are stored with the Internet radio portal, and are available<br />
through all Internet radios registered on the same account. Before<br />
favourites can be used, the radio has to be registered with the Internet<br />
radio portal.<br />
18
9.4 Browse<br />
To store a playing station as a favourite from <strong>DR</strong> <strong>460</strong>, simply<br />
press Select . The selected station appears in the default favourites list<br />
Stations.<br />
To select a favourite, select Menu > Station list > My favourites ><br />
[Favourites list] > [Station].<br />
To browse Internet broadcasts,<br />
select Menu > Station list > then<br />
either Stations > or Podcasts >.<br />
Browse through the menus to find<br />
broadcasts.<br />
19
9.5 Search<br />
You can also search through Internet broadcasts for stations or podcasts<br />
with particular keywords in their title.<br />
To search, select Menu ><br />
Station list > then either<br />
Stations > or Podcasts ><br />
Enter a keyword by selecting<br />
characters then OK. The search<br />
entry screens are similar in<br />
operation to the Wi-Fi password<br />
entry screen.<br />
Select a broadcast from the list.<br />
For podcasts, you may be able to<br />
select a particular episode.<br />
9.6 My added stations<br />
Even though the Internet radio portal contains thousands of stations, you<br />
may want to listen to stations not listed. You can add your own stations<br />
via<br />
the portal. These added stations are accesible from <strong>DR</strong> <strong>460</strong> by selecting<br />
Menu > Station list > My added stations > [Station].<br />
9.7 Now playing information<br />
While the stream is playing, the screen shows its name and description.<br />
To view further information about the stream, press Info .<br />
20
Each time you press Info , another set of information is displayed,<br />
cycling through description, format/location, reliability, bit<br />
rate/codec/sampling rate, playback buffer and today’s date.<br />
10. Music Player Mode (Network and USB)<br />
Music player mode plays audio files<br />
such as MP3s or WMAs from a<br />
computer on the local network, or<br />
from a USB Flash stick or hard<br />
drive.<br />
To enter Music player mode, either press Mode until the display shows<br />
Music player or select Menu > Main menu > Music player.<br />
Once in music player mode, press Menu , then select either Shared<br />
media, Shared folders or USB mass storage.<br />
If you are already playing a music file, you can press Back rather<br />
than Menu to quickly return to the last visited branch of the menu tree.<br />
For example, suppose you were listening to the track Heat by the artist<br />
50 Cent through browsing shared media as described in section 0 below.<br />
Pressing Back would return you to the track listing for the album<br />
Get Rich or Die Tryin’. Pressing Back again would list all 50 Cent<br />
albums. Pressing Back again would list all album artists, and so on.<br />
10.1 Shared media (from media server)<br />
Select Menu > Shared media ><br />
If you have set up shared media (as described on page 14), you should<br />
see an entry consisting of : , for<br />
example JB-Laptop: Audio. If you have more than one computer sharing<br />
media, the alternatives are listed. Select the shared media you want to<br />
play.<br />
From this point on, the menus<br />
are generated from the shared<br />
media server (typically Windows<br />
Media Player). The first menu<br />
shows a list of media types, for<br />
example Music, Video, Pictures<br />
and Playlists. <strong>DR</strong> <strong>460</strong> can only<br />
play music and playlists.<br />
There is also a search function,<br />
which finds tracks in a similar<br />
21
way to Internet radio search (<br />
please see specific paragraph<br />
for this issue).<br />
From Music, there are<br />
numerous ways of selecting<br />
tracks, including:<br />
o Genre,<br />
o Artist,<br />
o Album,<br />
o Composer,<br />
o Rating.<br />
Once you have found a track you want to play, press Select . <strong>DR</strong> <strong>460</strong><br />
will play the selected track, then any further tracks that were listed on the<br />
same screen; usually this is the rest of the album.<br />
10.2 Shared folders (from network or USB mass-storage device)<br />
Selecting shared folders<br />
To play audio from shared folders, select Menu > Shared folders ><br />
If you have set up shared folders you should see an entry consisting of<br />
: , for example<br />
JB-Laptop: Audio. If you have more than one shared folder, the<br />
alternatives are listed. Select the shared folder you want to browse.<br />
Selecting a USB mass-storage device<br />
To play audio from a USB mass-storage device such as a USB Flash<br />
stick or USB hard drive, Select Menu > USB Mass Storage.<br />
Browsing folders<br />
From this point on, the menus are<br />
generated from the shared folders on<br />
the remote computer.You can browse<br />
the music library through its folder<br />
tree with the Select control<br />
and Back button. The display shows<br />
folder and file names (not necessarily<br />
track names).<br />
22
Once you have found a track you<br />
want to play, press Select . <strong>DR</strong> <strong>460</strong><br />
will play the selected track, then any<br />
further tracks in the same directory, in<br />
alphanumeric order.<br />
10.3 Now playing information<br />
While the track is playing, the screen shows its track and artist (UPnP) or<br />
file name and folder (CIFS/USB). At the bottom of the screen, an icon<br />
indicates UPnP, CIFS or USB depending on the source. To view further<br />
information about the stream, press Info .<br />
Each time you press Info , another set of information is displayed,<br />
cycling through:<br />
o UPnP: artist, album, URL, bit rate/codec/sampling rate, playback<br />
buffer and today’s date,<br />
o CIFS/USB: folder, path, bit rate/codec/sampling rate, playback<br />
buffer and today’s date.<br />
23
11. Info and Error Messages<br />
The following is a description of the info and error messages that the Wi-Fi radio<br />
could possibly display.<br />
Massage Type Description<br />
Failed to<br />
connect<br />
Network<br />
error<br />
Format<br />
error<br />
Connecting<br />
…<br />
Error Seen when a Wi-Fi network related error occurs. Some examples of<br />
circumstances which will trigger a ‘failed to connect’ are :<br />
- radio fails to connect to Wi-Fi network<br />
- wrong network security key entered<br />
Error Seen when a server/connection related error occurs. Some<br />
examples of circumstances which will trigger a ‘network error’ are :<br />
- radio fails to connect to Wi-Fi network<br />
- radio fails to connect to internet radio portal<br />
- radio fails to connect to a radio station<br />
- radio’s was streaming a station and connection fails midway<br />
through the streaming<br />
- radio fails to connect to a PC for streaming music<br />
Error Seen when the radio has problem playing the media due to<br />
unsupported format type. Some examples of circumstances which<br />
will trigger a ‘format error’ are :<br />
- Radio tunes to a internet radio station which is being<br />
transmitted using an audio codec not supported by the radio<br />
(i.e. AAC+).<br />
- Radio tries to play a music file from a PC which is in a<br />
format not supported<br />
Info Seen when the radio tries to establish connection with a network,<br />
server, portal, station.<br />
Loading… Info Seen once the radio has established connection, and starts<br />
buffering the station/stream.<br />
Playing Info Seen once the radio has completed connecting, and loading, and<br />
starts playing the stream. This is the point when the station<br />
becomes audible.<br />
24
12. Troubleshooting – connecting to an internet station<br />
Radio attempts to connect to the wifi network<br />
[Connecting… ]<br />
Connected?<br />
yes<br />
Radio attempts to connect to internet portal to<br />
get internet radio listings<br />
[Please Wait ]<br />
[Loading… ]<br />
Connected?<br />
yes<br />
Show Internet radio top-level menu<br />
-------------------<br />
My Favourites<br />
Stations<br />
Podcast<br />
My Added Stations<br />
-------------------<br />
User selects a station to be played<br />
Radio attempts to connect to the internet radio<br />
station<br />
[Connecting… ]<br />
Connected?<br />
yes<br />
Radio attempts to play the radio stream<br />
[Loading… ]<br />
Successful ?<br />
yes<br />
[Playing ]<br />
no<br />
no<br />
no<br />
no<br />
Failed to connect<br />
1. Wifi router might be down<br />
2. Wrong network key entered<br />
Network error<br />
1. Broadband internet<br />
connection might be down.<br />
2. Internet portal (fs.vtuner.com)<br />
might be down<br />
Network error<br />
1. Selected internet radio station<br />
might be down<br />
- 25 -<br />
Possible Cause Checklist<br />
Format error<br />
1. Radio does not support the<br />
format used by the internet radio<br />
station<br />
Check if PC is able<br />
to connect to the wifi<br />
network and the<br />
network key (if in<br />
use) is correct<br />
Check if PC is able<br />
to access the<br />
internet radio portal<br />
(http://wifiradiofrontier.com)<br />
when<br />
connected to the<br />
same wifi network<br />
Go to the internet<br />
radio portal (http://<br />
fs.vtuner.com) and<br />
try to play the station<br />
from the PC to see if<br />
problem is due to the<br />
station or your<br />
network<br />
Go to the internet<br />
radio portal (http://<br />
wifiradiofrontier.com)<br />
and try<br />
to play the station<br />
from the PC to see if<br />
problem is due to the<br />
station or the radio
13. FAQ- Frequently asked questions<br />
Question: Answer:<br />
To access Internet radio mode, use the<br />
What do I need to start using the Radio? “MODE” key to set it to Internet radio mode.<br />
Then follow the on-screen instruction to choose<br />
either GENRE or LOCATION to select.<br />
How do I connect the radio to my wireless<br />
network?<br />
- 26 -<br />
Important: You would need a ADSL<br />
broadband connection to use the Internet<br />
Radio mode. And you would need to have a<br />
Wireless router/Acess Point to connect<br />
wirelessly.<br />
On initial power up the radio will prompt you to<br />
“Scan for network”. After a brief scan a list of all<br />
available networks will occur and allow you to<br />
select which one you wish to use.<br />
If the selected network is not configured to<br />
request a password, you can immediately<br />
access your wireless network.<br />
If the selected network is configured to request<br />
a password (WEP key), you will be asked to<br />
enter<br />
the key at this point.<br />
It will not acknowledge my encryption key? Remember to write it with capital letters if<br />
It will not connect to my wireless network?<br />
Can I receive Radio on my Radio if no Internet<br />
connection is available?<br />
needed.<br />
It is worth checking the following if you are<br />
experiencing problems connecting to your<br />
wireless network:<br />
Check that you are using the correct WEP Key /<br />
passphrase, remember this will be case<br />
sensitive.<br />
Check if your router connected to the internet.<br />
The easiest way to check this is if you have a<br />
computer on the same network, if it can access<br />
the internet we know the router is connected to<br />
the internet.<br />
Check that your WIFI network allows other<br />
devices to get access. Then reboot radio and<br />
try again.<br />
No. Since this is an internet radio only it is not<br />
possible to receive wireless broadcast stations<br />
like FM or DAB.
Why won’t my Radio playback my media files?<br />
I can see my music listed on the Radio’s album<br />
list but cannot play it back?<br />
Does the Radio have memory presets to hold<br />
my favourite stations?<br />
I am getting an error when entering Radio ID on<br />
http://www.wifiradio-frontier.com?<br />
I have manually entered IP etc. but I get no<br />
connection?<br />
I am using a MAC. How can I stream music<br />
from MAC to the radio?<br />
Is this Radio compatible with Windows PCs and<br />
Apple Macs?<br />
- 27 -<br />
If you are experiencing difficulties in playing<br />
media files, it is worth checking the following:<br />
• If you are logged in as a guest, you may<br />
not have access privileges to all shared<br />
files which may include media files.<br />
• If the files you are trying to access are<br />
the correct file type, remember that this<br />
radio will only playback MP3, WMA &<br />
AAC files.<br />
• If you are using Mac OS X, please<br />
ensure you have Windows files sharing<br />
activated.<br />
Please check that the media you are trying to<br />
access is not copy protected. Our Radio will not<br />
play <strong>DR</strong>M or copy protected media files.<br />
Yes, It allows you to store 5 internet radio<br />
stations.<br />
This is because it is not the Radio ID that needs<br />
to be entered but the Access Code instead. To<br />
get the Access Code please start playback of<br />
an internet radio station and press MENU. Turn<br />
SELECT knob and choose Station List. Turn<br />
SELECT knob and choose Help. Choose Get<br />
Access code. This is the code to enter on<br />
http://www.wifiradio-frontier.com<br />
It is sometimes necessary to unplug the power<br />
of the radio after manually settings. Please re-<br />
start radio.<br />
You are able to stream music from your<br />
MAC/iTunes to your radio through the “shared<br />
folders” library. Please also check that your<br />
music folder on your MAC is “shared”. For<br />
guideline how to share your folders please<br />
check your MAC instruction booklet.<br />
NOTE: If you are still having problems you can<br />
also install the third-party software like Twonky<br />
Media.<br />
Yes it can access PCs or Macs that are<br />
connected to your wireless network. Meaning<br />
that MP3, WMA and AAC media files can be<br />
played back.<br />
Additionally, if you are running a PC with<br />
Windows XP or Vista, you can use Windows<br />
Media Player 11 (WMP11) as a UPnP server.<br />
This allows Pico Wi-Fi to access albums,<br />
genres, tracks and playlists as listed on<br />
WMP11.<br />
Can I Use a MAC Airport router? If you are connecting to a Mac Airport wireless<br />
network, make sure the password you are using
Firewall preventing access?<br />
Cannot play particular Internet radio station?<br />
(Station not broadcasting, overloaded or<br />
insufficient bandwidth. Station broadcasting<br />
using unknown codec. Link out of date.)<br />
- 28 -<br />
is for non Mac devices. This password is likely<br />
to differ from the password used for other<br />
devices on your Airport network. Your non Mac<br />
devices password can be checked in the<br />
Applications folder. Under Utilities, select<br />
Airport Admin where you can then click on the<br />
Password icon to view the password.<br />
Check the following ports are open: UDP and<br />
TCP ports 80 and 123;<br />
DNS port 53.<br />
Windows shares: ports 135 – 139 and 445.<br />
Windows Media Player: varies – non-Microsoft<br />
firewalls may require configuration for UPnP.<br />
Try other stations; try listening on computer via<br />
Internet radio portal website; try later<br />
14. European warranty regulations<br />
The distributor, dealer or retail shop where You bought the internet radio adaptor warrants<br />
to the original retail purchaser of this product that should this product or any part of it,<br />
under normal use and conditions, be proven defective in material or workmanship within 2<br />
years from the date of original purchase, such defect(s) will be repaired or replaced with<br />
new or reconditioned product without charge for parts and repair labour. To obtain repair<br />
or replacement within the terms of this warranty, the product is to be delivered with proof of<br />
warranty coverage (e.g. a copy of Your bill of sale), specification of defect(s), to the<br />
distributor, dealer or his authorized repair partner.<br />
Liability for communications range of this product is disclaimed. The warranty does not<br />
apply to any product or part there of which, has suffered or been damaged through<br />
alteration, improper installation, mishandling, misuse, neglect, accident, or by removal or<br />
defacement of the factory serial number label(s). The warranty does not apply to<br />
accessory parts or problems caused through not authorised or not recommended<br />
accessories like other than the supplied power supply, external audio cables, external<br />
network cables and over voltage caused through external power supplies, lightning or over<br />
voltage defects via cables, broken or damaged acrylic glass windows and cabinet parts.
15. Where to find service hints and service documentation<br />
The complete technical documentation is updated regularly. You can download the latest<br />
versions of user manuals, technical documents and conformity declaration, as well as<br />
service hints or FAQ’s any time from our server under<br />
http://www.hobbyradio.de<br />
If you should have a problem, please have a look to the service hints or frequently asked<br />
questions (FAQ) before You send Your internet radio adaptor back to the service centre.<br />
16. Disposal and Recycling of Electronics Waste<br />
This Internet Radio adaptor has been produced according to the European<br />
ROHS directive and does no more contain certain banned hazardous<br />
substances. Please dispose defective and no more usable electronic items<br />
only via officially allowed collecting points.<br />
The new European WEEE directive does no more allow to dispose items via<br />
household trash. Please contribute to the efficient recycling of used<br />
electronic items!<br />
- 29 -
17. CE Declaration of Conformity<br />
Declaration of Conformity<br />
We hereby declare that our product: WLAN / LAN Internet Radio Adapter<br />
<strong>DR</strong> <strong>460</strong><br />
satisfies all technical regulations applicable to the product within the scope of EU Council<br />
Directives and harmonized European Standards:<br />
EU- Directives : 73 / 23 / EEC, 2004 / 108 / EG and 99 / 5 EC ;<br />
European Standards EN 301 489 -1 V 1.1.8, EN 301 489 - 17 V 1.2.1,<br />
EN 300 328 - 2 V.1.7.1,<br />
EN 60 950 - 1 : 2006<br />
All essential radio test suites have been carried out.<br />
<strong>Alan</strong> Electronics GmbH<br />
Daimlerstr. 1 k<br />
63303 Dreieich<br />
GERMANY<br />
This declaration is issued under the sole responsibility of the manufacturer according to the<br />
procedure of Annex III R&TTE directive.<br />
Note: the latest valid issue of this Declaration of Conformity, as well as all other information about this radio<br />
and possible restrictions of use, can be downloaded any time from our public internet server under:<br />
Contact person: Wolfgang Schnorrenberg<br />
Place and date of issue:<br />
Dreieich, 05.08.2009<br />
http://www.hobbyradio.de<br />
(Signature)<br />
Dipl.-Phys. Wolfgang Schnorrenberg<br />
<strong>Alan</strong> Electronics GmbH<br />
- 30 -
© August 2009 <strong>Alan</strong> Electronics GmbH – Daimlerstr. 1 k - D 63303 Dreieich<br />
Technical information hotline:<br />
Technical inquiries: 01805- 012204 (14 Cent/min, mobile phone charges may<br />
be different)<br />
e-mail: alan-service@ps-tech.de<br />
Returns and <strong>Service</strong> Address: PST professional support technologies GmbH<br />
Breitscheider Weg 117a<br />
D - 40885 Ratingen<br />
Technical <strong>Homepage</strong>: www.hobbyradio.de<br />
<strong>Homepage</strong> / Internetshop www.alan-electronics.de<br />
- 31 -
Adapteur pour Radio Internet<br />
<strong>DR</strong> <strong>460</strong><br />
Mode d'emploi
MISE EN GARDE<br />
POUR PREVENIR LES CHOCS ELECTRIQUES NE PAS UTILISER CETTE FICHE<br />
POLARISEE AVEC UN PROLONGATEUR UNE PRISE DE COURANTOU UNE AUTRE<br />
SORTIE DE COURANT, SAUF SI LES LAMES PEUVENT ETRE INSEREES A FOND<br />
SANS EN LAISSER AUCUNE PARTIE A DECOUVERT AFIN DE REDUIRE LES RISQUES<br />
D'INCENDIE OU D'ELECTROCUTION, NE PAS EXPOSER CET APPAREIL A LA PLUIE<br />
OU A L'HUMIDITE<br />
Le symbole de l'éclair à l'intérieur<br />
d'un triangle équilatéral, est<br />
destiné à alerter l'utilisateur de la<br />
présence de pièces sous tension<br />
non isolées dans le produit, d'une<br />
magnitude pouvant constituer un<br />
risque d'électrocution<br />
AVERTISSEMENT :<br />
Pour réduire le risque de choc<br />
électrique, ne pas déposer le capot<br />
(ou le panneau arrière) Cette unité<br />
ne renferme aucune pièce<br />
réparable par l’utilisateur. Confier<br />
l'entretien à un technicien qualifié<br />
uniquement<br />
MESURES DE SECURITE IMPORTANTES<br />
1.) Veuillez lire ce manuel.<br />
2.) Conservez ce manuel dans un endroit sûr.<br />
3.) Lisez tous les avertissements.<br />
4.) Suivez toutes les instructions.<br />
5.) N’utilisez pas cet appareil près d’une source d’eau.<br />
6.) Nettoyez toujours cet appareil avec un chiffon sec.<br />
7.) Ne bloquez jamais les fentes d’aération. Installer en respectant les consignes du fabricant.<br />
8.) Cet appareil ne doit pas être installé près d’une source de chaleur telle qu’un radiateur, un<br />
registre de chaleur, une cuisinière ou tout autres appareils produisant de la chaleur (y compris<br />
des amplificateurs).<br />
9.) Evitez que le cordon soit piétiné ou pincé, surtout aux fiches, prises de courant, et au point de<br />
leur sortie de l'appareil.<br />
10.) Utilisez uniquement des pièces ou des accessoires recommandés par le fabricant<br />
11.) Débranchez cet appareil pendant les orages ou si vous n’allez pas l’utiliser pendant une longue<br />
période de temps.<br />
12.) Pour toute réparation, veuillez faire appel à un technicien qualifié. Contactez un technicien<br />
qualifié si cet appareil est endommagé, par exemple si le cordon d’alimentation ou la prise est<br />
endommagé, si un liquide a été renversé ou si des objets sont tombés sur cet appareil, si cet<br />
appareil a été exposé à la pluie ou à l’humidité, ne fonctionne pas normalement ou s’il est tombé.<br />
13.) Cet appareil ne doit pas être exposé à des gouttes ou à des éclaboussements d’eau ; aucun<br />
objet contenant de l’eau, tel qu’un vase, ne doit être posé sur cet appareil<br />
14.) Ne surchargez pas la prise secteur. N'utiliser qu'une source d'alimentation indiquée.<br />
15.) N'utiliser que des pièces recommandées par le fabricant.<br />
1<br />
Le symbole du point<br />
d'exclamation, dans un<br />
triangle équilatéral, sert à<br />
avertir l'utilisateur que<br />
d'importants conseils de<br />
fonctionnement et de<br />
maintenance sont fournis<br />
dans ce manuel de<br />
l'utilisateur.
Bienvenue<br />
Nous tenons à vous féliciter pour votre achat de <strong>ALBRECHT</strong> <strong>DR</strong> <strong>460</strong>. Le <strong>DR</strong> <strong>460</strong> est<br />
conçu pour être un adaptateur de musique numérique, un complément à votre<br />
système audio existant pour fournir des heures de distraction musicale de manière<br />
simple, d'un accès pratique à des milliers de stations radio Internet dans le monde<br />
entier avec plus d'options de streaming musical. Peu importe que vous soyez à<br />
Zurich et que vous souhaitez écouter à de la musique Brésilienne, ou choisir un<br />
genre quelconque tel que de la musique classique, hard rock ou jazz, l'adaptateur<br />
pour Radio Internet <strong>DR</strong> <strong>460</strong> vous apporte des stations radio de votre choix.<br />
Table des matières<br />
1. Contenu de l'emballage ·······················································································Page 3<br />
2. Avant de commencer ···························································································Page 3<br />
2.1 Différence entre Portail Radio et Station Radio Internet ···································Page 4<br />
3. Présentation du <strong>DR</strong> <strong>460</strong>·······················································································Page 5<br />
3.1 Panneau avant ···········································································Page 5<br />
3.2 Télécommande ··········································································Page 5<br />
3.3 Panneau arrière··········································································Page 6<br />
4. Navigation / Structure générale des menus ························································Page 7<br />
5. Structure des menus ···························································································Page 7<br />
6. Informations générales et réglages ·····································································Page 8<br />
7. Mise en marche du <strong>DR</strong> <strong>460</strong> ·················································································Page 9<br />
8. Configuration du <strong>DR</strong> <strong>460</strong> ···················································································Page 10<br />
8.1 Choix de la langue····································································Page 10<br />
8.2 Réglage de la date et de l’heure···············································Page 10<br />
8.3 Connexion au réseau ·······························································Page 11<br />
8.4 Enregistrement au portail radio Internet ··································Page 13<br />
8.5 Configurer un serveur de musique ···········································Page 14<br />
8.6 Partage de fichiers multimédias avec le lecteur Windows MediaPage 14<br />
8.7 Partage de dossiers sur un PC Windows ································Page 15<br />
8.8 Partage de dossiers sur ordinateurs non Windows ·················Page 15<br />
8.9 Configuration du <strong>DR</strong> <strong>460</strong> pour utiliser des dossiers partagés ·Page 17<br />
9. Mode radio Internet ···························································································Page 18<br />
9.1 Dernière station écoutée ·························································Page 18<br />
9.2 Stations préréglées···································································Page 18<br />
9.3 Favoris······················································································Page 18<br />
9.4 Explorer ···················································································Page 18<br />
9.5 Rechercher ···············································································Page 20<br />
9.6 Mes stations ajoutées·······························································Page 20<br />
9.7 Informations sur la lecture en cours ·········································Page 21<br />
10. Mode lecteur de musique·················································································Page 22<br />
10.1 Média partagé (depuis le serveur multimédia) ·························Page 22<br />
10.2 Dossiers partagés (depuis le serveur multimédia) ···················Page 23<br />
10.3 Informations sur la lecture en cours ·········································Page 24<br />
11. Messages d'information et d'erreur··································································Page 26<br />
12. Dépannage – connexion à une station Internet ··············································Page 27<br />
13. FAQ……………………………………………………………………………….…..Page 28<br />
14-17. EU-Garantie, Recyclage, Déclaration de Conformité, <strong>Service</strong>……..………Page 31<br />
2
1. Contenu de l'emballage<br />
Vérifiez que tous les éléments suivants sont présents dans l’emballage :<br />
1. Adaptateur <strong>DR</strong> <strong>460</strong> - unité principale<br />
2. Alimentation<br />
3. Télécommande<br />
4. Manuel de l'utilisateur <strong>DR</strong> <strong>460</strong><br />
5. Cable audio<br />
2. Avant de commencer<br />
Avant de pouvoir utiliser votre Radio Internet, vous aurez besoin de :<br />
1. Une connexion Internet à large bande.<br />
2. Un point d’accès sans fil connecté à votre Internet à large bande. Via un<br />
routeur est recommandé.<br />
3. Si votre réseau sans fil est protégé par un protocole de chiffrement de<br />
données WEP (Wired Equivalent Privacy) ou WPA (Wi-Fi Protected Access),<br />
vous devez disposer de la clé WEP ou WPA pour pouvoir connecter au<br />
réseau.<br />
4. PC<br />
• Le lecteur Windows Media 11 (WMP) peut être configuré<br />
pour autoriser le streaming de fichiers musique d'un PC<br />
vers la radio.<br />
• Les dossiers Windows partagés peuvent également être<br />
utilisés si WMP n'est pas installé sur le PC.<br />
• Le PC peut également être utilisé pour personnaliser les<br />
favoris radio via le portail Frontier Silicon Internet radio.<br />
3
2.1 Différence entre Portail Radio et Station Radio Internet<br />
Il se peut qu'il y ait une certaine confusion à l'égard de la différence entre le portail<br />
radio Internet et les stations radio Internet réelles.<br />
Portail Radio Internet Le portail et un agrégateur de contenu qui maintient les<br />
liens avec toutes les stations radio Internet disponibles. Il<br />
peut être considéré comme un ‘Carnet d'adresses’, une<br />
liste d'adresses de toutes les stations radio Internet qui est<br />
mise à jour régulièrement avec les nouvelles stations.<br />
Lorsque l'utilisateur parcourt les menus radio, la liste des<br />
stations est renvoyée par le Portail. Le portail utilisé est :<br />
http://www.wifiradio-frontier.com<br />
Station radio Internet la station est le site web qui contient effectivement le flux<br />
audio sélectionné. Une l'usager a choisi une station via le<br />
portail, la radio se connecte directement à la station.<br />
En fonction de votre routeur sans fil, la radio Internet devrait fonctionner n'importe où<br />
à une distance de 20 à 30 mètres du point d'accès sans fil.<br />
4
Avant de continuer, assurez-vous que votre point d’accès sans fil est sous tension et<br />
connecté à votre Internet à large bande. Reportez-vous au manuel de votre point<br />
d’accès sans fil four faire fonctionner cette partie.<br />
3. Présentation du <strong>DR</strong> <strong>460</strong><br />
Après avoir retiré le <strong>DR</strong> <strong>460</strong> de son emballage, prenez du temps pour vous<br />
familiariser avec ses fonctionnalités.<br />
3.1 Panneau avant<br />
Le <strong>DR</strong> <strong>460</strong> ne comprend ni clavier ni boutons. Il complètement commandé par la<br />
télécommande fournie. La conception est simple et conviviale et toute navigation est<br />
effectuée via la télécommande.<br />
3.2 Télécommande<br />
5
3.3 Panneau arrière<br />
Connecteurs<br />
Stéréo (RCA)<br />
Connecteur<br />
alimentation 9V<br />
4. Navigation / Structure générale des menus<br />
La radio Wi-Fi comprend trois types de menus. Les voici :<br />
• Le menu principal<br />
C'est le menu du plus haut niveau qui permet aux usagers d'accéder à<br />
différents modes, (Radio Internet, Lecteur Média, Mode sommeil, Réveils et<br />
configuration (pour configurer la radio et afficher des informations sur la radio<br />
(par exemple la version du logiciel, ID du produit).<br />
• Le menu Liste des Stations Radio Internet<br />
C'est le menu qui permet aux usagers d'accéder à différents services de radio<br />
Internet. Ce menu vient directement du portail Radio Internet.<br />
• Les menus Mode pour les différents modes<br />
Les menus mode sont ainsi appelés car ils montrent les fonctions disponibles<br />
pour chaque mode. En appuyant sur la touche MENU à tout moment, vous<br />
serez amené au menu mode du mode actuel où se trouve la radio. Chaque<br />
menu contextuel comporte une entrée appelée menu principal qui fait<br />
retourner au menu Principal.<br />
Pour naviguer dans les différents menus vous devez utiliser les touches fléchées de<br />
la télécommande. Ceci est valable pour tous les éléments des menus. utilisez les<br />
touches fléchées pour localiser le menu souhaité et y naviguer jusqu'à élément<br />
souhaité. Appuyez ensuite sur ENTER pour sélectionner Vous pouvez aussi<br />
confirmer l'élément sélectionné par la touche fléchée droite.<br />
Par exemple pour naviguer jusqu'au menu Principal alors que vous êtes en mode<br />
radio Internet, appuyez sur la touche fléchée gauche et le Menu s'affiche à l'écran.<br />
Utilisez les touches Haut/Bas jusqu'à ce que le menu Principal soit sélectionné.<br />
Appuyez sur la touche ENTER pour sélectionner menu Principal.<br />
En appuyant sur MENU du panneau frontal vous amène au Menu Contextuel du<br />
mode actuel du <strong>DR</strong> <strong>460</strong> (radio Internet, etc.)<br />
6<br />
Connecteur<br />
LAN
5. Structure des menus (toutes les fonctions montrées ici ne sont pas disponibles sur ce modèle)<br />
Arborescence des menus et modes<br />
7
6. Informations générales et réglages<br />
Conventions utilisées dans le présent manuel<br />
Boutons (Appuyer) bouton matériel sur le clavier<br />
Option (sélectionner) option de menu affichée à l'écran<br />
Nom Menu, écran ou autre nom<br />
Le <strong>DR</strong> <strong>460</strong> dispose de plusieurs fonctions qui demandent une petite configuration<br />
avant que les usagers puissent utiliser toutes les fonctionnalités de la radio. On peut<br />
modifier les paramètres système, au sens large, au moyen des options de menu<br />
Principal � menu Configuration système.<br />
Voici ces paramètres :<br />
Le <strong>DR</strong> <strong>460</strong> comprend pratiquement trois types de menus. Utilisez le bouton<br />
Select pour localiser et sélectionner les options. Une barre de défilement à<br />
droite de l'écran montre s'il y a encore des options en haut ou en bas.<br />
En plus, chaque menu mode dispose de<br />
deux options finales : Paramètres système<br />
> et menu Principal >. Le caractère ‘>’<br />
indique qu'il y a des options qui mènent vers<br />
plus de menus.<br />
Le menu Paramètres système permet<br />
l'accès aux Paramètres et informations<br />
système telles que, réseau, heure, langue et<br />
mise à jour du logiciel.<br />
Les menus avec beaucoup d'options qui ne<br />
peuvent tenir sur un écran, auront une barre<br />
de défilement à droite.<br />
Le menu Principal permet l'accès à tous les<br />
modes et aux fonctions Sommeil (OFF,15,<br />
30, 45 min), minuterie et Réveil (avec music).<br />
Certains menus, par exemple le menu Paramètres système, ont plusieurs<br />
sous-menus.<br />
8
Écrans de dialogue<br />
Les écrans de dialogue sont affichés à<br />
tous les usagers pour changer des<br />
paramètres. Ils varient en complexité,<br />
de l'option simple Oui/Non aux écrans<br />
déroulants d'entrée de mot de passe<br />
réseau.<br />
Comme pour les menus, l'élément<br />
sélectionné est affiché avec un fond<br />
blanc.<br />
Les écrans de dialogue marquent le<br />
paramètre courant d'un astérisque (*).<br />
Le <strong>DR</strong> <strong>460</strong> comprend trois pratiquement types d'écrans de dialogue.<br />
L'écran de veille affiche l'heure, date<br />
toute heure d'alarme active.<br />
Au fur et à mesure que vous basculez<br />
entre les modes à l'aide de Mode, le<br />
<strong>DR</strong> <strong>460</strong> affiche une fenêtre d'attente<br />
pour chaque mode. Après une seconde,<br />
le <strong>DR</strong> <strong>460</strong> accède au mode sélectionné<br />
et essaie de syntoniser la dernière<br />
station ou piste qui était active dans ce<br />
mode. S'il est impossible, le <strong>DR</strong> <strong>460</strong><br />
essaie de se connecter à la source<br />
sélectionnée en effectuant une<br />
recherche de stations, réseaux, ou<br />
invite l'usager à entrer quelque chose.<br />
L'écran "Lecture en cours" affiche des<br />
informations, si disponibles, sur la<br />
source audio et la pise en cours de<br />
lecture<br />
En plus, il y as des écrans pour information tels que volume, muet et messages<br />
d'information/d'erreur.<br />
7. Mise en marche du <strong>DR</strong> <strong>460</strong><br />
Préparation du <strong>DR</strong> <strong>460</strong> l'utilisation :<br />
1. Placez le <strong>DR</strong> <strong>460</strong> sur une surface plate.<br />
2. Branchez le câble électrique et allumez la radio.<br />
9
8. Configuration<br />
8.1 Choix de la langue<br />
L'Anglais est la langue par défaut. Pour changer cela, sélectionnez<br />
Menu > Paramètres système > Langues > puis sélectionnez la langue<br />
souhaitée.<br />
8.2 Régler Heure/Date<br />
L'heure et la date peuvent mises à jour manuellement ou<br />
automatiquement.<br />
Le réglage manuel est plus simple, mais l'heure et la date seront<br />
perdues à la mise hors tension.<br />
Le réglage automatique est un peu plus compliqué au début, mais<br />
l'heure et la date seront synchronisées automatiquement avec des<br />
horloges externes, donc ceci ne doit être effectué qu'une seule fois. La<br />
mise à jour automatique est généralement plus précise.<br />
Pour accéder au menu Réglage de l’heure, sélectionnez<br />
Menu > Paramètres système> Heure/Date><br />
Mise à jour manuelle<br />
sélectionnez Régler Heure/Date><br />
La date et l'heure sont affichée sous la<br />
forme jj-mm-aaaa et hh:mm AM/PM avec<br />
la première valeur, dd active<br />
(clignotante).<br />
Vous pouvez régler chaque valeur à<br />
l'aide du bouton Select.<br />
A chaque fois qu'une valeur est réglée,<br />
la valeur suivant devient active<br />
(clignotante).<br />
Lorsque vous sélectionnez la dernière<br />
valeur (minutes ou AM/PM, en fonction<br />
du format de l'heure 12 ou 24 heures),<br />
l'écran revient à l'affichage "Lecture<br />
actuelle" et affiche l'heure nouvellement<br />
mise à jour.<br />
Mise à jour automatique<br />
La mise à jour automatique utilise les données envoyées via le réseau<br />
(cette fonction n’est disponible que sur des modèles spécifiques).<br />
L'horloge n'est mise à jour qu'avec le mode correspondant, il est donc<br />
préférable de choisir le mode que vous utilisez régulièrement.<br />
10
o Le réseau utilise un signal heure envoyé par le portail Frontier<br />
Silicon Internet radio lorsque le mode est radio Internet ou lecteur<br />
de musique.<br />
1. Sélectionnez Mise à jour automatique> puis sélectionnez Mettre à<br />
jour depuis le réseau.<br />
2. Définissez votre fuseau horaire via Définir le fuseau horaire ><br />
3. Si l’heure d’été est utilisée dans votre pays, la mise à jour<br />
automatique de l’heure peut être erronée d'une heure. Si l’heure<br />
d’été prend effet (en été), activez l’option heure d’été via Heure<br />
d’été > Activer<br />
Le <strong>DR</strong> <strong>460</strong> mettra à jour l’heure depuis la source sélectionnée lorsque<br />
les informations sont disponibles.<br />
Format de l’heure 12/24<br />
Pour basculer entre l'affichage 12 et 24 heures, sélectionnez Définir<br />
12/24 heures et choisissez votre format préféré.<br />
8.3 Connexion au réseau<br />
Pour les modes radio Internet ou lecteur de musique, vous avez besoin d'un<br />
connexion au réseau. Pour connecter votre <strong>DR</strong> <strong>460</strong> au réseau, vous avez<br />
besoin d'un router sans fil (WLAN), et un mot de passe (si ce dernier est défini).<br />
Pour la radio Internet, le logiciel Internet et la mise à jour automatique de<br />
l’heure/date, le routeur doit avoir une connexion Internet à large bande.<br />
Lorsque vous sélectionnez le mode radio Internet ou lecteur de musique,<br />
le <strong>DR</strong> <strong>460</strong> essaie de se connecter au réseau. Si c'est la première où il<br />
essaie de se connecter, ou si les réseaux définis ne sont pas<br />
accessibles, l'assistant de connexion réseau démarre.<br />
Pour lancer l'assistant de connexion réseau manuellement, sélectionnez<br />
Menu > Paramètres système > Réseau > Assistant de connexion.<br />
Une fois l'assistant démarre, entrez les informations suivantes :<br />
o Si ce n'est pas encore définie, la région WLAN (sélectionnez<br />
pays/région dans la liste),<br />
o Nom du réseau (sélectionnez votre réseau dans la liste),<br />
o S'il s'agit d'une connexion de réseau sans fil protégé, il faut entrer<br />
la clé (mot de passe).<br />
Pour entrer votre clé, utilisez le<br />
bouton Select pour déplacer le<br />
curseur sur les différents caractères<br />
et de sélectionner. Au fur et à<br />
mesure qu'un caractère est<br />
sélectionne, la clé se forme près du<br />
11
haut de l'écran.<br />
Il y a trois options accessibles en<br />
tournant le bouton Select devant le<br />
premier caractère (0123…) –<br />
Retour, OK et Annuler. Vous<br />
pouvez également utiliser la touche<br />
Précédent pour effacer des<br />
caractères.<br />
Une fois vous aurez terminé d'entrer<br />
la clé, sélectionnez OK, et le <strong>DR</strong> <strong>460</strong><br />
essaie de se connecter au réseau<br />
sélectionné.<br />
En cas d'échec de la connexion, le<br />
<strong>DR</strong> <strong>460</strong> retourne à l'écran de saisie<br />
du mot de passe.<br />
En cas de perte de connexion, le <strong>DR</strong> <strong>460</strong> essaie de se reconnecter<br />
automatiquement.<br />
Profils réseau<br />
Le <strong>DR</strong> <strong>460</strong> se rappele des quatre derniers réseau sans fil auxquels il a<br />
été connecté, et essaie de se rconnecter automatiquement à celui qu'il<br />
peut trouver.<br />
Vous pouvez voir la liste des réseaux enregistrés via Menu ><br />
Paramètres système> Réseau > Profil réseau >. Dans ce menu, vous<br />
pouvez supprimer les réseaux indésirables en tournant et en appuyant<br />
sur Select puis en confirmant par Oui.<br />
Autres options<br />
Il y a aussi d'autres options pour voir et modifier manuellement les<br />
paramètres réseau via Menu > Paramètres système> Réseau >. Ces<br />
12
options ne sont pas normalement nécessaires, mais les usagers<br />
expérimentés en réseau peuvent les trouver utiles pour diagnostiquer et<br />
résoudres des problèmes réseau.<br />
8.4 Enregistrement au portail radio Internet<br />
Le <strong>DR</strong> <strong>460</strong> fonctionne avec le portail Frontier Silicon Internet radio un<br />
site web qui vous permet d'organiser vos listes favorites et d'écouter des<br />
stations de radio Internet sur un ordinateur.<br />
Pour enregistrer votre <strong>DR</strong> <strong>460</strong> sur le portail, il<br />
faut tout d'abord obtenir le code d'accès unique<br />
au portail radio en sélectionnant Menu > Liste<br />
des stations > Aide > Obtenir un code<br />
d'accès >.<br />
Notez le code d'accès.<br />
Remarque : Ne pas confondre code d'accès au portail avec l'ID de la Radio (via<br />
Menu > Paramètres système> Info.)<br />
Accédez au site web www.wifiradio-frontier.com via un ordinateur<br />
connecté à Internet.<br />
13
Si c'est votre première visite au portail, créez un nouveau compte, en<br />
entrant les informations suivantes :<br />
o code d'accès,<br />
o votre adresse de courriel,<br />
o mot de passe,<br />
o Le modèle de la radio (<strong>DR</strong> <strong>460</strong>).<br />
Si vous avez déjà un compte et vous souhaitez ajouter une autre radio,<br />
connectez-vous et sélectionnez Mes préférences > Ajouter une autre<br />
radio Wi-Fi.<br />
Une fois votre radio enregistrée sur le portail, vous pouvez<br />
immédiatement utiliser les stations favorites et ajoutées.<br />
8.5 Configurer un serveur de musique<br />
Pour que le <strong>DR</strong> <strong>460</strong> puisse lire des fichiers musique d'un ordinateur, ce<br />
dernier doit être be configuré pour partager des fichiers musique ou<br />
multimédias.<br />
UPnP media sharing (Partage de média UpnP) permet aux dispositifs<br />
tels que le <strong>DR</strong> <strong>460</strong> de lire de la musique d'une bibliothèque multimédia<br />
partagée, de naviguer à travers les menus tag tels que Artiste, Album ou<br />
Genre. Si vous utilisez un système de serveur convenable tel que le<br />
lecteur Windows Media Player 10 ou supérieur (WMP), et que votre<br />
bibliothèque de musique est bien balisée, il est alors recommandé<br />
d'utiliser le partage des fichiers multimédias. Vous n'avez qu'à configurer<br />
le serveur UPnP.<br />
Remarque: Pour le moment iTunes ne fonctionne pas comme un serveur<br />
multimédia UPnP, mais il y a des greffons disponibles qui marchent<br />
avec la bibliothèque iTunes.<br />
Folder sharing (CIFS) permet aux dispositifs tels que le <strong>DR</strong> <strong>460</strong><br />
d'explorer des dossiers sur un lecteur réseau à la recherche de fichiers<br />
audio. C'est une bonne alternative si vous ne pouvez pas utiliser le<br />
partage de fichiers multimédias, et aussi une alternative de recherche<br />
des fichiers même si vous avez le partage de fichiers multimédias<br />
configuré. L'ordinateur doit être configuré pour partager des dossiers, et<br />
s'il est fait avec un mot de passe, vous devez entrer le nom d'utilisateur<br />
et le mot de passe.<br />
14
8.6 Partage de fichiers multimédias avec le lecteur Windows Media<br />
Le serveur UPnP le plus connu esgt le lecteur Windows Media (10 ou<br />
supérieur). Pour configurer WMP pour partage de fichiers multimédias,<br />
effectuez la procédure suivante :<br />
1. S'assurer que le PC est connecté au réseau.<br />
2. S'assurer que la radio est allumée et connectée au même réseau.<br />
3. Dans WMP, ajoutez les fichiers et dossiers audio à la bibliothèque<br />
multimédia que vous souhaitez partager avec le <strong>DR</strong> <strong>460</strong><br />
(Bibliothèque > Ajouter à la bibliothèque…).<br />
4. Dans WMP, activez le partage de fichiers multimédias<br />
(Bibliothèque > Partage de média …).<br />
Le <strong>DR</strong> <strong>460</strong> est listé comme “Périphérique inconnu”. Assurez-vous que la<br />
radio peut accéder aux média partagé en les sélectionnant et en cliquant<br />
sur Autoriser. Vous pouvez aussi définir un nom pour le média partagé<br />
dans Paramètres… Cliquez sur OK pour fermer les boîtes de dialogue.<br />
Le PC est à présent prêt à transférer de la musique à la radio.<br />
8.7 Partage de dossiers sur un PC Windows<br />
Pour partager des dossiers sous Windows, le PC doit tout d'abord être<br />
un membre d'un domaine ou d'un groupe de travail. Une fois cela réglé,<br />
les dossiers peuvent être partagés avec Windows Explorer (Poste de<br />
travail).<br />
Configuration du domaine/groupe de travail<br />
La configuration du domaine sous Windows XP se fait de la manière<br />
suivante :<br />
1. Dans le menu Démarrer, sélectionnez Panneau de configuration ><br />
Système onglet Nom de l'ordinateur. Le domaine ou groupe de<br />
travail de l'ordinateur se trouvent dans cet onglet.<br />
15
2. Si le PC n'est membre d'aucun domaine ou groupe de travail, il faut<br />
qu'il en soit à l'un d'eux. Pour cela, cliquez sur le bouton Modifier… et<br />
entrez le nom du domaine (le nom par défaut pour Windows XP est<br />
MSHOME).<br />
3. Il vous sera demandé de redémarrer le PC si le domaine ou groupe<br />
de travail a été modifié.<br />
Création d'un nouveau compte utilisateur (Windows XP)<br />
La radio Wi-Fi exige un compte utilisateur sur chaque PC à explorer. Par<br />
défaut la plus part des PC on au moins un compte utilisateur. Le nom<br />
d'utilisateur et le mot de passe (facultatif) doit être le même sur chaque<br />
PC, car la radio Internet ne retient qu'un seul nom d'utilisateur et mot de<br />
passe. Voici comment faire sous windows XP :<br />
1. Dans le menu Démarrer, sélectionnez Panneau de configuration ><br />
Comptes d'utilisateurs.<br />
2. Dans l'écran qui s'ouvre, cliquez sur 'Créer un nouveau compte' et<br />
entrez un nouveau nom d'utilisateur avec le domaine/groupe de<br />
travail configuré plus haut. Sélectionnez le type d'utilisateur (limité)<br />
puis Terminer.<br />
3. Sélectionnez l'utilisateur qui vient d'être créé, sélectionnez ‘Créer un<br />
mot de passe …’ et entrez un mot de passe pour cet utilisateur.<br />
4. Notez le nom d'utilisateur et le mot de passe.<br />
Remarque :<br />
Pour Windows Vista : Il faut activer le compte Invité via le gestionnaire<br />
des comptes utilisateurs dans le Panneau de configuration, puis<br />
d'ajouter l'accès à 'Tout le monde' ou 'Invité' sur le lecteur partagé. Vous<br />
pouvez créer un nouveau compte avec mot de passe pour la radio<br />
Internet si vous êtes concerné par la sécurité. Le compte Invité n'a pas<br />
de mot de passe par défaut, ainsi le <strong>DR</strong> <strong>460</strong> se connecte avec les<br />
paramètres par défaut.<br />
Configuration d'un lecteur partagé<br />
Dans le menu Démarrer, sélectionnez Poste de travail ou Explorateur<br />
Windows et naviguez jusqu'au dossier à partager. Cliquez avec le<br />
bouton droit sur le dossier et sélectionnez Partage et sécurité…<br />
Configurez le lecteur partagé en Lecture seule, et assurez-vous que<br />
l'utilisateur créé ci-dessus puisse accéder au partage.<br />
16
8.8 Partage de dossiers sur ordinateurs non Windows<br />
Le partage de dossiers sur tous les systèmes d'ordinateurs dépassent la<br />
portée du présent guide. Reportez-vous à la documentation de votre<br />
système d'exploitation pour trouver comment partager des dossiers sur<br />
des systèmes d'ordinateurs non Windows. Si vous configurez le partage<br />
de dossiers avec nom d'utilisateur et mot de passe, notez ces données.<br />
8.9 Configuration du <strong>DR</strong> <strong>460</strong> pour utiliser des dossiers partagés<br />
Pour configurer le <strong>DR</strong> <strong>460</strong> pour lire des fichiers audio sauvegardés sur<br />
un lecteur réseau partagé protégé par mot de passe, vous devez entrer<br />
un nom d'utilisateur et un mot de passe. Pour cela, en mode Lecteur de<br />
musique, sélectionnez Menu > Paramètres PC > Nom d'utilisateur et<br />
entrez le nom d'utilisateur puis Paramètres PC > Mot de passe et<br />
entrez le mot de passe.<br />
Entrez un mot clé en sélectionnant<br />
des caractères puis OK. Les écrans<br />
de saisie du nom d'utilisateur et du<br />
mot de passe sont similaires à l'écran<br />
de saisie du mot de passe Wi-Fi.<br />
Le nom d'utilisateur par défaut est<br />
‘invité.<br />
9. Mode radio Internet<br />
Le <strong>DR</strong> <strong>460</strong> peut accéder à des milliers<br />
de stations radio et podcasts Internet<br />
dans le monde entier via une connexion<br />
Internet à large bande. Lorsque vous<br />
sélectionnez le mode radio Internet, le<br />
<strong>DR</strong> <strong>460</strong> contacte le portail Frontier<br />
Silicon Internet radio pour obtenir une<br />
liste de stations, organisées dans<br />
différentes catégories telles que Pays,<br />
les plus connus et Genre. Une fois vous<br />
sélectionnez une station, le <strong>DR</strong> <strong>460</strong> se<br />
connecte directement à cette station.<br />
Le portail met aussi à disposition plusieurs listes de stations favorites<br />
que vous pouvez personnaliser, par exemple les stations d'Andy, les<br />
favorites de Jo et interview-variétés. Pour utiliser la fonctionnalité<br />
17
favorites, enregistrer votre radio sur le site web du portail comme décrit à<br />
la page 12. Si vous avez plusieurs radios Frontier Silicon, vous pouvez<br />
les enregistrer toutes avec le même compte de manière que chaque<br />
radio a accès à vos listes favorites. Il est possible d'ajouter des stations<br />
favorites directement via <strong>DR</strong> <strong>460</strong> ou via tout ordinateur doté d'un<br />
navigateur web.<br />
• Pour entrer au mode Radio Internet, appuyez sur Mode jusqu'à<br />
ce l'écran affiche Radio Internet ou sélectionnez Menu > menu<br />
Principal> Radio Internet.<br />
Remarque : Le menu liste de stations est fourni par le portail radio<br />
Internet, il n'est donc accessible que lorsque le <strong>DR</strong> <strong>460</strong> est connecté à<br />
Internet. De temps en temps, les listes de stations et les sous-menus<br />
peuvent changer.<br />
Il plusiers façons pour sélectionner des stations.<br />
Directement depuis la radio :<br />
o Dernière station écoutée<br />
o Stations préréglées<br />
Depuis le portail via le menu Menu ><br />
Liste de stations > :<br />
o Listes des favorites,<br />
o Explorer par Pays, Genre, Les<br />
plus connues, les plus récentes,<br />
o Recherche par mot clé,<br />
o Mes stations ajoutées<br />
Si vous êtes déjà à l'écoute d'une station radio Internet, vous pouvez<br />
appuyer sur Précédent plutôt que sur Menu pour retourner rapidement à<br />
la dernière branche visitée de l'arborescence des menus. Par exemple,<br />
supposons que vous êtes à l'écoute de New Orleans Radio via la<br />
fonction d'exploration comme décrit dans la section 0 ci-dessous. Le fait<br />
d'appuyer sur Précédent vous fera retourner au menu des stations<br />
Highlighted Blues. En appuyant encore sur Précédent vous retournez au<br />
menu Blues, et ainsi de suite.<br />
9.1 Dernière station écoutée<br />
Lorsque le mode radio Internet démarre, la dernière station écoutée est<br />
sélectionnée. Pour sélectionner une station récemment écoutée,<br />
sélectionnez Menu > Dernière station écoutée pour choisissez l'une<br />
18
des stations listées. Les stations récemment écoutées apparaissent en<br />
haut de la liste.<br />
9.2 Stations préréglées<br />
Les stations préréglées sont mémorisées dans radio et ne peuvent pas<br />
être accédées à partir d'autres radios.<br />
Pour mémoriser une radio Internet dans une position de préréglage,<br />
maintenez enfoncé 1 – 5 jusqu’à ce que l'écran affiche "l'écran<br />
Enregistrer le Préréglage". Sélectionnez l'une des 5 positions de<br />
préréglage pour mémoriser la station en cours.<br />
Pour sélectionner une position de préréglage, appuyez brièvement sur 1<br />
… 5 . Lorsqu'une station est en cours, Pn (P1, P2 etc…P5.) sera<br />
affiché en bas de l'écran.<br />
9.3 Favoris<br />
Les stations favorites sont sauvegardées dans le portail radio Internet, et<br />
sont disponibles via toutes les radios Internet enregistrées sous le<br />
même compte. Avant de pouvoir utiliser les stations favorites, la radio<br />
doit être enregistrée sur le portail radio Internet (voir page 12).<br />
Pour sauvegarder la station en cours comme favorite depuis le <strong>DR</strong> <strong>460</strong>,<br />
il suffit d’appuyer sur Select. La station sélectionnée apparaît dans la<br />
liste des stations favorites par défaut.<br />
Pour sélectionner une station favorite, sélectionnez Menu > Liste de<br />
stations > Mes favorites > [liste des favorites ] > [Station].<br />
9.4 Explorer<br />
Pour explorer les émission Internet<br />
diffusées, sélectionnez Menu > Liste de<br />
stations > puis Stations > ou<br />
Podcasts >.<br />
Parcourez les menus pour trouver les<br />
émission diffusées.<br />
19
9.5 Rechercher<br />
Vous pouvez également rechercher à l'aide de mots clés particuliers<br />
dans les titres des émissions diffusées et des podcasts.<br />
Pour rechercher, sélectionnez Menu ><br />
Liste de stations > puis Stations > ou<br />
Podcasts >.<br />
Entrez un mot clé en sélectionnant des<br />
caractères puis OK. Les écrans de<br />
recherche sont similaires à l'écran de<br />
saisie du mot de passe Wi-Fi.<br />
20
Sélectionnez dans la liste une émission<br />
diffusée.<br />
Pour les podcasts, vous pouvez<br />
sélectionner un épisode particulier.<br />
9.6 Mes stations ajoutées<br />
Bien que le portail radio Internet contienne des milliers de stations radio,<br />
il se peut que vous ayez envie d'écouter à des stations non listées. Vous<br />
pouvez ajouter vos propres stations via le portail. Ces stations ajoutées<br />
seront accessibles via le <strong>DR</strong> <strong>460</strong> en sélectionnant Menu > Liste de<br />
stations > Mes stations ajoutées> [Station].<br />
9.7 Informations sur la lecture en cours<br />
Pendant qu'un flux est en cours de lecture, l'écran affiche son nom et<br />
une description. Pour voir plus d'informations sur le flux, appuyez sur<br />
Info. Chaque fois Info est appuyée, un autre ensemble d'informations<br />
est affiché, basculant entre description, format/Emplacement,<br />
performance, débit binaire/codec/fréquence d'échantillonnage, mémoire<br />
tampon de lecture et la date du jour.<br />
10. Mode Lecteur de musique (réseau et USB)<br />
Le mode Lecteur de musique lit des<br />
fichiers audio tels que fichiers MP3 ou<br />
WMA à partir d'un ordinateur du réseau<br />
local, ou à partir d'une clé USB à<br />
mémoire flash ou un clé USB à<br />
minidisque dur.<br />
21
• Pour entrer au mode Lecteur de musique, appuyez sur Mode<br />
jusqu'à ce l'écran affiche Lecteur de musique ou sélectionnez<br />
Menu > menu Principal> Lecteur de musique.<br />
• Une fois en mode Lecteur de musique, appuyez sur Menu, puis<br />
sélectionnez Média partagés, Dossiers partagés ou unité de<br />
stockage de masse USB.<br />
• Si vous êtes déjà à l'écoute d'un fichier de musique, vous pouvez<br />
appuyer sur Précédent plutôt que sur Menu pour retourner<br />
rapidement à la dernière branche visitée de l'arborescence des<br />
menus.<br />
Par exemple, supposons que vous écoutiez la piste Heat par l'artiste 50<br />
Cent via média partagé comme décrit dans la section ci-dessous. En<br />
appuyant sur Précédent vous retournez à la piste de l'album Get Rich ou<br />
Die Tryin’. En appuyant de nouveau sur Précédent vous listez tous les<br />
albums de 50 Cent. En appuyant de nouveau sur Précédent vous listez<br />
tous les artistes d'albums et ainsi de suite.<br />
10.1 Média partagé (du serveur de média)<br />
Sélectionnez Menu > Média partagé ><br />
Si vous avez configuré média partagé (comme décrit à la page 14), vous<br />
devrez avoir une entrée qui consiste en
À partir de Musique, il y a plusieurs<br />
manières pou sélectionner des pistes, y<br />
compris :<br />
o Genre,<br />
o Artiste,<br />
o Album,<br />
o Compositeur,<br />
o Classification<br />
Appuyez sur Select lorsque vous trouvez une piste que vous souhaitez<br />
lire. Le <strong>DR</strong> <strong>460</strong> lira la piste sélectionnée, puis toute autre piste listée sur<br />
le même écran; généralement le reste de l'album.<br />
10.2 Dossiers partagés (à partir du réseau ou d'unité de stockage de<br />
masse USB)<br />
Sélection de dossiers partagés<br />
Pour lire des fichiers audio à partir de dossiers partagés, sélectionnez<br />
Menu > Dossiers partagés ><br />
Si vous avez configuré Dossiers partagés vous devrez avoir une entrée<br />
qui consiste en
Explorer les dossiers<br />
À partir de ce point, les menus sont<br />
générés à partir des dossiers partagés<br />
sur l'ordinateur distant. Vous pouvez<br />
parcourir la bibliothèque de musique via<br />
son arborescence à l'aide du bouton<br />
Select et le bouton Précédent. L'écran<br />
affiche les noms des dossiers et des<br />
fichiers (par forcement les noms des<br />
pistes).<br />
Appuyez sur Select lorsque vous trouvez<br />
une piste que vous souhaitez lire. Le <strong>DR</strong><br />
<strong>460</strong> lira la piste sélectionnée, puis les<br />
pistes suivantes du même dossier, dans<br />
l’ordre alphanumérique.<br />
10.3 Informations sur la lecture en cours<br />
Pendant la lecture de la piste, l'écran affiche son nom et l'artiste (UPnP)<br />
ou le nom de dossier et fichier (CIFS/USB). En bas de l'écran un icône<br />
indique UPnP, CIFS ou USB en fonction de la source. Pour voir plus<br />
d'informations sur le flux, appuyez sur Info.<br />
Chaque fois Info est appuyée, un autre ensemble d'informations est<br />
affiché, basculant entre :<br />
o UpnP : artiste, album, URL, débit binaire/codec/fréquence<br />
d'échantillonnage, mémoire tampon de lecture et la date du jour,<br />
24
o CIFS/USB : dossier, chemin, débit binaire/codec/fréquence<br />
d'échantillonnage, mémoire tampon de lecture et la date du jour,<br />
25
11. Messages d'information et d'erreur<br />
Voici une description des messages d'information et d'erreur que la radio Wi-Fi<br />
pourrait afficher.<br />
Message Type Description<br />
Echec de Erreur Apparaît lorsqu'une erreur sur le réseau Wi-Fi se produit. Voici<br />
connexion<br />
quelques exemples de conditions qui déclenchent l'erreur ‘Echec de<br />
connexion’ :<br />
- La radio ne réussit pas à se connecter au réseau Wi-Fi<br />
- Clé de sécurité d'accès au réseau erronée<br />
Erreur Erreur Apparaît lorsqu'une erreur serveur/connexion se produit. Voici<br />
réseau<br />
quelques exemples de conditions qui déclenchent l'erreur ‘Erreur<br />
réseau’ :<br />
- La radio ne réussit pas à se connecter au réseau Wi-Fi<br />
- La radio ne réussit pas à se connecter au portail radio<br />
Internet<br />
- La radio ne réussit pas à se connecter à la station radio<br />
- La radio était en streaming avec la station et connexion est<br />
coupée en cours de route<br />
- La radio ne réussit pas à se connecter à un PC pour le<br />
transfert de musique<br />
Erreur de Erreur Apparaît lorsque la radio a des problèmes avec le média à cause de<br />
format<br />
type de format non pris en charge. Voici quelques exemples de<br />
conditions qui déclenchent l'erreur ‘Erreur de format’ :<br />
- La radio syntonise une station radio Internet qui est<br />
transmise utilisant un codec audio non supporté par la radio<br />
(ex. AAC+).<br />
- La radio essaie de lire un fichier de musique d'un PC mais<br />
qui un format non supporté<br />
Connexion Info Apparaît lorsque la radio essaie d'établir une connexion avec un<br />
…<br />
réseau, serveur, portail, station.<br />
Charge- Info Apparaît dès que la radio ait établi une connexion et commence la<br />
ment…<br />
mise en mémoire tampon de la station/flux.<br />
Lecture Info Apparaît lorsque la radio a établi une connexion, terminé le<br />
chargement et a commencé à lire le flux. C'est à partir de ce point<br />
que la station devient audible.<br />
26
12. Dépannage – connexion à une station internet<br />
Radio attempts to connect to the wifi network<br />
[Connecting… ]<br />
Connected?<br />
yes<br />
Radio attempts to connect to internet portal to<br />
get internet radio listings<br />
[Please Wait ]<br />
[Loading… ]<br />
Connected?<br />
yes<br />
Show Internet radio top-level menu<br />
-------------------<br />
My Favourites<br />
Stations<br />
Podcast<br />
My Added Stations<br />
-------------------<br />
User selects a station to be played<br />
Radio attempts to connect to the internet radio<br />
station<br />
[Connecting… ]<br />
Connected?<br />
yes<br />
Radio attempts to play the radio stream<br />
[Loading… ]<br />
Successful ?<br />
yes<br />
[Playing ]<br />
no<br />
no<br />
no<br />
no<br />
Cause possible Liste de vérification<br />
Echec de connexion<br />
1. Le routeur wi-fi peut être coupé<br />
2. Clé réseau entrée erronée<br />
Erreur réseau<br />
1. Connexion Internet à large<br />
bande peut être coupée<br />
2. Portail Internet (fs.vtuner.com)<br />
peut être coupé<br />
Erreur réseau<br />
1. La station radio Internet<br />
sélectionnée peut être coupée<br />
Erreur de Format<br />
1. La radio ne supporte pas le<br />
format utilisé par la station<br />
radio Internet<br />
- 27 -<br />
Vérifiez que le PC est<br />
capable de se connecter<br />
à un réseau wi-fi et clé<br />
réseau utilisée (si<br />
demandée) est correcte<br />
Vérifiez que le PC est<br />
capable de se connecter au<br />
portail radio Internet<br />
(htt://wifiradio<br />
portal-frontier.com)<br />
lorsqu'il est connecté au<br />
même réseau wi-fi<br />
Allez au portail radio Internet<br />
(http://fs.vtuner.com) et<br />
essayez d'écouter la<br />
station à partir d'un PC<br />
pour voir si le problème<br />
est dû à la station ou<br />
au réseau<br />
Allez au portail radio Internet<br />
(http://wifiradio<br />
portal-frontier.com) et<br />
essayez d'écouter la<br />
station à partir d'un PC<br />
pour voir si le problème<br />
est dû à la station ou<br />
au réseau
13. FAQ<br />
Question : Réponse :<br />
Pour accéder au mode radio Internet, utilisez la<br />
De quoi dois-je disposer pour utiliser la radio ? touche “MODE” et positionnez-la sur le mode<br />
radio Internet. Puis suivez les instructions à<br />
l'écran pour choisir Genre ou Emplacement.<br />
Comment puis-je connecter la radio à mon<br />
réseau sans fil ?<br />
- 28 -<br />
Important : Vous aurez besoin d'une connexion<br />
ADSL à large bande pour utiliser le mode radio<br />
Internet. Et vous aurez besoin d'un<br />
routeur/Point d'accès wi-fi pour se connecter<br />
sans fil.<br />
À la première mise en marche la radio vous<br />
demandera de “Rechercher les réseaux”. Après<br />
une brève recherche, une liste des réseaux<br />
disponibles s'affiche et vous permet de<br />
sélectionner celui que vous souhaitez utiliser.<br />
Si le réseau sélectionné n'est pas configuré<br />
pour demander un mot de passe, vous pouvez<br />
y accéder immédiatement.<br />
Si le réseau sélectionné est configuré pour<br />
demander un mot de passe (clé WEP), il vous<br />
sera demandé d'entrer une clé.<br />
Est-ce qu'l se souviendra de ma clé chiffrée ? N'oubliez pas de la noter quelque part en lettres<br />
Elle n'arrive pas à se connecter au réseau sans<br />
fil ?<br />
Puis-je écouter une station avec ma Radio s'il<br />
n'a pas de connexion Internet ?<br />
majuscules s'il le faut.<br />
Si vous rencontrez des problèmes à se<br />
connecter au réseau sans fil, il vaut mieux<br />
vérifier ce qui suit :<br />
Vérifiez que vous utilisez une clé WEP / mot de<br />
passe correct, ne pas oublier que cette dernière<br />
est sensible à la casse.<br />
Vérifiez que votre routeur est connecté à<br />
Internet. La manière la plus simple pour vérifier<br />
ceci si vous disposez d'un ordinateur connecté<br />
au même réseau, est de vérifier si ce dernier<br />
peut accéder à Internet.<br />
Vérifiez que votre réseau wi-fi permet aux<br />
périphériques d'accéder le réseau. Puis<br />
redémarrez votre radio et réessayez.<br />
Non. Car il s'agit d'une radio Internet, et rien<br />
n'est possible sans connexion Internet.
Pourquoi ma Radio n'arrive pas à lire mes<br />
fichiers multimédias ?<br />
Je peux voir ma musique listée sur la liste<br />
d'albums de la Radio mais je n'arrive pas à la<br />
lire ?<br />
Est-ce que la Radio est dotée de mémoire de<br />
préréglages pour retenir mes stations<br />
favorites ?<br />
J'obtiens une erreur en entrant l'ID de ma Radio<br />
sur http://www.wifiradio-frontier.com ?<br />
J'ai entré manuellement IP etc. mais je n'ai pas<br />
eu de connexion ?<br />
'utilise un MAC. Comment puis-je streamer de<br />
la musique d'un Mac vers la radio?<br />
Est-ce que cette Radio est compatible avec les<br />
PC Windows et les Mac d'Apple ?<br />
- 29 -<br />
Si vous rencontrez des difficultés à lire des<br />
fichiers multimédias, il vaut mieux vérifier ce qui<br />
suit :<br />
• Si vous êtes connecté en tant qu'invité, il se<br />
peut que vous n'ayez suffisamment de droit<br />
d'accès aux fichiers partagés.<br />
• Si les fichiers que vous essayez de lire sont<br />
de type correct, n'oubliez pas que cette radio<br />
ne lit que les formats MP3, WMA et AAC.<br />
• Si vous utilisez Mac OS X, vérifiez que vous<br />
avez activé le partage des fichiers Windows.<br />
Vérifiez que le support que vous essayez de lire<br />
n'est pas protégé contre la copie. Notre Radio<br />
ne lit pas des fichiers sur support <strong>DR</strong>M ou<br />
protégé contre la copie.<br />
Oui, elle peut mémoriser 5 stations radio<br />
Internet<br />
C'est parce que l'ID Radio doit être entré mais<br />
aussi le code d'accès. Pour obtenir un Code<br />
d'accès, démarrez la lecture d'une station radio<br />
Internet et appuyez sur MENU. Tournez le<br />
bouton SELECT et choisissez la Liste de<br />
stations. Tournez le bouton SELECT et<br />
choisissez Aide. choisissez Obtenir un Code<br />
d'accès Vous devez entrer ce code sur<br />
http://www.wifiradio-frontier.com<br />
Il est parfois nécessaire de mettre hors tension<br />
la radio après une configuration manuelle.<br />
Redémarrez la radio.<br />
Vous pouvez streamer de la musique depuis<br />
MAC/iTunes vers votre radio via la bibliothèque<br />
“Dossiers partagés”. Vérifiez que le dossier de<br />
musique sur votre Mac est "partagé". Pour les<br />
directives sur comment partager des dossiers<br />
sur MAC, consultez le mode d'emploi.<br />
REMARQUE : Si les problèmes persistent<br />
encore, vous pouvez toujours installer un<br />
logiciel tiers tel que Twonky Media.<br />
Oui il peut accéder des PC ou Mac qui sont<br />
connectés à votre réseau wi-fi. Cela veut dire<br />
qu'elle peut lire les fichiers multimédias MP3,<br />
WMA et AAC.<br />
En plus, si vous utilisez un PC avec Windows<br />
XP ou Vista, vous pouvez utiliser le lecteur<br />
Windows Media Player 11 (WMP11) comme<br />
serveur UPnP. Ceci permet au <strong>DR</strong> <strong>460</strong> Wi-Fi to<br />
d'accéder albums, genres, pistes et listes de<br />
lecture qui sont listés sur WMP11.
Puis-je utiliser un routeur Mac AirPort ? Si vous vous connectez à un réseau wi-fi Mac<br />
AirPort, assurez-vous que le mot de passe<br />
utilisé est pour périphériques non Mac. Ce mot<br />
de passe est différent du mot de passe utilisé<br />
pour d'autres périphériques du réseau AirPort.<br />
votre mot de passe pour périphériques non Mac<br />
peut être contrôlé dans le dossier Applications.<br />
Sous Utilitaires, sélectionnez Airport Admin où<br />
vous pouvez ensuite cliquer sur l'icône Mot de<br />
passe pour voir le mot de passe.<br />
Est-ce que le pare-feu empêche l'accès ?<br />
Vérifiez que les ports suivants sont ouverts :<br />
UDP et TCP ports 80 et 123;<br />
DNS port 53.<br />
Windows partage : Les ports 135 – 139 et 445.<br />
Lecteur Windows Media : varie – les pare-feu<br />
non-Microsoft peuvent exiger une configuration<br />
Je n'arrive pas à écouter certaines stations<br />
radio Internet particulières ?<br />
(Station hors service, surchargée ou de bande<br />
passante insuffisante, Station diffusant avec un<br />
codec inconnu, lien obsolète.)<br />
- 30 -<br />
pour UPnP.<br />
Essayez d'autres stations, essayez d'écouter<br />
des stations radio Internet ou portail sur un<br />
ordinateur, essayez plus tard.
14. Indications concernant la garantie de L’UE<br />
Le vendeur de cet appareil vous donne une garantie conforme à la loi de deux ans après<br />
l’achat de l’appareil. Cette garantie couvre tous les défauts apparaissant pendant la<br />
période de garantie concernant les pièces ou les fonctions défectueuses, mais ne<br />
couvrant pas les défauts, qui concernent une utilisation normale, tels qu’accumulateur ou<br />
piles usagés, rayures sur l’écran, défauts d’emballage, antenne, parties ou couvercle<br />
d’emballage cassés, ampoules usagées ou dommages dûs à une cause extérieure,<br />
comme par exemple corrosion, surtension dûe à une source de tension externe inadaptée<br />
ou à l’utilisation d’un équipement inadapté. Les dommages qui ne sont pas couverts par la<br />
garantie sont ceux qui concernent la manipulation inadéquate de l’appareil.<br />
Veuillez vous adresser directement au commerçant qui vous a vendu l’appareil pour toute<br />
réclamation concernant la garantie. Soit le commerçant réparera ou échangera votre<br />
appareil, soit il vous donnera l’adresse d’un service spécialisé pour votre appareil. Pour les<br />
appareils achetés en Allemagne vous pouvez également contacter directement le service<br />
de réparation <strong>Alan</strong> à l’adresse qui figure si-dessous. Si vous envoyez votre appareil au<br />
service de réparation, veuillez joindre une photocopie de votre facture et une description<br />
aussi détaillée que possible du dommage subi par votre appareil, afin que nous puissions<br />
vous aider aussi rapidement que possible.<br />
15. Déclaration de conformité aux normes de l’UE<br />
Cet appareil contient un module de reception Radio Internet et correspond aux<br />
directives européennes, comme LVD: 73/23/EEC, et EMV: 2004/108/EG et 99/5<br />
EC. Nous confirmons que toutes les normes applicables à cet appareil, comme EN<br />
60 950-1 : 2006, EN 300 328-2 V.1.7.1, EN 301 489-1 V.1.1.8, et EN 301 489-17 V<br />
1.2.1 sont respectées. Vous pouvez trouver le contenu original dans les versions<br />
actuelles respectives sur notre page d’accueil information http://service.alan-germany.de. Vous y<br />
trouverez également tous les documents techniques et les modes d’emploi de votre appareil que<br />
vous pourrez télécharger.<br />
16. Instructions pour la destruction et le recyclage<br />
Cet appareil a été fabriqué avec des substances peu polluantes en conformité avec<br />
la nouvelle directive RoHS européenne. Pour une éventuelle future destruction<br />
notez que les appareils électriques et électroniques ne doivent plus être jetés dans<br />
la poubelle normale, mais seulement dans les endroits de recupérations<br />
municipaux. La remise de l’appareil usagé est pour vous, en tant qu’utilisateur,<br />
gratuite, étant donné que l’industrie prend en charge les frais de destruction. En<br />
remettant votre appareil usagé dans les endroits de récupération municipaux vous<br />
apportez une grande contribution au recyclage de la matière première de grande valeur.<br />
© 2009 <strong>Alan</strong> Electronics GmbH - Daimlerstr. 1 - D- 63303 Dreieich<br />
Informations techniques: www.service.alan-electronics.de<br />
<strong>Service</strong> en Allemagne<br />
Renseignements techniques 01805- 012204 (14 Cent/min en Allemagne,<br />
mobile plus)<br />
e-mail alan-service@ps-tech.de<br />
<strong>Service</strong> technique PST professional support technologies GmbH<br />
Breitscheider Weg 117a<br />
D - 40885 Ratingen<br />
- 31 -