Oxi 330i Oxi 340i - LUIW
Oxi 330i Oxi 340i - LUIW
Oxi 330i Oxi 340i - LUIW

You also want an ePaper? Increase the reach of your titles
YUMPU automatically turns print PDFs into web optimized ePapers that Google loves.
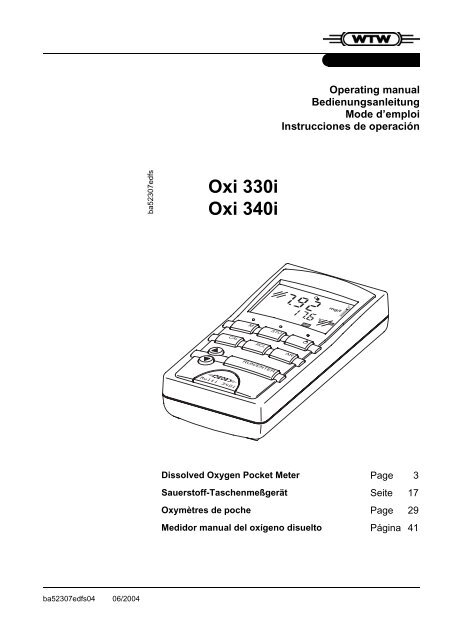
Operating manual<br />
Bedienungsanleitung<br />
Mode d’emploi<br />
Instrucciones de operación<br />
ba52307edfs<br />
<strong>Oxi</strong> <strong>330i</strong><br />
<strong>Oxi</strong> <strong>340i</strong><br />
O<br />
7 9 2<br />
M<br />
1 7 6<br />
ARng<br />
°C<br />
TP<br />
mg/l<br />
STO<br />
CAL<br />
RCL<br />
O<br />
AR<br />
Dissolved Oxygen Pocket Meter Page 3<br />
Sauerstoff-Taschenmeßgerät Seite 17<br />
Oxymètres de poche Page 29<br />
Medidor manual del oxígeno disuelto Página 41<br />
ba52307edfs04 06/2004
<strong>Oxi</strong> <strong>330i</strong>/<strong>340i</strong><br />
Note to this<br />
operating manual<br />
This operating manual contains a description of<br />
all basic functions,<br />
all instructions for a safe operation, and<br />
all technical data in a compact form.<br />
A more detailed description with notes for special applications is available as<br />
a pdf document via internet under http://www.WTW.com.<br />
Hinweise zu dieser<br />
Bedienungsanleitung<br />
Diese Bedienungsanleitung enthält in kompakter Form<br />
die Beschreibung aller Grundfunktionen,<br />
alle Hinweise für den sicheren Betrieb und<br />
alle technischen Daten.<br />
Eine ausführlichere Beschreibung mit Hinweisen für besondere Anwendungen<br />
ist als pdf-Dokument im Internet unter http://www.WTW.com erhältlich.<br />
Remarque à ce<br />
mode d’emploi<br />
Ce mode d'emploi contient sous forme compacte<br />
la description de toutes les fonctions de base et<br />
toutes les informations assurant un fonctionnement sûr, ainsi que<br />
tous les données techniques.<br />
Une description plus étendue contenant les informations sur des emplois<br />
spéciaux peut être obtenue sous forme pdf dans l'internet sous http://<br />
www.WTW.com.<br />
Observación<br />
a estas<br />
instrucciones<br />
Este manual de instrucciones incluye la descripción en forma resumida de<br />
todas las funciones básicas,<br />
todas las observaciones que le garantizan el<br />
funcionamiento normal y seguro, asimismo todo las especificaciones y<br />
datos técnicos.<br />
En el internet, bajo http://www.WTW.com encuentra Ud. una descripción<br />
más detallada, en formato pdf, para aplicaciones especiales.<br />
Copyright<br />
© Weilheim 2004, WTW GmbH<br />
2
<strong>Oxi</strong> <strong>330i</strong>/<strong>340i</strong><br />
List of contents<br />
<strong>Oxi</strong> <strong>330i</strong>/<strong>340i</strong> - List of contents<br />
Safety . . . . . . . . . . . . . . . . . . . . . . . . . . . . . . . . . . . . . . . . . . . . 4<br />
Display and jack field . . . . . . . . . . . . . . . . . . . . . . . . . . . . . . . . 4<br />
Mains power ( <strong>Oxi</strong> <strong>340i</strong> only) . . . . . . . . . . . . . . . . . . . . . . . . . . 5<br />
Switching on the measuring instrument . . . . . . . . . . . . . . . . . . 5<br />
Measuring. . . . . . . . . . . . . . . . . . . . . . . . . . . . . . . . . . . . . . . . . 6<br />
Calibration procedure: . . . . . . . . . . . . . . . . . . . . . . . . . . . . . . . 7<br />
Saving data . . . . . . . . . . . . . . . . . . . . . . . . . . . . . . . . . . . . . . . 9<br />
Outputting the data memory. . . . . . . . . . . . . . . . . . . . . . . . . . . 9<br />
Transmitting data (only <strong>Oxi</strong> <strong>340i</strong>) . . . . . . . . . . . . . . . . . . . . . . 9<br />
Configuring . . . . . . . . . . . . . . . . . . . . . . . . . . . . . . . . . . . . . . . 10<br />
Resetting to default settings . . . . . . . . . . . . . . . . . . . . . . . . . . 11<br />
Technical data . . . . . . . . . . . . . . . . . . . . . . . . . . . . . . . . . . . . 12<br />
3
Safety<br />
<strong>Oxi</strong> <strong>330i</strong>/<strong>340i</strong><br />
Safety<br />
Safety<br />
instructions<br />
The individual chapters of this operating manual use the following safety instruction<br />
to indicate various types of danger:<br />
Warning<br />
indicates instructions that must be followed precisely in order to avoid the<br />
possibility of slight injuries or damage to the instrument or the environment.<br />
Display and jack field<br />
Display<br />
Status display indicator<br />
S<br />
1Time<br />
Day.Month<br />
Year<br />
TDS UpHO<br />
Sal<br />
mV/pH<br />
% mg/l<br />
8 8 8<br />
mS/<br />
cm<br />
mbar M cm<br />
Baud<br />
1/cmSal<br />
No.<br />
° TP<br />
Ident<br />
88<br />
.8<br />
C<br />
°F % / K<br />
Tref25 Tref20 AutoCal DIN Auto Store<br />
LoBat nLF Lin Cal AutoCal TEC ARng AR<br />
RCL<br />
Sensor symbol<br />
Measured value display<br />
Function and<br />
Temperature display<br />
Jack field<br />
3<br />
1 2<br />
1 Oxygen sensor<br />
2 Plug-in power supply ( <strong>Oxi</strong> <strong>340i</strong> only)<br />
3 RS232 interface or analog output/recorder ( <strong>Oxi</strong> <strong>340i</strong> only)<br />
Warning<br />
Only connect sensors to the measuring instrument that cannot return any<br />
voltages or currents that are not allowed (> SELV and > current circuit with<br />
current limiting). Almost all sensors - in particular WTW sensors - fulfill these<br />
conditions.<br />
4
<strong>Oxi</strong> <strong>330i</strong>/<strong>340i</strong><br />
Mains power ( <strong>Oxi</strong> <strong>340i</strong> only)<br />
Mains power ( <strong>Oxi</strong> <strong>340i</strong> only)<br />
You can either operate the measuring instrument with batteries or with the<br />
plug-in power supply. The plug-in power supply provides the measuring instrument<br />
with low voltage (7.5 V ... 12 V DC). This saves the batteries.<br />
Warning<br />
The line voltage at the operating site must lie within the input voltage range<br />
of the original plug-in power supply (see TECHNICAL DATA).<br />
Warning<br />
Only use original plug-in power supplies (see TECHNICAL DATA).<br />
2<br />
3<br />
1<br />
Plug the jack (1) into the socket (2) of the measuring instrument.<br />
Connect the original WTW plug-in power supply (3) to an easily accessible<br />
mains socket.<br />
Switching on the measuring instrument<br />
Press the < > key.<br />
Display test appears briefly on the display.<br />
After this, the measuring instrument automatically switches to the measuring<br />
mode. The display shows the relevant measured value.<br />
5
Measuring<br />
<strong>Oxi</strong> <strong>330i</strong>/<strong>340i</strong><br />
Measuring<br />
Overview of the measuring modes:<br />
Oxygen<br />
concentration<br />
mg/l<br />
<br />
Oxygen<br />
partial pressure<br />
mbar<br />
<br />
<br />
Oxygen<br />
saturation<br />
%<br />
Special functions:<br />
AutoRead<br />
(drift control)<br />
Temperature<br />
measurement<br />
AutoRange<br />
measuring range<br />
selection<br />
Salinity<br />
correction<br />
The AutoRead function checks the stability of the measurement signal (except<br />
for the measurement of the ORP voltage). Activate AutoRead with<br />
. Press to start the AutoRead measurement. During<br />
the AutoRead measurement, AR flashes on the display until a stable measured<br />
value is reached. This can be terminated at any time taking over the<br />
current measured value with<br />
.<br />
The measuring instrument automatically measures the temperature of the<br />
sample with the integrated temperature sensor of the conductivity measuring<br />
cell (display TP).<br />
There are several measuring ranges available for oxygen measurements.<br />
If a measuring range is exceeded, AutoRange causes the measuring instrument<br />
to change automatically to the next measuring range. To switch the automatic<br />
measurement range selection on/off, see CONFIGURING. When the<br />
AutoRange function is switched on, ARng appears on the display.<br />
A salinity correction is required in the oxygen concentration measurement of<br />
samples with a salt content of more than 1 g/l. To do so, press the <br />
key repeatedly until Sal appears on the display. Then, enter the salinity with<br />
. Then change to the oxygen concentration measuring mode with<br />
.<br />
Switch on the salinity correction with (display SAL). To switch it off,<br />
press .<br />
6
<strong>Oxi</strong> <strong>330i</strong>/<strong>340i</strong><br />
Calibration procedure:<br />
Calibration procedure:<br />
Calibration<br />
procedures<br />
Sensor evaluation<br />
The <strong>Oxi</strong> <strong>330i</strong>/<strong>340i</strong> provides 2 calibration procedures:<br />
Calibration in water vapor-saturated air. Use the <strong>Oxi</strong>Cal ® -SL air calibration<br />
vessel (accessories) for the calibration.<br />
Calibration via a comparison measurement (e. g. Winkler titration according<br />
to DIN EN 25813 or ISO 5813). At the same time, the relative slope is<br />
adapted to the comparison measurement by a correction factor.<br />
After the calibration, the measuring instrument evaluates the current status<br />
of the sensor against the relative slope. The evaluation appears on the display.<br />
The relative slope has no effect on the measuring accuracy. Low values<br />
indicate that the electrolyte will soon be depleted and the probe will have to<br />
be regenerated.<br />
Display<br />
Relative slope<br />
S = 0.8 ... 1.25<br />
S = 0.7 ... 0.8<br />
S = 0.6 ... 0.7<br />
E3<br />
Invalid calibration<br />
S < 0.6 or S > 1.25<br />
7
Calibration procedure:<br />
<strong>Oxi</strong> <strong>330i</strong>/<strong>340i</strong><br />
Procedure for calibrating with the air calibration vessel <strong>Oxi</strong>Cal®-SL:<br />
Keep the <strong>Oxi</strong>Cal ® -SL air calibration vessel ready.<br />
Connect the D. O. probe to the measuring instrument.<br />
Put the D. O. probe into the air calibration vessel.<br />
O<br />
C A L<br />
1 7 6<br />
°C TP<br />
Press the key repeatedly until O 2 CAL appears.<br />
Cal<br />
Press . The AutoRead measurement begins.<br />
S<br />
O<br />
0 8 8<br />
1 7 6<br />
°C TP<br />
If the measured value is stable, the instrument displays the value of the<br />
relative slope and the sensor evaluation.<br />
Switch to the measuring mode with .<br />
Cal<br />
AR<br />
Procedure for calibrating via a comparison measurement:<br />
Connect the D. O. probe to the measuring instrument.<br />
O<br />
F A C<br />
1 7 6<br />
°C TP<br />
Press the key repeatedly until O 2 FAC appears.<br />
Immerse the oxygen sensor in the calibrating solution.<br />
Cal<br />
Press . The AutoRead measurement begins.<br />
O<br />
4 4 2<br />
1 0 0 7<br />
mg/l<br />
Cal<br />
ARng AR<br />
When the measured value is stable, the instrument displays the determined<br />
measured value and the correction factor of the relative slope (initial<br />
value = 1.000).<br />
Remove the oxygen sensor from the calibrating solution.<br />
Perform a comparison measurement (determine the nominal value).<br />
Leave the measuring instrument switched on until the nominal value is<br />
determined.<br />
Set the displayed value on the measuring instrument to the nominal value<br />
with . This changes the related correction factor of the relative<br />
slope.<br />
Switch to the measuring mode with .<br />
Note<br />
If the correction factor deviates from 1.000, the display of the measured value<br />
units flashes.<br />
8
<strong>Oxi</strong> <strong>330i</strong>/<strong>340i</strong><br />
Saving data<br />
Saving data<br />
Saving data<br />
manually<br />
Saving data<br />
automatically<br />
Int 1<br />
Press the key in the measuring mode (display No. with the number of<br />
the next free memory location). Then, press and enter the ID<br />
number with . Terminate the save with . The instrument<br />
changes to the measuring mode.<br />
The portable measuring instrument <strong>Oxi</strong> <strong>330i</strong>/<strong>340i</strong> has an internal data memory.<br />
It can store up to 800 datasets. The save interval (Int 1) determines the<br />
chronological interval between automatic save processes.<br />
To set up the save interval, press while pressing the <br />
key (display Int 1) and set the interval with key. Then, press<br />
and enter the ID number with . Change to the last<br />
active measuring mode with . The automatic save is switched<br />
on (display Auto Store)<br />
Outputting the data memory<br />
You can output the data memory with the key. By repeatedly pressing<br />
the key, you reach the following functions:<br />
StO dISP Output stored data on the display<br />
StO SEr Output stored data via the serial interface (only <strong>Oxi</strong> <strong>340i</strong>)<br />
CAL dISP Output calibration data on the display<br />
CAL SEr Output calibration data via the serial interface (only <strong>Oxi</strong> <strong>340i</strong>)<br />
Start the output with .<br />
Transmitting data (only <strong>Oxi</strong> <strong>340i</strong>)<br />
Transmitting data<br />
manually<br />
Transmitting data<br />
automatically<br />
Int 2<br />
Press the key in the measuring mode.<br />
This manually triggers a data transmission of the current measured value to<br />
the serial interface at any time - independently of the selected intervals.<br />
The interval to the data transmission (Int 2) determines the chronological interval<br />
between automatic data transmissions. After the selected interval expires,<br />
the current data record is transmitted to the interface. To set up the<br />
transmission interval, press while holding down the <br />
key (display Int 2). Then, set the interval with .<br />
9
Configuring<br />
<strong>Oxi</strong> <strong>330i</strong>/<strong>340i</strong><br />
Configuring<br />
Note<br />
You can leave the configuration menu at any time with . The parameters<br />
already changed are stored.<br />
Procedure for configuring (factory settings appear in bold typeface):<br />
Baud<br />
48<br />
00<br />
p<br />
mbar<br />
9 4 9<br />
1 n T 3<br />
Time<br />
Day.Month<br />
d<br />
O<br />
1 4<br />
A r n<br />
Y E S<br />
ARng<br />
09<br />
04<br />
Switch off the measuring instrument.<br />
While pressing the key, press < >.<br />
Select the required Baud rate with .<br />
Selection: 1200, 2400, 4800, 9600 Baud.<br />
Then press the key.<br />
The air pressure is only displayed if an oxygen sensor is connected. Otherwise,<br />
"---" appears.<br />
Continue with the key.<br />
Select the required calibration interval for oxygen measurements with<br />
.<br />
Selection: 1... 14... 999 d.<br />
Then press the key.<br />
Switch the automatic measuring range selection AutoRange on/off with<br />
.<br />
Selection: YES (On), no (Off).<br />
Then press the key.<br />
Select the date and time step-by-step with . In between, press<br />
the key each time.<br />
When the last key has been pressed, the instrument<br />
changes to the last active measuring mode.<br />
10
<strong>Oxi</strong> <strong>330i</strong>/<strong>340i</strong><br />
Resetting to default settings<br />
Resetting to default settings<br />
You can reset the measurement parameters and the configuration to the delivery<br />
status separately from one another (initialization).<br />
Measurement<br />
parameters<br />
The following measurement parameters can be reset to the delivery status:<br />
Oxygen (O 2 InI)<br />
Measuring mode<br />
D. O. concentration<br />
AutoRange automatic switchover of On (YES)<br />
the measurement range<br />
Relative slope 1.00<br />
Correction factor of the relative 1.000<br />
slope<br />
Salinity input 0.0<br />
Salinity correction<br />
off<br />
Configuration<br />
parameters<br />
The following configuration parameters (InI) can be reset to the delivery status:<br />
Baud rate 4800<br />
Interval 1<br />
(automatically saved)<br />
OFF<br />
Interval 2<br />
(for data transmission, only OFF<br />
<strong>Oxi</strong> <strong>340i</strong>)<br />
Procedure of the reset:<br />
O<br />
I n I<br />
n o<br />
To switch it off, press while pressing the key.<br />
To reset the measurement parameters with , select YES and<br />
confirm with , or<br />
Continue to the configuration parameters without resetting (InI) with the<br />
key.<br />
After the configuration parameters, InI changes the instrument to the last<br />
active measurement mode.<br />
11
Technical data<br />
<strong>Oxi</strong> <strong>330i</strong>/<strong>340i</strong><br />
Technical data<br />
Dimensions<br />
and weight<br />
Length [mm] 172<br />
Width [mm] 80<br />
Height [mm] 37<br />
Weight [kg] approx. 0.3<br />
Mechanical<br />
structure<br />
Type of protection IP 66<br />
Electrical<br />
safety<br />
Protective class<br />
III<br />
Test certificates<br />
cETLus, CE<br />
Ambient<br />
conditions<br />
Storage - 25 °C ... + 65 °C<br />
Operation -10 °C ... + 55 °C<br />
Climatic class 2<br />
<strong>Oxi</strong> measuring<br />
ranges<br />
Measuring<br />
range I<br />
Resolution<br />
mg/l % mbar<br />
0 ... 19.99<br />
(0 ... 19.9 DurOx)<br />
0.01<br />
(0.1 DurOx)<br />
0 ... 199.9<br />
(0 ... 199 DurOx)<br />
0.1<br />
(1 DurOx)<br />
0 ... 199.9<br />
(0 ... 199 DurOx)<br />
0.1<br />
(1 DurOx)<br />
Measuring<br />
range<br />
II<br />
Resolution<br />
0 ... 90.0<br />
(0 ... 90 DurOx)<br />
0.1<br />
(1 DurOx)<br />
0 ... 600<br />
(0 ... 600 DurOx)<br />
1<br />
(1 DurOx)<br />
0 ... 1250<br />
(0 ... 1250 DurOx)<br />
1<br />
(1 DurOx)<br />
12
<strong>Oxi</strong> <strong>330i</strong>/<strong>340i</strong><br />
Technical data<br />
Accuracy<br />
(± 1 digit)<br />
mg/l<br />
Concentration<br />
%<br />
Saturation<br />
mbar<br />
Partial pressure<br />
Temperature<br />
compensation<br />
± 0.5 % of the measured value<br />
at an ambient temperature of 5 °C ... 30 °C<br />
± 0.5 % of the measured value<br />
when measuring in the range of<br />
± 10 K around the calibration temperature<br />
± 0.5 % of the measured value<br />
at an ambient temperature of 5 °C ... 30 °C<br />
< 2 % at 0 ... 40 °C<br />
T [°C] ± 0.1<br />
Correction<br />
functions<br />
Salinity correction<br />
Air pressure correction<br />
0 ... 70.0 SAL<br />
Automatic through installation of<br />
pressure sensor in the range<br />
500 ... 1100 mbar<br />
Analog output<br />
(only Cond <strong>340i</strong>)<br />
Automatic switchover when the recorder is connected AK 323.<br />
Voltage<br />
Resolution<br />
Saturation<br />
0 ... 200.0 %<br />
0 ... 600 %<br />
Concentration<br />
0...20.00 mg/l<br />
0...100.0 mg/l<br />
0 ... 2 V<br />
0 ... 600 mV<br />
0...2 V<br />
0...1 V<br />
0.1 %<br />
1 %<br />
0.01 mg/l<br />
0.1 mg/l<br />
Accuracy<br />
Internal resistance<br />
± 0.5 % of display value<br />
± 0.1(% saturation)<br />
or<br />
± 0.5 % of the display value ± 0.01 mg/l<br />
< 5 Ohm (current limited to max. 0.2 mA<br />
output current)<br />
13
Technical data<br />
<strong>Oxi</strong> <strong>330i</strong>/<strong>340i</strong><br />
Serial interface<br />
( <strong>Oxi</strong> <strong>340i</strong> only)<br />
Automatic switchover when a PC or a printer is connected via the cable, AK<br />
340/B or AK 325/S.<br />
Type<br />
Baud rate<br />
RS232, data output<br />
Can be set to 1200, 2400, 4800, 9600 Baud<br />
Data bits 8<br />
Stop bit 2<br />
Parity<br />
Handshake<br />
Cable length<br />
None<br />
RTS/CTS + Xon/Xoff<br />
Max. 15 m<br />
Power supply<br />
Batteries<br />
Operational life<br />
Mains<br />
4 x 1.5 V alkali-manganese batteries, Type AA<br />
approx. 3000 operating hours<br />
The following applies to all plug-in power supplies:<br />
Connection max. Overvoltage category II<br />
Plug-in power supply unit<br />
(Euro, US , UK, Australian plug)<br />
FRIWO FW7555M/09, 15.1432<br />
Friwo Part. No. 1822089<br />
Input: 100 ... 240 V ~ / 50 ... 60 Hz / 400 mA<br />
Output: 9 V = / 1,5 A<br />
Guidelines<br />
and norms used<br />
EMC<br />
EG guideline 89/336/EWG<br />
EN 61326 A1:1998<br />
EN 61000-3-2 A14:2000<br />
EN 61000-3-3:1995<br />
FCC Class A<br />
Instrument safety EG guideline 73/23/EWG<br />
EN 61010-1 A2:1995<br />
Climatic class VDI/VDE 3540<br />
Type of protection EN 60529:1991<br />
14
<strong>Oxi</strong> <strong>330i</strong>/<strong>340i</strong><br />
Technical data<br />
FCC Class A Equipment Statement<br />
Note: This equipment has been tested and found to comply with the<br />
limits for a Class A digital device, pursuant to Part 15 of the FCC Rules.<br />
These limits are designed to provide reasonable protection against<br />
harmful interference when the equipment is operated in a commercial<br />
environment. This equipment generates, uses, and can radiate radio<br />
frequency energy and, if not installed and used in accordance with the<br />
instruction manual, may cause harmful interference to radio<br />
communications. Operation of this equipment in a residential area is<br />
likely to cause harmful interference in which case the user will be<br />
required to correct the interference at his own expense.<br />
15
Technical data<br />
<strong>Oxi</strong> <strong>330i</strong>/<strong>340i</strong><br />
16
<strong>Oxi</strong> <strong>340i</strong><br />
Inhaltsverzeichnis<br />
<strong>Oxi</strong> <strong>340i</strong> - Inhaltsverzeichnis<br />
Sicherheit . . . . . . . . . . . . . . . . . . . . . . . . . . . . . . . . . . . . . . . . 18<br />
Display und Buchsenfeld . . . . . . . . . . . . . . . . . . . . . . . . . . . . 18<br />
Netzbetrieb (nur <strong>Oxi</strong> <strong>340i</strong>) . . . . . . . . . . . . . . . . . . . . . . . . . . . 19<br />
Meßgerät einschalten. . . . . . . . . . . . . . . . . . . . . . . . . . . . . . . 19<br />
Messen. . . . . . . . . . . . . . . . . . . . . . . . . . . . . . . . . . . . . . . . . . 20<br />
Kalibrieren . . . . . . . . . . . . . . . . . . . . . . . . . . . . . . . . . . . . . . . 21<br />
Speichern . . . . . . . . . . . . . . . . . . . . . . . . . . . . . . . . . . . . . . . . 23<br />
Datenspeicher ausgeben . . . . . . . . . . . . . . . . . . . . . . . . . . . . 23<br />
Daten übertragen (nur <strong>Oxi</strong> <strong>340i</strong>). . . . . . . . . . . . . . . . . . . . . . . 23<br />
Konfigurieren . . . . . . . . . . . . . . . . . . . . . . . . . . . . . . . . . . . . . 24<br />
Rücksetzen (Reset) auf Grundeinstellungen . . . . . . . . . . . . . 25<br />
Technische Daten . . . . . . . . . . . . . . . . . . . . . . . . . . . . . . . . . 26<br />
17
Sicherheit<br />
<strong>Oxi</strong> <strong>330i</strong>/<strong>340i</strong><br />
Sicherheit<br />
Sicherheitshinweise<br />
In den einzelnen Kapiteln dieser Bedienungsanleitung weisen die folgenden<br />
Sicherheitshinweise auf verschiedene Stufen von Gefahren hin:<br />
Achtung<br />
kennzeichnet Hinweise, die genau beachtet werden müssen, um mögliche<br />
leichte Verletzungen oder Schäden am Gerät oder der Umwelt zu vermeiden.<br />
Display und Buchsenfeld<br />
Display<br />
Statusanzeige<br />
S<br />
1Time<br />
Day.Month<br />
Year<br />
TDS UpHO<br />
Sal<br />
mV/pH<br />
% mg/l<br />
8 8 8<br />
mS/<br />
cm<br />
mbar M cm<br />
Baud<br />
1/cmSal<br />
No.<br />
° TP<br />
Ident<br />
88<br />
.8<br />
C<br />
°F % / K<br />
Tref25 Tref20 AutoCal DIN Auto Store<br />
LoBat nLF Lin Cal AutoCal TEC ARng AR<br />
RCL<br />
Sensorsymbol<br />
Meßwertanzeige<br />
Funktions- und<br />
Temperaturanzeige<br />
Buchsenfeld<br />
3<br />
1 2<br />
1 Sauerstoffsensor<br />
2 Steckernetzgerät (nur <strong>Oxi</strong> <strong>340i</strong>)<br />
3 RS232 Schnittstelle bzw. Analogausgang/Schreiber (nur <strong>Oxi</strong> <strong>340i</strong>)<br />
Achtung<br />
Schließen Sie an das Meßgerät nur Sensoren an, die keine unzulässigen<br />
Spannungen oder Ströme (> SELV und > Stromkreis mit Strombegrenzung)<br />
einspeisen können. Nahezu alle Sensoren - insbesondere WTW-Sensoren -<br />
erfüllen diese Bedingungen.<br />
18
<strong>Oxi</strong> <strong>330i</strong>/<strong>340i</strong> Netzbetrieb (nur <strong>Oxi</strong> <strong>340i</strong>)<br />
Netzbetrieb (nur <strong>Oxi</strong> <strong>340i</strong>)<br />
Sie können das Meßgerät wahlweise mit Batterien oder mit dem Steckernetzgerät<br />
betreiben. Das Steckernetzgerät versorgt das Meßgerät mit Kleinspannung<br />
(7,5 V ... 12 V DC). Die Batterien werden dabei geschont.<br />
Achtung<br />
Die Netzspannung am Einsatzort muß innerhalb des Eingangs-Spannungsbereichs<br />
des Original-Steckernetzgeräts liegen (siehe TECHNISCHE DATEN).<br />
Achtung<br />
Verwenden Sie nur Original-Steckernetzgeräte (siehe TECHNISCHE DATEN).<br />
2<br />
3<br />
1<br />
Stecker (1) in die Buchse (2) des Meßgeräts stecken.<br />
Original WTW-Steckernetzgerät (3) an eine leicht zugängliche Steckdose<br />
anschließen<br />
Meßgerät einschalten<br />
Taste < > drücken.<br />
Im Display erscheint kurz der Displaytest.<br />
Das Meßgerät schaltet danach automatisch in den Meßmodus. Das Display<br />
zeigt den zugehörigen Meßwert an.<br />
19
Messen<br />
<strong>Oxi</strong> <strong>330i</strong>/<strong>340i</strong><br />
Messen<br />
<br />
Sauerstoffsättigung<br />
%<br />
<br />
Sauerstoffpartialdruck<br />
mbar<br />
<br />
Salinitätskorrektur<br />
Überblick über die Meßmodi:<br />
Sauerstoffkonzentration<br />
mg/l<br />
Spezialfunktionen:<br />
AutoRead<br />
(Driftkontrolle)<br />
Temperaturmessung<br />
Meßbereichswahl<br />
AutoRange<br />
Die Funktion AutoRead prüft die Stabilität des Meßsignals (außer bei der<br />
Messung bei Redoxspannung). AutoRead mit aktivieren. Zum Starten<br />
der AutoRead-Messung drücken. Während der AutoRead-<br />
Messung blinkt die Anzeige AR, bis ein stabiler Meßwert vorliegt. Ein Abbruch<br />
mit Übernahme des aktuellen Meßwerts ist jederzeit mit<br />
möglich.<br />
Das Meßgerät mißt die Temperatur der Meßlösung automatisch mit dem integrierten<br />
Temperaturmeßfühler des Sauerstoffsensors (Anzeige TP).<br />
Für Sauerstoffmessungen stehen mehrere Meßbereiche zur Verfügung.<br />
AutoRange bewirkt, daß das Meßgerät bei Überschreiten eines Meßbereichs<br />
automatisch in den nächsten Meßbereich wechselt. Zum Ein/Ausschalten<br />
der automatischen Meßbereichswahl siehe KONFIGURIEREN. Bei eingeschalteter<br />
Funktion AutoRange erscheint die Anzeige ARng.<br />
Bei der Sauerstoff-Konzentrationsmessung von Meßlösungen mit einem<br />
Salzgehalt von mehr als 1 g/l ist eine Salinitätskorrektur erforderlich. Dazu<br />
die Taste so oft drücken, bis im Display Sal erscheint. Anschließend<br />
mit Salinität eingeben. Anschließend mit in den Meßmodus<br />
Sauerstoffkonzentration wechseln.<br />
Salinitätskorrektur mit einschalten (Anzeige SAL). Zum Ausschalten<br />
drücken.<br />
20
<strong>Oxi</strong> <strong>330i</strong>/<strong>340i</strong><br />
Kalibrieren<br />
Kalibrieren<br />
Kalibrierverfahren<br />
Sensorbewertung<br />
Mit dem <strong>Oxi</strong> <strong>330i</strong>/<strong>340i</strong> stehen 2 Kalibriervefahren zur Verfügung:<br />
Kalibrierung in wasserdampfgesättigter Luft. Verwenden Sie zum Kalibrieren<br />
das Luftkalibriergefäß <strong>Oxi</strong>Cal ® -SL (Zubehör).<br />
Kalibrierung über eine Vergleichsmessung (z. B. Winkler-Titration nach<br />
DIN EN 25813 bzw. ISO 5813). Dabei wird die relative Steilheit über einen<br />
Korrekturfaktor an die Vergleichsmessung angepaßt.<br />
Nach dem Kalibrieren bewertet das Meßgerät den aktuellen Zustand des<br />
Sensors über die relative Steilheit. Die Bewertung erscheint im Display. Die<br />
relative Steilheit hat keine Auswirkung auf die Meßgenauigkeit. Niedrige<br />
Werte weisen darauf hin, daß die Elektrolytfüllung in absehbarer Zeit verbraucht<br />
ist und der Sensor regeneriert werden muß.<br />
Anzeige<br />
relative Steilheit<br />
S = 0,8 ... 1,25<br />
S = 0,7 ... 0,8<br />
S = 0,6 ... 0,7<br />
E3<br />
Unzulässige Kalibrierung<br />
S < 0,6 oder S > 1,25<br />
21
Kalibrieren<br />
<strong>Oxi</strong> <strong>330i</strong>/<strong>340i</strong><br />
Ablauf Kalibrieren mit dem Luftkalibriergefäß <strong>Oxi</strong>Cal®-SL:<br />
Luftkalibriergefäß <strong>Oxi</strong>Cal ® -SL bereithalten.<br />
Sauerstoffsensor an das Meßgerät anschließen.<br />
Sauerstoffsensor in das Luftkalibriergefäß stecken.<br />
O<br />
C A L<br />
1 7 6<br />
°C TP<br />
Taste so oft drücken, bis O 2 CAL erscheint.<br />
Cal<br />
drücken. Die AutoRead-Messung beginnt.<br />
S<br />
O<br />
0 8 8<br />
1 7 6<br />
°C TP<br />
Wenn der Meßwert stabil ist, zeigt das Gerät den Wert der relativen Steilheit<br />
und die Sensorbewertung an.<br />
Mit in den Meßmodus wechseln.<br />
Cal<br />
AR<br />
Ablauf Kalibrieren über eine Vergleichsmessung:<br />
Sauerstoffsensor an das Meßgerät anschließen.<br />
O<br />
F A C<br />
1 7 6<br />
°C TP<br />
Taste so oft drücken, bis O 2 FAC erscheint.<br />
Sauerstoffsensor in die Kalibrierlösung tauchen.<br />
Cal<br />
drücken. Die AutoRead-Messung beginnt.<br />
O<br />
4 4 2<br />
1 0 0 7<br />
mg/l<br />
Cal<br />
ARng AR<br />
Wenn der Meßwert stabil ist, zeigt das Gerät den ermittelten Meßwert<br />
und den Korrekturfaktor für die relative Steilheit (Ausgangswert = 1,000)<br />
an.<br />
Sauerstoffsensor aus der Kalibrierlösung nehmen.<br />
Vergleichsmessung durchführen (Sollwert ermitteln). Bis zur Ermittlung<br />
des Sollwerts das Meßgerät eingeschaltet lassen.<br />
Mit den angezeigten Wert am Meßgerät auf den Sollwert einstellen.<br />
Der zugehörige Korrekturfaktor für die relative Steilheit verändert<br />
sich dabei.<br />
Mit in den Meßmodus wechseln.<br />
Hinweis<br />
Wenn der Korrekturfaktor von 1,000 abweicht, blinkt die Einheit des Meßwerts<br />
in der Anzeige.<br />
22
<strong>Oxi</strong> <strong>330i</strong>/<strong>340i</strong><br />
Speichern<br />
Speichern<br />
Daten manuell<br />
speichern<br />
Daten automatisch<br />
Speichern Int 1<br />
Im Meßmodus Taste drücken (Anzeige No. mit der Nummer des<br />
nächsten freien Speicherplatzes). Anschließend drücken<br />
und Identnummer mit eingeben. Speichern mit abschließen.<br />
Das Gerät wechselt in den Meßmodus.<br />
Das Taschenmeßgerät <strong>Oxi</strong> <strong>330i</strong>/<strong>340i</strong> verfügt über einen internen Datenspeicher.<br />
Darin können bis zu 800 Datensätze abgespeichert werden. Das Speicherintervall<br />
(Int 1) bestimmt den zeitlichen Abstand zwischen<br />
automatischen Speichervorgängen.<br />
Zum Einstelllen des Speicherintervalls bei gedrückter Taste drücken (Anzeige Int 1) und Intervall mit einstellen. Anschließend<br />
drücken und Identnummer mit eingeben.<br />
Mit in den zuletzt aktiven Meßmodus wechseln. Das<br />
automatische Speichern ist eingeschaltet (Anzeige Auto Store).<br />
Datenspeicher ausgeben<br />
Mit der Taste können Sie den Datenspeicher ausgeben. Durch mehrmaliges<br />
Drücken der Taste gelangen Sie zu folgenden Funktionen:<br />
StO dISP<br />
StO SEr<br />
CAL dISP<br />
CAL SEr<br />
gespeicherte Daten auf Display ausgeben<br />
gespeicherte Daten auf serielle Schnittstelle ausgeben<br />
(nur <strong>Oxi</strong> <strong>340i</strong>)<br />
Kalibrierdaten auf Display ausgeben<br />
Kalibrierdaten auf serielle Schnittstelle ausgeben<br />
(nur <strong>Oxi</strong> <strong>340i</strong>)<br />
Ausgabe mit starten.<br />
Daten übertragen (nur <strong>Oxi</strong> <strong>340i</strong>)<br />
Daten manuell<br />
übertragen<br />
Daten automatisch<br />
übertragen Int 2<br />
Im Meßmodus Taste drücken.<br />
Damit lösen Sie jederzeit manuell eine Datenübertragung des aktuellen Meßwertes<br />
zur seriellen Schnittstelle aus - unabhängig von den eingestellten Intervallen.<br />
Das Intervall zur Datenübertragung (Int 2) bestimmt den zeitlichen Abstand<br />
zwischen automatischen Datenübertragungen. Nach Ablauf des eingestellten<br />
Intervalls wird der aktuelle Datensatz an die Schnittstelle übertragen.<br />
Zum Einstelllen des Übertragungsintervalls bei gedrückter Taste<br />
drücken (Anzeige Int 2). Anschließend Intervall mit <br />
einstellen.<br />
23
Konfigurieren<br />
<strong>Oxi</strong> <strong>330i</strong>/<strong>340i</strong><br />
Konfigurieren<br />
Hinweis<br />
Sie können das Konfigurationsmenü jederzeit mit verlassen. Die bereits<br />
geänderten Parameter sind gespeichert.<br />
Ablauf Konfigurieren (Werkseinstellungen sind fett gekennzeichnet):<br />
Baud<br />
48<br />
00<br />
p<br />
mbar<br />
9 4 9<br />
1 n T 3<br />
Time<br />
Day.Month<br />
d<br />
O<br />
1 4<br />
A r n<br />
Y E S<br />
ARng<br />
09<br />
04<br />
Meßgerät ausschalten.<br />
Bei gedrückter Taste Taste <<br />
> drücken.<br />
Gewünschte Baudrate mit einstellen.<br />
Auswahl: 1200, 2400, 4800, 9600 Baud.<br />
Anschließend Taste drücken.<br />
Der Luftduck wird nur angezeigt, wenn ein Sauerstoffsensor angeschlossen<br />
ist. Ansonsten erscheint "---".<br />
Weiter mit Taste .<br />
Gewünschtes Kalibrierintervall für Sauerstoff-Messungen mit <br />
einstellen.<br />
Auswahl: 1... 14... 999 d.<br />
Anschließend Taste drücken.<br />
Automatische Meßbereichswahl AutoRange mit aus/einschalten.<br />
Auswahl: YES (ein), no (aus).<br />
Anschließend Taste drücken.<br />
Datum und Uhrzeit Schritt für Schritt mit einstellen. Dazwischen<br />
jeweils Taste drücken.<br />
Nach dem letzten Druck auf die Taste wechselt das Gerät<br />
in den zuletzt aktiven Meßmodus.<br />
24
<strong>Oxi</strong> <strong>330i</strong>/<strong>340i</strong><br />
Rücksetzen (Reset) auf Grundeinstellungen<br />
Rücksetzen (Reset) auf Grundeinstellungen<br />
Sie können die Meßparameter und die Konfiguration getrennt voneinander<br />
auf den Lieferzustand rücksetzen (initialisieren).<br />
Meßparameter<br />
Sauerstoff (O 2 InI)<br />
Meßmodus<br />
Sauerstoffkonzentration<br />
Automatische Meßbereichsumschaltung<br />
Ein (YES)<br />
AutoRange<br />
relative Steilheit 1,00<br />
Korrekturfaktor der relativen 1,000<br />
Steilheit<br />
Salinitätseingabe 0,0<br />
Salinitätkorrektur<br />
ausgeschaltet<br />
Die folgenden Meßparameter lassen sich auf den Auslieferzustand rücksetzen:<br />
Konfigurationsparameter<br />
Die folgenden Konfigurationsparameter (InI) lassen sich auf den Auslieferzustand<br />
rücksetzen:<br />
Baudrate 4800<br />
Intervall 1<br />
(automatisches Speichern) OFF<br />
Intervall 2<br />
(für Datenübertragung, nur OFF<br />
<strong>Oxi</strong> <strong>340i</strong>)<br />
Ablauf Rücksetzen:<br />
O<br />
I n I<br />
n o<br />
Bei gedrückter Taste Taste drücken.<br />
Zum Rücksetzen der Meßparameter mit YES wählen und mit<br />
bestätigen, oder<br />
mit Taste ohne Rücksetzen weiter zu den Konfigurationsparametern<br />
(InI).<br />
Nach den Konfigurationsparametern InI wechselt das Gerät in den zuletzt<br />
aktiven Meßmodus.<br />
25
Technische Daten<br />
<strong>Oxi</strong> <strong>330i</strong>/<strong>340i</strong><br />
Technische Daten<br />
Abmessungen<br />
und Gewicht<br />
Länge [mm] 172<br />
Breite [mm] 80<br />
Höhe [mm] 37<br />
Gewicht [kg] ca. 0,3<br />
Mechanischer<br />
Aufbau<br />
Schutzart IP 66<br />
Elektrische<br />
Sicherheit<br />
Schutzklasse<br />
III<br />
Prüfzeichen<br />
cETLus, CE<br />
Umgebungsbedingungen<br />
Lagerung - 25 °C ... + 65 °C<br />
Betrieb -10 °C ... + 55 °C<br />
Klimaklasse 2<br />
Meßbereiche/<br />
Auflösungen mit<br />
Sauerstoffsensor<br />
CellOx 325<br />
Bereich I<br />
Auflösung<br />
Bereich II<br />
Auflösung<br />
mg/l % mbar<br />
0 ... 19,99<br />
0,01<br />
0 ... 90,0<br />
0,1<br />
0 ... 199,9<br />
0,1<br />
0 ... 600<br />
1<br />
0 ... 199,9<br />
0,1<br />
0 ... 1250<br />
1<br />
Meßbereiche/<br />
Auflösungen mit<br />
Sauerstoffsensor<br />
DurOx 325<br />
Bereich I<br />
Auflösung<br />
Bereich II<br />
Auflösung<br />
mg/l % mbar<br />
0 ... 19,9<br />
0,1<br />
0 ... 90<br />
1<br />
0 ... 199<br />
1<br />
0 ... 600<br />
1<br />
0 ... 199<br />
1<br />
0 ... 1250<br />
1<br />
26
<strong>Oxi</strong> <strong>330i</strong>/<strong>340i</strong><br />
Technische Daten<br />
Genauigkeit<br />
(± 1 digit)<br />
mg/l<br />
Konzentration<br />
%<br />
Sättigung<br />
mbar<br />
Partialdruck<br />
Temperatur<br />
kompensation<br />
± 0,5 % vom Meßwert<br />
bei Umgebungstemperatur 5 °C ... 30 °C<br />
± 0,5 % vom Meßwert<br />
bei Messung im Bereich von<br />
± 10 K um die Kalibriertemperatur<br />
± 0,5 % vom Meßwert<br />
bei Umgebungstemperatur 5 °C ... 30 °C<br />
< 2 % bei 0 ... 40 °C<br />
T [°C] ± 0,1<br />
Korrekturfunktionen<br />
Salzgehaltskorrektur<br />
Luftdruckkorrektur<br />
0 ... 70,0 SAL<br />
automatisch durch eingebauten<br />
Drucksensor im Bereich 500 ... 1100 mbar<br />
Analogausgang<br />
(nur <strong>Oxi</strong> <strong>340i</strong>)<br />
Automatische Umschaltung bei Anschluss des Schreiberkabels AK 323.<br />
Spannung<br />
Auflösung<br />
Sättigung<br />
0 ... 200,0 %<br />
0 ... 600 %<br />
Konzentration<br />
0...20,00 mg/l<br />
0...100,0 mg/l<br />
0 ... 2 V<br />
0 ... 600 mV<br />
0...2 V<br />
0...1 V<br />
0,1 %<br />
1 %<br />
0,01 mg/l<br />
0,1 mg/l<br />
Genauigkeit<br />
Innenwiderstand<br />
± 0,5 % vom Anzeigewert<br />
± 0,1(%-Sättigung)<br />
bzw.<br />
± 0,5 % vom Anzeigewert ± 0,01 mg/l<br />
< 5 Ohm (Strombegrenzung auf max.<br />
0,2 mA Ausgangsstrom)<br />
27
Technische Daten<br />
<strong>Oxi</strong> <strong>330i</strong>/<strong>340i</strong><br />
Serielle<br />
Schnittstelle<br />
(nur <strong>Oxi</strong> <strong>340i</strong>)<br />
Automatische Umschaltung bei Anschluss eines PCs oder eines Druckers<br />
über das Kabel AK 340/B oder AK 325/S.<br />
Typ<br />
RS232, Datenausgabe<br />
Baudrate<br />
einstellbar<br />
1200, 2400, 4800, 9600 Baud<br />
Datenbits 8<br />
Stoppbit 2<br />
Parität<br />
Handshake<br />
Kabellänge<br />
keine (None)<br />
RTS/CTS+Xon/Xoff<br />
max. 15 m<br />
Energieversorgung<br />
Batterien<br />
Laufzeit<br />
Netz<br />
4 x 1,5 V Alkali-Mangan-Batterien Typ AA<br />
ca. 3000 Betriebsstunden<br />
Für alle Steckernetzgeräte gilt:<br />
Anschluß max. Überspannungskategorie II<br />
Steckernetzgerät mit<br />
Euro-, US-, UK- und Austr.-Stecker:<br />
FRIWO FW7555M/09, 15.1432<br />
Friwo Part. No. 1822089<br />
Input: 100 ... 240 V ~ / 50 ... 60 Hz / 400 mA<br />
Output: 9 V = / 1,5 A<br />
Angewendete<br />
Richtlinien und<br />
Normen<br />
EMV<br />
EG-Richtlinie 89/336/EWG<br />
EN 61326 A1:1998<br />
EN 61000-3-2 A14:2000<br />
EN 61000-3-3:1995<br />
FCC Class A<br />
Gerätesicherheit EG-Richtlinie 73/23/EWG<br />
EN 61010-1 A2:1995<br />
Klimaklasse VDI/VDE 3540<br />
Schutzart EN 60529:1991<br />
28
<strong>Oxi</strong> <strong>340i</strong><br />
Sommaire<br />
<strong>Oxi</strong> <strong>340i</strong> - Sommaire<br />
Sécurité . . . . . . . . . . . . . . . . . . . . . . . . . . . . . . . . . . . . . . . . . 30<br />
Affichage et emplacement des douilles . . . . . . . . . . . . . . . . . 30<br />
Alimentation du réseau (uniquement <strong>Oxi</strong> <strong>340i</strong>) . . . . . . . . . . . 31<br />
Allumer l'appareil de mesure . . . . . . . . . . . . . . . . . . . . . . . . . 31<br />
Mesure . . . . . . . . . . . . . . . . . . . . . . . . . . . . . . . . . . . . . . . . . . 32<br />
Calibration . . . . . . . . . . . . . . . . . . . . . . . . . . . . . . . . . . . . . . . 33<br />
Enregistrement . . . . . . . . . . . . . . . . . . . . . . . . . . . . . . . . . . . . 35<br />
Écrire en sortie la mémoire de données. . . . . . . . . . . . . . . . . 35<br />
Transmission de données (uniquement <strong>Oxi</strong> <strong>340i</strong>) . . . . . . . . . 35<br />
Configuration . . . . . . . . . . . . . . . . . . . . . . . . . . . . . . . . . . . . . 36<br />
Retourner (Reset) à l'état initial . . . . . . . . . . . . . . . . . . . . . . . 37<br />
Données techniques. . . . . . . . . . . . . . . . . . . . . . . . . . . . . . . . 38<br />
29
Sécurité<br />
<strong>Oxi</strong> <strong>330i</strong>/<strong>340i</strong><br />
Sécurité<br />
Indications de<br />
sécurité<br />
Dans les chapitre suivants de ce mode d'emploi, les indications de sécurité<br />
avertissent sur les différents stades des dangers possibles:<br />
Attention<br />
signale les indications à respecter précisément pour éviter des blessures légères,<br />
des endommagement de l'appareil ou de l'environnement.<br />
Affichage et emplacement des douilles<br />
Affichage<br />
Affichage de l'état<br />
S<br />
1Time<br />
Day.Month<br />
Year<br />
TDS UpHO<br />
Sal<br />
mV/pH<br />
% mg/l<br />
8 8 8<br />
mS/<br />
cm<br />
mbar M cm<br />
Baud<br />
1/cmSal<br />
No.<br />
° TP<br />
Ident<br />
88<br />
.8<br />
C<br />
°F % / K<br />
Tref25 Tref20 AutoCal DIN Auto Store<br />
LoBat nLF Lin Cal AutoCal TEC ARng AR<br />
RCL<br />
Symbole de sonde<br />
Affichage des valeurs<br />
mesurées<br />
Affichage fonction<br />
et température<br />
Emplacement des<br />
douilles<br />
3<br />
1 2<br />
1 Sonde à oxygène<br />
2 Transformateur d'alimentation (uniquement <strong>Oxi</strong> <strong>340i</strong>)<br />
3 RS232 Interface ou sortie analogique/enregistreur<br />
(uniquement <strong>Oxi</strong> <strong>340i</strong>)<br />
Attention<br />
Ne raccordez à l'appareil de mesure que des sondes ne pouvant pas être alimentées<br />
par des tensions ou courants nonautorisés (> SELV et > circuit avec<br />
limitation de courant. A peu près toutes les sondes - les sondes WTW en particulier<br />
- remplissent ces conditions.<br />
30
<strong>Oxi</strong> <strong>330i</strong>/<strong>340i</strong> Alimentation du réseau (uniquement <strong>Oxi</strong> <strong>340i</strong>)<br />
Alimentation du réseau (uniquement <strong>Oxi</strong> <strong>340i</strong>)<br />
Vous pouvez alimenter l'apareil de mesure ou avec des piles ou bien avec<br />
un transformateur d'alimentation. Le transformateur d'alimentation assure<br />
l'alimentation de l'apareil de mesure en très basse tension<br />
(7,5 V ... 12 V DC), ce qui ménage les piles.<br />
Attention<br />
La tension du secteur du lieu d'utilisation doit se situer dans la plage de tension<br />
d'entrée du transformateur d'alimentation original (voir DONNÉES TECH-<br />
NIQUES).<br />
Attention<br />
Utilisez uniquement les transformateurs d'alimentation originaux (voir DON-<br />
NÉES TECHNIQUES).<br />
2<br />
3<br />
1<br />
Brancher le connecteur (1) dans la douille (2) de l'appareil de mesure.<br />
Brancher le transformateur d'alimentation (3) sur une prise facilement<br />
accessible.<br />
Allumer l'appareil de mesure<br />
Appuyer sur la touche >.<br />
A l'écran s'affiche rapidement le test d'affichage.<br />
Ensuite, l'appareil commute automatiquement sur le mode de mesure.<br />
L'affichage indique la valeur mesurée.<br />
31
Mesure<br />
<strong>Oxi</strong> <strong>330i</strong>/<strong>340i</strong><br />
Mesure<br />
Résumé des modes de mesure:<br />
Concentration<br />
en oxygène<br />
mg/l<br />
<br />
Pression partielle<br />
en oxygène<br />
mbar<br />
<br />
<br />
Saturation<br />
en oxygène<br />
%<br />
Fonctions spéciales:<br />
AutoRead<br />
(Contrôle de<br />
dérive)<br />
Mesure de<br />
température<br />
Choix de la plage<br />
de mesure<br />
AutoRange<br />
Correction de<br />
salinité<br />
La fonction AutoRead examine la stabilité du signal de mesure (sauf mesure<br />
d'un potentiel Redox). Activer AutoRead avec . Pour mettre en route la<br />
mesure AutoRead, appuyer sur . Pendant la mesure Auto-<br />
Read, l'indication ARclignote jusqu'à ce qu'une valeur de mesure stable se<br />
présente. L'interruption avec enregistrement de la valeur de mesure actuelle<br />
est possible à tout moment en appuyant sur .<br />
L'appareil mesure automatiquement la température de la solution de mesure<br />
à l'aide de la sonde de température intégrée de la sonde à oxygène (Indication<br />
affichée TP).<br />
Il y a plusieurs plages de mesure pour les mesures d'oxygène.<br />
AutoRange assure que, en cas d'un dépassement d'une plage de mesure,<br />
l'apareil de mesure change automatiquement dans la plage de mesure suivante.<br />
Pour activer/désactiver le choix automatique de la plage de mesure,<br />
voir CONFIGURATION. Si la fonction AutoRange est activée, il est affiché ARng.<br />
Lors de la mesure de concentration d'oxygène de solutions de mesure dont<br />
la teneur en sel est supérieure à 1 g/l, il faut procéder à une correction de salinité.<br />
Appuyer sur la touche et répéter la pression jusqu'à ce que Sal<br />
apparaisse à l'écran. Ensuite, entrer la salinité avec . Commuter<br />
alors avec au mode de mesure concentration en oxygène.<br />
Activer la correction de salinité en cliquant sur (Indication affichée<br />
SAL). Désactiver avec .<br />
32
<strong>Oxi</strong> <strong>330i</strong>/<strong>340i</strong><br />
Calibration<br />
Calibration<br />
Procédure de<br />
calibration<br />
Evaluation de<br />
sonde<br />
Avec <strong>Oxi</strong> <strong>330i</strong>/<strong>340i</strong>, il y a deux procédures de calibration à votre disposition :<br />
La calibration en air saturé en vapeur d'eau. Pour la calibration, utilisez le<br />
bécher <strong>Oxi</strong>Cal ® -SL pour la calibration dans l'air (accessoire).<br />
La calibration en passant par une mesure comparative (p. ex. titration-<br />
Winkler selon DIN EN 25813 ou ISO 5813). Ici, la pente relative est adaptée<br />
à la mesure comparative par un facteur de correction.<br />
Après la calibration, l'appareil de mesure évalue l'état actuel de la sonde au<br />
moyen de la pente relative. L'évaluation apparaît à l'écran. La pente relative<br />
n'a pas d'influence sur la précision de mesure. Les valeurs faibles indiquent<br />
que le remplissage d'électrolyte sera bientôt épuisé et que la sonde doit être<br />
régénérée.<br />
Indication<br />
Pente relative<br />
S = 0,8 ... 1,25<br />
S = 0,7 ... 0,8<br />
S = 0,6 ... 0,7<br />
E3<br />
Calibration incorrecte<br />
S < 0,6 oder S > 1,25<br />
33
Calibration<br />
<strong>Oxi</strong> <strong>330i</strong>/<strong>340i</strong><br />
Déroulement de la calibration à l'aide d'un bécher <strong>Oxi</strong>Cal®-SL pour la<br />
calibration dans l'air :<br />
Préparer le bécher <strong>Oxi</strong>Cal ® -SL pour la calibration dans l'air.<br />
Raccorder la sonde à oxygène à l'appareil de mesure.<br />
Enfoncer la sonde à oxygène dans le bécher de calibration dans l'air.<br />
O<br />
C A L<br />
1 7 6<br />
°C TP<br />
Appuyer sur la touche jusqu'à affichage de O 2 CAL.<br />
Cal<br />
Appuyer sur . La mesure AutoRead se met en marche.<br />
S<br />
O<br />
0 8 8<br />
1 7 6<br />
°C TP<br />
Lorsque la valeur mesurée est stable , l'appareil indique la valeur de la<br />
pente relative, ainsi que l'évaluation de sonde.<br />
Commuter sur le mode de mesure avec .<br />
Cal<br />
AR<br />
Déroulement de la calibration en passant par une mesure comparative:<br />
Raccorder la sonde à oxygène à l'appareil de mesure.<br />
O<br />
F A C<br />
1 7 6<br />
°C TP<br />
Appuyer sur la touche jusqu'à affichage de O 2 FAC.<br />
Immerger la sonde à oxygène dans la solution de calibration.<br />
Cal<br />
Appuyer sur . La mesure AutoRead se met en marche.<br />
O<br />
4 4 2<br />
1 0 0 7<br />
mg/l<br />
Cal<br />
ARng AR<br />
Lorsque la valeur mesurée est stable, l'appareil affiche la valeur de mesure<br />
déterminée, ainsi que le facteur de correction pour la pente relative<br />
(valeur initiale = 1,000).<br />
Retirer la sonde à oxygène de la solution de calibration.<br />
Effectuer la mesure comparative (déterminer la valeur prescrite). Laisser<br />
allumé l'appareil de mesure jusqu'à la détermination effectuée de la valeur<br />
prescrite.<br />
Avec ajuster dans l'appareil de mesure la valeur affichée à la<br />
valeur prescrite. Ceci modifie le facteur de correction correspondant à la<br />
pente relative.<br />
Commuter sur le mode de mesure avec .<br />
Remarque<br />
Si le facteur de correction dérive de 1,000, l'unité de la valeur mesurée de<br />
l'indication affichée clignote .<br />
34
<strong>Oxi</strong> <strong>330i</strong>/<strong>340i</strong><br />
Enregistrement<br />
Enregistrement<br />
Enregistrement<br />
manuel de<br />
données<br />
Enregistrement<br />
automatique de<br />
données<br />
Int 1<br />
Appuyer sur la touche au mode de mesure (indication affichée No.<br />
avec le numéro de la position de mémoire disponible). Ensuite appuyer sur<br />
et entrer le numéro d'identification avec . Finir l'enregistrement<br />
avec . L'appareil commute sur le mode de mesure.<br />
L'appareil de mesure de poche <strong>Oxi</strong> <strong>330i</strong>/<strong>340i</strong>dispose d'une mémoire de données<br />
interne. Il est possible d'y enregistrer jusqu'à 800 groupes de données.<br />
L'intervalle d'enregistrement (Int 1) détermine l'intervalle temporel entre les<br />
processus d'enregistrement automatiques.<br />
Pour régler l'intervalle d'enregistrement appuyer sur et appuyer en<br />
même temps sur la touche (indication affichée Int 1) et ajuster<br />
l'intervalle avec . Ensuite appuyer sur et entrer<br />
le numéro d'identification avec . Commuter avec <br />
dans le mode de mesure actif ultérieurement. L'enregistrement automatique<br />
est activé (indication affichée Auto Store).Écrire en sortie la mémoire de données<br />
Écrire en sortie la mémoire de données<br />
Appuyer sur la touche pour écrire en sortie la mémoire de données.<br />
Vous arrivez à des fonctions indiquées ci-dessous en appuyant plusieurs fois<br />
sur la touche :<br />
StO dISP<br />
StO SEr<br />
CAL dISP<br />
CAL SEr<br />
écrire en sortie des données enregistrées dans la fenêtre d'affichagd<br />
écrire en sortie des données enregistrées sur l'interface sérielle<br />
(uniquement <strong>Oxi</strong> <strong>340i</strong>)<br />
écrire en sortie des données de calibration dans la fenêtre d'affichage<br />
écrire en sortie des données de calibration sur l'interface sérielle<br />
(uniquement <strong>Oxi</strong> <strong>340i</strong>)<br />
Déclencher l'écriture en sortie avec .<br />
Transmission de données (uniquement <strong>Oxi</strong> <strong>340i</strong>)<br />
Transmission<br />
manuelle de<br />
données<br />
Appuyer sur la touche au mode de mesure.<br />
Ainsi vous déclenchez à tout moment manuellement une transmission de<br />
données de la valeur mesurée actuelle vers l'interface sérielle - indépendamment<br />
des intervalles configurés.<br />
35
Configuration<br />
<strong>Oxi</strong> <strong>330i</strong>/<strong>340i</strong><br />
Transmission de<br />
données<br />
automatique<br />
Int 2<br />
L'intervalle pour la transmission de données (Int 2) détermine l'intervalle de<br />
temps entre les transmissions de données automatiques. Après écoulement<br />
de l'intervalle réglé, le groupe de données actuel est transmis à l'interface.<br />
Pour régler l'intervalle de transmission appuyer sur et en même<br />
temps sur la touche (indication affichée Int 2). Ensuite, régler<br />
l'intervalle avec .<br />
Configuration<br />
Remarque<br />
Vous pouvez quitter le menu de configuration à tout moment en appuyant sur<br />
. Les paramètres déjà modifiés sont enregistrés.<br />
Déroulement de la configuration (Les ajustements faits à l'usine sont indiqués<br />
en gras):<br />
Baud<br />
48<br />
00<br />
p<br />
mbar<br />
9 4 9<br />
1 n T 3<br />
Time<br />
Day.Month<br />
d<br />
O<br />
1 4<br />
A r n<br />
Y E S<br />
ARng<br />
09<br />
04<br />
Eteindre l'appareil de mesure.<br />
Appuyer sur la touche et en même temps sur < >.<br />
Ensuite, régler baudrate désiré avec .<br />
Au choix: 1200, 2400, 4800, 9600 Baud.<br />
Ensuite appuyer sur la touche .<br />
La pression d'air n'est indiquée qu'en cas de connexion d'une sonde à<br />
oxygène. Autrement apparaît "---".<br />
Continuer avec .<br />
Intervalle de calibration souhaité pour des mesures d'oxygène se règle<br />
avec .<br />
Au choix: 1... 14... 999 d.<br />
Ensuite appuyer sur la touche .<br />
Activer/déactiver le choix de la plage de mesure automatique AutoRange<br />
avec .<br />
Au choix: YES (allumé), no (éteint).<br />
Ensuite appuyer sur la touche .<br />
Ajuster la date et l'heure en pas à pas avec . Entre les pas, appuyer<br />
sur la touche .<br />
Après avoir appuyé la dernière fois sur la touche l'appareil<br />
commute au mode de mesure actif ultérieurement.<br />
36
<strong>Oxi</strong> <strong>330i</strong>/<strong>340i</strong><br />
Retourner (Reset) à l'état initial<br />
Retourner (Reset) à l'état initial<br />
Vous pouvez remettre à l'état initial de livraison les paramètres de mesure et<br />
la configuration séparément (initialiser).<br />
Paramètres de<br />
mesure<br />
Les paramètres de mesure suivants sont à remettre à l'état initial de livraison:<br />
Oxygène (O 2 InI)<br />
Mode de mesure<br />
Concentration en oxygène<br />
Commutation de la plage de mesure<br />
ALLUMÉ (YES)<br />
automatique AutoRange<br />
Pente relative 1,00<br />
Facteur de correction de<br />
1,000<br />
la pente relative<br />
Entrée de salinité 0,0<br />
Correction de salinité<br />
désactivée<br />
Paramètres de<br />
configuration<br />
Les paramètres de configuration suivant (InI) sont à remettre à l'état initial de<br />
livraison:<br />
Débit en bauds 4800<br />
Intervalle 1<br />
(enregistrement automatique) OFF<br />
Intervalle 2<br />
(pour la transmission de données, OFF<br />
uniquement <strong>Oxi</strong> <strong>340i</strong>)<br />
Déroulement remise à l'état initial:<br />
O<br />
I n I<br />
n o<br />
Appuyer sur la touche et en même temps sur .<br />
Si les paramètres de mesure sont à remettre à l'état initial , choisir avec<br />
YES et confirmer avec , ou,<br />
sans remettre, continuer avec la touche jusqu'aux paramètres<br />
de configuration (InI).<br />
Après les paramètres de configuration InI l'appareil commute au mode<br />
de mesure actif ultérieurement.<br />
37
Données techniques<br />
<strong>Oxi</strong> <strong>330i</strong>/<strong>340i</strong><br />
Données techniques<br />
Dimensions<br />
et poids<br />
Longueur [mm] 172<br />
Largeur [mm] 80<br />
Hauteur [mm] 37<br />
Poids [kg] env. 0,3<br />
Construction<br />
mécanique<br />
Manière de protection IP 66<br />
Sécurité<br />
électrique<br />
Classe de protection<br />
III<br />
Marque de<br />
contrôle<br />
cETLus, CE<br />
Conditions<br />
de milieu<br />
Stockage - 25 °C ... + 65 °C<br />
Fonctionnement -10 °C ... + 55 °C<br />
Catégorie climatique 2<br />
Plages de mesure<br />
mg/l % mbar<br />
Plage I<br />
résolution<br />
0 ... 19,99<br />
(0 ... 19,9 DurOx)<br />
0,01<br />
(0,1 DurOx)<br />
0 ... 199,9<br />
(0 ... 199 DurOx)<br />
0,1<br />
(1 DurOx)<br />
0 ... 199,9<br />
(0 ... 199 DurOx)<br />
0,1<br />
(1 DurOx)<br />
Plage II<br />
résolution<br />
0 ... 90,0<br />
(0 ... 90 DurOx)<br />
0,1<br />
(1 DurOx)<br />
0 ... 600<br />
(0 ... 600 DurOx)<br />
1<br />
(1 DurOx)<br />
0 ... 1250<br />
(0 ... 1250 DurOx)<br />
1<br />
(1 DurOx)<br />
38
<strong>Oxi</strong> <strong>330i</strong>/<strong>340i</strong><br />
Données techniques<br />
Précision<br />
(± 1 digit)<br />
mg/l<br />
Concentration<br />
%<br />
Saturation<br />
mbar<br />
Pression partielle<br />
Compensation<br />
de température<br />
± 0,5 % de la valeur mesurée<br />
à la température ambiante de 5 °C ... 30 °C<br />
± 0,5 % de la valeur mesurée<br />
en cas de mesure dans la plage de<br />
± 10 K autour de la température de calibration<br />
± 0,5 % de la valeur mesurée<br />
à la température ambiante de 5 °C ... 30 °C<br />
< 2 % à 0 ... 40 °C<br />
T [°C] ± 0,1<br />
Fonctions<br />
de correction<br />
Correction de la teneur<br />
en sel<br />
Correction de la pression<br />
atmosphérique<br />
0 ... 70,0 SAL<br />
automatique par sonde de pression<br />
intégrée dans la plage 500 ... 1100 mbar<br />
Sortie analogique<br />
(uniquement<br />
<strong>Oxi</strong> <strong>340i</strong>)<br />
Commutation automatique en cas de connexion d'un câble d'enregistreur<br />
AK 323.<br />
Potentiel<br />
Résolution<br />
Saturation<br />
0 ... 200,0 %<br />
0 ... 600 %<br />
Concentration<br />
0...20,00 mg/l<br />
0...100,0 mg/l<br />
0 ... 2 V<br />
0 ... 600 mV<br />
0...2 V<br />
0...1 V<br />
0,1 %<br />
1 %<br />
0,01 mg/l<br />
0,1 mg/l<br />
Précision<br />
Résistance intérieure<br />
± 0,5 % de la valeur affichée<br />
± 0,1(%-saturation)<br />
ou<br />
± 0,5 % de la valeur affichée ± 0,01 mg/l<br />
< 5 Ohm (Limitation du courant à 0,2 mA<br />
courant de sortance max.)<br />
39
Données techniques<br />
<strong>Oxi</strong> <strong>330i</strong>/<strong>340i</strong><br />
Interface<br />
sérielle<br />
(uniquement<br />
<strong>Oxi</strong> <strong>340i</strong>)<br />
Commutation automatique en cas de connexion d'un PC ou d'une imprimante<br />
à l'aide du câble AK 340/B ou AK 325/S.<br />
Type<br />
RS232, Sortie de données<br />
Débit en bauds<br />
réglable 1200, 2400, 4800, 9600 Baud<br />
Bits de donnée 8<br />
Bit d'arrêt 2<br />
Parité<br />
Handshake<br />
Longueur du cable<br />
non (None)<br />
RTS/CTS + Xon/Xoff<br />
15 m max.<br />
Alimentation<br />
d'énergie<br />
Piles<br />
Durée de service<br />
Secteur<br />
4 x 1,5 V piles alcalines au manganèse de type AA<br />
env. 3000 heures de service<br />
Pour tous les transformateurs d'alimentation, observer:<br />
connexion max. catégorie de surtension II<br />
Transformateur d'alimentation avec fiches UE,<br />
US, UK, Australie:<br />
FRIWO FW7555M/09, 15.1432<br />
Friwo Part. No. 1822089<br />
Input: 100 ... 240 V ~ / 50 ... 60 Hz / 400 mA<br />
Output: 9 V = / 1,5 A<br />
Réglementations<br />
et normes<br />
appliquées<br />
EMV<br />
Règlementation UE 89/336/CEE<br />
EN 61326 A1:1998<br />
EN 61000-3-2 A14:2000<br />
EN 61000-3-3:1995<br />
FCC Class A<br />
Sécurité de l'appareil Règlementation UE 73/23/CEE<br />
EN 61010-1 A2:1995<br />
Catégorie climatique VDI/VDE 3540<br />
Manière de protection EN 60529:1991<br />
40
<strong>Oxi</strong> <strong>340i</strong><br />
Índice<br />
<strong>Oxi</strong> <strong>340i</strong> - Índice<br />
Seguridad . . . . . . . . . . . . . . . . . . . . . . . . . . . . . . . . . . . . . . . . 42<br />
Display y bujes de conexión. . . . . . . . . . . . . . . . . . . . . . . . . . 42<br />
Conexión a la red (sólo <strong>Oxi</strong> <strong>340i</strong>) . . . . . . . . . . . . . . . . . . . . . 43<br />
Conectar el instrumento . . . . . . . . . . . . . . . . . . . . . . . . . . . . . 43<br />
Medir . . . . . . . . . . . . . . . . . . . . . . . . . . . . . . . . . . . . . . . . . . . 44<br />
Calibración . . . . . . . . . . . . . . . . . . . . . . . . . . . . . . . . . . . . . . . 45<br />
Archivar en memoria . . . . . . . . . . . . . . . . . . . . . . . . . . . . . . . 47<br />
Llamar los datos archivados en memoria. . . . . . . . . . . . . . . . 47<br />
Transferir datos (sólo <strong>Oxi</strong> <strong>340i</strong>) . . . . . . . . . . . . . . . . . . . . . . . 47<br />
Configurar. . . . . . . . . . . . . . . . . . . . . . . . . . . . . . . . . . . . . . . . 48<br />
Reajustar al valor inicial (Reset). . . . . . . . . . . . . . . . . . . . . . . 49<br />
Especificaciones técnicas . . . . . . . . . . . . . . . . . . . . . . . . . . . 50<br />
41
Seguridad<br />
<strong>Oxi</strong> <strong>340i</strong><br />
Seguridad<br />
Instrucciones<br />
de seguridad<br />
En los diferentes capítulos del presente manual las siguientes indicaciones<br />
de seguridad hacen referencia a los diferentes grados de seguridad:<br />
Atención<br />
identifica observaciones de seguridad que Ud. debe respetar para evitar<br />
eventuales daños a personas y daños materiales al instrumento y cargas al<br />
medio ambiente.<br />
Display y bujes de conexión<br />
Display<br />
Indicación del estado actual<br />
S<br />
1Time<br />
Day.Month<br />
Year<br />
TDS UpHO<br />
Sal<br />
mV/pH<br />
% mg/l<br />
8 8 8<br />
mS/<br />
cm<br />
mbar M cm<br />
Baud<br />
1/cmSal<br />
No.<br />
° TP<br />
Ident<br />
88<br />
.8<br />
C<br />
°F % / K<br />
Tref25 Tref20 AutoCal DIN Auto Store<br />
LoBat nLF Lin Cal AutoCal TEC ARng AR<br />
RCL<br />
Símbolo del sensor<br />
Indicación del valor medido<br />
Indicación de la función y<br />
de la temperatura<br />
Conexiones varias<br />
3<br />
1 2<br />
1 Sensor de oxígeno<br />
2 Transformador de alimentación (sólo <strong>Oxi</strong> <strong>340i</strong>)<br />
3 Interfase RS232 o salida analógica / registrador (sólo <strong>Oxi</strong> <strong>340i</strong>)<br />
Atención<br />
Conecte al instrumento solamente sensores que no eroguen tensiones o corrientes<br />
inadmisibles que pudieran deteriorarlo(> SELV y > circuito con limitación<br />
de corriente). La mayoría de los sensores - especialmente los<br />
sensores de la WTW - cumplen con estos requisitos.<br />
42
<strong>Oxi</strong> <strong>340i</strong> Conexión a la red (sólo <strong>Oxi</strong> <strong>340i</strong>)<br />
Conexión a la red (sólo <strong>Oxi</strong> <strong>340i</strong>)<br />
Usted puede trabajar con el instrumento conectándolo a la red, o bien independientemente,<br />
con pilas. El transformador para la conexión a la red suministra<br />
al instrumento de medición el bajo voltaje de alimentación<br />
(7,5 V ... 12 V DC). La conexión a la red permite ahorrar pilas.<br />
Atención<br />
El voltaje de la red en el lugar de trabajo debe corresponder al voltaje de entrada<br />
del transformador de alimentación original (vea las ESPECIFICACIONES<br />
TÉCNICAS).<br />
Atención<br />
Emplee exclusivamente transformadores de alimentación originales (vea las<br />
ESPECIFICACIONES TÉCNICAS).<br />
2<br />
3<br />
1<br />
Introducir el enchufe (1) en el buje (2) del instrumento.<br />
Enchufar el transformador de alimentación original WTW (3) en un enchufe<br />
de la red que sea fácilmente accesible.<br />
Conectar el instrumento<br />
Presionar la tecla < >.<br />
En el display aparece brevemente el test del display.<br />
Luego el instrumento cambia automáticamente al modo de medición. El<br />
display indica el valor medido actual.<br />
43
Medir<br />
<strong>Oxi</strong> <strong>340i</strong><br />
Medir<br />
Sumario de los modos de medición:<br />
Concentración<br />
de oxigeno<br />
mg/l<br />
<br />
Presión parcial<br />
del oxigeno<br />
mbar<br />
<br />
<br />
Saturación<br />
de oxigeno<br />
%<br />
Funciones especiales:<br />
AutoRead<br />
(control de deriva)<br />
Medición de la<br />
temperatura<br />
Selección del<br />
rango de medición<br />
AutoRange<br />
Corrección de<br />
la salinidad<br />
La función AutoRead verifica la estabilidad de la señal de medición (excepto<br />
al medir el potencial Redox). Activar la función AutoRead con . Para iniciar<br />
la medición AutoRead, presionar . Durante la medición<br />
AutoRead la indicación AR parpadea intermitentemente, hasta que la señal<br />
medida se estabiliza. La medición con AutoRead puede ser interrumpida en<br />
todo momento mediante , siendo registrado el valor actual.<br />
El instrumento mide la temperatura de la solución de medición automáticamente<br />
mediante el sensor térmico integrado del sensor de oxígeno (indicación<br />
TP).<br />
Para las mediciones de oxígeno se disponen de varios rangos de medición.<br />
La función AutoRange hace que el instrumento cambie automáticamente al<br />
siguiente rango de medición en el momento de sobrepasar el rango de medición<br />
actual. Para conectar / desconectar la selección automática del rango<br />
de medición, vea CONFIGURACIÓN/PROGRAMACIÓN. Estando conectada la función<br />
AutoRange, aparece la indicación ARng.<br />
Al efectuar mediciones de la concentración de oxígeno en soluciones con un<br />
contenido en sal de más de 1 g/l, es necesario corregir la salinidad. Para ello<br />
presionar la tecla repetidamente hasta que en el display aparezca<br />
Sal. Luego, con la tecla ingresar la salinidad. Luego cambiar al<br />
modo de medición 'concentración de oxígeno' con .<br />
Conectar la corrección de la salinidad con (indicación SAL). Para desconectarla,<br />
presionar .<br />
44
<strong>Oxi</strong> <strong>340i</strong><br />
Calibración<br />
Calibración<br />
Procedimientos de<br />
calibración<br />
Evaluación del<br />
sensor<br />
Con <strong>Oxi</strong> <strong>340i</strong> se dispone de 2 procedimientos de calibración:<br />
Calibraciones en aire saturado de vapor de agua. Para esta calibración,<br />
emplee el recipiente de calibración de aire <strong>Oxi</strong>Cal ® -SL (accesorio).<br />
Calibración por medio de una medición comparativa (por ejemplo titración<br />
(titulación volumétrica) de Winkler según DIN EN 25813 o ISO 5813).<br />
En este proceso la pendiente relativa es adaptada a la medición comparativa<br />
por medio de un factor de corrección.<br />
Después de la calibración, el instrumento valoriza el estado actual en función<br />
de la pendiente relativa. El valor de cada evaluación es indicado en el display.<br />
La pendiente relativa no afecta en modo alguno la exactitud de medición.<br />
Los valores bajos indican que pronto el electrolito estará consumido/<br />
agotado y que el sensor deberá ser regenerado.<br />
Indicación<br />
Pendiente relativa<br />
S = 0,8 ... 1,25<br />
S = 0,7 ... 0,8<br />
S = 0,6... 0,7<br />
E3<br />
Calibración inadmisible<br />
S < 0,6 o S > 1,25<br />
45
Calibración<br />
<strong>Oxi</strong> <strong>340i</strong><br />
Proceso de calibración con el recipiente de calibración de aire <strong>Oxi</strong>Cal®-<br />
SL:<br />
Tener preparado el recipiente de calibración de aire <strong>Oxi</strong>Cal ® -SL.<br />
Conectar el sensor de oxígeno al instrumento.<br />
Introducir el sensor de oxígeno en el recipiente de calibración de aire.<br />
O<br />
C A L<br />
1 7 6<br />
°C TP<br />
Presionar la tecla repetidas veces, hasta que aparezca O 2 CAL).<br />
Cal<br />
Presionar . La medición AutoRead comienza.<br />
S<br />
O<br />
0 8 8<br />
1 7 6<br />
°C TP<br />
En el momento en que el valor medido se estabiliza, el instrumento indica<br />
el valor de la pendiente relativa y la evaluación de la sonda de medición.<br />
Con cambiar al modo de medición.<br />
Cal<br />
AR<br />
Proceso de calibración por medio de una medición comparativa:<br />
Conectar el sensor de oxígeno al instrumento.<br />
O<br />
F A C<br />
1 7 6<br />
°C TP<br />
Presionar la tecla repetidas veces, hasta que aparezca O 2 FAC .<br />
Sumergir el sensor de oxígeno en la solución de calibración.<br />
Cal<br />
Presionar . La medición AutoRead comienza.<br />
O<br />
4 4 2<br />
1 0 0 7<br />
mg/l<br />
Cal<br />
ARng AR<br />
Cuando el valor medido es estable, el instrumento indica el valor determinado<br />
y el factor de corrección para la pendiente relativa (valor inicial =<br />
1,000).<br />
Sacar el sensor de oxígeno de la solución de calibración.<br />
Efectuar una medición comparativa (determinar el valor nominal). Hasta<br />
determinar el valor nominal, dejar el instumento conectado.<br />
Con ajustar el valor indicado por el instrumento al valor nominal.<br />
El factor de corrección correspondiente a la pendiente relativa cambia.<br />
Con cambiar al modo de medición.<br />
Observación<br />
Si el factor de corrección difiere de 1,000, la unidad del valor medido parpadea<br />
en el display.<br />
46
<strong>Oxi</strong> <strong>340i</strong><br />
Archivar en memoria<br />
Archivar en memoria<br />
Archivar<br />
manualmente en<br />
memoria<br />
Archivar datos en<br />
memoria en forma<br />
automática<br />
Int 1<br />
Encontrándose en el modo de medición, presionar la tecla (indicación<br />
No. con el número correspondiente a la siguiente posición de almacenamiento<br />
libre). A continuación presionar e ingresar el No.<br />
de identificación con . Terminar el archivo en memoria con . El instrumento cambia al modo de medición.<br />
El instrumento <strong>Oxi</strong> <strong>340i</strong> dispone de una memoria interna. La capacidad de<br />
la memoria alcanza para archivar 800 conjuntos de datos. El intervalo de almacenamiento<br />
(Int 1) determina el tiempo que transcurre entre dos almacenamientos<br />
consecutivos automáticos.<br />
Para ajustar el intervalo de almacenamiento, presionar manteniendo<br />
oprimida la tecla (indicación Int 1) y asignar el intervalo deseado<br />
mediante . A continuación presionar e ingresar<br />
el No. de identificación con . Con cambiar<br />
al modo de medición activado de último. La función para almacenamiento<br />
automático está conectada (indicación Auto Store).<br />
Llamar los datos archivados en memoria<br />
Con la tecla se pueden llamar de la memoria los datos archivados.<br />
Presionando repetidas veces la tecla el instrumento le ofrece las siguientes<br />
funciones:<br />
StO dISP<br />
StO SEr<br />
CAL dISP<br />
CAL SEr<br />
Presentar en el display los datos archivados en memoria<br />
Transferir los datos archivados a la interfase serial<br />
(sólo <strong>Oxi</strong> <strong>340i</strong>)<br />
Presentar en el display los datos de calibración<br />
Transferir los datos de calibración a la interfase serial<br />
(sólo <strong>Oxi</strong> <strong>340i</strong>)<br />
Iniciar la transferencia de datos con .<br />
Transferir datos (sólo <strong>Oxi</strong> <strong>340i</strong>)<br />
Transferir los<br />
datos<br />
manualmente<br />
Transferencia<br />
automática de los<br />
datos<br />
Int 2<br />
Presionar la tecla encontrándose en el modo de medición.<br />
De esta manera Ud. puede iniciar en cualquier momento la transmisión de<br />
datos hacia la interfase serial de los valores medidos, independientemente<br />
de los intervalos asignados.<br />
El intervalo para la transferencia de datos (Int 2) determina el período de<br />
tiempo entre dos transferencias consecutivas automáticas de datos. Después<br />
que ha transcurrido el intervalo asignado, el conjunto actual de datos<br />
es transferido a la interfase. Para asignar el intervalo de tiempo entre dos<br />
transferencias automáticas consecutivas , manteniendo oprimida la<br />
tecla, presionar (indicación Int 2). A continuación asignar el<br />
intervalo con .<br />
47
Configurar<br />
<strong>Oxi</strong> <strong>340i</strong><br />
Configurar<br />
Observación<br />
Ud. puede abandonar el menú de configuración en todo momento mediante<br />
. Los parámetros modificados han sido archivados en memoria.<br />
Proceso de configuración/programación (los valores asignados y/o programados<br />
de fábrica aparecen en negrita):<br />
Baud<br />
48<br />
00<br />
p<br />
mbar<br />
9 4 9<br />
1 n T 3<br />
Time<br />
Day.Month<br />
d<br />
O<br />
1 4<br />
A r n<br />
Y E S<br />
ARng<br />
09<br />
04<br />
Desconectar el instrumento<br />
Manteniendo oprimida la tecla , presionar la tecla < >.<br />
Fijar la cuota de transmisión (en baud) con .<br />
Valores a elección: 1200, 2400, 4800, 9600 Baud.<br />
Luego, presionar la tecla .<br />
La presión atmosférica es indicada únicamente si se ha conectado un<br />
sensor de oxígeno. De lo contrario aparece "---".<br />
Continuar con la tecla .<br />
Asignar el intervalo de calibración deseado para las mediciones de oxígeno<br />
mediante .<br />
Valores a elección: 1... 14... 999 d.<br />
Luego, presionar la tecla .<br />
Conectar / desconectar la selección automática del rango de medición<br />
AutoRange, con .<br />
Valores a elección: YES (conect.), no (desconect.).<br />
Luego, presionar la tecla .<br />
Ajustar la fecha y la hora, paso a paso, con . Confirmar cada<br />
ingreso presionando la tecla .<br />
Al presionar la tecla por última vez, el instrumento cambia<br />
al modo de medición que estaba activo de último.<br />
48
<strong>Oxi</strong> <strong>340i</strong><br />
Reajustar al valor inicial (Reset)<br />
Reajustar al valor inicial (Reset)<br />
Usted puede inicializar por separado los parámetros de medición y la configuración,<br />
es decir, puede reajustar los correspondientes parámetros a los<br />
valores iniciales de fábrica.<br />
Parámetros de<br />
medición<br />
Los siguientes parámetros de medición pueden ser reajustados al valor inicial<br />
de fábrica:<br />
Oxígeno (O 2 InI)<br />
Modo de medición<br />
Concentración de oxígeno<br />
Cambio automático del rango de Conect. (YES)<br />
medición AutoRange<br />
Pendiente relativa 1,00<br />
Factor de corrección de<br />
1,000<br />
la pendiente relativa<br />
Ingreso de la salinidad 0,0<br />
Corrección de la salinidad<br />
desconectada<br />
Parámetros de<br />
configuración<br />
Los siguientes parámetros de configuración (InI) pueden ser reajustados al<br />
valor inicial de fábrica:<br />
Cuota de transmisión (en baud) 4800<br />
Intervalo 1<br />
(archivar en memoria automaticamente)<br />
OFF<br />
Intervalo 2<br />
(para la transferencia de datos, OFF<br />
sólo <strong>Oxi</strong> <strong>340i</strong>)<br />
Reajustar el proceso al valor inicial:<br />
O<br />
I n I<br />
n o<br />
Manteniendo oprimida la tecla , presionar la tecla<br />
.<br />
Para reajustar al valor inicial los parámetros de medición, con <br />
seleccionar YES y con confirmar, o bien,<br />
continuar con los otros parámetros de configuración (InI) con la tecla<br />
, sin inicializar los parámetros.<br />
Después de los parámetros de configuración InI el instrumento cambia<br />
al modo de medición que estaba activo de último.<br />
49
Especificaciones técnicas<br />
<strong>Oxi</strong> <strong>340i</strong><br />
Especificaciones técnicas<br />
Dimensiones<br />
y peso<br />
Longitud [mm] 172<br />
Anchura [mm] 80<br />
Altura [mm] 37<br />
Peso [kg] aprox. 0,3<br />
Diseño<br />
mecánico<br />
Tipo de protección IP 66<br />
Seguridad<br />
eléctrica<br />
clase de protección<br />
III<br />
Marca de<br />
tipificación<br />
cETLus, CE<br />
Condiciones<br />
medioambientales<br />
de almacenamiento - 25 °C ... + 65 °C<br />
de funcionamiento -10 °C ... + 55 °C<br />
clase climática 2<br />
Rangos de<br />
medición<br />
Rango de<br />
medición I<br />
Resolución<br />
mg/l % mbar<br />
0 ... 19,99<br />
(0 ... 19,9 DurOx)<br />
0,01<br />
(0,1 DurOx)<br />
0 ... 199,9<br />
(0 ... 199 DurOx)<br />
0,1<br />
(1 DurOx)<br />
0 ... 199,9<br />
(0 ... 199 DurOx)<br />
0,1<br />
(1 DurOx)<br />
Rango de<br />
medición<br />
II<br />
Resolución<br />
0 ... 90,0<br />
(0 ... 90 DurOx)<br />
0,1<br />
(1 DurOx)<br />
0 ... 600<br />
(0 ... 600 DurOx)<br />
1<br />
(1 DurOx)<br />
0 ... 1250<br />
(0 ... 1250 DurOx)<br />
1<br />
(1 DurOx)<br />
50
<strong>Oxi</strong> <strong>340i</strong><br />
Especificaciones técnicas<br />
Exactitud<br />
(± 1 dígito)<br />
mg/l<br />
Concentración<br />
%<br />
saturación<br />
mbar<br />
presión parcial<br />
Compensación de<br />
la temperatura<br />
± 0,5 % del valor medido<br />
a temperatura ambiente 5 °C ... 30 °C<br />
± 0,5 % del valor medido<br />
al medir en el rango de<br />
± 10 K alrededor de la temperatura de calibración<br />
± 0,5 % del valor medido<br />
a temperatura ambiente 5 °C ... 30 °C<br />
< 2 % a 0 ... 40 °C<br />
T [°C] ± 0,1<br />
Funciones de<br />
corrección<br />
Corrección del contenido<br />
en sal<br />
Corrección de la presión<br />
atmosférica<br />
0 ... 70,0 SAL<br />
automáticamente mediante sensor de presión barométrica<br />
integrado para el rango de 500 ... 1100 mbar<br />
Salida analógica<br />
(sólo <strong>Oxi</strong> <strong>340i</strong>)<br />
Conmutación automática al conectar el cable de registro AK 323.<br />
Tensión<br />
Resolución<br />
Saturación<br />
0 ... 200,0 %<br />
0 ... 600 %<br />
Concentración<br />
0...20,00 mg/l<br />
0...100,0 mg/l<br />
0 ... 2 V<br />
0 ... 600 mV<br />
0...2 V<br />
0...1 V<br />
0,1 %<br />
1 %<br />
0,01 mg/l<br />
0,1 mg/l<br />
Exactitud<br />
Resistencia interna<br />
± 0,5 % del valor indicado<br />
± 0,1(saturación porcentual %)<br />
o bien.<br />
± 0,5 % del valor indicado ± 0,01 mg/l<br />
Especificaciones técnicas<br />
<strong>Oxi</strong> <strong>340i</strong><br />
Interfase serial<br />
(sólo <strong>Oxi</strong> <strong>340i</strong>)<br />
Conmutación automática al conectar un ordenador PC o una impresora a través<br />
del cable AK 340/B o bien, AK 325/S.<br />
Tipo<br />
Cuota de transmisión<br />
(en baud)<br />
RS232, salida de datos<br />
ajustable entre<br />
1200, 2400, 4800, 9600 Baud<br />
Bits de datos 8<br />
Bit de parada 2<br />
Paridad<br />
Handshake<br />
Longitud del cable<br />
sin (none)<br />
RTS/CTS + Xon/Xoff<br />
max. 15m<br />
Suministro<br />
eléctrico<br />
Pilas<br />
vida útil<br />
Red<br />
4 x 1,5 V pilas alcalinas al manganeso tipo AA<br />
aprox. 3000 horas de servicio<br />
Para todos los transformadores de alimentación vale:<br />
conexión de sobretensión máxima según categoría II<br />
Transformador de alimentación con enchufes europeo,<br />
americano, inglés, australiano:<br />
FRIWO FW7555M/09, 15.1432<br />
Friwo Part. No. 1822089<br />
Input: 100 ... 240 V ~ / 50 ... 60 Hz / 400 mA<br />
Output: 9 V = / 1,5 A<br />
Directivas y<br />
normas aplicadas<br />
EMV<br />
Clase de seguridad<br />
del aparato<br />
clase climática VDI/VDE 3540<br />
Tipo de protección EN 60529:1991<br />
Directiva de la Comunidad Europea 89/336/EWG<br />
EN 61326 A1:1998<br />
EN 61000-3-2 A14:2000<br />
EN 61000-3-3:1995<br />
FCC Class A<br />
Directiva de la Comunidad Europea 73/23/EWG<br />
EN 61010-1 A2:1995<br />
52