You also want an ePaper? Increase the reach of your titles
YUMPU automatically turns print PDFs into web optimized ePapers that Google loves.
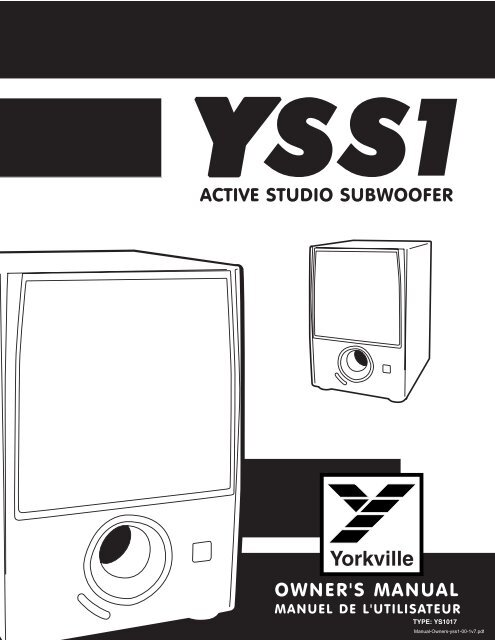
<strong>YSS1</strong><br />
ACTIVE STUDIO SUBWOOFER<br />
OWNER'S MANUAL<br />
MANUEL DE L'UTILISATEUR<br />
TYPE: YS1017
IMPORTANT SAFETY INSTRUCTIONS<br />
INSTRUCTIONS PERTAINING TO A<br />
RISK OF FIRE, ELECTRIC SHOCK,<br />
OR INJURY TO PERSONS<br />
CAUTION:<br />
TO REDUCE THE RISK OF ELECTRIC SHOCK, DO<br />
NOT REMOVE COVER (OR BACK).<br />
NO USER SERVICEABLE PARTS INSIDE.<br />
REFER SERVICING TO QUALIFIED<br />
SERVICE PERSONNEL.<br />
Read Instructions: The Owner’s Manual should be<br />
read and understood before operation of your unit.<br />
Please, save these instructions for future reference and<br />
heed all warnings.<br />
Clean only with dry cloth.<br />
Packaging: Keep the box and packaging materials, in<br />
case the unit needs to be returned for service.<br />
Warning: To reduce the risk or fire or electric shock, do<br />
not expose this apparatus to rain or moisture.<br />
Warning: When using electric products, basic precautions<br />
should always be followed, including the following:<br />
Power Sources<br />
Your unit should be connected to a power source only of the voltage<br />
specified in the owners manual or as marked on the unit. This unit has a<br />
polarized plug. Do not use with an extension cord or receptacle unless<br />
the plug can be fully inserted. Precautions should be taken so that the<br />
grounding scheme on the unit is not defeated.<br />
Hazards<br />
Do not place this product on an unstable cart, stand, tripod, bracket or<br />
table. The product may fall, causing serious personal injury and serious<br />
damage to the product. Use only with cart, stand, tripod, bracket, or<br />
table recommended by the manufacturer or sold with the product.<br />
Follow the manufacturer’s instructions when installing the product and<br />
use mounting accessories recommended by the manufacturer.<br />
The apparatus should not be exposed to dripping or splashing water;<br />
no objects filled with liquids should be placed on the apparatus.<br />
Terminals marked with the “lightning bolt” are hazardous live; the<br />
external wiring connected to these terminals require installation by an<br />
instructed person or the use of ready made leads or cords.<br />
Ensure that proper ventilation is provided around the appliance.<br />
No naked flame sources, such as lighted candles, should be<br />
placed on the apparatus.<br />
Power Cord<br />
The AC supply cord should be routed so that it is unlikely that it will be<br />
damaged. If the AC supply cord is damaged DO NOT OPERATE THE UNIT.<br />
Unplug this apparatus during lightning storms or when unused for<br />
long periods of time.<br />
Service<br />
The unit should be serviced only by qualified service personnel.<br />
INSTRUCTIONS RELATIVES AU RISQUE<br />
DE FEU, CHOC ÉLECTRIQUE, OU<br />
BLESSURES AUX PERSONNES<br />
AVIS:<br />
AFIN DE REDUIRE LES RISQUE DE CHOC ELECTRIQUE,<br />
N’ENLEVEZ PAS LE COUVERT (OU LE PANNEAU ARRIERE)<br />
NE CONTIENT AUCUNE PIECE<br />
REPARABLE PAR L’UTILISATEUR.<br />
CONSULTEZ UN TECHNICIEN QUALIFIE<br />
POUR L’ENTRETIENT<br />
Veuillez Lire le Manuel: Il contient des informations<br />
qui devraient êtres comprises avant l’opération de votre<br />
appareil. Conservez<br />
Gardez S.V.P. ces instructions pour consultations<br />
ultérieures et observez tous les avertissements.<br />
Nettoyez seulement avec le tissu sec.<br />
Emballage: Conservez la boite au cas ou l’appareil<br />
devait être retourner pour réparation.<br />
Avertissement: Pour réduire le risque de feu ou la<br />
décharge électrique, n'exposez pas cet appareil à la<br />
pluie ou à l'humidité.<br />
Attention: Lors de l’utilisation de produits électrique,<br />
assurez-vous d’adhérer à des précautions de bases<br />
incluant celle qui suivent:<br />
Alimentation<br />
L’appareil ne doit être branché qu’à une source d’alimentation<br />
correspondant au voltage spécifié dans le manuel ou tel qu’indiqué sur<br />
l’appareil. Cet appareil est équipé d’une prise d’alimentation polarisée.<br />
Ne pas utiliser cet appareil avec un cordon de raccordement à moins<br />
qu’il soit possible d’insérer complètement les trois lames. Des<br />
précautions doivent êtres prises afin d’eviter que le système de mise à<br />
la terre de l’appareil ne soit désengagé.<br />
Risque<br />
Ne pas placer cet appareil sur un chariot, un support, un trépied ou une<br />
table instables. L’appareil pourrait tomber et blesser quelqu’un ou subir<br />
des dommages importants. Utiliser seulement un chariot, un support,<br />
un trépied ou une table recommandés par le fabricant ou vendus avec<br />
le produit. Suivre les instructions du fabricant pour installer l’appareil et<br />
utiliser les accessoires recommandés par le fabricant.<br />
Il convient de ne pas placer sur l’appareil de sources de flammes<br />
nues, telles que des bougies allumées.<br />
L’appeil ne doit pas être exposé à des égouttements d’eau ou des<br />
éclaboussures et qu’aucun objet rempli de liquide tel que des vases<br />
ne doit être placé sur l’appareil.<br />
Assurez que lappareil est fourni de la propre ventilation.<br />
Les dispositifs marqués d’une symbole “d’éclair” sont des parties<br />
dangereuses au toucher et que les câblages extérieurs connectés à<br />
ces dispositifs de connection extérieure doivent être effectivés par un<br />
opérateur formé ou en utilisant des cordons déjà préparés.<br />
Cordon d’Alimentation<br />
Évitez d’endommager le cordon d’alimentation. N’UTILISEZ PAS<br />
L’APPAREIL si le cordon d’alimentation est endommagé.<br />
Débranchez cet appareil durant les orages ou si inutilisé pendant de<br />
longues périodes.<br />
Service<br />
Consultez un technicien qualifié pour l’entretien de votre appareil.<br />
safety-4v4.eps • Jan.16/2007
<strong>YSS1</strong><br />
<strong>YSS1</strong> ACTIVE STUDIO SUBWOOFER<br />
The <strong>YSS1</strong> is a self-powered active subwoofer designed<br />
for accurate reproduction of the lower audio band down<br />
to 32Hz. This, combined with a maximum sound-pressure<br />
level of 119dB, provides basic performance that easily<br />
responds to the demands of recordists in studio environments<br />
up to medium or large scale. Home theatre and<br />
stereo system applications are also possible. A roster<br />
of features adds flexibility at the professional level. All<br />
three types of input connectors are included - balanced<br />
XLR, balanced/unbalanced quarter inch and RCA, plus<br />
straight-through balanced male XLR outputs so that you<br />
may relay the source signals to powered full-range speakers<br />
or a power amp. Controls regulate both volume and<br />
low-pass frequency while a 2-way switch lets you invert<br />
the <strong>YSS1</strong>'s phase. Thus all low-frequency sound parameters<br />
can be tailored to match the system/room response.<br />
Power Connection<br />
Plug the <strong>YSS1</strong>'s power cord into a grounded 120Volt, 60Hz outlet. Be sure the plug is inserted<br />
all the way to avoid shocks.<br />
Location<br />
Although the <strong>YSS1</strong> can provide substantial levels of sound pressure, should you require<br />
more, low frequency sound pressure tends to increase somewhat with the source placed<br />
close to a wall. For maximum emphasis position the <strong>YSS1</strong> in a corner facing outward. Low<br />
frequencies tend to be less directional than mids and highs hence you have considerable<br />
flexibility when it comes to placement<br />
Sources<br />
Any audio source with *line-level outputs, whether it's a mixer, signal processor, tuner/amplifier,<br />
CD, tape player, TV (with audio outputs), VCR or DVD player can be connected to the<br />
<strong>YSS1</strong>. The source's output can be balanced or unbalanced.<br />
*(the <strong>YSS1</strong> cannot accept speaker-level signals)<br />
Connections<br />
To connect the output of a stereo mixer or other audio source with RCA (phono) type outputs,<br />
simply run a standard dual male RCA-to-dual male RCA cable to the A & B RCA Input connectors<br />
on the <strong>YSS1</strong> back panel. If your mixer only has a single (mono) RCA output you may use a<br />
single-element cable of this type and simply connect it to either the A or B RCA inputs. This mono<br />
capability applies to all the inputs. The <strong>YSS1</strong> does not require a stereo input signal as the internal<br />
amplifier is mono and stereo input signals are summed down to mono by the input circuitry.<br />
XLR/¼-inch A&B "combi" Input jacks permit connecting a balanced or unbalanced line-level<br />
output from the audio source. If the source outputs are ¼-inch unbalanced, simply run one or two<br />
unbalanced ¼-inch-to-unbalanced (mono) ¼-inch cables to the <strong>YSS1</strong>'s combi inputs. If the source<br />
output is balanced use either XLR (female) - to - XLR(male) balanced cables (e.g. low-impedance<br />
mic cables) , or ¼-inch TRS (stereo) male-to-¼-inch TRS male balanced patch cords. Again, if the<br />
source only has one output, just run one cable to either the A or B combi jack.
<strong>YSS1</strong><br />
The male XLRs are balanced "through" connectors.<br />
This way the source output can go directly to<br />
the <strong>YSS1</strong> then be patched through to the input of<br />
the full-range amplifier or powered speakers with<br />
the appropriate cables. For powered speakers or a<br />
power amplifier with balanced inputs, use balanced<br />
cables with a female XLR on the <strong>YSS1</strong> end and<br />
the appropriate connector (TRS ¼-inch or male<br />
XLR) on the other end. Unbalanced signal may<br />
also be passed through using modified patch cords<br />
with a female XLR on one end (pin 1 to shield, pin<br />
2 to center) and a mono ¼-inch jack or male RCA<br />
connector on the other end.<br />
Controls<br />
The <strong>YSS1</strong>'s Volume control should be set while<br />
program is playing through the full-range speakers<br />
at the maximum volume you expect to employ.<br />
Adjust the <strong>YSS1</strong>'s Volume control until the desired<br />
balance of lows and full-range level is achieved.<br />
Thereafter the signal level from the source will<br />
determine the subwoofer's volume so that sub<br />
and full-range sound levels remain in balance.<br />
Naturally adjustments can be made at any time.<br />
The <strong>YSS1</strong> has a low-pass filter, which affects<br />
the A&B Output signals and is regulated by the<br />
Variable High-Pass control. This is a feature,<br />
which enables you to match the upper frequency<br />
range of the sub with the lower frequency limit of<br />
the full-range speakers for the smoothest sub/low<br />
transition. If you have an accurate response graph<br />
of the full-range speakers, set the <strong>YSS1</strong>'s Variable<br />
High-Pass control to the frequency on the graph<br />
where the lows have rolled off -3dB. Otherwise, simply adjust the it for the desired<br />
smoothness of response throughout the sub/low-frequency range while program<br />
(music, video, etc.) or test tones are playing. If necessary, re-adjust the <strong>YSS1</strong> Volume.<br />
The phase relationship between subwoofers and full-range speakers can make a noticeable<br />
difference in overall low-mid response smoothness. To reduce low-mid presence it<br />
sometimes helps to invert the sub's phase 180 degrees thus creating an audibly more<br />
defined separation between the two types of enclosures. To achieve this simply set the<br />
<strong>YSS1</strong>'s Phase button to the 180 position. Otherwise you would use the Normal position.<br />
Footswitch Jack<br />
From time to time you may need to shut the subwoofer off in order to hear the program<br />
as it sounds to someone who does not have a subwoofer, or to let you concentrate<br />
more on mid-to-high frequency music components - vocals for example. The<br />
Footswitch jack accepts a standard on/off footswitch without an LED. When connected<br />
and engaged, the footswitch will mute the output of the <strong>YSS1</strong> and bypass the highpass<br />
filters on the A & B Outputs. This way the sub frequencies are cut off and the<br />
full-range amplifier or powered speakers return to full-range operation.<br />
* This product features B.A.S.H. technology<br />
MIN<br />
60 Hz<br />
A<br />
MAX<br />
PHASE<br />
0˚(Norm)<br />
180˚<br />
VARIABLE<br />
HIGH PASS<br />
150 Hz<br />
VOLUME<br />
INPUTS<br />
B<br />
INPUT A<br />
INPUT B<br />
OUTPUT A<br />
OUTPUT B<br />
FOOTSWITCH<br />
ALL INPUTS ARE SUMMED TO SUBWOOFER<br />
YORKVILLE SOUND • TORONTO, CANADA<br />
Made in CANADA<br />
<strong>YSS1</strong><br />
ACTIVE STUDIO SUBWOOF<br />
VARIABLE<br />
HIGH PASS<br />
YSM1 Monitors = 60 Hz<br />
This suggested setting is<br />
considered a starting point,<br />
adjust the setting according<br />
to the environment<br />
RCA<br />
1/4 INCH<br />
XLR<br />
TIP<br />
(+) 0˚<br />
SLEEVE<br />
(GND)<br />
TIP (+) 0˚<br />
RING (-) 180˚<br />
SLEEVE (GND)<br />
FOOTSWITCH<br />
PIN 2 (+) 0˚<br />
PIN 3 (-) 180˚<br />
PIN 1 (GND)<br />
When engaged, the output<br />
of the subwoofer amplifier<br />
will be muted. The full range<br />
signal will be sent directly to<br />
the full range enclosures<br />
using the low-level outputs<br />
POWER<br />
ON<br />
OFF<br />
AVIS: POUR REDUIRE LE RISQUE<br />
DE FEU OU DE CHOC ELECTRIQUE,<br />
NE PAS EXPOSER A LA PLUIE OU L'HUMIDITE<br />
TYPE: YS1017<br />
120 VAC<br />
60Hz 180W<br />
FUSE: T2AL250V<br />
230V<br />
50Hz 180W<br />
FUSE: T1AL250V<br />
1v9
<strong>YSS1</strong><br />
YSM1i<br />
YSM1i<br />
+ - + -<br />
YSM1P<br />
Balanced Input<br />
YSM1P<br />
Balanced Input<br />
Amplifier<br />
Balanced Input<br />
<strong>YSS1</strong><br />
Balanced Input<br />
<strong>YSS1</strong><br />
Balanced Input<br />
<strong>YSS1</strong><br />
Balanced Output<br />
Mixer<br />
Balanced Output<br />
<strong>YSS1</strong><br />
Balanced Output<br />
Mixer<br />
Balanced Output<br />
Powered Satellites<br />
Non-Powered Satellites
<strong>YSS1</strong><br />
LE SUBWOOFER AMPLIFIÉ<br />
POUR STUDIO <strong>YSS1</strong><br />
Le <strong>YSS1</strong> est un subwoofer avec amplification intégrée<br />
conçu pour reproduire fidèlement les fréquences graves<br />
de la bande audio jusqu'à 32Hz. Ceci, allié avec un<br />
niveau de pression sonore maximum de 119dB, offre<br />
une performance qui répond facilement aux besoins des<br />
studios moyens ou des studios de grande importance.<br />
Les applications telles que Home theatre et systèmes<br />
stéréophoniques sont aussi possibles. La liste de caractéristiques<br />
ajoute à sa polyvalence lors d'utilisation<br />
à des niveaux professionnels. Les trois types de connecteurs<br />
sont inclus - XLR symétrique, fiche ¼ symétrique/asymétrique<br />
et RCA, en plus de sortie type XLR<br />
male symétrique pour ré-acheminement direct. Ceci<br />
vous permet d'acheminer le signal de source à des<br />
enceintes pleine bande avec amplification intégrée ou à<br />
un amplificateur de puissance. Les contrôles règlent à<br />
la fois le volume et la fréquence de coupure pour le filtre<br />
passe bas tandis qu'un sélecteur vous permet d'inverser<br />
la phase du <strong>YSS1</strong>. Par conséquent, tous les paramètres<br />
sonores des fréquences graves peuvent être adaptés au<br />
système ou à la pièce dans laquelle il est installé.<br />
Connexion d’Alimentation<br />
Branchez le cordon d'alimentation du <strong>YSS1</strong>'s à une prise 120Volts, 60 Hz avec mise à la<br />
masse. Assurez-vous de bien insérer la fiche jusqu'au bout afin d'éviter les risques de choc.<br />
Emplacement<br />
Le niveau de pression sonore des fréquences graves augmente lorsque l'appareil est<br />
placé près d'un mur. Bien que le <strong>YSS1</strong> soit capable de produire des niveaux de pressions<br />
sonores considérables, il vous sera peut-être parfois nécessaire d'en obtenir un peu plus.<br />
Pour ce faire, placez le <strong>YSS1</strong> dans un coin et dirigez le vers l'extérieur. Les fréquences<br />
graves sont moins directionnelles que les médianes ou les aiguës, vous bénéficierez<br />
donc d'une flexibilité considérable pour l'emplacement.<br />
Sources<br />
N'importe quelle source audio avec sortie de niveau ligne peut être branchée au <strong>YSS1</strong>, que<br />
ce soit un mixeur, un processeur de signal, syntoniseur/amplificateur, lecteur CD, magnétophone<br />
à cassette, Téléviseur (avec sortie audio), lecteur vidéo ou lecteur DVD. Ils peuvent<br />
tous être branchés au <strong>YSS1</strong>. La sortie de la source peut être symétrique ou asymétrique.<br />
*(Le <strong>YSS1</strong> n’accepte pas les signaux de niveau haut-parleur)<br />
Connections<br />
Pour brancher les sorties d'un mixeur stéréo ou d'une autre source audio avec prises de<br />
sorties type RCA (phono), utilisez un câble avec à ses deux extrémités, des prises mâles<br />
doubles type RCA et raccordez le câble aux prises d'entrées RCA A & B sur le panneau<br />
arrière du <strong>YSS1</strong>. Si votre mixeur n'a qu'une sortie monophonique type RCA n'utilisez<br />
qu'un côté du câble et branchez le à l'entrée RCA A ou B du <strong>YSS1</strong>. Cette compatibilité<br />
mono s'applique à toutes les entrées. Le <strong>YSS1</strong> ne nécessite pas un signal d'entrée stéréo<br />
puisque l'amplificateur de puissance interne est monophonique et les signaux stéréos à<br />
l'entrée sont additionnés par le circuit d'entrée pour produire un signal monophonique.
<strong>YSS1</strong><br />
Les prise d'entrées XLR/1/4-pouce A&B "combi" permettent le branchement de la sortie<br />
niveau ligne asymétrique ou symétrique d'une source audio. Si les sorties de la source sont<br />
¼" asymétriques, raccordez simplement aux entrées combi du <strong>YSS1</strong> un ou deux câbles<br />
avec aux deux extrémités des prises ¼" (mono) asymétrique ou symétrique,. Si la sortie de<br />
la source est symétrique utilisez soit un câble symétrique avec prise XLR femelle aux deux<br />
extrémités (ex. Câble à basse impédance pour microphone), ou un câble symétrique avec<br />
aux deux extrémités une prise mâle ¼" TRS (stéréo). Si la source n'a qu'une sortie, ne raccordez<br />
que un des câbles à la prise d'entrée combi A ou B.<br />
Les connecteurs à ré-acheminement direct mâle XLR sont symétriques. Ils vous permettent de<br />
brancher le signal de sortie de la source directement au <strong>YSS1</strong> pour ensuite l'acheminer à l'entrée<br />
de l'amplificateur de puissance pour signal pleine bande ou à l'entrée des haut-parleurs avec<br />
amplification intégrée à l'aide de câble appropriés. Pour les enceintes amplifiées ou les amplificateurs<br />
de puissance avec entrées symétriques, utilisez des câbles symétriques avec une prise<br />
femelle type XLR à l'extrémité du câble qui est connecté au <strong>YSS1</strong> et le connecteur approprié à<br />
l'autre extrémité (TRS ¼" ou mâle XLR). Un signal asymétrique peut aussi être ré acheminé à<br />
l'aide d'un câble de raccordement modifié, avec à une extrémité une prise femelle XLR (tige 1 =<br />
blindage, tige 2 = centre) et à l'autre extrémité une fiche mono ¼" ou un connecteur mâle RCA.<br />
Contrôles<br />
Réglez le volume du <strong>YSS1</strong> lorsque la musique qui<br />
joue. Les enceintes pleine bande doivent aussi<br />
être actives et le volume du système doit être réglé<br />
au niveau le plus élevé que vous aurez à utiliser.<br />
Ajustez le volume du <strong>YSS1</strong> jusqu'à ce que vous<br />
ayez obtenu le balance désirée entre la bande des<br />
fréquences graves et celle pleine bande. Le niveau<br />
du subwoofer sera ainsi déterminé par le niveau<br />
du signal de source de façon à ce que les niveaux<br />
du subwoofer et des enceintes pleines bande<br />
demeurent balancés. Vous pouvez aussi faire les<br />
ajustements nécessaires à n'importe quel moment.<br />
Le <strong>YSS1</strong> est doté d'un filtre passe-bas qui affect<br />
les signaux de sortie A&B. Le filtre est régulé par le<br />
contrôle variable passe-haut. Cette caractéristique<br />
vous permet de marier la bande supérieure des<br />
fréquences du subwoofer avec la bande inférieure<br />
de fréquences de l'enceinte pleine bande de façon à<br />
obtenir la meilleure transition possible entre les deux<br />
enceintes. Si vous possédez un graphique précis de<br />
la réponse en fréquence de l'enceinte pleine bande,<br />
réglez le contrôle variable du filtre passe-haut du<br />
<strong>YSS1</strong> à la fréquence indiquée sur le graphique ou<br />
les graves ont diminué de 3 dB. Sinon, ajustez le<br />
simplement pour obtenir la courbe de réponse désirée<br />
à travers la gamme des fréquences sous-graves<br />
et graves et cela pendant que le programme musical<br />
(musique, vidéo, etc.) joue. Ou ajustez-le avec une<br />
tonalité de calibrage. Si nécessaire, ajustez à nouveau<br />
le volume du <strong>YSS1</strong>.<br />
VARIABLE<br />
HIGH PASS<br />
INPUTS<br />
B<br />
Le rapport de phase entre les subwoofers et le enceintes pleine gamme peut affecter sensiblement<br />
la courbe générale des fréquences moyennes et basses. Pour réduire la présence<br />
des fréquences moyennes/basses il est parfois utile d'inverser la phase du subwoofer de 180<br />
degrés créant ainsi une séparation audible plus définit entre les deux types d'enceintes. Vous<br />
pouvez accomplir ceci en réglant le bouton de Phase du <strong>YSS1</strong> en position 180. Sinon, ce<br />
bouton devrait être réglé à la position Normale.<br />
MIN<br />
60 Hz<br />
A<br />
MAX<br />
150 Hz<br />
VOLUME<br />
PHASE<br />
0˚(Norm)<br />
180˚<br />
INPUT A<br />
INPUT B<br />
OUTPUT A<br />
OUTPUT B<br />
FOOTSWITCH<br />
ALL INPUTS ARE SUMMED TO SUBWOOFER<br />
YORKVILLE SOUND • TORONTO, CANADA<br />
Made in CANADA<br />
<strong>YSS1</strong><br />
ACTIVE STUDIO SUBWOO<br />
VARIABLE<br />
HIGH PASS<br />
YSM1 Monitors = 60 Hz<br />
This suggested setting is<br />
considered a starting point,<br />
adjust the setting according<br />
to the environment<br />
RCA<br />
1/4 INCH<br />
XLR<br />
TIP<br />
(+) 0˚<br />
SLEEVE<br />
(GND)<br />
TIP (+) 0˚<br />
RING (-) 180˚<br />
SLEEVE (GND)<br />
FOOTSWITCH<br />
PIN 2 (+)<br />
PIN 3 (-)<br />
0˚<br />
180˚<br />
PIN 1 (GND)<br />
When engaged, the output<br />
of the subwoofer amplifier<br />
will be muted. The full range<br />
signal will be sent directly to<br />
the full range enclosures<br />
using the low-level outputs<br />
POWER<br />
ON<br />
OFF<br />
AVIS: POUR REDUIRE LE RISQUE<br />
DE FEU OU DE CHOC ELECTRIQUE,<br />
NE PAS EXPOSER A LA PLUIE OU L'HUMIDIT<br />
TYPE: YS1017<br />
120 VAC<br />
60Hz 180W<br />
FUSE: T2AL250V<br />
230V<br />
50Hz 180W<br />
FUSE: T1AL250V<br />
1v9
<strong>YSS1</strong><br />
Prise Pour Commutateur au Pied<br />
De temps à autres, vous pouvez avoir à éteindre le subwoofer pour vous permettre<br />
d'entendre le programme musical comme une personne qui n'a pas de subwoofer, ou<br />
pour vous concentrer sur une gamme de fréquence plus élevée comme la voix par<br />
exemple. La prise pour commutateur au pied accepte un commutateur standard "on/off"<br />
sans DEL. Lorsque branché et engagé, le commutateur coupe le son de sortie du <strong>YSS1</strong><br />
et contourne les filtres passe-haut sur les sorties A & B. De cette façon, les fréquences<br />
sous-graves sont coupées et l'amplificateur pleine bande ou les haut-parleur avec amplification<br />
intégré retournent à l'opération pleine bande.<br />
*Ce produit offre la technologie B.A.S.H.<br />
YSM1i<br />
YSM1i<br />
+ - + -<br />
YSM1P<br />
Entrée Symétrique<br />
YSM1P<br />
Entrée Symétrique<br />
Amplificateur<br />
Entrée Symétrique<br />
<strong>YSS1</strong><br />
Entrée Symétrique<br />
<strong>YSS1</strong><br />
Sortie symétrique<br />
<strong>YSS1</strong><br />
Entrée Symétrique<br />
mixeur<br />
Sortie Symétrique<br />
<strong>YSS1</strong><br />
Sortie Symétrique<br />
mixeur<br />
Sortie Symétrique<br />
Enceinte Active Satellite<br />
Enceinte Passive Satellite
<strong>YSS1</strong><br />
Specifications<br />
System Type Studio Subwoofer<br />
Active or Passive<br />
Active<br />
Program Power (Watts) 150<br />
Max SPL (dB) 125<br />
Frequency Response (Hz +/- 3db) 35 to 150<br />
Driver Configuration<br />
LF Power Amplifier (Watts) 150<br />
Inputs 4<br />
Inputs - 1/4-inch Jacks<br />
Inputs - XLR<br />
Level Controls<br />
LED Indicators<br />
Other Controls / Features<br />
Feet<br />
Enclosure Materials<br />
Baffle Material<br />
Port(s)<br />
Single long excursion 12 inch<br />
2 x (combined XLR / 1/4 inch TRS Combi-jacks)<br />
2 x (combined XLR / 1/4 inch TRS Combi-jacks)<br />
Main Volume<br />
power<br />
<strong>YSS1</strong> frequency response<br />
Selectable low pass filter, input phase-flip switch, additional<br />
RCA stereo inputs.<br />
Thick Rubber Contact Feet<br />
MDF<br />
MDF<br />
Yes<br />
Other Details Two Transparent balanced XLR Full range 'thru-puts' to feed<br />
Active near-field studio monitors.<br />
Dimensions (DWH xbackW, inches) 20.5 x 13.75 x 16.75<br />
Dimensions (DWH xbackW, cm) 52 x 35 x 41<br />
Weight (lbs/kg) 44 / 20<br />
Spécifications<br />
Type de Système Subwoofer pour Studio<br />
Actif ou Passif<br />
Actif<br />
Puissance - Programme musical(Watts) 150<br />
Max SPL (dB) 125<br />
Réponse en Fréquence (Hz +/- 3db) 35 à 150<br />
Configuration de driver 12 pouces à longue Excursion<br />
Amplificateur de puissance - Graves(Watts) 150<br />
Entrées 4<br />
Entrées - 1/4-pouce Jacks<br />
Entrées - XLR<br />
Contrôle de niveau<br />
DEL indicatrices<br />
Autres Contrôles/ Caractéristiques<br />
Pieds<br />
Matériaux de construction<br />
Matériaux du Baffle<br />
Évents<br />
2 x (combi jack XLR / 1/4 pouce PBM)<br />
2 x (combi jack XLR / 1/4 pouce PBM)<br />
Volume Principal<br />
Alimentation<br />
Filtre Passe-bas Commutable, sélecteur de phase d'entrée,<br />
Entrées stéréo RCA additionnel<br />
Pied de contact en caoutchouc épais<br />
Bois stratifié MDF<br />
Bois stratifié MDF<br />
Oui<br />
Autres Détails Deux "thru-put" symétriques XLR pleine-bande pour acheminer<br />
les signaux à des moniteurs de studio actifs.<br />
Dimensions (PLH x L arrière, pouces) 20.5 x 13.75 x 16.75<br />
Dimensions (PLH x L arrière, cm) 52 x 35 x 41<br />
Poids (livres/kg) 44 / 20
<strong>YSS1</strong>
Two<br />
Year<br />
Two Year Warranty<br />
Limited Warranty<br />
<strong>Yorkville</strong>’s two-year conditional warranty on this product is transferable and<br />
does not require registration with <strong>Yorkville</strong> <strong>Sound</strong> or your dealer. If this<br />
product should fail within two years of the original purchase date due to a<br />
manufacturing defect, simply return it to your <strong>Yorkville</strong> Dealer with original<br />
proof of purchase and it will be repaired free of charge.<br />
Freight charges, consequential damages, weather damage, damage as a<br />
result of improper installation, damages due to exposure to extreme humidity,<br />
accident or natural disaster are excluded under the terms of this warranty.<br />
See your <strong>Yorkville</strong> dealer for more details. Warranty valid only in Canada and<br />
the United States<br />
Garantie Limitée<br />
La protection qu’offre cette garantie limitée de deux ans est transférable. Il n’est<br />
pas nécessaire de faire enregistrer votre nom. Si durant les deux années qui<br />
suivent la date d’achat originale, un problème causé par un défaut de fabrication<br />
survient, nous ferons la réparation de l’appareil gratuitement. Retournez<br />
simplement l’appareil défectueux à votre vendeur autorisé avec la preuve d’achat<br />
originale et l’appareil sera réparé gratuitement. Les frais de port et de<br />
manutention ainsi que les dommages indirects ou dommages causés par<br />
désastres naturels, extrême humidité ou mauvaise installation ne sont pas<br />
couverts par cette garantie. Voir votre marchand <strong>Yorkville</strong> pour plus de détails.<br />
Cette garantie n’est valide qu’au Canada et aux États Unis d’Amérique.<br />
REAL Gear.<br />
REAL People.<br />
Canada<br />
Voice: (905) 837-8481<br />
Fax: (905) 837-8746<br />
w w w . y o r k v i l l e . c o m<br />
<strong>Yorkville</strong> <strong>Sound</strong><br />
550 Granite Court<br />
Pickering, Ontario<br />
L1W-3Y8 CANADA<br />
U.S.A.<br />
Voice: (716) 297-2920<br />
Fax: (716) 297-3689<br />
<strong>Yorkville</strong> <strong>Sound</strong> Inc.<br />
4625 Witmer Industrial Estate<br />
Niagara Falls, New York<br />
14305 USA<br />
Printed in Canada
WORLD HEADQUARTERS<br />
CANADA<br />
<strong>Yorkville</strong> <strong>Sound</strong><br />
550 Granite Court<br />
Pickering, Ontario<br />
L1W-3Y8 CANADA<br />
Voice: (905) 837-8481<br />
Fax: (905) 837-8746<br />
U.S.A.<br />
<strong>Yorkville</strong> <strong>Sound</strong> Inc.<br />
4625 Witmer Industrial Estate<br />
Niagara Falls, New York<br />
14305 USA<br />
Voice: (716) 297-2920<br />
Fax: (716) 297-3689


