You also want an ePaper? Increase the reach of your titles
YUMPU automatically turns print PDFs into web optimized ePapers that Google loves.
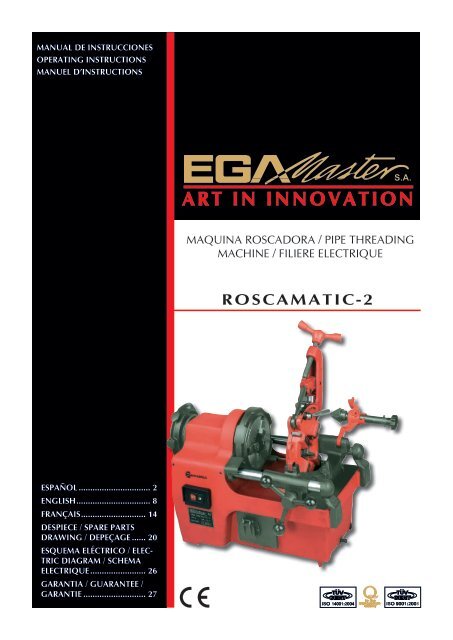
CARACTERÍSTICAS TÉCNICASCapacidad total de la máquina 1/4÷2"Motor con condensador de arranque750W (230V/50Hz) (110V/60Hz) R.P.M.=22Máxima capacidad del plato65 mm.Recorrido del carro140 mm.Lubricación automática por bomba de engranajesDimensiones635x400x440 mm.Peso65 Kg.INSTRUCCIONES DE FUNCIONAMIENTOA) FIJACIÓN DE TUBOSA1. Abrir ambos platos e introducir el tubo a través del plato trasero y el plato delantero (por esteorden).A2. Manteniendo el extremo delantero del tubo con la mano derecha, cerrar ambos platos medianteuna acción de golpe.A1A2B) SOLTAR EL TUBOMediante acción de golpe abrir ambos platos.BB3
CORTE Y ESCARIADO DEL TUBOE) CORTEE1. Tanto la terraja como el escariador se situaran retirados en posición abatidos.E2. Descender el cortatubos en la posición de trabajo, habiendo abierto suficiente para que el cortatubosdescanse en el carro sin que tropiece el tubo a cortar.Trasladar el carro para situar el corte en el lugar deseado del tubo.E3. Realizar el corte presionando mediante el mando en cada una de las vueltas hasta que el tubohaya sido cortado.NOTA: cuide que la presión ejercida por la cuchilla para el corte no sea excesiva, ya que puedecausar la malformación del tubo o rotura de la cuchilla debido a las imperfecciones del tubo.E1 E2 E3F) ESCARIADOF1. Retirar tanto la terraja como el cortatubos a la posición de reposo o abatida.F2. Abatir el escariador a la posición de trabajo hasta que éste descanse en el carro.Avanzar hacia el tubo e inmovilizarla mediante el enclavamiento que dispone el cuerpo delescariador.F3. Avanzar el carro hasta que el escariador haga contacto con el tubo, presionándolo progresivamentehasta que se haya producido el biselado necesario.F1 F2 F35
MANTENIMIENTOG) ENGRASEAsegúrese de que el aceite discurre libremente y que las líneas de conducción no ofrecen obturaciones.Cuide de que el depósito contenga suficiente aceite para que el filtro de aspiración se encuentreen todo momento sumergido y no aspire aire.Si el aceite pierde color y/o se contamina, limpie el depósito y cámbielo.Limpie con frecuencia el depósito para que no existan impurezas que obturen el filtro de aspiración.Mantenga limpio el filtro de aspiración para que realice un correcto aspirado.Esta máquina adopta un aceite especial de corte y refrigerador, pide siempre el del fabricante. Nuncause taladrina. Si se conserva el aceite limpio, se prolongará la vida de la bomba y sus conducciones.H) ESCARIADORMantener en buen estado de corte, reemplazándolo cuando se encuentre dañado.I) CORTATUBOSMantener limpio y engrasado el husillo para que gire suavemente.Cambiar la cuchilla cuando se observa un deterioro y comienza a cortar con dificultad.J) TERRAJAMantener extrema atención a la limpieza de los peines y sustituirlos cuando algún diente seencuentre dañado o roto.K) CABEZALLubricar los cojinetes del eje principal a través de los engrasadores que lleva en la parte superiordel cabezal.L) CARROMantener limpias las barras donde ha de deslizarse el carro, engrasándolas frecuentemente.Engrasar el piñón y cremallera por donde se accióna el movimiento del carro.M) PLATO DE ARRASTREMantenga limpias las garras para que éstas queden oscilantes y no bloqueadas.Reemplace las bocas de agarre cuando su dentadura esté dañada o desgastada, no realizando correctamentela retencion del giro del tubo.N) MOTORTenga en cuenta que este motor dispone de un condensador de arranque que deben mantenerlimpio y seco, sustituyéndolo cuando sea necesario. Este va alojado al lado del motor.G G J6
ENGLISHSAFETY INSTRUCTIONSAttention! Be careful.1. Do not wear loose clothing. They could be caught by moving parts of the machine.2. For outdoor work, rubber gloves must be worn.3. Before starting up the machine, check that the electric cable and switch are in optimumcondition.4. Before carrying out any maintenance work or change of accesories, disconnect the machinefrom the mains.5. Always use the machine´s indicicated accesories because if you don´t, it could lead to risk ofpersonal injury.THREADING MACHINES – 2This is suitable for threading, cutting and reaming ¼÷2" water, electricity and gas pipes. Besideshaving compact structure, simple operation and higt efficiency.Theese threading machines have been widely applied in installing and building industries.EQUIPMENT- 1 die head ½-2"- 2 set of dies (1/2-3/4") y (1-2") BSPT or NPT.- 1 set of legs.- 1 oil can of 5 litres maker’s.- Conexion for foot pedal- 2 screw drivers (5,5x25 and PH-2).- Set of 3 Allen keys (4mm, 5mm and 6mm).IMPORTANTWhen ordering spare parts please indicate its code number and serial number of the machine.8
TECHNICAL SPECIFICATIONSTotal capacity 1/4÷2"Condenser motor750W (230V/50Hz) (110V/60Hz) R.P.M.=22Max capacity of the plate65 mm.Carriage run140 mm.Automatic oilingSize635x400x440 mm.Weight65 Kg.OPERATION GUIDEA) SETTING THE PIPEA1- Open both chucks and insert the pipe through the rear chuck side and the front chuck (in thisorder).A2- Holding the right end of the pipe in your right hand, lock both chucks with a knocking movement.A1A2B) LOOSE THE PIPEA sharp jerk will release the pipe.BB9
C) PREPARATION FOR THREADINGC1- Select the correct die head and dies as required.C2- Insert the die thread lining it up with the positioning ball of the die head, until a “klick” sounds.C3- Once the dies are positioned, turn the lever nut to lock until you get the desired measure.C1 C2 C3D) THREADINGD1- Raise cutter and reamer out of the way.D2- Lower the die head to the carriage in its fixed position.D3- Switch on the machine checking that the oil is flowing correctly from the die head, if not, youcan regulate it by the oil flow adjustment knob on the right bottom part of the carriage.D4- Advance the carriage until the dies engage the pipe pressing it to start the threading and keepingit until 3 threads are produced, releasing after because the thread itself would drive thecarriage during the rest of the threading. When the dies be alocated just at the end of the pipe,turn up die head hand gear.to allow the dies could retire.D5- Stop the machine.D6- Retract carriage to the initial position.D1 D2 D3D4 D5 D610
CUTTING AND REAMINGE) CUTTINGE1- Raise reamer and die head out of the pipe.E2- Lower the cutter to work position and by turning cutter handle open up cutter guide wider thanthe width of the pipe.Move carriage to position where pipe is to be cut.E3- Cut the pipe turning the cutter handle in each turn of the pipe until cut is completed.NOTE: take care that the pressure made by the cutting blade isn’t excessive. Due to pipe defectsit can cause pipe deformity or bursts in the cutting blade.E1 E2 E3F) REAMINGF1- Raise die head and cutter out of the way.F2- Lower reamer to work position onto the carriage.Feed the reamer into the pipe and lock it by the reamer interlock.F3- Move the carriage until the reamer makes contact to the pipe, pressing it until the belbel iscompleted.F1 F2 F311
MAINTENANCEG) LUBRICATIONBe sure oil flows freely and oil lines are free from obstructions.Be sure there is enough oil in the tank so that the strainer is allways submerged and it doesn’tintake air.If oil becomes discolored or contaminated, clean the tank and refill with fresh cutting oil.Clean the tank frequently so that the scraps don’t bung up the strainer.Keep the strainer clean to ensure a proper aspiration.This machine uses a special oil as cooling agent for threading, ask for maker’s oil. Never usecutting water. If the oil system is kept clean, this will prolong the working like of the gear-pump.H) REAMERKeep cutting in good condition and replace it when damaged.I) CUTTERClean and lubricate the feed screw so that turns softly.Change the cutter wheel when damaged and it cuts with difficulty.J) DIE HEADTake great care with the dies cleaning and replace them when damaged or with broken teeth.K) HEAD STOCKLubricate hollow spindle bearings through the two grease nipples in the head stock.L) CARRIAGEClean and lubricate frequently the bars of the carriage.Lubricate the gear and rack that make the carriage drive.M) HAMMER CHUCKKeep the chuck-jaws clean so that they swing and they are not blocked.Replace the chuck-jaws when their theeth is damaged or worn out and the don’t make correctlythe pipe turning retention.N) MOTORTake into account that this motor has a condenser that must be kept clean and dry, replace itwhen necessary. This is placed beside the motor.G G J12
NOTESIMPORTANT!The maker will not take responsibility for damage or malfunction as a result of the machinebeing incorrectly used or, applied for a purpose for which it was not intended.For ordering spare parts, please refer to the Spare Parts Drawing and note the needed number.According to Waste Electrical and Electronic Equipment directive (WEEE), these ones mustbe collected and arranged separately. If you have to throw them out, please, do not use the usualrubbish. Please, contact your distributor for free recycling.GUARANTEEThe maker guarantees to the machine owner 12 months against any manifacture defect.This guaranteee do not cover the parts wich are consumables.Note: to apply the guarantee its necesary to send the “GUARANTEE CERTIFICATE” duly filledwithin one week after purchased the machine to the maker.13
FRANÇAISINSTRUCTIONS DE SECURITEAttention! Soyez prudent.1. N´utilisez pas des vêtements amples Ils pourraient être entrainés dans les parties mobiles de lamachine.2. Utilisez des gants de travail en caoutchouc, lors de travaux en extérieur.3. Avant de démarrer la machine, vérifiez le bon état du câble d´alimentation électrique et del´interrupteur.4. Déconnectez la machine du secteur, avant toute intervention d´entretien de la machine ou dechangement d´accesoire.5. N´utilisez que des accesoires destinés exactement á la machine, afin d´eviter tout risque deblessure corporelle.MACHINE A FILETER – 2Filière éauipée pour le filtage, la coupe et l’alésage de tubes fers de ¼÷2" pour l’eau, le gaz,etc …Machine compacte, maniable et d’une grande efficacité.Ces machines ont été utilisées par extension pour l’installation et la construction industrielles.EQUIPEMENT- 1 tête de filière ½-2"- 2 sets de peignes (1/2-3/4") y (1-2") BSPT ou NPT.- 1 set de pieds.- 1 bidon de 5 litres d’huile du fabricant.- Branchement de pédale- 2 tournevis (5,5x25 et PH-2).- Set de clés héxagonales (4mm, 5mm et 6mm).IMPORTANTPour la commande de piéces détachées, indiquer la référence et le numéro de série de la machine.14
CARACTERISTIQUES TECHNIQUESCapacité totale 1/4÷2"Condenser motor750W (230V/50Hz) (110V/60Hz) R.P.M.=22Capacité max. du plateau65 mm.Course du plateau140 mm.Graissage autoDimension635x400x440 mm.Poids65 Kg.GUIDE D’UTILISATIONA) FIXATION DES TUBESA1- Ouvrir les deux plateaux et introduire le tube à travers le plateau arrière et le plateau de devant(dans cet ordre).A2- En maintenant le bout avant du tube avec la main droite, fermer le plateau avant, fermer lesdeux plateaux en actionnant d’un coup.A1A2B) SORTIR LE TUYAUEn agissant d’un coup sur le disque extérieur.BB15
C) PREPARATION POUR FILETERC1- Choisir suivant le cas les têtes ou les peignes à utiliser.C2- Introduire les peignes sur la filière en suivant la numérotation, en faisant coïncider l’empreintedu peigne avec la boule de positionnement de la filière, jusqu’à entendre un “clic”.C3- Une fois positionnés les 4 peignes, tourner la manette en sens de serrage, jusqu’à obtenir lamesure désirée, en la fixant dans cette position.C1 C2 C3D) FILETAGED1- Le coupe-tube et l’alésoir doivent être en position de retrait.D2- La tête de filière doit être reposée sur le chariot, dans son emplacement.D3- Démarrer la machine , en vérifiant que l’huile coule correctement dans la filière, en régulant ledébit ,dans le cas contraire, à l’aide de la manette située sur la partie inférieure droite du chariot.D4- Avancer le chariot, jusqu’à ce que les peignes soient en contact avec le tube à fileter, en appuyant pourinitier les premiers files, après quoi les peignes guideront eux même le tube, jusqu’à la fin. Quand lefiletage est terminé, relever la filière à l’aide du levier pour pour que les peignes soient libérés.D5- Stopper la machine.D6- Remettre le chariot à son positionnement initial pour répéter l’opération.D1 D2 D3D4 D5 D616
COUPE ET ALESAGE DU TUBEE) COUPEE1- La filière et l’alésoir devront être en position de retrait.E2- Descendre le coupe-tube en position de marche, en ouvrant suffisemment le diamètre pouréviter de détériorer le tube.Faire avancer le chariot jusqu’au point de coupe désiré.E3- Réaliser la coupe, en appuyant sur le levier, jusqu’à la coupe totale.NOTA: attention à ce que la pression exercée par la lame pour la coupe ne soit pas excessive car celapourrait causer une malformation du tube ou bien la casse de la lame du aux inperfections du tube.E1 E2 E3F) ALESAGEF1- Retirer aussi bien la tête de filière que le coupe tube (position arrière).F2- Rabattre l’alésoir en position de travail jusqu’à qu’il soit sur le chariot.Avancer jusqu’au tube, l’immobiliser à l’aide d’une fixation située sur le corps de l’alésoir.F3- Avancer le chariot jusqu au contact de l’alésoir avec le tube, appuyer jusqu’à obtenir le chanfreindésiré.F1 F2 F317
MAINTENANCEG) LUBRIFICATIONS’assurer que l’huile coule librement et que les files produits ne fassent pas obstacle.Faire attention que la cuve d’huile soit assez remplie et que le filtre d’aspiration d’huile soit continuellementimmergé et n’aspire pas d’air.Si l’huile perd de sa couleur et/ou se contamine, il faut laver la cuve et changer l’huile.Laver souvent la cuve pour éliminer les impuretés et éviter qu’elles obstruent le filtre d’aspirarion.Garder le filtre propre, pour optimiser l’aspiration.Cette machine utilise une huile spéciale de coupe et de refroidissement, demandez toujourscelle du fabricant. Ne jamais utiliser de liquide de refroidissement. En gardant l’huile propre, vousprolongerez la vie de la pompe et des conduits.H) ALESOIRMaintenir en bon état, en le remplaçant quand il est détérioré.I) COUPE-TUBEMaintenir propre et graissée la broche pour une rotation douce.Changer le couteau quand on observe une détérioration et quand il commence à couper mal.J) FILIEREMaintenir les peignes très propres et les changer quand des dents sont cassées.K) SUPPORTLubrifier les coussinets de l’axe principal à l’aide des graisseurs de la partie supérieure du support.L) CHARIOTTenir propre les rails du chariot.Graisser le pignon et la crémaillère qui actionnent le mouvement du chariot.M) PLATEAU D’AMARRAGEGarder propre les fixations pour qu’elles restent oscillantes et non bloquées.Remplacer les bouches de fixation quand la denture est entamée ou détériorée, ne pouvant réalisercorrectement la rétention du tour de tube.N) MOTEURA noter que ce moteur dispose d’un condensateur de démarrage qui doit être maintenu propre etsec, et remplacé dés que nécessaire. Celui-ci est placé à côté du moteur.G G J18
NOTESIMPORTANT!Le fabricant ne se responsabilise pas des détériorations ou du mauvais fonctionnement de lamachine dans le cas d’une mauvaise utilisation ou suite à des usages pour lesquels elle n’est pasconcue.Pour commander les pièces de rechange, regarder le descriptif et le numéro de pièce désiré.Selon la directive des déchets d’appareils électriques et électroniques (DEEE), ces derniersdevront se ramasser et suivre un traitement séparé. Si dans l’l’avenir vous devez vous débarrasserde ce produit, ne le faites pas avec le reste d’ordures ménagères. Merci de vous adresser à votredistributeur pour procéder à son recyclage gratuit si possibleGARANTIELe fabricant donne une garantie de 12 mois à l’acquéreur de cette machine, pour les pièces avecun défaut de fabrication.La garantie ne s’applique pas aux pièces d’usure normale.Note : pour obtenir la validité de la garantie, il est obligatoire de compléter et de retourner aufabricant, le document ‘’CERTIFICAT DE GARANTIE’’ dans les 7 jours d’acquisition de la machine.19
DESPIECE / SPARE PARTS DRAWING / DEPEÇAGECABEZAL / HEAD STOCK / SUPPORTDENOMINACION DESCRIPTION DESCRIPTION ITEM COD CANT / QTY / QTÉVOLANTE DEL CARROCHAVETAENGRANAJECASQUILLOTORNILLO M.8x8PROTECTORINTERRUPTORBANDEJACUERPOTAPATORNILLO M.5x10TORNILLO M.8x16CASQUILLOTORNILLO M.4x10REJILLATAPON DE VACIADOCONJUNTO VÁLVULATUBO ACEITE METALICOCARROBARRA GUIA CARROSOPORTE BARRASTORNILLOS M.6x20PASADOR Ø6x30PATASPEDALSTEERFLAT KEYGEARRINGSCREW M.8x8PROTECTORSWITCHCHIP RECEPTABLEBODYPLATESCREW M.5x10SCREW M.8x16RINGSCREW M.4x10GRILLEDRAIN PLUGVALVE SETOIL PIPECARRIAGECARRIAGE GUIDING BARBAR SUPPORTSCREW M.6x10PIN M.6x30LEGSPEDALVOLANTCLAVETTEENGRENAGEBAGUEVIS M.8x8PROTECTIONINTERRUPTEURPLATEAU DU FILTRECORPSCOUVERCLEVIS M.5x10VIS M.8x16BAGUEVIS M.4x10COUVERCLE D’AERATIONBOUCHON DE VIDANGESET DE SOUPAPESCONDUITE D’HUILECHARIOTGUIDE DE CHARIOTBARRES SUPPORTVIS M.6x10CLAVETTE Ø6x30PIEDSPEDALE123456789101112131415161718192021222324252627282982100821018210282103821048210582106821078210882109821108211182112821138211482249821168211782118821198212082121821228212381603111111111124241111122443(Optional)20
CAJA REDUCTORA / GEAR BOX / BOITE D’ENGRENAGESDENOMINACION DESCRIPTION DESCRIPTION ITEM COD CANT / QTY / QTÉTORNILLO M.4x12ARANDELAAPOYO DE RODAMIENTORODAMIENTO 204CASQUILLOENGRANAJECIRCLIP – 20RODAMIENTO – 202TAPA CAJA REDUCTORAARANDELATORNILLO M.5x25CHAVETACUERPO CAJA REDUCTORAARANDELATORNILLO M.8x20EJE ENGRANAJECHAVETAEJE ENGRANAJE SALIDARODAMIENTO 102ENGRANAJETAPACHAVETAENGRANAJE MOTORENGRANAJEENGRANAJECONJUNTO BOMBATORNILLO M.6x20ARANDELAMOTOR 230 VMOTOR 110 VCONJUNTO CAJA REDUCTORACONDENSADORSCREW M.4x12WASHERBEARING COVERBEARING 204RINGGEARCIRCLP – 20BEARING – 202LOWER HOUSINGWASHERSCREW M.5x25FLAT KEYUPPER HOUSINGWASHERSCREW M.8x20LOW GEAR AXLEFLAT KEYOUTPUT GEAR AXLEBEARING 102GEARCOVERFLAT KEYMOTOR GEARGEARGEAROIL PUMPSCREW M.6x20WASHERMOTOR 230 VMOTOR 110 VGEAR BOX SETCONDENSERVIS M.4x12RONDELLESUPPORT DE ROULEMENTROULEMENT 204BAGUEENGRENAGECIRCLP – 20ROULEMENT – 202COUVERCLE DE BOITERONDELLEVIS M.5x25CLAVETTEBLOC DE BOITERONDELLEVIS M.8x20AXE D’ENGRENAGECLAVETTEAXE D’ENGRENAGE DE SORTIEROULEMENT 102ENGRENAGECOUVERCLECLAVETTEMOTEUR D’ENGRENAGEENGRENAGEENGRENAGEPOMPE À HUILEVIS M.6x20RONDELLEMOTEUR 220 VMOTEUR 110 VBLOC DE CAISSE RÉDUCTRICECONDENSATEUR123456789101112131415161718192021222324252627288214282143821448214582146821478214882149821508215182152821538215482155821568215782158821598216082161821628216382164821658216682167821688216982170821718217282173331111131882144111211111113311121
PLATO DELANTERO Y TRASERO / FRONT AND REAR CHUCK / PLATEAU AVANT ET ARRIEREDENOMINACION DESCRIPTION DESCRIPTION ITEM COD CANT / QTY / QTÉTORNILLO M.6x55CASQUILLO DE GOLPEPLATO DELANTEROTORNILLO M.6x20PASADOR Ø8x25TORNILLO M.6x15ENGRANAJE PLATODELANTEROJGO.3 GARRAS PLATOTRASEROTORNILLO M.6x15CASQUILLO PLATOTRASEROCIRCLIP – 130CUERPO PLATODELANTEROPUNTERAMUELLETORNILLO M.JGO. 3 GARRASPLATO DELANTEROCAÑACUERPO PLATOTRASEROTAPONJGO. 3 PORTA GARRASCASQUILLO PLATODELANTEROCONJUNTO PLATODELANTEROCONJUNTO PLATOTRASEROSCREW M.6x55HAMMER CHUCKSCREW M.6x20PIN Ø8x25SCREW M.6x15MASTER SHAFT GEARREAR JAW SETSCREW M.6x15REAR CHUCK SCROLL CAMCIRCLIP – 130FRONT CHUCK PLATEROLL PINSPRINGSCREW M.FRONT JAW SETHOLLOWS SPINDLEREAR CHUCK PLATECAPFRONT JAW CARRIERS SETFRONT CHUCK SCROLLFRONT CHUCK SETREAR CHUCK SETVIS M.6x55DISQUE CHOC AVANTVIS M.6x20CLAVETTE Ø8x25VIS M.6x15ENGRENAGEJEU DE 3 FIXATIONSPLATEAU ArrièreVIS M.6x15BAGUE PLATEAUARRIERECIRCLIP – 130CORPS DE PLATEAUAVANTPOINTEAURESSORTVIS M.JEU DE MORSBAGUECORPS PLATEAUARRIEREBOUCHONJEU DE 3 PORTES MORSDISQUE PLATEAUAVANTENSEMBLE PLATEAUAVANTENSEMBLE PLATEAUArrière1234567891011121314151617181920821778217882179821808218182182821838218482185821868218782188821898219082191821928219382194821978219882195821966121211311133331131122
TERRAJA ½-2” / ½-2” DIE HEAD / ½-2” SUPPORT DE PEIGNESDENOMINACION DESCRIPTION DESCRIPTION ITEM COD CANT / QTY / QTÉTORNILLO M.5x20CASQUILLOPASADOR Ø3x8DISCOCUERPO DE FIJACIÓNMANILLA FIJACIÓNARANDELAMANILLA APERTURASOPORTE EXCÉNTRICOTORNILLO M.SOPORTE PORTA PEINESSOPORTE DE GIROINDICE ROSCAS(BSPT Y NPT)CONJUNTO TERRAJA ½-2"SCREW M.5x20BACK RINGPIN Ø3x8PLATECURVE PLATEHANDLEWASHERLOCKING GRIPECCENTRIC CHUNKSCREW M.DIE PLATESUPPORT SHAFTINDEX FOR DIE HEAD(BSPT & NPT)½-2" DIE HEAD SETVIS M.5x20BAGUEAXE Ø3x8DISQUEBLOC DE FIXATIONMANETTE DE BLOCAGERONDELLEMANETTE D’OUVERTURESUPPORT EXCENTRIQUEVIS M.SUPPORT DE PEIGNESSUPPORT PIVOTANTINDICE DE FILETAGE(BSPT &NPT)TETE DE FILIERE ½-2"123456789101112138212782128821298213082131821328213382134821358213682137821388212681600418111111111123
CORTATUBOS / PIPE CUTTER / COUPE TUBEDENOMINACION DESCRIPTION DESCRIPTION ITEM COD CANT / QTY / QTÉCUERPOBRAZO PORTA CUCHILLATAPÓN DE EMPUJEEJE CUCHILLARODILLOSEJE RODILLOSMANILLA – HUSILLOMUELLE DEL BRAZOPASADOR DEL SOPORTESOPORTEPASADORPASADORCUCHILLAPASADOR 2 X 30PASADOR 2 X 20CONJUNTO CORTATUBOSBODYCARRIAGEPUSHING DISKAXLE PIN OF CUTTERROLLERSAXLE PIN OF ROLLERSHANDLE – SPINDLETORSIONAL SPRINGPIN SUPPORTSUPPORTPINPINCUTTING WHEELPIN 2 X 30PIN 2 X 20PIPE CUTTER SETCORPSPORTE MOLETTEPASTILLE DE POIGNÉEAXE DE MOLETTEROUESEXE DE ROUESMANETTEDE VERINRESSORT DE BRASCLAVETTE DU SUPPORTSUPPORTCLAVETTEPINCUTTING WHEELPIN 2 X 30PIN 2 X 20CUTTER SET1234567891011121314158221282213822148221582216822178221882219822208222182222822236410482224822258160111112211111111224
ESCARIADOR / REAMER / ALESOIRDENOMINACION DESCRIPTION DESCRIPTION ITEM COD CANT / QTY / QTÉPOMOPASADOR Ø8x35EJE DE GIROCUERPOMUELLEBOLA Ø8CABEZA ESCARIADORPASADOR ELÁSTICOØ8x35EJE ESCARIADORCONJUNTO ESCARIADORKNOBPIN Ø8x35AXLE PINBODYSPRINGSTELL BALL Ø8REAMER HEADFLEXIBLE PINØ8x35REAMER AXLEREAMER SETPOMMEAUCLAVETTE Ø8x35AXE DE PIVOTCORPSRESSORTBOULE Ø8ALESOIRCLAVETTE ELASTIQUEØ8x35AXE D’ALESOIRENSEMBLE ALÉSOIR1234567898220082201822028220382204822058220682207822088160211111111125
ESQUEMA ELÉCTRICO / ELECTRIC DIAGRAM / SCHEMA ELECTRIQUEALMACENAJESTORAGESTOCKAGEGuardar en un lugar seco para evitar humedades y descargas eléctricas.Store the threader in a dry place to avoid humidity and electric shock.Guarder dans un endroit sec pour eviter l’humidite et les décharges electriques.26
CERTIFICADO DE GARANTIAGUARANTEE CERTIFICATECERTIFICAT DE GARANTIEARTICULO / ITEM / ARTICLE:.....................................................................................................................Nº DE SERIE / SERIE Nº / Nº SERIE:............................................................................................................DISTRIBUIDOR / DISTRIBUTOR / DISTRIBUTEUR:....................................................................................PAIS / COUNTRY / PAYS:..............................................................................TEL.:....................................FECHA DE VENTA / SALE DATE / DATE VENTE:.........................................................................................NOMBRE DEL COMPRADOR / BUYER NAME / NOM DE L’ACHETEUR:...................................................TEL. COMPRADOR / BUYER TEL. / TEL. DE L’ACHETEUR:.........................................................................EGA MASTER GARANTIZA AL COMPRADOR DE ESTA MAQUINA LA GARANTIA TOTAL (DURANTE 12 MESES), DE LAS PIEZAS CON DEFECTOS DE FABRICACION. ESTAGARANTIA NO CUBRE AQUELLAS PIEZAS QUE POR SU USO NORMAL TIENEN UN DESGASTE. PARA OBTENER LA VALIDEZ DE LA GARANTIA , ES ABSOLUTAMENTEIMPRESCINDIBLE QUE COMPLETE Y REMITA ESTE DOCUMENTO A EGA MASTER , DENTRO DE LOS SIETE DIAS A PARTIR DE LA FECHA DE COMPRA.EGA MASTER GUARANTEES TO THE BUYER OF THIS MACHINE THE TOTAL WARRANTY (DURING 12 MONTHS), OF THE PIECES WITH MANUFACTURING FAULTS.THIS GUARANTEE DOES NOT COVER THOSE PIECES WORN OUT DUE TO A NORMAL USE. IN ORDER TO OBTAIN THE VALIDITY OF THIS WARRANTY , IT IS ABSOLUTE-LY NECESSARY TO FULFILL THIS DOCUMENT AND RESEND IT TO EGA MASTER WITHIN 7 DAYS FROM SALE DATE.EGA MASTER GARANTIE A L’ACHETEUR DE CETTE MACHINE LA GARANTIE TOTALE (PENDANT 12 MOIS) DES PIECES AVEC DEFAUTS DE FABRICATION. CETTE GARANTIENE COUVRE PAS LES PIECES QUE PAR UN USAGE NORMAL, SOIENT DETERIOREES. POUR OBTENIR LA VALIDITE DE LA GARANTIE, IL EST ABSOLUMENT IMPERATIFCOMPLETER ET ENVOYER CE DOCUMENT EGA MASTER, DANS UN DELAI DE 7 JOURS A PARTIR DE LA DATE D’ACHAT.SELLO / STAMP / CACHETEJEMPLAR PARA EGA MASTER / COPY FOR EGA MASTER / EXEMPLAIRE POUR EGA MASTERCERTIFICADO DE GARANTIAGUARANTEE CERTIFICATECERTIFICAT DE GARANTIEARTICULO / ITEM / ARTICLE:.....................................................................................................................Nº DE SERIE / SERIE Nº / Nº SERIE:............................................................................................................DISTRIBUIDOR / DISTRIBUTOR / DISTRIBUTEUR:....................................................................................PAIS / COUNTRY / PAYS:..............................................................................TEL.:....................................FECHA DE VENTA / SALE DATE / DATE VENTE:.........................................................................................NOMBRE DEL COMPRADOR / BUYER NAME / NOM DE L’ACHETEUR:...................................................TEL. COMPRADOR / BUYER TEL. / TEL. DE L’ACHETEUR:.........................................................................EGA MASTER GARANTIZA AL COMPRADOR DE ESTA MAQUINA LA GARANTIA TOTAL (DURANTE 12 MESES), DE LAS PIEZAS CON DEFECTOS DE FABRICACION. ESTAGARANTIA NO CUBRE AQUELLAS PIEZAS QUE POR SU USO NORMAL TIENEN UN DESGASTE. PARA OBTENER LA VALIDEZ DE LA GARANTIA , ES ABSOLUTAMENTEIMPRESCINDIBLE QUE COMPLETE Y REMITA ESTE DOCUMENTO A EGA MASTER , DENTRO DE LOS SIETE DIAS A PARTIR DE LA FECHA DE COMPRA.EGA MASTER GUARANTEES TO THE BUYER OF THIS MACHINE THE TOTAL WARRANTY (DURING 12 MONTHS), OF THE PIECES WITH MANUFACTURING FAULTS.THIS GUARANTEE DOES NOT COVER THOSE PIECES WORN OUT DUE TO A NORMAL USE. IN ORDER TO OBTAIN THE VALIDITY OF THIS WARRANTY , IT IS ABSOLUTE-LY NECESSARY TO FULFILL THIS DOCUMENT AND RESEND IT TO EGA MASTER WITHIN 7 DAYS FROM SALE DATE.EGA MASTER GARANTIE A L’ACHETEUR DE CETTE MACHINE LA GARANTIE TOTALE (PENDANT 12 MOIS) DES PIECES AVEC DEFAUTS DE FABRICATION. CETTE GARANTIENE COUVRE PAS LES PIECES QUE PAR UN USAGE NORMAL, SOIENT DETERIOREES. POUR OBTENIR LA VALIDITE DE LA GARANTIE, IL EST ABSOLUMENT IMPERATIFCOMPLETER ET ENVOYER CE DOCUMENT EGA MASTER, DANS UN DELAI DE 7 JOURS A PARTIR DE LA DATE D’ACHAT.SELLO / STAMP / CACHETEJEMPLAR PARA EL CLIENTE / COPY FOR THE CUSTOMER / EXEMPLAIRE POUR LE CLIENT
C/ ZORROLLETA 11, POL. IND. JUNDIZ01015 VITORIA, SPAIN P.O.B. APTDO. 5005TEL. 34 - 945 290 001 FAX. 34 - 945 290 141master@egamaster.comwww.egamaster.com


