LIGHT UNIT - Exo Terra
LIGHT UNIT - Exo Terra
LIGHT UNIT - Exo Terra
- No tags were found...

Create successful ePaper yourself
Turn your PDF publications into a flip-book with our unique Google optimized e-Paper software.
<strong>LIGHT</strong> <strong>UNIT</strong>Operating InstructionsMode d’emploiGebrauchsanleitungManual de InstruccionesManuale d’istruzioniGebruiksaanwijzingART.# PT-2235-2237-2239
INDEXENGLISH 3FRANÇAIS 9DEUTSCH 16ESPAÑOL 22ITALIANO 28NEDERLANDS 34<strong>LIGHT</strong> <strong>UNIT</strong>ART.# PT-2235ART.# PT-2237ART.# PT-2239ACUS
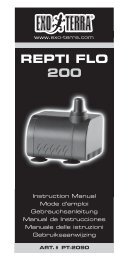
<strong>LIGHT</strong> <strong>UNIT</strong>OperatingInstructionsENGLISHElectronic <strong>Terra</strong>riumLamp Controller• Fits two fluorescent bulbs• Ideal for use with <strong>Exo</strong> <strong>Terra</strong> Repti Gloand other fluorescent bulbs• More energy efficient thanconventional ballasts or light strips• No flickering; less stressful for reptilesand amphibians• Long end-cap leads• On/Off Switch (A)AVAILABLE IN 3 SIZES:PT-2235 (max. 20 Watt)PT-2237 (max. 30 Watt)PT-2239 (max. 40 Watt)INSTRUCTIONS PERTAINING TO A RISK OF FIRE, ELECTRICSHOCK, OR INJURY TO PERSONSIMPORTANT SAFETY INSTRUCTIONSWARNING: To guard against injury, basic safety precautions shouldbe observed when handling the <strong>Exo</strong> <strong>Terra</strong>® Light Unit, includingthe following.1. READ AND FOLLOW ALL SAFETY INSTRUCTIONSand all important notices on the appliance before using. Failureto do so may result in damage to the appliance.2. WARNING: This appliance is NOT waterproof and MUST beprotected from coming in contact with water.3. DANGER – To avoid possible electrical shock, special care shouldbe taken. For each of the following situations, do not attemptrepairs yourself; return the appliance to an authorized servicefacility for service or discard the appliance.A. If the appliance falls into the water, DON’T reach for it! Firstunplug it and then retrieve it. If the electrical components ofthe appliance get wet, unplug the appliance immediately.B. Carefully examine the appliance after installation. It shouldnot be plugged in if there is water on parts not intended tobe wet.C. Do not operate any appliance if it has a damaged electricalFRANÇAISDEUTSCHESPAGÑOLITALIANONEDERLANDS
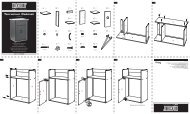
cord or plug, or if it is malfunctioning or if it is dropped ordamaged in any manner. The power cord of this appliancecannot be replaced: if the cord is damaged, the applianceshould be discarded. Never cut the cord.D. To avoid the possibility of the appliance plug or electricaloutlet getting wet,position the applianceto one side of a wallmounted outlet to preventwater from dripping ontothe outlet or plug.A “drip-loop” should bearranged. The “drip-loop”is that part of the cordbelow the level of theunit and the outlet,or the connector if anextension cord is used,to prevent water fromtraveling along the cordand coming in contactwith the outlet or lightunit. If the plug or outletdoes get wet, DON’Tunplug the electrical cord.Disconnect the fuse orcircuit breaker thatsupplies power to the appliance, then unplug and examine forpresence of water in the outlet.4. To reduce the risk of injury, close supervision is necessary whenthe appliance is used by or near children.5. To avoid injury, do not contact hot parts.6. Always unplug an appliance from an outlet when not in use,before putting on or taking off parts, and before cleaning. Neveryank cord to pull plug from outlet. Grasp the plug and pull todisconnect.7. Do not use the appliance for other than intended use. The useof attachments not recommended or sold by the appliancemanufacturer may cause an unsafe condition.8. Do not install or store the appliance where it will be exposed toweather or to temperatures below freezing.9. Do not install the light unit housing near filter outputs or exposeit to water spray or humidity. Do not submerge in water. Ensuresufficient air space around the heat vents. The safety of thisappliance is guaranteed only provided that the bulbs, adaptors,and light unit is properly installed.10. If an extension cord is necessary, a cord with a proper ratingshould be used. A cord rated for less amperes or watts than theappliance rating may overheat. Care should be taken to arrangethe cord so that it will not be tripped over or pulled.11. WARNING - For North American market only: This appliance hasa polarized plug (one blade is wider than the other). As a safetyfeature, this plug will fit in a polarized outlet only one way. Ifthe plug does not fit fully in the outlet, reverse the plug. If it stilldoes not fit, contact a qualified electrician. Never use with anextension cord unless plug can be fully inserted. Do not attemptto defeat this safety feature.SAVE THESE INSTRUCTIONS FOR FUTURE REFERENCE.
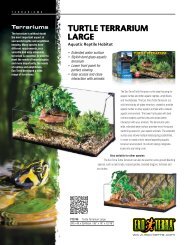
Only the faithful observation of these installation, electrical andmaintenance guidelines will ensure the safe and efficient use ofthis appliance.<strong>Exo</strong> <strong>Terra</strong>® Light Unit Installation Instructions -European/CE MarketRecommended: For use with T8 only (25 mm / 1” diameter)fluorescent bulbs.ENGLISHFollow these instructions whenever installing T8 fluorescenttubes.• This equipment is FOR INDOOR USE ONLY.• Warning: Disconnect the plug of this light unit, and any otherelectrical equipment, used for the terrarium, paludarium oraqua-terrarium before placing your hands in the water; and/orperforming any maintenance of any kind.• Warning: Whenever installing, removing or changingfluorescent tubes or maintaining, installing or removing the <strong>Exo</strong><strong>Terra</strong>® Light Unit or any other equipment, always ensure that itis unplugged.1. The light unit housing provides a slot for suspending the housingon a securely fastened screw head. The light unit housingshould be located in a properly ventilated area, away fromhumidity,moisture,flammableobjects,and fragilesurfaces.The light unithousing isequipped withventilationslots to allowheat to escape,do not obstructthese ventsin any wayand ensurethat any dustor debris ispromptlyremoved.2. Install fluorescent bulbs of the correct diameter and wattage byinserting the bulb into the end cap so that the pins align with theinternal sockets. Push while inserting the bulb into the end capto ensure a positive connection.3. Once the fluorescent bulbs have been inserted into the endcaps, position the bulbs on top of the metal screen cover of theterrarium (not over the glass as UVB light does not penetrateglass). Ensure that the surface of the screen cover is flat andeven so that the bulbs will not roll. Ensure that the bulbs arepositioned over the top metal screen portion of the terrarium andNOT over any glass, plastic parts, or other flammable material.Failure to do so could result in a possible fire hazard.4. Keep unit out of reach of children. Keep unit away from curtainsor other flammable objects.FRANÇAISDEUTSCHESPAGÑOLITALIANONEDERLANDS
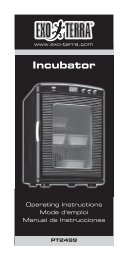
<strong>Exo</strong> <strong>Terra</strong>® Light Unit Installation Instructions -North American MarketRecommended: For use with T8 (25 mm / 1” diameter) orT10 (32 mm / 1 1/4” diameter) fluorescent bulbs.Follow these instructions whenever installing T8 / T10fluorescent tubes.• This equipment is FOR INDOOR USE ONLY.• Warning: Disconnect the plug of this light unit, and any otherelectrical equipment, used for the terrarium, paludarium oraqua-terrarium before placing your hands in the water; and/orperforming any maintenance of any kind.• Warning: Whenever installing, removing or changingfluorescent tubes or maintaining, installing or removing the<strong>Exo</strong> <strong>Terra</strong>® Light Unit or any other equipment, always ensurethat it is unplugged.1. The light unit housing provides a slot for suspending the housingon a securely fastened screw head. The light unit housingshould be located in a properly ventilated area, away fromhumidity,moisture,flammableobjects,and fragilesurfaces.The light unithousing isequipped withventilationslots to allowheat to escape,do not obstructthese vents inany way andensure that anydust or debrisis promptlyremoved.2. To install fluorescent bulbs of the correct diameter and wattage,first determine which bulb diameter you wish to install (T8 orT10). For T8 bulbs, adaptors are supplied for this purpose. Theadaptors should be snapped into the end caps before installingthe bulbs. T10 bulbs fit directly into the end caps supplied withthis unit.
Note: For safety purposes it is recommended that either two T8bulbs or two T10 Bulbs be installed. Do not install a combinationof T8 and T10 bulbs.3. Insert the bulb into the end cap so that the pins align with theinternal sockets. Push while inserting the bulb into the end capto ensure a positive connection.4. Once the fluorescent bulbs have been inserted into the endcaps, position the bulbs on top of the metal screen cover of theterrarium (not over the glass as UVB light does not penetrateglass). Ensure that the surface of the screen cover is flat andeven so that the bulbs will not roll. Ensure that the bulbs arepositioned over the top metal screen portion of the terrarium andNOT over any glass, plastic parts, or other flammable material.Failure to do so could result in a possible fire hazard.5. Keep unit out of reach of children. Keep unit away from curtainsor other flammable objects.Maintenance:Warning:• Disconnect the plug of this light unit, and any otherelectrical equipment, used for the terrarium, paludarium oraqua-terrarium before placing your hands in the water; and/orperforming any maintenance of any kind.• Whenever installing, removing or changing fluorescent tubesor maintaining, installing or removing the <strong>Exo</strong> <strong>Terra</strong>® LightUnit or any other equipment, always ensure that it isunplugged.• The electrical supply cords of this lighting system cannot bereplaced. If any of the cords are damaged the entire unitshould be discardedCleaning the Unit:1. Do not place the light unit housing near filter outputs or expose itto water spray or humidity. Do not submerge in water.2. Ensure that the heat vents are kept free and clear of anyobstruction, dust and debris. Use a cloth to wipe away anydebris that may obstruct the heat vents.3. No special maintenance is required for the <strong>Exo</strong> <strong>Terra</strong>® LightUnit, other than periodic cleaning with a cloth (never use harshchemical products or detergents). To remove calcareousdeposits (bulb sockets), it is recommended to use a mild acidsuch as vinegar, followed by a thorough wipe down with a dampcloth to remove any residues.4. It is strongly recommended to always follow all the precautionsand procedures outlined in both the Important Safeguards andInstallation Instructions sections.NEDERLANDS ITALIANO ESPAGÑOL DEUTSCH FRANÇAIS ENGLISH
GUARANTEEThis product is guaranteed for defects in material or workmanshipfor a period of 2 years from date of purchase. The guarantee is validwith proof of purchase only. The guarantee is limited to repair orreplacement of the unit only and does not cover consequential lossor damage of or to animate or inanimate objects. This guaranteeis valid only under normal operating conditions for which the unitis intended. It excludes any damage caused by unreasonable use,improper installation, negligence, tampering, or abuse of the unit.For guarantee service or spare parts contact your local pet dealer orwrite to the representative in your country. This guarantee does notaffect your statutory rights.ServiceIf you have any problem or question about the operation of thisproduct, please let us try to help you before you return the productto your dealer. Most problems can be handled promptly with aphone call. When you call (e-mail or write), please have all relevantinformation such as model number and/or part numbers available,as well as the nature of the problem. Call our Customer ServiceDepartment:Canada Only:Toll Free Number 1-800-555HAGEN (1-800-554-2436)Between 9:00 am and 4:30 pm (Eastern Time)U.S.A. Only:Toll Free Number 1-800-724-2436Between 9:00 am and 4:00 pm (Eastern Time)U.K. Only:Helpline Number 01977 556622Between 9:00 am and 5:00 pmFor Authorized Warranty Repair Service:Return unit with dated receipt and reason for return to:Canada:Hagen Industries, 3235 Guenette, Montreal, QC H4S 1N2Rolf C. Hagen Inc., 8770-24th Street, Edmonton AB T6P 1X8U.S.A.:Rolf C. Hagen (U.S.A.) Corp.50 Hampden Road, Mansfield, MA. 02048-9107U.K.:Rolf C. Hagen (UK) Ltd.California Dr. Whitwood Industrial EstateCastleford, West Yorkshire WF10 5QHFor general information on our whole product range,explore our websites at: www.exo-terra.com or www.hagen.com.Distributed by:Canada: Rolf C. Hagen Inc., Montreal, QC H9X 0A2U.S.A.: Rolf C. Hagen (U.S.A.) Corp., Mansfield MA. 02048U.K.: Rolf C. Hagen (U.K.) Ltd. Castleford, W. Yorkshire WF10 5QH
Système d’éclairageMode d’emploiENGLISHRégulateur d’éclairageélectronique pour terrarium• Pour deux tubes fluorescents• Idéal pour être utilisé avec les tubesfluorescents Repti Glo <strong>Exo</strong> <strong>Terra</strong> et autres• Plus éconergétique que les ballastsconventionnels ou que les bandes d’éclairage• Ne clignote pas, réduisant ainsi le stress desreptiles et des amphibiens• Bouchons de fermeture munis de longscordons d’alimentation• Interrupteur marche/arrêt (A)OFFERT EN TROIS GRANDEURS :PT-2235 (20 watts max.)PT-2237 (30 watts max.)PT-2239 (40 watts max.)INSTRUCTIONS RELATIVES À UN RISQUE D’INCENDIE, À UN CHOCÉLECTRIQUE OU À DES BLESSURES AUX PERSONNESMESURES DE SÉCURITÉ IMPORTANTESAVERTISSEMENT : Pour éviter toute blessure, il faut observer desprécautions élémentaires de sécurité lors de la manipulation dusystème d’éclairage <strong>Exo</strong> <strong>Terra</strong>®, notamment les suivantes :1. LIRE ET RESPECTER TOUTES LES CONSIGNES DE SÉCURITÉavant usage, ainsi que tous les avis importants apparaissant surl’appareil. Tout manquement à ces précautions pourrait entraînerdes dommages à l’appareil.2. MISE EN GARDE : Cet appareil N’EST PAS étanche et DOIT êtreprotégé de tout contact avec l’eau.3. DANGER : Pour éviter tout risque d’électrocution, une attentionspéciale doit être portée au régulateur d’éclairage. Dans chacunedes situations suivantes, ne pas essayer de réparer l’appareil soimême;le retourner plutôt à un service des réparations autoriséou le jeter.A. Si l’appareil tombe dans l’eau, NE PAS le ramasser! Il fautd’abord le débrancher puis le récupérer. Si des pièces électriquesde l’appareil se mouillent, il faut le débrancher immédiatement.FRANÇAISDEUTSCHESPAGÑOLITALIANONEDERLANDS
10B. Examiner avec attention l’appareil après l’installation. Il nedevrait pas être branché en présence d’eau sur des pièces nedevant pas être mouillées.C. Ne pas faire fonctionner un appareil dont le cordon ou la ficheest endommagé, qui ne fonctionne pas correctement ou quiest tombé ou a été endommagé d’une quelconque manière.Le cordon d’alimentation de cet appareil ne peut pas êtreremplacé; si le cordon est endommagé, il faut jeter l’appareil.Ne jamais couper le cordon.D. Afin d’éviter que la fiche ou la prise de courant de l’appareilsoit mouillée, placerl’appareil d’un côtéde la prise de courantmurale et faire ensorte que l’eau nes’égoutte pas sur laprise ou la fiche.Une « boucled’égouttement »devrait êtreformée. La « boucled’égouttement » estla partie du cordonse trouvant sous laprise de courant oule raccord, si unerallonge est utilisée,afin d’empêcher l’eaude glisser le long ducordon et d’entreren contact avec laprise de courantou le système d’éclairage. Si la fiche ou la prise de courantest mouillée, NE PAS débrancher l’appareil. Mettre d’abordhors circuit le fusible ou le disjoncteur qui fournit l’électricité àl’appareil et le débrancher ensuite. Vérifier qu’il n’y a pas d’eaudans la prise.4. Pour réduire les risques de blessures, il est nécessaire desurveiller étroitement les enfants qui utilisent cet appareil ou quis’en trouvent à proximité.5. Pour éviter toute blessure, ne toucher aucune pièce chaude.6. Toujours débrancher un appareil quand il n’est pas utilisé,avant d’insérer ou de retirer des pièces et avant de le nettoyer.Ne jamais tirer sur le cordon d’alimentation pour débrancherl’appareil mais plutôt prendre la fiche entre les doigts et tirer.7. Ne pas employer cet appareil pour un usage autre que celuiprévu. L’emploi de fixations non recommandées ou venduespar le fabricant de l’appareil peut être source de situationsdangereuses.8. Ne pas installer ou ranger l’appareil où il sera exposé auxintempéries ou à des températures sous le point de congélation.9. Ne pas installer le boîtier du système d’éclairage près dessorties d’eau d’un filtre ni l’exposer à de l’eau diffusée ou à del’humidité. Ne pas le submerger dans l’eau. Vérifier qu’il y asuffisamment d’espace pour l’air autour des sorties de chaleur.La sécurité de cet appareil est garantie seulement à conditionque les tubes, les adapteurs et le système d’éclairage soientcorrectement installés.10. Si une rallonge électrique est nécessaire, vérifier qu’elle est d’uncalibre suffisant. Un cordon électrique de moins d’ampères ou de
watts que l’appareil peut surchauffer. Des précautions devraientêtre prises afin d’éviter qu’on tire la rallonge ou qu’on trébuchedessus.11. MISE EN GARDE : Pour le marché nord-américain seulement :cet appareil est muni d’une fiche polarisée (une lame est pluslarge que l’autre). Par mesure de sécurité, cette fiche ne peutêtre insérée dans une prise de courant polarisée que d’une seulemanière. Si la fiche n’entre pas correctement dans la prise,l’insérer de l’autre côté. Si elle n’entre toujours pas, contacter unélectricien qualifié. Ne jamais utiliser avec une rallonge à moinsque la fiche puisse y être insérée complètement. Ne pas aller àl’encontre de cette mesure de sécurité.CONSERVER CES INSTRUCTIONS POUR CONSULTATION FUTURE.Seule l’observation constante de ces directives d’installation,d’électricité et d’entretien assurera l’emploi sûr et efficace de cetappareil.Instructions d’installation du système d’éclairage <strong>Exo</strong> <strong>Terra</strong>® –Marché européen/CERecommandation : utiliser seulement des tubes fluorescents T8(25 mm/1”de diamètre).Suivre ces directives pour l’installation de tubes fluorescentsT8.• Cet équipement est POUR USAGE À L’INTÉRIEURSEULEMENT.• Mise en garde : Débrancher la fiche de ce systèmed’éclairage et tout autre équipement électrique utilisé pour leterrarium, le paludarium ou l’aquaterrarium avant de mettreles mains dans l’eau ou d’effectuer quelque entretien quece soit.• Mise en garde : Avant d’installer, d’enlever ou de changer destubes fluorescents ou de faire l’entretien, d’installer oud’enlever le système d’éclairage <strong>Exo</strong> <strong>Terra</strong>® ou tout autreéquipement, toujours s’assurer que le tout est débranché.1. Le boîtier du système d’éclairage est muni d’une fente pourle suspendreà la tête d’unevis solidementancrée. Le boîtierdu systèmed’éclairage devraitêtre placé à unendroit bienaéré, loin del’humidité, de labuée, des objetsinflammableset des surfacesfragiles. Le boîtierdu systèmed’éclairage estmuni de fentes deventilation pourNEDERLANDS ITALIANO ESPAGÑOL DEUTSCH FRANÇAIS ENGLISH
permettre à la chaleur de s’échapper. Ne pas obstruer ces fentesde quelque manière que ce soit et s’assurer d’enlever toutepoussière ou débris rapidement.2. Installer des tubes fluorescents d’un diamètre et d’unepuissance en watts conformes en les insérant dans les bouchonsde fermeture de manière à ce que les broches s’alignent àl’intérieur des douilles. Pousser tout en insérant le tube dans lebouchon de fermeture pour assurer un raccordement positif.3. Une fois les tubes fluorescents insérés dans les bouchonsde fermeture, les placer sur le dessus du couvercle grillagédu terrarium (et non pas sur le verre car les rayons UVB nepénètrent pas le verre). S’assurer que la surface du couverclegrillagé est de niveau et égale pour que les tubes ne puissentpas rouler. S’assurer de placer les tubes fluorescents sur lapartie supérieure du couvercle grillagé du terrarium et NONsur le verre, les pièces en plastique ou sur tout autre matièreinflammable. Tout manquement à ces précautions pourraitentraîner un risque d’incendie.4. Garder l’appareil hors de portée des enfants. Garder l’appareilloin des rideaux et de tout autre objet inflammable.Recommandation : utiliser seulement des tubes fluorescents T8(25 mm/1”de diamètre) ou T10 (32 mm/1 1/4” de diamètre).Suivre ces directives pour l’installation de tubes fluorescentsT8 ou T10.12• Cet équipement est POUR USAGE À L’INTÉRIEURSEULEMENT.• Mise en garde : Débrancher la fiche de ce systèmed’éclairage et tout autre équipement électrique utilisé pour leterrarium, le paludarium ou l’aquaterrarium avant de mettreles mains dans l’eau ou d’effectuer quelque entretien quece soit.• Mise en garde : Avant d’installer, d’enlever ou de changer destubes fluorescents ou de faire l’entretien, d’installer ou d’enleverle système d’éclairage <strong>Exo</strong> <strong>Terra</strong>® ou tout autre équipement,toujours s’assurer que le tout est débranché.1. Le boîtier du système d’éclairage est muni d’une fente pourle suspendreà la tête d’unevis solidementancrée. Le boîtierdu systèmed’éclairage devraitêtre placé à unendroit bienaéré, loin del’humidité, de labuée, des objetsinflammableset des surfacesfragiles. Le boîtierdu systèmed’éclairage estmuni de fentesde ventilationpour permettre à
la chaleur de s’échapper. Ne pas obstruer ces fentes de quelquemanière que ce soit et s’assurer d’enlever toute poussière oudébris rapidement.2. Pour installer des tubes fluorescents d’un diamètre et d’unepuissance en watts conformes, d’abord déterminer le diamètre dutube fluorescent à installer (T8 ou T10). Pour les tubes fluorescentsT8, des adapteurs sont compris à cette fin. Les adapteursdevraient être attachés aux bouchons de fermeture avantd’installer les tubes fluorescents. Les tubes fluorescents T10 vonts’insérer directement dans les bouchons de fermeture comprisavec l’appareilENGLISHFRANÇAISNote: Par mesure de sécurité, il est recommandé d’installer soitdeux tubes fluorescents T8, soit deux tubes fluorescents T10. Nepas installer une combinaison de tubes T8 et T10.3. Insérer le tube fluorescent dans le bouchon de fermeture demanière à ce que les broches s’alignent à l’intérieur des douilles.Pousser tout en insérant le tube dans le bouchon de fermeturepour assurer un raccordement positif.4. Une fois les tubes fluorescents insérés dans les bouchons defermeture, les placer sur le dessus du couvercle grillagé duterrarium (et non pas sur le verre car les rayons UVB ne pénètrentpas le verre). S’assurer que la surface du couvercle grillagé estde niveau et égale pour que les tubes ne puissent pas rouler.S’assurer de placer les tubes fluorescents sur la partie supérieuredu couvercle grillagé du terrarium et NON sur le verre, lespièces en plastique ou sur tout autre matière inflammable. Toutmanquement à ces précautions pourrait entraîner un risqued’incendie.5. Garder l’appareil hors de portée des enfants. Garder l’appareil loindes rideaux et de tout autre objet inflammable.Entretien :Mise en garde :• Débrancher la fiche de ce système d’éclairage et tout autreéquipement électrique utilisé pour le terrarium, le paludariumou l’aquaterrarium avant de mettre les mains dans l’eau oud’effectuer quelque entretien que ce soit.• Avant d’installer, d’enlever ou de changer des tubesfluorescents ou de faire l’entretien, d’installer ou d’enleverle système d’éclairage <strong>Exo</strong> <strong>Terra</strong>® ou tout autre équipement,toujours s’assurer que le tout est débranché.• Les cordons d’alimentation de cet appareil ne peuvent pasêtre remplacés. Si un des cordons est endommagé, il faut jeterl’appareil.DEUTSCHESPAGÑOLITALIANONEDERLANDS
14Nettoyage de l’appareil :1. Ne pas placer le boîtier du système d’éclairage près dessorties d’eau d’un filtre ni l’exposer à de l’eau diffusée ou à del’humidité. Ne pas le submerger dans l’eau.2. S’assurer que les sorties de chaleur sont libres de touteobstruction, poussière ou débris. Utiliser un linge pour essuyertout débris qui pourrait obstruer les sorties de chaleur.3. Aucun entretien spécial n’est requis pour le système d’éclairage<strong>Exo</strong> <strong>Terra</strong>® sauf un nettoyage périodique avec un linge (nejamais utiliser des produits chimiques ou des détergentscorrosifs). Afin d’enlever les dépôts calcaires (douilles des tubes),il est recommandé d’utiliser un acide doux tel que du vinaigre etde bien essuyer ensuite avec un linge humide pour retirer toutrésidu.4. Il est fortement recommandé de toujours observer toutes lesprécautions et les procédures décrites dans les Mesures desécurité importantes et dans les Instructions d’installation.GARANTIECe produit est garanti contre les défauts de matériel et de maind’œuvrepour une période de deux ans à partir de la date d’achat. Lagarantie est valide seulement avec la preuve d’achat. La garantie estlimitée à la réparation ou au remplacement de l’appareil seulementet exclut toute perte indirecte ou dommage aux objets animésou inanimés en contact avec l’appareil. Cette garantie est valideseulement dans le cas de l’usage normal pour lequel il est conçu.La garantie exclut tout dommage causé par un usage excessif,une installation incorrecte de l’appareil, de la négligence, unemodification quelconque apportée à l’appareil ou un usage abusif.Pour le service offert par la garantie ou pour des pièces de rechange,prière de contacter votre détaillant d’animalerie locale ou d’écrire aureprésentant de votre pays. Cette garantie ne modifie pas vos droitsprévus par la loi.ServiceSi cet appareil vous semble défectueux ou que vous vous posezdes questions quant à son fonctionnement, n’hésitez pas àcommuniquer avec nous avant de le retourner au marchand. Notreligne téléphonique nous permet de régler la plupart des problèmes.Lorsque vous téléphonez (courriel ou poste), S.V.P. ayez en main tousles renseignements pertinents (p. ex. le numéro du modèle ou de lapièce) ainsi qu’une description du problème. Contactez notre Serviceà la clientèle.Canada seulement :Numéro sans frais : 1 800 555HAGEN (1 800 554-2436)Entre 9 h et 16 h 30 (heure de l’Est)États-Unis seulement :Numéro sans frais : 1 800 724-2436Entre 9 h et 16 h (heure de l’Est)Royaume-Uni seulement :Numéro du service d’assistance : 01977 556622Entre 9 h et 17 h
Pour réparation d’un article sous garantie :Retournez l’appareil avec une preuve d’achat et la raison du retourà :Canada:Industries Hagen ltée3235, rue GuénetteMontréal QC H4S 1N2Rolf C. Hagen Inc.8770-24th StreetEdmonton AB T6P 1X8États-Unis :Rolf C. Hagen (U.S.A.) Corp.50 Hampden Road, Mansfield, MA 02048-9107Royaume-Uni :Rolf C. Hagen (UK) Ltd.California Dr. Withwood Industrial EstateCastleford, West Yorkshire WF10 5QHPour toute information sur la gamme complète de nos produits,explorez nos sites Web www.exo-terra.com et www.hagen.com.Distribué par :Canada: Rolf C. Hagen Inc., Montréal QC H9X 0A2U.S.A.: Rolf C. Hagen (U.S.A.) Corp., Mansfield MA. 02048U.K.: Rolf C. Hagen (U.K.) Ltd. Castleford, W. Yorkshire WF10 5QHENGLISHFRANÇAISDEUTSCHNEDERLANDSITALIANOESPAGÑOL
<strong>LIGHT</strong> <strong>UNIT</strong>Gebrauchsanleitung16ElektronischeLampensteuerung in<strong>Terra</strong>rien• Für zwei Leuchtstoffröhren• Ideal für den Gebrauch mit <strong>Exo</strong> <strong>Terra</strong> ReptiGlo und anderen Leuchtstoffröhren• Energieeffizienter als viele vergleichbareVorschaltgeräte und andereLichtanschlussstellen• Kein Flackern; weniger Stress für Reptilienund Amphibien• Lange Anschlüsse an den Endkappen• An/Aus-Schalter (A)In 3 Grössen erhältlich:PT-2235 (max. 20 Watt)PT-2237 (max. 30 Watt)PT-2239 (max. 40 Watt)Anleitungen im Falle von Feuer, elektrischen Schlägenoder Verletzungen an PersonenWichtige SicherheitshinweiseWARNUNG: Zum Schutz vor Verletzungen sind beim Umgang mitder <strong>Exo</strong> <strong>Terra</strong>® Light Unit grundlegende Sicherheitsvorkehrungen zubeachten, einschließlich der folgenden Hinweise:1. LESEN UND BEFOLGEN SIE ALLE SICHERHEITSHINWEISEund alle wichtigen Hinweise auf dem Gerät vor derInbetriebnahme des Gerätes. Bei Nichtbeachtung kann dies zuSchäden an diesem Gerät führen.2. WARNUNG: Dieses Gerät ist NICHT wasserdicht und darf NICHTmit Wasser in Berührung kommen.3. GEFAHR – Um einen möglichen elektrischen Schlag zuvermeiden, sollten Sie besonders vorsichtig sein. Wenn eine dernachfolgenden Situationen eintritt, sollten Sie nicht versuchen,das Gerät selber zu reparieren, sondern dieses an eineautorisierte Kundendienststelle zur Reparatur geben oder dasGerät entsorgen.A. Wenn das Gerät ins Wasser fällt, NICHT danach greifen!
Erst die Netzsteckverbindung lösen und dann das Gerätherausnehmen. Wenn die elektrischen Teile des Gerätes nasswerden, sofort die Netzsteckverbindung lösen.B. Gerät nach dem Einbau sorgfältig überprüfen. Es darf nichtan das Stromnetz angeschlossen werden, wenn sich Wasserauf Teilen befindet, die nicht nass werden dürfen.C. Kein Gerät mit beschädigtem Netzkabel oder beschädigtemStecker benutzen oder wenn dieses nicht richtig funktioniertoder heruntergefallen oder anderweitig beschädigt wurde. DieNetzschnur dieses Gerätes kann nicht ausgewechselt werden;wenn die Schnur beschädigt ist, sollte das Gerät weggeworfenwerden. Niemals die Schnur abschneiden.D. Um die Möglichkeit auszuschließen, dass der Gerätesteckeroder die Steckdose nass werden, soll das Gerät neben einerWandsteckdose so angeordnet werden, dass kein Wasser aufSteckdose oderStecker tröpfeln kann.Eine „Tropfschleife“sollte zur Steckdosehin gebildet werden.Die „Tropfschleife“ist der Teil desNetzkabels, der unterdem Niveau derSteckdose oder derAnschlussdose beiVerwendung einerVerlängerungsschnurliegt. Damit wirdverhindert, dassWasser die Schnurentlang wandert undmit der Steckdose inBerührung kommt.Wenn der Stecker oderSteckdose nasswerden, NetzkabelNICHT aus der Steckdose ziehen. Sicherung oder Sicherungsschalterdes Stromkreises für das Gerät ausschalten. Erstdanach das Netzkabel herausziehen und die Steckdose aufVorhandensein von Wasser überprüfen.4. Sorgfältige Aufsicht ist notwendig, wenn das Gerät von Kindernoder in der Nähe von Kindern benutzt wird.5. Zur Vermeidung von Verletzungen keine heißen Teile berühren.6. Trennen Sie immer alle Geräte vom Stromnetz, wenn sie nicht inGebrauch sind, bevor Teile angebracht oder entfernt werden undvor der Reinigung. Nicht am Netzkabel ziehen, um den Steckeraus der Steckdose zu lösen. Immer am Stecker anfassen undherausziehen.7. Benutzen Sie das Gerät nur für den vorgesehenenVerwendungszweck. Die Verwendung von Anbauteilen, die nichtvom Gerätehersteller empfohlen oder verkauft werden, kann zueinem unsicheren Betriebszustand führen.8. Installieren oder lagern Sie das Gerät nicht an Stellen, an denenes der Witterung oder Temperaturen unter dem Frostpunktausgesetzt ist.9. Installieren Sie die Light Unit nicht in der Nähe vonFilterauslassen oder dort, wo sie Wasserspritzern oderFeuchtigkeit ausgesetzt sein könnte. Tauchen Sie die Einheitnie in Wasser. Achten Sie darauf, dass genügend Luftraum umNEDERLANDS ITALIANO ESPAGÑOL DEUTSCH FRANÇAIS ENGLISH
die heißen Lüftungsschlitze vorhanden ist. Die Sicherheit diesesGerätes ist nur gewährleistet, wenn die Leuchtstoffröhren,Adapter und die Light Unit selbst sicher und ordnungsgemäßinstalliert sind.10. Wenn ein Verlängerungskabel benötigt wird, muss ein Kabelgeeigneter Leistung benutzt werden. Ein Verlängerungskabel miteiner kleineren Ampere- oder Wattzahl als das Gerät kann sichüberhitzen. Achten Sie darauf, das Verlängerungskabel so zuverlegen, dass man nicht darüber stolpert oder es herauszieht.BEWAHREN SIE DIESE ANLEITUNG AUF.Nur die genaue Einhaltung dieser Anleitungen zu Installation,elektrischen Daten und Wartung gewährleistet den sicheren undeffizienten Gebrauch dieses Gerätes.<strong>Exo</strong> <strong>Terra</strong>® Light Unit Montageanleitungen –Europäischer/CE-MarktEmpfohlen: Nur für den Gebrauch mit T8 (25 mm)LeuchtstoffröhrenBefolgen Sie diese Anleitungen, wenn Sie T8 Leuchtstoffröhreninstallieren18• Diese Einheit ist ausschließlich für den Gebrauch ingeschlossenen Räumen geeignet.• Warnung: Trennen Sie diese Light Unit und alle anderenelektrischen Einheiten, die in dem <strong>Terra</strong>rium, Paludarium oderAquarterrarium in Gebrauch sind, vom Stromnetz, bevor SieIhre Hände ins Wasser tauchen und/oder bevor SieWartungsvorgänge durchführen..• Warnung: Achten Sie immer darauf, dass die Light Unit vomStromnetz getrennt ist, wenn die <strong>Exo</strong> <strong>Terra</strong>® Light Unit, dieLeuchtstoffröhren oder andere Geräte installieren, entfernen,gewechselt oder gewartet werden.1. In dem Gehäuse der Light Unit befindet sich ein Schlitz, damitman die Einheit sicher mit einer Schraube aufhängen kann.Das Gehäuse der Light Unit sollte an einer gut gelüfteten Stelle,entfernt von Feuchtigkeit, Nässe, leicht entzündbaren Objektenund nicht aufzerbrechlichenFlächenpositioniertwerden. In demGehäuse der LightUnit befinden sichLüftungsschlitze,aus denen dieHitze entweichenkann. BlockierenSie dieseLüftungsschlitzenicht und achtenSie darauf, dassStaub oderSchmutz immerumgehendentfernt werden.
2. Um eine Leuchtstoffröhre mit dem korrekten Durchmesserund der korrekten Wattzahl zu installieren, montieren Sie dieRöhre in den Endkappen, sodass die Anschlussstifte in dieinneren elektrischen Anschlüsse passen. Drücken Sie dieRöhre in die Endkappen, um eine ordnungsgemäße Verbindungsicherzustellen.3. Wenn die Leuchtstoffröhren in die Endkappen gesteckt wurden,positionieren Sie die Röhren auf der Netzgitterabdeckung ausMetall auf dem <strong>Terra</strong>rium (nicht über Glas, da UVB-Strahlennicht durch Glas dringen können). Achten Sie darauf, dassdie Oberfläche der Netzgitterabdeckung glatt und gerade ist,sodass die Leuchtstoffröhren nicht herunterrollen können.Achten Sie darauf, dass die Leuchtstoffröhren über der oberenNetzgitterabdeckung des <strong>Terra</strong>riums positioniert sind undNICHT über Glas, irgendwelchen Plastikteilen oder anderenleicht entzündlichen Materialien. Bei Nichtbeachtung bestehtFeuergefahr.4. Für Kinder unzugänglich in Betrieb nehmen und aufbewahren.Halten Sie das Gerät außerhalb der Reichweite von Vorhängenund anderen leicht entzündlichen Objekten.Empfohlen: Für den Gebrauch mit T8 (25 mm) oder T10 (32 mm)Leuchtstoffröhren.Befolgen Sie diese Anleitungen, wenn Sie T8 / T10Leuchtstoffröhren installieren.• Diese Einheit ist ausschließlich für den Gebrauch ingeschlossenen Räumen geeignet.• Warnung: Trennen Sie diese Light Unit und alle anderenelektrischen Einheiten, die in dem <strong>Terra</strong>rium, Paludarium oderAquarterrarium in Gebrauch sind, vom Stromnetz, bevor SieIhre Hände ins Wasser tauchen und/oder bevor SieWartungsvorgänge durchführen.• Warnung: Achten Sie immer darauf, dass die Light Unit vomStromnetz getrennt ist, wenn die <strong>Exo</strong> <strong>Terra</strong>® Light Unit, dieLeuchtstoffröhren oder andere Geräte installieren, entfernen,gewechselt oder gewartet werden.1. In dem Gehäuse der Light Unit befindet sich ein Schlitz, damitman die Einheitsicher miteiner Schraubeaufhängen kann.Das Gehäuseder Light Unitsollte an einergut gelüftetenStelle, entferntvon Feuchtigkeit,Nässe, leichtentzündbarenObjektenund nicht aufzerbrechlichenFlächenpositioniertwerden. In demNEDERLANDS ITALIANO ESPAGÑOL DEUTSCH FRANÇAIS ENGLISH
Gehäuse der Light Unit befinden sich Lüftungsschlitze, aus denendie Hitze entweichen kann. Blockieren Sie diese Lüftungsschlitzenicht und achten Sie darauf, dass Staub oder Schmutz immerumgehend entfernt werden.2. Um eine Leuchtstoffröhre mit dem korrekten Durchmesser undder korrekten Wattzahl zu installieren, müssen Sie zuerst denDurchmesser der Röhre festlegen, die Sie installieren möchten(T8 oder T10). Für die T8 Röhren sind zu diesem Zweck Adapterim Lieferumfang enthalten. Die Adapter sollten in die Endkappengesteckt werden, bevor die Röhren installiert werden.Die T10 Röhren passen direkt in die mitgelieferten Endkappen.20Hinweis: Aus Sicherheitsgründen ist es empfehlenswertentweder zwei T8 oder zwei T10 Röhren zu installieren.Installieren Sie nie eine Kombination aus einer T8 und einerT10 Röhre.3. Montieren Sie die Röhre in den Endkappen, sodass dieAnschlussstifte in die inneren elektrischen Anschlüssepassen. Drücken Sie die Röhre in die Endkappen, um eineordnungsgemäße Verbindung sicherzustellen.4. Wenn die Leuchtstoffröhren in die Endkappen gesteckt wurden,positionieren Sie die Röhren auf der Netzgitterabdeckung ausMetall auf dem <strong>Terra</strong>rium (nicht über Glas, da UVB-Strahlennicht durch Glas dringen können). Achten Sie darauf, dassdie Oberfläche der Netzgitterabdeckung glatt und gerade ist,sodass die Leuchtstoffröhren nicht herunterrollen können.Achten Sie darauf, dass die Leuchtstoffröhren über der oberenNetzgitterabdeckung des <strong>Terra</strong>riums positioniert sind und NICHTüber Glas, irgendwelchen Plastikteilen oder anderen leichtentzündlichen Materialien. Bei Nichtbeachtungbesteht Feuergefahr.5. Für Kinder unzugänglich in Betrieb nehmen und aufbewahren.Halten Sie das Gerät außerhalb der Reichweite von Vorhängenund anderen leicht entzündlichen Objekten.Wartung:Warnung:• Trennen Sie diese Light Unit und alle anderen elektrischenEinheiten, die in dem <strong>Terra</strong>rium, Paludarium oderAquarterrarium in Gebrauch sind, vom Stromnetz, bevor SieIhre Hände ins Wasser tauchen und/oder bevor SieWartungsvorgänge durchführen.• Achten Sie immer darauf, dass die Light Unit vomStromnetz getrennt ist, wenn die <strong>Exo</strong> <strong>Terra</strong>® Light Unit, die
Leuchtstoffröhren oder andere Geräte installieren, entfernen,gewechselt oder gewartet werden• Die Netzschnur dieses Gerätes kann nicht ausgewechseltwerden; wenn eine Schnur beschädigt ist, sollte das Gerätweggeworfen werden.Reinigung der Einheit:1. Installieren Sie die Light Unit nicht in der Nähe vonFilterauslassen oder dort, wo sie Wasserspritzern oderFeuchtigkeit ausgesetzt sein könnte. Tauchen Sie die Einheit niein Wasser.2. Stellen Sie sicher, dass die Belüftungsschlitze nicht blockiertwerden und frei von Staub oder Schmutz sind. Wischen Siejeglichen Schmutz mit einem Lappen ab, der die Schlitzeblockieren könnte.3. Für die <strong>Exo</strong> <strong>Terra</strong>® Light Unit ist keine besondere Wartungnotwendig; sie muss nur regelmäßig mit einem Lappenabgewischt werden (benutzen Sie niemals aggressive chemischeProdukte oder Reinigungsmittel). Um kalkhaltige Ablagerungen(Anschlussdose der Leuchtstoffröhre) zu entfernen, ist esempfehlenswert, eine milde Säure, z.B. Essig, zu benutzen unddiese dann gründlich mit einem feuchten Lappen abzuwischen,damit keine Rückstände zurückbleiben.4. Es wird dringend empfohlen, immer alle Vorsichtsmaßnahmenund –Vorgehensweisen zu befolgen, die sowohl in denWICHTIGEN SICHERHEITSHINWEISEN als auch in denMONTAGEANLEITUNGEN hervorgehoben werden.GarantieDieses Produkt hat eine uneingeschränkte Garantie auf Mängelin Material und Verarbeitung für die Dauer von zwei Jahren abKaufdatum. Diese Garantie gilt nur mit Kaufbeleg. Diese Garantieist begrenzt auf Reparatur oder Ersatz und schließt Schäden anPersonen oder Gegenständen, die durch Berührung mit der LightUnit entstehen, aus. Ausgeschlossen sind außerdem alle Schäden,die durch unsachgemäße Verwendung oder Missbrauch desVorschaltgerätes verursacht werden. Für Garantieleistung oderErsatzteile werden Sie sich bitte an Ihren örtlichen Zoofachhändleroder schreiben Sie an den Vertreter in Ihrem Land.KundendienstFalls dieses Produkt fehlerhaft sein sollte, geben Sie es zusammenmit dem Kaufnachweis entweder an Ihren örtlichen Zoofachhändleroder senden Sie es mit im Voraus bezahlten Versandkosten an:HAGEN Deutschland GmbH & Co. KGLehmweg 99-105, D-25488 HolmVertrieb durch:Deutschland: HAGEN Deutschland GmbH & Co. KG, 25488 HolmNEDERLANDS ITALIANO ESPAGÑOL DEUTSCH FRANÇAIS ENGLISH
EQUIPO DE ILUMINACIONManual deinstrucciones22Lampara electrónicacontroladora para terrarios• Para 2 lámparas fluorescentes• Es ideal para usar en conjunto con <strong>Exo</strong> <strong>Terra</strong>Repti Glo y otras lámparas fluorescentes.• Más eficiente que los balastosconvencionales u otros artefactos eléctricos.• Sin parpadeos; es menos estresante para losreptiles y anfibios.• Guías amplias en extremos• Interruptor de encendido/apagado (A)DISPONIBLE EN 3 TAMAÑOS:PT-2235 (max. 20 Watt)PT-2237 (max. 30 Watt)PT-2239 (max. 40 Watt)INSTRUCCIONES REFERENTES A RIESGO DE INCENDIO, SHOCKELÉCTRICO O DAÑOS A PERSONASIMPORTANTES INSTRUCCIONES DE SEGURIDADPRECAUCIÓN: Para evitar lesiones, deben tomarse en cuentasmedidas de seguridad al momento de manipular el Equipo deIluminación de <strong>Exo</strong> <strong>Terra</strong>, lo cual incluye lo siguiente:1. LEA Y SIGA LAS INSTRUCCIONES DE SEGURIDADy todas las indicaciones importantes en relación al aparato antesde usar. Una falla podría dañar el equipo.2. PRECAUCION: Este aparato NO es impermeable y DEBE evitarseel contacto con el agua3. PELIGRO: Pata evitar un choque eléctrico, se deber ser muycuidadoso. En las situaciones siguientes, no intente reparar elequipo usted mismo; devuelva el equipo a un servicio autorizadoo deshágase del aparato.A. Si el equipo cae en el agua, NO trate de sacarlo! Primero desconécteloy luego sáquelo. Si los componentes eléctricos delequipo se llegan a mojar, desconecte el equipo de inmediato.B. Revise Cuidadosamente el equipo después de instalar.No deberá conectarse si hay agua en sus componentes.C. No opere ningún aparato si tiene dañado el cable de conexióno el enchufe, si está funcionando mal, o si se ha caído o
dañado de cualquier otra forma. El cable de corriente nopuede ser reemplazado; si el cable está dañado, el aparatodeberá desecharse. Nunca corte el cable.D. Para evitar la posibilidad que el enchufe del equipo o tomaselectricas entren en contacto con el agua, colocar el equipoa un lado del toma corriente para prevenir agua por goteoentre en enchufes otoma corrientes. Undrip-loop deberáemplearse. Un “driploop”es la parte delcable que está entreel aparato y la tomade corriente, o delconector si se empleauna extensión; estopara evitar que elagua que se mueve através del cable entreen contacto con latoma de corriente ocon el equipo.Si el enchufe llegasea mojarse, NOdesconecte el cable.Desconecte el fusibleo el breaker quesuministra energíaeléctrica al aparato, luego desconéctelo y revíselo paraconfirmar la presencia de agua en la toma de corriente.4. Para reducir el riesgo de daño, se requiere de supervisióncuando el equipo es usado por niños.5. Para evitar heridas, no toque las partes calientes.6. Siempre desconecte el aparato cuando no esté en uso, antes decolocar o quitar alguno de sus componentes y antes de limpiarlo.Nunca hale el cable para desconectarlo de la toma de corriente.7. Use este equipo sólo para lo que está destinado. El uso deaccesorios no recomendados o vendidos por el fabricante delaparato podría causar una condición insegura.8. No instale o coloque el equipo donde pueda quedar expuesto alclima o a temperaturas muy bajas.9. No instale la unidad de luz cerca de las salidas de los filtroso exponerla a la humedad. No la sumerja en el agua. Aseguresuficiente espacio libre cerca de las rejillas de ventilación. Laseguridad de este equipo está garantizada siempre y cuando losbombillos, adaptadores y unidades de luz estén correctamenteinstalados.10. Si se requiere de un cable de extensión, deberá emplearseuno del tipo adecuado. Si se emplea una extensión con mejoramperaje o voltaje que el del equipo, éste podría recalentarse.Deberá tenerse cuidado al acomodar el cable de forma tal queno pueda ser tropezado o halado.11. PRECAUCION: Sólo para el mercado Norteamericano: Esteequipo tiene un cable polarizado (el enchufe tiene una hoja másancha que la otra). Como medida de seguridad, este enchufepodrá sólo entrar en una toma de corriente polarizada. Si elenchufe no encaja en la toma de corriente, conéctelo a lainversa. Si aún persiste el problema, contacte a un electricistacalificado. Nunca lo use como un cable de extensión a menosENGLISHFRANÇAISDEUTSCHESPAÑOLITALIANONEDERLANDS
que el enchufe pueda insertarse completamente. No pase poralto esta medida de seguridad.GUARDE ESTAS NORMAS DE SEGURIDAD PARA FUTURASREFERENCIASSolo siguiendo al pie de la letra los pasos de instalación, y las pautasde mantenimiento y electricidad asegurarán el seguro y eficienteuso de este equipo.Instalación del Equipo de Iluminación de <strong>Exo</strong><strong>Terra</strong> – BombillosFluorescentes T8 Recomendados: Para usar solamente conbombillos fluorescentes T8 (25 mm / 1” de diámetro)Siga las siguientes instrucciones siempre que instale bombillosfluorescentes T8.• Este equipo es para usar UNICAMENTE DENTRO DE LA CASA.• Precaución: Desconecte el cable de la unidad de iluminacióny cualquier otro equipo usado para terrarios, paludarios oacua-terrarios antes de introducir las manos en el agua y/ollevar a cabo algún tipo de mantenimiento.• Precaución: Siempre que instale, quite o cambie tubosfluorescentes o realice mantenimiento, instale o quite laUnidad de Iluminación de <strong>Exo</strong> <strong>Terra</strong> o cualquier otro equipo,siempre asegúrese de que esté desconectado.241. La Unidad de Iluminación posee una ranura para suspenderlaen un tornillo. Ésta debe ser colocada en un área ventilada, lejosde la humedad,de objetosinflamablesy superficiesfrágiles. La Unidadde Iluminaciónestá equipadacon ranurasde ventilaciónpara permitir lasalida del calor;no obstruyaestas rejillas yasegúrese deeliminar cualquierresiduo de polvo oescombros.2. Instale bombillos fluorescentes del diámetro y vatiaje correctosinsertando el bombillo en uno de los extremos de forma tal quelas clavijas queden alineadas con las tomas eléctricas internas.Empuje mientras inserta el bombillo en uno de los extremos paraasegurar una buena conexión.3. Una vez que se han insertado los bombillos, colóquelos enla parte superior del terrario (no sobre el vidrio ya que la luzultravioleta no atraviesa el vidrio) Asegúrese de que la superficiede la rejilla superior esté colocada horizontalmente de forma
que el bombilla no pueda rodar. Asegúrese de que los bombillosestén colocados sobre la parte metálica de la rejilla del terrarioy NO sobre algún vidrio, partes plásticas u otro materialinflamable. De lo contrario, podría resultar en riesgo de incendio.4. Mantenga la unidad fuera del alcance de los niños. Coloque launidad lejos de cortinas u otros objetos inflamables.Instalación del Equipo de Iluminación de <strong>Exo</strong><strong>Terra</strong> – BombillosFluorescentes T8/T10 Recomendados: Para usar solamente conbombillos fluorescentes T8 (25 mm / 1” de diámetro) oT10 (32 mm /1 1/4” de diámetro)Siga las siguientes instrucciones siempre que instale bombillosfluorescentes T8 / T10.• This equipment is UNICAMENTE DENTRO DE LA CASA.• Precaución: Desconecte el cable de la unidad de iluminacióny cualquier otro equipo usado para terrarios, paludarios oacua-terrarios antes de introducir las manos en el agua y/ollevar a cabo algún tipo de mantenimiento.• Precaución: Siempre que instale, quite o cambie tubosfluorescentes o realice mantenimiento, instale o quite laUnidad de Iluminación de <strong>Exo</strong> <strong>Terra</strong> o cualquier otro equipo,siempre asegúrese de que esté desconectado.1. La Unidad de Iluminación posee una ranura para suspenderlaen un tornillo.Ésta debe sercolocada en unárea ventilada, lejosde la humedad, deobjetos inflamablesy superficiesfrágiles. La Unidadde Iluminaciónestá equipadacon ranurasde ventilaciónpara permitir lasalida del calor;no obstruyaestas rejillas yasegúrese deeliminar cualquierresiduo de polvo oescombros.2. Para instalar tubos fluorescentes del diámetro y vataje correctos,primero determine cuál es el diámetro del tubo que deseaNEDERLANDSITALIANO ESPAÑOL DEUTSCH FRANÇAIS ENGLISH
instalar (T8 o T10). Para tubos T8, se suministran adaptadorespara tal fin. Los adaptadores deben atornillarse en losextremos del tubo antes de instalarlos. Los tubos T10 encajandirectamente.Nota: Por seguridad, se recomienda que se instalen 2 tubos T8 o2 tubos T10.3. Inserte los bombillos fluorescentes len uno de los extremosde forma tal que las clavijas queden alineadas con las tomaseléctricas internas. Empuje mientras inserta el bombillo en unode los extremos para asegurar una buena conexión.4. Una vez que se han insertado los bombillos, colóquelos enla parte superior del terrario (no sobre el vidrio ya que la luzultravioleta no atraviesa el vidrio) Asegúrese de que la superficiede la rejilla superior esté colocada horizontalmente de forma queel bombilla no pueda rodar. Asegúrese de que los bombillos estécolocados sobre la parte metálica de la rejilla del terrario y NOsobre algún vidrio, partes plásticas u otro material inflamable. Delo contrario, podría resultar en riesgo de incendio5. Mantenga la unidad fuera del alcance de los niños. Coloque launidad lejos de cortinas u otros objetos inflamables.Mantenimiento:26Precaución:• Desconecte el cable de la unidad de iluminación y cualquierotro equipo usado para terrarios, paludarios o acua-terrariosantes de introducir las manos en el agua y/o llevar a caboalgún tipo de mantenimiento.• Siempre que instale, quite o cambie tubos fluorescentes orealice mantenimiento, instale o quite la Unidad de Iluminaciónde <strong>Exo</strong> <strong>Terra</strong> o cualquier otro equipo, siempre asegúrese deque esté desconectado.• Los cables de corriente de este sistema de iluminación nopueden ser reemplazados. Si alguno de ellos se daña, toda launidad debe ser descartada.Limpieza de la unidad:1. No coloque el equipo cerca de la salida de los filtros o exponerloa la humedad o al agua. No lo sumerja en agua.2. Asegúrese que las rejillas de ventilación estén libres y libresde cualquier obstrucción, polvo o escombros. Use un trapopara eliminar cualquier sucio que pueda obstruir las rejillas deventilación.3. No se requiere de mantenimiento especial; solo una limpiezaperiódica con un trapo (nunca use productos químicosfuertes o detergentes) Para eliminar los depósitos calcáreos,se recomienda usar un ácido suave, como el vinagre, yposteriormente limpiar profundamente con un paño húmedopara eliminar cualquier residuos.4. Se recomienda encarecidamente acatar todas las precauciones yprocedimientos esbozados tanto en la parte de Seguridad comode Instalación.
GARANTIA:Este producto está garantizado por defectos del material o manode obra por un período de 2 años a partir de la fecha de compra.La garantía es válida sólo con la prueba de la compra. La garantíaestá limitada a reparar o reemplazar la unidad únicamente y nocubre pérdida o daño consecuente de o por objetos animados oinanimados. Esta garantía es válida sólo bajo condiciones normalesde operabilidad para lo cual está destinado el equipo. Ésta excluyecualquier daño causado por uso irracional, instalación inapropiada,negligencia, forzamiento o abuso de la unidad. Para servicio degarantía o repuestos, contacte a su comerciante preferido o escribaal representante en su país. Esta garantía no afecta sus derechoslegales.SERVICIO:Si tiene algún problema o duda respecto a la operación de esteproducto, por favor, permítanos ayudarle antes que devuelva elproducto a su proveedor. La mayoría de los problemas puedenmanejarse prontamente mediante una llamada telefónica. Cuandousted llame (envíe un e-mail o nos escriba), por favor, tenga amano toda la información relevante, como el número del modelo y/onúmero de los componentes, así como también la naturaleza delproblema. Llame a nuestro Departamento de Atención al Cliente:En Canadá:Número de Teléfono Gratuito 1-800-555HAGEN (1-800-554-2436)Entre 9:00 am y 4:30 pm (Hora del Este)En Estados Unidos:Número de Teléfono Gratuito 1-800-724-2436Entre 9:00 am y 4:00 pm (Hora del Este)En Reino Unido:Ayuda Telefónica 01977 55662Entre 9:00 am y 5:00 pmPara Servicio de Reparación Autorizado:Devuelva la unidad con el recibo y el motivo de devolución a:Canada:Hagen Industries, 3235 Guenette, Montreal, QC H4S 1N2Rolf C. Hagen Inc., 8770-24th Street, Edmonton AB T6P 1X8Estados Unidos.:Rolf C. Hagen (U.S.A.) Corp.50 Hampden Road, Mansfield, MA. 02048-9107Reino Unido:Rolf C. Hagen (UK) Ltd.California Dr. Whitwood Industrial EstateCastleford, West Yorkshire WF10 5QHPara información general sobre todos nuestros productos,visite nuestro sitio Web: www.exo-terra.com o www.hagen.com.Distribuido por:Canada: Rolf C. Hagen Inc., Montreal, QC H9X 0A2Estados Unidos: Rolf C. Hagen (U.S.A.) Corp., Mansfield MA. 02048Reino Unido: Rolf C. Hagen (U.K.) Ltd. Castleford, W. Yorkshire WF10 5QHEspaña: Rolf C. Hagen ( España) Avda. de Beniparrel, 11 y 13 – Silla ValenciaNEDERLANDS ITALIANO ESPAÑOL DEUTSCH FRANÇAIS ENGLISH
<strong>LIGHT</strong> <strong>UNIT</strong>Manualed’istruzioni28Controllo Elettronico diLampada giorno-notte• Per due neon• Ideale per l’<strong>Exo</strong> <strong>Terra</strong> Repti Glo e altrelampade a fluorescenza• Più energia rispetto agli alimentatoriconvenzionali o altre lampade fluorescenti• Nessun tremolio di luce; meno stress perrettili e anfibi• Terminali lunghi• Non necessita starter (A)DISPONIBILE IN 3 FORMATI:PT-2235 (max. 20 Watt)PT-2237 (max. 30 Watt)PT-2239 (max. 40 Watt)ISTRUZIONI RELATIVE A RISCHIO DI INCENDIO, SCOSSEELETTRICHE, O DANNI ALLE PERSONEIMPORTANTI ISTRUZIONI DI SICUREZZAATTENZIONE: Per un corretto utilizzo dell’<strong>Exo</strong> <strong>Terra</strong>® Light, ènecessario osservare delle precauzioni di sicurezza basilari, inclusele seguenti.1. LEGGERE E SEGUIRE TUTTE LE ISTRUZIONI DISICUREZZA e tutte le avvertenze relative all’unità primadel suo utilizzo. La non osservanza di tali istruzioni potrebbeprovocare danni all’unità.2. ATTENZIONE: Quest’apparecchio NON è impermeabile e DEVEessere protetto dal contatto con l’acqua.3. PERICOLO – Per evitare possibili scosse elettriche, bisognaosservare delle precauzioni particolari. Per ognuna delle situazioniseguenti, non tentare di riparare l’unità da soli: rivolgersi adun servizio d’assistenza convenzionato oppure gettarla via.A. Se l’unità cade nell’acqua, NON tentare di raccoglierla senzaprima aver tolto la presa! Se i componenti elettrici si bagnano,togliere la presa immediatamente.B. Esaminare attentamente l’unità dopo l’installazione. Essa nondeve essere collegata se i suoi componenti elettrici sono bagnati.
C. Non utilizzare l’unità con un cavo o una spina danneggiati,se presenta anomalie di funzionamento o se è stata bagnatao danneggiata. Il cavo di alimentazione di quest’unità non puòessere sostituito; se il cavo è danneggiato, non è più possibileutilizzare l’unità. Non tagliare mai il cavo.D. L’attacco elettrico deve essere sempre sopra il livello dell’unità. Per evitare il rischio che la spina o l’attacco si bagnino,si consiglia di utilizzare un “drip loop”. Un “drip-loop” è laparte del cavo sottoil livello dell’unitàe della spina, o delconnettore se siutilizza una prolunga,che evita che l’acquaentri nel cavo evenga in contattocon l’attacco o lalampada. Se laspina o l’attaccosi bagnano,NON scollegarela prolunga.Disconnettereil fusibile ol’interruttore chealimentano l’unità,poi scollegaree controllare lapresenza di acquanell’attacco.4. Per ridurre il rischio di incidenti, è necessaria la massimasupervisione quando l’unità viene utilizzata da o in presenza diun bambino.5. Per evitare incidenti, non toccare le parti calde.6. Togliere sempre la presa dalla corrente dopo aver utilizzato lalampada, prima dell’inserimento o della sostituzione di eventualicomponenti, e prima della pulizia. Non tirare mai il cavo pertogliere la spina dalla corrente. Afferrare la spina e tirare.7. Non utilizzare l’unità per un uso diverso da quello per cui è stataconcepita. L’utilizzo di parti non consigliate o non vendute dalfabbricante dell’unità potrebbe causare situazioni a rischio.8. Non installare o conservare l’unità in luoghi esposti alleintemperie o a temperature troppo basse.9. Non installare l’unità vicino alle bocche dei filtri e non esporlavicino a spruzzi di acqua. Non immergerla nell’acqua. Assicurarespazi d’aria sufficienti attorno agli sfiati di calore. La sicurezza diquest’unità è garantita solo se le lampade, gli adattatori e l’unitàsono stati installati in modo corretto.10. Nel caso fosse necessaria una prolunga, essa deve avereun amperaggio appropriato, poiché una prolunga con menoamperes o watts provocherebbe il surriscaldamento dellalampada. Riavvolgere i cavi in modo da non accavallarli o tirarli.CONSERVARE QUESTE ISTRUZIONI PER EVENTUALICONSULTAZIONI FUTURE.Solo l’attenta osservazione di queste istruzioni elettriche, diinstallazione e manutenzione assicurano la sicurezza e l’efficienzadi quest’unità.NEDERLANDS ITALIANO ESPAGÑOL DEUTSCH FRANÇAIS ENGLISH
Installazione dell’<strong>Exo</strong> <strong>Terra</strong>® Light Unit -European/CE MarketRaccomandato: Per uso con T8 (25 mm / 1” diametro), Lampadefluorescenti.Seguire le seguenti istruzioni per installare neon T8.30• SOLO PER USO INTERNO.• Attenzione: Scollegare la spina dell’unità di luce, o qualsiasialtro dispositivo elettrico utilizzato per terrario, paludario oacqua-terrario, prima di immergere le mani in acqua e/oiniziare una manutenzione di qualsiasi tipo.• Attenzione: Quando si installano, rimuovono o sostituisconoi neon, l’<strong>Exo</strong> <strong>Terra</strong>® Light Unit o qualsiasi altro accessorio,assicurarsi sempre che il dispositivo sia scollegato.1. Il portalampada deve essere posizionato in una zona ventilata,lontanodall’umidità,da oggettiinfiammabili esuperfici fragili.Il portalampadaè provvistodi fori diventilazioneper permettereal calore difuoriuscire; nonostruire questifori e rimuovereeventualidepositi dipolvere o detriti.2. Installare lampade fluorescenti del diametro e del wattaggiocorretti inserendo la lampada nell’alloggio in modo che il piedinoterminale sia allineato con il portalampada. Spingere mentresi inserisce la lampadina nel portalampada per assicurare laconnessione.3. Una volta inserite le lampadine, posizionarle al di sopra delloschermo metallico del terrario (non sopra il vetro poiché i raggiUV non passano attraverso il vetro.) Assicurarsi che la superficiedello schermo sia piana ed uniforme. Posizionare le lampadesopra lo schermo in metallo e NON sopra materiali di vetro,plastica, o altri materiali infiammabili. Il mancato rispetto di taleprecauzione potrebbe provocare un possibile rischio di incendio.4. Tenere l’unità fuori dalla portata dei bambini. Mantenere l’unitàlontano da tende o oggetti infiammabili.
Installazione dell’<strong>Exo</strong> <strong>Terra</strong>® Light Unit -European/CE MarketRaccomandato: Per uso con T8 (25 mm / 1” diametro) o T10(32 mm / 1 1/4” diametro), Lampade fluorescenti.Seguire le seguenti istruzioni per installare neon T8 / T10.• SOLO PER USO INTERNO.• Attenzione: Scollegare la spina dell’unità di luce, o qualsiasialtro dispositivo elettrico utilizzato per terrario, paludario oacqua-terrario, prima di immergere le mani in acqua e/oiniziare una manutenzione di qualsiasi tipo.• Attenzione: Quando si installano, rimuovono o sostituisconoi neon, l’<strong>Exo</strong> <strong>Terra</strong>® Light Unit o qualsiasi altro accessorio,assicurarsi sempre che il dispositivo sia scollegato.1. Il portalampada deve essere posizionato in una zona ventilata,lontanodall’umidità,da oggettiinfiammabilie superficifragili. Ilportalampadaè provvistodi fori diventilazioneper permettereal calore difuoriuscire;non ostruirequesti fori erimuovereeventualidepositi dipolvere odetriti.2. Per installare le lampade fluorescenti con il diametro e ilwattaggio corretti, prima di tutto determinare quale diametrosi intende installare (T8 o T10). Per lampade T8, esistono degliappositi adattatori. Gli adattatori vanno avvitati prima di installarela lampadina. Le lampade T10 si inseriscono direttamente neiportalampade.ITALIANO ESPAGÑOL DEUTSCH FRANÇAIS ENGLISHN.B: Per motivi di sicurezza si consiglia di installare due T8oppure due T10. Non installare mai una combinazione di T8 eT10 contemporaneamente.NEDERLANDS
3. Inserire la lampada nel portalampada in modo che il piedinoterminale sia allineato. Spingere mentre si inserisce la lampadinanel portalampada per assicurare la connessione.4. Una volta inserite le lampadine, posizionarle al di sopra delloschermo metallico del terrario (non sopra il vetro poiché i raggiUV non passano attraverso il vetro.) Assicurarsi che la superficiedello schermo sia piana ed uniforme. Posizionare le lampadesopra lo schermo in metallo e NON sopra materiali di vetro,plastica, o altri materiali infiammabili. Il mancato rispetto di taleprecauzione potrebbe provocare un possibile rischio di incendio.5. Tenere l’unità fuori dalla portata dei bambini. Mantenere l’unitàlontano da tende o oggetti infiammabili.Manutenzione:Attenzione:• Togliere la presa dell’unità o di altri dispositivi elettrici utilizzatinel terrario, paludario o acqua-terrario prima di immergere lemani nell’acqua e/o iniziare una manutenzione diqualsiasi tipo.• Durante l’installazione, la rimozione o la sostituzione di neon odi <strong>Exo</strong> <strong>Terra</strong>® Light Unit o qualsiasi altro dispositivo,assicurarsi che la spina sia disinserita..• I cavi elettrici di questo sistema d’illuminazione non possonoessere sostituiti. Se sono danneggiati, l’intera unità deveessere gettata.32Pulizia dell’Unità:1. Non posizionare la lampada vicino ai filtri e non esporla vicino aspruzzi d’acqua o umidità. Non immergere in acqua.2. Assicurarsi che le ventole siano libere e pulirle da ogni depositodi polvere o detriti. Utilizzare un panno per asportare i detriti chepotrebbero ostruire le ventole.3. L’<strong>Exo</strong> <strong>Terra</strong>® Light Unit non necessita manutenzioni particolari,all’infuori di tale pulizia periodica con un panno (non utilizzaremai prodotti chimici o detergenti abrasivi). Per rimuovere idepositi di calcare, si raccomanda di utilizzare un acido dolcecome l’aceto e un panno morbido.4. Si consiglia vivamente di osservare tutte le precauzioni ele procedure descritte nelle sezioni Istruzioni di Sicurezza eIstruzioni di Installazione.GARANZIAQuesto prodotto è garantito per i difetti di materiale o fabbricazioneper un periodo di 2 anni dalla data di acquisto. La garanzia è validasolo dietro presentazione di una prova d’acquisto. La garanzia èlimitata alla riparazione o sostituzione dell’unità e non copre danni apersone, animali o oggetti. La garanzia è valida solo se l’unità è statautilizzata in modo appropriato. Essa esclude ogni danno causato daun uso irragionevole, da un’installazione impropria, da negligenza,o abuso dell’unità. Per servizi di garanzia o assistenza tecnica,contattare il proprio rivenditore di animali domestici o scrivere alrappresentante della propria città.
ServizioIn caso di problemi o domande sull’utilizzo di questo prodotto,contattateci prima di rivolgervi al vostro rivenditore. La maggiorparte dei problemi può essere risolta con un colpo di telefono.(Quando chiami (scrivi o invii un email), cerca di fornire tutte leinformazioni importanti, quali il numero del modello e/o i numeridelle parti disponibili, così come la natura del problema. Chiama ilNostro Servizio di Assistenza al Cliente:Per Centri di Assistenza Autorizzati:Riconsegnare l’unità con lo scontrino specificando il motivo dellarichiesta di assistenza:Canada:Rolf C. Hagen Inc.3225 Sartelon St., Montreal Quebec H4R 1E8U.S.A.:Rolf C. Hagen (U.S.A.) Corp.50 Hampden Road, Mansfield, MA. 02048-9107U.K.:Rolf C. Hagen (UK) Ltd.California Dr. Whitwood Industrial EstateCastleford, West Yorkshire WF10 5QHPer informazioni generali sulla nostra gamma di prodotti, visita ilnostro sito al : www.exo-terra.com or www.hagen.com.Distribuito da:Canada: Rolf C. Hagen Inc., Montreal, QC H9X 0A2U.S.A.: Rolf C. Hagen (U.S.A.) Corp., Mansfield MA. 02048U.K.: Rolf C. Hagen (U.K.) Ltd. Castleford, W. Yorkshire WF10 5QHENGLISHFRANÇAISDEUTSCHNEDERLANDSITALIANOESPAGÑOL
<strong>LIGHT</strong> <strong>UNIT</strong>Gebruiksaanwijzing34Electronische <strong>Terra</strong>riumLamp Controller• Voor twee buislampen• Ideaal voor de <strong>Exo</strong> <strong>Terra</strong> Repti Glo serie enandere buislampen• Gaat efficiënter met energie om danconventionele voorschakelapparatuur• Knippert niet; minder stresserend voorreptielen en amfibiën• Lange bedrading• Aan en uit schakelaar (A)VERKRIJGBAAR IN 3 MATEN:PT-2235 (max. 20 Watt)PT-2237 (max. 30 Watt)PT-2239 (max. 40 Watt)Lees voor de installatie en de inbedrijfstelling aandachtigde instructies.BELANGRIJKE VEILIGHEIDSVOORSCHRIFTENWAARSCHUWING: Om u te beschermen tegen verwondingen,moeten minimale voorzorgsmaatregelen in acht worden genomenbij het gebruik van de <strong>Exo</strong> <strong>Terra</strong>® Light Unit, met inbegrip van hetvolgende.1. LEES EN VOLG ALLE VEILIGHEIDSVOORSCHRIFTENen alle belangrijke aantekeningen op het toestel voor gebruik.Als u nalaat dit te doen, kan dit resulteren in schade aan deeenheid.2. WAARSCHUWING: De <strong>Exo</strong> <strong>Terra</strong>® Light Unit is NIET waterdichten mag niet in contact komen met water.3. GEVAAR – Om een electrische schok te vermijden dienenbepaalde voorzorgen te worden genomen. Vermijd in één van devolgen gevallen het toestel zelf te herstellen; stuur het toestelterug naar de service-dienst.A. Valt het toestel in het water, probeer het niet te grijpen,alvorens de stekker uit te trekken. Trek ook onmiddelijk destekker uit als één van de electronische onderdelen van hettoestel nat geworden zijn.
B. Onderzoek het toestel na installatie. Steek nooit de stekker inals er nog water op één van de onderdelen zou zitten.C. Sluit het toestel niet aan als één van de snoeren of de stekkerbeschadigd zijn, of als het toestel zelf schade vertoont ofgevallen is. Het snoer kan niet vervangen worden: alsde stroomkabel beschadigd is mag je het toestel niet meergebruiken. Nooit de stroomkabel doorknippen.D. Om te voorkomen dat het toestel of de electrische bedradingnat worden, is het best het toestel aan de muur te bevestigen.Als je een “druiplus”gebruikt vermijd jedat er water op hettoestel of destekker druppeltlangs het snoer. Een“druiplus” is een lusonder het toestel,connector en destekker, zodanigdat er geen waterlangs het snoer kansijpelen om zoin contact te komenmet elektrischeelementen. Als hettoestel of de stekkertoch nat wordt, trekdan NIET de stekkeruit maar schakeleerst de stroom uit.ENGLISHFRANÇAISDEUTSCH4. UIT DE BUURT VAN KINDEREN HOUDEN5. Om ongevallen te vermijden, raak geen hete onderdelen aan6. Trek steeds de stekker uit als het toestel niet in gebruik is, als jehet wil reinigen of als je een onderdeel wil vervangen. Nooit aanhet snoer trekken om het toestel uit het stopcontact te halen,steeds met de stekker werken.7. Gebruik dit toestel alleen voor het gestelde doel.8. Zie dat het toestel nooit blootgesteld is aan vrieskou.9. Installeer de Light Unit niet dichtbij filters of waterverstuivers.Niet onder water dompelen. Voorzie genoeg ruimte rondomde warme elementen. De veiligheid van dit toestel is enkelgegarandeerd als het juist geïnstalleerd werd.10. Als een verlengingssnoer noodzakelijk is, moet een snoer meteen aangepast toelaatbaar vermogen worden gebruikt. Eensnoer dat een vermogen toelaat voor minder ampère of wattdan het vermogen van het toestel kan oververhitten. Let eropdat het snoer zo bevestigd wordt, dat er niet kan worden overgestruikeld of aan getrokken.BEWAAR DEZE INSTRUCTIES.Alleen de juiste installatie verzekerd de veiligheid van het toestel.ESPAGÑOLITALIANONEDERLANDS
<strong>Exo</strong> <strong>Terra</strong>® Light Unit Installatie Instructies -Europese/CE MarktAanbevolen: Voor gebruik enkel met T8 (25 mm / 1” diameter)lampen.Volg deze instructies als je T8 lampen wil installeren.• Dit materiaal is voor gebruik BINNENSHUIS.• Waarschuwing: Trek de stekker uit van deze light unit, en elkander electrisch apparaat, gebruikt voor terrarium, paludariumof aqua-terrarium alvorens je handen in het water te stekenom één of andere onderhoudshandeling te doen.• Waarschuwing: Bij het installeren, verwijderen of vervangenvan lampen, de <strong>Exo</strong> <strong>Terra</strong>® Light Unit of ander materiaal,verzeker je er altijd van dat de stekker uitgetrokken is.361. The light unit housing provides a slot for suspending the housingon a securelyfastenedscrew head.De light unitmoet gebruiktworden in eengoed verluchteruimte, weg vanvocht, brandbareobjectenen fragieleoppervlakken.De light unit isvoorzien vanluchtgatenzodanig datde hitte kanontsnappen, zorgervoor dat dezevrij zijn.2. Installeer buislampen met de juiste diameter en wattage, delampen passen dan perfect in de pinnen van de einddoppen.Voor een positieve connectie duw nog even op de einddoppenwanneer je de lamp bevestigd.3. Eens de lamp geïnstalleerd in de einddopen plaats je ze bovenop de metalen screen cover van het terrarium (niet boven glaswant glas laat geen UVB licht door). Verzeker je ervan dat descreencover mooi vlak is zodanig dat de lampen niet kunnenwegrollen. Verzeker je ervan dat de lampen NIET geïnstalleerdzijn boven glas, plastic onderdelen, of andere brandbarematerialen. Dit nalaten zou brand kunnen veroorzaken.4. Buiten bereik van kinderen houden en buiten bereik vangordijnen en andere brandbare objecten.
<strong>Exo</strong> <strong>Terra</strong>® Light Unit Installatie Instructies -Europese/CE MarkAanbevolen: Voor gebruik met T8 (25 mm / 1” diameter) ofT10 (32 mm / 1 1/4” diameter) lampen.Volg deze instructies als je T8 / T10 lampen wil installeren.• Dit materiaal is voor gebruik BINNENSHUIS.• Waarschuwing: Trek de stekker uit van deze light unit, en elkander electrisch apparaat, gebruikt voor terrarium, paludariumof aqua-terrarium alvorens je handen in het water te stekenom één of andere onderhoudshandeling te doen.• Waarschuwing: Bij het installeren, verwijderen of vervangenvan lampen, de <strong>Exo</strong> <strong>Terra</strong>® Light Unit of ander materiaal,verzeker je er altijd van dat de stekker uitgetrokken is.1. The light unit housing provides a slot for suspending the housingon a securelyfastenedscrew head.De light unitmoet gebruiktworden in eengoed verluchteruimte, weg vanvocht, brandbareobjectenen fragieleoppervlakken.De light unit isvoorzien vanluchtgatenzodanig datde hitte kanontsnappen,zorg ervoor datdeze vrij zijn.2. Installeer buislampen met de juiste diameter en wattage, kijkeerst welke lamp diameter je wil installeren (T8 of T10). Voor T8lampen zijn er adaptors voorzien. De adaptors moeten eerst in deeinddoppen geklikt worden vooraleer de lampen te bevestigen.T10 lampen passen perfect in de pinnen van de einddoppengeleverd bij deze light unit.ITALIANO ESPAGÑOL DEUTSCH FRANÇAIS ENGLISHNota: Om veiligheidsredenen is het aanbevolen alleen T8 of T10lampen te gebruiken. Installeer geen combinatie van T8 en T10.NEDERLANDS
3. Voor een positieve connectie duw nog even op de einddoppenwanneer je de lamp bevestigd.4. Eens de lamp geïnstalleerd in de einddopen plaats je ze bovenop de metalen screen cover van het terrarium (niet boven glaswant glas laat geen UVB licht door). Verzeker je ervan dat descreencover mooi vlak is zodanig dat de lampen niet kunnenwegrollen. Verzeker je ervan dat de lampen NIET geïnstalleerdzijn boven glas, plastic onderdelen, of andere brandbarematerialen. Dit nalaten zou brand kunnen veroorzaken.5. Buiten bereik van kinderen houden en buiten bereik vangordijnen en andere brandbare objecten.Onderhoud:Waarschuwing:• Trek de stekker uit van deze light unit, en elkander electrisch apparaat, gebruikt voor terrarium, paludariumof aqua-terrarium alvorens je handen in het water te stekenom één of andere onderhoudshandeling te doen.• Bij het installeren, verwijderen of vervangenvan lampen, de <strong>Exo</strong> <strong>Terra</strong>® Light Unit of ander materiaal,verzeker je er altijd van dat de stekker uitgetrokken is.• De electrische bedrading van dit toestel kan niet vervangenworden. Als één van de snoeren beschadigd is, mag je hettoestel niet meer gebruiken38Cleaning the Unit:1. Installeer de light unit niet dichtbij filters of waterverstuivers.Niet onder water dompelen.2. De light unit is voorzien van luchtgaten zodanig dat de hitte kanontsnappen, zorg ervoor dat deze vrij zijn.3. Er zijn geen speciale onderhoudsproducten nodig voor de<strong>Exo</strong> <strong>Terra</strong>® Light Unit, regelmatig reinigen met een doekis voldoende (nooit chemische producten of detergentengebruiken). Om kalkaanslag (op de lamphouders) te verwijderen,gebruik je best een mild zuur zoals azijn, vervolgens met eenvochtige doek de restanten verwijderen.4. Het is aanbevolen de waarschuwingen en instructies hierbeschreven op te volgen.
GUARANTEEDeze garantie is beperkt tot louter de Light Unit. De Light Unit isonvoorwaardelijk onder garantie voor defecten aan het materiaal ofaan de afwerking voor een periode van 2 jaar vanaf de datum vanaankoop. De garantie is slechts geldig met een aankoopbewijs. Degarantie dekt geen bijkomend verlies of schade van of aan levendeof niet levende objecten. Deze garantie is slechts geldig ondernormale omstandigheden van de inbedrijfstelling waarvoor de LightUnit is bedoeld. Deze garantie zal niet van toepassing zijn op elkeLight Unit die onderhevig is aan onjuist gebruik, onachtzaamheid ofgeknoei. De motor werd verzegeld in de fabriek, geknoei zorgt ervoordat de garantie ongeldig wordt. Deze garantie heeft geen invloed opuw wettelijke rechten.Voor algemene informatie over onze gehele reeks producten,verken onze websites op:www.exo-terra.com of www.hagen.com.Distributed by:Canada: Rolf C. Hagen Inc., Montreal, QC H9X 0A2U.S.A.: Rolf C. Hagen (U.S.A.) Corp., Mansfield MA. 02048U.K.: Rolf C. Hagen (U.K.) Ltd. Castleford, W. Yorkshire WF10 5QHENGLISHFRANÇAISNEDERLANDSITALIANOESPAGÑOLDEUTSCH