Set up ESPEK.book - Linfo - Linn
Set up ESPEK.book - Linfo - Linn
Set up ESPEK.book - Linfo - Linn
- No tags were found...

You also want an ePaper? Increase the reach of your titles
YUMPU automatically turns print PDFs into web optimized ePapers that Google loves.
Important safety informationExplanation of symbols used in this manual and on the product:This symbol is intended to alert the user to the presence, within theenclosure, of uninsulated dangerous voltages of sufficient magnitude tocause electric shock.This symbol is intended to alert the user to the presence of importantmaintenance and servicing information in the instruction and servicemanuals.CAUTIONNO USER SERVICEABLE PARTS INSIDE.REFER SERVICING TO QUALIFIED SERVICE PERSONNEL.WARNINGTO REDUCE THE RISK OF FIRE OR ELECTRIC SHOCK DO NOT EXPOSE THISAPPLIANCE TO RAIN OR MOISTURE.GENERAL SAFETY INSTRUCTIONS1. Read instructions. Read the safety and operating instructions before operating theappliance.2. Retain instructions. Retain the safety and operating instructions for future reference.3. Heed warnings. Observe all warnings on the appliance and in the operating instructions.4. Follow instructions. Follow all operating and use instructions.5. Water and moisture. Do not use the appliance near water, for example near a bathtub,washbowl, kitchen sink, laundry tub, in a wet basement, or near a swimming pool andthe like.6. Carts and stands. Use only with a cart or stand that is recommended by the manufacturer.6a. An appliance and cart combination should be used with care. Quick stops, excessiveforce, and uneven surfaces may cause the appliance and cart combination to overturn.7. Wall or ceiling mounting. Mount to a wall or ceiling only as recommended by themanufacturer.8. Ventilation. Site the appliance so that its location or position does not interfere with itsproper ventilation. For example, the appliance should not be situated on a bed, sofa,rug, or similar surface that may block the ventilation openings, or placed in a built-ininstallation such as a <strong>book</strong>case or cabinet that may impede the flow of air through theventilation openings.9. Heat. Site the appliance away from heat sources such as radiators, heaters, stoves, orother appliances (including amplifiers) that produce heat.10. Power sources. Connect the appliance to a power s<strong>up</strong>ply only of the type described inthe operating instructions or marked on the appliance.11. Grounding or polarisation. Do not defeat the safety purpose of the polarised orgrounding type plug. A polarised plug has two blades with one wider than the other. Agrounding type plug has two blades and a third grounding prong. The wide blade orthe third prong are provided for your safety. When the provided plug does not fit intoyour outlet, consult an electrician for replacement of the obsolete outlet.12. Power cord protection. Route power cords so that they are not likely to be walked on orpinched by items placed <strong>up</strong>on or against them, paying particular attention to cords atplugs, power sockets, and at the point where they exit from the appliance.13. Protective attachment plug. As a safety feature the product is equipped with anattachment plug containing overload protection. See the instruction manual aboutresetting or replacing the plug. Should the plug need replacing ensure that areplacement is used which has the same overload protection as the original.14. Cleaning. The product should be cleaned only as recommended by the manufacturer.15. Power lines. An outdoor antenna should be located away from power lines.16. Outdoor antenna grounding. If an outdoor antenna is connected to the tuner/receiverensure that the antenna system is grounded to provide some protection against voltagesurges and static build <strong>up</strong>.In the USA see article 810 of the National Electrical Code ANSI/NFPA 70 concerninginstallation requirements.17. Unplug this apparatus during lightning storms or when unused for long periods of time.18. Objects and liquid entry. Take care not to let objects or liquids fall into the product.19. Damage requiring service. The product should be serviced by qualified personnel if:a) The power cord or plug has been damaged.b) Objects or liquid have fallen into the product.c) The product has been exposed to rain.d) The product does not appear to operate normally or exhibits a marked change inoperation.e) The product has been dropped or the enclosure damaged.20. Servicing. Don’t attempt to service the product beyond that described in the operatinginstructions. All other servicing should be referred to qualified service personnel.i
CE Declaration of Conformity<strong>Linn</strong> Products Ltd declare that this product is in conformance with the LowVoltage Directive 73/23/EEC and Electromagnetic Compatibility 89/336/EEC asamended by 92/31/EEC and 93/68/EEC.The conformity of the designated product with the provisions of Directivenumber 73/23/EEC (LVD) is proved by full compliance with the followingstandards:Standard number Date of issue Test typeEN60065 1993 General requirementsMarkingIonizingHeating under normal conditionsShock hazards under normaloperating instructionsInsulation requirementsFault conditionsMechanical strengthParts connected to the mains s<strong>up</strong>plyComponentsTerminal devicesExternal flexible cordsElectrical connections andmechanical fixingsThe conformity of the designated product with the provisions of Directivenumber 89/336/EEC (EMC) is proved by full compliance with the followingstandards:Standard number Date of issue Test typeEN55013 1994 Conducted emissionsEN55013 1994 Absorbed emissionsEN60555-2 1987 HarmonicsEN60555-3 1987 Voltage fluctuationsEN55020 1994 ImmunityFCC noticeNOTE: This equipment has been tested and found to comply with the limits for aClass B digital device, pursuant to Part 15 of the FCC Rules. These limits aredesigned to provide reasonable protection against harmful interference in aresidential installation. This equipment generates, uses and can radiate radiofrequency energy and, if not installed and used in accordance with theinstructions, may cause harmful interference to radio communications. However,there is no guarantee that interference will not occur in a particular installation.If this equipment does cause harmful interference to radio or televisionreception, which can be determined by turning the equipment off and on, theuser is encouraged to try to correct the interference by one or more of thefollowing measures:— Reorient or relocate the receiving antenna.— Increase the separation between the equipment and receiver.— Connect the equipment into an outlet on a circuit different from that to whichthe receiver is connected.— Consult the dealer or an experienced radio/TV technician for help.ii
Instructions de sécuritéExplication des symboles utilisés dans ce manuel et sur le produit :Ce symbole avertit l'utilisateur de la présence, à l'intérieur du carter del'appareil, d'une tension dangereuse pouvant être suffisamment élevéepour présenter un risque de choc électrique.Ce symbole informe l’utilisateur que ce manuel contient des instructionsimportantes concernant l’entretien et le dépannage.ATTENTIONL’NTERIEUR NE COMPORTE QUE DES COMPOSANTS REPARABLES PAR UNSPECIALISTE.EN CAS DE PROBLEME CONTACTER UN REPARATEUR AGREE.AVERTISSEMENTAFIN DE LIMITER LE RISQUE D’INCENDIE OU DE CHOC ELECTRIQUE, NE PASEXPOSER CET APPAREIL A LA PLUIE OU A L’HUMIDITE.IINSTRUCTIONS GENERALES DE SECURITE1. Veuillez lire toutes les instructions de sécurité et de fonctionnement avant d’utiliser l’appareil.2. Veuillez conserver les instructions de sécurité et de fonctionnement pour pouvoir vous yreporter ultérieurement.3. Tenez compte des avertissements. Respectez tous le avertissements figurant sur l’appareil etsur la notice d’utilisation.4. Suivez les instructions. Suivez toutes les instructions relatives à l’utilisation et aufonctionnement.5. Eau et humidité. N’utilisez pas cet équipement à proximité d’une baignoire, d’une bassine,d’un évier, d’une cuve à lessive, dans un sous-sol humide, près d’une piscine ou de toute autresource d’humidité.6. Chariots et socles. Placez ce système uniquement sur un chariot ou sur un socle recommandépar le fabricant.6a. L’ensemble appareil-chariot doit être déplacé avec précaution. Il peut basculer en cas d’arrêtbrusque, de poussée excessive ou de parcours accidenté.7. Montage au mur ou au plafond. Suivez scr<strong>up</strong>uleusement les recommandations du fabricant sivous décidez de fixer le système au mur ou au plafond.8. Ventilation. Positionnez l’appareil de façon à ne pas obstruer sa ventilation. Ne le posez passur un lit, un canapé, un tapis ou autre surface similaire, car les ouvertures prévues pour laventilation pourraient être bloquées. Ne le placez pas dans un meuble encastré (bibliothèqueou placard, par exemple) car cela risquerait également d’empêcher la circulation de l’air àtravers les évents.9. Chaleur. Eloignez l’appareil de toute source de chaleur : radiateurs, chauffe-eau, poêles, outout autre appareil électrique (y compris un amplificateur) produisant de la chaleur.10. Alimentation électrique. Connectez l’appareil à une source de courant adéquate, en suivantles instructions de fonctionnement ou d’utilisation inscrites sur l’appareil.11. Raccord à la masse ou polarisation. Ne touchez pas au dispositif de sécurité de raccordementà la masse et de polarité. Une fiche polarisée a une broche plus épaisse que l’autre. Une fichede terre a trois broches : une pour le neutre, une pour la phase, une pour la terre. La brochede mise à la masse est prévue pour votre sécurité. Si la fiche fournie ne correspond pas à laprise de secteur, consultez un électricien et faites remplacer votre prise murale.12. Protection du cordon d’alimentation. Placez les cordons d’alimentation électriques afin qu’onne puisse pas marcher dessus ni les écraser. Prenez grand soin des cordons, en particulier auniveau des fiches, des prises murales et à la sortie de l’appareil.13. Fiche de raccordement de protection. Dans un souci de sécurité, ce produit a été équipéd’une fiche de raccordement dotée d’une protection contre les surtensions. Reportez-vousaux instructions relatives au remplacement ou au réenclenchement de la fiche. Si la fiche doitêtre remplacée, veillez à ce que la nouvelle fiche soit également munie d’une protectioncontre les surtensions.14. Nettoyage. Nettoyez l’appareil en suivant les recommandations du fabricant.15. Lignes secteur. Veillez à ce que l’antenne extérieure soit éloignée des lignes secteur.16. Raccordement à la masse de l’antenne extérieure. Si une antenne extérieure est connectée autuner/récepteur, veillez à ce que le système de l’antenne soit raccordé à la masse de façon àfournir une protection contre les surtensions et l’accumulation d’électricité statique.Pour les Etats-Unis, consultez l’article 810 du National Electrical Code ANSI/NFPA 70 relatif àla conformité des installations électriques.17. Périodes de non-utilisation. Débranchez le cordon d’alimentation de la prise murale si vousavez l’intention de ne pas utiliser l’appareil pendant une longue période.18. Pénétration d’objets et de liquides. Veillez à ce qu’aucun objet ne tombe à l’intérieur etqu’aucun liquide ne coule dans l’appareil.19. Dégâts exigeant une réparation. Le système doit être confié à un réparateur agréé si :a) le cordon d’alimentation électrique ou la fiche ont été endommagés,b) des objets sont tombés à l’intérieur ou un liquide a été répandu dans l’appareil,c) l’équipement a été exposé à la pluie,d) il ne semble pas fonctionner normalement ou présente un changement notoire deperformance oue) le système est tombé ou son boîtier a été endommagé.20. Réparations. N’essayez en aucun cas de réparer ce système vous-mêmes. Conformez-vousaux instructions de fonctionnement. Toute intervention doit être confiée à un réparateuragréé.iii
CE DÉCLARATION DE CONFORMITÉ<strong>Linn</strong> Products Ltd certifie que ce produit est conforme à la directive 73/23/EECconcernant la basse tension et à la directive 89/336/EEC concernant lacompatibilité électromagnétique comme amendé par les circulaires 92/31/EECet 93/68/EEC.Les normes suivantes prouvent la parfaite conformité du présent produit auxprovisions de la directive 73/23/EEC (LVD) :Numéro de norme Date Type de testEN60065 1993 Conditions requisesMarquageIonisationChauffage dans des conditionsnormalesRisque de chocs dans des conditionsnormales de fonctionnementExigences relatives à l’isolationAnomaliesForce mécaniquePièces connectées à l’alimentationsecteurComposantsPériphériques terminauxCordons externes flexiblesConnexions électriques etaccessoires mécaniquesLes normes suivantes prouvent la parfaite conformité du présent produit auxprovisions de la directive 89/336/EEC (EMC) :Numéro de norme Date Type de testEN55013 1994 Emissions par conductionEN55013 1994 Emissions absorbéesEN60555-2 1987 HarmoniquesEN60555-3 1987 Fluctuations de la tensionEN55020 1994 ImmunitéDéclaration FCCREMARQUE : cet équipement a été testé et déclaré conforme aux limitationsprévues dans le cadre de la catégorie B des appareils numériques défini par lasection 15 du règlement de la FCC. Ces limitations sont stipulées aux fins degarantir une protection raisonnable contre les interférences gênantes eninstallation résidentielle. Cet équipement génère, utilise et diffuse des ondesradio, et s’il n’est pas installé ni utilisé en conformité avec les instructions dont ilfait l’objet, peut causer des interférences gênantes avec les communicationsradio. Cependant, nous ne pouvons vous garantir qu’une interférence ne seproduira pas dans une installation particulière.Si cet équipement produit des interférences graves, lors de réceptions radio outélévisées qui peuvent être détectées en allumant et en éteignant l’équipement,vous êtes invités à les s<strong>up</strong>primer de plusieurs manières :— Réorientez ou déplacez l’antenne de réception.— Augmentez la distance séparant l’équipement et le récepteur.— Connectez l’équipement à un circuit différent de celui du récepteur.— Contactez votre revendeur ou un technicien radio/TV qualifié.iv
Copyright and acknowledgementsCopyright © <strong>Linn</strong> Products Limited.Droits d'auteur et remerciementsCopyright © <strong>Linn</strong> Products Limited.<strong>Linn</strong> Products Limited, Floors Road, Waterfoot, Glasgow, G76 0EP,Scotland, United Kingdom.<strong>Linn</strong> Products Limited, Floors Road, Waterfoot, Glasgow, G76 0EP,Ecosse, Royaume-Uni.All rights reserved. No part of this publication may be reproduced, storedin a retrieval system, or transmitted, in any form or by any means,electronic, mechanical, photocopying, recording, or otherwise, without theprior written consent of the publisher.Printed in the United Kingdom.<strong>Linn</strong> Espek is a trademark of <strong>Linn</strong> Products Limited.Tous droits réservés. Aucune partie de cette publication ne peut êtrereproduite, mémorisée, sous quelque forme et de quelque façon que cesoit, par procédé électronique ou mécanique, par photocopie, parenregistrement ou par toute autre méthode, sans l'accord préalable del'éditeur.Imprimé au Royaume-Uni.<strong>Linn</strong> <strong>ESPEK</strong> sont des marques de <strong>Linn</strong> Products Limited.<strong>Linn</strong> Part Number: PACK 620The information in this manual is furnished for informational use only, issubject to change without notice, and should not be construed as acommitment by <strong>Linn</strong> Products Limited. <strong>Linn</strong> Products Limited assumes noresponsibility or liability for any errors or inaccuracies that may appear inthis manual.Numéro de référence : PACK 620Les renseignements que contient ce manuel sont fournis à titred'information uniquement, peuvent être modifiés sans préavis et nedoivent pas être considérés comme un engagement pris par <strong>Linn</strong>Products Limited. <strong>Linn</strong> Products Limited n'accepte aucune responsibilitépour les erreurs ou inexactitudes qui peuvent apparaître dans ce manuel.v
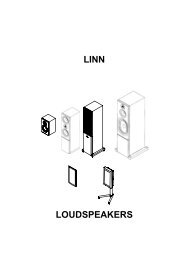
ContentsSommaireInhaltKey features. . . . . . . . . . . . . . . . . . . . . . . . . . . . . . . . . . 1Caractéristiques clés . . . . . . . . . . . . . . . . . . . . . . . . . . .1Die wichtigsten Merkmale . . . . . . . . . . . . . . . . . . . . . . . 1<strong>Set</strong>ting Up the <strong>Linn</strong> <strong>ESPEK</strong> . . . . . . . . . . . . . 3Safely unpacking . . . . . . . . . . . . . . . . . . . . . . . . . . . . . . 4Check you have . . . . . . . . . . . . . . . . . . . . . . . . . . . . . . . 5Fitting the stand. . . . . . . . . . . . . . . . . . . . . . . . . . . . . . . 6Positioning the speakers . . . . . . . . . . . . . . . . . . . . . . . . 8Configuration options . . . . . . . . . . . . . . . . . . . . . . . . . . 9Preparing speakers for configuration. . . . . . . . . . . . . . 11Connecting cables . . . . . . . . . . . . . . . . . . . . . . . . . . . . 12Looking after your speakers. . . . . . . . . . . . . . . . . . . . . 14Technical s<strong>up</strong>port and information . . . . . . . . . . . . . . . 15<strong>Linn</strong> <strong>ESPEK</strong> Specifications. . . . . . . . . . . . . . . . . . . . . . 16Assemblage du <strong>Linn</strong> <strong>ESPEK</strong> . . . . . . . . . . . . .3Précautions de déballage . . . . . . . . . . . . . . . . . . . . . . . .4Vérifiez que vous avez : . . . . . . . . . . . . . . . . . . . . . . . . .5Fixation du socle . . . . . . . . . . . . . . . . . . . . . . . . . . . . . .6Positionnement des enceintes . . . . . . . . . . . . . . . . . . . .8Options de configuration . . . . . . . . . . . . . . . . . . . . . . . .9Préparation des enceintes pour configuration . . . . . . .11Câbles de connexion . . . . . . . . . . . . . . . . . . . . . . . . . .12Entretien de vos enceintes . . . . . . . . . . . . . . . . . . . . . .14S<strong>up</strong>port technique et autres renseignements . . . . . . . .15Spécifications du <strong>Linn</strong> <strong>ESPEK</strong> . . . . . . . . . . . . . . . . . . 16Einrichtung des <strong>Linn</strong> <strong>ESPEK</strong> . . . . . . . . . . . . 3Sicheres Auspacken . . . . . . . . . . . . . . . . . . . . . . . . . . . . 4Bestandsaufnahme . . . . . . . . . . . . . . . . . . . . . . . . . . . . 5Fuß installieren . . . . . . . . . . . . . . . . . . . . . . . . . . . . . . . 6Lautsprecher aufstellen . . . . . . . . . . . . . . . . . . . . . . . . . 8Konfigurationsoptionen . . . . . . . . . . . . . . . . . . . . . . . . . 9Lautsprecher für Konfiguration vorbereiten . . . . . . . . . 11Kabelverbindungen . . . . . . . . . . . . . . . . . . . . . . . . . . . 12Pflege Ihrer Lautsprecher . . . . . . . . . . . . . . . . . . . . . . 14Technische Beratung und Information . . . . . . . . . . . . . 15<strong>Linn</strong> <strong>ESPEK</strong> Technische Daten . . . . . . . . . . . . . . . . . . . 16vi
IndiceContenidoInhoudCaratteristiche principali . . . . . . . . . . . . . . . . . . . . . . . . 1Características principales. . . . . . . . . . . . . . . . . . . . . . . .1Eigenschappen . . . . . . . . . . . . . . . . . . . . . . . . . . . . . . . . 1Installazione di <strong>Linn</strong> <strong>ESPEK</strong> . . . . . . . . . . . . 3Disimballaggio sicuro . . . . . . . . . . . . . . . . . . . . . . . . . . 4Verificare di avere disponibili. . . . . . . . . . . . . . . . . . . . . 5Montaggio dello stand . . . . . . . . . . . . . . . . . . . . . . . . . . 6Posizionamento dei diffusori . . . . . . . . . . . . . . . . . . . . . 8Modalità di collegamento. . . . . . . . . . . . . . . . . . . . . . . . 9Preparazione dei diffusori per il collegamento . . . . . . . 11Cablaggio. . . . . . . . . . . . . . . . . . . . . . . . . . . . . . . . . . . 12Cura dei diffusori . . . . . . . . . . . . . . . . . . . . . . . . . . . . . 14Assistenza tecnica e informazioni . . . . . . . . . . . . . . . . 15Specifiche di <strong>Linn</strong> <strong>ESPEK</strong>. . . . . . . . . . . . . . . . . . . . . . . 16Instalación de las <strong>Linn</strong> <strong>ESPEK</strong> . . . . . . . . . . 3Desembale con cuidado . . . . . . . . . . . . . . . . . . . . . . . . 4Compruebe que tiene . . . . . . . . . . . . . . . . . . . . . . . . . . 5Sujeción del soporte . . . . . . . . . . . . . . . . . . . . . . . . . . . 6Posicionamiento de las cajas acústicas. . . . . . . . . . . . . 8Opciones de configuración . . . . . . . . . . . . . . . . . . . . . . 9Preparación de la configuración de las cajas acústicas 11Cableado . . . . . . . . . . . . . . . . . . . . . . . . . . . . . . . . . . . 12Cuidado de sus cajas acústicas. . . . . . . . . . . . . . . . . . 14Soporte técnico e información . . . . . . . . . . . . . . . . . . .15Características técnicas <strong>Linn</strong> <strong>ESPEK</strong> . . . . . . . . . . . . . . 16Gebruiksklaar maken van de <strong>Linn</strong> <strong>ESPEK</strong>. . 3Uit de verpakking halen . . . . . . . . . . . . . . . . . . . . . . . . . 4Controleer de inhoud . . . . . . . . . . . . . . . . . . . . . . . . . . . 5Montage van de standaard . . . . . . . . . . . . . . . . . . . . . . . 6Plaatsen van de luidsprekers . . . . . . . . . . . . . . . . . . . . . 8Configuraties . . . . . . . . . . . . . . . . . . . . . . . . . . . . . . . . . 9Configuraties instellen . . . . . . . . . . . . . . . . . . . . . . . . . 11Aansluitkabels. . . . . . . . . . . . . . . . . . . . . . . . . . . . . . . . 12Onderhoud van uw luidsprekers . . . . . . . . . . . . . . . . . . 14Technische ondersteuning en informatie . . . . . . . . . . . 15<strong>Linn</strong> <strong>ESPEK</strong> Specificaties . . . . . . . . . . . . . . . . . . . . . . . 16viiLINN <strong>ESPEK</strong>
viii
Key featuresCaractéristiques clésDie wichtigsten Merkmale❑A new technology, wide dispersion treble unit with a neodymiummagnet that produces a clean and open sound.❑Nouvelle technologie de haut-parleur d'aigu à dispersion largeavec un aimant en néodyme qui produit un son pur et ouvert.❑Neu entwickelter, breitstreuender Höhenlautsprecher mitNeodymiummagnet bietet reinen, offenen Klang.❑The <strong>ESPEK</strong>’s high specification crossover ensures accuratemusic reproduction across the full frequency range with deepand extended bass.❑Le filtre haute performance <strong>ESPEK</strong> garantit une reproductionmusicale précise dans toute la gamme de fréquences avec desbasses intenses et prolongées.❑Die Hochleistungsweiche ermöglicht eine präziseMusikwiedergabe über den gesamten Frequenzbereich. Einehochwertige Verkabelung sorgt für die verlustfreie Weiterleitungdes Signals an die Lautsprecher.❑❑❑High quality internal cabling to the <strong>ESPEK</strong>’s input terminalsdeliver optimum signals to each drive unit.The <strong>ESPEK</strong>’s drive units are fully shielded to enable placementclose to a television or computer without causing pictureinterference.Versitile Aktiv/passive link plates providing several crossoverconfigurations that can be changed effortlessly.❑❑❑Le câblage interne de pointe aux terminaux d'entrée du <strong>ESPEK</strong>produit des signaux optimaux à chaque baffle.Les haut-parleurs <strong>ESPEK</strong> sont pleinement protégés pourpermettre de les placer près d'un téléviseur ou d'un ordinateursans provoquer de parasites sur l'image.Des plaques de connexion polyvalentes " Aktiv "/passivesfournissent plusieurs configurations de chevauchementpouvant être facilement modifiées.❑❑Die Betriebsteile des <strong>ESPEK</strong> sind voll abgeschirmt und könnensomit in der Nähe eines PC oder Fernsehers aufgestellt werden,ohne Bildstörungen hervorzurufen.Vielseitige aktiv/passiv Verbindungsplatten bieten mehrereÜberschneidungskonfigurationen, die mühelos geändertwerden können.1
Caratteristiche principaliCaracterísticas principalesEigenschappen❑Una unità alti, ad ampia dispersione, di nuova tecnologia, conmagnete in neodimio, capace di un suono chiaro e trasparente.❑Altavoz de agudos de nueva tecnología y dispersión amplia conimán de neodimio que produce un sonido limpio y abierto.❑Een nieuwe technologie, de brede dispersie treble-eenheid meteen neodymium-magneet voor een onvervormde en helderegeluidsweergave.❑Le elevate caratteristiche tecniche del crossover <strong>ESPEK</strong>garantiscono l’accurata riproduzione del suono su tutta lagamma di frequenza, con profondità ed estensione nei bassi.❑El filtro de alta calidad de la <strong>ESPEK</strong> garantiza una reproducciónfiel de la música en toda la gama de frecuencias con unos gravesamplios y profundos.❑De doordachte <strong>ESPEK</strong> crossover-eenheid staat garant voor eenzuivere geluidsweergave met diepe en geprolongeerde bastonenbinnen het gehele frequentiebereik.❑Il cablaggio interno di alta qualità ai terminali di ingresso del<strong>ESPEK</strong> invia segnali di ottimo livello a ciascuna unità.❑El cableado interno de gran calidad a las bornas de entrada de la<strong>ESPEK</strong> ofrece unas señales óptimas a cada uno de los altavoces.❑De hoge kwaliteit van de inputaansluitingen op de <strong>ESPEK</strong> leverteen optimaal signaal aan beide stuureenheden.❑❑Grazie alla schermatura totale delle unità <strong>ESPEK</strong>, è possibileposizionare i diffusori vicino al televisore o computer, senzainterferire sulla qualità dell’immagine.Le schede di connessione versatili attive/passive consentono dieseguire numerose configurazioni crossover, facilmentemodificabili.❑❑Los altavoces de la <strong>ESPEK</strong> están completamente apantalladospara permitir la colocación en la proximidad de un televisor o deuna pantalla de ordenador sin que puedan provocarinterferencias en la imagen.Placas de conexión versátiles activas/pasivas ofrecen distintasconfiguraciones de filtraje que pueden cambiarse sin ningúnesfuerzo.❑❑De stuureenheden van de <strong>ESPEK</strong> zijn volledig afgeschermdzodat ze zonder beeldvervorming te veroorzaken in de nabijheidvan een televisietoestel of computer geplaatst kunnen worden.Door middel van de aktief/passief-schakelplaatjes zijn diverseconfiguraties op eenvoudige wijze in te stellen.2 LINN <strong>ESPEK</strong>
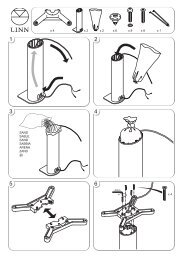
LINN <strong>ESPEK</strong><strong>Set</strong>ting Up the <strong>Linn</strong> <strong>ESPEK</strong>Assemblage du <strong>Linn</strong> <strong>ESPEK</strong>Installation der <strong>Linn</strong> <strong>ESPEK</strong>Installazione di <strong>Linn</strong> <strong>ESPEK</strong>Instalación de las <strong>Linn</strong> <strong>ESPEK</strong>Gebruiksklaar maken van de<strong>Linn</strong> <strong>ESPEK</strong>
LINN <strong>ESPEK</strong>EnglishSafely unpackingYour <strong>Linn</strong> <strong>ESPEK</strong> speakers areheavy. Take care when removingthem from their packaging.Always take care when lifting heavyobjects.Lay the contents on a smooth surfaceto avoid accidental damage beforeinstallation.If possible, keep the packaging incase you need to move or return yourspeakers.FrançaisPrécautions de déballageVos enceintes <strong>Linn</strong> <strong>ESPEK</strong> sontlourdes. Faites attention lorsque vousles retirez de leur emballage.Prenez toujours des précautionslorsque vous soulevez des objetslourds.Disposez le contenu sur une surfacedouce pour éviter toutendommagement accidentel avantinstallation.Si possible, conservez l'emballage aucas où vous devriez ramener oudéménager vos enceintes.DeutschSicheres AuspackenDie <strong>Linn</strong> <strong>ESPEK</strong> Lautsprecher sindschwer. Bitte mit Vorsicht aus derVerpackung entfernen.Bitte beim Heben schwererGegenstände stets vorsichtigvorgehen.Legen Sie alle Teile vor Installationauf eine ebene Oberfläche, umBeschädigungen zu vermeiden.Bitte Verpackung für den Fall, dassLautsprecher zurückgeschickt odertransportiert werden, aufbewahren.ItalianoDisimballaggio sicuroI diffusori <strong>Linn</strong> <strong>ESPEK</strong> sono pesanti,per il qual motivo vanno disimballaticon estrema cautela.Fare attenzione nel sollevare oggettipesanti.Appoggiare i componenti su unas<strong>up</strong>erficie piana, per evitare didanneggiarli prima dell’installazione.Se possibile, conservare l’imballaggionell’eventualità che i diffusori debbanoessere spostati o restituiti.EspañolDesembale con cuidadoSus cajas acústicas <strong>Linn</strong> <strong>ESPEK</strong> sonpesadas. Proceda con cuidadocuando las saque de su embalaje.Tenga siempre cuidado cuandolevante objetos pesados.Deje los contenidos sobre unas<strong>up</strong>erficie lisa para evitar dañosaccidentales antes de la instalación.Si es posible, guarde el embalaje parael caso en el que necesite mover odevolver las cajas acústicas.NederlandsUit de verpakking halenUw <strong>Linn</strong> <strong>ESPEK</strong> luidsprekers zijnzwaar. Wees voorzichtig als u ze uitde verpakking haalt.Neem altijd de nodige voorzorg inacht bij het tillen van zwarevoorwerpen.Leg de inhoud van de doos voordat utot aansluiten overgaat op een gladoppervlak om beschadigingen tevoorkomen.Bewaar indien mogelijk de origineleverpakking voor het geval u uwluidsprekers ooit verhuist.4
LINN <strong>ESPEK</strong>EnglishCheck you haveSpeakers.Speaker stands.Fixing kit. Spike kit. 4mm plugs. 2 double-sided linkboards (patent pending)attached to eachspeaker.Warranty card.Complete the warrantycard and return it to <strong>Linn</strong>or your <strong>Linn</strong> retailer.FrançaisVérifiez que vous avez :Enceintes.Socles d'enceintes.Kit de fixation. Kit de pointes Fiches 4 mm. 2 tableaux de liaison àdouble face (en attentede brevet) attachés àchaque enceinte.Fiche de garantie.Complétez la fiche degarantie et renvoyez-laà <strong>Linn</strong> ou à votredétaillant <strong>Linn</strong>.DeutschBestandsaufnahmeLautsprecher.Lautsprechersockel.Installationsset. Spikes. 4mm Stecker. 2 doppelseitigeVerbindungskarten(Patentiert) für jedenLautsprecher.Garantiekarte.Füllen Sie dieGarantiekarte bitte ausund senden Sie sie an <strong>Linn</strong>oder Ihren <strong>Linn</strong> Händler.ItalianoVerificare di avere disponibiliDiffusori.Stand dei diffusori.Kit di montaggio. Kit di punta. Banane da 4mm. 2 schede diconnessione a doppiafaccia (in attesa dibrevetto) fissate aciascun diffusoreTagliando di garanzia.Compilare il tagliando digaranzia e inviarlo a<strong>Linn</strong> o al distributoreautorizzato.EspañolCompruebe que tieneLas cajas acústicas.Los soportes.Kit de montaje. Kit de puntas. Conectores banana de4mm.2 paneles de bornas dedoble cara (pendientede patente) colocadasen cada caja acústica.Tarjeta de garantía.Rellene la tarjeta degarantía y envíela a <strong>Linn</strong>España (dirección en latarjeta de garantía).NederlandsControleer de inhoudLuidsprekers.Luidsprekerstandaards.Installatiesetje. Spike kit 4mm pluggen. 2 dubbelzijdigeverbindingsplaten (inafwachting van patent)aan elke luidspreker.Garantiebewijs.Vul het garantiebewijs inen stuur deze op naar<strong>Linn</strong> of uw <strong>Linn</strong>-dealer.5 LINN <strong>ESPEK</strong>
LINN <strong>ESPEK</strong>EnglishFitting the standLay the speaker on its top on asmooth surface.Place the stand on to the speaker.Take a washer from the fixing kit andinsert it into one of the counter bores.Insert a screw into the washer.Repeat for the remaining screws.Tighten the screws with a hexagonkey.FrançaisFixation du soclePosez l'enceinte à l'envers sur unesurface douce.Placez le socle sur l'enceinte.Prenez une rondelle du kit de fixationet insérez-la dans l'un des orifices.Insérez un écrou par-dessus larondelle.Répétez l'opération pour les autresécrous.Serrez les écrous avec une clé à sixpans.DeutschFuß installierenLegen Sie den Lautsprecher auf eineebene Grundlage.Richten Sie den Sockel amLautsprecher aus.Stecken Sie einen der Ringe aus demInstallationsset in eines der Gewaide.Stecken Sie eine Schraube durch denRing.Wiederholen Sie denselben Vorgangfür die restlichen Schrauben.Ziehen Sie die Schrauben mit einemSechserschlüssel fest.ItalianoMontaggio dello standCapovolgere il diffusore su unas<strong>up</strong>erficie liscia.Appoggiare lo stand sul diffusore.Inserire una rondella, presa dal kit dimontaggio, nell’estremità di uno deifori.Inserire una vite nella rondella.Ripetere l’operazione per le vitirimanenti.Serrare le viti con una chiaveesagonale.EspañolSujeción del soporteColoque la caja acústica boca abajodescansando sobre la partes<strong>up</strong>erior,sobre una s<strong>up</strong>erficie lisa.Coloque el soporte en la cajaacústica.Coja una arandela del kit de sujecióne insértela en los huecos rectificados.Introduzca un tornillo en la arandela.Repita el procedimiento para losrestantes tornillos.Apriete los tornillos, primero con losdedos (para que entren bien en larosca), luego con una llave Allen.NederlandsMontage van de standaardPlaats de luidspreker onderstebovenop een glad oppervlak.Plaats de standaard op deluidspreker.Pak een ring uit het installatiesetje endruk die in een van de gaten.Draai een schroef in de ring.Herhaal dit voor de overigeschroeven.Draai de schroeven stevig aan metpassend gereedschap.6
Open the spike kit.Place a washer over one of thecorner holes in the stand.Screw a floor spike through thewasher into the stand.Screw a locknut on to the spike.Leave finger tight for now to makeadjusting easier later.Repeat for the remaining spikes.An optional composite stand isavailable please contact your <strong>Linn</strong>retailer for more details.Ouvrez le kit de broches.Placez une rondelle sur l'un desorifices de coin du socle.Vissez une des broches à travers larondelle dans le socle.Vissez un contre-écrou sur la broche.Serrez à la main pour pouvoir ajusterplus tard.Répétez l'opération pour les autresbroches.Un socle en métal composite estdisponible ; consultez votre détaillantpour plus d'informations.Öffnen Sie das Spikeset.Geben Sie einen Ring über eines derEcklöcher des Fußes.Schrauben Sie einen Spike durch denring in den Fuß.Schrauben Sie eine Gegenmutter aufden Spike. Vorerst noch nicht ganzfestziehen, damit genau eingestelltwerden kann.Wiederholen Sie den Vorgang für dierestlichen Spikes.Zusammenges. Fuß als Optionerhältlich - fragen Sie Ihren Händler.Aprire il kit delle caviglie.Appoggiare una rondella sul foro inuno degli angoli dello stand.Avvitare la caviglia nello standattraverso la rondella.Avvitare il controdado sulla caviglia,serrandolo temporaneamente a manoper facilitarne la regolazione in unmomento successivo.Ripetere l’operazione per le caviglierimanenti.È disponibile uno stand composito;per ulteriori informazioni, rivolgersi aldistributore.Abra el kit de puntas.Coloque una arandela sobre uno delos agujeros de la esquina en elsoporte.Atornille una punta para suelo através de la arandela en la base.Coloque una contratuerca sobre lapunta. Apriete de momento solamentea mano para hacer más fácil un ajusteposterior.Repita el procedimiento con laspuntas restantes. Hay disponible unsoporte opcional de materialcompuesto - consulte a su detallistapara más detalles.Open de spike kit.Plaats een ring op een van de gatenop de hoek van de standaard.Schroef een spike door de ring in destandaard.Draai een bormoer op de spike.Handvast aandraaien om het afstellenlater te vergemakkelijken.Herhaal dit voor de overige spike.Er is een optionele standaardleverbaar – informeer hiernaar bij uwdealer.7 LINN <strong>ESPEK</strong>
LINN <strong>ESPEK</strong>45cm10cm-30cmEnglishPositioning the speakerPlace the speakers so that you are thesame distance from each speaker. Thedistance between the speakers shouldbe the same as between you and thespeakers.For best results the speakers shouldbe at least 6 inches (15cm) in front ofa wall and at least 6 inches (15cm)from any corner.Angle speakers inward by 5 o to 10 ofor a clearer, more tuneful mid range.Adjust the floor spikes, so the speakersits level on the floor. Lock the spike inposition with the lock nuts.FrançaisPositionnement des enceintesPlacez les enceintes à égale distancel'une de l'autre. La distance entre lesenceintes devra être la même qu'entrevous et les enceintes.Pour des résultats optimaux, lesenceintes devraient être à 10-30 cmd'un mur et à au moins 45 cm den'importe quel angle.Orientez les enceintes vers l'intérieurde 5 o à 10 o pour une fréquencemoyenne plus claire et plusmélodieuse.Ajustez les broches, de façon à ceque l'enceinte soit d'équerre avec lesol. Serrez les broches avec lescontre-écrous.DeutschLautsprecher aufstellenLautsprecher so aufstellen, dass Sie vonjedem gleich weit entfernt sind. DieEntfernung zwischen den Lautsprechernund Ihen und den Lautsprechernvoneinander sollte jeweils gleich sein.Für beste Ergebnisse 10-30cmAbstand von einer Wand undmindestens 45cm Abstand von denEcken einhalten.Für klareren, klangvolleren MitteltonLautsprecher im Winkel 5 o bis 10 oeinwärtsgerichtet stellen.Bodenspitzen abstimmen, so dassLautsprecher flach aufliegt. Spitze mitGegenmutter fixieren.ItalianoEspañolPosizionamento dei diffusoriPosicionamiento de las cajasacústicasPosizionare i diffusori in modo checiascuno sia equidistante dal puntod’ascolto. La distanza tra i diffusori deveessere eguale a quella tra il puntod’ascolto e i diffusori.Sitúe las cajas de forma que seencuentre a una distancia idéntica deambas cajas. La distancia entre lascajas debe ser la misma que la queexiste entre usted y las cajas.Per risultati ottimali, i diffusori devonoessere a 10-30 cm dalla parete e adalmeno 45 cm da ciascun angolo.Para obtener unos resultados óptimos,las cajas acústicas deberán estar entre10 y 30cm delante de una pared ycomo mínimo a 45cm de cualquieresquina.Per maggiore trasparenza emusicalità in gamma media,sistemare obliquamente, ad un angolointerno di 5 o - 10 o .Gire las cajas acústicas hacia dentroentre 5º y 10º para unas frecuenciasmedias más claras y nítidas.Regolare le caviglie, in modo che idiffusori siano perfettamente parallelirispetto al pavimento. Serrare lecaviglie nella posizione corretta con icontrodadi.Regule las puntas del suelo de formaque la caja acústica descansenivelada en el suelo. Apriete laspuntas en su posición con lascontratuercas.NederlandsPlaatsen van de luidsprekersPlaats de luidsprekers dusdanig dat deafstand tussen u en de luidsprekersonderling even groot is.Om de beste resultaten te bereikendienen de luidsprekers 10 - 30 cm vrijvan de wand en minstens 45 cm vaneen hoek te staan.Draai de luidsprekers 5 o tot 10 o naarelkaar toe voor een helderder enmelodieuzere weergave van hetmiddenbereik.Stel de spikes dusdanig af dat deluidspreker waterpas staat.Vergrendel deze afstelling met deborgmoeren.8
LINN <strong>ESPEK</strong>EnglishConfiguration optionsSingle wired - a single cable fromone amplifier drives each speaker.Bi-wired - a single amplifier, withseparate wires to drive the bass/midunits and the treble unit.Bi-amplified passive - two amplifiers.One drives the bass/mid units. Theother drives the treble unit.Tri-wire passive - a single amplifierwith seperate wires to drive the bassunit, mid-range unit and the trebleunit.FrançaisOptions de configurationMono-câblage - un seul câbleprovenant d’un amplificateur excitechaque haut-parleur.Bi-câblage - un seul amplificateur,dont des câbles distincts excitent lesunités des graves/médianes et celledes aiguës.Bi-amplification passive - deuxamplificateurs. L’un excite les unitésdes graves/médiane et l’autre celledes aiguës.Tri-câblage passif -un seulamplifificateur aux câbles distinctsexcitant le haut-parleur des graves,celui des fréquences médianes etcelui des aiguës.DeutschKonfigurationsoptionenSingle wired - ein individuelles Kabelvon einem Verstärker für jedenLautsprecher.Bi-wired - ein Verstärker mitseparaten Kabeln für die Bass/mittleren Bereiche und Höhen.Bi-amplified passiv - zweiVerstärker. Einer für die Bass/mittleren Bereiche; der andere für dieHöhen.Tri-wire passiv - ein Verstärker mitseparaten Kabeln für Bass, mittlerenBereich und Höhen.ItalianoModalità di collegamentoSingle wiring : un unico cavo da unamplificatore pilota ciascun diffusore.Bi-wiring : un unico amplificatore,con cavi separati, pilota le unità bassi/mid e l’unità alti.Bi-amping passivo : dueamplificatori; uno pilota le unità bassi/mid e l’altro l’unità alti.Tri-wiring : un unico amplificatore,con cavi separati, pilota le unità bassi,mid e alti.EspañolOpciones de configuraciónMonocableado - un único cableprocedente de un amplificadorcontrola cada caja.Bicableado - un único amplificador,con cables separados para controlarlas cajas de graves/medios y la deagudos.Biamplificado pasiva - dosamplificadores. Uno controla losaltavoces de graves y medios. El otrocontrola el altavoz de agudos.Tricableado pasivo - un únicoamplificador, con cables separadospara controlar el altavoz de graves, elde medios y el de agudos.NederlandsConfiguratiesEnkel snoer - een enkel snoer voedtelke luidspreker van eengemeenschappelijke versterker.Dubbel snoer - een enkeleversterker, met aparte snoeren om deeenheden van bas/middenbereik entreble aan te sturen.Dubbelversterkt passief - tweeversterkers. De ene stuurt deeenheden van bas/middenbereik aanen de andere de treble.Drievoudig passief - een enkeleversterker stuurt apart de bas, hetmiddenbereik en de treble aan.9 LINN <strong>ESPEK</strong>
LINN <strong>ESPEK</strong>EnglishConfiguration options(Continued)FrançaisOptions de configuration(Suite)DeutschKonfigurationsoptionen(Fortsetzung)ItalianoModalità di collegamento(continua)EspañolOpciones de configuración(Continuación)NederlandsConfiguraties(Vervolg)Tri-amplified passive - 3 amplifiers,one drives the bass unit, one the midrangeunit and the other drives thetreble.Tri-amplification passive - 3amplificateurs, l’un excite les basses,l’autre le haut-parleur des fréquencesmédianes et le troisième celui desaiguës.Tri-amplified passiv - 3 Verstärker,einer für den Bass, einer für denmittleren Bereich und einer für dieHöhen.Tri-amping passivo : 3 amplificatori:uno pilota l’unità bassi, uno la mid el’altro l’unità alti.Triamplificado pasivo - 3amplificadores, uno controla la unidadde los graves, otro la unidad defrecuencias medias y la otra controlala de agudos.Drievoudig versterkt passief - 3versterkers, apart aangestuurdeeenheden van bas, middenbereik entreble.Tri-amplified Aktiv - The signal isseparated into bass, mid and treblefrequency bands using activecrossovers built into the threededicated amplifiersTri-amplification « Aktiv » - Le signalest séparé par bandes de fréquencesgraves, médianes et aiguës enutilisant des chevauchements actifsintégrés aux trois amplificateursconçus à cet effet.Tri-amplified Aktiv - Das Signal wirdmit Hilfe aktiver, in die drei dazubestimmten Verstärkern eingebautenÜberschneidungen in Bass-, MittelundHöhenfrequenzbänder unterteilt.Tri-amping attivo : il segnale è divisonelle bande di frequenza bassa,media e alta mediante i crossoverattivi, incorporati in tre amplificatoridedicatiTriamplificado activo - La señal sesepara en las bandas de frecuenciasgraves, medias y agudas mediantefiltros activos integrados en los tresamplificadores de potenciadedicados.Drievoudig versterkt aktief - Hetsignaal wordt via aktieve crossovervanaf de drie aangesloten versterkersgescheiden in bastonen,middenbereik en treble10
LINN <strong>ESPEK</strong>EKWAL SINGLE WIRE PASSIVEEKWAL BI-WIRE-PASSIVE<strong>ESPEK</strong> SINGLE WIRE PASSIVE<strong>ESPEK</strong>-BI-WIRE-PASSIVEEnglishPreparing speakers forconfigurationFrançaisPréparation des haut-parleurspour les configurerDeutschLautsprecher für dieKonfiguration vorbereitenItalianoPreparazione dei diffusori peril collegamentoEspañolPreparación de las cajas parasu configuraciónNederlandsConfiguratie instellenThe crossover link plates enablepassive or aktiv configuration. Formore information go to www.linn.co.ukand select ‘Loudspeakers’ from the‘Product Locator’.Les plaques de connexion permettentd'avoir une configuration "activ" o<strong>up</strong>assive. Veuillez contacter votrerevendeur <strong>Linn</strong> pour obtenir de plusamples renseignements à ce sujet ouvisitez notre site www.linn.co.ukMit den Überschneidungs-Verbindungsplatten ist eine aktiveoder passive Konfiguration möglich.Weitere Informationen finden Sieunterwww.linn.co.uk wo Sie aus‘Product Locator’ ‘Loudspeakers’wählen.Le schede di connessione crossoverconsentono di eseguire ilcollegamento passivo o attivo.Ulteriori informazioni sullaconfigurazione, nel sitowww.linn.co.uk,; selezionare“Loudspeakers” in “Product Locator”.Preparación de las cajas para suconfiguración Las placas de conexiónpermiten una configuración activa opasiva. Para obtener másinformación, póngase en contacto consu detallista de <strong>Linn</strong> o visite la páginawww.linn.co.uk.Door middel van de crossoverschakelplaatjes kunt u de aktieve ofpassieve configuratie instellen. Voornadere informatie hierover raadpleegtu www.linn.co.uk en kiest u‘Loudspeakers’ op de ‘ProductLocator’.There is a crossover configuration linkboard for each configuration. Thesecontains the necessary linkingcircuitry.Il existe une plaque de connexionpour chaque configuration dechevauchement. Elle contient toute laconnectique nécessaire.Für jede Konfiguration gibt es eineVerbindungsplatine zurÜberschneidungskonfiguration.Darauf befinden sich die notwendigenVerbindungsschaltungen.È disponibile una scheda diconnessione crossover per ciascunaconfigurazione, che contiene lacircuiteria necessaria alcollegamento.Hay una placa de enlace deconfiguración de transición para cadaconfiguración. Estas placas contienenla circuitería de enlace necesaria.Er is voor elke configuratie eencrossover schakelplaatje beschikbaar.Op het plaatje zijn de benodigdeschakelingen reeds aangebracht.Remove the connector holdingcollars, and both link boards.Select the link board for theconfiguration option you want to use.Retirez les colliers de retenue duconnecteur et les deux plaques deconnexion.Sélectionnez la plaque de connexionrépondant à l’option de configurationque vous voulez utiliser.Anschlusseinfassungen und beideVerbindungsplatinen entfernen.Die Verbindungsplatine für diegewünschte Konfiguration wählen.Rimuovere i collari dei connettori edambedue le schede.Selezionare la scheda idonea allamodalità di connessione desiderata.Quite todas las tuercas de las bornas,y ambos paneles.Seleccione el panel de conexión parala opción de configuración que deseeutilizar.Maak de vergrendeling los enverwijder beide schakelplaatjes.Kies het schakelplaatje voor de door ugewenste configuratie.Replace both link boards on thespeaker with the chosen boardoutermost.Ensure the collars are fullytightened.Reposez les deux plaques deconnexion sur le haut-parleur enplaçant celle que vous avez choisiesur l’extérieur.Vérifiez que vous avez bien serréles colliers.Beide Verbindungsplatinen wieder amLautsprecher mit der gewähltenPlatine nach außen anbringen.Sicherstellen, dass Einfassungenfest angezogen sind.Sostituire ambedue le schede diconnessione del diffusore con quellaprescelta in posizione esterna.Verificare che i collari siano benserrati.Coloque ambos paneles de conexiónen la caja acústica, con el panelseleccionado hacia fuera.Compruebe que las tuercas estánperfectamente apretadas.Herplaats beide schakelplaatjes in deluidspreker, met het door u gekozenplaatje aan de buitenzijde.Maak de vergrendeling vast.11
Tri-amplified (Note: For Tri-amplifiedconfiguration, use the TRI-WIREPASSIVE link board).Tri-amplified AktivTri-amplification (Veuillez noter: Pourune configuration à tripleamplification, utilisez la plaque deconnexion “TRI-WIRE PASSIVE”(TRI-CABLAGE PASSIF).Tri-amplification AktivTri-amplified (Hinweis: Für TriamplifiedKonfiguration bitte TRI-WIRE PASSIVE Verbindungsplatineverwenden).Tri-ampfiler AktivTri-amping (Nota: per il collegamentotri-amping, utilizzare la scheda diconnessione TRI-WIRE PASSIVE).Tri-amping AktivTriamplificado (Nota: Para laconfiguración triamplificada, utilice laplaca de enlace TRI-WIRE PASSIVE).Tri- amplificación activaDrievoudig versterkt (Opm.: voor eendrievoudig versterkte configuratiekiest u het TRI-WIRE PASSIVEschakelplaatje).Tri-amplifier Aktiv13 LINN <strong>ESPEK</strong>
LINN <strong>ESPEK</strong>EnglishLooking after your speakersDo not open the speakers; there areno user serviceable parts inside.Remove any marks from the cabinet,polish with a soft, slightly damp cloth.Avoid getting any liquid behind thegrille.Remove spikes from the stand of thespeaker before transporting.Your <strong>Linn</strong> retailer can s<strong>up</strong>plypackaging if you no longer have it.FrançaisEntretien de vos enceintesNe pas ouvrir les enceintes ; aucunepièce interne ne doit être entretenuepar l'utilisateur.Enlevez les traces sur l'enceinte ennettoyant avec un chiffon doux,légèrement humide.Evitez que tout liquide ne passederrière la grille.Retirez les broches du socle del'enceinte avant transport.Votre détaillant <strong>Linn</strong> peut vous fournirun emballage si vous n'avez pasgardé celui d'origine.DeutschPflege Ihrer LautsprecherLautsprecher nicht öffnen, es sindkeine vom Kunden zu wartendenInnenteile vorhanden.Flecken vom Gehäuse entfernen undmit einem weichen, leichtangefeuchteten Tuch abwischen.Den Eintritt von Flüssigkeitenvermeiden.Vor Transport der LautsprecherSpitzen aus dem Sockel entfernen.Ihr <strong>Linn</strong> Händler kann Verpackungbereitstellen, wenn Originalverp. nichtmehr vorhanden ist.ItalianoCura dei diffusoriNon aprire i diffusori; l’utente nondeve riparare né sostituire alcunadelle componenti interne.Rimuovere eventuali impronte dalcabinet e lucidare con un pannosoffice, leggermente inumidito.Evitare che dei liquidi penetrino dietrola griglia.Rimuovere le caviglie dal diffusoreprima di spostarlo.Se non si è conservato l’imballaggio, ildistributore <strong>Linn</strong> può fornirne unonuovo.EspañolCuidado de sus cajas acústicasNo abra las cajas acústicas; suinterior no contiene elementos que sepuedan reparar.Quite las marcas del mueble ylímpielas con un paño suave yligeramente húmedo.Evite que entre cualquier tipo delíquido por detrás de la rejilla.Quite las puntas de la base de la cajaacústica antes de moverla. Sudetallista<strong>Linn</strong> le podrá proporcionar losembalajes si usted ya no los tuviera.NederlandsOnderhoud van uwluidsprekersMaak de luidsprekerkasten niet open;de inwendige onderdelen vereisengeen onderhoud.Verwijder vlekken en poets deluidsprekerkasten met een zachte,vochtige doek.Voorkom dat vloeistoffen achter hetrooster terecht komen.Voordat u de luidsprekers transporteertdienen de spikes verwijderd te worden.Uw <strong>Linn</strong>-dealer kan voor origineelverpakkingsmateriaal zorgen als u datniet meer in uw bezit heeft.14
LINN EKWALTechnical s<strong>up</strong>port and information For technical s<strong>up</strong>port, product queries and information, please contact either your local retailer or the offices below.Full details of your local retailer/distributor can be found at : www.linn.co.uk/buy_linn/find_retailer.cfmS<strong>up</strong>port technique et autres renseignementsPrière de contacter le détaillant le plus proche ou les bureaux mentionnés ci-dessous pour tout s<strong>up</strong>port technique, informations concernantles produits et autres renseignements.Les détails complets de votre distributeur local se trouvent à l'adresse : www.linn.co.uk/buy_linn/find_retailer.cfmTechnische Beratung und InformationFür technische Beratung, Produktanfragen und Information wenden Sie sich bitte an Ihren Händler vor Ort oder an die Adresse unten.Genaue Angaben zu Ihrem Händler vor Ort finden Sie unter: www.linn.co.uk/buy_linn/find_retailer.cfmAssistenza tecnica e informazioniPer l’assistenza tecnica, domande ed informazioni sul prodotto, rivolgersi al rivenditore locale o agli uffici riportati di seguito.Informazioni più dettaglate sul distributore di zona sono reperibili nel sito: www.linn.co.uk/buy_linn/find_retailer.cfmSoporte técnico e informaciónPara realizar cualquier consulta de productos, petición de información o solicitar soporte técnico, por favor póngase en contacto consu distribuidor local o con cualquiera de las delegaciones siguientes.La información correspondiente a su distribuidor local podrá encontrarla en: www.linn.co.uk/buy_linn/find_retailer.cfmTechnische ondersteuning en informatieVoor technische ondersteuning, vragen over het product of voor informatie kunt u terecht bij uw plaatselijke winkelier of de hierondergenoemde kantoren.Meer informatie over uw plaatselijke dealer kunt u vinden op :www.linn.co.uk/buy_linn/find_retailer.cfmTechnical s<strong>up</strong>port<strong>Linn</strong> Products LimitedFloors RoadWaterfootGlasgow G76 0EPScotland, UKPhone: +44 (0)141 307 7777Fax: +44 (0)141 644 4262Helpline: 0500 888909Email: Helpline@<strong>Linn</strong>.co.uk<strong>Linn</strong> Incorporated8787 Perimeter Park BoulevardJacksonville,FL 32216USAPhone: +1 (904) 645 5242Fax: +1 (904) 645 7275Helpline: 888-671-LINNEmail: Helpline@<strong>Linn</strong>Inc.com<strong>Linn</strong> Deutschland GmbHAlbert-Einstein-Ring 1922761 HamburgDeutschlandPhone: +49-(0) 40-890 660-0Fax: +49-(0) 40-890 660-29Email: info@linn-deutschland.comWebsite: http://www.linn.co.ukWebsite:http://www.linn.co.ukWebsite:http://www.linninc.com15 LINN <strong>ESPEK</strong>
<strong>Linn</strong> <strong>ESPEK</strong> SpecificationsIntroduced: 2000Spécifications de l’enceinte<strong>Linn</strong> <strong>ESPEK</strong><strong>Linn</strong> <strong>ESPEK</strong> Technische DatenEingeführt: 2001Volumen42 LiterVolume42 litresLancée en : 2001Frequenzverhalten30Hz-20KHz +/- 3dbFrequencyresponseInput impedance:Efficiency:Minimum amplifierpower:30Hz-20KHz +/- 3db4 ohms90db for 1W at 1m (KHz)60W into 4 ohmsVolume :Réponse enfréquence :Impédance d’entrée:Efficacité :42 litres30Hz-20KHz +/- 3db4 ohms90dB pour 1W à 1m (KHz)Eingabeimpedanz:Effizienz:Verstärkermindestleistung:MagnetischeAbschirmung4 Ohm90db für 1W bei 1m (KHz)60W in 4 OhmInnerhalb von 3 Gauß ab Gehäusekantevoll abgeschirmtMagnetic ScreeningCrossover optionsWiring OptionsSize:Weight:FinishesFully screened within 3 gauss from cabinetedgeTreble level can be reduced by 1db on thecrossover board.Single wire passive, bi wire passive,tri-wire passive, tri amp active170mm (W) x 320 mm (D) x 980mm (H)21.5kg (47.4lb)Black Ash, American Cherry or MaplePuissanced’amplificationminimale :Protection antimagnétique:Options dechevauchement :Options de câblage:Dimensions :60W dans 4 ohmsEcran anti-magnétique complet dans unelimite de 3 gauss du bord du coffretVous pouvez réduire le niveau des aiguësde 1dB sur la plaque de chevauchement.Mono-câblage passif, bi-câblage passif,tri-câblage passif, tri-amplificationactive170mm (L) x 320 mm (D) x 980mm (H)ÜberschneidungsoptionenAnschlussoptionenGröße:Gewicht:VerarbeitungHöhenpegel kann auf derÜberschneidungsplatine um 1db reduziertwerden.Single wire passiv, bi wire passiv, tri wirepassiv, tri amp aktiv170mm (B) x 320 mm (T) x 980mm (H)21,5kgEingeführt: 2001Schwarzesche, Amerikan. Kirschbaumoder AhornPoids :21,5 kg (47,4livres)Volumen42 LiterFinitions :Frêne noir, cerisier américain ou érable16
Specifiche di <strong>Linn</strong> <strong>ESPEK</strong>Anno didistribuzione:Volume:Risposta infrequenzaImpedenza diingressoEfficienza:Potenza minima perl’amplificazione:SchermaturamagneticaOpzione crossoverOpzioni dicollegamentoDimensioni:200142 litri30Hz-20KHz +/- 3db4 ohm90db per 1W a 1m a 1KHz60W 4 ohmTotalmente schermato entro 3 gauss dalbordo del cabinet.Il livello degli alti può essere ridotto di 1dBsulla scheda crossover.Single wiring passivo, bi-wiring passivo,tri-wiring passivo, tri-amping attivo170mm (L) x 320 mm (P) x 980mm (A)Especificaciones de las <strong>Linn</strong><strong>ESPEK</strong>Presentado: 2001VolumenRespuesta enfrecuenciaImpedancia deentrada:Rendimiento:Potencia mínima delamplificador:ApantalladomagnéticoOpciones detransiciónOpciones decableado42 litros30Hz-20KHz +/- 3db4 ohmios90db para 1W a 1m (KHz)60W a 4 ohmiosCompletamente apantallado a 3 gaussdesde el borde del recintoEl nivel de agudos puede reducirse en 1dben la placa de transición.Monocableado pasivo, bicableado pasivo,tricableado pasivo, triamplificaciónactiva.<strong>Linn</strong> <strong>ESPEK</strong> SpecificatiesGeintroduceerd: 2001InhoudFrequentieresponsInput impedantie:Efficiency:Minimaalversterkervermogen:AfschermingCrossover optiesAansluitmogelijkhedenAfmetingen:Gewicht:42 liter30Hz-20kHz +/- 3db4 ohm90db per 1W op 1m (kHz)60W bij 4 ohmBuiten de kast geheel afgeschermdTreble niveau kan via het crossover boardmet 1db worden verminderd.Enkel snoer passief, dubbel snoer passief,drievoudig snoer passief, drievoudig versterktaktief170mm (B) x 320 mm (D) x 980mm (H)21.5kgPeso:21,5kgTamaño:170mm (W) x 320 mm (D) x 980mm (H)KleurenZwart, kersen of esdoornFinituraFrassino, ciliegio americano o acero nero.Peso:21,5kg (47,4lb)Geintroduceerd: 2000Anno didistribuzione:2000AcabadosPresentado: 2000Negro ceniza, cerezo o arce17
PACK 620 rev518