

Karcher WD 3 P - manuals
Karcher WD 3 P - manuals
Karcher WD 3 P - manuals

You also want an ePaper? Increase the reach of your titles
YUMPU automatically turns print PDFs into web optimized ePapers that Google loves.
Note: As soon as the electric tool is switched on, the<br />
suction turbine starts with a 0.5 second delay. If the<br />
electric tool is switched off, the suction turbine continues<br />
to run for approx. 5 seconds in order to vacuum up<br />
the remaining dirt in the suction hose.<br />
Cleaning hard to reach locations or, where vacuuming<br />
is not possible, like leaves from a gravel bed.<br />
Illustration<br />
Connect the suction hose to the blower connection,<br />
this will activate the blower function.<br />
<br />
Turn off the appliance.<br />
Blowing function<br />
Interrupting operation<br />
Illustration<br />
Hook the floor nozzle into the parking position.<br />
Finish operation<br />
Turn off the appliance and disconnect the mains<br />
plug.<br />
Empty the container<br />
Illustration<br />
Remove the appliance head and empty the reservoir.<br />
Storing the appliance<br />
Illustration<br />
Stow away the mains cable and accessory at the<br />
machine. Store the appliance in a dry room.<br />
Care and maintenance<br />
Clean the appliance and accessory parts made of<br />
plastic with a commercial plastic cleaner.<br />
If required, rinse the container and accessories<br />
with water properly and dry them before reuse.<br />
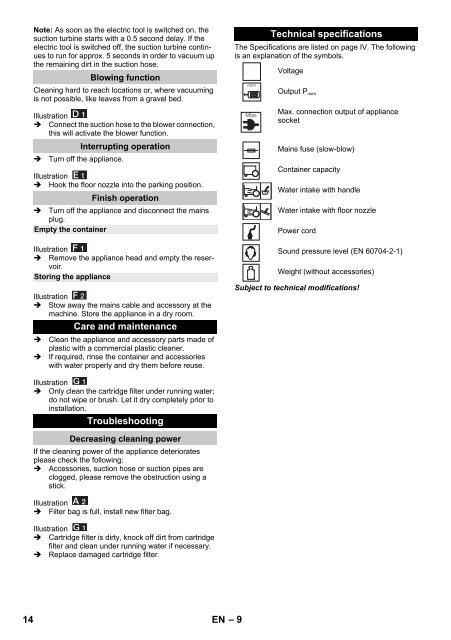
Technical specifications<br />
The Specifications are listed on page IV. The following<br />
is an explanation of the symbols.<br />
Voltage<br />
Output P nom<br />
Max. connection output of appliance<br />
socket<br />
Mains fuse (slow-blow)<br />
Container capacity<br />
Water intake with handle<br />
Water intake with floor nozzle<br />
Power cord<br />
Sound pressure level (EN 60704-2-1)<br />
Weight (without accessories)<br />
Subject to technical modifications!<br />
Illustration<br />
Only clean the cartridge filter under running water;<br />
do not wipe or brush. Let it dry completely prior to<br />
installation.<br />
Troubleshooting<br />
Decreasing cleaning power<br />
If the cleaning power of the appliance deteriorates<br />
please check the following:<br />
Accessories, suction hose or suction pipes are<br />
clogged, please remove the obstruction using a<br />
stick.<br />
Illustration<br />
Filter bag is full, install new filter bag.<br />
Illustration<br />
Cartridge filter is dirty, knock off dirt from cartridge<br />
filter and clean under running water if necessary.<br />
Replace damaged cartridge filter.<br />
14 EN – 9


