

Karcher SC 3 EasyFix - manuals
Karcher SC 3 EasyFix - manuals
Karcher SC 3 EasyFix - manuals

You also want an ePaper? Increase the reach of your titles
YUMPU automatically turns print PDFs into web optimized ePapers that Google loves.
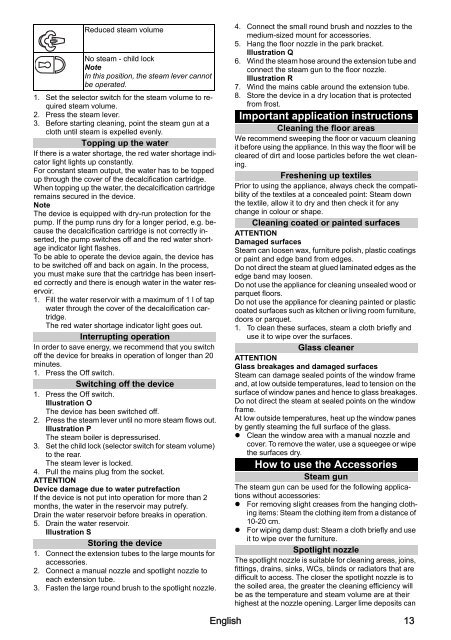
Reduced steam volume<br />
No steam - child lock<br />
Note<br />
In this position, the steam lever cannot<br />
be operated.<br />
1. Set the selector switch for the steam volume to required<br />
steam volume.<br />
2. Press the steam lever.<br />
3. Before starting cleaning, point the steam gun at a<br />
cloth until steam is expelled evenly.<br />
Topping up the water<br />
If there is a water shortage, the red water shortage indicator<br />
light lights up constantly.<br />
For constant steam output, the water has to be topped<br />
up through the cover of the decalcification cartridge.<br />
When topping up the water, the decalcification cartridge<br />
remains secured in the device.<br />
Note<br />
The device is equipped with dry-run protection for the<br />
pump. If the pump runs dry for a longer period, e.g. because<br />
the decalcification cartridge is not correctly inserted,<br />
the pump switches off and the red water shortage<br />
indicator light flashes.<br />
To be able to operate the device again, the device has<br />
to be switched off and back on again. In the process,<br />
you must make sure that the cartridge has been inserted<br />
correctly and there is enough water in the water reservoir.<br />
1. Fill the water reservoir with a maximum of 1 l of tap<br />
water through the cover of the decalcification cartridge.<br />
The red water shortage indicator light goes out.<br />
Interrupting operation<br />
In order to save energy, we recommend that you switch<br />
off the device for breaks in operation of longer than 20<br />
minutes.<br />
1. Press the Off switch.<br />
Switching off the device<br />
1. Press the Off switch.<br />
Illustration O<br />
The device has been switched off.<br />
2. Press the steam lever until no more steam flows out.<br />
Illustration P<br />
The steam boiler is depressurised.<br />
3. Set the child lock (selector switch for steam volume)<br />
to the rear.<br />
The steam lever is locked.<br />
4. Pull the mains plug from the socket.<br />
ATTENTION<br />
Device damage due to water putrefaction<br />
If the device is not put into operation for more than 2<br />
months, the water in the reservoir may putrefy.<br />
Drain the water reservoir before breaks in operation.<br />
5. Drain the water reservoir.<br />
Illustration S<br />
Storing the device<br />
1. Connect the extension tubes to the large mounts for<br />
accessories.<br />
2. Connect a manual nozzle and spotlight nozzle to<br />
each extension tube.<br />
3. Fasten the large round brush to the spotlight nozzle.<br />
4. Connect the small round brush and nozzles to the<br />
medium-sized mount for accessories.<br />
5. Hang the floor nozzle in the park bracket.<br />
Illustration Q<br />
6. Wind the steam hose around the extension tube and<br />
connect the steam gun to the floor nozzle.<br />
Illustration R<br />
7. Wind the mains cable around the extension tube.<br />
8. Store the device in a dry location that is protected<br />
from frost.<br />
Important application instructions<br />
Cleaning the floor areas<br />
We recommend sweeping the floor or vacuum cleaning<br />
it before using the appliance. In this way the floor will be<br />
cleared of dirt and loose particles before the wet cleaning.<br />
Freshening up textiles<br />
Prior to using the appliance, always check the compatibility<br />
of the textiles at a concealed point: Steam down<br />
the textile, allow it to dry and then check it for any<br />
change in colour or shape.<br />
Cleaning coated or painted surfaces<br />
ATTENTION<br />
Damaged surfaces<br />
Steam can loosen wax, furniture polish, plastic coatings<br />
or paint and edge band from edges.<br />
Do not direct the steam at glued laminated edges as the<br />
edge band may loosen.<br />
Do not use the appliance for cleaning unsealed wood or<br />
parquet floors.<br />
Do not use the appliance for cleaning painted or plastic<br />
coated surfaces such as kitchen or living room furniture,<br />
doors or parquet.<br />
1. To clean these surfaces, steam a cloth briefly and<br />
use it to wipe over the surfaces.<br />
Glass cleaner<br />
ATTENTION<br />
Glass breakages and damaged surfaces<br />
Steam can damage sealed points of the window frame<br />
and, at low outside temperatures, lead to tension on the<br />
surface of window panes and hence to glass breakages.<br />
Do not direct the steam at sealed points on the window<br />
frame.<br />
At low outside temperatures, heat up the window panes<br />
by gently steaming the full surface of the glass.<br />
• Clean the window area with a manual nozzle and<br />
cover. To remove the water, use a squeegee or wipe<br />
the surfaces dry.<br />
How to use the Accessories<br />
Steam gun<br />
The steam gun can be used for the following applications<br />
without accessories:<br />
• For removing slight creases from the hanging clothing<br />
items: Steam the clothing item from a distance of<br />
10-20 cm.<br />
• For wiping damp dust: Steam a cloth briefly and use<br />
it to wipe over the furniture.<br />
Spotlight nozzle<br />
The spotlight nozzle is suitable for cleaning areas, joins,<br />
fittings, drains, sinks, WCs, blinds or radiators that are<br />
difficult to access. The closer the spotlight nozzle is to<br />
the soiled area, the greater the cleaning efficiency will<br />
be as the temperature and steam volume are at their<br />
highest at the nozzle opening. Larger lime deposits can<br />
English 13


