K 5.20 M - Kärcher
K 5.20 M - Kärcher
K 5.20 M - Kärcher

Create successful ePaper yourself
Turn your PDF publications into a flip-book with our unique Google optimized e-Paper software.
Commissioning and<br />
operation<br />
Definition of abbreviations used:<br />
HP = High pressure<br />
DT = Detergent<br />
Description of the Appliance<br />
When unpacking the product, make sure<br />
that no accessories are missing and that<br />
none of the package contents have been<br />
damaged. If you detect any transport damages<br />
please contact your dealer.<br />
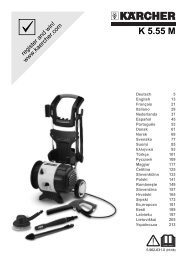
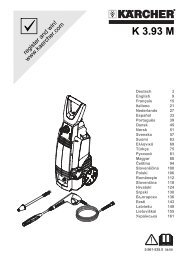
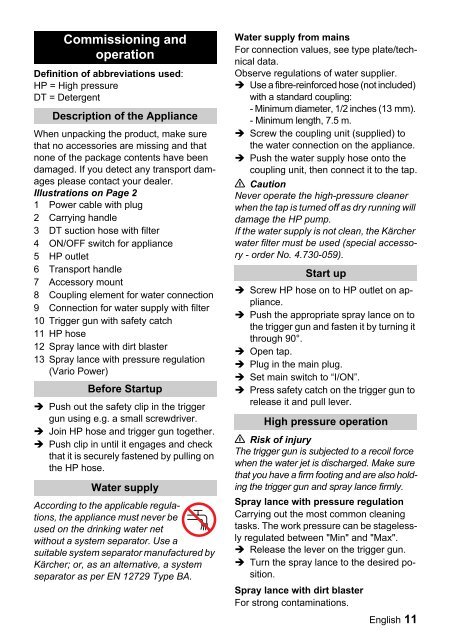
Illustrations on Page 2<br />
1 Power cable with plug<br />
2 Carrying handle<br />
3 DT suction hose with filter<br />
4 ON/OFF switch for appliance<br />
5 HP outlet<br />
6 Transport handle<br />
7 Accessory mount<br />
8 Coupling element for water connection<br />
9 Connection for water supply with filter<br />
10 Trigger gun with safety catch<br />
11 HP hose<br />
12 Spray lance with dirt blaster<br />
13 Spray lance with pressure regulation<br />
(Vario Power)<br />
Before Startup<br />
Push out the safety clip in the trigger<br />
gun using e.g. a small screwdriver.<br />
Join HP hose and trigger gun together.<br />
Push clip in until it engages and check<br />
that it is securely fastened by pulling on<br />
the HP hose.<br />
Water supply<br />
According to the applicable regulations,<br />
the appliance must never be<br />
used on the drinking water net<br />
without a system separator. Use a<br />
suitable system separator manufactured by<br />
Kärcher; or, as an alternative, a system<br />
separator as per EN 12729 Type BA.<br />
Water supply from mains<br />
For connection values, see type plate/technical<br />
data.<br />
Observe regulations of water supplier.<br />
Use a fibre-reinforced hose (not included)<br />
with a standard coupling:<br />
- Minimum diameter, 1/2 inches (13 mm).<br />
- Minimum length, 7.5 m.<br />
Screw the coupling unit (supplied) to<br />
the water connection on the appliance.<br />
Push the water supply hose onto the<br />
coupling unit, then connect it to the tap.<br />
Caution<br />
Never operate the high-pressure cleaner<br />
when the tap is turned off as dry running will<br />
damage the HP pump.<br />
If the water supply is not clean, the Kärcher<br />
water filter must be used (special accessory<br />
- order No. 4.730-059).<br />
Start up<br />
Screw HP hose on to HP outlet on appliance.<br />
Push the appropriate spray lance on to<br />
the trigger gun and fasten it by turning it<br />
through 90°.<br />
Open tap.<br />
Plug in the main plug.<br />
Set main switch to “I/ON”.<br />
Press safety catch on the trigger gun to<br />
release it and pull lever.<br />
High pressure operation<br />
Risk of injury<br />
The trigger gun is subjected to a recoil force<br />
when the water jet is discharged. Make sure<br />
that you have a firm footing and are also holding<br />
the trigger gun and spray lance firmly.<br />
Spray lance with pressure regulation<br />
Carrying out the most common cleaning<br />
tasks. The work pressure can be stagelessly<br />
regulated between "Min" and "Max".<br />
Release the lever on the trigger gun.<br />
Turn the spray lance to the desired position.<br />
Spray lance with dirt blaster<br />
For strong contaminations.<br />
English 11