
You also want an ePaper? Increase the reach of your titles
YUMPU automatically turns print PDFs into web optimized ePapers that Google loves.
English<br />
<strong>BR</strong> <strong>400</strong><br />
1. Operation<br />
Attaching the push handle<br />
• On unpacking the unit you will find the upper push handle folded<br />
down.<br />
• Position the lower push handle half vertically, attach the upper<br />
half and screw together using the supplied screws and nuts.<br />
Caution:<br />
Do not clamp the cable during assembly.<br />
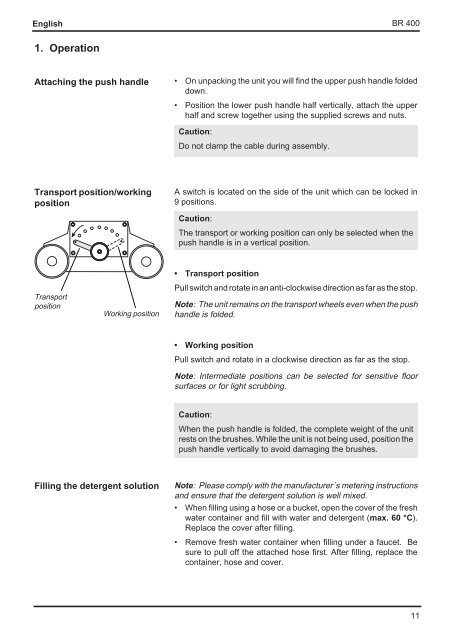
Transport position/working<br />
position<br />
A switch is located on the side of the unit which can be locked in<br />
9 positions.<br />
Caution:<br />
The transport or working position can only be selected when the<br />
push handle is in a vertical position.<br />
Transport<br />
position<br />
Working position<br />
• Transport position<br />
Pull switch and rotate in an anti-clockwise direction as far as the stop.<br />
Note: The unit remains on the transport wheels even when the push<br />
handle is folded.<br />
• Working position<br />
Pull switch and rotate in a clockwise direction as far as the stop.<br />
Note: Intermediate positions can be selected for sensitive floor<br />
surfaces or for light scrubbing.<br />
Caution:<br />
When the push handle is folded, the complete weight of the unit<br />
rests on the brushes. While the unit is not being used, position the<br />
push handle vertically to avoid damaging the brushes.<br />
Filling the detergent solution<br />
Note: Please comply with the manufacturer´s metering instructions<br />
and ensure that the detergent solution is well mixed.<br />
• When filling using a hose or a bucket, open the cover of the fresh<br />
water container and fill with water and detergent (max. 60 °C).<br />
Replace the cover after filling.<br />
• Remove fresh water container when filling under a faucet. Be<br />
sure to pull off the attached hose first. After filling, replace the<br />
container, hose and cover.<br />
11