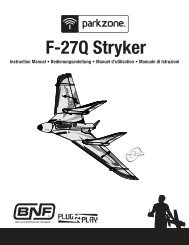
F-27C Stryker RTF - ParkZone
F-27C Stryker RTF - ParkZone
F-27C Stryker RTF - ParkZone

Create successful ePaper yourself
Turn your PDF publications into a flip-book with our unique Google optimized e-Paper software.
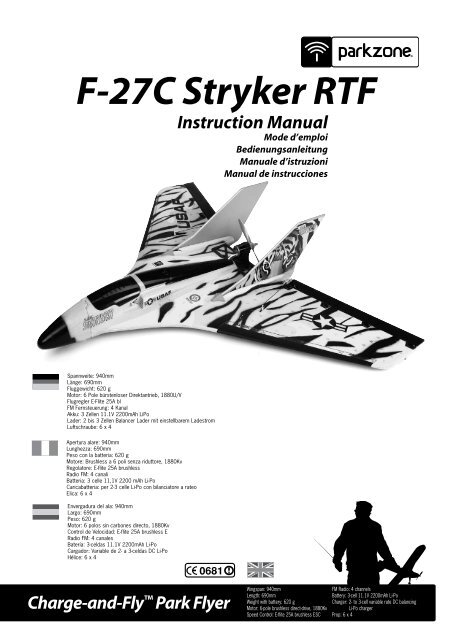
F-<strong>27C</strong> <strong>Stryker</strong> <strong>RTF</strong><br />
Instruction Manual<br />
Mode d’emploi<br />
Bedienungsanleitung<br />
Manuale d’istruzioni<br />
Manual de instrucciones<br />
Spannweite: 940mm<br />
Länge: 690mm<br />
Fluggewicht: 620 g<br />
Motor: 6 Pole bürstenloser Direktantrieb, 1880U/V<br />
Flugregler E-Flite 25A bl<br />
FM Fernsteuerung: 4 Kanal<br />
Akku: 3 Zellen 11.1V 2200mAh LiPo<br />
Lader: 2 bis 3 Zellen Balancer Lader mit einstellbarem Ladestrom<br />
Luftschraube: 6 x 4<br />
Apertura alare: 940mm<br />
Lunghezza: 690mm<br />
Peso con la batteria: 620 g<br />
Motore: Brushless a 6 poli senza riduttore, 1880Kv<br />
Regolatore: E-flite 25A brushless<br />
Radio FM: 4 canali<br />
Batteria: 3 celle 11,1V 2200 mAh Li-Po<br />
Caricabatteria: per 2-3 celle Li-Po con bilanciatore a rateo<br />
Elica: 6 x 4<br />
Envergadura del ala: 940mm<br />
Largo: 690mm<br />
Peso: 620 g<br />
Motor: 6 polos sin carbones directo, 1880Kv<br />
Control de Velocidad: E-flite 25A brushless E<br />
Radio FM: 4 canales<br />
Batería: 3-celdas 11.1V 2200mAh Li-Po<br />
Cargador: Variable de 2- a 3-celdas DC Li-Po<br />
Hélice: 6 x 4<br />
Charge-and-Fly Park Flyer<br />
Wingspan: 940mm<br />
FM Radio: 4 channels<br />
Length: 690mm<br />
Battery: 3-cell 11.1V 2200mAh Li-Po<br />
Weight with battery: 620 g<br />
Charger: 2- to 3-cell variable rate DC balancing<br />
Motor: 6-pole brushless direct-drive, 1880Kv<br />
Li-Po charger<br />
Speed Control: E-flite 25A brushless ESC Prop: 6 x 4
Congratulations on your purchase of the <strong>ParkZone</strong> ® F-<strong>27C</strong> <strong>Stryker</strong> <br />
Charge-and-Fly park flyer. Your F-<strong>27C</strong> <strong>Stryker</strong> has come with<br />
everything needed to get you in the air—all in one box! You will only<br />
need to attach the vertical fins, attach the nose, and charge the<br />
battery pack prior to flight.<br />
Everyone at <strong>ParkZone</strong> is committed to giving you the most enjoyable<br />
flight experience you can have. In order to ensure a safe and<br />
successful flight, we ask that you do not fly until you have read these<br />
instructions thoroughly.<br />
Warning: We knocked this one out of the park!<br />
This is a high-performance airplane and is not a toy. The F-<strong>27C</strong><br />
<strong>Stryker</strong> is capable of flying at speeds exceeding 130 kilometers<br />
per hour, so it is intended for highly experienced and expert radio<br />
control pilots only. We suggest that this airplane is flown only at AMA<br />
approved flying sites. It travels much too fast to be flown in a “typical”<br />
park setting, even if this is where you usually fly your park flyers and<br />
even if there are many acres of space. Never fly where you may place<br />
anyone’s safety in jeopardy.<br />
F-<strong>27C</strong> <strong>Stryker</strong> Instruction Manual<br />
Crash damage is not covered under any warranty.<br />
Warning:<br />
Your F-<strong>27C</strong> <strong>Stryker</strong> comes with a 3S Li-Po battery pack that must<br />
be handled carefully at all times. Failure to follow the charging<br />
instructions properly could result in a fire! You must use an appropriate<br />
Li-Po charger to charge your Li-Po pack. The one supplied in the box<br />
with your F-<strong>27C</strong> <strong>Stryker</strong> will work very well.<br />
Italiano<br />
Manuale del F-<strong>27C</strong> <strong>Stryker</strong><br />
Congratulazioni per aver acquistato il <strong>ParkZone</strong> ® F-<strong>27C</strong> <strong>Stryker</strong> Chargeand-Fly<br />
. Lo F-<strong>27C</strong> <strong>Stryker</strong> è fornitocon tutto quello che serve per<br />
farlo volare- tutto nella scatola! Basta solo installare le derive verticali,<br />
aggiungere il muso e caricare la batteria prima di volare.<br />
Alla <strong>ParkZone</strong> cerchiamo di offrirti il modo di farti divertire nel migliore<br />
dei modi. Ti chiediamo però di non volare finchè non avrai betto con<br />
attenzione tutte le istruzioni.<br />
Attenzione: non usarlo nel parco!<br />
Non si tratta di un giocattolo ma di un aereo dalle caratteristiche<br />
avanzate. Lo F-<strong>27C</strong> <strong>Stryker</strong> può raggiungere anche i 130 km/h e di<br />
conseguenza è adatto solo per piloti con grande esperienza. Si consiglia<br />
di farlo volare solo su piste abilitate per i modelli RC. È troppo veloce per<br />
venire considerato un “tipico” park flyer anche se si tratta del parco dove<br />
voli normalmente ed è molto ampio. Non farlo assolutamente volare in<br />
posti che possono essere pericolosi per le persone.<br />
Español<br />
F-<strong>27C</strong> <strong>Stryker</strong> Manual de Instrucciones<br />
Ricorda che I danni dovuti alle cadute al suolo non sono coperti dalla<br />
garanzia!<br />
Attenzione:<br />
Lo F-<strong>27C</strong> <strong>Stryker</strong> è dotato di una batteria composta da 3 celle Li-Po<br />
che devono venire utilizzate sempre con molta attenzione. Non seguire<br />
le procedure corrette potrebbe significare lo sviluppo di un incendio! È<br />
obbligatorio l’uso di un caricabatterie per Li-Po. Quello in dotazione è<br />
pefettamente adatto allo scopo.<br />
Deutsch<br />
F-<strong>27C</strong> <strong>Stryker</strong> Bedienungsanleitung<br />
Herzlichen Glückwunsch, dass Sie die F-<strong>27C</strong> <strong>Stryker</strong> von <strong>ParkZone</strong> ®<br />
erworben haben. Sie haben mit der F-<strong>27C</strong> <strong>Stryker</strong> ein Set erworben,<br />
was alles enthält, was Sie zum Fliegen brauchen. Sie brauchen nur noch<br />
die Leitwerke anbringen, die Nase ankleben und den Akku zu laden.<br />
Das Team von <strong>ParkZone</strong> wollte Ihnen ein Produkt zur Verfügung stellen,<br />
mit dem Sie viel Spass haben werden. Um dies zu Gewährleisten, sollten<br />
Sie erst fliegen gehen, wenn Sie diese Anleitung sorgfältig gelesen und<br />
verstanden haben.<br />
Warnung: Wir haben dieses Modell aus dem Park<br />
herausgeflogen!<br />
Dieses Modell ist ein Hochleistungsflugzeug und kein Spielzeug. Das<br />
Modell erreicht Geschwindigkeiten von mehr als 130 km/h, ist also für<br />
den erfahrenen Modellpiloten bestimmt. Wir empfehlen dringend, dass<br />
dieses Modell nur auf zugelassenen Flugplätzen geflogen wird. Es fliegt<br />
zu schnell, um es in einem normalen Park zu fliegen, selbst wenn Sie<br />
dies gewöhnlich dort tun und selbst, wenn der Park größer ist. Fliegen Sie<br />
niemals dort, wo eine Gefährdung entstehen könnte.<br />
Die Garantie deckt Unfallschäden nicht ab.<br />
Achtung!<br />
Ihre <strong>Stryker</strong> F-<strong>27C</strong> <strong>Stryker</strong> wird mit einem 3 zelligen Li-Po Akku geliefert,<br />
der mit großer Sorgfalt zu behandeln ist. Fehler beim Laden können zu<br />
Feuer führen. Es dürfen nur geeignete Li-Po Lader verwendet werden. Der<br />
mitgelieferte Lader ist hier ideal.<br />
Felicidades en tu compra del F-<strong>27C</strong> <strong>Stryker</strong> de <strong>ParkZone</strong> ® , Carga-y-<br />
Vuela. Tu F-<strong>27C</strong> <strong>Stryker</strong> viene con todo lo que necesitas para volar-todo<br />
en una sola caja! Solamente necesitas ensamblar los timones verticales,<br />
ensamblar la nariz y cargar la batería antes de volar.<br />
Todos y cada uno de los miembros del equipo <strong>ParkZone</strong> están<br />
comprometidos a proporcionarte la mejor de las experiencias en<br />
tu vuelo. Para asegurar un vuelo seguro y exitoso, te pedimos<br />
que no vueles tu avión hasta que hayas leído estas instrucciones<br />
completamente.<br />
Precaución: este no es un avión apto para volarse en un parque!<br />
Este es un avión de alto desempeño y no es un juguete. El F-<strong>27C</strong><br />
<strong>Stryker</strong> es capaz de alcanzar velocidades mayores a 130 kilómetros<br />
por hora, de tal forma que deberá ser volado sólo por pilotos con<br />
amplia experiencia en el radio control. Sugerimos que este avión sea<br />
volado únicamente en campos de vuelo aprobados por la AMA. Es<br />
demasiado rápido para ser volado en un parque común y corriente, aún<br />
cuando sea el lugar donde usualmente vuelas tus aviones y consideres<br />
que hay suficiente espacio. Nunca vueles si consideras que puedes<br />
poner en riesgo la seguridad de otros.<br />
Recuerde que los daños por choques no están cubiertos por la garantía.<br />
Advertencia:<br />
Tu F-<strong>27C</strong> <strong>Stryker</strong> viene con una batería 3s de Li-Po que deberá manejarse<br />
cuidadosamente en todo momento. El no seguir las instrucciones de<br />
carga apropiadamente puede causar incendios! Debes usar un cargador<br />
apropiado para cargar las baterías de Li-Po. El cargador incluido en el<br />
paquete con tu F-<strong>27C</strong> <strong>Stryker</strong> funcionará perfectamente bien.<br />
2
Step 1<br />
Italiano<br />
Passo 1. Trasmettitore<br />
Setting Up the Transmitter<br />
Your F-<strong>27C</strong> <strong>Stryker</strong> comes with a fully proportional, 4-channel,<br />
FM radio system. Your F-<strong>27C</strong> <strong>Stryker</strong> also features industry<br />
standard 3-wire servos, making the radio system usable in<br />
other small electric aircraft. The servo-reversing feature of the<br />
transmitter also makes the system ideal to use in another park<br />
flyer application. Always make certain the various switches are<br />
set correctly for your application prior to each flight.<br />
Transmitter Features:<br />
• Fully proportional, 4-channel, 35MHz FM radio system<br />
• Dual rate switch (high and low rates)<br />
• Proportional trim adjustment<br />
• LED battery voltage regulators<br />
• Neck strap holder<br />
• Charge jack for use with optional rechargeable<br />
transmitter batteries<br />
• Servo reversing option<br />
• Comfortable ergonomic case design<br />
The stock setup for all of the servo reversing switches on the<br />
transmitter is set for the following:<br />
Throttle: Normal<br />
Elevator: Normal<br />
Aileron: Reverse<br />
Rudder: Either<br />
Mix: Reverse<br />
To Test the Transmitter:<br />
1. Insert the 8 AA batteries that are included into<br />
the transmitter.<br />
2. Turn the switch on to ensure that the batteries have been<br />
installed correctly. The LED’s on the transmitter should<br />
glow brightly.<br />
If during operation the transmitter makes a repeated<br />
“beep” sound, it is your warning that it is time to replace<br />
the transmitter batteries, and you should land your plane<br />
immediately.<br />
Lo F-<strong>27C</strong> <strong>Stryker</strong> è dotato di un radiocomando a 4 canali FM<br />
proporzionale. Anche i servi sono i normali servi a tre fili e<br />
ciò permette di utilizzare la radio anche su altri piccoli modelli<br />
elettrici. Anche la possibilità di invertire la corsa dei servi facilita<br />
l’uso della radio su altri modelli. Accertarsi sempre che gli<br />
interruttori siano settati correttamente prima di ogni volo.<br />
Caratteristiche della Trasmittente:<br />
• Radiocomando 4 canali proporzionali FM 35MHz<br />
• Interruttore Dual Rate (risposta lenta o veloce)<br />
• Regolazione dei trim proporzionale<br />
• Indicatori LED carica della batteria<br />
• Aggancio del collare<br />
• Jack per la ricarica di batterie ricaricabili opzionali<br />
• Possibilità di inversione servi<br />
• Forma ergonomica della trasmittente<br />
La configurazione standard per gli interruttori per l’inversione<br />
della corsa dei servi è la seguente:<br />
Gas: Normale<br />
Elevatore: Normale<br />
Alettoni: Reverse<br />
Direzionale: Entrambi<br />
Mixer: Reverse<br />
Per controllare la Trasmittente:<br />
1. Inserire le 8 pile AA in dotazione nella trasmittente.<br />
2. Accendere l’interruttore per verificare che le pile sono state<br />
inserite correttamente. I LED dovrebbero emettere una luce<br />
brillante.<br />
Se durante l’uso la Trasmittente emette un “beep” ripetuto, si<br />
tratta del segnale che indica la necessità di sostituire le pile ed è<br />
neccessario atterrare immediatamente.<br />
Deutsch<br />
Schritt 1. Sender<br />
Español<br />
Paso 1. Transmisor<br />
Ihr F-<strong>27C</strong> <strong>Stryker</strong> wird mit einer proportionalen 4 Kanal Anlage<br />
geliefert. Weiterhin sind standard 3 adrige Servos verbaut. Somit<br />
ist die Anlage in vielen Anwendungen und Modellen einzusetzen.<br />
Der Sender verfügt über eine praktische Einstellung für die<br />
Servoumkehr. Bitte stellen Sie sicher, dass die Schalter immer in<br />
der richtigen Position stehen vor Ihrem Flug.<br />
Senderfunktionen:<br />
• 4 Kanal proportional System<br />
• Dual Rate Schalter<br />
• Trimmung, proportional<br />
• LED Batterieanzeige<br />
• Öse für Nackengurt<br />
• Ladebuchse für optionalen Akkueinsatz<br />
• Servoumkehr<br />
• Ergonomisches Gehäusedesign<br />
Die Servoumkehrschalter sind ab Werk wie folgt gesetzt:<br />
Gas: Normal<br />
Höhenruder: Normal<br />
Querruder: Umkehr<br />
Ruder: beides<br />
Mix: Umkehr<br />
Sender Test:<br />
1. Legen Sie die 8 AA Batterien aus der Packung in den<br />
Sender ein.<br />
2. Schalten Sie den Schalter ein und prüfen Sie, ob die<br />
Batterien richtig eingelegt sind. Die LED sollten hell leuchten.<br />
Wenn der Sender während des Einsatzen ein Beep von sich gibt,<br />
müssen die Batterien gewechselt werden. Ist Ihr Modell in der<br />
Luft, sollten Sie es umgehend landen.<br />
Tu F-<strong>27C</strong> <strong>Stryker</strong> viene con un radio proporcional de 4 canales.<br />
También incluye servos estándar de 3 cables, esto permite<br />
que utilices el sistema de radio en otros aviones eléctricos<br />
pequeños. El dispositivo de reversa de servos en el transmisor<br />
lo hace también ideal para ser utilizado en otras aplicaciones de<br />
aviones tipo Park Flyer. Asegúrate de que los interruptores estén<br />
posicionados correctamente para tu aplicación previo a cada<br />
vuelo.<br />
Características del Transmisor:<br />
• Radio proporcional de 4 canales a 35Mhz FM<br />
• Dos condiciones de vuelo (mandos altos y mandos bajos)<br />
• Ajuste de trim proporcional<br />
• Indicadores de batería tipo LED<br />
• Correa para colgar el radio<br />
• Conector que permite optar por baterías recargables para<br />
el transmisor<br />
• Opción de reversa para servos<br />
• Diseño ergonómico<br />
La posición del interruptor de reversa de servos en el transmisor<br />
ha sido determinada de la siguiente manera:<br />
Acelerador: Normal<br />
Elevador: Normal<br />
Alerones: Reversa<br />
Timón: Indistinta<br />
Mezcla: Reversa<br />
Prueba del Transmisor:<br />
1. Inserte en el transmisor las 8 baterías AA incluidas.<br />
2. Encienda el interruptor para asegurarse que las baterías<br />
se hayan instalado correctamente. Los focos en el transmisor<br />
deberán aparecer encendidos.<br />
Si durante la operación, el transmisor hace un “beep”<br />
repetidamente, ese es el mensaje que te alerta a cambiar las<br />
baterías, y deberás aterrizar tu avión inmediatamente.<br />
THR ELE AIL RUD T/V<br />
THR ELE AIL RUD T/V
Step 2<br />
Deutsch<br />
Schritt 2. Laden des Flugakkus<br />
Charging the Aircraft Battery<br />
Your F-<strong>27C</strong> <strong>Stryker</strong> comes with a DC balancing charger and<br />
3S Li-Po battery. You must charge the included Li-Po battery<br />
pack with a Li-Po specific charger only (such as the included<br />
charger). Never leave the battery and charger unattended<br />
during the charge process. Failure to follow the instructions<br />
properly could result in a fire. When charging, make certain<br />
the battery is on a heat-resistant surface.<br />
DC Li-Po Balancing Charger Features:<br />
• Charges 2- to 3-cell lithium polymer battery packs<br />
• Variable charge rates from 300mAh–2A<br />
• Automatically detects incorrect cell count selection<br />
• Simple single push-button operation<br />
• LED charge status indicator<br />
• LED cell balance indicator<br />
• Audible beeper indicates power and charge status<br />
• Cigarette lighter input cord<br />
Specifications<br />
• Input power: 12V DC, 3A<br />
• Charges 2- to 3-cell Li-Po packs with minimum<br />
capacity of 300mAh<br />
• Variable charge rates from 300mAh to 2 amps<br />
3S 11.1V 2200mAh Li-Po Battery Pack<br />
The <strong>ParkZone</strong> 3S Li-Po battery pack features a<br />
balancing lead that allows you to more safely charge<br />
your battery pack when used with the included<br />
<strong>ParkZone</strong> Li-Po balancing charger.<br />
To Complete the Charging Process<br />
1. Attach the input cord of the charger to the appropriate<br />
power supply (12V automobile cigarette lighter), or use<br />
the HBZ6513 and attach to 12V AC power supply. Once<br />
your charger has been correctly powered up, there will<br />
be an approximate 3- second delay and then you will hear<br />
an audible “beep” and the green (ready) LED will flash.<br />
2. Refer to the chart below to select the appropriate<br />
charge rates:<br />
BATTERY CAPACITY<br />
300–400mAh<br />
300mAh<br />
500–1000mAh<br />
500mAh<br />
1000–1500mAh<br />
1A<br />
1500–2000mAh 1.5A<br />
2000mAh + 2.0A<br />
MAX. CHARGE RATE<br />
3S Port<br />
Warning: Selecting a charge rate higher than 1 x<br />
battery capacity may cause a fire!<br />
3. Select the proper number of cells that you will be<br />
charging, either 2 or 3 cells.<br />
4. Locate the safety charge lead on the battery pack. The<br />
charge lead of a 3-cell Li-Po battery will plug into the<br />
larger 4-pin port on the bottom right of the charger. A 2-<br />
cell pack will need to plug into the 3-pin port on bottom<br />
left of the charger. Once the battery is properly plugged<br />
into the correct port, it will beep 3 times if it is a 3-cell,<br />
and twice if it is a 2-cell pack. Once this is done, you are<br />
ready to proceed to charge the battery pack.<br />
5. Push the start button to begin the charging process.<br />
Once this is done, the charger will make an audible beep<br />
that matches the cell count, and then the red (charge)<br />
LED will begin to flash. Do not adjust the current once<br />
the charger has begun to charge.<br />
Note: At times, the green LED may also flash during<br />
the charging process, indicating that the charger is<br />
balancing one or more of the cells at the same time it<br />
is charging the battery pack. When this is occurring,<br />
the red and green LED’s will both be flashing. It will not<br />
always be necessary for the cells to be balanced.<br />
6. When the battery pack is fully charged, you will hear an<br />
audible beep for about 3 seconds, and the green LED<br />
will be solid. The LED will remain solid until the battery<br />
pack is unplugged from the charger. Always unplug the<br />
battery from the charger immediately upon completion.<br />
Failure to do so could cause a fire.<br />
Laden des Flugakkus<br />
Ihr F-<strong>27C</strong> <strong>Stryker</strong> wird mit einem 12V Balancerlader geliefert,<br />
sowie einem 3 zelligen LiPo Akku. Wenn Sie den mitgelieferten<br />
Lader nicht einsetzen, müssen Sie einen geeigneten LiPo Lader<br />
verwenden. Lassen Sie den Akku nie unbeaufsichtigt beim<br />
Laden. Das Nichtbeachten der Ladevorschriften kann zu Feuer<br />
führen. Der Akku muss beim Laden auf einer hitzebeständigen<br />
Unterlage liegen.<br />
12 V LiPo Balancelader:<br />
• Lädt 2-3 zellige LiPo Akkus<br />
• Einstellbarer Ladestrom von 300mA bis 2A<br />
• Automatische Zellenerkennung<br />
• Einfache Druckschalterfunktion<br />
• LED Statusanzeige<br />
• LED Balanceranzeige<br />
• Audio Beeper<br />
• 12V Steckeranschluss<br />
Spezifikation<br />
• 12V, 3 A Gleichstrom Eingang<br />
• Lädt 2 & 3 Zellen Lipos mit mindestens 300mAh<br />
Kapazität<br />
• Einstellbarer Ladestrom 300mA-2A<br />
3S 11.1V 2200mAh LiPo Akku<br />
Der <strong>ParkZone</strong> 3S LiPo Akku verfügt über ein Balancer<br />
Kabel, welches Ihnen mit dem mitgelieferten Balancer<br />
Lader das sichere Laden des Akkus erlaubt.<br />
Abschluss des Ladevorgangs<br />
1. Stecken Sie den 12V Anschlussstecker in die<br />
vorgesehene Stromquelle oder verwenden Sie HBZ6513<br />
und ein geeignetes Netzteil. Ist der Lader richtig<br />
angeschlossen, gibt’s es eine 3 sekündige Verzögerung<br />
und dann hören Sie einen Beep. Die grüne LED blinkt.<br />
2. Stellen Sie den Ladestrom nach der Tabelle unten ein:<br />
Akku Kapazität<br />
300–400mAh<br />
300mAh<br />
500–1000mAh<br />
500mAh<br />
1000–1500mAh<br />
1A<br />
1500–2000mAh 1.5A<br />
2000mAh + 2.0A<br />
MAXIMALER LADESTROM<br />
3S Buchse<br />
Warnung: Wenn Sie einen Ladestrom > 1C des Akkus<br />
wählen, kann dies zu Feuer führen.<br />
3. Wählen Sie die korrekte Zellenzahl, 2 oder 3 Zellen.<br />
4. Stecken Sie das Balancer Kabel in das Ladegerät,<br />
dass viepolige ind die enstprechende Buchse beim 3S<br />
Pack und das dreipolige in die entsprechende Buchse<br />
beim 2S Pack. Ist dr Akku in der richtigen Buchse<br />
eingesteckt, beept der Lader dreimal bei einem 3S und<br />
zweimal bei einem 2S Akku. Jetzt kann der Ladevorgang<br />
gestartet werden.<br />
5. Drücken Sie den Starttaster, um den Ladevorgang<br />
zu starten. Der Lader beep so oft, wie Zellen<br />
angeschlossen sind und die rote Lade LED blinkt.<br />
Verändern Sie den Ladestrom nicht, wenn der<br />
Ladevorgang gestartet wurde.<br />
Hinweis: Die grüne LED kann während des Ladens<br />
gleichzeitig blinken und zeigt damit an, das der Pack<br />
gebalanced wird. In so einem Fall blinken die rote und<br />
grüne LED gleichzeitig. Es ist nicht immer erforderlich,<br />
die Zellen zu balancen.<br />
6. Ist der Akku voll, hören Sie ein 3 Sekunden Beep und<br />
die grüne LED leuchtet und zwar solange, bis der Akku<br />
abgezogen wird. Tun Sie dies immer gleich, wenn der<br />
Akku geladen wurde. Ansonsten besteht Feuergefahr.
Italiano Passo 2. Carica della Batteria del Modello Español Paso 2. Cargando la Bateria del Avion<br />
Carica della batteria del modello<br />
Lo F-<strong>27C</strong> <strong>Stryker</strong> è dotato di un caricabatterie/bilanciatore ed<br />
una batteria Li-Po a 3 celle in serie. Tale batteria deve venire<br />
caricata solo con un caricabatterie specifico per Li-Po (come<br />
quello di dotazione). Non lasciare mai le batterie Li-Po incustodite<br />
durante la carica. Esiste il pricolo reale di incendio nel caso<br />
in cui non si seguano le istruzioni. Assicurarsi che durante la<br />
carica la batteria appoggi su una superficie resistente al calore.<br />
Caratteristiche del Caricabatterie/Bilanciatore CC Li-Po:<br />
• Carica batterie Li-Po a 2 o 3 celle<br />
• Corrente di carica variabile da 300mAh a 2A<br />
• Rilevamento automatico di un numero di celle sbagliato<br />
• Funzionamento semplicissimo premendo un pulsante<br />
• Indicatore LED dello stato della carica<br />
• Indicatore LED del bilanciamento delle celle<br />
• Il segnale acustico indica lo stato della carica<br />
• Cavo con presa per accendisigari<br />
Caratteristiche<br />
• Potenza di input: 12V CC, 3A<br />
• Carica pacchi da 2- a 3-celle Li-Po con capacità minima<br />
di 300mAh<br />
• Corernte di carica variabile da 300mAh a 2A<br />
Pacco batteria 3 celle Li-Po in serie 11,1V<br />
2200mAh<br />
Il pacco batteria 3S Li-Po <strong>ParkZone</strong> è munito di un<br />
cavo per il bilanciamento delle celle che permette una<br />
carica più sicura quando utilizzato con il caricabatterie<br />
<strong>ParkZone</strong> in dotazione.<br />
Come caricare la batteria<br />
1. Collegare il cavo di alimentazione alla sorgente adatta<br />
(Accendisigaro dell’automobile a 12V) oppure utilizzare<br />
l’alimentatore a CA HBZ6513. Effettuato il collegamento,<br />
sopo circa 3 secondi si avverte un “beep” ed il LED<br />
verde (pronto) lampeggerà.<br />
2. Fare riferimento alla tabella qui sotto per scegliere il<br />
rateo di carica appropriato:<br />
Capacità della batteria<br />
300–400mAh<br />
300mAh<br />
500–1000mAh<br />
500mAh<br />
1000–1500mAh<br />
1A<br />
1500–2000mAh 1.5A<br />
2000mAh + 2.0A<br />
Corrente massima di carica<br />
Presa 3S<br />
Attenzione: Selezionando una corrente di carica<br />
maggiore di 1 x capacità massima può provocare un<br />
incendio!<br />
3. Selezionare il numero di celle che si vogliono caricare:<br />
2 o 3.<br />
4. Individuare il cavo di sicurezza di carica del pacco<br />
batteria. Il cavo di carica della batteria Li-Po 3 celle<br />
si collega alla presa a 4 poli in basso a destra del<br />
caricabatteria. Un pacco a 2 celle va collegato alla<br />
presa a 3 poli in basso a sinistra. Quando la batteria è<br />
correttamente collegata nella presa giusta si udiranno 3<br />
beep se la batteria ha 3 celle e 2 beep se ha 2 celle. A<br />
questo punto si può procedere alla carica della batteria.<br />
5. Per iniziare la carica premere il pulstante start.<br />
Il caricabatterie emetterà un segnale acustico<br />
corrispondente al numero delle celle del pacco ed il<br />
LED rosso (carica) inizierà a lampeggiare. Non cambiare<br />
la corrente di carica dopo che è iniziato il processo di<br />
carica.<br />
Nota: A volte anche il LED verde inizia a lampeggiare<br />
durante la carica indicando che sta avvenendo il<br />
processo di bilanciamento durante la carica. In questo<br />
caso sia il LED rosso che quello verde lampeggiano<br />
contemporaneamente. Ciò non avviene sempre.<br />
6. Quando il pacco batteria è completamente carico si<br />
udirà un segnale acustico per 3 secondi ed il LED verde<br />
si accende . Il LED verde rimarrà illuminato finchè la<br />
batteria verrà scollegata dal caricabatteria. Scollegare<br />
sempre la batteria dal caricabatterie non appena è<br />
carica. Il mancato scollegamento può provocare un<br />
incendio.<br />
Carga de la batería del avión<br />
Tu F-<strong>27C</strong> <strong>Stryker</strong> viene con un cargador balanceado de pared<br />
y baterías de Li-Po de 3S. Deberás cargar la batería de Li-Po<br />
Incluida con un cargador adecuado para Li-Po (como el que se<br />
incluye). Nunca dejes las baterías y el cargador desatendidos<br />
durante el proceso de carga. El no seguir las instrucciones<br />
correctamente podrá causar incendio. Cuando cargues tus baterías,<br />
asegúrate de que se encuentren en una superficie resistente<br />
al calor.<br />
Características del Cargador balanceado de Li-Po:<br />
• Adecuado para cargar baterías de 2 a 3 celdas de<br />
Litio Polímero<br />
• Carga variable desde 300mAh hasta 2A<br />
• Detector automático de número incorrecto de celdas<br />
• Operación simple con un sólo botón<br />
• Foco indicador del estado de carga<br />
• Foco indicador del balance de celdas<br />
• Sonido indicador de encendido y estatus de carga<br />
• Adaptador para encendedor de automóvil<br />
Especificaciones<br />
• Potencia de entrada:12V DC, 3A<br />
• Carga baterías de Li-Po de 2 a 3 celdas con capacidad<br />
mínima de 300mAh<br />
• Carga variable desde 300mAh hasta 2Amperes<br />
Baterías de Li-Po de 3S 11.1V 2200mAh<br />
La batería de Li-Po de <strong>ParkZone</strong> tiene una terminal<br />
balanceada que te permite cargar tu batería de forma<br />
segura, siempre y cuando se utilice el cargador<br />
balanceado de <strong>ParkZone</strong> incluido.<br />
Completando el proceso de carga<br />
1. Conecta el cargador a la fuente de poder deseada<br />
(encendedor de automóvil de 12V) o utiliza el HBZ6513<br />
y conéctalo a una fuente de poder de 12V. Una vez<br />
que el cargador tenga corriente habrá un espacio de<br />
unos 3 segundos, después de eso escucharás un<br />
“beep” y el foco color verde (listo) encenderá de manera<br />
intermitente.<br />
2. Refiérete al cuadro siguiente para seleccionar la cantidad<br />
de carga apropiada:<br />
Capacidad de la batería<br />
300–400mAh<br />
300mAh<br />
500–1000mAh<br />
500mAh<br />
1000–1500mAh<br />
1A<br />
1500–2000mAh 1.5A<br />
2000mAh + 2.0A<br />
Carga máxima<br />
Puerto 3S<br />
Advertencia: Seleccionar una carga mayor a 1 vez la<br />
capacidad de la batería puede causar incendio!<br />
3. Seleccione el número apropiado de celdas que se<br />
dispone a cargar, entre 2 y 3 celdas.<br />
4. Localice la terminal balanceada en la batería. La<br />
terminal de carga de una batería de 3 celdas de Li-Po<br />
se conectará en el puerto de 4 puntos en la parte baja<br />
a la derecha del cargador. Una batería de 2 celdas<br />
deberá conectarse en el puerto de 3 puntos en la parte<br />
baja izquierda del cargador. Una vez que la batería está<br />
conectada en el puerto correcto, hará 3 “beep” si es<br />
de 3 celdas o 2 “beep” si es de 2 celdas. Una vez que<br />
haya sucedido, estas listo para cargar tus baterías.<br />
5. Presiona el botón de comienzo (start) para comenzar<br />
el proceso de carga. Una vez que lo hayas hecho, el<br />
cargador hará un sonido acorde al número de celdas,<br />
y el foco rojo (charge) se encenderá intermitentemente.<br />
No ajustes la cantidad de corriente hasta que el<br />
cargador haya comenzado a cargar.<br />
Nota: Algunas veces el foco verde encenderá<br />
intermitentemente durante el proceso de carga, esto<br />
indica que el cargador está balanceando una o más<br />
celdas mientras está cargando la batería. Cuando esto<br />
sucede, los focos rojo y verde estarán encendiendo<br />
intermitentemente. Las celdas no siempre necesitarán<br />
ser balanceadas.<br />
6. Cuando la batería esté totalmente cargada, escucharás<br />
un “beep”s por aproximadamente 3 segundos, y el foco<br />
verde permanecerá encendido. El foco se mantendrá<br />
encendido hasta que la batería sea desconectada.<br />
Siempre desconecte la batería del cargador al momento<br />
de terminar el proceso de carga. El no hacerlo puede<br />
causar un incendio!
Step 3<br />
Attaching the nose<br />
1. Locate the nose inside the box.<br />
2. Trial fit the nose without peeling away the paper<br />
covering the tape. This will give you a good idea<br />
as to what the fit will be.<br />
3. Peel the paper off the tape and carefully attach<br />
the nose.<br />
4. To add support, apply the included decals to the<br />
side and bottom of the nose/fuselage.<br />
Deutsch<br />
Schritt 3. Anbringen der Nase<br />
1 Nehmen Sie die Nase aus der Box.<br />
2. Prüfen Sie den Sitz der Nase, ohne das Schutzpapier abzuziehen.<br />
3. Ziehen Sie nun das Schutzpapier ab.<br />
4. Um die Festigkeit zu erhöhen, kleben Sie zusätzlich das Dekor an den Seiten an.<br />
Italiano<br />
Passo 3. Installazione del muso<br />
1. Individuare il muso.<br />
2. Provare ad installare il muso senza togliere la carta protettiva del nastro. Si potrà avere una buona idea di come le<br />
parti combaciano.<br />
3. Togliere la carta protettiva dal nastro adesivo ed installare il muso con delicatezza.<br />
4. Per aumentare l’adesione aggiungere le decals sui fianchi e sotto la fusoliera ed il muso.<br />
Step 4<br />
Step 4 Attaching the Vertical Fins<br />
1. Locate both fins from box.<br />
2. Slide the fins into the slots on the fuselage. The<br />
leading edge of the fin should fit under the retainer<br />
that is already secured in the fuselage.<br />
3. Confirm that the fit is tight and both fins are<br />
secured properly.<br />
Note: It may be helpful to add a few drops of CA to the<br />
front tips of the vertical stabs in order to keep them in<br />
place while flying your F-<strong>27C</strong> <strong>Stryker</strong>. There is rubber<br />
double-sided tape on the front of each one, but over<br />
time, and despite a tight tension fit when you slide the<br />
fins on the first time, they can lose their sticking power.<br />
At speeds exceeding 130 km/h, it is good, for your<br />
safety and the safety of your plane, to add CA to ensure<br />
they will stay in place.<br />
Deutsch<br />
Schritt 4. Anbringen der Leitwerke<br />
1. Nehmen Sie die Leitwerke aus der Box.<br />
2. Schieben Sie die Leitwerke von hinten auf den Rumpf.Die Vorderkante sollte in die Halter im Rumpf einschnappen.<br />
3. Stellen Sie sicher, dass beide Leitwerke fest im Rumpf sitzen.<br />
Hinweis: Es kann sinnvol sein, den Sitz der Leitwerke mit Sekundenkleber zu stärken. Es befindet sich<br />
Doppelklebeband an der Vorderseite, welches über die Zeit die Klebekraft verlieren könnte. Bei Geschwindigkeiten um<br />
130km/h ist es aus Sicherheitsgründen zu empfehlen, die Leitwerke zu fixieren.<br />
Español<br />
Paso 3. Ensamblando la nariz<br />
Italiano<br />
Passo 4. Ensamblando los Timones Verticales<br />
1. Localiza la nariz del avión dentro del paquete.<br />
2. Presenta la nariz al fuselaje sin quitar el papel que cubre la cinta. Esto te dará una idea de cómo ajustará la nariz.<br />
3. Retira el papel de la cinta y ensámblala cuidadosamente.<br />
4. Para añadir soporte, aplica las calcomanías incluidas en un costado y en la parte de abajo de la nariz/fuselaje.<br />
1. Individuare le due derive contenute nella scatola.<br />
2. Inserire le derive nelle fessure della fusoliera. Il bordo d’entrata della deriva dovrebbe incastrarsi sotto il fermo che è<br />
già fissato alla cellula.<br />
3. Controllare che le derive siano ferme e ben fissate.<br />
Nota: può essere utile aggiungere qualche goccia di cianoacrilato sulla punta delle derive per mantenerle fisse<br />
durante il volo. Del nastro biadesivo è già installato ma con l’uso, anche se le derive all’inizio sono ben fisse, è<br />
possibile che l’adesivo perda la sua proprietà. Volando anche velocità superiori ai 130 km/h è buona norma rendere<br />
ancora più sicuro il fissaggio delle derive con qualche goccia di cianoacrilato.<br />
Español<br />
Paso 4. Acoplamiento del Estabilizador Horizontal<br />
1. Localiza los dos timones en el paquete.<br />
2. Desliza los timones en las ranuras del fuselaje. El borde de ataque del timón deberá entrar justo debajo del retenedor<br />
que está colocado previamente en el fuselaje.<br />
3. Asegúrate de que quede debidamente ajustado y que ambos timones estén asegurados de manera adecuada.<br />
Nota: Sería de gran utilidad añadir unas cuantas gotas de cyanocrilato a las puntas frontales de los estabilizadores<br />
verticales, para mantenerlas en su lugar cuando vueles tu F-<strong>27C</strong> <strong>Stryker</strong>. Los estabilizadores verticales tienen<br />
aplicada cinta de doble lado al frente de cada uno, sin embargo, a pesar de haberte asegurado que entraron<br />
justos en su posición, la cinta puede perder su poder de pegado. A velocidades superiores a las 130 km/h, te<br />
recomendamos, por tu seguridad y la de tu avión que coloques unas gotas de cyanocrilato para asegurarte que se<br />
mantengan en su lugar.<br />
10 11
Step 5<br />
Deutsch<br />
Schritt 5. 25A Flugregler<br />
E-FLITE 25-AMP ESC<br />
Your F-<strong>27C</strong> <strong>Stryker</strong> comes out of the box with the E-flite ® 25-amp brushless<br />
ESC. This controller has been designed for use in radio control aircraft and<br />
is designed to support motor currents up to 25 amps continuous, and up to<br />
4 micro servos with a 2- to 3-cell Li-Po battery. It is suitable to use with most<br />
radio brands. The E-flite 25A ESC comes in an impressive plastic case with<br />
exposed, finned heat sinks for both of the motor drive mosfets and, unlike many<br />
controllers, there is also a finned heat sink fitted to the BEC regulators to give<br />
a more reliable and more powerful power supply to the servos. If you intend<br />
to fly your F-<strong>27C</strong> <strong>Stryker</strong> stock, then there is no need to program your ESC. It<br />
comes installed with the default settings. If you intend to re-program the ESC, we<br />
strongly recommend removing the propeller first in order to avoid the propeller<br />
from spinning if the motor is accidentally engaged.<br />
Note: ALWAYS assume the motor and the propeller are live. ALWAYS<br />
keep clear of the propeller at all times. The high rpm of the brushless<br />
motor can cause severe injury.<br />
E-flite 25-Amp ESC Features:<br />
• Two soft cut settings (for 2- and 3-cell Li-Po battery packs)<br />
• 70% Smart Cut feature<br />
• Brake option<br />
• Timing options for up to 4-pole inrunner and 4-pole outrunner motors<br />
• 2 setting options for the throttle input range<br />
Using Your E-flite 25-Amp Brushless Controller<br />
The E-flite 25A controller is very simple to use and, for safety, will not arm<br />
the motor until the throttle stick has been held in the Idle/Off position for<br />
more than 1 second. The controller will tell you what setting you have for the<br />
soft cut voltage every time you plug in the battery by first making a low, long<br />
beep to show startup. Then, it makes 2 or 3 medium length, mid-tone beeps<br />
to indicate the cell count (or 7 beeps if 70% Smart Cut is selected), helping<br />
you to check the setting before every flight.<br />
To prepare for flight, you should first turn on your transmitter and ensure<br />
the throttle is set to the Idle/Off position. Next, plug in the flight pack to the<br />
speed control and listen for the tones to indicate soft-cut voltage. After the<br />
controller has indicated the cell count, the controller will make one set of 3<br />
medium length, rising tones to tell you it is armed and ready to fly, or 2 sets<br />
of fast rising tones if you are entering the programming mode.<br />
For your own safety, and the safety of others, you should always<br />
treat the motor and propeller as though they are “live” and dangerous,<br />
remembering the motor could start at any time. Keep any body parts,<br />
clothing and tools clear of the propeller arc. Never leave the battery<br />
connected when you are not flying the aircraft. Always remove the battery<br />
pack from the model before charging the battery, and when finished flying.<br />
Programming:<br />
The E-flite 25-amp programming sequence is designed to be very simple<br />
and intuitive. It is a simple menu system that should be very easy to learn<br />
and remember.<br />
Stick up = Full Throttle<br />
Stick down = Idle<br />
Default Setup for E-flite 25-Amp ESC:<br />
• 3S auto cutoff<br />
• Brake inactive<br />
• 4-pole and greater timing<br />
• Auto setting throttle input range<br />
Programming Mode:<br />
1. With the battery disconnected from the controller, and the transmitter<br />
turned on, first move the throttle stick to the full power position. Leave<br />
it in this position and then connect the battery to the controller.<br />
2. Wait for 5 seconds, and the ESC will give two sets of fast ringing tones<br />
to indicate you have successfully entered the programming mode.<br />
3. Once you hear these tones, move the stick to center, and the controller will<br />
beep 1 time, indicating you are at menu item number 1.<br />
4. The controller will now wait 5 seconds for you to make your selection,<br />
move the stick to Full Throttle for “Yes,” or to Idle for “No.”<br />
5. When you have made a valid selection, the control will beep once with a<br />
lower tone and then you can move the stick back to center for the next<br />
menu item (2 beeps, 3 beeps and so on). If you do not make a selection<br />
within 5 seconds, the controller will move to the next menu item.<br />
6. Please note that you do not need to program every menu item. You<br />
can simply exit the programming mode after you have made the<br />
required selections by:<br />
a. Moving the throttle stick to idle, after making your selection;<br />
b. Leaving it in the idle position if you made no selection, for<br />
approximately 8 seconds, until you hear one set of 3 medium length<br />
rising tones that indicate the controller has armed the motor; or<br />
c. By simply unplugging the battery.<br />
Menu Item Selections:<br />
The menu items and choices are as below, where “Yes” means Full Throttle<br />
and “No” means Idle.<br />
Menu Item 1: Cell Count<br />
Stick up - 3S Li-Po soft cut (default)<br />
Stick down - 2 cells Ni-Cd or Ni-MH and our exclusive 70% Smart Cut.<br />
To access the 70% Smart Cut option, leave the stick at full throttle for<br />
7 seconds while in menu item 1, until 7 beeps are heard, then continue<br />
through the program normally. This option will activate the soft cut at<br />
70% of startup voltage. For example, if your pack measures 10.0 volts<br />
at startup, then the soft cut will occur at 7 volts. The Smart Cut option<br />
will check the startup voltage every time you plug the controller in, so<br />
beware of using partially-charged packs, as the system cannot protect<br />
your Li-Po batteries if you are using Smart Cut and connect a partially<br />
charged pack.<br />
Note: The default setting is 3-cell auto cutoff (3.05 volts per cell). You will<br />
know that your battery pack has reached auto cutoff when you hear the<br />
motor “whine/pulse” repeatedly.<br />
Menu Item 2: Brake<br />
Stick up - Brake inactive (default)<br />
Stick down - Brake active<br />
This option gives you the choice to force the propeller to stop during<br />
flight or allow it to windmill. Use the brake option for gliders.<br />
Menu Item 3: Timing<br />
Stick up - 4-pole and greater timing mode (default)<br />
Stick down - 2-pole motors<br />
Refer to your motor specifications to confirm the number of poles.<br />
Menu Item 4: Input Range<br />
Stick up - Throttle range 1.1 ms to 1.9 ms<br />
Stick down - Auto set (default)<br />
This option allows all the different radios on the market to work with the<br />
F-<strong>27C</strong> <strong>Stryker</strong>. Most radios work well with the auto set option, but some<br />
radios have a wider output range and may give a more linear response<br />
with the 1.1- to 1.9-ms range. If you feel there is too much “dead” area<br />
in the stick movement near full throttle, try adjusting the end points<br />
in your radio or change to the wider input range. Beware that if these<br />
settings are not correct, it may be impossible to arm the controller. If<br />
this happens, return the input range setting to the default auto-learning<br />
setting. The auto-setting option learns the minimum position of your<br />
throttle (between 1.1 and 1.3 ms), stores this value at each startup, and<br />
then adds a value of 0.6 ms for the full throttle setting.<br />
Error Codes:<br />
The controller will beep continuously if the input voltage is below the soft<br />
cut voltage (beep..beep..beep) when the battery is connected. If you<br />
have trouble arming the controller, enter the programming mode and try<br />
the auto setting in menu item 4 to see if it helps fix your problem.. (If it<br />
is a computer radio, you may alternatively increase your ATV (endpoint)<br />
percentages).<br />
Note: If you reverse the polarity of the ESC, you will destroy it. Do not<br />
allow the ESC to contract any moisture.<br />
When flying in hot weather, we recommend checking on the condition<br />
of the ESC, battery, and motor after each flight. You should strongly<br />
consider letting the electronic components cool between flights. We also<br />
recommend throttle management. It is not recommended that you fly an<br />
entire flight at full throttle. If this is done, it is possible to cause permanent<br />
damage to your motor, battery, and ESC.<br />
For more information regarding your E-flite 25A ESC<br />
please visit www.E-fliteRC.com.<br />
In der F-<strong>27C</strong> <strong>Stryker</strong> ist ein 25A bl Regler eingebaut. Der Regler ist für den<br />
Einsatz in einem Flugmodell konzipert, unterstützt 4 Servos, leistet 25A<br />
Dauerstrom und kann mit 2 oder 3 Lipos betrieben werden. Er kann mit den<br />
meisten Fernsteueranlagen betrieben werden. Der 25A Regler befindet sich in<br />
einem Gehäuse aus dem Kühlrippen hervorstehen. Ein Kühlkörper ist für die<br />
Motor MOSFET`s und zweiter für das BEC montiert. Damit steht eine sichere<br />
Versorgung der Servos zur Verfügung. Wenn Sie Ihren F-<strong>27C</strong> <strong>Stryker</strong> aus der<br />
Box einsetzen, brauchen Sie den Regler nicht programmieren. Alle Einstellungen<br />
wurden im Werk vorgenommen. Wenn Sie den Regler neu programmieren<br />
wollen, empfehlen wir, die Luftschraube abzunehmen, um Beschädigungne zu<br />
vermeiden.<br />
Hinweis: Nehmen Sie bitte immer an, dass der Motor scharf ist und<br />
die Luftschraube sich drehen kann. Halten Sie sich aus dem Drehkreis<br />
heraus. Es besteht erhöhte Verletzungsgefahr.<br />
E-Flite 25A bl Regler Funktionen:<br />
• 2 Abschaltkriterien, 2 Zellen und 3 Zellen LiPo<br />
• 70% Abschaltkriterium<br />
• Bremse optional<br />
• Timing Option für 4 Pol Motoren<br />
• 2 Gaswegstellungen<br />
Einsatz des E-Flite 25A bl Reglers<br />
Der E-Flite ® 25A Regler ist sehr einfach zu bedienen. Aus Sicherheitsgründen<br />
läuft der Motor erst an, wenn der Gashebel für eine Sekunde in die<br />
Nullstellung zurückgenommen wird. Der Regler gibt die Cut Off Stellung an,<br />
in der er arbeitet und zwar jedesmal, wen der Akku angesteckkt wird. Es<br />
kommt ein langer Ton gefolgt von zwei bzw. drei mittleren Tönen oder 7<br />
Töne für 70% Abschaltung. Dies können Sie bei jedem Flug prüfen.<br />
Vor einem Flug schalten Sie bitte erst den Sender an. Das Gas muss in<br />
der Nullstellung stehen. Stecken Sie nun den Akku an und stellen Sie fest,<br />
welcher Cut Off Mode gewählt ist. Wenn der Akku die Zellenzahl bestimmt<br />
hat, wird er eine ansteigende Tonserie von drei Tönen mittlerer Länge von<br />
sich geben wenn der Regler armiert ist oder zwei schnelle Töne, wenn Sie in<br />
den Programmiermodus gehen.<br />
Beachten Sie die Sicherheit und gehen Sie davon aus, dass der Motor<br />
scharf ist und u.U. anlaufen kann. Halten Sie alle Teile außerhalb des<br />
Luftschraubenkreises, Kleidung, Haare, Werkzeuge und ähnliches. Lassen<br />
Sie den Akku niemals angesteckt, wenn Sie nicht fliegen. Entnehmen Sie den<br />
Akku immer dem Modell.<br />
Programmierung:<br />
Die Programmierschritte des E-Flite 25A Reglers sind so angelegt, dass man<br />
sie intuitiv und einfach ausführen kann. Es ist ein einfaches Menümuster, das<br />
man sich leicht merken kann.<br />
Knüppel nach Vorn = Vollgas<br />
Knüppel nach hinten = Leerlauf<br />
Werkseinstellung:<br />
• 3S Abschaltung<br />
• Bremse aus<br />
• 4 Pole und mehr Motortiming<br />
• Auto Gasknüppelweg<br />
Programmiermodus:<br />
1. Schieben Sie das Gas auf Vollgas mit eingeschaltetem Sender, bevor<br />
der Akku mit dem Regler verbunden wird. Stecken Sie nun den Akku an.<br />
2. Warten Sie 5 Sekunden bis der Regler eine schnelle Serie von Tönen<br />
von sich gibt, um anzuzeigen, dass er sich im Programmiermodus<br />
befindet.<br />
3. Wenn Sie das Signal gehört haben, ziehen Sie den Gasknüppel in die<br />
Mitte. Der Regler beept einmal und steht auf Programmpunkt 1.<br />
4. Der Regler wartet nun bis zu 5 Sekunden auf Ihre Eingabe. Wenn Sie<br />
“Ja” eingeben wollen, geben Sie Vollgas, bei “Nein” Leerlauf.<br />
5. Nach korrekter Eingabe wird der Regler einen tieferen Ton von sich<br />
geben. Danach können Sie den Knüppel für den nächsten Menüpunkt in<br />
die Mitte zurückschieben (2x Beep, 3x Beep usw.). Wenn Sie innerhalb<br />
von 5 Sekunden keine Eingabe machen, springt der Regler zum<br />
nächsten Menüpunkt.<br />
6. Bitte beachten Sie, dass nicht jeder Punkt programmiert werden muss.<br />
Sie können das Programm an jeder Stelle verlassen.<br />
a. Bewegen Sie den Knüppel in den Leerlauf, wenn Sie Ihre Wahl gemacht haben.<br />
b. Verbleibt der Knüppel für 8 Sekunden im Leerlauf, hören Sie 3 Töne mit<br />
mittlerer Länge, die anzeigen, dass der Regler nun programmiert ist,<br />
c. Oder indem Sie den Akku abziehen.<br />
Menüauswahl:<br />
Der Menüpunkt unten bedeutet bei der Wahl von “Ja” Vollgas und “Nein”<br />
bedeutet Leerlauf.<br />
Menüpunkt 1: Zellenzahl<br />
Knüppel vorn - 3 Lipos, sanfte Abschaltung (Voreinstellung)<br />
Knüppel unten -2 Lipo oder NiMH oder 70% Abschaltung (siehe<br />
Informationen unten)<br />
Um die 70% Abschaltung einzustellen, schieben Sie den Gasknüppel<br />
ganz nach vorn im Menü 1 und warten sie 7 Sekunden auf 7 Beeps.<br />
Gehen Sie dann normal weiter durch das Programm. Diese Option<br />
aktiviert die 70% Softabschaltung. Wenn Sie beim Start 10.0V<br />
Spannung haben, schaltet das System bei 7.0V ab. Diese Option prüft<br />
bei jedem Anstecken des Reglers die Startspannung. Deshalb müssen<br />
Sie bei teilgeladenen Akkus mit besonderer Vorsicht vorgehen. In<br />
diesem FAll kann das System Ihren Lipo nicht schützen.<br />
Hinweis: Standard ist die Einstellung für ein 3S Akku (3.05V pro Zelle). Den<br />
Cut Off erkennen Sie, wenn der Motor ein pulsierendes Geräusch macht.<br />
Menü 2: Bremse<br />
Gas nach vorn - Bremse aus<br />
Gas nach hinten - Bremse aktiv<br />
Dies Option nutzt man, um die Luftschraube stehen zu lassen oder<br />
im Wind mitlaufen zu lassen. Die Bremse sollte bei Segelflugzeugen<br />
aktiviert werden.<br />
Menü 3: Timing<br />
Gas nach vorn - 4 Pol Motor und höhere Timings<br />
Gas nach hinten - 2 Pole Motor<br />
Suchen Sie in den Spezifikationen für Ihren Motor nach der Anzahl der Pole.<br />
Menü 4: Gasweg<br />
Gas nach vorn - Gas von 1.1ms bis 1.9ms<br />
Gas nach hinten - Auto<br />
Diese option erlaubt Ihnen, verschiedene Sender am Markt für die<br />
F-<strong>27C</strong> <strong>Stryker</strong> zu benutzen. Die meisten Sendern arbeiten korrekt mit<br />
der Einstellung Auto, aber einige Sender haben eine Bandbreite von 1.1<br />
bis 1.9ms. Wenn Sie also das Gefühl haben, im Knüppel befindet sich<br />
zu viel “toter” Weg, verändern Sie entweder den GAsweg am Sender<br />
oder setzen Sie den Regler auf die BAndbreite von 1.1-1.9ms. Bedenken<br />
Sie, dass eine unpassende Einstellung dazu führen kann, dass Sie den<br />
Regeler nicht armieren können. Sollte dies der Fall sein, stellen Sie die<br />
ursprünglichen Auto Einstellungen wieder her. Im Auto Setting wird ein<br />
Startwert für den Gasknüppel zwischen 1.1 und 1.3ms eingestellt und<br />
dan 0.6ms für den Weg hinzuaddiert.<br />
Fehlermeldungen:<br />
Der Regler wird ein Daubeep abgeben, wenn die Eingangspannung<br />
unterhalb der Abschaltspannung liegt. Wenn Sie den Regler nicht<br />
armieren können, wählen Sie in Menü 4 die Einstellung Auto. Mit einem<br />
Computersender können Sie auch die Endstellungen im ATV so ändern,<br />
dass die Armierung möglich wird.<br />
Hinweis: Wenn Sie den Regler verpolt anschließen, wird dieser zerstört.<br />
Halten Sie den Regler vor Feuchtigkeit geschützt.<br />
Im heißem Wetter sollten Sie nach jedem Flug den Regler, den Akku und<br />
den Motor prüfen. Sie sollten die Komponenten zwischen den Flügen<br />
abkühlen lassen. Wir empfehlen auch den umsichtigen Umgang mit dem<br />
Gashebel. Vermeiden Sie dauerhaftes Vollgas. In so einem Fall könnten Sie<br />
den Motor, den Akku oder auch den Regler beschädigen.<br />
Weitere Informationen finden Sie unter www.E-fliteRC.com<br />
12 13
Italiano Passo 5. Regolatore E-flite da 25A Español Paso 5. Control Electrónico de Velocidad de 25-AMP<br />
Lo F-<strong>27C</strong> <strong>Stryker</strong> è dotato di un regolatore E-flite ® da 25A per motori brushless.<br />
Esso è concepito per i modelli radiocomandati con motori che assorbono 25A<br />
continui e che utilizzano fino a 4 microservi e una batteria a 2-3 celle Li-Po. Si<br />
può usare con la maggioranza dei radiocomandi. E’ dotato di una scatola di<br />
plastica da cui fuoriescono le alette di raffreddamento per entrambi i mosfet del<br />
motore ed a differenza della maggior parte dei regolatori anche delle alette di<br />
raffreddamento del BEC per dare una maggiore potenza ai servi. Se si fa volare<br />
normalmente lo F-<strong>27C</strong> <strong>Stryker</strong> non c’è bisogno di programmare il regolatore<br />
che è già settato per le funzioni standard. Se invece si vuole riprogrammare il<br />
regolatore si consiglia di togliere subito l’elica dal motore per evitare che inizi a<br />
girare se per essore si avvia il motore.<br />
Nota: considerare SEMPRE la possibilità che il motore e l’elica si<br />
possano mettere in moto. Il numero elevato di giri del motore brushless<br />
può provocare anche ferite gravi.<br />
Caratteristiche del regolatore E-flite 25A:<br />
• Due allestimenti software (per pacchi da 2 e 3 celle Li-Po )<br />
• Taglio intelligente al 70%<br />
• Freno programmabile<br />
• Possibilità di agire sulla fase dei motori inrunner ed outrunner fino a 4 spire<br />
• 2 opzioni programmabili per l’escursione del gas<br />
Uso del regolatore brushless E-flite da 25A<br />
Il regolatore E-flite da 25A è molto semplice da usare e, per sicurezza, non<br />
arma il motore finchè la leva del gas non è stata tenuta nella posizione di<br />
minimo/spento per almeno 1 secondo. Ogni volta che si collega il regolatore<br />
alla batteria il regolatore informa circa il settaggio del taglio di alimentazione<br />
emettendo dapprima un lungo beep per indicare l’accensione cui seguono<br />
2 o 3 beep di media durata per indicare il numero delle celle (o 7 beep se<br />
si sceglie il taglio intelligente al 70%) informando il pilota del suo settggio<br />
prima di ogni volo.<br />
Per prepararsi al volo si accende la trasmittente dopo aver controllato<br />
che la leva del gas sia al minimo/spento. Poi si collega la batteria di volo al<br />
regolatore e si ascoltaoi toni che indicano il taglio di corrente. Dopo che il<br />
regolatore ha informato del numero di celle, il regolatore emetterà 3 segnali<br />
acustici di media durata e di tono in aumento per informare che il motore è<br />
armato e pronto al volo oppure 2 segnali brevi di tono in aumento se si usa il<br />
modo programmato.<br />
Per la propria e per la altrui sicurezza converrebbe considerare sempre<br />
il motore e l’elica come qualcosa di “vivo” e pericoloso pensando che il<br />
motore può mettersi in moto ad ogni momento. Tenere sempre le mani, i<br />
vestiti e gli attrezzi lontani dall’elica. Mai lasciare la batteria collegata quando<br />
non si vola. Togliere sempre la batteria dal modello e quando si ha finito di<br />
volare.<br />
Programmazione:<br />
La sequenza di programmazione del regolatore E-flite da 25A è molto<br />
semplice ed intuitiva. Ha un menu facile da apprendere e ricordare.<br />
Stick in avanti = tutto gas<br />
Stick all’indietro = minimo<br />
Configurazione iniziale del regolatore E-flite 25A:<br />
• Auto esclusione 3S<br />
• Freno disattivato<br />
• Timing per 4 e più spire<br />
• Range del gas automatico<br />
Modo Programmazione:<br />
1. Con la batteria scollegata dal regolatore e la trasmittente accesa,<br />
dapprima spostare la leva del gas al massimo. Lasciarla al massimo e<br />
collegare la batteria al regolatore.<br />
2. Attendere 5 secondi, il regolatore darò due serie di suoni acuti per<br />
indicare che si è nel modo programmazione.<br />
3. Uditi i toni, mettere lo stick al centro. Il regolatore emetterà un beep<br />
indicando che si è nel primo stadio del menu.<br />
4. Il controller attende 5 secondi per permettere di fare la scelta<br />
desiderata: stick al massimo per indicare “Si” o al minimo per indicare<br />
“No”.<br />
5. Fatta una scelta valida, il regolatore emetterà un beep con un tono<br />
basso e si può spostare la leva al centro per la seconda voce del<br />
menu.(2 been, 3 beep ecc). Se non si esegue la selezione entro 5<br />
secondi il regolatore si sposta alla voce successiva del menu.<br />
6. Non occorre programmare ogni voce del menu. Si può uscire dal<br />
modo programmazione dopo aver fatto le proprie scelte:<br />
a. Spostando al minimo lo stick dopo aver fatto la scelta.<br />
b. Lasciando la leva del gas al minimo senza effettaure scelte per 8<br />
secondi finchè si ode tre segnali acustici di media lunghezza e di<br />
tonalità crescente indicanti che il regolatore ha armato il motore,<br />
oppure<br />
c. Semplicemente staccando la batteria.<br />
Selezione articoli del Menu:<br />
Gli articoli del menu e le scelte sono riportate qui sotto dove “Si” significa<br />
Motore al massimo e “No” motore al minimo.<br />
Articolo del menu 1: conteggio numero celle<br />
Stick su - 3S Li-Po interruzione graduale (default)<br />
Stick giù - 2 celle Ni-Cd o Ni-MH e la nostra interruzione intelligente (Vedere<br />
sotto per la spiegazione)<br />
Per accedere alla opzione interruzione intelligente al 70%, lasciare la<br />
leva del motore al massimo per 7 secondi mentre l’articolo 1 del menu<br />
emette 7 beep e quindi continuare la programmazione normalmente.<br />
Questa opzione attiva la interruzione intelligente al 70% del voltaggio di<br />
partenza. Per esempio se il pacco batteria alla partenza misura 10,0V<br />
allora la interruzione intelligente inizia a 7V. Questa opzione controlla<br />
il voltaggio iniziale ogni volta che si collega il regolatore e quindi<br />
attenzione ad usare pacchi non completamente carichi. Ricordarsi<br />
che anche le batterie Li-Po non sono protette l’opzione interruzione<br />
intelligente se il pacco è solo parzialmente carico.<br />
Nota: Il settaggio di default è 3 celle interruzione automatica (3,05V per<br />
cella). Sappiate che il pacco batteria è entrato nell’interruzione automatica<br />
quando si sente il motore che freme/pulsa ripetutamente.<br />
Articolo del menu 2: Freno<br />
Stick su - Freno disattivato (default)<br />
Stick giù - Freno attivato.<br />
Questa opzione fa fermare l’elica durante il volo oppure la lascia<br />
ruotare liberamente. Usare l’opzione Freno per gli alianti.<br />
Articolo del menu 3: Timing<br />
Stick su - motori con 4 spire e più (default)<br />
Stick giù - motori a 2 spire<br />
Controllare le caratteristiche del vostro motore per confermare il<br />
numero di spire.<br />
Articolo del menu 4: intervallo di input<br />
Stick su - Intervallo motore da 1,1ms a 1,9ms<br />
Stick giù - Autoregolazione (default)<br />
Questa opzione permette di utilizzare qualsiasi radio in commercio per<br />
pilotare lo F-<strong>27C</strong> <strong>Stryker</strong>. La maggior parte delle radio funziona bene<br />
con l’opzione Autoregolazione ma alcune radio hanno un intervallo di<br />
uscita maggiore e possono dare una risposta più lineare utilizzando<br />
l’intervallo da 1.1 a 1.9 ms. Se ci si accorge che c’è una zona “morta”<br />
troppo ampia dell’escursione dello stick in prossimità del massimo<br />
del motore, conviene provare a regolare le escursioni del servo o<br />
aumentare l’ampiezza dell’ingresso. Fare attenzione al fatto che se<br />
queste regolazioni non sono corrette può risultare impossibile armare il<br />
regolatore. Se succede questo ritornare alla opzione Autoregolazione in<br />
cui viene letta la posizione del motore al minimo (tra 1.1 e 1.3 ms) viene<br />
memorizzata ad ogni avvio ed aggiunge un valore di 0.6s al valore del<br />
massimo del gas.<br />
Codici di errore:<br />
Il regolatore emetterà un beep in continuazione (beep.. beep.. beep)se<br />
il voltaggio della batteria quando collegata è inferiore al voltaggio<br />
dell’interruzione. Se si riscontrano dei problemi armando il regolatore,<br />
provare a programmare l’autoregolazione nel punto 4. del menu e vedere<br />
se il problema si risolve. Se si dispone di una radio computerizzata si può<br />
aumentare la percentuale della escursione.<br />
Nota: Invertendo la polarità, il regolatore viene distrutto. Tenere lontano il<br />
regolatore da ogni liquido.<br />
Quando si vola con il caldo, si raccomanda di controllare le condizioni del<br />
regolatore, della batteria e del motore dopo ogni volo. Si raccomanda<br />
vivamente di lasciare raffreddare i componenti elettronici tra un volo e<br />
l’altro. Si raccomanda anche di gestire il gas in modo che da non fare tutto<br />
il volo al massimo. Volare sempre a tutto gas può provocare un danno<br />
permanente al motore, alla batteria o al regolatore.<br />
Per maggiori informazioni sul regolatore E-flite 25A visitare il sito<br />
www.scorpio.it<br />
Tu F-<strong>27C</strong> <strong>Stryker</strong> viene con un Controlador Electrónico de velocidad (ESC) de 25<br />
amperes. Este controlador ha sido diseñado para ser utilizado en aviones a control<br />
remoto y soportar cargas hasta de 25 amperes continuos, y hasta 4 micro servos<br />
con una batería de 2 a 3 celdas de Li-Po. Es posible utilizar la mayoría de las<br />
marcas de radios. El Control Electrónico de Velocidad (ESC) de E-Flite ® de 25A<br />
viene en un paquete de plástico con enfriadores para componentes del controlador<br />
y a diferencia de muchos controladores tambien existe un enfriador colocado<br />
para el regulador del BEC para obtener una fuente de poder mas dependiente y<br />
potente a los servos. Si planea volar su F-27 <strong>Stryker</strong> como viene de paquete no<br />
hay nececidad de programar su ESC. Viene programado de fabrica. Si pretende reprogramar<br />
el ESC le sugerimos remover la helice antews para evitar que la helice<br />
gire si el motor es activado por accidente.<br />
Nota: Siempre asuma que el motor y la hélice están vivos. Manténgase<br />
fuera del alcance de la hélice en todo momento. El motor brushless de<br />
altas rpm puede causar severos daños.<br />
Características del Controlador Electrónico de Velocidad<br />
E-Flite de 25 amperes:<br />
• Dos ajustes de corte suave (para baterías de 2 y 3 celdas)<br />
• Condición de corte inteligente al 70%<br />
• Opción de freno<br />
• Opciones de tiempo para motores inrunner de 4 polos y motores<br />
outrunner de 4 polos<br />
• 2 opciones de rango para el mando en acelerador<br />
Utilizando Tu Controlador de 25 Amperes Brushless (sin carbones)<br />
El controlador E-flite de 25A es muy fácil de usar y, por seguridad, no activará<br />
el motor hasta que el bastón del acelerador haya sido colocado en la posición<br />
de baja/apagado por más de 1 segundo. El controlador te indicará qué posición<br />
está activada para el corte suave de voltaje cada vez que conectes la batería,<br />
haciendo primero un beep a volumen bajo para indicar el inicio. Después, hará<br />
2 o 3 beeps a volumen medio y con una duración media, esto para indicar la<br />
cantidad de celdas. (o 7 beeps en caso de que el Corte ingeligente al 70% se<br />
encuentre activado), esto te ayudará a asegurarte que el sistema está activado<br />
correctamente antes de cada vuelo.<br />
En preparción para el vuelo, deberás encender el Transmisor primero y<br />
asegurarte de que el acelerador se encuentre en la posición de baja/apagado.<br />
A continuación, conecta el paquete de baterías al controlador de velocidad y<br />
escucha los tonos para indicar el corte de voltaje suave. Despues de haber<br />
indicado en número de celdas, el controlador hará una serie de 3 tonos<br />
aumentando de volúmen, estos con duración media, para avisarte que el sistema<br />
está activado y listo para volar, o 2 series de tonos rápidos aumentando el<br />
volúmen si estas entrando al modo de programación.<br />
Por tu propia seguridad, y la seguridad de los demás, deberás actuar como<br />
si el motor y la hélice estuvieran siempre activos y fueran peligrosos. Recuerda<br />
que el motor puede arrancar en cualquier momento. Mantén cualquier parte de tu<br />
cuerpo, ropa y herramientas fuera del alcance de la hélice. Nunca deje la batería<br />
conectada mientras no esté volando el avión. Siempre quite la batería del modelo<br />
para cargarla, y cuando haya terminado de volar.<br />
Programación:<br />
La secuencia del controlador de velocidad E-flite de 25-amperes ha sido<br />
diseñada para se súmamente sencilla e intuitiva. Existe sólo un sencillo menú<br />
que aprenderás y recordarás fácilmente.<br />
Bastón arriba=Toda la potencia<br />
Bastón abajo=Baja ó apagado<br />
Ajuste de fábrica para el Control Electrónico de Velocidad<br />
E-flite de 25-amp:<br />
• 3S auto desactivado<br />
• Freno desactivado.<br />
• 4-polos y mejor tiempo<br />
• Control automático de rango en el mando del acelerador<br />
Modo de programación:<br />
1. Con la batería desconectada del controlador, y el transmisor encendido,<br />
mueve el bastón del acelerador hasta la posición de potencia máxima.<br />
Manténlo en esta posición y conecta la batería al controlador.<br />
2. Espere 5 segundos, y el Control Electrónico de Velocidad te dará 2<br />
series de tonos rápidos para indicarte que has entrado exitosamente al<br />
modo de programación.<br />
3. Una vez que haya escuchado estos tonos, mueva el bastón hacia el<br />
centro y el controlador hará un sonido por una ocasión. Esto indica que<br />
estás en el menú número 1.<br />
4. El controlador ahora esperará 5 segundos para permitirte hacer tu<br />
selección, mueve el bastón a la posición de potencia máxima para aceptar la<br />
opción y a baja/apagado para no aceptarla.<br />
5. Una vez que hayas seleccionado la opción, el controlador emitirá un tono por<br />
una vez a un volumen bajo, después puedes mover el bastón al centro para el<br />
siguiente menú (2 tonos, 3 tonos y así sucesivamente). Si no seleccionas nada<br />
en el transcurso de 5 segundos, el controlador se moverá al siguiente menú.<br />
6. Nota: no es necesario programar cada uno de los pasos del menú.<br />
Simplemente sal del modo de programación después de haber seleccionado<br />
lo necesario de la siguiente manera.<br />
a. Moviendo el bastón del acelerador hasta abajo, después de hacer tu selección.<br />
b. Dejándolo en la posición de baja si no seleccionaste nada, por<br />
aproximadamente 8 segundos, hasta escuchar una serie de 3 tonos de<br />
mediana duración que indican que el controlador ha armado el motor, o<br />
c. Simplemente desconectando la batería.<br />
Selección de Menu:<br />
La selección del Menu son las mismas a continuacion donde “Si” significa<br />
Acelerador maximo y “No” significa desacelerado.<br />
Menu 1: Cuenta de Celdas<br />
Baston arriba - 3S Li-Po corte suave (default)<br />
Baston abajo - 2 celdas Ni-Cd o Ni-MH y nuestro exclusivo 70% corte<br />
inteligente. (Vease abajo para mayor informacion)<br />
Para accesar la opcion de el 70% Corte Inteligente, deje el baston hasta<br />
arriba por 7 segundos mientras en el menu 1, hasta 7 sonidos sean<br />
escuchados luego continue con la programacion normal. Esta opcion activara<br />
el corte suave al 70% de el voltaje inicial. Por ejemplo si su bateria mide<br />
10.0 voltios al iniciar el corte suave iniciara a 7 voltios. La opcion del corte<br />
inteligente checara el voltaje cada vez que conecte el control de velocidad<br />
asi que tenga precaucion usando baterias parcialmente cargadas ya que el<br />
sistema no puede proteger su baterias de Li-Po si esta usando la opcion del<br />
corte inteligente y una baterias parcialmente cargada.<br />
Nota: Los ajustes de fabrica es para corte automatico a 3 celdas (3.05 voltios<br />
por celda). Usted sabra que su bateria alcanzo el corte automatico cuando<br />
escuche el motor pulsar repetidamente.<br />
Menu 2: Freno<br />
Baston arriba - Freno inactivo (default)<br />
Baston abajo - Freno activo<br />
Esta opcion le permite forzar a detener la helice durante el vuelo o a que<br />
gire. Use la opcion de freno para planeadores.<br />
Menu 3: Tiempo<br />
Baston arrib -4-polos y tiempo mas alto (deafault)<br />
Baston abajo motor de -2-polos<br />
Refierase a las especificaciones del motor para confirmar el numero de polos.<br />
Menu 4: Rango de Movimiento<br />
Baston arriba -Rango de acelerador de 1.1mS a 1.9mS<br />
Baston abajo - Auto ajuste (default)<br />
Esta opcion le permite utilizar diferentes radios en el mercado con su F-<br />
<strong>27C</strong> <strong>Stryker</strong>. La mayoria de los radio funcionaran bien con la opcion de<br />
auto ajuste pero algunos radio con rango de operación mayor podran<br />
tenr una respuesta mas linear con el rango de1.1 -a 1.9-mS. Si siente que<br />
existe una respuesta muerta muy amplia de respuesta en el movimiento<br />
del baston cerca del la maxima potencia trate de ajustar los puntos<br />
maximos de su radio. Note que si estos ajustes no son correctos puede<br />
ser posible que no pueda armar el controlador. Si esto sucede regrese al<br />
modo de inicio por default. La opcion de auto-ajuste memoriza la posicion<br />
mas baja del baston (entre 1.1 y 1.3mS) y graba el valor cada vez que se<br />
inicia y luego le añade un valor de 0.06mS para la maxima potencia con el<br />
baston arriba.<br />
Codigo de Errores:<br />
El controlador emitira un sonido continuo si el voltaje es menor que el voltaje<br />
de corte suave. (beep..beep..beep) cuando la bateria de conecte. Si tiene<br />
problemas de armado del controlador entre al mode de programacion y<br />
trate seleccionar el auto ajuste en el menu 4 y verifique que esto resuelva su<br />
problema.. (Si es un radio con computadora puede incrementar alternamente<br />
los porcentajes del ATV (endpoint).<br />
Nota: Si voltea la polaridad del ESC lo destruira. No permita que el ESC<br />
tenga contacto con la humedad.<br />
Cuando vuele en un a temperatura caliente le recomendamos revisar<br />
la condicion del ESC, bateria y motor despues de cada vuelo. Debe de<br />
considerar seriamente dejar enfriar los componentes electronicos entre<br />
vuelos. Tambien le recomendamos hacer uso del acelerador. No es<br />
recomendable que vuele todo el timpo a maxima potencia. Si esto se hace<br />
es posible dañar o causar daño permanente a su motor, bateria y ESC.<br />
Para mayor informacion de su ESC 25A de E-flite favor de visitar<br />
www.E-fliteRC.com o www.mundohobby.com.mx.<br />
14 15
Step 6<br />
Step 7<br />
Receiver Information<br />
The following are the channels programmed into the receiver:<br />
Ch.1: Throttle (ESC)<br />
Ch.2: Elevator (left servo)<br />
Ch.3: Aileron (R) (right servo)<br />
Ch.4: Aileron (L)<br />
Ch.5: Rudder<br />
Ch.6: Aux 1<br />
The channels in bold italics are the channels that are<br />
used in the stock setup of the F-<strong>27C</strong> <strong>Stryker</strong>.<br />
Deutsch<br />
Jumper Out<br />
ohne Jumper<br />
Senza Jumper<br />
Puente fuera<br />
Schritt 6. Empfänger Informationen<br />
Jumper In<br />
mit Jumper<br />
Con Jumper<br />
Puenteincluido<br />
*Activates dual rates (stock)<br />
*Aktiviert Dual Rate<br />
* Attiva il Dual Rate (standard)<br />
*Activa pasos variables (stock)<br />
Motor and CG Information<br />
<strong>ParkZone</strong> 6-pole 1880Kv Brushless Motor<br />
Your F-<strong>27C</strong> <strong>Stryker</strong> is powered by <strong>ParkZone</strong>’s 6-pole<br />
1880Kv brushless motor, which is installed at the factory,<br />
and a 6 x 4 propeller. The 6 x 4 propeller, along with the<br />
motor, was chosen to create the correct balance of speed<br />
and torque and we do not recommend changing propeller<br />
sizes.<br />
Warning: Changing the propeller size could increase the<br />
current draw and may cause damage to the motor, ESC<br />
and battery pack.<br />
Center of Gravity<br />
The center of gravity (CG) is set at the factory based on<br />
using the included battery. As long you insert the battery in<br />
the provided battery saddle that is molded into the foam,<br />
this CG should be accurate. The 3S Li-Po battery should fit<br />
snuggly into the foam saddle. For your reference, the CG<br />
sits approximately 6 inches (15.25cm) in front of the trailing<br />
edge of the elevons. There are molded round holes on<br />
each side of the finger holds on the bottom of the plane<br />
that indicate the spot where the CG is located.<br />
Aileron and Elevator Throws:<br />
The recommended throws for low rate are approximately:<br />
Ailerons: +/- 7/16 inches (11mm)<br />
Elevator: +/- 3/8 inches (9mm)<br />
The recommended throws for high rate are approximately:<br />
Ailerons: +/- 5/8 inches (16mm)<br />
Elevator: +/- 1/2 inches (12mm)<br />
Folgende Kanalbelegung ist programmiert:<br />
Kanal 1: Gas<br />
Kanal 2: Höhenruder (Servo links)<br />
Kanal 3: Querruder (R) (rechtes Servo)<br />
Kanal 4: Querruder (L)<br />
Kanal 5: Seitenruder<br />
Kanal 6: Hilfskanal<br />
Die Kanaäle in Fettdruck werden beim F-<strong>27C</strong> <strong>Stryker</strong> verwendet.<br />
Italiano<br />
Ecco i canali della ricevente utilizzati:<br />
Ch.1: Motore (Regolatore)<br />
Ch.2: Elevatore (servo sinistro)<br />
Ch.3: Alettoni (servo destro)<br />
Ch.4: Alettoni (Sx)<br />
Ch.5: Direzionale<br />
Ch.6: Ausiliario 1<br />
Passo 6. Informazione sulla Ricevente<br />
Deutsch<br />
Schritt 7. Motor und Schwerpunktinformationen<br />
<strong>ParkZone</strong> 6 Pol 1880 V/U bürstenloser Motor<br />
Der F-<strong>27C</strong> <strong>Stryker</strong> wird von einem <strong>ParkZone</strong> 6 Pol bürstenlosen<br />
Motor mit 1880 U/V betrieben. Dieser ist montiert<br />
und treibt eine 6X4 Luftschraube an. Diese Luftschraube<br />
ergibt mit dem Motor eine harmonische Einheit in Sachen<br />
Geschwindigkeit und Drehmoment. Es wird abgeraten,<br />
andere Luftschraubengrößen zu verwenden.<br />
Warnung: Die Verwendung einer anderen Luftschraube<br />
kann zu einer überhöhten Stromaufnahme führen und in der<br />
Folge den Motor, Regler und den Akku zerstören.<br />
Schwerpunkt<br />
Der korrekte Schwerpunkt wurde auf Baisis des mitgelieferten<br />
Akkus bereits eingestellt. Solange Sie den mitgelieferten<br />
Akku in das vorhande Akkufach schieben, ist der Schwerpunkt<br />
korrekt. Der 3S Li-Po passt saugend in das Fach.<br />
Der Schwerpunkt liegt 15,25cm vor der Hinterkante der<br />
Elevons. Im Schaum sind zwei runde Erhöhungen vorhanden,<br />
die den Punkt definieren. Zum Prüfen halten Sie das<br />
Flugzeug auf diesen Punkten mit den Fingerspitzen fest. Die<br />
Nase des Flugzeuges sollte sich leicht nach unten neigen.<br />
Querruder- und Höhenruderauschläge:<br />
Wir empfehlen folgende Ruderausschläge im Low Modus:<br />
Querruder +/- 16mm<br />
Höhenruder +/- 9mm<br />
Empfohlene Ruderausschläge im High Modus:<br />
Querruder +/- 16mm<br />
Höhenruder +/-12mm<br />
I canali in grassetto corsivo sono quelli usati nello F-<strong>27C</strong> <strong>Stryker</strong>.<br />
Español<br />
Paso 6. Informacion del Receptor<br />
Los canales siguientes estan programdos en el receptor:<br />
Ch.1: Acelerador (ESC)<br />
Ch.2: Elevador (servo izquierdo)<br />
Ch.3: Aleron (D) (servo derecho)<br />
Ch.4: Aleron (I)<br />
Ch.5: Timon<br />
Ch.6: Aux 1<br />
Los canales en negrillas italics son los canales usados en la configuracion stock del F-<strong>27C</strong> <strong>Stryker</strong>.<br />
16 17
Italiano<br />
Passo 7. Motore e informazioni sul CG<br />
Step 8<br />
Motore brushless <strong>ParkZone</strong> 6 spire 1880Kv<br />
Lo F-<strong>27C</strong> <strong>Stryker</strong> è mosso da un motore brushless<br />
<strong>ParkZone</strong> ad 8 spire e 1880Kv già installato in fabbrica e<br />
da un’elica 6x4. Sia l’elica che il motore sono stati scelti<br />
per ottenere la giusta velocità e la giusta coppia e non si<br />
consiglia di cambiarli.<br />
Attenzione: Cambiare il tipo di elica può portare ad<br />
un’aumento della corrente assorbita e danneggiare il regolatore,<br />
il motore ed anche il pacco batteria.<br />
Baricentro<br />
Il centro di gravità (CG) o baricentro è regolato in fabbrica<br />
a seconda della batteria. Finchè si mette la batteria<br />
nell’apposito vano della fusoliera il baricentro dovrebbe<br />
essere giusto. La batteria 3S Li-Po dovrebbe inserirsi di<br />
misura nel vano. Come riferimento il CG si dovrebbe trovare<br />
a circa 15,25 cm davanti al bordo di uscita degli elevoni.<br />
Español<br />
Sono stampati due fori rotondi ad ogni lato del punto di<br />
presa per le dita sul fondo del modello per indicare il punto<br />
dove si trova il CG.<br />
Escursione degli alettoni e dell’elevatore:<br />
Le escursioni consigliate per il rateo basso sono indicativamente:<br />
Alettoni: +/- 11mm<br />
Elevatore: +/- 9mm<br />
Le escursioni consigliate per il rateo elevato sono indicativamente:<br />
Alettoni: +/- 16mm<br />
Elevatore: +/- 12mm<br />
Paso 7. Motor e Informacion del centro de gravedad<br />
Control Test<br />
When you are looking from the tail of the aircraft toward<br />
the nose, and you give right aileron command, the right<br />
elevon should deflect upward, while the left deflects<br />
downward. The opposite should happen when you give<br />
left aileron command, the left elevon will go up and the<br />
right elevon will go down. When pulling the elevator stick<br />
back (down), the elevons should both deflect upward.<br />
Conversely, when pushing forward (up), the elevons should<br />
both deflect downward.<br />
Aileron Right<br />
Querruder rechts<br />
Alettoni Destra<br />
Alerón derecha<br />
Elevator Up<br />
Höhenruder hoch<br />
Elevatore Su<br />
Elevador arriba<br />
Jumper In<br />
Your F-<strong>27C</strong> <strong>Stryker</strong> receiver comes with a jumper installed<br />
into the sixth port (Aux 1) of the receiver. When this<br />
jumper is installed, the switch at the top right of the<br />
transmitter will function as a dual rate switch.<br />
Aileron Left<br />
Querruder links<br />
Alettoni Sinistra<br />
Alerón izquierda<br />
Elevator Down<br />
Höhenruder runter<br />
Elevatore Giù<br />
Elevador abajo<br />
Motor Brushless <strong>ParkZone</strong> de 6 polos 1880Kv<br />
Tu F-<strong>27C</strong> <strong>Stryker</strong> contiene un motor de <strong>ParkZone</strong> Brushless de<br />
1880Kv de 6 polos, que ha sido instalado de fábrica, y una hélice<br />
6 x 4. La hélice 6 x 4, junto con el motor, fue escogida para<br />
lograr el balance correcto de velocidad y torque, por lo tanto no<br />
recomendamos cambiar el tamaño de la hélice.<br />
Advertencia: Cambiar el tamaño de la hélice puede<br />
incrementar el consumo de corriente y puede causar daño<br />
al motor al controlador electrónico de velociad y a las<br />
baterías.<br />
Centro de Gravedad<br />
El centro de Gravedad (CG) ha sido localizado de fábrica<br />
utilizando la batería incluídao. Siempre y cuando insertes la<br />
batería en la ranura que ha sido moldeada previamente en<br />
el foam, este centro de gravedad será preciso. La batería<br />
de Litio de 3S debe entrar justa en el espacio asignado.<br />
Para tu referencia, el centro de gravedad se localiza aproximadamente<br />
6 pulgadas adelante del borde de salida de los<br />
elevones. Hay unos orificios redondos moldeados en cada<br />
lado de las agarraderas en la parte baja del avión que indican<br />
el punto en que está localizado el centro de gravedad.<br />
Mandos en Alerones y Elevador:<br />
Los mandos recomendados para ajuste en baja son aproximadamente:<br />
Alerones: +/-11mm<br />
Elevador: +/- 9mm<br />
Los mandos recomendados para ajuste en alta son aproximadamente:<br />
Alerones: +/- 16mm<br />
Elevador: +/- 12mm<br />
Deutsch<br />
Italiano<br />
Schritt 8. Ruderfunktionstest<br />
Wenn Sie von hinten über die Elevons zur Nase des F-<strong>27C</strong> <strong>Stryker</strong><br />
schauen und rechtes Querruder geben, sollte sich das rechte Ruder<br />
nach oben und das linke nach unten bewegen. Wenn Sie linkes<br />
Querruder geben, muss sich das linke Querruder nach oben und<br />
das rechte nach unten bewegen. Wenn Sie den Höhenruderknüppel<br />
nach hinten ziehen, müssen beide Ruder nach oben laufen und<br />
wenn Sie den Knüppel nach vorn schieben, beide nach unten.<br />
Passo 8. Controllo generale<br />
Guardando il modello da dietro verso il muso, se si da il comando<br />
alettoni a destra, l’elevone destro dovrebbe alzarsi mentre quello<br />
sinistro dovrebbe abbassarsi. Dando alettoni a sinistra dovrebbe<br />
succedere il contrario ossia l’elevone sinistro dovrebbe alzarsi<br />
mentre quello destro dovrebbe abbassarsi. Tirando all’indietro lo<br />
stick della trasmittente entrambi gli elevoni dovrebbero alzarsi<br />
ed al contrario spingendo in avanti lo stick entrambi gli elevoni<br />
dovrebbero abassarsi.<br />
Jumperbelegung<br />
In dem 6 Kanalempfänger Ihres F-<strong>27C</strong> <strong>Stryker</strong> ist der 6. Kanal mit<br />
einem Jumper belegt. Mit dieser Belegung arbeitet der Schalter<br />
oben rechts auf dem Sender als Dual Rate Schalter.<br />
Jumper inserito<br />
La ricevente dello F-<strong>27C</strong> <strong>Stryker</strong> arriva con un jumper installato<br />
nella sesta presa (Aux 1) della ricevente. Quando questo jumper<br />
è inserito, l’interruttore che si trova in alto a destra sulla trasmittente<br />
funziona come Dual-Rate.<br />
Español<br />
Paso 8. Prueba de control<br />
Viendo el modelo desde su parte trasera hacia la nariz, cuando<br />
mueves el alerón hacia la derecha, el elevón del lado derecho deberá<br />
subir y el del lado izquierdo deberá bajar. Lo contrario debe<br />
suceder cuando muevas el alerón hacia la izquierda , el elevon<br />
iquierdo deberá subir y el derecho debera bajar. Cuando jales<br />
el bastón del elevador hacia tí (abajo), ambos elevones deberán<br />
flexionarse hacia arriba, viceversa, cuando embujes el bastón (arriba),<br />
los elevones deberán flexionarse hacia abajo.<br />
Puenteincluido<br />
El receptor de su F-<strong>27C</strong> <strong>Stryker</strong>, viene con un puente instalado<br />
dentro del puerto 6 (Aux 1) del receptor. Cuando este puente<br />
esta instalado, el interruptor arriba a la derecha del transmisor,<br />
funcionará como interruptor reductor.<br />
18 19
Step 9<br />
Range Checking Your Radio System<br />
Prior to each flight, range check the radio system to<br />
make certain everything is functioning correctly.<br />
• Make certain no one is using the channel that you will<br />
be flying on.<br />
• Always make sure the transmitter is on prior to<br />
plugging in the flight battery, and that when you have<br />
finished flying, the transmitter is turned off after the<br />
battery has been unplugged.<br />
• Have someone help you with this. One person needs<br />
to carefully hold the aircraft while the other walks<br />
approximately 30 meters away, with the radio on and<br />
the motor running. Make certain the person holding the<br />
plane stays clear of the propeller.<br />
• Make certain the aircraft is responding correctly to all<br />
input. If this is not the case, DO NOT FLY! Contact the<br />
store where you made your purchase.<br />
• Always make sure all controls are functioning per the<br />
Deutsch<br />
transmitter input.<br />
• Always make sure you have fully charged transmitter<br />
batteries.<br />
Schritt 9. Überprüfung der Fernsteueranlage<br />
Vor jedem Flug muss zwingend ein Reichweitentest durchgeführt<br />
werden, um eine einwandfreie Funktion zu gewährleisten.<br />
• Stellen Sie sicher, dass der von Ihnen genutzte Kanal frei ist.<br />
• Stellen Sie sicher, dass Sie immer erst den Sender einschalten,<br />
bevor Sie den Akku anstecken und nach der Landung erst den<br />
Flugakku abziehen, bevor Sie den Sender ausschalten.<br />
• Nehmen Sie für den Test eine zweite Person zur Hilfe. Eine Person<br />
hält das Flugzeug, während die andere Person sich mit dem<br />
Italiano<br />
Passo 9. Controllo della portata della radio<br />
Prima di ogni volo, controllare la portata della radio per essere<br />
sicuri che tutto funzioni correttamente.<br />
• Assicurarsi che nessun altro stia usando la stessa frequenza del<br />
modello.<br />
• Controllare sempre che la trasmittente sia accesa prima di collegare<br />
la batteria del modello. Al termine del volo spegnere la<br />
trasmittente solo dopo che è stata staccata la batteria di volo.<br />
• Tenete sempre una persona con voi. Essa dovrà tenere in mano il<br />
Español<br />
Paso 9. Checando el alcance de tu sistema de radio<br />
Previo a cualquier vuelo, pruba el alcance de tu radio y asegúrate<br />
de que todo está funcionando correctamente.<br />
• Asegúrate de que nadie está utilizando el mismo canal que tú.<br />
• Siempre asegúrate de que el transmisor esté encendido antes<br />
de conectar la batería, y cuando hayas terminado de volar, el<br />
transmisor deberá apagarse después de haber desconectado<br />
la batería.<br />
• Consigue alguien que te ayude a hacer lo siguiente. Una persona<br />
deberá sostener cuidadosamente el avión mientras otra camina<br />
100 paces<br />
100 Schritte<br />
100 passi<br />
100 pasos<br />
Sender ca. 30m entfernt. Dabei sollte der Sender an sein und<br />
der Motor laufen. Stellen Sie sicher, dass sich der Helfer außerhalb<br />
des Luftschraubendrehkreises befindet.<br />
• Stellen Sie sicher, dass alle Funktionen ohne Störung sind. Sollten<br />
Sie Zweifel haben, fliegen Sie auf keinen Fall. Wenden Sie sich in<br />
diesem Fall an Ihren Fachhändler oder den lokalen Service.<br />
• Stellen Sie sicher, dass die Ruder den Steuerkommandos folgen.<br />
• Stellen Sie bitte auch sicher, dass die Batterie im Sender vollständig<br />
geladen sind.<br />
modello mentre il pilota si allontana di circa 30 metri con la radio<br />
accesa ed il motore in moto. La persona che tiene il modello<br />
deve fare attenzione all’elica.<br />
• Assicurarsi che il modello risponda correttamente ai comandi e<br />
se ciò non avviene, NON FAR VOLARE IL MODELLO! Chaiamare il<br />
servizio assistenza Scorpio.<br />
• Assicurarsi sempre che tutti i comandi funzionino correttamente.<br />
• Le batterie della trasmittente devono essere sempre completamente<br />
cariche.<br />
aproximadamente 30 metros de distancia del avión, con el radio<br />
encendido y el motor funcionando. Asegurate de que la persona<br />
que sostenga el avión esté fuera del alcance de la hélice.<br />
• Asegúrate de que el avión esté respondiendo correctamente a<br />
los mandos. De lo contrario, NO VUELES! Llama al departamento<br />
de Soporte de Modelimport en España (91-6774720) o Mundo<br />
Hobby en Mexico (333-1800710).<br />
• Asegúrate siempre de que todos los controles esten funcionando.<br />
• Asegúrate siempre de haber cargado completamente<br />
las baterías.<br />
Step 10<br />
Flying Your F-<strong>27C</strong> <strong>Stryker</strong><br />
We’ve knocked this one out of the park! Choose a very large<br />
open space, or an AMA sanctioned flying field, to fly your<br />
F-<strong>27C</strong> <strong>Stryker</strong>. DO NOT fly at a location such as a public<br />
park or sports field, even if this is where you typically have<br />
flown your park flyers. This airplane can fly at speeds<br />
exceeding 130 km/h, so make sure there are no people<br />
that may be endangered. As always, avoid flying where your<br />
view may become obstructed, or where there are buildings,<br />
trees, cars, or other objects that may jeopardize the<br />
success of your flight. Always follow local ordinances.<br />
Deutsch<br />
Wir haben uns aus der Parkumgebung heraus entwickelt. Wählen<br />
Sie deshalb ein besonders großes Flugfeld oder noch besser<br />
einen zugelassenen Modellflugplatz. Fliegen Sie dieses Modell<br />
auf keinen Fall in einem öffentlichen Park oder auf einem Sportplatz.<br />
Dieses Flugzeug erreicht Geschwindigkeiten von über<br />
130km/h und kann deshalb in dieser Umgebung nicht geflogen<br />
werden. Beachten Sie auch, dass nicht dort fliegen, wo Ihre Sicht<br />
behindert ist, zum Beispiel Gebäude, Bäume, Fahrzeuge oder<br />
andere Objekte. Beachten Sie lokale Vorschriften!<br />
Italiano<br />
Español<br />
Schritt 10. Fliegen des F-<strong>27C</strong> <strong>Stryker</strong><br />
Passo 10. Lo F-<strong>27C</strong> <strong>Stryker</strong> in volo<br />
Questo modello non è adatto per volare in un parco! Non si tratta<br />
di un giocattolo ma di un aereo dalle caratteristiche avanzate. Lo<br />
F-<strong>27C</strong> <strong>Stryker</strong> può raggiungere anche i 130 km/h e di conseguenza<br />
è adatto solo per piloti con grande esperienza. Si consiglia<br />
di farlo volare solo su piste abilitate per i modelli RC. È troppo<br />
veloce per venire considerato un “tipico” park flyer anche se si<br />
tratta del parco dove voli normalmente ed è molto ampio. Non<br />
farlo assolutamente volare in posti che possono essere pericolosi<br />
per le persone. Rispettare sempre le regole del posto.<br />
Paso 10. Volando tu F-<strong>27C</strong> <strong>Stryker</strong><br />
Before flying, always communicate the frequency at which<br />
you intend to fly to other RC pilots around you, and make<br />
sure other pilots are not using that channel.<br />
Vor dem Flug müssen den Kanal an andere Piloten mitteilen, auf<br />
dem Sie fliegen wollen.Stellen Sie ganz sicher, dass dieser Kanal<br />
auch wirklich frei ist.<br />
Prima di volare comunicare sempre la frequenza usata in modo<br />
che gli altri piloti non usino le stesse frequenze.<br />
Hemos dejado este avión fuera de la categoría de Park Flyer!<br />
Escoge un lugar lo más grande posible, o de preferencia un<br />
campo acreditado por la AMA para volar tu F-27 <strong>Stryker</strong>. No lo<br />
vueles en lugares tales como parques públicos, campos deportivos<br />
aún cuando sea el lugar donde acostumbras volar tus Park<br />
Flyers. Este avión puede alcanzar velocidades superiores a las<br />
130 km/h, por lo tanto asegúrate de que no haya personas que<br />
puedas poner en peligro. Como siempre, evita volar si tu vista<br />
puede ser obstruída, o donde haya edificios, arboles, automóviles<br />
o cualquier otro objeto que pueda evitar un vuelo exitoso.<br />
Siempre sigue las reglas locales.<br />
Antes de volar, comunica a los demás pilotos la frecuencia en la<br />
que pretendes salir, y asegúrate de que otros pilotos no estén<br />
utilizandola.<br />
20 21
Step 11<br />
Launching and Landing Your Aircraft<br />
1. Always launch your aircraft directly into the wind, with a<br />
very slight upward angle.<br />
2. We recommend launching with power off, and then<br />
adding between 60% and full throttle. This is due to the<br />
fact that the F-<strong>27C</strong> <strong>Stryker</strong> has a pusher propeller.<br />
3. After several minutes of flying, and when you begin to<br />
feel the power decreasing, it is time to land.<br />
4. Line up the aircraft directly into the wind when landing,<br />
making sure you land with no power to the motor. This<br />
will avoid causing damage to the prop, motor, and<br />
other components of the plane.<br />
Deutsch<br />
Italiano<br />
Español<br />
Schritt 11. Start & Landung<br />
WIND<br />
VENT<br />
VIENTO<br />
Note: ALWAYS assume the motor and the propeller are live.<br />
ALWAYS keep clear of the propeller at all times. The high rpm of<br />
the brushless motor can cause severe injury.<br />
1. Starten Se das Modell immer direkt in den Wind. Die Nase sollte dabei eben über den Horizont zeigen.<br />
2. Wir empfehelen, das Modell mit stehendem Motor zu werfen und dann 60% Gas zu geben. Beachten Sie, das der F-<strong>27C</strong><br />
<strong>Stryker</strong> eine Druckluftschraube besitzt.<br />
3. Nach einigen Minuten Flugzeit werden Sie beobachten, dass die Leistung nachlässt. Dann ist es Zeit zu landen.<br />
4. Richten Sie das Flugzeug gegen den Wind aus. Stellen Sie sicher, dass der Motor aus ist, bevor Sie landen. Sie vermeiden so Beschädigungen<br />
an der Luftschraube, dem Motor und den anderen Komponenten des Modells.<br />
Hinweis: Nehmen Sie bitte immer an, dass der Motor scharf ist und die Luftschraube sich drehen kann. Halten Sie sich aus dem<br />
Drehkreis heraus. Es besteht erhöhte Verletzungsgefahr.<br />
Passo 11. Lancio ed atterraggio<br />
1. Lnciare sempre il modello controvento, leggermente verso l’alto.<br />
2. Consigliamo di lanciarlo col motore spento e quindi di dare tra il 60% ed il 100% del motore. Ciò è dovuto al fatto che lo F-<strong>27C</strong><br />
<strong>Stryker</strong> ha un’elica propiulsiva.<br />
3. Dopo diversi minuti di volo, quando la potenza del motore comincia a diminuire, è tempo di atterrare.<br />
4. Per l’atterraggio porre il modello controvento assicurandovi di non atterrare con l’elica in moto. Ciò evita danni all’elica ed agli altri<br />
componenti del modello.<br />
Nota: considerare SEMPRE la possibilità che il motore e l’elica si possano mettere in moto. Il numero elevato di giri del motore<br />
brushless può provocare anche ferite gravi.<br />
Paso 11. Lanzando y aterrizando tu avión<br />
1. Siempre lanza tu avión directamente en contra del viento, con un ángulo ligeramente ascendente.<br />
2. Recomendamos lanzar el modelo sin acelerar, y después añadir potencia entre 60% y 100%. Esto es debido a que el F-<strong>27C</strong><br />
<strong>Stryker</strong> tiene una hélice que lo empuja en la parte trasera.<br />
3. Después de varios minutos de estar volando, y cuando comiences a sentir que la potencia disminuye, es momento de aterrizar.<br />
4. Alinea el avión directamente en contra del viento cuando aterrices, asegurandote de aterrizar con el motor completamente apagado.<br />
Esto evitará dañar la hélice, el motor y otros componentes del avión.<br />
Future RC Flight<br />
We hope you enjoy flying your new F-<strong>27C</strong> <strong>Stryker</strong>, and<br />
thank you for supporting <strong>ParkZone</strong>. Please continue to<br />
watch <strong>ParkZone</strong>.com for the most up-to-date information.<br />
This is the official website of the creators and distributors<br />
of all <strong>ParkZone</strong> products. There are many other planes<br />
available from <strong>ParkZone</strong> in a variety of models, from scale<br />
civilian aircraft to warbirds to planes that can be flown<br />
indoors and out, and we’re always working on new and<br />
exciting products for you.<br />
Deutsch<br />
Italiano<br />
Español<br />
Die Zukunft des RC-Fliegens<br />
I prossimi modelli RC<br />
Futuros vuelos<br />
For more advanced electric products beyond <strong>ParkZone</strong>,<br />
we recommend that you research the items developed<br />
and distributed under the E-flite ® brand.<br />
Visit horizonhobby.com for more information.<br />
Sincerely,<br />
The <strong>ParkZone</strong> Team<br />
Nous espérons que vous serez satisfait de votre nouveau F-<strong>27C</strong> <strong>Stryker</strong> et nous vous remercions d’avoir choisi un modèle <strong>ParkZone</strong>. Veuillez<br />
consulter notre site internet <strong>ParkZone</strong>.com pour les informations les plus récentes. C’est le site Web officiel des créateurs et distributeurs<br />
de tous les produits <strong>ParkZone</strong>. Il y a beaucoup d’autres modèles disponibles, reproductions d’avions civils ou militaires qui peuvent voler à<br />
l’intérieur et à l’extérieur. Nous continuons à travailler pour vous proposer de nouveaux produits aussi passionnants.<br />
Pour des modèles électriques plus avancés que ceux de <strong>ParkZone</strong>, nous vous recommandons de consulter les articles développés et distribués<br />
sous la marque E-flite ® . Visitez le site horizonhobby.com pour plus d’informations.<br />
Sincèrement votre,<br />
Le team <strong>ParkZone</strong><br />
Nel ringraziarvi di avere scelto un prodotto <strong>ParkZone</strong> ci auguriamo che vi siate divertiti con il F-<strong>27C</strong> <strong>Stryker</strong>. Vi consigliamo di tenere<br />
d’occhio il nostro sito per altre novità in arrivo. Ci sono molti altri modelli <strong>ParkZone</strong> che vanno da modelli in scala di aerei da turismo a quelli<br />
da caccia ed anche modelli che possono essere fatti volare sia indoor che outdoor. Siamo sempre alla ricerca di nuovi modelli che possano<br />
soddisfare le vostre esigenze.<br />
Per modelli ancora più avanzati di quelli <strong>ParkZone</strong> vi consigliamo di prendere in considerazione quelli E-flite ® . Anche questi modelli si possono<br />
trovare sul nostro sito www.scorpio.it.<br />
Cordialmente,<br />
The <strong>ParkZone</strong>Zone Team<br />
Esperamos que disfrute de los vuelos de su nuevo F-<strong>27C</strong> <strong>Stryker</strong> y gracias por el soporte a <strong>ParkZone</strong>. Por favor continue entrando en<br />
<strong>ParkZone</strong>.com para mantenerse informado. Esta es la pagina oficial de los creadores y distribuidores de todos los productos <strong>ParkZone</strong>.<br />
Existen otros muchos modelos disponibles de <strong>ParkZone</strong> en una importante varidad de modelos, desde modelos civiles a escala a aviones<br />
de la 2º guerra ó modelos indoor y exterior. Siempre estamos trabajando en nuevos y excitantes productos par Ud.<br />
Para mas avanzados productos electricos de <strong>ParkZone</strong>, le recomendamos que busque productos desarrollados y distribuidos por la<br />
marca E-Flite ® . Visite horizonhobby.com patra mas información.<br />
Atentamente,<br />
El Equipo <strong>ParkZone</strong><br />
Nota: Siempre asuma que el motor y la hélice están vivos. Manténgase fuera del alcance de la hélice en todo momento. El motor<br />
brushless de altas rpm puede causar severos daños.<br />
22 23
Warranty and Follow-Up Procedures<br />
Deutsch Garantiebestimmungen<br />
Due to the nature and operation of this product, the warranty<br />
does not extend beyond the initial preflight testing.<br />
Carefully check the parts and operation BEFORE your first<br />
flight. Damage incurred during flying, landing, crashing or<br />
modification is not covered under the warranty.<br />
Warranty: Horizon Hobby® Inc. guarantees this product<br />
to be free of defects in material and workmanship. If you<br />
discover defects during the very first preflight testing<br />
(Steps 1–6 & 9–10), please call our Product Support staff<br />
toll-free at 44 (0) 1279 641097. If you are directed by<br />
them to return the product to our Service Center, you will<br />
be provided with a RA (Return Authorization) number. If, in<br />
our opinion after inspecting the product, we determine it to<br />
be defective, we will repair or replace it at our discretion.<br />
If you are directed by our Product Support staff to return<br />
the airplane, please follow these instructions:<br />
1. Unplug the battery from the airplane.<br />
2. Pack the complete <strong>ParkZone</strong> F-27 <strong>Stryker</strong> (all<br />
components in the original box) and place in a sturdy<br />
shipping carton for protection.<br />
3. Include your complete name and address information<br />
inside the carton, as well as clearly writing it on<br />
the outer label/return address area. Include detailed<br />
information explaining the nature of the problem(s)<br />
encountered.<br />
4. Please date your correspondence and be sure your<br />
complete name, address and daytime phone number<br />
appear on this enclosure. Please include your original<br />
dated sales receipt.<br />
Mail to the address below:<br />
Helger Distribution<br />
Units 2-4, Ployters Road<br />
Staple Tye, Southern Way<br />
Harlow, Essex CM18 7NS England<br />
Tel. 44 (0) 1279 641097<br />
Fax. 44 (0) 1279 428863<br />
Aufgrund der Einsatzweise dieses Produktes erstreckt sich<br />
die Garantie nicht über die Prüfung vor dem Fliegen. Überprüfen<br />
Sie alle Teile und die Funktion des Flugzeuges, BEVOR<br />
sie Ihren ersten Flug starten. Schäden, die während des<br />
Fliegens, beim Landen, durch Absturz oder Modifikationen<br />
auftreten, sind durch die Garantie nicht gedeckt.<br />
Garantie: Horizon Hobby garantiert, dass das Produkt frei<br />
von Herstellungs- und Materialfehlern ist. Wenn Sie einen<br />
beim Zusammenbau oder dem ersten Testflug einen Fehler<br />
erkennen, nehmen Sie bitte umgehend Kontakt mit unserem<br />
Service Team unter der Telefonnummer +49 4604 9875110.<br />
Wenn Sie vom Service Team angewiesen werden, das Produkt<br />
zurück zu senden, schicken Sie das Produkt in Originalverpackung<br />
an die Service Stelle. Falls wir nach Eingang feststellen,<br />
dass ein Defekt vorliegt, der einen Garantieanspruch<br />
begründet, werden wir den Artikel entweder reparieren oder<br />
ersetzen.<br />
Wenn Sie von unserem Produkt-Support gebeten werden, das<br />
Flugzeug zu retournieren, beachten Sie bitte Folgendes:<br />
1. Akku vom Flugzeug ausstecken.<br />
2. Packen Sie die F-<strong>27C</strong> <strong>Stryker</strong> komplett (alle Bauteile) in die<br />
Originalverpackung und zum Schutz in eine feste Transportschachtel.<br />
3. Legen Sie Name und Anschrift in der Schachtel bei und<br />
schreiben Sie diese auch außen auf den Aufkleber/in den<br />
Rückadressen-Bereich. Legen Sie eine ausführliche Beschreibung<br />
des Problems bzw. der Probleme bei.<br />
4. Tragen Sie bitte in Ihrem Schreiben das Datum und Ihren<br />
vollen Namen und Ihre volle Anschrift sowie Telefonnummer,<br />
über die wir Sie tagsüber erreichen können, ein.<br />
Legen Sie bitte auch den datierten Originalkaufbeleg bei.<br />
Bitte senden Sie die Sendung an folgende Adresse:<br />
JSB Marketing & Vertriebs GmbH<br />
Dorfstr. 23<br />
24969 Sillerup<br />
Germany<br />
Wir empfehlen Ihnen einen Paketdienst zu wählen, der über<br />
eine Paketverfolgung verfügt. Wir sind für Ihr Produkt erst verantwortlich,<br />
wenn es bei uns sicher eingetroffen ist. Deshalb<br />
sollten Sie den Versand versichern.<br />
24 25
Italiano<br />
Garanzia ed Assistenza<br />
Español<br />
Procedimientos de Garantía y Seguimiento<br />
A causa della natura e del funzionamento di questo<br />
prodotto, la garanzia non si estende oltre la verifica di<br />
prevolo iniziale. Controlla con attenzione le parti e il funzionamento<br />
PRIMA del primo volo. I danni subiti durante il<br />
volo, l’atterraggio, la caduta al suolo o la modifica non sono<br />
coperto dalla garanzia.<br />
Garanzia: Scorpio s.r.l.. garantisce che questo prodotto<br />
è privo di difetti di materiale e lavorazione. Se si scoprono<br />
difetti durante la prima verifica di prevolo, chiamare il nostro<br />
personale di Supporto Prodotto al num. 0461-823099.<br />
Se si viene consigliati di restituire il prodotto al nostro<br />
Centro di Servizio, verrà fornito un numero di RA (autorizzazione<br />
di ritorno). Se, a nostro giudizio, dopo avere esaminato<br />
il prodotto, viene considerato difettoso, verrà riparato<br />
o sostituito a nostra discrezione.<br />
Se il nostro personale di Supporto Prodotto invita a restituire<br />
il F-<strong>27C</strong> <strong>Stryker</strong>, seguire queste istruzioni:<br />
1. Staccare la batteria dall’aeroplano.<br />
2. Imballare il <strong>ParkZone</strong> F-<strong>27C</strong> <strong>Stryker</strong> (completo (tutti i componenti<br />
nella scatola originale) e metterlo in una robusta<br />
scatola di spedizione per proteggerlo.<br />
3. Includere nella scatola le informazioni complete di nome<br />
e indirizzo, oltre a scriverle chiaramente nello spazio<br />
riservato all’indirizzo dell’etichetta esterna/di ritorno. Includere<br />
le informazioni dettagliate che spiegano la natura<br />
del/i problema/i incontrato/i.<br />
4. Si prega di datare la corrispondenza e di assicurarsi<br />
che il nome completo, l’indirizzo e il numero di telefono<br />
compaiano su questo contenitore. Si prega di includere<br />
lo scontrino fiscale originale. Inviare all’indirizzo:<br />
Spedire al seguente indirizzo:<br />
Scorpio Service Center<br />
Via Brennero 169/15<br />
38100 Trento<br />
Vi suggeriamo di spedire il F-<strong>27C</strong> <strong>Stryker</strong> con un vettore<br />
che vi permetta di seguire il pacco e che richieda una<br />
ricevuta. La Scorpio risponderà solo degli oggetti arrivati al<br />
suo magazzino. Molti vettori richiedono una assicurazione<br />
aggiuntiva per la copertura di smarrimenti durante il trasporto,<br />
vi consigliamo di farlo.<br />
Debido a la naturaleza y funcionamiento de este producto,<br />
la garantía no va más allá de las pruebas iniciales previas al<br />
vuelo. Inspeccione cuidadosamente las piezas y compruebe<br />
el funcionamiento antes de su primer vuelo. Los daños producidos<br />
durante el vuelo, el aterrizaje, choques o modificaciones<br />
no están cubiertos por la garantía.<br />
Garantía: Model Import. garantiza que este producto está<br />
libre de defectos en el material y la mano de obra. Si descubre<br />
defectos durante las primeras pruebas, previas al vuelo,<br />
llame a nuestro personal de soporte de producto, al teléfono<br />
gratuito (91) 677-4720. Si le indican que devuelva el producto<br />
a nuestro Centro de servicio, se le proporcionará un número<br />
de RA (Autorización de devolución). Si después de haber<br />
inspeccionado el producto, creemos que es defectuoso, lo<br />
repararemos o sustituiremos, a nuestra discreción.<br />
Si nuestro personal de soporte de producto le indica que<br />
devuelva el avión, siga estas instrucciones:<br />
1. Desenchufe la batería del avión.<br />
2. Empaquete el F-<strong>27C</strong> <strong>Stryker</strong> de <strong>ParkZone</strong> completo<br />
(todos los componentes en la caja original) e introdúzcalo<br />
en una caja de expedición resistente para protegerlo.<br />
3. Indique su nombre y dirección completos dentro de la<br />
caja de cartón, además de escribirlos claramente en la<br />
etiqueta exterior/zona de dirección de devolución. Incluya<br />
información detallada explicando la naturaleza de los problemas<br />
encontrados.<br />
4. Indique la fecha en su correspondencia y asegúrese de anotar<br />
su nombre completo, dirección y número de teléfono<br />
de contacto durante el día en este sobre. Incluya su recibo<br />
de compra original con la fecha.<br />
Envíe la carta a la dirección siguiente:<br />
Modelimport<br />
c/Primavera 48<br />
Pol. Ind. Las Monjas<br />
22850 Torrejon de Ardoz<br />
Madrid<br />
Le sugerimos que envíe su F-<strong>27C</strong> <strong>Stryker</strong> a través de un<br />
transportista que proporcione un seguimiento y/o firma del<br />
paquete. Modelimport es únicamente responsable del producto<br />
una vez llega y es aceptado en sus instalaciones. La<br />
mayoría de los transportistas requieren un seguro opcional<br />
para cubrir los daños o pérdidas durante el transporte, por lo<br />
que debe considerar esta posibilidad al enviar la mercancía.<br />
26 27
Replacement Parts<br />
Make sure that you keep your F-<strong>27C</strong> <strong>Stryker</strong> in the air. Replacement parts are available at your local hobby shop or<br />
from Horizon Hobby (www.horizonhobby.com). Please try your local retailer first. By supporting your local hobby shop,<br />
they will be there when you need them!<br />
Item #: Description:<br />
PKZ1009 Propeller: F<strong>27C</strong> (6 x 4)<br />
PKZ1010 Prop Adapter<br />
PKZ1030 3S 2200mAh Li-Po Battery<br />
PKZ1040 Variable Rate DC Balancing Charger<br />
PKZ1061 Mini Servo (3) with Arms, Long Lead<br />
PKZ1062 Servo Gear Set (3W and 5W)<br />
PKZ1212 Battery Hatch<br />
PKZ1218 Clevis and Pushrod<br />
PKZ1220 Vertical Fin Set<br />
PKZ1221 Vertical Fin Retainer (2)<br />
PKZ4141I Tx:(T572) CH61, 35.010:3D, F<strong>27C</strong><br />
PKZ4142I Tx:(T572) CH64, 35.040:3D, F<strong>27C</strong><br />
PKZ4143I Tx:(T572) CH68, 35.080:3D, F<strong>27C</strong><br />
PKZ4144I Tx:(T572) CH72, 35.120:3D, F<strong>27C</strong><br />
PKZ4145I Tx:(T572) CH76, 35.160:3D, F<strong>27C</strong><br />
PKZ4146I Tx:(T572) CH80, 35.200:3D, F<strong>27C</strong><br />
PKZ4151I Rx:(RG600T) CH6, 35.010:3D, F<strong>27C</strong><br />
PKZ4152I Rx:(RG600T) CH64, 35.040:3D, F<strong>27C</strong><br />
PKZ4153I Rx:(RG600T) CH68, 35.080:3D, F<strong>27C</strong><br />
PKZ4154I Rx:(RG600T) CH72, 35.120:3D, F<strong>27C</strong><br />
PKZ4155I Rx:(RG600T) CH76, 35.160:3D, F<strong>27C</strong><br />
PKZ4156I Rx:(RG600T) CH80, 35.200:3D, F<strong>27C</strong><br />
PKZ4203 Decal Sheet<br />
PKZ4206 Instruction Manual<br />
PKZ4213 Complete Hatch Set<br />
PKZ4215 Painted Nose<br />
PKZ4216 6-Pole 1880Kv Brushless Motor<br />
PKZ4233 Elevons with Control Horns<br />
PKZ4234 Motor Mount with Hardware<br />
EFLA1025 25A Brushless ESC<br />
Option Parts<br />
PKZ1050 3S 2200mAh Li-Po and 2-3S DC balancing Li-Po Charger<br />
PKZ1051 Non-Balancing Charge Lead Adapter (3S to EC3)<br />
PKZ1052 Non-Balancing Charge Lead Adapter (3S to JST)<br />
PKZ1053 Non-Balancing Charge Lead Adapter (2S to JST)<br />
PKZ1267 Unpainted Fuselage<br />
PKZ4275 F-<strong>27C</strong> <strong>Stryker</strong> Plug-N-Play<br />
(The PNP is the same as the <strong>RTF</strong>, but does not include the batteries, radio system or charger.)<br />
Ersatzteile<br />
Halten Sie Ihren F-<strong>27C</strong> <strong>Stryker</strong> in der Luft! Ersatzteile sind bei Ihrem Händler erhältlich oder direkt beim Importeur.<br />
Wenden Sie sich aber zuerst an Ihren Händler. Er wird es Ihnen mit Unterstützung danken.<br />
BEST.NR. BESCHREIBUNG<br />
PKZ1009 Luftschraube F<strong>27C</strong> (6 x 4)<br />
PKZ1010 Luftschraubenmitnehmer<br />
PKZ1030 3S 2200Ah Li-Po Akku<br />
PKZ1040 Einstellbarer LiPo Balancer Lader<br />
PKZ1061 Mini Servo (3) mit Hebeln und langem Kabel<br />
PKZ1062 Servogetriebe<br />
PKZ1212 Akkudeckel<br />
PKZ1218 Schubstangen mit Clips<br />
PKZ1220 Seitenleitwerk<br />
PKZ1221 Leitwerkshalter (2)<br />
PKZ4141I Sender:(T572) Kanal 61, 35.010:3D, F<strong>27C</strong><br />
PKZ4142I Sender:(T572) Kanal 64, 35.040:3D, F<strong>27C</strong><br />
PKZ4143I Sender:(T572) Kanal 68, 35.080:3D, F<strong>27C</strong><br />
PKZ4144I Sender:(T572) Kanal 72, 35.120:3D, F<strong>27C</strong><br />
PKZ4145I Sender:(T572) Kanal 76, 35.160:3D, F<strong>27C</strong><br />
PKZ4146I Sender:(T572) Kanal 80, 35.200:3D, F<strong>27C</strong><br />
PKZ4151I Empfänger:(RG600T) Kanal 6, 35.010:3D, F<strong>27C</strong><br />
PKZ4152I Empfänger:(RG600T) Kanal 64, 35.040:3D, F<strong>27C</strong><br />
PKZ4153I Empfänger:(RG600T) Kanal 68, 35.080:3D, F<strong>27C</strong><br />
PKZ4154I Empfänger:(RG600T) Kanal 72, 35.120:3D, F<strong>27C</strong><br />
PKZ4155I Empfänger:(RG600T) Kanal 76, 35.160:3D, F<strong>27C</strong><br />
PKZ4156I Empfänger:(RG600T) Kanal 80, 35.200:3D, F<strong>27C</strong><br />
PKZ4203 Dekorbogen<br />
PKZ4206 Bedienungsanleitung<br />
PKZ4213 Abdeckungen Komplett<br />
PKZ4215 Nase, Lackiert<br />
PKZ4216 6 Pol 1800U/V bl Motor<br />
PKZ4233 Elevons mit Ruderhorn<br />
PKZ4234 Motorhalter<br />
EFLA1025 25A bl Flugregler<br />
Zubehörteile<br />
PKZ1050 Set mit 3S 2200mAh LiPO Akku und Balancer Lader<br />
PKZ1051 Adapterkabel 3S auf EC3<br />
PKZ1052 Adapterkabel 3S auf JST<br />
PKZ1053 Adapterkabel 2S auf JST<br />
PKZ1267 Rumpf Unlackiert<br />
PKZ4275 F-<strong>27C</strong> <strong>Stryker</strong> PNP Version<br />
(PNP ist indentsich mit der <strong>RTF</strong> Version aber ohne Fernsteueranlage, Akku und Lader)<br />
28 29
Parti di ricambio<br />
Mantenete in efficienza il vostro <strong>ParkZone</strong> F-<strong>27C</strong> <strong>Stryker</strong>! Le parti di ricambio si possono acuistare presso il vostro negozio<br />
di fiducia o direttamente da www.scorpio.it Vi consigliamo di consultare sempre per primo il vostro rivenditore che è anche in<br />
grado di darvi preziosi consigli. Per la lista dei rivenditori consultate la sezione relativa sul sito della Scorpio.<br />
Codice DESCRIZIONE<br />
PKZ1009 Elica: F-<strong>27C</strong> (6 x 4)<br />
PKZ1010 Fermo Elica<br />
PKZ1030 Batteria Li-Po 3S 2200mAh<br />
PKZ1040 Caricabatterie/Bilanciatore CC a Rateo Variabile<br />
PKZ1061 Mini Servo (3) con Ancorine, Cavo Lungo<br />
PKZ1062 Set Ingranaggi Servo (3W e 5W)<br />
PKZ1212 Coperchio Batteria<br />
PKZ1218 Rinvii e Forcelle<br />
PKZ1220 Set Deriva Verticale<br />
PKZ1221 Fermi Derive Verticali (2)<br />
PKZ4141I Trasmittente:(T572) CH61, 35.010:3D, F<strong>27C</strong><br />
PKZ4142I Trasmittente:(T572) CH64, 35.040:3D, F<strong>27C</strong><br />
PKZ4143I Trasmittente:(T572) CH68, 35.080:3D, F<strong>27C</strong><br />
PKZ4144I Trasmittente:(T572) CH72, 35.120:3D, F<strong>27C</strong><br />
PKZ4145I Trasmittente:(T572) CH76, 35.160:3D, F<strong>27C</strong><br />
PKZ4146I Trasmittente:(T572) CH80, 35.200:3D, F<strong>27C</strong><br />
PKZ4151I Ricevente:(RG600T) CH6, 35.010:3D, F<strong>27C</strong><br />
PKZ4152I Ricevente:(RG600T) CH64, 35.040:3D, F<strong>27C</strong><br />
PKZ4153I Ricevente:(RG600T) CH68, 35.080:3D, F<strong>27C</strong><br />
PKZ4154I Ricevente:(RG600T) CH72, 35.120:3D, F<strong>27C</strong><br />
PKZ4155I Ricevente:(RG600T) CH76, 35.160:3D, F<strong>27C</strong><br />
PKZ4156I Ricevente:(RG600T) CH80, 35.200:3D, F<strong>27C</strong><br />
PKZ4203 Decals<br />
PKZ4206 Manuale di Istruzioni<br />
PKZ4213 Set Completo Sportello<br />
PKZ4215 Muso Dipinto<br />
PKZ4216 Motore Brushless 1880Kv 6 spire<br />
PKZ4233 Elevoni con Squadrette di Comando<br />
PKZ4234 Supporto Motore con Minuterie Metalliche<br />
EFLA1025 Regolatore Brushless 25A<br />
Parti opzionali<br />
PKZ1050 3S 2200mAh Li-Po e 2-3S + Caricab/Bilanciatore<br />
PKZ1051 Cavo di Carica Senza Bil. (3S a EC3)<br />
PKZ1052 Cavo di Carica Senza Bil. (3S a JST)<br />
PKZ1053 Cavo di Carica Senza Bil. (2S a JST)<br />
PKZ1267 Fusoliera non Dipinta<br />
PKZ4275 F-<strong>27C</strong> <strong>Stryker</strong> Plug-N-Play<br />
(Il PNP è come il <strong>RTF</strong>, ma non comprende le batterie, la radio ed il caricabatteria)<br />
Recambios<br />
Asegúrese de mantener su F-<strong>27C</strong> <strong>Stryker</strong> siempre en condición de volar. Los recambios están disponibles en su tienda de<br />
ocio local o directamente a través de Horizon Hobby (www.horizonhobby.com). Pruebe primero en su distribuidor local. Su<br />
distribuidor le ayudará y le conseguirá todo lo que lo necesite.<br />
Nº PIEZA DESCRIPCIÓN<br />
PKZ1009 Hélice: F-<strong>27C</strong> (6 x 4)<br />
PKZ1010 Adaptador para Hélice<br />
PKZ1030 3S 2200mAh Batería de Litio-Polimero<br />
PKZ1040 Cargador de Corriente Directa con Balanceador<br />
PKZ1061 Mini Servo (3) con Brazos. Cable Largo<br />
PKZ1062 Juego de Engranes para Servo (3W y 5W)<br />
PKZ1212 Soporte Bateria<br />
PKZ1218 Enganches y Transmisiones<br />
PKZ1220 Juego de Timón Vertical<br />
PKZ1221 Sujección Aleta Vertical (2)<br />
PKZ4141I Transmisor:(T572) Canal 61, 35.010:3D, F<strong>27C</strong><br />
PKZ4142I Transmisor:(T572) Canal 64, 35.040:3D, F<strong>27C</strong><br />
PKZ4143I Transmisor:(T572) Canal 68, 35.080:3D, F<strong>27C</strong><br />
PKZ4144I Transmisor:(T572) Canal 72, 35.120:3D, F<strong>27C</strong><br />
PKZ4145I Transmisor:(T572) Canal 76, 35.160:3D, F<strong>27C</strong><br />
PKZ4146I Transmisor:(T572) Canal 80, 35.200:3D, F<strong>27C</strong><br />
PKZ4151I Receptor:(RG600T) Canal 6, 35.010:3D, F<strong>27C</strong><br />
PKZ4152I Receptor:(RG600T) Canal 64, 35.040:3D, F<strong>27C</strong><br />
PKZ4153I Receptor:(RG600T) Canal 68, 35.080:3D, F<strong>27C</strong><br />
PKZ4154I Receptor:(RG600T) Canal 72, 35.120:3D, F<strong>27C</strong><br />
PKZ4155I Receptor:(RG600T) Canal 76, 35.160:3D, F<strong>27C</strong><br />
PKZ4156I Receptor:(RG600T) Canal 80, 35.200:3D, F<strong>27C</strong><br />
PKZ4203 Calcomanías<br />
PKZ4206 Manual de Instrucciones<br />
PKZ4213 Juego de Cabina Completo<br />
PKZ4215 Nariz Pintada<br />
PKZ4216 6 Polos sin Carbones Directo, 1880Kv motor<br />
PKZ4233 Elevones Conenganches<br />
PKZ4234 Monta Motor con Tornillería<br />
EFLA1025 Controlador Electrónico de Velocidad de 25A<br />
Accesorios opcionales<br />
PKZ1050 3S 2200mAh Li-Po y 2-3S Cargador Balanceador DC Li-Po<br />
PKZ1051 Adaptador para Cargar s/balanceador (3S-EC3)<br />
PKZ1052 Adaptador para Cargar s/balanceador (3S-JST)<br />
PKZ1053 Adaptador para Cargar s/balanceador (2S-JST)<br />
PKZ1267 Fuselaje sin Pintar<br />
PKZ4275 F-<strong>27C</strong> <strong>Stryker</strong> Plug-N-Play<br />
(El PNP es el mismo que el <strong>RTF</strong>, pero no incluye las baterias, sistema de radio ni cargador.)<br />
30 31
<strong>ParkZone</strong> products are distributed<br />
in the United Kingdom exclusively by:<br />
Helger Distribution<br />
Units 2-4, Ployters Road<br />
Staple Tye - Southern Way<br />
Harlow, Essex CM187NS<br />
©2006 Horizon Hobby, Inc.<br />
www.parkzone.com<br />
<strong>ParkZone</strong> Produkte werden exklusiv in Deutschland vertrieben von:<br />
JSB Marketing & Vertriebs GmbH<br />
Otto Hahn Str. 9a<br />
25337 Elmshorn<br />
©2006 Horizon Hobby, Inc.<br />
www.parkzone.com<br />
I prodotti <strong>ParkZone</strong> sono distribuiti in esclusiva per l’Italia da:<br />
Scorpio.s.r.l.<br />
CP 750<br />
38100 Trento<br />
©2006 Horizon Hobby, Inc.<br />
www.parkzone.com<br />
Visitate www.scorpio.it per maggiori informazioni sui prodotti<br />
<strong>ParkZone</strong>: troverete altri aerei, scafi ed auto!<br />
Los productos <strong>ParkZone</strong> están distribuidos en exclusiva en Espana por:<br />
Modelimport<br />
c/Primavera 48<br />
Pol. Ind. Las Monjas<br />
22850 Torrejon de Ardoz<br />
Madrid<br />
©2006 Horizon Hobby, Inc.<br />
www.parkzone.com<br />
Mundo Hobby<br />
Av. Prologacion Mariana Otero #1620<br />
Guadulajara, Jalisco<br />
Mexico C.P. 45100<br />
©2006 Horizon Hobby, Inc.<br />
www.mundohobby.com.mx<br />
9671<br />
®