KITSLIM12 - The Remote Control Gate Co
KITSLIM12 - The Remote Control Gate Co
KITSLIM12 - The Remote Control Gate Co

You also want an ePaper? Increase the reach of your titles
YUMPU automatically turns print PDFs into web optimized ePapers that Google loves.
V2 ELETTRONICA SPA<br />
<strong>Co</strong>rso Principi di Piemonte, 63<br />
12035 RACCONIGI (CN) ITALY<br />
tel. +39 01 72 81 24 11<br />
fax +39 01 72 84 050<br />
info@v2elettronica.com<br />
www.v2elettronica.com<br />
IL n. 145<br />
EDIZ. 04/02/03<br />
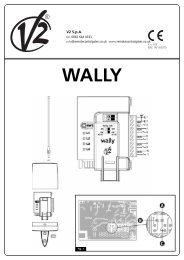
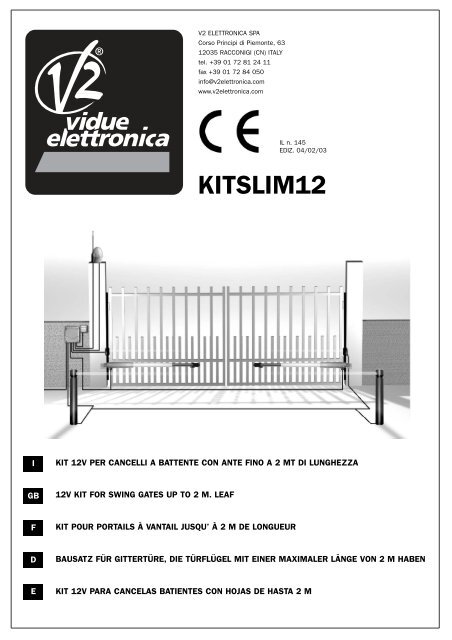
<strong>KITSLIM12</strong><br />
I<br />
KIT 12V PER CANCELLI A BATTENTE CON ANTE FINO A 2 MT DI LUNGHEZZA<br />
GB<br />
12V KIT FOR SWING GATES UP TO 2 M. LEAF<br />
F<br />
KIT POUR PORTAILS À VANTAIL JUSQU’ À 2 M DE LONGUEUR<br />
D<br />
BAUSATZ FÜR GITTERTÜRE, DIE TÜRFLÜGEL MIT EINER MAXIMALER LÄNGE VON 2 M HABEN<br />
E<br />
KIT 12V PARA CANCELAS BATIENTES CON HOJAS DE HASTA 2 M
<strong>KITSLIM12</strong><br />
I<br />
ISTRUZIONI . . . . . . . . . . . . . . . . . . . . . . . . . . . . . . . . . . . . . . . . . . . . . . .1<br />
GB<br />
INSTRUCTIONS . . . . . . . . . . . . . . . . . . . . . . . . . . . . . . . . . . . . . . . . . . . . .11<br />
F<br />
NOTICES . . . . . . . . . . . . . . . . . . . . . . . . . . . . . . . . . . . . . . . . . . . . . . . . .21<br />
D<br />
ANLEITUNGEN . . . . . . . . . . . . . . . . . . . . . . . . . . . . . . . . . . . . . . . . . . . . . .31<br />
E<br />
INSTRUCCIONES . . . . . . . . . . . . . . . . . . . . . . . . . . . . . . . . . . . . . . . . . . . .41
INDICE<br />
AVVERTENZE IMPORTANTI . . . . . . . . . . . . . . . . . . . . . . . . . . . . . . . . . . . . . . . . . . . . . . . . . . .2<br />
CONFORMITÀ ALLE NORMATIVE . . . . . . . . . . . . . . . . . . . . . . . . . . . . . . . . . . . . . . . . . . . . . . .2<br />
ELENCO COMPONENTI . . . . . . . . . . . . . . . . . . . . . . . . . . . . . . . . . . . . . . . . . . . . . . . . . . . . . .3<br />
DATI TECNICI SLIM12V . . . . . . . . . . . . . . . . . . . . . . . . . . . . . . . . . . . . . . . . . . . . . . . . . . . . .4<br />
OPERAZIONI PRELIMINARI . . . . . . . . . . . . . . . . . . . . . . . . . . . . . . . . . . . . . . . . . . . . . . . . . . .4<br />
MONTAGGIO DEGLI OPERATORI . . . . . . . . . . . . . . . . . . . . . . . . . . . . . . . . . . . . . . . . . . . . . . . .5<br />
SCHEMA D'INSTALLAZIONE . . . . . . . . . . . . . . . . . . . . . . . . . . . . . . . . . . . . . . . . . . . . . . . . . .6<br />
INSTALLAZIONE DELLA CASSETTA ELETTRICA . . . . . . . . . . . . . . . . . . . . . . . . . . . . . . . . . . . . . .6<br />
INSTALLAZIONE DEL LAMPEGGIANTE E DEI DISPOSITIVI DI COMANDO . . . . . . . . . . . . . . . . . . . . .6<br />
INSTALLAZIONE DEL SISTEMA DI RILEVAZIONE AD INFRAROSSO . . . . . . . . . . . . . . . . . . . . . . . . .6<br />
ANTENNA ESTERNA . . . . . . . . . . . . . . . . . . . . . . . . . . . . . . . . . . . . . . . . . . . . . . . . . . . . . . . .6<br />
DESCRIZIONE DELLA CENTRALE DI COMANDO . . . . . . . . . . . . . . . . . . . . . . . . . . . . . . . . . . . . .7<br />
CARATTERISTICHE TECNICHE . . . . . . . . . . . . . . . . . . . . . . . . . . . . . . . . . . . . . . . . . . . . . . . . .7<br />
COLLEGAMENTI ALLA MORSETTIERA . . . . . . . . . . . . . . . . . . . . . . . . . . . . . . . . . . . . . . . . . . . .7<br />
INSTALLAZIONE ACCUMULATORE . . . . . . . . . . . . . . . . . . . . . . . . . . . . . . . . . . . . . . . . . . . . . . .8<br />
PROGRAMMAZIONE . . . . . . . . . . . . . . . . . . . . . . . . . . . . . . . . . . . . . . . . . . . . . . . . . . . . . . . .8<br />
AUTO-APPRENDIMENTO DEI TEMPI . . . . . . . . . . . . . . . . . . . . . . . . . . . . . . . . . . . . . . . . . . . . .8<br />
MEMORIZZAZIONE DEI TRASMETTITORI . . . . . . . . . . . . . . . . . . . . . . . . . . . . . . . . . . . . . . . . . .8<br />
IMPOSTAZIONE DELLE FUNZIONI . . . . . . . . . . . . . . . . . . . . . . . . . . . . . . . . . . . . . . . . . . . . . . .9<br />
INDICATORI VISIVI . . . . . . . . . . . . . . . . . . . . . . . . . . . . . . . . . . . . . . . . . . . . . . . . . . . . . . . .10<br />
1
AVVERTENZE IMPORTANTI<br />
Per chiarimenti tecnici o problemi di installazione la<br />
V2 ELETTRONICA dispone di un servizio di assistenza<br />
clienti attivo durante le ore di ufficio<br />
TEL. (+39) 01 72 81 24 11<br />
V2 ELETTRONICA si riserva il diritto di apportare eventuali<br />
modifiche al prodotto senza preavviso; inoltre<br />
declina ogni responsabilità per danni a persone o cose<br />
dovuti ad un uso improprio o ad un’errata installazione.<br />
CONFORMITÁ ALLE NORMATIVE<br />
V2 ELETTRONICA SPA dichiara che i componenti del kit<br />
sono conformi ai requisiti essenziali fissati dalle<br />
seguenti Direttive:<br />
73/23/EEC sicurezza elettrica<br />
93/68/EEC compatibilità elettromagnetica<br />
99/05/EEC direttiva radio<br />
98/37/EEC direttiva macchine<br />
Sono state applicate le seguenti norme tecniche per<br />
verificarne la conformità:<br />
Leggere attentamente il seguente manuale di<br />
istruzioni prima di procedere con l'installazione.<br />
SLIM12V<br />
PRG12PP<br />
TSC-4<br />
• Il presente manuale di istruzioni è destinato<br />
solamente a personale tecnico qualificato nel<br />
campo delle installazioni di automazioni.<br />
• Nessuna delle informazioni contenute all'interno del<br />
manuale può essere interessante o utile per<br />
l'utilizzatore finale.<br />
• Qualsiasi operazione di manutenzione o di<br />
programmazione deve essere eseguita esclusiava<br />
mente da personale qualificato.<br />
L’AUTOMAZIONE DEVE ESSERE REALIZZATA IN<br />
CONFORMITÀ VIGENTI NORMATIVE EUROPEE:<br />
EN 60204–1 (Sicurezza del macchinario, equipaggiamento<br />
elettrico delle macchine, parte 1: regole generali).<br />
EN 12445 (Sicurezza nell'uso di chiusure<br />
automatizzate, metodi di prova).<br />
EN 12453 (Sicurezza nell'uso di chiusure<br />
automatizzate, requisiti).<br />
• L'installatore deve provvedere all'installazione di un<br />
dispositivo (es. interruttore magnetotermico) che<br />
assicuri il sezionamento onnipolare del sistema<br />
dalla rete di alimentazione.<br />
La normativa richiede una separazione dei contatti<br />
di almeno 3 mm in ciascun polo (EN 60335-1).<br />
• Per la connessione di tubi rigidi e flessibili o<br />
passacavi utilizzare raccordi conformi al grado di<br />
protezione IP44 o superiore.<br />
• L’installazione richiede competenze in campo elettrico<br />
e meccanico; deve essere eseguita solamente da<br />
personale qualificato in grado di rilasciare la<br />
dichiarazione di conformità di tipo A sull’installazione<br />
completa (Direttiva macchine 98/37/EEC, allegato IIA).<br />
• E’ obbligo attenersi alle seguenti norme per chiusure<br />
veicolari automatizzate: EN 12453, EN 12445,<br />
EN 12978 ed alle eventuali prescrizioni nazionali.<br />
• Anche l’impianto elettrico a monte dell’automazione<br />
deve rispondere alle vigenti normative ed essere<br />
eseguito a regola d’arte.<br />
• La regolazione della forza di spinta dell’anta deve<br />
essere misurata con apposito strumento e regolata<br />
in accordo ai valori massimi ammessi dalla<br />
normativa EN 12453.<br />
• <strong>Co</strong>nsigliamo di utilizzare un pulsante di emergenza<br />
da installare nei pressi dell’automazione (collegato<br />
all’ingresso STOP della scheda di comando) in modo<br />
che sia possibile l’arresto immediato del cancello in<br />
caso di pericolo.<br />
73/23/EEC<br />
93/68/EEC<br />
99/05/EEC<br />
Nota: Dichiara che non è consentito mettere in<br />
servizio i dispositivi sopra elencati fino a che la<br />
macchina (cancello automatizzato) sia stata identificata,<br />
marchiata CE e ne sia stata emessa la conformità alle<br />
condizioni della Direttiva 89/392/EEC e successive<br />
modifiche.<br />
Il responsabile della messa in servizio deve fornire i<br />
seguenti documenti:<br />
• Fascicolo tecnico<br />
• Dichiarazione di conformità<br />
• Marcatura CE<br />
• Verbale di collaudo<br />
• Registro della manutenzione<br />
• Manuale di istruzioni ed avvertenze<br />
Racconigi il 28/01/2003<br />
Rappresentante legale V2 ELETTRONICA SPA<br />
A. Livio <strong>Co</strong>stamagna<br />
/<br />
EN 55014-1<br />
EN 55014-2<br />
/<br />
EN 60335–1<br />
EN 50081–1,<br />
EN 50081–2<br />
/<br />
EN 60335–1<br />
EN 301489-3<br />
EN 300220-3<br />
2
ELENCO COMPONENTI<br />
1<br />
2<br />
4<br />
3<br />
Ref Descrizione Q.tà<br />
1 Attuatori elettromeccanici 12VDC 2<br />
2 Centrale di comando PRG12PP 1<br />
3 Trasmettitori TSC-4 2<br />
4 Lampeggiante EGG12 1<br />
5 Staffa per fissaggio attuatori sul pilastro 2<br />
6 Perno per fissaggio attuatore 2<br />
7 Seeger per fissaggio perno 4<br />
8 Staffa per fissaggio attuatore sull'anta 2<br />
9 Pinza tubolare 2<br />
10 Rondelle in plastica 4<br />
Rondelle in plastica di riserva 4<br />
11 Dado M10 2<br />
12 Rondella per M10 2<br />
13 Vite M10 x 40 2<br />
8<br />
5<br />
7<br />
6<br />
9<br />
10 11 12 13<br />
3
DATI TECNICI SLIM12V<br />
Lunghezza max anta 2 m<br />
Alimentazione<br />
12 VDC<br />
Potenza motore<br />
30 W<br />
<strong>Co</strong>rsa max di traino 300 mm<br />
Velocità di traino<br />
0,016 m/s<br />
Temperatura d'esercizio -20 ÷ +60 °C<br />
Grado di protezione IP44<br />
Ciclo di lavoro 80 %<br />
Peso del motore<br />
3 Kg<br />
OPERAZIONI PRELIMINARI<br />
L’automatismo è stato studiato per adattarsi ad un<br />
cancello di 4 metri massimi. Può essere utilizzato su<br />
cancelli leggeri, pesanti, in legno, in metallo, PVC o<br />
alluminio; la spinta degli operatori permette una reale<br />
efficacia e un buon funzionamento nel tempo.<br />
Prima di procedere con l’installazione è fondamentale<br />
assicurarsi che il vostro cancello si apra e si chiuda<br />
liberamente e verificare scrupolosamente i seguenti<br />
punti:<br />
• cardini e perni in ottimo stato e opportunamente<br />
ingrassati<br />
• nessun ostacolo deve impedire il movimento<br />
• nessun attrito con il suolo e tra le ante (dilatazione<br />
meccanica da 7 a 8 mm minimi)<br />
• il vostro cancello deve essere equipaggiato di fermi<br />
• centrale e laterali: questi sono indispensabili per un<br />
buon funzionamento del sistema.<br />
FERMO CANCELLO<br />
4<br />
FERMI LATERALI
MONTAGGIO DEGLI OPERATORI<br />
Per effettuare una corretta installazione degli operatori<br />
e garantire un funzionamento ottimale dell’automazione<br />
è necessario rispettare le quote di misurazione riportate<br />
nella tabella sottostante.<br />
Eventualmente modificare la struttura del cancello in<br />
modo da adattarlo ad uno dei casi riportati nella tabella<br />
sottostante.<br />
APERTURA 90° APERTURA 110°<br />
C(mm) A(mm) B(mm) D(mm) A(mm) B(mm) D(mm)<br />
30<br />
40<br />
50<br />
60<br />
70<br />
80<br />
90<br />
100<br />
110<br />
120<br />
130<br />
130<br />
120<br />
120<br />
120<br />
120<br />
120<br />
120<br />
120<br />
110<br />
155<br />
155<br />
155<br />
165<br />
160<br />
160<br />
160<br />
160<br />
160<br />
160<br />
125<br />
115<br />
105<br />
105<br />
90<br />
80<br />
70<br />
60<br />
50<br />
50<br />
130<br />
120<br />
120<br />
120<br />
120<br />
120<br />
120<br />
110<br />
/<br />
/<br />
135<br />
145<br />
140<br />
140<br />
140<br />
140<br />
140<br />
150<br />
/<br />
/<br />
105<br />
105<br />
90<br />
80<br />
70<br />
60<br />
50<br />
50<br />
/<br />
/<br />
Per installare correttamente gli attuatori sul cancello<br />
seguire attentamente i seguenti punti:<br />
• Riportare sui pilastri le misure A e B ritenute più<br />
opportune.<br />
• Fissare le staffe 5 sui pilastri e posizionare gli<br />
operatori su di esse.<br />
• Inserire il perno 6 nel foro e bloccare il perno alle<br />
due estremità mediante i due seeger 7 inserendoli<br />
nelle apposite scanalature.<br />
DURANTE TUTTE QUESTE OPERAZIONI EVITARE DI<br />
TENERE L'ATTUATORE A SBALZO; deve essere mantenuto<br />
orizzontale senza essere lasciato appeso per un solo<br />
punto.<br />
• Montare la staffa 8 sulla pinza tubolare 9 come<br />
indicato in figura.<br />
• Montare le due rondelle plastiche 10 sulla staffa 8<br />
usando del grasso per ancorarle nella loro sede ed<br />
evitare un eventuale spostamento e caduta durante<br />
il montaggio della pinza tubolare 9.<br />
• Posizionare la staffa 8 con le rondelle plastiche 10<br />
nella pinza tubolare 9 allineando i fori.<br />
ATTENZIONE! LA PINZA TUBOLARE HA UN VERSO DI<br />
MONTAGGIO: MONTARLA CON IL LATO<br />
DELL'ALLOGGIAMENTO ESAGONALE VERSO IL BASSO.<br />
• Mettere il dado 11 nella sua sede (lato inferiore),<br />
infilare la rondella 12 sulla vite 13, montare la vite 13<br />
ed avvitare leggermente.<br />
• Fare uscire completamente lo stelo dell'attuatore 1<br />
svitandolo manualmente; giunti a finecorsa avvitarlo di<br />
un giro.<br />
• Infilare la pinza tubolare 9 sullo stelo dell'attuatore 1<br />
(dado verso il basso) e posizionarla a 1,5 cm dalla<br />
testa dello stelo.<br />
• Bloccare il portone sul proprio arresto centrale di<br />
chiusura, posizionare l'attuatore orizzontalmente<br />
sull'anta, individuare la posizione dei due fori della<br />
staffa 8 sull'anta e fissare solidamente la staffa.<br />
• Svitare la vite 13 sulla pinza tubolare 9.<br />
Essa, scorrendo su tutta la lunghezza dello stelo<br />
dell'attuatore, permette di verificare che l'apertura<br />
dell'anta sia completa. Questa verifica è da farsi solo<br />
per simulare un'apertura manuale d'emergenza per<br />
mancanza di corrente o di non funzionamento<br />
dell'automatismo. Richiudere, rifermare il portone e<br />
serrare la vite 13 sulla pinza tubolare 9.<br />
5
SCHEMA D'INSTALLAZIONE<br />
INSTALLAZIONE DELLA CASSETTA<br />
ELETTRICA<br />
E' importante installare la cassetta elettrica nelle<br />
immediate vicinanze del cancello per evitare di utilizzare<br />
cablaggi di collegamento eccessivamente lunghi.<br />
Utilizzare tasselli adatti al tipo di parete (es. mattone o<br />
cemento).<br />
INSTALLAZIONE DEL LAMPEGGIANTE<br />
E DEI DISPOSITIVI DI COMANDO<br />
(pulsanti di comando e di sicurezza)<br />
Il lampeggiante deve essere installato nella posizione<br />
più visibile dall'interno e dall'esterno del cancello.<br />
Il collegamento dei pulsanti di comando può essere<br />
eseguito in serie o in parallelo (programmando opportunamente<br />
la centrale secondo le indicazioni della tabella<br />
FUNZIONI).<br />
Per il collegamento dei pulsanti di STOP o di sicurezza,<br />
il collegamento deve essere fatto obbligatoriamente in<br />
serie.<br />
INSTALLAZIONE DEL SISTEMA DI<br />
RILEVAZIONE AD INFRAROSSO<br />
(Fotocellule)<br />
Questa operazione deve essere eseguita unicamente<br />
sotto le indicazioni fornite dal costruttore. La posizione<br />
di montaggio ideale prevede che l'asse ottico tra il<br />
ricevitore ed il trasmettitore ad infrarosso rimanga ad<br />
un'altezza compresa tra 30 e 60 cm dal suolo e a 10<br />
cm dal portone.<br />
lato esterno<br />
lato interno<br />
Funzionamento: durante la chiusura del cancello, se si<br />
passa tra le fotocellule, il cancello si ferma e si riapre<br />
per eludere l’ostacolo.<br />
ANTENNA ESTERNA<br />
Antenna a lunga portata frequenza 433.92 MHz dotata di<br />
supporto di fissaggio e 2,5 m di cavo coassiale RG–58.<br />
ATTENZIONE: si consiglia di utilizzare l'antenna esterna<br />
modello ANS433 per garantire la massima portata radio.<br />
6
DESCRIZIONE DELLA CENTRALE DI<br />
COMANDO<br />
La PRG12PP è stata progettata dalla V2 ELETTRONICA<br />
per il comando di cancelli ad anta doppia e singola,<br />
motorizzati con attuatori in corrente continua a 12 Volt.<br />
I vantaggi derivati dall'impiego di sistemi di automazione<br />
a bassissima tensione utilizzanti la PRG12PP sono<br />
elencati qui sotto:<br />
• Eliminazione del rischio di elettrificazione accidentale<br />
delle masse metalliche connesse alla centrale<br />
(attuatori, ante ed accessori).<br />
• Sicurezza antischiacciamento, realizzata mediante<br />
rilevatore di sforzo sul motore che garantisce<br />
l'arresto del movimento d'anta in caso di ostacolo<br />
non rilevato dalle fotocellule.<br />
• Funzione antiblackout con l'ausilio di un'accumulatore<br />
al piombo che permette il funzionamento del sistema<br />
anche in mancanza di energia elettrica.<br />
• Rallentamento delle ante nella zona di fine corsa,<br />
impedisce chiusure rumorose e rimbalzi delle ante.<br />
• Auto-apprendimento dei tempi, in fase di<br />
programmazione il sistema esegue un ciclo di<br />
memorizzazione dei tempi di chiusura e di apertura<br />
delle ante semplificando quindi le operazioni di<br />
taratura e di regolazione.<br />
Gli ingressi alla morsettiera prevedono l'utilizzo dei<br />
seguenti componenti:<br />
• Ingresso FOTOCELLULE.<br />
• Ingresso per pulsante di STOP.<br />
• Ingresso per pulsante di START.<br />
Le uscite alla morsettiera prevedono:<br />
• Alimentazione motore 1 e motore 2.<br />
• Lampeggiante a 12 Volt (max 10 W).<br />
• Alimentazione accessori a 12 Volt continui.<br />
• Elettroserratura a 12 Volt continui.<br />
COLLEGAMENTI ALLA MORSETTIERA<br />
1 - 4 <strong>Co</strong>llegare al pulsante / i START<br />
(contatto normalmente aperto o<br />
normalmente chiuso selezionabile<br />
in programmazione con switch 5).<br />
2 Non utilizzato<br />
3 - 4 <strong>Co</strong>llegare al pulsante / i di STOP<br />
(contatto normalmente chiuso).<br />
Se non utilizzato ponticellare con<br />
il comune.<br />
4 COMUNE<br />
5 - 6 <strong>Co</strong>llegare al contatto normalmente<br />
chiuso della FOTOCELLULA.<br />
Se non utilizzato ponticellare con<br />
il comune.<br />
7 - 8 <strong>Co</strong>llegare al motore 2 rispettando<br />
le polarità indicate dalla serigrafia.<br />
NON utilizzare questa uscita in<br />
caso di cancello ad anta singola.<br />
9 - 10 <strong>Co</strong>llegare al motore 1 rispettando<br />
le polarità indicate dalla serigrafia.<br />
Utilizzare questa uscita in caso di<br />
cancello ad anta singola.<br />
11 - 12 Uscita per l’alimentazione delle<br />
FOTOCELLULE. Tensione 12 VDC,<br />
corrente massima 500 mA.<br />
Ricevitore radio super-eterodina a 433MHz incorporato.<br />
Il sistema può memorizzare fino a 48 trasmettitori della<br />
serie Personal Pass.<br />
DATI TECNICI PRG12PP<br />
Alimentazione<br />
230 VAC 50 Hz<br />
<strong>Co</strong>rrente max per motore 3 A<br />
Carico max accessori 10 W<br />
alimentati a 12 VAC<br />
Temperatura di lavoro -20 ÷ +50 °C<br />
Fusibili di protezione F1 = 2 A<br />
F2 = 10 A<br />
Dimensioni<br />
210 x 275 x 100 mm<br />
Peso<br />
2,5 Kg<br />
Grado di protezione IP55<br />
13 - 14<br />
15 - 16<br />
17 - 18 -<br />
19 - 20 -<br />
21 - 22<br />
23<br />
24<br />
<strong>Co</strong>llegare al lampeggiante di<br />
segnalazione. Tensione 12Volt,<br />
potenza massima lampadina 10W.<br />
<strong>Co</strong>llegare ad una elettroserratura.<br />
Tensione 12 Volt, corrente<br />
massima 3 A.<br />
Non utilizzati.<br />
<strong>Co</strong>llegare alla schermatura del<br />
cavo di antenna.<br />
Utilizzare antenna con frequenza<br />
nominale 433 MHz.<br />
In alternativa collegare un conduttore<br />
con isolamento principale di<br />
lunghezza 17 cm<br />
7
INSTALLAZIONE ACCUMULATORE<br />
Se intendente utilizzare la funzione antiblackout dovete<br />
collegare un' accumulatore al piombo (del tipo senza<br />
manutenzione) per mezzo di appositi morsetti ad innesto<br />
facendo estrema attenzione a rispettare le polarità<br />
indicate dalla serigrafia sulla scheda di comando.<br />
La batteria deve avere le seguenti caratteristiche:<br />
TIPO:<br />
TENSIONE:<br />
CAPACITA’:<br />
Al piombo senza manutenzione<br />
12 V<br />
4,2 Ah<br />
Kit accessorio su richiesta: KIT PILA 12V.<br />
Pratico kit composto da batteria al piombo senza<br />
manutenzione (12 VOLT - 4,2 Ah), cavetto bipolare per il<br />
collegamento alla PRG12PP e staffa portabatteria.<br />
AUTO-APPRENDIMENTO DEI TEMPI<br />
Prima di procedere selezionate per mezzo di SW2 la<br />
condizione anta singola o anta doppia a seconda del<br />
tipo di installazione (vedi tabella di pag. 4) e il selettore<br />
anta leggera o anta pesante sulla posizione anta leggera.<br />
Premere il pulsante AUTO sulla scheda di comando e<br />
mantenerlo premuto per almeno 10 secondi. Il LED L1<br />
inizia a lampeggiare, conteporaneamente i motori (uno<br />
alla volta) entrano in movimento e fanno 2 cicli di apertura<br />
e 2 cicli di chiusura.<br />
PORRE LA MASSIMA ATTENZIONE DURANTE L'APPREN-<br />
DIMENTO DEI TEMPI EVITANDO DI OSTACOLARE I<br />
MOVIMENTI DELL'ANTA.<br />
ATTENZIONE: Se durante i movimenti di auto-apprendimento<br />
una delle ante si blocca prima di arrivare a battuta<br />
di chiusura o di apertura spostate il selettore anta<br />
leggera o anta pesante sulla posizione anta pesante<br />
(vedi tabella di pag. 4) e ripetere l'operazione dall'inizio.<br />
Questo può succedere se le ante del cancello sono<br />
troppo pesanti o con eccessivo attrito.<br />
Procedere con la memorizzazione dei trasmettitori.<br />
MEMORIZZAZIONE DEI<br />
TRASMETTITORI<br />
Per effettuare la memorizzazione dei trasmettitori procedere<br />
nel seguente modo:<br />
• Premere e tenere premuto il tasto RX per 2 secondi.<br />
• Il led L1 si accende.<br />
• Entro 10 secondi trasmettere premendo uno<br />
qualsiasi dei 4 tasti.<br />
• Il led L1 si spegne.<br />
Procedere nello stesso modo per gli altri trasmettitori.<br />
A memoria esaurita (dopo 48 trasmettitori memorizzati)<br />
il led L1 esegue 5 tripli lampeggi .<br />
Per la cancellazione dei 48 codici dei trasmettitori procedere<br />
nel seguente modo:<br />
ATTENZIONE: le batterie devono essere rimosse dall'apparecchio<br />
prima del suo smaltimento e devono essere<br />
eliminate secondo le norme vigenti.<br />
Scollegare l'apparecchio dalla rete prima di eseguire<br />
ogni operazione.<br />
• Premere e tenere premuto il tasto RX per 10<br />
secondi.<br />
• Il led L1 emette 5 lampeggi singoli per indicare che<br />
ha cancellato tutto il contenuto della memoria.<br />
Una volta memorizzati, le funzioni associate ai tasti del<br />
trasmettitore rimangono configurate come segue:<br />
PROGRAMMAZIONE<br />
Dopo aver collegato i componenti dell'automatismo<br />
secondo le indicazioni riportate sulla serigrafia della<br />
scheda, vi consigliamo di procedere con la fase di<br />
auto-apprendimento dei tempi di apertura e di chiusura.<br />
La centrale di comando è dotata di indicatori a LED (L1,<br />
L2); di un dip-switch (SW2) per l'impostazione delle<br />
logiche di funzionamento e di due pulsanti per attivare<br />
le fasi di programmazione.<br />
8<br />
1 2<br />
Tasto 1: Il comando di START permette di<br />
attivare l'apertura dell'anta/e per tutta<br />
loro corsa.<br />
Tasto 2: Il comando di START PEDONALE<br />
permette di attivare l'apertura di una sola<br />
delle ante, quella collegata ai morsetti<br />
M1, per un tempo dimezzato rispetto al<br />
tempo di start.
IMPOSTAZIONE DELLE FUNZIONI<br />
Procedere ora con la personalizzazione delle logiche di funzionamento. Questa operazione, che ha lo scopo di adattare<br />
il funzionamento del sistema di apertura a Vostro piacimento, si effettua agendo sul mini switch a 6 posizioni presente<br />
sulla scheda (SW2). La tabella seguente Vi indica quale tipo di funzione potete selezionare.<br />
FUNZIONE<br />
POSIZIONE<br />
DESCRIZIONE<br />
Sensibilità del sensore<br />
antischiacciamento<br />
Sensibilità alta: anta leggera<br />
Sensibilità bassa: anta pesante<br />
Tempo di pausa<br />
30 secondi<br />
1 minuto<br />
Richiusura automatica<br />
Attiva<br />
Non attiva<br />
Anta doppia o singola<br />
Anta doppia<br />
Anta singola<br />
<strong>Co</strong>mando di START<br />
<strong>Co</strong>ntatto alla morsettiera normalmente chiuso<br />
<strong>Co</strong>ntatto alla morsettiera normalmente aperto<br />
DIP SWITCH 6 NON UTILIZZATO<br />
DIP 1: Sensibilità del sensore antischiacciamento<br />
Interviene quando lo sforzo sull'anta, causato da un<br />
ostacolo nello spazio di movimento, supera un certo<br />
valore. La soglia di sensibilità è selezionabile.<br />
Noi vi consigliamo di impostarla inizialmente su<br />
sensibilità alta. Se durante il funzionamento nella<br />
stagione fredda il cancello si blocca senza motivi<br />
apparenti allora impostatela come bassa.<br />
Dip 2 Tempo di pausa<br />
Quando si presentano le seguenti condizioni il<br />
movimento delle ante si arresta per un tempo definito<br />
come "tempo di pausa".<br />
DURANTE L'APERTURA: se interviene il sensore<br />
antischiacciamento, il movimento delle ante si arresta;<br />
si inverte per 4 secondi disimpegnando l'area<br />
interessata e si arresta nuovamente disponendosi nella<br />
condizione di pausa. Se è stata abilitata la funzione di<br />
RICHIUSURA AUTOMATICA dopo il tempo di pausa (30 o<br />
60 secondi) il cancello richiude. In caso contrario il<br />
sistema attende un nuovo comando si START prima di<br />
completare il ciclo.<br />
DURANTE LA FASE DI CHIUSURA: se interviene il<br />
sensore antischiacciamento il movimento delle ante si<br />
arresta; si inverte per 4 secondi disimpegnando l'area<br />
interessata e si arresta nuovamente disponendosi nella<br />
condizione di pausa. Se è stata abilitata la funzione di<br />
RICHIUSURA AUTOMATICA dopo il tempo di pausa (30 o<br />
60 secondi) il cancello richiude.<br />
DIP 3: Richiusura automatica<br />
Se abilitata permette al cancello di richiudersi dopo il<br />
tempo di pausa.<br />
DIP 4: Anta singola o doppia<br />
Permette la selezione del tipo di cancello. Se il cancello<br />
è ad anta singola collegate l'attuatore ai morsetti contrassegnati<br />
come M1.<br />
DIP 5: <strong>Co</strong>mando di START<br />
Permette di selezionare il tipo di contatto del pulsante<br />
di START normalmente chiuso o normalmente aperto.<br />
DIP 6: non utilizzato<br />
9
INDICATORI VISIVI<br />
Il sistema è stato studiato per dare indicazioni visive<br />
sullo stato di funzionamento in condizioni normali o in<br />
stato di anomalia:<br />
LAMPEGGIANTE<br />
Lampeggiante spento:<br />
• Il portone è chiuso: il sistema è in attesa di un<br />
segnale di apertura dal telecomando o dal contatto<br />
a chiave.<br />
• Il portone è aperto: indica che il sistema attende un<br />
segnale di chiusura proveniente dal telecomando o<br />
dal contatto a chiave (programma manuale scelto<br />
con switch 3 in OFF)<br />
LED SULLA SCHEDA DI COMANDO<br />
Sulla scheda di comando ci sono 2 indicatori luminosi a<br />
LED indicati dalla serigrafia come L1 e L2.<br />
Per L1 si è già visto quali indicazioni fornisce durante la<br />
fase di programmazione.<br />
L2 ha la funzione di segnalare lo stato di carica dell'accumulatore<br />
collegato alla scheda.<br />
LED ACCESSO: accumulatore in fase di carica.<br />
LED SPENTO: accumulatore carico.<br />
Lampeggiante che lampeggia rapidamente: il cancello è<br />
in fase di apertura.<br />
Lampeggiante che lampeggia normalmente: il cancello<br />
è in fase di chiusura.<br />
Lampeggiante che lampeggia lentamente: il cancello è<br />
nella condizione di pausa.<br />
Lampeggiante che si accende per cinque secondi al<br />
ricevimento del segnale per poi spegnersi: indica che il<br />
sistema ha tentato la chiusura ma il contatto della<br />
fotocellula non era chiuso.<br />
Lampeggiante che si accende con un comando di START<br />
senza movimenti delle ante: quando viene premuto il<br />
tasto 1 od il tasto 2 di uno dei trasmettitori memorizzati<br />
o si utilizza un contatto a chiave e la lampada rimane<br />
accesa per tutto il tempo di trasmissione/chiusura del<br />
contatto il sistema è in STOP, cioè la centrale vede ai<br />
morsetti indicati come STOP un contatto aperto.<br />
Se il pulsante di STOP, essendo opzionale, non è<br />
installato può darsi che il ponticello sui morsetti<br />
contrassegnati STOP sia instabile; in questo caso<br />
controllarlo, eventualmente sostituirlo o eseguirlo.<br />
Lampeggiante che rimane acceso in permanenza:<br />
a causa di un'anomalia in fase di apertura o chiusura<br />
del portone, per esempio per vento forte che impedisce<br />
qualsiasi movimento dell'anta.<br />
Per uscire da questa anomalia agire sul contatto a<br />
chiave e contemporaneamente spingere il bottone del<br />
trasmettitore.<br />
L'automatismo riprenderà il suo ciclo normale.<br />
ATTENZIONE: dovete mantenere per tutto il tempo dell'apertura<br />
o della chiusura il bottone del trasmettitore<br />
premuto e la chiave girata. Il movimento che avviene è<br />
condizionato: "un'anta alla volta". Quando l'utilizzatore<br />
constaterà che la prima anta ha finito la sua corsa,<br />
deve rilasciare tempestivamente il bottone del trasmettitore<br />
e la chiave. Il lampeggiante rimane acceso in permanenza<br />
per indicare che la medesima operazione deve<br />
essere fatta per rimuovere la seconda anta.<br />
10
INDEX<br />
IMPORTANT REMARKS . . . . . . . . . . . . . . . . . . . . . . . . . . . . . . . . . . . . . . . . . . . . . . . . . . . . .12<br />
CONFORMITY TO REGULATIONS . . . . . . . . . . . . . . . . . . . . . . . . . . . . . . . . . . . . . . . . . . . . . . .12<br />
PARTS LIST . . . . . . . . . . . . . . . . . . . . . . . . . . . . . . . . . . . . . . . . . . . . . . . . . . . . . . . . . . . . .13<br />
PRELIMINARY OPERATIONS . . . . . . . . . . . . . . . . . . . . . . . . . . . . . . . . . . . . . . . . . . . . . . . . . .14<br />
OPERATOR INSTALLATION . . . . . . . . . . . . . . . . . . . . . . . . . . . . . . . . . . . . . . . . . . . . . . . . . . .15<br />
INSTALLATION LAYOUT . . . . . . . . . . . . . . . . . . . . . . . . . . . . . . . . . . . . . . . . . . . . . . . . . . . . .16<br />
DESCRIPTION OF THE CONTROL UNIT . . . . . . . . . . . . . . . . . . . . . . . . . . . . . . . . . . . . . . . . . . .17<br />
TERMINAL CONNECTIONS . . . . . . . . . . . . . . . . . . . . . . . . . . . . . . . . . . . . . . . . . . . . . . . . . . .17<br />
SPECIFICATIONS . . . . . . . . . . . . . . . . . . . . . . . . . . . . . . . . . . . . . . . . . . . . . . . . . . . . . . . . .17<br />
ACCUMULATOR INSTALLATION . . . . . . . . . . . . . . . . . . . . . . . . . . . . . . . . . . . . . . . . . . . . . . . .18<br />
PROGRAMMING . . . . . . . . . . . . . . . . . . . . . . . . . . . . . . . . . . . . . . . . . . . . . . . . . . . . . . . . . .18<br />
TIME AUTO-LEARNING . . . . . . . . . . . . . . . . . . . . . . . . . . . . . . . . . . . . . . . . . . . . . . . . . . . . . .18<br />
TRANSMITTER RECORDING . . . . . . . . . . . . . . . . . . . . . . . . . . . . . . . . . . . . . . . . . . . . . . . . .18<br />
FUNCTION SETUP . . . . . . . . . . . . . . . . . . . . . . . . . . . . . . . . . . . . . . . . . . . . . . . . . . . . . . . . .19<br />
VISUAL INDICATORS . . . . . . . . . . . . . . . . . . . . . . . . . . . . . . . . . . . . . . . . . . . . . . . . . . . . . . .20<br />
11
IMPORTANT REMARKS<br />
For any installation problems please contact V2 ELETTRO-<br />
NICA TEL. (+39) 01 72 81 24 11<br />
V2 ELETTRONICA has the right to modify the product<br />
without previous notice; it also declines any responsibility<br />
to damage or injury to people or things caused<br />
by improper use or wrong installation.<br />
Please read this instruction manual very carefully<br />
before installing and programming your control unit.<br />
CONFORMITY TO REGULATIONS<br />
V2 ELETTRONICA SPA declares that the components<br />
included in the kit are in conformity with the provisions<br />
of the following EC directives:<br />
73/23/EEC electrical safety<br />
93/68/EEC electromagnetic compatibility<br />
99/05/EEC radio directive<br />
98/37/EEC machine directive<br />
and with the standards referenced here below:<br />
SLIM12V<br />
PRG12PP<br />
TSC-4<br />
• This instruction manual is only for qualified<br />
technicians, who specialize in installations and<br />
automations.<br />
• <strong>The</strong> contents of this instruction manual do not<br />
concern the end user.<br />
• Every programming and/or every maintenance<br />
service should be done only by qualified technicians.<br />
73/23/EEC<br />
93/68/EEC<br />
/<br />
EN 55014-1<br />
EN 55014-2<br />
EN 60335–1<br />
EN 50081–1,<br />
EN 50081–2<br />
EN 60335–1<br />
EN 301489-3<br />
AUTOMATION MUST BE IMPLEMENTED IN COMPLIAN-<br />
CE WITH THE EUROPEAN REGULATIONS IN FORCE:<br />
EN 60204–1 (Machinery safety. electrical equipment of<br />
machines, part 1: general rules)<br />
EN 12445 (Safe use of automated locking devices,<br />
test methods)<br />
EN 12453 (Safe use of automated locking devices,<br />
requirements)<br />
• <strong>The</strong> installer must provide for a device<br />
(es. magnetotermical switch) ensuring the omnipolar<br />
sectioning of the equipment from the power supply.<br />
<strong>The</strong> standards require a separation of the contacts<br />
of at least 3 mm in each pole (EN 60335-1).<br />
• <strong>The</strong> plastic case has an IP55 insulation; to connect<br />
flexible or rigid pipes, use pipefittings having the<br />
same insulation level.<br />
• Installation requires mechanical and electrical skills,<br />
therefore it shall be carried out by qualified<br />
personnel only, who can issue the <strong>Co</strong>mpliance<br />
Certificate concerning the whole installation<br />
(Machine Directive 98/37/EEC, Annex IIA).<br />
• <strong>The</strong> automated vehicular gates shall comply with the<br />
following rules: EN 12453, EN 12445, EN 12978<br />
as well as any local rule in force.<br />
99/05/EEC<br />
Note: Declares that the above mentioned devices may<br />
not be operated until the machine (automated gate) is<br />
identified, CE-labeled, and declared to be compliant to<br />
the specifications of Directive 89/392/EEC and following<br />
modifications.<br />
<strong>The</strong> person in charge for the machine start-up must provide<br />
the following records:<br />
• Technical specification paper<br />
• Declaration of conformity<br />
• CE-labeling<br />
• Testing record<br />
• Maintenance record<br />
• Operation manual and directions<br />
Racconigi 28/01/2003<br />
V2 ELETTRONICA SPA legal representative<br />
A. Livio <strong>Co</strong>stamagna<br />
/<br />
/<br />
EN 300220-3<br />
• Also the automation upstream electric system shall<br />
comply with the laws and rules in force and be<br />
carried out workmanlike.<br />
• <strong>The</strong> door thrust force adjustment shall be measured<br />
by means of a proper tool and adjusted according to<br />
the max. limits, which EN 12453 allows.<br />
• We recommend to make use of an emergency<br />
button, to be installed by the automation (connected<br />
to the control unit STOP input) so that the gate may<br />
be immediately stopped in case of danger.<br />
12
PARTS LIST<br />
1<br />
2<br />
4<br />
3<br />
Ref Part name Q.ty<br />
1 Electromechanical actuators 12VDC 2<br />
2 <strong><strong>Co</strong>ntrol</strong> unit PRG12PP 1<br />
3 Transmitters TSC-4 2<br />
4 Flasher EGG12 1<br />
5 Fastening bracket, actuator to pillar 2<br />
6 Fastening pin, actuator 2<br />
7 Fastening Seeger, pin 4<br />
8 Fastening bracket, actuator to shutter 2<br />
9 Clamp cylinder 2<br />
10 Plastic washers 4<br />
Spare plastic washers 4<br />
11 M10 nut 2<br />
12 M10 washer 2<br />
13 M10 x 40 screw 2<br />
8<br />
5<br />
7<br />
6<br />
9<br />
10 11 12 13<br />
13
SPECIFICATION FOR SLIM12V<br />
Max leaf length<br />
2 m<br />
Power supply<br />
12 VDC<br />
Motor power<br />
30 W<br />
Max travel<br />
300 mm<br />
Operating speed<br />
0,016 m/s<br />
Working temperature -20 ÷ +60 °C<br />
Protection grade<br />
IP44<br />
Duty cicle 80 %<br />
Motor weight<br />
3 Kg<br />
PRELIMINARY OPERATIONS<br />
Such automation has been planned for a max. 4-m.<br />
gate; it can operate on light, heavy, wooden, metal, PVC<br />
as well as aluminum gates. Its operators’ thrust allows<br />
a good performance and a long lasting operation as<br />
well.<br />
Before installing your automation, be sure that your<br />
gate correctly opens and closes, as well as carefully<br />
check as follows:<br />
• Pintles and pivots shall be in good order and<br />
properly lubricated<br />
• Nothing shall block the movement<br />
• No friction with earth and between the doors shall<br />
exist (mechanical expansion from 7 to 8 mm min.)<br />
• Your gate shall be equipped with central and side<br />
stops, which are fundamental for the good system<br />
operation.<br />
GATE STOP<br />
SIDE STOPS<br />
14
OPERATOR INSTALLATION<br />
In order to correctly mount actuators onto the gate,<br />
carefully follow the directions below:<br />
• Mark pillars with the most significant A and B mea<br />
surements.<br />
• Fasten brackets 5 to pillars and position operators<br />
onto them.<br />
• Insert pin 6 into the hole and lock it at both ends by<br />
placing the two seegers 7 into the specially made<br />
grooves.<br />
ALL TIME DURING THESE OPERATIONS, AVOID LEAVING<br />
THE ACTUATOR LOOSE; this must be kept horizontally<br />
and not being left hanging from one single point.<br />
To carry out a proper installation of the operator parts<br />
as well as to ensure the best automation performance,<br />
the measurement levels shown in the following table<br />
shall be complied with.<br />
Change the gate structure to adapt it to one of the following<br />
cases, if necessary.<br />
• Mount bracket 8 onto the clamp cylinder 9 as<br />
shown in figure.<br />
• Mount the two plastic washers 10 onto bracket 8;<br />
use some grease in order to secure them in place<br />
and prevent any drifts and drops when mounting<br />
clamp cylinder 9.<br />
• Position bracket 8 into the clamp cylinder 9 with pla<br />
stic washers 10, lining bores up.<br />
C(mm)<br />
OPENING 90° OPENING 110°<br />
A(mm) B(mm) D(mm) A(mm) B(mm) D(mm)<br />
CAUTION! THE CLAMP CYLINDER HAS A MOUNTING<br />
SIDE: THE HEXAGONAL SEAT SHOULD BE PLACED<br />
BELOW.<br />
30<br />
40<br />
50<br />
60<br />
70<br />
80<br />
90<br />
100<br />
110<br />
120<br />
130<br />
130<br />
120<br />
120<br />
120<br />
120<br />
120<br />
120<br />
120<br />
110<br />
155<br />
155<br />
155<br />
165<br />
160<br />
160<br />
160<br />
160<br />
160<br />
160<br />
125<br />
115<br />
105<br />
105<br />
90<br />
80<br />
70<br />
60<br />
50<br />
50<br />
130<br />
120<br />
120<br />
120<br />
120<br />
120<br />
120<br />
110<br />
/<br />
/<br />
135<br />
145<br />
140<br />
140<br />
140<br />
140<br />
140<br />
150<br />
/<br />
/<br />
105<br />
105<br />
90<br />
80<br />
70<br />
60<br />
50<br />
50<br />
/<br />
/<br />
• Place nut 11 in its own seat (lower side), position<br />
washer 12 on screw 13, mount screw 13, screw it<br />
loose.<br />
• Extract the actuator rod 1 completely, by unscrewing<br />
it manually; at its end stop, screw it one turn on.<br />
• Insert clamp cylinder 9 onto actuator rod 1 (nut in<br />
low position) and place it 1,5 cm from the rod head.<br />
• Lock the gate at its closing stop in the center,<br />
position the actuator horizontally onto the shutter,<br />
locate the two bores of bracket 8 on the shutter,<br />
and secure the bracket.<br />
• Loose screw 13 on clamp cylinder 9. This runs all<br />
the length of the actuator rod and makes it possible<br />
to check for the complete opening of the shutter.<br />
This check should only be made to simulate an<br />
emergency manual opening, in case of a power or<br />
automatism failure.<br />
• Close it back, lock the gate, and tight screw 13 on<br />
clamp cylinder 9.<br />
15
INSTALLATION LAYOUT<br />
INSTALLATION OF THE CONTROL<br />
BOARD<br />
<strong>The</strong> control board should be installed next to the gate,<br />
to avoid too much long connecting wiring.<br />
Make use of dowels which are suitable to the kind of<br />
wall (for instance: brick or cement).<br />
INSTALLATION OF BLINKING LAMP<br />
AND CONTROL DEVICES<br />
(safety and control buttons).<br />
<strong>The</strong> blinking lamp shall be installed in the most visible<br />
position both inside and outside the gate.<br />
<strong>The</strong> control button can have series or parallel connections<br />
(by properly programming the power plant according<br />
to the indications shown in table 2).<br />
<strong>The</strong> series connection is mandatory for the safety block<br />
buttons.<br />
INSTALLATION OF THE INFRARED<br />
SURVEY SYSTEM (Photocells).<br />
This operation shall be carried out according to the<br />
manufacturer’s instructions only. According to the perfect<br />
assembly position, the optical axis between the<br />
receiver and the infrared transmitter should be 30-60<br />
cm from the earth and 10 cm from the door.<br />
External side<br />
Internal side<br />
Operation: during the gate closing, when passing<br />
through the photocells, the gate stops and opens<br />
again, to avoid the obstacle.<br />
EXTERNAL ANTENNA<br />
It deals with a wide range antenna having a 433.92<br />
MHz frequency, equipped with a fastening device and a<br />
2,5 m RG – 58 coaxial cable.<br />
NOTE: We recommend using external antenna model<br />
ANS433 in order to ensure the largest radio range.<br />
16
DESCRIPTION OF THE CONTROL UNIT<br />
PRG12PP has been planned by V2 ELETTRONICA to control<br />
double- and one – door gates, driven by means of<br />
12V D.C. actuators.<br />
Benefits resulting from the very low voltage<br />
automations using PRG12PP are as follows:<br />
TERMINAL CONNECTIONS<br />
1 - 4 <strong>Co</strong>nnect to the START button/s<br />
(it deals with a normal open or normal<br />
closed contact, which can be<br />
• No risk of accidental electrification of the metallic<br />
masses which are connected to the power plant<br />
(actuators, doors and accessories).<br />
• Anti-squashing safety, carried out by means of a<br />
stress detector on the motor ensuring the door<br />
movement stop in case the photocells do not detect<br />
the presence of an obstacle.<br />
• No blackout function by means of a lead accumulator<br />
enabling the system operation even if no power is<br />
supplied.<br />
• Door slowing down in the end of stroke area, to<br />
prevent noisy closings and door recoil.<br />
• Time machine auto-learning: during the program<br />
phase, the system carries out a recording cycle<br />
concerning the door opening and closing times, so<br />
simplifying the calibration and adjustment<br />
operations.<br />
<strong>The</strong> terminal inlets are equipped with the following<br />
components:<br />
• Infrared bearing inlet (PHOTOCELLS).<br />
• Stop button inlet (STOP).<br />
• Opening button inlet (START).<br />
<strong>The</strong> terminal outputs are equipped with as follows:<br />
• Motor 1 and Motor 2 feeding.<br />
• 12 Volt blinking lamp (max 10 W).<br />
• 12 Volt D.C. accessory feeding.<br />
• 12 Volt D.C. electrolock.<br />
Built-in super-heterodyne 433 Mhz receiver.<br />
This system can record up to 48 Personal Pass<br />
transmitters.<br />
SPECIFICATIONS<br />
Power supply<br />
230 VAC, 50 Hz<br />
Motors maximum load 60 W<br />
24VAC attachment 10 W<br />
maximum load<br />
Room work temperature -20 ÷ +60 °C<br />
Fuses<br />
F1 = 2 A<br />
F2 = 10 A<br />
Dimensions<br />
210 x 275 x 100 mm<br />
Weight<br />
2,5 Kg<br />
Protection<br />
IP55<br />
2<br />
3 - 4<br />
4<br />
5 - 6<br />
7 - 8<br />
9 - 10<br />
11 - 12<br />
13 - 14<br />
15 - 16<br />
17 - 18 -<br />
19 - 20 -<br />
21 - 22<br />
23<br />
24<br />
programmed by means of switch 5)<br />
UNUSED<br />
<strong>Co</strong>nnect to the STOP button<br />
(it deals with a normal closed<br />
contact). If it is not used make a<br />
jumper with the common contact.<br />
COMMON<br />
<strong>Co</strong>nnect to the normal closed<br />
contact of the PHOTOCELL. If it is<br />
not used make a jumper with the<br />
common contact.<br />
<strong>Co</strong>nnect to the motor 2 according<br />
to the silk screen printing polarities.<br />
DO NOT use this output if it<br />
deals with a one-door gate.<br />
<strong>Co</strong>nnect to the motor 1 according<br />
to the silk screen printing polarities.<br />
Use this output if it deals<br />
with a one-door gate.<br />
Output for the feeding of the<br />
PHOTOCELL). Voltage 12 VDC,<br />
500 mA max. current.<br />
<strong>Co</strong>nnect to the signaling blinking<br />
lamp.<br />
Voltage: 12 Volt, lamp: 10 W.<br />
<strong>Co</strong>nnect to an electric lock.<br />
Voltage: 12 VDC, 3 A max.<br />
current.<br />
UNUSED<br />
<strong>Co</strong>nnect to the antenna cable<br />
shielding.<br />
<strong>Co</strong>nnect to the antenna cable central<br />
connector. Use an antenna<br />
having a 433 MHz rated frequency.<br />
Alternatively, connect a conductor<br />
having a 17cm main insulation.<br />
17
ACCUMULATOR INSTALLATION<br />
If the antiblackout function is required, a no-maintenance<br />
lead accumulator needs to be connected by means<br />
of special coupling terminals, by strictly complying with<br />
the silk screen printing polarities of the control card.<br />
<strong>The</strong> accumulator shall have the following characteristics:<br />
TYPE<br />
VOLTAGE<br />
CAPACITY<br />
lead and with no maintenance need<br />
12 VOLT<br />
4,2 Ah<br />
Option kit: BATTERY KIT 12V.<br />
A handy kit comprising a free-maintenance lead battery<br />
(12V - 4,2Ah), twin lead for connection to the PRG12PP,<br />
and battery holder.<br />
TIME AUTO-LEARNING<br />
Before starting, select “one door” or “double door”, by<br />
means of the SW2, according to the kind of installation<br />
required (see table at page 11), and put the “light” or<br />
“heavy” door selector on “light door” Press the AUTO<br />
button on the control card and keep it pressed for 10<br />
seconds at least. LED L1 will start blinking and, at the<br />
same time, the two motors (one at a time) will work by<br />
carrying out two opening and closing cycles respectively.<br />
BE EXTREMELY CAREFUL DURING THE TIME AUTO-LEAR-<br />
NING AVOIDING TO IMPEDE THE DOOR MOVEMENT.<br />
If during the self-learning movements one of the two<br />
doors stops before closing or opening, put the “light<br />
door” or “heavy door” selector on “heavy door” (see<br />
table at page 11) and repeat everything again.<br />
This could happen if the gate doors are too heavy or<br />
the friction is too much.<br />
Now, proceed with the transmitter recording<br />
TRANSMITTER RECORDING<br />
To carry out the transmitter recording proceed as<br />
follows:<br />
• Press the RX key and keep it pressed for 2<br />
seconds.<br />
• Led L1 will turn on.<br />
• Within 10 seconds, transmit by means of the remote<br />
control device by pressing one of the 4 keys.<br />
• Led L1 will turn off.<br />
• Proceed in the same way with the other transmitters.<br />
As soon as the memory is full (after 48 recorded transmitters)<br />
Led L1 carries out 5 triple blinkings.<br />
To cancel the 48 codes proceed as follows:<br />
• Press the RX key and keep it pressed for 10<br />
seconds.<br />
• Led L1 will carry out 5 single blinkings to show that<br />
all the memory content has been removed.<br />
CAUTION: Batteries must be removed before device disposal<br />
according to the regulations in force.<br />
Disconnect electric power before any operation.<br />
PROGRAMMING<br />
As soon as these automation components have been<br />
connected according to the indications shown on the<br />
silk-screen printing and on the card as well, with reference<br />
to the hereabove page, we kindly recommend to<br />
set up the opening and closing time auto learning.<br />
Once recorded, the transmitter key functions are setup<br />
as follows:<br />
1 2<br />
Key 1: the START command allows to activate<br />
the opening of the door/s during the<br />
whole stroke.<br />
Key 2: the START PEDESTRIAN command<br />
allows to activate only one door opening,<br />
the one being connected to the M1<br />
terminals, for half time as to the start<br />
time.<br />
<strong>The</strong> control card is equipped with LED indicators (L1,<br />
L2), a micro switch selector (SW2) to set up the operation<br />
logic and two buttons to start the program phase<br />
as well.<br />
18
FUNCTION SETUP<br />
Proceed with the customization of the operation logic. This kind of operation which aims to customize your opening<br />
system, shall be carried out by means of the 6-position SW2 micro switch, which is on the card. <strong>The</strong> following table will<br />
show you which kind of function you may select.<br />
FUNCTION<br />
POSITION<br />
DESCRIPTION<br />
Anti-squashing sensor sensitivity<br />
High sensitivity: light leaf<br />
Low sensitivity: heavy leaf<br />
Pause time<br />
30 seconds<br />
1 minute<br />
Automatic closing<br />
Automatic<br />
Manual<br />
Single or double leaf<br />
Double leaf<br />
Single leaf<br />
START command<br />
<strong>Co</strong>ntact with the terminal board: normally closed<br />
<strong>Co</strong>ntact with the terminal board: normally open<br />
DIP SWITCH 6 NOT IN USE<br />
DIP 1: Anti-squashing sensor sensitivity<br />
It will work in case of stress on the door, resulting from<br />
the presence of an obstacle within the movement area<br />
and exceeding a certain value. <strong>The</strong> sensitivity threshold<br />
can be selected.<br />
We recommend to set it on “high sensitivity”, first; but<br />
if during winter time the gate jams without any clear<br />
reason, then set it on “low sensitivity”.<br />
Dip 2 Pause time<br />
When the following situations occur, the door movement<br />
stops for a period called "pause time".<br />
DURING THE OPENING<br />
If the anti-squashing command intervenes, the door<br />
movement will stop and reverse for 4 seconds to clear<br />
the area involved, then it will stop again on “pause”. If<br />
the AUTOMATIC CLOSING function has been enabled,<br />
after the pause time (30 or 60 seconds) the gate will<br />
be closed again. Otherwise, the gate will need another<br />
START command to end its cycle.<br />
DURING THE CLOSING<br />
If the anti-squashing sensor command intervenes, the<br />
door movement will stop and reverse for 4 seconds to<br />
clear the area involved, then it will stop again on<br />
“pause”. If the AUTOMATIC CLOSING function has been<br />
enabled, after the pause time (30 or 60 seconds) the<br />
gate will be closed again.<br />
DIP 3: Automatic closing<br />
If it is enabled, it allows the gate to be closed after the<br />
pause time.<br />
DIP 4: Single or double leaf<br />
It allows to select the type of gate. If it deals with a<br />
one-door gate, connect the actuator to the M1<br />
terminals.<br />
DIP 5: START command<br />
It allows to select the START button contact time: normal<br />
closed or normal open.<br />
DIP 6: non utilizzato<br />
19
VISUAL INDICATORS<br />
<strong>The</strong> system has been planned to provide for visual<br />
indications about the operation status in normal or<br />
anomalous conditions.<br />
BLINKING LAMP.<br />
Blinking lamp off:<br />
• <strong>The</strong> door is closed: the system is waiting for a<br />
remote control device opening signal or a key<br />
contact opening signal.<br />
• <strong>The</strong> door is open: the system is waiting for a remote<br />
control device closing signal or a key contact signal<br />
(manual program selected by means of switch 3 on<br />
OFF)<br />
LED ON THE CONTROL UNIT<br />
On the control unit there are two LED luminous<br />
indicators, which the silk screen-printing shows as L1<br />
and L2.<br />
As for L1, the indications it provides for have been<br />
already examined in the program phase.<br />
L2 is used to show the charge status of the unit<br />
connected accumulator.<br />
LED ON: the accumulator is on charge<br />
LED OFF: the accumulator is charged<br />
<strong>The</strong> blinking lamp is rapidly blinking: the gate is opening.<br />
<strong>The</strong> blinking lamp is normally blinking: the gate is closing.<br />
<strong>The</strong> blinking lamp is slowly blinking: the gate is on<br />
pause and the AUTOMATIC CLOSING has been setup.<br />
<strong>The</strong> blinking lamp turns on for five seconds as soon as<br />
it receives the signal and then it turns off: the system<br />
tried to close the gate but the infrared system contact<br />
was not closed.<br />
<strong>The</strong> blinking lamp turns on by means of a START<br />
command without any door movement:<br />
when the key 1 or 2 of one of the recorded transmitters<br />
is pressed or a key contact is used and the blinking<br />
lamp is on during all the transmission/contact closing<br />
time, means that the control unit detects an open<br />
contact to the STOP terminals.<br />
Since the STOP button is optional, if it has not been<br />
installed, it could be the case that the jumper on the<br />
STOP terminals is instable; then, it will be necessary to<br />
check it and repair or replace it, if necessary.<br />
<strong>The</strong> blinking lamp is blinking permanently:<br />
this may be caused by a defect during the door opening<br />
or closing phase, a wild wind that does not allow any<br />
door movement, for instance.<br />
To restore the situation: act on the key contact and<br />
press the remote control device button at the same<br />
time, then the normal cycle will start again.<br />
WARNING!<br />
<strong>The</strong> remote control device button and the key correctly<br />
turned shall be kept pressed during all the closing or<br />
opening time.<br />
<strong>The</strong> resulting movement is “one door at a time” and as<br />
soon as the user realizes that the first door stroke is<br />
finished, he shall immediately release remote control<br />
device button and key. <strong>The</strong> blinking lamp will always be<br />
blinking to show that the same operation shall be carried<br />
out on the other door.<br />
20
INDEX<br />
CONSEILS IMPORTANTS . . . . . . . . . . . . . . . . . . . . . . . . . . . . . . . . . . . . . . . . . . . . . . . . . . . .22<br />
CONFORMITÉ AUX NORMATIFS . . . . . . . . . . . . . . . . . . . . . . . . . . . . . . . . . . . . . . . . . . . . . . . .22<br />
LISTE COMPOSANTS . . . . . . . . . . . . . . . . . . . . . . . . . . . . . . . . . . . . . . . . . . . . . . . . . . . . . .23<br />
DONNEE TECHNIQUES SLIM12V . . . . . . . . . . . . . . . . . . . . . . . . . . . . . . . . . . . . . . . . . . . . . .24<br />
OPÉRATIONS PRÉLIMINAIRES . . . . . . . . . . . . . . . . . . . . . . . . . . . . . . . . . . . . . . . . . . . . . . . . .24<br />
MONTAGE DES ACTIONNEURS . . . . . . . . . . . . . . . . . . . . . . . . . . . . . . . . . . . . . . . . . . . . . . . .25<br />
SCHÉMA D’INSTALLATION . . . . . . . . . . . . . . . . . . . . . . . . . . . . . . . . . . . . . . . . . . . . . . . . . . .26<br />
DESCRIPTION DE LA CENTRALE DE COMMANDE . . . . . . . . . . . . . . . . . . . . . . . . . . . . . . . . . . .27<br />
BRANCHEMENTS AU BORNIERE . . . . . . . . . . . . . . . . . . . . . . . . . . . . . . . . . . . . . . . . . . . . . . .27<br />
CARACTÉRISTIQUES TECHNIQUES . . . . . . . . . . . . . . . . . . . . . . . . . . . . . . . . . . . . . . . . . . . . .27<br />
INSTALLATION ACCUMULATEUR . . . . . . . . . . . . . . . . . . . . . . . . . . . . . . . . . . . . . . . . . . . . . . .28<br />
PROGRAMMATION . . . . . . . . . . . . . . . . . . . . . . . . . . . . . . . . . . . . . . . . . . . . . . . . . . . . . . . .28<br />
AUTO-APPRENTISSAGE DES DELAIS . . . . . . . . . . . . . . . . . . . . . . . . . . . . . . . . . . . . . . . . . . . .28<br />
MEMORISATION DES EMETTEURS . . . . . . . . . . . . . . . . . . . . . . . . . . . . . . . . . . . . . . . . . . . . .28<br />
MISE EN PLACE DES FONCTIONS . . . . . . . . . . . . . . . . . . . . . . . . . . . . . . . . . . . . . . . . . . . . . .29<br />
INDICATEURS VISUELS . . . . . . . . . . . . . . . . . . . . . . . . . . . . . . . . . . . . . . . . . . . . . . . . . . . . .30<br />
21
CONSEILS IMPORTANTS<br />
Pour tout précision technique ou problème d’installation<br />
V2 ELETTRONICA dispose d’un service d’assistance<br />
clients actif pendant les horaires de bureau<br />
TEL. (+39) 01 72 81 24 11<br />
V2 ELETTRONICA se réserve le droit d’apporter<br />
d’éventuelles modifications au produit sans préavis;<br />
elle décline en outre toute responsabilité pour tous types<br />
de dommages aux personnes ou aux choses dus à une<br />
utilisation imporopre ou à une mauvaise installation.<br />
CONFORMITÉ AUX NORMATIFS<br />
V2 ELETTRONICA SPA déclare que les composants du<br />
kit sont conformes aux qualités requises par les<br />
Directives:<br />
73/23/EEC<br />
93/68/EEC<br />
99/05/EEC<br />
98/37/EEC<br />
sécurité électrique<br />
compatibilité electromagnétique<br />
directive radio<br />
directive machines<br />
Ils ont été appliqués les Normes techniques suivantes<br />
pour en vérifier la conformité:<br />
Avant de proceder avec l'installation et la<br />
progarmmation, lire attentivement les notices.<br />
SLIM12V<br />
PRG12PP<br />
TSC-4<br />
• Ce manuel d'instruction est destiné à des techniciens<br />
qualifiés dans le domain des automatismes.<br />
• Aucune des informations contenues dans ce livret<br />
pourra être utile pour le particulier.<br />
• Tous operations de maintenance ou programation<br />
doivent être faites à travers de techniciens qualifiés.<br />
73/23/EEC<br />
93/68/EEC<br />
/<br />
EN 55014-1<br />
EN 55014-2<br />
EN 60335–1<br />
EN 50081–1,<br />
EN 50081–2<br />
EN 60335–1<br />
EN 301489-3<br />
L’AUTOMATION DOIT ÊTRE RÉALISÉE<br />
CONFORMÉMENT AUX DISPOSITIFS NORMATIFS<br />
EUROPÉENS EN VIGUEUR:<br />
99/05/EEC<br />
/<br />
/<br />
EN 300220-3<br />
EN 60204–1 (Sécutité de la machinerie. Équipement<br />
électriquedes machines, partie 1: régles générales).<br />
EN 12445 (Sécutité dans lìutilisation de fermetures<br />
automatisées, méthodes d'essai).<br />
EN 12453 (Sécurité dans l'utilisation de fermetures<br />
automatisées, conditions requises).<br />
• L'installateur doit pourvoir à l'installation d'un<br />
dispositif (ex. interrupteur magnétothermique) qui<br />
assure la coupure omnipolaire de l'équipement du<br />
réseau d'alimentation.<br />
La norme requiert une séparation des contacts<br />
d'au moins 3 mm pour chaque pôle (EN 60335-1).<br />
• L'enveloppe en plastique de la carte possède une<br />
protection IP55, pour la connexion de tubes rigides<br />
ou flexibles utiliser des raccordements possédant le<br />
même niveau de protection<br />
• L’installation requiert des compétences en matière<br />
d’électricité et mécaniques; doit être faite<br />
exclusivement par techniciens qualifiés en mesure<br />
de délivrer l’attestation de conformité pour<br />
l’installation (Directive 98/37/EEC, - IIA).<br />
• Il est obligatoire se conformer aux normes suivantes<br />
pour fermetures véhiculaires automatisées:<br />
EN 12453, EN 12445, EN 12978 et à toutes<br />
éventuelles prescriptions nationales.<br />
• Même l’installation électrique ou on branche<br />
l’automatisme doit répondre aux normesen vigueur<br />
et être fait à règles de l’art.<br />
• La régulation de la force de poussée du vantail doit<br />
être mesurée avec outil spécial et réglée selon les<br />
valeurs maxi admis par la norme EN 12453.<br />
• Nous conseillons d’utiliser un poussoir d’urgence à<br />
installer près de l’automatisme (branché à l’entrée<br />
STOP de l’armoire de commande de façon qui soit<br />
possible l’arrêt immédiat du portail en cas de danger.<br />
Nota: Déclare que n’est pas permis mettre en<br />
service les dispositifs indiqués ci-dessous jusqu’à<br />
quand<br />
la machine (portail automatisé) soie été identifiée, marqué<br />
CE et on aie émise la conformité aux conditions de<br />
la Directive 89/392/EEC et ses modifications.<br />
Le responsable de la mise en service doit fournir les<br />
papiers suivants:<br />
• Dossier technique<br />
• Déclaration de conformité<br />
• Marque CE<br />
• Verbal de vérification<br />
• Registre de l’ entretien<br />
• Notices de montages et avertissements<br />
Racconigi le 28/01/2003<br />
Le représentant dument habilité V2 ELETTRONICA SPA<br />
A. Livio <strong>Co</strong>stamagna<br />
22
LISTE COMPOSANTS<br />
1<br />
2<br />
4<br />
3<br />
Réf Description Q.té<br />
1 Opérateurs électromécaniques 12VDC 2<br />
2 Armoire de commande PRG12PP 1<br />
3 Emetteurs TSC-4 2<br />
4 Clignotant EGG12 1<br />
5 Patte de fixation opérateur sur pilier 2<br />
6 Goujon de fixation opérateur 2<br />
7 Seeger pour fixation du goujon 4<br />
8 Patte de fixation opérateur sur vantail 2<br />
9 Pince tubulaire 2<br />
10 Rondelle plastique 4<br />
Rondelle plastique en réserve 4<br />
11 Dé M10 2<br />
12 Rondelle pour M10 2<br />
13 Vis M10 x 40 2<br />
8<br />
5<br />
7<br />
6<br />
9<br />
10 11 12 13<br />
23
DONNEE TECHNIQUES SLIM12V<br />
Longueur maximale vantail 2 m<br />
Alimentation<br />
12 VDC<br />
Puissance moteur<br />
30 W<br />
<strong>Co</strong>urse max. de traction<br />
300 mm<br />
Vitesse de traction<br />
0,016 m/s<br />
Température de fonctionnement -20 ÷ +60 °C<br />
Degré de protection<br />
IP44<br />
Cycle de fonctionnement 80 %<br />
Poids moteur<br />
3 Kg<br />
OPÉRATIONS PRÉLIMINAIRES<br />
L'automatisme à été étudié pour s'adapter à un portail<br />
de 4 mètres maximum. Il peut être utilisé sur des portails<br />
légers, lourds, en bois, en métal, en PVC ou en<br />
aluminium; la poussée des actionneurs permet une<br />
réelle efficacité et un bon fonctionnement dans la<br />
durée.<br />
Avant de procéder à l'installation il est fondamental de<br />
s'assurer que votre portail s'ouvre et se referme sans<br />
problèmes et de vérifier scrupuleusement les points<br />
suivants:<br />
• gonds et tourillons en très bon état et graissés de<br />
manière opportune<br />
• aucune entrave ne doit empêcher le mouvement<br />
• aucun frottement contre le sol et entre les volets<br />
(dilatation mécanique de 7 à 8 mm minimum)<br />
• votre portail doit être équipé d'arrêts central et<br />
latéraux: ceux-ci sont indispensables pour un bon<br />
fonctionnement du système.<br />
ARRÊT PORTAIL<br />
24<br />
ARRÊTS LATÉRAUX
MONTAGE DES ACTIONNEURS<br />
Pour bien monter les opérateurs sur le portail il faut<br />
suivre attentivement les points suivants:<br />
• Pointer sur les piliers les mesures A et B les plus<br />
convenables.<br />
• Fixer les pattes 5 sur les piliers et positionner les<br />
opérateur sur celles-ci.<br />
• Insérer le goujon 6 dans le trous et le bloquer à les<br />
deux extrémités à travers des deux seeger 7 en les<br />
introduisant dans les rainures appropriées.<br />
PENDANT TOUTES CES OPERATIONS EVITER DE<br />
TENIR L’OPERATEUR EN BOSSELAGE; il faut le tenir en<br />
horizontal sans le tenir suspendu sur un point.<br />
Pour effectuer une bonne installation des actionneurs et<br />
garantir un fonctionnement optimal de l'automatisation il<br />
est nécessaire de respecter le niveaux de mesure<br />
reproduits dans le tableau ci-dessous.<br />
Modifier le cas échéant la structure du portail de<br />
manière à l'adapter à l'un des cas de figure énoncés<br />
dans le tableau ci-dessous.<br />
• Monter la patte 8 sur la pince tubulaire 9 selon la<br />
figure.<br />
• Monter les deux rondelles plastiques 10 sur la<br />
patte 8 utilisant du gras pour les fixer dans son<br />
logement et éviter un déplacement et chute pendant<br />
le montage de la pince tubulaire 9.<br />
• Positionner la patte 8 avec les rondelles plastiques<br />
10 dans la pince tubulaire 9 alignat les trous.<br />
C(mm)<br />
OUVERTURE 90° OUVERTURE 110°<br />
A(mm) B(mm) D(mm) A(mm) B(mm) D(mm)<br />
ATTENTION! LA PINCE TUBULAIRE A UNE DIRECTION DE<br />
MONTAGE: LA MONTER AVEC LA COTE DU LOGEMENT<br />
HEXAGONAL EN BAS.<br />
30<br />
40<br />
50<br />
60<br />
70<br />
80<br />
90<br />
100<br />
110<br />
120<br />
130<br />
130<br />
120<br />
120<br />
120<br />
120<br />
120<br />
120<br />
120<br />
110<br />
155<br />
155<br />
155<br />
165<br />
160<br />
160<br />
160<br />
160<br />
160<br />
160<br />
125<br />
115<br />
105<br />
105<br />
90<br />
80<br />
70<br />
60<br />
50<br />
50<br />
130<br />
120<br />
120<br />
120<br />
120<br />
120<br />
120<br />
110<br />
/<br />
/<br />
135<br />
145<br />
140<br />
140<br />
140<br />
140<br />
140<br />
150<br />
/<br />
/<br />
105<br />
105<br />
90<br />
80<br />
70<br />
60<br />
50<br />
50<br />
/<br />
/<br />
• Mettre le dé 11 dans son logement (coté inférieure),<br />
introduire la rondelle 12 sur la vis 13, monter la vis<br />
13 et visser légèrement.<br />
• Sortir complètement le tube de l’opérateur 1 en le<br />
dévissant manuellement; quand on arrive en fin<br />
course le visser d’un tour.<br />
• Introduire la pince tubulaire 9 sur le tube de<br />
l’opérateur 1 (dé en bas) et la positionner à 1,5 cm<br />
du but de tube.<br />
• Bloquer le portail sur son propre arrêt centrale de<br />
fermeture, positionner l’opérateur en horizontal sur<br />
le ventail, chercher la position des deux trous de la<br />
patte 8 sur le ventail et fixer la patte.<br />
• Dévisser la vis 13 sur la pince tubulaire 9.<br />
Ellemême, glissant sur toute la longueur du tube de<br />
l’opérateur, permet de vérifier la complète ouverture<br />
du ventail. Il faut faire cette opération seulement<br />
pour simuler un ouverture manuelle en situation<br />
d’urgence pour coupure d’alimentation ou de non<br />
fonctionnement de l’automation. Re-fermer le portail<br />
et serrer la vis 13 sur la pince tubulaire 9.<br />
25
SCHÉMA D’INSTALLATION<br />
INSTALLATION DU BOÎTIER<br />
ÉLECTRIQUE<br />
Il est important d'installer le boîtier électrique dans le<br />
voisinage immédiat du portail pour éviter d'avoir à<br />
utiliser des câblages de raccordement excessivement<br />
longs.<br />
Utiliser des chevilles adaptées au type de mur (ex. brique<br />
ou béton).<br />
INSTALLATION DU CLIGNOTANT ET<br />
DES DISPOSITIFS DE COMMANDE<br />
(poussoirs de commande et de sécurité)<br />
Le clignotant doit être installé dans la position la plus<br />
visible de l'intérieur et de l'extérieur du portail.<br />
Le raccordement des poussoirs de commande peut être<br />
exécuté en série ou en parallèle (en programmant<br />
opportunément la centrale suivant les indications de la<br />
table 2).<br />
Pour le raccordement des poussoirs de STOP ou de<br />
sécurité, le raccordement doit être fait obligatoirement<br />
en série.<br />
INSTALLATION DU SYSTEME DE<br />
DETECTION À INFRAROUGE<br />
(Cellules photoélectriques)<br />
Cette opération doit être exécutée uniquement en suivant<br />
les consignes données par le constructeur. La<br />
position de montage idéale comporte que l'axe optique<br />
entre le récepteur et le transmetteur à infrarouge<br />
demeure à une hauteur comprise entre 30 et 60 cm<br />
par rapport au sol et à 10 cm du portail.<br />
côté extérieur<br />
côté intérieur<br />
Fonctionnement: pendant la fermeture du portail, si<br />
quelqu'un ou quelque chose s'interpose entre les<br />
cellules photoélectriques, le portail s'arrête et s'ouvre<br />
à nouveau pour esquiver l'obstacle.<br />
ANTENNE EXTÉRIEURE<br />
Antenne à longue portée, 433.92 MHz de fréquence,<br />
dotée de support de fixation et 2,5 m de câble coaxial<br />
RG – 58.<br />
ATTENTION: il est conseillé d’utiliser l’antenne externe<br />
model ANS433 pour garantir la plus haute porte radio<br />
possibleo.<br />
26
DESCRIPTION DE LA CENTRALE DE<br />
COMMANDE<br />
La PRG12PP a été conçue par la Société V2 ELETTRONICA<br />
pour la commande de portails à volet double et unique,<br />
motorisés grâce à des actionneurs à courant continu de<br />
12 Volt.<br />
Dans la liste qui va suivre ci-dessous sont énoncés les<br />
avantages se rattachant à l'emploi de systèmes d'automatisation<br />
à très basse tension qui utilisent la PRG12:<br />
• Élimination du risque d'électrification accidentelle<br />
des masses métalliques raccordées à la centrale<br />
(actionneurs, volets et accessoires).<br />
• Sécurité contre les écrasements, réalisée au moyen<br />
d'un détecteur d'effort sur le moteur qui garantit<br />
l'arrêt du mouvement de volet en cas d'entrave non<br />
détectée par les cellules photoélectriques.<br />
• Fonction contre le black-out à l'aide d'un accumulateur<br />
au plomb qui permet le fonctionnement du système<br />
même à défaut d'énergie électrique.<br />
• Ralentissement des volets dans la zone de fin de<br />
course, il empêche des fermetures bruyantes et<br />
des rebonds des volets.<br />
• Auto-apprentissage des délais, en phase de<br />
programmation le système exécute un cycle de<br />
mémorisation des délais de fermeture et d'ouverture<br />
des volets simplifiant donc les opérations<br />
d'étalonnage et de régulation.<br />
Les entrées sur la plaque à bornes prévoient<br />
l'utilisation des composants suivants:<br />
• Entrée pour CELLULES PHOTOÉLECTRIQUES (FOTO).<br />
• Entrée pour poussoir de STOP.<br />
• Entrée pour poussoir d'ouverture (START).<br />
BRANCHEMENTS AU BORNIERE<br />
1 - 4 Raccorder au poussoir/i démarrage<br />
(contact normalement ouvert ou<br />
normalement fermé sélectionnable<br />
en programmation par dip 5).<br />
2 Non utilisé<br />
3 - 4 Raccorder au poussoir / i STOP<br />
(contact normalement fermé).<br />
Si on ne l'utilise pas, raccorder<br />
par pontage au câble commun.<br />
4 COMUN (-)<br />
5 - 6 Raccorder au contact normalement<br />
fermé du Cellule Photoélectrique.<br />
Si on ne l'utilise pas raccorder<br />
par pontage au câble commun.<br />
7 - 8 Raccorder au moteur 2 en respectant<br />
les polarités indiquées sur la<br />
sérigraphie. NE PAS utiliser cette<br />
sortie en cas de portail à volet unique.<br />
9 - 10 Raccorder au moteur 1 en respectant<br />
les polarités indiquées sur la<br />
sérigraphie. Utiliser cette sortie<br />
en cas de portail à volet unique.<br />
11 - 12 Sortie pour l'alimentation du<br />
Le sorties sur la plaque à bornes prévoient:<br />
• Alimentation moteur 1 et moteur 2.<br />
• Clignotant à 12 Volt (max 10 W).<br />
• Alimentation accessoires à 12 Volt continus.<br />
• Électroserrure à 12 Volt continus.<br />
Récepteur superhéterodyne 433 MHz integrè.<br />
Le système peut mémoriser jusqu'à 48 transmetteurs<br />
de la série Personal Pass.<br />
CARACTÉRISTIQUES TECHNIQUES PRG12PP<br />
Alimentation<br />
230 VAC / 60 Hz<br />
Charge max moteurs 60 W<br />
Charge max accessoires 10 W<br />
alimentés à 12 VAC<br />
Température de travail -20 ÷ +60 °C<br />
Fusibles de protection F1 = 2 A<br />
F2 = 10 A<br />
Dimensions<br />
210 x 275 x 100 mm<br />
Poids<br />
2,5 Kg<br />
Protection<br />
IP55<br />
13 - 14<br />
15 - 16<br />
17 - 18 -<br />
19 - 20 -<br />
21 - 22<br />
23<br />
24<br />
cellule photoélectrique. Tension<br />
12 VDC, courant max. 500 mA.<br />
Raccorder au clignotant de signalisation.<br />
Tension 12 VDC, puissance<br />
max. lampe 10 W.<br />
Raccorder à une électroserrure.<br />
Tension 12 VDC, courant max. 3 A<br />
Non utilisé<br />
Raccorder au blindage du câble<br />
d'antenne.<br />
Raccorder au connecteur central<br />
du câble antenne. Utiliser une<br />
antenne de fréquence nominale<br />
de 433 MHz. En remplacement,<br />
raccorder un conducteur de<br />
longueur de 17 cm<br />
27
INSTALLATION ACCUMULATEUR<br />
Si vous avez l'intention d'utiliser la fonction contre le<br />
black-out vous devez raccorder un accumulateur au<br />
plomb (du type sans maintenance) au moyen de bornes<br />
à accouplement prévues à cet effet en faisant extrêmement<br />
attention à respecter les polarités indiquées sur<br />
la sérigraphie sur la carte de commande.<br />
La batterie doit avoir les caractéristiques suivantes:<br />
TYPE<br />
TENSION<br />
CAPACITÉ<br />
al plomb sans maintenance<br />
12 VOLT<br />
4,2 Ah<br />
Accessoires sur demande: KIT PILA 12V.<br />
Kit composé par batterie au plomb sans<br />
Entretien (12 VOLT - 4,2 Ah), câble bipolaire pour le<br />
branchement à la PRG12PP et patte porte-batterie.<br />
AUTO-APPRENTISSAGE DES DELAIS<br />
Avant de procéder, sélectionnez au moyen de SW2 la<br />
condition volet unique ou volet double en fonction du<br />
type d'installation (voir table de page 19) et placez le<br />
sélecteur volet léger ou volet lourd sur la position volet<br />
léger.<br />
Appuyez sur le poussoir AUTO de la carte de commande et<br />
maintenez-le sous pression pendant au moins 10 secondes.<br />
La DEL L1 commence à clignoter, en même temps<br />
les moteurs (un à la fois) entrent en mouvement et effectuent<br />
2 cycles d'ouverture et 2 cycles de fermeture.<br />
PRÊTER LE MAXIMUM D'ATTENTION PENDANT<br />
L'APPRENTISSAGE DES DELAIS ET EVITER D'ENTRAVER<br />
LES MOUVEMENTS DU VOLET.<br />
N.B. Si pendant les mouvements d'auto-apprentissage<br />
un des volets se bloque avant d'arriver au battant de<br />
fermeture ou d'ouverture déplacez le sélecteur volet<br />
léger ou volet lourd sur la position volet lourd (voir table<br />
de page 19) et répétez l'opération depuis le début. Ceci<br />
peut se produire si les volets du portail sont trop<br />
lourds ou s'ils produisent un frottement excessif.<br />
Procéder par la mémorisation des transmetteurs.<br />
ATTENTION: les batteries il faut les enlever de l’appareil<br />
avant de l’écouler et il faut les écouler selon les<br />
normes en vigueur.<br />
Débrancher l’appareil avant de faire n’importe quelle<br />
opération.<br />
PROGRAMMAZIONE<br />
Dopo aver collegato i componenti dell'automatismo<br />
secondo le indicazioni riportate sulla serigrafia della<br />
scheda, vi consigliamo di procedere con la fase di<br />
auto-apprendimento dei tempi di apertura e di chiusura.<br />
La centrale di comando è dotata di indicatori a LED (L1,<br />
L2); di un dip-switch (SW2) per l'impostazione delle<br />
logiche di funzionamento e di due pulsanti per attivare<br />
le fasi di programmazione.<br />
28<br />
MEMORISATION DES EMETTEURS<br />
Pour effectuer la mémorisation des emetteurs procédez<br />
de la manière suivante:<br />
• Appuyez sur et maintenez sous pression la touche<br />
RX pendant 2 secondes.<br />
• La LED L1 s'allume.<br />
• Dans les 10 secondes transmettez avec l'emetteur<br />
en appuyant sur l'une quelconque des 4 touches.<br />
• La LED L1 s'éteint.<br />
• Procéder de la même manière pour les autres<br />
emetteurs.<br />
La mémoire épuisée (après mémorisation de 48 transmetteurs)<br />
la DEL L1 exécute 5 triples clignotements .<br />
Pour l'effacement des 48 codes des transmetteurs procédez<br />
de la manière suivante:<br />
• Appuyez sur et maintenez sous pression la touche<br />
RX pendant 10 secondes.<br />
• La DEL L1 émet 5 clignotements individuels pour<br />
indiquer que tout le contenu de la mémoire a été<br />
effacé.<br />
Après leur mémorisation, les fonctions associées aux<br />
touches du transmetteur gardent la configuration<br />
suivante:<br />
1 2<br />
Touche 1: La commande de DÉMARRAGE<br />
permet d'activer l'ouverture du/des<br />
volet/s sur toute leur course.<br />
Touche 2: La commande de DÉMARRAGE<br />
PIÉTONNIER permet d'activer l'ouverture<br />
d'un seul des volets, celui raccordé aux<br />
bornes M1, pour une durée de moitié<br />
temps par rapport au délai de démarrage.
MISE EN PLACE DES FONCTIONS<br />
Procéder à présent par la personnalisation des logiques de fonctionnement. Cette opération, qui a pour but d'adapter le<br />
fonctionnement du système d'ouverture selon vos souhaits, s'effectue en agissant sur le minicommutateur à 6<br />
positions présent sur la carte (SW2).La table suivante vous indique quel type de fonction vous pouvez sélectionner.<br />
FONCTION<br />
POSITION<br />
DESCRIPTION<br />
Sensibilité du capteur contre les<br />
ecrasements<br />
Sensibilité haute: ventail léger<br />
Sensibilité baisse: ventail lourd<br />
Délai en pause<br />
30 secondes<br />
1 minute<br />
Fermeture automatique<br />
Active<br />
Pas active<br />
Un ou double vantail<br />
Double vantail<br />
Un vantail<br />
<strong>Co</strong>mmande de START<br />
<strong>Co</strong>ntact à la plaque à bornes normalement fermé<br />
<strong>Co</strong>ntact à la plaque à bornes normalement ouvert<br />
DIP SWITCH 6 PAS EMPLOYÉ<br />
DIP 1: Sensibilité du capteur contre les ecrasements<br />
Elle intervient lorsque la contrainte sur le volet, causée<br />
par une entrave dans le rayon de mouvement, dépasse<br />
une certaine valeur. Le seuil de sensibilité peut être<br />
sélectionné. Nous vous conseillons de le poser initialement<br />
à un niveau de sensibilité élevée.<br />
Si pendant le fonctionnement lors de la saison froide le<br />
portail se bloque sans motifs apparents alors posez-le<br />
à un niveau de plus faible sensibilité.<br />
Dip 2 Délai en pause<br />
Le mouvement des volets s'arrête pendant un temps<br />
défini comme "délai de pause", lorsque se manifestent<br />
les conditions suivantes.<br />
• PENDANT L'OUVERTURE: S'il y a déclenchement du<br />
capteur contre les écrasements ou déclenchement<br />
d'une commande de DÉMARRAGE, le mouvement des<br />
volets s'arrête; il s'intervertit pendant 4 secondes<br />
dégageant la zone intéressée et s'arrête à nouveau se<br />
mettant dans la condition de pause. S'il y a eu habilitation<br />
de la fonction de REFERMETURE AUTOMATIQUE<br />
après le délai de pause (30 ou 60 secondes) le portail<br />
se referme. En cas contraire le système attend une<br />
nouvelle commande de DÉMARRAGE avant d'achever le<br />
cycle.<br />
29<br />
• PENDANT LA PHASE DE FERMETURE: S'il y a<br />
déclenchement du capteur contre les écrasements ou<br />
déclenchement d'une commande de DÉMARRAGE le<br />
mouvement des volets s'arrête; il s'intervertit pendant<br />
4 secondes dégageant la zone intéressée et s'arrête à<br />
nouveau se mettant dans la condition de pause. S'il y a<br />
eu habilitation de la fonction de REFERMETURE AUTO-<br />
MATIQUE après le délai de pause (30 ou 60 secondes)<br />
le portail se referme.<br />
DIP 3: Fermeture automatique<br />
Si elle est habilitée, elle permet au portail de se<br />
refermer après le délai de pause<br />
DIP 4: Un ou double vantail<br />
Il permet la sélection du type de portail. Si le portail<br />
est à volet unique raccordez l'actionneur aux bornes<br />
marquées M1.<br />
DIP 5: <strong>Co</strong>mmande de START<br />
Il permet de sélectionner le type de contact du poussoir de<br />
DÉMARRAGE normalement fermé ou normalement ouvert.<br />
DIP 6: pas employé
INDICATEURS VISUELS<br />
Le système a été étudié pour donner des indications<br />
visuelles sur l'état de fonctionnement en conditions<br />
normales ou en état d'anomalie:<br />
CLIGNOTANT.<br />
Clignotant éteint:<br />
• Le portail est fermé : le système est en attente<br />
d'un signal d'ouverture provenant de l'emetteur ou<br />
du contact à clef .<br />
• Le portail est ouvert: il indique que le système<br />
attend un signal de fermeture provenant de<br />
l'emetteur ou du contact à clef (programme manuel<br />
choisi par commutateur 3 sur OFF)<br />
DEL SUR LA CARTE DE COMMANDE<br />
Sur la carte de commande il y a 2 voyants à DEL indiqués<br />
sur la sérigraphie comme L1 et L2.<br />
En ce qui concerne L1 on a déjà vu quelles indications<br />
fournit la carte pendant la phase de programmation.<br />
L2 a pour fonction de signaler l'état de charge de l'accumulateur<br />
raccordé à la carte.<br />
DEL ALLUMÉE: accumulateur en phase de charge<br />
DEL ÉTEINTE: accumulateur chargé<br />
Clignotant qui clignote rapidement: le portail est en<br />
phase d'ouverture.<br />
Clignotant qui clignote normalement: le portail est en<br />
phase de fermeture.<br />
Clignotant qui clignote lentement: le portail est dans la<br />
condition de pause en attente et le programme de<br />
REFERMETURE AUTOMATIQUE a été programmé.<br />
Clignotant qui s'allume pendant cinq secondes à la<br />
réception du signal pour s'éteindre ensuite: ceci signale<br />
que le système a essayé la fermeture mais le contact<br />
du système à infrarouge n'était pas fermé.<br />
Clignotant qui s'allume avec une commande de<br />
DÉMARRAGE sans mouvements des volets:<br />
lorsque l'on appuie sur la touche 1 ou sur la touche 2<br />
d'un des transmetteurs mémorisés ou l'on utilise un<br />
contact à clef et la lampe reste allumée pendant tout le<br />
temps de transmission/fermeture du contact le système<br />
est en STOP, c'est-à-dire que la centrale voit aux bornes<br />
indiquées STOP un contact ouvert.<br />
Si le poussoir de STOP, qui constitue une option, n'est<br />
pas installé il se peut que le raccordement par pontage<br />
sur les bornes marquées STOP soit instable; dans un<br />
tel cas le contrôler, le remplacer ou l'acquitter le cas<br />
échéant.<br />
Clignotant qui demeure allumé en permanence:<br />
À cause d'une anomalie en phase d'ouverture ou de<br />
fermeture du portail, par exemple à cause de vent fort<br />
qui empêche quelque mouvement du volet que ce soit.<br />
Pour surmonter cette anomalie agir sur le contact à clef<br />
et en même temps appuyer sur le bouton de l'emetteur.<br />
L'automatisme reprendra son cycle normal.<br />
ATTENTION!<br />
Vous devez maintenir pendant tout le temps de<br />
l'ouverture ou de la fermeture le bouton de l'emetteur<br />
sous pression et la clef tournée.<br />
Le mouvement qui se produit est conditionné: "un volet<br />
à la fois". Lorsque l'utilisateur constatera que le premier<br />
volet a terminé sa course, il doit relâcher rapidement le<br />
bouton de la télécommande et la clef. Le clignotant<br />
demeure allumé en permanence pour indiquer que la<br />
même opération doit être effectuée pour déplacer le<br />
deuxième volet.<br />
30
INHALT<br />
WICHTIGE HINWEISE . . . . . . . . . . . . . . . . . . . . . . . . . . . . . . . . . . . . . . . . . . . . . . . . . . . . . .32<br />
ÜBEREINSTIMMUNG MIT DEN NORMEN . . . . . . . . . . . . . . . . . . . . . . . . . . . . . . . . . . . . . . . . .32<br />
LISTE DER KOMPONENTEN . . . . . . . . . . . . . . . . . . . . . . . . . . . . . . . . . . . . . . . . . . . . . . . . . .33<br />
TECHNISCHE DATEN SLIM12V . . . . . . . . . . . . . . . . . . . . . . . . . . . . . . . . . . . . . . . . . . . . . . . .34<br />
VORBEREITNDE ARBEITSSCHRITTE . . . . . . . . . . . . . . . . . . . . . . . . . . . . . . . . . . . . . . . . . . . . .34<br />
MONTAGE DER OPERATOREN . . . . . . . . . . . . . . . . . . . . . . . . . . . . . . . . . . . . . . . . . . . . . . . . .35<br />
INSTALLATIONSPLAN . . . . . . . . . . . . . . . . . . . . . . . . . . . . . . . . . . . . . . . . . . . . . . . . . . . . . . .36<br />
BESCHREIBUNG DER STEUERZENTRALE . . . . . . . . . . . . . . . . . . . . . . . . . . . . . . . . . . . . . . . . .37<br />
ANSCHLÜSSE AM KLEMMENBRETT . . . . . . . . . . . . . . . . . . . . . . . . . . . . . . . . . . . . . . . . . . . .37<br />
TECHNISCHE DATEN . . . . . . . . . . . . . . . . . . . . . . . . . . . . . . . . . . . . . . . . . . . . . . . . . . . . . . .37<br />
INSTALLATION DES AKKUMULATORS . . . . . . . . . . . . . . . . . . . . . . . . . . . . . . . . . . . . . . . . . . . .38<br />
PROGRAMMIERUNG . . . . . . . . . . . . . . . . . . . . . . . . . . . . . . . . . . . . . . . . . . . . . . . . . . . . . . .38<br />
EIGENERFASSUNG DER ZEITEN . . . . . . . . . . . . . . . . . . . . . . . . . . . . . . . . . . . . . . . . . . . . . . .38<br />
SPEICHERN DER SENDER . . . . . . . . . . . . . . . . . . . . . . . . . . . . . . . . . . . . . . . . . . . . . . . . . . .38<br />
EINSTELLUNG DER FUNKTIONEN . . . . . . . . . . . . . . . . . . . . . . . . . . . . . . . . . . . . . . . . . . . . . .39<br />
LEUCHTANZEIGEN . . . . . . . . . . . . . . . . . . . . . . . . . . . . . . . . . . . . . . . . . . . . . . . . . . . . . . . .40<br />
31
WICHTIGE HINWEISE<br />
Für tecnische Erläuterungen oder Installtionsprobleme<br />
verfügt die Firma V2 ELETTRONICA über einen<br />
Kundendienst, der zu Bürozeiten unter der Telefonnummer<br />
(+39) 01 72 81 24 11 erreicht werden kann.<br />
Die Firma V2 ELETTRONICA behält sich das Recht vor,<br />
das Produkt ohne vorherige Ankündigungen abzuändern;<br />
die Übernahme der Haftung für Schäden an<br />
Personen oder Sachen, die auf einen unsachgemäßen<br />
Gebrauch oder eine fehlerhafte Installation zurückzuführen<br />
sind, wird abgelehnt.<br />
Um die Steuerung PRG12PP fehlerfrei zu installieren<br />
und programmieren zu können, lesen Sie bitte<br />
diese Bedienungsanleitung sehr aufmerksam durch.<br />
• Diese Bedienungsanleitung ist nur für Fachtechniker,<br />
die auf Installationen und Automationen von Toren<br />
spezialisiert sind.<br />
• Keine Information dieser Bedienungsanleitung ist für<br />
den Endbenutzer nützlich.<br />
• Jede Programmierung und/oder jede Wartung sollte<br />
nur von geschulten Technikern vorgenommen werden.<br />
DIE AUTOMATISIERUNG MUSS IN ÜBEREINSTIMMUNG<br />
MIT DEN GELTENDEN EUROPÄISCHEN NORMEN<br />
ERFOLGEN:<br />
EN 60204 –1 (Sicherheit der Maschine elektrische<br />
Ausrüstungen von Maschinen, Teil 1: allgemeine<br />
Anforderungen)<br />
EN 12445 (Nutzungssicherheit kraftbetätigter Tore<br />
prüfverfahren)<br />
EN 12453 (Nutzungssicherheit kraftbetätigter Tore<br />
Anforderungen)<br />
• Der Installateur muss eine Vorrichtung (z.B. thermomagn.<br />
Schalter) anbringen, die die Trennung aller Pole des<br />
Geräts zum Versorgungsnetz garantiert.<br />
Die Norm verlangt eine Trennung der Kontakte von<br />
mindestens 3 mm an jedem Pol (EN 60335-1).<br />
• Für den Anschluss von Rohren und Schläuchen oder<br />
Kabeldurchgängen sind Verbindungen zu verwenden,<br />
die dem Sicherungsgrad IP55 entsprechen.<br />
• Die Installation erfordert Kenntnisse auf den<br />
Gebieten der Elektrik und Mechanik; sie darf<br />
ausschließlich von kompetentem Personal durchgeführt<br />
werden, welches berechtigt ist, eine vollständige<br />
Konformitätserklärung vom Typ A auszustellen<br />
(Maschinenrichtlinie 98/37/EEC, Anlage IIA).<br />
• Für automatisch betriebene Rolltore ist die Einhaltung<br />
der folgenden Normen obligatorisch: EN 12453,<br />
EN 12445, EN 12978 und alle eventuell geltenden,<br />
regionalen Vorschriften.<br />
• Auch die elektrische Anlage der Automatik muss den<br />
geltenden Normen genügen, und fachgerecht<br />
installiert werden.<br />
• Die Schubkraft des Torflügels muss mit Hilfe eines<br />
geeigneten Instruments gemessen, und entsprechend<br />
den in Richtlinie EN 12453 definierten Höchstwerten<br />
eingestellt werden.<br />
• Es wird empfohlen, in der Nähe der Automatik einen<br />
Notaus-Schalter zu installieren (mit Anschluss an en<br />
Eingang STOP der Steuerkarte), so dass bei Gefahr<br />
ein unverzügliches Halten des Tors bewirkt werden<br />
kann.<br />
32<br />
ÜBEREINSTIMMUNG MIT DEN NORMEN<br />
V2 ELETTRONICA SPA dichiara che i componenti del kit<br />
sono conformi ai requisiti essenziali fissati dalle<br />
seguenti Direttive:<br />
73/23/EEC Sicherheit Elektrik<br />
93/68/EEC Elektromagnetische Kompatibilität<br />
99/05/EEC Radiorichtlinie<br />
98/37/EEC Maschinenrichtlinie<br />
Für die Konformitätskontrolle wurden die folgenden<br />
technischen Normen angewandt:<br />
73/23/EEC<br />
93/68/EEC<br />
99/05/EEC<br />
Anmerkung: Legt fest, dass die oben aufgeführten<br />
Vorrichtungen erst in Betrieb genommen werden dürfen,<br />
nachdem die Anlage (Automatiktor) identifiziert und<br />
CE-gekennzeichnet, bzw. die Konformität mit den<br />
Anforderungen der Richtlinie 89/392/EWG einschl.<br />
nachfolgender Änderungen erklärt wurde.<br />
Der Verantwortliche der Inbetriebnahme muss folgende<br />
Dokumentation vorlegen:<br />
• Technisches Datenheft<br />
• Konformitätserklärung<br />
• CE-Zertifizierung<br />
• Prüfprotokoll<br />
• Wartungsheft<br />
• Benutzerhandbuch und Gebrauchshinweise<br />
Racconigi, den 28.01.2003<br />
Der Rechtsvertreter der V2 ELETTRONICA SPA<br />
A. Livio <strong>Co</strong>stamagna<br />
SLIM12V<br />
/<br />
EN 55014-1<br />
EN 55014-2<br />
/<br />
PRG12PP<br />
EN 60335–1<br />
EN 50081–1,<br />
EN 50081–2<br />
/<br />
TSC-4<br />
EN 60335–1<br />
EN 301489-3<br />
EN 300220-3
LISTE DER KOMPONENTEN<br />
1<br />
2<br />
4<br />
3<br />
Bez. Beschreibung Menge<br />
1 Elektromechanische Stellglieder 12V GS 2<br />
2 Steuerzentrale PRG12PP 1<br />
3 TSC Sender 2<br />
4 Blinkleuchte EGG12 1<br />
5 Bügel für die Befestigung der Stellglieder 2<br />
am Pfeiler<br />
6 Befestigungsstift Stellglied 2<br />
7 Seegerring für Stiftbefestigung 4<br />
8 Bügel für die Befestigung des Stellgliedes am 2<br />
Tor flügel<br />
9 Befestigungsschelle 2<br />
10 Unterlegscheiben aus Kunststoff 4<br />
Reserve-Unterlegscheiben aus Kunststoff 4<br />
11 Mutter M10 2<br />
12 Unterlegscheibe für M10 2<br />
13 Schraube M10 x 40 2<br />
33<br />
8<br />
5<br />
7<br />
6<br />
9<br />
10 11 12 13
TECHNISCHE DATEN SLIM12V<br />
Maximale Länge des Flügels 2 m<br />
Versongung<br />
12 VDC<br />
Motorleistung<br />
30 W<br />
Maximaler Schleppenlauf 300 mm<br />
Laufgeschwindigkeit 0,016 m/s<br />
Betriebstemperatur -20 ÷ +60 °C<br />
Schutzart<br />
IP44<br />
Arbeitszyklus 80 %<br />
Motorgewicht<br />
3 Kg<br />
VORBEREITNDE ARBEITSSCHRITTE<br />
Die Automatik wurde für die Anpassung an Tore von<br />
maximal 4 Metern entwickelt. Sie kann für leichte und<br />
schwere Tore, sowie für solche aus Holz Metall, PVC<br />
oder Aluminium verwendet werden. Die Schubkraft der<br />
Operatoren gewährleistet Effizienz und Zeitbeständigkeit.<br />
Vor der Installation muss sichergestellt werden, dass<br />
sich das Tor hindernisfrei öffnen und schlie_en lässt,<br />
ferner ist es auf folgende Voraussetzungen zu prüfen:<br />
• Angeln und Stifte müssen sich in einwandfreiem<br />
Zustand befinden und hinreichend geschmiert sein<br />
• kein Hindernis darf die Bewegung beeinträchtigen<br />
• es darf keine Reibung zwischen den Torflügeln und<br />
dem Grund bestehen (mechanische Ausdehnung<br />
mindestens 7-8 mm)<br />
• Ihr Tor muss mit zentralen und seitlichen Stoppern<br />
ausgerüstet sein: Diese sind für die korrekte<br />
Funktion des Systems unentbehrlich.<br />
TORSTOPPER<br />
34<br />
SEITLICHE STOPPER
MONTAGE DER OPERATOREN<br />
Um eine korrekte Installation der Operatoren zu gewährleisten<br />
und ein optimales Funktionieren der Automatik<br />
zu garantieren, müssen die in der untenstehenden<br />
Tabelle aufgeführten Höhenangaben genau beachtet<br />
werden. Es könnte sich eventuell als notwendig erweisen,<br />
die Torstruktur zu verändern, um sie an eine der<br />
hier aufgeführten Konstellationen anzupassen.<br />
ÖFFNUNG 90° ÖFFNUNG 110°<br />
C(mm) A(mm) B(mm) D(mm) A(mm) B(mm) D(mm)<br />
30<br />
40<br />
50<br />
60<br />
70<br />
80<br />
90<br />
100<br />
110<br />
120<br />
130<br />
130<br />
120<br />
120<br />
120<br />
120<br />
120<br />
120<br />
120<br />
110<br />
155<br />
155<br />
155<br />
165<br />
160<br />
160<br />
160<br />
160<br />
160<br />
160<br />
125<br />
115<br />
105<br />
105<br />
90<br />
80<br />
70<br />
60<br />
50<br />
50<br />
130<br />
120<br />
120<br />
120<br />
120<br />
120<br />
120<br />
110<br />
/<br />
/<br />
135<br />
145<br />
140<br />
140<br />
140<br />
140<br />
140<br />
150<br />
/<br />
/<br />
105<br />
105<br />
90<br />
80<br />
70<br />
60<br />
50<br />
50<br />
/<br />
/<br />
Folgen Sie für die korrekte Montage der Stellglieder am<br />
Tor bitte aufmerksam dieser Anleitung:<br />
• Markieren Sie an den Pfeilern die für angemessen<br />
erachteten Abstände A und B.<br />
• Befestigen Sie die Bügel 5 an den Pfeilern und<br />
positionieren Sie die Stellglieder darauf.<br />
• Führen Sie den Stift 6 in die Bohrung ein und<br />
arretieren Sie diesen an beiden Enden mit Hilfe der<br />
beiden Seegerringe 7, indem Sie sie in die hierfür<br />
vorgesehenen Nuten einsetzen.<br />
VERMEIDEN SIE WÄHREND DIESER OPERATIONEN<br />
EINEN ÜBERHANG DES STELLGLIEDES. Das Stellglied<br />
muss stets horizontal gehalten werden und darf in keinem<br />
Punkt überhängen.<br />
• Montieren Sie den Bügel 8 an der Befestigungsschelle<br />
9 wie in der Abbildung gezeigt.<br />
• Montieren Sie die beiden Unterlegscheiben aus<br />
Kunststoff auf Bügel 8. Verwenden Sie Schmierfett<br />
um die Scheiben in ihrem Sitz zu verankern und so<br />
ein Verrutschen oder Lösen während der Montage<br />
der Befestigungsschelle 9 zu vermeiden.<br />
• Positionieren Sie Bügel 8 mit den montierten<br />
Unterlegscheiben 10 und der Befestigungsschelle 9<br />
und richten Sie die Bohrungen zueinander aus.<br />
ACHTUNG! FÜR DIE BEFESTIGUNGSSCHELLE MUSS DIE<br />
SPEZIFISCHE MONTAGERICHTUNG BEACHTET WERDEN:<br />
MONTIEREN SIE SIE SO, DASS DIE SECHSECKIGE AUF-<br />
NAHME NACH UNTEN WEIST.<br />
• Setzen Sie die Mutter 11 in ihren Sitz ein (Unterseite),<br />
schieben Sie die Unterlegscheibe 12 auf die<br />
Schraube 13, montieren Sie die Schraube und<br />
ziehen Sie sie leicht an.<br />
• Ziehen Sie den Zylinderschaft des Stellgliedes 1<br />
vollständig aus, indem Sie ihn von Hand herausdre<br />
hen. Schrauben Sie ihn nach Erreichen des<br />
Endanschlags mit einer Umdrehung leicht fest.<br />
• Schieben Sie die Befestigungsschelle 9 über den<br />
Schaft des Stellgliedes 1 (Mutter nach unten<br />
weisend) und positionieren Sie sie in einem Abstand<br />
von 1,5 cm vom Schaftkopf.<br />
• Blockieren Sie das Tor in zentral geschlossener<br />
Position, positionieren Sie das Stellglied horizontal<br />
auf dem Flügel, lokalisieren Sie die Position der<br />
zwei Bohrungen an Bügel 8 (am Flügel) und fixieren<br />
Sie den Bügel sicher.<br />
• Lockern Sie die Schraube 13 an der<br />
Befestigungsschelle 9. Indem man die Schelle über<br />
die gesamte Schaftlänge des Stellgliedes gleiten<br />
lässt, kann überprüft werden, ob die Öffnung des<br />
Flügels komplett erfolgt. Mit dieser Probe wird eine<br />
manuelle Notöffnung simuliert, die bei Stromausfall<br />
und Funktionsstörungen der Automatik erforderlich<br />
wird. Schließen und blockieren Sie das Tor wieder<br />
und ziehen Sie die Schraube 13 an der<br />
Befestigungsschelle fest.<br />
35
INSTALLATIONSPLAN<br />
INSTALLATION DER ELEKTRISCHEN<br />
SCHALTTAFEL<br />
Die elektrische Schalttafel sollte in unmittelbarer Nähe<br />
des Tores installiert werden, um zu vermeiden, dass für<br />
die Anschlüsse zu lange Kabel erforderlich werden.<br />
Verwenden Sie Dübel, die für die jeweilige Art von Wand<br />
geeignet sind (z.B. Ziegel oder Zement).<br />
INSTALLATION DER BLINKLEUCHTE<br />
UND DER STEUERELMENTE<br />
(Befehls- und Sicherheitstasten).<br />
Die Blinkleuchte muss derart installiert sein, dass sie<br />
sowohl von außen, als auch von innen gut sichtbar ist.<br />
der Anschluss der Befehlstasten kann sowohl seriell als<br />
auch parallel erfolgen (indem die Steuerzentrale<br />
entsprechend programmiert wird, folgen Sie dazu bitte<br />
en Hinweisen in Tabelle 2).<br />
Der Anschluss der Notaus-Schalter oder<br />
Sicherheitsschalter hingegen muss seriell erfolgen.<br />
INSTALLATION DES INFRAROT-ERFAS-<br />
SUNGSSYSTEMS (Fotozellen)<br />
Diese Installation darf nur nach den Anweisungen des<br />
Herstellers ausgeführt werden. Die ideale<br />
Montageposition sieht vor, dass sich die optische<br />
Achse zwischen dem Infrarot-Sender und -Empfänger auf<br />
einer Höhe zwischen 30 und 60 cm vom Boden gemessen,<br />
und 10 cm vom Torrand befindet.<br />
Außenseite<br />
Interne Seite<br />
Funktionsprinzip: Geht man während der Schließphase<br />
durch die Lichtschranke, stoppt das Tor, um nicht auf<br />
das Hindernis zu treffen.<br />
EXTERNE ANTENNE<br />
Antenne mit hoher Reichweite, Frequenz 433.92 MHz,<br />
ausgestattet mit Befestigungsvorrichtung und 2,5 m<br />
Koaxialkabel RG – 58.<br />
ACHTUNG: Es wird empfohlen, eine Außenantenne<br />
Modell ANS433 zu verwenden um einen maximalen<br />
Sendebereich zu gewährleisten.<br />
36
BESCHREIBUNG DER STEUERZENTRALE<br />
Die PRG12PP wurde von der V2 ELETTRONICA zur<br />
Steuerung von Toren mit einem oder zwei Flügeln entwickelt,<br />
die mit 12 Volt-Gleichstrom-Stellantrieben automatisiert<br />
werden. Eine Niedrigstspannungs-Automatik,<br />
wie sie von der Steuerzentrale PRG12PP verwendet<br />
wird, bietet die folgende Vorteile:<br />
• Ausschaltung des Risikos der versehentlichen<br />
Elektrifizierung metallischer Massen, die an die<br />
Steuerzentrale angeschlossen sind (Stellglieder,<br />
Flügel, oder Zubehör).<br />
• Sicherheit gegen Quetschungen, die durch einen<br />
Beanspruchungsmesser des Motors gewährleistet<br />
wird, welcher das Stoppen der Flügelbewegung<br />
garantiert, falls ein vorhandenes Hindernis nicht von<br />
den Fotozellen erfasst wurde.<br />
• Antiblackout-Funktion durch einen Bleiakkumulator,<br />
der die Funktionstüchtigkeit des Systems auch bei<br />
fehlender Netzspannung gewährleistet.<br />
• Abbremsen der Flügel im Endbereich, wodurch<br />
lautes Schließen und das Zurückprallen der Flügel<br />
verhindert wird.<br />
• Eigenerfassung der Zeiten. In der Programmierungsphase<br />
führt das System einen Speicherzyklus der Öffnungs<br />
und Schließzeiten der Torflügel aus, wodurch die<br />
Operationen der Eichung und Regulierung<br />
vereinfacht werden.<br />
Die Eingänge am Klemmenbrett sehen die Verwendung<br />
folgender Komponenten vor:<br />
• Eingang für den Infrarotsensor (FOTO).<br />
• Eingang für Sperrtaste (STOP).<br />
• Eingang für Öffnungstaste (START).<br />
Die Ausgänge am Klemmenbrett sehen vor:<br />
• Versorgung der Motoren 1 und 2.<br />
• Warnblinkleuchte mit 12 Volt (max 10 W)<br />
• Versorgung der Zubehör-Komponenten mit 12 Volt<br />
Gleichstrom.<br />
• Elektroschloss mit 12 Volt Gleichstrom.<br />
Einbau-Empfänger 433 MHz (Superheterodynempfang).<br />
Auf dem System können bis zu 48 Sender der Serie<br />
Personal Pass.<br />
TECHNISCHE DATEN<br />
Versorgung<br />
230 VAC 50 Hz<br />
Max. Motorbelastung 60 W<br />
Max. Belastung des mit 10 W<br />
24VAC versorgten Zubehörs<br />
Betriebstemperatur -20 ÷ +60 °C<br />
Schutzsicherungen F1 = 2 A<br />
F2 = 10 A<br />
Ausmaße<br />
210 x 275 x 100 mm<br />
Gewicht<br />
2,5 Kg<br />
Schutzart<br />
IP55<br />
ANSCHLÜSSE AM KLEMMENBRETT<br />
1 - 4 Anschluss an die Taste / i START<br />
(Kontakt normalerweise geöffnet<br />
oder normalerweise geschlossen,<br />
auswählbar während der<br />
Programmierung mithilfe des<br />
Dipschalters 5).<br />
Nicht verwendet<br />
2 Anschluss an die Taste / i STOP<br />
3 - 4 (Kontakt i.d.R. geschlossen). Wird<br />
der Anschluss nicht verwendet,<br />
mit allgemeiner Klemme verpolen.<br />
4 Gemein (-)<br />
5 - 6 An den i.d.R. geschlossenen Kontakt<br />
des FOTOZELLE anschließen. Wird<br />
der Anschluss nicht verwendet,<br />
mit allgemeiner Klemme verpolen<br />
7 - 8 Anschluss an Motor 2 unter<br />
Berücksichtigung der in der Serigrafie<br />
angegebenen Polaritäten. Verwenden<br />
Sie diesen Ausgang NICHT bei<br />
Toren mit nur einem Flügel<br />
9 - 10 Anschluss an Motor 1 unter<br />
Berücksichtigung der in der Serigrafie<br />
angegebenen Polaritäten. Bei Toren<br />
mit nur einem Flügel verwenden<br />
Sie bitte diesen Ausgang.<br />
11 - 12 Ausgang für die Stromversorgung<br />
des FOTOZELLE. Spannung 12 VDC,<br />
max. Stromaufnahme 500 mA.<br />
13 - 14 Anschluss an die Warnblinkleuchte.<br />
Spannung 12 Volt, maximale<br />
Leistung der Glühlampe 10 W.<br />
15 - 16 Anschluss an das Elektroschloss.<br />
Spannung 12 Volt, maximale<br />
Stromaufnahme 3 A.<br />
17 - 18 -<br />
19 - 20 - Nicht verwendet<br />
21 - 22<br />
23 Anschluss an die Entstörung des<br />
Antennenkabels<br />
24 Anschluss an die Hauptverbindung<br />
des Antennenkabels. Verwenden<br />
Sie bitte eine Antenne mit einer<br />
Nennfrequenz von 433 MHz.<br />
Alternativ kann ein Leiter mit<br />
Hauptisolierung und einer Länge<br />
von 17 cm angeschlossen werden<br />
37
INSTALLATION DES AKKUMULATORS<br />
Zur Verwendung der Funktion Antiblackout muss ein<br />
Bleiakkumulator (wartungsfrei) über die dafür<br />
vorgesehenen Steckklemmen angeschlossen werden.<br />
Achten Sie dabei bitte genau darauf, dass die auf der<br />
Serigrafie der Steuerplatte angegebenen Polaritäten<br />
korrekt übernommen werden.<br />
Die Batterie muss über folgende Eigenschaften verfügen:<br />
TYP<br />
SPANNUNG<br />
LEISTUNG<br />
WARTUNGSFREIER BLEIAKKU<br />
12 VOLT<br />
4,2 Ah<br />
Auf Anfrage erhältliches Zubehörset: KIT PILA 12V.<br />
Praktisches Set mit wartungsfreien Bleibatterien<br />
(12 Volt - 4,2 Ah), zweiadrigem Kabel für den Anschluss<br />
an die PRG12PP und Haltebügel.<br />
EIGENERFASSUNG DER ZEITEN<br />
Wählen Sie bitte zunächst über den Mikroswitch SW2<br />
die Option für Tore mit einem oder zwei Flügen, je nach<br />
Installationsart (s. Tabelle auf S. 61), und stellen Sie<br />
den Wähler für leichte oder schwere Flügel auf die<br />
Position “leicht”. Betätigen Sie die Taste AUTO auf der<br />
Steuerplatte und halten Sie diese für wenigstens 10<br />
Sekunden gedrückt. Das LED L1 beginnt zu blinken,<br />
gleichzeitig setzen sich die Motoren in Bewegung und<br />
führen zwei Öffnungs- und Schließzyklen durch.<br />
GEHEN SIE BEI DER EIGENERFASSUNG DER ZEITEN MIT<br />
GROSSER AUFMERKSAMKEIT VOR, STELLEN SIE<br />
SICHER; DASS DIE BEWEGUNG DES FLÜGELS NICHT<br />
BEHIDERT WIRD.<br />
Falls während der Zyklen zur Eigenerfassung einer der<br />
Flügel blockiert, bevor er den Endanschlag erreicht,<br />
stellen Sie bitte den Wähler für leichte oder schwere<br />
Flügel auf die Position “schwer” (s. Tabelle auf S. 61)<br />
und starten Sie den Vorgang erneut. Diese Störung<br />
kann durch das zu hohe Gewicht der Flügel oder übermäßige<br />
Reibung verursacht werden.<br />
Anschließend kann mit dem Speichern der Sender fortgefahren<br />
werden.<br />
SPEICHERN DER SENDER<br />
Zum Speichern der Sender gehen Sie bitte wie folgt vor:<br />
• Halten Sie die Taste RX für 2 Sekunden gedrückt.<br />
• Das Led L1 leuchtet auf.<br />
• Drücken Sie innerhalb von 10 Sekunden eine<br />
beliebige der 4 Tasten der Fernbedienung<br />
• Das Led L1 erlischt.<br />
• Gehen Sie zum Speichern der anderen Sender bitte<br />
analog vor.<br />
Ist der Speicherplatz ausgeschöpft (wenn 48 Sender<br />
abgespeichert worden sind); gibt das Led L1 fünfmal<br />
ein dreifaches Blinksignal ab.<br />
ACHTUNG: Vor der Verschrottung des Geräts müssen<br />
die Batterien entfernt und den geltenden Vorschriften<br />
gemäß entsorgt werden.<br />
Trennen Sie das Gerät vor jedem beliebigen Eingriff von<br />
der Stromversorgung.<br />
Zum Löschen der 48 <strong>Co</strong>des gehen Sie bitte wie folgt vor:<br />
• Halten Sie die Taste RX für 10 Sekunden gedrückt.<br />
• Das Led L1 gibt 5 einfache Blinksignale ab, und<br />
zeigt damit an, dass der gesamte Speicherinhalt<br />
gelöscht wurde.<br />
Nach abgeschlossener Einstellung sind die den Tasten des<br />
Senders zugeordneten Funktionen wie folgt konfiguriert:<br />
PROGRAMMIERUNG<br />
Nachdem die Komponenten der Automatik entsprechend<br />
den Anleitungen auf der Serigrafie der Platine<br />
angeschlossen worden sind (siehe vorhergehende<br />
Seite), wird empfohlen, mit der Eigenerfassung der<br />
Zeiten des Öffnungs- und Schließvorgangs fortzufahren.<br />
Die Steuerplatte ist mit Leuchtanzeigen (LED L1, L2),<br />
einem Mikroswitch (SW2) für die Einstellung der<br />
Funktionslogiken, sowie zwei Tasten zur Aktivierung der<br />
einzelnen Programmierungsphasen ausgestattet.<br />
38<br />
1 2<br />
Taste 1: Der Befehl START gestattet die<br />
Aktivierung des Öffnungsvorgangs des<br />
Flügels/der Flügel für die gesamte Strecke.<br />
Taste 2: Der Befehl START<br />
FUSSGÄNGERDURCHGANG gestattet die<br />
Aktivierung des Öffnungsvorgangs für denjenigen<br />
der zwei Flügel, der an die<br />
Klemmen M1 angeschlossen ist. Die Zeit<br />
der Öffnung entspricht der Hälfte der Zeit<br />
des Vorgangs START
EINSTELLUNG DER FUNKTIONEN<br />
Nun kann mit der Einstellung der Funktionslogiken fortgefahren werden. Diese Einstellung mit dem Zweck der individuellen<br />
Anpassung der Systemfunktionen des Öffnungsvorgangs an die Bedürfnisse de Nutzers erfolgt über den Miniswitch<br />
mit 6 Stellpositionen auf der Leiterplatte (SW2). Die folgende Tabelle veranschaulicht die Auswahl der verfügbaren Funktionen.<br />
FUNKTION<br />
POSITION<br />
BESCHREIBUNG<br />
AUFNAHMEEMPFINDLICHKEIT<br />
ANTIQUETSCHEN<br />
Hohe Empfindlichkeit : leichter Torflügel<br />
Niedrige Empfindlichkeit : schwerer Torflügel<br />
STILLSTANDSZEITEN<br />
30 Sekunden<br />
1 Minute<br />
AUTOMATISCHER RÜCKVERSCHLUSS<br />
Aktive<br />
Nicht aktive<br />
DOPPELTER ODER EINZELNER<br />
TORFLÜGEL<br />
Doppelter Torflügel<br />
Einzelner Torflügel<br />
STARTSTEUERUNG<br />
Normalerweise geschlossener Klemmleistenkontakt<br />
Normalerweise geöffneter Klemmleistenkontakt<br />
NICHT VERWENDETER DIP-VERTEILER 6<br />
DIP 1: AUFNAHMEEMPFINDLICHKEIT ANTIQUETSCHEN<br />
Greift ein, wenn die Beanspruchung des Flügels,<br />
verursacht durch ein im Bewegungsraum befindliches<br />
Hindernis, einen bestimmten Wert übersteigt. Die<br />
Sensibilitätsschwelle ist einstellbar. Es wird empfohlen,<br />
die Sensibilität auf „hoch” einzustellen.<br />
Sollte das Tor während der kalten Jahreszeit ohne sichtbaren<br />
Grund blockieren, kann die Sensibilität auf „niedrig“<br />
umgestellt werden.<br />
Dip 2 STILLSTANDSZEITEN<br />
Unter den folgenden Bedingungen stoppt die Bewegung<br />
der Flügel für eine Dauer, die als “Pausenzeit” definiert ist.<br />
WÄHREND DES ÖFFNENS: Bei Auslösen des Sensors<br />
gegen das Einquetschen, stoppen die Torflügel, die<br />
Bewegungsrichtung wird für 4 Sekunden umgekehrt, um<br />
das Hindernis freizugeben, anschließend stoppt das Tor<br />
erneut und verbleibt im Modus Pause. Wurde die<br />
Funktion AUTOMATISCHES SCHLIESSEN aktiviert,<br />
schließt sich das Tor nach Ablauf der Pausenzeit (30<br />
oder 60 Sekunden). Andernfalls wartet das System<br />
einen erneuten Befehl START, um den Zyklus fortzusetzen.<br />
WÄHREND DES SCHLIESSENS: Bei Auslösen des<br />
Sensors gegen das Einquetschen, stoppen die<br />
Tor flügel, die Bewegungsrichtung wird für 4 Sekunden<br />
umgekehrt, um das Hindernis freizugeben, anschließend<br />
stoppt das Tor erneut und verbleibt im Modus Pause.<br />
Wurde die Funktion AUTOMATISCHES SCHLIESSEN<br />
aktiviert, schließt sich das Tor nach Ablauf der<br />
Pausenzeit (30 oder 60 Sekunden).<br />
DIP 3: AUTOMATISCHER RÜCKVERSCHLUSS<br />
Ist diese Funktion aktiviert, schließt das Tor nach<br />
Ablauf der Pausenzeit automatisch.<br />
DIP 4: DOPPELTER ODER EINZELNER TORFLÜGEL<br />
Auswahlfunktion für den jeweiligen Tortyp. Verfügt das<br />
Tor über nur einen Flügel, schließen Sie das Stellglied<br />
bitte an die mit M1 gekennzeichneten Klemmen an.<br />
DIP 5: STARTSTEUERUNG<br />
Gestattet die Auswahl der Kontaktart der Taste START<br />
auf normalerweise geschlossen oder normalerweise<br />
geöffnet.<br />
39<br />
DIP 6: NICHT VERWENDETER
LEUCHTANZEIGEN<br />
Das System wurde mit Leuchtanzeigen ausgestattet,<br />
die über den jeweiligen Betriebsstatus informieren oder<br />
eventuelle Anomalien signalisieren.<br />
WARNBLINKLEUCHTE<br />
Warnblinkleuchte aus:<br />
• Das Tor ist geschlossen: Das System ist in<br />
Erwartung eines Öffnungsbefehls über die<br />
Fernbedienung oder den Schlüssel.<br />
• Das Tor ist geöffnet: Das System ist in Erwartung<br />
des Schließbefehls über die Fernbedienung oder<br />
den Schlüssel (manuelles Programm durch<br />
Positionierung von Switch 3 auf OFF).<br />
LED AUF DER STEUERPLATTE<br />
Auf der Steuerplatte befinden sich 2 Leuchtanzeigen<br />
(LED), die in der Serigrafie mit L1 und L2 bezeichnet<br />
sind.<br />
Die Anzeigenfunktion von L1 in der<br />
Programmierungsphase wurde bereits erläutert<br />
(s.Tabelle 2).<br />
L2 hat die Funktion der Anzeige des Ladestatus’ des an<br />
die Platte angeschlossenen Akkumulators.<br />
LED LEUTET: Akkumulator in Aufladephase<br />
LED ERLOSCHEN: Akkumulator aufgeladen<br />
Warnblinkleuchte mit schnellem Blinksignal: Tor in<br />
Öffnungsphase.<br />
Warnblinkleuchte mit normalem Blinksignal: Tor in<br />
Schließphase.<br />
Warnblinkleuchte mit langsamem Blinksignal: Tor im<br />
Modus Pause und die Funktion AUTOMATISCHES<br />
SCHLIESSEN ist aktiviert.<br />
Die Warnblinkleuchte leuchtet bei Empfang eines<br />
Signals für 5 Sekunden auf und erlischt dann: Dieses<br />
Signal zeigt an, dass das System versucht hat, den<br />
Schließvorgang zu starten, der Kontakt des<br />
Infrarotsystems jedoch nicht geschlossen war.<br />
Die Warnblinkleuchte leuchtet beim Befehl START auf,<br />
ohne dass sich die Flügel bewegen: Wird Taste 1 oder 2<br />
an einem der gespeicherten Sender gedrückt, oder ein<br />
Schlüssel verwendet, und die Leuchte bleibt während<br />
der gesamten Sendezeit / Zeit des Verschlusses des<br />
Kontakts an, ist das System BLOCKERT, d.h. die<br />
Zentrale hat an den mit BL bezeichneten Klemmen<br />
einen offenen Kontakt erfasst.<br />
Ist die Taste STOP, da optional, nicht installiert, könnte<br />
die Polbrücke an den mit BL bezeichneten Klemmen<br />
instabil sein. Prüfen Sie in diesem Fall die Polbrücke<br />
und ersetzen Sie sie gegebenenfalls.<br />
Warnblinkleuchte leuchtet dauerhaft:<br />
Signal, welches durch eine Anomalie während der<br />
Öffnungs- oder Schließphase des Tores ausgelöst wird,<br />
zum Beispiel wenn starker Wind die Bewegung der<br />
Flügel verhindert.<br />
Zur Behebung dieser Anomalie betätigen Sie den<br />
Schlüssel und drücken Sie gleichzeitig die Taste der<br />
Fernbedienung, worauf die Automatik ihren normalen<br />
Betrieb wieder aufnimmt.<br />
ACHTUNG!<br />
Während der gesamten Zeit der Öffnungs- und<br />
Schließphase muss die Taste der Fernbedienung<br />
gedrückt, bzw. der Schlüssel gedreht gehalten werden.<br />
Die Bewegung erfolgt unter der Bedingung “jeder Flügel<br />
einzeln”. Hat sich ein Flügel vollständig geöffnet, muss<br />
der Nutzer die Taste der Fernbedienung, bzw. den<br />
Schlüssel unverzüglich loslassen. Die Warnblinkleuchte<br />
leuchtet dauerhaft weiter und zeigt damit an, dass der<br />
gleiche Vorgang für den zweiten Flügel wiederholt werden<br />
muss.<br />
40
ÍNDICE<br />
ADVERTENCIAS IMPORTANTES . . . . . . . . . . . . . . . . . . . . . . . . . . . . . . . . . . . . . . . . . . . . . . . .42<br />
CONFORMIDAD A LAS NORMATIVAS . . . . . . . . . . . . . . . . . . . . . . . . . . . . . . . . . . . . . . . . . . . .42<br />
LISTA DE COMPONENTES . . . . . . . . . . . . . . . . . . . . . . . . . . . . . . . . . . . . . . . . . . . . . . . . . . .43<br />
DATOS TÉCNICOS SLIM12V . . . . . . . . . . . . . . . . . . . . . . . . . . . . . . . . . . . . . . . . . . . . . . . . . .44<br />
OPERACIONES PRELIMINARES . . . . . . . . . . . . . . . . . . . . . . . . . . . . . . . . . . . . . . . . . . . . . . . .44<br />
MONTAJE DE LOS OPERADORES . . . . . . . . . . . . . . . . . . . . . . . . . . . . . . . . . . . . . . . . . . . . . .45<br />
ESQUEMA DE INSTALACIÓN . . . . . . . . . . . . . . . . . . . . . . . . . . . . . . . . . . . . . . . . . . . . . . . . . .46<br />
DESCRIPCION DEL CUADRO DE MANIOBRAS . . . . . . . . . . . . . . . . . . . . . . . . . . . . . . . . . . . . . .47<br />
CONEXION DE LOS BORNES . . . . . . . . . . . . . . . . . . . . . . . . . . . . . . . . . . . . . . . . . . . . . . . . .47<br />
CARACTERISTICAS TECNICAS . . . . . . . . . . . . . . . . . . . . . . . . . . . . . . . . . . . . . . . . . . . . . . . .47<br />
INSTALACION DE LA BATERIA . . . . . . . . . . . . . . . . . . . . . . . . . . . . . . . . . . . . . . . . . . . . . . . . .48<br />
PROGRAMACION . . . . . . . . . . . . . . . . . . . . . . . . . . . . . . . . . . . . . . . . . . . . . . . . . . . . . . . . .48<br />
AUTOAPRENDIZAJE DE LOS TIEMPOS . . . . . . . . . . . . . . . . . . . . . . . . . . . . . . . . . . . . . . . . . . .48<br />
MEMORIZACION DE LOS EMISORES . . . . . . . . . . . . . . . . . . . . . . . . . . . . . . . . . . . . . . . . . . . .48<br />
PROGRAMACION DE LAS FUNCIONES . . . . . . . . . . . . . . . . . . . . . . . . . . . . . . . . . . . . . . . . . . .49<br />
INDICADORES VISIVOS . . . . . . . . . . . . . . . . . . . . . . . . . . . . . . . . . . . . . . . . . . . . . . . . . . . . .50<br />
41
ADVERTENCIAS IMPORTANTES<br />
Por cualquier problema técnico ponerse en contacto<br />
con el servicio asistencia V2 ELETTRONICA<br />
TEL. (+39) 01 72 81 24 11<br />
La V2 ELETTRONICA se reserva el derecho de aportar<br />
eventuales modificaciones al producto sin previo aviso;<br />
ademmás, no se hace responsable de danos a personas<br />
o cosas debidos a un uso improprio o a una instalación<br />
errónea.<br />
CONFORMIDAD A LAS NORMATIVAS<br />
V2 ELETTRONICA SPA declara que los componentes del<br />
kit son conformes con los requisitos esenciales fijados<br />
por las Directivas:<br />
73/23/EEC Seguridad electrica<br />
93/68/EEC <strong>Co</strong>mpatibilidad electromagnetica<br />
99/05/EEC directiva radio<br />
98/37/EEC directiva maquinas<br />
Han sido aplicadas las siguientes Normas técnicas<br />
para verificar la conformidad:<br />
Antes de proceder en las installacion y la<br />
programmacion es aconsejable leer bien las instrucciones.<br />
SLIM12V<br />
PRG12PP<br />
TSC-4<br />
• Dicho manual es destinado exclusivamente a técnicos<br />
calificados en las installacione de automatismos.<br />
• Ninguna de las informacciones contenidas en dicho<br />
manual puede ser de utilidad para el usuario final.<br />
• Cualquiera operacion de manutencion y programacion<br />
tendrà que ser hecha para técnicos calificados en<br />
las installacione de automatismos.<br />
73/23/EEC<br />
93/68/EEC<br />
/<br />
EN 55014-1<br />
EN 55014-2<br />
EN 60335–1<br />
EN 50081–1,<br />
EN 50081–2<br />
EN 60335–1<br />
EN 301489-3<br />
LA AUTOMATIZACION DEBE SER REALIZADA EN<br />
CONFORMIDAD A LAS VIGENTES NORMATIVAS<br />
EUROPEAS:<br />
99/05/EEC<br />
/<br />
/<br />
EN 300220-3<br />
EN 60204–1 (Seguridad de la maquinaria. Equipamiento<br />
electrico de las maquinas, partes 1: reglas generales).<br />
EN 12445 (Seguridad en el uso de cierres<br />
automatizados, metodos de prueba)<br />
EN 12453 (Seguridad en el uso de cierres<br />
automatizados, requisitos)<br />
• El instalador debe proveer la instalación de un<br />
dispositivo (ej. interruptor magnetotérmico) que<br />
asegure el seccionamiento omnipolar del aparato<br />
de la red de alimentación. La normativa requiere<br />
una separación de los contactos de almenos 3 mm<br />
en cada polo (EN 60335-1).<br />
• Para la conexión de tubos rígidos o flexibles y<br />
pasacables, utilizar manguitos conformes al grado<br />
de protección IP55 como la caja de plástico que<br />
contiene la placa.<br />
• La instalación requiere competencias en el campo<br />
eléctrico y mecánico; debe ser realizada únicamente<br />
por personal cualificado en grado de expedir la<br />
declaración de conformidad en la instalación<br />
(Directiva máquinas 98/37/EEC, anexo IIA).<br />
• Es obligatorio atenerse a las siguientes normas para<br />
cierres automatizados con paso de vehículos:<br />
EN 12453, EN 12445, EN 12978 y a las eventuales<br />
prescripciones nacionales.<br />
• Incluso la instalación eléctrica antes de la<br />
automatización debe responder a las vigentes<br />
normativas y estar realizada correctamente.<br />
• La regulación de la fuerza de empuje de la hoja<br />
debe medirse con un instrumento adecuado y<br />
regulada de acuerdo con los valores máximos<br />
admitidos por la normativa EN 12453.<br />
• Aconsejamos utilizar un pulsador de emergencia e<br />
instalarlo en proximidad a la automatización<br />
(conectado a la entrada STOP de la placa de<br />
comando) de modo que sea posible el paro<br />
inmediato de la puerta en caso de peligro.<br />
42<br />
Nota: Se declara que no está permitido poner en<br />
marcha los dispositivos que se detallan arriba hasta<br />
que la<br />
maquina (puerta automatizada) haya sido identificada,<br />
sellada CE y haya sido emitida la conformidad a las<br />
condiciones de la Directiva 89/392/EEC y posteriores<br />
modificaciones.<br />
El responsable de la puesta en funcionamiento tiene<br />
que entregar la siguiente documentación:<br />
• Manual técnico<br />
• Declaración de conformidad<br />
• Sellado CE<br />
• Informe de comprobación final<br />
• Registro de mantenimiento<br />
• Manual de instrucciones y advertencias<br />
Racconigi a 28/01/2003<br />
El Representante legal de V2 ELETTRONICA SPA<br />
A. Livio <strong>Co</strong>stamagna
LISTA DE COMPONENTES<br />
1<br />
2<br />
4<br />
3<br />
Ref. Descripción Cant.<br />
1 Operadores electromecánicos 12VDC 2<br />
2 Cuadro de maniobras PRG12PP 1<br />
3 Emisores TSC-4 2<br />
4 Lámpara de señalización EGG12 1<br />
5 Soporte para instalación operadores al poste 2<br />
6 Perno para instalación operador 2<br />
7 Seeger para sujetar perno 4<br />
8 Soporte para instalación operadores a la hoja 2<br />
9 Pinza tubular 2<br />
10 Arandelas de plástico 4<br />
Arandelas de plástico de reserva 4<br />
11 Tuerca M10 2<br />
12 Arandela para M10 2<br />
13 Tornillo M10 x 40 2<br />
8<br />
5<br />
7<br />
6<br />
9<br />
10 11 12 13<br />
43
DATOS TÉCNICOS SLIM12V<br />
Longitud máxima de la hoja 2 m<br />
Alimentación<br />
12 VDC<br />
Potencia motor<br />
30 W<br />
Carrera máx. de arrastre<br />
300 mm<br />
Velocidad de arrastre<br />
0,016 m/s<br />
Temperatura de funcionamiento -20 ÷ +60 °C<br />
Grado de protección<br />
IP44<br />
Ciclo de trabajo 80 %<br />
Peso motor<br />
3 Kg<br />
OPERACIONES PRELIMINARES<br />
El automatismo ha sido estudiado para adaptarse a<br />
una cancela de 4 metros máximo. Puede ser utilizado<br />
para cancelas ligeras, pesadas, de madera, de metal,<br />
PVC o aluminio; el empuje de los operadores permite<br />
una eficacia real y un buen funcionamiento en el tiempo.<br />
Antes de proceder con la instalación, es fundamental<br />
asegurarse de que vuestra cancela abra y cierre<br />
libremente y verificar los siguientes puntos:<br />
• bisagras y pernios en estado óptimo y<br />
oportunamente lubricados<br />
• ningún obstáculo debe impedir el movimiento<br />
• ningún roce entre el suelo y las hojas (dilatación<br />
mecánica de 7 a 8 mm mín.)<br />
• su cancela ha de estar equipada de topes centrales<br />
y laterales: estos son indispensables para un buen<br />
funcionamiento del sistema.<br />
TOPE CANCELA<br />
TOPES LATERALES<br />
44
MONTAJE DE LOS OPERADORES<br />
Para instalar de forma correcta los operadores a la<br />
puerta seguir atentamente los siguientes puntos:<br />
• Marcar en los postes las medidas A y B que se<br />
consideren más oportunas.<br />
• Instalar los soportes 5 a los postes y posicionar los<br />
operadores en ellos.<br />
• Introducir el perno 6 en el agujero y bloquearlo en<br />
las dos extremidades utilizando los dos seeger 7.<br />
DURANTE TODAS ESTAS OPERACIONES EVITAR<br />
MANTENER EL OPERADOR COLGADO; tiene que<br />
aguantarse horizontalmente sin que cuelgue por un solo<br />
punto.<br />
Para efectuar una correcta instalación de los<br />
operadores y garantizar un funcionamiento óptimo de la<br />
automatización, es necesario respetar las cotas de<br />
medición de la tabla de abajo.<br />
Eventualmente, modificar la estructura de la puerta, de<br />
forma que se adapte a uno de los casos de la tabla de<br />
abajo.<br />
APERTURA 90° APERTURA 110°<br />
C(mm) A(mm) B(mm) D(mm) A(mm) B(mm) D(mm)<br />
30<br />
40<br />
50<br />
60<br />
70<br />
80<br />
90<br />
100<br />
110<br />
120<br />
130<br />
130<br />
120<br />
120<br />
120<br />
120<br />
120<br />
120<br />
120<br />
110<br />
155<br />
155<br />
155<br />
165<br />
160<br />
160<br />
160<br />
160<br />
160<br />
160<br />
125<br />
115<br />
105<br />
105<br />
90<br />
80<br />
70<br />
60<br />
50<br />
50<br />
130<br />
120<br />
120<br />
120<br />
120<br />
120<br />
120<br />
110<br />
/<br />
/<br />
135<br />
145<br />
140<br />
140<br />
140<br />
140<br />
140<br />
150<br />
/<br />
/<br />
105<br />
105<br />
90<br />
80<br />
70<br />
60<br />
50<br />
50<br />
/<br />
/<br />
• Montar el soporte 8 con la pinza tubular 9 como<br />
indicado en la figura.<br />
• Montar las dos arandelas de plástico 10 en el<br />
soporte 8. Eventualmente utilizar grasa para sujetar<br />
las, de modo que durante el montaje de la pinza<br />
tubular 9 no se desplacen o caigan.<br />
• Posicionar el soporte 8 con las arandelas de plástico<br />
10 en la pinza tubular 9 alineando los agujeros.<br />
CUIDADO! LA PINZA TUBULAR TIENE QUE SER<br />
MONTADA CON EL LADO DEL ALOJAMIENTO<br />
HEXAGONAL HACIA ABAJO.<br />
• <strong>Co</strong>locar la tuerca 11 en su sede (por debajo),<br />
introducir la arandela 12 en el tornillo 13, montar el<br />
tornillo 13 y atornillar sin hacer excesiva fuerza.<br />
• Sacar completamente el vástago del operador 1<br />
desatornillándolo manualmente; llegados al tope<br />
volver a atornillarlo de una vuelta.<br />
• Introducir el vástago del operador 1 en la pinza<br />
tubular 9 (tuerca en la parte de abajo) y posicionarla<br />
a 1,5 cm de la punta del vástago.<br />
• Cerrar la puerta y bloquearla a su tope central,<br />
posicionar el operador horizontalmente, localizar la<br />
posición de los dos agujeros del soporte 8 sobre la<br />
hoja e instalarla de forma que aguante grandes<br />
esfuerzos.<br />
• Aflojar el tornillo 13 de la pinza tubular 9. La<br />
misma, desplazándose por toda la longitud del<br />
vástago del operador, permite verificar que la<br />
apertura de la hoja sea total. Esta comprobación a<br />
de hacerse solo para simular una apertura manual<br />
de emergencia por falta de luz (en el caso de no<br />
utilizar batería de emergencia) o de no-funcionamiento<br />
del automatismo. Volver a cerrar, bloqueando la<br />
puerta y, apretar el tornillo 13 de la pinza tubular 9.<br />
45
ESQUEMA DE INSTALACIÓN<br />
INSTALACION DEL CUADRO DE<br />
MANIOBRAS<br />
Es importante instalar el cuadro de maniobras lo más<br />
cerca posible de la puerta para evitar utilizar cables de<br />
conexión excesivamente largos.<br />
Utilizar tacos adecuados al tipo de pared (ej. ladrillo o<br />
cemento).<br />
INSTALACION DE LA LAMPARA Y DE<br />
LOS DISPOSITIVOS DE COMANDO<br />
(pulsadores de comando y de seguridad)<br />
La lámpara de señalización ha de instalarse de forma<br />
que sea visible tanto desde el interior como desde el<br />
exterior.<br />
La conexión de los pulsadores de comando puede<br />
efectuarse en serie o en paralelo (programando<br />
oportunamente el cuadro según las indicaciones de la<br />
tabla 2).<br />
Para la conexión de los pulsadores de STOP o de seguridad,<br />
la conexión tiene que efectuarse obligatoriamente<br />
en serie.<br />
INSTALACION DE LAS FOTOCELULAS<br />
Esta operación debe efectuarse únicamente siguiendo<br />
las instrucciones del constructor. La posición de montaje<br />
ideal prevé que el eje óptico entre el receptor y el<br />
emisor quede a una altura incluida entre 30 y 60 cm<br />
del suelo y a 10 cm de la puerta.<br />
exterior<br />
interior<br />
Funcionamiento: durante el cierre de la puerta, si se<br />
pasa entre las fotocélulas, la puerta se para y reabre<br />
para eludir el obstáculo.<br />
ANTENA EXTERIOR<br />
Antena de largo alcance frecuencia 433.92 MHz dotada<br />
de un soporte para fijarla y 2,5 m de cable coaxial<br />
RG – 58.<br />
CUIDADO: se aconseja utilizar la antena exterior modelo<br />
ANS433 para garantizar el máximo alcance radio.<br />
46
DESCRIPCION DEL CUADRO DE<br />
MANIOBRAS<br />
El PRG12PP ha sido desarrollado por V2 ELETTRONICA<br />
para el comando de cancelas de una o dos hojas,<br />
motorizadas con operadores en corriente continua a 12<br />
Voltios.<br />
Las ventajas derivadas por uso de sistemas de automatización<br />
en baja tensión que utilizan la PRG12PP son<br />
las siguientes:<br />
CONEXION DE LOS BORNES<br />
1 - 4 <strong>Co</strong>nectar al pulsador/es de START<br />
(contacto normalmente abierto o<br />
normalmente cerrado seleccionable<br />
en programación con switch 5).<br />
2 No utilizado<br />
3 - 4 <strong>Co</strong>nectar al pulsador/es de STOP<br />
• Eliminación del riesgo de electrificación accidental<br />
de las masas metálicas conectadas al cuadro<br />
(operadores, hojas y accesorios).<br />
• Seguridad antiaplastamiento, realizada mediante<br />
detección de esfuerzo en el motor que garantiza el<br />
STOP del movimiento de la puerta en caso de<br />
obstáculo no detectado por las fotocélulas.<br />
• Función antiblackout con la ayuda de una batería de<br />
plomo que permite el funcionamiento del sistema<br />
incluso con falta de energía eléctrica.<br />
• STOP suave de las hojas antes del tope de la puerta;<br />
impide cierres ruidosos y rebotes de las hojas.<br />
• Autoaprendizaje de los tiempos, en fase de<br />
programación el sistema efectúa un ciclo de<br />
memorización de los tiempos de cierre y de apertura<br />
de las hojas simplificando las operaciones de ajuste<br />
y de regulación.<br />
Las entradas de la regleta de bornes prevén la utilización<br />
de los siguientes componentes:<br />
• Entrada para detección de presencia (FOTO).<br />
• Entrada para pulsador de STOP (STOP).<br />
• Entrada para pulsador de apertura (START).<br />
Las salidas de la regleta de bornes prevén:<br />
• Alimentación motor 1 y motor 2.<br />
• Lámpara de señalización de 12 Voltios (max 10 W).<br />
• Alimentación accesorios de 12 Voltios continua.<br />
• Electrocerradura de 12 Voltios continua.<br />
El sistema puede memorizar hasta 48 emisores de la<br />
serie Personal Pass (TXC-2, TXC-4, TRC-4, TOV-4, TSC-4).<br />
El receptor incorporado es del tipo superheterodina con<br />
filtro de banda estrecha en antena.<br />
DATOS TÉCNICOS PRG12PP<br />
Alimentación<br />
230 VAC 50 Hz<br />
Carga máx motor<br />
60 W<br />
Carga máx accesorios 10 W<br />
alimentados a 12 Va.c.<br />
Temperatura de trabajo -20 ÷ +60 °C<br />
Fusibles de protección F1 = 2 A<br />
F2 = 10 A<br />
Dimensiones<br />
210 x 275 x 100 mm<br />
Peso<br />
2,5 Kg<br />
IP 55<br />
4<br />
5 - 6<br />
7 - 8<br />
9 - 10<br />
11 - 12<br />
13 - 14<br />
15 - 16<br />
17 - 18 -<br />
19 - 20 -<br />
21 - 22<br />
23<br />
24<br />
(contacto normalmente cerrado).<br />
Si no se utiliza puentear.<br />
<strong>Co</strong>mun<br />
<strong>Co</strong>nectar al contacto normalmente<br />
cerrado del detector de presencia<br />
(fotocélula).<br />
Si no se utiliza puentear.<br />
<strong>Co</strong>nectar al motor 2 respetando<br />
las polaridades indicadas en la<br />
serigrafía. No utilizar esta salida<br />
en caso de cancela con una hoja.<br />
<strong>Co</strong>nectar al motor 1 respetando<br />
las polaridades indicadas en la<br />
serigrafía. Utilizar esta salida en<br />
caso de hoja única.<br />
Salida para la alimentación de<br />
accesorios.<br />
Tensión 12 Vcc. Máx. 500 mA.<br />
<strong>Co</strong>nectar a la lámpara de<br />
señalización. Tensión 12 V, potencia<br />
máxima de la bombilla 10 W.<br />
<strong>Co</strong>nectar a una electrocerradura.<br />
Tensión 12 Voltios, corriente<br />
máxima 3 A.<br />
No utilizados<br />
<strong>Co</strong>nectar a la malla de la antena<br />
si se utiliza.<br />
<strong>Co</strong>nectar al positivo de la antena.<br />
Utilizar antenas con frecuencia<br />
nominal 433 MHz.<br />
En alternativa conectar un cable<br />
con una longitud de 17 cm.<br />
47
INSTALACION DE LA BATERIA<br />
Si quieren utilizar la función antiblackout han de conectar<br />
una batería de plomo (del tipo que no necesitan<br />
mantenimiento) a los bornes enchufables expresos<br />
teniendo extremo cuidado con respetar las polaridades<br />
indicadas en la serigrafía de la placa.<br />
La batería ha de tener las siguientes características:<br />
TIPO<br />
TENSION<br />
CAPACIDAD<br />
de plomo sin mantenimiento<br />
12 V<br />
4,2 Ah<br />
Kit accesorio sobre pedido: KIT PILA 12V.<br />
Practico kit que se compone de batería de plomo sin<br />
mantenimiento (12VOLT - 4,2Ah), cable bipolar para la<br />
conexión a la PRG12PP y soporte para la misma.<br />
AUTOAPRENDIZAJE DE LOS TIEMPOS<br />
Antes de proceder seleccionar por medio de SW2 la<br />
condición hoja única o doble hoja, según el tipo de<br />
instalación (ver tabla de pág. 49) y el selector hoja<br />
ligera u hoja pesada en la posición hoja ligera.<br />
Pulsar la tecla AUTO en la placa de comando y mantenerla<br />
pulsada durante almenos 10 segundos. El LED L1<br />
inicia a destellar, contemporáneamente los motores (de<br />
uno en uno) entran en movimiento y hacen 2 ciclos de<br />
apertura y 2 ciclos de cierre.<br />
PONER LA MAXIMA ATENCION DURANTE EL APRENDIZA-<br />
JE DE LOS TIEMPOS, EVITANDO OBSTACULIZAR LOS<br />
MOVIMIENTOS DE LA HOJA.<br />
NOTA:<br />
Si durante los movimientos de autoaprendizaje una de<br />
las hojas se bloquea antes de llegar al tope de cierre o<br />
de apertura, desplazar el selector hojas ligeras u hoja<br />
pesada a la posición hoja pesada (ver tabla pág. 77) y<br />
repetir la operación del principio. Esto puede suceder si<br />
las hojas de la puerta son muy pesadas o con excesivo<br />
roce. Proceder con la memorización de los emisores.<br />
MEMORIZACION DE LOS EMISORES<br />
Para efectuar la memorización de los emisores proceder<br />
de la siguiente forma:<br />
• Pulsar y mantener pulsada la tecla RX durante 2<br />
segundos.<br />
• El led L1 se enciende.<br />
• Dentro de 10 segundos transmitir con el emisor,<br />
pulsando una cualquiera de las teclas.<br />
• El led L1 se apaga.<br />
• Proceder de la misma manera para los demás<br />
emisores.<br />
<strong>Co</strong>n la memoria agotada (después de 48 emisores<br />
memorizados), el led L1 efectúa 5 destellos triples.<br />
Para la cancelación de los 48 códigos de los emisores<br />
proceder de la siguiente manera:<br />
CUIDADO: para tirar una batería descargada, hay que<br />
removerla del cuadro de maniobras y eliminarla<br />
respetando las normativas vigentes.<br />
Desconectar el cuadro de la red antes de realizar<br />
cualquier operación.<br />
PROGRAMACION<br />
Después de haber conectado los componentes del<br />
automatismo según las indicaciones reseñadas en la<br />
serigrafía de la placa y haciendo referencia a las páginas<br />
precedentes, os aconsejamos proceder con la fase de<br />
autoapredizaje de los tiempos de apertura y de cierre.<br />
La placa de comando está dotada de indicadores LED<br />
(L1,L2); de un selector de micro switch (SW2) para la<br />
programación de las lógicas de funcionamiento y de<br />
dos pulsadores para activar las fases de programación.<br />
• Pulsar y mantener pulsada la tecla RX durante 10<br />
segundos<br />
• El led L1 emite 5 destellos individuales para indicar<br />
que ha cancelado todo el contenido de la memoria.<br />
Una vez memorizados, las funciones asociadas a las<br />
teclas del emisor quedan configuradas como sigue:<br />
1 2<br />
Tecla 1: El comando de START permite<br />
activar la apertura de la hoja/s durante<br />
todo su recorrido.<br />
Tecla 2: El comando de START PEATONAL<br />
permite activar la apertura de una sola de<br />
las hojas, aquella conectada al borne M1,<br />
durante la mitad de tiempo con respecto<br />
al tiempo de start.<br />
48
PROGRAMACION DE LAS FUNCIONES<br />
Proceder ahora con la personalización de las lógicas de funcionamiento. Esta operación, que tiene el fin de adaptar el<br />
funcionamiento del sistema de apertura a vuestro gusto, se efectúa mediante el mini switch de 6 posiciones presente<br />
en la placa (SW2). La siguiente tabla os indica que tipo de función podéis seleccionar.<br />
FUNCION<br />
POSICION<br />
DESCRIPCION<br />
Sensibilidad del sensor<br />
antiaplastamiento<br />
Sensibilidad elevada: hoja ligera<br />
Sensibilidad baja: hoja pesada<br />
Tiempo de pausa<br />
30 segundos<br />
1 minuto<br />
Cierre automático<br />
Activa<br />
No activa<br />
Hoja doble o única<br />
Hoja doble<br />
Hoja única<br />
<strong>Co</strong>mando de START<br />
<strong>Co</strong>ntacto a la regleta de conexión Normalmente cerrado<br />
<strong>Co</strong>ntacto a la regleta de conexión Normalmente abierto<br />
DIP SWITCH 6 NO UTILIZADO<br />
DIP 1: Sensibilidad del sensor antiaplastamiento<br />
Interviene cuando el esfuerzo sobre la hoja, causado por<br />
un obstáculo en el espacio de movimiento, supera un<br />
cierto valor. El valor de sensibilidad es seleccionable.<br />
Nosotros os aconsejamos programarlo inicialmente en<br />
sensibilidad alta.<br />
Si durante el funcionamiento en la estación fría, la<br />
puerta se bloquea sin motivos aparentes, entonces<br />
programarlo como baja.<br />
DIP 2: Tiempo en fase de pausa<br />
Cuando se presentan las siguientes condiciones, el<br />
movimiento de las hojas se detiene durante un tiempo<br />
definido como “tiempo de pausa”.<br />
DURANTE LA APERTURA<br />
Si interviene el sensor antiaplastamiento, el movimiento<br />
de las hojas se detiene e invierte durante 4 segundos,<br />
liberando el área interesada y se detiene nuevamente<br />
entrando en la condición de pausa. Si ha sido<br />
habilitada la función de CIERRE AUTOMATICO, después<br />
del tiempo de pausa (30 a 60 segundos) la puerta<br />
cierra. En caso contrario, el sistema espera un nuevo<br />
comando de START antes de completar el ciclo.<br />
49<br />
DURANTE LA FASE DE CIERRE<br />
Si interviene el sensor antiaplastamiento, el movimiento<br />
de las hojas se detiene e invierte durante 4 segundos,<br />
liberando el área interesada y se detiene nuevamente<br />
entrando en la condición de pausa. Si ha sido habilitada<br />
la función de CIERRE AUTOMATICO, después del<br />
tiempo de pausa (30 a 60 segundos) la puerta cierra.<br />
En caso contrario, el sistema espera un nuevo<br />
comando de START antes de completar el ciclo.<br />
DIP 3: Cierre automatico<br />
Si está habilitado permite a la puerta cerrarse después<br />
del tiempo de pausa.<br />
DIP 4: Hoja unica o doble<br />
Permite la selección del tipo de puerta. Si la puerta es<br />
de una sola hoja, conectar el operador a los bornes<br />
reseñados como M1.<br />
DIP 5: <strong>Co</strong>mando de start<br />
Permite seleccionar el tipo de contacto del pulsador de<br />
START, normalmente cerrado o normalmente abierto.<br />
DIP 6: No utilizado
INDICADORES VISIVOS<br />
(LÁMPARA DE SEÑALIZACIÓN)<br />
El sistema ha sido estudiado para dar indicaciones visivas<br />
sobre el estado de funcionamiento en condiciones<br />
normales o en estado de anomalía:<br />
LAMPARA DE SEÑALIZACION<br />
Lámpara de señalización apagada:<br />
• La puerta está cerrada: el sistema está a la espera<br />
de una señal de apertura del emisor o de la<br />
cerradura de contacto.<br />
• La puerta está abierta: indica que el sistema espera<br />
una señal de cierre proveniente del emisor o de la<br />
cerradura de contacto (programa manual elegido<br />
con switch 3 en OFF)<br />
LED EN EL CUADRO DE MANIOBRAS<br />
En el cuadro hay 2 indicadores luminosos (LED) indicados<br />
con la serigrafía como L1 y L2.<br />
Para L1 se han visto ya las indicaciones que proporciona<br />
durante la fase de programación (ver tab.2).<br />
L2 tiene la función de señalar el estado de carga de la<br />
batería conectada a la placa.<br />
LED ENCENDIDO: batería en fase de carga.<br />
LED APAGADO: batería cargada.<br />
Lámpara de señalización que destella rápidamente: la<br />
puerta está en fase de apertura.<br />
Lámpara de señalización que destella normalmente: la<br />
puerta está en fase de cierre.<br />
Lámpara de señalización que destella lentamente: la<br />
puerta está en condición de pausa, ya que ha sido<br />
programado el CIERRE AUTOMATICO.<br />
Lámpara de señalización que se enciende durante<br />
cinco segundos al recibir la señal para después apagarse:<br />
esto indica que el sistema ha intentado el cierre<br />
pero el contacto del sistema de detección de presencia<br />
no estaba cerrado.<br />
Lámpara de señalización que se enciende con un<br />
comando de START sin movimientos de las hojas: cuando<br />
se pulsa la tecla 1 o la tecla 2 de uno de los emisores<br />
memorizados o se utiliza una cerradura de contacto<br />
y la lámpara permanece encendida durante todo el<br />
tiempo de transmisión/cierre del contacto, el sistema<br />
está en STOP, ya que el cuadro ve en los bornes indicados<br />
como STOP un contacto abierto.<br />
Si el pulsador de STOP, siendo opcional, no está instalado,<br />
puede suceder que el puente de los bornes reseñados<br />
como STOP sea inestable; en este caso controlarlo,<br />
eventualmente sustituirlo o hacerlo.<br />
Lámpara de señalización que permanece encendida<br />
permanentemente:<br />
a causa de una anomalía en fase de apertura o cierre<br />
de la puerta, por ejemplo, por viento fuerte que impide<br />
cualquier movimiento de la hoja.<br />
Para salir de esta anomalía actuar sobre la cerradura<br />
de contacto y contemporáneamente pulsar el botón del<br />
emisor. El automatismo reanudará su ciclo normal.<br />
ATENCION!<br />
Se debe mantener durante todo el tiempo de la apertura<br />
o del cierre, la tecla del emisor pulsada y la llave activada.<br />
El movimiento que ejecuta está condicionado: “una<br />
hoja a la vez”. Cuando el usuario detecte que la primera<br />
hoja ha finalizado su recorrido, debe soltar tempestivamente<br />
la tecla del emisor y la llave. La lámpara de<br />
señalización permanece encendida permanentemente,<br />
para indicar que la misma operación debe ser realizada<br />
para desbloquear la segunda hoja.<br />
50