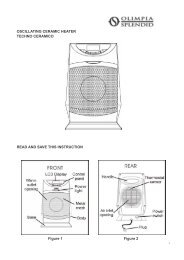
SK 94 NUOVO - Olimpia Splendid
SK 94 NUOVO - Olimpia Splendid
SK 94 NUOVO - Olimpia Splendid

You also want an ePaper? Increase the reach of your titles
YUMPU automatically turns print PDFs into web optimized ePapers that Google loves.
Istruzioni<br />
per l’installazione,<br />
uso e manutenzione<br />
Instructions<br />
for installation,<br />
use and maintenance<br />
Instructions<br />
pour l’installation,<br />
l’emploi et l’entretien<br />
Instrucciones<br />
para la instalación,<br />
uso y mantenimiento
2<br />
INTRODUZIONE<br />
L'uso di questa nuova apparecchiatura è facile.<br />
Tuttavia,per ottenere i migliori risultati, è<br />
importante leggere attentamente questo libretto<br />
e seguire tutte le istruzioni prima di farla<br />
funzionare per la prima volta. Il libretto fornisce<br />
le indicazioni corrette sull'installazione,<br />
l'uso e la manutenzione, oltre a dare utili consigli.<br />
LA GARANZIA<br />
La nuova apparecchiatura è coperta da garanzia.<br />
Il relativo certificato Lei lo trova qui<br />
allegato. Se dovesse mancare lo richieda al<br />
Rivenditore indicando la data di acquisto, il<br />
modello e il numero di matricola che sono<br />
stampigliati sulla targhetta che identifica l' apparecchiatura.<br />
IMPORTANTE<br />
Per una perfetta installazione e regolazione<br />
è necessario ricorrere ad un installatore qualificato.<br />
La mancata osservanza di questa precauzione<br />
provoca il decadere della garanzia.<br />
INTRODUCTION<br />
This new appliance is easy to use. Nonetheless,<br />
to obtain the best possible results it is important<br />
to read this manual carefully and follow all the<br />
instructions before using the appliance for the<br />
first time. The manual gives instructions for<br />
correct installation, operation and maintenance<br />
of the appliance and provides helpful hints.<br />
WARRANTY<br />
The new appliance is covered by warranty. The<br />
warranty certificate is enclosed. If for any reason<br />
it is missing, contact your dealer, specifying the<br />
date of purchase, model and serial number,<br />
which are marked on the appliance identification<br />
plate.<br />
IMPORTANT<br />
Call a qualified installation technician for correct<br />
installation. This is an essential condition for the<br />
validity of the warranty.<br />
INTRODUCTION<br />
Ce nouvel appareil est facile à utiliser. Toutefois,<br />
pour obtenir les meilleurs résultats, il est<br />
important de lire attentivement le présent livret<br />
et de suivre attentivement toutes les instructions<br />
avant de le faire fonctionner pour la première<br />
fois. Le livret fournit les indications correctes sur<br />
l’installation, l’usage et l’entretien ainsi que des<br />
conseils utiles.<br />
LA GARANTIE<br />
Le nouvel appareil est couvert par la garantie.<br />
Le certificat est joint en annexe. S’il devait faire<br />
défaut, demandez-le au revendeur en indiquant<br />
la date d’achat, le modèle et le numéro de série<br />
qui sont estampillés sur la plaquette<br />
d’identification de l’appareil.<br />
IMPORTANT<br />
Pour une installation et un réglage parfaits, il est<br />
nécessaire de faire appel à un technicien qualifié.<br />
Le non-respect de cette précaution entraîne<br />
l’annulation de la garantie.<br />
INTRODUCCION<br />
Este nuevo aparato es sumamente fácil de<br />
usar. Para obtener mejores resultados, es<br />
importante leer el presente manual y seguir<br />
todas las instrucciones antes de ponerlo en<br />
funcionamiento por primera vez. El manual<br />
proporciona las indicaciones necesarias para<br />
la instalación, uso y mantenimiento, así como<br />
útiles consejos.<br />
GARANTIA<br />
El nuevo aparato está cubierto por garantía,<br />
cuyo certificado adjuntamos al presente<br />
manual. Si no lo encontrara, solicítelo al<br />
Revendedor, indicando la fecha de compra, el<br />
modelo y el número de matrícula que se<br />
hallan impresos en la placa de datos del<br />
aparato.<br />
IMPORTANTE<br />
Para una perfecta instalación y regulación<br />
diríjanse a un instalador cualificado, el no<br />
cumplimiento de esta precaución anula<br />
inmediatamente la garantía.
3<br />
ISTRUZIONI PER L'INSTALLATORE<br />
INSTRUCTIONS FOR INSTALLATION<br />
TECHNICIAN<br />
INSTRUCTIONS POUR L’INSTALLATEUR<br />
INSTRUCCIONES PARA EL INSTALADOR<br />
ATTENZIONE<br />
Durante il funzionamento tutte le parti dell'apparecchio<br />
devono essere considerate parti<br />
attive che raggiungono elevate temperature.<br />
E' opportuno che i bambini o gli inabili non si<br />
avvicinino alla stufa.<br />
In caso ciò non sia possibile, prevedere uno<br />
schermo fisso davanti all'apparecchio.<br />
WARNING<br />
During operation all parts of the appliance must<br />
be considered active parts which reach high<br />
temperatures. Children or disabled people should<br />
not come near the stove.<br />
If this cannot be prevented, install a fixed guard<br />
in front of the appliance.<br />
ATTENTION<br />
Pendant le fonctionnement, toutes les parties<br />
de l’appareil doivent être considérées comme<br />
des parties actives atteignant des températures<br />
élevées. Les enfants et les handicapés ne doivent<br />
pas s’approcher du poêle.<br />
Si cela n’est pas possible, prévoir un écran fixe<br />
devant l’appareil.<br />
ATENCION<br />
Durante el funcionamiento todas las partes<br />
del aparato deben considerarse partes activas<br />
que alcanzan elevadas temperaturas. Es conveniente<br />
que los niños o incapacitados no se<br />
acerquen a la estufa.<br />
Si esto no fuera posible, coloquen una pantalla<br />
de protección fija delante del aparato.<br />
POSIZIONE DELL'APPARECCHIO<br />
Collocare la stufa in una posizione tale che<br />
l'aria vi possa circolare liberamente attorno e<br />
riscaldarsi:lasciare tra le pareti e la stufa uno<br />
spazio di almeno 20 cm.<br />
POSITION OF THE APPLIANCE<br />
Install the appliance in a position that allows air<br />
to circulate freely around it and be heated.<br />
Leave a space of at least 20 cm between the wall<br />
and the stove.<br />
POSITION DE L’APPAREIL<br />
Placer le poêle de manière à ce que l’air puisse<br />
circuler librement autour et se réchauffer:<br />
ménager entre les murs et le poêle un espace<br />
d’au moins 20 cm.<br />
POSICION DEL APARATO<br />
Coloquen la estufa en una posición tal que el<br />
aire pueda circular libremente alrededor y<br />
calentarse: dejen entre las paredes y la estufa<br />
un espacio de por lo menos 20 cm.<br />
Evitare di inserirla nelle nicchie esistenti nelle<br />
pareti. Il locale dove viene installata la stufa<br />
deve essere sufficientemente ventilato (norma<br />
UNICIG 7129 E 7131).<br />
Do not install it in recesses in walls. The room in<br />
which the stove is installed must be adequately<br />
ventilated (standards UNICIG 7129 and 7131).<br />
Eviter de l’installer dans des niches creusées<br />
dans les murs. La pièce où est installé le poêle<br />
doit être suffisamment ventilée (norme UNICIG<br />
7129 E 7131).<br />
Eviten colocarla en las cavidades existentes<br />
en las paredes. El local donde se instala la<br />
estufa debe estar suficientemente ventilado<br />
(norma UNICIG 7129 E 7131).<br />
AVVERTENZA<br />
Le pareti ed il pavimento adiacenti devono resistere<br />
ad aumenti di temperatura di circa 80 °C.<br />
La spina deve essere accessibile dopo il posizionamento<br />
dell’apparecchio.<br />
IMPORTANT<br />
The adjacent walls and floor must be able to<br />
withstand a temperature increase of about 80°C.<br />
The plug must be accessible after the appliance<br />
has been positioned.<br />
MISE EN GARDE<br />
Les murs et le sol adjacents doivent pouvoir<br />
résister à des hausses de température d’environ<br />
80°C. La fiche doit être accessible après le<br />
positionnement de l’appareil.<br />
ADVERTENCIA<br />
Las paredes y el pavimento adyacentes deben<br />
resistir a aumentos de temperatura de unos<br />
80°C. Una vez posicionado el aparato, debe<br />
poderse acceder a la clavija.
4<br />
Anello superiore<br />
Upper ring<br />
Anneau supérieur<br />
Anillo superior<br />
Tegolo bruciatore<br />
Flame lowering device<br />
Bec du brûleur<br />
Teja quemador<br />
Anello inferiore<br />
Inferior ring<br />
Anneau inférieur<br />
Anillo inferior<br />
Fig. 1<br />
MESSA IN OPERA<br />
Preparazione stufa:<br />
Sistemare all'interno della camera di combustione<br />
gli anelli bruciatore sopra agli appositi<br />
supporti come in fig. 1.<br />
Posizionare il tegolo bruciatore nelle apposite<br />
sedi dell'anello superiore. La stufa dovrà<br />
essere installata in posizione favorevole onde<br />
permettere la migliore diffusione del calore.<br />
INSTALLATION<br />
Preparing the stove:<br />
Position the burner rings on their supports in the<br />
combustion chamber as shown in fig. 1.<br />
Position the flame lowering device in its seat in<br />
the upper ring. The stove must be installed in a<br />
suitable position to promote maximum heat<br />
diffusion.<br />
MISE EN OEUVRE<br />
Préparation du poêle:<br />
placer à l’intérieur de la chambre de combustion<br />
les anneaux du brûleur sur les supports prévus<br />
à cet effet comme cela est indiqué en fig. 1.<br />
Placer le bec du brûleur dans les encoches de<br />
l’anneau supérieur. Le poêle devra être installé<br />
en position favorable pour permettre la meilleure<br />
diffusion de la chaleur.<br />
COLOCACION<br />
Preparación de la estufa:<br />
Coloquen en el interior de la cámara de<br />
combustión los anillos del quemador sobre<br />
los adecuados soportes, como indica la fig. 1.<br />
Posicionen la teja del quemador en los<br />
adecuados alojamientos del anillo superior. La<br />
estufa deberá ser instalada en posición favorable<br />
a fin de permitir la mejor difusión del calor.<br />
VERIFICA TIRAGGIO<br />
Il tiraggio minimo richiesto per una perfetta<br />
combustione del kerosene o gasolio a regime<br />
massimo della stufa è di mm 1,5/2 di colonna<br />
d'acqua di depressione misurabile con<br />
apposito strumento inserito nel foro del coperchio<br />
camera combustione (fig. 2).<br />
E' indispensabile pertanto che l'installatore disponga<br />
di strumento di misurazione del tiraggio.<br />
CHECKING DRAUGHT<br />
The minimum draught required for perfect<br />
combustion of kerosene or gas oil at maximum<br />
stove power is a pressure drop of 1.5-2 mm<br />
H2O, which can be measured using a special<br />
instrument inserted through the hole in the<br />
combustion chamber cover (fig. 2).<br />
It is therefore essential for the installation<br />
technician to have a draught measuring<br />
instrument.<br />
VERIFICATION DU TIRAGE<br />
Le tirage minimum requis pour une parfaite<br />
combustion du kérosène ou du gasoil au régime<br />
maximum du poêle et de 1,5/2 mm de colonne<br />
d’eau de dépression mesurable au moyen de<br />
l’instrument spécial inséré dans l’orifice du<br />
couvercle de la chambre de combustion (fig. 2).<br />
Il est par conséquent indispensable que<br />
l’installateur dispose d’un instrument de mesure<br />
du tirage.<br />
VERIFICACION DEL TIRO<br />
El tiro mínimo requerido para una perfecta<br />
combustión del queroseno o gasóleo a<br />
régimen máximo de la estufa es de 1,5/2 mm.<br />
de columna de agua de depresión, que puede<br />
medirse con el instrumento destinado a tal fin<br />
colocado en el orificio de la tapa de la cámara<br />
de combustión (fig. 2).<br />
Por lo tanto, es indispensable que el instalador<br />
disponga del instrumento de medición del tiro.
5<br />
RACCORDO AL CAMINO<br />
Collegare la stufa alla canna fumaria tramite<br />
tubi in lamiera del tipo comune da fumisteria,<br />
aventi un diametro di 120 mm.<br />
Curare la perfetta tenuta degli innesti e delle<br />
giunture. E' opportuno evitare i tratti orizzontali;<br />
dare sempre una pendenza in salita almeno<br />
del 10%.<br />
Limitare il più possibile i gomiti; attenersi in<br />
ogni caso a quanto prescritto dalle norme<br />
UNICIG 7129 e 7131.<br />
La canna fumaria dovrà presentarsi in ottime<br />
condizioni; possibilmente fornita di cappa<br />
antivento.<br />
CONNECTION TO THE FLUE<br />
Connect the stove to the flue using normal 120<br />
mm diameter steel tubes designed for this<br />
purpose. Make sure that the joints and<br />
connections are perfectly sealed. Do not install<br />
pipes horizontally but sloping upwards by at<br />
least 10%.<br />
Use elbows as little as possible. In any case<br />
observe the provisions of UNICIG 7129 and<br />
7131 standards.<br />
The flue must be in perfect condition and<br />
preferably fitted with a wind hood.<br />
RACCORDEMENT A LA CHEMINE<br />
Raccorder le poêle au carneau au moyen de<br />
tuyaux en tôle de type courant d’un diamètre de<br />
120 mm. Veiller à ce que les embrayages et les<br />
jointures soient parfaitement étanches. Il<br />
convient d’éviter les tronçons horizontaux,<br />
l’inclinaison en montée doit toujours être d’au<br />
moins 10%.<br />
Limiter le plus possible les coudes et s’en tenir<br />
dans tous les cas aux prescriptions des normes<br />
UNICIG 7129 et 7131.<br />
Le carneau devra être en parfait état et si possible<br />
équipé d’un dispositif anti-vent.<br />
CONEXION A LA CHIMENEA<br />
Conecten la estufa al conducto de humo por<br />
medio de los tubos de chapa del tipo común<br />
para estos conductos, con un diámetro de<br />
120 mm. Verifiquen que las conexiones y las<br />
juntas estén perfectamente acopladas. Es<br />
conveniente evitar los tramos horizontales,<br />
dejen siempre una inclinación de subida como<br />
mínimo del 10%.<br />
Limiten lo máximo posible los codos:<br />
aténganse siempre a las prescripciones de<br />
las normas UNICIG 7129 y 7131.<br />
El conducto de humo deberá estar en óptimas<br />
condiciones; posiblemente provisto de campana<br />
anti-viento.<br />
ACCENSIONE BRUCIATORE<br />
1) Prima di innestare la spina nella presa di<br />
corrente, aprire la portina (seguendo le<br />
istruzioni di fig. 4) e spingere verso il basso<br />
la leva di sicurezza valvola (fig. 3).<br />
2) Richiudere la portina (sempre seguendo<br />
le istruzioni di fig. 4) ed innestare la spina<br />
alla presa di corrente (220 volt).<br />
3) Togliere il tappo serbatoio (fig. 2), effettuare<br />
il caricamento combustibile e procedere<br />
nel modo seguente:<br />
4) Ruotare la manopola rubinetto serbatoio<br />
(fig. 2) nel senso della freccia rivolta verso<br />
la dicitura "aperto".<br />
5) Portare la manopola comando sulla posizione<br />
Accensione ( ) e attendere almeno<br />
2 minuti. La lampada spia si accenderà<br />
indicando che la candeletta è in funzione.<br />
6) Portare la manopola comando (fig. 2) sulla<br />
posizione 1 e attendere almeno 10 minuti.<br />
7) Acceso il bruciatore spostare gradualmente<br />
ad intervalli la manopola comando (fig.<br />
2) sino al raggiungimento della posizione<br />
voluta.<br />
LIGHTING THE BURNER<br />
1) Before inserting the plug in the electrical<br />
power socket, open the door (following the<br />
instructions in fig. 4) and push the valve<br />
safety lever downwards (fig. 3).<br />
2) Close the door (again following the<br />
instructions in fig. 4) and insert the plug in the<br />
power socket (220 V).<br />
3) Take off the fuel tank cap (fig. 2), fill up with<br />
fuel, then proceed as follows:<br />
4) Turn the fuel tank tap handle (fig. 2) in the<br />
direction marked by the arrow with the word<br />
"aperto" (open).<br />
5) Turn the control knob round to the ON position<br />
( ) and wait at least 2 minutes. The<br />
indicator light will turn on meaning that the<br />
igniter plug is working.<br />
6) Turn the control knob (fig. 2) round to position<br />
1 and wait at least 10 minutes.<br />
7) Once the burner has lit, move the control<br />
knob (fig. 2) gradually and at intervals until<br />
the desired position is reached.<br />
ALLUMAGE DU BRULEUR<br />
1) Avant de brancher la fiche dans la prise de<br />
courant, ouvrir le portillon (en suivant les<br />
instructions de la fig. 4) et pousser vers le<br />
bas le levier de sécurité de la soupape (fig.<br />
3).<br />
2) Refermer le portillon (toujours en se<br />
conformant aux instructions de la fig. 4) et<br />
brancher la fiche dans la prise de courant<br />
(220V).<br />
3) Oter le bouchon du réservoir (fig. 2), introduire<br />
le combustible et procéder de la manière<br />
suivante:<br />
4) Tourner la poignée du robinet du réservoir<br />
(fig. 2) dans le sens de la flèche tournée vers<br />
l’inscription “aperto” (ouvert).<br />
5) Placez la manette de commande sur la<br />
position Allumage ( ) et attendez 2 minutes<br />
au moins. Le voyant s’allumera pour signaler<br />
que la bougie est activée.<br />
6) Placez la manette de commande (dessin 2)<br />
sur la position 1 et attendez 10 minutes au<br />
moins.<br />
7) Une fois le brûleur allumé, tourner<br />
graduellement la poignée de commande par<br />
intervalles (fig. 2) jusqu’à atteindre la position<br />
voulue.<br />
ENCENDIDO DEL QUEMADOR<br />
1) Antes de enchufar la clavija en la toma de<br />
corriente, abran la portezuela (siguiendo<br />
las instrucciones de la fig. 4) y empujen<br />
hacia abajo la palanca de seguridad de la<br />
válvula (fig.3).<br />
2) Cierren la portezuela (siempre siguiendo<br />
las instrucciones de la fig. 4) y enchufen la<br />
clavija a la toma de corriente (220 Volt).<br />
3) Quiten el tapón del depósito (fig. 2),<br />
carguen el combustible y realicen las<br />
siguientes operaciones:<br />
4) Giren la manilla del grifo del depósito (fig.<br />
2) en el sentido que indica la flecha,<br />
colocándola hacia la palabra “aperto”<br />
(abierto).<br />
5) Coloquen el botón de mando en posición<br />
de Encendido ( ) y esperen por lo menos<br />
2 minutos. El piloto se encenderá para<br />
indicar que la bujía está en funcionamiento.<br />
6) Coloquen el botón de mando (fig. 2) en la<br />
posición 1 y esperen por lo menos 10<br />
minutos.<br />
7) Una vez encendido el quemador desplacen<br />
gradualmente y a intervalos el botón de<br />
mando (fig. 2) hasta alcanzar la posición<br />
deseada.
6<br />
Manopola rubinetto<br />
Tap handle<br />
Manopola comando<br />
Poignée robinet<br />
Control knob<br />
Manilla grifo<br />
Poignée de commande<br />
Botón de mando<br />
Tappo serbatoio<br />
Fuel tank cap<br />
Couvercle<br />
réservoir<br />
Tapa depósito<br />
Coperchietto<br />
camera combustione<br />
Combustion chamber<br />
cover<br />
Couvercle chambre de<br />
combustion<br />
Tapa cámara de<br />
combustión<br />
Manopola<br />
comando<br />
Control knob<br />
Poignée de<br />
commande<br />
Botón de mando<br />
Iniettore<br />
Injector<br />
Injecteur<br />
Inyector<br />
Leva di sicurezza<br />
Safety lever<br />
Levier de sécurité<br />
Palanca de securidad<br />
Filtro valvola<br />
Valve filter<br />
Filtre soupape<br />
Filtro válvula<br />
Fig. 2 Fig. 3<br />
AVVERTENZA<br />
La lampada spia si spegnerà solo quando la<br />
stufa avrà raggiunto una sufficente temperatura<br />
di funzionamento.<br />
WARNING<br />
The indicator light will only turn off when the<br />
stove has reached an adequate operating temperature.<br />
ATTENTION !<br />
Le voyant s’éteint seulement lorsque la cuisinière<br />
aura atteint une température suffisante de<br />
fonctionnement.<br />
ADVERTENCIA<br />
El piloto se apagará sólo cuando la estufa haya<br />
alcanzado una temperatura suficiente de<br />
funcionamiento.<br />
IMPORTANTE<br />
L'accensione dovrà essere effettuata quando la<br />
stufa è fredda; l'accensione a stufa calda o l'accumulo<br />
di combustibile nel bruciatore camera<br />
di combustione, prima dell'accensione della stufa,<br />
possono provocare gravi incidenti. L'uso di<br />
carta, stracci ed altro non previsto per l'accensione,<br />
provoca dei residui sul fondo della camera<br />
di combustione che causano fuliggine durante<br />
la combustione. Non impiegare altro combustibile<br />
di quello prescritto.<br />
SPEGNIMENTO<br />
1 Portare la manopola comando (fig. 2) in<br />
posizione "O".<br />
2 Ruotare la manopola rubinetto serbatoio<br />
(fig. 2) sino a fine corsa, nel senso della<br />
dicitura "chiuso".<br />
IMPORTANT<br />
The stove must be lit only when it is cold.<br />
Lighting a hot stove or allowing fuel to accumulate<br />
in the combustion chamber burner before<br />
lighting can cause serious accidents. Using<br />
paper, rags or other materials to light the stove<br />
causes residues to deposit on the bottom of the<br />
combustion chamber and generates soot during<br />
combustion. Do not use any other fuel than the<br />
type specified.<br />
TURNING OFF<br />
1) Turn the control knob (fig. 2) to the "O"<br />
position.<br />
2) Turn the fuel tank tap handle (fig. 2) as far as<br />
it will go in the direction of the word "chiuso"<br />
(closed).<br />
IMPORTANT<br />
L’allumage doit être effectué lorsque le poêle est<br />
froid. L’allumage à chaud ou l’accumulation de<br />
combustible dans le brûleur de la chambre de<br />
combustion avant l’allumage du poêle peuvent<br />
provoquer de graves accidents. L’utilisation de<br />
papier, de chiffons et d’autres matériaux non prévus<br />
pour l’allumage provoque des résidus au fond de<br />
la chambre de combustion qui génère de la suie<br />
pendant la combustion. Ne pas utiliser d’autres<br />
combustibles que celui prescrit.<br />
EXTINCTION<br />
1) Mettre la poignée de commande (fig. 2) en<br />
position “0”.<br />
2) Tourner la poignée du robinet du réservoir (fig.<br />
2) jusqu’en fin de course, dans le sens de<br />
l’inscription “chiuso” (fermé).<br />
IMPORTANTE<br />
El encendido deberá efectuarse cuando la<br />
estufa está fría, el encendido con la estufa<br />
caliente o con acumulación de combustible en<br />
el quemador cámara de combustión, antes del<br />
encendido de la estufa, pueden provocar graves<br />
accidentes. El uso del papel, trapos u otro<br />
material no previsto para el encendido, crea<br />
residuos en el fondo de la cámara de combustión<br />
que causan hollín durante la combustión. No<br />
utilicen otro combustible que no sea el<br />
recomendado.<br />
APAGADO<br />
1) Coloquen el botón de mando (fig.2) en<br />
posición “0”.<br />
2) Giren la manilla del grifo del depósito (fig.2)<br />
hasta fin de carrera, hacia la palabra “cerrado”.
7<br />
Fig. 4<br />
MANUTENZIONE<br />
Periodicamente è necessario provvedere alla<br />
pulizia dell'iniettore e del filtro valvola (fig. 3).<br />
Alla fine dell'utilizzo stagionale si consiglia di<br />
riposizionare verso l'alto la leva di<br />
sicurezza,posta sul carburatore (fig. 3).<br />
(Seguendo le istruzioni di fig.4).<br />
Si consiglia altresì tale operazione anche nel<br />
caso di trasporto della stufa.<br />
ATTENZIONE<br />
Per aprire la portina di accesso alle pareti interne<br />
della stufa è neccessario a spina<br />
disinserita dalla rete elettrica, togliere le viti<br />
di bloccaggio posizionate come in figura 4.<br />
Una volta completate le operazioni di pulizia<br />
o manutenzione sulle parti interne, è necessario<br />
bloccare di nuovo la portina reinserendo<br />
le medesime viti.<br />
MAINTENANCE<br />
The injector and the valve filter must be cleaned<br />
periodically (fig. 3). At the end of seasonal use,<br />
the safety lever above the carburettor should be<br />
moved to the up position (fig. 3). (Follow the<br />
instructions shown in fig. 4).<br />
This should also be done if the stove needs to be<br />
transported.<br />
WARNING<br />
To open the access door to interior parts of the<br />
stove, remove the electrical plug from the power<br />
socket, then remove the securing screws shown<br />
in fig. 4.<br />
Once the cleaning or maintenance operations<br />
on internal parts have been completed, lock the<br />
access door again by doing up the screws.<br />
ENTRETIEN<br />
Il est nécessaire, périodiquement, de nettoyer<br />
l’injecteur et le filtre de la soupape (fig. 3). Au<br />
terme de l’utilisation saisonnière, il est conseillé<br />
de remettre vers le haut le levier de sécurité<br />
situé sur le carburateur (fig. 3) en suivant les<br />
instructions de la fig. 4.<br />
Il est également recommandé de procéder ainsi<br />
en cas de transport du poêle.<br />
ATTENTION<br />
Pour ouvrir le portillon d’accès aux parties<br />
internes du poêle, il est nécessaire, une fois la<br />
fiche débranchée de prise de courant, de retirer<br />
les vis de blocage situées comme en fig. 4.<br />
Une fois terminées les opérations de nettoyage<br />
et d'entretien sur les parois internes, bloquer de<br />
nouveau le portillon en remettant les vis.<br />
MANTENIMIENTO<br />
Periódicamente hay que limpiar el inyector y<br />
el filtro de la válvula (fig.3). Al finalizar la<br />
utilización invernal, se aconseja posicionar<br />
hacia arriba la palanca de seguridad, colocada<br />
sobre el carburador (fig.3).<br />
(Siguiendo las instrucciones de fig.4).<br />
También se aconseja realizar dicha operación<br />
en caso de transporte de la estufa.<br />
ATENCION<br />
Para abrir la portezuela de acceso a las<br />
paredes internas de la estufa hay que<br />
desenchufar la clavija de la red eléctrica y<br />
quitar los tornillos de bloqueo posicionados<br />
como muestra la fig. 4.<br />
Una vez completadas las operaciones de<br />
limpieza o mantenimiento de las paredes<br />
internas, es necesario bloquear de nuevo la<br />
portezuela utilizando los mismos tornillos.
8<br />
SCHEMA ELETTRICO <strong>SK</strong> <strong>94</strong> AE<br />
ELECTRICAL DIAGRAM <strong>SK</strong> <strong>94</strong> AE<br />
SCHÉMA ÉLECTRIQUE <strong>SK</strong> <strong>94</strong> AE<br />
ESQUEMA ELECTRICO <strong>SK</strong> <strong>94</strong> AE<br />
CA Candeletta accensione<br />
Ignition spark plug<br />
Bougie allumage<br />
Bujía de encendido<br />
H1 Lampada spia<br />
Lamp<br />
Voyant lumineux<br />
Luz testigo<br />
K1 Klixon accensione<br />
Ignition thermal switch<br />
Klixon allumage<br />
Protector térmico de encendido<br />
S1 Microinterruttore<br />
Microswitch<br />
Micro-interrupteur<br />
Microinterruptor<br />
X1 Morsettiera Alimentazione generale<br />
Terminal board for main power<br />
Bornier alimentation générale<br />
Caja de bornes amimentación general<br />
BL<br />
M<br />
B<br />
Blu<br />
Blue<br />
Bleu<br />
Azul<br />
Marrone<br />
Brown<br />
Marron<br />
Marrón<br />
Bianco<br />
White<br />
Blanc<br />
Blanco<br />
Apparecchio marcato CE<br />
in conformità alla Direttiva<br />
Bassa Tensione 73/23/CEE<br />
e successive modifiche.<br />
Appliance bearing CE<br />
marking in conformity with<br />
Low Tension Directive 73/23/EEC<br />
and subsequent amendments.<br />
Appareil marqué CE<br />
en conformité avec la Directive<br />
Basse Tension 73/23/CEE<br />
et ses modifications successives.<br />
Aparato con marca CE<br />
en conformidad con las Directivas<br />
Baja Tensión 73/23/CEE<br />
y sucesivas madificaciones.<br />
Cod. 271541B - Edizione 7D