p lik o m in i - Peg Perego
p lik o m in i - Peg Perego
p lik o m in i - Peg Perego

You also want an ePaper? Increase the reach of your titles
YUMPU automatically turns print PDFs into web optimized ePapers that Google loves.
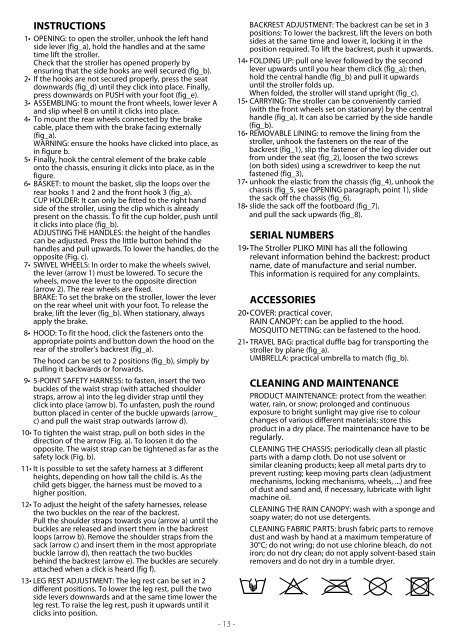
INSTRUCTIONS<br />
1• OPENING: to open the stroller, unhook the left hand<br />
side lever (fig_a), hold the handles and at the same<br />
time lift the stroller.<br />
Check that the stroller has opened properly by<br />
ensur<strong>in</strong>g that the side hooks are well secured (fig_b).<br />
2• If the hooks are not secured properly, press the seat<br />
downwards (fig_d) until they click <strong>in</strong>to place. F<strong>in</strong>ally,<br />
press downwards on PUSH with your foot (fig_e).<br />
3• ASSEMBLING: to mount the front wheels, lower lever A<br />
and slip wheel B on until it clicks <strong>in</strong>to place.<br />
4• To mount the rear wheels connected by the brake<br />
cable, place them with the brake fac<strong>in</strong>g externally<br />
(fig_a).<br />
WARNING: ensure the hooks have clicked <strong>in</strong>to place, as<br />
<strong>in</strong> figure b.<br />
5• F<strong>in</strong>ally, hook the central element of the brake cable<br />
onto the chassis, ensur<strong>in</strong>g it clicks <strong>in</strong>to place, as <strong>in</strong> the<br />
figure.<br />
6• BASKET: to mount the basket, slip the loops over the<br />
rear hooks 1 and 2 and the front hook 3 (fig_a).<br />
CUP HOLDER: It can only be fitted to the right hand<br />
side of the stroller, us<strong>in</strong>g the clip which is already<br />
present on the chassis. To fit the cup holder, push until<br />
it clicks <strong>in</strong>to place (fig_b).<br />
ADJUSTING THE HANDLES: the height of the handles<br />
can be adjusted. Press the little button beh<strong>in</strong>d the<br />
handles and pull upwards. To lower the handles, do the<br />
opposite (Fig. c).<br />
7• SWIVEL WHEELS: In order to make the wheels swivel,<br />
the lever (arrow 1) must be lowered. To secure the<br />
wheels, move the lever to the opposite direction<br />
(arrow 2). The rear wheels are fixed.<br />
BRAKE: To set the brake on the stroller, lower the lever<br />
on the rear wheel unit with your foot. To release the<br />
brake, lift the lever (fig_b). When stationary, always<br />
apply the brake.<br />
8• HOOD: To fit the hood, click the fasteners onto the<br />
appropriate po<strong>in</strong>ts and button down the hood on the<br />
rear of the stroller’s backrest (fig_a).<br />
The hood can be set to 2 positions (fig_b), simply by<br />
pull<strong>in</strong>g it backwards or forwards.<br />
9• 5-POINT SAFETY HARNESS: to fasten, <strong>in</strong>sert the two<br />
buckles of the waist strap (with attached shoulder<br />
straps, arrow a) <strong>in</strong>to the leg divider strap until they<br />
click <strong>in</strong>to place (arrow b). To unfasten, push the round<br />
button placed <strong>in</strong> center of the buckle upwards (arrow_<br />
c) and pull the waist strap outwards (arrow d).<br />
10• To tighten the waist strap, pull on both sides <strong>in</strong> the<br />
direction of the arrow (Fig. a). To loosen it do the<br />
opposite. The waist strap can be tightened as far as the<br />
safety lock (Fig. b).<br />
11• It is possible to set the safety harness at 3 different<br />
heights, depend<strong>in</strong>g on how tall the child is. As the<br />
child gets bigger, the harness must be moved to a<br />
higher position.<br />
12• To adjust the height of the safety harnesses, release<br />
the two buckles on the rear of the backrest.<br />
Pull the shoulder straps towards you (arrow a) until the<br />
buckles are released and <strong>in</strong>sert them <strong>in</strong> the backrest<br />
loops (arrow b). Remove the shoulder straps from the<br />
sack (arrow c) and <strong>in</strong>sert them <strong>in</strong> the most appropriate<br />
buckle (arrow d), then reattach the two buckles<br />
beh<strong>in</strong>d the backrest (arrow e). The buckles are securely<br />
attached when a click is heard (fig f).<br />
13• LEG REST ADJUSTMENT: The leg rest can be set <strong>in</strong> 2<br />
different positions. To lower the leg rest, pull the two<br />
side levers downwards and at the same time lower the<br />
leg rest. To raise the leg rest, push it upwards until it<br />
clicks <strong>in</strong>to position.<br />
- 13 -<br />
BACKREST ADJUSTMENT: The backrest can be set <strong>in</strong> 3<br />
positions: To lower the backrest, lift the levers on both<br />
sides at the same time and lower it, lock<strong>in</strong>g it <strong>in</strong> the<br />
position required. To lift the backrest, push it upwards.<br />
14• FOLDING UP: pull one lever followed by the second<br />
lever upwards until you hear them click (fig_a); then,<br />
hold the central handle (fig_b) and pull it upwards<br />
until the stroller folds up.<br />
When folded, the stroller will stand upright (fig_c).<br />
15• CARRYING: The stroller can be conveniently carried<br />
(with the front wheels set on stationary) by the central<br />
handle (fig_a). It can also be carried by the side handle<br />
(fig_b).<br />
16• REMOVABLE LINING: to remove the l<strong>in</strong><strong>in</strong>g from the<br />
stroller, unhook the fasteners on the rear of the<br />
backrest (fig_1), slip the fastener of the leg divider out<br />
from under the seat (fig_2), loosen the two screws<br />
(on both sides) us<strong>in</strong>g a screwdriver to keep the nut<br />
fastened (fig_3),<br />
17• unhook the elastic from the chassis (fig_4), unhook the<br />
chassis (fig_5, see OPENING paragraph, po<strong>in</strong>t 1), slide<br />
the sack off the chassis (fig_6),<br />
18• slide the sack off the footboard (fig_7).<br />
and pull the sack upwards (fig_8).<br />
SERIAL NUMBERS<br />
19• The Stroller PLIKO MINI has all the follow<strong>in</strong>g<br />
relevant <strong>in</strong>formation beh<strong>in</strong>d the backrest: product<br />
name, date of manufacture and serial number.<br />
This <strong>in</strong>formation is required for any compla<strong>in</strong>ts.<br />
ACCESSORIES<br />
20• COVER: practical cover.<br />
RAIN CANOPY: can be applied to the hood.<br />
MOSQUITO NETTING: can be fastened to the hood.<br />
21• TRAVEL BAG: practical duffle bag for transport<strong>in</strong>g the<br />
stroller by plane (fig_a).<br />
UMBRELLA: practical umbrella to match (fig_b).<br />
CLEANING AND MAINTENANCE<br />
PRODUCT MAINTENANCE: protect from the weather:<br />
water, ra<strong>in</strong>, or snow; prolonged and cont<strong>in</strong>uous<br />
exposure to bright sunlight may give rise to colour<br />
changes of various different materials; store this<br />
product <strong>in</strong> a dry place. The ma<strong>in</strong>tenance have to be<br />
regularly.<br />
CLEANING THE CHASSIS: periodically clean all plastic<br />
parts with a damp cloth. Do not use solvent or<br />
similar clean<strong>in</strong>g products; keep all metal parts dry to<br />
prevent rust<strong>in</strong>g; keep mov<strong>in</strong>g parts clean (adjustment<br />
mechanisms, lock<strong>in</strong>g mechanisms, wheels, ...) and free<br />
of dust and sand and, if necessary, lubricate with light<br />
mach<strong>in</strong>e oil.<br />
CLEANING THE RAIN CANOPY: wash with a sponge and<br />
soapy water; do not use detergents.<br />
CLEANING FABRIC PARTS: brush fabric parts to remove<br />
dust and wash by hand at a maximum temperature of<br />
30°C; do not wr<strong>in</strong>g; do not use chlor<strong>in</strong>e bleach, do not<br />
iron; do not dry clean; do not apply solvent-based sta<strong>in</strong><br />
removers and do not dry <strong>in</strong> a tumble dryer.