Create successful ePaper yourself
Turn your PDF publications into a flip-book with our unique Google optimized e-Paper software.
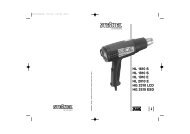
Set dimming level of your choice:<br />
- Hold button down until LED flashes.<br />
- Keep button pressed, the system will slowly run<br />
through dimmer range from 0 – 50%.<br />
- Release button when chosen setting is reached.<br />
The LED will now continue flashing for about 5 sec.<br />
This period may be used for optimising the dimmer<br />
setting.<br />
Manual override function <br />
If a mains switch is installed in the mains supply lead,<br />
the SensorLight provides the following functions in<br />
addition to just being able to switch it ON and OFF:<br />
Sensor operation<br />
1) Switch light ON:<br />
Turn switch OFF and ON once.<br />
Light stays ON for the period selected.<br />
2) Switch light OFF:<br />
Turn switch OFF and ON once.<br />
The light goes out or switches over to sensor mode.<br />
Manual override<br />
1) Activate manual override:<br />
Turn switch OFF and ON twice. The light is set to stay<br />
ON for 4 hours (red LED lights up). Then it returns<br />
automatically to sensor mode (red LED OFF).<br />
2) Deactivate manual override:<br />
Turn switch OFF and ON once. The light goes out or<br />
switches over to sensor mode.<br />
Important:<br />
The switch should be actuated in rapid succession<br />
(in the 0.5 – 1 sec. range).<br />
Reset function<br />
The light can be returned to its original settings at any<br />
time (daylight operation 2000 lux, 'ON' time 10 sec.<br />
and dimmer OFF).<br />
To do this, hold all three buttons down at the same<br />
time until the LED comes ON and goes out again<br />
(approx. 5 sec.).<br />
Soft light start<br />
The SensorLight comes ON with a soft light start<br />
function. This means that when the light is switched<br />
ON, it does not go directly to maximum output but<br />
gradually increases brightness to 100% over the<br />
space of one second. Brightness is also gradually<br />
reduced when the light is switched OFF.<br />
Basic reach setting <br />
The sensor lens is divided into two detection zones.<br />
One half provides a max. reach of 5 m, the other half<br />
a max. reach of 12 m (when installed at a height of<br />
approx. 2 m). After fitting the lens (firmly clip lens into<br />
the groove provided), a small arrow marks the max.<br />
- 10 -<br />
reach of 12 m or 5 m selected (arrow left = 5 metres,<br />
arrow right = 12 metres).<br />
Using a screwdriver, the lens can be unclipped from<br />
the groove at the side and re-positioned for the reach<br />
you require.<br />
Precision adjustment<br />
using shrouds <br />
Shrouds may be used to define the detection zone<br />
exactly as you require in order, for example, to blank<br />
out or specifically target paths or neighbouring premises.<br />
The shrouds can be divided or cut with a pair of<br />
scissors along the vertical and horizontal grooves.<br />
They can be clipped into the top channel around the<br />
centre of the lens. They are held securely in place by<br />
fitting the cover .<br />
(Fig. shows examples of how you can reduce the<br />
angle of coverage and shorten reach.)<br />
Operation / Maintenance<br />
The SensorLight is suitable for switching light ON<br />
automatically. Weather conditions may affect the way<br />
the SensorLight works. Strong gusts of wind, snow,<br />
rain or hail may cause the light to come ON when it is<br />
not wanted because the sensor is unable to distinguish<br />
sudden changes in temperature from sources<br />
of heat. The detector lens may be cleaned with a<br />
damp cloth if it gets dirty (do not use cleaning<br />
agents).<br />
Caution:<br />
Stainless steel should be cleaned at regular intervals<br />
(about every 3 months) with a standard stainless steel<br />
cleaner. If it is not cleaned, corrosion may occur on the<br />
surface (flash rust).<br />
Declaration of conformity<br />
This product complies with the European Directive<br />
on Low-Voltage Appliances, 2006/95/EC and the<br />
EMC Directive 2004/108/EC.<br />
Troubleshooting<br />
Malfunction<br />
SensorLight without power<br />
SensorLight will not switch ON<br />
SensorLight will not switch OFF<br />
SensorLight switches ON when it<br />
should not<br />
SensorLight reach changed<br />
LED ON all the time although<br />
man ual override is not selected<br />
Functional Warranty<br />
■ Fuse faulty, not switched ON,<br />
break in wiring<br />
■ Short circuit<br />
This STEINEL product has been manufactured with<br />
utmost care, tested for proper operation and safety<br />
and then subjected to random sample inspection.<br />
STEINEL guarantees that it is in perfect condition and<br />
proper working order.<br />
The warranty period is 36 months, starting on the date<br />
of sale to the consumer. We will remedy defects caused<br />
by material flaws or manufacturing faults. The<br />
guarantee will be met by repair or replacement of defective<br />
parts at our own discretion. The warranty shall<br />
not cover damage to wear parts, damage or defects<br />
caused by improper treatment or maintenance.<br />
Further consequential damage to other objects shall<br />
be excluded.<br />
Cause Remedy<br />
■ Twilight setting in night-time<br />
mode during daytime operation<br />
■ Bulb faulty<br />
■ Power switch OFF<br />
■ Fuse faulty<br />
■ Detection zone not properly<br />
targeted<br />
■ Internal electrical fuse has been<br />
activated (LED ON all the time)<br />
■ Continued movement within the<br />
detection zone<br />
■ Brightness control to 100%<br />
■ Wind is moving trees and<br />
bushes in the detection zone<br />
■ Cars in the street are being<br />
detected<br />
■ Sunlight shining on the lens<br />
■ Sudden temperature changes<br />
due to weather (wind, rain,<br />
snow) or air expelled from fans,<br />
open windows<br />
■ Lens not pressed firmly enough<br />
into groove<br />
- 11 -<br />
■ Fit new fuse; switch ON mains<br />
switch; check wiring with voltage<br />
tester<br />
■ Check connections<br />
■ Reset (button )<br />
■ Change bulb<br />
■ Switch ON<br />
■ New fuse, check connection<br />
if necessary<br />
■ Re-adjust<br />
■ Switch SensorLight OFF and<br />
back ON again after 5 sec.<br />
■ Check detection zone and<br />
re-adjust if necessary<br />
■ Set brightness control to 0%<br />
(button )<br />
■ Change detection zone<br />
■ Change detection zone<br />
■ Mount sensor in a sheltered<br />
place or change detection zone<br />
■ Change detection zone, change<br />
site of installation<br />
■ Press lens into groove<br />
■ Differing ambient temperatures ■ Use shrouds to define detection<br />
zone precisely<br />
■ Internal fuse activated ■ Switch SensorLight OFF and<br />
back ON again after 5 sec.<br />
Claims under the warranty will only be accepted if the<br />
unit is sent fully assembled and well packed with a<br />
brief description of the fault, a receipt or invoice (date<br />
of purchase and dealer's stamp) to the appropriate<br />
Service Centre.<br />
Repair Service:<br />
Our Customer Service Department<br />
will repair faults not covered by warranty<br />
or after the warranty period.<br />
Please send the product well packed<br />
to your nearest Service Centre.<br />
GB