

Manuale Istruzioni Barbecue MagiKo a GAS Manual ... - Foker srl
Manuale Istruzioni Barbecue MagiKo a GAS Manual ... - Foker srl
Manuale Istruzioni Barbecue MagiKo a GAS Manual ... - Foker srl

You also want an ePaper? Increase the reach of your titles
YUMPU automatically turns print PDFs into web optimized ePapers that Google loves.
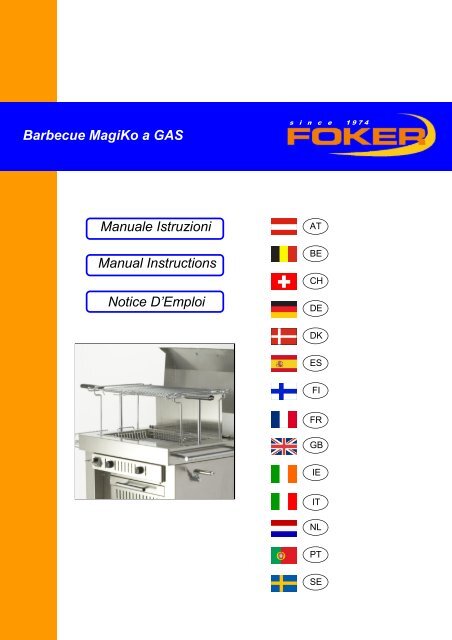
<strong>Barbecue</strong> <strong>MagiKo</strong> a <strong>GAS</strong>s i n c e 1 9 7 4<strong><strong>Manual</strong>e</strong> <strong>Istruzioni</strong><strong>Manual</strong> InstructionsNotice D’EmploiATBECHDEDKESFIFRGBIEITNLPTSE
COD.34186/<strong>GAS</strong>LIBRETTO ISTRUZIONIBARBECUES A <strong>GAS</strong>MOD. <strong>MagiKo</strong>Art.02952MOD. <strong>MagiKo</strong>Art.02953FOKER SRLVia Rassega,125030 TORBOLE CASAGLIA (BS) - ITALY
ITCHITALIANOAVVERTENZE PER L’INSTALLAZIONE, L’UTILIZZO E LA MANUTENZIONEBARBECUES A <strong>GAS</strong> CAT.I3+IMPORTANTE: Consultare le istruzioni prima dell’uso. Per una corretta installazione ed un uso appropriato dell’apparecchio e dei suoi componenti, vedere anchegli allegati A1 e A2 con disegni e figure.APPARECCHIO DA UTILIZZARE SOLO ALL’APERTO in assenza di fiamme e di superfici molto calde; l’aria necessaria per la combustione è di 2 m³/h per ogni kW dipotenza termica nominale installata. Gli apparecchi funzionano a gas BUTANO o a gas PROPANO, con riduttore di pressione normalizzato a 30 mbar per ilbutano e a 37 mbar per il propano.L’apparecchio deve essere posizionato su un piano orizzontale e sicuro, lontano da materiali infiammabili e almeno a 25 cm da pareti adiacenti.La bombola deve essere posizionata verticale e protetta contro il ribaltamento accidentale. Proteggere la bombola dai raggi diretti del sole. La bombola non è daconservare ne in casa ne in posti ove non ci sia ricambio d’aria. La bombola conservata all’aperto deve essere protetta in modo da evitare che i bambini lapossano manipolare. Chiudere l’alimentazione del gas alla bombola dopo l’uso.ATTENZIONE: ALCUNE PARTI ACCESSIBILI POSSONO ESSERE MOLTO CALDE! UTILIZZARE GUANTI PROTETTIVI!ALLONTANARE I BAMBINI E GLI ANIMALI DOMESTICI! NON SPOSTARE L’APPARECCHIO QUANDO FUNZIONA O QUANDO E’ ANCORA CALDO!ALLACCIAMENTO ( vedi Figura 1)Per l’allacciamento alla bombola è necessario disporre di:- Bombola da 3 a 13 Kg di contenuto (B).- Regolatore di pressione con taratura fissa; pressione di funzionamento: 30/37 mbar (R).- Tubo di gomma di lunghezza adeguata (MAX 1,5 m.), rispondente alle norme nazionali UNI-CIG 7140, montato senza pieghe per assicurare che non siasottoposto a sforzo di torsione (T). Il tubo di gomma deve essere sostituito alla data di scadenza riportata sul tubo stesso.- Spray cercafughe oppure altro mezzo schiumogeno adeguato (es: acqua saponata).PROCEDIMENTO1) Prima di effettuare l’allacciamento verificare che i rubinetti del barbecue siano chiusi.2) Chiudere il rubinetto del regolatore di pressione o della bombola.3) Raccordare il tubo al regolatore ed all’attacco dell’apparecchio.4) Bloccare il tubo stesso alle due estremità con fascette stringitubo.5) Dopo l’allacciamento deve essere effettuata una verifica di tenuta: usare per tale scopo spray cercafughe oppure una soluzione d’acqua saponata, passando igiunti; il comparire di bolle indica probabili perdite di gas: in caso di fuga (odore di gas), chiudere immediatamente l’alimentazione del gas.NON USARE FIAMME PER LA VERIFICA DI TENUTA!NOTA: la sostituzione del recipiente di gas deve essere effettuata lontano da qualsiasi fonte di calore. La bombola vuota va chiusa e conservata in un postoadeguato fino alla riconsegna al venditore gas.ATTENZIONE: Vi consigliamo di verificare che l’installazione del vostro apparecchio sia stata fatta correttamente. In tutti gli apparecchi, la regolazione dell’ariaprimaria viene effettuata, secondo le normative, in fase di collaudo: E’ ASSOLUTAMENTE VIETATO MANIPOLARE O RIMUOVERE TALI DISPOSITIVI.POSIZIONE DELLA MANOPOLA: La manopola si trova sempre di fronte al bruciatore corrispondente.ACCENSIONE : Premere e girare la manopola verso sinistra e contemporaneamente premere il pulsante (P) negli apparecchi provvisti di accensione piezo,oppure avvicinare una fiamma al bruciatore ed il gas che esce si infiamma (Figura 2); vedi in Figura 3 posizione rubinetto chiuso , posizione di MASSIMO(fiamma grande) e posizione di minimo (fiamma piccola). Inserire nell’apposito contenitore (GR), posto sopra al bruciatore acceso, circa 3,5 Kg di roccevulcaniche per barbecue (Figura 7/8). Cenere e residui di cottura potranno cadere nell’apposito cassetto raccoglitore sottostante con maniglia (M2), che deveessere riempito con circa 1,5 litri d’acqua, prima di iniziare la cottura (Figura 12).SPEGNIMENTO : Girare completamente la manopola verso destra.CONSIGLI PRATICILa griglia di cottura (G) deve essere inserita negli appositi supporti laterali (SG) inclinandola leggermente (Figura 6).A seconda della cottura desiderata, è possibile regolare l’altezza della griglia, rispetto al contenitore delle braci, grazie ad un esclusivo meccanismo azionatomanualmente dalla manovella laterale (MG)(Figura 5): l’apertura della manovella si ottiene facendola semplicemente ruotare verso l’esterno; per la chiusurabisogna invece premere, per comprimere la molla, e ruotarla verso l’interno. Per azionare il meccanismo sali-scendi della griglia di cottura, bisogna tirare etrattenere la manovella verso l’esterno e quindi farla ruotare (in senso orario per la salita e in senso antiorario per la discesa): una volta raggiunta l’altezzadesiderata, rilasciare la manovella che si bloccherà nuovamente contro la parete del barbecue quando il perno dell’albero di rotazione si inserisce in uno deiquattro fori ricavati nella fiancata opposta (Figura 10). E’ possibile anche ribaltare facilmente la griglia di cottura impugnando con entrambe le mani le manopolelaterali e facendola scorrere nelle apposite guide dei supporti laterali (Figura 9).Nelle versioni senza coperchio (Art.02952), alle estremità posteriori dei supporti laterali è applicata una parete paravento (PV) che protegge la grigliata daeventuali raffiche di vento, limitandone il fumo ed il propagarsi di schizzi e scintille. Nelle versioni senza paravento (Art.02953), le stesse funzioni di protezione sipossono ottenere con il coperchio (aperto, in posizione verticale); quando invece, dopo aver cotto il cibo sulla griglia si vuole mantenerlo caldo sino al momentodi servirlo, coprire la grigliata con il coperchio (chiuso, in posizione orizzontale).Per spostare l’apparecchio usare sempre la maniglia (M3) prevista per tale scopo (Figura 4). Opposto alla maniglia di trasporto (M3) e alla manovella laterale(MG) è possibile utilizzare un comodo piano d’appoggio laterale (L) per alimenti ed accessori: l’apertura del piano si ottiene facendolo semplicemente ruotareverso l’alto fino a quando i suoi due sostegni laterali (SL) scattano e si bloccano nelle sedi delle guide ricavate sulla fiancata del barbecue; per richiudere il pianod’appoggio bisogna premere verso l’interno i suoi due sostegni laterali in prossimità delle curve e farlo ruotare verso il basso (Figura 11).MANUTENZIONEControllare con regolarità le condizioni dei tubi di gomma e, se necessario, cambiarli prima della scadenza.Per conservare a lungo il vostro apparecchio è necessaria una manutenzione costante. La pulizia deve essere fatta ad apparecchio freddo, con acqua saponata odetersivi non abrasivi. Dopo la pulizia controllare sempre che i fori di uscita del gas non siano otturati; fare attenzione che l’acqua e il detersivo non entrino nelbruciatore: in caso di ostruzione del tubo venturi del bruciatore o del foro dell’iniettore, occorre soffiare con aria in pressione.Nel caso di un prolungato non utilizzo dell’apparecchio, pulirlo accuratamente, ricoprirlo possibilmente con un telo impermeabile e conservarlo in locali benventilati, privi di umidità e agenti corrosivi.ATTENZIONE: Quando l’apertura o la chiusura del rubinetto diviene difficile, non forzare ma chiamare d’urgenza l’assistenza tecnica.NON MODIFICARE L’APPARECCHIO!: ogni tipo di modifica può rivelarsi pericolosa. Riparazioni e manutenzioni sono da eseguirsi esclusivamente da personaleautorizzato. Il fabbricante declina ogni responsabilità per i danni causati da una errata installazione o da un utilizzo non corretto dell’apparecchio.DATI TECNICI:MOD. <strong>MagiKo</strong> Art.02952 - Art.02953CAT.I3+ Gas: Butano(G30)/(G31)Propano Pressione: 30/37 mbarPotenza termica nominale: 5,35x2=10,7 kW Consumo: 390x2=780g/h Ø Iniettori: 1,15mm
GBIEENGLISHINSTALLATION, USE AND MAINTENANCE INSTRUCTIONS<strong>GAS</strong> BARBECUES, CAT. I3+IMPORTANT: Read the instructions before using the appliance. See also enclosure A1 and enclosure A2 for the correct installation and use of the barbecue and ofits components. These enclosures contain drawings and pictures.THIS BARBECUE MUST BE USED ONLY IN OPEN SPACES away from flames and hot surfaces; the air quantity needed for correct combustion is 2m³/h foreach kW of nominal thermal capacity installed. The appliances work on BUTANE or PROPANE <strong>GAS</strong> SUPPLY, with the pressure regulator fixed to 28 mbar forbutane and to 37 mbar for propane.It must be placed on a horizontal and stable surface, away from inflammable materials, at a distance of at last 25 cm from walls.The gas bottle must be placed in a vertical position and be protected from accidental overturning. Protect the gas bottle from exposure to direct sunlight. Donot keep the gas bottle indoors or in places without ventilation. Keeping your gas bottle outdoors you should provide adequate protection and place it out ofreach of any children who may manipulate it dangerously. Turn off the gas supply at the gas container after use.ATTENTION: SOME OF THE ACCESSIBLE PARTS CAN BE VERY HOT! USE PROTECTIVE GLOVES!KEEP CHILDREN AND PETS AWAY FROM THE BARBECUE! DO NOT MOVE IT WHILE IT IS WORKING OR WHEN IT IS STILL HOT!INSTALLATION (Picture 1)For the assembly of the appliance the following parts are necessary:- A gas bottle from 3 to 13 Kg (B).- A pressure regulator with fixed setting; operating pressure: 28/37 mbar (R).- A standard hose (max. length 1.5 mt.) in compliance with the British standard and connected without bends, to ensure that this not subjected to twisting (T).The hose must be replaced at the given expiry date indicated on it.- Check for gas leaks by spray or other suitable means (i.e. soapy water).CONNECTION1) Before carryng out the connection make sure that the gas valves are in the off-position.2) Shut off the valve on the gas pressure regulator or the valve on the gas bottle.3) Connect the hose to the gas regulator and to the inlet of the gas rings.4) Firmly secure the hose to both ends with metal hose clamps.5) After carrying out the connection, check if the appliance is tight: use a leak-detection spray or a solution made of soapy water and go over the joints. Ifbubbles form, this means there are gas leaks. In the case of a leak (gas smell), immediately shut off the gas supply.DO NOT USE FLAMES TO CHECK FOR LEAKS.NOTE: The changing of the gas container must be carried out far from any source of ignition. The empty gas bottle must be shut off and adequately stored untilreturned to the gas dealer.WARNING: We advise you to carefully check if the installation operations of your appliance have been carried out properly. In all the appliances, the primary airis regulated in compliance with the standards during testing. DO NOT TAMPER WITH OR REMOVE THESE DEVICES.<strong>GAS</strong> CONTROL KNOB LOCATION: The knob is always located opposite the corresponding burner.TO TURN ON: Press and turn to the left the gas control knob and, at the same time, press button (P) if you have a barbecue equipped with a piezo-electriclighting system, or put down a flame to the burner in order to light the gas (Picture 2). See the shut off position of the valve , MAXIMUM position (bigflame) and MINIMUM position (small flame)(Picture 3). Put about 3,5 Kg of volcanic rocks in the container (GR) located above the lit burner (Picture 7/8).Ash and food remains will fall into the collection tray underneath, equipped with a handle (M2). The collection tray must be filled with about 1,5 l water beforestarting cooking (Picture 12).TO TURN OFF: Turn the gas control knob completely to the right.PRACTICAL SUGGESTIONSTilt the cooking grill (G) slightly to insert it in the lateral guides (SG)(Picture 6). The height of the grill above the container of the live coal can be adjusted,according to the desired type of cooking, thanks to an exclusive manual mechanism which can be activated using the side handle (MG)(Picture 5): the handleopens if you turn it outwards and closes if you push it, to compress the spring, and if you then turn it inwards. Pull the handle, hold it and turn it (to the rightto go up and to the left to go down) in order to activate the up/down mechanism of the cooking grill.Once you have reached the desired height, release the handle. It will be secured against the barbecue wall, once the pin of the rotating shaft has been insertedinto one of the four holes located on the opposite side (Picture 10). You can also easily upturn the cooking grill, if you hold the side handles with both handsand make it slide in the guides of the lateral supports (Picture 9).The models without a cover (Art. 02952) are equipped with a wind protection barrier (PV) at the rear ends of the lateral supports. This barrier protects the foodthat is being barbecued from wind gusts, limits the smoke, splashing and sparks. Models without wind protection (Art. 02953) are equipped with a cover (open,in vertical position) which has the same function as the wind protection. You can also use this cover to keep the food warm before serving it (closed, inhorizontal position).Always use handle (M3) to move the barbecue (Picture 4). On the opposite side of the carrying handle (M3) and of the side crank (MG) there is a lateralsupport surface (L) for food and accessories. This surface can be opened by rotating it upwards until its two lateral supports (SL) click and are made secure in theseat of the guides located on the side of the barbecue; push the two lateral supports inwards, where the curves are, and rotate the surface downwards, in orderto close it (Picture 11).MAINTENANCECheck the rubber pipes regularly and replace them before the indicated expiry date, if necessary.Constant maintenance is necessary to keep your barbecue in good conditions for a long time. Clean it when it is cold. Use soapy water or non-abrasive washingupliquid. After cleaning, always check that the gas output holes are not blocked. Make sure that the water and the washing-up liquid do not enter the burner. Ifthe Venturi tube of the burner or of the injector hole is blocked, blow with pressurized air. If you plan not to use the barbecue for a long time, clean it carefully,cover it with a (possibly water-proof) sheet and store it in a well ventilated room protected from humidity and corrosive agents.ATTENTION: When turning the gas valves becomes difficult, do not force them; call the gas appliance service immediately.DO NOT MODIFY THE BARBECUE! Changes could be dangerous. Repair and maintenance work must be carried out only by authorized personnel. The producerwaives any responsibility for damages caused by the incorrect installation or incorrect use of the barbecue.TECHNICAL DATA:MOD. <strong>MagiKo</strong> Art.02952 - Art.02953CAT. I3+ Gas: Butane(G30)/(G31)Propane Pressure: 28/37 mbarNominal thermal capacity: 5,35x2=10,7 kW Consumption: 390x2=780 g/h Ø Injectors: 1,15 mm