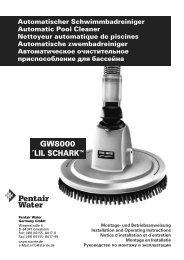
Plastic Pool Light Installation Manual - Pentair Pool Europe
Plastic Pool Light Installation Manual - Pentair Pool Europe
Plastic Pool Light Installation Manual - Pentair Pool Europe

Create successful ePaper yourself
Turn your PDF publications into a flip-book with our unique Google optimized e-Paper software.
Panel pool<br />
To install the niche in a panel swimming pool, please follow the steps mentioned below (Overview of installation<br />
see Fig. 7)<br />
• Make a circular hole with a diameter of 228 mm for the niche (item no. 5) in the panel (Fig. 4)<br />
• Stick one adhesive seal ring on the niche, lining up the holes (Fig. 3)<br />
• Drill 20 holes of diameter 4,5 mm in the panel. The mounting ring can be used as a template to indicate the<br />
position of the holes.<br />
• Stick a second adhesive seal ring at the inner side of the panel (Fig. 5)<br />
• Align the holes of the niche with the holes in the panel, and fix the niche to the panel with 4 screws using the<br />
holes indicated in Fig. 6<br />
• Install the liner<br />
• Make a circular opening of 225 mm in the liner<br />
• Stick the other seal ring on the inner side of the mounting ring<br />
• Install mounting ring on the niche and hand-tighten with 16 screws. Make sure that the screw-heads of the 4<br />
screws that were used to fit the niche to the panel fit in the therefore foreseen cutouts in the mounting ring<br />
4. INSTALLATION OF THE POOLLIGHT<br />
<strong>Installation</strong> of the pool light is to be done by fixing the optic (item no. 2) in the niche (item no. 5)<br />
To install the optic in the niche, please follow the steps mentioned below,<br />
• Insert the cable through compression seal (Fig. 8)<br />
• Connect the lamp assembly to a deckbox, which gets power from a 300 W – 12 V transformer.<br />
• Tighten the compression seal (left-handed thread) until user can verify that the cable will not yield<br />
when users pull on it with the hand.<br />
• Wind the remaining cable around the plastic core of the optic and insert the optic in the niche by keeping cable<br />
outlet in the upper side (Fig. 9)<br />
• Tighten the 2 screws until the fastening clips are secured in the inner walls of the niche<br />
• Install the color filter (item no. 1) on the face ring - optional<br />
▲ Warning: The light fixture must be installed by a licensed or certified electrician or a qualified pool<br />
serviceman, in accordance with IEC 364-7-702 and all applicable local codes and ordinance. Improper<br />
installation will create an electrical hazard, which could result in death or serious injury to pool user,<br />
installer or other due to electrical shock and may also cause damage to the property.<br />
5 THINGS TO REMEMBER DURING START UP<br />
• The start-up voltage of this pool light is 12V. Always ensure that the voltage that the lamp receives is never<br />
greater than 12 V. Therefore make sure the optic is connected to a 300 W – 12 V transformer.<br />
• The optic should only operate underwater while secured to the vertical walls of the pool. Never switch on the<br />
lamp for more than 10 sec if it is not underwater.<br />
▲ Warning: Never operate this pool light for more than 10 seconds unless it is totally submerged in<br />
the water. Without total submersion, the light assembly will get extremely hot, which may result in<br />
burns or in breakage of the lamp and lens. This may result in serious injury to pool user, installer or<br />
bystanders or in damage to the property<br />
6. SAFETY WARNINGS<br />
• The persons who are in charge of assembly should have the required qualification for this type of work<br />
• Avoid making contact with the electric voltage<br />
• Comply with the current standards regarding accident prevention<br />
• The wiring should comply with IEC 364-7-702 WIRING IN BUILDINGS SPECIAL WIRING SWIMMING POOLS<br />
and /or the local wiring regulations<br />
• Any operation related to the maintenance or replacement of parts should be performed by disconnecting or<br />
switching off the pool light from the electrical power system<br />
• Do not handle any operation with wet feet<br />
5