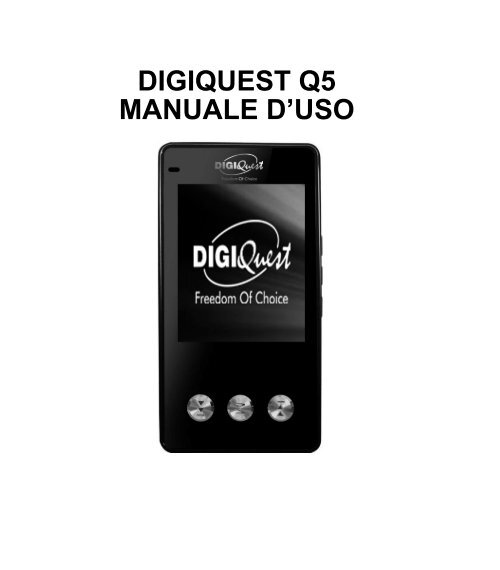
DIGIQUEST Q5 MANUALE D'USO
DIGIQUEST Q5 MANUALE D'USO
DIGIQUEST Q5 MANUALE D'USO

You also want an ePaper? Increase the reach of your titles
YUMPU automatically turns print PDFs into web optimized ePapers that Google loves.
0<br />
<strong>DIGIQUEST</strong> <strong>Q5</strong><br />
<strong>MANUALE</strong> D’USO
Indice<br />
INDICE ....................................................................................................................... 1<br />
INFORMAZIONI ...................................................................................................... 2<br />
TASTI & PORTE....................................................................................................... 6<br />
CARATTERISTICHE............................................................................................... 7<br />
OPERAZIONI............................................................................................................ 7<br />
1. ACCENSIONE/SPEGNIMENTO .......................................................................... 7<br />
2. MODALITÀ MUSICA ........................................................................................ 8<br />
3. MODALITÀ VIDEO ......................................................................................... 16<br />
4. MODALITÀ REGISTRAZIONE ........................................................................ 20<br />
5. MODALITÀ VOCE......................................................................................... 24<br />
6. MODALITÀ RADIO FM.................................................................................. 29<br />
7. MODALITÀ FOTO........................................................................................... 30<br />
8. IMPOSTAZIONI DI SISTEMA........................................................................... 33<br />
9.MODALITÀ TESTO.......................................................................................... 36<br />
10. MODALITÀ GIOCO ...................................................................................... 41<br />
PROBLEMI E SOLUZIONI................................................................................... 50<br />
SPECIFICHE TECNICHE..................................................................................... 57<br />
1
Informazioni<br />
� Non avvicinare il lettore al fuoco per evitare esplosioni.<br />
� Non immergere il lettore in acqua per evitare di<br />
danneggiare la batteria.<br />
� Durante il caricamento della batteria l’interruttore ON/OFF<br />
(accensione /spegnimento) deve essere posizionato su<br />
ON.<br />
� Per prolungare il tempo di vita di una batteria, scaricarla<br />
completamente prima di ricaricarla.<br />
� Ricaricare la batteria solo nei seguenti casi:<br />
- batteria scarica<br />
- spegnimento automatico del sistema<br />
- i tasti non funzionano<br />
� La batteria ricaricabile del lettore deve essere<br />
sostituita soltanto da personale specializzato o<br />
competente.<br />
� Quando sul vostro PC appare la finestra "copying Files"<br />
non rimuovere l’ USB dal PC.<br />
� Non scollegare il cavo USB durante il download dei file,<br />
per evitare danni al PC o al lettore.<br />
� Non collegare cuffie o cavi audio durante il download dei<br />
file.<br />
� Il download potrebbe richiedere più tempo se contiene<br />
2
molte cartelle e file.<br />
� L’ordine dei file mostrati in Windows Explorer non è<br />
l’ordine effettivo della riproduzione.<br />
� Quando è connesso ad un PC il lettore è anche sotto<br />
carica.<br />
� Non aprire il lettore; per qualsiasi informazione rivolgersi<br />
all’assistenza. L’apertura invalida la garanzia.<br />
� Assicurarsi che la versione del Direct X nel computer sia<br />
Direct X 9.0 o superiore quando si converte il formato di un<br />
file video. Per aggiornare la versione DirectX, visitate il sito<br />
www.microsoft.com e leggete attentamente le istruzioni.<br />
� Assicurarsi che la versione media player sia Media Player<br />
10 o superiore.<br />
� Se il file video non viene riprodotto dal vostro PC, non<br />
potrà neanche essere convertito in formato AMV.<br />
3
Per la vostra sicurezza<br />
Leggere attentamente quanto segue prima dell’uso:<br />
1) ATTENZIONE: Ascoltare musica ad alto volume per un<br />
periodo di tempo prolungato, può danneggiare in maniera<br />
permanente l’udito. Accertarsi che il volume sia regolato ad<br />
un livello accettabile.<br />
2) Non usare il lettore vicino all’acqua o in luoghi molto umidi.<br />
3) Non usare il lettore vicino fonti di calore.<br />
4) Non aprire il lettore e non tentare di riparare eventuali guasti.<br />
Con l’apertura o la rimozione di sigilli e viti si invalida la<br />
garanzia.<br />
5) Non usare il lettore nei luoghi in cui l'uso di tali apparecchi è<br />
proibito.<br />
6) Abbiate cura del vostro lettore, una caduta o un forte impatto<br />
possono danneggiare i componenti interni. Non schiacciare o<br />
inserire oggetti nel lettore.<br />
7) Tenere l’apparecchio lontano da polvere e agenti chimici come<br />
benzene o diluenti.<br />
4
8) Non lasciare il lettore in posti soggetti ad umidità o con<br />
temperatura superiore a 35° o inferiore a –5°.<br />
Leggere attentamente le seguenti norme:<br />
1) Non usare il lettore mentre si guida, si va in bicicletta, si<br />
attraversa la strada o nei posti in cui l’uso è proibito, per<br />
esempio in aereo.<br />
2) Regolare il livello del volume in modo che sia sopportabile e<br />
non eccessivo.<br />
3) Se avvertite disagio o dolore mentre siete in ascolto,<br />
astenetevi dall’utilizzo del lettore.<br />
4) Il bene acquistato è un congegno elettronico sofisticato per cui<br />
non è assolutamente idoneo all’uso da parte di minori di anni<br />
18. Non si risponde dei danni verificatisi a persone e cose<br />
derivanti dall’utilizzo del bene da parte di soggetti di età<br />
inferiore ad anni 18.<br />
5) Se il lettore viene mandato in assistenza salvate prima i vostri<br />
dati sul computer, perché la riparazione comporta la perdita dei<br />
dati.<br />
5
6) Card Mania Multimedia fornisce il prodotto con software<br />
residente e, fatto salvo quanto previsto da inderogabili<br />
previsioni di legge, resta esonerata da ogni responsabilità<br />
civile, penale ed amministrativa nel caso di utilizzo del prodotto<br />
con qualsivoglia software di terzi o configurazione che non<br />
siano stati installati o forniti dalla medesima.<br />
TASTI & PORTE<br />
6<br />
S/N Descrizione<br />
1 Interruttore ON/OFF<br />
2 Porta USB<br />
3 Sede per laccio<br />
4 Jack cuffia<br />
5 Vol-<br />
6 Vol+<br />
7 Play / Pausa<br />
8 Precedente<br />
9 Menu<br />
10 Successivo<br />
11 Display
Caratteristiche<br />
� Supporto formati musicali MP3, WMA, WAV (solo modalità<br />
Voce).<br />
� Supporto formato immagine JPEG.<br />
� Supporto formato video AMV.<br />
� MIC integrato.<br />
� Modalità risparmio energetico, spegnimento automatico.<br />
� Varie possibilità EQ, modalità ripetizione.<br />
� Multi-lingua.<br />
� Compatibile con Win98 SE/ME, Win2000, Win XP, Vista.<br />
� Collegamento tramite cavo USB e riconoscimento plug &<br />
play.<br />
� USB 2.0 alta velocità, mass storage.<br />
OPERAZIONI<br />
Il lettore si ricarica tramite il collegamento USB con il<br />
computer<br />
1. Accensione/Spegnimento<br />
Per accendere il lettore posizionare il tasto dell’alimentazione su<br />
ON. Se già si trova su ON premere a lungo il tasto PLAY.<br />
7
Per spegnere il lettore premere a lungo il tasto PLAY e<br />
posizionare il tasto dell’alimentazione su OFF.<br />
Per entrare e uscire dalle Impostazioni premere a lungo il tasto M.<br />
2. Modalità Musica<br />
Dopo aver acceso il lettore, selezionare Musica nel menu<br />
principale e premere il tasto M per accedere. Premere poi il tasto<br />
PLAY per riprodurre file musicali.<br />
8
2.1 Descrizione del display in modalità musica<br />
2.2 Modalità Riproduzione Musica<br />
1) Durante la riproduzione premere brevemente il tasto PLAY<br />
per mettere in Pausa, premere di nuovo brevemente il tasto<br />
PLAY per riprendere la riproduzione.<br />
2) Durante la riproduzione premere brevemente VOL+ / VOLper<br />
regolare il volume.<br />
3) Durante la riproduzione premere brevemente /<br />
per passare alla traccia successiva o precedente, premere<br />
a lungo / per avanzare o retrocedere velocemente<br />
4)<br />
nella riproduzione.<br />
Durante la riproduzione premere brevemente il tasto M per<br />
entrare nel sottomenu<br />
9
Impostazioni Musica (paragrafo 2.3). Premere a lungo il<br />
tasto M per tornare al menu<br />
principale.<br />
5) Durante la riproduzione premere a lungo il tasto M per<br />
entrare nell’interfaccia Lirica e visualizzare il testo di una<br />
canzone, se la traccia lo comprende (in questo caso il<br />
pallino in basso nel display sarà verde, se non è associato<br />
nessun file lyric il pallino sarà rosso).<br />
2.3 Sottomenu Impostazioni Musica in modalità riproduzione<br />
Mentre si ascolta un brano premere brevemente il tasto M per<br />
entrare nel sottomenu Impostazioni Musica:<br />
2.3.1 Ripetizione:<br />
nel sottomenu Impostazioni Musica selezionare Ripeti e poi<br />
premere il tasto M per accedere. Premere poi i tasti / per<br />
selezionare la modalità preferita e premere il tasto Menu per<br />
confermare. E’ possibile scegliere fra le seguenti modalità:<br />
Normale, Ripeti uno, Cartella, Ripeti cartella, Ripeti tutto, Random<br />
e Intro:<br />
� Normale: riproduzione tutti i file contenuti nella ROOT o nelle<br />
cartelle.<br />
10
� Ripeti uno: Riproduce la stessa traccia ripetutamente.<br />
� Cartella: Riproduce tutti i file in una cartella una sola volta.<br />
� Ripeti cartella: Riproduce tutti i file in una cartella<br />
ripetutamente.<br />
� Ripeti Tutto: Riproduce tutti i file ripetutamente<br />
� Random: Riproduce tutti i file contenuti nella cartella corrente<br />
ripetutamente.<br />
� Intro: Riproduce i primi 10 secondi di tutti i file in sequenza .<br />
2.3.2 Equalizzatore:<br />
nel sottomenu Impostazioni Musica entrare nel sottomenu<br />
Equalizzatore premendo brevemente il tasto M e premere /<br />
per scegliere tra le 7 modalità disponibili: Naturale, Rock,<br />
Pop, Classica, Soft, Jazz e DBB.<br />
2.3.3 Velocità Riproduzione:<br />
nel sottomenu Impostazioni Musica entrare nel sottomenu<br />
Velocità Riproduzione, premere / per impostare il livello<br />
di riproduzione. Ci sono 16 livelli disponibili: da -8 to a +8: -8 è il<br />
più lento, +8 è il più veloce e 0 è quello naturale.<br />
11
2.3.4 Ripetizione A-B:<br />
nel sottomenu Impostazioni Musica scegliere Ripeti A-B, la lettera<br />
“A” in alto nel display lampeggia. Premere per<br />
memorizzare il punto di inizio “A”, la lettera“A” smetterà di<br />
lampeggiare e inizierà “B” .<br />
Premere per memorizzare il punto di fine riproduzione B.<br />
“A-B” smettono di lampeggiare e inizierà la riproduzione dal punto<br />
A al punto B.<br />
Per modificare l’intervallo di riproduzione premere<br />
“A” inizierà di nuovo a lampeggiare come sopra.<br />
: la lettera<br />
Per registrare la ripetizione A-B: è possibile registrare<br />
l’intervallo di ripetizione A-B creato, aggiungendo una<br />
registrazione vocale attraverso il microfono integrato. Premere il<br />
tasto e apparirà l’icona “ ” sullo schermo, la registrazione<br />
è ora avviata.<br />
Dopo la registrazione, premere il tasto e apparirà il simbolo<br />
“ ”, il lettore riproduce il file di ripetizione più la registrazione<br />
effettuata attraverso il microfono integrato ; premere di nuovo<br />
e apparirà il simbolo ” ”, il lettore riprodurrà il solo file<br />
12
egistrato.<br />
Per uscire in qualsiasi momento premere brevemente il tasto M.<br />
2.3.5 Numero volte ripetizione:<br />
permette di scegliere il numero di volte che si desidera ripetere le<br />
tracce. E’ possibile scegliere da 1 a 10, premere / per<br />
impostare il numero di volte e premere il tasto M per confermare.<br />
2.3.6 Intervallo ripetizione:<br />
permette di selezionare il tempo di pausa tra la prima ripetizione e<br />
le ripetizione successiva. Si può scegliere da 1 a 10, premendo<br />
/ per selezionare il tempo di intervallo e premendo poi M<br />
per confermare.<br />
2.3.7 Esci:<br />
premere per uscire dal sottomenu Impostazioni Musica.<br />
2.4 Modalità Pausa<br />
1) Durante la riproduzione, premere brevemente il tasto<br />
PLAY per mettere in pausa. L’icona in basso a sinistra nel<br />
display cambierà da ► a II.<br />
2) Durante la pausa premere brevemente VOL+ / VOL- per<br />
regolare il volume.<br />
13
3) In modalità Pausa premere brevemente il tasto PLAY per<br />
ripristinare la riproduzione.<br />
4) In modalità Pausa, premere a lungo il tasto PLAY per<br />
spegnere il lettore.<br />
5) In modalità Pausa premere brevemente il tasto M per<br />
accedere ai sottomenu di Musica (vedi paragrafo 2.5)<br />
6) Premere a lungo il tasto M per tornare al menu principale<br />
2.5 Sottomenu Impostazioni Musica in modalità pausa<br />
In modalità pausa nel menu musica premere brevemente il tasto<br />
M per entrare nel sottomenu Impostazioni Musica:<br />
2.5.1 Cartella Locale:<br />
selezionare cartella locale e premere<br />
cartella. Premere poi M per confermare.<br />
2.5.2 Elimina File:<br />
/ per scegliere la<br />
selezionare Eliminare file? e premere M per confermare. Premere<br />
/ per selezionare il file che si desidera cancellare e<br />
premere il tasto M per confermare. Premere / per<br />
selezionare ”Si” o “No”. Scegliendo Si e premendo M per<br />
confermare, il file selezionato verrà cancellato. Scegliendo No si<br />
uscirà dalla modalità Elimina.<br />
14
2.5.3 Elimina tutti:<br />
selezionare Elimina Tutt?i e premere M per confermare.<br />
Premere / per selezionare “Sì” e premere il tasto M per<br />
confermare. Si cancelleranno tutti i file.<br />
2.5.4 Esci:<br />
premere per uscire dal sottomenu.<br />
2.6 Display Lyric<br />
In modalità riproduzione Musica se la traccia corrente ha<br />
associata la funzione lyric (cioè la possibilità di far scorrere sul<br />
display il testo del file), apparirà al display l’icona con il<br />
pallino a destra di colore verde. Premere a lungo il tasto M per<br />
accedere alla modalità Lyric e selezionare la lirica della traccia<br />
desiderata.<br />
Il lettore supporta file "*. LRC" e mostrerà il testo della canzone<br />
simultaneamente. Assicurarsi però che il nome del file lyric e il<br />
nome della canzone siano gli stessi.<br />
Esempio: Nome canzone: sky.mp3 Nome file lyric : sky.lrc<br />
15
2.7 Funzione Directory<br />
� Supporta 2 livelli – ROOT Directory e subdirectory.<br />
� In qualsiasi punto della riproduzione musicale si entra<br />
pausa, quando si riprende la riproduzione continua da<br />
dove era stata interrotta.<br />
3. Modalità Video<br />
Nel menu principale selezionare VIDEO e premere M per<br />
confermare.<br />
Nota: 1. Il formato video che il lettore supporta è AMV e i formati<br />
che sono convertibili in AMV sono MPG, ASF, AVI,<br />
WMV, DIVX; è possibile convertire un file in AMV grazie<br />
al tool contenuto nel CD.<br />
2. Installare il tool di conversione AMV nel computer e, una<br />
16
volta entrati nel programma, premere per entrare<br />
in modalità HELP (aiuto); leggere attentamente le<br />
istruzioni prima di procedere nella conversione.<br />
3. Verificate che il file video da convertire venga riprodotto<br />
dal vostro PC (assicuratevi che vi siano installati i codec<br />
necessari), altrimenti non verrà riprodotto neanche dal<br />
lettore.<br />
4. Caricare il file video da convertire nel programma di<br />
conversione, selezionandolo dalla casella INPUT file.<br />
Nella riga OUTPUT file scegliere dove salvare il file da<br />
convertire (sul proprio computer). Nella finestra OUTPUT<br />
info selezionare l’icona di SETTING (l’icona raffigurante<br />
un ingranaggio), si aprirà una finestra: alla voce<br />
SCREEN width and height selezionare 160x120 e dare<br />
OK. Per avviare la conversione digitare il tasto BEGIN<br />
contraddistinto da due frecce opposte e oblique.<br />
17
3.1 Modalità Riproduzione Video<br />
Nel menu principale selezionare VIDEO e premere M per<br />
confermare.<br />
1) Premere il tasto PLAY per riprodurre il video, a volte bisogna<br />
aspettare qualche secondo.<br />
2) Mentre viene riprodotto il video premere brevemente /<br />
per passare al file successivo e precedente, premere a lungo<br />
/ per avanzare o retrocedere velocemente.<br />
3) Premere a lungo il tasto M per tornare al menu principale.<br />
3.2 Modalità Pausa<br />
In modalità riproduzione Video premere brevemente PLAY per<br />
mettere in Pausa.<br />
1) In modalità Pausa premere brevemente PLAY per riprendere<br />
la riproduzione, a volte bisogna aspettare qualche secondo.<br />
2) Premere al lungo il tasto PLAY per spegnere il lettore.<br />
3) Premere brevemente / per passare al video<br />
successivo o precedente.<br />
4) Premere brevemente VOL+/VOL- per regolare il livello del<br />
volume.<br />
18
5) Premere brevemente il tasto M per accedere ai sottomenu<br />
VIDEO (vedi paragrafo 3.3).<br />
6) Premere a lungo il tasto M per tornare al menu principale.<br />
3.3 Sottomenu Video:<br />
3.3.1 Cartella Locale<br />
selezionare cartella locale e premere<br />
cartella. Premere poi M per confermare.<br />
3.3.2 Elimina File:<br />
/ per scegliere la<br />
selezionare Eliminare file? e premere M per confermare. Premere<br />
/ per selezionare il file che si desidera cancellare e<br />
premere il tasto M per confermare. Premere<br />
/ per selezionare ”Si” o “No”. Scegliendo Si e premendo<br />
M per confermare, il file selezionato verrà cancellato. Scegliendo<br />
No si uscirà dalla modalità Elimina.<br />
3.3.3 Elimina tutti:<br />
selezionare Elimina Tutti? e premere M per confermare.<br />
Premere / per selezionare “Sì” e premere il tasto M per<br />
confermare. Si cancelleranno tutti i file.<br />
19
3.3.4 Esci:<br />
premere per uscire dal sottomenu.<br />
4. Modalità Registrazione<br />
Nel menu principale selezionare Registrazione e premere il tasto<br />
M per entrare nel menu.<br />
Prima di registrare, premere brevemente il tasto M per accedere<br />
ai sottomenu.<br />
Cartella Locale: per scegliere la cartella.<br />
Tipo REC: per scegliere il tipo di registrazione tra i seguenti:<br />
Qualità alta REC, Qualità normale REC, Qualità alta VOR, Qualità<br />
normale VOR.<br />
20
Qualità alta REC: Il tempo di registrazione disponibile è più breve<br />
ma la registrazione è di migliore qualità (formato WAV).<br />
Qualità normale REC: tempo di registrazione disponibile più<br />
lungo ma qualità inferiore (formato ACT).<br />
Qualità alta VOR: formato WAV (controllo audio registrazione, la<br />
registrazione si interrompe se non vi è audio.)<br />
Qualità normale VOR: formato ACT (controllo audio<br />
registrazione, la registrazione si interrompe se non vi è audio)<br />
Esci: torna all’interfaccia registrazione in standby.<br />
4.1 Inizio Registrazione<br />
Nel menu registrazione premere brevemente il tasto “PLAY” per<br />
avviare la registrazione.<br />
Premere brevemente il tasto “PLAY” per mettere in pausa la<br />
registrazione, il tempo di registrazione comincerà a lampeggiare .<br />
21
4.2 Salva file registrato<br />
In modalità registrazione o pausa premere a lungo il tasto M per<br />
salvare il file registrato e tornare al menu principale.<br />
4.3 Batteria scarica<br />
Durante la registrazione in caso di batteria scarica il lettore<br />
salverà la registrazione del file corrente e interromperà la<br />
registrazione. Sul display apparirà il messaggio BATTERIA<br />
SCARICA. Ricaricare la batteria collegando il lettore al computer.<br />
4.4 Funzionamento anomalo del display in modalità<br />
registrazione<br />
1. Il file di registrazione è pieno<br />
Se il file di registrazione raggiunge le 99 unità o la memoria<br />
è piena, apparirà il messaggio a video. Cancellare file mp3 o<br />
altri file di registrazione per recuperare spazio e continuare a<br />
registrare.<br />
2. File totali pieni<br />
Il lettore può memorizzare un massimo di 200 file di<br />
registrazione (quantità ideale). Se si raggiunge la quantità<br />
massima disponibile, la registrazione verrà interrotta.<br />
22
Occorrerà cancellare alcuni file per recuperare spazio e<br />
continuare a registrare.<br />
3. Spazio Disco Pieno<br />
Quando il disco è pieno apparirà il messaggio di avviso<br />
“Disco Pieno”. Cancellare file mp3 o altri file di<br />
registrazione per recuperare spazio e continuare a<br />
registrare.<br />
4. Errore Disco<br />
Nel caso venga riscontrato un errore nel file che si vuole<br />
registrare, il lettore salverà il file registrato e mostrerà il<br />
messaggio “Errore Disco”. Occorre procedere con una<br />
formattazione a basso livello per evitare questo tipo di errore.<br />
(Nota: Si può causare “ errore disco” con formattazione a<br />
basso livello se il lettore è pieno. Non utilizzare la<br />
formattazione a basso livello se il lettore è pieno.)<br />
23
5. Modalità VOCE<br />
Nel menu principale selezionare VOCE e premere M per<br />
accedere al menu.<br />
5.1 Modalità Pausa Voce<br />
Premere a lungo il tasto PLAY per spegnere il lettore.<br />
Premere brevemente il tasto M per accedere ai sottomenu VOCE<br />
(vedi paragrafo 5.2).<br />
Premere a lungo il tasto M per tornare al menu principale.<br />
Premere brevemente / per selezionare il file registrato<br />
successivo o precedente.<br />
Premere i tasti VOL+ / VOL- per regolare il volume.<br />
24
5.2 Sottomenu Voce in modalità pausa:<br />
5.2.1 Cartella Locale:<br />
selezionare Cartella locale, premere / per selezionare la<br />
cartella desiderata, premere il tasto M per confermare.<br />
5.2.2 Elimina File:<br />
in modalità Pausa Voce premere brevemente il tasto M per<br />
accedere al sottomenu, selezionare Eliminare file? e premere il<br />
tasto M per confermare. Premere / per selezionare il file<br />
che si desidera cancellare e premere M per confermare. Premere<br />
/ per selezionare Sì o NO e premere M per confermare.<br />
5.2.3 Elimina tutti:<br />
stesse operazioni dell’opzione Eliminare File, ma il comando<br />
Eliminare tutto? cancellerà tutta la cartella. Dopo aver cancellato<br />
tutti i file, il lettore tornerà alla modalità Standby dell’interfaccia<br />
VOCE.<br />
5.2.4 Esci:<br />
per uscire da questo sottomenu.<br />
25
5.3 Modalità Riproduzione Voce<br />
Premere PLAY per interrompere la riproduzione.<br />
Premere a lungo il tasto PLAY per spegnere il lettore.<br />
Premere brevemente il tasto M per accedere ai sottomenu Voce<br />
(vedi paragrafo 5.4)<br />
Premere a lungo il tasto M per tornare al menu principale.<br />
Premere brevemente / per selezionare il file<br />
successivo/precedente.<br />
Premere brevemente VOL+ / VOL- per regolare il volume.<br />
5.4 Sottomenu Voce in modalità riproduzione voce:<br />
5.4.1 Ripeti:<br />
nel sottomenu ripeti premere / per selezionare la<br />
modalità di ripetizione tra le 7 disponibili: Normale, Ripeti uno,<br />
Cartella, Ripeti cartella, Ripeti tutti, Random e Intro (vedi<br />
modalità Musica).<br />
5.4.2 Velocità Riproduzione:<br />
premere / per impostare il livello tra i 16 disponibili da -8<br />
a +8. Il più basso è -8 e il più alto è +8 , 0 è la velocità normale.<br />
26
5.4.3 Ripeti A-B:<br />
scegliendo Ripeti A-B, la lettera “A” in alto nel display comincerà a<br />
lampeggiare. Premere<br />
per memorizzare il punto di inizio “A”, la lettera“A” smetterà di<br />
lampeggiare, e inizierà “B”.Premere per memorizzare il punto<br />
di fine riproduzione B.<br />
“A-B” smettono di lampeggiare e inizia la riproduzione dal punto A<br />
al punto B.<br />
Per modificare l’intervallo di riproduzione premere : la lettera<br />
“A” inizierà di nuovo a lampeggiare come sopra<br />
5.4.4 Esci:<br />
per uscire dal sottomenu<br />
5.5 Errore modalità Voce<br />
1. Nessun file registrato (no record file): questo messaggio<br />
appare se il lettore non trova file registrati o se i file sono<br />
stati cancellati.<br />
2. Nessun file: il file registrato ha un formato, quindi, quando<br />
27
28<br />
l’utente modifica il nome del file, se il nome inserito non è<br />
esatto il lettore non può trovare il file.<br />
3. File corrotto (illegal file): questo messaggio appare se il file è<br />
danneggiato o non è un file di registrazione quindi il lettore<br />
non può riprodurlo.<br />
Attenzione: Il lettore potrebbe non riprodurre<br />
alcuni file in formato WAV copiati dal PC.
6. Modalità Radio FM<br />
Nel menu principale selezionare FM Radio e premere M per<br />
confermare.<br />
1) Premere brevemente<br />
successiva o precedente.<br />
/ per passare alla stazione<br />
2) Premere a lungo il tasto M per tornare al menu principale.<br />
3) Premere brevemente VOL+ / VOL- per regolare il volume.<br />
4) Premere brevemente M per entrare in modalità Impostazioni<br />
FM:<br />
� Salva: memorizza la stazione corrente.<br />
� Registra: registra la stazione corrente e salva nella<br />
29
30<br />
cartella VOICE.<br />
� Cancella: cancella la stazione corrente.<br />
� Cancella tutte: cancella tutte le stazioni memorizzate.<br />
� Ricerca automatica: ricerca automatica delle stazioni.<br />
� Banda normale: 87. ~108.0MHZ.<br />
� Banda giapponese: 76.0~90.0MHZ.<br />
� Esci: per uscire dal sottomenu.<br />
7. Modalità Foto<br />
La funzione supporta tutti i formati JPEG e alcuni formati GIF.<br />
1. Nel menu principale premere<br />
menu “Foto”.<br />
2. Premere M per accedere.<br />
/ per selezionare il
3. Premere / per scegliere l’immagine desiderata e<br />
premere PLAY .<br />
4. Premere / per visualizzare le immagini in sequenza<br />
(solo riproduz. manuale).<br />
7.1 Impostazioni riproduzione immagini<br />
Nell’elenco immagini premere brevemente M per accedere al<br />
sottomenu :<br />
7.1.1 Cartella Locale:<br />
selezionare Cartella locale, premere / per selezionare la<br />
cartella desiderata, premere il tasto M per confermare.<br />
7.1.2 Impostazioni Lettura:<br />
premere<br />
Lettura.<br />
/ per selezionare l’opzione Impostazioni<br />
Premere M per entrare nel sottomenu.<br />
Premere / e selezionare “Manuale” o “Automatico” e<br />
premere M per confermare.<br />
Se si sceglie Automatico premere / per regolare la<br />
velocità della riproduzione automatica. Premere M per<br />
confermare.<br />
31
7.1.3 Elimina File:<br />
nell’elenco immagini, premere brevemente M per accedere al<br />
sottomenu.<br />
Premere / e scegliere l’opzione “Eliminare file?”.<br />
Premere M per accedere a questa opzione.<br />
Premere / per scegliere il file che si desidera cancellare<br />
e premere M per confermare.<br />
Premere / per scegliere Sì o No e premere M per<br />
confermare.<br />
7.1.4 Elimina tutto<br />
nell’elenco immagini, premere brevemente M per accedere al<br />
sottomenu.<br />
Premere / per scegliere l’opzione “Eliminare tutto?”.<br />
Premere M per entrare.<br />
Premere / per scegliere SI o NO. Scegliendo si tutti i file<br />
foto verranno cancellati.<br />
Nota: Il formato consigliato per la foto da copiare è 128x160: la<br />
qualità è buona e il file non risulta troppo pesante, quindi non<br />
occupa troppa memoria.<br />
32
8. Impostazioni di Sistema<br />
Scegliere Impostazioni nel menu principale.<br />
Premere brevemente / per scegliere l’opzione<br />
desiderata e premere M per confermare.<br />
Premere a lungo M per tornare al menu principale. Premere a<br />
lungo PLAY per spegnere il lettore.<br />
8.1 Data e Ora<br />
Premere brevemente “VOL+ / VOL-” per regolare l’anno, il mese,<br />
giorno, ora, minuti e secondi. Premere / per modificare.<br />
Premere M per confermare e uscire dal menu.<br />
Quando si spegne il lettore con l’interruttore ON/OFF va pesa la<br />
memorizzazione.<br />
33
8.2 Display<br />
Risparmio energetico: impostato un determinato intervallo di<br />
tempo (da1 a30) quando il lettore non è in uso lo schermo<br />
diventerà automaticamente scuro. Selezionando 0 la funzione<br />
sarà disabilitata.<br />
8.3 Lingua<br />
In questo menu l’utente può scegliere la lingua. Premere /<br />
per scegliere la lingua e M per confermare e uscire dal menu.<br />
8.4 Spegnere<br />
Prevede due possibili scelte: Spegnimento automatico e Sleep.<br />
8.4.1 Spegnimento automatico: il lettore si spegnerà<br />
automaticamente se resterà inutilizzato dopo un determinato<br />
tempo impostato da 1 a 60. 0 disabilita questa funzione.<br />
8.4.2 Sleep: dopo un periodo di attività (da 1 a 120) il lettore si<br />
spegnerà automaticamente.<br />
0 disabilita questa funzione.<br />
34
Nota: La modalità Sleep è valida solo se impostata. Il<br />
lettore cancellerà automaticamente la funzione dopo la prima<br />
operazione. Occorre impostarla di nuovo per renderla attiva.<br />
8.5 Modo di ripetizione<br />
Si possono scegliere due modalità:<br />
Manuale: la funzione ripetizione A-B non si interrompe<br />
automaticamente.<br />
Automatico: si usa per l’apprendimento delle lingue; il lettore si<br />
ferma automaticamente tra la prima frase e la seconda.<br />
8.6 Scelta collegamento<br />
L’utente può rendere visibili o meno i file contenuti nel lettore<br />
scegliendo tra:<br />
Multi driver: si possono visualizzare tutti i file presenti nel lettore,<br />
criptati e non.<br />
Solo normale: si possono visualizzare solo i file non criptati.<br />
Solo criptato si possono visualizzare solo i file criptati.<br />
35
8.7 Informazioni memoria<br />
Visualizza le informazioni sulla memoria.<br />
8.8 Versione Software<br />
Informazioni versione software.<br />
8.9 Versione Firmware A228<br />
Descrizione firmware.<br />
8.10 Esci<br />
Esce dal menu.<br />
9.Modalità Testo<br />
Questa funzione supporta tutti i formati TXT.<br />
1. Entrare nel menu principale, premere<br />
selezionare il menu Testo.<br />
/ e<br />
36
2. Premere M per entrare nella modalità.<br />
3. Premere / per selezionare il file TXT desiderato.<br />
Premere Play per aprire il file selezionato.<br />
4. Premere / per girare le pagine in sequenza(solo se<br />
impostatoin riproduzione manuale).<br />
5. Durante la lettura del file premere brevemente M per accedere<br />
al sottomenu impostazioni segnalibro (vedi paragrafo 9.1).<br />
6. Premere a lungo il tasto M per tornare al menu principale.<br />
9.1 Sottomenu Impostazioni segnalibro in modalità<br />
riproduzione file testo<br />
Se il file testo che stiamo riproducendo sul lettore è molto lungo, si<br />
potrebbe avere la necessità di un segnalibro: possiamo cioè<br />
interrompere la riproduzione e riprenderla da dove si è lasciata.<br />
Per fare ciò durante la lettura del file, nel punto dove dobbiamo<br />
interrompere, selezionare Aggiungi segnalibro. Si crea<br />
automaticamente un file che usa come nome i primi caratteri del<br />
testo dove si è interrotto. Quando si vuole riprendere la<br />
riproduzione, selezionare il file originale, premere PLAY per<br />
37
avviare la riproduzione e poi brevemente il tasto M. Si entra nel<br />
sottomenu Impostazioni Segnalibro dove in “Seleziona<br />
segnalibro” troverete il file salvato come spiegato sopra.<br />
Selezionarlo e premere PLAY, il file si aprirà nel punto dove lo<br />
avete lasciato.<br />
9.1.1 Seleziona segnalibro (se non è stato creato apparirà la<br />
scritta Non Trovato!)<br />
1. Nella lista E-book premere<br />
Seleziona segnalibro.<br />
/ per scegliere l’opzione<br />
2. Con i tasti i / scegliere il testo file da riprodurre.<br />
3. Premere M per avviare la riproduzione.<br />
9.1.2 Elimina segnalibro<br />
1. Nella lista E-book premere<br />
“ Elimina segnalibro”.<br />
/ per scegliere l’opzione<br />
3. Premere il tasto M per confermare l’opzione.<br />
4. Premere / per scegliere il file che si desidera<br />
cancellare e premere il tasto M per confermare.<br />
38
9.1.3 Aggiungi segnalibro<br />
1. Nella lista E-book premere<br />
“Aggiungi segnalibro”.<br />
/ per scegliere l’opzione<br />
3. Premere il tasto M per confermare l’opzione. Si crerà il file in<br />
automatico come spiegato all’inizio del paragrafo.<br />
9.1.4 Esci<br />
Esce dal sottomenu.<br />
9.4 Modalità Pausa testo<br />
Premere a lungo il tasto PLAY per spegnere il lettore.<br />
Premere brevemente il tasto M per accedere ai sottomenu<br />
TESTO (E-book vedi paragrafo 9.5).<br />
Premere a lungo il tasto M per tornare al menu principale.<br />
Premere brevemente / per selezionare il file successivo<br />
o precedente.<br />
9.5 Sottomenu testo in modalità pausa<br />
In modalità pausa nel menu Testo (e-book) premere<br />
brevemente il tasto M per entrare nel sottomenu Impostazioni<br />
Testo:<br />
39
9.5.1 Cartella Locale:<br />
selezionare Cartella locale, premere / per selezionare la<br />
cartella desiderata, premere il tasto M per confermare.<br />
9.5.2 Impostazione lettura:<br />
1. Premere<br />
lettura.<br />
/ per scegliere l’opzione Impostazione<br />
2. Premere M per accedere all’opzione o premere PLAY per<br />
uscire.<br />
3. Premere / per scegliere Manuale o Automatica e premere<br />
M per confermare.<br />
9.5.3 Elimina File:<br />
selezionare Eliminare file? e premere il tasto M per confermare.<br />
Premere / per selezionare il file che si desidera<br />
cancellare e premere M per confermare. Premere<br />
selezionare Sì o NO e premere M per confermare.<br />
9.5.4 Elimina tutti:<br />
/ per<br />
stesse operazioni dell’opzione Eliminare File, ma il comando<br />
Eliminare tutto? cancellerà tutta la cartella<br />
40
9.5.5 Esci:<br />
per uscire da questo sottomenu.<br />
10. Modalità Gioco<br />
Premere brevemente il tasto M per entrare in modalità Gioco e<br />
premere / per selezionare il gioco e premere M per<br />
confermare.<br />
10.1 Bricks<br />
Selezionare Bricks e premere il tasto M per accedere.<br />
● Avvio: Premere M per iniziare a giocare.<br />
● Velocità: per regolare la velocità.<br />
● Indietro: Torna all’interfaccia principale del Menu<br />
Giochi.<br />
41
10.2 Esci<br />
Esce dalla modalità Giochi.<br />
11. Connessione al PC<br />
Se usate Windows 98 SE o versioni precedenti, il driver software<br />
(vedi paragrafo successivo “Installazione driver software per<br />
Win98”) deve essere installato prima di proseguire con la<br />
seguente procedura.<br />
Aggiungere/Rimuovere File MP3<br />
Connettere il cavo USB al computer. Apparirà la seguente foto<br />
42
selezionare la voce “Apri cartella per visualizzare file”. Apparirà<br />
la seguente schermata<br />
43
Per aggiungere file nella cartella che verrà rilevata dal PC<br />
selezionare i file che si vogliono inserire (tramite il tasto destro del<br />
mouse selezionare “copia”) vedi foto<br />
44
posizionarsi nella cartella del lettore MP3 e sempre tramite il<br />
tasto destro del mouse selezionare “incolla” (vedi foto)<br />
45
l’operazione terminerà con la visualizzazione dei file copiati nella<br />
cartella dell’MP3.<br />
Per cancellare file dalla cartella del lettore selezionarli e tramite il<br />
tasto destro del mouse eliminarli (“elimina”). Chiudere la cartella<br />
con X in alto a destra.<br />
46
Prima di rimuovere il lettore, cliccare sul simbolo nello<br />
schermo in basso a destra.<br />
Attendere il messaggio di OK rimozione sicura.<br />
Durante la connessione a PC<br />
1. Non tirate la USB. Così facendo potreste perdere o<br />
danneggiare definitivamente alcuni file.<br />
2. Se avete difficoltà durante la connessione, seguite le seguenti<br />
47
indicazioni:<br />
a. Uscire dal programma, chiudere la connessione e riprovare di<br />
nuovo.<br />
b. Connettere ad un altro computer con sistema WIN2000 o WIN<br />
XP o Vista.<br />
3) Se il computer si arresta durante la trasmissione, i dati<br />
andranno persi.<br />
12. Installazione Driver Software per WIN 98<br />
Installazione di drive è necessaria se si utilizzano Windows 98SE<br />
o precedenti:<br />
assicurarsi di aver installati nel proprio PC i driver USB 2.0.<br />
Uso del CD<br />
Se avete windows 98SE installare il driver contenuto nel CD:<br />
inserire il CD nel driver del CD.<br />
Premere il tasto destro per accendere il driver ed eseguire il file<br />
“CD disk/driver/MP3/SETUP.EXE”.<br />
48
Premere “NEXT” per entrare nell’immagine seguente<br />
49
Premere di nuovo “NEXT” per entrare nell'immagine seguente<br />
Scegliere “Finish” per terminare programma. Riavviare il PC per<br />
cominciare ad utilizzare il lettore MP3.<br />
Problemi e Soluzioni<br />
Prima di rivolgervi all’assistenza al numero 199 315151 provate a<br />
risolvere eventuali problemi leggendo il seguente paragrafo.<br />
Per segnalare eventuali errori nel manuale e per aiutarci a<br />
rendere più comprensibili spiegazioni e procedure, Vi preghiamo<br />
50
di inviarci commenti e consigli all’indirizzo:<br />
suggerimenti@cardmania.it (eventuali richieste di assistenza a<br />
questo indirizzo non avranno risposta).<br />
● Il lettore MP3 non si accende<br />
Verificare che l’interruttore ON/OFF sia posizionato su ON.<br />
● Il lettore MP3 si spegne automaticamente dopo l’accensione o<br />
nessun display premendo PLAY<br />
Collegare il lettore al PC per ricaricarlo. Provare a riaccenderlo<br />
dopo 10 minuti.<br />
● Audio assente.<br />
Controllare che il livello del volume non sia posizionato su 0.<br />
Assicurarsi che gli auricolari non abbiano problemi di<br />
connessione.<br />
Assicurarsi che gli auricolari siano puliti e non danneggiati.<br />
Verificare di aver ben inserito il jack degli auricolari.<br />
Canzoni Mp3 danneggiate possono generare diversi livelli di<br />
rumore o disabilitare la riproduzione. Assicuratevi che i file siano<br />
completi.<br />
51
● Non si riesce a riprodurre file MP3.<br />
I file sono in un formato non corretto. Il lettore supporta solo<br />
standard MP3 e WMA.<br />
● Testo anormale sullo schermo<br />
Assicuratevi di aver selezionato la lingua corretta.<br />
● Scarsa ricezione FM<br />
Le cuffie fungono da antenna. Spostarsi in un altro luogo.<br />
Provare altri auricolari.<br />
Spegnere altri apparecchi vicini.<br />
● Una volta collegato con il computer, non viene riconosciuto<br />
alcun disco.<br />
I drive installati possono essere danneggiati, si prega di<br />
cancellare i drive originali e installarli nuovamente.<br />
● Né la lettura né la scrittura sono possibili durante la<br />
connessione a PC<br />
Incompatibilità con il computer, provate ad utilizzare un altro<br />
computer.<br />
52
Controllare che la connessione USB non sia danneggiata.<br />
Il driver è correttamente installato?<br />
Controllare che la memoria non sia piena.<br />
● La memoria del disco removibile non è come descritta.<br />
Il sistema può occupare dello spazio e questo può non essere<br />
visualizzato.<br />
Se compare la dicitura “Disco pieno” anche se non ci sono file<br />
all’interno del lettore,<br />
formattare (andare in “Risorse del computer”, selezionare “Disco<br />
removibile”, cliccare il tasto destro del mouse e selezionare<br />
“Formattazione”)<br />
● Brani protetti da copyright<br />
Molti dei CD in commercio sono protetti da copyright. Per<br />
riprodurre questi file è necessaria una licenza. Se vengono<br />
caricati sul lettore non vengono riprodotti (errore brano) e il lettore<br />
si blocca. Formattare.<br />
● Malfunzionamento del PC dopo aver scollegato il lettore<br />
Non scollegare mai il lettore dal PC durante il trasferimento di file.<br />
Spegnere e riaccendere il PC.<br />
53
● Quando il lettore è collegato al Pc non avviene il download dei<br />
file<br />
Assicurarsi di aver installati nel proprio PC i driver USB 2.0.<br />
● Non si visualizzano i file memorizzati nel lettore<br />
Il lettore memorizza fino a 100 cartelle o 2 directory (inclusa la<br />
root directory), nella cartella può memorizzare fino a 999 file. Se ci<br />
sono più di 100 cartelle o 2 directory, si possono vedere le cartelle,<br />
le directory o i file in eccesso solo nel computer. Cancellare i file<br />
superflui e assicurarsi che le cartelle siano meno di 100, che le<br />
directory non siano superiori ai 2 e i file totali non siano superiori a<br />
999.<br />
ATTENZIONE:<br />
tutti i file che vengono caricati devono essere controllati con un<br />
antivirus.<br />
Copiare sempre i file dal computer al lettore usando i comandi<br />
copia e incolla. Usando altri metodi è possibile che si abbiano<br />
problemi nella riproduzione.<br />
54
Corretto smaltimento del prodotto<br />
(rifiuti elettrici e elettronici)<br />
(Applicabile nei paesi dell’Unione Europea e in quelli<br />
con sistema di raccolta differenziata)<br />
Il marchio riportato sul prodotto o sulla sua<br />
documentazione indica che il prodotto non deve<br />
essere smaltito con altri rifiuti domestici al termine del ciclo di vita.<br />
Per evitare eventuali danni all’ambiente o alla salute causati<br />
dall’inopportuno smaltimento dei rifiuti, si invita l’utente a separare<br />
questo prodotto da altri tipi di rifiuti e di riciclarlo in maniera<br />
responsabile per favorire il riutilizzo sostenibile delle risorse<br />
materiali.<br />
Gli utenti domestici sono invitati a contattare il rivenditore presso il<br />
quale è stato acquistato il prodotto o l’ufficio locale preposto per<br />
tutte le informazioni relative alla raccolta differenziata e al<br />
riciclaggio per questo tipo di prodotto. Gli utenti aziendali sono<br />
invitati a contattare il proprio fornitore e verificare i termini e le<br />
condizioni del contratto di acquisto. Questo prodotto non deve<br />
essere smaltito unitamente ad altri rifiuti commerciali.<br />
55
Conformità alle Direttive Europee<br />
Il simbolo CE applicato sul presente apparecchio garantisce la<br />
conformità del prodotto con la Direttiva Europea:<br />
56<br />
2004/108/EC direttiva EMC<br />
In conformità alle clausole di questa direttiva, le<br />
seguenti normative sono state testate e garantite per attenersi a<br />
quanto segue:<br />
EN55022:2006 ; EN55024:1998+A2:2003 ;<br />
EN55013:2001+A2:2006 ; EN55020:2007.<br />
Una copia completa della Dichiarazione di Conformità alle<br />
Direttive Europee può essere richiesta presso:<br />
CARD MANIA MULTIMEDIA SRL Via Avisio, 4 - 00048<br />
Nettuno (Roma) Italy.<br />
Il prodotto distribuito è conforme alle disposizioni contenute nella<br />
direttiva RoHS (2002/95/CE)
Specifiche Tecniche<br />
Formato Musica MP3. WMA. WAV<br />
Formato Video AMV<br />
Formato Immagine JPG<br />
Capacità di memoria 256MB/512MB/1GB/2GB/4GB/8GB<br />
Display 1.8” color display , 128*160 matrix<br />
SNR 85dB<br />
Modalità Registrazione Microfono integrato<br />
Formato registrazione WAV e ACT<br />
Funzione FM Supportata<br />
Output frequency 20HZ-22KHZ<br />
Dimensioni 78*42*8mm<br />
Batteria ricaricabile ai polimeri di litio<br />
Specifiche batteria<br />
(Li-Poly) 3.7V 300MA<br />
Slot PC USB2.0<br />
Sistemi compatibili Win98SE/ME,Win2000,WinXP, Vista<br />
57
<strong>DIGIQUEST</strong> <strong>Q5</strong><br />
User Manual
Contents<br />
CONTENTS .................................................................................................1<br />
NOTICE........................................................................................................2<br />
KEYS & PORTS SPECIFICATION .........................................................4<br />
FEATURES ..................................................................................................5<br />
OPERATION MANUAL ............................................................................5<br />
1. TURN ON/OFF .......................................................................................5<br />
2. MUSIC MODE.......................................................................................6<br />
3. MOVIE MODE ....................................................................................13<br />
4. RECORD MODE..................................................................................15<br />
5. VOICE MODE....................................................................................19<br />
6. FM RADIO MODE..............................................................................23<br />
7. PHOTO MODE ....................................................................................24<br />
8 SYSTEM SETTING.................................................................................26<br />
9. E-BOOK MODE...................................................................................30<br />
10. GAME MODE....................................................................................32<br />
TROUBLE SHOOTING ...........................................................................33<br />
TECHNICAL SPECIFICATION.............................................................35<br />
1
Notice<br />
� Do not throw the product into fire to avoid danger of<br />
explosion.<br />
� Do not immerse into water or get soaked since the battery<br />
charging function will be lost.<br />
� When charge the battery, the Power Switch should be in the<br />
ON position.<br />
� Do not charge rechargeable battery longer than specified to<br />
prevent danger of fire.<br />
� Do not take the batteries apart.<br />
� Overcharging & over-discharging rechargeable batteries may<br />
shorten their life span.<br />
� To prolong the life of a rechargeable battery, completely<br />
discharge it before fully charging it again.<br />
� Recharge battery with below status:<br />
- Low battery<br />
- System auto off.<br />
- Operation key not working<br />
� The "copying Files" windows appears on your PC please don't<br />
Remove USB from computer.<br />
� Do not unplug the USB cable during file downloading, it may<br />
cause malfunction to your PC and player.<br />
2
� Do not plug in an earphone or audio cable during file<br />
downloading.<br />
� Downloading can be delayed if there are too many folders or<br />
files.<br />
� The order of music files displayed on the Windows Explorer is<br />
not the order of actual music playback.<br />
� When it is connect with PC, the player start charging.<br />
� Do not open the player; any questions just contact your<br />
retailer.<br />
� Please make sure that the version of the Direct X in the<br />
computer must be Direct X 9.0 or above when converting the<br />
format of the video file. For the update of DirectX, please visit<br />
www.microsoft.com and read the concerned information<br />
carefully.<br />
� Please Make sure the version of the media player should be<br />
Media Player 10.<br />
� If the video file cannot be played in your computer, it is also<br />
cannot be converted into AMV format.<br />
3
Keys & Ports Specification<br />
4
Features<br />
� Support MP3, WMA, WAV format music<br />
� View JPEG format picture<br />
� Supports AMV video format.<br />
� USB storage, for above WIN98, plug & play by cable<br />
� Built in MIC<br />
� Save energy mode, auto off set<br />
� Various EQ, repeat modes<br />
� Support multi-languages<br />
� Support Win98 SE/ME, Win2000, Win XP system<br />
� USB 2.0 High speed<br />
Operation Manual<br />
1. Turn on/off<br />
Please switch the Power Switch to the ON position to turn on the<br />
player.<br />
Please long press the PLAY key to turn on the player when the Power<br />
switch is in the ON position and the player is in the turn off status.<br />
Long press the PLAY key to turn off the player and then switch the<br />
Power switch to the OFF position.<br />
5
2. Music Mode<br />
After turn on the player, select Music in the main menu and press M<br />
key to enter and then press PLAY key to play the music.<br />
2.1 Interface Introduction<br />
6
2.2 Music play mode<br />
1) While playing, short press PLAY key to pause, and then short<br />
press PLAY key again to continue.<br />
2) In the play/pause mode, short press VOL+/VOL- key to adjust the<br />
volume.<br />
3) In the music play mode, short press / to skip to the next<br />
or previous song, long press / to fast forward or fast<br />
backward.<br />
4) While playing, short press M key to enter the music setting mode.<br />
5) In the music setting mode, long press M key to return to the main<br />
menu.<br />
6) While playing, long press M key to enter the lyric interface, you can<br />
see the lyrics, If the track with lyrics.<br />
2.3 Music setting<br />
In the music playing mode, short press M key to enter music setting<br />
mode,<br />
2.3.1 Repeat Setting<br />
In the music setting mode, select Repeat and then press M key to<br />
7
enter. And then press / to select the mode you prefer and<br />
press Menu key confirm. There are the following modes: Normal,<br />
Repeat One, Folder, Repeat Folder, Repeat All, Random and Intro.<br />
8<br />
� Normal: After finishing playing the music under the current<br />
menu, it will play the music under the next menu<br />
continuously until it finishes playing all files.<br />
� Repeat One: Play one song repeatedly.<br />
� Folder: Play all music inside the folder one time.<br />
� Repeat Folder: Play all music inside the folder repeatedly.<br />
� Repeat All: Play all music repeatedly.<br />
� Random: Play all music under the current folder randomly.<br />
� Intro: Play the first 10 sec. of all music under the current file<br />
sequentially.<br />
2.3.2 Equalizer setting:<br />
Under MUSIC setting mode, get into the Equalizer submenu first,<br />
press / to choose the EQ Mode, there are 7 modes as<br />
follows: Natural, Rock, Pop, Classic, Soft, Jazz and DBB.
2.3.3 Tempo rate setting:<br />
Under music setting mode, get into the tempo rate setting, press<br />
/ to set the rate of playing. There are 16 levels from -8 to +8, -8<br />
is the lowest, +8 is the fastest and 0 means natural.<br />
2.3.4 Replay setting:<br />
A-B Repeat: Under music playing mode, choose Replay, now “A”<br />
start to flickers. Press to fix replay start point “A”, “A” stops<br />
flickers, and “B” starts to flicker<br />
Press to fix replay ending point B, “A-B” stops flicker and now it<br />
starts to replay the sounds from A to B.<br />
Now, if you want to change the replayed file, just press<br />
start to flickers, other steps same as above.<br />
, then “A”<br />
Following: If you want to follow the repeated file, just press<br />
again, you can see the icon “<br />
record.<br />
” on the screen, now it is start to<br />
Contrast: After recording, press the key and it will show “ ”<br />
sign, it will play the repeated file and then press key again and it<br />
will show ” ”, it is will play the recorded file. It is contrast.<br />
Under any step of the above, if you want to exit from it, just short<br />
press M key.<br />
9
2.3.5 Replay times setting:<br />
Replay times means the times the replay file will be played. There is<br />
1-10 to choose, press<br />
to confirm.<br />
/ to set the times, and press M key<br />
2.3.6 Replay gap setting:<br />
Repeat gap decides the pause time between first replay time and<br />
next replay time. (Unit: Second). There are 1-10 for chosen, press<br />
/ to set the time, and then press M key to confirm.<br />
2.3.7 Exit<br />
Exit from MUSIC setting.<br />
2.4 Music Pause mode<br />
While playing music, short press PLAY key to pause.<br />
10<br />
� In the pause mode, short press PLAY key to continue to play.<br />
� In the pause mode, long press PLAY key to turn off the player.<br />
� In the pause mode, short press M key to enter the submenu of<br />
music.
2.4.1 Local folder:<br />
Select local folder and then press<br />
folder and press M key to confirm.<br />
2.4.2 Delete file:<br />
/ to choose the<br />
Select Delete file and press M key to confirm. Press /<br />
to select the file you want to delete and then press M key to<br />
confirm. Press / to select “Yes” or “No”, If choose<br />
“Yes” and press M key to confirm, it will delete the file selected,<br />
If choose “No”, it will exit the delete mode.<br />
2.4.3 Delete all:<br />
Select Delete all and press M key to confirm<br />
Press / to select “Yes”, and press M key to confirm.<br />
2.4.4 Exit: exit from the menu<br />
2.5 Lyric display<br />
Under MUSIC playing mode, if there is suited lyric file for the current<br />
playing song. It will display the icon . Long press M key to enter<br />
the lyric mode, in this mode, you can see the lyric for the current<br />
track.<br />
11
Lyric<br />
The MP4 player supports "*. LRC" lyric file, it will execute the lyric<br />
display simultaneously. Just make sure the lyric file and the song file<br />
have the same file name.<br />
Example:<br />
Song file name is: sky.mp3 Lyric file name is: sky.lrc<br />
2.6 Directory function<br />
12<br />
� It can support two levels – Root Directory and subdirectory.<br />
� The order of the directory is the order in the root directory.<br />
� No matter what you enter the MUSIC mode; just enter into the<br />
stop mode, and the song will come back to the song you<br />
played last time, and the directory is also. If the music is not<br />
exit now, it will go to the first file of the current directory, if the<br />
directory is not exit, it will go to the next directory.<br />
� The sequence of the directory is the sequence in the<br />
sub-directory.
3. Movie Mode<br />
In the main menu, select MOVIE and press M key to confirm.<br />
Note: 1. The video file format that can be played in the player is AMV,<br />
and the formats that can be converted directly into AMV are<br />
MPG, ASF, AVI, WMV and so on by the convert tooling<br />
saved in the CD.<br />
2. Install the AMV convert tooling in your computer and in the<br />
interface of the AMV convert tooling, please click to<br />
into the HELP mode, please read the introduction carefully<br />
before starting converting.<br />
3. Please make sure that the video file converted can be<br />
played in your computer, if not, it is also can not be played<br />
in the MP4 player.<br />
4. Please set the size for the video file that will be converted as<br />
128*160.<br />
13
3.1 Playback mode<br />
In the main menu, select MOVIE and press M key to confirm.<br />
1) Press PLAY key to play the movie.<br />
2) In the movie play mode, short press / to skip to the next<br />
or previous movie, long press<br />
backward.<br />
/ to fast forward or fast<br />
3) Long press M key to return to the main menu.<br />
3.2 Pause mode<br />
While movie playback mode, short press PLAY key to pause.<br />
1) In the pause mode, short press PLAY key to continue to play.<br />
2) Long press PLAY key to turn off the player.<br />
3) Short press / to skip to the next or previous song,<br />
4) Short press VOL+/VOL- key to adjust the volume.<br />
5) Short press M key to enter the submenu of the movie.<br />
6) Long press M key to return to the main menu.<br />
3.3 Delete movie file<br />
In the movie pause mode, short press M key to enter the delete mode,<br />
and then the next operations are the same with the operations<br />
introduced in the music mode. Please refer to that.<br />
14
3.4 Repeat mode<br />
Set the playmode when movie is playing.<br />
4. Record Mode<br />
In the main menu, select Record and press M key to enter the record<br />
mode.<br />
Before recording, short press M key to enter the submenu of the<br />
record.<br />
Local folder: users can choose the folder here.<br />
REC type: choose the record type in this menu.<br />
There Fine REC, Long REC, Fine VOR, Long VOR for you to choose<br />
Fine REC: The record time is shortest, but the record quality is better.<br />
(WAV format)<br />
15
Long REC: record with longer time, but the record quality is lower.<br />
(ACT format)<br />
Fine VOR: WAV format (Sound control record, it will pause recording<br />
if there is no sound.)<br />
Long VOR: ACT format. (Sound control record, it will pause<br />
recording if there is no sound.)<br />
Exit: turn back the record standby interface.<br />
Start Record<br />
Under record standby condition, short press the “PLAY” key, the<br />
record will start.<br />
Short press the “PLAY” key: pause recording, when in the pause<br />
mode, the record time will be flicker.<br />
Long press the M key to save the current recorded file and return<br />
back to the main menu.<br />
Save the record file:<br />
In the recording or pause mode, long press M key to save the current<br />
recorded file and return to the main menu. In the recording or pause<br />
mode,<br />
16
Low battery:<br />
When recording, if in short of power, System will save the current<br />
recorded file, stop recording and show LOW BATTERY, now please<br />
charge the battery.<br />
Abnormal display of record mode<br />
1. Record file is full<br />
When recording file reaches 99 units or the flash space is full, it<br />
will show the notice. At this moment, it must delete some MP3<br />
songs or other recording files to have more space and continue<br />
recording.<br />
2. Total files are full<br />
This player can save maximum 200 record files (ideal amount),<br />
and the maximum amount is relative with the file name. (Usually, it<br />
will be less than 200) The system will judge if it reaches the<br />
maximum amount automatically; if it is, then, the record will be<br />
17
18<br />
stopped. User must delete some record files to have more space<br />
and continue recording.<br />
3. Disk space is full<br />
When the disk has no more space to save the record files, the<br />
system will notice that “disk full”. It must delete some MP3 songs<br />
or other record files to have more space and continue recording.<br />
4. Disk error<br />
When the disk has the error area, the system will find the area and<br />
save the current record file, then show “Disk error”. It needs to<br />
do the low end format to avoid this error. (Note: It is possible to<br />
have disk error if use the low end format to format the player<br />
completed. Therefore, try not to format the player completed.)
5. VOICE mode<br />
In the main menu, select VOICE and press M key to enter the voice<br />
mode.<br />
5.1 Under Voice stop mode<br />
Long press the PLAY key to turn off the player<br />
Short press M key to the submenu of VOICE<br />
Long press M key to back to the Main menu<br />
Short press / to select next/previous recorded file<br />
Press VOL+/VOL- key to adjust the volume.<br />
Local folder:<br />
In the voice stop mode, select Local Folder, press / to<br />
19
select the folder you want, press M key to confirm. (Only the folder<br />
under VOICE folder can be chosen).<br />
Delete file:<br />
In the voice stop mode, short press M key to enter the submenu,<br />
select Delete file and press M key to confirm. Press / to<br />
select the file you want to delete and then press M key to confirm.<br />
Press<br />
confirm.<br />
Delete all:<br />
/ to select YES or No and then press M key to<br />
Same as delete file, but is will delete all files in the folder. After<br />
delete all files, it will back the standby mode of VOICE interface.<br />
Exit:<br />
Exit from this menu.<br />
5.2 Under Voice playing mode<br />
20<br />
Press PLAY to stop the playing<br />
Long press PLAY to turn off the player<br />
Short press M key to the submenu of Voice playing<br />
Long press M key to back the Main menu<br />
Short press / to select next/previous file
Short press VOL+/VOL- key to adjust the volume.<br />
Submenu of voice playing:<br />
Repeat:<br />
In the repeat submenu, press / to select the repeat mode.<br />
There are 7 choices: Normal, Repeat One, Folder, Repeat Folder,<br />
Repeat All, Random and Intro.<br />
Tempo rate:<br />
In the tempo rate submenu, press / to set the rate of<br />
playing. There are 16 levels from -8 to +8, -8 is the lowest, +8 is<br />
the fastest and 0 means natural.<br />
Replay:<br />
In the submenu of voice playing: choose Replay, now “A” start to<br />
flickers. Press to fix replay start point “A”, “A” stops flickers,<br />
and “B” starts to flicker<br />
Press to fix replay ending point B, “A-B” stops flicker and now<br />
it starts to replay the sounds from A to B.<br />
Exit: exit from the submenu.<br />
21
5.3 VOICE mode error display<br />
22<br />
1. No record file<br />
It will show the notice when the player doesn’t have the record<br />
file or record file had been deleted.<br />
2. No files<br />
The record file name has the format, thus, when user change the<br />
record file name, the player can find the record file according to<br />
the rule. But, it will show the notice when the file name can’t<br />
match the rule under the play mode.<br />
3. Illegal file<br />
When the record file is damaged or the file is not a record file, the<br />
player can’t play the file and it will show the notice.<br />
Attention: For the WAV file play, the player can only play<br />
WAV format with recording file from this player. It cannot play<br />
WAV files copied from a PC.
6. FM Radio Mode<br />
In the main menu, select FM Radio and press M key to confirm.<br />
Short press / key to skip the next or previous station,<br />
Long press M key to return to the main menu.<br />
Short press VOL+/VOL- key to adjust the volume.<br />
Short press M key to enter the FM setting mode.<br />
� Save: Save the current station.<br />
� Record: Record the current station.<br />
� Delete: Delete the current station.<br />
� Delete All: Delete all the stored stations.<br />
� Auto Search: Search station automatically under valid<br />
channels.<br />
� Normal Band: It is 87. ~108.0MHZ.<br />
� Japan Band: It is 76.0~90.0MHZ.<br />
� Exit: Exit current mode.<br />
23
7. Photo Mode<br />
This function supports all JPEG format pictures<br />
1. In the main menu, press<br />
option.<br />
/ button to choose the “Photo”<br />
2. Press the M key to enter picture selection menu<br />
3. Press / button to choose desired picture and press PLAY<br />
key to display:<br />
4.Press / button to browse pictures in sequence(only<br />
suitable for ”Manual play”).<br />
24
7.1 Play Set<br />
1. In the picture list, short press M key to enter picture submenu,<br />
2. Press / button to select the “play set” option.<br />
3. Press M key to enter the following interface.<br />
4. Press / (button to choose “Manual play” or “auto play”<br />
options, press M button to confirm.<br />
6. Press / button to adjust “auto play” speed. Press the M<br />
key to confirm.<br />
7.2 Delete File<br />
1. In the picture list, short press M key to enter submenu.<br />
2. Press / to choose “Delete file” option:<br />
3. Press M key to enter this option.<br />
4. Press / to choose the file you want to delete and press M<br />
key to confirm.<br />
5. Press / to choose Yes or No, and press M key to confirm.<br />
7.3 Delete All<br />
1. In the picture list, short press M key to enter submenu.<br />
2. Press / to choose “Delete All” option:<br />
25
3. Press M key to enter this option.<br />
4. Press / to choose Yes or No, if choose Yes, it will delete<br />
all the photo files.<br />
Note: Please make sure that the size of the photo should be<br />
128*160.<br />
8 System setting<br />
Choose Setup in the main menu.<br />
Short press<br />
key to confirm.<br />
/ to select the setting option and short press M<br />
Long press M will back to the main menu. Long press PLAY to power<br />
off the player.<br />
26
8.1 System time<br />
Short press the “VOL+/VOL-” key the year, month, date, hour, minute<br />
or seconds. And then press / key to modify it.<br />
At last please press M key to confirm the setting and exit from the<br />
system time menu.<br />
8.2 LCD set<br />
Dark mode: Set fixed period of time (unit: second) so that when no<br />
key operation is performed, the players screen will turn black<br />
automatically. If “0” is selected, function is invalid.<br />
8.3 Language setting<br />
Users can choose the language under this mode.<br />
In the interface of language, press / to choose the language<br />
and press M key to confirm the selection and exit from the language<br />
setting at the same time.<br />
8.4 Power off setting<br />
There are two choices: off time and sleep time.<br />
Off time: means that if no any operation during the pre-set time, the<br />
system will power off automatically.<br />
(Unit: second), there are 0-60 for choice, 0 means do not use this<br />
27
function<br />
Sleep time: it means that after working for xxx minutes (xxx=preset<br />
time), the system will power off automatically. There is 0-120 for<br />
choice, 0 means do not use this function<br />
Note: Sleep mode is only valid once when it is been set. The<br />
system will delete the setting automatically after it works. If you need<br />
this function, please reset once more.<br />
8.5 Replay mode setting<br />
There are two choices: Manual reply, Auto reply<br />
"Manual replay": when use A-B repeat function, it cannot break<br />
automatically.<br />
“Auto replay”: it is used in the language learning; the system can<br />
pause between the first sentence and the second sentence<br />
automatically.<br />
8.6 Online mode<br />
Users can check the amount of free memory space.<br />
Multi driver: you can see the Normal section and Encrypted section in<br />
My Computer.<br />
Normal only: only the Normal section shown in My Computer<br />
28
Encrypted only: only the Encrypted section shown in My Computer<br />
Note: Some operating systems (under Windows 2000 SP4) cannot<br />
support two drive letters for a USB disk. This means if “ Private<br />
Space” function is on you should select “single ordinary disk” or<br />
“single encrypted disk” in order for correct displaying of the selected<br />
disk after it is connected to the PC. Please select “single ordinary<br />
disk” if your not sure or turn off the “Private Space” function and<br />
select “Normal only”.<br />
8.7 Memory info<br />
Users can check the memory information here.<br />
8.8 Firmware version<br />
Users can check the firmware of the player here.<br />
8.9 Firmware upgrade<br />
Under this mode, users can upgrade the MP4 if new version comes<br />
out.<br />
Wrong operation may cause damage to the player, please consult<br />
professional person before operation.<br />
29
8.10 Exit<br />
Exit back to the Main menu.<br />
9. E-book Mode<br />
This function supports all TXT file.<br />
1. Enter the main menu, press / button to choose“E-Book”<br />
2. Press M button to enter the mode.<br />
3. Press / button to select desired text file to read. Press<br />
Play button to enter text interface<br />
4. Press / button to turn the pages in sequence(only<br />
suitable for ”Manual play”)<br />
5. While reading, short press M key to enter the Bookmark setting<br />
mode.<br />
30
9.1 Play set<br />
1. In the E-book list, short press M key to enter submenu.<br />
2. Press / button to choose “play set” option:<br />
3. Press M key to enter this option, or press PLAY key to exit.<br />
4. Press / button to choose “Manual play” or “auto play”<br />
options. Press M key to confirm.<br />
5. Press �/� button to adjust “auto play” speed. Press M button to<br />
confirm.<br />
9.2 Delete File<br />
1. In the E-book list, short press M key to enter submenu.<br />
2. Press / to choose “Delete file” option:<br />
3. Press M key to enter this option.<br />
4. Press / to choose the file you want to delete and press<br />
M key to confirm.<br />
5. Press / to choose Yes or No, and press M key to confirm.<br />
9.3 Delete All<br />
1. In the E-book list, short press M key to enter submenu.<br />
2. Press / to choose “Delete all” option:<br />
3. Press M key to enter this option.<br />
31
4. Press / to choose Yes or No, if choose Yes, it will delete<br />
all the E-book files.<br />
10. Game Mode<br />
Short press M key to enter the Game mode, and then press /<br />
32<br />
to select the game you want to play and press M key to confirm.<br />
10.1 Bricks<br />
Select Bricks and press M key to enter.<br />
● Start: Short press M key to start the game.<br />
● Speed: In the speed mode, you can adjust the speed.<br />
● Return: Return to the Game main interface.
10.2 Return<br />
Select Exit to exit the mode.<br />
Trouble Shooting<br />
1. when I press on “play”, No display?<br />
Cause/ Solution:Please connect the player on the computer for<br />
recharging. Try to restart it 10 minutes later.<br />
2. When I want to play files, no sound?<br />
Cause/ Solution:volume is too low,turn up the volume,inspect the<br />
connection of the earphone or if it is broken.<br />
3. Why does my computer go wrong when I disconnect the<br />
player?<br />
Cause/ Solution: mostly because of taking off the player when it is<br />
transferring file,We advise you not to disconnect the player while<br />
transferring.<br />
33
4. Why can’t I download files while MP3 player is connected to<br />
the PC?<br />
Cause/ Solution:The USB Driver hasn’t been installed correctly,<br />
Please install the USB driver again follow the operation instruction, or<br />
your computer’s motherboard does not support USB equipment, you<br />
need update your motherboard driver.<br />
5. Why can’t I see the files which have been stored in the player?<br />
Cause/Solution: The player just can save 100 folders or 2 directories<br />
(including the root directory). And in the folder, just can save 999 files.<br />
If more than 100 folders or 2 directories, we just can see superfluous<br />
folders or files or directories in the computer. Please delete the<br />
superfluous files and make sure that the folders should be less than<br />
100 and the directories should be less than 2 and the files in each<br />
folder should less than 999.<br />
34
Technical specification<br />
Music format MP3. WMA. WAV<br />
Video format AMV<br />
Picture format JPG<br />
Storage capacity 256MB/512MB/1GB/2GB/4GB<br />
Display 1.8” color display , 128*160 matrix<br />
SNR 85dB<br />
Record mode Built-in microphone<br />
Record format WAV<br />
FM Function Support<br />
Output frequency range 20HZ-22KHZ<br />
Size 78*42*8mm<br />
Battery specification Rechargeable lithium battery<br />
PC slot USB2.0<br />
System requirement Win98SE/ME,Win2000,Win XP,Vista<br />
35