Bedienungsanleitung operating instructions mode d ... - 4mybaby AG
Bedienungsanleitung operating instructions mode d ... - 4mybaby AG
Bedienungsanleitung operating instructions mode d ... - 4mybaby AG

You also want an ePaper? Increase the reach of your titles
YUMPU automatically turns print PDFs into web optimized ePapers that Google loves.
INT<br />
10<br />
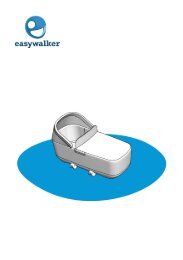
COSMO<br />
the warranty will expire with immediate effect.<br />
● This pram is intended for only one child.<br />
● The seat or the carry-cot may not be used in<br />
the car.<br />
● The pushchair seat is designed for a child<br />
from birth up to 15 kg.<br />
● Carry-cots, prams and sports buggies may<br />
be used only for transport and are not a<br />
substitute for a cot or a cradle.<br />
● Always park the stroller/pram out of the<br />
reach of children and do not allow children<br />
to play in or with the stroller/pram.<br />
● Please never park the stroller/pram without<br />
first applying the brakes. Make sure that<br />
the brakes have locked properly.<br />
● The brakes should always be applied when<br />
you sit or lift your child in and out of the<br />
stroller/pram.<br />
● Always avoid parking on slopes.<br />
● When using public transport take special<br />
care to ensure the stroller/pram stands<br />
firmly and safely.<br />
● Wheel the stroller/pram slowly and gently<br />
up and down steps.<br />
● Never place objects on the folding top.<br />
● The shopping net can be loaded to a maximum<br />
of 5 kg (11 lbs). Please always place<br />
heavy objects in the centre of the shopping<br />
basket.<br />
● When unfolding and folding the chassis<br />
make sure that you do not pinch yourself or<br />
others.<br />
● Make sure that no locks disengage while<br />
carrying the stroller/pram over obstacles<br />
(e.g. steps).<br />
● When adjusting the stroller/pram make<br />
sure that your child is clear of moveable<br />
parts.<br />
● The stroller/pram can be damaged or destroyed<br />
by overloading, improper folding or<br />
use of unapproved accessories.<br />
● The foot rest is not suitable for transporting<br />
heavy loads or a second child.<br />
● Before using the stroller/pram for the first<br />
time: please remove the labels or tags that<br />
DO NOT refer to safety <strong>instructions</strong> or<br />
notes.<br />
● Never use the foot rest or the safety bar to<br />
lift or carry the stroller/pram.<br />
● For babies up to an age of 6 month we recommend<br />
only to use the backrest in its lowest<br />
position.<br />
Parking the pram/buggy<br />
Attention: Under certain circumstances, the wheels may<br />
cause discolouration of floor surfaces.<br />
Foreign bodies (e.g. little stones) in the wheels must be<br />
removed to prevent any potential damage to floor surfaces.<br />
Extreme heat, in particular direct contact with hot<br />
surfaces (e.g. in the car in summer) can lead to permanent<br />
deformations on hollow cavity tyres.<br />
Related complaints or claims for compensation will not<br />
be recognized.<br />
Cleaning the textile parts<br />
To remove small stains, use a cloth dampened with clear<br />
water and carefully clean the spot. Avoid brisk rubbing<br />
(especially on dark fabrics). Normally, all removable fabric<br />
parts can be washed in the washing machine with a<br />
fine fabric detergent (no brightening agents) at 30 °C/<br />
85 °F (gentle cycle). Please check separate care labels<br />
on the fabric parts.<br />
Rain Cover<br />
In rainy weather fit the rain cover over the entire<br />
stroller/pram before it starts to rain.<br />
Caution: The rain cover is not a toy! Never leave your<br />
child unsupervised. For the best possible ventilation of<br />
the stroller/pram we recommend using the rain cover only<br />
for the duration of the rain shower.<br />
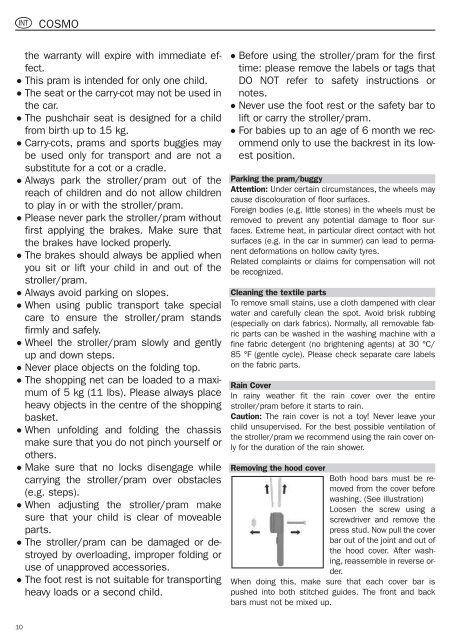
Removing the hood cover<br />
Both hood bars must be removed<br />
from the cover before<br />
washing. (See illustration)<br />
Loosen the screw using a<br />
screwdriver and remove the<br />
press stud. Now pull the cover<br />
bar out of the joint and out of<br />
the hood cover. After washing,<br />
reassemble in reverse order.<br />
When doing this, make sure that each cover bar is<br />
pushed into both stitched guides. The front and back<br />
bars must not be mixed up.