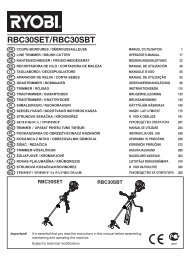
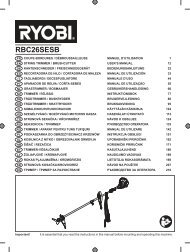
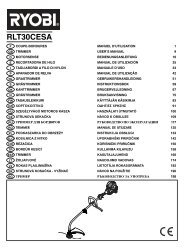
G-1156 - Ryobi
G-1156 - Ryobi
G-1156 - Ryobi

You also want an ePaper? Increase the reach of your titles
YUMPU automatically turns print PDFs into web optimized ePapers that Google loves.
13. The flange and clamp nut must have same outer diameter.<br />
14. Do not remove the soft paper in the center of the grinding wheel.<br />
(If the paper has been previously removed, insert some soft paper<br />
or rubber between grinding wheel and flange.)<br />
15. Use the tool only for approved applications. Never use coolants or<br />
water or use the tool as a fixed tool.<br />
16. Grip the tool securely with both hands while operating.<br />
17. Ensure that ventilation openings are kept clear when working in dusty<br />
conditions. If it should become necessary to clear dust, first disconnect<br />
the tool from the mains supply (use nonmetallic objects) and avoid<br />
damaging internal parts.<br />
SPECIFICATIONS<br />
G-<strong>1156</strong> G-1256<br />
Grinding wheel 115 mm (4-1/2”) 125 mm (5”)<br />
Frequency 50/60 Hz 50/60 Hz<br />
Voltage* 110V, 230V 110V, 230V<br />
Input 920 W 920 W<br />
Spindle thread M14 M14<br />
No load speed 11,000 min-1 11,000 min-1 Overall length 274 mm (10-3/4”) 274 mm (10-3/4”)<br />
Net weight 1.6 kg (3.5 lbs.) 1.6 kg (3.5 lbs.)<br />
* Be sure to check the nameplate on the product, because the<br />
voltage is subject to change depending on the area in which the<br />
product is to be used.<br />
Maximum circumferential speed of grinding wheel : 4,800 m/min.<br />
(Example of calculation)<br />
4,320 = 3.14 x 125 x 11,000 / 1,000<br />
4,320 : Circumferential speed of grinding wheel<br />
125 : Wheel diameter<br />
11,000 : No load speed of grinder<br />
STANDARD ACCESSORIES<br />
Aux. handle, Wrench<br />
A grinding wheel is included in the standard accessories for some<br />
countries.<br />
APPLICATIONS<br />
(Use only for the purposes listed below.)<br />
1. Grinding<br />
NOISE BUILD-UP<br />
Noise (sound pressure level) in the workplace can exceed 85 dB (A). In<br />
this case, sound insulation and hearing protection measures must be<br />
taken by the operator.<br />
SWITCH (Fig.1)<br />
This tool is started and stopped by sliding and releasing the switch (5).<br />
For the convenience for continuous operation, slide the switch along<br />
then press the front end down to lock it (action A).<br />
To release the lock, press the rear end of the switch (action B).<br />
MOUNTING THE GRINDING WHEEL (Fig.2)<br />
1. Attach the disc flange (6), the grinding wheel (1) and the clamp<br />
nut (7) to the spindle shaft (8).<br />
Be sure the disc flange is properly seated on the spindle shaft.<br />
2. Depress the lock button (4) located on the right side of gear case.<br />
3. Using the wrench (9) provided, tighten the clamp nut in a clockwise<br />
direction.<br />
WARNING!<br />
Check carefully whether or not there are cracks in the wheel.<br />
Replace a cracked wheel immediately.<br />
OPERATING (Fig.3)<br />
KEEP SAFETY GUARDS IN PLACE.<br />
NEVER COVER THE AIR VENTS SINCE THEY MUST ALWAYS BE<br />
OPEN FOR PROPER MOTOR COOLING.<br />
The key to efficient operating is controlling the pressure and surface<br />
contact between the disc and work piece. Flat surfaces are ground at an<br />
acute angle, usually 10 to 20 degrees with the work piece. Allow the disc<br />
to reach full speed before starting to grind. Too great angle causes<br />
concentration of pressure on a small area which may gouge or burn<br />
work surface.<br />
MAINTENANCE<br />
After use, check the tool to make sure that it is in top condition.<br />
It is recommended that you take this tool to a <strong>Ryobi</strong> Authorized Service<br />
Center for a through cleaning and lubrication at least once a year.<br />
DO NOT MAKE ANY ADJUSTMENTS WHILE THE MOTOR IS IN<br />
MOTION.<br />
ALWAYS DISCONNECT THE POWER CORD FROM THE<br />
RECEPTACLE BEFORE CHANGING REMOVABLE OR<br />
EXPENDABLE PARTS (BLADE, BIT, SANDING PAPER ETC.),<br />
LUBRICATING OR WORKING ON THE UNIT.<br />
WARNING!<br />
To ensure safety and reliability, all repairs should be performed by<br />
an AUTHORIZED SERVICE CENTER or other QUALIFIED SERVICE<br />
ORGANIZATION.<br />
SAVE THESE INSTRUCTIONS FOR FUTURE REFERENCE.