Jøtul F 370 Series
Jøtul F 370 Series
Jøtul F 370 Series

You also want an ePaper? Increase the reach of your titles
YUMPU automatically turns print PDFs into web optimized ePapers that Google loves.
English<br />
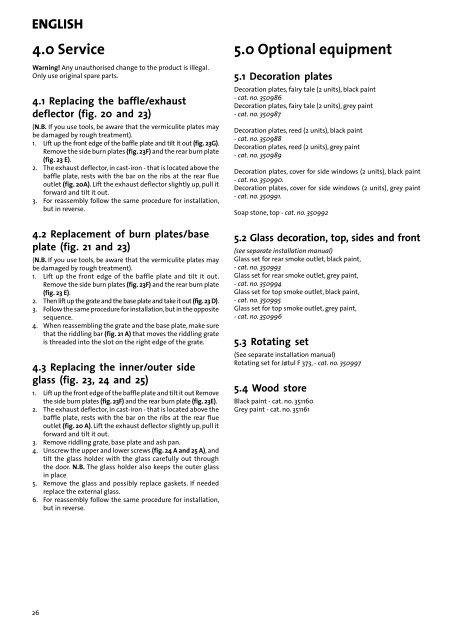
4.0 Service<br />
Warning! Any unauthorised change to the product is illegal.<br />
Only use original spare parts.<br />
4.1 Replacing the baffle/exhaust<br />
deflector (fig. 20 and 23)<br />
(N.B. If you use tools, be aware that the vermiculite plates may<br />
be damaged by rough treatment).<br />
1. Lift up the front edge of the baffle plate and tilt it out (fig. 23G).<br />
Remove the side burn plates (fig. 23F) and the rear burn plate<br />
(fig. 23 E).<br />
2. The exhaust deflector, in cast-iron - that is located above the<br />
baffle plate, rests with the bar on the ribs at the rear flue<br />
outlet (fig. 20A). Lift the exhaust deflector slightly up, pull it<br />
forward and tilt it out.<br />
3. For reassembly follow the same procedure for installation,<br />
but in reverse.<br />
4.2 Replacement of burn plates/base<br />
plate (fig. 21 and 23)<br />
(N.B. If you use tools, be aware that the vermiculite plates may<br />
be damaged by rough treatment).<br />
1. Lift up the front edge of the baffle plate and tilt it out.<br />
Remove the side burn plates (fig. 23F) and the rear burn plate<br />
(fig. 23 E).<br />
2. Then lift up the grate and the base plate and take it out (fig. 23 D).<br />
3. Follow the same procedure for installation, but in the opposite<br />
sequence.<br />
4. When reassembling the grate and the base plate, make sure<br />
that the riddling bar (fig. 21 A) that moves the riddling grate<br />
is threaded into the slot on the right edge of the grate.<br />
4.3 Replacing the inner/outer side<br />
glass (fig. 23, 24 and 25)<br />
1. Lift up the front edge of the baffle plate and tilt it out Remove<br />
the side burn plates (fig. 23F) and the rear burn plate (fig. 23E).<br />
2. The exhaust deflector, in cast-iron - that is located above the<br />
baffle plate, rests with the bar on the ribs at the rear flue<br />
outlet (fig. 20 A). Lift the exhaust deflector slightly up, pull it<br />
forward and tilt it out.<br />
3. Remove riddling grate, base plate and ash pan.<br />
4. Unscrew the upper and lower screws (fig. 24 A and 25 A), and<br />
tilt the glass holder with the glass carefully out through<br />
the door. N.B. The glass holder also keeps the outer glass<br />
in place<br />
5. Remove the glass and possibly replace gaskets. If needed<br />
replace the external glass.<br />
6. For reassembly follow the same procedure for installation,<br />
but in reverse.<br />
5.0 Optional equipment<br />
5.1 Decoration plates<br />
Decoration plates, fairy tale (2 units), black paint<br />
- cat. no. 350986<br />
Decoration plates, fairy tale (2 units), grey paint<br />
- cat. no. 350987<br />
Decoration plates, reed (2 units), black paint<br />
- cat. no. 350988<br />
Decoration plates, reed (2 units), grey paint<br />
- cat. no. 350989<br />
Decoration plates, cover for side windows (2 units), black paint<br />
- cat. no. 350990.<br />
Decoration plates, cover for side windows (2 units), grey paint<br />
- cat. no. 350991.<br />
Soap stone, top - cat. no. 350992<br />
5.2 Glass decoration, top, sides and front<br />
(see separate installation manual)<br />
Glass set for rear smoke outlet, black paint,<br />
- cat. no. 350993<br />
Glass set for rear smoke outlet, grey paint,<br />
- cat. no. 350994<br />
Glass set for top smoke outlet, black paint,<br />
- cat. no. 350995<br />
Glass set for top smoke outlet, grey paint,<br />
- cat. no. 350996<br />
5.3 Rotating set<br />
(See separate installation manual)<br />
Rotating set for Jøtul F 373, - cat. no. 350997<br />
5.4 Wood store<br />
Black paint - cat. no. 351160<br />
Grey paint - cat. no. 351161<br />
26