3003085-2011-06-22.fm - EXHAUSTO DK
3003085-2011-06-22.fm - EXHAUSTO DK
3003085-2011-06-22.fm - EXHAUSTO DK

You also want an ePaper? Increase the reach of your titles
YUMPU automatically turns print PDFs into web optimized ePapers that Google loves.
<strong>3003085</strong>-<strong>2011</strong>-<strong>06</strong>-<strong>22.fm</strong> GB - BESB – Product information<br />
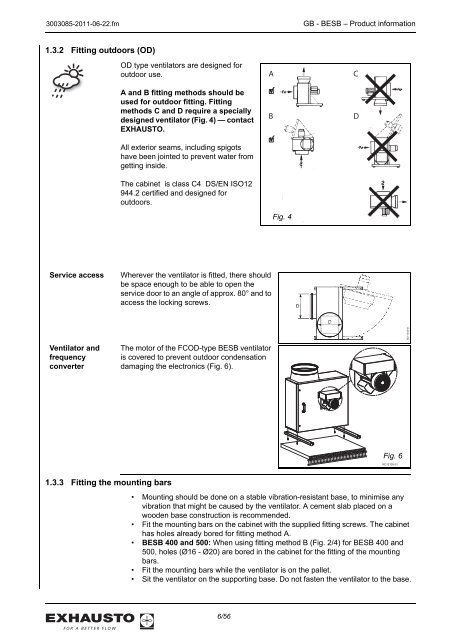
1.3.2 Fitting outdoors (OD)<br />
OD type ventilators are designed for<br />
outdoor use.<br />
A and B fitting methods should be<br />
used for outdoor fitting. Fitting<br />
methods C and D require a specially<br />
designed ventilator (Fig. 4) — contact<br />
<strong>EXHAUSTO</strong>.<br />
All exterior seams, including spigots<br />
have been jointed to prevent water from<br />
getting inside.<br />
The cabinet is class C4 DS/EN ISO12<br />
944.2 certified and designed for<br />
outdoors.<br />
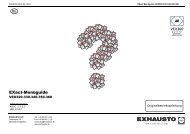
Service access Wherever the ventilator is fitted, there should<br />
be space enough to be able to open the<br />
service door to an angle of approx. 80° and to<br />
access the locking screws.<br />
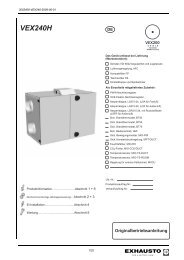
Ventilator and<br />
frequency<br />
converter<br />
1.3.3 Fitting the mounting bars<br />
The motor of the FCOD-type BESB ventilator<br />
is covered to prevent outdoor condensation<br />
damaging the electronics (Fig. 6).<br />
• Mounting should be done on a stable vibration-resistant base, to minimise any<br />
vibration that might be caused by the ventilator. A cement slab placed on a<br />
wooden base construction is recommended.<br />
• Fit the mounting bars on the cabinet with the supplied fitting screws. The cabinet<br />
has holes already bored for fitting method A.<br />
• BESB 400 and 500: When using fitting method B (Fig. 2/4) for BESB 400 and<br />
500, holes (Ø16 - Ø20) are bored in the cabinet for the fitting of the mounting<br />
bars.<br />
• Fit the mounting bars while the ventilator is on the pallet.<br />
• Sit the ventilator on the supporting base. Do not fasten the ventilator to the base.<br />
6/56<br />
A<br />
B<br />
Fig. 4<br />
C<br />
D<br />
Fig. 5<br />
Fig. 6<br />
RD12105-01<br />
RD11358-01
![3003415_ins_vex270hx_de.pdf [Download] - exhausto.de](https://img.yumpu.com/8086300/1/184x260/3003415-ins-vex270hx-depdf-download-exhaustode.jpg?quality=85)