Australian Cooking with the Weber® Q.TM
Australian Cooking with the Weber® Q.TM
Australian Cooking with the Weber® Q.TM

You also want an ePaper? Increase the reach of your titles
YUMPU automatically turns print PDFs into web optimized ePapers that Google loves.
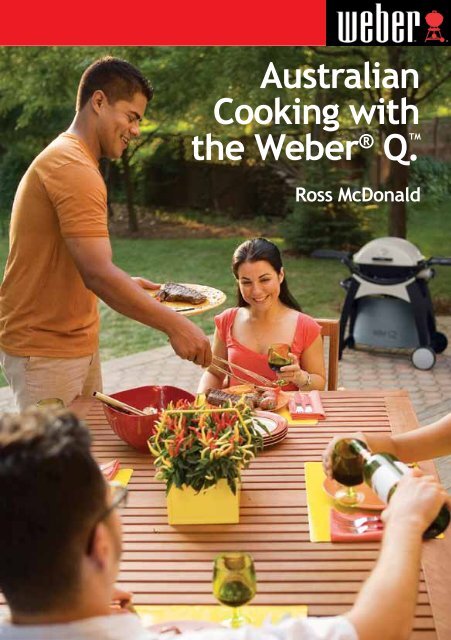
<strong>Australian</strong><br />
<strong>Cooking</strong> <strong>with</strong><br />
<strong>the</strong> Weber ® <strong>TM</strong><br />
Q.<br />
Ross McDonald
Weber ® Q <strong>TM</strong> (Q220) <strong>TM</strong><br />
The shape of <strong>the</strong> Weber ® Q <strong>TM</strong> is a registered trademark.<br />
Thank you for choosing <strong>the</strong> Weber ® Q <strong>TM</strong> barbecue. We know you will quick-<br />
ly begin to enjoy many memorable barbecued meals on your Weber Q <strong>TM</strong> .<br />
To help you get started we’ve included this Weber Q <strong>TM</strong> cooking guide. It<br />
includes some of our favourite recipes. To get <strong>the</strong> best results, you need<br />
to use <strong>the</strong> correct heat settings as shown in <strong>the</strong> barbecuing and roasting<br />
instructions. In addition to <strong>the</strong> recipes, you’ll find a ‘barbecuing and<br />
roasting guide’ on <strong>the</strong> last few pages. This provides an estimate of <strong>the</strong><br />
cooking times for many of <strong>the</strong> dishes you may like to try.<br />
If you need advice or would like some help, you can ei<strong>the</strong>r call us on 1300<br />
301 290 or e-mail us at custserv@weberbbq.com.au. You’ll find that <strong>the</strong><br />
people in our company will go out of <strong>the</strong>ir way to try and help you. If you<br />
would like more information about any of our barbecues or accessories,<br />
visit our website at www.weberbbq.com.au.<br />
Thank you again, and happy Weber-Q-ing.<br />
®
Contents<br />
How to get <strong>the</strong> best from your Weber ® Q <strong>TM</strong> 2<br />
Helpful hints for <strong>the</strong> Weber ® Q <strong>TM</strong> 3<br />
Sunday Breakfast 7<br />
Crackling Pork 9<br />
Glazed Racks of Lamb 11<br />
Fillet Steaks <strong>with</strong> Lemon-Parsley Butter 13<br />
Prawn Satay <strong>with</strong> Peanut Dipping Sauce 15<br />
Salmon <strong>with</strong> Thai Cucumber Relish 17<br />
Roast Chicken 19<br />
Spanish Chicken Breasts Marinated in Citrus and Tarragon 21<br />
Aussie Roast Lamb Greek-Style 23<br />
Christmas Turkey 25<br />
Barbecuing and Roasting Guide 26<br />
Weber ® Q <strong>TM</strong> Accessories 29
How to get <strong>the</strong> best from your Weber ® Q <strong>TM</strong><br />
Barbecuing<br />
Your Q<strong>TM</strong> has been designed to cook magnificent<br />
steaks. To get <strong>the</strong> best results <strong>with</strong><br />
steak, cook on <strong>the</strong> grill-bars ra<strong>the</strong>r than on<br />
a hotplate. Only use a hotplate when <strong>the</strong>re<br />
is <strong>the</strong> potential for a lot of fat to come<br />
away from <strong>the</strong> meat or when cooking eggs,<br />
pancakes and <strong>the</strong> like. Where a recipe in<br />
this cooking guide requires you to ‘barbecue’,<br />
it is recommended that you turn <strong>the</strong><br />
meat only once, halfway through cooking.<br />
Always barbecue <strong>with</strong> <strong>the</strong> lid closed, <strong>the</strong>se<br />
barbecues are not designed to cook <strong>with</strong><br />
<strong>the</strong> lid up. Even when cooking on a hotplate<br />
always cook <strong>with</strong> <strong>the</strong> lid down.<br />
Whe<strong>the</strong>r you are barbecuing meat on <strong>the</strong><br />
grill or on <strong>the</strong> breakfast plate, it is important<br />
that you pre-heat <strong>the</strong> barbecue before<br />
cooking. The instructions for pre-heating<br />
your Q<strong>TM</strong> follow.<br />
Pre-heating and Barbecuing<br />
To pre-heat your Q<strong>TM</strong> , open <strong>the</strong> lid, unfold<br />
<strong>the</strong> work surfaces and turn <strong>the</strong> burner control<br />
knob to START/HI (Photograph A). Press<br />
<strong>the</strong> red ignition button to light <strong>the</strong> barbecue.<br />
Once alight, allow <strong>the</strong> gas to run for<br />
10 minutes <strong>with</strong> <strong>the</strong> lid closed. Your Q<strong>TM</strong> is<br />
now pre-heated and ready<br />
for barbecuing. Leave <strong>the</strong><br />
burner setting on START/HI<br />
throughout <strong>the</strong> barbecuing<br />
process. Remeber to always<br />
cook <strong>with</strong> <strong>the</strong> lid down. If<br />
you are cooking <strong>with</strong> a hotplate<br />
or breakfast plate,<br />
A remember to allow plenty<br />
of time for it to heat up. Always pre-heat<br />
<strong>the</strong> plate <strong>with</strong> <strong>the</strong> lid down and test it <strong>with</strong><br />
a droplet of water to make sure it’s hot<br />
enough to cook on.<br />
Roasting<br />
It is recommended that you use <strong>the</strong> Q roasting<br />
trivet accessory. Using this accessory allows<br />
air to convect all around <strong>the</strong> roast for<br />
2<br />
more even cooking. It also helps minimise<br />
scorching on <strong>the</strong> base of <strong>the</strong> roast. To ensure<br />
<strong>the</strong> bottom of <strong>the</strong> roast is not scorched<br />
by <strong>the</strong> hot grill bars you will need a sheet of<br />
foil that is folded to produce a ‘heat-shield’<br />
of double thickness between <strong>the</strong> grill and<br />
<strong>the</strong> base of <strong>the</strong> trivet. (Double thickness<br />
creates an air gap between <strong>the</strong> two layers<br />
of foil which assists insulation). This foil<br />
lies on <strong>the</strong> cooking grill directly below <strong>the</strong><br />
roasting trivet (Photographs B & E).<br />
Photograph B<br />
With <strong>the</strong> foil in position create slits in <strong>the</strong><br />
foil so that <strong>the</strong> fat from <strong>the</strong> roast can drain<br />
away. When doing this we are trying to<br />
make sure that <strong>the</strong> fat doesn’t fall onto <strong>the</strong><br />
grill bars but drops between <strong>the</strong>m.<br />
When you are roasting you must also pre-heat<br />
<strong>the</strong> barbecue. The instructions for pre-heating<br />
<strong>the</strong> Q<strong>TM</strong> for roasting follow.<br />
Pre-heating and Roasting<br />
To pre-heat your Weber Q<strong>TM</strong> , open <strong>the</strong> lid<br />
and place <strong>the</strong> foil and roasting trivet in position.<br />
Turn <strong>the</strong> burner control knob to START/<br />
HI (Photograph C). Press <strong>the</strong><br />
red ignition button to light<br />
<strong>the</strong> barbecue. Once alight,<br />
allow <strong>the</strong> gas to run for 10<br />
minutes <strong>with</strong> <strong>the</strong> lid closed.<br />
Now that your Weber Q<strong>TM</strong> is<br />
pre-heated turn <strong>the</strong> control<br />
knob to <strong>the</strong> roast setting<br />
(Photograph D). Your Q<strong>TM</strong> C<br />
is
eady for roasting. You can<br />
now place your meat inside<br />
<strong>the</strong> Q<strong>TM</strong> . As your Q<strong>TM</strong> is fitted<br />
<strong>with</strong> a lid <strong>the</strong>rmometer you<br />
can monitor <strong>the</strong> internal<br />
temperature of your Q<strong>TM</strong> .<br />
The ideal roasting temperature<br />
is between 2000C and 2200C. Unlike an indoor<br />
oven, your Q<strong>TM</strong> D<br />
uses natural convection allowing<br />
you to cook in this temperature<br />
range to produce wonderful, flavoursome<br />
roasts. Remember, <strong>the</strong>re is no need to turn<br />
<strong>the</strong> meat when roasting, so do not to open<br />
<strong>the</strong> lid unnecessarily.<br />
Photograph E<br />
Roasting Tip<br />
Getting <strong>the</strong> timing right so that your roast<br />
is cooked to your liking can be a bit tricky<br />
at times when cooking outside. Wind, ambient<br />
temperature and <strong>the</strong> temperature of<br />
<strong>the</strong> meat when you started cooking all influence<br />
<strong>the</strong> amount of time a roast needs<br />
to be cooked.<br />
One of <strong>the</strong> best ways to make sure you get<br />
your roast cooked just <strong>the</strong> way you like it is<br />
to use a meat <strong>the</strong>rmometer. With a standard<br />
meat <strong>the</strong>rmometer you can read <strong>the</strong> internal<br />
temperature of <strong>the</strong> meat, so you can<br />
tell when it’s cooked to your liking. The latest<br />
meat <strong>the</strong>rmometers are digital/remote.<br />
They really are fool-proof. (How <strong>the</strong>y work<br />
is explained on <strong>the</strong> inside back cover).<br />
Helpful hints for <strong>the</strong> Weber ® Q <strong>TM</strong><br />
Always cook <strong>with</strong> <strong>the</strong> lid closed<br />
No matter whe<strong>the</strong>r you are cooking a roast,<br />
a barbecue or breakfast on <strong>the</strong> breakfast<br />
plate, always cook <strong>with</strong> <strong>the</strong> lid closed. Why?<br />
First, cooking <strong>with</strong> <strong>the</strong> lid closed creates<br />
natural convection of <strong>the</strong> air inside <strong>the</strong> barbecue.<br />
This results in more even cooking<br />
<strong>with</strong> more natural juices retained.<br />
Second, you will achieve outstanding barbecue<br />
flavour that you can’t get by cooking<br />
<strong>with</strong> <strong>the</strong> lid open. This is produced when<br />
‘flavour-giving’ barbecue smoke is convected<br />
all around <strong>the</strong> meat.<br />
Third, cooking times are greatly reduced<br />
(about half of what you might expect on an<br />
open barbecue), which means you can barbecue<br />
<strong>the</strong> same amount using a lot less gas.<br />
Because less gas is required to cook foods,<br />
you don’t need to fill <strong>the</strong> gas bottle anywhere<br />
near as often (a 9kg gas bottle will<br />
last for over 36 hours of cooking).<br />
Use ‘natural convection’<br />
to get <strong>the</strong> best results<br />
Remember, <strong>the</strong>se barbecues use natural<br />
convection to cook food perfectly. To assist<br />
convection, try not to cover more than<br />
two thirds of <strong>the</strong> cooking grill at one time.<br />
Whilst <strong>the</strong>y will cook <strong>with</strong> <strong>the</strong> whole cooking<br />
surface covered, <strong>the</strong> results are far better<br />
if you barbecue in two or three batches<br />
when feeding a crowd.<br />
When roasting, make sure <strong>the</strong> height of<br />
your food fits inside <strong>with</strong> <strong>the</strong> lid closed. To<br />
allow <strong>the</strong> air to convect properly you should<br />
use an accessory roasting trivet and make<br />
sure you have clearance between your food<br />
and <strong>the</strong> lid.<br />
How often should you turn <strong>the</strong> meat?<br />
Your Weber Q <strong>TM</strong> will produce <strong>the</strong> most impressive<br />
food when you let <strong>the</strong> ‘convection<br />
process’ do its work <strong>with</strong> minimum<br />
interruption. For this reason, resist <strong>the</strong><br />
temptation to continually turn <strong>the</strong> food.<br />
3
4<br />
Each time you turn <strong>the</strong> food you have to<br />
raise <strong>the</strong> lid, allowing <strong>the</strong> hot air to escape.<br />
When barbecuing meat, outstanding<br />
results are achieved if you use tongs to turn<br />
<strong>the</strong> meat (once only) half-way through <strong>the</strong><br />
cooking time. Roasts, on <strong>the</strong> o<strong>the</strong>r hand,<br />
should never need turning.<br />
Food sticking to <strong>the</strong> grill<br />
When barbecuing steaks or chops <strong>the</strong> meat<br />
can sometimes stick to <strong>the</strong> hot grill. If <strong>the</strong><br />
meat is properly branded (2½ to 3 minutes)<br />
before you turn it, it will not stick. People<br />
trying to turn <strong>the</strong> meat too early often have<br />
this ‘sticking’ problem. Don’t tear it, just<br />
leave <strong>the</strong> meat where it is and it will come<br />
free once properly branded.<br />
Using sauces and glazes<br />
Only apply sauces or glazes that have a high<br />
sugar content during <strong>the</strong> last 10–15 minutes<br />
of cooking. If applied too early <strong>the</strong>y<br />
will spoil <strong>the</strong> food, because <strong>the</strong> sugar in <strong>the</strong><br />
glaze will caramelise and turn black.<br />
Regular cleaning is necessary<br />
Some people never clean <strong>the</strong>ir Q <strong>TM</strong> . Allowing<br />
lots of fat to build up inside <strong>the</strong> barbecue<br />
below <strong>the</strong> cooking grill can result in a fat<br />
fire. If excess fats are cleaned away every<br />
four or five times <strong>the</strong> barbecue is used this<br />
should never be a problem. If you ever do<br />
have a fat fire turn <strong>the</strong> gas off at <strong>the</strong> gas<br />
bottle and open <strong>the</strong> lid to let <strong>the</strong> heat escape.<br />
Remove <strong>the</strong> food. Do not throw water<br />
on <strong>the</strong> fire, just allow <strong>the</strong> fire to burn out<br />
<strong>with</strong> <strong>the</strong> lid up. It could burn for five or ten<br />
minutes.<br />
Cleaning your Weber ® Q <strong>TM</strong><br />
Your Q <strong>TM</strong> is easy to clean. For day to day<br />
cleaning <strong>the</strong> best method is to use a Weber<br />
grill brush. Immediately after removing<br />
your food, while <strong>the</strong> grill is still very hot,<br />
dip <strong>the</strong> grill brush in cold water and brush<br />
along <strong>the</strong> grill bars where food residue remains.<br />
It is not necessary to wash your Q <strong>TM</strong><br />
grill in water after every use but regular<br />
washing <strong>with</strong> <strong>the</strong> brush (while <strong>the</strong> grill is<br />
hot) is a good idea.<br />
Troubleshooting<br />
Problem. Meat tastes stewed and lacks expected<br />
barbecue flavour.<br />
Solution. Temperature is not hot enough.<br />
Make sure that you pre-heat your barbecue<br />
as directed under ‘barbecuing’ on page 2.<br />
Always cook all food <strong>with</strong> <strong>the</strong> lid closed.<br />
Problem. Food does not cook in <strong>the</strong> estimated<br />
cooking time.<br />
Solution. Temperature is not hot enough.<br />
Make sure that you pre-heat your barbecue<br />
as directed under ‘barbecuing’ on page 2.<br />
Always cook all food <strong>with</strong> <strong>the</strong> lid closed.<br />
Problem. Strong wind blows gas flame out.<br />
Solution. Turn off gas and allow 5 minutes<br />
before relighting. If possible move your<br />
barbecue to a position that is protected<br />
from <strong>the</strong> wind. If this is not possible, face<br />
<strong>the</strong> back of your barbecue into <strong>the</strong> wind,<br />
so that <strong>the</strong> wind cannot blow into <strong>the</strong> barbecue<br />
through <strong>the</strong> air-vents on ei<strong>the</strong>r side.<br />
Problem. The gas will not relight after<br />
you’ve been cooking.<br />
Solution. The barbecue needs to cool down<br />
a bit, so that <strong>the</strong> gas is not carried away<br />
from <strong>the</strong> igniter by heat rising. Turn off <strong>the</strong><br />
gas and allow 5 minutes before relighting.<br />
Problem. Flame doesn’t travel all <strong>the</strong> way<br />
around <strong>the</strong> burner, <strong>the</strong>refore, not producing<br />
even heating of <strong>the</strong> grill.<br />
Solution. Hole(s) in <strong>the</strong> burner tube may be<br />
blocked by something that has fallen from<br />
above. Lift out <strong>the</strong> cooking grill and use a<br />
paper clip or safety pin to clean out any<br />
residue from <strong>the</strong> burner holes.
Problem. Black residue from <strong>the</strong> cooking<br />
grill sticks to <strong>the</strong> meat.<br />
Solution. Ensure that <strong>the</strong> cooking surface is<br />
clean before you start barbecuing. A quality<br />
grill brush dipped in cold water and rubbed<br />
over <strong>the</strong> grill bars, when <strong>the</strong>y are very hot,<br />
will remove <strong>the</strong> stubborn residue.<br />
Problem. Black smoke is coming from <strong>the</strong><br />
barbecue.<br />
Solution. Black smoke is a sure sign that<br />
<strong>the</strong>re is a fire inside your barbecue (see<br />
regular cleaning is necessary, page 4). Grey<br />
smoke is fine, this grey smoke imparts flavour<br />
to your food.<br />
Practise Weber ® Q <strong>TM</strong> safety<br />
• Follow <strong>the</strong> instructions in your Weber ® Q <strong>TM</strong><br />
owner’s manual for safe lighting and operating<br />
your barbecue.<br />
• Keep your barbecue at least 60cm from<br />
any combustible materials, including your<br />
house, garage, deck railing, etc.<br />
• Never use a barbecue indoors – that includes<br />
a garage or enclosed patio.<br />
• Keep sleeves and garments at a safe dis-<br />
tance from <strong>the</strong> heat.<br />
• If for some reason you ever have a fat<br />
fire, turn off <strong>the</strong> gas at <strong>the</strong> bottle and open<br />
<strong>the</strong> lid, <strong>the</strong>n stand away. Never pour water<br />
on a fat fire.<br />
• Never use <strong>the</strong> barbecue on a boat. Bottled<br />
gas is denser than air and can accumulate in<br />
<strong>the</strong> bottom of <strong>the</strong> boat.<br />
• Never use a barbecue on a table or stand<br />
that wobbles, leans, or is in any way unstable.<br />
• Keep children and pets a safe distance<br />
away from <strong>the</strong> barbecue when it is hot.<br />
• When you’ve finished cooking, turn off<br />
<strong>the</strong> barbecue at <strong>the</strong> burner control and at<br />
<strong>the</strong> gas bottle.<br />
• Before you start cooking check and empty<br />
any accumulated fat from <strong>the</strong> drip pan located<br />
in <strong>the</strong> aluminium tray below <strong>the</strong> barbecue.<br />
Food safety<br />
• Wash your hands thoroughly <strong>with</strong> soap and<br />
hot water before starting any meal preparation<br />
and after handling fresh meat, fish<br />
or poultry.<br />
• Thoroughly defrost foods in <strong>the</strong> refriger-<br />
ator, not on <strong>the</strong> bench top.<br />
• Use a clean spatula or tongs to remove<br />
food from <strong>the</strong> barbecue.<br />
• Never place cooked food on <strong>the</strong> platter<br />
that was used to carry <strong>the</strong> uncooked food<br />
to <strong>the</strong> barbecue.<br />
• Always cook minced meats until <strong>the</strong>y are<br />
at least medium (71°C internal tempera-<br />
ture) and poultry until well done (74°C).<br />
<strong>Cooking</strong> times<br />
In this cooking guide each recipe has <strong>the</strong> estimated<br />
cooking time included. In addition,<br />
pages 26 to 28 provide a general guide to<br />
help you <strong>with</strong> cooking times for o<strong>the</strong>r cuts<br />
and thicknesses of meat. Barbecuing and<br />
roasting times listed in this guide are approximate.<br />
You may have to allow more time<br />
or use more heat on cold or windy days.<br />
Try using a timer; you’ll find it really handy.<br />
It’ll give you a reminder when your barbecue<br />
is pre-heated, when your meat needs<br />
turning and when <strong>the</strong> meat is likely to be<br />
cooked.<br />
5
Sunday Breakfast
Barbecue on Breakfast Plate<br />
Eggs<br />
Bacon rashers<br />
Sausages (optional)<br />
Tomato halves<br />
You will need an oiled breakfast plate (accessory). If cooking sausages, place <strong>the</strong>m on<br />
<strong>the</strong> pre-heated breakfast plate for 6-8 minutes <strong>with</strong> <strong>the</strong> lid down. Turn <strong>the</strong>m only once or<br />
twice. Add <strong>the</strong> eggs, bacon and <strong>the</strong> tomato halves (flat-side down) and continue cooking<br />
for 3-4 minutes, or until <strong>the</strong> eggs are cooked to your liking.<br />
7
Crackling Pork
Roast on Roasting Trivet<br />
Butcher-prepared rack of pork on <strong>the</strong> bone (5-6 chops)<br />
Vegetable oil<br />
Salt<br />
Have <strong>the</strong> pork skin scored right though <strong>the</strong> rind but not all <strong>the</strong> way through <strong>the</strong> fat. Rub<br />
<strong>the</strong> skin <strong>with</strong> vegetable oil to coat it evenly, <strong>the</strong>n rub salt over <strong>the</strong> skin and into <strong>the</strong> score<br />
marks. Position a roasting trivet and foil (see page 2 of this guide) on <strong>the</strong> barbecue.<br />
Light <strong>the</strong> barbecue and preheat for 15 minutes <strong>with</strong> <strong>the</strong> lid down and <strong>the</strong> burner set to<br />
HIGH.<br />
After preheating, place <strong>the</strong> prepared pork on <strong>the</strong> roasting trivet and close <strong>the</strong> lid. If <strong>the</strong><br />
bones are to high for <strong>the</strong> lid you may have to lie <strong>the</strong> rack down (skin side up) to make it fit<br />
and allow <strong>the</strong> lid to close properly.<br />
Continue cooking <strong>the</strong> pork <strong>with</strong> <strong>the</strong> burner on high for <strong>the</strong> next 25 to 35 minutes. Do not<br />
lift <strong>the</strong> lid to see how things are going until 25 minutes have elapsed.<br />
Once this initial “crackling” has been achieved you can turn <strong>the</strong> control knob to <strong>the</strong> normal<br />
roasting position (see page 3 of this guide). The pork should take 1¼ to 1½ hours to cook<br />
to an internal temperature of 710C. Pork Crackling Tips:<br />
1. Try to use pork that hasn’t been vacuum packed, fresh pork is much easier to crackle.<br />
2. Small pieces of pork crackle more easily, <strong>the</strong> loin for example is much better than a leg.<br />
3. High temperatures are needed to crackle pork (see above). Be careful, if <strong>the</strong>y are maintained<br />
for too long <strong>the</strong> pork will begin to blacken and burn.<br />
9
Glazed Racks of Lamb
Roast on Roasting Trivet<br />
Butcher-prepared lamb racks, 3-4 chops each<br />
Salt and pepper to taste<br />
For <strong>the</strong> glaze:<br />
½ cup marmalade<br />
1 teaspoon dry English mustard<br />
Protect <strong>the</strong> ends of <strong>the</strong> bones <strong>with</strong> foil. Season <strong>the</strong> racks <strong>with</strong> salt and pepper to taste.<br />
Place <strong>the</strong>m on <strong>the</strong> roasting trivet and cook using <strong>the</strong> roast setting.<br />
To make <strong>the</strong> glaze, place <strong>the</strong> marmalade and mustard in a saucepan and heat, stirring<br />
until <strong>the</strong> marmalade becomes a thick liquid. Cook <strong>the</strong> lamb for 30 to 40 minutes and<br />
<strong>the</strong>n thickly brush it <strong>with</strong> <strong>the</strong> glaze. Cook for a fur<strong>the</strong>r 10 minutes or until cooked to your<br />
liking, and serve.<br />
11
Fillet Steaks <strong>with</strong> Lemon-Parsley Butter
Barbecue<br />
Fillet steaks, about 25mm thick (one per person)<br />
Extra-virgin olive oil<br />
½ teaspoon salt<br />
½ teaspoon freshly ground black pepper<br />
For <strong>the</strong> butter:<br />
4 tablespoons unsalted butter<br />
1 tablespoon finely chopped fresh Italian parsley<br />
1 teaspoon fresh lemon juice<br />
¼ teaspoon grated lemon zest<br />
¼ teaspoon salt<br />
¼ teaspoon freshly ground black pepper<br />
Using <strong>the</strong> back of a fork, mash <strong>the</strong> butter ingredients toge<strong>the</strong>r and stir until evenly mixed.<br />
Cover and refrigerate <strong>the</strong> butter mixture until ready to serve.<br />
Lightly brush or spray both sides of <strong>the</strong> steak <strong>with</strong> oil. Season evenly <strong>with</strong> <strong>the</strong> salt and<br />
pepper. Barbecue <strong>the</strong> steaks for 4 to 5 minutes each side or until <strong>the</strong>y are cooked as<br />
desired. Transfer each steak to a serving plate and place a tablespoon of <strong>the</strong> butter on<br />
top to melt.<br />
13
Prawn Satay <strong>with</strong> Peanut Dipping Sauce
Barbecue<br />
20 large green prawns (about 450g), peeled and de-veined<br />
1 tablespoon vegetable oil<br />
¼ teaspoon chilli powder<br />
¼ teaspoon curry powder<br />
¼ teaspoon freshly ground black pepper<br />
½ 8 teaspoon salt<br />
For <strong>the</strong> sauce:<br />
1 tablespoon vegetable oil<br />
1 tablespoon minced garlic<br />
1 tablespoon minced ginger<br />
¼ cup smooth peanut butter<br />
1 tablespoon soy sauce<br />
¼ teaspoon freshly ground black pepper<br />
¼ teaspoon Tabasco sauce (or more, to taste)<br />
1 tablespoon fresh lime juice<br />
To make <strong>the</strong> sauce, take a small saucepan, add <strong>the</strong> oil and warm over medium-high heat.<br />
Add <strong>the</strong> garlic and ginger and cook until fragrant, about 1 minute, stirring occasionally.<br />
Add ½ cup of water, followed by <strong>the</strong> peanut butter, soy sauce, pepper, and Tabasco sauce.<br />
Whisk until smooth. When <strong>the</strong> sauce comes to a simmer, remove it from <strong>the</strong> heat. Just<br />
before serving, reheat <strong>the</strong> sauce over medium heat and add <strong>the</strong> lime juice and 2 to 3 tablespoons<br />
of water, whisking vigorously to achieve a smooth consistency.<br />
Lightly brush or spray <strong>the</strong> prawns <strong>with</strong> oil. Season <strong>with</strong> <strong>the</strong> chilli powder, curry<br />
powder, pepper and salt. Thread <strong>the</strong> prawns onto skewers, ei<strong>the</strong>r one per skewer for hors<br />
d’oeuvres or four per skewer for a main course. Barbecue for 1 to 3 minutes each side, or<br />
until opaque. Serve <strong>with</strong> <strong>the</strong> peanut dipping sauce.<br />
15
Salmon <strong>with</strong> Thai Cucumber Relish
Barbecue<br />
Salmon steaks, 150g to 200g each and 20mm thick<br />
3 tablespoons Asian (toasted) sesame oil<br />
Freshly ground black pepper<br />
For <strong>the</strong> relish:<br />
2 tablespoons fresh lime juice<br />
1 tablespoon fish sauce<br />
1 tablespoon soy sauce<br />
1 tablespoon sugar<br />
1 tablespoon finely chopped fresh mint<br />
1 tablespoon finely chopped fresh coriander<br />
1 teaspoon minced fresh chilli<br />
½ teaspoon minced garlic<br />
1 cup finely chopped or thinly sliced cucumber<br />
In a medium bowl, whisk toge<strong>the</strong>r all <strong>the</strong> relish ingredients except <strong>the</strong> cucumber.<br />
Add <strong>the</strong> cucumber, stir well, and allow to stand at room temperature for at<br />
least 15 minutes.<br />
Lightly brush or spray <strong>the</strong> salmon all over <strong>with</strong> oil. Season <strong>with</strong> pepper to taste.<br />
Barbecue <strong>the</strong> salmon for 4 to 5 minutes each side, or until opaque throughout. Serve<br />
<strong>with</strong> <strong>the</strong> relish spooned over <strong>the</strong> top.<br />
17
Roast Chicken
Roast on Roasting Trivet<br />
Number 18 or 20 chicken<br />
Oil<br />
Salt and pepper to taste<br />
Wash <strong>the</strong> chicken thoroughly and pat it dry. Tuck <strong>the</strong> wings behind <strong>the</strong> back. Brush <strong>the</strong><br />
chicken <strong>with</strong> oil and season <strong>with</strong> salt and pepper.<br />
Place <strong>the</strong> chicken on <strong>the</strong> roasting trivet inside <strong>the</strong> barbecue and cook, <strong>with</strong> <strong>the</strong> lid down,<br />
for approx 1 hour. The chicken will be juicy and golden brown <strong>with</strong> crispy skin. Serve it<br />
<strong>with</strong> your favourite gravy and vegetables.<br />
19
Spanish Chicken Breasts Marinated in Citrus
and Tarragon<br />
Barbecue<br />
Boneless chicken breasts (<strong>with</strong> skin)<br />
For <strong>the</strong> marinade:<br />
¼ cup extra-virgin olive oil<br />
¼ cup roughly chopped fresh tarragon<br />
2 tablespoons white-wine vinegar<br />
Zest and juice of 1 orange<br />
Zest and juice of 1 lemon<br />
2 teaspoons salt<br />
1 teaspoon minced garlic<br />
1 teaspoon grated ginger<br />
½ teaspoon chilli powder<br />
½ teaspoon freshly ground black pepper<br />
Place all marinade ingredients into a medium bowl and whisk.<br />
Rinse <strong>the</strong> chicken breasts under cold water, place <strong>the</strong>m in a large, resealable plastic bag,<br />
and pour in <strong>the</strong> marinade. Press <strong>the</strong> air out of <strong>the</strong> bag and seal tightly. Turn <strong>the</strong> bag several<br />
times to distribute <strong>the</strong> marinade, place <strong>the</strong> bag in a bowl, and refrigerate for 3 to 4 hours.<br />
Remove <strong>the</strong> chicken breasts from <strong>the</strong> marinade and reserve <strong>the</strong> marinade. Pour <strong>the</strong><br />
marinade into a small saucepan and boil for a minute. Barbecue <strong>the</strong> breasts, skin side<br />
down first, for 5 to 6 minutes each side, or until <strong>the</strong> meat is firm and <strong>the</strong> juices run clear.<br />
Baste <strong>with</strong> <strong>the</strong> boiled marinade once, halfway through cooking.<br />
21
Aussie Roast Lamb Greek-Style
Roast on Roasting Trivet<br />
1 leg of lamb (approx 1.8kg), boned and opened out flat<br />
2 cloves of garlic, peeled and cut into slivers<br />
Sprigs of rosemary<br />
½ lemon<br />
Salt and pepper<br />
Skewer right through <strong>the</strong> lamb lengthways <strong>with</strong> 2 or 3 skewers; this will help prevent <strong>the</strong><br />
meat from curling during cooking. Turn <strong>the</strong> skewered lamb over so that <strong>the</strong> skin side is<br />
facing up. Make incisions all over <strong>the</strong> surface of <strong>the</strong> meat on <strong>the</strong> skin-side.<br />
Insert one sprig of rosemary and one sliver of garlic into each incision. Squeeze <strong>the</strong> lemon<br />
and smear <strong>the</strong> juice all over <strong>the</strong> skin. Sprinkle <strong>with</strong> salt and pepper to taste. Roast <strong>the</strong><br />
lamb, skin side up, for 55-65 minutes.<br />
To carve, remove <strong>the</strong> skewers and cut across <strong>the</strong> skin into thin slices. Decorate <strong>with</strong> sliced<br />
lemon, rosemary and Greek olives.<br />
23
Christmas Turkey
Roast on Roasting Trivet<br />
4kg Turkey<br />
Vegetable oil<br />
Salt and pepper<br />
Ensure that <strong>the</strong> turkey is fully thawed to refrigerated temperature (no ice left deep inside<br />
<strong>the</strong> cavity).<br />
Rub <strong>the</strong> skin <strong>with</strong> vegetable oil to coat it evenly, <strong>the</strong>n season <strong>with</strong> salt and pepper to taste.<br />
Roast <strong>the</strong> turkey allowing 20 minutes and <strong>the</strong>n an additional 20 minutes per kilo (eg. for a<br />
4 kilo turkey allow 100 minutes in total).<br />
Allow <strong>the</strong> cooked turkey to stand for ten minutes before commencing carving.<br />
Turkey Tip:-<br />
Turkeys cooked <strong>with</strong>out stuffing are less likely to dry out. This is because juices in <strong>the</strong><br />
cavity steam up through <strong>the</strong> breast while cooking. If you like stuffing cook it in a foil pan<br />
beside <strong>the</strong> turkey.<br />
25
Barbecuing and Roasting Guide<br />
26<br />
The following cuts, thicknesses, weights, and barbecuing times are meant to be guidelines ra<strong>the</strong>r<br />
than hard and fast rules. <strong>Cooking</strong> times are affected by such factors as altitude, wind, outside temperature,<br />
and how well done you like your meat. <strong>Cooking</strong> times for beef and lamb are for medium<br />
unless o<strong>the</strong>rwise noted. Let roasts and larger cuts of meat rest for 5 to 10 minutes before carving.<br />
Beef<br />
Steak: rump, porterhouse, fillet, T-bone, or sirloin (medium)<br />
12mm thick barbecue 2½ to 3 minutes per side<br />
20mm thick barbecue 3 to 4 minutes per side<br />
25mm thick barbecue 4 to 5 minutes per side<br />
30mm to 40mm thick 14 to 16 minutes (total) barbecue 5 minutes per side<br />
and roast 2-3 minutes per side<br />
Roast fillet of beef<br />
70mm to 80mm thick roast 70 to 80 minutes on roasting trivet<br />
Rib Roast<br />
90mm to 100mm thick roast 1½ to 1¾ hours on roasting trivet (cook bone side down)<br />
Veal loin chop<br />
25mm thick barbecue 5 to 6 minutes per side<br />
Kebab<br />
25mm to 30mm cubes barbecue 5 to 6 minutes per side<br />
Minced beef patty<br />
20mm thick barbecue 4 to 5 minutes per side<br />
Sausages<br />
thin barbecue 3 to 4 minutes per side<br />
thick barbecue 4 to 5 minutes per side<br />
Game<br />
Quail, whole<br />
150g roast 15 to 20 minutes on roasting trivet<br />
Duck, whole<br />
1.6kg to 2.0kg roast 1½ to 2 hours on roasting trivet<br />
Duck breast, boneless<br />
200g to 230g roast 10 to 15 minutes on roasting trivet<br />
Pork<br />
Loin chops<br />
12mm to 15mm thick barbecue 4 to 6 minutes each side<br />
Spare ribs<br />
12mm to 15mm thick barbecue 4 to 6 minutes each side<br />
Rolled loin roast<br />
1.5kg to 2.5kg roast 1¼ to 1¾ hours on roasting trivet<br />
(first 25 minutes on higher setting)
Lamb<br />
loin or chump chops<br />
12mm to 15mm thick barbecue 4 to 6 minutes each side<br />
Leg of lamb<br />
1.5kg to 2kg roast 1½ to 2 hours on roasting trivet<br />
Rack of lamb<br />
450g to 650g roast 30 to 40 minutes on roasting trivet<br />
Poultry<br />
Chicken breast barbecue 5 to 6 minutes each side<br />
Chicken Maryland roast 30 to 40 minutes on roasting trivet<br />
Chicken, whole<br />
1.8kg to 2.0kg roast approx 1 to 1¼ hours on roasting trivet<br />
Chicken, half<br />
570g to 650g roast 30 to 40 minutes on roasting trivet<br />
Rolled turkey breast<br />
1.5kg to 1.8kg roast 1¼ to 1¾ hours on roasting trivet<br />
Fish and Seafood<br />
Fish: fillet or steak<br />
6mm to 13mm thick barbecue 3 to 5 minutes<br />
13mm to 25mm thick barbecue 3 to 5 minutes each side<br />
25mm to 32mm thick<br />
Fish, whole<br />
barbecue 5 to 6 minutes each side<br />
450g roast 15 to 20 minutes on roasting trivet<br />
900g to 1.2kg roast 30 to 40 minutes on roasting trivet<br />
Prawns barbecue 1 to 3 minutes each side<br />
Scallop barbecue 3 to 6 minutes<br />
Mussel barbecue 5 to 6 minutes (discard any that don’t open)<br />
Oyster in shell barbecue 3 to 5 minutes<br />
Fruit<br />
Apple thick rounds barbecue 4 to 6 minutes<br />
Banana halved lengthwise barbecue 6 to 8 minutes<br />
Peach, pit removed halved lengthwise barbecue 8 to 10 minutes<br />
Pear halved lengthwise barbecue 10 to 12 minutes<br />
Pineapple rings<br />
Note: Barbecuing times for fruit will vary <strong>with</strong> ripeness.<br />
barbecue 5 to 10 minutes<br />
Vegetables<br />
Artichoke:<br />
whole steam 20 to 25 minutes; cut in half and barbecue 8 to 10 minutes<br />
Asparagus barbecue 6 to 8 minutes<br />
27
Barbecuing and Roasting Guide<br />
28<br />
Capsicum:<br />
whole barbecue 10 to 12 minutes<br />
halved or quartered barbecue 6 to 8 minutes<br />
Chilli<br />
Corn:<br />
barbecue 7 to 9 minutes<br />
husked barbecue 10 to 12 minutes<br />
in husk<br />
Eggplant:<br />
barbecue 25 to 30 minutes<br />
sliced barbecue 8 to 10 minutes<br />
halved<br />
Garlic:<br />
barbecue 12 to 15 minutes<br />
whole<br />
Green bean:<br />
roast 45 to 60 minutes<br />
whole barbecue 8 to 10 minutes<br />
Leek barbecue 14 to 16 minutes<br />
Mushrooms barbecue 8 to 12 minutes<br />
Onion thickly sliced<br />
Potato:<br />
barbecue 8 to 12 minutes<br />
whole (small) roast 45 to 60 minutes<br />
thickly sliced<br />
Potato: new<br />
barbecue 14 to 16 minutes<br />
halved<br />
Pumpkin:<br />
barbecue 20 to 25 minutes<br />
half small butternut roast 50 to 60 minutes<br />
small pieces<br />
Sweet potato:<br />
barbecue 20 to 30 minutes<br />
whole roast 50 to 60 minutes<br />
thickly sliced<br />
Tomato: garden<br />
barbecue 8 to 10 minutes<br />
thickly sliced barbecue 2 to 4 minutes<br />
halved<br />
Tomato: roma<br />
barbecue 6 to 8 minutes<br />
halved barbecue 6 to 8 minutes<br />
whole<br />
Zucchini:<br />
barbecue 8 to 10 minutes<br />
thickly sliced barbecue 6 to 8 minutes<br />
halved barbecue 6 to 10 minutes
Weber ® Q <strong>TM</strong><br />
Accessories<br />
Stainless Steel Tools<br />
Dishwasher proof tongs and spatula are for<br />
use <strong>with</strong> <strong>the</strong> Q<strong>TM</strong> .<br />
Premium Trolley Cover for <strong>the</strong> Weber ® Q<strong>TM</strong> This full-length cover is made from heavyduty<br />
vinyl and designed to <strong>with</strong>stand <strong>the</strong><br />
harsh <strong>Australian</strong> climate.<br />
Vinyl Cover<br />
Keep your Weber ® Q<strong>TM</strong> clean and dust free<br />
<strong>with</strong> a fitted heavy-duty cover.<br />
Breakfast Plate<br />
Perfect for bacon, eggs, sausages and pancakes.<br />
Great for camping or a champagne<br />
breakfast.<br />
Roasting Trivet<br />
Enjoy juicier, more succulent roasts. The<br />
Weber roasting trivet creates natural convection,<br />
allowing super-heated air to circulate<br />
all around <strong>the</strong> meat.<br />
Replacement Drip Trays<br />
High quality heavy-gauge pans designed for<br />
barbecue use. Can be cleaned and re-used.<br />
29
Weber ® Q <strong>TM</strong><br />
Accessories<br />
Premium Trolley<br />
A stylish permanent trolley for your Weber ®<br />
Q<strong>TM</strong> . Make your barbecue <strong>the</strong> centre of attention<br />
on your patio.<br />
30<br />
®<br />
Mobile Trolley<br />
In <strong>the</strong> upright position it’s just <strong>the</strong> right<br />
height for cooking; in <strong>the</strong> folded position<br />
it creates a mobile trolley; and in <strong>the</strong> collapsed<br />
position it’s easy to transport or<br />
store.<br />
®<br />
®
Premium Hotplate<br />
The porcelain coated surface gives great<br />
cooking results and is rust resistant. The<br />
stainless steel handles can lift <strong>the</strong> hotplate<br />
from <strong>the</strong> barbecue to <strong>the</strong> table ensuring<br />
your food stays hot until it is served.<br />
Q<br />
31<br />
<strong>TM</strong> Pizza Stones<br />
Weber ® Q<strong>TM</strong> pizza stone <strong>with</strong> easy-serve pizza tray. Turn your Weber ® Q<strong>TM</strong> into a pizza oven<br />
and enjoy fantastic gourmet pizzas in your own backyard.
Weber ® Q <strong>TM</strong><br />
Accessories<br />
3 Sided Grill Brushes<br />
These grill brushes make it easy to get between<br />
grill bars and o<strong>the</strong>r difficult places.<br />
Available in long or short handle.<br />
Weber ® Q<strong>TM</strong> Handle Light<br />
Three LED lights illuminate <strong>the</strong> cooking<br />
surface of your Weber ® Q<strong>TM</strong> making cooking<br />
even easier.<br />
Weber ® Q<strong>TM</strong> Non-stick Breakfast Plate Sheet<br />
Makes your Breakfast Plate as easy as a nonstick<br />
frying pan to clean.<br />
32<br />
Australia’s own Weber ® Q <strong>TM</strong> Cookbook<br />
This is <strong>the</strong> second barbecue book that Ross<br />
McDonald and Margaret Kirkwood have put<br />
toge<strong>the</strong>r. Those of you who own a copy of<br />
‘The Complete <strong>Australian</strong> Barbecue Kettle<br />
Cookbook’ will know <strong>the</strong> superb quality of<br />
<strong>the</strong>ir work. The Q<strong>TM</strong> cookbook is <strong>the</strong> sort of<br />
book that would make <strong>the</strong> perfect gift for<br />
someone who ‘loves’ <strong>the</strong>ir Weber ® Q<strong>TM</strong> .<br />
In it <strong>the</strong>y show you how to use each of <strong>the</strong><br />
Weber ® Q<strong>TM</strong> models, so that you can enjoy<br />
mouth-watering breakfasts, lunches, dinners<br />
and desserts for years and years to<br />
come. The book is not available in book<br />
shops. You can purchase this book by going<br />
to <strong>the</strong> store where you purchased your<br />
Weber ® Q<strong>TM</strong> . If this is inconvenient, you can<br />
purchase a copy by calling 1300 301 290<br />
<strong>with</strong> your credit card details.
Digital/Remote Meat Thermometer<br />
The very latest in meat <strong>the</strong>rmometers is<br />
<strong>the</strong> digital/remote version. It beeps to let<br />
you know when your roast is cooked to your<br />
liking. It doesn’t even need to be near <strong>the</strong><br />
barbecue; you can carry it around on your<br />
belt or leave it somewhere handy. Weber’s<br />
digital/remote <strong>the</strong>rmometers can be purchased<br />
at Specialist dealers.<br />
How it works<br />
Suppose you’re cooking a roast of tender<br />
veal and you like to cook it to medium.<br />
Step 1. Select veal from <strong>the</strong> various<br />
meat choices on your digital receiver.<br />
Step 2. Select medium from <strong>the</strong> cooking options<br />
offered.<br />
Portable digital receiver. The portable digital receiver<br />
displays <strong>the</strong> type of roast (step 1), <strong>the</strong> cooking options<br />
(step 2), <strong>the</strong> target temperature and <strong>the</strong> current<br />
temperature in <strong>the</strong> centre of <strong>the</strong> meat.<br />
Digital transmitter. The digital<br />
transmitter is connected to <strong>the</strong><br />
probe by <strong>the</strong> insulated cable<br />
so that it can be located<br />
outside <strong>the</strong> barbecue.<br />
Step 3. Insert <strong>the</strong> meat probe into <strong>the</strong> meat<br />
inside your barbecue. Attached to <strong>the</strong> probe<br />
is an insulated cable that leads to <strong>the</strong> digital<br />
transmitter. This is located outside your<br />
barbecue. The transmitter sends signals to<br />
<strong>the</strong> digital receiver. As long as <strong>the</strong> receiver<br />
is <strong>with</strong>in 30 metres of <strong>the</strong> barbecue (if you<br />
walk out of range <strong>the</strong> portable digital receiver<br />
will beep) it will display <strong>the</strong> internal<br />
temperature in <strong>the</strong> centre of <strong>the</strong> meat.<br />
When <strong>the</strong> meat is nearly cooked <strong>the</strong> receiver<br />
will beep four times. It’s now time for<br />
you to make <strong>the</strong> gravy and to get <strong>the</strong> salads<br />
ready. A short time later, <strong>the</strong> receiver will<br />
give a continuous beep which indicates that<br />
your veal is perfectly cooked to medium.<br />
Meat probe.<br />
The tip of <strong>the</strong> probe<br />
is inserted into <strong>the</strong> centre<br />
of <strong>the</strong> meat (step 3).<br />
33
Weber-Stephen Products Co. (Aust) Pty. Ltd.<br />
<strong>Australian</strong> Representative R. McDonald Co. Pty. Ltd.<br />
A.C.N. 007 905 384.<br />
104 South Terrace, Adelaide, South Australia, 5000.<br />
Consumer information phone 1300 301 290.<br />
To learn more or to register your <strong>Weber®</strong> barbecue<br />
online, visit www.weberbbq.com.au<br />
Patents, trademarks and copyright.<br />
<strong>Weber®</strong>, <strong>the</strong> kettle shape and <strong>the</strong> kettle silhouette are registered trademarks of © Weber-<br />
Stephen Products LLC, 200 East Daniels Road, Palatine, Illinois 60067. <strong>Weber®</strong> Q<strong>TM</strong> , <strong>Weber®</strong><br />
baby Q<strong>TM</strong> and <strong>Weber®</strong> Family Q<strong>TM</strong> are trademarks of Weber-Stephen Products LLC, 200<br />
East Daniels Road, Palatine, Illinois 60067. The shape of <strong>the</strong> <strong>Weber®</strong> Q<strong>TM</strong> is a registered<br />
trademark.<br />
The Q design is covered by <strong>the</strong> following <strong>Australian</strong> patents: Patent No. 2007202420 – Weber<br />
Q grill and support frame assembly, Patent No. 2005274149 – Weber Q fuel support<br />
apparatus, Patent No. 2004220587 – Gas burner <strong>with</strong> flame stabilization structure for Weber<br />
Q, Patent No. 2003300872 – Barbecue grill and support frame assembly for Weber Q,<br />
Patent No. 2003297113 – Heat distributing cooking grate <strong>with</strong> grease control structure for<br />
Weber Q and Patent No. 2003241363 – Curvilinear burner tube for Weber Q and <strong>the</strong> following<br />
pending <strong>Australian</strong> applications: Patent Application No. 2007286136 – Bayonet connection<br />
for Weber Q burner tube. An application to register <strong>the</strong> ‘Q’ logo has been filed and<br />
approved for publication. This booklet incorporates material which is copyright 2007 and<br />
owned by © Weber-Stephen Products LLC, © R. McDonald Co. Pty. Ltd. and © McDonald-<br />
Kirkwood Pty. Ltd.