September 2010

Create successful ePaper yourself
Turn your PDF publications into a flip-book with our unique Google optimized e-Paper software.
Newsletter Of The<br />
Forty-Niners Chapter Of<br />
The Cadillac & LaSalle Club<br />
Jay Friedman – President<br />
E-mail: jaysfriedman@yahoo.com<br />
Art Gardner – Editor<br />
E-mail: agardner@gardnergroff.com<br />
Frank Lindauer – Editor Emeritus<br />
Frank Stagnitto – Member-at-Large<br />
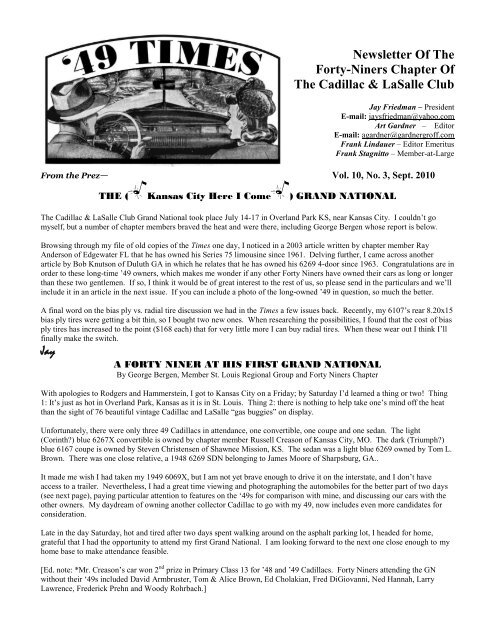
From the Prez— Vol. 10, No. 3, Sept. <strong>2010</strong><br />
THE ( Kansas City Here I Come ) GRAND NATIONAL<br />
The Cadillac & LaSalle Club Grand National took place July 14-17 in Overland Park KS, near Kansas City. I couldn‟t go<br />
myself, but a number of chapter members braved the heat and were there, including George Bergen whose report is below.<br />
Browsing through my file of old copies of the Times one day, I noticed in a 2003 article written by chapter member Ray<br />
Anderson of Edgewater FL that he has owned his Series 75 limousine since 1961. Delving further, I came across another<br />
article by Bob Knutson of Duluth GA in which he relates that he has owned his 6269 4-door since 1963. Congratulations are in<br />
order to these long-time ‟49 owners, which makes me wonder if any other Forty Niners have owned their cars as long or longer<br />
than these two gentlemen. If so, I think it would be of great interest to the rest of us, so please send in the particulars and we‟ll<br />
include it in an article in the next issue. If you can include a photo of the long-owned ‟49 in question, so much the better.<br />
A final word on the bias ply vs. radial tire discussion we had in the Times a few issues back. Recently, my 6107‟s rear 8.20x15<br />
bias ply tires were getting a bit thin, so I bought two new ones. When researching the possibilities, I found that the cost of bias<br />
ply tires has increased to the point ($168 each) that for very little more I can buy radial tires. When these wear out I think I‟ll<br />
finally make the switch.<br />
Jay<br />
A FORTY NINER AT HIS FIRST GRAND NATIONAL<br />
By George Bergen, Member St. Louis Regional Group and Forty Niners Chapter<br />
With apologies to Rodgers and Hammerstein, I got to Kansas City on a Friday; by Saturday I‟d learned a thing or two! Thing<br />
1: It‟s just as hot in Overland Park, Kansas as it is in St. Louis. Thing 2: there is nothing to help take one‟s mind off the heat<br />
than the sight of 76 beautiful vintage Cadillac and LaSalle “gas buggies” on display.<br />
Unfortunately, there were only three 49 Cadillacs in attendance, one convertible, one coupe and one sedan. The light<br />
(Corinth?) blue 6267X convertible is owned by chapter member Russell Creason of Kansas City, MO. The dark (Triumph?)<br />
blue 6167 coupe is owned by Steven Christensen of Shawnee Mission, KS. The sedan was a light blue 6269 owned by Tom L.<br />
Brown. There was one close relative, a 1948 6269 SDN belonging to James Moore of Sharpsburg, GA..<br />
It made me wish I had taken my 1949 6069X, but I am not yet brave enough to drive it on the interstate, and I don‟t have<br />
access to a trailer. Nevertheless, I had a great time viewing and photographing the automobiles for the better part of two days<br />
(see next page), paying particular attention to features on the „49s for comparison with mine, and discussing our cars with the<br />
other owners. My daydream of owning another collector Cadillac to go with my 49, now includes even more candidates for<br />
consideration.<br />
Late in the day Saturday, hot and tired after two days spent walking around on the asphalt parking lot, I headed for home,<br />
grateful that I had the opportunity to attend my first Grand National. I am looking forward to the next one close enough to my<br />
home base to make attendance feasible.<br />
[Ed. note: *Mr. Creason‟s car won 2 nd prize in Primary Class 13 for ‟48 and ‟49 Cadillacs. Forty Niners attending the GN<br />
without their „49s included David Armbruster, Tom & Alice Brown, Ed Cholakian, Fred DiGiovanni, Ned Hannah, Larry<br />
Lawrence, Frederick Prehn and Woody Rohrbach.]
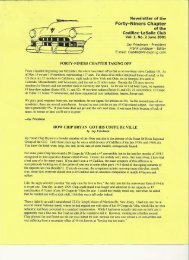
SCENES AT THE GRAND NATIONAL<br />
RUSSELL CREASON’S GORGEOUS CONVERTIBLE WHICH WON 2 ND PRIZE IN 48-49 PRIMARY CLASS<br />
INTERIOR OF RUSSELL’S CAR<br />
6167 COUPE OWNED BY STEVEN CHRISTENSEN OF SHAWNEE MISSION, KS
ALL THREE ‘49S ATTENDING, WITH A ’48 AND THE HOST HOTEL IN THE BACKGROUND<br />
SERVICING THE 1949 CADILLAC SPEEDOMETER HEAD<br />
By Dan Fisher<br />
Recently the speedometer head on my ‟49 Coupe de Ville developed a screeching noise that was loud and about as welcome as<br />
fingernails scratching a chalk board. If you follow the steps listed below you can fix your speedometer, also.<br />
Disconnect the ground cable from the battery. Wrap a towel around the steering column and secure it with tape. Apply tape to<br />
towel, not the paint. Lie underneath the dash with a good light. Remove the 2 wing nuts that secure the instrument cluster to the<br />
dashboard. Loosen the nut at the bottom of the dash for the trip odometer. Make sure there is enough slack in the oil pressure<br />
tubing to allow the cluster to move forward a couple of inches; if not, disconnect the oil pressure tube now. Push and wiggle<br />
the instrument cluster toward steering wheel about two inches. Be patient. It‟s been there for 60 years and it may want to stick.<br />
Return to sitting position in your front seat. Your back will appreciate this. Now you can lean forward and view the backside of<br />
the entire cluster. You can also pull the cluster a little closer to your body to have easier access to everything connected to it.<br />
You MUST mark all wires and bulb fixtures BEFORE unplugging them from the instrument cluster housing. I recommend<br />
using masking tape on each wire, numbering everything from left to right and writing those numbers down. Unplug all wires<br />
from the gauges, all bulb fixtures, and unscrew the speedometer cable nut and pull cable out. You must also remove the oil<br />
pressure gauge tubing. Use caution. Use an open end wrench to secure the gauge fitting as you loosen the tubing fitting so as<br />
not to damage the gauge. A 6 point tubing wrench is best for the tubing nut. Do not damage the nut. Unscrew the odometer<br />
reset cable at the speedometer housing and pull it out. With everything disconnected you can remove the entire cluster from the<br />
dash, while taking care not to bump any painted surfaces, and place it on your workbench face down against a soft cloth.<br />
Remove the 2 screws that go through the rubber grommets near the connection for the speedometer cable. Keep all screws and<br />
fasteners in a shallow pan or other suitable container since you don‟t want to lose anything! Remove 4 screws that hold the<br />
galvanized cover to the speedometer head. Gently place a thin screwdriver between the cover and main housing and pry it away<br />
from the head AS you hold the head downward. It may stick because there is a rubber gasket between the cover and head.<br />
SAVE the rubber gasket and grommets. Now you will be able to view the speedometer head. It is a delicate instrument so be<br />
careful handling it! You will see 2 tabs about an inch long that are bent over the edge of the head to secure it during assembly<br />
at the factory. Bend them sideways just enough to allow sufficient clearance for the head to be lifted out of the main housing.<br />
Before lifting the speedometer head out of the main housing REMIND yourself that you do not want to damage the pointer or<br />
the very delicate spring that is attached to the rotating part that attaches by a slender shaft to the pointer. Lift the head out of the<br />
main housing and place it on your work bench with the pointer side (front) facing your body. Write down the orientation of the<br />
indicator needle/pointer in relation to the left directional signal arrow. When reassembling you will want to place it back onto<br />
the shaft in the SAME position. Use two thin bladed screw drivers to get underneath the pointer. The ends of the screw driver<br />
blades should contact the shaft and be opposite one another so when you pry the pointer upward you do not break it. It does not<br />
require much strength, but you MUST pry with equal pressure. After you have removed the pointer you will see that it has<br />
internal splines that mate to the splines on the shaft. That‟s why you marked the orientation prior to removal.
Remove the 2 screws that secure the plated face, with directional arrows, to the head‟s pot metal housing and lift the face off.<br />
Your next step is to remove the 2 countersunk screws that secure the support for the shaft. After you have removed the support,<br />
the shaft will develop a mind of its own and flop all over the place, so handle with care. You do not want to damage the spring.<br />
As you handle the head for continued disassembly the part that rotates with the shaft may get out of its correct position. Just<br />
remember that the stops rest against each other so as to prevent the indicator needle from rotating too far counter-clockwise.<br />
When reassembled the needle must rotate clockwise to indicate the speed you are traveling.<br />
Next you will find one thin clip that secures the numbered speedometer assembly and one that secures the numbered odometer<br />
assembly. Remove the clips one at a time and remove the numbered assemblies one at a time by sliding them in the direction of<br />
the retaining clip groove as you lift out the opposite end and then slide it back toward the original position. Put differently, they<br />
angle out of the housing. Please note: the back side of the numbered assemblies have slotted tabs that must engage a thin flat<br />
strap to correctly orient them. Visually examine before removing. Now you can remove the gear that runs front to back in the<br />
housing. Note orientation. Don‟t attempt to remove the other gears. Now you can clean the gear teeth and bearing surfaces. The<br />
old grease has dried and hardened and is no longer lubricating properly. Q-tips are helpful, but do not leave residue of cotton<br />
on gears. Use a very, very light grease to lubricate all gear teeth and bearing surfaces for shafts. Apply sparingly and DO NOT<br />
lubricate the indicator needle shaft. It rotates in a brass bushing which acts as a lubricant. Greasing it will adversely affect<br />
performance and accuracy.<br />
This next step is critical for quiet operation of your speedometer head. On the back side of the head you will find a brass cup<br />
plug near the threads for the speedometer cable. It may be covered with dust and fuzz. Clean it with a Q-tip and then pry it out<br />
of the hole using an ice pick or sharp awl. Be gentle. Use just enough strength to remove it without damage. Place the pointed<br />
end of the tool against the bottom inside portion of the cup plug and simply pry it out. DO NOT LOSE IT. Under the cup plug<br />
you will see a round piece of felt which was lubricated at the factory. Do not attempt to remove it. Place several drops of 3-inone-oil<br />
onto the felt and allow it to be absorbed as you rotate the shaft, by hand, that mates to the speedometer cable. Cradle the<br />
pointer shaft in one hand so the spring does not get damaged as you lube the felt and spin the cable shaft. When the cable shaft<br />
rotates smoothly and freely then you can push the cup plug back into the hole.<br />
Now you can reassemble the speedometer head. Reverse the process of disassembly. Here are some tips: make sure the stops<br />
for the pointer are correctly oriented as stated earlier and the slotted tabs on the back of the numbered assemblies are aligned<br />
correctly. Ensure that the countersunk screws are in the correct locations. Be certain your indicator needle is correctly oriented<br />
before gently pushing it back onto the shaft. If you bend it don‟t panic, just straighten it. Also, if the luminescent paint on the<br />
tip of the needle is flaking off you may want to paint it before reassembly. When you install the entire cluster back into the<br />
dash, be careful to connect everything to the proper location. Oh, and have a cold one after the road test. You deserve it!<br />
A WEDDING WITH A 1949 CADILLAC<br />
By Michael Kistinger, Bottrop Germany<br />
On Friday, May 28th, my friends Christian Stiewe and Samira Farouqi got married, with my ‟49 convertible and me an<br />
important part of the festivities. Christian and Samira live in Cologne, about 60 miles from my home. The area is heavily<br />
populated, and there are traffic jams every morning and afternoon in and around the city. To avoid getting stuck, I decided to<br />
travel to Cologne Thursday evening and spend the night at another friend's home in the same neighborhood.<br />
I was busy at work that day and got home late, but it wasn't too bad because when I finally started, the traffic jams had<br />
disappeared. But soon after entering the highway, raindrops were falling. When I started the wipers, one of the blades flew<br />
away! With a bad feeling, I continued my journey (no chance to stop and look for the missing part). The rain stopped soon,<br />
and when I arrived at my friend's home, I found a pair of new wiper blades in the trunk. Phew, you can imagine my relief.<br />
The night brought rain again, but the sky cleared up very slowly in the morning. After breakfast I drove to Christian‟s home to<br />
pick up some glasses for the champagne to be served after the wedding ceremony. Next, I had to drive to the town center to get<br />
flowers for the car and pick up Samira from the hair dresser. The traffic was very heavy, and road work didn't make it easier.<br />
Finally I managed to pick up the flowers, the bride and reach the civil registry office just in time.<br />
After the ceremony the sky had cleared further and the Cadillac‟s top was dry. I put it down and placed the car next to the<br />
entrance, where the champagne was served while everyone tried to photograph the couple and the Cadillac. What an<br />
experience driving an old Cadillac cross-town with the top down, flowers on the hood and a happy couple in the back seat!<br />
Pedestrians shouted congratulations and held their thumbs up when they saw us passing by.
After the wedding pictures had been taken, I drove the couple to the hotel where the wedding guests were waiting. The hotel<br />
was surrounded by a large pedestrian zone. No motor vehicles allowed. But the management lowered a barrier just for us. I<br />
drove slowly in a semi circle, stopped in front of the entrance and let the couple get out of the car. What a show! When I drove<br />
my „49 to the underground garage, I took three boys with me. For them riding the short distance in that old Cadillac was much<br />
more exciting than the wedding.<br />
The next day started with a perfect blue sky. After breakfast with Christian, Samira and some other guests, we stowed the<br />
presents in the trunk and I drove the couple home. They enjoyed the ride again, and so did I on my way home. What started so<br />
bad with rain and a lost wiper blade became a very nice experience that will stay in fond memory for a long time.<br />
CHRISTIAN AND SAMIRA JUST MARRIED IN MICHAEL’S ’49 CONVERTIBLE, COLOGNE, GERMANY<br />
POWER WINDOW SWITCHES (AGAIN)<br />
By John Washburn<br />
This is what I do to repair the Hydro Electric Window Switches when they start to act up. A lot of time, the nylon rod breaks<br />
from age and use. This makes the switches sloppy and prone to poor contact. This angers the driver when the windows<br />
sometimes fail to go up, or sometimes fail to go down. Removing the switch for the car is not terribly difficult – just be sure to<br />
mark the wires so you know where they go. If the wiring is original, be careful about handling it or you may have to use shrink<br />
wrap insulation if the cloth insulation comes off.<br />
The pictures show the refurbishment of a 1953 Cadillac 4-gang switch, but the 1949 switch is the same as in all functional<br />
respects; only the chrome is a little different. Picture A shows a 4-gang switch disassembled. The orange wire or rod is weed<br />
wacker line, .095” in diameter. I have also used the tip off a broken fly rod instead, but finding broken fly rods is not easy!<br />
PICTURE A
The most difficult part of disassembly is getting the spring clip/lock off (Picture A, top left) without damaging it or the<br />
housing. But if one is patient, one can get the two spring clips out of their holes and slide it off. Then everything just falls apart.<br />
Picture B shows the toggles from two different perspectives, one with a nylon rod through it and three oriented to show the<br />
holes in the toggles for the nylon rod. It goes through all 4 toggles and holds them in place and ensures good contact on the<br />
spring surfaces. Both ends of the original nylon rod are tapered, but the weed wacker line will fit fine without the taper. If you<br />
have trouble threading it in, you could taper one end of the replacement line (rod) with a little sandpaper. These toggles are<br />
original to a 1949 Cadillac.<br />
PICTURE B PICTURE C<br />
Picture C shows the base unit with one toggle installed and the orange nylon line partially installed. It takes a little patience to<br />
install the line, but really it is not that bad of a job. Red wine is a great shop assistant!<br />
While you have the switch assembly apart, now is a good time to clean and polish things. Take time to clean up the housing.<br />
Also, take the springs out and polish them for better electrical contact. I generally clean them up just in case. A dab of<br />
dielectric grease might be used to maintain good electrical contact and avoid corrosion down the road.<br />
When you get the toggles installed and the rod threaded the spring clip fits over the hole where the rod goes through. The clips<br />
hold the rod in place. Once done the switch toggles will be nice and tight and work a lot better.<br />
FISHING FOR ’49 CADIILACS<br />
By Fred Hammerle, 6207 Club Coupe<br />
In my spare time, when I'm not twisting wrenches on my 6207 Club Coupe or another old automotive toy, I enjoy a day on the<br />
lake fishing for Largemouth and Smallmouth Bass. Such was the case in mid June when I was invited for a couple of days of<br />
fishing on Great East Lake which borders New Hampshire and Maine. We had a pleasant afternoon of fishing, then headed out<br />
for a light supper at Poor Peter's Pub ... a local watering hole with very good comfort food. Upon approaching the restaurant, I<br />
was surprised to see a white '49 Club Coupe out front ... in of all places, rural Maine. As you all know, other than at car shows,<br />
we seldom see another vintage Cad, so this was surprising to say the least.<br />
Upon closer inspection, this was no ordinary '49 Coupe. It had a rally style ram front bumper, bucket seats with racing type<br />
belts and a roll bar. Also, heavy duty steel wheels that looked sort of NASCAR and plaques front and rear with "Peking to<br />
Paris Rally". Now my curiosity was peaking so I had to find the owner and chat with him about this car. I asked the waiter<br />
and he directed me to a group of 60-something gentlemen enjoying their dinner and beer. I proceeded to inquire about the car<br />
and of course, mentioned my involvement with the best Cadillac ever made. Long story short, this is a specially modified 6207<br />
Coupe that will be running this rally in the Fall of <strong>2010</strong>. When you access the website (below) for the Team and the Rally, you<br />
will see the many exotic countries they will be navigating ... including Mongolia and Iran! This famous event, first run in<br />
1907, requires the car to run the original motor and brakes, along with certain other OEM parts, but does allow some latitude<br />
on other systems.<br />
I will be following their progress on this incredible adventure and hope many of you will do so as well. I'm so glad they chose<br />
our favorite Cadillac to challenge the Asian and European countryside and elements.<br />
Peking to Paris in a ‟49 http://cschwager.wordpress.com/<strong>2010</strong>/05/13/the-preparation/
RUST BEHIND THE ROCKER PANEL MOLDING<br />
By Luca Marzana, Lazzeretto, Italy<br />
Hi everyone. I know I am a new-comer and that there are many people who are very experienced about working and restoring<br />
'49 cars. But I would like to give a little contribution even if, probably, many of you already know what I am talking about.<br />
Taking apart my car I came to the lower chrome molding. I took it apart and then I took off the retainer metal strip. Really a<br />
lot of dirt and mud came out from the space between the retainer and the body and the retainer and the chrome. Probably this<br />
is a kind of mud trap which can be harmful for both chrome and body metal, especially if you drive your car all year round and<br />
in bad weather. Too bad I did not take a picture when there was all that mud around. Better, maybe, to periodically have a look<br />
at this spot once in a while as rust may be developing there. Hope this little tip can help someone.<br />
RUSTY ROCKER PANEL AND METAL RETAINER STRIPS ON LUCA’S 6269<br />
ME AND MY COUPE DE VILLE RETIRE II<br />
By Alan Towne<br />
I've been enjoying driving the car on long drives around the Long Beach (Washington) Peninsula. That's what I bought it for<br />
so long ago, and now that I'm retired I can take advantage of the sunny week-days and drive with little or no traffic here at<br />
sustained speeds and few stops. Lovely road car and lovely memories of riding in my grandmother's '49 on the exact same<br />
roads, past the same landmarks. I wish I could have shared photos of the interior of my car with Jim Jordan (see June ‟10<br />
Times) so that he could have restored his interior to its original look. I was fortunate to buy an untampered-with, one-owner<br />
car, which looks very much at home in its new garage (photo attached). Still looks timeless, modern, and elegant!<br />
ALAN’S ’08 CTS CADILLAC AND HIS ’49 CDV SHARE A GARAGE IN OCEAN PARK, WASHINGTON<br />
TECH TIP: CHECK YOUR HORN RELAY IF THE HORN DOESN’T BLOW<br />
The horn relay is the small black box with 3 wires connected to it on the upper driver's side of the ‟49 firewall. They are<br />
inexpensive and easily obtained, as the same horn relay was used on 1934-52 Cadillacs and probably other GM cars as well.<br />
You can merely replace it and see if this corrects the problem. If you prefer testing it first, have an assistant press your horn<br />
button. Assuming the horn does not blow, connect a jumper wire from the center terminal of the relay to the left hand<br />
terminal; that is, the terminal closest to the center of the car. If the horn then blows, the problem may be with the relay.