USER MANUAL
USER MANUAL
USER MANUAL

You also want an ePaper? Increase the reach of your titles
YUMPU automatically turns print PDFs into web optimized ePapers that Google loves.
0 +<br />
<strong>USER</strong> <strong>MANUAL</strong>
Index<br />
<strong>USER</strong> <strong>MANUAL</strong><br />
Chapter 1: DVR Features ....................................................................................................................................2<br />
DVR Features.....................................................................................................................................................2<br />
Chapter 2: Layout ................................................................................................................................................3<br />
2.1 Front Panel (Details please refer to the real product)...................................................................................3<br />
2.2 Rear Panel (Details please refer to the real product.) ................................................................................3<br />
2.3 Remote Controller (Only for reference).......................................................................................................4<br />
Chapter 3: DVR Installation................................................................................................................................5<br />
3.1 Installing Hard Drive....................................................................................................................................5<br />
3.2 Camera and Monitor Connection .................................................................................................................5<br />
3.3 VGA Output (optional).................................................................................................................................5<br />
3.4 Power Supply connection.............................................................................................................................5<br />
Chapter 4: System Boot ...........................................................................................................................................6<br />
4.1 System Initialization.....................................................................................................................................6<br />
4.2 Display mode................................................................................................................................................6<br />
Chapter 5: DVR Menu .........................................................................................................................................7<br />
5.1 Main Screen..................................................................................................................................................7<br />
5.2 Main Menu ...................................................................................................................................................7<br />
5.3 Display Mode ...............................................................................................................................................7<br />
5.4 Setup.............................................................................................................................................................8<br />
5.4.1 Camera ..............................................................................................................................................8<br />
5.4.1.1 Color.......................................................................................................................................9<br />
5.4.1.2 Title.........................................................................................................................................9<br />
5.4.2 Record ...............................................................................................................................................9<br />
5.4.2.1 Frame Rate ...........................................................................................................................10<br />
5.4.3 Motion Detection.............................................................................................................................10<br />
5.4.3.1 Sensitivity.............................................................................................................................11<br />
5.4.3.3 Email set...............................................................................................................................12<br />
5.4.3.4 DVR Name Setup.................................................................................................................12<br />
5.4.4 Sensor..............................................................................................................................................13<br />
5.4.5 Schedule ..........................................................................................................................................13<br />
5.4.6 Network...........................................................................................................................................14<br />
5.4.6.1 External Net Map .................................................................................................................14<br />
5.4.6.2 DDNS ...................................................................................................................................15<br />
5.4.7 Backup.............................................................................................................................................15<br />
5.4.8 System .............................................................................................................................................16<br />
5.4.8.1 Time Set................................................................................................................................16<br />
5.4.8.2 System Password..................................................................................................................16<br />
5.4.8.3 System Info...........................................................................................................................16<br />
5.4.8.4 Video Format........................................................................................................................17<br />
5.4.8.5 Log View ..............................................................................................................................17<br />
5.4.8.6 Log Set .................................................................................................................................17<br />
5.4.8.7 Disk Format..........................................................................................................................17<br />
5.4.8.8 Firmware Upgrade................................................................................................................17<br />
5.4.8.9 Noise Filter...........................................................................................................................18<br />
1
<strong>USER</strong> <strong>MANUAL</strong><br />
5.4.8.10 Language Select .................................................................................................................18<br />
5.4.8.11 Spot Monitor Setup.............................................................................................................18<br />
5.5 Search Setup...............................................................................................................................................18<br />
5.5.1 Time Search.....................................................................................................................................18<br />
5.5.2 Event Search....................................................................................................................................19<br />
5.5.3 Urgent Search..................................................................................................................................19<br />
5.5.4 Record playback..............................................................................................................................19<br />
5.6 Motion Trace ..............................................................................................................................................19<br />
5.7 Area Zoom in/out .......................................................................................................................................20<br />
5.8 PTZ Control................................................................................................................................................20<br />
5.9 Rotation ......................................................................................................................................................20<br />
5.10 Audio........................................................................................................................................................20<br />
5.11 Quit...........................................................................................................................................................20<br />
Chapter 6: NetViewer Program.........................................................................................................................21<br />
6.1 Installation Procedure.................................................................................................................................21<br />
6.2 Program Main Interface..............................................................................................................................21<br />
6.3 Login- in System ........................................................................................................................................22<br />
6.4 Working Mode............................................................................................................................................23<br />
Chapter 7: Specification.....................................................................................................................................24<br />
Chapter 8: Appendix..............................................................................................................................................25<br />
8.1 System Connection Diagram......................................................................................................................25<br />
8.2 DVR Accessories (included) ......................................................................................................................25<br />
2
<strong>USER</strong> <strong>MANUAL</strong><br />
Safety Instruction<br />
General safety<br />
1. Use proper power source.<br />
Do not operate this product from a power source that applies more than specified voltage<br />
(100-240V AC).<br />
2. Never insert anything metallic into the DVR case.<br />
Putting something into the DVR case can be a source of dangerous electronic shock.<br />
3. Do not operate in wet & dusty or use near water.<br />
Avoid places like a damp basement or dusty hallway.<br />
4. Do not expose this product to rain or use near water.<br />
If this product accidentally gets wet, unplug it and contact an authorized dealer immediately.<br />
5. Keep product surfaces clean and dry.<br />
To clean the outside case of the DVR, use lightly dampened cloth with water (no solvents).<br />
6. Provide proper ventilation.<br />
This DVR has a built in fan that properly ventilates the system.<br />
7. Do not attempt to remove the top cover.<br />
If there are any unusual sounds or smells coming from the DVR, unplug it immediately and<br />
contact an authorized dealer or service center.<br />
8. Do not attempt to remove the top cover.<br />
Warning: You may be subjected to severe electrical shock if you remove the cover of the DVR.<br />
9. Handle DVR box carefully.<br />
If you accidentally drop your DVR on any hard surface, it may cause a malfunction. If the DVR<br />
doesn’t work properly due to physical damage, contact an authorized dealer for repair or exchange.<br />
10. Use standard lithium cell battery. (NOTE: Manufacturer has preinstalled battery.)<br />
The standard lithium cell 3v battery located on the mother board should be replaced if the time<br />
clock does not hold its time after the power is turned off. Warning: unplug the DVR before<br />
replacing battery or you may be subjected to severe electrical. Properly dispose of old batteries.<br />
11. Install this product under good air circulation conditions.<br />
This DVR system contains a hard disk drive inside, which generates much heat during<br />
operation. Therefore, do not block air holes (bottom, upper, sides and back) of the DVR that cool<br />
down the system while running. Install or place this product in an area where there is good air<br />
circulation.<br />
1
<strong>USER</strong> <strong>MANUAL</strong><br />
Chapter 1: DVR Features<br />
DVR Features<br />
• MPEG4 Compression.<br />
• Supports three recording resolutions: CIF, HD1 and D1.<br />
• Well Image Quality, High Definition.<br />
• Supports NTSC or PAL system.<br />
• SOC single chip, high stability.<br />
• LINUX operation system, fluent web transmission.<br />
• Supports Multiple record modes: Manual, Motion detection, Sensor trigger and<br />
scheduled recording.<br />
• Supports recording list search and advanced time search.<br />
• Supports spot output and dwell time (Sequential Channel Switch) Display.<br />
• Supports video loss alarm.<br />
• VGA output to Monitor (Optional)<br />
• Supports PTZ camera operations through built-in RS-485 port<br />
• Supports Password protection Function.<br />
• With IR Remote Control.<br />
• HDD Support up to 500GB.<br />
• Supports USB 2.0 Port (Optional).<br />
• Supports mouse operation.<br />
• Supports USB/CD/DVD backup. (Optional).<br />
• Supports Zoom in/out function in a special area.<br />
• Supports alarm video sent to Email.<br />
2
<strong>USER</strong> <strong>MANUAL</strong><br />
Chapter 2: Layout<br />
2.1 Front Panel (Details please refer to the real product)<br />
1 HDD indicator 9 ►►Backup / FWD<br />
2 Power indicator 10 Display mode<br />
3 Channel select/Numeric Key 11 ◄ Move left<br />
4 Menu Key 12 ▲Move up<br />
5 ESC 13 ►Move light<br />
6 REC 14 ▼Move down<br />
7 ◄◄PTZ Control / REW 15 Enter<br />
8 ► Search / Play / Stop key<br />
2.2 Rear Panel (Details please refer to the real product.)<br />
8-CH Rear Panel<br />
16-CH Rear Panel<br />
1 Video Input 8 LAN port<br />
2 Video Output 9 PS/2 mouse port<br />
3 Audio Input 10 USB port<br />
4 Audio Output 11 Debug port<br />
5 RS-485/Sensor/Alarm port 12 VGA port<br />
6 Power switch 13 Power input<br />
7 S-VIDEO port 14 GND<br />
3
<strong>USER</strong> <strong>MANUAL</strong><br />
RS485/Sensor/Alarm ports definition:<br />
Pin 1---12: sensor 1---sensor 12<br />
Pin 13&20&24&25: GND<br />
Pin 14---17: sensor 13---sensor 16<br />
Pin 18 &19: RS485 (18: RS485A, 19: RS485B).<br />
Pin 21&22&23: Alarm output (21: COM, 22: NC, 23: NO).<br />
2.3 Remote Controller (Only for reference)<br />
POWER Shut down DVR REC: Manual Record<br />
:<br />
2x2: 4 Display Quad mode on screen<br />
0~10: Select channel/Enter Number<br />
3x3: Display all 8-channel cameras on screen<br />
4x4: Display all 16-channel cameras on screen<br />
AUTO:<br />
Dwell time (Sequential Channel Switch) Display<br />
DISPLAY: Switch<br />
Display<br />
Mode;<br />
SEARCH: Search Recording;<br />
ZOOM:<br />
Zoom out/in a<br />
BACKUP:<br />
Backup recording event<br />
special area<br />
MUTE:<br />
On or off Audio output on the spot mode or Playback<br />
Mode;<br />
▲,▼,◄,►: Direction Arrows<br />
ENTER: Enter Key MENU: Menu<br />
PTZ: PTZ Control ESC: Exit<br />
Z+,Z-: Zoom in / out F+,F-: Focus Control key<br />
► : Starting Recording / Stopping Recording<br />
■: Stop and exit Playing Mode<br />
◄◄ FWD Key ►► REW Key<br />
◄ Next Frame ► Previous Frame<br />
4
<strong>USER</strong> <strong>MANUAL</strong><br />
Chapter 3: DVR Installation<br />
3.1 Installing Hard Drive<br />
Note:Please do not take out Hard Drive when DVR is running!<br />
I. If your product does not come with a removable HDD drawer, please refer below:<br />
(1) Open DVR upper cover carefully;<br />
(2) Insert Power Cord and data cable into Pin of Hard Drive tightly;<br />
(3) Put the upper cover back carefully.<br />
II. If your product comes with a removable HDD drawer (optional), please refer below:<br />
(1) Take out the hard drive drawer from the DVR side panel;<br />
(2) Connect the power cord and data cable to hard disk;<br />
(3) Insert the HDD tray into DVR body tightly.<br />
3.2 Camera and Monitor Connection<br />
There are 8/16 camera inputs and 2 video outputs with BNC connectors (Refer to 2.2 Rear Panel),<br />
or Connecting S-video port to Monitor (Refer to System connection Configuration on Page 24.)<br />
3.3 VGA Output (optional)<br />
There is one VGA output connector.<br />
3.4 Power Supply connection<br />
Please only use the power adapter supplied with the DVR itself.<br />
5
<strong>USER</strong> <strong>MANUAL</strong><br />
4.1 System Initialization<br />
Chapter 4: System Boot<br />
SYSTEM INITIALIZE…<br />
After connecting the power, the system will<br />
boot-up and start initializing.<br />
System will detect mouse, initialize file system<br />
and recording parameters etc.<br />
4.2 Display mode<br />
After finishing initialization, DVR will enter into<br />
Preview Mode. (Shown as left picture)<br />
Display of 8-CH DVR is three rows, three columns,<br />
and last channel at right corner of screen is blank.<br />
DVR Status bar lies on the bottom of screen, which<br />
shows Menu, Recording status, current HDD, HDD used<br />
ratio and system time etc.<br />
Menu: Press the [Menu] button to enter into the<br />
Main Menu, and you also could click the [Enter] key on<br />
Front Panel to enter into Main menu.<br />
REC:When the icon shows in blue color, that means DVR is on recording mode.<br />
HD1:current Hard Drive<br />
1%:indicates the percentage of hard drive being used<br />
System Time: display current system time<br />
6
<strong>USER</strong> <strong>MANUAL</strong><br />
Chapter 5: DVR Menu<br />
5.1 Main Screen<br />
On preview Mode, press the [Menu] key on the<br />
bottom of status bar or [Enter] key on front panel to<br />
enter into Main Menu (Shown as left picture).<br />
5.2 Main Menu<br />
Menu Directory<br />
MAIN<br />
MENU<br />
5.3 Display Mode<br />
LIVE<br />
SETUP<br />
SEARCH<br />
MOTION<br />
ZOOM<br />
PTZ<br />
ROTATION<br />
AUDIO<br />
QUIT<br />
Camera<br />
Record<br />
Motion<br />
Sensor<br />
Schedule<br />
Network<br />
Backup<br />
System<br />
DVR supports several different display modes, e.g.: 2*2, 3*3, 4*4(8-CH DVR not support<br />
4x4 display), PIP (Picture-In-Picture), press [display mode] key to switch display mode.<br />
7
5.4 Setup<br />
<strong>USER</strong> <strong>MANUAL</strong><br />
On preview mode, press [MENU] key or click<br />
“ ” key to enter into setup menu.<br />
The option allows you to setup parameters for<br />
Camera, Record, Motion and Sensor etc.<br />
5.4.1 Camera<br />
Channel: Press [◄ or ►] key to select channel.<br />
When selecting [ALL], that means configuring all<br />
channels at the same time.<br />
Color: In order to get the best video image, the<br />
option allows you to adjust parameters such as<br />
brightness, saturation, contrast and hue etc. For detail<br />
setup, please refer to section 5.4.1.1.<br />
Title: the option allows you to define the name of each camera. For details please refer 5.4.1.2<br />
PTZ protocol: Press [◄ or ►] key to select protocol, including Pelco-D & Pelco-P.<br />
PTZ baud rate: Press [◄ or ►] key to adjust baud rate, including 600,1200,1800,2400,4800,<br />
9600 and 19200.<br />
PTZ address: Press [◄ or ►] key to adjust physical address of PTZ camera, can be changed<br />
from 0 to 255.<br />
Event popup: When alarm triggered with one channel, DVR will make this channel enlarge to<br />
full screen for designated time, can be changed from 1 to 10 seconds or off.<br />
Main rot. time: Define the dwell time for single channel full screen show when rotation function<br />
is turned on. You can use [◄ or ►] key to select, can be changed from 1 to 10 seconds or off.<br />
Covert recording: Select “ON” to mask replaces the live image with a blank screen, and the<br />
monitor shows nothing but recording is still on.<br />
Press [MENU] button to save parameters, press [ESC] key to abort modification and exit.<br />
8
<strong>USER</strong> <strong>MANUAL</strong><br />
5.4.1.1 Color<br />
Move cursor to the “COLOR”, press [ENTER] key<br />
or click “<br />
” to enter into color setup interface. You<br />
can use [◄ or ►] key to adjust the values.<br />
Adjust the Contrast, Brightness, Hue or Saturation<br />
for each channel. The level is from 1 to 99.The default<br />
value is 50.<br />
Sharpness: Select ON or OFF.<br />
Press the [Enter] button to save parameters, and then press [ESC] key to abort modification and<br />
exit.<br />
5.4.1.2 Title<br />
Move [▲ or ▼] key to [Title] Menu and press<br />
[Enter] key to enter into title setup interface. On the<br />
setup interface, move [◄, ►, ▲ or ▼] key to select<br />
numeric key or character and then press [ENTER]<br />
key to confirm. Press “shift” key to switch lowercase.<br />
Press “Backspace” key to delete.<br />
Note: The title support up to eight characters or<br />
numbers.<br />
5.4.2 Record<br />
Move cursor to “RECORD” icon, press [ENTER]<br />
key to enter into record sub menu.<br />
Channel: Press [◄ or ►] key to select channel.<br />
While selecting [ALL], it means configuring all<br />
channels at the same time.<br />
Resolution: Use [◄ or ►] key to select<br />
CIF(100Frames), HD1(50Frames) or D1(25Frames).<br />
Pre record: Set the pre-record function ON (10M) & OFF. When pre-record is activated, the<br />
DVR will record 10M before alarm /motion triggered<br />
9
<strong>USER</strong> <strong>MANUAL</strong><br />
Note: Only when channel is set to “ALL”, system allows you to setup resolution and pre-record).<br />
FPS: Set record frame rate of each channel. Details please refer to section 5.4.2.1.<br />
Quality: The option supports four levels: low、standard、high、highest. Higher record quality<br />
shows smooth images, but requires more hard drive space.<br />
Record mode: Press [◄ or ►] key to adjust record mode such as off (no record), always<br />
(continuous record), motion (motion record), sensor (sensor record), schedule (scheduled record).<br />
Audio: To bind one audio channel to a designated video channel, can be changed from 1 to 4 or<br />
off.<br />
Schedule: When record mode is schedule, schedule option is active. DVR supports up to five<br />
schedule1 (schedule1- schedule5).<br />
Press [MENU] button to save parameters or press [ESC] key to abort modification and exit.<br />
5.4.2.1 Frame Rate<br />
Move cursor to “FPS” menu and press [Enter] key<br />
to enter into frame rate setup interface (shown as left<br />
picture).<br />
On CIF mode, total frame rate is 100 frames, and<br />
on HD1 mode, for 50 frames, on D1 mode, for 25<br />
frames.<br />
You could select to manually setup frame rate or<br />
system automatically allocate.<br />
Press [▲or▼] key to adjust value. Press [Enter] button to save parameters; or [ESC] key to abort<br />
modification and exit.<br />
5.4.3 Motion Detection<br />
Move cursor to “MOTION” icon, press<br />
[ENTER] key to enter into motion setup menu.<br />
Channel: Press [◄ or ►] key to select channel.<br />
While selecting [ALL], it means configuring all<br />
channels at the same time.<br />
Motion enable: Turn on or off motion detection<br />
10
function.<br />
<strong>USER</strong> <strong>MANUAL</strong><br />
Sensitivity: Supports up to eight levels, from 1 (the lowest) to 8 (the highest), default is 4.<br />
Motion area: Set motion detection area. Press [Enter] key to enter into motion area setup<br />
interface then press [MENU] key to set up area.<br />
Post record time: Define the recording time when motion is detected, and the post record time<br />
can be changed from 5 、10、15to 60 seconds or off.<br />
Buzzer time: Define how long buzzer will sound when motion is detected, and the Buzzer time<br />
can be changed from 1 to 60 seconds or off.<br />
Alarm time: Define how long external alarm will last when motion is detected, can be changed<br />
from 1 to 60 seconds or off.<br />
Motion trace: indicates whether screen will display the motion trace or not when motion is<br />
detected. When motion detection is on and there is motion in detection area, the motion trace will<br />
display in red.<br />
Alarm Email: The option allows you to open or close the Email alarm function.<br />
DVR Name: Setup a DVR name for the DVR which have email advice function.<br />
Mail to: Set up a email address which receive a motion alarm video. (Refer to Chapter 5.4.3.3.)<br />
Mail from: set up a email address which send out a motion alarm video. (Refer to Chapter<br />
5.4.3.3.)<br />
Press [MENU] key to save parameters, press [ESC] key to abort modification and exit.<br />
Remark: Alarm email may be not available due to any delay or broken of network.<br />
5.4.3.1 Sensitivity<br />
Press [Enter] button to enter into Sensitivity<br />
Menu.<br />
Sensitivity: indicate sensitivity triggered by<br />
motion speed.<br />
Spatial: Indicates sensitivity to object cubage.<br />
Black Level:Indicates the sensitivity triggered by<br />
sheltered lens<br />
White Level: Indicate the sensitivity triggered by light shining<br />
All the above options support up to eight Levels, from level 1 (the Lowest) to Level 8 (the<br />
Highest).<br />
11
Motion area:<br />
<strong>USER</strong> <strong>MANUAL</strong><br />
Press [Enter] key to save parameters, press [ESC]<br />
key to abort modification and exit.5.4.3.2 Motion<br />
Area<br />
Move cursor and select “Motion Area”, and then<br />
press [Enter] key to enter into motion area setup<br />
interface.<br />
Press [MENU] key to popup “select/clear/exit”<br />
menu, press [select] and [ENTER] key, move cursor<br />
to setup motion area. Green blocks represent the area that is not being detected while the transparent<br />
blocks are the areas under detections<br />
You also can select Mouse operation. Click right button of Mouse and select “select/clear/exit” to<br />
setup motion area.<br />
5.4.3.3 Email set<br />
Press[▲or▼] key to enter Title set menu (shown as<br />
left picture);<br />
To change titles, you can select characters by mouse<br />
or direction arrow on front panel.<br />
Click [Enter] key on the screen to confirm save and<br />
exit, [ESC] to quit save and exit.<br />
Remark: Please input standard email address to<br />
make sure email sent out normally.<br />
5.4.3.4 DVR Name Setup<br />
Press [▲or▼] key to move cursor to DVR Name<br />
and press [Enter] key to enter into the name set menu<br />
(shown as left picture):<br />
Click [◄ / ►/ ▲/▼] keys to select a character,<br />
and click [Enter] key to input the character.<br />
Click [Enter] key of keypad to save and exit the<br />
menu interface, or [Esc] key to quit saving.<br />
Remark: Please input standard email address to make sure email sent out normally.<br />
12
<strong>USER</strong> <strong>MANUAL</strong><br />
5.4.4 Sensor<br />
Note: The DVR systems do not include external<br />
Sensor and Alarm. If need, please purchase it<br />
yourself.<br />
Move cursor to “SENSOR” icon, press [ENTER]<br />
key to enter into sensor setup menu.<br />
Sensor channel: Press [◄ or ►] to select<br />
channel. While selecting [ALL], it means<br />
configuring all channels at the same time.<br />
Sensor type: Supports Normal-Open and Normal-Closed. Press [◄ or ►] to select a type.<br />
Post record time: Define the recording time after sensor is triggered, the setting can be changed<br />
to 5 、10、15to 60 seconds or off.<br />
Buzzer time: Define how long buzzer will sound when sensor is triggered, the setting can be<br />
changed to 1 to 60 seconds or off.<br />
Alarm time: Define how long external alarm will last when sensor is triggered, the setting can be<br />
changed to 1 to 60 seconds or off.<br />
Email alarm: Turn on or off email alarm function<br />
DVR Name: the option allows you to setup the DVR name sent out alarm email to differentiate<br />
an email alarm DVR from the other type of DVR. (Refers to section 5.4.3.4)<br />
Mail to: Setup email address which can receive alarm email. (Refer to section 5.4.3.3).<br />
Mail from: Setup email address which can send out alarm email (Refers to section 5.4.3.3).<br />
Press [◄ or ►] key to adjust parameter values, and press [Menu] key to save the above settings<br />
and [Esc] key to quit saving.<br />
Remark: We can’t make sure a alarm email be sent out timely due to network delay or broken.<br />
5.4.5 Schedule<br />
Move cursor to “SCHEDULE” icon, press<br />
[ENTER] key to enter into schedule setup interface.<br />
System supports up to 5 schedules and you can set<br />
different record modes in different periods. This<br />
provides a very flexible way to setup record schedule<br />
according to your needs.<br />
Row means 24 hours for one day, column means 7<br />
day for a week. Move cursor to “SCHEDULE1” and press [◄ or ►] key to select a schedule, and<br />
13
<strong>USER</strong> <strong>MANUAL</strong><br />
then press 1-4 buttons (1-always, 2-motion, 3-sensor, 4-cancel) to select record modes, press [◄ or<br />
►] to select time periods and press [MENU] key to confirm. Press [Enter] key to save parameters, or<br />
[ESC] key to abort modification and exit.<br />
5.4.6 Network<br />
Network Type: This option allows you to set system<br />
network type to DHCP or static. Once you set to static<br />
allocation, you will manually setup IP address, Gateway,<br />
Net Mask etc. If set to dynamitic mode, you will have to<br />
provide DHCP server, otherwise, DVR can’t capture IP<br />
address.<br />
Video port: Network access port number, default<br />
value is 3100. You change the port number as per your<br />
actual situation.<br />
Net mask: It refers to a subnet mask used to<br />
determine what subnet an IP address belongs to a<br />
number that is used to identify a sub network so that IP address can be recognized by a local area<br />
network.<br />
Gateway: The Gateway is usually housed at the ISP. The gateway connects networks that have<br />
different<br />
Protocols: The Gateway address is provided by your ISP.<br />
DHCP server: Domain server address.<br />
DDNS:refers to section 5.4.6.2.<br />
Web port number: These port numbers are used to communicate with PC client. It should be<br />
changed to another value. The default value is 80.<br />
Press [Menu] key to save the above parameter, or [ESC] key to abort modification and exit.<br />
5.4.6.1 External Net Map<br />
If you need to visit DVR via External net, you should setup the map address of video port and<br />
[All] and tick“ ” at Enable column.<br />
web port at the public Router of all network located<br />
in the DVR.<br />
Firstly open the website of router and enter into<br />
transmission standardvirtual server to setup<br />
service ports (included video port and web port).IP<br />
address of external net is same as the DVR IP<br />
address at intranet, As for Protocol, please select<br />
14
<strong>USER</strong> <strong>MANUAL</strong><br />
5.4.6.2 DDNS<br />
If you require an external service to maintain a<br />
dynamic IP address enter the user information here.<br />
Note: DDNS only support www.3322.org<br />
DNNS Setup Procedure:<br />
1. You need to register a www.3322.org to get a<br />
free account and apply for domain name;<br />
2. Set DVR network parameters and DDNS Menu<br />
according to a local area network allocation;<br />
3. Put the DVR’s IP AND port number usable by your modem/router;<br />
4. Ensure domain name on the website have automatically captured IP address recognized by<br />
your router;<br />
5. Register your domain name on the website;<br />
Note: Press the“▲”、“▼”、“ ” and“ ” button to move cursor and “Enter” key to enter<br />
into.<br />
5.4.7 Backup<br />
When you insert USB into DVR or DVR comes<br />
with CD-RW device, this menu is available. Press<br />
[BACKUP] key on the front panel or move cursor to<br />
[BACKUP] icon and press [ENTER] key to enter into<br />
backup interface.<br />
Move cursor to disk、 channel、start、end and press<br />
[MENU] key to adjust parameters.<br />
After setting the above parameters, press [ENTER] key to start backup process.<br />
DVR supports AVI file backup, to use this function, just move the cursor to “AVI” and press<br />
[MENU] key to turn it on and then there’s a “v” mark.<br />
15
<strong>USER</strong> <strong>MANUAL</strong><br />
5.4.8 System<br />
Select [System] menu to enter into the menu. On<br />
system mode, we can setup parameters on system time,<br />
password, system info, video format and Log view etc.<br />
5.4.8.1 Time Set<br />
There are three time format options. We setup<br />
different time format according to different zone.<br />
Date format: Asia YY/MM/DD; Europe DD/MM/YY;<br />
USA: MM/DD/YY.<br />
Press [◄or►] key to move cursor and press [▲or▼]<br />
key to adjust values.<br />
Press [ENTER] key to return parent menu and Press [MENU] key to save parameters or [ESC]<br />
key to abort modification and exit.<br />
5.4.8.2 System Password<br />
Input new password and confirm the password. The<br />
password supports up to eight characters or number.<br />
Detail setting methods please refer to the section 5.4.2.1<br />
5.4.8.3 System Info<br />
Firmware Ver.: DVR’s software version.<br />
DVR support 4 HDD. It shows HDD info, e.g. : HDD’s<br />
total capacity.<br />
HDD overwrite: ON/OFF. If you choose “ON”,<br />
recording continues and overwrites previous recordings<br />
when the hard drive is full.<br />
If you choose “OFF”, the recording process will stop when the hard drive is full.<br />
16
<strong>USER</strong> <strong>MANUAL</strong><br />
5.4.8.4 Video Format<br />
Press[◄or►] key to select PAL or NTSC video<br />
output; and there are following options: 800*600、<br />
1204*768、1280*1024.You can also use [◄ or ►]<br />
key to select.<br />
5.4.8.5 Log View<br />
In this window you can check DVR’s related<br />
log information, e.g.: booting, motion detection、<br />
sensor triggered、manual record etc.<br />
5.4.8.6 Log Set<br />
Log set determines what information DVR<br />
will write into the system log file.<br />
Press [▲or▼] key to move cursor; press<br />
[◄or►] key to adjust values; press [ENTER]<br />
key to return parent menu.<br />
5.4.8.7 Disk Format<br />
System supports 4 HDD. Firstly<br />
select disk which you want to format,<br />
then press [ENTER] key to format the<br />
HDD. Be carefully, if you format the<br />
hard drive, it will erase all the data in the<br />
hard drive.<br />
5.4.8.8 Firmware Upgrade<br />
You can proceed firmware upgrade on DVR via U disk or Network. Please restart DVR and<br />
17
estore all the factory default setting after successful upgrade.<br />
<strong>USER</strong> <strong>MANUAL</strong><br />
5.4.8.9 Noise Filter<br />
The Setting allows you to turn on channel noise<br />
filter function or not at time period. Red stand for On,<br />
and Green for Off.<br />
0-24 stands for one day.<br />
5.4.8.10 Language Select<br />
You can change the OSD language from the default language to other languages according to<br />
different area, if your DVR supports multi-languages.<br />
5.4.8.11 Spot Monitor Setup<br />
The setup menu allows you to setup parameters<br />
on auxiliary Output port.<br />
Channel Enable: indicates system will permit<br />
which channel can be output by auxiliary Output<br />
port.<br />
Rotation time: Set the dwell time for channel, the rotation time can be changed from 1 to 10<br />
seconds or off. Press [◄or►] key to adjust the values.<br />
Event popup: On or off. If event popup is turned on and DVR will make the channel enlarge full<br />
screen when this channel has alarm triggered.<br />
5.5 Search Setup<br />
DVR supports three search modes: Time search 、Event<br />
search and Urgent search.<br />
Press [SEARCH] key to enter into search menu.<br />
Select the recorded file and press [ENTER] key to play<br />
the file.<br />
5.5.1 Time Search<br />
18<br />
1).TIME SEARCH: Search the recorded
images according to the accurate time.<br />
Press [◄or►] key to move the cursor and press.<br />
[▲or▼] key to adjust the value<br />
<strong>USER</strong> <strong>MANUAL</strong><br />
5.5.2 Event Search<br />
2).EVENT SEARCH: Search the recorded<br />
images according to the recording type.<br />
Press [▲or▼] keys to select the file and press<br />
[ENTER] key to start playing.<br />
5.5.3 Urgent Search<br />
URGENT SEARCH: Search the manually<br />
recorded images<br />
Press [▲or▼] keys to select the file and press<br />
[ENTER] key to start playing.<br />
5.5.4 Record playback<br />
On playback mode, press [Display mode] key to change to preview mode . You can use the keys<br />
on the front panel or mouse to control play-back. DVR supports multiple speed (X2, X4, and X6) for<br />
rewind or fast forward play and also supports single frame rewind or forward play.<br />
NOTE: On playback mode, [◄and ►] keys on the front panel are used to control rewind or<br />
forward play frame by frame; [ESC] key is used to quit the play-back mode.<br />
5.6 Motion Trace<br />
Turn on or off motion trace function. When any object is moving on motion detection area, the<br />
trace which the object located at will display in red.<br />
Note: The function will be available only when turning on Motion detection, setting detection<br />
area and turning on motion trace.<br />
19
5.7 Area Zoom in/out<br />
<strong>USER</strong> <strong>MANUAL</strong><br />
The option allows you to enlarge a special area and view the area more clearly. Select a channel<br />
and select the function. At this moment you could enlarge the selected area by sliding mouse. Click<br />
the right button of mouse or press [ESC] key to exit the [Zoom] function.<br />
5.8 PTZ Control<br />
Select PTZ channel you need to control, and press [PTZ]<br />
button on the front panel or select [PTZ] on main menu to open<br />
PTZ control interface.<br />
At this moment, you could click Z+&Z- keys to zoom out or<br />
in and click F+&F- keys to control focus function.<br />
5.9 Rotation<br />
The function allows you to rotate full display of each camera in turn. Before turn-on, you must<br />
setup the main rotation time in the channel setup menu.<br />
5.10 Audio<br />
Turn on or off audio output.<br />
Before turn on, please first setup video output has been bundled with audio output on record<br />
setup menu.<br />
5.11 Quit<br />
Shut down system normally.<br />
Remind:Please shut down HDD Recorder normally , not unplug power (especially recording),to<br />
avoid any damage to HDD.<br />
20
Chapter 6: NetViewer Program<br />
6.1 Installation Procedure<br />
1. Insert the software CD into your CD-ROM drive;<br />
2. Open the CD file;<br />
3. Double-click the setup file to run the installation program;<br />
4. Follow up the instruction to finish the installation step by step.<br />
6.2 Program Main Interface<br />
<strong>USER</strong> <strong>MANUAL</strong><br />
1<br />
2<br />
3<br />
4<br />
5<br />
6<br />
7 8 9 11 10<br />
12<br />
1. Net-viewer Program setup: Setup the software parameter;<br />
2. Network Connection: Press the button to connect or disconnect network;<br />
3. Stopping DVR record: Remotely stopping DVR manual recording function;<br />
4. Remote record: Manually start recording on remote DVR.<br />
5. AVI Record: Convert video stream to AVI file and save it in your computer;<br />
6. Backup: Backup the video stream to your computer with a special format;<br />
7. Live:Remote view Live image;<br />
21
<strong>USER</strong> <strong>MANUAL</strong><br />
8. Playback:Remote playback DVR’s recording file;<br />
9. Play video: Playing backup video file;<br />
10. Upgrade: Remote upgrade DVR’s program;<br />
11. PTZ Control buttons:These button allows you to control PTZ cameras;<br />
12. Display mode switch: The button allow you to switch to different display mode.<br />
6.3 Login- in System<br />
1).Press “<br />
” button to enter into below windows:<br />
Host Address: indicates Remote DVR’s IP address. If system have setup DDNS and External<br />
Net map,you hereby enter into Host name(included 3322.org).<br />
Video Port:indicates data transmission Port;<br />
Language Sel.:Select Language which you want;<br />
Net Status: The option allows you to setup network transmission speed;<br />
Max Channel: Select channel quantity according to DVR connected to channels;<br />
Local Record: indicate record save path;<br />
AVI Save: The option allows you to setup video size and source. For D1 format, you should<br />
select full frame rate; for HD format, select half frame rate, and for CIF format, you could select any<br />
one. At same time, Video source should match with DVR setting.<br />
AVI Codec: Select a AVI codec program to proceed video stream processing;<br />
After finishing the above setting, click [ok] key to confirm.<br />
2).Press“ ” button to pop up Login-in window, and input password to connect a network.<br />
22
<strong>USER</strong> <strong>MANUAL</strong><br />
6.4 Working Mode<br />
1).Live monitor:After successful connection, click [Live] icon to enter into Live Mode, and then<br />
click “ PLAY” button to preview image. If you want to stop to preview, please click “ STOP”<br />
button to stop.<br />
On Live mode, system could proceed PTZ control. Firstly you should setup PTZ protocol,<br />
Baud rate and PTZ address on one channel, then enter into PTZ operation interface; next<br />
double-click the camera you want to control. At this moment, you could proceed PTZ control by<br />
clicking the button at the bottom of screen..<br />
2).Remote playback: After successful connection, click [Playback] icon to enter into remote<br />
playback mode.<br />
Input a special time of recorded file that you want to search, and click [ Play] to remote play<br />
the record file.<br />
3).File Play: Click[File Play] icon to enter into file play mode.<br />
The function is usually used to play backup video file. Click [Open] button to open backup file<br />
for playing. During the playing, click [<br />
Pause\Rew\Fwd\ playback.<br />
4).Program upgrade: Click [Upgrade] icon to enter into remote upgrade mode.<br />
23<br />
] key to control
<strong>USER</strong> <strong>MANUAL</strong><br />
Please click [Load] button to open the upgrade file. This moment the system will be prompted<br />
to remote login-in DVR, and click [ok] to start network upgrade.<br />
Remark: Please don’t shut down Net-viewer program until successful upgrade.<br />
Chapter 7: Specification<br />
8/16-CH DVR<br />
ITEMS<br />
Description<br />
System Format<br />
Video I/O<br />
Audio I/O<br />
Display<br />
Recording<br />
NTSC/PAL<br />
BNC 8/16-CH inputs/ 2-CH outputs<br />
RCA 4-CH inputs / 2-CH outputs<br />
Resolutions<br />
Feature<br />
Resolutions<br />
Feature<br />
NTSC:720×480@30fps(Each CH)<br />
PAL:720×576@25fps(Each CH)<br />
Full-D1,1/4/9/(16CH)/PIP/ Single-CH Sequence Display<br />
NTSC:720×480,720×240,360×240<br />
PAL:720×576,720×288, 360×288<br />
Frame rate adjustable<br />
Quality<br />
4 Level(Higher, High, Normal, Low)<br />
Audio<br />
Video<br />
Motion Detection<br />
Micro-processor<br />
LAN Port<br />
HDD Port<br />
Recorder Port<br />
Mouse Port<br />
PTZ Control<br />
USB Interface<br />
VGA Output<br />
IR Remote Control<br />
ADPCM2 Codec<br />
MPEG4 Compression<br />
Setting Area and checking Sensitivity<br />
32-bit RISC Processor<br />
RJ45<br />
Support SATA HDD up to 500GB<br />
Support SATA port and DVD+R recorder<br />
PS/2<br />
RS- 485 Port<br />
U Disk Backup or Upgrade<br />
Support VGA Output<br />
Support IR Remote Control<br />
24
<strong>USER</strong> <strong>MANUAL</strong><br />
Chapter 8: Appendix<br />
8.1 System Connection Diagram<br />
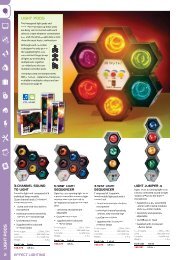
8.2 DVR Accessories (included)<br />
Power Cord Power Adaptor User’s Manual Guarantee Card Quality Cert.<br />
CD Disk Remote Controller Batteries for RC Screws USB Cable(optional)<br />
25
<strong>USER</strong> <strong>MANUAL</strong><br />
The material in this document is the intellectual property of our<br />
department .<br />
No part of this manual may be reproduced, copied, translated,<br />
transmitted, or published in any form or by any means without our<br />
department prior written permission.<br />
Our products are under continual improvement and we reserve the right to<br />
make changes without notice. But no guarantee is given as to the correctness<br />
of its contents.<br />
We do not undertake any responsibility for the harms cause by using our<br />
product.<br />
The model of the products in the user's manual only f recognition, but<br />
these names also perhaps are belong to other company's registered<br />
trademark or the copyright.<br />
The product picture may differ from the actual product, only for your<br />
reference. The accessories will probably be different according to the<br />
different selling areas. For details of accessories, please refer to your local<br />
distributor.<br />
Copyright reserved<br />
26