Download (PDF) - Canadian Musician
Download (PDF) - Canadian Musician
Download (PDF) - Canadian Musician
Create successful ePaper yourself
Turn your PDF publications into a flip-book with our unique Google optimized e-Paper software.
percussion<br />
The Care & Feeding Of Your Hardware<br />
by Seppo Salminen<br />
All drummers need to do a periodic<br />
check of their hardware and fix<br />
potential problems before the<br />
gig. There is the regular maintenance<br />
of parts (cleaning shells, oiling, changing<br />
heads, cleaning cymbals), and then<br />
there is the check-up thing ... kinda like<br />
your yearly physical – yup, it’s a bummer!<br />
The most important concept is what<br />
I call “springs and levers.” These are<br />
the bass drum pedals and hi hat stand.<br />
You don’t need to be a physics major<br />
to understand the movement of these<br />
parts. Some companies are trying to go<br />
that way, but the simpler the design,<br />
the simpler to maintain and repair. If<br />
you can’t figure out how to fix or repair<br />
the broken part, then most drum shops<br />
can take care of it for you, or you can<br />
contact your friendly neighbourhood<br />
custom drum shop where all work is<br />
done professionally (shameless plug).<br />
So ... bass pedals – many potential<br />
problems here. Check the pedal every<br />
time you set up and pack down. If your<br />
hardware is supplied, definitely look<br />
over the hardware a little more closley.<br />
This sounds simple enough, but first<br />
make sure the beater shaft is tightened<br />
down properly. Most companies now<br />
supply two key nuts for this: use ’em!<br />
Check the beater itself: if it’s a moulded-on<br />
plastic beater head, no problem,<br />
but if there’s a nut to secure it, make<br />
sure it’s tightened properly, or better<br />
yet, replace it with a nylon insert locking<br />
nut – this won’t loosen off easily.<br />
You only have to lose the beater once<br />
and try playing with the shaft, or lack of<br />
one, to remember this. Next, check the<br />
pedal linkages and all moving<br />
parts. If you use a leather<br />
or nylon strap drive pedal, be<br />
aware that these pedals are<br />
prone to wear and the straps<br />
can stretch and break. I use<br />
a DW5000 type double pedal<br />
with nylon straps. I like the<br />
feel of the “lobe” shaped cam<br />
of the old-school Gretsch<br />
Floating Action and Tama<br />
Flexi-flyers.<br />
The strap will tend to<br />
wear at the point it bends<br />
around the cam and at the<br />
attachment point of the footboard.<br />
Both are not quickly<br />
noticeable as they wear on<br />
the inside of the strap. Nylon<br />
is not supposed to stretch<br />
but can, and the holes will<br />
elongate and may lower the<br />
footboard some. Changing<br />
the footboard height will<br />
also change its feel. Change<br />
the straps regularly, keeping in mind<br />
the distance between the holes on the<br />
straps as they too can change.<br />
If you use a metal strap like those<br />
on the Ludwig Speed King’s, the metal<br />
wears at the point of attachment at the<br />
pin on the pedal and at the cam. These<br />
should be checked and replaced. If the<br />
linkage or pin goes during a gig, there<br />
is no quick fix here – get out the backup<br />
pedal. The chain “strap” is the least<br />
problematic I’ve seen. It has some of<br />
the flexibility of a nylon strap and the<br />
strength of a metal strap. Just check<br />
the bolts connecting the chain to the<br />
footboard and the locking clip of the<br />
top portion of the chain. Simple lubrication<br />
of the chain keeps its movement<br />
smooth.<br />
The external tension spring is next.<br />
There is generally a triangular hoop<br />
that fits over a pulley and onto a spring.<br />
This is then attached via a locking bolt<br />
(hopefully) at the base of the pedal.<br />
Watch the wear on the hoop, especially<br />
on older pedals. I’ve seen these things<br />
completely wear through. Also check<br />
for wear on the “hook” of the spring.<br />
This is where it connects to the tension<br />
adjustment and axle. This too can wear<br />
straight through. Also note that if you<br />
have an older pedal and spring, you<br />
should pack it lightly with a piece of felt.<br />
This will help eliminate any unwanted<br />
squeaking.<br />
The last part to look at is the hinge of<br />
the footboard and heel plate. Remember<br />
that the pedal not only receives a<br />
basic downward motion, but can also<br />
receive a sideways push from your foot,<br />
adding some extra torque pressure to<br />
the hinge pin of the pedal. Loose hinge<br />
pins can not only add noise to the pedal,<br />
but can also add some extra sideways<br />
swaying movement causing a loose and<br />
sloppy feel to the pedal. Again, older<br />
pedals can suffer more quickly.<br />
Next … the hi hat stand. Springs<br />
and levers, springs and levers! The hi<br />
hat stand is the other piece of hardware<br />
taking some major punishment.<br />
As bass pedals have evolved, so have<br />
their counterparts. The hi hat in general<br />
has pretty much the same linkages and<br />
hinges as the bass pedal and thus will<br />
be prone to the same kind of wear. The<br />
main difference with the hi hat is that<br />
the spring mechanism is internal and<br />
not easily accessible in a pinch. Aside<br />
from the footboard components, always<br />
check the locking components of the<br />
stand at the height adjustment, and at<br />
the cup washer for damage or breakage.<br />
The hi hat clutch for the top cymbal is<br />
pretty basic and not too prone to breakage,<br />
but the locking wing nut can strip.<br />
Simple fix: always carry an extra hi hat<br />
clutch!<br />
Shouldn’t you be more worried about<br />
that tempo and groove thing than if your<br />
gear will hold up<br />
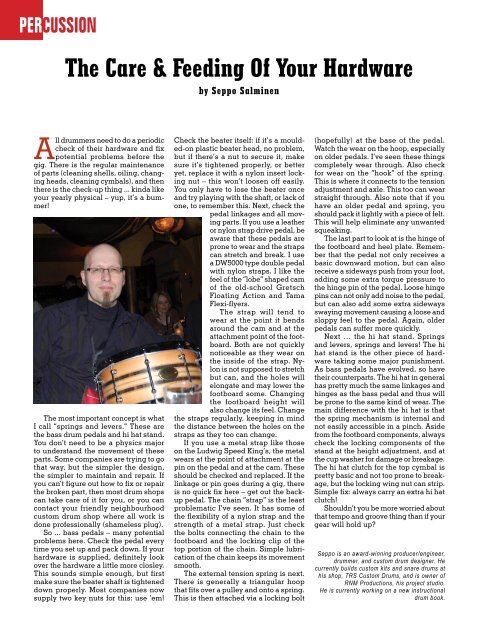
Seppo is an award-winning producer/engineer,<br />
drummer, and custom drum designer. He<br />
currently builds custom kits and snare drums at<br />
his shop, TRS Custom Drums, and is owner of<br />
RNM Productions, his project studio.<br />
He is currently working on a new instructional<br />
drum book.


