
You also want an ePaper? Increase the reach of your titles
YUMPU automatically turns print PDFs into web optimized ePapers that Google loves.
-<br />
.<br />
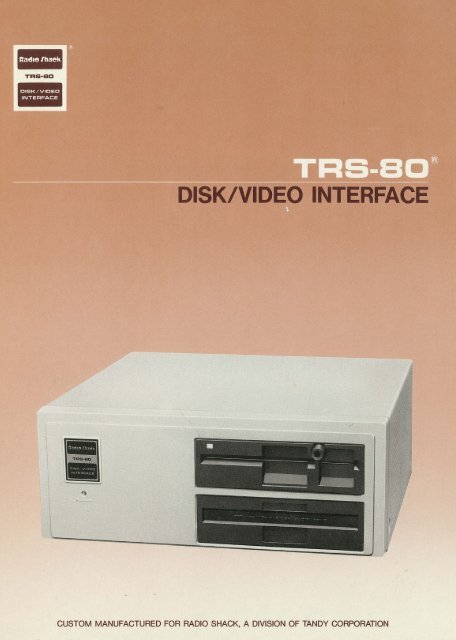
TRS-BD<br />
DISK/VIDEO INTERFACE<br />
r"i<br />
........<br />
-()<br />
I<br />
~<br />
CUSTOM MANUFACTURED FOR RADIO SHACK, A DIVISION OF TANDY CORPORATION
TERMS AND CONDITIONS OF SALE AND LICENSE OF RADIO SHACK COMPUTER EQUIPMENT AND SOFTWARE<br />
PURCHASED FROM A RADIO SHACK COMPANY-OWNED COMPUTER CENTER . RETAIL STORE OR FROM A<br />
RADIO SHACK FRANCHISEE OR DEALER AT ITS AUTHORIZED LOCATION<br />
CU STO MER OBLIGATIO NS<br />
LIMITED WARRANTY<br />
A CUSTOMER assumes ful l responsib1l1ty that this Radio Shack computer hardware purchased (the Equipment ) and any copies of Radio<br />
Shack software included with the Equipment or licensed separately (the Software · ) meets the spec1f1cat1ons capacity . capabil ities<br />
versatility. and other requirements of CUSTOMER .<br />
B CUSTOMER assumes full responsib ility for the condition and effectiveness of the operating environment in which the Equ 1prnent and Software<br />
are to funct ion. and for its installation<br />
IL<br />
Ill.<br />
IV.<br />
V.<br />
VI.<br />
RADIO SHACK LIMITED WARR AN TI ES AN D CONDITIONS OF SALE<br />
A<br />
B<br />
C<br />
For a period of ninety (90) calendar days from the date of the Radio Shack sales document received upon purchase of the Equipment RADIO<br />
SHACK warrants to the original CUSTOMER that the Equipment and the medium upon which the Software is stored 1s free from manufacturing<br />
defects . THIS WARRANTY IS ONLY APPLICABLE TO PURCHASES OF RADIO SHACK EQU IP MENT BY THE ORIGINAL CUSTOMER FROM<br />
RADIO SHACK COMPANY-OWNED COMPUTER CENTERS . RETAI L STORES AND FROM RADIO SHACK FRANC HI SEES AND DEALERS AT ITS<br />
AUTHORIZED LOCATION . The warranty is void if lhe Equipments case or cabinet has been opened . or if the Equipment or Software has been<br />
sub1ected to improper or abnormal use . If a manufacturing defect is discovered during the stated warranty period . the defective Equipment<br />
must be returned to a Radio Shack Computer Center. a Radio Shack retail store. participating Radio Shack franchisee or Radio Shack dealer<br />
for repair . along with a copy of the sales document or lease agreement The original CUSTOMER·s sole and exclusive remedy in the event of<br />
a defect is l1m1ted to the correction of the defect by repa ir replacement or refund of the purchase price . at RADIO SHACK·s election and sole<br />
expense RADIO SHACK has no obligation to replace or repair expendable items<br />
RAD IO SHACK makes no warranty as to the design. capability capacity. or suitability fo r use of the Software. except as provided in this<br />
paragraph . Software is licensed on an ··As is·· basis. without warranty The original CUSTOMER·s exclusive remedy . in the event of a<br />
Software manufacturing defect 1s its repa ir or replacement within thirty (30) calendar days of the date of the Radio Shack sales document<br />
received upon license of the Software . The defective Software shall be returned to a Radio Shack Computer Center. a Radio Shack reta il store .<br />
part1cipat1ng Rad io Shack franch isee or Radio Shack dealer along with the sales document<br />
Except as provided herein no employee. agent franchisee. dealer or other person is authorized to give any warranties of any nature on behalf<br />
of RADIO SHACK<br />
D. Except as provided here in. RADIO SHACK MAKES NO WARR ANT IES , INCLUDING WARRA NTIES OF MERCHANTABILITY OR FITNESS FOR A<br />
PARTICU LAR PURPOSE .<br />
Some states do not allow limitations on how long an implied warranty lasts. so the above limitat1on(s) may not apply to CUSTOMER<br />
LIMITATION OF LIABILITY<br />
A. EXCEPT AS PROVIDED HEREIN . RADIO SHACK SHALL HAVE NO LIABILITY OR RESPONSIBILI TY TO CUSTOMER OR ANY OTH ER PERSON<br />
OR ENTITY WITH RESPECT TO ANY LIABILI TY. LOSS OR DAMAGE CAUSED OR ALLEGED TO BE CAUSED DIR ECTLY OR INDIRECTLY BY<br />
EQU IPMENr OR ·· soFTWARE .. SOLD. LE ASED. LICENSED OR FURN ISHED BY RADIO SHACK. INCLUDING . BUT NOT LIM ITED TO. ANY<br />
INTERRUPTI ON OF SERVICE. LOSS OF BUSINESS OR AN TI CIPATORY PROFITS OR CONSEQUENTIAL DAMAGES RESULTING FROM THE<br />
USE OR OPERATION OF THE ·EQ UIPM ENr OR ·· so FTWARE . IN NO EVENT SHALL RADIO SHACK BE LIABLE FOR LOSS OF PRO FITS. OR<br />
ANY INDIR ECT. SPECIAL. OR CONSEQUENTIAL DAMAGES AR ISING OUT OF ANY BREACH OF THIS WARRANTY OR IN ANY MANNER<br />
AR ISING OUT OF OR CONNECTED WITH THE SALE . LEASE. LI CENSE . USE OR ANTICIPATED USE OF THE EQUIPMENr OR . SO FTWARC<br />
B<br />
C<br />
D<br />
NOTWITHSTANDING THE ABOVE LI MITATIONS AND WARRANT IES. RADIO SHACK ·s LIABI LI TY HEREUN DER FOR DAMAG ES INCURRED BY<br />
CUSTOMER OR OTHERS SHALL NOT EXCEED TH E AMOUNT PAID BY CUSTOMER FOR TH E PARTICULAR EQUIPM ENT OR . SO FTWAR E ..<br />
INVOLVED<br />
RAD IO SHACK shall not be liable for any damages caused by delay in del ivering or furnishing Equipment and or Software<br />
No action arising out of .any claimed breach of this Warranty or transactions under this Warr anty may be brought more than two (2) years<br />
after the cause of action has accrued or more than four (4) years after the date of the Radio Shack sales document for the Equipment or<br />
Software. whichever first occurs<br />
Some states do not allow the limitation or exclusion of incidental or consequential damages . so the above l1mitat1on(s) or exclusion(s ) may<br />
not apply to CUSTOMER<br />
RADIO SHACK SOFTWARE LICENSE<br />
RADIO SHACK grants to CUSTOMER a non-exclusive. paid-up license to use the RADIO SHACK Software on one computer sub1ect to the following<br />
prov1s1ons:<br />
A Except as otherwise provided in this Software License . applicable copyright laws shall apply to the Software<br />
B Title to the medium on which the Software is recorded (cassette and or <strong>disk</strong>ette) or stored (ROM) is transferred to CUSTOMER . but not title to<br />
the Software.<br />
C CUSTOMER may use Software on one host computer and access that Software through one or more terminals if the Software permits this<br />
function<br />
[) CUSTOMER shall not use. make . manufacture. or reproduce copies of Software except for use on one computer and as is speci fically<br />
provided in this Softwa re License . Customer is expressly pro hibited from disassembling the Software .<br />
CUSTOMER 1s permitted to make additional copies of the Software only for backup or archival purposes or 1f additional copies are required in<br />
the operation of one co mputer with the Software. but only to the extent the Software allows a backup copy to be made . However. for<br />
TRS DOS Software. CUSTOMER is permitted to make a limited number of additional cop ies for CUSTOMER ·s own use .<br />
CUSTOMER may resell or distribute unmodified copies of the Software provided CUSTOMER has purchased one copy of the Software for each<br />
one sold or distributed . The provisions of this Software License shall also be app licab le to third parties receiving copies of the Software from<br />
CUSTOM ER<br />
G Al l copyright notices shall be retained on all copies of the Software<br />
APPLICABILITY OF WARRANTY<br />
A The te rms and conditions of this Warranty are applicable as between RADIO SHACK and CUSTOMER to either a sale of the Equipment and or<br />
Software License to CUSTOMER or to a transaction whe reby RADIO SHACK sells or conveys such Equipment to a third party for lease to<br />
CUSTOMER<br />
B. The limitations of liability and Warranty provisions herein shall in ure to the benefit of RADIO SHACK . the author. owner and or licensor of the<br />
Software and any manufacturer of the Equipment sold by RADIO SHACK<br />
STATE LAW RI GHTS<br />
The wa rranties granted herein give the original CUSTOM ER spec1f1c legal rights and the original CUSTOMER may have other rights wh ich vary<br />
from state to state·.
The FCC Wants You to Know ...<br />
This equipment generates and uses radio frequency energy. If not installed and used properly,<br />
that is, in strict accordance with the manufacturer's instructions, it may cause interference<br />
to radio and television reception.<br />
It has been type tested and found to comply with the limits for a Class B computing<br />
device in accordance with the specifications in Subpart J of Part 15 of FCC Rules, which are<br />
designed to provide reasonable protection against such interference in a residential installation.<br />
However, there is no guarantee that interference will not occur in a particular<br />
installation.<br />
If this equipment does cause interference to radio or television reception, which can be<br />
determined by turning the equipment off and on , the user is encouraged to try to correct the<br />
interference by one or more of the following measures:<br />
• Reorient the receiving antenna<br />
• Relocate the computer with respect to the receiver<br />
• Move the computer away from the receiver<br />
• Plug the computer into a different outlet so that computer and receiver are on different<br />
branch circuits.<br />
If necessary, you should consult the dealer or an experienced radio/television technician for<br />
additional suggestions. You may find the following booklet prepared by the Federal Communications<br />
Commission helpful: How to Identify and Resolve Radio-TV Interference<br />
Problems.<br />
This booklet is available from the US Government Printing Office, Washington, DC<br />
20402, Stock No. 004-000-00345-4.<br />
Warning<br />
This equipment has been certified to comply with the limits for a Class B computing device,<br />
pursuant to Subpart J of Part 15 of FCC Rules. Only peripherals (computer input/output<br />
devices, terminals, printers, etc.) certified to comply with the Class B limits may be attached<br />
to this computer. Operation with non-certified peripherals is likely to result in interference to<br />
radio and TV reception .<br />
TRS-80® Disk/ Video Interface Owner's Manual:<br />
©1983 Tandy Corporation, Fort Worth, Texas 76102<br />
U.S.A. All Rights Reserved.<br />
Reproduction or use, without express written permission<br />
from Tandy Corporation, of any portion of this<br />
<strong>manual</strong> is prohibited. While reasonable efforts have<br />
been taken in the preparation of this <strong>manual</strong> to assure<br />
its accuracy, Tandy Corporation assumes no liability<br />
resulting from any errors or omissions in this <strong>manual</strong> ,<br />
or from the use of the information obtained herein.<br />
TRS-80® Model 100 Software: ©1983 Microsoft Incorporated.<br />
All Rights Reserved.<br />
The software in the Model 100 microcomputer is retained<br />
in a read-only memory (ROM) format. All portions<br />
of this software, whether in the ROM format or<br />
other source code form format, and the ROM circuitry,<br />
are copyrighted and are the proprietary and trade secret<br />
information of Tandy Corporation and Microsoft. Use,<br />
reproduction or publication of any portion of ihis material<br />
without the prior written authorization by Tandy<br />
Corporation is strictly i:irohibited.<br />
ii
Contents<br />
Introduction . . . . . . . . . . . . . . . . . . . . . . . . . . . . . . . . . . . . . . . . . . . 1<br />
PART I/GENERAL INFORMATION<br />
I/Description of the Disk/Video Interface. . . . . . . . . . . . . . . . . . 5<br />
2/Diskette . . . . . . . . . . . . . . . . . . . . . . . . . . . . . . . . . . . . . . . . . . . . 7<br />
3/Installation. . . . . . . . . . . . . . . . . . . . . . . . . . . . . . . . . . . . . . . . . . 9<br />
Connecting the Portable Computer . . . . . . . . . . . . . . . . . . . . . 9<br />
Connecting the Video Monitor ................. ., ....... 10<br />
Connecting the Television Set ......................... 10<br />
4/ System Start-Up ..................................... 11<br />
Turning the Power On . . . . . . . . . . . . . . . . . . . . . . . . . . . . . . . 11<br />
Loading Portable Computer Disk Operating Software (DOS)<br />
into the Disk/Video Interface . . . . . . . . . . . . . . . . . . . . . . . . . 11<br />
Loading Disk-BASIC into the Portable Computer ......... 12<br />
Displaying Characters on the CRT . . . . . . . . . . . . . . . . . . . . . 13<br />
5/Making a BACKUP of Disk-BASIC ..................... 15<br />
Making a Data Diskette (FORMAT) ................... 15<br />
Single-Drive BACKUP (BACKUP.SNG) ................. 16<br />
Two-Drive BACKUP (BACKUP) ....................... 17<br />
6/Using the Floppy Disk in TEXT ......................... 19<br />
7 /Quick Instructions for Using Disk-BASIC ................ 21<br />
Saving . a Program . . . . . . . . . . . . . . . . . . . . . . . . . . . . . . . . . . . 21<br />
Loading a Program . . . . . . . . . . . . . . . . . . . . . . . . . . . . . . . . . . 21<br />
PART II/DISK-BASIC<br />
8/Portable Computer Disk-BASIC Overview ................ 25<br />
How Disk-BASIC Uses the RAM ...................... 25<br />
Filenames. . . . . . . . . . . . . . . . . . . . . . . . . . . . . . . . . . . . . . . . . . 26<br />
9/Disk-BASIC Functions ................................ 27<br />
File and CRT Manipulation . . . . . . . . . . . . . . . . . . . . . . . . . . . 28<br />
Commands . . . . . . . . . . . . . . . . . . . . . . . . . . . . . . . . . . . . . . . . . 28<br />
Statements. . . . . . . . . . . . . . . . . . . . . . . . . . . . . . . . . . . . . . . . . 32<br />
Functions . . . . . . . . . . . . . . . . . . . . . . . . . . . . . . . . . . . . . . . . . . 35<br />
10/Utility Programs .................................... 43<br />
FORMAT .......................................... 43<br />
BACKUP. .......................................... 44<br />
BACKUP.SNG ...................................... 45<br />
iii
PART III/FORMAT OF THE DISKETTE<br />
11/Format of the Diskette ............................... 49<br />
Physical Configuration of a Diskette .................... 49<br />
Cluster . . . . . . . . . . . . . . . . . . . . . . . . . . . . . . . . . . . . . . . . . . . . 50<br />
Format of a System Diskette . . . . . . . . . . . . . . . . . . . . . . . . . . 50<br />
PART IV I APPENDICES<br />
Appendix A/ Connector Pin Assignments . . . . . . . . . . . . . . . . . . . 57<br />
System Bus Connector. . . . . . . . . . . . . . . . . . . . . . . . . . . . . . . . 57<br />
RF Modulator . . . . . . . . . . . . . . . . . . . . . . . . . . . . . . . . . . . . . . 58<br />
Appendix B/Technical Information . . . . . . . . . . . . . . . . . . . . . . . 59<br />
System Block Diagram . . . . . . . . . . . . . . . . . . . . . . . . . . . . . . . 59<br />
Character Code Tables . . . . . . . . . . . . . . . . . . . . . . . . . . . . . . . 60<br />
Disk-BASIC Error Codes . . . . . . . . . . . . . . . . . . . . . . . . . . . . . 63<br />
iv
Introduction<br />
Congratulations on selecting Radio Shack's Disk/Video Interface for use with your TRS-80<br />
Portable Computer. Even though a CRT or a TV set is not necessary when working with the<br />
Portable Computer, using this Disk/Video Interface will help you realize the full potential of your<br />
Portable Computer as a home or business computer.<br />
The Disk/Video Interface contains a 5-1/4 inch Floppy Disk Drive <strong>interface</strong> and an <strong>interface</strong> for<br />
connecting a Video Monitor or TV set.<br />
• Floppy Disk Drive Unit. Allows you to use a 5-1/4 inch double-density floppy <strong>disk</strong> with your<br />
Portable Computer.<br />
• Floppy Disk Interface. Controls the standard built-in Floppy Disk Drive Unit and can control<br />
an optional single-sided, double-density, 5-1/4 inch Floppy Disk Drive Unit.<br />
• Video Interface. Allows connection to a Video Monitor or, with the built-in RF converter,<br />
to any standard television set with the cable and switch box supplied.<br />
For further expansion of your Portable Computer system, Radio Shack offers the following<br />
optional equipment:<br />
• A Floppy Disk Drive Unit to expand storage capacity.<br />
1
About this <strong>manual</strong>. ....... .<br />
For your convenience, we've divided this <strong>manual</strong> into four sections.<br />
Part I gives general information about the Disk/Vido Interface and should get you started with<br />
Disk-BASIC . Also , with the CRT connected to the Portable Computer, you will learn how to<br />
transfer the characters on the Liquid Crystal Display (LCD) of the Portable Computer to the<br />
monitor.<br />
Part II provides detailed information on Disk-BASIC commands that drive the CRT and the<br />
floppy <strong>disk</strong> and utility programs to use the floppy <strong>disk</strong>.<br />
Part III describes the file structure and format of the floppy <strong>disk</strong> which can be used for more<br />
detailed manipulation of <strong>disk</strong>ette files .<br />
Part IV, the Appendices, provides technical information that enables you to use the Disk/Video<br />
Interface more effectively.<br />
We suggest you read this <strong>manual</strong> thoroughly. After you become familiar with the Disk/Video<br />
Interface, the Disk/Video Interface Quick Reference Guide will help keep you "up-and-running"<br />
2
3
I/Description of the Disk/Video<br />
Interface<br />
Open the package and take out the Disk/Video Interface. 'Do not throw away the packing material<br />
or the box. They may be useful if you ever need to transport the Disk/Video Interface.<br />
The Disk/Video Interface package includes:<br />
• A Disk/Video Interface<br />
• This Owner's Manual<br />
• A Quick Reference Guide<br />
• A System Diskette<br />
• Cable and Switch Box for Standard TV Connection<br />
• Cable for Connection to Portable Computer<br />
• Adapter Connector for the 1/0 Bus on the Portable Computer<br />
• Replacement Compartment Cover for the Portable Computer<br />
CD<br />
@<br />
Figure 1-1. Disk/Video Interface (Front view)<br />
LED Power Indicator. Lights up when the Power Switch is on.<br />
Drive 0. This is the <strong>disk</strong> drive unit for the BASIC SYSTEM <strong>disk</strong>ette.<br />
G) Drive Select LED. During access of the <strong>disk</strong>ette, this LED lights.<br />
@<br />
Optional Disk Cover. If you wish to add an optional <strong>disk</strong> drive unit, a qualified Radio<br />
Shack service technician will remove this cover when he does the upgrade for you.<br />
G) Clamp Lever. Turning this lever downward locks the <strong>disk</strong> drive unit into the operating<br />
position.<br />
5
CD<br />
CT)<br />
Figure 1-2. Disk/Video Interface (Rear view)<br />
AC Power Cord. Supplies AC power source to the Disk/Video Interface.<br />
Power Switch. Turn this switch on to supply AC power to the Disk/Video Interface.<br />
G) Fuse Holder. Contains a 250V/1A fuse. Remove the AC cord from the AC receptacle while<br />
inspecting/replacing the fuse.<br />
© Video Monitor Terminal. Connect your <strong>video</strong> monitor for a 80 x 25 or 40 x 25 line display.<br />
@<br />
Home TV Terminal. Provides RF output modulated to Channel 3 ot Channel 4 of the<br />
TV frequency. Connect your home TV set to this terminal using the TV cable and switch<br />
box supplied.<br />
@ Channel 3/Channel 4 Exchange Switch. Select either Channel 3 or Channel 4 RF output,<br />
whichever is not used in your area.<br />
(j) System Bus Connector. Connect the system bus connector of the Portable Computer using<br />
the attached cable.<br />
6
2/Diskette<br />
Always, handle your <strong>disk</strong>ettes carefully. Take the same precautions you use with your music<br />
cassettes and high-fidelity phonograph records. A small indentation, dust particle or· scratch can<br />
render all or part of <strong>disk</strong>ette unreadable - permanently.<br />
• Keep the <strong>disk</strong>ette in its storage envelope whenever it is not in use .<br />
• Always remove a <strong>disk</strong>ette from the drive before turning the system on or off.<br />
• Keep <strong>disk</strong>ettes away from magnetic fields (transformers; AC motors, magnets, TVs, radios,<br />
etc.). Strong magnetic fields will erase data stored on a <strong>disk</strong>ette.<br />
• Handle a <strong>disk</strong>ette by the jacket only. Do not touch any of the exposed surfaces. Do not try<br />
to wipe or clean the <strong>disk</strong>ette surface; it scratches easily.<br />
• Keep <strong>disk</strong>ettes out of direct sunlight and away from heat.<br />
• Avoid contaminating <strong>disk</strong>ettes with cigarette ashes, dust or other particles.<br />
• Do not write directly on the <strong>disk</strong>ette jacket with a hard-point device , such as a ball-point pen<br />
or lead pencil. Use a felt-tip pen only.<br />
• Store <strong>disk</strong>ettes in a vertical file folder on a shelf where they are protected from pressure to<br />
their flat sides Gust as phonograph records are stored).<br />
• In very dusty environments, you may need to provide filtered air to the room where you use<br />
your computer.<br />
Tips on Labeling Diskettes<br />
Each <strong>disk</strong>ette has a permanent label on its jacket. This label is for "vital staistics" that will never<br />
change. For example, to keep track of <strong>disk</strong>ettes, it's a good idea to assign a unique number to<br />
each <strong>disk</strong>ette. Write such a number on the permanent label. You might also put your name on<br />
the <strong>disk</strong>ette, and record the date when the <strong>disk</strong>ette was first put into use. Remember, use only<br />
a felt-tip pen for marking.<br />
This "permanent" label is not a good place to record the contents of the <strong>disk</strong>ette, since you may<br />
want to change the contents, and you do not want to be erasing or scratching out information<br />
on this label.<br />
7
2<br />
MINI DISK<br />
"'<br />
4<br />
IUl§i¥j'I<br />
Im 13 i'f\fi.M<br />
CD<br />
Figure 2-1. A Diskette<br />
Storage Envelope. While a <strong>disk</strong>ette is not in use, keep it here.<br />
0 Write Protect Notch. When this notch is covered, the <strong>disk</strong> drive cannot write (change<br />
information) on the <strong>disk</strong>ette. Do not pinch the tab into the notch when you apply it.<br />
If the tab becomes indented, the <strong>disk</strong> drive may not sense that the <strong>disk</strong> is write-protected.<br />
Leave the notch uncovered if you want to save or change information on the <strong>disk</strong>ette.<br />
@ Jacket. The <strong>disk</strong>ette is permanently sealed inside this protective jacket. Do not attempt<br />
to remove it.<br />
(±) Read/Write Window. The <strong>disk</strong> drive accesses the <strong>disk</strong>ette surface through this window.<br />
Do not touch the di~kette surface.<br />
G) Label. To write on this label, use only a felt-tip pen. Any other writing instrument might<br />
damage the <strong>disk</strong>ette.<br />
8
3/Installation<br />
Connecting to the portable Computer<br />
Connect the Portable Computer and the Disk/Video Interface using the connection cable referred<br />
to in Figure 3-1. Make sure that cable connectors are firmly connected. Loose connections will<br />
cause trouble since data is transferred through this cable.<br />
v<br />
/RED LINE<br />
Figure 3-1. Cable Connection to the Portable Computer<br />
1. Remove the compartment cover located on the bottom case or rear of the Portable Computer<br />
using a coin, etc.<br />
2. You will find two integrated circuit (IC) sockets. Connect the adapter socket supplied with<br />
the unit into the upper IC socket. Be careful not to connect it to the other socket. Pull the<br />
release lever on the adapter socket up and insert one side of the cable connector into the<br />
adapter socket, then push the release lever down into the locked position. Make sure that<br />
pins 1-40 of the cable connector are connected to their corresponding numbers on the IC<br />
socket. You can find these numbers marked in white on the printed circuit board.<br />
Important Notice: When you are going to insert the adapter socket or cable connector into the<br />
IC socket, apply force evenly on the adapter or cable connector. If the force is not applied evenly,<br />
pins on the connector may be damaged. If you mistakenly damage pins, carefully straighten the<br />
pins using pliers. Be careful - repeated bending and straightening of the pins will cause them to<br />
break off.<br />
When connection is completed, attach the replacement compartment cover supplied with this<br />
unit to the bottom of the Portable Computer.<br />
Always use this replacement cover and remove it only when connecting/disconnecting the Disk/<br />
Video Interface. This cover keeps out dust and dirt, which can cause poor connection to the<br />
IC socket: it also prevents the cable from being accidentally disconnected.<br />
Once you have installed the adapter socket, leave it in the iC sock;et for ease of re-insertion and<br />
removing the connector cable.<br />
3. Connect the other side of the cable to the System Bus Connector located on the bottom side<br />
of the Disk/Video Interface. Make sure the guide and guide slot match to insure correct<br />
connection.<br />
9
Connecting the Video Monitor<br />
To connect the Video Monitor, use the connection cable shown in Figure 3-2 .<br />
\\\\\\\\\\ ,. \\\<br />
\\\\\\\\\\ '{{~\\ \ \<br />
\\\\\\\\\\<br />
Figure 3-2. Connecting the Video Monitor<br />
Connecting the Television Set<br />
Connect the Disk/Video Interface to your home TV set using the cable connector and switch<br />
box as illustrated in Figure 3-3.<br />
Set the Channel 3/Channel 4 Exchange Switch to the channel that is not being used by a broadcast<br />
station in your area.<br />
Figure 3-3. Connecting the Television Set<br />
10
4/System Start-Up<br />
Connect all cables according to the instructions in Chapter 3. Check that all the connections<br />
were made correctly. If you are ready, start the Disk/Video Interface according to the procedure<br />
below:<br />
Turning the Power On<br />
1. Tum the Power Switch of the Portable Computer on.<br />
2. Tum the Power Switch of the Disk/Video Interface on.<br />
This power up sequence is very important. If you do it in reverse, the unit will not function<br />
properly.<br />
A message appears on the CRT for a few seconds:<br />
Please wait<br />
Another message appears:<br />
Insert s~stem<br />
<strong>disk</strong>ette.<br />
and the Disk Select LED for Drive 0 lights.<br />
Loading Portable Computer Disk Operating<br />
Software (DOS) into the Disk/Video lnterf ace<br />
1. Insert the System Diskette into Drive 0 with the label edge up. Be sure the edge with the write<br />
protect notch is the first to enter the drive.<br />
Figure 4-1. Inserting the System Diskette<br />
11
2. Confirm that the <strong>disk</strong>ette is fully inserted in the drive unit.<br />
3. Turn the Clamp Lever downward.<br />
A new message Now, getting read!::!. . . • • appears and then the following message<br />
appears on the CRT:<br />
CORP. 1983, MICROSOFT, CORP.<br />
ALL RIGHTS RESERVED<br />
LICENSED TO TANDY CORPORATION<br />
VE RS I ON ID 1 • lZllZl. 1Zl0<br />
and the <strong>disk</strong> select LED turns off. If this message does not appear, you probably didn't turn the<br />
Clamp Lever correctly. Release the Clamp Lever once, and turn it downward again.<br />
If the above message does not appear even after the operation above, chances are that the <strong>disk</strong>ette<br />
inserted in Drive 0 is not the system <strong>disk</strong>ette. If so, the message:<br />
In Drive0 is NOT a SYSTEM DISKETTE.<br />
will appear. Check the <strong>disk</strong>ette and re-insert system <strong>disk</strong>ette.<br />
If any mulfunction has occurred in Drive 0, the following message:<br />
There is no drive.<br />
will appear.<br />
Through these steps, all the programs (i.e., DOS) necessary to control the Disk and CRT are stored<br />
in the RAM of the Disk/Video Interface.<br />
Loading Disk-BASIC into the Portable Computer<br />
Before you can use Disk-BASIC, you have to transfer/load the Disk-BASIC program recorded on<br />
the System Diskette into the RAM of the Portable Computer.<br />
There are two ways to do this. Whichever step you take, you must first load DOS into the RAM<br />
of the Disk/Video Interface. Then:<br />
• Warm start<br />
Turn the Power Switch of the Portable Computer off and then on again. Or, if you prefer,<br />
simply press the RESET switch.<br />
• Cold start (see "Important Notice" below)<br />
Press and hold (CTRL) (PAUSE) and the RESET switch, in that order. Release the RESET switch<br />
while continuing to press down the (CTRL) and (PAUSE) keys. When the Main Menu reappears<br />
on the LCD display, release the keys.<br />
When you start the system (either warm or cold), the Disk Select LED turns on for a moment.<br />
Important Notice: When you do a cold sta_rt, all the programs and data stored in the RAM of the<br />
Portable Computer are erased. You have to save programs and data to cassette tape in advance<br />
or you will lose everything you had stored in memory.<br />
A warm start will not erase the stored data but it requires at least 4 ,500 free bytes. If there are<br />
not, you must either KILL some file(s) or cold start is required.<br />
12
Once you have loaded Disk-BASIC into the Portable Computer, it is kept there unless you clear<br />
all the memory (cold start). But since Disk-BASIC is not loaded as "file", it does not appear as<br />
a file in the menu of the Portable Computer.<br />
Displaying Characters on the CRT<br />
After you've loaded DOS and Disk-BASIC into the RAM of the Disk/Video Interface and the<br />
Portable Computer, you are ready to change the display device from the LCD of the Portable<br />
Computer to the CRT (except Menu, which is always displayed on the LCD).<br />
1. Move the Cursor to :BASIC on the Menu and press (ENTER). The Portable Computer is<br />
now set in BASIC Mode.<br />
2. Type:<br />
SCREEN 1, 1 (ENTER)<br />
When you enter this command, the display of the Portable Computer is switched to the CRT.<br />
On the bottom line of the CRT, a LABEL line indicating Function Keys from Fl to F8 is<br />
displayed. If the LABEL line is not required, you can just type<br />
SCREEN 1 (ENTER)<br />
The LABEL line can be displayed or removed using the LABEL key just like on the LCD .<br />
If you want to move the display to the LCD again, type the command:<br />
SCREEN 0, l<br />
(ENTER)<br />
3. If you want to display characters in the 80-column x 25 -line mode, type the command<br />
(in BASIC mode):<br />
WIDTH 80 (ENTER)<br />
To return to the 40-column x 25-line display, type:<br />
WIDTH .4.0 (ENTER)<br />
CAUTION:<br />
When you disconnect your Portable Computer from the Disk/Video Interface, the system's<br />
power must be OFF.<br />
When you tum the system's power off, the system must be in menu mode. Make it a habit to<br />
press (EID before turning the power off.<br />
13
5/Making a BACKUP of Disk-BASIC<br />
A BACKUP duplicates information from one <strong>disk</strong>ette onto another <strong>disk</strong>ette.<br />
Your Disk-BASIC <strong>disk</strong>ette contains utility programs called FORMAT, BACKUP. SNG and<br />
BACKUP. FORMAT is for initialization, BACKUP. SNG is for a single-drive system BACKUP,<br />
and BACKUP is for a two-drive system BACKUP.<br />
To make a BACKUP, the first step is to format a blank <strong>disk</strong>ette.<br />
Making a Data Diskette (FORMAT)<br />
The FORMAT utility program takes a <strong>disk</strong>ette and initializes or "formats" it.<br />
If the <strong>disk</strong>ette was previously formatted, ali prior information will be lost.<br />
1. In the Disk-BASIC mode, type:<br />
F~UN" 0: FORM/H" (ENTER)<br />
2. Disk-BASIC will start the formatter program and ask you a series of questions:<br />
This utilit~<br />
formats <strong>disk</strong>ettes.<br />
- All data will be lost -<br />
Which drive will be used (0 or 1)?<br />
3. If you are using a single-drive system, remove the System Diskette from Drive 0 and insert<br />
a blank <strong>disk</strong>ette; then type:<br />
0 (ENTER)<br />
If you are using a two-drive system, insert a blank <strong>disk</strong>ette into Drive 1; then type:<br />
1 (ENTER)<br />
4. Next, Disk-BASIC will ask you:<br />
Put the <strong>disk</strong>ette to be formatted in<br />
Drive X<br />
Press ENTER when ready.<br />
Press (ENTER)<br />
5. Disk-BASIC will now format the <strong>disk</strong>ette. After formatting, Disk-BASIC will display the<br />
message:<br />
FORMAT COMPLETE;<br />
number of flawed tracks: ~<br />
6. If you are using a single-drive system, remove the formatted <strong>disk</strong>ette from Drive 0 and insert<br />
the Disk Operating System <strong>disk</strong>ette.<br />
15
Single-Drive BACKUP (BACKUP. SNG)<br />
The DOS <strong>disk</strong>ette will be referred to as the Source, and the blank one you just formatted will<br />
be called the Formatted during BACKUP.<br />
1. Start Disk-BASIC as explained in the previous section.<br />
The copyright message will be displayed, for example:<br />
TRS-80 MODEL 100 software<br />
Corp. 1983 Microsoft<br />
XXXXX B!::!tes Free<br />
A BACKUP requires at least 8500 free bytes. If the number of free bytes is less than 8500,<br />
BACKUP cannot be started. In this case , you will have to increase the number of free bytes.<br />
To do this, save some or all the files in the Portable Computer to cassette tape. Then you can<br />
load BACKUP.<br />
2. Type: RUN 11 0: :E.A CKU P. SNG 11 (ENTER)<br />
3. Disk-BASIC now loads and starts BACKUP.SNG; it will then ask you:<br />
SINGLE DRIVE BACKUP UTILITY<br />
COPY ALL or<br />
SYSTEM
Two-Drive BACKUP (BACKUP)<br />
This section applies to two-drive systems only.<br />
1. In the Disk-BASIC mode, type:<br />
RUN II (2): BA Ch:U p II<br />
(ENTER)<br />
2. Disk-BASIC now loads and starts BACKUP; it will then ask you:<br />
BAChUP UTILITY<br />
COPY ALL (Entire Diskette><br />
or SYSTEM (System Files Onl~><br />
Enter A CALL) or S ?<br />
3. Type: A (ENTER)<br />
4. Next, Disk-BASIC asks:<br />
Enter Source Drive (0 or 1)?<br />
5. Specify the drive which contains the original Disk-BASIC <strong>disk</strong>ette. If you load the source<br />
<strong>disk</strong>ette in Drive 0, type:<br />
6. Disk-BASIC will ask you:<br />
Copy All from Drive 0 ta Drive 1<br />
Put the SOURCE <strong>disk</strong>ette in Drive 0 and<br />
a FORMATTED <strong>disk</strong>ette in Drive 1.<br />
Press ENTER when ready.<br />
7. Now, the duplication process will begin and then the message "Ca PY in g ..• " blinks on the<br />
display. When the BACKUP is completed, Disk-BASIC will display the message:<br />
COPY COMPLETE.<br />
The duplication process is now completed. We suggest you save the original Disk-BASIC and<br />
use the duplicate as your working copy. If anything happens to the working copy, you can make<br />
another BACKUP from the original.<br />
When executing FORMAT, BACKUP.SNG or BACKUP, press (EID key (in response to any prompt)<br />
to terminate the utility and returns to the Menu.<br />
Tips<br />
It is better to back up system information on all the <strong>disk</strong>ettes you want to use, even if you want<br />
to use certain <strong>disk</strong>ettes to store data only. Since data cannot be written on the system track,<br />
you will lose no memory space if system tracks are recorded on the <strong>disk</strong>ette.<br />
17
6/U sing the Floppy Disk in TEXT<br />
With the Disk/Video Interface connected to the Portable Computer, you can save/load TEXT<br />
data to/from the floppy <strong>disk</strong>.<br />
This section explains the procedure to make a simple sentence and save it to the <strong>disk</strong>, and then<br />
load it back into the RAM of the Portable Computer.<br />
1. Enter MENU on the LCD of the Portable Computer and move the Cursor to TEXT. Press<br />
(ENTER).<br />
2. The Portable Computer asks you:<br />
i=iles to edit?<br />
Type in the filename of your text:<br />
TEST 1 (ENTER)<br />
In this case, TESTl is the filename. Of course, you can use any other filename, provided<br />
the filename is less than 6 characters and starts with an alphabetic character (not numeric).<br />
3. After assigning the filename, you can type in any message . For example, type:<br />
You are living in the computer age. (ENTER)<br />
4. In order to load this message on the floppy <strong>disk</strong>, press ~ . You will see a message<br />
"Save to" on the bottom line of the Portable Computer display. Type:<br />
Ql : TEST 1 (ENTER)<br />
Important Notice: In the above command, the first digit 0 specifies the number of the <strong>disk</strong> drive<br />
and TESTl specifies the filename. (The filename here need not be the same as the one used<br />
for the "File to edit?" prompt.) If you do not type the number of the <strong>disk</strong> drive, then the<br />
computer will SA VE the file to cassette. (Even if a cassette recorder is not connected, data<br />
will still be output to the cassette port.) The Portable Computer cannot perform other functions<br />
until SA VE is complete.<br />
5. To see the message saved on the floppy <strong>disk</strong> on the display, press ~. You will find a message<br />
"Load 1°rom"atthebottomofthedisplay. Type:<br />
0 ~ TEST 1 (ENTER)<br />
The message saved in floppy <strong>disk</strong> under the name ofTESTl is loaded. Then, the display becomes:<br />
You are living in the computer age.<br />
You are living in the computer age.<br />
The message in the first line is the data actually typed in, and the second line is the data loaded<br />
from the floppy <strong>disk</strong>.<br />
19
Tips<br />
When using the CRT or TV set as an output device, and you want to insert some lines, you may<br />
find it takes too long to scroll down the screen to add the new text. To avoid this, insert a couple<br />
of carriage returns/line feeds (press (ENTER)) before inserting. After text has been inserted,<br />
press the delete key to eliminate extra carriage returns. Another way is to move the displayed<br />
text so the part you wish to insert appears at the bottom of the screen.<br />
20
7 /Quick Instructions for Using<br />
Disk-BASIC<br />
This section will give you step-by-step procedures for saving a program to a <strong>disk</strong> file and loading<br />
a program for a <strong>disk</strong> file .<br />
For programming information, refer to the Disk-BASIC section of this <strong>manual</strong>.<br />
Saving a Program<br />
Suppose you have a BASIC program in the Portable Computer memory. Try saving that program<br />
onto <strong>disk</strong>. Load the program by either LOADing it in the BASIC_mode, or positioning the Cursor<br />
over the program name in the Main Menu and pressing (ENTER) . Be sure the "OK" prompt<br />
is showing. Type:<br />
SA\.lE II 0: 1::iRGRAM" (ENTER)<br />
Disk-BASIC now saves the program in Drive 0 to a file arbitrarily named PRGRAM. Note that<br />
the filename here need not be the same as the one you assigned it originally.<br />
Loading a Program<br />
For this sample session, load the program just saved. First, type:<br />
NEW (ENTER)<br />
to delete the resident program from memory. (This will prove that it can be retrieved from the<br />
<strong>disk</strong> file.)<br />
Now, type:<br />
LO.~D" 0: PRGRAM " (ENTER)<br />
and Disk-BASIC will load the specified program. List it or run it for verification.<br />
For further information on using Disk-BASIC, refer to Part II of this <strong>manual</strong>.<br />
21
23<br />
PART II/ ·<br />
DISK-BASIC
8/Portable Computer Disk-BASIC<br />
Overview<br />
As shown in Figure 8-1, conceptually, Portable Computer BASIC is a core function of the larger,<br />
more functional Portable Computer Disk-BASIC.<br />
Because of this structure, when using the Portable Computer Disk-BASIC, you can use not only<br />
most of the functions of the Portable Computer BASIC, but also the characteristic functions of<br />
Disk-BASIC together.<br />
DISK<br />
BASIC<br />
Figure 8-1. Structure of the Floppy Disk<br />
How Disk-BASIC Uses the RAM<br />
To operate the Disk/Video Interface using the Portable Computer, the first step is to load<br />
Disk-BASIC. Figure 8-2 shows the Memory Map, before and after loading Disk-BASIC.<br />
FFFFH<br />
F5FOH<br />
BASIC<br />
WORK AREA<br />
STRINGS,<br />
STACK AREA<br />
FFFFH<br />
E397H<br />
BASIC<br />
WORK AREA<br />
DISK-BASIC<br />
STRINGS,<br />
STACK AREA<br />
USER'S<br />
AREA<br />
USER'S<br />
AREA<br />
8000H<br />
8000H<br />
Figure 8-2. Memory Map<br />
25
As shown in Figure 8-2, by loading Disk-BASIC , the memory area used for BASIC expands to the<br />
lower address, i.e., the memory size in t_he RAM you can use decreases.<br />
Important Notice: The second parameter of the CLEAR command specifies the area in the<br />
RAM that the user can use freely . If you assign a figure over 58263 (E397 Hex) as the second<br />
parameter, FC (illegal function call) error will occur. Be careful when using the POKE<br />
command .<br />
Filenames<br />
A filename consists of a name and a fde extension. A name consists of 6 alphanumeric characters.<br />
The first character must be an alphabetic letter. A file extension consists of 3 characters and<br />
you can use any combination of alphabetic and numeric characters.<br />
Between the name and the file extension, Disk-BASIC inserts either a ".","blank" or " *" as a<br />
partition mark. At the same time, this character indicates an attribute of the file . In Disk-BASIC ,<br />
file extension is regarded as part of the filename.<br />
" . " stands for BASIC file<br />
" " stands for ASCII file<br />
"* " stands for Machine Language file<br />
To create a BASIC file or a Machine Language file, you have to save them using the SAVE or<br />
SAVEM commands in BASIC. You can create an ASCII file in two ways: 1) by saving a file in<br />
TEXT mode for accessing it as an input file to BASIC , or 2) by saving it in BASIC mode using<br />
the "A" option.<br />
26
9/Disk-BASIC Functions<br />
Disk-BASIC provides a powerful set of commands, statements and functions relating to Disk I/O<br />
and CRT control. They are divided into two categories:<br />
1. File or CRT manipulation. Deals with the file or CRT as a unit, rather than with the contents<br />
of the file.<br />
2. File or CRT access. Prepares data files for I/Oby reading or writing to the file or CRT.<br />
COMMAND<br />
KILL<br />
LOAD<br />
LO ADM<br />
LFILES<br />
MERGE<br />
NAME<br />
RUN "~rogram"<br />
RUNM "program"<br />
SAVE<br />
SAVEM<br />
SCREEN-"---<br />
WIDTH<br />
OPERATION<br />
Deletes a program or data file<br />
Loads a BASIC program<br />
Loads a machine language Rrogram<br />
~~~~~~~~~~1<br />
Displays filenames on the <strong>disk</strong><br />
Merges a BASIC program (in ASCII format)<br />
------~<br />
Changes the name of the file<br />
Loads and executes a BASIC JJrogram<br />
Loads and executes a machine language program<br />
----<br />
Saves the resident BASIC program<br />
Saves a machine language program<br />
Assigns the console to the specified device<br />
Sets the screen width<br />
Table 9-1. File or CRT Manipulation<br />
STATEMENT<br />
DESCRIPTION<br />
Closes ORen files<br />
~~---1 -------<br />
CLOSE<br />
DSKO$<br />
INPUT#<br />
LINE INPUT#<br />
OPEN<br />
PRINT#<br />
Writes a string on the specified sector<br />
Reads from the <strong>disk</strong> in sequential mode<br />
Reads a line of data in sequential mode<br />
Opens a file or CRT for use (creates the file on the <strong>disk</strong>, if specified)<br />
Writes to the <strong>disk</strong> in sequential mode<br />
FUNCTION<br />
CSRLIN<br />
DSKI$<br />
EOF<br />
INPUT$<br />
LOC<br />
LOF<br />
POS<br />
CHR$(27)+ code<br />
----•LI-<br />
DESCRIPTION<br />
Gets the vertical coordinate of the Cursor<br />
--~~~~~-~1<br />
Gets a string from the specified sector<br />
Checks to see if the end-of-file has been encountered during the last read<br />
Gets a string of characters from the file<br />
Gets current record number<br />
Returns number of the last record in the file<br />
. Returns the current Cursor position<br />
Controls the CRT display (ESCAPE character ... begins a control sequence)<br />
Table 9-2. File or CRT Access<br />
27
File and CRT Manipulation<br />
Commands<br />
KILL<br />
Deletes a Program or Data File<br />
KILL "drive#: filename. file extension"<br />
KILL deletes a specified file from the <strong>disk</strong>. Both filename and file extension must be specified.<br />
Example<br />
hILL"0:GAME"<br />
Filename "GAME" is deleted from the <strong>disk</strong> in Drive 0 . If you save files by assigning file<br />
extensions using the SAVE command, you must specify the file extension when "KILLing" the<br />
file .<br />
LOAD<br />
Loads a BASIC Program from the Disk<br />
LOAD "drive#: filename" [ , R J<br />
LOAD loads a BASIC program file from the <strong>disk</strong> into the memory. LOAD closes all the open<br />
files . However, with the R(un) option, all the data files which have been already opened remain<br />
OPEN and the program starts to run after it is loaded.<br />
Examples<br />
LOAD"0~DEMO",R<br />
Filename "DEMO" is loaded from Drive 0 and executed because of the R option.<br />
LO ADM<br />
Loads a Machine Language Program<br />
LOADM "drive#: filename"<br />
LOADM loads the specified saved program from the <strong>disk</strong> into the memory at the address specified<br />
when the program was saved on the <strong>disk</strong> originally.<br />
Example<br />
LOADt1 II 0: BBB II<br />
28
LFILES<br />
Displays Filenames on the Disk<br />
LFILES drive#<br />
LFILES displays the filenames on the specified drive, with the size of each file in clusters. A<br />
cluster is the minimum unit of allocation for a file with a size of 2.25K bytes (9 sectors).<br />
Example<br />
LFil_E:3 0<br />
On entering the above command, the following message is displayed:<br />
SYSTEM VER 01.00.00 0r 1\10<br />
FORMr-'.liT. 1 B,
NAME<br />
Changes the Name of the File<br />
NAME "drive#:old filename. file extension" AS "drive#:new filename. file extension"<br />
NAME changes the name of the file. The old filename must already exist and the new filename<br />
must not already exist. Otherwise, an FF or FE error will result.<br />
Example<br />
Nf~ME" 1 :GAME" AS "1 :SPACE"<br />
RUN Program<br />
Loads and Executes a BASIC Program<br />
RUN "drive#:filename" [ ,RJ<br />
RUN loads a BASIC program from the <strong>disk</strong> and runs it. RUN closes all open files. LOAD with<br />
the R option does the same thing except all the data files remain OPEN.<br />
Example<br />
RUN" fZJ: TEST"<br />
Filename ''TEST" is loaded from Drive 0 into the main storage, and runs.<br />
RUNMProgrm<br />
Loads and Executes a Machine Language Program<br />
RUNM "drive#:filename"<br />
RUNM loads a machine language program file from the <strong>disk</strong> into the appropriate location of the<br />
memory that was specified when the file was saved and runs it. RUNM closes all open files. The<br />
machine language program to be loaded must be independent of BASIC (i.e., one that can be<br />
called directly in Menu mode).<br />
Note: Execution ADRS must have been specified when the program was saved.<br />
Example<br />
RUl\IM II fZJ: DDD II<br />
SAVE<br />
Saves the Resident BASIC Program<br />
30
SA VE saves a BASIC program file on the <strong>disk</strong> . Use the A option to save the file in ASCII format .<br />
Otherwise, BASIC saves the file in a compressed binary format. ASCII files take up more space,<br />
but some types of access require that the files be in ASCII format. For example, a file intended<br />
to be MERGEd must be saved in ASCII format. Programs saved in ASCII format may be read as<br />
BASIC data files or text files.<br />
Example<br />
SAVE fl !ZI: GAME fl ,<br />
A<br />
Filename "GAME" is saved onto Drive 0 as an ASCII file . File extension during execution of a<br />
SA VE command is optional.<br />
SAVEM<br />
Saves a Machine Language Program<br />
SAVEM "drive#: filename", start address, end address, entry address.<br />
SA VEM writes the program stored, beginning at the start address and ending at the end address<br />
on the <strong>disk</strong> under the specified filename . Entry address is optional. If omitted, BASIC considers<br />
the entry address to be the same as the start address.<br />
Example<br />
SAVEM"0:CCC",5!Zl!Zl00,S!Z1256,50000<br />
SCREEN<br />
Assigns the Console to the Specified Devivce<br />
SCREEN assigns the console on the specified devices.<br />
Console 0: LCD<br />
Console 1: CRT<br />
Function key display switch 0 does not display the contents of function keys; switch 1 does<br />
display the contents of function keys.<br />
Console is the output device for the PRINT and PRINT@ statements, the LIST command, and<br />
TEXT, ADDRESS, SCHEDL, and TELCOM functions (except Menu).<br />
The default value of console is 0 (LCD) and function key display switch is 0 (does not display).<br />
Example<br />
10 SCREEN 1,1<br />
2Ql CLS<br />
30 PRINT "SPRING"<br />
The first 5 characters of each function key definition is displayed on the bottom line of the<br />
CRT screen, and "SPRING" is printed on the first line.<br />
31
WIDTH<br />
Sets the Screen Width<br />
WIDTH 40 or 80<br />
This command sets the width of the screen at 40 or 80. The width set will stay effective in<br />
TELCOM, TEXT, ADDRESS and SCHEDL mode, too.<br />
Important Notice: When the Disk/Video Interface is turned on, be sure to enter this command<br />
or what is displayed on the CRT may not be what you intended.<br />
Example<br />
WIDTH 40<br />
The CRT display is set at 40 characters per line.<br />
Statements<br />
CLOSE<br />
Closes Open Files<br />
CLOSE [file number list]<br />
This command closes the files specified in file number list. The file number is the number under<br />
which the file was opened. If omitted , all open files are closed.<br />
Important Notice: When you remove the <strong>disk</strong>ette from the drive , be sure that the files in the<br />
<strong>disk</strong>ette have been already closed .<br />
Example<br />
CLOSE 1,2, 3<br />
Files associated with the file numbers 1, 2 and 3 are closed.<br />
DSKO$<br />
Writes a String on the Specified Sector<br />
Writes the string on the specified sector. When (switch) is zero, the first half of the sector is<br />
accessed; and when (switch) is one, the latter half of the sector is accessed. The maximum length<br />
for the string is 128 characters. Disk-BASIC fills the entire 128-character length with null codes<br />
(ASCII 00) if the string is less than 128 characters.<br />
32
Example<br />
DSKOS 0 , S,12 , 0 ," ABCDEF"<br />
The string data "ABCDEF" is written on track-5 , first half of sector-12 in Drive 0.<br />
IMPORTANT NOTE: DSKO$ writes data to any position on the <strong>disk</strong>ette, whether the position<br />
is used or not, EVEN ON THE SYSTEM TRACK. Refer to the "Tips on manipulation for files<br />
on <strong>disk</strong>ette" before you attempt to use this statement.<br />
INPUT#<br />
Reads from the Disk in Sequential Mode<br />
INPUT# file number, variable list<br />
INPUT# reads data items from the <strong>disk</strong> file and assigns them to the variable list. The type of<br />
data in the file must match the type specified by the variable list.<br />
The first character encountered that is not a space, carriage return or line feed is assumed to be<br />
the beginning of the data. The numeric data terminates on a space, carriage return, line feed or<br />
comma.<br />
String data can be stored in two ways: 1) Inside the double quotation marks("), or 2) just as a<br />
"bare" string. If you use the double quotation marks, Portable Computer will read the data as<br />
one string until it encounters the next double quotation mark.<br />
If the first character of the string is not a quotation mark, the string is a "bare" string, and will<br />
terminate on a comma, carriage return, line feed or after 255 characters have been read. When you<br />
want to store a string that contains a comma, carriage return or line feed, use double quotation<br />
marks.<br />
A normal PRINT# statement followed by a double quotation mark will store the "bare" string on<br />
the <strong>disk</strong>. If you want to store a string with a double quotation mark, use "PRINT#CHR$(34)"<br />
(34 is the ASCII code for quotation mark), or save data in the TEXT mode, using a quotation<br />
mark at the top of the string.<br />
If end-of-file is reached when a numeric or string data is being INPUT, the data is terminated.<br />
LINE INPUT#<br />
Reads a Line of Data in Sequential Mode<br />
LINE INPUT# file number, string variable<br />
LINE INPUT# reads an entire line of up to 254 characters without delimiters from a <strong>disk</strong> file<br />
to a string variable. The file number to assign is limited to the file already opened. The string<br />
variable is the name of a string variable to which the line will be assigned.<br />
LINE INPUT# reads all the characters in the <strong>disk</strong> file up to the carriage return not preceded by<br />
line feed . Then the line feed/carriage return sequence is ignored (not read by LINE INPUT#).<br />
The next LINE INPUT# reads all the characters up to the next carriage return.<br />
33
If a line feed/carriage return in this sequence is encountered, it is preserved, i.e., the line feed/<br />
carriage return codes are read as a part of the string. (When you press (ENTER), carriage return/<br />
line feed is sent in this sequence. If you want to send line feed/carriage return in this sequence,<br />
you must send CHR$(10) CHR$(13).)<br />
LINE INPUT# is especially useful if each line of a file has been broken into fields, or if a BASIC<br />
program saved in ASCII mode is being read as data by another program.<br />
OPEN<br />
Opens a File or CRT for Use<br />
OPEN "device or drive#: filename" FOR mode AS file number<br />
OPEN creates a buffer for a file on the given device .<br />
CRT: Opens the CRT as a file and sets the mode to sequential output. If the CRT is assigned<br />
as the device, it is not necessary to specify filename .<br />
Disk Drive: Allows I/Oto a <strong>disk</strong> file and sets the mode that will be used with the file.<br />
Mode is one of the following:<br />
OUTPUT: Specifies sequential output mode.<br />
INPUT: Specifies sequential input mode.<br />
File number is an integer expression whose value is between 1 and the maximum number of the<br />
files specified in a MAXFILES statement. File number, once assigned when OPENed, will remain<br />
the same until it is CLOSEd and must be referenced each time you access the file .<br />
You must OPEN a file before you can do any I/O statements to the file, such as one of the<br />
following statements, or any statement or function requiring a file number:<br />
PRINT#, PRINT#USING, INPUT#, LINEINPUT#, INPUT$<br />
A file cannot be opened for input if it is already opened for output; or the file opened for input<br />
cannot be re-opened for output, unless you close it first.<br />
Example<br />
10 OPEN "CRT" FOR OUTPUT AS 1<br />
Opens CRT and assigns it as file number "l" for output.<br />
Example<br />
10 OPEN"0:TEST1" INPUT AS 2<br />
Opens TESTl file on Drive 0 as file number "2" for input.<br />
PRINTtt<br />
Writes to the Disk in Sequential Mode<br />
PRINT# file number,<br />
34
This statement writes data sequentially to the specified file . When you first open a file for<br />
sequential output, a pointer is set to the beginning of the file. Therefore, your first PRINT#<br />
places data at the beginning of the file . At the end of each PRINT# operation, the pointer<br />
advances, so the values are written in sequence.<br />
A PRINT# statement creates a <strong>disk</strong> image similar to what a PRINT to display creates on the<br />
screen. Remember this, and you will be able to set up your PRINT#list correctly for access by<br />
one or more INPUT# statements. PRINT# does not compress the data; it writes ASCII codes<br />
data. Also you can use the field specifier of PRINT USING statement in the form of PRINT#n,<br />
USING.<br />
Functions<br />
CSRLIN<br />
Gets the Vertical Coordinate of the Cursor<br />
CSRLIN<br />
The value returned will be in the range from 0 to 24 (if the console is CRT or TV).<br />
Example<br />
10 CLS<br />
20 PRH1T<br />
30 PRINT<br />
40 PRINT"CURRENT CURSOR LINE IS";CSRLIN<br />
DSKI$<br />
Gets a String from the Specified Sector<br />
DSKI$ (drive, track, sector, switch)<br />
DSKI$ is a complementary function to DSKO$ statement. DSKI$ returns the contents of the<br />
first half of the sector (I 28 bytes) when the switch is "O", and the latter half when the switch is<br />
" I" to a string variable.<br />
Example<br />
PRINT DSKIS
Returns "-1" (true) when the end of a <strong>disk</strong> file is detected. Use EOF to test end-of-file during<br />
a read operation.<br />
Example<br />
H~ M.~XFILE=2<br />
20 OPEN"0:SDATA" FOR OUTPUT AS 2<br />
30 PRINT#2, "ABCDE":CLOSE<br />
40 OPEN"0:SDATA" FOR INPUT AS 1<br />
50 IF EOFC1> THEN PRINT "EOF":CLOSE:END<br />
60 LINE INPUT#l, AS<br />
7f.Zl PRINT A$<br />
80 GOTO 50<br />
Data is transferred from <strong>disk</strong> 0 until the EOF marker is detected.<br />
INPUT$<br />
Gets a String of Characters from the File<br />
INPUT$ (numeric expression, file number)<br />
INPUT$ returns a string of a length given in a numeric expression from the file opened under<br />
file number. The numeric expression must be in the range of 1 to 255.<br />
Example<br />
lf.Zl<br />
AS=INPUTSCS,1l<br />
Inputs five characters from the file opened as file #1 , and assigns the input string to A$ .<br />
LOC<br />
Gets Current Record Number<br />
LOC (file number)<br />
LOC is used to determine the current record number, i.e., the number of the last record read<br />
since the file was opened.<br />
Example<br />
PRINT LOCC1)<br />
LOF<br />
Returns Number of the Last Record in the File<br />
LOF (file number)<br />
This function provides you With the number of the last record, i.e., the highest numbered record<br />
in the file. A record means one sector on the <strong>disk</strong>ette.<br />
36
Example<br />
10 OPEl\l" 0 ~ SD.t;T1\"<br />
P R I \\ T L 0 F ( 1. )<br />
FOR INPUT .C>iS 1<br />
POS<br />
Returns the Current Cursor Position<br />
POS (dummy numeric expression)<br />
This command returns the current position of the Cursor on the display.<br />
Example<br />
10 CLS<br />
21Zl PRINT<br />
3lZl i=>RINT"ABC"<br />
40 PRINT POS<br />
50 END<br />
CHR$(27) +code<br />
Controls the CRT Display<br />
CHR$; "character"<br />
CHR$(27) is the "ESCape" code. This code notifies the Portable Computer that a special control<br />
code is on its way. The next character sent determines which control on the CRT is selected.<br />
CHR$(27); "A"<br />
CHR$(27); "B"<br />
CHR$(27); "C"<br />
CHR$(27); "D"<br />
CHR$(27); "E"<br />
CHR$(27); "H"<br />
CHR$(27); "J"<br />
CHR$(27); "K"<br />
CHR$(27); "L"<br />
CHR$(27); "M"<br />
CHR$(27); "P"<br />
CHR$(27); "Q"<br />
CHR$(27); "T"<br />
CHR$(27); "U"<br />
CHR$(27); "V"<br />
CHR$(27); "W"<br />
CHR$(27); "Y"; "x"; "y"<br />
CHR$(27); "j"<br />
CHR$(27); "p"<br />
CHR$(27); "q"<br />
Cursor up<br />
Cursor down<br />
Cursor forward<br />
Cursor backward<br />
Clears display<br />
Moves Cursor to the home position<br />
Erases up to the end of the page<br />
Erases up to the end of the line<br />
Inserts a line<br />
Deletes a line<br />
Cursor ON<br />
Cursor OFF<br />
Sets the system line (bottom line)<br />
Resets the system line<br />
Locks the screen (hold mode)<br />
Unlocks the screen<br />
Sets Cursor (refer to note below)<br />
Clears display (same as CHR$(27) "E")<br />
Enters the reverse mode<br />
Exits the reverse mode<br />
37
Note: CHR$(27); "Y"; "x"; "y"<br />
This code specifies location of the cursor directly by "x" and "y" coordinates (the corresponding<br />
ASCII character code numbers in decimal - see Part 4 Character Code Tables). Note that, however,<br />
the actual values given to the Portable Computer are "x-32" and "y-32". For instance, assume<br />
you assign"!" in "y" and "if' in "x". ASCII code for"!" is 33 and for"#" is 35, so, by<br />
deducting 32, each value becomes 1 and 3. Therefore, the cursor is located in column 3 on line 1.<br />
Example<br />
1(2) CLS<br />
20 PRINT"0123Lf"<br />
3({) PRINT" 1" :PRINT":2" : PRINT"3" : PRINT"4"<br />
Lf(2) PRINT CHR$(27); "Y"; II! II;"#"; "A"<br />
5121 END<br />
After excuting this program, the result on the CRT will be:<br />
(2)1234<br />
1 A<br />
2<br />
3<br />
4<br />
Tips on Using PRINT@ Command<br />
When you write data into the RAM or <strong>disk</strong>ette using the command "PRINT@" etc., Disk-BASIC<br />
recognizes the numeric expression of the first parameter in this command as ESC code, line<br />
number and column number according to the condition of console width. So, ifthe console is<br />
in the 80 characters mode, the parameter of PRINT@ command will be written on the RAM<br />
or <strong>disk</strong>ette as the following form:<br />
PRINT@75; "ABC" + PRINT+ ESC + "Y" +line #0 +column #75 +"ABC"<br />
When this data is read from the RAM or <strong>disk</strong>ette in the 40 characters mode, resultant display<br />
on the CRT will be:<br />
I<br />
I<br />
1HC<br />
1" - -- -<br />
40 charactors mode<br />
(\I<br />
- - - - • 1<br />
I<br />
I<br />
I<br />
I<br />
38
That is, the frrst character of the string is displayed on the last column in the first line instead<br />
of the 75th column from the home position.<br />
80 charactors mode<br />
:A BC I<br />
I<br />
I<br />
'<br />
I<br />
75 th column:<br />
Note: The PSET and PRESET commands on your Portable Computer function only on the<br />
LCD: they do not function on the CRT or TV screen.<br />
Before you switch the display device from the <strong>video</strong> display to the LCD by SCREEN command,<br />
you must terminate the last print line with a carriage return.<br />
You should not switch the display device if the last PRINT command ended with a semi-colon.<br />
39
Tips on Manipulation for Files on Diskette<br />
We've described how to access files on the <strong>disk</strong>ette ... here's some hints and tips to manipulate<br />
the data on the <strong>disk</strong>ette.<br />
PRINT# writes data on the <strong>disk</strong>ette sequentially. You can use TAB or USING along with<br />
PRINT#, just like with PRINT.<br />
PRINT#l, TAB;A$<br />
PRINT#l, USING"$$###.##",B<br />
However, when you INPUT# from file, you will have to use some tactics if you want to retrieve<br />
as PRINT#ed. For, in the first example above, if you just INPUT#, leading blank will be ignored.<br />
Supposing LEN(A$)= 5, use INPUT$(27 ,n) (n is the number of file you assigned when OPENed),<br />
or use LINEINPUT#. In the second example, the stored data is not longer the numeric data<br />
(the$ on top is not numeric) so you have to INPUT# as string data. You had better not use<br />
comma to show unit of thousand, because INPUT# regards the comma as terminator of data.<br />
As explained to you previously, when you PRINT# the string, the double quotation mark(") is<br />
not attached, and, remember, the comma in the string too is regarded as data terminator. So,<br />
when you are storing a string such as :<br />
When you think computer, think small.<br />
You must PRINT# as<br />
PRINT#l, CHR$C34);"When you think<br />
computer, think small.";CHRSC34)<br />
or, in TEXT mode, type<br />
When ~ou<br />
think computer, think small.<br />
and SA VE using the filename you want to use when running BASIC program including<br />
"INPUT#".<br />
Is there no way to input the string (or numeric data) including comma? Yes, there is.<br />
Use LINEINPUT#.<br />
This statement reads data up to where you pressed ENTER, even there is comma in the string.<br />
Or, as we've said before, you can even include linefeed and carriage return in the string to be<br />
retrived by LINEINPUT # . Try the following:<br />
PRINT#l,"This is one line";CHRS(lm>;CHRS<br />
(13);"This is another line"<br />
And use LINEINPUT# to read this string.<br />
All these statements/commands access <strong>disk</strong> file sequentially. On some occasion you may want<br />
to access <strong>disk</strong> randomly. Use DSKO$ and DSKI$ for this purpose. BUT USE THESE WITH<br />
CARE!<br />
For proper use ofDSKO$ and DSKI$, you must first be well acquainted with the format of the<br />
<strong>disk</strong>ette. Go through Part III and after you're confident that you get the picture, return to this<br />
point.<br />
40
Essentially the DSK0$ is analogous to POKE and DSKI$ is to PEEK. The POKE/PEEK writes/<br />
reads on/from RAM, but DSKO$/DSKI$ do same on/from <strong>disk</strong>ette. POKE cannot write anything<br />
on ROM, of course, but on <strong>disk</strong>ette there is no such parts as "Read Only Memory". So DSKO$<br />
can write to any portion on the <strong>disk</strong>ette, EVEN ON THE SYSTEM TRACK. This is the<br />
reason why we tell you to use this statement with great care.<br />
DSKO$ does not read directory or FAT. So it writes data on the track/sector you specified ,<br />
whether it is used or not. Also directory and FAT remains same when you write data using<br />
DSKO$ - there is data on track/sector you specified, but directory/FAT do not reflect this.<br />
For convenience, first create the "dummy" file using OPEN statement and PRINT# dummy<br />
data to prepare enough capacity for the data you want to put with DSKO$. Then CLOSE this<br />
file. Now the directory/FAT have the data for this dummy file. Use DSKI$ to read the data in<br />
the directory to see where on the <strong>disk</strong>ette is this dummy file.<br />
Return to Part III re structure of the directory and FAT.<br />
Suppose our dummy file is named "DUMMY". Following is one of the method to get the data<br />
for DSKO$ (Track number and Sector number).<br />
10<br />
20<br />
30<br />
412!<br />
50<br />
2G'.J<br />
N=1:M=0<br />
FOR L=0 TO 15<br />
AS=MIDS
The informations to be put on directory are filename, extension, attribute and cluster number.<br />
The cluster number can be obtained by doubling the track number and add l if the sector number<br />
is between I 0 and 18. So the cluster number in our case is 11.<br />
lt.'.1 A$=" TEST II+" "+CHR$(0)+CHR$C11><br />
20 BS=DSKI$(0,20,1,0)<br />
30 MIDSCB$,49,16>=AS<br />
40 DSKOS 0,20,1,0,BS<br />
will put the necessary information into directory. Now we must also write to FAT. Use the same<br />
method as above.<br />
Sector 12 we used is the third sector of cluster 11. So we have to put C3 hex, which is 195<br />
decimal, on I Ith byte.<br />
50 A·$=CHR$ < 195)<br />
60 FOR M=16 TO 18<br />
70 B$=DSKI$C0,20,M~0)<br />
80 MIDSCBS,12,1>=A$<br />
90 DSKOS 0,20,M,0,BS<br />
1\J0 NEXT M<br />
This completes the operation. You may want to save this or similar program so you can load<br />
any time you want.<br />
42
10/Utility Programs<br />
FORMAT<br />
The FORMAT program lets you prepare data <strong>disk</strong>ettes (either new <strong>disk</strong>ettes or <strong>disk</strong>ettes which<br />
contain data or programs of being no longer needed), leaving a maximum amount of space for<br />
your program and data files.<br />
FORMAT takes a blank (new or magnetically erased) <strong>disk</strong>ette, records track/sector boundaries<br />
on it, initializes it and creates a directory.<br />
First, load the FORMAT program from the <strong>disk</strong>ette (or wherever it is stored) and run it.<br />
This utility formats <strong>disk</strong>ettes.<br />
- All data will be lost -<br />
Which drive will be used
Format aborted; no <strong>disk</strong>ette.<br />
Furthermore, the write protect notch on the <strong>disk</strong>ette is covered, the message;<br />
Format aborted; W~ite-Protected.<br />
will be displayed.<br />
BACKUP<br />
This system is operative only when two floppy <strong>disk</strong> drives are used together and not operative<br />
with only one drive. First load the BACKUP program from the <strong>disk</strong>ette (or wherever it is stored)<br />
and let it run. How the following will be displayed:<br />
E.,O.Ci·\UP UTILITY<br />
COPY ALL <br />
or SYSTEM (System Files Only)<br />
Enter A CALL) or S
BACKUP. SNG<br />
First load the BACKUP.SNG program from <strong>disk</strong>ette (or from wherever it is stored) and make it<br />
run. Now the following should be indicated:<br />
SINGLE DRIVE BACK UP UTILITY<br />
COPY ALL
In reverse case, when inserting the destination <strong>disk</strong>ette into the drive during reading process,<br />
following message will be given:<br />
NOT SOURCE~<br />
Put the SOURCE <strong>disk</strong>ette in the drive<br />
Press ENTER when read~<br />
During BACKUP, if the back-up is disturbed on a track due to some reason, e.g. scratch on the<br />
<strong>disk</strong>ette, etc. the system gives the following message.<br />
ABORTED: < Destination's Flaw ><br />
When the correct procedures are followed , the following will appear on the display:<br />
COPY COMPLETED.<br />
Important Notice for BACKUP and BACKUP. SNG utilities<br />
(1) When writing from a <strong>disk</strong>ette which contains data or program, the system will indicate the<br />
following:<br />
Destination contains data.<br />
Use this <strong>disk</strong>ette CY/NJ?<br />
(2) When writing into a protected <strong>disk</strong>ette, the system will give the following message and this<br />
utility is ended:<br />
ABORTED: < Write-Protected ><br />
(3) When attempting to access the drive (for read/write process), if the <strong>disk</strong>ette is not inserted,<br />
or the lever in not set down, or not ready, the system will give following message and this<br />
utility is ended:<br />
ABORTED : < Drive Error ><br />
( 4) If some mulfunction occurs accidentally during Read and Write process, it gives the<br />
following message and ceases the utility:<br />
BACKUP FAILED: < R/W Error ><br />
46
PART Ill/<br />
FORMAT OF THE DISKETTE<br />
47
11/Format of the Diskette<br />
Part III will provide you with the information necessary to effectively use the floppy <strong>disk</strong>. These<br />
informations may not be so useful for you to use Disk-BASIC because Disk-BASIC handles data<br />
on the <strong>disk</strong>ette as a logical conception so called "File".<br />
But to use the DSK0$ statement and DSKI$ function effectively, you have to understand the<br />
physical data configuration of the floppy <strong>disk</strong>. This information will help you develop a wider<br />
range of applications for the Portable Computer which will enable you to create better and more<br />
effective programs.<br />
Physical Configuration of a Diskette<br />
As shown in Figure 11-1, the tracks of a <strong>disk</strong>ette are distributed as concentric circles. The outside<br />
edge track is numbered 0. Moving toward the center the number increases, and the centermost<br />
track number is 39. Therefore, the total track number count is 40 (tracks 0 through 39).<br />
Each Track is divided into smaller units called sectors. Disk-BASIC handles sectors each time it<br />
controls the Diskette.<br />
In order for Disk-BASIC to access multiple sectors efficiently, sectors are written in a definite<br />
interleave pattern.<br />
The number of sectors count from 1 through 18 . One sector has a maximum of 256 bytes.<br />
Therefore, one <strong>disk</strong>ette contains:<br />
256 bytes x 18 sectors x 40 tracks= 184,320 bytes<br />
of memory capacity. A small percentage of this space is used by system software; therefore, not<br />
all of this space is available to the user.<br />
Figure 11-1. Physical Configuration of a Diskette<br />
49
Cluster<br />
Although the physical configuration of a <strong>disk</strong>ette has been explained, you should not be<br />
concerned with this theory when you use the Disk Drive Unit. You can operate the Disk Drive<br />
Unit freely by assigning the filenames. Conversion of the filename is executed by Disk-BASIC<br />
automatically.<br />
Although the minimum access unit of the <strong>disk</strong> is 1 sector, when the program or data is handled<br />
as a file, 9 sectors are accessed as a minimum access unit. This minimum access unit of9 sectors<br />
is called a Cluster.<br />
Figure 11-2 shows the logical configuration of a cluster. Please note that, as explained, sectors<br />
1 through 18 are not distributed sequentially on a track; an actual cluster is not distributed as<br />
this figure shows. This is the reason why this figure is titled "logical configuration".<br />
Figure 11-2. Logical Configuration of a Diskette<br />
Format of a System Diskette<br />
Figure 11-3 shows the format of a System Diskette. On tracks 0 and 1 of the System Diskette,<br />
the Disk Operating Software of Disk-BASIC and the Disk/Video Interface are loaded. On track<br />
20 a directory, the record of the loading address of each file, is loaded.<br />
The system track and directory are very important and, ordinarily, the user is not allowed to<br />
access them directly. However, if you use the DSKO$ statement and DSKI$ function, you can<br />
access them directly. For this reason, you have to be careful when using DSKO$ or DSKI$ .<br />
50
V Index<br />
Figure 11-3. Format of a System Diskette<br />
System Track<br />
Figure 11-4 shows the format of system tracks 0 and 1. When the Disk/Video Interface reads<br />
DOS, it reads 128 bytes of the second half of sector 1 on track 0 first ; then, it reads the data on<br />
sector 2 to 14 of track 1. Also, when the Portable Computer reads Disk-BASIC, it reads 128 bytes<br />
of the first half of sector 1 on track O; then, it reads the other 17 sectors on track 0 and sector 1<br />
of track 1.<br />
Thus, on sector 1 of track 0, the first program to read DOS and Disk-BASIC is loaded. This kind<br />
of program is named IPL (Initial Program Loader). The first half of sector 1 of track 0 is the<br />
IPL for Disk-BASIC, and the second half is the IPL for DOS.<br />
------ SECTOR1-----+-------~ SECTOR2 - 18--------.--1<br />
IPL* FOR T IPL FOR DISK 7(<br />
DISK-BASIC J ~b~~~ll~~ DISK-BASIC ))__________<br />
TRACKOO<br />
SECTO~<br />
SECTOR 1 SECTOR 2 - 14 15 - 18<br />
DISK-BASIC DISK OPERATING SOFTWARE NOT USED<br />
S\<br />
TRACK 01<br />
* IPL: Initial Program Loader<br />
Figure 11- 4. Format of System Tracks 0 and 1<br />
51
Directory Track<br />
Figure 11-5 shows the format of track 20, the directory track. Sectors 1 through 15 are the<br />
directory, and sectors 16, 17 and 18 are called FAT (File Allocation Table). The figure shows the<br />
allocation of each cluster.<br />
SECTOR<br />
SECTOR 1""' 15----------- 16 17<br />
t--~~~~~~~~~~~<br />
18<br />
DIRECTORY<br />
FAT1 FAT2 FAT3<br />
TRACK 20<br />
....___..____.~__.__..__._____)) 1 i i____._I _Not u_sed ----'~----------<br />
ByM 1 2 3 4 5 ~mso 256<br />
Figure 11-5. Format of the Directory Track<br />
Directory<br />
The directory is a kind of index to investigate the address of a certain file on the <strong>disk</strong>ette on which<br />
you are going to access data.<br />
In the directory, filenames, head cluster numbers and attributes corresponding to the files loaded<br />
on the <strong>disk</strong>ette are recorded. For any one file, the directory shows this information using a<br />
16-byte record. Figure 11-6 shows the contents of this one record.<br />
[<br />
Head Cluster Address in Hex. Decimal.<br />
Ex.<br />
CLUSTER 63 ... 2F<br />
Byte<br />
r T T I<br />
-1. -1. .l J.<br />
File Name<br />
Not Used<br />
L~~~~~~~~~-----"<br />
File Attribute<br />
[ OOH ... ASCII Text File<br />
01 H ... Machine Language File<br />
80H ... BASIC Program File<br />
Figure 11-6. Format of the Directory<br />
52
FAT (File Allocation Table)<br />
One byte in FAT corresponds to one cluster in the <strong>disk</strong>ette and shows the allocation of each<br />
cluster. As such, the actual memory size that is used by FAT is the first 80 bytes of sector 16, 17<br />
and 18, they are all the same contents, that is, one track can contain 2 clusters (remember, one<br />
track consists of 18 sectors, and one cluster is made up of 9 sectors), 40 tracks per one <strong>disk</strong>ette,<br />
for a total of 80 clusters on one <strong>disk</strong>ette.<br />
Allocation indicates whether or not the cluster is used yet, etc. When the <strong>disk</strong>ette is FORMATed,<br />
Disk-BASIC sets "flags" on the FAT that show that Disk-BASIC uses the clusters for system tracks<br />
0 and 1 and directory track 20. As you store other data or programs onto <strong>disk</strong>, Disk-BASIC<br />
writes the cluster allocations for those data/programs into FAT.<br />
The value of FAT byte for unused clusters is FF hex (255 decimal). For the cluster that cannot<br />
be used (system track and damaged track if any) the value is FE hex (254 decimal). For the<br />
clusters that are already used (data is stored), the value is decided as follows.<br />
a) If the data is continued to the next cluster, the value shows the next cluster number in hex.<br />
b) If the cluster is the last one in the file, the value is in the range of C 1 to C9 hex (19 3 to 201<br />
decimal). The lower digit of hex notation (1 through 9) shows the number of the last sector<br />
used in the cluster.<br />
53
55<br />
PART IV/<br />
APPENDICES
Appendix A/Connector Pin<br />
Assignments<br />
Pin No.<br />
2<br />
3<br />
4<br />
5<br />
6<br />
7<br />
8<br />
9<br />
10<br />
I 11<br />
12<br />
13<br />
14<br />
15<br />
16<br />
17<br />
18<br />
19<br />
20<br />
21<br />
22<br />
23<br />
24<br />
25<br />
26<br />
27<br />
28<br />
29<br />
30<br />
31<br />
32<br />
33<br />
34<br />
35<br />
36<br />
37<br />
38<br />
39<br />
40<br />
SYSTEM BUS CONNECTOR<br />
Symbol<br />
Description<br />
VDD<br />
VDD<br />
GND<br />
GND<br />
AD1<br />
AD¢<br />
AD3<br />
AD2<br />
AD5<br />
AD4<br />
AD7<br />
AD6<br />
A 9<br />
A 8<br />
A 11<br />
A 10<br />
A 13<br />
A 12<br />
A 15<br />
A 14<br />
GND<br />
GND<br />
WR*<br />
RD*<br />
S¢<br />
10/M*<br />
s 1<br />
ALE*<br />
Y¢<br />
CLK<br />
RESET*<br />
®*<br />
INTA<br />
INTR<br />
GND<br />
GND<br />
NC<br />
RAM RST<br />
NC<br />
NC<br />
+5V Power Supply from TRS-80 Model 100,<br />
+ 5V Power Supply from TRS-80 Model 100<br />
Logic Ground<br />
Logic Ground<br />
Address Data Signal bit 1<br />
Address Data Signal bit ¢<br />
Address Data Signal bit 3<br />
Address Data Signal bit 2<br />
Address Data Signal bit 5<br />
Address Data Signal bit 4<br />
Address Data Signal bit 7<br />
Address Data Signal bit 6<br />
Address Signal bit 9<br />
Address Signal bit 8<br />
Address Signal bit 11<br />
Address Signal bit 10<br />
Address Signal bit 13<br />
Address Signal bit 12<br />
Address Signal bit 15<br />
Address Signal bit 14<br />
Logic Ground<br />
Logic Ground<br />
Write enable Signal<br />
Read enable Signal<br />
Status ¢ Signal<br />
1/0 or Memory Signal<br />
Status 1 Signal<br />
Address Latch enable Signal<br />
110 Controller enable Signal<br />
2.54MHz Clock Signal<br />
TRS-80 Model 100 Reset Signal<br />
Memory or 1/0 Access enable Signal<br />
Interrupt acknowledge Signal<br />
Interrupt request Signal<br />
Logic Ground<br />
Logic Ground<br />
No connection<br />
TRS-80 Model 100 RAM reset Signal<br />
No connection<br />
No connection<br />
. . . . . . . . . . . . . . .<br />
39 37 35 33 31 29 27 25 23 21 19 17 15 13 11 9 7 5 3<br />
~~~~~~~~~~~~~~~~A<br />
. .<br />
6 4<br />
.<br />
2<br />
57
RF Modulator<br />
4 3<br />
Pin Jack for CRT Monitor<br />
Channel Select Switch<br />
Pin Jack for Home TV<br />
58
Appendix B/Technical Information<br />
System Block Diagram<br />
I<br />
I<br />
~----~ System Bus<br />
TRS-80<br />
I<br />
Portable<br />
Computer<br />
I<br />
I<br />
, - --~-----j--~<br />
I<br />
Z80A (CPUl<br />
PPI<br />
8255<br />
IK<br />
ROM<br />
Control Bus<br />
4K<br />
RAM<br />
CRTC<br />
HD 465055<br />
r-------- I<br />
CRT<br />
Monitor<br />
Home<br />
TV.<br />
I<br />
I<br />
I<br />
I<br />
I<br />
Option<br />
________ J<br />
RF<br />
Modulator<br />
Disk Drive<br />
Units<br />
1- ----,<br />
I<br />
I<br />
~ l ~ i<br />
I<br />
I<br />
I<br />
I<br />
I<br />
I Option I<br />
I L ______ ...J I<br />
59
Character Code Tables<br />
Decimal Hex Binary<br />
Printed<br />
Character<br />
Decimal Hex Binary<br />
Printed<br />
Character<br />
32 20 00100000<br />
78 4E 01001110<br />
N<br />
33 21 00100001<br />
79 4F 01001111<br />
0<br />
34 22 00100010<br />
35 23 00100011<br />
#<br />
80 50 01010000<br />
81 51 01010001<br />
p<br />
a<br />
36 24 00100100<br />
37 25 00100101<br />
$<br />
%<br />
82 52 01010010<br />
83 53 01010011<br />
R<br />
s<br />
38 26 00100110<br />
39 27 00100111<br />
40 28 00101000<br />
41 29 00101001<br />
42 2A 00101010<br />
43 28 00101011<br />
44 2C 00101100<br />
&<br />
+<br />
84 54 01010100<br />
85 55 01010101<br />
86 56 01010110<br />
87 57 01010111<br />
88 58 01011000<br />
89 59 01011001<br />
90 5A 01011010<br />
T<br />
u<br />
v<br />
w<br />
x<br />
y<br />
z<br />
45 20 00101 101<br />
91 58 01011011<br />
46 2E 00101110<br />
92 5C 01011100<br />
47 2F 00101111<br />
93 50 01011101<br />
48 30 00110000<br />
0<br />
94 5E 01011110<br />
49 31 00110001<br />
95 5F 01011111<br />
50 32 00110010<br />
2<br />
96 60 01100000<br />
51 33 00110011<br />
3<br />
97 61 01100001<br />
a<br />
52 34 00110100<br />
4<br />
98 62 01100010<br />
b<br />
53 35 00110101<br />
5<br />
99 63 01100011<br />
c<br />
54 36 00110110<br />
6<br />
100 64 01100100<br />
d<br />
55 37 00110111<br />
7<br />
101 65 01100101<br />
e<br />
56 38 00111000<br />
8<br />
102 66 01100110<br />
57 39 00111001<br />
9<br />
103 67 01100111<br />
g<br />
58 3A 00111010<br />
104 68 01101000<br />
h<br />
59 38 00111011<br />
105 69 01101001<br />
60 3C 00111100<br />
<<br />
106 6A 01101010<br />
61 30 00111101<br />
107 68 01101011<br />
k<br />
62 3E 00111110<br />
><br />
108 6C 01101100<br />
63 3F 00111111<br />
?<br />
109 60 01101101<br />
m<br />
64 40 01000000<br />
110 6E 01101110<br />
n<br />
65 41 01000001<br />
A<br />
111 6F 01101111<br />
0<br />
66 42 01000010<br />
67 43 01000011<br />
8<br />
c<br />
112 70 01110000<br />
113 71 01110001<br />
p<br />
q<br />
68 44 01000100<br />
0<br />
11 4 72 01110010<br />
69 45 01000101<br />
E<br />
11 5 73 0111 0011<br />
s<br />
70 46 01000110<br />
F<br />
116 74 011 10100<br />
71 47 01000111<br />
G<br />
11 7 75 01110101<br />
u<br />
72 48 01001000<br />
H<br />
118 76 01110110<br />
v<br />
73 49 01001001<br />
74 4A 01001010<br />
J<br />
119 77 01110111<br />
120 78 01111000<br />
w<br />
x<br />
75 48 01001011<br />
K<br />
121 79 01111 001<br />
y<br />
76 4C 01001100<br />
L<br />
122 7A 01111010<br />
z<br />
77 40 01001101<br />
M<br />
123 78 01111011<br />
60
Decimal Hex Binary Printed<br />
Character<br />
124 7C 01111100<br />
125 70 01111101<br />
126 7E 01111110<br />
12S so 10000000 ~<br />
129 S1 10000001 111<br />
130 S2 10000010 (x<br />
131 S3 10000011 ~<br />
132 S4 10000100 *<br />
133 S5 10000101 t<br />
134 S6 10000110 ..<br />
135 s7 10000111 n<br />
136 SS 10001000<br />
137 S9 10001001<br />
13S SA 10001010<br />
139 SB 10001011<br />
140 SC 10001100<br />
141 SD 10001101<br />
142 BE 10001110 I<br />
143 BF 10001111<br />
144 90 10010000<br />
ft<br />
145 91 10010001<br />
e<br />
146 92 10010010<br />
147 93 10010011<br />
14S 94 10010100<br />
149 95 10010101<br />
150 96 10010110<br />
151 97 10010111 r;,<br />
152 9S 10011000 t<br />
153 99 10011001<br />
154 9A 10011010<br />
-<br />
155 9B 10011011<br />
-<br />
156 9C 10011100<br />
157 90 10011101 0<br />
15S 9E 10011110<br />
159 9F 10011111 0<br />
160 AO 10100000<br />
161 Al 10100001<br />
162 A2 10100010<br />
163 A3 10100011 £<br />
164 A4 10100100<br />
165 A5 10100101 µ<br />
166 A6 10100110 0<br />
167 A7 10100111<br />
16S AS 10101000 t<br />
169 A9 10101001<br />
170 AA 10101010<br />
171 AB 10101011<br />
172 AC 10101100<br />
173 AD 10101101<br />
174 AE 10101110 'lz<br />
Decimal Hex Binary Printed<br />
Character<br />
175 AF 10101111 qr<br />
176 BO 10110000 ¥<br />
177 Bl 10110001 A<br />
17S B2 10110010 b<br />
179 B3 10110011 0<br />
1SO B4 10110100 ¢<br />
1S1 B5 10110101<br />
1s2 B6 10110110 a<br />
1S3 B7 10110111 b<br />
1S4 BS 10111000 0<br />
1S5 B9 10111001 B<br />
1S6<br />
1S7<br />
1SS<br />
1S9<br />
190<br />
191<br />
192<br />
193<br />
194<br />
BA 10111010<br />
BB 10111011<br />
BC 10111100<br />
BO 10111101<br />
BE 10111110<br />
BF 10111111<br />
co 11000000<br />
Cl 11000001<br />
C2 11000010<br />
T<br />
M<br />
195 C3 11000011 6<br />
196 C4 11000100<br />
197 C5 11000101<br />
19S C6 11000110<br />
199 C7 11000111<br />
200 cs 11001000<br />
201 C9 11001001<br />
202 CA 11001010 6<br />
203 CB 11001011<br />
204 cc 11001100<br />
205 CD 11001101 ii<br />
206 CE 11001110<br />
207 CF 11001111 6<br />
20S DO 11010000 A<br />
209 01 11010001<br />
210 02 11010010<br />
211 03 11010011<br />
212 04 11010100 (J<br />
213 05 11010101<br />
214 06 11010110<br />
215 07 11010111<br />
216 OS 11011000 A<br />
217 09 11011001<br />
21S DA 11011010<br />
219 DB 11011011<br />
220 DC 11011100<br />
221 DD 11011101<br />
222 DE 11011110<br />
223 OF 11011111 A<br />
224 ED 11100000<br />
61
Dec Imel Hex Binary Printed Deel ma I Hex Binary Printed<br />
Character<br />
Character<br />
225 E1 11100001 • (upper left) 241 F1 11110001<br />
226 E2 11100010 • (upper right) 242 F2 11110010<br />
,<br />
227 E3 11100011<br />
• !lower left) 243 F3 11110011 T<br />
228 E4 11100100 • (lower right) 244 F4 11110100 I-<br />
229 ES 11100101 .. 245 F5 11110101<br />
230 E6 11100110 rfJ 246 F6 11110110 L<br />
231 E7 11100111 (upper) 247 F7 11110111 .J<br />
232 EB 11101000 (lower) 248 FB 11111000 J_<br />
233 E9 11101001 I !leftl 249 F9 11111001 ~<br />
234 EA 11101010 I (right) 250 FA 11111010 +<br />
235 EB 11101011 251 FB 11111011<br />
•.. ,,.<br />
..<br />
236 EC 11101100 252 FC 11111100 ....<br />
..<br />
237 ED 11101101 253 FD 11111101 "111111<br />
238 EE 11101110 254 FE 11111110 ....<br />
239 EF 11101111 255 FF 11111111<br />
• •<br />
240 FO 11110000 r<br />
62
Disk BASIC Error Codes<br />
Code Message Meaning<br />
1 NF NEXT without FOR.<br />
2 SN Syntax Error.<br />
3 RG RETURN without GOSUB.<br />
4 OD Out of Data.<br />
5 FC Illegal Function call.<br />
6 ov Overfiow.<br />
7 OM Out of Memory.<br />
8 UL Undefined line.<br />
9 BS Bad Subscript.<br />
10 DD Double Dimensioned Array.<br />
11 10 Division by Zero.<br />
12 ID Illegal Direct.<br />
13 TM Type Mismatch.<br />
14 OS Out ot String Space.<br />
15 LS String Too Long.<br />
16 ST String Formula Too Comples.<br />
17 CN Can't Continue.<br />
18 10 1/0 Error.<br />
19 NR No RESUME.<br />
RW<br />
RESUME without Error.<br />
UE<br />
Undefined Error.<br />
22 MO Missing Operand.<br />
23-49 UE Undefined Error.<br />
50 IE Internal Error.<br />
51 BN Bad Fi le Number.<br />
52 FF File Not Found.<br />
53 AO Already Oi:ien.<br />
54 EF Input Past End of File.<br />
55 NW Bab Filename.<br />
56 DS Direct Statement in File.<br />
FL<br />
Too Many Files.<br />
58 CF File Not Open.<br />
59 AT Bad Allocation Table.<br />
60 DN Bad Drive Number.<br />
61 TS Bad Track/Sector.<br />
FE<br />
File Already Exists.<br />
DF<br />
Disk Full.<br />
64-255 UE Undefined Error.<br />
63
SERVICE POLICY<br />
Radio Shack's nationwide network of service facilities provides quick, convenient,<br />
and reliable repair services for all of its computer products, in most instances.<br />
Warranty service will be performed in accordance with Radio Shack's Limited<br />
Warranty. Non-warranty service will be provided at reasonable parts and labor<br />
costs.<br />
Because of the sensitivity of computer equipment, and the problems which can<br />
result from improper servicing, the following limitations also apply to the services<br />
offered by Radio Shack:<br />
1. If any of the warranty seals on any Radio Shack computer products are broken,<br />
Radio Shack reserves the right to refuse to service the equipment or to void<br />
any remaining warranty on the equipment.<br />
2. If any Radio Shack computer equipment has been modified so that it is not<br />
within manufacturer's specifications, including, but not limited to, the installation<br />
of any non-Radio Shack parts, components, or replacement boards, then<br />
Radio Shack reserves the right to refuse to service the equipment, void any<br />
remaining warranty, remove and replace any non-Radio Shack part found in<br />
the equipment, and perform whatever modifications are necessary to return<br />
the equipment to original factory manufacturer's specifications.<br />
3. The cost for the labor and parts required to return the Radio Shack computer<br />
equipment to original manufacturer's specifications will be charged to the<br />
customer in addition to the normal repair charge.
Software<br />
Registration<br />
Card<br />
Cat. No. 26-3 I 4<br />
Version 01.00.00<br />
Name ____________________<br />
Company ________________ ~<br />
Address ______________ ___ _<br />
City ____ _ _ _ _ Phone (_ _ ) _ _ -___<br />
State<br />
Zip ________ _<br />
Read Carefully<br />
In order for us to notify you of modifications<br />
or updates to this program<br />
you MUST complete this card and<br />
return it immediately. This card gets<br />
you information only and is NOT a<br />
warranty registration. Register one<br />
software package per card only. The<br />
registration card is postage paid-it<br />
costs you nothing to mail.<br />
Two change of address cards have<br />
been included so that you may continue<br />
to receive information in the<br />
event that you move. Copy all address<br />
information from the Registration<br />
Card onto them prior to sending<br />
the Registration Card. They must<br />
show your "old address" exactly as<br />
you originally registered it with us.<br />
•<br />
61<br />
(/)<br />
(/)<br />
Name<br />
w<br />
c Address<br />
ct<br />
a: Company<br />
;= City Phone ( __ ) _ _ -<br />
w<br />
z<br />
State Zip<br />
(/)<br />
Name<br />
(/)<br />
w<br />
a:<br />
c<br />
Company<br />
Address<br />
ct<br />
c City Phone (_ _ ) _ _ -<br />
..J<br />
0 State Zip<br />
tn<br />
(/)<br />
(/)<br />
Name<br />
w<br />
tn<br />
a: Company<br />
c<br />
~<br />
ct<br />
Address<br />
"C ;= City<br />
"C w<br />
cu<br />
.....<br />
0<br />
Q)<br />
(/)<br />
(/)<br />
C> w<br />
c<br />
z State Zip<br />
Name<br />
c<br />
a: Company<br />
cu<br />
c Address<br />
.c c ct<br />
City<br />
..J<br />
0 0 State Zip
111111<br />
NO POSTAGE<br />
NECESSARY<br />
IF MAILED<br />
IN THE<br />
UNITED STATES<br />
BUSINESS REPLY MAIL<br />
FIRST CLASS PERMIT NO. 138 FORT WORTH. TEXAS<br />
POSTAGE WILL BE PAID BY ADDRESSEE<br />
Software Registration<br />
Data Processing Dept.<br />
P.O. Box 2910<br />
Fort Worth, Texas 76113-9965<br />
PLACE<br />
STAMP<br />
HERE<br />
Software Registration<br />
Data Processing Dept.<br />
P.O. Box 2910<br />
Fort Worth, Texas 76113-2910<br />
PLACE<br />
STAMP<br />
HERE<br />
Software Registration<br />
Data Processing Dept.<br />
P.O. Box 2910<br />
·Fort Worth, Texas 76113-2910
'l":'<br />
..<br />
•. .'i<br />
·~ 'h I
RADIO SHACK, A DIVISION OF TANDY CORPORATION<br />
U.S.A.: FORT WORTH, TEXAS 76102<br />
CANADA: BARRIE, ONTARIO L4M 4W5<br />
TANDY CORPORATION<br />
AUSTRALIA BELGIUM U. K.<br />
91 KURRAJONG AVENUE<br />
MOUNT DRUITT, N.S.W. 2770<br />
PARC INDUSTRIEL DE NANINNE BILSTON ROAD WEDNESBURY<br />
5140 NANINNE WEST MIDLANDS WS10 ?JN<br />
11A3 K TX11*1001 PRINTED IN JAPAN