

Social-Feeds-Cookbook-2016
Social-Feeds-Cookbook-2016
Social-Feeds-Cookbook-2016

You also want an ePaper? Increase the reach of your titles
YUMPU automatically turns print PDFs into web optimized ePapers that Google loves.
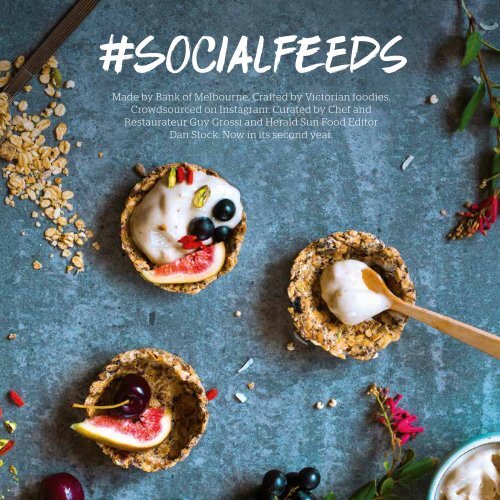
Made by Bank of Melbourne. Crafted by Victorian foodies.<br />
Crowdsourced on Instagram. Curated by Chef and<br />
Restaurateur Guy Grossi and Herald Sun Food Editor<br />
Dan Stock. Now in its second year.
Welcome to<br />
<strong>2016</strong><br />
Victoria loves food. It’s no secret. And at Bank of Melbourne, we<br />
believe Victoria’s home cooks are some of the world’s best. That’s<br />
why we started #socialfeeds – to compile the most delicious<br />
recipes from the kitchens of our great state into one crowdsourced<br />
cookbook. Now in its second year of showcasing the food that fuels<br />
Victoria’s Makers, #socialfeeds is your ultimate resource for the<br />
finest local flavours.<br />
Each and every recipe featured was entered by way of our<br />
#socialfeeds Instagram competition and selected by our expert<br />
curators: Chef and Restaurateur, Guy Grossi, and Herald Sun Food<br />
Editor, Dan Stock. As far as foodie ambassadors go, you couldn’t<br />
ask for a more qualified pair.<br />
#socialfeeds <strong>2016</strong> is about bringing the recipes of our home cooks to<br />
life, and we’re proud to be working with so many talented Victorian<br />
Makers. So, if you’re searching for the ultimate compilation of<br />
Victoria’s best home cooking, look no further. Bon appetit.<br />
Download your copy of the 2015 and <strong>2016</strong> #socialfeeds<br />
cookbooks at bankofmelbourne.com.au/socialfeeds
It was an absolute pleasure to help Bank of Melbourne select the<br />
best of the best homecooked dishes for this year’s #socialfeeds.<br />
I hope you enjoy all of the recipes here and that you were lucky<br />
enough to get along to one of our food trucks. If not, the recipes<br />
inside #socialfeeds <strong>2016</strong> should be enough to keep your<br />
tastebuds satisfied until next year.<br />
We all know Victoria is a foodie destination. But if you need proof,<br />
just take a look inside #socialfeeds <strong>2016</strong>. The book is chock full<br />
of the state’s best and most imaginative home cooking, and<br />
it’s been an absolute pleasure to work alongside Guy Grossi and<br />
the Bank of Melbourne to select our favourites. Here’s hoping<br />
all of the Victorian home cooks keep up the good work<br />
– I’m already looking forward to next year!<br />
Guy Grossi<br />
Chef, Restaurateur and Bank of Melbourne Customer<br />
Dan Stock<br />
Herald Sun Food Editor
FoOd Truck<br />
Food trucks are an institution across Victoria and this year we<br />
wanted to celebrate the talent of our Makers by bringing their<br />
recipes to life. Enter the #socialfeeds food truck.<br />
Stopping off at five Victorian locations over a two-week period,<br />
our food truck served up the dishes of seven of our #socialfeeds<br />
Makers, with catering extraordinaire Tommy Collins helping<br />
bring the food to life. Hungry foodies were able to roll up and<br />
have a tantalising taste at different locations across Victoria,<br />
including exclusive Melbourne Food & Wine Festival events.
ConTeNts<br />
Breakfast 10<br />
Snacks 26<br />
Mains 46<br />
Desserts 86
BreakfAst<br />
Huevos Rancheros 12<br />
Hashbrown Muffins 14<br />
Chia Pudding Smoothie 16<br />
Matcha Breakfast Bowl 18<br />
Blueberry Banana Whip 20<br />
Banana Pancake Stack 22<br />
Muesli & Fruit Tarts 24
Huevos RancHEROS<br />
By @dmattercooks<br />
Cooking difficulty: medium<br />
45 minutes (Huevos Rancheros) + overnight (chill)<br />
Serves 1<br />
“If you have a hangover or are just a craving a delicious weekend breakfast this is the<br />
dish for you. I suggest making a big batch of chilli the night before for dinner and using<br />
the leftovers the next morning, the flavours really develop with time.”<br />
Ingredients<br />
Method<br />
2 corn tortillas (I used La Tortilleria)<br />
1 big bunch of coriander<br />
1 jalapeno<br />
5 cherry tomatoes<br />
Leftover chilli, last night’s beef and<br />
bean chilli<br />
1 tbs home made or store bought<br />
hummus<br />
2 red onions<br />
2 limes<br />
Maker’s note<br />
12<br />
1 egg<br />
1 tsp cayenne pepper<br />
½ tbs parmesan<br />
1 tsp brown sugar<br />
2 tbs olive oil<br />
1 cup red wine<br />
1kg organic beef mince<br />
1 cup beef stock<br />
1 bag dry black beans<br />
1 splash red wine vinegar<br />
1 can of chipotle in adobo<br />
4 cloves garlic<br />
1 pinch of salt and pepper<br />
1 tinned tomatoes<br />
1 tsp ground cumin<br />
“I used the best tortillas in town from La Tortilleria in Kensington.”<br />
Beef and bean chilli – cook this the night<br />
before and eat for dinner.<br />
Wash and soak black beans overnight.<br />
Rinse then boil until soft but still tender.<br />
Chop 1 red onion and garlic.<br />
Heat pot (dutch oven) until oil is hot.<br />
Sauté salted onions and garlic until<br />
lightly brown. Add and brown beef mince.<br />
Add spices including cayenne pepper<br />
and chipotle, when mince has slightly<br />
caramelised sides add beans.<br />
Add canned tomatoes, wine and brown<br />
sugar. Mix through, reduce. At this<br />
point I like to add some stock or water if<br />
reduced too far.<br />
Remember to taste! Add more spices<br />
and heat if not fiery enough for you...<br />
No rules with this chilli! Feel the love<br />
and go with what you like.<br />
Cover and let simmer for about an<br />
hour. Keep tasting and add more stock<br />
or water as needed.<br />
Chop the coriander and dice the<br />
tomatoes, jalapeno and red onion.<br />
Heat tortillas in a cast iron pan.<br />
Fry the egg in butter and oil, over low<br />
heat. I tend to play with the heat to crisp<br />
the edges. To fry the perfect egg you<br />
don’t want yourpan too hot, you are<br />
almost poaching the egg in the oil and<br />
butter. When edges are crispy, drain on<br />
paper towel.<br />
Place heated tortillas on plate, spoon<br />
on the chilli. Place the fried egg on<br />
top. Arrange the chopped tomatoes,<br />
onion and jalapeno around the egg.<br />
Spoon on the homemade hummus<br />
(or store bought) sprinkle with coriander,<br />
parmesan and squeeze on some lime.<br />
Eat with your fingers and enjoy this<br />
fantastic breakfast.<br />
13
Baked HAsHBrown MufFiNS<br />
By @thespiceadventuress<br />
Cooking difficulty: easy<br />
45 minutes<br />
Makes 20 muffins<br />
“Who doesn’t love a good hashbrown… crispy, golden goodness that make our mornings<br />
brighter and delicious. But what could be better? Oven baked hashbrown muffins<br />
generously endowed with ham, parmesan and sundried tomatoes. Perfect for parties and<br />
perfect for lazy Sunday mornings!”<br />
Ingredients<br />
Method<br />
100g ham, chopped finely<br />
1.2kg potatoes, grated<br />
(any starchy variety)<br />
½ cup sundried tomatoes,<br />
chopped finely<br />
2 tbs parsley, finely chopped<br />
1 cup mozzarella, grated<br />
(or any melting cheese)<br />
Salt, to season<br />
Freshly milled black pepper, to season<br />
Sauté the ham on low heat until lightly browned. Keep aside.<br />
Pre–heat the oven to 160°C fan–forced (180°C for conventional).<br />
Wash the grated potatoes once or twice in cold water to remove excess starch.<br />
Squeeze out the excess water in small batches and place in a bowl.<br />
Add the ham (reserve a bit for garnish), cheese, sundried tomatoes and 1<br />
tablespoon parsley to the potatoes; season with salt and pepper. Mix well to<br />
combine.<br />
Oil the muffin tray well (even if it is nonstick); scoop about ½ cup of the potato mixture<br />
and place in each muffin well. Flatten the top lightly with the back of a spoon.<br />
Oven bake for about 20 – 25 minutes or until the top has taken a golden brown colour.<br />
Garnish with the remaining ham and parsley; serve warm.<br />
Maker’s note<br />
14<br />
“This recipe is all about cooking for your family with every day ingredients that<br />
can be sourced locally from your farmer’s market – two important aspects for a<br />
Victorian household.”
Chia PudDIng with<br />
BreakfAst SmoOTHIE<br />
By @_.kimmy_._<br />
Cooking difficulty: easy<br />
30 minutes or overnight<br />
Serves 2<br />
“I love this dish because it’s like eating a dessert for breakfast! It’s creamy, it’s sweet, but<br />
completely healthy and filling. It’s easy to make and you can use any fruit you have on hand.”<br />
Ingredients<br />
Method<br />
Nut Crumble<br />
½ cup of almonds<br />
2 tbs coconut<br />
2 tsp coconut oil, melted<br />
1 tsp rice malt syrup<br />
Chia Pudding<br />
4 tbs chia seeds<br />
400ml almond / coconut milk<br />
Smoothie<br />
2 frozen bananas<br />
1 cup frozen berries<br />
(blueberries / rasberries)<br />
2 cups almond / coconut milk<br />
2 tsp maca powder<br />
¼ cup almonds<br />
To make the nut crumble put all the ingredients into a bowl and mix.<br />
Place on a tray lined with baking paper into an oven at 180°C.<br />
Bake for 5 minutes or until golden. This can happen fast so don’t walk away.<br />
Once cooled, store in an airtight container.<br />
To make the chai pudding, place the chai seeds and milk of your choice into a<br />
bowl and stir. Cover and place into the fridge for 30 minutes or overnight is best<br />
(I like to make my pudding in a glass jar, shake vigorously for 1 minute then put<br />
straight in the fridge).<br />
To make the smoothie, place all ingredients into a blender and process until smooth.<br />
To serve, place the chia pudding into a glass. Place smoothie on top of the pudding.<br />
Top with nut crumble and fresh fruit of your choice.<br />
Don’t think that this is just a dish you can only eat at breakfast, I enjoy it at any<br />
time of the day.<br />
17
MatchA BreakfAsT Bowl<br />
By @naturomedico<br />
Cooking difficulty: easy<br />
10 minutes<br />
Serves 1<br />
“Breakfast is often skipped due to not having enough time but this recipe stops time<br />
from being an excuse. This smoothie bowl is a quick, delicious and nutrition–packed<br />
solution to your early morning hunger pains.”<br />
Ingredients<br />
Method<br />
1 heaped tbs flaxseeds<br />
1 tsp chia seeds<br />
1 tsp Matcha powder<br />
1 heaped tbs coconut flakes<br />
1 cup frozen blueberries<br />
½ cup frozen banana<br />
¾ cup plant–based milk of your choice<br />
i.e. coconut milk, almond milk<br />
Place the flaxseeds, chia seeds, Matcha powder and coconut flakes into your blender<br />
or food processor and blitz until they represent rough grains of sand then transfer<br />
them to a bowl. This is your smoothie bowl topping.<br />
Place the blueberries, banana and milk into the same blender or food processor and<br />
blitz them together for approximately 1 minute or until thick and smooth like soft<br />
serve. Add extra liquid in small amounts at a time to thin if you need to.<br />
Assemble the breakfast bowl by pouring the smoothie into a deep breakfast bowl<br />
and top with the seed and matcha mix.<br />
Before eating, mix everything together quickly with a spoon and enjoy!<br />
Maker’s note<br />
“Melbourne–made, Matcha powder by Matcha Maiden makes this breakfast bowl<br />
authentically local.”<br />
18
BlueBErRy BanANa Whip<br />
By @lilseats<br />
Cooking difficulty: easy<br />
5 minutes<br />
Serves 1<br />
“A delicious, healthy and fruity alternative to cereal or toast in the morning for<br />
breakfast. This is my favourite breakfast in summer as it keeps me cool and is<br />
still highly satisfying. Serve it in a bowl or jar and have a play with your favourite<br />
toppings, the options are endless.”<br />
Ingredients<br />
Method<br />
2 (200g) frozen ripe bananas (frozen<br />
for at least 6 hours or overnight)<br />
¼ cup frozen blueberries<br />
¼ cup coconut water<br />
1 tsp chia seeds<br />
1 tbs coconut flakes, to decorate<br />
Handful fresh raspberries,<br />
strawberries, sliced banana (optional)<br />
The night before, throw your very ripe (spotty) bananas in the freezer.<br />
In the morning, chop up the bananas into 5 cm chunks and pop into a high speed<br />
blender with the frozen blueberries.<br />
Add the coconut water and chia seeds and blend. You may need to scrape down the<br />
sides to get rid of all the lumps.<br />
Keep blending until the consistency is creamy and smooth.<br />
Transfer to a jar or bowl and top with coconut flakes and any fresh fruit.<br />
Enjoy!<br />
Maker’s note<br />
“Smoothie bowls are popping up more and more on Melbourne cafe menus and<br />
this is my take on it. Somewhere between ice cream and a smoothie, it is sure to<br />
hit the spot with that sweet tooth and it is a lot easier on the wallet!”<br />
21
FlourLesS BanANa<br />
PancAke StaCKs<br />
By @tabletopaper<br />
Cooking difficulty: easy<br />
30 minutes<br />
Serves 2<br />
“Pancakes don’t need to be a treat or reserved for weekends – these pancakes are not only<br />
healthy, but contain ingredients that are typically found in most pantries. A bit of patience<br />
is required to make these but keep in mind that you can store any leftover pancakes in the<br />
fridge for a delicious, guilt–free snack!”<br />
Ingredients<br />
Method<br />
2 eggs<br />
3 medium sized bananas (ripe)<br />
3 tbs butter<br />
1 ½ tsp cinnamon<br />
Pinch bicarb soda<br />
1 tsp vanilla extract, optional<br />
Suggested Toppings<br />
Maple syrup<br />
Seasonal fruits<br />
1 tsp cinnamon<br />
Combine all ingredients in a blender and pulse a few times – the mixture does not<br />
need to be completely blended until smooth.<br />
Tip: if you do not have a blender, this can be done using a large mixing bowl by first<br />
mashing the bananas and then adding the remaining ingredients.<br />
Once the mixture has been blended, transfer to a bowl and heat a large non–stick pan<br />
with just a little butter.<br />
When the pan is heated, carefully spoon some of the mixture to the pan to form small<br />
pancakes, leaving around a 2 – 3cm gap between each pancake.<br />
Tip: as there is no flour in this mixture, the mixture can spread out quite quickly so it’s<br />
best to keep the pancakes small.<br />
Continue to cook the pancakes at low heat for several minutes, once you notice the top<br />
and edges of the pancakes starting to bubble, flip the pancakes.<br />
Once all the pancakes have cooked, stack and drizzle with maple syrup, cinnamon<br />
(optional) and seasonal fruits.<br />
22
Muesli and Fruit Ta RTs<br />
By @rainbownourishments<br />
Cooking difficulty: easy<br />
45 minutes<br />
Serves 4<br />
“These muesli and fruit tarts are perfect for bressert, which are basically meals that are<br />
healthy and delicious enough to enjoy for breakfast AND dessert. The tarts are moreish,<br />
ridiculously easy to make and so easy to customise! There’s something so satisfying<br />
about the combination of crunchy muesli and a creamy filling such as banana ice<br />
cream or yoghurt!”<br />
Ingredients<br />
Method<br />
1 cup Table of Plenty fig and plum<br />
muesli or any other muesli<br />
¼ cup mashed banana<br />
¼ cup coconut butter, softened<br />
Berries, or filling of your choice<br />
1 banana, frozen (break the banana<br />
into chunks before freezing)<br />
Coconut yoghurt<br />
Any other fruit, nuts or seeds<br />
Line 4 cupcake moulds with baking paper or cupcake liners.<br />
Pour muesli into a dry fry pan over low heat. Stir muesli until golden and remove<br />
from heat. Wait until muesli has cooled down.<br />
Add mashed banana and coconut butter to a medium bowl and mix thoroughly.<br />
Add muesli into bowl and mix until all muesli is coated.<br />
Press muesli mixture into cupcake moulds and put in freezer for at least 20 minutes.<br />
Meanwhile, make ‘banana ice cream’ by adding frozen banana chunks to a food<br />
processor and blending until creamy. You may need to add a dash of water,<br />
plant–based milk and / or scrape down the sides of the food processor to help make<br />
the ice cream. Prepare remaining toppings.<br />
Remove tart cases from the freezer. Scoop banana ice cream into each tart and add<br />
other toppings as desired. Eat immediately.<br />
Tip: Make the tarts the night before if you want them for breakfast!<br />
25
snackS<br />
Pork Sliders 28<br />
Pork Gyoza 30<br />
Chicken Tacos 32<br />
Paleo Asian Fried Wings 34<br />
Okonomiyaki 36<br />
Zucchini Bruschetta 38<br />
Panelle 40<br />
Cauliflower Salad 42<br />
Chicken Coleslaw 44
Pork SlideRs<br />
By @ilovefoodlove<br />
Cooking difficulty: easy<br />
4 ½ hours<br />
Makes 30 sliders<br />
“There are few things I love more than throwing a party. These days, all of the fun is<br />
mostly centred around the little people in our lives, but not everything. Feeding people<br />
is one of my great joys in life and these pork sliders make it so easy to satisfy both the<br />
cook, and the crowd. Just don’t forget to pass around the crackling, and have some cold<br />
beers at the ready too.”<br />
Ingredients<br />
Method<br />
2.5 – 3kg boneless pork shoulder,<br />
preferably organic, scored<br />
2 cloves garlic, finely chopped<br />
1 tsp smoked paprika<br />
2 tsp ground coriander<br />
1 tsp ground cumin<br />
1 tsp fennel seeds<br />
1 tsp salt, plus extra for the skin<br />
2 tbs olive oil<br />
2 bay leaves<br />
30 brioche slider buns<br />
Apple and Radish Slaw<br />
500g white cabbage<br />
2 granny smith apples,<br />
cut in half and cored<br />
6 small radishes<br />
4 spring onions, thinly sliced<br />
½ cup flat leaf parsley,<br />
roughly chopped<br />
Sea salt and pepper<br />
Dressing<br />
1 heaped tbs whole egg mayonnaise<br />
1 tbs white wine vinegar<br />
3 tbs extra virgin olive oil<br />
1 tsp dijon mustard<br />
A pinch of sugar<br />
Sea salt and pepper<br />
Pre–heat your oven to 210°C.<br />
Rub the pork skin with a drizzle of olive<br />
oil, season with salt and place skin–side<br />
down in a heavy–based roasting pan. Mix<br />
together the garlic and spices with the oil<br />
and rub all over the meat side.<br />
Place the pork in the oven and cook<br />
for 30 to 40 minutes or until the skin is<br />
golden and crispy. (I’ve found this is by far<br />
the best way to achieve a super crunchy<br />
crackling). Carefully turn the pork over,<br />
sneak the bay leaves in under the meat<br />
and place back in the oven.<br />
Turn the oven down to 130°C and forget<br />
about it for another four hours when the<br />
meat will be meltingly tender.<br />
When it’s done, remove the crackling<br />
and cut into pieces, set aside. Using two<br />
forks pull apart the meat into small pieces<br />
while discarding any remaining fat that<br />
hasn’t rendered down. Season with salt<br />
and freshly ground black pepper, cover<br />
with foil and keep warm until ready to<br />
assemble the sliders.<br />
For the slaw, using a mandolin or great<br />
knife skills, thinly slice the cabbage,<br />
apples and radishes. Place them in a large<br />
bowl with the spring onions and parsley.<br />
For the dressing, whisk together all of<br />
the dressing ingredients and season<br />
with salt and pepper. Pour over the slaw<br />
and toss together.<br />
To serve, cut your buns in half and fill them<br />
generously with the pork and top with<br />
some apple and radish slaw. Pile the sliders<br />
up on a big tray with a bowl of that amazing<br />
crackling on the side, and make sure you<br />
save some for yourself too.<br />
Maker’s note<br />
28<br />
“Gathering our family and friends together for good food and good times is what we<br />
love to embrace and celebrate in this convivial city. This is how I do it.”<br />
29
JapAnesE POrk Gyoza<br />
By @isobelgordon<br />
Cooking difficulty: easy<br />
1 hour<br />
Makes 24 gyoza<br />
“After recently returning from living in Japan and basically having gyoza on tap for nine<br />
months, I needed to create my own recipe in order to fill the void. This recipe has classic<br />
Japanese flavours of sesame, soy, mirin and sake put into traditional pork gyoza to bring<br />
back memories of crispy, delicious, cheap, ramen-accompanying gyoza. Enjoy!”<br />
Ingredients<br />
Method<br />
180g chinese cabbage, other varieties<br />
are easily substituted<br />
1 tbs ginger<br />
½ spring onion<br />
125g minced pork<br />
2 cloves garlic<br />
1 tbs soy sauce<br />
½ tsp sugar<br />
2 tsp mirin<br />
2 tsp sesame oil<br />
2 tsp sake, optional<br />
24 gyoza wrappers<br />
4 tbs canola oil<br />
¼ cup water<br />
1 tbs soy sauce<br />
1 tbs rice vinegar<br />
2 shakes Tabasco<br />
30<br />
Thinly slice the cabbage. In a pan with a small amount of water, steam for about<br />
5 minutes or until soft. Drain and leave to cool.<br />
Chop the ginger and spring onion finely.<br />
In a small bowl place the pork. Add the ginger and spring onion. Crush the garlic into<br />
the mix. Add soy sauce, sugar, mirin, sesame oil and sake.<br />
With the cooled cabbage, squeeze it in between your hands or against the drainer to<br />
thoroughly remove excess water. Add to pork mix and stir in with fork.<br />
Separate one wrapper and wet the edges with some water. Place 1 heaped teaspoon<br />
of pork mixture in the centre. Bring two opposite sides together so it looks like a taco.<br />
To close the right side of the gyoza, press together the top centre point and with<br />
the side of the gyoza facing away from you, begin pleating from the centre out. It’s<br />
important that all the pleats face towards the centre. As you pleat, pinch them to the<br />
non–pleated wrapper side that is closest to you, forming a tight seal. Repeat on the<br />
other side and continue for the rest of the gyoza.<br />
Heat 1 – 2 tablespoons of oil in a pan. Place 2 rows of 6 gyoza, pleated side up in the pan.<br />
Fry for 1 to 2 minutes or until golden. Add ¼ cup of water, cover and steam for 5 minutes.<br />
Mix together soy, rice vinegar and Tabasco.<br />
When 5 minutes is up, lift lid and let excess water evaporate. Remove from pan and<br />
serve crispy side up with the dipping sauce.
Korean fRiEd ChiCken Tacos<br />
By @kristina_nina_<br />
Cooking difficulty: medium<br />
45 minutes (cooking) + 4 hours (marinating)<br />
Makes 18 mini tacos<br />
“I first made this dish as a Korean fried chicken slider, but one day I couldn’t find my<br />
favourite slider buns, and opted for flour tortillas and ended up with a Korean fried<br />
chicken taco! Either way is equally delicious, hope you have a shot at making it yourself.”<br />
Ingredients<br />
Method<br />
600ml buttermilk<br />
12 chicken tenderloins,<br />
cut into 3 equal sized pieces<br />
¼ white cabbage, very finely shredded<br />
½ tsp white sugar<br />
6 tbs good quality whole<br />
egg mayonnaise<br />
3 tbs Sriracha sauce<br />
¼ cup cabbage kimchi, finely chopped<br />
4 stems spring onion, green part only,<br />
finely sliced<br />
2 cups plain flour, sifted<br />
2 cups corn or potato starch<br />
2 tsp fine salt<br />
1 tsp sweet Hungarian paprika<br />
18 mini flour tortillas, 10cm in diameter<br />
(cut edges to make smaller if needed)<br />
3 cups vegetable oil<br />
Place chicken pieces into a bowl with the buttermilk. Ensure all pieces are covered<br />
with buttermilk, cover and leave in the fridge for a minimum of 4 hours or overnight<br />
(maximum 24 hours).<br />
Place finely shredded cabbage in a bowl with white sugar and a pinch of salt. Mix well<br />
and leave to sit for 20 to 30 minutes, turning every 5 minutes.<br />
Meanwhile, mix mayonnaise and Sriracha sauce together and set aside.<br />
Finely slice spring onion and chop kimchi and set aside separately.<br />
Mix plain flour, corn starch, salt and paprika in a large bowl and mix well.<br />
Remove chicken from buttermilk and coat well in the flour mix by placing a few<br />
pieces at a time and coating with one hand. Use your other hand to set aside coated<br />
chicken and repeat until all chicken is coated.<br />
Heat oil in a medium size saucepan on medium heat and fry chicken without<br />
crowding the pan, until gorgeously golden brown and crispy. Remove, then cool in a<br />
metal mesh strainer. Repeat until all chicken is cooked.<br />
To assemble, heat tortillas on a dry non stick pan, until soft and pliable<br />
(10 to 20 seconds).<br />
Place on each tortilla: 1 ½ tsp of mayonaise, as much kimchi as you like, 2 pieces of<br />
chicken, spring onions and cabbage, then fold and enjoy!<br />
32
Paleo Asian Fried WIngs<br />
By @marvellephotography_food<br />
Cooking difficulty: easy<br />
1 day (preparation) + 15 minutes (cooking)<br />
Serves 3 – 4<br />
“In the tyrannical grip of a Paleo diet challenge, my desire one Friday night for my old<br />
friend, the fried chicken wing, one Friday night was just too strong. So, armed with a<br />
pioneering spirit and a deep fryer, I set out to invent a low carb, no sugar, no wheat, no<br />
gluten, paleo compliant and overall “guilt” free but sinful treat...”<br />
Ingredients<br />
500g chicken wings, skin on<br />
500ml coconut milk<br />
Equal parts coconut and tapioca flours<br />
2 sticks lemongrass, bruised<br />
2 tbs kaffir lime leaves finely shredded<br />
Thumb sized knob ginger, peeled<br />
2 cloves garlic, crushed but still whole<br />
(whacked with a spoon!)<br />
2 tbs chilli powder, to taste (depending<br />
on how hot you like it!)<br />
2 tbs garlic powder<br />
2 tbs ginger powder<br />
2 tsp salt<br />
1 tsp pepper<br />
Half a lime, lime zest<br />
1 – 2L vegetable oil for deep frying (or<br />
coconut oil to keep it paleo)<br />
3 tbs good quality store bought or home<br />
made egg mayonnaise<br />
1 tbs Sriracha chilli sauce (or minced<br />
chilli to keep it paleo)<br />
Fresh chilli and coriander, to serve<br />
Lime wedges, to serve<br />
Method<br />
Place coconut milk, lemongrass, kaffir<br />
lime leaves, ginger, garlic into a large<br />
container with wings and marinate,<br />
covered overnight in the fridge.<br />
Combine flours, chilli, garlic, ginger, salt,<br />
pepper and zest in a large bowl.<br />
Deep fry in batches of 3 or 4 (to stop them<br />
sticking together) in oil on 170°C for 15<br />
minutes or until cooked through, golden<br />
brown and crunchy (to keep it paleo,<br />
shallow fry in a few inches<br />
of coconut oil or duck fat on a<br />
medium heat).<br />
Combine mayonnaise and Sriracha chilli<br />
sauce and serve with a sprinkling of fresh<br />
coriander, chilli and lime wedges.<br />
Shake off excess coconut milk from each<br />
chicken wing and coat in flour mixture,<br />
shaking off any excess flour.<br />
Drain and rest for 5 to 10 minutes on<br />
paper towel to absorb excess oil.<br />
Maker’s note<br />
34<br />
“Melbourne is currently suffering from a delicious fried chicken epidemic! But how<br />
would the rest of Australia (aka Bondi) be able to enjoy this blubbery culinary marvel<br />
with the demands of Paleo, Crossfit and beach–side workouts?! Thusly, as a community<br />
minded Melburnian hipster, I simply saw it as my duty to try and help those in need.”<br />
35
OkOnomiyakI<br />
By @gundeeptrouble<br />
Cooking difficulty: easy<br />
45 minutes<br />
Serves 4 generously<br />
“This recipe for Okonomiyaki is a great base to build on, you can adjust it to your liking by<br />
adding ingredients such as grated cheese, prawns, octopus and sliced pork belly. Using<br />
Otafuku and Japanese mayonnaise are absolutely crucial to get an authentic taste!”<br />
Ingredients<br />
Method<br />
½ head (500g) white cabbage,<br />
shredded<br />
2 cups plain flour<br />
½ cup corn flour<br />
1 ½ cups chicken stock<br />
2 eggs<br />
½ cup Otafuku (Okinomiyaki) sauce<br />
(available at Asian grocery stores)<br />
½ cup Japanese mayonnaise<br />
¾ cup spring onions, finely sliced<br />
Bonito flakes<br />
Optional toppings such as grated<br />
cheese, prawns, cooked octopus,<br />
thinly sliced pork belly / bacon<br />
To make the batter, in a large bowl combine the plain flour, corn flour, chicken stock<br />
and eggs and keep in the fridge for 30 minutes.<br />
Mix the cabbage into the batter. At this point, mix in any additional toppings.<br />
Heat a non–stick pan or barbeque hot plate and lightly oil before spreading a quarter<br />
of the mixture onto the hot pan. Cook on a medium heat for 5 – 7 minutes, or until it<br />
is lightly brown on the base. If using pork belly or bacon, arrange the strips on the<br />
uncooked side. Carefully turn over the pancake, using two spatulas if necessary and<br />
continue to cook until the pancake is cooked through.<br />
Drizzle pancake with Otafuku sauce and Japanese mayonnaise, and sprinkle with<br />
spring onion and bonito flakes before serving.<br />
Maker’s note<br />
36<br />
“If you know where to look, you can get a close to authentic Japanese dining<br />
experience in Melbourne. They range from small, hole in the wall eateries run by<br />
a small family, all the way to large izakaya style restaurants complete with iPads<br />
to order from.”
ZucChinI Br UscHet Ta<br />
By @kyky_27<br />
Cooking difficulty: easy<br />
15 minutes<br />
Serves 1<br />
“This recipe is the perfect choice for a quick yet healthy meal on a warm Australian<br />
evening. The ingredients are all in season and at their peak in flavour which makes this<br />
dish a little bit special during summer… and what better to be able to pick the zucchini<br />
and herbs right out of my little veggie patch!”<br />
Ingredients<br />
Method<br />
2 slices sourdough toast<br />
½ cup Greek yogurt<br />
1 large pinch cumin powder<br />
1 small pinch paprika<br />
2 small garlic cloves<br />
1 zucchini<br />
Lemon zest from ½ lemon<br />
¼ cup peas – fresh or frozen<br />
1 tbs honey roasted cashew nuts<br />
1 tsp olive oil<br />
1 spring onion<br />
½ tsp toasted sesame seeds<br />
Freshly ground sea salt and pepper<br />
Fresh mint and basil leaves, to serve<br />
Mix together the yoghurt, cumin, paprika, 1 crushed garlic clove and salt and<br />
pepper to taste. Set aside.<br />
Peel your zucchini into long strips, and toss in the oil until glossy. Place onto a nice<br />
hot griddle pan until char strips form.<br />
Toast your sourdough bread. Whilst still hot, rub the remaining garlic clove over the<br />
surface to infuse the flavour.<br />
Spread the sourdough with a good amount of the yoghurt then top with the zucchini,<br />
peas, spring onion, lemon zest and finish by sprinkling over the sesame seeds,<br />
roughly crushed cashews and herbs.<br />
Crack some pepper and sprinkle salt on top before serving.<br />
Maker’s note<br />
“The zucchini was grown and harvested right out of my backyard, and with a visit<br />
to my local farmers market I was able to source some beautiful local sourdough,<br />
olive oil and fresh honey roasted cashews.”<br />
39
PanelLE<br />
By @louisebgigovic<br />
Cooking difficulty: medium<br />
50 minutes<br />
Makes 30 – 40 panelle<br />
Maker’s note<br />
“This recipe for chickpea fritters (panelle) adds some summer freshness to a traditional<br />
street food originating from Palermo with readily available Victorian produce.”<br />
“Mamma Lucia Ricotta (Weston St,<br />
Brunswick), produce from garden or<br />
Melbourne Farmer’s Markets, Cobram<br />
Estate EVOO.”<br />
Ingredients<br />
Method<br />
½ cup European style yoghurt<br />
1 bunch basil<br />
1 large ripe tomato, diced<br />
Red wine vinegar<br />
200g chickpea flour<br />
500ml water<br />
½ cup ricotta<br />
Extra virgin olive oil<br />
Lemon wedges<br />
Salt and pepper<br />
For the basil yoghurt, blend the yoghurt and a generous handful of basil in a food<br />
processor until light green in colour and only specks of the basil remain. Transfer to a<br />
container and refrigerate.<br />
For the tomato salsa, blend ¼ cup of olive oil and a small handful of basil; add salt and<br />
vinegar to taste. Transfer to a dish, stir through tomatoes and set aside.<br />
For the panelle, salt the water with two tsp of salt. Put the chickpea flour and a<br />
pinch of ground pepper into a medium saucepan and whisk in the cold water a<br />
little at a time to avoid lumps.<br />
Cook over a low flame for 15 minutes, whisking continuously. If whisking becomes<br />
difficult after the mixture has become quite thick stir with a wooden spoon.<br />
It is vital to work quickly at this point. Transfer mixture to an oiled work surface<br />
such as marble or laminate (in absence of these use plates) and spread it as thinly as<br />
possible using a wet spatula and allow to completely cool. Cut away the messy edges<br />
with a knife and then cut the dough into squares, then triangles.<br />
To fry the panelle, pour enough extra virgin olive oil in a heavy skillet to cover the<br />
bottom with 2 to 3cm of oil, and set over medium heat. When the oil is hot, fry the<br />
panelle in batches until both sides are crisp and golden; about 2 minutes on either<br />
side. Transfer to paper towels and lightly salt the panelle as you go.<br />
Arrange on a large platter with lemon wedges, or smaller plates for individual<br />
servings, and scatter the tomato salsa, ricotta and basil yoghurt over the top.<br />
40<br />
Panelle are best served hot but if you are not eating them immediately serve<br />
accompaniments on the side so they remain crisp.
CaulifLower SAlad<br />
By @wholesomedaily<br />
Cooking difficulty: easy<br />
30 minutes<br />
Serves 4 – 6<br />
“A combination of fresh herbs, avocado and the versatility of cauliflower paired with<br />
pomegranate arils to add a delicious burst of flavour, this salad is a quick nourishing go–to<br />
meal or side dish.”<br />
Ingredients<br />
Method<br />
Salad<br />
1 head of cauliflower<br />
2 avocados<br />
½ cup freeze dried blueberries (you<br />
could also use currants or goji berries)<br />
1 cup fresh pomegranate arils<br />
½ cup activated walnuts<br />
1 cup fresh chopped mint<br />
1 cup fresh chopped flat leaf parsley<br />
1 red onion<br />
2 cups baby spinach<br />
Chop all the stalks off the cauliflower then blitz in food processor until it resembles<br />
rice sized pieces. Set aside.<br />
Chop your herbs finely and mix through cauliflower.<br />
Add your chopped red onion, walnuts, baby spinach and stir through.<br />
Add remaining ingredients walnuts, dried blueberries and pomegranate arils.<br />
Leave some pomegranate and avocado for decoration.<br />
To make the dressing, combine all ingredients in a high speed food processor and<br />
add your dressing prior to serving.<br />
Lastly add more avocado and pomegranate arils for serving.<br />
Dressing<br />
4 tbs avocado oil<br />
2 tbs apple cider vinegar<br />
1 lemon<br />
1 clove of garlic, crushed<br />
1 tsp Himalyan salt<br />
1 tsp black pepper<br />
Maker’s note<br />
“Victoria is one of the largest producers<br />
of cauliflower!”<br />
43
VietnamEse ChiCkEN Coles Law<br />
By @feedmeichi<br />
Cooking difficulty: easy<br />
45 minutes<br />
Serves 6<br />
“I grew up eating my mum’s constantly changing variations of this salad so it’s like<br />
comfort food to me. The dressing in this recipe is what pulls everything together and,<br />
just like how my mum and my grandma used to make it, you have to keep tasting to get<br />
the right balance of flavours. We used to always have a jar of this in our fridge, ready to<br />
use as a dipping sauce for spring rolls or to drizzle over a steak on rice.”<br />
Ingredients<br />
Pickled Carrots<br />
1 large carrot, peeled<br />
¼ cup caster sugar<br />
⅓ cup water<br />
⅓ cup white vinegar<br />
½ tsp salt<br />
Dressing<br />
3 tbs good quality fish sauce<br />
3 garlic cloves<br />
1 – 2 birds eye chilli<br />
2 – 3 tbs white vinegar<br />
6 tbs water<br />
Maker’s note<br />
Salad<br />
5 medium sized chicken drumsticks<br />
¼ purple cabbage, finely shredded<br />
150g rice vermicelli<br />
1 cup coriander, roughly chopped<br />
½ cup Vietnamese mint, roughly torn<br />
½ cup Thai basil, roughly torn<br />
2 spring onions, thinly sliced<br />
Toasted peanuts, roughly crushed<br />
Fried shallots<br />
Pickled Radishes<br />
2 tbs vegetable oil<br />
3 small radishes, ends removed and<br />
thinly sliced with a mandolin<br />
3 tbs caster sugar<br />
4 tbs rice wine vinegar<br />
3 tbs water<br />
“Vietnamese food is one of the staples of the Melbourne food scene – it’s always easily<br />
found around town, good value and rewards you with tasty, fresh flavours.”<br />
Method<br />
The pickles need to be made a few hours<br />
beforehand.<br />
To make the pickled radish: mix sugar,<br />
rice wine vinegar and water together until<br />
the sugar is dissolved. Add radishes to the<br />
mixture and refrigerate until needed.<br />
To make pickled carrots: using a<br />
vegetable peeler, peel the carrots to<br />
create long ribbons. In a bowl, dissolve<br />
salt and sugar in the white vinegar and<br />
then submerge carrot ribbons in the<br />
pickling mixture, refrigerate until needed.<br />
To cook chicken: place chicken<br />
drumsticks in a pot of cold water and<br />
bring to just under boiling. Turn heat<br />
down immediately to low and simmer<br />
for 5 minutes. Take the pot off the stove<br />
and set aside with the lid on and the<br />
chicken will continue to cook. Remove<br />
a drumstick after 10 minutes and check<br />
to see if it’s cooked through. Once ready,<br />
remove chicken drumsticks and set aside.<br />
When the chicken has cooled enough to<br />
handle, remove meat from the bone and<br />
tear into large pieces.<br />
To make dressing: using a pestle, crush<br />
the garlic and chilli in a mortar. Add fish<br />
sauce, sugar, lemon juice and water – stir<br />
and adjust sauce by adding extra fish<br />
sauce, sugar and lemon juice to get the<br />
right balance of sweet, salty and sour.<br />
To cook vermicelli: place the noodles in<br />
a large bowl and cover with boiling water.<br />
Place a lid on top for 5 minutes or until<br />
the noodles just soften. Once noodles are<br />
ready, drain and refresh with cold water<br />
before setting aside.<br />
To assemble salad: drain the pickled<br />
radish and carrot and add to a large salad<br />
bowl with cabbage, herbs, vermicelli<br />
and chicken. Sprinkle a few tablespoons<br />
of dressing and mix the ingredients<br />
thoroughly. Sprinkle peanuts and shallots<br />
over the salad and drizzle more dressing<br />
over the top. Toss well before serving.<br />
44<br />
45
Mains<br />
Chickpeas & Eggplant 48<br />
Beef Cheeks 50<br />
Slow Cooked Duck Leg 54<br />
Chilli Pan Mee 56<br />
Ma Po Chicken 60<br />
Hendricks Cured Salmon 62<br />
Hoppi Scallopini 64<br />
Ground Pork 68<br />
Chicken Curry 70<br />
Braised Chicken 72<br />
Duck Vegetable Salad 74<br />
Chilli Carbonara 78<br />
Cotoletta with Sage 80<br />
Linguine Mare 82<br />
Chilli Prawn Spaghetti 84
ChiCkpeas And EgGPlaNt<br />
By @libertybrowne<br />
Cooking difficulty: easy<br />
25 minutes<br />
Serves 4<br />
“This easy recipe is one of my favourite weeknight meals. I think chickpeas and<br />
eggplant are a match made in heaven, and the preserved lemon enhances the flavour<br />
with an aromatic citrus burst.”<br />
Ingredients<br />
Method<br />
350g eggplant, cut roughly into<br />
2cm pieces<br />
3 tbs olive oil, plus more to serve<br />
150g onion, roughly chopped<br />
1 tbs preserved lemon rind, rinsed and<br />
finely chopped (plus more to serve)<br />
2 garlic cloves, finely chopped<br />
1 small bunch of coriander, stems<br />
finely chopped and leaves reserved<br />
¼ tsp red chilli flakes (or more if<br />
desired)<br />
3 tsp ground cumin<br />
2 tsp ground coriander<br />
2 tsp sweet paprika<br />
½ tsp sea salt (plus more to taste)<br />
2 400g tins of crushed tomatoes<br />
240g or 1 ½ cups cooked chickpeas<br />
In a fry pan over high heat, cook the eggplant in 2 tablespoons of the olive oil for 5<br />
minutes until mostly cooked. Then add the onion and 1 more tbs of oil and cook for a<br />
further 2 minutes, until golden and the eggplant is cooked through.<br />
Add the preserved lemon rind, garlic, coriander stems, spices, and salt, and cook for<br />
another 30 seconds to 1 minute or until fragrant, before adding the tomatoes and<br />
chickpeas. Bring to boil and then lower to a simmer for 10 minutes. Taste and add<br />
additional salt, if desired.<br />
Finish with a good drizzle of olive oil, more preserved lemon and the reserved<br />
coriander leaves. Serve with flat breads, roasted potatoes, your favourite cooked<br />
grain, or as part of a Moroccan-style spread-<br />
Maker’s note<br />
48<br />
“This a seasonal recipe inspired by Victoria’s strong multicultural influence, part of<br />
what makes living and dining out in Melbourne so great! Lemons are grown all over<br />
Melbourne’s backyards, and preserving them is an exciting way to use them year round.”
BeEf CheEks with PolenTa,<br />
MushroOMS and HAzelNUtS<br />
By @aliceanddave<br />
Cooking difficulty: medium<br />
8 hours<br />
Serves 4 – 6<br />
“We love this recipe because it’s all about flavour. There’s no fancy techniques, it’s just<br />
about treating beautiful produce the right way and then enjoying it with wonderful<br />
friends. That’s what we love most about cooking.”<br />
Ingredients<br />
Stock<br />
2.5kg beef bones (we like marrow<br />
bones the best)<br />
3 carrots, roughly chopped<br />
5 celery sticks, roughly chopped<br />
2 onions, roughly chopped<br />
6 cloves of garlic<br />
1 large bouquet of rosemary,<br />
thyme and parsley stalks<br />
3 bay leaves<br />
Beef Cheeks<br />
4 beef cheeks<br />
1 onion, diced<br />
1 carrot, diced<br />
2 celery sticks, diced<br />
750ml red wine<br />
2 bay leaves<br />
A few sprigs of rosemary and thyme<br />
1 tsp peppercorns<br />
The Rest<br />
1 cup polenta<br />
2 cups milk<br />
2 cups water<br />
½ cup grated parmesan<br />
1 tbs butter<br />
1 tsp cornflour<br />
4 large king brown mushrooms,<br />
sliced lengthways<br />
100g Enoki mushrooms<br />
½ cup hazelnuts<br />
Salt and pepper<br />
Vegetable oil<br />
50
BeEf CheEks with PolenTa,<br />
MushroOMS and HAzelNUtS<br />
In the same pan, brown off the celery, carrot and onions until<br />
slightly soft.<br />
Place the beef cheeks and vegetable mixture in a large<br />
roasting dish or casserole dish. Cover with 1.5L of the stock you<br />
made and the wine. Add to the liquid the bay leaves, thyme,<br />
peppercorns, rosemary and salt. (You can cover at this stage and<br />
rest overnight in the fridge for extra flavour).<br />
Eating time! Pop the polenta on the plate. Top with a beef<br />
cheek (we sliced ours in half because it looks pretty). Drizzle<br />
with a generous amount of sauce. Finish with hazelnuts, king<br />
brown and enoki mushrooms and some fresh thyme leaves.<br />
P.S. A glass of red wine is definitely deserved with this after all<br />
that cooking!<br />
Place in an oven heated to 140°C. Cooked covered for 2<br />
hours then uncover and continue cooking turning every 30<br />
minutes (this will give a sticky coating on the cheeks). They<br />
will take about 4 hours in total to cook, depending on the size<br />
of your beef cheeks.<br />
While the cheeks are cooking pop the hazelnuts on a roasting<br />
tray and place in the oven for about 15 minutes or until the shells<br />
start to come off. Put aside ready to serve.<br />
Maker’s note<br />
“Sometimes in Melbourne in winter (or summer for that<br />
matter) you just want a dish that makes you feel warm and<br />
cozy. This one does just that. Perfect with a glass of red on the<br />
couch whilst watching the footy (go Tigers).”<br />
52<br />
Method<br />
First of all you need to make your stock. You can<br />
cheat and buy stock if you’re feeling lazy but<br />
homemade stock really makes a difference. Heat<br />
your oven to 220°C. Roast your marrow bones in a<br />
roasting pan, turning occasionally until browned<br />
(about 30 minutes).<br />
Add the celery, carrot, onion and garlic to the<br />
roasting dish with the bones and roast for a further<br />
20 minutes or until the vegetables are brown.<br />
Put the vegetables and bone mixture into a large<br />
stockpot (try to get all the good bits stuck to the<br />
bottom of the pan too) and then cover with cold<br />
water. Add the bay leaves and herbs. Bring to the<br />
boil and then let simmer for 4 hours then strain.<br />
Stock done!<br />
Truss the beef cheeks by tying some butcher’s<br />
string around them to make a nice cylindrical<br />
shape (this will help them stay together while<br />
they’re roasted). Brown the beef cheeks in a pan<br />
over high heat with a dash of oil. You want to get<br />
really good colour all over. Then put aside to cool.<br />
To make the polenta, bring the milk and water to the boil<br />
and whisk in the polenta. Reduce heat to low and cook for<br />
about 30 minutes or until soft and creamy. You need to stir<br />
this regularly so it doesn’t stick. Just before serving, mix in the<br />
butter, parmesan and season to taste with salt and pepper. (You<br />
can leave it covered for about 20 minutes while you’re getting<br />
everything else ready).<br />
Remove the cheeks from the liquid and cover with foil to keep<br />
warm. Strain the remaining liquid (you may need to add a little<br />
water to get it off the bottom of the roasting dish). Reduce and<br />
thicken with a teaspoon of cornflour (mixed in a little water<br />
first), season with salt and pepper. This is your sauce done!<br />
Finally lightly pan fry your sliced king brown mushrooms in a<br />
little butter until nice and golden and slightly soft.<br />
53
Duck Leg<br />
By @jacobm87<br />
Cooking difficulty: medium<br />
10 hours<br />
Serves 4<br />
“This dish is perfect for a cold winter’s night. The crisp skin in contrast with the tender,<br />
slow–cooked meat is something special that is worth the time it takes to achieve.”<br />
Ingredients<br />
Method<br />
2 chicken carcasses<br />
2 carrots, roughly chopped<br />
2 celery sticks, roughly chopped<br />
2 brown onions, roughly chopped<br />
2 tomatoes, roughly chopped<br />
2 oranges, sliced (zest of 1)<br />
2 cinnamon sticks<br />
1 crushed star anise pod<br />
4 bay leaves<br />
1 bunch of thyme, chop 2 tsp<br />
4 sprigs of rosemary, chop 1 tsp<br />
10 black peppercorns<br />
4 medium duck legs<br />
1 bottle of shiraz<br />
54<br />
1 cup of brown sugar<br />
1 cup of red wine vinegar<br />
4 dried figs<br />
100g polenta<br />
300ml milk<br />
40g butter<br />
50g parmesan<br />
4 Dutch carrots<br />
2 small parsnips<br />
2 fresh figs, quartered<br />
¼ head of cauliflower<br />
2 shallots<br />
1L sunflower oil, for frying<br />
Preheat oven to 200°C.<br />
In a deep roasting pan, roast the chicken<br />
bones, roughly chopped carrots, celery,<br />
onion and tomatoes for approximately<br />
30 minutes until golden brown.<br />
Place duck legs, sliced orange, 4 bay<br />
leaves, cinnamon stick, star anise,<br />
peppercorns, ½ bunch of thyme and<br />
2 sprigs of rosemary into roasting pan<br />
and cover with cold water. Using the<br />
stovetop, warm to 75 – 80°C and hold<br />
temperature for up to 10 hours, or until<br />
meat is almost falling off the bone.<br />
To make Vincotto: in a heavy based<br />
saucepan, place shiraz, orange zest,<br />
¼ bunch of thyme, 2 sprigs of rosemary,<br />
brown sugar, red wine vinegar and dried<br />
figs. Bring to a very low simmer and<br />
reduce to a third of its original quantity.<br />
Strain into a blender. Pluck figs from<br />
strainer and place into blender with<br />
reduced wine. Blend until smooth and<br />
strain back into a clean pot. Consistency<br />
should be a glossy syrup.<br />
To make polenta: lightly grease a<br />
10 x 10cm cake tin. Place polenta, milk,<br />
300ml of stock from duck legs, chopped<br />
rosemary and thyme, into a heavy<br />
based saucepan. On low heat, whisk<br />
until thick and the polenta is soft. Take<br />
off heat, stir in butter and parmesan, and<br />
season. Pour into cake tin and allow to<br />
set in fridge.<br />
Once set, cut into desired shapes and<br />
pan fry for serving. Halve Dutch carrots,<br />
shallots and parsnips lengthways. Cut<br />
cauliflower into small florets and roast<br />
all vegetables in oven at 180°C until<br />
golden brown.<br />
To serve, heat sunflower oil in a heavy<br />
based saucepan to 180°C. Remove duck<br />
legs carefully from roasting pan, taking<br />
off the bottom knuckle. Dry with paper<br />
towel to ensure no flare–ups. Fry skin<br />
side down in oil until skin is crisp and<br />
golden brown.<br />
Serve with roasted vegetables, pan fried<br />
polenta and Vincotto. Garnish with<br />
quartered figs and thyme flowers.
ChiLlI Pan MeE<br />
By @carbmyenthusiasm<br />
Cooking difficulty: medium – hard<br />
2 – 2 ½ hours<br />
Serves 4<br />
“Chewy, springy, hand-pinched noodles make this homey, comforting dish<br />
unforgettable. While your favourite old Malaysian auntie makes these noodles by the<br />
roadside, seasoned with sweat and love, clever cheats use a food processor. Topped<br />
with mincemeat, and a perfect Melburnian poached egg, the only way to make this<br />
more local would be to add sliced avocado (hint: please don’t).”<br />
Ingredients<br />
Hand-pinched pan mee noodles<br />
(or any thick Asian wheat noodles)<br />
350g plain flour, plus extra for rolling<br />
1 egg<br />
200ml water<br />
1 tbs sesame oil<br />
¼ tsp salt<br />
Pan mee soup<br />
100g dried anchovies, rinsed (from your<br />
Asian grocer, otherwise known as ikan<br />
bilis – rinse well to remove excess salt)<br />
1 tsp whole white peppercorns<br />
1 yellow onion, roughly chopped<br />
1 cube / 1 tsp good quality chicken stock<br />
1 – 1 ½ L water<br />
Garnishes<br />
80g dried anchovies, rinsed and dried<br />
1 bunch fresh spinach, cleaned and<br />
roots removed<br />
1 handful dried shitake mushrooms<br />
4 eggs, for poaching<br />
4 – 6 stalks spring onions, chopped<br />
2 tbs pre-fried onions (from your<br />
Asian grocer)<br />
Crispy chilli oil to taste (Lao Gan Ma<br />
brand is good, but use either an original<br />
flavour, veg, or prawn flavoured<br />
chilli oil)<br />
Meat topping<br />
400g minced turkey<br />
5 cloves garlic, chopped<br />
1 red onion, chopped<br />
1 tbs light soy sauce<br />
2 tbs dark soy sauce<br />
2 tbs rice vinegar<br />
½ tsp sugar<br />
Salt and white pepper to taste<br />
56
ChiLlI Pan MeE<br />
Continued<br />
Prepare the (many) garnishes<br />
Prepare the garnishes early, as it is fine for these not to be<br />
piping hot when served.<br />
Shallow fry the rinsed, dried anchovies – be careful of oil<br />
splatter as these tend to spit. Set aside on a paper towel to drain<br />
off excess oil.<br />
Boil some water. Wash the dried shitake mushrooms, and soak<br />
these in around half a cup of recently boiled water for at least<br />
15 minutes. Reserve this water, as we will be using it later. Once<br />
the mushrooms are soft, cut them into halves.<br />
Poach your eggs (or use your preferred method): put some<br />
water in a pot with a lid and raise it to a rolling boil. Turn off the<br />
heat and wait for the bubbles to settle. Crack eggs into a bowl<br />
and lower into the hot water one by one, before covering the<br />
pot with a lid. Time 3 minutes before removing the eggs, set<br />
aside in cool water to keep.<br />
Briefly blanch the spinach in hot water, and rinse with cool<br />
water in the sink to stop the cooking process. Set aside.<br />
Remaining garnishes do not require cooking (spring onion,<br />
pre–fried onions, crispy chilli oil).<br />
Hand-pinch and boil the noodles<br />
Fill a pot with water and bring to a boil. Pinch a small ball of dough<br />
off the main block that you have set aside to rest, around the size<br />
of a 50 cent coin. Flatten this roughly between your thumbs and<br />
forefingers, and twist slightly. Toss into the boiling water.<br />
Repeat this process until all the dough has been used. These<br />
cook similarly to gnocchi – when they float to the surface<br />
they are done. Once done, remove with a slotted spoon and<br />
place into bowls to serve. Try not to overcrowd the pan so<br />
they do not stick together.<br />
Method<br />
Start your noodles<br />
Add all the noodle ingredients to a food<br />
processor, and run the processer until the dough<br />
comes together in a ball and starts ‘thumping’ the<br />
walls of the food processor. If the dough looks like<br />
dry and does not come together after a minute,<br />
add a little more water. If it looks wet and does<br />
not form a ball, add a little more flour.<br />
Once dough has come together, knead for a few<br />
minutes on a floured chopping board until it<br />
becomes smooth and has a slight shine.<br />
Place in a bowl and cover with cling film to rest<br />
for at least half an hour.<br />
Get your pan mee soup boiling<br />
Put the water in a large pot with a lid, and bring to<br />
boil. Add all the soup ingredients. If you have one,<br />
it is convenient to use a small muslin spice bag<br />
or disposable tea bag to hold the anchovies and<br />
white peppercorns.<br />
Cover the soup with a lid, and lower to medium<br />
heat. Allow to boil for at least 45 min, while you<br />
work on the other components.<br />
Before serving, season with salt and pepper, and<br />
discard the bag of anchovies and peppercorns.<br />
The longer this cooks the better it will taste!<br />
Cook the meat topping<br />
Over medium heat, fry chopped onions until golden. Then add<br />
chopped garlic, and cook until the mixture is fragrant.<br />
Add the minced meat, fry and stir until meat is cooked. Stir in<br />
all the sauces and continue to fry until the meat is browned<br />
and slightly dry.<br />
Moisten the meat slightly with approximately 3 tablespoons<br />
of the water used to soak the shitake mushrooms. Taste and<br />
adjust with sauces as you like. Season with salt and pepper.<br />
Set aside.<br />
Assemble the pan mee<br />
To each bowl of noodles, add the following: 1 scoop of meat<br />
topping, ¼ of the cooked spinach, a few halved shitake<br />
mushrooms, 1 poached egg, 5 to 10 fried anchovies.<br />
Sprinkle across the top of each bowl: half tablespoon<br />
fried onions, some chopped spring onions, approximately<br />
1 teaspoon chilli oil, depending on the level of spiciness you<br />
can tolerate.<br />
Serve each bowl of noodles with a small bowl of the anchovy<br />
soup. Before eating the noodles, pour about 3 to 5 tablespoons of<br />
anchovy soup into the noodle bowl. Break up the poached egg,<br />
and mix the yolky goodness into the noodles and soup. Enjoy!<br />
Maker’s note<br />
“Special shout out to my favourite Asian supermarket,<br />
Minh Phat (Victoria St, Richmond)! Everything you could<br />
ever need and more. Hawker food tastes better with<br />
amazing fresh Victorian produce, and I would never have<br />
attempted to cook this dish if I didn’t live in Melbourne.”<br />
58<br />
59
Ma Po Chicken<br />
By @cookingathomeisfun<br />
Cooking difficulty: easy<br />
30 minutes<br />
Serves 4<br />
Maker’s note<br />
“This dish is a celebration of flavour inspired by China’s Sichuan region. The numbing<br />
effect that the Sichuan peppercorns have on the chilli allows you to freely explore the<br />
depth of flavour and texture this dish brings. Adding the Chinese red dates brings a<br />
sweet balance to the heat and leaves you with a delightfully aromatic aftertaste. This is<br />
one of our favourite meals and we hope you enjoy it too!“<br />
“Melbourne is fortunate to have<br />
exceptional markets and grocers<br />
which put interesting and exotic<br />
ingredients within easy reach. The<br />
accessibility to these great resources<br />
make it possible now, more than ever<br />
to bring exciting flavours to our<br />
own kitchens.”<br />
Ingredients<br />
Method<br />
½ cup chicken stock<br />
2 tsp cornflour<br />
4 tsp Sichuan peppercorns<br />
2 tbs vegetable oil<br />
1 ½ tbs crushed garlic<br />
1 tbs grated ginger<br />
1kg chicken breast, sliced<br />
2 tbs fermented chilli bean paste<br />
1 cup red dates<br />
1 tsp ground chilli powder<br />
2 tbs Shaoxing wine<br />
1 tbs soy sauce<br />
¼ cup chilli oil<br />
1 cup dried chilli<br />
1 cup spring onions<br />
In a small bowl, mix cornflour with cool chicken stock until combined then set aside.<br />
Heat Sichuan peppercorns in wok over medium heat until fragrant (approximately<br />
1 minute). Grind peppercorns in a mortar and pestle until finely ground then set aside.<br />
Heat oil in wok over medium to high heat until smoking. Add garlic and ginger and<br />
cook until fragrant, (approximately 15 seconds). Add chicken and chilli paste and<br />
cook, stirring, until chicken is cooked through (approximately 2 minutes).<br />
Add in the red dates, then stir in the chilli powder, wine, soy sauce, and cornflour<br />
mixture. Bring to boil and allow to thicken. Stir in ground Sichuan peppercorns, chilli<br />
oil, dried chillies and half of the spring onions. Serve with rice and garnish with the<br />
remaining spring onions.<br />
60
Hendricks CuRED SalmoN<br />
By @De3ja1<br />
Cooking difficulty: medium – hard<br />
45 minutes<br />
Serves 7<br />
“My mentoring head chef always told me never to become a café chef as it was just<br />
bacon and eggs and I was better than that. 10 years later I scored my first head chef<br />
position in a trendy café. He inspired me to push the boundaries and make café food<br />
likely to be found on a fine dining menu. This was the first dish written on my menu, my<br />
best seller, and signature dish, and now award winning. The Melbourne food scene has<br />
allowed me to become the forward thinking chef I am today.”<br />
Ingredients<br />
Method<br />
Salmon<br />
500g A-grade salmon, trimmed and<br />
bones removed<br />
Cure<br />
40ml Hendricks gin<br />
195g sugar<br />
135g salt<br />
½ bunch dill<br />
30g juniper berries<br />
20g coriander seeds<br />
3 orange zest and juice<br />
3 grapefruit zest and juice<br />
3 yuzu zest and juice<br />
Rosti<br />
1 kg Russet Burbank potato<br />
½ onion<br />
1 garlic<br />
2 tbs olive oil<br />
2 egg yolk<br />
60g rice flour<br />
1 sprig thyme<br />
1 – 2 tbs salt and pepper<br />
Smoked Yoghurt<br />
200g yoghurt<br />
5g apple wood chips and smoking gun<br />
Salad<br />
1 carrot<br />
½ bunch coriander<br />
2 apples<br />
1 cucumber<br />
1 small Daikon radish<br />
1 punnet micro flowers<br />
Dressing<br />
50ml yuzu juice<br />
150ml extra virgin olive oil<br />
1 – 2 tsp mustard<br />
1 tsp salt<br />
Preheat oven to 170°C, then mix the<br />
curing ingredients together in a medium<br />
sized bowl.<br />
Place salmon skin side down in a tray<br />
lined with glad wrap, pour cure over,<br />
wrap and weigh down with tins. Cure for<br />
4 to 24 hours.<br />
Place yoghurt in an airtight container<br />
leaving an opening for the smokers<br />
Mosel. Fill smoke machine with wood<br />
chips and light, placing the nozzle in<br />
the container until it is full of smoke.<br />
Leave to sit for 3 to 5 minutes. Once<br />
smoked put yoghurt in muslin cloth<br />
and hang in your fridge for 1 hour.<br />
Remove salmon and wipe any excess<br />
cure from the flesh with paper towel.<br />
Slice thinly on an angle being sure not to<br />
slice through the skin. Once all sliced run<br />
your knife between the skin and flesh<br />
removing the slices.<br />
For the rosti, peel and grate potato, onion<br />
and garlic and mix with egg, oil, flour and<br />
seasoning.<br />
Pour a thin layer of the mix into an<br />
oven tray and bake for approximately<br />
30 minutes or until golden.<br />
Whisk dressing ingredients together.<br />
<br />
Julienne cucumber, apple, carrot and<br />
daikon mix with picked coriander<br />
and dress.<br />
Arrange yoghurt, salmon, rosti, salad and<br />
flowers on plate.<br />
To assemble, smear yoghurt and arrange<br />
rosti and salmon on the plate, add salad<br />
and garnish with optional micro flowers.<br />
62<br />
63
HopPi ScalLOpIni<br />
By @eXchangefood<br />
Cooking difficulty: medium<br />
3 hours<br />
Serves 2<br />
“Wild rabbits can be quite a problem in rural Victoria, causing severe damage to the<br />
environment and agriculture with ever–increasing numbers. On the flip side wild<br />
rabbits are a sustainable source of free–range, organic protein that’s locally grown<br />
and best of all free. This recipe celebrates free feral foods and the versatility of the<br />
rabbit backstrap tenderloin.”<br />
Ingredients<br />
Rabbit Stock<br />
3 rabbit carcasses, wild<br />
60ml olive oil, extra virgin<br />
2 onions<br />
3 carrots<br />
3 bay leaves<br />
3 sprigs thyme<br />
1 cup white wine<br />
Polenta Carrots<br />
½ cup polenta<br />
1 cup rabbit stock<br />
3 tbs butter, unsalted<br />
½ cup parmesan cheese, grated<br />
6 sprigs parsley, flat leaf<br />
Hoppi Scallopini<br />
6 rabbit backstraps, wild<br />
3 tbs flour, seasoned with salt<br />
and pepper<br />
3 tbs olive oil, extra virgin<br />
3 tbs butter, unsalted<br />
2 tbs white wine<br />
2 tbs rabbit stock<br />
2 tbs capers<br />
2 tbs parsley<br />
1 tsp lemon juice<br />
64
HopPi ScalLOpIni<br />
Continued<br />
Form carrot shapes by placing polenta into greased<br />
cone shaped cream horn moulds then place in<br />
fridge to set.<br />
When ready to serve scallopini, gently remove<br />
from mould and fry in butter for 2 minutes until<br />
lightly browned.<br />
Insert sprig of parsley into the top of each polenta<br />
carrot to form carrot tops.<br />
Hoppi Scallopini<br />
Using a sharp knife, butterfly the backstraps.<br />
Gently tenderise and flatten each backstrap with<br />
a kitchen mallet.<br />
Roll backstraps in seasoned flour, shaking off excess.<br />
Heat oil and half the butter in sauté pan.<br />
Fry backstraps for 2 minutes on each side, then<br />
remove from pan. Keep warm.<br />
Deglaze pan with white wine.<br />
Add stock and reduce liquid by half to make the jus.<br />
Add remaining butter, capers and parsley and fry<br />
for 2 minutes. Season to taste.<br />
Place backstraps on serving plate and squeeze over<br />
lemon juice. Pour over the rabbit jus and serve with<br />
polenta carrots.<br />
Method<br />
66<br />
Rabbit Stock<br />
Remove legs and backstraps from rabbits<br />
and reserve. Chop the rabbit carcasses into<br />
several pieces.<br />
Coat the bottom of a large pot with olive oil, and<br />
place the carcass pieces in the pot on medium<br />
high heat. Cook until browned on all sides.<br />
Add herbs and vegetables and fry for<br />
5 minutes.<br />
Add white wine and cook for a further<br />
5 minutes.<br />
Pour in just enough water to cover the rabbit<br />
pieces then bring to a boil. Reduce heat and<br />
simmer uncovered for several hours until<br />
liquid is reduced to about a third.<br />
Place a large sieve over a bowl and pour the<br />
stock through to strain out all solids.<br />
Polenta Carrots<br />
Bring to the boil the rabbit stock with 1 cup<br />
of water.<br />
Add polenta and stir constantly for 20 minutes.<br />
Mix in butter and grated parmesan.<br />
Maker’s note<br />
“This dish was originally created as an entry to<br />
a wild rabbit cooking competition known as the<br />
“Rabbit Ramble” in Tooborac, Victoria. It was the<br />
first time I’d entered this cooking competition and<br />
was very lucky to win first prize with this dish.”<br />
67
Ground PORk<br />
By @fastfoodslow<br />
Cooking difficulty: easy<br />
15 minutes<br />
Serves 2 – 4<br />
“I have chosen this recipe because it is a dish that can be whipped up quickly. Granted<br />
there is a little bit of prep to do but it’s well worth it. It is super tasty as it combines all<br />
those punchy Thai flavours, and most of the ingredients are easy to find or you will<br />
already have them on hand. If you cant get hold of galangal, replace with some ginger.”<br />
Ingredients<br />
2 tbs vegetable oil<br />
1 large shallot, peeled and<br />
roughly chopped<br />
3 cloves garlic, chopped finely<br />
1 tbs very finely chopped galangal (use<br />
ginger if you cant get galangal)<br />
2 – 7 birds eye chilies (or however<br />
many you can tolerate)<br />
200g minced pork, with 1 tbs<br />
cornstarch mixed in<br />
2 tbs fish sauce<br />
1 tbs dark sweet soy sauce<br />
(Ketjap Manis)<br />
½ tsp sugar (if required)<br />
1 cup coriander leaves washed<br />
and picked<br />
150g long bean (snake beans)<br />
sliced into 1cm strips<br />
2 tbs thin / light soy sauce or seasoning<br />
sauce such as Golden Mountain<br />
2 tbs roasted cashews<br />
2 – 4 fresh eggs<br />
Method<br />
Maker’s note<br />
“Due to the immense cultural diversity in Melbourne we have access to some<br />
incredible produce from all corners of the globe. Whether you’re cooking a Middle<br />
Eastern mezze feast or an Asian banquet you can find key ingredients to make an<br />
authentic dish. One of my favourite pastimes is wandering places like Dandenong<br />
market or Victoria Street in Richmond, through the numerous Asian groceries,<br />
picking up those essentials, galangal, palm sugar and all the important sauces.”<br />
If you have a mortar, pound together<br />
the garlic, galangal, chilies, and shallot<br />
until you get a coarse paste. If no mortar,<br />
either chop them all up with a cleaver<br />
on a chopping block or pulse them into a<br />
coarse paste in a mini–chopper.<br />
In a skillet, heat up the vegetable oil over<br />
medium–high heat. Add the paste to it<br />
and fry until fragrant.<br />
Add the meat to the skillet and break it<br />
up with the spatula into small pieces.<br />
Add the remaining ingredients (except<br />
the coriander leaves), correcting<br />
seasoning as needed. Add some palm or<br />
brown sugar if you like your Thai dishes<br />
on the sweeter side.<br />
Once the meat is cooked through,<br />
check the amount of liquid in the skillet.<br />
If it’s too dry, add a little bit of water or<br />
sodium–free broth.<br />
Before taking the skillet off the heat,<br />
add the coriander leaves to the mixture<br />
and give it a stir. We only want to wilt<br />
the coriander with the residual heat<br />
that is still in the pan so as not to kill the<br />
fragrance of the fresh leaves.<br />
Gently fry eggs and place on top of pork<br />
mixture; serve with steamed rice.<br />
68<br />
69
ChiCken, PumPKIN and<br />
CocOnut CUrRy<br />
By @foodmoodkitchen<br />
Cooking difficulty: medium<br />
15 minutes (preparation) + 30 minutes (cooking)<br />
Serves 4<br />
“Melbourne to me is all about good quality and delicious food. We are very spoilt with<br />
the amount of different cuisines on offer. I was inspired to create this dish as I enjoy<br />
dining at many of the contemporary Asian restaurants popping up all over Melbourne.”<br />
Ingredients<br />
Method<br />
Chicken Curry<br />
750g chicken thigh fillets trimmed<br />
and cut into thirds<br />
2 tsp coconut oil<br />
400ml can coconut milk<br />
(full fat not light)<br />
1 cup chicken stock<br />
1 tsp curry powder<br />
½ tsp ground cumin<br />
2 tsp garam masala<br />
2 garlic cloves finely chopped<br />
1 brown onion thinly sliced<br />
2 cups freshly pureed pumpkin<br />
2 carrots cut into inch pieces<br />
2 cups spinach<br />
½ lemon juice<br />
½ tsp salt and pepper<br />
Grated coconut<br />
To Serve<br />
Fresh herbs (basil, coriander<br />
or mint)<br />
2 cups brown rice or frekkah<br />
Dollop greek yoghurt on each<br />
1 piece warmed olive bread<br />
Heat 1 tablespoon of coconut oil in a<br />
large frying pan over a high heat.<br />
Add half the chicken. Cook, turning<br />
occasionally, for around 4 minutes or<br />
until chicken has that beautiful golden<br />
brown texture.<br />
Place the cooked chicken to the<br />
side to rest and repeat with the<br />
remaining chicken.<br />
Reduce the heat to a medium heat.<br />
Add the remaining coconut oil to pan.<br />
Add the onion and garlic. Cook, stirring<br />
often, for 2 to 3 minutes or until slightly<br />
browned and smelling delicious.<br />
Add the cumin, curry powder, garam<br />
masala and cook, stirring, for 1 minute<br />
or until smelling divine.<br />
Stir in the chicken stock, coconut milk,<br />
pumpkin puree, carrots and pumpkin<br />
and bring to a boil until the vegetables<br />
are tender.<br />
Reduce heat to low, then return chicken,<br />
grated coconut and salt and pepper.<br />
Cover and simmer for around 15 to 20<br />
minutes or until chicken is tender.<br />
Finally stir in the spinach and<br />
lemon juice.<br />
Serve over rice or a grain and top<br />
with herbs, yoghurt, and side of<br />
warmed bread.<br />
70<br />
71
Braised ChICkEn witH<br />
ShiItake MushroOmS<br />
By @happeemonkee<br />
Cooking difficulty: easy<br />
40 – 45 minutes (including preparation)<br />
Serves 4<br />
“Since my mother’s passing, I’ve been trying to recreate dishes she would have made<br />
when I was young so I can continue to make them for my son. This is one of my favourites.”<br />
Ingredients<br />
Method<br />
1 tbs rice bran oil<br />
5cm ginger, julienned<br />
400g chicken thighs, cubed<br />
10 dried shiitake mushrooms, soak in<br />
1 cup of hot water for 20 minutes, drain<br />
water, then slice<br />
¼ cup dried wood ear mushrooms,<br />
soaked in lukewarm water for 20<br />
minutes, and cut into smaller pieces<br />
¼ cup Shaoxing cooking wine<br />
1 tsp sugar<br />
1 tsp soy sauce<br />
2 tsp dark caramel sauce<br />
2 tsp cornflour<br />
1 spring onion, sliced<br />
A pinch salt<br />
A crack of freshly ground white pepper<br />
Heat oil in a wok or frying pan over medium heat.<br />
Add ginger and cook until fragrant (about a minute). Turn the heat to high and<br />
add chicken.<br />
Keep stirring until chicken is browned. Then add soaked shiitake mushrooms and<br />
wood ear mushrooms.<br />
Add Shaoxing wine, soy sauce, dark caramel sauce, sugar and mix well.<br />
In a small bowl, combine cornflour and mushroom soaking water to make a paste.<br />
Pour cornflour paste onto braised chicken mix. Bring liquid to boil, cover and<br />
simmer over low heat for 5 minutes, or until sauce has thickened.<br />
Add salt to taste and a crack of white pepper. Garnish with spring onions and<br />
serve with rice.<br />
Kombu Pumpkin soup: in a saucepan, add 500ml of water, 1 piece of kombu seaweed<br />
(cut into smaller pieces), 200g of pumpkin (cubed), and a chicken stock cube. Boil<br />
until pumpkin softens. Garnish with spring onions.<br />
73
Duck VegEtable NoODLEs<br />
in a SpIcy PeANut SaUCE<br />
By @boymeetsgirlmeetsfood<br />
Cooking difficulty: medium<br />
2 hours<br />
Serves 5<br />
“We love this dish for summer – it’s healthy, easy, and flavoursome, but is still a bit of<br />
a treat because of the slow cooked duck!”<br />
Ingredients<br />
Equipment Required<br />
Mandolin or spiraliser<br />
Food processer / blender<br />
Medium ovenproof sauté pan with lid<br />
(big enough for four duck legs,<br />
avoiding crowding)<br />
Salad and Slow Cooked Duck<br />
4 duck legs, washed and patted dry<br />
1 ¼ cups chicken stock<br />
1 bunch coriander, washed with stalks<br />
chopped and leaves separated, ½ leaves<br />
reserved for peanut sauce<br />
1 star anise<br />
2 carrots<br />
2 zucchinis<br />
2 bunches broccolini<br />
1 cucumber<br />
Salt and pepper<br />
Additional lime wedges and coriander<br />
for garnishing<br />
Spicy Peanut Sauce<br />
4 cm knob ginger, peeled and grated<br />
¼ cup low sodium soy sauce<br />
½ cup crunchy, no-salt peanut butter<br />
4 tsp Sriracha chilli sauce*<br />
4 tsp apple cider vinegar<br />
3 limes, juiced<br />
3 tsp palm sugar<br />
2 tsp fish sauce<br />
4 birds eye chilies, to taste<br />
¼ cup water, or as needed<br />
* Can be substituted for your favourite<br />
Asian style chilli sauce<br />
74
Duck VegEtable NoODLEs<br />
in a SpIcy PeANut SaUCE<br />
Continued<br />
Method<br />
Preheat oven to 160°C.<br />
Season duck legs generously with salt and pepper, place skin<br />
down in sauté pan. Bring pan to medium – high heat on stove,<br />
cook for 4 to 5 minutes, or until fat has rendered and skin is<br />
golden. Drain excess fat.<br />
Flip legs to skin side up, add 1 cup chicken stock, a quarter<br />
of the coriander stalks and star anise. Cover and place in<br />
pre-heated oven for 1 ½ hours.<br />
Meanwhile, make the peanut sauce. Combine all sauce<br />
ingredients (except water) in blender, plus half a bunch of<br />
coriander leaves reserved from salad, and blitz for 10 seconds.<br />
Taste and adjust if necessary. When you’re satisfied with<br />
flavour, add a small splash of water so that peanut sauce thins<br />
to a pouring consistency and can properly coat the noodles.<br />
Set sauce aside.<br />
With one hour cooking time remaining on duck, start<br />
preparing the vegetables. Bring a large pot of generously<br />
salted water to the boil. Also ready a large bowl of iced water.<br />
Blanch broccolini for 90 seconds until it turns bright green,<br />
and immediately transfer to iced water. Leave to cool, drain<br />
and set aside to dry.<br />
Using a mandolin (don’t forget the hand guard!), julienne<br />
carrots, zucchinis and cucumber (halved to match the length<br />
of zucchini) so that they resemble noodles.<br />
Combine with remaining half bunch of roughly torn<br />
coriander leaves in a large bowl and set aside.<br />
Next, peel broccolini florets down the stalks (you’ll get<br />
beautiful ribbons of broccolini stalks, topped with florets)<br />
and finely slice the remaining stalks. Add to the bowl of<br />
veggie noodles.<br />
After 1 ½ hours, remove duck from the oven, add remaining<br />
stock if the pan is dry, and return duck to oven without lid<br />
for 15 minutes to crisp up the skin.<br />
Remove duck from oven and set aside to cool slightly.<br />
Once duck is cool enough to handle, remove crispy skin,<br />
chop / tear into small pieces and set aside.<br />
Pull meat from bones and shred as desired, discarding any<br />
excess fat or skin.<br />
Combine shredded duck and noodles. Add one quarter of<br />
peanut sauce, toss and repeat until desired consistency and<br />
flavour reached. Some peanut sauce may be left over and can<br />
be refrigerated for up to 5 days.<br />
Serve immediately, garnished with coriander leaves, lime<br />
wedges and crispy duck skin.<br />
Maker’s note<br />
“We love making the best of Victorian<br />
produce and meat, and in this dish both<br />
elements really shine through. Swapping<br />
out carbs for veggies is quite a trend right<br />
now, as health is such a focus, and we<br />
think this dish plays up that trend nicely<br />
while still delivering plenty of flavour.”<br />
76<br />
77
ChilLI CarbonARa<br />
By @girleatsmelbourne<br />
Cooking difficulty: easy<br />
15 minutes<br />
Serves 2<br />
Maker’s note<br />
“Foolproof, quick and easy dish with lots of flavours to impress your dinner guest<br />
(especially with the poached egg on top) or to make with your kids for a little kitchen<br />
bonding. I love chilli because it balances out the creamy taste from the cheese and egg<br />
yolk, so I used it generously in this version, but feel free to adjust it to your liking.”<br />
Ingredients<br />
Method<br />
“With Melbourne’s constant evolving<br />
food culture, this is something I<br />
came up with using ingredients that<br />
can be found in most kitchens (eggs,<br />
pasta, cream, etc) and one of the<br />
most popular brunch elements – the<br />
poached egg, that can be found in most<br />
cafes. This recipe is perfect for a dinner<br />
meal to impress the unexpected<br />
guest or a relaxed night in because of<br />
Melbourne’s unpredictable weather.”<br />
200g spaghetti<br />
1 tbs olive oil<br />
150g bacon or flat pancetta,<br />
sliced as pleased<br />
2 garlic cloves, finely chopped<br />
1 small chilli, finely chopped<br />
¼ onion, diced<br />
1 egg, plus 2 for poaching<br />
75ml thickened cream<br />
½ cup parmesan, plus extra to serve<br />
Fresh parsley leaves, finely chopped<br />
Cook pasta as instructed on the package.<br />
Mix 1 egg with cream and parmesan in a bowl, season with a small pinch of salt.<br />
Heat oil in a fry pan over medium heat. Cook bacon or pancetta for 2 minutes, stir<br />
regularly until they start to crisp. Add onion, wait until it is slightly golden.<br />
Add garlic and chilli, cook for another 30 seconds. Stir until the onion, bacon and<br />
garlic are all crisp and set aside. Reduce the fry pan to low heat. If you want a stronger<br />
flavour, increase the amount of chopped chilli.<br />
Fill a smaller pot with water (about 8cm deep) over medium heat. Add 1 teaspoon of<br />
white vinegar if the egg is not freshly purchased. Crack two eggs in separate bowls.<br />
When the water starts to boil, turn the heat to low so it simmers and start stirring using<br />
the wooden spoon to create a whirpool, slowly pour the eggs in, one at a time. Cook for<br />
2 to 3 minutes for a soft yolk or 3 to 4 minutes for a firm yolk, depending on how you like<br />
your eggs. Using a slotted spoon, gently remove the egg from the water and set aside.<br />
Drain pasta and return to pan, toss for a few minutes. Add the egg, cream and<br />
parmesan mixture. Toss and combine to form a creamy sauce. Season to your taste<br />
with salt and pepper if you would like more heat.<br />
Serve immediately with the poached egg on top. Garnish with extra parsley,<br />
parmesan and finely chopped chilli.<br />
78
COtoleTta with Sage<br />
And Walnuts<br />
By @young.ryan.t<br />
Cooking difficulty: easy<br />
20 minutes (preparation) + 10 minutes (cooking)<br />
Serves 4<br />
“This simple recipe of cotoletta is a midweek staple in my household. Using young, organic,<br />
milk fed veal ensures a perfect final product. Paired with a simple salad it makes for a quick<br />
and easy meal for when time isn’t on your side.”<br />
Ingredients<br />
Method<br />
2 boneless veal ribs<br />
approximately 250g each<br />
2 eggs, lightly beaten<br />
100g seasoned flour<br />
200g fine fresh breadcrumbs, seasoned<br />
120ml olive oil<br />
60g unsalted butter<br />
12 fresh sage leaves<br />
12 fresh walnuts, broken in half<br />
1 lemon, cut into wedges<br />
Cut each piece of veal in half to create four equal cutlets.<br />
Pound out the veal cutlets until they are approximately 1cm in thickness.<br />
Coat the veal with seasoned flour, then egg, then breadcrumbs, shaking off excess<br />
in between and set aside.<br />
In a large nonstick frying pan, heat the olive oil over medium high heat, add the<br />
cotoletta and cook until golden and delicious (approximately 4 minutes).<br />
Turn, add the butter, sage and walnuts.<br />
Baste the cotoletta until cooked (approximately 2 minutes). The sage and walnuts<br />
should now be crispy and the butter should have a brown hue.<br />
Serve hot straight from the pan, drizzled with the infused pan juices. Season with<br />
flakey salt and garnish with lemon.<br />
Maker’s note<br />
“Victoria has a diverse history with Italian food. Most households know at least<br />
three or four recipes that are cooked on almost a weekly basis. My recipe calls<br />
for the freshest and best ingredients, sourced locally. When my local butcher<br />
can source it, I like to use Otway Harvest Rose veal for this dish.”<br />
81
LinguINe MarE<br />
By @secondhelping<br />
Cooking difficulty: easy<br />
30 minutes<br />
Serves 2<br />
“Chilli, garlic and shellfish have long been good friends. And pasta? Well, it goes with<br />
everything. This dish is dinner party worthy or just a delicious weeknight treat and when<br />
your pasta is half linguine and half zucchini you get half the carbs but twice the flavour.<br />
You can mix and match the shellfish based on what’s available or in season.”<br />
Ingredients<br />
Method<br />
1 large zucchini<br />
100g cooked crab flesh<br />
2 Moreton Bay Bug tails or jumbo<br />
green prawns<br />
½ cup flat leaf parsley<br />
1 tbs chopped fennel fronds<br />
2 cloves garlic<br />
1 long red chilli (or 2 small hot chillies if<br />
you like more heat)<br />
100g squid ink linguine<br />
Good quality extra virgin olive oil<br />
Place a large pot of salted water on to boil.<br />
Flex your knife skills or use a mandolin or v–slicer to cut the zucchini lengthwise into<br />
julienne strips, so that it looks like long pieces of pasta.<br />
Finely chop the garlic, parsley and chilli.<br />
Cut the bug tails or prawns into three of four equal size pieces.<br />
Cook the squid ink linguine in the boiling water until al dente or according to the<br />
instructions on the packet.<br />
Add 2 tablespoons of olive oil to a large flat frying pan over medium heat.<br />
Gently sauté the garlic and chilli for one minute then add the bug / prawn meat and<br />
cook for a further minute.<br />
Add the zucchini noodles and crab meat and sauté for one minute. Add extra olive oil<br />
if the pan needs it. Remove from heat.<br />
When the linguine is cooked, drain it reserving a little of the cooking water.<br />
Add the linguine to the frying pan and return to heat. Gently mix through and add the<br />
parsley and fennel fronds. If it looks dry, loosen it up with a tbs of the cooking water.<br />
82<br />
Transfer to serving plates, drizzle with olive oil and serve with ground black pepper<br />
and a wedge of lemon.
SpaghetTi wiTH brocCOlinI,<br />
prawns ANd chilLI<br />
By @leo_fortuna<br />
Cooking difficulty: easy<br />
10 minutes (cooking)<br />
Serves 4<br />
“This pasta has the right amount of ingredients to moisten your taste buds.”<br />
Ingredients<br />
Method<br />
250g spaghetti<br />
1 bunch broccolini, cut into<br />
5cm lengths<br />
3 cloves garlic, finely chopped<br />
1 red chilli, seeded and finely chopped<br />
1 green chilli, seeded and<br />
finely chopped<br />
10 prawns, peeled and deveined<br />
8 anchovies, drained, add oil from jar<br />
60ml (¼ cup) extra virgin oil<br />
Salt and pepper to taste<br />
Lemon juice, sprinkle<br />
Cook pasta in a large saucepan, until al dente.<br />
In a separate saucepan cook the broccolini in water, bring to boil, then drain and<br />
leave in cool water.<br />
Combine 30ml olive oil, half amount of garlic, and half amount of green and red chilli,<br />
then prawns.<br />
Add ingredients to baking tray and add the remainder of the olive oil, garlic and red<br />
and green chillies. Heat up and leave to rest.<br />
Add spaghetti, broccolini and anchovies, also add oil from the anchovies jar for taste.<br />
Add salt and pepper to taste, very important once all ingredients are mixed in,<br />
drizzle lemon juice, not too much – and voilà!<br />
Dish up and enjoy, bon appetit!<br />
85
DesSErt<br />
Peach Clafoutis 88<br />
Lamington Truffles 90<br />
White Chocolate Crepes 92<br />
Snickers Cheesecake Tart 96<br />
Spiced Rum Chocolate Mousse 98<br />
Tropical Carrot Cake 100<br />
Chocolate & Pistachio Donuts 102<br />
Coconut & Chocolate Pops 104<br />
Dalmatian Fritule 106
Peach ClAfoutis<br />
By @aforkandapencil<br />
Cooking difficulty: easy<br />
45 minutes<br />
Serves 4<br />
“Of all the ways it’s possible to turn peaches into dessert, besides eating them straight<br />
from the fruit bowl, this has to be one of the simplest. “Clafoutis” sounds fancy – thank<br />
you, France – but it’s actually just a kind of sweet pancake batter that bakes into a<br />
deliciously squidgy cake, which is why combining it with fruit works so well. No need to<br />
get out the mixer: a bit of stirring with a wooden spoon is all the effort it takes.”<br />
Ingredients<br />
Method<br />
1 tbs butter<br />
40g caster sugar (plus extra<br />
for preparing the dish)<br />
1 egg<br />
45g plain flour<br />
75ml milk<br />
½ tsp vanilla extract<br />
2 ripe peaches, halved and sliced<br />
1 tsp icing sugar, to serve<br />
Set your oven to 180°C. Butter a small baking dish (mine is 20 x 12cm) and dust with<br />
caster sugar, tapping out the excess. Set aside.<br />
Melt the tablespoon of butter (I find it easiest to do this in the microwave in 15 second<br />
bursts) and set aside to cool a little.<br />
Put the sugar and egg in a mixing bowl and beat with a wooden spoon until<br />
combined. Add the flour, milk and vanilla, mixing until everything is incorporated,<br />
then stir in the melted butter.<br />
Make a layer of sliced peaches in your baking dish, overlapping them a little, and<br />
pour over the batter. Top with another layer of peaches.<br />
Bake for 30 minutes, until it has risen and is golden.<br />
Allow to cool for about 10 to 15 minutes, as this is much better eaten warm than piping<br />
hot. Dust with a little icing sugar just before serving.<br />
Maker’s note<br />
“When Victorian peaches turn up at our markets in late summer, this simple<br />
dessert is my go-to recipe to let the ripe fruit shine.”<br />
88
LamingtoN TrufFles<br />
By @angelssharefood<br />
Cooking difficulty: easy<br />
50 minutes<br />
Makes 12 truffles<br />
“These chocolatey truffles hide the good stuff that is coconut on the inside to give you<br />
a hit of iconic lamington flavours.”<br />
Ingredients<br />
Method<br />
1 cup shredded coconut<br />
2 tbs rice malt syrup<br />
2 tsp vanilla essence<br />
Pinch of salt<br />
150g dates<br />
¼ cup water<br />
½ cup almond meal<br />
⅓ cup raw cacao powder, sifted<br />
(plus extra for dusting)<br />
Soften the dates by soaking them in half cup of water.<br />
Blend the shredded coconut in a food processor; scraping down the sides often.<br />
Blending for approximately 5 to 10 minutes will turn the coconut into a fine powder<br />
that releases some of the oils.<br />
Add the rice malt syrup and 1 teaspoon of vanilla essence and blend until all<br />
ingredients are combined.<br />
Shape into balls approximately the size of a 5 cent coin. Chill the coconut macaroons<br />
in the fridge for 30 minutes.<br />
Drain the dates and blend them with the almond meal, 1 teaspoon of vanilla and raw<br />
cacao powder until the mixture is soft and crumbly in texture.<br />
Take the coconut macaroons from the fridge. Place a tablespoon of the chocolate<br />
mixture in the palm of your hand and gently press the mixture around the macaroon<br />
until it is completely covered.<br />
Coat each ball by either dusting or rolling in cacao powder and chill until ready to serve.<br />
Maker’s note<br />
“Melburnian’s focus on health and nutritional needs inspired me to make a<br />
naturally sweetened, flour, dairy and egg free indulgence that would allow my<br />
friends to enjoy iconic Aussie flavours.”<br />
91
White ChoCOlaTE CrepEs<br />
By @ChngyFoodNTravel<br />
Cooking difficulty: easy<br />
15 minutes (preparation) + 25 minutes (cooking time)<br />
Serves 3 – 4<br />
“The inspiration for this recipe stems from my love of cooking for family and friends<br />
using seasonal produce (or anything leftover in the kitchen) and being creative when<br />
plating up meals. As a photography enthusiast I’m of the belief that food should look as<br />
good as it tastes. This crepe recipe was also created to highlight the vibrant Melbourne<br />
café culture, which we are all lucky to be part of. The crepes can be eaten for breakfast,<br />
afternoon tea or dessert. I hope everyone gains as much enjoyment from trying this<br />
recipe as my daughter did when polishing off the cotton candy.”<br />
Ingredients<br />
White Chocolate Crepes<br />
2 cups plain flour<br />
2 tsp caster sugar<br />
2 tsp melted butter<br />
4 eggs<br />
1 tsp vanilla extract<br />
240 ml full cream milk<br />
100g Lindt white chocolate<br />
Crème Anglaise<br />
½ cup full cream milk<br />
½ cup thick whipping cream<br />
2 vanilla bean stalks<br />
3 egg yolks<br />
3 tbs white sugar<br />
Final Assembly<br />
7 raspberries<br />
20g pink cotton candy<br />
92
White ChoCOlaTE CrepEs<br />
94<br />
Method<br />
Crème Anglaise<br />
Combine milk and cream in heavy<br />
bottomed saucepan.<br />
Split open the vanilla bean stalks.<br />
Scrape in seeds from the vanilla bean stalks into<br />
the saucepan.<br />
Bring milk mixture to simmer.<br />
Remove from heat.<br />
Separate the egg yolks into a medium bowl<br />
ready for whisking.<br />
Pour the sugar in with the egg yolks and whisk<br />
until mixture has blended.<br />
Continued<br />
Gradually whisk the hot milk mixture to<br />
combine with the yolk and sugar.<br />
Return crème anglaise mixture to saucepan.<br />
Stir over low heat until crème anglaise<br />
thickens. You can tell it is the right consistency<br />
when the mixture leaves a clear path on the<br />
back of a spoon when your finger is drawn<br />
across (approximately 5 minutes but do not<br />
allow to boil).<br />
Strain crème anglaise through a sieve and into<br />
a bowl.<br />
Cover and chill in the refrigerator. Note: The crème<br />
anglaise can also be prepared a day in advance.<br />
White Chocolate Crepes<br />
Sift the flour into a medium bowl.<br />
Add caster sugar and melted butter.<br />
Combine the eggs and whisk until a smooth mixture forms.<br />
Add in the vanilla extract.<br />
Gradually pour and whisk in all the milk.<br />
Chop white chocolate into small pieces and place into a<br />
stainless steel bowl.<br />
Fill a large pot with water and bring to the boil (use a double<br />
boiler if you have one handy).<br />
Hold the stainless steel bowl over the pot of boiling water and<br />
stir until the white chocolate is completely melted.<br />
Allow to cool for 1 to 2 minutes before adding to the<br />
crepe mixture.<br />
Whisk to combine the crepe mixture and white chocolate.<br />
Place a 16cm non–stick crepe pan over medium heat.<br />
Brush some butter over the surface of the crepe pan.<br />
When the crepe pan is hot, reduce the heat to low / medium.<br />
Pour in just enough crepe mixture to cover the base.<br />
Swirl the crepe mixture around the pan so that it forms a thin<br />
layer over the entire base.<br />
Cook the crepe for about 1 minute (or until golden).<br />
Now for the moment of truth! Use a spatula to flip the crepe<br />
(practice makes perfect so if you break one, consider it a taste<br />
test. Pop it in your mouth and try again).<br />
After a successful flip, cook the other side for 40 seconds<br />
(or until golden).<br />
Turn out onto a plate and allow to cool for 30 seconds.<br />
Whilst the crepe is still warm, use your hands to roll it up.<br />
Remove any untidy edges with a sharp knife, ensuring each<br />
crepe is the same length (approximately 10 to 12cm).<br />
Repeat steps to make the crepes until you have 3 crepes ready<br />
to go for the final assembly. Tip: Give the crepe mixture a<br />
quick mix each time before pouring into the pan.<br />
Final Assembly<br />
Grab a round plate (preferably a dark colour to create contrast<br />
and make the dish stand out!).<br />
Place 3 crepe rolls next to one another.<br />
Use a Chinese-style soup spoon (effectively a small ladle!) to<br />
scoop the crème anglaise.<br />
Lower the crème anglaise infront of the 3 crepe rolls and drag<br />
the spoon backwards to create the “shooting comet” pattern<br />
shown in the photo.<br />
Place one raspberry at the narrow end of the crème anglaise<br />
“shooting comet”.<br />
Grab the remaining 6 raspberries and balance 3 each<br />
between the crepes.<br />
Top with cotton candy to serve.<br />
Maker’s note<br />
“Melbourne / Victoria is a melting pot of wonderful cultures<br />
and with it comes a diverse range of food. The vibrant<br />
colours and different origins of elements used in my recipe<br />
are intended to represent the “Melbourne” lifestyle that we<br />
are so lucky to be a part of.”<br />
95
SnickerS ChEesEcake TArT<br />
By @crishfish<br />
Cooking difficulty: easy<br />
35 mins (preparation) + 4 – 5 hours (chill)<br />
Serves 8 – 10<br />
Maker’s note<br />
“Do you ever go to a patisserie and wish you could buy the whole store? Don’t you<br />
worry; you’re not the only one! This recipe combines my everlasting love for<br />
cheesecake, tarts and everything Snickers related.”<br />
“I created this recipe by being inspired<br />
by the crazy creativity Melbourne<br />
chefs seem to possess. Because if<br />
you’re not eating some sort of funky<br />
fusion in Melbourne, then you’re really<br />
not doing Melbourne right, man!”<br />
Ingredients<br />
Method<br />
1 ½ cups pretzels (store–bought)<br />
¾ cups (or around 5 fingers) shortbread<br />
(either homemade or store–bought)<br />
1 tbs milk powder<br />
2 tbs cocoa powder<br />
1 tbs brown sugar<br />
50g Snickers ‘Pods’<br />
50g butter, melted<br />
125g cream cheese<br />
200g condensed milk<br />
100g dark chocolate, melted<br />
2 tbs smooth peanut butter<br />
1 shot espresso<br />
1 tsp vanilla<br />
170g mascarpone<br />
1 tsp gelatine, dissolved in ¼ cup<br />
boiling water<br />
Preheat oven to 170°C.<br />
Process pretzels, shortbread, milk powder, cocoa powder, brown sugar, and Snickers<br />
Pods into a fine crumb and place into a medium bowl. Add melted butter, and using a<br />
wooden spoon mix until you have a ‘wet sand’ consistency.<br />
Line a medium sized tart tin (24cm) with the crumb base. Let it to toast in the oven for<br />
8 to 10 minutes. Allow it to rest and cool in its case.<br />
Using a hand–held or stand mixer, mix the cream cheese and condensed milk on<br />
medium speed until smooth.<br />
Add in the melted chocolate, peanut butter, espresso and vanilla and mix until<br />
ingredients have combined evenly.<br />
On low speed, mix in the mascarpone and gelatine until just combined. Try to<br />
avoid overbeating!<br />
Fill the tart tin with cheesecake mix. This is where you can be creative and add your<br />
favourite toppings! I added dusted chopped Snickers bars, homemade peanut brittle<br />
and some chocolate biscuits (and maybe just a sneaky drizzle of chocolate).<br />
Refrigerate the cheesecake tart for 4 hours or until set. Enjoy this chocolatey,<br />
peanuty, cheesecakey goodness!<br />
96
Spiced Rum ChocOlate MousSE<br />
By @lady.flamingo<br />
Cooking difficulty: medium<br />
35 minutes<br />
Serves 2<br />
“This recipe was created in ‘dire avocado shortage times’, with a hankering for a delicious<br />
and silky vegan mousse and an unwillingness to pay $8 per avocado. Spiced rum adds an<br />
intricate depth of flavour whilst lingering coconut notes cut through the sweetness. The<br />
recipe is not only vegan, but also low in sodium so suitable for those with Menieres disease.”<br />
Ingredients<br />
Method<br />
Spiced Rum Chocolate Sauce<br />
1 can coconut cream<br />
220g dairy free dark chocolate<br />
(highest quality preferred)<br />
¼ cup dark brown sugar<br />
1 vanilla pod, split<br />
1 tbs spiced rum<br />
2 clove pods<br />
Mousse<br />
2 400ml can coconut cream<br />
(chilled overnight)<br />
½ cup cocoa powder (unsweetened)<br />
Begin by making the chocolate sauce component by combining all of the ingredients<br />
for the chocolate sauce, stirring until completely melted and sugar is dissolved.<br />
Tip: rub a small section of the sauce between your fingers to test if the sugar has<br />
completely dissolved. If it has not, you will feel the grains.<br />
Remove the clove pods and pour the sauce into a small jug, and put into the fridge<br />
for 10 minutes to chill slightly and thicken.<br />
In a stand mix or in a large bowl, whip the coconut cream until soft peaks form and<br />
slowly add in the chilled chocolate sauce and the cocoa powder until it’s light and<br />
fluffy and at your desired consistency.<br />
Spoon or pipe into ramekins or glasses and let set in the fridge for around<br />
3 hours. Or you can do what I do, and put it in the freezer to speed up the<br />
process and eat it straight away.<br />
Maker’s note<br />
98<br />
“I prefer to use ingredients which are sourced from Victorian suppliers, such as<br />
using cocoa and vanilla from Grounded Pleasures. This mousse is perfect for rainy<br />
Melbourne days or nights, curled up on the sofa watching your favourite movie.”
Tropical CArROT Cake<br />
By @nicolecrystal<br />
Cooking difficulty: easy<br />
30 minutes (preparation) + 1 hour (cooking)<br />
Serves 16<br />
“This is my absolute favourite cake to make for<br />
friends and family, not to mention eat! It’s a super<br />
moist carrot cake that I’ve amped up by adding<br />
heaps of spices, nuts and fruit – crystallised ginger<br />
gives it a kick. I decided to make this cake for my<br />
wedding (yes – I made my own wedding cake!)<br />
but due to time constraints knew I would have<br />
to make it ahead of time and freeze it… I whipped<br />
up a mini version (a photo of which I posted on<br />
Instagram for #socialfeeds) so I could see how<br />
well it would hold up to freezing for several<br />
weeks, and then being frosted whilst still frozen…<br />
End result – ABSOLUTE SUCCESS!!! I pair this with<br />
a white chocolate cream cheese frosting and<br />
finish off with dripping salted caramel… delicious!”<br />
Ingredients<br />
⅓ cup golden raisins<br />
⅓ cup dried cranberries<br />
1 tbs orange blossom water<br />
1 cup white sugar<br />
1 cup brown sugar<br />
1 cup canola oil<br />
4 large eggs<br />
2 cups plain flour<br />
2 tsp bicarbonate soda<br />
2 tsp baking powder<br />
3 tsp cinnamon<br />
1 tsp ground ginger<br />
4 large carrots, grated<br />
225g tin crushed pineapple,<br />
well drained<br />
1 ½ cups chopped nuts (I like a mixture of<br />
walnuts, macadamias, pecans<br />
and pistachios)<br />
1 cup shredded coconut<br />
¼ cup crystallised ginger, chopped<br />
Method<br />
Preheat oven to 180°C.<br />
Grease and line two 22cm round cake pans.<br />
Place raisins and cranberries in a small bowl. Add just enough boiling water to cover,<br />
along with the orange blossom water (this will plump up the dried fruit and infuse a<br />
delicate flavour).<br />
In a large bowl, beat together the sugars and oil until smooth. Add eggs one at a time,<br />
beating after each addition.<br />
Sift in the flour, baking powder, bicarbonate soda, cinnamon and ground ginger.<br />
Add the grated carrot, pineapple, chopped nuts, dried fruit, coconut and crystallised<br />
ginger and mix to combine.<br />
Divide batter between the two cake tins and cook for approximately one hour or until<br />
a skewer comes out clean.<br />
Sandwich the cake layers with your frosting of choice.<br />
Maker’s note<br />
“Melburnians are all about constantly re–inventing classic dishes… like my tropical spin<br />
on the humble carrot cake!”<br />
100<br />
101
ChoCOlate And Pistachio DOnuTS<br />
By @storminateacupp<br />
Cooking difficulty: easy<br />
45 minutes<br />
Makes 12 small donuts<br />
“I love this recipe because not only is it fast and easy to make, but it also satisfies my craving<br />
for chocolate and donuts in one go.”<br />
Ingredients<br />
Method<br />
¾ cup plain flour<br />
⅓ cup brown sugar<br />
¼ cup cocoa powder<br />
½ tsp baking powder<br />
¼ tsp baking soda<br />
1 mashed banana<br />
100ml milk<br />
3 tbs melted coconut oil<br />
1 tsp vanilla extract<br />
¼ cup milk<br />
125g dark chocolate chips<br />
2 ½ tbs cocoa powder<br />
¼ cup crushed pistachio praline<br />
Grease donut pan and preheat oven to 180°C.<br />
Combine the flour, sugar, cocoa powder, baking powder and baking soda in a large<br />
bowl. In a separate bowl, mix the banana, milk, oil and vanilla extract.<br />
Add the wet mixture to the dry mixture and stir until it is combined.<br />
Pipe batter into the donut pan and bake for 12 minutes or until the donuts are coming<br />
away from the sides. Remove from oven and transfer onto a cooling rack.<br />
Chocolate Icing<br />
Place chocolate chips and cocoa in a small bowl. Heat milk until it is just about to<br />
boil. Pour over the chocolate mixture and allow it to sit for a few minutes before<br />
stirring to combine.<br />
Dip each donut into the chocolate icing. After each donut is dipped, sprinkle with<br />
pistachio praline. Leave in the fridge to set; let icing set completely before serving.<br />
Notes<br />
If you do not own a donut pan, you can easily use a muffin pan by placing a small ball<br />
of foil in the middle of the muffin moulds.<br />
Recipe can easily be made vegan by substituting the milk with a vegan alternative and<br />
using dairy free chocolate chips.<br />
102
CocOnut and ChocOlate PoPs<br />
By @thehealthyhunter<br />
Cooking difficulty: medium<br />
15 minutes (cooking) + 5 hours (freezing)<br />
Serves 4<br />
“I love the combination of chocolate, creamy vanilla and toasted coconut. These easy<br />
to make icy poles can be made in the morning for a delicious afternoon treat on a hot<br />
Melbourne day.”<br />
Ingredients<br />
Method<br />
400ml coconut cream<br />
2 tbs cacao or cocoa powder<br />
4 tbs desiccated coconut<br />
3 tbs coconut flakes (or shredded)<br />
1 tsp vanilla extract<br />
4 tsp maple syrup<br />
Equipment Required<br />
4 100ml ice cream / popsicle moulds<br />
In a small pot combine ¾ cup of the coconut cream, 2 teaspoons of maple<br />
syrup and the cacao powder. Place on low heat and stir continuously until well<br />
combined. Remove from heat.<br />
Pour the cacao mix into 4 ice cream moulds, place in the freezer for 1 – 1.5 hours, then<br />
stick an ice cream stick into each ice cream. Make sure you leave enough of the stick at<br />
the top of the mould for you to hold!<br />
Meanwhile, in a medium bowl, preferably one that’s easy to pour from, mix<br />
together the remaining coconut cream, maple syrup, the vanilla and desiccated<br />
coconut. Pour this mixture on top of the semi–frozen chocolate ice cream. Return<br />
to the freezer to set for 4 hours.<br />
While this is happening, heat your oven to 150°C and line a tray with baking paper.<br />
Place the coconut flakes on this and toast in the oven for a few minutes until golden.<br />
Remove and allow to cool.<br />
Once the ice creams have frozen take them out of their moulds (use your hands to warm<br />
the moulds), lie on parchment paper and sprinkle the toasted coconut over one side.<br />
Place in a sealed container lined with baking paper, and return to the freezer until<br />
ready to eat. I think they’re best when you get them out of the freezer at least<br />
5 minutes before eating. Yum!<br />
105
DalmAtian FrITule<br />
By @missplavalaguna<br />
Cooking difficulty: easy<br />
10 minutes (preparation) + 10 minutes (cooking)<br />
Makes 20 fritules<br />
“Fritule is our Dalmatian traditional dessert served on Good Friday, Christmas Eve<br />
and Shrove Tuesday. Easy to make and delicious.”<br />
Ingredients<br />
Method<br />
10 tbs (heaped) self–raising flour<br />
1 egg, lightly beaten<br />
1 large apple, peeled and grated<br />
1 lemon, rind only, finely grated<br />
200g Greek yoghurt<br />
2 tbs caster sugar, plus more<br />
for rolling<br />
½ cup Sailor Jerry rum<br />
1 handful sultanas<br />
1 tsp vanilla essence<br />
Oil for deep frying<br />
(sunflower oil is good)<br />
Soak sultanas in rum for 3 hours or preferably overnight.<br />
In a bowl mix everything well, except flour and oil.<br />
Add flour and mix well again, add more flour if the dough is too runny. You need to<br />
be able to grab the dough with a spoon and form little doughnuts, but it should not be<br />
too thick.<br />
Form doughnuts.<br />
Heat oil in a pot and when hot, drop spoonfuls of dough in and fry, turning frequently<br />
until golden brown.<br />
Drain on paper towels and roll in caster sugar.<br />
Maker’s note<br />
106<br />
“I’ve been making it for family and friends on Christmas Eve ever since I came to live<br />
here 16 years ago. It’s become my signature dessert and everyone looks forward to<br />
enjoying it for Christmas Eve lunch held at our place every year.”
Thank you to Melbourne Food & Wine Festival,<br />
Guy Grossi, Dan Stock, Tommy Collins and<br />
every single one of you who entered this year’s<br />
#socialfeeds. It’s you – the Makers of Victoria<br />
– who make this all possible. Bon appetit!<br />
© <strong>2016</strong> Bank of Melbourne – A Division of Westpac Banking Corporation.<br />
ABN 33 007 457 141 AFSL and Australian credit licence 233714.