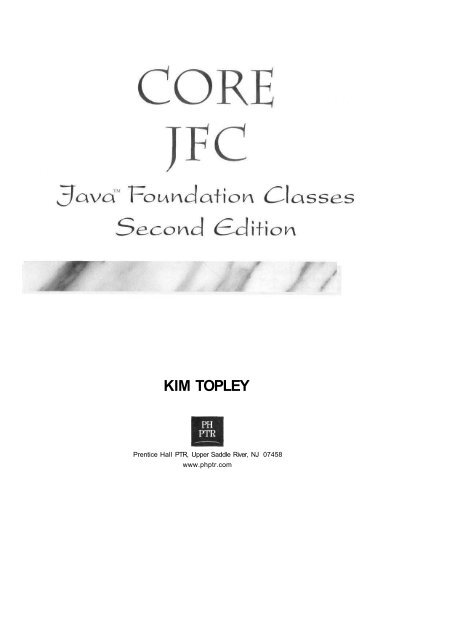
Core JFC Java Foundation Classes 2nd edition - Read
Core JFC Java Foundation Classes 2nd edition - Read
Core JFC Java Foundation Classes 2nd edition - Read

Create successful ePaper yourself
Turn your PDF publications into a flip-book with our unique Google optimized e-Paper software.
KIM TOPLEY<br />
Prentice Hall PTR, Upper Saddle River, NJ 07458<br />
www.phptr.com
Library of Congress Cataloging-in-Publication Data<br />
A catalog record for this hook can be obtained from the Library of Congress<br />
Editorial/Production Supervision: Nick Radhuber<br />
Acquisitions Editor: Greg Doench<br />
Editorial Assistant: Brandt Kenna<br />
Marketing Manager: Debby vanDijk<br />
Manufacturing Manager: Alexis Heydt-Long<br />
Cover Design: Design Source<br />
Cover Design Direction: Jerry Votta<br />
Art Director: Gail Cocker-Bogusz<br />
© 2002 Prentice Hall PTR<br />
Prentice-Hall, Inc.<br />
Upper Saddle River, NJ 07458<br />
Prentice Hall books are widely used by corporations and government<br />
agencies for training, marketing, and resale.<br />
The publisher offers discounts on this book when ordered in bulk quantities.<br />
For more information, contact<br />
Corporate Sales Department,<br />
Prentice Hall PTR<br />
One Lake Street<br />
Upper Saddle River, NJ 074.58<br />
Phone: 800-382-3419; FAX: 201-236-7141<br />
E-mail: corpsales@prenhall.com<br />
All rights reserved. No purl of this book may be reproduced, in any<br />
form or by any means, without permission in wnting from the publisher.<br />
Products and company names mentioned herein are the trademarks or registered trademarks<br />
of their respective companies.<br />
Printed in the United States of America<br />
10 9 8 7 6 5 4 3 2 1<br />
ISBN 0-13-090581-X<br />
Pearson Education LTD.<br />
Pearson Education Australia PTY, Limited<br />
Pearson Education Singapore, Pte. Ltd.<br />
Pearson Education North Asia Ltd.<br />
Pearson Education Canada, Ltd.<br />
Pearson Edueacion de Mexico, S.A. de C.V<br />
Pearson Education—Japan<br />
Pearson Education Malaysia, Pte. Ltd.
For my family, Berys, Andrew, and Katie, and my parents, Sheila and Bill,<br />
and with thanks to the twelve men who undertook the ultimate adventure,<br />
and the nine others who got so close, for a memory that has<br />
inspired me for over thirty years.
PREFACE xxi<br />
Who This Book Is For xxii<br />
What You'll Need xxiii<br />
How This Book Is Organized xxiv<br />
Conventions Used in This Book xxviii<br />
About the CD-ROM xxviii<br />
Feedback xxxviii<br />
Further Information xxxviii<br />
Acknowledgments xxxviii<br />
VII
viii Contents<br />
PART ONE:<br />
FROM AWT TO SWING 2<br />
1 INTRODUCTION TO THE JAVA FOUNDATION<br />
CLASSES 4<br />
What Are the <strong>Java</strong> <strong>Foundation</strong> <strong>Classes</strong>? 6<br />
Overview of <strong>JFC</strong> Features 13<br />
The Swing Packages 22<br />
The Model-View-Controller Architecture 42<br />
Summary 55<br />
2 FRAMES, LABELS AND BUTTONS 56<br />
The Shell of an Application:The JFrame Class 58<br />
Components and Their Properties 63<br />
Containers and Layout Managers 89<br />
Event Handling 108<br />
Using Buttons I 15<br />
Images on Components: Icons 125<br />
Summary 161<br />
3 MANAGING THE USER INTERFACE 164<br />
Layout Managers 165<br />
Component Orientation 240<br />
Working with the Application Window 257
Summary 280<br />
Contents i x<br />
4 GRAPHICS.TEXT HANDLING AND PRINTING .... 282<br />
Working with Graphics 283<br />
A Graphics Application 320<br />
Rendering Text 376<br />
Printing Graphics and Text 389<br />
Summary 449<br />
PART TWO:<br />
USING SWING TO BUILD BETTER<br />
APPLICATIONS 450<br />
5 KEYBOARD HANDLING, ACTIONS, AND<br />
SCROLLING 452<br />
Implementing Mouseless Operation 454<br />
Scrolling Components 546<br />
Logical Scrolling and Forcing Visibility of an Area 562<br />
Implementing Scrolling with JScrollBar 590<br />
Scrolling with the Keyboard 601<br />
Component Autoscrolling 608<br />
Summary 617<br />
6 MENUS AND TOOLBARS 618<br />
The Menu Bar and the Menu System 619
:<br />
X Contents<br />
Toolbars 684<br />
Actions and <strong>Java</strong> 2 Version 1.3 724<br />
Summary 758<br />
7 USING STANDARD DIALOGS 760<br />
Basic Dialogs 762<br />
The JFileChooser Component 778<br />
Summary 826<br />
8 CREATING CUSTOM DIALOGS 828<br />
Creating Custom Dialog Boxes 829<br />
Tabbed Panes and Borders 887<br />
Swing Components Often Used in Dialogs 908<br />
Summary 1003<br />
PART THREE:<br />
ADVANCED TOPICS 1004<br />
9 TEXT CONTROLS 1006<br />
Simple Text Controls 1007<br />
Input Verification 1037<br />
Text Components: Under the Hood 1046<br />
Getting Multiple Views of a Document 1114<br />
Documents with Nontext elements: JTextPane and JEditorPane 1125
Summary I 183<br />
Contents xi<br />
10 THE TREE CONTROL I 184<br />
The Tree Control 1185<br />
Custom Tree Rendering and Editing 1256<br />
Summary 1296<br />
11 THE TABLE CONTROL 1298<br />
An Overview of the Table Control 1299<br />
The Table Model 1313<br />
Table Columns and the Table Column Model 1339<br />
The Table Control 1354<br />
Customized Table Rendering and Editing 1378<br />
Summary 1435<br />
12 MULTIPLE-DOCUMENT APPLICATIONS 1436<br />
Internal Frames 1437<br />
Layered Panes 1443<br />
Working with Internal Frames 1454<br />
Icons, the Desktop Pane and the Desktop Manager 1463<br />
An Example Multiple-Document Application 1491<br />
Summary 1512<br />
13 THE PLUGGABLE LOOK-AND-FEEL 1514
xii Contents<br />
The Look-and-Feel and the UIManager 1516<br />
Changing Component Look-and-Feel 1547<br />
Summary 1604<br />
APPENDIX A<br />
SWING AND APPLETS 1607<br />
INDEX 1633
FIGURES<br />
Figure l-l Swing combo boxes 13<br />
Figure 1-2 A Swing titled border grouping three radio buttons 16<br />
Figure I -3 A tool tip 18<br />
Figure 1-4 Swing menus and menu items 22<br />
Figure 1-5 The Swing toolbar 23<br />
Figure 1-6 A button as an MVC component 45<br />
Figure 1-7 The Metal look-and-feel 52<br />
Figure 1-8 The Motif look-and-feel 53<br />
Figure 1-9 The Windows look-and-feel 54<br />
Figure 2-1 A basic AWT and Swing component hierarchy 58<br />
Figure 2-2 The Swing JFrame 59<br />
Figure 2-3 Placing a button on a JFrame 67<br />
Figure 2-4 A text field on a Jframe 76<br />
Figure 2-5 Buttons with various fonts 84<br />
Figure 2-6 Using fonts that don't exist 85<br />
Figure 2-7 A disabled button 90<br />
Figure 2-8 Using indexing to insert a component in a container. ... 93<br />
Figure 2-9 An attempt to lay out a container without a layout<br />
manager 95<br />
Figure 2-10 A second attempt to lay out a container without a<br />
layout manager 96<br />
Figure 2-11 A successful attempt to lay out a container without a<br />
layout manager 99<br />
Figure 2-12 The internal structure of a JFrame 103<br />
Figure 2-13 An input form created with labels 106<br />
Figure 2-14 Labels with varying text alignments 108<br />
Figure 2-15 Using a JButton 120<br />
Figure 2-16 A JButton with a mnemonic added 123<br />
Figure 2-1 7 Buttons with images 130<br />
Figure 2-18 Button text and icon alignment options 133<br />
Figure 2-19 Icons and text in a left-to-right locale 139<br />
Figure 2-20 Icons and text in a right-to-left locale 141<br />
Figure 2-21 A JLabel with HTML in JDK I. I and <strong>Java</strong> 2 version 1.2.2 144<br />
Figure 2-22 A JLabel with HTML text in <strong>Java</strong> 2 version 1.3 145<br />
Figure 2-23 Using an embedded IMG tag in JLabel 147<br />
Figure 2-24 Potential multithreading conflicts in a Swing application . 152<br />
Figures xiii
xiv Figures<br />
Figure 3-1 The FlowLayout manager 168<br />
Figure 3-2 Resizing a container with a FlowLayout using center<br />
alignment 170<br />
Figure 3-3 The FlowLayout Manager increasing vertical space 170<br />
Figure 3-4 The FlowLayout Manager with too little horizontal<br />
space 171<br />
Figure 3-5 The FlowLayout Manager with too little vertical space 172<br />
Figure 3-6 The FlowLayout Manager with components of unequal<br />
size 172<br />
Figure 3-7 The FlowLayout Manager with components arranged in<br />
two rows 173<br />
Figure 3-8 A fully-populated BorderLayout Manager 174<br />
Figure 3-9 A fully-populated BorderLayout manager with too little<br />
vertical space 176<br />
Figure 3-10 A BorderLayout manager with an expandable center<br />
component I 78<br />
Figure 3-1 I Inappropriate use of the BorderLayout manager 179<br />
Figure 3-12 A rough-and-ready calculator using GridLayout 182<br />
Figure 3-13 A GridLayout with too little space 182<br />
Figure 3-14 A GridLayout with an extra cell 184<br />
Figure 3-15 A GridLayout with more items than requested cells. ... 185<br />
Figure 3-16 Explicit placement of objects with GridBagLayout 187<br />
Figure 3-17 Basic GridBagLayout: resizing the frame 188<br />
Figure 3-18 GridBagLayout: with simple constraints 193<br />
Figure 3-19 GridBagLayout: with extra space around the<br />
components 197<br />
Figure 3-20 GridBagLayout: with cells that can expand or contract. . 199<br />
Figure 3-21 GridBagLayout: anchoring components to the side of a<br />
cell 201<br />
Figure 3-22 GridBagLayout: a typical form layout 204<br />
Figure 3-23 GridBagLayout: a form layout with the buttons kept<br />
together 210<br />
Figure 3-24 Various BoxLayout configurations 212<br />
Figure 3-25 BoxLayout and Component alignment 217<br />
Figure 3-26 Components with different horizontal alignment values . 220<br />
Figure 3-27 BoxLayout arranging components on the x-axis with<br />
different vertical alignment values 220<br />
Figure 3-28 Using the OverlayLayout manager 236<br />
Figure 3-29 Icons and text in a right-to-left locale 249
Figure 3-30 Default FlowLayout Behavior in a Right-to-Left locale . . 253<br />
Figure 3-31 FlowLayout with LEADING alignment in a left-to-right<br />
locale 254<br />
Figure 3-32 FlowLayout with LEADING alignment in a right-to-left<br />
locale 254<br />
Figure 3-33 BorderLayout in a left-to-right locale 256<br />
Figure 3-34 BorderLayout in a Right-to-Left Locale 256<br />
Figure 3-35 Configuring multiple monitors with Windows 98 273<br />
Figure 3-36 Co-ordinate system when using multiple monitors 274<br />
Figure 4-1 Drawing Text on a Jpanel 287<br />
Figure 4-2 Changing the font and color in a Graphics object 291<br />
Figure 4-3 Using drawLine to draw straight lines 293<br />
Figure 4-4 Drawing polygons and polylines 295<br />
Figure 4-5 Drawing 3D rectangles and rectangles with rounded<br />
corners 298<br />
Figure 4-6 Drawing arcs and ellipses 301<br />
Figure 4-7 Drawing filled shapes 304<br />
Figure 4-8 Drawing filled 3D shapes 306<br />
Figure 4-9 Drawing with two Graphics objects 310<br />
Figure 4-10 JComponent drawing logic 318<br />
Figure 4-11 A graphics application 321<br />
Figure 4-12 An enlarged view of the border 346<br />
Figure 4-1 3 Font measurements 380<br />
Figure 4-14 Disabled text 389<br />
Figure 4-15 The Printer Dialog when using the original getPrintJob<br />
method with <strong>Java</strong> 2 Version 1.2.2 415<br />
Figure 4-16 The Printer Dialog created by the <strong>Java</strong> 2 Version 1.3<br />
getPrintJob method 416<br />
Figure 4-17 Two-sided long edge printing 429<br />
Figure 4-18 Two-sided short edge printing 429<br />
Figure 4-19 Specifying print ranges on Windows 431<br />
Figure 4-20 High-resolution image printing 436<br />
Figure 4-21 Using <strong>Java</strong> 2 Version 1.3 features to add extra printing<br />
capabilities 439<br />
Figure 5-1 The dangers of the wrong initial focus assignment 458<br />
Figure 5-2 Adding a help message using focus events 467<br />
Figure 5-3 A form to show Swing/AWT tab order differences 470<br />
Figures xv
XVI<br />
Figures<br />
Figure 5-4 Using accelerator keys 500<br />
Figure 5-5 Fl key detected on button "A" 501<br />
Figure 5-6 Using keyboard shortcuts and actions together 510<br />
Figure 5-7 Mapping a Key to an Action 529<br />
Figure 5-8 InputMap and ActionMap Ul mappings 534<br />
Figure 5-9 Using JScrollPane to scroll a large image 548<br />
Figure 5-10 Component parts of JScrollPane 550<br />
Figure 5-1 I Using Row and column headers with JScrollPane 554<br />
Figure 5-12 A scrolling grid of images 566<br />
Figure 5-13 A Scrolling grid with buttons to bring grid cells into<br />
view 573<br />
Figure 5-14 Text areas with and without word wrap in a scroll pane 589<br />
Figure 5-15 A large pattern to be scrolled with a scrollbar 592<br />
Figure 5-16 A demonstration of Swing component autoscrolling. ... 6 I I<br />
Figure 5-17 How autoscrolling works 612<br />
Figure 6-1 An application with a menu bar 621<br />
Figure 6-2 A menu with a recently-used file list 638<br />
Figure 6-3 A checkbox menu item 640<br />
Figure 6-4 Initial state of the editor menu 643<br />
Figure 6-5 The editor menu with only the available items enabled 645<br />
Figure 6-6 The editor menu when a file is open 646<br />
Figure 6-7 The editor menu with a read-only file open 647<br />
Figure 6-8 A menu with three accelerator keys 652<br />
Figure 6-9 A customized menu item 654<br />
Figure 6-10 A menu with icons 656<br />
Figure 6-11 A menu with the icons above the text 657<br />
Figure 6-12 Radio Button menu items with icons 661<br />
Figure 6-13 A menu bar with a customized border 662<br />
Figure 6-14 Menus in a right-to-left locale 668<br />
Figure 6-15 Popup menus 673<br />
Figure 6-16 A frame with a toolbar 687<br />
Figure 6-17 Customized toolbars 690<br />
Figure 6-18 The Graphics Demo application with a toolbar 692<br />
Figure 6-19 A floating toolbar 716<br />
Figure 6-20 A floating toolbar with a description in is caption bar . . 717<br />
Figure 6-21 The File Editor application using <strong>Java</strong> 2 version 1.3<br />
Actions 741
Figure 6-22 Implementing a simple status line 746<br />
Figure 7-1 A JOptionPane message dialog 764<br />
Figure 7-2 Variations on the JOptionPane message dialog 766<br />
Figure 7-3 Using a custom icon with JOptionPane 768<br />
Figure 7-4 The JOptionPane confirm dialog 770<br />
Figure 7-5 The JOptionPane option dialog 774<br />
Figure 7-6 The JOptionPane input dialog 775<br />
Figure 7-7 The JOptionPane input dialog with a combo box 776<br />
Figure 7-8 The JOptionPane input dialog with an object rather<br />
than a string 777<br />
Figure 7-9 The Swing JFileChooser Control 780<br />
Figure 7-10 Selecting more than one file in the file chooser 787<br />
Figure 7-1 I Using custom file filters 790<br />
Figure 7-12 Usng suffix-based file filters 794<br />
Figure 7-13 Filtering to show only <strong>Java</strong> source files 795<br />
Figure 7-14 Using a filter to show uncompiled <strong>Java</strong> source files .... 798<br />
Figure 7-15 Displaying an error message when attempting to open a<br />
file 801<br />
Figure 7-16 Displaying a file chooser with no control buttons 805<br />
Figure 7-17 Using a custom FileView to change display icons 811<br />
Figure 7-18 The Swing Color Chooser Dialog 813<br />
Figure 7-19 The Color Chooser HSB Tab 814<br />
Figure 7-20 The Color Chooser RGB Tab 815<br />
Figure 7-21 A Color Chooser with the Swatches and HSB tabs<br />
removed 825<br />
Figure 8-1 A basic confirmation dialog 839<br />
Figure 8-2 A dialog containing an image map 851<br />
Figure 8-3 A file preview dialog 864<br />
Figure 8-4 A color toolbox 879<br />
Figure 8-5 The JTabbedPane control 889<br />
Figure 8-6 The JTabbedPane control with tabs on the right 897<br />
Figure 8-7 Swing etched borders 902<br />
Figure 8-8 Swing soft bevel borders 904<br />
Figure 8-9 Compound borders 905<br />
Figure 8-10 Matte borders 908<br />
Figure 8-1 I Checkboxes and radio buttons 909<br />
Figure 8-12 A dialog with a default button 918<br />
Figures xvii
XVIII<br />
Figures<br />
Figure 8-1 3 The JList control 920<br />
Figure 8-14 The JList control with a custom renderer 948<br />
Figure 8-1 5 The JComboBox control 949<br />
Figure 8-16 Progress bar 975<br />
Figure 8-17 Customized progress bars 979<br />
Figure 8-18 ProgressMonitorlnputStream monitoring a long process 986<br />
Figure 8-19 Using ProgressMonitor 995<br />
Figure 8-20 Two JSIider controls 997<br />
Figure 8-21 JSIider with incompatible major/minor tick values 998<br />
Figure 8-22 An inverted, filled slider 1001<br />
Figure 8-23 A JSIider with default labels 1002<br />
Figure 9-1 A text field with too much text 1010<br />
Figure 9-2 A text area with added scrollbars 1014<br />
Figure 9-3 A text area with line wrapping enabled 1015<br />
Figure 9-4 Input fields with keyboard accelerators 1020<br />
Figure 9-5 An input field for passwords 1023<br />
Figure 9-6 Verifying Text Field Content 1038<br />
Figure 9-7 Responding to invalid input 1039<br />
Figure 9-8 Text component architecture 1048<br />
Figure 9-9 The structure of a plain document 1082<br />
Figure 9-10 The internal structure of a text area 1083<br />
Figure 9-1 I Usinng a JSplitPane to get two views of a document. . . 1116<br />
Figure 9-1 2 Styled Text with JTextPane 1136<br />
Figure 9-13 Viewing HTML with JEditorPane I 167<br />
Figure I 0-1 A tree showing a file system I 186<br />
Figure 10-2 A tree as drawn by the Windows look-and-feel I 189<br />
Figure I 0-3 A Motif tree I I 90<br />
Figure 10-4 A Metal tree with line style 'None' 1191<br />
Figure 10-5 A Metal tree with line style 'Horizontal' I 192<br />
Figure 10-6 A tree created from a Hashtable I I 94<br />
Figure 10-7 A tree with the root visible I 195<br />
Figure 10-8 A tree built using DefaultMutableTreeNodes 1200<br />
Figure 10-9 A tree to demonstrate tree traversal enumerations . . . 1233<br />
Figure 10-10 Customizing the icons and colors of tree nodes I 259<br />
Figure 10-11 Changing text and icon positions using a custom tree<br />
renderer 1264<br />
Figure 10-12 Basic Tree Ul Customizable Items 1268
Figure 10-13 A tree with customized expansion icons 1269<br />
Figure 10-14 A tree with a Combo Box cell editor 1276<br />
Figure 10-15 A tree node with a custom icon 1295<br />
Figure I I -1 A simple table I 300<br />
Figure I 1-2 The table after resizing the second column 1302<br />
Figure I 1-3 Dragging a table column to a new location 1304<br />
Figure I 1-4 Multiple Cell Selection in a Table 1307<br />
Figure I I -5 The internal structure of a table 1312<br />
Figure I 1-6 The table data model 1315<br />
Figure 11-7 A table created with AbstractTableModel 1320<br />
Figure I 1-8 An improved version of the orders table 1323<br />
Figure 11-9 An editable orders table 1325<br />
Figure 11-10 Two views of one table model I 326<br />
Figure I l-l I How DefaulTableModel holds the table data 1330<br />
Figure 11-12 A table with customized colors 1367<br />
Figure 11-13 A table with no horizontal grid lines 1368<br />
Figure 11-14 A table with a column renderer 1385<br />
Figure 11-15 Custom date and time Tenderers 1392<br />
Figure 11-16 A table with two locked columns 1397<br />
Figure 11-17 A table with a custom renderer for colors 1402<br />
Figure 11-18 A custom table color editor in a separate dialog box. . 1416<br />
Figure 11-19 Exporting Rows of Table Data 1423<br />
Figure I 1-20 Exporting a Rectangular Selection of Data 1424<br />
Figure 11-21 Pasting Data into Microsoft Excel 1429<br />
Figure I 1-22 Pasting Data into a JTable 1433<br />
Figure I 1-23 A Partial Paste Operation 1434<br />
Figure I 1-24 Another Partial Paste Operation 1434<br />
Figure 12-1 Four internal frames in an application window (Metal<br />
look-and-feel) 1438<br />
Figure 12-2 Internal frames in the Windows look-and-feel 1439<br />
Figure 12-3 Internal frames in the Motif look-and-feel 1440<br />
Figure 12-4 The window menu in the Motif look-and-feel 1441<br />
Figure 12-5 How JLayeredPane manages its child components 1452<br />
Figure 12-6 Motif internal frames with and without resizing handles 1456<br />
Figure 12-7 An internal frame with a custom frame icon 1458<br />
Figures XIX
XX Figures<br />
Figure 12-8 Four desktop icons 1464<br />
Figure 12-9 A tiled desktop 1471<br />
Figure 12-10 A cascaded desktop 1472<br />
Figure 12-11 A tiled desktop with I I components 1480<br />
Figure 12-12 Resizing a frame with the extended desktop manager. .1491<br />
Figure 12-13 An example multiple-document application 1492<br />
Figure 12-14 Prompting the user to confirm or abandon a close when<br />
there is unsaved data 1511<br />
Figure 13-1 Icons stored as lazy values 1539<br />
Figure 13-2 Three buttons with a new user interface 1548<br />
Figure 13-3 An application using the <strong>Core</strong> <strong>JFC</strong> button with the<br />
Windows look-and-feel 1589<br />
Figure 13-4 The switch look-and-feel menu 1590<br />
Figure 13-5 The graphics application after switching to the Motif<br />
look-and-feel 1591<br />
Figure 13-6 The <strong>Core</strong> <strong>JFC</strong> look-and-feel on the application<br />
look-and-feel menu 1600<br />
Figure A-1 An Applet Loaded Using <strong>Java</strong> Plug-in 1612
The <strong>Java</strong> <strong>Foundation</strong> <strong>Classes</strong> (<strong>JFC</strong>) are a collection of user interface features<br />
that are included as part of the Standard Edition of <strong>Java</strong> 2 platform.<br />
Many of these features, most notably the Swing user interface<br />
toolkit, were actually initially developed before the <strong>Java</strong> 2 was released and can<br />
also be used with JDK 1.1. The <strong>JFC</strong>] is such a large topic area that to cover it in<br />
one volume and give it the treatment that it deserves, and that an experienced<br />
programmer would expect, is an impossible task. So, this volume doesn't<br />
attempt to describe everything that falls under the <strong>JFC</strong> banner. Instead, I have<br />
chosen to concentrate on the parts that are of the most immediate interest to<br />
programmers working in the commercial <strong>Java</strong> development environment<br />
today. More advanced topics are discussed at length in this book's companion<br />
volume, <strong>Core</strong> Swing: Advanced Programming, which is also published by<br />
Prentice Hall.<br />
Most of this book is concerned with the subset of the <strong>JFC</strong> that you can use<br />
with both JDK 1.1 and the <strong>Java</strong> 2 platform. Specifically, this means the<br />
Abstract Windows Toolkit (AWT) as it existed in JDK 1.1, which is briefly<br />
covered as introductory or refresher material; printing, a JDK 1.1 feature<br />
that is deemed to be part of the <strong>JFC</strong>; and the Swing component set, which is<br />
the main focus of this book.<br />
In writing about Swing, I have tried to include material that is of immediate<br />
interest to programmers who will want to use it to create real applications.<br />
The approach I have taken throughout is to explain how the Swing<br />
XXI
xxii Preface<br />
components and the various new Swing mechanisms (such as keyboard accelerators)<br />
work by giving an overview of each topic and then presenting examples<br />
that show the basic principles. Then, typically, I move on to show more<br />
complex use of the component or feature and how it can be used together<br />
with other components and features to solve real application-related problems.<br />
Much of the time, you can find out some of what you want to know by<br />
reading the documentation that comes with the JDK or Swing package, but<br />
this documentation often falls short of explaining the more complex features<br />
and how they interact. These are the things that programmers usually need<br />
to understand before they can make full use of what is available. You'll find<br />
those explanations in this book.<br />
I have tried to write this book as I would have liked to have seen it as an<br />
experienced programmer wanting to learn about Swing for the first time. By<br />
reading the documentation, studying the source code, disassembling the<br />
class files, and trying various test cases, I have tried to do more than just<br />
scratch the surface of this large and complex topic by gathering together<br />
material and examples that are not available in Suns documentation and presenting<br />
it in an organized, focused manner.<br />
WhoThisBooklsFor<br />
This book is for experienced <strong>Java</strong> programmers who want to find out about<br />
the <strong>Java</strong> <strong>Foundation</strong> <strong>Classes</strong> and, in particular, the Swing component set.<br />
Because this book is aimed at experienced <strong>Java</strong> programmers, you'll find that<br />
most of the examples are not trivial, with the exception of some of those in<br />
the early chapters that illustrate basic points that, for reasons of clarity, can't<br />
be embedded. Many of the examples that you'll find in this book are<br />
intended to be used as a starting point for writing production code that you<br />
can include in your own applications; some of the material here has been<br />
included specifically to address the most common questions that have been<br />
aired in the various news and discussion groups since the early versions of<br />
Swing were released. In particular, I have tried to address the following<br />
issues that seemed to cause the most confusion:<br />
• Creating and customizing tree components.<br />
• Custom Tenderers and editors for list boxes, trees, and tables.<br />
• How to use the powerful Swing text components, including a<br />
detailed description of how they work.
• Making proper use of the internal frames feature to create<br />
multidocument applications.<br />
• Customizing individual components by creating your own lookand-feel<br />
classes.<br />
What You'll Need xxiii<br />
The focus in this book is entirely on writing <strong>Java</strong> applications rather than on<br />
applets. However, if you're already thoroughly familiar with applets, you'll<br />
find that you can use write applets using Swing veiy quickly and most of this<br />
book will still apply, since Swing components can be used in applets just as<br />
easily as in applications. To make the task even easier, there is an appendix<br />
devoted entirely to using Swing in the applet environment, including discussion<br />
on some of the topics that cause problems for developers, such as how to<br />
use Swing with a browser that doesn't include it and how to access non-code<br />
resources, such as image files, in a browser- and location-independent way.<br />
What You'll Need<br />
This book is written with the assumption that you are familiar with the <strong>Java</strong><br />
language and the core <strong>Java</strong> classes and that you can compile and run <strong>Java</strong><br />
applications. Although this book is mainly about the Swing components, the<br />
first few chapters cover the basic principles of the Abstract Windows Toolkit<br />
(AWT), knowledge of which is a prerequisite for understanding Swing. You'll<br />
get the most from this book if you have read <strong>Core</strong> <strong>Java</strong> 2, Volume I—Fundamentals<br />
by Cay S. Horstmann and Gary Cornell, also published by Prentice<br />
Hall, and if you understand inner classes, which are heavily used both in the<br />
Swing source code and in the examples shown in this book. <strong>Core</strong> <strong>Java</strong><br />
includes excellent coverage of this topic.<br />
Assuming that you have a computer running Windows 95, Windows 98,<br />
Windows 2000, Windows NT version 4 or later, Linux or Solaris, everything<br />
else that you need, including the <strong>Java</strong> 2 platform itself and a professional<br />
development environment (JBuilder 4 <strong>Foundation</strong> Edition), is included on<br />
the CD-ROM that accompanies this book.
xxiv Preface<br />
How This Book Is Organized<br />
The book is divided into three sections. Section 1, "From AWT to Swing"<br />
(Chapters 1 through 4), describes the relationship between the Abstract<br />
Windows Toolkit and Swing. Because Swing is based on the AWT, some<br />
understanding of the latter is needed before you can make full use of Swing.<br />
Therefore, this book opens by presenting the fundamentals of the AWT for<br />
those who are not entirely confident that they fully understand them and as a<br />
revision for those who do. These early chapters are, however, written not<br />
simply as a short course on the AWT, but they deliberately have a Swing slant<br />
to them so that as early as Chapter 2 you will meet and use your first Swing<br />
components. I recommend that everybody reads Chapter 1 and then,<br />
depending on your background, you should read, or at least skim, Chapters 2<br />
through 4.<br />
Section 2, "Using Swing to Build Better Applications" (Chapters 5 through<br />
8), deals with the various new mechanisms and components that Swing offers<br />
that have no real parallel in the AWT. Much of this section deals with individual<br />
Swing components or Swing concepts and, to a certain extent, the chapters<br />
here can be read in any order. Finally, Section III, "Advanced Topics"<br />
(Chapters 9 through 13), covers larger topic areas such as the tree and table<br />
components and the pluggable look-and-feel.<br />
Chapter 1 introduces the <strong>Java</strong> <strong>Foundation</strong> <strong>Classes</strong> (<strong>JFC</strong>) and puts them<br />
into perspective by comparing them to the AWT. You'll learn the scope of the<br />
<strong>JFC</strong> and get a quick overview of the main features of the Swing component<br />
set. The last part of this chapter introduces you to one of the more novel features<br />
of Swing—the so-called "pluggable look-and-feel," which allows applications<br />
to adapt their appearance to suit the platform that they are running<br />
on or to take on the same appearance across all platforms. It also explains the<br />
basis of this facility, the Model/View/Controller architecture (MVC).<br />
Chapter 2 is the first of the AWT revision chapters. This chapter begins by<br />
introducing the Swing JFrame class as the top-level window of an application<br />
and uses it to illustrate basic AWT concepts such as components, containers,<br />
position, size, color, fonts, and so on. The second half of this chapter includes<br />
material on event handling and introduces Swings JLabel and JButton<br />
classes, which allow you to include text and an image on the same component.<br />
Here, you'll also find out about some Swing features that don't really<br />
exist in the AWT, such as icons and accelerator keys.<br />
Chapter 3 is concerned with global user-interface issues, principal among<br />
which is controlling the layout of components in the interface. With this in
How This Book Is Organized xxv<br />
mind, almost the whole chapter is devoted to in-depth coverage of the AWT<br />
and Swing layout managers. Layout managers are a topic that is often given<br />
only fleeting coverage in <strong>Java</strong> books and yet represents a large proportion of<br />
the questions that are asked in the <strong>Java</strong>-related Internet newsgroups. Here, I<br />
have tried to create a consistent picture of all of the layout managers and to<br />
address the most common misunderstandings by illustrating how each of<br />
them lays out its container and how resizing the container affects the positioning<br />
of the components.<br />
Swing includes a useful new feature that can help with understanding<br />
problems with component layout—Graphics Debugging. This feature allows<br />
you to see how your components are drawn, line-by-line, in slow motion.<br />
Chapter 3 looks at this feature and shows you how to use it, concluding with a<br />
look at the events generated by windows and by individual components.<br />
Chapter 4 covers the AWT Graphics object and describes how you can<br />
use it to render text and draw graphics. The main body of this chapter is<br />
devoted to building a complete Swing application that allows you to use the<br />
mouse to draw and fill colored graphic shapes. While constructing this application,<br />
you'll put into practice much of what was covered in the previous two<br />
chapters and you'll also discover how to create custom icons and components<br />
with borders. The completed application will serve as a starting point for several<br />
improvements that will be made to it in the rest of the book. Chapter 4<br />
closes with a discussion of printing, another topic that has caused much confusion<br />
in the past.<br />
Chapter 5 shows you how to develop applications that work well when the<br />
user prefers to use the keyboard rather than the mouse, and introduces focus<br />
handling and the powerful concept of Actions. Actions are often used in<br />
Swing to abstract an action to be performed from the stimulus to perform<br />
it—such as a keystroke or a button press. The second half of the chapter<br />
looks at how Swing supports scrolling using the new JSc roll Pane and<br />
JScrollBar components, which are much more powerful than their AWT<br />
counterparts.<br />
Chapter 6 introduces the Swing menu system. Swing menus are more consistent<br />
than those available with AWT. Keyboard accelerators are available on<br />
any menu or menu item and you can use icons as well as, or instead of, text.<br />
You'll also see how to integrate the Actions that were introduced in Chapter<br />
5 with the menu system and with another new Swing facility, the toolbar.<br />
Chapter 7 is the first of two chapters that contain extensive coverage of<br />
dialogs. This chapter concentrates on the basic dialogs that you can easily<br />
create using the JOptionPane component, which allow you to post error,<br />
warning, and information messages, or present options to the user and wait
xxvi Preface<br />
for a choice to be made. Two more complex, but extremely useful standard<br />
dialogs, the file chooser and color chooser, are also covered in this chapter.<br />
Chapter 8 shows you how to use the Swing JDialog class to create your<br />
own dialogs. This chapter also introduces many of the Swing components<br />
that are useful in dialogs, such as tabbed panes, list boxes, combo boxes,<br />
progress controls, and sliders.<br />
In Chapter 9, you'll find an in-depth description of the Swing text controls,<br />
starting with the simple JTextField and JTextArea components, which<br />
are related to the AWT TextField and TextArea controls. The Swing controls<br />
are underpinned by a complex but powerful document model that is<br />
covered in detail in this chapter. The description of the document model is<br />
followed by a description of two new Swing text controls—JTextPane,<br />
which allows multiple fonts, colors, images, and event components to be<br />
mixed in a view of a document, and the flexible JEditorPane, which adapts<br />
itself to render documents held as plain text, HTML, Rich Text Format, and<br />
a potentially infinite number of other formats.<br />
Chapter 10 describes the Swing tree control and shows you how to build a<br />
tree, how to control which parts of it are expanded or collapsed, and how to<br />
traverse the tree in various different ways. This chapter also shows you a custom<br />
control based on the tree that presents a file system in a manner familiar<br />
to users of the Windows platform. It describes in detail how to customize<br />
trees using specially-developed Tenderers to control how the various pieces<br />
of the tree are drawn.<br />
Chapter 11 is concerned with the table component. This component<br />
allows you to present data in a tabular form. You'll see how to determine the<br />
order of columns and their sizes and how to change the way in which the data<br />
in the table is displayed. There is also a section on table cell editors, which<br />
shows you how to present to the user a suitable interface for changing the<br />
content of the table.<br />
Chapter 12 discusses Swings support for multiple-document applications.<br />
Starting with a discussion of the basic components that make multiple-document<br />
applications possible, the chapter moves on to discuss desktop panes<br />
and icons and the desktop manager. You'll also see how to create a custom<br />
desktop pane that automatically cascades or tiles the windows that it manages<br />
and how to customize the desktop manager itself.<br />
Finally, Chapter 13 returns to the theme of the pluggable look-and-feel<br />
that was first touched on in Chapter 1. This chapter shows the underlying<br />
support for changing the look-and-feel of an application, then shows you how<br />
to create your own user interface for the Swing button component. Finally,
How This Book Is Organized xxvii<br />
you'll see various ways to introduce look-and-feel related customizations into<br />
your application and how to create your own look-and-feel.<br />
This book covers all of the Swing components and most of the other<br />
important Swing features. For ease of reference, the following table lists the<br />
Swing components, along with the chapters in which they are described.<br />
Component Chapter Component Chapter<br />
Box 3 JRadioButtonMenuItem 6<br />
BoxLayout 3 JRootPane 2<br />
JButton 2 JScrollBar 5<br />
JCheckBox 8 JScrollPane 5<br />
JCheckBoxMenu- 6 JSeparator 8<br />
Item<br />
JComboBox 8 JSlider 8<br />
JComponent 2 JSplitPane 9<br />
JDesktopPane 12 JTabbedPane 8<br />
JDialog 8 JTable 11<br />
JEditorPane 9 JTextArea 9<br />
JFrame 2 JTextField 9<br />
JInternalFrame 12 JTextPane 9<br />
JLabel 2 JToggleButton 8<br />
JLayeredPane 12 JToolBar 6<br />
JList 8 JToolTip 8<br />
JMenu 6 JTree 10<br />
JMenuBar 6 JViewport 5<br />
JMenuItem 6 JWindow 2<br />
JOptionPane 7 OverlayLayout 3<br />
JPanel 2 ProgressMonitor 8<br />
JPasswordField 9 ProgressMonitorlnput- 8<br />
Stream<br />
JPopupMenu 6 Timer 8<br />
JProgressBar 8 UIDefaults 13<br />
JRadioButton 8 UIManager 13
xxviii Preface<br />
Conventions Used in This Book<br />
Courier font is used to indicate <strong>Java</strong> code, both in the listings and in the<br />
shorter code extracts that you'll find included in the text. The same font is<br />
also used to indicate key words and class names (such as JFrame). In some<br />
cases, we show a code extract and then explain how to modify it to change its<br />
behavior. In this case, the code that is added or modified is shown in bold<br />
courier font.<br />
Icons are used to call out material that is of significance and that the<br />
reader should be alerted to.<br />
<strong>Core</strong> Note, Alert, Tip<br />
Note.This is information that deserves special attention, such as an<br />
interesting fact about the topic at hand, or that the reader may want to<br />
keep in mind while programming.<br />
AlertThis is information that, while useful, may cause unexpected<br />
results or serious frustration.<br />
Tip:This is particularly useful information that will save the reader<br />
time, highlight a valuable programming tip, or offer specific advice on<br />
increasing productivity.<br />
About the CD-ROM<br />
The CD-ROM that accompanies this book contains the following:<br />
• The source code for all of the examples in this book.<br />
• A copy of the JBuilder 4 Integrated Development Environment<br />
for Windows, Linux, and Solaris, which includes a compiler and<br />
a copy of the <strong>Java</strong> 2 Runtime Environment (JRE) version 1.3.<br />
• A copy of SwingBuilder, a utility that allows you to graphically<br />
create Swing-based user interfaces.<br />
• A chapter from <strong>Core</strong> Swing: Advanced Programming in PDF<br />
form.<br />
The directory structure of the CD-ROM looks like this:<br />
Examples
Software<br />
JBuilder<br />
unix<br />
windows<br />
SwingBuilder<br />
SwingBuilder.zip<br />
AdvancedSwing<br />
About the CD-ROM xxix<br />
In order to run the examples in this book, you need to install the source code,<br />
install the development environment, and compile the examples.<br />
Installing the Source Code<br />
The example source code is supplied in the form of a ZIP file called examples,<br />
zip in the Examples directory of the CD-ROM. In order to use the<br />
examples, you should copy the ZIP file to your hard drive and expand it using<br />
WinZip or a compatible utility. For example, you might create a directory on<br />
your hard drive called<br />
C:\<strong>Core</strong><strong>JFC</strong>Examples<br />
then copy examples. zip to that directory and expand it there. If you don't<br />
have a suitable native utility that expands ZIP files but you have the <strong>Java</strong><br />
Development Kit installed, you can use the j ar command to unpack this file:<br />
jar xvf examples.zip<br />
If you have correctly expanded the archive, you should see a new subdirectory<br />
called <strong>JFC</strong>Book and three other files whose names end in ". jpr". You<br />
may now delete the examples. zip file.<br />
Beneath the <strong>JFC</strong>Book directory, the example code is organized into further<br />
subdirectories based on the chapter in which they are described. Thus, for<br />
example, all of the examples for Chapter 2 will be found in the directory<br />
C:\<strong>Core</strong><strong>JFC</strong>Examples\<strong>JFC</strong>Book\Chapter2<br />
While most of the examples work with all versions of Swing and the JDK,<br />
there are some that are specific to different releases. These examples are<br />
held in further subdirectories beneath the chapter directory. For example,<br />
the Chapter2 directory has subdirectories called jdki2 and jdki3. The<br />
examples in jdki2 can only be compiled and run if you are using <strong>Java</strong> 2 version<br />
1.2 or later, while those in the j dkl3 directory require <strong>Java</strong> 2 version 1.3<br />
or later. Do not attempt to compile these examples if you are using Swing<br />
with JDK 1.1.
xxx Preface<br />
Having installed the example code, you now need to compile it. How you<br />
do this depends on whether you intend to use the JBuilder 4 environment<br />
supplied on the CD-ROM or the <strong>Java</strong> Development Kit. Both of these cases<br />
are covered in the following sections.<br />
Using the Example Source Code with Borland<br />
JBuilder 4, <strong>Foundation</strong> Edition<br />
The CD-ROM contains copies of Borland's JBuilder 4, <strong>Foundation</strong> Edition<br />
for Windows, Linux, and Solaris.<br />
To install JBuilder on a Windows system, run the fndinstall. exe file in<br />
the JBuilder\windows directory of the CD-ROM. You can also install the<br />
documentation by running doc_install.exe and some sample code using<br />
smp_install. exe, both of which will be found in the same directory.<br />
If you are using Linux or Unix, the files you need to use are in the directory<br />
JBuilder/unix. The JBuilder installation file is called<br />
fnd_linux_install.bin or fnd_solaris_install.bin, depending on<br />
your operating system, while the documentation and samples can be installed<br />
using doc_install.bin and smp_install.bin, respectively. After installing<br />
JBuilder4 using fnd_linux_install.bin or<br />
fnd_solaris_install.bin, you must add the location of the newly<br />
installed <strong>Java</strong> VM to your PATH variable. If you are using the Bourne shell,<br />
you can do this using the command:<br />
PATH=/opt/jbuilder4/jdkl.3/jre/bin:$PATH<br />
assuming that you installed JBuilder4 in /opt/jbuilder4. Once this has<br />
been done, you can install the JBuilder4 samples using smp_install .bin.<br />
Once you have installed the software, you need to get an activation key to<br />
license your software. To do this, visit the Borland Web site at<br />
http://www.borland.com/jbuilder/foundation/download<br />
You will need to register in order to receive your activation key.<br />
Compiling the Source Code<br />
For convenience, the example code contains three JBuilder project files<br />
that allow you to compile and run all of the source code from within the<br />
development environment. With the exception of the applet examples in<br />
Appendix A, all of the book's source code can be conveniently accessed by<br />
opening the project file <strong>Core</strong><strong>JFC</strong>Examples. jpr in the directory into which
About the CD-ROM XXXI<br />
you installed them. To open this project file, run JBuilder, open the File<br />
menu, select Open Project and then navigate to the <strong>Core</strong><strong>JFC</strong>Examples<br />
. j pr file and click on it. When you do this, you will see a set of folders in<br />
the left-hand pane of the JBuilder main window, as shown in Figure P-l.<br />
Each folder is labeled for one of the chapters of this book and contains all<br />
of the examples for that chapter, with the exception of the cj f c folder which<br />
contains additional files used in Chapter 13. In Figure P-l, the chapter2<br />
folder has been opened to show the example code for Chapter 2. To view a<br />
source file, double click on the name and it will be opened in the main window<br />
of the IDE.<br />
To compile the source code, open the Project menu and select Rebuild<br />
Project "<strong>Core</strong><strong>JFC</strong>Examples . jpr". This will compile all of the source code,<br />
placing each class file in the same directory as its corresponding source file.<br />
You should also open the other two project files, <strong>Core</strong><strong>JFC</strong>AppendixBNative<br />
. jpr and <strong>Core</strong><strong>JFC</strong>AppendixAPlugin. jpr, and follow the same process<br />
to compile the remaining source code.
xxxii Preface<br />
Running the Examples Using JBuilder<br />
Since JBuilder 4 comes with a complete copy of the <strong>Java</strong> Runtime Environment<br />
version 1.3, you can use it to compile and run all of the source code in<br />
this book. It is a simple matter to run any given example. For example, in<br />
Chapter 2, you will find an instruction to run the first example using the command<br />
<strong>Java</strong> <strong>JFC</strong>Book.Chapter2.BasicFrame<br />
To run this example from within the IDE, do the following:<br />
1. Open the Project Menu<br />
2. Select Project Properties<br />
3. When the Project Properties Dialog appears, select the<br />
Run tab<br />
4. Press the button with three dots on it on the Application tab<br />
5. In the next dialog, open the "<strong>JFC</strong>Book" node and then the<br />
"Chapter2" node to show the classes for the Chapter 2 examples<br />
6. Select the example that you want to run—in this case, Basic-<br />
Frame, by double clicking, as shown in Figure P-2<br />
7. Close the Project Properties Dialog<br />
This apparently long-winded process (which will get easier with time!) makes<br />
BasicFrame the current example. In order to run it, open the Run menu and<br />
select Run Pro j ect, or just press F9. Incidentally, you can also use the debug<br />
features of JBuilder to step through any of the example source code by using<br />
the Debug Pro j ect menu item. Usually, you would first open the source file<br />
and apply a breakpoint before doing this.<br />
Using the Example Source Code with the <strong>Java</strong><br />
Development Kit<br />
If you prefer not to use a development environment, you can compile and<br />
run the examples using the <strong>Java</strong> Development Kit.
Figure P-2 Selecting an example to run in JBuilder.<br />
Preparing to Use the Example Code with<br />
JDK I.I<br />
Swing is not part of the core <strong>Java</strong> platform in JDK 1.1. Therefore, if you want<br />
to use the examples with JDK 1.1, you will need to download and install both<br />
JDK 1.1 and Swing version 1.1.1. You can download the <strong>Java</strong> Development<br />
Kit from the <strong>Java</strong>Soft Web site at<br />
http://j ava.sun.com/products/j dk/1.1<br />
and Swing version 1.1.1 from<br />
http://<strong>Java</strong>.sun.com/products/jfc/download.html<br />
About the CD-ROM xxxiii
xxxiv Preface<br />
Instructions for installing both products are available as part of the download.<br />
For the purpose of the descriptions that follow, we assume that you install the<br />
<strong>Java</strong> Development Kit in the directory c:\jdki.i.8 and Swing in<br />
c:\Swing-l.1.1.<br />
Having completed the installation, you need to set your PATH and CLASS -<br />
PATH variables so that all of the executables and classes that you need to<br />
access are readily available. The instructions here assume that you are using a<br />
DOS session under Windows. Similar commands should be substituted if you<br />
are installing under Solaris or Linux.<br />
The PATH variable must be set so that the j avac and j ava commands are<br />
accessible when compiling and running the examples. Assuming that the<br />
JDK has been installed as described above, the following command will set<br />
the PATH variable appropriately:<br />
PATH=c:\j dkl.1.8\bin;%PATH%<br />
The CLASSPATH variable should be set to include both the JDK classes, the<br />
Swing classes, and the classes for the book's examples. Having installed<br />
Swing, you need to add the appropriate JAR files to your CLASSPATH. Swing<br />
contains several JAR files, all of which are found in the c:\swing-l.l.l<br />
directory:<br />
swing.jar<br />
windows.jar<br />
mac.jar<br />
motif.jar<br />
multi.jar<br />
beaninfo.jar<br />
swingall.jar<br />
You can either choose to include the optimal set of files for your platform,<br />
or you can simply add swingall. j ar to your CLASSPATH. If you just want<br />
to use the standard Metal look-and-feel, you can get away with adding<br />
swing. j ar. If you want to use the Windows, Mac, or Motif look-and-feel as<br />
well, add windows, jar, mac. jar, and/or motif .jar. If you plan to<br />
develop <strong>Java</strong> Accessibility features (a topic outside the scope of this book),<br />
you need to add multi. jar. You won't need to use beaninf o. jar file<br />
unless you need to recreate your own version of swingall. j ar.<br />
The following commands are sufficient to use Swing with the Metal, Windows,<br />
or Motif look-and-feels:<br />
set CLASSPATH=c:\jdkl.1.8\lib\classes.zip;%CLASSPATH%<br />
set CLASSPATH=c:\swing-1.1.1\swingall.jar;%CLASSPATH%<br />
set CLASSPATH=c:\<strong>Core</strong><strong>JFC</strong>Examples;%CLASSPATH%
About the CD-ROM xxxv<br />
In order to make these settings persistent, you should add these commands<br />
to your AUTOEXEC . BAT file.<br />
Having installed the necessary software, the next step is to compile the<br />
example code. This process is described in "Compiling and Running the<br />
Example Code."<br />
<strong>Core</strong> Alert<br />
Swing 1.1.1 is the last version of Swing that will be issued by <strong>Java</strong>Soft for<br />
use with JDK version 1.1. As of October 2002, it will no longer be<br />
supported. JDK version 1.1 is itself undergoing its "end of life cycle" and will<br />
also no longer be supported by <strong>Java</strong>Soft at around the same time.<br />
Preparing to Use the Example Code with<br />
the <strong>Java</strong> 2 Platform<br />
The <strong>Java</strong> 2 platform includes the Swing classes, so you do not need to install a<br />
separate Swing package. The example code in this book works with both <strong>Java</strong><br />
2 version 1.2 and <strong>Java</strong> 2 version 1.3, which you can download from the following<br />
locations:<br />
http://<strong>Java</strong>.sun.com/products/jdk/1.2<br />
http.-//java. sun. com/j2se/l. 3<br />
Both of these downloads include installation instructions.<br />
As with JDK 1.1, following installation you need to set both the PATH and<br />
CLASSPATH variables. In the descriptions that follow, we assume that you<br />
have installed the JDK in the directory c: \ jdki .3.<br />
The PATH variable should be set to include the locations of the j avac and<br />
java commands:<br />
PATH=c:\j dkl.3\bin;%PATH%<br />
By comparison with JDK 1.1, the CLASSPATH variable does not need to<br />
include the location of the JDK core classes, since these are located by other<br />
means when the <strong>Java</strong> 2 platform is being used. Therefore, only the location of<br />
the example code needs to be added to the CLASSPATH:<br />
set CLASSPATH=c:\<strong>Core</strong><strong>JFC</strong>Examples;%CLASSPATH%<br />
Compiling and Running the Example Code<br />
If you did not unpack the examples when you installed them, you should do<br />
so now. Make the directory in which the examples.zip file has been
xxxvi Preface<br />
installed (c:\<strong>Core</strong><strong>JFC</strong>Examples) your working directory, then execute the<br />
following command:<br />
jar xvf examples.zip<br />
This will extract all of the examples. You should now have a directory<br />
called <strong>JFC</strong>Book in your <strong>Core</strong><strong>JFC</strong>Examples directory, with one subdirectory<br />
per chapter. A typical layout might be as follows:<br />
C:\<strong>Core</strong><strong>JFC</strong>Examples\<strong>JFC</strong>Book\Chapter2<br />
C:\<strong>Core</strong><strong>JFC</strong>Examples\<strong>JFC</strong>Book\Chapter3<br />
and so on. If you do not have this layout, you have done something wrong and<br />
the example programs will not work. One possible problem you might have at<br />
this stage is an inability to run the j ar command or an error while running it.<br />
If this is the case, either your PATH variable or your CLASSPATH variable is<br />
not correctly set. Check that you have correctly followed the instructions in<br />
this section, then reboot your computer to make sure that the settings have<br />
been incorporated into your environment.<br />
The examples for each chapter are held in a directory named after that<br />
chapter and all the examples in that directory must be compiled together.<br />
You must also build the examples in ascending chapter-number order, apart<br />
from those in Chapter 13, which must be built after those in the directory<br />
Cj f c. The correct build order, therefore, is as follows:<br />
• Chapter2 through Chapterl2<br />
• Cj f c<br />
• Chapterl3<br />
• AppendixA\Native<br />
• AppendixA\Plugin<br />
To build the examples for Chapter 2, for example, do the following:<br />
cd C:\<strong>Core</strong><strong>JFC</strong>Examples\<strong>JFC</strong>Book\Chapter2<br />
j avac *.j ava<br />
This process should be repeated for each chapter, in the order just shown.<br />
Some of the chapters have additional examples that can be used with different<br />
versions of the <strong>Java</strong> 2 platform. For example, the Chapter2 director)'<br />
has subdirectories called jdkl2 and jdkl3. The examples in the jdki2 directory<br />
can be used with any version of the <strong>Java</strong> 2 platform, whereas those in the<br />
jdki3 directory apply only to <strong>Java</strong> 2 version 1.3 or later. To use these examples,<br />
you will need to compile them first; for example:<br />
cd C:\<strong>Core</strong><strong>JFC</strong>Examples\<strong>JFC</strong>Book\Chapter2\jdkl.2<br />
j avac *.j ava
About the CD-ROM xxxvii<br />
Do not attempt to compile the examples in the jdkl3 subdirectories<br />
unless you are using <strong>Java</strong> 2 version 1.3.<br />
To run the examples, you must have the directory C: \<strong>Core</strong><strong>JFC</strong>Examples<br />
in your CLASS PATH, as described earlier. You must then supply the full class<br />
name of the example that you want to run along with any required parameters<br />
as described in the appropriate chapter. For example, to run the first<br />
example in Chapter 2, use the following command:<br />
<strong>Java</strong> <strong>JFC</strong>Book.Chapter2.BasicFrame<br />
In most cases, at appropriate points throughout the text, you will find<br />
explicit instructions that tell you how to run particular examples. Usually,<br />
however, you just need to use the example s class name and its chapter number<br />
as shown here.<br />
Using SwingBuilder<br />
SwingBuilder is a utility that allows you to visually create Swing-based user<br />
interfaces. Unlike JBuilder, it is not a complete development environment.<br />
Instead, it is one component of a suite of IDE tools produced by SwingSoft,<br />
a UK-based company who can be contacted via their Web site at<br />
www.swingsoft.com, where you can also find details of their other IDE<br />
components. Unlike most GUI builders, SwingBuilder does not generate<br />
code from your user interface design. Instead, it saves either a compact<br />
binary representation of your component layout, or it creates an XML file.<br />
At runtime, software provided by SwingSoft (and included with Swing-<br />
Builder) reads either of these formats and recreates the user interface.<br />
The CD-ROM contains an evaluation copy ol SwingBuilder for Windows<br />
platforms. In the directory Sof tware\SwingBuilder, you'll find a ZIP file<br />
that you can expand onto your hard drive. The set of files extracted from this<br />
archive contains a file, sb.bat, that can be used to run SwingBuilder. You<br />
must pass the name of the directory into which SwingBuilder has been<br />
installed as a command line argument. If you expand the ZIP archive into a<br />
directory called C:\SwingBuilder, then the following commands will start<br />
SwingBuilder:<br />
cd C:\SwingBuilder<br />
sb.bat c:\SwingBuilder
xxxviii Preface<br />
Feedback<br />
No book is perfect and this one is unlikely to be an exception to that rule.<br />
Even though it has been through a long period of revision and technical<br />
review, there are, of course, errors still to be found and improvements still to<br />
be made. If you find an error or if there is something that you think might<br />
make the book more useful, we want to know. Please send comments and<br />
corrections to the following e-mail address:<br />
ktotopley.demon.co.uk<br />
Further Information<br />
<strong>Java</strong> is a fast-moving subject. To keep up with developments, reading books is<br />
not enough. The best place for up-to-date information is, of course, the <strong>Java</strong>-<br />
Soft Web site at:<br />
http://j ava.sun.com<br />
You can get the most recent information on Swing and download the latest<br />
version of the software from the following page:<br />
http://java.sun.com/products/j fc/download.html<br />
<strong>Java</strong>Soft also provides an online Swing magazine called The Swing Connection,<br />
which is periodically updated and can be found at:<br />
http://<strong>Java</strong>.sun.com/products/j fc/tsc<br />
Finally, there are several active newsgroups devoted to the discussion of<br />
the <strong>Java</strong> platform. The following two groups in particular frequently discuss<br />
Swing and <strong>JFC</strong>-related issues:<br />
comp.lang.j ava.gui<br />
comp.lang.j ava.programmer<br />
Acknowledgments (Second Edition)<br />
Following the release of the <strong>Java</strong> 2 platform, which introduced several<br />
important changes that affect Swing, a second <strong>edition</strong> of <strong>Core</strong> <strong>Java</strong> Founda-
Acknowledgments (First Edition) xxxix<br />
tion <strong>Classes</strong> was obviously going to be required. However, book-writing is a<br />
time-consuming process and it has, almost unbelievably, taken nearly three<br />
years to find the time to complete the task. My thanks, as always, go to Greg<br />
Doench at Prentice Hall for giving me the opportunity to update this book<br />
(and for patiently waiting for it to happen), Nicholas Radhuber for doing an<br />
excellent job of seeing this book through its production phase, and to Mary<br />
Treacy for her usual attention to detail when it comes to contracts and all<br />
things administrative.<br />
Thanks also go to the technical reviewer of this <strong>edition</strong>, Paul Philion, who<br />
dealt very efficiently with a very large manuscript in what must have felt like<br />
too little time. The second <strong>edition</strong> also benefits greatly from feedback I have<br />
received from readers of the first <strong>edition</strong>. In no particular order, I would like<br />
to thank the following individuals for their comments and suggestions, with<br />
apologies to anybody that I might have missed:<br />
Bill Paris, Bob Herrmann, Bruce Hochstetler, Eric Inman, Frederic<br />
Peron, Jim Lawton, Jim Logsdon, Joe Shelby, John Broderick, Jon Steelman,<br />
Leigh Power, Marco Melgazzi, Mark Jones, Michael Boyle, Mort Goldberg<br />
(an especially prolific contributor!), Pat Patrudu, Stephen Kleinman, Conrad<br />
Taylor, Tim Lowe, and Weimin Wang.<br />
Last, and most important, my family has once again had to put up with<br />
long periods when it seemed that all I did was come home from (real) work,<br />
have dinner, and retire to the study, only to emerge well past midnight and<br />
then repeat the cycle the next day. I reserve my biggest thank you for my<br />
wife, Berys, children Andrew (Flight Simulator ace and budding programmer)<br />
and Katie, and Max, a dog who can never be ignored.<br />
Acknowledgments (First Edition)<br />
I seem to have spent all of my life buying and reading books. It is probably<br />
not too great an exaggeration to say that almost everything I know I have read<br />
in a book somewhere. So it was only to be expected that when <strong>Java</strong> first<br />
appeared, I turned to the bookshop to help me find out about it. After examining<br />
the (then) limited number of books available on the subject, I settled on<br />
the one that stood out as most appropriate for an experienced programmer<br />
and took down from the bookshelf the copy in best condition. That book was<br />
the first <strong>edition</strong> of <strong>Core</strong> <strong>Java</strong>, by Cay S. Horstmann and Gary Cornell.<br />
A little over a year later, having decided to try to make some money from<br />
books instead of spending money on them, I submitted a very basic outline
f<br />
xl Preface<br />
for a book to a small group of publishers. The next day, I found two e-mail<br />
items waiting for me—one from Gary Cornell, the other from Greg Doench<br />
at Prentice Hall. Of course, there was a lot more work to do before a contract<br />
was agreed, but of all the people that deserve thanks for making this book<br />
possible, these two are at the head of the queue. It still amazes me that they<br />
were willing to put such faith in someone who had not yet written a book, on<br />
the strength of a vague outline and two chapters of a different book idea that<br />
never came to fruition. Throughout the writing process, which seems to have<br />
taken such a long time, I found that I could always approach either of them<br />
with questions or problems and have them addressed quickly. They helped<br />
me with all kinds of issues, from determining the scope of the book, right<br />
down to the details of the template with which the manuscript was written.<br />
But, most of all, they trusted me to deliver and it is for this that I am most<br />
grateful to them.<br />
As the writing phase drew to a close, Greg introduced me to Jim<br />
Markham, the books development editor. It fell to Jim to read the entire<br />
manuscript and turn what was essentially a jumble of programmers language<br />
into more fluent sentences and paragraphs, all under pressure of time. I can't<br />
thank Jim enough for the attention he paid to this task—the book you now<br />
hold in your hands is much more readable than the collection of chapters he<br />
started with. As well as being an excellent development editor, I have to say<br />
that I used Jim frequently as a sounding board for ideas and asked him to do<br />
other things that went well beyond the boundaries of his job.<br />
On the technical review front, my thanks go to Buzzy Brown (of IBM<br />
Retail Store Solutions), Blake Ragsdell, and Cameron Laird, who all read<br />
parts of the manuscript at various stages of its development, for their comments<br />
which have helped improve the presentation of the technical content<br />
as well as remove several errors of fact. Special thanks, though, are due to<br />
two people who have contributed significantly to the technical side of this<br />
book. First, Rayme Jernigan read and commented on the entire manuscript<br />
as it was being overhauled for the penultimate time. Called to the task at the<br />
last minute, Rayme did an incredible job against a deadline that at first<br />
looked aggressive and then almost impossible. Nevertheless, he made it and<br />
is still alive to tell the tale! Secondly, I am indebted to Timothy Prinzing of<br />
the <strong>Java</strong>Soft Swing development team who, at the same time as working on<br />
the Swing 1.0 release, graciously agreed to review the chapter describing the<br />
Swing Text Components, for which he was responsible. His feedback helped<br />
me to include the Swing 1.0 changes much more quickly than would otherwise<br />
have been possible and has made this a much more useful and accurate<br />
chapter.
Acknowledgments (First Edition) xli<br />
I would also like to thank all the other people at Prentice Hall who helped<br />
with the production of this book, especially Mary Treacy for making sure that<br />
the contract details were sorted out, Yvette Raven for putting together the<br />
book's CD-ROM, and Joe Czerwinski, who answered many questions on the<br />
document template and saw the book through the production phase against a<br />
tight schedule. Despite the efforts of all of these people, and many others, as<br />
with most books of this size, there will undoubtedly be errors that remain.<br />
For these, I claim all credit.<br />
Writing a book of this size takes a long time. In the year or so that I have<br />
devoted to this task, there have been times when I was inclined to take a long<br />
break or even give up completely. Apart from my own stubbornness (and, of<br />
course, a possible breach of contract), several groups of people have inspired<br />
me to keep going with this project, possibly without realizing it. Most significantly,<br />
I would like to mention my work colleagues, Dave Martin and Tim<br />
Lowe, who made it their business to ask about the state of the book almost<br />
every day of every week and thus made it totally unacceptable to stop work,<br />
and my supervisor, Polly Yee, for being understanding when asked for a few<br />
days' leave to get through a particularly busy part of the schedule.<br />
Finally, I would like to express my gratitude to my family for putting up<br />
with my effective absence for most of the last year and for not complaining<br />
too much about the state of the study, which has been buried under books,<br />
notes, and computers for the duration of this project.
FROM AWT<br />
TO SWING
The Abstract Window Toolkit (AWT) has been available for as<br />
long as the <strong>Java</strong> language itself. The shortcomings of the AWT<br />
have been well known for a long time and developers have<br />
spent a great deal of time and effort augmenting it with components of<br />
their own to provide some of the missing user interface functionality<br />
that their customers have become accustomed to from applications<br />
written in other programming languages. The goal of the Swing project<br />
was to enhance the AWT by providing much of that missing functionality<br />
in a common class library that was immediately portable to any platform<br />
that has a <strong>Java</strong> virtual machine. In the first part of this book, you'll<br />
see the relationship between the AWT and Swing, and you'll discover<br />
how much more powerful the Swing components are than their AWT<br />
counterparts.<br />
Part 1 begins with an overview of Swing, then covers the fundamentals<br />
of the AWT, using Swing components to revisit AWT concepts such<br />
as position, size, visibility, and color. Chapter 3 takes an in-depth look at<br />
layout managers, including the ones provided by the AWT and the new<br />
ones added by Swing. In Chapter 4, you'll learn about the graphics<br />
capabilities provided by the AWT and how these are used with Swing<br />
components. In the same chapter, you'll also see how to use the AWT<br />
printing facilities, which are considered to be part of the <strong>Java</strong> <strong>Foundation</strong><br />
<strong>Classes</strong>.
INTRODUCTION<br />
TO THE JAVA<br />
FOUNDATION<br />
CLASSES<br />
M Topics in This Chapter<br />
• The History of the <strong>Java</strong> <strong>Foundation</strong> <strong>Classes</strong><br />
• Overview of <strong>JFC</strong> Features<br />
• The Swing Packages<br />
• Look-and-Feel and the Model-View-Controller<br />
Architecture
The <strong>Java</strong> <strong>Foundation</strong> <strong>Classes</strong> bring new capabilities to the <strong>Java</strong> programmer,<br />
foremost among which are the Graphical User Interface<br />
(GUI) components in the Swing set. This chapter begins by looking<br />
briefly at the history of the <strong>Java</strong> programming language and of the Abstract<br />
Window Toolkit in particular. The Abstract Window Toolkit, or AWT for<br />
short, provides the classes used to build an application's user interface. In<br />
both <strong>Java</strong> Development Kit (JDK) 1.0 and JDK 1.1, <strong>Java</strong> applications running<br />
under Windows looked just like Windows programs, while those running on<br />
Solaris looked the same as native applications written with the Motif toolkit.<br />
The reason for this was simply that much of the AWT is provided by code<br />
from the native platforms windowing system—the user interface components<br />
are rendered by Windows or by Motif, not by <strong>Java</strong> code. While this has<br />
its advantages, it also has drawbacks. For one thing, it is difficult to implement<br />
a single interface and map it to two (or more) host platforms that work<br />
differently. And even when you've done that, the controls themselves behave<br />
somewhat differently between the platforms. Because this behavior is part of<br />
the native windowing system, there's nothing you can do about it.<br />
Implementing all of the user interface classes in <strong>Java</strong> gets rid of these<br />
problems in one stroke. That's exactly what the Swing components, which are<br />
the most significant part of the <strong>Java</strong> <strong>Foundation</strong> <strong>Classes</strong> (<strong>JFC</strong>), do—they<br />
replace the native implementation with a user interface library that works the<br />
same on all <strong>Java</strong> platforms.
Chapter I Introduction to the <strong>Java</strong> <strong>Foundation</strong> <strong>Classes</strong><br />
This chapter starts by looking at the history of the Swing project and then<br />
moves on to look at the new architecture that was developed to implement<br />
the Swing controls. The power of this architecture will be shown toward the<br />
end of the chapter when you'll see how simple it is to change the way an<br />
application built with Swing controls looks, without changing a single line of<br />
code.<br />
What Are the <strong>Java</strong> <strong>Foundation</strong><br />
<strong>Classes</strong>?<br />
The <strong>Java</strong> <strong>Foundation</strong> <strong>Classes</strong> are a group of features, one of the most significant<br />
parts of which, and the main concern of this book, is the Swing component<br />
set. The Swing components are all graphical user interface controls that<br />
replace most of the platform-native components provided by the JDK 1.0<br />
and JDK 1.1 AWT. The best way to understand what the Swing components<br />
are and how they will affect the development of <strong>Java</strong> applications is to look at<br />
how the Swing project came about and at the problems with the AWT that<br />
Swing is intended to address.<br />
In the Beginning:The Abstract Windows Toolkit<br />
Sun Microsystems released JDK 1.0 in the first half of 1996. A significant<br />
part of this new language was a package called j ava. awt, which contains the<br />
classes for the AWT.<br />
In its early days, <strong>Java</strong> was associated veiy closely with the Internet and,<br />
thanks to its incorporation in Netscape's popular Web browser, the sight of<br />
cool applets written in <strong>Java</strong> became commonplace. A Web site without a <strong>Java</strong><br />
applet of some kind soon became hard to find. While dedicated surfers<br />
searched for the next exciting applet, programmers were busy trying to meet<br />
user expectations using the facilities of the AWT—for it is the AWT that provides<br />
the user interface that, when viewed through a Web browser, becomes<br />
a <strong>Java</strong> applet.<br />
Most of the original <strong>Java</strong> applets were of a similar, rather simple, type:<br />
moving images, dancing text, showers of pixels, and just about anything that<br />
caught the eye. The aim was usually just to liven up an otherwise static Web<br />
page and attract as many callers as possible, in the hope that at least some of<br />
them might look at and, better still, buy the product or service that the Web<br />
site's owner was offering. Creating such simple applets did not really place
What Are the <strong>Java</strong> <strong>Foundation</strong> <strong>Classes</strong>? 7<br />
much of a demand on the AWT. Most of the work revolved around loading<br />
and displaying sequences of images or animating some simple text. More<br />
sophisticated applets allowed user interaction using the mouse or the keyboard<br />
but, on the whole, the level of functionality required from the AWT by<br />
these applets was very low.<br />
Alongside the applet developers, others were trying to use <strong>Java</strong> to develop<br />
weightier applications, such as office productivity tools and database client<br />
interfaces. While the applet developer was very happy with his newfound<br />
freedom of expression and got just about all he needed from the AWT, his<br />
colleagues were typically less impressed. For serious development work,<br />
AWT 1.0 simply did not stand up to scrutiny. For one thing, it was slow.<br />
While this is not such an issue on the Internet, it assumes great importance<br />
to a user accustomed to applications written in Visual Basic, C, or C+ +<br />
that usually (but with some notable exceptions) don't require you to wait a<br />
noticeable amount of time for something to happen after pressing a button.<br />
For another, the AWT simply wasn't robust enough—the implementation,<br />
particularly of the Windows version, was buggy and required developers to<br />
spend inordinate amounts of time looking for solutions to problems that<br />
weren't in their own code and having to produce work-arounds to patch up<br />
their applications and make them usable. Worst of all, though, the AWT<br />
didn't provide much variety in its range of user interface elements.<br />
User interfaces have come a long way since the days of DOS. These days,<br />
even Unix has a windowing interface and only programmers and (some) system<br />
administrators still toil away at the shell prompt. Over the years, users<br />
have become accustomed to interacting with applications using a mouse and<br />
a collection of familiar controls such as buttons, scroll bars, text fields, and so<br />
on. Each release of Windows or the Motif toolkit brought new elements to<br />
the user's attention, most of which were quickly accepted and became indispensable.<br />
Unfortunately, AWT 1.0 was not particularly sophisticated in its supply of<br />
visual controls, so developers who wanted to make their <strong>Java</strong> spreadsheet or<br />
word processor resemble existing products had to start virtually from scratch<br />
and write their own components.<br />
Inevitably, this was a long and tiresome process, repeated in many companies<br />
around the world. The end result, of course, was that there never were<br />
that many serious <strong>Java</strong> applications developed with AWT 1.0 that made it to<br />
the marketplace, even in beta form. By the time the development community<br />
had come to terms with creating their own components, <strong>Java</strong>Soft had<br />
released JDK 1.1 and, along with it, version 1.1 of the AWT.
8 Chapter I Introduction to the <strong>Java</strong> <strong>Foundation</strong> <strong>Classes</strong><br />
By comparison to its predecessor, AWT 1.1 was a great improvement. The<br />
Windows version was completely rewritten and was made much faster and<br />
more robust. Better integration with the users desktop was provided and, for<br />
the first time, a <strong>Java</strong> programmer could give an application access to a printer<br />
without needing to write platform-dependent native code. The programming<br />
model was improved, too, with a better mechanism for handling events from<br />
the user interface and, with the introduction of the <strong>Java</strong>Beans specification<br />
and its incorporation in JDK 1.1, it became possible for developers to create<br />
components that could be taken and reused elsewhere more easily and could<br />
even be incorporated into graphical application builder tools such as<br />
Microsoft Visual Basic or Borland's JBuilder. But still, there remained the<br />
issue of user interface sophistication. Notwithstanding the breadth of JDK<br />
1.1 and the immense improvement in the quality of the AWT, only two new<br />
components (a scrolling window and a pop-up menu) were added. Developers<br />
still had to produce most of their own user interface controls.<br />
Enter Netscape<br />
Meanwhile, developers at Netscape had begun development of a set of<br />
improved user controls that were eventually released under the banner of the<br />
Internet <strong>Foundation</strong> <strong>Classes</strong> (IFC). Implemented on top of AWT 1.0, the<br />
IFC components were a more complete set than their predecessors and<br />
included some nice features such as dialogs to allow a user to choose colors,<br />
files, and fonts visually; buttons with images, sliders, images, support for animation<br />
sequences, and an improved application framework that supported<br />
the nesting of parts of an application's interface inside other parts, with<br />
drawn boundaries to emphasize the nesting and grouping of components.<br />
As well as providing improved functionality, the IFC components are different<br />
from AWT in another way. Whereas the AWT components are implemented<br />
partly in <strong>Java</strong> and partly as a platform-dependent native library, the<br />
IFC components are written entirely in <strong>Java</strong>. As a result, the IFC is immediately<br />
portable to any platform that supports <strong>Java</strong> and takes with it its lookand-feel,<br />
unlike the AWT, which adopts the appearance of its host platform.<br />
The Swing Set:A Joint Effort<br />
In the early part of 1997, developers from Netscape and <strong>Java</strong>Soft began<br />
cooperating on a project that was dubbed Swing. The aim of this project was<br />
to bring together the AWT and the best parts of Netscape's IFC to produce a<br />
fully-featured, robust set of user interface classes to be released as part of the
What Are the <strong>Java</strong> <strong>Foundation</strong> <strong>Classes</strong>? 9<br />
<strong>Java</strong> 2 platform. Like their IFC counterparts, these components (referred to<br />
as the Swing component set) would be written entirely in <strong>Java</strong> to ensure portability<br />
and would, at some future time, allow <strong>Java</strong>Soft to drop most of the<br />
peer model that the AWT had used for its first two releases. The peer model<br />
allowed <strong>Java</strong>Soft to leverage native platform user interface support to get the<br />
first release of the JDK into the hands of developers very quickly. This<br />
approach had, of course, been extremely successful but was also, in part,<br />
responsible for the bad reputation of the AWT on the Windows platform.<br />
The Swing project would soon grow far beyond a straight merge of the<br />
IFC components into the AWT, however. <strong>Java</strong>Soft launched a 100% Pure<br />
<strong>Java</strong> initiative, of which the Swing component set was, of course, a very good<br />
example, and the number of components to be included in this set increased.<br />
The final result of this project was, as you'll see, a comprehensive new set of<br />
controls that matches the best of the competition and puts <strong>Java</strong> applications<br />
on a (visual) par with those written using the native platform libraries.<br />
Whereas the <strong>Java</strong> developer had been forced to limit the scope of the user<br />
interface or implement custom components, the problem was more the<br />
wealth of choice available.<br />
Swing Plus More: The <strong>Java</strong> <strong>Foundation</strong> <strong>Classes</strong><br />
The Swing components are, without doubt, the most notable part of what<br />
<strong>Java</strong>Soft named the <strong>Java</strong> <strong>Foundation</strong> <strong>Classes</strong>, but they are not the whole<br />
story. Several improvements that had gone into AWT 1.1, plus a few more<br />
enhancements added as part of the <strong>Java</strong> 2 platform, were brought together<br />
and placed under the <strong>JFC</strong> banner. In total, the <strong>Java</strong> <strong>Foundation</strong> <strong>Classes</strong> consist<br />
of the following:<br />
• The Swing components<br />
• The Desktop Colors feature of JDK 1.1<br />
• The JDK 1.1 Printing facility<br />
• The <strong>Java</strong>2D API, which supports enhanced text, color and<br />
image support and more advanced printing<br />
• Accessibility, which provides support for technologies that make<br />
it easier for users with disabilities to use the <strong>Java</strong> platform<br />
• The JDK 1.1 cut-and-paste and clipboard facility, combined<br />
with a new drag-and-drop facility introduced in <strong>Java</strong> 2<br />
The full range of <strong>JFC</strong> features is delivered as part of the <strong>Java</strong> 2 platform,<br />
but <strong>Java</strong>Soft also provides a package called Swing 1.1.1 that contains the<br />
Swing components in a form suitable for use with JDK 1.1. At the time of this
10 Chapter I Introduction to the <strong>Java</strong> <strong>Foundation</strong> <strong>Classes</strong><br />
writing, the <strong>Java</strong> 2 platform has been available as a released product for well<br />
over a year, but there is still a large installed base of JDK 1.1 users and this<br />
situation is likely to continue for the foreseeable future. The Swing 1.1.1<br />
package allows developers who cannot assume that their applications will be<br />
run on the <strong>Java</strong> 2 platform to make use of the Swing components to build<br />
user interfaces.<br />
This book covers all of the Swing components. In addition, it describes the<br />
JDK 1.1 printing facility and a host of other features from JDK 1.1 that are<br />
closely related to the Swing components, all of which must be properly<br />
understood in order for you to make full use of Swing. This subset of the full<br />
<strong>JFC</strong> family consists mainly of the first three items just listed. For those using<br />
the <strong>Java</strong> 2 platform, there is also coverage of the <strong>Java</strong> 2D API and the more<br />
powerful printing facilities that it introduces. The Accessibility API is also<br />
available both as part of the <strong>Java</strong> 2 platform and as an add-on package for<br />
JDK 1.1 (you'll find a full discussion of it among the advanced topics covered<br />
in this book). The drag-and-drop feature, which is not available in JDK 1.1, is<br />
not covered in this book. If you need to use drag-and-drop in your applications,<br />
you'll find a detailed description of it in this book's companion volume,<br />
<strong>Core</strong> Swing: Advanced Programming, also published by Prentice Hall.<br />
<strong>Core</strong> Note<br />
This book covers both the JDK I.I and <strong>Java</strong> 2 versions of Swing. For the<br />
most part, you can consider these to be the same thing—in fact, the Swing<br />
I.I.I package for JDK I.I is the same version as the one supplied with<br />
<strong>Java</strong> 2 version I.I.I.<strong>Java</strong> 2 version 1.3 includes some additions and<br />
changes that cannot be used with JDK I.I (or with earlier releases of the<br />
<strong>Java</strong> 2 platform). We'll point out these differences as we encounter them<br />
throughout the book.<br />
What Is the Relationship Between Swing and<br />
AWT?<br />
With the introduction of a new set of components that use a different software<br />
architecture from those already in the AWT, it is natural to wonder what<br />
will now become of the AWT itself. As early as the last Beta version of JDK<br />
1.1, <strong>Java</strong>Soft was signaling that there was a major change on the way for the<br />
AWT. In this last release before final customer shipment, the AWT engineers<br />
introduced a new facility called Lightweight Components. On the surface,<br />
this simply added the ability to produce a component or a container with a
What Are the <strong>Java</strong> <strong>Foundation</strong> <strong>Classes</strong>? I I<br />
transparent background. This was done by allowing developers to directly<br />
extend the Component and Container classes, and a nice example of a button<br />
with rounded edges was provided in the release documentation. However,<br />
also among the documentation was a paper entitled "AWT: The Next<br />
Generation." This paper indicated that the future of the AWT lay in the<br />
direction of lightweight components and it was the first public announcement<br />
of the initiative that would eventually result in the delivery of the Swing<br />
components.<br />
In both JDK 1.1 and <strong>Java</strong> 2, the old AWT components and the Swing components<br />
are supported. Some of the Swing components are actually derived<br />
directly from an AWT component—for example, the JFrame component,<br />
which provides the top-level window for an application, is derived from the<br />
AWT Frame class, and, moreover, the base class from which all of the other<br />
Swing components are derived is itself a subclass of the AWT Container<br />
class. Every AWT component has a corresponding Swing component, so it is<br />
possible to implement an application that does not directly depend on the<br />
AWT, apart from the top-level window.<br />
Because the AWT infrastructure is still in place, applications written with<br />
the old AWT continue to work in JDK 1.1 and with <strong>Java</strong> 2 in the same way as<br />
those using the JDK 1.0 event model continued to work in JDK 1.1. Because<br />
of the clean separation of the two sets of components and the fact that they<br />
are all ultimately derived from the Component class and share the same<br />
event model, it is possible to mix AWT and Swing components in a single<br />
application. Of course, it is extremely unlikely that anybody would develop a<br />
new application that relied on both sets of components, but the ability to mix<br />
allows developers to migrate from the old set to the new incrementally,<br />
retaining a working application throughout.<br />
This feature is of enormous importance if you have spent great efforts<br />
developing your own custom components based on the AWT classes. Most<br />
importantly, it means you can continue to use them in the short term until<br />
you create Swing-based replacements. However, because of the breadth of<br />
coverage of the Swing components, it is very likely that you will be able to use<br />
them to directly replace a large proportion of your custom controls, avoiding<br />
the need to carry out any porting at all.
12 Chapter I Introduction to the <strong>Java</strong> <strong>Foundation</strong> <strong>Classes</strong><br />
<strong>Core</strong> Warning<br />
This ability to mix Swing and AWT components should be regarded as<br />
strictly an implementation convenience. In practice, there are problems that<br />
make it difficult to support an application that uses both component sets,<br />
especially if you try to mix them in the same window.Therefore, when<br />
writing new applications, use only Swing components. If you need to port<br />
an AWT application to Swing, replace all of your AWT components with the<br />
corresponding Swing ones.<br />
<strong>Core</strong> Note<br />
iin mi nmi TIIH n n miw • » win — — »• i n n iwwww—— mil mini •ml •uiu. iiijiiiiniiiiiiiiMiiuiiiMniiiiiwuiiwm<br />
You will often see references in this book to AWT components and Swing<br />
components as if they were mutually exclusive sets. Strictly speaking, this is<br />
not true, because all of the Swing components are also AWT components.<br />
What we really mean when we say AWT components is the set of<br />
components that the AWT provided in JDK I.I.<br />
What Do I Need to Releam to Use the Swing<br />
Components?<br />
The simple answer to this question is that, if you are familiar with the AWT,<br />
you should be able to make basic use of many of the Swing components<br />
straight away. Swing does not fundamentally change the way in which <strong>Java</strong><br />
applications are constructed. You still create a top-level window; you still use<br />
frames, components, and layout managers; and you still connect them<br />
together in almost the same way as you always have (but see the discussion of<br />
JFrame in Chapter 2, "Frames, Labels, and Buttons," for an important<br />
exception). The main problem you have to overcome to use Swing proficiently<br />
is being aware of all the possibilities available to you. Instead of the<br />
handful of AWT components, each of which was very simple and required little<br />
customization, you now have a very large and very rich set of possibilities<br />
to choose from. In addition to the wide choice, many of the components are<br />
very highly customizable, especially if you are prepared to spend time implementing<br />
some of the pluggable helper classes that can be attached to some of<br />
them. The aim of this book is to help you to do that.<br />
As an example, consider the new Swing combo box. This control allows a<br />
user to select from a list of possible values and shows the selected value in an<br />
input field. To see the list of possibilities, click on a small arrow near the
Overview of <strong>JFC</strong> Features 13<br />
input control to reveal a drop-down list. If the programmer has made the<br />
Combo editable and the value you want is not in the list, or if you know the<br />
value without needing to refer to the list, you can type it directly into the<br />
input field. That's the basic functionality of the control.<br />
However, if you are prepared to do a little work, you can provide your own<br />
way of rendering the contents of the drop-down box or of editing the input<br />
field. You don't have to restrict yourself anymore to a traditional drop-down<br />
combo box containing a list of strings. For one thing, without doing very<br />
much, you can add images to the strings. Figure 1-1, for example, shows<br />
three combo boxes, one of which only uses images.<br />
Figure 7-7 Swing combo boxes.<br />
With slightly more effort, you can present a hierarchical view of a file system<br />
from which you could select a file to operate on. Or maybe you would<br />
prefer a drop-down scientific calculator, or, in a financial institution, a way of<br />
choosing from a selection of pricing information held on a server somewhere.<br />
Overview of <strong>JFC</strong> Features<br />
The <strong>Java</strong> <strong>Foundation</strong> <strong>Classes</strong> provide a very wide range of components and<br />
facilities. Before we start our detailed investigation, we'll spend a short time
14 Chapter I Introduction to the <strong>Java</strong> <strong>Foundation</strong> <strong>Classes</strong><br />
in this section looking briefly at the various parts of the <strong>Java</strong> <strong>Foundation</strong><br />
<strong>Classes</strong> API.<br />
The JComponent Class<br />
The JComponent class is the common superclass of almost all of the new<br />
Swing components. In the same way that Component provides common<br />
methods and states for all AWT components, JComponent performs several<br />
major functions for its own subclasses, several of which will be briefly<br />
described in the next few sections. JComponent is derived from the AWT<br />
Container class, which is itself a subclass of Component. Because JComponent<br />
extends Container, it is a lightweight object. It does not have a window<br />
in the native windowing system like the AWT components do and it can<br />
be transparent. The other advantage of extending Container is that a<br />
JComponent can be constructed from many different components because it<br />
has built-in container functionality.<br />
JComponent enables the pluggable look-and-feel facility (discussed later<br />
in this chapter), by redirecting calls that would otherwise be handled by<br />
Component methods to a separate user interface object that is responsible<br />
for maintaining the component's appearance. For example, JComponent<br />
overrides the paint method and redirects it to the user interface component<br />
instead of allowing Component to process it. This issue is discussed further in<br />
"The Model-View-Controller Architecture" below and in Chapter 13, "The<br />
Pluggable Look-and-Feel." Many other Swing features are also based on support<br />
provided by the JComponent class.<br />
Frames and Dialogs<br />
In Swing, the top-level windows have changed. Instead of Frame, there is<br />
JFrame and, similarly, there are JWindow and JDialog classes. The difference<br />
between these Swing components and their AWT counterparts is much<br />
more than just a name change. Whereas the AWT components were straightforward<br />
containers that were special only because their native windowing<br />
system peers were top-level windows, the Swing components have a complicated<br />
internal structure that is visible to the programmer and that allows<br />
them to be much more useful when constructing user interfaces.<br />
As an example of this, all of these containers can support a menu bar, a<br />
facility that was previously only available with a Frame. In addition, the main<br />
working area can be treated as if it had many independent layers. Placing<br />
components in different layers makes it possible to arrange them to overlap,
Overview of <strong>JFC</strong> Features 15<br />
and also to ensure that some components always appear in front of others.<br />
This facility can be used to great effect to provide support for multiple document<br />
applications, which is covered in Chapter 12, "Multiple-Document<br />
Applications."<br />
<strong>Core</strong> Note<br />
In fact, JFrame, JWindow and JDialog are not actually new top-level<br />
windows—JFrame is just a subclass of the AWT Frame class and,<br />
similarly, JWindow and JDialog are derived from Window and<br />
Dialog, respectively. Hence, everything you can do with the old AWT<br />
windows you can also do with Swing Windows.<br />
The working area of a JFrame can be divided into two areas using the<br />
Swing JSplitPane control. This component allows the user to drag a moving<br />
boundary either horizontally or vertically to adjust the space available to<br />
two components mounted on the frame. This control is useful when creating<br />
layouts like that of the Microsoft Windows Explorer, or the network news<br />
interface provided by some Web browsers, where the list of news groups and<br />
the list of items in the current news group are displayed side-by-side with a<br />
slider that allows the space available to one list to be increased at the expense<br />
of the other. JSplitPane is covered in Chapter 9, "Text Components,"<br />
where it is used to show two different \iews of a single document.<br />
Swing also provides a gamut of new support for dialogs, which were hardly<br />
catered to at all in JDK 1.1. The old FileDialog, which was very limiting<br />
and fell far short of similar facilities on the native platform, has been replaced<br />
by the more powerful JFileChooser, which can be used on its own or as<br />
part of a larger dialog. Other extended dialog support includes JColor-<br />
Chooser for graphically selecting colors, and a host of message, warning,<br />
error, and information panes provided by the JOptionPane class.<br />
One of the most impressive-looking Swing controls is the JTabbedPane,<br />
which looks and behaves like a Windows property sheet. JTabbedPane is<br />
especially useful in dialog boxes, where it allows the programmer to create<br />
panels of controls that control related parts of an application's configuration<br />
and present them in an uncluttered manner, separate from configuration<br />
information for other aspects of the application, while still having all of a program's<br />
configurable options available in one place.<br />
The wide range of dialog components is discussed in Chapter 7, "Using<br />
Standard Dialogs," and Chapter 8, "Creating Custom Dialogs."
16 Chapter I Introduction to the <strong>Java</strong> <strong>Foundation</strong> <strong>Classes</strong><br />
Per-Component Borders<br />
All of the Swing components provide for the drawing of a border around<br />
their edges. Borders are managed by the following JComponent methods:<br />
• public void setBorder(Border b) ;<br />
• public Border getBorder();<br />
Border is an interface, not a class, and the Swing set contains several standard<br />
borders that should meet most requirements.<br />
A border can be used to group together controls that are related to each<br />
other and don't need to be closely associated with other controls on the same<br />
panel. For example, it might be appropriate to surround a group of radio buttons<br />
with a border that contains some text to describe what the buttons control,<br />
as shown in Figure 1—2. Alternatively, you can use the setBorder<br />
method to replace the border of a standard component, such as a text input<br />
field, with one of your own choice.<br />
Figure 1-2 A Swing-firled border grouping three radio buttons.<br />
Borders are discussed in Chapter 4, "Graphics, Text Handling, and Printing,"<br />
and in Chapter 8.<br />
Graphics Debugging<br />
Often it can be difficult to see why complicated layouts or graphics are not<br />
being rendered properly, because the entire process happens so quickly<br />
that it is impossible to see exactly what is being done. Alternatively, you<br />
may find that sometimes your layouts are being redrawn too frequently. In
Overview of <strong>JFC</strong> Features 17<br />
both of these cases, it would be useful to have a way to either slow down<br />
the rendering process or to have a record of what was done so that it can be<br />
inspected later for redundant operations. Swing includes a new Graphics<br />
Debugging facility that provides both of these features, and JComponent<br />
provides the interface to it via the getDebugGraphicsOptions and<br />
setDebugGraphicsOptions methods. This feature is covered in detail in<br />
Chapter 3, "Managing the User Interface."<br />
Enhanced Mouseless Operation<br />
Swing provides an improved mechanism for allowing an application to be<br />
driven from the keyboard as well as using a mouse. JDK 1.1 introduced<br />
keyboard accelerators for menu items and a better mechanism for managing<br />
focus traversal using the Tab and Shift-Tab keys. Swing extends this<br />
by allowing actions to be triggered by particular key sequences on arbitrary<br />
components on the user interface. This new mechanism makes it almost<br />
trivial to support function keys and other types of hot keys that were very<br />
difficult to implement with JDK 1.1. JComponent provides the repository<br />
for the configuration information for this mechanism. The Swing components<br />
also provide a more flexible focus management model, including the<br />
ability to install a customized focus manager. Accelerator keys and focus<br />
management are discussed in Chapter 5, "Keyboard Handling, Actions, and<br />
Scrolling."<br />
Tooltips<br />
A nice feature of some user interfaces is the ability to show a small help window<br />
or tip when the mouse pauses over a button. Typically, this window<br />
would contain text that describes what the button would do if it were<br />
pressed. Swing generalizes this mechanism by making it available in all of the<br />
new components.<br />
Simple applications can make use of the facility by supplying some text<br />
that will display in the "tip" window, as shown in Figure 1-3, by invoking the<br />
JComponent setToolTipText method. If you want to be a bit more clever,<br />
you can take control of this mechanism by providing your own component to<br />
be used instead of the default window with text, or you can arrange for the<br />
text that is shown to be dependent upon the position of the mouse relative to<br />
the control. We cover this mechanism and show how to exploit it to the fullest<br />
in Chapter 8.
18 Chapter I Introduction to the <strong>Java</strong> <strong>Foundation</strong> <strong>Classes</strong><br />
Figure 1-3 A tool tip.<br />
Enhanced Scrolling<br />
In JDK 1.1, some of the AWT components supplied scroll bars if the information<br />
that they needed to display did not fit in the available screen space.<br />
Programmers could also create their own scrolling components using the<br />
primitive Scrollbar or the Scroll Pane container, which handles most of<br />
the details of scrolling for the simplest cases.<br />
By contrast, Swing components do not provide their own scroll bars—if,<br />
for example, the text in a text area could turn out to be too large to be seen on<br />
the screen at once, it is up to the programmer to supply the scrolling functionality.<br />
Fortunately, the Swing component set provides a very simple to use<br />
but extremely powerful scrolling container, JScrollPane, that fully replaces<br />
the AWT Scroll Pane and can be added to any Swing component with only<br />
one line of code.<br />
When a component is wrapped with scroll bars, it is often useful to force a<br />
particular part of the scrolled area to become visible. As an example of this,<br />
consider the case of a text control that provides a search facility. As the search<br />
progresses through the text, it is necessary to scroll the content so that<br />
matched parts of the text are in the visible region. JComponent provides a<br />
method that can be used to request that a scrolling parent object change its<br />
viewport to make some part of the calling component visible. Similarly, if the<br />
user drags an object over a scrolled list, JComponent provides the means to<br />
make the list scroll automatically, without intervention by the list itself, so
Overview of <strong>JFC</strong> Features 19<br />
that the position in which the user might want to drop the component<br />
becomes visible. Compare this to dragging files between directories in the<br />
Windows Explorer, for example. If the target directory in which the file is to<br />
be dropped is not visible, dragging the file to the top or bottom of the window<br />
that is showing the directory tree causes that window to scroll in the<br />
appropriate direction. This mechanism and the Swing scrolling controls are<br />
described in Chapter 5.<br />
Pluggable Look-and-Feel<br />
Without a doubt, one of the more interesting and novel features of the Swing<br />
architecture is the fact that the applications it produces have a platform-independent<br />
look-and-feel to them, because the user interface is rendered not by<br />
Windows or the Motif library, but by <strong>Java</strong> code that will work the same way<br />
on every platform. As a result, you can take an application developed using<br />
Swing components on Solaris, say, and have it run with the same appearance<br />
on Windows. But that's only half the story.<br />
Unlike the old AWT, the parts of the Swing classes that deal with drawing<br />
components onto the screen are not an inseparable part of each component.<br />
Instead, each control delegates its screen drawing to a separate entity that<br />
knows how to draw components of that type. For example, a button object<br />
allows a separate button-drawing class to render its image onto the screen;<br />
the button itself would be concerned only with things like delivering a notification<br />
to the application program that it has been pressed.<br />
Once you have separated the rendering of components from the components<br />
themselves, it becomes possible to substitute a different rendering<br />
class that draws the button in a different way, and what you can do for a button<br />
you can also do for every other interface component. From this idea<br />
comes the concept of a family of user interface classes that implements a<br />
consistent look-and-feel across all of the components. The Swing components<br />
come with several look-and-feel implementations, among them two<br />
that emulate the Windows and Motif look-and-feel and a third that is a crossplatform<br />
look-and-feel specifically designed for <strong>Java</strong> applications called the<br />
Metal look-and-feel. All the user has to do is plug the appropriate look-andfeel<br />
set into the application by configuring a default for his or her platform.<br />
You'll see more on this later in this chapter and in much greater detail in<br />
Chapter 13.
20 Chapter I Introduction to the <strong>Java</strong> <strong>Foundation</strong> <strong>Classes</strong><br />
<strong>Core</strong> Note<br />
There are two other look-and-feel implementations created by <strong>Java</strong>Soft that<br />
are not included in the standard Swing release for the <strong>Java</strong> 2 platform. One<br />
of these is a Mac look-and-feel that gives Apple Macintosh-like behavior to<br />
the application. The other is another cross-platform look-and-feel called<br />
Organic, which was originally available in the later developer prerelease<br />
versions of Swing under the name of the <strong>Java</strong> look-and-feel.The Organic<br />
look-and-feel was replaced by Metal (which is now often referred to as the<br />
<strong>Java</strong> look-and-feel) and is no longer supported.<br />
Layout Managers<br />
Swing adds two new layout managers to those provided by the AWT. Box-<br />
Layout is a useful layout manager that arranges its components in either a<br />
single row or a single column. As such, it is ideal for managing groups of buttons<br />
or other components that have to remain properly aligned in one direction.<br />
It also provides the ability for the programmer to specify how its<br />
components should move and resize when the container is expanded, how<br />
much of the extra space should be used to let the components grow, and how<br />
much should be left empty. The OverlayLayout manager can be used to<br />
arrange for components to overlap each other and to stay overlapped as their<br />
container expands. OverlayLayout can be used in conjunction with transparent,<br />
lightweight components to build up an interface from several layers,<br />
with each layer being composed of a different component.<br />
Because layout managers have generally been poorly documented and a<br />
proper understanding of them can save a lot of time and effort when developing<br />
applications, this book provides an extended description of the complete<br />
set of layout managers, both the old AWT and the Swing types, in<br />
Chapter 3.<br />
Labels and Buttons<br />
The AWT Label and Button classes were very simple and offered limited<br />
functionality. By contrast, the Swing JLabel and JButton classes are highly<br />
customizable. Labels and buttons can have both text and an image associated<br />
with them and it is possible to choose the relative positions of these items and<br />
their overall alignment in relation to the control itself. The Swing button<br />
classes are, in fact, a hierarchy that includes the Swing menu items, traditional<br />
push buttons, toggle buttons that are "sticky" (that is, they remain
Overview of <strong>JFC</strong> Features 21<br />
pressed in until pressed again), check boxes, and radio buttons. All of these<br />
types of buttons share the features of JButton, including the ability to<br />
present an image. Among the possibilities that this opens up is the potential<br />
to represent a check box or a radio box with an image more in keeping with<br />
the application it is being used in rather than the default square box or the<br />
circled dot that are traditionally used. You'll see all of this functionality, and<br />
more, in Chapter 2, "Frames, Labels, and Buttons."<br />
Menus and Toolbars<br />
The AWT menu system was very restricted and idiosyncratic. Menus could<br />
only be used in frames, where they had to be placed directly under the caption<br />
bar and above the useful working area. Furthermore, menus and menu<br />
items were not derived from the Component class, which meant that they<br />
often couldn't be treated in the same way as the other components in an<br />
application. JDK 1.1 added a menu shortcut facility, but even that was disappointing<br />
because it could be used only with menu items, not menus.<br />
By contrast, the Swing menus are all derived from the same common base<br />
class as all the other Swing components (JComponent) and they are all<br />
implemented entirely in <strong>Java</strong>. As a result, they behave predictably across all<br />
platforms and they don't exhibit any platform-specific peculiarities or limitations.<br />
In addition, it is possible to attach mnemonics that allow a menu item<br />
to be activated with a single keystroke when it is visible and hot keys that activate<br />
the menu item even when it is not visible. Figure 1—4 shows a selection<br />
of menus and menu items, with mnemonics indicated by underlines.<br />
Swing menus also have other features that are taken for granted elsewhere.<br />
For example, you can add an image to the text on a menu item, or<br />
remove the text altogether and let the image stand alone, or you can change<br />
the font and color of the text or its background subject, of course, to constraints<br />
placed by the look-and-feel that the user has selected. For the benefit<br />
of the programmer, menus now generate events as they are posted and<br />
removed from the screen so that they can be created and changed in a lazy<br />
manner, as they can in other windowing environments.<br />
A relative of the menu bar is the Swing toolbar. The toolbar hosts a twodimensional<br />
arrangement of components, usually buttons with mnemonic<br />
images, that allow very fast access to important features of the application. A<br />
typical toolbar is shown in Figure 1-5. The toolbar will usually be located<br />
under an applications menu bar, but it can be placed anywhere on the application's<br />
window. Toolbars can also be configured so that they can be com-
22 Chapter I Introduction to the <strong>Java</strong> <strong>Foundation</strong> <strong>Classes</strong><br />
Figure 1-4 Swing menus and menu items.<br />
pletely detached from the window to float in a separate frame and can later<br />
be redocked with the frame under program or user control.<br />
Menus and toolbars are discussed in Chapter 6, "Menus and Toolbars."<br />
Text Controls<br />
Swing provides lightweight replacements for the AWT TextField and<br />
TextArea controls that provide all the functionality of their predecessors,<br />
including the ability to detect and track changes to their content as they are<br />
made. The Swing components are, however, built on a complex infrastructure<br />
that makes it possible to create more complex text controls that can render<br />
text in multiple fonts and colors, possibilities that the AWT does not<br />
offer. Swing includes the JTextPane control, which supports text in various<br />
styles and can intermix text with images and even AWT and Swing compo-
Figure 1-5 The Swing toolbar.<br />
nents to create documents with embedded functionality, and JEditorPane,<br />
which can display documents encoded in several different input formats,<br />
including HTML. Chapter 9 contains a detailed look at the Swing text components<br />
and the underlying support that makes their powerful functionality<br />
possible.<br />
Data Selection and Display Controls<br />
Overview of <strong>JFC</strong> Features 23<br />
One area in which Swing is much more complete than the AWT is its provision<br />
of controls for selecting and displaying data. Where the AWT provided<br />
the List and Choice controls, Swing has JList and JComboBox, which do<br />
everything that their predecessors do and more. Both of these Swing controls<br />
can handle large amounts of data easily, whereas on some platforms the AWT<br />
components do not cope well with large lists. The Swing controls can also be<br />
customized to represent the data they contain in various ways, including the<br />
use of images as well as or instead of text; they can also hold lists of objects<br />
that are not limited to the strings that the AWT components require. These<br />
components are both described in Chapter 8.<br />
Swing also has two data display controls that have no precedent in the<br />
AWT. JTree is a very flexible control for displaying data organized in a hierarchical<br />
form. As such, it can be used to display, for example, a graphical representation<br />
of a file system or anything else with a similar structure. JTable
24 Chapter I Introduction to the <strong>Java</strong> <strong>Foundation</strong> <strong>Classes</strong><br />
is used to display data that is organized in two-dimensional row and column<br />
form and therefore is a natural choice for representing information returned<br />
from queries made to a database. Among the facilities of JTable is the ability<br />
for the user to rearrange and resize the columns in the table. Both<br />
JTable and JTree can be customized in various ways and they can both<br />
allow the user to edit the data being displayed.<br />
<strong>Core</strong> Note<br />
Both JTree and JTable merit chapters of their own.They are covered in<br />
Chapter IO,"TheTree Control,"and Chapter 11,"TheTable Control,"<br />
respectively.<br />
Timers<br />
JDK 1.1 had no support for timers. If you needed one, the best you could do<br />
was to create a separate thread that slept for the required time and then<br />
resumed to perform a delayed action or to post an event to another thread.<br />
Swing provides a Timer class that allows you to create either a one-off timer<br />
that fires once and then stops, or a repeating heartbeat timer. We look at timers<br />
and see an example of their use in Chapter 8.<br />
Support for Applets<br />
You can use Swing classes in applets in the same way you can use AWT<br />
classes. In fact, there is very little that we will say about Swing in this book<br />
that doesn't apply equally to applications and applets. For this reason, you<br />
won't find many applet-specific examples in this book—there simply is no<br />
need to make the distinction between these two environments with Swing<br />
anymore. There are, however, a couple of points to know about Swing and<br />
applets.<br />
First, Swing applets must be based on the JApplet class instead of<br />
Applet. JApplet is, in fact, a subclass of Applet. Secondly, JApplet has<br />
the same internal structures as the JFrame class that you'll see in Chapter 2.<br />
This means that you can have an applet with a layered display and even a<br />
menu bar if you want one. Usually, the major problem with using Swing in<br />
applets is arranging for the correct packages to be available at run time, since<br />
the commercial browsers do not support either <strong>Java</strong> 2 or Swing, at least at the<br />
time of this writing. We'll say more about this topic in Appendix A.
Printing<br />
Overview of <strong>JFC</strong> Features 25<br />
For most applications, a powerful user interface is an obvious requirement.<br />
In the commercial world, however, it is almost as important to be able to provide<br />
the user with a printed copy of information that the application displays.<br />
JDK 1.0 did not have any printing capability whatsoever—the only way to get<br />
hard copy was to buy a third-party package or use the <strong>Java</strong> Native Interface<br />
to implement your own direct access to your operating system's printing system.<br />
Doing this was not only relatively difficult, but it also made your application<br />
dependent on code that would probably only work on a single operating<br />
system (or required you to implement the same facility for each platform that<br />
you wanted to print on).<br />
Platform-independent printing is officially part of the <strong>Java</strong> <strong>Foundation</strong><br />
<strong>Classes</strong> and was included with JDK 1.1. With the introduction of this feature,<br />
<strong>Java</strong> developers could create printed output with much less effort than was<br />
required in JDK 1.0. However, the API left much to be desired both in terms<br />
of ease of use and the level of functionality offered. The <strong>Java</strong> 2 platform provides<br />
a much-improved printing package as part of the <strong>Java</strong> 2D packages, as<br />
well as continuing to support the JDK 1.1 API. We'll cover the basic JDK 1.1<br />
facility in Chapter 4 and the <strong>Java</strong> 2D printing package in Volume 2.<br />
<strong>Java</strong> ID<br />
The <strong>Java</strong> platform has always provided basic support for simple line graphics<br />
as part of the AWT package. In JDK 1.0 and JDK 1.1, this enabled you to:<br />
• Load and draw images encoded in the GIF and JPEG formats<br />
• Draw simple shapes using straight lines<br />
• Fill an enclosed area with a single, solid color<br />
While this is enough for many applications, for specialist uses a more<br />
sophisticated graphics package is required. In the <strong>Java</strong> 2 platform, <strong>Java</strong>Soft<br />
addressed the need to improve the graphics capability by introducing the<br />
<strong>Java</strong> 2D API.<br />
<strong>Java</strong> 2D is not a single package that could be taken and back-fitted to JDK<br />
1.1, so you can't use it unless you know that your application will run on the<br />
<strong>Java</strong> 2 platform. One reason for this is that the support underlying the <strong>Java</strong><br />
2D API is buried in the graphics rendering engine that applications use when<br />
they access the screen or a printer and much of it is implemented in native<br />
code. The <strong>Java</strong> 2D API is, of itself, large and complex enough to justify a
26 Chapter I Introduction to the <strong>Java</strong> <strong>Foundation</strong> <strong>Classes</strong><br />
book on its own and several such books already exist, including <strong>Java</strong> 2D API<br />
Graphics by Vincent Hardy, also published by Prentice Hall, which I recommend<br />
for those who want to know everything there is to know about this<br />
topic. In this book, we'll look at the most important features of <strong>Java</strong> 2D,<br />
which include:<br />
• The ability to draw arbitrary shapes<br />
• The ability to apply transformations to graphics operations as<br />
they are being performed, to create effects such as rotation,<br />
skewing, or stretching<br />
• Filling shapes with arbitrary color patterns as well as the simple<br />
solid color fills available in JDK 1.1<br />
• Drawing lines with different stroke styles, such as dashes or<br />
dots as well as the usual solid style<br />
• Advanced image manipulation. As well as drawing and scaling<br />
images, it is also possible to rotate them, to merge them with<br />
other images or other graphics, and to apply filters that do such<br />
things as blur, sharpen, brighten, and darken the image<br />
• Enhanced text layout control and font management<br />
The <strong>Java</strong> 2D API is covered in great detail in Volume 2 of this book.<br />
Accessibility<br />
Accessibility is concerned with making it easier for people with disabilities to<br />
use computer software. Good user interface design can, of itself, go a long<br />
way to making an application simpler for a person with visual or mobility<br />
impairments to use—for example, sensible use of colors and fonts can make<br />
the interface more readable and, just as importantly, by making proper use of<br />
Swing's keyboard accelerators and the focus manager, you can make it much<br />
easier for users who find it difficult to use the mouse to drive your application<br />
using the keyboard only. Beyond this, the accessibility feature can be used to<br />
expose your application to assistive technologies that can help the user see<br />
the interface more clearly or even realize parts of it in a different way, such as<br />
taking text and vocalizing it.<br />
There are four aspects to <strong>Java</strong> Accessibility:<br />
1. The <strong>Java</strong> Accessibility API, which can be used to obtain information<br />
from user interface components that implement it. This<br />
low-level programming interface might be used to extract the
Overview of <strong>JFC</strong> Features 27<br />
text from a text field or a label, for presentation in a different<br />
window using a larger font, or so that it can be spoken out loud.<br />
The <strong>Java</strong> Accessibility API is part of the Swing 1.1.1 package<br />
and is integrated into the <strong>Java</strong> 2 platform. It is implemented by<br />
all of the Swing components, which means that they are all<br />
automatically accessible.<br />
2. The Accessibility Utilities. These utilities, which are released as<br />
an add-on package, provide to third-party assistive technologies<br />
a higher-level and more global interface than the basic, component-based<br />
one available from the Accessibility API. Using this<br />
interlace, it is possible, for example, to detect the creation and<br />
destruction of top-level windows, listen to arbitrary events generated<br />
by every Swing or AWT component, and find out which<br />
component has the keyboard focus.<br />
3. Assistive Technologies. Using the features provided by the<br />
Accessibility Utilities, third-party vendors can create assistive<br />
technologies such as screen magnifiers and screen readers that<br />
allow the user to interact more easily with a <strong>Java</strong> application.<br />
4. The <strong>Java</strong> Access Bridge. Since the interface provided by the<br />
Accessibility Utilities is <strong>Java</strong>-based, assistive technologies that<br />
use it directly are, necessarily, written at least partly in <strong>Java</strong>.<br />
However, this is far from an ideal situation if the host platform<br />
already has native support for accessibility and tools in the marketplace<br />
that users are familiar with, as is the case with the Windows<br />
platform. If the user is accustomed to a particular screen<br />
reader to see Windows applications, it doesn't make much sense<br />
to require him or her to use a separate one to look at the <strong>Java</strong><br />
application or applet that he or she is also using. One way to<br />
avoid this is lor vendors to arrange lor their tools to use both the<br />
native platform API and the <strong>Java</strong> Accessibility utilities and to<br />
transparently switch between the two as necessaiy. Of course,<br />
this is cumbersome and very costly in terms of development<br />
and testing. The <strong>Java</strong> Access Bridge is a free add-on provided<br />
by <strong>Java</strong>Soft that solves this problem by exposing the accessibility<br />
support in the <strong>Java</strong> Virtual Machine to platform-native assistive<br />
technologies through Windows libraries, thus making it<br />
unnecessary to implement them partly in <strong>Java</strong> and partly in<br />
native code.
28 Chapter I Introduction to the <strong>Java</strong> <strong>Foundation</strong> <strong>Classes</strong><br />
Since all of the Swing components support Accessibility and therefore are<br />
already accessible to assistive technologies, if you are simply concerned with<br />
building applications, you can probably get away without learning much<br />
about the Accessibility APIs, although you should still be aware of the techniques<br />
for keyboard management that we'll cover in the first few chapters of<br />
this book. If your work includes creating custom user interface components,<br />
however, you'll need to ensure that they support the Accessibility API so that<br />
they are accessible to assistive technologies in the same way that the existing<br />
components are.<br />
Even if you are not in the business of building your own components, you<br />
may still be able to make use of the hooks provided by the Accessibility Utilities<br />
and some of the example code that is delivered with it to help debug your<br />
applications by using them to track events and inspect properties of Swing<br />
components without having to change any of your application code. Both the<br />
Accessibility API and the Accessibility Utilities are covered in Volume 2 of<br />
this book.<br />
The Swing Packages<br />
As we've said, Swing is available both as an add-on to JDK f .1 and as an integral<br />
part of the <strong>Java</strong> 2 platform. The original reason for this duality was to<br />
allow Swing-based applets and applications to be written before the final<br />
release of the <strong>Java</strong> 2 platform, but today there is still a large group of users<br />
who cannot or do not want to migrate to the <strong>Java</strong> 2 platform immediately or<br />
even in the short term. For such users, the availability of Swing as a separate<br />
add-on makes it possible to continue to use applications written for JDK 1.1.<br />
Issuing Swing as an add-on is not without its problems, however. Without<br />
doubt, Swing is a very important part of the <strong>Java</strong> platform - so important that<br />
it is considered by <strong>Java</strong>Soft to be part of the <strong>Java</strong> 2 core, which means that<br />
developers can rely on its presence in every <strong>Java</strong> 2 installation. Given this,<br />
you might expect to find a j ava. swing package as part of the <strong>Java</strong> 2 JAR file<br />
but, in fact, this is not the case. Although the Swing packages are part of the<br />
<strong>Java</strong> 2 rt. j ar file, they don't use the j ava. swing name.<br />
History of the Swing Package Name<br />
Swing was originally developed separately from the JDK itself and was initially<br />
released as a set of packages with names starting with
The Swing Packages 29<br />
com. sun. j ava. swing, making it clear that they were, at that time, not part<br />
of the standard JDK release. The ideal solution, since Swing was intended to<br />
eventually become part of the core platform, would have been to eventually<br />
place them in a package hierarchy rooted at java. swing both for JDK 1.1<br />
and <strong>Java</strong> 2 users, but unfortunately this was never a practical possibility. Since<br />
the JDK 1.1 version of Swing is not installed with the JDK itself, developers<br />
creating applets with Swing need to arrange for the Swing JAR file to be<br />
downloaded to the browser at the same time as their applets code. However,<br />
for security reasons, packages starting with java cannot be downloadable to<br />
browsers. Hence, moving Swing to a new java. swing package hierarchy is<br />
not compatible with keeping the Swing 1.1 version separate from the JDK—<br />
it would only work if Swing migrated in its entirety into the JDK itself.<br />
Although this sounds like a good idea, it would never have worked in practice,<br />
for the following reasons:<br />
• Swing development was proceeding at a much faster pace than<br />
that of JDK 1.1 and, even after its first release when you might<br />
have expected the rate of change to slow down a little, Swing<br />
releases were still being made more frequently than the<br />
relatively infrequent maintenance releases of JDK 1.1. Moving<br />
Swing into the JDK development cycle for JDK 1.1 would have<br />
increased the response time for bug fixes and improvements<br />
that developers needed to make productive use of Swing. This<br />
is much less true for <strong>Java</strong> 2, since there was more time for<br />
Swing to stabilize before <strong>Java</strong> 2 was released.<br />
• As far as browsers are concerned, there has always been a large<br />
time lag between the release of a new JDK and the time at<br />
which it was integrated into the virtual machines supplied by<br />
the major browser vendors. Following the release of JDK 1.1,<br />
there was a very long delay before it could be used in either<br />
Netscape or Internet Explorer. Even at the time of this writing,<br />
when JDK 1.1.8 is the current release, Netscape<br />
Communicator 4.7 is still using JDK 1.1.5, while the <strong>Java</strong> VM<br />
used by Microsoft Internet Explorer 5 and also separately<br />
released as part of the "Microsoft SDK for <strong>Java</strong>," claims to be<br />
based on JDK 1.1.4 to the extent that it can be said to track the<br />
JDK release cycle. Both of those releases are well over a year<br />
out of date. However, since the Swing classes are in a separate<br />
JAR file, developers and users can use Swing 1.1.1 with both of<br />
these browsers. Had Swing been in the JDK itself, applet
30 Chapter I Introduction to the <strong>Java</strong> <strong>Foundation</strong> <strong>Classes</strong><br />
developers would be obliged to work with code that is over a<br />
year behind the current state of the art.<br />
<strong>Core</strong> Note<br />
This is not quite the end of the story, however, since the existence of the<br />
<strong>Java</strong> plug-in means that you are no longer obliged to constrain yourself to<br />
use the browser vendor's built-in virtual machine. However, using the plugin<br />
implies a one-off download of a large file, which may not be acceptable<br />
to all users.We look at the plug-in and the issue of developing applets with<br />
Swing in Appendix A.<br />
In the early beta releases of the <strong>Java</strong> 2 platform, Swing was moved into a<br />
new package called j avax. awt. swing, where it was part of the <strong>Java</strong> 2 JDK.<br />
The intent was to continue to issue the JDK 1.1 version using the<br />
com. sun. j ava. swing package name. However, developers were not happy<br />
with this solution because it required them to maintain two versions of their<br />
Swing-based applications - one compiled for JDK 1.1, the other for the <strong>Java</strong> 2<br />
platform. After a debate conducted partly over the Internet, <strong>Java</strong>Soft finally<br />
settled on moving most of Swing to a new hierarchy rooted at j avax. swing,<br />
both for JDK 1.1 and <strong>Java</strong> 2. While requiring a migration, using a single<br />
name made it possible for developers to issue a single version of their software<br />
that would run on both platforms. Some of Swing was, however, not<br />
moved to j avax. swing. The parts that have been left out, which will be<br />
described in the next section, are not part of the core JDK and will not necessarily<br />
be installed on all systems.<br />
The Swing and Accessibility Packages<br />
The Swing and Accessibility packages that are common to JDK 1.1 and the<br />
<strong>Java</strong> 2 platform are as follows:<br />
• javax.accessibility<br />
• j avax.swing<br />
• javax.swing.border<br />
• javax.swing.colorchooser<br />
• j avax.swing.event<br />
• javax.swing.filechooser<br />
• javax.swing.plaf<br />
• javax.swing.plaf.basic<br />
• javax.swing.plaf.metal
• javax.swing.plaf.multi<br />
• javax.swing.table<br />
• javax.swing.text<br />
• javax.swing.text.html<br />
• javax.swing.text.html.parser<br />
• javax.swing.text.rtf<br />
• javax.swing.tree<br />
• javax.swing.undo<br />
• com.sun.javax.swing.plaf.mac<br />
• com.sun.javax.swing.plaf.motif<br />
• com.sun.j avax.swing.plaf.windows<br />
• com.sun.<strong>Java</strong>.accessibility.util<br />
The Swing Packages 31<br />
In the following sections we briefly describe what each of these packages<br />
contain.<br />
javax.swing<br />
The j avax. swing package contains the Swing components themselves and<br />
many of the interfaces that they use. The classes and interfaces in this package<br />
follow a naming convention that helps to identify what type of object they<br />
are. For example, the GUI components themselves have names that begin<br />
with a J (although Box is an exception to this rule, because it is not derived<br />
from JComponent); there is a Swing component to replace every AWT component<br />
and usually you can deduce its name by just adding the J prefix. A<br />
notable exception to this rule is Choice, which is replaced by JList, a Swing<br />
component that also supersedes the AWT List control.<br />
Many GUI components and other classes are closely related to each other<br />
and have much of their code in a shared base class; these shared classes all<br />
have names that start with Abstract. Examples of this are AbstractButton,<br />
which is the base class for all of the Swing buttons (which include menu<br />
items!) and AbstractAction, which is a basic implementation of the<br />
Action interface that will be introduced in Chapter 5. As their names suggest,<br />
these classes are all abstract. Some of these abstract classes also have<br />
concrete subclasses that provide a complete implementation that can either<br />
be used directly or used as a base class for a custom implementation of your<br />
own. These classes usually have names that begin with the word Default.<br />
An example of this pattern is the implementation of a Swing interface called<br />
ListModel, which specifies a set of methods for managing a list of items.<br />
The j avax. swing package contains an abstract class called<br />
AbstractListModel that implements much of the list functionality without
32 Chapter I Introduction to the <strong>Java</strong> <strong>Foundation</strong> <strong>Classes</strong><br />
actually providing the storage for the list itself, from which is derived<br />
DefaultListModel, which stores the list in a Vector and is therefore a<br />
complete implementation of a ListModel.<br />
Swing components are composed of several parts; a typical component is<br />
made up of a class that represents the control itself (such as JButton), a class<br />
that knows how to draw the component on the screen, and another class that<br />
represents the state of the component, known as the components model.<br />
The Swing package contains several interfaces that define the methods that<br />
the model provides as well as actual implementations of those interfaces that<br />
are used by real components. Buttons, for instance, have a model that implements<br />
the ButtonModel interface. The actual implementation of this model<br />
that all of the Swing buttons use is in a class called DefaultButtonModel.<br />
This naming scheme, whereby a basic, but complete implementation of an<br />
interface is placed in a class whose name is that of the interface with the<br />
added prefix Default, extends to the other model interfaces and their<br />
implementations in the Swing package and is also used in some of the other<br />
packages.<br />
The Swing package also contains some classes that are used in the implementation<br />
of new mechanisms that can be used with the components themselves.<br />
For example, Swing introduces a more flexible focus management<br />
mechanism that allows much finer tuning than the mechanism provided in<br />
JDK 1.1. The basic methods that make up a Swing focus manager are contained<br />
in the abstract FocusManager class and there is a complete implementation<br />
of a specific focus management policy in the class<br />
DefaultFocusManager. Similarly, there are classes that support the new<br />
API for managing keyboard accelerators and the pluggable look-and-feel<br />
mechanism that will be described later in this chapter.<br />
javax.swing.colorchooser and javax.swing.filechooser<br />
Although almost all of the Swing GUI components are basic building<br />
blocks, the javax. swing package also contains two utility classes called<br />
JColorChooser and JFileChooser, made up of other Swing components,<br />
that provide dialogs to allow the user to select colors and to choose files or<br />
dii'ectories for file-based operations. These compound components are complex<br />
enough that they require a significant number of supporting classes,<br />
which are grouped together in the javax.swing.colorchooser and<br />
javax. swing, f ilechooser packages.
javax.swing.table and javax.swing.tree<br />
The Swing Packages 33<br />
Swing provides two powerful components that allow you to present collections<br />
of data in the form of a tree or a table. The classes for the components<br />
themselves, JTree and JTable, reside with the other GUI components in<br />
the j avax. swing package, but both components are sufficiently complex<br />
that their data model classes and the other helper classes that are required<br />
to make them useful are packaged separately to avoid cluttering the Swing<br />
package and to make it easier to see what is available from JTree and<br />
JTable themselves. Like many of the Swing components, these controls<br />
are highly configurable and, by replacing or extending the Tenderers that<br />
draw parts of their screen representation, you can fundamentally change<br />
the way these controls look. The renderer interfaces are held alongside the<br />
tree and table support classes in the javax.swing.tree or<br />
j avax. swing. table package as appropriate.<br />
The Text Packages<br />
The Swing text components are much more complex than those in the AWT.<br />
While you can regard the relatively simple JTextField and JTextArea<br />
controls as straightforward replacements for TextField and TextArea, in<br />
implementation terms they are very different. All of the text controls are<br />
derived from the base class JTextComponent, which resides in the<br />
j avax. swing. text package. JTextComponent itself is a generic wrapper<br />
for the large collection of classes that keep track of the content of a text control<br />
and how it should be rendered when displayed, the classes that actually<br />
display the text, and those that react to user input from the keyboard or the<br />
mouse. All of these classes reside in the j avax. swing. text package.<br />
The Swing package itself contains three other text components—<br />
JPasswordField, JTextPane, and JEditorPane, which all rely on<br />
support from the classes in the j avax. swing. text package. In addition to<br />
this, JEditorPane can be configured to render text stored in various different<br />
forms, including HTML and Rich Text Format (RTF), for which it uses classes<br />
in the javax.swing.text.html, j avax. swing, text .html .parser, and<br />
j avax. swing. t ext. rt f packages.<br />
A common requirement in sophisticated text management applications,<br />
such as word processors, is to be able to undo changes made to the text. The<br />
text components are all implemented in such a way that changes made to the<br />
control's data model are recorded as transactions that can be reversed (in the<br />
right order) or re-applied after being reversed (from the right initial state), so<br />
that it is possible to expose to the user an undo/redo facility. The
34 Chapter I Introduction to the <strong>Java</strong> <strong>Foundation</strong> <strong>Classes</strong><br />
j avax. swing. undo package contains classes that work with the information<br />
provided by the text components to make it easier to provide this support.<br />
<strong>Core</strong> Note<br />
The undo package is not covered in this book. If you want to know how to<br />
use it, however, you'll find detailed coverage in <strong>Core</strong> Swing: Advanced<br />
Programming, which is also published by Prentice Hall.<br />
javax.swing.border<br />
This package contains all of the standard borders that Swing provides,<br />
together with the Border interface that borders must implement, and an<br />
abstract base class, AbstractBorder, that forms the basis of all of the Swing<br />
borders and can be used when creating new ones.<br />
As you'll see in Chapter 8, borders are not usually created directly.<br />
Instead, so that border instances can be shared between components whenever<br />
possible, a new border is usually created by using the BorderFactory<br />
class, which arranges to satisfy a request for a new border by returning an<br />
existing instance if it can be shared. BorderFactory resides in the Swing<br />
package.<br />
javax.swing.event<br />
The Swing components bring with them many new events and event listener<br />
classes. Just as the usual AWT events are all held in the<br />
j ava. awt. event package, the Swing events and their listeners reside in<br />
javax.swing.event. Among the new events are ChangeEvent, which<br />
reports an unspecified change of state in its source (see the discussion of<br />
progress bars and sliders for example of this event) and TreeModelEvent<br />
that is generated when the content of a tree's data model changes. While<br />
some of the events, such as ChangeEvent, extend the existing AWTEvent<br />
that is the basis of the events in j ava. awt .event, many of them, like<br />
TreeModelEvent, are not component-based and are therefore derived<br />
directly from j ava. util. EventObj ect instead. This reflects the fact that<br />
most of the events in this package represent things that happen inside a<br />
component or as a result of some operation performed by the component<br />
on itself, possibly as an indirect result of user interaction, rather than arising<br />
directly from actions at the user interface. Changes to the tree's data<br />
content can, for example, occur if the user is allowed to edit the tree contents,<br />
but the source of the event is the tree's data model itself reporting
The Swing Packages 35<br />
that it has been changed rather than the tree component, which is just the<br />
visual representation of the data.<br />
javax.swing.plaf<br />
A major feature of the Swing components is their ability to be rendered in<br />
different ways depending on the look-and-feel packages that are installed on<br />
a particular system. This is made possible by placing all of the code that<br />
knows how to draw the component in a separate class from the one that the<br />
application interacts with, so that it can be changed at run time without<br />
affecting code in the application that holds references to the component<br />
objects themselves. In order for this to work, there must be a well-defined<br />
interface between each component type and the class that implements its<br />
look-and-feel. The javax.swing.plaf package contains all of these interfaces<br />
(plaf stands for pluggable Look-And-Feel).<br />
All of the objects in this package are actually abstract classes that both<br />
specify the actual look-and-feel interface and, in some cases, contain prototypical<br />
implementations. All of them are derived from<br />
j avax. swing. plaf . ComponentUI, which represents the generic interface<br />
(or minimum contract) between a component and its user interface class.<br />
The amount of usable code in these classes that could form part of a real<br />
look-and-feel class implementation varies from class to class.<br />
This package also contains classes that wrap default values stored by lookand-feel<br />
implementations that are used by the user interface classes. For<br />
example, many components have several associated colors that are used to fill<br />
part of their screen representation. The colors that a control uses will, of<br />
course, depend on the look-and-feel, so they are stored separately by each<br />
look-and-feel. Instead of storing the colors as a j ava. awt. Color object,<br />
however, the color is wrapped with an instance of<br />
j avax. swing .plaf . ColorUIResource. There are also similar classes to<br />
wrap fonts and other resources. In Chapter 13, you'll see why these wrapper<br />
classes are used.<br />
It is important to realize that this package does not contain any actual lookand-feel<br />
implementation: it just stores the classes that define the interfaces<br />
that these implementations use.<br />
The Look-and-Feel Packages<br />
Several packages provide the user interface classes for the look-and-feel<br />
implementations supplied with Swing. Some of these classes reside in subpackages<br />
of java. swing.plaf, while others reside outside the standard
36 Chapter I Introduction to the <strong>Java</strong> <strong>Foundation</strong> <strong>Classes</strong><br />
Swing release in the original com. sun. <strong>Java</strong>, swing package hierarchy. The<br />
com. sun. java. swing.plaf .motif package, for example, contains classes<br />
that know how to render all of the Swing components and react to mouse,<br />
keyboard, and focus changes in such a way as to make the components look<br />
and feel as if they were part of a Motif desktop application. Similarly, the<br />
com. sun. <strong>Java</strong>, swing, plaf .windows package provides the Windows<br />
look-and-feel and there is also a com. sun. j ava. swing. plaf . mac package<br />
that renders components as they might look on an Apple Macintosh. These<br />
three packages are not in the j avax. swing hierarchy because they are not<br />
intended to be used on every platform. In fact, for licensing reasons, you are<br />
only allowed to use the Windows look-and-feel on the Windows platform and<br />
the Macintosh look-and-feel on an Apple Macintosh. The Motif look-andfeel,<br />
however, can be used on any platform. The code that implements three<br />
look-and-feels is actually packaged in separate JAR files which need not be<br />
installed on systems for which they are not appropriate.<br />
The core Swing release, however, does contain two packages relating to lookand-feel:<br />
javax.swing.plaf.metal and javax.swing.plaf.basic.<br />
The j avax. swing, plaf .metal package contains a custom look-and-feel<br />
design called Metal, which was produced specifically by <strong>Java</strong>Soft for <strong>Java</strong> applications.<br />
The Metal look-and-feel is selected by default and is available for use on<br />
all platforms. Most of the screen shots in this book use the Metal look-and-feel,<br />
which has a unique appearance that has become popular with developers and<br />
users since its first release.<br />
<strong>Core</strong> Note<br />
Which look-and-feels you have installed depends on the version of the <strong>Java</strong><br />
platform you are using. If you are using the Sun Swing-1.1.1 package for<br />
JDK I.I,you will find the Metal,Windows, Motif, and Macintosh look-andfeels<br />
in the swingall. jar file.Alternatively,you can use the smaller<br />
swing. j ar file which contains only the code necessary to use the Metal<br />
look-and-feel and then add the windows . j ar, motif . j ar, and<br />
mac . j ar files to the CLASSPATH as necessary. In the case of the <strong>Java</strong> 2<br />
platform, the Metal,Windows, and Motif look-and-feels are included with<br />
the core rt. j ar file.The Macintosh look-and-feel is not included with <strong>Java</strong><br />
2 and must be downloaded separately.<br />
The j avax. swing, plaf .basic package does not provide a look-andfeel<br />
implementation that the user can elect to use. Instead, it provides a set<br />
of base classes, one for each Swing component, that can be used (by pro-
The Swing Packages 37<br />
grammers) either directly or as the basis for a more customized one in a real<br />
look-and-feel package. For example, the user interface class for the JTree<br />
component, javax. swing.plaf .basic .BasicTreeUI, is used as the base<br />
class for the tree user interface for Windows (windowsTreeUI in the<br />
com. sun. <strong>Java</strong>, swing.plaf .windows package), Motif (MotifTreeUI in<br />
com. sun. j ava . swing. plaf . motif), and for the Metal look-and-feel (MetalTreeUI<br />
in javax. swing, plaf .metal). You'll see examples of the available<br />
user interfaces and how they render various components later in this<br />
chapter and throughout this book.<br />
<strong>Core</strong> Alert<br />
Sometimes, the only way to make a Swing component do exactly what you<br />
want it to do is to make use of an interface that is look-and-feel specific.<br />
You'll see several examples where this is the case in this book. During the<br />
development releases of Swing, the definitions of these interfaces were very<br />
unstable. Although there have not been any changes in this API recently, it is<br />
still not beyond the realms of possibility that there may be changes in the<br />
future. If you plan on using these interfaces, you should be prepared to<br />
evolve your software when you migrate to later releases of Swing.<br />
javax.swing.plaf.multi<br />
By default, a component only has a single user interface associated with it at<br />
any time. However, by using the multiplexing look-and-feel provided by the<br />
javax.swing.plaf.multi package, it is possible for more than one user<br />
interface from any of the other look-and-feel packages, or from a custom<br />
package, to be connected to a single component at one time. This can be useful<br />
if, for example, you want a text component to be able to draw its content<br />
on the screen and also to be able to "read" that content through a sound card.<br />
This is particularly important in an application that uses the <strong>Java</strong> Accessibility<br />
features to make itself more useful to those with sight impairments, for<br />
example.<br />
The implementation of the look-and-feel in this package is such that this<br />
requirement can be satisfied without any other look-and-feel package knowing<br />
that it is being used in connection with another one to manage a single<br />
component.
38 Chapter I Introduction to the <strong>Java</strong> <strong>Foundation</strong> <strong>Classes</strong><br />
Accessibility<br />
As noted earlier, the core <strong>Java</strong> Accessibility API which the Swing components<br />
support directly to expose information required by assistive technologies,<br />
resides in the javax. accessibility package. Although this does not fit<br />
below the j avax. swing hierarchy associated with the rest of Swing, this<br />
package is part of the Swing JAR file for JDK 1.1 and is included with the<br />
standard version of the <strong>Java</strong> 2 platform, so you can rely on it being available<br />
whenever Swing is installed.<br />
The <strong>Java</strong> Accessibility Utilities, however, are not part of the core platform<br />
and reside in the com. sun. <strong>Java</strong>.accessibility.util package, which<br />
must be downloaded separately. The JDK 1.1 and <strong>Java</strong> 2 versions of this<br />
package are different in implementation terms, but the API is the same. You<br />
don't need to install this package unless you intend to make use of assistive<br />
technologies. Of course, if you are intending to create your own custom components,<br />
you'll need this package for testing purposes and, if you are working<br />
on the Windows platform, you should also download the <strong>Java</strong> Access Bridge,<br />
which will allow you to use native Windows accessibility tools to test your<br />
new components. The <strong>Java</strong> Access Bridge contains two Windows DLLs<br />
(dynamically linked libraries) and a small JAR file that contains some extra<br />
classes that also reside in the com. sun. java .accessibility package.<br />
The <strong>Java</strong> 2D Packages<br />
<strong>Java</strong> 2D is a major enhancement to the rather basic graphics capability that<br />
was provided in JDK 1.1. Much of the implementation of <strong>Java</strong> 2D is either in<br />
native code or in <strong>Java</strong> packages that are specific to each JDK implementation<br />
and hence have to be ported to each host platform. The <strong>Java</strong> 2D API itself is<br />
spread over several packages, the content of most of which is briefly summarized<br />
in the following sections.<br />
java.awt<br />
The j ava. awt package contains the core classes of the AWT and a few others<br />
added by <strong>Java</strong> 2D. The most important <strong>Java</strong> 2D-related class in this package<br />
is Graphics2D, which allows you to draw shapes and text and render<br />
images on the screen, to a printer, or onto an image using the new facilities<br />
provided by <strong>Java</strong> 2D. Graphics2D is an enhanced version of the Graphics<br />
class that was used to perform these functions in JDK 1.1. Because<br />
Graphics2D is a subclass of Graphics, code written for JDK 1.1 that<br />
expects to work with a Graphics object continues to work in the <strong>Java</strong> 2 plat-
The Swing Packages 39<br />
form where it will actually be passed an instance of Graphics2D instead. In<br />
the first part of this book, we'll keep things simple and portable by using only<br />
the Graphics class; we describe the extensions provided by Graphics2D in<br />
the second volume of this book.<br />
Among the other new additions to this package are the Paint interface,<br />
which describes a generalized way of filling space with color (which need not<br />
be a solid color), the Composite interface, which governs the way in which<br />
new colors are merged with existing ones where they overlap on a drawing<br />
surface, and another interface called Stroke, which of itself is concerned<br />
only with obtaining a representation of the outline of a shape but which has a<br />
concrete implementation called BasicStroke that provides different ways<br />
to draw lines (solid, dashed, dotted etc.) and the ways in which merging lines<br />
can be joined.<br />
java.awt.image<br />
This is another package that existed in JDK 1.1 to which <strong>Java</strong> 2D makes<br />
numerous additions and changes. Many of these changes are relatively lowlevel<br />
and of importance only if you intend to do some serious work with<br />
image rendering. Without a doubt, the most important contribution that <strong>Java</strong><br />
2D makes to this package is the new Buf f eredlmage class. In JDK 1.1, it<br />
was possible to load an image from an external source, render it onto the<br />
screen or to the printer, and manipulate the image in a limited number of<br />
ways to produce another image, leaving the original untouched. The Buf f -<br />
eredlmage class allows you to access and directly modify the buffered data<br />
that represents an image in ways that were not possible in JDK 1.1. Using<br />
this class, you can also create a blank canvas of any given size and then construct<br />
an image pixel by pixel, by using drawing primitives provided by the<br />
Graphics2D class or by loading image data from a file, or any combination of<br />
these methods.<br />
java.awt.color<br />
Rendering colors properly on an output device is not quite as simple as you<br />
might imagine it to be. If you have done any GUI programming before, you<br />
are almost certainly familiar with the most common way to represent colors—<br />
by specifying three integer values that represent the amounts of red, green,<br />
and blue that should be combined to create it. In JDK 1.1, all colors were<br />
specified using this mechanism, referred to as the RGB representation.<br />
Unfortunately, using the same RGB value with different output devices is not<br />
guaranteed to produce exactly the same result. This may not be an issue if you
40 Chapter I Introduction to the <strong>Java</strong> <strong>Foundation</strong> <strong>Classes</strong><br />
are just developing a user interface in which the exact colors that the user sees<br />
are not of critical importance, but if you are trying to reproduce a high-resolution<br />
image, you probably want everybody to see the same colors, or to see colors<br />
that are as close to the original as their monitor or printer will allow.<br />
Since the inteq^retation of RGB values is device-dependent, <strong>Java</strong> 2 uses a<br />
device-independent encoding known as sRGB (Standard RGB) to represent<br />
colors, and most applications will usually deal entirely with sRGB values.<br />
When it is necessary to render color on a real output such as a screen or a<br />
printer, each device-independent sRGB value is mapped to the devicedependent<br />
RGB value that the output device needs in order to represent the<br />
color that the application needs. In order to make it possible to perform this<br />
translation, each device can provide its own mapping from sRGB to the RGB<br />
values that it uses to represent the required colors. This mapping is called a<br />
profile. The java. awt. color package contains the classes and interfaces<br />
that fava 2D uses to deal with colors, color spaces, and profiles.<br />
java.awt.font<br />
As with colors, fonts can be either simple; things or very complex things. In<br />
JDK 1.1, an application could do little more than select one of the small<br />
number of standard fonts supported by the JDK and use it to render text.<br />
About the only kind of manipulation a JDK 1.1 application could do with<br />
fonts was to use the font's metrics to determine how large a text string rendered<br />
with that font would be in order to determine where to place different<br />
fragments of text relative to each other.<br />
In <strong>Java</strong> 2, you can do much more with fonts. No longer are you tied to a<br />
small set of standard typefaces - now, you can use just about any font you can<br />
find on your host platform. The j ava . awt. font package contains classes<br />
and interfaces that allow you to manipulate text in various ways that depend<br />
on the details of the font in which it will be rendered, including the following:<br />
• Turning a text string into a set of glyphs that represent the<br />
character outlines that would result from rendering the text<br />
with a given font. Once you have a set of glyphs, you can<br />
manipulate them like any other graphic shapes. As well as<br />
simply drawing them directly onto the screen, you can also do<br />
such things as rotating them, stretching them, or filling them<br />
with color or with part of an image.<br />
• Measuring the size of the string with a given font or determine<br />
where to break the text in order to fit it in a given space. This is,
of course, very convenient when trying to fit text to the width of<br />
a page when creating printed output.<br />
• Applying attributes, such as color and font changes, to text and<br />
rendering the result on an output device with the attribute<br />
changes handled automatically.<br />
java.awt.geom<br />
The Swing Packages 41<br />
The JDK 1.1 Graphics class allows you draw simple shapes such as lines,<br />
rectangles, circles, and ellipses by calling specific methods that take the<br />
parameters of the shape as arguments. As an example, you can draw a circle<br />
or an ellipse by calling the drawOval method, specifying the location of the<br />
ellipse and the width and height of its bounding box. There is no JDK 1.1<br />
class that represents a circle, ellipse, straight line, or any other shape apart<br />
from rectangles.<br />
<strong>Java</strong> 2D provides a more object-oriented interface by adding these classes<br />
in the j ava. awt. geom package and providing drawing methods for them in<br />
the Graphics2D class. Now, instead of calling the drawOval method of<br />
Graphics and passing in parameters that describe the shape you want<br />
drawn, you instead call the draw method, which takes an argument of type<br />
Shape. Shape is an interface and, because all of the classes in the<br />
java.awt.geom package implement it, you can simply pass an instance of<br />
any of them to the Graphics2D draw method to have the corresponding<br />
shape drawn on the output device. The java.awt.geom package contains<br />
classes that represent the following shapes:<br />
• Straight lines<br />
• Rectangles<br />
• Polygons<br />
• Ellipses (which includes circles as a special case)<br />
• Arcs<br />
• Quadratic and cubic curves<br />
• General paths made up of arbitrary combinations of straight<br />
lines and quadratic and cubic curves<br />
java.awt.print<br />
This package contains the <strong>Java</strong> 2D printing API. Although JDK 1.1 has a<br />
platform-independent printing facility, as you'll see in Chapter 4 it provides a<br />
very low-level interface which, although being fairly convenient if you just<br />
want to take a screen shot of a GUI layout, quickly becomes cumbersome if
42 Chapter I Introduction to the <strong>Java</strong> <strong>Foundation</strong> <strong>Classes</strong><br />
you need to print something, especially text, that covers more than a single<br />
sheet of paper. Using the JDK 1.1 API, if you want to print the content of a<br />
text file, for example, you need to write code that loops over the file line-byline,<br />
determining how much of each text line will fit in each line of printed<br />
output and watching out for page boundaries as you go.<br />
The <strong>Java</strong> 2D printing API, by contrast, works at a higher level. Instead of<br />
simply giving the developer direct access to the printer and little else, it<br />
works at the level of a page by calling developer-supplied code to render each<br />
individual page as a separate unit of work. The printing code is also capable<br />
of handling print jobs in which it might be necessary to change the orientation<br />
of the output from portrait to landscape for individual pages or for<br />
groups of pages, and it can deal with requests to print only a subset of a complete<br />
print job. In Volume 2 of this book, you'll see how to use the <strong>Java</strong> 2D<br />
printing API to produce a robust and fully featured printing subsystem that<br />
you can use with almost any <strong>Java</strong> application, including the ability to view the<br />
printed output on the screen before it is sent to the printer.<br />
The Model-View-Controller<br />
Architecture<br />
The major difference between the Swing components and their AWT counterparts<br />
is that the Swing controls are written entirely in <strong>Java</strong> and, as a result,<br />
do not depend on any code provided by the host windowing system to provide<br />
their visual appearance or their functionality. On its own, this change<br />
makes it possible to create controls that look the same on any platform. However,<br />
the controls have not simply been reimplemented in <strong>Java</strong>—they have,<br />
in fact, been completely redesigned using a paradigm that is well-known in<br />
object-oriented programming, called the model-view-controller architecture,<br />
or MVC for short.<br />
To avoid getting lost in obscure and abstract discussions, let's look at what<br />
the MVC architecture means in terms of a concrete example and then show<br />
why this particular way of implementing components is so useful. At the end<br />
of the chapter, when you've seen what has been done and why it has been<br />
done, you'll find some examples of the results, and you'll be able to decide for<br />
yourself whether or not it was actually worthwhile! If, after this, you're sold<br />
on the idea of having a customized appearance to your applications, or even<br />
to somebody else's applications, you'll see in more detail how to go about<br />
implementing your own look-and-feel in Chapter 13.
An MVC Component:A Button<br />
The Model-View-Controller Architecture 43<br />
To see what the MVC architecture is and how it relates to the Swing components,<br />
let's look at how you might go about designing a component that represents<br />
a button. A button is a control that has pieces that represent all three<br />
parts of the MVC architecture and it is also simple and well-understood, so it<br />
should be easy to use it to examine and assess a new component architecture.<br />
Fundamentally, a button is an object that does little more than sit on a user<br />
interface and wait for you to click it. When it has been clicked, it changes its<br />
appearance so that it looks pushed-in, generates an event for some interested<br />
party to catch, then redraws itself to look popped-out again. It couldn't be<br />
much simpler in principle, but there is a little more to it than this straightforward<br />
description would suggest. Before going any further, read back over the<br />
first part of this paragraph. By and large, what I've told you is what the button<br />
looks like while it is being used: it starts in a popped-up state, it changes<br />
appearance so that it appears to be pushed in, and then it pops back out<br />
again. These few words actually describe what the view part of a Swing component<br />
is supposed to know about—how the component should look at any<br />
given time.<br />
<strong>Core</strong> Note<br />
Here and throughout the book you'll find descriptions of components and<br />
how they behave. Swing poses a particularly difficult problem for authors in<br />
that there is no single way for a component to look or behave—exactly<br />
what it looks like or what it does can depend crucially on the look-and-feel<br />
that is being used. In this book, unless indicated otherwise, the descriptions<br />
match the way components look and behave when the Metal look-and-feel<br />
is selected.<br />
In this case, you can see that the button has two different representations<br />
that the view has to be able to reproduce. In fact, though, there are more<br />
than that. Buttons are not always in an active state: if you create a form with<br />
several fields that need to be filled in with an OK button to be pressed when<br />
the form is complete, it makes little sense to offer the possibility for the user<br />
to be able to actually press it until all mandatory fields have been completed.<br />
To implement this kind of functionality, the button (along with other components)<br />
can be either enabled or disabled at any given time. Naturally, the button<br />
will only respond to a click when it is enabled. Having a software switch<br />
that records the state of the button is useful for the programmer, but of no
44 Chapter I Introduction to the <strong>Java</strong> <strong>Foundation</strong> <strong>Classes</strong><br />
use to the user, who can't see it, so to make it clear when the button can and<br />
can't be pressed, it is normal for the view to render it differently. Thus, there<br />
are three different ways to draw a button (only three, because a pressed-in<br />
disabled button should not be possible!). More could be added to this, but<br />
for now it should be clear that the view has to render the button differently<br />
depending on its state.<br />
The state of the button is, of course, something that would be part of any<br />
component that represented it, be it the button component provided in the<br />
Swing package or a private one that you implemented for yourself. In fact,<br />
the buttons total state is the model part of the MVC architecture. So far,<br />
you've seen two items that are legitimate parts of the model—whether the<br />
button is pressed in and whether it is enabled. If you started looking more<br />
closely at the problem, you would soon see that there are a few more<br />
attributes that you would need to have; those attributes would all be held in<br />
the model.<br />
You now know that the button holds its state in the model and that the<br />
view uses the model to decide how to draw the button. The other important<br />
feature of the button is that its state can change—when you click on it with<br />
the mouse, or give it the focus and press the space or return key, the button is<br />
activated. Obviously, something must be monitoring the mouse and the keyboard<br />
and the fact that the button has received or lost the focus, in order to<br />
notice that a state change is necessary. The part of the component that<br />
receives and responds to input is the controller.<br />
Let's represent all of this with a diagram. Figure 1—6 shows a representation<br />
of the various pieces of the button in the MVC architecture and it also<br />
shows how the state of the various pieces can change. When the button is<br />
created, all three pieces come into existence and get connected together;<br />
you'll see later how this is done. The model adopts an initial state: Usually,<br />
the button isn't pressed and in this case it will start life enabled. When the<br />
button first becomes visible, the view uses the model's initial state to draw it<br />
in the appropriate way.<br />
Now suppose that the user clicks the button with the mouse. This action is<br />
detected by the controller, which interprets it as a request to click the button.<br />
A click actually requires two steps—first, the button is pressed and then it is<br />
released. When the mouse button is pressed, the controller tells the model to<br />
change its state to reflect the fact that the button itself has been pressed. The<br />
button now needs to be redrawn so that it looks pressed in. To make this happen,<br />
the model notifies the view that its state has changed by generating an<br />
event that the view has registered to receive. On receipt of this event, the<br />
view queries the model for its new state and redraws the button accordingly.
Figure 1-6 A button as an MVC component.<br />
The Model-View-Controller Architecture 45<br />
When the user releases the mouse button, the controller detects it and<br />
changes the model again so that the buttons state indicates that it is not<br />
pressed. This causes the model to generate another event to the view, as a<br />
result of which the button will be redrawn in its "up" state. This particular<br />
state change, from pressed to not pressed, also causes the model to generate<br />
another event that can be delivered to application code to indicate that the<br />
button has been clicked. This is the only piece of this interaction that is<br />
important to code outside the button: The rest has only been visible inside<br />
the button.<br />
Now suppose the button were disabled instead of enabled. What difference<br />
would this have made? When the mouse is pressed over the button, the<br />
controller will still detect it and will attempt to change the model's state to<br />
reflect this. However, the fact that the button is disabled is held within the<br />
model. When the model is disabled it doesn't allow the button's pressed state<br />
to be changed, so no event will be generated to the view and the button's<br />
appearance won't change. As far as the user is concerned, the button press<br />
was ignored.<br />
There is another way in which the button's state can change: Code in the<br />
application can change the enabled state of the button, or it can programmatically<br />
perform a click as if the mouse had been pressed and then released.<br />
Disabling the button is an action that affects the state of the model and, of
46 Chapter I Introduction to the <strong>Java</strong> <strong>Foundation</strong> <strong>Classes</strong><br />
course, causes an event to the view, which will make the button be redrawn<br />
with the usual "grayed-out" appearance. Similarly, clicking the button is performed<br />
as a two-step interaction with the model in which a mouse press and<br />
a mouse release are simulated, without going through the controller. The<br />
model, of course, doesn't know which piece of software is changing its<br />
state—be it controller or application code, it still sends events to the view<br />
and, if necessary, generates the event for the button click.<br />
The MVC Button Implementation in Swing<br />
What has just been described is the purist approach to the MVC architecture<br />
in which there are three pieces of software that separately implement the<br />
model, the view, and the controller and which get bound together when the<br />
button is created. You have also seen that application code can directly<br />
change the model to click the button or change its enabled state.<br />
In practice, while this exact architecture is used for some components (for<br />
example, the text components that you'll see in Chapter 9), many of the<br />
Swing controls are built slightly differently. In these cases, the view and the<br />
controller are merged into one entity that implements the functions of both.<br />
Also, applications usually don't have to interact directly with the model.<br />
Instead, the component itself often (but not always) exposes methods that<br />
manipulate the model, so that application code almost always deals only with<br />
the component.<br />
What do we mean by "the component" here? Isn't the whole thing the<br />
component? In fact, the component is usually made up of several pieces; in<br />
the case of the button, these are as follows:<br />
1. An instance of a class that implements the model. In the case of<br />
an ordinaiy button, this class is called Def aultButtonModel.<br />
2. An instance of a class that knows how to draw the button that<br />
fulfills the role of the view. A class called BasicButtonUI does<br />
this job for ordinary buttons. As you'll see in Chapter 13, the<br />
button's border is provided by yet another class, which we consider<br />
to be part of the view for the purposes of this discussion.<br />
3. An instance of a class that responds to user input, in the role of<br />
controller. For the button, this role is played by the<br />
BasicButtonListener class.<br />
4. A wrapper class that provides the programming interface to the<br />
button and hides the other pieces. The Swing class that represents<br />
a button is JButton.
<strong>Core</strong> Note<br />
The Model-View-Controller Architecture 47<br />
You can see that the button actually has separate view and controller<br />
classes. Many other components do not.<br />
In this case, when we speak of "the component," we would be referring to<br />
the JButton instance, because this is what the application program would<br />
almost always interact with. However, all of the Swing components that have<br />
a model provide a method that allows applications to access it directly if they<br />
need to. For some controls, there is no way to change the state of the model<br />
via the component—you have to go directly to the model itself.<br />
Using MVC to Enable the Pluggable Look-and-<br />
Feel Architecture<br />
The MVC architecture is the cornerstone of the pluggable look-and-feel feature<br />
in Swing. If you wanted to take a button and make it look different and,<br />
perhaps, make it respond to different keys or mouse events, you would need<br />
to modify the controller and the view. You wouldn't change the model,<br />
because you need the same button states—after all, this is still a button, no<br />
matter how you draw it, and you wouldn't want to change the programming<br />
interface to the wrapper component either because if you did, you would<br />
make it difficult to substitute your button for an existing one. So, if you<br />
wanted to be able to substitute one button look-and-feel for another easily,<br />
you would need to design your components in such a way that the view and<br />
controller could be removed and replaced by another one without disturbing<br />
anything else. This, of course, is one reason why the view and controller are<br />
often implemented as a single unit.<br />
<strong>Core</strong> Note<br />
You can change the button's model for another one if you want to, provided<br />
that it implements the same interface as the default model.This is,<br />
however, an application issue and is not strictly part of the pluggable lookand-feel<br />
architecture because it does not affect the button's appearance.<br />
The more complex components, such as the table and tree, are examples<br />
of components in the default model installed when they are created is of no<br />
practical use and which the application code must replace with a model<br />
that represents the specific data that it wants to have displayed.
48 Chapter I Introduction to the <strong>Java</strong> <strong>Foundation</strong> <strong>Classes</strong><br />
Plugging in new view-controller units means having a well-defined interface<br />
between this part and the component itself and having an interface that<br />
tells the component that the look-and-feel specific part is being changed. In<br />
fact, the actual interface that is needed will depend on the type of component<br />
because, as you can imagine, a tree control is vastly more complex than<br />
a button. There is, however, a core set of methods that is required by every<br />
pluggable unit. This core set is specified in Swing by the abstract class<br />
j avax. swing. plaf . ComponentUT. The suffix UI here is common to all of<br />
the classes in the j avax. swing, plaf package that specify an interface<br />
between a particular component and its view-controller implementation.<br />
Other examples are TreeUI, TableUI, LabelUI, and so on. Each of these<br />
is an abstract class that is derived from ComponentUT.<br />
<strong>Core</strong> Note<br />
In cases where the view and controller are separate, the view class,<br />
naturally enough, is the one that has the UI suffix.<br />
If you wanted to change the way a Swing component looks or behaves, you<br />
would write a class that implemented all the methods in the corresponding<br />
UI class for that type of component and arrange for it to be plugged in at run<br />
time. For example, to create a new look-and-feel for a tree, you would have<br />
to implement a class that provided all the methods of TreeUI. The Swing<br />
packages, as we know, contain several look-and-feel packages. These packages<br />
all consist of a set of classes that implement (or inherit) all of the methods<br />
of all of the UI classes in the j avax. swing . plaf package.<br />
The Componentui class has only a very small number of methods; ever)'<br />
pluggable component module must, of course, provide all of them:<br />
public abstract class Componentui {<br />
public static Componentui createUI(JComponent c);<br />
public void installUI(JComponent c);<br />
public void uninstallUT(JComponent c);<br />
public void update(Graphics g, JComponent c);<br />
public void paint(Graphics g, JComponent c);<br />
public Dimension getPreferredSize(JComponent c);<br />
public Dimension getMinimumSize(JComponent c);<br />
public Dimension getMaximumSize(JComponent c);<br />
public boolean contains(JComponent c, int x, int y);<br />
public Accessible getAccessibleChild(JComponent c, int<br />
i) ;<br />
public int getAccessibleChildrenCount(JComponent c);<br />
}
The Model-View-Controller Architecture 49<br />
The gory details of how the actual pluggable look-and-feel mechanism<br />
works are not discussed in this chapter, because most of the time you don't<br />
really need to know how the component is created in order to use it. These<br />
details are important only if you want to create a replacement look-and-feel,<br />
so we'll confine ourselves to a basic outline here. If you want to know more,<br />
you'll find complete coverage in Chapter 13.<br />
The first three methods deal with creating a UI object for a control and<br />
connecting it to the component. When, for example, a button is created, the<br />
createUT method of the button UI class for the look-and-feel that happens<br />
to be active is called. This is a static method and its job is to return an object<br />
that can be plugged into a JButton. If the Metal look-and-feel is selected,<br />
the createUl method of MetalButtonUI will be called and it will return a<br />
new MetalButtonUI, which will be installed into the JButton. To tell the<br />
new MetalButtonUI object that this has happened and to let it know which<br />
component it is associated with, its installUi method is called. As you can<br />
see, this method receives a reference to the component into which the UI<br />
class is being installed as an argument.<br />
It is possible to replace the UI after the component has been created. If<br />
this is happening, the old UI class is disconnected from the component by<br />
calling its uninstallUI method, then the installUi method of the<br />
replacement ui is invoked. The job of creating UI classes for components,<br />
based on the currently selected look-and-feel, is carried out by a class called<br />
UIManager that resides in the j avax. swing package.<br />
The last two methods (getAccessibleChild and getAccessible-<br />
ChildrenCount) are part of Swings support for the <strong>Java</strong> Accessibility API<br />
and will not be discussed here. The remaining methods are invoked when the<br />
component is in use and they deal with things that only the look-and-feel<br />
class can know about. Clearly, drawing the component is very look-and-feel<br />
specific, so most (but not all) of this is handled by the UI class's update and<br />
paint methods. Similarly, a component's size can depend on how it is being<br />
drawn, so the JComponent methods that determine how big a component<br />
can be or wants to be do their job by calling the corresponding method in the<br />
UI class. Finally, the contains method, as its name suggests, determines<br />
whether a given point is "inside" the component; if the drawn shape of the<br />
component is irregular, deciding whether a point is inside or not cannot be<br />
done by generic code—instead, the question is passed to the UI class, which<br />
knows how the component is drawn.
50 Chapter I Introduction to the <strong>Java</strong> <strong>Foundation</strong> <strong>Classes</strong><br />
Selecting the Look-and-Feel<br />
When an application starts, its UIManager needs to know which of the available<br />
look-and-feel classes to use. The user can determine the selected UI by<br />
editing the file swing.properties, which resides in the lib directory of<br />
the user's <strong>Java</strong> installation. Typical locations for this file on a Windows system<br />
would be<br />
• c : \ j dkl. 1. 8\lib\swing . properties for JDK 1.1.8 when<br />
using the JDK<br />
• c:\Program Files\<strong>Java</strong>Soft\jre\l.l\lib\swing.prope<br />
rties for JDK 1.1 when using the JRE only<br />
• c:\jdkl.3\j re\lib\swing.properties for <strong>Java</strong> 2 when<br />
the JDK is installed<br />
• c:\Program Files\<strong>Java</strong>Soft\jre\l.3\lib\swing.prope<br />
rties for <strong>Java</strong> 2 version 1.3 when using the JRE only<br />
Note that for <strong>Java</strong> 2 (and for JDK 1.1 when you are using the JRE and not the<br />
full JDK), the swing.properties file must reside with the appropriate<br />
copies of the <strong>Java</strong> Runtime Environment (JRE) files—if you create it instead<br />
in c : \jdkl. 3\lib (by analogy with JDK 1.1) it will be ignored. The default<br />
installations of the <strong>Java</strong> 2 platform and Swing for JDK 1.1 do not include this<br />
file, so you'll need to create one yourself if you want to switch the look-andfeel<br />
used on your machine.<br />
The content of this file is a set of 'property = value' lines, which will be<br />
described in Chapter 13. The only line of interest here is the following one:<br />
swing.defaultlaf = javax.swing.plaf.metal.MetalLookAndFeel<br />
The swing.defaultlaf property must be set to the name of the class<br />
that provides the look-and-feel support. This example selects the Metal lookand-feel.<br />
To select Motif, use this line:<br />
swing.defaultlaf = com.sun.<strong>Java</strong>.swing.plaf.motif.MotifLookAndFeel<br />
to use the Windows look-and-feel, you need this line:<br />
swing.defaultlaf = com.sun.java.swing.plaf.windows.Windows-<br />
LookAndFeel<br />
while the Mac look-and-feel requires this:<br />
swing.defaultlaf = com.sun.java.swing.plaf.mac.MacLookAndFeel
<strong>Core</strong> Note<br />
The Model-View-Controller Architecture 51<br />
Note the important difference between the line required to use the Metal<br />
look-and-feel and the other three: since Metal is part of the core platform,<br />
it is packaged under the j avax. swing hierarchy.The other three look-<br />
and-feels, however, are packaged under com. sun. j ava. swing.<br />
Because of this, you can't rely on finding them on any given platform.There<br />
may also be restrictions on where these look-and-feels can be used—<br />
Windows and Mac can only be used on Windows and Apple Macintosh<br />
computers respectively.<br />
If swing, properties doesn't exist, or it doesn't contain a<br />
swing.defaultlaf property, the cross-platform Metal look-and-feel will<br />
be used. This is, of course, the case when you initially install the software.<br />
Another way to select the look-and-feel is to arrange for the<br />
swing. defaultlaf key to be defined in the system properties. The easiest<br />
way to do this is to use the -D argument when launching your application. To<br />
try the example shown here with the Motif look-and-feel, you would use the<br />
following command:<br />
<strong>Java</strong> -Dswing.defaultlaf=<br />
com.sun.<strong>Java</strong>.swing.plaf.motif.MotifLookAndFeel<br />
<strong>JFC</strong>Book.ChapterlO.TreeExamplel directory<br />
where directory is the name of a directory on your machine. The values<br />
that can be specified for the swing.defaultlaf property are the same as<br />
those that would have been supplied in the swing.properties file. If you<br />
use this method, the value specified on the command line overrides the content<br />
of the swing .properties file.<br />
When you are running the examples in this book or developing your own<br />
programs, you may find it useful to switch between the various look-and-feel<br />
classes to see how a program looks with the different styles installed. Chapter<br />
13 shows you how to give an application the ability to switch its look-and-feel<br />
on command, but, if you aren't using a program that can do that, the only way<br />
around it is to stop the program, edit swing.properties, or supply a different<br />
-D argument and then start the application again. To save time, I keep<br />
several of the above lines in my file and comment out the ones that I don't<br />
want by placing a "#" at the start of the line. Here's what my file looks like<br />
when I want to run an example with the Motif look-and-feel:<br />
#swing.defaultlaf = javax.swing.plaf.metal.MetalLookAndFeel<br />
swing.defaultlaf = com.sun.<strong>Java</strong>.swing.plaf.motif.MotifLookAndFeel<br />
#swing.defaultlaf =
52 Chapter I Introduction to the <strong>Java</strong> <strong>Foundation</strong> <strong>Classes</strong><br />
com.sun.j ava.swing.plaf.windows.WindowsLookAndFeel<br />
One Application, Several Disguises<br />
To conclude this chapter, let's see how a typical Swing application's appearance<br />
changes when its look-and-feel is switched, by looking ahead to a program<br />
that will be developed in Chapter 10. This program demonstrates the<br />
Swing tree component by using it to display a view of a file system on a PC.<br />
The meaning of what you're actually seeing here is not really important—<br />
what is important is the way in which the tree's content is presented. Look<br />
carefully at Figures 1-7, 1-8, and 1-9 and notice the differences in the way<br />
that the trees are drawn. As you look at these figures, remember that the program<br />
was only written once and no code was changed between these three<br />
screen shots.<br />
Figure 1-7 The Metal look-and-feel.
Figure 1-8 The Motif look-and-feel.<br />
The Model-View-Controller Architecture 53
54 Chapter I Introduction to the <strong>Java</strong> <strong>Foundation</strong> <strong>Classes</strong><br />
Figure 1-9 The Windows look-and-feel.
Summary<br />
This chapter introduced the <strong>Java</strong> <strong>Foundation</strong> <strong>Classes</strong> and, in particular, the<br />
Swing component set, which is its major new feature. It presented the history<br />
of the <strong>JFC</strong> and described how the Swing components relate to their AWT<br />
predecessors.<br />
You also saw the major features of the Swing set and were briefly introduced<br />
to the "core" class, JComponent, which makes most of them possible.<br />
After a short description of most of the core packages that make up the <strong>Java</strong><br />
<strong>Foundation</strong> <strong>Classes</strong>, you were shown the architecture of the Swing components<br />
and how this architecture makes it possible to change the appearance<br />
of a component or of a complete application without changing any application<br />
code.<br />
In the rest of this book you'll be introduced to all of the Swing components<br />
and to many of the new facilities that the <strong>Java</strong> <strong>Foundation</strong> <strong>Classes</strong> provide.<br />
The next chapter, however, covers some basic ground by discussing the fundamentals<br />
of the AWT, and then introduces two of the simpler Swing controls—JLabel<br />
and JButton.<br />
Summary 55
FRAMES, IAKIA<br />
AND BUTTONS<br />
• The JFrame Class<br />
Topics in This Chapter<br />
• Components, Containers, and Layout Manager<br />
• Events and Event Listeners<br />
• Labels, Buttons, and Images<br />
• Swing and Multithreading
This chapter presents both an introduction to some of the Swing components<br />
and a review of the fundamentals of the Abstract Window<br />
Toolkit (AWT), covering the information that you'll be needing<br />
throughout the book. You'll first be introduced to the JFrame class, which is<br />
the Swing component that acts as your application's main window. You'll see<br />
how to create a JFrame and how to control its location, size, and colors.<br />
Within the frame, you'll want to place other components that make up<br />
your application's user interface. Before you can begin building your interface,<br />
you need to know how you can control and customize these components.<br />
You'll look at the properties that all of the Swing components expose<br />
and see the difference between a simple component and a container. You'll<br />
also have a brief look at the job of the layout manager, which controls the<br />
locations of components within containers, in preparation for a thorough discussion<br />
of this topic in the next chapter.<br />
The second part of this chapter takes a close look at two of the simplest<br />
but most commonly used Swing components—labels and buttons. The Swing<br />
versions of these components are more powerful than their AWT counterparts<br />
because, among other things, they can display images as well as text. In<br />
the course of discussing these components, you'll find a review of the AWT<br />
event model and you'll see how the Swing Imagelcon class makes it much<br />
easier than ever before to load images for use with labels and buttons.<br />
57
58 Chapter 2 Frames, Labels, and Buttons<br />
If you are already familiar with the Abstract Window Toolkit, you will find<br />
a lot of this chapter familiar, but you'll also find some things that are completely<br />
new and much that has changed since TDK 1.1.<br />
The Shell of an Application:<br />
The JFrame Class<br />
When you start any <strong>Java</strong> program with a graphical user interface (GUI), you<br />
see a window where the application will display its output and into which the<br />
user will type input with the keyboard or point and click with the mouse.<br />
When you use the Swing components, this top-level window is an instance of<br />
the class j avax. swing. JFrame. Like some of the other Swing components,<br />
including the other Swing top-level windows JDialog and JWindow,<br />
JFrame is derived from an AWT control. Figure 2-1 shows how the components<br />
that are introduced in this chapter are related to each other and to the<br />
heavyweight AWT controls that you are familiar with. In this diagram, the<br />
shaded rectangles represent AWT controls and all the others are Swing components.<br />
This diagram shows clearly that JFrame is derived from the familiar<br />
AWT Frame class.<br />
Figure 2-1 A basic AWT and Swing componenf hierarchy.
Images on Components: Icons 59<br />
Creating a frame and making it visible are very simple tasks in <strong>Java</strong>. It can<br />
be done as easily as this:<br />
package <strong>JFC</strong>Book.Chapter2;<br />
import j avax.swing.*;<br />
public class BasicFrame {<br />
public static void main(String [] args) {<br />
JFrame f = new JFrame("Simple Frame");<br />
f.setSize(250, 200);<br />
f.setvisible(true) ;<br />
}<br />
}<br />
Running this trivial program under Windows, using the command<br />
<strong>Java</strong> <strong>JFC</strong>Book.Chapter2.BasicFrame<br />
produces the result shown in Figure 2-2.<br />
Figure 2-2 The Swing JFrame.<br />
The string that is supplied to the constructor is used as the frame s caption.<br />
Alongside it on the caption bar are the minimize, maximize and cZo.se buttons<br />
that top-level windows usually have. If you try the minimize and maximize<br />
buttons, you will find that they both work as you expect—the minimize but-
60 Chapter 2 Frames, Labels, and Buttons<br />
ton causes the frame to iconify and the maximize button makes it grow to fill<br />
the entire screen. When the frame is full-screen sized, the maximize button<br />
changes to another one that allows you to restore the frame to its original<br />
size. Furthermore, if you move the mouse to the lower right corner of the<br />
frame, the cursor changes as it normally does to show that you can drag the<br />
mouse to resize the frame. Move the mouse over the caption bar and drag it,<br />
and you will find that the frame moves around the screen. In short, this is a<br />
fully-fledged application window, created with only three lines of code.<br />
Sizing the Application Frame and Making<br />
It Visible<br />
Having created the frame, the next step is to set its size:<br />
f.setSize(250, 100);<br />
When the frame is first created, its internal width and height are both zero<br />
and they will stay that way until you do something to change them. If you<br />
removed this line from the example code and ran it again, you would get a<br />
frame with the caption bar just large enough to contain the usual buttons and<br />
a small part of the caption text and the application icon at the far left.<br />
Unfortunately, a frame cannot make an intelligent guess as to how large<br />
you would like it to be. Even if you create a frame with some useful content,<br />
it still won't enlarge itself so that you can actually see what it contains - it just<br />
takes a default size that depends on the platform that your application is running<br />
on, which is determined at the time that you make the frame visible.<br />
Therefore, it is always necessary to explicitly size a frame to make its content<br />
visible. You don't, however, have to tell it the exact size that you want, as<br />
you'll see later.<br />
All frames start out invisible, allowing you to create and add other elements<br />
of the user interface away from the user's eyes. This trivial application<br />
does not have any more content to add to the frame, so you can just make it<br />
visible right after setting its size:<br />
f.setVisible(true);<br />
Once the frame is visible, the user can interact with it using the mouse.<br />
You've seen that it behaves as a normal top-level window in every respect,<br />
apart from one. If you click the close button, you would probably expect the<br />
frame to disappear and the application to terminate. In fact, the window does<br />
disappear, but the application continues running, with nothing to do.
Images on Components: Icons 61<br />
When you press the close button, the <strong>Java</strong> libraries notify your application<br />
by generating an event that you can choose to intercept. In this example, no<br />
arrangement was made to receive the event and, as a result, the request to<br />
close the window is handled by default code in the JFrame class, which simply<br />
makes the window invisible again.<br />
<strong>Core</strong> Note<br />
If you're familiar with JDK I.I, you will have noticed that this is different<br />
from the behavior of Frame, which doesn't close unless the application<br />
processes the event caused by pressing the close button and takes explicit<br />
action to allow the close to proceed. As you'll see in Chapter 3, "Managing<br />
the User Interface," you can, if you wish, make JFrame adopt the JDK I.I<br />
Frame behavior. If you're porting code from JDK I.I to use Swing classes,<br />
this is one of several important differences that you need to look out for.<br />
In real-world applications you need to be careful to take proper action<br />
when the user tries to close the top-level window: at the very least, your<br />
application might need to save any data the user has entered that has not yet<br />
been written away. You'll find out more about events and how to handle them<br />
later in this chapter and you'll see exactly what happens when the user clicks<br />
the frame close button in Chapter 3. In the meanwhile, if you want to stop<br />
this simple application, you'll have to go to the command line prompt at<br />
which you started it and kill it from there (ctrl-C usually works with both<br />
DOS and Unix; if this doesn't work, try the DEL key).<br />
Position and Color<br />
There are a couple of other things that we did not do to the frame before we<br />
made it visible that the <strong>Java</strong> libraries have done for us. Most obviously, how<br />
did the frame know where to appear? If you don't tell a frame where it<br />
should be, the platform-specific toolkit implementation is free to choose a<br />
default position for you. Current implementations place the frame at the topleft<br />
corner of the screen, so starting more than one application with default<br />
positioning results in them being overlaid on top of each other.<br />
Sometimes, of course, you need to place a top-level window in a specific<br />
position on the screen. This is most commonly the case with dialogs, which<br />
allow the user to customize an application or control its behavior at certain<br />
critical points. Dialogs are usually placed on top of the application window<br />
and are often arranged to be centered over it. To allow you to influence a
62 Chapter 2 Frames, Labels, and Buttons<br />
windows position, <strong>Java</strong> provides the setBounds method, which lets you<br />
specify its size and position at the same time.<br />
<strong>Core</strong> Note<br />
There are three Swing classes that can act as top-level windows—<br />
JWindow, JDialog, and JFrame.This book will always refer to<br />
JDialog and JFrame using their class names or, less formally, as dialog<br />
or frame.When describing a feature that applies equally to dialogs and<br />
frames, the more general term window is often used. Do not confuse this<br />
use of the word window with the Swing JWindow class, which we won't<br />
say much about in this book. JWindow is used almost exclusively to create<br />
pop-ups but, as you'll see later, not all popups are created this way. In this<br />
book, the unadorned term window will never be used to mean JWindow.<br />
If you had wanted to start the application and have its frame appear 30 pixels<br />
down and 40 pixels to the right of the top left-hand corner of the screen,<br />
you would have replaced the setSize line that was used earlier with the following:<br />
f . s e t B o u n d s ( 4 0 , 3 0 , 2 5 0 , 2 0 0 ) ;<br />
or, alternatively, you can do this in two steps:<br />
f.setSize (250, 200) ;<br />
f.setLocation(40, 30);<br />
Note, however, that, strictly speaking, the requested position is only a hint<br />
to the windowing system about where it should place a window—nothing is<br />
guaranteed. On Unix, for example, the window manager may be operating a<br />
policy that totally disregards the application s placement request in favor of a<br />
common policy enforced across the users desktop.<br />
The other thing that the <strong>Java</strong> libraries did was to set the frames colors.<br />
These colors are not arbitrary—they depend on the look-and-feel that is<br />
selected. Each look-and-feel has a set of colors that it uses for particular parts<br />
of the user interface. These colors are all grouped together in the look-andfeel's<br />
UIDefaults table, along with a host of other properties that vary<br />
between different look-and-feel implementations. You can read more about<br />
this table and how it is used by Swing components in Chapter 13, "The Pluggable<br />
Look-and-Feel." Both the Windows and Motif look-and-feel give the<br />
application's frame a gray background, whereas the Metal look-and-feel has<br />
the capability of supporting several colors schemes or themes. The Metal<br />
color scheme supplied with Swing also has a gray frame background. You'll
Images on Components: Icons 63<br />
see more about how the frame's color is actually determined when you look<br />
at the JFrame class in more detail a bit later in the chapter.<br />
Components and Their Properties<br />
At the top of the class hierarchy for all user interface elements is the<br />
j ava. awt. Component class. Component is an abstract class, so you can't<br />
actually instantiate it. The only way to create one is to use one of the Swing or<br />
AWT controls that are derived from it, or to create your own subclass. In<br />
JDK 1.0, it wasn't possible to directly subclass Component, because its constructor<br />
had package scope. If you wanted to create a custom component,<br />
you had to extend one of the AWT controls. With JDK 1.1, this restriction<br />
was removed, but subclassing Component (or, as you'll see later, its derived<br />
class Container) produces a different result from subclassing an AWT control.<br />
All of the AWT controls have a corresponding window in the native windowing<br />
system. The connection between the <strong>Java</strong> code that implements the<br />
AWT control and the windowing system is provided by a so-called peer class,<br />
of which there is one for each type of AWT component and whose methods<br />
are implemented in native code. The job of the peer class is to translate operations<br />
specified by your <strong>Java</strong> application (such as setting the control's size,<br />
position, or color) into the corresponding Motif or Windows API calls. A control<br />
created by directly subclassing Component is referred to as a lightweight<br />
component, because it does not have an associated window of its own in the<br />
native windowing system, and therefore incurs less system overhead. Instead<br />
of having its own window, a lightweight component borrows an area of its<br />
parent s window, an important consequence of which is that, if a lightweight<br />
component chooses not to fill in its background, then the contents of its parent<br />
will show through. This means that it can be transparent, a fact that can<br />
be used to great effect in many of the Swing controls that are discussed in<br />
this book.<br />
With only a few exceptions, the Swing components are all derived from<br />
JComponent, which is a subclass of Component and, therefore, almost all of<br />
the Swing components are lightweight. Given that Component is the ultimate<br />
ancestor of all of the Swing user interface elements, any and all of its<br />
methods and fields are applicable to all of the Swing controls. If you want to<br />
know the features of a Swing control or how to make it behave in a particular
64 Chapter 2 Frames, Labels, and Buttons<br />
way, the first place to look is in the API definition for JComponent and then<br />
at those of Container and Component.<br />
<strong>Core</strong> Alert<br />
Keep in mind at all times that JComponent is the ancestor of most, but<br />
not all, of the Swing components.The exceptions to this rule are JFrame,<br />
JDialog, JWindow, and JApplet, which are all derived directly from<br />
their AWT counterparts and Box, which is derived from Container. As a<br />
result, these components are not lightweightThe most important<br />
consequence of this, however, is that you can't do with them many of the<br />
useful things that you can do with JComponents, such as directly<br />
assigning keyboard accelerators (see Chapter 5, "Keyboard Handling,<br />
Actions, and Scrolling," for a discussion of keyboard accelerators).These<br />
classes are, however, all derived from Component, so most of what is said<br />
in this section applies equally to them.<br />
A component, lightweight or otherwise, has several important properties,<br />
among which are the following:<br />
• Position<br />
• Size<br />
• Background and foreground colors<br />
• Font<br />
• Visibility<br />
• Enabled or disabled status.<br />
Position<br />
A component's position is specified in x and y coordinates. In <strong>Java</strong>, all coordinates<br />
are measured in pixels relative to an absolute coordinate space that has<br />
the top left-hand corner of the screen as the origin (x = 0, y = 0) and where x<br />
coordinates increase as you move from left to right and y coordinates<br />
increase as you move toward the bottom of the screen. The coordinates of a<br />
JFrame that sits directly on the desktop are, as you have already seen, given<br />
relative to the top left-hand corner of the screen and are therefore absolute<br />
values. However, a typical application is made up of many components that<br />
reside inside the frame. It is not convenient to specify the coordinates of<br />
these components as absolute values, because they would all have to be<br />
adjusted if the frame s position were changed.
Images on Components: Icons 65<br />
To avoid this problem, the position of a nested component is measured<br />
relative to that of its parent. As the parent moves, its coordinates may change,<br />
but those of its children will still be correct. To calculate the absolute coordinates<br />
of any child component, you simply add its coordinates to those of its<br />
parent.<br />
You can retrieve the coordinates of a component relative to its parent<br />
using either the getLocation or getBounds methods of Component. The<br />
first of these returns a Point object that contains only the components x and<br />
y coordinates, while the second returns a Rectangle containing both the<br />
position and the size of the component. These methods work equally well for<br />
both a top-level frame and a component mounted on a container.<br />
<strong>Core</strong> Note<br />
A container is a component that can contain other components, of which<br />
JFrame is an example. Containers are discussed in detail later in this<br />
chapter.<br />
If you want to get the position of a component relative to the screen (that<br />
is, its absolute position), you can use the getLocationOnScreen method<br />
which, like getLocation, returns a Point. For a top-level window<br />
(jPrame, JDialog, or JWindow), getLocation and getLocationOn-<br />
Screen return the same result. The example in Listing 2—1 shows how these<br />
methods are used. You can try this example using the command<br />
java <strong>JFC</strong>Book.Chapter2.ComponentPosition<br />
Listing 2-1 Measuring a component's position<br />
package <strong>JFC</strong>Book.Chapter2;<br />
import j avax.swing.*;<br />
import j ava.awt.*;<br />
public class ComponentPosition {<br />
public static void main(String[] args) {<br />
JFrame f = new JFrame("Simple Frame");<br />
JButton b = new JButton("Press");<br />
Container cp = f.getContentPane();<br />
cp.setLayout(new FlowLayout());<br />
cp.add(b);
66 Chapter 2 Frames, Labels, and Buttons<br />
Listing 2-1 Measuring a component's position (continued)<br />
f.setBounds(4 0, 50, 250, 200);<br />
f.setVisible(true);<br />
System.out.println("Frame position is " +<br />
f.getLocation ()) ;<br />
System.out.println("Frame screen position is "<br />
f.getLocationOnScreen());<br />
System.out.println("Content pane position is "<br />
cp.getLocation());<br />
System.out.println("Content pane screen position is "<br />
cp.getLocationQnScreenO);<br />
System.out.println("Button position is " +<br />
b.getLocation());<br />
System.out.println("Button screen position is<br />
b.getLocationOnScreen());<br />
This code creates a frame and places a button on it. You use the setLayout<br />
method to associate a layout manager with a container. Layout managers<br />
apply policies to arrange components within a container and determine how<br />
big each component should be. Here, the FlowLayout manager is used to<br />
control the positioning of the button. As a result, as you will see in Chapter 3<br />
where layout managers are discussed in detail, it will appear just under the<br />
caption bar and will be horizontally centered in the frame, as shown in<br />
Figure 2-3.<br />
The button is placed on the frame as follows:<br />
Container cp = f.getContentPane() ;<br />
cp.setLayout(new FlowLayout());<br />
cp.add(b);<br />
The add method belongs to the j ava. awt. Container class; in this case,<br />
it arranges for the button to become a child of a part of the frame called its<br />
content pane. Notice that the button was not added directly to the frame. If<br />
you're used to the JDK 1.1 Frame class, this may look a bit strange to you.<br />
Exactly what the content pane is and when to use it are covered later in this<br />
chapter. In terms of Figure 2-3, the content pane occupies the whole of the<br />
frame apart from its caption bar and the gray border around the outside—in<br />
other words, it is the lighter colored rectangular area in the middle of the<br />
frame; if you are a Windows programmer, you can think of the content pane<br />
as occupying the frames client area. Here, then, we have a button sitting on
Figure 2-3 Placing a button on a JFrame.<br />
Images on Components: Icons 67<br />
top of the content pane that resides inside the JFrame. In fact, as you'll see,<br />
there is more to it than just these three components, but this simplified<br />
description will suffice to illustrate how coordinates are managed.<br />
The output from this program is as follows:<br />
Frame position is java.awt.Point[x=40,y=50]<br />
Frame screen position is <strong>Java</strong>.awt.Point[x=40,y=50]<br />
Content pane position is java.awt.Point[x=0,y=0]<br />
Content pane screen position is<br />
j ava.awt.Point[x=44,y=73 ]<br />
Button position is <strong>Java</strong>.awt.Point[x=86,y=5]<br />
Button screen position is java.awt.Point[x=130,y=78]<br />
Here you can clearly see the relationships described earlier. Looking first<br />
at the content pane and the button, you can see that the content pane's absolute<br />
screen coordinates are (x = 44, y = 73), while those of the button are (x =<br />
130, y = 78). The position of the button relative to the content pane is<br />
obtained by subtracting these component pairs, giving the result (x = 86, y =<br />
5), which is indeed the value returned by getLocation.
68 Chapter 2 Frames, Labels, and Buttons<br />
<strong>Core</strong> Note<br />
The actual coordinates that you see if you run this example will depend on<br />
your operating system platform. However, while the absolute values may<br />
differ, the relationships between the sets of components that are being<br />
described here will still be the same.<br />
Now prepare for a surprise. Look at the coordinates of the frame and<br />
those of the content pane. The frame is at (x = 40, y = 50), as requested by<br />
the setBounds call in the program, and the content pane is located at (x =<br />
44, y = 73). Subtracting these two, we should find that the coordinates of the<br />
content pane relative to the frame are (x = 4, y = 23), but the reported coordinates<br />
of the pane are (x = 0, y = 0), which is apparently impossible. In fact,<br />
though, as hinted above, the frame, content pane, and button are not the only<br />
three components involved here. The frame is not actually the parent of the<br />
content pane and the content pane's coordinates shown above are not relative<br />
to the frame, but to another container that you haven't seen yet. The mystery<br />
will be fully explained when you see the complete structure of JFrame later<br />
in this chapter.<br />
It is rare to need to specify a fixed position for a component other than a<br />
top-level window, because you usually allow a layout manager to decide<br />
where exactly components are placed within their container, given constraints<br />
such as place it on the east side or divide the container into four equal<br />
rectangles and place this component in the top-left corner. If you wanted to<br />
control a component's position and size yourself, however, you would use the<br />
Component setBounds method, as shown in Listing 2—1, and supply the<br />
component's x and y coordinates relative to the container and its required<br />
width and height, in pixels. This method has an overloaded variant that allows<br />
you to use a Rectangle object to supply the same information. Thus, the following<br />
two lines are equivalent:<br />
f . s e t B o u n d s ( 4 0 , 5 0 , 2 5 0 , 2 0 0 ) ;<br />
f . s e t B o u n d s ( n e w R e c t a n g l e ( 4 0 , 5 0 , 2 5 0 , 2 0 0 ) ) ;<br />
If you want to change the position of a component without changing its<br />
size, you can use the setLocation method, which accepts either a pair of x<br />
and y values or a Point structure:<br />
f.setLocation(20, 30);<br />
f.setLocation(new Point (20, 30));<br />
As shown in Listing 2-1, to get the location of a component relative to its<br />
parent, you use one of the following methods:
public Point getLocation();<br />
public Rectangle getBounds();<br />
Images on Components: Icons 69<br />
The getLocation method is used when you just want the component's<br />
coordinates, while getBounds returns a Rectangle that describes the component's<br />
size as well as its location. If your component is derived from JComponent<br />
(which is usually the case if it isn't an old-style AWT control), you<br />
can use two additional forms of getLocation and getBounds methods:<br />
public Point getLocation(Point pos) ;<br />
public Rectangle getBounds(Rectangle rect);<br />
The reason for these methods is to save repeated allocation of new Point<br />
and Rectangle objects by allowing the caller to create one instance and<br />
reuse it for several calls. If you use the original getLocation method, for<br />
example, the code that implements it has to create a new Point object on<br />
each call. Often, you will call this method in a loop to get the positions of a set<br />
of components. If the position of each component is only used once, a lot of<br />
wasteful memory allocation and freeing will be performed. It is more efficient<br />
to allocate a single Point object and pass it to the getLocation<br />
method on each pass of the loop. In other words, code that looks like this:<br />
JComponent[] comp = ; // Get a list of components (not<br />
shown)<br />
for (int i = 0; i < count; i++) {<br />
Point p = comp[i].getLocation(); // Allocates new Point<br />
System.out.println("Position is " + p);<br />
}<br />
can be written more efficiently like this:<br />
JComponent[] comp = ; // Get a list of components (not<br />
shown)<br />
Point p = new Point(); // Use this Point throughout<br />
for (int i = 0; i < count; i++) {<br />
p = comp[i].getLocation(p);<br />
System.out.println("Position is " + p);<br />
}<br />
The value returned from both these methods is the object that you supply<br />
to them, which allows most of the code to remain unchanged from the original.<br />
*
70 Chapter 2 Frames, Labels, and Buttons<br />
<strong>Core</strong> Alert<br />
If you intend to specify absolute positions or sizes for components that you<br />
add to a container, you probably want to remove the layout manager like<br />
this:<br />
setLayout(null);<br />
because almost all layout managers will override size and position<br />
specifications and place components according to their own layout policy.<br />
Size<br />
Like its position, a component's size is measured in pixels. Unlike position,<br />
which is usually stated relative to another component, size is an absolute<br />
quantity. A components size can be obtained using either the getsize or<br />
getBounds methods, the former returning a Dimension object containing<br />
the width and height and the latter a Rectangle object that also contains the<br />
position:<br />
public Dimension getSizeO;<br />
public Rectangle getBounds();<br />
If your component is derived from JComponent, you can use two alternative<br />
forms of these methods<br />
public Dimension getSize(Dimension size);<br />
public Rectangle getBounds(Rectangle rect);<br />
You saw the getBounds method in the previous section. As before, you<br />
would use the getsize method when you need to make repeated calls to get<br />
the sizes of several components and you can use the same Dimension object<br />
each time.<br />
When a component is created, it may adopt a natural size, or it may start<br />
with no size at all. In general, components like buttons that are initialized<br />
with user-defined content (the label in the case of the button) are able to<br />
adopt a size suitable for their content, while components such as JPanel (a<br />
simple container that replaces the AWT Panel and Canvas classes) that has<br />
no natural initial size will start out with its width and height both at zero.<br />
The size of a component is almost always constrained by the size of the<br />
container it resides in and is usually fixed by the containers layout manager.<br />
The layout manager and the container work together to set a suitable initial<br />
size and to adjust a component's size, as necessary, should the container be<br />
resized.
Resizing a Frame<br />
Images on Components: Icons 71<br />
Most applications allow the user to resize the top-level window and the<br />
JFrame class supports this by providing the usual resizing decoration at the<br />
bottom right of the window. Sometimes, though, you would prefer the user<br />
not to be able to change the frame size. This is particularly often the case for<br />
dialogs, which are usually laid out with a fixed size in mind and do not react<br />
well when the size is changed. If you want to stop a frame or dialog being<br />
resized by the user, you can use the setResizable method. The following<br />
code extract creates a frame that doesn't have resize handles:<br />
JFrame f = new JFrame("Fixed size frame");<br />
f.setResizable(false);<br />
Note that application code can still change the size of a window for which<br />
setResizable (false) has been called—the restriction applies only to the<br />
user.<br />
<strong>Core</strong> Note<br />
While frames on Unix systems have visible resize handles provided by the<br />
window manager, this is not the case on Windows.The fact that a JFrame<br />
is not resizable on a Windows system is not obvious until you move the<br />
mouse over an edge or over the corner. Usually, this would cause the cursor<br />
to change to indicate the directions in which you can drag the edge to<br />
change the size.This doesn't happen if the frame is not resizable.<br />
Maximizing and Iconifying a Frame<br />
As you can see from Figure 2-2, a frame is created with a maximize button<br />
that allows the user to make it expand to occupy the entire screen. When this<br />
is done, the maximize button is exchanged for another one that will restore<br />
the window to its original size. If you have called the setResizable method<br />
with argument false, however, the maximize button will either not be<br />
present or will be disabled, depending on the platform the application is running<br />
on, so that the user can't change the size of the window in any way.<br />
<strong>Core</strong> Alert<br />
With some early versions of JDK 1.1, a frame for which<br />
setResizable (false) has been called still has an active maximize<br />
button that allows the user to make it occupy the entire screen, which could
72 Chapter 2 Frames, Labels, and Buttons<br />
be an issue if your application's carefully thought-out component layout<br />
won't stand being blown up to full size. If you have to use one of these<br />
versions of the JDK (perhaps because your code has to run in a web<br />
browser that uses it) and you must have your frame at its initial size only,<br />
your only recourse is to catch the event that is generated when the frame's<br />
size changes and force the frame back to its original shape.You can find<br />
out about this event in the "Component Events" section of Chapter 3.<br />
There is no way for an application to programmatically maximize a window<br />
in the same way as the user can by pressing the maximize button. If you need<br />
your window to fill the entire screen, the best you can do is to specify a size<br />
that matches that of the screen itself:<br />
JFrame f = new JFrame("Full Screen");<br />
f.setSize(f.getToolkit().getScreenSize());<br />
The getToolkit method is inherited from the Component class and<br />
returns a Toolkit object that provides methods that perform platform-specific<br />
operations, one of which is getScreenSize, which returns the size of<br />
the screen in the form of a Dimension object. Although this code makes the<br />
frame occupy the full screen, it isn't technically maximized and it still has a<br />
maximize button in its caption bar. Another obvious difference between this<br />
state and being maximized is that you can drag the window around using its<br />
caption bar—when a window is maximized, you can't do this. Nevertheless,<br />
although it isn't perfect, this is currently the best you can achieve from within<br />
a <strong>Java</strong> application.<br />
<strong>Core</strong> Note<br />
<strong>Java</strong> 2 version 1.3 provides support for systems with more than one<br />
monitor.You might wonder what meaning should be ascribed to the result<br />
returned by the getScreenSize method when there is more than one<br />
screen, especially if not all of the monitors are set at the same resolution. In<br />
Chapter 3, you'll see how to work with multiple monitors and you'll get the<br />
answer to this question. For now, we'll assume that your system has only<br />
one monitor.<br />
In JDK 1.1, there is also no way to iconify or deiconify a frame under<br />
application control. However, this restriction was lifted for the <strong>Java</strong> 2 platform,<br />
where the AWT Frame class provides the following methods that are<br />
inherited by JFrame:
public int getStateO ;<br />
public void setState(int state);<br />
Images on Components: Icons 73<br />
The argument to the setState and the value returned by getstate<br />
takes one of the following values:<br />
• Frame.NORMAL<br />
• Frame.ICONIFIED<br />
and specifies whether the frame is or should be iconified or in its normal<br />
(open) state. You can see an example of this by typing the following command:<br />
java <strong>JFC</strong>Book.Chapter2.jdkl2.FrameState<br />
This example creates a frame containing a single button labeled Iconify'.<br />
When you press this button, the setState method is called with argument<br />
Frame . ICONIFIED and you'll see that the frame is minimized. Five seconds<br />
later, the setState method is invoked again, this time with argument<br />
Frame . NORMAL, which restores it to its original state.<br />
<strong>Core</strong> Note<br />
The code for this example is not presented here because you haven't yet<br />
seen how to react to button presses or how to set timers. The source code,<br />
however, is included along with the rest of the example code on the CD-<br />
ROM that accompanies this book. Buttons are covered later in this chapter<br />
and timers are discussed in Chapter 8, "Creating Custom Dialogs."<br />
Calling setResizable (false) for a frame has no effect on whether<br />
either the user or the application can iconify it and the frame will still have a<br />
minimize control. This should not be a problem, however, since using this<br />
control does not result in a change to the actual size of the window and hence<br />
does not affect the component layout—it just causes the windowing system<br />
to stop displaying the window and to substitute an icon instead.<br />
Background and Foreground Colors<br />
All components have two associated colors, one that dictates the color of its<br />
background, the other that of its foreground. The default colors associated<br />
with a component are initially set when it is created and depend on the component<br />
involved and on the look-and-feel implementation that the user has
74 Chapter 2 Frames, Labels, and Buttons<br />
selected. Both the foreground and background colors can (at least in theory)<br />
be changed by the programmer.<br />
In most cases, it is obvious what is meant by the terms foreground and<br />
background in relation to a given component. For buttons and text-based<br />
components, the foreground color is used to render the text itself, while the<br />
rest of the component takes on the background color, apart from the normal<br />
shading effects that serve to give these components their distinctive appearance.<br />
In most cases, the colors used to provide the shading are derived<br />
directly from the background color, so changing the background color automatically<br />
adjusts the shading to preserve the three-dimensional effect without<br />
any extra work on the part of the programmer.<br />
<strong>Core</strong> Note<br />
Some components, like jpanel, which is a simple container, consist entirely<br />
of background and therefore do not use their foreground color at all. Since<br />
jpanel is ultimately derived from Component, it still has a foreground<br />
color property that the programmer can set Although of no use to JPanel,<br />
this property can still be put to some use if the JPanel is used as the basis<br />
of a custom component that can ascribe some meaning to it<br />
The <strong>Java</strong> <strong>Foundation</strong> <strong>Classes</strong> introduce the concept of a lightweight component<br />
that has a transparent background, allowing whatever is behind the<br />
component to show through. Transparent components make no use of their<br />
background color. All of the Swing components (apart from JFrame, JWindow,<br />
JDialog, and JApplet, none of which are lightweight components)<br />
have an isOpaque method that returns false if they are transparent and a<br />
setOpaque method that can be used to change the value of this property.<br />
You set a components colors using the setForeground and setBackground<br />
methods, both of which take an argument of type j ava . awt. Color.<br />
The following code extract creates a text input field and sets both its background<br />
and foreground colors:<br />
JTextField tf = new JTextField("Text");<br />
tf.setForeground(Color.white);<br />
tf.setBackground(Color.blue);<br />
After these statements have been executed, the text field will be initialized<br />
to show white text on a blue background. You can use the same methods to<br />
change the text field's background and foreground colors at any time, as<br />
shown in Listing 2-2.
Listing 2-2 Setting and changing component colors<br />
package <strong>JFC</strong>Book.Chapter2;<br />
import j avax.swing.*;<br />
import j ava.awt.*;<br />
Images on Components: Icons 75<br />
public class ColorChange {<br />
public static void main(String[] args) {<br />
JFrame f = new JFrarae("Simple Frame");<br />
JTextField tf = new JTextField("Text");<br />
tf.setForeground(Color.white);<br />
tf.setBackground(Color.blue);<br />
f.getContentPane().setLayout(new BorderLayout());<br />
f.getContentPane0 .add(tf, BorderLayout.NORTH);<br />
f.setBounds(4 0, 50, 200, 100);<br />
f.setVisible(true);<br />
try {<br />
Thread.sleep(10000);<br />
} catch (InterruptedException e) {<br />
// Ignore<br />
}<br />
tf.setForeground(Color.red);<br />
tf . setBackground(Color.black) ;<br />
tf.repaint () ;<br />
}<br />
J You can run this example using the command<br />
j ava <strong>JFC</strong>Book.Chapter2.ColorChange<br />
The text field in this example starts out with white text on a blue background;<br />
after 10 seconds, the foreground and background are changed to red<br />
and black, respectively. Sometimes, changing a component's colors does not<br />
result in any change to its appearance. If you want the change to be immediate,<br />
you can either make the change while the component is not visible and<br />
then make it visible, or force the color change to be made by invoking the<br />
repaint method, which causes the component to redraw itself, as shown in<br />
Listing 2-2.<br />
<strong>Core</strong> Alert<br />
As you know from Chapter I ."Introduction to the <strong>Java</strong> <strong>Foundation</strong> <strong>Classes</strong>,"<br />
the appearance of a control is determined entirely by the look-and-feel that
76 Chapter 2 Frames, Labels, and Buttons<br />
you are using. Setting a control's foreground and background colors is<br />
strictly only a hint as to how you would like it to appear, but there is no<br />
absolute guarantee that it will have any effect.You have just seen that text<br />
fields honor the background and foreground colors in the default look-and-<br />
feel for your platform (in fact, they do this in all three of the standard Swing<br />
look-and-feel implementations). By contrast, the Swing button class<br />
(jButton) has a method that controls whether the background color<br />
attribute should be ignored.Custom components might have their own<br />
private policy on the use of application-specified colors.<br />
You'll also notice something else new in Listing 2-2: to make the text field<br />
fill the frame horizontally, we used a BorderLayout manager and attached<br />
the text field in the North of the content pane. You'll see the BorderLayout,<br />
and the other layout managers, in Chapter 3. The result is shown in<br />
Figure 2-4.<br />
Figure 2-4 A text field on a JFrame.<br />
Methods that deal with colors all accept an argument of type<br />
java.awt .Color. A Color object encapsulates a single, specific color,<br />
either one of a small predefined set defined by AWT or a custom color created<br />
by the application. The Color class defines the following fixed set of<br />
standard colors, shown in Table 2-1.<br />
Table 2-1 Standard Colors<br />
Color.black Color.blue Color.cyan<br />
Color.gray Color.green Color.lightGray<br />
Color.orange Color.pink Color.red<br />
Color.yellow<br />
Color.darkGray<br />
Color.magenta<br />
Color.white
Images on Components: Icons 77<br />
If these colors don't meet your needs, you can define one of your own by<br />
creating a Color object and describing your color in terms of red, green, and<br />
blue (RGB) values. The RGB system represents a color in terms of the levels<br />
of its red, green, and blue components. Each of these components is specified<br />
as a value from 0 to 255 inclusive, where 0 means none of that color is<br />
used, while 255 uses as much as possible. A color that has only one nonzero<br />
component produces one of the three basic colors in the RGB model:<br />
Color r = new Color(255, 0, 0); // Red<br />
Color g = new Color(0, 255, 0); // Green<br />
Color b = new Color(0, 0, 255); // Blue<br />
This form of the constructor requires the red, green, and blue values as<br />
integers, in that order. Using it, you can, for example, create various shades of<br />
gray by specifying three numerically equal components, ranging from<br />
Color (0, 0, 0), which is black, to Color (255, 255, 255), which produces<br />
white. The standard gray (Color. gray) is equivalent to Color (128,<br />
128, 128), and light gray is Color (192, 192, 192). Some other common<br />
colors, all from the predefined set shown in Table 2-1, include:<br />
Yellow Color (255, 255, 0)<br />
Magenta Color(255, 0, 255);<br />
Cyan Color(0, 255, 255);<br />
Reducing the color levels from 255 while keeping the nonzero components<br />
equal produces a darker shade of the same color. For example,<br />
Color(255, 255, 255)<br />
produces white, while<br />
Color(192, 192, 192)<br />
gives a shade of gray, and<br />
Color(140, 140, 140)<br />
also results in gray, but with a darker hue. A convenient (but somewhat limited)<br />
way to produce related colors, without worrying about exactly how they<br />
are generated, is to use the brighter and darker methods of Color. For<br />
example:<br />
Color yellow = Color.yellow;<br />
Color darkerYellow = yellow.darker();<br />
Color brighterYellow = yellow.brighter();
78 Chapter 2 Frames, Labels, and Buttons<br />
This technique is useful when drawing components with shadows, where<br />
the darker color would be used to render the part of the component in<br />
shadow and the brighter color the more illuminated part.<br />
The Color class also has two other constructors:<br />
public Color(int rgb);<br />
public Color(float r, float g, float b);<br />
The first form requires an RGB value specified as a single integer, constructed<br />
as follows:<br />
RGB value = (red value
Images on Components: Icons 79<br />
If you really could freely specify the RGB values of a color independently,<br />
then it would seem that you could construct a total of 256 *256 * 256 =<br />
16,777,216 different colors. Of course, not every video card can cope with so<br />
many colors at the same time. Many cards in common use allocate 8 bits per<br />
pixel, allowing a maximum of 256 colors on display at any one time. The<br />
actual colors used are usually programmable, so the host operating system is<br />
responsible for choosing which 256 of the possible 16 million colors are actually<br />
available at any given time.<br />
What usually happens is something like this. First, the operating system<br />
(or windowing system if the operating system does not take direct responsibility<br />
for managing the graphics card) reserves a number of colors for itself.<br />
Windows, for example, always reserves 20 fixed colors. Then, colors are allocated<br />
to applications based on their requests until all 256 colors have been<br />
used up. What happens when all of the available colors have been used up, so<br />
that the exact color requested is not available and cannot be added to the<br />
active set? There are two techniques available to tiy to resolve this situation.<br />
First, the application could be allocated the closest available color based<br />
on the host environment's determination of closest. This is the only real<br />
solution if you are just drawing lines in a color that is not available. If you<br />
are filling areas of screen, however, there is a second possibility—the windowing<br />
system or the graphics driver may choose to approximate your color<br />
by dithering, which involves using combinations of different colors to cover<br />
the area in such a way that the eye is fooled into seeing a color that is actually<br />
not present but is a good approximation to the color that was<br />
requested. For example, a properly constructed pattern of a darkish color<br />
with interspersed dots of white can give the illusion of a lighter version of<br />
the dark color.<br />
In practice, you have little control over the way in which your colors are<br />
actually represented on the screen. Fortunately, for many purposes, it is possible<br />
to stick with the standard color set, which <strong>Java</strong> maps to the closest colors<br />
on your platform.<br />
Colors and the Look-and-Feel<br />
All of the Swing components have default colors, which depend on the lookand-feel<br />
installed. If your application never changes the colors of the standard<br />
components, you don't really need to worry about how they are determined,<br />
because you can be sure that they will be consistent across the user<br />
interface and will fit in with the look-and-feel in use.
•<br />
80 Chapter 2 Frames, Labels, and Buttons<br />
However, if you are using a third-party component that doesn't behave well<br />
in the presence of multiple user interface styles or you are creating a component<br />
of your own, you will need to explicitly set colors that match the rest of the<br />
application. In JDK 1.1, it was normal to use the SystemColor class to determine<br />
appropriate default colors when implementing or tailoring a custom component.<br />
The SystemColor class defines a set of colors based on the role that<br />
those colors play in the user interface; at run time, these colors are initialized<br />
from the values actually used in the users selected desktop color scheme.<br />
Using this facility you can find out, in a platform-independent way, the appropriate<br />
color to use for your components background if it plays the role of a user<br />
interface control like a button, or the color that your main window's caption is<br />
using, by referencing static members of the SystemColor class like System-<br />
Color . control, which is the color used for the background of dialogs and<br />
typical controls that are used in a dialog. On systems that allow the user to customize<br />
the desktop colors, using these special values allows the program to fit<br />
in with the users chosen color scheme because they don't represent fixed colors.<br />
Thus, for example, in the default Windows setup, using System-<br />
Color . control gives a gray color, but if the user has tailored the desktop so<br />
that dialogs have a pink background, then a component whose background is<br />
set to the value SystemColor. control will appear pink instead of gray.<br />
This arrangement doesn't work well when a single platform can support<br />
more than one look-and-feel, because the colors supplied by the System-<br />
Color class are correct only for the platform's native look-and-feel. In other<br />
words, an application that contained a component that based its colors on<br />
SystemColor would integrate well on a Windows system when the Windows<br />
look-and-feel is in use, but might look completely wrong if the application<br />
used the Metal look-and-feel.<br />
Since the appropriate values for the standard colors clearly depend on the<br />
look-and-feel, they are now managed by the look-and-feel classes. Instead of<br />
using the JDK 1.1 SystemColor class to get the value of a standard color,<br />
you should instead use the getColor method of the UIManager class, which<br />
is defined as follows:<br />
public static Color getColor(Object key);<br />
This method uses the key value to look up a color in the UlDefaults<br />
table of the currently active look-and-feel and returns the corresponding<br />
Color object. The key values for the standard look-and-feel classes are all<br />
strings; you'll see the complete set, and find out more about the UlDefaults<br />
table, when the Swing look-and-feel support is discussed in Chapter 13.
Images on Components: Icons 81<br />
Using this mechanism, you can set a components background to the lookand-feel's<br />
control color using the following line of code:<br />
comp.setBackground(UIManager.getColor("control"));<br />
If the selected look-and-feel is the native one for the platform, this invocation<br />
of getColor returns the desktop color used for controls—that is, the same<br />
value as the constant SystemColor. control. If any other look-and-feel is<br />
in use, then the getColor method will return a fixed color value that<br />
depends on the look-and-feel but not on the desktop color scheme selected<br />
by the user.<br />
You can see exactly how this works and also prove to youself that the Swing<br />
components are capable of making use of the host system's own desktop color<br />
settings by using the BasicFrame example that we saw at the start of this<br />
chapter. Since the desktop colors are used only with the platforms native<br />
look-and-feel, you should first ensure that this is selected by editing the<br />
swing. properties file as described in Chapter 1, then type the command<br />
java <strong>JFC</strong>Book.Chapter2.BasicFrame<br />
which brings up the empty frame shown in Figure 2-2. If you now change<br />
the desktop color scheme, which you can do on the Windows platform using<br />
Control Panel/Display/Appearance, you'll find that the other windows on<br />
your desktop will immediately change to reflect the new desktop colors. By<br />
contrast, in the case of the <strong>Java</strong> application window, its caption bar will<br />
change, but the frame background will remain the same. If you now run the<br />
application again, you'll see that this time the frame takes on the newlyselected<br />
background color.<br />
The system colors seen by the <strong>Java</strong> application using a platform's native<br />
look-and-feel are those that were selected when the application started, but<br />
they are not changed when the desktop color scheme is changed. Thus, a<br />
change in the desktop color scheme does not affect a Swing application until<br />
it is restarted. If you use the Metal look-and-feel or any of the other nonnative<br />
look-and-feels, the colors used are constant and do not depend in any<br />
way on your desktop color settings.<br />
Font<br />
The Component class provides a font property that can be set or read using<br />
the following methods:<br />
public synchronized void setFont(Font f);<br />
public Font getFontO;
82 Chapter 2 Frames, Labels, and Buttons<br />
The actual font initially assigned to a component is a default which, like<br />
the set of fonts available, depends on the host system and also on the lookand-feel.<br />
If you want to change a components font, you will need to create a<br />
Font object that describes the characteristics of the new font that you want.<br />
In JDK 1.1, the Font class has only one constructor:<br />
public Font(String name, int style, int size);<br />
The name argument distinguishes one particular font from a set (or family)<br />
of similar font styles. In practice, in JDK 1.1, <strong>Java</strong> supports only a small number<br />
of font names. You can get the complete list by using the getFontList<br />
method of the j ava. awt. Toolkit class, as shown in Listing 2-3.<br />
<strong>Core</strong> Note<br />
For users of the <strong>Java</strong> 2 platform, the <strong>Java</strong> 2D packages include much more<br />
powerful font handling capabilities than those provided in JDK I.I.<strong>Java</strong> ID<br />
font handling is covered in Volume 2 of this book.<br />
Listing 2-3 Getting the system font list<br />
package <strong>JFC</strong>Book.Chapter2;<br />
import j avax.swing.*;<br />
import j ava.awt.*;<br />
public class FontListExample {<br />
public static void main(String[] args) {<br />
String [] list = Toolkit.getDefaultToolkit().get-<br />
FontList();<br />
for (int i = 0; i < list.length; i++) {<br />
System.out.printIn(list[i] ) ;<br />
}<br />
}<br />
J<br />
This program produces the following results on my system:<br />
Dialog<br />
SansSerif<br />
Serif<br />
Monospaced<br />
Dialoglnput
Images on Components: Icons 83<br />
All of these strings can be used as valid first arguments to the Font constructor.<br />
The names are actually platform-independent, so they work anywhere,<br />
but they aren't real font names—before being used, they are mapped<br />
to the names of actual fonts installed on the host system. For this reason,<br />
these fonts are referred to as virtual fonts. The mapping between a virtual<br />
font and its real equivalent is both platform and locale-dependent: that is, it<br />
may be different based on the operating system you are using and on your<br />
choice of language and country.<br />
The mapping from name to font is determined by the file font .properties,<br />
which is installed along with the JDK software and can be found in<br />
the same directory as the swing.properties file, as described in Chapter<br />
1. If, for example, you are using JDK 1.1 and you installed it in the directory<br />
c:\jdkl.l.8, then you will find this file in the directory<br />
c : \ j dkl. l. 8\lib. On the other hand, if you are using <strong>Java</strong> 2, you should<br />
look instead in c : \jdkl. 2 . 2\jre\lib or c : \jdkl. 3\jre\lib. Since the<br />
font used depends on the mapping, which itself depends on the availability of<br />
fonts on your system, you cannot be certain what the font you finally get will<br />
look like.<br />
Following the font name in the Font constructors argument list, you specify<br />
the font style. Here, there are four possibilities—Font. PLAIN,<br />
Font.BOLD, Font.ITALIC, Font.BOLD. Font.ITALIC produces the<br />
obvious results, assuming once again that a suitable font is available. The last<br />
argument gives the required font size in points.<br />
To make this somewhat abstract discussion more concrete, let's look at<br />
how it works in practice. On a Windows system, the default font mappings<br />
are shown in Table 2-2.<br />
Table 2-2 Standard Fonts<br />
Type Font<br />
Dialog Arial, Wingdings, or Symbol<br />
Dialoglnput Courier, Wingdings, or Symbol<br />
Serif Times New Roman, Wingdings, or Symbol<br />
SansSerif Arial, Wingdings, or Symbol<br />
Monospaced Courier New, Wingdings, or Symbol
84 Chapter 2 Frames, Labels, and Buttons<br />
The list of names on the right is stated in order of preference; for example,<br />
if a dialog font is requested, then the platform s Arial font will be used, but if<br />
this font is not found, the next choice is Wingdings, followed by Symbol.<br />
Now suppose you want to create a button whose label has a 14-point bold,<br />
Serif font. The code would look like this (the JButton class will be described<br />
later in this chapter):<br />
JButton bl = new JButton("Bold, 14-point, Serif");<br />
bl.setFont(new Font("Serif", Font.BOLD, 14));<br />
and the resulting button would be as shown on the left of Figure 2-5. Once<br />
you've worked out how to do this, it's easy to make changes and see what the<br />
results are. Here are a couple more examples, which can also be seen in Figure<br />
2-5:<br />
JButton b2 = new JButton("Plain, 12-point Monospaced");<br />
b2.setFont(new Font("Monospaced", Font.PLAIN, 12));<br />
JButton b3 = new JButton("Italic, 14-point SansSerif");<br />
b3.setFont(new Font("SansSerif", Font.ITALIC, 14));<br />
Figure 2-5 Buttons with various fonts.<br />
If you want to try this example for yourself, you can run it using the command<br />
java <strong>JFC</strong>Book.Chapter2.FontExamplel<br />
What happens, then, if the application specifies a font or a font size that<br />
isn't known on the system that it is running on? What you get is a system-chosen<br />
substitute font that approximates what you asked for as closely as possible.<br />
In the case of a large font size, it may be possible to provide a font of the<br />
correct size if the given name maps to a TrueType font. Here are two buttons<br />
with rather unusual fonts requested for them:<br />
JButton bl = new JButton("Unlikely font");<br />
bl.setFont(new Font("UnlikelyFont", Font.BOLD, 14));<br />
JButton b2 = new JButton("Plain, 120-point Dialoglnput");<br />
b2.setFont(new Font("Dialoglnput", Font.PLAIN, 120));<br />
Of course, I don't have a font called UnlikelyFont on my system, but<br />
<strong>Java</strong> does manage to draw the button; in this case, it substitutes a 14-point,
Images on Components: Icons 85<br />
bold SansSerif font. As for the 120-point Dialoglnput font, this maps to<br />
Courier, which is a TrueType font on my system; as a result, what I actually<br />
got was a 120-point Courier font! Figure 2-6 shows the buttons that result<br />
from this code extract. Because of the large font, the second button is wider<br />
than the screen and thus does not render very well. You can try this for yourself<br />
using the command<br />
j ava <strong>JFC</strong>Book.Chapter2.FontExample2<br />
point<br />
Figure 2-6 Using fonts that don't exist.<br />
As far as using fonts in connection with standard components is concerned,<br />
you've now seen just about all you need to know. This subject will be<br />
revisited in Chapter 4, "Graphics, Text Handling, and Printing," and the<br />
topic of text in general is fully covered in Chapter 9, "Text Components." If<br />
you are using the <strong>Java</strong> 2 platform, you will find details of its enhanced font<br />
and text handling in Volume 2.<br />
Visibility<br />
All components have a visibility attribute that partly controls whether or not<br />
they can be seen. A component can be seen only if its visible property is set to<br />
true and the container in which it resides is also visible. Components are<br />
created with their visibility attribute initialized to true, except for the toplevel<br />
containers JFrame, JWindow, and JDialog, which are all initially invisible.<br />
Thus, when you create a top-level window and build up a user interface<br />
by adding components (and possibly other containers) to it, the top-level<br />
window is initially invisible, which prevents any of the components being<br />
seen. When you have finished constructing the user interface and make the<br />
top-level window visible, all of the other components also appear because<br />
they were created with their visibility attribute set to true.<br />
You can get and set this attribute using the following Component methods:<br />
public boolean isVisible();<br />
public void setVisible(boolean state);
86 Chapter 2 Frames, Labels, and Buttons<br />
There is also another related method:<br />
public boolean isShowing();<br />
that indicates whether the component is actually visible on the screen. This is<br />
true if the component itself and all of its parent containers are visible. The<br />
example in Listing 2-4 illustrates this point.<br />
Listing 2-4 Setting and changing component visibility<br />
package <strong>JFC</strong>Book.Chapter2;<br />
import j avax.swing.*;<br />
import j ava.awt.*;<br />
public class VisibilityExample {<br />
public static void main(String [] args) {<br />
JFrame f = new JFrame("Visibility Example");<br />
f.getContentPane().setLayout(new FlowLayout())<br />
JButton bl = new JButton("First");<br />
JButton b2 = new JButton("Second");<br />
b2.setVisible(false);<br />
JButton b3 = new JButton("Third");<br />
f.getContentPane().add(bl);<br />
f.getContentPane().add(b2);<br />
f.getContentPane().add(b3);<br />
System.out.println("Button 1 visible? " +<br />
bl.isVisibleO ) ;<br />
System.out.println("Button 1 showing? " +<br />
bl. isShowingO ) ;<br />
f .pack() ;<br />
f.setVisible(true);<br />
System.out.println("Button 1 visible? " +<br />
bl.isVisibleO ) ;<br />
System.out.println("Button 1 showing? " +<br />
bl.isShowing());<br />
try {<br />
Thread.sleep(5000);<br />
System.out.println("Make button 2 visible");<br />
b2.setVisible(true);
Images on Components: Icons 87<br />
Listing 2-4 Setting and changing component visibility (continued)<br />
}<br />
}<br />
Thread.sleep(5000);<br />
} catch (Exception e) {};<br />
System.out.println("Force container layout");<br />
f.pack();<br />
Here is the output from this program, which you can run using the command<br />
<strong>Java</strong> <strong>JFC</strong>Book.Chapter2.VisibilityExample<br />
Button 1 visible? true<br />
Button 1 showing? false<br />
Button 1 visible? true<br />
Button 1 showing? true<br />
Make button 2 visible<br />
Force container layout<br />
In this example, button 1 is visible when created (i.e., its visibility attribute<br />
is true), but it is not showing because its parent is invisible. The parent is<br />
invisible because it is a top-level window. The first two lines of output show<br />
the state of button 1 before the top-level window is made visible. Immediately<br />
after the top-level window becomes visible, we look at the buttons state<br />
again. Now, as you might expect, the button is both visible and showing. Note<br />
that a component is considered to be showing even if you can't see it because<br />
it is obstructed by other windows.<br />
This example also shows another effect of the visibility attribute. Button 2<br />
was made invisible just after it was created. When the frame appears on the<br />
screen, you see only buttons 1 and 3. You will also notice that no space has<br />
been left for button 2. Five seconds later, the program makes button 2 visible<br />
but it doesn't actually appear, because it has no screen space allocated to it.<br />
To force it to appear, you have to make the container lay itself out again by<br />
invoking the validate method of Container, which we do indirectly here<br />
by calling the pack method of the top-level window, which causes it to resize<br />
itself to make room for the extra button and then lay out its contents again.<br />
Containers and layouts will be discussed in the next section, when this will<br />
make more sense to you. The important points to note from this example are<br />
that the process of deciding where components should go on the user interface<br />
ignores invisible components and that changing the visibility attribute of
88 Chapter 2 Frames, Labels, and Buttons<br />
a component does not, on its own, immediately cause any change in the user<br />
interface itself.<br />
Enabled or Disabled Status<br />
Sometimes you need to arrange to make a component inactive so that the<br />
user can't make any use of it. For example, you may have a dialog box that<br />
allows the user to customize some aspect of the application by filling in one<br />
or more fields and then pressing a button marked OK. If the dialog box<br />
doesn't supply defaults for every field, it wouldn't make sense for the user to<br />
be able to press the OK button immediately. If you allowed this, you would<br />
just have to post an error message and make the user try again, until all of the<br />
required fields had been filled in. A simpler and clearer alternative is to make<br />
the OK button unavailable until it can be legally pressed.<br />
One possible solution to this problem is to make the OK button invisible.<br />
However, it is considered bad style to create interfaces in which components<br />
come and go according to circumstance, because it is confusing for the user.<br />
The accepted practice in this situation is to make the button appear unusable<br />
by graying it out. You can achieve this by disabling it with the button's set-<br />
Enabled method, passing it the argument false. To re-enable the component<br />
later, you simply call setEnabled(true). The example in Listing 2-5<br />
shows how a buttons appearance changes as you enable and disable it. You<br />
can run it using the command<br />
java <strong>JFC</strong>Book.Chapter2.DisableExample<br />
Listing 2-5 Enabling and disabling components<br />
package <strong>JFC</strong>Book.Chapter2;<br />
import j avax.swing.*;<br />
import j ava.awt.*;<br />
public class DisableExample {<br />
public static void main(String[] args) {<br />
JFrame f = new JFrame("Disable Example");<br />
JButton b = new JButton("OK");<br />
b.setFont(new Font("SansSerif", Font.BOLD, 18))<br />
f.getContentPane().add(b);<br />
f.setSize (200, 200) ;<br />
f.setvisible(true);
Listing 2-5 Enabling and disabling components (continued)<br />
}<br />
}<br />
for (;;) {<br />
try {<br />
Thread.sleep(5000) ;<br />
b.setEnabled(false);<br />
Thread.sleep (5000) ;<br />
b.setEnabled(true);<br />
} catch (Exception e) {};<br />
}<br />
Images on Components: Icons 89<br />
You'll notice that the buttons label becomes less distinct when it is disabled<br />
(see Figure 2-7) and if you try to press the button when it is in this<br />
state it won't react. A button can be configured to notify application code<br />
when it has been pressed (as we will see below), but when it is disabled,<br />
pressing it does not generate any notification—it is just as if the user had not<br />
tried to click the button.<br />
Any component can be disabled, since all components inherit the setEnabled<br />
method from j ava. awt. Component. The precise effect of disabling<br />
a component in terms of its visual effect varies from control to control, but<br />
the result is always the same—any active feature that the component possesses<br />
is suppressed when it is disabled. For many components, there is no<br />
active feature to disable and so the component ignores the request. Typically,<br />
containers are not affected by being disabled.<br />
<strong>Core</strong> Warning<br />
Some of the more complex controls also effectively ignore the enabled<br />
state, including the table control, which allows you to edit its content even<br />
when it has been disabled.<br />
Containers and Layout Managers<br />
User interfaces are created by grouping together components and placing<br />
them in a logical order inside a container. The container's job is to provide<br />
the screen space for its child components and to arrange for them to be<br />
drawn onto the screen when they are visible. The actual positioning of com-
90 Chapter 2 Frames, Labels, and Buttons<br />
Figure 2-7 A disabled button.<br />
ponents within the container is a matter not for the container itself—it is<br />
taken care of instead by the containers layout manager. This section looks at<br />
the important features of containers and layout managers, in preparation for<br />
more complete coverage in Chapter 3.<br />
Containers<br />
A container is a special type of component that has the ability to contain<br />
other components. Since a container is itself a component, it can also be a<br />
parent to other containers, making it possible to create hierarchical arrangements<br />
of components and most applications have several containers within<br />
the top-level frame. The base class from which all containers are derived is<br />
java. awt. Container. Like Component, this class is abstract, so it cannot<br />
be used directly. Instead, you must either create your own container by subclassing<br />
it or, more likely, you will use one of the standard ones, of which<br />
JPanel is the most commonly used example.<br />
Once you have a container, you usually add components to it to create part<br />
of a user interface. To make this possible, Container has an add method<br />
with several overloaded forms:<br />
public Component add(Component comp);<br />
public Component add(String name, Component comp);<br />
public Component add(Component comp, int index);<br />
public void add(Component comp, Object constraints);
Images on Components: Icons 91<br />
public void add(Component comp, Object constraints, int<br />
index);<br />
You can also remove components, using the following methods:<br />
public void remove(int index);<br />
public void remove(Component comp);<br />
public void removeAl1();<br />
Why are there so many ways to add a component to a container, and how<br />
do you choose the correct one? As far as the container is concerned, there are<br />
really only two distinct variants of add: one variant that supplies an index and<br />
another does not. The container itself does not make use of either the<br />
optional constraints argument or the String argument in the second form<br />
above. That information, if it is present, is passed to a layout inanager.<br />
A container maintains a list of all the components that have been added to<br />
it, but it does not act alone in creating the user interface—it delegates the<br />
responsibility for positioning its child components and of determining their<br />
sizes to the layout manager. Exactly what layout managers do and how they<br />
influence your choice of add method is discussed shortly but, for now, note<br />
that some of them are sensitive to the order in which components are added<br />
to the container.<br />
For example, if you use a layout manager that arranges components in a<br />
straight line, left-to-right, across the container, then you need to be aware of<br />
the fact that the layout manager places the first component in the list toward<br />
the left of the container, the second to the right of the first, and so on. If you<br />
add the components in this order, you can simply used the single-argument<br />
add method as follows:<br />
JFrame f = new JFrame("Add Example");<br />
Container cp = f.getContentPane();<br />
cp.setLayout(new FlowLayout() ) ;<br />
cp.add(new JButton("Left"));<br />
cp.add(new JButton("Middle"));<br />
cp.add(new JButton("Right"));<br />
You'll see what the setLayout and the getContentPane methods do<br />
shortly. This code arranges three buttons left to right, in the manner suggested<br />
by the associated text strings. Now suppose, some time later, you want<br />
to add another button between the middle and right ones. If you just did this:<br />
cp.add(new JButton("Middle Right"));<br />
the button would go to the end of the containers internal list and the layout<br />
manager would place it to the right of the button labeled Right. To fix this<br />
problem, you need to know that the container associates an index with each
92 Chapter 2 Frames, Labels, and Buttons<br />
of its children that reflects its position in its internal component list. In this<br />
case, the button marked Left has index 0, Middle has index 1, and Right<br />
has index 2. To force the new button to be placed between Middle and<br />
Right, you must make it occupy the location with index 2. To do this, you<br />
use one of the variants of the add method that accepts an index, for example:<br />
cp.add(new JButton("Middle Right"), 2);<br />
This causes the Right button to move to index 3. Listing 2-6 shows this<br />
mechanism in action and Figure 2-8 shows the result of running the program<br />
using the command<br />
<strong>Java</strong> <strong>JFC</strong>Book.Chapter2.AddExample<br />
Listing 2-6 Adding a component between existing components<br />
package <strong>JFC</strong>Book.Chapter2;<br />
import j avax.swing.*;<br />
import j ava.awt.*;<br />
public class AddExample {<br />
public static void main(String [] args) {<br />
JFrame f = new JFrame("Add Example");<br />
Container cp = f.getContentPane();<br />
cp.setLayout(new FlowLayout());<br />
cp. add (new JButton ( "Lef t" ) ) ,cp.add(new<br />
JButton("Middle"));<br />
cp.add(new JButton("Right"));<br />
_}<br />
}<br />
f .packO ;<br />
f.setVisible(true);<br />
try {<br />
Thread.sleep(5000);<br />
} catch (Exception e) {<br />
}<br />
cp.add(new JButton("Middle Right"), 2);<br />
f .packO ;
Figure 2-8 Using indexing to insert a component in a container.<br />
Layout Managers<br />
Images on Components: Icons 93<br />
Container is a relatively simple class. Aside from assisting with changes in<br />
layout when its own size is changed, we have already seen just about everything<br />
that a container is required to do. It is the layout manager that undertakes<br />
the complex task of creating a suitable arrangement of components<br />
within a container so that the screen representation appears in the way that<br />
the programmer intended. There is a fairly varied selection of layout managers,<br />
all of which are discussed in detail in Chapter 3. Having chosen a suitable<br />
layout manager, you use the setLayout method to associate it with a container.<br />
Here's an example that creates a frame and assigns a FlowLayout<br />
manager with it:<br />
JFrame f = new JFrame("FlowLayout");<br />
f.getContentPane().setLayout(new FlowLayout());<br />
Let's find out exactly what a layout managers job is by trying to imitate<br />
one. In order to do the job of a layout manager, create a frame and remove its<br />
default layout manager:<br />
JFrame f = new JFrame("No layout manager: 1");<br />
f.getContentPane().setLayout(null);<br />
Now suppose you want to add two buttons to this container. First, you<br />
need to create them and add them using the add method:<br />
JButton bl = new JButton("Left");<br />
JButton b2 = new JButton("Right");<br />
f.getContentPane().add(bl);<br />
f.getContentPane().add(b2);<br />
Here, you use the simplest variant of add, because you don't have a layout<br />
manager to look at any constraints. You are going to explicitly manage the<br />
buttons yourself, so the order in which the container holds them internally is<br />
of little interest. That's the end of the easy part. Here is where the layout<br />
manager would normally take over. To make a reasonable layout, you have to<br />
first ensure that the frame is large enough to contain both buttons, with some<br />
empty space allocated around them to avoid an over-crowded appearance. To
94 Chapter 2 Frames, Labels, and Buttons<br />
determine the size of the buttons, you can use the getsize method that you<br />
saw when discussing components:<br />
Dimension blSize = bl.getsize();<br />
Dimension b2Size = b2.getsize () ;<br />
Now let's say that you want to place the buttons next to each other, with<br />
GAP_SIZE pixels between the buttons and between the end buttons and the<br />
edges of the frame, where GAP_SIZE is a constant that will (arbitrarily) have<br />
the value 8. Recall from the beginning of this chapter that the frame size<br />
includes not only the main area, usually referred to as the client area, but also<br />
the caption bar and the frame surroundings at the sides and bottom of the<br />
frame. The actual sizes of these pieces depend on the platform that the application<br />
is running on (and whether or not the container has been given a border),<br />
so you wouldn't want to hard-code it into the application. Instead, you can<br />
get this information in the form of an Insets object using the Container<br />
getlnsets method:<br />
Insets i = f.getlnsets ();<br />
With this information and the sizes of the buttons, you can calculate and<br />
set the frame size as follows:<br />
Dimension fSize = new Dimension(blSize.width +<br />
b2Size.width + i.left + i.right + 3 * GAP^SIZE,<br />
Math.max(blSize.height, b2Size.height)<br />
+ i.top + i.bottom + 2 * GAP_SIZE);<br />
f.setSize(fSize);<br />
Finally, you need to place the buttons on the container, for which you can<br />
use the setLocation method, and then make the frame visible:<br />
bl.setLocation(GAP_SIZE, GAP__SIZE) ;<br />
b2.setLocation(blSize.width + 2 * GAP_SIZE, GAP_SIZE);<br />
f.setVisible(true);<br />
Notice that when you're placing the buttons you don't need to take<br />
account of the frame's insets, because you are adding the buttons to the<br />
frame's content pane whose position already accounts for the insets. Remember<br />
that a component's position is specified relative to that of its parent, not<br />
of the frame that it resides in. You do, of course, take the insets into consideration<br />
when calculating the size of the frame itself.<br />
Running this code with the command<br />
j ava <strong>JFC</strong>Book.Chapter2.NoLayoutExamplel
produces the result shown in Figure 2—9.<br />
Images on Components: Icons 95<br />
As you can see, this is not quite what was intended—the frame is, as nearly<br />
as is possible, of zero size. There are certainly no buttons in sight! What<br />
exactly went wrong here? Obviously, the frame size was wrong. Since the<br />
frame size was deduced from the sizes of the frame s insets and that of the<br />
buttons, you need to look further at how those were obtained. Let's look at<br />
the buttons. Their size was obtained by using the get Size method, which<br />
does indeed return the size of the button. The trouble is, the button doesn't<br />
automatically assume any convenient size when it is created: Unless you do<br />
something to make it do otherwise, the button is happy to have zero width<br />
and height. Setting the initial size of the button is one of the jobs of the layout<br />
manager. In other words, in this case it is our job.<br />
How would you go about finding out what the size of the button should<br />
be? You can't know this in advance—it depends on the button's look-and-feel<br />
(which can be changed if you allow it) and on the size of the font used for the<br />
button's label. While all of this could be hard-coded for this particular example,<br />
you couldn't use this approach in the real world. Fortunately, there is a<br />
solution. Ever)' Component has a getPref erredSize method that returns<br />
the size that the component thinks is most appropriate for its current configuration.<br />
Each component provides its own implementation of this method,<br />
since the details depend entirely on the component itself—a button is clearly<br />
different from a frame, for example.<br />
<strong>Core</strong> Note<br />
In fact, for the Swing components, the result depends not only on the<br />
component itself, but also on which look-and-feel is installed, so the<br />
getPref erredSize method for Swing components is actually delegated<br />
to the look-and-feel part of the component's implementation, as you'll see<br />
in Chapter 13.<br />
To take this into account, it is necessary to change two lines of our example<br />
code:<br />
Dimension blSize = bl.getPreferredSize();<br />
Dimension b2Size = b2.getPreferredSize();<br />
Figure 2-9 An attempt to lay out a container without<br />
a layout manager.
96 Chapter 2 Frames, Labels, and Buttons<br />
The result this time is slightly better, as you can see from Figure 2-10. You<br />
can run this version of the program with the command<br />
j ava <strong>JFC</strong>Book.Chapter2.NoLayoutExample2<br />
Figure 2-10 A second attempt to lay out a<br />
container without a layout manager.<br />
Now the top halves of two buttons are visible, but the bottoms are clipped<br />
by the frame. Given that our button size must now be correct, this leads us to<br />
conclude that the insets returned by the frame were wrong. If you investigate<br />
a little, perhaps by running the <strong>Java</strong> debugger, you will find that the insets<br />
returned have zero in all fields, as if the caption bar and the other frame decorations<br />
were not present. Why has this happened?<br />
Here, we have run into a little piece of <strong>Java</strong> AWT history. The original<br />
AWT components are all heavyweight, which is to say that they have an associated<br />
window in the native platform windowing system. As you create components<br />
and change their attributes, the AWT classes take care of reflecting<br />
these changes in the real window. But since <strong>Java</strong> can run on more than one<br />
platform, it is necessary to map the <strong>Java</strong> requests to the native windowing<br />
system requests in different ways. To make this easier to handle, the platform-specific<br />
parts of the AWT are separated out into a toolkit that is<br />
installed along with the <strong>Java</strong> class libraries on each system. There is a toolkit<br />
for Windows, one for X-Windows, another for the Macintosh, and various<br />
third-party ports for other platforms.<br />
To manage the interaction between the pure <strong>Java</strong> part of the interface that<br />
resides in the j ava. awt package and the native windowing system, there is a<br />
j ava. awt. peer package, which contains a peer class for each component in<br />
java.awt. Therefore, when you create a Frame object, you will eventually<br />
get an instance of j ava. awt. peer. FramePeer assigned to your frame. All<br />
of the peer classes are real <strong>Java</strong> classes, but their methods are all native and<br />
typically written in C or C + + .<br />
Returning to the case of the frame, recall that, although JFrame is a Swing<br />
component, it is derived directly from the pre-Swing Frame class, which is<br />
peer-based. Therefore, even for JFrame, the size of its caption bar and decorations<br />
is platform-dependent, because Windows caption bars are not necessarily<br />
the same size as those used by your window manager on Unix. To find<br />
out how big the frames insets are, the getlnsets method is passed from<br />
JFrame to java. awt .peer. FramePeer. Or, rather, it would be if the<br />
frames peer had been created. In fact, AWT delays the creation of the peer
Images on Components: Icons 97<br />
object for as long as possible. Normally, this object is created for the frame<br />
just before the frame is made visible for the first time [i.e., when setvisible<br />
(true) is called for the first time for the frame]. In our example, when<br />
getlnsets is called, we have not yet called setvisible, so the peer does<br />
not exist and the getlnsets method will return an Insets object with all of<br />
its members set to zero.<br />
Obviously, it isn't possible to wait until after setvisible has been called<br />
to get the sizes that we need—if we did that, the user would see our layout<br />
being constructed on the screen. At best, this would produce an unprofessional<br />
flashing effect. So, what normally happens when a layout manager<br />
tackles this problem?<br />
The layout manager is an integral part of the AWT infrastructure; layout<br />
manager methods are called at appropriate points to size and place the components.<br />
In particular, when setvisible (true) is first called and the<br />
frame's peer object has been created, the layout manager is called to lay out<br />
the components in the frame. Now, of course, the frame's peer exists and the<br />
getlnsets method returns correct values. In fact, the layout manager won't<br />
attempt to lay out the container until this time, unless we force it to, because<br />
it won't be called.<br />
If we want to persist with the mechanism we are using for sizing the container,<br />
we have to force the frame s peer to be created much earlier. Fortunately,<br />
this can be done by calling the frame's addNotify method, which has<br />
the effect of creating the peer. This call must be made before getting any size<br />
information, so it must be called after you add both of the buttons to the container<br />
(for a very good reason that you'll see shortly). Listing 2—7 shows the<br />
code as it would be so far.<br />
Listing 2-7 Working with no layout manager<br />
package <strong>JFC</strong>Book.Chapter2;<br />
import j avax.swing.*;<br />
import j ava.awt.*;<br />
public class NoLayoutExample3 {<br />
public static void main(String[] args) {<br />
JFrame f = new JFrame("No layout manager: 3")<br />
f.getContentPane().setLayout(null);
98 Chapter 2 Frames, Labels, and Buttons<br />
Listing 2-7 Working with no layout manager (continued)<br />
}<br />
}<br />
JButton bl = new JButton("Left");<br />
JButton b2 = new JButton("Right");<br />
f.getContentPane().add(bl);<br />
f.getContentPane().add(b2);<br />
f.addNotify();<br />
Dimension blSize = bl.getPreferredSize();<br />
Dimension b2Size = b2.getPreferredSize();<br />
System.out.println("bl: " + blSize);<br />
System.out.println("b2: " + b2Size);<br />
Insets i = f.getlnsets();<br />
Dimension fSize = new Dimension(<br />
blSize.width + b2Size.width + i.left<br />
+ i.right + 3 * GAP_SIZE,<br />
Math.max(blSize.height, b2Size.height)<br />
+ i.top + i.bottom + 2 * GAP_SIZE);<br />
f.setSize (fSize) ;<br />
bl.setBounds(GAP_SIZE, GAPJ3IZE, blSize.width,<br />
blSize.height);<br />
b2.setBounds(blSize.width + 2 * GAP_SIZE, GAP_SIZE,<br />
b2Size.width, b2Size.height) ,•<br />
f.setVisible(true);<br />
private static final int GAP__SIZE = 8;<br />
<strong>Core</strong> Alert<br />
Although it is public, as an application developer you should really consider<br />
the addNotify method to be part of the internals of the Swing<br />
component and not routinely invoke it as has been done here. In real<br />
application development, there should be no reason to use addNotify—<br />
if you find yourself needing to do so, you should consider whether there is a<br />
better alternative. If you are creating custom components, you may need to<br />
override the addNotify method to perform some action when the<br />
component is added to its parent container but you should still never invoke<br />
it directly yourself, except as super. addNotify from your overriding
Images on Components: Icons 99<br />
implementation ofit.The present example is somewhat artificial because it<br />
is trying to demonstrate what a layout manager does without showing a<br />
complete layout manager implementation, so you can think of the use of<br />
addNotif y here as a kludge to allow us to continue with this example for<br />
the sake of making a point.<br />
If yon try this version using the command<br />
j ava <strong>JFC</strong>Book.Chapter2.NoLayoutExample3<br />
you will find that it actually produces the desired result (see Figure 2-11).<br />
Figure 2-11 A successful attempt to lay<br />
out a container without a layout manager.<br />
Finally, after a few difficulties, you have a working layout, so perhaps you<br />
don't need layout managers after all. But now suppose you want to improve<br />
the design and put a text field above the two buttons. To do this, you need to<br />
add the text field, calculate its size, factor that size into the calculation of the<br />
frame's size, change the code that places the buttons, and add code to size<br />
and place the text field. In fact, you have to do this whenever you add a new<br />
component to your layout. The amount of code affected is not always proportional<br />
to the number of components added either—it is more closely related<br />
to the number of components already present, so as things get more complex,<br />
it becomes more and more costly to add something new.<br />
If you think, despite this, that you can get things right and you know<br />
exactly what components you need and where to put them before you start<br />
coding for the first time, you then run up against the second problem, which<br />
you can see by running our example code and then resizing the frame. Of<br />
course, the buttons stay exactly where they are no matter how large or small<br />
you make the frame. This might be acceptable in this case, but in general it is<br />
not. Suppose that part of your user interface is a text area that displays a<br />
user's document. If the user resizes the frame, the odds are that he or she<br />
wants to see more of the document. What you should do is make the text area<br />
take up any spare space. What our example code does is to leave the spare<br />
space empty.
100 Chapter 2 Frames, Labels, and Buttons<br />
You could implement this by overriding the frames set Size and set-<br />
Bounds methods so that you get the opportunity to resize the components<br />
when the frame changes size, but this just introduces more code that is tied<br />
to your exact layout and makes it even harder to adjust according to changing<br />
needs.<br />
I hope by now you are convinced that working without a layout manager is<br />
not a simple thing to do and is usually undesirable. Later in this book (in<br />
Chapter 12, "Multiple-Document Applications"), you will see an example of<br />
a container that deliberately does not use a layout manager, and you'll revisit<br />
some of the problems that have been exposed here. But, except in special<br />
cases, a layout manager is by far the best way to manage a container.<br />
Setting the Initial Size of a Container<br />
One of the things that a layout manager can help with is establishing the initial<br />
size of the container that it is managing. As you saw in the previous section,<br />
working this out involves knowing how large each component within the<br />
container needs to be and how the components should be laid out relative to<br />
each other. To find a containers ideal size, you just call its getPref erred-<br />
Size method. As you know, every component has a getPreferredSize<br />
method and the Container class overrides the default implementation provided<br />
by Component by delegating the request to its layout manager. This<br />
makes sense because, while the container could certainly discover the<br />
required sizes for each of its children, only the layout manager knows how<br />
the components will be positioned, and this information is vital in working<br />
out the target size of the container.<br />
The container passes the request to the layout manager by invoking its<br />
preferredLayoutSize method, passing itself as the only argument. To<br />
determine the container size, the layout manager usually needs to process<br />
each component within the container and typically uses the getComponent -<br />
Count and getComponents methods of Container to discover how many<br />
components there are and to obtain a list of them:<br />
public int getComponentCount();<br />
public Component [] getComponents();<br />
Using this list, the layout manager can invoke the getPreferredSize<br />
method of each component. It may also ask for each components minimum<br />
and maximum tolerable sizes by calling its getMinimumSize and getMaximumSize<br />
methods. Having obtained all the necessary information, the layout<br />
manager can determine the best size for the container itself based on its own<br />
individual component placement policy.
Images on Components: Icons 101<br />
The most common way to cause a frame to set its initial size is to call the<br />
pack method of the java.awt .Window class, from which Frame, JFrame,<br />
Dialog, and JDialog are all derived. This method is basically equivalent to<br />
the following line of code:<br />
setSize(getPreferredSize() ) ;<br />
In other words, establish the preferred size of the container and then set<br />
the container to that size. The pack method also has the side effect of creating<br />
the frame's peer and the peer objects of any other heavyweight components<br />
within the frame.<br />
Laying Out the Container<br />
Determining the preferred size of the container and laying out the components<br />
within the container are actually two separate facets of the layout managers<br />
job. Often, as in the case of pack, the former immediately precedes<br />
the latter, but this is not always the case. The preferredLayoutSize<br />
method is called when the application (or another container) is determining<br />
the best size for the container that the layout manager is associated with. By<br />
contrast, layoutContainer is invoked after the size of the container has<br />
been set and requires the layout manager to place the containers child components<br />
within the space available to it.<br />
A layout manager lays out a container when its layoutContainer<br />
method is called. Like the pref erredLayoutSize method, the layout manager<br />
is passed a reference to the container. This time, however, it has to work<br />
within the current size of the container, which it can obtain using getSize.<br />
In deciding how to arrange the components, the layout manager might take<br />
into account some of the following factors:<br />
• The preferred size of each of the components<br />
• The maximum or minimum size of each component<br />
• Constraints supplied with each component when it was added<br />
to the container<br />
• Global settings, such as horizontal and vertical gaps to be<br />
maintained between components, specified when the layout<br />
manager is created or using layout-manager specific methods<br />
after creation and the containers insets<br />
Which of these is used depends entirely on the layout manager in use. In<br />
Chapter 3, the layout policies of most of the current layout managers and the
102 Chapter 2 Frames, Labels, and Buttons<br />
way in which they use the information supplied by individual components<br />
and by the program itself will be discussed.<br />
A Closer Look at JFrame<br />
In JDK 1.1, you can create a frame, select a layout manager, and add a component<br />
to it using code like this:<br />
Frame f = new Frame("A Frame");<br />
f.setLayout(new FlowLayout() ) ;<br />
f.add(new Button("Press"));<br />
In the examples shown so far, however, you've seen some slightly more<br />
complex code being used to do the same thing. Unfortunately, if you try to<br />
convert your JDK 1.1 AWT-based application to use Swing components in<br />
the obvious way, like this:<br />
JFrame f = new JFrame("A JFrame");<br />
f.setLayout(new FlowLayout() ) ;<br />
f.add(new JButton("Press"));<br />
you'll get a j ava . lang. Error exception when you run the program, on the<br />
second line of the extract shown above. Instead of being a simple container,<br />
the Swing JFrame component is really a compound object, whose structure<br />
is shown in Figure 2—12.<br />
When created, the JFrame has a single child container, which is an instance<br />
of the class JRootPane, automatically added to it. The JRootPane can manage<br />
up to four other components: a layered pane, a content pane, a menu bar,<br />
and a glass pane. Figure 2-12 shows how these components are organized.<br />
<strong>Core</strong> Tip<br />
Ever looked at a sophisticated user interface and wondered how it has been<br />
constructed? Sometimes resizing the frame and watching how the<br />
components move and resize can give you a clue, but there is a much<br />
simpler way. Click with the mouse somewhere in the frame and press CTRL<br />
+ SHIFT + FI .This prints the component hierarchy for the frame. Here's<br />
what it looks like for a simple JFrame.<br />
j avax.swing.JFrame[frame 0,0,0,20 0x2 0 0,<br />
layout=j ava.awt.BorderLayout,<br />
resizable,title=Frame]<br />
javax.swing.JRootPane[,4,23,192x173,layout=<br />
j avax.swing.JRootPane$RootLayout]<br />
javax.swing.JPanel[null.glassPane,0,0,192x173,hidden,
Images on Components: Icons 103<br />
layout = j ava.awt.FlowLayout]<br />
javax.swing.JLayeredPane[null.layeredPane,0,0,192x173]<br />
javax.swing.JPanel[null.contentPane,0,0,192x173,<br />
1ayout = j ava.awt.BorderLayout]<br />
You'll actually see two copies of this output—the first is generated when<br />
you press the Fl key and the second when you release it<br />
The JRootPane is managed in such a way that it always covers the entire<br />
surface of the JFrame, except for the caption bar and the frame resize bars.<br />
In other words, the JRootPane occupies all of the JFrame apart from its<br />
insets. This is the same as the usable area of the AWT Frame. Layered on top<br />
of the JRootPane is a JLayeredPane, which will be described in detail in<br />
Chapter 12. For now, just note that JLayeredPane is a container that allows<br />
Figure 2-72 The internal structure of a JFrame.
104 Chapter 2 Frames, Labels, and Buttons<br />
you to arrange components that overlap each other in such a way that some<br />
components always appear in front of other ones, giving the appearance of<br />
distinct layers within its bounds. The JRootPane adds to the JLayeredPane<br />
a content pane, which again covers its entire area by default. The content<br />
pane is actually a JPanel, which serves as the working area of the frame.<br />
Optionally, you can also add a menu bar to the JRootPane. If you do this,<br />
the JRootPane arranges for the menu bar to appear at the top of the JLayeredPane<br />
and for the content pane to occupy the rest of it. The glass pane is<br />
always present and covers the entire JLayeredPane, but is invisible by<br />
default.<br />
The content pane plays the role of the working area of the frame: All of the<br />
user elements in the frame should be added to the content pane instead of to<br />
the frame itself. You can get a reference to the content pane using the following<br />
JFrame method:<br />
public Container getContentPane();<br />
The proper way to add components to a JFrame is as follows:<br />
JFrame f = new JFrame("A JFrame");<br />
Container cp = f.getContentPane();<br />
cp.add(new JButton("Press"));<br />
This code adds the button to the frames content pane, not to the frame<br />
itself; the JFrame should only ever have a single child, namely the JRoot-<br />
Pane that it was created with. For compatibility with the AWT Frame class,<br />
the content pane has the same layout manager as Frame itself (a Border-<br />
Layout, which is described in Chapter 3). If you need a different layout<br />
manager, you change the layout manager of the content pane, not of the<br />
JFrame:<br />
JFrame f = new JFrame("A JFrame");<br />
Container cp = f.getContentPane();<br />
cp.setLayout(new FlowLayout() ) ;<br />
// NOT f.setLayout(new FlowLayout() ) ;<br />
The default content pane is a simple JPanel, which is opaque by default.<br />
If you want to change the background color of the JFrame, you need to do<br />
something like this:<br />
f.getContentPane().setBackground(Color.green);<br />
This sets the background color of the content pane only. If you add a menu<br />
bar to the frame (see Chapter 6, "Menus and Toolbars"), its background color<br />
will need to be set separately if you want it to match that of the content pane.
Images on Components: Icons 105<br />
As a general rule, whenever you would have applied an operation to a<br />
Frame that would have affected its contents (but not its size or visibility), you<br />
should invoke it on the content pane of the JFrame instead.<br />
<strong>Core</strong> Note<br />
If you wish, you can make JFrame behave a bit more like Frame by using<br />
the setRootPaneCheckingEnabled method. If you call this with<br />
argument false, you can add components to the JFrame itself instead<br />
of adding them to the content pane. If you are going to do this, you should<br />
probably also remove the JRootPane using the setRootPane method.<br />
The following code creates a JFrame that behaves just like a Frame:<br />
JFrame f = new JFrame("Frame-like JFrame");<br />
f.setRootPane(null);<br />
f.setRootPaneCheckingEnabled(false) ;<br />
This practice is not recommended and should be used only as a (very)<br />
short-term porting aid.<br />
Labels<br />
Almost every user interface uses labels and buttons. If you are familiar with<br />
the AWT in JDK 1.1, you will be aware of the java.awt .Label and<br />
java. awt .Button classes. In JDK 1.1, these are both simple controls. As<br />
far as the label is concerned, about all that you can do is set the text that it<br />
should display and align it left, right, or in the center. You have about the<br />
same level of control over a button, the only difference being that the button<br />
is an active component that can cause your program to perform some action<br />
in response to the user pressing it.<br />
The corresponding Swing components are called JLabel and JButton<br />
and, like all of the new controls, they are reasonably compatible with their<br />
predecessors. As well as providing the same features as Label and Button,<br />
they also have quite a lot of new functionality that you'll see later in this chapter.<br />
Labels are typically used to attach descriptive text to a control that can't<br />
describe itself. A common use of a label is to place it next to a text input field<br />
to indicate what should by typed in the text area. On the other hand, you<br />
might use a button to allow the user to clear the input field or, on a form, to<br />
indicate that the user would like the form's content processed. Figure 2-13<br />
shows a typical form designed in this way. You can run this example for yourself<br />
using the command
106 Chapter 2 Frames, Labels, and Buttons<br />
java <strong>JFC</strong>Book.Chapter2.LabelExamplel<br />
Figure 2-13 An input form created with labels.<br />
There are several ways to create a label. For now, lets look at the three<br />
simplest forms of the constructor:<br />
public JLabel();<br />
public JLabel(String text);<br />
public JLabel(String text, int horizontalAlignment);<br />
The first constructor creates a label with no text. Obviously, for this to be<br />
useful you need to use the label's set Text method before you make it visible.<br />
The second variant supplies the text, while the third supplies both the<br />
text and specifies how the text will be aligned relative to the label. JLabel<br />
allows you to control both the horizontal and vertical alignment of its text.<br />
You can specify the horizontal alignment using this constructor, or you can<br />
use the methods setHorizontalAlignment and setVerticalAlignment,<br />
both of which take a string argument. The horizontal alignment must<br />
be one of SwingConstants.LEFT, SwingConstants.RIGHT, or Swing-<br />
Constants . CENTER, and the vertical alignment SwingConstants .TOP,<br />
SwingConstants . CENTER or SwingConstants . BOTTOM. If you don't<br />
explicitly set the alignment, the text will be aligned to the left and centered<br />
vertically. The example in Listing 2-8 constructs a small number of labels<br />
with different horizontal and vertical text alignments.<br />
<strong>Core</strong> Note<br />
The SwingConstants interface defines a number of useful position and<br />
alignment constants that are used by many of the Swing components.<br />
Because these components all import these constants by implementing the<br />
SwingConstants interface, it is also possible to think of them as
Images on Components: Icons 107<br />
belonging to the individual component so that, for example, you can use<br />
JLabel. CENTER os an alternative to SwingConstants . CENTER if<br />
you wish.<br />
Listing 2-8 Aligning the text on a label<br />
package <strong>JFC</strong>Book.Chapter2;<br />
import j avax.swing.*;<br />
import j ava.awt.*;<br />
public class LabelExample2 {<br />
public static void main(String[] args) {<br />
JFrame f = new JFrame("Label Example 2");<br />
Container cp = f.getContentPane();<br />
cp.setLayout(new GridLayout(0, 1));<br />
cp.add(new JLabel("Left-aligned ",<br />
SwingConstants.LEFT));<br />
cp.add(new JLabel("Center-aligned",<br />
SwingConstants.CENTER))<br />
cp.add(new JLabel("Right-aligned",<br />
SwingConstants.RIGHT));<br />
JLabel 1 = new JLabel("Top-aligned");<br />
1.setVerticalAlignment(SwingConstants.TOP);<br />
cp.add(1);<br />
1 = new JLabel("Bottom-aligned" );<br />
1.setVerticalAlignment(SwingConstants.BOTTOM);<br />
1.setHorizontalAlignment(SwingConstants.RIGHT);<br />
cp.add(1);<br />
f .pack() ;<br />
f.setvisible(true);<br />
}<br />
When you run this program using the command<br />
j ava <strong>JFC</strong>Book.Chapter2.LabelExample2<br />
it won't be apparent that the bottom two labels have strings with top and bottom<br />
alignment, because the pack method is used to size the frame. As a<br />
result of this, all of the labels were made just the right height to fit the text, so<br />
the text appears to be vertically centered in each label. If you make the frame<br />
larger, however, you will see trie difference between the bottom two labels, as<br />
shown in Figure 2~14.
108 Chapter 2 Frames, Labels, and Buttons<br />
Figure 2-14 Labels with varying text alignments.<br />
An interesting difference between JLabel and Label is that the former<br />
can be either transparent or opaque. By default, JLabel is transparent, so it<br />
takes on the background color of the container that it resides in (as was the<br />
case in Figure 2-14) and changing its background color using setBackground<br />
has no visible effect. You can, however, use the JComponent setOpaque<br />
method to make the label opaque and make use of its own<br />
background color.<br />
Event Handling<br />
JLabel is useful for adding text to the user interface, but it is entirely passive.<br />
Both the AWT and Swing also have active components that react to the<br />
user's actions by sending events to the applications that they are a part of.<br />
Before looking at an active Swing component, the JButton, this section<br />
introduces you to the AWT event model and shows you what events there are<br />
and how to receive them.<br />
Events and Listeners<br />
Whenever something of interest happens within a component, it creates and<br />
delivers an event. Events are encapsulated in classes and are delivered to event<br />
listeners. In order to receive a components events, you must register an event<br />
listener of the appropriate type with that component. All events are ultimately
Images on Components: Icons 109<br />
derived from j ava. util. Eventobj ect, which is a simple class that contains<br />
only two methods in addition to its constructor. Here is its definition:<br />
public class EventObject implements <strong>Java</strong>.io.Serializable<br />
{<br />
public EventObject(Object source);<br />
public Object getSource();<br />
public String toString();<br />
}<br />
As its name suggests, the getSource method retrieves a reference to the<br />
object that generated the event. Note that it returns an Obj ect, not a Component.<br />
This is because events are a general concept—they can be created and<br />
delivered by any type of object, not just AWT and Swing components. Almost<br />
all of the events that are generated by GUI components are, however, derived<br />
from a subclass of EventObject called java.awt .AWTEvent. Apart from<br />
defining several new constants used in the low-level event handling performed<br />
within components, this class adds two things to EventObject—an identifier<br />
and a consumed status, which is used to indicate that the events should not be<br />
processed any further. The integer identifier can be obtained from an<br />
AWTEvent using its get ID method. Identifiers are used to distinguish specific<br />
events types within a family of related events, each family being assigned its<br />
own subclass of AWTEvent. Let's look at an example to see how this works in<br />
practice.<br />
When the mouse is over a component, anything that you do with the mouse<br />
results in the delivery of a Mouse Event, with the component itself as the<br />
source. There are seven reasons for the mouse to generate an event. One way<br />
to deal with this would be to create seven different classes, one for each type of<br />
mouse event. However, if this were the general approach, there would be a<br />
large number of mouse-related event classes, each containing very similar<br />
information. For example, all of the mouse events contain the coordinates of<br />
the mouse and flags indicating which mouse button is pressed. The only real<br />
difference between all of these events is a single integer describing the exact<br />
reason for the event. Instead of generating seven event classes, there is a single<br />
MouseEvent class that includes one of the following identifiers:<br />
MouseEvent.MOUSE_PRESSED<br />
MouseEvent.MOUSE_RELEASED<br />
MouseEvent.MOUSE_CLICKED<br />
MouseEvent.MOUSE_MOVED<br />
MouseEvent.M0USEJ3RAGGED<br />
MouseEvent.MOUSE_ENTERED<br />
MouseEvent.MOUSE^EXITED
110 Chapter 2 Frames, Labels, and Buttons<br />
Given this, you might think that to process a mouse event you would need<br />
to write code that looks something like this:<br />
public void receivedMouseEvent(MouseEvent evt) {<br />
switch (evt.getlDO ) {<br />
case MouseEvent.MOUSE_PRESSED:<br />
// Handle mouse button down<br />
break;<br />
case MouseEvent.MOUSE_RELEASED:<br />
// Handle mouse button up<br />
break;<br />
// etc, etc<br />
}<br />
}<br />
In fact, code like this does exist, but it should not be within your application<br />
because the event delivery mechanism examines each event on your<br />
behalf and delivers each type of message to the appropriate method of your<br />
registered event listener.<br />
Along with each class of event, there is an associated interface that listeners<br />
wanting to receive events of that type must implement. Each of these<br />
interfaces is derived from the interface java . util. EventListener, which<br />
does not itself declare any methods or constants. Within a listening interface,<br />
there is one method for each distinct value of the event identifier; therefore,<br />
there are usually seven methods associated with mouse events.<br />
Typically, one event class has one associated listener interface but, exceptionally,<br />
MouseEvent has two—MouseListener and MouseMotionListener,<br />
both in the package java. awt. event and declared as follows:<br />
public interface MouseListener extends EventListener {<br />
public void mouseClicked(MouseEvent e);<br />
public void mousePressed(MouseEvent e) ;<br />
public void mouseReleased(MouseEvent e);<br />
public void mouseEntered(MouseEvent e);<br />
public void mouseExited(MouseEvent e);<br />
}<br />
public interface MouseMotionListener<br />
extends EventListener {<br />
public void mouseDragged(MouseEvent e)<br />
public void mouseMoved(MouseEvent e);<br />
}<br />
As you can probably guess, MOUSE_PRESSED events are delivered to the<br />
mousePressed method, MOUSE_RELEASED events to mouseReleased, and<br />
so on. Each of these methods is passed a reference to the original Mou-
Images on Components: Icons 111<br />
seEvent, which contains information relating to that specific occurrence of<br />
the event.<br />
Registering to Receive Events<br />
The last piece of the event model that you need to know about is how to<br />
become a listener. Each object that can deliver events defines a method to<br />
allow you to register a listener to receive them. Since all components can<br />
generate mouse events, the registration methods for these events are defined<br />
by Component itself:<br />
public void addMouseListener(MouseListener 1);<br />
public void addMouseMotionListener(MouseMotionListener<br />
1) ;<br />
Each time you invoke one of these methods, the component adds your listener<br />
to its internal list of listeners for mouse or mouse motion events. From<br />
the component's point of view, delivering an event can be accomplished by<br />
traversing its list of registered listeners and calling the appropriate method<br />
on each of them in turn (although the order of delivery of a given event to<br />
seperate listeners is not defined). For example, if a MOUSE_PRESSED event<br />
occurs, the component calls the mousePressed method of every object registered<br />
by a call to addMouseListener. If you no longer wish to receive<br />
events from a component, you can use the corresponding remove method to<br />
remove your listener from the component's internal list.<br />
It is no coincidence that the name of the event, the names of the identifiers,<br />
the name of the listening interface (or interfaces) and of the methods<br />
within that interface are closely linked. This is an example of a design pattern<br />
that was introduced for the benefit of <strong>Java</strong>Beans and has been used throughout<br />
the event model. You will probably find that it makes the job of remembering<br />
which events go with which listeners very easy. You'll find definitions<br />
of all of the events and listener interfaces in the j ava. awt. event and<br />
j avax. swing. event packages.<br />
Event Handling Example<br />
To conclude this short discussion of the event model, let's now look at a short<br />
program that demonstrates the delivery of mouse events—see Listing 2—9.
112 Chapter 2 Frames, Labels, and Buttons<br />
Listing 2-9 Receiving mouse events<br />
package <strong>JFC</strong>Book.Chapter2;<br />
import j avax.swing.*;<br />
import j ava.awt.*;<br />
import <strong>Java</strong>.awt.event.*;<br />
public class EventExample1 {<br />
public static void main(String[] args) {<br />
JFrame f = new JFrame("Events 1");<br />
JButton bl = new JButton("OK");<br />
JButton b2 = new JButton("Cancel");<br />
f.getContentPane().setLayout(new FlowLayout());<br />
}<br />
f.getContentPane0 .add(bl);<br />
f.getContentPane().add(b2);<br />
// Add listeners<br />
MouseListener 1 = new ExampleMouseListener();<br />
MouseMotionListener m = new ExampleMouseListener();<br />
bl.addMouseListener(1);<br />
b2.addMouseListener(1);<br />
bl.addMouseMotionListener(m);<br />
b2.addMouseMotionListener(m);<br />
f.pack();<br />
f.setvisible(true);<br />
}<br />
// Mouse listener class<br />
class ExampleMouseListener implements MouseListener,<br />
MouseMotionListener {<br />
// MouseListener interface<br />
public void mousePressed(MouseEvent evt) {<br />
System.out.println("Mouse pressed: " + evt);<br />
}<br />
public void mouseReleased(MouseEvent evt) {<br />
System.out.println("Mouse released: " + evt);<br />
}<br />
public void mouseClicked(MouseEvent evt) {<br />
System.out.println("Mouse clicked: " + evt);<br />
}<br />
public void mouseEntered(MouseEvent evt) {<br />
System.out.println("Mouse entered: " + evt);<br />
}
Listing 2-9 Receiving mouse events (continued)<br />
public void mouseExited(MouseEvent evt) {<br />
System.out.println("Mouse exited: " + evt);<br />
}<br />
// MouseMotionListener interface<br />
public void mouseMoved(MouseEvent evt) {<br />
System.out.println("Mouse moved: " + evt);<br />
}<br />
Images on Components: Icons 113<br />
public void mouseDragged(MouseEvent evt) {<br />
System.out.println("Mouse dragged: " + evt);<br />
}<br />
j In this example, two buttons are created next to each other on the content<br />
pane of a frame. To catch the mouse events that happen on these buttons,<br />
both the MouseListener and MouseMotionListener interfaces are<br />
implemented in a single class (ExampleMouseListener) and the<br />
addMouseListener and addMouseMotionListener methods of Component,<br />
of which JButton is a subclass, are used to register one instance of<br />
this class to receive mouse events and another to receive mouse motion<br />
events. Notice that this means that a single listener catches events from more<br />
than one component. This is a very common programming practice.<br />
If you start the program using the command<br />
j ava <strong>JFC</strong>Book.Chapter.EventExamplel<br />
and move the mouse over one of the buttons, you will see a burst of output as<br />
the mouses motion is reported by a stream of events. Here is a short (abbreviated)<br />
extract that is typical of what you might see:<br />
Mouse entered: java.awt.event.MouseEvent<br />
[MOUSE_ENTERED, (39,22) ,mods = 0,clickCount = 0] on Button<br />
[. •]<br />
Mouse moved: java.awt.event.MouseEvent<br />
[MOUSE_MOVED, (39,22) ,mods = 0,clickCount = 0] on Button [..]<br />
Mouse moved: <strong>Java</strong>.awt.event.MouseEvent<br />
[MOUSE_MOVED,(40,21),mods=0,clickCount=0] on Button [..]<br />
Mouse moved: java.awt.event.MouseEvent<br />
[MOUSE_MOVED,(40,20),mods=0,clickCount=0] on Button [..]<br />
Mouse moved: <strong>Java</strong>.awt.event.MouseEvent<br />
[MOUSE_MOVED,(40,19),mods=0,clickCount=0] on Button [..]<br />
Mouse moved: java.awt.event.MouseEvent
114 Chapter 2 Frames, Labels, and Buttons<br />
[MOUSE_MOVED,(40,18),mods=0,clickCount=0] on Button [..]<br />
Mouse moved: <strong>Java</strong>.awt.event.MouseEvent<br />
[MOUSE_MOVED, (41,18) ,mods = 0,clickCount = 0] on Button [..]<br />
Mouse moved: <strong>Java</strong>.awt.event.MouseEvent<br />
[MOUSE_MOVED, (44,18) ,mods=0,clickCount = 0] on Button [..]<br />
Mouse moved: <strong>Java</strong>.awt.event.MouseEvent<br />
[MOUSE_MOVED,(47,16),mods=0,clickCount=0] on Button [..]<br />
Mouse exited: <strong>Java</strong>.awt.event.MouseEvent<br />
[MOUSE_EXITED,(51,16),mods=0,clickCount=0] on Button [..]<br />
Mouse entered: <strong>Java</strong>.awt.event.MouseEvent<br />
[MOUSE_ENTERED, (0,15) ,mods = 0,clickCount = 0] on Button [..]<br />
Mouse moved: java.awt.event.MouseEvent<br />
[MOUSEJYIOVED, (0, 15) ,mods = 0, clickCount = 0] on Button [..]<br />
Mouse moved: <strong>Java</strong>.awt.event.MouseEvent<br />
[MOUSEJVIOVED, (1, 15) , mods = 0 , clickCount = 0] on Button [..]<br />
Mouse moved: java.awt.event.MouseEvent<br />
[MOUSE_MOVED,(1,16),mods=0,clickCount=0] on Button [.]<br />
Mouse moved: <strong>Java</strong>.awt.event.MouseEvent<br />
[MOUSE_MOVED,(1,18),mods=0,clickCount=0] on Button [..]<br />
Mouse moved: <strong>Java</strong>.awt.event.MouseEvent<br />
[MOUSE_MOVED, (3,22) ,mods = 0,clickCount = 0] on Button [..]<br />
Mouse exited: <strong>Java</strong>.awt.event.MouseEvent<br />
[MOUSE_EXITED,(7,27),mods=0,clickCount=0] on Button [..]<br />
If you look carefully, you'll notice that the mouse moved over one of the<br />
buttons (the left one, in fact) for a short while, then moved out and onto the<br />
right button, where it stayed for a while before leaving. As you can see, each<br />
event records the event identifier, the position of the mouse relative to the<br />
component that receives the event, the keyboard modifiers (there weren't<br />
any pressed in this example), and the number of mouse clicks represented by<br />
the event, which is nonzero only for a MOUSE_CLICKED event.<br />
Now try something a little different. Move the mouse over the left button<br />
and press the left mouse button. With the left mouse button pressed, move<br />
the mouse outside the button. You'll see a stream of MOUSE_DRAGGED messages<br />
as the mouse moves, as you might expect. However, these<br />
MOUSEJDRAGGED messages continue to be delivered as the mouse moves outside<br />
the button, even though it is no longer over the component that they are<br />
being delivered to. You can even move the mouse outside the frame and continue<br />
to get events. If you move the mouse around to the left of the button<br />
and keep moving left, you'll get negative coordinates reported. These<br />
MOUSE_DRAGGED events will continue to be delivered until the mouse button<br />
is released.
Images on Components: Icons 115<br />
Incidentally, this example also shows why there are separate interfaces to<br />
receive mouse events and mouse motion events. Most applications are interested<br />
only in hearing about mouse clicks and, maybe, the times at which the<br />
mouse enters or leaves a component. If they had to receive such a large number<br />
of redundant mouse motion events as well, performance would be badly<br />
impacted. For this reason, it is possible to register to receive the more useful<br />
mouse events without being swamped by the motion of the mouse.<br />
<strong>Core</strong> Note<br />
You will notice that five methods were implemented in order to receive<br />
mouse events (and another two to get mouse motion events). You are<br />
obliged to provide all five methods in the MouseListener interface no<br />
matter how many of the event types you are actually interested in receiving,<br />
because the <strong>Java</strong> compiler requires this of a class that claims to implement<br />
the interface. In many cases, however, you won't actually want to handle all<br />
of the events received by a given interface and you might prefer not to have<br />
to implement dummy methods for the events that you don't wantTo cater<br />
for this situation, adapter classes are provided for some event interfaces.<br />
You can find out about adapter classes in the next chapter.<br />
Using Buttons<br />
Now that you know how events are handled, this section will show you how to<br />
create a button and handle the event generated when the button is pressed.<br />
Creating a Simple Button<br />
The JButton class replaces the AWT Button object. As with the JLabel,<br />
you can do everything with a JButton that you could do with its predecessor,<br />
but as you'll see, you can also do a lot more. The simplest way to create a button<br />
is to use one of the following two constructors:<br />
public JButton();<br />
public JButton(String label);
116 Chapter 2 Frames, Labels, and Buttons<br />
<strong>Core</strong> Tip<br />
As a general rule, Swing components have many more constructors than<br />
their AWT counterparts, but in this book, only the most useful constructors<br />
are shown in the text It is recommended that you look at the API<br />
documentation for each component as you meet it for information on the<br />
other constructors, as well as some of the less important methods that<br />
there isn't space to cover here.<br />
As with jLabel, you have the choice of setting the buttons text immediately,<br />
or using the setText method later. Unlike the label, though, you don't<br />
have the choice of setting the alignment in the constructor; such an option is<br />
less likely to be useful, since buttons almost always have their text centered<br />
and this is the default. Like JLabel, buttons also have setHorizontalAlignment<br />
and setVerticalAlignment methods and you are free to use<br />
them if you really want to change the alignment. In reality, though, the real<br />
utility of these two methods is in conjunction with icons, as you'll see later.<br />
Handling Button Presses<br />
You've already seen examples in this chapter in which buttons have been<br />
used to demonstrate how components are placed on frames. Now that you<br />
have seen how events are handled, you can add the code needed to handle a<br />
button press.<br />
When the user presses a JButton, several things happen. First, the act of<br />
pushing the mouse button causes a MOUSE_PRESSED event to be delivered to<br />
the JButton; in response to this, it redraws itself so that it appears to be<br />
pushed in. When the mouse button is released, a MOUSE_RELEASED and a<br />
MOUSE_CLICKED event are delivered. These events cause the JButton to<br />
render itself in its normal state and then generate an ActionEvent. Note<br />
that the JButton receives and responds to all of the mouse events itself.<br />
Even though you could register to receive these events yourself, there would<br />
be little point in doing so. Instead, you need to register to catch the Action-<br />
Event by creating an ActionListener and using the button's addAction-<br />
Listener method to register it. The ActionListener interface is defined<br />
as follows:<br />
public interface ActionListener extends EventListener {<br />
}<br />
Public void actionPerformed(ActionEvent e);
Images on Components: Icons 117<br />
This interface only has a single method, which receives the ActionEvent.<br />
As well as the getSource and get ID methods inherited from its superclasses,<br />
this event type has two methods of its own:<br />
public int getModifiers();<br />
public String getActionCommand();<br />
The getModif iers method returns a mask indicating which control keys<br />
were pressed at the time that the button was clicked; this mask is constructed<br />
by "OR-ing" together the appropriate values from the following list:<br />
ActionEvent.ALT_MASK<br />
ActionEvent.CTRL_MASK<br />
ActionEvent.META_MASK<br />
ActionEvent.SHIFT_MASK<br />
You can, for example, use this facility to assign a different meaning to a<br />
button press that happens when certain keys on the keyboard are also<br />
pressed. In most applications, though, this would not be very useful, because<br />
users are 7iot accustomed to using keyboard keys (even modifier keys) in conjunction<br />
with the mouse when activating buttons.<br />
The getActionCommand method returns a string associated with the button<br />
set earlier using setActionCommand. If you don't ever call setAction-<br />
Command, then getActionCommand returns the text of the label that appears<br />
on the button. This string is intended to help you decide how to action the button<br />
click. To see how, let s look at alternative ways of responding to a button<br />
press.<br />
When your listener's actionPerformed method is entered, you need to<br />
work out why you were called. In the simplest possible case, you may have<br />
attached your ActionListener to only one button, in which case you know<br />
why you have been called and what to do. If your listener serves more than<br />
one button, or perhaps a button and another component that generates an<br />
ActionEvent, such as menu items, which will be described in Chapter 6,<br />
you need some way to identify which of these components originated the<br />
event. One way is to use the getSource method, which returns a reference<br />
to the component in the form of an Obj ect. If you saved a reference to your<br />
JButton object when you created it, you can write code like this:<br />
public void actionPerformed(ActionEvent evt) {<br />
Object o = evt.getSource () ;<br />
if (o == (Object)myButton) {<br />
// It was the button<br />
} else {<br />
// It was something else<br />
}<br />
}
118 Chapter 2 Frames, Labels, and Buttons<br />
// Instance variables<br />
JButton myButton = new JButton("OK");<br />
This is fine if you save references to all of the objects to which you attach<br />
listeners. Sometimes, it is inconvenient to save a reference, or to access the<br />
reference from the event handler. Fortunately, there is another way. If yon<br />
use the setActionCommand method to associate a string with the button,<br />
you can retrieve the same string from the ActionEvent in the event handler<br />
and use it to decide what to do. Here is an example:<br />
ActionListener 1; // Initialize "1": not shown here<br />
JButton b = new JButton("OK");<br />
b.setActionCommand("OK");<br />
b.addActionListener(1) ;<br />
b = new JButton("Cancel");<br />
b.setActionCommand("Cancel");<br />
b.addActionListener(1) ;<br />
Your actionPerf ormed method would then look something like this:<br />
public void actionPerformed(ActionEvent evt) {<br />
String cmd = evt.getActionCommand();<br />
if (cmd.equals("Cancel" )) {<br />
// It was the Cancel button<br />
} else {<br />
// It was the OK button<br />
}<br />
}<br />
Using this method, you don't need to store a reference to the button anywhere.<br />
If you need to change the buttons state in the event handler, you can use<br />
the reference returned by the getSource method to do so. You may be thinking<br />
that you could have omitted the setActionCommand completely, because<br />
the getActionCommand would return the buttons label anyway. You would be<br />
right, as long as the label continued to read Cancel. But suppose that you want<br />
your application to work in languages other than English. If the buttons label<br />
were changed to the French equivalent of Cancel, the event handler shown<br />
above would not work, unless you changed the Cancel string there as well.<br />
Of course, you could use a single string to set both the label and perform<br />
the comparison in the event handler, but this is not always possible, because<br />
the initialization of the button and the event handler are not always contained<br />
in the same class. Also, in internationalized applications, the label text<br />
is not compiled into the program; instead, it is usually obtained from a separate<br />
text file or <strong>Java</strong> class file, which is selected based on the language in use.
Images on Components: Icons 119<br />
It would be inconvenient, and often difficult to arrange, to have the correct<br />
version of the label available at initialization time and in the event handler. It<br />
is much easier to use the setActionCommand method, as in our example,<br />
because this string is never seen by the user and so can be in any language<br />
you choose.<br />
Now lets have a look at an example of a button in use. The code in Listing<br />
2-10 creates a frame with a button and a text field on its content pane. You<br />
can run this example using the command<br />
j ava <strong>JFC</strong>Book.Chapter2.RandomNumbers<br />
When you press the button, a random number is generated and displayed<br />
in the text area (see Figure 2-15).<br />
Listing 2-10 Reacting to button presses<br />
package <strong>JFC</strong>Book.Chapter2;<br />
import j avax.swing.*;<br />
import j ava.awt.*;<br />
import j ava.awt.event.*;<br />
import <strong>Java</strong>.util.Date;<br />
public class RandomNumbers implements ActionListener {<br />
public RandomNumbers(Container c) {<br />
// Create and display the user interface<br />
// on the container that we are passed<br />
JButton b = new JButton("Press Me");<br />
}<br />
t.setEditable(false);<br />
b.reguestFocus () ;<br />
b.addActionListener(this);<br />
c.setLayout(new BorderLayout() ) ;<br />
c.add(b, BorderLayout.EAST);<br />
c.add(t, BorderLayout.CENTER);<br />
public void actionPerformed(ActionEvent evt) {<br />
// Button pressed: generate a random number<br />
double r = Math.random();<br />
Date d = new Date();<br />
r *= d.getTimeO - lastDate .getTime () ;
120 Chapter 2 Frames, Labels, and Buttons<br />
Listing 2-10 Reacting to button presses (continued)<br />
lastDate = d;<br />
t.setText(new Double(r) .toString ());<br />
}<br />
public static void main(String[] args) {<br />
JFrame f = new JFrame("Random Numbers");<br />
RandomNumbers r = new RandomNumbers(f.getContent-<br />
Pane ()) ;<br />
f . addWindowListener (new WindowAdapter () {<br />
public void windowClosing(WindowEvent evt) {<br />
System.exit(0);<br />
});<br />
f.pack();<br />
f.setvisible(true);<br />
}<br />
private JTextField t = new JTextField(20);<br />
private Date lastDate = new Dated ;<br />
Figure 2-15 Using a JButton.<br />
As you can see, when the user interface is created, an ActionListener is<br />
registered to catch the buttons events. Unlike our last example, though, this<br />
one doesn't use a separate class to receive the event. Instead, it creates a class<br />
that encapsulates the processing behind the user interface and that implements<br />
the ActionListener interface. This makes it possible to put the<br />
code that creates the user interface and the code that handles the events<br />
from that interface into a single class, which is the ideal situation since it<br />
allows us to present a black box interface to our RandomNumbers class—<br />
given a container to reside in, it is entirely self-sufficient.
<strong>Core</strong> Note<br />
Images on Components: Icons 121<br />
A black box is something that provides a service according to a defined<br />
interface but doesn't require you (and perhaps doesn't allow you) to know<br />
the implementation details of the service provider. Object-oriented<br />
programming is, by and large, all about producing black box<br />
implementations in the form of classes with private or protected variables<br />
and methods—the less your client knows about how you do your job, the<br />
fewer assumptions they will make that could be invalid if the<br />
implementation is changed later.<br />
Having registered the RandomNumbers class as the ActionListener<br />
and made the frame visible, you just need to wait for the user to press the<br />
button. When he or she does so, the actionPerformed method will be<br />
entered. In this case, of course, there is only one place that an ActionEvent<br />
can come from, so you know when you receive it that the button has been<br />
pressed. The response to this is to calculate the time since the last time the<br />
button was pressed and use this to generate a random number that is then<br />
displayed in the text field.<br />
In this example, you see, for the first time, one of the Swing text components,<br />
JTextField, which provides a way to read or display a single line of<br />
text. As you'll see later in this book, the JTextField, like JButton, generates<br />
an ActionEvent when the Return key is pressed. In our example,<br />
there is no possibility of confusing an event from the text field with one from<br />
the button, for two reasons. First, setEditable (false) was used to put<br />
the JTextField into a mode in which it is output-only. Since the user won't<br />
be allowed to type into this field, it will never generate an event. Making the<br />
text field read-only was, of course, the appropriate thing to do because it is<br />
only being used to display random numbers—it was never intended to be<br />
used to accept input. Secondly, even if this line were removed and the text<br />
field were allowed to generate an event, there would still be no problem.<br />
Because an ActionListener has not been registered on the JTextField,<br />
no events would be delivered to the RandomNumbers class. Remember that<br />
events are only delivered if you register to receive them.<br />
Incidentally, you may be wondering about the following piece of code<br />
from Listing 2-10:<br />
f.addWindowListener(new WindowAdapter() {<br />
public void windowClosing(WindowEvent evt) {<br />
}<br />
});<br />
System.exit(0);
122 Chapter 2 Frames, Labels, and Buttons<br />
This is a compact way of arranging for an application to exit and you'll see<br />
it in many of the examples in this book. It uses an adapter class to process<br />
Window events from the application's top-level frame and intervenes only to<br />
catch the event that is generated when the user clicks on the close button. If<br />
you want to know more about how it works, look ahead to the "Working witli<br />
the Application Window" section in Chapter 3.<br />
<strong>Core</strong> Note<br />
In JDK 1.1, a Frame would not close when the window close button was<br />
pressed unless the application handled the event that this button generated<br />
and allowed the window to close. By contrast, it is possible to arrange for a<br />
JFrame (or a jDialog, which will be discussed in Chapter 7, "Using<br />
Standard Dialogs") to automatically hide or dispose itself without<br />
application intervention. See the "Working with the Application Window"<br />
section in Chapter 3 for more on this.<br />
Mnemonics<br />
Usually, you activate a button by "pressing" it with the mouse or, if the application<br />
is properly implemented, you might use the TAB key to move the keyboard<br />
focus to the button and then press it using the space bar. The JButton<br />
provides another way for you to activate it, by means of a mnemonic.<br />
You define a mnemonic for a button by calling its setMnemonic method,<br />
passing it a single character representing the key that you want to activate the<br />
button. The button will be activated when the user presses the selected key<br />
in conjunction with the ALT modifier key, whenever the keyboard focus is on<br />
the button or in the top-level window that contains it. You can, for example,<br />
make the button in the RandomNumbers example respond to the key<br />
sequence ALT + p by adding the line of code shown in bold face type:<br />
b.requestFocus();<br />
b.addActionListener(this);<br />
b.setMnemonic( v p');<br />
f.add(b, "East");<br />
If, as in this case, the letter you choose appears in the label of the button,<br />
then it will be shown underlined to indicate to the user that a shortcut exists<br />
(see Figure 2-16). A letter that is not part of the label would, of course, be a<br />
bad choice because the user would not know that there is a possible shortcut,<br />
but the key would still work. Note also that we purposely specified a lower-
Images on Components: Icons 123<br />
case 'p' even though the button has an uppercase one. This does not stop<br />
the letter ' P' from being underlined on the button and it doesn't make any<br />
difference to the mnemonic either because mnemonics are case-insensitive<br />
when you assign them, so the following lines of code are equivalent:<br />
b.setMnemonic( v p' );<br />
b.setMnemonic ( ' P' ) ;<br />
To activate this button, you press ALT + p without pressing the SHIFT<br />
key, even if the mnemonic assigned was an uppercase letter. You can try this<br />
for yourself by typing the command<br />
j ava <strong>JFC</strong>Book.Chapter2.RandomNumbers2<br />
<strong>Core</strong> Alert<br />
Pressing ALT + SHIFT + p does NOT trigger the button, even ifyour<br />
code specified 'p'os the mnemonic.<br />
Figure 2-16 AJButton with a mnemonic added.<br />
There is a similar facility to this offered by the JLabel component that<br />
you'll see during the discussion of text components in Chapter 9, "Text Components,"<br />
and there is also a more general mechanism for keyboard shortcuts<br />
that will be discussed in Chapter 5.<br />
Focus, Border Drawing, and Background Filling<br />
There are a few other facilities that JButton provides that are covered here<br />
for the sake of completeness. All of these are properties that are either<br />
enabled or disabled. Like all such properties, you control them with a<br />
method that accepts a boolean value. These properties and the associated<br />
methods are summarized in Table 2-3.<br />
In Chapter 8, "Creating Custom Dialogs," you'll see how to set a different<br />
border from a set supplied in the j avax. swing. border package.
124 Chapter 2 Frames, Labels, and Buttons<br />
Table 2-3 JButton Border and Focus Methods<br />
Method<br />
public void setFocus-<br />
Painted(boolean)<br />
public boolean isFocus-<br />
Painted()<br />
public void setBorder-<br />
Painted(boolean)<br />
public void isBorderPainted()<br />
public void setContentArea-<br />
Filled(boolean)<br />
Description<br />
If you move the focus to a button, it<br />
highlights itself by drawing a box<br />
around its label to make it clear; for the<br />
benefit of keyboard users, that the focus<br />
is on the button and that pressing the<br />
space bar would activate it. You can,<br />
however, use setFocus-<br />
Painted(false) to disable this highlighting<br />
action. This action is not<br />
recommended because it makes it hard<br />
to see which component has the input<br />
focus.<br />
Returns true if the button highlights<br />
the fact that it has the focus.<br />
By default, a button draws a border that<br />
suits the type of button it is. A JButton<br />
with the Windows look-and-feel<br />
selected, for example, draws the familiar<br />
three-dimensional border. Using the<br />
setBorderPainted method, you<br />
can stop a button that would normally<br />
draw a border from doing so.<br />
Returns true if the button will draw a<br />
border.<br />
Determines whether the button will use<br />
its background color to fill its background.<br />
By default, this property has the<br />
value true, so that the button will use<br />
the color set using setBackground to<br />
color itself. If you call setContentAreaFilled<br />
(false), the interior<br />
of the button is not colored—the background<br />
shows through. Calling this<br />
method with argument true makes the<br />
button opaque—it has the effect of also<br />
calling setOpaque (true) —and
Table 2-3 J Button Border and Focus Methods (continued)<br />
public void setContentArea-<br />
Filled(boolean)<br />
(continued)<br />
public boolean isContentArea-<br />
FilledO<br />
Images on Components: Icons<br />
Images on Components: Icons 125<br />
similarly invoking it with argument<br />
false results in<br />
setOpaque (false) being called<br />
internally. However, there is a difference<br />
between a button for which only<br />
setOpaque (false) lias been<br />
invoked and one for which setContentAreaFilled<br />
(false) is used,<br />
which can be seen when either the<br />
Metal or Motif look-and-feel is installed.<br />
These two buttons would look the same<br />
(i.e., transparent) when not pressed, but<br />
when pressed, the former would use a<br />
different color for its background, while<br />
the latter would not change its color.<br />
When the Windows look-and-feel is in<br />
use, both buttons would be transparent<br />
at all times (that is, there is no visible<br />
difference at any time).<br />
Returns true if the button's content<br />
area is filled.<br />
So far, you have seen a button with just a text label, but JButton can do better<br />
than this. Like several of the controls in the Swing set, it can host an image as<br />
well as (or instead of) the text string. JButton inherits this ability from its<br />
superclass AbstractButton, from which several other types of buttons are<br />
also derived, including radio buttons and checkboxes, which are described in<br />
Chapter 8. Bear in mind that eveiything in this section applies to all types of<br />
buttons, not just to JButton, and also to JLabel (even though it is not a subclass<br />
of AbstractButton). In fact, as you'll see in Chapter 6, menu items are<br />
also derived from the AbstractButton class and so they also support the<br />
facilities that are described here.
126 Chapter 2 Frames, Labels, and Buttons<br />
What Is an Icon?<br />
Earlier, you saw two of JButton's constructors. In fact, there are two more:<br />
public JButton(Icon icon);<br />
public JButton(String label, Icon icon);<br />
Both of these constructors have an extra element that specifies the inclusion<br />
of an Icon. Icon is an interface that provides a way to implement a<br />
user-defined area within a larger control. Here is its definition:<br />
public interface Icon {<br />
public void paintlcon(Component c, Graphics g, int x,<br />
int y);<br />
public int getlconWidth();<br />
public int getlconHeight();<br />
}<br />
The basic idea when creating an icon is to provide a class that implements<br />
this interface. This class might fill a rectangular area with a solid color, draw<br />
some complex graphics, show some text, or display an image. The important<br />
thing is that the class must provide the getlconWidth and getlconHeight<br />
methods to allow the host component (in this section, this will be JButton<br />
or JLabel) to allocate the necessary space for it, and the paintlcon<br />
method. The host component will typically obtain the Icon's size while it is<br />
calculating how much screen space it needs for itself and will call the paint -<br />
Icon method when its own paint method is called. As you'll see in Chapter<br />
4, the Graphics object that is passed to the paintlcon method is used to<br />
gain access to the host component's surface and the Component argument to<br />
extract attributes, such as colors, from the component that the icon is being<br />
drawn on. There is an example implementation of an Icon in Chapter 4.<br />
The Swing set includes an implementation of Icon called Imagelcon, an<br />
extremely useful class that can load images and render them on the surface of<br />
a button or any other JComponent that accepts an Icon. Imagelcon has<br />
many constructors, of which the following are the three most useful:<br />
public Imagelcon(String fileName);<br />
public Imagelcon(URL url);<br />
public Imagelcon(Image img);<br />
The first constructor requires a file name, which may be either an absolute<br />
or a relative name. Note, however, that if it is a relative name, it is interpreted<br />
relative to the current directory of the application. Since image files are usually<br />
stored near the application's class files, this constructor can only usefully<br />
be used when you have an absolute file name or you are in control of the
Images on Components: Icons 127<br />
application's current directory. This form is of no use for applets, which usually<br />
have no access to file store, or for code loaded from a JAR file if the file to<br />
be loaded is in the same JAR file.<br />
The second constructor is probably the most useful one, since it works<br />
both for applications and applets and can be used to access image files that<br />
are close to the associated class files. In the examples below, you'll see how to<br />
use this constructor. The last constructor assumes that you have already created<br />
an Image object and hence have dealt with the issues of locating the<br />
image file itself. The Image I con class can deal with any type of image file<br />
that the <strong>Java</strong> libraries can handle. This means that, in JDK 1.1 and <strong>Java</strong> 2 version<br />
1.2.2, it can load GIF and JPEG images, while <strong>Java</strong> 2 version 1.3 adds<br />
support for images in PNG (Portable Network Graphics) format.<br />
Adding Icons to Buttons and Labels<br />
Once you have an Icon (whether an Image I con or any other type), you can<br />
place it on a button or a label. The example in Listing 2—11 shows two buttons,<br />
each with both an image and a text string.<br />
Listing 2-11 Adding images to buttons<br />
package <strong>JFC</strong>Book.Chapter2;<br />
import javax.swing.*;<br />
import j ava.awt.*;<br />
import j ava.awt.event.*;<br />
public class ImageButtonsExamplel extends JPanel {<br />
public ImageButtonsExamplel() {<br />
setLayout(new GridLayout(2, 1, 4, 4));<br />
ok = new JButton("OK",<br />
new Imagelcon(getClass().getResource(<br />
"images/ok.gif")));<br />
cancel = new JButton("Cancel",<br />
new Imagelcon(getClass().getResource(<br />
"images/cancel.gif") ) ) ;<br />
ok.setFont(new Font("Dialog", Font.BOLD, 14));<br />
cancel.setFont(new Font("Dialog", Font.BOLD, 14));
128 Chapter 2 Frames, Labels, and Buttons<br />
Listing 2-1 I Adding images to buttons (continued)<br />
add(ok);<br />
add(cancel);<br />
}<br />
public static void main(String[] args) {<br />
JFrame f = new JFrame("Image Buttons 1");<br />
f.getContentPane().add(new ImageButtonsExamplel());<br />
f.pack();<br />
f.setVisible(true);<br />
f.addWindowListener(new WindowAdapter() {<br />
public void windowClosing(WindowEvent e) {<br />
System.exit(0);<br />
}<br />
});<br />
}<br />
JButton ok;<br />
JButton cancel;<br />
j ______________ _^<br />
Although it may not be immediately obvious, the code that creates the<br />
buttons uses the Image I con constructor that accepts a URL argument:<br />
ok = new JButton("OK", new Imagelcon(<br />
getClass () .getResource("images/ok.gif"))) ;<br />
The getResource method of j ava . lang . Class takes a file name and<br />
returns a URL that resolves to it. This method works by locating the image<br />
file using the class loader that loaded the class file for this example; since this<br />
class loader knows how to find the class file, it can also find other files that are<br />
located close to the class file. In this example, getResource takes the name<br />
of the package to which the class belongs, replaces the dots in the name by<br />
forward slashes (even on a Windows platform, because URLs use forward<br />
slash as their separator), and then adds the partial file name specified to form<br />
the second half of a URL.<br />
Since this example resides in the class <strong>JFC</strong>Book.Chapter2, the second<br />
part of our URL would be <strong>JFC</strong>Book/Chapter2/images/ok. gif. The first<br />
part of the URL is the location at which the class loader found the class itself.<br />
Let's look at two cases. First, suppose that our class was loaded from local file<br />
storage using the entry C: \<strong>Core</strong><strong>JFC</strong>Book in the CLASSPATH variable. Then<br />
the actual file must reside in C:\<strong>Core</strong><strong>JFC</strong>Book\<strong>JFC</strong>Book\Chapter2\
Images on Components: Icons 129<br />
images /ok. gif and the URL returned would be something equivalent to<br />
file:///C:/<strong>Core</strong><strong>JFC</strong>Book/<strong>JFC</strong>Book/Chapter2/images/ok.gif. On<br />
the other hand, if the class file has been downloaded from a host with a<br />
CODEBASE of http://www.myhost .com/java, then the URL generated<br />
would be http://www.myhost.com/java/<strong>JFC</strong>Book/Chapter2/<br />
images/ok.gif.<br />
Whatever the URL looks like, the truth of the matter is that you don't<br />
need to care. Using the getResource method in this way allows the class file<br />
to be independent of the user's current directory when the application is running<br />
and it avoids any assumptions about where the class was loaded from,<br />
since the same line works whether the class is in local file storage, on a Web<br />
server, or in a JAR file. Figure 2-17 shows what this program looks like when<br />
it is running. The command to run this program is:<br />
j ava <strong>JFC</strong>Book.Chapter2.ImageButtonsExamplel<br />
<strong>Core</strong> Alert<br />
Although getResource is the most convenient way to access resources<br />
such as images when writing applications, it can be problematic if your<br />
code has to run in an applet because some browsers do not properly<br />
implement this method. Netscape Navigator, for example, always returns<br />
null if you try to use this method to access an image held with your<br />
applet's code. Fortunately, there is a way to work around this as you'll see in<br />
the discussion of using Swing with applets in Appendix A.<br />
As you can see, both buttons have both an image and text on them. The<br />
text is placed to the right of the image, and the text-image combination is<br />
both vertically and horizontally centered. To see this more clearly, make the<br />
window larger in both directions and you will find that the image and text<br />
stay close together in the middle of each button.<br />
It is possible to change the way in which these elements are arranged relative<br />
to each other and relative to the button itself, using the following four<br />
methods of JLabel or AbstractButton:<br />
setHorizontalTextPosition(int pos)<br />
setVerticalTextPosition(int pos)<br />
setHorizontalAlignment(int align)<br />
setVerticalAlignment(int align)<br />
You have already seen the setHorizontalAlignment and setVerticalAlignment<br />
methods, which set the position of the text and icon combi-
130 Chapter 2 Frames, Labels, and Buttons<br />
Figure 2-17 Buttons with images.<br />
nation relative to the button as a whole. Setting these to<br />
SwingConstants . LEFT and SwingConstants . TOP, respectively, would,<br />
not surprisingly, place the image and text in the top left-hand corner of the<br />
button. By default, they reside in the center.<br />
The setHorizontalTextPosition and setVerticalTextPosition<br />
methods deal with placing the text relative to the icon. The possible arguments<br />
for the former are SwingConstants .LEFT, SwingConstants . CEN-<br />
TER and SwingConstants .RIGHT and for the latter<br />
SwingConstants.TOP, SwingConstants.CENTER, and SwingConstants<br />
. BOTTOM. To see how this works, let's consider a few examples. If the<br />
horizontal position is given as SwingConstants . LEFT and the vertical position<br />
as SwingConstants .CENTER, then the text and icon are placed with<br />
their centers aligned and the text to the left of the icon. If the horizontal position<br />
is SwingConstants .RIGHT, the positions are reversed.<br />
If the vertical position is SwingConstants . TOP, then the text is above the<br />
icon and is to the left of it if the horizontal position is SwingConstants<br />
. LEFT, directly above it if it is SwingConstants . CENTER, and to the<br />
right of it if it is SwingConstants . RIGHT. These arrangements are vertically<br />
flipped if the vertical position is SwingConstants .BOTTOM. Finally, if both<br />
positions are SwingConstants. CENTER, then the text is placed directly<br />
over the image.<br />
The example program shown in Listing 2-12 creates a frame with 14 buttons<br />
on it, each with different values for text alignment and overall alignment.<br />
Listing 2-12 Positioning images and text on a button<br />
package <strong>JFC</strong>Book.Chapter2;
Images on Components: Icons 131<br />
Listing 2-12 Positioning images and text on a button (continued)<br />
import j avax.swing.*;<br />
import j ava.awt.*;<br />
import j ava.awt.event.*;<br />
public class ImageButtonsExample2 extends JPanel {<br />
public ImageButtonsExample2() {<br />
Imagelcon oklcon =<br />
new Imagelcon(getClass().getResource(<br />
"images/ok.gif" )) ;<br />
Imagelcon cancellcon =<br />
new Imagelcon(getClass().getResource(<br />
"images/cancel.gif"));<br />
setLayout(new GridLayout(4, 5, 4, 4));<br />
add(makeButton("L,C/L,C",oklcon,LEFT,CENTER,LEFT,CENTER));<br />
add(makeButton("R,C/R,T",oklcon,RIGHT,CENTER,RIGHT,TOP));<br />
add(makeButton("L,T/C,B",oklcon,LEFT,TOP,CENTER,BOTTOM));<br />
add(makeButton("R,B/L,T",oklcon,RIGHT,BOTTOM,LEFT,TOP));<br />
add(makeButton("C,T/C,B",oklcon,CENTER,TOP,CENTER,BOTTOM));<br />
add(makeButton("C,B/L,T",oklcon,CENTER,BOTTOM,LEFT,TOP));<br />
add(makeButton("C,C/L,T",oklcon,CENTER,CENTER,LEFT,TOP));<br />
add(makeButton("L,C/L, C" , cancellcon,LEFT,CENTER,LEFT,<br />
CENTER));<br />
add(makeButton("R,C/R,T",cancellcon,RIGHT,CENTER,RIGHT,<br />
TOP));<br />
add(makeButton("L,T/C,B", cancellcon,LEFT,TOP,CENTER,<br />
BOTTOM));<br />
add(makeButton("R,B/L,T",cancellcon,RIGHT,BOTTOM,LEFT,TOP));<br />
add(makeButton("C,T/C,B",cancellcon,CENTER,TOP,CENTER,<br />
BOTTOM));<br />
add(makeButton("C,B/L,T",cancellcon,CENTER,BOTTOM,LEFT,<br />
TOP));<br />
add(makeButton("C,C/L,T",cancellcon,CENTER,CENTER,LEFT,<br />
TOP));<br />
}<br />
JButton makeButton(String label, Imagelcon icon,<br />
int hTextPosition,<br />
int vTextPosition,<br />
int halign,<br />
int valign) {<br />
JButton b = new JButton(label, icon);<br />
b.setFont(new Font("serif", Font.BOLD, 14));<br />
b.setHorizontalTextPosition(hTextPosition);<br />
b.setVerticalTextPosition(vTextPosition);
132 Chapter 2 Frames, Labels, and Buttons<br />
Listing 2-12 Positioning images and text on a button (continued)<br />
b.setVerticalAlignment(valign);<br />
b.setHorizontalAlignment(halign);<br />
return b;<br />
}<br />
// Shortened names for text positions and alignments<br />
private static final int LEFT= SwingConstants.LEFT;<br />
private static final int RIGHT= SwingConstants.RIGHT;<br />
private static final int CENTER= SwingConstants.CENTER;<br />
private static final int TOP= SwingConstants.TOP;<br />
private static final int BOTTOM= SwingConstants.BOTTOM;<br />
public static void main(String [] args) {<br />
JFrame f = new JFrame("Image Buttons 2");<br />
f.getContentPane().add(new ImageButtonsExample2());<br />
f .pack() ;<br />
f.addWindowListener(new WindowAdapter() {<br />
public void windowClosing(WindowEvent e) {<br />
System.exit(0);<br />
f.setVisible(true);<br />
}<br />
You can run this example for yourself with the command:<br />
j ava <strong>JFC</strong>Book.Chapter2.ImageButtonsExample2<br />
The result of running this program is shown in Figure 2-18.<br />
If you resize the window, you can see exactly how the specified relationships<br />
between the text and image and between the text-image combination as a<br />
whole and the button are maintained. For reference, the parameters used to<br />
set up these buttons are encoded within the text part of the label. The first two<br />
letters specify the horizontal and vertical text position, while the last two are<br />
the horizontal and vertical alignment. Thus, for example, the top left-hand button<br />
bearing the label "L, C/L, C" was created with the following settings:<br />
• Horizontal text position SwingConstants . LEFT<br />
• Vertical text position SwingConstants .CENTER<br />
• Horizontal alignment SwingConstants .LEFT<br />
• Vertical alignment SwingConstants . CENTER
Figure 2-18 Button text and icon alignment options.<br />
Images on Components: Icons 133<br />
As a result, the text should appear to the left of the image, but on the same<br />
horizontal level. The text/image combination will be placed against the left<br />
edge of the button, with its center line vertically aligned with the middle of<br />
the button. This is borne out by the actual appearance of this button in Figure<br />
2—1 8. We'll say more about text positioning and alignment for both labels<br />
and buttons in "Locale-Sensitive Positioning of Text and Icons" later in this<br />
chapter.<br />
Spacing and Margins<br />
JLabel has an extra method that controls icon and text placement:<br />
setlconTextGap(int gap)<br />
This method determines the distance between the icon and the text in pixels.<br />
If the text and icon are aligned horizontally (i.e., the horizontal alignment<br />
is SwingConstants . CENTER), this is the horizontal distance between them.<br />
On the other hand, if one is above the other and they are vertically aligned,<br />
this is the vertical separation. If the two parts are arranged diagonally, then<br />
this distance governs both the horizontal and vertical gaps between them.<br />
You cannot control the distance between the text and the icon in the case<br />
of a button, but you can set the buttons margin. The margin is the distance<br />
between the buttons border and the space occupied by its text and/or icon; it<br />
is specified as an Insets object, so it does not have to be the same on all
134 Chapter 2 Frames, Labels, and Buttons<br />
sides. You can set or retrieve the current value of the margin using the following<br />
methods of AbstractButton:<br />
public void setMargin(Insets margin);<br />
public Insets getMargin();<br />
If you don't set a margin, a look-and-feel-dependent default is used. On<br />
the other hand, setting a margin does not guarantee that it will be used—this<br />
is at the discretion of the look-and-feel.<br />
<strong>Core</strong> Warning<br />
The margin, being the space between the button content and its border, is<br />
actually implemented by the classes used by the various look-and-feels that<br />
draw the button's border. If you install a custom border in a button, you<br />
won't automatically have any margin space—if you need a margin, you<br />
must arrange for the border itself to supply it Borders are covered in<br />
Chapter 4 and Chapter 8.<br />
Context-Sensitive Icons<br />
The JButton and JLabel constructors just described allow you to associate<br />
a single icon with the component. In fact, though, there can be four icons for<br />
every button and two icons for a label, although only one can be seen at any<br />
time. For both componenets, in addition to the normal icon, you can explicitly<br />
specify an icon to be used when the button or label is in a disabled state.<br />
You use the following methods to set or retrieve the disabled icon:<br />
public void setDisabledlcon(Icon icon);<br />
public Icon getDisabledlcon();<br />
When either a button or a label is disabled, the disabled icon is substituted<br />
for the normal one and the text, if there is any, is rendered in such away as to<br />
make it appear "grayed out." If you don't specify an icon to be used in the disabled<br />
state, then a suitable one will be generated from the normal icon.<br />
A different disabled icon can be used for a button depending on whether it<br />
is selected or not. This has no real meaning for ordinary buttons, but it can be<br />
used with radio buttons and checkboxes, which are discussed in Chapter 8.<br />
The following two methods are used to manipulate this icon:<br />
public void setDisabledSelectedlcon(Icon icon);<br />
public Icon getDisabledSelectedlcon();
Images on Components: Icons 135<br />
In the case of a button, you can also specify icons to be used when the button<br />
is pressed and when the cursor is over the button—the rollover icon. If<br />
either of these is not set, the button uses the normal icon instead. A useful way<br />
to use the rollover and pressed icons is to supply a color image to be used for<br />
both and another identical image with less color, or a gray-scale version of the<br />
rollover image, as the noriual image. If you do this, then the button has a lowprofile<br />
appearance until the mouse pointer moves over it, at which point it<br />
takes on its colored appearance and attracts the user's attention. Listing 2—13<br />
shows how yon would modify the first icon example to arrange for the button<br />
images to be gray scale when the mouse is not over the button.<br />
Listing 2-13 Using a different image when a button is<br />
activated (continued)<br />
package <strong>JFC</strong>Book.Chapter2;<br />
import j avax.swing.*;<br />
import j ava.awt.*;<br />
import <strong>Java</strong>.awt.event.*;<br />
public class ImageButtonsExample3 extends JPanel {<br />
public ImageButtonsExample3() {<br />
setLayout(new GridLayout(2, 1, 4, 4));<br />
ok = new JButton("OK",<br />
new Imagelcon(getClass().getResource(<br />
"images/ok_inactive.gif")));<br />
cancel = new JButton("Cancel",<br />
new Imagelcon(getClass().getResource(<br />
"images/cancel_inactive.gif")))<br />
ok.setFont(new Font("Dialog", Font.BOLD, 14));<br />
cancel.setFont(new Font("Dialog", Font.BOLD, 14));<br />
Icon oklcon =<br />
new Imagelcon(getClass().getResource("images/ok.gif"\<br />
Icon cancellcon =<br />
new Imagelcon(getClass().getResource(<br />
"images/cancel.gif"));<br />
ok.setPressedlcon(oklcon);<br />
ok.setRolloverlcon(oklcon);
136 Chapter 2 Frames, Labels, and Buttons<br />
Listing 2-13 Using a different image when a button is<br />
activated (continued)<br />
cancel.setPressedlcon(cancellcon) ;<br />
cancel.setRolloverlcon(cancellcon);<br />
add(ok);<br />
add(cancel);<br />
}<br />
public static void main(String[] args) {<br />
JFrame f = new JFrame("Image Buttons 3");<br />
f.getContentPane().add(new ImageButtonsExample3());<br />
f.pack();<br />
f.setVisible(true) ;<br />
f.addWindowListener(new WindowAdapter() {<br />
public void windowClosing(WindowEvent e) {<br />
System.exit(0);<br />
} '<br />
});<br />
}<br />
JButton ok;<br />
JButton cancel;<br />
First, two gray-scale versions of the images used in the first example were<br />
created using a graphics manipulation program and their names were substituted<br />
in the button constructors. This ensures that the buttons have grayscale<br />
images when they are not active. Next, an icon is created from each of<br />
the original image files and the appropriate methods are used to make these<br />
the pressed and rollover icons. You'll have to run this example for yourself,<br />
because the effect can't be seen properly in a book without using color diagrams,<br />
for obvious reasons. The appropriate command is<br />
j ava <strong>JFC</strong>Book.Chapter2.ImageButtonsExample3<br />
Here are the methods that are used in connection with the extra icons<br />
available with labels and buttons. Only the first two of these can be used with<br />
JLabel.<br />
public void setDisabledlcon(Icon)<br />
public Icon getDisabledlcon()<br />
public void setDisabledSelectedlcon(Icon)<br />
public Icon getDisabledSelectedlcon()
public void setRolloverlcon(Icon)<br />
public Icon getRolloverlcon()<br />
public void setRolloverSelectedlcon(Icon)<br />
public Icon getRolloverSelectedlcon()<br />
public void setPressedlcon(Icon)<br />
public Icon getPressedlcon()<br />
Images on Components: Icons 137<br />
Locale-Sensitive Positioning of Text and Icons<br />
In JDK 1.1, both labels and buttons place the icon, if it is present, to the left<br />
of the text and align the whole on the left-hand side of the control. In other<br />
words, the default is equivalent to the following:<br />
label.setHorizontalTextPosition(SwingConstants.RIGHT);<br />
label.setHorizontalAlignment(SwingConstants.LEFT);<br />
This is a natural arrangement in locales in which the natural reading order<br />
is from left to right, but it is not ideal when text (and perhaps other user<br />
interface elements) is rendered from right to left. The <strong>Java</strong> 2 platform introduced<br />
support for bidirectional text, which makes it possible for strings to be<br />
drawn in such a way that they can be read from right-to-left when this is<br />
appropriate, as it would be for Arabic text, and to mix right-to-left and left-toright<br />
text together. We'll see examples of this in Volume 2 of this book when<br />
we look at the new text support provided by <strong>Java</strong> 2D. Alongside this feature,<br />
the notion of orientation was added to the AWT component class. The orientation<br />
of a Component is intended to hold information that can be used to<br />
adjust the way in which it is drawn to suit the needs of the locale that the<br />
application is running in. As you'll see in Chapter 3, it is possible to set the<br />
orientation of a Container so that its layout manager will take this into<br />
account when deciding on how to place the components within that container<br />
relative to each other. Using this facility, it is possible to write applications<br />
that are, to some degree, independent of the reading conventions of<br />
their locale, because the code that determines the correct component placement<br />
or text rendering direction is provided as part of Swing and the AWT.<br />
The Swing label and button controls can be made sensitive to the component<br />
orientation by using two special alignment values:<br />
SwingConstants.LEADING<br />
SwingConstants.TRAILING<br />
These two values can be used as arguments to both the setHorizontal-<br />
TextPosition and setHorizontalAlignment methods. When used with<br />
the setHorizontalTextPosition method, LEADING means that the text<br />
should appear before the icon in the locale's natural reading order, while
138 Chapter 2 Frames, Labels, and Buttons<br />
TRAILING requires the text to follow (i.e., trail behind) the icon. In the usual<br />
Western left-to-right reading order, if you specify SwingConstants.TRAILING<br />
then the text will appear to the right of the icon, as<br />
shown on the rightmost button on the top row of Figure 2-18 (labeled R, B/<br />
L, T). In a right-to-left locale, on the other hand, the same control would be<br />
rendered with the text to the left of the icon, as it is in the leftmost button on<br />
the top row of Figure 2-18.<br />
The effect of using these values with the setHorizontalTextPosition<br />
method is to place the text/icon pair either on the left- or right-hand side of<br />
the control depending on the locale. The following call:<br />
label.setHorizontalAlignment(SwingConstants.LEADING);<br />
results in the text and icon being placed on the left-hand side of the label<br />
when the reading order is left-to-right, but on the right when it is right-toleft.<br />
On the other hand,<br />
label.setHorizontalAlignment(SwingConstants.TRAILING);<br />
creates the reverse situation.<br />
To put this another way, in a left-to-right locale:<br />
• LEADING has the same effect as LEFT<br />
• TRAILING has the same effect as RIGHT<br />
while in a right-to-left locale:<br />
• LEADING has the same effect as RIGHT<br />
• TRAILING has the same effect as LEFT.<br />
While these analogies are useful to have when deciding which value to use<br />
in your code, you should bear in mind that there is an important difference<br />
between the following two lines of code:<br />
label.setHorizontalTextPosition(SwingConstants.RIGHT);<br />
label.setHorizontalTextPosition(<br />
SwingConstants.TRAILING);<br />
The effect of the first line is to place the text to the right of the icon unconditionally.<br />
The second line makes this dependent on the locale—if your<br />
machine is in a locale with a left-to-right reading order, you will see the text<br />
to the right of the icon, but a person using the same application in a right-toleft<br />
locale sees it with the text on the left of the icon. Code that is fully internationalized<br />
should only use TRAILING and LEADING, never LEFT and<br />
RIGHT.
Images on Components: Icons 139<br />
Although the component orientation feature is part of the <strong>Java</strong> 2 platform<br />
and is not supported in JDK 1.1, you do not need to be concerned about this<br />
when writing your application and you will not need to manage two separate<br />
versions of the source code if you decide to internationalize it. The constants<br />
SwingConstants .TRAILING and SwingConstants .LEADING are defined<br />
by Swing 1.1.1 and you can use them just as you would in the <strong>Java</strong> 2 platform.<br />
However, since JDK 1.1 cannot handle locale-dependent component orientation,<br />
Swing 1.1.1 treats LEADING as if it were specified as LEFT and TRAIL-<br />
ING as if it were RIGHT, so that you always get the effect of a left-to-right<br />
(Western-style) locale. Since this decision is made at run time, the same compiled<br />
code works properly on all platforms.<br />
If you are using the <strong>Java</strong> 2 platform, you can see how the LEADING and<br />
TRAILING values work using the command:<br />
j ava <strong>JFC</strong>Book.Chapter2.j dkl2.ImageButtonsExample4<br />
This example creates a frame with three buttons, as shown in Figure 2-19,<br />
which shows how it appears in a locale with a left-to-right reading order.<br />
<strong>Core</strong> Note<br />
This example demonstrates that component orientation affects labels and<br />
ordinary push buttons but, in fact, the same applies to all of the button or<br />
button-like components that Swing provides, including toggle buttons, check<br />
boxes, radio buttons, and even menu items.<br />
Figure 2-79 Icons and text in a left-to-right locale.
140 Chapter 2 Frames, Labels, and Buttons<br />
The top two buttons in Figure 2-19 have their horizontal alignment and<br />
text position attributes set as follows:<br />
Button Attribute Value<br />
OK horizontal text posi- SwingConstants. RIGHT<br />
tion<br />
horizontal alignment SwingConstants . LEADING<br />
Cancel horizontal text posi- Defaulted<br />
tion<br />
<strong>Core</strong> Note<br />
horizontal alignment SwingConstants . TRAILING<br />
If you run this example on a system whose default locale has a left-to-right<br />
reading order, you'll find that it will look like Figure 2-20 instead of Figure 2-<br />
19. In this case, press the "Switch Orientation" button before reading any<br />
further.<br />
As you can see from the figure, the text appears to the right of the icon in<br />
both cases, but the horizontal alignment is different—in the case of the OK<br />
button, the text and icon are aligned to the left, while for the Cancel button<br />
they align themselves to the right. If you refer to the attribute settings, you<br />
can see why the horizontal alignment differs between these two controls—<br />
for the OK button, the horizontal alignment has been set to LEADING, which<br />
will make the text and icon appear on the left side of the control in a left-toright<br />
locale, while the Cancel button uses TRAILING, which would move the<br />
text and icon to the right-hand side. This is all consistent with what you see in<br />
Figure 2-19.<br />
Moving on to the text position, the OK button has this specified as RIGHT,<br />
so you would naturally expect the text to appear to the right of the icon, as<br />
indeed it does. The horizontal text position attribute has been defaulted—<br />
that is to say, the setHorizontalTextPosition method was not called for<br />
in this control. The <strong>Java</strong> 2 button and label classes both default this attribute<br />
to TRAILING so that, in a left-to-right locale, the text would appear to the<br />
right of the icon. This also agrees with the layout of the Cancel button in<br />
Figure 2-19.
Images on Components: Icons 141<br />
For the sake of completeness, note that the default value of the horizontal<br />
alignment attribute is CENTER for buttons, but it is LEADING for labels, which<br />
will make label content default to the left-hand side in left-to-right locales<br />
and to the right in a right-to-left locale.<br />
To see what happens when the same example code runs in a right-to-left<br />
locale, press the "Switch orientation" button. When you do this, the layout of<br />
the other two buttons changes to that shown in Figure 2-20.<br />
Figure 2-20 Icons and text in a right-to-left locale.<br />
Looking first at the Cancel button, you'll see that two things have<br />
changed: the relative positions of the text and the icon, and their alignment<br />
within the button. In the case of the OK button, however, the text and icon<br />
have moved as a unit from the left side of the control to right side, but they<br />
haven't changed relative positions. The fact that the content alignment for<br />
both controls has changed is because their horizontal alignments use the special<br />
values LEADING and TRAILING, which means that content will move to<br />
the opposite side of the control when the component orientation is reversed.<br />
The same is true of the text position for the Cancel button—since this<br />
attribute was defaulted to TRAILING, it follows that changing the orientation<br />
will move the text to the other side of the icon. The OK button, however, has<br />
its horizontal text alignment set to RIGHT, which causes the text to remain to<br />
the right of the icon no matter what the locale orientation is.<br />
While you've seen what effect changing the component orientation has on<br />
labels and buttons, you haven't seen exactly how this example works, because<br />
the code that implements the button that switches the orientation relies on<br />
an understanding of the underlying support for component orientation that<br />
you haven't yet been introduced to. In the next chapter, you'll see how com-
142 Chapter 2 Frames, Labels, and Buttons<br />
ponent orientation works and how it influences the way in which some of the<br />
AWT layout managers place components within a container.<br />
Using HTML Text with Labels and<br />
Buttons<br />
So far, you've only seen labels and buttons displaying plain text. By changing<br />
the font using the setFont method or using setForeground to change the<br />
foreground color, you can create a component bold or italic text or rendered<br />
using a different color, but these attributes apply to all of the text—there<br />
appears to be no simple way to change these attributes within the text string.<br />
Another common requirement is a label or button with more than one line of<br />
text—this would be particularly useful for components such as the tree and<br />
the table that, as you'll see later in this book, use a label as part of their rendering<br />
mechanism.<br />
Fortunately, Swing provides an easy way to do all of these things. When<br />
setting the text for labels and buttons, either using the setText method or in<br />
the constructor, you can use HTML tags to provide rendering instructions,<br />
with the result that you can change the font style and size or the text color at<br />
arbitrary ponts within the text. When you do this, the component creates an<br />
instance of the HTML rendering engine used by the JEditorPane component<br />
that you'll see in Chapter 9 and uses that to paint the text onto the button<br />
or label.<br />
In order for the text to be recognized as HTML, it lias to start with the following<br />
character sequence:<br />
<br />
This string must appear right at the start of the text and it must be in lower<br />
case, or the component will treat the whole thing as plain text, with the result<br />
that the HTML tags will be visible to the user.<br />
<strong>Core</strong> Note<br />
For <strong>Java</strong> 2 version 1.3, this restriction has been relaxed a little, to the extent<br />
that the case of the word "html "is ignored, which allows you to use upper<br />
case (or mixed case) within your HTML tags. If you need to produce<br />
portable code, however, you can't make use of this concession. Note that<br />
the case of the other tags in the HTML string is ignored in all versions of
Images on Components: Icons 143<br />
Swing—it is only the case of the tag that is crucial to activate this<br />
feature.<br />
Listing 2-14 shows an example that creates a label using text that contains<br />
HTML formatting. You can try this example for yourself using the command<br />
java <strong>JFC</strong>Book.Chapter2.HTMLLabelExample<br />
Listing 2-14 Using HTML tags with JLabel<br />
package <strong>JFC</strong>Book.Chapter2 ;<br />
import javax.swing.*;<br />
import j ava.awt.*;<br />
import j ava.awt.event.*;<br />
public class HTMLLabelExample extends JPanel {<br />
public HTMLLabelExample(String text) {<br />
JLabel 1 = new JLabel(text,<br />
new Imagelcon(getClass().getResource(<br />
"images/ok.gif")), SwingConstants.CENTER);<br />
add (1) ;<br />
J<br />
}<br />
public static void main(String[] args) {<br />
String text = (args.length > 0) ? args [0] : LABELJTEXT;<br />
JFrame f = new JFrame("HTML Label");<br />
f.getContentPane().setLayout(new FlowLayout());<br />
f.getContentPane().add(new HTMLLabelExample(text));<br />
f .pack() ;<br />
f.addWindowListener(new WindowAdapter() {<br />
public void windowClosing(WindowEvent evt) {<br />
}<br />
});<br />
System.exit(0);<br />
f.setvisible(true);<br />
} static final String LABEL__TEXT =<br />
"First line" +<br />
"Second line" +<br />
"Larger text";
144 Chapter 2 Frames, Labels, and Buttons<br />
The HTML used with the label in this example looks like this:<br />
First lineSecond Line<br />
Larger text<br />
When you run this example with JDK 1.1 or <strong>Java</strong> 2 version 1.2.2, you get<br />
the result shown in Figure 2-21.<br />
Figure 2-21 A label with HTML texf in JDK 1.1 and <strong>Java</strong> 2 version 1.2.2.<br />
As you can see, the label now has three lines of text, with the icon placed<br />
on its left and horizontally centered with respect to the text. Of course, the<br />
usual alignment options continue to work with HTML text—when there is<br />
more than one line of text, the whole text block is treated as a single unit,<br />
which is why the center line of the icon is aligned here with the center line of<br />
the text. Notice that the line breaks on the label correspond to the tags<br />
in the HTML. The font changes requested in the HTML—bold font on the<br />
first line, italic on the second line, and a larger font size on the last line—have<br />
also been honored. If you run this example with <strong>Java</strong> 2 version 1.3, the results<br />
are almost the same, but there are some small (but important) differences, as<br />
you can see from Figure 2-22.<br />
The first thing you are likely to notice about this is that the <strong>Java</strong> 2 version<br />
1.3 version is narrower. It turns out that using a tag seems to increase<br />
the horizontal space required for the label, a problem that has been<br />
addressed in <strong>Java</strong> 2 version 1.3. The other important difference is that the<br />
text is rendered in a different color. In Figure 2-21, the text is black, but Figure<br />
2-22 uses a lighter color. In fact, in <strong>Java</strong> 2 version 1.3, the components<br />
foreground color is used when renderering HTML, so that you get the same<br />
effect as you would if you supplied plain text. Unfortunately, you can't fix the<br />
problem for earlier Swing versions by explicitly invoking set Foreground<br />
for the label, because the code that renders the HTML ignores the foreground<br />
color completely. You can, of course, use the HTML FONT tag to
Figure 2-22 A JLabel with HTML text in <strong>Java</strong> 2 version 1.3.<br />
Images on Components: Icons 145<br />
explicitly set a different color, but you would need to work quite hard to keep<br />
this in step with the foreground color of the label, especially if you allow the<br />
user to choose which look-and-feel to use, as this would result in a change in<br />
the labels default foreground color and hence would require a change to the<br />
labels HTML text.<br />
If you want to experiment with the use of HTML in labels, you can run the<br />
example that you have just seen and supply the HTML on the command<br />
line. For example, the following command (which should be typed on a single<br />
line) shows the label with the text "Red text" rendered in red:<br />
j ava <strong>JFC</strong>Book.Chapter2.HTMLLabelExample<br />
COLOR=red>Red text"<br />
chtmlxFONT<br />
In JDK 1.1 and <strong>Java</strong> 2 version 1.2.2, HTML text works for the following<br />
components:<br />
• JLabel<br />
• JButton<br />
• JTabbedPane<br />
• JToolTip<br />
• JMenuItem<br />
• JCheckBoxMenuItem<br />
• JRadioButtonMenuItem<br />
In addition, <strong>Java</strong> 2 version 1.3 extends this support to include JToggle-<br />
Button, JRadioButton, and JCheckBox.<br />
While the ability to use HTML to specify the text for labels and buttons is<br />
undoubtedly a useful feature, you should be cautious about the extent to<br />
which you use it, because there is a price to pay for this functionality in terms
146 Chapter 2 Frames, Labels, and Buttons<br />
of the time required to render the HTML. In <strong>Java</strong> 2 version 1.3, a label containing<br />
a simple text string wrapped with HTML tags (such as<br />
Bold text) takes around one and a half times as Jong to<br />
paint as the same label with plain text; in JDK 1.1 and <strong>Java</strong> 2 version 1.2.2,<br />
the same label takes around twice as long to paint as its plain text counterpart.<br />
HTML and Images<br />
The ability to use HTML within labels and buttons opens up the possibility<br />
of using the HTML tag to include an image instead (or perhaps as<br />
well as) making use of the icon that these components already support. In<br />
most cases, this probably isn't justified, but there might be occasions when it<br />
could be useful—for one thing, it makes it easier to create a label in which<br />
the image appears in the middle of a line of text rather than with all of the<br />
text grouped together to one side of it. The only technical problem with<br />
doing this is how to specify the location of the image.<br />
The HTML tag has a SRC attribute that gives the location of the<br />
image as a URL. In most cases, HTML authors keep their images close to<br />
the HTML that uses them and supply a relative URL to locate the image.<br />
Thus, for example, if the image "ok. gif" is in the subdirectory images relative<br />
to the directory in which the HTML page that uses it resides, the following<br />
tag would be used to load it:<br />
<br />
This technique works for an HTML page loaded into a browser (or into<br />
the Swing JEditorPane component which can display HTML pages, as<br />
you'll see in Chapter 9) because the browser knows the URL of the hosting<br />
page and can simply append the relative part in the SRC tag to it to get an<br />
absolute location for the image. Unfortunately, it doesn't work when the IMG<br />
tag is in HTML being rendered on a label or a button, because there is no<br />
"hosting page" to provide a base URL. So it would seem that to use an image<br />
in this context, you would need to supply an absolute URL when setting the<br />
component's text attribute.<br />
While it is inconvenient to have to do this, it is perfectly possible to create<br />
an absolute URL without having to hardcode the final location of the image<br />
into your source code—all you have to do is use the getResource method of<br />
the class java. lang.Class, which, as we saw earlier, returns a URL for a<br />
resource whose location is specified relative to the CLASSPATH or to the<br />
package to which a given class belongs. As an example of this technique, sup-
Images on Components: Icons 147<br />
pose you wanted to include an image in the HTML text used in the example<br />
shown in Listing 2-14 and that the image is stored in the directory images<br />
relative to the class file itself. The following code creates the appropriate<br />
HTML and assigns it to a JLabel:<br />
// Get a URL for the image<br />
URL imageURL = getClass().getResource("images/ok.gif");<br />
String text = "An image in embedded HTML";<br />
JLabel 1 = new JLabel(text);<br />
You can see that this actually works by using the command<br />
java <strong>JFC</strong>Book.Chapter2.HTMLLabelExample2<br />
which produces the result shown in Figure 2-23.<br />
HTML Label 2<br />
An inn.:<br />
in embedded HTML<br />
Figure 2-23 Using an embedded IMG tag in a JLabel.<br />
Note that since we have used the getResource method in preference to<br />
hard-coding the URL, this code will work equally well in an application<br />
loaded from the CLASSPATH or from a JAR file and it will also work for an<br />
applet downloaded from a Web server as individual files or as a JAR.<br />
<strong>Core</strong> Alert<br />
As we said earlier in this chapter, some browsers (including some versions<br />
of Netscape's browser) do not properly support the getResource<br />
method. In Appendix A, you'll see a way to work around this problem that<br />
works in almost all circumstances. Unfortunately, that technique doesn't<br />
work in this case, so you won't be able to make use of this feature if you're<br />
writing an applet that must work with one of these browsers, unless your<br />
users are prepared to use the <strong>Java</strong> plug-in to overcome the shortcomings of<br />
the browser.
148 Chapter 2 Frames, Labels, and Buttons<br />
Although this technique works, it's hardly attractive—instead of supplying<br />
a simple HTML text string, you are forced to build it at run time to include<br />
the image URL which can't be known at compile time. In fDK 1.1 and <strong>Java</strong> 2<br />
version 1.2.2, this is the best solution available. In <strong>Java</strong> 2 version 1.3, however,<br />
you can solve the problem in a more elegant way. As we said at the<br />
beginning of this discussion, what you really need is for the component hosting<br />
the HTML to have a base URL that it can use to build an absolute URL<br />
given a relative one in the SRC attribute. <strong>Java</strong> 2 version 1.3 gives you exactly<br />
that—all you have to do is to initialize the label or button with a client property<br />
that gives the base URL that you would like the HTML to have, and<br />
then you can get away with supplying relative URLs in the HTML itself.<br />
We'll say more about client properties in Chapter 4—for now, you just need<br />
to know that they are a means of associating arbitrary values with a JComponent<br />
that can be retrieved later by supplying a well-known key, much like a<br />
Hashtable. Here's how you would code the example shown above for <strong>Java</strong> 2<br />
version 1.3:<br />
JLabel 1 = new JLabel ();<br />
String text =<br />
"An image in embedded<br />
HTML";<br />
1.putClientProperty("html.base",<br />
1.setText(text);<br />
getClass().getResource(""));<br />
You can try this code out by typing the command<br />
j ava <strong>JFC</strong>Book.Chapter2.j dkl3.HTMLLabelExample3<br />
and you'll get the same result as that shown previously in Figure 2-23.<br />
The line of code highlighted in bold is the key to this example. The<br />
getResource call gets an absolute URL for the package that the example<br />
class file resides in, which is then stored as a client property of the JLabel<br />
using the putClientProperty method that JLabel inherits from JComponent,<br />
under the name "html. base ." The HTML rendering code looks for<br />
a property of this name and will use it as a base URL, so having set this property<br />
we are now free to supply a relative URL in the HTML itself. As you can<br />
see, the HTML in the text passed to the JLabel's setText method contains<br />
exactly the same tags as you would use in a real HTML page. Once you've set<br />
the html.base property on a component, you can use as many relative<br />
URLs as you like in the HTML associated with it.
Images on Components: Icons 149<br />
If you are wary of using hard-coded values for property names defined by<br />
other people such as "html. base, " you can use a longer-winded but proba-<br />
bly more technically correct version, which is:<br />
1.putClientProperty(<br />
j avax.swing.plaf.basic.BasicHTML.documentBaseKey,<br />
value);<br />
<strong>Core</strong> Alert<br />
You'll note that the last code extract differed from its predecessor in that<br />
the text string was not passed to the JLabel constructor—instead it was<br />
set using the setText method.The reason for this is that the<br />
html. base property must be set before you can install an HTML string<br />
containing relative URLs in the component. If you pass a relative URL in the<br />
text string given to the constructor, you will get an exception. Be aware also<br />
that since this technique also uses the getRe source method, it still does<br />
not work for browsers that do not properly support getResource.<br />
Swing and Multithreading<br />
All of the example code that you have seen so far has followed a simple pattern—we<br />
create a small class, construct a user interface in its main method,<br />
and then make it visible, at which point you can interact with it. One of the<br />
example programs in this chapter, though, is slightly different. If you refer<br />
back to Listing 2-6, you'll sec that its main method looks like this:<br />
public static void main(String[] args) {<br />
JFrame f = new JFrame("Add Example");<br />
Container cp = f.getContentPane();<br />
cp.setLayout(new FlowLayout());<br />
cp.add(new JButton("Left"));<br />
cp.add(new JButton("Middle"));<br />
cp.add(new JButton("Right"));<br />
f .packO ;<br />
f.setVisible(true);<br />
try {<br />
Thread.sleep(5000);<br />
} catch (Exception e) {
150 Chapter 2 Frames, Labels, and Buttons<br />
}<br />
cp.add(new JButton("Middle Right"), 2);<br />
f .packO ;<br />
The important difference between this example and the others in this<br />
chapter is that the main method does not end when the JFrame is made visible.<br />
In this example, we are trying to show how to add an extra component to<br />
the user interface after it has been displayed to the user and we made the<br />
point that simply adding an extra button to the frame was not good enough—<br />
you also have to force the layout manager to allocate space for the new button<br />
and resize the window to make that extra space available. To do that, we<br />
included code, shown in bold, that waits for a short period after the main<br />
window has been made visible and then takes the necessary steps to include<br />
the extra button. From the viewpoint of an illustrative example, this code is<br />
both straightforward and clear. Unfortunately, it is also technically incorrect<br />
because the resulting code is not thread-safe.<br />
It might not be immediately apparent that there can possibly be any issues<br />
of thread safety associated with such a simple example—this code does not<br />
look multithreaded, because everything seems to run in whichever thread the<br />
main method is running. However, things are not quite so simple. To see<br />
what might go wrong, run this example again using the command<br />
java <strong>JFC</strong>Book.Chapter2.AddExample<br />
when the user interface appears, but before the fourth button has been<br />
added, take a snapshot of the thread activity in the <strong>Java</strong> virtual machine by<br />
typing CTRL+BREAK (for Windows) or CTRL+\ (for Unix) in the command<br />
window from which you ran this example. The result will look something<br />
like this:<br />
Full thread dump<br />
"AWT-Windows"<br />
sun.awt.windows.WToolkit.run(WToolkit.<strong>Java</strong>:100)<br />
java.lang.Thread.run(Thread.<strong>Java</strong>:4 66)<br />
"AWT-EventQueue-O"<br />
java.lang.Object.wait(Object.java:3 07)<br />
j ava.awt.EventQueue.getNextEvent(Compiled Code)<br />
java.awt.EventDispatchThread.run(EventDispatch-<br />
Thread.java:67)<br />
"Finalizer thread"
"main"<br />
Images on Components: Icons 151<br />
<strong>JFC</strong>Book.Chapter2.AddExample.main(AddExample.<strong>Java</strong>:19)<br />
Note that this extract was taken from a JDK 1.1 <strong>Java</strong> VM running on Windows<br />
98—the output will look slightly different for <strong>Java</strong> 2 or if you use a different<br />
operating system. Also, for the sake of clarity, this output has been<br />
slightly trimmed to remove extraneous detail.<br />
While this example is running, there are four active threads, of which only<br />
two are important for our purposes. First, at the end of the output, you can<br />
see a thread called "main." This is the thread in which the main method of<br />
the example is executed—as you can see, when this snapshot was taken, the<br />
main thread was executing line 19 of the AddExample. <strong>Java</strong> source file,<br />
which contains the call to the Thread sleep method. When the five-second<br />
wait ends, the code to add the last button to the window and resize the window<br />
will also be executed in the main thread.<br />
Nearer to the top of the output you'll see a thread labeled "AWT-Event -<br />
Queue - 0, " which is currently waiting for work to do. This thread, commonly<br />
referred to as the AWT event thread (or simply the "event thread") is, as its<br />
name suggests, where the AWT dispatches all of its events. Whenever an<br />
event is generated from the user interface, including mouse movements, keyboard<br />
actions, changes of focus, etc., an event object (such as MouseEvent,<br />
KeyEvent, or FocusEvent) is created and place in an internal queue. While<br />
this queue is empty, as it was when the snapshot shown above was taken, the<br />
event thread is asleep. The act of adding an event to the queue wakes up the<br />
event thread, which removes events from the queue and processes them<br />
until the queue is empty. Therefore, all of the event handlers that you have<br />
seen so far in this chapter have been executed in the event thread; many of<br />
the examples shown in this chapter were, in fact, multithreaded even though<br />
they didn't appear to be, because the user interface was constructed by code<br />
in the main thread, while the events that were subsequently delivered from<br />
the user interface were handled in the event thread.<br />
So Swing applications that involve events are inherently multithreaded,<br />
but how does this affect the simple example shown here, which doesn't handle<br />
any events? From what you have seen so far, it may not be obvious what<br />
role the event thread plays in this example to cause the code shown to not be<br />
thread-safe. The answer is that, even though the example code does not<br />
appear to be involved in event handling, in practice it is making use of events.<br />
When the main window is displayed, the components within it have to be<br />
painted. As was noted in Chapter 1, Swing components are actually drawn by<br />
code in the paint method of JComponent, which delegates to the paint<br />
method of its installed UI class so that the right appearance for the selected
152 Chapter 2 Frames, Labels, and Buttons<br />
look-and-feel can be rendered. The paint method is almost never invoked<br />
directly by application code—usually, it is called as a result of the component<br />
being made visible or being exposed after being covered by another window<br />
that is subsequently moved to reveal it. These user interface events cause the<br />
windowing system to deliver an internal event which is translated to an event<br />
in the <strong>Java</strong> virtual machine and then placed in the AWT event queue and processed<br />
by the event thread. In other words, when a component draws itself in<br />
its paint method, it is executing code in the AWT event thread. As a result,<br />
therefore, all Swing applications are multi-threaded, even the simple one<br />
shown in Listing 2-6.<br />
Armed with this knowledge, you should now be able to see why there is a<br />
possible thread-safety issue with the example code that we have been looking<br />
at. When the fourth button is added to the window and the window is<br />
resized, the code that performs these actions is running in the virtual<br />
machine's main thread. What happens if, at exactly the same time, the user<br />
does something that will require the window to repaint itself, such as hiding<br />
the main window and then exposing it, thus causing a paint event to be<br />
placed into the AWT event queue? Theoretically, there is a small chance that<br />
the event thread could dispatch this event and start painting the applications<br />
main window at exactly the same time as the main thread is changing the<br />
windows layout. Figure 2-24 shows a possible sequence of actions that<br />
clearly shows the multithreading aspect of this apparently simple example.<br />
Figure 2-24 Potential multithreading conflicts in a Swing application.
Images on Components: Icons 153<br />
The solid black lines on the left and right of this figure represent time,<br />
which increases as you read from the top of the diagram to the bottom. The<br />
black line on the right shows the timing of the actions undertaken in the main<br />
thread, beginning with the addition of a new button to the interface and ending<br />
with the window being resized and the layout manager laying out the buttons<br />
in their new positions. The left-hand line indicates the time over which<br />
the window and its contents are being painted; note that, in practice, the<br />
paint methods of the content pane and each of the buttons that are visible<br />
will be called during this time but, for simplicity, we represent this as a single<br />
paint call. In this case, the user is assumed to have hidden and exposed the<br />
window just as the fourth button was being added to it so, as you can see, the<br />
event thread starts executing the paint method while the fourth button is<br />
being added and completes it while the window is being resized and its content<br />
laid out again. As you can imagine, there is a conflict here—how many<br />
buttons will the paint method draw? Since the add method of the frames<br />
content pane changes the number of children that the content pane has, it is<br />
possible that the paint method will examine the list of child components just<br />
as the add method is modifying it. Another possibility is that, for one of the<br />
original buttons, the paint method will start to paint it just as the pack<br />
method is causing it to be moved or resized. What will be the result of this?<br />
This is, of course, a classic multithreading problem. Usually, you would<br />
account for this by synchronizing access to objects that could be accessed<br />
from more than one thread at a time so that all updates become atomic and<br />
the results predictable in all circumstances. However, synhronized methods<br />
and synchronized code blocks in <strong>Java</strong> are not as cheap as their unsynchronized<br />
counterparts (although the difference is now much smaller than it was<br />
with the early <strong>Java</strong> virtual machines) and writing thread-safe code is a difficult<br />
task. Rather than incur the overheads of synchronization and the complexities<br />
of multithreading all of the Swing components, the Swing<br />
development team decided to leave the task of ensuring thread safety to the<br />
application developer. Therefore, with very few exceptions, the Swing code is<br />
written with the assumption that only one thread will access it at any given<br />
time.<br />
The Rule Governing Access to Swing<br />
Components<br />
Since Swing components are not thread-safe, all access to them should be<br />
made from a single thread. Furthermore, because painting operations always<br />
take place in the AWT event thread and since they can take place at any time,
154 Chapter 2 Frames, Labels, and Buttons<br />
all access must be from the event thread. The Swing development team produced<br />
an article that appeared at the same time as the release of Swing 1.0<br />
that stated this restriction as follows:<br />
Once a Swing component has been realized, all code that might affect or<br />
depend on the state of that component should be executed in the event-<br />
dispatching thread.<br />
You'll see in this section what is meant by the term "realized" in the statement<br />
of this rule and you'll also see some special circumstances in which you<br />
don't need to use the event thread to access Swing components.<br />
<strong>Core</strong> Note<br />
When the Swing team first posted the article that contained this rule, much<br />
concern was expressed that this restriction makes Swing unusable, or at least<br />
unpleasant to use. In fact, most applications are not affected because they<br />
are naturally written in such a way as to satisfy the single-threaded<br />
requirement by virtue of the fact that, other than initialization, all of their<br />
code handles events that are delivered in the AWT event thread. Other<br />
people found it hard to believe that this restriction actually existed, based on<br />
the fact that they had written applets or applications that didn't adhere to it<br />
and had not experienced any problems.<br />
The truth of the matter is, of course, that if you do this, most of the<br />
time you'll get away with it, just as you would if you wrote a multithreaded<br />
application that updated data shared between the threads without proper<br />
synchronization. You only see a problem when two threads happen to<br />
operate on the same Swing component at the same time and, even then,<br />
depending on the component involved and the operation being performed,<br />
you may still not suffer any adverse effects. However, as has already been<br />
said, the results of ignoring this rule depend on the implementation details<br />
of the individual components and their ill classes. It would be unwise to use<br />
the fact that you haven't seen a problem with your use of a component to<br />
justify ignoring the rule, because the component's implementation may<br />
change.This is more of an issue with Swing than it is in other areas of <strong>Java</strong>,<br />
because you may not be able to test your application with every possible<br />
look-and-feel that your customers might use. A third-party look-and-feel<br />
might expose a problem not shown by the ones you regularly test with.
Identifying Potential Problems<br />
Images on Components: Icons 155<br />
Finding potential problems in your code is not always a simple task. The rule<br />
provided by the Swing team states that all operations on a Swing component<br />
must take place in the event thread once the component has been realized, to<br />
guarantee that there will never be a conflict between these operations and<br />
the unpredictable paint calls that are serviced by the component's UI class.<br />
To apply this rule, you need to know what is meant by "realizing" a component.<br />
Realizing AWT Components<br />
As you know, AWT components are actually made up of two separate<br />
pieces—a pure <strong>Java</strong> piece that you create and with which your code directly<br />
interacts, and a "peer" component that is created internally when necessary.<br />
The peer component interfaces with native code in the platform-specific<br />
AWT toolkit to create the necessary platform object that you manipulate<br />
through the <strong>Java</strong> AWT object. For example, an AWT Button consists of an<br />
instance of the class java.awt .Button class which is written in <strong>Java</strong>, which<br />
creates and manipulates a java.awt.peer.ButtonPeer object that contains<br />
native code. An AWT component is realized when it creates its peer object.<br />
Usually, you don't care about exactly when a component is realized. However,<br />
the Swing access rule requires you to be concerned about this, at least to<br />
some degree. So exactly when does a component create its peer? Here are<br />
the rules:<br />
1. Components which are not Containers create their peer object<br />
when instructed to by their parent Container.<br />
2. A Component or Container is told to create its peer when<br />
added to a Container which already has a peer (that is, to a<br />
Container that has already been realized).<br />
3. When a Container creates its own peer, it arranges for all of its<br />
child Components to create their own peers. If the Container<br />
contains other Containers, this will recursively create the peers<br />
for the children of those Containers so that eveiything within a<br />
Container is realized when the Container itself is realized.<br />
4. Top-level windows (Frame, Dialog, and Window), which are, of<br />
course, all Containers, create their peers (and therefore realize<br />
themselves and all of their child Components and Containers)<br />
when one of the pack, show, or setvisible (true) methods is
1S6 Chapter 2 Frames, Labels, and Buttons<br />
called for the first time. An applet is realized and has a peer<br />
object by the time its init method is called.<br />
In summary, if you create a Frame, Dialog, or window and add components<br />
to it, none of them are realized until you call pack on it or make it visible<br />
with show or setvisible (true) . Once a Frame, Dialog, or Window is<br />
packed or made visible, everything it contains is realized and any new components<br />
or containers you add to it are realized as soon as they are added.<br />
Realizing Swing Components<br />
The discussion to this point has all revolved around AWT components and<br />
peers—you may be wondering what the connection is with Swing components<br />
which are supposed to be lightweight and not have peers—how can a peerless<br />
object be realized? There are actually two distinct cases to consider, depending<br />
on whether the Swing component is derived from JComponent or not.<br />
Swing components that are not derived from JComponent are the top-level<br />
objects JFrame, JWindow, JDialog, and JApplet. All of these are subclassed<br />
directly from the corresponding AWT components (Frame, Window, Dialog<br />
and Applet). Therefore, they are all heavyweight objects and create their<br />
peers as described above for AWT objects.<br />
The other Swing components are derived from JComponent. Although<br />
these are lightweight in the sense that they don't have a physical window of<br />
their own in the native windowing system, they do have peers—each of them<br />
has an associated instance of java.awt.peer.LightweightPeer. A Swing<br />
component derived from JComponent is considered to be realized when its<br />
LightweightPeer object is created, which follows the rules already listed for<br />
heavyweight AWT components. In other words, lightweight components are<br />
realized when their parent container is realized, which ultimately means that<br />
they are realized when the top-level JFrame, JDialog, JWindow, or JApplet<br />
is packed or made visible. This is exactly the same as for heavyweight components.<br />
<strong>Core</strong> Note<br />
The Swing Box component is a strange case because it is derived from the<br />
AWT Container class instead of from JComponent. However, because<br />
it is lightweight, it behaves like any other JComponent for the purposes of<br />
this discussion.
Safe and Unsafe Use of Swing Components<br />
Images on Components: Icons 157<br />
According to the single-threading rule, you can manipulate Swing components<br />
outside of the event thread until they have been realized. Combining this rule<br />
with the information in the previous section, this means that you don't need to<br />
worry about the event thread interfering with your use of a newly-created<br />
Swing component until you add it to a realized container or you realize the<br />
container that it is contained in. Once either of these has happened, however,<br />
you must only access the component from the event thread. This is, in fact, the<br />
reason why most of the examples shown in this chapter do not fail the Swing<br />
access rule even though they build a user interface in the main thread instead<br />
of the AWT event thread—up until the point at which the pack call is made,<br />
no peers have been created, so there will be no possibility of an event for the<br />
user interface being scheduled in the event thread and hence there will be no<br />
multithreading issues. The same does not apply to listing 2-6, where a component<br />
is added long after all of the components have been realized.<br />
Moving Work to the Event Thread<br />
To satisfy the Swing team's rule for safe access to Swing components, in order<br />
to safely add the fourth button to the frame in Listing 2-6, we have to execute<br />
the appropriate code in the event thread. By doing this, we allow any paint<br />
events to be handled either before or after we update the user interface, but<br />
not while we are doing so. The question is, how can we arrange for code to be<br />
executed in the AWT event thread when we are currently running in the<br />
main thread?<br />
One way to schedule work into the AWT event thread is to use a timer,<br />
which will be described in Chapter 8—code executed on the expiration of a<br />
timer always runs in the event thread. However, there is a more elegant<br />
method. Swing provides two static methods in the SwingUtilities class<br />
that you can use to schedule work in the event thread, without undue delay:<br />
public static void invokeLater(Runnable obj);<br />
public static void invokeAndWait(Runnable obj) throws<br />
InterruptedException;<br />
Both of these methods are given a Runnable as their only argument.<br />
When called, they arrange for the run method of this object to be invoked in<br />
the AWT event thread some time later . It is guaranteed that any events<br />
already in the AWT event queue when either of these methods are called will<br />
be processed to completion before the run method is called.<br />
The invokeLater method returns control as soon as it has arranged for<br />
the run method to be executed, which it does by scheduling an event into the
158 Chapter 2 Frames, Labels, and Buttons<br />
AWT event queue, whereas invokeAndWait suspends the calling thread until<br />
the target objects run method has been executed to completion. The<br />
invokeAndWait method cannot be called from the AWT event thread itself<br />
and throws <strong>Java</strong>.lang.Error if you attempt to do so. If you need to use<br />
invokeAndWait in circumstances in which you might already be in the AWT<br />
event thread, you can either catch the exception and execute the target code<br />
directly in the exception handler or you can detect that you are running in<br />
the event thread using the following SwingUtilities method:<br />
public static boolean isEventDispatchThread();<br />
<strong>Core</strong> Tip<br />
SwingUtilities is a class that contains a collection of static methods<br />
that perform various useful tasks.You are strongly recommended to review<br />
the API documentation for this class and become familiar with what it<br />
provides.<br />
Using the invokeLater method, you can easily modify the example in<br />
Listing 2-6 so that it is thread-safe, as shown in Listing 2-15.<br />
Listing 2-15 Adding a component between existing components<br />
package <strong>JFC</strong>Book.Chapter2;<br />
import javax.swing.*;<br />
import j ava.awt.*;<br />
public class AddExample2 {<br />
public static void main(String[] args) {<br />
final JFrame f = new JFrame("Add Example 2");<br />
final Container cp = f.getContentPane();<br />
cp.setLayout(new FlowLayout());<br />
cp.add(new JButton("Left"));<br />
cp.add(new JButton("Middle"));<br />
cp.add(new JButton("Right"));f.pack();<br />
f.setvisible(true);<br />
try {<br />
Thread.sleep(5000) ;
Images on Components: Icons 159<br />
Listing 2-15 Adding a component between existing components<br />
(continued)<br />
}<br />
}<br />
} catch (Exception e) {<br />
}<br />
SwingUtilities.invokeLater(new RunnableO {<br />
public void run() {<br />
cp.add(new JButton("Middle Right"), 2);<br />
f.pack();<br />
}<br />
});<br />
As you can see, all that was necessary was to wrap the two lines that add<br />
the button and resize the window in an anonymous inner class that implements<br />
the Runnable interface and pass a reference to it to the SwingUtilites<br />
invokeLater method. As a result of this call, this code will be<br />
invoked on the AWT event thread some time after the invokeLater<br />
method itself is called. Any pending paint requests (or other events) already<br />
in the event queue will execute and complete before this code runs. You'll<br />
notice that it was necessaiy also to change the declaration of the variables<br />
that contain references to the frame and its content pane to make them final,<br />
so that they could be referenced from the inner class. If you are not familiar<br />
with inner classes, you should refer to <strong>Core</strong> <strong>Java</strong> 2: Volume 1 by Cay Horstmann<br />
and Gary Cornell which contains a good description of how to use<br />
them.<br />
<strong>Core</strong> Note<br />
In a real-world application, it is essential to use the SwingUtilities<br />
invokeLater or invokeAndWait methods to ensure that you are<br />
protected against multithreading issues when using Swing components.<br />
However, as you can see from Listing 2-15, the extra code needed to do<br />
this tends to make what would otherwise be simple examples relatively<br />
difficult to read—the overhead of placing some of the code in another class<br />
obscures the rather simpler point that the example code is trying to make.<br />
For this reason, some of the examples that you'll see later in this book do<br />
not always protect themselves in this way. Although this is technically<br />
incorrect, I believe that this is more than made up for by the increase in<br />
clarity that results. In some cases, however, especially when using the text
160 Chapter 2 Frames, Labels, and Buttons<br />
components, certain updates must be made from the event thread, as<br />
you'll see in Chapter 9. Where this is true, the example code is written<br />
accordingly.<br />
There is only one remaining issue in this code—is it safe to call setvisible<br />
from the main thread as shown? You might think that it is obviously safe to do<br />
so—after all, the frame is not yet visible, so how can it get a paint request in<br />
the AWT event thread? On the other hand, this call does follow the invocation<br />
of pack, which will realize the GUI components and so does not conform to<br />
the access rule given above. The Swing team describes this situation as follows:<br />
...as long as the program doesn't have a visible GUI, it's exceedingly<br />
unlikely that the JFrame or its contents will receive a paint call before<br />
f.setVisible(true) returns. Because there's no GUI code after the<br />
fsetVisible(true) call, all GUI work moves to the event-dispatching thread<br />
and this code is, in practice, thread-safe.<br />
In essence, this says that the setvisible call is safe. If you're not comforted<br />
by this description, you can always move the setvisible call into another<br />
Runnable:<br />
});<br />
f.packO; // Realizes the frame<br />
SwingUtilities.invokeLater(new Runnable() {<br />
public void run () {<br />
}<br />
f.setvisible(true) ;<br />
Applet User Interfaces and Multithreading<br />
The situation is slightly different for an applet than it is for an application<br />
because the user interface of an applet is realized by the browser (or the<br />
appletviewer) before the init method is called. Therefore, there is no safe<br />
time to manipulate the applets user interface unless you can do so in its constructor.<br />
If this is not possible, you will have to build the applet s GUI in the<br />
AWT event thread by calling the invokeLater or invokeAndWait method
Images on Components: Icons 161<br />
from init. Listing 2-16 shows a trivial Swing applet that constructs its interface<br />
in a thread-safe manner. It's not elegant, but it is guaranteed to work.<br />
Listing 2-16 Creating the initial user interface of an applet<br />
public class SimpleApplet extends JApplet {<br />
public void initO {<br />
SwingUtilities.invokeLater(new Runnable() {<br />
public void run() {<br />
getContentPane().add(new JLabel("Simple Applet"));<br />
validate();<br />
}<br />
});<br />
}<br />
j<br />
Notice that after constructing the user interface (in this case just adding a<br />
label), it is necessary to call validate to have the layout manager size and<br />
place the components. Usually, this would be done automatically, but you<br />
must do it yourself when interface construction is deferred to the event<br />
thread. Using Swing in Applets is covered in more detail in Appendix A.<br />
Summary<br />
This chapter introduced three of the simpler Swing components. You have<br />
seen that Swing applications use a new top-level container called JFrame<br />
that is similar to, but subtly different from, the AWT Frame class. Later in<br />
this book, you'll see how to fully exploit the new features that JFrame provides<br />
to make up for what might seem at the moment to be a rather annoying<br />
programming interface.<br />
You have also seen the basic properties that all AWT and Swing components<br />
share and learned that, in many cases, the exact appearance and behavior<br />
of components depends heavily on the look-and-feel that the user has<br />
chosen to use. You have seen examples of code that produces different<br />
results when run with the Metal look-and-feel than with the Motif and Windows<br />
versions, which underlines the need to test applications with all of these<br />
look-and-feels before considering them completed.<br />
An important topic covered at the end of this chapter is how to identify<br />
potential timing problems when handling Swing components and how to
162 Chapter 2 Frames, Labels, and Buttons<br />
work around them. Bear in mind that, unlike AWT components, Swing controls<br />
are not thread-safe and ensuring consistent operation is your responsibility.<br />
Fortunately, many applications and applets will not need to take special<br />
steps to ensure this, because all of their work after initialization will take<br />
place in the AWT event thread. Even if your application does use other<br />
threads, the invokeLater and invokeAndWait methods make it relatively<br />
painless to ensure that they interact properly with Swing controls.<br />
This chapter also briefly examined the topic of containers and layout managers.<br />
In the next chapter, you'll take a very detailed look at all of the Swing<br />
layout managers, which are the key to producing a good user interface. Swing<br />
retains all of the layout managers provided by AWT and also introduces a<br />
couple of new ones that will make your job much easier when creating many<br />
common layouts.
MANAGING THE<br />
USER INTERFACE<br />
• Layout Managers<br />
• Component Orientation<br />
Topics in This Chapter<br />
• Using the DebugGraphics Feature<br />
• Window and Component Events<br />
• Using Multiple Monitors
So far, you've seen how to create a top-level window and how to build<br />
some very simple user interfaces by placing components on the<br />
frame's content pane. As you know, the way in which components are<br />
laid out within a container and how that layout changes when the container's<br />
size is changed is controlled by the container's layout manager. In the previous<br />
chapter, you had a brief introduction to the job of the layout manager.<br />
Here, you'll have a close look at all of the Swing layout managers, many of<br />
which are inherited from the AWT. It is very important to understand how<br />
the different layout managers work, so their policies will be described in<br />
some detail and you'll also see how they handle unusual situations.<br />
After completing the survey of layout managers, this chapter continues the<br />
discussion of event handling, started in Chapter 2, with a look at the various<br />
events that can be generated by operations performed on windows and by<br />
moving, resizing, showing, and hiding windows and components in general.<br />
Layout Managers<br />
Layout managers are a subject you either love or hate. Some people like and<br />
use the ones provided with the JDK and produce professional-looking applications<br />
with them, while others insist that the standard layout managers are<br />
165
166 Chapter 3 Managing the User Interface<br />
difficult to understand or don't suit their needs, and consequently implement<br />
their own. Both points of view are, of course, valid. The standard layout managers<br />
are not perfect and there are definitely cases in which it is necessary to<br />
write your own. Much of the perceived problem, however, stems from the<br />
fact that some of them, particularly the more complex ones like GridBag-<br />
Layout, are not properly understood. In this chapter, you'll see the strengths<br />
and weaknesses of all of the original AWT layout managers and also become<br />
acquainted with two new ones introduced by Swing.<br />
The FlowLayout Manager<br />
When you create a JPanel object, it has associated with it an instance of<br />
what is probably the simplest of all of the AWT layout managers, FlowLayout.<br />
FlowLayout has a very simple, but effective layout policy: given a set of<br />
components, it lays them out side-by-side starting near the top of the container<br />
and working downward as each row is filled. Within each row, the components<br />
are, by default, arranged as evenly as possible around the center of<br />
that row. The horizontal and vertical gaps between components on a row and<br />
between rows are set either when the FlowLayout manager is created or<br />
using its setVgap and setHgap methods.<br />
The most important aspect of FlowLayout's layout policy is the fact that it<br />
allows each component to occupy its ideal space, otherwise known as its preferred<br />
size. You will see later, in connection with the BorderLayout manager,<br />
why this is such a useful feature. A FlowLayout is almost never used to<br />
manage a complete application window or a dialog box. Instead, it is common<br />
to find it managing panels that represent discrete areas of the user interface,<br />
while itself being managed by a more sophisticated layout manager.<br />
Let's now look at an example of a FlowLayout manager in action. This<br />
example shows six buttons that need to be placed next to each other with a<br />
small gap between them. In order to show how FlowLayout reacts to a<br />
change in the size of its container, it creates a JPanel and allows the Flow-<br />
Layout to manage it. The code required to create and place these buttons is<br />
shown in Listing 3-1. You can run this program using the command:<br />
j ava <strong>JFC</strong>Book.Chapter3.FlowLayoutExample<br />
Listing 3-1 Using the FlowLayout manager<br />
package <strong>JFC</strong>Book.Chapter3;
Listing 3-1 Using the FlowLayout manager (continued)<br />
import javax.swing.*;<br />
import j ava.awt.*;<br />
import j ava.awt.event.*;<br />
public class FlowLayoutExample {<br />
public static void main(String[] args) {<br />
JFrame f = new JFrame("FlowLayout");<br />
JPanel p = new JPanel0;<br />
Insets margin = new Insets(5, 14, 5, 14);<br />
p.setLayout(new FlowLayout(FlowLayout.CENTER, 4, 4));<br />
for (int i = 1; i
168 Chapter 3 Managing the User Interface<br />
ment takes the value FlowLayout .CENTER to center the components<br />
(which is the default), or either of FlowLayout .LEFT or FlowLayout<br />
. RIGHT to align them toward one of the sides. The <strong>Java</strong> 2 platform also<br />
supports two extra alignment values (FlowLayout. LEADING and FlowLayout<br />
.TRAILING) that use the components locale-dependent orientation to<br />
determine on which side of the container the components should be<br />
grouped. These alignment options behave much like the ones used by JLabel<br />
and JButton that you saw in the last chapter. We'll say more about component<br />
orientation later.<br />
The results of running this program are shown in Figure 3-1. As you can<br />
see, the buttons are evenly spread across the window and are centered, so<br />
that the gaps at each side of the window are of equal size. Had left, right,<br />
leading, or trailing alignment of the components been requested by passing<br />
one of the other alignment values as the first argument of the constructor,<br />
there would not have been any difference in the layout at this stage. The vertical<br />
gap applies between rows of components; in this case, since there is only<br />
one row of buttons, this gap is used to determine the space left between the<br />
buttons and the edges of the window.<br />
Figure 3-1 The FlowLayout manager.<br />
This example creates a window of exactly the size needed to hold the buttons<br />
and the requested horizontal and vertical spaces between them, by using<br />
the pack method of j ava . awt. Window, a superclass of JFrame, which asks<br />
the layout manager to establish the space requirements of each of its components<br />
(and containers if it contains any) and then to size the window to<br />
exactly match these requirements. Lets look at how this mechanism works.<br />
In our example, the JFrames content pane contains a JPanel, so the layout<br />
manager of the JFrame asks the JPanel for its preferred size. This<br />
request is interpreted by the JPanel s layout manager, which is the Flow-<br />
Layout manager installed in Listing 3-1. The FlowLayout manager, in turn,<br />
asks each of its containers components, namely the six buttons, for their preferred<br />
sizes and computes its own space requirements based on the values<br />
returned by the buttons and the intercomponent gaps it has been asked to<br />
provide. This value is returned to the JFrames layout manager, which then
Layout Managers 169<br />
resizes the frame to accommodate the JPanel (and therefore its buttons)<br />
and the frames own overhead (i.e., the caption bar and the decorations<br />
around the side and bottom of the window).<br />
This, however, is not the end of the process. The resizing of the window<br />
marks its contents as invalid. The effect of this is eventually to cause the<br />
JFrame's layout manager to allocate space to the JPanel and then to tell the<br />
JPanels layout manager to lay out its own components. Since the window<br />
has been sized exactly as requested by the JPanels FlowLayout manager, it<br />
will find that it has exactly enough room to lay out the buttons and provide<br />
the 4-pixel gaps above, below, and around them. This results in the neat layout<br />
shown in Figure 3-1. This use of pack to create an initial window of<br />
exactly the right size for its components is common to most <strong>Java</strong> applications.<br />
You will also see this method used for exactly the same purpose in connection<br />
with dialog boxes and internal frames later in this book.<br />
<strong>Core</strong> Note<br />
This discussion has been deliberately simplified a little to make the<br />
important points clear. In fact, the JFrame is, as you have already seen,<br />
not directly connected to the JPanel because of the intervening<br />
JRootPane and the content view.The part played by these containers in<br />
this discussion has not been mentioned because they behave in the same<br />
way as the JFrame's layout manager and simply pass requests to the<br />
JPanel. If there were, for example, a menu bar associated with the<br />
JRootPane, the situation would be slightly more complex, but the<br />
principles would remain the same.<br />
If you now stretch the window by grabbing its right-hand side and moving<br />
it to the right, leaving its height unchanged for now, you will observe the<br />
FlowLayout manager in action as it redistributes the buttons over the larger<br />
window space. When you enlarge the window, FlowLayout has to distribute<br />
the extra space somehow. The way in which each layout manager handles the<br />
distribution of extra space, or the lack of space, is cme of the things that differentiates<br />
it from other layout managers. In this situation, because the layout<br />
manager was created specifying center alignment, it will allocate the<br />
extra space equally at both sides of the window, keeping the buttons tightly<br />
bunched together in the center. The more you increase the size of the window,<br />
the more obvious this effect becomes, as shown in Figure 3-2. Notice<br />
that the button's sizes are not changed in this operation and that the gaps<br />
between the buttons are also the same as they were in the original layout.
170 Chapter 3 Managing the User Interface<br />
Figure 3-2 Resizing a container with a FlowLayout using center alignment.<br />
Suppose, instead, the FlowLayout had been created using the following<br />
line of code:<br />
p.setLayout(new FlowLayout(FlowLayout.LEFT, 4, 4));<br />
In this case, instead of allocating the extra space equally to both sides, it<br />
would all have been placed on the right-hand side of the window, leaving the<br />
buttons on the left side of the window and 4 pixels from its inner edge. Similarly,<br />
if FlowLayout .RIGHT had been specified, the extra space would be<br />
added to the left-hand gap and the buttons would have moved, as a group, to<br />
the right-hand side of the window.<br />
Now grab the bottom of the window and pull it downward, making the<br />
window taller but leaving the horizontal size unchanged. Since this increases<br />
the vertical size available in the window you might, based on what you have<br />
just seen, expect that the buttons would now move downward, leaving equal<br />
space between themselves and the top and bottom of the window. But, as<br />
Figure 3-3 shows, this is not the case: The buttons stay in place, as if invisible<br />
strings attached them to the top of the window. Even after resizing, the distance<br />
between the top of the buttons and the top of the window remains<br />
fixed at the initial 4 pixels.<br />
You can make life a little more difficult for FlowLayout by giving it too little<br />
horizontal space to lay out all of its buttons side-by-side. When this happens,<br />
as many buttons as will fit are allocated to the top row, separated by the<br />
Figure 3-3 The FlowLayout Manager increasing vertical space.
Layout Managers 171<br />
required horizontal gaps, and the rest of the buttons are moved onto a second<br />
row. In Figure 3-4, the window has been resized in such a way as to<br />
allow four buttons to fit on the top row and, as a result, the last two have been<br />
moved to the second row.<br />
Figure 3-4 The FlowLayouf Manager with too little horizontal space.<br />
FlowLayout manages the second row using the same rules as it used for<br />
the first one: The buttons are separated by the specified horizontal gap and<br />
are then aligned as specified in the constructor. You could, theoretically, continue<br />
this process of making the window taller and narrower. Eventually, you<br />
would probably hit a minimum size constraint on the top-level frame<br />
imposed by your platform. On Windows, for example, the frame has to be<br />
wide enough to show the controls on the caption bar and a few letters of the<br />
caption itself and you can't make it narrower than this minimum. If you could<br />
make the frame just wider than one button, then all the buttons would be<br />
arranged vertically in six rather trivial rows, all individually centered (or leftor<br />
right-aligned, as appropriate).<br />
You could, of course, go further than this. You might wonder what would<br />
happen if the window were too narrow to accept even a single button. One<br />
possibility is for FlowLayout to resize the buttons so that they fit within the<br />
reduced space available. However, FlowLayout always lays out components<br />
at their preferred size. Instead of making the buttons fit the window, it renders<br />
them at full size and, as a result, they are clipped at the right by the edge<br />
of the window. Similarly, if the window is too small vertically, the buttons at<br />
the bottom will be clipped. You can see an example of this in Figure 3-5.<br />
In this example, the buttons were all of approximately equal size, but what<br />
happens if not all of the components are so closely matched? In a slightly<br />
modified version of Figure 3—1, let's see what happens when the third and<br />
fourth buttons are taller and wider than the other four (see Figure 3-6). You<br />
can try this example using the command:
172 Chapter 3 Managing the User Interface<br />
Figure 3-5 The FlowLayout Manager with too little vertical space.<br />
java <strong>JFC</strong>Book.Chapter3.FlowLayoutExample2<br />
In the initial configuration of the window, the buttons are still rendered in<br />
a straight line, but notice that they are arranged such that their centers line<br />
up horizontally. The vertical gap now represents the space between the window<br />
and the top and bottom edges of the largest components.<br />
Figure 3-6 The FlowLayout Manager with components of unequal size.<br />
Resizing the window so that there are now three buttons in each row<br />
results in the configuration shown in Figure 3-7. The rows are now of equal<br />
width, with the vertical distance between them determined by the constructor's<br />
vertical gap parameter. As you might expect by now, if you make the<br />
window too small by dragging the bottom upwards, the entire layout is preserved,<br />
but the buttons at the bottom are clipped by the window.<br />
The BorderLoyout Manager<br />
As useful as FlowLayout is, it isn't really capable of managing a complete<br />
user interface, except in the simplest cases. The main shortcoming of Flow-<br />
Layout is that it is essentially one-dimensional, preferring to lay out components<br />
left-to-right and creating vertical distributions only when there is<br />
insufficient horizontal space. You have no real control over the way in which<br />
FlowLayout distributes components when this happens and no way to force<br />
it to create a two-dimensional arrangement of controls. By contrast, the BorderLayout<br />
manager is very suited to more generalized arrangements of
Layout Managers 173<br />
Figure 3-7 The FlowLayout Manager with<br />
components arranged in two rows.<br />
components and is the default layout manager for the AWT Frame, window,<br />
and Dialog containers and for the content pane of the Swing JFrame,<br />
JWindow, and JDialog containers.<br />
A BorderLayout can manage from one to five components. Each component<br />
is explicitly assigned to one of the four edges of the container or to its<br />
center. Listing 3-2 shows an example that creates a fully populated container<br />
with five huttons.<br />
Listing 3-2 Using the Border-Layout manager<br />
package <strong>JFC</strong>Book.Chapter3;<br />
import j avax.swing.*;<br />
import j ava.awt.*;<br />
import j ava.awt.event.*;<br />
public class BorderLayoutExamplel {<br />
public static void main(String[] args) {<br />
JFrame f = new JFrame("Border1");<br />
Container cp = f.getContentPane();<br />
cp.add(new JButton("N"), BorderLayout.NORTH);<br />
cp.add(new JButton("S"), BorderLayout.SOUTH);<br />
cp.add(new JButton("E"), BorderLayout.EAST);<br />
cp.addtnew JButton("W"), BorderLayout.WEST);<br />
cp.add(new JButton("C"), BorderLayout.CENTER);<br />
f .packO ;<br />
f.addWindowListener(new WindowAdapter() {<br />
public void windowClosing(WindowEvent evt) {<br />
System.exit(0);<br />
}<br />
});
174 Chapter 3 Managing the User Interface<br />
Listing 3-2 Using the BorderLayout manager (continued)<br />
_}<br />
}<br />
f.setVisible(true);<br />
You can run this example using the command:<br />
j ava <strong>JFC</strong>Book.Chapter3.BorderLayoutExamplel<br />
which prodtices the result shown in Figure 3—8. As you would expect from<br />
their designations, four of the buttons are indeed placed at the compass<br />
points around the frames border and the fifth in the center of the frame's<br />
content pane.<br />
<strong>Core</strong> Note<br />
The symbolic values BorderLayout .NORTH,<br />
BorderLayout. SOUTH, etc.,are actually the strings "North",<br />
"South, "and so on.Although you can explicitly code something like<br />
add (button, "North" ),/t is better to use the slightly wordier<br />
add (button, BorderLayout .NORTH) to avoid making assumptions<br />
about the values of these constants.You may, however, see code that uses<br />
the string values instead of the symbolic values because they were not<br />
available in JDK 1.0. As a result, many developers have become used to<br />
simply writing the compass points in their code when using<br />
BorderLayout, so it is not simpy an issue that affects legacy code!<br />
<strong>Core</strong> Note<br />
Figure 3-8 A fully-populated BorderLayout<br />
Manager.<br />
Like FlowLayout, the <strong>Java</strong> 2 implementation of BorderLayout is<br />
affected by component orientation.To make it easy for developers to create
layouts that work in locales with different orientations, BorderLayout<br />
defines a further four layout constraints whose effect depends on the<br />
orientation of the container that it is managing.These extra constraints are<br />
described in "Component Orientation"later in this chapter.<br />
Layout Managers 175<br />
The code shown in Listing 3-2 uses an overloaded version of the Container<br />
add method that accepts one of the compass points or the Center<br />
constraint as a second argument. In JDK 1.0, the component and position<br />
designator were supplied in a different order and, for compatibility, this form<br />
is still allowed, so that the two lines<br />
// Post-JDK 1.0 style<br />
cp.add(new JButton("N"), BorderLayout.NORTH);<br />
// JDK 1.0 style<br />
cp.add(BorderLayout.NORTH, new J B u t t o n ( " N " ) ) ;<br />
are equivalent. The first form of the add method is defined as:<br />
public void add(Component c, Object constraints);<br />
where the second parameter is an object passing constraints in a form acceptable<br />
to the containers layout manager. In the case of BorderLayout, you<br />
must supply a String argument from the set shown above or, if you are<br />
using the <strong>Java</strong> 2 platform, one of the locale-sensitive values that you'll see in<br />
the discussion of layout managers and component orientation later in this<br />
chapter. You will also see this form of the add method used in connection<br />
with the GridBagLayout manager, which requires a constraints object of a<br />
different type. To complete the story, you can also just write:<br />
cp.add(new JButton("C"));<br />
This is a special case that places the button in the center position.<br />
Returning to Figure 3-8, you can see that this is very different from the<br />
layout produced by FlowLayout. Aside from the fact that the components<br />
are not laid out in a straight line, it is clear that they are not all of the same<br />
size, despite the fact that they were all potentially of the same size when created,<br />
since their labels are almost identical. When laying out the container,<br />
BorderLayout asks each component for its preferred size. The components<br />
in the north and south positions are always assigned their requested preferred<br />
heights, while those in the east and west always get their preferred<br />
widths. After this has been done, the component in the center is given whatever<br />
space is left, which may sometimes be no space at all.
176 Chapter 3 Managing the User Interface<br />
As is shown in Figure 3-8, this usually means that the north and south<br />
components are stretched horizontally, while the east and west ones are<br />
stretched vertically. The fate of the center component depends entirely on<br />
the size of the container; it may appear at its correct size, expanded, or<br />
squashed. You can see this effect in action if you resize the container. Note<br />
particularly that, if the container is too small to give one of the components<br />
its preferred size when BorderLayout would normally have done so, that<br />
component begins to overlap its opposite number in the container, as you can<br />
see with the buttons in the north and south of Figure 3-9.<br />
Figure 3-9 A fully-populated BorderLayout<br />
manager with too little vertical space.<br />
The discussion so far has assumed that all five possible components are<br />
present. This need not, of course, be the case. Normally, the BorderLayout<br />
is used in situations where you require a large working area that should be<br />
allocated as much space as possible, with some buttons or input controls<br />
underneath or alongside it. The large working area is ideally suited to the<br />
center position, while the buttons can be placed on a panel at one of the<br />
other positions, probably in the south. This panel counts as one component<br />
and, since it uses the FlowLayout as its layout manager by default, it lays out<br />
the buttons neatly across the bottom of the container. An example of this can<br />
be produced with the code in Listing 3-3.<br />
Listing 3-3 BorderLayout with an expandable component in the<br />
center position<br />
package <strong>JFC</strong>Book.Chapter3;<br />
import j avax.swing.*;<br />
import j ava.awt.*;<br />
import j ava.awt.event.*;<br />
public class BorderLayoutExample2 {<br />
public static void main(String[] args) {<br />
JFrame f = new JFrame("Border2");<br />
f.getContentPane().setLayout(new BorderLayout(0, 4));
Listing 3-3 BorderLayout with an expandable component in the<br />
center position (continued)<br />
f.getContentPane().setBackground(Color.black);<br />
JTextArea t = new JTextArea(10, 30);<br />
t.setText("Some text");<br />
JPanel p = new JPanel(true);<br />
p.add(new JButton("Clear"));<br />
p.add(new JButton("Cut"));<br />
p.add(new JButton("Paste"));<br />
p.add(new JButton("Copy"));<br />
f.getContentPane().add(t, BorderLayout.CENTER);<br />
f.getContentPane().add(p, BorderLayout.SOUTH);<br />
f .packO ;<br />
f.addWindowListener(new WindowAdapter() {<br />
public void windowClosing(WindowEvent evt) {<br />
System.exit(0);<br />
}<br />
});<br />
f.setvisible(true);<br />
}<br />
This example, which you can run with the command<br />
j ava <strong>JFC</strong>Book.chapter3.BorderLayoutExample2<br />
Layout Managers 177<br />
produces a layout like that shown in Figure 3-10. Note that this example creates<br />
its own BorderLayout, replacing the one automatically assigned to the<br />
container on creation:<br />
f.getContentPane().setLayout(new BorderLayout(0, 4 ) ) ;<br />
This form of the constructor allows you to specify the horizontal and vertical<br />
gaps between the components. In our case, for the purposes of illustration,<br />
no horizontal gap and a 4-pixel vertical gap were requested—the<br />
vertical gap shows up as the black bar above the buttons, because the background<br />
color of the content pane has been set to black.<br />
Resizing the container causes BorderLayout to resize both components.<br />
If you enlarge the container, any extra vertical space goes entirely to<br />
the text area, while the button panel's height remains constant, which is<br />
exactly what you would want to happen. If you make the container too<br />
small, however, you will eventually start losing buttons. There is little that<br />
you can do about this as a programmer—if the user makes the window too<br />
small to show everything, there is no sensible way out. It is, however,
178 Chapter 3 Managing the User Interface<br />
Figure 3-10 A BorderLayout manager with an expandable center component.<br />
important to distribute spare space where the user would prefer it to be if<br />
the container is enlarged. In this case, it is clearly better to allocate spare<br />
room to the text area. This is the reason for assigning the text area to the<br />
center position. Had it been placed in the north position, leaving the center<br />
slot unoccupied, then any extra space would have been left unused because<br />
both the text area and the button areas would have retained their preferred<br />
heights and stayed at the top and bottom of the container, leaving a gap in<br />
the middle that would get larger as the window is made taller.<br />
One case in which the BorderLayout doesn't work so well can be seen if<br />
you change the location of the button panel from the south to the east or the<br />
west. The motivation for this change would most likely be to get a vertical<br />
stack of buttons on the left or right side of the frame instead of a horizontal<br />
arrangement at the top or bottom. The results of this apparently trivial<br />
change are shown in Figure 3-11. The command<br />
j ava <strong>JFC</strong>Book.Chapter3.BorderLayoutExample3<br />
can be used to run this example. The figure shows a window that has been<br />
made smaller than that which you'll see on the screen in order to save space.<br />
Here you can see the FlowLayout that is managing the button panel following<br />
its normal policy of laying out the buttons horizontally whenever possible,<br />
which is not really what we want. When the application starts, every<br />
component and container gets the chance to suggest its preferred size. If the<br />
layout managers can conform to these requests, they will do so. Here, Flow-
Figure 3-11 Inappropriate use of rhe BorderLayout manager.<br />
Layout Managers 179<br />
Layout asks for enough space to lay out its buttons horizontally. Because this<br />
example sizes the frame using pack, which asks the frame to find its own<br />
ideal size, the FlowLayouts size request is passed indirectly to the content<br />
pane. The BorderLayout, which is managing it, complies with this request<br />
and allocates the horizontal space required for the panel. It also satisfies the<br />
text area's request for both horizontal and vertical space and constructs the<br />
content pane in such a way as to suit both containers. Simple though this<br />
might be for BorderLayout, it does not produce the desired results, and<br />
you can't even manually resize the container to force the buttons to be<br />
arranged vertically because the BorderLayout always assigns a component<br />
in the east or west its preferred width, even if it ends up being too wide for<br />
the window.<br />
If you need to produce a container that must have components stacked<br />
vertically, as would be better in this case, you should not use the FlowLayout<br />
manager. Instead, you should choose either the GridLayout or Grid-<br />
BagLayout managers that are described next or, better still in some cases,<br />
the BoxLayout manager described later in this chapter.<br />
The GridLayout Manager<br />
Our third layout manager, GridLayout, is, as its name suggests, used for laying<br />
out components in a gridlike configuration. A container managed by<br />
GridLayout is divided into a number of equally-sized cells, into each of<br />
which is placed one component. As the container is resized, the individual<br />
cells grow or shrink proportionately, as do the components that they contain.<br />
GridLayout has four configurable parameters that can be used to exercise<br />
control over its behavior. The first two are the familiar horizontal and<br />
vertical gaps that you've already seen in connection with FlowLayout and<br />
BorderLayout. The gap values are applied around the edges of each cell.<br />
The other two parameters specify the number of rows and columns in the
180 Chapter 3 Managing the User Interface<br />
grid that GridLayout will create. All of these parameters can be set when<br />
the layout manager is created or modified later using the setVgap, setHgap,<br />
setRows, and setColumns methods. Here is an example that creates a<br />
GridLayout with 2 rows and 3 columns:<br />
GridLayout g = new GridLayout(2, 3);<br />
If, as in this example, you don't specify the horizontal and vertical gaps,<br />
then there will be no gaps between the grid cells. The following line creates<br />
the same grid as above, but with 2-pixel gaps in both directions:<br />
GridLayout g = new GridLayout(2, 3, 2, 2);<br />
The GridLayout manager is very useful when you need to create layouts<br />
that look something like the keys on a pocket calculator. This is demonstrated<br />
in the following example, which uses a GridLayout to produce a simple but<br />
recognizable interface for a calculator. See Listing 3—4.<br />
Listing 3-4 Producing a calculatorlike layout with GridLayout<br />
package <strong>JFC</strong>Book.Chapter3;<br />
import j avax.swing.*;<br />
import j ava.awt.*;<br />
import j ava . awt. event. * ,-<br />
public class GridLayoutExamplel {<br />
public static void main(String[] args) {<br />
JFrame f = new JFrame("Calculator");<br />
JTextField t = new JTextField();<br />
JPanel p = new JPanel(true);<br />
p.setLayout(new GridLayout(5, 4, 2, 2));<br />
p.add(new JButton("1"));// Top row<br />
p.add(new JButton("2"));<br />
p.add(new JButton("3"));<br />
p.add(new JButton (" = "));<br />
p.add(new JButton("4"));// <strong>2nd</strong> row<br />
p.add(new JButton("5"));<br />
p.add(new JButton("6"));<br />
p.add(new JButton("+"));<br />
p.add(new JButton("7"));// 3rd row<br />
p.add(new JButton("8"));<br />
p.add(new JButton ( "9"));<br />
p.add(new JButton("-"));
Listing 3—4 Producing a calculatorlike layout with GridLayout<br />
(continued)<br />
}<br />
p.add(new JButton("0"));// 4th row<br />
p.add(new JButton("."));<br />
p.add(new JButton("C"));<br />
p.add(new JButton("*"));<br />
p.add(new JButton("MR"));// Last row<br />
p.add(new JButton("MC"));<br />
p.add(new JButton("M+"));<br />
p.add(new JButton("/"));<br />
f.getContentPane().add(t, BorderLayout.NORTH) ;<br />
f.getContentPane().add(p, BorderLayout.CENTER);<br />
f.pack();<br />
f.addWindowListener(new WindowAdapter() {<br />
public void windowClosing(WindowEvent evt) {<br />
System.exit(0);<br />
});<br />
f.setvisible(true);<br />
You can run this example with the command:<br />
java <strong>JFC</strong>Book.Chapter3.GridLayoutExamplel<br />
Layout Managers 181<br />
The result is shown in Figure 3-12. Note that all of the cells are of the<br />
same size, which means that the single-letter buttons have been stretched<br />
slightly to match the size of those with two-letter labels.<br />
As always, the interesting feature of a layout manager is how it reacts to<br />
the container being resized. In this respect, GridLayout is veiy different<br />
from both FlowLayout and BorderLayout. Whereas those two layout<br />
managers tried to maintain their components' preferred sizes (at least to the<br />
extent to which they originally honored the preferred size), GridLayout<br />
always divides the container space into equally-sized cells. As a result, if the<br />
container is too small in either direction, then each component will be<br />
reduced in size proportionately in that direction. Conversely, extra space is<br />
distributed evenly, causing each component to grow a little. This effect is<br />
shown in the Figure 3-13, where the calculator has been stretched horizontally,<br />
but compressed vertically, resulting in wide, thin buttons.
182 Chapter 3 Managing the User Interface<br />
Figure 3-12 A rough-and-ready calculator using GridLayout.<br />
You don't need to specify both the row and column count when you create<br />
a GridLayout. If you supply 0 as either the row or the column count, the<br />
missing value is calculated based on the total number of components added<br />
to the container. For example, you can create the same layout manager as<br />
that in Figure 3-12 with either of the following lines of code:<br />
GridLayout gl = new GridLayout(5, 0);<br />
GridLayout g2 = new GridLayout(0, 4);<br />
Figure 3-13 A GridLayout with too little space.<br />
Since 20 components are added to the container, it is a simple matter to<br />
calculate the unspecified dimension in either case. You can't, of course, supply<br />
both the row and column count as zero; if you try, you will get an I liegalArgumentException.
Layout Managers 183<br />
Whether or not you actually supply both dimensions, you are not obliged<br />
to supply enough components to fill the entire grid. To illustrate what happens<br />
when you supply too few, Listing 3-5 creates a 3-row by 3-column grid<br />
and then adds only 8 components to it.<br />
GridLayout always lays out components in the order in which they were<br />
added, filling the top row from left to right, then moving on to the second<br />
row and so on. When you don't supply enough components to occupy every<br />
cell, the last cell or cells are simply left empty. If you requested a specific<br />
number of rows, either in the constructor or via setRows, that number of<br />
rows will always be created, even if some of them are completely empty,<br />
because it is possible to add components after the container has been laid out<br />
for the first time. The code in Listing 3-5, therefore, results in a layout with<br />
the bottom right cell empty, as shown in Figure 3-14.<br />
Listing 3-5 A GridLayout with an empty cell<br />
package <strong>JFC</strong>Book.Chapter3;<br />
import j avax.swing.*;<br />
import j ava.awt.*;<br />
import j ava.awt.event.*;<br />
public class GridLayoutExample2 {<br />
public static void main(String [] args) {<br />
JFrame f = new JFrame("GridLayout 2");<br />
f.getContentPane().setLayout(new GridLayout(3, 3));<br />
f.getContentPane().setBackground(Color.black);<br />
for (int i = 0; i < 8; i++) {<br />
JLabel 1 = new JLabel("" + i, SwingConstants.CENTER);<br />
1.setForeground(Color.yellow);<br />
f.getContentPane().add(l);<br />
}<br />
f .packO ;<br />
f.addWindowListener(new WindowAdapter() {<br />
public void windowClosing(WindowEvent evt) {<br />
System.exit(0);<br />
}<br />
});<br />
f.setVisible(true);<br />
}
184 Chapter 3 Managing the User Interface<br />
<strong>Core</strong> Note<br />
GridLayout always fills each row from left to right, even in a locale in<br />
which the component orientation would suggest a right-to-left ordering. No<br />
changes have been made to GridLayout (at least as of <strong>Java</strong> 2 version<br />
1.3) to make it sensitive to component orientation.<br />
Figure 3-14 A GridLayout with an extra cell.<br />
Having looked at the simple cases, lets briefly examine some slightly less<br />
obvious ones. First, what happens if you don't specify one of the dimensions<br />
and don't add a number of components that can be divided evenly by the<br />
other dimension? For example, suppose you do the following:<br />
JFrame f = new JFrame ("GridLayout 3") ;<br />
f.getContentPane().setLayout(new GridLayout(3, 0));<br />
f.getContentPane().setBackground(Color.black);<br />
for (int i = 0; i < 4; i++) {<br />
JLabel 1 = new JLabel("" + i, SwingConstants.CENTER) ,•<br />
1.setForeground(Color.yellow);<br />
f.getContentPane().add(l);<br />
}<br />
You can try this example using the command:<br />
j ava <strong>JFC</strong>Book.Chapter3.GridLayoutExample3<br />
Here there are four labels that need to be distributed over three rows.<br />
Obviously, there must be at least two columns, so GridLayout constructs a<br />
3-row by 2-eolumn grid into which it places the four labels starting from the
Layout Managers 185<br />
top left. At the end of the second row, all four labels have been placed, so<br />
there are none left to place on the bottom row. Nonetheless, since the constructor<br />
calls for three rows, the empty bottom row remains.<br />
What about specifying both dimensions and then supplying too many components?<br />
In this case, GridLayout retains the required number of rows and<br />
adds more columns until it has enough room to accommodate all of the components,<br />
again leaving unoccupied cells to the bottom right, as in the following<br />
code extract:<br />
JFrame f = new JFrame("GridLayout 4");<br />
f.getContentPane().setLayout(new GridLayout(3, 3));<br />
f.getContentPane().setBackground(Color.black);<br />
for (int i = 0; i < 10; i++) {<br />
JLabel 1 = new JLabel("" + i, SwingConstants.CENTER);<br />
1.setForeground(Color.yellow);<br />
f.getContentPane().add(1);<br />
}<br />
Here, there are nine available cells and 10 components to place in them.<br />
GridLayout resolves this by creating three rows as requested, but allocates<br />
four columns to each row, then lays out the labels from the top left, leaving<br />
the two cells at the bottom right empty, as shown in Figure 3-15.<br />
Figure 3-15 A GridLayout with more items than requested cells.<br />
What about the problem of creating a panel of buttons arranged vertically<br />
that we examined at the end of our discussion of BorderLayout? As it happens,<br />
GridLayout is better suited to creating a layout of this form than<br />
FlowLayout, which we tried in the last section because, provided you
186 Chapter 3 Managing the User Interface<br />
request one column and the correct number of rows to accommodate all of<br />
the buttons, GridLayout is guaranteed to lay the buttons out vertically and<br />
to keep them that way no matter what happens to the container's shape. In<br />
most cases, you can arrange for a panel like this to preserve its horizontal size<br />
by, for example, placing it on the east or west side of a container managed by<br />
BorderLayout provided that there is also a center component. But even in<br />
this case the panel will grow vertically if the user resizes the window in that<br />
direction. Since GridLayout always allocates extra space to its managed<br />
components, this will cause the buttons to grow vertically even though their<br />
horizontal size will remain constant. Whether or not this is acceptable<br />
depends on the application.<br />
To create a panel in which the buttons do not grow in either direction, you<br />
need to use either the GridBagLayout manager, which we discuss next, or,<br />
probably best of all, the BoxLayout manager that we cover immediately<br />
afterwards.<br />
Complete Flexibility with GridBagLayout<br />
GridBagLayout is, without doubt, the most complex of all the AWT layout<br />
managers. This complexity arises because of the number of configurable<br />
options that it provides, which give you almost total control over the way in<br />
which your container is laid out. For all the apparent complexity, though,<br />
once you grasp the basic ideas, GridBagLayout becomes surprisingly easy<br />
to use. In this section you'll see all of the options available, how they change<br />
the way in which components are laid out, and how they move and resize in<br />
response to changes in the containers shape.<br />
GridBagLayout is superficially similar to GridLayout in that it creates<br />
and manages a grid configuration within a container. However, there are two<br />
significant differences that make GridBagLayout a much more powerful<br />
tool. First, the columns and rows managed by GridBagLayout can all be of<br />
different sizes. Secondly, whereas GridLayout confines each component to<br />
one cell, GridBagLayout does not: A component can occupy a rectangular<br />
area of any size within the container, but it cannot overlap other components.<br />
To make this latter point clearer, consider Figure 3-16, which shows a<br />
container divided up into a 3-row by 4-column grid, occupied by three buttons<br />
and a text field. In terms of cells, the buttons labeled ONE and TWO<br />
have both been configured to occupy one row and two columns, button<br />
THREE has been configured to occupy two rows and two columns and the<br />
text field occupies one row and all four columns of the grid. These row and<br />
column constraints are stated to GridBagLayout when the container is con-
Layout Managers 187<br />
structed—the layout manager does not determine how many cells a component<br />
will cover. It does, however, decide how large each of these cells will be.<br />
Figure 3-16 Explicit placement of objects with GridBagLayout.<br />
In this case, button ONE occupies the top two cells on the left. No other<br />
component could occupy any of the area within these two cells, even if they<br />
had enough available space: No cell can be occupied by more than one component.<br />
Furthermore, you will notice that, unlike GridLayout, it is possible<br />
to arrange for components to be smaller in the size than the cell area to<br />
which they are allocated and, as we shall see, it is possible to determine how a<br />
component that is smaller than its assigned cell space is aligned within that<br />
space; in this case, all of the components are aligned to the center of their<br />
respective areas.<br />
The simplest way to use GridBagLayout is simply to create and add components<br />
to a container that it manages. This is perfectly valid, as the example<br />
in Listing 3—6 shows.<br />
Listing 3-6 A GridLayout with no explicit constraints<br />
package <strong>JFC</strong>Book.Chapter3;<br />
import javax.swing.*;<br />
import j ava.awt.*;<br />
import <strong>Java</strong>.awt.event.*;<br />
public class GridBagLayoutExamplel {<br />
public static void main(String[] args) {<br />
JFrame f = new JFrame("GridBagLayout 1");<br />
f.getContentPane().setLayout(new GridBagLayout())<br />
for (int i = 0; i < 3; i++) {<br />
JButton b = new JButton("" + i);
188 Chapter 3 Managing the User Interface<br />
Listing 3-6 A GridLayout with no explicit constraints (continued)<br />
}<br />
f.getContentPane().add(b);<br />
f.pack () ;<br />
f.addWindowListener(new WindowAdapter() {<br />
public void windowClosing(WindowEvent evt) {<br />
System.exit(0);<br />
}<br />
});<br />
f.setVisible(true);<br />
}<br />
J<br />
The result of running this program, using the command<br />
j ava <strong>JFC</strong>Book.Chapter3.GridBagLayoutExamplel<br />
is a frame with three buttons side-by-side, tightly packed next to each other.<br />
If you resize the frame, the buttons remain together as a single unit and<br />
retain their original size. Making the container larger results in the extra<br />
space being evenly distributed around the buttons, leaving the center of the<br />
row of three buttons exactly in the center of the container. Similarly, if you<br />
make the frame too small, the buttons still move themselves so that they are<br />
centered in the container, resulting in clipping at the edges. See Figure 3-17.
Layout Managers 189<br />
This is, of course, a rather trivial and unusual way to use GridBagLayout.<br />
The key to making use of the power of the GridBagLayout is the two-argument<br />
form of the Container add method that was used in conjunction with<br />
BorderLayout which, as you may recall, has the following signature:<br />
public void add(Component c, Object constraints);<br />
In the case of BorderLayout, the constraint object was supplied in the<br />
form of a String. For GridBagLayout, the constraints are supplied in an<br />
instance of a dedicated class called GridBagConstraints. All the members<br />
of GridBagConstraints are public, so to configure a GridBagLayout, you<br />
simply create a constraints object and set the member variables directly.<br />
Here are the public variables of GridBagConstraints :<br />
public int anchor<br />
public int fill<br />
public int gridheight<br />
public int gridwidth<br />
public int gridx<br />
public int gridy<br />
public Insets insets<br />
public int ipadx<br />
public int ipady<br />
public double weightx<br />
public double weighty<br />
It might look like there are a lot of constraints to set here, but in fact you'll<br />
find that you can set many of them once and then reuse the settings for more<br />
than one component, changing only a small number of items each time you<br />
add a component. When you add a component to a container managed by<br />
GridBagLayout, you pass both the component and the constraints to the<br />
add method. The GridBagLayout then takes its own copy of the GridBag-<br />
Constraints object and associates that with the component, so you can<br />
reuse your copy without affecting the settings of components added earlier.<br />
To demonstrate how the GridBagConstraints object is used, let's write<br />
the code that generates the component layout shown in Figure 3-16. So that<br />
you can see the effects of changing the various possible constraint settings,<br />
the code will be developed in stages.<br />
The most obvious constraints you need to set for each component are its<br />
position and its size, which are specified by the gridx, gridy, gridwidth,<br />
and gridheight members. The grid cells have x and y coordinates assigned<br />
to them, with gridx = 0 and gridy = 0, indicating the cell at the top left of<br />
the layout; x values increase toward the right and y values increase as you<br />
move downward. The gridwidth and gridheight values describe how
190 Chapter 3 Managing the User Interface<br />
many cells in the corresponding direction the component should occupy. A<br />
component must, as has been said earlier, have sole occupancy of the cells it<br />
covers.<br />
<strong>Core</strong> Note<br />
The grid cell coordinates refer to grid locations, not pixel values.<br />
Furthermore, like GridLayout, GridBagLayout is not sensitive to<br />
component orientation, so the cell with gridx = 0 and gridy = 0 is<br />
always at the top left of the grid.<br />
Once you have created your GridBagConstraints object, you add the<br />
corresponding component to the container using the add method, passing<br />
the constraints object as well. Here's an example that configures button ONE<br />
as shown in Figure 3—16:<br />
JPanel p = new JPanel(true);<br />
p.setLayout(new GridBagLayout());<br />
GridBagConstraints c = new GridBagConstraints();<br />
JButton b = new JButton("ONE");<br />
c.gridx = 0;<br />
c.gridy = 0;<br />
c.gridwidth = 2;<br />
c.gridheight = 1;<br />
p.add(b, c); // b = component, c = constraints<br />
This is not the only way to associate constraints with a component. Before<br />
JDK 1.1, it was necessary to use the GridBagLayout setConstraints<br />
method to do this, because the variant of the Container add method used<br />
above did not exist in the earlier release. In JDK 1.0, this code would have<br />
been written like this—do not be surprised if you see code like this carried<br />
over from applications that have not been fully ported to JDK 1.1:<br />
Panel p = new Panel () ;<br />
GridBagLayout 1 = new GridBagLayout();<br />
p.setLayout(1);<br />
GridBagConstraints c = new GridBagConstraints();<br />
Button b = new Button("ONE");<br />
c.gridx = 0;<br />
c.gridy = 0;<br />
c.gridwidth = 2;<br />
c.gridheight = 1;<br />
1.setConstraints(b, c) ; // Component, constraints<br />
p.add(b);
Layout Managers 191<br />
I think you'll agree that the newer method is simpler, saving a line of code<br />
for each component added, as well as being much clearer.<br />
If you are using the <strong>Java</strong> 2 platform, you can simplify your code event further.<br />
In JDK 1.1, you have to create a GridBagConstraints object and<br />
then explicitly modify the settings that you need to change by assigning values<br />
to the public member variables, as shown above. The <strong>Java</strong> 2 platform<br />
gives you a convenient shorthand for this by providing a constructor that<br />
allows you to initialize all of the settings when you create the GridBagConstraints<br />
object, thus making it possible to roll all of these assignments into<br />
a single line of code.<br />
At this stage, the members of the GridBagConstraints object that we<br />
did not initialize above will be left at their default values and we'll look at the<br />
rest of the code to create the layout shown in Figure 3-L6. This first version<br />
will be straightforward and will only use what you have seen so far; later, the<br />
code will be refined to create exactly the layout shown in Figure 3-16 and to<br />
make it behave properly when the container is resized. Listing 3-7 shows the<br />
first attempt.<br />
Listing 3-7 A GridLayout with simple constraints<br />
package <strong>JFC</strong>Book.Chapter3;<br />
import javax.swing.*;<br />
import j ava.awt.*;<br />
import j ava.awt.event.*;<br />
public class GridBagLayoutExample2 extends JPanel {<br />
public GridBagLayoutExample2() {<br />
this.setLayout(new GridBagLayout());<br />
this.setOpaque(true);<br />
this.setBackground(UIManager.getColor("control"))<br />
GridBagConstraints c = new GridBagConstraints();<br />
JButton b = new JButton("ONE");<br />
c.gridx = 0;<br />
c.gridy = 0;<br />
c.gridwidth = 2;<br />
c.gridheight = 1;<br />
this.add(b, c); // Button ONE added<br />
c.gridy++;
192 Chapter 3 Managing the User Interface<br />
Listing 3-7 A GridLayout with simple constraints (continued)<br />
}<br />
b = new JButton("TWO");<br />
this.add(b, c); // Button TWO added<br />
c.gridx = 2;<br />
c.gridy = 0;<br />
c.gridwidth = 2;<br />
c.gridheight = 2;<br />
b = new JButton("THREE");<br />
this.add(b, c); // Button THREE added<br />
c.gridx = 0;<br />
c.gridy = 2;<br />
c.gridwidth = 4;<br />
c.gridheight = 1;<br />
this.addtnew JTextField(35), c);// Text field<br />
public static void main(String[] args) {<br />
JFrame f = new JFrame("GridBagLayout 2");<br />
JPanel p = new GridBagLayoutExample2();<br />
f.getContentPane().add(p);<br />
f .pack() ;<br />
f.addWindowListener(new WindowAdapter() {<br />
public void windowClosing(WindowEvent evt) {<br />
System.exit(0);<br />
}<br />
});<br />
f.setVisible(true) ;<br />
}<br />
J That's all there is to it! First, a custom panel (based on JPanel) is created<br />
and a GridBagLayout is assigned to manage it. You will notice that we are<br />
not required to specify the size of the grid, because the layout manager can<br />
deduce the number of cells required from the constraints objects it is given<br />
as the components are added.<br />
Since each component is added along with associated constraints that<br />
include its position, you don't need to add them in any particular order. Usually,<br />
the calls that add the components are ordered in such a way as to minimize<br />
changes in the GridBagConstraints object as you move from one<br />
component to the next. As noted earlier, GridBagLayout takes a private
Layout Managers 193<br />
copy of the constraints passed with each add call, so it is perfectly safe to use<br />
only one GridBagConstraints object to lay out the entire container, modifying<br />
it as you go. In this example, each time a component is added, only the<br />
constraints that must be changed are actually modified—often just one of<br />
gridx, gridy, gridwidth, and gridheight.<br />
<strong>Core</strong> Tip<br />
In the real world, layouts are not static forever and you will probably need<br />
to add extra rows or columns to your container as requirements change. To<br />
make this easier, I recommend that you use one GridBagConstraints<br />
object for each column of the layout. If you adopt this approach then, in<br />
most cases, as you add rows, you just need to increment the gridy value<br />
of the GridBagConstraints object for each column (or use the special<br />
value RELATIVE described shortly) and leave all of the other attributes<br />
unchanged.<br />
If you now run the example code, you will see that we have already done<br />
enough to obtain a layout that at least resembles the one we were trying to<br />
achieve—see Figure 3-18. The command to do this is:<br />
j ava <strong>JFC</strong>Book.Chapter3.GridBagLayoutExample2<br />
Figure 3-18 GridBagLayout: with simple constraints.<br />
While this layout may look approximately correct, you will see a major<br />
problem if you make the window larger. When you do this, the entire layout<br />
stays frozen in the middle of the container with the extra space distributed<br />
symmetrically around it. This happens because the defaulted constraints<br />
parameters that have been associated with each component tell GridBag-<br />
Layout to allocate them their preferred sizes and never to assign any more<br />
space than that. As a result, when the container is enlarged, the extra room<br />
cannot be assigned to any of the components, so it is left around the outside.
194 Chapter 3 Managing the User Interface<br />
Before seeing how to distribute the extra space more sensibly, lets look at<br />
some convenient shorthand that you can use to make your code more readable<br />
and more maintainable. You will often find when laying out containers<br />
that you will place components in order along a row, or down a single column.<br />
To do this, you would probably increment either gridx or gridy, leaving<br />
all of the other constraints unchanged. Since this is such a common<br />
operation, GridBagConstraints provides a constant value, RELATIVE,<br />
that can be assigned to either gridx or gridy. The effect of using this is to<br />
place the component affected one cell to the right of the previous component<br />
added if used in gridx or one cell below the previous one if used in gridy.<br />
So, for example, the following extract produces a row of buttons along the top<br />
of the container.<br />
JPanel p = new JPanelO;<br />
GridBagConstraints c = new GridBagConstraints();<br />
p.setLayout(new GridBagLayout());<br />
c.gridx = GridBagConstraints.RELATIVE;<br />
p.addfnew JButton ( "1") , c);<br />
p.add(new JButton("2"), c);<br />
p.add(new JButton("3"), c);<br />
Each time a button is added, GridBagLayout adds one to the x coordinate<br />
it used the previous time, resulting in a straight line of buttons. You<br />
could create a vertical set of buttons in the same way by setting gridy to<br />
GridBagConstraints .RELATIVE instead. Setting both gridx and gridy<br />
to this value is the same as setting just gridx. The results of running this<br />
code are the same as the code shown in Listing 3-6. The reason that this happens<br />
is that, if you don't supply a GridBagConstraints object in an add<br />
call, the default constraints have both gridx and gridy set to RELATIVE,<br />
which is effectively the same as the example we showed above.<br />
A similar useful shorthand is available for the gridwidth and the gridheight<br />
members. Here, you can use the constant GridBagConstraints<br />
.REMAINDER in the gridwidth member to create a component<br />
that spans the rest of the container to the right of its starting point, no matter<br />
where that might be. Similarly, using this constant in gridheight forces the<br />
component to stretch to the bottom of the container. This facility allows you<br />
to create components that span the right number of columns or rows even if<br />
you subsequently add extra components elsewhere in the layout, resulting in<br />
a change in the number of components in the direction concerned.<br />
As an example of this, in the panel of buttons created in Listing 3-7, the<br />
text field was made to stretch under all of the buttons by hard-coding gridwidth<br />
to the value 4. This works until you insert a new control on one of the<br />
other rows, creating a container with five columns instead of four. If you
Layout Managers 195<br />
instead change the gridwidth to GridBagConstraints .REMAINDER,<br />
then the text field would always span all of the bottom row.<br />
A problem with the layout obtained from this first version of the code is<br />
that buttons ONE and TWO are placed right up against each other. Button<br />
THREE has been placed a respectable distance away, but only because of<br />
the fact that the text field forced the container to be wider than the sum of<br />
the widths of the buttons. You can arrange for some space to be left around<br />
the component by using the insets member of the GridBagConstraints<br />
object. By default, this member is null, which requests no external padding.<br />
You can change this by creating a java.awt. Insets object specifying the<br />
amount of space needed above, below, to the left, and to the right of the<br />
component. The constructor of this object is defined as follows:<br />
public Insets(top, left, bottom, right);<br />
If you want to create a space around a component with 1 pixel above, 2<br />
pixels to the left, 3 pixels below, and 4 pixels to the right, you would do the<br />
following:<br />
GridBagConstraints c = new GridBagConstraints();<br />
// Other initializations not shown<br />
// -<br />
c.insets = new Insets(1, 2, 3, 4);<br />
Once you have created an Insets object, you can reuse it, since all of its<br />
members are public and GridBagLayout copies this object when it copies<br />
the associated GridBagConstraints object. To obtain a suitable space<br />
around the buttons and text area in our code example, you simply add the following<br />
line after the GridBagConstraints object has been created and<br />
before it is first used:<br />
c.insets = new Insets(4, 3, 4, 3);<br />
This changes the initial layout to that shown in Figure 3-19; although it is<br />
difficult to see, you now have 4 pixels above and below each component and<br />
3 pixels to both the left and the right.<br />
Now that you have the proper spacing around the outside of the buttons,<br />
the next issue to be addressed is the behavior when the container is resized.<br />
To stop the entire layout huddling together in the middle of the container, as<br />
they do with the constraints that are currently applied, you need to allow the<br />
cells in which the components reside to expand or contract in sympathy with<br />
the rest of the container. This is most apparent in the case of the text field,
196 Chapter 3 Managing the User Interface<br />
which remains stubbornly the same size no matter how the container is<br />
reshaped. The text area should always span the bottom of the container, but<br />
you would not want it to grow vertically.<br />
The weightx and weighty members of the GridBagConstraints<br />
object control how the cells themselves resize when the container is<br />
reshaped. These fields are both floating-point numbers and the ratio of each<br />
individual entry's value to the total of all of the values across the container or<br />
down the container determines the proportion of the extra space that will be<br />
allocated to each cell.<br />
Lets look at an example to see how this works, by setting the values of<br />
weightx for each component as follows:<br />
Button ONE 0.4<br />
Button TWO 0.4<br />
Button THREE 0.6<br />
Text Area 1.0<br />
Bearing in mind that button ONE is above button TWO and should<br />
remain orizontally aligned with it, it makes sense for their weightx values to<br />
be the same. Looking at the layout of the container as shown in the diagram<br />
above, you can see that these values make the total value of weightx across<br />
each row equal to 1.0. Now suppose that the container expands horizontally<br />
by 10 pixels Then the extra space allocated to each cell is as follows:<br />
Cell containing ONE: (0.4/1.0) x 10 = 4 pixels<br />
Cell containing TWO: (0.4/1.0) x 10 = 4 pixels<br />
Cell containing THREE: (0.6/1.0) x 10 = 6 pixels<br />
Cell containing FOUR: (1.0/1.0) x 10 = 10 pixels<br />
It is actually not necessary that the sum of the weightx values across the<br />
container (or of the weighty values) add up to 1.0: They can add up to any<br />
value at all, because it is the ratio of each columns value to the total that<br />
counts. Now that there is some flexibility in the horizontal direction, the<br />
GridBagLayout will allocate all of the available space in that direction to<br />
cells and not leave it unused.
Figure 3-19 GridBagLayout: with extra space around the components.<br />
Layout Managers 197<br />
If weighty values were left zero, the layout would expand nicely horizontally,<br />
but would continue to be squashed into the middle of the container if it<br />
were expanded vertically. In order to stop this from happening, you need to<br />
set sensible values of weighty for each component. As noted earlier, you<br />
wouldn't want the text field to grow in the vertical direction, so you would<br />
probably choose to allocate all of the extra space to the buttons. To do this,<br />
you set the weighty value for the text area to 0.0 (so that it gets no extra<br />
space) and that for the buttons to an arbitrary nonzero values. To distribute<br />
the vertical space equally between them, our example uses the value 0.5 (it<br />
could equally well have used 3.0 or 0.7 or any other positive value). After<br />
these changes, the code looks like that shown in Listing 3-8, where the<br />
changes just described are highlighted in bold.<br />
Listing 3-8 GridBagLayout with per-cell expansion constraints<br />
package <strong>JFC</strong>Book.Chapter3;<br />
import j avax.swing.*;<br />
import j ava.awt.*;<br />
import j ava.awt.event.*;<br />
public class GridBagLayoutExample4 extends JPanel {<br />
public GridBagLayoutExample4() {<br />
this.setLayout(new GridBagLayout());<br />
this.setOpaque(true);<br />
this.setBackground(UIManager.getColor("control"));<br />
GridBagConstraints c = new GridBagConstraints();<br />
JButton b = new JButton("ONE");<br />
c.gridx = 0;<br />
e.gridy = 0;<br />
e.gridwidth = 2;<br />
e.gridheight = 1;
198 Chapter 3 Managing the User Interface<br />
Listing 3-8 GridBagLayout with per-cell expansion<br />
constraints (continued)<br />
c.weightx = 0.4;<br />
c.weighty = 0.5;<br />
c.insets = new Insets(4, 3, 4, 3);<br />
this.add(b, c); // Button ONE added<br />
c.gridy++;<br />
b = new JButton("TWO");<br />
this.addfb, c); // Button TWO added<br />
c.gridx = 2;<br />
c.gridy = 0;<br />
c.gridwidth = 2;<br />
c.gridheight = 2;<br />
c.weightx = 0.6;<br />
b = new JButton("THREE");<br />
this.add(b, c); // Button THREE added<br />
c.gridx = 0;<br />
c.gridy = 2;<br />
c.gridwidth = 4;<br />
c.gridheight = 1;<br />
c.weightx = 1.0;<br />
c.weighty = 0.0;<br />
this.add(new JTextField(35), c);// Text field<br />
}<br />
public static void main(String[] args) {<br />
JFrame f = new JFrame("GridBagLayout 4");<br />
JPanel p = new GridBagLayoutExample4();<br />
f.getContentPane().add(p);<br />
f .packO ;<br />
f.addWindowListener(new WindowAdapter() {<br />
public void windowClosing(WindowEvent evt) {<br />
System.exit(0) ;<br />
}<br />
});<br />
f.setvisible(true) ;<br />
}<br />
This looks correct, but if you run this code and resize the window in both<br />
directions, you find that the text area does not behave as expected, as you can
Layout Managers 199<br />
see from Figure 3-20, which shows the result. The command you need to<br />
run thisversion of the example is:<br />
java <strong>JFC</strong>Book.Chapter3.GridBagLayoutExample4<br />
Figure 3-20 GridBagLayout: with cells that can expand or contract.<br />
While the buttons have improved their behavior, moving away from the<br />
edges of the container in the initial configuration and also moving when the<br />
container grows, the text area, although it stays attached to the bottom of the<br />
container as required, does not expand to take up the extra horizontal space<br />
available to it even though its weightx constraint is 1.0. So what has gone<br />
wrong here?<br />
The problem has arisen because the distinction between the terms cell<br />
and component has not yet been made clear. The weightx and weighty values<br />
control the extent to which the grid cells expand when the container<br />
grows, but, they have no direct effect on the size of the component within<br />
each cell. In fact, all of the cells in the container grew when the window was<br />
expanded, including the cells across which the text field lies. However, the<br />
text field didn't grow at all. This is because the growth of a component within<br />
its assigned cell or cells is controlled by the fill member of the GridBag-<br />
Constraints object, which has the following possible values:<br />
GridBagConstraints.NONE Do not grow<br />
GridBagConstraints . HORIZONTAL Grow horizontally only<br />
GridBagConstraints . VERTICAL Crow vertically only<br />
GridBagConstraints . BOTH Grow in both directions
200 Chapter 3 Managing the User Interface<br />
When you create a GridBagConstraints object, its fill value is set to<br />
GridBagConstraints .NONE, so that the associated component will not<br />
resize within its cell, even if the cell grows. To make the text area take up all<br />
of the horizontal space available to it, you need to set its fill value to Grid-<br />
BagConstraints .HORIZONTAL. Changing the initialization of the constraints<br />
object for the text area as follows produces the required result:<br />
c.gridx = 0;<br />
c.gridy = 2;<br />
c.gridwidth = 4;<br />
c.gridheight = 1;<br />
c.weightx = 1.0;<br />
c.weighty = 0.0;<br />
c.fill = GridBagConstraints.HORIZONTAL;<br />
this.add(new JTextField(35), c);// Text field<br />
Now the text area would occupy the bottom of the container (less the 8pixel<br />
insets) no matter how the container is resized. Use the command<br />
j ava <strong>JFC</strong>Book.Chapter3.GridBagLayoutExample6<br />
to verify this.<br />
There are three more members of the GridBagConstraints object left<br />
to look at. First, lets look at the ipadx and ipady values. When GridBag-<br />
Layout is laying out the container, it considers the minimum size of each<br />
component as one of the constraints used to decide how to allocate space; for<br />
example, if there is a choice as to how to allocate a few pixels, it is better to<br />
allocate them to a component that would otherwise be below its designers<br />
stated minimum size than to give them to a component that would not be.<br />
The ipadx and ipady values can be set to increase the values taken as the<br />
minimum sizes for a component when performing this calculation. For example,<br />
if a button indicates that its minimum size is 30 pixels wide and 20 pixels<br />
high and the associated constraints object has ipadx set to 4 and ipadx set<br />
to 2, then the minimum size of the button will be taken to be 38 pixels across<br />
and 24 pixels high. Furthermore, the component will not be made smaller<br />
than this.<br />
The last constraint is the anchor value. This field comes into play when the<br />
component is smaller than the cell area allocated to it, in either the horizontal<br />
or vertical direction. If this is the case, then the anchor value determines how<br />
the component will be aligned within the available space. By default, the component<br />
is anchored to the center of its display area, so that the extra space is<br />
distributed symmetrically around it. However, you can instead choose to<br />
anchor the component to any of the eight principal compass points, by using<br />
one of the possible anchor values from the following set:
GridBagConstraints .NORTH<br />
GridBagConstraints .SOUTH<br />
GridBagConstraints .NORTHEAST<br />
GridBagConstraints .SOUTHEAST<br />
GridBagConstraints .NORTHWEST<br />
GridBagConstraints .SOUTHWEST<br />
GridBagConstraints .EAST<br />
GridBagConstraints .WEST<br />
Layout Managers 201<br />
The default value, as noted above, is GridBagConstraints . CENTER.<br />
As an example of how this works, the following simple program (Listing 3-9)<br />
creates a 2-by-2 grid and places a button in each cell. The buttons are all<br />
anchored to the outside of their cells so that, if you resize the container, they all<br />
stay in their respective corners and move away from each other as the container<br />
expands, as shown in Figure 3—21. The command to run this example is:<br />
j ava <strong>JFC</strong>Book.Chapter3.GridBagLayoutExample6<br />
Figure 3-21 GridBagLayout: anchoring components to the side of a cell.<br />
There is, of course, a connection between the anchor and fill values for<br />
a cell. If a cell has a fill value that allows its component to expand in any<br />
given direction, the anchor constraint for that direction is effectively nullified.<br />
Suppose, for example, you place a text field in a cell and set the cell's<br />
fill constraint to GridBagConstraints .HORIZONTAL, so that it expands<br />
horizontally. Applying an anchor constraint like GridBagConstraints<br />
.WEST would now not make sense, because the component is<br />
growing horizontally and so will automatically stay anchored to the west (and<br />
east) side of its cell. It is, however, still meaningful to apply vertical anchor<br />
constraints like GridBagConstraints .NORTH, because the component is<br />
not going to grow vertically.
202 Chapter 3 Managing the User Interface<br />
Listing 3-9 GridBagLayout using anchor constraints<br />
package <strong>JFC</strong>Book.Chapter3;<br />
import j avax.swing.*;<br />
import j ava.awt.*;<br />
import j ava.awt.event.*;<br />
public class GridBagLayoutExample6 extends JPanel {<br />
public GridBagLayoutExample6() {<br />
this.setLayout(new GridBagLayout() ) ;<br />
this.setOpaque(true);<br />
this.setBackground(UIManager.getColor("control"));<br />
GridBagConstraints c = new GridBagConstraints();<br />
c.gridx = 0;<br />
c.gridy = 0;<br />
c.gridwidth = 1;<br />
c.gridheight = 1;<br />
c.weightx = 0.5;<br />
c.weighty = 0.5;<br />
c.insets = new Insets (4, 3, 4, 3);<br />
c.anchor = GridBagConstraints.NORTHWEST;<br />
this.add(new JButton("ONE"), c);<br />
c.gridx++;<br />
c.anchor = GridBagConstraints.NORTHEAST;<br />
this.add(new JButton("TWO"), c) ;<br />
c.gridx = 0;<br />
c.gridy++;<br />
c.anchor = GridBagConstraints.SOUTHWEST;<br />
this.add(new JButton("THREE"), c);<br />
c.gridx++;<br />
c.anchor = GridBagConstraints.SOUTHEAST;<br />
this.add(new JButton("FOUR"), c);<br />
}<br />
public static void main(String[] args) {<br />
JFrame f = new JFrame("GridBagLayout 6");<br />
JPanel p = new GridBagLayoutExample6();<br />
f.getContentPane().add(p);<br />
f.pack();
Listing 3-9 GridBagLayout using anchor constraints (continued)<br />
f.addWindowListener(new WindowAdapter() {<br />
public void windowClosing(WindowEvent evt) {<br />
System.exit(0);<br />
}<br />
});<br />
Layout Managers 203<br />
f.setVisible(true);<br />
}<br />
J<br />
To recap, Table 3-1 summarizes the fields of GridBagConstraints and<br />
how they affect how the cells and components of a container are laid out by<br />
GridBagLayout. Be very careful to distinguish between the cell and component<br />
in the descriptions that follow: The term "cell" refers to the grid areas<br />
allocated to a component, whereas the term "component" refers to the space<br />
within that cell actually occupied by the component; these two are usually<br />
not the same thing, unless the fill member is set to GridBagConstraints<br />
.BOTH.<br />
Now that you've seen all aspects of GridBagLayout, let's look at how you<br />
might create the more complex layout shown in Figure 3—22 in a JPanel and<br />
then test it by placing it in the content pane of a JFrame so that you can see<br />
how it behaves when resized.<br />
Table 3-1 Fields of the GridBagConstructions Object<br />
Field Description<br />
gridx and These members give the x and y coordinates of the top left-hand<br />
gridy corner of a cell in which a component will reside. The top lefthand<br />
corner of the container has x and y coordinates equal to 0; x<br />
coordinates increase to the right and y coordinates increase<br />
downward. You can use the special value GridBagConstraints<br />
. RELATIVE for gridx to indicate the next cell to<br />
the right of the previous component added and as gridy to indicate<br />
the next cell below the previous added component. This is<br />
useful when working across a row or down a column.
204 Chapter 3 Managing the User Interface<br />
Figure 3—22 GridBagLayout: a typical form layout.<br />
Table 3-1 Fields of the GridBagConstructions Object (continued)<br />
gridwidth The number of cells allocated to the component, horizontally and<br />
and grid- vertically. For example, a component that requires a space 2 cells<br />
height wide by 3 cells high would have gridwidth set to 2 and gridheight<br />
set to 3. If you assign the value GridBagConstraints<br />
. REMAINDER to gridwidth, this component will<br />
be the last in its row and its cells will occupy all of the remaining<br />
space to the right-hand edge of the container. Similarly, using this<br />
value in the gridheight member makes the component be the<br />
last in its column, stretching to the bottom of the container.<br />
insets An Insets object that specifies padding to be added around the<br />
outside of the component when determining the size requirements<br />
of its cell. This value may be nul 1 if no external padding is<br />
required.
Table 3-1 Fields of the GridBagConstructions Object (continued)<br />
Layout Managers 205<br />
ipadx and The amount to be added to a component's declared minimum<br />
ipady size to create the minimum size of the components cell area. The<br />
actual size added is 2 x ipadx horizontally and 2 X ipady vertically,<br />
because the space is added to both sides of the component.<br />
fill This value is used if the component's preferred size is smaller<br />
than the space allocated to its cells and describes whether and<br />
how the component will grow to occupy this extra space. If the<br />
component is not required to grow at all, use GridBagConstraints<br />
. NONE, which is the default value. To make the component<br />
grow horizontally or vertically (but only in the stated<br />
direction), use GridBagConstraints . HORIZONTAL or<br />
GridBagConstraints . VERTICAL respectively. To make the<br />
component grow in both directions, use GridBagConstraints<br />
.BOTH.<br />
anchor Controls how the component is placed within its cell if it doesn't<br />
occupy all of the available space. By default, this field is set to<br />
GridBagConstraints . CENTER, which places spare room<br />
evenly around the outside of the component. The other possible<br />
values move the component to one of the eight available compass<br />
points: GridBagConstraints .NORTH, GridBagConstraints<br />
.NORTHEAST, GridBagConstraints.EAST,<br />
GridBagConstraints.SOUTHEAST, GridBagConstraints<br />
.SOUTH, GridBagConstraints.SOUTH-<br />
WEST, GridBagConstraints.WEST or<br />
GridBagConstraints.NORTHWEST.<br />
weightx and These fields are both used to control how the component's cells<br />
weighty expand to occupy any extra space available. If either value is 0.0,<br />
the cell does not expand in that direction. The total space for each<br />
cell in each row is determined by the ratio of the cell's we ightx to<br />
the sum of all of the weightx values in that row and similarly for<br />
the columns. To make all cells resize by the same amount, use<br />
identical, nonzero weightx or weighty values for all cells in<br />
the row or column (the actual value is not important); to make cell<br />
A expand twice as fast as cell B in the horizontal direction, give cell<br />
A a weightx that is twice the value of the weightx for cell B.<br />
First, let's review what is required of this layout. At the top is a text heading;<br />
clearly, the correct component to use for this is a JLabel, which should<br />
stretch across the top of the container, but retain a fixed height when the con-
206 Chapter 3 Managing the User Interface<br />
tainer expands. For this component, you would want weightx = 1.0 and<br />
weighty = ().() so that the cells occupied by the label expand as much as possible<br />
horizontally but remain a constant vertical size.<br />
The text area, shown as the large white area in Figure 3-22, is the one that<br />
should grow as much as possible in both directions when the user expands<br />
the window. Thus, you need to set both weightx and weighty to 1.0 and<br />
fill to GridBagConstraints .BOTH. Recall, however, that setting<br />
weightx and weighty to nonzero values will allow the cells occupied by the<br />
text area to expand, but the text area itself would remain stranded in the middle<br />
of its allocated area if fill were not changed, because its default value is<br />
GridBagConstraints .NONE, which stops the component resizing. Therefore,<br />
we set the fill value for this component to GridBagConstraints<br />
. BOTH. The text field at the bottom of the container has the same<br />
resize requirements as the text area, except that it should not expand vertically<br />
so the same constraints can be used for both, with a change to weighty<br />
(from 1.0 to 0.0) for the text field. That leaves the buttons and the "Search"<br />
label.<br />
Taking the label first, it should not resize in the horizontal direction after it<br />
has been placed, but it should occupy all of the space available initially. Accordingly,<br />
you should set weightx = 0.0 and weighty = 0.0 to prevent any resizing<br />
of the cell and fill = GridBagConstraints . BOTH to make the label fill<br />
all of the space available, so that the text appears to be close to the text input<br />
field that it refers to. You might wonder why GridBagConstraints .HORI-<br />
ZONTAL wasn't used to achieve this. That setting would also work, but Grid-<br />
BagConstraints .BOTH is preferable when the cells are constrained not to<br />
expand, because it ensures that all of the vertical space is used, resulting in<br />
proper vertical alignment of the centers of both the label and the adjacent text<br />
field, which also has the GridBagConstraints .BOTH setting for the same<br />
reason.<br />
That leaves only the buttons. All of the buttons should have the same vertical<br />
and horizontal size and retain their initial sizes under all circumstances.<br />
Since the same font is going to be used on all of these buttons, their heights<br />
will be the same when they first appear but, since the text on the buttons is<br />
not all of the same width, they would not all occupy the same horizontal<br />
space. To be sure that they do, the fill constraint should be to set Grid-<br />
BagConstraints .HORIZONTAL, which forces them to expand horizontally<br />
to fill the column that they reside in, thus making them all of the same size, ft<br />
is also necessary to ensure that this column remains of fixed size, which can<br />
be arranged by setting weightx to 0.0.
Layout Managers 207<br />
As for the vertical layout of the buttons, there are two choices. One possibility<br />
is to allow each cell to expand so that the buttons get equally spread<br />
over the vertical space available and get further apart as the height of the<br />
window is increased. This is the configuration shown in the diagram above.<br />
To achieve this, weighty should be set to 1.0 for every button. Actually, any<br />
nonzero value would do, as long as each button has the same value; if the values<br />
differ, the buttons with larger weighty values would get more space allocated<br />
to their cells and so would appear to be spaced further apart than those<br />
with smaller values. An alternative is to keep all of the buttons packed tightly<br />
together, separated by a constant distance and aligned toward the top of the<br />
text area. To achieve this, you would just set weighty to 0.0 for every button.<br />
To make the layout pretty, suitable insets have been added around the<br />
components, resulting in the code shown in Listing 3-10.<br />
Listing 3-10 Implementing a form-type layout with GridBagLayout<br />
package <strong>JFC</strong>Book.Chapter3;<br />
import javax.swing.*;<br />
import j ava.awt.*;<br />
import j ava.awt.event.*;<br />
public class GridBagLayoutExample7 extends JPanel {<br />
public GridBagLayoutExample7(boolean pack) {<br />
this.setLayout(new GridBagLayout() ) ;<br />
this.setOpaque(true);<br />
this.setBackground(UIManager.getColor("control"));<br />
GridBagConstraints c = new GridBagConstraints();<br />
double buttonWeighty = pack ? 0.0 : 1.0;<br />
int buttonCount = pack ? 7 : 6 ;<br />
JTextArea ta = new JTextArea(2 0, 30);<br />
JTextField tf = new JTextField(20);<br />
JLabel 1 = new JLabel("TEXT EDIT", SwingConstants.CEN-<br />
TER) ;<br />
1.setFont(new Font("SansSerif", Font.BOLD, 14));<br />
1.setForeground(Color.green);<br />
JLabel s = new JLabel("Search:", SwingConstants<br />
. RIGHT) ;<br />
// Heading label<br />
c.gridx = 0;<br />
c.gridy = 0;<br />
c.gridwidth = GridBagConstraints.REMAINDER;
208 Chapter 3 Managing the User Interface<br />
Listing 3-10 Implementing a form-type layout with GridBagLayout<br />
(continued)<br />
c.gridheight = 1;<br />
c.weightx = 1.0;<br />
c.weighty = 0.0;<br />
c.fill = GridBagConstraints.BOTH;<br />
c.insets = new Insets (2, 2, 2, 2);<br />
this.add(1, c);<br />
// Text area<br />
c.gridx = 1;<br />
c.gridy = 1;<br />
c.gridwidth = GridBagConstraints.REMAINDER;<br />
c.gridheight = buttonCount;<br />
c.fill = GridBagConstraints.BOTH;<br />
c.weightx = 1.0;<br />
c.weighty = 1.0;<br />
this.add(new JScrollPane(ta), c) ;<br />
// Text field<br />
c.gridx = 1;<br />
c.gridy = buttonCount + 1;<br />
c.gridwidth = GridBagConstraints.REMAINDER;<br />
c.gridheight = 1;<br />
c.fill = GridBagConstraints.BOTH;<br />
c.weightx = 1.0;<br />
c.weighty = 0.0;<br />
this.add(tf, c) ;<br />
// Search label<br />
c.gridwidth = 1;<br />
c.fill = GridBagConstraints.BOTH;<br />
c.weightx = 0.0;<br />
c.weighty = 0.0;<br />
this.add(s, c);<br />
// The buttons<br />
c.gridx = 0;<br />
c.gridy = 1;<br />
c.fill = GridBagConstraints.HORIZONTAL;<br />
c.weightx = 0.0;<br />
c.weighty = buttonWeighty;<br />
this.add(new JButton("Load..."), c);<br />
c.gridy = GridBagConstraints.RELATIVE;
Listing 3-10 Implementing a form-type layout with GridBagLayout<br />
}<br />
(continued)<br />
this.add(new JButton("Save..."), c) ;<br />
this.add(new JButton("Print. . ."), c) ;<br />
this.add(new JButton("Cut" ), c) ;<br />
this.add(new JButton("Copy"), c);<br />
this.add(new JButton("Paste"), c) ;<br />
}<br />
public static void main(String[] args) {<br />
JFrame f = new JFrame("GridBagLayout 7");<br />
boolean pack = false;<br />
}<br />
if (args.length > 0 && args [0] .equals("packed")) {<br />
pack = true;<br />
}<br />
JPanel p = new GridBagLayoutExample7(pack);<br />
f.getContentPane().add(p);<br />
f .pack() ;<br />
f.addWindowListener(new WindowAdapter() {<br />
public void windowClosing(WindowEvent evt) {<br />
System.exit(0);<br />
}<br />
});<br />
f.setVisible(true);<br />
Layout Managers 209<br />
In order to allow you to try out both ways of laying out the buttons, Listing<br />
3-10 allows you to supply an argument that determines which layout choice<br />
you want to see. To see the layout that allows the buttons to spread out, type<br />
java <strong>JFC</strong>Book.Chapter3.GridBagLayoutExample7<br />
To see the buttons tightly packed at the top and to verify that they stay that<br />
way when the container is resized, use this command:<br />
<strong>Java</strong> <strong>JFC</strong>Book.Chapter3.GridBagLayoutExample7 packed<br />
The packed button layout is shown in Figure 3-23.
210 Chapter 3 Managing the User Interface<br />
Figure 3-23 GridBagLayout: a form layout with the buttons kept together.<br />
Box and BoxLayout<br />
The BoxLayout manager is very useful if you want to lay out a single row<br />
or a single column of components within a container. You can use a BoxLayout<br />
with any container, or you can use the Box container, which comes with a<br />
BoxLayout as its default layout manager. To create a Box, you have to specify<br />
the axis along which its child components will be laid out:<br />
public Box(int axis);<br />
where axis is either BoxLayout .X_AXIS for a horizontal arrangement or<br />
BoxLayout. Y_AXIS for a vertical one. As you add components to the Box,<br />
they are arranged in order, either from left to right or from top to bottom.
<strong>Core</strong> Warning<br />
Unlike the other Swing components, Box is derived from Container, not<br />
JComponent. This means you can't do useful things like adding a border,<br />
setting client properties, registering keystroke handlers, etc., that are<br />
supported by JComponent when you use a Box. If you need these<br />
features, use a JPanel with a BoxLayout layout manager instead.<strong>Java</strong><br />
2 version 1.4 corrects this anomaly by reparenting Box to JComponent.<br />
Layout Managers 211<br />
The interesting thing about BoxLayout, like all layout managers, is the way<br />
in which it sizes its child components and how it allocates extra space. For<br />
the sake of simplicity, let's assume for now that you want to lay out components<br />
in a Box (or any other container) which has a BoxLayout configured to<br />
organize them horizontally (i.e., BorderLayout .X_AXIS). The BoxLayout<br />
tries to give each component its preferred size. In a horizontal arrangement,<br />
the components are laid out from the left of the container, with the first component<br />
flush against the left side of the container, the second immediately to<br />
its right, and so on. When all of the components have been added, any spare<br />
space appears to the right. Resizing the container horizontally does not cause<br />
the components to relocate—the free space to the right increases or<br />
decreases according to the change in the containers size.<br />
Figure 3-24 shows a number of configurations created using BoxLayout;<br />
the one described here is labeled "1: Nothing," and there is a similar vertical<br />
arrangement labeled "5: Nothing."<br />
To run this example, type<br />
j ava <strong>JFC</strong>Book.Chapter3.BoxLayoutDemo<br />
Resize the window both horizontally and vertically: You'll find that the<br />
components in these two configurations stay where they are, while the empty<br />
space to the right of and below them changes. If you make the window so<br />
small that there isn't enough space for all of the components, you'll see that<br />
they get compressed, with the result that they are no longer able to display<br />
their associated text properly.<br />
Here is the code used to generate the horizontal version of this arrangement:<br />
public JPanel createFirstBoxPane() {<br />
JPanel p = new JPanel();<br />
this.addTitledBorder(p, "1: Nothing");<br />
p.setLayout(new BoxLayout(p, BoxLayout.X_AXIS));<br />
p.add(new JButton("L"));
212 Chapter 3 Managing the User Interface<br />
Figure 3-24 Various BoxLayout configurations.<br />
}<br />
p.add(new JButton("M"));<br />
p.add(new JButton("R"));<br />
return p;<br />
As you can see, the container we're using here is not a Box, but a JPanel.<br />
To associate a BoxLayout with it, you use the set Layout method as normal,<br />
but note that the BoxLayout constructor is passed not only the<br />
required orientation, but also a reference to the container that it is managing<br />
as its first argument.<br />
The BoxLayout allows you to change the way in which extra space is distributed<br />
by using three special types of invisible components—rigid areas,<br />
struts, and glue. You create these components using static methods declared<br />
by the Box class and add them to the BoxLayout's container to get the<br />
desired effects.<br />
Rigid Areas<br />
As its name suggests, a rigid area is a fixed-size, two-dimensional component.<br />
Adding it to a horizontal container, for example, causes a horizontal gap equal<br />
to its width to be left in the layout and ensures that the container is at least as<br />
high as the rigid area itself. You create a rigid area using the following Box<br />
method:
public static Component createRigidArea(Dimension d) ;<br />
Layout Managers 213<br />
Note that this is a static method, so you don't need to create an instance of<br />
Box to be able to use it. The panel labeled "4: Rigid Areas" has three rigid<br />
areas, one to the left of the button labeled "L" and two between the three<br />
buttons. Here is the code used to create this area:<br />
public JPanel createFourthBoxPane() {<br />
JPanel p = new JPanel();<br />
}<br />
this.addTitledBorder(p, "4: Rigid Areas");<br />
p.setLayout(new BoxLayout(p, BoxLayout.X_AXIS));<br />
// The rigid areas make the pane larger top to bottom<br />
// and space the buttons out<br />
p.add(Box.createRigidArea(horzRigidAreaDim));<br />
p.add(new JButton("L"));<br />
p.add(Box.createRigidArea(horzRigidAreaDim));<br />
p.add(new JButton("M"));<br />
p.add(Box.createRigidArea(horzRigidAreaDim));<br />
p.add(new JButton("R") ) ;<br />
return p;<br />
As you can see, the rigid areas are added to the container exactly as if they<br />
were ordinary components. The rigid areas in this example are all of the same<br />
size, declared as follows:<br />
private static Dimension horzRigidAreaDim =<br />
new Dimension(8, 40);<br />
As a result, we are adding a rigid area that is 8 pixels wide and 40 pixels<br />
high. This causes the left button to be 8 pixels from the left side of the container<br />
and creates an 8-pixel gap between the three buttons. Again, any spare<br />
space appears to the right of the rightmost button. A secondary effect of adding<br />
this component is to ensure that the panel is at least 40 pixels high; it<br />
could, of course, be higher if there were a component in that layout that<br />
exceeded 40 pixels in the vertical direction. There is a similar vertical construction<br />
in panel number 8. This time, there are two rigid areas, one above<br />
the button labeled "T" and the other below the one labeled "M." These two<br />
rigid areas dictate the space around these buttons and also influence the<br />
width of the panel.
214 Chapter 3 Managing the User Interface<br />
Struts<br />
Struts are very similar to rigid areas, except that they are one-dimensional. A<br />
horizontal strut introduces a fixed-size horizontal gap in the layout, but has<br />
no effect on the vertical size of the container because it has zero height. Similarly,<br />
a vertical strut introduces a vertical space of fixed size and does not<br />
have any effect in the horizontal direction. You create these struts using one<br />
of the following static Box methods:<br />
public static Component createVerticalStrut(int height);<br />
public static Component createHorizontalStrut(<br />
int width);<br />
Panel 3 has 16-pixel horizontal struts around the button labeled "L," which<br />
causes a gap of this size to appear on each side of it. The other two buttons are<br />
arranged next to each other because they don't have any intervening spacer<br />
component and the remaining free space appears to the right, as always. The<br />
code for this particular panel is similar to that for the previous two:<br />
public JPanel createThirdBoxPane() {<br />
}<br />
JPanel p = new JPanel();<br />
this.addTitledBorder(p, "3: Struts");<br />
p.setLayout(new BoxLayout(p, BoxLayout.X-AXIS));<br />
// The struts ensure that the "L" button is<br />
// a fixed distance from the left and the "M"<br />
// button the same distance from the "L" button<br />
p.add(Box.createHorizontalStrut(strutWidth));<br />
p.add(new JButton("L"));<br />
p.add(Box.createHorizontalStrut(strutWidth));<br />
p.add(new JButton("M"));<br />
p.add(new JButton("R"));<br />
return p;<br />
The exact effect of a horizontal strut depends on the orientation of the<br />
container. Here we've seen a horizontal strut enforcing a separation between<br />
two components. You can also use a horizontal strut in a vertical container, in<br />
which case it enforces a minimum container width. Similarly, you can create<br />
vertical struts that have the corresponding effects in the other direction.
Glue<br />
Layout Managers 215<br />
The last spacer component that Box provides is glue. You create glue using<br />
one of the following methods:<br />
public static Component createGlue();<br />
public static Component createHorizontalGlue();<br />
public static Component createVerticalGlue();<br />
Glue is perhaps the wrong term for this component because it suggests<br />
something sticky. In fact, a glue component expands to take up as much<br />
space as it can. Horizontal glue occupies as much horizontal space as it can<br />
and vertical glue does the same in the direction of the Y axis. Glue created<br />
using createGlue expands in both directions.<br />
Panels 2 and 6 show glue in use. Here is the implementation of panel 2:<br />
public JPanel createSecondBoxPane() {<br />
}<br />
JPanel p = new JPanel();<br />
this.addTitledBorder(p, "2: Glue");<br />
p.setLayout(new BoxLayout(p, BoxLayout.X_AXIS));<br />
// These buttons align around the center<br />
p.add(Box.createGlue ()) ;<br />
p.add(new JButton("L"));<br />
p.add(Box.createGlue() ) ;<br />
p.add(new JButton("M"));<br />
p.add(Box.createGlue());<br />
p.add(new JButton("R"));<br />
p.add(Box.createGlue ()) ;<br />
return p;<br />
The four glue components take all of the extra space and divide it equally<br />
between themselves. As a result, this arrangement produces three evenlyspaced<br />
buttons. If there were one glue component to the left of the button<br />
labeled "L" and the rest of the glue were removed, all of the free space would<br />
be taken up by the glue on the left of the container, so the buttons would all<br />
be packed tightly together on the right. On the other hand, placing glue to<br />
the left of the left button and the right of the right button would distribute<br />
the spare space equally on each side, leaving the three buttons huddled<br />
together in the center of the container.
216 Chapter 3 Managing the User Interface<br />
More About BoxLayout's Layout Policy<br />
In the discussion up to this point, you have seen the major features of Box-<br />
Layout, but we have not yet fully covered its layout policy. You've seen that a<br />
BoxLayout created using X_AXIS as its layout direction places components<br />
horizontally, starting from the left of the container, while a Y_AXIS BoxLayout<br />
arranges its components vertically, from top to bottom. However, this is<br />
not the whole story because we haven't told you what happens in the other<br />
direction for each of these cases. In order to simplify the discussion, we'll<br />
describe first what happens with a vertical (Y_AXIS) BoxLayout.<br />
If you look back at the panel labeled "5 Nothing" in Figure 5-24, you'll<br />
see an example of a BoxLayout laying its components out along the y-axis.<br />
As you can see, these components are all left-justified within the panel and<br />
they all seem to have been given their preferred width, since the middle<br />
component is wider than the other two. Looking simply at this example, you<br />
might be tempted to believe that this is what happens on the x-axis when a<br />
BoxLayout is arranging components along its y-axis. However, this is not the<br />
case. To see an example of somewhat different behavior, try the following<br />
command:<br />
j ava <strong>JFC</strong>Book.Chapter3.BoxLayoutExamplel<br />
This command creates a frame containing three colored panels which have<br />
been added to another panel managed by a Y_AXIS BoxLayout. The panels<br />
have been given minimum, preferred, and maximum sizes that ensure that<br />
they aren't all the same width. The result of running this command is shown<br />
in the uppermost frame of Figure 3-25.<br />
In this case, the top panel is narrower than the other two, but instead of<br />
being aligned to the left of the frame, the shorter one floats in the middle. If<br />
you make the frame wider, you'll find that all three panels get wider and<br />
adopt different sizes until eventually they don't grow any more and empty<br />
space appears to the left right of all three panels, as shown at the bottom of<br />
Figure 3-25. No matter how wide you make the frame, all three panels align<br />
themselves with its center, instead of being left-aligned as was the case in<br />
Figure 3-24. In fact, this example shows two divergences from Figure 3-24:<br />
• The panels are centered instead of being left-aligned.<br />
• Some of the panels stretch horizontally when the frame is<br />
resized in that direction, whereas in Figure 3-24, the<br />
components seemed to adopt a fixed size and therefore did not
Figure 3-25 BoxLayout and Component alignment.<br />
expand to fill the space allocated to the panel that they were<br />
mounted on.<br />
To simplify matters, we'll look at these two aspects separately.<br />
Layout Managers 217
218 Chapter 3 Managing the User Interface<br />
Component Alignment<br />
Figure 3-24 might have given the impression that a Y_AXIS BoxLayout<br />
arranges components along the x-axis so that their left-hand sides are flush<br />
with the left of the container. In fact, this is not the case—BoxLayout actually<br />
arranges the components so that their horizontal alignment points lie in a<br />
vertical line, one above the other.<br />
What is meant by a components alignment points? Each component has<br />
an alignment attribute for each axis, given as a floating-point number in the<br />
range O.Of to l.Of, which represents how far the alignment point for that<br />
direction is along the corresponding side. These values can be set with the<br />
setAlignmentX and setAlignmentY methods of JComponent and can be<br />
read using getAlignmentX and getAlignmentY. The default value for<br />
each alignment varies from component to component. The JComponent<br />
class itself initializes them both to 0.5f, which implies center alignment in<br />
each direction. If the X alignment were O.Of, then the horizontal alignment<br />
point would be at the far left of the component, while the value l.Of would<br />
move the alignment point to the far right. The Y values work in the same way.<br />
The Component class actually defines symbolic constants for the most common<br />
alignment value.<br />
LEFT_ALIGNMENT O.Of<br />
CENTER_ALIGNMENT 0.5f<br />
RIGHT_ALIGNMENT l.Of<br />
TOP__ALIGNMENT O.Of<br />
BOTTOM^ALIGNMENT l.Of<br />
For clarity, you should use these constants instead of the literal values.<br />
<strong>Core</strong> Alert<br />
The alignment values are properties belonging to the Component class<br />
and they are, therefore, inherited by JComponent. Note carefully,<br />
however, that Component does not define the setAlignmentX and<br />
setAlignmentY methods—these are added by JComponent.The only<br />
way to change the alignment value of an AWT component is to subclass it<br />
and override the getAlignmentX and/or getAlignmentY methods.
Layout Managers 219<br />
How does this explain the apparent disparity between Figures 3-24 and 3-<br />
25? The reason for this disagreement is that fact that the components concerned<br />
have different X alignment values. In Figure 3-24, the components in<br />
the panel labeled "5 Nothing" are all JButtons. The initialization code of<br />
the AbstractButton class from which JButton is derived includes the following<br />
two lines of code:<br />
setAlignmentX(LEFT_ALIGNMENT);<br />
setAlignmentY(CENTER_ALIGNMENT);<br />
This means that all buttons have their X alignment points on their lefthand<br />
side, which means that a Y_AXIS BoxLayout will organize them so that<br />
their left-hand sides are lined up vertically, as you can see in Figure 3-24.<br />
Since this container only has the three buttons, their left-hand sides are<br />
placed flush left within the panel.<br />
What about Figure 3-25? Here, the BoxLayout is managing three JPanels.<br />
JPanel has an X alignment value of CENTER_ALIGNMENT, which means<br />
that BoxLayout will align their centers one above the other instead of their<br />
left-hand sides. This explains why the top panel in Figure 3-25, which is narrower<br />
than the other two, is placed in the middle of the frame with empty<br />
space on both sides. If the JPanels' X alignment attributes were all changed<br />
to LEFT_ALIGNMENT, you would see the same result as is shown in Figure 3-<br />
24, while if they all had RIGHT_ALIGNMENT, they would be placed flush right<br />
within the frame because their right-hand sides would have to be placed one<br />
above the other in a vertical line.<br />
There is, of course, no requirement for all the Components in a Container<br />
to have the same X alignment value. If, in the example shown in Figure<br />
3-25, the X alignment of the top panel were changed to<br />
LEFT_ALIGNMENT, then BoxLayout would align the left-hand side of the top<br />
panel over the center points of the other two panels, as shown in Figure 3-26.<br />
It is also possible to use intermediate values (such as 0.75F, 0.25F, etc.),<br />
which move the alignment point the corresponding distance along the X axis.<br />
The example shown in this section used a Y_AXIS BoxLayout. If an<br />
X AXIS BoxLayout had been used, then the components would be laid out<br />
left to right and the Y alignment would be used instead of the X alignment to<br />
determine their relative positions along the y-axis. To see an example of this,<br />
type the command:<br />
j ava <strong>JFC</strong>Book.Chapter3.BoxLayoutExample2<br />
The result of running this command is shown in Figure 3-27.
220 Chapter 3 Managing the User Interface<br />
Figure 3-26 Components with different horizontal alignment values.<br />
Figure 3-27 BoxLayout arranging components on the x-axis with different vertical<br />
alignment values.<br />
In this example, since the components are laid out along the x-axis, we<br />
need to consider the Y alignment values, which are set as follows:
Left Panel CENTER_ALIGNMENT<br />
Middle Panel TOP_ALIGNMENT<br />
Right Panel BOTTOM_ALIGNMENT<br />
Layout Managers 221<br />
These values imply that the center line of the left panel will be aligned<br />
with the top of the center panel and bottom of the right-hand panel, which is<br />
indeed what Figure 3-27 shows.<br />
Component Sizing<br />
In order to understand how BoxLayout determines the size of the components<br />
that it is managing, we need to consider both layout directions separately<br />
because they don't behave in the same way. For the purposes of this<br />
discussion, we'll use the example shown in Figure 3-27, which uses a Box-<br />
Layout arranging its components along the x-axis. This example prints the<br />
sizes of each of the panels every time they change size so that you can see<br />
how resizing the frame affects the sizes of the components that the BoxLayout<br />
is controlling. These panels are constrained with fixed minimum, preferred,<br />
and maximum sizes as follows:<br />
When the program starts, the three panels are arranged as shown in Figure<br />
3-27 and their initial sizes are reported in the window from which you<br />
started the example:<br />
Left panel size: Dimension[width=75,height=150]<br />
Middle panel size: Dimension [width=125,height=100]<br />
Right panel size: Dimension[width=175,height=100]<br />
Looking first at the x-axis, which is the direction of layout for this BoxLayout,<br />
you'll see that each panel has been given its preferred width. This is<br />
probably what you would expect, because the initial size of the frame was<br />
determined by calling its pack method, which allows the layout manager to
222 Chapter 3 Managing the User Interface<br />
request the size that it would like its container to be. Since the BoxLayout is<br />
tiling horizontally, it will naturally consider its preferred size to be the sum of<br />
the preferred widths of its three components. Now enlarge the frame horizontally<br />
by a small amount. You might expect that the three panels would be<br />
left at their preferred widths and blank space would appear somewhere in<br />
the frame, but this is not what happens—in fact, all three panels are<br />
stretched horizontally as the program's output shows:<br />
Left panel size: Dimension[width=88,height=150]<br />
Middle panel size: Dimension [width=138,height=100]<br />
Right panel size: Dimension[width=188,height=100]<br />
Now, all of the panels are larger than they would prefer to be and the additional<br />
space available has been distributed among all three of them evenly. If<br />
you keep dragging the right hand side of the frame, you'll see the panels continue<br />
to get wider until you reach a certain point, when you'll see output that<br />
looks something like this:<br />
Left panel size: Dimension[width=100,height=150]<br />
Middle panel size: Dimension[width=150,height=100]<br />
Right panel size: Dimension[width=200,height=100]<br />
At this point, there will be blank space on the right of the frame and the<br />
size of this area will get larger if you continue to expand the window, while<br />
the panels refuse to get any wider. What has happened here is that the panels<br />
have all reached their maximum widths. When a component reaches its maximum<br />
size in the direction of layout, BoxLayout doesn't attempt to make it<br />
any larger in that direction.<br />
Now restart the example to revert to the original settings and then drag<br />
the right-hand side of the frame to the left a little way, thus making the frame<br />
narrower. When you do this, there is insufficient space for all of the panels to<br />
be given their preferred width, so at least one of them will have to get narrower<br />
or the rightmost one will have to be clipped. You can see what happens<br />
by looking at the program's output:<br />
Left panel size: Dimension[width=66,height=150]<br />
Middle panel size: Dimension[width=116,height=100]<br />
Right panel size: Dimension[width=166,height=100]<br />
In fact, all three panels have been made narrower and are now below their<br />
preferred width. So, when there is insufficient space in the direction of layout,<br />
BoxLayout distributes the shortfall over all of the components, making<br />
each of them narrower. It does not try to preserve the preferred width of any<br />
of them. If you continue to narrow the frame, you'll see that the panels continue<br />
to get narrower. Eventually, however, they reach their minimum sizes.
Layout Managers 223<br />
At this point, BoxLayout will not attempt to make them any narrower and<br />
the rightmost panel will be clipped by the right-hand edge of the frame.<br />
In the other direction, the layout policy is similar but not exactly identical.<br />
When the panels in Figure 3-27 are initially sized, you'll notice that the middle<br />
and right-hand panels are given their preferred heights, but the left-hand<br />
panel is taller than it would prefer to be. The reason for this is simple. The<br />
height of the frame is determined by the fact that the alignment of the three<br />
panels requires that the bottom of the right panel should be in line with the<br />
top of the middle one. As a result, the frame will need to be at least as high as<br />
the total of the the preferred heights of these panels—that is, 200 pixels. The<br />
left-hand panel's center line will be aligned with the top of the middle panel<br />
and it would prefer to be 100 pixels high. However, as we saw in the direction<br />
of layout, BoxLayout does not allocate the preferred size if there is extra<br />
space available. In this case, it would naturally want to make the left panel<br />
200 pixels high, but it does not do so because its has a maximum height of<br />
150 pixels. Therefore, the left panel is sized at 150 pixels.<br />
The other difference between the y-axis in this example and the direction<br />
of layout will be seen if you make the frame shorter and shorter. As you<br />
would expect, the panels also shrink. In the direction of layout, the panels do<br />
not shrink below their minimum size, but this is not true in the other direction—they<br />
continue to shrink no matter how small the frame gets, as shown<br />
by the following output:<br />
Left panel size: Dimension[width=75,height=43]<br />
Middle panel size: Dimension[width=125,height=22]<br />
Right panel size: Dimension[width=175,height=21]<br />
Despite the fact that all three panels have a minimum height of 50, they<br />
have all been allocated a height that breaks that constraint. However, the<br />
alignment constraints are still satisfied.<br />
To summarize, the layout policy of BoxLayout results in its components<br />
being sized as follows:<br />
• In the direction of layout, the preferred width or height of all<br />
the components is added up to determine the overall preferred<br />
width or height. If the container is sized exactly to the preferred<br />
height or width, then all of the components will be given their<br />
preferred size in this direction. If not, any extra space is<br />
distributed among all the components, making them all larger<br />
than their preferred size and, similarly, any shortfall causes<br />
them all to be smaller then their preferred size. However, the
224 Chapter 3 Managing the User Interface<br />
maximum and minimum sizes are respected, so there may be<br />
clipping if the container is too narrow or a gap if it is too wide.<br />
• In the other direction, the priority is to maintain the<br />
components' alignment constraints. Again, if the space available<br />
is larger than that required by a component, it will be expanded<br />
to take up as much space as possible, subject to its alignment<br />
constraints being obeyed. However, no component will grow<br />
beyond its maximum size. Similarly, if there is too little space,<br />
components will be reduced in size. However, in this direction,<br />
the component's minimum size is ignored—the component may<br />
shrink as small as necessary.<br />
In both directions, therefore, the component will not necessarily be given<br />
its preferred size even if it can be achieved, because if the space available is<br />
larger, the component will grow into it, up to its maximum size, or shrink to<br />
fit a shortfall. If you want your component to grow no larger than its preferred<br />
size, then you will need to set the maximum size to be the same as the<br />
preferred size using the JComponent setMaximumSize method. This works<br />
on both axes. However, setting the minimum size is effective only in the<br />
direction of layout because BoxLayout does not respect the minimum size<br />
in the other direction. That is, for a Y_AXIS layout, the minimum height will<br />
be respected, but the minimum width is not. Similarly, for an X_AXIS layout,<br />
the minimum width will be respected, but the minimum height is not.<br />
In the panel labeled "5 Nothing" in Figure 3-24, the three buttons all<br />
have their natural sizes because the button returns the same value for its<br />
minimum, preferred, and maximum sizes, and so BoxLayout has no alternative<br />
but to give all of the buttons their preferred width, even when there is<br />
extra space. However, if the frame is narrowed, the buttons also get narrower<br />
because they are placed on a Y_AXIS BoxLayout, so the minimum width<br />
will be ignored. On the other hand, if the frame is made shorter, the buttons'<br />
heights will not change because the minimum is respected in the direction of<br />
layout, which means that they will be clipped if there is not enough vertical<br />
space to show them all.<br />
Watching Component Layout and Drawing with<br />
DebugGraphics<br />
If you've ever wondered why your applications interface wasn't being drawn<br />
properly, or tried to develop a custom component and spent hours wondering<br />
why a part of your control was missing or drawn incorrectly, the Swing
Layout Managers 225<br />
DebugGraphics feature is sure to be able to help you. This is, quite simply,<br />
one of the best new ideas in the <strong>Java</strong> <strong>Foundation</strong> <strong>Classes</strong> and, as is usually the<br />
case with <strong>Java</strong>, it is very easy to use it when you need to: You don't have to<br />
spend a long time trying to enable it or configure it properly.<br />
The basic idea is that, since all rendering operations in <strong>Java</strong> are performed<br />
by operations on a Graphics object (about which you learn more in the next<br />
chapter), it is possible to capture all of these operations and control the way<br />
they are performed by providing a subclass of Graphics that intercepts<br />
every operation on a component and can then report it to the user. In Swing,<br />
the DebugGraphics class performs this function. The best way to see what it<br />
does is to observe it in action.<br />
The layout created in Listing 3-10 was fairly complicated, so let's use it to<br />
show how easy it is to turn on graphics debugging and what happens as a<br />
result. Look at the code in Listing 3—11.<br />
The main method of this example is almost the same as that which was<br />
used to test the original layout. However, the following important line has<br />
been added:<br />
p.setDebugGraphicsOptions(DebugGraphics.FLASHjDPTION);<br />
The setDebugGraphicsOptionQ method belongs to the JComponent<br />
class; debugging can therefore be enabled on any class that is derived from<br />
JComponent. Here, debugging is enabled by invoking this method against<br />
the JPanel. The effect of calling this method on an object is to set the<br />
debugging options specified for that object and, if that object is a container,<br />
for all of the components contained within that container. If any of these<br />
components is also a container, the options are effectively cascaded down<br />
into that containers children as well. Thus, turning on graphics debugging<br />
for a container has the effect of switching it on for all of the components contained<br />
wihin it, no matter how deeply nested.<br />
Listing 3-1 I Using DebugGraphics to view component drawing on<br />
the screen<br />
package <strong>JFC</strong>Book.Chapter3;<br />
import j avax.swing.*;<br />
import j ava.awt.*;<br />
import j ava.awt.event.*;<br />
public class DebugGraphicsExamplel {
226 Chapter 3 Managing the User Interface<br />
Listing 3-1 I Using DebugGraphics to view component drawing on<br />
When you run the example code in Listing 3-11, you will see the frame<br />
appear and then the panel will start to lay itself out. However, the drawing<br />
operations will proceed much more slowly than usual and, as each line is<br />
drawn, it will flash red. With debugging enabled, you can now watch all of the<br />
drawing operations in action at a speed slow enough to allow you to see what<br />
is going on. The command needed to run this example is:<br />
j ava <strong>JFC</strong>Book.Chapter3.DebugGraphicsExamplel<br />
<strong>Core</strong> Alert<br />
You may be wondering about this strange-looking line of code in the above<br />
example:<br />
the screen (continued)<br />
public static void main(String[] args) {<br />
JFrame f = new JFrame("DebugGraphicsExample 1");<br />
boolean pack = false;<br />
if (args.length > 0 && args[0].equals("packed")) {<br />
pack = true;<br />
}<br />
RepaintManager.currentManager(f.getRootPane()).<br />
setDoubleBufferingEnabled(false);<br />
JPanel p = new <strong>JFC</strong>Book.Chapter3.GridBagLayoutExample7<br />
(pack);<br />
}<br />
p.setDebugGraphicsOptions(DebugGraphics.FLASH_OPTION);<br />
f.getContentPane().add(p);<br />
f.pack();<br />
f.addWindowListener(new WindowAdapter() {<br />
public void windowClosing(WindowEvent evt) {<br />
System.exit(0);<br />
}<br />
});<br />
f.setVisible(true);<br />
}<br />
RepaintManager.currentManager (f.getRootPane()).
setDoubleBufferEnabled(false);<br />
As you'll see later, Swing components provide graphics double-buffering—<br />
that is, they can be drawn into an off-screen buffer first and then copied<br />
directly to the screen. This technique reduces flashing effects caused by<br />
components redrawing themselves on the screen. It is possible to use<br />
DebugGraphics with double-buffering, but you haven't seen how to do<br />
that yet, so the above line is included to turn off the double-buffering for<br />
everything in the frame's root pane.<br />
Configuring Graphics Debugging<br />
Layout Managers 227<br />
The setDebugGraphicsOptions method takes a single integer argument<br />
made up of a bitmask constructed by ORing together with some of the following<br />
constants:<br />
DebugGraphics.FLASH_OPTION<br />
DebugGraphics.LOG_OPTION<br />
DebugGraphics.BUFFEREDJDPTION<br />
Each time you call setDebugGraphicsOptions, the mask you supply is<br />
combined with the current settings, rather than overwriting it, so that the two<br />
calls<br />
p.setDebugGraphicsOptions(DebugGraphics.FLASH_OPTION);<br />
p.setDebugGraphicsOptions(DebugGraphics.LOG_OPTION);<br />
result in both of these options being enabled. To clear all options (and hence<br />
turn debugging off), use the following line:<br />
p.setDebugGraphicsOptions(DebugGraphics.NONE_OPTION);<br />
If you select FLASH_OPTION, then graphics operations on the screen will<br />
cause the flashing effects that were shown in the example above. By default,<br />
each operation flashes twice, with each flash lasting for 100 milliseconds. You<br />
can change the number of flashes and the duration of each using the following<br />
static methods of the DebugGraphics class:<br />
public static void setFlashTime(int flashTime);<br />
public static void setFlashCount(int flashCount);<br />
You can also use the setFlashColor method to change the flash color if<br />
red is not to your taste. The example in Listing 3-12 makes each operation<br />
display four flashes, each lasting 250 milliseconds, in green. This version of<br />
the program takes much longer to run, of course, since every graphics call<br />
now takes one second to perform. Try it out with the command
228 Chapter 3 Managing the User Interface<br />
java <strong>JFC</strong>Book.Chapter3.DebugGraphicsExample2<br />
Listing 3-12 Using a customized DebugGraphics setup<br />
package <strong>JFC</strong>Book.Chapter3;<br />
import j avax.swing.*;<br />
import j ava.awt.*;<br />
import j ava.awt.event.*;<br />
public class DebugGraphicsExample2 {<br />
public static void main(String[] args) {<br />
JFrame f = new JFrame("DebugGraphicsExample 2");<br />
boolean pack = false;<br />
if (args.length > 0 && args [0] .equals("packed")) {<br />
pack = true;<br />
}<br />
RepaintManager.currentManager(f.getRootPane() ) .<br />
setDoubleBufferingEnabled(false);<br />
JPanel p = new <strong>JFC</strong>Book.Chapter3.GridBagLayoutExample7<br />
(pack);<br />
p.setDebugGraphicsOptions(DebugGraphics.FLASH_OPTION);<br />
DebugGraphics.setFlashTime(250);// 1/4 second<br />
DebugGraphics.setFlashCount(4) ;<br />
DebugGraphics.setFlashColor(Color.green);<br />
f.getContentPane().add(p);<br />
f.pack () ;<br />
f.addWindowListener(new WindowAdapter() {<br />
public void windowClosing(WindowEvent evt) {<br />
System.exit(0);<br />
}<br />
});<br />
f.setVisible(true);<br />
}<br />
J<br />
Since setFlashColor, setFlashTime, and setFlashCount are all<br />
static methods, the settings they establish are effective for every component:<br />
it is not possible to customize these settings on a per-component basis. If you<br />
want to find out what settings are in effect, there are the corresponding static<br />
methods flashColor, flashTime, and flashCount that take no arguments<br />
and return the obvious data types:
public static Color flashColor();<br />
public static int flashTime();<br />
public static int flashCount();<br />
Graphics Debug Logging<br />
Layout Managers 229<br />
While it will often be sufficient to watch components flash as they draw<br />
themselves, some problems cannot be so easily debugged. For cases like this,<br />
you can use the LOG_OPTION setting. When you enable this, every graphics<br />
operation causes a message to be written to a logging stream. By default, this<br />
output goes to your application's DOS or Unix command line window (in<br />
fact, to your programs standard output stream). If you want to capture the<br />
output in a file, you can use the DebugGraphics static setLogStream<br />
method:<br />
public static void setLogStream(PrintStream stream);<br />
Listing 3-13 sets the debug options so that all of the graphics operations<br />
are written to a file whose name you supply on the program s command line.<br />
A typical command line for running this program would be:<br />
j ava <strong>JFC</strong>Book.Chapter3.DebugGraphicsExample3<br />
c:\temp\debugout<br />
Writing the results to a file is much quicker than directing them to your<br />
screen, and not turning on the flashing option also saves a lot of time.<br />
Beware, however, that this example produces a lot of output: when I ran it, I<br />
got more than 1000 lines, an extract of which is shown below.<br />
Graphics(0-1) Setting color: javax.swing.plaf.<br />
ColorUIResource[r=0,g=0,b=0]<br />
Graphics(0-1) Setting font: javax.swing.plaf.<br />
FontUIResource[family=Dialog,name=Dialog,<br />
style=plain,size=12]<br />
Graphics(1-1) Setting color: javax.swing.plaf.<br />
ColorUIResource[r=192,g=192,b=192]<br />
Graphics(1-1) Filling rect: <strong>Java</strong>.awt.Rectangle<br />
[x=0,y=0,width=6 9,height=23]<br />
Graphics(1-1) Setting font: javax.swing.plaf.<br />
FontUIResource[family=Dialog,name=Dialog,<br />
style=plain,size=12]<br />
Graphics(1-1) Setting color: javax.swing.plaf.<br />
ColorUIResource[r=192,g=192,b=192]<br />
Graphics(1-1) Filling rect: java.awt.Rectangle
230 Chapter 3 Managing the User Interface<br />
Listing 3-13 Saving DebugGraphics output in a file<br />
package <strong>JFC</strong>Book.Chapter3;<br />
import j avax.swing.*;<br />
import j ava.awt.*;<br />
import j ava.awt.event.*;<br />
import j ava.io.*;<br />
public class DebugGraphicsExample3 {<br />
public static void main(String[] args) {<br />
JFrame f = new JFrame("DebugGraphicsExample 3");<br />
if (args.length != 1) {<br />
System.err.println("Please supply an output file<br />
name");<br />
}<br />
System.exit(0);<br />
PrintStream s = null;<br />
try {<br />
s = new PrintStream(new FileOutputStream(args[0]));<br />
} catch (Exception e) {<br />
System.err.println("Failed to create output file<br />
: " + e);<br />
System.exit(0);<br />
}<br />
JPanel p = new <strong>JFC</strong>Book.Chapter3.GridBagLayoutExample7<br />
(true, false);<br />
p.setDebugGraphicsOptions(DebugGraphics.LOGJOPTION);<br />
DebugGraphics.setLogStream(s);<br />
f.getContentPane().add(p);<br />
f .pack() ;<br />
f.addWindowListener(new WindowAdapter() {<br />
public void windowClosing(WindowEvent evt) {<br />
System.exit(0);<br />
}<br />
});<br />
f.setvisible(true);<br />
}<br />
_2____ „__
[x=0,y=0,width=6 9,height = 23 ]<br />
Graphics(1-1) Setting color: javax.swing.plaf.<br />
ColorUIResource[r=0,g=0,b=0]<br />
Graphics(1-1) Drawing string: "Paste" at:<br />
java.awt.Point[x=18,y=16]<br />
Graphics(0-1) Translating by: java.awt.Point[x=0,y=0]<br />
Graphics(0-1) Setting color:<br />
java.awt.Color[r=2 5 5,g=2 55,b=255]<br />
Graphics(0-1) Drawing line: from (0, 0) to (0, 22)<br />
Graphics(0-1) Drawing line: from (1, 0) to (66, 0)<br />
Graphics(0-1) Setting color:<br />
java.awt.Color[r=128,g=128,b=128]<br />
Graphics(0-1) Drawing line: from (1, 21) to (67, 21)<br />
Graphics(0-1) Drawing line: from (67, 0) to (67, 20)<br />
Graphics(0-1) Setting color: <strong>Java</strong>.awt.Color [r=0,g=0,b=0]<br />
Graphics(0-1) Drawing line: from (0, 22) to (68, 22)<br />
Graphics(0-1) Drawing line: from (68, 22) to (68, 0)<br />
Graphics(0-1) Translating by: java.awt.Point[x=0,y=0]<br />
Layout Managers 231<br />
It is interesting, and a little strange, that the setLogStream method<br />
requires a Print Stream object to write to, since the constructors of the<br />
PrintStream class were officially deprecated since JDK 1.1. As a result, if<br />
you compile the code in Listing 3—13 in JDK 1.1, you get warnings about the<br />
use of deprecated APIs. However, this is no longer the case in the <strong>Java</strong> 2 platform—the<br />
deprecation has been removed.<br />
Debugging Off-Screen Graphics Operations<br />
Showing graphics operations on the screen with colored flashes is very useful,<br />
except when you perform all of your drawing in an off-screen buffer. This is<br />
actually the default for Swing components, which is why double-buffering<br />
was not enabled in the examples you've seen so far in this section. If you want<br />
to work with the double-buffering mechanism enabled and still use the<br />
debug graphics feature, you can set the BUFFERED_OPTION flag in addition<br />
to FLASH_OPTION, as shown in Listing 3-14. When you do this, a separate<br />
frame appears in which the contents of a component's off-screen buffer are<br />
shown; the operations performed on the buffer are then visible in this frame.<br />
You can try this example by typing the command<br />
j ava <strong>JFC</strong>Book.Chapter3.DebugGraphicsExample4
232 Chapter 3 Managing the User Interface<br />
<strong>Core</strong> Alert<br />
At the time of this writing, this feature isn't working, even in <strong>Java</strong> 2 version<br />
1.3.The drawing all takes place off-screen and the layout appears on the<br />
screen, but the frame that should show what is happening as the graphics<br />
operations take place does not appear.<br />
Listing 3-14 Using DebugGaphics to watch off-screen drawing<br />
package <strong>JFC</strong>Book.Chapter3;<br />
import j avax.swing.*;<br />
import j ava.awt.*;<br />
import j ava.awt.event.*;<br />
import java.io.*;<br />
public class DebugGraphicsExample4 {<br />
public static void main(String [] args) {<br />
JFrame f = new JFrame("DebugGraphicsExample 4");<br />
JPanel p = new <strong>JFC</strong>Book.Chapter3.GridBagLayoutExample7(true);<br />
J<br />
}<br />
p.setDebugGraphicsOptions(DebugGraphics.FLASH_OPTION<br />
DebugGraphics.BUFFERED_OPTION);<br />
f.getContentPane().add(p);<br />
f .pack() ;<br />
f.addWindowListener(new WindowAdapter() {<br />
public void windowClosing(WindowEvent evt) {<br />
System.exit(0);<br />
}<br />
}>;<br />
f.setVisible(true);<br />
OverlayLayout Manager<br />
OverlayLayout is a Swing layout manager that allows you to place components<br />
in a container in such a way that their alignment points are all in the<br />
same place. It returns a preferred size for the container that would be just<br />
large enough to contain all of its children.
<strong>Core</strong> Note<br />
The issue of component alignment and alignment points was discussed in<br />
connection with BoxLayout earlier in this chapter.<br />
Layout Managers 233<br />
To understand how the OverlayLayout manager works, let's confine ourselves<br />
to a container that has two child components, each the same size and<br />
both with default (center) alignment values, and let's consider only the x-axis.<br />
The first thing that OverlayLayout tries to do is to place the alignment<br />
points of its children on top of each other. Since our two children both have<br />
center alignment, their horizontal midpoints will be placed over each other<br />
and, because they are the same size, they will, in fact, be placed exactly on<br />
top of each other. That takes care of the relative positioning. What about<br />
positioning within the container? Here, the story is a little more complex.<br />
When considering how to lay out the container, OverlayLayout uses the<br />
minimum acceptable size of each component to determine how big its container<br />
needs to be, then works out where the common alignment point would<br />
be based on minimum sizes. Using this information, it calculates the overall<br />
alignment position as the ratio of the x coordinate of the alignment point to<br />
the minimum required size of the container. When the container is finally<br />
sized and the components placed, this ratio is multiplied by the actual size of<br />
the container to determine the real location of the alignment point, then the<br />
components are all placed relative to that point.<br />
By now, you're probably confused, so let's try an example to make it<br />
clearer. We'll take the case of two panels that both have minimum widths of<br />
28 pixels and preferred widths of 56. Panel A has an X alignment of 0.25 and<br />
panel B an X alignment of 0.75. These strange sounding numbers are actually<br />
chosen to make the following arithmetic easier!<br />
To work out what will happen, remember that the OverlayLayout wants<br />
to place the alignment point of A over the alignment point of B. Now suppose<br />
that each component were at its minimum size of 28 pixels. The alignment<br />
point of A is 0.25 of the way along its side, or 7 pixels to the right of its left<br />
edge, while the alignment position of B is 0.75 of the way along its side, or 21<br />
pixels in from its own left edge. Therefore, the OverlayLayout must place<br />
the point 7 pixels from the left of A over the point 21 pixels from the left of B.<br />
In order to achieve this, the left edge of B must be to the left of the left edge<br />
of A. Suppose that the left edge of B were placed at x coordinate 0 within its<br />
container. Then, the point 7 pixels from the left of A would need to lie over<br />
the point 21 pixels from the left of B, which would be at x coordinate 21.<br />
Therefore, A would need to start at x coordinate (21 - 7) = 14. Since each
234 Chapter 3 Managing the User Interface<br />
component is assumed to be at its minimum size of 28 pixels, it follows that B<br />
would cover the area from x = 0 to x = 27 and A would occupy the range from<br />
x = 14 to x = 41. The alignment point in this case is at x = 21 and the container<br />
must be at least 42 pixels wide to cover both components. With this<br />
information, the OverlayLayout calculates the total alignment as 21/42 =<br />
0.5. In other words, the alignment point will reside in the middle of the x-axis<br />
of the container.<br />
A similar size calculation is performed based on the components' preferred<br />
width to arrive at the preferred width of the container, but the total<br />
alignment value is not recalculated. Since each component has a preferred<br />
width of 56 pixels, the alignment point of A will be 14 pixels from its left edge<br />
(remember, its alignment requirement is 0.25) and that of B will be 42 pixels<br />
along. Thus, the alignment point will be 42 points from the left of the container<br />
and A will start 14 pixels to the left of it. Since A is going to be 56 pixels<br />
wide at its preferred size, it will stretch 14 pixels to the left of the alignment<br />
point and 42 points to the right of it. Since the alignment point is 42 points<br />
from the left of the container, the total required size will be 42 + 42 = 84 pixels<br />
and this will be the preferred width of the container. Not surprisingly, this<br />
is twice the minimum size.<br />
Now suppose that the container is finally sized at its preferred size. We<br />
know that the total alignment ratio is 0.5, so the alignment point will be<br />
placed at 0.5 x 84 (the actual width) = 42, as required. If the container grows<br />
beyond its preferred size, the alignment point will remain in the middle of<br />
the x-axis and the components will shift along accordingly, while staying at<br />
their preferred sizes. Given this size, we know that A should be placed at x =<br />
(42 - 14) = 28 and B should be at x = 0.<br />
<strong>Core</strong> Alert<br />
In practice, the calculations performed by OverlayLayout only work<br />
properly if the component's maximum size is exactly the same as its<br />
preferred size.This happens because of the way the component sizes are<br />
calculated when the container size is known.To see the problem, suppose<br />
we constrained both panels to be 128 pixels wide by making this the<br />
maximum size. In calculating the size of component A, OverlayLayout<br />
works out the ascent and descent values of the container and the<br />
maximum ascent and descent of the componenlThe ascent is the distance<br />
of the alignment point from the left of the container and the descent is its<br />
distance from the right of the container. If the container is at its preferred<br />
width of 84, then the alignment point is centered and both the ascent and<br />
descent are 42 pixels.The maximum ascent of a component is calculated
as its maximum size multiplied by its requested alignment. In the case of A,<br />
this is 128 X 0.25 = 32. The final ascent of A is then taken to be the lesser<br />
of its own ascent and the ascent of the container, which comes out as 32.<br />
The x coordinate of A is then given by the container ascent less its own<br />
ascent—i.e., 42 - 32 = 10. But we know that the correct x coordinate for<br />
A is actually 28, not 101 However, if the maximum size of A were the same<br />
as its preferred size (i.e., 56), then its ascent would be 56 x 0.25 = / 4 and<br />
the x coordinate would then be 42 - 14 - 28, which is the correct result.<br />
Layout Managers 235<br />
In fact, although we have only looked at the x-axis in this example, these<br />
calculations are actually performed independently along both axes. As a<br />
result, the two components in this example might be offset from each other<br />
along the x-axis, but their relative x positions will always be such that their<br />
alignment points are over each other. Listing 3—15 shows an example that is<br />
exactly like the one that has just been described, but in which the same alignment<br />
constraints are applied on both the x and y axes at the same time.<br />
Because the same constraints are applied and the components being used for<br />
illustration are both square and the same size as each other, you get the same<br />
result along each axis, as you can see from Figure 3—25.<br />
Listing 3-15 Offset alignment with the OverlayLayout manage<br />
package <strong>JFC</strong>Book.Chapter3;<br />
import javax.swing.*;<br />
import j ava.awt.*;<br />
public class OverlayLayoutExample {<br />
public static void main(String [] args) {<br />
JFrame f = new JFrame("OverlayLayout Example'<br />
JPanel p = new JPanelO ;<br />
p.setLayout(new OverlayLayout(p));<br />
p.setBackground(Color.black);<br />
JPanel pi = new JPanelO;<br />
JPanel p2 = new JPanelO ;<br />
pi.setMinimumSize(new Dimension(28, 28));<br />
p2.setMinimumSize(new Dimension(28, 28));<br />
pi.setPreferredSize(new Dimension(56, 56));<br />
p2.setPreferredSize(new Dimension(56, 56));<br />
pi.setMaximumSize(new Dimension(56, 56));
236 Chapter 3 Managing the User Interface<br />
Listing 3-15 Offset alignment with the OverlayLayout manager<br />
(continued)<br />
p2.setMaximumSize(new Dimension(56, 56));<br />
pi.setBackground(Color.white);<br />
p2.setBackground(Color.green);<br />
pi.setAlignmentX(0.25f);<br />
p2.setAlignmentX(0.75f);<br />
pi.setAlignmentY(O. 25f);<br />
p2.setAlignmentY(0.75f);<br />
p.add(pi);<br />
p.add(p2);<br />
System.out.println("Minimum panel size is " + p.getMinimum-<br />
SizeO) ;<br />
System.out.println("Preferred panel size is " + p.getPreferred-<br />
SizeO);<br />
}<br />
}<br />
f.getContentPane().setLayout(new FlowLayout());<br />
f.getContentPane().add(p);<br />
f.setSize(200, 200);<br />
f.setvisible(true);<br />
System.out.println("Panel size: " + p.getSize());<br />
System.out.printIn("pi bounds: " + pl.getBounds());<br />
System.out.println("p2 bounds: " + p2.getBounds());<br />
Figure 3-28 Using the OverlayLayout manager.
You can try this example for yourself with the command:<br />
j ava <strong>JFC</strong>Book.Chapter3.OverlayLayoutExample<br />
Layout Managers 237<br />
In Figure 3-28, the lighter-colored panel is A and the darker one is B. So<br />
that you can see what is happening, the location and size of both panels are<br />
printed when the layout has been completed. Here is the result:<br />
Minimum panel size is <strong>Java</strong>.awt.Dimension[width=42,height=42]<br />
Preferred panel size is java.awt.Dimension<br />
[width=84,height=84]<br />
Panel size: java.awt.Dimension[width=84,height=84]<br />
pi bounds: <strong>Java</strong>.awt.Rectangle[x=28,y=28,width=56,height=56]<br />
p2 bounds: <strong>Java</strong>.awt.Rectangle[x=0,y=0,width=56,height=56]<br />
As you can see, the minimum and preferred sizes of the container agree<br />
with the calculations that were shown earlier, as do the actual size and locations<br />
of the components.<br />
An interesting feature of this example is the use of the JComponent methods<br />
setMinimumSize, setPref erredSize, and setMaximumSize. In the<br />
case of AWT components, the minimum, preferred, and maximum sizes of a<br />
component are controlled entirely by the component itself and are usually<br />
calculated based on what it needs to display. For example, a label with a long<br />
text string would need more space than one with a short string and would<br />
request greater width. In Swing, the same is true, but the calculations are<br />
now performed by a component's look-and-feel specific UI class rather than<br />
by the component itself. Often, these calculations, which are required frequently<br />
by layout managers, would be expensive. To save having to repeat the<br />
same process, the results can now be cached (computed once and then<br />
saved) on a per-JComponent basis using these new methods. Once these values<br />
have been set, the usual getMinimumSize, getPreferredSize, and<br />
getMaximumSize methods don't go to the component's user interface<br />
class—instead, they retrieve the saved value. As a side effect of this, you can<br />
now apply any constraints you want on the size of a JComponent without<br />
needing to change or subclass its implementation by setting appropriate minimum,<br />
preferred, and maximum sizes of your own.<br />
CardLayout Manager<br />
The last of the standard layout managers is the CardLayout. As its name<br />
suggests, this manager takes a set of components (normally containers) and<br />
lays them out on top of each other like cards, so that only one of them is visi-
238 Chapter 3 Managing the User Interface<br />
ble at any given time. Even in JDK 1.1, CardLayout was a relatively primitive<br />
implementation of this idea, which is often seen in Windows applications<br />
in the form of a property sheet. As you'll see later, the Swing classes incorporate<br />
a component called JTabbedPane that provides all the functionality of<br />
Windows property sheets and hence is a more effective tool than using several<br />
panels with a CardLayout for many purposes.<br />
The quickest way to explain how this layout manager works is to show an<br />
example. The code in Listing 3-16 creates a frame on which eight labels are<br />
mounted. Since the layout manager of the frame's content pane is changed<br />
from BorderLayout to CardLayout, only one of these labels will be visible<br />
at any one time. The layout manager sizes the content pane so that it is large<br />
enough to hold all of the labels. In a real application, each card would almost<br />
certainly be a panel, on which a set of related controls would be grouped. For<br />
example, you might group together controls relating to color control on one<br />
card, font selection on another card, and so on. For the purposes of this<br />
example, a simple label is sufficient to illustrate how CardLayout works.<br />
Listing 3-16 Using the CardLayout manager<br />
package <strong>JFC</strong>Book.Chapter3 ;<br />
import j avax.swing.*;<br />
import j ava.awt.*;<br />
import j ava.awt.event.*;<br />
public class CardLayoutExample {<br />
public static void main(String [] args) {<br />
JFrame f = new JFrame("CardLayout Example");<br />
Container cp = f.getContentPane();<br />
CardLayout 1 = new CardLayout();<br />
cp.setLayout (1) ;<br />
cp.add(new JLabeK"First", JLabel.CENTER), "First");<br />
cp.add(new JLabel("Second", JLabel.CENTER), "Second");<br />
cp.add(new JLabel("Third", JLabel.CENTER), "Third");<br />
cp.add(new JLabel("Fourth", JLabel.CENTER), "Fourth");<br />
cp.add(new JLabel("Fifth", JLabel.CENTER), "Fifth");<br />
cp.add(new JLabel("Sixth", JLabel.CENTER), "Sixth");<br />
cp.add(new JLabel("Seventh", JLabel.CENTER),<br />
"Seventh");<br />
cp.add(new JLabel("Last", JLabel.CENTER), "Eighth");<br />
f .setSize(300, 300) ;
Listing 3-16 Using the CardLayout manager (continued)<br />
f.addWindowListener(new WindowAdapter() {<br />
public void windowClosing(WindowEvent evt) {<br />
System.exit(0);<br />
}<br />
});<br />
f.setvisible(true);<br />
for (;;) {<br />
try {<br />
Thread.sleep(1000);<br />
double r = Math.random();<br />
if (r > 0.9) {<br />
1.last(cp);<br />
} else if (r < 0.1) {<br />
1. first(cp) ;<br />
} else if (r > 0.5) {<br />
1.next(cp);<br />
} else {<br />
}<br />
1.previous(cp);<br />
} catch (Exception e) {<br />
// Ignore any exception<br />
}<br />
}<br />
}<br />
J _____^<br />
This example can be run using the command:<br />
java <strong>JFC</strong>Book.Chapter3.CardLayoutExample<br />
Layout Managers 239<br />
You will notice that each label is added with a string constraint. In this<br />
case, these constraints happen to match the text on the labels themselves<br />
(with the exception of the last one), but this need not be the case: the labels<br />
are arbitrary, but they must be unique.<br />
Once all the cards have been added, the frame is made visible and then<br />
the program enters a loop, in which the top card is changed at random every<br />
second. The loop demonstrates the methods of CardLayout that make it<br />
possible to change the card on view. The first and last methods select the<br />
first and last cards added, respectively, no matter what was on view before.
240 Chapter 3 Managing the User Interface<br />
For relative selection, you can use the next and previous methods, both of<br />
which wrap when they reach the end and beginning of the set, respectively.<br />
Not shown in Listing 3-16 is the show method. This method accepts a<br />
String argument that selects a card to be shown. This argument must match<br />
one of the constraints given when adding a component to the container managed<br />
by the CardLayout. In this example, the line<br />
1.show("Eighth");<br />
would select the card containing the label "Last."<br />
<strong>Core</strong> Alert<br />
This example, of course, violates the rules regarding access to Swing<br />
components outside the event thread because it manipulates the layout<br />
manager in the main thread.As we said in the last chapter, we're not<br />
always going to bother wrapping code like this in an anonymous class to<br />
invoke it using the SwingUtilities invokeLater method, but you<br />
should be careful to make sure you do so when writing production code.<br />
Component Orientation<br />
In both this chapter and the last, reference has been made to the concept of<br />
component orientation, which was introduced in the <strong>Java</strong> 2 platform. So far,<br />
you have seen that component orientation can affect the relative position of<br />
the text and icon on a label or a button, and we have mentioned in passing<br />
that some layout managers are sensitive to it as well. In this section, you'll see<br />
in greater detail what is meant by component orientation and how it is determined.<br />
Once the fundamentals have been covered, we'll briefly describe how<br />
changing the component orientation affects the appearance of those Swing<br />
components that have been modified to take account of it and which layout<br />
managers change their layout policy to suit the component orientation of the<br />
container that they are managing.
Locale-Dependent Ordering of Text and<br />
Components<br />
Component Orientation 241<br />
Different locales order text in different ways. There are four main reading<br />
orders currently in use:<br />
Left-to-right, This is the order used in Western European countries and<br />
top-to-bottom is probably the one you are most familiar with. Text is<br />
arranged in horizontal lines and read starting at the left.<br />
When the right-hand end of a line is reached, the text<br />
continues one line below and restarts on the left hand<br />
side, as shown below, where the numerical order of the<br />
numbers reflects the order in which they would be read:<br />
0 12 3 4<br />
5 6 7 8 9<br />
Right-to-left, By contrast with the left-to-right style of Western Europe,<br />
top-to-bottom Arabic and Hebrew text is read from right to left,<br />
although the lines of text are still arranged horizontally,<br />
like this:<br />
4 3 2 10<br />
9 8 7 6 5<br />
Top-to-bottom, Far eastern languages like Japanese and Chinese use a<br />
left-to-right different system in which the symbols are read from top<br />
to bottom instead of horizontally. The reader would start<br />
at the top left of a page and read down the leftmost column.<br />
When the bottom of the column is reached, the next<br />
symbol will be found at the top of the next column to the<br />
right. Hence, the column reading order is left-to-right.<br />
Here's an example:<br />
0 5<br />
1 6<br />
2 7<br />
3 8<br />
4 9<br />
Top to bottom, Mongolia also uses a vertical text layout, but the horizonright-to-left<br />
tal reading order is right-to-left instead of left-to-right, as<br />
shown below:<br />
5 0<br />
6 1<br />
7 2<br />
8 3<br />
9 4
242 Chapter 3 Managing the User Interface<br />
As you can see, the difference between these systems is whether the major<br />
axis is vertical or horizontal—that is, does the reader scan across the page or<br />
down the page to go from one letter or symbol to the next, and whether the<br />
reading order in the horizontal direction is left-to-right or right-to-left.<br />
Notice that the vertical reading order is always top-to-bottom—there are no<br />
cases in which the text is read starting from the bottom and moving towards<br />
the top. These means that you can describe the reading convention for a<br />
locale using two independent attributes:<br />
Line orienta- Describes whether text is read horizontally - that is,<br />
tion: "by row," or vertically—"by column".<br />
Direction: Describes whether text is read left-to-right or rightto-left.<br />
In terms of these attributes, the text as written in Western locales can be<br />
described as horizontal, left-to-right, whereas in a Japanese locale it would be<br />
vertical, left-to-right.<br />
The ComponentOrientation Class<br />
As far as the user interface is concerned, JDK 1.1 can handle only standard<br />
Western European text ordering, but the <strong>Java</strong> 2 platform added a new class<br />
called ComponentOrientation that encapsulates the attributes that<br />
describe the text ordering conventions of a locale and the ability to associate<br />
an instance of this class with every Component in the user interface. This<br />
capability makes it theoretically possible for GUI components to adapt themselves<br />
to take into account layout and ordering conventions that are appropriate<br />
to the locale in which an application is being used.<br />
ComponentOrientation is a simple class with a private constructor, of<br />
which there are (currently) only three instances created, all of them being<br />
contant-valued static members of the ComponentOrientation class itself:<br />
LEFT TO RIGHT Represents left-to-right, horizontal ordering<br />
- that is, the Western style of writing.<br />
RIGHT TO LEFT Represents Arabic or Hebrew conventions<br />
- right-to-left and horizontal.
UNKNOWN This value is used as a default, indicating<br />
that a specific value has not been supplied.<br />
The attributes of this value are the<br />
same as those of LEFT_TO_RIGHT, so<br />
that Western style conventions are<br />
obtained.<br />
Component Orientation 243<br />
Notice that all three of these orientations are horizontal. <strong>Java</strong> 2 does not<br />
currently support the use vertical text layout, so there are no instances of<br />
ComponentOrientation that specify it and, since its constructor is private,<br />
you can't create any further instances should you wish to implement this feature<br />
for yourself.<br />
Every Component has a ComponentOrientation associated with it.<br />
When it is created, this attribute is given the value ComponentOrientation<br />
. UNKNOWN, which will cause it to arrange itself in a manner suitable for<br />
Western Europe. You can get or set the orientation of a Component using the<br />
following methods:<br />
public ComponentOrientation getComponentOrientation();<br />
public void setComponentOrientation(<br />
ComponentOrientation o);<br />
Once you have a reference to the ComponentOrientation for a Component,<br />
you can get its attributes using the following methods:<br />
public boolean isHorizontal();<br />
public boolean isLeftToRight();<br />
The first method returns true for all existing instances of ComponentOrientation,<br />
since none of them specify a vertical layout.<br />
Setting the Component Orientation for an<br />
Application<br />
When the <strong>Java</strong> VM is started, it has an associated Locale object that<br />
reflects the conventions of the part of the world that it is being used in and<br />
operations that implicitly or explicitly rely on the locale, such as date and<br />
time formatting, are carried out appropriately without the application having<br />
to take special action (other than to use the classes, such as DateFormat,<br />
that are supplied with the JDK rather than an in-house implementation that<br />
does not account for locale dependencies). This makes it relatively simple for<br />
developers to support many aspects of internationalization. Unfortunately,<br />
the same does not hold true for ComponentOrientation—components are
244 Chapter 3 Managing the User Interface<br />
not born with an orientation that would be correct for the default locale of<br />
the <strong>Java</strong> VM. If you want to use the Swing and AWT features that depend on<br />
having the correct orientation selected, you have to manually set the ComponentOrientation<br />
ol every Component that you create. In order to arrange<br />
for your application to operate properly in a given locale, there are two issues<br />
that need to be addressed:<br />
• How to select the correct orientation for the application's<br />
locale.<br />
• How to apply this orientation to all of the components in your<br />
user interface.<br />
Selecting the Correct Orientation for a<br />
Locale<br />
The ComponentOrientation class has two static methods that you can use<br />
to get a ComponentOrientation object for your application:<br />
public static ComponentOrientation getOrientation(<br />
Locale locale);<br />
public static ComponentOrientation getOrientation(<br />
ResourceBundle b);<br />
The first of these two methods requires you to supply the Locale object<br />
for the locale for which you want to customize your application. You can get<br />
the Locale object for the locale in which your VM thinks it is running using<br />
the static getDefault method of the Locale class. The following code<br />
extract gets the ComponentOrientation for your VM s default locale:<br />
ComponentOrientation defaultCO =<br />
ComponentOrientation.getOrientation(<br />
Locale.getDefault ());<br />
A Locale specifies attributes for a particular combination of country and<br />
language and you can get a Locale object for a given pairing by passing the<br />
country and language to its constructor or by using one of the set of standard<br />
locales supplied by the JDK. Thus, you can get the ComponentOrientation<br />
to be used in Japan as follows:<br />
ComponentOrientation japanCO =<br />
ComponentOrientation.getOrientation(<br />
Locale.JAPANESE);<br />
or like this:<br />
ComponentOrientation japanCO =
ComponentOrientation.getOrientation(<br />
new Locale("ja", "JP"));<br />
Component Orientation 245<br />
The other way to get the ComponentOrientation is from a Resource-<br />
Bundle. Applications that are localized for different regions of the world typically<br />
use a ResourceBundle to hold attributes that vary from locale to<br />
locale, and component orientation could be included in the ResourceBundles<br />
that you ship with your application. If you want to do this, you must<br />
store the orientation as a ComponentOrientation object under the key<br />
"Orientation. " If a key with this name is not found, the ComponentOri -<br />
entation suitable for the locale specified by the ResourceBundle is used<br />
and, if this doesn't return a result, the ComponentOrientation for the<br />
VMs default locale is returned instead.<br />
<strong>Core</strong> Note<br />
ResourceBundles are an important topic for developers of applications<br />
that are fully internationalized, but they are beyond the scope of this book.<br />
You'll find detailed coverage of ResourceBundles and other aspects of<br />
internationalization in <strong>Core</strong> <strong>Java</strong> 2, Volume 2 -Advanced Features<br />
written by Cay Hortsmann and Gary Cornell and published by Prentice<br />
Hall.<br />
In practice, you are unlikely to include an orientation in your application s<br />
ResourceBundles because the core ResourceBundles for the locales that<br />
the JDK supports already specify it and it is, in fact, from here that the variant<br />
of getOrientation that accepts a Locale argument actually gets the<br />
right ComponentOrientation.<br />
Installing the Orientation in the User<br />
Interface<br />
Once you have the correct ComponentOrientation, associating it with<br />
individual Components is simply a matter of calling the setComponentOrientation<br />
method. In the last chapter, you saw an example application that<br />
demonstrated how ComponentOrientation affects the layout of text and<br />
icons on buttons and allowed you to switch between left-to-right and lightto-left<br />
layout by pressing a button. The code to implement this switch was<br />
very simple:<br />
if (isLTR) {<br />
ok.setComponentOrientation(
246 Chapter 3 Managing the User Interface<br />
ComponentOrientation.RIGHT_TO_LEFT);<br />
cancel.setComponentOrientation(<br />
ComponentOrientation.RIGHT_TO_LEFT);<br />
} else {<br />
ok.setComponentOrientation(<br />
ComponentOrientation.LEFT_TO_RIGHT);<br />
cancel.setComponentOrientation(<br />
ComponentOrientation.LEFT_TO_RIGHT);<br />
}<br />
isLTR = lisLTR;<br />
ok.repaint();<br />
cancel.repaint()<br />
In this code, the variables ok and cancel represent a pair of JButtons<br />
and isLTR is a boolean variable that keeps track of whether the interface<br />
should be shown with left-to-right orientation or not. Setting a component's<br />
orientation using the setComponentOrientation method causes the component's<br />
state to change but this is not immediately reflected on the screen—<br />
you need to call the repaint method to force it to redraw itself as shown<br />
above.<br />
Applying the component orientation to a complete application is not as<br />
simple as you might think. What you really want is to be able to set a default<br />
ComponentOrientation and have that applied to each Component as it is<br />
created. As long as your application did not change locale, this would enable<br />
you to entirely forget about manipulating the orientation once the correct<br />
default was selected. Unfortunately, this feature is not implemented, so you<br />
either have to manually set the ComponentOrientation of each Component<br />
as you create it, or apply to a hierarchy of Components just before they<br />
are displayed. The problem with the first approach is that some Components<br />
are actually compounds, made up of smaller units - you'll see examples of this<br />
(for example, the file and color chooser dialogs) later in this book. Simply setting<br />
the orientation on the Component itself is not good enough for something<br />
that contains subcomponents—you still have to descend the hierarchy<br />
to get at the components inside.<br />
The Window class provides a convenience method that sets the ComponentOrientation<br />
for all components inside the Window object to which it<br />
is applied:<br />
public void applyResourceBundle(ResourceBundle rb);<br />
Since this is a Window method, it applies equally well to JFrame, JDialog,<br />
and JWindow. However, it does not work for JApplet.<br />
The API documentation for this method says that it applies settings from<br />
the supplied ResourceBundle to the target window's hierarchy—in fact, in
Component Orientation 247<br />
both <strong>Java</strong> 2 version 1.2.2 and version 1.3, the only setting it changes is the<br />
ComponentOrientation. In order to use this method, however, yon need<br />
to have a ResoureeBundle that contains the ComponentOrientation that<br />
you want to apply. As we said above, the ResourceBundles for the supported<br />
locales that ship with the JDK and the JRE already contain this setting,<br />
so to use the applyResourceBundle method to set the orientation<br />
properly for a given locale, you need to be able to find that locales ResoureeBundle.<br />
Fortunately, these are stored in a well-known place so that it is<br />
easy to map from a Locale to its corresponding ResoureeBundle.<br />
To illustrate how this is done, our next example will be another variant of<br />
the image button program that we used in the previous chapter to demonstrate<br />
icons on buttons. Since most of the code is not of relevence to this<br />
example, we'll show only the part that gets the correct ResoureeBundle for<br />
the locale to be used and applies that to the main window of the application.<br />
This code, which resides in the main method, is shown below.<br />
Locale locale = new Locale(lang, country);<br />
System.out.println("Country: " +<br />
locale.getDisplayCountryO +<br />
", language: " +<br />
locale.getDisplayLanguage());<br />
.<br />
JFrame f = new JFrame("Orientation #1");<br />
f.getContentPane().add(new OrientationExamplel());<br />
// Get the resource bundle for the selected locale<br />
// and apply the orientation to the frame.<br />
ResoureeBundle rb = ResoureeBundle.getBundle(<br />
11 java. text. resources .LocaleElements" , locale) ;<br />
f.applyResourceBundle(rb);<br />
To get a locale, you need to supply a language and a country (where the<br />
country may be given as the empty string if required). This example gets<br />
these values from the command line (using code that is not shown here) and,<br />
having obtained the corresponding Locale object, displays the language and<br />
country names in the window from which it is run. It then creates the frame<br />
and adds a panel containing two buttons to it, the code to construct which is<br />
very similar to that shown in Listing 2-13. The last two steps, shown in bold,<br />
are the important ones. The getBundle method locates a ResoureeBundle<br />
given a starting point and a Locale object. Here, the starting point is given<br />
as<br />
j ava.text.resources.LocaleElements
'<br />
248 Chapter 3 Managing the User Interface<br />
which is a package that contains the standard Locale objects for the core<br />
JDK. This call gets the ResourceBundle containing the basic resources for<br />
the selected locale, including the correct ComponentOrientation. Having<br />
got the ResourceBundle, the last step is to apply the orientation to the<br />
whole frame, which is done by calling the applyResourceBundle method,<br />
which JFrame inherits from Window, passing it the ResourceBundle that<br />
has just been located.<br />
<strong>Core</strong> Note<br />
If you change the ComponentOrientation of a component or a whole<br />
hierarchy of components, you have to arrange to have them redrawn by<br />
calling repaint on the component itself or on the topmost component in<br />
the hierarchy. In fact, strictly speaking, changing a components orientation<br />
might change the amount of space it needs to display itself, so you should<br />
really call pack on the top-level window to have it resize itself and<br />
reorganize its content as necessary.This would be especially likely to be<br />
necessary if you were switching from a horizontal orientation to a vertical<br />
one, because labels that were long and thin would become tall and narrow.<br />
At present, of course, this will never happen because vertical orientations<br />
are not supported. Nevertheless, some components might need different<br />
amounts of space for left-to-right or right-to-left orientation, so you should<br />
always call pack after switching orientation or, as in the example shown<br />
here, set the orientation before the size of the top-level window is set<br />
To run this example, type the following command<br />
<strong>Java</strong> <strong>JFC</strong>Book.Chapter3.jdkl2.OrientationExamplel locale<br />
where locale specifies the language and country separated by an underscore,<br />
or just a country. For example, supplying en_GB sets the application up<br />
for Englisg as it used in Great Britain, while en uses generic English settings.<br />
If you supply a Western locale like en_GB or en_US, you'll see that the buttons<br />
appear in the "standard" order with the icon to the left of the text, as<br />
shown in Figure 2-17 in Chapter 2. However, the Arabic and Hebrew locales<br />
supplied by the JDK have a right-to-left orientation. If you try the command:<br />
j ava <strong>JFC</strong>Book.Chapter3.j dkl2.OrientationExamplel ar_JO<br />
you'll see how this simple application would look to an Arabic speaker in<br />
Jordon. As you can see from Figure 3-29, in this locale the text on both buttons<br />
appears to the left of the icon instead of to its right as it does in the<br />
United Kingdom or the United States. This happens because the Component
Component Orientation 249<br />
tOrientation obtained by the applyResourceBundle method for this<br />
locale is ComponentOrientation.RIGHT_TO_LEFT and, additionally, the<br />
default text position attribute for buttons is SwingConstants . TRAILING, as<br />
was noted in Chapter 2. Of course, if the application had deliberately configured<br />
the button with an explicit, constant text position such as SwingConstants<br />
. LEFT, then the text would always appear to the left of the icon no<br />
matter which locale is selected.<br />
Figure 3-29 Icons and text in a right-to-left locale.<br />
One important point to note is that, although the application is running in<br />
a right-to-left locale and the text and icon have changed places as you would<br />
expect, the text is still rendered left-to-right, whereas an Arabic speaker<br />
would expect to read from right to left. The fact that the text has not been<br />
reversed is not a Swing bug—Swing fully supports right-to-left text, but only<br />
for characters that belong to the alphabets of right-to-left locales. Had the<br />
text on this label been set using Arabic Unicode characters, then they would<br />
have been rendered right-to-left instead of left-to-right.<br />
<strong>Core</strong> Warning<br />
Although the window applyResourceBundle method looks like a<br />
convenient shorthand, it is not a complete solution for all applications. One<br />
major problem is that it does not change the orientation of menus and<br />
menu items, which almost all applications are likely to use.You'll see how to<br />
work around this problem when we cover menus in Chapter 6.
250 Chapter 3 Managing the User Interface<br />
Swing Components and Component<br />
Orientation<br />
Several Swing components adjust their appearance based on their ComponentOrientation<br />
attribute. You have already seen that JLabel and JButton<br />
both arrange their text and icons differently depending on the horizontal<br />
reading order of the locale that the application is running in and other components<br />
do something similar. Since these components have not yet been<br />
introduced, we'll simply summarize which ones are affected and give a short<br />
description of what a difference ComponentOrientation makes to them.<br />
As you can see, many of these are enhancements that were introduced in <strong>Java</strong><br />
2 version 1.3. You will find further coverage of this topic along with each<br />
component as it is introduced.<br />
JLabel,JButton,<br />
JToggleButton,<br />
JMenu, JMenuItem,<br />
JCheckBox, JRadioButton,<br />
JCheckBoxMenu-<br />
Item, JRadioButtonMenuItetn<br />
JComboBox<br />
(<strong>Java</strong> 2 version 1.3)<br />
JInternalFrame<br />
(<strong>Java</strong> 2 version 1.3)<br />
JMenu<br />
The relative positions of the text and icon depend on<br />
the value of the horizontal text position, while the<br />
alignment of the icon/text pair within the control is<br />
controlled by the horizontal alignment attribute. Both<br />
of these attributes may LEADING or TRAILING.<br />
These cases have been thoroughly covered in Chapter<br />
2<br />
The vertical scroll bar in the drop-down box moves<br />
from the right-hand side (left-to-right locale) to the<br />
left (right-to-left locale) and the order of the elements<br />
that make up the combo box editor is reversed (see<br />
Chapter 8).<br />
An internal frame is a frame that can be placed inside a<br />
multiple document interface container, much like<br />
viewing several documents in Microsoft Word. Each<br />
internal frame has a caption bar that looks just like the<br />
one that appears on a top-level frame. In a right-to-left<br />
environment, the order of items in the caption bar is<br />
reversed so that, for example, the internal frame title<br />
appears on the righth and the frame close button on<br />
the left.<br />
Top-level menus and cascading menus pop up on the<br />
left side of their parent objects in a right-to-left environment<br />
instead of on the right-hand side.
JMenuItem<br />
JProgressBar<br />
(<strong>Java</strong> 2 version 1.3)<br />
JScrollPane<br />
(<strong>Java</strong> 2 version 1.3)<br />
JSlider<br />
(<strong>Java</strong> 2 version 1.3)<br />
JTabbedPane<br />
(<strong>Java</strong> 2 version 1.3)<br />
JTextArea and<br />
JEditorPane<br />
(<strong>Java</strong> 2 version 1.3)<br />
JTextField<br />
(<strong>Java</strong> 2 version 1.3)<br />
JToolBar<br />
JToolTip<br />
(<strong>Java</strong> 2 version 1.3)<br />
Component Orientation 251<br />
The text for menu accelerators (e.g., Ctrl-C) appears<br />
on the left of the menu item when in a right-to-left<br />
locale, but on the right in a left-to-right locale (that is,<br />
it trails the menu icon and text).<br />
A progress bar usually fills from the left and moves to<br />
the right to reflect progress made toward completion<br />
of a task, but in a right-to-left locale the fill starts on<br />
the right and moves to the left instead.<br />
Changes the location of the vertical scroll bar from<br />
right (in a left-to-right locale) to left (in a right-to-left<br />
locale).<br />
Changes the orientation of the slider bar. Usually, a<br />
horizontal slider is drawn with the lowest value on the<br />
left and the highest on the right. In a right-to-left<br />
locale, the lowest value will instead be drawn on the<br />
right and the highest value on the left.<br />
In a left-to-right locale, as tabs are added, they move<br />
from left to right. This is reversed in a right-to-left<br />
environment.<br />
In a right-to-left environment, paragraphs are rightjustified<br />
instead of left-justified.<br />
Like labels and buttons, the horizontal text alignment<br />
also accepts the values LEADING and TRAILING,<br />
with the same effects. The default alignment is LEAD-<br />
ING, so that the text field content appears to the right<br />
in a right-to-left environment and on the more familial'<br />
left-hand side in a left-to-right locale.<br />
Tool bar buttons (and other components) are laid out<br />
from left-to-right or right-to-left depending on the<br />
ComponentOrientation of the JToolBar.<br />
In a left-to-right environment, a tooltip appears at the<br />
mouse position and extends to the right. In a right-toleft<br />
locale, the tooltip appears to the left of the mouse,<br />
with its right-hand edge at the mouse location.
252 Chapter 3 Managing the User Interface<br />
JTree The familiar view of a tree usually has the root node at<br />
(<strong>Java</strong> 2 version 1.3) the top left and the tree unfolds down and to the right,<br />
with any text appearing to the right of the node's icon.<br />
When rendered in a right-to-left environment, a mirror<br />
image is obtained—the root is at the top right, the<br />
tree grows down and towards the left, and the text is<br />
placed to the left of the nodes.<br />
Titled Border A titled border includes a piece of descriptive text<br />
(<strong>Java</strong> 2 version 1.3) somewhere in the border area. By default in a left-toright<br />
environment, the text is placed at the top-left of<br />
the border. In a right-to-left locale, the text moves to<br />
the top right hand side.<br />
Layout Managers and Component Orientation<br />
Component orientation applies to containers as well as to ordinary components.<br />
When you set the component orientation of a container, the layout<br />
manager must arrange the container's contents in a manner consistent with<br />
the ordering rules of the containers locale. In the <strong>Java</strong> 2 platform (both version<br />
1.2.2 and 1.3), only FlowLayout and Border-Layout have been<br />
extended to take account of component orientation. In this section you'll see<br />
how these two layout managers work in a right-to-left environment—the<br />
other layout managers operate in the same way no matter what ComponentOrientation<br />
you associate with the containers that they manage, so there<br />
is nothing more to say about them here.<br />
FlowLayout and Component Orientation<br />
As far as FlowLayout is concerned, the ComponentOrientation of a container<br />
that it is managing primarily affects the order in which components<br />
added to the container are placed when they are laid out. When we discussed<br />
the way in which FlowLayout orders its components earlier in this chapter,<br />
we said that components are placed in rows starting from the left and moving<br />
to the right and that, when a row is full, a new row is started below it and the<br />
same rule applied. You won't be surprised to learn that the same policy operates<br />
in a right-to-left environment, except that the first component is placed<br />
toward the right of the container, the next to its left, and so on.<br />
The simplest way to demonstrate this is to slightly modify the example<br />
code that you saw in Listing 3-1, which added six buttons to a panel, by<br />
changing the panel's ComponentOrientation to right-to-left:
Component Orientation 253<br />
p.setLayout(new FlowLayout(FlowLayout,CENTER, 4, 4));<br />
p.setComponentOrientation(<br />
ComponentOrientation.RIGHT_TO_LEFT);<br />
You can try the modified example using the command:<br />
java <strong>JFC</strong>Book.Chapter3.jdkl2.RTLFlowLayoutExample<br />
The result will look like Figure 3-30. As you can see, the only difference<br />
between this and the original version of this example shown in Figure 3-1 is<br />
that the buttons have been placed from right-to-left instead of left-to-right. If<br />
you resize the container to force the buttons onto more than one row as we<br />
did during the earlier discussion, you'll find that each row will be ordered<br />
from right-to-left.<br />
Figure 3-30 Default FlowLayout Behavior in a Right-to-Left Locale.<br />
If you expand the window horizontally, the buttons stay in the center so<br />
that the extra space is allocated equally on either side of them. We saw earlier<br />
in the chapter that you can specify a component alignment either in the constructor<br />
(as shown in the code extract above) or using the setAlignment<br />
method, that forces FlowLayout to place the components against the left or<br />
right side of the container. This continues to be true even if you change the<br />
container's ComponentOrientation—the alignment value FlowLayout<br />
. LEFT still places all the components on the left of the container, while<br />
FlowLayout .RIGHT moves them all to the right. However, the <strong>Java</strong> 2 platform<br />
supports two extra alignment values—FlowLayout .LEADING and<br />
FlowLayout. TRAILING, that work just like the horizontal alignment values<br />
for labels and buttons. That is, in a left-to-right environment:<br />
FlowLayout.LEADING = FlowLayout.LEFT<br />
FlowLayout.TRAILING = FlowLayout.RIGHT<br />
whereas in a right-to-left locale,<br />
FlowLayout.LEADING = FlowLayout.RIGHT<br />
FlowLayout.TRAILING = FlowLayout.LEFT<br />
To see how this works, type the following command:
254 Chapter 3 Managing the User Interface<br />
j ava <strong>JFC</strong>Book.Chapter3.j dkl2.RTLFlowLayoutExample2<br />
This example is the same as the last one, except for the following few lines<br />
of code which replace those shown above:<br />
p.setLayout(new FlowLayout(FlowLayout.LEADING, 4, 4));<br />
p.setComponentOrientation(args.length == 0 ?<br />
ComponentOrientation.LEFT_TO_RIGHT :<br />
ComponentOrientation.RIGHT_TO_LEFT);<br />
In this example, the layout manager is constructed with LEADING alignment.<br />
If the example is run with no command line arguments, the usual leftto-right<br />
orientation is used, and, at first, the result will look exactly like Figure<br />
3-1. However, if you drag the right-hand edge of the frame to enlarge the<br />
window, you'll see that the buttons stay on the left side of the container, as<br />
shown in Figure 3-31. This happens because in a left-to-right locale, LEAD-<br />
ING is the same as LEFT.<br />
Figure 3-31 FlowLayout with LEADING alignment in a left-to-right locale.<br />
If you now rerun the example and supply an arbitrary command line argument,<br />
a right-to-left orientation will be installed and this time when you<br />
enlarge the window horizontally, the buttons align themselves to the right of<br />
the window, as shown in Figure 3-32.<br />
Figure 3-32 FlowLayout with LEADING alignment in a right-to-left locale.<br />
BorderLayout and Component Orientation<br />
BorderLayout distinguishes five positions within a container, designating<br />
them NORTH, SOUTH, EAST, WEST, and CENTER. As you might have guessed by
Component Orientation 255<br />
now, these are absolute layout constraints that correspond to the same position<br />
within a container whatever the container's ComponentOrientation<br />
is—that is, BorderLayout will always map NORTH to the top and EAST to<br />
the right. Like FlowLayout, in the <strong>Java</strong> 2 platform, BorderLayout defines<br />
constraints that specify positions that depend on the containers ComponentOrientation.<br />
These constraints, and their mappings to the more familiar<br />
ones that you saw earlier in this chapter, are shown in Table 3-2.<br />
Table 3-2 Locale-sensitive BorderLayout Constraints<br />
Constraint Left-to-right effect Right-to-left effect<br />
BEFORE__FIRST_LINE NORTH NORTH<br />
AFTER_LAST_LINE SOUTH SOUTH<br />
BEFORE_LINE_BEGINS WEST EAST<br />
AFTER_LINE_ENDS EAST WEST<br />
Since ComponentOrientation can theoretically influence vertical as<br />
well as horizontal positioning, BorderLayout has new constraints for both<br />
types of positioning although, since <strong>Java</strong> 2 does not support locale-sensitive<br />
vertical positioning, only the hoizontal ones have any effect. All four of these<br />
constraints refer to a line' and describe where the affected component<br />
should go relative to the line. The easiest way to think about this is to consider<br />
the component in the CENTER position to be the line'—the constraints<br />
names describe themselves relative to that component. To demonstrate this,<br />
the examples on the books CD-ROM contain a modified version of the<br />
example presented in Listing 3-2 that uses the new constraints instead of the<br />
absolute compass point constraints. To try this example, type the command<br />
j ava <strong>JFC</strong>Book.Chapter3.j dkl2.RTLBorderLayoutExample<br />
which produces the result shown in Figure 3-33.<br />
In order to create this layout, only four lines of the code presented in Listing<br />
3-2 were changed:<br />
cp.add(new JButton("Before First Line"),<br />
BorderLayout.BEFORE_FIRST_LINE);<br />
cp.add(new JButton("After Last Line"),<br />
BorderLayout.AFTER_LAST_LINE);<br />
cp.add(new JButton("AfterLineEnds"),<br />
BorderLayout.AFTER_LINE_ENDS);
256 Chapter 3 Managing the User Interface<br />
Figure 3-33 BorderLayout in a left-to-right locale.<br />
cp.add(new JButton("BeforeLineBegins"),<br />
BorderLayout.BEFORE_LINE_BEGINS);<br />
If you compare this code with Listing 3-2 and Figure 3-33 with Figure 3-8,<br />
you'll see that the new constraints map to the original ones according to the<br />
rules shown in Table 3-2. To see what happens in a right-to-left locale, press<br />
the button in the center of the layout to change the ComponentOrientation<br />
of the frame's content pane. When you do this, you'll see that the buttons<br />
on the left and right exchange positions while those at the top and<br />
bottom do not move, giving the result shown in Figure 3-34.<br />
Figure 3-34 BorderLayout in a Right-to-Left Locale.<br />
Using both absolute and orientation-relative BorderLayout constraints<br />
in the same container is not a good idea—you should use one set or the other.
Working with the Application Window 257<br />
Obviously, if you assign a component to the WEST location and another to<br />
AFTER_LINE_ENDS, then in a left-to-right locale they will both be displayed,<br />
with one in the WEST and the other in the EAST. However, in a right-to-left<br />
locale, AFTER_LINE_ENDS maps to WEST, which means that there would be<br />
two components assigned the same constraint. When this happens, the Border-Layout<br />
prefers the component that is placed with the orientation-sensitive<br />
constraint, so the component originally placed to the WEST will<br />
disappear. This is unlikely to be the desired result.<br />
Working with the Application<br />
Window<br />
So far, you have seen how to lay out the components that make up an application's<br />
user interface, This section deals with some of the general issues relating<br />
to the management of the interface as a whole and of the top-level<br />
window in particular. First, you'll see how the application's window interacts<br />
with the desktop and discover the events that are delivered in response to<br />
changes in the top-level window's state. Then, you'll look at how an application<br />
can detect that its top-level window is being moved or resized. Finally,<br />
we'll look at what happens to top-level windows if your system has more than<br />
one monitor, support for which was introduced in <strong>Java</strong> 2 version 1.3.<br />
Reacting to Changes in the Window State<br />
Much of an applications logic is concerned with laying out the user interface<br />
and then reacting to the user's interaction with its controls. In the real world,<br />
though, it is often necessary to take into account interactions with the user's<br />
desktop. For example, the user might use your application for a while, then<br />
switch to another one, only to return later, or he or she might iconify the<br />
application for a while. In many cases, you might want to modify the way<br />
your application behaves at these times.<br />
Window Events<br />
The AWT allows you to detect these changes by delivering window events to<br />
the top-level window. Window events are instances of the<br />
j ava. awt. event. WindowEvent class and can be processed by classes that<br />
implement the WindowListener interface. Table 3-3 summarizes the set of
258 Chapter 3 Managing the User Interface<br />
window events and the WindowListener interface methods that are<br />
invoked when they are received.<br />
Table 3-3 Window Events and Listener Methods<br />
Event Listener Method<br />
WINDOWjDPENED windowOpened<br />
WINDOW^ACTIVATED windowActivated<br />
WINDOW_DEACTIVATED windowDeactivated<br />
WINDOW_ICONIFIED windowlconified<br />
WINDOW_DEICONIFIED windowDeiconified<br />
WINDOW_CLOSING windowClosing<br />
WINDOW_CLOSED windowClosed<br />
Every windowEvent has an identifier field from the set shown in Table 3-<br />
3, which can get from within an event handler using the get ID method that<br />
WindowEvent inherits from java.awt .AWTEvent. You can also use the<br />
getwindow method to find out which window caused the event. The easiest<br />
way to describe when these events occur and how to handle them is by using<br />
an example. The code in Listing 3-17 implements a bare-bones application<br />
that just listens for events on its top-level window. As each event is received,<br />
a message is written to the application's console window.<br />
Listing 3-17 Handling window events<br />
package <strong>JFC</strong>Book.Chapter3;<br />
import j avax.swing.*;<br />
import j ava.awt.*;<br />
import j ava.awt.event.*;<br />
public class WindowEventsExamplel implements WindowListener<br />
{<br />
// WindowListener Interface<br />
public void windowActivated(WindowEvent e) {
Listing 3-17 Handling window events (continued)<br />
_}<br />
}<br />
System.out.println("Window Activated");<br />
public void windowDeactivated(WindowEvent e) {<br />
System.out.println("Window Deactivated");<br />
}<br />
public void windowOpened(WindowEvent e) {<br />
System.out.println("Window Opened");<br />
}<br />
public void windowClosing(WindowEvent e) {<br />
System.out.println("Window Closing");<br />
e.getWindow().dispose();<br />
}<br />
public void windowClosed(WindowEvent e) {<br />
System.out.println("Window Closed");<br />
System.exit(0);<br />
}<br />
public void windowlconified(WindowEvent e) {<br />
System.out.println("Window Iconified");<br />
}<br />
public void windowDeiconified(WindowEvent e) {<br />
System.out.println("Window Deiconified");<br />
}<br />
Working with the Application Window 259<br />
public static void main(String[] args) {<br />
JFrame f = new JFrame("Window Events");<br />
JLabel 1 = new JLabel(" Window Test");<br />
f.addWindowListener(new WindowEventsExamplel());<br />
f.getContentPane().add(1, BorderLayout.CENTER);<br />
f.pack();<br />
f.setVisible(true);<br />
}<br />
The WindowEventsExamplel class exists only to implement the WindowListener<br />
interface. When this program is started with the command
260 Chapter 3 Managing the User Interface<br />
<strong>Java</strong> <strong>JFC</strong>Book.Chapter3.WindowEventsExamplel<br />
it creates a small frame, then registers an instance of the class as a WindowListener<br />
on itself, using the addWindowListener method:<br />
f.addWindowListener(new WindowEventsExamplel());<br />
The addWindowListener method is declared by the j ava. awt. Window<br />
class, which is the parent of all of the top-level windows, and is thus inherited<br />
by JFrame.<br />
When the window first appears on the screen, two lines are printed. If you<br />
are using JDK 1.1, you'll see the following output:<br />
Window Opened<br />
Window Activated<br />
The first line is caused by the delivery of a WINDOW_OPENED event; this<br />
event is only delivered once in the lifetime of a window, at the point that it<br />
first becomes visible on the screen. A window is activated and receives a<br />
WINDOW_ACTIVATED event when it becomes the foreground application. On<br />
the Windows platform, other than when the window is first created, this<br />
event is not actually triggered until the user clicks with the mouse somewhere<br />
inside the window. Under X-Windows, with some Window Managers<br />
it may be sufficient to simply move the mouse over the application window,<br />
while with others you may need to click to activate the window.<br />
<strong>Core</strong> Note<br />
The situation is not even as clear-cut as described because some window<br />
managers can be configured to work either way.<br />
If you're using <strong>Java</strong> 2, however, you'll see that these events are delivered in<br />
the opposite order:<br />
Window Activated<br />
Window Opened<br />
If you want to write code that works with both JDK 1.1 and <strong>Java</strong> 2, you<br />
should not rely on receiving the WINDOW_OPENED event before<br />
WINDOW_ACTIVATED.<br />
If you now move the mouse outside the application window, you may see<br />
the message<br />
Window Deactivated
Working with the Application Window 261<br />
indicating the receipt of a WINDOW_DEACTIVATED event. If you had to click<br />
to receive the WINDOW_ACTIVATED message, you will need to click somewhere<br />
outside the window to see this message. The intent of this event is to<br />
notify the application that it is no longer in the foreground—the user has<br />
turned his or her attention elsewhere. What you do with this message<br />
depends entirely on your application. One possibility might be to reduce the<br />
priority of background threads if you have any, especially if those threads are<br />
performing tasks that might consume a lot of system resources.<br />
If you now iconify the application, two events are delivered:<br />
Window Iconified<br />
Window Deactivated<br />
The WINDOW_ICONIFIED event is delivered as the application is minimized.<br />
In many cases, you won't make much use of this event. Applications<br />
that do a lot of rendering on their main window, for example, programs that<br />
draw three-dimensional graphics or animate images, might use this event to<br />
stop drawing on the screen, because none of the drawing will be visible.<br />
Once an application is iconified, it is no longer in the foreground, which<br />
explains the receipt of a WINDOW_DEACTIVATED event. As you might now<br />
expect, deiconifying the application produces another pair of events:<br />
Window Deiconified<br />
Window Activated<br />
These events would be used to reverse the effects of the previous pair. An<br />
application that had stopped drawing while it was iconified would now allow<br />
itself to draw again, but would not need to take any explicit action to refresh<br />
the screen, because the paint method of all of the components on the window<br />
will be called as soon as the window is visible again.<br />
Lastly, press the applications close button. If you're using JDK 1.1, this<br />
will result in the delivery of another three events:<br />
Window Closing<br />
Window Deactivated<br />
Window Closed<br />
The first message indicates the receipt of a WINDOW_CLOSING event, and<br />
the last shows that a WINDOW_CLOSED event has been sent. Between these<br />
two events, since the window is being destroyed, it is clearly becoming inactive,<br />
so a WINDOW_DEACTIVATED event is delivered. However, if you're using<br />
the <strong>Java</strong> 2 platform, you won't get a WINDOW_DEACTIVATED event—you just<br />
see WINDOW_CLOSING followed by WINDOW_CLOSED.
262 Chapter 3 Managing the User Interface<br />
Window Closing Events<br />
Whereas you can't do much other than react passively to the other window<br />
events, in response to a WINDOW_CLOSING event you can take some action<br />
that influences the future course of events. This event is delivered to indicate<br />
a request by the user to close the window; in many cases, this request is also<br />
implicitly a request to terminate the application. The application can respond<br />
in one of four ways when processing the WINDOW_CLOSING event:<br />
1. It can do nothing, thereby ignoring the event.<br />
2. It can hide the application window by calling setvisi -<br />
ble(false).<br />
3. It can exit.<br />
4. It can destroy the window by invoking its dispose method.<br />
In the first two cases, the assumption is that the application does not want<br />
the window to close—in the second case the window vanishes but could be<br />
reopened by the application later, while in the first case nothing happens at all,<br />
just as if the user had not pressed the close button. In the third case, since the<br />
application exits, there is nothing more to discuss. Finally, if the fourth choice<br />
is elected, the window close is allowed to proceed and a WINDOW_CLOSED<br />
event will subsequently be delivered.<br />
There is, however, an extra complication to the handling of these events<br />
for both JFrame and JDialog. After the WINDOWCLOSING event has been<br />
received by any listeners, a JFrame or a JDialog may hide or dispose itself<br />
of its own accord, whether or not the listener wanted it to. What it actually<br />
does depends on its default close operation, a property that can have one of<br />
the following three values:<br />
WindowConstants.DO_NOTHING_ON_CLOSE<br />
WindowConstants .HIDE_ON__CLOSE<br />
WindowConstants.DISPOSE_ON_CLOSE<br />
Starting with <strong>Java</strong> 2 version 1.3, there is a fourth value that can be used<br />
with JFrames (but not dialogs):<br />
JFrame.EXIT_ON_CLOSE<br />
Both JFrame and JDialog have methods that allow the setting of this<br />
property to be read or changed:<br />
public int getDefaultCloseOperation();<br />
public void setDefaultCloseOperation(int mode);
Working with the Application Window 263<br />
The default setting for all window types is WindowConstants.HIDE_ON_CLOSE.<br />
Here is what actually happens when the user clicks the close button:<br />
• A WINDOW_CLOSING event is delivered to all registered<br />
listeners, as described above.<br />
• If any listener chooses to go ahead with the close by disposing<br />
the window, the window will close and a WINDOW_CLOSED event<br />
will be delivered. If the listener does nothing or simply hides<br />
the window, no further events are delivered because the<br />
window has not been closed. This is all as described above.<br />
• After all listeners have seen the event, JFrame and JDialog<br />
then check their default close operation. If it is set to<br />
WindowConstants .DO_NOTHING_ON_CLOSE, no further<br />
action will be taken. In other words, what happens to the<br />
window depends only on what the listeners do.<br />
• If the default close operation is<br />
WindowConstants .HIDE_ON_CLOSE, the frame or dialog will<br />
be hidden; in this case, the program could make it visible again<br />
later.<br />
• If the default close operation is set to<br />
WindowConstants . DISPOSE_ON_CLOSE, then the window<br />
will be disposed and will no longer be usable (but the JFrame<br />
or JDialog object can still be used, although not to make the<br />
window visible again) and a WINDOW_CLOSED event will be<br />
delivered.<br />
• Finally, starting with <strong>Java</strong> 2 version 1.3, if the window is a<br />
JFrame and this property has the value<br />
JFrame . EXIT_ON_CLOSE, the application will exit.<br />
If you want to control exactly what happens to your frames and dialogs<br />
when the user clicks the close button and you do not want them to be hidden<br />
or closed unless you explicitly request it, you should set the close operation<br />
to WindowConstants . DO_NOTHINGJON_CLOSE, in which case what<br />
happens to the window is entirely at the discretion of your listeners and is<br />
not controlled by Swing code.<br />
If you do not select DO_NOTHING_ON_CLOSE, your event handler does<br />
not have final control over what happens to the window, because code in<br />
the Swing JFrame and JDialog classes will take over when you finish handling<br />
the WINDOW_CLOSING event. If you accept the default close operation<br />
or you explicitly request dispose on close, the frame or dialog will be hid-
264 Chapter 3 Managing the User Interface<br />
den or disposed after your listeners complete their processing of the<br />
WINDOW_CLOSING event, but your application will not, of course, exit.<br />
In the case of the application's main window, which should normally<br />
cause the application to exit when it is closed, EXIT_ON_CLOSE may be<br />
appropriate if it is available. In general, though, you should be wary of<br />
using EXIT_ON_CLOSE unless you take care to save anything that needs to<br />
be preserved (such as the content of open files that have been modified)<br />
when processing the WINDOW__CLOSING event. Even this is not ideal,<br />
because a professional application would present a dialog box allowing the<br />
user to cancel the close operation if desired, in case the close button had<br />
been pressed accidentally. If you use EXIT_ON_CLOSE, you won't get a<br />
chance to do this because the application will exit when you return from<br />
handling the WINDOW_CLOSING event. For the main window, therefore, the<br />
recommended setting is to use DO_NOTHING_ON_CLOSE and to handle the<br />
event yourself, exiting if appropriate when you have completed the necessary<br />
fomalities. In most of the examples in this book, a listener is registered<br />
to exit when the top-level frame is closed by user request.<br />
<strong>Core</strong> Note<br />
This behavior is different from that of the AWT Frame and Dialog<br />
classes, which don't support this feature and therefore stay visible unless<br />
closed or disposed of explicitly, as described earlier, behaving in the way<br />
described for the DO_NOTHING_ON_CLOSE setting.This behavior also<br />
doesn't apply to the AWT window or the Swing JWindow classes, which<br />
are relatively rarely used directly by the programmer. One reason why these<br />
two are different is that they don't have any window manager controls to<br />
allow the user to request that they be closed.<br />
Note carefully that the WINDOW^CLOSING event is delivered only if the<br />
window is being closed by user request. It is a common misconception that<br />
you can expect a WINDOW_CLOSING event if you close a window programmatically<br />
by invoking its dispose method. If you do this, all you get is a<br />
WINDOW_CLOSED event. The rationale behind this is simple:<br />
• If the user asks for the window to be closed, listeners are given<br />
an opportunity to respond in their windowClosing methods.<br />
Suitable responses might be to preserve unsaved data and<br />
dispose the window, thus allowing it to close, or rejecting the
Working with the Application Window 265<br />
close request (which requires that DO_NOTHING_ON_CLOSE is<br />
selected).<br />
On the other hand, if program code voluntarily calls dispose,<br />
it is assumed that it has completed all necessary tidy up and that<br />
the window must be closed. Hence, there is no need to go<br />
through the usual WINDOW_CLOSING processing. Indeed, as<br />
described above, dispose is commonly called from within a<br />
window listener handling a WINDOW_CLOSING event, so it<br />
would not be appropriate for it to cause another<br />
WINDOW_CLOSING event to be generated (or for it to detect this<br />
as a special case and only generate this event sometimes).<br />
<strong>Core</strong> Tip<br />
If you want to have complete control over what happens when the user<br />
clicks a window's close button, call the window's<br />
setDef aultCloseOperation method with argument<br />
WindowConstants . DO_NOTHING_ON_CLOSE. If you don't do this, the<br />
window will close whether your window listener wanted it to or not.<br />
Event-Handling Adapters<br />
If you don't want to act on all of the window events that your window listener<br />
can receive, you can avoid implementing empty interface methods by using<br />
the java. awt. event. WindowAdapter class, which defines the empty<br />
methods for you. To use an adapter, you create a derived class based on the<br />
adapter in which you override just the methods for the events you want to<br />
provide your own handling for. For example, if you want to exit when the<br />
user closes the top-level window, you can use code that looks like that shown<br />
in Listing 3-18.<br />
Listing 3-18 Using a WindowAdapter to terminate the application<br />
package <strong>JFC</strong>Book.Chapter3;<br />
import j avax.swing.*;<br />
import j ava.awt.*;<br />
import j ava.awt.event.*;
266 Chapter 3 Managing the User Interface<br />
Listing 3-18 Using aWindowAdapter to terminate the application<br />
(continued)<br />
public class WindowEventsExample2 extends JFrame {<br />
public WindowEventsExample2(String title) {<br />
super(title);<br />
JLabel 1 = new JLabel(" Window Test");<br />
}<br />
this.getContentPane () .add(1, BorderLayout.CENTER) ;<br />
pack();<br />
public static void main(String [] args) {<br />
WindowEventsExample2 w = new WindowEventsExample2<br />
("Window Events 2");<br />
w.addWindowListener(new WindowEventsListenerl());<br />
w.setDefaultCloseOperation(<br />
WindowConstants.DO_NOTHING_ON_CLOSE);<br />
}<br />
w.setVisible(true);<br />
class WindowEventsListenerl extends WindowAdapter {<br />
public void windowClosing(WindowEvent e) {<br />
System.out.println("Window Closing");<br />
e.getWindow().dispose();<br />
}<br />
public void windowClosed(WindowEvent e) {<br />
System.out.println("Window Closed");<br />
System.exit(0);<br />
}<br />
2 Here, an instance of the class WindowEventsListenerl is registered to<br />
catch window events on our window. This class extends WindowAdapter and<br />
overrides only the windowClosing and windowClosed methods, so that it<br />
will only take action when the window is being closed. In this example, the<br />
default behavior of the frame is explicitly overridden by using setDef ault-<br />
CloseOperation so that it won't close unless it is told to do so and the<br />
frame is actually closed by virtue of the fact that its dispose method is called<br />
by the listener's windowClosing method. Note that we don't need to<br />
arrange in advance for the listener class to have a reference to the frame,
Working with the Application Window 267<br />
because it can use the getWindow method of the WindowEvent class to find<br />
out which window is closing. This means that you can register a single<br />
instance of this class as a window listener on any number of windows and<br />
thus avoid the memory overhead of creating a listener per window.<br />
We can, and frequently do, abbreviate the above example by using inner<br />
classes. If you're not familiar with inner classes, you can find out about them<br />
by reading <strong>Core</strong> <strong>Java</strong> 1.1, Volume I: Fundamentals, also published by Prentice<br />
Hall. When you know about inner classes, you can use a shorthand version<br />
like that in Listing 3—19, where an anonymous inner class derived from a<br />
windowAdapter has been created using the code shown in bold.<br />
Listing 3-19 Using an inner class to handle events<br />
package <strong>JFC</strong>Book.Chapter3;<br />
import javax.swing.*;<br />
import j ava.awt.*;<br />
import j ava.awt.event.*;<br />
public class WindowEventsExample3 extends JFrame {<br />
public WindowEventsExample3(String title) {<br />
super(title);<br />
JLabel 1 = new JLabel(" Window Test");<br />
this.getContentPane().add(l, BorderLayout.CENTER);<br />
pack () ;<br />
}<br />
public static void main(String[] args) {<br />
WindowEventsExample3 w = new WindowEventsExample3<br />
("Window Events 3");<br />
w.addWindowListener(new WindowAdapter() {<br />
public void windowClosing(WindowEvent e) {<br />
System.out.println("Window Closing");<br />
e.getWindow().dispose();<br />
}<br />
}<br />
});<br />
public void windowClosed(WindowEvent e) {<br />
System.out.println("Window Closed");<br />
System.exit(0);<br />
w.setDefaultCloseOperation(
268 Chapter 3 Managing the User Interface<br />
Listing 3-19 Using an inner class to handle events (continued)<br />
WindowConstants.DO_NOTHING_ON_CLOSE);<br />
w.setVisible(true);<br />
}<br />
J Many of the event-listening interfaces have corresponding adapter classes<br />
that you can use in this way.<br />
Movement of Components<br />
Window events allow you to detect most of what the user is doing to the toplevel<br />
window but not everything—you can't use them to react to attempts by<br />
the user to move your window around on the screen, for example. You might<br />
think that this is an esoteric thing to want to do, but it can be important for<br />
some applications. Suppose that you want to implement your own desktop<br />
toolbar that attaches itself to one side of the screen and changes its orientation<br />
depending on where it is. You probably want to allow the user to relocate<br />
the toolbar by dragging it around the screen. When the user stops dragging<br />
the toolbar, you need to relocate it against the nearest edge of the screen and<br />
change its size and orientation to match that of the edge you are now<br />
attached to.<br />
To allow you to conveniently implement this kind of behavior, each component<br />
can generate a ComponentEvent when it is moved, resized, hidden,<br />
or shown. The <strong>Java</strong>, awt .event. ComponentEvent, like all AWT events,<br />
has an identifier that describes the specific event and an interface (ComponentListener)<br />
to allow you to create an event listener. Table 3-4 summarizes<br />
the various events, the listener interface methods that receive them,<br />
and the conditions under which each event is generated.<br />
Table 3—4 Component Events<br />
Event Listener Method Description<br />
COMPONENT_SHOWN componentShown Generated when the component<br />
first becomes visible and<br />
subsequently on every use of<br />
setVisible(true)
Table 3^4 Component Events (continued)<br />
Event Listener Method Description<br />
Working with the Application Window 269<br />
COMPONENT_HIDDEN componentHidden Delivered after use of set -<br />
Visible(false)<br />
COMPONENT_MOVED componentMoved Generated when the component<br />
is moved by setLocation,<br />
setBounds, or by the<br />
layout manager when the component's<br />
container is first laid<br />
out or resized<br />
COMPONENT_RESIZED componentResized Sent when the components<br />
size is changed using set-<br />
Size or setBounds or<br />
when the layout manager initially<br />
sizes or subsequently<br />
resizes the component<br />
These events apply to all components, not just to windows. Because of<br />
this, you can, if you wish, decouple logic that might be needed after some of<br />
your internal components are moved around in your window from the code<br />
that actually moves them. Many applications won't allow independent movement<br />
of parts of the user interface, but for those that do, this can be an<br />
invaluable feature. Later in this book, you'll see how to implement applications<br />
that contain internal frames, each of which might show, for example, a<br />
view of a word processing file. The internal frame can be moved around by<br />
the user without reference to the application since the code to handle the<br />
movement is part of the internal frame itself. If you need to know about the<br />
movement, perhaps to adjust the location or size of the other frames, you can<br />
do this by monitoring component events generated by the frames.<br />
So that you can detect which component is involved in a component event,<br />
the Component Event class includes the following method:<br />
public Component getComponent();<br />
The use of this method is demonstrated in Listing 3-20, which shows component<br />
events generated when a button is moved around inside a container<br />
under program control.
270 Chapter 3 Managing the User Interface<br />
Listing 3-20 Handling component events<br />
package <strong>JFC</strong>Book.Chapter3;<br />
import j avax.swing.*;<br />
import j ava.awt.*;<br />
import j ava.awt.event.*;<br />
public class ComponentEventsExample<br />
implements ComponentListener {<br />
// ComponentListener interface<br />
public void componentMoved(ComponentEvent e) {<br />
Component c = e.getComponent();<br />
Point p = c.getLocation();<br />
System.out.println("Component moved to (" + p.x + ", "<br />
}<br />
+ p . y + ") " ) ;<br />
public void componentResized(ComponentEvent e) {<br />
Component c = e.getComponent0;<br />
Dimension d = c.getSize();<br />
System.out.println("Component resized: width " + d.width +<br />
", height " + d.height);<br />
}<br />
public void componentShown(ComponentEvent e) {<br />
System.out.println("Component made visible");<br />
}<br />
public void componentHidden(ComponentEvent e) {<br />
System.out.println("Component made invisible");<br />
}<br />
public static void main(String[] args) {<br />
JFrame f = new JFrame("Component Events");<br />
JButton b = new JButton("Do not press...");<br />
b.addComponentListener(new ComponentEventsExample());<br />
f.getContentPane().add(b, BorderLayout.CENTER);<br />
f.setSize (300, 200) ;<br />
f.addWindowListener(new WindowAdapter() {<br />
public void windowClosing(WindowEvent evt) {<br />
System.exit(0);<br />
}<br />
});<br />
f.setVisible(true);
Listing 3-20 Handling component events (continued)<br />
Working with the Application Window 271<br />
try {<br />
Thread.sleep(5000); // Delay a bit<br />
f.getContentPane().setLayout(null);<br />
b.setVisible(false) ; // Hide<br />
Thread.sleep(5000) ; // Delay a bit<br />
b.setSize(100, 100); // Change size<br />
Thread.sleep(5000) ; // Delay a bit<br />
b. setLocation(20, 20); // Move ourselves<br />
Thread.sleep(5000) ; // Delay a bit<br />
b.setVisible(true); // Appear again<br />
Thread.sleep(5000) ; // Delay a bit<br />
b.setLocation(30, 40); // Move ourselves<br />
Thread.sleep(5000) ; // Delay a bit<br />
b . setSize(80, 80); // Change size<br />
Thread.sleep(5000) ; // Delay a bit<br />
} catch (Exception e) {<br />
System.out.println(e);<br />
}<br />
System.exit(0);<br />
}<br />
} _ _ _<br />
Running this program using the command<br />
java <strong>JFC</strong>Book.Chapter3.ComponentEventsExample<br />
produces the following output:<br />
Component resized: width 292, height 173<br />
Component made invisible<br />
Component resized: width 100, height 100<br />
Component moved to (2 0, 20)<br />
Component made visible<br />
Component moved to (30, 40)<br />
Component resized: width 80, height 80<br />
The first line is produced when the frame's BorderLayout manager<br />
places and sizes the button within the frame. To avoid further interference<br />
from the layout manager, we use setLayout (null) to work without one for<br />
the rest of this example. The second line is caused by the setVisible<br />
(false) call, at which point the button will disappear. The subsequent<br />
changes of size and position requested by setSize and setLocation are<br />
responsible for the next two lines. Notice that the correct size and location
272 Chapter 3 Managing the User Interface<br />
are reported and that component events continue to be delivered even when<br />
the component is invisible. The last three events report that the component<br />
is made visible again and is then moved and resized to its final configuration.<br />
The example code shown here implements all of the methods of the Component<br />
Listener interface because we want to show each event as it is<br />
delivered. In real applications, however, you are unlikely to want to do this.<br />
For convenience, there is an adapter class for ComponentEvents called<br />
ComponentAdapter that you can use as a base class for your listener. Like<br />
the other event adapters, this class provides dummy implementations of all<br />
the listener methods so that you only have to override the ones for which you<br />
want specific behavior.<br />
<strong>Core</strong> Warning<br />
This is another case in which we have taken the liberty of manipulating<br />
Swing components outside the event thread. If this example were written<br />
the proper way, every setvisible, setsize, and setLocation call<br />
would have to be run separately on the event thread, making the code<br />
twice as long and no more revealing as far as ComponentEvents are<br />
concerned.The absolutely correct version can be found on the CD-ROM in<br />
the file <strong>JFC</strong>Book\Chapter3\ComponentEventsExample2 . java/'f<br />
you want to see for yourself.<br />
There is a price to pay for this shortcut, however, because this example<br />
does not repaint itself properly when run with <strong>Java</strong> 2 version 1.2.2—<br />
outlines of the button are left on the screen after it moves and resizes.The<br />
version in ComponentEventsExample2 . <strong>Java</strong> paints properly with<br />
JDK 1.1, <strong>Java</strong> 2 version 1.2.2 and <strong>Java</strong> 2 version IJ.This simply illustrates<br />
the danger of using shorthand techniques for the sake of brevity, which you<br />
should avoid when writing production code.<br />
Using Multiple Monitors<br />
<strong>Java</strong> 2 version 1.3 officially supports configurations in which a machine has<br />
more than one monitor across which the desktop is displayed in a Virtual<br />
desktop' arrangement. Whether you can make use of this feature depends on<br />
your hardware and the operating system that you are using. Multiple monitor<br />
support is built into Microsoft Windows 98 and Windows 2000 and you can<br />
use it if you have a suitable graphics card or graphics cards. If you have the<br />
appropriate hardware installed, you activate your additional monitor(s) from
Working with the Application Window 273<br />
the Control Panel by opening the Display dialog and then selecting Settings.<br />
On a system with two monitors, you should see something like Figure 3-35.<br />
Figure 3-35 Configuring multiple monitors with Windows 98.<br />
When you have two or more screens, one of them is considered to be the<br />
primary monitor - in Figure 3-35, the primary monitor is the larger of the<br />
two. To activate a secondary monitor, you click on it and Windows will ask<br />
you if you want to enable it. When you click 'OK', your desktop will be<br />
extended to include the new monitor. You can determine the part of the<br />
desktop that an extra monitor occupies by dragging its icon around and placing<br />
it relative to the others according to your needs. The configuration shown<br />
in Figure 3-35 produces a wide, narrow desktop but you could create a tall<br />
desktop instead by placing the secondary monitor above or below the main<br />
one.<br />
Once you have your virtual desktop in place, you can drag windows from<br />
one monitor to another as if you were using a single, seamless desktop space.<br />
Incidentally, there is no requirement for all of the monitors to display the
274 Chapter 3 Managing the User Interface<br />
same number of colors or to be set at the same resolution. If the secondary<br />
monitor has a lower resolution than the main one, then there will be part of<br />
the primary monitor's desktop area that does not extend on the secondaiy<br />
monitor. For the rest of this section, we'll work with a two monitor configuration<br />
in which the secondary monitor is placed to the left of the primary one,<br />
as shown in Figure 3-35.<br />
Multiple Monitors and Coordinates<br />
The only real issue that developers have to be aware of when using a multiple<br />
monitor configuration is that the coordinates used to place top-level<br />
windows are virtual coordinates measured relative to the top-left hand corner<br />
of the primary monitor. To illustrate how virtual coordinates work, look at<br />
Figure 3-36.<br />
Figure 3-36 Co-ordinate system when using multiple monitors.<br />
This diagram shows a two-monitor configuration in which the primary<br />
monitor, with a resolution of 1024 by 768 pixels, is placed to the right of the<br />
640-480 pixel resolution secondary monitors. The origin of coordinates is<br />
always at the top-left of the primary window, as shown in the diagram. The x<br />
coordinate increases through positive values as you move to the right along<br />
the primary monitor, while y values increase as you move from the top to the<br />
bottom of the figure. Therefore, the bottom right comer of the primaiy mon-
Working with the Application Window 275<br />
itor has coordinates x = 1023, y - 767. This is all consistent with what you saw<br />
in Chapter 2.<br />
Now let's turn to the secondary monitor. Since it is located to the left of the<br />
primary monitor, all of its coordinates have negative x values, starting with x =<br />
-1 at the right hand edge and decreasing to x = -640 at its far left. The y coordinates<br />
on this monitor are, however, positive, because its upper edge is<br />
below the upper edge of the primary monitor. If, as shown here, the lower<br />
edge of the primary and secondary monitors form a straight line, the virtual<br />
coordinates of the top left corner of the secondary monitor would be (-640,<br />
368), as shown in the figure.<br />
To work out the coordinates of any frame on the desktop, you just add its<br />
coordinates relative to its monitor to the virtual coordinates of the top-left of<br />
that monitor. Thus, for example, frame A on the primary monitor is located at<br />
(100, 120). To place a frame here, you would do this:<br />
JFrame f = new JFrame("Frame A");<br />
f.setLocation(100, 120);<br />
Frame B on the secondary monitor is positioned 140 pixels to the right and<br />
32 pixels down from the top left of that monitor, making its virtual coordinates<br />
(-500, 400) and requiring the following code to position it:<br />
JFrame f = new JFrame("Frame B");<br />
f.setLocation(-500, 400);<br />
Finally, Frame C is above and to the right of the origin of the coordinate<br />
system and would be placed like this:<br />
JFrame f = new JFrame("Frame C") ;<br />
f.setLocation(600, -100);<br />
Here, the negative y coordinate means that the top of the frame will<br />
appear above the upper reach of the primary monitor, with the result that the<br />
top 100 pixels of this frame will be clipped. This part of the frame would,<br />
however, be visible if another monitor were added there or if the secondary<br />
monitor were dragged around and placed above the primary one.<br />
If you have a multiple monitor configuration, you can experiment with virtual<br />
coordinates by typing the following command:<br />
<strong>Java</strong> <strong>JFC</strong>Book.Chapter3.jdkl3.MultipleMonitorExamplel<br />
This example creates a small frame that is initially placed at location (0,<br />
0)—that is, at the top left of the primary monitor. If you drag the frame<br />
around, each time you drop it it reports its location by catching ComponentEvemts<br />
from the top-level window. Drag the window around each of<br />
your monitors to see for yourself that the coordinates reported are consistent
276 Chapter 3 Managing the User Interface<br />
with those shown in Figure 3-36 and explained above. If you supply two<br />
numeric values when starting this program, they are taken as the initial x and<br />
y coordinates for the frame, and therefore determine not only where the<br />
frame is placed, but also which monitor it starts on. For example, use the<br />
command<br />
<strong>Java</strong> <strong>JFC</strong>Book.Chapter3.jdkl3.MultipleMonitorExamplel -50 100<br />
to have the frame placed at (-50, 100), which makes it horizontally straddle<br />
both monitors in the configuration shown in Figure 3-35.<br />
Getting Information on Available Monitors<br />
Many applications will simply work with multiple monitors by virtue of the<br />
fact that the support provided by <strong>Java</strong> 2, version 1.3 is transparent—the only<br />
problem that might arise would be application code that refused to work with<br />
negative coordinates for the top-level window. It is unlikely, however, that<br />
any existing code bothers to check for negative coordinates, so almost all<br />
existing applications should work.<br />
More sophisticated applications might want to make explicit use of whatever<br />
monitors are available and exploit the fact that a given system has a large<br />
desktop area to work with. To create such an application, you need to know<br />
how to find out how many monitors are included in your virtual desktop and<br />
what coordinates, ranges they cover. Using some features originally introduced<br />
in the <strong>Java</strong> 2 platform as part of the <strong>Java</strong> 2D API, you can get this<br />
information.<br />
The first step you need to take to find out about the monitors available on<br />
your system is to get a reference to the Graphics Environment object that<br />
describes it. You can do this using the static getLocalGraphicsEnvironment<br />
method:<br />
GraphicsEnvironment ge =<br />
GraphicsEnvironment.getLocalGraphicsEnvironment();<br />
Once you have this object, you can find out which monitors you have by<br />
calling its getScreenDevices method, which returns an array of GraphicsDevice<br />
objects, one for each monitor attached to your system:<br />
GraphicsDevice[] gd = ge.getScreenDevices();<br />
The number of entries in this array tells you how many monitors yovir<br />
application can work with, but it doesn't tell you their resolutions or where<br />
they appear in the virtual desktop. To obtain this information, you need to get<br />
a GraphicsConf iguration object for each monitor. Theoretically, a single
Working with the Application Window 277<br />
device may have multiple GraphicsConf iguration objects, each describing<br />
a different possible configuration of that device. You can get a list of all<br />
the configurations for a device by calling the GraphicsDevice getConf igurations<br />
method, or you can get the default configuration for a monitor by<br />
invoking getDe fault Configuration:<br />
GraphicsConfiguration[] gcs = gd.getConfigurations();<br />
GraphicsConfiguration gc = gd.getDefaultConfiguration();<br />
The GraphicsConf iguration class has a getBounds method that<br />
returns a Rectangle describing the monitor that it refers to, in which the<br />
width and height members give the size of the monitor in pixels, while the<br />
x and y values describe the location of the top left-hand corner of the monitor<br />
in the virtual coordinate system of the desktop. Listing 3-21 demonstrates<br />
how to use these methods to create a single frame positioned near the top<br />
left of each monitor on your system.<br />
Listing 3-21 Getting information for each monitor on a system<br />
package <strong>JFC</strong>Book.Chapter3.jdkl3;<br />
import j ava.awt.*;<br />
import javax.swing.*;<br />
public class MultiMonitorExample2 {<br />
public static void main(String [] args) {<br />
GraphicsEnvironment ge = GraphicsEnvironment.<br />
getLocalGraphicsEnvironment();<br />
GraphicsDevice [] gd = ge.getScreenDevices();<br />
System.out.println("There are " + gd.length +<br />
" screen device(s)");<br />
Imagelcon image = new Imagelcon(<br />
MultiMonitorExample2.class.getResource(<br />
"images/lem.jpg"));<br />
for (int i = 0; i < gd.length; i++) {<br />
GraphicsConfiguration[] gcs =<br />
gd[i].getConfigurations(<br />
System.out.println("Device " + i + " has " +
278 Chapter 3 Managing the User Interface<br />
Listing 3-21 Getting information for each monitor on a system<br />
(continued)<br />
}<br />
}<br />
gcs.length + " configuration(s)");<br />
for (int j =0; j < gcs.length; j++) {<br />
System.out.printIn("\tConfig " + j + " bounds: " +<br />
gcs [ j] .getBounds()) ;<br />
}<br />
JFrame f = new JFrame("Screen " + i);<br />
JLabel 1 = new JLabel(image);<br />
f.getContentPane().add(1);<br />
f .packO ;<br />
GraphicsConfiguration gc =<br />
gd[i].getDefaultConfiguration();<br />
Rectangle pt = gc.getBounds();<br />
f.setLocation(pt.x + 100, pt.y + 100);<br />
f.setVisible(true);<br />
You can run this example using the command<br />
<strong>Java</strong> <strong>JFC</strong>Book.Chapter3.jdkl3.MultipleMonitorExample2<br />
As well as creating one frame per monitor, it also prints information about<br />
your configuration in the window from which you start it. On my system, the<br />
following output is produced:<br />
There are 2 screen device(s)<br />
Device 0 has 1 configuration(s)<br />
Config 0 bounds: java.awt.Rectangle<br />
[x=0,y=0,width=1024,height=768]<br />
Device 1 has 1 configuration(s)<br />
Config 0 bounds: java.awt.Rectangle<br />
[x=-64 0,y=2 8 0,width=64 0,height=48 0]<br />
This mirrors the configuration shown in Figure 3-35—there are two monitors,<br />
the primary one having resolution 1024x768 and the secondary,<br />
640x400. As you can see, the primary is located at (0, 0) in the virtual coordinate<br />
system/whereas the secondary resides at (-640, 280), which places it to<br />
the left of and slightly below the upper edge of the primary monitor.
Working with the Application Window 279<br />
The code that positions each individual frame in Listing 3-21 looks like<br />
this:<br />
GraphicsConfiguration gc =<br />
gd[i].getDefaultConfiguration();<br />
Rectangle pt = gc.getBounds();<br />
f.setLocation(pt.x + 100, pt.y + 100);<br />
This code gets the default GraphicsConf iguration for a monitor and<br />
then uses the getBounds method to find out where the monitor is in the<br />
desktop's virtual coordinate space. Using this information, it simply adds a<br />
constant offset to both the x and y coordinates to place the frame in the same<br />
corresponding location on each screen.<br />
Calculating the Desktop Size<br />
In Chapter 2, you saw that you could find out the size of your monitors<br />
screen using the Toolkit getScreenSize method. What does this mean<br />
when there is more than one monitor attached to your system? In a multimonitor<br />
environment, getScreenSize actually returns the dimensions of<br />
the primary monitor, which is the correct behavior for most applications.<br />
However, suppose you want to find out the size of the total virtual desktop—<br />
that is, the area mapped by all of your monitors. You can do this by calling<br />
getBounds for each GraphicsConf iguration object for all screen<br />
devices and taking the union of all the Rectangles that are returned. The<br />
code to do that would look something like this:<br />
System.out.println("Screen size is " +<br />
Toolkit.getDefaultToolkit().getScreenSize());<br />
Rectangle desktop = new Rectangle();<br />
for (int i = 0; i < gd.length; i++) {<br />
GraphicsConfiguration[] ges =<br />
gd[i].getConfigurations();<br />
for (int j =0; j < gcs.length; j++) {<br />
desktop = desktop.union(gcs[j].getBounds());<br />
}<br />
}<br />
System.out.println("Virtual desktop bounds are: " +<br />
desktop);<br />
You can try this out on your system using the command:<br />
java <strong>JFC</strong>Book.Chapter3.jdkl3.MultipleMonitorExample3<br />
On my system, this produces the following result:<br />
••'.
280 Chapter 3 Managing the User Interface<br />
There are 2 screen device(s)<br />
Screen size is <strong>Java</strong>.awt.Dimension[width=1024,height=768]<br />
Virtual desktop bounds are:<br />
<strong>Java</strong>.awt.Rectangle[x=-64 0,y=0,width=16 64,height=768]<br />
As you can see, the "screen size" is reported as 1024x768, which is the resolution<br />
of my primary monitor, while the desktop is 1664 pixels wide (which<br />
is 1024 + 640, the sum of the horizontal resolutions of the two displays) and<br />
768 pixels high, which corresponds to the case in which the two monitors are<br />
logically arranged side by side. Notice also that the desktop starts at x coordinate<br />
-640, which happens because the secondary monitor appears to the<br />
left of the primary monitor.<br />
Summary<br />
This chapter presented all of the AWT and Swing layout managers. Making<br />
the correct choice of layout manager can considerably simplify your job, as<br />
can a proper understanding of what each layout manager is tiying to achieve.<br />
Our survey of layout managers showed you how each layout manager lays out<br />
its container and how constraints can be used to influence the placement of<br />
individual components. You've looked quite closely at how layout managers<br />
respond to resizing of their containers, what their limitations are, and how<br />
they behave in unusual situations, including the way in which they handle<br />
locales in which the usual reading order is right-to-left instead of the left-toright<br />
that most English-speaking developers are accustomed to (and take for<br />
granted!).<br />
You also saw an interesting tool for debugging component layout in the<br />
DebugGraphics feature of JComponent. This feature will also be of use if<br />
you plan to implement a new user interface for a Swing component, a topic<br />
covered in Chapter 13, or render complex graphics, which are the subject of<br />
the next chapter.<br />
The last part of the chapter continued our description of event handling by<br />
looking at the events that are generated by an application s top-level windows<br />
and those generated by components as they are moved and resized. Almost<br />
all applications will need to make use of at least some of these events, particularly<br />
the window events, while component events are likely to be of interest<br />
if you are creating your own GUI components or creating a higher-level toolkit<br />
for others to use. Finally, you saw how to make use of multiple monitors
when they are available, using facilities that are supported for the first time in<br />
<strong>Java</strong> 2, version 1.3.<br />
Summary 281
GRAPHICS, TEXT<br />
HANDLING, AND<br />
PRINTING<br />
M Topics in This Chapter<br />
• The Graphics Context, Lines, Shapes, and Fills<br />
• Properties and Property Change Events<br />
• Borders and Icons<br />
• Drawing and Printing Graphics and Text
In the last two chapters, you have seen both text and images used in conjunction<br />
with buttons and labels. All you had to do to get your text or<br />
image drawn was to pass it to the components constructor and the component<br />
arranged for it to appear. In this chapter, you'll see how to draw text<br />
and graphics of your own. The chapter begins by looking at the JPanel and<br />
Graphics classes. JPanel will be used as a drawing area and the methods of<br />
the Graphics class will be used to draw on it.<br />
When you've seen how to use the primitive graphics operations, you'll build<br />
a complete application around them, concentrating on the details of the user<br />
interface and how to build components in a reusable manner. During the<br />
development of this application, you'll see how to implement a custom border,<br />
a very simple custom component, and some icons that don't depend on images.<br />
Next, you'll learn how to draw text and see how alike text and graphics<br />
handling are in <strong>Java</strong>. Armed with this knowledge, in the last part of this chapter<br />
you'll see how to use the printer to print an image of an application, a single<br />
component from that application, or a complete text file.<br />
Working with Graphics<br />
In this section, you're going to see how to draw text and graphics. In order to<br />
draw, you need something to draw on and something to draw with. The best<br />
283
284 Chapter 4 Graphics, Text Handling, and Printing<br />
thing to draw on is something that's naturally blank—like JPanel. In earlier<br />
chapters, you have used JPanel as a container and arranged components on<br />
top of it, but it is equally useful as an empty area that you can draw on.<br />
If you're familiar with JDK l.f, you might think it strange to use a container<br />
like JPanel for something as simple as drawing. After all, the AWT<br />
provided a simpler object, Canvas, derived from Component, that was used<br />
as the traditional surface for drawing on and as one of the starting points for<br />
creating custom components. Swing doesn't have a JCanvas, however. A<br />
JCanvas class would have been derived from JComponent, as JPanel is.<br />
Since JComponent is already a container, there is little to gain by retaining a<br />
separate JCanvas class so, although it made an appearance in the early<br />
releases of Swing, it soon disappeared. Now, wherever you would have used<br />
Canvas, you should probably use JPanel.<br />
There is, however, another possible choice if you want something to draw<br />
on—JComponent itself. What JComponent and JPanel have in common<br />
that make them useful as a drawing area is that they both occupy screen<br />
space but don't draw anything onto themselves when they appear. There are<br />
only three real differences between them:<br />
• JComponent is abstract, which means that you need to create a<br />
subclass to get something to draw on. JPanel is not abstract, so<br />
you can just create one whenever you need to.<br />
• JPanel is opaque by default and so fills its background with its<br />
background color, whereas JComponent is transparent.<br />
• JPanel is initialized with a foreground color, background color,<br />
and font that are appropriate for the selected look-and-feel.<br />
JComponent does not have fixed values for any of these<br />
properties installed by default—they are all inherited from the<br />
container that it is mounted in, or ultimately from the top-level<br />
window of the container and its ancestors do not define values<br />
for these properties.<br />
As you'll see, the first difference is not at all important, because you will<br />
need to subclass JPanel if you want to draw on it. The second difference is<br />
only a matter of a different default setting of the opaque property—you can<br />
make JComponent opaque, and have it fill in its background, by calling<br />
setOpaque (true), or you can make a JPanel transparent using setOpaque<br />
(false). The third difference is also only a minor point if you just<br />
want a component to use as a drawing surface, because you'll probably select<br />
explicit colors and fonts and not need to rely on the defaults that you might<br />
or might not get. The examples in this chapter all use JPanel, but the same
A Graphics Application 285<br />
techniques work if you want to use JComponent as your starting point and,<br />
as you'll see in Volume 2, JComponent is the usual choice for the base class<br />
of custom components.<br />
The Graphics Context<br />
Every component, JPanel included, has an associated graphics context,<br />
which gives direct access to the screen space that it occupies. The graphics<br />
context is represented by the <strong>Java</strong>, awt .Graphics class. Graphics is an<br />
abstract class, so you can't create an instance of it for yourself—the only way<br />
to get a Graphics objects for a component one is from the component itself.<br />
If you're going to draw on a JPanel (or a JComponent), the simplest way to<br />
get an appropriate Graphics object is to subclass it and override its paint -<br />
Component method, which is called to allow the component to update its onscreen<br />
representation. The only argument that this method receives is a<br />
Graphics object that covers its on-screen area.<br />
The Graphics class has a large number of methods that allow you to draw<br />
on the surface of the component, all of which will be covered in the first part<br />
of this chapter. To get started, let's use the drawstring method to place a<br />
short piece of text onto a JPanel. Listing 4-1 shows how this is done.<br />
Listing 4-1 Drawing text<br />
package <strong>JFC</strong>Book.Chapter4;<br />
import javax.swing.*;<br />
import j ava.awt.*;<br />
import j ava.awt.event.*;<br />
public class DrawText extends JPanel {<br />
public void paintComponent(Graphics g) {<br />
super.paintComponent(g);<br />
g.drawstring("<strong>Core</strong> <strong>Java</strong> <strong>Foundation</strong> <strong>Classes</strong>", 20, 80);<br />
} '<br />
public static void main(String[] args) {<br />
JFrame f = new JFrame("Drawing Text");<br />
JPanel panel = new DrawText();<br />
f.getContentPane().add(panel);<br />
f.setSize(250, 200);
286 Chapter 4 Graphics, Text Handling, and Printing<br />
Listing 4-1 Drawing text (continued)<br />
f.setVisible(true);<br />
}<br />
J_____________<br />
The first line of the paintComponent method is there to make JPanel<br />
draw its background—this is the only thing that JPanel does in its own<br />
paintComponent method. If this weren't done, the panel would be transparent<br />
and the text would be drawn on the background of the frame (which,<br />
at least in the Metal look-and-feel, would have the same color by default, so<br />
you wouldn't see any difference). As you can see, apart from this, it only takes<br />
one line of code to draw some text onto a component—the drawstring<br />
method is given the string to be drawn and the position at which the string is<br />
to appear on the component's surface as x and y coordinates. The coordinate<br />
system used by the Graphics class is very simple: Each pixel in the area<br />
described by the graphics context is uniquely described by its x and y coordinates.<br />
By default, the origin of this coordinate system is at the top left of the<br />
component from which the graphics context was obtained. The x coordinate<br />
increases as you move to the right and the y coordinate increases as you move<br />
down (i.e., towards the bottom of the screen). This is, of course, the same as<br />
the coordinate system used to place components on the screen and in containers.<br />
The result of running this simple program using the command<br />
<strong>Java</strong> <strong>JFC</strong>Book.Chapter4.DrawText<br />
is shown in Figure 4—I.<br />
You may be surprised at how little had to be done to get this string to<br />
appear on the JPanel. For example, how was the font to be used determined?<br />
It wasn't explicitly specified in the paintComponent method. When<br />
you use Graphics methods to draw text, lines, and shapes, you never<br />
directly specify things like font or color—those attributes often need to be<br />
the same for many graphics operations performed one after another, so<br />
instead of passing them as arguments to each call, they are held within the<br />
graphics context itself.<br />
Graphics Context Properties<br />
The Graphics object stores five properties that you can regard as persistent—that<br />
is, they don't change between invocations of Graphics methods,<br />
unless those methods are explicitly intended to change them. The five properties<br />
are shown in Table 4—1.
Figure 4-1 Drawing text on a JPanel.<br />
Table 4-1 Graphics Context Properties<br />
Property<br />
Font<br />
Color<br />
Origin<br />
Clip<br />
Description<br />
The font to be used for text rendering.<br />
A Graphics Application 287<br />
The color used for text rendering and by line, shape, and fill operations.<br />
The location within the component of the point whose coordinates<br />
are to be considered to be given by x=0, y=0. By default,<br />
the graphics context has its origin at the top left of the component,<br />
but it is possible to move the origin elsewhere. The<br />
Graphics class stores the current location of the origin.<br />
Graphics operations (line drawing, text rendering, etc.) are all<br />
carried out in conjunction with a graphics context and usually can<br />
reach anywhere on the surface of the component. Sometimes,<br />
however, it is useful to restrict or clip the area that can be<br />
affected by graphics operations and the Graphics object stores<br />
the current clip.
288 Chapter 4 Graphics, Text Handling, and Printing<br />
Table 4—1 Graphics Context Properties (continued)<br />
Drawing mode The drawing mode controls how the pixels in a graphics operation<br />
interact with those already in the drawing area. By default, new<br />
pixels are painted over the old ones and completely replace them.<br />
You can, however, arrange to have new pixels combined with<br />
existing ones in such a way that they can be removed later by performing<br />
the same operation again.<br />
<strong>Core</strong> Note<br />
In Volume 2 of this book,you'\\ see that the Graphics objects used in the<br />
]ava 2 platform are actually instances of a subclass of Graphics called<br />
Graphics2D which was introduced to support the <strong>Java</strong> 2DAPI.<br />
Graphics2D objects hove extra attributes in addition to those listed<br />
above that we are not going to cover here. Everything you see in this<br />
chapter applies to both JDK I.I and <strong>Java</strong> 2—to see what you can do with<br />
the <strong>Java</strong> 2DAPI, refer to Volume 2.<br />
You'll probably notice right away that the first two of these properties are<br />
very similar to properties of JComponent. This is, of course, no coincidence.<br />
When the paintComponent method of a JComponent is invoked, the<br />
Graphics object is initialized, as shown in Table 4—2.<br />
Table 4-2 Graphics settings in the paintComponent Method<br />
Property Initial Value<br />
Font The font associated with the JComponent<br />
Color The JComponent' s foreground color<br />
Origin The top-left corner of the JComponent<br />
Clip Covers the area that needs to be redrawn, often the entire component<br />
Drawing Mode Set to normal drawing mode<br />
Because the component's current font and foreground color are selected<br />
when the paintComponent method is entered, there was no need to do anything<br />
special about selecting the font or drawing color before drawing the
A Graphics Application 289<br />
text in Listing 4—1. You'll see how the origin, clip, and drawing mode are used<br />
later in this chapter. For now, only the font and color properties will be used.<br />
Notice that a graphics context contains only one color, whereas components<br />
have two—background and foreground. Graphics only needs one<br />
color because it doesn't recognize the concept of foreground and background.<br />
When you draw text, for example, the pixels that represent the characters<br />
in the font are written onto the screen in the appropriate locations and<br />
with the color selected into the graphics context. Other pixels, which you<br />
might consider to be in the background color, are not affected by this operation—their<br />
color does not change. The same is true when you use Graphics<br />
methods to draw lines and other shapes—only the pixels that make up the<br />
shape being drawn are affected and each operation involves only one color.<br />
Usually, of course, you will draw or render text in the foreground color of the<br />
component that you are using, but this is only a convention and is not an<br />
assumption made by the Graphics class.<br />
As well as using the default settings, you can change the font or color in<br />
the graphics context using the following methods:<br />
public void setColor(Color color);<br />
public void setFont(Font font);<br />
There are also corresponding methods that allow you to read the current<br />
settings:<br />
public Color getColor();<br />
public Font getFontO;<br />
When the components paintComponent method is entered, the Graphics<br />
object is initialized to draw using the font and foreground color of the<br />
Component. If you want to use a different font or draw the text in a different<br />
color, you need to set the appropriate Graphics attributes yourself. The<br />
modified version of our first example shown in Listing 4-2 draws the same<br />
text in green using a 16-point bold and italic font. The result of running this<br />
program is shown in Figure 4-2, where you can see that the font and color<br />
have both changed, although you can't really see that the text is green!<br />
Listing 4-2 Changing Graphics properties<br />
package <strong>JFC</strong>Book.Chapter4;<br />
import javax.swing.*;<br />
import j ava.awt.*;<br />
import j ava.awt.event.*;
290 Chapter 4 Graphics, Text Handling, and Printing<br />
Listing 4-2 Changing Graphics properties (continued)<br />
public class DrawColoredText extends JPanel {<br />
public void paintComponent(Graphics g) {<br />
super.paintComponent(g);<br />
g.setFont(new Font("SansSerif", Font.ITALIC | Font.BOLD,<br />
16)) ;<br />
g.setColor(Color.green);<br />
g . drawstring ( "<strong>Core</strong> <strong>Java</strong> <strong>Foundation</strong> <strong>Classes</strong>", 20, 80) ,-<br />
} '<br />
public static void main(String[] args) {<br />
JFrame f = new JFrame("Colored Text");<br />
JPanel panel = new DrawColoredText();<br />
f.getContentPane().add(panel);<br />
f.setSize (280, 200) ;<br />
f.setVisible(true);<br />
}<br />
}<br />
You'll learn more about changing the properties of the Graphics object in<br />
the rest of this section and you'll see other ways to get a Graphics object for<br />
a component in "Graphics Context as a View of a Component." The topic of<br />
drawing text is also covered more fully later in this chapter and again, for the<br />
<strong>Java</strong> 2 platform, in the discussion of the <strong>Java</strong> 2D API in Volume 2.<br />
Drawing Lines and Shapes<br />
As well as holding properties, the Graphics class provides methods for<br />
drawing lines, arcs, and ovals, and for filling shapes with solid colors.<br />
Straight Lines<br />
The simplest possible graphics operation you could perform would be to plot<br />
a single point. Yet <strong>Java</strong> does not provide a method to do this. Instead, there is<br />
a line-drawing method that can draw a point as a special case:<br />
public void drawLine(int xl, int yl, int x2, int y2);<br />
This method draws a straight line, one pixel wide, between the points (xl,<br />
yl) and (x2, y2), in the color currently selected into the graphics context. To<br />
draw a single point, you specify a start and end point that are the same. The<br />
code in Listing 4-3 draws a set of vertical, horizontal, and diagonal dashed<br />
lines in three different colors by calling drawLine in a loop. You can see a
Figure 4-2 Changing the font and color in a Graphics object.<br />
A Graphics Application 291<br />
gray-scale reproduction of the results of this program in Figure 4-3. To run it<br />
for yourself, use the command:<br />
<strong>Java</strong> <strong>JFC</strong>Book.Chapter4.DrawLines<br />
Listing 4-3 Drawing lines<br />
package <strong>JFC</strong>Book.Chapter4;<br />
import javax.swing.*;<br />
import j ava.awt.*;<br />
import j ava.awt.event.*;<br />
public class DrawLines extends JPanel {<br />
public void paintComponent(Graphics g) {<br />
super.paintComponent(g);<br />
for (int i = 0; i < 10; i++) {<br />
g.setColor(Color.black);<br />
g.drawLine(20 * i + 10, 40, 20 * i + 20, 40);<br />
g.setColor(Color.white);<br />
g.drawLine(4 0, 20 * i + 10, 40, 20 * i + 20);<br />
g. setColor(Color.red) ;<br />
g.drawLine(20 * i + 10, 20 * i + 10, 20 * i + 20,<br />
20 * i + 20)
292 Chapter 4 Graphics, Text Handling, and Printing<br />
Listing 4-3 Drawing lines (continued)<br />
}<br />
}<br />
public static void main(String[] args) {<br />
JFrame f = new JFrarne ("Line Drawing" ) ;<br />
JPanel panel = new DrawLinesO ;<br />
f.getContentPane().add(panel);<br />
f .setSize (250, 250) ;<br />
f.setVisible(true);<br />
}<br />
Polygons, Polylines, and the Graphics Origin<br />
As well as drawing points and individual lines, you can also draw outlines<br />
made up of several lines that are joined together (i.e., each line starts where<br />
the previous one ends) using the drawPolyline method. You give this<br />
method two arrays of integers, one containing the x coordinates and the other<br />
the y coordinates of each point in the shape, and a single integer that specifies<br />
how many points there are. There is a similar method called drawPolygon<br />
that takes the same set of arguments, but draws a closed shape by<br />
connecting together the first and last points drawn. Alternatively, you can<br />
encapsulate the points in a java.awt. Polygon object and pass that to<br />
drawPolygon.<br />
public void drawPolyline(int[] xPoints, int [] yPoints,<br />
int nPoints);<br />
public void drawPolygon(int[] xPoints, int[] yPoints,<br />
public void drawPolygon(Polygon p);<br />
int nPoints);<br />
You create a Polygon object by specifying the vertices in the same way as<br />
you would give them to drawPolygon:<br />
public Polygon(int[] xPoints, int[] yPoints,<br />
int nPoints);<br />
Listing 4-4 is an example that has a version of the paintComponent<br />
method that demonstrates the difference between drawPolygon and draw-<br />
Polyline.
Figure 4-3 Using drawLine to draw straight lines.<br />
A Graphics Application 293<br />
The two arrays hold the x and y coordinates of all of the points in both<br />
shapes; both methods traverse these arrays from the first entry to the last, so<br />
the vertices of these shapes will be at the points (100, 20), (50, 50), (100, 80),<br />
(150, 60), and (170, 30), relative to the origin of the graphics context.<br />
Listing 4-4 Polygons and polylines<br />
package <strong>JFC</strong>Book.Chapter4;<br />
import javax.swing.*;<br />
import j ava.awt.*;<br />
import <strong>Java</strong>.awt.event.*;<br />
public class Polygons extends JPanel {<br />
public void paintComponent(Graphics g) {<br />
super.paintComponent(g);<br />
int[] xValues = { 100, 50, 100, 150, 170 } ;<br />
int[] yValues = { 20, 50, 80, 60, 30 };<br />
g. setColor(Color.black) ;<br />
g.drawPolyline(xValues, yValues, xValues.length);
294 Chapter 4 Graphics, Text Handling, and Printing<br />
Listing A-A Polygons and polylines (continued)<br />
g.translate (0, 30) ;<br />
g.setColor(Color.white);<br />
g.drawPolygon(xValues, yValues, xValues.length);<br />
} '<br />
public static void main(String[] args) {<br />
JFrame f = new JFrame("Polygons and Polylines");<br />
Polygons c = new Polygons();<br />
f.getContentPane().add(c);<br />
f.setSize(250, 200);<br />
f.addWindowListener(new WindowAdapter() {<br />
public void windowClosing(WindowEvent evt) {<br />
}<br />
});<br />
System.exit ( 0) ;<br />
f.setvisible(true);<br />
}<br />
j _____<br />
This example first selects black as the drawing color and draws a<br />
polyline. Next, the intention is to change the drawing color to something<br />
else (in this case white) and use the same set of points to draw a polygon.<br />
This would demonstrate that the polygon closes itself by joining the first<br />
and last points and that the polyline does not. But if this were all that were<br />
done, because the same sets of coordinates are used, the polygon would be<br />
drawn on top of the first shape, completely obscuring it. To make the polygon<br />
separate from the polyline, you could create another array of points<br />
offset from the first set by a constant amount. However, there is a more<br />
convincing way. Since the coordinates are measured relative to the origin of<br />
the graphics context, why not use the same coordinate arrays and simply<br />
relocate the origin? This can be done using the Graphics translate<br />
method:<br />
public void translate(int x, int y);<br />
This moves the origin to the point (x, y) relative to its current position. Any<br />
subsequent drawing is done using coordinates relative to this new origin, so,<br />
in this example, the polygon is drawn with each vertex 30 pixels directly<br />
below the corresponding one in the polyline. You can see the result in Figure<br />
4_4; which clearly demonstrates that the drawPolygon method closes up
A Graphics Application 295<br />
the shape that it is drawing, while drawPolyline does not. To run this<br />
example for yourself, use the command<br />
<strong>Java</strong> <strong>JFC</strong>Book.Chapter4.Polygons<br />
Figure 4-4 Drawing polygons and polylines.<br />
Incidentally, you can move the origin as many times as you like and the<br />
effect is, of course, cumulative: If the following lines were added at the end<br />
of the paint Component method just shown:<br />
g.translate (0, 30) ;<br />
g.setColor(Color.green);<br />
g.drawPolygon(xValues, yValues, xValues.length);<br />
then the result would be an extra green polygon 60 pixels below the first<br />
polyline. You can also supply negative values for x and y, and you can even<br />
move the origin right off the surface of the component by giving negative<br />
coordinates or by making one or both coordinates larger than the size of the<br />
component. When you do this, those parts of the polygon or polyline that end<br />
up being outside the bounds of the component are simply not drawn—this is<br />
called "clipping", because the edges of the component "clip off any drawing<br />
that spills over them to the outside. You will see why it is useful to move the<br />
origin off the surface of the component in Chapter 5, "Keyboard Handling,<br />
Actions, and Scrolling," when you'll see how to view drawings and images<br />
that are too large to be all on the screen at the same time.
296 Chapter 4 Graphics, Text Handling, and Printing<br />
Drawing Rectangles<br />
There are also methods for drawing rectangles, arcs and ovals. Here are the<br />
three methods that can he used to draw rectangles:<br />
public void drawRect(int x, int y, int width,<br />
int height);<br />
public void drawRoundRect(int x, int y, int width,<br />
int height, int arcWidth, int arcHeight);<br />
public void draw3DRect(int x, int y, int width,<br />
int height, boolean raised);<br />
The parameters of the drawRect method are obvious; those of the<br />
drawRoundRect method are less so. This method draws a rectangle in which<br />
the four corners are 90-degree arcs facing outward, so that the edges appear<br />
rounded; you use the arcWidth parameter to specify the horizontal diameter<br />
(not radius) of each arc and arcHeight to give the vertical diameter. The<br />
example in Listing 4-5 shows how this works in practice.:<br />
The rounded rectangle has an arcWidth of 16 and an arcHeight of 8 so<br />
that the corners will appear to be quadrants of an ellipse that is twice as long<br />
as it is tall; each arc will extend in by 8 pixels and downward by 4 pixels, as<br />
you can see from Figure 4—5. If we made arcWidth and arcHeight equal,<br />
the corners would be circular. To run this example, use the command<br />
<strong>Java</strong> <strong>JFC</strong>Book.Chapter4.Rectangles<br />
Listing 4-5 Drawing rectangles<br />
package <strong>JFC</strong>Book.Chapter4;<br />
import j avax.swing.*;<br />
import j ava.awt.*;<br />
import j ava.awt.event.*;<br />
public class Rectangles extends JPanel {<br />
public void paintComponent(Graphics g) {<br />
super.paintComponent(g);<br />
g.setColor(Color.white);<br />
g.drawRect(10, 10, 80, 60);<br />
g.translate(0, 70) ;<br />
g.setColor(Color.black);<br />
g.drawRoundRect(10, 10, 80, 60, 16, 8)<br />
g.translate (90, -70) ;
Listing 4-5 Drawing rectangles (continued)<br />
g.setColor(Color.lightGray);<br />
g.draw3DRect(10, 10, 80, 60, true);<br />
g.translate(0, 70) ;<br />
g.draw3DRect(10, 10, 80, 60, false);<br />
} '<br />
A Graphics Application 297<br />
public static void main(String[] args) {<br />
JFrame f = new JFrame("Rectangles");<br />
Rectangles c = new Rectangles();<br />
f.getContentPane().setBackground(UIManager.getColor("control"))<br />
;<br />
f.getContentPane().add(c);<br />
f .setSize(200, 200) ;<br />
f.addWindowListener(new WindowAdapter() {<br />
public void windowClosing(WindowEvent evt) {<br />
System.exit(0);<br />
}<br />
});<br />
f.setVisible(true);<br />
}<br />
J_________________<br />
The draw3DRect method draws a rectangle with a shaded border that<br />
makes it look either raised up or pressed into the surface that it is drawn<br />
onto. If you are used to working with the AWT, you might have used this<br />
method to create button outlines or a border around a group of controls, but<br />
with Swing there is a better way to do this—see our discussion of borders in<br />
Chapter 8.<br />
Whichever of these methods you use, the rectangle will actually be one<br />
pixel wider and higher than the width and height that you specify. In other<br />
words, if you ask for a rectangle with width 20 and height 10, it will actually<br />
cover a space 21 pixels wide and 11 pixels high, counting the pixel lines themselves.<br />
As a consequence, if you were to do this:<br />
g.drawRectangle(10, 10, 20, 1);<br />
your rectangle would be 2 pixels high and 21 pixels wide; if you specify a<br />
height of zero, you actually get a single-pixel line. The situation changes<br />
when you create a filled rectangle, as you will see in "Color Fills."
298 Chapter 4 Graphics, Text Handling, and Printing<br />
Figure 4-5 Drawing 3D rectangles and rectangles with rounded corners.<br />
Arcs and Ovals<br />
You can draw curved lines using the drawOval and drawArc methods.<br />
public void drawOval(int x, int y, int width,<br />
int height);<br />
public void drawArc(int x, int y, int width, int height,<br />
int startAngle, int arcAngle);<br />
The drawOval method draws a circle or an ellipse, wholly contained<br />
within the rectangle described by its arguments and drawn such that its center<br />
coincides with that of the rectangle. If the width and height arguments<br />
are equal, you get a circle. Similarly, drawArc creates an arc of a circle or an<br />
ellipse inside its bounding rectangle. The code in Listing 4-6 and the results<br />
in Figure 4-6 show how these methods work. To show how the shape is<br />
related to its bounding rectangle, we used the drawRect method to show the<br />
bounding rectangle in addition to that shape itself.<br />
Listing 4-6 Drawing arcs and ovals<br />
package <strong>JFC</strong>Book.Chapter4 ,<br />
import j avax.swing.*;
Listing 4-6 Drawing arcs and ovals (continued)<br />
import j ava.awt.*;<br />
import j ava.awt.event.*;<br />
public class Arcs extends JPanel {<br />
public void paintComponent(Graphics g)<br />
super.paintComponent(g);<br />
g. setColor(Color.white) ;<br />
g.drawRect (10, 10, 80, 40);<br />
g.setColor(Color.black);<br />
g.drawOval(10, 10, 80, 40);<br />
g.setColor(Color.white);<br />
g.drawRect(10, 80, 80, 80);<br />
g.setColor(Color.black);<br />
g.drawOval(10, 80, 80, 8 0);<br />
g.translate(100, 0);<br />
g. setColor(Color.white) ;<br />
g.drawRect(0, 0, 80, 4 0);<br />
g.setColor(Color.black);<br />
g.drawArc(0, 0, 80, 40, -90, 9 0);<br />
g.setColor(Color.white);<br />
g.drawRect (0, 60, 80, 40);<br />
g.setColor(Color.black);<br />
g.drawArc(0, 60, 80, 40, 0, 90);<br />
g.setColor(Color.white);<br />
g.drawRect(0, 12 0, 80, 40);<br />
g. setColor(Color.black) ;<br />
g.drawArc(0, 120, 80, 40, 90, -90);<br />
g.translate(100, 0);<br />
g. setColor(Color.white) ;<br />
g.drawRect(0, 0, 40, 4 0);<br />
g.setColor(Color.black);<br />
g.drawArc(0, 0, 40, 40, -90, 90);<br />
g.setColor(Color.white);<br />
g.drawRect(0, 60, 40, 40);<br />
g.setColor(Color.black) ;<br />
g.drawArc(0, 60, 40, 40, 0, 90);<br />
g.setColor(Color.white) ;<br />
g.drawRect(0, 12 0, 40, 4 0);<br />
g.setColor(Color.black);<br />
g.drawArc(0, 120, 40, 40, 90, -90);<br />
A Graphics Application 299
300 Chapter 4 Graphics, Text Handling, and Printing<br />
Listing 4-6 Drawing arcs and ovals (continued)<br />
public static void main(String[] args) {<br />
JFrame f = new JFrame("Arcs and Ovals");<br />
Arcs c = new Arcs();<br />
f.getContentPane().setBackground(UIManager.getColor("control"))<br />
;<br />
f.getContentPane () .add(c) ;<br />
f.setSize (300, 200) ;<br />
f.addWindowListener(new WindowAdapter() {<br />
public void windowClosing(WindowEvent evt) {<br />
}<br />
});<br />
System.exit(0);<br />
f.setvisible(true);<br />
}<br />
_}<br />
This example can be run using the command<br />
<strong>Java</strong> <strong>JFC</strong>Book.Chapter4.Arcs<br />
The results of drawing the ellipse and the circle are exactly as you would<br />
expect—the shape fills the bounding rectangle, touching all four sides. The<br />
arcs are a little less obvious. First, what you get is actually an arc taken<br />
from a complete ellipse or circle drawn within the rectangle that you specify;<br />
if you want to get an arc that fills a particular rectangle, you have to<br />
compute the size of a larger rectangle that would contain the entire circle<br />
or ellipse of which your arc is a part and specify that as the bounding rectangle.<br />
The startAngle and arcAngle parameters describe which part of the<br />
arc is drawn; both are specified in degrees. If you think of the bounding rectangle<br />
as the face of a clock, zero degrees is at the 3 o'clock position; positive<br />
values correspond to counter-clockwise rotation, and negative values to<br />
clockwise rotation. For example, the first arc drawn is created as follows:<br />
g . d r a w A r c ( 0 , 0 , 8 0 , 4 0 , - 9 0 , 9 0 ) ;<br />
The ellipse of which this arc is a part is 80 pixels wide and 40 pixels high.<br />
The arc starts 90 degrees clockwise from 3 o'clock—that is, at 6 o'clock, and<br />
turns 90 degrees counter-clockwise, that is, back to the three o'clock position.<br />
Because a 90-degree segment from an ellipse that starts on the y-axis and<br />
ends on the x-axis is being used, the whole arc is a quadrant and therefore<br />
occupies one quarter of the bounding rectangle. This arc is shown at the top
Figure 4-6 Drawing arcs and ellipses.<br />
A Graphics Application 301<br />
of the second column in the diagram. There are, of course, two ways to draw<br />
any given arc, depending on which end of the arc you start with. The next two<br />
examples illustrate this:<br />
g . d r a w A r c ( 0 , 6 0 , 8 0 , 4 0 , 0 , 9 0 ) ;<br />
g . d r a w A r c ( 0 , 1 2 0 , 8 0 , 4 0 , 9 0 , - 9 0 ) ;<br />
The first line creates an arc starting at 3 o'clock and rotating 90 degrees<br />
counter-clockwise, while the second arc starts 90 degrees counterclockwise<br />
from 3 o'clock and rotates back 90 degrees to produce the same result. The<br />
third column shows the same arcs taken from a circle rather than an ellipse.<br />
Color Fills<br />
As well as drawing outlines, you can also easily draw shapes that are filled<br />
with solid color. You can draw rectangles, polygons, ovals, and arcs that are<br />
filled with the color currently selected into the graphics context using methods<br />
that are the same as the line-drawing variants apart from the word fill<br />
in the name:<br />
public void fill3DRect(int x, int y, int width,<br />
int height, boolean raised);<br />
public void fillArc(int x, int y, int width, int height,<br />
int startAngle, int arcAngle);<br />
public void fillOval(int x, int y, int width,
302 Chapter 4 Graphics, Text Handling, and Printing<br />
int height);<br />
public void fillPolygon(int[] xPoints, int [] yPoints,<br />
int nPoints);<br />
public void fillPolygon(Polygon p);<br />
public void fillRect(int x, int y, int width,<br />
int height);<br />
public void fillRoundRect(int x, int y, int width,<br />
int height, int arcWidth, int arcHeight);<br />
Notice that there is no f illPolyline method: a filled polyline would, of<br />
course, be the same as filling the polygon drawn with the same arguments, so<br />
it is sufficient to provide just f illPolygon. Most of these methods are simple<br />
and produce obvious results; the example in Listing 4-7, which can be<br />
run using the command<br />
<strong>Java</strong> <strong>JFC</strong>Book.Chapter4.Fills<br />
creates filled rectangles, polygons, and ovals.<br />
Listing 4-7 Drawing filled shapes<br />
package <strong>JFC</strong>Book.Chapter4;<br />
import javax.swing.*;<br />
import j ava.awt.*;<br />
import j ava.awt.event.*;<br />
public class Fills extends JPanel {<br />
public void paintComponent(Graphics g) {<br />
super.paintComponent(g);<br />
g.setColor(Color.white);<br />
g.drawRect(10, 10, 80, 40);<br />
g.setColor(Color.gray);<br />
g.fillRect(10, 10, 80, 40);<br />
g.setColor(Color.white);<br />
g.drawRect(10, 80, 80, 80);<br />
g.setColor(Color.gray);<br />
g.fillOval(10, 80, 80, 80);<br />
g.translate (100, 0);<br />
g.setColor(Color.white);<br />
g.drawRect(0, 0, 80, 40);<br />
g.setColor(Color.gray);<br />
g.fillArc(0, 0, 80, 40, -60, 90);
Listing 4-7 Drawing filled shapes (continued)<br />
g.setColor(Color.white);<br />
g.drawRect(0, 60, 80, 40);<br />
g.setColor(Color.gray);<br />
g.fillArc(0, 60, 80, 40, 0, 45);<br />
g.setColor(Color.white);<br />
g.drawRect(0, 120, 80, 80);<br />
g.setColor(Color.gray);<br />
g.fillArc(0, 120, 80, 80, 135, -135);<br />
g.translate(100, 0);<br />
int[] xPoints = { 30, 0, 30, 60, 80 };<br />
int[] yPoints = { 0, 30, 60, 45, 15 };<br />
Polygon p = new Polygon(xPoints, yPoints,<br />
xPoints.length);<br />
g.setColor(Color.white);<br />
g.drawPolygon(p);<br />
g.setColor(Color.gray);<br />
g. fillPolygon(p) ;<br />
}<br />
A Graphics Application 303<br />
public static void main(String[] args) {<br />
JFrame f = new JFrame("Filled Shapes");<br />
Fills c = new Fills 0;<br />
f.getContentPane().setBackground(UIManager.getColor("control"))<br />
;<br />
f.getContentPane().add(c);<br />
f .setSize(300, 280) ;<br />
f.addWindowListener(new WindowAdapter() {<br />
public void windowClosing(WindowEvent evt) {<br />
System.exit(0);<br />
}<br />
});<br />
f.setVisible(true);<br />
J____ ._____^^<br />
For clarity, the corresponding bounding boxes have again been drawn in<br />
white. If you look carefully at the polygon and the rectangle in Figure 4-7,<br />
you will see that the right and lower parts of the bounding shapes are not<br />
affected by the filling operation; this means, for example, the filled rectangles<br />
are one pixel narrower and shorter than their drawn counterparts. The other<br />
shapes fill to the same boundary as they would draw. Notice that a filled arc<br />
draws what you might think of as a segment of a pie chart, with the filled area
304 Chapter 4 Graphics, Text Handling, and Printing<br />
bounded by the curved edge and the two lines joining the end points of the<br />
curve to the center of the bounding rectangle.<br />
Figure 4-7 Drawing filled shapes.<br />
You can also draw filled 3D rectangles and more complex polygons, as<br />
Listing 4-8 illustrates. You can see the results of running this example in Figure<br />
4-8 and you can run it for yourself using the command<br />
<strong>Java</strong> <strong>JFC</strong>Book.Chapter4 . FH13D<br />
Listing 4-8 Drawing filled 3D shapes<br />
package <strong>JFC</strong>Book.Chapter4;<br />
import javax.swing.*;<br />
import j ava.awt.*;<br />
import j ava.awt.event.*;<br />
public class Fill3D extends JPanel {<br />
public void paintComponent(Graphics g) {
Listing 4-8 Drawing filled 3D shapes (continued)<br />
super.paintComponent(g) ;<br />
g.setColor(Color.white) ;<br />
g.fill3DRect(10, 10, 80, 40, false);<br />
g.fill3DRect(10, 100, 80, 40, true);<br />
A Graphics Application 305<br />
g.translate(100, 0);<br />
g. setColor(Color.gray) ;<br />
int[] xPoints = { 120, 60, 0, 240, 180, 120, 240, 240<br />
}; int [] yPoints = { 0, 200, 100, 100, 200, 0, 0, 100 } ;<br />
Polygon p = new Polygon(xPoints, yPoints,<br />
xPoints.length);<br />
g.fillPolygon(p);<br />
} '<br />
public static void main(String[] args) {<br />
JFrame f = new JFrame("3D Fills");<br />
Fill3D c = new Fill3D();<br />
f.getContentPane().setBackground(UIManager.getColor("control"))<br />
;<br />
f.getContentPane().add(c);<br />
f .setSize(400, 280) ;<br />
f.addWindowListener(new WindowAdapter() {<br />
public void windowClosing(WindowEvent evt) {<br />
System.exit(0);<br />
}<br />
});<br />
f.setVisible(true);<br />
}<br />
J_______ ______<br />
Filled 3D rectangles are rendered by filling them with the currently<br />
selected color when they are raised and with a contrasting color when they<br />
are not. The 3D effect is achieved by drawing edges on the bottom and right<br />
sides that consist of the alternate color. In onr example, the current color is<br />
white, so the rectangle is white when raised. The boundary in this case is rendered<br />
in a grayish color. When the rectangle is drawn with the raised<br />
parameter set to false, these colors are exchanged.<br />
The polygon that is used in this example is not as trivial as the one that was<br />
filled in our earlier example, because the bounding line crosses itself, creating<br />
an enclosed area to the top right. You might wonder whether this area
306 Chapter 4 Graphics, Text Handling, and Printing<br />
Figure 4-8 Drawing filled 3D shapes.<br />
should be considered to be inside or outside the shape. Since it is wholly<br />
enclosed by the shape's boundaries, you might think that it is inside and<br />
hence should be filled, but in fact it is not. When deciding which areas of a<br />
shape should be filled, a simple rule is used: The area is filled if it can be<br />
reached from outside the shape by crossing an odd number of lines. This is<br />
known as the alternating rule.<br />
Points of intersection are counted according to how many times the pen<br />
that draws the shape crosses the intersection point. In this example, you<br />
should be able to see that the unfilled area can always be reached by crossing<br />
exactly two lines. If you are curious about the three vertices of this area, you<br />
should convince yourself that each vertex is visited exactly twice by the drawing<br />
pen by looking at the definitions of the points that make up the shape:<br />
Vertex at x = 120, y = 0:<br />
Vertex at x = 240, y = 100:<br />
start point (first visit)<br />
End of line from x = 180, y = 0 (second visit)<br />
End of line from x = 0, y = 100 (first visit)
End of line from x = 240, y = 0 (second visit)<br />
A Graphics Application 307<br />
Vertex on the line y = 100: Part of line from x = 0, y = 100 to x = 240, y = 100<br />
(first visit)<br />
Part of line from x = 180, y = 200 to x = 120, y = 0<br />
(second visit)<br />
There is one final filling method that hasn't yet been mentioned in this<br />
section:<br />
public void clearRect(int x, int y, int width,<br />
int height);<br />
This is a convenience method that clears the rectangle described by its<br />
parameters to the background color of the component from which the<br />
Graphics object was obtained. It isn't very useful unless you are implementing<br />
new components, because this is about the only case in which you don't<br />
need to explicitly specify the color used for the fill operation.<br />
Although the methods that you have seen in this chapter allow you to draw<br />
and fill shapes with ease, they are a little restricted in that the resulting<br />
shapes are always drawn with a one-pixel wide boundary and are aligned horizontally<br />
or vertically. You cannot, for example, draw an ellipse with a 4-pixel<br />
wide dashed edge inclined at 45 degrees to the horizontal. If you need to do<br />
this, you will need to use the <strong>Java</strong> 2D API, which is part of the <strong>Java</strong> 2 platform<br />
and is covered in Volume 2 of this book.<br />
Graphics Context as a View of a Component<br />
So far, all of our examples have only used a single graphics context at a time.<br />
It is, however, possible to obtain more than one Graphics object from the<br />
same component and perform operations on each of them to affect the same<br />
component. Suppose, for example, that you wanted to run a sequence of<br />
graphics operations on one component in two separate drawing colors to<br />
compare the results. You could do this by using the same Graphics object<br />
twice, changing the color when we move from the first to the second. This is<br />
less convenient, however, if you want to specify the graphics operations in<br />
real-time using the mouse or if the color is not the only attribute that you<br />
want to be different. In cases like this, it is more convenient to use a dedicated<br />
Graphics object.
308 Chapter 4 Graphics, Text Handling, and Printing<br />
Getting a Second Graphics Object Using the<br />
Create Method<br />
You can get a second (or third, or more) graphics context in two ways.<br />
First, you can call the JComponent getGraphics method, which will give<br />
you a new Graphics object that covers the entire component. The get-<br />
Graphics method is discussed in the next section. Secondly, if you want a<br />
copy of an existing graphics context, you can clone it using the Graphics<br />
create method:<br />
public Graphics create();<br />
public Graphics create(int x, int y, int width,<br />
int height);<br />
The first of these methods creates an exact copy of the graphics context to<br />
which it applies; the second creates a new graphics context that corresponds<br />
to a rectangular subset of the area covered by the original context and with its<br />
origin translated to the top left corner of that area. If you create a context<br />
using the second form of create, you cannot use it to draw outside of its<br />
defined area.<br />
Once created, each Graphics object is independent, so changes you<br />
make to one object are not reflected in any of the others. In this sense, each<br />
graphics context is an independent view of the original component, with the<br />
capability to affect it in different ways, even when performing the same operations.<br />
Since you can change any of the attributes of each graphics context<br />
individually, the same operations invoked on two Graphics objects could be<br />
realized in different colors, in different positions on the same object, with<br />
different painting modes and so on.<br />
Listing 4-9 illustrates this by drawing the same shape in two copies of<br />
the same graphics context and shows that the result depends on which<br />
graphics context is used by moving the origin of the second context and<br />
drawing the same shape as is drawn in the original Graphics object, but<br />
using a different color. To run this example, use the command<br />
java <strong>JFC</strong>Book.Chapter4.GraphicsCreate<br />
The paintComponent method is passed a graphics context that covers<br />
the whole component, so this example uses the component's getSize<br />
method and then creates a second copy of the graphics context that covers<br />
only the right half of the component by using the create method applied to<br />
the original Graphics object. The original Graphics object is then used to<br />
fill the background with black and then draw the same polygon as was used in<br />
Listing 4-8 with a white pen.
Listing 4-9 Using two Graphics objects with one component<br />
package <strong>JFC</strong>Book.Chapter4;<br />
import j avax.swing.*;<br />
import j ava.awt.*;<br />
import j ava.awt.event.*;<br />
A Graphics Application 309<br />
public class GraphicsCreate extends JPanel {<br />
public void paintComponent(Graphics g) {<br />
super.paintComponent(g);<br />
int[] xPoints = { 120, 60, 0, 240, 180, 120, 240,<br />
24 0 } ;<br />
int[] yPoints = { 0, 200, 100, 100, 200, 0, 0, 100 }<br />
Polygon p = new Polygon(xPoints, yPoints,<br />
xPoints.length);<br />
Dimension d = getSizeO;<br />
int width = d.width;<br />
int height = d.height;<br />
}<br />
Graphics secondContext = g.create(width/2, 0, width/2,<br />
height);<br />
g.setColor(Color.black);<br />
g.fillRect(0, 0, width/2, height);<br />
g.setColor(Color.white);<br />
g.fillPolygon(p);<br />
secondContext.setColor(Color.white);<br />
secondContext.fillRect(0, 0, width/2, height);<br />
secondContext.setColor(Color.black);<br />
secondContext.fillPolygon(p);<br />
secondContext.dispose();<br />
public static void main(String[] args) {<br />
JFrame f = new JFrame("Graphics create method");<br />
GraphicsCreate c = new GraphicsCreate();<br />
f.getContentPane().setBackground(UIManager.getColor("control"))<br />
;<br />
f.getContentPane().add(c);<br />
f.setSize (500, 280) ;<br />
f.addWindowListener(new WindowAdapter() {<br />
public void windowClosing(WindowEvent evt) {<br />
});<br />
}<br />
System.exit(0);
310 Chapter 4 Graphics, Text Handling, and Printing<br />
Listing 4-9 Using two Graphics objects with one component<br />
(continued)<br />
1<br />
}<br />
f.setvisible(true);<br />
The second context was derived from the original Graphics object but<br />
was clipped to the right half of the component and therefore can be used to<br />
access only that part. The origin of this context is the top left of the area of<br />
the component that it covers, not the top left of the component itself. So,<br />
when this context is filled with white and then the same polygon is drawn<br />
from the same points with a black pen, the result is a color-inverted image of<br />
the left side of the component on the right side, as shown in Figure 4-9.<br />
The important point to note about this example is that the actual drawing<br />
code is the same in both cases. To effect the differences required, all that is<br />
necessary is to adjust the properties of the graphics context.<br />
The last part of this example shows something you haven't seen yet in this<br />
chapter:<br />
secondContext.dispose () ;<br />
This method explicitly disposes of the Graphics object. Whenever you<br />
acquire a Graphics object yourself by using create or the getGraphics<br />
method that you'll see in the next section, you must release it in this way<br />
when you have finished with it. On some platforms, the <strong>Java</strong> Graphics<br />
object is linked to an underlying windowing system resource, of which there<br />
may be a limited number. If you don't dispose of Graphics objects that you<br />
allocate, you could degrade or cripple the system that you are running on by<br />
using up this critical resource.<br />
This rule does not, however, apply to Graphics objects that are passed to<br />
you from elsewhere. Therefore, you must not dispose of the Graphics<br />
object that you use in the paintComponent method—that object is disposed<br />
of by the code in the <strong>Java</strong> libraries that allocated it in the first place.<br />
Figure 4-9 Drawing with two<br />
Graphics objects.
The getGraphics method<br />
A Graphics Application 311<br />
The create method allows you to "clone" an existing Graphics object and<br />
make changes to it that don't affect the original graphics context. This<br />
method is useful if you already have a Graphics object, but there are times<br />
when you will need to draw on a JComponent and you won't have a Graphics<br />
object on hand. So far, all of the drawing you have seen has been inside<br />
the paintComponent method, where the JComponent provides a Graphics<br />
object that lets you draw on its surface. Suppose, however, that you were<br />
implementing an application that drew shapes on a component in response to<br />
mouse movements. When the mouse moves, you get an event and you'll need<br />
to draw on the component immediately. Here, you don't have a Graphics<br />
object to work with.<br />
You can get a graphics context for any JComponent (or, in fact, any AWT<br />
Component) using its getGraphics method:<br />
public Graphics getGraphics 0;<br />
The Graphics object returned by this method always covers the entire<br />
surface of the component unlike the one you get in paintComponent, which<br />
might be clipped if only some of the component needs to be repainted. You<br />
use it just like any other Graphics object, but there are a few important<br />
points you need to be aware of.<br />
First, until the component has been realized, it doesn't have a graphics<br />
context at all. Until you have made the top-level window of your application<br />
visible, or at least called its pack method, you can't rely on any of your<br />
components having a valid graphics context and getGraphics may return<br />
null.<br />
Second, any drawing you do on a component outside of its paintComponent<br />
method should be considered temporary. The reason for this is simple.<br />
Suppose you render a line of text onto a JPanel by invoking<br />
getGraphics to get a graphics context and then use drawstring to draw<br />
directly onto its surface. This text will, of course, be drawn. Now suppose<br />
that the user covers your panel with another application and then uncovers<br />
it again. When the panel is uncovered, it will be cleared by the windowing<br />
system and the panel's paintComponent method will be called to draw the<br />
component again. Unless you have arranged for the paintComponent<br />
method to know about the text you drew, it won't be able to recreate it and<br />
the text will be lost.<br />
To demonstrate this, Listing 4-10 shows another way of implementing the<br />
code you first saw in Listing 4-2.
312 Chapter 4 Graphics, Text Handling, and Printing<br />
Listing 4-10 Drawing text onto a JPanel using its graphic context<br />
package <strong>JFC</strong>Book.Chapter4;<br />
import j avax.swing.*;<br />
import j ava.awt.*;<br />
import j ava.awt.event.*;<br />
public class DirectText {<br />
public static void main(String[] args) {<br />
JFrame f = new JFrame("Drawing Text");<br />
JPanel panel = new JPanel();<br />
f.getContentPane().add(panel);<br />
f.setSize(280, 200);<br />
f.setvisible(true);<br />
try {<br />
Thread.sleep(5000);<br />
} catch (InterruptedException e) {<br />
}<br />
Graphics g = panel.getGraphics();<br />
g.setColor(Color.yellow) ;<br />
g.setFont(new Font("SansSerif", Font.BOLD | Font.ITALIC,<br />
16)) ;<br />
g.drawstring("<strong>Core</strong> <strong>Java</strong> <strong>Foundation</strong> <strong>Classes</strong>", 20, 80);<br />
g.dispose();<br />
}<br />
J ______<br />
If you run this program using the command<br />
<strong>Java</strong> <strong>JFC</strong>Book.Chapter4.DirectText<br />
you'll first see an empty frame then, after a few seconds, the string "<strong>Core</strong><br />
<strong>Java</strong> <strong>Foundation</strong> <strong>Classes</strong>" will appear. Now cover the frame up by moving<br />
another window and expose it again, or iconify and de-iconify it. The text<br />
disappears and there is no way to get it back.<br />
To make this program work, there is a five-second delay before the string<br />
is drawn. This delay is necessary because the JPanel's paintComponent<br />
method is called shortly after the frame is made visible. As you know, this is<br />
just going to fill the panel with its background color, which will wipe out any<br />
text that has been drawn directly onto it with drawstring. In fact, since the<br />
code in the main method and the code in paintComponent run in different<br />
threads, it is possible, on some platforms, that you could make this example
A Graphics Application 313<br />
work even without a five-second delay if the panels painting occurs before<br />
the string is drawn. Even if this does work sometimes, it is unlikely to work<br />
reliably because it relies on timing.<br />
You should not, however, conclude from this that drawing directly onto a<br />
component using a graphics context obtained from getGraphics is not useful.<br />
As long as you arrange for the paintComponent method to draw the<br />
same thing when the component needs to be repainted, direct drawing can<br />
improve the perceived performance of your application. You'll see an example<br />
of this in "A Graphics Application" later in this chapter.<br />
The Relationship between Graphics and<br />
JComponent Properties<br />
As you saw in Table 4-2, some of the properties of a Graphics object, namely<br />
color and font, are similar to those of JComponent. In fact, since you get a<br />
Graphics object from a JComponent, there is a relationship between these<br />
properties. As you already know, the Graphics object passed to a JComponent's<br />
paintComponent method has its color set to the foreground color of<br />
the JComponent and its font is the font currently selected into the JComponent.<br />
If you're familiar with the AWT, you'll recognize this as the normal state<br />
when the paint method of an AWT Component is called. The same is true of<br />
graphics contexts created from this Graphics object using create, because<br />
create just makes an exact copy of the context that it is given.<br />
<strong>Core</strong> Note<br />
If you're confused by the various methods being described here, you'll find<br />
everything much clearer when you've read the section "Component<br />
Painting: Swing versus AWT" of this chapter.<br />
You need to be careful, however, when you use getGraphics to obtain a<br />
Graphics object for a component. If you apply this to a heavyweight AWT<br />
Component, you would get back an object initialized with the font and foreground<br />
color of the Component, exactly as you would get in the Component<br />
paint method. However, this is not true for JComponent. If you call get-<br />
Graphics on a JComponent, the color in the returned Graphics object is<br />
not related to those of the JComponent.<br />
The code in Listing 4-11 demonstrates how different the properties of a<br />
JComponent are from those of the Graphics object returned by getGraphics.
314 Chapter 4 Graphics, Text Handling, and Printing<br />
Listing 4-11 Properties of a graphic context returned by getGraphics<br />
package <strong>JFC</strong>Book.Chapter4;<br />
import javax.swing.*;<br />
import j ava.awt.*;<br />
public class GetGraphics {<br />
public static void main(String[] args) {<br />
JFrame f = new JFrame("Graphics Context");<br />
Component cp = f.getContentPane();<br />
cp.setBackground(Color.black);<br />
cp.setForeground(Color.yellow);<br />
JLabel 1 = new JLabel("Hello");<br />
1.setOpaque(true);<br />
f.getContentPane().add(1) ;<br />
Graphics g = 1.getGraphics();<br />
System.out.println("Label graphics: " + g);<br />
System.out.println("Label font is: " + 1.getFont());<br />
1.setForeground(Color.yellow);<br />
1.setBackground(Color.green);<br />
f.setSize(300, 300);<br />
f.setvisible(true) ;<br />
System.out.println("\nFrame made visible");<br />
g = 1.getGraphics();<br />
System.out.println("Label graphics: " + g) ;<br />
System.out.println("Label font is: " + 1.getFont());<br />
g.dispose();<br />
System.out.println("\nChange label font...");<br />
1.setFont(new Font("SansSerif", Font.BOLD, 16));<br />
g = 1.getGraphics();<br />
System.out.println("Label graphics color is " +<br />
g.getColor());<br />
System.out.println("Label graphics font is " +<br />
g.getFont());<br />
System.out.println("Label font is " + 1.getFont());<br />
System.out.println("Label foreground color is " +<br />
1.getForeground());<br />
System.out.println("Label background color is " +<br />
1.getBackground());
Listing 4-1 I Properties of a graphic context returned by<br />
getGraphics (continued)<br />
System.out.printIn(<br />
"\nChange graphics color to red.. .") ;<br />
g.setColor(Color.red);<br />
System.out.println("Label graphics color is " +<br />
g.getColor());<br />
System.out.println("Label foreground: " +<br />
1.getForeground());<br />
System.out.println("label background: " +<br />
1.getBackground());<br />
System.out.printIn("\nChange label background to green,<br />
foreground to blue...");<br />
1.setBackground(Color.green);<br />
1.setForeground(Color.blue);<br />
System.out.println("Label foreground color is " +<br />
1.getForeground() ) ;<br />
System.out.println("Label background color is " +<br />
1.getBackground());<br />
A Graphics Application 315<br />
System.out.println("Label graphics color is " +<br />
g.getColor());<br />
Graphics gl = 1.getGraphics () ;<br />
System.out.println("Second label graphics: color is " +<br />
gl.getColor());<br />
g.dispose();<br />
gl.dispose () ;<br />
}<br />
2 _^_____^^<br />
This program produces the following output (on a Windows platform):<br />
Label graphics: null<br />
Label font is: javax.swing.plaf.FontUIResource[family=dialog.bold,name=Dialog,style=bold,size=12]<br />
Frame made visible<br />
Label graphics: sun.awt.windows.WGraphics<br />
Label font is: javax.swing.plaf.FontUIResource[family=dialog.bold,name=Dialog,style=bold,size=12]<br />
Change label font...<br />
Label graphics color is <strong>Java</strong>.awt.Color[r=0,g=0,b=0]
316 Chapter 4 Graphics, Text Handling, and Printing<br />
Label graphics font is <strong>Java</strong>.awt.Font[family=sansserif.bold,name=SansSerif,style=bold,size=16]<br />
Label font is java.awt.Font[family=sansserif.bold,name=Sans-<br />
Serif,style=bold,size=16]<br />
Label foreground color is <strong>Java</strong>.awt.Color[r=255,g=255,b=0]<br />
Label background color is <strong>Java</strong>.awt.Color[r=0,g=255,b=0]<br />
Change graphics color to red...<br />
Label graphics color is <strong>Java</strong>.awt.Color[r=255,g=0,b=0]<br />
Label foreground: <strong>Java</strong>.awt.Color[r=255,g=255,b=0]<br />
label background: <strong>Java</strong>.awt.Color[r=0,g=255,b=0]<br />
Change label background to green, foreground to blue...<br />
Label foreground color is <strong>Java</strong>.awt.Color[r=0,g=0,b=255]<br />
Label background color is java.awt.Color[r=0,g=255,b=0]<br />
Label graphics color is <strong>Java</strong>.awt.Color[r=255,g=0,b=0]<br />
Second label graphics: color is <strong>Java</strong>.awt.Color[r=0,g=0,b=0]<br />
This code creates a frame and a JLabel and places the JLabel on the<br />
frame. Before the frame is made visible, getGraphics is called to get a<br />
graphics context; as noted above, this returns null. The label's font is also<br />
obtained, for comparison with the one that will be returned from the Graphics<br />
object later.<br />
<strong>Core</strong> Note<br />
You may be surprised that the label's font turns out not to be an instance of<br />
<strong>Java</strong> . awt. Font, but of javax. swing .plaf . FontUTResource.<br />
This class also represents a font—you'll see in Chapter 13 exactly why the<br />
label doesn't return a j ava. awt. Font object<br />
When the frame is made visible, getGraphics is called again and this<br />
time it returns a meaningful Graphics object. You can see that the font in<br />
the Graphics object is the same as you get by invoking getFont on the<br />
label. This is always the case—the getGraphics method initializes the<br />
Graphics object that it returns with the component's font.<br />
The next step is to change the label's font by calling setFont on it. The<br />
font is changed to 16-point, bold, SansSerif, and a new Graphics object<br />
obtained using getGraphics. Now, the font obtained from the label and the<br />
graphics object are printed, along with the color in the font and the foreground<br />
and background colors of the label. You can see that the Graphics<br />
font still matches that of the JLabel, but there is no relationship at all<br />
between the colors—the Graphics object still has black as the selected
A Graphics Application 317<br />
color, whereas the label itself has a green background and a yellow foreground.<br />
<strong>Core</strong> Note<br />
Actually, the state of the Graphics object is not as random as you might<br />
think. Because all JComponents are lightweight, they don't strictly have a<br />
graphics context of their own—instead, they share the context of the<br />
heavyweight container that they are contained in.When getGraphics is<br />
called for a JComponent, it returns the Graphics object of its<br />
heavyweight container with that container's foreground color selected. In<br />
this case, then, the JLabel is getting the Graphics object of the<br />
JFrame, which is a heavyweight subclass of Frame. You should not,<br />
however, build applications that rely on this knowledge!<br />
This example also illustrates the perhaps less surprising fact that changing<br />
the properties of a Graphics object doesn't affect the JComponent that it<br />
was derived from. This is true whether the Graphics object is returned by<br />
getGraphics or create, or is passed as the argument to the paintComponent<br />
method. To show this, the selected color of the Graphics object is<br />
changed to red and the labels foreground and background are fetched again.<br />
As you can see, they are unchanged by this operation. Further changes to the<br />
label's foreground and background are also not reflected in the Graphics<br />
object, or in a new Graphics object obtained after the color changes have<br />
been made.<br />
Component Painting: Swing Versus AWT<br />
If you're familiar with how components are painted in the AWT, you will<br />
probably have been surprised that the examples in this section have been<br />
overriding a method called paintComponent instead of the more usual<br />
paint method that is used with the AWT. In fact, component drawing is<br />
slightly different for Swing components. To end this section, let's summarize<br />
how AWT components are painted and compare that with what happens in<br />
Swing.<br />
Painting AWT Components<br />
There are two methods that are involved in drawing AWT components:<br />
public void update(Graphics g) ;<br />
public void paint(Graphics g);
318 Chapter 4 Graphics, Text Handling, and Printing<br />
Although it can be overridden, the update method usually just fills the<br />
component with its background color and then calls paint to draw whatever<br />
should be in the foreground. The update method is called when a component's<br />
size is changed, because this operation doesn't necessarily cause the<br />
host windowing system to clear its background automatically. If, however, it<br />
can be determined that the background has already been cleared, update is<br />
skipped and paint is called directly. This will be the case if the application<br />
window is iconified and reopened, or if it is obscured and then exposed.<br />
Both methods are passed a Graphics object initialized with the components<br />
font and with its foreground color selected.<br />
Painting Swing JComponents<br />
JComponents are, of course, just Components with some extra software layered<br />
on top. The update and paint methods of the JComponent class are<br />
called just as they are for Component, but JComponent overrides the Component<br />
implementations of these methods to provide the same functionality<br />
in a different way that is more suited to Swing components that can have<br />
associated borders and may be drawn differently when different look-andfeel<br />
classes are installed.<br />
Figure 4—10 shows the logical flow of control through the JComponent<br />
painting mechanism.
A Graphics Application 319<br />
First, the update method of Component is overridden so that it just calls<br />
paint directly, without clearing the background. This is necessary, of course,<br />
because Swing components can be transparent. As a result, they must fill<br />
their own backgrounds during the execution of the paint method if this is<br />
required.<br />
The JComponent paint method is rather complex, because it implements<br />
double-buffering and it also tries to optimize the drawing process by only<br />
redrawing those parts of the component that need to be redrawn. Cutting<br />
through all the details, paint essentially does the following:<br />
• If graphics debugging is enabled and the component has a UI<br />
class associated with it, it creates a copy of the Graphics object<br />
it is passed and uses it for the rest of the paint method.<br />
• Selects the components foreground color and font into the<br />
Graphics object.<br />
• Calls the paintComponent method.<br />
• Calls the paintBorder method.<br />
• Calls the paint Children method if the component has<br />
children.<br />
The second step is necessary because, as noted, the Graphics object<br />
passed into the paint method actually belongs to the JComponent's heavyweight<br />
container, so it will not have the JComponent's color and font selected<br />
into it. This step makes it possible for the paintComponent method to<br />
behave like the AWT Component's paint method, as all of our examples in<br />
this chapter have.<br />
The paintComponent method is responsible for drawing most of the component's<br />
user interface. However, the drawing code is not actually implemented<br />
in a Swing component's paintComponent method and, in fact, almost<br />
none of the standard Swing components override paintComponent. This is<br />
because, as you know from Chapter 1, "Introduction to the <strong>Java</strong> <strong>Foundation</strong><br />
<strong>Classes</strong>," all of the Swing components have an associated pluggable look-andfeel<br />
class associated with them that will actually draw the component, so there<br />
is no need to implement custom drawing code in paintComponent. All of<br />
these classes are derived from the Swing class j avax. swing. plaf . ComponentUI,<br />
which you saw in Chapter 1. The JComponent paintComponent<br />
method arranges for the UI class to paint the component by calling the Componentui<br />
update method. By default, this fills the component with its background<br />
color, if it is opaque, and then calls the UI class's overridden paint<br />
method to do the rest of the drawing.
320 Chapter 4 Graphics, Text Handling, and Printing<br />
After the component has been painted, paintBorder is called to add the<br />
border around the outside, if there is one, and finally the paintChildren<br />
method is called to paint any lightweight children that this component might<br />
have. Remember that JComponent is derived from Container, so any<br />
JComponent can, theoretically, have child components associated with it.<br />
Note that the same Graphics object is passed to paintComponent,<br />
paintBorder, and paintChildren. This means that if you override<br />
paintComponent or implement your own border (as will be done later in<br />
this chapter), you must not make any persistent changes to the Graphics<br />
object. If you need to change the selected color, the font, the graphics origin,<br />
or the clip, you must either restore them before your method returns, or,<br />
probably simpler, create a copy of the Graphics object using create and<br />
use that instead. If you fail to do this, the border or any child components<br />
that there might be will probably not be drawn properly.<br />
A Graphics Application<br />
You've learned quite a lot about the Graphics class in this chapter. Now,<br />
you're going to put what you know into practice and develop an application<br />
that allows you to use the mouse to draw graphics objects onto a drawing<br />
area. This is the first real application that you've seen in this book, so quite<br />
a lot of time is going to be spent looking in great detail at how it works and<br />
why certain design decisions were made. As well as using much of what has<br />
been covered in the preceding sections, we'll also take the opportunity to<br />
introduce some important new features along the way. Let's first look at<br />
what the completed application looks like after it's been used for a while<br />
(see Figure 4—11).<br />
As you can see, the left-hand side of the application's frame is a drawing<br />
area, or canvas, as we'll call it here. Here, you can draw any of the shapes<br />
available on the buttons that reside on the lower right and you can choose<br />
from the colors shown on the buttons at the top right. If you want to run this<br />
application for yourself, just type the command:<br />
java <strong>JFC</strong>Book.Chapter4.GraphicsDemo<br />
When the program starts, the shapes and colors that are initially selected<br />
are shown at the bottom right; if you place the mouse over the scribbling area<br />
then press and hold down any button and drag you'll find that the cursor<br />
changes to a hand shape and a thin black line follows it. When you're happy
Figure 4-11 A graphics application.<br />
A Graphics Application 321<br />
with your line, just release the mouse. If you want to draw a different shape,<br />
select it from the selection available in the right-hand panel by pressing on<br />
the appropriate button and a copy of the shape will appear at the bottom<br />
right where the line used to be. When you're drawing any of the shapes, you<br />
move the mouse to where you want to start and press to establish the starting<br />
point. As you move the mouse, an impression of what the shape would look<br />
like appears and becomes permanent only when you release the mouse button.<br />
You'll find that the color of the shape changes when you've let go of the<br />
mouse button. For reasons that will be discussed when looking at the implementation,<br />
the outline shape you draw when you're moving the mouse is not<br />
in the color selected from the buttons at the top right.<br />
If you get bored with your drawing, you can start again by pressing the<br />
Clear button. If you want to remove the last shape you drew, press the Undo<br />
button. You can use the Undo button repeatedly, each time removing the<br />
most recently drawn shape, until you've cleared the entire canvas. Last, but
322 Chapter 4 Graphics, Text Handling, and Printing<br />
by no means least, if you're pleased with your artwork, you can use the Print<br />
button to send it to the printer if you've got one. Notice that these buttons<br />
are only enabled when they could be useful: if the drawing area is empty,<br />
they are all disabled.<br />
Now that you've seen what the application does, let's have a look at its<br />
component parts and what they are individually expected to do. The first<br />
thing to look at is how the user interface is constructed.<br />
The User Interface<br />
The application is hosted in a JFrame, laid on top of which is a JPanel that<br />
covers its entire surface. On top of this, the drawing area is implemented as a<br />
custom component that has the lightweight JPanel as its base, while the<br />
controls all reside on a home-grown subclass of JPanel (GraphicsDemo-<br />
Pane) that is itself overlaid with another four JPanels: one for the color buttons,<br />
a second for the shape selection buttons, a third for the Clear, Undo and<br />
Print buttons, and a fourth for the two status indicators<br />
Why so many panels? Couldn't everything just be placed onto one, saving<br />
some memory? You could implement the control section as a single panel<br />
and manage the whole thing with a GridBagLayout layout manager, but it<br />
would be exceedingly complex to do so. Once you'd got it working, the odds<br />
are that you would want to add another control or two. After doing this a few<br />
times, you would quickly regret your decision to simplify things by removing<br />
the odd panel. As a general rule, it is probably better to aim for a larger number<br />
of simpler items than a smaller number of complex ones. The odds are<br />
that you'll need to modify the smaller pieces (by adding a new shape or a new<br />
color) more often than the larger pieces (for example adding a new set of<br />
buttons), so you start with something simpler to change by adopting this<br />
approach.<br />
As well as this, of course, there is a natural affinity between all of the color<br />
buttons and all of the shape buttons that suggests that they should be handled<br />
as separate groups. Furthermore, if you resized the application, you<br />
would want the buttons within each group to stay closely bunched together<br />
and the space between the groups to increase if it had to—this gives a much<br />
better effect than allowing large gaps to appear between the buttons, because<br />
gaps tend to dispel the impression that there is a logical grouping of controls.<br />
Keeping related buttons on the same panel makes it much simpler to ensure<br />
that they stay close together—all you have to do is make sure that the panel<br />
doesn't get larger.
A Graphics Application 323<br />
The drawing canvas is, in fact, slightly more involved than it might at first<br />
appear. Although it looks like a white JPanel, you'll notice that it has a<br />
grooved border on a gray background (or at least it's gray with the default<br />
desktop settings under Windows—your setup may be different). The Swing<br />
components support the addition of various borders as we shall see in Chapter<br />
8, "Creating Custom Dialogs," and we could just add a standard border to<br />
a JPanel to create this effect. However, since this chapter is all about how to<br />
draw, the opportunity has been taken to show you how to implement your<br />
own border. Even though JPanel has the ability to host a border, the drawing<br />
area will be based not directly on JPanel, but on a derived class called<br />
BorderedCanvas. The reason for this will become clear later.<br />
But that isn't all there is to say about the innocuous looking white drawing<br />
area, because it also contains all the logic to turn mouse movements into the<br />
drawing of shapes and it handles the printing as well. Of course, not all of this<br />
functionality will be required in all of the applications where you might use a<br />
canvas with a border, so in true object-oriented style, the drawing and printing<br />
logic is added not to BorderedCanvas but to a derived class called GraphicsBorderedCanvas.<br />
This class will be examined in great detail below.<br />
If all of the drawing functionality is in the canvas, then all of the control is<br />
in the panels! In other words, while the canvas can handle its own drawing by<br />
responding directly to the mouse, it won't know what shape to draw or what<br />
color to draw it in, without input from the buttons on GraphicsDemoPane.<br />
How should this communication be implemented? At the lowest level, when<br />
a button is pressed, it needs to call an appropriate method exported by the<br />
drawing canvas that causes it to change its drawing color or to start using a<br />
different drawing shape. All that is necessary is to define a set of such routines,<br />
implement them in the GraphicsBorderedCanvas, ensuring that<br />
they are public, and add code to GraphicsDemoPane to call them as necessary.<br />
In fact, that is exactly what is done, but this idea has been taken one step<br />
further: The methods needed have been grouped together as a <strong>Java</strong> interface.<br />
If the necessary methods had simply been added to the public interface<br />
of GraphicsBorderedCanvas, there would have been code like this somewhere<br />
in the implementation of GraphicsDemoPane:<br />
GraphicsBorderedCanvas c;// Initialized elsewhere<br />
Color newColor; // New color to draw in<br />
c.setColor(newColor); // Change drawing color<br />
As you can see, with this code the GraphicsDemoPane could only be used<br />
to drive a GraphicsBorderedCanvas, because of the explicit dependency<br />
on it in the first line of this extract. But suppose, in a few months' time, you
324 Chapter 4 Graphics, Text Handling, and Printing<br />
decide to redesign the user interface of the drawing canvas while retaining<br />
the same programmatic interface. You could just throw away the existing<br />
GraphicsBorderedCanvas class and implement another one with the<br />
same name, or use a different name and modify the above lines of code in<br />
GraphicsDemoPane, but there is a better way. If the necessary control functions<br />
were encapsulated in an interface, you can have GraphicsBordered-<br />
Canvas implement that interface and then reference the interface instead of<br />
a specific class. In our case, the interface is called GraphicOps, so the<br />
extract shown above would be replaced with this:<br />
GraphicOps o; // Initialized elsewhere<br />
Color newColor; // New color to draw in<br />
o.setColor(newColor);// Change drawing color<br />
Since GraphicsBorderedCanvas implements GraphicOps, you can<br />
legally write this:<br />
o = new GraphicsBorderedCanvas(...);<br />
and, in a few months, you could write a second application in which you<br />
reuse exactly the same GraphicsDemoPane implementation and write this<br />
in the applications main method:<br />
o = new GraphicsBorderedCanvasVersion2(...);<br />
If you wanted to be a bit more clever, you could even allow the user to run<br />
one copy of the application and choose which flavor of drawing canvas to use,<br />
based on a command line argument or a configuration file. The correct component<br />
would be loaded by creating the required implementation of GraphicOps<br />
in the applications main method. Neither the canvas nor the button<br />
panel need know that there is an element of plug-and-play going on here.<br />
Putting this another way, the button panel needs something to send commands<br />
to when its buttons are pressed. It doesn't care what exactly it is sending<br />
commands to, as long as the recipient is prepared to receive the<br />
commands. This is exactly the scenario in which you should automatically<br />
think of using an interface, because all that matters is that the target object<br />
should implement certain named methods that respond to the commands<br />
being sent.<br />
GraphicOps is not the only interface between these two parts of the<br />
application. The canvas reacts to commands from the button panel, but the<br />
button panel also needs to have certain information about the state of the<br />
canvas, because the Clear, Undo, and Print buttons should only be enabled<br />
when it is not empty. Since shapes appear on the canvas in response to mouse
A Graphics Application 325<br />
events delivered to the canvas, the button panel can't know when shapes<br />
appear and, even if it could, it would also have to keep track of how many<br />
there are so that it could disable the buttons when the Undo button had been<br />
pressed enough times to clear the canvas. Ideally, you don't really want to<br />
make the button panel that knowledgeable about what is happening on the<br />
canvas, so you need to arrange for the canvas to tell the button panel when<br />
something of interest has happened. This could be done by inventing another<br />
interface that would allow the canvas to call the button panel when the number<br />
of shapes on its surface changes, but there is an alternative solution that<br />
uses a general mechanism provided by JComponent.<br />
Properties and Property Change Events<br />
So far, care has been taken to develop the drawing canvas in such a way that<br />
its implementation details are not visible from outside, so that the implementation<br />
can be changed or a different component with the same interface substituted<br />
later. If you think of the drawing canvas as a self-contained<br />
component, then it is clear that the number of shapes that have been drawn<br />
should be regarded as a property of the canvas that a user of the component<br />
can obtain by using a public method provided by the canvas. But in this case,<br />
the canvas should also be required to inform its users when the value of this<br />
property changes—in other words, it needs to generate an event.<br />
JComponent provides a set of methods that allow you to create a property<br />
and permit users to register for notification when the value of the property<br />
changes. Here are their definitions:<br />
public void addPropertyChangeListener(<br />
public void removePropertyChangeListener(<br />
public void addVetoableChangeListener(<br />
PropertyChangeListener 1);<br />
PropertyChangeListener 1);<br />
VetoableChangeListener 1);<br />
public void removeVetoableChangeListener(<br />
VetoableChangeListener 1) ;<br />
As you can see, when you register a listener, you don't say which properties<br />
you are interested in: You are notified of changes to all of the components<br />
properties. If you don't want to receive further notifications, you cancel your<br />
registration using the removePropertyChangeListener method.
326 Chapter 4 Graphics, Text Handling, and Printing<br />
<strong>Core</strong> Note<br />
The <strong>Java</strong> 2 platform extends the set of methods available to make it<br />
possible to register for notification of changes to a specific named property<br />
so that your listener doesn't need to filter out changes to properties that<br />
you are not interested in.These methods are defined as follows:<br />
public void addPropertyChangeListener(String name,<br />
PropertyChangeListener 1)<br />
public void removePropertyChangeListener(String name,<br />
PropertyChangeListener 1);<br />
We don't use these two methods here because we want the code to be<br />
portable between <strong>Java</strong> 2 and JDK I.I.<br />
The listener interfaces each have one method:<br />
public interface PropertyChangeListener<br />
extends java.util.EventListener {<br />
void propertyChange(PropertyChangeEvent evt);<br />
}<br />
public interface VetoableChangeListener<br />
extends java.util.EventListener {<br />
void vetoableChange(PropertyChangeEvent evt)<br />
throws PropertyVetoException;<br />
}<br />
All of the information about the changed property is encapsulated in the<br />
PropertyChangeEvent object. Each event contains the name of the property<br />
concerned, and the values before and after the change. You can extract<br />
these values using the following accessor methods:<br />
public String getPropertyName();<br />
public Object getNewValue();<br />
public Object getOldValue();<br />
There are two types of property—bound and constrained. The difference<br />
between these two is that a component may change a bound property at any<br />
time and simply notify its listeners that the value has changed, whereas a constrained<br />
property may only be changed if all of the listeners agree to it. To<br />
receive notification of a bound property change, you use the addProperty-<br />
ChangeListener method. The addVetoableChangeListener method is<br />
used to receive notification of changes to constrained properties. A listener<br />
may veto a change to a constrained property by throwing a PropertyVetoException.
A Graphics Application 327<br />
To return to the problem at hand, what is needed is to create a property<br />
that contains the number of shapes on the canvas and to implement the canvas<br />
so that it notifies registered listeners when a new shape is drawn or when<br />
one or all of the shapes is removed. You'll see the details of how this is done<br />
when you look at the implementation of the canvas. Because the property<br />
change listeners shouldn't be able to stop us drawing or removing shapes, this<br />
property will be bound but not constrained.<br />
Creating the User Interface<br />
You can see how the user interface is created by examining the program's<br />
main method and the constructor of its GraphicsDemo object, which implements<br />
the application's top-level window (see Listing 4-12).<br />
Listing 4-12 The shell of the graphics demo application<br />
package <strong>JFC</strong>Book.Chapter4;<br />
import j avax.swing.*;<br />
import javax.swing.border.*;<br />
import j ava.awt.*;<br />
import j ava . awt . event . * ,-<br />
public class GraphicsDemo extends JFrame {<br />
public GraphicsDemo(String title) {<br />
super(title);<br />
Container cp = this.getContentPane();<br />
JPanel p = new JPanel(true);<br />
cp.setBackground(UIManager.getColor("control"));<br />
p.setLayout(new BorderLayout());<br />
cp.add(p);<br />
// Create the canvas in which the<br />
// drawing will be done.<br />
GraphicsBorderedCanvas c =<br />
new GraphicsBorderedCanvas();<br />
c.setPreferredSize(new Dimension(450, 500));<br />
// Create the border and associate it with the canvas.<br />
Border bd = new EdgedBorder(UIManager.getColor(<br />
"control"));<br />
c.setBackground(Color.white) ;
328 Chapter 4 Graphics, Text Handling, and Printing<br />
Listing 4-12 The shell of the graphics demo application (continued)<br />
c.setBorder(bd);<br />
p.add(c, BorderLayout.CENTER);<br />
// Create the right-hand panel that<br />
// holds the color buttons.<br />
GraphicsDemoPane gp = new GraphicsDemoPane();<br />
p.add(gp, BorderLayout.EAST);<br />
// Connect panel to canvas so that<br />
// it can enable/disable buttons,<br />
c.addPropertyChangeListener(gp);<br />
// Connect the canvas to the panel<br />
// so that it can action button presses.<br />
gp.setDrawingArea(c);<br />
// Select the initial color and shape<br />
// from the button panel,<br />
gp.selectTools();<br />
} '<br />
public static void main(String[] args) {<br />
GraphicsDemo f = new GraphicsDemo("Graphics Demo");<br />
f .pack() ;<br />
f.addWindowListener(new WindowAdapter() {<br />
public void windowClosing(WindowEvent evt) {<br />
System.exit(0);<br />
}<br />
});<br />
f.setVisible(true);<br />
}<br />
J__<br />
The main method just creates the top-level window, arranges for the<br />
application to exit when the close button is pressed and makes it visible. The<br />
real initialization takes place in the constructor, which is extremely simple.<br />
First, it creates the jPanel that performs the double buffering and arranges<br />
for it to cover the frame by placing it in the center of the frame. This works<br />
because the frames layout manager is BorderLayout, which gives all of the<br />
frame's space to the center component if there are no others. Next, the drawing<br />
canvas (including its border) and the button panel are created and placed
A Graphics Application 329<br />
on the buffering panel. As these two objects are created, their constructors<br />
are executed and they create their own user interface components, as you'll<br />
see when you look at their implementations.<br />
Another BorderLayout is used to manage the main panel, placing the<br />
drawing canvas in the center and the buttons in the east, so that the canvas<br />
gets as much of the available space as possible and the button panel gets only<br />
what it needs. In this example, the canvas is given a preferred size that will be<br />
used to determine the initial size of the main window. If the user subsequently<br />
expanded the window, because it has been placed in the center of the<br />
BorderLayout, all of the extra space would go to the canvas, so that the buttons<br />
stay in their original configuration.<br />
Having created and placed the user interface components, the next step is<br />
to make the logical connection between the canvas and the button panel.<br />
This is achieved with only two lines of code:<br />
// Connect panel to canvas so that<br />
// it can enable/disable buttons<br />
c.addPropertyChangeListener(gp);<br />
// Connect the canvas to the panel<br />
// so that it can action button presses<br />
gp.setDrawingArea(c);<br />
The first line registers the button panel to receive property change events<br />
from the canvas; as you'll see, the GraphicsDemoPane class that contains<br />
the buttons implements the PropertyChangeListener interface, so it can<br />
be registered using the canvas' addPropertyChangeListener method,<br />
which is inherited from JComponent. Similarly, the GraphicsBordered-<br />
Canvas implements the GraphicOps interface and can be supplied as an<br />
argument to the button panel's setDrawingArea method. With these two<br />
steps completed, the application is fully operational. The last step is to select<br />
the initial drawing shape and color, which is achieved by calling the button<br />
panel's selectTools method, which will be discussed later. What should<br />
strike you about this code is that it knows remarkably little about what each<br />
part of the user interface does—its only job is to create the two pieces and<br />
connect them to each other. If you had alternative implementations of these<br />
pieces in different classes, it would be very simple to modify this code to<br />
switch over and use them—one line of code would change for each piece that<br />
you want to substitute: It couldn't be much simpler.
330 Chapter 4 Graphics, Text Handling, and Printing<br />
The Drawing Canvas<br />
The drawing canvas is where the real action in this program takes place. In<br />
principle, its job is very easy—all it has to do is monitor the mouse and draw<br />
shapes in the selected color. In fact, though, there are a few problems to<br />
solve to make this work smoothly. Let's look at what we have to do to make<br />
this component behave as the user expects.<br />
First, you have to make the drawing canvas look right. As you can see from<br />
the screen shot of the application (Figure 4-11), the canvas consists of a<br />
white drawing area surrounded by a grooved border on a colored background.<br />
The first problem is to write the code that creates this appearance.<br />
Secondly, how do you go about actually drawing the graphics shapes on the<br />
canvas? The obvious solution is to start drawing a shape when the user<br />
presses a mouse button and to place it in its final position when the button is<br />
released. In between, to give the appearance that the shape is adjusting itself<br />
to the way that the user moves the mouse, you need to keep removing and<br />
redrawing the shape so that one point remains where the user first pressed<br />
the mouse button, while the other follows the mouse pointer itself.<br />
This might sound easy, but what happens if the shape crosses over a shape<br />
that is already there? When you remove the shape to redraw it as the user<br />
continues to move the mouse, you have to somehow replace the pixels of the<br />
existing shape that have been erased. Not only that but, as you saw earlier in<br />
this chapter, just drawing on the canvas is not good enough. If the user iconifies<br />
the window or obscures part of it, you lose what you have done—how can<br />
it be recreated when the window is reopened or exposed again?<br />
As you have seen before, the code to draw on a component is usually<br />
placed in its paintComponent method, which is called whenever it is necessary<br />
to show the component's contents. Therefore, it is necessary to remember<br />
enough about what the user has done to create the drawing to be able to<br />
reconstruct it from scratch inside the paintComponent method. On the<br />
other hand, if paintComponent were called each time the user moved the<br />
mouse, it would end up doing far too much work and, worse, the performance<br />
would be very bad—the user would probably notice that the shape<br />
being drawn was very slow to follow the mouse pointer. So, as well as being<br />
able to reconstruct the entire picture if necessary, it is a good idea to render<br />
directly onto the canvas as the mouse moves as well.<br />
The problems of drawing the outline of the canvas and managing the<br />
shapes drawn inside it are actually quite separate; as noted earlier, this is recognized<br />
in the implementation by creating a subclass of JPanel called BorderedCanvas<br />
that is responsible for drawing the border and subclassing that
A Graphics Application 331<br />
to create GraphicsBorderedCanvas, which is responsible for all of the<br />
logic to do with drawing the shapes. These two components are discussed<br />
separately later in this chapter.<br />
The Button Panel<br />
The three sets of buttons and the state indicators on the button panel are<br />
managed on a set of four panels that sit within the main button panel. Each<br />
of these panels needs to stay at its preferred size, so that the buttons on each<br />
subpanel stay close to each other as the top-level frame is expanded by the<br />
user. The button panel is implemented by the GraphicsDemoPane class,<br />
which is derived from JPanel. When this panel is created, it is placed in the<br />
East position of the BorderLayout manager, which ensures that its horizontal<br />
size will not increase no matter how big the window gets.<br />
What about the vertical size? In the East position, the panel will grow with<br />
the window. Since each sub-panel is required to stay the same size, something<br />
else is needed to take up the extra space. This can be achieved by adding<br />
a transparent JComponent between the Clear/Undo/Print buttons and<br />
the status indicators. Since all we need is a transparent object that takes up<br />
space, we can safely use a JComponent, although a JPanel would also be<br />
acceptable here. Having done this, we make sure that all of the extra space<br />
goes to this canvas and none to the four panels by managing the Graphics-<br />
DemoPane with a GridBagLayout layout manager and constraining everything<br />
such that only the JComponent can expand to occupy extra space.<br />
The top two sets of buttons are arranged in grids with three buttons in<br />
each row. This sort of layout is naturally managed by the GridLayout layout<br />
manager, which makes sure that the buttons are arranged uniformly so that<br />
they line up nicely and arranges for them to be all of the same size. This gives<br />
a better visual impression than the ragged arrangement that would result if<br />
each button were allowed to be just large enough to surround the text or icon<br />
that it contains. The same applies to the panel that contains the Undo, Clear,<br />
and Print buttons.<br />
The fourth panel, containing the symbols and text that indicate the current<br />
drawing shape and color, is implemented using two JLabels, with text and<br />
an icon on each. Here, you could choose to make the labels expand to fill all<br />
of the space available or have them stay together in the center of the area<br />
that they occupy. If you wanted the former effect, you would use a GridLayout<br />
manager, while a FlowLayout would produce the latter. The implementation<br />
shown here uses the FlowLayout, so these two components will<br />
always appear close together.
332 Chapter 4 Graphics, Text Handling, and Printing<br />
As well as laying out the buttons, it is necessary to provide the code that<br />
responds to the buttons when they are pressed and the icons that appear on<br />
their surfaces also need to be drawn. You've already seen that you can decorate<br />
buttons and labels with images, but the icons that are used in this example<br />
program are not image files—instead, they are custom icons that are<br />
rendered directly, rather than by using the Imagelcon class. You'll see how<br />
this is done later in this chapter.<br />
The layout of the button panel is handled in the constructor of the GraphicsDemoPane<br />
class. The complete implementation of this class is shown in<br />
Listing 4-13.<br />
Listing 4-13 The Graphics demo's button panel<br />
package <strong>JFC</strong>Book.Chapter4;<br />
import j avax.swing.*;<br />
import j ava.awt.*;<br />
import j ava.awt.event.*;<br />
public class GraphicsDemoPane extends JPanel<br />
implements PropertyChangeListener {<br />
public GraphicsDemoPane() {<br />
super(true); // Double buffer<br />
this.setLayout(new GridBagLayout() ) ;<br />
GridBagConstraints c = new GridBagConstraints();<br />
c.gridx = 0;<br />
c.gridy = 0;<br />
c.gridwidth = 1;<br />
c.gridheight = 1;<br />
c.weightx = 0.0;<br />
c.weighty = 0.0;<br />
c.fill = GridBagConstraints.NONE;<br />
c.anchor = GridBagConstraints.CENTER;<br />
// Create and add the button panel<br />
JPanel colorPanel = new JPanel();<br />
colorPanel.setLayout(new GridLayout(0, 3, 2, 2));<br />
colorButtons = new JButton[buttonColors.length];<br />
for (int i = 0; i < buttonColors.length; i++) {<br />
JButton button = new JButton(new<br />
ColorFilllcon(buttonColors[i]
Listing 4-13 The graphics demo's button panel (continued)<br />
colorButtons[i] = button;<br />
colorPanel.add(button);<br />
button.putClientProperty(DRAW_COLOR,<br />
buttonColors[i]);<br />
button.addActionListener(new ActionListener() {<br />
public void actionPerformed(ActionEvent evt) {<br />
JButton b = (JButton)evt.getSource();<br />
A Graphics Application 333<br />
Color color =<br />
(Color)b.getClientProperty(DRAW_COLOR);<br />
Icon g = b.getlcon();<br />
colorLabel.setlcon(g);<br />
graphicOps.setColor(color) ;<br />
}<br />
}<br />
});<br />
this.add(colorPanel, c) ;<br />
// Create and add the shape selection panel<br />
JPanel shapePanel = new JPanelO;<br />
shapePanel.setLayout(new GridLayout(0, 3, 2, 2));<br />
shapeButtons = new JButton[shapeList.length];<br />
for (int i = 0; i < shapeList.length; i++) {<br />
}<br />
JButton button = new JButton(<br />
new GraphicShapelcon(shapeList[i] )) ;<br />
shapeButtons[i] = button;<br />
shapePanel.add(button);<br />
button.putClientProperty(DRAW_SHAPE,<br />
new Integer(shapeList[i]));<br />
button.addActionListener(new ActionListener() {<br />
public void actionPerformed(ActionEvent evt) {<br />
JButton b = (JButton)evt.getSource();<br />
int shape =<br />
((Integer)b.getClientProperty(DRAW_SHAPE)).<br />
intValue();<br />
shapeLabel.setlcon(b.getlcon());<br />
graphicOps.setShape(shape);<br />
} '<br />
});
334 Chapter 4 Graphics, Text Handling, and Printing<br />
Listing 4-13 The graphics demo's button panel (continued)<br />
c.gridy++;<br />
c.insets = new Insets(16, 0, 0, 0);<br />
this.add(shapePanel, c);<br />
// Add a dummy component that takes<br />
// all the spare space in the<br />
// right-hand panel<br />
c.gridy++;<br />
c.weighty = 1.0;<br />
c.insets = new Insets(0, 0, 0, 0);<br />
this.add(new JComponent(){}, c);<br />
// Add the "Clear" and "Undo" buttons<br />
c.gridy++;<br />
c.weighty = 0.0;<br />
JPanel buttonPanel = new JPanelO;<br />
clearButton = new JButton("Clear");<br />
undoButton = new JButton("Undo");<br />
printButton = new JButton("Print");<br />
Font font = new Font("Serif", Font.BOLD, 12);<br />
clearButton.setFont(font);<br />
undoButton.setFont(font) ;<br />
printButton.setFont(font);<br />
buttonPanel.add(clearButton);<br />
buttonPanel.add(undoButton);<br />
buttonPanel.add(printButton);<br />
this.add(buttonPanel, c);<br />
clearButton.addActionListener(new ActionListener() {<br />
public void actionPerformed(ActionEvent evt) {<br />
graphicOps.clearCanvas();<br />
}<br />
});<br />
undoButton.addActionListener(new ActionListener() {<br />
public void actionPerformed(ActionEvent evt) {<br />
graphicOps.removeLast();<br />
} '<br />
});<br />
printButton.addActionListener(new ActionListener() {<br />
public void actionPerformed(ActionEvent evt) {
Listing 4-13 The graphics demo's button panel (continued)<br />
} '<br />
});<br />
graphicOps.printCanvas();<br />
A Graphics Application 335<br />
// Place labels with the currently selected<br />
// color and shapes underneath the color panel<br />
c.gridy++;<br />
c.weighty = 0.0;<br />
c.weightx = 1.0;<br />
c.fill = GridBagConstraints.BOTH;<br />
c.insets = new Insets(8, 0, 0, 0);<br />
JPanel lowerPanel = new JPanel();<br />
this.add(lowerPanel, c);<br />
lowerPanel. setLayout (new FlowLayout (FlowLayout. CENTER, 4 ,<br />
4));<br />
colorLabel.setVerticalTextPosition(<br />
SwingConstants.BOTTOM);<br />
colorLabel.setHorizontalTextPosition(<br />
SwingConstants.CENTER);<br />
colorLabel.setHorizontalAlignment(<br />
SwingConstants.CENTER) ;<br />
ColorLabel.setVerticalAlignment(<br />
SwingConstants.BOTTOM);<br />
lowerPanel.add(colorLabel);<br />
shapeLabel.setVerticalTextPosition(<br />
SwingConstants.BOTTOM);<br />
shapeLabel.setHorizontalTextPosition(<br />
SwingConstants.CENTER);<br />
shapeLabel.setHorizontalAlignment(<br />
SwingConstants.CENTER);<br />
shapeLabel.setVerticalAlignment(<br />
SwingConstants.BOTTOM);<br />
lowerPanel.add(shapeLabel);<br />
// Disable clear/undo/print buttons<br />
clearButton.setEnabled(false) ;<br />
undoButton.setEnabled(false);<br />
printButton.setEnabled(false) ;<br />
}<br />
// Associate drawing area<br />
public void setDrawingArea(GraphicOps graphicOps) {
336 Chapter 4 Graphics, Text Handling, and Printing<br />
Listing 4-13 The graphics demo's button panel (continued)<br />
}<br />
this.graphicOps = graphicOps;<br />
// Select initial color and shape<br />
public void selectTools () {<br />
colorButtons[0].doClickO ;// Draw with black<br />
shapeButtons [0] . doClickO ; // Draw a line<br />
}<br />
// PropertyChangeListener Interface<br />
public void propertyChange(PropertyChangeEvent evt) {<br />
if (evt.getPropertyName().equals(<br />
GraphicOps.SHAPE_PROPERTY)) {<br />
int count = ((Integer)evt.getNewValue()).intValue<br />
boolean state = (count > 0);<br />
}<br />
clearButton.setEnabled(state);<br />
undoButton.setEnabled(state) ;<br />
printButton.setEnabled(state) ;<br />
}<br />
// Labels showing the current color and current shape<br />
protected JLabel colorLabel = new JLabel("Color");<br />
protected JLabel shapeLabel = new JLabel("Shape");<br />
// Clear, undo and print buttons<br />
protected JButton clearButton;<br />
protected JButton undoButton;<br />
protected JButton printButton;<br />
// Coloring buttons<br />
private static Color [] buttonColors = {<br />
Color.black, Color.blue,<br />
Color.cyan, Color.darkGray,<br />
Color.gray, Color.green,<br />
Color.lightGray, Color.magenta,<br />
Color.orange, Color.pink,<br />
Color.red, Color.yellow,<br />
Color.white };<br />
private JButton [] colorButtons;<br />
// Shape buttons
Listing 4-13 The graphics demo's button panel (continued)<br />
private static int[] shapeList = {<br />
GraphicOps.DRAWN_LINE,<br />
GraphicOps.DRAWN_RECT,<br />
GraphicOps.DRAWN_ROUND_RECT,<br />
GraphicOps.FILLED_RECT,<br />
GraphicOps.FILLED_ROUND_RECT,<br />
GraphicOps.DRAWN_OVAL,<br />
GraphicOps.FILLED_OVAL };<br />
private JButton[] shapeButtons;<br />
// Connection to drawing area<br />
private GraphicOps graphicOps;<br />
A Graphics Application 337<br />
// Property names<br />
private static final String DRAW_COLOR = "Draw_color"<br />
private static final String DRAW_SHAPE = "Draw_shape"<br />
j The complete panel is managed by a GridBagLayout. If you read<br />
through the code, you'll see that each of cells containing the four subpanels<br />
(colorPanel, shapePanel, buttonPanel, and lowerPanel) are constrained<br />
so that they don't grow vertically, by setting the weighty member of<br />
their GridBagConstraints object to 0.0. The other component in this<br />
panel, the transparent JComponent, has a weighty value of 1.0. Because it<br />
is the only component with a nonzero weighty, it gets all of the extra vertical<br />
space when the GraphicsDemoPane grows.<br />
Most of this code should be familiar from the ground that has been covered<br />
in previous chapters. Each of the color and shape buttons is created<br />
with an icon on its surface, for example:<br />
JButton button = new JButton(new ColorFilllcon(<br />
buttonColors[i]));<br />
The ColorFilllcon is a custom icon that draws a colored square with a<br />
black border; the color of the square is taken from the constructor argument.<br />
Similarly, the shape buttons use another custom icon:<br />
JButton button = new JButton(new GraphicShapelcon(<br />
shapeList[i]));<br />
You'll see how these icons are implemented later. After creating each of<br />
the color selection buttons, the following line of code is executed:
338 Chapter 4 Graphics, Text Handling, and Printing<br />
button.putClientProperty(DRAW_COLOR, buttonColors [i]) ;<br />
and something almost identical happens when the shape selection buttons<br />
are created:<br />
button.putClientProperty(DRAW_SHAPE, new Integer(<br />
shapeList[i]));<br />
The constants DRAW_COLOR and DRAW_SHAPE are actually strings, defined<br />
as follows:<br />
private static final String DRAW_COLOR = "Draw_color";<br />
private static final String DRAW_SHAPE = "Draw_shape";<br />
What is going on here? When any of these buttons are pressed, two things<br />
need to happen—the status indicator on the bottom of the button panel<br />
needs to change to show the new shape or color that will be used for drawing,<br />
and the drawing canvas also needs to be told which color or shape it is to<br />
draw with. We find out about the button click when the event handler for the<br />
ActionEvent that the button generates is entered. To do what needs to be<br />
done, it is necessary to work out which button has been pressed and, from<br />
that information, get the icon that was drawn on its surface and the color<br />
associated with the button.<br />
As you know, the ActionEvent contains a reference to the object that<br />
caused the event. Given that this allows us to find the original button, our job<br />
will be made much easier if it were possible to find both the icon and the<br />
color directly from the button itself. Getting the icon is easy, because JBut -<br />
ton has a getlcon method that it inherits from its superclass Abstract-<br />
Button. It is, however, more difficult to get the color that the icon uses to<br />
paint its surface. It isn't the color of the button itself, so calling getForeground<br />
or getBackground on the JButton is of no use. The icon, however,<br />
knows which color it uses and must store it internally. One approach would<br />
be to add a method to the ColorFilllcon class that would return the color;<br />
if this method were called getColor, there would then be code like this in<br />
the event handler:<br />
JButton b = (JButton)evt.getSource();<br />
Icon g = b.getlcon();<br />
Color c = ((ColorFilllcon)g).getColor();<br />
While this would work, it means that a ColorFilllcon (or a derived<br />
class) must be used to draw the color on the button. This prevents you from<br />
substituting a more interesting icon that doesn't implement the getColor<br />
method at a later date. You have seen this issue before with the connection<br />
between the drawing canvas and the button panel. As a general rule, it is not
A Graphics Application 339<br />
a good idea to restrict your future options: whenever you can retain flexibility<br />
without incurring unacceptable cost, it is usually better to do so. Ideally, we<br />
would want to be able use any class that implements Icon to provide the<br />
decoration for our button.<br />
Fortunately, there is a better solution available that makes use of another<br />
facility provided by JComponent, which allows you to associate user-defined<br />
properties with a component by denning an arbitrary key and then using the<br />
JComponent putClientProperty method to store the associated value<br />
under that key. You can retrieve the value later by invoking the getClient-<br />
Property method with the same key. These properties are known as client<br />
properties, because they are stored in the component but often used by client<br />
software outside the component itself. Here are the definitions of these<br />
methods:<br />
public void putClientProperty(Object key, Object value);<br />
public Object getClientProperty(Object key);<br />
In this case, you need to store the color associated with the button, so all<br />
you have to do is decide on a suitable key and supply the Color as the value<br />
argument. The key can, of course, be anything you like, as long as it is an<br />
instance of a class. For clarity, the actual implementation uses the string<br />
"Draw_color" as the key. Since this string will be used both when the color<br />
value is stored and when it is retrieved, the private constant DRAW_COLOR is<br />
defined to avoid having to use the actual string more than once. Now, when<br />
the button is created, the associated color is stored as a Color object in the<br />
property table of the JButton:<br />
button.putClientProperty(DRAW_COLOR, buttonColors[i]);<br />
In the event handler, the getClientProperty method is given the same<br />
property name to retrieve the value. Here is the implementation of the event<br />
handler for each of the color buttons:<br />
public void actionPerformed(ActionEvent evt) {<br />
JButton b = (JButton)evt.getSource();<br />
Color color = (Color)b.getClientProperty(DRAW_COLOR);<br />
Icon g = b.getIcon();<br />
colorLabel.setlcon(g);<br />
graphicOps.setColor(color);<br />
} '<br />
As noted earlier, getting the icon is much simpler. Having obtained the<br />
icon, you then simply call the setlcon method of the color indicator label at<br />
the bottom of the screen to change the picture that it shows. Note that this
340 Chapter 4 Graphics, Text Handling, and Printing<br />
method is given exactly the same instance of the icon that is being used for<br />
the button itself. This is quite alright because, as you'll see when you look at<br />
its implementation, our icon, like all icons, doesn't know which component it<br />
is associated with—one icon can be used to render the same drawing on as<br />
many objects as you like.<br />
<strong>Core</strong> Note<br />
Using the getlcon method is the obvious way to retrieve the icon from<br />
the button in the actionPerf ormed method.You could also choose to<br />
isolate yourself from the fact that the button happens to have an icon<br />
property by storing the Icon as another client property of the button and<br />
using the getClientProperty method to retrieve it.An even better<br />
method would be to consider the icon to be part not of the button but of<br />
the action that is being performed. The most natural way to do this is to<br />
store the icon as part of an object that encapsulates the action to be<br />
carried out and all of the attributes related to that action, so that there is<br />
no need to access the GUI component in performing the action.You'll see<br />
how to do this when we discuss the important topic of Actions in the next<br />
chapter.<br />
The last thing that the event handler does is to invoke the setColor<br />
method to pass the color to the drawing canvas. This method is part of the<br />
GraphicOps interface that was mentioned earlier. You'll see shortly what<br />
this interface looks like.<br />
The event handler for the shape buttons is almost identical. In this case, it<br />
is necessary to retrieve the icon and work out which shape the user wants to<br />
select. You can, of course, use the same mechanism to store and retrieve the<br />
shape as long as it is represented as an object, but how exactly should the<br />
shape be represented? Since whatever it is that represents the shape is going<br />
to be passed to the drawing canvas via the GraphicOps interface, the most<br />
obvious thing to do is to try to use whatever it is that we defined for that<br />
interface. Here is how GraphicOps is defined:<br />
public interface GraphicOps {<br />
public void setColor(Color color);// Set drawing color<br />
public void setShape(int shape);// Set drawing shape<br />
public void clearCanvas(); // Clear drawing area<br />
public void removeLast () ; // Remove last item<br />
public void printCanvas(); // Print everything<br />
public int getShapeCount();<br />
// Get number of shapes
Constants<br />
public static final int DRAWN__LINE = 0;<br />
public static final int DRAWN_RECT = 1;<br />
public static final int DRAWN_ROUND_RECT= 2;<br />
public static final int FILLED_RECT = 3;<br />
public static final int FILLED_ROUND_RECT= 4;<br />
public static final int DRAWN_OVAL = 5;<br />
public static final int FILLED_OVAL = 6;<br />
// Property for count of graphic shapes<br />
public static final String SHAPE_PROPERTY =<br />
A Graphics Application 341<br />
"shape_jproperty" ;<br />
}<br />
The first part of this definition declares the methods that can be used to<br />
cause the drawing canvas to take some action. You have already seen that the<br />
setColor method is used by the event handler for the color buttons. The<br />
shape buttons need to call the setShape method, which requires an integer<br />
argument from the list of constants defined by the interface to specify which<br />
shape is to be drawn. Unfortunately, the primitive type int is not an object,<br />
so it can't be passed directly to putClientProperty; instead, an instance of<br />
the wrapper class Integer is created and used instead, as the following code<br />
extract from the constructor illustrates:<br />
JButton button = new JButton(new GraphicShapelcon(<br />
shapeList[i]));<br />
shapeButtons[i] = button;<br />
shapePanel.add(button);<br />
button.putClientProperty(DRAW_SHAPE, new<br />
Integer(shapeList [i])) ;<br />
In this case, the string "Draw__shape" is used as the key to store the shape<br />
identifier. The event handler for the shape buttons simply has to extract the<br />
stored value and unwrap it from the Integer object to obtain an int again:<br />
JButton b = (JButton)evt.getSource();<br />
int shape =<br />
((Integer)b.getClientProperty(DRAW_SHAPE)).<br />
intvalue();<br />
shapeLabel.setlcon(b.getlcon());<br />
graphicOps . setShape (shape) ,-<br />
The rest of the constructor should be very easily understood. Notice that<br />
the event handlers associated with the Clear, Undo, and Print buttons just<br />
call the appropriate methods in the GraphicOps interface to get the canvas<br />
(or whatever class has been substituted for it) to perform the required
342 Chapter 4 Graphics, Text Handling, and Printing<br />
action—they don't take any further part in the processing themselves. You<br />
may be surprised to see, for example, that the Clear button doesn't disable<br />
itself and the other two buttons. This would be a logical thing to do because,<br />
when it has invoked the clearCanvas method, there won't be any more<br />
shapes on the canvas. It is, of course, not necessary to do this because, as<br />
you'll see when you look at the implementation of the canvas in more detail,<br />
clearing the canvas causes a PropertyChangeEvent to be generated. Since<br />
the button panel implements the PropertyChangeListener interface and<br />
is registered to be informed of these events (as you saw in the description of<br />
the GraphicsDemo class), any appropriate actions can be handled when this<br />
event is processed.<br />
You'll notice that when the methods in the GraphicOps interface are<br />
called, they are invoked against the field graphicOps. This field contains a<br />
reference to the class that implements the GraphicOps interface—in our<br />
case, this is, of course, the GraphicsBorderedCanvas. It was initialized<br />
when the constructor of the GraphicsDemo class called our setDrawingArea<br />
method, which is implemented as follows:<br />
// Associate drawing area<br />
public void setDrawingArea(GraphicOps graphicOps) {<br />
}<br />
this.graphicOps = graphicOps;<br />
// Connection to drawing area<br />
private GraphicOps graphicOps;<br />
When the constructor is complete, the button panel and all of its subpanels<br />
are initialized with all of their buttons and labels in place and event handlers<br />
attached. Only one element is missing—the two status indicators at the<br />
bottom of the panel that show which shape is to be drawn and which color to<br />
use have been created, but they don't have an associated icon, because the<br />
constructor only associates a text label for each of them:<br />
// Labels showing the current color and current shape<br />
protected JLabel colorLabel = new JLabel("Color");<br />
protected JLabel shapeLabel = new JLabel("Shape");<br />
How are the correct icons for these labels set? The choice of initial shape<br />
and color is arbitrary; the implementation chooses black as the color and<br />
starts by drawing a straight line. As it happens, these correspond to the first<br />
color button and the first shape button. Since references to all of these buttons<br />
were stored as they were created, the icons could be obtained directly<br />
like this:
colorLabel.setIcon(colorButtons[0] .getIcon()) ;<br />
shapeLabel. setlcon (shapeButtons [0] .getlconO) ;<br />
A Graphics Application 343<br />
The problem with this is not that it wouldn't work, but rather that it only<br />
does part of the job. As well as setting the label icons, it is also necessary to<br />
tell the canvas which color and shape to use, by calling the setColor and<br />
setShape methods of the GraphicOps interlace. To do this, of course, you<br />
need the color and shape associated with these buttons. You could use the<br />
values that were used to initialize the buttons in the first place, in which case<br />
you would write the following:<br />
colorLabel. setlcon (colorButtons [0] .getlconO) ;<br />
shapeLabel. setlcon (shapeButtons [0] .getlconO) ;<br />
graphicOps.setColor(buttonColors [0]) ;<br />
graphicOps.setShape(shapeList [0]) ;<br />
Since this code uses the graphicOps field, it can't be placed in the constructor,<br />
since graphicOps is not set until the setDrawingArea method is<br />
called.<br />
There is, however, a more elegant method that doesn't rely on this code<br />
knowing how the buttons were initialized. What we are trying to do is to set<br />
the labels to show the current color and shape selected for the drawing area<br />
and inform the drawing area of our initial choice. Exactly the same work also<br />
needs to be done if the user were to press the buttons, so why not logically<br />
press the buttons ourselves? This can be done by using the dociick method<br />
of AbstractButton; when you invoke this method, it generates the<br />
ActionEvent that would have been fired had the user actually pressed the<br />
button. As you already know, when this event is received, the button event<br />
handlers that were discussed earlier do the job of setting the label icons and<br />
invoking the appropriate methods in the GraphicOps interface. This<br />
reduces our implementation to the following two lines, which are placed in<br />
the selectTools method:<br />
public void selectTools() {<br />
colorButtons [0] . doClickO; // Draw with black<br />
shapeButtons[0] .doClickO ; // Draw a line<br />
}<br />
As with the more direct mechanism, this method can't be called from the<br />
constructor, because the event handlers will try to call the drawing canvas's<br />
setColor and setShape methods through graphicOps, which isn't yet initialized.<br />
Instead, this routine is invoked from the GraphicsDemo class after<br />
the canvas and button panel have been connected by calling setDrawingArea.
344 Chapter 4 Graphics, Text Handling, and Printing<br />
The last method in this class is the one that receives the PropertyChangeEvent<br />
from the drawing canvas. When you register to receive these<br />
events, you get notified of all changes to any property that the component<br />
has. As you saw earlier, the PropertyChangeEvent has methods that allow<br />
the listener to get the name of the property whose value has changed and the<br />
new and old values. The property name forms part of the interface between<br />
the canvas and its listener, so it was declared as the constant<br />
SHAPE_PROPERTY in the GraphicOps interface. The value of this property<br />
is the number of shapes on the canvas at the completion of the operation that<br />
generated the event; since a property has to be an object, it is encoded as an<br />
Integer. Here is the code that processes this event:<br />
// PropertyChangeListener Interface<br />
public void propertyChange(PropertyChangeEvent evt) {<br />
if (evt.getPropertyName().equals(<br />
GraphicOps.SHAPE_PROPERTY)) {<br />
int count =((Integer)evt.getNewValue0).intValue();<br />
boolean state = (count > 0);<br />
}<br />
}<br />
clearButton.setEnabled(state) ;<br />
undoButton.setEnabled(state) ;<br />
printButton.setEnabled(state) ;<br />
First, the getPropertyName method is used to extract the name of the<br />
property that generated the event. As you'll see, GraphicsBorderedCanvas<br />
only generates a property change event when the number of shapes on<br />
its surface changes, but its superclasses (in particular JComponent itself)<br />
generate events of their own, so it is important to make sure that the event<br />
that has been received is of interest, by ensuring that it is a change to<br />
SHAPE_PROPERTY. Having done this, the new value of the property can be<br />
extracted using getNewValue and converted from Integer to an int. Since<br />
all that has to be done with this value is to enable the Clear, Undo, and Print<br />
buttons if there are any shapes on the canvas and disable them if there are<br />
not, it is only necessary to check whether the shape count is positive and act<br />
accordingly.<br />
Implementing a Custom Border<br />
In order to physically separate the drawing canvas from the button panel, it is<br />
wrapped with a border. All of the Swing components can be rendered with a<br />
border simply by choosing one from the standard set that will be shown in
A Graphics Application 345<br />
Chapter 8 and calling the components setBorder method. This section<br />
shows you how to implement a custom border that will be used in the application's<br />
user interface.<br />
Every border implements the <strong>Java</strong>, swing, border .Border interface,<br />
which has only three methods:<br />
public Insets getBorderlnsets(Component comp);<br />
public void paintBorder(Component comp, Graphics g,<br />
int x, int y, int width, int height);<br />
public boolean isBorderOpaque();<br />
If a components setBorder method has been called, the component will<br />
need to allocate space for the border around its outer edge and draw the border<br />
when it paints itself. The getBorderlnsets method allows the border<br />
to tell its host component how much screen space it will need; it is up to the<br />
component to supply this space. When the component's paint method is<br />
called, it calls the border's paintBorder method, passing a reference to<br />
itself and the Graphics object that gives access to its screen area. Passing a<br />
reference to the component makes it possible to implement borders that act<br />
differently depending on the component that they are drawing on. For example,<br />
the border might make use of the components foreground and background<br />
color. You can also implement borders that can be shared among<br />
many components—all of the standard Swing borders are implemented in<br />
this way, as you'll see in Chapter 8.<br />
The x, y, width, and height arguments describe the outside of the<br />
rectangle on the component's surface within which the border must render<br />
itself. In most cases, the border will be drawn on the outer edge of the component,<br />
so x and y will both be zero and the width and height values will be<br />
the width and height of the component itself. Finally, the isBorderOpaque<br />
method indicates whether the border paints the area of the components<br />
background that it covers.<br />
That's all there is to the Border interface. A real border needs a bit more<br />
than that, however. At the very least, it needs to know what color it should<br />
use to draw itself. How this is achieved depends on the border implementation:<br />
you could decide to use a fixed color, use the look-and-feel dependent<br />
color UIManager. getColor ( "control" ) that is the usual background for<br />
components (other than windows), use the color associated with the component<br />
on which the border is being drawn, or pass the drawing color or colors<br />
to the border object's constructor. The last of these methods is the one that<br />
will be used for the border that you'll see in this section. However, to allow<br />
this border to be shared among many components, if the color supplied to<br />
the constructor is null, the actual color used when filling the background
346 Chapter 4 Graphics, Text Handling, and Printing<br />
will be taken from the background color of the component on which the border<br />
is being drawn.<br />
A close-up view of the border that will be implemented in this section is<br />
shown in Figure 4-12. This border provides a small colored edge to its host<br />
component, the color of which is passed as an argument to our border<br />
object's constructor or obtained from the component, onto which it draws a<br />
rectangular groove. To create the grooved effect, two rectangles will be<br />
drawn, one pixel wide and offset from each other by one pixel horizontally<br />
and vertically. These rectangles will be drawn in contrasting colors, one light<br />
and one dark, to give the effect of a shadow on one side of the groove. You<br />
can see this clearly in the enlarged view shown in Figure 4—12.<br />
Figure 4-12 An enlarged view of the border.<br />
Given the color of the solid edge, suitable colors for the groove rectangles<br />
can be obtained by applying the darker and brighter methods of the<br />
Color class to it:<br />
lightShadow = edgeColor.brighter();<br />
darkShadow = edgeColor.darker();<br />
While this works well enough as a default, the border will also provide a<br />
method that allows specific shadow colors to be supplied. Building in flexibility<br />
like this costs very little, enhances the usability of your class, and increases<br />
the likelihood of it being reused in the future.<br />
Listing 4-14 shows the implementation of our border, in a class called<br />
EdgedBorder.
Listing 4-14 The graphics demo's custom border<br />
package <strong>JFC</strong>Book.Chapter4;<br />
import javax.swing.*;<br />
import javax.swing.border.*;<br />
import j ava.awt.*;<br />
public class EdgedBorder implements Border {<br />
public EdgedBorder(Color edgeColor) {<br />
this.edgeColor = edgeColor;<br />
}<br />
// Set explicit shadow colors<br />
public void setShadowColors(Color lightShadow,<br />
Color darkShadow) {<br />
this.lightShadow = lightShadow;<br />
this.darkShadow = darkShadow;<br />
}<br />
// Border interface<br />
public Insets getBorderlnsets(Component comp) {<br />
return new Insets(BORDER_PAD, BORDER_PAD, BORDER_PAD,<br />
BORDER_PAD);<br />
}<br />
public void paintBorder(Component comp, Graphics g,<br />
int x, int y, int width,<br />
int height) {<br />
Color saveColor = g.getColorO ;<br />
int totalBorder = 2 * BORDER_PAD;<br />
// Use the component color if null has been supplied<br />
if (edgeColor == null) {<br />
edgeColor = comp.getBackground();<br />
lightShadow = null;<br />
darkShadow = null;<br />
}<br />
// Determine the border colors if<br />
// they have not been supplied<br />
if (lightShadow == null) {<br />
lightShadow = edgeColor .brighter (),darkShadow<br />
= edgeColor.darker();<br />
}<br />
A Graphics Application 347
348 Chapter 4 Graphics, Text Handling, and Printing<br />
Listing 4-14 The graphics demo's custom border (continued)<br />
}<br />
// Draw the colored edge on which the shadow resides<br />
g.setColor(edgeColor);<br />
g.fillRect(x, y, width, BORDER_PAD);<br />
g. f illRect (x, y + height - BORDER__PAD, width,<br />
BORDER_PAD);<br />
g.fillRect(x, y + BORDERJPAD, BORDER_PAD,<br />
height - totalBorder);<br />
g.fillRect(x + width - BORDER_PAD, y + BORDER_PAD,<br />
BORDER_PAD, height - totalBorder);<br />
// Draw the shadow<br />
g.setColor(lightShadow);<br />
g.drawRect(x + OUTER_PAD + 1, y + OUTER_PAD + 1,<br />
width - 2 * OUTER^PAD - 1,<br />
height - 2 * OUTER_PAD - 1);<br />
g.setColor(darkShadow);<br />
g.drawRectfx + OUTER_PAD, y + OUTER_PAD,<br />
width - 2 * OUTER_PAD - 1,<br />
height - 2 * OUTER_PAD - 1);<br />
// Restore graphics context color<br />
g.setColor(saveColor);<br />
public boolean isBorderOpaque() {<br />
return true;<br />
}<br />
private Color edgeColor;<br />
private Color lightShadow;<br />
private Color darkShadow;<br />
// Constants<br />
private static final int OUTER_PAD = 2;<br />
private static final int BORDER_SIZE = 2;<br />
private static final int INNER_PAD = 2;<br />
private static final int BORDER_PAD =<br />
OUTER_PAD + BORDER_SIZE + INNER_PAD;<br />
As you might expect, it is very simple. A constructor is provided to set the<br />
color of the solid edge, along with a method to override the default choice of
A Graphics Application 349<br />
groove colors with those preferred by the programmer and the three methods<br />
required by the Border interface. The border is of fixed size: it is always<br />
6 pixels wide and has a 2-pixel wide groove in the middle of it. The private<br />
constants OUTER_PAD, BORDER_SIZE and INNER_PAD determine the widths<br />
of the three parts of the border and BORDER_PAD, being the sum of the<br />
three, is the borders total width. Because the border is of constant size, the<br />
implementation of the getBorderlnsets method is very simple. Likewise,<br />
the isBorderOpaque method simply returns true.<br />
To paint the border, the paintBorder method first draws the edge in the<br />
se-lected color by dividing the border space allocated to it into two vertical<br />
and two horizontal rectangles. Although in practice the border will usually be<br />
drawn on the outside of the host component, this simplifying assumption<br />
cannot be made in the general case, so the code that fills the rectangles uses<br />
the starting coordinates of the borders assigned area as well as the width and<br />
height to determine the size and position of each rectangle.<br />
<strong>Core</strong> Note<br />
To see a case in which the border would not be drawn on the outside edge<br />
of the component, look ahead to the description of the<br />
CompoundBorder class in Chapter 8,"Creating Custom Dialogs."<br />
Finally, the drawRect method is used to draw two one-pixel wide rectangles<br />
in the middle of the border edge, using the colors that were selected (or<br />
were given) for the groove. Note that the Graphics object passed by the<br />
host component is used to draw the border. In order to avoid assumptions<br />
about which color is selected in this Graphics object, the initial color is<br />
saved before the borders color is installed and restored when drawing is<br />
complete, in case the component assumes that the selected color is the same<br />
on return as it was on entry to paintBorder.<br />
The Bordered Canvas and the Graphics Clip<br />
The main drawing area consists of a JPanel with a border and some added<br />
drawing logic. As noted earlier, the code that will handle mouse events and<br />
actually draw new shapes is contained in a class called GraphicsBordered-<br />
Canvas, which is derived from a direct subclass of JPanel called BorderedCanvas.<br />
As you know, JPanel itself can directly host a border of any<br />
sort, so why create an intermediate class instead of deriving GraphicsBorderedCanvas<br />
directly from JPanel?
350 Chapter 4 Graphics, Text Handling, and Printing<br />
The reason that BorderedCanvas exists is to provide one small piece of<br />
functionality that could be placed in GraphicsBorderedCanvas, but is better<br />
implemented elsewhere so that it can be reused in conjunction with an<br />
improved GraphicsBorderedCanvas without having to copy code. To see<br />
what this piece of functionality is, you need to look forward a little to the<br />
implementation of the drawing code in GraphicsBorderedCanvas.<br />
Suppose that the application is running and the user starts drawing a line.<br />
As long as the line stays within the canvas, all is well. But suppose the user<br />
moves the mouse outside the canvas. This will cause the line that the user is<br />
drawing to cross the border. Since the border is actually a part of the JPanel<br />
that the GraphicsBorderedCanvas is derived from, the space occupied by<br />
the border is as much a part of the component as the blank drawing area in<br />
the middle and nothing will prevent the drawing code in GraphicsBorderedCanvas<br />
drawing a line straight across it.<br />
The Graphics Clip<br />
Fortunately, there is a simple solution to this problem. One of the attributes<br />
of the graphics context is the clip, which constrains the area within which<br />
graphics operations are effective. If you get a graphics context by calling<br />
getGraphics, the clip covers the whole of the component (or image), so<br />
you can use drawing primitives to change any part of the source of the graphics<br />
context. You can, however, set a different clip using one of the following<br />
methods of the Graphics class:<br />
public void clipRect(int x, int y, int width,<br />
int height);<br />
public void setClip(int x, int y, int width,<br />
int height);<br />
public void setClip(Shape clip);<br />
A graphics context always has a current clip. If you use clipRect, the current<br />
clip is set to the intersection of the rectangle described by its arguments<br />
and the current clip, which has the effect of making the clip smaller, or leaving<br />
it unchanged. Suppose that you invoke getGraphics on a component<br />
that is 100 pixels wide and 200 pixels high. Initially, the Graphics object that<br />
is returned has a clip that covers all of this area. If you now do this:<br />
g.clipRect(10, 10, 50, 60);<br />
then the clip is reduced to the rectangle whose vertices are at (10, 10), (59,<br />
10), (59, 69), (10, 69), which is the rectangle specified in the clipRect call.<br />
Calling clipRect again can only make the clip smaller, not larger, since the
A Graphics Application 351<br />
resulting clip is the intersection of the current clip with the requested one.<br />
Executing this line at this point, with the reduced clip installed:<br />
g . c l i p R e c t (0, 0, 60, 7 0 ) ;<br />
leaves the clip unchanged, despite the fact that it requests the inclusion of an<br />
area to the left of and above the current clip. To make the clip larger, you<br />
must use the setClip method. The first form shown, like clipRect, supplies<br />
a rectangular area that becomes the new clip, whatever the current clip<br />
might be. The second form takes a Shape argument. Shape is an interface<br />
that provides a method that returns the bounding box of the class that implements<br />
it. Using this form, you can create a nonrectangular clip:<br />
int [] xPoints = { 10, 50, 100, 70, 30} ;<br />
int[] yPoints = { 60, 20, 70, 90, 80);<br />
Polygon p = new Polygon(xPoints, yPoints,<br />
xPoints.length);<br />
JPanel c = new JPanel () ;<br />
c.setSize (200 . 200);<br />
Graphics g = c.getGraphics();<br />
g.setClip(p); // Polygon implements Shape<br />
Once you set a clip, graphics operations that fall outside the range of the<br />
clip are ignored. If a graphics operation falls partly inside and partly outside<br />
the clip, only those parts covered by the clip are actually performed—the<br />
areas outside the clip are unaffected. This can save the time required to draw<br />
the pixels outside the clip and it can also stop unwanted changes to the<br />
graphics context.<br />
The BorderedCanvas Class<br />
How does the graphics clip help with the problem of protecting the border of<br />
the drawing area? Quite simply, the easiest way to stop the user drawing lines<br />
and shapes into the border area is to set a graphics clip that excludes the border<br />
before the drawing code (which is in the mouse event handler of GraphicsBorderedCanvas,<br />
as you'll see later) turns mouse movements into<br />
shapes. If this is done, then the fact that the user moves the mouse out of the<br />
main area of the drawing canvas won't matter—the drawing code can ignore<br />
the fact that it is attempting to draw into the border, because the graphics<br />
clip will prevent the parts of the operation that cover the border being actually<br />
performed.<br />
The problem is, though, where in the code should the clip be applied? The<br />
most obvious solution is to put it in the mouse handling code at the point that<br />
a shape is being drawn. Naturally, this would work. The drawing code has
352 Chapter 4 Graphics, Text Handling, and Printing<br />
access to the component it is drawing on, so it can get hold of the size of the<br />
border and compute the appropriate clip. However, if this were made a<br />
generic function of a class that supports a border and an enclosed, safe, drawing<br />
area, the same class could be used again for something other than the<br />
GraphicsBorderedCanvas used in this application. To make this possible,<br />
an intermediate class, BorderedCanvas, is implemented, as shown in Listing<br />
4-15.<br />
Listing 4-15 The border canvas<br />
package <strong>JFC</strong>Book.Chapter4;<br />
import j avax.swing.*;<br />
import javax.swing.border.*;<br />
import j ava.awt.*;<br />
public class BorderedCanvas extends JPanel {<br />
// Clip the graphics context to exclude the border<br />
protected void excludeBorder(Graphics g, Border border,<br />
int width, int height) {<br />
Rectangle r = AbstractBorder.getlnteriorRectangle(<br />
this, border, 0, 0, width, height);<br />
g.clipRect(r.x, r.y, r.width, r.height);<br />
}<br />
J<br />
// Override getGraphics() to clip for derived class<br />
public Graphics getGraphics() {<br />
Dimension d = getSizeO;<br />
}<br />
Graphics g = super.getGraphics();<br />
Border border = getBorder();<br />
if (border != null) {<br />
excludeBorder(g, border, d.width, d.height);<br />
}<br />
return g;<br />
As you can see, there really is very little to this class. As you would expect,<br />
it is derived from JPanel, so it carries with it the ability to host a border.<br />
There is no drawing code, because it doesn't need to add to the behavior of
A Graphics Application 353<br />
JPanel, which will fill the component with its background color whenever<br />
needed as well as inheriting the code to draw the border from JComponent.<br />
The only useful thing this class does is to override the Component get-<br />
Graphics method.<br />
When new shapes are being drawn on the canvas, the mouse event handler<br />
of GraphicsBorderedCanvas will need a Graphics object that gives<br />
access to the drawing area. If this code were being called from inside the<br />
paintComponent method, it would already have a Graphics object. However,<br />
in an event handler, the only way to get a Graphics object for a component<br />
is to call getGraphics. Because GraphicsBorderedCanvas is<br />
derived from BorderedCanvas, when it calls getGraphics, it will actually<br />
invoke the BorderedCanvas version of that method, which adjusts the clip<br />
to exclude the components border area by calling its internal excludeBorder<br />
method.<br />
The excludeBorder method needs to get the size of the canvas and the<br />
size of the border and subtract the border dimensions from those of the canvas<br />
to determine the size of the rectangular area in the middle of the canvas<br />
on which it is safe to draw. The dimensions of the border could be obtained<br />
by calling its getBorderlnsets method, but it isn't necessary to do this<br />
work ourselves because the AbstractBorder class provides a convenience<br />
method to perform this calculation for us.<br />
AbstractBorder is the base class from which all of the standard Swing<br />
borders are derived. It supplies the static getlnteriorRectangle method<br />
that accepts as arguments a component, a Border, the x and y positions at<br />
which the border will be rendered on the component, and the width and<br />
height of the outside of the border, and returns a Rectangle object describing<br />
the area inside the border. As you can see from Listing 4-15, the<br />
excludeBorder method uses the Rectangle returned by getlnterior-<br />
Rectangle to set the clip as required.<br />
The Drawing Area and Its Contents<br />
The last major part of this application is the GraphicsBorderedCanvas,<br />
which is derived from the BorderedCanvas class that has just been<br />
described. Before starting the implementation, let's look at what it needs to<br />
do:<br />
1. It must allow a suitable border to be attached and it must render<br />
that border when it is on the screen.
354 Chapter 4 Graphics, Text Handling, and Printing<br />
2. When the user presses the left mouse button, it must start<br />
drawing the currently selected shape. As the user drags the<br />
mouse, it must draw the outline of the shape as it would appear<br />
if the mouse button were released.<br />
3. When the mouse button is released, the shape should become a<br />
permanent part of the canvas.<br />
4. It must be possible to change the drawing color and the current<br />
shape.<br />
5. It must be possible to undo the last drawing operation, clear the<br />
canvas, and print the content of the canvas.<br />
Drawing the Border<br />
Drawing the border is the simplest issue to address, because it is almost free.<br />
When the canvas is created, the GraphicsDemo class associates a border<br />
with it, as follows:<br />
// Create the canvas in which the<br />
// drawing will be done.<br />
GraphicsBorderedCanvas c = new GraphicsBorderedCanvas();<br />
// Create the border and associate it with the canvas<br />
Border bd = new EdgedBorder(UIManager.getColor(<br />
c . setBackground(Color.white) ;<br />
c . setBorder(bd) ;<br />
"control"));<br />
After creating the GraphicsBorderedCanvas, a suitable border is created<br />
and the setBorder method, which is inherited from JComponent, is<br />
used to connect the border to the canvas. The borders color is passed to its<br />
constructor; since the colors to be used for the shadow are not explicitly supplied,<br />
they are defaulted to, for example, light and dark gray on Windows<br />
platforms with the default desktop settings. Finally, the canvas background is<br />
set to white. The setBackground method is inherited from Component and<br />
this color is actually used to fill the background in the paintComponent<br />
method of JPanel, which will be called from the paintComponent method<br />
ofGraphicsBorderedCanvas.
Painting the Canvas and Drawing in<br />
Response to the Mouse<br />
A Graphics Application 355<br />
Items 2 and 3 of the list above are related, so they will be dealt with together.<br />
The basic problems to be solved are how to use the mouse to trigger the<br />
proper drawing of shapes, how to make the shape expand or contract to follow<br />
the mouse, and how to make the shape appear permanently on the canvas<br />
when the mouse button is released. Before looking at the details of<br />
handling the mouse events, it is necessary to decide how to represent the<br />
shapes that have been drawn and the one currently being created.<br />
The simplest thing to do would be to catch the initial mouse press and<br />
remember where the mouse is at this point; then when the user drags the<br />
mouse, draw the appropriate shape between the current mouse position and<br />
the starting point. Suppose the user is drawing a line. When the mouse is<br />
pressed, its location would be stored. When the mouse moves a short distance,<br />
a line would be drawn between the start point and the new mouse<br />
location. But what happens when the mouse moves again? According to this<br />
algorithm, another line would be drawn from the start point to the mouse<br />
cursor. But, if these three points are not in a straight line, there would now be<br />
two lines and, the more the user moves the mouse, the more lines there<br />
would be. Obviously, the last line drawn must be removed before drawing<br />
another one. How can this be done when the Graphics class doesn't have<br />
an unDrawLine method? Perhaps the line can be removed by drawing it<br />
again in the background color. This would work, except that if there are<br />
already other shapes on the screen and the line crosses any of them, they will<br />
be damaged whenever the mouse is moved and sweeping a line across a<br />
shape could completely wipe it out!<br />
The Exclusive-Or Graphics Mode<br />
This problem can be solved by changing the Graphics paint mode. By<br />
default, when you draw lines or fill shapes, the new pixels just overwrite the<br />
old ones, so you have no memory of what was there before. This is called<br />
"paint" mode. If you want to remove your drawing, you need to have remembered<br />
what you overwrote, but the Graphics drawing methods don't do this<br />
for you. However, if you switch to exclusive-or drawing mode, you get a<br />
reversible drawing operation without having to remember what was underneath<br />
your shape. To set this mode, you use the Graphics setXORMode<br />
method, which is defined as follows:<br />
public void setXORMode(Color alt);
356 Chapter 4 Graphics, Text Handling, and Printing<br />
When you have set this mode, you are effectively drawing with a pen of a<br />
different color, generated by combining the drawing color and the alternation<br />
color that you supply as an argument to setXORMode. Usually, when you<br />
draw in XOR mode, you set the current color to the one you want to draw<br />
with (which will be referred to as the drawing color) and specify the background<br />
color as the alternate color. Now, when you draw on top of the background,<br />
the color that will actually be used is the drawing color. This appears<br />
to be the same as if you used the default drawing mode. However, if you<br />
draw on top of pixels that are already in the drawing color, they are changed<br />
to the alternation color—in other words, they take on the background color.<br />
If you draw on a pixel of any other color, you get a pixel of a different<br />
(unspecified) color but, if you draw on top of it again, it goes back to its original<br />
color. Let's clarify this with an example in which the drawing color is black<br />
and the background is white so that white is used as the alternative color.<br />
Table 4-3 shows what happens when you draw twice on the same pixels,<br />
when the current color is black, and the background and the alternate color<br />
are both white. The alternate color and the drawing color are set like this:<br />
g.setXORMode(Color.white);<br />
g. setColor (Color. black) ,-<br />
Table 4-3<br />
White<br />
Black<br />
Red<br />
Green<br />
Existing<br />
Color<br />
Using XOR Graphics Mode<br />
Drawing<br />
Color<br />
Black<br />
Black<br />
Black<br />
Black<br />
After First Drawing<br />
Operation<br />
Black<br />
White<br />
(Unpredictable)<br />
(Unpredictable)<br />
After Second<br />
Drawing Operation<br />
White<br />
Black<br />
Red<br />
Green<br />
As you can see, when you draw on the white background with a black pen,<br />
you get black. When you repeat the process, you get white again, so the background<br />
reappears. In other words, drawing the same shape twice on the<br />
background first makes it appear and then removes it. Similarly, drawing with<br />
black on black produces a white result first time (because the alternation<br />
color is white), then returns to black; again, performing the same operation<br />
twice is the same as not performing it at all. If you draw on any other color,<br />
you get an undefined color after the first operation and, after repeating the
A Graphics Application 357<br />
same operation, the original color returns. Therefore, by using XOR mode<br />
you can draw a shape and then remove it by just drawing it again.<br />
If you find this hard to remember, let's look at it in a slightly different way.<br />
Let's call the alternate color alt and the drawing color draw. When you set<br />
XOR mode, you effectively create a new pen whose color is given by the<br />
expression<br />
alt * draw<br />
and you exclusive-OR this color with that of the color of the pixels that you<br />
draw over; in other words, the resulting color for any pixel that you draw over is<br />
pixel alt * draw<br />
If you repeat the operation, the resulting color will be<br />
pixel A (alt A draw) A (alt A draw)<br />
Since the result of exclusive-ORing anything with itself is zero, the last two<br />
bracketed terms vanish, leaving us with pixel — that is, the original color.<br />
This explains why drawing twice returns the original state. If you draw once<br />
over a pixel that is the same as the alternate color (which is the background<br />
color in our case), the color you end up with is<br />
alt alt A draw<br />
which is, of course, just draw; that is, drawing over the background once produces<br />
pixels of the drawing color. Drawing on pixels of the drawing color<br />
results in<br />
draw alt A draw<br />
and again the two draw terms cancel out, leaving alt, which is the background<br />
color. Finally, drawing on any color other, gives<br />
other alt draw<br />
It isn't easy to see what this color represents because I haven't told you<br />
how the exclusive-or operation is performed. If you assume that it is done by<br />
exclusive-ORing the pixel values, you would still need to know how colors are<br />
encoded as pixels. If the default RGR model is used, you would get one<br />
result, but you might get a different result with a different color model.<br />
Because of this and because the API specification doesn't describe how the<br />
exclusive-or operation is done, it is best to regard the result of drawing over<br />
colors other than the alternate color and the drawing color as undefined, with<br />
the caveat that repeating the operation restores the original color.
358 Chapter 4 Graphics, Text Handling, and Printing<br />
Painting the Canvas<br />
That clears up the mechanics of drawing each shape and making the shape<br />
follow the mouse as it moves without destroying what is already there. As you<br />
have seen before, though, just drawing shapes as you go along is not enough.<br />
At any time, the user can close or obscure the window, which causes some or<br />
all of its content to be lost. When the window is reopened or made visible<br />
again, you will have to repaint all of the shapes that the user has drawn so far.<br />
In order to do this, the necessary information about each shape must be<br />
stored so that they can all be redrawn later. This is what has to be saved for<br />
each shape:<br />
• Its color.<br />
• Its start and end positions.<br />
• What the shape is (line, rectangle etc.).<br />
• Whether it is drawn or filled.<br />
Obviously, storing this information requires a new class. There will be one<br />
instance of this class for each shape that the user draws and they will be<br />
stored in the order in which the user created them, so that shapes that<br />
obscure each other will always be drawn in the same way. It's easy to see how<br />
the color and the start and end positions should be stored, but what about the<br />
shape and fill? You could define a data member for these and use the constants<br />
defined in the GraphicOps interface to describe the shape, but there<br />
is a more natural way to do this that you've probably seen before. This<br />
method involves defining an abstract base class, that will be called Drawn-<br />
Shape, which contains the data members and an abstract method to do the<br />
drawing. There will then be a derived class for each real shape that will<br />
implement its own drawing method appropriately. Listing 4—16 shows how<br />
the base class is defined.<br />
Listing 4-16 A basic class for drawing shapes<br />
package <strong>JFC</strong>Book.Chapter4;<br />
import j ava.awt.*;<br />
public abstract class DrawnShape {<br />
public DrawnShape(Color color, int x, int y, String text)<br />
{
Listing 4-16 A basic class for drawing shapes (continued)<br />
this.color = color;<br />
this.xl = x;<br />
this.yl = y;<br />
this.x2 = x;<br />
this.y2 = y;<br />
this.text = text;<br />
}<br />
public abstract void draw(Graphics g);<br />
public void changeEnd(int x, int y) {<br />
x2 = x ;<br />
y2 = y;<br />
}<br />
public void makePermanent() {<br />
perm = true;<br />
}<br />
public boolean isPermanent() {<br />
return perm;<br />
}<br />
public Rectangle getBoundingBox() {<br />
rect.width = x2 > xl ? x2 - xl + 1: xl - x2 + 1;<br />
rect.height = y2 > yl ? y2 - yl + 1: yl - y2 + 1;<br />
rect.x = xl < x2 ? xl : x2 ;<br />
rect.y = yl < y2 ? yl : y2;<br />
}<br />
return rect;<br />
// Get the text for the shape<br />
public String getText() {<br />
return text;<br />
}<br />
protected Color color; // Pen color<br />
protected int xl; // Start...<br />
protected int yl; // ... point<br />
protected int x2; // End...<br />
protected int y2; II ... point<br />
protected boolean perm; // Permanent or not<br />
protected String text; // Description<br />
A Graphics Application 359
360 Chapter 4 Graphics, Text Handling, and Printing<br />
J<br />
Listing 4-16 A basic class for drawing shapes (continued)<br />
protected Rectangle rect = new Rectangle();<br />
Lets look first at the fields of this class. The color field holds the color in<br />
which this shape is drawn, while xl, x2, yl, and y2 hold the coordinates of<br />
the two points that define the shape. If this shape is a line, these are the coordinates<br />
of its two ends. All of the other shapes that can he drawn are defined<br />
in terms of their bounding rectangles; in these cases, (xl, yl) is the point at<br />
which the left mouse button was pressed to start the definition of the shape<br />
and (x2, y2) is the point at which it was released.<br />
The perm field records whether the shape is permanent or not. While the<br />
shape is being drawn, it is considered temporary, so this field is initially set to<br />
false. A shape becomes permanent when the user releases the left mouse<br />
button. The state of this field determines the way in which the shape is<br />
drawn, as you'll see later. The text field is not used by our simple application—it<br />
was added in anticipation of future enhancements. The idea is that<br />
you can associate a string with each shape that you can use to describe it in<br />
some interaction with the user. For example, when the user places the mouse<br />
over the Undo button on the button panel, you might want to display a message<br />
describing what will be undone if the button is pressed. The text field<br />
is where you would store this message.<br />
Having seen the fields, the purpose of most of the methods should be<br />
obvious. The constructor initializes the object according to its arguments.<br />
Notice that you supply only the starting coordinate: The end coordinate is set<br />
to the same value, so the shape initially consists of just a single point.<br />
The make Permanent and is Permanent methods set and query the permanent<br />
attribute. Since a shape won't become temporary once it has been<br />
made permanent, there is no need for a makeTemporary or a setPermanent(boolean<br />
state) method.<br />
The last of the methods actually supplied by the base class is getBoundingBox,<br />
which returns a Rectangle that exactly bounds the shape. This is<br />
used in the GraphicsBorderedCanvas class to redraw only the affected<br />
region of the screen when the Undo button is pressed to remove the shape<br />
from the canvas. Finally, the changeEnd method changes the x2 and y2 values;<br />
it is called as the user moves the mouse.<br />
The draw method is the one that will actually draw the shape, using the<br />
graphics context passed as an argument. The size, position, and color of the<br />
shape are the current values held in the object. Every shape uses a different
A Graphics Application 361<br />
Graphics method to do its drawing, so each derived class will have its own<br />
implementation of this draw. Here is the derived class that draws a straight<br />
line.<br />
package <strong>JFC</strong>Book.Chapter4;<br />
import j ava.awt.*;<br />
public class DrawnLine extends DrawnShape {<br />
public DrawnLine(Color color, int x, int y) {<br />
}<br />
}<br />
super(color, x, y, "draw line");<br />
public void draw(Graphics g) {<br />
g.setColor(color);<br />
g.drawLine(xl, yl, x2, y2);<br />
} '<br />
As you can see, this class inherits most of its functionality from Drawn-<br />
Shape; its constructor is given the drawing color and the starting point and<br />
passes these to DrawnShape, along with some descriptive text. All of the<br />
derived classes have a constructor that looks like this one. The only method<br />
that differs from class to class is draw, which, in this case, selects the drawing<br />
color and draws a line between the two endpoints. The coordinates of the<br />
endpoints are, of course, held by DrawnShape and are accessible here<br />
because they are protected.<br />
All of the other classes have a slightly more complex draw method. Here,<br />
for example, is the implementation of FilledRectangle:<br />
package <strong>JFC</strong>Book.Chapter4;<br />
import j ava.awt.*;<br />
public class FilledRectangle extends DrawnShape {<br />
public FilledRectangle(Color color, int x, int y) {<br />
super(color, x, y, "draw filled rectangle");<br />
}<br />
public void draw(Graphics g) {<br />
int width = x2 > xl ? x2 - xl : xl - X2;<br />
int height = y2 > yl ? y2 - yl : yl - y2 ;<br />
g.setColor(color);<br />
if (perm) {
362 Chapter 4 Graphics, Text Handling, and Printing<br />
}<br />
}<br />
g.fillRect(Math.min(xl, x2) , Math.rain(yl, y2), width,<br />
height);<br />
} else {<br />
g.drawRect(Math.min(xl, x2), Math.min(yl, y2), width,<br />
height);<br />
}<br />
The draw method has to be more complex here because all of the drawing<br />
methods of Graphics, apart from drawLine, accept a start position and a<br />
width and height, the latter two of which must be positive. If the user starts<br />
the rectangle at the point (50, 50) and drags the mouse to (100, 100) then<br />
releases the left mouse button, it is necessary to draw a rectangle starting at<br />
(50, 50) that is 50 pixels in each direction. The width and height values are,<br />
naturally, computed by subtracting the starting coordinates from the last<br />
ones. Now suppose that the user started at (50, 50) and moved the mouse to<br />
(20, 20). Now the end coordinates are less than the starting ones, so you<br />
might be tempted to call f illRect with start coordinates (50, 50), width -30<br />
and height -30. Unfortunately, this would not work: f illRect takes a negative<br />
width or height as zero, so you would get just a single point.<br />
To draw the rectangle you want in this case, you have to give f illRect<br />
the end coordinate and calculate the absolute values of the coordinate differences<br />
to get the width and the height. In general, the x value given to fill-<br />
Rect must be the smaller of the starting and ending x values and similarly for<br />
the y value.<br />
You'll also notice that sometimes the filled rectangle is drawn by calling<br />
drawRect, which only draws the outline. In fact, the complete filled rectangle<br />
is only drawn when the shape is permanent, that is, when the user has<br />
released the mouse button. This implementation was chosen because drawing<br />
the outline is much faster than filling the shape and produces a much better<br />
response as the user moves the mouse across the screen.<br />
Here is the complete implementation of the canvass paintComponent<br />
method:<br />
public void paintComponent(Graphics g) {<br />
super.paintComponent(g); // Paint the background<br />
int len = drawingOps.size();<br />
for (int i = 0; i < len; i++) {<br />
DrawnShape d =<br />
(DrawnShape)drawingOps.elementAt(i) ;<br />
if (d.isPermanent()) {
g. setPaintMode() ;<br />
} else {<br />
g.setXORMode(getBackground());<br />
} '<br />
d.draw(g);<br />
}<br />
g.setPaintMode();// Restore paint mode<br />
}<br />
A Graphics Application 363<br />
As the user draws each shape, the appropriate subclass of DrawnShape is<br />
created to represent it and is added to the Vector drawingOps. This vector<br />
holds all of the shapes in the order in which they were drawn, so it is possible<br />
to reconstruct the content of the canvas by drawing each shape in the vector<br />
starting from the first entry. As you can see, a check is made as to whether the<br />
entry is permanent or temporary to set the appropriate drawing mode in the<br />
graphics context. Because all of the drawing objects are subclasses of Drawn-<br />
Shape, this code doesn't care exactly how the shape is drawn—it just invokes<br />
the object's draw method.<br />
There's one small point that needs to be made in connection with the<br />
paintComponent method. You'll remember that the BorderedCanvas<br />
class was invented so that shapes that are drawn through the boundary area<br />
don't end up corrupting the border by drawing over it and that this problem<br />
was solved by returning a Graphics object from the getGraphics method<br />
that was clipped to exclude the border. This works when the shape is being<br />
drawn as the user is dragging the mouse, because the Graphics used to<br />
draw that shape is a clipped one obtained by calling getGraphics. In the<br />
paintComponent method, though, the Graphics object is passed in from<br />
the JComponent paint code and so is not clipped to exclude the border. So,<br />
if the user has drawn a shape that extends over the border, then won't the<br />
paintComponent method redraw it? Since the Graphics object that it gets<br />
includes the border, doesn't this mean that the shape will be drawn over the<br />
border, spoiling the work done by BorderedCanvas?<br />
The analysis of the last paragraph is correct, but it overlooks one small<br />
point. As you know, when a component is being drawn, its content is rendered<br />
by its paintComponent method and then the border is drawn on top<br />
by calling paintBorder. That, of course, is the saving grace—if paintComponent<br />
draws into the border area, it won't matter because the border will<br />
be redrawn on top of it. However, this wouldn't help at the time that the original<br />
shape was being drawn, because it would be too expensive to redraw the<br />
border from inside the mouse event handler. Hence, the use of a clipped<br />
Graphics object in the event handler is the best solution for that case.
364 Chapter 4 Graphics, Text Handling, and Printing<br />
Drawing in Response to the Mouse<br />
Now let's see how the mouse is handled. Initially, there will be no shape<br />
being drawn and no mouse buttons pressed. When the user presses the left<br />
mouse button over the canvas, the appropriate subclass of DrawnShape<br />
needs to be created to record the drawing color and the shape's starting position.<br />
To catch mouse button events, GraphicsBorderedCanvas implements<br />
the MouseListener interface and, because the mouse is going to be<br />
tracked as it moves, it also implements MouseMotionListener. The left<br />
mouse button is handled in the mousePressed method.<br />
public void mousePressed(MouseEvent evt) {<br />
if ((evt.getModifiers() & MouseEvent.BUTTON1_MASK) !=<br />
0) {<br />
currentShape = getNewShape(evt.getX(), evt.getY());<br />
setCursor(Cursor.getPredefinedCursor(<br />
Cursor.HAND^CURSOR));<br />
drawingOps.addElement(currentShape);<br />
drawShape();<br />
}<br />
}<br />
The first check verifies that the left mouse button is the one that is<br />
pressed; if it is, a new object to represent the shape being drawn is created<br />
and then added to the drawingOps veetor. So that the objeet can be<br />
accessed quickly when handling the mouse motion events, a reference to it is<br />
also saved in the instance variable currentShape. The cursor is also<br />
changed so that it looks like a hand, to make it clear to the user that the<br />
mouse press has been registered. Finally, the method drawShape is called to<br />
put the shape, at the moment just a point, onto the screen. Here is how<br />
drawShape is implemented:<br />
public void drawShape() {<br />
if (currentShape != null) {<br />
Graphics g = getGraphics();<br />
if (currentShape.isPermanent()) {<br />
g.setPaintMode();<br />
} else {<br />
g.setXORMode(getBackground() ) ;<br />
} '<br />
currentShape.draw(g);<br />
g.dispose () ;<br />
} '<br />
}
A Graphics Application 365<br />
As you can see, this method is very similar to paintComponent, except<br />
that only the current shape is drawn. Note also that the graphics context is<br />
obtained using getGraphics which, as you know, is overridden by BorderedCanvas<br />
to return a context that is clipped to prevent drawing over the<br />
border. Finally, after using the graphics context, it is released by invoking<br />
dispose.<br />
To create an object for the new shape, the getNewShape method is used.<br />
This method is simply a switch statement that creates an object of the appropriate<br />
type; since these objects are all derived from DrawnShape, this<br />
method returns a reference to an object of that type. This is the only place<br />
where the exact nature of the object is known, because <strong>Java</strong> takes care of dispatching<br />
the draw call to the draw method of the actual object's class.<br />
protected DrawnShape getNewShape(int x, int y) {<br />
switch (drawingShape) {<br />
case GraphicOps.DRAWN_LINE:<br />
return new DrawnLine(drawingColor, x, y);<br />
case GraphicOps.DRAWN_RECT:<br />
return new DrawnRectangle(drawingColor, x, y);<br />
case GraphicOps.DRAWN_ROUND_RECT:<br />
return new DrawnRoundedRectangle(drawingColor, x,<br />
y);<br />
case GraphicOps.FILLED^RECT:<br />
return new FilledRectangle(drawingColor, x, y);<br />
case GraphicOps.FILLED_ROUND_RECT:<br />
return new FilledRoundedRectangle(drawingColor, x,<br />
y);<br />
case GraphicOps.DRAWN_OVAL:<br />
return new DrawnOval(drawingColor, x, y);<br />
case GraphicOps.FILLED_OVAL:<br />
return new FilledOval(drawingColor, x, y);<br />
default:<br />
throw new IllegalArgumentException(<br />
"Illegal shape - " + drawingShape);<br />
}<br />
}<br />
Selecting and Changing the Current Drawing<br />
Shape and Color<br />
The type of the shape to create is obtained from the instance variable<br />
drawingShape. This variable is set in the setshape method, which is also<br />
part of the GraphicOps interface and is called from the button panel when a
366 Chapter 4 Graphics, Text Handling, and Printing<br />
shape button is pressed. This method and setColor that is called by the<br />
button panel when a color button is pressed are shown below:<br />
public void setColor(Color color) {<br />
// Set drawing color<br />
drawingColor = color;<br />
}<br />
public void setShape(int shape) {<br />
// Set drawing shape<br />
drawingShape = shape;<br />
}<br />
As the mouse moves, the mouseDragged method is called. Here, the<br />
mouse position is extracted and passed to the method changeEnd to set the<br />
new ending position of the shape. It is also necessary to remove the old drawing<br />
of the shape and paint a new one. Because the component being drawn is<br />
not yet permanent, drawShape will use exclusive-or mode when painting it.<br />
This means that the old drawing of the shape can be removed by calling<br />
drawShape again before invoking changeEnd, so that it draws the same<br />
shape in the same place and therefore reinstates what was there before. Here<br />
is the implementation:<br />
public void mouseDragged(MouseEvent evt) {<br />
if (currentShape != null) {<br />
drawShape(); // Remove shape<br />
currentShape.changeEnd(evt.getx(), evt.getY());<br />
drawShape () ; // Redraw it<br />
}<br />
}<br />
Note that mouse dragged events will continue to be received even if the<br />
user drags the mouse outside the window. There is no problem with this—<br />
the code always draws a shape that ends where the mouse is, but the part that<br />
is not on the drawing canvas will be clipped. When the user releases the<br />
mouse (inside or outside the window), the mouseReleased method is<br />
entered and we make the shape permanent.<br />
public void mouseReleased(MouseEvent evt) {<br />
if ((evt.getModifiers() & MouseEvent.BUTTON1_MASK) != 0) {<br />
if (currentShape != null) {<br />
drawShape(); // Remove shape<br />
currentShape . changeEnd (evt .getX () , evt.getYO) ;<br />
currentShape.makePermanent();<br />
drawShape(); // Redraw it
}<br />
}<br />
// Inform listeners<br />
int count = drawingOps.size () ;<br />
firePropertyChange(SHAPE_PROPERTY,<br />
new Integer(count - 1) ,<br />
new Integer(count));<br />
currentShape = null;<br />
setCursor(Cursor.getPredefinedCursor(<br />
Cursor.DEFAULT_CURSOR));<br />
}<br />
A Graphics Application 367<br />
As before, the shape is removed from the display first, then the final<br />
mouse position is recorded. This time, though, before the shape is redrawn,<br />
it is made permanent. This causes the final draw operation to be done in<br />
paint mode, so the true color of the shape will appear and, if it is a filled<br />
shape, the filled version rather than the outline will appear for the first time.<br />
The mouse cursor is also switched back to the default shape.<br />
Since the shape has now become permanent, the number of shapes on the<br />
canvas has changed. Recall that this number is being maintained as a property<br />
of the canvas, so a PropertyChangeEvent has to be sent to registered<br />
listeners to notify them that the property's value has changed. The number of<br />
shapes now on the canvas is obtained from the vector that stores them and<br />
the f irePropertyChange method of JComponent is used to generate the<br />
event, sending the number of shapes before and after this one was created as<br />
the old and new values of the property. This method is defined as follows:<br />
protected void firePropertyChange(String propertyName,<br />
Object oldValue, Object newValue);<br />
There is a similar method that generates an event for a change to a constrained<br />
property, which has a slightly different definition:<br />
protected void fireVetoableChange(String propertyName,<br />
Object oldValue, Object newValue)<br />
throws PropertyVetoException<br />
When this latter method is called, the propertyChange method of each<br />
registered listener is invoked; if any of them vetoes the change by throwing a<br />
PropertyVetoException, the exception is propagated back to the owner<br />
of the property (i.e., the caller of f ireVetoableChange) so that any<br />
changes made in anticipation of the property changing can be reversed.<br />
Since the property that we are using is not constrained, f ireProperty-
368 Chapter 4 Graphics, Text Handling, and Printing<br />
Change is the appropriate method to use. As you know, this event will be<br />
received by the button panel and, if the count of shapes is positive, it will<br />
cause the Undo, Clear, and Print buttons to be enabled.<br />
<strong>Core</strong> Tip<br />
The variant of firePropertyChange shown here takes Object<br />
arguments for the old and new values of the property.There are some<br />
overloaded versions that let you supply primitive types instead, which can<br />
make your code more readable:<br />
public void firePropertyChange(String name, boolean old,<br />
boolean new);<br />
public void firePropertyChange(String name, byte old,<br />
byte new);<br />
public void firePropertyChange(String name, char old,<br />
char new);<br />
public void firePropertyChange(String name, double old,<br />
double new);<br />
public void firePropertyChange(String name, float old,<br />
float new);<br />
public void firePropertyChange(String name, int old,<br />
int new);<br />
public void firePropertyChange(String name, long old,<br />
long new);<br />
public void firePropertyChange(String name, short old,<br />
short new);<br />
Using these methods is not always efficient, however, because they all<br />
convert the primitive arguments to Objects and then call the variant of<br />
firePropertyChange that we have used in this example.<br />
Undoing Drawing Operations<br />
The GraphicsBorderedCanvas has some other minor duties to perform<br />
for the button panel. When the Undo button is pressed, the last shape that<br />
was drawn must be removed from the canvas. This is handled in the<br />
removeLast method, which is part of the GraphicOps interface:<br />
public void removeLast() {<br />
// Remove last drawn item<br />
if (drawingOps.isEmpty() == false &&<br />
currentShape == null) {<br />
int count = drawingOps.size();
}<br />
DrawnShape d =<br />
(DrawnShape)drawingOps.lastElement() ;<br />
drawingOps.removeElementAt(count - 1);<br />
Rectangle r = d.getBoundingBox();<br />
repaint(r.x, r.y, r.width, r.height);<br />
// Inform listeners<br />
firePropertyChange(SHAPE_PROPERTY,<br />
new Integer(count),<br />
new Integer(count - 1));<br />
}<br />
A Graphics Application 369<br />
The last permanent shape can easily be found from the Vector class, and<br />
it can equally be easily removed from the Vector. Notice that removeLast<br />
is ignored if a shape is currently being drawn (currentShape not null) to<br />
avoid having to write some more complicated logic; the user could cause this<br />
to happen by holding the left mouse button down, the navigating to the Undo<br />
button using the Tab key and activating it. If special action were not taken<br />
and the last shape in drawingOps were simply removed, there would be an<br />
inconsistency because the shape currently being drawn would not be there.<br />
Having removed the shape from our stored list, it must be removed from<br />
the canvas. Since this shape was permanent, it was drawn in paint mode, not<br />
XOR mode, so it can't be removed by being redrawn. Instead, it is necessary<br />
to arrange for the entire canvas to be repainted so that the shape or shapes<br />
under the removed one will be redrawn properly. Because there may be a lot<br />
of shapes on display, this could be a time-consuming operation, so a short cut<br />
is used. Instead of just calling repaint, which would clear the canvas and<br />
redraw everything, the getBoundingBox method of DrawnShape that you<br />
saw earlier is used. This method returns a Rectangle just large enough to<br />
contain the shape; the information in this object is used to invoke a different<br />
version of repaint:<br />
Rectangle r = d.getBoundingBox();<br />
repaint(r.x, r.y, r.width, r.height);<br />
The effect of this is that the paint Component method will be called with<br />
a graphics context whose clip is set to allow drawing only within the bounding<br />
box of the removed shape. This saves time because drawing operations outside<br />
this area can be ignored and it also reduces flashing of the screen,<br />
because only the rectangular area occupied by the removed shape is cleared.<br />
After removing the shape, a property change event is generated because<br />
there is now one fewer shape on the screen. This may cause the Undo, Clear,<br />
and Print buttons to be disabled. Similar to this is the clearCanvas method,
370 Chapter 4 Graphics, Text Handling, and Printing<br />
which handles the Clear button. Here, a property change event is sent in<br />
which the new value is zero, which will cause these buttons to be disabled.<br />
This method also removes all ol the shapes from the drawingOps vector and<br />
calls repaint to have the canvas repainted. This time, since there will be no<br />
shapes to draw, the variant of repaint that takes no arguments is used, so<br />
that the entire canvas is cleared.<br />
public void clearCanvas() {<br />
// Remove everything from the drawing area<br />
int count = drawingOps.size();<br />
drawingOps.removeAllElements();<br />
}<br />
// Inform listeners<br />
firePropertyChange(SHAPE_PROPERTY,<br />
new Integer(count),<br />
new Integer(0));<br />
repaint();<br />
That only leaves the Print button, which is handled by the printCanvas<br />
method. Since you haven't yet seen how to print from <strong>Java</strong>, the discussion of<br />
this method is deferred until later in this chapter.<br />
Implementing Custom Icons<br />
In Chapter 2, "Frames, Labels and Buttons," you saw how to add images to<br />
buttons and labels by using the Imagelcon class, which loads an image and<br />
renders it onto the component. You can, however, draw a graphic on a label<br />
or a button using any class that implements the Icon interface—you aren't<br />
just restricted to images. In this section, you will see how simple it is to create<br />
a custom icon by looking at how the ColorFilllcon and GraphicShape-<br />
Icon classes that are used to decorate the buttons in our graphics application<br />
are implemented.<br />
Any class that you want to use as an icon must implement the<br />
j ava. swing. Icon interface that you first saw in Chapter 2:<br />
public interface Icon {<br />
public void paintIcon(Component cotnp, Graphics g,<br />
int x, int y);<br />
public void int getlconWidth();<br />
public int getlconHeight();<br />
}
A Graphics Application 371<br />
This interface is very similar to the Border interface that you saw earlier<br />
in this chapter. The only real difference is that the class implementing Icon<br />
can fill the entire area allocated to it, not just the border area. The getlcon-<br />
Width and getlconHeight methods are invoked by the host component to<br />
find out how much space the icon needs to draw itself. When the component<br />
is painted, it calls the icon's paint I con method, passing it a component, a<br />
graphics context and the coordinates of the top left corner of the area allocated<br />
to the icon. The icon is responsible for rendering itself in this area and<br />
must not use more space than it asked for. The area reserved for the icon will<br />
have been cleared to the components background color, so it is possible to<br />
create a non-rectangular icon by not rendering the entire icon area. The<br />
GraphicShapelcon (Listing 4—f 7) is an example of this.<br />
Listing 4-17 An icon that displays a graphical shape<br />
package <strong>JFC</strong>Book.Chapter4;<br />
import j avax.swing.*;<br />
import j ava.awt.*;<br />
public class GraphicShapelcon implements Icon {<br />
public GraphicShapelcon(int shape) {<br />
this.shape = shape;<br />
}<br />
public GraphicShapelcon(int shape, int fullWidth,<br />
int fullHeight) {<br />
this.shape = shape;<br />
this.fullWidth = fullWidth;<br />
this.fullHeight = fullHeight;<br />
this.width = fullWidth - 2 * PAD;<br />
this.height = fullHeight - 2 * PAD;<br />
this.arcSize = fullWidth/2;<br />
}<br />
// Icon interface<br />
public int getlconWidth() {<br />
return fullWidth;<br />
}<br />
public int getlconHeight() {<br />
return fullHeight;<br />
}
372 Chapter 4 Graphics, Text Handling, and Printing<br />
Listing 4-17 An icon that displays a graphical shape (continued)<br />
public void paintlcon(Component comp, Graphics g,<br />
int x, int y) {<br />
Color c = g.getColor () ;<br />
g.translate(x + PAD, y + PAD);<br />
g.setColor(Color.black);<br />
switch(shape) {<br />
case GraphicOps.DRAWN_LINE:<br />
g.drawLine(0, 0, width - 1, height - 1);<br />
break;<br />
case GraphicOps.DRAWN_RECT:<br />
g.drawRect (0, 0, width - 2, height - 2) ;<br />
break;<br />
case GraphicOps.DRAWN_ROUND_RECT:<br />
g.drawRoundRect(0, 0, width - 2, height - 2,<br />
arcSize, arcSize);<br />
break;<br />
case GraphicOps.FILLED_RECT:<br />
g.fillRect(0, 0, width - 1, height - Inbreak;<br />
case GraphicOps.FILLED_ROUND_RECT:<br />
g.fillRoundRect(0, 0, width - 1, height - 1,<br />
arcSize, arcSize);<br />
break;<br />
case GraphicOps.DRAWN_OVAL:<br />
g.drawOval(0, height/4, width, height/2);<br />
break;<br />
case GraphicOps.FILLED_OVAL:<br />
g.fillOval(0, height/4, width, height/2);<br />
break;<br />
}<br />
g. setColor(c) ;<br />
g.translate(-(x + PAD), -(y + PAD));<br />
} '<br />
private int shape;
Listing 4-17 An icon that displays a graphical shape (continued)<br />
A Graphics Application 373<br />
// Constants<br />
public static final int FULLWIDTH = 32;<br />
public static final int FULLHEIGHT = 32;<br />
public static final int PAD = 2;<br />
public static final int WIDTH = FULLWIDTH - 2 * PAD;<br />
public static final int HEIGHT = FULLHEIGHT - 2 * PAD;<br />
public static final int ARC_SIZE = FULLWIDTH/2;<br />
// Sizes for this instance<br />
private int fullWidth = FULLWIDTH;<br />
private int fullHeight = FULLHEIGHT;<br />
private int width = WIDTH;<br />
private int height = HEIGHT;<br />
private int arcSize = ARC_SIZE;<br />
}<br />
A GraphicShapelcon is created by giving its constructor an integer that<br />
specifies the shape to be drawn, from the values declared by the GraphicOps<br />
interface. A second constructor that allows the size of the icon to be<br />
specified is also provided; this facility will be used when menus are added to<br />
this application later in this book. The paint icon method is very simple: the<br />
shape is drawn by switching based on the integer passed to the constructor.<br />
Each case draws the appropriate shape, being careful to ensure that it stays<br />
within the fixed area that it requested via its getlconWidth and getlcon-<br />
Height methods. To make this simple, the origin of the graphics context is<br />
moved to the top left hand corner of this area, the coordinates of which are<br />
determined by the host component and passed to the paintlcon method.<br />
Note that the paintlcon method doesn't pass in the width and height of the<br />
area in which the host component is drawing the Icon, so it has to assume<br />
that the space it requested has been allocated to it.<br />
It is very important to note that the color initially selected into the graphics<br />
context on entry is saved before the color used to draw the shape is<br />
installed and is restored before the method completes. Similarly, the origin is<br />
restored after the drawing has been completed, by reversing the translation<br />
performed at the start of the method. If you forget to do this, you will find<br />
that the component that your icon is being drawn onto won't render properly.<br />
The ColorFilllcon, shown in Listing 4-18, is similar, but allows more<br />
configuration.
374 Chapter 4 Graphics, Text Handling, and Printing<br />
Listing 4-18 An icon that shows a color-filled square<br />
package <strong>JFC</strong>Book.Chapter4;<br />
import javax.swing.*;<br />
import j ava.awt.*;<br />
public class ColorFilllcon implements Icon {<br />
public ColorFilllcon(Color fill,<br />
int width, int height, int borderSize) {<br />
this.fillColor = fill;<br />
this.borderSize = borderSize;<br />
this.width = width;<br />
this.height = height;<br />
this.shadow = Color.black,•<br />
this.filiwidth = width - 2 * borderSize;<br />
this.fillHeight = height - 2 * borderSize;<br />
}<br />
public ColorFilllcon(Color fill, int size) {<br />
this(fill, size, size, BORDER_SIZE);<br />
}<br />
public ColorFilllcon(Color fill) {<br />
this(fill, DEFAULT_SIZE, DEFAULT_SIZE, BORDER^SIZE);<br />
}<br />
// Set nondefault shadow color<br />
public void setShadow(Color c) {<br />
shadow = c;<br />
}<br />
// Change the main color<br />
public void setFillColor(Color c) {<br />
fillColor = c;<br />
}<br />
// The Icon interface<br />
public int getlconWidth() {<br />
return width;<br />
}<br />
public int getlconHeight() {<br />
return height;<br />
}
A Graphics Application 375<br />
Listing 4-18 An icon that shows a color-filled square (continued)<br />
public void paintlcon(Component comp, Graphics g,<br />
int x, int y) {<br />
Color c = g.getColor();<br />
}<br />
// Draw the border<br />
if (borderSize > 0) {<br />
g.setColor(shadow);<br />
for (int i = 0; i < borderSize; i++) {<br />
g.drawRect (x + i, y + i, width - 2 * i - 1,<br />
height - 2 * i - 1);<br />
}<br />
}<br />
// Fill the remainder of the icon<br />
g.setColor(fillColor);<br />
g.fillRect(x + borderSize, y + borderSize,<br />
fillWidth, fillHeight);<br />
g . setColor (c) ;<br />
// Icon state<br />
protected int width; // Color fill width<br />
protected int height; // Color fill height<br />
protected Color fillColor;// Color to fill with<br />
protected Color shadow; // Shadow color<br />
protected int borderSize;// Border size in pixels<br />
protected int fillHeight;// Height of area to fill<br />
protected int fillWidth; // Width of area to fill<br />
// Constants<br />
public static final int BORDER_SIZE = 2;<br />
public static final int DEFAULT_SIZE = 32;<br />
J The most general constructor allows you to tailor the width and height of<br />
the colored area, the width of the border area, which can be removed<br />
entirely by making it zero pixels wide, and the color to be used to fill the center<br />
of the icon. Two other constructors allow you to construct a square icon of<br />
specified size or a 32-pixel square icon, with a fill color of your choice. The<br />
border is colored black, unless the setShadow method is used to change the
376 Chapter 4 Graphics, Text Handling, and Printing<br />
color. The rest of this class follows the same pattern as GraphicShapeicon,<br />
except that calculated values are used instead of constants in the get iconwidth,<br />
getlconHeight, and paintlcon methods. There is also a method<br />
that allows the fill color of the icon to be changed. Calling this method and<br />
then repainting the component that hosts the icon will have the effect of<br />
changing the icon's color.<br />
In these examples, the Component argument passed to the paintlcon<br />
method hasn't been used. This argument is passed so that you can create<br />
icons that use information from the component that they are drawing on,<br />
such as the component's background color.<br />
Rendering Text<br />
In <strong>Java</strong>, rendering text is just like drawing graphics, with one minor difference:<br />
whereas the lines that you draw with the graphics drawing methods are<br />
all one pixel wide (unless you use the <strong>Java</strong> 2D API), text lines are much<br />
wider. While you can describe where to start a line by naming a single pixel,<br />
how do you specify the starting point of a text string that is 12-pixels high?<br />
You might think that you could draw a rectangle around the text and specify<br />
the coordinates of its top left-hand corner. This would be perfectly reasonable,<br />
but it's not how it is actually done in fava. In this chapter, you'll see the<br />
basic mechanisms used to render simple text. As far as JDK 1.1 is concerned,<br />
what you see here is just about all you can do with text. In the <strong>Java</strong> 2 platform,<br />
the <strong>Java</strong> 2D API greatly extends the possibilities for rendering and<br />
measuring text, however, as we'll show in Volume 2, where you'll see some<br />
better and more convenient ways of doing some of the things that you'll do<br />
the hard way in this section.<br />
Fonts and Font Metrics<br />
Let's tackle what should be a reasonably simple exercise to see what issues<br />
arise when trying to handle drawing text. The aim is to create a panel of a<br />
given size and render a string onto it in such a way that it is both horizontally<br />
and vertically centered on the canvas. Obviously, to do this it is necessary to<br />
know the height and width of the string as it will appear when drawn and this<br />
is our first problem—how is it possible to know how large it will be? If you<br />
think about it, you will realize that the size of the string depends on the font<br />
you're using to render it—obviously, a string drawn in a 24-point font will be
A Graphics Application 377<br />
much larger in both directions than the same string drawn in a 12-point font.<br />
Also, since most of todays fonts are proportional, you can't just take the width<br />
of one character from the font (if you could discover that somehow) and multiply<br />
it by the number of characters in the string to get the total length,<br />
because the characters in the font are not all the same width.<br />
Fortunately, there is a simple solution to this problem. Once you have a<br />
Font object, you can acquire a different kind of object, called FontMetrics,<br />
that gives you all the information you need about your font. There are three<br />
ways to get a FontMetrics object. First, you can use the getFontMetrics<br />
method of the Toolkit class, like this:<br />
Font f = new Font("Serif", Font.PLAIN, 12);<br />
FontMetrics fm =<br />
Toolkit.getDefaultToolkit().getFontMetrics(f);<br />
This method is, however, deprecated in the <strong>Java</strong> 2 platform, although it<br />
still works. Alternatively, if you have a Graphics object on hand, you can use<br />
one of its two getFontMetrics methods:<br />
// "comp" is assumed to be a Component<br />
Graphics g = comp.getGraphics () ;<br />
FontMetrics fml = g.getFontMetrics();<br />
Font f = new Font("Serif", Font.PLAIN, 12);<br />
FontMetrics fm2 = g.getFontMetrics(f);<br />
When you don't give it an argument, as in the first case, getFontMetrics<br />
returns a FontMetrics object for whichever font is currently<br />
selected into the graphics context. On the other hand, if you hand it a font,<br />
it gives you the FontMetrics for that font, as does the Toolkit getFont-<br />
Metrics method.<br />
The Component class also has a getFontMetrics method:<br />
public FontMetrics getFontMetrics(Font f);<br />
This method works in the same way as the second Graphics getFont-<br />
Metrics method.<br />
How do you choose between these methods? You should make every<br />
effort to avoid using the The Toolkit getFontMetrics method because it<br />
is deprecated (for reasons that will be described in "Font Metrics and Measurement<br />
Units" later in this chapter). If you can defer using font metrics<br />
until you have a Component or Graphics object available to you, then you<br />
should do so. The no-argument Graphics getFontMetrics method is<br />
obviously the easiest to use when you have an initialized Graphics object<br />
and you want to render text in its selected font, as might be the case in the<br />
paintComponent method of a component (you'll see an example of this
378 Chapter 4 Graphics, Text Handling, and Printing<br />
below). You might use the other Graphics method in the same place if you<br />
sometimes wanted to render in a different font on the same component, or if<br />
the string is going to be drawn in more than one font. The only possible problem<br />
with using either of these methods is that you need a Graphics object to<br />
use them, but you know that components don't have Graphics objects associated<br />
with them until just before they appear on the screen. However, the<br />
Component getFontMetrics method works even before the Component<br />
appears on the screen.<br />
<strong>Core</strong> Note<br />
If you are planning to use the <strong>Java</strong> 2 platform and you don't need to remain<br />
compatible with JDK I. I, you can dispense entirely with FontMetrics for<br />
many purposes and use the <strong>Java</strong> 2D LineMetrics or TextLayout<br />
classes instead. These classes give you much more accurate metric<br />
information for text, which can result in better results on high-resolution<br />
devices such as printers, and they also take into account differences that<br />
might be caused by the use of antialiasing. For further information, refer to<br />
the <strong>Java</strong> 2D chapters of Volume 2.<br />
What exactly does a FontMetrics object tell us? To start with, it has a<br />
stringWidth method that returns the width of a string when it is rendered<br />
in the font from which the FontMetrics object was obtained. Here's an<br />
example, in which g is assumed to refer to a Graphics object into which the<br />
text will be drawn:<br />
Font f = new Font("Serif", Font.BOLD, 24);<br />
FontMetrics fm = g.getFontMetrics (f);<br />
String s = "Hello, world";<br />
int width = fm.stringWidth(s);<br />
width will be set to the width of the string "Hello, world" if it were rendered<br />
using the font represented by f on a component managed by the default tool<br />
kit. Note carefully that this is not strictly the width of that string when rendered<br />
in a 24-point, bold "Serif font, but rather in the font that your system uses<br />
when you ask for such a thing—remember that <strong>Java</strong> maps generic names like<br />
"Serif to actual fonts based on what it has available to it. It doesn't promise to<br />
provide a 24-point font, or even a bold font for that matter.<br />
So much for the width, what about the height? This is equally simple,<br />
because FontMetrics provides a getHeight method that returns the<br />
height of the font:
int height = fm.getHeight();<br />
A Graphics Application 379<br />
Now that you have the width and height of the string, it seems that you<br />
know all you need to know to center the string in the canvas, assuming you<br />
also know the size of the canvas. But you're not quite there yet. Recall that<br />
strings are drawn with the Graphics drawstring method that looks like<br />
this:<br />
public void drawstring(String text, int x, int y) ;<br />
The problem, of course, is to calculate the x and y arguments so that the<br />
string is centered on the canvas. You can't do this yet, because you don't<br />
know which point of the string the coordinates describe. You can get this last<br />
piece of information from Figxire 4-13.<br />
Figure 4-13 shows the various measurements that distinguish one font<br />
from another. First, you know that different characters in a font are not necessarily<br />
all the same width; each character has its own width, known as the<br />
advance. When laying out characters, the drawstring method draws a character,<br />
then adds its advance value to its x coordinate to get the starting x<br />
coordinate of the next character. The total width of the string, as returned by<br />
stringwidth, is the sum of the advance values for each character in the<br />
string.<br />
Running along under the characters is the baseline. If you think of the<br />
screen as a lined page and you wrote on the page longhand, the lines on the<br />
page would be lined up with the baseline of the font. Any individual character<br />
extends some way above and possibly some way below the baseline; the<br />
extent to which it rises above the baseline is its ascent and the distance that it<br />
stretches below is the descent. Just as different characters have different<br />
widths, so they can have different ascent and descent<br />
values. In JDK 1.1, <strong>Java</strong> doesn't actually give you access to the ascents and<br />
descents tor every individual character. Instead, each font has a constant<br />
value that bounds the ascent and descent of most alphanumeric characters in<br />
the font; it is these bounding values that we refer to when we speak of a font's<br />
ascent and descent. Some characters will, of course, exceed these bounds, so<br />
there is a maximum ascent and a maximum descent associated with each font<br />
and there is also a maximum advance value that is large enough to cover<br />
every character in the font.<br />
<strong>Core</strong> Note<br />
In the <strong>Java</strong> 2 platform, you can get access to per-character metric<br />
information.
380 Chapter 4 Graphics, Text Handling, and Printing<br />
Figure 4-13 Font measurements.<br />
The final ingredient is the distance between lines on the page. Each font<br />
has a value called leading that gives the minimum advised extra space to<br />
allow between lines. The total of the font ascent, descent, and leading values<br />
is the font's height. As shown in the diagram, we usually render successive<br />
lines so that the baseline of each line is height pixels below the baseline of<br />
the line above it. Since most characters are no higher than the font ascent<br />
and do not drop below the font descent, this arrangement means that there<br />
will be little vertical overlap between the characters of one line and those of<br />
the line below it, but this is not guaranteed because some of the characters<br />
may exceed these bounds and hence run into each other. Of course, if the<br />
baselines were separated by the leading space plus the maximum ascent and<br />
descent, then there would never be any overlap, but the lines would be too<br />
far apart most of the time.<br />
FontMetrics stores values for all of the font attributes that we have just<br />
described and provides public methods that allow you to get access to them.<br />
It also has a few methods, like stringWidth, which return the widths of<br />
strings and characters. These methods are summarized in Table 4-4.<br />
Table 4—4 FontMetrics Class Methods<br />
Method<br />
public int getAscent<br />
public int getDescent<br />
Description<br />
Gets the font ascent.<br />
Gets the font descent.
Table 4-4 FontMetrics Class Methods (continued)<br />
Method<br />
public int getHeight<br />
public int getLeading<br />
public int getMaxAdvance<br />
public int getMaxAscent<br />
public int getMaxDescent<br />
public int[] getWidths<br />
public int bytesWidth<br />
(byte[] data, int off, int len)<br />
public int chars Width<br />
(char[] data, int off, int len)<br />
public int charWidth(char c)<br />
public int charWidth(int c)<br />
Description<br />
A Graphics Application 381<br />
Returns the font height (ascent + descent + leading).<br />
Returns the recommended interline gap.<br />
Gets the maximum width of all characters in the<br />
font.<br />
Returns the ascent of the tallest character in the<br />
font.<br />
Gets the maximum distance that any character<br />
stretches below the baseline.<br />
Returns the widths of the first 256 characters in the<br />
font (or fewer if the font has fewer characters).<br />
Returns the length of the string made up of the<br />
bytes in the entries of f through of f + len - 1<br />
of the array data. Since all <strong>Java</strong> strings are made up<br />
of 16-bit Unicode characters and bytes are 8 bits<br />
long, each byte is logically extended on the left with<br />
8 zero bits to create a Unicode character.<br />
This method is the same as bytesWidth except<br />
that it accepts 16-bit Unicode characters and so<br />
does not need to zero-pad its input array.<br />
Returns the width of the single character given as an<br />
argument.<br />
Same as the previous method. The least significant<br />
16 bits of the integer argument are taken as a 16-bit<br />
Unicode character.<br />
Now let's return to the problem of the text and the canvas. The x and y<br />
coordinates supplied to drawstring are those of the baseline at the left end<br />
of the string being rendered. In order to center the string horizontally, you<br />
need to calculate the width of the string, subtract this from the width of the<br />
canvas to get the amount of extra horizontal space, and distribute this equally<br />
on the left and right sides of the string. If the width of the canvas is cWidth,
382 Chapter 4 Graphics, Text Handling, and Printing<br />
the text is in a String variable called str, and you have a suitable FontMet -<br />
rics object in f m, then what will the string's starting x coordinate will be?<br />
(cWidth - fm.stringWidth(str))/2<br />
To center the string vertically, you need to decide what this actually<br />
means. It could mean placing the font baseline at the vertical midpoint of the<br />
canvas. If you choose this definition, then the y coordinate for drawstring<br />
is simply:<br />
cHeight/2<br />
assuming that cHeight holds the height of the canvas. If you adopt this definition,<br />
however, you will find that most of the text ends up above the center<br />
of the canvas, because comparatively few characters have descenders.<br />
Instead, you get a better result if you average the ascent and the descent values<br />
and place the midpoint of those two extremes in the center of the canvas.<br />
This is slightly complex, because you actually have to supply the coordinates<br />
of the font's baseline when calling drawstring.<br />
Imagine that the text is surrounded by a bounding box that extends above<br />
and below the baseline by the amount of the font ascent and descent, respectively.<br />
The height of this box is then (fm.getAscent () + fm.getDescent<br />
() ) . You want to center this box in the canvas, so half of it will be<br />
above the center of the canvas and half will be below. Therefore, the top of<br />
this box will be at y coordinate (cHeight/2) - (fm.getAscent () +<br />
f m. getDescent () ) /2. Since you need the y coordinate of the baseline, not<br />
the top, you need to add fm. getAscent () to the y coordinate of the top of<br />
the bounding box, giving the result:<br />
(cHeight + fm.getAscent() - fm.getDescent())/2<br />
Now let's put this into practice by implementing the canvas and text as a<br />
subclass of JPanel. The code is shown in Listing 4-19.<br />
Listing 4-19 Drawing centered text<br />
package <strong>JFC</strong>Book.Chapter4;<br />
import j avax.swing.*;<br />
import j ava.awt.*;<br />
import j ava.awt.event.*;<br />
public class TextCanvas extends JPanel {<br />
public TextCanvas(String text) {
Listing 4-19 Drawing centered text (continued)<br />
this.text = text;<br />
setBackground(UIManager.getColor("control" ) ) ;<br />
}<br />
public void paintComponent(Graphics g) {<br />
super.paintComponent(g);<br />
Dimension d = getSize();<br />
int cWidth = d.width;<br />
int cHeight = d.height;<br />
A Graphics Application 383<br />
g.setColor(getForeground());<br />
FontMetrics fm = g.getFontMetrics () ;<br />
g.drawstring(text, (cWidth - fm.stringWidth(text))/2,<br />
( (cHeight + fm.getAscent() - fm.getDescent())/2)) ;<br />
}<br />
// Test code<br />
public static void main(String[] args) {<br />
try {<br />
int fontNumber;<br />
Font font;<br />
JFrame f = new JFrame("Text Canvas Test");<br />
if (args.length != 2) {<br />
System.err.printIn(<br />
"Usage: TextCanvas ");<br />
System.exit(1);<br />
}<br />
TextCanvas c = new TextCanvas(args [0]);<br />
fontNumber = Integer.parselnt(args[1]);<br />
switch(fontNumber) {<br />
case 0:<br />
font = new Font("Serif", Font.BOLD, 12);<br />
break;<br />
case 1:<br />
font = new Font("Dialog", Font.PLAIN, 8);<br />
break;<br />
case 2 :<br />
font = new Font("SansSerif", Font.BOLD, 24);<br />
break;<br />
case 3:
384 Chapter 4 Graphics, Text Handling, and Printing<br />
Listing 4-19 Drawing centered text (continued)<br />
3");<br />
}<br />
}<br />
font = new Font("MonoSpaced", Font.PLAIN, 16);<br />
break;<br />
default:<br />
throw new NumberFormatException();<br />
}<br />
c.setFont(font);<br />
f.getContentPane().add(c);<br />
f .setSize(200, 150) ;<br />
f.addWindowListener(new WindowAdapter() {<br />
public void windowClosing(WindowEvent evt) {<br />
System.exit(0);<br />
}<br />
});<br />
f.setvisible(true);<br />
} catch (NumberFormatException e) {<br />
System.err.printIn("The font must be in the range 0 through<br />
}<br />
System.exit(1);<br />
protected String text; // The text string<br />
Most of this listing is actually just the test code in the main method—the<br />
real code is all in the paintComponent function and you should be able to<br />
see that it implements the scheme worked out above. Note that the background<br />
color is set to the look-and-feel default color for controls. To get the<br />
background painted in this color, you just need to call super . paintComponent<br />
from the component's paintComponent method. Painting the background<br />
is the only thing that JPanel does in this method; it also leaves the<br />
background color selected in the graphics context, so the foreground color is<br />
selected before drawing the string.<br />
This program requires two arguments—a quoted string and a font number<br />
in the range 0 to 3. You can see how these numbers correspond to actual<br />
fonts from the listing. Here is an example of how to run it:<br />
java <strong>JFC</strong>Book.Chapter4.TextCanvas "Hello, world" 0<br />
This produces a frame containing our control, with the words "116110,<br />
world" rendered in a 12-point, bold, serif font in the middle of it. Try resizing
A Graphics Application 385<br />
the frame to demonstrate that the text remains anchored to the center of it<br />
no matter what you do to it.<br />
What you have implemented here is a very simple custom component. You<br />
might find it instructive to tiy to improve it in various ways. For example, the<br />
paintComponent method always gets the FontMetrics object and recalculates<br />
the position of the text, a process that takes time. If you wanted to be<br />
clever, you could calculate the text position only when it needed to change—<br />
for example, once when you first paint the component, and then subsequently<br />
only when you change the font, text, or size of the component. For<br />
this, you will need to override the setPont, setSize, and setBounds<br />
methods and implement a set Text method to allow the user to change the<br />
text after the component has been constructed; for completeness, you should<br />
also implement a getText method.<br />
Font Metrics and Measurement Units<br />
In the last section, you saw how to get the metrics ol a font and how to use a<br />
FontMetrics object to work out how wide a string would be in the font that<br />
it represents. You'll notice, however, that we haven't yet told you in what<br />
units these metrics are expressed. When you call the get As cent method<br />
and it returns 33 (say), does this mean 33 pixels, or is it something else? In<br />
the last example, it may have appeared that we made the implicit assumption<br />
that the number returned is expressed in pixels because we use the Component<br />
getsize method to obtain the width and height of a component and<br />
then subtracted font metric values from these measurements to determine<br />
how to center a string. This only works, of course, if we ai"e working with<br />
quantities measured in the same units.<br />
In fact, it is inaccurate to say that the metrics provided by a FontMetrics<br />
object are in pixels and it also inaccurate to say that the values returned by<br />
theComponent getsize method are in pixels. These measurements are all<br />
expressed in what we will call "user space measurement units" or simply<br />
"user space units." In most circumstances, <strong>Java</strong> maps 72 user space units to<br />
an inch, so you can think of a user space unit as being about the same as what<br />
printers call a "point." Most monitors have a resolution of something like 72<br />
dots per inch, so as far as rendering on the screen is concerned, one user<br />
space unit is approximately the same as a dot (or pixel) on your screen and,<br />
because of this, we can usually get away with saying that the values in the<br />
Dimension structure returned by getsize or the values provided by a<br />
FontMetrics object are in "pixels" when, in fact, strictly speaking they are<br />
not.
386 Chapter 4 Graphics, Text Handling, and Printing<br />
When it comes to rendering text on higher-resolution devices such as<br />
printers, you may be dealing with something like 300 or 600 dots per inch<br />
instead of around 72 dots per inch for a screen. For such a printer, a dot or<br />
pixel would be l/300th or l/600th inch. However, user space units are always<br />
expressed in units of l/7<strong>2nd</strong> inch. Consequently, a user space unit corresponds<br />
to just over 8 pixels vertically and horizontally on a 600dpi printer.<br />
Nevertheless, on such a printer, the FontMetrics for a given font will<br />
return the same values as it would for the same font on a 72dpi screen. The<br />
mapping between user space units and the actual pixels on the device is carried<br />
out internally and is not something you need to be worried about, ft is<br />
worth bearing in mind the distinction between user space units and pixels,<br />
however. This is a topic that we'll return to in Volume 2 in connection with<br />
the <strong>Java</strong> 2D API.<br />
<strong>Core</strong> Note<br />
In <strong>Java</strong> 2 version 1.3, you can arrange to use higher resolution printing than<br />
the default 72dpi.This topic is covered later in this chapter.<br />
If you're curious about why the Toolkit getFontMetrics method is<br />
deprecated, the discussion above actually provides you with a clue to the<br />
answer to this. Since this method is given only a Font object as its argument,<br />
it cannot take into account any differences in the actual metrics of the font<br />
that might be caused by the device on which the font will actually be rendered<br />
or the way in which it will be rendered. What you get back is a roughand-ready<br />
answer which will be close enough to the truth for most purposes<br />
and the presence of a static method such as Toolkit .getFontMetrics<br />
gives the incorrect impression that accurate metrics can be obtained without<br />
any surrounding context. On the other hand, the Graphics getFontMetrics<br />
method has the Graphics context of the actual device on which the<br />
text will be rendered available to it. This makes it possible for more accurate<br />
metrics to be returned, which can be important for higher-resolution devices<br />
where user space units do not map to single or even integral numbers of dots<br />
on the output device.<br />
Incidentally, the fact that the height, ascent, descent, and other values<br />
available from FontMetrics are integers is a major issue for high-resolution<br />
devices, because it makes it difficult for you to calculate exact locations on<br />
such a device. For a 600dpi printer, for example, a vertical distance of one<br />
user space coordinate maps to 8.33333.... pixels. Of course, a real character<br />
on a printer is always an exact number of dots high, but FontMetrics can-
A Graphics Application 387<br />
not always capture these exact heights in terms of integral user space units<br />
because of rounding effects, which can result in significant placement errors<br />
as these small inaccuracies accumulate. In the <strong>Java</strong> 2D API, user-space measurements<br />
can be given as floating point numbers instead of integers, which<br />
makes it possible to map pretty much exactly to device measurements. Furthermore,<br />
<strong>Java</strong> 2D prefers the use of the LineMetrics and TextLayout<br />
classes over FontMetrics because these also deal in floating-point numbers<br />
instead of integers. If you have to work with JDK 1.1, however, you are<br />
obliged to continue to use FontMetrics.<br />
Working with Multiple Fonts<br />
So far, you've seen how to create a component that handles only one font. If<br />
you want to work with more than one font, you have to try much harder,<br />
because drawstring can only handle a single font each time it is called. To<br />
create a component that deals with font changes, you need to treat the string as<br />
a collection of smaller parts, each of which is in only a single font. Of course,<br />
this brings with it the issue of how to represent a change of font within a string.<br />
The <strong>Java</strong>2D API includes a class called AttributedString that solves this<br />
problem and there is also a variant of drawstring that lets you render an<br />
AttributedString just as simply as drawstring ordinary strings. This<br />
topic is covered in depth in Volume 2. If you have to use JDK 1.1, however, the<br />
only way to render multifont strings is to create your own component and a format<br />
of your own that specifies the font changes, or to use the JTextPane and<br />
JEditorPane components that well discuss in Chapter 9, "Text Components."<br />
Simulating Disabled Text<br />
As a further example of how simple it is to render text in <strong>Java</strong> and to produce<br />
useful effects with very little code, this section will show how to modify the<br />
TextCanvas class to create one that has an enabled and a disabled state, as<br />
many of the Swing components do. The difference between these two states<br />
is that when it is enabled, the label is shown in the normal foreground color,<br />
but when it is disabled it appears grayed out.<br />
To produce this effect, all that is necessaiy is to modify the paintComponent<br />
method. The first change that needs to be made is to check whether the<br />
component is enabled or not by calling the isEnabled method of its Component<br />
superclass. If this returns true, the text is drawn exactly as it was before.<br />
However, if it returns false, something slightly different needs to be done.
388 Chapter 4 Graphics, Text Handling, and Printing<br />
Grayed-out text is produced by superimposing two copies of the text, one in<br />
a color slightly brighter than that of the background (not the foreground) and<br />
one slightly darker, with one copy offset one pixel to the right of and below the<br />
other. This produces the impression of a groove carved in the surface of the<br />
control in the shape of the original text. The effect works best when the background<br />
is a grayish color, as it often is on the Windows platform.<br />
The modified paintComponent method, which incorporates some tidying<br />
up to avoid repeating the same calculations, and the modified setEnabled<br />
method are shown below. The important changes are highlighted in<br />
bold.<br />
You invoke this program in the same way as the other one, for example:<br />
<strong>Java</strong> <strong>JFC</strong>Book.Chapter4.DisabledText "Press" 1<br />
Once started, it loops until you close it, flipping itself between enabled and<br />
disabled state every five seconds.<br />
public void paintComponent(Graphics g) {<br />
super.paintComponent(g);<br />
Dimension d = getSizeO;<br />
int cWidth = d.width;<br />
int cHeight = d.height;<br />
boolean enabled = isEnabledO;<br />
FontMetrics fm = g.getFontMetrics();<br />
int xpos = (cWidth - fm.stringWidth(text))/2;<br />
int ypos = (cHeight + fm.getAscent() -<br />
fm.getDescent 0 ) /2;<br />
}<br />
if (enabled == true) {<br />
g.setColor(getForeground() ) ;<br />
g.drawstring(text, xpos, ypos);<br />
} else {<br />
g.setColor(getBackgroundO.brighter());<br />
g.drawstring(text, xpos + 1, ypos +1);<br />
g.setColor(getBackground().darker());<br />
g.drawString(text, xpos, ypos);<br />
} "<br />
Figure 4-14 shows a magnified view of the disabled text, which shows how<br />
it achieves the desired effect.<br />
Note carefully how colors for the text in its disabled state are generated:<br />
g.setColor(getBackground().brighter());<br />
g.drawString(text, xpos + 1, ypos + 1);<br />
g.setColor(getBackground().darker());
g.drawstring(text, xpos, ypos);<br />
Figure 4-14 Disabled text.<br />
A Graphics Application 389<br />
As mentioned earlier in this chapter in connection with creating custom<br />
borders, the brighter and darker methods of j ava . awt. Color are useful<br />
for generating new colors that are closely related to an existing color, without<br />
needing to worry about what that color is. These methods work by<br />
multiplying the red, green, and blue components of the color by the same<br />
constant value (greater than 1 for brighter and less than 1 for darker), so<br />
that their ratios are unchanged, to produce the effect of actually lightening or<br />
darkening it rather than changing it to a different color.<br />
Printing Graphics and Text<br />
Support for printing was first introduced into the <strong>Java</strong> platform as part of<br />
JDK 1.1. Before that, if you needed to print from a <strong>Java</strong> application, you had<br />
to write native code and directly access the printing system on whatever platform<br />
your application was running. Not only did this require extra effort, it<br />
also made the application platform-dependent. The introduction of a supported<br />
printing API in JDK 1.1 was, therefore, a welcome step forward but,<br />
unfortunately, the initial implementation was not very good and the API was<br />
very restricting. In the various maintenance releases of JDK 1.1 that have followed,<br />
many of the initial problems have been fixed, but the API remained<br />
very basic. The <strong>Java</strong> 2 platform introduced a completely new printing subsystem<br />
that offers much a better API for the application developer. The <strong>Java</strong><br />
2 printing feature is officially part of the <strong>Java</strong> 2D subsystem and it is supported<br />
alongside the existing JDK 1.1 printing API, which is retained for<br />
backward compatibility. The <strong>Java</strong> 2 printing API will be covered in Volume 2,<br />
together with the details of <strong>Java</strong> 2D itself. In this chapter, we cover the printing<br />
facilities provided by JDK 1.1.
390 Chapter 4 Graphics, Text Handling, and Printing<br />
Printing in <strong>Java</strong>, as supported by JDK 1.1, is a multistep process: You have<br />
to get access to the printer, prepare to print a page, draw what you want to<br />
print onto the page and then have the printer print what you have drawn.<br />
After repeating this operation for as many pages as necessary, you finally<br />
release the printer. In this section, you'll see how to use the printing API by<br />
looking at three simple examples.<br />
Printing Components and Containers<br />
The printing API operates at several levels. Although you always initiate<br />
printing in the same way, there are several things you can do when you have<br />
access to the printer. In this section, the printing support provided by the<br />
Component and Container classes will be used to produce a hardcopy of a<br />
single component or a complete application. Listing 4-20 shows the code for<br />
the first example.<br />
Listing 4-20 Printing <strong>Java</strong> components<br />
package <strong>JFC</strong>Book.Chapter4;<br />
import javax.swing.*;<br />
import java.awt.*;<br />
import <strong>Java</strong>.awt.event.*;<br />
import java.util.Properties;<br />
public class PrintingExamplel extends JFrame {<br />
public PrintingExamplel(String title,<br />
final Component comp) {<br />
super(title);<br />
JPanel panel = new JPanel() ;<br />
panel.setLayout(new BorderLayout() ) ;<br />
panel.setBorder(BorderFactory.createEtchedBorder());<br />
panel.add(comp, BorderLayout.CENTER);<br />
this.getContentPane().add(panel, BorderLayout.CENTER);<br />
panel = new JPanel();<br />
buttonl = new JButton("Print All...");<br />
buttonl.setMnemonic('A');<br />
panel.add(buttonl);<br />
button2 = new JButton("Print Label...");<br />
button2.setMnemonic('L');<br />
panel.add(button2);
Listing 4-20 Printing <strong>Java</strong> components (continued)<br />
A Graphics Application 391<br />
this.getContentPane().add(panel, BorderLayout.SOUTH);<br />
ActionListener 1 = new ActionListener() {<br />
public void actionPerformed(final ActionEvent evt) {<br />
Properties props = new Properties();<br />
setCursor(Cursor.getPredefinedCursor(<br />
Cursor.WAIT^CURSOR));<br />
PrintJob pj =<br />
Toolkit.getDefaultToolkit().getPrintJob(<br />
PrintingExamplel.this,<br />
"Print test 1", props);<br />
if (pj != null) {<br />
System.out.println("Returned properties: " +<br />
props);<br />
JButton b = (JButton)evt.getSource();<br />
Component c;<br />
if (b == buttonl) {<br />
c = PrintingExamplel.this.getContentPane();<br />
} else {<br />
c = comp;<br />
}<br />
}<br />
RepaintManager manager =<br />
RepaintManager.currentManager(c);<br />
manager.setDoubleBufferingEnabled(false);<br />
Graphics g = pj.getGraphics();<br />
// Print in the centre of the page<br />
Dimension od = c.getSize () ;// Object size<br />
Dimension pd = pj.getPageDimension();<br />
// Page size<br />
g.setClip(new Rectangle(O, 0,<br />
pd.width, pd.height));<br />
g.translate((pd.width - od.width)/2,<br />
(pd.height - od. height) /2 ),-<br />
// Print the required component<br />
c.print(g);<br />
g.dispose();// Prints here<br />
pj.endO;// Release printer<br />
manager.setDoubleBufferingEnabled(true);
392 Chapter 4 Graphics, Text Handling, and Printing<br />
Listing 4-20 Printing <strong>Java</strong> components (continued)<br />
}<br />
};<br />
setCursor(Cursor.getPredefinedCursor(<br />
Cursor.DEFAULT_CURSOR));<br />
buttonl.addActionListener(1);<br />
button2.addActionListener(1) ;<br />
}<br />
public static void main(String[] args) {<br />
Imagelcon icon = new Imagelcon(<br />
PrintingExamplel.class.getResource("images/Iem.jpg"));<br />
JFrame f = new PrintingExamplel("Printing Test 1",<br />
new JLabel("Label to be printed", JLabel.CENTER));<br />
f.setSize(300, 200);<br />
f.addWindowListener(new WindowAdapter() {<br />
public void windowClosing(WindowEvent evt) {<br />
System.exit(0);<br />
}<br />
});<br />
f.setvisible(true);<br />
}<br />
JButton buttonl;// The "Print All.." button<br />
JButton button2;// The "Print Image..." button<br />
}<br />
You can run this example using the command:<br />
<strong>Java</strong> <strong>JFC</strong>Book.Chapter4.PrintingExamplel<br />
The application frame contains a label on a panel surrounded by an<br />
etched border, below which are two buttons that allow you to request a<br />
hardcopy of either the entire content pane of the frame or just the label. If<br />
you press the button labeled "Print All," you'll get a hard copy representation<br />
of the label with its border and the two buttons, all on the gray background<br />
that you see on the screen. If you press the other button, the<br />
application just prints the label and, because the label itself is transparent,<br />
you'll only see the text—the gray background will not be drawn on the<br />
printer.
<strong>Core</strong> Alert<br />
What you actually see will depend on the version of <strong>Java</strong> you are using.<br />
Unfortunately, printing involves code that is not entirely bug free. At the<br />
A Graphics Application 393<br />
time of this writing, this example worked on the <strong>Java</strong> 2 platform with some<br />
operating system and printer combinations, but not with others. The same<br />
is true of the text printing example that you'll see later in this chapter. I got<br />
the following results on Windows 98 with an HP Deskjet 970Cxi printer.<br />
JDK 1.1.8 Code works as described above.<br />
<strong>Java</strong> 2 version 1.2.2 Code works as described above, but no text appears<br />
in the label or on the buttons. Hence, when you<br />
press the "Print Label" button, you actually get a<br />
blank page.<br />
<strong>Java</strong> 2 version 1.3 FCS No output is produced and the application hangs.<br />
<strong>Java</strong> 2 version 1.3.1 Code works as described above.<br />
The interesting code in this application is in the actionPerformed<br />
method of the inner class that implements the ActionLiistener attached<br />
to the two buttons.<br />
The first step is to get access to the printer using the getPrintJob<br />
method of Toolkit:<br />
Properties props = new Properties();<br />
setCursor(Cursor.getPredefinedCursor(<br />
Cursor.WAIT_CURSOR));<br />
PrintJob pj = Toolkit.getDefaultToolkit().getPrintJob(<br />
PrintingExamplel.this,<br />
"Print test 1",<br />
props);<br />
The getPrintJob method is defined as follows:<br />
public PrintJob getPrintJob(Frame frame, String title,<br />
Properties props);<br />
When this method is invoked, it posts a dialog that allows you to choose<br />
the printer that you want to use and to set printer-specific options. The dialog<br />
that you see and the options that you might be able to change depend on the
394 Chapter 4 Graphics, Text Handling, and Printing<br />
operating system that you are using. On Windows, you see the usual printing<br />
dialog that allows you to select a printer or direct the printed output to a file<br />
and, optionally, via a further dialog box that depends on your printer, set further<br />
properties such as the paper size and orientation. On Unix you see a dialog<br />
that allows you to select the printer or a file to print to and to choose the<br />
type of paper in use. In <strong>Java</strong>, to create a dialog box you must have a Frame<br />
that can act as its parent, so the get Print Job method requires a Frame<br />
argument. Usually, you will pass the application's JFrame object here. The<br />
second argument to getPrintJob is a string that becomes the title of the<br />
dialog box.<br />
Whichever platform you are using, the dialog box has buttons that allow you<br />
to proceed with or cancel the print operation. If you decide to proceed, get-<br />
Print Job returns a Print Job object that you can use to drive the printer; if<br />
you press the Cancel button, null is returned instead, so be careful to check<br />
for this when you implement printing support in your applications.<br />
The final argument to getPrintJob is a Properties object that allows<br />
you to pass configuration information to the printing dialog box. The content<br />
of this object is platform-dependent. On Windows, it is completely ignored<br />
and is unchanged when getPrintJob returns. On Unix, you can specify any<br />
of the properties shown in Table 4-5. When the dialog box is displayed, the<br />
Table 4-5 Printer Properties for UNIX<br />
Property Meaning<br />
awt. print. numCopies Number of copies to print<br />
awt .print .paperSize Type of paper to use (e.g., "A4")<br />
awt .print. destination "printer" or "file"<br />
awt. print. orientation "portrait" or "landscape"<br />
awt .print. f ileName Name of the file for the printed output, if<br />
awt. print. destination is "file"<br />
awt .print .printer Printer name if awt .print. destination is<br />
"printer"<br />
properties you supply are reflected in the options that are initially selected. If<br />
any of these options are subsequently changed by the user, the change is<br />
reflected in the Properties object when getPrintJob returns. The exam-
A Graphics Application 395<br />
pie code shown above prints the properties that are returned. If yovi're using<br />
Windows, you won't see anything interesting here and any settings in the<br />
printer dialog that the user might change will not be reflected in the Properties<br />
object.<br />
Once you have a Print Job object, you can use it to get a graphics context<br />
that represents a single page of printed output. The getGraphics method<br />
returns a Graphics objects that implements the <strong>Java</strong>. awt. PrintGraphics<br />
interface:<br />
Graphics g = pj.getGraphics ();<br />
The PrintGraphics interface has only a single method, which allows you<br />
to retrieve a reference to the Print Job from which it was obtained:<br />
public interface PrintGraphics {<br />
public PrintJob getPrintJob();<br />
}<br />
It is unlikely that you'll need to make much use of this method; the real<br />
value of the PrintGraphics interface is that it allows you to check whether<br />
a Graphics object that you are given is a graphics context for the printer or<br />
not by using code like this:<br />
Graphics g;<br />
if (g instanceof PrintGraphics) {<br />
// Code specific to printing<br />
}<br />
We'll see a case in which we can use this construction later.<br />
Using the Graphics object returned by the getGraphics method, you<br />
can use any drawing primitive to write text or draw graphics on the page, as<br />
we'll see shortly. There are also two convenience methods that can be used to<br />
print a component or a container:<br />
public void print(Graphics g);<br />
public void printAll(Graphics g);<br />
These methods were part of the JDK f.l API and, for AWT components,<br />
you need to be careful which of these methods you call. The API says that the<br />
print method prints a single component, while the printAll method<br />
prints a component and all of its child components as well. From this<br />
description, you might expect to use print for a single Component and<br />
printAll for a Container. Unfortunately, these descriptions no longer<br />
reflect the state of the software. For AWT components in JDK 1.1.8, the following<br />
seems to be the case:
396 Chapter 4 Graphics, Text Handling, and Printing<br />
• The print method doesn't work at all.<br />
• The printAll method works for both single Components and<br />
Containers.<br />
Therefore, if you intend to print a single AWT component or a set of AWT<br />
components (or, in fact, a mixture of Swing and AWT components, which<br />
should almost never be necessary), you should always use printAll.<br />
Swing components are a different issue, however. For these, you can use<br />
either print or printAll. The reason that these are technically equivalent<br />
is that all Swing components are derived from Container and some of<br />
them are compound components that have children that must be printed as<br />
well as the outer Component itself. The painting of child components is handled<br />
automatically by the Swing component's paint method, which is called<br />
to do the printing, so they will be printed whether you call print or print-<br />
All. In theory, calling print for a Swing component should be faster than<br />
calling printAll, because it ought to just call paint, but this is not the case<br />
in JDK I.I or <strong>Java</strong> 2 version 1.2.2.—both print and printAll call paint<br />
for the Swing component itself, which prints everything, and then call paint<br />
for each child component, which results in the child components being<br />
printed twice. This happens because the print method used by Swing components<br />
is implemented in the Container class and therefore does not take<br />
account of the fact that Swing component's paint their own children. In <strong>Java</strong><br />
2 version 1.3, JComponent has its own overridden versions of print and<br />
printAll that work differently making it more efficient to call print than<br />
printAll. Summing this up, code to print Swing components should always<br />
use the print method.<br />
Returning to the application code, the print method is called to print<br />
either the label or the entire content pane, depending on which button was<br />
pressed. Calling this method doesn't actually make anything appear on the<br />
printer until you finish printing a page of output. When a complete page has<br />
been rendered, the Graphics object's dispose method should be invoked<br />
and it is this that actually causes the page to be printed. To print several<br />
pages, you would repeat this process. The following code would print 20<br />
pages of output:<br />
PrintJob pj = Toolkit.getDefaultToolkit().getPrintJob(f,<br />
"Print 20 pages", props);<br />
if (pj != null) {<br />
for (int i = 0; i < 20; i++) {<br />
Graphics g = pg.getGraphics();<br />
// Render page using "g": not shown
A Graphics Application 397<br />
g.dispose(); // Print the page<br />
}<br />
pj.end(); // Release the printer<br />
}<br />
Finally, as just shown, when printing is complete you must call the end<br />
method ot your Print Job object to release the printer. If you forget to do<br />
this, you may find that you won't be able to use the printer any more, because<br />
it is still allocated to the last program that called getPrint Job.<br />
The Graphics object returned from getGraphics covers the entire<br />
page, so if you simply call print or printAll, the result will be printed at<br />
the top left-hand corner of the page. In our example, a more pleasing result is<br />
produced by centering the output both horizontally and vertically:<br />
// Print in the center of the page<br />
Dimension od = c.getSizeO ; // Object size<br />
Dimension pd = pj.getPageDimension();// Page size<br />
g.setClip(new Rectangle(0, 0,<br />
pd.width, pd.height));<br />
g.translate((pd.width - od.width)/2,<br />
(pd.height - od.height)/2);<br />
The getPageDimension method returns the size of the printed page, so<br />
you can use its return value to change the location in which the component<br />
or container will be drawn by moving the origin of the graphics context in<br />
such a way that the center of the object being printed is in the center of the<br />
page.<br />
<strong>Core</strong> Warning<br />
The code shown above explicitly sets the clipping rectangle of the printer<br />
Graphics object to cover the entire page area.This should not be<br />
necessary, but if it is not done, the printer Graphics has a null clipping<br />
rectangle, which means that the clipping area covers all of the paper.<br />
Unfortunately, there is code in the AWT Graphics class that fails if the<br />
clipping rectangle is null. If you take this line out of the example and run<br />
it on the <strong>Java</strong> 2 platform, you'll get a NullPointerException.<br />
PrintJob also has a getPageResolution method that theoretically<br />
returns the number of dots per inch that the printer can print:<br />
public Dimension getPageDimension();<br />
public int getPageResolution();
398 Chapter 4 Graphics, Text Handling, and Printing<br />
To see the values returned for your printer, type the following command:<br />
j ava <strong>JFC</strong>Book.Chapter4.PrinterSizes<br />
and select your printer and the required paper size and orientation from<br />
the printer dialog. Here's some typical output:<br />
Page is 612 dots across and 792 dots vertically<br />
Printer resolution is 72 dots per inch<br />
Approximate paper size is 8.5 inches by 11.0 inches<br />
These values look a little curious. You'll notice that this 3()()dpi printer is<br />
reported as having only 72 addressable dots per inch. In fact, with the current<br />
implementation, the value returned by getPageResolution is always<br />
72! The paper size chosen here was Letter, which is 8.50 inches by 11.0<br />
inches. Ordinarily, you would expect a 300dpi printer to be able to address<br />
2550 dots horizontally and 3300 dots vertically, but getPageResolution<br />
instead claims that there are only 612 horizontal and 792 vertical dots on the<br />
page. The reason for this disparity is, of course, that the printer is being<br />
reduced to 72dpi, so the number of dots available is correspondingly<br />
reduced:<br />
8.50 inches at 72dpi = 612 dots<br />
11 inches at 72 dpi = 792 dots<br />
As you can see, these agree with the values returned by getPageDimension.<br />
The last line of output is the result of dividing the returned page<br />
dimensions by the page resolution to give the actual paper size, essentially<br />
reversing the above calculation.<br />
Why has the 300dpi printer been converted to a virtual 72dpi device? The<br />
reasoning behind this is that it allows you to use the same code to render<br />
graphics for the screen and for the printer. As we said earlier in "Font Metrics<br />
and Measurement Units," your screen is treated as a 72dpi device and all<br />
drawing is done in terms of user space units that occupy l/7<strong>2nd</strong> of an inch on<br />
your display. If you draw a rectangle that occupies a space 1 inch wide and 2<br />
inches deep on your screen, you would have drawn 72 dots horizontally and<br />
144 dots vertically in order to achieve this, using code something like this:<br />
g . d r a w R e c t ( 0 , 0, 72, 144);<br />
where g is the Graphics context for the screen. Tf g were instead a<br />
Graphics for a printer and the true resolution of the printer were used during<br />
rendereing, then on a 300dpi printer this rectange would be only 1/4 inch<br />
wide and about 1/2 inch high! If you wanted to preserve the size of this shape<br />
for printing, you would have to change the above line to
g . d r a w R e c t ( 0 , 0, 300, 6 0 0 ) ;<br />
A Graphics Application 399<br />
This is inconvenient because it means you have to write separate code for<br />
rendering on the screen and on the printer. Even if you are prepared to do<br />
this in your own code, what about third-party code that is only prepared to<br />
handle the screen?<br />
To avoid this problem, the Graphics returned from the Print Job get-<br />
Graphics method incorporates a transformation that scales every graphics<br />
operation from a coordinate system in which each pixel represents l/7<strong>2nd</strong> of<br />
an inch to another that matches the actual resolution of the printer, so that 72<br />
dots passed to the Graphics drawRect method maps to 1 inch on the<br />
printer, whatever the printer's resolution is. As a result, you can treat the<br />
printer as just another screen for most purposes. We'll return to this topic<br />
later when we show you how to fit lines of text onto a printer page.<br />
<strong>Core</strong> Note<br />
In <strong>Java</strong> 2 version 1.3, you can choose to override this automatic scaling and<br />
drive the printer at its full resolution. In fact, <strong>Java</strong> 2 version 1.3 has several<br />
very useful extensions to the JDK I. I printing API, all of which will be<br />
covered in "Printing Enhancements Introduced in <strong>Java</strong> 2 Version l.3"later in<br />
this chapter.<br />
Before leaving this example, there is one more detail to examine. You'll<br />
notice that before we do the component printing, the following code is executed:<br />
RepaintManager manager =<br />
RepaintManager.currentManager(c);<br />
manager.setDoubleBufferingEnabled(false) ;<br />
We saw this code in the last chapter when we were describing the Debug-<br />
Graphics feature. As we said then, Swing components use a double-buffering<br />
technique when painting themselves to avoid screen flicker and the code<br />
shown above switches this off, forcing all drawing to be done directly to the<br />
device itself. Why is this necessary here?<br />
If you don't switch off double-buffering, when you print a component or a<br />
set of components, they will first render themselves in an off-screen buffer.<br />
The off-screen buffer is then drawn into the printer Graphics object and<br />
sent to the printer. As far as the printer is concerned, it is being asked to print<br />
a bitmap image of the result of drawing the component into a buffer. Unfortunately,<br />
this can be quite expensive. Consider what happens if your compo-
400 Chapter 4 Graphics, Text Handling, and Printing<br />
nent is a 100 by 100 rectangle filled with blue. In terms of graphics<br />
operations, you can draw this by just using an appropriate call to the Graphics<br />
f illRect method having selected the correct color into the Graphics<br />
context and, in all probability, your printer driver has a shorthand way of telling<br />
the printer to perform this same operation which means that the actual<br />
commands sent to the printer to draw this shape would occupy only a relatively<br />
small number of bytes, discounting any overhead that would be present<br />
to start and end the print job. However, when double buffering is enabled,<br />
what happens is this:<br />
• The f illRect call fills 10,000 pixels in an off-screen image<br />
buffer with the color blue. This process is not trivial—it takes a<br />
non-zero time and it needs memory for the buffer.<br />
• The 10,000 pixels are sent to the printer.<br />
Since the printer is now being asked to draw an image, it doesn't know that<br />
all ol the pixels are the same and will have to transfer all 10,000 dots individually.<br />
Perhaps some printer drivers might just be clever enough to recognize<br />
this, but the odds are that yours (or your customers) won't and, in any case,<br />
real components are much more complex than this simple case and would<br />
produce a more complex 10,000 pixel pattern that can't easily be compressed.<br />
Switching off the double-buffering for the duration of the print operation<br />
allows the software to choose the appropriate commands to send to the<br />
printer. As an example of the difference that this can make, running the<br />
example shown in Listing 4-20 on Windows 98 with double-buffering<br />
switched off and sending the output for the printer to a file instead of to the<br />
printer itself results in 360K byte output file, whereas leaving double-buffering<br />
switched on produces 1.8 megabytes of data.<br />
<strong>Core</strong> Note<br />
In <strong>Java</strong> 2 version 1.3, JComponent implements the print and<br />
print All methods in such a way that you don't need to turn off double-<br />
buffering. However, if your code needs to run on earlier releases, you should<br />
include the code to disable and enable double-buffering as shown in Listing<br />
4-20.
Printing the Contents of the<br />
GraphicsBorderedCanvas<br />
A Graphics Application 401<br />
Now that you know how to use the printer, the GraphicsDemo application<br />
that we have been developing in this chapter can be completed by implementing<br />
the code behind its Print button. As you've seen, once you've gone<br />
through the formalities of gaining access to the printer, you have a Graphics<br />
object that will reflect any operations you perform on the printer when you<br />
dispose it. The GraphicsBorderedCanvas will reproduce all of the<br />
shapes that you have drawn on it if you call its paintComponent method, so<br />
this seems to be the obvious way to implement the Print button. The code<br />
is shown in Listing 1-21.<br />
Listing 4-21 Printing Graphics objects<br />
// Print the canvas contents<br />
public void printCanvas() {<br />
if (drawingOps.isEmpty() == false) {<br />
// Locate the frame<br />
Container c = this.getTopLevelAncestor();<br />
if (c != null && c instanceof Frame) {<br />
c.setCursor(Cursor.getPredefinedCursor(<br />
Cursor.WAIT_CURSOR));<br />
Properties props = new Properties();<br />
PrintJob pj =<br />
Toolkit.getDefaultToolkit().getPrintJob((Frame)c,<br />
"Print Drawn Graphics",<br />
props);<br />
if (pj != null) {<br />
Graphics g = pj.getGraphics();<br />
Dimension pd = pj.getPageDimension();<br />
Dimension od = this.getSize();<br />
g.translate((pd.width - od.width)/2,<br />
(pd.height - od.height)/2);<br />
paintComponent(g);<br />
g.dispose();// Printing happens here<br />
pj.end();<br />
}<br />
c.setCursor(Cursor.getPredefinedCursor(<br />
Cursor.DEFAULT_CURSOR));<br />
}<br />
}<br />
}
402 Chapter 4 Graphics, Text Handling, and Printing<br />
The getPrint Job method requires a Frame object as its first argument.<br />
Here, we are developing code that is part of a component that can potentially<br />
be reused in many applications, so it is not desirable to rely on the application<br />
having a global variable that holds a reference to its top-level frame. Instead,<br />
it is better to use the getTopLevelAncestor method of JComponent,<br />
which returns the top-level container in which the component resides. This<br />
method works by looking at the component itself; if it is not a Window or an<br />
Applet, it looks at the components parent, and so on, until it reaches the top<br />
of the component hierarchy. In fact, since you can't add a Window to another<br />
container, a Window is always bound to be at the top of the hierarchy. You<br />
could, of course, point getTopLevelAncestor at a component that doesn't<br />
have a parent, or does not have an ancestor that is a window; if you do this, it<br />
just returns null.<br />
The object returned from getTopLevelAncestor is declared to be a<br />
Window or an Applet and not necessarily a Frame because the original component<br />
could also be contained within a Dialog; both Frame and Dialog<br />
are subclasses of Window. Since you must pass a Frame to getPrint Job, it<br />
follows that you can't use this shortcut to create a print dialog that is a child of<br />
another dialog, so the GraphicsBorderedCanvas would not be able to<br />
print its contents in the (unlikely) event that it were mounted in a dialog box.<br />
This is an acceptable restriction for this particular application.<br />
<strong>Core</strong> Note<br />
In JDK I.I, every Dialog (or JDialog) must be parented to a Frame<br />
(or JFrameJ, so this was not such an onerous restriction. The <strong>Java</strong> 2<br />
platform allows you to parent a dialog from any window, including another<br />
dialog. Dialogs are covered in detail in Chapter 8.<br />
Since Frame is a subclass of Window, you can cast the window reference<br />
returned by getTopLevelAncestor to a Frame reference provided that the<br />
object actually is a Frame. To be sure that this is so, you use the instanceof<br />
operator. You could also have just directly cast the returned object to Frame,<br />
provided you catch the exception that would be generated if you had been<br />
returned a Dialog or an Applet:<br />
Window w = this.getTopLevelAncestor ();<br />
if (w != null) {<br />
try {<br />
Properties props = new Properties!);<br />
PrintJob pj =
}<br />
A Graphics Application 403<br />
Toolkit.getDefaultToolkit().getPrintJob((Frame)w,<br />
"Print Drawn Graphics",<br />
props);<br />
if (pj != null) {<br />
// Code omitted<br />
}<br />
} catch (ClassCastException e) {<br />
}<br />
// Can't print from a Dialog<br />
As in the previous example, this code takes the trouble to center the output<br />
on the page by subtracting the canvas size from the apparent size of the<br />
printing area and dividing by two.<br />
Finally, the paintComponent method is called to render the complete<br />
canvas onto the printer. We arrange for the shapes on the canvas to be drawn<br />
on the printer instead of on the screen by passing the printer's Graphics<br />
object to paintComponent. As we said earlier, because the printer Graphics<br />
incorporates automatic scaling from the assumed 72 dpi of the screen to<br />
the printers actual resolution, the shapes drawn on the printer will appear to<br />
be approximately the same size as they are on the screen. The only difference<br />
between the canvas as shown on the screen and on the printer is the border.<br />
If you recall, the GraphicsBorderedCanvas includes a border provided by<br />
its superclass BorderedCanvas. The border won't be drawn on the printer,<br />
because it is rendered by the BorderedCanvas paintBorder method that<br />
is inherited from JComponent, not by paintComponent. Instead, a blank<br />
area where the border would have been drawn will be present, but you're<br />
unlikely to notice this empty space because the canvas is centered in the<br />
printed page anyway.<br />
One last point regarding this code—you have probably noticed that, unlike<br />
the first printing example, we did not bother to switch off double-buffering<br />
before printing the canvas' content. In fact, this is not necessary here because<br />
double-buffering is a feature provided by the JComponent paint method,<br />
which arranges for paintComponent, paintBorder, and paintChildren<br />
to draw into an off-screen buffer and then copies the buffer content to the<br />
screen. Since we are going in at a lower level and directly calling paintComponent,<br />
this code does not get invoked and the GraphicsBorderedCanvas<br />
drawing code interacts directly with the printer. As a general rule, you only<br />
need to switch double-buffering off if you are printing by using a JCompo -<br />
nent's print or paint methods.
404 Chapter 4 Graphics, Text Handling, and Printing<br />
Printing Text<br />
Printing text is almost as simple as printing graphics because text is also rendered<br />
using a Graphics method, but, unlike graphics, the text is not completely<br />
self-describing, because the width and height of a string depend on<br />
the font being used. This section illustrates how to deal with the text by<br />
showing a program that prints the content of a text file. Unfortunately, a large<br />
proportion of the code for this example deals with parsing the text file into<br />
words, a task that a real-word processing program probably wouldn't have to<br />
deal with because it would not be likely to store the document content in an<br />
ASCII file. Since the aim of this section is to concentrate on printing, the<br />
code that handles the reading and parsing of data from the file won't be discussed<br />
here. The code is shown in Listing A—22.<br />
Listing 4-22 Printing text<br />
package <strong>JFC</strong>Book.Chapter4;<br />
import javax.swing.*;<br />
import j ava.awt.*;<br />
import j ava.awt.event.*;<br />
import java.io.*;<br />
import java.util.*;<br />
public class PrintingExample2 {<br />
static void print() {<br />
// Print the file content<br />
text.setText("Printing file...");<br />
Properties props = new Properties ();<br />
PrintJob pj = Toolkit.getDefaultToolkit().getPrintJob(<br />
frame, "Print File", props);<br />
if (pj == null) {<br />
text.setText("Printing canceled");<br />
return;<br />
}<br />
int printerResolution = pj.getPageResolution();<br />
int topMargin = printerResolution;// 1 inch<br />
int leftMargin = printerResolution/2;// 0.5 inches<br />
Dimension pageSize = new Dimension(
Listing 4-22 Printing text (continued)<br />
pj.getPageDimension());<br />
pageSize.width -= 2 * leftMargin;<br />
pageSize.height -= 2 * topMargin;<br />
// Use try/finally to release PrintJob even if<br />
// we get an exception<br />
try {<br />
String data;<br />
A Graphics Application 405<br />
// Set margin and clip<br />
Graphics g = pj.getGraphics();<br />
g.translate(leftMargin, topMargin);// Skip margins<br />
g.clipRect(0, 0, pageSize.width, pageSize.height);<br />
g. setFont(font) ;<br />
// Get font metrics from the printer graphics<br />
fm = g.getFontMetrics();<br />
fontHeight = fm.getHeight();<br />
fontAscent = fm.getAscent();<br />
int line = fontAscent; // Pixel line on page<br />
int column =0; // Pixel column on page<br />
int raaxLine = pageSize.height - fontHeight;<br />
int tabGap = 8 * fm.stringWidth(" ");<br />
boolean isTab; // True when we find a Tab<br />
Buffered<strong>Read</strong>er r = new Buffered<strong>Read</strong>er(<br />
new File<strong>Read</strong>er(file));<br />
text.setText("Printing started");<br />
while((data = r.readLine()) != null) {<br />
if (data.equals("")) {<br />
data = " ";<br />
}<br />
StringTokenizer st = new StringTokenizer(<br />
data, " \t", true);<br />
while (st.hasMoreElements() == true) {<br />
String token = (String)st.nextElement();<br />
isTab = token.equals("\t");<br />
int stringWidth;<br />
if (isTab == true) {<br />
int nextCol = ((column + tabGap)/tabGap) *<br />
tabGap;
406 Chapter 4 Graphics, Text Handling, and Printing<br />
Listing 4-22 Printing text (continued)<br />
}<br />
stringWidth = nextCol - column;<br />
} else {<br />
stringWidth = fm.stringWidth(token);<br />
}<br />
if (column + stringWidth > pageSize.width) {<br />
line += fontHeight;<br />
column = 0;<br />
if (isTab == true) {<br />
stringWidth = tabGap;<br />
}<br />
if (line > raaxLine) {<br />
g.dispose(); // Flush page<br />
g = pj.getGraphics();// Access to printer<br />
g.translate(leftMargin, topMargin);<br />
// Skip margins<br />
g.clipRect(0, 0, pageSize.width,<br />
pageSize.height);<br />
g.setFont(font);<br />
line = fontAscent;<br />
column = 0;<br />
}<br />
}<br />
if (isTab == false) {<br />
g.drawstring(token, column, line);<br />
} '<br />
column += stringWidth;<br />
}<br />
// End of line: go to next line<br />
column = pageSize.width;<br />
}<br />
g.dispose();// Print the last page<br />
} catch (Exception e) {<br />
System.out.println("Exception while reading file data: "<br />
+ e);<br />
} finally {<br />
// Always terminate the print job<br />
pj.end();<br />
text.setText("Printing completed");<br />
}
Listing 4-22 Printing text (continued)<br />
J<br />
A Graphics Application 407<br />
public static void main(String[] args) {<br />
if (args.length != 1) {<br />
System.out.println("Please supply one file name");<br />
System.exit(1);<br />
}<br />
file = new File(args [0]);<br />
if (file.can<strong>Read</strong>() == false) {<br />
System.out.println("Cannot read " + args [0]) ;<br />
System.exit(1);<br />
}<br />
font = new Font("serif", Font.PLAIN, 12);<br />
text.setEditable(false);<br />
frame.getContentPane().add(text, "Center");<br />
text.setText("Press \"Print\" to print file \"" +<br />
args[0] + "\"");<br />
frame.getContentPane().add(button, "East");<br />
button.addActionListener(new ActionListener() {<br />
public void actionPerformed(ActionEvent evt) {<br />
print();<br />
}<br />
});<br />
frame.pack();<br />
frame.addWindowListener(new WindowAdapter() {<br />
public void windowClosing(WindowEvent evt) {<br />
System.exit (0) ;<br />
}<br />
});<br />
frame.setvisible(true);<br />
}<br />
static JFrame frame = new JFrame("Printing Example 2");<br />
static JTextField text = new JTextField(40);<br />
static JButton button = new JButton("Print...");<br />
static File file;<br />
static Font font;<br />
static FontMetrics fm;<br />
static int fontHeight;<br />
static int fontAscent;
408 Chapter 4 Graphics, Text Handling, and Printing<br />
The main method deals with creating the simple user interface for this<br />
program, which just allows the user to start printing by pressing a button; the<br />
name of the file to be printed is supplied on the command line, for example:<br />
<strong>Java</strong> <strong>JFC</strong>Book.Chapter4.PrintingExample2 myfile.txt<br />
For the string myf ile . txt, substitute the absolute path name of any file<br />
vou w/ould<br />
like to have printed—for example:<br />
<strong>Java</strong> <strong>JFC</strong>Book.Chapter4.PrintingExample2 /etc/passwd<br />
java <strong>JFC</strong>Book.Chapter4.PrintingExample2 c:\autoexec.bat<br />
<strong>Core</strong> Alert<br />
As with Print ingExamplel, this code does not work with some printer<br />
and operating system combinations with versions of the <strong>Java</strong> 2 platform<br />
prior to version 1.3.1.<br />
The printing work is carried out in the print method. Apart from the<br />
mechanics of reading the file, the issues to be dealt with in this method are:<br />
• Leaving suitable side and top/bottom margins around the text.<br />
• Constructing each line of output and wrapping at the end of<br />
each line.<br />
• Detecting when the end of a page is reached.<br />
Here, as in the previous examples, the first thing to do is to get a Print -<br />
Job object for the printer and return without doing anything if the user cancels<br />
the print operation. Having acquired a PrintJob, you can use its<br />
getPageDimension method to get the effective size of the page.<br />
When you print, you will use a Graphics object that corresponds to a single<br />
page of output. This graphics context has its origin at the top left of the<br />
page and is not clipped (unlike a graphics context for a component, which is<br />
clipped to the component's boundary). However, most printers can't actually<br />
print over the entire area of the page, so you must leave a margin of blank<br />
area around the edge of the paper that you don't attempt to print on. In order<br />
to create this margin, you need to move the origin of the Graphics object to<br />
the top left of the area you want to print in and set a clip that exposes only<br />
that area. If the code that constructs each line of output is implemented correctly,<br />
it shouldn't even attempt to print into the margins, so setting a clip
A Graphics Application 409<br />
should not actually be necessary, but we do it anyway to illustrate how it<br />
would be done. If you were implementing a real word processor, you would<br />
be more likely to need to set the clip because there might be embedded<br />
objects (such as graphics) in the document and if any of these were too large<br />
for the page or margin size selected, it might not be possible to ensure that<br />
the graphic did not draw onto the margin by any other means.<br />
Since the margin and page size are both constant, you can compute the<br />
appropriate position for the origin and the size of the clipping rectangle only<br />
once and apply them at the start of every page. In this case, suppose you want<br />
to leave a 0.5 inch margin on each side and a 1 inch margin at the top and the<br />
bottom. As we said earlier in this chapter, the page resolution returned by the<br />
getPageResolution method is not the actual resolution of the printer, but<br />
you can still use it to compute how many user space units the margin will<br />
occupy because these units will be mapped to device units by the printer's<br />
Graphics object. Therefore, calculating the margin size and the bounds of<br />
the clip is just a matter of multiplying the printer's apparent resolution (given<br />
in dots per inch) by the number of inches of space that you want, like this:<br />
PrintJob pj =Toolkit.getDefaultToolkit().getPrintJob<br />
(frame, Print File", props);<br />
if (pj == null) {<br />
text.setText("Printing canceled");<br />
return;<br />
}<br />
int printerResolution =<br />
pj.getPageResolution();// Dots per inch<br />
int topMargin = printerResolution;// 1 inch<br />
int leftMargin = printerResolution/2;// 0.5 inches<br />
Dimension pageSize = new Dimension(pj.getPageDimension());<br />
pageSize.width -= 2 * leftMargin;<br />
pageSize.height -= 2 * topMargin;<br />
The value returned from getPageResolution is the apparent number of<br />
dots per inch, so to leave a one-inch gap, you need to move that many dots in<br />
the required direction, which is the value to which the variable topMargin is<br />
set. Similarly, leftMargin is set to half the printer's apparent resolution, to<br />
give a 0.5 inch horizontal margin. The page size is obtained using getPage-<br />
Dimension and the margins are applied by subtracting twice the top margin<br />
from the height and twice the left margin from the width.
410 Chapter 4 Graphics, Text Handling, and Printing<br />
<strong>Core</strong> Note<br />
One of the more useful extensions available from <strong>Java</strong> 2 version 1.3<br />
onward is the ability to let the printing subsystem work out how much<br />
space to leave for the page margin, as you'll see in the next section.<br />
Having acquired a Print Job, it is essential to release it when printing is<br />
completed, so the printing is enclosed in a try/catch/finally block that<br />
invokes the end method in the finally clause:<br />
try {<br />
// Printing code not shown<br />
} catch (Exception e) {<br />
System.out.println("Exception while reading file data: "<br />
+ e);<br />
} finally {<br />
// Always terminate the print job<br />
pj.end();<br />
text.setText("Printing completed");<br />
}<br />
Since the data to be printed is being read from a file, we are exposed to<br />
getting an IOException and this construction ensures that the printer is<br />
released no matter how the printing code terminates.<br />
Printing the file content is a matter of constructing each output line and<br />
writing it to the Graphics object. The number of words that can be placed<br />
onto a line depends on the font in use and the size of each word as measured<br />
in that font. In the main method of this example, a 12-point, plain Serif font<br />
is selected. In order to determine how much can be placed on each line, you<br />
need a FontMetrics object for this font. You could use the Toolkit get-<br />
FontMetrics method to get the FontMetrics but, as explained earlier in<br />
this chapter, this method is deprecated and it also returns metrics that do not<br />
necessarily exactly match those that apply when drawing text on the printer.<br />
Instead, the font metrics are obtained from the Graphics object for the<br />
printer that is itself obtained from the Print Job.<br />
The main loop of this code processes a single line from the file. Having<br />
read a line, the j ava. util. stringTokenizer class is used to break it into<br />
words, separated by spaces or tabs. Since it is necessary to get both complete<br />
words and all of the spaces and tabs that separate them, the StringTokenizer<br />
is configured to delimit the words and the delimiters by passing true<br />
as the third argument. The inner loop then processes each token as it is<br />
returned by StringTokenizer. For each word, its size must be computed
A Graphics Application 411<br />
by using the stringWidth method of FontMetrics, then it is necessary to<br />
work out whether it fits on the current line. If it doesn't, it is necessary to<br />
move to the next line and, if the current list is the last one that will fit on the<br />
page, a new page must be started.<br />
The current horizontal and vertical position are tracked using the variables<br />
column and line, respectively; the variable maxLine is initialized to the<br />
height of the usable area of the page (excluding the margins) less the height<br />
of the font. The fact that the end of the page has been reached can be<br />
detected by comparing line to maxLine. Similarly, the end of the current<br />
line can be detected as follows:<br />
column + stringWidth > pageSize.width<br />
Here, stringWidth is the width of the token in the current font, unless<br />
the token is a tab character. In the case of a tab, the column position has to be<br />
advanced to the next tab stop. In a real-word processing application, the positions<br />
of tab stops would be configurable; for simplicity, in this example, tab<br />
stops are defined to occur on eight-character boundaries, so the distance to<br />
the next tab stop can be computed as follows:<br />
int nextCol = ((column + tabGap)/tabGap) * tabGap;<br />
stringWidth = nextCol - column;<br />
The variable tabGap is the number of pixels between tab stops; it is set to<br />
eight times the size of a space character:<br />
tabGap = 8 * fm.stringWidth(" ");<br />
To write some text onto the page, we use the printers Graphics object<br />
and call its drawstring method. In order to work out the size of the text, we<br />
get a Graphics object before entering the main printing loop and continue<br />
to use it until the page is full. The Graphics object is prepared by moving its<br />
origin and setting the clip to exclude the margins and then, as each word is<br />
processed , it is rendered using the drawstring method, using the line<br />
and column variables to specify the position, and then the current position is<br />
moved past the word just printed by adding its size to column. Note that tab<br />
characters are not actually rendered as spaces- all that happens is that column<br />
is increased by the value of stringWidth, which was previously set to<br />
the distance to the next tab stop.<br />
As each line is filled, the line variable is incremented by the font height<br />
and, if its value exceeds the value in the maxLine variable, the page must be<br />
full, so the Graphics dispose method is called to flush the page content to<br />
the printer, as shown below.
412 Chapter 4 Graphics, Text Handling, and Printing<br />
if (column + stringWidth > pageSize.width) {<br />
line += fontHeight;<br />
column = 0;<br />
if (isTab == true) {<br />
stringWidth = tabGap;<br />
}<br />
if (line > maxLine) {<br />
g.dispose (); // Flush page<br />
g = pj.getGraphics(); / Access to printer<br />
g.translate(leftMargin, topMargin);// Skip margins<br />
g.clipRect(0, 0, pageSize.width, pageSize.height) ;<br />
g.setFont(font);<br />
line = fontAscent;<br />
column = 0;<br />
}<br />
}<br />
if (isTab == false) {<br />
g.drawstring(token, column, line);<br />
}<br />
column += stringWidth<br />
Having printed the page and disposed the Graphics, a new Graphics<br />
object is obtained for the next page. As with the original Graphics, its origin<br />
and the clip are set to exclude the margins. The line and column variables<br />
are also reset so that the current position is at the top and left of the<br />
new page. Notice that, if the previous line ended because of a tab character,<br />
the new line is indented by the size of a tab stop by setting stringwidth<br />
to tabGap.<br />
When the entire input file has been processed, the last page is printed by<br />
invoking dispose on the Graphics object.<br />
<strong>Core</strong> Note<br />
Almost all of this code is concerned with the mechanical process of working<br />
out how much text fits on an input line. If you are using JDK I.I, you have<br />
to do all of this by hand, as shown here.The <strong>Java</strong> 2 platform, however,<br />
provides a class called LineBreakMeasurer that you can use to<br />
automate this process and so reduce the amount of code that you need to<br />
write. LineBreakMeasurer is covered as part of the discussion of <strong>Java</strong><br />
2D text processing in Volume 2 of this book.
A Graphics Application 413<br />
The code shown here assumes that the printer actually prints the pages in<br />
the order in which you generate them. This is not always the case, however.<br />
You can use the lastPageFirst method of Print Job to get the printing<br />
order; as its name suggests, it returns true if pages appear in reverse order.<br />
If the printer is going to reverse the order of your pages, you might want to<br />
compensate by generating them last page first.<br />
Printing Enhancements Introduced in <strong>Java</strong> 2<br />
Version 1.3<br />
As noted earlier, this chapter is concerned only with the original JDK 1.1style<br />
printing API and does not cover the completely new printing framework<br />
that was introduced for the <strong>Java</strong> 2 platform as part of the <strong>Java</strong> 2D subsystem,<br />
which is described in detail in Volume 2. However, <strong>Java</strong> 2 version 1.3 introduced<br />
a significant improvement to the JDK 1.1 printing API that you can<br />
use to make your applications and applets more user friendly without having<br />
to incur the expense of migrating your code immediately to the <strong>Java</strong> 2 printing<br />
subsystem. In this section, we'll look at this new feature and show how<br />
you can use it to make your printing code behave in a way that will be more<br />
familiar to users of native applications such as Microsoft Word.<br />
Introduction to the PageAttributes<br />
and JobAttributes <strong>Classes</strong><br />
The simplest way to explain the new facilities that are available with [ava 2<br />
version 1.3 is to show them in action. To do this, we'll make a simple change<br />
to the text printing example that you saw in Listing 4-22 and demonstrate the<br />
effect that it has. In order to introduce the new feature, we only need to<br />
modify a few lines of code, as follows:<br />
// Create default page and job attributes<br />
static PageAttributes page = new PageAttributes();<br />
static JobAttributes job = new JobAttributes();<br />
static void print() {<br />
// Print the file content<br />
text.setText("Printing file ...");<br />
// Use the page and job attributes to<br />
// profile the print job...<br />
PrintJob pj = Toolkit.getDefaultToolkit().getPrintJob(
414 Chapter 4 Graphics, Text Handling, and Printing<br />
frame, "Print File", job, page);<br />
If you refer back to the top of listing 4-22, you'll see that the change that<br />
has been made amounts to the following:<br />
• We no longer create a Properties object to pass to<br />
getPrintJob.<br />
• In place of the Properties object, we create static<br />
PageAttributes and JobAttributes objects and pass them<br />
to the getPrint Job method instead.<br />
The code shown above uses a new overloaded form of the Toolkit get-<br />
Print Job method that has the following definition:<br />
public PrintJob getPrintJob(Frame frame,<br />
String jobTitle, JobAttributes jobAttrs,<br />
PageAttributes pageAttrs);<br />
As you can see, the original Properties argument is replaced by two<br />
arguments of type JobAttributes and PageAttributes. Like the original<br />
Properties argument, these objects are used to pass in attributes that are<br />
to be taken as defaults to be offered to the user in a printer dialog and return<br />
the values that the user chooses. Aside from the obvious fact that the new<br />
API uses different objects, the significant differences are as follows:<br />
1. The PageAttributes and JobAttributes objects have<br />
named properties for each attribute that can be set to tailor the<br />
printing operation and each attribute has a type-safe setter and<br />
getter method to manipulate it, whereas the Properties<br />
object relied on the use of the getProperty and setProperty<br />
methods, which are not type-safe and use text-valued keys<br />
that you have to remember each time you write the code to create<br />
a print job.<br />
2. The JDK 1.1 and <strong>Java</strong> 2 version 1.2.2 Properties-based<br />
implementations were not complete, in the sense that the<br />
extent to which they honored the properties that were set in the<br />
call to getPrint Job depended on the host platform and, furthermore,<br />
there were many printing attributes that could not be<br />
set or retrieved at all. By contrast, <strong>Java</strong> 2 version 1.3 allows you<br />
almost complete control over the content of the print dialog
A Graphics Application 415<br />
offered to the user and lets you retrieve almost all of the settings<br />
that the user selected. This facility works on all platforms.<br />
We'll look more closely at the details of the JobAttributes and Page-<br />
Attributes objects and exactly what printing attributes they manage later<br />
in this section. Before doing so, let's look at the difference that the minor<br />
code change shown above makes. To try this code out, type the command<br />
<strong>Java</strong> <strong>JFC</strong>Book.Chapter4.jdkl3.PrintingExample3 filename<br />
where, as before, filename is the path name of a text file to be printed. As<br />
with PrintingExample2, this example displays a window with a button that<br />
allows you to initiate printing. If you press this button, your system s usual<br />
printing dialog will appear. You might like to compare this dialog with the<br />
result that you get by running PrintExample2 with JDK 1.1 or <strong>Java</strong> 2 version<br />
1.2.2. The print dialogs produced by running these two examples on my<br />
system are shown in Figure 4-15 and Figure 4-16.<br />
Figure 4-15 The Printer Dialog when using the original getPrintlob method with <strong>Java</strong> 2<br />
Version 1.2.2.<br />
As you can see, in <strong>Java</strong> 2 version 1.2.2, the radio buttons and controls<br />
allowing to choose to print either a page range or a text selection were grayed<br />
out. However, these buttons are both enabled in <strong>Java</strong> 2 version 1.3 and the<br />
text boxes that allow you type the pages that you want to print are also active.
416 Chapter 4 Graphics, Text Handling, and Printing<br />
Figure 4-16 The Printer Dialog created by the <strong>Java</strong> 2 Version 1.3 getPrintJob method.<br />
In fact, yoTi don't need to use PageAttributes and JobAttributes to<br />
achieve this effect—these fields are always enabled in <strong>Java</strong> 2 version 1.3.<br />
However, you do need to use PageAttributes and JobAttributes if you<br />
want to be able to get hold of the user's selections for these fields.<br />
Unfortunately, filling in these fields has no effect on its own. For example,<br />
you could now choose to print a single page of your text file by, for example,<br />
specifying page 2 as both the start and end of the range. If you have supplied<br />
a large enough text file, you might hope that only page 2 would be printed.<br />
However, you'll find that this example still prints the whole file, because it<br />
hasn't yet been modified to take account of the selected page range—we'll<br />
show you how to do that in "A More Advanced Printing Example" later in<br />
this chapter.<br />
Once you've printed one copy of the file, if you press the "Print" button<br />
again, the printer dialog will reappear and you'll see another important difference.<br />
In <strong>Java</strong> 2 version 1.2.2, the print dialog was reinitialized each time<br />
you called get Print Job, so user settings were not carried forward from one<br />
print request to the next which meant, for example, that it would be necessary<br />
to continually reselect landscape mode to print a series of wide documents.<br />
However, if you use PrintingExample3, you'll see that the settings<br />
you used for the first print job are preserved when the printer dialog is displayed<br />
for a second time, which is much more convenient for the user. This
A Graphics Application 417<br />
happens because the dialog is initialized from the PageAttributes and<br />
JobAttributes objects and the changes that are made in the dialog are<br />
then written back to these objects when the getPrint Job call completes.<br />
Since PrintingExample3 uses the same PageAttributes and JobAttributes<br />
objects each time it calls getPrintJob, the settings saved after<br />
each getPrint Job call are used to initialise the dialog at the start of the next<br />
print job.<br />
It should be obvious by now that using the new version of getPrint Job<br />
gives you the possibility of offering the user a much more robust and friendly<br />
user interface. Using PageAttributes and JobAttributes allows you to<br />
preserve the user's print selections from one print job to the next, but it isn't<br />
a complete solution on its own, because it is still up to you to write the code<br />
that provides some of the prnting options that the user can select. In the next<br />
two sections, we'll look in more detail at the JobAttributes and PageAttributes<br />
classes, then we'll move on to show you how to act on the most<br />
common user selections from the print dialog.<br />
The PageAttributes Properties<br />
Like JobAttributes, PageAttributes is a class derived directly from<br />
Object that is simply a repository for related values that are passed into the<br />
printing subsystem using the getPrint Job method. Each attribute has an<br />
associated pair of methods that allow its value to be set or retrieved. Other<br />
than performing checks to ensure that the values supplied are valid, this class<br />
has no real behavior of its own. The values stored in a PageAttributes<br />
object relate to the way in which a page should be printed or describe the<br />
shape of the paper being used. Theoretically, in a more complete printing<br />
API, it would be meaningful to vary some of these attributes from page to<br />
page. As an example of this, one of the attributes that PageAttributes<br />
stores is the paper size. In most cases, all of the pages of a print job would use<br />
the same type of paper. However, storing this attribute in a page-related<br />
object makes it possible to change paper size when necessary. Unfortunately,<br />
this is not possible with the JDK 1.1-derived printing support provided by<br />
<strong>Java</strong> 2 version 1.3.<br />
While some of the PageAttributes properties are represented using<br />
primitive types, where possible the get and set methods have been made<br />
type-safe by requiring to use constant-valued arguments that are instances of<br />
inner classes of PageAttributes. There are five such inner classes, all of<br />
which have private constructors, so you can only use the specific constant values<br />
for these attributes that are declared as static members of their respec-
418 Chapter 4 Graphics, Text Handling, and Printing<br />
tive classes. Table 4-6 lists the five inner classes and gives a short description<br />
of what they represent.<br />
Table 4-6 Inner <strong>Classes</strong> of PageAttributes<br />
Name Use<br />
ColorType Specifies color or monochrome printing, using<br />
the two distinguished values PageAttributes<br />
. ColorType . COLOR and Page-<br />
Attributes.ColorType.MONOCHROME.<br />
MediaType Defines the type of paper to be used. The<br />
PageAttributes . MediaType class defines<br />
a large number of constant values that correspond<br />
to standard paper sizes. Typical values are<br />
PageAttributes.MediaType. A4and<br />
PageAttributes.MediaType.NA_LETTER.<br />
OrientationRequestedType Defines constant values for portait and landscape<br />
printing (PageAttributes . OrientationRequestedType<br />
.PORTRAIT and<br />
PageAttributes.OrientationRequestedType<br />
. LANDSCAPE).<br />
OriginType<br />
PrintingQualityType<br />
Specifies the location that the point (0, 0) in the<br />
Graphics object corresponds to, either Page-<br />
Attributes.OriginType.PHYSICAL or<br />
PageAttributes.OriginType.LOGI-<br />
CAL. Refer to the description of the Origin-<br />
Type property of PageAttributes for<br />
further details.<br />
Specifies the print quality required—one of<br />
PageAttributes.PrintingQuality.DRAFT,PageAttributes.PrintingQuality.NORMAL,<br />
or<br />
PageAttributes.PrintingQuality<br />
.BEST.<br />
As described earlier, you would normally use a PageAttributes object<br />
as follows:
A Graphics Application 419<br />
• Construct a PageAttributes object, possibly setting initial<br />
default values.<br />
• Pass the PageAttributes object to the getPrint Job<br />
method, which uses it to initialize the printer dialog that will be<br />
seen by the user (if one is displayed) and will update it with<br />
values selected by the user.<br />
• Extract the (possibly modified) attributes and use them when<br />
generating the printed output.<br />
The PageAttributes class has six properties, all of which may be set<br />
either at construction time or using one of the mutator methods. Each property<br />
also has a method that allows you to obtain its current value and some<br />
also provide a method that let you reset it to its default value. For example,<br />
the media property has three associated methods:<br />
public PageAttributes.MediaType getMediaO;<br />
public void setMedia(PageAttributes.MediaType type);<br />
public void setMediaToDefault () ;<br />
In this case, as with all of the PageAttributes properties (and the<br />
JobAttributes properties), the use of the constant values defined by the<br />
MediaType inner class makes it easy to understand what the code is doing<br />
when setting or checking the value of a property and promotes type safety.<br />
However, some properties also have a second mutator method that accepts a<br />
primitive argument. As an example of this, there are two methods that can be<br />
used to set the page orientation:<br />
public void setOrientationRequested(<br />
PageAttributes.OrientationRequestedType orientation);<br />
public void setOrientationRequested(int orientation);<br />
The second of these methods use integer values that are interpreted to<br />
mean either portrait or landscape. Since using this method would reduce<br />
readability and introduce the possibility of error through the use of incorrect<br />
values, it is recommended that you use only the type-safe mutator variants.<br />
The following sections describe the constructors provided by the PageAttributes<br />
class and its properties in more detail.<br />
Constructors<br />
The PageAttributes class has three constructors:<br />
public PageAttributes()<br />
public PageAttributes(PageAttributes pageAttributes)<br />
public PageAttributes(PageAttributes.ColorType color,
420 Chapter 4 Graphics, Text Handling, and Printing<br />
PageAttributes.MediaType media,<br />
PageAttributes.OrientationRequestedType orientation,<br />
PageAttributes.OriginType origin,<br />
PageAttributes.PrintQualityType printQuality,<br />
int[] printerResolution);<br />
The first constructor creates a PageAttributes object in which the<br />
properties all have default values. Note that these values are all hardwired<br />
constants and do not in any way depend on the capabilities of the users<br />
printer, since these capabilities will not be known until the getPrintJob<br />
method is called.<br />
The second constructor creates a copy of an existing PageAttributes<br />
object and might be used to initialize a printer dialog using the properties of<br />
a PageAttributes object that was created earlier, perhaps as the result of<br />
offering the user a "Printer Setup" dialog. This technique allows the user to<br />
tailor individual settings for each print operation while retaining the same<br />
default settings for those occasions when they are appropriate.<br />
The third constructor allows each property to be assigned an explicit value.<br />
This constructor will probably be used only rarely.<br />
The Color Property<br />
This property determines whether the printer will render output in color or<br />
monochrome. It is set using the setColor method, for which the argument<br />
should be PageAttributes.ColorType.COLOR or PageAttributes<br />
. ColorType .MONOCHROME. More usually, however, the user will<br />
make this choice when the printer dialog is displayed. This attribute only<br />
affects the printer itself—you don't (of course) need to change your code<br />
depending on whether color or monochrome printing is selected.<br />
The Orientation Property<br />
The orientation property specifies whether portrait or landscape printing is<br />
required. To set your preferred mode, you can use the setOrientationRequested<br />
method, passing the value PageAttributes .OrientationRequestedType<br />
.PORTRAIT or<br />
PageAttributes.OrientationRequestedType.LANDSCAPE but, as<br />
with the color property, it is most often the user that makes the selection<br />
rather than the application.<br />
Before printing, you can get the selected print orientation by calling the<br />
getOrientationRequested method. However, the orientation setting also<br />
affects the apparent dimensions of the page, which you can obtain from the
A Graphics Application 421<br />
PrintJob or the returned PageAttributes object. We'll say more about<br />
this when discussing the printer resolution property.<br />
The Origin Property<br />
In the text printing examples that you have seen so far in this chapter, we<br />
were careful to leave a small margin around the printed area because almost<br />
all printers are unable to print right to the edge of the paper. When discussing<br />
these examples, we said that the PrintJob getPageDimension method<br />
gave the size of the entire page, which includes the non-printable area and,<br />
to avoid printing in this area, we included our own margins which were arbitrarily<br />
sized. This remains true in <strong>Java</strong> 2 version 1.3, unless you use the<br />
PageAttributes origin property, which has two settings that allow you to<br />
work with the physical page or just the printable area.<br />
By default, the origin property has the value PageAttributes . Origin-<br />
Type. PHYSICAL. In this mode, the printing subsystem behaved as it did in<br />
earlier releases—you see the entire page and you have to compute and<br />
enforce your own margins. However, if you call the setOrigin method with<br />
argument PageAttributes.OriginType.PRINTABLE, then the Print-<br />
Job getPageDimension method returns a smaller-sized area that excludes<br />
the printer's margin and, furthermore, the Graphics object that you use to<br />
print has its origin at the top-left of this printable area. As a result, when you<br />
select this mode, you don't need to concern yourself with how large a margin<br />
you should leave - instead, you just use the whole area indicated by<br />
getPageDimension. We'll return to this subject again when discussing the<br />
printer resolution property.<br />
The Media Type Property<br />
The media type property specifies the type of paper that should be used for<br />
the printed output. The default value depends on your locale—in the United<br />
States, it is MediaType .NA_LETTER and in the United Kingdom it would be<br />
MediaType . IS0_A4. While you can programmatically set a different media<br />
type using the setMedia method, the user generally selects the appropriate<br />
paper size in the print dialog and you can retrieve the selected value using<br />
the PageAttributes getMedia method, which returns an object of type<br />
PageAttributes .MediaType. More usually, however, your code won't<br />
need to retrieve the actual media type, because the paper size affects the<br />
returned page dimensions in the same way as changing the origin or print orientation<br />
does. See the description of the printer resolution property for further<br />
details.
422 Chapter 4 Graphics, Text Handling, and Printing<br />
The Print Quality Property<br />
This property determines whether the printer should print in draft, normal<br />
or best quality. It can be set or retrieved using the setPrintQuality and<br />
getPrintQuality methods, but there is usually no need to do this, because<br />
the value is required only by the printer itself and it is usually selected by the<br />
user, not application code.<br />
The Printer Resolution Property<br />
Loosely speaking, the printer resolution property determines how many<br />
"dots" the printer will print in a given horizontal or vertical distance, given<br />
either in inches or centimeters. However, things are not quite as straightforward<br />
as that! Lets first look at how the printer resolution property is represented<br />
in the API, then we'll go on to look at how it interacts with the other<br />
PageAttributes properties and how the printed output is affected if you<br />
change the printer resolution.<br />
The PageAttributes methods that get and set the printer resolution<br />
are:<br />
public int[] getPrinterResolution();<br />
public void setPrinterResolution(int[] resolution);<br />
public void setPrinterResolution(int resolution);<br />
public void setPrinterResolutionToDefault();<br />
The integer array that is used by two of these methods always has three<br />
entries:<br />
• The entry with index 0 is the printer resolution in the "crossfeed"<br />
direction which is typically the shorter side of the paper in<br />
portrait mode.<br />
• The entry with index 1 is the printer resolution in the "feed"<br />
direction.<br />
• The entry with index 2 specifies the units in which the other two<br />
values are given - the value 3 denotes dots per inch and the<br />
value 4 means dots per centimeter.<br />
In the current implementation, the horizontal and vertical resolutions<br />
must be given the same value (or an exception will be thrown). The third<br />
method is a convenient shorthand that sets both resolutions to the given<br />
value expressed in dots per inch. Thus, for example, the following line of<br />
code:<br />
setPrinterResolution(72);
is equivalent to:<br />
setPrinterResolution(new int[] { 72, 72, 3 });<br />
A Graphics Application 423<br />
The last method restores the resolution to its initial default value.<br />
You will probably recall from our earlier discussion of the Print Job<br />
getPageDimension and getPrinterResolution methods that the JDK<br />
1.1 printing subsystem arranges for all printers to appear to have a resolution<br />
of 72 dpi, even if they support much higher resolutions and that the result of<br />
this is a lack ol quality because your text or images are rendered first at 72 dpi<br />
and then scaled up to 300dpi, 600dpi or whatever the printer can handle. By<br />
default, this remains true even in <strong>Java</strong> 2 version 1.3. In fact, if you pass a<br />
PageAttributes object to the getPrintJob method and look at the values<br />
returned by the getPrinterResolution method, you'll see that you<br />
aren't told the printer's actual resolution. Instead, the printer is still claimed<br />
to be a 72 dpi device! In fact, there is currently no way to find out what the<br />
printer's actual resolution is. Instead, all you can do is either continue to work<br />
at 72 dpi, or you can set your own resolution by using the setPrinterResolution<br />
method:<br />
PageAttributes page = new PageAttributes () ;<br />
page.setPrinterResolution(300);<br />
PrintJob pj = Toolkit.getDefaultToolkit().<br />
getPrintJob(..., page,...);<br />
When you change the printer resolution, your output is automatically<br />
scaled before being printed. Thus, for example, if you set the printer resolution<br />
to 300 dpi and then draw a horizontal line 300 pixels long, it will appear<br />
to be one inch long on the paper. Similarly, if you select 600 dpi and draw the<br />
same line, it will be reduced to half an inch. Note that you can do this even if<br />
your printer is only capable of 300 dpi. However, your printer will only print<br />
300 dots instead of the required 600, so there is a loss of quality for images<br />
that actually need 600 dpi, but your code only needs to know that 600 dots<br />
represent an inch and does not need to concern itself with the actual printer<br />
resolution. Note carefully, however, that if you print in a 12-point font at 600<br />
dpi, you get very small output!<br />
Changing the printer resolution affects the value returned from the get-<br />
PrinterResolution method, as you might expect. Importantly, however, it<br />
also changes the values returned from the Print Job getPageResolution<br />
and getPageDimension methods. This is fortunate, because it means that<br />
code like that shown in Listing 4-22, which uses these values to determine<br />
how much space is available on the page, continues to work whether or not<br />
you use the <strong>Java</strong> 2 version 1.3 PageAttributes features. The value
424 Chapter 4 Graphics, Text Handling, and Printing<br />
returned from getPageResolution is the same resolution set using the<br />
PageAttributes setPrinterResolution method and therefore the<br />
mechanism used in Listing 4-22 to work out how many "pixels" to skip to<br />
leave a one inch margin continues to work. The getPageDimension<br />
method will, of course, return much larger values if you increase the printer<br />
resolution. Not surprisingly, the values returned from getPageDimension<br />
are also affected by the media type (because this changes the physical measurements<br />
of the paper), the orientation (because it switches the axes), and<br />
the origin location (because it causes the paper margin to be included or<br />
excluded).<br />
As an example, suppose the user selects ISOA4 paper. On my system, if I<br />
use the default printer resolution as set by PageAttributes, then<br />
getPageDimension claims that the page is 595 dots wide and 842 dots high.<br />
If I set the printer resolution to 600 dpi, on the other hand, getPageDimension<br />
would then indicate that the page has 4960 available horizontal dots<br />
and 7014 vertical dots. The ratio of these values to the original ones is<br />
(approximately) the same as the ratio of the new resolution (600) to the original<br />
(72), as you would expect. In this case, if the user selected landscape,<br />
then the dimensions would be reversed—the paper would appear to be 7014<br />
dots wide and 4960 high so that your code will see the apparent change in<br />
paper shape. You don't, of course, have to tiy to rotate your text or other<br />
drawing through 90 degrees to print in landscape (for which you would need<br />
to use <strong>Java</strong> 2D features that are not available in JDK 1.1), because the printing<br />
subsystem handles that for you.<br />
If you change the origin to PRINTABLE, then the si/e of the area indicated<br />
by getPageDimension is reduced by the printer's margin. On my system, at<br />
72 dpi and with A4 paper, the printable area is 575 dots across and 805 dots<br />
from top to bottom, while at 600 dpi it becomes 4790 horizontally and 6712<br />
vertically. The result of this is that, if you use the <strong>Java</strong> 2 version 1.3 PageAttributes<br />
mechanism and set the origin property to PRINTABLE, your code<br />
does not need to explicitly factor in space for margins.<br />
The JobAttributes Properties<br />
JobAttributes stores value for attributes that apply to, and are constant<br />
for, the duration of a complete print job. Like PageAttributes, many of<br />
the properties have values that must be chosen from a fixed set of constants<br />
defined in inner classes of JobAttributes and summarized in Table 4-7.<br />
The JobAttributes class has 14 properties, some of which are related to<br />
each other. It also has three constructors that are similar to those of PageAttributes—a<br />
default constructor, a constructor that copies it state from an
Table 4-7 Inner <strong>Classes</strong> of JobAttributes<br />
Name Use<br />
A Graphics Application 425<br />
Default Describes which part of the printable object should actually be<br />
SelectionType printed. There are three possible values: JobAttributes .<br />
DefaultSelectionType .ALL, which requests that<br />
everything be printed,<br />
JobAttributes.DefaultSelectionType.RANGE,<br />
which requires the printing of a subset of the pages of a document,<br />
and<br />
JobAttributes.DefaultSelectionType.SELEC-<br />
TION which prints the part of the document that is selected in<br />
the user interface. See the description of the<br />
JobAttributes class below for further information.<br />
Destination- Specifies where the printed output should go— one of<br />
Type JobAttributes.DestinationType.PRINTER or<br />
JobAttributes.Destination.FILE.<br />
DialogType Determines which printer dialog should be displayed to allow<br />
the user to view or change prinitng attributes. One of<br />
JobAttributes.DialogType.NATIVE,<br />
JobAttributes.DialogType.COMMON, or<br />
JobAttributes.DialogType.NONE.<br />
Multiple Specifies whether the pages of multiple copies of a document<br />
Document - printed together should be interleaved or kept together. Legal<br />
HandlingType values are JobAttributes . MultipleDocument-<br />
Handling.SEPARATE_DOCUMENTS_COLLATED<br />
_COPIES and<br />
JobAttributes.MultipleDocumentHandling.SEPARATE_DOCUMENTS_UNCOLLATED<br />
_COPIES.<br />
SidesType Describes how the printed output should be arranged on the<br />
paper. One of JobAttributes .<br />
SidesType.ONE_SIDED, JobAttributes.<br />
SidesType.TWO_SIDED_LONG_EDGE and<br />
JobAttributes.<br />
SidesType.TWO_SIDED_SHORT_EDGE.<br />
existing JobAttributes object, and a constructor that lets you supply<br />
explicit values for each property. In the following sections, we'll briefly discuss<br />
each of the JobAttributes properties before going on show how you
426 Chapter 4 Graphics, Text Handling, and Printing<br />
can use PageAttributes and JobAttributes together to improve the<br />
printing capabilities of your applications.<br />
The Dialog Property<br />
When you invoke the getPrintJob method, a printer dialog appears.<br />
Prior to <strong>Java</strong> 2 version 1.3, you would always see the native dialog provided<br />
by the host platform. However, using the Dialog property of the JobAttributes<br />
class, you can choose to use a different dialog. The setDialog<br />
method determines the value of this property, using one of the DialogType<br />
values listed in Table 4-7. The default setting, DialogType .NATIVE, is<br />
equivalent to the JDK 1.1 behavior. However, you also have two other<br />
choices:<br />
• DialogType . COMMON displays a printer- and platformindependent<br />
dialog that is written in <strong>Java</strong>. Using this dialog has<br />
the advantage that your application looks the same on all<br />
platforms and it also supports all of the JobAttributes and<br />
PageAttributes properties that the user might want to set.<br />
However, it does not provide access to extra features of some<br />
printers that are not represented in the printing API.<br />
• Dialog. NONE does not display a printer dialog at all. Instead,<br />
the Print Job is profiled from the PageAttributes and<br />
JobAttributes that you supply to the getPrintJob method.<br />
We'll look more closely at both of these alternatives in "A More Advanced<br />
Printing Example" later in this chapter.<br />
The Destination, File, and Printer Properties<br />
These three properties work together to determine where your printed output<br />
goes. The Destination property can be set, using the setDestination<br />
method or from the printer dialog, to either DestinationType. FILE<br />
or DestinationType. PRINTER. Depending on which mode is selected,<br />
either the File or Printer property than specifies the exact output target.<br />
When file output is required, the name of the output file to be used can be<br />
retrieved using the getFileName method. You can also specify a default file<br />
name if you call the setFileName method before invoking getPrintJob.<br />
The effect that this has depends on the printer dialog being used:<br />
• If you are using the <strong>Java</strong> common printer dialog, selecting file<br />
output causes this mode to be selected in a checkbox in the<br />
initial dialog. When the content of the dialog is accepted, a
A Graphics Application 427<br />
second dialog appears to allow the user to choose the output<br />
file. The file name given to setFileName is used to set a<br />
default value for this dialog. If you don't call setFileName (or<br />
call it with a null argument), no default value appears.<br />
• If you use the native printer dialog, what happens will depend<br />
on the operating system. In the case of Microsoft Windows, if<br />
you supply a file name, then the dialog that allows the user to<br />
choose a file does not appear— in other words, the user does<br />
not have the opportunity to override the selected file.<br />
However the file name is selected, your code does not need to be aware<br />
that it is printing to an output file, since the printing subsystem takes care of<br />
saving the printed output in the file instead of sending it directly to the<br />
printer.<br />
Printer output, which is the default, can be selected programmatically by<br />
calling setDestination with the argument JobAttributes .DestinationType.<br />
PRINTER. You can also choose the printer to be used by calling<br />
the setPrinter method, which requires the name of the printer as its argument.<br />
If you don't call setPrinter, or you pass a null argument, the system's<br />
default printer will be used. Most commonly, however, the user will<br />
choose the printer from the print dialog, which will result in the printer name<br />
being available in the JobAttributes object after the getPrintJob<br />
method returns. Application code does not, however, need to retrieve the<br />
printer name in order to successfully print, since the printing subsystem<br />
directs output to the selected printer.<br />
The Copies and Multiple Document Handling Properties<br />
These two properties control the printing of multiple copies of the same<br />
document. The Copies property simply represents the number of copies that<br />
should be printed. Although you can set this value by calling the setCopies<br />
method passing a positive integer value, it is normally set by the user an<br />
retrieved by calling getCopies:<br />
public void setCopies(int copies);<br />
public void setCopiesToDefault(); // Default is 1 copy<br />
public int getCopies();<br />
Printing multiple copies is not handled by the printer or the printing subsystem—you<br />
have to handle it yourself. We could, for example, easily add<br />
support for this to the example code shown in Listing 4-22 by wrapping most<br />
of the print method in a loop that is executed once per copy required. How-
428 Chapter 4 Graphics, Text Handling, and Printing<br />
ever, this would not be sufficient because there are two ways to print multiple<br />
copies of a document:<br />
• Print all of the pages of the first copy, followed by all the pages<br />
of the second copy and so on. This is called collated printing.<br />
• Print all of the copies of the first page, then all of the copies of<br />
the second page and so on. This is non-collated printing.<br />
The user can select which style is required in the printer dialog and the<br />
result can be retrieved using the getMultipleDocumentHandling<br />
method, which returns either MultipleDocumentHandling.SEPARATE<br />
JDOCUMENTS_COLLATED_COPIES or Multiple-<br />
DocumentHandling.SEPARATE JDOCUMENTSJJNCOLLATED_COPIES. It is<br />
your job to write the printing code to respond properly to the selected setting.<br />
The Sides Property<br />
The Sides property determines how successive pages are printed relative to<br />
one another. The default value for this property is SidesType . ONE_SIDED,<br />
which results in printing on only one side of the paper, which is all that some<br />
printers can support. However, there are two other possible values, which are<br />
useful only if the printer supports two-sided printing:<br />
• SidesType . TWO_SIDED_LONG_EDGE prints successive pages<br />
on both sides of the paper, where the result is to be bound along<br />
its long edge, as this book is. Figure 4-17 shows how my<br />
printer's dialog represents this form of printing.<br />
• SidesType . TWO_SIDED_SHORT_EDGE also uses both sides of<br />
the paper, but is intended for the case where the output will be<br />
bound along its short edge, as shown in Figure 4-18.
Figure 4-17 Two-sided long edge printing.<br />
Figure 4-18 Two-sided short edge printing.<br />
A Graphics Application 429<br />
Although you can determine which of these modes the user has selected<br />
using the JobAttributes getsides method, your code doesn't need to<br />
concern itself directly with this property, because the printer takes care of<br />
the differences.<br />
The Output Selection Properties<br />
The last set of JobAttributes properties describes which part of a document<br />
is to be printed. The most important of these properties is DefaultSelection,<br />
the value of which can be obtained using the<br />
getDef aultSelection method and should be interpreted as follows.<br />
• The value Def aultSelectionType . ALL is the simplest,<br />
requiring you to print all of the document (or whatever it is that
430 Chapter 4 Graphics, Text Handling, and Printing<br />
your application is printing). The example code that you have<br />
seen so far in this chapter has implicitly operated in this mode.<br />
• The value Def aultSelectionType . SELECTION specifies that<br />
the current selection should be printed. Typically, this would be<br />
used in applications that allow some form of selection, such as a<br />
word processor, where the user would highlight some part of<br />
the text to have only that part printed. If your printing code can<br />
support this mode of operation, it should check whether there<br />
is a non-empty selection before calling the getPrint Job<br />
method and, if there is, call the JobAttributes<br />
setDef aultSelection method with argument<br />
JobAttributes.DefaultSelectionType.SELECTION to<br />
make this the default setting when the print dialog appears.<br />
• The value Def aultSelectionType .RANGE is the most<br />
difficult case to handle. This mode indicates that the user wants<br />
to print one or more complete pages from the document, which<br />
may not represent the whole document and may not even be<br />
contiguous.<br />
When the last of these three values is chosen, five other JobAttributes<br />
properties come into play:<br />
• HinPage<br />
• MaxPage<br />
• FromPage<br />
• ToPage<br />
• PageRanges<br />
All five of these properties may be set by application code before calling<br />
getPrintJob, but none of them is mandatory. When getPrintJob<br />
returns, the application should check the value of the DefaultSelection<br />
property and, if it is set to Def aultSelectionType .RANGE, it should, if<br />
possible, only print the selected pages.<br />
The MinPage and MaxPage specify the smallest and largest page number<br />
that the user can select for printing. By default, MinPage is 1 and MaxPage is<br />
effectively unbounded. If these properties are set, the printer dialog is<br />
expected to check any values entered by the user and reject those that lie<br />
outside this range. Besides the benefit of the automatic range check, setting<br />
these values also allows the printer dialog to indicate to the user how many<br />
pages are available for printing. As an example, if MinPage is set to 1 and<br />
MaxPage to 20, then the native Windows printer dialog box displays a radio
A Graphics Application 431<br />
button with the text "All 20 pages" instead of the usual "All" if the page count<br />
is not given.<br />
The FromPage and ToPage properties form the bounds of the range of<br />
pages that the user actually wants to print. The values of these properties<br />
usually appear on the printer dialog as two separate input fields so that the<br />
user can change their values. Naturally, FromPage must not be less than<br />
MinPage, ToPage must not be greater than MaxPage, and ToPage must not<br />
be less than FromPage. As an example, Figure 4-19 shows a typical print dialog<br />
that results from the following settings:<br />
MinPage = 1<br />
MaxPage =20<br />
FromPage = 3<br />
ToPage = 5<br />
Figure 4-19 Specifying print ranges on Windows.<br />
As you can see, the values assigned to MinPage and MaxPage values have<br />
been used to indicate that there are 20 pages available to be printed, while<br />
the FromPage and ToPage values appear in input fields associated with the<br />
"Print from/to" radio button. Under normal circumstances, application code
432 Chapter 4 Graphics, Text Handling, and Printing<br />
would not set the FromPage and ToPage properties. In this case, they would<br />
both be defaulted to the value of MinPage.<br />
The final property to be considered is PageRanges. This property should<br />
be considered as a generalization of the FromPage and ToPage properties,<br />
in that it allows more than one range of pages to be printed. The value of this<br />
property is a two-dimensional array of integers:<br />
public int [] [] getPageRanges() ;<br />
public void setPageRanges(int[][]);<br />
The array is made up of integer pairs, each of which describes a contguous<br />
range of pages to be printed. For example, the following code extract initialises<br />
the PageRanges property to print pages 1,2, 5, and 6, inclusive:<br />
int [] [] ranges = new int [] [] {<br />
new int [] { 1, 2 } ,<br />
new int [] {5,6}<br />
};<br />
Within a range, the second page number must not be less than the first<br />
and, furthermore, ranges must not overlap.<br />
When the DefaultSelection has the value DefaultSelection-<br />
Type . RANGE, application code is expected to do the following:<br />
• If it can support the printing of individual pages, it should get<br />
the value of the PageRanges property and print only the pages<br />
that are within the page ranges that it describes.<br />
• Otherwise, it should get the FromPage and ToPage properties<br />
and print only those pages.<br />
In practice, many print dialogs don't allow the user to specify more than<br />
one range of pages, so the PrintRanges property will often contain only one<br />
range. No matter how many ranges exist, the FromPage and ToPage properties<br />
always reflect the lowest and highest page number so that in the case just<br />
shown where there were two pange ranges, FromPage would have been set<br />
to 1 and ToPage would have been 6.<br />
Printing at Higher Resolution<br />
By default, the JDK 1.1 printing facility behaves as if your printer could only<br />
print at 72 dots per inch. While this certainly makes it easy for application<br />
code to take screen shots that almost exactly match what the user sees on the<br />
screen, at least in terms of size, it effectively makes it impossible to make<br />
good use of your printers capabilities of you want to print high resolution
A Graphics Application 433<br />
graphics. Suppose, for example, that you have an image stored at 300 dpi that<br />
you would like to print. Prior to <strong>Java</strong> 2 version 1.3, this image could only have<br />
been rendered at 72 dpi, whch would have had two effects:<br />
• It would have been stretched both horizontally and vertically to<br />
around 4 times its actual size (i.e., 300 divided by 72).<br />
• Each actual pixel in the image would have been "expanded" to<br />
cover a 16-pixel area on the paper, because the apparent 72 dpi<br />
provided by the printing subsystem has to be rescaled to the<br />
300 dpi on the printer. This would result in the smoothness of<br />
the image being lost.<br />
We can avoid both of these problems by changing the printer resolution in<br />
the PageAttributes object to match that of the printer or the image itself.<br />
Listing 4-23 shows the code necessary to do this.<br />
Listing 4-23 Changing the print resolution<br />
package <strong>JFC</strong>Book.Chapter4.jdkl3;<br />
import j avax.swing.*;<br />
import j ava.awt.*;<br />
import j ava.awt.event.*;<br />
import java.io.*;<br />
import java.net.*;<br />
import java.util. *,-<br />
public class HiResPrintExample {<br />
// Create default page and job attributes<br />
static void print(Image image) {<br />
PageAttributes page = new PageAttributes();<br />
JobAttributes job = new JobAttributes();<br />
// Set up to use the printable area and install<br />
// the desired resolution.<br />
page.setColor(PageAttributes.ColorType.COLOR);<br />
page.setOrigin(PageAttributes.OriginType.PRINTABLE)<br />
int dpi = 72;<br />
try {<br />
dpi = Integer.parselnt(resolution.getText());<br />
} catch (NumberFormatException e) {
434 Chapter 4 Graphics, Text Handling, and Printing<br />
Listing 4-23 Changing the print resolution (continued)<br />
System.out.printIn(<br />
"Illegal resolution - using 72dpi");<br />
}<br />
System.out.println("Printing at " + dpi + " dpi.");<br />
page.setPrinterResolution(dpi);<br />
PrintJob pj = Toolkit.getDefaultToolkit().getPrintJob(<br />
frame, "Print Image", job, page);<br />
if (pj == null) {<br />
// Cancelled by user<br />
}<br />
return;<br />
// Print the image centered on the paper<br />
Dimension pageSize =<br />
new Dimension(pj.getPageDimension());<br />
int imageWidth = image.getwidth(null) ;<br />
int imageHeight = image.getHeight(null);<br />
// Use try/finally to release PrintJob even<br />
// if we get an exception<br />
try {<br />
Graphics g = pj.getGraphics();<br />
g.drawlmage(image,<br />
(pageSize.width - imageWidth)/2,<br />
(pageSize.height - imageHeight)/2, null);<br />
g.dispose();// Print the last page<br />
} catch (Exception e) {<br />
System.out.println("Exception while printing image: "<br />
+ e) ;<br />
} finally {<br />
// Always terminate the print job<br />
pj.end();<br />
System.out.println("Printing completed");<br />
}<br />
}<br />
public static void main(String[] args) {
Listing 4-23 Changing the print resolution (continued)<br />
A Graphics Application 435<br />
// Load the image<br />
URL imageURL = HiResPrintExample.class.getResource(<br />
"images/earth.jpg");<br />
Imagelcon imagelcon = new Imagelcon(imageURL);<br />
final Image image = imagelcon.getlmage();<br />
JLabel label = new JLabel(imagelcon);<br />
frame.getContentPane() .add(label, BorderLayout.CENTER) ;<br />
JPanel panel = new JPanel (<br />
new FlowLayout(FlowLayout.LEFT));<br />
panel.add(new JLabel("Resolution: "));<br />
panel.add(resolution);<br />
panel.add(button);<br />
frame.getContentPane().add(panel,<br />
BorderLayout.SOUTH);<br />
button.addActionListener(new ActionListener() {<br />
public void actionPerformed(ActionEvent evt) {<br />
print(image);<br />
}<br />
});<br />
frame.pack();<br />
frame.addWindowListener(new WindowAdapter() {<br />
public void windowClosing(WindowEvent evt) {<br />
System.exit(0);<br />
}<br />
});<br />
frame.setVisible(true);<br />
}<br />
static JFrame frame =<br />
new JFrame("Hi-res Printing Example");<br />
static JTextField resolution = new JTextField("72", 10);<br />
static JButton button = new JButton("Print...");<br />
}<br />
To try this example, type the command:<br />
j ava <strong>JFC</strong>Book.Chapter4.j dkl3.HiResPrintExample
436 Chapter 4 Graphics, Text Handling, and Printing<br />
This example creates a frame into which an image is loaded, as shown in<br />
Figure 4-20. You can choose the resolution at which you would like the image<br />
to be printed and the press the "Print" button.<br />
Figure 4-20 High-resolution image printing.<br />
The image used in this example has been saved at 300 dpi and is 640 pixels<br />
wide and 480 pixels high. It is therefore intended to be around 2 inches wide<br />
and an inch and a half in height. If you print at the default resolution, you'll<br />
find that it occupies more than the full-width of an A4 or letter page, because<br />
it will be rendered at just under 9 inches wide and over 6 inches high! Also, if<br />
you look closely at the output, you'll see that the globe of the earth is not<br />
quite a smooth sphere, an effect you may also see on the screen. On the other<br />
hand, if you select 300 dpi and press "Print" again, you'll get a much smaller<br />
and crisper image.
<strong>Core</strong> Alert<br />
Image printing doesn't work properly in <strong>Java</strong> 2 version 1.3 on some<br />
platforms. This example does work properly with <strong>Java</strong> 2 version 1.3.1,<br />
however.<br />
The interesting part of this example is in the print method:<br />
// Set up to use the printable area and install<br />
// the desired resolution.<br />
page.setColor(PageAttributes.ColorType.COLOR);<br />
page.setOrigin(PageAttributes.OriginType.PRINTABLE);<br />
int dpi = 72;<br />
try {<br />
dpi = Integer.parselnt(resolution.getText());<br />
} catch (NumberFormatException e) {<br />
System.out.printIn(<br />
"Illegal resolution - using 72dpi");<br />
System.out.println("Printing at " + dpi + " dpi.");<br />
page.setPrinterResolution(dpi);<br />
A Graphics Application 437<br />
This code extracts the required resolution from the text field and uses it to<br />
set the PrinterResolution attribute, before the getPrint Job method is<br />
called. This has the effect of setting the correct resolution in the Graphics<br />
objects returned from the subsequent call (or calls) to the Print Job get-<br />
Graphics method. You'll notice that we also arrange for the printing to take<br />
place only within the printable area of the page (thus making it unnecessary<br />
to add code to calculate how much space to leave for margins) and we also set<br />
the Color attribute to ensure that the image is rendered in color, if the<br />
printer supports it. This is necessary because some printers default to monochrome<br />
even if they are capable of color printing.<br />
The rest of the code is less interesting, because printing the image is simply<br />
a a matter of using the Graphics drawlmage method. We take care to<br />
center the image on the page by using the Print Job getPageDimension<br />
method to get the size of the printable area—as we said earlier, the width and<br />
height that this method returns take into account the fact that we want to use<br />
only the printable area and the resolution that we want to use.<br />
A More Advanced Text Printing Example<br />
The text printing example that you saw earlier in this chapter is simple and<br />
straightforward, but not very user-friendly. To close this chpater, we'll show
438 Chapter 4 Graphics, Text Handling, and Printing<br />
you how to use the <strong>Java</strong> 2 version 1.3 PageAttributes and JobAttributes<br />
classes to create a much more usable text printing facility. For<br />
simplicity, we're not going to create a full-blown printing framework that you<br />
could reuse for more general printing tasks, although we will undertake<br />
something approaching that in Volume 2. Instead, our revised printing example<br />
will provide the following additional features:<br />
• A "Setup" button that allows the user to select paper size,<br />
orientation and other attributes that can be applied to future<br />
print operations, without having to print.<br />
• A "Quick Print" button that prints without showing a printer<br />
dialog.<br />
• Printing of multiple copies.<br />
• The ability to select a range of pages to be printed.<br />
Before looking at the how the code is changed to add these extra facilities,<br />
you should try out the example by typing the command:<br />
java <strong>JFC</strong>Book.Chapter4.jdkl3.EnhancedPrintingExample<br />
This command opens a frame with an input field into which you can type<br />
the name of a file, a text area to display the file contents and three buttons. If<br />
you enter a file name and press return, the file will be displayed in the text<br />
area, as shown in Figure 4-21.<br />
The three buttons at the bottom right correspond to the three printrelated<br />
operations that this example provides:<br />
• The Setup button displays a printer dialog to allow the user to<br />
adjust job and page attributes. The settings configured using<br />
this dialog are used as the starting point for the other print<br />
operations.<br />
• The Print button displays a printer dialog and then prints the<br />
file whose content has been loaded into the text area. The<br />
dialog initially displays the printer settings established using the<br />
Setup button, or the printers defaults if the Setup button has<br />
never been used. The user can change any of the attributes in<br />
the printer dialog, but these changes will be effective only for<br />
this print operation.<br />
• The Quick Print button prints the loaded file without<br />
displaying a printer dialog at all, using the settings configured<br />
using the Setup button, or the printers defaults if Setup has<br />
never been used.
A Graphics Application 439<br />
Figure 4-21 Using <strong>Java</strong> 2 Version 1.3 features to add extra printing capabilities.<br />
Much of the code in this example is unchanged from that shown in Listing<br />
4-22, so we're not going to reproduce it all here. If you want to see all of the<br />
code, you'll find it in the file <strong>JFC</strong>Book/Chapter4/jdkl3/Enhanced-<br />
PrintingExample. java on the CD-ROM that accompanies this book.<br />
We'll deal with two aspects of the implementation of this example—how the<br />
printer dialogs are managed and how the new features affect the core printing<br />
code.<br />
Managing the Printer Dialogs<br />
If you look back at Listing 4-22, you'll notice that a printer dialog is only displayed<br />
in one place - as a result of the get Print Job call at the start of the<br />
print method, when the user has decided to print a file. In the original<br />
example, this was appropriate because the original example only allowed the<br />
user to perform this single operation. In our enhanced example, the printing<br />
code still needs access to a Print Job in order to get the printer resolution,<br />
the page size, and to be able to create a Graphics object for each page.
440 Chapter 4 Graphics, Text Handling, and Printing<br />
However, it is no longer appropriate to call getPrint Job at the beginning of<br />
the print method, for the following reasons:<br />
• We don't always want to display a printer dialog before starting<br />
the print operation—if the user pressed the Quick Print<br />
button, we want to start printing using job and page attributes<br />
that were stored earlier.<br />
• Printing is not the only operation that needs a printer dialog -<br />
the code that handles the Setup button also needs to do this.<br />
For these reasons, it makes sense to decouple the handling of printer dialogs<br />
from the print method itself. We do this by moving the getPrint Job<br />
call outside of the print method and change its signature to the following:<br />
private static void print(PrintJob pj,<br />
PageAttributes page,<br />
JobAttributes job);<br />
Once we have done this, the print method can get all of the attributes<br />
that it needs from its arguments and does not need to concern itself with how<br />
the information was obtained and whether or not a printer dialog has been<br />
displayed.<br />
The purpose of the printer dialog is to present the user with a set of page<br />
and job attributes and allow the user to modify them as required. In fact, we<br />
are dealing with two different sets of printer attributes in this example:<br />
• The default attributes that are set up using the Setup button<br />
and used when the Quick Print button is pressed.<br />
• The attributes that the user selects when the Print button is<br />
pressed. These attributes are actually based on the default<br />
attributes, but they are not the same because the user can<br />
modify them for the duration of the current print operation.<br />
The default attributes are actually created the first time that they are<br />
needed and are subsequently available when any of the buttons are pressed.<br />
We can't just create these attributes in this simple way:<br />
PageAttributes defaultPageAttributes =<br />
new PageAttributes();<br />
JobAttributes defaultJobAttributes =<br />
new JobAttributes();<br />
because this would simply give us attributes that don't in any way relate to<br />
the capabilities of the printer. To get real attributes, we need to call get-
A Graphics Application 441<br />
Print Job in order to allow the <strong>Java</strong> printing subsystem to locate the default<br />
printer and fill in the PageAttributes and JobAttributes fields as<br />
appropriate. Furthermore, we need to do this almost immediately, because<br />
the user may just load a file and then press Quick Print without first using<br />
the Setup button. Since the Quick Print operation is defined to not show<br />
a printer dialog, it follows that we can't display a printer dialog when obtaining<br />
our default attributes. This of course, is where the JobAttributes Dialog<br />
attribute comes in handy. Here's the code for the method that gets the<br />
default page and job attributes:<br />
private static void setupDefaultAttributes() {<br />
defaultPageAttributes = new PageAttributes();<br />
defaultJobAttributes = new JobAttributes();<br />
// Get printer specifics, without displaying<br />
// a dialog.<br />
PrintJob pj = null;<br />
defaultJobAttributes.setDialog(<br />
JobAttributes.DialogType.NONE);<br />
pj = Toolkit.getDefaultToolkit().getPrintJob(frame,<br />
"", defaultJobAttributes,<br />
defaultPageAttributes);<br />
pj.end();<br />
}<br />
This code should be self-explanatory—it simply creates basic PageAttributes<br />
and JobAttributes objects that will be held in static members<br />
and then calls the getPrint Job method to allow them to be initialised from<br />
the default printer, ensuring the the Dialog property is set so that no printer<br />
dialog will appear. Any time these attributes are needed, they can be<br />
obtained by calling one of the following methods:<br />
// Gets the default page attributes, creating them<br />
// if necessary.<br />
private static PageAttributes getDefaultPageAttributes()<br />
{<br />
if (defaultPageAttributes == null) {<br />
setupDefaultAttributes() ;<br />
}<br />
return defaultPageAttributes;<br />
}<br />
// Gets the default job attributes, creating them<br />
// if necessary.<br />
private static JobAttributes getDefaultJobAttributes() {
442 Chapter 4 Graphics, Text Handling, and Printing<br />
if (defaultJobAttributes == null) {<br />
setupDefaultAttributes();<br />
}<br />
return defaultJobAttributes;<br />
}<br />
As you can see, when one of these methods is called for the first time, it<br />
creates both the default job and page attributes by calling setupDefaultAttributes;<br />
subsequent calls return exactly the same set of attributes<br />
which may, as we'll see, have been modified by user action.<br />
Now let's look at how the buttons are handled, starting with the Setup<br />
button. Here's the code that is executed when this button is pressed:<br />
// Handles the setup button<br />
public static void doSetupO {<br />
// Display the print dialog....<br />
JobAttributes jobAttrs = getDefaultJobAttributes();<br />
jobAttrs.setDialog(JobAttributes.DialogType.NATIVE);<br />
PrintJob pj = Toolkit.getDefaultToolkit0 .getPrintJob(<br />
frame, "Printer Setup", jobAttrs,<br />
getDefaultPageAttributes());<br />
if (pj != null) {<br />
pj.end();<br />
}<br />
}<br />
This method uses the getDefault JobAttributes and getDefault-<br />
PageAttributes methods to get the default attributes and then passes<br />
them as the starting point for getPrint Job. Since the point of the Setup<br />
button is to allow the user to change the defaults, the JobAttributes Dialog<br />
property is set to ensure that a printer dialog is displayed. Since the<br />
getPrint Job method updates the PageAttributes and JobAttributes<br />
that it is given and since these objects are the default attributes that were created<br />
by setupDefaultAttributes, it follows that the effect of this code is<br />
to make sure that the default attributes always contain the results of the dialog<br />
displayed by the Setup button. As an example, if the user starts the application<br />
then presses the Setup button twice to make changes, here is how the<br />
attributes are managed:<br />
1. The first use of the Setup button calls the doSetup method,<br />
which in turn invokes getDef ault JobAttributes.<br />
2. Since this is the first call to this method, the default JobAttributes<br />
and def aultPageAttributes variables will be
A Graphics Application 443<br />
null, so getDefaultJobAttributes calls setupDef aultAttributes,<br />
which will create them.<br />
3. The doSetup method then passes the new defaults to the get -<br />
Printer Job method which will then display a printer dialog.<br />
When this dialog is closed, any changes the user makes will be<br />
reflected in the default attributes.<br />
4. When the Setup button is pressed again, the same code is executed.<br />
The difference this time around, however, is that when<br />
doSetup calls getDefaultJobAttributes, it finds that the<br />
defaultJobAttributes variable is not null, so it simply<br />
returns the default job attributes, as modified by the user on<br />
thye first use of the Setup button. The same applies to the page<br />
attributes.<br />
Now lets look at the Quick Print button. Here's the code that handles<br />
this button:<br />
// Prints without user intervention<br />
public static void doQuickPrint() {<br />
PrintJob pj = null;<br />
try {<br />
// Use the default settings for this - there will<br />
// be no printer dialog<br />
PageAttributes pageAttrs =<br />
new PageAttributes(getDefaultPageAttributes() ) ;<br />
JobAttributes jobAttrs =<br />
new JobAttributes(getDefaultJobAttributes());<br />
jobAttrs.setDialog(JobAttributes.DialogType.NONE);<br />
jobAttrs.setDefaultSelection(<br />
JobAttributes.DefaultSelectionType.ALL);<br />
pageAttrs.setOrigin(<br />
PageAttributes.OriginType.PRINTABLE);<br />
}<br />
pj = Toolkit.getDefaultToolkit().getPrintJob(<br />
frame, "<strong>Java</strong> File Print",<br />
jobAttrs, pageAttrs);<br />
// Print using the default settings<br />
print(pj, pageAttrs, jobAttrs);<br />
} finally {<br />
if (pj != null) {<br />
pj.end();<br />
}<br />
}
444 Chapter 4 Graphics, Text Handling, and Printing<br />
This method is supposed to print the loaded file using the current default<br />
settings without displaying a printer dialog. In order to do this, it should simply<br />
have to get the default page and job attributes using the getDef ault-<br />
PageAttributes and getDef ault JobAttributes methods and then call<br />
getPrint Job to install the default attributes for the subsequent print operation.<br />
That's more or less what it does, but you'll notice that it actually changes<br />
some of the attributes:<br />
• The job attribute Def aultSelectionType is explicitly set to<br />
request that the whole document be printed. This is necessary<br />
because the print method, which we'll see shortly, can also<br />
handle printing selected pages from the file.<br />
• The job attribute Dialog is set to ensure that no printer dialog<br />
appears.<br />
• The page attribute Origin is set so that only the printable<br />
portion of the paper is used.<br />
Rather than make these changes in the default attributes themselves, copies<br />
are made using the PageAttributes and JobAttributes "copy" constructors<br />
and the modified and the modified versions are passed to the<br />
getPrintJob method. Strictly speaking this is unnecessary, because the<br />
user does not see a printer dialog and so cannot change the attributes, but<br />
this is a safer option that ensures that the defaults cannot be inadvertently<br />
changed as a result of this operation.<br />
This method is actually very similar to the code that handles the Print<br />
button:<br />
// Displays a print dialog and then prints<br />
public static void doPrintO {<br />
PrintJob pj = null;<br />
try {<br />
// Initialise the dialog from the default settings<br />
// and display a dialog for the user to make<br />
// changes.<br />
PageAttributes pageAttrs =<br />
new PageAttributes(getDefaultPageAttributes());<br />
JobAttributes jobAttrs =<br />
new JobAttributes(getDefaultJobAttributes());<br />
j obAttrs.setDialog(<br />
JobAttributes.DialogType.NATIVE);<br />
pageAttrs.setOrigin(<br />
PageAttributes.OriginType.PRINTABLE);<br />
pj = Toolkit.getDefaultToolkit().
}<br />
getPrintJob(frame, "<strong>Java</strong> File Print",<br />
jobAttrs, pageAttrs);<br />
// Print using the user's settings<br />
print(pj, pageAttrs, jobAttrs);<br />
} finally {<br />
if (pj != null) {<br />
pj.end();<br />
}<br />
}<br />
The only differences are the following:<br />
A Graphics Application 445<br />
• The JobAttributes Dialog property is set to display a native<br />
printer dialog. This is necessary because we want to allow the<br />
user to change the properties.<br />
• The JobAttributes Def aultSelectionType attribute is<br />
not changed. It is not necessary to do so, because the user will<br />
have the opportunity to decide whether to print all of the<br />
document or just a part of it, which will update this attribute.<br />
Here, of course, it is absolutely essential to pass copies of the default<br />
PageAttributes and JobAttributes objects to getPrintJob, because<br />
we want the user to be offered the defaults (as modified by the Setup dialog<br />
if it has been used), but we do not want the defaults to be updated with these<br />
changes.<br />
Printing Changes<br />
As far as the actual printing code is concerned, this example differs from the<br />
one shown in Listing 4-22 in the following ways:<br />
• Since PageAttributes has a mode that allows the printing<br />
subsystem to determine which part of each page should be<br />
treated as the margin, there is no longer any need to include the<br />
code to do this ourselves.<br />
• It is now possible to print more than one copy of the document<br />
if the user requests it.<br />
• A page number is printed at the bottom of each page.<br />
• Support is provided to print a range of pages instead of the<br />
whole document.
446 Chapter 4 Graphics, Text Handling, and Printing<br />
Since some of these changes are relatively trivial, we don't reproduce all of<br />
the code for the print method here—instead, we'll just show the affected<br />
code segments. As note above, you can find the complete source code for this<br />
example on the book's CD-ROM.<br />
Let's deal first with the margins and printing more than one copy of the<br />
document since both of these are trivial. Restricting printing to the area<br />
inside the printer's natural margin area is simply a matter of setting the<br />
PageAttributes OriginType property to OriginType.PRINTABLE.<br />
Since we always want to do this, the property value is set in both the<br />
doPrint and doQuickPrint methods before the core printing code is<br />
called, as you saw earlier. Within the print method, the value returned by the<br />
PrintJob getPageDimension method will exclude the margins and, furthermore,<br />
every Graphics object returned from the getGraphics method<br />
will be initialized with its origin at the top left of the printable area and will<br />
be clipped to exclude the margins. Hence, the code in Listing 4-22 that<br />
moved the origin and set a new clip at the start of each page is no longer<br />
required.<br />
It is equally simple to print more than one copy of the document—all that<br />
is necessary is to get the value of the JobAttributes Copies attribute<br />
and loop through the printing code as many times as required:<br />
int copies = job.getCopies();<br />
for (int i = 0; i < copies; i++) {<br />
}<br />
In order to print a page number on each page, we need to do three things:<br />
• Keep a running count of the current page number. This is so<br />
trivial we won't mention it any further here.<br />
• Leave space at the bottom of the page to print the page<br />
number.<br />
• Print the page number when each page is full.<br />
If you recall from Listing 4-22, we used a variable called maxLine to hold<br />
the y coordinate of the last line on the page that we could use for printing<br />
and, after printing each line, we checked to see whether the y coordinate of<br />
the next line would be greater than maxLine. Here is how the value of max-<br />
Line was calculated in Listing 4-22:<br />
int maxLine = pageSize.height - fontHeight;
A Graphics Application 447<br />
This code ensures that we leave no more than one blank line at the foot of<br />
the page. In order to print a page number, we need to leave a line for the<br />
page number itself and a blank line to offset it from the document content.<br />
All we need to do to arrange this is subtract more from the page height:<br />
int maxLine = pageSize.height - 3 * fontHeight;<br />
and then print the page number at the bottom of each page, in the space<br />
allocated to it:<br />
if (line > maxLine) {<br />
// Page full - move to next page<br />
if (printPage) {<br />
// Print page number at the bottom<br />
statusLabel.setText("Printed page " + pageNumber);<br />
statusLabel.paintlmmediately(<br />
0, 0, d.width, d.height);<br />
g.drawstring("Page " + pageNumber,<br />
32, maxLine + 2 * fontHeight);<br />
g.disposeO; // Flush page<br />
The final part of this example concerns a printed subset of the entire document.<br />
If you run this example and press the Print button, you'll have the<br />
opportunity to specify which pages you'd like to have printed, by filling in the<br />
appropriate fields in the printer dialog, an example of which was shown in<br />
Figure 4-16. Whatever you type in here is returned via the Jobattributes<br />
Def aultSelectionType, FromPage, ToPage, and PageRanges properties<br />
that were discussed earlier in this section. Our first printing example behaved<br />
as if the user always specified that all pages were to be printed; this one takes<br />
a more general approach and implements the PageRanges property, which<br />
is to say that it will print any subset of pages that the user can specify via the<br />
printer dialog.<br />
Since the printing code is mainly a loop based around printing complete<br />
pages (and most of it is concerned with working out when to move from line<br />
to line and page to page), all we have to do in order to print a page subset is<br />
not to do anything for pages that are not requested. That simply means we<br />
have to have a boolean called, say, printPage, that specifies whether the<br />
page being generated on a given pass of the loop should be printed or not.<br />
The only problem is knowing when printPage should be true and when it<br />
should be false. This requires two things:<br />
1. Knowing the current page number on each pass of the loop.<br />
2. Knowing whether the current page is one of those specified in<br />
the PageRanges property returned from the printer dialog.
448 Chapter 4 Graphics, Text Handling, and Printing<br />
Obviously, keeping a page counter is a simple case of incrementing a variable<br />
on each pass of the loop. We already have this variable by virtue of the<br />
fact that we now print the page number at the bottom of each page. The second<br />
point is slightly tricker. Since the PageRanges property is an array of<br />
integer arrays, it isn't possible to do something like this:<br />
if (pageNumber >= fromPage && pageNumber
Summary<br />
A Graphics Application 449<br />
In this chapter, you've seen how to use a component's graphics context to<br />
draw graphics and text onto its surface. You discovered that there are subtle<br />
differences between the way in which the Graphics object is initialized<br />
when dealing with lightweight components like those derived from JComponent.<br />
This chapter also developed a complete working application, one that will<br />
be used in the next few chapters to demonstrate some more of the new<br />
Swing features. During the construction of this application, you saw how custom<br />
borders are constructed and you also saw how to create a custom component<br />
of your own, albeit a very simple one.<br />
Finally, you saw the support that the JDK 1.1 provides for printing and<br />
how to print user interface components and text, taking care to break the text<br />
at the margins and at page boundaries. Although the JDK 1.1 printing API is<br />
still supported by the <strong>Java</strong> 2 platform, you'll see in Volume 2 that the <strong>Java</strong> 2D<br />
API provides greatly enhanced facilities that make it easier for developers<br />
using the <strong>Java</strong> 2 platform to print both text and graphics.
USING SWING<br />
TO BUILD BETTER<br />
APPLICATIONS
Now that you've seen the basics of Swing and the AWT, Part 2<br />
introduces some of the Swing mechanisms and components<br />
that help you create more professional applications. All of the<br />
things that you will see in this part could, of course, be provided in an<br />
AWT-based application, provided that you were prepared to implement<br />
them yourself. With Swing, these features are available for nothing—all<br />
you have to do is make proper use of them.<br />
Keyboard and focus handling is a feature that is often not properly<br />
handled by AWT applications. Before Swing, it was difficult to implement<br />
shortcut keys, a feature that users of other platforms are accustomed<br />
to, because the event model makes it difficult to catch key events<br />
that should be processed outside of the component that happens to<br />
have the focus. Swing solves this problem in an elegant manner by providing<br />
a registry of keystrokes that works no matter which component<br />
that has the focus. It also provides a more flexible focus manager that<br />
makes it possible to control the tabbing order of a user interface more<br />
easily.<br />
An application of any complexity will need a well-designed menu system.<br />
Swing provides a much more comprehensive (and more regular)<br />
menu system than the AWT. The Swing menu system comes with keyboard<br />
mnemonics that allow you to activate visible menu items and hotkeys<br />
that let you access facilities from menus without having to navigate<br />
the menu hierarchy. For the more frequently-used features, you can<br />
mirror menu items with toolbar buttons. The Swing toolbar feature lets<br />
you add a toolbar to your application that can be fixed or allowed to float<br />
around the screen and subsequently re-dock with the application's window.<br />
Finally, Part 2 describes at length how Swing supports dialogs. Whereas<br />
the AWT was light on such things as information, warning and error message<br />
boxes, Swing has a full complement of them, each of which is easy to<br />
use and highly customizable. It also has dialogs that allow the user to<br />
choose files and colors and a whole set of components (such as lists, combo<br />
boxes, and tabbed panes) that you can use to build dialogs of your own.
KEYBOARD<br />
HANDLING,<br />
ACTIONS, AND<br />
SCROUING<br />
Handling the Focus<br />
Topics in This Chapter<br />
Keyboard Events and Shortcuts<br />
Using Actions to Respond to Events<br />
JScrollPaneJViewport, and JScrollBar<br />
Logical Scrolling and Keyboard Scrolling<br />
Component Autoscrolling
This chapter looks at several Swing mechanisms that you can use to build<br />
better applications. The main theme of the first half of the chapter is<br />
the need to be able to operate the application without using a mouse.<br />
This is often a difficult area for some software developers to get right because<br />
they rarely use the keyboard to navigate around an application, but to the<br />
expert user the ability to get quickly to the parts of the application that they use<br />
the most is of great importance. Getting to a piece of the application quickly<br />
usually means using accelerator keys or shifting the input focus manually with<br />
the Tab key until a particular control is reached. This chapter looks at the basic<br />
mechanisms that the Swing focus manager offers and shows how much simpler<br />
it is to create key accelerators with Swing than it was with the AWT.<br />
The use of keyboard accelerators leads naturally to the concept of<br />
Actions, which encapsulate application functionality in a way that is independent<br />
of the manner in which it is accessed. This chapter looks at using<br />
Actions as targets for accelerator keys, but later you'll see that they can be<br />
used with menus and toolbars as well.<br />
The second half of the chapter looks at the powerful Swing scrolling components,<br />
JScrollPane and JScrollBar. JScrollPane is much more useful<br />
than its AWT counterpart (ScrollPane). You'll see how to arrange for a<br />
component to be scrolled and how to customize the appearance and operation<br />
of JScrollPane. Finally, the two halves of the chapter are brought<br />
together by an example that shows how you can arrange for the user to be<br />
able to scroll a view using only the keyboard.<br />
453
454 Chapter 5 Keyboard Handling, Actions, and Scrolling<br />
Implementing Mouseless Operation<br />
One of the things that often separates software developers from users is the<br />
extent to which they make use of the mouse. Software developers probably<br />
use the mouse most of the time and would be lost (or at least would slow<br />
down noticeably) without it; by contrast, many non-programmers, especially<br />
those who use the same application frequently, find the mouse too slow to<br />
use—they quickly become familiar with the parts of the application that they<br />
want to use and learn how to use the keyboard to activate those controls that<br />
they use most often. Once you have learned where the most commonly-used<br />
accelerator keys are on the keyboard, the odds are that you can use them to<br />
do something much faster than you could by moving the mouse right across<br />
the screen to access the same control (or pull down a menu) and then activate<br />
it.<br />
For example, while writing this book, I invariably used CTRL+S to save<br />
what I had done rather than moving the mouse to the File menu, clicking to<br />
make it drop down, dragging the mouse down to Save and then clicking<br />
again. Using a keyboard accelerator like this is much faster and more convenient.<br />
Unfortunately, writing an application that works well both with the<br />
mouse and the keyboard is not trivial. In this section, you'll see how keyboard<br />
events are handled by <strong>Java</strong> programs as well as two features that, when properly<br />
used, will allow you to produce an application that works well for keyboard<br />
users—focus handling and keyboard accelerators.<br />
Focus Handling<br />
Mouse users are often unaware of what the concept of focus is. A mouse user<br />
wanting to press a button will move the pointer over the button and click it,<br />
but for the keyboard user, this simple operation breaks down into two steps.<br />
First, you have to convince the application that you want to do something<br />
with the button and, secondly, you have to carry out the operation. Getting<br />
the application to direct the next action to the button is called giving the button<br />
the input focus (which we will usually just refer to as the focus). Think of<br />
the focus as being the place to which keyboard operations will be directed.<br />
To make it possible to drive an application using only the keyboard, you must<br />
be able to reach every active component using only the keyboard and you<br />
must be able to activate the component with the keyboard as well.
Simple Focus Management<br />
Logical Scrolling and Forcing Visibility of an Area 455<br />
The Swing components provide support for both focus handling and keyboard<br />
activation, but your application still has to make proper use of these<br />
facilities to make them useful. Consider the example in Listing 5-1, which<br />
creates a frame with a button and a text input field. For the purposes of<br />
illustration, whatever you type in the text area will appear on the frames<br />
caption and, for convenience, you can use the button to clear out the text<br />
area.<br />
Listing 5-1 Automatic focus handling<br />
package <strong>JFC</strong>Book.Chapter5;<br />
import j avax.swing.*;<br />
import j ava.awt.*;<br />
import j ava.awt.event.*;<br />
public class FocusExamplel extends JFrame implements ActionListener<br />
{<br />
public FocusExamplel() {<br />
super("Focus 1") ;<br />
b = new JButton("Clear");<br />
t = new JTextField(35);<br />
this.getContentPane().add(t, BorderLayout.CENTER);<br />
this.getContentPane() .add(b, BorderLayout.WEST) ;<br />
b.addActionListener(this);<br />
t.addActionListener(this) ;<br />
}<br />
// ActionListener interface<br />
public void actionPerformed(ActionEvent e) {<br />
if (e.getSource() == b) {<br />
// The button has been pressed<br />
t.setText("");// Clear the text field<br />
} else {<br />
// Return pressed in the text field<br />
this.setTitle(t.getText());<br />
t.setText("");<br />
}<br />
}
456 Chapter 5 Keyboard Handling, Actions, and Scrolling<br />
Listing 5-1 Automatic focus handling (continued)<br />
public static void main(String[] args) {<br />
FocusExamplel f = new FocusExamplel();<br />
f .packO ;<br />
f.addWindowListener(new WindowAdapter() {<br />
public void windowClosing(WindowEvent evt) {<br />
System.exit(0);<br />
}<br />
});<br />
f.setVisible(true);<br />
}<br />
private JButton b; // The button<br />
private JTextField t; // The text field<br />
Run this program using the command<br />
j ava <strong>JFC</strong>Book.Chapters.FocusExamplel<br />
and try it without using the mouse. You will find that the text area is ready to<br />
receive input straight away, because the initial focus has been assigned to this<br />
component automatically. Now type something and press the return key and<br />
your text will appear on the caption bar. So far, so good. Now type some more<br />
into the text area. Suppose that you wanted to use the Clear button to discard<br />
the text you have just typed. With the mouse, you simply move the<br />
pointer over the button and click, but if you can't use the mouse, how can you<br />
get to the button?<br />
The focus can be moved between components by using Tab to go forward<br />
and Shift-Tab to move backward. In this case, since there are only two<br />
components, you can use either key to move to the button. When you get the<br />
focus onto the button, notice that it highlights itself—this is typical visual<br />
feedback when a component has the focus. Now that you're over the button,<br />
how do you "click" it? The JButton class is keyboard-aware: if you press the<br />
space bar, it acts as if you had clicked it with the mouse. Do this now and<br />
your text will disappear. To type some more text, just tab back to the text area<br />
and notice that the button loses its highlighting.<br />
Using the requestFocus Method<br />
What you have just seen was free functionality: the correct component got<br />
the focus when the application started and both components reacted prop-
Logical Scrolling and Forcing Visibility of an Area 457<br />
erly when they received the focus and the keyboard was used to activate<br />
them. This example used features built into Swing components, but it is possible<br />
to do better. After pressing the button to clear the text field, the button<br />
retains the focus, but there is little use for this. What does the user want to do<br />
next? It is unlikely that the next action will be to press the button again—far<br />
more likely than this is that the user wants to type some more text. So, why<br />
not pass the focus back to the text area so that the user can do this without<br />
pressing tab again? To allow you to do this, every component has a request-<br />
Focus method that can be used to pass it the focus. By adding a single line of<br />
code to the last example, the focus can be moved directly back to the text<br />
area after the button has done its job:<br />
public void actionPerformed(ActionEvent e) {<br />
}<br />
}<br />
if (e.getSource() == b) {<br />
// The button has been pressed<br />
t.setText(""); // Clear the text field<br />
t.requestPocus0;// Give focus to the text area<br />
} else {<br />
// Return pressed in the text field<br />
this.setTitle(t.getText());<br />
t.setText("");<br />
You can try this example using the command<br />
java <strong>JFC</strong>Book.Chapter5.FocusExample2<br />
Selecting the Component with Initial Focus<br />
Another use for requestFocus is to force the focus to be given to a specific<br />
component when the application starts. It was fortunate that the text area<br />
was allocated focus in this simple application; let's show a case in which the<br />
automatic choice is perhaps not the best. Suppose you were presented with a<br />
choice like that shown in Figure 5-1, which results from the command<br />
j ava <strong>JFC</strong>Book.Chapters.FocusExample3
458 Chapter 5 Keyboard Handling, Actions, and Scrolling<br />
Figure 5-1 The dangers of the wrong initial focus assignment.<br />
The question and the choices are reasonable; the problem is that the Yes<br />
button has the default keyboard focus, as you can see because it is highlighted.<br />
Now, if you press the space bar, perhaps accidentally, your machine<br />
will be closed down (not really—this is just an example!) and you probably<br />
won't be very amused. What we really wanted to do was to give the initial<br />
focus to the No button. Then, if the user accidentally activated it, all that<br />
would happen is that the frame would go away.<br />
To fix this problem, perhaps the initial focus should be assigned when the<br />
user interface is created, as shown in the following code extract:<br />
public FocusExample4() {<br />
super("Focus 4");<br />
}<br />
1 = new JLabel(<br />
"Do you want to shut down your machine?",<br />
SwingConstants.CENTER);<br />
// Add some space around the label<br />
BorderLayout m = new BorderLayout(10, 10);<br />
this.getContentPane().setLayout(m);<br />
bl = new JButton("Yes");<br />
b2 = new JButton("No");<br />
JPanel p = new JPanelO;<br />
p.add(bl);<br />
p.add(b2);<br />
this.getContentPane().add(1, BorderLayout.CENTER);<br />
this.getContentPane().add(p, BorderLayout.SOUTH);<br />
bl.addActionListener(this);<br />
b2.addActionListener(this);<br />
b2.requestFocus();
Logical Scrolling and Forcing Visibility of an Area 459<br />
Unfortunately, this simple solution doesn't work: the Yes button will still<br />
have the initial focus. To see this for yourself, use the command<br />
java <strong>JFC</strong>Book.Chapters.FocusExample4<br />
This happens because the focus isn't assigned until the window is about to<br />
appear on the screen, so any request made before this time is lost. The initial<br />
focus is always assigned to the first component added to the container, assuming<br />
that it can accept the focus. If it can't, the next component is tried and so<br />
on, until a component that can accept the focus is found. This search travels<br />
down through as many container levels as necessary to find a focusable component.<br />
This implies that it is possible to influence whether a component can<br />
accept the focus—you'll see exactly how this is done in the section, "AWT<br />
Component Tabbing Order." As a simple rule, remember that active components<br />
like JButton can accept the focus, while passive ones like JLabel usually<br />
cannot. So to get the focus to the correct place in this example, we just<br />
need to be careful about how we add children to our JPanel: the component<br />
that should receive the initial focus should be added first, as the code in Listing<br />
5-2 shows.<br />
<strong>Core</strong> Note<br />
Notice the careful wording—"while passive ones like JLabel usually<br />
cannot."As you'll see in the discussion on tabbing order, even a JLabel<br />
can be made to accept the focus.You'll even see an example of this in<br />
"Handling Keyboard Input" later in this chapter.<br />
Listing 5-2 Selecting the component that gets the initial focus<br />
package <strong>JFC</strong>Book.Chapters;<br />
import j avax.swing.*;<br />
import j ava.awt.*;<br />
import <strong>Java</strong>.awt.event.*;<br />
public class FocusExample5 extends JFrame implements<br />
ActionListener{<br />
public FocusExample5() {<br />
super("Focus 5");<br />
1 = new JLabel (<br />
"Do you want to shut down your machine?"
460 Chapter 5 Keyboard Handling, Actions, and Scrolling<br />
Listing 5-2 Selecting the component that gets the initial focus<br />
(continued)<br />
SwingConstants.CENTER);<br />
// Add some space around the label<br />
BorderLayout m = new BorderLayout(10, 10) ;<br />
this.getContentPane().setLayout(m);<br />
bl = new JButton("Yes");<br />
b2 = new JButton("No");<br />
JPanel p = new JPanelO ;<br />
// Add "No" button first to give it initial focus<br />
JPanel buttonPanel = new JPanelO;<br />
buttonPanel.setLayout(new BorderLayout() ) ;<br />
buttonPanel.add(b2, BorderLayout.EAST);<br />
buttonPanel.add(bl, BorderLayout.WEST);<br />
p.add(buttonPanel) ;<br />
this.getContentPane0 .add(l, BorderLayout.CENTER);<br />
this.getContentPane().add(p, BorderLayout.SOUTH);<br />
bl.addActionListener(this) ;<br />
b2.addActionListener(this) ;<br />
}<br />
// ActionListener interface<br />
public void actionPerformed(ActionEvent e) {<br />
if (e.getSource () == bl) {<br />
// Yes pressed<br />
1.setText("Machine being shut down....");<br />
} else {<br />
// No pressed - go away<br />
System.exit(0);<br />
}<br />
}<br />
public static void main(String[] args) {<br />
FocusExample5 f = new FocusExample5();<br />
f .packO ;<br />
f.addWindowListener(new WindowAdapter() {<br />
public void windowClosing(WindowEvent evt) {<br />
System.exit(0);<br />
}<br />
});
Logical Scrolling and Forcing Visibility of an Area 461<br />
Listing 5-2 Selecting the component that gets the initial focus<br />
(continued)<br />
}<br />
f.setVisible(true);<br />
private JButton bl; // The "Yes" button<br />
private JButton b2; // The "No" button<br />
private JLabel 1; // The label<br />
}<br />
Unfortunately, because the buttons are hosted by a JPanel that uses a<br />
FlowLayout manager, changing the order in which they are added to the<br />
panel would also reverse their order on the display, so that the No button would<br />
now appear on the left. Since the user interface order should not be dictated by<br />
an implementation detail, this problem is solved by using a BorderLayout<br />
instead of FlowLayout, because this allows us to specify where the buttons<br />
should go, independently of the order in which they are added to the container.<br />
Just doing this would have another undesirable effect—because there<br />
would only be east and west components on the panel, BorderLayout<br />
would move them to the left and right sides of the panel, leaving a large<br />
empty space in between them. To avoid this problem, we create a new panel<br />
with a Border-Layout onto which we mount the buttons, then mount this<br />
panel onto the original one, in the south of the BorderLayout. Now the button<br />
panel will be allowed to occupy only the space that it needs because its<br />
parent is managed by FlowLayout, as a result of which it will be just large<br />
enough to contain the two buttons placed side by side. You can try this example<br />
and verify that the focus is set correctly with the command<br />
j ava <strong>JFC</strong>Book.Chapter5.FocusExample5<br />
Explicitly Assigning the Initial Focus<br />
Component<br />
The automatic initial assignment of focus to the first focusable component<br />
in the container hierarchy of a frame works as described here for the <strong>Java</strong> 2<br />
platform and for some versions of JDK 1.1. Unfortunately, it doesn't work for<br />
JDK 1.1.8 and, in any case, it is sometimes not convenient to arrange your<br />
components in such a way as to satisfy the criterion used to make the JDK's<br />
choice of initial focus component. In cases like this, you can explicitly assign
462 Chapter 5 Keyboard Handling, Actions, and Scrolling<br />
the focus to a component by catching the event that is delivered when a window<br />
opens and invoking the required components requestFocus method.<br />
The main method of the example code that we have been looking at in this<br />
section already registers for windowEvents from the frame so that it can exit<br />
when the user closes the window. It is a simple matter to add a few lines to<br />
this code that will force the "No" button to be focused when the frame opens:<br />
public static void main(String[] args) {<br />
final FocusExample4A f = new FocusExample4A();<br />
f .pack() ;<br />
f.addWindowListener(new WindowAdapter() {<br />
public void windowClosing(WindowEvent evt) {<br />
}<br />
}<br />
});<br />
System.exit(0);<br />
public void windowOpened(WindowEvent evt) {<br />
f.b2.requestFocus();<br />
f.setvisible(true);<br />
}<br />
This code works no matter what the ordering of components within containers<br />
happens to be. To demonstrate this, type the command:<br />
java <strong>JFC</strong>Book.Chapters.FocusExample4A<br />
and you'll find that the "No" button will be focused when the window<br />
opens. This version of the example does not have the buttons reorganized to<br />
take account of the JDK's automatic focus choice, so without the code in the<br />
WindowListener, the "Yes" button would still have had the focus.<br />
Since addWindowListener is a method provided by the Window class,<br />
this technique works for all top-level windows derived from Window - that is,<br />
Window, JWindow, Frame, JFrame, Dialog ,and JDialog.<br />
Focus Events<br />
Movement of the focus can be monitored by registering to receive focus<br />
events, which are delivered when a component gains or loses the focus.<br />
These events are most often useful to component developers, who can use<br />
them to change a component's appearance to indicate whether it owns the<br />
focus.
<strong>Core</strong> Note<br />
Logical Scrolling and Forcing Visibility of an Area 463<br />
There is a good example of this in Chapter 13,"The Pluggable Look-and-<br />
Feel,"in which you'll see how to implement a new user interface for a<br />
button that changes depending on whether the button has the focus.<br />
To receive focus events, you create an object that implements the Focus-<br />
Listener interface and register it with the component or components that<br />
you want to monitor. The possible FocusEvents and the corresponding listener<br />
interface methods are shown in Table 5—1.<br />
Table 5-1 Focus Events<br />
Event ID Method Meaning<br />
FOCUS_GAINED f ocusGained Delivered when a component receives the<br />
input focus<br />
FOCUS_LOST focusLost Delivered when the input focus moves elsewhere<br />
Each of these methods gets a FocusEvent as its only argument. This<br />
event has two interesting properties. First, since it extends ComponentEvent,<br />
you can use the getComponent method to discover the component<br />
to which the event relates. Secondly, in the case of the FOCUS_LOST<br />
event, you can use the isTemporary method to determine whether the<br />
focus has been permanently or temporarily lost. We'll use the code in Listing<br />
5-3 to demonstrate both the use of focus events and the concept of temporary<br />
and permanent loss of focus.<br />
Listing 5-3 Adding a help message using focus events<br />
package <strong>JFC</strong>Book.Chapters;<br />
import javax.swing.*;<br />
import j ava.awt.*;<br />
import j ava.awt.event.*;<br />
public class FocusExample6 extends JFrame implements Action-<br />
Listener {
464 Chapter 5 Keyboard Handling, Actions, and Scrolling<br />
Listing 5-3 Adding a help message using focus events (continued)<br />
public FocusExample6() {<br />
super("Focus 6") ;<br />
this.getContentPane() .setBackground(UIManager. get-<br />
Color("control"));<br />
1 = new JLabel (<br />
"Do you want to shut down your machine?",<br />
SwingConstants.CENTER);<br />
1.setFont(new Font("sansserif", Font.BOLD, 14));<br />
h = new JLabel(" ", SwingConstants.LEFT);<br />
h.setFont(new Font("serif", Font.BOLD, 12));<br />
bl = new JButton("Yes");<br />
b2 = new JButton("No");<br />
this.getContentPane().setLayout(new GridBagLayout());<br />
GridBagConstraints c = new GridBagConstraints();<br />
c.gridx = 0;<br />
c.gridy = 0;<br />
c.gridwidth = GridBagConstraints.REMAINDER;<br />
c.gridheight = 1;<br />
c.weightx = 1.0;<br />
c.weighty = 1.0;<br />
c.fill = GridBagConstraints.BOTH,•<br />
c.insets = new Insets(20, 20, 20, 20);<br />
this.getContentPane().add(l, c);// The message text<br />
// Add the 'Yes' and 'No' buttons<br />
// 'No' MUST be added first so that it gets focus<br />
c.gridx = 1;<br />
c.gridy = 1;<br />
c.gridwidth = 1;<br />
c.weighty = 0.0;<br />
c.fill = GridBagConstraints.NONE;<br />
c.anchor = GridBagConstraints.CENTER;<br />
c.insets = new Insets(4, 4, 4, 4);<br />
this.getContentPane().add(b2, c); // No button - must<br />
// be before Yes<br />
c.gridx = 0;<br />
this.getContentPane() .add(bl, c) ;
Logical Scrolling and Forcing Visibility of an Area 465<br />
Listing 5-3 Adding a help message using focus events (continued)<br />
c.gridx = 0;<br />
c.gridy = 2;<br />
c.gridwidth = GridBagConstraints.REMAINDER;<br />
c.fill = GridBagConstraints.HORIZONTAL;<br />
this.getContentPane().add(h, c); // The help area<br />
bl.addActionListener(this);<br />
b2.addActionListener(this);<br />
// Catch focus events<br />
FocusListener f = new FocusListener() {<br />
public void focusGained(FocusEvent e) {<br />
JButton b = (JButton)e.getComponent();<br />
if (b == bl) {<br />
h.setText(<br />
"Press this button to shut down your system");<br />
} else {<br />
h.setText(<br />
"Press this button to cancel system shutdown");<br />
}<br />
}<br />
public void focusLost(FocusEvent e) {<br />
JButton b = (JButton)e.getComponent();<br />
String type = e.isTemporary() ? "temporarily" :<br />
"permanently";<br />
String blabel = (b == bl) ? "\"Yes\"" : "\"No\"";<br />
System, out .println( "The " + blabel + " button has " +<br />
type + " lost focus.");<br />
}<br />
};<br />
bl.addFocusListener(f);<br />
b2.addFocusListener(f);<br />
}<br />
// ActionListener interface<br />
public void actionPerformed(ActionEvent e) {<br />
if (e.getSource() == bl) {<br />
// Yes pressed<br />
1.setText("Machine being shut down....");<br />
} else {<br />
//No pressed - go away<br />
System.exit(0);
466 Chapter 5 Keyboard Handling, Actions, and Scrolling<br />
Listing 5-3 Adding a help message using focus events (continued)<br />
}<br />
}<br />
public static void main(String [] args) {<br />
FocusExample6 f = new FocusExample6();<br />
f.pack();<br />
f.addWindowListener(new WindowAdapter() {<br />
public void windowClosing(WindowEvent evt) {<br />
System.exit(0);<br />
}<br />
});<br />
f.setVisible(true);<br />
}<br />
private JButton bl; // The "Yes" button<br />
private JButton b2; // The "No" button<br />
private JLabel 1; // The label<br />
private JLabel h; // The "help" label<br />
}<br />
This example extends the one used above by adding a "help" message<br />
below the buttons, as shown in Figure 5-2. The idea is to show help for the<br />
currently focused button. When a button gets the focus, its help text is written<br />
to a JLabel at the bottom of the frame. To implement this, we create a<br />
FocusListener that reacts to FOCUS_GAINED events by extracting the reference<br />
to the component concerned from the FocusEvent and using that to<br />
choose between two different help messages. Since the "No" button gets the<br />
focus automatically when the application is started, its message will appear<br />
without needing to write any special code.<br />
If you tab between the two buttons, you will see the help message change<br />
and you will also see messages like this in the window in which you started<br />
the program:<br />
The "No" button has permanently lost focus.<br />
The "Yes" button has permanently lost focus.<br />
The "No" button has temporarily lost focus.<br />
The "No" button has permanently lost focus.<br />
These messages are generated by the focusLost method, based on the<br />
value returned by isTemporary when applied to each FocusEvent. When<br />
you tab between the buttons, you will notice that the previous button loses the<br />
focus permanently; to give it back, you would need to tab back into that button.
Figure 5-2 Adding a help message using focus events.<br />
Logical Scrolling and Forcing Visibility of an Area 467<br />
A temporary loss of focus occurs when you switch to a different window, causing<br />
this one to be deactivated, or when you iconify the window. The difference in<br />
the case of a temporary loss of focus is that you don't need to tab back into the<br />
button for it to get the focus again—the focus will return (with another<br />
FOCUS_GAINED event) when you reactivate or deiconify the application.<br />
AWT Component Tabbing Order<br />
As has been said, you can move the focus between components using the Tab<br />
or Shift-Tab keys. But what determines which is the next component to<br />
receive the focus? Every container has a defined tabbing order that dictates<br />
the order in which the focus moves between components. When you press<br />
Tab, the focus moves to the next component in the tabbing order and with<br />
Shift-Tab it moves to the previous component. The determination of the<br />
tabbing order among AWT components is simple—it is the same as the order<br />
in which the components appear in the child list of their parent container,<br />
which is usually the order in which they are added to the container. Hence, in<br />
the example in Listing 5—2, you would expect the tabbing order to be the No<br />
button followed by the Yes button, which is what you get. If a container is<br />
added inside another container, when that container is reached in the tabbing<br />
order, its first eligible component gets the focus, and so on. Determination<br />
of the tabbing order in Swing is, however, slightly more complex.<br />
Swing Component Tabbing Order<br />
The default Swing tabbing order within a container is more natural than that<br />
of the AWT because it is based on the visual layout of the container, not on<br />
the order in which components were added to the container, which has no
468 Chapter 5 Keyboard Handling, Actions, and Scrolling<br />
meaning for the end user. Thus, for example, if a container has a single row of<br />
buttons, the tabbing order for that container would start with the button on<br />
the left and proceed from left to right, so that all of the buttons would be tra-<br />
versed in left-to-right order. If this container had two rows of buttons, the<br />
tabbing order would be across the top row, then to the leftmost button on the<br />
second row and across the second row from left-to-right. This would be true<br />
whether or not the buttons were added to the container in this order. The<br />
example in Listing 5-4 shows the difference between the default AWT and<br />
Swing tab order.<br />
Listing 5^4 Illustrating Swing and AWT tab order (continued)<br />
package <strong>JFC</strong>Book.Chapters;<br />
import j avax.swing.*;<br />
import j ava.awt.*;<br />
import j ava.awt.event.*;<br />
public class TabOrder extends JFrame {<br />
public TabOrder(String title) {<br />
super(title);<br />
JPanel mainPanel = new JPanelO;<br />
mainPanel.setLayout(new GridBagLayout ()) ;<br />
GridBagConstraints c = new GridBagConstraints();<br />
// Do the left column: the labels<br />
c.gridx = 0;<br />
c.gridy = GridBagConstraints.RELATIVE;<br />
c.insets = new Insets (2, 2, 2, 2);<br />
mainPanel.add(new JLabel("Name:", JLabel.RIGHT) , c) ;<br />
mainPanel.add(new JLabel("Street:", JLabel.RIGHT), c);<br />
mainPanel.addtnew JLabel("City:", JLabel.RIGHT), c);<br />
mainPanel.add(new JLabel("Zip:", JLabel.RIGHT), c);<br />
mainPanel.add(new JLabel("E-mail:", JLabel.RIGHT), c);<br />
// Middle column: the text fields<br />
c.gridx = 1;<br />
c.weightx = 1.0;<br />
c.fill = GridBagConstraints.HORIZONTAL;<br />
for (int i = 0; i < 5; i++) {<br />
mainPanel.add(new JTextField(32) , c) ;<br />
}
Logical Scrolling and Forcing Visibility of an Area 469<br />
Listing 5^4 Illustrating Swing and AWT tab order (continued)<br />
// Right side: two buttons<br />
c.gridx = 2;<br />
c.weightx = 0.0;<br />
mainPanel.add(new JButton("OK"), c);<br />
mainPanel.add(new JButton("Cancel"), c) ;<br />
// Add the main panel to the frame<br />
getContentPane() .add(mainPanel) ;<br />
} '<br />
public static void main(String[] args) {<br />
String title = "Tab Order (Swing style)";<br />
if (args.length > 0 && args[0] .equals("awt")) {<br />
DefaultFocusManager.disableSwingFocusManager();<br />
title = "Tab Order (AWT style)";<br />
}<br />
JFrame f = new TabOrder(title);<br />
f.pack();<br />
f.addWindowListener(new WindowAdapter() {<br />
public void windowClosing(WindowEvent evt) {<br />
System.exit(0);<br />
}<br />
});<br />
f.setVisible(true);<br />
}<br />
}<br />
This example creates a form on which there are five input fields stacked<br />
vertically. To the left of each field is a label that indicates what is to be typed<br />
into each field and to the right of the input fields are two buttons. You can<br />
run this example using either of the following two commands:<br />
<strong>Java</strong> <strong>JFC</strong>Book.Chapters.TabOrder<br />
<strong>Java</strong> <strong>JFC</strong>Book.Chapters.TabOrder awt<br />
If you use the first command, the Swing focus manager is used. The second<br />
command disables the Swing focus manager, so you can use it to see how<br />
this layout would be handled by the AWT. You'll see how to disable the Swing<br />
focus manager in "Controlling the Focus Mechanism" later in this chapter.<br />
Both commands create the same layout, as shown in Figure 5-3; only the<br />
caption bar title differs between the two commands.
470 Chapter 5 Keyboard Handling, Actions, and Scrolling<br />
Figure 5-3 A form to show Swing/AWT tab order differences.<br />
Whichever form of the command you use, the focus is assigned initially to<br />
the text field labeled Name. This might surprise you—shouldn't the first component<br />
added to the container, which is the Name label, get the initial focus?<br />
The initial focus goes to the first eligible component in the container, not the<br />
first component. The label is not eligible beeause its isFocusTraversable<br />
method returns false. Here is how this method is defined by Component:<br />
public boolean isFocusTraversable();<br />
Inactive components like JLabel return false from this method, while<br />
buttons, text fields, and other components that can accept the focus all return<br />
true. To determine the initial focus component, the container is scanned<br />
from the first component added to find the first component for which isFocusTraversable<br />
returns true. In this ease, the first text field will therefore<br />
get the initial focus. If you are creating a custom component, you should<br />
override isFocusTraversable to indicate whether your component can<br />
accept the focus. If it can't, it won't appear in its container's tabbing order<br />
and any focus-moving operations will ignore it.<br />
If you run the AWT version of the command and keep pressing the Tab<br />
key, you'll find that the focus moves down the list of text fields until it reaches<br />
the bottom, then passes to the OK button and the Cancel button, and finally<br />
back to the Name text field again. This is probably the order that you want,<br />
because the user will most likely fill in the form from the top down and use<br />
Tab to get between the fields, then Tab over to the OK button and press it.<br />
You get this order free because the text fields were all added in the order in<br />
which you want them to be filled in, followed by the OK button and then the<br />
Cancel button and, as you know, the AWT tabbing order matches the order<br />
in which the components were added to the container.<br />
If you now run the Swing version of this command (by omitting the "awt"<br />
argument on the command line), you'll immediately see a difference. The
Logical Scrolling and Forcing Visibility of an Area 471<br />
focus starts in the same place, but pressing Tab moves it to the OK button,<br />
followed by the Street field, the Cancel button and then the City field.<br />
This happens because the Swing tabbing order is determined by the final layout<br />
of the container, not by the way in which the components were added.<br />
<strong>Core</strong> Note<br />
Even though Swing's tabbing order is determined by layout, the initial focus<br />
still goes to the first component added to the container.<br />
To determine the default tabbing order, the Swing focus manager compares<br />
each pair of components in the container, looking at their x and y coordinates.<br />
If the y coordinates are "close"—such as, within 10 pixels of each<br />
other, it orders the components based on the x coordinate, so that the component<br />
with the lower x coordinate comes first. If the y coordinates are not<br />
close, then the ordering is based on the y coordinate, with the lower y coordinate<br />
coming before the higher one. Put simply, components on the same<br />
row (or nearly the same row) are ordered from left to right and come before<br />
components on a lower row, but after components on a higher row.<br />
In this example, then, the components on the top row all have approximately<br />
the same y coordinate that is lower than that of any other component,<br />
so the tab order will traverse the top row first and, within that row it will<br />
travel from low to high x coordinates—in other words, from left to right.<br />
Often, this will be what you want and it is probably more natural than the<br />
AWT arrangement most of the time. This example, of course, has been chosen<br />
to highlight one case in which it does not produce the desired result.<br />
Changing the Default Tabbing Order<br />
With the AWT, to change the tabbing order, you have to change the order in<br />
which the components are added to the container which, as we have alreadyseen,<br />
is somewhat artificial. Indeed, this sometimes causes you to have to add<br />
extra panels and change layout managers in order to get the tabbing order<br />
that you want. With Swing, you can change the tabbing order in two ways:<br />
• Move components into a different container.<br />
• Explicitly set the next and previous components for particular<br />
components where the order is wrong.
472 Chapter 5 Keyboard Handling, Actions, and Scrolling<br />
Using a Container to Change the Tabbing Order<br />
The default Swing tabbing order only makes sense within a single container—it<br />
doesn't jump from one arbitrary component in one container to an<br />
arbitrary component in another one. But you can use containers to change<br />
the tabbing order. Here, for example, you could move the buttons onto a<br />
panel of their own. What happens then is that the panel is considered on its<br />
own as a member of the main form's tabbing order. Suppose you did this by<br />
changing the code shown in Listing 5-4 to that shown below, where the modifications<br />
are highlighted in bold:<br />
for (int i = 0; i < 5; i++) {<br />
mainPanel.add(new JTextField(32), c);<br />
}<br />
// Right side: two buttons on a separate panel<br />
JPanel buttonPanel = new JPanelO;<br />
buttonPanel.setLayout(new GridBagLayout());<br />
c.gridx = 2;<br />
c.weightx = 0.0;<br />
c.anchor = GridBagConstraints.NORTH;<br />
c.gridheight = GridBagConstraints.REMAINDER;<br />
mainPanel.add(buttonPanel, c);<br />
// Put the buttons on the panel<br />
c.gridx =0;<br />
c.weightx = 1.0;<br />
c.gridheight = 1;<br />
buttonPanel.add(new JButton("OK"), c) ;<br />
buttonPanel.add(new JButton("Cancel"), c);<br />
// Add the main panel to the frame<br />
getContentPane().add(mainPanel);<br />
The tabbing order for the form would then be:<br />
• Name field<br />
• Button Panel<br />
• Street Field<br />
• City Field<br />
• Zip field<br />
• E-mail field<br />
Note that the button panel appears second in the tabbing order because of<br />
its position in the form's geometry—its y coordinate is the same as that of the
Logical Scrolling and Forcing Visibility of an Area 473<br />
first text field and its x coordinate is greater, so it comes after the first text<br />
field and before the second one. You can see what happens with this change<br />
in place with the command:<br />
<strong>Java</strong> <strong>JFC</strong>Book.Chapter5.Tab0rder2<br />
You'll find that the tab order has indeed changed—after the text field, the<br />
OK button gets the focus, followed by the Cancel button, then the rest of the<br />
text fields in order. This is different, but not correct. You get this tab order<br />
because the first Tab takes the focus from the Name field to the button panel<br />
(see the order above), where it starts following the tab order of that panel.<br />
Inside the panel, the tab order is the OK button followed by the Cancel button,<br />
because of their respective y coordinates. When the end of this order<br />
has been reached, the focus moves out of the panel and back up to the original<br />
form, where it goes first to the Street field and then continues through<br />
the original order shown in the list above.<br />
There is, however, another way to regroup these components so that the<br />
correct tabbing order is obtained. The problem with the first attempt was<br />
that the button panel was on the main panel and therefore was counted in its<br />
tabbing order. The simplest way to get around this is to move it off the main<br />
panel and place it on the content pane alongside the main panel. The tabbing<br />
order within the main panel will then be the text fields in top-to-bottom<br />
order. On the button panel, the tabbing order will be the OK button followed<br />
by the Cancel button. Finally, the main panel will be traversed before the<br />
button panel because their y coordinates are equal and the main panel's x<br />
coordinate is lower. Listing 5—5 shows the implementation of this idea.<br />
Here, the button panel is added to the content pane directly. Because the<br />
content pane is managed by a BorderLayout, the add line for the main<br />
panel is changed to specify the Center position and the button panel is<br />
added in the East position. In order to make the OK and Cancel buttons<br />
stay at the top of the button panel, a dummy panel is added to the button<br />
panel. The GridBagLayout manager will expand this panel to take up the<br />
empty space at the bottom, as you saw in a similar example in Chapter 3. If<br />
you run this version of the program using the command<br />
<strong>Java</strong> <strong>JFC</strong>Book.Chapter5.Tab0rder3<br />
you'll find that the text fields and buttons are traversed in the correct order.<br />
Changing the Tabbing Order Explicitly<br />
Swing offers another way to change the tabbing order of JComponents: the<br />
setNextFocusableComponent method:
474 Chapter 5 Keyboard Handling, Actions, and Scrolling<br />
Listing 5-5 Using containers to change the tab order (continued)<br />
package <strong>JFC</strong>Book.Chapters;<br />
import javax.swing.*;<br />
import j ava.awt.*;<br />
import j ava.awt.event.*;<br />
public class Tab0rder3 extends JFrame {<br />
public Tab0rder3(String title) {<br />
super(title);<br />
JPanel mainPanel = new JPanelO;<br />
mainPanel.setLayout(new GridBagLayout());<br />
GridBagConstraints c = new GridBagConstraints();<br />
// Do the left column: the labels<br />
c.gridx = 0;<br />
c.gridy = GridBagConstraints.RELATIVE;<br />
c.insets = new Insets(2, 2, 2, 2);<br />
mainPanel.add(new JLabel("Name:", JLabel.RIGHT) , c) ;<br />
mainPanel.add(new JLabel("Street:", JLabel.RIGHT), c);<br />
mainPanel.add(new JLabel("City:", JLabel.RIGHT), c);<br />
mainPanel.add(new JLabel("Zip:", JLabel.RIGHT), c);<br />
mainPanel.add(new JLabel("E-mail:", JLabel.RIGHT), c) ;<br />
// Middle column: the text fields<br />
c.gridx = 1;<br />
c.weightx = 1.0;<br />
c.fill = GridBagConstraints.HORIZONTAL;<br />
for (int i = 0; i < 5; i++) {<br />
mainPanel.add(new JTextField(32), c);<br />
}<br />
// Right side: two buttons on a separate panel<br />
JPanel buttonPanel = new JPanelO;<br />
buttonPanel.setLayout(new GridBagLayout());<br />
c.gridx = 2;<br />
c.weightx = 0.0;<br />
c.anchor = GridBagConstraints.NORTH;<br />
c.gridheight = GridBagConstraints.REMAINDER;<br />
// Put the buttons on the panel<br />
c.gridx = 0;
Logical Scrolling and Forcing Visibility of an Area 475<br />
Listing 5-5 Using containers to change the tab order (continued)<br />
}<br />
c.weightx = 1.0;<br />
c.gridheight = 1 ,buttonPanel.add(new<br />
JButton("OK"), c);<br />
buttonPanel.add(new JButton("Cancel"), c);<br />
c.weighty = 1.0;<br />
buttonPanel. add (new JPanelO , c) ;<br />
// Add the main panel and the button panel to the frame<br />
getContentPane().add(mainPanel, BorderLayout.CENTER);<br />
getContentPane().add(buttonPanel, BorderLayout.EAST);<br />
} '<br />
public static void main(String [] args) {<br />
String title = "Tab Order";<br />
JFrame f = new TabOrder3(title);<br />
f.pack();<br />
f.addWindowListener(new WindowAdapter() {<br />
public void windowClosing(WindowEvent evt) {<br />
System.exit(0);<br />
}<br />
});<br />
f.setvisible(true);<br />
}<br />
public void setNextFocusableComponent(Component acomp);<br />
You can use the setNextFocusableComponent method to explicitly<br />
specify which component gets the focus after the one to which the method is<br />
applied. This method belongs to JComponent, so although you can give it<br />
any Component as an argument, you can't set up tabbing/rom an AWT Component<br />
this way, because it doesn't have a setNextFocusableComponent<br />
method. This method, then, is only really useful when you are only using<br />
Swing components (which is probably the normal case).<br />
To arrange the tabbing order required for our example, you would leave all<br />
of the text fields and components on the original panel and set them up as<br />
before. Then, you would apply setNextFocusableComponent to the Name<br />
field, pointing it to the Street field. Similarly, you apply this method to the<br />
Street field and point it to the City field and so on. The E-mail field<br />
would then be pointed to the OK button and the OK button to the Cancel<br />
button. Finally, to close the loop, the setNextFocusableComponent
476 Chapter 5 Keyboard Handling, Actions, and Scrolling<br />
method is used to ensure that the focus passes from the Cancel button back<br />
to the first text field. Listing 5-6 shows how this works.<br />
Listing 5-6 Using setNextFocusableComponent<br />
package <strong>JFC</strong>Book.Chapters;<br />
import javax.swing.*;<br />
import j ava.awt.*;<br />
import j ava.awt.event.*;<br />
public class Tab0rder4 extends JFrame {<br />
public Tab0rder4(String title) {<br />
super(title);<br />
JPanel mainPanel = new JPanelO;<br />
mainPanel.setLayout(new GridBagLayout());<br />
GridBagConstraints c = new GridBagConstraints0;<br />
// Do the left column: the labels<br />
c.gridx = 0;<br />
c.gridy = GridBagConstraints.RELATIVE;<br />
c.insets = new Insets(2, 2, 2, 2);<br />
mainPanel.add(new JLabel("Name:", JLabel.RIGHT), c);<br />
mainPanel.add(new JLabel("Street:", JLabel.RIGHT), c);<br />
mainPanel.add(new JLabel("City:", JLabel.RIGHT) , c) ;<br />
mainPanel.add(new JLabel("Zip:", JLabel.RIGHT), c);<br />
mainPanel.add(new JLabel("E-mail:", JLabel.RIGHT), c);<br />
// Middle column: the text fields<br />
c.gridx = 1;<br />
c.weightx = 1.0;<br />
c.fill = GridBagConstraints.HORIZONTAL;<br />
JTextField textFields[] = new JTextField[5];<br />
for (int i = 0; i < 5; i++) {<br />
textFields[i] = new JTextField(32);<br />
mainPanel.add(textFields[i], c);<br />
}<br />
// Explicitly set tab order for the text fields<br />
for (int i = 0; i < 4; i++) {<br />
textFields[i].setNextFocusableComponent(<br />
textFields[i + 1]);<br />
}
Logical Scrolling and Forcing Visibility of an Area 477<br />
Listing 5-6 Using setNextFocusableComponent (continued)<br />
// Right side: two buttons<br />
c.gridx = 2;<br />
c.weightx = 0.0;<br />
JButton okButton = new JButton("OK");<br />
mainPanel.add(okButton, c);<br />
JButton cancelButton = new JButton ( "Cancel");<br />
mainPanel.add(cancelButton, c);<br />
// Place the buttons in the tabbing order<br />
textFields[4].setNextFocusableComponent(okButton);<br />
okButton.setNextFocusableComponent(cancelButton);<br />
// Finally, point the Cancel button back to the<br />
// first text field.<br />
cancelButton.setNextFocusableComponent(textFields[0] ) ;<br />
// Add the main panel to the frame<br />
getContentPane().add(mainPanel);<br />
} '<br />
public static void main(String [] args) {<br />
String title = "Tab Order 4";<br />
JFrame f - new TabOrder4(title);<br />
}<br />
f.pack();<br />
f.addWindowListener(new WindowAdapter() {<br />
public void windowClosing(WindowEvent evt) {<br />
System.exit (0) ;<br />
}<br />
});<br />
f.setVisible(true);<br />
You can try this example for yourself with the command:<br />
java <strong>JFC</strong>Book.Chapter5.Tab0rder4<br />
Note that you are not actually obliged to complete a closed tabbing order<br />
as has been done here. If you leave the tabbing order open by not calling the<br />
setNextFocusableComponent method, then the Swing focus manager<br />
reverts to its geometry-based mechanism to decide where to move the focus<br />
from that component. In the case of this example, if setNextFocusable-
478 Chapter 5 Keyboard Handling, Actions, and Scrolling<br />
Component had not been called to direct focus from the Cancel button to<br />
the Name field, then it would have passed to the City field instead.<br />
Controlling the Focus Mechanism<br />
The focus mechanism is controlled by the Swing focus manager, implemented<br />
in the DefaultFocusManager class, which is derived from the<br />
basic focus manager class FocusManager. FocusManager is an abstract<br />
class, defined as follows:<br />
public abstract class FocusManager {<br />
public FocusManager();<br />
public static FocusManager getCurrentManager();<br />
public static void setCurrentManager(<br />
FocusManager aFocusManager);<br />
public static void disableSwingFocusManager();<br />
public static boolean isFocusManagerEnabled();<br />
public abstract void processKeyEvent(<br />
Component focusedComponent, KeyEvent anEvent);<br />
public abstract void focusNextComponent(<br />
Component aComponent);<br />
public abstract void focusPreviousComponent(<br />
Component aComponent);<br />
}<br />
The FocusManager class itself provides complete implementations of the<br />
four static methods, which are all concerned with managing focus managers.<br />
The three abstract methods are placeholders for code that implements the<br />
response of a particular focus manager to key strokes and determines how<br />
the focus moves from one component to another, either forward (in the case<br />
of f ocusNextComponent) or backward (for f ocusPreviousComponent).<br />
Concrete implementations of these three methods that implement the policies<br />
that have been described in this section are provided by Def aultFocusManager.<br />
You've already seen the focus policy operated by Def aultFocusManager,<br />
which gets control whenever a key press occurs within a JComponent. Every<br />
key pressed when the focus is in any JComponent is passed first to the<br />
installed focus manager's processKeyEvent method, which must either<br />
return having done nothing with it, or handle it as a focus-changing stimulus<br />
and consume the KeyEvent that it received. As an example, Def aultFocusManager<br />
usually consumes all KeyEvents that contain the Tab key and<br />
does nothing with the others. KeyEvents that are not consumed are processed<br />
by the component in the usual way.
Logical Scrolling and Forcing Visibility of an Area 479<br />
In this section it is the four static methods that are of interest. The get-<br />
CurrentManager and setCurrentManager methods allow you to get and<br />
change the focus manager that your application uses. The definition of these<br />
methods seems to imply that there is a single focus manager in operation at<br />
any given time, but this is not strictly true. In fact, there is one focus manage r<br />
per thread group within the application: All threads in a thread group share<br />
the same focus manager.<br />
<strong>Core</strong> Note<br />
Thread groups are discussed in <strong>Core</strong> <strong>Java</strong> 2,Volume I: Fundamentals.<br />
If you use setCurrentManager to install a custom focus manager, this<br />
change affects only the threads in the same thread group as the one that<br />
made the call: threads in other thread groups, if there are any, continue to<br />
use the previous focus manager. This design is motivated by the implementation<br />
of Web browsers, which isolate each applet in a single thread group: a<br />
change of focus manager by an applet would then only affect that applet.<br />
In practice, it is unlikely that a <strong>Java</strong> application will want to have thread<br />
groups with different focus managers because, in fact, the focus manager is<br />
only useful when processing events. Events are handled by the AWT event<br />
handling thread which is in the thread group in which the application starts.<br />
If you create a new thread group and change its focus manager, this will have<br />
no effect because AWT events will not be processed in that thread group and<br />
so the new focus manager will not be invoked there.<br />
Initial Selection of Focus Manager<br />
When a Swing application starts, there is actually no active focus manager. A<br />
focus manager is created only when the getCurrentManager method of<br />
FocusManager is invoked, which is usually when a key press is processed by<br />
the processKeyEvent method of JComponent. This method looks in a<br />
hash table that maps thread groups to focus managers. Since this table is initially<br />
empty, the first key event will create a focus manager for the calling<br />
thread group and enter it into the hash table. Subsequent calls to getCurrentManager<br />
from the same thread group will return the same focus manager<br />
instance.<br />
The default focus manager is not hardwired into an application or an<br />
applet—it is, in fact, a property held under the symbolic name FocusManager<br />
. FOCUS_MANAGER_CLASS_PROPERTY in the application's UIDef aults<br />
table. You'll see in Chapter 13 how to change the value of this property. By
480 Chapter 5 Keyboard Handling, Actions, and Scrolling<br />
doing so, you can install your own custom focus manager that is automatically<br />
selected for all thread groups. By default, of course, the value of this property<br />
is javax. swing.Def aultFocusManager. The subject of writing custom<br />
focus managers is beyond the scope of this book, but it is not a difficult task.<br />
The information presented in this section, together with the source code for<br />
the FocusManager and Def aultFocusManager classes, should be enough<br />
to enable you to write one of your own.<br />
Disabling the Focus Manager<br />
If you want to disable the Swing focus manager and use the AWT one<br />
instead, as was done in Listing 5-4, you can use the disableSwingFocus-<br />
Manager method to do so:<br />
public static void main(String[] args) {<br />
String title = "Tab Order (Swing style)";<br />
if (args.length > 0 && args [0] .equals("awt")) {<br />
DefaultFocusManager.disableSwingFocusManager();<br />
title = "Tab Order (AWT style)";<br />
}<br />
This method, like setCurrentManager, applies only to the thread group<br />
containing the thread that invoked it, so it is most useful if it is invoked as<br />
soon as the application starts. The isFocusManagerEnabled method<br />
allows you to check wh ether the Swing focus manager is enabled. This<br />
method returns true if the AWT manager is not enabled, which means that<br />
the Swing manager or a custom focus manager is active in the current thread<br />
group.<br />
The Swing focus manager is actually disabled not by installing a subclass of<br />
FocusManager that implements AWT focus manager semantics, but by<br />
installing a special focus manager called DisabledFocusManager, which<br />
has empty implementations for processKeyEvent, focusNextComponent,<br />
and focusPreviousComponent. Of these, only the first matters in<br />
this case—because it is empty, it never consumes Tab keys, which has the<br />
effect of passing them to the AWT focus manager instead.<br />
One reason to switch off the Swing focus manager is to provide compatibility<br />
with the AWT tabbing order in an application that uses Swing components<br />
but does not want the extended Swing focus manager facilities (i.e., the<br />
setNextFocusableComponent method). It can also be a good idea to<br />
switch the Swing focus manager off if you are mixing Swing and AWT components,<br />
because you cannot use the setNextFocusableComponent<br />
method with AWT components to correct the default tabbing order when it<br />
doesn't suit your application.
Logical Scrolling and Forcing Visibility of an Area 481<br />
Which Component Has the Input Focus?<br />
So far in this section you've seen how the tabbing order is determined and<br />
how to use FocusListeners to detect focus changes. Sometimes, though,<br />
you will need to know which component actually has the input focus. Given a<br />
specific JComponent, you can tell very easily whether it has the focused by<br />
invokingthe following method:<br />
public boolean hasFocusl);<br />
While this method allows you to take different action based on whether a<br />
given component has the focus, it doesn't address the problem of locating the<br />
focused component when you have no idea which one it might be. There are<br />
several approaches that you can use to locate the focused component.<br />
The window class has a getFocusOwner method which returns a reference<br />
to the component within the window that has the focus, if any:<br />
public Component getFocusOwner();<br />
Since this is a Window method, it can be used for Window, JWindow,<br />
Frame, Dialog, JFrame and JDialog. Note that this method returns a<br />
Component not a JComponent, so it works even if a non-Swing component<br />
has the focus. If no component in the window has the focus, this method<br />
returns null. Note that getFocusOwner works only when the window that<br />
is invoked on is active—if you call it when the window has been deactivated<br />
then, strictly speaking, no component in the window can have the input<br />
focus, so it returns null.<br />
<strong>Core</strong> Note<br />
Beginning with <strong>Java</strong> 2 version 1.3, JlnternalFrame also has a<br />
getFocusOwner method which works if some component in the internal<br />
frame has the focus. Internal frames are discussed in detail in Chapter 12.<br />
Another way to find out where the focus lies is to use the static f indFocusOwner<br />
method of the SwingUtilities class:<br />
public static Component findFocusOwner(Component comp);<br />
This method first checks whether comp has the input focus. If it does not<br />
and it is a Container, it recursively descends the container looking at all of<br />
its child components until it finds the focused Component. If neither the<br />
given Component nor any of the Components contained within it have the<br />
focus, this method returns null. In practice, this method only works if the
482 Chapter 5 Keyboard Handling, Actions, and Scrolling<br />
focus is in a JComponent because it relies on the hasFocus method, which<br />
is not implemented by Component. Unless you are mixing Swing and AWT<br />
components, this is not likely to be an issue.<br />
Both of these approaches rely on knowing which Window or Container<br />
the focus might be in. In many cases, this is an acceptable restriction, either<br />
because your application only has one top-level window ot because your code<br />
is window-centric and only needs to know where the focus is if it is inside a<br />
given window. Unfortunately, neither the AWT nor Swing provide a method<br />
that you can use to conveniently find out where the focus is without any prior<br />
knowledge. However, as you'll see in Volume 2, if you have the <strong>Java</strong> Accessibility<br />
Utilities installed, you can find out which Window contains the focused<br />
component, which allows you to locate the focused component itself using<br />
either of the other approaches described above.<br />
Handling Keyboard Input<br />
Having seen how to control the keyboard focus, this section will briefly show<br />
you how the keyboard itself is seen by <strong>Java</strong> applications. Most <strong>Java</strong> programs<br />
will probably not deal this directly with keyboard input, since Swing provides<br />
several standard controls that allow the user to type text into an application<br />
and a higher-level mechanism that allows direct handling of keys that will be<br />
described later in this chapter. You will probably only need to handle keyboard<br />
events for yourself if you plan to write a custom component that reacts<br />
to keyboard input or you want to create a custom look-and-feel for one or<br />
more of the Swing components that interact with the keyboard.<br />
Key Events<br />
All keyboard activity is turned into one of three keyboard events, delivered as<br />
a j ava. awt. event. KeyEvent object: KEY_PRESSED, KEY_RELEASED, and<br />
KEY_TYPED. While the purpose of these events might seem obvious from<br />
their names, there are a few subtleties to consider as will become evident if<br />
you run the program shown in Listing 5-7 using the command:<br />
<strong>Java</strong> <strong>JFC</strong>Book.Chapters.KeyExample<br />
Following a familiar pattern, this program creates a window with an empty<br />
text area and a label below it, then attaches a listener to the label. Since the<br />
idea is to capture keyboard actions on the label, the program creates an object<br />
that implements the KeyListener interface, which is defined as follows:
Listing 5-7 Receiving key events<br />
package <strong>JFC</strong>Book.Chapters;<br />
import j avax.swing.*;<br />
import j ava.awt.*;<br />
import j ava.awt.event.*;<br />
Logical Scrolling and Forcing Visibility of an Area 483<br />
public class KeyExample implements KeyListener {<br />
KeyExample(JTextArea t) {<br />
this.t = t;<br />
}<br />
// KeyListener Interface<br />
public void keyPressed(KeyEvent e) {<br />
showKeyEvent(e);<br />
}<br />
public void keyReleased(KeyEvent e) {<br />
showKeyEvent(e);<br />
}<br />
public void keyTyped(KeyEvent e) {<br />
showKeyEvent(e);<br />
}<br />
// Describe a key event<br />
private void showKeyEvent(KeyEvent e) {<br />
t.append(e + " [action? " + e.isActionKey() + "]\n");<br />
}<br />
public static void main(String [] args) {<br />
JFrame f = new JFrame("Key Events");<br />
JTextArea t = new JTextArea(20, 80);<br />
KeyExample k = new KeyExample(t);<br />
JLabel 1 = new JLabel("Press keys here",<br />
SwingConstants.CENTER) {<br />
public boolean isFocusTraversable() {<br />
return true;<br />
}<br />
};<br />
f.addWindowListener(new WindowAdapter() {<br />
public void windowClosing(WindowEvent evt) {<br />
}<br />
});<br />
System.exit(0);
484 Chapter 5 Keyboard Handling, Actions, and Scrolling<br />
Listing 5-7 Receiving key events (continued)<br />
1.addKeyListener(k) ;<br />
1.addMouseListener(new MyMouseAdapter(1));<br />
f.getContentPane().add(1, BorderLayout.SOUTH);<br />
f.getContentPane().add(new JScrollPane(t),<br />
BorderLayout.CENTER);<br />
f.pack();<br />
f.show();<br />
}<br />
// Instance data<br />
private JTextArea t;// The text area<br />
}<br />
//<br />
// This adapter class ensures that we can pass the focus to the<br />
label<br />
class MyMouseAdapter extends MouseAdapter {<br />
MyMouseAdapter(Component c) {<br />
this.c = c;<br />
}<br />
}<br />
public void mousePressed(MouseEvent e) {<br />
c.requestFocus () ;<br />
}<br />
private Component c; // Component to get focus<br />
public interface KeyListener extends EventListener {<br />
public void keyTyped(KeyEvent e);<br />
public void keyPressed(KeyEvent e);<br />
public void keyReleased(KeyEvent e);<br />
}<br />
The important thing to realize about KeyEvents is that they are only<br />
delivered to the component that has the keyboard focus. In this example, we<br />
want keyboard input to be directed to the label, so we use the same technique<br />
that we showed earlier, namely adding the label to the container before<br />
the text area to assign the initial focus to the label without any need for the<br />
mouse to be clicked over it. In this case, that would not be enough on its own,<br />
because an ordinary JLabel claims not to be able to accept the keyboard
Logical Scrolling and Forcing Visibility of an Area 485<br />
focus, so the initial focus would still be given to the text area. To get around<br />
this problem, a subclass of JLabel with an overridden isFocusTraversable<br />
method is used instead. Because this method returns true and the<br />
label is the first component in the frame, it will be assigned the initial focus.<br />
For good measure, a MouseAdapter that gives the focus to the label when it<br />
is clicked on has been added, so that you can continue typing in the label if<br />
you accidentally give the focus to the text area by clicking on it.<br />
When you run the program, move the mouse anywhere over the application<br />
window . There is no need to click the mouse. You will find that you can<br />
press keys and view the events they generate in the text area.<br />
<strong>Core</strong> Alert<br />
As noted earlier, some releases of JDK I.I do not properly assign the input<br />
focus when the window is opened. If you don't get any output in the text<br />
area when you start pressing keys, move the mouse over the label and click<br />
to force the focus onto it.<br />
Start by pressing the A key on the keyboard (without pressing SHIFT) and<br />
releasing it. This produces the following output in the text area (some of the<br />
program's output has been deleted for clarity):<br />
java.awt.event.KeyEvent[KEY_PRESSED,keyCode=65,keyChar='a']<br />
on [.] [action? false]<br />
java.awt.event.KeyEvent[KEY_TYPED,keyCode=0,keyChar='a' ] on<br />
[.] [action? false]<br />
java.awt.event.KeyEvent[KEY_RELEASED,keyCode=6 5,keyChar='a']<br />
on[.] [action? false]<br />
Pressing and releasing this key generated three events. The KEY_PRESSED<br />
and KEY_RELEASED events are generated at the times at which their names<br />
suggest and the KEY_TYPED message is produced somewhere in between.<br />
Both of these messages have two attributes called keyCode and keyChar.<br />
The keyCode attribute is a number (known as a virtual key code) assigned to<br />
the key on the keyboard which has been pressed or released, while keyChar<br />
represents the Unicode character produced by that key. The KEY_PRESSED<br />
event shows that pressing the "A" key generates a keyChar of'a' and a key-<br />
Code of 65. You will also notice that the KEY_RELEASED event contains the<br />
same values.<br />
The set of values that can be returned as the keyCode attribute can be<br />
found in the <strong>Java</strong> API documentation for the KeyEvent class. Each value has
486 Chapter 5 Keyboard Handling, Actions, and Scrolling<br />
a symbolic representation that should be used in code: You should not rely on<br />
the actual numeric values. Typical examples of values that you might find in<br />
keyCode are:<br />
KeyEvent. VK_A The "A" key.<br />
KeyEvent. VK_0 The key "0" on the main keyboard.<br />
KeyEvent. VK_NUMPADO The key "0" on the keyboard number pad<br />
KeyEvent. VK_F1 Function key Fl.<br />
KeyEvent. VK_DELETE The DELETE key<br />
KeyEvent. VK^PRINTSCRE Tlie PRINT SCREEN key<br />
EN<br />
KeyEvent. VK_SHI FT The SHIFT key<br />
KeyEvent. VK_ENTER The ENTER key<br />
Now look at the KEY_TYPED event. This contains the same keyChar value<br />
as the KEY_PRESSED event, but the keyCode is set to 0. This is one of the<br />
differences between these two events: the KEY_JTYPED event never carries<br />
the keyCode associated with the actual key pressed.<br />
Next, press the shift key and the "A" key together, so that you type an<br />
uppercase "A," then release both keys. This time, you will see the following:<br />
java.awt.event.KeyEvent[KEY_PRESSED,keyCode=16,keyChar='',<br />
modifiers=Shift] on [.] [action? false]<br />
<strong>Java</strong>.awt.event.KeyEvent[KEY_PRESSED,keyCode=65,keyChar='A 1 ,<br />
modifiers=Shift] on [.] [action? false]<br />
j ava.awt.event.KeyEvent[KEY_TYPED,keyCode = 0,keyChar='A' ,<br />
modifiers=Shift] on [.] [action? false]<br />
java.awt.event.KeyEvent[KEY_RELEASED,keyCode=65,keyChar='A',<br />
modifiers=Shift] on [.] [action? false]<br />
java.awt.event.KeyEvent[KEY_RELEASED,keyCode=16,keyChar='']<br />
on [.] [action? false]<br />
<strong>Core</strong> Note<br />
If you see an uppercase A in the text area, you have inadvertently shifted<br />
the keyboard focus into the text area. Return it to the label by clicking the<br />
mouse over it and try again. Note that, in this special case, pressing Tab to<br />
navigate back to the label doesn't work because the JTextArea<br />
component swallows the Tab character before the keyboard navigation<br />
mechanism sees itYou can, however, use Tab with the CTRL key pressed<br />
to return the focus to the label.
Logical Scrolling and Forcing Visibility of an Area 487<br />
The exact order of the KEY_RELEASED events depends on the order in<br />
which yon release the Shift and "A" so it may differ from that shown above.<br />
Notice that there are KEY_PRESSED and KEY_RELEASED events for both the<br />
Shift and A keys, and a single KEY_TYPED event for the single effective keystroke.<br />
Comparing the KEY_TYPED event with the previous one, you will<br />
notice that keyChar now has the value "A" rather than "a," but the keyCode<br />
in the KEY_PRESSED and KEY^RELEASED events is still 65. This is because<br />
the key code represents the key itself and is independent of any modifiers,<br />
such as Shift, applied by other keys.<br />
The KEY_TYPED event also indicates that the Shift key was pressed. The<br />
state of the Shift, Ctrl, Alt, and Meta keys (or as many as are defined on your<br />
particular keyboard) is encoded in the modifiers attribute of the KeyEvent<br />
object as an OR of the values SHIFT_MASK, CTRL_MASK, ALT_MASK, and<br />
META_MASK defined by the class inputEvent, which is the superclass of<br />
KeyEvent (and, incidentally, of MouseEvent as well). This mask is also supplied<br />
with the KEY_PRESSED and KEY_RELEASED events (assuming, in the<br />
case of KEY_RELEASE, that the Shift key is released after the "A" key, which<br />
was the case in the example above).<br />
If you now press and hold down the "A" key (without Shift) for slightly<br />
longer than before so that the key starts to repeat, and then release it, you see<br />
a different set of events:<br />
<strong>Java</strong>.awt.event.KeyEvent[KEY_PRESSED,keyCode=6 5,keyChar='a']<br />
on [.] [action? false]<br />
<strong>Java</strong>.awt.event.KeyEvent[KEY_TYPED,keyCode=0,keyChar='a'] on<br />
[.] [action? false]<br />
<strong>Java</strong>.awt.event.KeyEvent[KEY_PRESSED,keyCode=65,keyChar='a']<br />
on [.] [action? false]<br />
<strong>Java</strong>.awt.event.KeyEvent[KEY_TYPED,keyCode=0,keyChar='a'] on<br />
[.] [action? false]<br />
<strong>Java</strong>.awt.event.KeyEvent[KEY_PRESSED,keyCode=6 5,keyChar='a']<br />
on [.] [action? false]<br />
<strong>Java</strong>.awt.event.KeyEvent[KEY_TYPED,keyCode=0,keyChar='a'] on<br />
[.] [action? false]<br />
<strong>Java</strong>.awt.event.KeyEvent[KEY_PRESSED,keyCode=65,keyChar='a']<br />
on [.] [action? false]<br />
j ava.awt.event.KeyEvent[KEY_TYPED,keyCode=0,keyChar='a' ] on<br />
[.] [action? false]<br />
<strong>Java</strong>.awt.event.KeyEvent[KEY_RELEASED,keyCode=6 5,keyChar='a']<br />
on [.] [action? false]<br />
As the keyboard repeat takes effect, pairs of KEY_PRESSED and<br />
KEY TYPED events are generated until the key is released. Here there are
488 Chapter 5 Keyboard Handling, Actions, and Scrolling<br />
four pairs of KEY_PRESSED and KEYJTYPED events, followed by the single<br />
KEY_RELEASED. This example shows that it is incorrect to assume that a<br />
KEY_PRESSED will be followed by a KEY_RELEASED event before the next<br />
KEY_PRESSED. The set of keys that repeat and the rate at which they repeat<br />
is platform-dependent and cannot be controlled by the <strong>Java</strong> application.<br />
Not all keys on the keyboard have a valid Unicode encoding. To see how<br />
<strong>Java</strong> deals with this, press and release the Fi key. You should see the following<br />
output:<br />
java.awt.event.KeyEvent[KEY_PRESSED,keyCode=112,Fl] on [.]<br />
[action? true]<br />
<strong>Java</strong>.awt.event.KeyEvent[KEY_RELEASED,keyCode=112,Fl] on [.]<br />
[action? true]<br />
Since function keys do not have a Unicode encoding, no KEY_TYPED<br />
event is generated for them. Note also that the value of the keyChar<br />
attribute is not shown; in fact, this field would have the value<br />
KeyEvent.CHAR_UNDEFINED. Another difference you will see here is that<br />
this key has the attribute action set to true. Several keys on the keyboard,<br />
including the function keys, the cursor movement keys, PAGE_UP,<br />
PAGE_DOWN, PRINT_SCREEN, and so on, which request an action on the<br />
part of the application rather than supply information to be stored, are<br />
tagged as action keys in this way.<br />
The KeyEvent class supplies methods for extracting the various attributes<br />
in a form usable by an application. The keyCode and keyChar attributes can<br />
be extracted using the get KeyCode and get KeyChar methods, while the<br />
modifiers can be obtained using the getModif iers method inherited from<br />
InputEvent and there is a corresponding mask defined for each of these<br />
modifier keys in the InputEvent class. For example, the following expression<br />
evaluates to a non-zero value if the control or shift keys are pressed:<br />
evt.getModifiers () &<br />
(InputEvent.CTRL_MASK | InputEvent.SHIFT_MASK)<br />
Alternatively, the state of individual modifier keys can be obtained using<br />
the isAltDown, isControlDown, isMetaDown, and isShiftDown methods,<br />
while isActionKey returns the action attribute. These last five methods<br />
all return a boolean, so you can use the following code to test for either<br />
the control or shift keys being pressed instead of using a bit mask as shown<br />
above:<br />
if (evt.isControlDown() evt.isShiftDown())
Logical Scrolling and Forcing Visibility of an Area 489<br />
Whether you decide to monitor just KEY_TYPED events or act upon<br />
KEY_PRESSED and KEY_RELEASED events depends on the functionality<br />
your component or application needs to provide. If you only act upon<br />
KEY_TYPED events, you will not be able to detect action keys and other keys<br />
that do not generate Unicode characters. In this case, you would examine<br />
the keyChar attribute to handle a key stroke. Note that keyChar is a Unicode<br />
character, so your code would look something like this:<br />
public void keyTyped(KeyEvent e) {<br />
char key = e.getKeyChar();<br />
if (key == v x') {<br />
// Lower case 'x' pressed, no shift<br />
} else if (key == V X') {<br />
}<br />
// Upper case ( x'<br />
As noted earlier, a KEY_TYPED event is generated only if the keys pressed<br />
generate a valid Unicode character. If you press the x key on its own or with<br />
the Shift key, you would get a KEY_TYPED event with keyChar set to either a<br />
lower case V or an uppercase 'x' and with modifiers indicating shift, respectively.<br />
If you press Y together with ALT, you get a KEY_TYPED event with<br />
keyChar set to 'x' and the modifiers indicating that the ALT key is also<br />
pressed. Similarly, holding down x with Shift and ALT together yields a<br />
KEY_TYPED event with keyChar set to uppercase 'X' and the modifier field<br />
containing bits for both the shift and ALT keys.<br />
The situation is slightly different when the CTRL key pressed. If you press<br />
the x key and the CTRL key together, you still get a KEY_TYPED event, but the<br />
keyChar field no longer contains the Unicode character value for a lower<br />
case 'x' - it actually contains the numeric value 24, which is the ASCII value<br />
associated with the key sequence CTRL-X. The modifiers field will, of<br />
course, indicate that the CTRL key was pressed. Similarly, pressing Y, and<br />
both the CTRL and ALT keys results in a KEYJTYPED event with the key-<br />
Char attribute set to 24 and the modifiers showing that both ALT and CTRL<br />
were pressed. This behavior might seem a little strange because you may<br />
have expected the keyChar field to contain V even if CTRL was pressed, but<br />
that is not the case—the CTRL key is treated differently from the other modifier<br />
keys and it is treated as generating a different Unicode value when the<br />
key is alphabetic. If you press CTRL together with a non-alphabetic key, you<br />
don't get a KEY_TYPED event at all!<br />
If you need to handle every key press, whether it results in a valid Unicode<br />
character or not, you will need to process KEY_PRESSED (and possibly<br />
KEY_RELEASED) events. In this case, you could choose to inspect the key-
490 Chapter 5 Keyboard Handling, Actions, and Scrolling<br />
Char attribute for Unicode characters and if this has the value<br />
KeyEvent. CHAR_UNDEFINED you would look at the value of keyCode. The<br />
following code extract shows one way to handle a KEY_PRESSED event:<br />
public void keyPressed(KeyEvent e) {<br />
char key = e.getKeyChar();<br />
int keyCode = e.getKeyCode();<br />
int modifiers = e.getModifiers();<br />
}<br />
if (key != KeyEvent.CHARJJNDEFINED) {<br />
// Process Unicode character<br />
} else if (keyCode == KeyEvent.VK_F1) {<br />
// Fl is pressed<br />
} else if (keyCode == KeyEvent.VK_PRINTSCREEN) {<br />
if (modifiers & InputEvent.ALT_MASK) {<br />
// Alt + PrintScreen<br />
// Could also have used isAltDownO<br />
} else {<br />
// Just PrintScreen<br />
}<br />
}<br />
However, code that processes these events typically just looks at the key-<br />
Code field and the modifiers and doesn't use keyChar since it is not always<br />
valid, so you might write this:<br />
if (evt.getKeyCode() == KeyEvent.VK_C &&<br />
evt.isControlDown()) {<br />
// Control-C pressed - do copy action<br />
} else if (evt.getKeyCode() == KeyEvent.VK_V &&<br />
evt.isControlDown()) {<br />
// Control-V pressed - do paste action<br />
} else if (evt.getKeyCode() == KeyEvent.VK_X &&<br />
evt.isControlDown()) {<br />
// Control-X pressed - do cut action<br />
}<br />
Keyboard Shortcuts<br />
Directly handling keyboard events was the only way to respond to user key<br />
presses in the AWT, but because of the way events are handled, it is very difficult<br />
to provide some of the features expected of a professional application<br />
without doing a lot of work. The most obvious example of this is providing<br />
support for accelerator keys that work wherever the keyboard focus is. Sup-
Logical Scrolling and Forcing Visibility of an Area 491<br />
pose, for example, you want to write an application that can provide help<br />
when the user presses the Fl key. To be useful, this feature has to work no<br />
matter where the user is typing and irrespective of the keyboard focus.<br />
The problem with this is that the KEY_PRESSED event will only go to the<br />
component that has the focus—which could be any component in the application<br />
window. In order to implement a help system based on the Fl key, you<br />
would have to register keyboard listeners on each and every component, then<br />
specifically check for either Fl or forward key events that a component<br />
doesn't want to process itself to another part of the application that looks for<br />
appropriate key presses. This is highly undesirable, because it complicates<br />
the application and doesn't work very well (and perhaps not at all) if you use<br />
third-party components in your application, because you may not be able to<br />
gain access to the internals of these components in order to register key listeners.<br />
Keystrokes<br />
JComponent provides a mechanism that makes it very easy to intercept<br />
the key events that you are interested in and dispatch them to an event handler,<br />
no matter where the keyboard focus is when the appropriate keys are<br />
pressed. This mechanism is activated using the following JComponent methods:<br />
public void registerKeyboardAction(ActionListener action,<br />
Keystroke stroke, int condition);<br />
public void registerKeyboardAction(ActionListener action,<br />
String command, Keystroke stroke, int condition)<br />
<strong>Core</strong> Note<br />
The key handling mechanism that is described in this section is supported<br />
by all versions of Swing. However, as of <strong>Java</strong> 2 version 1.3, this is no longer<br />
the officially approved method for handling keys.You'll see the new<br />
mechanism, which is very similar, later in this chapter.As ever, if you want<br />
to write code that works with the widest range of <strong>Java</strong> platforms, you will<br />
have to forego the newer mechanism and continue to use the<br />
registerKeyboardAction method.Although<br />
registerKeyboardAction is still available in <strong>Java</strong> 2 version 1.3,there<br />
is a minor compatibility issue that you will need to be aware of if you want<br />
to write code that works everywhere. We'll show you later what the issue is<br />
and how to work around it
492 Chapter 5 Keyboard Handling, Actions, and Scrolling<br />
The arguments passed to the registerKeyboardAction methods are:<br />
• Action. The action to be performed when the given key<br />
combination is pressed and the specified condition is satisfied.<br />
• Command. A string which is used as the action command field of<br />
the ActionEvent passed to the ActionListener given by<br />
the action parameter. If this argument is not supplied (i.e., the<br />
three-argument form of the method is used), the action<br />
command in the event will be null.<br />
• Stroke. Specifies the key to be pressed or released and the<br />
state of the modifier keys.<br />
• Condition. Indicates where the focus can be for this action to<br />
be triggered.<br />
The key combination is specified using a Keystroke object. The Key-<br />
Stroke class provides five static methods that all create a Keystroke object:<br />
public static Keystroke getKeyStroke(int keyCode,<br />
int modifiers, boolean onKeyRelease);<br />
public static Keystroke getKeyStroke(int keyCode,<br />
int modifiers);<br />
public static Keystroke getKeyStroke(char keyChar);<br />
public static Keystroke getKeyStroke(char keyChar,<br />
boolean onKeyRelease);<br />
public static Keystroke getKeyStroke(Character keyChar,<br />
int modifiers);<br />
public static Keystroke getKeyStroke(String str) ;<br />
public static Keystroke getKeyStrokeForEvent(KeyEvent evt);<br />
The first form of the getKeyStroke method allows you to specify all<br />
three of a key stroke s attributes—a key code, the modifier state, and a boolean<br />
specifying whether the key stroke is deemed to have occurred when the<br />
key is pressed (when false) or when it is released (true). For example, to<br />
create a Keystroke that describes releasing the Fl key when there are no<br />
modifier keys pressed, use the following:<br />
Keystroke ks = Keystroke.getKeyStroke(KeyEvent.VK_F1,<br />
0, true);<br />
The modifiers are specified as a combination of the values Input<br />
Event.SHIFT_MASK, InputEvent.ALT_MASK, InputEvent.META_MASK,<br />
and InputEvent. CTRL_MASK. For example, the following creates a Key-<br />
Stroke that can be used to trigger an action when the PRINT_SCREEN key is<br />
pressed, but only if the ALT key is also pressed:<br />
Keystroke ks = Keystroke.getKeyStroke(
Logical Scrolling and Forcing Visibility of an Area 493<br />
KeyEvent.VK_PRINTSCREEN, InputEvent.ALT_MASK, false);<br />
The second form of getKeyStroke is a convenience method that creates<br />
a Keystroke in which the condition is triggered when the key is pressed,<br />
which is the case that you'll need to deal with most frequently. Invoking this<br />
method is the same as calling the first variant with the onKeyRe lease argument<br />
set to false. Thus, the following two lines are equivalent:<br />
Keystroke ks = Keystroke.getKeyStroke(<br />
KeyEvent.VK_PRINTSCREEN,<br />
InputEvent.ALT_MASK, false);<br />
Keystroke ks = Keystroke.getKeyStroke(<br />
KeyEvent.VK_PRINTSCREEN,<br />
InputEvent.ALT_MASK);<br />
<strong>Core</strong> Warning<br />
When using these methods, be careful to ensure that you supply a key code<br />
as the first argument and not a Unicode character code. The correct way<br />
to create a Keystroke to detect the 'A'key being pressed together with<br />
the CTRL key is the following:<br />
Keystroke.getKeyStroke(KeyEvent.VK_A,<br />
InputEvent.CTRLJVIASK);<br />
However, it would be very tempting to write the following instead:<br />
Keystroke.getKeyStroke( v a', InputEvent.CTRL_MASK);<br />
This will actually compile because the literal 'a' is of type char, which the<br />
compiler will silently convert to the int required by the second getKeyStroke<br />
method. However, this second KeyStroke is not equivalent to the first<br />
because the values of KeyEventVK_A and (int)'a'are differentThis type of<br />
error can be difficult to detect. What makes it worse is that the following<br />
similar mistake may not even be noticed during testing:<br />
Keystroke.getKeyStroke(*A', InputEvent.CTRL_MASK);<br />
Unfortunately, this will both compile and work, because the numeric value<br />
of the Unicode character corresponding to 'A'is the same as the key code<br />
VK_A. However, this should be considered to be an accident because the<br />
values of the key codes for upper case alphabetic characters currently<br />
match the Unicode values but are not guaranteed always to do so.<br />
The third getKeyStroke method allows you to conveniently create a<br />
Keystroke from a Unicode character:
494 Chapter 5 Keyboard Handling, Actions, and Scrolling<br />
Keystroke ks = Keystroke.getKeyStroke( x v ) ;<br />
The Keystroke returned from this invocation would cause an event if the<br />
space bar is pressed with no keyboard modifiers. The fourth variant is the<br />
same as this one except that it allows you to specify key press or key release.<br />
Since most key handling deals with key presses, there is little real use for this<br />
variant and it is actually deprecated in favor of the third one.<br />
The fifth get Keystroke method gives you yet another way to define a<br />
key sequence:<br />
public static Keystroke getKeyStroke(Character keyChar,<br />
int modifiers);<br />
This time, you specify the key itself as a Character object instead of a<br />
primitive char type and you can supply a mask of bits that determine which<br />
modifier keys should also be pressed. The Keystroke returned by this<br />
method is constructed with the onKeyRelease condition set to false, so<br />
that it corresponds to a key press. Note that this method is only available<br />
beginning with <strong>Java</strong> 2 version 1.3.<br />
The sixth variant of getKeyStroke accepts a string description of a key<br />
sequence and returns the correspsonding Keystroke object. The syntax of<br />
the string that is passed to this method is as follows:<br />
[ modifierl [ modifer 2 ....]] key<br />
where the modifiers take the following values:<br />
• alt<br />
• button 1<br />
• button2<br />
• button 3<br />
• control<br />
• meta<br />
• shift<br />
Note that, in general, buttonl corresponds to the left mouse button,<br />
button2 to the middle button (if there is one), and button3 to the right<br />
button. However, these assignments may be changed by the user.<br />
The key value is the name of a keycode as defined by the KeyEvent class<br />
without the leading VK_ so that, for example, the keycode for<br />
VK_PAGE_DOWN would be specified as PAGE_DOWN and that for VK_INSERT<br />
becomes INSERT. You can specify more than one modifier key to require that
Logical Scrolling and Forcing Visibility of an Area 495<br />
all of the named keys or the specified mouse buttons be pressed as well as the<br />
key given by the key value. Examples of valid key specifications are:<br />
getKeyStroke("Ctrl C" ) CTRL+C<br />
getKeyStroke("Ctrl alt DELETE") CTRL+ALT+DELETE<br />
getKeyStroke ( " PAGEJJP" ) ; Page Up key pressed<br />
getKeyStroke ( "NUMPADO " ) ; Key 0 on the numeric key<br />
pad<br />
Note that the whole string is case-sensitive, so the modifier keys must be<br />
in lower case and the key specifier in upper case and must match exactly the<br />
name of the keycode in the KeyEvent class.<br />
<strong>Java</strong> 2 version 1.3 expands the set of key sequences that can be described<br />
and passed to this variant of getKeyStroke by adding some extra syntax to<br />
the string. Here are the legal syntaxes for <strong>Java</strong> 2 version 1.3:<br />
[ modifierl [ modifer 2....]] key<br />
[ modifierl [ modifer 2....]] pressed key<br />
[ modifierl [ modifer 2 ....]] released key<br />
[ modifierl [ modifer 2 ....]] typed character<br />
The first of these is the same syntax supported by (DK 1.1 and <strong>Java</strong> 2 version<br />
1.2.2. This form implicitly specifies that the action corresponds to a key<br />
being pressed. The next two variants allow you to explicitly specify a key<br />
press or release—for example:<br />
Keystroke.getKeyStroke("Ctrl pressed C");<br />
Keystroke.getKeyStroke("Ctrl released C");<br />
The first of these two is, of course, the same as<br />
Keystroke.getKeyStroke("Ctrl C");<br />
The last syntax lets you specify a Unicode character instead of a keycode<br />
and can only be used for those key presses that produce a KEY_TYPED event.<br />
For example,<br />
Keystroke.getKeyStroke("typed a" ) ;<br />
Note that the character specified is a Unicode character and not a key<br />
code, so it is case-sensitive—this example is NOT equivalent to<br />
Keystroke.getKeyStroke("typed A");
496 Chapter 5 Keyboard Handling, Actions, and Scrolling<br />
which will be triggered only if the SHIFT key is pressed together with A<br />
(even though it is not specified in the list of modifiers).<br />
With the current implementation, all modifier keys are ignored when you<br />
use the typed variant. Thus, the following may look different, but they all<br />
catch the same keys:<br />
Keystroke.getKeyStroke("typed A");<br />
Keystroke.getKeyStroke("shift typed A");<br />
Keystroke.getKeyStroke("alt typed A");<br />
Any of these will match SHIFT+A and ALT+SHIFT+A, but not A without<br />
the SHIFT key pressed. By contrast, the following two lines both create a<br />
Keystroke that will catch a lower case 'a' whether or not the ALT key is<br />
pressed (because the alt qualifier is effectively ignored):<br />
Keystroke.getKeyStroke("typed a") ;<br />
Keystroke.getKeyStroke("alt typed a" ) ;<br />
However, these do not work if SHIFT is also pressed, because that generates<br />
the character 'A' instead of 'a' and neither does<br />
Keystroke.getKeyStroke("shift typed a");<br />
which doesn't catch anything because you cannot generate a lower ease 'a'<br />
with SHIFT pressed.<br />
Using this variant of getKeyStroke allows you to store key sequences in<br />
configuration files that can be read during initialization. You can use this to<br />
allow users to change key mappings if appropriate, or you can use it if you<br />
want to make your code more readable. However, there is a downside to<br />
using this approach—the time taken to parse the key specification is non-trivial<br />
and may noticably affect the time taken to start up your application or create<br />
a GUI screen. As an example of the overheads involved, on my laptop<br />
running <strong>Java</strong> 2 version 1.3, it took only 50 milliseconds to execute the following<br />
call 100,000 times:<br />
Keystroke.getKeyStroke(KeyEvent.VK_C,<br />
InputEvent.CTRL_MASK, false);<br />
whereas 100,000 executions of the following equivalent code:<br />
Keystroke.getKeyStroke("Ctrl C");<br />
took over 10 seconds!<br />
Finally, you can use the getKeyStrokeForEvent event to create a Key-<br />
Stroke that corresponds to the key sequence that generated the specified<br />
event. The key code and modifiers are extracted from the KeyEvent and the<br />
condition is set so that the Keystroke specifies pressing the key if the event
Logical Scrolling and Forcing Visibility of an Area 497<br />
is KEY_PRESSED and releasing it if it is KEY_RELEASED. If the event is<br />
KEYJTYPED, the key is taken from the keyChar field of the event, the modifier<br />
field is set to 0, and the key must be pressed to cause an event to occur.<br />
Returning now to the registerKeyboardAction method, the condition<br />
argument specifies when the keystroke will be acted upon. The following<br />
values can be specified:<br />
JComponent.WHEN_FOCUSED<br />
JComponent.WHEN_ANCESTOR_OF_FOCUSED_COMPONENT<br />
JComponent.WHEN_IN_FOCUSED_WINDOW<br />
If you specify WHEN_FOCUSED, the keystroke will generate an action only if<br />
the JComponent to which it is registered actually has the keyboard focus.<br />
This is the most restrictive case and is similar to registering a KeyListener<br />
to receive key events from the JComponent itself. If you use<br />
WHEN_ANCESTOR_OF_FOCUSED_COMPONENT, the condition is satisfied if the<br />
keystroke is registered to the parent container of the JComponent that has<br />
the focus, or to that container's parent, and so on. Finally the condition<br />
WHEN_IN_FOCUSED_WINDOW causes the registered action to be performed<br />
when the component with which it is associated is anywhere within the toplevel<br />
window that has the focus. To clarify these conditions, let's look at the<br />
example shown in Listing 5-8.<br />
Listing 5-8 Keyboard accelerators<br />
package <strong>JFC</strong>Book.Chapter5;<br />
import j avax.swing.*;<br />
import j ava.awt.*;<br />
import j ava.awt.event.*;<br />
public class KeyboardActionExample {<br />
public static void main(String [] args) {<br />
JFrame f = new JFrame("Keyboard Action Example");<br />
JPanel upperPane = new JPanel();<br />
JPanel lowerPane = new JPanel ();<br />
upperPane.setBackground(Color.green);<br />
lowerPane.setBackground(Color.yellow);<br />
f.getContentPane().add(upperPane,<br />
BorderLayout.CENTER);
498 Chapter 5 Keyboard Handling, Actions, and Scrolling<br />
Listing 5-8 Keyboard accelerators (continued)<br />
f.getContentPane().add(lowerPane, BorderLayout.SOUTH);<br />
JButton buttonA = new JButton("A");<br />
JButton buttonB = new JButton("B");<br />
JButton buttonC = new JButton("C");<br />
JButton buttonD = new JButton("D") ;<br />
JTextField tf = new JTextField(32);<br />
upperPane.add(buttonA);<br />
upperPane.add(tf);<br />
lowerPane.add(buttonB);<br />
lowerPane.add(buttonC);<br />
lowerPane.add(buttonD);<br />
f.pack();<br />
f.addWindowListener(new WindowAdapter() {<br />
public void windowClosing(WindowEvent evt) {<br />
System.exit(0);<br />
}<br />
});<br />
f.setVisible(true);<br />
// Create keystrokes and assign them<br />
// (1) Fl anywhere in the window<br />
ActionListener 11 = new ActionListener() {<br />
public void actionPerformed(ActionEvent evt) {<br />
System.out.println("Fl somewhere in main window");<br />
}<br />
};<br />
f.getRootPane().registerKeyboardAction(11,<br />
Keystroke.getKeyStroke(KeyEvent.VK_F1, 0, false),<br />
JComponent.WHEN_IN_FOCUSED_WINDOW);<br />
//<br />
// (2) Keys A or D when buttons B, C, D have focus<br />
ActionListener 12 = new ActionListener() {<br />
public void actionPerformed(ActionEvent evt) {<br />
System. out. println (<br />
"A released or D pressed on lower pane button");<br />
}<br />
};<br />
lowerPane.registerKeyboardAction(12,
Logical Scrolling and Forcing Visibility of an Area 499<br />
Listing 5-8 Keyboard accelerators (continued)<br />
}<br />
Keystroke.getKeyStroke(KeyEvent.VK_A, 0, true),<br />
JComponent.WHEN_ANCESTOR_OF_FOCUSED_COMPONENT);<br />
lowerPane.registerKeyboardAction(12,<br />
Keystroke.getKeyStroke(KeyEvent.VK_D, 0, false),<br />
JComponent.WHEN_ANCESTOR_OF_FOCUSED_COMPONENT);<br />
// (3) Fl pressed on button in lower pane<br />
ActionListener 13 = new ActionListener () {<br />
public void actionPerformed(ActionEvent evt) {<br />
System.out.println("Fl somewhere in lower pane");<br />
}<br />
};<br />
lowerPane.registerKeyboardAction(13,<br />
Keystroke.getKeyStroke(KeyEvent.VK_F1, 0, false),<br />
JComponent.WHEN_ANCESTOR_OF_FOCUSED_COMPONENT);<br />
// (4) 'Fl' only when text area focused<br />
ActionListener 14 = new ActionListener() {<br />
public void actionPerformed(ActionEvent evt) {<br />
System.out.println("Fl pressed in the text area");<br />
}<br />
};<br />
tf.registerKeyboardAction(14,<br />
Keystroke.getKeyStroke(KeyEvent.VK_F1, 0, false),<br />
JComponent.WHEN_FOCUSED);<br />
}<br />
This example program creates a JFrame with two colored panes one<br />
above the other. On the upper pane there is a button labeled 'A' and a text<br />
field and on the bottom pane are three buttons labeled "B," "C," and "D," as<br />
shown in Figure 5-4.
500 Chapter 5 Keyboard Handling, Actions, and Scrolling<br />
Figure 5-4 Using accelerator keys.<br />
You can run this example using the command:<br />
<strong>Java</strong> <strong>JFC</strong>Book.Chapter5.KeyboardActionExample<br />
After the user interface has been created, keyboard actions are registered<br />
for four different cases; each action has a corresponding inner class that<br />
implements the ActionListener interface, providing an actionPerf<br />
ormed method that prints a message that allows us to see when the action<br />
has been triggered and exactly which action was selected. Later in this section,<br />
you'll see a more useful way of processing actions generated from the<br />
keyboard, which also generalizes to menu, button, and toolbar operations.<br />
Here are the keyboard actions that are registered and when they should be<br />
triggered; the numbers correspond to those in Listing 5-8.<br />
1. The Fl key is pressed within the focused window.<br />
2. The "A" key is pressed or the "D" key is released when the<br />
focus is in the lower pane.<br />
3. The Fl key is pressed when the focus is in the lower pane.<br />
4. The Fl key is pressed when the text field has the focus.<br />
You may find the registerKeyboardAction lines slightly confusing: It<br />
can be a little difficult to see the exact conditions under which the action will<br />
be triggered. If you read these lines in a particular way, however, everything<br />
will become clear. Lets take the following example:<br />
lowerPane.registerKeyboardAction(13,<br />
Keystroke.getKeyStroke(KeyEvent.VK_F1, 0, false),<br />
JComponent.WHEN_ANCESTORJDF_FOCUSED_COMPONENT);<br />
This action (the actionPerf ormed method of the ActionListener referenced<br />
by the variable 13) is triggered when the Fl key is pressed if lower-<br />
Pane is the ancestor of the focused component. To see this, first read the<br />
keystroke description (the second argument to registerKeyboardAction),<br />
then the JComponent against which the action is registered, and
Logical Scrolling and Forcing Visibility of an Area 501<br />
finally the condition applied (the last argument). The lowerPane is the<br />
ancestor of the focused component when the focus is directed to any of the<br />
components that it contains - in this case, buttons "B," "C," or "D." To verify<br />
that the action occurs when one if these buttons has the focus, click any of<br />
them with the mouse to give one of them the input focus and press the Fl<br />
key. This produces the message "Fl somewhere in lower pane," showing that<br />
the correct action was dispatched.<br />
Next, click on button "A" and press Fl again. This time, you see the message<br />
"Fl somewhere in main window," as shown in Figure 5-5, because the<br />
first action has been performed. If you look at all of the actions that involve<br />
Fl, you can see how the appropriate operation is selected. If you press Fl<br />
when button "A" has the focus, the key event that this generates will actually<br />
be processed by the JComponent part of the JButton "A." There is no keyboard<br />
action registered against button "A" for Fl, so the buttons parent is<br />
inspected next. In this case, the parent is upperPane. Since there are no<br />
actions registered on the upper pane, the next place to look is this pane's parent,<br />
which is the frame's content pane. Again, this has no registered action.<br />
The search continues upward until the JFrame's JRootPane is reached,<br />
which has keyboard action (1) associated with it by the following code.<br />
ActionListener 11 = new ActionListener () {<br />
public void actionPerformed(ActionEvent evt) {<br />
tf.setText("Fl somewhere in main window");<br />
}<br />
};<br />
f.getRootPane().registerKeyboardAction(11,<br />
KeyStroke.getKeyStroke(KeyEvent.VK_F1, 0, false),<br />
JComponent. WHEN_IN__FOCUSED__WINDOW) ;<br />
This explains why you see the message "Fl somewhere in main window."<br />
Figure 5-5 Fl key detected on button "A."<br />
Now click in the text area and again click on Fl. This time, you see the<br />
message "Fl pressed in the text area." It is easy to see that this is correct,<br />
because the fourth action is supposed to be performed when you press Fl<br />
when the text field has the focus:
502 Chapter 5 Keyboard Handling, Actions, and Scrolling<br />
ActionListener 14 = new ActionListener() {<br />
public void actionPerformed(ActionEvent evt) {<br />
tf.setText("Fl pressed in the text area");<br />
}<br />
};<br />
tf.registerKeyboardAction(14,<br />
Keystroke.getKeyStroke(KeyEvent.VK_F1, 0, false),<br />
JComponent.WHEN_FOCUSED);<br />
Lastly, click on any button in the lower pane. Now press the "A" key and<br />
hold it down. When you release it, you will see the message "A released or D<br />
pressed on lower pane button," indicating that one of the actions labeled (2)<br />
has been activated. You get the same message if you press the "D" key, but<br />
this time you don't have to wait until you release the key. Again, you can see<br />
that this is the correct result by imitating the logic used by the JComponent<br />
class when searching for an appropriate action, which runs as follows. Suppose<br />
that you clicked on button "B" to give it the input focus and then<br />
pressed the "D" key. The KEY_PRESSED event will go to button "B," which<br />
doesn't have a handler for it (there are no actions registered against button<br />
"B"). Next, the parent of button "B"—namely lowerPane—is inspected.<br />
This has the following actions associated with it:<br />
lowerPane.registerKeyboardAction(12,<br />
Keystroke.getKeyStroke(KeyEvent.VK_A, 0, true),<br />
JComponent.WHEN_ANCESTOR_OF_FOCUSED_COMPONENT);<br />
lowerPane.registerKeyboardAction(12 ,<br />
Keystroke.getKeyStroke(KeyEvent.VK_D, 0, false),<br />
JComponent.WHEN_ANCESTOR_OF_FOCUSED_COMPONENT);<br />
Of these, only the second has the correct keystroke —the "D " key has just<br />
been pressed. Finally, the condition is checked: This action is selected if<br />
lowerPane is the parent of the focused component. Since the focused component<br />
is button "B," which is one of the children of lowerPane, the condition<br />
is met so the action is performed.<br />
The search order for actions is as follows:<br />
1. Check the focused JComponent for any action matching the<br />
keystroke.<br />
2. Scan upward through the ancestors of the focused JComponent<br />
for actions that match the keystroke and also have either the<br />
condition WHEN_ANCESTOR_OF_FOCUSED__COMPONENT or the<br />
condition WHEN IN_FOCUSED WINDOW.
Logical Scrolling and Forcing Visibility of an Area 503<br />
3. Check all JComponents in the same window as the focused<br />
component for actions that match the keystroke and have condition<br />
WHEN_IN_FOCUSED_WINDOW.<br />
Note that only one action is ever performed for each registered keystroke.<br />
Thus, despite the fact that there is, for example, an action registered for Fl<br />
that covers the whole window, it won't be triggered if Fl is pressed when the<br />
focus is in the text area or in one of the buttons on the lower pane because<br />
those actions will be located first.<br />
<strong>Core</strong> Note<br />
In <strong>Java</strong> 2 version 1.3, the processing order described above is modified<br />
slightly if the focused component is inside an internal frame. Internal<br />
frames (which are described in Chapter 12) are like mini-windows that are<br />
grouped inside a desktop that resides in the main window, much like<br />
document windows. When the action search reaches an internal frame, if<br />
the internal frame does not have a<br />
WHEN_ANCESTOR_OF_FOCUSED_COMPONENT action registered, instead<br />
of proceeding immediately to its parent, any<br />
WHEN_IN_FOCUSED_WINDOW actions for the components inside the<br />
internal frame are processed. Only if this set of actions does not contain<br />
one that matches the key stroke will the search continue with the internal<br />
frames parentThis allows you to treat an internal frame as a proper toplevel<br />
window from the point of view of keyboard actions by giving<br />
components inside the frame preference over those outside it when<br />
deciding which actions should trigger actions.<br />
Removing and Managing Keystrokes<br />
As well as registerKeyboardAction, JComponent has a few other methods<br />
that deal with keyboard actions. You can remove a registered keyboard<br />
action using the method:<br />
public void unregisterKeyboardAction(Keystroke);<br />
The argument passed to this method is the reference to the Keystroke<br />
originally obtained from registerKeyboardAction. Notice that when you<br />
register a keyboard action, you specify a Keystroke and a condition, but<br />
when you unregister, you specify only the Keystroke. This is because the
504 Chapter 5 Keyboard Handling, Actions, and Scrolling<br />
actions are held in a table associated with the JComponent in which the<br />
Keystroke reference is the key. As a result, you cannot have two actions registered<br />
to the same JComponent under the same Keystroke, even if the<br />
conditions are different, so you only need to supply the Keystroke to unregister<br />
it. To clarify this, the following plausible code sequence:<br />
Keystroke k = Keystroke.getKeyStroke("Ctrl C");<br />
comp.registerKeyboardAction(listenerl, k,<br />
JComponent.WHEN_FOCUSED);<br />
comp.registerKeyboardAction(Iistener2, k,<br />
JComponent.WHEN_IN_FOCUSED_WINDOW);<br />
almost certainly doesn't do what you might expect it to. What actually happens<br />
here is that the second registerKeyboardAction call removes the<br />
binding installed by the first one, so that listenerl will never be called.<br />
You can't even attempt to work around this restriction by creating two Key-<br />
Stroke objects because the getKeyStroke methods are clever enough to<br />
return the same object when the same key sequence is requested on a subsequent<br />
call, so that the following code sequence:<br />
Keystroke kl = Keystroke.getKeyStroke("Ctrl C" ) ;<br />
Keystroke k2 = Keystroke.getKeyStroke("Ctrl C" ) ;<br />
results in kl and k2 containing references to the same object!<br />
You can remove all registered keyboard actions from a JComponent using<br />
the resetKeyboardActions method, which doesn't require any arguments.<br />
If you want to know what actions are registered against a component, you<br />
can use the method getRegisteredKeyStrokes:<br />
public Keystroke[] getRegisteredKeyStrokes();<br />
When you have a Keystroke object, you can retrieve the associated<br />
action and the condition for that action using the following methods:<br />
public ActionListener getActionForKeyStroke(Keystroke)<br />
public int getConditionForKeyStroke(Keystroke)<br />
Note that these are JComponent methods, not Keystroke methods,<br />
because the action and condition are stored in the JComponent, not in the<br />
Keystroke.<br />
Keystrokes and Actions<br />
The Keystroke class and the supporting functionality in JComponent is one<br />
of the improvements in Swing that make it easier to write keyboard-aware
Logical Scrolling and Forcing Visibility of an Area 505<br />
applications. The Swing designers wanted to make it easy for developers to<br />
make application functions that would naturally be placed on menus (and, as<br />
you'll see later, on toolbars) available via keyboard accelerators. As you'll see,<br />
the design they came up with was a very clever one.<br />
Providing the Keystroke class goes some way toward satisfying this aim,<br />
since it is very easy to link any action to a keystroke: Only one line of code is<br />
needed to arrange for an appropriate event handler to be invoked. The other<br />
problem that needed to be solved was how to represent the actions themselves.<br />
Actions<br />
If you've created user interfaces using the AWT, you've probably connected<br />
application logic to buttons and menu items by writing an ActionListener<br />
and placing the code that performs the required function in the actionPerfortned<br />
method, or in another method invoked from there. The Action-<br />
Listener would then be registered with a button or a menu item using its<br />
addActionListener method. Sometimes, the fact that an event has<br />
occurred tells you all that you need to know. For example, if the user selects a<br />
menu item that says Exit, you can assume that he/she wants to terminate the<br />
application. You might, in this case, verify that this is really intended, but you<br />
won't need any more information. In most cases, though, the action will<br />
involve changing the state of something and the problem is to know how to<br />
locate that something from within the event handler.<br />
To see why this can be a problem, remember that an action triggered from a<br />
button (or a menu item, as you'll find out later in this chapter), causes the<br />
act ionPer formed method of the registered listener to be invoked, with an<br />
ActionEvent as its only argument. From the event, you can determine the<br />
component that caused the event and the string that you may have associated<br />
with that component using setActionCommand. The action command is<br />
often used to tell you which of several possible application functions is required<br />
(e.g., open a file, save a file, etc.). Where can other types of information be<br />
stored? Since the event contains a reference to the source component, you<br />
could consider storing any information you need there. If it is a JComponent,<br />
you could, for example, use the putClientProperty method to save arbitrary<br />
information that can be retrieved in the event handler using getClient-<br />
Property. You've already seen this technique in the graphics drawing<br />
program back in Chapter 4, "Graphics, Text Handling, and Printing:"<br />
JButton button = new JButton(new ColorFilllcon(buttonColors[i]<br />
)) ;
506 Chapter 5 Keyboard Handling, Actions, and Scrolling<br />
colorButtons[i] = button;<br />
colorPanel.add(button);<br />
button.putClientProperty(DRAWCOLOR, buttonColors[i]);<br />
button.addActionListener(new ActionListener() {<br />
public void actionPerformed(ActionEvent evt) {<br />
JButton b = (JButton)evt.getSource();<br />
Color color = (Color)b.getClientProperty(DRAWCOLOR);<br />
Icon g = b.getlconO ;<br />
colorLabel.setlcon(g);<br />
graphicOps.setColor(color);<br />
}<br />
D.-<br />
Here, each button corresponds to a color; when the button is pressed, you<br />
need to know which color has been selected. While this could have been<br />
encoded in a string in some way and stored in the button using setAction-<br />
Command, it would be tedious to parse the string back into a color in the<br />
event handler. Instead, a reference to the information is stored in the JComponent<br />
that caused the event, where it could easily be retrieved. It is easy to<br />
see that information that is needed in an event handler cannot always be conveniently<br />
represented as a string, so some solution of this kind will be needed<br />
in most cases.<br />
While the solution adopted here was perfectly workable for this application,<br />
things aren't always so simple. Storing the information along with the<br />
source of the event works well when there is only one source. Sometimes,<br />
however, there will be more than one source of the same event. In this chapter,<br />
you have already seen how to make it possible for users to activate application<br />
functionality from the keyboard. What is the source of the event in this<br />
case? The whole point of the Keystroke mechanism described in this chapter<br />
is that it should work no matter where the keyboard focus is—you might,<br />
therefore, get the Fl key pressed when the mouse is pointing anywhere at all<br />
in the application window. What actually happens is that the event appears to<br />
come from the component against which the keyboard action was registered<br />
(i.e., the JComponent on which registerKeyboardAction was performed).<br />
It might be that you could store the information that you need<br />
inside that component. But suppose you also have the Help function on a<br />
menu. Now, the event can happen in two ways, with two different sources. If<br />
you want to continue storing the information with the source components,<br />
you now have to save it twice. But that isn't the end of the story.<br />
What if you want a Help button on your application's toolbar? You might<br />
(stretching a point) even want a separate Help button on the application win-
Logical Scrolling and Forcing Visibility of an Area 507<br />
dow itself, making a total of four sources for the same event. Obviously, it will<br />
be very inconvenient to have to write the same code four times and a nightmare<br />
to maintain it should you need to change anything later. Clearly, there<br />
has to be a better way to store information that relates to processing an application<br />
event for use by the event handler. The solution to this provided by<br />
Swing is the Action interface and an implementation of it called AbstractAction.<br />
Here is how the Action interface is defined:<br />
public interface Action extends ActionListener {<br />
public Object getValue(String key);<br />
public void putValue(String key, Object value);<br />
public void setEnabled(boolean b);<br />
public boolean isEnabledO;<br />
public void addPropertyChangeListener(PropertyChangeListener listener)<br />
;<br />
public void rerncvePrcpei1;vChangeListener(Pix3pertvCnangeListener listener)<br />
;<br />
}<br />
The main point to note here is that Action extends ActionListener.<br />
This has two consequences. First, any class that implements Action must<br />
also implement ActionListener, so it must provide an actionPerf ormed<br />
method in addition to those shown above. Secondly, you can use an Action<br />
anywhere that yon can use an ActionListener. In other words, you can use<br />
an Action as the target of a registered keyboard action or to process a button<br />
press. As you'll see shortly, you can also use an Action to handle menu and<br />
toolbar events.<br />
The AbstractAction Class<br />
How does Action help with the problem of storing information needed by<br />
event handlers? Actually, on its own it doesn't, but the AbstractAction<br />
class does. AbstractAction is an implementation of Action in which all of<br />
the methods, apart from the actionPerformed method, are provided. You<br />
can think of AbstractAction as a prototypical Action: It is used in the<br />
same way as event adapters, like MouseAdapter, by providing a way for you<br />
to write only that part of an interface that you want to use, while defaulting<br />
the rest. Unlike event adapters, however, it is an abstract class: To use it, you<br />
must subclass it aiid implement actionPerformed. This is perfectly reasonable—what<br />
use would an Action be without a method to process the action<br />
when it occurs?<br />
Here is how the AbstractAction class is defined:
508 Chapter 5 Keyboard Handling, Actions, and Scrolling<br />
public abstract class AbstractAction implements Action,<br />
Cloneable, Serializable {<br />
public AbstractAction();<br />
public AbstractAction(String name);<br />
public AbstractAction(String name, Icon icon);<br />
public abstract void actionPerformed(ActionEvent evt);<br />
public synchronized void setEnabled(boolean enabled);<br />
public boolean isEnabledO;<br />
public Object getValue(String key);<br />
public synchronized void putValue(String key,<br />
Object value);<br />
public synchronized void<br />
addPropertyChangeListener(PropertyChangeListener 1);<br />
public synchronized void<br />
removePropertyChangeListener(PropertyChangeListener 1);<br />
}<br />
To pass information to an event handler, you can create an instance of a<br />
subclass of AbstractAction that stores that information when it is created.<br />
In the event handler, you can easily retrieve whatever you stored because the<br />
"this" pointer in the actionPerformed method points to your original<br />
AbstractAction object. Furthermore, you can solve the problem of performing<br />
the same action in response to an event from more than one source<br />
by simply registering one Action (i.e., one instance of your subclass of<br />
AbstractAction) to process the event no matter where it comes from.<br />
You have two ways to store information in a subclass of AbstractAction.<br />
The most obvious way is to define the storage yourself within your subclass<br />
and pass the information to be stored to the constructor. This information<br />
can then be used in the actionPerformed method. The FontChangeAction<br />
that you'll see in the next section is an example of this approach.<br />
AbstractAction also provides a limited form of internal storage that<br />
allows you to store arbitrary objects under named keys using the putValue<br />
and getValue methods. While you can store anything you like using these<br />
methods, they are most commonly used to store attributes such as a text<br />
string and an Icon that are associated with the Action. As you'll see in the<br />
next chapter, you can add Actions to Swing menus and toolbars and when<br />
you do this, the menu looks for the text string to use as die label of a menu<br />
item and the toolbar needs the Icon to mount on a button. These values are<br />
held under well-known keys. Here is the complete set of keys defined by the<br />
Action interface:
DEFAULT<br />
NAME<br />
SHORT_DESCRIPTION<br />
LONG_DESCRIPTION<br />
SMALL_ICON<br />
Logical Scrolling and Forcing Visibility of an Area 509<br />
ACTION_COMMAND_KEY (<strong>Java</strong> 2 version 1.3)<br />
ACCELERATOR_KEY (<strong>Java</strong> 2 version 1.3)<br />
MNEMONIC_KEY (<strong>Java</strong> 2 version 1.3)<br />
The SMALL_ICON value is used to store an Icon that can be used by toolbars<br />
and menus. The Object stored under this key must, of course, be of<br />
type Icon. The NAME value is the string used to set the text of a menu item<br />
created using the Action. The DEFAULT, SHORT_DESCRIPTION and<br />
LONG_DESCRIPTION keys are available for use but have no preassigned<br />
meanings in JDK 1.1 or <strong>Java</strong> 2 version 1.2.2. However, <strong>Java</strong> 2 version 1.3<br />
introduces three new keys (the last three in the list above) and makes more<br />
use of the five keys that it has in common with earlier releases. We'll say more<br />
about this in the next chapter.<br />
<strong>Core</strong> Note<br />
This section describes the support for Actions that is common to JDK<br />
1.1,<strong>Java</strong> 2 version 1.2.2, and <strong>Java</strong> 2 version 1.3. <strong>Java</strong> 2 version 1.3<br />
includes some enhancements to Action handling that will be covered<br />
separately when we discuss menus and toolbars in the next chapter.<br />
Everything you read here applies all three versions of <strong>Java</strong>.<br />
You can store the text label or the Icon when you create an AbstractAction<br />
using the last two constructors that you saw earlier. If you specify the<br />
name parameter, it is stored under the NAME key and similarly if you supply<br />
an Icon, it becomes the SMALLICON value. Any other attributes must be<br />
set using the putValue method.<br />
At the end of this chapter, the graphics application from Chapter 4 will be<br />
rewritten to show exactly how to use Actions and how to share Actions<br />
between multiple sources. For now, let's clarify what has just been said with a<br />
simpler example.
510 Chapter 5 Keyboard Handling, Actions, and Scrolling<br />
Using Actions with Keyboard Accelerators<br />
The following code creates a simple user interface with a text label and three<br />
buttons that can be used to change the font of the text on the label. The set-<br />
Mnemonic method could be used to attach keyboard accelerators to these<br />
buttons, but for the purposes of this example, Keystroke objects that map<br />
F2 to the Bold key, F3 to the Italic key and F4 to the Plain key are used<br />
instead, as shown in Figure 5—6.<br />
Figure 5-6 Using keyboard shortcuts and actions together.<br />
To see how to use an Action, let's look at what the event handler that will<br />
handle the button press or the keystroke will need to do. When the user<br />
causes the event to occur, the font associated with the label must be changed.<br />
To do this, the event handler will need a reference to the label and to the font<br />
to be associated with it. To store this information, you would create a class<br />
derived from Abstract Act ion and pass the label and font to its constructor,<br />
which stores them within the object. Here is the implementation of this class:<br />
class FontChangeAction extends AbstractAction {<br />
public FontChangeAction(Font f, Component c) {<br />
this.font = f;<br />
this.comp = c;<br />
}<br />
}<br />
public void actionPerformed(ActionEvent evt) {<br />
comp.setFont(font);<br />
}<br />
protected Font font; // Font to select<br />
protected Component comp;<br />
// Component whose font is to change
Logical Scrolling and Forcing Visibility of an Area 511<br />
One of these action objects will be created for each font and the registerKeyboardAction<br />
method will be used to map a keystroke for one of the<br />
functio keys to its corresponding action, as shown in the code for the application<br />
itself (Listing 5-9). The command<br />
j ava <strong>JFC</strong>Book.Chapter5.ActionExample<br />
can be used to run this example.<br />
Listing 5-9 Using an Action to implement a keyboard accelerator<br />
package <strong>JFC</strong>Book.Chapter5;<br />
import javax.swing.*;<br />
import j ava.awt.*;<br />
import j ava.awt.event.*;<br />
public class ActionExample extends JPanel {<br />
public ActionExample() {<br />
this.setLayout(new BorderLayout());<br />
JLabel 1 = new JLabel(<br />
"Bold = F2; Italic = F3; Plain = F4",<br />
SwingConstants.CENTER);<br />
this.add(1, BorderLayout.CENTER);<br />
JPanel buttonPanel = new JPanel();<br />
this.add(buttonPanel, BorderLayout.SOUTH);<br />
Font boldFont = new Font("Dialog", Font.BOLD, 14);<br />
Font italicFont = new Font("Dialog", Font.ITALIC, 14);<br />
Font plainFont = new Font("Dialog", Font.PLAIN, 14);<br />
1.setFont(plainFont) ;<br />
JButton boldButton = new JButton("Bold");<br />
boldButton.setFont(boldFont);<br />
JButton italicButton = new JButton("Italic");<br />
italicButton.setFont(italicFont) ;<br />
JButton plainButton = new JButton("Plain");<br />
plainButton.setFont(plainFont);<br />
buttonPanel.add(boldButton) ;<br />
buttonPanel.add(italicButton);<br />
buttonPanel.add(plainButton);
512 Chapter 5 Keyboard Handling, Actions, and Scrolling<br />
Listing 5-9 Using an Action to implement a keyboard accelerator<br />
(continued)<br />
FontChangeAction boldAction =<br />
new FontChangeAction(boldFont, 1);<br />
FontChangeAction italicAction =<br />
new FontChangeAction(italicFont, 1);<br />
FontChangeAction plainAction =<br />
new FontChangeAction(plainFont, 1);<br />
// Associate actions with buttons<br />
boldButton.addActionListener(boldAction);<br />
italicButton.addActionListener(italicAction);<br />
plainButton.addActionListener(plainAction);<br />
// Attach actions to keystrokes over the whole panel<br />
this.registerKeyboardAction(boldAction,<br />
Keystroke.getKeyStroke(KeyEvent.VK_F2, 0, false),<br />
JComponent.WHEN_ANCESTORJDF_FOCUSEDj:OMPONENT);<br />
this.registerKeyboardAction(italicAction,<br />
Keystroke.getKeyStroke(KeyEvent.VK_F3, 0, false),<br />
JComponent.WHEN_ANCESTOR__OF_FOCUSED_COMPONENT);<br />
this.registerKeyboardAction(plainAction,<br />
Keystroke.getKeyStroke(KeyEvent.VK_F4, 0, false),<br />
JComponent . WHEN__ANCESTOR__OF_FOCUSED_COMPONENT) ;<br />
}<br />
public static void main(String [] args) {<br />
JFrame f = new JFrame("Action Example");<br />
ActionExample e = new ActionExample();<br />
f.setContentPane(e);<br />
f.addWindowListener(new WindowAdapter() {<br />
public void windowClosing(WindowEvent evt) {<br />
System.exit(0);<br />
}<br />
});<br />
f.setSize (300, 150) ;<br />
f.setvisible(true);<br />
}<br />
j____ .________^^^<br />
As you can see, the boldAction object is created with a reference to the<br />
text label and the bold font and then registered to receive the event generated<br />
by the F2 key using the following line of code:
Logical Scrolling and Forcing Visibility of an Area 513<br />
this.registerKeyboardAction(boldAction,<br />
Keystroke.getKeystroke(KeyEvent.VK_F2, 0, false),<br />
JComponent.WHEN_ANCESTOR_OF_FOCUSED_COMPONENT);<br />
When the F2 key is pressed, the actionPerformed method of the bold-<br />
Action object is entered and performs the font change in one simple line of<br />
code, using the reference to the label that was stored when the action was<br />
created:<br />
public void actionPerformed(ActionEvent evt) {<br />
}<br />
comp.setFont(font);<br />
I think you'll agree that this couldn't be much simpler: There is no need to<br />
worry about which component actually generated the event and you don't<br />
need to search for information stored with that component (or elsewhere)<br />
when the user interface was created—all of the context for the action to be<br />
performed is contained in the Action implementation where it can be<br />
accessed directly by the actionPerformed method.<br />
As a bonus, the same object can be used to act as the ActionListener<br />
for the buttons themselves, so the same code is executed whether a button or<br />
a function key is used to change the font. In fact, though, there is a small difference<br />
between this case in which a button triggers the event and the case in<br />
which the actionPerformed method is entered because of the F2, F3, or<br />
F4 key being pressed. When the action is triggered from one of the buttons,<br />
the button itself generates the ActionEvent and appears to be the source of<br />
the event (that is, the getSource method returns a reference to one of the<br />
JButtons). On the other hand, if one of the function keys was pressed, the<br />
source of the ActionEvent will be the object against which the keystroke<br />
was registered - in this case, the panel itself. In general, an Action should<br />
not be concerned with the apparent source of the event that calls its<br />
actionPerformed method because it will, in most cases, have little connection<br />
to the target of the Action. In fact, the actual target is usually the component<br />
that currently has the input focus or, as in this case, a component that<br />
is connected with the Action when it is constructed.<br />
More use will be made of the Action interface and the AbstractAction<br />
class later in this chapter and the next, where you will see how to use them in<br />
conjunction with menus and toolbars and you'll also see the way in which<br />
Actions are used in <strong>Java</strong> 2 version 1.3.
514 Chapter 5 Keyboard Handling, Actions, and Scrolling<br />
Keystroke Mapping in <strong>Java</strong> 2 Version 1.3<br />
The registerKeyboardAction method maps a key sequence, given in<br />
the form of a Keystroke object, to the action that should be performed<br />
when the key sequence is detected under specified conditions. In many<br />
cases, it is appropriate to directly connect the trigger for an action to the<br />
action itself in this way, but there are circumstances in which creating such a<br />
direct link causes a problem. For this reason, <strong>Java</strong> 2 version 1.3, while still<br />
supporting registerKeyboardAction and the other related methods that<br />
you have seen in this chpater, offers a more flexible replacement mechanism<br />
that uses two new classes—ActionMap and InputMap. In this section, well<br />
look first at how the new mechanism works from the point of view of code<br />
developed to work with <strong>Java</strong> 2 version 1.3, then we'll look at how to ensure<br />
that code written for JDK 1.1 and <strong>Java</strong> 2 version 1.2.2 will also work in <strong>Java</strong> 2<br />
version 1.3.<br />
Keyboard Handling Scenarios<br />
Before describing how the the replacement keyboard handling mechanism<br />
works, let's set the scene by looking at some of the issues that arise from using<br />
the original mechanism.<br />
The keyboard mechanism that Swing provides is commonly used for two<br />
quite different purposes—component developers use it to map keystrokes<br />
directed at a GUI component to the corresponding component-based action,<br />
while application developers more commonly take advantage of the ability to<br />
easily catch keystrokes wherever the input focus might be to install global<br />
actions, such as responding to the Fl key to provide help. These slighly different<br />
needs have been satisfied by a common solution in Swing 1.1.1 and<br />
<strong>Java</strong> 2 version 1.2.2, but this solution does cause problems, especially for<br />
component developers or for application developers who want to slightly<br />
modify the behavior of individual components. The existing mechanism is<br />
much better suited to the needs of the application developer where the need<br />
is usually to install global actions.<br />
Keyboard Actions and GUI Components<br />
Almost all Swing components come with built-in keyboard shortcuts that<br />
take effect when they have the input focus. For example, buttons have a keyboard<br />
mapping that causes them to "click" when the SPACE key is pressed<br />
and text components use CTRL+C, CTRL+X, and CTRL+V as the trigger to
Logical Scrolling and Forcing Visibility of an Area 515<br />
copy, cut and paste text between themselves and the system clipboard. There<br />
are two things to note about these mappings:<br />
• The actual key sequences usually depend on which look-andfeel<br />
is in use. In the examples given above, for example, the key<br />
mappings given are the ones when the Windows or Metal lookand-feel<br />
is installed. If you use the Motif look-and-feel,<br />
however, the clipboard actions are mapped to the key<br />
sequences CTRL+INSERT (copy), SHIFT+DELETE (cut) and<br />
SHIFT+INSERT (paste). For this reason, component-based<br />
keyboard mappings are installed by each components UI class,<br />
which is the part of the component that is dependent on the<br />
look-and-feel in use.<br />
• The key sequences, whatever they might be, are actually<br />
mapped to code within the component or its UI class. As you<br />
know, registerKeyboardAction requires both a<br />
Keystroke, which we know will typically be look-and-feel<br />
dependent, and ActionListener that will perform the<br />
required action when the key sequence is detected. In most<br />
cases, this code is implemented as an inner class of the<br />
components UI class and either implements the<br />
ActionListener interface directly or by deriving from<br />
AbstractAction.<br />
Here's an example of some typical code in Swing 1.1.1 or <strong>Java</strong> 2 version<br />
1.2.2 that connects a key sequence to an action within a component:<br />
Keystroke spacePressedKeyStroke =<br />
Keystroke.getKeyStroke(' ', 0, false);<br />
PressedAction pressedAction = new PressedAction(b);<br />
b.registerKeyboardAction(pressedAction,<br />
spacePressedKeyStroke, JComponent.WHEN_FOCUSED);<br />
This is, in fact, the code that arranges for the SPACE key to click a button<br />
when the button has the focus—in the actual source, not all of the lines<br />
appear together as shown here, but the result is the same. If you want to look<br />
at the complete source code, you'll find it in the file javax/swing/plaf /<br />
basic/BasicButtonListener. <strong>Java</strong>, which can be found in the Swing<br />
source code that can be installed from the package downloaded from the Sun<br />
web site. You'll need the Swing 1.1.1 or <strong>Java</strong> 2 version 1.2.2 source, of course,<br />
because <strong>Java</strong> 2 version 1.3 does this differently, as you'll see later.
516 Chapter 5 Keyboard Handling, Actions, and Scrolling<br />
Notice that in this case, the use of the SPACE key is hard-wired into the<br />
code because it is look-and-feel independent, but this is not always the<br />
case—typically though, the key sequence will be stored along with other data<br />
that depends on the look-and-feel in an instance of a class called ulDefaults,<br />
from where it will be extracted by the UI class in a look-and-feel<br />
independent way, by providing a known key that maps to the required information.<br />
The uiDef aults class is described in detail in Chapter 13.<br />
The last two statements in the above extract connect the keystroke to an<br />
instance of a class called PressedAction. This class is an inner class of<br />
BasicButtonListener, declared like this:<br />
static class PressedAction implements ActionListener {<br />
AbstractButton b = null;<br />
PressedAction(AbstractButton b) {<br />
this.b = b;<br />
}<br />
public void actionPerformed(ActionEvent e) {<br />
}<br />
}<br />
The code required to actually cause the button to be pressed is contained<br />
in the actionPerf ormed method and is not shown here.<br />
All of this looks fairly simple and straightforward, so what is the issue that<br />
caused the Swing team to introduce a different way of doing this for <strong>Java</strong> 2<br />
version 1.3?<br />
The basic problem with this approach is that it places too much knowledge<br />
in the component UI class and makes it difficult to change the key mappings<br />
between look-and-feels or for specific applications that want to remove the<br />
standard key mappings and provide their own.<br />
Taking the code shown above as an example, the PressedAction class<br />
contains all the logic to "press" the button on demand and to connect it to a<br />
sequence of keystrokes requires that an instance of it be created and passed<br />
as a parameter to registerKeyboardAction. The fact that the PressedAction<br />
class is used for this will be the same for all look-and-feels,<br />
although the key sequence will be different. By forcing the key sequence and<br />
the target code to be bound together in a single call in this way, you either<br />
force the binding to take place in code common to all of the look-and-feels to<br />
which the actual Keystroke for each look-and-feel must be passed as a
Logical Scrolling and Forcing Visibility of an Area 517<br />
parameter or, as in this case, you have to rely on the same key being used in<br />
all cases, which is not the usual case. Alternatively, you could place the entire<br />
binding in each look-and-feel implementation, so that you might have for the<br />
Windows look-and-feel:<br />
Keystroke keystroke = .; // Code to get Windows keystroke<br />
PressedAction pressedAction = new PressedAction (b) ;<br />
b.registerKeyboardAction(pressedAction,<br />
keystroke, JComponent.WHEN_FOCUSED);<br />
and for the Metal look-and-feel:<br />
Keystroke keystroke = .; // Code to get Metal keystroke<br />
PressedAction pressedAction = new PressedAction (b) ;<br />
b.registerKeyboardAction(pressedAction,<br />
keystroke, JComponent.WHEN_FOCUSED);<br />
This would work, but it has two problems:<br />
• Most of the code is duplicated; only the construction of the<br />
Keystroke object varies from look-and-feel to look-and-feel.<br />
• The classes that implement the user interfaces for the different<br />
look-and-feels are in different packages<br />
(javax. swing.plaf .metal for Metal,<br />
com. sun. <strong>Java</strong> . swing .plaf . windows for Windows, etc.),<br />
but they all need access to the component's equivalent of the<br />
PressedAction class. This means that the code that performs<br />
the keyboard action cannot be in a package private class as was<br />
the case with PressedAction in the code above, which relied<br />
on the key sequence being the same for all of the look-and-feel<br />
implementations. In fact, in most cases, the code that<br />
implements the built-in keyboard actions is provided in a base<br />
class from which the Metal, Windows, Motif, and Macintosh UI<br />
classes are derived and is either protected or public.<br />
Why is this latter point an issue? It comes down to encapsulation—ideally,<br />
when writing a component, you want to provide a public API that applications<br />
will use and expose as little of the internal detail as you can possibly get<br />
away with. With the coding style forced by registerKeyboardAction, in<br />
order to connect a key sequence to the action you have to know which inner<br />
class of the components UI class actually contains the code that provides the<br />
action. This may not seem such a big problem when that knowledge is only<br />
hard-coded into look-and-feel implementations, most of which are provided<br />
by Sun and which an application developer is unlikely to want to modify or
518 Chapters Keyboard Handling, Actions, and Scrolling<br />
implement a replacement for. The fact is, however, that this is not always the<br />
extent of the problem.<br />
In the real world, it is often the case that companies migrate existing user<br />
interfaces from platform-dependent code written for either Windows or<br />
Motif (or the Macintosh) to platform-independent code in <strong>Java</strong>, using Swing<br />
as the delivery vehicle. As you have seen, the standard keyboard shortcuts<br />
vary from platform to platform. Ideally, when migrating to the <strong>Java</strong> replacement,<br />
users would get used to the keyboard shortcuts offered by the Metal<br />
look-and-feel, or whichever look-and-feel they happen to use, and forget the<br />
ones they were accustomed to on the original platform. In practice, however,<br />
not all users are as understanding as this. As we said earlier in this chapter, it<br />
is possible to save valuable time when using a user interface if you have<br />
access to a comprehensive set of keyboard shortcuts and long-standing users<br />
get very used to having them. Not only will you find that they can't do without<br />
most of their shortcuts, you will also probably come under strong pressure<br />
to offer the same shortcuts in the <strong>Java</strong> version as the legacy code did. If<br />
the legacy application used only the standard and well-known shortcuts used<br />
on the original host platform, this may not be an issue, because the chances<br />
are that those same shortcuts will be supplied by the Swing look-and-feel.<br />
However, if the application used non-standard shortcuts, or the original<br />
application ran under Motif on a UNIX platform but will now use the Metal<br />
look-and-feel, yon are Jikely to need to remove the keyboard mappings supplied<br />
by the look-and-feel and install your own or, possibly, you could get<br />
away with leaving the existing mappings installed and adding extra ones that<br />
correspond to those that the user is familiar with, so that both sets are available<br />
at the same time (which might facilitate user migration).<br />
If you find yourself in this situation, you will have to call registerKeyboardAction<br />
to add your own keyboard shortcut for one or more actions<br />
provided by a component, so you will need to be able to get a reference to<br />
the ActionListener that the component provides to implement that<br />
action. Unfortunately, this is not always possible, even if you are prepared to<br />
look at the source code to find out how the action is implemented and which<br />
class you have to instantiate to get the right ActionListener. The case of<br />
the SPACE action provided by buttons is an example of this—you can't instantiate<br />
the PressedAction class from application code because it is package<br />
private! Even if this were not the case, making use of component features<br />
that are not strictly part of its public interface is not a good thing to do<br />
because the implementation can change and your code may no longer work<br />
and may stop compiling some time in the future.
Logical Scrolling and Forcing Visibility of an Area 519<br />
If you find it absolutely necessary to change key mappings when using<br />
Swing 1.1.1 or <strong>Java</strong> 2 version 1.2.2, there is a way to do it that makes no<br />
assumptions about the underlying implementation. Suppose you wanted to<br />
arrange for the BACKSPACE key to activate a button instead of the SPACE key.<br />
We know that you can't just create an instance of PressedAction and pass<br />
it to registerKeyboardAction, but you can make use of the instance that<br />
has already been registered by the components look-and-feel class by using<br />
the JComponent getActionForKeyStroke method. The following code<br />
will arrange for a given button to be activated using the BACKSPACE key<br />
instead of SPACE:<br />
Keystroke spacePressed = Keystroke.getKeyStroke(<br />
KeyEvent.VK_SPACE, 0, false);<br />
Keystroke spaceReleased = Keystroke.getKeyStroke(<br />
KeyEvent. VK_SPACE, 0, true);<br />
Keystroke backSpacePressed = Keystroke.getKeyStroke(<br />
KeyEvent.VK_BACK_SPACE, 0, false);<br />
Keystroke backSpaceReleased = Keystroke.getKeyStroke(<br />
KeyEvent.VK_BACK_SPACE, 0, true);<br />
ActionListener 1 =<br />
b.getActionForKeyStroke(spacePressed);<br />
b.unregisterKeyboardAction(spacePressed);<br />
b.registerKeyboardAction(1, backSpacePressed,<br />
JComponent.WHEN_FOCUSED);<br />
1 = b.getActionForKeyStroke(spaceReleased) ;<br />
b.unregisterKeyboardAction(spaceReleased);<br />
b.registerKeyboardAction(1, backSpaceReleased,<br />
JComponent.WHEN_FOCUSED);<br />
Note that the button has separate actions registered to be triggered when<br />
the space key is pressed (which makes the button appear pressed) and when<br />
it is released (which generates the ActionEvent), so it is necessary to remap<br />
the keys assigned to both of them. As you can see, the technique is a simple<br />
one—get a reference to the ActionListener that was originally referenced,<br />
unregister the look-and-feeFs keystroke mapping for the action, and<br />
then register our own. Although this succeeds in remapping the action without<br />
making any assumptions about how it is implemented, it is still not ideal<br />
because it relies on you knowing which keys are set to trigger the action. If<br />
you know which look-and-feel is selected, or if you know that the key mapping<br />
is look-and-feel independent (as it is here), you might be able to accept<br />
this assumption. Nevertheless, you could not reliably use this technique to<br />
assign extra key mappings or new key mappings for copy, cut, and paste on a
520 Chapter 5 Keyboard Handling, Actions, and Scrolling<br />
text component, because the key sequences that trigger those actions depend<br />
on the selected look-and-feel. This is a major weakness of the keyboard handling<br />
mechanism provided by Swing 1.1.1 and <strong>Java</strong> 2 version 1.2.2.<br />
The ActionMap and InputMap <strong>Classes</strong><br />
<strong>Java</strong> 2 version 1.3 takes a completely different approach to connecting component-based<br />
actions to the keystrokes that should trigger them. As you've<br />
seen, the weakness of the original mechanism comes from the direct coupling<br />
of the keystroke to the action. <strong>Java</strong> 2 version 1.3 tackles this problem<br />
head-on by removing this direct linkage and replacing it with an indirection<br />
through an action name which is usually a String, but could be any Obj ect.<br />
The idea is that the component developer defines the actions that the component<br />
will export by giving each of them a name which then effectively<br />
becomes part of the component's public interface. The component developer<br />
is then responsible for connecting the name with the code that performs the<br />
action by making an entry in the components ActionMap. Key sequences<br />
can be assigned to actions by making an entry in the components InputMap.<br />
Instead of mapping directly from Keystroke to ActionListener, the<br />
InputMap actually maps Keystroke to action name. Taken together with<br />
the ActionMap, this is sufficient to locate the correct ActionListener to<br />
use in response to a given key sequence, without tightly coupling them to<br />
each other.<br />
The ActionMap Class<br />
Including its constructor, the ActionMap class has ten public methods:<br />
public ActionMap();<br />
public void put(Object key, Action action);<br />
public Action get(Object key);<br />
public void remove(Object key);<br />
public void clear();<br />
public Object [] keys();<br />
public int sized ;<br />
public void setParent(ActionMap parent);<br />
public ActionMap getParentO;<br />
public Object [] allKeysO;<br />
The function of the ActionMap class is to hold a collection of mappings<br />
from action names to the corresponding Actions. The put and get methods<br />
are used to create and retrieve entries from the collection, respectively. As<br />
you can see from the declarations of these methods, although we refer to<br />
action names, the keys that ActionMap uses are actually Objects, not
Logical Scrolling and Forcing Visibility of an Area 521<br />
Strings. The ActionMaps installed in the standard Swing components do,<br />
in fact, all use strings as their keys but, as we'll see when we look at the<br />
question of providing backward compatibility with Swing 1.1.1 and <strong>Java</strong> 2<br />
version 1.2.2, the ability to use an arbitrary Obj ect as the key is invaluable.<br />
Notice also that the objects that are stored in the ActionMap are Actions,<br />
not ActionListeners. This encourages developers of new components to<br />
implement their operations as Actions rather than ActionListeners but,<br />
again, it has some implications for code that was originally written to use the<br />
registerKeyboardAction interface where an ActionListener was<br />
acceptable. We'll look at issues relating to compatibility in "Writing Compatible<br />
Code" later in this chapter.<br />
The functions of most of the other methods should be obvious from their<br />
names, but there is a slight complication that we'll describe here and explain<br />
further later. An ActionMap is not a single-level mapping from an action<br />
name to an Action—in fact, ActionMaps can be hierarchical, so that any<br />
given ActionMap can have a parent that contains mappings that appear to be<br />
in the original map. You can, for example, create an ActionMap that contains<br />
mappings that are common to all instances of a component and then add<br />
another one that contains mappings that are exclusive to a particular subclass<br />
of that component or to cater for special uses of the component:<br />
ActionMap commonMap = new ActionMap();<br />
commonMap.put("baseAction", ...);// Add common mappings<br />
ActionMap specialMap = new ActionMap0;<br />
specialMap.put("specialAction", ...);<br />
// Specific mappings for special use<br />
specialMap.setParent(commonMap);<br />
In the example shown above, as far as the get method is concerned, any<br />
mappings that are in commonMap can also be retrieved from specialMap as<br />
if they had been denned in specialMap, so that the following code:<br />
Action action = specialMap.get("baseAction");<br />
will return whatever Action was installed in commonMap under the name<br />
"baseAction" even though the get method was invoked on specialMap.<br />
The put method, however, affects only the ActionMap that it is directly<br />
applied to, so that the key "specialAction" in the example above is valid<br />
only in the ActionMap specialMap, not commonMap:<br />
Action action = specialMap.get("specialAction");// OK<br />
action = commonMap. get ( "specialAction" ),-// Returns null
522 Chapter 5 Keyboard Handling, Actions, and Scrolling<br />
Similarly, the remove, clear, size , and keys methods apply only to the<br />
ActionMap that they are invoked on and do not affect any ancestor maps.<br />
Calling remove on an ActionMap that does not contain an entry with the<br />
given key has no effect. For example,<br />
Action action = specialMap.get("baseAction");// OK<br />
specialMap.remove("baseAction");// No effect<br />
action = specialMap.get("baseAction");// OK<br />
Here, the first and last lines both return the Action stored under the key<br />
"baseAction" in the base ActionMap; invoking remove with this key on<br />
specialMap has no effect whatsoever because that ActionMap did not contain<br />
a mapping for the name "baseAction." The following code, however,<br />
produces a different result:<br />
Action action = specialMap.get("baseAction");// OK<br />
baseMap.remove("baseAction");// Removes mapping<br />
action = specialMap.get("baseAction");// Returns null<br />
In this case, the remove method removes the mapping from the base<br />
ActionMap, which also has the effect of removing it from any other<br />
ActionMaps that have baseMap as their parent (or grandparent etc.).<br />
It is perfectly permissible to define a mapping in baseMap and then override<br />
this mapping in a more specific ActionMap. If you do this, the new<br />
mapping hides the original one. Consider the following example:<br />
ActionMap baseMap = new ActionMap();<br />
Action actionl = ;// Original action<br />
Action action2 = ;// Another action<br />
baseMap.put("actionName", actionl);<br />
baseMap.put("anotherAction", action2);<br />
ActionMap specialMap = new ActionMap();<br />
specialMap.setParent(baseMap);<br />
Action childAction = ;// Action defined for child<br />
specialMap.put("actionName", childAction);<br />
In this case, the following line:<br />
Action action = specialMap.get("actionName");<br />
retrieves childAction, because the mapping for the name actionName<br />
in specialMap hides the mapping in baseMap. If you now did this:<br />
specialMap.remove("actionName");<br />
action = specialMap.get("actionName" );
Logical Scrolling and Forcing Visibility of an Area 523<br />
then the mapping for actionName in specialMap would be removed<br />
and the get call would return the Action actionl from the base Action-<br />
Map, because the mapping in the base ActionMap is unaffected by the<br />
remove operation on specialMap.<br />
The keys method returns a list of all the keys that are defined in the<br />
ActionMap on which it is invoked and the size method returns the number<br />
of keys in the ActionMap. This list does not include any keys visible from<br />
ancestor ActionMaps. Thus, for example, in the case of the baseMap and<br />
specialMap hierarchy shown above, calling keys on specialMap would<br />
return an array with a single entry containing the key "actionName ." If you<br />
want to get a list of all of the keys visible through a given ActionMap, use the<br />
allKeys method:<br />
Object[] keyList = specialMap.allKeys();<br />
In this case, the keyList array would contain the values "actionName"<br />
and"anotherAction."<br />
As you'll see in "Application Mappings and UI Mappings" later in this<br />
chapter, the ability to create a hierarchy of ActionMaps allows you to override<br />
the effect of a given key sequence on a specific component, without<br />
affecting other instances of that component.<br />
<strong>Core</strong> Alert<br />
Both the keys and allKeys methods return null if no mappings have<br />
ever been installed in the ActionMap or in the total ActionMap<br />
hierarchy, respectively, instead of returning an empty array.<br />
The InputMap Class<br />
Like ActionMap, the InputMap class has ten public methods:<br />
public InputMap();<br />
public void put(Keystroke keystroke, Object actionKey);<br />
public Object get(Keystroke keystroke);<br />
public void remove(Keystroke keystroke);<br />
public void clear();<br />
public KeyStroke[] keys();<br />
public int sized ;<br />
public void setParent(InputMap parent);<br />
public InputMap getParent();<br />
public KeyStrokef] allKeys();
524 Chapter 5 Keyboard Handling, Actions, and Scrolling<br />
As you can see, there is more than a passing similarity between these two<br />
classes—they have identical method names, both of them are used to map<br />
from a collection of keys to a set of corresponding values and they are both<br />
hierarchical. Whereas ActionMap holds mappings from Object-valued keys<br />
to Actions, an InputMap is a collection in which the keys are Keystroke<br />
objects and the values are-arbitrary Objects. In fact, the values held in an<br />
InputMap are the keys used to access an ActionMap.<br />
ActionMap, InputMap, and Keyboard<br />
Handling<br />
When a Swing component is created, the look-and-feel specific UI class that<br />
is installed is responsible for initializing the components ActionMaps and<br />
InputMaps. In general, the ActionMap for a given component does not<br />
depend on the look-and-feel in use because the set of actions that a component<br />
exposes is dependent on the nature oi the component and not on how it<br />
is represented. For this reason, the ActionMap, once created, is not usually<br />
changed over the lifetime of the component. By contrast, the key sequences<br />
that map to individual actions will often depend on the look-and-feel, so different<br />
look-and-feels will install their own specific InputMaps for each component.<br />
The ActionMaps and InputMaps are stored by JComponent, which<br />
provides the following public methods to allow access to them:<br />
• public final ActionMap getActionMap();<br />
• public final void setActionMap(ActionMap map);<br />
• public final InputMap getInputMap(int<br />
condition);<br />
• public final InputMap getInputMap();<br />
• public final void setInputMap(int condition,<br />
InputMap map);<br />
The getActionMap and setActionMap methods allow you to retrieve<br />
and set the components ActionMap, respectively. The getActionMap<br />
method will create an empty ActionMap method if one has not already been<br />
installed by an earlier invocation of setActionMap. As we said earlier, however,<br />
a components ActionMap is initially created by its look-and-feel class,<br />
so you would not normally choose to directly invoke the setActionMap<br />
method from application code and, if you did, you would lose all of the component's<br />
standard Actions unless the ActionMap that you supply contains<br />
mappings for them.
Logical Scrolling and Forcing Visibility of an Area 525<br />
A component has only one ActionMap, but it can have up to three<br />
InputMaps. The getlnputMap and setlnputMap methods both have a<br />
condition parameter that determines which map it should act upon. This<br />
parameter takes one of the following values:<br />
WHEN_FOCUSED The InputMap that is<br />
used for keys delivered<br />
when the component has<br />
the input focus.<br />
WHEN_ANCESTOR_0F_F0CUSED_COMP0NENT TheInputMap used for<br />
keys delivered when a<br />
descendent of this component<br />
has the input<br />
focus.<br />
WHEN_IN_F0CUSED_WINDOW The InputMap used for<br />
keys handled when the<br />
component is in the same<br />
window as the component<br />
that has the input<br />
focus.<br />
These condition values are, of course, the same as those used with the<br />
registerKeyboardAction method and they have exactly the same meanings.<br />
As with ActionMaps, the initial InputMaps for a component are created<br />
by the components look-and-feel class, so it would be relatively unusual for<br />
application code to directly invoke the setlnputMap method. As with set-<br />
ActionMap, calling setlnputMap causes any existing mappings to be lost.<br />
Notice that there are two variants of getlnputMap—if you use the variant<br />
that does not require a condition argument, the InputMap that is returned is<br />
the one that would be used for keys delivered when the component has the<br />
input focus.<br />
The getlnputMap method creates an empty InputMap for a given condition<br />
if none has yet been installed. If a components look-and-feel does not<br />
install any mappings for a component for a specific condition, then the<br />
InputMap will appear to exist but will be empty.<br />
To see how ActionMaps and InputMaps work, let's look at how they are<br />
used to map the SPACE key when directed at a button to Actions that make<br />
the button behave as it has been pressed. The code shown in Listing 5-10
526 Chapter 5 Ke/board Handling, Actions, and Scrolling<br />
creates a JButton and then prints the ActionMap and the InputMaps that<br />
are installed by its look-and-feel class.<br />
Listing 5-10 Printing the ActionMaps and InputMaps for a button<br />
package <strong>JFC</strong>Book.Chapter5.jdkl3;<br />
import j avax.swing.*;<br />
import j ava.awt.*;<br />
import j ava.awt.event.*;<br />
public class ButtonlnputMapExamplel extends JFrame {<br />
public ButtonlnputMapExamplel() {<br />
super("Button Input Map Example 1");<br />
}<br />
JButton button = new JButton("PRESS");<br />
getContentPane () .add(button, BorderLayout.CENTER) ;<br />
printActionMap(button.getActionMap());<br />
printInputMap(button.getlnputMap(<br />
JComponent.WHEN^FOCUSED),<br />
"Input map used when focused");<br />
printlnputMap(button.getlnputMap(<br />
JComponent.WHEN_ANCESTOR_OF_FOCUSED_COMPONENT),<br />
"Input map used when ancestor of focused component");<br />
printlnputMap(button.getlnputMap(<br />
JComponent.WHEN_IN_FOCUSED_WINDOW),<br />
"Input map used when in focused window");<br />
public static void printActionMap(ActionMap actionMap) {<br />
System.out.println("Button action map:");<br />
Object [] keys = actionMap.allKeys();<br />
if (keys != null) {<br />
for (int i = 0; i < keys.length; i++) {<br />
Object key = keys [i] ;<br />
Action targetAction = actionMap.get(key);<br />
System.out.println("\tName: , action: "<br />
+ targetAction.getClass().getName());<br />
}<br />
}<br />
}
Logical Scrolling and Forcing Visibility of an Area 527<br />
Listing 5-10 Printing the ActionMaps and InputMaps for a button<br />
(continued)<br />
public static void printInputMap(InputMap inputMap,<br />
String heading) {<br />
System.out.println("\n" + heading + ":");<br />
Keystroke[] keys = inputMap.allKeys();<br />
if (keys != null) {<br />
for (int i = 0; i < keys.length; i++) {<br />
Keystroke key = keys[i];<br />
Object actionName = inputMap.get(key);<br />
System.out.println("\tKey: , action name: "<br />
+ actionName);<br />
}<br />
}<br />
}<br />
public static void main(String[] args) {<br />
JFrame f = new ButtonlnputMapExamplel();<br />
f.pack();<br />
f.setVisible(true);<br />
f.addWindowListener(new WindowAdapter () {<br />
public void windowClosing(WindowEvent e) {<br />
System.exit(0);<br />
}<br />
});<br />
}<br />
}<br />
This example uses the getActionMap and getlnputMap methods to get<br />
the installed ActionMap and InputMaps and then invokes the locallydefined<br />
static printActionMap and print InputMap methods to display<br />
their contents. These methods use code that is a simple exploitation of the<br />
InputMap and ActionMap classes that were described earlier in this chapter.<br />
The only interesting points to note about these methods are the following:<br />
• They use the all Keys method instead of keys to get the set of<br />
mappings in the ActionMap and InputMaps. You might<br />
wonder why this is necessary, since we said earlier in this
528 Chapter 5 Keyboard Handling, Actions, and Scrolling<br />
chapter that these methods are used to show all mappings in an<br />
ActionMap or inputMap hierarchy and there has been no<br />
suggestion so far that there is any more than one level of<br />
mapping involved here. In fact, as you'll see in "Application<br />
Mappings and Ul Mappings," both the ActionMaps and<br />
inputMaps installed by the UI classes have two levels in their<br />
hierarchy.<br />
• Both the print InputMap and print ActionMap methods<br />
explicitly check whether the array reference returned by the<br />
allKeys method is null before printing all of the mappings<br />
that have been returned. This is necessary because a null<br />
reference is returned if no mappings have been installed<br />
instead of the more usual empty array. However, if you install<br />
mappings and then remove them using the clear or remove<br />
methods, an empty array will be returned instead.<br />
If you run this example using the command:<br />
java <strong>JFC</strong>Book.Chapter5.jdkl3.ButtonlnputMapExamplel<br />
you should see the following output:<br />
Button action map:<br />
Name: , action:<br />
javax.swing.piaf.basic.BasicButtonListener$PressedAction<br />
Name: , action:<br />
javax.swing.plaf.basic.BasicButtonListener$ReleasedAction<br />
Input map used when focused:<br />
Key: , action name: pressed<br />
Key: , action name: released<br />
Input map used when ancestor of focused component:<br />
Input map used when in focused window:<br />
The button's ActionMap contains two entries mapping the names<br />
"pressed" and "released" to instances of the inner classes PressedAction<br />
and ReleasedAction, respectively. These are the only Actions that<br />
the button exports. Of the three possible InputMaps, only the one that is<br />
used when the button has the keyboard focus has any entries. As you might<br />
expect, there is one entry corresponding to each Action in the ActionMap -<br />
the first maps the SPACE key when pressed to the ActionMap entry stored
Logical Scrolling and Forcing Visibility of an Area 529<br />
under the key "pressed" and the other maps the release of the SPACE kev to<br />
the entry with key "released."<br />
When the user presses the SPACE key while the button has the focus, code<br />
in the JComponent method that handles KeyEvents creates a Keystroke<br />
object for the SPACE key, with no modifiers and with the released flag set<br />
to false. This Keystroke is used as the key to the inputMap for keys delivered<br />
while the component has the focus, which will locate the entiy with the<br />
value "pressed". This value is then used as the key to the components<br />
ActionMap, where it will find the PressedAction instance that was stored<br />
in the ActionMap when the component was created and, finally, the<br />
actionPerformed method of PressedAction will be called to "press" the<br />
button. A similar process takes place when the user releases the SPACE key.<br />
Figure 5-7 summarizes the process of mapping a key stroke to its correspondmg<br />
Action.<br />
Figure 5-7 Mapping a Key to an Action.
530 Chapter 5 Keyboard Handling, Actions, and Scrolling<br />
In fact, the complete process of matching key events to their corresponding<br />
Actions is slightly more complex than this but, apart from the fact that<br />
there is now an indirection through an inputMap and an ActionMap, it consists<br />
of the same steps that were followed in Swing 1.1.1 and <strong>Java</strong> 2 version<br />
1.2.2 in connection with ActionListeners registered using registerKeyboardAction.<br />
For the sake of completeness, here is what happens:<br />
1. If the component is not enabled, no keyboard actions will be<br />
processed.<br />
2. The key code or character and modifiers (and whether this is a<br />
key press or key release) are used to create a Keystroke<br />
object.<br />
3. The Keystroke is used as a key to the components<br />
WHEN__FOCUSED InputMap. If this returns a non-null action<br />
name, then that name is used as a key to the components<br />
ActionMap.<br />
4. If the ActionMap contains an Action under the key found<br />
from the InputMap and that Action is enabled, its action-<br />
Performed method invoked and passed an ActionEvent with<br />
the focused component as its source. Processing for this key is<br />
now complete.<br />
5. If no mapping was found in the InputMap or the ActionMap<br />
or an Action was found but was disabled, steps 3 and 4 are<br />
repeated using the<br />
WHEN_ANCESTOR_OF_FOCUSED_COMPONENT InputMap of the<br />
focused components parent. If this does not contain an eligible<br />
match, then the search moves to its parent and so on, until the<br />
top of the containment hierarchy is reached. If a match is found<br />
among any of these components, the ActionEvent that is<br />
delivered to the target Action will have as its source the ancestor<br />
of the focused component whose InputMap and Action-<br />
Map contained the match.<br />
6. If the key still has not been dispatched, the<br />
WHEN_IN__FOCUSED_WINDOW inputMaps of all components in<br />
the same window as the focused component are searched for a<br />
match.
Logical Scrolling and Forcing Visibility of an Area 531<br />
Application Mappings and Ul Mappings<br />
Now that you've seen the overall picture, it's time to look a little more closely<br />
at some of the details that we have glossed over so far and look at some example<br />
code that shows how to use InputMaps and ActionMaps in place of<br />
registerKeyboardAction.<br />
Adding a Keyboard Action Mapping<br />
Let's start by continuing with the problem of assigning the BACKSPACE key<br />
instead of the SPACE key to press a button. You saw in the last section that<br />
the button exposes two Actions in its ActionMaps that perform the operations<br />
needed to click the button. In order to arrange for the BACKSPACE key<br />
to trigger these operations, we have to do two things:<br />
• Make entries in the appropriate InputMap to map the<br />
BACKSPACE key press and release events to the correct entries<br />
in the ActionMap.<br />
• Remove the entries in the InputMap that connect the SPACE<br />
key to these ActionMap entries.<br />
You have already seen that the key mappings are held in the<br />
WHEN_FOCUSED InputMap and that the action names stored in the Action-<br />
Map are "pressed" and "released," respectively. Given this information<br />
and the methods that you saw earlier that allow you to get a reference to a<br />
component's InputMap and add and remove entries in it, it would seem that<br />
the solution is straightforward. Listing 5-11 shows the obvious way to implement<br />
this feature. For brevity, we show only the relevant part of the code for<br />
this example—the rest is the same as that shown in Listing 5-10.<br />
Listing 5-11 Replacing the SPACE key with the BACKSPACE key<br />
package <strong>JFC</strong>Book.Chapter5.jdkl3;<br />
import j avax.swing.*;<br />
import j ava.awt.*;<br />
import j ava.awt.event.*;<br />
public class ButtonInputMapExample2 extends JFrame {<br />
public ButtonInputMapExample2() {
532 Chapter 5 Keyboard Handling, Actions, and Scrolling<br />
Listing 5-11 Replacing the SPACE key with the BACKSPACE key<br />
(continued)<br />
}<br />
super("Button Input Map Example 2");<br />
JButton button = new JButton("PRESS");<br />
getContentPane().add(button, BorderLayout.CENTER);<br />
// Add InputMap entries for the BACKSPACE key<br />
InputMap whenFocused = button.getlnputMap(<br />
JComponent.WHENFOCUSED);<br />
whenFocused.put(Keystroke.getKeyStroke(<br />
KeyEvent.VK BACKSPACE, 0, false), "pressed");<br />
whenFocused.put(Keystroke.getKeyStroke(<br />
KeyEvent.VKBACKSPACE, 0, true), "released");<br />
// Remove the InputMap entries for the SPACE key<br />
whenFocused.remove(<br />
Keystroke.getKeyStroke(KeyEvent.VKSPACE, 0, false));<br />
whenFocused.remove(<br />
KeyStroke.getKeyStroke(KeyEvent.VKSPACE, 0, true));<br />
// Code omitted<br />
This example creates the same layout as the previous example, placing a<br />
single JButton in a frame. Before displaying the frame, it gets a reference to<br />
the buttons WHEN_FOCUSED InputMap using the JComponent getlnput-<br />
Map method and then uses the InputMap put method twice to add entries<br />
that map the BACKSPACE key pressed and released keystrokes to the button's<br />
"pressed" and "released" actions, respectively. This should be enough to<br />
make pressing and releasing the BACKSPACE key click the button. In order to<br />
stop the SPACE key doing the same thing, the last two lines make use of the<br />
InputMap remove methods to remove the SPACE key entries from the same<br />
map. If you run this example using the command<br />
<strong>Java</strong> <strong>JFC</strong>Book.Chapter5.jdkl3.ButtonInputMapExample2<br />
you'll find that if you give the button the input focus and press the BACK-<br />
SPACE key, it will behave as if it is being clicked with the mouse, so clearly<br />
the new entries in the InputMap are working as expected. There is, however,<br />
a small problem: if you press the SPACE key while the button has the focus,<br />
you'll find that it too causes the button to click, despite the fact that we
Logical Scrolling and Forcing Visibility of an Area 533<br />
attempted to remove the SPACE keystrokes from the WHEN_FOCUSED<br />
InputMap! Like the previous example, this one prints the content of the button's<br />
inputMaps and, if you look at the window in which you started this<br />
example, you'll see the following amonst the output:<br />
Input map used when focused:<br />
Key.- , action name: pressed<br />
Key: , action name: released<br />
Key: , action name: pressed<br />
Key.- , action name: released<br />
This clearly shows that the WHEN_FOCUSED InputMap now has mappings<br />
for both the SPACE and BACKSPACE keys, so our attempt to remove the<br />
SPACE key mapping assigned when the component was created was not successful.<br />
Removing an Existing Keyboard Mapping<br />
Why didn't the code shown in Listing 5-11 succeed in removing the mappings<br />
for the SPACE key? The problem is that neither the InputMaps nor the<br />
ActionMap are as simple as we have been pretending so far. When we were<br />
describing the InputMap and ActionMap classes, we said that it was possible<br />
to have a hierarchical arrangement with multiple sets of mappings<br />
installed in different physical maps but appearing to all be in the one flat map<br />
as far as the get method is concerned. In fact, this is exactly what is happening<br />
here. But why are these maps multilevel instead of being a simple flat<br />
map?<br />
We've already mentioned that both the ActionMap and the InputMaps<br />
for a component are initially installed by its look-and-feel class and we've said<br />
that the entries in the InputMaps will sometimes (but not always) depend on<br />
which look-and-feel is currently installed. This implies, of course, that if you<br />
switch the look-and-feel of an application, it has to be possible to remove the<br />
existing InputMaps and install a set that applies to the incoming look-andfeel.<br />
The obvious way to do this is for each look-and-feel to construct the<br />
InputMaps that it needs and to use the JComponent set InputMap method<br />
to replace whatever was installed by the previous look-and-feel. While this<br />
would, indeed, be simple and straightforward, it would also be very inconvenient<br />
if the application programmer has added some extra key mappings by<br />
modifying a components InputMaps, as is the case in Listing 5-11, because<br />
those changes would be lost. Of course, switching from one look-and-feel to<br />
another might make any key mappings installed by a developer inappropriate,<br />
but the correct approach is to allow the developer to make the choice as<br />
to whether to change the mappings.
534 Chapter 5 Keyboard Handling, Actions, and Scrolling<br />
In order to make it possible to preserve whatever mappings the application<br />
has installed, the UI installs its own entries in a private InputMap or<br />
ActionMap which is actually the parent of the one you get a reference to<br />
when you call the getlnputMap or get ActionMap method. In other words,<br />
for a component like JButton that has a couple of entries in its ActionMap<br />
and another two in its WHEN_FOCUSED InputMap, and to which the application<br />
has added extra mappings for the BACKSPACE key, the situation would<br />
look like Figure 5-8.<br />
Figure 5-8 InpufMap and ActionMap UI mappings.<br />
As you can see, both the ActionMap and the InputMap have two hierarchical<br />
levels and the UI mappings are placed in the parent map in both cases. The<br />
same would be true of the components other two InputMaps if there wei-e any<br />
key mappings required for the WHEN_ANCESTOR_OF_FOCUSED_COMPONENT<br />
and WHEN_IN_FOCUSED_WINDOW conditions. In this case, no application mappings<br />
have been added to the ActionMap, so the application ActionMap is<br />
empty, while the two application entries for the BACKSPACE key appear in the<br />
child WHEN_FOCUSED InputMap. When a look-and-feel switch occurs, only<br />
the mappings in the UI part of the InputMaps are replaced, leaving any application-supplied<br />
mappings unchanged.<br />
In Listing 5-10, we presented code that displayed the ActionMaps and<br />
InputMaps for a component. You will remember that, in order to retrieve<br />
the mappings, we used the all Keys method of both ActionMap and
Logical Scrolling and Forcing Visibility of an Area 535<br />
InputMap. The reason for this should now be clear—had we just used the<br />
keys method, we would only have seen the mappings in the application part<br />
of each map and, since no mappings had been added by the application,<br />
nothing at all would have been returned. The same issue resurfaces in Listing<br />
5-11: when the remove method is used to try to remove the SPACE mappings<br />
in the WHEM_FOCUSED InputMap, it operates only on the part of the Input -<br />
Map to which it is applied—in this case, the application part into which the<br />
mappings for the BACKSPACE key have just been installed. Since the mapping<br />
for the SPACE key is not in that level of the InputMap, there is nothing<br />
for the remove method to remove!<br />
Clearly, in order to stop the SPACE key activating the button, it is necessary<br />
to do something about the mappings in the UI part of the<br />
WHEN_FOCUSED InputMap. There are two possible ways to achieve this:<br />
• Remove the mapping from the UI part of the InputMap.<br />
• Mask the UI mapping with a mapping in the application part of<br />
the InputMap that does nothing.<br />
Let's look at these alternatives separately. In order to remove the UI mapping,<br />
you need to get a reference to the UI part of the InputMap. In Figure<br />
5-8, the UI InputMap is at the top of the hierarchy, so you could look for it<br />
by walking up the hierarchy using the getParent method until you find an<br />
InputMap that has no parent. You don't need to write this code, however,<br />
because there are methods in the Swingutilities class that you can use to<br />
manipulate the UI parts of both inputMaps and ActionMaps:<br />
public static void replaceUIActionMap(<br />
JComponent component, ActionMap uiActionMap)<br />
public static void replaceUIInputMap(<br />
JComponent component, int type, InputMap uiInputMap)<br />
public static ActionMap getUIActionMap(<br />
JComponent component)<br />
public static InputMap getUIInputMap(<br />
JComponent component, int condition)<br />
The first two methods completely overwrite a UI ActionMap or Input-<br />
Map with one that you supply as an argument. This method will clearly<br />
remove the mapping for the buttons SPACE key—you can either install an<br />
empty map or a null map:<br />
// Install an empty InputMap<br />
Swingutilities.replaceUIInputMap(button,<br />
JComponent.WHEN_FOCUSED, new InputMap());
536 Chapter 5 Keyboard Handling, Actions, and Scrolling<br />
// Alternatively, completely remove the UI mapping layer<br />
SwingUtilities.replaceUIInputMap(button,<br />
JComponent.WHEN_FOCUSED, mil 1) ;<br />
Either of these alternatives will work, but they also result in all of the other<br />
installed mappings being removed. In this case, that would be acceptable<br />
because we are replacing all of the original mappings anyway. If you want to<br />
preserve the other mappings, you can use the getullnputMap method to<br />
get a reference to the UI InputMap and then remove only the mappings that<br />
you no longer need. Here's how you would use this approach to disable the<br />
SPACE key for a button:<br />
InputMap uilnputMap = SwingUtilities.getUIInputMap(<br />
button, JComponent.WHEN_FOCUSED);<br />
uilnputMap.remove(Keystroke.getKeystroke(<br />
KeyEvent.VK_SPACE, 0, false));<br />
uilnputMap.remove(Keystroke.getKeyStroke(<br />
KeyEvent.VK_SPACE, 0, true));<br />
Instead of manipulating the UI InputMap, you can instead stop the<br />
entries in that map being accessed by masking them with dummy entries in<br />
the application part of the InputMap. This works because the search process<br />
starts from the bottom level of the map and works up the hierarchy, stopping<br />
when a match is found. Hence, an entry in the application part will be found<br />
before one in the UI part of the map.<br />
Remember that the InputMap maps a Keystroke to an Object (usually<br />
a String), which must also be present as a key in the ActionMap. In order<br />
to stop a key sequence activating an Action in the ActionMap, it is necessary<br />
to add a mapping to a value that is not a valid key in the InputMap. The<br />
easiest way to do this is to use an arbitrary Object as the action part of the<br />
mapping:<br />
// Mask the UI mappings for the SPACE key<br />
Object dummy = new Object();<br />
whenFocused.put(Keystroke.getKeyStroke(<br />
KeyEvent.VK_SPACE, 0, false), dummy);<br />
whenFocused.put(Keystroke.getKeyStroke(<br />
KeyEvent.VK_SPACE, 0, true), dummy);<br />
Now when the SPACE key is pressed or released, the appropriate one of<br />
these mappings will be located and the value dummy will be extracted and<br />
presented as a key to the ActionMap. Since there is no Action stored under<br />
this key, the mapping does not succeed. However, this is sufficient to end the<br />
process of searching up the InputMap hierarchy of the component, so the<br />
entries in the UI map are effectively masked. Putting this another way, the
Logical Scrolling and Forcing Visibility of an Area 537<br />
fact that a match for the SPACE key was found in the application part of the<br />
InputMap hides the match that also exists in the UI map, even though the<br />
entry in the application part does not match an entry in the ActionMap while<br />
the UI entry would, because the UI map is never inspected if a match to the<br />
Keystroke is found before the UI map is reached.<br />
You can verify that this works by typing the command:<br />
<strong>Java</strong> <strong>JFC</strong>Book.Chapter5.jdkl3.ButtonInputMapExample3<br />
Note that the following apparently tempting alternative does not work:<br />
whenFocused.put(Keystroke.getKeyStroke(<br />
KeyEvent.VK_SPACE, 0, false), null);<br />
whenFocused.put(Keystroke.getKeyStroke(<br />
KeyEvent .VK__SPACE, 0, true), null);<br />
This fails because the put method treats a null value as a request to<br />
remove the value with the associated key from the map (which in this case<br />
will, of course, have no effect at all).<br />
Using ActionMap and InputMap to create<br />
Global Mappings<br />
The examples that you have seen so far have concentrated on showing how<br />
the ActionMap and InputMap mechanism replaces the use of the registerKeyboardAction<br />
method when setting up the mapping between key<br />
strokes and the internal actions exported by GUI components. As a means of<br />
supporting this, the new mechanism is well designed. However, not all key<br />
assignments within an application are at the component level. Sometimes,<br />
you need to add a mapping that works over an entire GUI screen or part of<br />
that screen and while you can certainly do this using ActionMaps and<br />
inputMaps, it becomes slightly artificial because the action has to be associated<br />
with a component that it is not really connected with. To demonstrate<br />
this point, we'll look at reimplementing the example that we showed in Listing<br />
5-8. The modified version of this example is shown in Listing 5-12.<br />
Listing 5-12 Global mappings using InputMap and ActionMap<br />
package <strong>JFC</strong>Book.Chapter5.jdkl3;<br />
import j avax.swing.*;
538 Chapter 5 Keyboard Handling, Actions, and Scrolling<br />
Listing 5-12 Global mappings using InputMap and ActionMap<br />
(continued)<br />
import j ava.awt.*;<br />
import j ava.awt.event.*;<br />
public class GlobalMappingExample {<br />
public static void main(String[] args) {<br />
JFrame f = new JFrame("JDK 1.3 Global Mapping Example");<br />
JPanel upperPane = new JPanel();<br />
JPanel lowerPane = new JPanel();<br />
upperPane.setBackground(Color.green);<br />
lowerPane.setBackground(Color.yellow);<br />
f.getContentPane().add(upperPane, BorderLayout.CENTER);<br />
f.getContentPane().add(lowerPane, BorderLayout.SOUTH);<br />
JButton buttonA = new JButton("A");<br />
JButton buttonB = new JButton("B");<br />
JButton buttonC = new JButton("C");<br />
JButton buttonD = new JButton("D");<br />
final JTextField tf = new JTextField(32);<br />
upperPane.add(buttonA);<br />
upperPane.add(tf);<br />
lowerPane.add(buttonB);<br />
lowerPane.add(buttonC);<br />
lowerPane.add(buttonD);<br />
f.pack () ;<br />
f.addWindowListener(new WindowAdapter() {<br />
public void windowClosing(WindowEvent evt) {<br />
System.exit(0);<br />
}<br />
});<br />
f.setVisible(true);<br />
// Create actions and install them<br />
// (1) Fl anywhere in the window<br />
AbstractAction al = new AbstractAction() {<br />
public void actionPerformed(ActionEvent evt) {<br />
tf.setText("Fl somewhere in main window");<br />
}<br />
};<br />
f.getRootPane().getActionMap().put("helpAction", al);
Logical Scrolling and Forcing Visibility of an Area 539<br />
Listing 5-12 Global mappings using InputMap andActionMap<br />
(continued)<br />
// Install the mapping for this action<br />
f.getRootPane().getlnputMap(<br />
JComponent.WHEN_IN_FOCUSED_WINDOW).put(<br />
Keystroke.getKeyStroke(KeyEvent.VK_F1, 0, false),<br />
"helpAction");<br />
//<br />
// (2) Keys A or D when buttons B, C, D have focus<br />
AbstractAction a2 = new AbstractAction() {<br />
public void actionPerformed(ActionEvent evt) {<br />
tf.setText(<br />
"A released or D pressed on lower pane button");<br />
}<br />
};<br />
ActionMap actionMap = lowerPane.getActionMap();<br />
InputMap inputMap = lowerPane.getlnputMap(<br />
JCompnent.WHEN_ANCESTOR_OF_FOCUSED_C0MPONENT);<br />
actionMap.put("lowerPaneAction", a2);<br />
inputMap.put(Keystroke.getKeyStroke(<br />
KeyEvent .VK__A, 0, true),<br />
"lowerPaneAction");<br />
inputMap.put(Keystroke.getKeyStroke(<br />
KeyEvent.VK_D, 0, false),<br />
"lowerPaneAction");<br />
// (3) Fl pressed on button in lower pane<br />
AbstractAction a3 = new AbstractAction() {<br />
public void actionPerformed(ActionEvent evt) {<br />
tf.setText("Fl somewhere in lower pane");<br />
}<br />
};<br />
actionMap.put("helpAction", a3);<br />
inputMap.put(Keystroke.getKeyStroke(<br />
KeyEvent.VK_F1, 0, false),<br />
"helpAction");<br />
// (4) 'Fl' only when text area focused<br />
AbstractAction a4 = new AbstractAction() {
540 Chapter 5 Keyboard Handling, Actions, and Scrolling<br />
Listing 5-12 Global mappings using InputMap and ActionMap<br />
(continued)<br />
public void actionPerformed(ActionEvent evt) {<br />
tf.setText("Fl pressed in the text area");<br />
}<br />
};<br />
tf.getActionMap().put("helpAction", a4);<br />
tf.getlnputMap().put(Keystroke.getKeyStroke(<br />
KeyEvent.VK_F1, 0, false),<br />
"helpAction");<br />
}<br />
J<br />
If you compare this code with the original in Listing 5-8, you'll see that<br />
each registerKeyboardAction call has been replaced with a two-part<br />
sequence that first creates an ActionMap entry and then adds an inputMap<br />
entry to connect a key stroke to the Action. Here's a typical example:<br />
// (4) 'Fl' only when text area focused<br />
AbstractAction a4 = new AbstractAction() {<br />
public void actionPerformed(ActionEvent evt) {<br />
tf.setText("Fl pressed in the text area");<br />
};<br />
}<br />
tf.getActionMap().put("helpAction", a4);<br />
tf.getlnputMap().put(Keystroke.getKeyStroke(<br />
KeyEvent.VK_F1, 0, false),<br />
"helpAction");<br />
Here, we add a mapping so that the Fl key pressed when the text field has<br />
the focus executes a method that, in the real world, would bring up some<br />
help information. In order to make this clear, we assign the ActionMap entry<br />
the key "helpAction" and install the Action object under that key. Since<br />
we are now required to use Actions instead of ActionListeners, the<br />
example has been converted to use subclasses of AbstractAction throughout.<br />
Having created the ActionMap, we then add a mapping in the<br />
WHEN FOCUSED InputMap that connects the Fl key press to the "helpAction"<br />
entry in the ActionMap. This same pattern is repeated throughout the<br />
code listing. You'll notice that there are several InputMap entries for the Fl<br />
key that have different scope, but they all map to an ActionMap entry called<br />
"helpAction" registered with different components.
Logical Scrolling and Forcing Visibility of an Area 541<br />
When converting code that uses registerKeyboardAction, the component<br />
whose ActionMap and inputMaps should be used is always the same<br />
as the one on which you originally invoked registerKeyboardAction.<br />
This makes the conversion process simple and fairly mechanical—all you<br />
have to do is decide on a name for each Action that you need to install, so<br />
why did we say earlier that using this mechanism to add global mappings is<br />
slightly artificial? The reason is simply that you have to invent a name for an<br />
Action that, in previous versions of Swing, used to be anonymous and then<br />
you have to install it in the ActionMap of a component which effectively<br />
makes it a part of that component and technically available for use elsewhere,<br />
even if you didn't intend that to be the case. In the code extract shown above,<br />
for example, the name "he lpAc t i on" really has value only in the line of code<br />
in which it is used to create an ActionMap entry and the following line. With<br />
this sort of tight coupling, the shorthand that registerKeyboardAction<br />
provides, keeping the internal details of the implementation out of sight, is<br />
much more natural. By contrast, when the new mechanism is used to allow<br />
keystrokes to be connected to public actions within a component, the action<br />
name is, quite rightly, intended to be used as a key to be used at any time to<br />
associate a Keystroke with it and so is properly a part of the components<br />
programming interface. For the component developer, then, ActionMaps<br />
and InputMaps are an improvement over registerKeyboardAction, but<br />
for the application developer the benefits are less obvious.<br />
Writing Compatible Code<br />
The inputMap and ActionMap mechanism is only available in <strong>Java</strong> 2 version<br />
1.3 and later, so if you need to write code that works with all versions of<br />
Swing, then you can't use it—instead, you'll have to continue to use registerKeyboardAction.<br />
Fortunately, this method, together with unregisterKeyboardAction<br />
and resetKeyboardActions, is still supported and<br />
is not deprecated in <strong>Java</strong> 2 version 1.3 (but its use is discouraged in the documentation).<br />
Although the programming interface remains the same, these<br />
methods have been reimplemented as a layer over the InputMap and<br />
ActionMap mechanism. For most purposes, you won't need to be aware that<br />
this is the case, but there is one specific instance in which code written for<br />
Swing 1.1.1 or <strong>Java</strong> 2 version 1.2.2 may not work properly when running with<br />
<strong>Java</strong> 2 version 1.3. In this section, we'll show you how the old mechanism has<br />
been reimplemented using the new facilities and then demonstrate how to<br />
modify existing code that exhibits this compatibility problem so that it works<br />
with all versions of Swing.
542 Chapter 5 Keyboard Handling, Actions, and Scrolling<br />
The registerKeyboardAction Implementation<br />
Implementing registerKeyboardAction using ActionMap and Input-<br />
Maps is relatively straightforward. All that is necessary is to map a line of<br />
code like this:<br />
comp.registerKeyboardAction(ActionListener 1,<br />
String command, Keystroke ks, int condition);<br />
into two lines like this:<br />
comp.getActionMap().put(name, action);<br />
comp.getlnputMap(condition).put(ks, name);<br />
As yon can see, the Keystroke and condition arguments supplied to<br />
registerKeyboardAction can be used directly in the underlying implementation,<br />
so creating an InputMap entry is not a problem. The ActionMap<br />
is no so simple however for the following reasons:<br />
• The value stored in the ActionMap must be an Action, but<br />
the caller of registerKeyboardAction supplies an<br />
ActionListener. Since the Action interface is derived from<br />
ActionListener and not the other way around, you can't just<br />
give an ActionListener reference to the ActionMap put<br />
method.<br />
• The command argument, if it's given, must be stored<br />
somewhere and used to create the ActionEvent when the<br />
ActionListener's actionPerf ormed method is invoked.<br />
• An ActionMap entry requires a name that is used as the key to<br />
the map and must, therefore, be unique so as to not accidentally<br />
replace existing entries.<br />
Fortunately, these problems can be solved relatively easily. In order to<br />
convert an ActionListener to an Action, JComponent has a package private<br />
inner class called ActionStandin that implements the Action interface<br />
and wraps the caller's ActionListener:<br />
final class ActionStandin implements Action {<br />
private final ActionListener actionListener;<br />
private final String command;<br />
// This will be non-null if actionListener is an<br />
Action.<br />
private final Action action;<br />
ActionStandin(ActionListener actionListener,<br />
String command) {
Code not shown<br />
}<br />
// Code not shown<br />
}<br />
Logical Scrolling and Forcing Visibility of an Area 543<br />
When the registerKeyboardAction method is called, an instance of<br />
ActionStandin is created and the command argument (which will be null<br />
if the three-argument variant of registerKeyboardAction is used) is<br />
stored, along with the ActionListener reference. To create the Action-<br />
Map entry, the ActionStandin object is passed to the ActionMap put<br />
method in place of the callers ActionListener. Later, when the user<br />
presses the keys that trigger the action, the ActionStandins actionPerformed<br />
method will be called and will directly call the actionPerformed<br />
method of the ActionListener (or Action) that was originally supplied to<br />
registerKeyboardAction, which is stored in the instance variable<br />
actionListener.<br />
The ActionStandin class solves the first two problems posed by the<br />
ActionMap and it is also the key to the remaining issue—that of assigning a<br />
unique name to the ActionMap entiy. As we said earlier, even though the<br />
ActionMap key will usually be a String (and for this reason we have consistently<br />
referred to it as the name of the entiy), it can actually be an Obj ect of<br />
any kind. Moreover, code that uses registerKeyboardAction is not aware<br />
of ActionMaps and InputMaps, so there is no need for the ActionMap key<br />
to be usable elsewhere in the application—the only requirement is that it be<br />
unique. The ActionStandin object that is created to wrap the callers<br />
ActionListener is unique, so it can safely be used as the ActionMap key<br />
and this, in fact, is what happens. Hence, a call to registerKeyboardAction<br />
is implemneted in terms of InputMap and ActionMap like this:<br />
ActionStandin standin = new ActionStandin(1, command);<br />
comp.getActionMap().put(standin, standin);<br />
comp.getInputMap(condition).put(ks, standin);<br />
The Compatibility Issue<br />
<strong>Java</strong> 2 version 1.3 supports registerKeyboardAction for backward compatibility,<br />
so why did we bother to explain in detail how this compatibility is<br />
implemented? The reason for going into detail is the fact that, although it<br />
looks reasonable, there is a small problem with the use of InputMaps and<br />
ActionMaps that will affect some code that will work properly with earlier<br />
versions of Swing but fail in <strong>Java</strong> 2 version 1.3. Without an understanding of<br />
the way in which registerKeyboardAction is implemented, it can be difficult<br />
to see why your code doesn't work as it should.
544 Chapter 5 Keyboard Handling, Actions, and Scrolling<br />
To demonstrate the problem, let s take another look at the example that we<br />
have used throughout this section—replacing a button's SPACE mapping with<br />
a mapping for the BACKSPACE key that does the same thing. So for, we have<br />
concentrated on how to achieve this with <strong>Java</strong> 2 version 1.3, but this time<br />
we'll examine the technique for doing this with Swing 1.1.1 and <strong>Java</strong> 2 version<br />
1.3. In theory, what you need to do is simple:<br />
• Add mappings so that the BACKSPACE key can press and<br />
release the button.<br />
• Remove the press and release mappings for the SPACE key.<br />
Here's one way in which you could choose to implement this idea:<br />
JButton button = new JButton("PRESS");<br />
getContentPane().add(button, BorderLayout.CENTER);<br />
// Get the pressed and released actions<br />
ActionListener pressedAction =<br />
button.getActionForKeyStroke(Keystroke.getKeyStroke(<br />
KeyEvent.VK^SPACE, 0, false));<br />
ActionListener releasedAction =<br />
button.getActionForKeyStroke(Keystroke.getKeyStroke(<br />
KeyEvent.VK_SPACE, 0, true));<br />
// Add mappings for BACKSPACE<br />
button.registerKeyboardAction(pressedAction,<br />
Keystroke.getKeyStroke(KeyEvent.VK_BACK_SPACE,<br />
0, false),<br />
JComponent.WHEN^FOCUSED);<br />
button.registerKeyboardAction(releasedAction,<br />
Keystroke.getKeyStroke(KeyEvent.VK_BACK_SPACE,<br />
0, true),<br />
JComponent.WHEN_FOCUSED);<br />
// Remove the SPACE actions<br />
button.unregisterKeyboardAction(<br />
Keystroke.getKeyStroke(KeyEvent.VK_SPACE, 0, false));<br />
button.unregisterKeyboardAction(<br />
Keystroke.getKeyStroke(KeyEvent.VK_SPACE, 0, true));<br />
This code looks straightforward. The first thing it does is use the getActionForKeyStroke<br />
method to get a reference to the ActionListeners<br />
(or Actions) that the UI class installed to press and release the button in<br />
response to the SPACE key. Next, these listeners are passed to the registerKeyboardAction<br />
method to install mappings for the BACKSPACE key so
Logical Scrolling and Forcing Visibility of an Area 545<br />
that the Ill's original code is invoked in response to this key. Finally, the<br />
unregisterKeyboardAction method is called to remove the UI mappings<br />
for the SPACE key. You can try out this code using the command:<br />
<strong>Java</strong> <strong>JFC</strong>Book.Chapter5.jdkl3.ButtonInputMapExample4<br />
If you try this example with Swing 1.1.1 or <strong>Java</strong> 2 version 1.2.2, you'll find<br />
that it works—the BACKSPACE key presses the button and the SPACE key<br />
does nothing. Unfortunately, if you run it using <strong>Java</strong> 2 version 1.3, you'll find<br />
that, while the BACKSPACE key works as you'd expect it to, the mapping for<br />
the SPACE key has not been removed, so the SPACE key also presses the button!<br />
This problem is very similar to the one that we faced earlier when trying to<br />
remove the UI InputMap mapping for the SPACE key, working only in terms<br />
of <strong>Java</strong> 2 version 1.3 interfaces and, in fact, this problem has the same cause.<br />
Like registerKeyboardAction, the unregisterKeyboardAction<br />
method is also implemented in terms of the underlying InputMaps and the<br />
ActionMap. When you call unregisterKeyboardAction, the component's<br />
three InputMaps are searched for an entry that has the Keystroke<br />
that you supply as its key. If one is found, the action that it maps to is<br />
extracted and then the remove method is called on the component's<br />
ActionMap to remove the action that it is mapped to. The remove method is<br />
also called on the InputMap, with the supplied Keystroke as its key, to<br />
remove the InputMap mapping.<br />
This works when mappings added by the application using the register-<br />
KeyboardAction method are involved, because the InputMap and<br />
ActionMap entries are placed in the application part of each map, from<br />
which they can be removed by the remove method. However, if you run this<br />
code on <strong>Java</strong> 2 version 1.3, the mappings for the SPACE key are not added by<br />
registerKeyboardAction—instead, they are installed directly in the UI<br />
parts of the ActionMap and the InputMap and, as a result, the calls to the<br />
maps' remove methods in the unregisterKeyboardAction method fail to<br />
remove them.<br />
If, for reasons of compatibility, you can't rewrite your code to use the <strong>Java</strong><br />
2 version 1.3 interfaces, it would seem that you have a major problem here.<br />
However, there is a simple way to modify the original code so that it works<br />
whichever platform you are running on. To remap a key, you have to add a<br />
new mapping and remove or disable the old one. Since removing a UI mapping<br />
using unregisterKeyboardAction does not work in <strong>Java</strong> 2 version<br />
1.3, your only recourse is to leave the UI InputMap mapping there but override<br />
it with an Action that is disabled. Since this mapping is installed in the<br />
application part of the InputMap, it will mask the UI mapping:
546 Chapter 5 Keyboard Handling, Actions, and Scrolling<br />
Action disabledAction = new AbstractAction() {<br />
public void actionPerformed(ActionEvent evt) {<br />
}<br />
};<br />
disabledAction.setEnabled(false) ;<br />
// Disable the SPACE actions<br />
button.registerKeyboardAction(disabledAction,<br />
Keystroke.getKeyStroke(KeyEvent.VK_SPACE, 0, false),<br />
JComponent.WHEN_FOCUSED);<br />
button.registerKeyboardAction(disabledAction,<br />
Keystroke.getKeyStroke(KeyEvent.VK_SPACE, 0, true),<br />
JComponent.WHEN_FOCUSED) ;<br />
This code replaces the two unregisterKeyboardAction calls in the<br />
original extract shown earlier. It first creates an Action that does nothing<br />
and also disables it, then registers that Action as the target for the SPACE<br />
key when it is pressed and released. In terms of <strong>Java</strong> 2 version 1.3, the<br />
Action will be placed in the application part of the ActionMap and the<br />
mapping to it for the SPACE key will be placed in the application part of the<br />
WHEN_FOCUSED InputMap. Now when the SPACE key is pressed, the mappings<br />
in the application parts of the maps will be found instead of those in the<br />
UI part, with the effect that the SPACE key will no longer press the button.<br />
Scrolling Components<br />
Most sophisticated user interfaces use scrollable areas in some way. Sometimes<br />
you'll want to display large graphics or images and for this you'll need a<br />
means of creating a canvas that allows you to scroll its contents. Fortunately,<br />
Swing provides a component called JScrollPane that fulfills most of the<br />
requirements you're likely to come across for scrolling and, if this isn't sufficient,<br />
you can create your own scrolling component by interacting directly<br />
with the JScrollBar component that JScrollPane uses. This section<br />
looks at both of these possibilities.
Logical Scrolling and Forcing Visibility of an Area 547<br />
The JScrollPane and JViewport <strong>Classes</strong><br />
JScrollPane is a composite component that, in its simplest form, allows<br />
you to attach scrollbars to any component and manages the scrolling itself<br />
without any further intervention from your application code. This gives you a<br />
very simple way to allow a user with a small screen to view an image or<br />
graphic that would otherwise be too large to display. You can see how<br />
JScrollPane works by looking at a simple example (see Listing 5-13).<br />
Listing 5-13 Scrolling an image<br />
package <strong>JFC</strong>Book.Chapter5;<br />
import javax.swing.*;<br />
import j ava.awt.*;<br />
import j ava.awt.event.*;<br />
public class ScrollExamplel extends JFrame {<br />
public ScrollExamplel() {<br />
super("Scroll Example 1");<br />
JScrollPane p = new JScrollPanet<br />
JScrollPane.VERTICAL_SCROLLBAR_AS_NEEDED,<br />
JScrollPane.HORIZONTAL_SCROLLBAR_AS_NEEDED);<br />
this.getContentPane().add(p);<br />
Imagelcon icon = new Imagelcon(getClass().getResource<br />
("images/bridge.jpg"));<br />
JLabel 1 = new JLabel(icon);<br />
p.setviewportview(1) ;<br />
}<br />
}<br />
public static void main(String[] args) {<br />
JFrame f = new ScrollExamplel0;<br />
f.setSize(250, 200) ;<br />
f.setVisible(true);<br />
f.addWindowListener(new WindowAdapter() {<br />
public void windowClosing(WindowEvent e) {<br />
System.exit(0) ;<br />
}<br />
});<br />
}
548 Chapter 5 Keyboard Handling, Actions, and Scrolling<br />
This example creates a frame on which it places a JScrollPane. In the<br />
display area or viewport of this component we want to display an image. You<br />
know that images can by displayed easily using the Image I con class in conjunction<br />
with a JLabel, so this technique is used here to place a JLabel in<br />
the viewport of the JScrollPane. This is all that needs to be done to make<br />
the scrolling work.<br />
You can run this example using the command:<br />
<strong>Java</strong> <strong>JFC</strong>Book.Chapter5.ScrollExamplel.<br />
When you do this, you'll see the image in the window with scrollbars to the<br />
right of and below it, as shown in Figure 5-9. If you click in these scrollbars<br />
you'll find that the image moves as expected. More than this, if you resize the<br />
window until it becomes larger then the image, one or both of the scrollbars<br />
become unnecessary and disappears.<br />
Figure 5-9 Using JScrollPane to scroll a large image.<br />
JScrollPane has four constructors:<br />
public JScrollPane ();<br />
public JScrollPane(int vsbpolicy, int hsbpolicy);<br />
public JScrollPane(Component comp);<br />
public JScrollPane(Component comp, int vsbpolicy.
Logical Scrolling and Forcing Visibility of an Area 549<br />
int hsbpolicy);<br />
The second of these constructors allows you to specify which of the scrollbars<br />
you want and when they should be displayed. The first argument refers<br />
to the vertical scrollbar and the second to the horizontal one. The following<br />
values are possible:<br />
HORIZONTAL_SCROLLBAR_ALWAYS<br />
HORIZONTAL_SCROLLBAR_AS_NEEDED<br />
HORIZONTAL^SCROLLBAR_NEVER<br />
VERTICAL_SCROLLBAR_ALWAYS<br />
VERTICAL_SCROTJLBAR_AS_NEEDED<br />
VERTICAL_SCROLLBAR_NEVER<br />
These constants are part of the ScrollPaneConstants interface, which<br />
is implemented by JScrollPane, so you would normally write them as<br />
JScrollPane.HORIZONTAL_SCROLLBAR_ALWAYS, etc. If you use the first<br />
constructor, then you get scrollbars only when they are needed. No matter<br />
how you create the JScrollPane, you can change the scrollbar policy at any<br />
time using the setHorizontalScrollBarPolicy and setVerticalScrollBarPolicy<br />
methods, which accept the constants shown above as<br />
their argument.<br />
<strong>Core</strong> Alert<br />
The JScrollPane constructors (and several other methods) accept a<br />
Component for the object to be scrolled, which suggests that you can give<br />
it an AWT component such as a Panel or a Canvas. In fact, if you do<br />
this, you'll find that the AWT component is drawn over the top of the<br />
scrollbars instead of behind them.This happens because the scrollbars are<br />
lightweight components that get painted onto the background of their<br />
container, whereas AWT components are heavyweight and always appear<br />
in front of lightweights. In general, you should avoid mixing heavyweight<br />
(AWT) and lightweight (Swing) components.<br />
Creating a JScrollPane is the first step; the other thing you have to do is<br />
give it something to scroll. One way to do this, as shown in Listing 5-13, is to<br />
use the setviewportview method, which takes a Component as its argument.<br />
Using this method, you can theoretically scroll almost anything you can<br />
display on the screen, including another JScrollPane (although that would<br />
be a rather perverse thing to do)! Once you've given it something to display,
550 Chapter 5 Keyboard Handling, Actions, and Scrolling<br />
the JScrollPane takes care of everything, including whether or not to display<br />
scrollbars, how large the slider in the scrollbar should be, and which part<br />
of the scrolled object should be visible at any given time. The other way to do<br />
it is to use the third or fourth constructor, which take the Component to be<br />
scrolled as the first argument, so you don't need to call setviewportview<br />
yourself:<br />
JLabel label = new JLabel(....);<br />
JScrollPane p = new JScrollPane(label);<br />
While you can use JScrollPane in this simple way, you can do more with<br />
it if you take a closer look at how it is constructed, as shown in Figure 5—10.<br />
Figure 5-10 Component parts of JScrollPane.<br />
The JScrollPane can have up to nine separate components, many of<br />
which are entirely optional. The most obvious of these, of course, are the<br />
scrollbars which, when present, are placed at the bottom and the right of the<br />
display area. Usually, these are just JScrollBar components but, as we'll<br />
see later, you can supply your own scrollbars if you need to. The other piece<br />
that is always present is the scrolling area, which is referred to as the viewport.<br />
The scrolled component is not laid directly on top of the JScrollPane<br />
itself; instead, the constructor creates an instance of the JViewport class<br />
that will actually occupy the scrolled area, and passes the object to be
Logical Scrolling and Forcing Visibility of an Area 551<br />
scrolled to it. In fact, it is not the JScrollPane itself that manages the<br />
scrolling, but the JViewport—more about this in a moment.<br />
<strong>Core</strong> Note<br />
In <strong>Java</strong> 2 version 1.3, if you set the component orientation of the<br />
JScrollPane to be right-to-left, the vertical scrollbar appears on the left<br />
instead of on the right.<br />
Corners<br />
So far, you have seen the pieces that create the scrolling control you saw in<br />
Listing 5-13. In addition to these parts, you can supply components for the<br />
corners and for the row and column headings.<br />
When you have scrollbars, each of them extends only to the bottom or to<br />
the right of the viewport so that, if you have two of them, there will be a gap<br />
in the bottom right corner where the two scrollbars meet. This area will normally<br />
be blank and will be the same color as the background of the<br />
JScrollPane itself (which is not necessarily the same color as the component<br />
in the viewport). You can enhance the appearance of the scroll pane by<br />
supplying a component to fill this area using the set Corner method:<br />
public void setCorner(String key, Component corner);<br />
The component you supply can be anything you like; often, it will be a<br />
graphic of the appropriate size or, as you'll see in a moment, you can create a<br />
custom component that adjusts its appearance according to the space it is<br />
given Whatever component is used, its size is set to match the space between<br />
the scrollbars and the edges of the JScrollPane.<br />
The key argument specifies which of the four corners the component<br />
should occupy and must be one of the following:<br />
• JScrollPane.LOWER_RIGHT_CORNER<br />
• JScrollPane.LOWER_LEFT_CORNER<br />
• JScrollPane.UPPER_RIGHT_CORNER<br />
• JScrollPane. UPPER__LEFT_CORNER<br />
Each corner is displayed only if it is requested and it is necessary to do so.<br />
If a corner is necessary but you don't supply one using setCorner, then the<br />
background of the JScrollPane will appear in the area that it would<br />
occupy. The lower right-hand corner, for example, is necessary only if there<br />
are two scrollbars; if there were only a vertical scrollbar, it would extend to
552 Chapter 5 Keyboard Handling, Actions, and Scrolling<br />
the bottom of the scroll paue, making a corner unnecessary. Similarly, the<br />
upper right corner is needed only if the vertical scrollbar and the column<br />
heading component are present.<br />
Row and Column Headings<br />
The row and column headings are added using the following two methods:<br />
public void setColumnHeaderView(Component heading);<br />
public void setRowHeaderView(Component heading);<br />
Again, you can use any component as a row or column heading, but usually<br />
you would use an image of the appropriate size or supply a custom component<br />
that draws an appropriate graphic as you'll see in the next example.<br />
The column heading is placed across the top of the display area and it<br />
scrolls horizontally in step with the display area itself, but it never scrolls<br />
vertically. This allows you to keep some descriptive text or graphic in line<br />
with something in the scrolled area itself. For example, if your scrolled<br />
object is a spreadsheet, you can supply the column headings as the column<br />
header component and they will remain on view as you scroll the spreadsheet<br />
up and down, but move left to right as you scroll it sideways so that<br />
the headings remain over their assigned columns. Similarly, the row heading<br />
is attached to the left side of the scroll pane and scrolls vertically but<br />
not horizontally.<br />
<strong>Core</strong> Note<br />
This technique is used to good effect in Chapter I l,"TheTable Control,"to<br />
provide headings for a JTable.<br />
The layout of the scroll pane itself is managed by an invisible layout manager<br />
called ScrollPaneLayout. Its job is to place the parts of the pane that<br />
have been requested and to ensure that they are sized appropriately as the<br />
scroll pane itself is initially sized or subsequently resized.<br />
When the user moves the slider in a scrollbar, an event is generated that<br />
is handled by the JScrollPane's UI component. In response to this event,<br />
it decides how far and in which direction the component in the viewport<br />
should be moved and effects the move by calling the viewport's setview-<br />
Position method, which acts like the translate method of the Graphics<br />
class that was used to move graphics around on a canvas in Chapter 4.<br />
In fact, the setViewPosition method works by changing the coordinates<br />
of the component being scrolled relative to the viewport itself and then
Logical Scrolling and Forcing Visibility of an Area 553<br />
having that component repaint itself. Thus, for example, if the user moves<br />
the slider in the vertical scrollbar downward, the scrolled component<br />
should move upwards, so the JViewport gives the scrolled component, of<br />
which it is the parent container, a negative or more negative y coordinate,<br />
so that more of the component falls above the top of the scrolled area.<br />
You'll see more clearly how this works when you see how to implement a<br />
scrolling component of your own at the end of this section.<br />
Customizing the JScrollPane Component<br />
Given that the JViewport s job is to effect the scrolling of the component<br />
that it contains, you won't be surprised to know that the row and column<br />
headings are also wrapped with a JViewport component. When you use the<br />
setviewportview, setRowHeaderView, or setColumnHeaderView<br />
methods, you supply a Component and the JScrollPane creates the corresponding<br />
JViewport object (if it doesn't already have one), adds your component<br />
to it, and then adds it to its own layout in the appropriate location.<br />
You can, if you wish, create your own JViewport objects and assign them to<br />
the scroll pane yourself by using the following JScrollPane methods:<br />
public void setViewport(JViewport view);<br />
public void setRowHeader(JViewport view);<br />
public void setColumnHeader(JViewport view);<br />
If you use these methods, it is your responsibility to suitably initialize the<br />
JViewport by adding to it the component to be scrolled. The next example<br />
shows how this is done and also demonstrates most of the ways in which you<br />
can customize JScrollPane. The idea is to create a scrolling canvas with<br />
two custom corners at the top right and bottom left, and row and column<br />
headings that are engraved with markings approximately every half-inch, so<br />
that they look like rulers attached to the top and side of the image that will be<br />
placed in the scrolling area. The rulers and the corners are all simple custom<br />
components that demonstrate how to attach your own controls to a scrolled<br />
pane. Figure 5-11 shows what this example program looks like when you run<br />
it using the command:<br />
<strong>Java</strong> <strong>JFC</strong>Book.Chapter5.ScrollExample2<br />
Let's first look at Listing 5-14 and see how the application window and the<br />
JScrollPane are created.
554 Chapter 5 Keyboard Handling, Actions, and Scrolling<br />
Figure 5-11 Using row and column headers with JScrollPane.<br />
Listing 5—14 Adding custom row and column headers to<br />
JScrollPane<br />
package <strong>JFC</strong>Book.Chapters;<br />
import javax.swing.*;<br />
import j ava.awt.*;<br />
import j ava.awt.event.*;<br />
public class ScrollExample2 extends JFrame {<br />
public ScrollExample2() {<br />
super("Scroll Example 2");<br />
JScrollPane p = new JScrollPane(<br />
JScrollPane.VERTICAL_SCROLLBAR_AS_NEEDED,<br />
JScrollPane.HORIZONTAL_SCROLLBAR_AS_NEEDED);<br />
this.getContentPane().add(p);<br />
Imagelcon icon = new Imagelcon(getClass().getResource(<br />
"images/lem.jpg"));
Logical Scrolling and Forcing Visibility of an Area 555<br />
Listing 5-14 Adding custom row and column headers to<br />
JScrollPane (continued)<br />
}<br />
JLabel 1 = new JLabel(icon);<br />
1.setHorizontalAlignment(SwingConstants.LEFT);<br />
1.setVerticalAlignment(SwingConstants.TOP);<br />
p.setViewportView(1);<br />
RulerPane hrc = new RulerPane(<br />
RulerPane.HORIZONTAL_RULE,<br />
1.getPreferredSize().width, 0);<br />
JViewport hr = new JViewport() ;<br />
hr.add(hrc);<br />
hr.setSize(hrc.getPreferredSize());<br />
RulerPane vrc = new RulerPane(RulerPane.VERTICAL_RULE,<br />
0, 1.getPreferredSize().height);<br />
JViewport vr = new JViewport();<br />
vr.add(vrc);<br />
vr.setSize(vrc.getPreferredSize() ) ;<br />
p.setColumnHeader(hr) ;<br />
p.setRowHeader(vr);<br />
p.setCorner(JScrollPane.UPPER_RIGHT_CORNER,<br />
new RuledCorner());<br />
p.setCorner(JScrollPane.LOWER_LEFT_CORNER,<br />
new RuledCorner());<br />
}<br />
public static void main(String[] args) {<br />
JFrame f = new ScrollExample2();<br />
f .setSize(250, 200) ;<br />
f.setVisible(true) ;<br />
f.addWindowListener(new WindowAdapter() {<br />
public void windowClosing(WindowEvent e) {<br />
System.exit(0);<br />
}<br />
});<br />
}<br />
This code starts very much like the previous example in Listing 5-13; it<br />
creates a JScrollPane with the scrollbars visible only as needed and
556 Chapter 5 Keyboard Handling, Actions, and Scrolling<br />
mounts it on a JFrame. The main method creates the frame itself and sets its<br />
initial size. Also, as before, the image is loaded by using a JLabel and an<br />
Imagelcon and setviewportview is used to assign it as the main viewport.<br />
Since this method is used instead of setviewport, the JScrollPane creates<br />
its own JViewport and mounts the JLabel on top of it, then places the<br />
JViewport in the viewport position. You'll notice that the alignment properties<br />
of the JLabel are set so that the Imagelcon stays at its top left; if this<br />
hadn't been done, the image would detach itself from the top or left side of<br />
the scrolled area if the JScrollPane were resized to the extent that it had<br />
spare space in the viewport and would appear to move away from the ruler.<br />
The next step is to create the components that will become the horizontal<br />
and vertical rulers and their corresponding viewports and attach them to the<br />
pane:<br />
RulerPane hrc = new RulerPane(<br />
1.getPreferredSize().width, 0);<br />
JViewport hr = new JViewport();<br />
hr.add(hrc);<br />
RulerPane vrc = new RulerPane(0,<br />
1.getPreferredSize().height);<br />
JViewport vr = new JViewport();<br />
vr.add(vrc);<br />
p.setColumnHeader(hr);<br />
p.setRowHeader(vr);<br />
As you'll see, the rulers are derived from JPanel. Since all we want to do<br />
is draw on them, it makes sense to use a simple component as the base for<br />
these objects. To show how the setColumnHeader and setRowHeader<br />
methods are used, we create our own viewports, add the rulers to them, and<br />
then attach them as the row and column headings, but we could equally well<br />
have added them direcrly using setColumnHeaderView and setRowHeaderView.<br />
Adding Corners<br />
This example creates two custom components to act as the top right and bottom<br />
left corners and adds to the scroll pane:<br />
p.setCorner(JScrollPane.UPPER_RIGHT_CORNER,<br />
new RuledCorner());<br />
p.setCorner(JScrollPane.LOWER_LEFT_CORNER,<br />
new RuledCorner());
Logical Scrolling and Forcing Visibility of an Area 557<br />
Each of these corners will appear as long as the scrollbar to which it is<br />
adjacent is visible. Since the scrollbars are only shown when they are needed,<br />
the bottom-left corner, for example, will disappear when the scroll pane is<br />
wide enough to show the entire image and, when this happens, the vertical<br />
ruler (i.e., the row heading view) will extend to the bottom of the scroll pane.<br />
The corner itself is just a panel on which an etched border is drawn, as<br />
shown in Listing 5-15. Since JPanel can host a border, all this class does is<br />
add an etched border to itself, choosing colors that contrast with the color of its<br />
own background. You've already seen this technique used in Chapter 4 and you<br />
can find a complete description of Swing borders in Chapter 8, "Building Custom<br />
Dialogs." Note that the border color is adjusted to fit in with any change to<br />
the background color by overriding the setBackground method.<br />
Listing 5-15 Creating a custom corner for JScrollPane<br />
class RuledCorner extends JPanel {<br />
RuledCorner() {<br />
setBackground(UIManager.getColor("control"));<br />
addBorder();<br />
}<br />
2<br />
public void setBackground(Color color) {<br />
super.setBackground(color);<br />
addBorder();<br />
}<br />
protected void addBorder() {<br />
Color background = getBackground();<br />
setBorder(BorderFactory.createEtchedBorder(<br />
background.brighter(),<br />
background.darker ())) ;<br />
}<br />
Adding Horizontal and Vertical Rulers<br />
The last piece of this example is the RulerPane class, which provides an<br />
etched ruler along the top and the left side of the scroll pane. The constructor<br />
allows you to specify the orientation and its initial size. You'll notice that<br />
when the rulers were created, the width of the horizontal ruler and the<br />
height of the vertical one were specified so that they matched the corresponding<br />
dimension of the image. Since the size of the frame (and therefore
558 Chapter 5 Keyboard Handling, Actions, and Scrolling<br />
indirectly of the rulers) is fixed in the main method, these sizes are not actually<br />
used in this particular example, but they could be of use if this class were<br />
reused elsewhere. The other dimension of the rulers is not set in the constructor;<br />
instead, it will default based on the size of the rulers markings,<br />
which itself depends on the size of the font used to draw the numbers that<br />
appear every inch along it.<br />
The ruler markings are drawn in a way that you should be now very familiar<br />
with—by using two contrasting colors, you get the effect of an etched<br />
ruler face. This effect is applied to both the markings and the numbers. The<br />
marks are of two lengths: Every inch, there is a long mark accompanied by<br />
the number of inches along the ruler, and there is a shorter mark to indicate<br />
half-inches. The ruler is calibrated by using the getScreenResolution<br />
method of j ava. awt. Toolkit, which returns the number of pixels per inch<br />
of the screen. This value is only approximate, however, so the ruler you see<br />
on the screen may not be very accurate.<br />
Listing 5-16 shows the code for the Ruler Pane class.<br />
Listing 5-16 Creating a custom ruler for JScrollPane<br />
class RulerPane extends JPanel {<br />
RulerPane(int orientation, int width, int height) {<br />
this.width = width;<br />
this.height = height;<br />
this.orientation = orientation;<br />
setFont(new Font("Dialog", Font.PLAIN, 12));<br />
resolution = getToolkit().getScreenResolution();<br />
computeSizes() ;<br />
setBackground(UIManager.getColor("control"));<br />
setSize(width, height);<br />
}<br />
public void setBackground(Color color) {<br />
super.setBackground(color);<br />
lightShadow = null;// Recalculate shadow colors<br />
}<br />
public void setFont(Font f) {<br />
super.setFont(f);<br />
fm = null;// Recalculate sizes<br />
}
Logical Scrolling and Forcing Visibility of an Area 559<br />
Listing 5-16 Creating a custom ruler for JScrollPane (continued)<br />
public Dimension getPreferredSize() {<br />
computeSizes();<br />
return new Dimension(width, height);<br />
}<br />
public void paintComponent(Graphics g) {<br />
Dimension d = getSizeO;<br />
Rectangle r = g.getClipBounds();<br />
int markPosition = 0;<br />
if (lightShadow == null) {<br />
Color color = getBackground();<br />
lightShadow = color.brighter();<br />
darkShadow = color.darker();<br />
}<br />
if (fm == null) {<br />
computeSizes();<br />
}<br />
int ascent = fm.getAscent () ;<br />
g.setColor(getBackground());<br />
g.fillRect(r.x, r.y, r.width, r.height);<br />
if (orientation == VERTICAL_RULE) {<br />
int marks = d.height/resolution + 1;<br />
int startPosition = r.y;<br />
int endPosition = r.y + r.height;<br />
for (int i = 0; i < marks &&<br />
markPosition = startPosition) {<br />
g.setColor(lightShadow);<br />
g.drawLine(0, markPosition + 1, longMark + 1,<br />
markPosition + 1);<br />
g.drawstring(s, LEFT_GAP + 1,<br />
markPosition + ascent + 1);<br />
g.setColor(darkShadow);<br />
g.drawLine(0, markPosition, longMark,<br />
markPosition) ,g.drawstring(s,<br />
LEFT__GAP, markPosition+ascent);
560 Chapter 5 Keyboard Handling, Actions, and Scrolling<br />
Listing 5-16 Creating a custom ruler for JScrollPane (continued)<br />
}<br />
markPosition += resolution/2;<br />
if (markPosition >= startPosition) {<br />
g.setColor(lightShadow);<br />
g.drawLine(0, markPosition + 1, shortMark + 1,<br />
markPosition + 1);<br />
g.setColor(darkShadow);<br />
g.drawLine(0, markPosition, shortMark,<br />
markPosition);<br />
}<br />
markPosition += resolution/2;<br />
}<br />
} else {<br />
int marks = d.width/resolution + 1;<br />
int startPosition = r.x;<br />
int endPosition = r.x + r.width;<br />
for (int i = 0; i < marks &&<br />
markPosition = startPosition) {<br />
g.setColor(lightShadow);<br />
g.drawLine(markPosition +1, 0, markPosition+ 1,<br />
longMark + 1);<br />
g.drawString(s, markPosition + LEFT_GAP + 1,<br />
ascent + 1);<br />
g.setColor(darkShadow);<br />
g.drawLine(markPosition, 0, markPosition,<br />
longMark);<br />
g.drawstring(s, markPosition + LEFT_GAP,<br />
ascent);<br />
}<br />
markPosition += resolution/2;<br />
if (markPosition >= startPosition) {<br />
g.setColor(lightShadow);<br />
g.drawLine(markPosition +1, 0, markPosition+ 1,<br />
shortMark + 1);<br />
g.setColor(darkShadow);<br />
g.drawLine(markPosition, 0, markPosition,<br />
shortMark);
Logical Scrolling and Forcing Visibility of an Area 561<br />
Listing 5-16 Creating a custom ruler for JScrollPane (continued)<br />
}<br />
}<br />
}<br />
markPosition += resolution/2;<br />
}<br />
void computeSizes() {<br />
fm = getFontMetrics(getFont() ) ;<br />
int fontHeight = fm.getHeight ();<br />
longMark = fontHeight;<br />
shortMark = longMark/2;<br />
if (orientation == HORIZONTAL_RULE) {<br />
height = longMark + BOTTOMjGAP;<br />
} else {<br />
width = longMark + RIGHTJ3AP;<br />
}<br />
}<br />
private int width; // Width in pixels<br />
private int height;// Height in pixels<br />
private int orientation;// Horizontal or vertical<br />
private int resolution;// Pixels per inch<br />
private Color lightShadow;// Light shadow color<br />
private Color darkShadow;// Dark shadow color<br />
private FontMetrics fm;// Font sizes<br />
private int longMark;// Size of inch mark<br />
private int shortMark;// Size of other marks<br />
public static final int HORIZONTAL_RULE = 1;<br />
public static final int VERTICAL_RULE = 2;<br />
private static final int BOTTOM_GAP = 4;<br />
private static final int RIGHT_GAP = 4;<br />
private static final int LEFT_GAP = 2;<br />
2 Most of this code should be fairly obvious. The computeSizes method<br />
determines how long the inch and half-inch markings should be, based on<br />
the size of the font in use. The ruler is padded by a few extra pixels so that the<br />
inch marks don't cut right across it. The sizes calculated here, along with the
562 Chapter 5 Keyboard Handling, Actions, and Scrolling<br />
number of pixels per inch, are used to determine the length of each mark and<br />
the spacing between them that are used in the paintComponent method.<br />
Before drawing the ruler markings, the background is cleared. This is necessary<br />
because the ruler is scrolled horizontally or vertically by the JViewport<br />
as the image itself moves. You'll note that at the start of the<br />
paintComponent method the getClipBounds method is called. This<br />
method will tell us which part of the ruler is actually visible within the column<br />
or row heading viewport. To achieve the scrolling effect, the ruler is<br />
made to move relative to the viewport by moving its location within the viewport<br />
container in the direction of motion of the ruler and, when it is painted,<br />
the clipping rectangle is set so that only the part of the ruler visible inside the<br />
viewport is drawn.<br />
At any given time, then, only a part of the ruler is on the screen. Drawing<br />
the rest of the ruler in the paintComponent method won't do any harm<br />
because the drawing operations will fall outside the clipping rectangle, but<br />
they are a waste of time, so the loop in which the ruler is drawn does nothing<br />
if it would draw in the area before the start of the clipping rectangle and terminates<br />
when it reaches the end of the clipped area.<br />
Logical Scrolling and Forcing<br />
Visibility of an Area<br />
The scrolling you've seen so far has been pixel-based—each time the scrollbar<br />
is clicked, the scrolled area moves either by 1 pixel or by the size of its<br />
visible area (so-called block scrolling). If you make the scroll pane larger, the<br />
block scroll will move a larger amount, but each click will still move the content<br />
the same distance. Sometimes, this is not convenient. Listing 5-17 demonstrates<br />
this. It creates a panel on which nine images are drawn (using<br />
JLabels as before), arranged in a 3-by-3 grid. These pictures are not all of<br />
the same size and the example code deliberately uses a GridBagLayout to<br />
allow each row and column to occupy the natural size for the pictures that<br />
they contain, so that the rows and columns are all of different sizes.<br />
Listing 5-17 Pixel scrolling of multiple images in a grid<br />
package <strong>JFC</strong>Book.Chapters;
Logical Scrolling and Forcing Visibility of an Area 563<br />
Listing 5-17 Pixel scrolling of multiple images in a grid (continued)<br />
import javax.swing.*;<br />
import j ava.awt.*;<br />
import j ava.awt.event.*;<br />
public class ScrollExample3 extends JFrame {<br />
public ScrollExample3() {<br />
super("Scroll Example 3");<br />
JScrollPane p = new JScrollPane(<br />
JScrollPane.VERTICAL_SCROLLBAR_AS_NEEDED,<br />
JScrollPane.HORIZONTAL_SCROLLBAR_AS_NEEDED);<br />
this.getContentPane () .add(p) ;<br />
labels = new JLabel[imageNames.length];<br />
for (int i = 0; i < imageNames.length; i++) {<br />
labels [i] =<br />
new JLabel(new Imagelcon(getClass().<br />
getResource(imageNames[i] ))) ;<br />
labels [i] .setHorizontalAlignment(<br />
SwingConstants.LEFT);<br />
labels [i] .setVerticalAlignment(SwingConstants.TOP) ;<br />
}<br />
JPanel pictures = new JPanelO;<br />
pictures.setBackground(UIManager.getColor("control"));<br />
pictures.setLayout(new GridBagLayout());<br />
GridBagConstraints c = new GridBagConstraints();<br />
c.gridwidth = 1;<br />
c.gridheight = 1;<br />
c.gridx = 0;<br />
c.gridy = 0;<br />
c.insets = new Insets(4, 4, 4, 4);<br />
c.fill = GridBagConstraints.BOTH;<br />
for (int i = 0; i < labels.length; i++) {<br />
pictures.add(labels[i] , c) ;<br />
c.gridx++;<br />
if ((c.gridx % 3) ==0) {<br />
c.gridx = 0;<br />
c.gridy++;<br />
}<br />
}
564 Chapter 5 Keyboard Handling, Actions, and Scrolling<br />
Listing 5-17 Pixel scrolling of multiple images in a grid (continued)<br />
}<br />
p.setViewportView(pictures);<br />
p.getViewport().setBackingStoreEnabled(true);<br />
public static void main(String[] args) {<br />
JFrame f = new ScrollExample3();<br />
f.setSize (250, 200) ;<br />
f.setVisible(true);<br />
f.addWindowListener(new WindowAdapter() {<br />
public void windowClosing(WindowEvent e) {<br />
System.exit(0);<br />
}<br />
});<br />
}<br />
private static final String [] imageNames = {<br />
"images/pl.jpg", "images/p2.jpg", "images/p3.jpg",<br />
"images/p4.jpg", "images/p5.jpg", "images/p6.jpg",<br />
"images/p7.jpg", "images/p8.jpg", "images/p9.jpg" };<br />
private JLabel[] labels;<br />
}<br />
If you run this program using the command:<br />
<strong>Java</strong> <strong>JFC</strong>Book.Chapter5.ScrollExample3<br />
when the pictures appear you will find it awkward to view any one picture<br />
(see Figure 5-12). It takes too long to bring a picture conveniently into view<br />
if you scroll by one pixel, while block scrolling by clicking near the ends of<br />
the scrollbars is too coarse, and you inevitably have to adjust the scroll position<br />
one pixel at a time. This remains true even if you enlarge the scroll pane<br />
to fill the entire screen, because even if you get one picture properly positioned,<br />
it is just as difficult to align the next one.<br />
In order to speed up scrolling, the JViewport backing store facility has<br />
been enabled with this line of code:<br />
p.getViewport().setBackingStoreEnabled(true);<br />
When you enable backing store, the component in the viewport is rendered<br />
into an off-screen buffer and then the visible part is drawn to the<br />
screen. This allows much of the cost of drawing the component to be paid<br />
once; the scrolling action then only involves copying part of the saved image
Logical Scrolling and Forcing Visibility of an Area 565<br />
of the component onto the viewport. If you're using <strong>Java</strong> 2 version 1.3, however,<br />
you'll find that this method, although still supported, is deprecated. The<br />
reason for this is that, although using an off-screen buffer in cases such as this<br />
where rendering each piece of the scrolled component would be time consuming<br />
and will improve the responsiveness of scrolling from the user's point<br />
of view, it does incur the memory overhead of the backing store buffer, which<br />
could be large. Furthermore, copying the part of the scrolled component that<br />
is visible from the backing store to the screen also takes time. In <strong>Java</strong> 2 version<br />
1.3, the setBackingStoreEnabled method is deprecated in favor of<br />
the following method:<br />
public void setScrollMode(int mode);<br />
where the mode parameter can take one of three values:<br />
• JViewport.SIMPLE_SCROLL_MODE<br />
• JViewport.BACKINGSTORE_SCROLL_MODE<br />
• JViewport.BLIT_SCROLL_MODE<br />
SIMPLE_SCROLL_MODE is the original mode in which no backing store is<br />
used—the part of the scrolled component that is visible is drawn directly<br />
onto the screen. BACKINGSTORE_SCROLL_MODE is equivalent to calling set-<br />
BackingStoreEnabled (true) . BLIT_SCROLL_MODE is a new mode that<br />
has no equivalent in either JDK 1.1 or <strong>Java</strong> 2 version 1.2.2. Instead of using<br />
an offscreen buffer, it scrolls by literally copying areas of the screen around<br />
right in front of your eyes. The idea is that if you scroll down a little way,<br />
instead of redrawing the whole viewport area, you just copy the bottom half<br />
of it up to the top and then fill in the area at the bottom by drawing the part<br />
of the scrolled component that has just been scrolled into view. This mechanism<br />
avoids the expense of an off-screen buffer and the cost of copying a<br />
viewport's worth of image on each scroll operation. We'll see exactly how this<br />
idea is implemented at the end of this chapter. If you want to tiy this out for<br />
yourself and you are using <strong>Java</strong> 2 version 1.3, you can use the following command<br />
to do so:<br />
<strong>Java</strong> <strong>JFC</strong>Book.Chapter5.jdkl3.ScrollExample3<br />
While enabling the backing store or switching on the blit scroll mode<br />
noticeably speeds up the scrolling, it doesn't make it easier to look at any<br />
given picture. Fortunately, there are a couple of things that can be done to<br />
improve this situation. The first thing to do is to stop performing pixel scrolling<br />
and use logical scrolling instead. This will make it easier to find any particular<br />
picture using the scrollbars. The second improvement is to make use
566 Chapter 5 Keyboard Handling, Actions, and Scrolling<br />
of the JComponent scrollRectToVisible method that makes the viewport<br />
scroll to bring a particular region of a component into view. To show how<br />
these two features work, the example above will be amended to incorporate<br />
both of them.<br />
Figure 5-12 A scrolling grid of images.<br />
Logical Scrolling<br />
The idea behind logical scrolling is to move the display area by an amount<br />
that depends not on the size of the viewport, but on what is displayed within<br />
it. In our case, since we have a grid of pictures, it makes sense to change the<br />
block scrolling behavior so that scrolling down moves the next picture below<br />
up to the top left of the view port and so on. With this arrangement, a single<br />
click in any direction moves the viewport by one picture and aligns it exactly<br />
within the window so that its top left-hand corner is visible, no matter what<br />
the relative sizes of the pictures are.<br />
There are actually two ways to implement logical scrolling. One of them<br />
involves directly controlling the scroll bars and the other involves implement-
Logical Scrolling and Forcing Visibility of an Area 567<br />
ing an interface that will be used by the JScrollPane to find out how the<br />
scrolled area should move. Since these are such different techniques, both of<br />
them will be shown here.<br />
Logical Scrolling By Extending JScrollBar<br />
The first method of implementing logical scrolling involves taking direct control<br />
of the scrolling mechanism, which requires an understanding of how it<br />
works. This is the more involved of the two techniques. Under normal circumstances,<br />
the alternative mechanism (using the Scrollable interface) is<br />
preferable. This method, however, has the merit of illustrating how the<br />
JScrollPane and scrollbars work.<br />
Each scrollbar is an instance of the JScrollBar class. When you create a<br />
JScrollPane, depending on the scrollbar policy, it will create zero, one, or<br />
two scrollbars by invoking its own createHorizontalScrollBar and<br />
createVerticalScrollBar methods, the default implementations of<br />
which return a JScrollBar.<br />
<strong>Core</strong> Note<br />
In fact, the default scrollbars are instances of an inner class of<br />
JScrollPane called JScrollPane . ScrollBar.This class is derived<br />
from JScrollBar and contains the logic to deal with the other method of<br />
influencing scrolling that we'll see later in this section - the Scrollable<br />
interface. For all practical purposes, however, you can just think of the<br />
default scrollbars as instances of JScrollBar.<br />
The JScrollBar has a simple scrolling model that is based around the<br />
concepts of view size and extent .size.The view size is simply the size of the<br />
object being scrolled. Since a scrollbar only manages one dii'ection of motion,<br />
the vertical scrollbar considers only the height of the object in the viewport,<br />
while the horizontal one considers its width. By contrast, the extent size is the<br />
height or width of the viewport itself and measures how much of the scrolled<br />
object you can see at any one time. If the extent size is smaller than the view<br />
size in any given direction, a scrollbar will be shown if it has been requested<br />
and, conversely, if the extent is larger than the view size, the scrollbar will be<br />
removed unless you configure the scroll pane such that it always shows the<br />
scrollbar. The ratio of the view size to the extent size determines the size of<br />
the slider in the scrollbar, so that you can see how much of the actual object is<br />
on view.
568 Chapter 5 Keyboard Handling, Actions, and Scrolling<br />
The other values that control the scrollbar are its maximum and minimum<br />
values. As the scrollbar moves, the top or left extremity of the slider indicates<br />
its current value. By default, the minimum value is zero, and the maximum<br />
value is the size of the object being scrolled. However, since the height or<br />
width of the slider represents one extent, the top or left part of the scrollbar<br />
cannot indicate a value greater than (maximum — extent). For example, if you<br />
have a 200-pixel high object displayed in a 60-pixel high viewport, the minimum<br />
value will be 0 and the maximum will be 199, but the slider will represent<br />
60-pixels of view, so its upper end will represent the value 200 - 60 =<br />
140 when it is right at the bottom of the scrollbar.<br />
The extent size, view size, and maximum and minimum values are set<br />
automatically when the JScrollPane is sized. If you take direct control over<br />
the scrollbars you can, of course, manage them yourself by using the<br />
JScrollBar setValues method that allows you to set the maximum, minimum<br />
and current values and the extent size explicitly. You can also cause the<br />
slider to move to a new position by using the setValue method and get the<br />
current value using getvalue. You'll see more about this later in this chapter.<br />
When you click to move the scrollbar's slider, it moves by either a small<br />
amount, known as the unit increment, or a larger amount, the block increment.<br />
By default, the unit increment is 1 pixel and the block increment is the<br />
extent size, so that clicking on the arrow at either end shifts the view by one<br />
pixel in that direction, while clicking in the scrollbar near the arrow moves<br />
the view a complete viewport's distance. To decide how far to move, the<br />
scrollbar calls the following methods:<br />
public int getUnitlncrement(int direction);<br />
public int getBlocklncrement(int direction);<br />
The direction argument takes the value +1 if the scrollbar is moving to the<br />
right or downward and —1 if it is moving to the left or upwards. Note that this<br />
is the direction of movement of the slider in the scrollbar, not of the content<br />
of the viewport, which moves in the opposite direction. The value returned<br />
from these methods is always positive or zero and represents the distance to<br />
move in that direction; if you mistakenly return a negative value, you'll find<br />
that the scrollbar doesn't behave as you might have expected it to! To implement<br />
logical scrolling, you have to make the block increment depend on the<br />
current position of the object in the viewport, which requires you to override<br />
the getBlocklncrement method. In order to do this, you create a subclass<br />
of JScrollBar and have the JScrollPane create instances of this subclass<br />
instead of JScrollBar. Since the scrollbars are created by calling methods<br />
of JScrollPane, it follows that it is also necessary to subclass JScrollPane
Logical Scrolling and Forcing Visibility of an Area 569<br />
to be able to attach custom scrollbars. The new scrolled pane subclass will be<br />
called PictureScrollPane and the scrollbar class PictureScrollBar.<br />
Now let's consider what will happen when you click on a scrollbar. First,<br />
the getBlocklncrement method will be called and will return the distance<br />
by which the slider will move; the scroll pane then computes the new scrollbar<br />
value based on what was returned to it and adjusts the scrollbar accordingly.<br />
This also results in the viewport itself being scrolled, but there is no<br />
need to do anything extra to make that happen. In order to decide how far to<br />
move the slider, it is necessary to know where each picture begins within the<br />
viewport and where the scrollbar currently is.<br />
For example, considering only the vertical scrollbar, suppose there are<br />
three rows of pictures starting at pixel offsets 0, 100, and 180 from the top of<br />
the scrolled object. When the JScrollPane first appears, the top picture<br />
will be at the top left of the viewport. If you now click to move the slider<br />
downward by a block, you want to place the second row of pictures at the top<br />
of the viewport, which requires a downward scroll of 100 pixels. This result is<br />
arrived at by subtracting the scrollbars current value from the offset of the<br />
next row of pictures. Things can be slightly trickier, though, because the user<br />
could now click on the down arrow a few times, making the viewport scroll by<br />
individual pixel amounts, or the slider could be dragged down the scrollbar<br />
and dropped at a new position. In all of these cases, however, it is still possible<br />
to determine how far the slider should move next by subtracting the<br />
scrollbars current value from the pixel offset of the next row of pictures. The<br />
only problem is to figure out where the next row of pictures starts.<br />
If you know the pixel offsets of the pictures, you can compare the current<br />
slider value to these offsets to determine which is the next row; which way<br />
the list of offsets is traversed depends, of course, on whether the slider is<br />
moving upwards or downward. For example, in the example being considered<br />
here, suppose that the slider has been moved to position 20 and then<br />
the user clicks to move down a block. Since the next picture is at pixel offset<br />
100, the right thing to do is to move down 80 pixels.<br />
Now suppose the slider is dragged down to position 140. When this is<br />
done, neither getUnitlncrement not getBlocklncrement is called—<br />
instead, the scrollbars value changes directly to that which corresponds to its<br />
new position, in this case 140, and the top of the viewport ends up cutting the<br />
second row of pictures into two. If you were now to click to move down a<br />
block, by scanning the list of picture offsets, then the next row of pictures<br />
would be found at pixel offset 180, so the next action would be to move down<br />
by 40 pixels. From here, it isn't possible to go down any further. If the user<br />
clicked to move up a block, our getBlocklncrement method would be
570 Chapter 5 Keyboard Handling, Actions, and Scrolling<br />
called with its direction argument set to -1 and would look for the largest picture<br />
offset that is smaller than the current slider value, in this case 100.<br />
Because the current value is 180, it would return a block increment of 80<br />
(and not -80).<br />
We've summarized the basic idea, now let's see the implementation. First,<br />
let's look at the applications initialization code, which is shown in Listing 5-18.<br />
Listing 5-18 Logical scrolling and forced scrolling: application<br />
initialization<br />
package <strong>JFC</strong>Book.Chapter5;<br />
import javax.swing.*;<br />
import j ava.awt.*;<br />
import j ava.awt.event.*;<br />
public class ScrollExample4 extends JFrame {<br />
public ScrollExample4() {<br />
super("Scroll Example 4");<br />
picturePane = new PictureScrollPane(<br />
JScrollPane.VERTICAL_SCROLLBAR_AS_NEEDED,<br />
JScrollPane.H0RIZ0NTALJ3CR0LLBAR_AS_NEEDED,<br />
imageNames, PICTURES_PER_ROW);<br />
this.getContentPane().add(picturePane,<br />
BorderLayout.CENTER);<br />
// Add buttons to bring numbered picture into view<br />
JPanel panel = new JPanelO ;<br />
panel.setBackground(UIManager.getColor("control"));<br />
JPanel buttonPanel = new JPanelO;<br />
buttonPanel.setLayout(new GridLayout(0, PICTURES_PER_ROW,<br />
4, 4));<br />
panel.add(buttonPanel);<br />
Font f = new Font("Serif", Font.BOLD, 14);<br />
for (int i = 0; i < imageNames.length; i++) {<br />
JButton b = new JButton("" + i);<br />
b.setFont(f);<br />
buttonPanel.add(b);<br />
b.addActionListener(new ActionListener() {<br />
public void actionPerformed(ActionEvent evt) {<br />
JButton button = (JButton)evt.getSource();<br />
int index =<br />
button.getActionCommandO .charAt(0) - '0';
Logical Scrolling and Forcing Visibility of an Area 571<br />
Listing 5-18 Logical scrolling and forced scrolling: application<br />
}<br />
}<br />
}<br />
}<br />
});<br />
initialization (continued)<br />
picturePane.makeVisible(index);<br />
// Make picture visible<br />
this.getContentPane().add(panel, BorderLayout.EAST);<br />
public static void main(String[] args) {<br />
JFrame f = new ScrollExample4 () ;<br />
Dimension d =<br />
Toolkit.getDefaultToolkit().getScreenSize();<br />
f.setSize(3*d.width/4, 3*d.height/4);<br />
f.setvisible(true);<br />
f.addWindowListener(new WindowAdapter() {<br />
public void windowClosing(WindowEvent e) {<br />
System.exit(0);<br />
}<br />
});<br />
}<br />
private static final String [] imageNames = {<br />
"images/pl.jpg","images/p2.jpg","images/p3-jpg",<br />
"images/p4.jpg","images/p5.jpg","images/p6.jpg",<br />
"images/p7.jpg","images/p8.jpg","images/p9.jpg" };<br />
private static final int PICTURES_PER_ROW = 3;<br />
// Pictures on each row<br />
private PictureScrollPane picturePane;<br />
// The picture panel<br />
Here, as before, a scroll pane is created and mounted on the top-level window.<br />
But there are some differences this time. Most obviously, a Picture-<br />
ScrollPane is created instead of a JScrollPane. This example also adds a<br />
panel of buttons, one for each picture; these buttons will be used when you<br />
see how to move directly to a particular picture without using the scrollbars<br />
later in this section. The other difference is that the list of image names is
572 Chapter 5 Keyboard Handling, Actions, and Scrolling<br />
now passed to the PictureScrollPane so that it can construct the panel of<br />
pictures, instead of doing it ourselves and simply adding the completed panel<br />
as the viewport.<br />
The reason for this change is that the scrollbars need to know exactly<br />
where each row and column of pictures has been placed. Since the scrollbars<br />
are created by the PictureScrollPane class, it seems natural for it to know<br />
where the pictures have been placed and the simplest and most object-oriented<br />
way to achieve this is to have it be completely responsible for constructing<br />
and managing the picture panel. The only information it needs to<br />
do this is the list of pictures and the number of pictures that should appear<br />
on each row. In this case, there are nine pictures (a fact that the scroll pane<br />
can deduce from the length of the array of picture names), so we choose to<br />
allow three pictures per row, as in the previous example. Figure 5-13 shows<br />
what the application looks like when it is running. To run it for yourself, type<br />
the command<br />
<strong>Java</strong> <strong>JFC</strong>Book.Chapter5.ScrollExample4<br />
Note that since one of the files in this example uses the setBacking-<br />
StoreEnabled method which is deprecated in <strong>Java</strong> 2 version 1.3, a copy of<br />
all of the files for this example have also been placed in the jdkl3 subdirectory.<br />
This copy differs from the code in the listings shown here only in that it<br />
uses setScrollMode instead of setBackingStoreEnabled and you can<br />
run it with the command:<br />
<strong>Java</strong> <strong>JFC</strong>Book.Chapter5.jdkl3.ScrollExample4<br />
Before looking at the implementation of the PictureScrollPane class,<br />
let's look a bit more closely at what happens when the scrollbar is clicked near<br />
one of its ends. As noted earlier, to decide how far to move, you need the current<br />
value of the scrollbar and the offsets of each row of pictures. This calculation<br />
is performed in the getBlocklncrement method of the<br />
PictureScrollBar class. Getting the current value of the scrollbar is simply<br />
a matter of invoking the PictureScrollBar getValue method, but<br />
what about the picture offsets? Even though the scrollbar is attached to the<br />
JScrollPane, this association is not directly known to the scrollbar—it has<br />
never been told what component it is controlling, so it doesn't know how to<br />
get information about the pictures. But remember that each scrollbar is created<br />
by the PictureScrollPane when its overridden createHorizontalScrollBar<br />
or createVerticalScrollBar method is called. This<br />
seems to give us the opportunity to tell the scrollbars where to get the information<br />
they need. This is certainly a feasible solution: the PictureScroll-<br />
Bar constructor could be defined so that it takes a reference to the
Logical Scrolling and Forcing Visibility of an Area 573<br />
Figure 5-13 A scrolling grid with buttons to bring grid cells into view.<br />
PictureScrollPane as an argument and a method would be added to<br />
PictureScrollPane that would return the picture offsets as an array to the<br />
scrollbars; this function would be called from within the scrollbars get-<br />
Blocklncrement method.<br />
There is, however, a neater solution that allows the whole Picture-<br />
ScrollPane to be packaged as a single logical entity. Instead of creating a<br />
new public PictureScrollBar class and then inventing a way to give it<br />
access to information stored in the PictureScrollPane, the scrollbar can<br />
be implemented as an inner class of PictureScrollPane, so that it automatically<br />
has access to its members without spoiling the encapsulation of the<br />
information held by the scroll pane class and without adding any unnecessary<br />
publicly-visible functionality. Listing 5-19 shows the implementation of PictureScrollPane,<br />
together with its in-built scrollbars.<br />
The constructor contains the code to create the picture panel that was<br />
shown in the previous example. There then follow the overridden createVerticalScrollBar<br />
and createHorizontalScrollBar methods that<br />
allow custom scrollbars to be attached to the scrolled pane; these two methods<br />
return instances of our PictureScrollPane class, initialized with the
574 Chapter 5 Keyboard Handling, Actions, and Scrolling<br />
Listing 5-19 A custom scroll pane that can handle logical<br />
scrolling<br />
class PictureScrollPane extends JScrollPane {<br />
public PictureScrollPane(int vsbPolicy, int hsbPolicy,<br />
String [] imageNames, int picturesPerRow) {<br />
super(vsbPolicy, hsbPolicy);<br />
this.picturesPerRow = picturesPerRow;<br />
// Create labels for all of the pictures<br />
labels = new JLabel[imageNames.length];<br />
for (int i = 0; i < imageNames.length; i++) {<br />
labels [i] = new JLabel(new Imagelcon(getClass() .<br />
getResource(imageNames[i] ) ) ) ;<br />
labels [i] .setHorizontalAlignment(<br />
SwingConstants.LEFT);<br />
labels [i] .setVerticalAlignment(SwingConstants.TOP) ;<br />
}<br />
JPanel pictures = new JPanel();<br />
pictures.setBackground(UIManager.getColor("control"));<br />
pictures.setLayout(new GridBagLayout());<br />
GridBagConstraints c = new GridBagConstraints();<br />
c.gridwidth = 1;<br />
c.gridheight = 1;<br />
c.gridx = 0;<br />
c.gridy = 0;<br />
c.insets = new Insets(4, 4, 4, 4);<br />
c.fill = GridBagConstraints.BOTH;<br />
for (int i = 0; i < labels.length; i++) {<br />
pictures.add(labels[i], c);<br />
c.gridx++;<br />
if ((c.gridx % picturesPerRow) == 0) {<br />
c.gridx = 0;<br />
c.gridy++;<br />
rows++;<br />
}<br />
}<br />
// Correct row count if we haven't<br />
// filled the last row<br />
if (c.gridx != 0) {<br />
rows++;<br />
}
Logical Scrolling and Forcing Visibility of an Area 575<br />
Listing 5-19 A custom scroll pane that can handle logical<br />
scrolling (continued)<br />
setViewportView(pictures);<br />
getViewport().setBackingStoreEnabled(true);<br />
} '<br />
public JScrollBar createVerticalScrollBar() {<br />
return new PictureScrollBar(JScrollBar.VERTICAL);<br />
}<br />
public JScrollBar createHorizontalScrollBar() {<br />
return new PictureScrollBar(JScrollBar.HORIZONTAL);<br />
}<br />
public void makeVisible(int index) {<br />
try {<br />
JComponent c = labels [index] ;<br />
Dimension d = c.getSize();<br />
labels [index] .scrollRectToVisible(<br />
new Rectangle (0, 0, d.width, d.height));<br />
} catch (Exception e) {<br />
System.out.println("Illegal index: " + index);<br />
}<br />
}<br />
// Inner class to implement custom<br />
// scrollbar functionality<br />
class PictureScrollBar extends JScrollBar {<br />
public PictureScrollBar(int orientation) {<br />
super(orientation);<br />
}<br />
public int getBlocklncrement(int direction) {<br />
int value = getValueO;<br />
int targetValue;<br />
int index;<br />
if (positions == null) {<br />
// Cache the image positions<br />
getlmagePositions();<br />
}<br />
for (index = 0; index < positions.length; index++) {<br />
if (value
576 Chapter 5 Keyboard Handling, Actions, and Scrolling<br />
Listing 5-19 A custom scroll pane that can handle logical<br />
scrolling (continued)<br />
if (direction > 0) {<br />
if (index < positions.length - 1) {<br />
index++;<br />
} else if (index == positions.length) {<br />
// Already as far right as we can go<br />
return 0;<br />
}<br />
} else {<br />
if (index > 0) {<br />
index—;<br />
}<br />
}<br />
targetValue = positions [index] ;<br />
// Where we need to scroll to<br />
// Always return positive value<br />
return (targetValue - value) * direction;<br />
}<br />
public int getUnitlncrement(int direction) {<br />
}<br />
return 1;<br />
// Helper to cache the positions of the images<br />
private void getlmagePositions() {<br />
if (getOrientationO == JScrollBar.HORIZONTAL) {<br />
positions = new int [picturesPerRow] ;<br />
for (int i = 0; i < picturesPerRow; i++) {<br />
if (labels [i] != null) {<br />
positions [i] = labels [i] .getLocation() .x;<br />
}<br />
}<br />
} else {<br />
positions = new int [rows] ;<br />
for (int i = 0; i < rows; i++) {<br />
if (labels[i * picturesPerRow] != null) {<br />
positions[i] =<br />
labels[i * picturesPerRow].getLocation().y;<br />
}<br />
}<br />
}<br />
}
Logical Scrolling and Forcing Visibility of an Area 577<br />
Listing 5-19 A custom scroll pane that can handle logical<br />
scrolling (continued)<br />
}<br />
private int [] positions;<br />
private JLabel[] labels; // Pictures, one per JLabel<br />
private int picturesPerRow; // Pictures in each row<br />
private int rows; // Number of rows<br />
correct orientation. The makeVisible method helps to provide the functionality<br />
offered by the button panel on the main frame, as you'll see later.<br />
The rest of this class is the implementation of the PictureScrollBar<br />
class, which is derived from JScrollBar and overrides the getUnitIncrement<br />
and getBlocklncrement methods to provide the logical scrolling.<br />
The getUnit Increment method is trivial—it just returns 1, causing the<br />
viewport to move by f pixel in the appropriate direction. All of the real work<br />
of this class is in getBlocklncrement. You've already seen a description of<br />
how this method works in principle. Since this class could manage either a<br />
vertical or a horizontal scrollbar, there are two slightly different pieces of<br />
code, in the getlmagePositions method, that achieve the same thing in a<br />
slightly different way. In the case of a horizontal scrollbar, the x coordinates<br />
of the picture columns are found by invoking getLocation on the three pictures<br />
on the top row; since the pictures are arranged in columns, this returns<br />
the x coordinates of all the pictures. Similarly, the vertical scrollbar finds the y<br />
locations of the pictures in the left-hand column.<br />
Since the pictures won't move once they have been placed on the panel,<br />
the getBlocklncrement method only invokes getlmagePositions the<br />
first time it is called, saving the resulting array of offsets in the positions<br />
array for future use. Using this array and the current value of the scrollbar,<br />
obtained using getValue, the index of the picture that occupies the top-left<br />
corner of the viewport can be located. As described earlier, it is then a simple<br />
matter to locate the picture that should next be made visible and, with that<br />
information and the values in the positions array, the distance by which<br />
the scrollbar should be moved can be calculated with a simple subtraction.<br />
Forcing Visibility of Part of a Scrolled Area<br />
The last piece of the PictureScrollPane class is the makeVisible<br />
method. When the user presses one of the nine buttons at the top right of the
578 Chapter 5 Keyboard Handling, Actions, and Scrolling<br />
main frame, the actionPerformed method that you saw in the<br />
ScrollExample4 class above is invoked. The number on the face of the button<br />
is converted to an image index by simple subtraction and the makeVisi -<br />
ble method is called. Pressing the button is supposed to make the<br />
corresponding picture come into view in the viewport and, as you can see,<br />
not much work is needed to achieve this.<br />
The makeVisible method uses the index it is given to find the label on<br />
which the picture is mounted by using the label array, then uses getSize<br />
to construct a rectangle that exactly covers the picture. With the reference to<br />
the JLabel and a rectangle that covers the entire picture, you just need to<br />
use the scrollRectToVisible method of JLabel (which it inherits from<br />
JComponent) to make the label visible in the viewport. When this method is<br />
invoked, JComponent looks at its parent to see if it is a JViewport; if it isn't,<br />
it continues with that component's parent, until it finds a viewport or reaches<br />
the top-level frame. If it finds a JViewport, it calls its setViewPosition<br />
method to adjust the position of the view within the viewport so that the supplied<br />
rectangle is visible.<br />
<strong>Core</strong> Tip<br />
The scrollRectToVisible method is extremely useful in connection<br />
with many of the Swing components but particularly with trees and tables<br />
where it can be used to bring an important part of the component<br />
immediately into the user's view. One common use of<br />
scrollRectToVisible is to automatically scroll the view so that<br />
whatever is selected in the component comes into view. Another common<br />
application is to create a text component that scrolls to keep the lost piece<br />
of text added in view.<br />
Implementing Logical Scrolling with the<br />
Scrollable Interface<br />
What you have just seen works and demonstrates how to create custom<br />
scrollbars for use with a JScrollPane. In this section, you'll see what is<br />
often a simpler way to achieve the same result. The problem with the last<br />
approach is that the scrollbars had to have knowledge of the content of the<br />
picture pane. This is not really a very natural thing to do—it would be much<br />
better if the picture pane had some way to tell the scroll pane how much it<br />
should scroll by. This requirement is satisfied by the Scrollable interface.<br />
If the object that you place in the viewport of a JScrollPane implements
Logical Scrolling and Forcing Visibility of an Area 579<br />
Scrollable, then the scroll pane will delegate certain actions to it. Here is<br />
how this interface is denned:<br />
public interface Scrollable {<br />
}<br />
public Dimension getPreferredScrollableViewportSize();<br />
public boolean getScrollableTracksViewportHeight();<br />
public boolean getScrollableTracksViewportWidth()•<br />
public int getScrollableUnitlncrement(Rectangle visibleRect,<br />
int orientation, int direction) ;<br />
public int getScrollableBlocklncrement(Rectangle visibleRect,<br />
int orientation, int direction);<br />
Our revised implementation, which uses the Scrollable interface, no<br />
longer needs to extend JScrollPane, because there is no need to create<br />
custom scrollbars. Instead, it will use a standard JScrollPane and the<br />
object to be placed in the viewport, called PictureGallery, will be a subclass<br />
of JPanel that implements the Scrollable interface. All of the information<br />
about the pictures will be embedded in PictureGallery; the only<br />
extra method that it exposes over and above the methods of Scrollable,<br />
will be makeVisible, which will be used as it was in Listing 5-18.<br />
Let's first look at how the application that uses this new mechanism is<br />
implemented. The code is shown in Listing 5-20.<br />
Listing 5-20 A revised application using logical scrolling<br />
package <strong>JFC</strong>Book.Chapter5;<br />
import j avax.swing.*;<br />
import j ava.awt.*;<br />
import j ava.awt.event.*;<br />
import <strong>JFC</strong>Book.Chapter5.PictureGallery;<br />
public class ScrollExample4a extends JFrame {<br />
public ScrollExample4a() {<br />
super("Scroll Example 4A");<br />
// Create the gallery of pictures and add it<br />
// to the scroll pane<br />
final PictureGallery pg = new PictureGalleryi
580 Chapter 5 Keyboard Handling, Actions, and Scrolling<br />
Listing 5-20 A revised application using logical scrolling (continued)<br />
imageNames, PICTURES_PER_ROW);<br />
picturePane = new JScrollPane(pg,<br />
JS c ro11Pane.VERTICAL_S CROLLBAR_AS_NEEDED,<br />
JScrollPane.HORIZONTAL_SCROLLBAR_AS_NEEDED);<br />
picturePane.getViewport().<br />
setBackingStoreEnabled(true);<br />
this.getContentPane().add(picturePane,<br />
BorderLayout.CENTER);<br />
// Add buttons to bring numbered picture into view<br />
JPanel panel = new JPanelO ;<br />
panel.setBackground(UIManager.getColor("control"));<br />
JPanel buttonPanel = new JPanelO;<br />
buttonPanel.setLayout(new GridLayout(<br />
0, PICTURES_PER_ROW, 4, 4));<br />
panel.add(buttonPanel);<br />
Font f = new Font("Serif", Font.BOLD, 14);<br />
for (int i = 0; i < imageNames.length; i++) {<br />
JButton b = new JButton("" + i);<br />
b.setFont (f) ;<br />
buttonPanel.add(b);<br />
b.addActionListener(new ActionListener() {<br />
public void actionPerformed(ActionEvent evt) {<br />
JButton button = (JButton)evt.getSource ();<br />
int index =<br />
button.getActionCommandO .charAt(0) - '0';<br />
pg.makeVisible(index);// Make picture visible<br />
}<br />
});<br />
}<br />
this.getContentPane0 .add(panel, BorderLayout.EAST);<br />
}<br />
public static void main(String[] args) {<br />
JFrame f = new ScrollExample4a();<br />
Dimension d = Toolkit.getDefaultToolkit().getScreen-<br />
SizeO ;<br />
f.setSize(3*d.width/4, 3*d.height/4);<br />
f.setVisible(true);<br />
f.addWindowListener(new WindowAdapter() {<br />
public void windowClosing(WindowEvent e) {
Logical Scrolling and Forcing Visibility of an Area 581<br />
Listing 5-20 A revised application using logical scrolling (continued)<br />
I - , [<br />
System.exit(0) ;<br />
}<br />
}<br />
});<br />
private static final String[] imageNames = {<br />
"images/pl.jpg", "images/p2.jpg", "images/p3.jpg",<br />
"images/p4.jpg", "images/p5.jpg", "images/p6.jpg",<br />
"images/p7.jpg", "images/p8.jpg", "images/p9.jpg"<br />
};<br />
private static final int PICTURES_PER_ROW = 3;<br />
// Pictures on each row<br />
private JScrollPane picturePane;// The picture panel<br />
You'll notice that this is simpler than the original version in Listing 5—18.<br />
Instead of creating a custom JScrollPane, an instance of PictureGallery<br />
is created, with the list of images and number of pictures per row as<br />
arguments to the constructor, and it is simply installed in the JScrollPane<br />
like any other component. The JScrollPane checks whether the object in<br />
the viewport implements Scrollable when it needs to—it is not necessary<br />
to tell it. The other change you'll notice here is that the buttons' Action handlers<br />
direct the makeVisible call to the PictureGallery, because it is no<br />
longer implemented by the scroll pane. In other words, all of the operations<br />
performed by the application and the JScrollPane are now directed at one<br />
object that implements the real functionality of the application.<br />
The PictureGallery implementation is actually very similar to that of<br />
PictureScrollPane. The code is shown in Listing 5-21.<br />
Listing 5-21 A panel of pictures implementing the Scrollable<br />
interface<br />
package <strong>JFC</strong>Book.Chapters;<br />
import javax.swing.*;<br />
import j ava.awt.*;
582 Chapter 5 Keyboard Handling, Actions, and Scrolling<br />
Listing 5-21 A panel of pictures implementing the Scrollable<br />
interface (continued)<br />
import j ava.awt.event.*;<br />
public class PictureGallery extends JPanel<br />
implements Scrollable {<br />
public PictureGallery(String[] imageNames,<br />
int picturesPerRow) {<br />
this.picturesPerRow = picturesPerRow;<br />
// Create labels for all of the pictures<br />
labels = new JLabel[imageNames.length];<br />
for (int i = 0; i < imageNames.length; i++) {<br />
labels[i] = new JLabel(new Imagelcon(getClass().<br />
getResource(imageNames[i] ) ) ) ;<br />
labels[i].setHorizontalAlignment(<br />
SwingConstants.LEFT) ;<br />
labels [i] .setVerticalAlignment(SwingConstants.TOP) ;<br />
}<br />
setBackground(UIManager.getColor("control"));<br />
setLayout(new GridBagLayout 0) ;<br />
GridBagConstraints c = new GridBagConstraints();<br />
c.gridwidth = 1;<br />
c.gridheight = 1;<br />
c.gridx = 0;<br />
c.gridy = 0;<br />
c.insets = new Insets(4, 4, 4, 4);<br />
c.fill = GridBagConstraints.BOTH;<br />
for (int i = 0; i < labels.length; i++) {<br />
add(labels[i], c);<br />
c.gridx++;<br />
if ((c.gridx % picturesPerRow) == 0) {<br />
c.gridx = 0;<br />
c.gridy++;<br />
rows++;<br />
}<br />
}<br />
// Correct row count if we haven't<br />
// filled the last row<br />
if (c.gridx != 0) {<br />
rows++;<br />
}
Logical Scrolling and Forcing Visibility of an Area 583<br />
Listing 5-21 A panel of pictures implementing the Scrollable<br />
interface (continued)<br />
}<br />
public void makeVisible(int index) {<br />
try {<br />
JComponent c = labels[index];<br />
Dimension d = c.getSizeO ;<br />
labels [index] .scrollRectToVisible(<br />
new Rectangle(0, 0, d.width, d.height));<br />
} catch (Exception e) {<br />
System.out.println("Illegal index: " + index);<br />
}<br />
}<br />
// Implementation of the Scrollable interface<br />
public Dimension getPreferredScrollableViewportSize() {<br />
return getPreferredSize();<br />
}<br />
public boolean getScrollableTracksViewportWidth() {<br />
return false;<br />
}<br />
public boolean getScrollableTracksViewportHeight() {<br />
return false;<br />
}<br />
public int getScrollableUnitlncrement(<br />
Rectangle visibleRect,<br />
int orientation, int direction) {<br />
return 1;<br />
}<br />
public int getScrollableBlocklncrement(<br />
Rectangle visibleRect,<br />
int orientation, int direction) {<br />
int value;<br />
int targetValue;<br />
int index;<br />
int offsetType;<br />
if (positions == null) {<br />
// Cache the image positions<br />
getlmagePositions();<br />
} '
584 Chapter 5 Keyboard Handling, Actions, and Scrolling<br />
Listing 5-21 A panel of pictures implementing the Scrollable<br />
interface (continued)<br />
offsetType = orientation == SwingConstants.VERTICAL ?<br />
Y_OFFSETS : X_OFFSETS;<br />
value = orientation == SwingConstants.VERTICAL ?<br />
visibleRect.y : visibleRect.x;<br />
for (index = 0; index < positions.length; index++) {<br />
if (value 0) {<br />
if (index < positions[offsetType].length - 1) {<br />
index++;<br />
} else if (index == positions[offsetType].length) {<br />
// Already as far right as we can go<br />
return 0;<br />
}<br />
} else {<br />
if (index > 0) {<br />
index—;<br />
}<br />
}<br />
targetValue = positions[offsetType][index];<br />
// Where we need to scroll to<br />
// Always return positive value<br />
return (targetValue - value) * direction;<br />
}<br />
// Helper to cache the positions of the images<br />
private void getlmagePositions() {<br />
positions = new int [OFFSETJTYPES] [] ;<br />
positions[X_OFFSETS] = new int [picturesPerRow] ;<br />
positions[Y_OFFSETS] = new int[rows];<br />
for (int i = 0; i < picturesPerRow; i++) {<br />
if (labels[i] != null) {<br />
positions[X_OFFSETS] [i] =<br />
labels [i] .getLocation() .x;
Logical Scrolling and Forcing Visibility of an Area 585<br />
Listing 5-21 A panel of pictures implementing the Scrollable<br />
interface (continued)<br />
}<br />
}<br />
}<br />
for (int i = 0; i < rows; i++) {<br />
if (labels [i * picturesPerRow] != null) {<br />
positions [Y_OFFSETS] [i] =<br />
labels [i * picturesPerRow] .getLocation() .y;<br />
}<br />
}<br />
private int[] [] positions; // x and y picture offsets<br />
private JLabel[] labels; // Pictures, one per JLabel<br />
private int picturesPerRow; // Pictures in each row<br />
private int rows; // Number of rows<br />
private static final int X__OFFSETS = 0;<br />
private static final int Y_OFFSETS = 1;<br />
private static final int OFFSET_TYPES = Y_OFFSETS + 1;<br />
}<br />
The constructor is almost identical to that of PictureScrollPane,<br />
except that it has fewer arguments and does not need to initialize its superclass.<br />
You'll notice also that this class now implements the makeVisible<br />
method that was in PictureScrollPane, but the code is, in fact, identical.<br />
The rest of this class implements the Scrollable interface. The methods<br />
of most interest are the last two; the others are not of any real use here and<br />
just return standard values—you'll find a description of them at the end of<br />
this section. The getScrollableUnitlncrement and getScrollable-<br />
Blocklncrement methods are the ones that JScrollPane uses to work out<br />
how far to move when a unit or block scroll is required. Each of them gets<br />
three parameters:<br />
visibleRect the portion of the viewport that is currently visible<br />
orientation indicates which scrollbar is involved:<br />
SwingConstants.HORIZONTAL or<br />
SwingConstants.VERTICAL<br />
direction 1 or-1, as before
586 Chapter 5 Keyboard Handling, Actions, and Scrolling<br />
An important difference between these methods and the getUnitlncrement<br />
and getBlocklncrement methods is context—in the previous example,<br />
these methods were invoked against a particular scrollbar. Here, the new<br />
methods have a parameter that indicates which scrollbar is being moved.<br />
This makes a small difference to us, because the information used to decide<br />
how far to move, namely, the offsets of the picture rows and columns, was<br />
held separately in each scrollbar—the vertical scrollbar knew about vertical<br />
offsets and the horizontal one about horizontal offsets. Now, this is no longer<br />
feasible: The PictureGallery object has to know about both sets of offsets<br />
and getScrollableBlocklncrement has to use the correct set when<br />
deciding how far to move. Note that the getScrollableUnitlncrement<br />
method is trivial, as it was in the previous implementation.<br />
Instead of creating a single one-dimensional array of picture offsets in<br />
each scrollbar, PictureGallery builds a two-dimensional array, with one<br />
row for horizontal offset and one for vertical offsets. The code that builds this<br />
array is fundamentally the same as it was earlier, except that it now stores<br />
both the x and y offsets of each picture.<br />
When the getScrollableBlocklncrement method is called, it uses the<br />
orientation argument to determine which row of the positions array to<br />
use. Once this is done, the algorithm used to find the offset of the next picture<br />
to scroll to is identical to that shown in Listing 5-19. Notice, however,<br />
that the current value of the scrollbar is now obtained differently. In the earlier<br />
example, the scrollbar value was obtained by calling its getvalue<br />
method. Here, the scrollbar object is not directly available, but the same<br />
information is available in the visibleRect parameter, which describes the<br />
part of the scrollable that is actually visible in the viewport at the point of the<br />
call. This means that the horizontal scrollbar's value is given by the x value of<br />
visibleRect and the vertical scrollbars value by its y member variable.<br />
More About The Scrollable Interface<br />
This example didn't use the other three methods in the Scrollable interface,<br />
but they are worth knowing about because there are some common<br />
problems that you can use them to help with.<br />
The getPreferredScrollableViewportSize allows you to specify<br />
how big you would like the scroll panes viewport to be. Usually, the viewport<br />
should be either as large as the applications frame will allow it to be, or it<br />
should take the preferred size of the object that it is scrolling. Often, these are<br />
the same thing. In the example above, the preferred size of the PictureGallery<br />
was returned by this method. In fact, this won't really be used here,<br />
because the size of the application frame was explicitly set and the size of the
Logical Scrolling and Forcing Visibility of an Area 587<br />
JScrollPane is absolutely determined by that in this case. However, had the<br />
pack method been used to size the frame, the size allocated to the JScroll-<br />
Pane would depend on its preferred size, which is determined by the result of<br />
the getPreferredScrollableViewportSize method if its viewport<br />
implements Scrollable. You'll see an example of this method in use in<br />
Chapter 11, "The Table Control," because JTable has a setPreferred-<br />
ScrollableViewportSize method that allows you to specify the size of tbe<br />
viewport in which your table should be displayed if it needs to be scrolled.<br />
The other two methods, getScrollableTracksViewportWidth and<br />
getScrollableTracksViewportHeight, control what happens when the<br />
JScrollPane is resized. If these methods return false, the size of the<br />
scrolled object is unaffected by the size of the scroll pane itself. But suppose<br />
you return true from getScrollableTracksViewportWidth. If this happens,<br />
then the scrolled objects width is set to match the width of the scroll<br />
pane's viewport—so there will never be a horizontal scrollbar. When the<br />
scroll pane is expanded, the viewport and the scrolled component will grow<br />
horizontally by the same amount. You can use this to ensure that text is never<br />
cropped on the right, for example, but for this to be useful, you must have a<br />
text control that does word wrapping, such as the JTextArea control that<br />
you'll see in Chapter 9. The same behavior can be obtained in the vertical<br />
direction using the getScrollableTracksViewportHeight.<br />
Listing 5—22 shows a simple example in which the getScrollable-<br />
TracksViewportwidth method is used. This example defines a class called<br />
TextFlow that extends the JTextArea control. Its constructor has three<br />
arguments—the string to be displayed, a boolean that indicates whether it<br />
should perform line wrapping, and a boolean that specifies what it is to<br />
return to getScrollableTracksViewportWidth. Because JTextArea<br />
implements the Scrollable interface, it is only necessary to override the<br />
getScrollableTracksViewportWidth method itself—all of the other<br />
methods in the interface are already implemented.<br />
To see the difference between returning true and false, the example<br />
creates two TextFlow objects and mounts them side-by-side in a frame. The<br />
left-hand object will line wrap and will return true from getScrollable-<br />
TracksViewportWidth, while the right-hand one returns false and does<br />
not line wrap.
588 Chapter 5 Keyboard Handling, Actions, and Scrolling<br />
Listing 5-22 Tracking viewport width<br />
package <strong>JFC</strong>Book.Chapter5;<br />
import j avax.swing.*;<br />
import j ava.awt.*;<br />
import j ava.awt.event.*;<br />
public class TextFlow extends JTextArea<br />
implements Scrollable {<br />
public TextFlow(boolean tracksViewport,<br />
boolean lineWrap, String text) {<br />
super();<br />
super.setLineWrap(lineWrap);<br />
super.setWrapStyleWord(lineWrap);<br />
setText(text);<br />
this.tracksViewport = tracksViewport;<br />
}<br />
J<br />
// Scrollable implementation<br />
public boolean getScrollableTracksViewportWidth() {<br />
return tracksViewport;<br />
}<br />
public static void main(String[] args) {<br />
JFrame f = new JFrame("Text Flow");<br />
Dimension d =<br />
Toolkit.getDefaultToolkit() .getScreenSize () ;<br />
f.setSize(7 * d.width/8, 3 * d.height/4);<br />
f .getContentPane () . setLayout (new GridLayout (0, 2)),f.getContentPane().add(new<br />
JScrollPane(<br />
new TextFlow(true, true, text)));<br />
f.getContentPane().add(new JScrollPane(<br />
new TextFlow(false, false, text)));<br />
f.setVisible(true) ;<br />
f.addWindowListener(new WindowAdapter() {<br />
}<br />
public void windowClosing(WindowEvent e) {<br />
System.exit(0);<br />
>.!<br />
protected boolean tracksViewport;<br />
protected static String text = "V'Houston, Tranquility<br />
Base here.\nThe Eagle has Landed\"\n" +<br />
"\n\n\"Roger, Tranguility, we copy you on the ground.\n" +<br />
"You got a bunch of guys about to turn blue.\n" +<br />
"We're breathing again. Thanks a lot\"\n";
<strong>Core</strong> Note<br />
Logical Scrolling and Forcing Visibility of an Area 589<br />
You'll find out more about the JTextArea control in Chapter 9,"Text<br />
Components."<br />
You can try this example by typing the command<br />
<strong>Java</strong> <strong>JFC</strong>Book.Chapter5.TextFlow<br />
When the example starts, the window is wide enough to accommodate all<br />
of the text, so there are no scrollbars and you'll probably see a large gray area<br />
next to the text area in the right part of the window. If you narrow the window<br />
enough so that some of the text lines are too wide to fit, another difference<br />
between the two text panes becomes apparent, as shown in Figure 5-14<br />
Figure 5-14 Text areas with and without word wrap in a scroll pane.<br />
The left-hand text area's width always tracks that of the scroll pane. As a<br />
result, it starts off being the same width as the scroll pane and is made narrower<br />
and narrower as the window's width is reduced. Since some of the lines
590 Chapter 5 Keyboard Handling, Actions, and Scrolling<br />
are now too long to fit, it word-wraps onto the next line, but nothing is lost.<br />
By contrast, the right-hand text area's width does not get adjusted as the<br />
scroll pane gets smaller—instead, it stays constant. When the scroll pane's<br />
viewport becomes too small to show all of the text pane, a horizontal scrollbar<br />
is added to allow the rest of the text to be accessed. The gray area that you<br />
will see to the right of this text area when the application starts up if your<br />
screen is wide enough is actually the background of the viewport itself, which<br />
is visible because the text area is not wide enough to cover the entire area<br />
available to the sroll pane.<br />
Implementing Scrolling with<br />
JScrollBar<br />
JScrollPane gives you a veiy simple and quick way to add scrolling to an<br />
application; if you are prepared to do a bit more work, you can, as you have<br />
seen, produce a more sophisticated user interface. But there are times when<br />
it isn't convenient to use JScrollPane. For example, you may have noticed<br />
that the examples so far create the object to be scrolled and then pass it to<br />
JScrollPane to manage. This is fine if what you want to scroll can be created<br />
in one step like this, but this might not always be possible. Consider<br />
what would happen if you wanted to produce a scrolling view onto the results<br />
of a database query that had produced thousands of rows of data. Having all<br />
that data in memory would be costly enough, but adding to that by producing<br />
a graphical representation of that data, possibly very much larger than the<br />
original, could easily make the application impractical or, at worst, impossible<br />
to use because of its resource requirements.<br />
In this situation, you can improve matters if you process only enough<br />
data to fill the scrolling area and possibly a bit more to allow the user to<br />
scroll around a little before you have to create more information to display.<br />
This doesn't fit veiy well with the JScrollPane model, however. To make<br />
this work, you need to directly manage the scrolling area, which means<br />
associating your own scrollbars with the component that you use to display<br />
the data instead of wrapping it with a JScrollPane.<br />
The example in this section illustrates how scrollbars work by showing an<br />
application that has a canvas on which there is a gray-scale pattern that starts<br />
black at the top and gradually lightens until, after 1024 pixel lines, it has<br />
turned completely white. A pattern of 1024 lines is not that huge, so<br />
JScrollPane could actually be used to manage it, but we'll forsake the sim-
Logical Scrolling and Forcing Visibility of an Area 591<br />
pier implementation and use this program to demonstrate how scrollbars<br />
work and how scrolling speed can be maximized by copying the scrolled data<br />
rather than regenerating it every time the scrollbar moves. This is, in fact, the<br />
technique used by JViewport in <strong>Java</strong> 2 version 3 when you select<br />
BLIT_SCROLL_MODE.<br />
First let's look at how the application's frame is constructed (Listing 5—23)<br />
and what the finished product looks like (Figure 5-15).<br />
Listing 5-23 Handling scrolling directly with JScrollBar: application<br />
initialization<br />
package <strong>JFC</strong>Book.Chapter5;<br />
import j avax.swing.*;<br />
import j ava.awt.*;<br />
import j ava.awt.event.*;<br />
public class ScrollExample5 extends JFrame {<br />
public ScrollExample5(String title) {<br />
super(title);<br />
JScrollBar vsb = new JScrollBar(JScrollBar.VERTICAL);<br />
ScrollingCanvas c = new ScrollingCanvas(vsb);<br />
this.getContentPane().add(c, BorderLayout.CENTER);<br />
this.getContentPane().add(vsb, BorderLayout.EAST);<br />
( (JPanel)getContentPane()) .setDoubleBuffered(false) ;<br />
getRootPane().setDoubleBuffered(false);<br />
} '<br />
J<br />
public static void main(String [] args) {<br />
JFrame f = new ScrollExample5("Scroll Example 5");<br />
Dimension d = Toolkit.getDefaultToolkit().getScreen-<br />
Size 0 ;<br />
f.setSize(3 * d.width/4, 3 * d.height/4) ;:<br />
f.addWindowListener(new WindowAdapter() {<br />
public void windowClosing(WindowEvent evt) {<br />
System.exit(0);<br />
}<br />
});<br />
}<br />
f.setVisible(true);
592 Chapter 5 Keyboard Handling, Actions, and Scrolling<br />
Figure 5-15 A large pattern to be scrolled with a scrollbar.<br />
The main frame consists of a vertical JSc roll Bar and a subclass of<br />
JPanel that will actually handle the scrolling. Despite its name, JScroll-<br />
Bar doesn't actually do any scrolling on its own. Instead, it provides an interface<br />
that allows the user to specify how far and in which direction the content<br />
of the canvas should be scrolled and generates events when the slider is<br />
moved. In our case, it is the job of the ScrollingCanvas to manage the<br />
scrolling in response to the movement of the scrollbar. The scrollbar has five<br />
attributes that determine its appearance at any given time. These attributes<br />
are listed in Table 5-2.<br />
Table 5-2 JScrollBar Attributes<br />
Attribute Description<br />
Orientation JScrollBar . HORIZONTAL or JScrollBar .VERTICAL
Table 5-2 JScrollBar Attributes (continued)<br />
Attribute Description<br />
Logical Scrolling and Forcing Visibility of an Area 593<br />
Value The value represented by the sliders current position<br />
Minimum The lowest value that the slider can take<br />
Maximum The value represented by the bottom or right-most end of the<br />
slider when it is at its lowest or right-most point<br />
Extent The size of the visible part of the object being scrolled<br />
When the ScrollingCanvas is created, the maximum and minimum<br />
values will be set. Since, in general, these depend on what is being scrolled,<br />
they are not set in the application's main method. Instead, these values are<br />
set by the canvas, which knows how large an object it is going to represent.<br />
The extent is more difficult to set, because it depends on how tall the canvas<br />
will be. Naturally, the canvas doesn't know its height until it has been<br />
placed on the frame and the application window has been sized. Subsequently,<br />
the user could resize the application window, which would result<br />
in the canvas growing or shrinking; if this happened, it would be necessary<br />
to change the scrollbar's extent accordingly. To make this possible, the<br />
Scroll ingCanvas class overrides the Component methods setSize and<br />
setBounds. When either of these methods is called, the extent will be set<br />
by calling the scrollbar's setVisibleAmount method. When you use<br />
JScrollPane, all of this is done automatically for you.<br />
As you saw in the previous example, the scrollbar's slider moves either to<br />
an absolute position if the user drags it, or changes position by the unit or<br />
block increment amounts. To implement logical scrolling, the getUnitlncrement<br />
and getBlocklncrement methods were overridden so that these<br />
values could be context-dependent. If pixel scrolling is sufficient, as it is in<br />
this case, you can either let the scrollbar use default values for these increments,<br />
or set them explicitly using setUnitIncrement and setBlocklncrement.<br />
In this example, the unit increment will be defaulted (to 1<br />
pixel). When it comes to block scrolling, the default is to have the scrollbar<br />
move the scrolled object by the size of the visible area. Often, though, this<br />
will be confusing for the user: It is better to have some overlap so that the<br />
user can pick up looking at the information where they were before they<br />
scrolled it. For example, if you have a window that holds 32 lines of text,<br />
instead of scrolling up 32 lines on any click, you might choose to scroll by
594 Chapter 5 Keyboard Handling, Actions, and Scrolling<br />
only 30 lines, so that after scrolling, the two lines that were originally at the<br />
bottom of the viewport appear at the top of the screen to give reading continuity.<br />
This idea will be implemented here by setting the block increment<br />
to be 8 pixels less than the visible area. Since the height of the visible area<br />
can change, it is necessary to adjust the block increment whenever the<br />
height of the canvas changes.<br />
To ensure that the size of the visible region and the block increment are<br />
adjusted together, both operations are encapsulated in a single method called<br />
changeScrollBar. Here is its implementation, together with an illustration<br />
of how it is called from the setBounds method; there is a similar call in the<br />
setSize methods.<br />
public void setBounds(int x, int y, int width,<br />
int height) {<br />
super.setBounds(x, y, width, height);<br />
canvasHeight = height;<br />
canvasWidth = width;<br />
}<br />
changeScrollBar();<br />
// Keep visible size and block increment in step<br />
public void changeScrollBar() {<br />
scrollBar.setVisibleAmount(canvasHeight);<br />
scrollBar.setBlocklncrement(canvasHeight - OVERLAP);<br />
}<br />
Once the scrollbar and the canvas have been created and initialized, the<br />
next problem to solve is how the canvas will find out that the scrollbars slider<br />
has been moved. When its value changes, the scrollbar generates an<br />
AdjustmentEvent. In order to be notified of these changes, the canvas registers<br />
itself with the scrollbar as an AdjustmentListener by calling the<br />
JScrollBar addAdjustmentListener method. The AdjustmentListener<br />
interface contains only one method:<br />
public void adjustmentValueChanged(AdjustmentEvent evt)<br />
All of the information that describes the adjustment is contained in the<br />
AdjustmentEvent. Like the other AWT events, this one is derived from<br />
j ava. awt. AWTEvent, so it contains an identifier and the source of the event.<br />
The identifier is always set to the value ADJUSTMENT_VALUE_CHANGED and<br />
the event source, in this case, will be the vertical scrollbar. As well as these<br />
generic attributes, it also has a type and a value. The value, which can be<br />
obtained from the event using its getValue method, is the current value of<br />
the scrollbar. Note that the incremental amount by which the scrollbars value
Logical Scrolling and Forcing Visibility of an Area 595<br />
has changed is not contained in the event. This event can be generated as a<br />
result of the user dragging the scrollbar's slider or by clicking on or near the<br />
movement arrows of the scrollbar. If you want to know what the user did, you<br />
can extract the event type with the getAdjustmentType method, which<br />
returns one of the following values, all denned by the<br />
j ava. awt. event. AdjustmentEvent class as shown in Table 5-3.<br />
Table 5-3 Adjustment Event Types<br />
Attribute Description<br />
UNIT_INCREMENT Slider moved down by a click on the scrollbar arrow<br />
UNIT_DECREMENT Slider moved up by a click on the scrollbar arrow<br />
BLOCK_INCREMENT Slider moved down by a click inside the scrollbar<br />
BLOCK_DECREMENT Slider moved up by a click inside the scrollbar<br />
TRACK Slider dragged to a new position<br />
In this example, it isn't necessary to know how the scrollbar's value<br />
changed, so only its new value will be used.<br />
<strong>Core</strong> Tip<br />
Scrolling can be a very expensive operation, especially if you try to keep the<br />
view of the component up to date as the user drags the slider. For this<br />
reason, some applications prefer not to scroll while the user is dragging the<br />
slider and wait until the user stops dragging to update the display. Microsoft<br />
Word is an example of an application that behaves in this way. If you want<br />
to use this technique, then you should respond to events in which the<br />
adjustment type is TRACK by calling the scrollbar's<br />
getValuelsAdjusting method.This method returns false while the<br />
scrollbar is being dragged and true once the user has stopped moving the<br />
slider. Thus, you only need to update the display when<br />
getValuelsAdjusting returns false. You will, of course, still need to<br />
process the other types of event so that the user can still click to move the<br />
scrollbar. Most applications that adopt this type of scrolling policy usually<br />
provide some kind of feedback to the user, such as having a current page<br />
or line number that is changed to reflect the current state as the slider is<br />
dragged.
596 Chapter 5 Keyboard Handling, Actions, and Scrolling<br />
The last, and most important, part of the ScrollingCanvas is its paint -<br />
Component method. Before seeing how this works, let's remind ourselves of<br />
what needs to be drawn on the canvas. If you could see the entire scrolled<br />
object in one go on the screen, you would see 1024 pixels lines, each of which<br />
is painted in a single shade of gray. The color starts out being black at the top<br />
and gradually lightens until it is white at the bottom. The gradually changing<br />
color is produced by starting with a Color object created as follows:<br />
new Color(0, 0, 0)<br />
and incrementing each of the red, green, and blue values by the same<br />
amount as we move down the canvas. Since there are 1024 pixel lines and<br />
only 256 possible values for each color component, the color value is changed<br />
on every 4th pixel line.<br />
In reality, only a part of the canvas will be on display at any given time. If<br />
the pixel lines of the pattern were numbered 0 through 1023 with 0 at the<br />
top, then the value of the scrollbar will indicate which line should be drawn<br />
at the top of the canvas and the canvas's height determines the number of<br />
lines to draw. The color of the pixel line offset pixels from the top of the pattern<br />
is Color (of f set/4, offset/4, of f set/4), so the part of the pattern<br />
visible on the screen could be drawn as follows:<br />
public void paintComponent(Graphics g) {<br />
int value = scrollBar.getValue();<br />
}<br />
for (int i = 0; i < canvasHeight; i++, value++) {<br />
g.setColor(new Color(value/4, value/4, value/4));<br />
g.drawLine(0, i, canvasWidth - 1, i);<br />
} '<br />
While this works, it is very slow. Since the color changes only every fourth<br />
pixel line, the paintComponent method could be improved by drawing a<br />
filled rectangle instead of four pixel lines, remembering to treat the first one<br />
differently if it doesn't start on a 4-pixel boundary. While this would speed it<br />
up a bit, there is a simpler way to make an improvement to the scrolling<br />
speed. Once a section of the pattern has been drawn, when the scrollbar<br />
moves, what you really want to do is literally scroll the existing pattern<br />
upward or downward, preserving the part that remains within the viewport.<br />
The newly exposed part would then be filled in using code very much like<br />
that shown above. For example, if the viewport is 200 pixels high and the<br />
scrollbar is moved down by 20 pixels, the bottom 180 pixel lines, which won't<br />
need to change, should be copied up to the top of the canvas and new con-
Logical Scrolling and Forcing Visibility of an Area 597<br />
tent should be drawn only on the bottom 20 pixel lines. The copyArea<br />
method of Graphics allows us to do just that:<br />
public void copyArea(int x, int y, int width,<br />
int height, int dx, int dy)<br />
This method copies the content of the rectangle described by the first<br />
four parameters to a new location, offset from the original by dx pixels horizontally<br />
and dy pixels vertically, where positive values correspond to movement<br />
to the right and downward, respectively, and overlapping moves are<br />
handled properly. Using this method, you can calculate how much of the<br />
content of the canvas can be preserved and move it quickly to its new location,<br />
then draw only the new part as a continuous pattern at the top or bottom<br />
of the canvas.<br />
To allow the calculation of the offsets to be performed, the current value<br />
of the scrollbar and its previous value are recorded in the fields topLine<br />
and lastLine respectively; the difference between these two gives the<br />
amount of movement. Provided this distance is not greater than the height<br />
of the canvas, (canvasHeight - movement distance) pixel lines can<br />
be copied using copyArea. The implementation is shown in Listing 5—24.<br />
Listing 5-24 Direct scrollbar handling<br />
class ScrollingCanvas extends JPanel<br />
implements AdjustmentListener {<br />
ScrollingCanvas(JScrollBar sb) {<br />
scrollBar = sb;<br />
sb.setMaximum(MAX_VALUE);<br />
sb.setMinimum(0);<br />
sb.addAdjustmentListener(this);<br />
}<br />
// Draw the content of the canvas<br />
public void paintComponent(Graphics g) {<br />
int drawFromValue = 0;// Value to draw from<br />
int drawFromScan=0; // y-position in canvas to draw from<br />
int drawHeight = canvasHeight; // Amount to draw<br />
// If there is any overlap with what is on screen,<br />
// copy that amount.<br />
int delta = lastTopLine - topLine;<br />
// Negative if scrolling down
598 Chapter 5 Keyboard Handling, Actions, and Scrolling<br />
Listing 5-24 Direct scrollbar handling (continued)<br />
if (delta < 0) {<br />
// Scrolling downward<br />
int overlap = canvasHeight + delta;<br />
// Size of common area<br />
if (overlap > 0) {<br />
g.copyArea(0, -delta, canvasWidth,<br />
overlap, 0, delta);<br />
drawFromValue = topLine + overlap;<br />
drawFromScan = overlap;<br />
drawHeight = -delta;<br />
}<br />
} else if (delta != 0) {<br />
// Scrolling downward<br />
int overlap = canvasHeight - delta;<br />
// Size of common area<br />
if (overlap > 0) {<br />
g.copyArea(0, 0, canvasWidth, overlap, 0, delta);<br />
drawFromValue = topLine;<br />
drawFromScan = 0;<br />
drawHeight = delta;<br />
}<br />
}<br />
if (drawHeight + drawFromValue > MAX_VALUE) {<br />
drawHeight = MAX_VALUE - drawFromValue;<br />
}<br />
// Draw the part that was not visible before<br />
if (drawHeight > 0) {<br />
// Round down to block-size boundary<br />
int offset = drawFromValue % BLOCK_SIZE;<br />
if (offset != 0) {<br />
drawFromValue -= offset;<br />
drawFromScan -= offset;<br />
drawHeight += offset;<br />
}<br />
Color color;<br />
int total = (drawHeight + BLOCK_SIZE - 1)/BLOCK_SIZE;<br />
int value = drawFromValue/BLOCK_SIZE;<br />
for (int i = 0; i < total; i++) {<br />
color = new Color(value, value, value);
Logical Scrolling and Forcing Visibility of an Area 599<br />
Listing 5-24 Direct scrollbar handling (continued)<br />
}<br />
}<br />
g.setColor(color);<br />
value++ ,•<br />
g.fillRect(0, drawFromScan, canvasWidth,<br />
BLOCK_SIZE);<br />
drawFromValue += BLOCK^SIZE;<br />
drawFromScan += BLOCK_SIZE;<br />
}<br />
// Adjustment Listener interface<br />
public void adjustmentValueChanged(AdjustmentEvent evt)<br />
{<br />
if (evt.getlDO = =<br />
Adj ustmentEvent.ADJUSTMENT_VALUE_CHANGED) {<br />
// Scrollbar moved: repaint the canvas<br />
lastTopLine = topLine; // Save current top line<br />
topLine = evt.getValue();// Set new top line<br />
repaint();<br />
}<br />
}<br />
// Override size-setting methods to set<br />
// correct scrollbar visible size and<br />
// block increment values.<br />
public void setSize(int width, int height) {<br />
super.setSize(width, height);<br />
canvasHeight = height;<br />
canvasWidth = width;<br />
changeScrollBar();<br />
}<br />
public void setSize(Dimension d) {<br />
super.setSize(d);<br />
canvasHeight = d.height;<br />
canvasWidth = d.width;<br />
changeScrollBar();<br />
}<br />
public void setBounds(int x, int y, int width,<br />
int height) {<br />
super.setBounds(x, y, width, height);<br />
canvasHeight = height;<br />
canvasWidth = width;<br />
changeScrollBar () ;<br />
}<br />
'
600 Chapter 5 Keyboard Handling, Actions, and Scrolling<br />
Listing 5-24 Direct scrollbar handling (continued)<br />
// Keep visible size and block increment in step<br />
public void changeScrollBar() {<br />
scrollBar.setVisibleAmount(canvasHeight);<br />
scrollBar.setBlocklncrement(canvasHeight - OVERLAP);<br />
}<br />
private int topLine; // Top line on the canvas<br />
private int lastTopLine; // Previous value of the top<br />
line<br />
private int canvasHeight; // Height of the canvas<br />
private int canvasWidth; // Width of canvas<br />
private JScrollBar scrollBar; // Associated scrollbar<br />
private final int MAX_VALUE = 1023;// Maximum value<br />
private final int OVERLAP = 8;<br />
// Overlap for block scrolls<br />
private final int BLOCK_SIZE = 4;<br />
// Size of each rectangle<br />
}<br />
In the paintComponent method, the drawFromScan, drawFromValue,<br />
and drawHeight variables describe the area that can't be copied. The first of<br />
these is the pixel row line, relative to the top of the canvas, of the first line<br />
that can't be copied; drawFromValue is the offset down the original pattern<br />
of that line and drawHeight is the number of lines that need to be drawn.<br />
To see how these values are used, let's look at an example. When the frame<br />
first appears, nothing can be copied because the canvas is blank; it is simple<br />
to recognize this situation, because the current and previous values of the<br />
scrollbar are equal, so as much of the pattern as will fit on the canvas is<br />
drawn. Now suppose that the canvas is 200 pixels high and it is scrolled up by<br />
20 pixels. Since the difference between the old and new values is 20 pixels,<br />
(200 - 20) = 180 pixels worth can be copied from pixel line 20 of the canvas<br />
up to pixel line 0; this will, of course, represent pixel lines 20 through 199 of<br />
the original pattern. It would then be necessary to draw the bottom 20 lines<br />
(i.e., lines 200 through 219 of the pattern) using the usual graphics primitives.<br />
In this case, drawFromScan would be set to 180, drawFromValue to<br />
200, and drawHeight to 20. If the pattern were now scrolled down by 10<br />
pixels, 190 rows of pixels from the top of the canvas would be copied to the<br />
bottom and the top 10 lines would be drawn from scratch. Here, drawFrom-<br />
Scan would be set to 0, drawFromValue set to 10, and drawHeight also set<br />
to 10.
Scrolling with the Keyboard<br />
Logical Scrolling and Forcing Visibility of an Area 601<br />
At the beginning of this chapter, you saw how important it is to allow users to<br />
operate an application using only the keyboard. When the user interface<br />
includes scrollbars, it is essential that for the user to be able to operate them<br />
without resorting to the mouse. If you've used a word processor, you're probably<br />
used to being able to move up and down a document using the PAGE<br />
UP and PAGE DOWN keys as well as dragging or clicking the scrollbars.<br />
Fortunately, Swing makes it easy to imitate this behavior in your own applications.<br />
To show how to implement keyboard-controlled scrolling, let's modify the<br />
example used to show logical scrolling in Listing 5-18. Recall that this example<br />
consisted of an extended JScrollPane, called PictureScrollPane,<br />
that arranges images in a grid and allows the user to scroll to picture boundaries<br />
as well as a single pixel at a time. To make this example complete, the<br />
application that uses this component is going to be extended so that the following<br />
key sequences can be used to drive the scrollbars:<br />
• PAGE UP—Scroll up by one picture<br />
• PAGE DOWN—Scroll down by one picture<br />
• SHIFT + PAGE UP—Scroll left by one picture<br />
• SHIFT + PAGE DOWN—Scroll right by one picture<br />
• UP arrow key—Scroll up one pixel<br />
• DOWN arrow key—Scroll down by one pixel<br />
• LEFT arrow key—Scroll left by one pixel<br />
• RIGHT arrow key—Scroll right by one pixel<br />
What you need to do is to arrange to capture the key events just listed and<br />
perform the corresponding operation on either the horizontal or vertical<br />
scrollbar. To catch the key event, the key management facilities that were<br />
shown at the beginning of this chapter can be used to arrange for the appropriate<br />
combination of keys to be detected and processed as an Action. The<br />
Action will then perform the required operations on the scrollbar.<br />
Let's suppose for a moment that the proper key sequences have been registered.<br />
What should be done when the action is triggered? If the PAGE UP<br />
or PAGE DOWN key has been used, the correct scrollbar should be moved in<br />
the correct direction by the correct block increment, while if one of the<br />
arrow keys is pressed, the scrollbar should be moved by one pixel in the right
602 Chapter 5 Keyboard Handling, Actions, and Scrolling<br />
direction. To correctly process the action, then, the following information<br />
needs to be available:<br />
• Which scrollbar is involved (horizontal or vertical)<br />
• Whether to move by a pixel or by the size of a picture (i.e., a<br />
unit- or block-sized move)<br />
• Which direction the scrollbar should move in—i.e., whether the<br />
scrollbar value should increase or decrease.<br />
The keyboard action is handled by an ActionListener. In this case,<br />
since it is necessary to store several pieces of information to describe what is<br />
to be done, we choose to create a subclass of AbstractAction that will<br />
describe which scrollbar to operate on and what to do with it, and register<br />
this as the ActionListener for the key event. Listing 5—25 shows the definition<br />
of this class<br />
Listing 5-25 A scrolling action<br />
// Class to handle scrolling actions<br />
class ScrollBarAction extends AbstractAction {<br />
ScrollBarAction(JScrollPane pane, int orientation,<br />
int type, int direction) {<br />
this.pane = pane;<br />
this.orientation = orientation;<br />
this.type = type;<br />
this.direction = direction;<br />
}<br />
public void actionPerformed(ActionEvent evt) {<br />
JScrollBar bar;<br />
if (orientation == JScrollBar.HORIZONTAL) {<br />
bar = pane.getHorizontalScrollBar () ;<br />
} else {<br />
bar = pane.getVerticalScrollBar () ;<br />
}<br />
if (bar != null && bar.isVisible() == true) {<br />
int delta;<br />
delta = type == UNIT ?
Listing 5-25 A scrolling action (continued)<br />
}<br />
}<br />
Logical Scrolling and Forcing Visibility of an Area 603<br />
bar.getUnitlncrement(direction) :<br />
bar.getBlocklncrement(direction) ;<br />
if (direction == DECREASE) {<br />
delta = -delta;<br />
}<br />
bar.setValue(delta + bar.getValue());<br />
// Constants<br />
public static final int UNIT = 0;// Unit change<br />
public static final int BLOCK = 1;// Block change<br />
public static final int INCREASE = 1;<br />
public Static final int DECREASE = -1;<br />
private JScrollPane pane; // Target scroll pane<br />
private int orientation; // Orientation of scrollbar<br />
private int type; // UNIT or BLOCK change<br />
private int direction; // INCREASE or DECREASE<br />
}<br />
When one of these objects is created, it is given a reference to the<br />
JScrollPane object that has die scrollbars, the scrollbar that needs to be<br />
manipulated (as JScrollBar .HORIZONTAL or JScrollBar. VERTICAL),<br />
the scroll type (BLOCK or UNIT), and the direction of change (INCREASE or<br />
DECREASE). This information is stored within the object and used when the<br />
event occurs.<br />
When the correct key sequence occurs, the actionPerf ormed method of<br />
the ScrollBarAction object is invoked. Using the information stored when<br />
the object was constructed, it is a simple matter to decide which scrollbar is<br />
affected and what type of scrolling is required. First, a reference to the scrollbar<br />
is obtained and then a check is made that it is not null and, if so, that the<br />
scrollbar is visible. To decide how far to move, the getUnitlncrement or<br />
getBlocklncrement method of the scrollbar is called. These return the<br />
appropriate increments as positive numbers. As you already know, this works<br />
even if logical scrolling is being used. Once you have the distance by which to<br />
move, you can set the new scrollbar value using its setValue method. Incidentally,<br />
setValue ensures that the scrollbar is always in a legal position, so<br />
there is no need to write code to verify this—you can just add or subtract the
604 Chapter 5 Keyboard Handling, Actions, and Scrolling<br />
distance by which the scrollbar is to move to the current value and be sure<br />
that the scrollbar won't get out of range.<br />
Now lets look at the application code that registers the keyboard actions.<br />
The code for the earlier example (ScrollExample4) is used and modified<br />
slightly, renaming it to Scroll Example 6 as shown in Listing 5-26; the<br />
changes that have been made are highlighted.<br />
Listing 5-26 Using the keyboard to scroll<br />
package <strong>JFC</strong>Book.Chapters;<br />
import javax.swing.*;<br />
import j ava.awt.*;<br />
import j ava.awt.event.*;<br />
public class ScrollExample6 extends JFrame {<br />
public ScrollExample6() {<br />
super("Scroll Example 6");<br />
picturePane = new PictureScrollPane(<br />
JScrollPane.VERTICAL_SCROLLBAR_AS_NEEDED,<br />
JScrollPane.HORIZONTAL_SCROLLBAR_AS_NEEDED,<br />
imageNames, PICTURES_PER_ROW);<br />
this.getContentPane().add(picturePane,<br />
BorderLayout.CENTER);<br />
// Add buttons to bring numbered picture into view<br />
JPanel panel = new JPanel();<br />
panel.setBackground(UIManager.getColor("control"));<br />
JPanel buttonPanel = new JPanel();<br />
buttonPanel.setLayout(new GridLayout(0,<br />
PICTURES_PER_ROW, 4, 4));<br />
panel.add(buttonPanel);<br />
Font f = new Font("Serif", Font.BOLD, 14);<br />
for (int i = 0; i < imageNames.length; i++) {<br />
JButton b = new JButton("" + i);<br />
b.setMnemonic('0' + i);// Accelerator for button<br />
b.setFont (f) ;<br />
buttonPanel.add(b);<br />
b.addActionListener(new ActionListener() {<br />
public void actionPerformed(ActionEvent evt) {<br />
JButton button = (JButton)evt.getSource();<br />
int index = button.getActionCommand().<br />
charAt(0) - v 0' ;
Logical Scrolling and Forcing Visibility of an Area 605<br />
Listing 5-26 Using the keyboard to scroll (continued)<br />
}<br />
});<br />
picturePane.makeVisible(index);<br />
// Make picture visible<br />
}<br />
this.getContentPane().add(panel, "East");<br />
// Register keyboard actions<br />
// Down key<br />
picturePane.registerKeyboardAction<br />
(new ScrollBarAction(picturePane,<br />
JScrollBar.VERTICAL,<br />
ScrollBarAction.UNIT,<br />
ScrollBarAction.INCREASE),<br />
KeyStroke.getKeyStroke(KeyEvent.VK DOWN,<br />
0, false),<br />
JComponent.WHENINFOCUSEDWINDOW);<br />
//Up key<br />
picturePane.registerKeyboardAction<br />
(new ScrollBarAction(picturePane,<br />
JScrolIBar.VERTICAL,<br />
ScrollBarAction.UNIT,<br />
ScrollBarAction.DECREASE),<br />
Keystroke.getKeyStroke(KeyEvent.VKUP,<br />
0, false),<br />
JComponent.WHENINFOCUSEDWINDOW);<br />
// Left key<br />
picturePane.registerKeyboardAction<br />
(new ScrollBarAction(picturePane,<br />
JScrollBar.HORIZONTAL,<br />
ScrollBarAction.UNIT,<br />
ScrollBarAction.DECREASE),<br />
KeyS troke.getKeyS troke(KeyEvent.VKLEFT,<br />
0, false),<br />
JComponent.WHENINPOCUSEDWINDOW);<br />
// Right key<br />
picturePane.registerKeyboardAction<br />
(new ScrollBarAction(picturePane,<br />
JScrollBar.HORIZONTAL,<br />
ScrollBarAction.UNIT,<br />
ScrollBarAction.INCREASE),<br />
KeyStroke.getKeyStroke(KeyEvent.VKRIGHT,<br />
0, false),<br />
' •
606 Chapter 5 Keyboard Handling, Actions, and Scrolling<br />
Listing 5-26 Using the keyboard to scroll (continued)<br />
JComponent.WHENINFOCUSEDWINDOW);<br />
// Page up key<br />
picturePane.registerKeyboardAction<br />
(new ScrollBarAction(picturePane,<br />
JScrollBar.VERTICAL,<br />
ScrollBarAction.BLOCK,<br />
ScrollBarAction.DECREASE),<br />
Keystroke.getKeyStroke(KeyEvent.VK PAGE UP,<br />
0, false),<br />
JComponent.WHENINFOCUSEDWINDOW);<br />
// Page down key<br />
picturePane.registerKeyboardAction<br />
(new ScrollBarAction(picturePane,<br />
JScrollBar.VERTICAL,<br />
ScrollBarAction.BLOCK,<br />
ScrollBarAction.INCREASE),<br />
Keystroke.getKeyStroke(<br />
KeyEvent.VK_PAGE_DOWN,<br />
0, false),<br />
JComponent.WHENINFOCUSEDWINDOW);<br />
// Page up key + SHIFT<br />
picturePane.registerKeyboardAction<br />
(new ScrollBarAction(picturePane,<br />
JScrollBar.HORIZONTAL,<br />
ScrollBarAction.BLOCK,<br />
ScrollBarAction.DECREASE),<br />
Keystroke.getKeyStroke(<br />
KeyEvent.VK PAGEUP,<br />
InputEvent.SHIFTMASK, false),<br />
JComponent.WHEN IN FOCUSEDWINDOW);<br />
// Page down key + SHIFT<br />
picturePane.registerKeyboardAction<br />
(new ScrollBarAction(picturePane,<br />
JScrollBar.HORIZONTAL,<br />
ScrollBarAction.BLOCK,<br />
ScrollBarAction.INCREASE),<br />
Keystroke.getKeyStroke(<br />
KeyEvent.VKPAGEDOWN,<br />
InputEvent.SHIFT_MASK, false),<br />
JComponent.WHEN IN FOCUSEDWINDOW);<br />
}
Logical Scrolling and Forcing Visibility of an Area 607<br />
Listing 5-26 Using the keyboard to scroll (continued)<br />
public static void main(String [] args) {<br />
JFrame f = new ScrollExample6();<br />
Dimension d =<br />
Toolkit.getDefaultToolkit() .getScreenSize () ;<br />
f.setSize(3*d.width/4, 3*d.height/4);<br />
f.setVisible(true);<br />
f.addWindowListener(new WindowAdapter() {<br />
public void windowClosing(WindowEvent e) {<br />
System.exit(0);<br />
}<br />
});<br />
}<br />
private static final String[] imageNames = {<br />
"images/pl.jpg", "images/p2.jpg", "images/p3.jpg",<br />
"images/p4.jpg", "images/p5.jpg", "images/p6.jpg",<br />
"images/p7.jpg", "images/p8.jpg", "images/p9.jpg" };<br />
private static final int PICTURES_PER_ROW = 3;<br />
// Pictures on each row<br />
private PictureScrollPane picturePane;<br />
// The picture panel<br />
The first change was to add keyboard accelerators to the panel of buttons<br />
that allow us to directly scroll to a particular picture. With this modification,<br />
ALT+0 can now be used to view the top left picture, ALT+i to view the one to<br />
its right, and so on.<br />
Eight keyboard actions were also added using the JComponent register<br />
KeyboardAction method. Each registration is accompanied by a description<br />
of the key sequence required and a ScrollBarAction object that will<br />
handle the event; this should all be familiar from the examples shown earlier<br />
in this chapter. Since keyboard scrolling should work whenever the application<br />
is in the foreground, the keyboard events should be registered so that<br />
they are activated from anywhere within the JFrame. Unfortunately, JFrame<br />
is not a JComponent, so registerKeyboardAction can't be used on it.<br />
However, it can be applied to any JComponent in the JFrame provided that<br />
the action is configured to apply whenever the application window has the<br />
focus. Since the application window is the JFrame, this is equivalent to registering<br />
the action against the JFrame. In this case, the key events were regis-
608 Chapter 5 Keyboard Handling, Actions, and Scrolling<br />
tered against the PictureScrollPane. You can verify that this works by<br />
running this example using the command:<br />
<strong>Java</strong> <strong>JFC</strong>Book.Chapter5.ScrollExample6<br />
and using the arrow and page keys to scroll without using the mouse, or<br />
pressing the ALT key together with a picture number to bring that picture<br />
into view.<br />
Component Autoscrolling<br />
Scrolling is usually controlled by clicking the mouse in a scrollbar or dragging<br />
the slider until the required part of the scrolled component is in view. Sometimes,<br />
however, it is useful for the application to scroll the component when<br />
the user is not in a position to use the scrollbar. A common example of this is<br />
the behavior of Microsoft Windows Explorer and similar tools when you<br />
move or copy files using drag-and-drop. If you click or right-click on file, drag<br />
it somewhere else and drop it, the file will be copied or moved from its original<br />
location to the one specified by the drop action. Sometimes, though, you<br />
start dragging a file only to find that the folder that you want to move it to is<br />
out of view, so you need to scroll the Explorer view to make it visible. Of<br />
course, that means canceling the drag operation and then restarting it later.<br />
This is very inconvenient and, in fact, it isn't necessary—all you have to do is<br />
drag the file to the top or bottom edge of the view that you want to scroll and<br />
it will scroll automatically, moving up if you hover near the bottom of the<br />
view and down if you hover near the top. This is an example of autoscrolling.<br />
An Autoscrolling Example<br />
Swing has a mechanism that you can use to implement autoscrolling in your<br />
applications. In fact, autoscrolling is already provided in some Swing components,<br />
so you'll be able to use it without having to do anything special. We're<br />
not going to illustrate this mechanism by using drag-and-drop, because JDK<br />
1.1 doesn't support it and setting up drag-and-drop for a tree, to create an<br />
example like the Windows Explorer one described here, is a complex exercise.<br />
Instead, we'll show you a simpler example based on the Swing JList<br />
component that you'll meet in Chapter 8.
<strong>Core</strong> Note<br />
Logical Scrolling and Forcing Visibility of an Area 609<br />
Drag-and-drop for the <strong>Java</strong> 2 platform is covered in <strong>Core</strong> Swing:<br />
Advanced Programming, also published by Prentice Hall.TNs book shows<br />
you exactly how to add drag-and-drop functionality to a tree and<br />
demonstrates how to provide autoscrolling for such a component.<br />
Listing 5-27 shows the code for this example, which simply creates two<br />
lists of names and places them side-by-side in a window. You can run this<br />
example using the command<br />
<strong>Java</strong> <strong>JFC</strong>Book.Chapters.AutoScrollExamplel<br />
Listing 5-27 Demonstrating autoscrolling using the JList component<br />
package <strong>JFC</strong>Book.Chapter5;<br />
import javax.swing.*;<br />
import j ava.awt.*;<br />
import j ava.awt.event.*;<br />
public class AutoScrollExamplel extends JFrame {<br />
public AutoScrollExamplel() {<br />
super("AutoScroll Example 1");<br />
}<br />
JList listl = new JList(names);<br />
JList Iist2 = new JList(names);<br />
listl.setVisibleRowCount(10);<br />
Iist2.setVisibleRowCount(10);<br />
Container contentPane = getContentPane();<br />
contentPane.setLayout(new GridLayout(1, 2));<br />
contentPane.add(new JScrollPane(listl));<br />
contentPane.add(new JScrollPane(Iist2));<br />
// Arrange for the right-hand list not to scroll.<br />
Iist2.setAutoscrolls(false);<br />
public static void main(String [] args) {<br />
JFrame f = new AutoScrollExamplel();<br />
f.pack();
610 Chapter 5 Keyboard Handling, Actions, and Scrolling<br />
Listing 5-27 Demonstrating autoscrolling using the JList component<br />
(continued)<br />
}<br />
}<br />
f.setVisible(true);<br />
f.addWindowListener(new WindowAdapter() {<br />
public void windowClosing(WindowEvent e) {<br />
System.exit(0);<br />
}<br />
});<br />
private static final String names[] = {<br />
"Schirra", "Eisele", "Cunningham", "Borman",<br />
"Lovell", "Anders",<br />
"McDivitt", "Schweickart", "Scott", "Stafford",<br />
"Cernan", "Young",<br />
"Armstrong", "Aldrin", "Collins", "Conrad",<br />
"Gordon", "Bean",<br />
"Haise", "Swigert", "Shepard", "Roosa",<br />
"Mitchell", "Worden",<br />
"Irwin", "Duke", "Mattingly", "Evans", "Schmitt"<br />
};<br />
and you'll get a window that looks like Figure 5-16.<br />
In order to see the autoscrolling, select a name from the left hand-list by<br />
clicking it with the mouse. Now hold down the left mouse button and drag<br />
the mouse down to the bottom of the list and out of the window. As you do<br />
this, the list will scroll and continue to do so until it reaches the last name,<br />
you bring the mouse back into the window or you release the mouse button.<br />
This behavior occurs because JList turns on autoscrolling. The list on the<br />
right is slightly different, however. This component has autoscrolling turned<br />
off. If you try the same test, you'll find that this list also scrolls when you<br />
move the mouse outside the window, but there is a difference. If you drag<br />
the mouse outside the window on the left-hand list and then hold it steady<br />
without releasing it, the list continues to scroll. If you try this on the righthand<br />
list, though, it will stop scrolling when you stop moving the mouse—it<br />
actually scrolls only when the mouse is in motion.
Logical Scrolling and Forcing Visibility of an Area 611<br />
Figure 5-16 A demonstration of Swing component autoscrolling.<br />
How Autoscrolling Works<br />
The difference between an autoscrolling component and one that does not<br />
autoscroll is whether or not the component continues to scroll when the<br />
mouse is held stationary outside the component. Scrolling as a result of dragging<br />
the mouse, be it autoscrolling or not, is not completely free functionality<br />
because it is not provided by code in JComponent itself—each component<br />
that wants to scroll under these circumstances must provide the code to do<br />
so. Of the stanadard Swing components, only the list, table, and text controls<br />
provide this code. What JComponent contributes is a mechanism to generate<br />
artifical events that make it appear that the mouse is being dragged when<br />
it is, in fact, not moving at all. These events are not generated when autoscrolling<br />
is turned off.<br />
In order to see exactly how autoscrolling works and what support a component<br />
must provide for it, let's look at an example. Consider the ease of a JLabel<br />
displaying a large image that is mounted in a JScrollPane so that only<br />
part of the image is visible at any given time. What we want to do is to allow<br />
the user to click inside the image with the mouse and then drag the mouse<br />
downward and out of the JScrollPane. As the mouse moves out of the scroll<br />
pane, we want the image to scroll upwards and to continue scrolling until the
612 Chapter 5 Keyboard Handling, Actions, and Scrolling<br />
scroll bar reaches its maximum possible value or the user releases the mouse<br />
or brings it back inside the scroll pane.<br />
To implement this idea, you have to register a MouseMotionListener on<br />
the JLabel and write the code to scroll the label in the mouseDragged<br />
method. This is almost all you need to do and it works even when the mouse<br />
is not over the label or the scroll pane because, as we said when discussing<br />
mouse events in Chapter 5, these events continue to be delivered even after<br />
the mouse has been dragged outside the component that the mouse was over<br />
when one of its buttons was first pressed. Given that you can arrange to<br />
receive MOUSEJDRAGGED events whether the mouse is inside or outside the<br />
window, what do you need to do in order to produce the effect of autoscrolling?<br />
Figure 5-17 How autoscrolling works.<br />
Consider Figure 5-17, in which the JLabel that represents the image is<br />
represented by the large gray rectangle and the visible part of the image is<br />
shown in the JScrollPane that is superimposed on top of it. If you register<br />
a MouseMotionListener on the JLabel and monitor MOUSE_DRAGGED
Logical Scrolling and Forcing Visibility of an Area 613<br />
events, you'll receive a continuous stream of events in which the position of<br />
the mouse will be reported relative to the origin of the JLabel (not the<br />
JScrollPane). In Figure 5-17, the mouse, which is represented by the<br />
small black circle, has been dragged outside the JScrollPane and the coordinates<br />
that will be reported by a MOUSE_DRAGGED event are as shown. How<br />
can these coordinates be used to detect that scrolling is needed? There are<br />
several possible approaches to this problem, but well briefly examine only<br />
two of them.<br />
The first possibility is to implement code that examines the coordinates in<br />
every MOUSE_DRAGGED event, determines whether those coordinates correspond<br />
to a point that is outside the visible area of the scroll pane and, if they<br />
do, move the scroll bars so that the part of the label (or whichever component<br />
is actually being scrolled) that is under the mouse is scrolled into view.<br />
You may choose to scroll immediately to move that point into view, or you<br />
could move in several stages to give the effect of a slower scroll. You already<br />
know how to change the area that is visible inside the JScrollPane —just<br />
get a reference to the vertical or horizontal scroll bar and call its setValue<br />
method. You may, of course, need to make a change to both scroll bars if the<br />
mouse is, say, below and to the right of the viewable area. But how do you<br />
know that the mouse is outside the viewable area in the first place? In order<br />
to find out which part of the target component is visible, you can use the<br />
JComponent getVisibleRect method:<br />
public Rectangle getVisibleRect()<br />
For a component that is mounted in a JScrollPane, this method tells<br />
you which portion of it is actually visible, measured in its own coordinate system.<br />
In the case of the label in Figure 5-17, this would give you the location<br />
and size of the part of the image that you can actually see, relative to the origin<br />
at the top left of the gray rectangle that represents the entire image. If,<br />
for example, the visible rectangle of the image is obtained like this:<br />
Rectangle rect = label.getVisibleRect()<br />
and the coordinates of the mouse are reported in a MOUSE_DRAGGED event<br />
held in the variable evt, you can work out whether the mouse is inside or<br />
outside the visible area like this:<br />
if (! rect. contains (evt .getX (), evt.getYO)) {<br />
// Mouse is outside the visible area<br />
} '<br />
Using the difference between the x and y coordinates of the mouse and<br />
the bounds of the visible area as returned by the getVisibleRect method,
614 Chapter 5 Keyboard Handling, Actions, and Scrolling<br />
you can easily work out by how much you need to scroll in each direction to<br />
bring the point uder the mouse into view and then call setValue on the<br />
appropriate scroll bars to achieve this effect. If the distance between the<br />
mouse location and the viewable area is large, you might want to use a<br />
smaller offset and carry out the scroll in several steps, relying on separate<br />
MOUSE_DRAGGED events for each partial step.<br />
The other technique is a slightly simpler one that you can use to bring the<br />
part of the target component that is logically under the mouse into view in<br />
one easy step. Recall that JComponent has a scrollRectToVisible method<br />
that you can use to cause a JViewport parent of the component to scroll<br />
itself to bring the given rectangle into view if it is not already visible. You can<br />
use this method to arrange for the mouse location to become visible, by passing<br />
it a Rectangle object that describes a small rectangle surrounding the<br />
mouse location:<br />
label.scrollRectToVisible(new Rectangle(<br />
evt.getxO, evt.getYO, 1, 1) ) ;<br />
This is a much simpler implementation, which works even when the<br />
mouse is over the visible portion of the label, because scrollRectToVisible<br />
does nothing when the Rectangle it is given is already visible. The only<br />
slight disadvantage of this approach compared to the first one is that the<br />
mouse location will scroll immediately into view, which means that the further<br />
the mouse is moved outside the window, the faster the scrolling will<br />
appear to be. In general usage, though, this is not likely to be an issue<br />
because the user will probably move the mouse just outside the window and<br />
leave it there, so the difference between the mouse location and the visible<br />
rectangle will be small and scrolling will take place in small increments.<br />
Nothing that you have seen so far relies on any special support from<br />
JComponent—the mouse events are always available and the other methods<br />
you have seen (scrollRectToVisible and getVisibleRect) are not specific<br />
to autoscrolling. So why is there a JComponent setAutoscrolls<br />
method? To see why this is necessary, type the following command:<br />
<strong>Java</strong> <strong>JFC</strong>Book.Chapter5.AutoScrollExample2<br />
This command is an implementation of the code that we have just<br />
described - it registers a MouseMotionListener on a JLabel containing an
Logical Scrolling and Forcing Visibility of an Area 615<br />
image and uses the scrollRectToVisible method to keep the mouse<br />
location within the JScrollPanes visible area, as shown in Listing 5-28.<br />
Listing 5-28 A custom autoscrolling example<br />
package <strong>JFC</strong>Book.Chapter5;<br />
import javax.swing.*;<br />
import j ava.awt.*;<br />
import j ava.awt.event.*;<br />
import java.net.*;<br />
public class AutoScrollExample2 extends JFrame {<br />
public AutoScrollExample2(String title,<br />
boolean autoscroll) {<br />
super(title);<br />
URL url = getClassO .getResource("images/lem2.gif");<br />
JLabel label = new JLabel(new Imagelcon(url));<br />
JScrollPane pane = new JScrollPane(label);<br />
getContentPane().add(pane);<br />
}<br />
// Turn autoscrolling on if requested<br />
label.setAutoscrolls(autoscroll);<br />
// Add listener to handle the mouse events<br />
label.addMouseMotionListener(new AutoScrollListener(label));<br />
public static void main(String[] args) {<br />
boolean autoscroll = false;<br />
if (args.length > 0 && args[0].equals("autoscroll")) {<br />
autoscroll = true;<br />
}<br />
JFrame f = new AutoScrollExample2(<br />
"AutoScroll Example 2", autoscroll);<br />
f.setSize(300, 300);<br />
f.addWindowListener(new WindowAdapter() {<br />
public void windowClosing(WindowEvent evt) {<br />
System.exit(0);<br />
}<br />
});<br />
}<br />
f.setVisible(true);
616 Chapter 5 Keyboard Handling, Actions, and Scrolling<br />
Listing 5-28 A custom autoscrolling example (continued)<br />
}<br />
class AutoScrollListener extends MouseMotionAdapter {<br />
private JComponent comp; // The component to scroll<br />
Run this example, move the mouse over the image, press one of the mouse<br />
buttons and drag it outside the viewable area. You'll notice that the image<br />
scrolls and that the direction of scroll depends on where you move the<br />
mouse—you can make it scroll up by dragging the mouse below the frame,<br />
down by dragging it above the frame, left by dragging the mouse to the right<br />
of the frame and right by moving to the left. You'll also notice that the closer<br />
to the JScrollPane you keep the mouse, the slower the scrolling will be.<br />
The problem comes if you drag the mouse outside the window and hold it in<br />
one location. When this happens, MOUSEJDRAGGED events are no longer<br />
delivered, so the scrolling stops. Now rerun the example using the following<br />
command:<br />
<strong>Java</strong> <strong>JFC</strong>Book.Chapter5.AutoScrollExample2 autoscroll<br />
The only difference that supplying the argument autoscroll makes is to<br />
cause the code to call<br />
setAutoscrolls(true);<br />
on the JLabel component. Now if you repeat the steps taken before,<br />
you'll find that the label still scrolls as expected. However, in this case, if you<br />
hold the mouse still outside the component, it continues to scroll<br />
What does setAutoscrolls (true) do in order to achieve this effect?<br />
What this method does, when called with argument true, is to associate an<br />
instance of a simple class called Autoscroller with the JComponent on<br />
which it is called. This object monitors MOUSEJDRAGGED events sent to the<br />
component and notices when the mouse is dragged outside its visible area.<br />
While the mouse remains outside the visible area, the Autoscroller sends<br />
a fake MOUSE DRAGGED event to the component once every 100 milliseconds,<br />
giving the appearance that the user is moving the mouse 10 times per second.<br />
These events stop being generated when the mouse moves back within the<br />
visible region of the component, the component becomes invisible or set-<br />
Autoscrolls (false) is called. These events will be handled as if they are<br />
real mouse events and will cause the same code you saw earlier to scroll the<br />
target component if necessary.<br />
You will note from this the following:
Logical Scrolling and Forcing Visibility of an Area 617<br />
Support for autoscrolling is not really provided by<br />
JComponent—he scrolling is always performed by external<br />
code that recognizes a MOUSE_DRAGGED event and responds<br />
accordingly. Some of the standard Swing components<br />
incorporate logic that does this.<br />
The setAutoscrolls method does not, of itself, have any<br />
bearing on scrolling—all that it does is cause appropriate mouse<br />
events to be sent to the component 10 times every second,<br />
giving the appearance that the user is moving the mouse. Just<br />
calling setAutoscrolls (true) on a component that does<br />
not have code that scrolls in response to MOUSE_DRAGGED<br />
events will have no effect at all.<br />
Summary<br />
This chapter showed how important it is to pay proper attention to proper<br />
tabbing order and when to help the user by moving the focus automatically as<br />
the applications state changes. It also explored the various ways of handling<br />
the keyboard, from catching individual key events at the lowest level, to the<br />
powerful keystroke mechanism that allows you to handle accelerator keys<br />
without having to attach key listeners to every component on the screen that<br />
might acquire the focus. This facility dovetails nicely with the topic of<br />
Actions, which were used here only to provide ActionListeners for<br />
accelerator keys. In the next chapter, you'll see how the Action mechanism<br />
is used in conjunction with the menu bar and with toolbars and how you can<br />
conveniently connect various parts of the user interface to application logic<br />
using an Action.<br />
In the second part of the chapter, you saw how to scroll images and components<br />
using the built-in scrolling support and how to customize both the<br />
appearance and the operation of the JScrollPane component. We also<br />
looked at the more primitive JScrollBar, which can be used independently<br />
of JScrollPane, how to use Actions to drive scrollbars from the keyboard,<br />
and how to use support built into JComponent to implement automatic<br />
scrolling.
I<br />
MENUS AND<br />
TOOLBARS<br />
Topics in This Chapter<br />
• The Menu Bar and The popupMenu System<br />
• Menus and Component Orientation<br />
• Using Actions and Menus together<br />
• Customizing Menus and Using popup Menus<br />
• Using Toolbars<br />
• Implementing Floating and Docking Toolbars<br />
• Actions in <strong>Java</strong> 2 Version 1.3
This chapter looks at how to give the user fast access to application<br />
functionality by showing you how to add menus and toolbars. The<br />
Swing menu system is much more powerful and more configurable<br />
than the one provided by the AWT. You can, for example, add shortcuts on<br />
the menu bar and you can change the appearance of both the menu bar and<br />
the menus themselves. You'll see how to use various types of menu items and<br />
how to populate menus as needed.<br />
In a deep menu hierarchy, it can sometimes be time-consuming to find the<br />
menu item that you want. To make it easier to control an application, Swing<br />
provides the toolbar, on which you can mount buttons and other components.<br />
This chapter shows you how to create toolbars and how to arrange for<br />
them to float over the application window and dock again on request.<br />
The Menu Bar and the Menu<br />
System<br />
The Swing menu system is, in many ways, similar to the one that you have<br />
probably used when developing AWT applications. Swing retains the concepts<br />
of the menu bar, menus, and menu items and it also has popup menus,<br />
619
620 Chapter 6 Menus and Toolbars<br />
which were first introduced with JDK 1.1. But while the basic building blocks<br />
are the same, you'll see in this section that the implementation is much more<br />
generalized than it was in the AWT and, therefore, there is much more that<br />
you can do with Swing menus.<br />
Adding a Menu Bar to an Application<br />
Almost all applications have a menu bar and most have an extensive set of<br />
menus that provide a way (usually not the only way) to access the application s<br />
functionality. Creating menus in other programming languages can be a tricky<br />
process, but in <strong>Java</strong> it is easy. The first step is to create a menu bar and attach it<br />
to the application window. Creating the menu only takes one line of code:<br />
JMenuBar mb = new JMenuBar()•<br />
A menu bar is actually just another JComponent, so you could place it<br />
anywhere on the application window, but normally you attach it to a JFrame<br />
using the set JMenuBar method:<br />
JFrame f = new JFrame("Menu Example");<br />
f.setJMenuBar(mb);<br />
As you already know, JFrame is a compound container that houses several<br />
components, one of which is the content pane on which an applications user<br />
interface is mounted. If you use the set JMenuBar to attach the menu bar,<br />
the JFrame arranges for it to be sized at its preferred height and to appear at<br />
the top of the frame, just underneath the caption bar and immediately above<br />
the content pane.<br />
A menu bar can house one or more menus and each menu can hold any<br />
number of menu items or other menus. You add a new menu by creating an<br />
instance of JMenu and placing it on the menu bar:<br />
JMenu fileMenu = new JMenu("File");<br />
mb.add(fileMenu);<br />
In JDK 1.1, menus appear on the menu bar from left to right, in the order in<br />
which they are added. If you are using <strong>Java</strong> 2, however, the ordering of menu<br />
items reflects the component orientation of the menu bar itself—in a right-toleft<br />
environment, the menus will be added from the right instead of the left<br />
and will be right-aligned within the menu bar.<br />
On their own, menus are not useful. To make them usable, you add menu<br />
items that correspond to actions that the application can perform:<br />
JMenuItem newltem = new JMenuItem ("New...");<br />
JMenuItem openltem = new JMenuItem ("Open...");
JMenuItem closeltem = new JMenuItem("Close");<br />
fileMenu.add(newltem);<br />
fileMenu.add(openltern);<br />
fileMenu.add(closeltem);<br />
The Menu Bar and the Menu System 621<br />
When you create a menu or a menu item, the string supplied to the constructor<br />
is used to represent the object. For example, the string File supplied<br />
when we created the JMenu object appears on the menu bar in place of<br />
the menu itself.<br />
If you move the mouse over this word and click it, the menu will drop<br />
down, revealing the menu items that it contains. Figure 6-1 shows an example<br />
of an application with two menus, as it would appear just after the user<br />
had clicked on the word File. You can try this example for yourself using the<br />
command:<br />
j ava <strong>JFC</strong>Book.Chapter6.MenuExamplel<br />
Figure 6-1 An application with a menu bar.
622 Chapter 6 Menus and Toolbars<br />
The File menu in this example was created using statements very similar<br />
to those just shown; each menu item added results in another entry on the<br />
menu. You will notice that there are separators between some of the menu<br />
items. Separators are commonly used to group together menu items that<br />
implement related functions, such as opening and closing files. You can add a<br />
separator to a menu using the addSeparator method:<br />
fileMenu.addSeparator();<br />
The Recent Files menu item is different from all of the others in that it<br />
has a small arrow pointing to the right. This is an example of a cascading<br />
drop-down menu. If you moved the mouse pointer down over it and let it<br />
hover there for a short while, a new menu would drop down to the right,<br />
where the arrow is pointing.<br />
<strong>Core</strong> Note<br />
The gesture needed to open a cascading menu is actually look-and-feel<br />
dependentWith the <strong>Java</strong> and Windows look-and-feels, hovering the mouse<br />
over the menu item is sufficient, but the Motif look-and-feel requires you to<br />
click on a menu item to make its submenu appear.<br />
This submenu will be used to hold the names of files that have recently<br />
been used in this application. When this test program starts up, the submenu<br />
contains only one item, labeled Empty, which represents an empty file list<br />
(see Figure 6-1). You create a submenu by adding a JMenu object to the<br />
menu instead of a JMenultem. This is possible because JMenu is actually<br />
derived from JMenultem, so it is valid to supply a JMenu as an argument to a<br />
method whose signature is:<br />
public JMenultem add(JMenultem);<br />
Here is the code used to create the submenu:<br />
JMenu fileListMenu = new JMenu("Recent Files");<br />
fileMenu.add(fileListMenu);<br />
JMenultem emptyListltem = new JMenultem("Empty");<br />
etnptyListltem. setEnabled (false) ;<br />
fileListMenu.add(emptyListltem);<br />
The second line of this extract adds the new JMenu to its parent JMenu to<br />
create a cascaded menu. The label associated with the submenu (Recent<br />
Files) is used to represent it on the parent File menu. The dummy file<br />
entry is added in the same way as any other menu item, but to make it clear
The Menu Bar and the Menu System 623<br />
that this is not a real file name (so that it doesn't appear that a file called<br />
Empty has recently been opened), the label is grayed out by disabling the<br />
menu item. You'll see later what the effect of disabling a menu item is, other<br />
than the obvious visual feedback that we get.<br />
Handling Events from Menus<br />
When the user clicks on an item on the menu bar, the corresponding menu<br />
drops down and the user makes a choice by clicking on an individual menu<br />
item. At this point, two things happen—an event is generated to notify the<br />
application of the user's choice and the menu disappears. The source of the<br />
event is the JMenultem that the user selected. Since JMenuItem is actually<br />
derived from AbstractButton, which is the parent class of JButton, it<br />
uses the same notification mechanism as all of the Swing buttons—it generates<br />
an ActionEvent.<br />
To receive notification of a a choice being made from a menu, you register<br />
an ActionListener on each JMenultem and then handle the event as<br />
you would an event from a button. In particular, you can find out which<br />
item the user has selected by getting a reference to the menu item from<br />
the ActionEvent using the getSource method and then invoking<br />
getActionCommand, as was done with buttons in Chapter 2, "Frames,<br />
Labels, and Buttons." Alternatively, you can avoid string comparisons by<br />
attaching a single listener to each menu item. You'll see both of these techniques<br />
in the following example.<br />
A Simple File Editor<br />
The example application in this section is a veiy simple file editor. Most of<br />
the work is done by the standard JTextArea component; our interest will be<br />
not in how the text is manipulated, but in how to manage the opening and<br />
closing of files using menus. The menu bar of this application contains only a<br />
File menu, which is the same as the one you saw in the previous example.<br />
The difference here is that this menu will be functional. Listing 6-1 shows<br />
the implementation of the class MenuExample2, which contains the user<br />
interface for this application.<br />
Listing 6-1 A menu for a simple file editor<br />
package <strong>JFC</strong>Book.Chapter6;
624 Chapter 6 Menus and Toolbars<br />
Listing 6-1 A menu for a simple file editor (continued)<br />
import j avax.swing.*;<br />
import j ava.awt.*;<br />
import j ava.awt.event.*;<br />
import java.io.*;<br />
import java.util.*;<br />
public class MenuExample2 extends JFrame {<br />
public MenuExample2(String title) {<br />
super(title);<br />
JMenuBar mb = new JMenuBar();<br />
this.setJMenuBar(mb);<br />
JMenu fileMenu = new JMenu("File");<br />
mb.add(fileMenu);<br />
newltem = new JMenuItem("New...");<br />
openltem = new JMenuItem("Open.. . ") ;<br />
closeltem = new JMenuItem("Close");<br />
fileMenu.add(newltem);<br />
fileMenu.add(openltem);<br />
fileMenu.add(closeltem);<br />
fileMenu.addSeparator();<br />
saveltem = new JMenuItemC'Save");<br />
saveAsItem = new JMenuItemC'Save As ...");<br />
fileMenu.add(saveltem);<br />
fileMenu.add(saveAsItem);<br />
fileMenu.addSeparator();<br />
fileListMenu = new JMenu("Recent Files");<br />
fileMenu.add(fileListMenu);<br />
emptyListltem = new JMenuItem("Empty");<br />
emptyListltem.setEnabled(false) ;<br />
fileListMenu.add(emptyListltem);<br />
fileMenu.addSeparator();<br />
JMenuItem exitltem = new JMenuItem("Exit");<br />
fileMenu.add(exitltem);<br />
exitltem.addActionListener(new ActionListener() {
Listing 6-1 A menu for a simple file editor (continued)<br />
The Menu Bar and the Menu System 625<br />
public void actionPerformed(ActionEvent evt) {<br />
closeWindow();<br />
}<br />
});<br />
this.getContentPane().add(new JScrollPane<br />
(textArea = new JTextArea(20,40)));<br />
fileManager = new FileManager();<br />
// Processing for "New..." menu item<br />
newltem.addActionListener(new ActionListener() {<br />
public void actionPerformed(ActionEvent evt) {<br />
String name = getFileName("New File",<br />
FileDialog.SAVE);<br />
if (name != null) {<br />
if (fileManager.isFileOpen()) {<br />
// Close any open file<br />
try {<br />
fileManager.closeFile(textArea.getText());<br />
} catch (Throwable e) {<br />
// Ignore any exception<br />
}<br />
}<br />
try {<br />
fileManager.newFile(name);<br />
textArea.setText ( "") ;<br />
addRecentFile(name);<br />
} catch (IOException e) {<br />
// Do nothing - message already printed<br />
} '<br />
}<br />
}<br />
});<br />
// Processing for "Open..." menu item<br />
openltem.addActionListener(new ActionListener() {<br />
public void actionPerformed(ActionEvent evt) {<br />
String name = getFileName("Open File",<br />
FileDialog.LOAD);<br />
if (name != null) {<br />
try {
626 Chapter 6 Menus and Toolbars<br />
Listing 6-1 A menu for a simple file editor (continued)<br />
}<br />
});<br />
}<br />
String text = fileManager.openFile(name);<br />
textArea.setText(text);<br />
addRecentFile(name);<br />
} catch (IOException e) {<br />
// Do nothing - message already printed<br />
}<br />
// Processing for "Close..." menu item<br />
closeltem.addActionListener(new ActionListener() {<br />
public void actionPerformed(ActionEvent evt) {<br />
try {<br />
fileManager.closeFile(textArea.getText() ) ;<br />
textArea.setText("");<br />
} catch (IOException e) {<br />
// Do nothing - message already printed<br />
}<br />
}<br />
});<br />
// Processing for "Save..." menu item<br />
saveltem.addActionListener(new ActionListener() {<br />
public void actionPerformed(ActionEvent evt) {<br />
try {<br />
fileManager.saveFile(textArea.getText());<br />
} catch (IOException e) {<br />
// Do nothing - message already printed<br />
}<br />
}<br />
});<br />
// Processing for "Save As..." menu item<br />
saveAsItem.addActionListener(new ActionListener() {<br />
public void actionPerformed(ActionEvent evt) {<br />
if (fileManager.isFileOpen()) {<br />
String name = getFileName<br />
("Save As File", FileDialog.SAVE);<br />
if (name != null) {<br />
try {<br />
fileManager.saveAsFile(name,<br />
textArea.getText());
Listing 6-1 A menu for a simple file editor (continued)<br />
}<br />
});<br />
}<br />
}<br />
The Menu Bar and the Menu System 627<br />
} catch (IOException e) {<br />
// Do nothing - message already printed<br />
}<br />
// Create the handler for the recent file list<br />
menuAction = new AbstractAction() {<br />
public void actionPerformed(ActionEvent evt) {<br />
JMenuItem mi = (JMenuItem)(evt.getSource());<br />
String fileName = mi.getActionCommand();<br />
try {<br />
String text = fileManager.openFile(fileName);<br />
textArea.setText(text);<br />
addRecentFile(fileName);<br />
} catch (IOException e) {<br />
// Do nothing - message already printed<br />
}<br />
}<br />
};<br />
}<br />
// Add a name to the recent file list<br />
public void addRecentFile(String fileName) {<br />
int offset;<br />
// Check whether this file is already in the file list<br />
if ((offset = recentFiles.indexOf(fileName)) == -1) {<br />
// Not present - add it at the beginning<br />
recentFiles.insertElementAt(fileName, 0);<br />
if (recentFiles.size() > RECENT_FILES) {<br />
// List was full - remove the last (oldest) item<br />
recentFiles.removeElementAt(RECENT_FILES);<br />
}<br />
} else {<br />
// Already present: move this item to the<br />
// front of the list<br />
recentFiles.removeElementAt(offset);<br />
recentFiles.insertElementAt(fileName, 0);<br />
}<br />
// Rebuild the file menu
628 Chapter 6 Menus and Toolbars<br />
Listing 6-1 A menu for a simple file editor (continued)<br />
}<br />
buildRecentFileMenu();<br />
// Build the recent file menu<br />
public void buildRecentFileMenu() {<br />
int size = recentFiles.size();<br />
}<br />
fileListMenu.removeAll();<br />
for (int i = 0; i < size; i++) {<br />
String fileName =<br />
(String)(recentFiles.elementAt(i) ) ;<br />
JMenuItem mi = new JMenuItemO ;<br />
mi.setAction(menuAction);<br />
mi.setActionCommand(fileName);<br />
mi.setText(i + " " + fileName);<br />
mi.setMnemonic('0' + i);<br />
fileListMenu.add(mi); }<br />
// Get a file name<br />
public String getFileName(String title, int mode) {<br />
FileDialog fd = new FileDialog(this, title, mode);<br />
fd.setFile("*.*");<br />
fd.setDirectory(directory);<br />
fd.setVisible(true);<br />
String dir = fd.getDirectory();<br />
String file = fd.getFile ();<br />
if (dir == null || file == null) {<br />
return null;<br />
}<br />
directory = dir;<br />
String separator = System.getProperty(<br />
"file.separator");<br />
if (dir.endsWith(separator)) {<br />
return dir + file;<br />
} else {<br />
return dir + separator + file;<br />
}<br />
}
Listing 6-1 A menu for a simple file editor (continued)<br />
The Menu Bar and the Menu System 629<br />
// Take any action needed to close the application<br />
public void closeWindow() {<br />
try {<br />
fileManager.closeFile(textArea.getText());<br />
} catch (IOException e) {<br />
System.out.println(<br />
"Failed to write data on close.");<br />
}<br />
System.exit(0);<br />
}<br />
public static void main(String [] args) {<br />
JFrame f = new MenuExample2("Menu Example 2");<br />
f .pack() ;<br />
f.setvisible(true);<br />
f.addWindowListener(new WindowAdapter() {<br />
public void windowClosing(WindowEvent evt) {<br />
MenuExample2 frame = (MenuExample2)(evt.get-<br />
Source () ) ;<br />
frame.closeWindow();<br />
}<br />
});<br />
}<br />
JMenuItem newltem;<br />
JMenuItem openltem;<br />
JMenuItem closeltem;<br />
JMenuItem saveltem;<br />
JMenuItem saveAsItem;<br />
JMenuItem emptyListltem;<br />
JMenu fileListMenu;<br />
JTextArea textArea;<br />
FileManager fileManager;<br />
String directory = ""; // Current directory<br />
ActionListener menuListener;<br />
// Recently-used file list<br />
static final int RECENT_FILES = 4;<br />
Vector recentFiles = new Vector(RECENT_FILES);
630 Chapter 6 Menus and Toolbars<br />
The constructor builds the user interface by adding a JTextArea and a<br />
menu bar to a JFrame. After adding all of the menu items to the file menu,<br />
ActionListeners that handle the New, Open, Close, Save, Save As, and<br />
Exit operations are attached to them. The implementation of the action-<br />
Performed methods of these listeners is not going to be explored in any<br />
great detail, because they don't tell us much about the menu system. The<br />
important point to note about these methods is that, since there is a separate<br />
one for each menu item, each of them can do its own job without needing to<br />
work out which menu item caused it to be invoked. You'll also notice that this<br />
code does not directly deal with the details of reading and writing files; this<br />
job is delegated to a small helper class (FileManager) that isn't shown here.<br />
You can find the code for this class on the CD-ROM that accompanies this<br />
book. In general, it is good practice to separate user interface code from<br />
application logic like this as much as possible.<br />
<strong>Core</strong> Note<br />
When you use the New, Open, and Save As menu items in this<br />
application, you'll see a dialog that allows you to choose the name of the<br />
file that you want to create, open, or save. This dialog is the AWT<br />
FileDialog. In the next chapter, you'll see a much more powerful Swing<br />
dialog that does the same thing but is much more customizable than<br />
FileDialog.<br />
Maintaining the Recent Files Menu<br />
The most interesting part of this application from the point of view of this<br />
chapter is the way in which the Recent Files menu is maintained. When<br />
the application starts, this menu will be empty. An empty drop-down menu is<br />
rendered as a box that's almost too small to see, so to make it clear that the<br />
recent file list is empty, a menu with a single item on it that says "Empty" is<br />
created and, since this isn't a real file name, it is disabled so that the user<br />
can't activate it. The code that does this was shown at the start of this section.<br />
As files are opened, each file name should be added to this submenu. For<br />
convenience, the menu items should be arranged so that the most recently<br />
used file is at the top. When the menu is full, the oldest entrywill be dropped<br />
in favor of a newer one. In this example, an arbitrary limit of four items<br />
(defined as RECENT_FILES) is placed on this menu. The logic that maintains<br />
the menu is contained in the addRecentFile and buildRecentFileMenu<br />
methods. The file names are kept in a vector called recentFiles, which
The Menu Bar and the Menu System 631<br />
starts empty. Each time a file is opened, the addRecentFile method inserts<br />
its name at the front of the vector. When the vector is full, the oldest entry,<br />
which is always the one at the end—that is, the entry with index<br />
RECENT_FILES—should be discarded. This simple algorithm, as stated,<br />
doesn't work if a file that is already on the list is reopened, because there<br />
would then be two entries for the same file. To avoid this, we first check<br />
whether the file is already in the list and, if it is, the entiy is removed and<br />
then added again to the front. All of these operations can be performed very<br />
easily using the Vector class.<br />
<strong>Core</strong> Note<br />
If you are using the <strong>Java</strong> 2 platform and you don't need to be compatible<br />
with JDK I.I, you can use the ArrayList class instead of Vector to<br />
store the file names. ArrayList is part of the <strong>Java</strong> 2 Collections API that<br />
is described in detail in <strong>Core</strong> <strong>Java</strong> 2 Volume 2—Advanced Features by<br />
Cay Horstmann and Gary Cornell. Throughout this book, we use JDK I. I<br />
collection classes such as Vector and Hashtable so that the same code<br />
works with all versions of Swing.<br />
The buildRecentFileMenu creates the Recent Files menu itself from<br />
the vector of file names. The menu items should reflect the order of elements<br />
in the vector, with the first entry in the vector appearing at the top of the<br />
menu. When the vector is reordered, it is necessary to change the order of<br />
the items on the Recent Files menu. It is possible to change the order of<br />
items in a menu without completely reconstructing it and, for the sake of<br />
completeness, you'll see how to do this later in "Adding and Removing Menu<br />
Items." This example takes a simpler approach and empties and repopulates<br />
the menu whenever a change is made. Although this will take slightly longer<br />
than the method you'll see later, it makes it easier when accelerator keys<br />
whose values depend on the position of the associated menu item in the<br />
Recent Files menu are added later. Since the menu will be manipulated<br />
comparatively rarely, the slightly higher run-time cost is more than offset by<br />
the saving in implementation complexity.<br />
When the content of the file list changes, all of the menu items in the<br />
Recent Files menu are removed using the JMenu removeAll method,<br />
then a new JMenu I tern is added for each entry in the vector. Note that this<br />
simple algorithm solves the problem of what to do with the dummy Empty<br />
entry that should only exist until a file is opened, because it will be removed
632 Chapter 6 Menus and Toolbars<br />
the first time the removeAll method is called and will not he recreated<br />
because it is not in the list of open files.<br />
Receiving Menu Events<br />
To use the Recent Files menu, the user pops it up, selects the file to open,<br />
and clicks on it with the mouse. This will generate an ActionEvent. To handle<br />
the event, an ActionListener is attached to each of the menu items as<br />
it is created. Since all of these menu items will be processed in exactly the<br />
same way, in this case it makes more sense to attach the same listener to all of<br />
them. When the menu item is clicked, the listeners actionPerformed<br />
method extracts the file name as follows:<br />
menuListener = new ActionListener() {<br />
public void actionPerformed(ActionEvent evt) {<br />
JMenuItem mi = (JMenuItem)(evt.getSource());<br />
String fileName = mi.getActionCommand();<br />
try {<br />
String text = fileManager.openFile(fileName);<br />
textArea.setText(text);<br />
addRecentFile(fileName);<br />
} catch (IOException e) {<br />
// Do nothing - message already printed<br />
}<br />
}<br />
};<br />
The source of the event is the menu item itself. Since JMenuItem extends<br />
AbstractButton, the AbstractButton getActionCommand method can<br />
be used to obtain the command associated with the button. Since an action<br />
command was not explicitly set, this method retrieves the button's label,<br />
which is the file name on the menu item. This is, of course, one example in<br />
which it is acceptable to use the menu item text rather than an action command,<br />
because there are no internationalization concerns over the value of<br />
the text in the menu item—it will always be a file name.<br />
Adding and Removing Menu Items<br />
You've already seen a few of the methods that can be used to maintain<br />
menus. Let's now look at the complete set. When you create a new menu it is,<br />
of course, empty. To add some menu items, you would normally use the<br />
JMenu add method, which has five different forms:<br />
public JMenuItem add(JMenuItem menultem);
public JMenuItem add(Action a);<br />
public JMenuItem add(String s);<br />
public Component add(Component c);<br />
public Component add(Component c, int index);<br />
The Menu Bar and the Menu S/stem 633<br />
As you saw in Listing 6-1, you can also add a separator at the end of a<br />
menu using the addSeparator method:<br />
public void addSeparator();<br />
When you use the first four variants of the add method, the new menu<br />
item is always placed at the end of the menu. The first add method is the one<br />
that you have already seen in use in this chapter. When you use this form, you<br />
have to create your own JMenuItem. Often, this is the most convenient way<br />
to add a menu item, because you'll probably want to add an ActionListener,<br />
for which you will need access to the JMenuItem object, as you saw<br />
in the buildRecentFileMenu method in Listing 6-1. The second form is a<br />
variant on the first in which you pass an Action instead of a JMenuItem.<br />
This form is described further in the secton "Using Actions with Menus."<br />
The third variant is given only the string to be used as the menu item's label<br />
and creates a JMenuItem itself.<br />
The last two version of the add method allow you to add a Component of<br />
any sort to the menu. However, adding a Component in this way does not<br />
create a JMenuItem. The Component is physically a part of the menu, but is<br />
not managed by the menu system in any way. You can use this method to<br />
place custom separators or other objects on the menu, provided that you<br />
manage them yourself. This is, in effect, a way for the JMenu to allow other<br />
objects to occupy its screen space and could be regarded as an open-ended<br />
mechanism for extending the menu system. If you use the add (Component<br />
comp) form, the Component is added at the end of the menu, while<br />
add (Component comp, int index) inserts the Component at the position<br />
given by index, where the topmost item on the menu has index 0.<br />
As well as adding new entries at the end of a menu, you can also insert an<br />
entry or a separator at any given position using the insert method:<br />
public JMenuItem insert(JMenuItem menultem, int index);<br />
public JMenuItem insert(Action a, int index);<br />
public void insert(String s, int index);<br />
public void insertSeparator(int index);<br />
Note that there is no form of the insert method that allows the insertion<br />
of a Component.<br />
These methods work in the same way as add, except that the new menu<br />
item or separator occupies the position given by the index argument. As
634 Chapter 6 Menus and Toolbars<br />
with the last variant of the add method, the insertion position is counted<br />
from the top of the menu and is numbered from 0. Every item on the menu<br />
is counted, including separators and Components, if there are any. Consider,<br />
for example, the following code extract:<br />
JMenu menu = new JMenu("File");<br />
menu.add(new JMenuItem ( "New..." ) ) ;<br />
menu, add (new JMenuItem ("Open..." )) ;<br />
menu.addSeparator();<br />
menu.add(new JMenuItem("Exit") ) ;<br />
When this menu is constructed, the menu items occupy positions 0, 1, and<br />
3 and the separator is in position 2. The following statement:<br />
menu.insert(new JMenuItem("Close"), 2);<br />
would add a Close menu item in position 2, which is immediately below the<br />
Open item, displacing the separator to position 3 and the Exit item to position<br />
4.<br />
Menu items can be deleted using the remove method which, like add and<br />
insert, has several forms:<br />
public void remove(JMenuItem menultem);<br />
public void remove(Component comp);<br />
public void remove(int pos);<br />
If you want to remove everything from a menu (including any Components<br />
added with the add method), you can use the removeAll method,<br />
which you saw in Listing 6-1:<br />
public void removeAll()<br />
To show how these methods can be used to manipulate a menu, let's see<br />
how to implement the Recent Files menu without using the removeAll<br />
method that was shown in Listing 6-1. The idea behind this revised implementation<br />
is to place a newly-opened file at the top of the menu. If it was<br />
already in the menu, the existing item must be moved from its existing location<br />
to the top. If it was not in the menu, a new menu item is created and<br />
inserted at the top of the menu. If this makes the menu grow beyond the<br />
maximum size of RECENT_FILES, the last item is removed. Here is how the<br />
addRecentFile method would look when implemented in this way:<br />
// Add a name to the recent file list<br />
public void addRecentFile(String fileName) {<br />
int offset;<br />
// Remove the empty item if it is present
The Menu Bar and the Menu System 635<br />
if (emptyListltem != null &&<br />
fileListMenu.getltem(O) == emptyListltem) {<br />
fileListMenu.remove(0);<br />
emptyListltem = null;<br />
}<br />
// Check whether this file is already in the file list<br />
if ((offset = recentFiles.indexOf(fileName)) == -1) {<br />
// Not present - add it at the beginning<br />
recentFiles.insertElementAt(fileName, 0);<br />
// Add a menu item as well<br />
JMenuItem mi = new JMenuItem (fileNarne) ;<br />
mi.addActionListener(menuListener);<br />
fileListMenu.insert(mi, 0);<br />
if (recentFiles. size () > RECENT__FILES) {<br />
// List was full - remove the last (oldest) item<br />
recentFiles.removeElementAt(RECENT_FILES);<br />
// Also remove the last menu item<br />
fileListMenu.remove(RECENT_FILES);<br />
}<br />
} else {<br />
// Already present: move this item to the<br />
// front of the list<br />
recentFiles.removeElementAt(offset);<br />
recentFiles.insertElementAt(fileName, 0) ;<br />
// Move the menu item<br />
JMenuItem mi = fileListMenu.getltem(offset);<br />
fileListMenu.remove(offset);<br />
fileListMenu.insert(mi, 0);<br />
}<br />
}<br />
Notice that the first part of this code takes care of getting rid of the<br />
dummy Empty entry that should only be present until the first file is opened.<br />
Without this code, the Empty entry would get pushed down the menu until it<br />
disappeared off the bottom when the menu had been filled up. The operations<br />
on the menu exactly parallel the changes made to the vector of open<br />
files and use the same indexing to locate a menu item from the corresponding<br />
file name. If the new file is in the vector, its position within the vector is<br />
obtained and that position is used as the index to remove the corresponding<br />
menu item, then places it at the front of the menu, by inserting it at position<br />
0. This code implicitly assumes that the menu only contains menu items: If
636 Chapter 6 Menus and Toolbars<br />
separators or other components were added, it would no longer work<br />
because the positions of the file menu items would be incorrect.<br />
This code uses the JMenu getltem method to get the JMenuItem at a<br />
given position in the menu. Again, the position used here counts everything<br />
in the menu, not just menu items. If the index passed to the getltem<br />
method corresponds to a separator or a Component, then null is returned to<br />
indicate that the target of the operation is not a JMenuItem.<br />
Menu Mnemonics<br />
The implementation so far falls far short of being complete. There are a<br />
number of improvements that will be made in the next few sections that give<br />
the application a more professional appearance. The first change is to add<br />
mnemonics to the menus and menu items. Windows and Motif applications<br />
usually supply mnemonics (often called shortcuts) for all of their menu items,<br />
which appear as an underlined letter on the menu or the menu bar. For<br />
example, the file menu on the menu bar usually appears with its first letter<br />
underlined. To activate the file menu, you either click with the mouse on the<br />
word .File, or you press F together with the ALT key; either of these actions<br />
makes the file menu drop down. Similarly, it is normal to add mnemonics to<br />
the items that appear on the applications menus.<br />
You can add a shortcut to a menu item using a form of the constructor that<br />
accepts a mnemonic argument:<br />
public JMenuItem(String title, int mnemonic)<br />
Using this method, you can create an Open menu item with a suitable<br />
mnemonic like this:<br />
openltem = new JMenuItem ( "Open...", ' O ' ) ;<br />
A mnemonic works only if the corresponding menu item is visible on the<br />
screen.<br />
While this mechanism works for menu items, it can't be used for menus<br />
because JMenu doesn't have a constructor that accepts a mnemonic, despite<br />
the fact that it is derived from the class JMenuItem that does. Instead, you<br />
have to use the setMnemonic method. Since this method is actually implemented<br />
by AbstractButton, which is also a superclass of JMenuItem, you<br />
can also use it as an alternative to passing the shortcut to the constructor<br />
when creating a JMenuItem. Arranging for the File menu to drop down in<br />
response to the key sequence ALT+F requires the following two lines of code:<br />
JMenu fileMenu = new JMenu("File");
fileMenu.setMnemonic('F'<br />
<strong>Core</strong> Note<br />
The Menu Bar and the Menu System 637<br />
The menu mnemonics are the same mnemonics that you saw in connection<br />
with buttons in Chapter 2, which should not surprise you because both<br />
JMenu and JMenuItem are derived from AbstractButton.>4s before,<br />
these mnemonics are case-insensitive when you associate them with a<br />
menu or menu item. At the keyboard, you do not press the SHIFT key in<br />
conjunction with ALT to activate the mnemonic.<br />
Our example also has a submenu on the file menu; a mnemonic can be<br />
added to this in the same way:<br />
fileListMenu = new JMenu("Recent Files");<br />
fileListMenu.setMnemonic('R');<br />
Mnemonics on menus and menu items work only when they are visible, so<br />
to activate the Recent Files list, you first need to pop down the file menu<br />
using ALT+F, then activate the recent file list using ALT+R.<br />
The letter used as the mnemonic for a menu or menu item is usually the<br />
first letter of its label. If this is not unique, however, you need to choose<br />
another letter. Choosing the first letter of the label makes it easy for the user<br />
to remember the appropriate key sequence. This doesn't work very well for<br />
menus in which the menu items are not fixed, like the Recent File list.<br />
Figure 6—2 shows a typical screenshot of this file list.<br />
Here, the first letter is always "C," which couldn't be used anyway because<br />
it is ambiguous.<br />
Whatever choice was made here, it would not be especially useful,<br />
because the user needs to know the key sequence in advance, but the content<br />
of the recent file list is not fixed—it depends on how the application has been<br />
used. In cases like this, what the user might want to do with a mnemonic<br />
would be to open the second, third, or fourth most recently used file, without<br />
having to remember the file name and guess the shortcut. The best way to<br />
cater for this is to label the files with their position in the list, starting with 1,<br />
and arrange for the position number to be the shortcut key. With this<br />
arrangement, the user can open the files on the recent file list using ALT+l,<br />
ALT+2,ALT+3, and so on.<br />
The implementation of this idea is relatively simple, but it contains a small<br />
twist. If a mnemonic were added to each menu item on the recent file menu,<br />
it would work, but it wouldn't appear on the menu item unless there happened<br />
to be a l (or 2 etc.) in the file name. To make it appear there, the ordi-
638 Chapter 6 Menus and Toolbars<br />
Figure 6-2 A menu with a recently-used file list.<br />
rial needs to be included in the label of the menu item so that it gets<br />
underlined when the shortcut is attached to it. Since in our example application<br />
the action command associated with a menu item is used to determine<br />
which file to open and since the action command has the same value as the<br />
label by default, when we add the position of the menu item within the menu<br />
to the label, code will be needed to arrange that the action command is<br />
explicitly set to the file name because we do not want to have to remove the<br />
menu position that would otherwise be returned. Here is a modified implementation<br />
of the buildRecentFileMenu method that enables these mnemonics,<br />
with the changed lines highlighted:<br />
// Build the recent file menu<br />
public void buildRecentFileMenu() {<br />
int size = recentFiles.size();<br />
fileListMenu.removeAll();<br />
for (int i = 1; i
JMenuItem mi = new JMenuItem();<br />
mi.setActi onCommand(f i1eName);<br />
mi.setText(i + " " + fileName);<br />
mi.setMnemonic('0' + i);<br />
fileListMenu.add(mi);<br />
mi.addActionListener(menuListener);<br />
}<br />
}<br />
The Menu Bar and the Menu System 639<br />
You can run a version of the application with this modification in place<br />
using the command:<br />
java <strong>JFC</strong>Book.Chapter6.MenuExample3<br />
If you open several files in succession and then tiy the key sequence<br />
ALT+F, ALT+R, ALT+2, you will now find that the second most recently used<br />
file is opened.<br />
Checkbox and Radio Button Menu Items<br />
The menu items that have been used so far all cause a fixed action to be performed<br />
when they are activated. There are two other types of menu items<br />
that allow you to specify changes in an application's state—checkbox menu<br />
items and radio button menu items. As their names suggest, these menu<br />
items allow you to place checkboxes or a set of radio buttons on a menu. Typically,<br />
you use these to control parameters that are either on or off, or parameters<br />
that have a fixed set of values.<br />
The use of a checkbox menu item can easily be illustrated by enhancing<br />
our editor application. Up to now, it has been assumed that every file is<br />
opened with the intention of changing it and writing it back but sometimes<br />
you might want just to read the file and protect yourself against accidentally<br />
writing it back. In other words, you want to specify whether you want the file<br />
to be open for writing or not. This type of true or false state is ideally<br />
suited to a checkbox menu item.<br />
Creating a checkbox menu item is just as simple as creating an ordinary<br />
one:<br />
JCheckBoxMenuItem writeltem =<br />
new JCheckboxMenuItem("Enable writing", true);<br />
fileMenu.add(writeltem);<br />
These statements create a checkbox menu item with its state initialized to<br />
true and add it to the File menu. When you drop down this menu, it
640 Chapter 6 Menus and Toolbars<br />
appears as shown in Figure 6-3. To try this example for yourself, type the<br />
command<br />
j ava <strong>JFC</strong>Book.Chapter6.MenuExample4<br />
Figure 6-3 A checkbox menu item.<br />
When you click on this menu item, it inverts its state and generates an<br />
ActionEvent. You can obtain the state of the menu item using the get-<br />
State method and, if you wish, you can use the setstate method to<br />
change the state yourself:<br />
public boolean getStateO;<br />
public void setstate(boolean newState);<br />
In this example, the state of the checkbox menu item will be checked<br />
when a new file is opened. If writing has been disabled, the state of the<br />
JTextArea is changed so that its content cannot be edited and the File-<br />
Manager object is notified that the user doesn't want to write to the file, so<br />
that when the file is closed, the write operation that would usually be per-
The Menu Bar and the Menu System 641<br />
formed will be skipped. If, however, the New menu item is used to open a file,<br />
it is appropriate to assume that the user wants to write to the file, so the setting<br />
of this checkbox is ignored. Because the state of the menu item is<br />
inspected only when it is needed, there is no need to know, in this case, when<br />
the user changes it, so an ActionListener isn't registered against it. Here<br />
is the code that is affected by this change:<br />
// Processing for "New..." menu item<br />
newltem.addActionListener(new ActionListener() {<br />
public void actionPerformed(ActionEvent evt) {<br />
String name = getFileName("New File", FileDialog.SAVE);<br />
if (name != null) {<br />
if (fileManager.isFileOpen()) {<br />
// Close any open file<br />
try {<br />
fileManager.closeFile(textArea.getText() ) ;<br />
} catch (Throwable e) {<br />
}<br />
});<br />
}<br />
// Ignore any exception<br />
}<br />
try {<br />
fileManager.newFile(name);<br />
textArea.setText("");<br />
textArea.setEditable(true);// Always writable<br />
writeltem.setstate(true);// Check writable box<br />
fileManager.setWritable(true);<br />
// Allow writes to file<br />
addRecentFile(name);<br />
} catch (IOException e) {<br />
// Do nothing - message already printed<br />
}<br />
}<br />
// Processing for "Open..." menu item<br />
openltem.addActionListener(new ActionListener() {<br />
public void actionPerformed(ActionEvent evt) {<br />
String name = getFileName("Open File", FileDialog.LOAD);<br />
if (name != null) {<br />
try {<br />
String text = fileManager.openFile(name);<br />
textArea.setText(text);<br />
// Enable for writing if allowed to<br />
textArea.setEditable(writeltem.getState());
642 Chapter 6 Menus and Toolbars<br />
}<br />
});<br />
}<br />
fileManager.setWritable(writeltem.getState());<br />
addRecentFile(name);<br />
} catch (IOException e) {<br />
// Do nothing - message already printed<br />
}<br />
// Processing for "Enable writing" menu item<br />
writeltem.addActionListener(new ActionListener() {<br />
public void actionPer£ormed(ActionEvent evt) {<br />
textArea.setEditable(writeltem.getState() ) ;<br />
fileManager.setWritable(writeltem.getState());<br />
}<br />
RadioButtonMenuItems are just like ordinary JRadioButtons, which<br />
will be examined in Chapter 8, except that they reside on a menu. To ensure<br />
that only one of the radio buttons is selected at any time, you place them in a<br />
ButtonGroup. You'll see an example of this type of menu item under<br />
"Enhancing Menus" later.<br />
Changing Menu State<br />
In all of the versions of the editor application so far, the items on the File<br />
menu have been available at all times. However, this can be confusing for the<br />
user. For example, when you start the application, the menu looks like the<br />
one shown in Figure 6-4.<br />
This menu implies that you can save or close a file, but when the application<br />
is first started, this doesn't make sense because there is no file to close or<br />
write to. In a properly-implemented application, only those actions that make<br />
sense at any given time are available on the application's menu. You can control<br />
whether a menu item is available for use by enabling or disabling it using<br />
the setEnabled method. When you disable a menu item, it appears grayed<br />
out and doesn't respond when you move the mouse over it or click on it.<br />
There are other cases in which menu items should be disabled. Clearly,<br />
the Close item should be available only when there is an open file. It should<br />
only be possible to save a file if all of the following are true:
The Menu Bar and the Menu System 643<br />
Figure 6-4 Initial state of the editor menu.<br />
• A file is open.<br />
• The user has not disabled writing using the checkbox menu<br />
item.<br />
• The file is actually writeable (i.e., the user has permission to<br />
write to it).<br />
To find out whether or not a file can be written to, our FileManager class<br />
has a canWrite method that returns true or false when used just after the<br />
file has been opened. After a file has been opened, a check is made to find<br />
out whether or not it can be written to. If not, the Save and Save As menu<br />
items are disabled. In the modified version of the example that correctly<br />
manipulates the menu enabled states, the setting of the Enable write<br />
menu item is only going to be looked at when a file is opened and it will be<br />
disabled after opening a file, so as not to give the impression that a change in<br />
its state would be honored while there is an open file. It is re-enabled when<br />
the file is closed. The Close menu item will be enabled only when there is a<br />
file open.<br />
Now lets look at the implementation details. The initial menu item state is<br />
set in the constructor by disabling the Close, Save As, and Save items,<br />
because there is no file initially open:<br />
// Set initial state of menu items<br />
closeltem.setEnabled(false);<br />
saveltem.setEnabled(false);
644 Chapter 6 Menus and Toolbars<br />
saveAsItem.setEnabled(false);<br />
In response to the New menu item, having created a new file, the Close,<br />
Save and Save As menu items are enabled, because a newly-created file<br />
should be writable, and the checkbox that allows the user to make the file<br />
read-only is disabled:<br />
fileManager.newFile(name);<br />
textArea.setText("");<br />
textArea.setEditable(true); // Always writable<br />
writeltem.setState(true); // Check writable box<br />
fileManager.setWritable(true);// Allow writes to file<br />
closeltem.setEnabled(true); // Allow file close<br />
writeltem.setEnabled(false); // Disable checkbox<br />
boolean canWrite = fileManager.canWrite();<br />
saveltem.setEnabled(canWrite) ;<br />
saveAsItem.setEnabled(canWrite);<br />
addRecentFile(name);<br />
The actionPerformed method that handles file Open is similar, but in<br />
this case the Save and Save As menu items are enabled only if the file can<br />
be written (i.e., the user has write access to it) and the Enable write menu<br />
item is also checked. The text area is also made editable or not on the same<br />
condition:<br />
// Enable for writing if allowed to<br />
boolean canWrite = fileManager.canWrite()<br />
&& writeltem.getState();<br />
textArea.setEditable(canWrite);<br />
fileManager.setWritable(writeltem.getState() ) ;<br />
closeltem.setEnabled(true) ; // Allow file close<br />
writeltem.setEnabled(false) ; // Disable checkbox<br />
saveltem.setEnabled(canWrite);<br />
saveAsItem.setEnabled(canWrite);<br />
addRecentFile(name);
The Menu Bar and the Menu System 645<br />
The same code is also added to the actionPerf ormed method that handles<br />
selection of a file from the recent file list. Finally, the menu item state is<br />
reset when the file is closed:<br />
// Reset state of menu items<br />
closeltem.setEnabled(false);<br />
saveltem.setEnabled(false);<br />
saveAsItem.setEnabled(false);<br />
writeltem.setEnabled(true);<br />
You can see this code in action by starting the application with the command:<br />
java <strong>JFC</strong>Book.Chapter6.MenuExample5<br />
and pulling down the File menu, which now looks like Figure 6-5.<br />
Figure 6-5 The editor menu with only the available items enabled.
646 Chapter 6 Menus and Toolbars<br />
Here, the Close, Save, and Save As menu items are disabled. If you<br />
open a file to which you have write access, these items become enabled and<br />
the Enable writing item is disabled as in Figure 6—6.<br />
Closing the file reverts the menu to its original state. If you clear the<br />
Enable writing flag or open a file to which you only have read access, the<br />
Save and Save As items remain disabled, as shown in Figure 6-7, and you'll<br />
find that you can't modify the text in the text area either.<br />
Figure 6-6 The editor menu when a file is open.<br />
<strong>Core</strong> Note<br />
To arrange to have read-only access to a file that you own, use the following<br />
commands under Unix:<br />
chmod u-w filename<br />
chmod u+r filename
The Menu Bar and the Menu System 647<br />
If you are using Windows, use the Windows Explorer to find the file, right-<br />
click on it, select Properties, check "<strong>Read</strong>-only", and then click OK.<br />
Figure 6-7 The editor menu with a read-only file open.<br />
Disabling a menu item not only grays out the menu and stops it responding<br />
to the mouse it also disables any shortcut associated with that menu item.<br />
Therefore, when there is no file open, ALT+c, ALT+S, and ALT+A won't work.<br />
Another Way to Change the Menu State<br />
In the last section, the state of menu items was changed as soon as a change<br />
in the application state occurred, so that the menus would appear correct if<br />
they happened to be used. In complex applications, though, most of this work<br />
would be wasted because the number of application state changes that might<br />
affect the state of a menu usually far exceeds the number of times that the<br />
menu is actually dropped down. As well as wasting time, the implementation
648 Chapter 6 Menus and Toolbars<br />
technique that you have just seen also has the effect of spreading menu-handling<br />
code all over the application.<br />
Instead of taking this approach, you can instead change the state of menu<br />
items only when the menu is about to be dropped down. This allows you to<br />
keep the menu-handling code together and also avoids unnecessary menu<br />
updates. The menu system provides a MenuEvent that is posted whenever a<br />
menu is selected, deselected, or canceled. To catch a MenuEvent, you must<br />
register a MenuListener with the JMenu object for the menu. Here is the<br />
definition of the MenuListener interface:<br />
public interface MenuListener extends EventListener {<br />
public void menuCanceled(MenuEvent e);<br />
public void menuDeselected(MenuEvent e);<br />
public void menuSelected(MenuEvent e);<br />
}<br />
A menu is selected just before it is made visible and is deselected when it<br />
disappears. The only state associated with the MenuEvent is a reference to<br />
the source JMenu object, which can be obtained using the getSource<br />
method. Here is how you might implement a MenuListener for the File<br />
menu:<br />
// Processing for the "File" menu<br />
fileMenu.addMenuListener(new MenuListener() {<br />
public void menuSelected(MenuEvent evt) {<br />
boolean fileOpen = fileManager.isFileOpen();<br />
// Allow close only if we have an open file<br />
closeltem.setEnabled(fileOpen);<br />
// Similarly, allow "Enable write" only if<br />
//no open file<br />
writeltem.setEnabled(!fileOpen);<br />
// If we have an open file, enable Save and Save As<br />
// if the user has selected Enable Write AND the<br />
// file can be written to.<br />
boolean canSave =<br />
(fileOpen && writeltem.getState() &&<br />
fileManager.canWrite());<br />
saveltem.setEnabled(canSave);<br />
saveAsItem.setEnabled(canSave);<br />
}<br />
public void menuDeselected(MenuEvent evt) {
Not used<br />
}<br />
public void menuCanceled(MenuEvent evt) {<br />
// Not used<br />
}<br />
});<br />
You can try this code using the command:<br />
j ava <strong>JFC</strong>Book.Chapter6.MenuExample6<br />
The Menu Bar and the Menu System 649<br />
When you click on the File menu, a MenuEvent will be posted from the<br />
JMenu object just before the menu is made visible. When this event is passed<br />
to the listener's menuSelected method, the state of all of its menu items is<br />
adjusted based on the application s internal state. Therefore, the menu items'<br />
state will be correct when the menu is displayed, but may be out-of-date<br />
when it is not. This doesn't matter, of course, because the user can't see that<br />
the menu items are in the wrong state.<br />
As a consequence of implementing the MenuListener, all of the code<br />
that enables and disables menu items that were introduced in the previous<br />
section can be removed. Using a MenuListener is obviously cleaner—the<br />
code is all in one place and it is much more easily understandable. We recommend<br />
using this technique whenever possible.<br />
Using Actions with Menus<br />
So far in this chapter, all of the menu items have been created directly and<br />
ActionListeners have been added to them to handle the event generated<br />
when they are selected. In the last chapter, you saw how useful the concept<br />
of an Action was when handling events from the keyboard, since Actions<br />
make it possible to combine an ActionListener with some state information<br />
needed when the action is to be performed. A useful feature of the<br />
JMenu class is that it allows you to add an Action directly to a menu:<br />
public JMenuItem add(Action action);<br />
In order for this to work properly, you have to create an Action with an<br />
appropriate text string, which is then used as the label of the menu item. For<br />
example, you can use the AbstractAction class to create a suitable<br />
Action. Here's how you might add an Action to process the Save operation:<br />
JMenu menu = new JMenu("File");
650 Chapter 6 Menus and Toolbars<br />
JMenuItem mi = menu.add (new AbstractAction ("Save...") {<br />
public void actionPerformed(ActionEvent evt) {<br />
}<br />
});<br />
// Process save operation (not shown)<br />
When this code is run, a Save item will appear on the File menu. When<br />
this item is selected, the actionPerf ormed method shown will be executed.<br />
Since the add method returns a JMenuItem, you can treat this menu item in<br />
the same way as any other that you might create. In particular, you can add<br />
shortcut keys if required. You'll see in more detail how to make use of<br />
Actions on menus in the next section and also in "Using Actions with Menu<br />
Bars and Toolbars" later in this chapter.<br />
Menu Accelerators<br />
You've seen how to add mnemonics to menus and menu items that allow you<br />
to activate them from the keyboard when they are visible. Swing also provides<br />
menu accelerators that work the same way as mnemonics, except that<br />
the menu item does not need to be visible for the associated action to be carried<br />
out. To attach an accelerator to a menu item, you use the JMenuItem<br />
setAccelerator method:<br />
public void setAccelerator(Keystroke keystroke);<br />
The keystroke argument specifies the key sequence that causes the<br />
action associated with the menu item to be performed. When this key<br />
sequence is detected, an ActionEvent is delivered to all ActionListeners<br />
registered on the associated menu item.<br />
<strong>Core</strong> Note<br />
You can't attach an accelerator to a JMenu. It wouldn't make any sense to<br />
do so anyway, because there is no functionality associated with a JMenu<br />
(other than to post its associated menu items). If you try to attach one, you<br />
will get an exception.<br />
To show how menu accelerators work, let s add them to our editor application.<br />
On the File menu, there are three candidates for accelerators—the<br />
New item, the Open item, and the Exit item. The Recent Files item also<br />
has a mnemonic, but it can't have an accelerator because it is a JMenu, not a
The Menu Bar and the Menu System 651<br />
JMenultem. These accelerators are so common in Windows applications that<br />
they are almost always assigned the following key sequences:<br />
New<br />
Open<br />
Exit<br />
CTRL + N<br />
CTRL + ()<br />
CTRL + X<br />
However, as will be explained shortly, it is not possible to use CTRL+x in<br />
the case of the example application being used in this section, so instead the<br />
key sequence CTRL+E will be used.<br />
Attaching accelerators is veiy simple—here are the lines that would be<br />
added to our file editor application to add these three accelerators:<br />
newltem.setAccelerator(<br />
Keystroke.getKeyStroke(KeyEvent.VK_N,<br />
InputEvent.CTRL_MASK, false));<br />
openltem.setAccelerator(<br />
KeyS t roke.ge t KeyS t roke(KeyEvent.VK_O,<br />
InputEvent.CTRL_MASK, false));<br />
exitltem.setAccelerator(<br />
Keystroke .getKeyStroke (KeyEvent. VK__E,<br />
InputEvent.CTRL_MASK, false));<br />
If you run this version of the example using the command:<br />
j ava <strong>JFC</strong>Book.Chapter6.MenuExample6A<br />
and then drop down the File menu, you'll see that the accelerator keys are<br />
displayed on their associated menu items, as shown in Figure 6—8.<br />
If you now dismiss the File menu and then press CTRL+N or CTRL+O,<br />
you'll see the FileDialog associated with the New and Open menu items<br />
appear. Similarly, CTRL+E will cause the application to exit. An accelerator<br />
key that causes the application to exit can be a very dangerous facility. In a<br />
full-scale application, you would probably want to display a dialog asking the<br />
user to confirm this particular action. Dialogs are the subject of the next two<br />
chapters.<br />
Finally, why was it not possible to use CTRL+X as an accelerator for the<br />
Exit menu item? Accelerators are just Keystrokes that are automatically<br />
registered to catch keys in the window with which the menu is associated. If<br />
CTRL+X were used, a Keystroke would be registered to catch this key<br />
sequence if it happened anywhere in the main window by using the JComponent.<br />
WHEN_IN_FOCUSED_WINDOW setting (refer back to Chapter 5, "Key-
652 Chapter 6 Menus and Toolbars<br />
Figure 6-8 A menu with three accelerator keys.<br />
board Handling, Actions, and Scrolling," for a description of Keystrokes).<br />
As you'll recall from Chapter 5, this action will not be triggered if the focus is<br />
in another component that has registered to catch the same key sequence<br />
with the flag JComponent .WHEN FOCUSED. In the case of this example, the<br />
focus will always be in the text area, which registers CTRL+X as an accelerator<br />
that performs the cut action. Thus, it would never be passed to the inenu<br />
handling code.<br />
Enhancing Menus<br />
You've now seen most of the ways in which you can use menus in an application.<br />
This section will show you various ways in which you can change the<br />
appearance of a menu without changing its functionality.<br />
Changing Color and Font of Menu Items<br />
As you know, menus and menu items are basically buttons with slightly different<br />
user interfaces and modified behavior. They do, therefore, inherit
The Menu Bar and the Menu System 653<br />
some of the features of a button. In particular, you can change the color and<br />
font of any menu or menu item just by treating it as a standard component.<br />
Therefore, if you'd like to create a menu item that uses a 14-point bold italic<br />
dialog font and has white text on a green background, you can do it as shown<br />
in Listing 6-2.<br />
Listing 6-2 A customized menu item<br />
public class MenuExample7 extends JFrame {<br />
public MenuExample7(String title) {<br />
super(title) ;<br />
JMenuBar mb = new JMenuBar();<br />
this.setJMenuBar(mb);<br />
JMenu fileMenu = new JMenu("File");<br />
fileMenu.setMnemonic('F');<br />
mb.add(fileMenu);<br />
JMenuItem newltem = new JMenuItem("New...", 'N');<br />
JMenuItem openltem = new JMenuItem("Open. . .", '0' ) ;<br />
JMenuItem closeltem = new JMenuItem("Close", 'C');<br />
fileMenu.add(newltem);<br />
fileMenu.add(openltem);<br />
fileMenu.add(closeltem);<br />
// Set custom font and colors<br />
newltem.setFont(new Font("Dialog",<br />
Font.BOLD | Font.ITALIC, 14));<br />
newltem.setForeground(Color.white);<br />
newltem.setBackground(Color.green);<br />
this.getContentPane().add(new JScrollPane(new JTextArea(2<br />
0, 40)));<br />
}<br />
public static void main(String[] args) {<br />
JFrame f = new MenuExample7("Menu Example 7");<br />
f.pack();<br />
f.setVisible(true) ;<br />
f.addWindowListener(new WindowAdapter() {<br />
public void windowClosing(WindowEvent evt) {<br />
System.exit(0);<br />
}
654 Chapter 6 Menus and Toolbars<br />
Listing 6-2 A customized menu item (continued)<br />
}<br />
_L________<br />
Figure 6—9 shows what the File menu now looks like (not, of course, in<br />
color!). To try this for yourself, type the command<br />
<strong>Java</strong> <strong>JFC</strong>Book.Chapter6.MenuExample7<br />
Figure 6-9 A customized menu item.<br />
Although you can't see that the background is green, you can see that it<br />
has changed and that the menu item's label is in bold italic.<br />
Menus and Menu Items with Icons<br />
Another, more useful, technique is to add icons to a menu. Using the Image-<br />
Icon class (or any other class that implements the Icon interface), you can
The Menu Bar and the Menu System 655<br />
associate an icon with any menu or menu item. You can even create a menu or<br />
menu item without a text label if you think that the icon is descriptive enough.<br />
You can place an icon on a menu item using one of the following constructors:<br />
public JMenuItem(Icon icon);<br />
public JMenuItem(String text, Icon icon);<br />
The JMenu class doesn't have a constructor that accepts an icon, so to<br />
place an icon on a menu, you need to use the setlcon method inherited<br />
from AbstractButton. This method also works for JMenuItem. Here, for<br />
example, is how you might modify the previous example to include icons on<br />
the menu bar and in the File menu itself:<br />
JMenuItem newltem = new JMenuItem("New...", 'N');<br />
JMenuItem openltem = new JMenuItem("Open...", '0');<br />
JMenuItem closeltem = new JMenuItem("Close", 'C' ) ;<br />
fileMenu.add(newltem);<br />
fileMenu.add(openltem);<br />
fileMenu.add(closeltem);<br />
fileMenu.setlcon(new Imagelconl<br />
getClass().getResource("images/folder.gif")));<br />
newltem.setlcon(new Imagelcon(<br />
getClass().getResource("images/new.gif")));<br />
openltem.setlcon(new Imagelcon(<br />
getClass().getResource("images/open.gif")));<br />
Figure 6—10 shows how it looks when the File menu has been pulled<br />
down. You can try this for yourself with the command:<br />
java <strong>JFC</strong>Book.Chapter6.MenuExample8<br />
As you can see, by default the text label appears to the right of the icon.<br />
Since menu items are really just like buttons, you can change the relative positions<br />
and alignment of the text and the icon using the setHorizontal-<br />
Alignment, set VerticalAlignment, setHorizontalTextPosition,<br />
and setVertical Text Posit ion methods that you saw in Chapter 2. Here,<br />
for example, the icon for the File entry on the menu bar is moved to the right<br />
of the text:<br />
fileMenu.setlcon(new Imagelcon(<br />
getClass() .getResource("images/folder.gif" ) ) ) ;<br />
fileMenu.setHorizontalTextPosition(SwingConstants.LEFT);
656 Chapter 6 Menus and Toolbars<br />
Figure 6-10 A menu with icons.<br />
In <strong>Java</strong> 2, menus and menu bars are affected by their component orientation<br />
attribute in just the same way as the AbstractButton class from which<br />
they are derived (see Chapter 2 for a full discussion of component orientation<br />
and buttons). You'll see all of the implications of this in "Menus and<br />
Component Orientation" later in this chapter. As with buttons, you can use<br />
the constants TRAILING and LEADING to allow the decision as to whether to<br />
place the icon to the left or right of the text to be made based on the locale in<br />
which the application is run.<br />
The text on the menu items can also be made to appear directly underneath<br />
the corresponding images, as you can see in Figure 6-11. This is not, of
The Menu Bar and the Menu System 657<br />
course, to everybody's taste! To make the boundaries between the menu<br />
items clearer in this example, separators have been added.<br />
The code that is used to place the icons below the text is as follows:<br />
newltem.setlcon(new Imagelcon(<br />
getClass().getResource("images/new.gif")));<br />
newltem.setVerticalTextPosition(SwingConstants.BOTTOM);<br />
newltem.setHorizontalTextPosition(SwingConstants.CENTER);<br />
openltem.setlcon(new Imagelcon(<br />
getClass () .getResource("images/open.gif"))) ;<br />
openltem.setVerticalTextPosition(SwingConstants.BOTTOM);<br />
openltem.setHorizontalTextPosition(SwingConstants.CENTER);<br />
Figure 6-1 7 A menu with the icons above the text.<br />
You can try this example for yourself using the command:
658 Chapter 6 Menus and Toolbars<br />
java <strong>JFC</strong>Book.Chapter6.MenuExample9<br />
If you add an Action that has both text and an icon associated with it to a<br />
menu, the icon will automatically be drawn on the menu item associated with<br />
the Action, with the text to the right of the icon. You can also add an<br />
Action with an icon and no associated text to get an icon-only menu item.<br />
You'll find more on this topic later in this chapter.<br />
Icons with Checkbox and Radio Button<br />
Menu Items<br />
Icons can be used with all types of menu items, including JCheckboxMenu-<br />
Item and JRadioButtonMenuItem. With both of these types, as with<br />
JMenuItem, you can either associate the icon when you create the menu<br />
item, or later using the setlcon method. Listing 6-3 provides an example<br />
that shows the use of a group of JRadioButtonMenuItems with icons.<br />
Listing 6-3 Radio Button menu items with icons<br />
package <strong>JFC</strong>Book.Chapter6;<br />
import javax.swing.*;<br />
import j ava.awt.*;<br />
import j ava.awt.event.*;<br />
import java.util.*;<br />
import <strong>JFC</strong>Book.Chapter4.ColorFilllcon;<br />
public class RadioButtonMenuExample extends JFrame {<br />
public RadioButtonMenuExample(String title) {<br />
super(title);<br />
colorList.put("White", Color.white);<br />
colorList.put("Black", Color.black);<br />
colorList.put("Yellow", Color.yellow);<br />
colorList.put("Green", Color.green);<br />
colorList.put("Red", Color.red);<br />
colorList.put("Orange", Color.orange);<br />
colorList.put("Grey", Color.gray);<br />
colorList.put("Pink", Color.pink);<br />
JMenuBar menuBar = new JMenuBar();<br />
JMenu menu = new JMenu("Colors");
The Menu Bar and the Menu System 659<br />
Listing 6-3 Radio Button menu items with icons (continued)<br />
tnenuBar .add (menu) ;<br />
ButtonGroup group = new ButtonGroup();<br />
JRadioButtonMenuItem rb = null;<br />
Color color = Color.black;<br />
Action action = new AbstractAction() {<br />
public void actionPerformed(ActionEvent evt) {<br />
JRadioButtonMenuItem mi =<br />
(JRadioButtonMenuItem)evt.getSource();<br />
String newColor = mi.getActionCommand();<br />
mainPanel.setBackground(<br />
(Color)colorList.get(newColor));<br />
}<br />
};<br />
Enumeration keys = colorList.keys();<br />
while (keys.hasMoreElements()) {<br />
String label = (String)keys.nextElement();<br />
color = (Color)colorList.get(label);<br />
Icon icon = new ColorFilllcon(color, 16, 16, 1) ;<br />
rb = new JRadioButtonMenuItem(label, icon);<br />
rb.setSelected(false);<br />
rb.addActionListener(action);<br />
menu.add(rb);<br />
group.add(rb);<br />
} '<br />
rb.setSelected(true);<br />
mainPanel = this.getContentPane () ;<br />
mainPanel.setBackground(color);<br />
this.setJMenuBar(menuBar);<br />
}<br />
public static void main(String[] args) {<br />
JFrame f = new RadioButtonMenuExample(<br />
"Radio Button Menu Example");<br />
f .setSize(300, 300) ;<br />
f.addWindowListener(new WindowAdapter() {<br />
public void windowClosing(WindowEvent evt) {<br />
System.exit(0);<br />
}<br />
});
660 Chapter 6 Menus and Toolbars<br />
Listing 6-3 Radio Button menu items with icons (continued)<br />
}<br />
f.setVisible(true);<br />
Hashtable colorList = new Hashtable ();<br />
Container mainPanel;<br />
}<br />
Figure 6—12 shows what this example looks like when you run it and pull<br />
down the Colors menu item. The command required to run this example is:<br />
java <strong>JFC</strong>Book.Chapter6.RadioButtonMenuExample<br />
The program creates a JFrame with a single menu and populates it with<br />
JRadioButtonMenuItems. Each of these menu items is labeled with a color<br />
and has an associated icon, created using the ColorFillicon class that was<br />
implemented in Chapter 4, "Graphics, Text Handling, and Printing," and<br />
filled with the color associated with the menu item. As each menu item is<br />
created, it is added to a ButtonGroup. As you'll see in Chapter 8, "Creating<br />
Custom Dialogs," the ButtonGroup manages a set of buttons and ensures<br />
that only one of them is selected at any time. An Action, implemented using<br />
the AbstractAction class, is also associated with each of the menu items,<br />
illustrating the JRadioButtonMenuItem addActionListener method,<br />
which it inherits from AbstractButton. After creating the menu, the last<br />
entry is selected and the background color of the frame's content pane is set<br />
to the corresponding color.<br />
When you click on an item on the Color menu, the previously selected<br />
item is deselected and an ActionEvent is sent to the newly selected menu<br />
item, causing the actionPerf ormed method of the associated Action to be<br />
entered. The ActionEvent delivered by a JRadioButtonMenuItem, like<br />
any other, contains a reference to the event source, which in this case is the<br />
menu item. This reference is used to get the text from the menu item and<br />
hence the color associated with it, which is used to change the content pane's<br />
background color.<br />
Changing the Menu Bar Border<br />
A final cosmetic technique that you can apply to menus is to change the border<br />
of the menu bar. By default, the menu bar has a look-and-feel specific<br />
border that separates it from the frame it is mounted on. You can use the<br />
setBorderPainted method to completely remove the border:
Figure 6-12 Radio Button menu items with icons.<br />
JMenuBar mb = new JMenuBar();<br />
mb.setBorderPainted(false); //No border<br />
The Menu Bar and the Menu System 661<br />
Alternatively, you can use setBorder to replace the default border with<br />
one of your own choice. For example, you can opt for a lowered bevel border<br />
as follows:<br />
JMenuBar mb = new JMenuBar();<br />
this.setJMenuBar(mb);<br />
mb.setBorder(BorderFactory.createBevelBorder(<br />
BevelBorder.LOWERED));<br />
which produces the result shown in Figure 6-13. You can try this example for<br />
yourself using the command<br />
<strong>Java</strong> <strong>JFC</strong>Book.Chapter6.MenuExamplelO<br />
The lowered bevel border is one of the many types of border that Swing provides—a<br />
complete discussion of borders will be found in Chapter 8.
662 Chapter 6 Menus and Toolbars<br />
Figure 6-13 A menu bar with a customized border.<br />
<strong>Core</strong> Note<br />
The JMenu API contains provisions for tear-off menus, which are<br />
detachable from the menu bar and remain floating above the desktop, like<br />
the floating toolbars that are described at the end of this chapter. At the<br />
time of this writing, this feature has not yet been implemented.<br />
Menus and Component Orientation<br />
In Chapter 3, we discussed the <strong>Java</strong> 2 component orientation feature and<br />
how it affects the way in which Swing components are drawn. As far as the<br />
menu system is concerned, component orientation affects the menu bar,<br />
menus, and the individual menu items. The same general principles that<br />
apply to all other Swing components apply equally to menus, but there are
The Menu Bar and the Menu System 663<br />
some menu-specific issues that are worth mentioning separately. We'll cover<br />
those issues in this section.<br />
Applying Component Orientation to Menus<br />
In <strong>Java</strong> 2, every component has a component orientation attribute that can be<br />
set using the setComponentOrientation method. Usually, all components<br />
in an application will need to have the same component orientation, so the<br />
Window class provides a convenience method, applyResourceBundle, that<br />
extracts the appropriate setting from a resource bundle and applies it to<br />
every component in the given window. Using this method saves you having to<br />
write the code to walk through the windows comonent hierarchy for yourself,<br />
but unfortunately it doesn't work veiy well for windows that have an<br />
associated menu system.<br />
The applyResourceBundle method works by assuming that all of the components<br />
that relate to the Window are accessible by walking the component<br />
hierarchy. In the case of menus, however, this is not true. When you create a<br />
menu bar and install its top-level menus, the menu bar itself and the toplevel<br />
menus are installed in the component hierarehy, so their component<br />
orientation will be properly set by the applyResourceBundle method.<br />
However, the menus themselves and the menu items that they contain are<br />
not actually added to the component hierarchy until they are made visible<br />
and, when they disappear, they are removed again. As a result, if you just use<br />
applyResourceBundle, when a user in a right-to-left locale clicks on a<br />
menu title to open the menu, the menu items in the drop-down menu that<br />
appears, and in any submenus, will still have the default left-to-right orientation<br />
and will therefore be inconsistent with the rest of the application.<br />
In order to fix this, it is necessary to be able to find all of the components<br />
that make up the menu hierarchy, even when they are not displayed. The<br />
JMenu class includes a set of methods that allow you to work with its components,<br />
whether or not they are currently in the hierarchy of the parent window:<br />
public int getMenuComponentCount()<br />
public Component getMenuComponent(int index);<br />
public Component[] getMenuComponents();<br />
Using these methods, it is a relatively simple task to create a set of utility<br />
methods that allow you to set the component orientation of a single menu or<br />
all of the menus on a menu bar. Listing 6-4 shows a class that contains a collection<br />
of convenience methods that do just that.
664 Chapter 6 Menus and Toolbars<br />
Listing 6—4 Setting the component orientation of menus<br />
package <strong>JFC</strong>Book.Chapter6.jdkl2;<br />
import j avax.swing.*;<br />
import j ava.awt.*;<br />
import java.util.*;<br />
public class MenuUtilities {<br />
public static void applyOrientationToMenus(JMenuBar bar) {<br />
applyOrientationToMenus(bar,<br />
bar.getComponentOrientation());<br />
}<br />
public static void applyOrientationToMenus(JMenuBar bar,<br />
String bundleName) {<br />
applyOrientationToMenus(bar,<br />
ResourceBundle.getBundle(bundleName));<br />
}<br />
public static void applyOrientationToMenus(JMenuBar bar,<br />
ResourceBundle rb) {<br />
applyOrientationToMenus(bar,<br />
ComponentOrientation.getOrientation(rb));<br />
}<br />
public static void applyOrientationToMenus(JMenuBar bar,<br />
ComponentOrientation orientation) {<br />
// Apply the given orientation to each menu<br />
// on the menu bar. This is a recursive operation,<br />
int menuCount = bar.getMenuCount();<br />
for (int i = 0; i < menuCount; i++) {<br />
applyOrientationToMenu(bar.getMenu(i), orientation);<br />
}<br />
}<br />
public static void applyOrientationToMenu(JMenu menu,<br />
ComponentOrientation orientation) {<br />
// Apply the orientation to the menu<br />
menu.setComponentOrientation(orientation);
The Menu Bar and the Menu System 665<br />
Listing 6—4 Setting the component orientation of menus (continued)<br />
}<br />
// Now handle menu items and submenus<br />
Component[] comps = menu.getMenuComponents();<br />
for (int i = 0; i < comps.length; i++) {<br />
Component comp = comps [i];<br />
comp.setComponentOrientation(orientation);<br />
if (comp instanceof JMenu) {<br />
applyOrientationToMenu((JMenu)comp, orientation);<br />
}<br />
}<br />
}<br />
The four applyOrientationToMenus methods set the component orientation<br />
for all of the menus, submenus and menu items connected to a<br />
given JMenuBar. The difference between these methods is the way in which<br />
they obtain the ComponentOrientation object:<br />
• The first variant requires only a JMenuBar argument. This form<br />
takes the component orientation of the JMenuBar itself and<br />
applies it the menu hierarchy. You would typically use this after<br />
calling the Window applyResourceBundle method, which<br />
will have installed the correct component orientation in the<br />
menu bar itself.<br />
• The next two variants get the component orientation from a<br />
ResourceBundle given either its name or a reference to the<br />
ResourceBundle itself. Refer to the discussion of Component<br />
Orientation in Chapter 3 for a description of the use of<br />
ResourceBundles in connection with component orientation.<br />
• The fourth variant is the only one that is passed a<br />
ComponentOrientation argument. This is the method that<br />
actually does the work for the other three variants and you<br />
should directly call it if you have an appropriate<br />
ComponentOrientation object.
666 Chapter 6 Menus and Toolbars<br />
The final applyOrientationToMenus method does its job by looping<br />
over all of the menus in the menu bar and applying the given component orientation<br />
to them using another helper method called applyOrientation-<br />
ToMenu. This method installs a specified ComponentOrientation in a<br />
given JMenu, all of its menu components (JMenuItems and any other components<br />
installed in the menu) and then handles any submenus (i.e., JMenu<br />
objects) by calling itself, passing a reference to the submenu. This method<br />
could, for example, be used to set the orientation of all of the items and submenus<br />
of the File menu of an application by invoking it with a reference to<br />
the JMenu object that represents the File menu. It works by getting references<br />
to all of the components in the menu and looping over them:<br />
Component[] comps = menu.getMenuComponents();<br />
for (int i = 0; i < comps.length; i++) {<br />
Component comp = comps[i];<br />
comp.setComponentOrientation(orientation);<br />
if (comp instanceof JMenu) {<br />
applyOrientationToMenu((JMenu)comp, orientation);<br />
}<br />
}<br />
The JMenu getMenuComponents method works even if the given menu is<br />
not visible on the screen.<br />
The Effects of Component Orientation on<br />
the Menu System<br />
To see what effect component orientation has on the menu system, we can<br />
use the MenuUtilities class shown in Listing 6-4 to change the component<br />
orientation of the menu hierarchy of the file editing program that we used at<br />
the beginning of this chapter, the menu for which is shown in Figure 6-8. In<br />
order to do this, we simply need to add a few lines of code to the example's<br />
main method, which will look like this:<br />
public static void main(String[] args) {<br />
ResourceBundle bundle = null;<br />
if (args.length > 0) {<br />
String lang;<br />
String country;<br />
int index = args [0] .indexOf("_") ;<br />
if (index != -1) {<br />
lang = args [0] .substring(0, index);<br />
country = args[0].substring(index + 1);<br />
} else {<br />
lang = args [0] ;
The Menu Bar and the Menu System 667<br />
country = "";<br />
}<br />
Locale locale = new Locale(lang, country);<br />
System.out.println("Country: " +<br />
locale.getDisplayCountry() +<br />
", language: " + locale.getDisplayLanguage());<br />
// Get the resource bundle for the selected locale<br />
bundle = ResourceBundle.getBundle(<br />
"<strong>Java</strong>.text.resources.LocaleElements", locale);<br />
}<br />
JFrame f = new MenuOrientationExample(<br />
"Component Orientation and Menus");<br />
// If a locale was supplied, apply its orientation<br />
// to the contents of the frame and the menus<br />
if (bundle != null) {<br />
// Apply to the frame<br />
f.applyResourceBundle(bundle);<br />
// Apply to the menus<br />
MenuUtilities.applyOrientationToMenus(<br />
f.getJMenuBar () , bundle) ;<br />
}<br />
}<br />
The first part of this method takes the first command line argument, if it is<br />
present, interprets it as a locale name, and extracts from it the country and<br />
language in order to build a Locale object. The Locale object is then used<br />
to find the correct ResourceBundle for the given locale. This is the same<br />
code that was used in Chapter 3 in connection with component orientation<br />
(refer to the section headed "Installing the Orientation in the User Interface"<br />
for a description of how this works).<br />
Aftter the user interface has been created, the applyResourceBundle<br />
method is used to set the orientation of all the non-menu components and,<br />
finally, the MenuUtilities applyOrientationToMenus method is called<br />
to set the correct component orientation for the menu hierarchy. If no command<br />
line argument is supplied, then the component orientation of the toplevel<br />
window and the menu system will not be set, which means it will adopt<br />
the default left-to-right orientation.<br />
If you run this example using the command<br />
java <strong>JFC</strong>Book.Chapter6.jdkl2.MenuOrientationExample ar_JO
668 Chapter 6 Menus and Toolbars<br />
then the component orientation will be set as it should be for Arabic speakers<br />
in Jordan—which is a right-to-left locale. If you open the File menu, you'll<br />
get the result shown in Figure 6-14.<br />
Figure 6-74 Menus in a right-to-left locale.<br />
The first thing you'll notice about this is that the File menu now appears<br />
at the right-hand side of the menu bar instead of the left. If more top-level<br />
menu items were added, they would appear to the left of the File menu. As<br />
far as the drop-down menu itself is concerned, notice the following:<br />
• The menu's right-hand side is aligned with the right-hand end<br />
of the menu on the menu bar. In a left-to-right environment, it<br />
is the left-hand side that is aligned, as you can see from Figure<br />
6-12.<br />
• The text in each menu item is now right-justified and appears to<br />
the right of the menu.<br />
• Where a menu item has an associated icon, it now appears to<br />
the right of the text and on the right-hand side of the menu
The Menu Bar and the Menu System 669<br />
instead of on the left. This is also true of menus, as the File<br />
menu on the menu bar shows.<br />
• The text for menu accelerators is left-justified and is rendered<br />
on the left of the menu.<br />
The "Recent Files" menu demonstrates another feature of a right-toleft<br />
locale—submenus appear to the left of their parent menu and the arrow<br />
that indicates their presence also points in that direction.<br />
Context-Sensitive Menus<br />
Sometimes it is useful to be able to create a menu that comes into existence<br />
just long enough for the user to make a selection from it, then disappears. If<br />
you use the Windows platform, you'll be very used to these types of menusthey<br />
pop up just about anywhere when you press the right mouse button,<br />
which is why they are referred to as "popup menus". Since such a menu is not<br />
intended to be visible for very long and its availability and perhaps its content<br />
might depend on the application's state, it would not be appropriate for it to<br />
be permanently attached to the menu bar. To create a transient menu like<br />
this, you use the JpopupMenu class.<br />
Creating a JpopupMenu<br />
In most respects, a JpopupMenu is the same as a JMenu: You add menu<br />
items, and even submenus, to it in the same way and you receive the same<br />
menu events and action events as you would from a menu attached to the<br />
menu bar. The only time that you need to take special action for a popup<br />
menu is when you create it and when you destroy it.<br />
<strong>Core</strong> Note<br />
The similarity between JMenu and JpopupMenu runs much deeper than<br />
simply resemblance—in fact, when you click on a menu to open it, what<br />
actually appears is a JpopupMenu object that contains the JMenu I terns<br />
and other components that have been added to the JMenu. This<br />
JpopupMenu is managed transparently for you by the Swing toolkit, so<br />
you don't need to be concerned with it.<br />
The user causes a popup menu to appear using a mouse operation that is<br />
platform-dependent. On the Windows platform, as we've already mentioned,<br />
pressing and then releasing the right mouse button almost always produces a<br />
popup with menu items that depend on the context in which the menu
670 Chapter 6 Menus and Toolbars<br />
appears. To avoid the need to code a platform-dependent gesture into applications,<br />
the MouseEvent class provides the ispopupTrigger method that<br />
returns true when the event describes an action that the user might expect<br />
to produce a popup. When this method returns true, the application will<br />
typically generate an appropriate popup menu and place it at the current<br />
mouse location.<br />
<strong>Core</strong> Note<br />
<strong>Java</strong> 2 version 1.3 added an ispopupTrigger method to the<br />
JpopupMenu class itself:<br />
public boolean ispopupTrigger(MouseEvent evt);<br />
To illustrate how to manage a popup menu, let's look at a simple example.<br />
The program in Listing 6-5 creates an empty frame and monitors mouse<br />
events. When the popup trigger is received, it posts a popup menu where the<br />
mouse is located. Since this example is only intended to demonstrate the<br />
mechanics of managing popups, it doesn't contain any useful application<br />
code: The menu items are only connected to a trivial event handler that<br />
allows you to see that the menu is actually doing something.<br />
Listing 6-5 Creating a popup menu<br />
package <strong>JFC</strong>Book.Chapter6;<br />
import j avax.swing.*;<br />
import j ava.awt.*;<br />
import j ava.awt.event.*;<br />
public class popupExample extends JPanel<br />
implements MouseListener, ActionListener {<br />
public popupExample() {<br />
this.addMouseListener(this);<br />
}<br />
// MouseListener interface<br />
public void mousePressed(MouseEvent evt) {<br />
if (evt.ispopupTrigger()) {<br />
createpopup(evt.getPoint() ) ;
Listing 6-5 Creating a popup menu (continued)<br />
}<br />
}<br />
public void mouseReleased(MouseEvent evt) {<br />
if (evt.ispopupTrigger()) {<br />
createpopup(evt.getPoint ()) ;<br />
}<br />
}<br />
public void mouseClicked(MouseEvent evt) {<br />
if (evt.ispopupTrigger()) {<br />
createpopup(evt.getPoint()) ;<br />
}<br />
}<br />
public void mouseEntered(MouseEvent evt) {<br />
}<br />
public void mouseExited(MouseEvent evt) {<br />
}<br />
// Create and post the popup<br />
protected void createpopup(Point point) {<br />
JMenuItem mi;<br />
popup = new JpopupMenu();<br />
mi = popup.add(new JMenuItem("Copy"));<br />
mi.addActionListener(this);<br />
mi = popup.add(new JMenuItem("Cut"));<br />
mi.addActionListener(this);<br />
mi = popup.add(new JMenuItem("Paste"));<br />
mi.addActionListener(this);<br />
JMenu submenu = new JMenu("Colors");<br />
for (int i = 0 ; i < colors.length; i++) {<br />
mi = new JMenuItem(colors [i]);<br />
submenu.add(mi);<br />
mi.addActionListener(this);<br />
}<br />
popup.add(submenu);<br />
popup.show(this, point.x, point.y);<br />
The Menu Bar and the Menu System 671
672 Chapter 6 Menus and Toolbars<br />
Listing 6-5 Creating a popup menu (continued)<br />
public void actionPerformed(ActionEvent evt) {<br />
JMenuItem mi = (JMenuItem)evt.getSource();<br />
System.out.println("Menu item activated");<br />
}<br />
public static void main(String[] args) {<br />
JFrame f = new JFrame("popup Example");<br />
f.setContentPane(new popupExample() ) ;<br />
f .setSize(300, 300) ;<br />
f.addWindowListener(new WindowAdapter() {<br />
public void windowClosing(WindowEvent evt) {<br />
System.exit(0);<br />
}<br />
});<br />
f.setVisible(true);<br />
}<br />
private JpopupMenu popup;<br />
private String [] colors = {<br />
"Black", "White", "Green", "Orange", "Pink",<br />
"Red", "Blue", "Cyan", "Gray"<br />
};<br />
}<br />
When you run this example, nothing happens until you make the appropriate<br />
gesture with the mouse. On the Windows platform, you need to press and<br />
then release the right mouse button. Since you don't actually know when<br />
writing the application which mouse event should pop up the menu, ispopupTrigger<br />
is called both when the user presses the mouse and when it is<br />
released. When this method returns true, the popup menu is created and<br />
posted. If you run this example using the command:<br />
java <strong>JFC</strong>Book.Chapter6.popupExample<br />
and then popup the menu, you get a result that looks like Figure 6-15.<br />
To post the menu, the JpopupMenu show method is used. This method is<br />
defined as follows:<br />
public void show(Component invoker, int x, int y) ;<br />
The menu is placed at coordinates (x, y) relative to the component given as<br />
the first argument; usually, this component will be the applications top-level
Figure 6-15 popup menus.<br />
The Menu Bar and the Menu System 673<br />
frame or possibly the component whose mouse event handler posts the<br />
menu.<br />
If you move the mouse over any menu item and click on it, you'll find that<br />
the usual ActionEvent is fired (as shown by the message in the window<br />
from which you started the program) and, in addition to this, the popup<br />
menu disappears. If you move the mouse over the Colors item and post the<br />
Colors submenu, you'll notice that both of the menus disappear when you<br />
make a selection. This functionality is all built into the JpopupMenu.<br />
Managing a Popup Menu<br />
If you look carefully at the code for this example, a couple of questions<br />
should occur to you. First, what happens if the user brings up a popup menu<br />
by, say, clicking the right mouse button, then immediately does the same<br />
elsewhere in the frame? Looking at the code in the mouse event handlers,<br />
lid expect a second popup to appear alongside the first one—after all,<br />
you woul
674 Chapter 6 Menus and Toolbars<br />
the code doesn't do anything to make the first popup disappear and it doesn't<br />
check whether there is a popup before creating another one. The second<br />
question you might ask is how should the user dismiss a popup if he/she<br />
doesn't want to make a selection from the menu?<br />
The answer to the first question is that there is no need to check whether<br />
there is a popup active before creating another one, because the Jpopup-<br />
Menu does this for you. When you make a popup menu visible, it checks<br />
whether there is already one visible and, if there is, the original one is canceled<br />
and disappears. This makes the handling of popup menus very simple—you<br />
don't need to retain any state information at all.<br />
The user can dismiss a popup menu without making a selection by clicking<br />
the mouse anywhere inside the application frame but outside of the<br />
popup. Because this is all done automatically, you don't need to be concerned<br />
about if or when the popup disappears: Once you make it visible,<br />
you can forget about it and just handle selections in the event handlers connected<br />
to the menu items. If you want to discard the menu yourself at any<br />
time (perhaps because you want it to be visible for only a fixed amount of<br />
time), you can do so by making it invisible using setvisible (false). A<br />
popup menu also disappears if its parent frame is made invisible under program<br />
control [using setvisible (false) on the frame] or the frame is<br />
move or resized or if it is minimized, in which case it won't reappear if the<br />
frame is made visible again. Note that a popup that becomes invisible by<br />
virtue of being automatically canceled by any means described here, or<br />
because setvisible (false) is invoked, can be made visible again later—<br />
the popup is not destroyed as long you maintain a reference to it.<br />
Popup Menu Location and Types<br />
Usually, popup menus are placed wherever the mouse happens to be pointing<br />
because most popups are brought into being by a mouse event. Being<br />
careful over the choice of your popup's location can, however, make a slight<br />
difference to your applications performance. The reason for this is that, if<br />
you create your popup in such a way that it is entirely contained by your<br />
application's frame (or by the dialog if you are using a JDialog—see the<br />
next two chapters), the JpopupMenu is created inside a lightweight container<br />
(actually a subclass of JPanel), whereas if any part of it would lie<br />
outside the frame, a heavyweight window is used instead. It is, therefore,<br />
usually preferable to try to arrange for your popup menu to lie inside the<br />
application frame, unless it is critical that it appear next to the mouse<br />
pointer under all circumstances.
The Menu Bar and the Menu System 675<br />
To show how simple it is to arrange for your popups to be lightweight, let's<br />
amend the example in Listing 6-5 so that the popup always appears inside<br />
the frame, if at all possible. Looking first at the createpopup method of<br />
Listing 6-5, you'll see that the popup is placed at the current mouse position.<br />
The modified version will use the mouse location and the size of the popup,<br />
together with the size of the frame, to deduce a nearby location that bounds<br />
the popup inside the frame. So that you can use this logic elsewhere, it will all<br />
be encapsulated in a single method called getSuitableLocation. Here is<br />
how the end of the createpopup method will look after this modification,<br />
with changes in bold:<br />
popup.add(subMenu);<br />
// Try to make the popup lightweight<br />
point = getSuitableLocation(point, popup.getPreferredSize0,<br />
this);<br />
popup.show(this, point.x, point.y);<br />
The getSuitableLocation method is given the initial location for the<br />
popup, relative to the parent panel (NOT the frame), the size of the popup<br />
and a reference to the panel. The implementation of this method is quite<br />
straightforward, but it does introduce a couple of new methods that you<br />
haven't seen before.<br />
// Get a suitable location for a JpopupMenu<br />
// to make it lightweight<br />
protected Point getSuitableLocation(Point point,<br />
Dimension d, Component c) {<br />
// First locate the parent JFrame or JDialog<br />
Component topLevel = c;<br />
while (topLevel != null &&<br />
!(topLevel instanceof JFrame) &&<br />
!(topLevel instanceof JDialog)) {<br />
topLevel = topLevel.getParent();<br />
}<br />
if (topLevel != null) {<br />
int newX; // New proposed x co-ordinate<br />
int newY; // New proposed y co-ordinate<br />
// We have a top-level parent
676 Chapter 6 Menus and Toolbars<br />
}<br />
Rectangle parentBounds = topLevel.getBounds();<br />
// Parent bounds, screen-relative<br />
// Get proposed location, relative to the screen<br />
SwingUtilities.convertPointToScreen(point, c) ;<br />
if (point.x + d.width ><br />
parentBounds.x + parentBounds.width) {<br />
// popup overhangs to the right<br />
newX = parentBounds.x + parentBounds.width - d.width;<br />
} else {<br />
newX = point.x;<br />
}<br />
if (point.y + d.height ><br />
parentBounds.y + parentBounds.height) {<br />
// popup ends below frame<br />
newY =<br />
parentBounds.y + parentBounds.height - d.height;<br />
} else {<br />
newY = point.y;<br />
}<br />
// Change location only if necessary AND if<br />
// we can make the popup fit inside the frame<br />
if (newX >= 0 && newY >= 0) {<br />
point.x = newX;<br />
point.y = newY;<br />
}<br />
// Convert back to relative coordinates<br />
SwingUtilities.convertPointFromScreen(point, c);<br />
}<br />
return point;<br />
The basic idea is simple: If the popup overhangs the frame to the right,<br />
move it left so that it is within the frame by changing the x coordinate to be<br />
that of the right of the frame minus the width of the popup. The same applies<br />
to the y coordinate, except that the frame height and popup height are used.<br />
The first problem is to find the enclosing frame or dialog. That problem is<br />
solved by following up the parent chain of the panel (or whatever component
The Menu Bar and the Menu System 677<br />
is passed in) until a frame or dialog is found. If neither is found, the original<br />
coordinates are returned unchanged.<br />
<strong>Core</strong> Tip<br />
Another way to locate the top-level window is to use the<br />
SwingUtilities getWindowAncestor method, which will work<br />
when the top-level window is a JFrame, JDialog or JWindow.77ie<br />
SwingUtilities class has many useful helper methods -1 recommend<br />
that you spend some time looking at its documentation.<br />
When the frame has been found, its bounds are obtained. Since these are<br />
in terms of screen coordinates, it is now necessary to convert the proposed<br />
location of the popup into screen-relative coordinates. To do this, the method<br />
convertPointToScreen from the utility class SwingUtilities is used.<br />
This method requires a point and the component relative to which the point s<br />
co-ordinates are measured. Having converted the coordinates so that they<br />
are compatible with those of the frame, the necessary adjustments are made<br />
based on the widths and heights of the popup and the frame and the new<br />
location is converted back to the original coordinate space using the convertScreenToPoint<br />
method and then returned to the caller.<br />
Note that it is possible that the popup can't be placed in such a way that it<br />
will always be bounded by the frame: It could be wider or taller than the<br />
frame. In this case, the original location is used unchanged.<br />
To see that this algorithm works, you can try a modified version of the<br />
example in Listing 6-5 with the command:<br />
j ava <strong>JFC</strong>Book.Chapter6.popupExample2<br />
First, try creating a popup near the middle of the frame and notice that it<br />
appears where you click. You'll also notice that the component hierarchy<br />
above the JpopupMenu is displayed in the window from which you started<br />
the program. In this case, the JpopupMenu is hosted instead a component of<br />
type JPanelpopup, which is derived from JPanel and is therefore lightweight.<br />
Now try creating a popup near the bottom right corner. You'll find<br />
that the popup appears above and to the left of where you click and that it is<br />
fully bounded by the frame. As before, it will be a JPanelpopup.<br />
Finally, resize the frame so that its height is very small and click inside it to<br />
create a new popup. In this case, the popup cannot be bounded by the frame,<br />
so it will appear exactly where you click. The hierarchy in the command window<br />
this time shows that the JpopupMenu is mounted inside the content
678 Chapter 6 Menus and Toolbars<br />
pane of a separate JWindow subclass called Windowpopup. This is an example<br />
of a heavyweight popup.<br />
Choice of Popup Type<br />
You've seen that if you arrange to place a JpopupMenu so that it is completely<br />
bounded by its top-level window, you can force the popup to be<br />
placed inside a lightweight container and therefore avoid the overhead of<br />
creating a new window. However, there is slightly more to it than this. There<br />
are, in fact, three different types of popups:<br />
Lightweight popups When a lightweight popup is used, the Jpopup-<br />
Menu is mounted inside a lightweight container<br />
derived from JPanel and added to the root pane of<br />
the top level window that the JpopupMenu is associated<br />
with. This is the least expensive in use of<br />
resources.<br />
Medmmweiglit popups A mediumweight popup is similar to a lightweight<br />
popup except that the hosting container is derived<br />
from a heavyweight AWT Panel instead of a<br />
JPanel. It is, however, still added to the root pane<br />
of the existing top-level window so there is no need<br />
to create a new top-level window. This is slightly<br />
more expensive than using a lightweight popup, but<br />
cheaper than a heavyweight.<br />
Heavyweight popup A heavyweight popup requires the creation of a new<br />
top-level window, which has the JpopupMenu<br />
mounted in its content pane. It is the most expensive<br />
way to realize a JpopupMenu.<br />
It is important to realize that the choice between a lightweight, mediumweight<br />
and heavyweight popup is made not by the application, but by the<br />
Swing toolkit, although it is possible for the developer to influence the<br />
choice. The criteria used to make the selection are as follows:<br />
1. If the placement of the JpopupMenu causes it to overhang the<br />
bounds of its parent frame, then a heavyweight popup will be<br />
used. In the previous section, we showed you how to avoid this<br />
by careful placement of the JpopupMenu relative to the parent<br />
frame.
The Menu Bar and the Menu System 679<br />
2. If the JpopupMenu is completely enclosed by its parent frame,<br />
a lightweight popup will be used, unless the developer has<br />
invoked the JpopupMenu setLightWeightpopupEnabled<br />
method with argument false. If this call has been made, then<br />
a mediumweight popup will be created instead.<br />
Why would you force the creation of a mediumweight popup by calling<br />
setLightWeightpopupEnabled (false) ? Under most circumstances, you<br />
would not do this because it incurs extra overhead. However, if you mix<br />
heavyweight AWT components and lightweight Swing components in the<br />
same frame, you may find that your popup menus do not appear if you allow<br />
Swing to create lightweight popups. This happens because heavyweight components<br />
always appear to be in front of lightweight components even if the<br />
component hierarchy would seem to suggest otherwise. As a result, if you try<br />
to popup a JpopupMenu over an AWT Panel or Canvas (or any AWT component),<br />
it will be created but will be obscured by the AWT component. In<br />
this case, you should call setLightWeightpopupEnabled (false), which<br />
will cause the JpopupMenu to be mounted in a heavyweight Panel so that it<br />
will appear in front of the original AWT component. If you do not mix AWT<br />
and Swing components, you will never need to use this method.<br />
We said earlier in this chapter that the JpopupMenu is not restricted to<br />
being used as a context-sensitive menu. It is, in fact, used internally by Swing<br />
in two cases:<br />
1. To create the drop-down part of a JMenu.<br />
2. As the drop-down list in a JComboBox (which will be discussed<br />
in Chapter 8).<br />
When Swing creates its own JpopupMenus, it is careful to place them so<br />
that a lightweight popup can be created whenever possible. In some cases,<br />
this produces slightly unexpected results. For example, when you open the<br />
selection list of a JComboBox, you would normally expect it to drop down and<br />
appear below the component. However, if the combo box is near the bottom<br />
of its enclosing window so that the drop-down would overhang its bounds,<br />
then a heavyweight popup would have to be created. To avoid this, Swing will<br />
instead place the popup above the combo box if it would then fit entirely<br />
within the window, so that a lightweight popup can be used. You don't need<br />
to do anything special to get the benefit of this behavior.
680 Chapter 6 Menus and Toolbars<br />
Placing a Popup Menu on the Desktop<br />
Instead of using the show method to create a popup at a position specified<br />
relative to some component within your application, you can also post a<br />
menu at an absolute location relative to the desktop using the JpopupMenu<br />
setLocation method. If you use this method, you must also invoke the<br />
JpopupMenu setlnvoker method to associate the popup menu with your<br />
application's frame, by passing a reference to any component within the<br />
frame. A popup created and placed in this way won't be visible until you call<br />
setVisible(true).<br />
Listing 6-6 shows how a popup menu can be placed on the desktop. This<br />
example is similar to the one you saw in Listing 6-5, except that the popup<br />
menu now contains just the list of colors that was originally on a submenu<br />
and activates the popup followed by selecting one of the colors that will actually<br />
change the background color of the application.<br />
You'll notice that the createpopup method builds the menu by adding<br />
Actions to the JpopupMenu instead of building individual JMenuItems.<br />
This approach is very convenient here, because it makes it possible to store<br />
the color name (which appears on the menu), the color value, and a reference<br />
to the component whose background color is going to be changed in the<br />
ColorChangeAction, which is, as you would expect, derived from<br />
AbstractAction. This method of attaching Actions to menus should by<br />
now be familiar to you. Storing all this information together makes the implementation<br />
of the actionPerf ormed method trivial.<br />
Listing 6-6 Placing a popup menu on the desktop<br />
package <strong>JFC</strong>Book.Chapter6;<br />
import javax.swing.*;<br />
import j ava.awt.*;<br />
import j ava.awt.event.*;<br />
import java.util.Hashtable;<br />
public class popupExample3 extends JPanel<br />
implements MouseListener {<br />
public popupExample3() {<br />
this.addMouseListener(this);
The Menu Bar and the Menu System 681<br />
Listing 6-6 Placing a popup menu on the desktop (continued)<br />
// MouseListener interface<br />
public void mousePressed(MouseEvent evt) {<br />
if (evt.ispopupTrigger()) {<br />
createpopup(evt.getPoint());<br />
}<br />
}<br />
public void mouseReleased(MouseEvent evt) {<br />
if (evt.ispopupTrigger ()) {<br />
createpopup(evt.getPoint());<br />
}<br />
}<br />
public void mouseClicked(MouseEvent evt) {<br />
if (evt.ispopupTrigger ()) {<br />
createpopup(evt.getPoint());<br />
}<br />
}<br />
public void mouseEntered(MouseEvent evt) {<br />
}<br />
public void mouseExited(MouseEvent evt) {<br />
}<br />
// Create and post the popup<br />
protected void createpopup(Point point) {<br />
JMenuItem mi;<br />
popup = new JpopupMenu ();<br />
for (int i = 0 ; i < colors.length; i++) {<br />
popup.add(new ColorChangeAction(colors[i] ,<br />
colorValues [i] , this)) ;<br />
}<br />
Dimension d = popup.getPreferredSize();<br />
Dimension screenSize =<br />
Toolkit.getDefaultToolkit() .getScreenSize () ;<br />
popup.setLocation((screenSize.width - d.width)/2,<br />
(screenSize.height - d.height)/2);<br />
popup.setlnvoker(this);<br />
popup.setvisible(true);
682 Chapter 6 Menus and Toolbars<br />
Listing 6-6 Placing a popup menu on the desktop (continued)<br />
}<br />
// An Action that sets the background of a given<br />
// component to a given color.<br />
public class ColorChangeAction extends AbstractAction {<br />
public ColorChangeAction(String name, Color color,<br />
Component comp) {<br />
super(name);<br />
this.color = color;<br />
this.comp = comp;<br />
}<br />
public void actionPerformed(ActionEvent evt) {<br />
comp.setBackground(color) ;<br />
comp.repaint () ;<br />
}<br />
protected Color color;<br />
protected Component comp;<br />
}<br />
public static void main(String[] args) {<br />
JFrame f = new JFrame ( "popup Example") ,f.setContentPane(new<br />
popupExample3());<br />
f .setSize(300, 300) ;<br />
f.addWindowListener(new WindowAdapter() {<br />
public void windowClosing(WindowEvent evt) {<br />
System.exit(0);<br />
}<br />
});<br />
f.setVisible(true);<br />
}<br />
private JpopupMenu popup;<br />
private String [] colors = {<br />
"Black", "White", "Green", "Orange", "Pink", "Red",<br />
"Blue", "Cyan", "Gray"<br />
};<br />
private Color [] colorValues = {<br />
Color.black, Color.white, Color.green, Color.orange, Color.pink,<br />
Color.red, Color.blue,<br />
Color.cyan, Color.gray<br />
};<br />
}
The Menu Bar and the Menu System 683<br />
The createpopup method builds the JpopupMenu and calls setlnvoker<br />
passing it a reference to the main panel, which is used by Jpopup-<br />
Menu to find the application frame. The location of the popup is, in this<br />
example, calculated by getting its preferred size and the size of the screen<br />
and arranging for it to be centered in the screen. The setLocation method<br />
is used to specify the correct absolute location for the popup and then set-<br />
Visible is used to make it appear. If you run this example using the command:<br />
j ava <strong>JFC</strong>Book.Chapter6.popupExample3<br />
and press and release the right mouse button inside the frame (or do whatever<br />
your platform considers to be the popup trigger), you'll find that the<br />
popup appears in the middle of the screen and that selecting a color changes<br />
the background color of the panel accordingly. If you pop up the menu and<br />
then click again inside the frame, you'll find that the popup vanishes. Since it<br />
is has been placed on the desktop, this JpopupMenu will be a heavyweight<br />
popup.<br />
Popup Menu Events<br />
Like windows, popup menus generate events. However, since popups are<br />
sometimes panels and sometimes windows, they don't generate<br />
WindowEvents. Instead, they have a dedicated event called<br />
javax. swing, event .popupMenuEvent and a listener interface<br />
j avax. swing . event. popupMenuListener, which is defined as follows:<br />
public interface popupMenuListener extends EventListener<br />
{<br />
public void popupMenuWillBecomeVisible(<br />
popupMenuEvent e);<br />
public void popupMenuWillBecomelnvisible(<br />
popupMenuEvent e);<br />
public void popupMenuCanceled(popupMenuEvent e);<br />
}<br />
The popupMenuEvent, as you might expect, is derived from EventObject.<br />
The only useful information it contains is the source of the event,<br />
which is the JpopupMenu. The reference to the event source can, as usual,<br />
be obtained using the getSource method of EventObject. You can register<br />
to receive these events using the JpopupMenu addpopupMenuListener<br />
method and remove the listener using removepopupMenuListener.<br />
The popupMenuWillBecomeVisible method is called just before the<br />
popup menu appears on the screen. A typical use for this method is to con-
684 Chapter 6 Menus and Toolbars<br />
struct the content of the JpopupMenu as late as possible, in the same way<br />
that you saw earlier how menus are often manipulated just before they<br />
become visible. This method is actually invoked before the size of the popup<br />
has been determined and, therefore, you can do anything you need to at this<br />
point. Taking this strategy to its extreme, you could create an empty JpopupMenu,<br />
register a listener on it, then make it visible using show or setvisible<br />
and populate it in the popupMenuListener's<br />
popupMenuWillBecomeVisible method. Such a technique might be useful<br />
for a popup whose content is veiy dependent on the state of the application—you<br />
could create a single JpopupMenu when the application starts and<br />
populate it as needed. As was said earlier, you can reuse a JpopupMenu as<br />
many times as you wish by using setvisible to make it appear and disappear.<br />
Similarly, popupMenuWillBecomelnvisible is called just before the<br />
popup menu vanishes. This method is analogous to the windowClosing<br />
method of WindowListener, except that you cannot stop the popup menu<br />
closing. Finally, the popupMenuCanceled method is invoked when the<br />
popup is aborted because another popup was created, the user clicked outside<br />
the popup, or the application frame was iconified.<br />
Toolbars<br />
A menu system is a very powerful way to present the commands available to a<br />
user of an application, but it can take time to navigate a hierarchy of menus<br />
to find the command you want. With good menu design, it is possible to minimize<br />
this problem by placing the functions that most users will need most<br />
frequently on a top-level menu so that only two mouse clicks are needed to<br />
reach them and, of course, these functions should also have associated keyboard<br />
accelerators. Even so, many users (myself included) don't have very<br />
good memories for function keys for anything other than the most common<br />
functions and have to fall back on using the mouse to navigate the menu<br />
structure. In cases like this, a toolbar is a good solution. As well as including<br />
commands in the application's menus, you can also create buttons for the<br />
most common ones and place them on a toolbar underneath the menu bar<br />
where they can be reached quickly.<br />
The Swing set contains a component that makes it veiy simple to create<br />
toolbars. The JToolBar class is a container that you can add to your application's<br />
top level window (or any other window) and fill with buttons. The tool-
The Menu Bar and the Menu System 685<br />
bar takes care of arranging the buttons left to right (or top to bottom if you<br />
want a vertical toolbar) and even creates the buttons for you if you add an<br />
Action instead of a button. As well as attaching itself to an application window,<br />
a toolbar can also be made to float independently of the application in<br />
its own frame so that the user can place it in any convenient location on the<br />
screen and it can be reattached to the application window later if required.<br />
<strong>Core</strong> Note<br />
In <strong>Java</strong> 2, if you set the toolbar's component orientation to be right-to-lefi,<br />
then the toolbar buttons are right-justified on the toolbar, with the first one<br />
added being placed on the extreme right, the next one to the left of it, and<br />
so on.<br />
Creating and Populating a Toolbar<br />
Creating a toolbar is extremely simple—only one line of code is necessary:<br />
JToolBar toolBar = new JToolBarO;<br />
This produces an unpopulated horizontal toolbar. Adding buttons to the<br />
toolbar is equally simple: You just treat it as a container and use the add<br />
method to line the buttons up according to the component orientation or, if<br />
your toolbar is a vertical one, from top to bottom. The example in Listing 6-7<br />
shows a toolbar that might be useful in a file editor application.<br />
Listing 6-7 A typical toolbar<br />
package <strong>JFC</strong>Book.Chapter6;<br />
import j avax.swing.*;<br />
import j ava.awt.*;<br />
import j ava.awt.event.*;<br />
public class ToolBarExamplel extends JFrame {<br />
public ToolBarExamplel(String title) {<br />
super(title);<br />
// Create the toolbar<br />
JToolBar toolBar = new JToolBarO;
686 Chapter 6 Menus and Toolbars<br />
Listing 6-7 A typical toolbar (continued)<br />
// Create the buttons to populate it<br />
JButton newButton = new JButton(new Imagelcon(<br />
getClass().getResource("images/new.gif")));<br />
JButton openButton = new JButton(new Imagelcon(<br />
getClass().getResource("images/open.gif")))•<br />
JButton saveButton = new JButton(new Imagelcon(<br />
getClass().getResource("images/save.gif")));<br />
JButton copyButton = new JButton(new Imagelcon(<br />
getClass().getResource("images/copy.gif")));<br />
JButton cutButton = new JButton(new Imagelcon(<br />
getClass().getResource("images/cut.gif")));<br />
JButton pasteButton = new JButton(new Imagelcon(<br />
getClass().getResource("images/paste.gif")));<br />
// Add the buttons to the toolbar<br />
toolBar.add(newButton);<br />
toolBar.add(openButton);<br />
toolBar.add(saveButton);<br />
toolBar.addSeparator();<br />
toolBar.add(copyButton);<br />
toolBar.add(cutButton);<br />
toolBar.add(pasteButton);<br />
// Add a text area where we would show the file<br />
JTextArea textArea = new JTextArea(10, 40);<br />
Container cp = this.getContentPane();<br />
cp.add(toolBar, BorderLayout.NORTH) ;<br />
// Put the toolbar at the top<br />
cp.add(new JScrollPane(textArea), BorderLayout.CENTER);<br />
// Text area gets the rest<br />
}<br />
public static void main(String[] args) {<br />
JFrame f = new ToolBarExamplel("Toolbar Example 1");<br />
f.addWindowListener(new WindowAdapter() {<br />
public void windowClosing(WindowEvent evt) {<br />
System.exit(0);<br />
}<br />
});<br />
f .packO ;<br />
f.setVisible(true);<br />
}<br />
}
The Menu Bar and the Menu System 687<br />
This example creates a horizontal toolbar with six buttons grouped into<br />
two logical areas. As you can see, you can use the addSeparator method to<br />
group related buttons on the toolbar; unlike the menu addSeparator<br />
method, this just adds some padding between the buttons rather than drawing<br />
a line. Figure 6-16 shows what this example looks like when you run it<br />
using the command:<br />
j ava <strong>JFC</strong>Book.Chapter6.ToolBarExamplel<br />
Figure 6-16 A frame with a toolbar.<br />
The toolbar was populated with six buttons that were created in the usual<br />
way. Since this example is only intended to demonstrate how to create a toolbar,<br />
there isn't any processing associated with these buttons. If you wanted to<br />
make this application do something useful, you would create ActionListeners<br />
and connect them to the buttons; the creation of the buttons and<br />
their connection to application logic is, of course, nothing to do with the toolbar.<br />
You can, however, make the toolbar do some of this work for you if you<br />
use Actions, as you'll see later.<br />
Whereas the menu bar has a special method to attach it to a JFrame<br />
(set JMenuBar), the toolbar does not. You just treat JToolBar as an ordinary<br />
component and place it wherever you want to. Conventionally, the toolbar<br />
goes underneath the menu bar (if there is one), but you could place it at<br />
the bottom or along the side of the frame if that suits your application layout<br />
better. Some applications might even have more than one toolbar—there is<br />
an example of this later in this chapter.
688 Chapter 6 Menus and Toolbars<br />
Once you've created a toolbar, you have some control over its appearance.<br />
You can determine its orientation using the setOrientation method:<br />
JToolBar hToolBar = new JToolBar();<br />
hToolBar.setOrientation(JToolBar.HORIZONTAL);<br />
JToolBar.vToolBar = new JToolBarO;<br />
vToolBar.setOrientation(JToolBar.VERTICAL);<br />
You can also remove the toolbar's border or select a different one from the<br />
default, as you'll see in the next example.<br />
Buttons are the most common objects to be found on the toolbars.<br />
JToolBar is, however, just a container, so you can actually add any component<br />
you want to it. Listing 6-8 adds a label and a list box to a toolbar. List<br />
boxes and combo boxes, which will be described in detail in Chapter 8, "Creating<br />
Custom Dialogs," are commonly found on the toolbars of real applications.<br />
Listing 6-8 also shows a toolbar without a border and another with a<br />
Bevel border, as shown in Figure 5-17.<br />
Listing 6-8 A Frame with customized toolbars<br />
package <strong>JFC</strong>Book.Chapter6;<br />
import javax.swing.*;<br />
import javax.swing.border.*;<br />
import j ava.awt.*;<br />
import j ava.awt.event.*;<br />
public class ToolBarExample2 extends JFrame {<br />
public ToolBarExample2(String title) {<br />
super(title);<br />
// Create a toolbar with large insets<br />
JToolBar toolBarl = new JToolBar();<br />
toolBarl.setMargin(new Insets(8,8,8,8));<br />
addActions(toolBarl) ;<br />
// Create a toolbar with default insets, no border<br />
JToolBar toolBar2 = new JToolBarO;<br />
toolBar2.setBorderPainted(false) ;<br />
addActions(toolBar2) ;<br />
// Create a toolbar with a nondefault border<br />
// and a Combo Box<br />
JToolBar toolBar3 = new JToolBar();
The Menu Bar and the Menu System 689<br />
Listing 6-8 A Frame with customized toolbars (continued)<br />
toolBar3.setBorder(<br />
BorderFactory.createRaisedBevelBorder());<br />
addActions(toolBar3) ;<br />
toolBar3 .add (new JLabelC Font:",<br />
SwingConstants.RIGHT));<br />
JList lb = new JList(new String[] {<br />
"Dialog", "Dialog Input", "Courier",<br />
"Helvetica", "WingDings" });<br />
toolBar3.add(lb);<br />
Container cp = this.getContentPane();<br />
cp.add(toolBarl, BorderLayout.NORTH);<br />
JPanel innerPanel = new JPanel(new BorderLayout());<br />
innerPanel.add(toolBar2, BorderLayout.NORTH);<br />
cp.add(innerPanel, BorderLayout.CENTER);<br />
cp.add(toolBar3, BorderLayout.SOUTH);<br />
}<br />
public void addActions(JToolBar toolBar) {<br />
toolBar.add(newAction);<br />
toolBar.add(openAction);<br />
toolBar.add(saveAction);<br />
toolBar.add(copyAction);<br />
toolBar.add(cutAction);<br />
toolBar.add(pasteAction);<br />
}<br />
public static void main(String[] args) {<br />
JFrame f = new ToolBarExample2("Toolbar Example 2");<br />
f.addWindowListener(new WindowAdapter() {<br />
public void windowClosing(WindowEvent evt) {<br />
System.exit(0);<br />
}<br />
});<br />
f.setSize(500, 300) ;<br />
f.setVisible(true);<br />
}<br />
static Class thisClass = ToolBarExample2.class;<br />
static Action newAction =<br />
new NullAction("New", new Imagelcon(<br />
thisClass.getResource("images/new.gif") ) ) ;
690 Chapter 6 Menus and Toolbars<br />
Listing 6-8 A Frame with customized toolbars (continued)<br />
static Action openAction =<br />
new NullAction("Open", new Imagelcon(<br />
thisClass.getResource("images/open.gif")));<br />
static Action saveAction =<br />
new NullAction("Save", new Imagelcon(<br />
thisClass.getResource("images/save.gif")));<br />
static Action copyAction =<br />
new NullAction("Copy", new Imagelcon(<br />
thisClass.getResource("images/copy.gif")));<br />
static Action cutAction =<br />
new NullAction("Cut", new Imagelcon(<br />
thisClass.getResource("images/cut.gif")));<br />
static Action pasteAction =<br />
new NullAction("Paste", new Imagelcon(<br />
thisClass.getResource("images/paste.gif")));<br />
}<br />
Figure 6-17 Customized toolbars.
The Menu Bar and the Menu System 691<br />
The addictions method shown in Listing 6-8 adds the six buttons that<br />
appear on the toolbars, but there isn't a JButton in sight in the code! Instead<br />
of creating the buttons directly, this example creates objects derived from<br />
AbstractAction and puts those on the toolbar. With Swing 1.1.1 and <strong>Java</strong> 2<br />
version 1.2.2, when you add an Action of any sort to a toolbar, the toolbar<br />
invokes the Actions getValue method with the key Action. SMALL_ICON<br />
to get the associated icon and also looks for text stored under the key<br />
Action.NAME, then creates a JButton for itself, passing the text and icon<br />
to it. You are not required to supply both of these attributes. If both text and<br />
an icon are supplied, the text will appear below the icon and the combination<br />
will be centered in the button. In <strong>Java</strong> 2 version 1.3, the toolbar button no<br />
longer dissplays the text, as shown in Figure 6-16. In fact, there are several<br />
differences in the way that Actions are used in <strong>Java</strong> 2 version 1.3—we'll<br />
return to this topic in "Actions and <strong>Java</strong> 2 Version 1.3" later in this chapter.<br />
Incidentally, the Null Act ion class that is used in this example is not a<br />
Swing class, but a trivial subclass of AbstractAction that just writes a message<br />
that its actionPerformed method has been called. This example<br />
doesn't do anything useful when these buttons are pressed, but it is necessary<br />
to provide a concrete Action to the toolbar and AbstractAction can't be<br />
used directly because it is abstract. Here is the implementation ofNullAction:<br />
// An action that does nothing other<br />
// than log the fact that it was invoked<br />
public class NullAction extends AbstractAction {<br />
NullAction(String name, Icon icon) {<br />
super(name, icon);<br />
}<br />
}<br />
public void actionPerformed(ActionEvent evt) {<br />
System.out.println("Action performed");<br />
}<br />
Using Actions with Menu Bars and Toolbars<br />
One of the benefits of Actions is that you can create a single Action<br />
instance and use it to give the user access to an application feature in several<br />
different ways at the same time. This section illustrates the use of Actions to<br />
create menu bars and toolbars that use the same code by adding a menu bar<br />
and a toolbar to the GraphicsDemo application that you saw in Chapter 4.<br />
After the changes in this section have been made, the application will look<br />
like Figure 5-18.
692 Chapter 6 Menus and Toolbars<br />
Figure 6-18 The Graphics Demo application with a toolbar.<br />
Restructuring the Graphics Application User Interface<br />
As you can see from Figure 6—18, all of the color and shape buttons that were<br />
on a separate panel alongside the drawing area have been placed on a pair of<br />
toolbars just below the new menu bar, along with the Print, Clear, and<br />
Undo buttons. Also, the labels that used to be at the bottom of the right-hand<br />
part of the interface have now moved underneath the GraphicsBordered-<br />
Canvas, because they take up less space there.<br />
<strong>Core</strong> Note<br />
As noted earlier, if you are using Swing I.I.I or <strong>Java</strong> 2 version 1.2.2, you'll<br />
see a slightly different user interface than that shown in Figure 6-17<br />
because the toolbar buttons will all have text describing the button's action
The Menu Bar and the Menu System 693<br />
on them. This makes the frame much wider and causes the button widths<br />
to depend on the width of the text, which gives an untidy effectJhe only<br />
way to avoid this, other than moving to <strong>Java</strong> 2 version 1.3, is to explicitly<br />
remove the text from each toolbar after you create it.<br />
When we originally developed this application in Chapter 4, three classes<br />
were involved in providing the user interface: GraphicsBorderedCanvas<br />
provided the drawing area, GraphicsDemoPane housed the buttons and<br />
labels, and GraphicsDemo enclosed the other two, placing the drawing area<br />
to the left of the buttons and labels. In the revised application, all of the buttons<br />
on GraphicsDemoPane are removed and a pair of toolbars are added at<br />
the top. This arrangement could be implemented by using the existing<br />
GraphicsBorderedCanvas, a reduced version of GraphicsDemoPane and<br />
a new pane to hold the toolbars. While this would certainly make the job of<br />
laying out the user interface simple, it turns out to be inconvenient in other<br />
ways.<br />
The GraphicsDemoPane as implemented in Chapter 4 contained the<br />
logic for handling the color and shape buttons and their effects on the buttons<br />
and labels at the bottom of the interface. When the buttons are migrated<br />
to the toolbars, it is easier to keep the code that is executed from the toolbar<br />
within the same class as that which implements the lower part of the display.<br />
For this reason, the GraphicsBorderedCanvas class is left unchanged and<br />
two new classes are created: GraphicsMenuDemoPane to replace GraphicsDemoPane<br />
and GraphicsMenuDemo to replace GraphicsDemo.<br />
In terms of layout, GraphicsMenuDemoPane will now cover the entire<br />
JFrame, apart from the menu bar, and the GraphicsBorderedCanvas will<br />
be placed on top of it, between the toolbars that occupy the upper part of the<br />
pane and the labels at the bottom. In this way, most of the application logic is<br />
kept together and, as you'll see, this maximizes code reuse between the toolbar<br />
and the menu bar.<br />
Listing 6-9 shows the implementation of the Graphic sMenuDemo class,<br />
which replaces GraphicsDemo from Chapter 4.<br />
Listing 6-9 The Graphics Demo with a toolbar<br />
package <strong>JFC</strong>Book.Chapter6;<br />
import j avax.swing.*;<br />
import j avax.swing.border.*;<br />
import j ava.awt.*;
694 Chapter 6 Menus and Toolbars<br />
Listing 6-9 The Graphics Demo with a toolbar (continued)<br />
import j ava.awt.event.*;<br />
import <strong>JFC</strong>Book.Chapter4.GraphicsBorderedCanvas;<br />
import <strong>JFC</strong>Book.Chapter4.EdgedBorder;<br />
public class GraphicsMenuDemo extends JFrame {<br />
public GraphicsMenuDemo(String title) {<br />
super (title) ;<br />
// Create the canvas in which the<br />
// drawing will be done.<br />
GraphicsBorderedCanvas c =<br />
new GraphicsBorderedCanvas();<br />
// Create the border and associate it with the canvas<br />
Border bd = new EdgedBorder(c.getBackground());<br />
c.setBackground(Color.white) ;<br />
c.setBorder(bd);<br />
// Create the pane that holds the user interface<br />
// including the toolbars<br />
GraphicsMenuDemoPane gp = new GraphicsMenuDemoPane(c),<br />
// Connect panel to canvas so that<br />
// it can enable/disable buttons<br />
c.addPropertyChangeListener(gp);<br />
// Connect the canvas to the panel<br />
// so that it can action button presses<br />
gp.setDrawingArea(c);<br />
// Select the initial color and shape<br />
// from the button panel,<br />
gp.selectTools();<br />
// Create the menu bar<br />
JMenuBar mb = new JMenuBar();<br />
this.setJMenuBar(mb);<br />
// Build the File menu<br />
JMenu fileMenu = new JMenu("File");<br />
mb.add(f i1eMenu) ;<br />
fileMenu.setMnemonic('F');<br />
gp.buildFileMenu(fileMenu);<br />
fileMenu.addSeparator();
The Menu Bar and the Menu System 695<br />
Listing 6-9 The Graphics Demo with a toolbar (continued)<br />
}<br />
}<br />
JMenuItem mi = new JMenuItem("Exit", 'x');<br />
mi.addActionListener(new ActionListener() {<br />
public void actionPerformed(ActionEvent evt) {<br />
System.exit(0);<br />
}<br />
});<br />
fileMenu.add(mi);<br />
// Add GraphicsMenuDemoPane menus to the menu bar<br />
gp.addToMenuBar(mb);<br />
this.getContentPane().add(gp);<br />
public static void main(String[] args) {<br />
GraphicsMenuDemo f = new GraphicsMenuDemo(<br />
"Graphics Menu Demo");<br />
Dimension d = f.getPreferredSize();<br />
f.setSize(d.width, 500);<br />
f.addWindowListener(new WindowAdapter() {<br />
public void windowClosing(WindowEvent evt) {<br />
System.exit(0) ;<br />
}<br />
});<br />
f . setvisible(true) ;<br />
}<br />
Much of this code is unchanged from Chapter 4. The two major differences<br />
are the way in which GraphicsBorderedCanvas and GraphicsMenuDemo-<br />
Pane are handled and the fact that the new version has a menu bar to manage.<br />
In the original implementation, there was an extra pane on which the drawing<br />
area was placed in the center and the GraphicsDemoPane to the east. Now, it<br />
is only necessary to create a GraphicsMenuDemoPane and add it to the<br />
frames content pane. The GraphicsBorderedCanvas is passed to the<br />
GraphicsMenuDemoPanes constructor and is controlled by that object.<br />
The menu bar poses an interesting problem that is typical of complex<br />
applications. While it is usually practical to divide a user interface into different<br />
functional areas and arrange to manage each area with a single class<br />
(and possibly other related classes) with little or no direct interaction<br />
between the various areas, this approach often does not work for menus,<br />
because there is only one menu bar that many parts of the application
696 Chapter 6 Menus and Toolbars<br />
might want to use. In this case, the menu bar will have a File menu with<br />
an Exit command that should be controlled from the Graphic sMenuDemo<br />
class. In addition to this, the list of drawing shapes and colors should<br />
appear as separate menus and the Print, Undo, and Clear functions<br />
should also be available on the File menu.<br />
This type of arrangement is typical of real applications: Some parts of the<br />
application will want to create menus that they manage entirely themselves,<br />
while other parts need to add menu items to existing menus, usually the<br />
File menu. The solution adopted here is to create the menu bar in the<br />
Graphic sMenuDemo class and add to it a File menu that contains the Exit<br />
command. To allow the GraphicsMenuDemoPane to add its own items to<br />
the File menu, a buildFileMenu method is implemented in Graphics-<br />
MenuDemoPane; this method is then called with the File menu JMenu<br />
object as its argument. Similarly, to allow extra menus to be added, the<br />
GraphicsMenuDemoPane implements a method called addToMenuBar that<br />
will be called with the JMenuBar object as its argument. If there were other<br />
parts of the application that needed to add new menus or new menu items,<br />
you would add methods with these names to their classes and call them when<br />
the application is initialized.<br />
Now let's look at the GraphicsMenuDemoPane, which provides almost<br />
the entire user interface, the implementation of which is shown in Listing<br />
6-10. In terms of components, it is derived from JPanel and is assigned a<br />
BorderLayout manager. On top of this, there are three other JPanels in<br />
the north, center, and south positions. The center position is occupied by<br />
the GraphicsBorderedCanvas that is passed to the GraphicsMenuDemo-<br />
Pane constructor. Placing this in the center ensures that it uses any space<br />
not used by the other two panes, so that they both retain their original sizes<br />
should the user make the application window larger. In the north position<br />
there is a JPanel that will hold two JToolBars, one above the other; this<br />
pane will also have a BorderLayout manager to maintain the relative positions<br />
of the two toolbars. Finally, the south position is occupied by yet<br />
another JPanel for the labels that show the current color and drawing<br />
shape. The first part of Listing 6-10 shows how the user interface is created.<br />
Refer to Figure 6-18 to see where each component is being placed.<br />
Don't worry about the lines of code that use the setFloatable method—<br />
they just make sure you can't accidentally detach the toolbars by clicking on<br />
them. You'll see exactly how this works later in this chapter.
Creating the Menus and the Toolbar Using<br />
Actions<br />
The Menu Bar and the Menu System 697<br />
Now that the broad outline of the user interface is in place, it's time to add<br />
the code that connects the menus and the toolbar to the code that actually<br />
performs the work of the application. In Chapter 4, everything was controlled<br />
by JButtons, so all of the application logic was contained in or<br />
accessed from ActionListeners attached to these buttons. In its revised<br />
form, most of the functions of the application can be accessed in two ways—<br />
either from the toolbar or from a menu. It is, of course, possible to continue<br />
to create simple ActionListeners and attach the same listener wherever it<br />
needs to be accessed (i.e., to a menu item and a toolbar button), but the<br />
implementation shown here encapsulates the logic from the ActionListener<br />
in a class that implements the Action interface and reuses that class<br />
wherever the action formerly provided by the ActionListener is needed.<br />
To see why this is better, let's look at how the Clear, Undo, and Print buttons<br />
are implemented.<br />
In the constructor of GraphicsMenuDemoPane, after creating the user<br />
interface as shown in Listing 6-10, Actions are created for these three buttons:<br />
// Create Action objects for the clear, undo<br />
// and print buttons<br />
clearAction = new AbstractAction("Clear",<br />
new Imagelcon(getClass().getResource(<br />
"images/clear.gif"))) {<br />
public void actionPerformed(ActionEvent evt) {<br />
graphicOps.clearCanvas();<br />
} '<br />
};<br />
undoAction = new AbstractAction("Undo",<br />
new Imagelcon(getClass().getResource(<br />
"images/undo.gif"))) {<br />
public void actionPerformed(ActionEvent evt) {<br />
graphicOps.removeLast();<br />
} '<br />
};<br />
printAction = new AbstractAction("Print",<br />
new Imagelcon(getClass().getResource(<br />
"images/print.gif"))) {<br />
public void actionPerformed(ActionEvent evt) {<br />
graphicOps.printCanvas () ;
698 Chapter 6 Menus and Toolbars<br />
Listing 6-10 Creating the toolbar and labels for the Graphics Demo<br />
package <strong>JFC</strong>Book.Chapters;<br />
import javax.swing.*;<br />
import j ava.awt.*;<br />
import j ava.awt.event.*;<br />
import <strong>Java</strong>.beans.*;<br />
import <strong>JFC</strong>Book.Chapter4.GraphicShapelcon;<br />
import <strong>JFC</strong>Book.Chapter4.ColorFilllcon;<br />
import <strong>JFC</strong>Book.Chapter4.GraphicOps;<br />
public class GraphicsMenuDemoPane extends JPanel<br />
implements PropertyChangeListener {<br />
public GraphicsMenuDemoPane(Component c) {<br />
this.setLayout(new BorderLayout());<br />
// Create and add the toolbar pane<br />
JPanel toolBarPane = new JPanel();<br />
this.add(toolBarPane, BorderLayout.NORTH);<br />
toolBarPane.setLayout(new BorderLayout());<br />
colorToolBar = new JToolBar ();<br />
colorToolBar.setFloatable(false);<br />
shapeToolBar = new JToolBar();<br />
shapeToolBar.setFloatable(false);<br />
toolBarPane.add(colorToolBar, BorderLayout.NORTH);<br />
toolBarPane.add(shapeToolBar, BorderLayout.SOUTH);<br />
// Add the pane that will contain the graphics<br />
this.add(c, BorderLayout.CENTER);<br />
// Add the pane with the current shape/color<br />
JPanel labelPane = new JPanel0;<br />
this.add(labelPane, BorderLayout.SOUTH);<br />
colorLabel.setVerticalTextPosition(<br />
SwingConstants.BOTTOM);<br />
colorLabel.setHorizontalTextPosition(<br />
SwingConstants.CENTER);<br />
colorLabel.setHorizontalAlignment (<br />
SwingConstants.CENTER),<br />
colorLabel.setVerticalAlignment(<br />
SwingConstants.BOTTOM)<br />
labelPane.add (colorLabel);<br />
shapeLabel.setVerticalTextPosition<br />
SwingConstants.BOTTOM)
The Menu Bar and the Menu System 699<br />
Listing 6-10 Creating the toolbar and labels for the Graphics Demo<br />
(continued)<br />
shapeLabel.setHorizontalTextPosition(<br />
SwingConstants.CENTER);<br />
shapeLabel.setHorizontalAlignment(<br />
SwingConstants.CENTER);<br />
shapeLabel.setVerticalAlignment(SwingConstants.BOTTOM);<br />
labelPane.add(shapeLabel);<br />
// Create Action objects for the clear,<br />
// undo and print buttons<br />
clearAction = new AbstractAction("Clear",<br />
new Imagelcon(getClass().getResource(<br />
"images/clear.gif"))){<br />
public void actionPerformed(ActionEvent evt) {<br />
}<br />
};<br />
graphicOps.clearCanvas();<br />
undoAction = new AbstractAction("Undo",<br />
new Imagelcon(getClass().getResource(<br />
"images/undo.gif"))) {<br />
public void actionPerformed(ActionEvent evt) {<br />
}<br />
};<br />
graphicOps.removeLast();<br />
printAction = new AbstractAction("Print",<br />
new Imagelcon(getClass().getResource(<br />
"images/print.gif"))){<br />
public void actionPerformed(ActionEvent evt) {<br />
}<br />
};<br />
graphicOps.printCanvas();<br />
clearAction.setEnabled(false);<br />
undoAction.setEnabled(false);<br />
printAction.setEnabled(false);<br />
// Create actions for color changes<br />
colorActions = new ColorAction[colorList.length];<br />
for (int i = 0; i < colorList.length; i++) {<br />
colorActions [i] =<br />
new ColorAction(colorList [i] , colorNames[i] ,<br />
new ColorFilllcon(colorList[i]) ) ;<br />
}<br />
// Create actions for shape changes<br />
shapeActions = new ShapeAction[shapeList.length];<br />
for (int i = 0; i < shapeList.length; i++) {<br />
shapeActions[i] = new ShapeAction(shapeList[i], shapeNames[i],
700 Chapter 6 Menus and Toolbars<br />
Listing 6-10 Creating the toolbar and labels for the Graphics Demo<br />
(continued)<br />
}<br />
}<br />
JButton b;<br />
new GraphicShapelcon(shapeList[i]));<br />
// Add actions to the toolbars<br />
for (int i = 0; i < colorActions.length; i++) {<br />
b = colorToolBar.add(colorActions[i]);<br />
b.setToolTipText(<br />
(String)colorActions[i].getValue(Action.NAME));<br />
}<br />
// Add shapes to the shape toolbar<br />
for (int i = 0; i < shapeActions.length; i++) {<br />
b = shapeToolBar.add(shapeActions [i]);<br />
b.setToolTipText (<br />
(String)shapeActions[i].getValue(Action.NAME));<br />
}<br />
// Add a separator and then the print/clear/undo<br />
actions<br />
shapeToolBar.addSeparator() ;<br />
b = shapeToolBar.add(printAction);<br />
b.setToolTipText("Print...");<br />
b = shapeToolBar.add(clearAction);<br />
b.setToolTipText("Clear");<br />
b = shapeToolBar.add(undoAction);<br />
b.setToolTipText("Undo");<br />
// Associate drawing area<br />
public void setDrawingArea(GraphicOps graphicOps) {<br />
this.graphicOps = graphicOps;<br />
}<br />
// Select initial color and shape<br />
public void selectTools() {<br />
colorLabel.setlcon(<br />
(Icon)colorActions[0].getValue(Action.SMALL_ICON));<br />
graphicOps.setColor(colorActions[0].getColor());<br />
shapeLabel.setlcon(<br />
(Icon)shapeActions[0].getValue(Action.SMALL_ICON));<br />
graphicOps.setShape(shapeActions[0].getShape());<br />
} '
The Menu Bar and the Menu System 701<br />
Listing 6-10 Creating the toolbar and labels for the Graphics Demo<br />
(continued)<br />
// PropertyChangeListener Interface<br />
public void propertyChange(PropertyChangeEvent evt) {<br />
if (evt.getPropertyName().equals<br />
(GraphicOps.SHAPE_PROPERTY)) {<br />
int count = ((Integer)evt.getNewValue()).intValue();<br />
boolean state = (count > 0);<br />
}<br />
clearAction.setEnabled(state);<br />
undoAction.setEnabled(state);<br />
printAction.setEnabled(state);<br />
}<br />
// Add to the application's file menu<br />
public void buildFileMenu(JMenu fileMenu) {<br />
JMenuItem mi;<br />
mi = fileMenu.add(clearAction);<br />
mi.setMnemonic ( '1') ;<br />
mi = fileMenu.add(undoAction);<br />
mi.setMnemonic('U');<br />
mi = fileMenu.add(printAction);<br />
mi.setMnemonic('P');<br />
fileMenu.addSeparator();<br />
JCheckBoxMenuItem cmi;<br />
cmi = new JCheckBoxMenuItem("Show color toolbar",<br />
true);<br />
cmi.addActionListener(<br />
new ToolBarViewAction(cmi, colorToolBar));<br />
fileMenu.add(cmi);<br />
cmi = new JCheckBoxMenuItem("Show shape toolbar",<br />
true);<br />
cmi.addActionListener(<br />
new ToolBarViewAction(cmi, shapeToolBar));<br />
fileMenu.add(cmi);<br />
}<br />
// Add new menus to application's menu bar<br />
public void addToMenuBar(JMenuBar mb) {<br />
JMenu mn;
702 Chapter 6 Menus and Toolbars<br />
Listing 6-10 Creating the toolbar and labels for the Graphics Demo<br />
(continued)<br />
// Add the colors menu<br />
mn = new JMenu("Colors");<br />
mn.setMnemonic('C');<br />
for (int i = 0; i < colorActions.length; i++) {<br />
mn.add(colorActions[i]);<br />
}<br />
mb.add(mn);<br />
// Add the shapes menu<br />
mn = new JMenu("Shapes");<br />
mn.setMnemonic('S');<br />
for (int i = 0; i < shapeActions.length; i++) {<br />
mn.add(shapeActions[i]);<br />
}<br />
mb.add(mn);<br />
}<br />
// Labels showing the current color and current shape<br />
protected JLabel colorLabel = new JLabel("Color");<br />
protected JLabel shapeLabel = new JLabel("Shape");<br />
// Toolbars for shapes and colors<br />
protected JToolBar colorToolBar; // Color tools<br />
protected JToolBar shapeToolBar; // Shape tools<br />
// Coloring buttons<br />
private static Color [] colorList = {<br />
Color.black, Color.blue,<br />
Color.cyan, Color.darkGray,<br />
Color.gray, Color.green,<br />
Color.lightGray, Color.magenta,<br />
Color.orange, Color.pink,<br />
Color.red, Color.yellow,<br />
Color.white };<br />
private String colorNames[] = {<br />
"Black", "Blue", "Cyan", "Dark Gray",<br />
"Gray", "Green", "Light Gray","Magenta",<br />
"Orange","Pink","Red","Yellow",<br />
"White" };<br />
private ColorAction[] colorActions;<br />
// Shape buttons<br />
private static int [] shapeList = {
The Menu Bar and the Menu System 703<br />
Listing 6-10 Creating the toolbar and labels for the Graphics Demo<br />
(continued)<br />
GraphicOps.DRAWN_LINE,<br />
GraphicOps . DRAWN__RECT,<br />
GraphicOps.DRAWN_ROUND_RECT,<br />
GraphicOps.FILLED_RECT,<br />
GraphicOps.FILLED_ROUND_RECT,<br />
GraphicOps.DRAWNJDVAL,<br />
GraphicOps.FILLED^OVAL };<br />
private static String [] shapeNames = {<br />
"Line",<br />
"Rectangle",<br />
"Rounded Rectangle",<br />
"Filled Rectangle",<br />
"Filled Rounded Rectangle",<br />
"Oval",<br />
"Filled Oval" };<br />
private ShapeAction [] shapeActions;<br />
// Actions for the print/undo/clear buttons<br />
private Action clearAction;<br />
private Action undoAction;<br />
private Action printAction;<br />
// Connection to drawing area<br />
private GraphicOps graphicOps;<br />
//<br />
// Inner classes ColorAction, ShapeAction, ToolBarViewAction<br />
// - shown below<br />
//<br />
}<br />
};<br />
clearAction.setEnabled(false);<br />
undoAction.setEnabled(false);<br />
printAction.setEnabled(false) ;
704 Chapter 6 Menus and Toolbars<br />
If you compare this to the implementation in Chapter 4, you'll find that<br />
the actionPerf ormed methods here are unchanged. So what is the benefit<br />
of creating an Action object? In the case of these three buttons, there are<br />
two main benefits.<br />
The first is encapsulation. Instead of requiring you to create separate<br />
menu items and buttons to which you would connect the ActionListener<br />
and which would then be added to the menu and the toolbar, the Swing API<br />
allows Actions to be added directly to menus and toolbars. Furthermore, as<br />
you have seen, the AbstractAction class allows you to associate a text<br />
name and an icon with the action by passing them to the constructor. When<br />
you add an Action of any type to a menu, the text string is extracted from<br />
the Action and used as the label of the menu item and, similarly, when you<br />
assign an Action to a toolbar, the icon is used on the button that appears on<br />
the button. This means that you can almost completely specify an Action,<br />
including the way in which it will appear on the user interface, at the time of<br />
its creation and then just quote a reference to it later in whatever context you<br />
want to use it. To show how this works in practice, here is part of the implementation<br />
of the buildFileMenu method of GraphicsMenuDemoPane, in<br />
which we add the Clear, Undo, and Print actions to the File menu:<br />
// Add to the application's file menu<br />
public void buildFileMenu(JMenu fileMenu) {<br />
JMenuItem mi;<br />
}<br />
mi = fileMenu.add(clearAction);<br />
mi.setMnemonic( ' 1 ' ) ;<br />
mi = fileMenu.add(undoAction);<br />
mi.setMnemonic('U');<br />
mi = fileMenu.add(printAction);<br />
mi.setMnemonic('P');<br />
fileMenu.addSeparator () ;<br />
// Further code shown later<br />
As you can see, the menu entries are created by simply adding the<br />
AbstractAction for each function directly to the File menu. The code<br />
that creates the menu entries (and, elsewhere, the toolbar buttons) does not<br />
need to know how to connect them to application logic—the connection is<br />
already made through the Action. The definition of this variant of the<br />
JMenu add function used here is as follows:<br />
public JMenuItem add(Action);
The Menu Bar and the Menu System 705<br />
The return value is a reference to the JMenuItem that has been created<br />
for us. In our case, this reference is used only to add a keyboard accelerator<br />
for the action using the setMnemonic method that you saw earlier in this<br />
book in connection with JButtons. This is done by using the JMenuItem<br />
setMnemonic method, for example:<br />
mi.setMnemonic('1');<br />
The code that translates Actions into user interface components does not<br />
automatically assign mnemonics. However, in <strong>Java</strong> 2 version 1.3, it is possible<br />
to use the attributes of the Action to arrange for an accelerator key and a<br />
tooltip to be associated with the menu item, as you'll see in "Actions and <strong>Java</strong><br />
2 version 1.3" later in this chapter. If you are using Swing 1.1.1 or <strong>Java</strong> 2 version<br />
1.2.2, you have to explicit}' add these yourself if you need them.<br />
The second benefit of using an Action becomes evident when you<br />
remember how the Clear, Undo, and Print buttons are used. When the<br />
application starts, these three toolbar buttons are all disabled. They only<br />
become enabled when a shape is drawn on the GraphicsBorderedCanvas<br />
and they can later become disabled again after, for example, the Clear button<br />
is pressed. In this version of the application, it is also necessary to enable<br />
and disable the corresponding menu items to keep them in step with the<br />
state of their corresponding buttons. If Actions hadn't been used, this<br />
would have meant retaining references to the three JMenultems and the<br />
three JButtons on the toolbar and changing their states at the same time.<br />
Instead of this, however, it is now possible to just keep references to the<br />
AbstractAction objects and use the setEnabled method of the Action<br />
interface to enable and disable the action itself. When you do this, the<br />
change in state of the Action is propagated to both the corresponding menu<br />
item and the toolbar button. As well as reducing the amount of state that<br />
needs to be saved, this facility also allows most of the application to deal in<br />
terms of application-related objects (i.e., an AbstractAction object that<br />
describes an action to be performed by the application) and allows the application<br />
to enable and disable access to a feature by changing the state of the<br />
application object, rather than by directly manipulating a part of the user<br />
interface.<br />
Now let's look at how the color and shape buttons on the toolbar and the<br />
corresponding menu items are implemented. After the discussion above, you<br />
probably won't be surprised to find that Actions are used to encapsulate the<br />
logic for these buttons as well. As you already know, when an Action is<br />
added to a menu, the text associated with it is used as the label of the menu<br />
item. Similarly, when an Action is added to a toolbar, the toolbar uses the
706 Chapter 6 Menus and Toolbars<br />
Action interface's getvalue method to get an icon to display on the toolbar<br />
button. Yon've already seen an icon that can be used for both the shape and<br />
color buttons—the ColorFilllcon and GraphicShapelcon classes that<br />
were developed in Chapter 4 to decorate the JButtons that we used in the<br />
earlier implementation. Here, instead of creating a button and assigning it<br />
the appropriate icon, the icon is assigned to an Action and the Action is<br />
then placed on the toolbar, which ultimately has the same effect.<br />
Unlike the Print, Clear, and Undo buttons, which are self-describing<br />
because they have dedicated actionPerf ormed methods that don't need<br />
any information over and above the fact that they have been entered, it is<br />
necessary to retain some state for each color and shape button. In Chapter 4,<br />
you saw that the actionPerf ormed method for each of these buttons<br />
needed to know the color or shape that the button was associated with so that<br />
it could change the state of the GraphicsBorderedCanvas and it also<br />
needed access to the button's icon to change the icon displayed on the labels<br />
that show the current drawing color or shape. This information was obtained<br />
by having the actionPerf ormed handler extract the source of the button<br />
press from the ActionEvent. It could then obtain the icon by casting the<br />
event source to a JButton and using the JButton getlcon method. The<br />
shape number or color was also stored with the button, by making use of the<br />
JComponent getClientProperty and putClientProperty methods.<br />
Here is the original implementation of the actionPerf ormed method for a<br />
color selection button:<br />
public void actionPerformed(ActionEvent evt) {<br />
JButton b = (JButton)evt.getSource();<br />
Color color = (Color)b.getClientProperty(<br />
DRAW__COLOR) ;<br />
Icon g = b.getlcon();<br />
colorLabel.setlcon(g);<br />
graphicOps.setColor(color) ;<br />
} '<br />
In our revised implementation, a new color can be selected from either a<br />
menu item or a button on the toolbar. Since menu items and toolbar buttons<br />
are both instances of the AbstractButton class, and since AbstractButton<br />
is derived from JComponent, one possibility is to attempt to preserve the<br />
technique used in the earlier implementation by rewriting the code like this:<br />
public void actionPerformed(ActionEvent evt) {<br />
AbstractButton b = (AbstractButton)evt.getSource0;<br />
Color color = (Color)b.getClientProperty(DRAW_COLOR);
Icon g = b.getlconO ;<br />
colorLabel.setlcon(g);<br />
graphicOps.setColor(color);<br />
} '<br />
The Menu Bar and the Menu System 707<br />
To make this work, it would be necessary to store the color or shape number<br />
as a client property of both the menu item and the toolbar button when they<br />
are created. This is not really very convenient, especially as we are aiming to<br />
simplify the creation of the GUI by just adding an Action to a menu or toolbar<br />
and not changing the properties of or even directly using the component that<br />
happens to get created. There is, however, a much better solution: instead of<br />
associating the information that is needed when the action is triggered with the<br />
source of the action, it should instead be associated with the action itself. This<br />
is, of course, the solution that was used in the first example in this chapter that<br />
used the AbstractAction class.<br />
In order to add an action to a menu or a toolbar, you have to create a class<br />
that implements the Action interface by providing the actionPerf ormed<br />
method, the text label, and the icon. For the simple case of the Print,<br />
Clear, and Undo actions, it was sufficient to use a subclass of the Swing<br />
AbstractAction class (which implements Action and therefore provides a<br />
way to store the label and the icon), to which only an actionPerf ormed<br />
method was added. To save the additional information needed for the color<br />
and shape buttons, as you saw earlier in this chapter, you need to do slightly<br />
more than this and implement subclasses of AbstractAction that also have<br />
a field to hold a color or a shape number. It isn't necessary to take any special<br />
action for the icon, because AbstractAction itself can store the icon. Here<br />
are the two classes that are used to implement the Actions for the color and<br />
shape menu items and toolbar buttons; these are actually implemented as<br />
inner classes of GraphicsMenuDemoPane, so they can directly access the<br />
graphicOps member:<br />
// Action to handle color change<br />
class ColorAction extends AbstractAction {<br />
ColorAction(Color color. String name, Icon icon) {<br />
super(name, icon);<br />
this.color = color;<br />
}<br />
public void actionPerformed(ActionEvent evt) {<br />
colorLabel.setlcon((Icon)this.getValue(<br />
Action.SMALL_ICON));<br />
graphicOps.setColor(color);<br />
} '
708 Chapter 6 Menus and Toolbars<br />
}<br />
public Color getColor() {<br />
}<br />
return color;<br />
private Color color; // The associated color<br />
// Action to handle shape change<br />
class ShapeAction extends AbstractAction {<br />
ShapeAction(int shape, String name, Icon icon) {<br />
super(name, icon);<br />
this.shape = shape;<br />
}<br />
public void actionPerformed(ActionEvent evt) {<br />
shapeLabel.setlcon((Icon)this.getValue(<br />
Action.SMALL_ICON));<br />
graphicOps.setShape(shape) ;<br />
}<br />
} '<br />
public int getShapeO {<br />
return shape;<br />
}<br />
private int shape; // The associated shape<br />
As you can see, the actionPerf ormed methods of both these classes perform<br />
the same function as the versions shown above, but they are more compact<br />
and now deal only with local data. Furthermore, the same code is used<br />
whether the action is performed as a result of selection from the toolbar or<br />
the menu. The ColorAction class has a constructor that accepts a Color,<br />
the text label, and an Icon. The last two of these arguments are passed<br />
directly to the AbstractAction constructor: Only the color is stored by<br />
ColorAction itself. ShapeAction, likewise, saves the shape number and<br />
passes the text label and the icon to its superclass. Creating the actions for<br />
each of the color and shape buttons and adding them to the two toolbars is<br />
now very simple:<br />
// Create actions for color changes<br />
colorActions = new ColorAction[colorList.length];<br />
for (int i = 0; i < colorList.length; i++) {<br />
colorActions[i] =<br />
new ColorAction(colorList[i], colorNames[i],<br />
new ColorFilllcon(colorList[i] )) ;
}<br />
The Menu Bar and the Menu System 709<br />
// Create actions for shape changes<br />
shapeActions = new ShapeAction[shapeList.length] ;<br />
for (int i = 0; i < shapeList.length; i++) {<br />
shapeActions[i] =<br />
new ShapeAction(shapeList [i] , shapeNames[i] ,<br />
new GraphicShapelcon(shapeList[i] )) ;<br />
}<br />
JButton b;<br />
// Add actions to the toolbars<br />
for (int i = 0; i < colorActions.length; i++) {<br />
b = colorToolBar.add(colorActions[i]);<br />
b.setToolTipText(<br />
(String)colorActions[i].getValue(Action.NAME));<br />
}<br />
// Add shapes to the shape toolbar<br />
for (int i = 0; i < shapeActions.length; i++) {<br />
b = shapeToolBar.add(shapeActions[i] ) ;<br />
b.setToolTipText(<br />
(String)shapeActions[i].getValue(Action.NAME));<br />
}<br />
Having created the actions, the add method is used to arrange for an<br />
appropriate button to appear on the toolbar and, as a bonus, a tool tip is<br />
added by extracting the text from the action and invoking setToolTipText<br />
on the newly-created toolbar button.<br />
<strong>Core</strong> Note<br />
In <strong>Java</strong> 2 version 1.3, you can arrange to have a tooltip associated with the<br />
menu item or toolbar button by storing the text for the tooltip as the<br />
SHORT_DESCRIPTION property of an Action. See "Actions and <strong>Java</strong> 2<br />
Version 1.3"later in this chapter for details.<br />
Once they have been created, the exact same Action objects can also be<br />
used to create the Shapes and Colors menus that appear on the menu bar:<br />
// Add new menus to application's menu bar<br />
public void addToMenuBar(JMenuBar mb) {<br />
JMenu ran;
710 Chapter 6 Menus and Toolbars<br />
// Add the colors menu<br />
mn = new JMenu("Colors");<br />
mn.setMnemonic('C');<br />
for (int i = 0; i < colorActions.length; i++) {<br />
mn.add(colorActions [i] ) ;<br />
}<br />
mb.add(mn);<br />
// Add the shapes menu<br />
mn = new JMenu("Shapes");<br />
mn.setMnemonic('S');<br />
for (int i = 0; i < shapeActions.length; i++) {<br />
mn.add(shapeActions [i]) ;<br />
}<br />
mb.add(mn);<br />
}<br />
Again, after creating the new menus, they are populated with menu items<br />
by simply adding the Actions. This automatically creates the menu item<br />
with the correct label and connects it to the correct Action, so that the<br />
actionPerf ormed method will be invoked when the menu item is selected.<br />
Enabling and Disabling Functionality Using<br />
Actions<br />
Using Actions instead of directly manipulating buttons has another effect<br />
on the code. In Chapter 4, it was necessary to register to receive notification<br />
of changes to the SHAPE_PROPERTY of the GraphicsBorderedCanvas in<br />
order to keep track of the number of shapes on the canvas and therefore<br />
enable the Print, Clear, and Undo buttons as necessary. Now that Actions<br />
are being used, the property-Change method should be changed to enable<br />
or disable the Actions associated with the functions that these buttons and<br />
menu items provide, rather than directly enabling or disabling the menu<br />
items and toolbar buttons themselves:<br />
// PropertyChangeListener Interface<br />
public void propertyChange(PropertyChangeEvent evt) {<br />
if (evt.getPropertyName().equals(<br />
GraphicOps.SHAPE_PROPERTY)) {<br />
int count = ( (Integer)<br />
evt.getNewValue()).intValue();<br />
boolean state = (count > 0);<br />
clearAction.setEnabled(state);
}<br />
}<br />
undoAction.setEnabled(state) ;<br />
printAction.setEnabled(state) ;<br />
The Menu Bar and the Menu System 711<br />
Changing the enabled state of the action causes the menu item and the<br />
toolbar button to which it is connected to make the same state change. The<br />
propertyChange method doesn't know which user interface elements are<br />
being affected by its actions of course—it can simply assume that disabling<br />
the action stops the corresponding facility from being activated from the user<br />
interface and enabling it to make the facility available again.<br />
Making Toolbars Selectable<br />
Finally, a piece of gloss was added to this version of the application. The<br />
interface now uses two toolbars, which take up quite a bit of screen space.<br />
Some users might want to free as much of the screen as possible for use by<br />
the application proper, in this case to maximize the area occupied by the<br />
drawing canvas. In part, the situation has already been improved by comparison<br />
to the original implementation because the buttons that occupied the<br />
right-hand side of the interface have been removed, allowing more of the<br />
horizontal screen area to be used. If screen space is at a premium, things<br />
could be improved further if it were possible to remove the toolbars as well.<br />
This wouldn't make the application useless—all the functions of the toolbars<br />
can still be accessed from the menus, which take up far less space.<br />
This is, of course, the kind of trade-off that you should allow users to<br />
make—after all, one of the reasons given at the beginning of this section for<br />
including toolbars was to make access to commonly used functions quicker<br />
than it would be if the user had to traverse the menu hierarchy! To allow the<br />
user to decide whether the toolbars are to be shown, two checkbox menu<br />
items have been added to the File menu at the end of the buildFileMenu<br />
method (this code wasn't shown when this method was described earlier in<br />
this section):<br />
public void buildFileMenu(JMenu fileMenu) {<br />
JCheckBoxMenuItem cmi;<br />
cmi = new JCheckBoxMenuItem("Show color toolbar", true);<br />
cmi.addActionListener(new ToolBarViewAction(<br />
cmi, colorToolBar));<br />
fileMenu.add(cmi);
712 Chapter 6 Menus and Toolbars<br />
cmi = new JCheckboxMenuItem("Show shape toolbar", true);<br />
cmi.addActionListener(new ToolBarViewAction(<br />
cmi, shapeToolBar));<br />
fileMenu.add(cmi);<br />
}<br />
Again, an Action is used to process changes in state of the checkbox<br />
menu item. Notice, though, that since there is no way to automatically create<br />
a checkbox menu item by adding an Action to a menu, we have to create the<br />
menu item and add the Action to it as an ActionListener.<br />
When the state of the checkbox is changed, it is necessary to know which<br />
toolbar is affected. To ensure that this information is available, a subclass of<br />
AbstractAction is created to store a reference to the toolbar that it refers<br />
to and to handle the state change. This class is an inner class of Graphics -<br />
MenuDemoPane, implemented as follows:<br />
// Action to handle showing and hiding of toolbars<br />
class ToolBarViewAction extends AbstractAction {<br />
ToolBarViewAction(JCheckBoxMenuItem cmi, JToolBar tb) {<br />
this.cmi = cmi;<br />
this.tb = tb;<br />
}<br />
}<br />
public void actionPerformed(ActionEvent evt) {<br />
tb.setVisible(cmi.getState ());<br />
}<br />
protected JCheckboxMenuItem cmi;<br />
protected JToolBar tb;<br />
References to both the checkbox menu item and the toolbar are stored in the<br />
ToolBarViewAction object. When the checkbox changes state, the action-<br />
Performed method of the ToolBarViewAction is called. All that is necessary<br />
is to get the state of the checkbox (using the reference stored in the object)<br />
and change the toolbars visibility to match that state, so that when the checkbox<br />
is ticked the toolbar is visible and vice versa.<br />
Floating and Docking Toolbars<br />
The toolbars that have been shown so far have been attached to the application<br />
window, but you can also arrange for a toolbar to float. A floatable tool-
The Menu Bar and the Menu System 713<br />
bar may start life attached to the application frame and then be detached, or<br />
it may be created in a floating state.<br />
Creating a Floatable Toolbar<br />
There are several methods that you need to use if you want to create a floatable<br />
toolbar and make it float under program control:<br />
public void setFloatable(boolean b);<br />
public void setFloating(boolean b, Point p);<br />
public void setFloatingLocation(int x, int y);<br />
A toolbar must be floatable in order for it to become detached from the<br />
application frame. You can use the setFloatable method to make the toolbar<br />
floatable but, in fact, all toolbars are floatable by default so, if you don't<br />
want your applications toolbar to float, you need to use setFloatable<br />
(false). Assuming that a toolbar is floatable, it won't actually detach<br />
itself until setFloating is called. This method serves the dual purpose of<br />
detaching the toolbar from the frame when its first argument is true and reattaching<br />
or docking it later when it is called with its first argument set to<br />
false. The setFloatingLocation method is used to control where the<br />
toolbar is placed when it is detached. You'll see how this method is used at<br />
the end of this chapter.<br />
Floating and docking toolbars are actually supported not by JToolBar<br />
itself, but by the basic toolbar UI class. The setFloatable method belongs<br />
to JToolBar, but the other two, along with some others that you'll see<br />
shortly, are provided by the BasicToolBarUI class, not by JToolBar. Fortunately,<br />
however, the various look-and-feel implementations either use the<br />
basic toolbar UI class directly or extend it, so their toolbars are all built<br />
around BasicToolBarUI. Therefore, all three standard look-and-feels support<br />
floating and docking toolbars. You'll notice that all the examples in this<br />
section check that the UI is an instance of BasicToolBarUI before<br />
attempting to use either of the last two methods, to avoid an exception should<br />
a new look-and-feel with a separate UI be introduced.<br />
Although you can detach and reattach floatable toolbars under program<br />
control, it is usually the user that controls whether the toolbar is floating or<br />
docked. When it is docked, as you have seen, the toolbar normally resides<br />
near the top of the application frame. When it is floating, however, it is
714 Chapter 6 Menus and Toolbars<br />
housed in a separate top-level frame that the user can drag around the screen<br />
with the mouse. The example in Listing 6-11 shows how to create a toolbar<br />
that the user can detach from the frame.<br />
Listing 6-11 Creating a floating toolbar<br />
package <strong>JFC</strong>Book.Chapter6;<br />
import j avax.swing.*;<br />
import j avax.swing.plaf.basic.BasicToolBarUI;<br />
import javax.swing.border.*;<br />
import j ava.awt.*,import<br />
j ava.awt.event.*;<br />
public class ToolBarExample4 extends JFrame {<br />
public ToolBarExample4(String title) {<br />
super(title);<br />
}<br />
JToolBar toolBar = new JToolBar();<br />
toolBar.setMargin(new Insets(8, 12, 8, 12));<br />
addActions(toolBar);<br />
// Set various floating control attributes:<br />
if (toolBar.getUI() instanceof BasicToolBarUI) {<br />
BasicToolBarUI ui =<br />
(BasicToolBarUI)(toolBar.getUI());<br />
ui.setDockingColor(Color.orange);<br />
ui.setFloatingColor(Color.green);<br />
toolBar.setFloatable(true);<br />
}<br />
JTextArea textArea = new JTextArea(10, 40);<br />
Container cp = this.getContentPane();<br />
cp.add(toolBar, BorderLayout.NORTH);<br />
// Put the toolbar at the top<br />
cp.add(new JScrollPane(textArea),<br />
BorderLayout.CENTER);<br />
// Text area gets the rest<br />
public void addActions(JToolBar toolBar) {<br />
toolBar.add(newAction);<br />
toolBar.add(openAction);<br />
toolBar.add(saveAction);
Listing 6-1 I Creating a floating toolbar (continued)<br />
toolBar.add(copyAction);<br />
toolBar.add(cutAction);<br />
toolBar.add(pasteAction);<br />
}<br />
The Menu Bar and the Menu System 715<br />
public static void main(String[] args) {<br />
JFrame f = new ToolBarExample4("Toolbar Example 4");<br />
f.addWindowListener(new WindowAdapter() {<br />
public void windowClosing(WindowEvent evt) {<br />
System.exit(0);<br />
}<br />
});<br />
f .packO ;<br />
f.setVisible(true);<br />
}<br />
static Class thisClass = ToolBarExample4.class;<br />
static Action newAction = new NullAction("New",<br />
new Imagelcon(thisClass.getResource(<br />
"images/new.gif") ) ) ;<br />
static Action openAction = new NullAction("Open",<br />
new Imagelcon(thisClass.getResource("<br />
images/open.gif")));<br />
static Action saveAction = new NullAction("Save",<br />
new Imagelcon(thisClass.getResource(<br />
"images/save.gif") ) ) ;<br />
static Action copyAction = new NullAction("Copy",<br />
new Imagelcon(thisClass.getResource(<br />
"images/copy.gif")));<br />
static Action cutAction = new NullAction("Cut",<br />
new Imagelcon(thisClass.getResource (<br />
"images/cut.gif")));<br />
static Action pasteAction = new NullAction("Paste",<br />
new Imagelcon(thisClass.getResource (<br />
"images/paste.gif")));<br />
You can run this example using the command:<br />
java <strong>JFC</strong>Book.Chapter6.ToolBarExample4<br />
If you look at Listing 6-11, you'll see that the toolbar was made floating by<br />
calling setFloatable (true). This was strictly unnecessary, because this is<br />
the default. Before this method was called, though, a check was made that
716 Chapter 6 Menus and Toolbars<br />
the toolbars UI class is an instance of BasicToolBarUl. The UI class reference<br />
is obtained from the component using the getui method, which you'll<br />
find out more about in Chapter 13, "The Pluggable Look and Feel." If this<br />
example program is ever run with a look-and-feel whose toolbar is implemented<br />
with a different UI class, it won't be able to control some aspects of<br />
floating and docking that might be provided by that look-and-feel. The<br />
explicit check that is made here is made not so that setFloatable can be<br />
used (because setFloatable is a JToolBar method and so is always available)—it<br />
is necessary because the UI class reference must be cast to a<br />
BasicToolBarUl reference before it can be used in conjunction with the<br />
setDockingColor and setFloatingColor methods, which belong to the<br />
UI class. These methods will be discussed shortly. Casting without an explicit<br />
check would risk a ClassCastException sometime in the future.<br />
Detaching the Toolbar<br />
To make the toolbar float, place the mouse over the ridged area to the left of<br />
the buttons, press a mouse button, and drag the toolbar. When you do this,<br />
you'll find that a color-filled rectangle appears over the toolbar and then follows<br />
the mouse around. In this case, the rectangle will be either green or<br />
orange—the exact color will depend on where it is on the screen, as<br />
described in "Docking the Toolbar" below. If you move the colored rectangle<br />
away from the edges of the frame or right outside the main window and<br />
release the mouse, the toolbar reappears in a frame of its own and you can<br />
move it elsewhere by dragging on its caption bar, as shown in Figure 6-19.<br />
Figure 6-19 A floating toolbar.<br />
<strong>Core</strong> Note<br />
This works for the Metal look-and-feel. For the Windows and Motif lookand-feel,<br />
you'll need to expand the frame to create some empty space to<br />
the right of the toolbar buttons, place the mouse in the blank area and<br />
dragAttempting to float the toolbar by dragging when the mouse is over a
The Menu Bar and the Menu System 717<br />
button does not work because the button itself receives the mouse events<br />
instead of the toolbar.<br />
In Swing 1.1.1 and <strong>Java</strong> 2 version 1.2.2, the frame that is created when you<br />
float a toolbar has no title. In <strong>Java</strong> 2 version 1.3, you can use two new JTool -<br />
Bar constructors to give the toolbar a name:<br />
public JToolBar(String name);<br />
public JToolBar(String name, int orientation);<br />
The string that you supply as the name argument is used as the title bar for<br />
the toolbars floating frame. You can try this for yourself by using a version of<br />
the example in Listing 6-11 in which the toolbar is constructed like this:<br />
JToolBar toolBar = new JToolBar("Editing Tools");<br />
To run this example, use the command<br />
j ava <strong>JFC</strong>Book.Chapter6.j dkl3.ToolBarExample4<br />
If you now undock the toolbar, the result will like Figure 6-20 in which, as<br />
you can see, the frame now has the title "Editing Tools".<br />
Figure 6-20 A floating toolbar with a description in its caption bar.<br />
Docking the Toolbar<br />
Once the toolbar has been detached, you can move it anywhere on the screen<br />
by dragging it with its caption bar. If you want to dock it back onto the frame,<br />
you need to drag it back to the place on the frame where you want it to reattach<br />
itself and then release the mouse button, dropping it into its new docked<br />
location. However, you can't make the toolbar dock if you drag it by its caption<br />
bar. To make the toolbar eligible for docking, you have to hold down the<br />
mouse over the toolbar itself, somewhere between or outside the buttons,<br />
but not in the caption bar. With the Metal look-and-feel, you can drag the<br />
mouse by the ridged area to the left of the buttons as before. With other<br />
look-and-feels, you'll probably find that the frame is tightly wrapped around
718 Chapter 6 Menus and Toolbars<br />
the buttons and that there isn't any convenient location to drag with the<br />
mouse. If this is the case, your only recourse is to close the frame using the<br />
control on the frame's caption bar, when the toolbar will redock it at the top<br />
of the frame.<br />
Assuming that you can drag the toolbar around the screen, when you do<br />
so, a colored copy of the toolbar appears and follows the mouse, leaving the<br />
toolbar in its original location until you release the mouse, at which point the<br />
toolbar will move to the final location of the colored frame. If you move the<br />
colored frame over the application window into a position in which it could<br />
reattach itself to the window (or dock with the window), it changes color to<br />
indicate that it would dock if released. You can use the setFloatingColor<br />
and setDockingColor methods to set the colors that will be used when the<br />
outline is being dragged. In the example that was shown in Listing 6-11,<br />
these methods were use to arrange for the frame to be orange if it would<br />
dock when the mouse is released and green if it would not. If, in this example,<br />
the toolbar does not turn green or orange as you drag it, it won't dock<br />
because you don't have the mouse in the correct position—almost certainly,<br />
the mouse is over the caption bar.<br />
Docking and Docking Constraints<br />
To determine whether the toolbar can dock with the frame, it invokes the<br />
toolbar UI's canDock method as it moves:<br />
public boolean canDock(Component c, Point p)<br />
If this method returns true, then the toolbar reattaches itself by passing<br />
its current location as the second argument to the following method:<br />
private String getDockingConstraint(Component c, Point<br />
P);<br />
The first argument is the container that was the parent of the toolbar when<br />
it was first added to the application which, in most cases, will be the content<br />
pane of the application's JFrame. The second argument is the location of the<br />
toolbar relative to this container.<br />
This method returns a string that can be used as a position constraint by a<br />
BorderLayout. If the toolbar is close enough to the top of the container,<br />
this method will return the string North and the toolbar will dock in the<br />
North position, while if it is close to the bottom it docks to the South. If neither<br />
of these apply, then it docks either to the East or the West depending on<br />
whether it is near enough to either of these sides. If the toolbar docks to the<br />
North or South, it will be oriented horizontally and it will be vertical if it
The Menu Bar and the Menu System 719<br />
docks against the left or right edges. The meaning of "close enough" is determined<br />
by a parameter called the docking sensitivity. If the mouse position at<br />
the time that you release the mouse is nearer than the docking sensitivity pixels<br />
from one of the sides, in the order listed above, then the toolbar will dock<br />
against that side. At the present time, there is no way to control the value of<br />
the docking sensitivity—it is always the height of the toolbar.<br />
The fact that the getDockingConstraint method returns a string constraint<br />
that is suitable for a BorderLayout means that toolbar docking really<br />
only works properly if the container in which you origiiially install the toolbar<br />
is managed by a BorderLayout layout manager. If you need to use another<br />
layout manager, then you will probably have to stop your toolbars from floating<br />
by calling the setFloatable method with argument false. In most<br />
cases, though, you can avoid this by placing most of your user interface in a<br />
JPanel that uses whichever layout manager you need, then mounting this<br />
panel in the center position of the frame content pane and placing the toolbars<br />
in the north, south, east, or west. This works because the default content<br />
pane uses a BorderLayout. Unfortunately, there is no simple way to properly<br />
manage a window in which several toolbars are stacked together on one<br />
side of the frame.<br />
Creating a Floating ToolBar That Will Not<br />
Dock<br />
While most toolbars will probably be attached to the application frame at<br />
least some of the time, it is sometimes useful to be able to create a toolbar<br />
that starts life floating. It is a simple matter to create such a toolbar, as you<br />
can see from Listing 6-12. The toolbar in this example also has another characteristic<br />
that may sometimes be useful—it will never dock with the application<br />
window.<br />
Listing 6-12 Creating a toolbar that is initially floating and will<br />
never dock<br />
package <strong>JFC</strong>Book.Chapter6;<br />
import j avax.swing.*;<br />
import j avax.swing.plaf.basic.BasicToolBarUI;<br />
import javax.swing.plaf.basic.MetalToolBarUI;<br />
import javax.swing.border.*;<br />
import j ava.awt.*;
720 Chapter 6 Menus and Toolbars<br />
Listing 6-12 Creating a toolbar that is initially floating and will<br />
never dock (continued)<br />
import j ava.awt.event.*;<br />
public class ToolBarExample5 extends JFrame {<br />
public ToolBarExample5(String title) {<br />
super(title);<br />
ToolBar toolBar = new JToolBarO;<br />
JTextArea textArea = new JTextArea(10, 40);<br />
Container cp = this.getContentPane();<br />
cp.add(toolBar, BorderLayout.NORTH);<br />
cp.add(new JScrollPane(textArea), BorderLayout.CENTER);t<br />
toolBar.setMargin(new Insets (8, 12, 8, 12));<br />
toolBar.setUI(new NonDockingToolBarUI());<br />
addActions(toolBar);<br />
// Set various floating control attributes:<br />
BasicToolBarUI ui = (BasicToolBarUI)(toolBar.getUI());<br />
ui.setDockingColor(Color.orange);<br />
ui . setFloatingColor(Color.green) ;<br />
toolBar.setFloatable(true);<br />
ui.setFloatingLocation (200, 300) ;<br />
ui.setFloating(true, null);<br />
}<br />
public void addActions(JToolBar toolBar) {<br />
toolBar.add(newAction);<br />
toolBar.add(openAction);<br />
toolBar.add(saveAction);<br />
toolBar.add(copyAction);<br />
toolBar.add(cutAction);<br />
toolBar.add(pasteAction);<br />
}<br />
public static void main(String[] args) {<br />
JFrame f = new ToolBarExample5("Toolbar Example 5");<br />
f.addWindowListener(new WindowAdapter() {<br />
public void windowClosing(WindowEvent evt) {<br />
}<br />
});<br />
System.exit(0);
The Menu Bar and the Menu System 721<br />
Listing 6-12 Creating a toolbar that is initially floating and will<br />
never dock (continued)<br />
f.pack();<br />
f.setVisible(true);<br />
}<br />
// Inner class that implements our private toolbar UI<br />
public class NonDockingToolBarUI extends MetalToolBarUI {<br />
public boolean canDock(Component c, Point p) {<br />
return false;<br />
}<br />
}<br />
static Class thisClass = ToolBarExample5.class;<br />
static Action newAction = new NullAction("New",<br />
new Imagelcon(thisClass.getResource(<br />
"images/new.gif")));<br />
static Action openAction = new NullAction("Open",<br />
new Imagelcon(thisClass.getResource(<br />
"images/open.gif")));<br />
static Action saveAction = new NullAction("Save",<br />
new Imagelcon(thisClass.getResource(<br />
"images/save.gif")));<br />
static Action copyAction = new NullAction("Copy",<br />
new Imagelcon(thisClass.getResource(<br />
"images/copy.gif")));<br />
static Action cutAction = new NullAction("Cut",<br />
new Imagelcon(thisClass.getResource(<br />
"images/cut.gif")));<br />
static Action pasteAction = new NullAction("Paste",<br />
new Imagelcon(thisClass.getResource(<br />
"images/paste.gif")));<br />
}<br />
If you run this example using the command:<br />
j ava <strong>JFC</strong>Book.Chapter6.ToolBarExample5<br />
you'll find that the toolbar appears in its own frame below the application<br />
main window. As usual, you can drag it around with its caption bar and place<br />
it anywhere you want. You can also drag it from within the toolbar and a<br />
green rectangle will follow the mouse around the screen. However, the rect-
722 Chapter 6 Menus and Toolbars<br />
angle will never turn orange and the toolbar will never dock with the application.<br />
Let's see how this is achieved.<br />
Making the toolbar refuse to dock is very simple. This example creates its<br />
own toolbar UI class derived from MetalToolBarUI and attaches it to the<br />
JToolBar. The reason for inventing this class is to override the canDock<br />
method so that it always returns false, which will ensure that the toolbar<br />
will never dock with its frame. UI classes and how to attach them to GUI<br />
components are topics that are covered in detail in Chapter 13.<br />
Making the toolbar start life floating is also simple, but there are a few<br />
points you need to be careful about. In principle, to make the toolbar float,<br />
you just call the setFloating method of the toolbar's UI class with the first<br />
argument set to true. The second argument, which will be discussed shortly,<br />
can be null in this case because it is ignored when the first argument is<br />
true. This causes the toolbar to float at the location set by the setFloatingLocation<br />
method, which is also invoked in Listing 6-12. The coordinates<br />
given to setFloatingLocation are relative to the screen, not to the application<br />
frame. Therefore, in this case, the toolbar will always appear 200 pixels<br />
to the right and 300 pixels down from the top left-hand corner of the screen.<br />
The most important thing to remember when you create a floating toolbar<br />
like this is that you must have used the add method to add the toolbar to the<br />
application frame before letting it float—that's why the code that controls the<br />
floating attributes in Listing 6-12 is at the end of the constructor—the set-<br />
Floating method must be called after this line (in this example):<br />
cp.add(toolBar, BorderLayout.NORTH);<br />
//Put the toolbar at the top<br />
Finally, what about the second argument of the setFloating method?<br />
The full definition of this method is:<br />
public void setFloating(boolean floating,<br />
Point position);<br />
As well as being used to detach a toolbar, this method is also used to reattach<br />
a floating toolbar to the frame by invoking it with the floating argument<br />
set to false. In this case, the second parameter specifies the position<br />
relative to the application frame at which the toolbar would like to dock. This<br />
location is not, necessarily, where the toolbar will be placed. In fact, this position<br />
is simply passed to the getDockingConstraint method that you saw<br />
earlier, which uses it as a hint to decide which side of the container the toolbar<br />
should dock with. The constraint returned by this method will actually<br />
determine the toolbar's docked location.
The Menu Bar and the Menu System 723<br />
Unfortunately, there is a small problem with this implementation. While it<br />
is true that this toolbar won't dock while it is being dragged around, you can<br />
nevertheless make it dock by clicking the close button on its floating frame.<br />
When this happens, the toolbar is docked without calling canDock to check<br />
whether or not it should. If you really don't want the toolbar to dock under<br />
any circumstances, you need to take control of what happens when the floating<br />
frame is closed.<br />
There are two things you could do in this situation. First, you could let the<br />
toolbar disappear (and not dock). If you do this, you will need some other<br />
mechanism within the application to make it visible again—perhaps a menu<br />
item or a set of checkboxes that control which optional elements of the user<br />
interface are accessible. The second possibility is to ignore the user's request<br />
to close the frame. Here, you'll see how to do the second of these two. Once<br />
you know how to do that, implementing the first doesn't require any new<br />
techniques.<br />
When the user clicks on the close button, the floating frame closes without<br />
any intervention from the application or from the toolbar UI class because, as<br />
you saw in Chapter 2, frames by default hide themselves automatically when<br />
the close button is pressed. Obviously, this behavior needs to be changed. To<br />
do this, it is necessary to change the default close behavior of the frame, but<br />
the frame is held as a private member of the toolbar UI class, so it is not possible<br />
to get a reference to it, even from a derived toolbar UI class. Fortunately,<br />
BasicToolBarUI follows a common Swing design pattern—it calls a<br />
protected method to create the frame. Because of this, the NonDocking-<br />
ToolBarUl class from Listing 6-12 can be changed to override this method<br />
(called createFloatingFrame) and change the frame's close behavior to<br />
DO_NOTHING_ON_CLOSE.<br />
This change arranges for the toolbar's frame to remain visible on the<br />
screen, but it doesn't prevent the toolbar itself from being docked, leaving an<br />
empty frame on the desktop. The docking behavior is caused by a listener for<br />
WindowEvents that the toolbar UI class registers on the floating frame.<br />
When this listener's windowClosing method is entered, it calls setFloating<br />
(false, null) to dock the toolbar. What you need to do is stop this listener's<br />
window Closing method being called. The listener is created by<br />
another protected method of the BasicToolBarUI class called create-<br />
FrameListener, so the same solution is possible here—override this<br />
method and return a listener that ignores all WindowEvents. You can see the<br />
implementation of both of these methods in the revised NonDockingTool-<br />
BarUI class shown in Listing 6-13 and you can run this example to verify that<br />
the floating toolbar cannot be closed or docked using the command:
724 Chapter 6 Menus and Toolbars<br />
Listing 6-13 Creating a toolbar that is initially floating and will<br />
never dock<br />
public class NonDockingToolBarUI extends MetalToolBarUI {<br />
public boolean canDock(Component c, Point p) {<br />
return false;<br />
}<br />
// Don't allow autoclose<br />
protected JFrame createFloatingFrame(JToolBar toolbar) {<br />
JFrame f = super.createFloatingFrame(toolbar);<br />
f.setDefaultCloseOperation(<br />
JFrame.DO_NOTHING_ON_CLOSE);<br />
return f;<br />
}<br />
// Don't dock on frame close<br />
protected WindowListener createFrameListener() {<br />
return new WindowAdapter() {<br />
};<br />
}<br />
J j ava <strong>JFC</strong>Book.Chapter6.ToolBarExample6<br />
Actions and <strong>Java</strong> 2 Version 1.3<br />
In Swing 1.1.1 and <strong>Java</strong> 2 version 1.2.2, there are two ways in which you<br />
can use Actions:<br />
• You can create an Action and simply attach it as an<br />
ActionListener to an existing GUI component.<br />
• You can use an Action to create a GUI component by adding it<br />
to a menu, a popup menu, or a toolbar.<br />
The advantage of using Actions in the second of these two ways is that<br />
some of the attributes of the GUI component are set for you based on the<br />
properties of the Action and, if these properties subsequently change, the<br />
state of the GUI component changes as well. This feature is most commonly<br />
used to make it possible to enable or disable a menu item or a toolbar button
The Menu Bar and the Menu System 725<br />
by simply changing the enabled state of the Action from whicli it was created,<br />
but it works equally well for the text or icon as well.<br />
Nevertheless, the Action framework as implemented in Swing 1.1.1 and<br />
<strong>Java</strong> 2 version 1.2.2 is not perfect. Among its shortcomings are the following:<br />
• When a GUI component is created from an Action, the<br />
number of attributes that are set is more limited than it should<br />
be. Only the icon, text, and enabled state are inherited from the<br />
Action. Properly written applications would also need to set<br />
some or all of a mnemonic, an accelerator key, and a tooltip. To<br />
do this, they currently need to set these attributes of the GUI<br />
component after it has been created.<br />
• The number of components that can be created by adding an<br />
Action to a container is very limited and the developer has no<br />
control over it. As an example of this, the only case in which you<br />
can create a JButton connected to an Action is by adding the<br />
Action to a toolbar. However, it would be just as useful to have<br />
a JButton anywhere in the application associated with an<br />
Action, so that its enabled state can be controlled by managing<br />
the Action. Unfortunately, there is no add (Action action)<br />
method in JPanel that might provide this. Similarly, you can<br />
add an Action to a JMenu to create a JMenuItem, but what if<br />
you really want a JCheckBoxMenuItem?<br />
In short, the Action framework in Swing 1.1.1 and <strong>Java</strong> 2 version 1.2.2 is<br />
useful but too limited. For <strong>Java</strong> 2 version 1.3, most of these issues have been<br />
addressed by adding some new attributes to the Action interface and a small<br />
number of extra methods that allow you to associate Actions with more GUI<br />
components. We'll examine these improvements in the next two sections. An<br />
important point to note, however, is that the original API has been preserved<br />
in <strong>Java</strong> 2 version 1.3, so existing code will continue to work. New code which<br />
does not need to be compatible with earlier releases should definitely be<br />
written to use the new framework.<br />
Action Attributes and GUI Components<br />
In Swing 1.1.1 and <strong>Java</strong> 2 version 1.2.2, when a GUI component is created<br />
from an Action, only three properties of the Action are used:<br />
<strong>Java</strong> 2 version 1.3 defines two new Action properties that allow more<br />
state to be inherited from the Action:
726 Chapter 6 Menus and Toolbars<br />
Action<br />
Property<br />
NAME<br />
SMALL_ICON<br />
GUI Attribute<br />
Button or menu item<br />
text<br />
Button or menu item<br />
icon<br />
Enabled state Enabled State<br />
• The MNEMONIC_KEY property has avalue of type Integer. This<br />
property is intended to be a Unicode character that will be used<br />
as the mnemonic for the GUI component.<br />
• The ACCELERATOR_KEY property requires a value of type<br />
Keystroke and is intended to be used to associate a keyboard<br />
accelerator with the component created from the Action.<br />
In addition to these new keys, the existing SHORT_DESCRIPTION property is<br />
used to add a tooltip to the component. Even though these new key values<br />
have been defined, at the time of this writing they are not uniformly used<br />
when creating GUI components from Actions. The ACCELERATOR_KEY<br />
property is not used at all in the first release of <strong>Java</strong> 2 version 1.3 and the<br />
extent to which the other keys have any effect depends on the components<br />
that are created. The properties of the Action that are actually used when<br />
you add the Action to a toolbar or a menu in <strong>Java</strong> 2 version 1.3 are as follows:<br />
Container<br />
JToolBar<br />
NAME<br />
Property<br />
SMALL ICON<br />
Use<br />
Not used—the text is not<br />
shown in the toolbar button<br />
any more<br />
Becomes the toolbar button's<br />
icon<br />
SHORT_DESCRIPTION Used to create a tooltip for the<br />
toolbar button
Container Property Use<br />
The Menu Bar and the Menu System 727<br />
JMenu and NAME The text of the menu item<br />
JpopupMenu<br />
SMALL_ICON The menu item's icon<br />
SHORT_DESCRIPTION Not used<br />
MNEMONIC_KEY Becomes the menu item's<br />
mnemonic<br />
Associating Actions with GUI Components<br />
In <strong>Java</strong> 2 version 1.3, although you can still add an Action to a JToolBar,<br />
JMenu or JpopupMenu to create a GUI component, this is no longer the preferred<br />
way to use Actions. Instead, you are now expected to do the following:<br />
• Create an Action with the appropriate properties (and<br />
actionPerf ortned method, of course)<br />
• Create a GUI component for the user interface<br />
• Connect the Action to the GUI component using the<br />
component's setAction method.<br />
With this new paradigm, you no longer need to rely on the container to<br />
implement an add (Action action) method that creates the GUI component<br />
for you. Making this change allows you to choose which GUI component<br />
you want to create, provided only that it has a setAction method. This<br />
removes the restriction that adding an Action to a JToolBar could only<br />
create a JButton, while the JMenu add (Action action) method only<br />
created a JMenuItem. Now, if you need a JCheckBoxMenuItem, you simply<br />
create it yourself, add it to the menu, and then call setAction to associate it<br />
with the Action. When you invoke setAction for one of these components,<br />
it registers the Action as an ActionListener and configures itself<br />
from the Action's attributes. Suppose you create an Action to enable or<br />
disable writing to a file using code like this:<br />
class EnableWritingAction extends AbstractAction {<br />
public EnableWritingAction() {<br />
putValue(NAME, "Allow writing");<br />
putValue(SHORTJDESCRIPTION,<br />
"Enables or disables writing to the file");<br />
putValue (SMALL__ICON, somelcon) ;
728 Chapter 6 Menus and Toolbars<br />
public void actionPerformed(ActionEvent evt) {<br />
// Code to enable/disable writing<br />
}<br />
}<br />
In order to provide this facility on a menu, in Swing 1.1.1 and <strong>Java</strong> 2 version<br />
1.2.2 you would have done something like this:<br />
Action enableWritingAction = new EnableWritingAction();<br />
JCheckBoxMenuItem cb =<br />
new JCheckBoxMenuItem("Allow writing", someIcon);<br />
cb.addActionListener(enableWritingAction);<br />
The <strong>Java</strong> 2 version 1.3 equivalent is the following:<br />
Action enableWritingAction = new EnableWritingAction();<br />
JCheckBoxMenuItem cb = new JCheckBoxMenuItem();<br />
cb.setAction(enableWritingAction);<br />
There are two important differences between these two somewhat similarlooking<br />
code extracts:<br />
• In the first case, when the menu item is created, it is necessary<br />
to specify both the text and the icon that it should display, even<br />
though those are also attributes of the Action.This is necessary<br />
because there is no way in Swing 1.1.1 and <strong>Java</strong> 2 version 1.2.2<br />
to create a JCheckBoxMenuItem from an Action and hence<br />
no way to inherit these attributes from the Action. The<br />
addActionListener method, although it is given the Action<br />
reference as its argument, does not perform this function. By<br />
contrast, in <strong>Java</strong> 2 version 1.3, the setAction method does<br />
everything that addActionListener does, but it also sets<br />
certain attributes of the JCheckBoxMenuItem from the<br />
Action. Since these include the label and the icon, there is no<br />
need to specify these values when constructing the<br />
JCheckBoxMenuItem and, as you can see, the second code<br />
extract just uses the default constructor.<br />
• In the first case, changes made to the properties of the Action<br />
will not have any effect at all on the JCheckBoxMenuItem. In<br />
<strong>Java</strong>2 version 1.3, however, the setAction method establishes<br />
a connection between the two such that if you change any<br />
properties of the Action that affect the GUI component, the<br />
GUI component will be updated accordingly. Hence, if you<br />
disable the Action, for example, the JCheckBoxMenuItem<br />
would also be disabled. Similarly, changing the NAME property
The Menu Bar and the Menu System 729<br />
of the Action results in the text of the JCheckBoxMenuItem<br />
being updated.<br />
The components that have a set Act ion method and the attributes of the<br />
Action that are used to configure the GUI component are listed in Table<br />
6.1.<br />
Table 6-1 Components and Action Attributes in <strong>Java</strong> 2 Version 1.3<br />
Component<br />
JButton<br />
JCheckBox<br />
JComboBox<br />
JMenu,<br />
JMenuItem,<br />
JCheckBoxMenuItem<br />
and<br />
jRadioButtonMenu-<br />
Item<br />
JRadioButton<br />
Action Attribute<br />
NAME<br />
ICON<br />
SHORT_DESCRIPTION<br />
isEnabled()<br />
NAME<br />
SHORT_DESCRIPTION<br />
isEnabled()<br />
isEnabled<br />
SHORT_DESCRIPTION<br />
NAME<br />
SMALL_ICON<br />
MNEMONIC_KEY<br />
isEnabled()<br />
NAME<br />
SHORT_DESCRIPTION<br />
isEnabled()<br />
Component<br />
Property<br />
Button Text<br />
Button Icon<br />
Tooltip text<br />
isEnabled()<br />
Text<br />
Tooltip text<br />
isEnabled ()<br />
isEnabled()<br />
Tooltip text<br />
Text<br />
Icon<br />
Mnemonic<br />
isEnabled()<br />
Text<br />
Tooltip text<br />
isEnabled()
730 Chapter 6 Menus and Toolbars<br />
Table 6-1 Components and Action Attributes in <strong>Java</strong> 2 Version 1.3<br />
(continued)<br />
Component<br />
JTextField<br />
JToggleButton<br />
Component<br />
Action Attribute Property<br />
SHORT_DESCRIPTION Tooltip text<br />
isEnabled isEnabledQ<br />
NAME Button text<br />
ICON Button Icon<br />
MNEMONIC_KEY Mnemonic<br />
SHORT_DESCRIPTION Tooltip text<br />
isEnabled() isEnabledQ<br />
As you ean see, every component that has an addActionListener<br />
method now implements setAction as well. By the way, setAction is not<br />
a replacement for addActionListener - if you need to add listeners that<br />
are in addition to the Action used to initially configure a GUI component,<br />
you should use addActionListener to do so. You can call setAction<br />
more than once for a given GUI component but, if you do so, then the connection<br />
between the component and the original Action is removed. That<br />
is, if you do something like this:<br />
JCheckBoxMenuItetn cb = new JCheckBoxMenuItem();<br />
cb.setAction(actionl);<br />
cb.setAction(action2);<br />
then the attributes of the menu item will initially be set from act ionl and<br />
any events that it generates would go to the act ionPer formed method ol<br />
actionl. When the second setAction call is made, the GUI component<br />
will reconfigure itself from action2 and deliver all subsequent events to<br />
action2. No further events from the JCheckBoxMenuItem will be seen by
The Menu Bar and the Menu System 731<br />
actionl and changes to the attributes of actionl will have no effect at all on<br />
the GUI component.<br />
It is also worth noting that many of the components that have a setAction<br />
method also now have a constructor that accepts an Action as an argument,<br />
namely:<br />
public JButton(Action action);<br />
public JCheckBox(Action action);<br />
public JCheckBoxMenuItern(Action action);<br />
public JMenu(Action action);<br />
public JMenuItem(Action action);<br />
public JRadioButton(Action action);<br />
public JRadioButtonMenuItem(Action action);<br />
public JToggleButton(Action action);<br />
These constructors create the GUI component and set the attributes as<br />
listed in the table above. They are therefore equivalent to using the default<br />
constructor and then invoking setAction, that is:<br />
Action a = ;<br />
JButton b = new JButton (a);<br />
is the same as<br />
Action a = ;<br />
JButton b = new JButton();<br />
b.setAction(a);<br />
Using the <strong>Java</strong> 2 Version 1.3 Action Framework<br />
To demonstrate the use of the <strong>Java</strong> 2 version 1.3 Action framework, we'll<br />
rework the editor application that was used earlier in chapter to show how to<br />
use menus (refer to Figure 6—8 if your not sure what the example looks like).<br />
To begin with, we'll sweep through the code replacing ActionListeners<br />
with Actions to demonstrate how the setAction method initializes the<br />
GUI components associated with an Action, then we'll add a nice feature<br />
that many professional applications have that will make use of the getAction<br />
method, which returns the Action with which a GUI component is<br />
connected, if any. In some circumstances, it is very convenient to be able to<br />
retrieve the Action for a component because you can then write code to<br />
respond to events generated by the component that can extract and use<br />
information held in the Action itself, as we'll show.
732 Chapter 6 Menus and Toolbars<br />
Using Actions and the setAction Method<br />
The first change to the original example is to replace all of the ActionListeners<br />
with Actions. Listing 6-14 shows the results of this modification.<br />
Because this is a large example, not all of the code has been included here.<br />
Instead, only code that is affected by the changes made here is shown and<br />
the most significant parts are highlighted in bold for ease of identification. If<br />
you want to compare this directly with the original source code, you will find<br />
the complete source for both examples on the CD-ROM that accompanies<br />
this book, in the files:<br />
and<br />
<strong>JFC</strong>Book/Chapter6/MenuExample6A.<strong>Java</strong><br />
<strong>JFC</strong>Book/Chapter6/jdkl3/MenuExamplell.<strong>Java</strong><br />
Listing 6-14 Using the setAction method<br />
import j avax.swing.*;<br />
import j avax.swing.event.*;<br />
import j ava.awt.*;<br />
import j ava.awt.event.*;<br />
import j ava.io.*;<br />
import java.util.*;<br />
import <strong>JFC</strong>Book.Chapter6.FileManager;<br />
public class MenuExamplell extends JFrame {<br />
public MenuExamplell(String title) {<br />
super(title);<br />
this.getContentPane() .add(<br />
new JScrollPane(textArea = new JTextArea(20, 40)<br />
BorderLayout.CENTER);<br />
fileManager = new FileManager();<br />
AbstractAction exitAction = new AbstractActionO {<br />
{ putValue(NAME, "Exit");<br />
putValue(MNEMONICKEY, new Integer('X•) );<br />
putValue(SHORTDESCRIPTION,<br />
"Closes the open file and exits the application");<br />
putValue(LONG_DESCRIPTION,
Listing 6-14 Using the setAction method (continued)<br />
The Menu Bar and the Menu System 733<br />
"Closing the application");<br />
}<br />
public void actionPerformed(ActionEvent evt) {<br />
closeWindow();<br />
}<br />
};<br />
// Action for the "Enable writing menu item"<br />
final AbstractAction enableWritingAction =<br />
new AbstractAction() {<br />
{ // Constructor<br />
putValue(NAME, "Enable writing");<br />
putValue(MNEMONICKEY, new Integer('W));<br />
putValue(SHORTDESCRIPTION,<br />
"Allows writing to the next file to be<br />
opened");<br />
putValue(LONGDESCRIPTION,<br />
"Enabling writing to file");<br />
}<br />
public void actionPerformed(ActionEvent evt) {<br />
// Nothing to do<br />
}<br />
};<br />
// Processing for "Save..." menu item<br />
final AbstractAction saveAction = new AbstractAction()<br />
{<br />
{ // Constructor<br />
putValue(NAME, "Save...");<br />
putValue(SMALLICON, savelcon);<br />
putValue(MNEMONICKEY, new Integer(•S'));<br />
putValue(SHORTDESCRIPTION,<br />
"Saves the currently open file");<br />
putValue(LONGDESCRIPTION, "Saving....");<br />
setEnabled(false);<br />
}<br />
public void actionPerformed(ActionEvent evt) {<br />
try {<br />
fileManager.saveFile(textArea.getText() ) ;<br />
} catch (IOException e) {<br />
// Do nothing - message already printed<br />
} '
734 Chapter 6 Menus and Toolbars<br />
Listing 6-14 Using the setAction method (continued)<br />
}<br />
};<br />
// Processing for "Save As..." menu item<br />
final AbstractAction saveAsAction = new AbstractActionO<br />
{<br />
{ // Constructor<br />
putValue(NAME, "Save As...");<br />
putValue(MNEMONICKEY, new Integer('A•));<br />
putValue(SHORTDESCRIPTION,<br />
"Saves the open file under a new name");<br />
putValue(LONGJ3ESCRIPTION, "Saving ");<br />
}<br />
}<br />
};<br />
setEnabled(false);<br />
public void actionPerformed(ActionEvent evt) {<br />
if (fileManager.isFileOpen() ) {<br />
String name = getFileName("Save As File",<br />
FileDialog.SAVE);<br />
}<br />
}<br />
if (name != null) {<br />
try {<br />
fileManager.saveAsFile(name,<br />
textArea.getText());<br />
} catch (IOException e) {<br />
// Do nothing - message already printed<br />
}<br />
// Action for "New..." menu item<br />
AbstractAction newAction = new AbstractAction() {<br />
{ // Constructor<br />
putValue(NAME, "New.. . " ) ;<br />
putValue(SMALL ICON, newlcon);<br />
putValue(MNEMONIC KEY, new Integer( ' N' ) ) ;<br />
putValue(SHORTDESCRIPTION, "Creates a new file");<br />
putValue(LONGJ3ESCRIPTION, "Creating new file...");<br />
}<br />
public void actionPerformed(ActionEvent evt) {<br />
String name = getFileName("New File",
Listing 6-14 Using the setAction method (continued)<br />
The Menu Bar and the Menu System 735<br />
FileDialog.SAVE);<br />
if (name != null) {<br />
if (fileManager.isFileOpen()) {<br />
// Close any open file<br />
try {<br />
fileManager.closeFile(textArea.getText() ) ;<br />
} catch (Throwable e) {<br />
// Ignore any exception<br />
}<br />
}<br />
try {<br />
fileManager.newFile(name);<br />
textArea.setText("");<br />
textArea.setEditable(true);// Always writable<br />
writeltem.setState(true);// Check writable box<br />
fileManager.setWritable(true);<br />
// Allow writes to file<br />
addRecentFile(name);<br />
// Enable saving<br />
saveAction.setEnabled(true);<br />
} catch (IOException e) {<br />
// Do nothing - message already printed<br />
} '<br />
}<br />
}<br />
};<br />
// Processing for "Open..." menu item<br />
AbstractAction openAction = new AbstractAction0 {<br />
{ // Constructor<br />
putValue(NAME, "Open...");<br />
putValue(SMALL ICON, openlcon);<br />
putValue(MNEMONICKEY, new Integer CO 1 ));<br />
putValue(SHORTDESCRIPTION,<br />
"Opens an existing file");<br />
putValue(LONGDESCRIPTION, "Opening file...");<br />
}<br />
public void actionPerformed(ActionEvent evt) {<br />
String name = getFileName("Open File",<br />
FileDialog.LOAD);
736 Chapter 6 Menus and Toolbars<br />
Listing 6-14 Using the setAction method (continued)<br />
}<br />
};<br />
if (name != null) {<br />
try {<br />
String text = fileManager.openFile(name);<br />
textArea.setText(text);<br />
}<br />
// Enable for writing if allowed to<br />
boolean canWrite = fileManager.canWrite() &&<br />
writeltem.getState();<br />
textArea.setEditable(canWrite);<br />
fileManager.setWritable(writeltem.getState() ) ;<br />
addRecentFile(name);<br />
// Enable saving if writable<br />
saveAction.setEnabled(canWrite);<br />
} catch (IOException e) {<br />
}<br />
// Do nothing - message already printed<br />
// Processing for "Close..." menu item<br />
final AbstractAction closeAction =<br />
new AbstractAction() {<br />
{ // Constructor<br />
putValue(NAME, "Close");<br />
putValue(MNEMONICKEY, new Integer('C'));<br />
putValue(SHORT_DESCRIPTION,<br />
"Closes the currently open file");<br />
putValue(LONGDESCRIPTION, "Closing file...");<br />
setEnabled(false);<br />
}<br />
public void actionPerformed(ActionEvent evt) {<br />
try {<br />
fileManager.closeFile(textArea.getText() ) ;<br />
textArea.setText("");<br />
// Disable saving<br />
saveAction.setEnabled(false) ;
Listing 6-14 Using the setAction method (continued)<br />
};<br />
}<br />
The Menu Bar and the Menu System 737<br />
} catch (IOException e) {<br />
// Do nothing - message already printed<br />
}<br />
// The handler for the recent file list<br />
menuAction = new AbstractAction() {<br />
public void actionPerformed(ActionEvent evt) {<br />
String fileName = evt.getActionCommandO;<br />
try {<br />
String text = fileManager.openFile(fileName);<br />
textArea.setText(text);<br />
addRecentFile(fileName);<br />
}<br />
};<br />
// Enable for writing if allowed to<br />
boolean canWrite = fileManager.canWrite() &&<br />
writeltem.getState();<br />
textArea.setEditable(canWrite) ;<br />
fileManager.setWritable(writeltem.getState() )<br />
} catch (IOException e) {<br />
// Do nothing - message already printed<br />
}<br />
// Create the menu system using the Actions<br />
JMenuBar mb = new JMenuBar();<br />
this.setJMenuBar(mb);<br />
JMenu fileMenu = new JMenu("File");<br />
fileMenu.setMnemonic('F');<br />
mb.add(fileMenu);<br />
JMenuItem newltem = new JMenuItem(newAction);<br />
JMenuItem openltem = new JMenuItem(openAction);<br />
JMenuItem closeltem = new JMenuItem(closeAction) ,•<br />
fileMenu.add(newltem);<br />
fileMenu.add(openltem);<br />
fileMenu.add(closeltem);<br />
fileMenu.addSeparator () ;
738 Chapter 6 Menus and Toolbars<br />
Listing 6-14 Using the setAction method (continued)<br />
writeltem = new JCheckBoxMenuItem();<br />
writeltem.setState(true);<br />
writeltem.setAction(enableWritingAction);<br />
fileMenu.add(writeltem);<br />
fileMenu.addSeparator();<br />
JMenuItem saveltem = new JMenuItem(saveAction);<br />
JMenuItem saveAsItem = new JMenuItem(saveAsAction)<br />
fileMenu.add(saveltem);<br />
fileMenu.add(saveAsItem);<br />
fileMenu.addSeparator();<br />
fileListMenu = new JMenu("Recent Files");<br />
fileListMenu.setMnemonic('R');<br />
fileMenu.add(fileListMenu);<br />
JMenuItem emptyListltem = new JMenuItem("Empty");<br />
emptyListltem.setEnabled(false);<br />
fileListMenu.add(emptyListltem);<br />
fileMenu.addSeparator();<br />
JMenuItem exitltem = new JMenuItem(exitAction);<br />
fileMenu.add(exitItem);<br />
// Create and add the toolbar<br />
JToolBar toolBar = new JToolBar();<br />
toolBar.add(newAction);<br />
toolBar.add(openAction);<br />
toolBar.add(saveAction);<br />
this.getContentPane().add(toolBar, BorderLayout.NORTH);<br />
// Processing for the "File" menu<br />
fileMenu.addMenuListener(new MenuListener() {<br />
public void menuSelected(MenuEvent evt) {<br />
boolean fileOpen = fileManager.isFileOpen();<br />
// Allow close only if we have an open file<br />
closeAction.setEnabled(fileOpen);<br />
// Similarly, allow "Enable write" only<br />
// if no open file
Listing 6-14 Using the setAction method (continued)<br />
The Menu Bar and the Menu System 739<br />
enableWritingAction.setEnabled(fileOpen == false);<br />
// If we have an open file, enable Save and Save As<br />
// if the user has selected Enable Write AND the<br />
// file can be written to.<br />
boolean canSave = (fileOpen &&<br />
writeltem.getState() &&<br />
fileManager.canWrite 0);<br />
saveAction.setEnabled(canSave);<br />
saveAsAction.setEnabled(canSave);<br />
}<br />
public void menuDeselected(MenuEvent evt) {<br />
// Not used<br />
}<br />
public void menuCanceled(MenuEvent evt) {<br />
// Not used<br />
}<br />
});<br />
// Add accelerators<br />
newltem.setAccelerator(Key-Stroke.getKeyStroke(<br />
KeyEvent.VK_N, InputEvent.CTRLMASK, false));<br />
openltem.setAccelerator(Keystroke.getKeyStroke(<br />
KeyEvent.VKO, InputEvent.CTRLMASK, false));<br />
exitltem.setAccelerator(Keystroke.getKeyStroke(<br />
} // END OF CONSTRUCTOR<br />
// CODE NOT SHOWN<br />
KeyEvent. VKJ, InputEvent .CTRLMASK, false));<br />
// Build the recent file menu<br />
public void buildRecentFileMenu() {<br />
int size = recentFiles.size ();<br />
fileListMenu.removeAll0;<br />
for (int i = 1; i
740 Chapter 6 Menus and Toolbars<br />
Listing 6-14 Using the setAction method (continued)<br />
JMenuItem mi = new JMenuItemO ;<br />
mi .setAction(menuAotion);<br />
mi.setActionCommand(fileName);<br />
mi .setText(i + " " + fileName);<br />
mi.setMnemonic('0' + i);<br />
fileListMenu.add(mi);<br />
}<br />
}<br />
// CODE NOT SHOWN<br />
public static void main(String[] args) {<br />
JFrame f = new MenuExamplell("Menu Example 11");<br />
f .packO ;<br />
f.setVisible(true);<br />
f.addWindowListener(new WindowAdapter() {<br />
public void windowClosing(WindowEvent evt) {<br />
MenuExamplell frame =<br />
(MenuExamplell)(evt.getSource());<br />
frame.closeWindow() ;<br />
}<br />
});<br />
}<br />
// CODE NOT SHOWN<br />
// Icons<br />
static Class thisClass = MenuExamplell.class;<br />
static Icon newlcon = new Imagelcon(<br />
thisClass.getResource("images/new.gif"));<br />
static Icon openlcon = new Imagelcon(<br />
thisClass.getResource("images/open.gif"));<br />
static Icon savelcon = new Imagelcon(<br />
thisClass.getResource("images/save.gif"));<br />
}<br />
If you run this example using the command<br />
java <strong>JFC</strong>Book.Chapter6.jdkl3.MenuExamplell<br />
and open the File menu, you'll notice that it looks just like its predecessor as<br />
shown in Figure 6-8, except that three of the menu items now have icons
The Menu Bar and the Menu System 741<br />
(see Figure 6-21) and there is now a toolbar, which, for the purposes of this<br />
Figure, was moved from its initial location at the top of the frame to the<br />
right-hand side so that you can see both the toolbar and the menu.<br />
Figure 6-21 The File Editor application using <strong>Java</strong> 2 Version 1.3 Actions.<br />
The most important thing to note about the modified example is that all<br />
the ActionListeners have been replaced by Actions. Each Action is a<br />
self-contained class that contains the code to be executed when the action is<br />
to performed and all of the attributes that will be used to construct the GUI<br />
components in the user interface. Note how we set these attributes:<br />
AbstractAction openAction = new AbstractAction() {<br />
{ // Constructor<br />
putValue(NAME, "Open...");<br />
putValue(SMALL_ICON, openlcon);<br />
putValue (MNEMONIC__KEY, new Integer CO 1 ));<br />
putValue(SHORTJDESCRIPTION,<br />
"Opens an existing file");<br />
putValue(LONG_DESCRIPTION, "Opening file. . .") ;
742 Chapter 6 Menus and Toolbars<br />
This syntax may look a little strange to you if you are not familiar with<br />
inner classes—the code in braces is, in fact, the constructor of the anonymous<br />
inner class that implements the file open action for this application.<br />
Since the class has no name, its constructor doesn't need to have a method<br />
name, so none is supplied. The menu items of the original application did not<br />
have icons but, as you can see, the SMALL_ICON attribute of this Action has<br />
been set, which will result in the menu item created from it displaying the<br />
icon along with the text, as shown in Figure 6-21. You will notice that we did<br />
not set the ACCELERATOR_KEY property of the Action, even though the<br />
Open File action should have the key sequence Ctrl+O assigned to it. This<br />
is because, at least in the initial release of <strong>Java</strong> 2 version 1.3, this property is<br />
ignored. Instead, we explicitly assign the accelerator keys later in the example.<br />
We also defined the SHORT_DESCRIPTION and LONGJDESCRIPTION<br />
properties of the Action. The SHORT_DESCRIPTION will be used as the<br />
tooltip as you'll see if you let the mouse hover over the buttons on the toolbar.<br />
The LONG_DESCRIPTION is not used here, but we'll make use of it in the<br />
next example.<br />
One benefit of using Actions instead of ActionListeners is that we can<br />
easily use the same Action to create both a menu item and a toolbar button<br />
and, in fact, we have taken the opportunity to add a toolbar to this application<br />
and assigning buttons for the New File, Open File and Save operations to<br />
it. The code that creates menu items now looks like this typical extract, which<br />
creates the menu item for the Open File operation:<br />
JMenuItem openltem = new JMenuItem(openAction);<br />
fileMenu.add(openltem);<br />
Here, we have used the new JMenuItem constructor that accepts an<br />
Action as its argument. We could equally well have done the following<br />
instead:<br />
JMenuItem openltem = new JMenuItem();<br />
openltem.setAction(openAction);<br />
fileMenu.add(openltem);<br />
It is just as simple to create a toolbar from the same Actions as are used<br />
to build the menus:<br />
JToolBar toolBar = new JToolBarO;<br />
toolBar.add(newAction);<br />
toolBar.add(openAction);<br />
toolBar.add(saveAction);<br />
You may be a little surprised to notice that we are using the Swing 1.1.1<br />
and <strong>Java</strong> 2 version 1.2.2 method of creating a toolbar button by adding the
The Menu Bar and the Menu System 743<br />
Action directly to the toolbar. In the spirit of this section, you might have<br />
expected that the example code would create the toolbar buttons using the<br />
Actions and then adding them to the toolbar, like this:<br />
toolBar.add(new JButton(newAction));<br />
toolBar.add(new JButton(openAction));<br />
toolBar.add(new JButton(saveAction));<br />
However, this does not give the same effect. The code sequence that we<br />
used allows the toolbar itself to create the button and, as we have said earlier<br />
in this section, in <strong>Java</strong> 2 version 1.3, toolbar buttons created in this way display<br />
the icon from the Action but no text, which is what you see in Figure 6-<br />
21. If, instead, we create JButtons and add them to the toolbar, then both<br />
the icon and the text will appear, since the JButton will use the NAME<br />
attribute to set its text property. This is not very desirable, especially as the<br />
text appears to the right of the icon! To create toolbar buttons using the <strong>Java</strong><br />
2 version 1.3 APIs, you have to do this:<br />
JButton newButton = new JButton(newAction);<br />
newButton.setText("");<br />
toolBar.add(newButton);<br />
which is not veiy pretty.<br />
There are a few other things to note about this example:<br />
• The code that enables or disables the GUI components is now<br />
implemented to set the enabled state of the Action instead of<br />
directly manipulating the controls themselves. This is in<br />
keeping with the Swing Action philosophy and it works even<br />
though the GUI controls weren't created by adding Actions to<br />
the menus or toolbars because the set Act ion method<br />
connects the enabled state of the Action to that of the GUI<br />
control.<br />
• The checkbox menu item can also be connected to its Action<br />
by calling the setAction method. In this example, there is no<br />
particular benefit to taking this approach apart from<br />
consistency, but in other cases the ability to enable or disable<br />
the checkbox from the Action might be useful.<br />
• The menu items that make up the list of recently opened files are<br />
also connected to their corresponding Actions using<br />
setAction. Note that all of the menu items use the same<br />
Action object. When a menu item is selected, the Action can<br />
obtain sufficient context from the ActionEvent to decide which
744 Chapter 6 Menus and Toolbars<br />
file to open, because the file name is stored as the action<br />
command of the menu item and can therefore be retrieved using<br />
the getActionCommand method of the ActionEvent. The<br />
actionPerf ormed method of menuAction in Listing 6-14 has<br />
been coded to use this method rather than use the getSource<br />
method to find the menu item and then get the file name from<br />
there, as was done in Listing 6-1. It would not be desirable for<br />
the actionPerf ormed method of an Action to have to access<br />
the GUI component to determine what to do, because that<br />
would introduce a dependency from the code implementing the<br />
Action to the GUI component to which it happens to be<br />
connected. This is best avoided, because it allows you to use the<br />
same Action to service multiple components (such as a menu<br />
item and a toolbar button). In earlier versions of this example, we<br />
accepted the dependency between the ActionListener and<br />
the menu items on the recent file list because there was no real<br />
intention to separate them. Here, though, we want to emphasize<br />
that the Action could be independent of the menu item that it<br />
will eventually be attached to, so it is important to avoid<br />
unnecessary dependencies. In real world programming, keeping<br />
this principle in mind is important, because the Action will<br />
often belong to a different application subsystem (and perhaps a<br />
different programmer) from the one that owns the user interface<br />
(and hence the menu item).<br />
Using the getAction Method<br />
When the user activates a menu item or a button connected with an Action,<br />
its actionPerf ormed method is called to carry out the requested function.<br />
If you implement your Actions properly, they will have all of the information<br />
they need to do their jobs without needing to access the GUI component<br />
or components that were created from them or, in <strong>Java</strong> 2 version 1.3, associated<br />
with them using setAction. It is even less likely that you will need to<br />
write code activated from a GUI component that needs to find its associated<br />
Action, but there are some cases in which it is useful to be able to do this. In<br />
Swing 1.1.1 and <strong>Java</strong> 2 version 1.2.2, there is no way to get a reference to the<br />
Action that was used to create a menu item or a toolbar button. However, if<br />
you use the <strong>Java</strong> 2 version 1.3 setAction method to associate an Action<br />
with a GUI component, you can use the getAction method to find the original<br />
Action given a reference to the GUI component.
The Menu Bar and the Menu System 745<br />
In order to demonstrate a typical situation in which the get Act ion<br />
method would be used, we've extended the file editor example yet again and<br />
added another feature that you can reuse in your own applications. To see<br />
this feature in action, type the command<br />
<strong>Java</strong> <strong>JFC</strong>Book.Chapter6.jdkl3.MenuExamplel2<br />
The first thing you'll notice is that this version of the file editor has an extra<br />
label at the bottom that initially contains the word "<strong>Read</strong>y." This label is, in<br />
fact, a simple status line that displays this message when it has nothing more<br />
important to display. If you now open the File menu and move the mouse<br />
over the menu items that it contains, you'll see that, as the mouse moves over<br />
each menu item, the status line is updated with a short message that<br />
describes what that menu item does, as shown in Figure 6-22. The same<br />
thing happens when you move the mouse over the buttons on the toolbar.<br />
Furthermore, if you press the File Open toolbar button (which is the middle<br />
one) or activate the Open menu item, the message on the status line<br />
changes to indicate that a file is being opened. This message will stay there<br />
until the operation has been completed or abandoned.<br />
At first sight, it may not be obvious what the connection is between this<br />
example and the getAction method. In fact, the getAction method makes<br />
the implementation of this feature relatively simple. In order to provide a<br />
suitable message for the status line, you need to do the following:<br />
1. Receive notification when the mouse moves over a menu item<br />
or a toolbar button or when the user activates the menu item or<br />
presses the button.<br />
2. When notification is received, find a message that describes<br />
what the GUI component does or what action is being performed.<br />
Arranging to be notified that the message needs to be changed and actually<br />
finding the correct message are actually two different problems that we'll<br />
look at separately in this section. The getAction method will be used to<br />
solve the second of these two problems.<br />
Monitoring Menu and Button State<br />
In order to keep the status line updated, we need to arrange to have an event<br />
generated at the following times:<br />
1. When the mouse moves over a menu item.
746 Chapter 6 Menus and Toolbars<br />
Figure 6-22 Implementing a simple status line.<br />
2. When the mouse moves over a toolbar button.<br />
3. When the mouse moves out of a menu item.<br />
4. When the mouse moves out of a toolbar button.<br />
5. When the user activates a menu item or a toolbar button to start<br />
execution of the function that the GUI component provides.<br />
6. When the handler for the GUI component completes its work.<br />
As far as the menu items are concerned, you have already seen that events<br />
are generated when menus appear and disappear and that you can receive<br />
these events by registering a MenuListener with the JMenu that contains<br />
them. However, a MenuListener does not receive notification when the<br />
user moves the mouse from menu item to menu item. One possible way to<br />
detect this is to register a MouseListener with each JMenuItem. This<br />
would certainly work, but it would not be a general solution because it fails to
The Menu Bar and the Menu System 747<br />
cover the case where the user opens the menu and then uses the arrow keys<br />
to move the selection up and down the menu. In fact, there is a simple way to<br />
detect all of the six conditions listed above which works whether the user<br />
navigates the menu using the mouse or the keyboard and which also allows<br />
you to detect a menu item or a button being pressed using either the mouse<br />
or the keyboard equivalent (usually the SPACE key). Menu items and toolbar<br />
buttons are derived from AbstractButton, which represents graphically<br />
the state of a model called ButtonModel. ButtonModel is an interface that<br />
has several methods, including the following:<br />
public interface ButtonModel {<br />
public void addChangeListener(ChangeListener 1);<br />
public void removeChangeListener(ChangeListener 1);<br />
public boolean isArmed();<br />
public boolean isPressed();<br />
public void setArmed(boolean armed);<br />
public void setPressed(boolean pressed);<br />
// Other methods not shown<br />
}<br />
This extract from the complete definition of the ButtonModel interface<br />
shows that it has two independent boolean-valued states that indicate<br />
whether the button is armed and pressed. Furthermore, when either of these<br />
states changes, the ButtonModel generates a ChangeEvent that is sent to<br />
listeners registered with it using the addChangeListener method. The<br />
meaning of the pressed attribute is obvious: it has the value true when the<br />
button has been pressed and false when it is not; a ChangeEvent is generated<br />
when the user presses the button and another is generated when the<br />
button is released.<br />
The meaning of the armed state is not quite so obvious from its name. The<br />
armed state basically means that the button is in a state in which it could be<br />
activated. Buttons of all types are armed when the user moves the mouse<br />
over them and disarmed when the mouse moves out of the button. Additionally,<br />
menu items become armed when they are selected for any reason,<br />
including using the keyboard. These are, in fact, all of the cases in which you<br />
would want to report what the menu item or button would do if it were<br />
pressed, hence, all that is necessary to detect these conditions is to monitor<br />
the armed property of the menu item or buttons ButtonModel. Similarly,<br />
you can detect the button being pressed or released by monitoring the<br />
pressed property of the ButtonModel.<br />
With this idea in mind, as a first step toward implementing the status line<br />
feature of this example, we create a class that can be used to listen to any
748 Chapter 6 Menus and Toolbars<br />
number of ButtonModels and generate events when their armed and<br />
pressed states change. Listing 6-15 shows the implementation of this class.<br />
Listing 6-15 A class that monitors user actions on menus and buttons<br />
package <strong>JFC</strong>Book.Chapter6.jdkl3;<br />
import j ava.awt.*;<br />
import j ava.awt.event.*;<br />
import java.beans.*;<br />
import java.util.*;<br />
import javax.swing.*;<br />
import javax.swing.event.*;<br />
public class ButtonSnooper implements ChangeListener {<br />
public static final String ARMED_BUTTON = "armedButton";<br />
public static final String PRESSED_BUTTON =<br />
"pressedButton";<br />
private AbstractButton armedButton;<br />
private AbstractButton pressedButton;<br />
private Hashtable modelMap = new Hashtable();<br />
private PropertyChangeSupport changeSupport =<br />
new PropertyChangeSupport(this);<br />
public void attachToMenuBar(JMenuBar menuBar) {<br />
int count = menuBar.getMenuCount();<br />
for (int i = 0; i < count; i++) {<br />
attachToMenu(menuBar.getMenu(i));<br />
}<br />
}<br />
public void attachToMenu(JMenu menu) {<br />
Component[] comps = menu.getMenuComponents();<br />
for (int i = 0; i < comps.length; i++) {<br />
Component comp = comps[i];<br />
if (comp instanceof JMenu) {<br />
// Submenu - recurse<br />
attachToMenu((JMenu)comp);<br />
} else if (comp instanceof JMenuItem) {<br />
attachToButton((JMenuItem)comp);<br />
}<br />
}<br />
}
The Menu Bar and the Menu System 749<br />
Listing 6-15 A class that monitors user actions on menus and buttons<br />
(continued)<br />
public void attachToButton(AbstractButton button) {<br />
ButtonModel model = button.getModel();<br />
if (ImodelMap.containsKey(model)) {<br />
modelMap.put(model, button);<br />
model.addChangeListener(this);<br />
}<br />
}<br />
public void attachToButtons(Container cont) {<br />
Component[] components = cont.getComponents();<br />
for (int i = 0; i < components.length; i++) {<br />
Component comp = components[i];<br />
if (comp instanceof AbstractButton) {<br />
attachToButton((AbstractButton)comp);<br />
} else if (comp instanceof Container &&<br />
((Container)comp).getComponentCount() > 0) {<br />
attachToButtons((Container)comp);<br />
}<br />
}<br />
}<br />
public AbstractButton getArmedButton() {<br />
return armedButton;<br />
}<br />
public AbstractButton getPressedButton() {<br />
return pressedButton;<br />
}<br />
public void addPropertyChangeListener(<br />
PropertyChangeListener 1) {<br />
changeSupport.addPropertyChangeListener(1);<br />
}<br />
public void removePropertyChangeListener(<br />
PropertyChangeListener 1) {<br />
changeSupport.removePropertyChangeListener(1);<br />
}<br />
// Implementation of ChangeListener interface<br />
public void stateChanged(ChangeEvent evt) {<br />
ButtonModel model = (ButtonModel)evt.getSource();<br />
AbstractButton button =
750 Chapter 6 Menus and Toolbars<br />
Listing 6-15 A class that monitors user actions on menus and buttons<br />
(continued)<br />
}<br />
}<br />
(AbstractButton)modelMap.get(model);<br />
if (button != null) {<br />
if (model.isArmed()) {<br />
setArmedButton(button);<br />
} else if (button == armedButton) {<br />
setArmedButton(null);<br />
}<br />
}<br />
if (model.isPressed()) {<br />
setPressedButton(button);<br />
} else if (button == pressedButton) {<br />
setPressedButton(null);<br />
}<br />
private void setArmedButton(AbstractButton button) {<br />
AbstractButton oldButton = armedButton;<br />
armedButton = button;<br />
changeSupport.firePropertyChange(ARMED_BUTTON,<br />
oldButton, armedButton);<br />
}<br />
private void setPressedButton(AbstractButton button) {<br />
AbstractButton oldButton = pressedButton;<br />
pressedButton = button;<br />
changeSupport.firePropertyChange(PRESSED_BUTTON,<br />
oldButton, pressedButton);<br />
}<br />
This class has two bound properties that represent the currently armed<br />
button and the currently pressed button. The expectation is that an application<br />
will create a single instance of this class and connect it to all of the buttons<br />
or menu items that it needs to monitor, then register a<br />
PropertyChangeListener with it to detect when one of the buttons is<br />
armed or pressed. Theoretically, if your interface uses JToggleButtons,<br />
more than one button could be pressed at a time. However, there is little<br />
point in complicating the implementation by trying to retain a list of all
The Menu Bar and the Menu System 751<br />
pressed buttons because the status line only needs to reflect the function provided<br />
by the last button to be armed or pressed.<br />
Several methods are provided to allow an instance of this class to monitor<br />
one or more buttons. The attachToMenuBar method, for example,<br />
arranges for all of the menu items within a given JMenuBar to be monitored,<br />
whereas attachToButtons allows monitoring of all buttons (of all<br />
types) within a container. These methods work by finding each Abstract -<br />
Button in their scope and registering the ButtonSnooper instance as a<br />
ChangeListener of their associated ButtonModel. This class also maintains<br />
a mapping from each ButtonModel that it is associated with to the<br />
model's AbstractButton, in form of a HashTable keyed on the Button-<br />
Model reference. This is necessary because events delivered from the model<br />
have the ButtonModel as their source, but the event handler will actually<br />
need to find the corresponding AbstractButton. Since there is no reference<br />
within the model to its owning component, this mapping has to be<br />
stored by the ButtonSnooper.<br />
The values of the two bound properties are kept in the armedButton and<br />
pressedButton instance variables, which can be accessed using the<br />
getArmedButton and getPressedButton methods, respectively. When<br />
there is no pressed or armed button, these methods return null. Changes in<br />
the state of these properties can be monitored by registering a Property-<br />
ChangeListener with the ButtonSnooper. The property IiaiUCS that COrrespond<br />
to these attributes and the values that are delivered in the<br />
PropertyChangeEvents are as follows:<br />
ARMED_BUTTON A reference to the AbstractButton that has just<br />
been armed, or null if the button was armed but is<br />
no longer armed. The same value would be returned<br />
from the getArmedButton method.<br />
PRESSED BUTTON A reference to the AbstractButton that has just<br />
been pressed, or null if the previously pressed button<br />
is no longer pressed. The same value would be<br />
returned from the getPressedButton method.<br />
The core of this class is the stateChanged method which is the implementation<br />
of the ChangeListener interface. This method is invoked when<br />
the state of the ButtonModel of any of the buttons with which it is associated<br />
changes. Only changes to the pressed and armed attributes of the<br />
ButtonModel are of any interest and they are handled as follows:
752 Chapter 6 Menus and Toolbars<br />
1. If the property has value true, the ButtonModel that is the<br />
source of the event corresponds to the currently armed or<br />
pressed button. The ButtonModel reference is used as the key<br />
to the Hashtable to retrieve the corresponding Abstract-<br />
Button which is then stored in the armedButton or<br />
pressedButton instance variable and a PropertyChangeEvent<br />
for the appropriate property is delivered to all registered<br />
PropertyChangeListeners.<br />
2. If the property has the value false, the corresponding button<br />
is no longer pressed or no longer armed. In this case, the armed<br />
button or pressed button property is set to null and another<br />
PropertyChangeEvent is generated.<br />
You'll note, however, that when the armed or pressed property is false, the<br />
stateChanged method does not automatically generate a PropertyChangeEvent—a<br />
check is made to see whether the ButtonModel in the ChangeEvent<br />
is the same as the one in the previous ChangeEvent. The reason<br />
for this test is to avoid complications with the ordering of events generated by<br />
different ButtonModels. Suppose, for example, that the File menu of an<br />
application contains a New menu item and an Open menu item and that the<br />
user opens the menu and moves the mouse over the New menu item. At this<br />
point, the New menu item becomes armed and a ChangeEvent is generated<br />
by its button model. In response, the ButtonSnooper makes the New menu<br />
item the currently armed button and sends out a PropertyChangeEvent.<br />
Now suppose the user moves the mouse down from the New item to the<br />
Open item. This will cause the New menu item to be disarmed and the Open<br />
item to be armed. The ButtonModels for both of these menu items will generate<br />
ChangeEvents, one to show that the New menu item is not armed, the<br />
other to show that the Open menu item is. Suppose that the ChangeEvents<br />
arrive in the order just described. Then, what happens is the following:<br />
1. ChangeEvent arrives from the New menu item ButtonModel,<br />
with isArmed == false<br />
2. ButtonSnooper clears armedButton property and sends a<br />
PropertyChangeEvent for the ARMED_BUTTON property with<br />
value null<br />
3. ChangeEvent arrives from the Open menu item Button-<br />
Model, with isArmed == true
The Menu Bar and the Menu System 753<br />
4. ButtonSnooper sets armedButton property to the Open<br />
menu item and sends a PropertyChangeEvent for the<br />
ARMED_BUTTON property with the Open menu item as its<br />
value.<br />
This is the correct behavior. However, suppose the order of ChangeEvents<br />
were to be reversed. Then, if ButtonSnooper did the obvious<br />
thing, the following would be the result:<br />
1. ChangeEvent arrives from the Open menu item Button-<br />
Model, with is Armed == true<br />
2. ButtonSnooper sets armedButton property to the Open<br />
menu item and sends a PropertyChangeEvent for the<br />
ARMED_BUTTON property with the Open menu item as its value<br />
3. ChangeEvent arrives from the New menu item ButtonModel,<br />
with isArmed == false<br />
4. ButtonSnooper clears the armedButton property and sends<br />
a PropertyChangeEvent for the ARMED_BUTTON property<br />
with value null<br />
This, of course, is wrong—it now looks like there is no armed button<br />
when, in fact, the open menu item is armed. To avoid this, when the ButtonSnooper<br />
stateChanged method receives notification that a button is<br />
no longer pressed or armed, it first checks that the event is for the button that<br />
it currently thinks is pressed or armed and, if it is not, it ignores the event:<br />
if (model.isArmed()) {<br />
setArmedButton(button);<br />
} else if (button == armedButton) {<br />
setArmedButton(null);<br />
}<br />
With this check in place, the above sequence is replaced by the following:<br />
1. ChangeEvent arrives from the Open menu item Button-<br />
Model, with isArmed == true<br />
2. ButtonSnooper sets the armedButton property to the Open<br />
menu item and sends a PropertyChangeEvent for the<br />
ARMED_BUTTON property with the Open menu item as its value<br />
3. ChangeEvent arrives from the New menu item ButtonModel,<br />
with isArmed == false
754 Chapter 6 Menus and Toolbars<br />
4. ButtonSnooper sees that this is not from the currently armed<br />
button, so ignores it<br />
As a result, the ButtonSnooper correctly shows that the Open menu item is<br />
now armed and no PropertyChangeEvent is generated after the New menu<br />
item belatedly reports that it is not armed. The sequence of PropertyChangeEvents<br />
here does not include one with a null value, as the original<br />
sequence did, but this is not important because the events that are generated<br />
and passed to listeners indicate the correct state.<br />
Updating the Status Line<br />
The ButtonSnooper class allows you to receive notification when a button<br />
or a menu item is armed or pressed. For the purposes of this example, we<br />
need to provide a status line and write suitable messages to it when these<br />
events occur. Implementing a status line is very simple—the one used in this<br />
example is simply a subclass of JLabel in which the text is left-aligned. The<br />
only problem to be solved is what messages should be displayed when the<br />
ButtonSnooper delivers events.<br />
The messages that are displayed on the status line describe what the<br />
armed menu item or button would do when it is pressed, or what is actually<br />
being done if it is pressed. Since these GUI components are all associated<br />
with Actions, the natural place to keep these messages in within the Action<br />
itself. In fact, we use the SHORT_DESCRIPTION and LONG_DESCRIPTION<br />
properties of the Action to store the armed and pressed messages, respectively.<br />
The use of SHORT_DESCRIPTION for this purpose is, of course, consistent<br />
with its more general use as the source of the text of the tooltip that is<br />
automatically generated for a buttons when it is connected to an Action<br />
using the setAction method. Given that the messages are stored in the<br />
Action and that the ButtonSnooper class delivers events that contain a reference<br />
to the armed or pressed GUI component, all we need to do is map<br />
from the GUI component to its associated Action to be able to retrieve the<br />
message. This, of course, is exactly what the getAction method does for us.<br />
Although we could separate the implementation of the status line itself<br />
from the code that monitors events from the ButtonSnooper and writes the<br />
appropriate messages to the status line, for simplicity, we have combined the<br />
two in a single class whose implementation is shown in Listing 6—16.<br />
As noted earlier, the StatusLine class is simply a JLabel that will display<br />
any message written to it via its setMessage method. It also supports a<br />
default message which is displayed whenever setMessage is called with<br />
value null— that is, when there is no specific message of interest to the user
The Menu Bar and the Menu System 755<br />
Listing 6-16 A simple status line monitoring button and menu items<br />
package <strong>JFC</strong>Book.Chapter6.jdkl3;<br />
import j ava.awt.*;<br />
import j ava.awt.event.*;<br />
import java.beans.*;<br />
import java.util.*;<br />
import javax.swing.*;<br />
import j avax.swing.event.*;<br />
public class StatusLine extends JLabel<br />
implements PropertyChangeListener {<br />
private String defaultMessage = "<strong>Read</strong>y";<br />
public StatusLine(ButtonSnooper snooper) {<br />
setText(defaultMessage);<br />
snooper.addPropertyChangeListener(this) ;<br />
}<br />
public void setDefaultMessage(String defaultMessage) {<br />
this.defaultMessage = defaultMessage;<br />
}<br />
public void setMessage(String message) {<br />
setText(message != null ? message : defaultMessage);<br />
Dimension d = getSizeO;<br />
paintlmmediately(new Rectangle(0, 0,<br />
d.width, d.height));<br />
}<br />
public void propertyChange(PropertyChangeEvent evt) {<br />
String name = evt.getPropertyName();<br />
if (name.equals(ButtonSnooper.ARMED_BUTTON) ||<br />
name.equals(ButtonSnooper.PRESSED_BUTTON)) {<br />
String text = null;<br />
AbstractButton button =<br />
(AbstractButton)evt.getNewValue();<br />
Action sourceAction;<br />
if (button != null &&<br />
(sourceAction = button.getAction()) != null) {
756 Chapter 6 Menus and Toolbars<br />
Listing 6-16 A simple status line monitoring button and menu items<br />
(continued)<br />
}<br />
}<br />
String property;<br />
if (name.equals(ButtonSnooper.ARMED_BUTTON)) {<br />
property = Action.SHORTJDESCRIPTION;<br />
} else {<br />
property = Action.LONGJDESCRIPTION;<br />
}<br />
Object value = sourceAction.getValue(property);<br />
if (value instanceof String) {<br />
text = (String)value;<br />
}<br />
}<br />
// "text" is now null if there is no active or<br />
pressed<br />
// button or the button has no associated action or<br />
// there is an action but it does not have a string<br />
// stored under the SHORT_DESCRIPTION or<br />
// LONG_DESCRIPTION property. In any of those cases,<br />
// the default message will be displayed.<br />
setMessage(text);<br />
}<br />
to be shown on the status line. The default message is initially set to "<strong>Read</strong>y"<br />
but can be changed at any time using the setDef aultMessage method.<br />
The constructor allows the StatusLine to be connected to a Button-<br />
Snooper. The StatusLine registers itself to receive PropertyChangeEvents<br />
from the ButtonSnooper. When an event is received, the<br />
propertyChange method extracts the property name and value from the<br />
event and acts appropriately if it is the ARMED_BUTTON or<br />
PRESSED_BUTTON property:<br />
1. The pressed or armed button reference is obtained from the<br />
event<br />
2. If it is null, then there is no pressed or armed button, so the<br />
setMessage method will be called with value null. This will<br />
result in the default message being displayed. This is why the<br />
example application displays "<strong>Read</strong>y" on the status line when
The Menu Bar and the Menu System 757<br />
the mouse is not over a menu item or button and there is no<br />
menu or button action in progress.<br />
3. If it is not null, then the getAction method is used to get the<br />
Action associated with the pressed or armed button. If this<br />
method returns null, there is no assocaited Action and hence<br />
no message to display so the default message will be shown<br />
instead. Otherwise, the SHORT_DESCRIPTION or<br />
LONG_DESCRIPTION property of the Action is obtained and, if<br />
this is a String, it is written to the status line. If it is not a<br />
String (or is null), then the default message is again displayed.<br />
The ability to map from the GUI component to the Action using the<br />
getAction method is the key element that makes it so simple to provide this<br />
functionality. To provide the same feature for Swing 1.1.1 or <strong>Java</strong> 2 version<br />
1.2.2, it would be necessary to maintain a separate mapping from each button<br />
or menu item to the Action that was used to create it, which is inconvenient.<br />
The two classes, ButtonSnooper and StatusLine, that you have seen in<br />
this section, are both simple and easy to use because they make no assumption<br />
about how the user interface is constructed—all you have to do is use the<br />
correct ButtonSnooper methods to connect it to the buttons or menu items<br />
that you want to monitor and this can easily be done with an existing application<br />
without the need for intrusive changes. In fact, adding this functionality<br />
to the version of the file editor application shown in Listing 6-14 was as simple<br />
as adding the following lines of code at the end of the GUI construction<br />
code:<br />
// Create the ButtonSnooper and connect it to the menus<br />
ButtonSnooper snooper = new ButtonSnooper();<br />
snooper.attachToMenuBar(mb);<br />
// Connect the snooper to the buttons in the toolbar<br />
snooper.attachToButtons(toolBar);<br />
// Create and add a status line connected to the snooper<br />
this.getContentPane().add(new StatusLine(snooper),<br />
BorderLayout.SOUTH);
758 Chapter 6 Menus and Toolbars<br />
Summary<br />
This chapter started by looking at the Swing menu system and concluded by<br />
looking at the toolbar, a kind of single-level graphical menu that is often<br />
placed below the menu bar to allow fast access to frequently-used features of<br />
an application. In between, it described the various types of menu items that<br />
can be used to populate menus and showed how you can arrange to handle<br />
the user's menu selections.<br />
You also saw that you can use Actions, which were first introduced in<br />
Chapter 5, "Keyboard Handling, Actions, and Scrolling" as menu items and<br />
with toolbars. You saw how the text and icon from the Action are used to<br />
create menu items and toolbar buttons and how changing the state of the<br />
Action results in the same state change on the menu or the toolbar. You also<br />
saw the enhancements to this feature that have been added to Swing in <strong>Java</strong><br />
2 version 1.3.<br />
In order to demonstrate menus and toolbars in action, the graphical demo<br />
application from Chapter 4 was reworked and also modified to use Actions<br />
instead of ActionListeners, and you saw how to create docking and floating<br />
toolbars and how to control the conditions under which a floating toolbar<br />
will reattach itself to the application frame. Finally, we looked at the<br />
enhancements that have been made to the Actions framework in <strong>Java</strong> 2 version<br />
1.3.<br />
Menus and toolbars are useful for allowing the user exercise simple control<br />
over an application, but occasionally you need to allow the user to supply<br />
a lot of information at once. To make this possible, you can use free-standing<br />
windows called dialogs, which are the subject of the next two chapters.
USING STANDARD<br />
DIALOGS<br />
'<br />
Topics in This Chapter<br />
• Creating Dialogs with JOptionPane<br />
• Using the File Selection Dialog<br />
• Customizing and Filtering the File Selection Dialog<br />
• The Color Chooser Dialog
In this chapter, you'll see how to use dialog boxes to allow your application<br />
to interact with the user. Swing provides a small but powerful selection<br />
of dialog components that can be used directly or tailored with only<br />
a few lines of code to satisfy the needs of many applications, including message<br />
and information dialogs and controls that allow the user to select files<br />
and colors.<br />
The chapter starts by introducing the powerful JOptionPane component,<br />
which can be used to create free-standing dialog boxes or, as you'll see in the<br />
next chapter, as part of a more complex dialog layout. JOptionPane allows<br />
you to create simple dialogs that ask the user for input or inform the user of<br />
some condition that needs attention. In their most basic forms, these controls<br />
can be created with only a single line of code.<br />
This chapter also takes an in-depth look at JFileChooser, a component<br />
that can be used to allow the user to select files from a file system. You'll see<br />
how to select the directory in which the dialog will start, how to tailor the<br />
control so that it applies filters to the content of the directory before displaying<br />
its content to the user, and how to replace various parts of the control to<br />
customize its appearance or behavior.<br />
Finally, you'll see the simple, but very pretty, JColorChooser, which<br />
allows color selection to be made graphically.<br />
761
762 Chapter 7 Using Standard Dialogs<br />
Basic Dialogs<br />
A dialog is a free-standing window associated with an application that<br />
appears only when it is needed. There are several reasons for using dialogs.<br />
Most commonly, you would show a dialog when the user wants to change the<br />
application's behavior in some way. This type of dialog would contain a set of<br />
things that the user can configure represented by input fields, checkboxes,<br />
and other controls that allow the required settings to be specified. Other<br />
types of dialog just show a message to which the user must respond, or<br />
present the user with a simple set of alternatives, one of which must be chosen<br />
before the application will continue. Swing provides a rich set of dialogs<br />
that allow basic interaction with the user without the need to write a great<br />
deal of code. At the other end of the scale, it is also possible to build<br />
extremely complex dialog boxes of the type that you see in full-scale applications<br />
like Microsoft Word. This section looks at the basic dialogs and shows<br />
how you can customize them to meet your needs—the more complex dialogs<br />
are left for Chapter 8, "Creating Custom Dialogs."<br />
The Message Dialog<br />
If you just want to create a veiy simple dialog, you'll probably be able to find<br />
what you want among the possibilities provided by the Swing JOptionPane<br />
class. If you can't directly use what you find there, the odds are that you can<br />
use some of the techniques that you'll see in this chapter to create what you<br />
need from one of these basic dialogs. The simplest form of dialog that<br />
JOptionPane offers is a message dialog. In its most basic form, this displays<br />
an on-line message and a button labeled OK. Once it has been created, the<br />
dialog stays on view until the user presses the button. While the dialog is displayed,<br />
the user can't interact with the application in any other way.<br />
Creating a Basic Message Dialog<br />
Listing 7-1 shows how easy it is to create a simple message.<br />
Listing 7-1 A JOptionPane Message dialog<br />
package <strong>JFC</strong>Book.Chapter7;
Listing 7-1 A JOptionPane Message dialog (continued)<br />
import javax.swing. *;<br />
import j ava.awt.*;<br />
import <strong>Java</strong>.awt.event.*;<br />
public class MessageDialogExamplel extends JFrame {<br />
public MessageDialogExamplel(String title) {<br />
super(title);<br />
this.getContentPane().setBackground(Color.gray);<br />
}<br />
public void changeColor(Color targetColor,<br />
String colorName) {<br />
JOptionPane.showMessageDialog(this,<br />
"Press OK to change the background color to "<br />
+ colorName);<br />
this.getContentPane().setBackground(targetColor);<br />
this.getContentPane().repaint();<br />
}<br />
public static void main(String[] args) {<br />
MessageDialogExamplel f = new MessageDialogExamplel<br />
("Message Dialog Example 1") ;<br />
f.setSize(200, 200) ;<br />
f.setLocation(100, 100);<br />
f.addWindowListener(new WindowAdapter() {<br />
public void windowClosing(WindowEvent evt) {<br />
System.exit(0);<br />
}<br />
});<br />
f.setVisible(true) ;<br />
Basic Dialogs 763<br />
f.changeColor(Color.black, "black");<br />
f.changeColor(Color.white, "white");<br />
}<br />
J} This small program creates a frame with a gray background and then pops<br />
up a dialog informing you that the background is about to change to black.<br />
The Metal look-and-feel version of this dialog is shown in Figure 7-1. Notice<br />
that the dialog appears as an independent frame and that it is located in front<br />
of the application's main window. The default positioning of the dialog is<br />
determined entirely by JOptionPane and is not under your control. How-
764 Chapter 7 Using Standard Dialogs<br />
ever, as you'll see in the next chapter, there are ways to control the placement<br />
of dialogs if the default is not appropriate.<br />
The message itself appears in the right-hand side of the window and<br />
underneath it is the OK button. When you press this button, the dialog disappears<br />
and the frame's background color changes as advertised. A second dialog<br />
box then appears and the process repeats itself.<br />
<strong>Core</strong> Note<br />
The exact appearance of these dialog boxes is ultimately determined by<br />
the selected look-and-feel. For simplicity, the descriptions that you'll see in<br />
this chapter assume that the Metal look-and-feel is in use.<br />
The code that creates this dialog box is extremely simple:<br />
JOptionPane.showMessageDialog(this,<br />
"Press OK to change the background color to<br />
colorName);<br />
Figure 7-1 A JOptionPane message dialog.<br />
The static showMessageDialog method provides the simplest way to<br />
create a message dialog: you specify only the message to display and the<br />
frame to which the dialog belongs, which is usually the applications main<br />
window. This is the window relative to which the dialog's position is determined.<br />
The dialog appears in front of the frame and, once it has been displayed,<br />
the user can't do anything other than dismiss it. Furthermore, the<br />
application window (or windows if it has more than one) won't respond to<br />
the mouse or the keyboard while the dialog is displayed. This type of dialog<br />
is called a modal dialog. As you'll see later, it is also possible to create nonmodal<br />
dialogs that allow you to continue to interact with the application<br />
while they are visible.
Basic Dialogs 765<br />
If you look at the changeColor method of Listing 7-1, you might think<br />
that, according to the way the code is written, the content pane's color would<br />
be changed immediately after the dialog has been posted. In fact, though, the<br />
color change doesn't happen until you press the OK button. What actually<br />
happens is that the showMessageDialog method creates and displays the<br />
dialog and retains control until you dismiss it. This is slightly unusual in <strong>Java</strong>:<br />
normally, you create a window and continue execution; user actions on that<br />
window are usually handled elsewhere in an event handler. Of course, being<br />
able to wait until the user has responded to the dialog makes programming a<br />
lot simpler.<br />
The declaration of this simple form of the showMessageDialog method<br />
is as follows:<br />
public static void showMessageDialog(Component comp,<br />
Object message);<br />
In Listing 7-1, the application frame was used as the first argument, but,<br />
as you can see, all that you're bound to supply is a reference to a Component,<br />
not strictly a JFrame. If you wish, you can supply any component<br />
within the application window. The code that creates the dialog looks at the<br />
parents and grandparents of this component until it finds the top-level window,<br />
then places the dialog relative to that window. Therefore, the same<br />
result could have been obtained by saying<br />
JOptionPane.showMessageDialog(this.getContentPane(),<br />
"Press OK to change the background color to "<br />
+ colorName);<br />
You can also supply null as the first argument to this method. If you do<br />
this, the dialog is effectively parented to a shared and invisible frame that is<br />
not connected to the application window at all. Such a dialog will be displayed<br />
in the center of the screen. This feature, which also applies to all the<br />
other dialog creation methods in this chapter, is useful if you have to create a<br />
dialog in code that does not have a handle on the applications window, or if<br />
your application doesn't have a window at all, but does its work silently in the<br />
background until something goes wrong.<br />
Our example used a String to display a message, but the type of the second<br />
argument is actually declared as obj ect, which means that you can pass<br />
an instance of any <strong>Java</strong> class as the message. This might seem rather strange<br />
at first; you'll see what happens if you pass something other than a String in<br />
the next chapter.
766 Chapter 7 Using Standard Dialogs<br />
Customizing the Message Dialog<br />
This basic method doesn't allow much control over what the user sees. You<br />
can create a greater variety of dialogs without much extra work by using a<br />
second form of showMessageDialog:<br />
public static void showMessageDialog(Component comp,<br />
Object message, String title, int messageType);<br />
Using this method, you can supply your own title for the dialog and specify<br />
one of several message types. The message type must be chosen from the following<br />
set of values:<br />
JOptionPane.PLAINJMESSAGE<br />
JOptionPane . INFORMATION__MESSAGE<br />
JOptionPane.WARNINGJMESSAGE<br />
JOptionPane . QUEST IONJYIES SAGE<br />
JOptionPane.ERROR_MESSAGE<br />
The message type selects one of several icons that is placed next to the<br />
message text. If you specify JOptionPane . PLAINJYIESSAGE, you don't get<br />
an icon at all while using the value JOptionPane . INFORMATION_MESSAGE<br />
is the same as using the simple form of showMessageDialog shown earlier,<br />
except that this form also allows you to set the dialog title. Strictly speaking,<br />
the particular icon that is associated with each of these values depends on the<br />
look-and-feel associated with the application. If you use the Metal look-andfeel,<br />
you get the familiar-looking icons shown in the Figure 7-2.<br />
figure 7-2 Variations on the JOptionPane message dialog.
Basic Dialogs 767<br />
If you don't like any of the standard icons, you can use a third variant of<br />
showMessageDialog to supply your own—this form has an extra Icon<br />
parameter:<br />
public static void showMessageDialog(Component comp,<br />
Object message, String title, int messageType,<br />
Icon icon);<br />
Listing 7-2 shows an example that posts a message box indicating that a<br />
file save operation has been completed. In this example, the Image I con<br />
class is used to quickly create an Icon from an image stored in a file but you<br />
can, of course, create an icon in many other ways, including using graphics<br />
operations to draw a suitable picture.<br />
Listing 7-2 A message dialog with a custom icon<br />
package <strong>JFC</strong>Book.Chapter7;<br />
import javax.swing.*;<br />
import j ava.awt.*;<br />
import j ava.awt.event.*;<br />
public class MessageDialogExample3 {<br />
public static void main(String[] args) {<br />
JFrame f = new JFrame("Message Dialog Example 3");<br />
JOptionPane.showMessageDialog(f,<br />
"File Save Completed",<br />
"File has been saved successfully",<br />
JOptionPane.INFORMATION^MESSAGE,<br />
new Imagelcon(MessageDialogExample3.class.getResource(<br />
"images/save.gif")));<br />
System.exit(0);<br />
}<br />
}<br />
Notice that a value for the message type is still supplied, even though a<br />
custom icon is being used (Figure 7-3). We said that the purpose of this<br />
parameter is to select a suitable icon, so why is it necessary to supply a value<br />
when the icon that it implies is being replaced with our own? The reason is<br />
that, while the standard look-and-feel implementations use the message type<br />
only to select the icon (and therefore won't make any use of it in this case), it<br />
is perfectly possible to create a different look-and-feel for this dialog box that<br />
makes other changes to its appearance which depend on the message type.
768 Chapter 7 Using Standard Dialogs<br />
Figure 7-3 Using a custom icon with JOptionPane.<br />
For example, you might vary the background color to reflect the urgency of<br />
the message, using, perhaps, red for an error message and white for a simple<br />
information message. You'll see many similar examples of apparently redundant<br />
information when we look at the other types of dialog box. Incidentally,<br />
since convenience methods are being used to create dialogs, you never get a<br />
reference to the dialog itself and so you don't have the opportunity to change<br />
the background color or other attributes of the dialog box yourself. This is the<br />
price you pay for simplicity. If you want more control over the appearance of<br />
the dialog, you need to use the more complex interfaces that are described in<br />
the next chapter.<br />
The Confirm Dialog<br />
The message dialog is useful if you want to inform the user of some event,<br />
but there's no way to get any feedback from it. If you want the user to be able<br />
to allow or cancel what your application is about to do, you can use a Confirm<br />
dialog. In its simplest form, this displays a message and three buttons labeled<br />
Yes, No, and Cancel. You might use a dialog like this if your application has<br />
an open file whose content has been modified but not saved when the user<br />
tries to close the application. To avoid unintended loss of data, you could post<br />
a confirm dialog asking whether the user wants to save the data. In response<br />
to the answer Yes, the data would be saved and the application would then<br />
terminate, No would cause the application to exit without saving the data,<br />
while Cancel would withdraw the request to close the application. The simplest<br />
way to create such a dialog is to use the following JOptionPane<br />
method:<br />
public static int showConfirmDialog(Component comp,<br />
Object message);
• "<br />
Basic Dialogs 769<br />
As with showMessageDialog, this produces a modal dialog. Unlike<br />
showMessageDialog, however, this method provides a return value that<br />
reflects the user's response to the dialog. The possible return values, and<br />
their rather obvious meanings, are as follows:<br />
JOptionPane . CLOSED_OPTION The user dismissed the dialog with-<br />
out pressing any of the buttons.<br />
JOptionPane . CANCEL_OPTION The Cancel button was pressed.<br />
JOptionPane . NO_OPTION. The No button was pressed.<br />
JOptionPane . YES_OPTION. The Yes button was pressed.<br />
Listing 7—3 shows how you could use a dialog box to implement the policy<br />
described in the previous paragraph and Figure 7-4 shows how this dialog is<br />
rendered bv the Metal look-and-feel.<br />
Listing 7-3 The JOptionPane confirm dialog<br />
package <strong>JFC</strong>Book.Chapter7;<br />
import javax.swing.*;<br />
public class ConfirmDialogExamplel {<br />
public static void main(String[] args) {<br />
JFrame f = new JFrame("Confirm Dialog Example 1");<br />
int response = JOptionPane.showConfirmDialog(f,<br />
"Do you want to save the changes you have made to<br />
this file?");<br />
switch (response) {<br />
case JOptionPane.YES_OPTION:<br />
System.out.println("Yes - save data and exit");<br />
break;<br />
case JOptionPane.NO_OPTION:<br />
System.out.println("No - exit without saving data");<br />
break;<br />
case JOptionPane.CANCEL_OPTION:<br />
System.out.println("Cancel - do not exit");<br />
break;<br />
case JOptionPane.CLOSED_OPTION:<br />
System.out.println(<br />
"Close - treat as cancel: do not exit") ;<br />
break;
770 Chapter 7 Using Standard Dialogs<br />
Listing 7-3 The JOptionPane confirm dialog (continued)<br />
}<br />
// Just an example: exit anyway!<br />
System.exit(0);<br />
}<br />
Figure 7-4 The JOptionPane confirm dialog.<br />
In this case, if the user closes the dialog without responding to the question,<br />
the program behaves as if he/she had pressed Cancel. This is usually<br />
the safest course of action because it would (if this were a real application)<br />
avoid accidental loss of data.<br />
If you want to get slightly more sophisticated, there are three more variants<br />
of showConf irmDialog that allow you greater control over the appearance<br />
of the dialog box. The simplest of these allows you to specify the dialog s<br />
title and restrict the set of buttons on display:<br />
public static int showConfirmDialog(Component comp,<br />
Object message, String title, int optionType);<br />
The title parameter replaces the default dialog title ("Select an Option")<br />
supplied by the two-argument form of this method; optionType determines<br />
which buttons are displayed and takes one of the following values:<br />
JOptionPane . OK__CANCEL_OPTION<br />
JOptionPane.YES_NO_OPTION<br />
JOptionPane . YES_N0_CANCEL_OPTION<br />
JOptionPane.DEFAULT_OPTION<br />
It should be obvious what the result of using the first three of these constants<br />
will be. Using JOptionPane . DEFAULT_OPTION produces a dialog with<br />
a single button labeled OK. The OK button is always equivalent to "Yes." If you<br />
create a dialog with JOptionPane . OK_CANCEL_OPTION, the possible return<br />
values from showConf irmDialog are CLOSED_OPTION, CANCEL_OPTION,
Basic Dialogs 771<br />
and OK_OPTION. The actual value of OK_OPTION is the same as YES__OPTION,<br />
so you can use them interchangeably in your code. It makes more sense to<br />
check against OKJDPTION when you create a dialog with OK_CANCEL_OPTION<br />
or DEFAULT_OPTION; in fact, using DEFAULT_0PTION is not recommended,<br />
because you can obtain the same result with greater clarity using<br />
showMessageDialog.<br />
You can change the icon to one of the standard set shown in Figure 7-2 by<br />
supplying an extra message type parameter from the list that was shown with<br />
the description of showMessageDialog:<br />
public int showConfirmDialog(Component comp,<br />
Object message, String title, int optionType,<br />
int messageType);<br />
and, not surprisingly, you can also supply your own icon:<br />
public int showConfirmDialog(Component comp,<br />
Object message, String title, int optionType,<br />
int messageType, Icon icon);<br />
As before, the look-and-feel determines how the message type parameter<br />
is used when you supply your own icon—all of the standard look-and-feels<br />
simply display the icon you supply, whatever the message type happens to be.<br />
The exception to this is the unlikely case in which you supply a null Icon<br />
parameter, when the standard look-and-feel implementations revert to using<br />
the icon implied by the message type. Thus, the following two lines produce<br />
the same result:<br />
JOptionPane.showConfirmDialog(f, "Exit now?",<br />
"Exit dialog", JOptionPane.OKjCANCELjDPTION,<br />
JOptionPane.QUESTION_MESSAGE);<br />
JOptionPane.showConfirmDialog(f, "Exit now?",<br />
"Exit dialog", JOptionPane.OK_CANCEL_OPTION,<br />
JOptionPane.QUESTIONJVESSAGE, null);<br />
The Option Dialog<br />
The Option dialog box is basically the same as the Confirm dialog, except that<br />
it allows you complete control over the buttons that appear on it. If you use<br />
the Confirm dialog box, the possible button arrangements are limited to the<br />
following:<br />
• OK<br />
• OK and CANCEL<br />
• YES and NO<br />
•
772 Chapter 7 Using Standard Dialogs<br />
• YES, NO, and CANCEL<br />
In many cases, none of these choices are appropriate. For example, suppose<br />
your application needs to make a connection over a network to a host<br />
and discovers that it cannot be reached at present. In this situation, you<br />
might want to offer the user the choice between retrying the connection or<br />
aborting the entire operation, so you would like to have two buttons that say<br />
Abort and Retry. You can't do this with a Confirm dialog, but you can if you<br />
use an Option dialog instead. There is only one method that creates a modal<br />
Option dialog:<br />
public static int showOptionDialog(Component comp,<br />
Object message, String title, int optionType,<br />
int messageType, Icon icon, Object options[],<br />
Object initialValue);<br />
Much of this rather long list of arguments should be familiar from what<br />
you have already seen—only the last two arguments are new. The options<br />
array determines what appears at the bottom of the dialog box. Usually, you<br />
would supply a list of strings, each of which causes a button to be created<br />
with one of the strings as its label. The button whose label matches initialValue<br />
is given the initial keyboard focus. Listing 7-4 shows you how to<br />
create the dialog box for the network application mentioned above.<br />
Listing 7-4 The JOptionPane option dialog<br />
package <strong>JFC</strong>Book.Chapter7;<br />
import javax.swing.*;<br />
public class OptionDialogExamplel {<br />
private static final String RETRY_STRING = "Retry";<br />
private static final String ABORT_STRING = "Abort";<br />
public static void main(String [] args) {<br />
JFrame f = new JFrame("Option Dialog Example 1");<br />
int option = JOptionPane.showOptionDialog(f,<br />
"Attempt to connect to remote host has failed. " +<br />
"Do you want to retry?",<br />
"Connection Failed", JOptionPane.DEFAULT_OPTION,<br />
JOptionPane.ERROR_MESSAGE, null,
Listing 7-4 The JOptionPane option dialog (continued)<br />
}<br />
}<br />
new String [] { RETRY_STRING, ABORT_STRING },<br />
RETRY_STRING);<br />
switch (option) {<br />
case JOptionPane.CLOSED_OPTION:<br />
System.out.println("Close - treat as retry");<br />
break;<br />
case 0:<br />
System.out.println("Retry");<br />
break;<br />
case 1:<br />
System.out.println("Abort");<br />
break;<br />
}<br />
System.exit (0) ;<br />
Basic Dialogs 773<br />
The first three arguments passed to the showOptionDialog method in<br />
Listing 7-4 are self-explanatory. The fourth argument to showOptionDialog<br />
specifies which of the standard buttons are required. However, showOptionDialog<br />
can also specify the buttons using the options argument.<br />
If you are wondering how do these two arguments relate to each other, the<br />
rule is as follows:<br />
1. If the options argument is null, the optionType argument<br />
is used to determine the buttons that will appear in the dialog,<br />
as described for the Confirm dialog.<br />
2. If the options argument is not null, then the optionType<br />
argument is ignored and the buttons are created based on the<br />
content of the options array. Conventionally, the optionType<br />
parameter is set to JOptionPane . DEFAULT_OPTION in this<br />
case.<br />
In Listing 7-4, an array of strings that become the button labels is passed<br />
as the options argument and the Retry button is selected as the default by<br />
giving its label as the last argument. The optionType message is, therefore,<br />
set to JOptionPane.DEFAULT^OPTION. Finally, the messageType and<br />
icon arguments work in the same way as they do with the Confirm dialog.
774 Chapter 7 Using Standard Dialogs<br />
The values used in Listing 7-4 result in the creation of an error dialog with<br />
the default icon. Figure 7-5 shows the resulting dialog.<br />
Figure 7-5 The JOptionPane option dialog.<br />
You aren't restricted to any particular number of buttons in an Option dialog:<br />
You can have as many as you like, provided that there is room on the<br />
screen for them. Furthermore, although this example supplies an array of<br />
Strings as the options parameter, this is not the only possibility. In Chapter<br />
8, you'll see how values of different types can be used to create more<br />
complex dialogs.<br />
What about the return value from this method? If the user closes the dialog<br />
without clicking on one of the buttons, the return value is JOption-<br />
Pane . CLOSED_OPTION; otherwise, the value returned is the index number<br />
of the button that has been pressed, counting the left-most button as 0, the<br />
next as 1, and so on. In this example, the Retry button causes a return value<br />
of 0 and the Abort button generates 1. There is no possible confusion<br />
between a button being pressed and the dialog box being closed because<br />
JOptionPane . CLOSED_OPTION has the value -1.<br />
The Input Dialog<br />
The last of the basic dialogs that Swing provides is the Input dialog, which<br />
allows you to prompt the user for arbitrary input, usually in the form of a<br />
string. There are four different ways to create these dialogs:<br />
public static String showInputDialog(Object message);<br />
public static String showInputDialog(Component comp,<br />
Object message);<br />
public static String showInputDialog(Component comp,<br />
Object message, String title, int messageType);<br />
public static Object showInputDialog(Component comp,<br />
Object message, String title, int messageType,<br />
Icon icon, Object[ ] selectionValues,<br />
Object initialSelectionValue);
Basic Dialogs 775<br />
The first three forms of the showInputDialog method generate a dialog<br />
box with a text field into which the user can type a string. The first form is<br />
equivalent to the second variant with the comp argument supplied as null<br />
and therefore creates a dialog with no associated top-level frame. The message<br />
parameter can be used to prompt the user as to the type of information<br />
required and, as usual, you can either accept a default title (in this case<br />
Input) and a question mark icon or, using the third form of the method, supply<br />
your own title. Here are examples of both of these cases:<br />
String fileName = JOptionPane.showInputDialog(f,<br />
"Please supply the name of the file to open:");<br />
fileName = JOptionPane.showInputDialog(f,<br />
"File Open failed - Please supply an alternative name:",<br />
"File Open Failed",<br />
JOptionPane.ERROR_MESSAGE);<br />
Figure 7-6 shows the input dialog that would be created by the code<br />
extract above.<br />
Figure 7-6 The JOptionPane input dialog.<br />
All Input dialog boxes come with OK and Cancel buttons—showInput-<br />
Dialog doesn't provide any arguments that allow you to specify how many<br />
buttons there are or what their labels should be.<br />
If the user presses the OK button or hits RETURN in the text field, the<br />
showInputDialog method returns whatever has been typed into the input<br />
field. If the user didn't actually type anything, you get an empty string—not a<br />
null string. A null string is returned only if the user closes the dialog or<br />
presses Cancel.<br />
The fourth form of showInputDialog allows you to constrain the user's<br />
input by making it possible to supply a set of possible responses and select<br />
the initial value. This produces a dialog with a combo box or a list box,<br />
depending on the number of possible responses, instead of a text field:
776 Chapter 7 Using Standard Dialogs<br />
String colorName = (String)JOptionPane.showInputDialog(f,<br />
"Which color would you like to use for the background?:",<br />
"Background Color Selection",<br />
JOptionPane.QUESTION_MESSAGE,<br />
null,<br />
choices,<br />
choices[0]);<br />
public static final String [] choices = {<br />
"Red", "Orange", "Yellow", "Green", "Blue",<br />
"White", "Black", "Grey", "Pink" };<br />
Figure 7-7 shows what this code extract produces with the Metal lookand-feel.<br />
The Metal look-and-feel supplies a combo box when there are less<br />
than 20 selections and a list box if there are 20 or more, so in this case the<br />
color choices are placed in a combo box. You can run this example with the<br />
command:<br />
java <strong>JFC</strong>Book.Chapter7.InputDialogExample2<br />
Figure 7-7 The JOptionPane input dialog with a combo box.<br />
All of the strings in the choices array appear in the combo or list box and<br />
the one supplied as the last argument is selected as the one that is initially<br />
selected. The display field of the combo box is read-only, so the user cannot<br />
type an arbitrary value into it. However, it is possible to type a single character<br />
into this field, which is used to search the list of options; for example, typing<br />
the letter o locates Orange and makes it the current selection. Note,<br />
however, that only one letter is used, so that typing g followed by r locates<br />
Red, not Green.<br />
Notice that this form of showInputDialog accepts a list of Objects and<br />
returns an Object, which must be cast to the appropriate actual type to<br />
make it useful. In the overwhelming majority of cases, you will use a string<br />
here, but it is possible to supply a list of objects of any kind. If you do this,
Basic Dialogs 777<br />
each entry in the list is turned into a string by calling its toString method<br />
and the result is added to the combo box or list. However, when the user<br />
makes a selection, the value returned by showInputDialog is not the string<br />
that the user saw but the Object that generated that string. This can be<br />
demonstrated by creating a list of Font objects instead of Strings:<br />
Font selectedFont = (Font)JOptionPane.showInputDialog(f,<br />
"Please select a font:",<br />
"Background Color Selection",<br />
JOptionPane.PLAINJMESSAGE,<br />
null,<br />
choices,<br />
choices[0] );<br />
public static final Font [] choices = {<br />
new Font("Dialoglnput", Font.PLAIN, 12),<br />
new Font("Dialoglnput", Font.PLAIN, 14),<br />
new Font("Dialog", Font.PLAIN, 12),<br />
new Font("Dialog", Font.BOLD, 12),<br />
new Font("Serif", Font.ITALIC, 12),<br />
new Font("Serif", Font.BOLD [ Font.ITALIC, 12)<br />
};<br />
The dialog box that appears when you execute the command:<br />
java <strong>JFC</strong>Book.Chapter7.InputDialogExample3<br />
and which is shown in Figure 7-8 contains string versions of the Font<br />
objects. Unfortunately, the result of applying toString to a Font does not<br />
produce a very useful result (except perhaps to the programmer), but it does<br />
clearly show that the combo box contains a representation of the objects that<br />
it was passed.<br />
Figure 7-8 The JOptionPane input dialog with an object rather than a string.<br />
Choosing a font description and pressing OK causes showInputDialog to<br />
return and the result is printed. The output is, not surprisingly, the same as<br />
the entry that was selected from the dialog. It is clear, however, that what was
778 Chapter 7 Using Standard Dialogs<br />
returned was a Font object, not a String, because anything other than a<br />
Font would cause the assignment to the variable selectedFont to throw a<br />
ClassCastException.<br />
<strong>Core</strong> Tip<br />
One moral of this story is that, if you intend to create classes that might be<br />
used as part of a user selection in an Input dialog, you should provide a<br />
user-friendly tostring method.<br />
This short survey of the JOptionPane class has by no means exhausted all<br />
of its possibilities. As powerful as it is for creating common dialogs with ease,<br />
it is even more useful as part of a custom dialog, as you'll see in Chapter 8.<br />
The JFileChooser Component<br />
The simple dialog boxes that you have seen so far are very useful for basic<br />
interactions that require a yes/no response or a single line of input from the<br />
user. Most programs have more complex requirements than this, and almost<br />
eveiy application needs to manipulate files. In Chapter 6, "Menus and Toolbars,"<br />
you saw how to use the menu system to provide the user with the ability<br />
to open a file using a file selection dialog. The file selection dialog that was<br />
used in Chapter 6 was, in fact, the AWT FileDialog, which has been available<br />
since JDK 1.0. This class is simply a <strong>Java</strong> wrapper around the file selection<br />
dialog box offered by whatever platform the application is running on, so<br />
it will be familiar to users of the platform but, for various reasons, it hasn't<br />
been possible for programmers using the AWT to take full advantage of the<br />
facilities of the native file dialogs offered by either Windows or Motif. Swing<br />
replaces the old FileDialog class with the platform-independent JFile-<br />
Chooser, which is implemented completely in <strong>Java</strong> and provides features<br />
that are veiy similar to the Windows File Open dialog. JFileChooser is a<br />
Swing component that can be used to provide a means for the user to navigate<br />
the file system and select a file to open, write to, or perform some other<br />
operation on, with only a few lines of code. In this chapter, you'll see how to<br />
make use of most of the features of this component. JFileChooser can also<br />
be used as to create a custom dialog, where file selection is only a part of the<br />
user interface. We'll show you how to use it to build custom dialogs in the<br />
next chapter.
File Chooser Basics<br />
The JFileChooser Component 779<br />
JFileChooser is derived from JComponent and so can be used alone or<br />
as part of a more complex dialog. The simplest way to use the file chooser is<br />
to create a JFileChooser object and invoke a convenience method to pop<br />
up a dialog wrapping it. Listing 7—5 shows how to do this.<br />
Listing 7-5 Creating a basic file selection dialog<br />
package <strong>JFC</strong>Book.Chapter7;<br />
import javax.swing.*;<br />
import java.io.*;<br />
public class FileChooserExamplel {<br />
public static void main(String [] args) {<br />
JFrame parentFrame =<br />
new JFrame("File Chooser Example 1");<br />
JFileChooser chooser = new JFileChooser();<br />
chooser.setDialogTitle("File Chooser Example 1");<br />
}<br />
int result = chooser.showOpenDialog(parentFrame);<br />
File selectedFile = chooser.getSelectedFile();<br />
System.out.println(<br />
"Return value from showOpenDialog is " + result);<br />
if (selectedFile != null) {<br />
System.out.println("Chosen file is " +<br />
selectedFile.getPath());<br />
} else {<br />
System.out.println("No file was selected");<br />
}<br />
System.exit(0);<br />
}<br />
You can try this example for yourself by typing the command:<br />
<strong>Java</strong> <strong>JFC</strong>Book.Chapter7.FileChooserExamplel<br />
which produces a result like that shown in Figure 7-9.<br />
Listing 7-5 uses the default constructor to create the JFileChooser. The<br />
set of files that is initially displayed when you do this depends on which platform<br />
and <strong>Java</strong> version you are using. On platforms that support the concept,
780 Chapter 7 Using Standard Dialogs<br />
Figure 7-9 The Swing JFileChooser Control.<br />
the home directory that the JFileChooser starts in is the users home directory.<br />
Where this concept doesn't exist or is not implemented by the <strong>Java</strong> platform<br />
(as is the case for JDK 1.1.8 on the Windows platform), the content of<br />
the <strong>Java</strong> installation directory is displayed instead.<br />
If you don't want the file chooser to display the content of the default<br />
directory when it first appears, you can explicitly supply an initial directory<br />
when you create it (as you'll see in "Creating a JFileChooser Object" later in<br />
this section). Alternatively, you can use the following methods to set or get<br />
the file chooser's current directory once it has been created:<br />
public void setCurrentDirectory(File dir);<br />
public File getCurrentDirectory();<br />
These methods use a j ava . io. File object to specify the current directory.<br />
In fact, with the exception of two constructors, all JFileChooser<br />
methods that handle files and directories refer to them using File objects.<br />
This makes it possible for the file chooser API and most of its implementation<br />
to be independent of the format and interpretation of actual path names,<br />
which are dealt with by two classes that it uses internally (FileView and<br />
FileSystemView). One of the most useful consequences of this decision is<br />
that you can use the JFileChooser to navigate virtual file systems that are<br />
not realised as actual file systems by implementing your own FileView and<br />
FileSystemView classes. You could, for example, choose to present a view
The JFileChooser Component 781<br />
of anX.500 or LDAP directory hierarchy in a JFileChooser by building the<br />
appropriate mapping classes and a subclass of File that would represent the<br />
nodes and the target objects in the directory hierarchy. The API of the file<br />
chooser itself would be unaffected by this, but the application would, of<br />
course, need to know what type of objects it was dealing with to make use of<br />
the values returned by getSelectedFile or getSelectedFiles.<br />
Aside from the list of files and directories displayed in the middle of the<br />
control, JFileChooser has several other components embedded within it<br />
that the user can use to change the way in which objects are displayed or to<br />
interact with the file system. Above the file display, there are five controls<br />
(see Figure 7-9). Working from left to right, these controls are as follows:<br />
The "Look in" combo box<br />
The "Up One Level" button<br />
The "Home" button<br />
This control displays the name of the directory<br />
whose content is currently displayed in the file<br />
chooser. If you open the combo box, you'll see an<br />
entry for each drive on your system (where there are<br />
multiple drives), plus several entries that show the<br />
path through the file system to the current directory.<br />
If you select a different entry from this combo box,<br />
the file chooser will display the content of the corresponding<br />
directory.<br />
Clicking on this button causes the file chooser to display<br />
the content of the parent of the current directory,<br />
if there is one. You can achieve the same effect<br />
programmatically using the JFileChooser<br />
changeToParentDirectory method.<br />
This button causes the file chooser to switch to whatever<br />
it considers to be the user's home directory. As<br />
noted above, which directory this is depends on the<br />
platform and the JDK version in use.
782 Chapter 7 Using Standard Dialogs<br />
The "New Folder" button<br />
View Controls<br />
This button attempts to create a new folder in the<br />
currently displayed folder. The user must have permission<br />
to perform this operation. The name of the<br />
new folder is "New Folder" on the Windows platform<br />
and "NewFolder" for UNIX. If a folder of<br />
this name already exists, then a numeric part is<br />
added to the end to make the name unique in the<br />
current directory. On UNIX platforms, these names<br />
take the form "'NewFolder . 1" and so on, while on<br />
Windows they follow the pattern "New Folder<br />
(1) " ,etc. Having created a new folder, the user will<br />
then usually rename it using the mechanism<br />
described below.<br />
At the extreme right of the top part of the file<br />
chooser are two buttons that are intended to allow<br />
the user to switch between a list view and a detail<br />
view of the current directory content. At present,<br />
these buttons do not work.<br />
The file list allows the user to select one or more files by clicking them<br />
with the mouse, as described more fully in "Getting the Selected File." The<br />
user can also use the file list to rename a file or directory by clicking once on<br />
the object and then clicking again after a short delay (so as not to give the<br />
impression of a double click). Alternatively, clicking on an entry in the file list<br />
that is already selected is also interpreted as a request to rename it (which<br />
can be annoying at times). When the file chooser detects a gesture that it<br />
considers to be a request to rename the selected file, an editor opens up in<br />
place of the file name to allow the user to type a new name. The user can<br />
complete the rename operation by pressing RETURN after typing the new<br />
name, or abandon it by pressing the ESCAPE key, or selecting a different file<br />
in the file chooser.<br />
Below the file list there are four more controls, whose functions are<br />
described below.<br />
File Name This field contains the name of the selected file.<br />
Usually, it is the terminal part of the file name and it<br />
corresponds to a file selected in the file display area.<br />
However, the user can type a full or partial file or<br />
directory name into this field as an alternative to<br />
selecting an object graphically.
The JFileChooser Component 783<br />
Files of type This box contains one or more filters that determine<br />
the set of files and/or directories that will be displayed<br />
by the file chooser. Typically, tins box contains<br />
a filter that allows the user to display all files and one<br />
or more extra filters that display files with particular<br />
suffices (such as . j ava or . gif) while hiding all<br />
others. Filters are covered in detail in "Display Filtering"<br />
later in this chapter.<br />
Open What this button does depends on the way in which<br />
the file chooser is configured. If a file is selected, this<br />
button closes the dialog and returns the selected file<br />
to the caller. The same happens if a directory is<br />
selected and the chooser is allowed to return directories.<br />
However, if the file chooser is configured as<br />
FILES_ONTJY, then pressing Open when a directory<br />
is selected causes the chooser to descend into that<br />
directory and disjilay its content.<br />
Cancel Closes the dialog and returns a status indicating that<br />
the user did not wish to select a file.<br />
Creating a JFileChooser Object<br />
JFileChooser has six constructors:<br />
public JFileChooser(File dir);<br />
public JFileChooser(String dirname);<br />
public JFileChooser();<br />
public JFileChooser(File dir, FileSystemView fsv);<br />
public JFileChooser(String dirname, FileSystemView fsv);<br />
public JFileChooser(FileSystemView fsv);<br />
The first two constructors create a file chooser showing the directory corresponding<br />
to the given File object or with path dirname, respectively. The<br />
third constructor shows the content of the user's home directory, or the <strong>Java</strong><br />
installation directory on systems that do not have the concept of a home<br />
director) 7 .<br />
The second set of three constructors mirrors the first three but supply an<br />
explicit FileSystemView class. This class contains the code that interfaces<br />
the JFileChooser to the underlying file system; by default, a FileSystem-<br />
View suitable for the system on which the JFileChooser is running is automatically<br />
selected. You can use these constructors to install an extended<br />
FileSystemView class of your own if you need to.
784 Chapter 7 Using Standard Dialogs<br />
JFileChooser has three different styles, which differ only slightly. The<br />
possible styles are specified using the following constant values:<br />
• JFileChooser.OPEN_DIALOG<br />
• JF i1e Choo s e r.SAVE_DIALOG<br />
• JFileChooser.CUSTOM_DIALOG<br />
If you don't make an explicit choice, OPEN_DIALOG is assumed.<br />
You create a dialog from a JFileChooser using one of the following<br />
three convenience methods:<br />
public int showOpenDialog(Component parent);<br />
public int showSaveDialog(Component parent);<br />
public int showDialog(Component parent, String text);<br />
These methods all create a modal dialog wrapping the JFileChooser on<br />
which they are invoked. If you use the first variant, the resulting dialog is<br />
assumed to be used for the selection of a file to open and the dialog type is<br />
set to JFileChooser. OPEN_DIALOG. Similarly, the second method creates<br />
a save dialog, of type JFileChooser. SAVE_DIALOG. The last variant creates<br />
a custom dialog in which the text argument is used as the label of the<br />
button that would (by default) be labeled either 'Open' or 'Save' for the<br />
other two dialog styles. In fact, the only difference between these three dialog<br />
types is the way in which this button (referred to as the 'Approve' button)<br />
is configured and the title that appears in the dialogs caption bar. For further<br />
information on how to change the settings for the Approve button, see "Customization"<br />
later in this chapter.<br />
By default, the dialog title is the same as the text displayed on the<br />
Approve button. You can set or retrieve the title or set a custom title using<br />
the following methods:<br />
public String getDialogTitle();<br />
public void setDialogTitle(String title);<br />
Getting the Selected File<br />
When you pop up a dialog vising one of the above methods, it remains active<br />
until the user closes it by pressing the Approve or Cancel button, doubleclicks<br />
on a file, or uses the frame close button on the dialog's caption bar. The<br />
return value from the dialog opening method is one of the following values:<br />
• JFileChooser.APPROVE_OPTION<br />
• JFileChooser.CANCEL OPTION
The JFileChooser Component 785<br />
When the return value is JFileChooser. APPROVE_OPTION, the selected<br />
file can be retrieved from the dialog with the following method:<br />
public File getSelectedFile();<br />
If no file has been selected, this method returns null.<br />
You can see how this works in Listing 7-5. This example is, however, a little<br />
careless because it doesn't check the value returned from the showOpen-<br />
Dialog method before calling getSelectedFile. Under normal<br />
circumstances, you would check that JFileChooser. APPROVE__OPTION is<br />
returned before calling getSelectedFile, because this method returns the<br />
last file that was selected in the file chooser's file list, whether or not the user<br />
pressed the Approve button. Listing 7-6 shows the proper way to retrieve<br />
the selected file.<br />
Listing 7-6 Retrieving the selected file<br />
package <strong>JFC</strong>Book.Chapter7;<br />
import j avax.swing.*;<br />
import java.io.*;<br />
public class FileChooserExample2 {<br />
public static void main(String[] args) {<br />
JFrame parentFrame =<br />
new JFrame("File Chooser Example 2");<br />
JFileChooser chooser = new JFileChooser();<br />
chooser.setDialogTitle("File Chooser Example 2");<br />
chooser.setMultiSelectionEnabled(true);<br />
int result = chooser.showOpenDialog(parentFrame);<br />
if (result == JFileChooser.APPROVE_OPTION) {<br />
System.out.println("getSelectedFile returns " +<br />
chooser.getSelectedFile() ) ;<br />
Filet] selectedFiles = chooser.getSelectedFiles(]<br />
int length = selectedFiles.length;<br />
System.out.println(length + " file(s) selected")<br />
if (length > 0) {<br />
for (int i = 0; i < length; i++) {<br />
System.out.println("\t" +<br />
selectedFiles [i] .getPath ()) ;
786 Chapter 7 Using Standard Dialogs<br />
Listing 7-6 Retrieving the selected file (continued)<br />
}<br />
}<br />
}<br />
}<br />
}<br />
System.exit(0);<br />
Here, the value returned by showOpenDialog is checked before calling<br />
getSelectedFile to retrieve the selected file name. Notice also that this<br />
example also uses the getSelectedFiles method, which returns all of the<br />
files selected in the chooser:<br />
public File[] getSelectedFiles();<br />
You can run this example for yourself using the command<br />
<strong>Java</strong> <strong>JFC</strong>Book.Chapter7.FileChooserExample2<br />
The ability to select more than one file at a time is not enabled by<br />
default— as Listing 7—6 illustrates, you have to use the setMultiSelectionEnabled<br />
method to switch it on:<br />
public void setMultiSelectionEnabled(boolean cond);<br />
public boolean isMultiSelectionEnabled();<br />
When multiple selection is disabled, the user will only be allowed to select<br />
one file at a time. In this case, the getSelectedFile method returns the<br />
File object for the selected file and getSelectedFiles returns an empty<br />
array of files (even though there is a single file selected).<br />
When multiple file selection is enabled, the user can use the SHIFT and<br />
CTRL keys to select more than one file at a time:<br />
• Clicking on a file with neither CTRL nor SHIFT pressed selects<br />
only that file and deselects any other file or files that are<br />
selected.<br />
• Holding down the CTRL key when clicking on a file adds that<br />
single file to the current selection if the file being selected is not<br />
above the uppermost selected file. Otherwise, it clears the<br />
existing selection and selects only the file being clicked.
The JFileChooser Component 787<br />
• Holding down the CTRL key when clicking on a file that is<br />
already selected has the effect of deselecting that file, leaving<br />
the rest of the selection unchanged.<br />
• Holding down the SHIFT key when clicking on a file selects the<br />
clicked item and every other file between that item and the<br />
item previously clicked, unless the file being selected is above<br />
the uppermost selected file, in which case it clears the existing<br />
selection and selects only the file being clicked. The SHIFT key<br />
is useful for selecting a block of files.<br />
• Holding down the SHIFT key when clicking a file that is already<br />
selected leaves that file selected but deselects all others<br />
between that file and the lead selection.<br />
When multiple file selection is enabled, the getSelectedFiles method<br />
returns an array of File objects with one entry for each selected file. If there<br />
are no selected files, then the array is empty. Note that this method never<br />
returns null. The getSelectedFile method always returns the topmost<br />
item in the displayed file list, whether or not this was not the last one<br />
selected. Figure 7-10 shows a file chooser with more than one file selected.<br />
Figure 7-10 Selecting more than one file in the file chooser.
788 Chapter 7 Using Standard Dialogs<br />
<strong>Core</strong> Alert<br />
Although the getSelectedFiles and<br />
setMultiSelectionEnabled methods are present in all versions of<br />
the JFileChooser, they work as described here only in <strong>Java</strong> 2 version<br />
1.3. In Swing 1.1.1 and <strong>Java</strong> 2 version 1.2.2, the user can select multiple<br />
files, but getSelectedFiles always returns an empty array, as if no<br />
files had been selected, even if one or more files have been selected.The<br />
getSelectedFile method returns the selected file nearest the top of<br />
the displayed list.<br />
Display Filtering<br />
By default, the file chooser shows everything in its current directory. However,<br />
by using a FileFilter, you can change the set of files and directories<br />
that the chooser displays. The example shown in Listing 7-7 illustrates how<br />
to attach file filters to a JFileChooser.<br />
Listing 7-7 Using FileFilters to control the list of files in a<br />
JFileChooser<br />
package <strong>JFC</strong>Book.Chapter7;<br />
import javax.swing.*;<br />
import javax.swing.filechooser.*;<br />
import java.io.*;<br />
public class FileChooserExample3 {<br />
public static void main(String[] args) {<br />
JFrame parentFrame =<br />
new JFrame("File Chooser Example 3");<br />
JFileChooser chooser = new JFileChooser();<br />
chooser.setDialogTitle("File Chooser Example 3");<br />
FileFilter[] filters = new FileFilterf] {<br />
new FolderFilter(),<br />
new FilesOnlyFilter()<br />
};<br />
for (int i = 0 ; i < filters.length ; i++) {<br />
chooser.addChoosableFileFilter(filters [i]) ;
Listing 7-7 Using FileFilters to control the list of files in a<br />
JFileChooser (continued)<br />
}<br />
}<br />
The JFileChooser Component 789<br />
}<br />
chooser.setFileFilter(<br />
chooser . getAcceptAHFileFilter () ) ;<br />
int result = chooser.showOpenDialog(parentFrame);<br />
System.exit(0) ;<br />
To run this example, type the command<br />
java <strong>JFC</strong>Book.Chapter7.FileChooserExample3<br />
This example displays a file chooser with two extra entries in the Files of<br />
type box as shown in Figure 7-11. Each entry in this box corresponds to a<br />
single file filter. The entry labeled "All Files (*.*)" is installed by<br />
default, while the other two correspond to the classes FolderFilter and<br />
FilesOnlyFilter, which are custom filters whose implementation will be<br />
shown shortly.<br />
The following methods control the set of file filters associated with a file<br />
chooser:<br />
public FileFilter[] getChoosableFileFilters();<br />
public void setAcceptAllFileFilterUsed(boolean cond);<br />
public boolean isAcceptAHFileFilterUsed () ;<br />
public void addChoosableFileFilter(FileFilter filter);<br />
public void removeChoosableFileFilter(<br />
FileFilter filter);<br />
public void resetChoosableFileFilters();<br />
public FileFilter getAcceptAllFileFilter () ;<br />
public void setFileFilter(FileFilter filter);<br />
You can get the set of file filters installed in a file chooser by calling the<br />
getChoosableFileFilters method. The set of filters installed by default<br />
contains only the "All Files (*.*)" entry, referred to as the "Accept All"<br />
filter. In <strong>Java</strong> version 1.3 you can, if you wish, stop this filter being displayed<br />
and used by calling the setAcceptAllFileFilterUsed method with argument<br />
false. If you are using Swing 1.1.1 or <strong>Java</strong> 2 version 1.2.2 and you<br />
want to achieve the same effect, you need to get a reference to the Accept All<br />
filter and then remove it explicitly. The following code can be used to do this:
790 Chapter 7 Using Standard Dialogs<br />
Figure 7-11 Using custom file filters.<br />
chooser.removeChoosableFileFilter(<br />
chooser. getAcceptAHFileFilter () ) ,-<br />
Although you would normally do this only after adding some extra filters, it<br />
works even when there are no other filters defined, with the result that the<br />
"Files of type" box is shown as empty. Nevertheless, all files are still shown in<br />
the display area of the chooser.<br />
Each call to the addChoosableFileFilter filter adds a new filter to the<br />
file chooser. You can remove all of the custom filters added using this method<br />
by using resetChoosableFileFilters, which leaves only the Accept All<br />
file filter installed. If you use this method in <strong>Java</strong> 2 version 1.3 and you have<br />
previously called setAcceptAllFileFilterUsed (false), then<br />
resetChoosableFileFilters results in there being no file filters<br />
installed. On the other hand, if you disabled the Accept All file filter by<br />
removing it using removeChoosableFileFilter, calling resetChoosableFileFilters<br />
will put it back again. As noted earlier, the<br />
removeChoosableFileFilter method can be used to remove a single filter.<br />
The setFileFilter method sets the active filter. Although you may call<br />
this method from application code, it is usually called by the file chooser's UI<br />
class when the user changes the filter selection in the "Files of type" box.
The JFileChooser Component 791<br />
Changing the selected filter causes the file chooser to change the set of files<br />
that it is displaying to match the criterion that the filter applies.<br />
Implementing a Custom File Filter<br />
FileFilter is an abstract class in the javax. swing, f ilechooser package,<br />
defined as follows:<br />
public abstract class FileFilter {<br />
public FileFilter();<br />
public abstract boolean accept (File f) ;<br />
public abstract String getDescription () ;<br />
}<br />
Note that in <strong>Java</strong> 2, there is an interface called FileFilter in the j ava. io<br />
package as well as the FileFilter class in the<br />
javax. swing, f ilechooser package. This means that if you include the<br />
following imports in a <strong>Java</strong> source file:<br />
import java.io.*;<br />
import javax.swing.filechooser.*;<br />
and you need to use FileFilter, you will have to explicitly write either<br />
<strong>Java</strong>.io.FileFilter or javax.swing.filechooser.FileFilter.<br />
Alternatively, you can explicitly import the one that you want to use:<br />
import java.io.*;<br />
import j avax.swing.filechooser.*;<br />
import javax.swing.filechooser.FileFilter;<br />
Custom file filters are created by extending the FileFilter class and implementing<br />
the abstract accept and getDescription methods. Each file or<br />
directory that the file chooser considers to be a candidate to be displayed is<br />
passed, in the form of a j ava. io. File object, to the current filter's accept<br />
method. Only objects for which this method returns true will actually be<br />
displayed. Therefore, to suppress the display of a file, return false from the<br />
accept method. The getDescription method supplies the descriptive<br />
text for the filter that will be shown in the "Files of type" box.<br />
Listing 7—8 shows the implementation of FolderFilter, which was used<br />
in the example in Listing 7-7.<br />
The accept method of this filter simply tests whether the object it is<br />
passed represents a directory. Since this method will only return true when<br />
the object supplied is a directory, only directories will be displayed when this<br />
filter is active. A similar custom filter also used in Listing 7-7, FilesOnly-
792 Chapter 7 Using Standard Dialogs<br />
Listing 7-8 A custom file filter for JFileChooser<br />
package <strong>JFC</strong>Book.Chapter7;<br />
import javax.swing.*;<br />
import javax.swing.filechooser.*;<br />
import java.io.*;<br />
public class FolderFilter extends<br />
javax.swing.filechooser.FileFilter {<br />
public boolean accept(File f) {<br />
return f != null && f.isDirectory();<br />
}<br />
public String getDescription() {<br />
return "Folders Only";<br />
}<br />
J _____^^<br />
Filter, allows files, but not directories, to be shown. The accept method of<br />
Files On lyFilter looks like this:<br />
public boolean accept(File f) {<br />
return f != null && f.isFileO;<br />
}<br />
You have already seen that you can configure a file chooser to display only<br />
folders and omit files. This, however, is not the same as using FolderFilter,<br />
because the filter can be switched, under user control, for another one<br />
that allows the same file chooser to display other objects,. By contrast, a file<br />
chooser that is configured to only display folders will not display anything<br />
else unless its type is programmatically changed using the setFileSelectionMode<br />
method.<br />
Filters can be filter-based on any criterion you choose. The two filters<br />
shown so far looked only at the type of the object that was passed to them. A<br />
common requirement is to select files based on their filename extension.<br />
Listing 7-9 shows an example program that allows you to display <strong>Java</strong> source<br />
files and <strong>Java</strong> class files separately.<br />
This program accepts a directory name as an argument. If you installed the<br />
example code for this book in the directory c : \ <strong>Core</strong> <strong>JFC</strong>Book, the following<br />
command will display a JFileChooser that shows all of the source and class<br />
files for the examples that apply to this chapter:
Listing 7-9 Using filters that provide suffix-based filtering<br />
package <strong>JFC</strong>Book.Chapter7;<br />
import javax.swing.*;<br />
import javax.swing.filechooser.*;<br />
public class FileChooserExample4 {<br />
public static void main(String[] args) {<br />
JFrame parentFrame =<br />
new JFrame("File Chooser Example 4");<br />
JFileChooser chooser;<br />
}<br />
}<br />
The JFileChooser Component 793<br />
if (args.length == 1) {<br />
chooser = new JFileChooser(args[0]);<br />
} else {<br />
chooser = new JFileChooser();<br />
}<br />
chooser.setDialogTitle("File Chooser Example 4");<br />
FileFilter[] fileFilters = new FileFilter[] {<br />
new ExtensionFilter("<strong>Java</strong> Source Files",<br />
new String [] { ".<strong>Java</strong>"}),<br />
new ExtensionFilter("<strong>Java</strong> Class Files",<br />
new String [] { ".class"}),<br />
};<br />
for (int i = 0; i < fileFilters.length; i++) {<br />
chooser.addChoosableFileFilter(fileFilters [i]);<br />
}<br />
chooser.setFileFilter(<br />
chooser . getAcceptAHFileFilter () ) ;<br />
int result = chooser.showOpenDialog(parentFrame);<br />
System.exit(0) ;<br />
<strong>Java</strong> <strong>JFC</strong>Book.Chapter7.FileChooserExample4<br />
c:\<strong>Core</strong><strong>JFC</strong>Book\<strong>JFC</strong>Book\Chapter7
794 Chapter 7 Using Standard Dialogs<br />
As you can see from Figure 7-12, the file choosers "Files of type" box has<br />
three entries:<br />
• All Files (•.*)<br />
• <strong>Java</strong> Source Files<br />
• <strong>Java</strong> Class Files<br />
of which the first is initially selected. The last two entries correspond to<br />
the two custom filters that were added using the addChoosableFileFilter<br />
method. It is important to note that when you add a filter, it becomes the<br />
active filter, so to force the "Accept All" filter to be active when the file<br />
chooser first appears, the example code explicitly selects it with the set-<br />
FileFilter method.<br />
Figure 7-12 Using suffix-based file filters.<br />
If you now select the "<strong>Java</strong> Source Files" filter, you'll see that the display<br />
will show only the files whose names end in . j ava, along with the subdirectory<br />
images and jdkl3, as shown in Figure 7-13. Similarly, the "<strong>Java</strong> Class<br />
Files" filter will display only the <strong>Java</strong> class files and the subdirectories.
Figure 7-13 Filtering to show only <strong>Java</strong> source files.<br />
The JFileChooser Component 795<br />
The implementation of this filter is straightforward and is shown in Listing<br />
7-10.<br />
Listing 7-10 A filter that displays files based on a list of suffices<br />
package <strong>JFC</strong>Book.Chapter7;<br />
import javax.swing.*;<br />
import javax.swing.filechooser.*;<br />
import java.io.*;<br />
public class ExtensionFilter extends FileFilter {<br />
public ExtensionFilter(String desc, String [] extensions){<br />
this.desc = desc;<br />
this.extensions = (String[])extensions.clone();<br />
}<br />
public boolean accept(File f) {<br />
if (f.isDirectory() == true) {<br />
return true;<br />
}<br />
String name = f.getNameO;<br />
int length = name.length();
796 Chapter 7 Using Standard Dialogs<br />
Listing 7-10 A filter that displays files based on a list of suffices<br />
(continued)<br />
}<br />
}<br />
for (int i = 0 ; i < extensions.length; i++) {<br />
String ext = extensions[i];<br />
if (name.endsWith(ext) &&<br />
name.charAt(length - ext.length()) == '.') {<br />
return true;<br />
}<br />
}<br />
return false;<br />
public String getDescription() {<br />
return desc;<br />
}<br />
protected String desc;<br />
protected String[] extensions;<br />
The constructor accepts a description for the filter and an array of strings,<br />
each specifying a filename extension. The accept method will return true if<br />
the object it is passed is a file whose name ends with one of these extensions,<br />
or if the the object is a directory. Thus, for example, you could use this class<br />
to create a filter that shows <strong>Java</strong> source and class files together (but no other<br />
file types) as follows:<br />
FileFilter filter =<br />
new ExtensionFilter("<strong>Java</strong> Files (*.<strong>Java</strong>;*.class)",<br />
new String[] { "*.java", "*.class" });<br />
Notice that this filter explicitly allows directories to be displayed in order to<br />
make it possible for the user to navigate the file system while looking for specific<br />
file types. If the filter returned false when passed a File object corresponding<br />
to a directory, then subdirectories would not be visible.<br />
More complex filters are also possible—all you need to do is write the<br />
appropriate code in the accept method. As another example of a file filter,<br />
Listing 7-11 shows a filter that displays only <strong>Java</strong> source files that appear not<br />
to have been compiled—that is, for which there is no corresponding class file<br />
in the same directory.
The JFileChooser Component 797<br />
Listing 7-11 A filter that displays uncompiled <strong>Java</strong> source files<br />
package <strong>JFC</strong>Book.Chapter7;<br />
import j avax.swing.*;<br />
import j avax.swing.filechooser.*;<br />
import java.io.*;<br />
public class Uncompiled<strong>Java</strong>FileFilter<br />
extends javax.swing.filechooser.FileFilter {<br />
protected Uncompiled<strong>Java</strong>FileFilter() {<br />
}<br />
public String getDescription() {<br />
return "Uncompiled <strong>Java</strong> Source Files";<br />
}<br />
public boolean accept(File f) {<br />
if (f.isFileO && f .getName () .endsWith (" . <strong>Java</strong>") ) {<br />
String pathName = f.getPathO;<br />
int nameSize = pathName.length();<br />
String classFileName =<br />
pathName.substring(0, nameSize - 4) + "class";<br />
File classFile = new File(classFileName);<br />
return !classFile.isPile () ;<br />
}<br />
return f.isDirectory();<br />
}<br />
// A concrete instance to use as a constant<br />
public static final Uncompiled<strong>Java</strong>FileFilter<br />
Uncompiled<strong>Java</strong>File =<br />
new Uncompiled<strong>Java</strong>FileFilter();<br />
j_<br />
You can try out this filter using FileChooserExampleS, which takes a directory<br />
name as its command line argument. For example,<br />
j ava <strong>JFC</strong>Book.Chapter7.FileChooserExample5<br />
c:\<strong>Core</strong><strong>JFC</strong>Book\<strong>JFC</strong>Book\Chapter7<br />
When the file chooser is first displayed, the Accept All file filter is active<br />
and all of the files in the chosen directory are displayed. If you open the<br />
"Files of type" box, you'll see that there is an entry labeled "Uncompiled<br />
<strong>Java</strong> Source Files ." If you select this filter and you have compiled all of
798 Chapter 7 Using Standard Dialogs<br />
the <strong>Java</strong> source files in the directory that you supply on the command line,<br />
you will only see entries for any subdirectories that there might be. If you<br />
then delete one or more class files and run the example again, you should see<br />
that the <strong>Java</strong> source files that corresponding to the files that you have<br />
removed are displayed by the file chooser, as shown in Figure 7-14.<br />
Figure 7-14 Using a filter to show uncompiled <strong>Java</strong> source files.<br />
Notice that this filter has a protected constructor to ensure that instances<br />
of it are not directly created by application code. Since filters are stateless,<br />
there is no reason to create more than one instance of each filter class, so this<br />
filter defines a constant (Uncompiled<strong>Java</strong>FileFilter .Uncompiled<strong>Java</strong>File)<br />
that refers to the only instance of it that will ever be created. The<br />
same result could also be achieved by declaring the constructor to be private—the<br />
difference between the two is that a filter with a protected constructor<br />
can be subclassed.<br />
Controlling File Selection<br />
A file is selected when the user clicks on an entiy in the JFileChooser<br />
display and presses the "Approve" button or, as a shorthand, a double-click<br />
will also select a file. If you've used one of the convenience methods you saw<br />
earlier to create a dialog, the call will return at this point and you can retrieve
The JFileChooser Component 799<br />
the name of the selected file using the getSelectedFile or getSelect -<br />
edFiles methods.<br />
However, with a little work, you can do more than this. Suppose your dialog<br />
invites the user to open a file that will be edited and subsequently saved.<br />
Perhaps you would want to verify, before the file is opened, that the user<br />
actually has write access to it; if he or she does not, you might then post a<br />
warning message and allow an alternative selection. You could, of course, do<br />
this after the showOpenDialog call has completed and loop back to post the<br />
dialog again if the selected file is not writable, something like this:<br />
File f = null;// Selected file - no selection<br />
for (;;) {<br />
if (chooser.showOpenDialog(parentFrame)<br />
!= JFileChooser.APPROVE_OPTION) {<br />
break;// Cancel: no file selected<br />
}<br />
}<br />
f = chooser.getSelectedFile();<br />
if (f != null && f.canWrite()) {<br />
break;// f is now set<br />
}<br />
// Display modal error message (not shown)<br />
// Now if "f" is not null, it is a writable file<br />
While this would work, it is a little messy because the dialog disappears<br />
and reappears until the user chooses a suitable file. Instead of this, why not<br />
leave the dialog posted until the user cancels it or selects a writable file?<br />
The problem to solve is how to get control between the point at which the<br />
user selects the file and when the dialog is actually dismissed. The secret<br />
behind this trick is to use the JFileChooser approveSelection method:<br />
public void approveSelection();<br />
This method is invoked after the selection is made but before the showOpenDialog<br />
method returns. Its job is to dispose of the dialog after approving the selected<br />
file, and the default implementation in JFileChooser does exactly that, allowing<br />
the application's call to showOpenDialog to complete. However, if the default<br />
implementation of this method is not invoked, the file selection is ignored and the<br />
dialog remains posted. The example in Listing 7-12 shows how this works in practice.
800 Chapter 7 Using Standard Dialogs<br />
Listing 7-12 Prevention selection of read-only files<br />
package <strong>JFC</strong>Book.Chapter7;<br />
import j avax.swing.*;<br />
import javax.swing.filechooser.*;<br />
import <strong>Java</strong>.io.File;<br />
public class FileChooserExample6 {<br />
public static void main(String[] args) {<br />
File directory = null;<br />
JFileChooser chooser = new MyFileChooser() ;<br />
chooser.setDialogTitle("File Chooser Example 6");<br />
if (args.length > 0) {<br />
directory = new File(args[0]);<br />
}<br />
chooser.setCurrentDirectory(directory);<br />
int result = chooser.showOpenDialog(null);<br />
System.exit(0) ;<br />
}<br />
}<br />
// This chooser catches attempts to open unwriteable files<br />
class MyFileChooser extends JFileChooser {<br />
public void approveSelection() {<br />
File selectedFile = getSelectedFile();<br />
if (selectedFile != null &&<br />
(selectedFile.canWrite() == false ||<br />
selectedFile.isFile() == false)) {<br />
// Post an error message and return<br />
JOptionPane.showMessageDialog(getParent (),<br />
"You do not have permission to write to that file",<br />
"File not Writable",<br />
JOptionPane.ERROR_MESSAGE);<br />
}<br />
// Return - causes the dialog to stay posted<br />
return;
The JFileChooser Component 801<br />
Listing 7-12 Prevention selection of read-only files (continued)<br />
}<br />
// No file selected, or file can be written -<br />
// let OK action continue<br />
super.approveSelection();<br />
}<br />
You can try this example using the command<br />
<strong>Java</strong> <strong>JFC</strong>Book.Chapter7.FileChooserExample6<br />
In order to override approveSelection, it is necessary to subclass JFileChooser.<br />
As you can see, the new implementation first extracts the<br />
selected file, then tests to see whether it is writable. If it is, it allows the selection<br />
to go ahead by invoking super .approveSelection. If, however, the<br />
user does not have write access to the file, an error dialog is posted and the<br />
method simply returns. Figure 7-15 shows what the user sees if the file is not<br />
writable:<br />
Figure 7-15 Displaying an error message when attempring to open a file.<br />
There is also a similar method call cancelSelection. Calling this<br />
method is equivalent to pressing the 'Cancel' button. You can override this
802 Chapter 7 Using Standard Dialogs<br />
method if you want to do some extra work before allowing the cancel to proceed,<br />
or even if you want to prohibit canceling the dialog under some circumstances.<br />
Another way to use this method is to invoke it directly to cancel<br />
the dialog without the user having to press "Cancel."<br />
One problem with the previous example is that the error dialog only allows<br />
the user to continue by pressing "OK" then selecting another file. If the user<br />
wants to abort the operation and close the file chooser having selected an<br />
uwritable file, it takes two operations to do so—the "OK" button on the error<br />
dialog must be pressed, followed by the "Cancel" button on the JFileChooser.<br />
A friendler application would reduce this to one operation by<br />
posting an error dialog that offers both "OK" and "Cancel" as options, so that<br />
the "Cancel" option would dispose of both the error dialog and the JFileChooser<br />
itself. As we said earlier, you can programmatically dismiss a<br />
JFileChooser by calling its cancelSelection method, as shown in Listing<br />
7-13.<br />
Listing 7-13 Programmatically dismissing JFileChooser<br />
package <strong>JFC</strong>Book.Chapter7;<br />
import j avax.swing.*;<br />
import j avax.swing.filechooser.*;<br />
import <strong>Java</strong>.io.File;<br />
public class FileChooserExample7 {<br />
public static void main(String[] args) {<br />
File directory = null;<br />
JFileChooser chooser =<br />
new DismissFileChooser(parentFrame);<br />
chooser.setDialogTitle("File Chooser Example 7");<br />
if (args.length > 0) {<br />
directory = new File (args [0]);<br />
}<br />
chooser.setCurrentDirectory(directory);<br />
int result = chooser.showOpenDialog(null);<br />
System.out.println("File chooser " +<br />
(result == JFileChooser.APPROVE_OPTION ?<br />
" selected a file" : " was cancelled"));
The JFileChooser Component 803<br />
Listing 7-13 Programmatically dismissing JFileChooser (continued)<br />
}<br />
}<br />
System.exit(0);<br />
// This chooser catches attempts to open unwriteable files<br />
// and allows the interaction to be cancelled if required,<br />
class DismissFileChooser extends JFileChooser {<br />
public void approveSelection() {<br />
File selectedFile = getSelectedFile();<br />
if (selectedFile != null &&<br />
(selectedFile.canWrite() == false |<br />
selectedFile.isFile() == false)) {<br />
// Post a confirm dialog<br />
int response = JOptionPane.showConfirmDialog(frame,<br />
"You do not have permission to write to that file",<br />
"File not Writable", JOptionPane.OK_CANCEL_OPTION,<br />
JOptionPane.ERROR_MESSAGE);<br />
if (response == JOptionPane.CLOSED_OPTION ||<br />
response == JOptionPane.CANCEL_OPTION) {<br />
// Carry out the cancel action - drops the dialog<br />
cancelSelection() ;<br />
return;<br />
} else {<br />
// Return - causes the dialog to stay posted<br />
return;<br />
}<br />
}<br />
// No file selected, or file can be written -<br />
// let OK action continue<br />
super.approveSelection();<br />
}<br />
J} Here, when an error occurs, a confirm dialog is used instead of a message<br />
dialog so that "OK" and "Cancel" buttons will be displayed. If the 'Cancel'<br />
button is pressed or the dialog closed, it is assumed that the user wants to<br />
cancel the entire operation and the JFileChooser cancelSelection<br />
method is called to close it. There is, of course, no need to worry about dismissing<br />
the confirm dialog itself when the "Cancel" button is pressed,
804 Chapter 7 Using Standard Dialogs<br />
because the button press will close the dialog before the showConf irmDialog<br />
method returns.<br />
Customization<br />
There are several ways to customize the appearance of JFileChooser, some<br />
simple, others more complex. We'll look at each of them individually in this<br />
section.<br />
Customizing the Control Buttons<br />
The simplest customization you can perform is change the label, the mnemonic,<br />
and the tooltip for the 'Approve' button using the following methods:<br />
public void setApproveButtonText(String text);<br />
public void setApproveButtonMnemonic(char mnemonic);<br />
public void setApproveButtonMnemonic(int mnemonic);<br />
public void setApproveButtonToolTipText(String tip);<br />
By default, this button is labeled "Open" or "Save," depending on which of<br />
showOpenDialog or showSaveDialogis used to create the dialog. If you<br />
create a custom dialog by using showDialog, the label used is specified as<br />
one of the method arguments. The button mnemonic is set to a default that<br />
matches the selected label (i.e. "O" or "S"). Since the "Cancel" button<br />
always has the same label, it isn't possible to configure its mnemonic or its<br />
tooltip.<br />
If you are using <strong>Java</strong> 2 version 1.3, you can also elect to completely remove<br />
the "Approve" and "Cancel" buttons using the following method:<br />
public void setControlButtonsAreShown(boolean cond);<br />
If you invoke this method with argument false, the file chooser does not<br />
display the "Approve" and "Cancel" buttons, as shown in Figure 7-16. If<br />
you are using <strong>Java</strong> 2 version 1.3, you can run this example for yourself using<br />
the command<br />
<strong>Java</strong> <strong>JFC</strong>Book.Chapter7.jdkl3.NoControlButtons<br />
If you create a dialog without these buttons, the user can still select a single<br />
file by double-clicking it and can cancel the dialog using the close control<br />
on the caption bar, but there is no way to select directories or multiple files.<br />
This mode is really intended for developers who need to use the file chooser<br />
as part of a larger dialog, which will itself supply a means to determine when<br />
a file has been selected. In order to do this, you need to be able to gain con-
Figure 7-16 Displaying a file chooser with no control buttons.<br />
The JFileChooser Component 805<br />
trol when the user selects a file but has not yet pressed the "Approve" button,<br />
a topic that will be covered later in this chapter, and know how to build<br />
custom dialogs, which is the subject of the next chapter.<br />
Display of Hidden Files<br />
Some operating systems have the concept of hidden files which would not<br />
normally be displayed in a line-by-line or graphical listing of a directory.<br />
UNIX users, for example, are used to creating files whose names begin with a<br />
period (.) in order to provide configuration information to programs. These<br />
files are not displayed by the default options of the Is command. Similarly,<br />
using Windows Explorer, you can set a file property that determines whether<br />
the file should be hidden and you can configure Windows Explorer itself to<br />
specify whether it displays these "hidden" files or not.<br />
JFileChooser allows you to elect to display or not display hidden files<br />
using the following method:<br />
public void setFileHidingEnabled(boolean cond);<br />
Calling this method with argument true causes JFileChooser to not<br />
display all files that it considers to be "hidden." You can see how this works<br />
on your system by typing the following command:<br />
You can try out the three file selection modes using the following command:
806 Chapter 7 Using Standard Dialogs<br />
<strong>Java</strong> <strong>JFC</strong>Book.Chapter7.FileChooserExample8 directory<br />
where directory is the name of a directory that contains one or more hidden<br />
files. If you are using UNIX, you'll see that files in this directory whose<br />
names begin with a period do not appear in the file chooser's display. On<br />
Windows, however, all files are still displayed because the implementation of<br />
the FileSystemView class for Windows does not currently have any way to<br />
determine whether a file's hidden attribute is set. Therefore, on the Windows<br />
platform, the setFileHidingEnabled method has no effect.<br />
Selectability of Files and Directories<br />
Another possibility is to specify whether the user can select files, directories<br />
or both (the default) from the file chooser. This is determined by the following<br />
method:<br />
public void setFileSelectionMode(int mode);<br />
where the mode argument is one of FILES_ONLY, DIRECTORIES_ONLY,<br />
and FILES_AND_DIRECTORIES. It is very important to note that the file<br />
selection mode controls only what can be selected as a file to be returned to<br />
the caller—it does not always affect what is displayed in the file chooser. It is<br />
a common misconception that if you set the file selection mode to<br />
FILES_ONLY then directories will not be displayed. This, however, is not<br />
true—directories will be shown in the file chooser, so that the user can navigate<br />
them to select a file in a subdirectory. The differences between these<br />
three modes are summarized below:<br />
Mode Description<br />
FILES_AND_DIRECTORIES This is the default mode selected when the file<br />
chooser is constructed. The chooser displays<br />
all files and directories (subject, of course, to<br />
any filtering that might be enabled). The user<br />
may select a file or a directory and press the<br />
Approve button. If multiple selection is<br />
enabled, any combination of files and directories<br />
can be selected. If the user double clicks<br />
on a file, that file is chosen and returned. If the<br />
user double clicks on a directory, the file<br />
chooser does not return it—instead, it makes it<br />
the current directory and updates its display<br />
area.
Mode<br />
FILES ONLY<br />
DIRECTORIES ONLY<br />
Description<br />
The JFileChooser Component 807<br />
The chooser displays both files and directories.<br />
If a file is highlighted and the Approve butto7i<br />
is pressed, it is returned as the selected<br />
file. If multiple selection is enabled, any combination<br />
of files can be selected. If the user<br />
double clicks on a file, that file is chosen and<br />
returned. If the user double clicks on a directory,<br />
the file chooser does not return it—<br />
instead, it makes it the current directory and<br />
updates it display area. The same happens if<br />
the user highlights a director)' and presses the<br />
Approve button—instead of selecting the<br />
directory and returning to the user, the directory<br />
is opened and its content displayed in the<br />
file chooser.<br />
The chooser only displays directories. Double<br />
clicking a directory causes the file chooser to<br />
descend into it and make it the current directory.<br />
Highlighting a directory (or more than<br />
one if multiple selection is enabled) and pressing<br />
Approve is the only way to return a selection<br />
to the caller.<br />
You can try out the three file selection modes using the following command:<br />
<strong>Java</strong> <strong>JFC</strong>Book.Chapter7.FileChooserExample9 mode<br />
If you do not specify a mode, the file chooser is created with mode<br />
FILES AND_DIRECTORIES. Supply "f" as the mode to create a<br />
FILES_ONLY chooser or "d" for DIRECTORIES_ONLY. When the chooser<br />
closes, the selected file or files are displayed in the window from which you<br />
ran the example.<br />
Changing the Way in Which Files are<br />
Displayed<br />
More ambitious customization is possible by making use of the abstract<br />
FileView class, whose job is to determine how each object is displayed by<br />
the file chooser. Each JFileChooser can have two associated instances of<br />
this class—one providing defaults, the other for customization. The default
808 Chapter 7 Using Standard Dialogs<br />
instance is always present and is provided by the look-and-feel currently<br />
selected; a customized FileView is used only if you install one using the following<br />
method:<br />
public void setFileView(FileView view);<br />
Here is the definition of the FileView class:<br />
public abstract class FileView {<br />
public abstract String getName(File f);<br />
public abstract String getDescription(File f);<br />
public abstract String getTypeDescription(File f);<br />
public abstract Icon getIcon(File f);<br />
public abstract Boolean isTraversable(File f) ;<br />
}<br />
You can customize a file chooser by installing a subclass of FileView. Since<br />
all of FileViews methods are abstract, your subclass must provide implementations<br />
for all of them. However, if any of them returns null, the value<br />
returned by the default FileView is used instead. Thus, for example, if you<br />
wanted to supply a special icon for certain file types but not for other types or<br />
for directories, you would implement the get Icon method so that it<br />
returned the appropriate icon for your chosen file types and null for all others.<br />
This would make the file chooser get the icon for other file types from<br />
the default FileView supplied by the JFileChooser UI class, which could<br />
depend on the installed look-and-feel. If you don't want to change the other<br />
attributes returned by the default FileView (such as the file's name,<br />
returned from the getName method), you just return null from the other<br />
methods in your subclass.<br />
Listing 7-14 shows an example that changes the icons used for files that<br />
look like <strong>Java</strong> source files and <strong>Java</strong> class files to a letter "J" or "C," respectively,<br />
while returning null for all other types to allow the default FileView<br />
to supply the usual icons for the currently selected look-and-feel.<br />
Listing 7-14 Using FileView to change icon associated with a file<br />
package <strong>JFC</strong>Book.Chapter7;<br />
import javax.swing.*;<br />
import javax.swing.filechooser.*;<br />
import java.io.*;<br />
import <strong>JFC</strong>Book.Chapter7.Uncompiled<strong>Java</strong>FileFilter;
The JFileChooser Component 809<br />
Listing 7-14 Using FileView to change icon associated with a file<br />
(continued)<br />
public class FileChooserExamplelO{<br />
public static void main(String [] args) {<br />
JFrame parentFrame =<br />
new JFrame("File Chooser Example 10");<br />
JFileChooser chooser;<br />
}<br />
}<br />
if (args.length > 0) {<br />
chooser = new JFileChooser (args [0] ) ;<br />
} else {<br />
chooser = new JFileChooser();<br />
}<br />
chooser.setDialogTitle("File Chooser Example 10");<br />
chooser.setFileView(new <strong>Java</strong>FileView());<br />
FileFilter[] fileFilters = new FileFilterf] {<br />
Uncompiled<strong>Java</strong>FileFilter.Uncompiled<strong>Java</strong>File,<br />
new ExtensionFilter("<strong>Java</strong> Source Files",<br />
new String [] {".<strong>Java</strong>"}),<br />
new ExtensionFilter("<strong>Java</strong> Class Files",<br />
new String[] {".class"})<br />
};<br />
for (int i = 0 ; i < fileFilters.length ; i++) {<br />
chooser.addChoosableFileFilter(fileFilters[i] ) ;<br />
}<br />
chooser.setFileFilter(<br />
chooser . getAcceptAHFileFilter () ) ;<br />
int result = chooser.showOpenDialog(parentFrame) ;<br />
System.exit(0) ;<br />
class <strong>Java</strong>FileView extends FileView {<br />
public String getName(File f) {<br />
return null;<br />
}<br />
public String getDescription(File f) {<br />
if (is<strong>Java</strong>SourceFile(f) ) {
810 Chapter 7 Using Standard Dialogs<br />
Listing 7-14 Using File View to change icon associated with a file<br />
(continued)<br />
return "A file containing <strong>Java</strong> source code";<br />
} else if (is<strong>Java</strong>ClassFile(f)) {<br />
return "A file containing a compiled <strong>Java</strong> class";<br />
}<br />
return null;<br />
}<br />
public String getTypeDescription(File f) {<br />
if (is<strong>Java</strong>SourceFile (f)) {<br />
return "<strong>Java</strong> Source File";<br />
} else if (is<strong>Java</strong>ClassFile (f)) {<br />
return "<strong>Java</strong> Class File";<br />
}<br />
return null;<br />
}<br />
public Icon getIcon(File f) {<br />
if (is<strong>Java</strong>SourceFile (f)) {<br />
return srclcon;<br />
} else if (is<strong>Java</strong>ClassFile (f)) {<br />
return classlcon;<br />
}<br />
return null;<br />
}<br />
public Boolean isTraversable(File f) {<br />
return null;<br />
}<br />
protected boolean is<strong>Java</strong>SourceFile(File f) {<br />
return f != null && f.isFileO &&<br />
f.getName().endsWith(".<strong>Java</strong>");<br />
}<br />
protected boolean is<strong>Java</strong>ClassFile(File f) {<br />
return f != null && f.isFileO &&<br />
f.getName().endsWith(".class");<br />
}<br />
protected static final Icon srclcon = new Imagelcon(<br />
<strong>Java</strong>FileView.class.getResource("images/j.gif")) ;
The JFileChooser Component 811<br />
Listing 7-14 Using FileView to change icon associated with a file<br />
(continued)<br />
}<br />
protected static final Icon classlcon = new Imagelcon<br />
<strong>Java</strong>FileView.class.getResource("images/j c.gif")) ;<br />
If you have installed the example source code for this book in the directory<br />
c:\<strong>Core</strong><strong>JFC</strong>Book, the following command will display a JFileChooser<br />
that shows all of the source and class files for the examples that apply to this<br />
chapter, together with the new icons:<br />
java <strong>JFC</strong>Book.Chapter7.FileChooserExamplelO<br />
c:\<strong>Core</strong><strong>JFC</strong>Book\<strong>JFC</strong>Book\Chapter7<br />
The result of running this command is shown in Figure 7-17.<br />
Figure 7-17 Using a custom FileView to change display icons.<br />
The interesting code in this example is in the <strong>Java</strong>FileView class, which is<br />
derived from FileView. Since all of FileView's methods are abstract, we<br />
are obliged to provide implementations for each of them. However, to<br />
replace the icons displayed by the file chooser, we only need to provide a private<br />
implementation for the getlcon method. The other methods could del-
812 Chapter 7 Using Standard Dialogs<br />
egate to the look-and-feel specific File View class by returning null, and<br />
some of them do this. However, for the sake of illustration, this example also<br />
overrides the getDescription and getTypeDescription methods so<br />
that they return different values for <strong>Java</strong> source files and class files. Note that<br />
there is a fine distinction between the value i-eturned by the getDescription<br />
method, which is supposed to describe this instance of the file, where<br />
possible, and getTypeDescription, which returns a generic description of<br />
the type of file concerned.<br />
Choosing Colors<br />
Many applications will need to allow their users to customize the way they<br />
appear and, in many cases, color plays an important part of the user interface.<br />
The graphics application initially developed in Chapter 4 and improved in<br />
Chapter 6 is an example of this. To keep things simple, this application<br />
offered only a limited set of colors for the user to draw with. Ideally, it would<br />
have used a dialog box that offered a free choice of colors, not just the handful<br />
of standard ones declared by java. awt. Color. Fortunately, Swing provides<br />
a simple, yet powerful, dialog that makes it easy for the user to pick<br />
colors and for the programmer to give the user that choice.<br />
ColorChooser Overview<br />
The JColorChooser class makes it possible to display a color dialog and<br />
get the users selection with just a single line of code:<br />
Color selectedColor =<br />
JFileChooser.showDialog(parentFrame,<br />
"Choose a color", Color.red);<br />
The invocation of the showDialog method shown here creates and displays<br />
a modal dialog with the title "Choose a color," with red as the initially<br />
selected color. Figure 7-18 is a gray-scale reproduction that gives you some<br />
idea what this control looks like, but it really must be seen to be appreciated—its<br />
certainly one of the most attractive components I've ever come<br />
across. You can see this dialog for yourself using the command:<br />
j ava <strong>JFC</strong>Book.Chapter7.ColorChooserExamplel<br />
The area at the bottom of the control shows how the currently selected<br />
color would look under various circumstances, including as the background
Figure 7-18 The Swing Color Chooser Dialog.<br />
Choosing Colors 813<br />
and foreground of a text control. Initially, the selected color is set to the value<br />
supplied to the constructor. The color chooser is built from a tabbed pane<br />
that has three separate panels that allow you to modify the selected color in<br />
different ways. Switching tabs does not hide the lower region of the control,<br />
so you can always see how your selections affect it.<br />
The tab that is displayed by default and shown in Figure 7-18 is labeled<br />
"Swatches." It displays a grid of small squares each filled with a solid color. If<br />
you click in one of these squares, the color that it contains becomes the<br />
selected color and the preview area at the bottom of the control is updated<br />
accordingly. There is also a smaller grid that is updated each time you choose<br />
a color. This grid acts like a color histoiy, allowing you to try out various colors<br />
and revert to earlier selections be simply picking them from the history<br />
grid.<br />
The second tab, shown in Figure 7-19, lets you pick a color using its hue,<br />
saturation, and brightness (HSB) values. The three input fields to the right<br />
let you supply values for each of these individual values by typing them
814 Chapter 7 Using Standard Dialogs<br />
directly into the appropriate field. The hue field accepts integer values in the<br />
range 0 to 359, while the saturation and brightness are expressed as a percentage<br />
of their maximum values and therefore range from 0 to 100, inclusive.<br />
Figure 7-19 The Color Chooser HSB Tab.<br />
As you type into any of these boxes, the selected color is updated and the<br />
colored rectangle on the left side of the tab is updated, as is the preview area<br />
at the bottom of the control. The process happens each time you make any<br />
change to any of the three fields and, since it takes a short time to repaint the<br />
colored area, you may find that the control feels a little sluggish while this is<br />
happening. The colored square contains a small circle that you can grab and<br />
move around with the mouse to make color adjustments. Since the colored<br />
square represents the various colors that can be formed from the given hue<br />
by varying the saturation and brightness, dragging the circle around has the<br />
effect of selecting different values for these two parameters. The saturation<br />
and brightness both take the value zero in the bottom right hand corner; the<br />
brightness increases as you move up the y axis, while the saturation increases
Choosing Colors 815<br />
as you move to the left on the x-axis. Moving the circle towards the top,<br />
therefore, produces a brighter color.<br />
A third way to select a color is to use the slider, which can be used to control<br />
any of the three color attributes. You determine which attribute you wish<br />
to control by clicking the appropriate radio button (labeled H, S, and B in<br />
Figure 7-19) and then you adjust the attribute by dragging the slider to the<br />
desired location.<br />
The third tab lets you choose a color by specifying its RGB (red, green,<br />
blue) values, as shown in Figure 7-20.<br />
Figure 7-20 The Color Chooser RGB Tab.<br />
Here, you can either directly type values for the red, green and blue components<br />
(in the range 0 to 255 inclusive) into the three text boxes, or you can<br />
drag any or all of the three sliders to achieve the same effect.<br />
Whichever tab you happen to prefer using, when you're happy with the<br />
color you've chosen, and press "OK," the showDialog returns a Color<br />
object that represents the color you have selected. If you press "Cancel,"<br />
showDialog returns null, while the "Reset" button simply reverts the dis-
816 Chapter 7 Using Standard Dialogs<br />
play to the initial color supplied as the third argument to showDialog and<br />
has no other effect.<br />
Creating a Color Chooser<br />
As you saw in the last section, if all you need to do is open a dialog box to<br />
allow the user to select a color, you don't actually need to go to the trouble of<br />
creating a JColorChooser object— you simply use the showDialog<br />
method to display the dialog and retrieve the color that the user selected<br />
when it returns. However, like JOptionPane and JFileChooser, JColor-<br />
Chooser is designed so that it can be customized to some extent or be used<br />
as part of a larger dialog. If you need to do either of these, you need to create<br />
a JColorChooser object first.<br />
JColorChooser has three constructors:<br />
public JColorChooser();<br />
public JColorChooser(Color initColor);<br />
public JColorChooser(ColorSelectionModel model);<br />
All of these constructors create a component with the three color selection<br />
panels that were described in the previous section, with the exception that it<br />
is not mounted in a dialog. The first constructor selects white as the initial<br />
color, while the second allows you to choose a different starting point for the<br />
color chooser. Another way to set the initial color is to use one of the three<br />
setcolor methods after constructing the JColorChooser:<br />
public void setColor(Color color);<br />
public void setColor(int r, int g, int b);<br />
public void setColor(int c);<br />
The second of these methods supplies the color as an RGB value in which<br />
the individual color components are supplied as integers in the range 0 to<br />
255 inclusive. The third method combines these into a single 24-bit value<br />
with the blue value at the least significant end, the green value shifted left 8<br />
bits, and the red value shifted left 16 bits, so that the following calls are<br />
equivalent:<br />
setColor(OxAO, OxBO, OxCO);<br />
setColor(OxAOBOCO);<br />
The third constructor is sightly different because it requires a ColorSelectionModel<br />
instead of a Color. ColorSelectionModel is an interface<br />
that records a selected color and also allows listeners to be registered to monitor<br />
changes to the selected color. Here is the definition of the ColorSelectionModel<br />
interface:
public interface ColorSelectionModel {<br />
Color getSelectedColor();<br />
void setSelectedColor(Color color);<br />
void addChangeListener(ChangeListener listener);<br />
void removeChangeListener(ChangeListener listener)-<br />
}<br />
Choosing Colors 817<br />
As you can see, the ColorSelectionModel is responsible for remembering<br />
the color that is currently selected in the chooser and provides a mechanism<br />
for listeners to be notified when the selection changes. In fact, this<br />
event notification mechanism is what causes the colored areas on the various<br />
panels to be updated as the user changes the color specification using any of<br />
the mechanisms provided.<br />
You can use the third constructor to install a custom ColorSelection-<br />
Model if you wish, but for most purposes the default one created by the color<br />
chooser, which is an instance of the class DefaultColorSelectionModel,<br />
is perfectly adequate. You'll see an example that makes use of the ColorSelectionModel<br />
later in the next section.<br />
Handling the Color Chooser Selection<br />
If you are prepared to forego the convenience of the showDialog method<br />
and create your own color chooser, you can make slightly more sophisticated<br />
use of this powerful component. As an example of this, suppose you were<br />
creating an image management application that allowed the user to change<br />
the color of groups of pixels, or slightly changed the color of a part of the<br />
image. Of course, JColorChooser is the obvious choice as the means for<br />
letting the user pick the new color, but ideally you would want to allow the<br />
user to tiy out possible new colors by adjusting the image while the color<br />
chooser is active, so that the user can see the result immediately and continually<br />
adjust the selection until a suitable choice has been made. This is not<br />
possible if you use showDialog, because the user has to choose a color and<br />
then dismiss the dialog before the application can get control to modify the<br />
image.<br />
In order to do something like this, you need to be able to gain control each<br />
time the color is changed within the dialog and apply the change to the<br />
image. Only when the user is satisfied will he/she press the OK button to<br />
make a final selection. You have already seen the mechanism for receiving<br />
the notification of color changes as they happen—the ColorSelectionModel<br />
provides this. In total, what you need to do is the following:<br />
1. Create a JColorChooser.
818 Chapter 7 Using Standard Dialogs<br />
2. Get a reference to its ColorSelectionModel and register a<br />
listener with it.<br />
3. Display the dialog.<br />
4. While the dialog is displayed, react to color changes by adjusting<br />
the image (or whatever else the color change should apply<br />
to).<br />
5. When the dialog is dismissed, if the user pressed Cancel and<br />
any changes were made to the image, restore the original color.<br />
None of this is actually very difficult to achieve. Listing 7-15 shows an<br />
example that uses this technique to keep the background color of a frame in<br />
step with the color selected in a color chooser.<br />
Listing 7-15 Handling JColorChooser Events<br />
package <strong>JFC</strong>Book.Chapter7;<br />
import javax.swing.*;<br />
import j avax.swing.colorchooser.*;<br />
import javax.swing.event.*;<br />
import j ava.awt.*;<br />
import java.awt.event.*;<br />
public class ColorChooserExample2 {<br />
public static void main(String[J args) {<br />
final JFrame parentFrame =<br />
new JFrame("Color Chooser Example 2");<br />
parentFrame.getContentPane().setBackground(<br />
Color.black);<br />
parentFrame.setSize(300, 300);<br />
parentFrame.setVisible(true);<br />
parentFrame.getContentPane().addMouseListener(<br />
new MouseAdapter() {<br />
public void mousePressed(MouseEvent evt) {<br />
final Color originalColor =<br />
parentFrame.getContentPane () .getBackground () ;<br />
final JColorChooser chooser =<br />
new JColorChooser(originalColor)<br />
final ColorSelectionModel model =<br />
chooser.getSelectionModel0;
Listing 7-15 Handling JColorChooser Events (continued)<br />
}<br />
}<br />
}<br />
});<br />
Choosing Colors 819<br />
model.addChangeListener(new ChangeListener() {<br />
public void stateChanged(ChangeEvent cevt) {<br />
parentFrarae.getContentPane().setBackground(<br />
model.getSelectedColor ()) ;<br />
}<br />
});<br />
ActionListener cancelListener =<br />
new ActionListener() {<br />
public void actionPerformed(ActionEvent aevt){<br />
chooser.setColor(originalColor);<br />
}<br />
};<br />
JDialog dialog = JColorChooser.createDialog(<br />
parentFrame, "Select a Color", true,<br />
chooser, null, cancelListener);<br />
dialog.setDefaultCloseOperation(<br />
WindowConstants.DISPOSE_ON_CLOSE);<br />
Dimension d = parentFrame.getSize();<br />
Point pt = parentFrame.getLocationOnScreen();<br />
dialog.setLocation(pt.x + d.width, pt.y);<br />
// Display the dialog<br />
dialog.setVisible(true);<br />
\You can try this example for yourself by typing:<br />
j ava <strong>JFC</strong>Book.Chapter7.ColorChooserExample2<br />
This command causes an empty frame, initially colored black, to appear on<br />
the screen. The code that creates this frame appears at the beginning of Listing<br />
7-15. Once the frame has been created, a MouseListener is added to<br />
detect any clicks within the frame's content pane. When the user clicks in this<br />
area, a color chooser dialog appears to the right of the frame. The color<br />
chooser is initialized to the background color of the content pane. If you now<br />
change the color selection using any of the three panes, you'll see that the<br />
background color of the frames content pane changes as the selected color is
820 Chapter 7 Using Standard Dialogs<br />
adjusted. Pressing the Reset button restores the background to its initial<br />
color (black) without dismissing the dialog, while pressing Cancel both<br />
restores the original color and closes the dialog. Pressing OK removes the dialog,<br />
but otherwise has no effect because the dialog updates are being made in<br />
real time, so nothing remains to be done when the user accepts the selected<br />
color.<br />
The interesting code in this example is in the mousePressed method.<br />
The first thing to do when the user clicks the mouse is to store the initial<br />
color of the content pane and then create a JColorChooser component.<br />
Since we want to attach a listener to monitor the selected color as it changes<br />
we can't use the showDialog method to do this. Instead, we simply create a<br />
JColorChooser component with the content pane's background color as its<br />
initial selection using the second constructor that you saw in "Creating a<br />
Color Chooser." Having created the color chooser, we use its getSelectionModel<br />
method to get a reference to its ColorSelectionModel and<br />
then add the listener that will receive notification of color changes. In this<br />
case, the listener is a ChangeListener. The ChangeListener interface has<br />
only one method:<br />
public interface ChangeListener {<br />
public void stateChanged(ChangeEvent evt);<br />
}<br />
The event that is delievered to the listener, ChangeEvent, is very simple—<br />
it contains no state other than the source object that generated it<br />
(which will be the ColorSelectionModel in this case). When the event is<br />
received, the selected color is obtained by calling the getSelectedColor<br />
method of the ColorSelectionModel and it is then used to set the background<br />
color attribute of the content pane.<br />
Having created the JColorChooser and attached the appropriate listener,<br />
the final step is to wrap it in a dialog box and display it. To create the<br />
dialog, we use the static method createDialog, which is defined as follows:<br />
public static JDialog createDialog(Component c,<br />
String title, boolean modal,<br />
JColorChooser chooser,<br />
ActionListener okListener,<br />
ActionListener cancelListener);<br />
This method creates a JDialog, but does not display it. We discuss the<br />
JDialog class in detail in the next chapter—for now, just note that the createDialog<br />
call in this example creates a modal dialog, which prevents the<br />
user from interacting with the frame while the dialog is active. This method<br />
allows us to specify the dialog's associated frame by passing a reference to any
Choosing Colors 821<br />
component in that frame as the first argument; in fact, we pass a reference to<br />
the frame itself in this case. We also supply a dialog title and, using the third<br />
argument, force the dialog to be modal. The fourth argument is a reference<br />
to the JColorChooser that should be wrapped in the dialog.<br />
The dialog creation process includes arranging for the OK and Cancel buttons<br />
of the JFileChooser to close the dialog when they are pressed, so we<br />
do not need to concern ourselves about that. We do, however, need to take<br />
care to handle the case in which the user closes the dialog by clicking on the<br />
close button in the dialogs caption bar. JDialog, like JFrame, delivers a<br />
windowEvent with type WINDOW_CLOSING when this happens and, like<br />
JFrame, it allows you to determine what should happen to the dialog by calling<br />
the setDefaultCloseOperation method. In this case, we choose to<br />
let the dialog close.<br />
The last step, having created the dialog, is to make it visible. For convenience,<br />
since we want the user to be able to see the frame as the color is<br />
being adjusted, we place the dialog immediately to the right of the frame<br />
instead of adopting its default behavior, which would place it on top of the<br />
frame. Finally, the dialog is made visible by calling its setvisible method.<br />
Since the dialog is modal, this method will not return until the user has finished<br />
adjusting the frame s background color and closed the dialog.<br />
The showDialog method that we used in the first example in this section<br />
returned the selected color when the user closed the dialog. The createDialog<br />
method, of course, does no such thing, because the dialog does not<br />
appear until the user calls setvisible. If you need to get the selected color<br />
from a color chooser created in this way, you would use its getColor<br />
method after the setvisible call, like this:<br />
// Display the dialog<br />
dialog.setvisible(true);<br />
// Returns when the user dismisses the dialog<br />
// Get the user's color choice<br />
Color chosenColor = chooser.getColor();<br />
In this example, of course, we have no use for the selected color because<br />
the ChangeListener takes care of updating the frame background while<br />
the dialog is visible. In fact, though, this code does not always work, as you'll<br />
see shortly.<br />
There is only one aspect of the functionality of this example that we have<br />
not discussed. If the user cancels the dialog, we want to restore the frame<br />
background to its original color. One way to do this is to restore the color<br />
when the setvisible method returns, using code like this:
822 Chapter 7 Using Standard Dialogs<br />
// Display the dialog<br />
dialog.setvisible(true);<br />
// Returns when the user dismisses the dialog<br />
// Get the user's color choice<br />
Color chosenColor = chooser.getColor();<br />
if (chosenColor == null) {<br />
// Restore previous color - not shown<br />
}<br />
This looks appealing—if the selected color is null, put back the original<br />
color. Unfortunately, this approach fails, because the Cancel button does<br />
NOT reset the selected color to null, so the getColor call will retrieve<br />
whatever color was selected in the chooser when the user pressed the Cancel<br />
button.<br />
Fortunately, there is a way around this problem. The last two parameters<br />
of the createDialog method allow you to register up to two ActionListeners,<br />
the first of which is called when the OK button is pressed, the other<br />
when the Cancel button is pressed. In this example, we need to take special<br />
action only when the user presses Cancel, so we only supply an Action-<br />
Listener for that button and pass the parameter for the other listener as<br />
null. The code for the Cancel button handler looks like this:<br />
ActionListener cancelListener =<br />
new ActionListener() {<br />
public void actionPerformed(ActionEvent evt) {<br />
chooser.setColor(originalColor);<br />
}<br />
};<br />
Now, when the Cancel button is pressed, the color chooser will be reset<br />
to display whatever color was selected when it was opened. This will also generaete<br />
a ChangeEvent from the ColorSelectionModel, which will in turn<br />
cause the content pane's background color to be reverted to its original color.<br />
Now if you call the JColorChooser getColor method after the set-<br />
Visible method returns, you'll get either the newly selected color if the OK<br />
button was pressed or the dialog was closed from the caption bar, or the previous<br />
color if the Cancel button was pressed.<br />
As a final point, you may wonder why the Cancel buttons ActionListener<br />
was not coded like this:<br />
ActionListener cancelListener =<br />
new ActionListener() {<br />
public void actionPerformed(ActionEvent evt) {<br />
chooser.setColor(null);
Choosing Colors 823<br />
parentFrame.getContentPane().<br />
setBackground(originalColor)<br />
}<br />
};<br />
The idea here is to explicitly restore the content pane's background color<br />
and set the selected color to null, so that you can write code like that shown<br />
above, in which the JColorChooser getColor methods return value<br />
would be tested for null to determine that the Cancel button was pressed.<br />
This looks correct, but it fails because you cannot reset the selected color to<br />
null—the call<br />
chooser.setColor(null)<br />
or the equivalent<br />
chooser.getSelectionModel().setSelectedColor(null)<br />
have absolutely no effect on the selected color because these methods do<br />
nothing when passed a null argument, interpreting it as "no change."<br />
Color Chooser Customization<br />
There is veiy little that you can do to customize the color chooser, unless<br />
you are prepared to do a relatively large amount of work. The following sections<br />
hint at some of the things you can do.<br />
Implement your own Preview Panel<br />
The preview panel is that part of the chooser that displays the selected<br />
color at the bottom of the component. If you implement your own preview<br />
panel, you must register it as a ChangeListener of the ColorSelection-<br />
Model so that it can update itself as the selected color changes. As far as the<br />
JColorChooser is concerned, the preview panel is an arbitrary JComponent.<br />
You install it using the setPreviewPanel method:<br />
public void setPreviewPanel(JComponent comp);<br />
Implement your own Chooser Panel<br />
If you are not satisfied with the three chooser panels that are supplied by<br />
default, you can create your own and install it using the addChooserPanel<br />
method:<br />
public void addChooserPanel(<br />
AbstractColorChooserPanel panel);
824 Chapter 7 Using Standard Dialogs<br />
Your chooser panel must be derived from AbstractColorChooser-<br />
Panel, which is defined in the j avax. swing. colorchooser package.<br />
Changing the Set of Displayed Chooser<br />
Panels<br />
This is the simplest form of customization you can perform. In some cases,<br />
providing three different ways to configure a color can be confusing to the<br />
user. In these circumstances, you can get rid of the chooser panels that you<br />
don't want by calling the removeChooserPanel method:<br />
public void removeChooserPanel(<br />
AbstractColorChooserPanel panel);<br />
The only problem with this is that you need to get a reference to the correct<br />
panel in order to be able to remove it—you can't simply ask to have the<br />
HSB or Swatches tab removed. To get a reference to the panel, you need to<br />
get a list of all of the panels that have been installed and remove the ones you<br />
don't want. The following method gets a list of the panels:<br />
public AbstractColorChooserPanel[] getChooserPanels();<br />
The various panels do not have symbolic constants or symbolic names that<br />
you can use to identify them in a portable way, so you might choose to resort<br />
to one of the following techniques:<br />
1. Sean the list and compare the class of each panel with the<br />
classes of the panels that you want to keep or remove.<br />
2. Scan the list, get the name of each panel by calling its getDisplayName<br />
method, and use the name to determine which panels<br />
to remove.<br />
Unfortunately, you can't use the first of these techniques because the<br />
classes that implement the three chooser panes are not public. The second<br />
alternative, looking at the panel names, would look something like this:<br />
private static void removeChooserPanels(<br />
JColorChooser chooser) {<br />
String hsbName =<br />
UIManager.getString(<br />
"ColorChooser.hsbNameText");<br />
String swatchName =<br />
UIManager.getString(<br />
"ColorChooser.swatchesNameText");
for (int i = 0; i < panels.length; i++) {<br />
AbstractColorChooserPanel panel = panels[i];<br />
Choosing Colors 825<br />
// Don't want the Swatches or HSB panel<br />
if (panel.getDisplayName().equals(swatchName)<br />
panel.getDisplayName().equals(hsbName)) {<br />
chooser.removeChooserPanel(panel);<br />
}<br />
} }<br />
This code removes the Swatches and HSB panels, leaving only the one for<br />
RGB selection. This code actually works; you can try it using the command<br />
java <strong>JFC</strong>Book.Chapter7.ColorChooserExample3<br />
and you'll get the result shown in Figure 7-21.
826 Chapter 7 Using Standard Dialogs<br />
strings in your application. Ideally, though, the color chooser would define<br />
symbolic constants to identify the standard tabs.<br />
Summary<br />
This chapter introduced the Swing standard dialogs. These dialogs can be<br />
created very quickly, while still allowing the possibility of customization to<br />
meet particular needs. JOptionPane offers a comprehensive set of dialogs<br />
for direct interaction with the user, ranging from simple error messages to<br />
more complex interactions involving user input. JOptionPane also allows<br />
the programmer to create dialogs of open-ended complexity by allowing arbitrary<br />
components to be included.<br />
The JFileChooser dialog exploits the capabilities of the JDirectory-<br />
Pane control to display a set of files and allows the user to move around the<br />
file system to find a particular file and then select it. With only a modest<br />
amount of work, it is possible to add filtering to the dialog so that only files of<br />
particular types are displayed and to customize the way each entry in the dialog<br />
is presented. Finally, you saw the JColorChooser dialog, which presents<br />
an attractive way for the user to select colors.<br />
In the next chapter, you'll see how to create your own dialogs, incorporating<br />
some of the controls that were introduced in this chapter together with a<br />
collection of new ones, many of which have no counterparts in the AWT<br />
component set.
CREATING<br />
CUSTOM<br />
DIALOGS<br />
JP Topics in This Chapter<br />
Custom Dialog Boxes with JDialog<br />
Using JFileChooser<br />
• Tabbed Panes and Borders<br />
• Checkboxes and Radio Buttons<br />
Lists and Combo boxes<br />
Sliders and Progress Monitors<br />
Timers
The last chapter reviewed the built-in dialog classes that come with the<br />
Swing package. When these dialogs aren't sufficient for your needs,<br />
you need to create your own. This chapter looks at the JDialog class,<br />
which is the basis of all custom dialogs, and uses it to construct examples of<br />
the two basic types of dialog: modal and nonmodal.<br />
Whereas dialog support in AWT is very basic, Swing contains a very powerful<br />
set of information, error and warning dialogs wrapped up in the<br />
JOptionPane class, which were introduced in the previous chapter. The<br />
facilities provided by JOptionPane can also be used as part of a larger dialog,<br />
as you'll see here. This chapter also looks at many of the Swing components<br />
that are useful in dialogs, including the most powerful dialog<br />
component of all, the JTabbedPane, and also demonstrates how to use and<br />
customize the list box and combo box controls that present lists of choices to<br />
the user.<br />
Creating Custom Dialog Boxes<br />
The dialogs that you have seen so far have all been created with a static convenience<br />
method that hides what goes on behind the scenes. In a large number<br />
of cases, you won't need to look any further than this, because the<br />
829
830 Chapter 8 Creating Custom Dialogs<br />
standard dialog boxes are sufficiently general that they can be used<br />
unchanged much of the time. If you want to construct your own dialogs,<br />
however, you have to build a custom dialog by using the JDialog class.<br />
The JDialog Class<br />
JDialog is a Swing component derived from the AWT Dialog class, which<br />
is itself an instance of Window. Like JFrame, it is not a JComponent and, also<br />
like JFrame, it has a JRootPane with a content view, glass pane and an<br />
optional menu bar.<br />
<strong>Core</strong> Note<br />
The AWT Dialog class didn't allow you to have a menu bar. In Swing,<br />
there is very little difference between JFrame and JDialog, but the<br />
differences that exist are important ones, as you'll see.<br />
In Swing 1.1.1, the JDialog class has five constructors:<br />
public JDialog();<br />
public JDialog(Frame f);<br />
public JDialog(Frame f, boolean modal);<br />
public JDialog(Frame f, String title);<br />
public JDialog(Frame f, String title, boolean modal);<br />
Each of these constructors produces a dialog box which, when shown,<br />
looks just like a JFrame, except that it doesn't have the controls on the caption<br />
bar necessary to allow the user to iconily or maximize it. As you'll see,<br />
dialogs are usually designed with a fixed set of controls and are intended to<br />
be used only at their natural size.<br />
With the exception of the first, all of the constructors require a Frame<br />
argument. The Frame is usually referred to as the "parent frame" of its dialog<br />
and in fact, if you called the getParent method of the JDialog, then the<br />
return value would be the Frame reference that was passed to its constructor,<br />
but the dialog is not added to or embedded within the Frame as a panel<br />
would be. The JDialog is an independent window, in the sense that it is not<br />
confined to the boundaries of the Frame as a child component would be;<br />
indeed, dialogs are normally placed near to, but not entirely covering, their<br />
related Frame.The relationship between the JDialog and the Frame passed<br />
to its constructor has the following characteristics:
Creating Custom Dialog Boxes 831<br />
• The JDialog is always in front of its Frame. If you try to move<br />
the Frame over the JDialog, it appears to move behind it<br />
instead.<br />
• If the JDialog is modal, it blocks all input to its associated<br />
frame.<br />
• If you iconify the Frame, which is only possible if the dialog is<br />
not modal, the JDialog is iconified with it; deiconifying the<br />
Frame also deiconifies the JDialog.<br />
The existence of these relationships is the main reason why you can't take<br />
the simple option and always use a Frame or a JFrame instead of bothering<br />
with JDialogs—you simply can't reproduce this behavior with a JFrame or<br />
a Frame.<br />
Having said that a JDialog depends on and has a specific relationship<br />
with a Frame, what about the first constructor that doesn't require a Frame<br />
to be specified? This constructor can be useful when you want to create a dialog<br />
within code that does not have ready access to a Frame within the application.<br />
When you create a JDialog using this constructor, Swing makes it<br />
the dependent of a shared Frame that it creates internally and which is never<br />
made visible. All dialogs that are created without an explicit parent Frame<br />
are actually parented to this shared Frame.<br />
The <strong>Java</strong> 2 platform provides an extra four constructors that are not available<br />
in Swing 1.1.1:<br />
public JDialog(Dialog d);<br />
public JDialog(Dialog d, boolean modal);<br />
public JDialog(Dialog d, String title);<br />
public JDialog(Dialog d, String title, boolean modal);<br />
These constructors allow you to parent a JDialog to another Dialog and<br />
so are convenient if you need to display a second dialog from within the code<br />
of an existing dialog. In general, though, it is not a good idea to cascade dialogs<br />
because it can confuse the user. In most cases, using a JTabbedPane<br />
and including the extra interaction within the original dialog is a better alternative.<br />
Like frames, JDialog also has a title, which appears on the caption bar; if<br />
you use one of the forms of the constructor that doesn't supply a title, it will<br />
be blank unless you use the setTitle method (inherited from Dialog) to<br />
explicitly set it.<br />
Some of the constructors have a boolean parameter that allows you to<br />
specify whether the dialog is modal or nonmodal; if you don't use one of<br />
these constructors, the dialog is nonmodal. When a modal dialog is displayed,
832 Chapter 8 Creating Custom Dialogs<br />
it effectively takes over control of the application, in the sense that the user<br />
can't interact with the applications main window or any other windows it<br />
might have created. A modal dialog is typically used where you need to have<br />
the user respond immediately. If it wouldn't make sense to carry on without<br />
the user acknowledging the dialog and, possibly, providing some information,<br />
then you should use a modal dialog. By contrast, a nonmodal dialog doesn't<br />
stop the user accessing the rest of the application and is typically used to<br />
implement toolboxes that remain displayed until the user dismisses them.<br />
The choice between a modal and nonmodal dialog is usually part of the application<br />
design and, therefore, you would usually specify which mode you want<br />
when creating the dialog. However you can, if necessary, change the modality<br />
of a dialog using the setModal method:<br />
public void setModal(boolean modal);<br />
Note, however, that the value passed to this method is tested only when<br />
the dialog is made visible, so you can't change a modal dialog that is already<br />
active into a nonmodal one, or vice versa.<br />
<strong>Core</strong> Note<br />
Some platforms have the concept of system-modal and application-modal<br />
dialogs. <strong>Java</strong> modal dialogs are application-modal. A system-modal dialog<br />
not only prevents interaction with the other windows of the application that<br />
posted it - it stops the user using any window of any application window<br />
other than the dialog itself. <strong>Java</strong> doesn't support system-modal dialog boxes.<br />
Displaying and Closing a Dialog<br />
Once you have created a dialog box, you display it using the setvisible<br />
method. Calling this method with argument true makes the dialog visible<br />
and brings it to the front of the window stacking order (it does this even if the<br />
dialog is already visible). If the dialog is not modal, the setvisible method<br />
then returns. However, in the case of a modal dialog, setvisible (true)<br />
blocks until the user dismisses the dialog.<br />
<strong>Core</strong> Note<br />
If you are familiar with JDK 1.0, you may remember that windows, frames,<br />
dialogs, and indeed all components, used the show and hide methods to<br />
render themselves visible or invisible. In JDK I.I, these methods were<br />
deprecated for most components in favor of setvisible, meaning that
Creating Custom Dialog Boxes 833<br />
the show method should no longer be used.The exception to this rule was<br />
Dialog, which retained a show method, for which the show and hide<br />
methods were not deprecated.Consequently,you will often see code in<br />
which the programmer manages JDialogs using these older methods.<br />
Although there is nothing technically wrong with this, and the behavior is<br />
identical, we recommend that you prefer the use of setvisible because<br />
it is more consistent with the way in which frames and other components<br />
are managed.<br />
You've already seen this behavior in all of the standard dialogs that were<br />
shown in the last chapter—they have all stayed posted until the user pressed<br />
OK or Cancel (or the equivalent). When one of the standard dialogs is dismissed,<br />
the method that was used to post it (for example, the JColor-<br />
Chooser showDialog method) typically returns a value that represents the<br />
choice that the user made from the dialog, or indicates whether the dialog<br />
was canceled. This mechanism is, of course, very convenient for the programmer<br />
because it allows the code that drives a modal dialog to be very simple:<br />
// Get a new color from the user<br />
Color selectedColor = JColorChooser.showDialog(f,<br />
"Choose a new drawing color",<br />
Color.black);<br />
// "selectedColor" is now the color that the user chose.<br />
Things are not so simple when you use JDialog directly, however. Here is<br />
the definition of the setvisible method:<br />
public void setvisible(boolean visible);<br />
As you can see, it doesn't accept any arguments other than the value indicating<br />
whether it should show or hide the dialog and, worse, it doesn't have a<br />
return value, so how do you get an answer back from a dialog box that you manage<br />
yourself? In fact, since setvisible (true) blocks until the dialog is dismissed,<br />
how can you get control to manage the dialog box and dismiss it at all?<br />
After all, just placing an OK button on a JDialog won't achieve anything—that<br />
button won't make the dialog go away unless you do something to arrange for<br />
that to happen.<br />
So how is a dialog dismissed? There are three ways to get rid of a dialog:<br />
1. Call setvisible (false) ;<br />
2. Call dispose();
834 Chapter 8 Creating Custom Dialogs<br />
3. Clicks the close button on the dialog caption bar.<br />
All of these cause the dialog to disappear from the screen and, if it was a<br />
modal dialog, the setvisible method will return. The difference between<br />
them is, however, an important one:<br />
• Calling setvisible (false) makes the dialog invisible. This<br />
also happens when the user clicks the close button the dialogs<br />
caption bar.<br />
• Calling dispose has the same effect as setvisible (false),<br />
but it also releases all of the resources used for the dialog and its<br />
contents in the underlying windowing system.<br />
In terms of resource usage, it is more efficient to use the dispose method<br />
than it is to call setvisible (false), because the latter does not release<br />
resources from the windowing system that were assigned to the dialog and its<br />
content when it was made visible. For dialogs that have little content or those<br />
that appear rarely, you should always use dispose. Some applications use<br />
complex dialogs that can be expensive to create, to the extent that there is a<br />
noticable delay between the user requesting the dialog and the point at<br />
which it appears on the screen. In many cases, developers work to minimize<br />
this delay by creating the dialog once and then caching it, so that it can be<br />
reshown immediately when it is next needed. In this case, it is often thought<br />
that the dialog should be hidden by using setvisible (false) instead of<br />
dispose. In fact, either can be used—the dispose method destroys only<br />
those resources that were allocated internally from the windowing system<br />
and does not dismantle or change in any way the <strong>Java</strong> view of the dialog. In<br />
theory, if you close the dialog using setvisible (false), it will probably<br />
reappear slightly faster than if you used dispose, because in the former case<br />
it doesn't need to reallocate windowing system resources. This small gain in<br />
speed needs to be weighed carefully against the effects of retaining platform<br />
resources which, on some platforms, are limited and may be shared by all<br />
applications.<br />
Dialog Close Operations and Events<br />
When the user closes a dialog by clicking on the close button in the caption<br />
bar, what actually happens depends on the way in which the dialog has been<br />
constructed. Like frames, dialogs have a default close operation that can be<br />
used to control the dialogs reaction to the close button. This property is set<br />
using the setDefaultCloseOperation method which takes the same
Creating Custom Dialog Boxes 835<br />
three values as the same method of JFrame, described in Chapter 2. For<br />
clarity, here are the three values and their effects on the dialog.<br />
DO_NOTHING_ON_CLOSE Swing itself does nothing to the dialog. The application<br />
must register a WindowListener and take<br />
appropriate action.<br />
HIDE ON CLOSE Swing removes the dialog by calling setVisi -<br />
ble(false).<br />
DISPOSE_ON_CLOSE Swing removes the dialog by calling dispose.<br />
As with JFrame, if the application has registered a WindowListener with<br />
the dialog, its windowClosing method is called when the user tries to close<br />
the window and may take any action it wants to, including calling setvisible<br />
(false) or dispose and, if the default close operation has been set to<br />
DO_NOTHING_ON_CLOSE, it will usually do one of these things. If the close<br />
operation has one of the other two values, the application usually does not<br />
register a WindowListener or, if it does, it typically would not do anything<br />
to close the window itself because Swing takes care of that when the windowClosing<br />
method returns.<br />
It is important to remember exactly when the windowClosing and windowClosed<br />
methods of the WindowListener will be invoked. The same<br />
rules apply to dialogs as they do to frames:<br />
windowClosing<br />
windowClosed<br />
Invoked when the user tries to close the dialog using<br />
the close button on the caption bar. This method is<br />
NOT called when you call setVisible (false)<br />
or dispose to programmatically hide the dialog.<br />
Invoked only when the dispose method is used,<br />
whether this is in response to the user closing the<br />
dialog from the caption bar or as a result of the application<br />
calling dispose when the user closes the dialog<br />
using a button (such as "OK").<br />
If you create a JDialog and do not invoke the setDef aultCloseOperation<br />
method, it will behave as if you had specified HIDE__ON_CLOSE.<br />
Hence, when the dialog is closed, it will simply be made invisible and not disposed.<br />
As a result, it will retain its windowing system resources and will not<br />
call the windowClosed method of any registered WindowListeners.
836 Chapter 8 Creating Custom Dialogs<br />
Unless you want to cache and recycle dialogs and you feel that the time<br />
required to reallocate the windowing system resources each time the dialog<br />
is displayed is too great, we recommed that you always use code equivalent to<br />
the following when creating a custom dialog:<br />
JDialog dig = new JDialog(parentFrame, "Dialog", true);<br />
dig.setDefaultCloseOperation(<br />
A Simple Modal Dialog<br />
WindowConstants.DISPOSE_ON_CLOSE);<br />
You now know that either dispose or setvisible (false) can be used to<br />
get rid of a dialog, but how do you get to call either of these methods and<br />
how can a value be returned to the caller of setvisible (true) ? To see<br />
exactly how this works, lets look at how to implement a modal dialog box that<br />
displays a message and allows the user to respond using either OK or Cancel.<br />
This is, of course, a little like the confirm dialog that you saw in the previous<br />
chapter. When you've seen the basic principles involved in creating a custom<br />
modal dialog, the next step will be to create a better one by using some features<br />
of JOptionPane that you haven't seen yet.<br />
Our simple dialog is derived from JDialog. This dialog allows the programmer<br />
to specify the frame that the dialog is associated with, the caption<br />
bar title and a message that will be displayed in the dialog in bold font above<br />
the OK and Cancel buttons. Once the dialog is on display, it remains there<br />
until one of these buttons is pressed, or the window is closed using the close<br />
button on its caption bar, at which point the setvisible method returns.<br />
The programmer can then use the dialogs getValue method to retrieve the<br />
result, which will be one of OK_OPTION, CANCEL_OPTION, or<br />
CLOSED_OPTION, as defined by the JOptionPane class. You'll find the<br />
implementation of this dialog in Listing 8-1, while Figure 8-1 shows what it<br />
looks like. You can try this example for yourself by typing the following command<br />
and then pressing the button in the frame that appears:<br />
java <strong>JFC</strong>Book.Chapter8.SimpleConfirmDialog<br />
Listing 8-1 Creating a basic confirmation dialog with JDialog<br />
package <strong>JFC</strong>Book.Chapters;<br />
import javax.swing.*;<br />
import j ava.awt.*;
Creating Custom Dialog Boxes 837<br />
Listing 8-1 Creating a basic confirmation dialog with JDialog (continued)<br />
import j ava.awt.event.*;<br />
public class SimpleConfirmDialog extends JDialog {<br />
public SimpleConfirmDialog(<br />
Frame f, String title, String message) {<br />
super(f, title, true);<br />
setResizable(false);<br />
JPanel panel = new JPanel();<br />
JButton okButton = new JButton("OK");<br />
cancelButton = new JButton("Cancel");<br />
panel.add(okButton);<br />
panel.add(cancelButton);<br />
this.getContentPane().add(panel, BorderLayout.SOUTH);<br />
JLabel label = new JLabel(message,<br />
SwingConstants.CENTER);<br />
label.setFont(new Font("Dialog", Font.BOLD, 14));<br />
this.getContentPane().add(label, BorderLayout.CENTER);<br />
this.pack();<br />
// Arrange to catch window closing events<br />
// and also set initial focus<br />
this.addWindowListener(new WindowAdapter() {<br />
public void windowClosing(WindowEvent evt) {<br />
returnValue = JOptionPane.CLOSEDJDPTION;<br />
SimpleConfirmDialog.this.dispose();<br />
public void windowOpened(WindowEvent evt) {<br />
cancelButton.requestFocus() ;<br />
}<br />
});<br />
// Catch the OK button<br />
okButton.addActionListener(new ActionListener() {<br />
public void actionPerformed(ActionEvent evt) {<br />
returnValue = JOptionPane . OK__OPTION;<br />
SimpleConfirmDialog.this.dispose();<br />
}<br />
});<br />
// Catch the Cancel button<br />
cancelButton.addActionListener(new ActionListener() {<br />
public void actionPerformed(ActionEvent evt) {<br />
returnValue = JOptionPane.CANCEL_OPTION;<br />
SimpleConfirmDialog.this.dispose();
838 Chapter 8 Creating Custom Dialogs<br />
J<br />
Listing &-I Creating a basic confirmation dialog with JDialog (continued)<br />
}<br />
}<br />
});<br />
// Get the return value<br />
public int getValueO {<br />
return returnValue;<br />
}<br />
public static void main(String[] args) {<br />
final JFrame f =<br />
new JFrame("Test SimpleConfirmDialog");<br />
f.addWindowListener(new WindowAdapter() {<br />
public void windowClosing(WindowEvent evt) {<br />
System.exit(0) ;<br />
}<br />
});<br />
JButton button = new JButton("Press for dialog");<br />
f.getContentPane().add(button, BorderLayout.CENTER);<br />
button.addActionListener(new ActionListener() {<br />
public void actionPerformed(ActionEvent evt) {<br />
SimpleConfirmDialog d =<br />
new SimpleConfirmDialog(f, "Delete files",<br />
"This will erase all of your files. Proceed?")<br />
d.setVisible(true);<br />
System.out.println(<br />
"Dialog value is " + d.getValue());<br />
}<br />
});<br />
f .packO ;<br />
f.setVisible(true);<br />
}<br />
protected int returnValue = JOptionPane.CLOSEDjOPTION;<br />
protected JButton cancelButton;<br />
The main method demonstrates how this dialog is used: an instance of it is<br />
created and then it is popped up using the setvisible method. The setvisible<br />
method is inherited from JDialog and, since the dialog is modal
Creating Custom Dialog Boxes 839<br />
(because the JDialog constructor was invoked with the modal parameter set<br />
to true), it will block the calling thread until the dialog is dismissed.<br />
Figure 8-1 A basic confirmation dialog.<br />
Once the dialog has been displayed, from the point of view of the code<br />
that created it, nothing more will happen until the user presses a button or<br />
dismisses the dialog, either of which will cause an event to be generated. To<br />
catch these events, the dialog box's constructor registered listeners for the<br />
ActionEvents that will be delivered from the buttons and the Window-<br />
Event that will occur if the user dismisses the dialog box. Whichever of these<br />
happens, the event handler does the same things:<br />
1. It stores a return value in the dialog's returnValue member;<br />
each of the event handlers stores a different value that indicates<br />
how the dialog was dismissed.<br />
2. It drops the dialog by calling dispose. This causes the thread<br />
blocked in setvisible (true) to resume and the code that<br />
originally posted the dialog box will receive control again.<br />
The key to creating your own modal dialog boxes, then, is to use event<br />
handlers to manage the user's interaction with the dialog and to allow it to be<br />
dismissed when appropriate. If you need to return any values to the code that<br />
invoke the dialog, you must save them in the event handlers and provide a<br />
way for the invoking thread to retrieve them. Usually, the return value or values<br />
are members of the dialog class and member functions, like the<br />
getValue method in this example, are provided to allow the results to be<br />
accessed.<br />
If you examine the constructor of the dialog in Listing 8-1, you'll notice<br />
the following line of code near the start:<br />
setResizable(false);<br />
We introduced this method during our discussion of frames in Chapter 2.<br />
Calling it with argument false stops the user resizing the dialog by dragging<br />
its edges or its corner with the mouse. In general, the user should be allowed
840 Chapter 8 Creating Custom Dialogs<br />
to resize application frames, but with dialogs the opposite is usually true<br />
because they generally tend to be made up of a fixed set of components that<br />
are displayed at their preferred size and allowing the user to resize the dialog<br />
would ruin the layout, or simply result in extra space being added where it<br />
would not be useful to the user. For this reason, most code that creates dialogs<br />
calls setResizable (false) at some point. The user method to resize<br />
a window, namly the maximize button on the caption bar, is not displayed for<br />
dialogs, as you can see from Figure 8-1.<br />
Dialog Positioning<br />
In the example shown in Listing 8-1, no attempt is made to control the location<br />
of the dialog. Usually, however, you would want a dialog to appear in a<br />
specific position on the screen, most often somewhere near the control that<br />
was pressed to cause the dialog to appear so that the user does not have to<br />
shift his or her attention away from one part of the screen to another to complete<br />
the dialog and then back to the original location to continue working<br />
with the application.<br />
Dialogs are just like any other top-level window—you can determine<br />
where they appear by using any of the following methods, which are inherited<br />
from Component:<br />
public void setBounds(int x, int y, int width,<br />
int height);<br />
public void setBounds(Rectangle rect);<br />
public void setLocation(int x, int y) ;<br />
public void setLocation(Point point);<br />
Because dialogs are top-level windows, you specify the x and y coordinates<br />
relative to the screen. Here is how you would change Listing 8-1 if you<br />
wanted the confirmation dialog to appear on the screen directly to the right<br />
of the frame that it is associated with:<br />
public void actionPerformed(ActionEvent evt) {<br />
SimpleConfirmDialog d =<br />
new SimpleConfirmDialog(f, "Delete files",<br />
"This will erase all of your files. Proceed?");<br />
Rectangle rect = f.getBounds();<br />
int x = rect.x + rect.width;<br />
int y = rect.y;<br />
d.setLocation(x, y) ;<br />
d.setVisible(true);
}<br />
Creating Custom Dialog Boxes 841<br />
System.out.println("Dialog value is " + d.getValue());<br />
You can try this code for yourself using the command<br />
<strong>Java</strong> <strong>JFC</strong>Book.Chapter8.SimpleConfirmDialog2<br />
When you press the button in the frame to display the dialog, you'll find<br />
that it is positioned directly to the frame's right. If you press the OK or Cancel<br />
button, move the frame and then press the button again, the dialog<br />
appears to the right of the frames new location.<br />
The code itself is very simple—it calls the getBounds method of the<br />
frame to get both its location and size, then sets the dialog's position using<br />
setLocation, using the sum of the frame's x coordinate and its width as the<br />
dialog's x coordinate and using the same y coordinate as the frame so that the<br />
dialog appears right next to the frame with their upper edges at the same<br />
level.<br />
As we said earlier, the dialog setLocation method requires coordinates<br />
relative to the screen. In the code extract shown above, we were able to simply<br />
use the coordinates returned from the frames getBounds method<br />
because the frame is itself a top-level window, so the coordinates in the<br />
Rectangle returned by this method are given relative to the screen itself,<br />
even if more than one monitor is in use (see Chapter 3 for a discussion of<br />
how coordinates work in the presence of multiple monitors). Sometimes you<br />
will need to place a dialog near a component that is not a top-level window.<br />
Typically, you would like the dialog's position to be close to the control that<br />
the user used to open the dialog. In this case, if you simply call the get-<br />
Bounds or getLocation of that control, you'll get its coordinates relative to<br />
its parent. The correct approach is to call getLocationOnScreen instead,<br />
to get the component's coordinates relative to the screen. To place the dialog<br />
right on top of the button, for example, you would do this:<br />
public void actionPerformed(ActionEvent evt) {<br />
SimpleConfirmDialog d =<br />
new SimpleConfirmDialog(f, "Delete files",<br />
"This will erase all of your files. Proceed?");<br />
Point pt = ((Component)evt.getSource()).<br />
getLocationOnScreen();<br />
d. setLocation(pt);<br />
d.setvisible(true);<br />
System.out.println("Dialog value is " + d.getValue());
842 Chapter 8 Creating Custom Dialogs<br />
Notice, incidentally, that this code does not make any assumption about<br />
w'hich<br />
component activated it - it just uses the ActionEvent getSource<br />
method to get a reference to the activating component and then calls getLocationOnScreen<br />
to get its screen-relative coordinates. This style of coding<br />
allows you to attach the same listener to multiple components. If you type<br />
the command<br />
java <strong>JFC</strong>Book.Chapter8.SimpleConfirmDialog3<br />
you will now find that the dialog is posted directly over the button, no matter<br />
where you place the frame on the screen.<br />
Being able to directly position a dialog using the simple techniques we<br />
have seen here is very useful, but it can quickly get tedious to have to write<br />
the same code each time you need to create a dialog. Fortunately, the Swing<br />
development team included a shortcut that enables you to place a dialog in<br />
such a way that it is centered over another component, wherever that component<br />
might be. To do this, you simply have to invoke the following JDialog<br />
method:<br />
public void setLocationRelativeTo(Component comp);<br />
where comp is the component that the dialog should be centered over. In<br />
many cases, comp will be the frame that the dialog is associated with, but this<br />
need not always be so—you could, for example, center the dialog over any<br />
component in the frame (or in any other frame in the application for that<br />
matter) just bypassing a reference to it. To center the SimpleConfirmDialog<br />
over the button that makes it appear, for example, you would do this:<br />
public void actionPerformed(ActionEvent evt) {<br />
SimpleConfirmDialog d =<br />
new SimpleConfirmDialog(f, "Delete files",<br />
"This will erase all of your files. Proceed?");<br />
Component comp = (Component)evt.getSource();<br />
d.setLocationRelativeTo(comp);<br />
d.setVisible(true);<br />
System.out.println("Dialog value is " + d.getValue() ) ;<br />
}<br />
You can verify for yourself that this works using the command<br />
j ava <strong>JFC</strong>Book.Chapter8.SimpleConfirmDialog4<br />
This works well when the frame is sufficiently far from the edges of the<br />
screen so that there is room for the dialog to be positioned with its center
Creating Custom Dialog Boxes 843<br />
over that of the button. If you drag the frame towards the top or sides of the<br />
screen and then press the button again, you'll find that the dialog's position is<br />
automatically adjusted so that it is completely visible, even though this means<br />
that it isn't properly centered over the button any more.<br />
Modal Dialogs and Application Focus<br />
Earlier in this book we discussed the importance of properly managing the<br />
keyboard focus so that expert users can navigate your application without<br />
using the mouse. The same issue arises when using modal dialogs as part of<br />
the user interface. To see why this is, suppose the user is filling in a set of<br />
fields on a form and needs to activate a dialog to provide further details or to<br />
select a set of options. When the dialog interaction is complete and the dialog<br />
window is closed, the user should be able to continue completing the form<br />
from where he or she left off. In order for this to be the case, two things need<br />
to happen:<br />
1. When the dialog window closes, the original window needs to<br />
become the active window on the desktop so that it has the keyboard<br />
focus.<br />
2. Within this window, the keyboard focus should be passed back<br />
to the component that had it before the dialog window was<br />
made visible.<br />
Fortunately, Swing and AWT between them handle this aspect of focus management<br />
for you automatically, with one small caveat. To see how this works,<br />
rerun the last example by typing the following command:<br />
j ava <strong>JFC</strong>Book.Chapter8.SimpleConfirmDialog4<br />
When the application frame appears, you'll notice that it is the active desktop<br />
window and that the button that it contains has the keyboard focus, so you<br />
can activate it from the keyboard by pressing the SPACE key. When you do<br />
so, the confirm dialog appears and becomes the active desktop window, with<br />
the result that you can use the keyboard to select and press either the OK or<br />
Cancel button using some combination of TAB and SPACE. Whichever button<br />
you press, the dialog is dismissed and you'll see that the original frame<br />
again becomes the active window and the button regains the focus.<br />
This is exactly how focus handling should work in the presence of dialogs—<br />
at no time does the user have to shift the focus from window to window<br />
using the mouse. On the Windows platform, this works very well. It also
844 Chapter 8 Creating Custom Dialogs<br />
works on UNIX systems, with one small exception. If you nm this example<br />
under Linux or Solaris and open the dialog box but then, instead of activating<br />
the OK or Cancel button, you first move the focus to another application<br />
window by using the mouse and then restore it to the dialog, you'll find that<br />
the window focus does not return to the original frame when you subsequently<br />
close the dialog. This is an annoying feature that, unfortunately, you<br />
can't really do anything about. Luckily, it only happens if the user moves the<br />
focus away from your application to another one while in the process of interacting<br />
with a dialog, which should happen relatively rarely.<br />
Creating Custom Dialogs with JOptionPane<br />
The last chapter demonstrated how useful JOptionPane can be when you<br />
want to post messages or obtain input from the user. Up to now, its static convenience<br />
methods have been used to create modal dialogs that return the<br />
result of the interaction with the user directly to the calling thread. In addition<br />
to this useful feature, JOptionPane also allows you to create your own<br />
dialogs by using one of its many constructors to create one of several possible<br />
panes that can be incorporated into more sophisticated dialogs. Here is the<br />
complete set ofJOptionPanes constructors:<br />
JOptionPane ()<br />
JOptionPane(Object message)<br />
JOptionPane(Object message, int messageType)<br />
JOptionPane(Object message, int messageType,<br />
int optionType)<br />
JOptionPane(Object message, int messageType,<br />
int optionType, Icon icon)<br />
JOptionPane(Object message, int messageType,<br />
int optionType, Icon icon, Object [] options)<br />
JOptionPane(Object message, int messageType,<br />
int optionType, Icon icon, Object [] options,<br />
Object initialValue)<br />
You should recognize these constructors from the discussion of JOption-<br />
Pane in the last chapter. Using these constructors, you can create the basis<br />
for a custom dialog equivalent to an}' of the message, confirm, and option dialogs<br />
that were shown in Chapter 7. The only dialog type that you won't be<br />
able to find in this list is the form of the input dialog that provides a combo<br />
box or a list box of possible values. The last constructor above looks similar,<br />
but in fact the options array is used to add a set of buttons to the dialog and<br />
the initialValue indicates the one that is initially selected. In fact, to create<br />
a dialog pane with a combo box or a list box, you use any of the construe-
Creating Custom Dialog Boxes 845<br />
tors above and then add the combo box using the setSelectionValues<br />
and setlnitialSelectionValue methods.<br />
Creating aJOptionPane Dialog and<br />
Returning a Value<br />
When you've created an option pane, you can either use the JOptionPane<br />
createDialog method to build a dialog box that contains only the pane, or<br />
you can use it as part of your own dialog, supplying your own JDialog component<br />
and probably other components as well. The choice you make determines<br />
the way in which you get results from the dialog, so both variations will<br />
be shown in this chapter.<br />
The JOptionPane createDialog method is defined as follows:<br />
public JDialog createDialog(Component c, String title);<br />
The component you supply as the first argument determines the frame<br />
that controls the dialog. If this component isn't itself a frame, createDialog<br />
searches upwards through the parents and grandparents of this component<br />
until it finds one. The title argument becomes the dialog's caption.<br />
When you use the convenience methods like showOptionDialog shown<br />
in the last chapter, the dialog is displayed immediately. The createDialog<br />
method, however, doesn't do this—you need to use setvisible (true) to<br />
present the dialog to the user. Before doing that, you might want to use set-<br />
SelectionValues and setlnitialSelectionValue to add an input<br />
component such as a combo box or a list box, or customize the dialog in some<br />
other way. The code below creates the same dialog box as the showlnput-<br />
Dialog convenience method, as shown in the example in Chapter 7:<br />
JFrame f = new JFrame("Option Pane Example 1");<br />
JOptionPane pane = new JOptionPane(<br />
"Which color would you like to use for the background?:",<br />
JOptionPane.QUESTION_MESSAGE,<br />
JOptionPane.OK_CANCEL_OPTION,<br />
null) ;<br />
pane.setSelectionValues(choices) ;<br />
pane.setlnitialSelectionValue(choices[0] ) ;<br />
JDialog d = pane.createDialog(f,<br />
"Background Color Selection");<br />
You can verify for yourself that this produces the same dialog by typing the<br />
command
846 Chapter 8 Creating Custom Dialogs<br />
java <strong>JFC</strong>Book.Chapter8.OptionPaneExamplel<br />
If you look back to the description of the most general form of the showlnputDialog<br />
method and the example of it that was shown in the last chapter,<br />
you'll find that it returned the user's color choice as an object of the type that<br />
was supplied to populate the list or combo box, which was a String. This<br />
code, however, uses a JDialog and it will be popped up using the setvisible<br />
method, which doesn't return a value. So how is it possible to get the<br />
results of the dialog?<br />
In abstract terms, a dialog of this sort needs to return two things: the<br />
return value and the input value. The return value indicates which button<br />
was pressed to dismiss the dialog, whereas the input value is the item that<br />
was selected from the combo box. Dialogs that don't have a combo box or a<br />
list box don't have a meaningful input value, but they still have a return value.<br />
You can retrieve these values using the following JOptionPane methods:<br />
public Object getValue();<br />
public Object getlnputValue();<br />
Both of these methods return an Object, but in a real application, you<br />
can't do very much with an Object: you need to know its actual type. The<br />
Object returned by getlnputValue is always of the same type as the ones<br />
that you supplied with setSelectionValues because, in fact, it is one of<br />
those values. However, the type of the value returned by getValue is not so<br />
simple to predict.<br />
If, as in the example above, you allow JOptionPane to supply the buttons<br />
at the bottom of the dialog, then getValue will return an Integer whose<br />
value corresponds to the button that was pressed to close the dialog—that is,<br />
JOptionPane.OK_OPTION, JOptionPane.CANCEL_OPTION, and so on.<br />
However, if you supply an options parameter, what you get is the object<br />
that corresponds to the button that was pressed. In the example shown<br />
above, in which the JOptionPane supplied the buttons based on the<br />
optionType argument, this is how the return value and the input value<br />
would be handled:<br />
Integer returnValue = (Integer)d.getValue();<br />
String inputValue = (String)d.getlnputValue();<br />
Now suppose that you create a JOptionPane in which you specify the<br />
strings for the buttons explicitly using the options argument with the same<br />
options as were used in Listing 7-4, as in the following case:<br />
JFrame f = new JFrame("Option Pane Example 2");<br />
JOptionPane pane = new JOptionPane(<br />
"Connection to remote host has failed: retry or abort?",
JOptionPane.QUESTION_MESSAGE,<br />
JOptionPane.DEFAULTJOPTION,<br />
null,<br />
options, options [0]);<br />
Creating Custom Dialog Boxes 847<br />
JDialog d = pane.createDialog(f, "Connection Failure");<br />
d.stVisible(true);<br />
String returnValue = (String)pane.getValue();<br />
System.out.printIn("Return value is ");<br />
As you can verify for yourself by typing the command<br />
<strong>Java</strong> <strong>JFC</strong>Book.Chapter8.OptionPaneExample2<br />
this produces the same dialog box as the code in Listing 7-4 in the last<br />
chapter, with buttons labeled Retry and Abort. Because the buttons have<br />
been specified by supplying String labels, the return value from getValue<br />
is itself a String. This is actually a particular example of a more general rule<br />
as far as option panes are concerned. If you look back to the JOptionPane<br />
constructors at the start of this section and to the definitions of the convenience<br />
routines that were shown at the beginning of the last chapter, you'll<br />
see that the options argument, and the initial option, are both defined not<br />
as String, but as Obj ect. What happens if you supply something other than<br />
a String? Here are the rules:<br />
• If you supply a String, a JButton is created and the string<br />
becomes its label.<br />
• If you supply a Component, that Component is mounted on the<br />
dialog pane in place of the button.<br />
• If you supply any other Obj ect, it is converted to a String<br />
using its toString method and the result becomes the label of<br />
a JButton.<br />
Since the options argument is an array of Objects, you could, if you<br />
wished, mix various types of Obj ect, together. If you do this, each Obj ect in<br />
the array is treated separately according to the rules above.<br />
When you dismiss the dialog by pressing one of the buttons (or your Component),<br />
the value returned by getValue, will, by default, be the same<br />
object that created the button or Component. That is, a string returns a<br />
String, a Component returns a Component, and anything else returns
848 Chapter 8 Creating Custom Dialogs<br />
itself, having been represented on a button as a String. But this is not quite<br />
the end of the stoiy, because this is what happens by default: If you supply a<br />
Component, you can arrange for something different to happen and, in fact,<br />
you must do something to make anything happen at all.<br />
When you supply something other than a Component, the JOptionPane<br />
creates a button with the appropriate label and arranges to catch the Act ion-<br />
Event that is generated when that button is pressed. When this ActionEvent<br />
is caught, the JOptionPanes event handler has to store a return value and<br />
arrange for the dialog box to be dismissed, in much the same way as was shown<br />
in Listing 8-1. The event handler actually saves the return value using the<br />
JOptionPane setValue method, which is defined as follows:<br />
public void setValue(Object value);<br />
As you might expect, this method takes an Object; the event handler<br />
actually supplies the original object from the options list that created the<br />
button. Invoking this method on a dialog creating using createDialog also<br />
causes the dialog to be disposed as a side effect.<br />
<strong>Core</strong> Note<br />
The mechanism by which the dialog is dismissed is an interesting one. In<br />
Listing 8-1, our event handlers set the appropriate return value and then<br />
dosed the dialog by directly calling dispose. JOptionPane doesn't do it<br />
this way. Instead, the setValue method stores the new value and then<br />
fires a PropertyChangeEvent on the property name value. When<br />
creating the JDialog object, the createDialog method registers a<br />
PropertyChangeListener for this event. When this listener's<br />
propertyChange method is entered, one of the things it does is to<br />
dispose the dialog. This apparently circuitous mechanism is essential,<br />
because, as you'll see later, you can create JOptionPane objects and use<br />
them in your own dialogs that weren't created by createDialog. It<br />
wouldn't be correct for the setValue method itself to directly dispose the<br />
dialog, because you may want to perform error checking or carry out<br />
further interaction with the user when one of the dialog's buttons is<br />
pressed. As a result of this, when you create a custom dialog using a<br />
JOptionPane but you don't do it using createDialog, you must<br />
handle the PropertyChangeEvent youselfand take appropriate action<br />
(which might include disposing the dialog). An example of this appears later<br />
in this chapter.
Creating Custom Dialog Boxes 849<br />
The situation is different if you supply a Component among your options<br />
list. When you do this, the JOptionPane does nothing other than add it to<br />
the pane where it would otherwise have placed a button. It doesn't arrange<br />
for anything to be done when the component is activated to close the dialog—after<br />
all, it doesn't know what the component does. It certainly can't<br />
register an ActionListener, because Component doesn't have an addActionListener<br />
method! Instead, it is your responsibility to arrange for the<br />
Component to invoke setValue on the JOptionPane to which it has been<br />
added when it is activated. Since your object is calling setValue, it can pass<br />
anything it likes as the value to store and, when the dialog's setvisible<br />
method returns, the object returned by getvalue will be whatever was<br />
stored by setValue. Obviously, the code that extracts the dialog's return<br />
value has to know what type to expect.<br />
<strong>Core</strong> Note<br />
As mentioned earlier, since the options list is just an array of Ob j ects,<br />
there is no requirement for them to be all of the same type. If you wish, you<br />
can supply a mixture of Strings, Components, Integers, or anything<br />
else.The flip side of this, of course, is that the code that calls getvalue<br />
has to be able to cast the returned value to the appropriate type and the<br />
correct cast will depend on which option was actually selected.<br />
Using the JOptionPane Message Parameter<br />
You may have noticed that, even though the examples that have been shown<br />
so far always supply the message part of these dialogs as a String, the JOptionPane<br />
constructor actually defines the type of the message argument as<br />
Object. Like the options argument, JOptionPane handles different message<br />
values in different ways. If you supply a String, it is displayed in the<br />
message area, as you have already seen in earlier examples. If you supply a<br />
Component, it will just be mounted on the dialog where the message string<br />
would have gone—above the buttons and to the right of the icon, if there is<br />
one. You can also supply an Icon, which will be mounted on a JLabel and<br />
installed in the message slot. Anything other than a String, an Icon, or a<br />
Component is converted to a String using its toString method and the<br />
resulting String used as the text on a JLabel.<br />
The ability to supply a Component allows you to place customized labels<br />
incorporating text and an icon, for example, in addition to the standard icon<br />
provided by the JOptionPane itself. In fact, the message parameter is more
850 Chapter 8 Creating Custom Dialogs<br />
powerful than that. In <strong>Java</strong>, an array is an Ob j ect, so you can supply an array<br />
whenever an Object is required, provided that the code that interprets the<br />
Object is prepared to accept an array. JOptionPane will allow you to supply<br />
an array of Objects as the message parameter. Each entry in this array<br />
can itself be a String, an Icon, a Component, or another Obj ect. When an<br />
array is supplied, the objects in the array are stacked above each other on the<br />
JOptionPane, with the first entry at the top. You'll see an example of this in<br />
the next section.<br />
One final point to note about the message parameter is that you don't<br />
necessarily have to supply a custom component or an array of Strings to do<br />
something like create a multiline message. If the message argument is a<br />
String, JOptionPane will look for newline characters and create a separate<br />
line after each occurrence of a newline. Furthermore, because a String-valued<br />
message parameter is actually rendered using a JLabel, you can add<br />
color or font changes to the message by encoding the String using HTML<br />
tags, provided that the string starts with the text "", as described in<br />
Chapter 2.<br />
<strong>Core</strong> Note<br />
This discussion applies equally to the message parameter supplied to the<br />
convenience methods that were shown in the last chapter.<br />
Using ToolTips and JOptionPane to Create an<br />
Image Map Dialog<br />
This section will show you how to implement a custom dialog that allows the<br />
user to make a selection by using an image, in effect creating the <strong>Java</strong> equivalent<br />
of an HTML image map. The image map will be a Component and we<br />
will use it to demonstrate how to use a custom component and a JOption-<br />
Pane together to build a complete dialog. In the course of creating this dialog,<br />
you'll also find out more about how to make effective use of tooltips.<br />
First, lets look at what the finished product looks like (Figure 8-2).<br />
Figure 8-2 shows a modal dialog derived from JDialog and made up of<br />
two independent parts. The top half is our image map object, implemented<br />
in a class called imageMap, while the bottom is created using JOptionPane.<br />
Before looking at how this dialog is implemented, lets describe how it is supposed<br />
to work.
Figure 8-2 A dialog containing an image map.<br />
The Image Map Dialog<br />
Creating Custom Dialog Boxes 851<br />
From the user's point of view, this particular dialog offers the ability to select a<br />
part of the picture and receive some information about it. In this example, we<br />
will implement only the dialog itself—the dialog won't supply any actual information,<br />
but it will return a string that indicates what the user wanted information<br />
about. When the dialog is posted, the user will move the mouse over the<br />
image to an area of interest. As the mouse moves, nothing special happens, but<br />
if it remains stationary for a short period over a region of the picture for which<br />
there is information available, a tooltip appears, giving a brief description of the<br />
area beneath it. You can try this out for yourself using the command:<br />
java <strong>JFC</strong>Book.Chapter8.ImageMapDialogExample<br />
The picture used here shows a mock-up of an Apollo Lunar Module that<br />
was displayed at the Visitor Center of the John F. Kennedy Space Center in<br />
Florida a few years ago. If you move the mouse just about anywhere over the
852 Chapter 8 Creating Custom Dialogs<br />
Lunar Module and let it rest for a second or so, you'll see a tooltip appear.<br />
Move it over the upper part of the vehicle, for example, and you'll probably<br />
see the text "Ascent Stage" appear. Move it over one of the triangular windows<br />
and the text changes to "LM Pilot Position" or "Commanders Position."<br />
Double-click the mouse over an area with a tooltip and the dialog disappears<br />
but the content of the tooltip that describes the area clicked on is printed.<br />
Finally, if you didn't find the picture very inspiring and just pressed the Cancel<br />
button, the dialog will be dismissed and "null" will be printed, indicating<br />
that nothing was selected.<br />
The implementation of the image map itself will be shown later in this section.<br />
First, however, let's concentrate on the dialog itself. In order to see how<br />
the dialog works, you need to know what information the dialog requires to<br />
create the image map and what feedback the image map provides to the dialog.<br />
The image map class is supplied with the location of an image to load and an<br />
array of objects that specify the parts of the picture that are to respond to the<br />
mouse and the text that should be displayed when the mouse hovers over any<br />
particular area. Each such area is described by an instance of a class called<br />
MapSection that you'll see later on. To create the image map, the constructor<br />
for the dialog class, which is called ImageMapDialog, is passed a Uniform<br />
Resource Locator (URL) for the image and an array of MapSection objects.<br />
In addition, it is also given a reference to its controlling frame, the string to use<br />
in its title, and a boolean flag telling it whether to be modal or not.<br />
The constructor's main job is to lay out the contents of the dialog and to<br />
register to receive events from its active parts. Here, the dialog consists of an<br />
ImageMap, a message, and a single button. You already know that you can<br />
create the message and the button together as a JOptionPane and, in fact,<br />
the JOptionPane can also host the ImageMap. As noted earlier, the message<br />
parameter supplied to the JOptionPane constructor can be an array. In this<br />
case, you can arrange for the ImageMap to appear above the message by<br />
passing as the JOptionPane's message parameter an array consisting of a<br />
reference to the ImageMap as its first element and the String message as its<br />
second. The entire dialog, then, is just a JOptionPane added to the content<br />
pane of a JDialog.<br />
To create the Cancel button, the variant of JOptionPane that allows a<br />
list of buttons to be given as options is used:<br />
JOptionPane(Object message, int messageType,<br />
int optionType, Icon icon, Object [] options);<br />
In this case, since one button is required, the following, simpler constructor<br />
could have been used:
JOptionPane(Object message, int messageType,<br />
int optionType)<br />
Creating Custom Dialog Boxes 853<br />
with the value JOptionPane . CANCEL_OPTION supplied as the option-<br />
Type argument. Visually, this would have achieved the same result as the<br />
more complex constructor. The more complex constructor is used here for no<br />
reason other than to demonstrate yet another variant of the versatile<br />
JOptionPane component.<br />
The complete ImageMapDialog class constructor implementation is<br />
shown, along with that of the rest of the class, in Listing 8-2.<br />
Listing 8-2 A dialog that hosts an image map<br />
package <strong>JFC</strong>Book.Chapter8;<br />
import j avax.swing.*;<br />
import j ava.awt.*;<br />
import j ava.awt.event.*;<br />
import j ava.beans.*;<br />
import java.net.URL;<br />
public class ImageMapDialog extends JDialog<br />
implements ActionListener, PropertyChangeListener {<br />
public ImageMapDialog(Frame f, String title,<br />
boolean modal, URL imageURL, MapSection[] map) {<br />
super(f, title, modal);<br />
ImageMap imageMap =<br />
new ImageMap(new Imagelcon(imageURL), map);<br />
imageMap.addActionListener(this);<br />
};<br />
Object [] message = new Object [] { imageMap,<br />
"Double-click on an area of interest or press 'Cancel'<br />
optionPane = new JOptionPane(message,<br />
JOptionPane.PLAIN_MESSAGE,<br />
JOptionPane.DEFAULT_OPTION,<br />
null,<br />
options,<br />
options[0]);<br />
optionPane.addPropertyChangeListener(this)<br />
this.getContentPane().add(optionPane,<br />
BorderLayout.CENTER);
854 Chapter 8 Creating Custom Dialogs<br />
Listing 8-2 A dialog that hosts an image map (continued)<br />
this.pack () ;<br />
this.setResizable(false);<br />
}<br />
// This method gets the result of the dialog<br />
public String getValue() {<br />
String selectedValue = null;<br />
String returnValue;<br />
}<br />
returnValue = (String)optionPane.getValue();<br />
if (returnValue.equals(okString) ) {<br />
selectedValue = (String)optionPane.getlnputValue();<br />
}<br />
return selectedValue;<br />
// ActionListener for ImageMap<br />
public void actionPerformed(ActionEvent evt) {<br />
optionPane.setlnputValue(evt.getActionCommand() ) ;<br />
optionPane.setValue(okString);<br />
}<br />
// PropertyChangeListener £oir JOptionPane<br />
public void propertyChange(PropertyChangeEvent evt) {<br />
if (evt.getPropertyName().equals(<br />
JOpt ionPane.VALUE_PROPERTY)) {<br />
this.dispose();<br />
}<br />
}<br />
protected JOptionPane optionPane;<br />
private static String [] options = { "Cancel" };<br />
private static String okString = "OK";<br />
}<br />
You'll notice that this class implements both the ActionListener and<br />
PropertyChangeListener interfaces and that the constructor registers the<br />
dialog to receive action events from the ImageMap and property change<br />
events from the JOptionPane. The job of the dialog is to connect together<br />
these two different pieces and arrange for them to work together, which it<br />
does by handling events from both of them. The ImageMap generates an<br />
ActionEvent when the user double-clicks on an area for which it has associ-
Creating Custom Dialog Boxes 855<br />
ated text. The ActionEvent that is delivered has the text that appears in the<br />
tooltip as its action command. A double click indicates that the user has made<br />
a selection and that the dialog should now be dismissed. Similarly, the dialog<br />
should be dropped if the user presses the Cancel button.<br />
As you saw in the previous section, the JOptionPane handles the Cancel<br />
button itself: When it is pressed, the event is caught and causes the<br />
JOptionPanes setValue method to be invoked. When you supply your<br />
own options as Strings, as is the case here, the value set with setValue is a<br />
String and, in this case, it will be Cancel, the label of the button. As well as<br />
storing this value, setValue also generates a PropertyChangeEvent,<br />
which is why the ImageMapDialog was registered to receive these events.<br />
When this event occurs, the event handler (see propertyChange in Listing<br />
8-2) drops the dialog by calling dispose.<br />
If the user double-clicked on a part of the image with associated text, the<br />
ActionEvent from ImageMap will be processed in the actionPerf ormed<br />
method of ImageMapDialog, because it was registered as an ActionListener.<br />
Again, this method needs to cause the dialog to be dismissed, but it<br />
also needs to arrange for the text returned from the image map to be available<br />
to the code that invoked the dialog. As you know, a modal dialog is displayed<br />
using the setvisible method, which blocks until the dialog has<br />
completed but doesn't return a value. Instead, the dialog usually supplies a<br />
method (or methods) to allow the results of the dialog to be retrieved. In the<br />
case of ImageMapDialog, a getValue method is provided, which will<br />
return the text provided by the image map, or null if the Cancel button was<br />
pressed.<br />
How will getValue get this information? Remember that getValue will<br />
be called some time after the dialog has been dismissed, and the only information<br />
it can work with is whatever was stored by whichever event handler<br />
dismissed the dialog. One possibility would be to create a String member of<br />
ImageMapDialog in which the String from the ActionEvent would be<br />
saved when the image is double-clicked and which getValue would use as<br />
its return value. If the Cancel button were pressed, this member would be<br />
set to null. That would be a perfectly acceptable solution—no matter how<br />
the dialog was dismissed, the appropriate text would be held in this<br />
ImageMapDialog member. This example, however, adopts a slightly different<br />
solution that illustrates the use that can be made of mechanisms provided<br />
by JOptionPane.
856 Chapter 8 Creating Custom Dialogs<br />
<strong>Core</strong> Note<br />
Do not confuse the getValue method provided by ImageMapDialog with<br />
the getValue method of JOptionPane. In this example, the<br />
JOptionPane is encapsulated inside the ImageMapDialog and is not<br />
accessible to users of the latter.The job of ImageMapDialog is to extract the<br />
information stored inside the JOptionPane when its own getValue<br />
method is called.<br />
You've already seen that the Cancel button causes the JOptionPane<br />
setValue method to be called, with Cancel as its argument. When the dialog<br />
completes, you can determine that this happened by calling the<br />
JOptionPane getValue method. As you know, this returns an Object, but<br />
if this object is cast to a String, you can tell that the Cancel button was<br />
pressed by looking at the value. In order to be able to distinguish the Cancel<br />
button in this way, you have to arrange for the action taken when the user<br />
double-clicks the image to store a different value. As you can see by looking<br />
at the actionPerf ormed method, in this case setValue is called with the<br />
argument OK. This has two important effects. First, because the value being<br />
passed when either the Cancel button is pressed or the image is doubleclicked<br />
is of type String, it is always safe when calling the JOptionPane<br />
getValue method to cast the returned object to String. Had an Integer<br />
been used instead when the image was double-clicked, it would have made<br />
the ImageMapDialog's getValue method harder to implement. The second<br />
effect of calling the JOptionPane setValue method when the image is<br />
double-clicked, and the more important one from the point of view of this<br />
example, is that, just like the one performed internally by JOptionPane<br />
when the Cancel button was pressed, it causes a PropertyChangeEvent to<br />
be generated. This event is received by the same propertyChange method,<br />
which again dismisses the dialog. Hence, calling setValue method both<br />
removes the dialog from the screen and sets the return value of the JOptionPane.<br />
<strong>Core</strong> Note<br />
The propertyChange method checks that the event it has received is<br />
actually for a change in the "value" property of the JOptionPane before<br />
dismissing the dialog.This is very important, because JComponents have<br />
many properties that can generate property change events and it is not safe<br />
to assume that the only event you will receive is the one you are interested in.
Creating Custom Dialog Boxes 857<br />
Because of the way in which the event handlers use the JOptionPane<br />
setValue method, when the dialog has been dismissed using the Cancel<br />
button, the JOptionPane getValue method would return Cancel,<br />
whereas if the image had been double-clicked it would return OK. However,<br />
this is not what the user of ImageMapDialog needs to see. The ImageMap-<br />
Dialog getValue method should return a value of null in the first case<br />
and the string associated with the area of the image map that was clicked in<br />
the second. The fact that the JOptionPane getValue method returns different<br />
values in these two cases allows the ImageMapDialog getValue<br />
method to distinguish them and return null in the first case, but how will it<br />
get the text from the image map for the second case? It can only get this if it<br />
was stored somewhere within the dialog before it was dismissed.<br />
Where should this text be stored? It could be stored in a private member<br />
within ImageMapDialog, but this would require another method to be<br />
implemented to retrieve the stored value when the JOptionPane getValue<br />
method returns OK. Another possibility is to backtrack on the design just<br />
described and save the text itself instead of the constant string OK when the<br />
image is double-clicked. This would allow the text to be retrieved using the<br />
JOptionPane getValue method. This is a much better solution—the<br />
ImageMapDialog getValue method would then look something like this:<br />
String returnValue = (String)optionPane.getValue();<br />
return returnValue.equals("Cancel") ? null : returnValue;<br />
Again, however, this example forsakes this simple solution in favor of a<br />
slightly more complex one that is more general. Instead of either of these<br />
possibilities, the text from the image map is saved in the JOptionPane using<br />
its setlnputValue method and is later extracted by getValue using get-<br />
InputValue. This solution makes it easier to change the dialog to include,<br />
for example, a combo box that contains all the pieces of text that the image<br />
map could generate. If the user made a choice from the combo box, the<br />
JOptionPane would save that choice using its setlnputValue method,<br />
exactly as has been done in this case, and the ImageMapDialog getValue<br />
method would continue to use getlnputvalue to retrieve the text whether<br />
it came from the image or the combo box.<br />
Implementing the Image Map<br />
That's all there is to the ImageMapDialog class. Now lets look at the image<br />
map itself. Here, the problem is to create a component that can render a<br />
graphic and respond to the mouse by generating a tooltip whose content
858 Chapter 8 Creating Custom Dialogs<br />
depends on where the mouse is. Fortunately, all of this functionality is provided<br />
by Swing: All that is necessary is to exploit it in the right way.<br />
First, let's address the issue of rendering the image. This is very straightforward<br />
- you've already seen in Chapter 2 that the JLabel class allows you to<br />
draw an image onto its surface if you supply it in the form of an Image I con. To<br />
give a pleasing effect we add a border around the outside of the image using one<br />
of the Swing borders that you'll see later in this section. Since any JComponent<br />
can render a border, it is very easy to arrange for the JLabel to wrap one<br />
around the image.<br />
Having arranged for the image to be drawn on the label, the next problem<br />
is to show tooltips that depend on which part of the image the mouse is over.<br />
Again, JComponent provides the means to do this. To see how to make this<br />
work, let's look at how the tooltip mechanism itself works. Recall from Chapter<br />
1 and Chapter 6 that you can associate a fixed tooltip with a JComponent<br />
by using its setToolTipText method, for example:<br />
JLabel label = new JLabel(icon);<br />
label.setToolTipText("This is an Apollo Lunar Module");<br />
When you do this, the tooltip supplied is displayed when the mouse<br />
remains stationary over the component for a short period. This isn't really<br />
suitable for imageMap because the tooltip that it displays needs to depend on<br />
where the mouse is. To see how to implement a position-dependent tooltip,<br />
it is necessary to understand how tooltips work.<br />
All of the tooltips in the application are managed by the ToolTipManager.<br />
When you set a tooltip for a JComponent, the setToolTipText<br />
method declares the JComponent to the ToolTipManager, which registers<br />
itself to receive mouse events from it. Once the mouse has entered a component,<br />
the ToolTipManager registers to receive MouseMotionEvents.<br />
When the mouse has been inside the component for a short time (by default<br />
this is 750 milliseconds, but it can be changed using the ToolTipManager<br />
setlnitialDelay method), the ToolTipManager calls the JComponents<br />
getToolTipText method to get its tooltip, which is then displayed in a window<br />
that floats over the component, near the mouse pointer. This tip stays<br />
posted until the mouse leaves the component or until it remains stationary<br />
for a relatively long period (4 seconds by default). As long as the mouse<br />
remains inside the boundary of the component, the getToolTipText<br />
method is called every time it moves. If it returns the same text as that currently<br />
displayed, the tooltip window is left unchanged: It doesn't track the<br />
mouse pointer. If the text changes, the old window is hidden and a new one is<br />
posted at the mouses new location. Finally, if getToolTipText returns<br />
null, the tooltip is dismissed completely.
Creating Custom Dialog Boxes 859<br />
You can control many aspects of the global behavior of tooltips using the<br />
ToolTipManager object. There is only one of these objects and you can get<br />
a reference to it using the static method ToolTipManager.sharedlnstance.<br />
The most important methods of this class are shown in Table 8-1.<br />
Table 8-1 ToolTipManager Methods<br />
Method<br />
public void setEnabled(boolean cond);<br />
public void setInitialDelay(int delay);<br />
public void setDismissDelay(int delay);<br />
public void setReshowDelay(int delay);<br />
Effect<br />
Determines whether tooltips are displayed.<br />
If you set this to false, no tooltips<br />
will appear.<br />
The delay in milliseconds before which<br />
a tooltip will first appear after the mouse<br />
enters a component. By default, Tool -<br />
TipManager waits 750 milliseconds<br />
before showing a tooltip. It won't display<br />
one at all if the mouse leaves the component<br />
before this initial time elapses.<br />
The time for which the tooltip remains<br />
visible. Once the tooltip is displayed, it<br />
will remain on view for this interval and<br />
then disappear. However, this interval is<br />
extended if the mouse moves. This delay<br />
is four seconds by default.<br />
The time within which a tooltip will be<br />
reshown at once if the mouse re-enters a<br />
component that was showing a tooltip<br />
when it left. Initially, this is set to 500<br />
milliseconds, so that if the mouse reenters<br />
less than 0.5 seconds after leaving,<br />
the usual 0.5-second initial delay<br />
won't apply.<br />
To set the amount of time for which a tooltip remains visible to three seconds<br />
instead of four, for example, use the following:<br />
ToolTipManager.sharedlnstance().setDismissDelay(3000);<br />
Given this background information on ToolTipManager, it is easy to see<br />
how to enhance the basic mechanism in order to make the tooltip depend on
860 Chapter 8 Creating Custom Dialogs<br />
the position of the mouse. As we said earlier, when the ToolTipManager<br />
needs a tooltip for a JComponent, it invokes that JComponent's getToolTipText<br />
method, which is defined as follows:<br />
public String getToolTipText(MouseEvent evt);<br />
When you call the setToolTipText method, the string you supply is<br />
stored as a property of the JComponent. The default implementation of<br />
getToolTipText simply reads and returns this property, so you get a constant<br />
tool tip that doesn't follow the mouse. For the ImageMap, however, the<br />
tooltip returned needs to be based on the position of the mouse. To achieve<br />
this, you need to override the getToolTipText method and check the<br />
mouse position against the set of areas defined by the image map as having<br />
associated text. If the mouse is inside one of these areas, the associated text is<br />
returned from the overridden getToolTipText method. If it is not, null is<br />
returned and the tooltip window, if it is displayed, will vanish.<br />
Listing 8-3 shows the implementation of the ImageMap class, which is<br />
derived from JLabel. JLabel is subclassed rather than being used directly<br />
so that its getToolTipText method can be overridden. The constructor<br />
builds the image map's user interface by creating an Image I con with the<br />
supplied image and surrounding it with a border to improve the component s<br />
overall appearance. It also saves the array of MapSection objects for later<br />
use and remembers the size of the border, which it obtains from the borders<br />
getBorderlnsets method. Finally, it calls setToolTipText to set an<br />
empty tooltip string. This step is necessary so that the ToolTipManager registers<br />
to receive the mouse events that will eventually cause it to begin calling<br />
the ImageMaps getToolTipText method.<br />
Listing 8-3 An image map class<br />
package <strong>JFC</strong>Book.Chapter8;<br />
import j avax.swing.*;<br />
import javax.swing.border.*;<br />
import j ava.awt.*;<br />
import j ava.awt.event.*;<br />
public class ImageMap extends JLabel implements MouseListener<br />
{<br />
public ImageMap(Icon image, MapSection[] map) {<br />
super(image);
Listing 8-3 An image map class (continued)<br />
this.map = map;<br />
Border border =<br />
BorderFactory.createLoweredBevelBorder();<br />
this.setBorder(border);<br />
this.setToolTipText ("");<br />
Insets insets = border.getBorderlnsets(this);<br />
xoffset = insets.left;<br />
yoffset = insets.top;;<br />
}<br />
public String getToolTipText(MouseEvent evt) {<br />
Point pt = new Point(evt.getX() - xoffset,<br />
evt.getYO - yoffset);<br />
for (int i = 0; i < map.length; i++) {<br />
if (map[i] .area.contains (pt)) {<br />
return map[i].text;<br />
}<br />
}<br />
return null;<br />
public void addActionListener(ActionListener 1) {<br />
this.l = 1;<br />
this.addMouseListener(this);<br />
}<br />
Creating Custom Dialog Boxes 861<br />
public void removeActionListener(ActionListener 1) {<br />
if (this.l == 1) {<br />
this.l = null;<br />
this.removeMouseListener(this);<br />
}<br />
// Mouse Listener interface<br />
public void mouseClicked(MouseEvent evt) {<br />
if (evt.getClickCount() == 2) {<br />
String text = getToolTipText(evt);<br />
if (text != null) {<br />
1.actionPerformed(new ActionEvent(this,<br />
ActionEvent.ACTION_PERFORMED, text));<br />
}<br />
}
862 Chapter 8 Creating Custom Dialogs<br />
Listing 8-3 An image map class (continued)<br />
public void mouseEntered(MouseEvent evt) {<br />
}<br />
public void mouseExited(MouseEvent evt) {<br />
}<br />
public void mousePressed(MouseEvent evt) {<br />
}<br />
public void mouseReleased(MouseEvent evt) {<br />
}<br />
protected MapSection[] map;<br />
protected int xoffset;<br />
protected int yoffset;<br />
protected ActionListener 1;<br />
}<br />
As the mouse tracks over the ImageMap, its getToolTipText method is<br />
called. This method extracts the mouse position from the accompanying<br />
MouseEvent and adjusts it to account for the size of the border. This is<br />
essential, because the mouse position is reported relative to the top-left corner<br />
of the label, which is outside the border, but the map data contains coordinates<br />
measured relative to the image itself, which is inside the border. The<br />
mouse position, offset by the border insets, is used to search the array of<br />
MapSection objects passed to the constructor. MapSection is a trivial class,<br />
defined like this:<br />
public class MapSection {<br />
public MapSection(Polygon area, String text) {<br />
this.area = area;<br />
this.text = text;<br />
public String text;<br />
public Polygon area;<br />
}<br />
To find out whether or not the mouse is inside an area described by a Map -<br />
Section object, you just need to use the Polygons contains method,<br />
passing it the mouse position as the argument. If the mouse is inside one of<br />
these areas, the corresponding text is used as the return value of getToolTipText;<br />
if it isn't, null is returned and no tooltip will be displayed. In the<br />
case of the Apollo Lunar Module picture, many of the areas overlap each
Creating Custom Dialog Boxes 863<br />
other. For example, both windows have their own tooltips, as does the entire<br />
ascent stage. To make sure that the correct tooltip is returned, you need to<br />
organize the MapSection objects so that the smaller areas are found before<br />
the larger ones. In this case the MapSection objects for the windows appear<br />
before the enclosing one for the ascent stage.<br />
The other thing the ImageMap must do is respond to double clicks with<br />
the mouse. The ImageMap class allows a single object to register as an<br />
ActionListener; this could be generalized to allow more than one listener,<br />
but one listener suffices for this example. If an ActionListener is registered,<br />
the ImageMap starts listening to its own mouse events. When the user<br />
clicks the mouse, the Imagelcons mouseClicked method will be invoked.<br />
If the MouseEvent represents a double click, the mouse position is extracted<br />
from the event and passed to getToolTipText to locate the tooltip for the<br />
mouse's location. If the returned tooltip is not null, an ActionEvent is created<br />
and posted to the ActionListener. This event will show the<br />
ImageMap as its source and has the tooltip text as its action command.<br />
Custom Dialogs with JFileChooser<br />
In the last chapter some time was spent looking at how to make use of the<br />
showDialog, showOpenDialog, and showSaveDialog methods of the<br />
JFileChooser class to create simple file dialogs. In this section, you'll see<br />
how you can use JFileChooser in a custom dialog by looking at the implementation<br />
of a dialog that allows you to preview text files before opening<br />
them. The JFileChooser will be used to give a view of the file system. The<br />
user will be able to select an object in the file system by clicking on it and, if<br />
it is a file (not a directory) and it turns out to be readable, a preview of the<br />
first 20 lines of the file will appear in a small window alongside the directory<br />
listing. By double-clicking the file or pressing the Open button, the user can<br />
choose the file as the result of the dialog. The finished dialog box is shown in<br />
the Figure 8-3.<br />
Laying out the Dialog<br />
In this dialog, the right-hand side is a JTextArea component, which provides<br />
an easy way to display the contents of the file. Since we don't want the<br />
user to be able to change the file contents, the text area is made noneditable.<br />
Surrounding the text area is a titled border, which allows you to select any<br />
border style (here an etched border is being used) and overlays onto it a text<br />
string. As you'll see later in this chapter, you can control both the font and
864 Chapter 8 Creating Custom Dialogs<br />
Figure 8-3 A file preview dialog.<br />
location of the border title. Borders are very useful in breaking up the content<br />
of dialog boxes into discrete areas. You can achieve a similar effect with<br />
the JSeparator component, which simply draws a horizontal or vertical<br />
line; JSeparator is actually the object added to menus by the JMenu<br />
addSeparator method. Finally, the rest of the dialog is occupied by the<br />
components that make up the JFileChooser itself.<br />
You can try this example for yourself by typing the command<br />
<strong>Java</strong> <strong>JFC</strong>Book.Chapter8.FilePreviewDialog<br />
When the dialog appears, it shows all of the files and directories in its initial<br />
directory and you can use the file chooser controls to navigate the file system<br />
as usual. If you select a file in the file list by clicking on it, the first 20<br />
lines of its content will be displayed in the preview area, assuming that the<br />
object selected is a file that you have read access to. Once you have previewed<br />
a file, you can select it as the return value of the dialog by pressing the<br />
Open button or by double-clicking on the file's entry in the JFileChooser s<br />
file list.<br />
The code that is used to create this dialog is shown in Listing 8-4.<br />
Listing 8-4 A file content previewer<br />
package <strong>JFC</strong>Book.Chapter8;
Listing 8-4 A file content previewer (continued)<br />
import j avax.swing.*;<br />
import javax.swing.border.*;<br />
import j ava.awt.*;<br />
import j ava.awt.event.*;<br />
import java.io.*;<br />
import <strong>Java</strong>.beans.*;<br />
Creating Custom Dialog Boxes 865<br />
public class FilePreviewDialog extends JDialog<br />
implements ActionListener, PropertyChangeListener {<br />
public FilePreviewDialog(Frame f, String title) {<br />
this(f, title, null);<br />
}<br />
public FilePreviewDialog(Frame f, String title,<br />
String dir) {<br />
super(f, title, true);// Modal dialog<br />
File dirFile = dir == null ? null : new File(dir);<br />
chooser = new JFileChooser(dirFile);<br />
chooser.setMultiSelectionEnabled(false);<br />
// Create a text area to preview the file<br />
textArea = new JTextArea(LINES, COLUMNS);<br />
textArea.setEditable(false);<br />
textArea.setTabSize(2);<br />
textArea.setFont(new Font("Dialog", Font.BOLD, 10));<br />
JPanel controlPanel = new JPanel();<br />
controlPanel.setLayout(new BorderLayout() ) ;<br />
controlPanel.add(chooser, BorderLayout.CENTER);<br />
JPanel commentPanel = new JPanel();<br />
commentPanel.setLayout(new BorderLayout() ) ;<br />
commentArea = new JLabel("Select a file...",<br />
SwingConstants.LEFT);<br />
commentPanel.add(new JSeparator(), BorderLayout.NORTH);<br />
commentPanel.add(commentArea, BorderLayout.SOUTH);<br />
controlPanel.add(commentPanel, BorderLayout.SOUTH);<br />
JPanel textPanel = new JPanel();<br />
textPanel.setLayout(new BorderLayout());<br />
textPanel.add(new JScrollPane(textArea),<br />
BorderLayout.CENTER);
866 Chapter 8 Creating Custom Dialogs<br />
Listing 8-4 A file content previewer (continued)<br />
textPanel.setBorder(<br />
BorderFactory.createTitledBorder(<br />
BorderFactory.createEtchedBorder(),<br />
"Preview", TitledBorder.CENTER,<br />
TitledBorder.TOP));<br />
// Install the text previewer as the<br />
// JFileChooser accessory<br />
chooser.setAccessory(textPanel) ;<br />
this.getContentPane().add(controlPanel,<br />
BorderLayout.CENTER);<br />
this.pack();<br />
this.addWindowListener(new WindowAdapter() {<br />
public void windowClosing(WindowEvent evt) {<br />
// Dismiss the dialog<br />
FilePreviewDialog.this.dispose();<br />
}<br />
});<br />
// Register to receive file selection events<br />
// from the chooser<br />
chooser.addActionListener(this);<br />
// Register to receive property changes from the chooser<br />
chooser.addPropertyChangeListener(this);<br />
}<br />
// Get the selected file, or<br />
// null if none selected<br />
public File getFileO {<br />
return file;<br />
}<br />
// Handle file selected event from the JFileChooser<br />
public void actionPerformed(ActionEvent evt) {
Listing 8-4 A file content previewer (continued)<br />
Creating Custom Dialog Boxes 867<br />
String command = evt.getActionCommand();<br />
file = null;<br />
if (command.equals(JFileChooser.APPROVE_SELECTION)) {<br />
file = chooser.getSelectedFile ();<br />
if (file == null) {<br />
return;<br />
}<br />
}<br />
// Dispose the dialog<br />
dispose();<br />
}<br />
// Handle property changes from the JFileChooser<br />
public void propertyChange(PropertyChangeEvent evt) {<br />
String name = evt.getPropertyName();<br />
if (name.equals(<br />
JFileChooser.SELECTED_FILE_CHANGED_PROPERTY))<br />
{<br />
File selectedFile = (File)evt.getNewValue();<br />
// Single click on something<br />
if (selectedFile != null &&<br />
selectedFile.isFile() &&<br />
selectedFile.can<strong>Read</strong>()) {<br />
// It's a file: show the preview<br />
previewFile(selectedFile);<br />
commentArea.setText(<br />
"Double-click to select this file.");<br />
} else {<br />
// Clear text area if not a readable file<br />
textArea.setText("");<br />
if (selectedFile == null ||<br />
selectedFile.isFile() == false) {<br />
commentArea.setText("Not a file.");<br />
} else {<br />
commentArea.setText("File is not readable.");<br />
}<br />
}
868 Chapter 8 Creating Custom Dialogs<br />
Listing 8-4 A file content previewer (continued)<br />
} else if (name.equals(<br />
JFileChooser.DIRECTORY_CHANGED__PROPERTY)) {<br />
commentArea.setText("Not a file.");<br />
textArea.setText ( "");<br />
}<br />
}<br />
protected void previewFile(File f) {<br />
textArea.setText("");<br />
try {<br />
StringBuffer buffer = new StringBuffer();<br />
Buffered<strong>Read</strong>er br =<br />
new Buffered<strong>Read</strong>er(new File<strong>Read</strong>er(f) ) ;<br />
for (int i = 0; i < LINES; i++) {<br />
String s = br.readLine();<br />
if (s == null) {<br />
break;<br />
}<br />
buffer.append(s);<br />
buffer.append("\n");<br />
}<br />
br.close () ;<br />
textArea.setText(buffer.toString0 ) ;<br />
textArea.setCaretPosition(0) ;<br />
} catch (Throwable t) {<br />
commentArea.setText("Failed to read file contents.");<br />
}<br />
}<br />
public static void main(String [] args) {<br />
String dir = null;<br />
if (args.length > 0) {<br />
dir = args [0];<br />
}<br />
JFrame f = new JFrame();<br />
FilePreviewDialog d = new FilePreviewDialog(f,<br />
"File Preview", dir);
Listing 8-4 A file content previewer (continued)<br />
}<br />
d.setvisible(true);<br />
File file = d.getFile () ;<br />
String name = (file == null) ? "" :<br />
file.getAbsolutePath();<br />
System.out.println("Selected file is " + name);<br />
System.exit(0);<br />
}<br />
protected JFileChooser chooser;<br />
protected JTextArea textArea;<br />
protected JLabel commentArea;<br />
protected File file = null;<br />
protected static final int LINES = 20;<br />
protected static final int COLUMNS = 20;<br />
Creating Custom Dialog Boxes 869<br />
Most of the constructor should be self-explanatory. Several panels are used<br />
to create the required layout effect, all of which have a BorderLayout layout<br />
manager instead of the default FlowLayout that is automatically<br />
assigned to a JPanel. The dialog has three main areas:<br />
• The JFileChooser, which is placed in the center of the main<br />
panel<br />
• A comment area that resides at the bottom of the dialog<br />
• A horizontal separator that marks the boundary between the<br />
JFileChooser and the comment area.<br />
The comment area is just a JLabel whose text will be changed according<br />
to whether there is a selected file and whether that file is readable. In order<br />
to arrange for this label to display the correct message, it is necessary to<br />
respond to events that are generated as the selected item in the JFileChooser<br />
changes. You'll see later how this is done.<br />
The separator above the comment area is a JSeparator that shares a<br />
JPanel with it. The JPanel containing these two components occupies the<br />
South position of the main panel, directly below the JFileChooser, which is<br />
in the Center location so that it is allocated all of the extra vertical space and<br />
horizontal space if the user resizes the dialog.
870 Chapter 8 Creating Custom Dialogs<br />
<strong>Core</strong> Alert<br />
The JSeparator is in the North position of its parent panel. Placing it in<br />
this position means that it gets the height that it asks for and is stretched<br />
horizontally to the full width of the container. JSeparator allows you to<br />
specify either horizontal or vertical orientation as a constructor argument<br />
and defaults to horizontal if you use the default constructor, as in this<br />
example.<br />
You need to be careful when using JSeparator, because it assumes that<br />
the space it is allocated is narrow in one direction or the other.When asked<br />
its preferred size, it requests a width ofO and height 2, but its final<br />
allocation depends on the layout manager. If, for example, you placed a<br />
JSeparator in an area that could expand both horizontally and vertically<br />
as its container changed size, then your separator would grow into a<br />
rectangle with a grooved border instead of a line. For this reason, it is usual<br />
to use JSeparator with a BorderLayout in any position other than<br />
the Center.<br />
The rest of the layout is occupied by the JFileChooser itself. If you compare<br />
this example to the screen shots of the file chooser that you saw in the<br />
previous chapter, you'll notice that the file selection list occupies much less<br />
space in this case—in fact, it has been pushed over to the left to make room<br />
for the file preview area. You might be wondering how this was done - it looks<br />
like we have managed to add an extra component inside the private layout of<br />
the JFileChooser and, in fact, this is exactly what we have done. JFileChooser<br />
has the concept of an "accessory," which is a component belonging<br />
to the application that the file chooser is prepared to display as part of its<br />
own layout. You configure the accessory using the following JFileChooser<br />
method:<br />
public void setAccessory(JComponent comp);<br />
In this example, the accessory is the JTextArea that will contain the file<br />
preview. Configuring a component as an accessory does not provide you with<br />
any useful functionality other than having it appear as part of the JFileChooser—it<br />
does not, for example, arrange for it to be notified when the<br />
selected file changes. The way in which the accessory is displayed is a matter<br />
for the file choosers installed look-and-feel class and cannot be controlled by<br />
the programmer. All of the standard look-and-feel implementations place the<br />
accessory to the right of the file list as shown in Figure 8-3.
Handling Events from the JFileChooser<br />
Creating Custom Dialog Boxes 871<br />
Once the dialog has been created, nothing happens until the user clicks on<br />
something in the JFileChooser. To see what should then happen, let's walk<br />
through how you might expect this dialog to be used. The dialog would be<br />
created by an application that makes some use of text files, perhaps an editor<br />
of some sort. When its created, it is given the name of the directory that it<br />
should initially display the contents of. This directory name is passed directly<br />
to the JFileChooser.<br />
When the dialog is displayed, the intention is that the user should be able<br />
to click once on a plain file to have its content displayed in the JTextArea.<br />
Double-clicking on a file would have the same effect as pressing the JFileChooser<br />
OK button — the file becomes selected as the result of the dialog,<br />
which is then dismissed. Clicking once on a directory has no effect (other<br />
than highlighting it), while clicking twice makes the JFileChooser descend<br />
into it, updating its display accordingly. If the user clicks on a file that cannot<br />
be read, or on some object that is not a file, a message will appear at the bottom<br />
of the dialog explaining why the file preview does not appear. If a file is<br />
successfully previewed, however, a message instructing the user to doubleclick<br />
to select it is displayed.<br />
The controlling application displays this dialog using the blocking setvisible<br />
method. When the dialog is dismissed, the application must have a<br />
way to extract a reference to the file that the user chose. In this case, a<br />
method called get File is supplied that returns the selected files File<br />
object, or null if the dialog was canceled using the Cancel button or by<br />
closing its window.<br />
In order to provide the functionality just described, it is necessary to<br />
detect the user's actions in the JFileChooser. Here is what we need to be<br />
able to do:<br />
• When the user highlights an object in the file list with a single<br />
mouse click, its File object needs to be extracted and checked to<br />
see whether it is a readable file. If it is not a file, or it cannot be<br />
read, the text area should be cleared. Either way, an appropriate<br />
message should be written to the message area at the bottom<br />
right of the dialog.<br />
• If the user double-clicks on a directory, the JFileChooser will<br />
automatically update its view and descend into that directory.<br />
However, it still is necessary for us to get control in order to<br />
clear the file preview area and display a different message.
872 Chapter 8 Creating Custom Dialogs<br />
• Finally, if the user double-clicks a file that is readable, the files<br />
File object needs to be stored where it can later be retrieved by<br />
the getFile method and the dialog should be dismissed. The<br />
same thing needs to happen if the Open button is pressed.<br />
All of these features can be implemented using events that the file chooser<br />
generates at the appropriate times.<br />
JFileChooser Properties and Property Change Events<br />
JFileChooser has a large set of properties that you can monitor to detect<br />
state changes. Many of these are mainly intended for use by the file choosers<br />
UI delegate class so that it can keep the components visual state consistent<br />
with attributes of the JFileChooser that might affect it, such as the set of<br />
file filters or the accessory. Some of them, however, are of use when building<br />
custom dialogs. The complete set of properties and their meanings are shown<br />
in Table 8-2.<br />
Table 8-2 JFileChooser Properties and Their Meanings<br />
Property and Value Type<br />
ACCEPT_ALL_FILE_FILTER_USED_<br />
CHANGED_PROPERTY (type Boolean)<br />
ACCESSORY_CHANGED_PROPERTY<br />
(type Component)<br />
APPROVE_BUTTON_MNEMONIC_<br />
CHANGED_PROPERTY (type String)<br />
APPROVE_BUTTON_TEXT_CHANGED_<br />
PROPERTY (type String)<br />
Meaning<br />
Indicates that the property that determines<br />
whether the "Accept All" file filter<br />
should be included in the file filter<br />
list has been changed using the set -<br />
AcceptAllFileFilterUsed<br />
method.<br />
This property is affected when the<br />
setAccessory method is called.<br />
The accessory is an optional, programmer-supplied<br />
Component that is<br />
displayed as part of the file chooser to<br />
the right of the file list.<br />
The "Approve" button mnemonic has<br />
been changed.<br />
Indicates that the text to be displayed<br />
on the "Approve" button has been<br />
changed.
Creating Custom Dialog Boxes 873<br />
Table 8-2 JFileChooser Properties and Their Meanings (continued)<br />
APPROVE_BUTTON_TOOL_TI P_TEXT The "Approve" button tooltip text<br />
has been changed.<br />
CHANGED_PROPERTY (type String)<br />
CHOOSABLE_FILE_FILTER_CHANGE<br />
D_PROPERTY (type FileFilter [] )<br />
CONTROL_BUTTONS_ARE_SHOWN_<br />
CHANGED_PROPERTY (type Boolean)<br />
DIALOG_TITLE_CHANGED_<br />
PROPERTY (type String)<br />
DIALOG_TYPE_CHANGED_PROPERTY<br />
(type Integer)<br />
DIRECTORY_CHANGED_PROPERTY<br />
(type File)<br />
FILE_FILTER_CHANGED_PROPERTY<br />
(type FileFilter)<br />
FILE_HIDING_CHANGED_PROPERTY<br />
(type Boolean)<br />
FILE SELECTION_MODE_CHANGED_<br />
PROPERTY (type Integer)<br />
The set of active file filters has been<br />
changed using the addChoosable-<br />
FileFilter,removeChoosable-<br />
FileFilter or<br />
resetChoosableFileFilters<br />
methods. The value of this property is<br />
the set of filters after the change has<br />
been made.<br />
Indicates that the setControlButtonsAreShown<br />
method has been<br />
called to enable or disable the use of<br />
control buttons in the file chooser layout.<br />
The dialog title has been changed by<br />
calling setDialogTitle.<br />
The dialog type has been changed by<br />
calling setDialogType. Note that<br />
showOpenDialog and showSave-<br />
Dialog both call this method internally.<br />
The current directory has been<br />
changed by calling setCurrentDi -<br />
rectory.<br />
The active file filter has been changed<br />
using the setFileFilter method.<br />
File hiding has been enabled or disabled<br />
using setFileHidingEnabled.<br />
The file selection mode (files, directories,<br />
or both) has been changed by<br />
invoking setFileSelectionMode.
874 Chapter 8 Creating Custom Dialogs<br />
Table 8-2 JFileChooser Properties and Their Meanings (continued)<br />
FILE_SYSTEM_VIEW_CHANGED_<br />
PROPERTY (type FileSystemView)<br />
FILE_VIEW_CHANGED_PROPERTY<br />
(type FileView)<br />
MULTI_SELECTION_ENABLED_<br />
CHANGED_PROPERTY (type Boolean<br />
SELECTED_FILE_CHANGED_<br />
PROPERTY (type File)<br />
SELECTED_FILES_CHANGED_<br />
PROPERTY (type File [] )<br />
The file chooser's FileSystem-<br />
View object has been changed. Every<br />
file chooser has an associated object of<br />
this type which performs low-level<br />
operations on the file system on its<br />
behalf. Each platform has its own tailored<br />
subclass of FileSystemView<br />
that knows how to handle that platform's<br />
operating system interfaces for<br />
manipulating files and directories.<br />
The programmer-supplied Fi 1 e -<br />
View object has been changed using<br />
setFileView.<br />
The ability to select more than one file<br />
at a time has been enabled or disabled<br />
by calling setMultSelectionEnabled.<br />
The file or directory highlighted in the<br />
chooser's file list has changed. Note<br />
that this does not mean that this file<br />
has actually been selected—the<br />
"Approve" button has not yet been<br />
pressed.<br />
The set of files or directories highlighted<br />
in the chooser's file list has<br />
changed.<br />
To monitor changes to these properties, you attach a PropertyChange-<br />
Listener to the file chooser and check the value returned by the PropertyChangeEvent's<br />
get Proper tyName method against the property names<br />
shown in the table, which are all constants defined by the JFileChooser<br />
class.<br />
The properties that are of interest to us for the file preview dialog are the<br />
selected file property, which changes when the user selects or deselects a file<br />
in the file list and the current directoiy property. The constructor of the<br />
FilePreviewDialog class registers a PropertyChangeListener with the
Creating Custom Dialog Boxes 875<br />
file chooser and its propertyChange method checks the property name and<br />
proceeds as follows:<br />
1. If the property name is DIRECTORY_CHANGED_PROPERTY, then<br />
the current file preview is considered to be invalid, so the text<br />
area is cleared and the text in the comment area at the bottom<br />
of the dialog is changed to indicate that there is no valid<br />
selected file. This event will be generated when the user double-clicks<br />
a directory entry, selects a directory entry and presses<br />
the Open button or presses the file chooser buttons that move<br />
the display up one directory level or to the user's home directory.<br />
2. If the property name is SELECTED_FILE_CHANGED_PROPERTY,<br />
then either a file has been selected or the previously selected<br />
file has been deselected. If there is no file selected, then the<br />
same action as taken as for a change in the current directory<br />
property. If an object has been selected in the file chooser, the<br />
getNewValue method of the PropertyChangeEvent returns<br />
the File object that corresponds to it. If this File object refers<br />
to a file that the user has read access to, then its content is read<br />
into the text area and the comment field is updated to show that<br />
the user should double-click the file to select it. Otherwise, the<br />
file preview area is cleared.<br />
The code used to create the file preview itself is in the previewFile<br />
method, which opens the file and reads up to 20 lines of text from it, then displays<br />
them in the JTextArea component. Text components are discussed in<br />
detail in the next chapter.<br />
JFileChooser Action Events<br />
Monitoring the file choosers PropertyChangeEvents allow us to update<br />
the file preview when a readable file is selected, which meets the first two<br />
requirements in our original list. The other thing we need to do is take appropriate<br />
action when the user double-clicks a file, or presses the Open or Cancel<br />
buttons. These actions are not reported to<br />
PropertyChangeListeners. Instead, they generate an ActionEvent, in<br />
which the action command indicates the reason for the event, as follows:<br />
In order to handle these events, the FilePreviewDialog constructor<br />
registers an ActionListener with the file chooser. When an event contain-
876 Chapter 8 Creating Custom Dialogs<br />
JFileChooser . APPROVE_SELECTION The user double-clicked a file or<br />
pressed the Open button.<br />
JFileChooser. CANCEL_SELECTION The user pressed the Cancel<br />
button.<br />
ing the action command APPROVE_SELECTION is received, the getSelectedFile<br />
method is called to get the File object for the file that the user may<br />
have selected. Since the user can press the Open button when there is no file<br />
selected, it is necessary to check the return value of getSelectedFile to<br />
verify that a file has actually been chosen. If it has, its File object is stored in<br />
the private variable file so that the get File method can retrieve it later. If<br />
there is no selected file or the user has pressed the Cancel button, the file<br />
variable is set to null to indicate that there was no valid selection.<br />
Only one more thing remains to be done. When you create a file chooser<br />
using the showDialog, showOpenDialog or showSaveDialog methods,<br />
pressing the Approve button or the Cancel button results in the dialog<br />
being closed. This does not happen when you use JFileChooser as part of a<br />
custom dialog, so the actionPerformed method of the ActionListener<br />
explicitly closes the dialog by invoking the dispose method when it receives<br />
an ActionEvent that indicates that the Cancel button has been pressed or<br />
that a file has actually been selected.<br />
Using Nonmodai Dialogs<br />
All of the dialogs that you have seen so far have been modal. These are what<br />
the user usually thinks of as a dialog: They pop up from a menu, toolbar, or<br />
other button, stay around until a choice has been made, then go away. From<br />
the programming point of view, modal dialogs are usually very simple to handle<br />
because the application loses control until the setvisible method<br />
returns, at which point the result of the dialog is immediately available.<br />
There is no need to arrange for event handlers and synchronization between<br />
the dialog and the application: This is all left to the implementor of the dialog<br />
and you've seen how this is handled in the last two examples.<br />
By contrast, nonmodai dialogs usually stay open until the user explicitly<br />
dismisses them. The other major difference between modal and nonmodai<br />
dialogs is, of course, that non-modal dialogs don't lock out the rest of the<br />
application (or the system) while they're on display. For this reason, the most<br />
common use of a nonmodai dialog is as a toolbox. If you've ever used a graphics<br />
or photo editor program, you'll be very familiar with the nonmodai dialogs
Creating Custom Dialog Boxes 877<br />
that float over the main window with drawing and coloring tools that you can<br />
choose from at any time and then use in the application.<br />
Having seen how to build modal dialogs, you don't need to learn anything<br />
new to create a nonmodal one. To make a dialog nonmodal, you simply pass<br />
false as the third argument to the JDialog constructor. With a nonmodal<br />
dialog, the setvisible method doesn't block, so the application continues<br />
to execute in parallel with the dialog. This raises the issue of how to get<br />
results from the dialog to the application. You can still have a get method<br />
that the dialog exports to allow any changed values to be extracted, but how<br />
would the application know that it was worth using it?<br />
The usual solution to issues like this is to use an event to notify the dialogs<br />
users that something has changed in its state. The Swing classes make extensive<br />
use of the concept of bound properties that was introduced in JDK 1.1<br />
for <strong>Java</strong>Beans. You've already seen many examples of this, among them the<br />
graphics drawing application in Chapter 4, "Graphics, Text Handling, and<br />
Printing" and the properties of the JFileChooser that we made use of in<br />
the last section to implement a file preview dialog. Essentially, the idea is that<br />
a component declares a set of properties, whose names are part of the component's<br />
public interface. Interested parties can register with the component<br />
to receive PropertyChangeEvents whenever any of these properties<br />
changes. The PropertyChangeEvent will contain the name of the affected<br />
property and its old and new values, both defined as Obj ect. To make use of<br />
these events you do, of course, need to know the actual type of each property.<br />
In terms of nonmodal dialogs, it makes sense to adopt one of two approaches:<br />
• If the dialog only allows the user to change a small number of<br />
values and these values might often be changed independently<br />
of each other, define each of them as a bound property and fire<br />
a PropertyChangeEvent as each of them changes.<br />
• If the dialog has many configurable values, either group them<br />
together and define a property for each group, or define a single<br />
property that covers everything that the dialog can change. An<br />
event would be generated for each group, or for the whole<br />
dialog, when any value in the group or in the whole dialog<br />
changed. Since each event would report the change of one<br />
value among many, or possibly of several values, and the event<br />
only allows one changed value to be included, the old and new<br />
values in the event would normally be passed as null, which<br />
requires the listener to get the new values by querying the
878 Chapter 8 Creating Custom Dialogs<br />
dialog box for the values of all of its properties using get<br />
methods and then work out what might have changed.<br />
Since this property-based mechanism is used extensively in the Swing<br />
components themselves, support for it has been included in the JComponent<br />
class in the form of the following methods:<br />
addPropertyChangeListener Registers a listener to receive<br />
property change events from the<br />
component.<br />
removePropertyChangeListener Reverses the registration performed<br />
by the previous method.<br />
f irePropertyChange Generates a PropertyChangeEvent<br />
and posts it to all registered<br />
listeners. There are several<br />
overloaded forms that allow you to<br />
use primitives and objects of different<br />
types as the old and new values<br />
of the property. The most general<br />
form of this method is f irePropertyChange<br />
(String,<br />
Object, Object).<br />
Before we show an example of a nonmodal dialog that uses property<br />
events to communicate changes, we need to explain one small problem. The<br />
methods listed above are defined in the JComponent class, so they are available<br />
to any object derived from JComponent. Unfortunately, JDialog is<br />
derived not from JComponent, but from Dialog. In JDK 1.1, Dialog does<br />
not have or inherit the addPropertyChangeListener, removeProperty-<br />
ChangeListener, and f irePropertyChange methods, so the Swing 1.1.1<br />
version of JDialog does not provide any of these methods. The <strong>Java</strong> 2 platform<br />
adds these three methods to the Component class, so they are available<br />
to all components, be they Swing components or AWT components. If you<br />
want to use this mechanism when creating a custom dialog for Swing 1.1.1,<br />
then you need to implement it yourself. In the example we'll look at below,<br />
we show you how to do this. Using properties in this way is worth the small<br />
amount of extra work you have to do, because it makes your dialog consistent<br />
with other components and it is, of course, essential if you want your dialog<br />
to be <strong>Java</strong>Beans compatible.
A Color Toolbox as a Nonmodal Dialog<br />
Creating Custom Dialog Boxes 879<br />
Now let's look at an example. Our nonmodal dialog is going to be a toolbox<br />
that contains twelve buttons, each with an associated color. The user selects a<br />
color by pressing the appropriate button and the dialog's bound property<br />
COLOR_PROPERTY changes to the newly selected color. You could use such a<br />
toolbox with the graphics program from Chapter 4, for example, instead of<br />
the toolbar that was added to it in Chapter 6, "Menus and Toolbars." A simple<br />
program that just draws random lines continuously on a frame will be<br />
used to demonstrate this dialog and the property change mechanism that it<br />
uses. The lines will be drawn in the current drawing color and the frame will<br />
register to receive property change events from the dialog so that the drawing<br />
color will change as soon as a new selection is made in the toolbox. If the<br />
property being changed is COLOR_PROPERTY, the new color will be extracted<br />
from the event and the frame will start drawing in that color. Figure 8-4<br />
shows how the program looks when it is running and you can try it for yourself<br />
using the command<br />
j ava <strong>JFC</strong>Book.Chapter8.ColorToolBoxTest<br />
Before looking at the dialog itself, let's see how the test program uses it<br />
(Listing 8-5).<br />
Figure 8-4 A color toolbox.
880 Chapter 8 Creating Custom Dialogs<br />
Listing 8-5 A program that uses a dialog containing color selection<br />
buttons<br />
package <strong>JFC</strong>Book.Chapter8;<br />
import j avax.swing.*;<br />
import j ava.awt.*;<br />
import j ava.awt.event.*;<br />
import j ava.beans.*;<br />
public class ColorToolBoxTest extends JFrame implements<br />
PropertyChangeListener {<br />
public ColorToolBoxTest(String title) {<br />
super(title);<br />
}<br />
// This method draws random lines<br />
public void draw(JPanel p) {<br />
int lastX = 0;<br />
int lastY = 0;<br />
Graphics g = p.getGraphics();<br />
try {<br />
for (;;) {<br />
Thread.s1eep(2 5 0) ;<br />
Dimension d = p.getSize () ;<br />
int nextX = (int)(Math.random() * d.width);<br />
int nextY = (int)(Math.random() * d.height);<br />
g.setColor(drawingColor);<br />
g.drawLine(lastX, lastY, nextX, nextY);<br />
lastX = nextX;<br />
lastY = nextY;<br />
}<br />
} catch (Throwable t) {<br />
}<br />
}<br />
// PropertyChangeListener interface<br />
public void propertyChange(PropertyChangeEvent evt) {<br />
if (evt.getPropertyName().equals(ColorToolBoxDialog<br />
.COLOR_PROPERTY)) {<br />
drawingColor = (Color)evt.getNewValue();<br />
}<br />
}
Creating Custom Dialog Boxes 881<br />
Listing 8-5 A program that uses a dialog containing color selection<br />
buttons (continued)<br />
public static void main(String[] args) {<br />
ColorToolBoxTest f =<br />
new ColorToolBoxTest("Color ToolBox Test");<br />
JPanel p = new JPanelO;<br />
f.getContentPane().add(p);<br />
final ColorToolBoxDialog toolBox =<br />
new ColorToolBoxDialog(f, "Color ToolBox Dialog");<br />
toolBox.addPropertyChangeListener(f);<br />
f .setSize(300, 300) ;<br />
f.addWindowListener(new WindowAdapter() {<br />
public void windowClosing(WindowEvent evt) {<br />
toolBox.dispose();<br />
System.exit(0) ;<br />
}<br />
});<br />
f.setVisible(true);<br />
// Display the dialog box to the right of the frame<br />
Point pt = f.getLocationOnScreen();<br />
toolBox.setLocation(pt.x + f.getsize().width, pt.y);<br />
toolBox.setVisible(true);// Not modal, so returns...<br />
// Start drawing<br />
f.draw(p) ;<br />
}<br />
// The current drawing color<br />
protected static Color drawingColor = Color.black;<br />
The line drawing is done by an infinite loop in the draw method. As you<br />
can see, before each drawLine call, it selects the current drawing color from<br />
the static variable drawingColor into the Graphics context. The dialog<br />
itself is created in the main method and the frame object is registered to<br />
receive PropertyChangeEvents from it, then the dialog is placed to the<br />
right of the frame by getting the frame s location relative to the screen and<br />
adding its width. Since dialogs are top-level windows, their coordinates are<br />
specified relative to the screen itself, not to the frame. Like modal dialogs,
882 Chapter 8 Creating Custom Dialogs<br />
non-modal dialogs disappear when their associated frame is iconized and are<br />
restored when the frame is opened again.<br />
The frame's propertyChange method is very simple: it looks at the property<br />
name and, if the changed property is COLOR_PROPERTY, it gets the new<br />
color from the event and uses it to change its own current drawing color. The<br />
propertyChange event will almost certainly be received in a different<br />
thread from the one in which the drawing is being performed, so there is a<br />
possibility that the event thread will update the drawing color as the main<br />
thread is reading it. Because only one value is involved here, this is not a<br />
problem: either the drawing thread gets the old color on this pass or it gets<br />
the new one. Either way, it will get the new color on the next cycle of its loop.<br />
Note, however, that for the sake of simplicity, we have cheated slightly in this<br />
example. As we said in Chapter 2, you should only access Swing components<br />
from the event thread, but the drawing code in this example runs entirely in<br />
the thread in which the application starts, which is not the event thread. You<br />
could try to fix this by using the SwingUtilities invokeLater method to<br />
call the draw method instead, but this would result in the event thread being<br />
locked into a loop drawing on the screen and prevent it handling any events.<br />
Of course, you can modify the example so that it doesn't have this problem,<br />
but the complications involved would obscure the main point of the example.<br />
Now let's look at the dialog box itself, the code for which is shown in Listing<br />
8—6.<br />
Listing 8-6 A dialog containing color selection buttons<br />
package <strong>JFC</strong>Book.Chapters,-<br />
import j avax.swing.*;<br />
import j ava.awt.*;<br />
import j ava.awt.event.*;<br />
import <strong>Java</strong>.beans.*;<br />
public class ColorToolBoxDialog extends JDialog {<br />
public ColorToolBoxDialog(Frame f, String title) {<br />
super(f, title, false);// Not a modal dialog<br />
colorPanel = new HelperPanel();<br />
this.getContentPane().add(colorPanel);<br />
colorPanel.setLayout(new GridLayout(ROWS, COLUMNS))<br />
this.addWindowListener(new WindowAdapter() {<br />
public void windowClosing(WindowEvent evt) {
Creating Custom Dialog Boxes 883<br />
Listing 8-6 A dialog containing color selection buttons (continued)<br />
}<br />
}<br />
});<br />
ColorToolBoxDialog.this.dispose();<br />
// Add buttons to the toolbox<br />
JToggleButton b = null;<br />
for (int i = 0; i < actions.length; i++) {<br />
b = this.add(actions[i]);<br />
}<br />
// Select the last button<br />
b.doClickO ;<br />
this.pack();<br />
// Gets the current color<br />
public Color getSelectedColor() {<br />
return currentColor;<br />
}<br />
// Delegate property listener methods to the JPanel<br />
public void addPropertyChangeListener(<br />
PropertyChangeListener 1) {<br />
colorPanel.addPropertyChangeListener(1);<br />
}<br />
public void retnovePropertyChangeListener(<br />
PropertyChangeListener 1) {<br />
colorPanel.removePropertyChangeListener(1);<br />
}<br />
// Add an action to the toolbox and return<br />
// a toggle button<br />
protected JToggleButton add(Action a) {<br />
Icon icon = (Icon)a.getValue(Action.SMALL_ICON);<br />
if (icon != null) {<br />
JToggleButton b = new JToggleButton (icon) ,-<br />
// Use the text as a tooltip<br />
if (a.getValue(Action.NAME) != null) {<br />
b.setToolTipText((String)a.getValue(Action.NAME));<br />
}<br />
b.addActionListener(a) ;
884 Chapter 8 Creating Custom Dialogs<br />
Listing 8-6 A dialog containing color selection buttons (continued)<br />
// Add to the color panel<br />
colorPanel.add(b);<br />
// Add this button to the button group<br />
grp.add (b) ;<br />
return b;<br />
}<br />
return null;<br />
}<br />
// Color change - fire a property change event<br />
protected void colorChanged(Color c) {<br />
oldColor = currentColor;<br />
currentColor = c;<br />
}<br />
colorPanel.firePropertyChangeEvent(<br />
COLOR_PROPERTY, oldColor, currentColor);<br />
// Helper class that changes the drawing color<br />
protected class ColorChangeAction extends AbstractAction<br />
{ protected ColorChangeAction(Color c, String text) {<br />
super(text, new <strong>JFC</strong>Book.Chapter4.ColorFilllcon(c));<br />
this.color = c;<br />
}<br />
public void actionPerformed(ActionEvent evt) {<br />
ColorToolBoxDialog.this.colorChanged(color) ;<br />
}<br />
}<br />
private Color color;<br />
// Our exposed property name<br />
public static final String COLOR_PROPERTY =<br />
"COLOR__PROPERTY" ;<br />
// Button group to manage the toolbox buttons<br />
protected ButtonGroup grp = new ButtonGroup();<br />
// The color actions
Creating Custom Dialog Boxes 885<br />
Listing 8-6 A dialog containing color selection buttons (continued)<br />
protected final ColorChangeAction[] actions =<br />
new ColorChangeAction [] {<br />
new ColorChangeAction(Color.black, "Black"),<br />
new ColorChangeAction(Color.red, "Red"),<br />
new ColorChangeAction(Color.yellow, "Yellow"),<br />
new ColorChangeAction(Color.green, "Green"),<br />
new ColorChangeAction(Color.orange, "Orange"),<br />
new ColorChangeAction(Color.pink, "Pink"),<br />
new ColorChangeAction(Color.gray, "Gray"),<br />
new ColorChangeAction(Color.lightGray, "Light Gray"),<br />
new ColorChangeAction(Color.cyan, "Cyan"),<br />
new ColorChangeAction(Color.blue, "Blue"),<br />
new ColorChangeAction(Color.magenta, "Magenta"),<br />
new ColorChangeAction(Color.darkGray, "Dark Gray")<br />
};<br />
protected Color oldColor = Color.black;<br />
protected Color currentColor = Color.black;<br />
protected HelperPanel colorPanel;<br />
protected static final int ROWS = 4;<br />
protected static final int COLUMNS = 3;<br />
}<br />
// Helper class to generate PropertyChangeEvents<br />
class HelperPanel extends JPanel {<br />
// Expose the firePropertyChange method<br />
public void firePropertyChangeEvent(String name,<br />
Object oldValue, Object newValue) {<br />
firePropertyChange(name, oldValue, newValue);<br />
}<br />
}<br />
The first line of the constructor is an important one:<br />
super(f, title, false);// Not a modal dialog<br />
In this example, the third argument passed to JDialogs constructor is<br />
false, which results in the dialog being nonmodal. The main consequence<br />
of this from the application's point of view is that the setvisible method<br />
will return as soon as the dialog has been displayed. In the case of our example,<br />
this allows it to get on with drawing its lines. On top of the JDialog, the<br />
constructor overlays an object called HelperPanel, which is a helper class
886 Chapter 8 Creating Custom Dialogs<br />
derived from JPanel. Under ordinary circumstances, you would just use a<br />
JPanel and populate it directly with colored buttons, but here it is necessary<br />
to compensate for the fact that, as noted earlier, in Swing 1.1.1, JDialog<br />
does not have methods to support the property change mechanism. To solve<br />
this problem, the property change support of JPanel, which is a JComponent,<br />
is used instead. Here is what happens.<br />
When the dialogs users add or remove a property change listener, this<br />
operation is delegated to the HelperPanel; in effect, the dialogs users are<br />
registering as listeners of the HelperPanel, not the dialog.<br />
When the dialog needs to fire a property change event, it should just<br />
invoke the f irePropertyChange method of the panel, which will then<br />
broadcast the event to all of its registered listeners. Unfortunately, f irePropertyChange<br />
is protected, so it can only be used from within the Swing<br />
package or from a subclass of JPanel. This method is available from within<br />
the dialog because HelperPanel subclasses JPanel and implements a public<br />
version called f irePropertyChangeEvent that directly calls the protected<br />
f irePropertyChange method of its superclass.<br />
<strong>Core</strong> Note<br />
In fact, we need not have renamed the method - HelperPanel could<br />
have had a public f irePropertyChange method that calls the<br />
protected method inherited from its superclass. The name was changed<br />
only to make it clear that the underlying method could not be directly<br />
accessed from within the dialog.<br />
Each of the colors that appears in the dialog box is represented by an<br />
Action. Earlier in this book, we looked closely at Actions and pointed out<br />
how useful they are as a way of encapsulating functionality in such a way that it<br />
can be consistently accessed from menu bars, toolbars, and buttons without<br />
needing to replicate code. This example implements an add method for the<br />
dialog box that allows you to pass it an Action and have a button appear on the<br />
dialog. When pressed, the button will invoke the actionPerf ormed method<br />
of the Action. You'll recall from Chapter 6 that Action is an interface, so you<br />
need to implement a concrete class to make use of this mechanism. Here, as<br />
before, this class is derived from AbstractAction by adding the mandatory<br />
actionPerformed method and the color member, which stores the color<br />
associated with the button. The constructor of this class is passed the color that<br />
it represents as both a Color object and a text string. From the Color object it
Tabbed Panes and Borders 887<br />
generates an icon using the ColorFilllcon class from Chapter 4 and passes<br />
this and the text string to the AbstractAction constructor.<br />
Each Action is added to the dialog using its overloaded add method. This<br />
method needs to create a button that represents the action required, add it to<br />
the dialog itself (actually to the panel), then connect the actionPerformed<br />
method of the Action to the button so that it will be invoked when the button<br />
is pressed. The text string stored in the Action is used to add a tooltip,<br />
while the icon will appear on the button s face.<br />
If you add an Action to a JToolBar, you get back a JButton, created in<br />
much the same way as the buttons that are placed on this dialog. In our case,<br />
however, what is added and returned is not a JButton but a JToggleButton.<br />
JToggleButton is the same as JButton in all respects except that it is<br />
sticky: When you press it, it generates an ActionEvent and stays pressed in.<br />
Similarly if you press it again, it generates another ActionEvent and pops<br />
out. This is a more natural representation for buttons in a toolbox, because<br />
the selected color can be seen by looking for the button that's depressed. To<br />
make sure that only one button is pressed at any time, they are all added to a<br />
ButtonGroup. This class monitors the events generated by all of the buttons<br />
it contains. If one of them generates an event that indicates it has been<br />
pressed, the ButtonGroup will deselect whichever button was previously<br />
pressed. You can tell whether a JToggleButton is pressed in or not by calling<br />
its isSelected method, which returns true if the button is selected<br />
(i.e., pressed in). You can also use the setSelected method to cause the<br />
button to appear to be pressed (with argument true) or to make it pop up<br />
(with argument false). JToggleButton is the base upon which the Swing<br />
radio and checkbox buttons are built, as you'll see later in this chapter.<br />
The rest of the dialog is straightforward. The actionPerformed method<br />
of the Action subclass calls the dialogs colorChanged method, passing it<br />
associated color as argument. This method uses the new color and the previously<br />
selected color to fire a property change event that will be caught by the<br />
applications PropertyChangeListener, which will update the drawing<br />
color to the one selected in the dialog box and passed as the new value<br />
attribute of the PropertyChangeEvent.<br />
Tabbed Panes and Borders<br />
Swing introduces two features that are of great use in developing complex<br />
dialogs—the tabbed pane control and a set of stock borders. Since there are<br />
so many different border styles and many variations possible on each of these
888 Chapter 8 Creating Custom Dialogs<br />
styles, the tabbed pane is an appropriate way to put them all on view, so this<br />
section describes these features together.<br />
The Tabbed Pane<br />
The tabbed pane will be very familiar to you if you have used the Windows<br />
platform where it is known as the tabbed dialog box or a property sheet. A<br />
tabbed pane is a container that allows you to overlay several components,<br />
usually panels, on top of each other so that only one of them is visible at any<br />
time. In order that you can see which components are available and select<br />
the one you want, each of them has a label or tab at the top of it. In a fullypopulated<br />
dialog box, these tabs look like cards in a card file index. Figure 8-<br />
5 shows a typical tabbed pane that shows some of the Swing borders.<br />
For all its apparent complexity, the JTabbedPane is actually a very simple<br />
component. In order to create a dialog based around a tabbed pane, you<br />
need to do the following:<br />
1. Create an empty tabbed pane.<br />
2. Create a container for each sheet of the pane and populate it<br />
with the controls that you need.<br />
3. Add each container to the pane.<br />
4. Select the tab that should be initially displayed.<br />
5. Mount the JTabbedPane in a JDialog.<br />
Creating and Initializing a Tabbed Pane<br />
Creating the tabbed pane is simple—it has only two constructors:<br />
JTabbedPane();<br />
JTabbedPane(int tabPlacement);<br />
Each tab can be created in any way you like but usually, you'll create a<br />
JPanel and mount some controls on it. When you've created the panels, you<br />
add them to the JTabbedPane using one of the addTab or add methods<br />
shown in Table 8-3. The main difference between addTab and add is that<br />
addTab requires you to specify the text to be used on the tab separately,<br />
whereas add (sometimes) gets it from the components name, which can be<br />
set using the Component setName method—see Table 8-3 for details.<br />
When you use these methods, the tabs are arranged in the same order as<br />
the method calls, working across the pane from left to right, then moving to<br />
the left of the second row and so on. In <strong>Java</strong> 2 version 1.3, the placement
Figure 8-5 The JTabbedPane control.<br />
Tabbed Panes and Borders 889<br />
order of the tabs actually depends on the component orientation of the<br />
JTabbedPane—if the component orientation is right-to-left, then the tabs<br />
are installed starting on the right and moving to the left instead of left to<br />
right.<br />
The number of rows depends on the size of the pane and the number of<br />
tabs that you add to it. This description assumes the default tab placement,<br />
which arranges them along the top of the pane. You'll see later how to change<br />
the tab placement policy. The preferred size of the tabbed pane is calculated<br />
by obtaining the preferred size of all of the tabs and using the largest width<br />
and the largest height as the basis for the calculation.<br />
Table 8-3 Adding Tabs to a JTabbedPane<br />
Method Description<br />
public void addTab(String<br />
title, Component comp)<br />
Adds comp to the tabbed pane, with the<br />
text string title on its tab.
890 Chapter 8 Creating Custom Dialogs<br />
Table 8-3 Adding Tabs to a JTabbedPane (continued)<br />
public void addTab(String<br />
title, Icon icon,<br />
Component comp)<br />
public void addTab(String<br />
title, Icon icon,<br />
Component comp, String<br />
tip)<br />
public Component<br />
add(Component comp)<br />
public Component<br />
add(Component comp, int<br />
index)<br />
public void add(Component<br />
comp, Object constraints)<br />
public void add(Component<br />
comp, Object constraints,<br />
int index)<br />
Adds comp to the tabbed pane. The tab will<br />
have the text string title and the given<br />
icon on its tab. Either title or icon<br />
can be nul 1. For a tab with just an icon, for<br />
example, supply null for the text argument.<br />
Same as the above, but adds tip to the tab<br />
as a tooltip.<br />
Adds the given component to a new tab.<br />
The tab's title is set to the value returned<br />
by invoking the getName method of the<br />
component.<br />
Adds the given component to a new tab<br />
and places the tab at the location given by<br />
index, where 0 represents the position<br />
for the first tab added, 1 for the second and<br />
so on. The special value -1 is reserved to<br />
mean that the tab should be added after<br />
any that already exist (that is, add (comp,<br />
-1) is the same as add (comp)). If there<br />
is already a tab at the given index, it (and<br />
any others with higher index values) are<br />
moved along to make room.<br />
Adds the given component to a new tab. If<br />
the constraints object is a String, it is<br />
used as the title text for the tab. If constraints<br />
is an Icon, it is used to supply the<br />
tab's icon. If the constraints object is null<br />
or is not a String, the the title is obtained<br />
by calling getName on the component<br />
(this includes the case where it is an<br />
Icon).<br />
Same as the previous method, except that<br />
the tab is added at the given index.
Table 8-3 Adding Tabs to a JTabbedPane (continued)<br />
public Component add(String<br />
title, Component comp)<br />
Tabbed Panes and Borders 891<br />
Adds the given component in a new tab<br />
with the supplied title. This method is<br />
equivalent to addTab (title, comp)<br />
apart from its return value.<br />
When you've added all of the tabs that you want, you can select the one<br />
that should be initially displayed using one of the following methods:<br />
public void setSelectedlndex(int index);<br />
public void setSelectedComponent(Component comp);<br />
The index value is the number of the tab to select, where the first tab<br />
added to the pane is number 0. In the second method, you specify the component<br />
that was used to create the tab that you want selected. There are a<br />
number of other methods that you can use to insert tabs out of order or<br />
remove tabs. These, along with some other useful methods, are listed in<br />
Table 8-4.<br />
Table 8-4 Methods Used to Manipulate JTabbedPane<br />
Method<br />
public void insertTab (String<br />
title, Icon icon, Component<br />
comp, String tip, int index)<br />
public void removeTabAt (int<br />
index)<br />
public int getSelectedlndex()<br />
public Component<br />
getSelectedCotnponent ()<br />
public int getTabCount()<br />
Description<br />
Adds component comp to the pane at<br />
the supplied index. If this position is<br />
already occupied, the existing tab's number<br />
and those of all following tabs are<br />
increased by 1. Any of title, icon<br />
and tip may be null.<br />
Removes the tab at position index.<br />
Any tabs that follow this tab are renumbered.<br />
Gets the index of the tab at the front of<br />
the pane. This is usually used when handling<br />
the event generated when the tab<br />
on view is changed (see Listing 8-7).<br />
Gets the component for the selected<br />
tab.<br />
Gets the number of tabs in the pane.
892 Chapter 8 Creating Custom Dialogs<br />
Table 8-4 Methods Used to Manipulate JTabbedPane (continued)<br />
public int getTabRunCount ()<br />
public String getTitle-At (int<br />
index)<br />
public Icon getlconAt(int<br />
index)<br />
Public Icon getDisabledlconAt<br />
(int index)<br />
public Component<br />
getComponentAt (int index)<br />
public String<br />
getToolTipTextAt(int index)<br />
public void<br />
setToolTipTextAt(int index,<br />
String tip)<br />
public boolean isEnabledAt (int<br />
index)<br />
public void setEnabledAt (int<br />
index, boolean enabled)<br />
public void setTitleAt (int<br />
index, String title)<br />
public void setlconAt (int<br />
index, Icon icon)<br />
public void setDisabledlconAt<br />
(int index, Icon icon)<br />
Returns the number of tab runs necessary<br />
to display the tabs with the current<br />
placement policy.<br />
Gets the title of the indicated tab, or<br />
null if there is no string title.<br />
Gets the icon for a tab, or null if it<br />
doesn't have an icon.<br />
Gets the disabled icon for a tab.<br />
Retrieves the component for index .<br />
Returns the tooltip text for the given tab<br />
(as set by setToolTipText)<br />
Sets the tooltip for a given tab.<br />
Returns whether the indicated tab is<br />
enabled.<br />
Enables or disables a given tab. A<br />
disabled tab cannot be selected and<br />
may have a different icon (see<br />
setDisabledlconAt)<br />
Sets or changes the title for tab number<br />
index. You can supply nul 1 to remove<br />
the title for the tab.<br />
Sets or changes a tab's icon. Supply<br />
nul 1 to remove the icon.<br />
Sets or changes the icon to be used<br />
when a tab is disabled. If you don't set a<br />
disabled icon for a tab, a grayed-out version<br />
of the enabled icon is used instead.<br />
public void setComponentAt (int Replaces the entire content of a tab with<br />
index, Component comp) the supplied Component.
Tabbed Panes and Borders 893<br />
Table 8-4 Methods Used to Manipulate JTabbedPane (continued)<br />
public void setTabPlacement<br />
(int placement)<br />
public int getTabPlacement()<br />
public void setForegroundAt<br />
(int index, Color<br />
foreground)<br />
public Color getForegroundAt<br />
(int index)<br />
public void setBackgroundAt<br />
(int index, Color<br />
background)<br />
public Color getBackgroundAt<br />
(int index);<br />
public Rectangle getBoundsAt<br />
(int index)<br />
Sets the tab placement to one of<br />
JTabbedPane.TOP, JTabbed-<br />
Pane .BOTTOM, JTabbed-<br />
Pane .LEFT, JTabbedPane.RIGHT<br />
Returns the current tab placement.<br />
Sets the foreground color of the given<br />
tab.<br />
Returns the foreground color of a tab.<br />
Sets the background color of the given<br />
tab.<br />
Gets the background color of a tab.<br />
Gets the bounds of a tab.<br />
Once the dialog is displayed, the user can change the active panel by clicking<br />
on die appropriate tab. In the Windows and Motif look-and-feels, the<br />
JTabbedPane reorganizes the tabs so that the selected tabs row moves to<br />
the front. This does not, however, happen in the Metal look-and-feel.<br />
Each time the selected tab changes, JTabbedPane generates a ChangeEvent,<br />
which you can catch by registering a ChangeListener on the<br />
JTabbedPane. This is useful if you have dependencies between some of the<br />
sheets in the dialog, or if you want to delay updating a tab until it is actually<br />
on view. In the extreme case, you can avoid populating any of the tabs (apart<br />
from the first) until they are made visible. If you take this approach, there<br />
will be a delay as each tabs content is created, so it may not be feasible for<br />
complex layouts.<br />
You've now seen just about all there is to know about JTabbedPane. To<br />
see how it works in practice, look at Listing 8-7, which shows an extract from<br />
the BorderTab program that shows all of the Swing borders.<br />
This example creates a dialog box containing a JTabbedPane, each tab of<br />
which shows a selection of borders of one particular style. On the tab for each<br />
set of borders, a text description of the border style and a small icon that has<br />
an example of that border style applied to it is displayed. The dialog construe-
894 Chapter 8 Creating Custom Dialogs<br />
Listing 8-7 Using JTabbedPane<br />
public class BorderTab extends JDialog {<br />
public BorderTab(Frame f, String title, int placement) {<br />
super(f, title, true);<br />
}<br />
// Create a tabbed pane and add it to the dialog<br />
pane = new JTabbedPane(placement);<br />
this.getContentPane().add(pane);<br />
// Add the border tabs<br />
addBevelBorders () ;<br />
addCompoundBorders();<br />
addEmptyBorders () ;<br />
addEtchedBorders () ;<br />
addLineBorders();<br />
addMatteBorders();<br />
addSoftBevelBorders();<br />
addTitledBorders();<br />
pane.setSelectedlndex(0);<br />
this.setSize(600, 400);<br />
// Code omitted<br />
public static void main(String [] args) {<br />
JFrame f = new JFrame("Tabbed Pane with Borders");<br />
final JLabel label = new JLabel ("", JLabel.CENTER);<br />
f.getContentPane0 .add(label);<br />
f.setSize(200, 200);<br />
// Get tab placement from command line argument<br />
int tabPlacement = JTabbedPane.TOP;<br />
if (args.length > 0) {<br />
String arg = args [0];<br />
if (arg.equals("bottom")) {<br />
tabPlacement = JTabbedPane.BOTTOM;<br />
} else if (arg.equals ("left")) {<br />
tabPlacement = JTabbedPane.LEFT;<br />
} else if (arg.equals("right")) {<br />
tabPlacement = JTabbedPane.RIGHT;<br />
}<br />
}
J<br />
Listing 8-7 Using JTabbedPane (continued)<br />
}<br />
Tabbed Panes and Borders 895<br />
final BorderTab d = new BorderTab(f,<br />
"Swing Borders", tabPlacement);<br />
d.getTabbedPane().addChangeListener(<br />
new ChangeListener() {<br />
public void stateChanged(ChangeEvent evt) {<br />
JTabbedPane src = (JTabbedPane)evt.getSource();<br />
String title = src.getTitleAt(<br />
src.getSelectedlndex());<br />
label.setText(title);<br />
}<br />
});<br />
WindowListener 1 = new WindowAdapter() {<br />
public void windowClosing(WindowEvent evt) {<br />
d.dispose();<br />
System.exit(0) ;<br />
}<br />
};<br />
f.addWindowListener(1);<br />
d.addWindowListener(1);<br />
f.setVisible(true);<br />
try {<br />
Thread.sleep (2000) ;<br />
} catch (Throwable t) {<br />
}<br />
d.setLocation(50, 50);<br />
d.setVisible(true);<br />
System.exit(0);<br />
// Code omitted<br />
protected JTabbedPane pane;
896 Chapter 8 Creating Custom Dialogs<br />
tor creates the empty JTabbedPane and adds it to the content pane of the<br />
dialog box, then calls a series of methods, each of which adds one sheet of<br />
borders. You'll see some of these methods as the corresponding border styles<br />
are described below. After adding all of the sheets, the first one (which displays<br />
bevel borders) is selected and then the dialog is explicitly sized.<br />
To illustrate the events that are generated as the active sheet is changed,<br />
the main method creates a JFrame and mounts a JLabel onto it, then registers<br />
a ChangeListener against the tabbed pane. The ChangeEvent that is<br />
generated when the visible tab is changed is processed by the state-<br />
Changed method, which gets a reference to the JTabbedPane from the<br />
source field of the event. Using this reference, the title of the selected sheet<br />
is obtained using the getSelectedlndex and getTitleAt methods, and<br />
then used to set the text of the label on the application frame. As a result, if<br />
you start this application using the command:<br />
java <strong>JFC</strong>Book.Chapter8.BorderTab<br />
and select various sheets, you will see the text in the applications main window<br />
change as the tabs are switched.<br />
This example also allows you to specify on the command line where you<br />
would like the tabs to be placed. Use one of the following strings to explicitly<br />
control the tab placement:<br />
• top<br />
• left<br />
• bottom<br />
• right<br />
If you don't specify a placement, the tabs appear along the top. If you<br />
examine the code in Listing 8—7, you'll see that the command line argument<br />
is used to select a placement value (one of JTabbedPane. TOP, JTabbed-<br />
Pane. BOTTOM, JTabbedPane . LEFT, and JTabbedPane . RIGHT) which is<br />
passed to the JTabbedPane constructor. You can also control the placement<br />
of tabs (and change it dynamically) using the setTabPlacement method.<br />
Figure 8-5 shows the tabbed pane with the tabs along the top, while Figure<br />
8-6 shows tabs on the right, obtained using the following command line:<br />
java <strong>JFC</strong>Book.Chapter8.BorderTab right<br />
<strong>Core</strong> Warning<br />
You might expect that there would be support for locale-independent<br />
specification of tab placement in <strong>Java</strong> 2, so that instead of requesting that
Tabbed Panes and Borders 897<br />
the tabs be placed on the left or right of the tabbed pane, an application<br />
could specify LEADING or TRAILING in order that the final placement<br />
would depend on the component orientation that is assigned to the<br />
JTabbedPane./\t the time of writing, however, this is not the case, so<br />
applications can only specify absolute placement for tabs that appear at<br />
the side of the control. Contrast this with the treatment of those that<br />
appear on the top and bottom edges, where the left-to-right placement<br />
order does depend on the component orientation, as noted earlier.<br />
Figure 8-6 The JTabbedPane control with tabs on the right.<br />
Swing Borders<br />
Every Swing component derived from JComponent can be given any of a<br />
selection of standard borders, or a border that you implement yourself. The<br />
Swing borders are all classes that implement the Border interface, which<br />
was examined in some detail in Chapter 4 while implementing a border for a<br />
graphics canvas. Essentially, a border takes over a certain amount of space<br />
around the edge of a JComponent. When a component has a border, it is<br />
responsible for ensuring that it does not render its usual content over the<br />
border. In the AWT, you could not specify insets for a component, but some<br />
containers (such as Frame) had fixed insets that could not be changed by the<br />
programmer, except by subclassing and overriding the get Insets method.
898 Chapter 8 Creating Custom Dialogs<br />
By using the Swing EmptyBorder, however, you can achieve the effect of a<br />
blank region at the edge of a component, which is the same as setting component<br />
insets. This allows you to arrange for there to appear to be space around<br />
a component without relying on the layout manager for the components container<br />
to provide it for you.<br />
This section looks at each of the Swing border types and shows several<br />
variations on each one. The best way to see these borders for yourself is to<br />
ran the BorderTab application that was used in the previous section. We'll<br />
be looking at how some of the dialog sheets in that application were implemented<br />
as we survey the various border types.<br />
Borders and the BorderFactory<br />
Each Swing border is implemented as a separate class in the package<br />
javax. swing.border. All of the border classes implement the Border<br />
interface, which is defined as follows:<br />
public interface Border {<br />
public void paintBorder(Component c,<br />
Graphics g, int x, int y, int width, int height);<br />
public Insets getBorderlnsets(Component c);<br />
public boolean isBorderOpaque();<br />
}<br />
The getBorderlnsets method is used by the host component to find<br />
out how much space to allow for the border. Since this method returns an<br />
Insets object, there is no requirement for the border to use the same<br />
amount of space on every side of the component and, as you'll see, some of<br />
the Swing border classes allow you to create borders that are not symmetrical.<br />
The isBorderOpaque method returns true if the border itself either<br />
paints the background of the area it covers or completely covers that area.<br />
Some borders are transparent, EmptyBorder being the most obvious example.<br />
Finally, the paintBorder method is responsible for actually rendering<br />
the border. If you look back to Chapter 4, you'll find an implementation of a<br />
typical paintBorder method.<br />
Two of the Border methods have a Component as their first argument.<br />
This allows the border to take some of its state from the component that it is<br />
rendering on. For example, borders that draw effects that rely on shadows<br />
only work properly if they can use colors that are closely related to the surface<br />
that they are drawn on. One way to approach this problem would be to<br />
create a separate border object for each component that needs a border and<br />
to configure every border with the colors that it is supposed to use by passing
Tabbed Panes and Borders 899<br />
constructor arguments. However, this would be inefficient use of memory.<br />
By passing the host component as an argument, it is often possible to arrange<br />
for only one copy of a border type to be shared by every component that uses<br />
that border, because there is no state that needs to be separately saved for<br />
each use of that border.<br />
Because this is true, the Swing package includes a class called Border-<br />
Factory that has factory methods that can create common borders and maximize<br />
border sharing. While you can always create a border using the new<br />
operator, it is much more efficient to use BorderFactory whenever it can<br />
create a suitable border for you. Even with BorderFactory, not all borders<br />
are shared, because it is possible to specify individual colors for some borders<br />
if you don't want to accept the defaults. For example, you can use shared<br />
Bevel borders if you want the default color scheme, which uses colors<br />
derived from those of the host component, or you can create a Bevel border<br />
with your own chosen highlight and shadow colors. However, BorderFactory<br />
has factor)' methods for each case, which makes it possible to share the<br />
default bevel borders and, at least in theory, to share customized borders,<br />
created by different components, which have the same colors (even though it<br />
is not currently implemented that way).<br />
<strong>Core</strong> Tip<br />
To save memory, before creating a border instance using new, check<br />
whether the BorderFactory can create it for you. Also, with only a few<br />
exceptions, borders can be shared between components even if they were<br />
created with new—only those with constructor arguments where you need<br />
different argument values cannot be interchanged. Your default policy<br />
should be to consider Borders as static objects that can be shared among<br />
components.<br />
Empty Border<br />
The empty border is the most trivial border: it just leaves empty space at the<br />
edge of the component. You can use it to create insets that need not be the<br />
same on each edge of the component. There are two BorderFactory methods<br />
that create empty borders:<br />
public static Border createEmptyBorder0 ;<br />
public static Border createEmptyBorder (int top, int left,<br />
int bottom, int right) ,-
900 Chapter 8 Creating Custom Dialogs<br />
The first method is of questionable value, because it creates a border with<br />
zero insets—in other words, the border occupies no space at all. However,<br />
only one instance of this border is ever created. By contrast, the second<br />
method gives an empty border with arbitrary margins. A new border is created<br />
each time you call this method.<br />
The EmptyBorder class itself has two constructors that are equivalent to<br />
the second factory method:<br />
public EmptyBorder(Insets insets);<br />
public EmptyBorder(int top, int left, int bottom,<br />
int right);<br />
Line Border<br />
This border draws a simple rectangle of given color and thickness around the<br />
edge of its host component. There are two BorderFactory methods that<br />
create line borders:<br />
public static Border createLineBorder(Color color);<br />
public static Border createLineBorder(Color color,<br />
int thickness);<br />
The line is drawn right up against the edge of the component; if you need<br />
to leave a gap between the edge of the component and the line, you can combine<br />
a line border and an empty border using the CompoundBorder class,<br />
which is described later.<br />
The LineBorder class itself has two constructors that do the same job as<br />
the BorderFactory methods:<br />
public LineBorder(Color color);<br />
public LineBorder(Color color, int thickness);<br />
It also has two static methods that return shared instances of the most<br />
commonly used line borders:<br />
public static Border createBlackLineBorder();<br />
public static Border createGrayLineBorder();<br />
These methods should be used if you need a 1-pixel wide black- or graylined<br />
border.<br />
If you are using <strong>Java</strong> 2 version 1.3, you can use an extra constructor:<br />
public LineBorder(Color color, int thickness,<br />
boolean rounded);<br />
This constructor creates a border in which the corners are rounded if the<br />
third argument has the value true.
Etched Border<br />
Tabbed Panes and Borders 901<br />
An etched border draws a 2-pixel wide groove around the edge of its host<br />
component. To give a three-dimensional effect, the groove is drawn in two<br />
colors. By default, the highlight color is slightly lighter than its host components<br />
background and the shadow color slightly darker. The BorderFactory<br />
has methods to create a lowered etched border with the default colors<br />
(which is shared among all components) or a specific border with colors of<br />
your choice:<br />
public static Border createEtchedBorder();<br />
public static Border createEtchedBorder(Color highlight,<br />
Color shadow);<br />
The EtchedBorder class has four constructors:<br />
public EtchedBorder();<br />
public EtchedBorder(Color highlight, Color shadow);<br />
public EtchedBorder(int etchType);<br />
public EtchedBorder(int etchType, Color highlight,<br />
Color shadow);<br />
The first two produce the same borders as the factory methods. If you use<br />
the second constructor or the second factory method, then to get the proper<br />
etched effect, you need to choose the highlight and shadow colors carefully.<br />
To achieve the grooved effect of the default etched border, the shadow color<br />
must be darker than the highlight color; if you reverse these colors, making<br />
the shadow appear lighter, then the border will appear raised up from the<br />
component instead of being etched into it. Another way to get a raised<br />
etched border is to use one of the last two constructors. These both have an<br />
etchType argument that can be either EtchedBorder .LOWERED or<br />
EtchedBorder. RAISED. To get the correct effect with the last constructor,<br />
the shadow color must be darker than the highlight color, whichever type of<br />
etched border you choose.<br />
In <strong>Java</strong> 2 version 1.3, BorderFactory has two additional methods that<br />
allow it to create raised etched borders as well as the lowered ones that can<br />
be obtained using the two methods shown above:<br />
public static Border createEtchedBorder(int type);<br />
public static Border createEtchedBorder(int type,<br />
Color highlight, Color shadow);<br />
In both cases, the extra argument type takes the value EtchedBorder<br />
. LOWERED or EtchedBorder . RAISED .<br />
Fitmre 8-7 shows a selection of etched borders.
902 Chapter 8 Creating Custom Dialogs<br />
Figure 8-7 Swing etched borders.<br />
Bevel Border and Soft Bevel Border<br />
The bevel and soft bevel borders are similar to the etched border, exeept that<br />
the colors are used to create the impression that the region inside the border is<br />
raised above or depressed into the components surface. The border itself is<br />
always two pixels wide. There are five factory methods for the bevel border:<br />
public static Border createBevelBorder(int type);<br />
public static Border createBevelBorder(int type,<br />
Color highlight, Color shadow);<br />
public static Border createBevelBorder(int type,<br />
Color highlightOuter, Color highlightlnner,<br />
Color shadowOuter, Color shadowlnner);<br />
public static Border createRaisedBevelBorder();<br />
public static Border createLoweredBevelBorder();<br />
The createRaisedBevelBorder and createLoweredBevelBorder<br />
methods create borders with default colors derived from the background of<br />
the host component. These methods arrange for only one instance of each<br />
type to be created. The first factory method shown above takes an argument
Tabbed Panes and Borders 903<br />
that specifies the border type; it is just a longer equivalent of one of the last<br />
two methods:<br />
createBevelBorder (BevelBorder. RAISED) is equivalent to<br />
createRaisedBevelBorder()<br />
createBevelBorder (BevelBorder . LOWERED) is equivalent to<br />
createLoweredBevelBorder()<br />
You can use the other two factory methods to specify your own shadow<br />
and highlight colors. If you supply two colors, then the top and left sides of<br />
the border are each drawn as two-pixel wide lines of one color and the bottom<br />
and right sides as two-pixel wide lines of the other. On the other hand,<br />
you can give a more gradually sloping effect to the bevel if you supply four<br />
colors. If you do this, then, for a lowered bevel, the top and left corners are<br />
rendered using one line each of the highlight colors and the bottom and right<br />
one line each of the two shadow colors; for a raised bevel, the color ordering<br />
is reversed.<br />
A plain bevel uses rectangles to create the border. You can obtain rounded<br />
corners using a soft bevel border. These borders can only be created by using<br />
the Sof tBevelBorder constructors directly, because there are no corresponding<br />
BorderFactory methods:<br />
public SoftBevelBorder(int type)<br />
public SoftBevelBorder(int type, Color highlight,<br />
Color shadow);<br />
public SoftBevelBorder(int type, Color highlightOuter,<br />
Color highlightInner, Color shadowOuter,<br />
Color shadowlnner);<br />
You can see the soft bevel borders from the BorderTab application in Figure<br />
8-8.<br />
Compound Border<br />
As its name suggests, this border is made up of two other borders. The<br />
CompoundBorder accepts two instances of any of the borders (of which<br />
one or both may also be CompoundBorders) and arranges one of the borders<br />
inside the other one. This is especially useful if you want a border with<br />
a margin on either side of it, since all of the borders draw themselves onto<br />
the component without leaving a gap on their outer edge. There are two<br />
factory methods:<br />
public static CompoundBorder createCompoundBorder();<br />
public static CompoundBorder createCompoundBorder(<br />
Border outsideBorder, Border insideBorder);
904 Chapter 8 Creating Custom Dialogs<br />
Figure 8-8 Swing soft bevel borders.<br />
Of these, the first is of little use, since the resulting border is completely<br />
empty. The CompoundBorder class itself has two constructors that exactly<br />
mirror the factory methods:<br />
public CompoundBorder();<br />
public CompoundBorder(Border outsideBorder,<br />
Border insideBorder);<br />
Here is an extract from the implementation of the BorderTab application<br />
that shows how the "Compound Border" tab was created.<br />
protected void addCompoundBorders() {<br />
JPanel panel = new JPanelO ;<br />
panel.setLayout(new GridLayout(1, 0, HGAP, VGAP));<br />
panel.add(createBorderedLabel("Lowered Bevel/Lined",<br />
BorderFactory.createCompoundBorder(<br />
BorderFactory.createLoweredBevelBorder(),<br />
BorderFactory.createLineBorder(<br />
Color.black))));<br />
panel.add(createBorderedLabel("Empty/Lined",<br />
BorderFactory.createCompoundBorder(<br />
BorderFactory.createEmptyBorder(8, 8, 8, 8),<br />
BorderFactory.createLineBorder(
}<br />
Tabbed Panes and Borders 905<br />
Color.black)))) ;<br />
panel.add(createBorderedLabel("Etched/Raised Bevel'<br />
BorderFactory.createCompoundBorder(<br />
BorderFactory.createEtchedBorder(),<br />
BorderFactory.createRaisedBevelBorder())));<br />
The createBorderedLabel method used here is a helper that create<br />
label and adds the given border and text to it. The code for that method is<br />
simple that it is not shown here.<br />
The second example is probably the most useful—a lined border witl<br />
margin on the outside; in this case, there will be a uniform 8-pixel margin<br />
around the outside of the lined border. The borders on this tab are shown<br />
Figure 8-9.<br />
Figure 8-9 Compound borders.<br />
Titled Border<br />
The titled border is related to the compound border in that it (usually) takes<br />
another border as one of its arguments, then places some text near or on top
906 Chapter 8 Creating Custom Dialogs<br />
of it. The text and its precise location are configurable. Here are the factory<br />
methods that you can use to create a TitledBorder:<br />
public static TitledBorder createTitledBorder(<br />
String title);<br />
public static TitledBorder createTitledBorder(<br />
Border border);<br />
public static TitledBorder createTitledBorder(<br />
Border border, String title);<br />
public static TitledBorder createTitledBorder(<br />
Border border, String title,<br />
int justification, int position);<br />
public static TitledBorder createTitledBorder(<br />
Border border, String title,<br />
int justification, int position, Font font);<br />
public static TitledBorder createTitledBorder(<br />
Border border, String title,<br />
int justification, int position,<br />
Font font, Color color);<br />
The first of these methods creates an etched border and overlays the given<br />
title in the default position (see below), while the second creates a border<br />
from the given border but with no text string. This is not entirely useless,<br />
because TitledBorder has methods that allow you to add a title, among<br />
other things:<br />
public void setBorder(Border border);<br />
public void setTitle(String title);<br />
public void setTitlePosition(int position);<br />
public void setTitleJustification(int justification);<br />
public void setTitleFont(Font font);<br />
public void setTitleColor(Color color);<br />
The remaining factory methods create borders that have the above customizable<br />
values preset.<br />
The position and justification attributes govern where the text is<br />
placed in relation to the border. The possible values for position are as<br />
follows:<br />
• TitledBorder.ABOVE_BOTTOM<br />
• TitledBorder.ABOVE_TOP<br />
• TitledBorder.BELOW_BOTTOM<br />
• TitledBorder.BELOW_TOP<br />
• TitledBorder.BOTTOM<br />
• TitledBorder.TOP
And the possible justification values are:<br />
• TitledBorder.CENTER<br />
• TitledBorder.LEFT<br />
• TitledBorder.RIGHT<br />
<strong>Java</strong> 2 version 1.3 recognizes an extra pair of justification values:<br />
• TitledBorder.LEADING<br />
• TitledBorder.TRAILING<br />
Tabbed Panes and Borders 907<br />
which operate in conjunction with the component orientation of the component<br />
that the border is installed in to place the text either on the left or the<br />
right, as appropriate.<br />
You can see how these attributes, together with the font and color, affect<br />
the result from Figure 8-6, which shows the Titled Border tab of BorderTab.<br />
Matte Border<br />
This border can be used in two ways. Either it will paint a border of a solid<br />
color, which makes it similar to an empty border except that the color used<br />
does not have to be the same as the background color of the component, or it<br />
can be used to tile the border with an icon. Here are the constructors that<br />
correspond to these two cases:<br />
public MatteBorder(int top, int left,<br />
int bottom, int right, Color color);<br />
public MatteBorder(int top, int left, int bottom,<br />
int right, Icon icon);<br />
public MatteBorder(Insets insets, Color color);<br />
public MatteBorder(Insets insets, Icon icon);<br />
The first four arguments to the first pair of constructors specify the area<br />
that the border will occupy. The last two constmctors use an Insets object<br />
to describe the same area. BorderFactory also has static convenience<br />
methods that can be used to create these borders:<br />
public static MatteBorder createMatteBorder(<br />
int top, int left,<br />
int bottom, int right, Color color);<br />
public static MatteBorder createMatteBorder(<br />
int top, int left, int bottom,<br />
int right, Icon icon);<br />
-
908 Chapter 8 Creating Custom Dialogs<br />
Figure 8-10 shows an example of each of these forms of the Matte border.<br />
Figure 8-10 Matte borders.<br />
There is also another, simpler constructor that requires you to specify just<br />
an icon:<br />
public MatteBorder(Icon icon);<br />
This form uses the width and height of the icon to determine the border<br />
insets, saving you the trouble of retrieving the width and height yourself.<br />
Swing Components Often Used in<br />
Dialogs<br />
This section looks at some of the Swing components that are most commonly<br />
found in dialog boxes. This is by no means a complete survey of all the controls<br />
you would ever use in a dialog, because almost any control can be used<br />
in a dialog and, similarly, the controls that are introduced here are equally<br />
useful in the applications main window. The first controls that you'll see are<br />
checkboxes and radio boxes, which allow the user to make choices—a com-
Swing Components Often Used in Dialogs 909<br />
mon reason for creating a dialog box—followed by two controls that allow<br />
you to present lists of data to the user (a list box and a combo box), a progress<br />
bar and two related controls that use a progress bar to display progress<br />
through a time-consuming operation, and a slider control that can be used to<br />
change the value of a parameter with a bounded range.<br />
Checkboxes and Radio Buttons<br />
Checkboxes allow the user to make choices that are binary in nature,<br />
whereas radio buttons allow one of several mutually exclusive alternatives<br />
to be chosen. In appearance, these controls are very similar. By default, a<br />
checkbox consists of an etched box that has a tick in it when the option it<br />
represents is selected, with some associated text that describes the option.<br />
A radio button is identical, except that the box is replaced by a small etched<br />
circle that has a colored dot in the middle when the corresponding option is<br />
enabled. Figure 8-11 shows a selection of checkboxes and radio buttons.<br />
Figure 8-11 Checkboxes and radio buttons.<br />
As you can see, a pair of titled borders has been used to separate the<br />
checkboxes and radio buttons into two logical groups. Using borders in this<br />
way is a very effective way to show the relationships between controls in a<br />
dialog.<br />
To create a radio button, you use the JRadioButton class, while a checkbox<br />
can be created using JCheckBox. Each of these classes has several constructors<br />
that produce slightly different representations. Here, for example,<br />
are the constructors for JRadioButton:<br />
public JRadioButton()<br />
public JRadioButton(Icon icon)<br />
public JRadioButton(Icon icon, boolean state)<br />
public JRadioButton(String text)<br />
public JRadioButton(String text, boolean state)<br />
public JRadioButton(String text, Icon icon)
910 Chapter 8 Creating Custom Dialogs<br />
public JRadioButton(String text, Icon icon, boolean<br />
state)<br />
In addition, <strong>Java</strong> 2 version 1.3 provides an extra constructor:<br />
public JRadioButton(Action a);<br />
that configures the attributes of the radio button from the Action passed as<br />
its argument. The constructors for JCheckBox are identical.<br />
Both JRadioButton and JCheckBox are derived from JToggleButton,<br />
a control that you saw earlier in this chapter, because both of them have two<br />
possible states: selected or unselected. Some of the constructors allow you to<br />
specify the initial state of the button as a boolean. If you supply the value<br />
true, the checkbox or radio button starts in the selected state. If you use a<br />
constructor that doesn't specify an initial state, it defaults to unselected.<br />
If you don't specify an icon, the default icon (i.e., the square for JCheck-<br />
Box and the circle for JRadioButton) is used. If you supply your own icon,<br />
it replaces the default square or circle. One potential problem with this is<br />
that the default icon changes its state to indicate whether the checkbox or<br />
radio button is selected and if you just replace it with a fixed image or a stateless<br />
Icon implementation, the user won't be able to tell whether the control<br />
is selected or not. Therefore, if you intend to use a custom icon, you need to<br />
do one of two things:<br />
• Implement the Icon so that it looks at the selected state of its<br />
associated component in its paint I con method.<br />
• Install separate icons for the cases in which the control is<br />
selected and not selected. The icon supplied to the constructor<br />
is used in both cases by default, but you can supply a different<br />
one to be used when the control is selected by using the<br />
setSelectedlcon method.<br />
Constructors that do not supply text create a control with just an icon.<br />
<strong>Core</strong> Note<br />
As is often the case with Swing controls, the defaults actually depend on the<br />
selected look-and-feel.This section describes the appearance of these<br />
controls with the Metal look-and-feel.<br />
In the <strong>Java</strong> 2 platform, both JCheckBox and JRadioButton are affected<br />
by their ComponentOrientation property, to the extent that the text<br />
appears by default on the "trailing" side of the icon. That is, in the default
Swing Components Often Used in Dialogs 911<br />
left-to-right locale the icon is to the left of the text, but in a right-to-left locale<br />
the icon would be to to the right of the text.<br />
Ultimately, JToggleButton, JRadioButton, and JCheckBox are all<br />
derived from AbstractButton, which is also the parent of the familiar<br />
JButton class. This means that all these buttons can be configured as flexibly<br />
as JButton itself and everything you know about JButton works for these<br />
buttons too. Thus, you can, for example, change the relative positions and the<br />
alignment of the icon and the text, or add a key accelerator. You can also, of<br />
course, add a tooltip, as you can with airy JComponent and, in <strong>Java</strong> 2 version<br />
1.3, you can use an HTML string as the text for the control if you want specific<br />
effects such as multiple colors, font changes, or just a multiline description.<br />
Refer to Chapter 2 for a discussion of the use of HTML with Swing<br />
controls.<br />
Radio Button and Checkbox Selection<br />
In implementation terms, there is almost no difference between radio buttons<br />
and checkboxes, since, apart from the code that renders the user interface,<br />
they derive all of their functionality from their superclasses. In fact,<br />
radio buttons and checkboxes behave differently only if you force them to.<br />
The user expects, when confronted with a set of related radio buttons, that<br />
one and only one of them will be selected at any time. Initially, the application<br />
will select one of them to represent its default behavior and, subsequently<br />
the user can change this by clicking a different radio button. When<br />
this happens, the user will expect the radio button that was initially selected<br />
to be deselected. By contrast, there is no such expectation of checkboxes;<br />
they don't represent mutually exclusive choices, so any combination of them<br />
can be selected at any given time. This difference in behavior is not enforced<br />
by the JCheckBox and JRadioButton classes—in fact, they know nothing<br />
about it.<br />
To make a set of radio buttons behave as the user expects, you create a<br />
ButtonGroup and place them all in it by using its add method. The only job<br />
of the ButtonGroup is to receive events from all of the buttons that it is<br />
managing; when it receives an event indicating that one of these buttons has<br />
been selected, it just deselects the button that was selected before, if there<br />
was one. ButtonGroup isn't particular about the type of buttons that it manages:<br />
You can give it any combination of objects as long as they are all derived<br />
from AbstractButton. This means that you can make checkboxes behave<br />
like radio buttons if you wish, but it's not recommended! It also means that<br />
you can use a ButtonGroup to arrange for only one of a set of JToggleBut -<br />
tons to be pressed at any given time, which is very often useful.<br />
• : *
912 Chapter 8 Creating Custom Dialogs<br />
We've seen that you can set the initial state of either of these controls<br />
using the constructor. You can also change the state using the setSelected<br />
method and get the current state using isSelected:<br />
public void setSelected(boolean state);<br />
public boolean isSelected ();<br />
Getting Events from Checkboxes and Radio Buttons<br />
Checkboxes and radio buttons are only of any use if the application does<br />
something when the user clicks on them to change their state. There are two<br />
ways to be notified when the state of either a radio button or a checkbox<br />
changes. The most direct way is to exploit the fact that they are both derived<br />
from AbstractButton. As you know, buttons generate an ActionEvent<br />
when they are pressed and this is equally true for both checkboxes and radio<br />
buttons. The event is, however, generated only for the button that the user<br />
actually clicks on. In the case of a checkbox, this means that you get an<br />
ActionEvent whenever the user selects it or deselects it. Since the<br />
ActionEvent doesn't tell you what state the checkbox is in, you need to use<br />
the isSelected method to obtain that information, but that is usually all<br />
you need to know.<br />
For radio buttons, the situation is slightly more complicated because<br />
selecting one button implicitly deselects another one. However, an Action-<br />
Event is generated only for the radio button that the user clicked: you won't<br />
get notification that the previously selected button has been deselected. In<br />
many cases, this doesn't matter because the application is probably managing<br />
the buttons as a group and can deduce the state of all of the buttons if it<br />
knows which one is selected. You do, however, have another option.<br />
As well as generating ActionEvents, JToggleButton and its subclasses<br />
generate itemEvents on every state change. An itemEvent is an AWT<br />
event, derived from j ava. awt. AWTEvent and defined in the<br />
j ava. awt. event package. Like all AWT events, it has an identifier field<br />
that you can obtain using the get ID method; only one ID value,<br />
ITEM_STATE_CHANGED, is actually defined. In addition, it has the following<br />
methods:<br />
public Object getltemO;<br />
public ItemSelectable getltemSelectable();<br />
public int getStateChange();<br />
The getltem method returns the object that has been selected or deselected,<br />
which will be the checkbox or the radio button in this case. By contrast,<br />
getltemSelectable returns the ItemSelectable container that
Swing Components Often Used in Dialogs 913<br />
contains the changed item. For all toggle buttons, this method also returns<br />
the toggle button itself. Later in this chapter, you'll see the JComboBox,<br />
which is another example of an ItemSelectable. For a JComboBox, the<br />
getltemSelectable method returns a reference to the combo box itself,<br />
while the get Item method returns the item that was selected from it.<br />
For radio buttons and checkboxes, the most interesting method is get-<br />
StateChange, which returns either ItemEvent. SELECTED or ItemEvent.<br />
DESELECTED, which tells you whether the control has been selected<br />
or not. If you need to monitor every state change of a set of radio buttons,<br />
you register to receive ItemEvents from all of them by adding an itemListener<br />
using the addltemListener method. The ItemListener interface<br />
contains only one method, which corresponds to the single type of ItemEvent<br />
that it can receive:<br />
public interface ItemListener {<br />
}<br />
public void itemStateChanged(ItemEvent event);<br />
Now, if you have a set of radio buttons with one already selected and you<br />
click on another, the button that was initially selected generates an ItemEvent<br />
in which the state change is DESELECTED and the button that has<br />
been clicked generates an ItemEvent with state change SELECTED followed<br />
by an ActionEvent. The code in Listing 8-8 implements the dialog box<br />
shown in Figure 8-11.<br />
Listing 8-8 A dialog with radio buttons<br />
package <strong>JFC</strong>Book.Chapters;<br />
import j avax.swing.*;<br />
import javax.swing.border.*;<br />
import j ava.awt.*;<br />
import j ava.awt.event.*;<br />
public class CheckRadioButtonPanel extends JPanel {<br />
public CheckRadioButtonPanel() {<br />
this.setLayout(new BorderLayout());<br />
JPanel checkPanel = new JPanel();<br />
Border b = BorderFactory.createEtchedBorder();<br />
checkPanel.setBorder(
914 Chapter 8 Creating Custom Dialogs<br />
Listing 8-8 A dialog with radio buttons (continued)<br />
BorderFactory.createTitledBorder(<br />
b, "Search options",<br />
TitledBorder.TOP,<br />
TitledBorder.CENTER));<br />
JCheckBox subDirs = new JCheckBox(<br />
"Search subdirectories");<br />
subDirs.setMnemonic('S');<br />
JCheckBox ignoreCase = new JCheckBox("Ignore case");<br />
ignoreCase.setMnemonic('I');<br />
JCheckBox matchWords =<br />
new JCheckBox("Match whole words only");<br />
matchWords.setMnemonic('M');<br />
checkPanel.setLayout(<br />
new BoxLayout(checkPanel, BoxLayout.Y_AXIS));<br />
checkPanel.add(subDirs);<br />
checkPanel.add(ignoreCase);<br />
checkPanel.add(matchWords);<br />
this.add(checkPanel, "West");<br />
JPanel radioPanel = new JPanelO;<br />
radioPanel.setBorder(<br />
BorderFactory.createTitledBorder(<br />
b, "Save options",<br />
TitledBorder.TOP,<br />
TitledBorder.CENTER));<br />
ButtonGroup grp = new ButtonGroup();<br />
JRadioButton autoSave =<br />
new JRadioButton("Save automatically");<br />
autoSave.setMnemonic( V A');<br />
JRadioButton promptSave =<br />
new JRadioButton("Prompt before saving");<br />
promptSave.setMnemonic('P');<br />
JRadioButton requestSave =<br />
new JRadioButton("Save only when requested")<br />
requestSave.setMnemonic( v R' ) ;<br />
radioPanel.setLayout(<br />
new BoxLayout(radioPanel, BoxLayout.Y_AXIS))<br />
radioPanel.add(autoSave);<br />
radioPanel.add(promptSave);<br />
radioPanel.add(requestSave) ;
Listing 8-8 A dialog with radio buttons (continued)<br />
}<br />
Swing Components Often Used in Dialogs 915<br />
// Add the radio buttons to the button group<br />
grp.add(autoSave);<br />
grp.add(promptSave);<br />
grp.add(reguestSave) ;<br />
autoSave.setSelected(true);<br />
ActionListener 1 = new ActionListener() {<br />
public void actionPerformed(ActionEvent evt) {<br />
System.out.println("Button event: " + evt);<br />
}<br />
};<br />
ItemListener il = new ItemListener() {<br />
public void itemStateChanged(ItemEvent evt) {<br />
System.out.println("Item event: " + evt);<br />
}<br />
};<br />
subDirs.addActionListener(1);<br />
subDirs.addltemListener(il);<br />
ignoreCase.addActionListener(1);<br />
ignorecase.addltemListener(il);<br />
matchWords.addActionListener(1);<br />
matchWords.addltemListener(il) ;<br />
autoSave.addActionListener(1);<br />
autoSave.addltemListener(il) ;<br />
promptSave.addActionListener(1);<br />
promptSave.addltemListener(il) ;<br />
requestSave.addActionListener(1);<br />
requestSave.addltemListener(il) ;<br />
this.add(radioPanel, "Center");<br />
public static void main(String[] args) {<br />
JFrame f = new JFrame("CheckBox/RadioButton example");<br />
JDialog d =<br />
new JDialog(f, "CheckBoxes and RadioButtons", true);
916 Chapter 8 Creating Custom Dialogs<br />
Listing 8-8 A dialog with radio buttons (continued)<br />
CheckRadioButtonPanel p = new CheckRadioButtonPanel();<br />
d.getContentPane().add(p);<br />
d.packf);<br />
d.addWindowListener(new WindowAdapter() {<br />
public void windowClosing(WindowEvent evt) {<br />
System.exit(0);<br />
}<br />
});<br />
d.setVisible(true);<br />
}<br />
2 This example attaches both itemListeners and ActionListeners to all<br />
of the checkboxes and radio buttons and, when the events are received, prints<br />
their contents. You can use this simple example to see how checkboxes and<br />
radio buttons generate events. To run it, use the command<br />
java <strong>JFC</strong>Book.Chapters.CheckRadioButtonPanel<br />
Here's an extract from the output from this program in response to a particular<br />
sequence of button presses, which appears in the window from which you<br />
started it:<br />
Item event: <strong>Java</strong>.awt.event.ItemEvent[ITEM_STATE_CHANGED,item=javax.swing.JRadioButton[],stateChange=DESELECTED]<br />
on<br />
j avax.swing.JRadioButton[text = Save automatically]<br />
Item event: <strong>Java</strong>.awt.event.ItemEvent[ITEM_STATE_CHANGED,item=javax.swing.JRadioButton<br />
[], stateChange=SELECTED] on<br />
javax.swing.JRadioButton[text=Prompt before saving]<br />
Button event: java.awt.event.Action-<br />
Event [ACT I ON_PERFORMED, cmd= Prompt before saving] on<br />
javax.swing.JRadioButton[text=Prompt before saving]<br />
For the sake of brevity, some of the output that the program produces has<br />
been supressed - only the interesting information has been retained. Initially,<br />
the 'Save automatically radio button is selected. The action that generated<br />
the output shown above was clicking on the 'Prompt before saving' radio but-
Swing Components Often Used in Dialogs 917<br />
ton. In response to this, a DESELECTED ItemEvent for the 'Save automatically'<br />
radio button was generated, followed by a SELECTED ItemEvent and<br />
the usual ActionEvent for the "Prompt before saving' radio button, which<br />
is the one that was actually clicked on. Contrast this with what happens when<br />
the 'Ignore case' checkbox is pressed, resulting in the following output:<br />
Item event: <strong>Java</strong>.awt.event.ItemEvent<br />
[ITEM__STATE_CHANGED, item=javax. swing. JCheckBox [] , stateChange=SELECTED]<br />
on javax.swing.JCheckBox [text = Ignore case]<br />
Button event: <strong>Java</strong>.awt.event.Action-<br />
Event[ACTION_PERFORMED,cmd=Ignore case] on<br />
javax.swing.JCheckBox[text=Ignore case]<br />
This action generates a SELECTED ItemEvent and an ActionEvent for<br />
the checkbox that was clicked, but there is no DESELECT event, because<br />
selecting a checkbox doesn't cause any other item to be deselected.<br />
The Default Button<br />
Sometimes you want to create a group of controls and let the user change<br />
their state without processing any of the state changes until the user is happy<br />
with his or her selection, at which point he or she would press an OK button<br />
to have the new state processed. This is, of course, very easy to do and you<br />
have already seen all of the techniques that you need to use to do it. For such<br />
form-like dialogs, Swing has a small refinement that can make the keyboard<br />
user's life a little easier. Consider the dialog shown in Figure 8—12. This dialog<br />
contains a set of checkboxes that allow the user to make several independent<br />
choices. The expert keyboard user will move the focus around these<br />
checkboxes using the TAB key, check one or more of the checkboxes using<br />
the SPACE key, then move the focus to the button and activate it by pressing<br />
SPACE. Swing makes this last step unnecessary by making it possible to activate<br />
the OK button without giving it the focus. The application enables this<br />
feature by making this button the default button for the dialog.<br />
Each JRootPane can have a default button assigned using its setDef<br />
aultButton method:<br />
public void setDefaultButton(JButton defaultButton);<br />
Since each JFrame, JDialog, JWindow and JApplet object has a<br />
JRootPane, this means that there can be a default button on each frame,<br />
dialog, window, or applet. Here is how you might make a button the default<br />
button:
918 Chapter 8 Creating Custom Dialogs<br />
Figure 8-12 A dialog with a default<br />
button.<br />
JFrame f = new JFrame("Frame with default button");<br />
JButton b = new JButton("OK");<br />
f.getContentPane().add(b);<br />
f.getRootPane().setDefaultButton(b);<br />
Once the default button has been assigned, it can be activated any time<br />
the focus is within the frame, dialog, or applet for which it is the default by<br />
pressing the RETURN key, whether or not the button itself has the focus. You<br />
can try this for yourself by running the example shown in Figure 8-12 by<br />
using the command:<br />
j ava <strong>JFC</strong>Book.Chapter8.DefaultButton<br />
The code for this example is not reproduced here because most of it is not<br />
related to the topic of default buttons—you can, however, find it on the CD-<br />
ROM that accompanies this book.<br />
To demonstrate the default button, use the keyboard to move the focus<br />
around between the checkboxes and change their state. Then, leaving the<br />
focus on a checkbox, press RETURN. The dialog will disappear and a message<br />
appears in the window from which you started the example indicating that<br />
the OK button was pressed.<br />
<strong>Core</strong> Note<br />
Keep in mind the distinction between activation of an ordinary button and<br />
the default button: the default button is activated using the RETURN key,<br />
whether or not it has the keyboard focus. Any button (whether it is the<br />
default button or not) can be activated by pressing SPACE, but only if it<br />
has the focus.
Swing Components Often Used in Dialogs 919<br />
When using the default button in a dialog that also includes JText-<br />
Fields, it is important to realize that you cannot activate the default button<br />
by pressing the RETURN key while the focus is in the text field itself, because<br />
JText Field uses the RETURN key as the signal that the user has finished typing<br />
and wants the field content to be used. Hence, JTextField generates an<br />
ActionEvent in response to the RETURN key.<br />
In <strong>Java</strong> 2 version 1.3, however, this policy has been changed so that the<br />
RETURN key will be ignored by a JTextField if it does not have a i*egistered<br />
ActionListener, with the result that it will activate a default button in the<br />
same root pane even if such an JTextField has the input focus. The rationale<br />
behind this change is quite simple—when you create a form-based dialog,<br />
you don't need to process the content of the fields until the user presses<br />
the default button, so you almost certainly would not attach an ActionListener<br />
to a JTextField in this case. On the other hand, a properly written<br />
dialog of this type would probably want to validate the content of each JTextField<br />
when the user moves the focus to another control to give the user<br />
early warning if the field contains unacceptable content. Attaching an<br />
ActionListener does not help with this, however, because the user is most<br />
likely to use the TAB key or the mouse to move the focus to a different field.<br />
If you are using Swing 1.1.1 or <strong>Java</strong> 2 version 1.2.2, the usual way to perform<br />
this type of validation is to register to receive focus events and look at the<br />
content of each field when it loses focus. Alternatively, in <strong>Java</strong> 2 version 1.3<br />
you can use the new input verifier mechanism, which will be covered in the<br />
next chapter.<br />
The JList Control<br />
The JList control is one of several Swing components that allow you to<br />
present the user with a collection of data and allow one or more of the items<br />
to be selected. This chapter looks at JList and JComboBox and later in this<br />
book you'll see the more powerful JTable and JTree components, which<br />
allow data to be presented and selected in very sophisticated ways.<br />
JList is the simplest of all the data-handling controls. Its only purpose is<br />
to take a list of data items and present them in a vertical arrangement to the<br />
user. The basic JList doesn't even support scrolling, so you need to arrange<br />
for it to be allocated enough space in its container to display all of its contents,<br />
or add the scrolling capability yourself. Figure 8-13 shows two JList<br />
components displaying the same data; the frame has deliberately been made<br />
too small so that the list on the left cannot display all of its content. Those<br />
items that you can't see are now completely inaccessible. The JList on the
920 Chapter 8 Creating Custom Dialogs<br />
right, however, has been added to a JScrol lPane, which provides a vertical<br />
scrollbar to allow access to the bottom part of the list.<br />
Figure 8-13 The JList control.<br />
The code that created these two list boxes is shown below in Listing 8—9<br />
and you can run it using the command:<br />
<strong>Java</strong> <strong>JFC</strong>Book.Chapter8.ListExamplel<br />
Listing 8-9 Creating and populating JList controls<br />
package <strong>JFC</strong>Book.Chapter8;<br />
import j avax.swing.*;<br />
import javax.swing.border.*;<br />
import j ava.awt.*;<br />
import j ava.awt.event.*;<br />
import <strong>Java</strong>.util.Vector;<br />
public class ListExamplel extends JPanel {<br />
public ListExamplel() {<br />
this.setLayout(new GridLayout(1, 2));<br />
JPanel listlPanel = new JPanel();<br />
listlPanel.setLayout(new BorderLayout());<br />
listlPanel.setBorder(<br />
BorderFactory.createEtchedBorder() )<br />
JList listl = new JList(listlData) ;<br />
listlPanel.add(listl);<br />
for (int i = 0; i < listlData.length; i++) {
Swing Components Often Used in Dialogs 921<br />
Listing 8-9 Creating and populating JList controls (continued)<br />
}<br />
list2Data.addElement(listlData[i] ) ;<br />
JPanel list2Panel = new JPanelO;<br />
list2Panel.setLayout(new BorderLayout());<br />
list2Panel.setBorder(<br />
BorderFactory.createEtchedBorder());<br />
JList Iist2 = new JList(list2Data);<br />
JScrollPane listScroll = new JScrollPane(Iist2);<br />
list2Panel.add(listScroll);<br />
this.add(listlPanel);<br />
this.add(list2Panel);<br />
}<br />
public static void main(String[] args) {<br />
JFrame f = new JFrame("List Example 1");<br />
f.getContentPane().add(new ListExamplel());<br />
Dimension d = f.getPreferredSize() ;<br />
f.setSize(d.width, d.height/2);<br />
f.addWindowListener(new WindowAdapter() {<br />
public void windowClosing(WindowEvent evt) {<br />
System.exit(0);<br />
}<br />
});<br />
f.setVisible(true);<br />
}<br />
protected String [] listlData = {<br />
"Neil Armstrong", "Edwin Aldrin", "Michael Collins",<br />
"Pete Conrad", "Richard Gordon", "Alan Bean",<br />
"James Lovell", "Fred Haise", "Jack Swigert",<br />
"Alan Shepard", "Stuart Roosa", "Edgar Mitchell",<br />
"Dave Scott", "Jim Irwin", "Al Worden",<br />
"John Young", "Charlie Duke", "Ken Mattingly",<br />
"Eugene Cernan", "Ron Evans", "Harrison Schmitt"<br />
};<br />
protected Vector list2Data = new Vector();<br />
_}<br />
It is veiy unlikely that you would consider creating a JList without giving<br />
it the ability to scroll, unless you are enforcing a layout policy that ensures
922 Chapter 8 Creating Custom Dialogs<br />
that the control will always be large enough to show its content. Fortunately,<br />
adding scrollbars is a simple task:<br />
JList list = new JListO ;<br />
JScrollPane scrolledList = new JScrollPane(list);<br />
You can specify the preferred number of rows of your list that should be<br />
made visible in the scrollpane's viewport using the setVisibleRowCount<br />
method:<br />
list.setVisibleRowCount(4);<br />
Note that this method belongs to the JList control, not the JScroll-<br />
Pane. It only has any effect, however, if your list is mounted in a scrolling<br />
container and it will be ignored if the JScrollPane is allocated more space<br />
than it needs to show the requested number of rows. By default, if you do not<br />
call setVisibleRowCount, the JList will attempt to display eight rows.<br />
There are some other useful methods that you can use to manage the JList<br />
within a JScrollPane:<br />
public int getVisibleRowCount();<br />
public int getFirstVisiblelndex();<br />
public int getLastVisiblelndex();<br />
public void ensurelndexIsVisible();<br />
The getVisibleRowCount method returns the value set by the last set-<br />
VisibleRowCount method (or the default value if this method has not been<br />
called). Note that this may not represent number of rows of the list that are<br />
actually visible to the user, which depends on the amount of space actually<br />
allocated to the control by the layout manager of its container.<br />
The getFirstVisiblelndex and getLastVisiblelndex methods<br />
return the indices of the row that appears at the top of the viewport and the<br />
one at the bottom of the viewport, respectively. Indices are counted from 0<br />
and a row is considered to be visible even if only part of it can be seen. In the<br />
case of the right-hand list in Figure 8-13, for example, the getFirstVisiblelndex<br />
method would return 2 (because "Michael Collins" is entry 2 in<br />
the array listlData in Figure 8-9), while getLastVisiblelndex would<br />
return 10. By subtracting one value from the other (and adding l!), you can<br />
work out how many rows are actually visible to the user.<br />
The ensurelndexIsVisible method is useful if you want to keep the<br />
list's visible content synchronized with some other part of your layout. Given<br />
a valid index value, it scrolls the list contents so that the entry with that index<br />
is visible in the JScrollPane's viewport.
Creating a JList Control<br />
JList has four constructors:<br />
public JList();<br />
public JList(ListModel model);<br />
public JList(Object[] values);<br />
public JList(Vector data);<br />
Swing Components Often Used in Dialogs 923<br />
When you create a JList, you need to initialize it with some data. Contrary<br />
to what you might expect, the JList doesn't have any methods that<br />
allow you to add, remove or reorder individual items of data after the control<br />
has been created; your only choices, as far as JList is concerned, are to associate<br />
the data with it via the constructor, or to replace its data with a completely<br />
new set of values. This is because the JList doesn't manage any data<br />
itself. In terms of the Swing Model-View-Controller architecture, JList<br />
and its UI classes implement the view part, by providing a means to display<br />
the data, but the data itself is the model part of the architecture and is managed<br />
by a separate class.<br />
The first constructor creates a list with no data at all; to make use of this<br />
object, you will need to supply it with some data before it is displayed. There<br />
are three methods that can be used to do this:<br />
public void setModel(ListModel model);<br />
public void setListData(Object [] values);<br />
public void setListData(Vector data);<br />
These methods correspond very closely to the three remaining constructors,<br />
which supply data in various different ways. They all replace whatever<br />
dtita the control currently has with the new set.<br />
JList can manage data only if presented to it in the form of a List-<br />
Model. ListModel is an interface that provides methods to allow access to a<br />
collection of data and the ability to be notified of changes to that data. Here is<br />
how it is defined:<br />
public interface ListModel {<br />
public abstract int getSizeO ;<br />
public abstract Object getElementAt(int index);<br />
public abstract void addListDataListener(<br />
ListDataListener 1);<br />
public abstract void removeListDataListener(<br />
ListDataListener 1);<br />
As you can see, the getSize and getElementAt methods allow a client<br />
to find out how much data there is and makes it possible to extract each item,
924 Chapter 8 Creating Custom Dialogs<br />
one at a time. It is ealled a list model because the data is accessed using an<br />
integer index, starting at 0 and ending at getSizeQ - 1. There is no provision<br />
within this interface for creating the collection in the first place, or for<br />
changing its content. The fact that the interface does not support this capability<br />
is one reason why JList cannot support it either.<br />
The Swing package contains two implementations of this interface.<br />
AbstractListModel is a base class that does not store any data, but is<br />
intended to be extended by adding the data handling capabilities. What it<br />
does provide are the addListDataListener and removeListDataListener<br />
methods the code to manage the set of registered listeners on behalf<br />
of any class that extends it. It also provides a fireContentsChanged<br />
method that broadcasts a ListDataEvent to all registered listeners when<br />
the data content is changed, and two methods (f irelntervalAdded and<br />
f irelntervalRemoved) that report changes in the items in the model that<br />
are selected, again by delivering a ListDataEvent.<br />
There is also a subclass of AbstractListModel called DefaultList-<br />
Model that is a complete implementation, including the data management. It<br />
uses a Vector to store its data and clients must use Vector methods<br />
(addElement etc) to manipulate its contents. You can use a Def aultList-<br />
Model to create a JList using its second constructor:<br />
DefaultListModel m = new DefaultListModel();<br />
m.addElement("Neil Armstrong");<br />
m.addElement("Buzz Aldrin");<br />
m.addElement("Michael Collins")<br />
JList 1 = new JList(m);<br />
Usually, however, you will find it more convenient to supply the data either<br />
as an array or in a Vector, examples of which are shown in Listing 8-9. Neither<br />
the array nor the Vector class implements the ListModel interface,<br />
however, so the JList constructors that accept these data types use an anonymous<br />
class to wrap them and create the appearance of a ListModel object.<br />
Here is an example of this:<br />
public JList(final Vector data) {<br />
this(new AbstractListModel0 {<br />
public int getSizeO {<br />
data.getSize () ;<br />
}<br />
}<br />
public Object getElementAt(int index) {<br />
return data.getElementAt(index);<br />
}<br />
});
Swing Components Often Used in Dialogs 925<br />
The data model that is created from the Vector supplied as an argument<br />
is an anonymous class based on AbstractListModel. As you saw earlier,<br />
AbstractListModel implements the handling of listeners, so it is only necessary<br />
to supply the getSize and getElementAt methods, which are delegated<br />
directly to the underlying Vector. Notice that the reference to the<br />
Vector that was given to the constructor is used to access its data. This reference<br />
will actually be used long after the constructor has completed; to make<br />
this possible, it is necessary to declare the data argument final, which<br />
allows its value to be copied and stored locally with the anonymous class<br />
implementation for use later. All of this is done by the compiler.<br />
A common error that is made when creating a JList is to do something<br />
like this:<br />
JList list = new JList();<br />
DefaultListModel model = new DefaultListModel();<br />
list.setModel(model);<br />
// Get a list of items from database to be displayed<br />
// (code not shown). Items are assumed to have been<br />
// installed in an array called "items".<br />
// Add items to the model<br />
for (int i = 0; i < items.length; i++) {<br />
model.addElement(items[i] ) ;<br />
}<br />
This code gets a list of items from somewhere and adds them individually to a<br />
DefaultListModel that has been installed in a JList control. This looks<br />
harmless enough and it will certainly work. However, in performance terms,<br />
this is very expensive. Because the model has been installed in the JList,<br />
each time an item is added to it, the JList is notified and does some work to<br />
update itself because its content has changed. The overhead for each item is<br />
relatively small, but these small overheads can add up to a large delay if there<br />
is a large number of items to be displayed. The golden rule is always to create<br />
the model before installing it in the JList, so the correct way to write this<br />
code is as follows:<br />
DefaultListModel model = new DefaultListModel();<br />
list.setModel(model) ;<br />
// Get a list of items from database to be displayed<br />
// (code not shown). Items are assumed to have been<br />
// installed in an array called "items".
926 Chapter 8 Creating Custom Dialogs<br />
// Add items to the model<br />
for (int i = 0; i < items.length; i++) {<br />
model.addElement(items[i]);<br />
}<br />
// Install in the model in the JList AFTER<br />
// it has been populated<br />
JList list = new JList(model);<br />
Modifying the Content of a JList<br />
How do you go about changing the items in a JList? Since the JList<br />
doesn't supply an API for this, you have to add or remove items from the data<br />
model itself. If you created the JList by populating an instance of<br />
Def aultListModel, you can just make changes to the Def aultListModel<br />
directly, because it will fire events to notify the JList that its content is<br />
being changed. However, if you supplied the list content as an array of<br />
Obj ects or a Vector, this won't work because the JList will not be aware<br />
of changes to the Vector or the array and therefore will not redraw itself to<br />
reflect the changes. If you must, for some reason, use a Vector or an array,<br />
then you should call the appropriate setListData method again after making<br />
any changes to the data to force the list to redraw itself. Changing the<br />
model in this way is a relatively expensive process so, if the data in the list is<br />
likely to change, it is better to create and manipulate a Def aultListModel.<br />
Selecting Items in a JList Control<br />
Once you've supplied a JList with its data, it is ready to be displayed. If you<br />
wish, you can arrange for one or more of its items to be selected when it first<br />
appears, or at any other time, using the following methods:<br />
public void setSelectedlndex(int index);<br />
public void setSelectedValue(<br />
Object value, boolean scroll);<br />
public void setSelectedlndices(int [] indices);<br />
public void setSelectionlnterval(int indexl, int index2);<br />
public void addSelectionlnterval(int indexl, int index2);<br />
Most of these methods reference the appropriate items by index. The first<br />
two methods select a single item referenced either by index (counted from 0)<br />
or as an actual value, which must be present in the list. If you use the second<br />
method and the JList is hosted in a JScrollPane, you can ensure that the<br />
selected item is made visible by passing true as the second argument. You<br />
can use the last three methods to select a set of items, which need not be
Swing Components Often Used in Dialogs 927<br />
adjacent, or to select a range of items. The set methods replace the current<br />
selection with the range of indices that they specify, whereas addSelectionlnterval<br />
leaves the currently selected set selected. There are restrictions<br />
on the use of these methods, however, as you'll see below.<br />
In the same way that JList doesn't manage the data that it displays, it also<br />
doesn't directly deal with remembering which items are selected at any given<br />
time. It delegates this responsibility to a class implementing the ListSelectionModel<br />
interface. This interface provides the means to create selections<br />
as ranges of indices. For example, the ListSelectionModel starts<br />
with no items selected. Under program control, the JList might select entry<br />
3 (in response to setSelectedlndex (3), for example, or because the user<br />
clicked on this entiy), by invoking the ListSelectionModel s setSelectionlnterval<br />
method, specifying an interval from index 3 to index 3. The<br />
ListSelectionModel must remember that this item is selected, because<br />
the JList does not retain this information itself.<br />
The ListSelectionModel can handle multiple selection ranges, so that<br />
it is possible to select indices 2 through 5 and 9 through 12, for example.<br />
Whether or not it allows this depends on the list selection mode, which is set<br />
using the setSelectionMode method of either ListSelectionModel or<br />
of JList itself. This method takes a single argument from the set shown in<br />
Table 8-5.<br />
Table 8-5 List Box Selection Modes<br />
Setting Description<br />
ListSelectionModel. Only one item maybe selected.<br />
SINGLE_SELECTION Selecting another item causes the<br />
first to be deselected.<br />
ListSelectionModel. Allows a single range of adjacent<br />
SINGLE_INTERVAL__SELECTION items to be selected.<br />
ListSelectionModel. Allows any number of ranges of adja-<br />
MULTIPLE_INTERVAL_SELECTION cent items to be selected at the same<br />
time.<br />
If the model is in single-selection mode, calls to setSelectedlndex or<br />
setSelectedValue work as you would expect, selecting the indicated item<br />
and deselecting any other value currently selected. In this mode, however,<br />
you can't select a range of values, so the setSelectedlndices, setSelec-
928 Chapter 8 Creating Custom Dialogs<br />
tionlnterval, and addSelectionlnterval methods behave differently.<br />
The first two methods select only the last index that they are given. For<br />
example,<br />
setSelectedlndices(new int [] { 1, 2, 4, 6}) ;<br />
would select index 6 only, while<br />
setSelectionlnterval(2, 7);<br />
selects only index 7. The addSelectionlnterval method is treated in the<br />
same way as setSelectionlnterval.<br />
When the model is in single-interval selection mode, a single range of values<br />
can be selected. In this mode, setSelectedlndex and setSelected-<br />
Value again work as normal and result in only the nominated value being<br />
selected. The setSelectedlndices method works the same way as it does<br />
in single-selection mode—only the last index is selected, even if the set supplied<br />
is a contiguous range of items; that is to say, the following call:<br />
setSelectedlndices(new int[] {l, 2, 3, 4});<br />
selects only item 4, while the similar call<br />
setSelectionlnterval(1, 4);<br />
selects items 1 to 4 inclusive. As with single-selection mode, addSelectionlnterval<br />
behaves in the same way as setSelectionlnterval.<br />
In multiple-selection mode, all of the methods behave as you might<br />
expect. The setSelectedlndex and setSelectedValue methods again<br />
clear all selected values and then select the single named item. The setSelectedlndices<br />
method selects each of the items it is given, deselecting<br />
anything already selected and setSelectionlnterval creates a single<br />
selection consisting of the range of values it is supplied. Finally, addSelectionlnterval<br />
adds a new range of one or more values to whatever is currently<br />
selected.<br />
There are two other methods that allow you to manipulate the selection:<br />
public void clearSelection();<br />
public void removeSelectionlnterval(int indexl, int<br />
index2);<br />
The first of these methods clears the entire selection, leaving nothing<br />
selected. The second removes the range of items from indexl to index2<br />
inclusive from the selection. It is permissible for this range to include items<br />
that are not actually selected. Items that were initially selected but do not fall<br />
within the supplied range remain selected when this method completes.<br />
When you create a JList, the ListSelectionModel you get by default<br />
is in multiple interval selection mode.
<strong>Core</strong> Note<br />
Swing Components Often Used in Dialogs 929<br />
The ListSelectionModel never sees the data that a JList is<br />
holding.The JList just tells it which indices are to be considered selected<br />
at any given time. The Swing package includes an implementation of<br />
ListSelectionModel called Def aultListSelectionModel,<br />
which is used by JList. If you wish, you can supply your own<br />
implementation of ListSelectionModel instead of the default one<br />
using the JList setSelectionModel method.<br />
User Selections<br />
The methods just described allow you to manipulate the selection from<br />
within an application. These methods are also called from the JList UI class<br />
in response to user interaction with the JList using the mouse.<br />
<strong>Core</strong> Tip<br />
You can change the colors used to render selected items using the following<br />
two methods:<br />
public void setSelectionBackground(Color backColor);<br />
public void setSelectionForeground(Color foreColor);<br />
Using the mouse, a single item can be selected by clicking it, which will<br />
deselect anything currently selected.<br />
To select a contiguous range of items, click on the item at one end of the<br />
range, then hold down the SHIFT key while clicking on the item at the other<br />
end of the range. These two items and everything in between will be<br />
selected. The first item clicked on is referred to as the anchor of the selection,<br />
while the second is the lead item. Range selection doesn't work if the list<br />
is in single selection mode—here, the anchor and lead are always the last<br />
item clicked on.<br />
To select items that are not adjacent to each other, use the CTRL key as you<br />
click. This causes the item clicked on to be added to the current selection<br />
without deselecting anything already selected. It can only be used, however,<br />
when the list is in multiple interval selection mode.<br />
List Selection Events<br />
When the user makes a selection using the mouse, the JList UI class tells<br />
the ListSelectionModel to update its set of selected objects. The List-
930 Chapter 8 Creating Custom Dialogs<br />
SelectionModel changes its internal state and generates a ListSelectionEvent.<br />
To receive notification of selection changes, you need to register<br />
a ListSelectionListener using the addListSelectionListener<br />
method provided by JList. The ListSelectionListener interface has<br />
only one method:<br />
public interface ListSelectionListener<br />
extends EventListener {<br />
public void valueChanged(ListSelectionEvent evt);<br />
}<br />
The ListSelectionEvent contains the source of the event (which will<br />
be the JList), two indices that indicate a range of values between which a<br />
change has occurred and a boolean flag indicating whether the selection is<br />
still changing. You can obtain these four values using the following ListSelectionEvent<br />
methods:<br />
public Object getSourceO Gets the source of the event.<br />
public int The lower index of the range within which a<br />
getFirstlndex () change has occurred.<br />
public int getLastlndex () The upper index of the range within which<br />
the change occurred.<br />
public boolean Returns true if the selection is still changing.<br />
getValuelsAdjusting()<br />
<strong>Core</strong> Alert<br />
You can also add a ListSelectionListener directly to the<br />
ListSelectionModel using its addListSelectionListener<br />
method. If you do this, the source of the event you receive will be the<br />
ListSelectionModel itself, not the JList.<br />
When you first select a single item, both getFirstlndex and get-<br />
Lastlndex will return the same index. If a range of values is selected, the<br />
entire range will lie between the values returned by these methods. Note,<br />
however, that getFirstlndex and getLastlndex do not necessarily<br />
return the indices of the range of values that end up being selected at the end<br />
of the operation—they indicate the maximum range that the selection<br />
change affects. Thus, for example, if items 2 through 5 are selected and then<br />
you click on item 4, these methods return 2 and 5, respectively, because
Swing Components Often Used in Dialogs 931<br />
these are the bounds of the area affected by the change. Similarly, if items 2<br />
through 5 are selected and you then click on item 8, the affected range is 2<br />
through 8. The values returned by getFirstlndex and getLastlndex are<br />
designed to be suitable for the JList code that needs to determine which<br />
part of the control needs to be repainted. If you only want to know what is in<br />
the selected set after the selection changes, you should use the JList or<br />
ListSelectionModel methods that will be discussed below and ignore the<br />
values in the ListSelectionEvent.<br />
A change in selection will, in fact, result in at least two events being delivered.<br />
The first one or more events indicate that a selection change is in<br />
progress, while the last reports that the selection is complete. Unless you particularly<br />
need to handle all of the events, the most convenient way to handle<br />
selections is to ignore all but the last event of a set. This can be identified<br />
because getValuelsAdjusting returns false only for the final event.<br />
Therefore, most event handlers connected to JList controls will probably<br />
start by calling the getValuelsAdjusting method and will do nothing if it<br />
returns true. Lets look at an example that allows you to see the events generated<br />
as you make selections. Listing 8-10 shows an extract from a modified<br />
version of our earlier example. Run this program using the command:<br />
j ava <strong>JFC</strong>Book.Chapter8.ListExample2<br />
and follow the instructions that follow to see how the events are generated.<br />
Listing 8—10 Receiving selection events from a JList<br />
public ListExample2() {<br />
this.setLayout(new BorderLayout() ) ;<br />
this.setBorder(BorderFactory.createEtchedBorder());<br />
JList list = new JList(listData);<br />
JScrollPane listScroll = new JScrollPane(list);<br />
list.setVisibleRowCount(8);<br />
this.add(listScroll);<br />
// Register to receive selection events<br />
list.addListSelectionListener(<br />
new ListSelectionListener()<br />
public void valueChanged(ListSelectionEvent evt) {<br />
JList src = (JList)evt.getSource();<br />
System.out.printIn(
932 Chapter 8 Creating Custom Dialogs<br />
Listing 8-10 Receiving selection events from a JList (continued)<br />
}<br />
}<br />
});<br />
"Change in selection between indices " +<br />
evt.getFirstlndex() + " and " +<br />
evt.getLastlndex() +<br />
"; value is adjusting: " +<br />
evt.getValuelsAdjusting());<br />
if (evt.getValuelsAdjusting() == false) {<br />
int[] selectedlndices = src.getSelectedlndices();<br />
System.out.print("Selected indices are: ");<br />
for (int i = 0; i < selectedlndices.length; i++) {<br />
System.out.print(selectedlndices[i] + " ");<br />
}<br />
Object[] selectedValues = src.getSelectedValues();<br />
System.out.println("\n\nSelected values are:");<br />
for (int i = 0; i < selectedValues.length; i++) {<br />
System.out.println("\t" + selectedValues[i]);<br />
}<br />
}<br />
In this example, a ListSelectionListener that prints the content of<br />
each ListSelectionEvent that it receives is registered. First, try selecting<br />
the entry for "Neil Armstrong:"<br />
Change in selection between indices 0 and 0;<br />
value is adjusting: true<br />
Change in selection between indices 0 and 0;<br />
value is adjusting: false<br />
Selected indices are: 0<br />
Selected values are:<br />
Neil Armstrong<br />
First, notice that two events were received, in which only the last has the<br />
"value adjusting" flag set to false. The first event is actually generated when<br />
you press the mouse button to begin the selection, while the second occurs<br />
when you release the mouse. You can generate more than two events by<br />
pressing the mouse over the first entry in the list and then dragging it down,<br />
without releasing the left mouse button. As you do this, the selection highlight<br />
will follow the mouse, resulting in successive entries being selected and
Swing Components Often Used in Dialogs 933<br />
then deselected. Events will be delivered as you drag the mouse, until you<br />
stop and release the mouse button. Here's a snapshot of some typical output<br />
during this process:<br />
Change in selection between indices 0 and 0;<br />
value is adjusting: true<br />
Change in selection between indices 0 and 1;<br />
value is adjusting: true<br />
Change in selection between indices 1 and 2;<br />
value is adjusting: true<br />
Change in selection between indices 2 and 3;<br />
value is adjusting: true<br />
Change in selection between indices 3 and 4;<br />
value is adjusting: true<br />
Change in selection between indices 4 and 5;<br />
value is adjusting: true<br />
Change in selection between indices 0 and 5;<br />
value is adjusting: false<br />
Selected indices are: 5<br />
Selected values are:<br />
Alan Bean<br />
You'll notice that the selection started with entry 0 and finished at entry 5.<br />
Seven events were delivered, for only the last of which getValueAdjusting<br />
returns false. Notice also that the affected range for the events<br />
reported while the operation was in progress cover the single item being<br />
deselected and the adjacent item being selected, but the final event reports a<br />
change in the entire range. This event is a "summary" of all the other events.<br />
Our event handler ignores events that have the value-adjusting flag set to<br />
true, because they represent transient states that are usually not of interest.<br />
When you get an event of interest, you have several ways to get hold of the<br />
item that has been selected and you can also obtain other information about<br />
the current selection. As noted earlier, the indices contained in the event are<br />
generally not useful to application code, which should handle the selection<br />
either through either the JList itself or the ListSelectionModel. JList<br />
provides the following selection-related methods:<br />
public int getSelectedlndex();<br />
public Object getSelectedValue();<br />
public int [] getSelectedlndices() ;<br />
public Object[] getSelectedValues();<br />
public int getAnchorSelectionlndex();<br />
public int getLeadSelectionlndex();<br />
public int getMinSelectionlndex();
934 Chapter 8 Creating Custom Dialogs<br />
public int getMaxSelectionlndex();<br />
ListSelectionModel also provides the last four of these methods, but<br />
does not offer the first four. The first two methods return the item that the<br />
JList considers to be the selected item, either by index or by value. Since<br />
you can select more than one item at a time, it is important to know which of<br />
these is returned when there are several items selected. In fact, the item that<br />
is considered to be the selected item is the one with the lowest selection<br />
index. This, of course, is not necessarily the one most recently selected since,<br />
J J<br />
for example, if you select item 1 and then hold down the CTRL key to select<br />
item 4, the value returned by getSelectedlndex after both of these operations<br />
have been performed is 1. The same is true if you select item 4 and then<br />
hold down CTRL and click item 1. If you call these methods when there is<br />
nothing selected, getSelectedlndex will return -1 and getSelected-<br />
Value will return null.<br />
The next two methods return an array of all of the selected items either as<br />
indices or values. If these methods are called when there is no selection, they<br />
return empty arrays (not null).<br />
The last four methods return general information about the current selection.<br />
The terms anchor and lead were introduced earlier, while the minimum<br />
and maximum selected items are exactly as their names imply—the lowest<br />
numbered and highest number index of all the selected items. If the list is in<br />
multiple interval selection mode, there may be unselected items between<br />
these two indices. For reasons described earlier, the value returned by get-<br />
Selectedlndex will always be the same as that returned by getMinSelectionlndex.<br />
To see how all of these values change as the selection is changed, we'll use<br />
a modified version of the previous example that also displays the minimum,<br />
maximum, lead, and anchor selection values for each event for which<br />
getValuelsAdjusting returns false. To run this example, type the command<br />
j ava <strong>JFC</strong>Book.Chapter8.ListExample2A<br />
Start by clicking on the top item ("Neil Armstrong"), as before. This<br />
results in the following output (where events in which getValuelsAdjusting<br />
returns true have been ignored):<br />
Change in selection between indices 0 and 0;<br />
value is adjusting: false<br />
Selected indices are: 0 Selected index is 0<br />
Min selection is 0<br />
Max selection is 0
Lead selection is 0<br />
Anchor selection is 0<br />
Selected values are:<br />
Neil Armstrong<br />
Swing Components Often Used in Dialogs 935<br />
It is not surprising that all of the indices are zero, since we have only<br />
selected the first item in the list. Now scroll down to the bottom of the list<br />
and click on "Harrison Schmitt." The events that are generated this time are:<br />
Change in selection between indices 0 and 20;<br />
value is adjusting: false<br />
Selected indices are: 20 Selected index is 20<br />
Min selection is 20<br />
Max selection is 20<br />
Lead selection is 20<br />
Anchor selection is 20<br />
Selected values are:<br />
Harrison Schmitt<br />
This is almost identical to the first case, except that now the ListSelectionEvent<br />
indicates a selection change between index 0 and 20, which covers<br />
the entire list. As noted earlier, it is important to realize that the indices in<br />
the events cover the entire area over which there has been a change: This<br />
does not imply that every item in between has changed selection state. Again,<br />
all the other indices have the same value (20), which indicates the item that is<br />
finally selected.<br />
Things get more interesting when the selection involves more than one<br />
entry in the list. To see an example of this, leaving the last entry selected,<br />
hold down the SHIFT key and click on "Ken Mattingly" This results in the<br />
following output:<br />
Change in selection between indices 17 and 20;<br />
value is adjusting: false<br />
Selected indices are: 17 18 19 20 Selected index is 17<br />
Min selection is 17<br />
Max selection is 20<br />
Lead selection is 17<br />
Anchor selection is 20<br />
Selected values are:<br />
Ken Mattingly<br />
Eugene Cernan<br />
Ron Evans<br />
Harrison Schmitt
936 Chapter 8 Creating Custom Dialogs<br />
Since the SHIFT key was held down, all of the values between "Harrison<br />
Schmitt" and "Ken Mattingly" (inclusive) have been selected, as the selected<br />
indices and selected values indicate. Notice also that the minimum and maximum<br />
values are 17 and 20, respectively, which is what you would expect, and<br />
the selected item has index 17, because it is always the same as the minimum<br />
selection index. The anchor selection index in this case is 20, because it is the<br />
entry that was selected at the start of the operation (it is called "anchor"<br />
because it didn't move as a result of the operation), while the lead selection<br />
index is 17, because this entry was the one that completed the selection<br />
index. The index that the JList reports as being the selected item is the<br />
same as the lead selection here, but this is not always the case. To see an<br />
example in which this is not the case, click again on the entry for "Ken Mattingly"<br />
to create a single selection, then hold down SHIFT and click on "Harrison<br />
Schmitt." This creates exactly the same set of selected objects as the<br />
previous case, but the program's output is slightly different:<br />
Change in selection between indices 17 and 20;<br />
value is adjusting: false<br />
Selected indices are: 17 18 19 20 Selected index is 17<br />
Min selection is 17<br />
Max selection is 20<br />
Lead selection is 20<br />
Anchor selection is 17<br />
Selected values are:<br />
Ken Mattingly<br />
Eugene Cernan<br />
Ron Evans<br />
Harrison Schmitt<br />
The selected item is still at index 17, but now the lead and anchor selections<br />
are different—because the selection started at entry 17, this is now the<br />
anchor, while index 20 has become the lead index. The key definitions to bear<br />
in mind are:<br />
Selected index: always the lowest numbered index of all the selected<br />
items<br />
Lead selection index: the index of the last entry to be added to the selection.<br />
This is the most recently selected item.
Swing Components Often Used in Dialogs 937<br />
Now let's look at what happens if you use the CTRL key instead of SHIFT.<br />
The CTRL key adds items to an existing selection rather than creating an<br />
entirely new selection. To see the events that it generates, first click on "Neil<br />
Armstrong", then hold down the CTRL key and click on "Michael Collins,"<br />
thus creating a selection with two items with a gap in between, because the<br />
entry that lies between them ("Buzz Aldrin") is not selected by this operation.<br />
The output that appears at the end of this operation is as follows:<br />
Change in selection between indices 0 and 2;<br />
value is adjusting: false<br />
Selected indices are: 0 2 Selected index is 0<br />
Min selection is 0<br />
Max selection is 2<br />
Lead selection is 2<br />
Anchor selection is 2<br />
Selected values are:<br />
Neil Armstrong<br />
Michael Collins<br />
This output clearly shows that the correct two items are selected. The<br />
selected item is "Neil Armstrong" at index 0, because this entry has the lower<br />
index, and the minimum and maximum selection indices are reported as 0<br />
and 2 respectively, which is correct. The most interesting aspect of this output<br />
is the fact that the lead and anchor indices are both 2, whereas you might<br />
have expected the anchor index to be 0. This shows a fundamental difference<br />
between the use of the CTRL key and the SHIFT key—when you use the<br />
CTRL key, the lead and anchor indices always refer to the item added to the<br />
selection. If you hold down the CTRL key and click again on "Michael Collins,"<br />
that entry will be removed from the selection, leaving the other one<br />
selected. The program output for this is as follows:<br />
Change in selection between indices 2 and 2;<br />
value is adjusting: false<br />
Selected indices are: 0 Selected index is 0<br />
Min selection is 0<br />
Max selection is 0<br />
Lead selection is 2<br />
Anchor selection is 2<br />
Selected values are:<br />
Neil Armstrong
938 Chapter 8 Creating Custom Dialogs<br />
At first sight, there is nothing surprising here. Since only index 0 is<br />
selected, most of the indices are reported as zero, but notice that the lead<br />
and anchor indices are both 2, even though this item is no longer selected!<br />
The lead and anchor indices report the values that were last operated on in<br />
the selection process but, clearly, they don't imply that that item is actually<br />
selected! If you intend to use the lead selection index to perform an operation<br />
on the most recently selected item in a list (instead of using the result of<br />
getSelectedlndex or getSelectedlndices), be sure to check that the<br />
lead item is actually selected. You can do this using the following method<br />
provided by JList and ListSelectionModel:<br />
public boolean isSelectedlndex(int index);<br />
Handling Double-Click Selection<br />
In some applications, just selecting an item by clicking on it is enough to<br />
cause the application to perform an action. For example, you might display<br />
an explanatory message somewhere in a status bar when the user clicked on<br />
"Neil Armstrong" explaining that he was the first man to walk on the moon. If<br />
this grabs the user's interest, he or she might want to know more. Usually,<br />
choosing an item from a list involves selecting it and then pressing a button<br />
somewhere to confirm the selection. Most platforms allow the user to double-click<br />
on an entry as a quicker way to achieve this. If you double-click with<br />
JList, you still get a single ListSelectionEvent for the first click and<br />
nothing for the second click. This is because JList doesn't have any way to<br />
report a double click to you. If you want to implement double-click semantics,<br />
you need to register an event handler for mouse-clicked events and process<br />
the event yourself. Here's an example that shows how you might add this<br />
to the code in Listing 8-9:<br />
// Register for mouse events<br />
list.addMouseListener(new MouseAdapter() {<br />
public void mouseClicked(MouseEvent evt) {<br />
if (evt.getClickCount() ==2) {<br />
JList 1 = (JList)evt.getSource();<br />
int index = 1.locationToIndex(evt.getPoint());<br />
if (index > 0) {<br />
Object value = 1.getModel() .getElementAt(index) ;;<br />
System, out .printlnC Chosen value is " + value);<br />
}<br />
}<br />
}<br />
});
Swing Components Often Used in Dialogs 939<br />
This code registers to receive mouse events from the JList. As they<br />
arrive, the event is checked to see if it represents a double-click. If it does,<br />
then processing should be performed on the selected item. Usually, you<br />
would just use the usual getSelectedlndex method to locate the item that<br />
the user has selected, but here we illustrate another way to find the selected<br />
item without relying on the ListSelectionModel. The event handler first<br />
extracts the mouse location using the getPoint method of MouseEvent.<br />
JList provides the locationToIndex method to translate a point to the<br />
index of the item at that location—this translation is not trivial because the<br />
list might be mounted in a JScrollPane. Assuming the mouse is over an<br />
item, the returned index is then used to get the correct item from the<br />
JLists data model.<br />
You can try this out for yourself using the following command:<br />
java <strong>JFC</strong>Book.Chapter8.ListExample3<br />
If you double-click on one of the entries in the list, you'll see the usual<br />
output as the selection is updated (by the first mouse click) and then you'll<br />
see the debugging output from the mouse event handler indicating which<br />
item it found by using the locationToIndex method.<br />
<strong>Core</strong> Note<br />
Why is it necessary for the code shown above to check that the value<br />
returned by locationToIndex was positive? Surely a mouse event is<br />
only received if you click over the JList, in which case you must have a<br />
valid index? Yes to the first part of that statement and no to the second:<br />
Suppose the JList is in a frame that is larger than the space needed for<br />
the list. Then the items will stop part way down the list leaving the bottom<br />
of it empty. If you click in this area, you are within the JList but not over<br />
a valid selection and in this case locationToIndex returns -I.<br />
Customizing the JList Control<br />
To end this discussion of JList, let's look at how you can influence the way<br />
in which it renders its contents.
940 Chapter 8 Creating Custom Dialogs<br />
Controlling Cell Width<br />
When displaying the list of items, the width of the control is determined by<br />
the space required to render its widest item. To work this out, the list has to<br />
measure the rendered size of every item of data that it will draw. If there is a<br />
lot of data in the control, this can significantly impact performance. To avoid<br />
this, you can set a fixed width using the setFixedCellWidth method; you<br />
can also make all cells be of the same height using the setFixedCell-<br />
Height method. These methods are defined as follows:<br />
public void setFixedCellWidth(int width);<br />
public void setFixedCellHeight(int height);<br />
where both width and height are specified in pixels. Often, though, it is not<br />
convenient (or possible) to specify the cell sizes in pixels, because the width<br />
or height of a cell large enough to hold, say, an 8-character string depends<br />
entirely on the font in use. A better method is to let the JList compute the<br />
appropriate dimensions by passing typical content to the setPrototype-<br />
CellValue method, defined as follows:<br />
public void setPrototypeCellValue(Object typicalValue);<br />
If you are populating the control with 8-letter words, you can use the following<br />
to have the JList compute suitable cell width and height values:<br />
list.setPrototypeCellValue("MMMMMMMM");<br />
Using the List Cell Renderer<br />
The JList controls in the examples shown so far have been populated with<br />
strings, but the constructors allow you to supply data models that can hold<br />
any type of Object and the methods that retrieve values from the control<br />
return an Object or an array of Objects. If a JList can hold any type of<br />
object, how does it represent them on the screen? There are one case that is<br />
treated specially by default. If any item in the JList is an icon, it is rendered<br />
directly onto its cell. This means that it is trivial to create a list whose<br />
items are all graphics instead of text. If an item is anything other than an<br />
Icon, its toString method is called and the result is drawn into the items<br />
cell. In other words, JList can render icons and strings by default.<br />
If this isn't sufficient, you can take over the rendering process yourself by<br />
replacing the JList's default rendering behavior. To do this, you have to provide<br />
an implementation of the ListCellRenderer interface and install it by<br />
passing it to the setCellRenderer method. The ListCellRenderer<br />
interface has only one method:<br />
public Component getListCellRendererComponent(JList list,
Swing Components Often Used in Dialogs 941<br />
Object value, int index, boolean isSelected,<br />
boolean hasFocus);<br />
This method is invoked for each item in the list that is currently visible.<br />
The arguments passed to this method include the value from the list, its<br />
index within the ListModel and booleans indicating whether the value is<br />
currently selected and whether it has the focus, which is to say that it is the<br />
lead selection item. Note that the focused item need not actually be selected<br />
as we saw earlier—you can achieve this state by clicking an item to select it<br />
and then deselect it by holding down the CTRL key and clicking again. The<br />
getListCellRendererComponent method must return a Component that<br />
can be used to render on the screen the value passed to it. The JList will<br />
render the value by calling the returned Components paint method, having<br />
arranged for it to draw into a Graphics object that covers part of the<br />
JLists surface. In theory, an implementation of this method could return<br />
any sort of custom Component that exhibited the right behavior when its<br />
paint method was called. It is possible, for example, to create an object,<br />
derived from Component, that just stores the value and the selected and<br />
focus flags and uses them only when it is asked to paint itself. Usually,<br />
though, the simplest thing to do is to create an object derived from JPanel<br />
or jLabel that you can use to draw on or that can draw itself.<br />
The example that will be used here is another variation on the graphics<br />
drawing program from Chapter 4. In subsequent chapters, the color selection<br />
buttons that were originally on the application s main window have been<br />
removed and mounted first on a toolbar and then in a floating, non-modal<br />
dialog box. For the purposes of this example, they are going to be placed in a<br />
scrolling list. Each color will be represented by the usual colored square icon<br />
that has been used before, together with its name, which will appear to the<br />
right of it. Our task will be to make the list control display both the icon and<br />
the text.<br />
Had it been required to show just the icon, you could have simply created<br />
an array of them and directly populated the JList with them, because it can<br />
draw a list of icons without a special Tenderer. The code to do this would look<br />
something like this:<br />
ColorFilllcon[] icons = new ColorFilllcon[] {<br />
new ColorFilllcon(Color.white),<br />
new ColorFilllcon(Color.red),<br />
new ColorFilllcon(Color.black)<br />
};<br />
JList list = new JList(icons);
942 Chapter 8 Creating Custom Dialogs<br />
This code would populate each entry in the list with a ColorFilllcon<br />
and the icons would appear in the list box on the screen. If the user made a<br />
selection, the getSelectedValue method would return a ColorFilllcon<br />
object (and the selection handling code in the application would have to be<br />
able to handle objects of that type).<br />
However, more usually the objects in the ListModel are business objects<br />
or something of interest to the application that cannot automatically render<br />
themselves. In such cases, if the result of calling toString on these objects<br />
does not produce an acceptable result, you need to install a custom renderer<br />
that can use the content of the objects in the model to decide how to represent<br />
them on the screen. Because the requirement here is to render both text<br />
and an icon, the list needs to store an object that holds both pieces of information.<br />
When the user selects an entry, it will be necessary to get at both the<br />
icon and the corresponding color. You'll remember from Chapter 4 that the<br />
icon is used to change the appearance of a label at the bottom of the application<br />
window and the color, preferably as a Color object, is used to actually<br />
change the drawing color. Thus, it is necessary to have in the list an object<br />
that can store the icon, the color name, and the corresponding Color object.<br />
Suppose we create a class derived from AbstractAction. As you've seen<br />
in connection with menus and toolbars, this class can store and retrieve both<br />
the text and icon and, as a bonus, you can also define an actionPerf ormed<br />
method that contains the code to be executed when the user selects a color.<br />
By subclassing AbstractAction, you can also add a member to hold the<br />
Color object. To implement this solution, a class called ColorChangeAction,<br />
which is derived from AbstractAction, is created. The list box is<br />
then populated with a collection of these objects, one for each color choice.<br />
The implementation of this class is shown in Listing 8—11.<br />
Listing 8-11 An action to handle a JList selection<br />
// Helper class that implements a color change action<br />
class ColorChangeAction extends AbstractAction {<br />
ColorChangeAction(Color color, String name) {<br />
super(name, new ColorFilllcon(color));<br />
this.color = color;<br />
}<br />
// Action to take when this color is selected<br />
public void actionPerforraed(ActionEvent evt) {
Swing Components Often Used in Dialogs 943<br />
Listing 8-11 An action to handle a JList selection (continued)<br />
}<br />
System.out.println("Color chosen: " + color);<br />
Color color; // Associated color<br />
The Color object and the colors name are passed to the constructor,<br />
which creates the ColorFilllcon and stores both it and the color name in<br />
the AbstractAction by passing the name and the icon to the AbstractAction<br />
constructor. The only remaining duties are to store the color itself and<br />
to implement an actionPerf ormed method. In this example, the action-<br />
Performed method will just print a method to demonstrate that the code<br />
works properly: This list box is not actually going to be linked into the graphic<br />
drawing application here.<br />
To populate the list box, an array of ColorChangeAction objects is created<br />
and passed to the JList constructor. Then, the list box is mounted in a<br />
frame and displayed. At this point, if nothing more were done, the JList<br />
would use its default Tenderer, which would represent these objects by calling<br />
the toString method of each of them. This would produce a rather<br />
unusable result—here's a sample of what you might see in the list:<br />
<strong>JFC</strong>Book.Chapter8.ColorChangeAction@lcc9e9<br />
<strong>JFC</strong>Book.Chapter8.ColorChangeAction@lcc9ff<br />
<strong>JFC</strong>Book.Chapter8.ColorChangeAction@lcca04<br />
<strong>JFC</strong>Book.Chapter8.ColorChangeAction@lcca09<br />
To produce the required display, it is necessary to implement a custom<br />
ListCellRenderer and substitute it for the default one by calling the<br />
JList setCellRenderer method. When the JList paints itself, it calls the<br />
getListCellRendererComponent method of the renderer for each item<br />
in the list that is going to be visible. This method returns a Component that<br />
can paint a proper representation of the list item. Since this example uses a<br />
text item and an icon, a JLabel can be used to do the actual rendering. The<br />
code shown in Listing 8-12 creates a subclass of JLabel that implements the<br />
ListCellRenderer interface and registers that as the renderer.<br />
Listing 8-12 A custom list cell renderer<br />
package <strong>JFC</strong>Book.Chapter8;
944 Chapter 8 Creating Custom Dialogs<br />
Listing 8-12 A custom list cell renderer (continued)<br />
import j avax.swing.*;<br />
import j avax.swing.border.*;<br />
import javax.swing.event.*;<br />
import <strong>JFC</strong>Book.Chapter4.ColorFilllcon;<br />
import j ava.awt.*;<br />
import j ava.awt.event.*;<br />
import <strong>Java</strong>.util.Vector;<br />
public class ListExample4 extends JPanel {<br />
public ListExample4() {<br />
this.setLayout(new BorderLayout());<br />
this.setBorder(BorderFactory.createEtchedBorder());<br />
JList list = new JList(actions);<br />
JScrollPane listScroll = new JScrollPane(list);<br />
list.setVisibleRowCount(6);<br />
list.setCellRenderer(new ColorActionRenderer());<br />
this.add(listScroll);<br />
// Register to receive selection events<br />
list.addListSelectionListener(<br />
new ListSelectionListener() {<br />
public void valueChanged(ListSelectionEvent evt) {<br />
JList src = (JList)evt.getSource();<br />
if (evt.getValuelsAdjusting() == false) {<br />
ColorChangeAction action =<br />
(ColorChangeAction)src.getSelectedValue();<br />
System.out.println("Selected " +<br />
(String)action.getValue(Action.NAME));<br />
}<br />
}<br />
});<br />
// Register for mouse events<br />
list.addMouseListener(new MouseAdapter() {<br />
public void mouseClicked(MouseEvent evt) {<br />
if (evt.getClickCount() = =2) {<br />
JList 1 = (JList)evt.getSource();<br />
int index = 1.locationToIndex(evt.getPoint());<br />
if (index >= 0) {<br />
Object value =<br />
l.getModelO .getElementAt (index) ;<br />
ColorChangeAction action =
Listing 8-12 A custom list cell renderer (continued)<br />
}<br />
}<br />
});<br />
}<br />
}<br />
Swing Components Often Used in Dialogs 945<br />
(ColorChangeAction)value;<br />
System.out.println("Chosen " +<br />
(String)action.getValueAction.NAME));<br />
action.actionPerformed(new ActionEvent(1,<br />
ActionEvent.ACTION_PERFORMED, null));<br />
protected class ColorActionRenderer<br />
extends JLabel implements ListCellRenderer {<br />
public Component getListCellRendererComponent(<br />
JList list, Object value, int index,<br />
boolean isSelected, boolean hasFocus) {<br />
ColorChangeAction action = (ColorChangeAction)value;<br />
this.setOpaque(true);<br />
this.setlcon(<br />
(Icon)action.getValue(Action.SMALL_ICON));<br />
this.setText((String)action.getValue(Action.NAME));<br />
if (isSelected) {<br />
this.setBackground(Color.blue);<br />
this.setForeground(Color.white);<br />
this.setFont(selectedFont);<br />
} else {<br />
this.setBackground(Color.yellow);<br />
this.setForeground(Color.black);<br />
this.setFont(normalFont);<br />
}<br />
}<br />
return this;<br />
protected final Font selectedFont =<br />
new Font("Serif", Font.BOLD, 14);<br />
protected final Font normalFont =<br />
new Font("Serif", Font.PLAIN,<br />
12) ;<br />
}<br />
public static void main(String[] args) {
946 Chapter 8 Creating Custom Dialogs<br />
Listing 8-12 A custom list cell renderer (continued)<br />
JFrame f = new JFrame("List Example 4");<br />
f.getContentPane().add(new ListExample4());<br />
f.pack();<br />
f.addWindowListener(new WindowAdapter() {<br />
public void windowClosing(WindowEvent evt) {<br />
System.exit(0);<br />
}<br />
});<br />
f.setvisible(true) ;<br />
}<br />
// Data for the list<br />
ColorChangeAction [] actions = new ColorChangeAction[] {<br />
new ColorChangeAction(Color.white, "White"),<br />
new ColorChangeAction(Color.orange, "Orange"),<br />
new ColorChangeAction(Color.yellow, "Yellow"),<br />
new ColorChangeAction(Color.green, "Green"),<br />
new ColorChangeAction(Color.blue, "Blue"),<br />
new ColorChangeAction(Color.magenta, "Magenta"),<br />
new ColorChangeAction(Color.red, "Red"),<br />
new ColorChangeAction(Color.pink, "Pink"),<br />
new ColorChangeAction(Color.gray, "Gray"),<br />
new ColorChangeAction(Color.black, "Black") };<br />
2 „___<br />
The interesting part of this example is the implementation of the ColorActionRenderer<br />
class. When the getListCellRendererComponent<br />
method of this class is called, it will receive an object from the list box. This<br />
object is a ColorChangeAction, so the text and icon can be extracted using<br />
the AbstractAction getValue method and then used to configure the<br />
JLabel superclass. This, in itself, is enough to produce a reasonable effect,<br />
but one more thing needs to be done. When the user clicks on an entry in a<br />
list box, the background is highlighted. This highlighting is the responsibility<br />
of the cell renderer—in other words, it is our job. The JList passes an argument<br />
that indicates whether the cell that is being rendered is selected or not.<br />
Here, this argument is used to give the JLabel either a blue background<br />
when it is selected or a yellow one if it is not. In addition, a slightly larger font<br />
is used for the selected item. Having configured the JLabel, we return a reference<br />
to it to the JList.
<strong>Core</strong> Note<br />
Swing Components Often Used in Dialogs 947<br />
This example uses specific colors to show the highlighted items. If you want<br />
to be more orthodox, you can use the JList reference passed to the<br />
getListCellRendererComponent method to obtain the usual<br />
foreground and background colors using getForeground and<br />
getBackground or the colors to be used for selection using<br />
getSelectionForeground and getSelectionBackground.<br />
The JList uses this component to render the item's representation onto<br />
the screen by creating a Graphics object that corresponds to the part of the<br />
screen occupied by the item and calls the Component's paint method, passing<br />
the Graphics object as its argument. It doesn't create a container and<br />
permanently add a Component for each item to it. This is why you only need<br />
one Tenderer and one Component to render the contents of the entire list. If<br />
this were not so, we would have to derive our ListCellRenderer from<br />
some other class and have it create and return a new JLabel for each item to<br />
be displayed. Because of this economical design, most Tenderers, like this<br />
one, are derived from a Swing component (most often JLabel) and return a<br />
reference to themselves from the getListCellRendererComponent<br />
method. You'll see this pattern again in connection with JComboBox, JTree,<br />
and JTable which all use the same basic idea. Figure 8-14 shows what the<br />
list box looks like with this renderer. You can try this example out by using the<br />
command<br />
<strong>Java</strong> <strong>JFC</strong>Book.Chapter8.ListExample4<br />
To allow the user to make a selection by double-clicking on it, the mousehandling<br />
code from the previous example has been carried forward. This<br />
code extracts the selected value from the data model; since the list box was<br />
populated with ColorChangeAction objects, this value is the Color-<br />
ChangeAction object for the selected object. The mouse click method generates<br />
an ActionEvent and passes it to the act ionPer formed method of<br />
the ColorChangeAction. This method runs with the ColorChangeAction<br />
as its this pointer, so it has access to the color name, the icon, and the<br />
Color object itself, which is what would be needed to use this list box in the<br />
graphics drawing application from Chapter 4.<br />
An important point to note about the ListCellRenderer is that it is not<br />
required to return a component of the same height for each row. If the<br />
JList setFixedCellWidthor setFixedCellHeight methods have been<br />
called, then the renderer will be allocated a cell with the width and/or height
948 Chapter 8 Creating Custom Dialogs<br />
Figure 8-14 The JList control with a custom Tenderer.<br />
of the fixed size and must be prepared to draw in its allocated space. Similarly,<br />
calling setPrototypeCellValue effectively fixes the width. If either<br />
the width or height is not fixed by either of these means, the JList UI delegate<br />
works out how much space each item needs by invoking the getList-<br />
CellRendererComponent method for each item in the list in turn and<br />
saving the preferred size of the returned component. If this method returns<br />
different heights for different rows, then the list will be rendered with variable<br />
height rows. Because this is an expensive process, the returned values<br />
are cached, so it is not safe for the Tenderer to return different row heights<br />
for the same item based on context-dependent factors.<br />
The JComboBox Control<br />
There are many similarities between JList and its close relative JCombo-<br />
Box. Since these controls are so similar, this section concentrates mainly on<br />
the features unique to JComboBox.<br />
The major visible difference between these two controls is that a list box<br />
usually shows several possible choices at once, whereas a combo box will normally<br />
show only one. When you create a combo box, you get what looks like a<br />
text field with a downward-point arrow to the right of it. If you click on the<br />
arrow, a popup containing all of the possible choices appears beneath the<br />
input field, as shown in Figure 8-15, which shows three combo boxes side by<br />
side. Another important difference is that a combo box may (but need not)<br />
allow the user to type into the text field a value that isn't among the list of
Swing Components Often Used in Dialogs 949<br />
selectable values that the combo box has been initialized with. Unlike JList,<br />
however, you can only select a single value from a JComboBox.<br />
Figure 8-15 The JComboBox control.<br />
The Combo Box and its Data Model<br />
Like JList, the JComboBox class gets its data from a data model, which you<br />
can supply using one of its four constructors:<br />
public JComboBox();<br />
public JComboBox(ComboBoxModel model);<br />
public JComboBox(Vector data);<br />
public JComboBox(Object[] data);<br />
JComboBox needs data in the form of a ComboBoxModel, which is derived<br />
from the ListModel used by the list box with the addition of the following<br />
two methods:<br />
public void setSelectedltem(Object item);<br />
public Object getSelectedltem();<br />
These additional methods are needed because an editable combo box<br />
allows the user to make a choice from the data already in the model or to type<br />
a different value into the combo box. The value that the user types need not<br />
be one of the items in the combo box, so the ComboBoxModel has to be able<br />
to hold this value separately.<br />
If you choose the second constructor, you have to supply your own data<br />
model, populated with the data that you want to appear in the combo box.<br />
The most convenient way to do this is to use the Def aultComboBoxModel
950 Chapter 8 Creating Custom Dialogs<br />
class, which, like DefaultListModel, has a Vector-like interface and<br />
allows you to initialize it from a Vector or an array of objects, and to add and<br />
remove individual items at any time. The last two constructors provide the<br />
data in the form of a Vector or an array of Obj ects which are then wrapped<br />
into a Def aultComboBoxModel that is created by the JComboBox constructor.<br />
The first constructor supplies no data and results in a JComboBox with an<br />
empty Def aultComboBoxModel.<br />
Since ComboBoxModel is derived from ListModel, it has the same problem<br />
of not defining any methods that allow you to add, change or remove any<br />
data. In order to make it possible to change the data in a ComboBox, there is<br />
a second interface, derived from ComboBoxModel, that includes some extra<br />
methods that allow the model to be modified:<br />
public interface MutableComboBoxModel<br />
}<br />
extends ComboBoxModel {<br />
public void addElement(Object obj);<br />
public void removeElement(Object obj);<br />
public void insertElementAt(Object obj, int index);<br />
public void removeElementAt(int index);<br />
This interface is implemented by DefaultComboBoxModel, so that the<br />
content of any JComboBox created using an instance of this class can be<br />
changed after it has been created. The complete set of methods provided by<br />
DefaultComboBoxModel is shown below:<br />
public void addElement (Obj ect Adds the given item to the end of the<br />
anObject) model.<br />
public Object getElemen- Returns the item at the specified<br />
t At (int index) index or nul 1 if the index value is<br />
invalid.<br />
public int getlndexOf (Object Searches the model for an item that<br />
anOb j ect) is equal to the one supplied and<br />
returns its index if one is found, or -1<br />
if there is no match.<br />
public Object getSelecte- Returns the value of the selected<br />
dltem () item, or null if nothing is selected.<br />
public int getSizeO Gets the number of items in the<br />
model.
public void insertElementAt(Object<br />
anObject, int<br />
index)<br />
public void removeAHElements<br />
()<br />
public void removeElement(Object<br />
anObject)<br />
public void removeElementAt(int<br />
index)<br />
public void setSelected!tem(Object<br />
anObject)<br />
Swing Components Often Used in Dialogs 951<br />
Inserts the given object at the specified<br />
index in the model, replacing the<br />
object that is currently there. The<br />
index value must be within the<br />
bounds of the model—you cannot<br />
insert an item beyond the end of the<br />
list using this method.<br />
Clears the model, leaving it empty.<br />
Removes the given item from the<br />
model if it is found. No effect if the<br />
given object is not in the model.<br />
Removes the item at the given index,<br />
which must be within the bounds of<br />
the model.<br />
Makes the given object the selected<br />
item. The item need not be one of<br />
the items in the model.<br />
If you don't want to work directly with Def aultComboBoxModel, JComboBox<br />
has convenience methods that allow you to manipulate data in the<br />
model without needing a reference to the ComboBoxModel itself. Note that<br />
these work ONLY if the JComboBox has a Def aultComboBoxModel<br />
installed, because they have to use special knowledge of this model to do<br />
their jobs. If you install your own model that is not derived from Default -<br />
ComboBoxModel and then try to manipulate it using these methods, you will<br />
get an exception. Here are the data manipulation methods implemented by<br />
JComboBox itself:<br />
public void addltem (Object<br />
anltem)<br />
Adds an item at the end of the model.<br />
public Obj ect getltemAt (int Returns the item at the specified index.<br />
index)<br />
public int getltemCount Returns the number of items in the<br />
model.
952 Chapter 8 Creating Custom Dialogs<br />
public void insertltemAt Inserts an item at the given index.<br />
(Object anltem, int index)<br />
public void removeAllltems () Empties the data model.<br />
public void removeltem (Object Removes the given item.<br />
anltem)<br />
public void removeltemAt (int Removes the item at the given index.<br />
index)<br />
As with JList, these methods all deal with Obj ects, not just text strings,<br />
so you can store arbitrary content in a combo box. Furthermore, the same<br />
rules apply as far as retrieving and displaying data are concerned: You get<br />
back one of the objects that you stored when you ask for the selected item,<br />
and the objects in the combo box are either displayed directly in the case of<br />
icons or strings, or have the results of applying the toString method displayed<br />
otherwise. Also like JList, you can create a custom cell renderer by<br />
implementing the ListCellRenderer interface and using the setRenderer<br />
method to register it with the combo box (note that this is not the<br />
same method name as that used by JList). In fact, any custom renderer that<br />
works with JList will work just as well with JComboBox and vice versa.<br />
Combo Box Selection and Events<br />
When you have data in the combo box, you can display it and allow the user<br />
to make a selection. When the combo box first appears, the first item that you<br />
added to it is considered to be selected and appears in the combo box.<br />
To choose an item from the combo box, the user clicks on the down arrow to<br />
make the list of possible choices appear. The area in which the choices are displayed<br />
is referred to as a "popup," despite the fact that it usually drops down<br />
below the combo box. As the mouse moves up and down the list of choices,<br />
they are highlighted, unlike the list box, which only highlights choices when the<br />
mouse is clicked. If there are too many items in the combo box to fit in the visible<br />
area of popup, a scrollbar will be added so that it can be scrolled to bring<br />
all of the choices into view. By default, the popup can display eight items, but<br />
you can change this by calling the setMaximumRowCount method.<br />
Unlike JList, the combo box's selection is handled not by a separate<br />
ListSelectionModel - it is built in as the selected item property of the<br />
ComboBoxModel. The following methods allow you to manage the selection<br />
of items in the combo box:
Swing Components Often Used in Dialogs 953<br />
public void getSelectedlndex () Returns the index of the selected item,<br />
counted from 0.<br />
public Object getSelectedltem () Returns the selected object.<br />
public Obj ect [] Returns all selected items.<br />
getSelectedObjects()<br />
public void setSelectedlndex Selects the item at index.<br />
(int index)<br />
public void setSelectedltem Selects the given object, which need not<br />
(Object anltem) be in the combo box's list.<br />
Even though there is a getSelectedObjects method that returns an<br />
array of objects, you can only select one item at a time from the combo box.<br />
Trying to use the SHIFT or CTRL keys to select a range of objects won't<br />
work—only the last item you click on will be considered to be selected. The<br />
array returned by getSelectedObjects will, therefore, have at most one<br />
entry in it. The last item to be highlighted will appear in the combo box's<br />
input area, and this item is also the one that will be returned if you call the<br />
getSelectedltem method.<br />
The example in Listing 8-13 demonstrates some of the features of the<br />
combo box. It creates three combo boxes and populates two with strings and<br />
the third with colored icons.<br />
You can see what this application looks like in Figure 8—15 and you can run<br />
it for yourself using the command:<br />
j ava <strong>JFC</strong>Book.Chapter8.ComboBoxExample<br />
Listing 8-13 The JComboBox control<br />
package <strong>JFC</strong>Book.Chapter8;<br />
import javax.swing.*;<br />
import javax.swing.event.*;<br />
import j ava.awt.*;<br />
import j ava.awt.event.*;<br />
import <strong>JFC</strong>Book.Chapter4.ColorFilllcon;<br />
public class ComboBoxExample extends JPanel {<br />
public ComboBoxExample() {<br />
this.setLayout(new BorderLayout(8, 8));
954 Chapter 8 Creating Custom Dialogs<br />
Listing 8-13 The JComboBox control (continued)<br />
}<br />
leftCombo = new JComboBox(leftComboData) ;<br />
this.add(leftCombo, BorderLayout.WEST);<br />
middleCombo = new JComboBox(middleComboData);<br />
this.add(middleCombo, BorderLayout.CENTER);<br />
rightCombo = new JComboBox(rightComboData) ;<br />
middleCombo.setEditable(true);// Make it editable<br />
this.add(rightCombo, BorderLayout.EAST);<br />
// Add item listeners<br />
leftCombo.addltemListener(new ItemListener() {<br />
public void itemStateChanged(ItemEvent evt) {<br />
System.out.println("Left combo event: " + evt);<br />
System.out.println("Selected index: " +<br />
leftCombo.getSelectedlndexO);<br />
System.out.println("Selected item: " +<br />
leftCombo.getSelectedItem());<br />
}<br />
});<br />
middleCombo.addltemListener(new ItemListener() {<br />
public void itemStateChanged(ItemEvent evt) {<br />
System.out.println("Middle combo event: "<br />
+ evt);<br />
System.out.println("Selected index: " +<br />
middleCombo.getSelectedlndex());<br />
System.out.println("Selected item: " +<br />
middleCombo.getSelectedltem());<br />
}<br />
});<br />
rightCombo.addltemListener(new ItemListener() {<br />
public void itemStateChanged(ItemEvent evt) {<br />
System.out.println("Right combo event: "<br />
+ evt);<br />
System.out.println("Selected index: " +<br />
rightCombo.getSelectedlndexO);<br />
System.out.println("Selected item: " +<br />
rightCombo.getSelectedltem() ) ;<br />
}<br />
});
Listing 8-13 The JComboBox control (continued)<br />
Swing Components Often Used in Dialogs 955<br />
public static void main(String[] args) {<br />
JFrame f = new JFrame("Combo Box Example");<br />
ComboBoxExample c = new ComboBoxExample();<br />
f.getContentPane().add(c);<br />
f.addWindowListener(new WindowAdapter() {<br />
public void windowClosing(WindowEvent evt) {<br />
System.exit(0);<br />
}<br />
});<br />
f.pack () ;<br />
f.setVisible(true);<br />
// Start with the popup shown<br />
// on the left combo box<br />
leftCombo.showPopup();<br />
}<br />
static JComboBox leftCombo;<br />
static JComboBox middleCombo;<br />
static JComboBox rightCombo;<br />
public static String [] rightComboData = {<br />
"Neil Armstrong", "Buzz Aldrin", "Michael Collins",<br />
"Pete Conrad", "Richard Gordon", "Alan Bean",<br />
"James Lovell", "Fred Haise", "Jack Swigert",<br />
"Alan Shepard", "Stuart Roosa", "Edgar Mitchell"<br />
};<br />
public static String [] middleComboData = {<br />
"White", "Yellow", "Green", "Red", "Pink",<br />
"Blue", "Magenta", "Orange", "Gray", "Black"<br />
};<br />
public static Icon[] leftComboData = new Icon[] {<br />
new ColorFilllcon(Color.white, 16),<br />
new ColorFilllcon(Color.yellow, 16),<br />
new ColorFilllcon(Color.green, 16),<br />
new ColorFilllcon(Color.red, 16),<br />
new ColorFilllcon(Color.pink, 16),<br />
new ColorFilllcon(Color.blue, 16),<br />
new ColorFilllcon(Color.magenta, 16),
956 Chapter 8 Creating Custom Dialogs<br />
Listing 8-13 The JComboBox control (continued)<br />
new ColorFilllcon(Color.orange, 16),<br />
new ColorFilllcon(Color.gray, 16),<br />
new ColorFilllcon(Color.black, 16)<br />
};<br />
__J_____^^<br />
All three combo boxes are populated by passing an array of objects to the<br />
JComboBox constructor. As you can see, the strings and the icons are added<br />
in exactly the same way. The middle combo box, which contains text strings,<br />
is made editable and, as a result, when you run this program, if you type<br />
something into the middle combo box and press return, you'll see an event<br />
containing the string that you typed appear in the window from which you<br />
started the program. If you move to the left-hand combo box and select an<br />
icon, you'll find that that icon will appear in the input box and another selection<br />
event is generated. You won't be able to type anything into the righthand<br />
combo box because it isn't editable, which is the default state. You can<br />
change this using the setEditable method.<br />
JComboBox ItemEvents<br />
Lets look in detail at the ItemEvents that are generated when the user<br />
changes the selection in the combo box. If you first open the right-hand<br />
combo box by clicking on the down-facing arrow and then select the first<br />
item by clicking on it with the mouse, you'll won't see any output in the window<br />
from which you started the example, because the first entry was already<br />
selected before the combo was opened—since the selection was not<br />
changed, no event was generated. Next open the combo again and click the<br />
second entry with the mouse. The combo popup will disappear and "Buzz<br />
Aldrin" appears in the combo box display. At the same time, you'll see the following<br />
output in the command window (for brevity, some of the output has<br />
not been reproduced here):<br />
Right combo event: java.awt.event.ItemEvent[ITEM_STATE_CHANGED,item=Buzz<br />
Aldrin,state-<br />
Change=SELECTED] on javax.swing.JComboBox []<br />
Selected index: 1<br />
Selected item: Buzz Aldrin<br />
This ItemEvent clearly indicates that the entry for "Buzz Aldrin" has<br />
been selected and this is confimed by the last two lines, which show the<br />
results of calling the JComboBox getSelectedlndex and getSelecte-
Swing Components Often Used in Dialogs 957<br />
dltem methods. Now open the combo box again and select the entiy for<br />
"Michael Collins." This time, you see two ItemEvents:<br />
Right combo event: <strong>Java</strong>.awt.event.ItemEvent[ITEM_STATE_CHANGED,item=Buzz<br />
Aldrin, state-<br />
Change=DESELECTED] on javax.swing.JComboBox[]<br />
Selected index: 2<br />
Selected item: Michael Collins<br />
Right combo event: <strong>Java</strong>.awt.event.ItemEvent[ITEM_STATE_CHANGED,item=Michael<br />
Collins,state-<br />
Change=SELECTED] on javax.swing.JComboBox[]<br />
Selected index: 2<br />
Selected item: Michael Collins<br />
The first of these two events reports the fact that the previous entry has<br />
been deselected and it is closely followed by a second event that reports the<br />
selection of the entry for "Michael Collins."<br />
<strong>Core</strong> Note<br />
Notice that when the first selection (of "Buzz Aldrin") was made, there was<br />
no itemEvent reporting that the initial selection ("Neil Armstrong") had<br />
been deselected.This appears to be a feature of the JComboBox that has<br />
no rational explanation. In practice, it probably doesn't matter because you<br />
are unlikely to have to make use of the deselection event.<br />
The right-hand combo box is non-editable, which means that you can only<br />
choose items from the popup box. The middle JComboBox. however, is a little<br />
different—after it is created, the example code calls setEditable<br />
(true) on it. As you can see, this changes the combo display area from<br />
gray to white. In fact, an editable combo box has an editor installed in its display<br />
area, so you can type directly into it. You can type any value you like into<br />
this editor—it doesn't have to match one of the entries in the popup list. If<br />
you move the focus to the middle popup and type "SkyBluePink" into it and<br />
then press RETURN (or just move the focus away from the combo box), the<br />
following will appear in the command window:<br />
Middle combo event: <strong>Java</strong>.awt.event.ItemEvent<br />
[ITEM_STATE_CHANGED,item=SkyBluePink,state-<br />
Change=SELECTED] on javax.swing.JComboBox[]<br />
Selected index: -1<br />
Selected item: SkyBluePink
958 Chapter 8 Creating Custom Dialogs<br />
Once again, you get a SELECTED ItemEvent, with the item attribute set<br />
to the value that was typed into the combo box. To retrieve this value, you<br />
can either call the getltem method of the ItemEvent, or the JComboBox<br />
getSelectedltem method. However, notice that, in this case, the getSelectedlndex<br />
method returns -1, because the selection was made by typing<br />
a value directly into the editor. However, typing a value into the editor does<br />
not always give this result—if you type the value "Red" into the editor and<br />
press return, you'll get the following result:<br />
Middle combo event: java.awt.event.ItemEvent<br />
[ITEM_STATE_CHANGED,item=SkyBluePink, state-<br />
Change=DESELECTED] on javax.swing.JComboBox[]<br />
Selected index: 3<br />
Selected item: Red<br />
Middle combo event: <strong>Java</strong>.awt.event.ItemEvent<br />
[ITEM_STATE_CHANGED,item=Red,stateChange=SELECTED]<br />
on j avax.swing.JComboBox [ ]<br />
Selected index: 3<br />
Selected item: Red<br />
In this case, because the value typed exactly matched one of the entries in<br />
the popup, the selected index is the index of the matching entry.<br />
So far, it looks like you can keep track of what is selected in a JComboBox<br />
by monitoring the itemEvents and looking for those that have a type of<br />
ItemEvent. SELECT. Things are not quite so simple, however. To see why,<br />
open the right-hand combo box again and move the mouse down over the<br />
popup list, without pressing any buttons. As you do this, you won't see any<br />
events generated, but the selection highlight will follow the mouse and move<br />
down the popup. Now move the mouse back to the top of the list so that the<br />
entry for "Neil Armstrong" is selected and press the down arrow key on the<br />
keyboard. When you do this, the selection highlight moves down one entry,<br />
as it did when you moved the mouse. But something else happens as well: in<br />
the output window, you'll see that an event is generated:<br />
Right combo event: java.awt.event.ItemEvent<br />
[ITEM_STATE_CHANGED,item=Buzz Aldrin,state-<br />
Change=SELECTED] on javax.swing.JComboBox[]<br />
Selected index: 1<br />
Selected item: Buzz Aldrin<br />
Also, the combo box display changes to show that "Buzz Aldrin" has been<br />
selected. In fact, the control is behaving exactly as if the user had selected<br />
this entry, even though the popup is still visible. This is not the same behavior<br />
as you see when the user simply moves the mouse over the popup. As far as
Swing Components Often Used in Dialogs 959<br />
application code is concerned, when the user moves the selection up and<br />
down the popup using the keyboard, each entry visited looks as if it has been<br />
selected.<br />
JComboBox ActionEvents<br />
ItemEvents are one way to monitor the selected item in a JComboBox,<br />
but you can also register an ActionListener and receive ActionEvents.<br />
To see the ActionEvents generated by the combo box, type the command<br />
<strong>Java</strong> <strong>JFC</strong>Book.Chapter8.ComboBoxExample2<br />
This example is the same as the previous one, except that it registers an<br />
ActionListener with each combo box instead of an ItemListener. If you<br />
now open the right-hand combo box and click on the first entiy, you will<br />
immediately see an event generated:<br />
Right combo action event: <strong>Java</strong>.awt.event.Action-<br />
Event [ACTION_PERFORMED,cmd=comboBoxChanged] on<br />
j avax.swing.JComboBox[]<br />
Selected index: 0<br />
Selected item: Neil Armstrong<br />
This is not the same as the previous example, where an ItemEvent was<br />
not generated when the selected item was not changed. In fact, you always<br />
get an ActionEvent when you select an entry from the popup, whether or<br />
not you actually changed the selection. If you now select a different entry,<br />
another event is generated reflecting the new selection:<br />
Right combo action event: <strong>Java</strong>.awt.event.Action-<br />
Event [ACTION_PERFORMED,cmd=comboBoxChanged] on<br />
j avax.swing.JComboBox [ ]<br />
Selected index: 1<br />
Selected item: Buzz Aldrin<br />
When you change the selection, only one ActionEvent is generated,<br />
unlike the previous example, which showed that each selection change produced<br />
two ItemEvents to report the deselection of one item and the selection<br />
of the next. Notice also that the ActionEvent does not contain the item<br />
that is selected, unlike the ItemEvent. This is because the ActionEvent<br />
class does not contain an attribute that could be used to report the selected<br />
object: the only context-dependent property it has is the action command,<br />
but this is defined to be of type string, whereas the item selected in the<br />
combo box could be an object of any type. In fact, the action command of<br />
all ActionEvents generated by a JComboBox is set by default to the string
960 Chapter 8 Creating Custom Dialogs<br />
"comboBoxChanged" as you can see from the output shown above. You can<br />
change this value by calling the JComboBox setActionCommand method,<br />
but whatever value you supply will appear in all of its ActionEvents. When<br />
monitoring these events, the only way to get the selected item is from the<br />
JComboBox itself, using its getSelectedlndex or getSelectedltem<br />
methods, the output from which is also shown above.<br />
Now type the value "SkyBluePink" into the (editable) middle combo box<br />
and press RETURN. The following output will appear in the command window:<br />
Middle combo action event: java.awt.event.Action-<br />
Event [ACTION_PERFORMED,cmd=comboBoxChanged] on<br />
j avax.swing.JComboBox[]<br />
Selected index: -1<br />
Selected item: SkyBluePink<br />
The behavior here is exactly the same as it is when you select an item from<br />
the popup - an ActionEvent is generated and the getSelectedlndex<br />
method returns -1 because the value that was typed into the editor is not one<br />
of the items in the popup. If you type the value "Red" instead, the selected<br />
index would be 3, as before, but the ActionEvent would be unchanged.<br />
Finally, let's look at what happens if you navigate the combo box popup<br />
using the mouse and the keyboard. Open the right-hand popup and move the<br />
mouse over it without pressing any buttons. As before, the selection highlight<br />
follows the mouse pointer and no events are generated. Now return the<br />
selection highlight to the top entry and press the down arrow key twice, highlighting<br />
first "Buzz Aldrin" and then "Michael Collins", In the previous section,<br />
we saw that this caused ItemEvents reporting that both of these entries<br />
had been selected. In the command window, you will see the following output:<br />
Right combo action event: java.awt.event.Action-<br />
Event [ACTION_PERFORMED,cmd=comboBoxChanged] on<br />
j avax.swing.JComboBox [ ]<br />
Selected index: 1<br />
Selected item: Buzz Aldrin<br />
Right combo action event: java.awt.event.Action-<br />
Event [ACTION_PERFORMED,cmd=comboBoxChanged] on<br />
j avax.swing.JComboBox[]<br />
Selected index: 2<br />
Selected item: Michael Collins<br />
As you can see, the result is the same—you get two ActionEvents reporting<br />
the apparent selection of two items. There is, in fact, no easy way to dis-
Swing Components Often Used in Dialogs 961<br />
tinguish the case in which the user makes a final selection from the combo<br />
box by opening the popup and clicking on an entry and this "pseudo-selection"<br />
that takes place when the user navigates through the choices in the<br />
popup without closing the popup. Depending on your viewpoint, you might<br />
think that the user's choice should not be considered final until the popup is<br />
closed.<br />
If you don't like this behavior, you can change it be using a client property<br />
of the combo box called JComboBox. lightweightKeyboardNavigation.<br />
This property has two possible values—"Heavyweight", which is the default<br />
and makes the combo box behave as just described, or "Lightweight,"<br />
which changes its behavior with respect to keyboard navigation. You set this<br />
property in the following way:<br />
final JComboBox cb = new JComboBox(....);<br />
cb.putClientProperty(<br />
"JComboBox.lightweightKeyboardNavigation",<br />
"Lightweight");<br />
When this property has the value Lightweight, no events are generated<br />
as the user moves the selection through the combo box popup using the keyboard,<br />
which means that the mouse and the keyboard behave in the same<br />
way. Furthermore, if the combo box is not editable, the expected ItemEvents<br />
and ActionEvent are generated when the user selects an entry by<br />
clicking it with the mouse or pressing RETURN. However, the behavior of this<br />
mode is not entirely ideal, for the following reasons:<br />
• In <strong>Java</strong> 2 version 1.2.2 and Swing 1.1.1, when the combo is not<br />
editable, making a selection generates the correct events and<br />
closes the popup window. This is probably what the user<br />
expects. However, in <strong>Java</strong> 2 version 1.3, the popup window<br />
remains open in the case where the user's selection was made<br />
with the keyboard. This is not desirable.<br />
• In all versions, if the combo box is editable, using the keyboard<br />
to make a selection by pressing RETURN does not work as<br />
expected—the item in the combo box editor remains the<br />
selected item and ItemEvents and an ActionEvent are<br />
generated to this effect. As a result, the user's selection is<br />
ignored.
962 Chapter 8 Creating Custom Dialogs<br />
Selecting an Entry By Prefix<br />
So far, you've seen that you can navigate the JComboBox popup using the<br />
mouse or by pressing the up and down arrow keys on the keyboard. A third way<br />
to make a selection from a combo box is to press a key corresponding to the<br />
first letter of one of its entries, which causes that entry to be selected. This<br />
method only works if the combo box is not editable and if the items in the<br />
selection list have meaningful string representations. In the example we have<br />
been looking at this chapter, only the right-hand combo box will respond to key<br />
selection because the center combo box is editable and the left-hand one does<br />
not contain objects that produce useful Strings when their toString<br />
method is invoked. Case is ignored when matching the key you press to the<br />
entries in the combo box. To try this, type the command<br />
j ava <strong>JFC</strong>Book.Chapter8.ComboExample2<br />
then click on the right-hand combo box to give it the focus and press the "B"<br />
key on your keyboard. You'll see that the entry for "Buzz Aldrin" appears in the<br />
combo box and an ActionEvent is generated indicating that this entry has<br />
been selected. This works whether or not the popup is open.<br />
If the combo is searchable and there is more than one entry with the same<br />
first letter, pressing the same key repeatedly causes them all to be selected in<br />
turn. To demonstrate this, press the "j" key and "Jack Swigert" will be<br />
selected. Press the "j" key again and the selection changes to "Jack Schmitt".<br />
Finally, pressing "j" again returns the selection to "Jack Swigert," because<br />
there are only two items in the list that begin with the letter "J."<br />
It is possible to search objects that are not strings in this way, provided that<br />
the object has a toString method that returns a reasonable value. For<br />
example, if we changed our ColorFilllcon class to return the color name<br />
from its toString method, it would be possible to find a green icon by<br />
pressing "g," because the search algorithm compares the key pressed to the<br />
first character of the string returned by toString.<br />
Note that it isn't possible to search for strings based on more than one letter,<br />
because pressing the key "J" followed by "A" results in a search for an<br />
entry that starts with "J" or "j" and then for an entry beginning with "A" or<br />
"a," not for an entry that begins "JA" (in either upper, lower or mixed case).<br />
A Combo Box with Multiple Key Selection<br />
If you want to improve on the default, single key searching feature of JComboBox,<br />
you can install a custom key manager by implementing the JComboBox.<br />
KeySelectionManager interface, which has only one method:
public int selectionForKey(char key,<br />
Swing Components Often Used in Dialogs 963<br />
ComboBoxModel model);<br />
Keys pressed in the combo box's popup are passed to this method,<br />
together with a reference to its ComboBoxModel. This method is expected to<br />
perform some operation that returns the index of the item that matches the<br />
selected key, according to its own definition of what matching means. If no<br />
entry matches, -1 should be returned. The default key selection manager<br />
looks for an exact match of the single given character against an entry in the<br />
model—which is why it cannot cope with searching for a string more than<br />
one character long. To implement a more powerful search, you need to<br />
remember some state between invocations of this method. Listing 8-14<br />
shows a sample implementation of a key selection manager that implements<br />
such a search. You can try this example out by typing the command:<br />
java <strong>JFC</strong>Book.Chapter8.ComboBoxSearchExample<br />
Listing 8-14 Implementation of a JComboBox list-searching<br />
class<br />
package <strong>JFC</strong>Book.Chapter8;<br />
import javax.swing.*;<br />
import java.awt.event.ActionEvent;<br />
import java.awt.event.ActionListener;<br />
import j ava.awt.event.KeyEvent;<br />
import java.awt.Toolkit;<br />
public class MultiKeySelection implements<br />
JComboBox.KeySelectionManager,<br />
ActionListener {<br />
public MultiKeySelection() {<br />
searchTimer = new Timer(SEARCH_DELAY, this);<br />
searchTimer.setRepeats(false);<br />
// Only one event is required<br />
}<br />
public int selectionForKey(char key,<br />
ComboBoxModel model) {<br />
int selectedlndex = 0;<br />
int modelSize = model.getSize();<br />
// Ignore this if our search string is at maximum size
964 Chapter 8 Creating Custom Dialogs<br />
Listing 8-14 Implementation of a JComboBox list-searching<br />
class (continued)<br />
if (searchStringSize == MAX_SEARCH_STRING) {<br />
}<br />
return -1;<br />
if (key == KeyEvent.CHAR_UNDEFINED || key == v \b') {<br />
searchStringSize = 0;<br />
searchString = "";<br />
Toolkit.getDefaultToolkit().beep();<br />
}<br />
return -1;<br />
// Stop the search delay timer<br />
searchTimer.stop();<br />
// Convert the key to lower case and store it.<br />
char realKey = ("" + key).toLowerCase().charAt(0);<br />
searchString += realKey;<br />
searchStringSize++;<br />
// Get the start point of the search<br />
Object selectedltem = model.getSelectedItem();<br />
if (selectedltem != null) {<br />
for (int i = 0; i < modelSize; i++) {<br />
if (selectedltem.equals(<br />
model.getElementAt(i))) {<br />
selectedlndex = i;<br />
break;<br />
}<br />
}<br />
}<br />
boolean found = false;<br />
// Search forward from "selectedlndex", wrapping<br />
// the search at the bottom<br />
for (int i = 0; i < modelSize; i++) {<br />
String entry = ((String)model.getElementAt(<br />
selectedlndex)).toLowerCase();<br />
if (entry.length 0 >= searchStringSize) {<br />
// Entry is no smaller than search string<br />
if (entry.startsWith(searchString)) {
Swing Components Often Used in Dialogs 965<br />
Listing 8-14 Implementation of aJComboBox list-searching<br />
}<br />
class (continued)<br />
found = true;<br />
break;<br />
}<br />
// Try next entry<br />
if (++selectedlndex == modelSize) {<br />
selectedlndex =0; // Wrap to the top<br />
}<br />
}<br />
// Restart the delay timer<br />
searchTimer.start();<br />
return found == true ? selectedlndex : -1;<br />
}<br />
// Timer handler<br />
public void actionPerformed(ActionEvent evt) {<br />
// Timer has expired: empty the search string<br />
searchStringSize = 0;<br />
searchString = "";<br />
}<br />
// Size of the longest search string<br />
public static final int MAX_SEARCH_STRING = 16;<br />
// The current search string<br />
protected String searchString = "";<br />
// Size of the search string<br />
protected int searchStringSize;<br />
// The timer that cancels a search after a pause<br />
protected Timer searchTimer;<br />
// The delay until we cancel a search. If no key is<br />
// pressed for this length of time, we clear the<br />
// search string.<br />
protected static final int SEARCH_DELAY = 5000;<br />
// 5 seconds<br />
j _<br />
When you start this example, you get a frame with a single combo box in it<br />
that contains the names of many of the Apollo astronauts. The list of names
966 Chapter 8 Creating Custom Dialogs<br />
will drop down without the combo box being clicked. To get the list to drop<br />
down, the JComboBox showPopup method was used. An instance of the<br />
MultiKeySelection class has been attached to this combo box, replacing<br />
the default key selection manager. Now, any key strokes that are directed at<br />
the combo box will be passed to this object's selectionForKey method.<br />
The basic idea of this method is simple. A string containing all of the<br />
search characters that have been typed is created. Each time a new character<br />
is received, it is added to the string and then the data in the model is scanned<br />
for an item that starts with that string, ignoring case. If a match is found, the<br />
index of the matching entry is returned, which will cause it to be selected. If<br />
there is no match, -1 is returned, which leaves the current selection<br />
unchanged. The details are a little more complicated, but not too hard.<br />
First, as key strokes are received, they are converted to lowercase and<br />
appended to the string held in the searchString field. An upper limit of 16<br />
characters on this field keeps the search times reasonable; any characters in<br />
excess of this limit being simply discarded. In order to perform the search,<br />
the following methods of ComboBoxModel are used:<br />
public int getSizeO Returns the number of items in the model<br />
public Obj ect Returns the indicated entry<br />
getElementAt(int index)<br />
Where should the search start? The most logical place to start is with the<br />
currently selected item, but it isn't easy to directly find out where that is—<br />
since this code doesn't have a reference to the JComboBox, it can't get call<br />
getSelectedlndex to get the starting index. Instead, it only has access to<br />
the ComboBoxModel, so it calls its getSelectedltem method, which<br />
returns the Obj ect that is the current selection. If this is not null, it is compared<br />
with each entry in the model looking for a match. If a match is found,<br />
its index is the starting point. If a match is not found, or there was no selected<br />
item, the search starts at the first entry.<br />
Once the starting point is known, the search is easy: Every item is<br />
retrieved, sequentially, from the model and checked to see if it starts with the<br />
search string. Note that, again, the items in the model are Objects, so the<br />
code first invokes toString and then converts the result to lowercase before<br />
performing the comparison. Finally, if a match is found, its index is returned.<br />
If no match is found when all the entries in the model have been checked, -1<br />
is returned.<br />
This much code is sufficient to implement a search that matches on multiple<br />
keys. To see that this works, try searching for "Jack Swigert" and "James
Swing Components Often Used in Dialogs 967<br />
Lovell." You'll discover that you can find them, and any other entry, by continuing<br />
to type characters until you have supplied a string that is not ambiguous.<br />
When there is more than one match, the first one found is selected<br />
(which depends on what was selected before, of course).<br />
<strong>Core</strong> Alert<br />
Unfortunately, you can't match entries in the combo popup using the<br />
SPACE character because the JComboBox uses SPACE as a shortcut that<br />
closes the popup if it is open, so as soon as you type SPACE, the popup will<br />
close.<br />
At some stage it is necessary to clean out the search string, or it would soon<br />
reach 16 characters and would be useless. It can't be cleared out when a match<br />
is found, because that would give the same result as the default key selection<br />
manager. Instead, two mechanisms are used. First, if you hit any key on your<br />
keyboard that doesn't generate a valid Unicode character (such as a function<br />
key) or the backspace key, you will hear a beep and the search string will be<br />
cleared. You can try this easily by type typing "Ala" then hitting backspace followed<br />
by "B." You'll immediately find Buzz Aldrin. The second mechanism<br />
involves using a timer. Each time a key is added to the search string, a five-second<br />
timer is started. If this timer expires (i.e., there hasn't been a keystroke for<br />
five seconds), it is assumed that the user has given up on the search and the<br />
search string is discarded. The Timer class that is used in this example is a<br />
Swing feature that will be discussed later in this chapter.<br />
ComboBox Performance<br />
When looking at JList, we observed that it was expensive in performance<br />
terms to add entries to its ListModel after it has been installed in the JList.<br />
The same is also true of JComboBox—you should initialise the combo box<br />
using a Vector or an array of Objects, or you should build a ComboBox-<br />
Model and pass it to the constructor. Adding elements to the ComboBoxModel<br />
after it has been installed in the JComboBox is very costly. It is even more<br />
tempting to do this with JComboBox than with JList, because it offers convenience<br />
methods that allow you to update the model through the JComboBox<br />
itself. However, the following pattern should be avoided:<br />
Object [] data = new Object [] { /* Data for combo */ };<br />
JComboBox combo = new JComboBox();<br />
for (int i = 0; i < data.length; i++) {
968 Chapter 8 Creating Custom Dialogs<br />
}<br />
combo.addltem(data [i]);<br />
Instead of this, you should use either of the following:<br />
or<br />
Object [] data = new Object [] { /* Data for combo */ };<br />
JComboBox combo = new JComboBox(data);<br />
Object [] data = new Object[] { /* Data for combo */ };<br />
DefaultComboBoxModel model = new DefaultComboBox(data)<br />
JComboBox combo = new JComboBox(model);<br />
As an example of the time differences involved, creating a combo box with 50<br />
items by the first method shown above (i.e., calling addltem after the JComboBox<br />
has been created) took 930 milliseconds on my laptop computer,<br />
while using the third method required less than 1 millisecond. The difference<br />
becomes even worse when more elements are involved, with the corresponding<br />
timings for 200 items being 8740 milliseconds agains less than 1<br />
millisecond.<br />
Swing Timers<br />
In JDK 1.1, before Swing was available, if you wanted to use a timer you had<br />
to implement it for yourself, usually by starting a separate thread that suspended<br />
itself (using the Thread, sleep method) for the required length of<br />
time and then generating an event. Swing provides a Timer class that allows<br />
you to create and manage as many timers as you need without worrying about<br />
the implementation details. In this section, well look at how you can use this<br />
class to provide timed actions in your applications.<br />
Creating, Starting, and Stopping a Timer<br />
To use a Swing timer, you need a Timer object and an ActionListener<br />
that will be notified when the timer expires. The Timer class has only one<br />
constructor:<br />
public Timer(int delay, ActionListener 1);<br />
The delay is specified in milliseconds. Creating the timer does not, however,<br />
make it active. Often, as is the case in Listing 8-14, you create a timer in<br />
the constructor of some other object and you don't want it to start running<br />
until some later point. When you need the timer to run, you use its start<br />
method:
public void start();<br />
Swing Components Often Used in Dialogs 969<br />
Once the timer is running, it continues until one of three things happens:<br />
• The timer delay expires<br />
• The timer is stopped<br />
• The timer is restarted<br />
When the timer expires, it creates an ActionEvent and delivers it to any<br />
registered ActionListeners. In Listing 8-14, the MultiKeySelection<br />
class acts as its own ActionListener and it handles timer expiry in its<br />
actionPerf ormed method. A timer's ActionListener is usually passed as<br />
an argument to its constructor, but you don't have to do it this way—it is permissible<br />
to create a timer with the ActionListener argument passed as<br />
null and to add a listener later with the addActionListener method. You<br />
can also deregister a listener using removeActionListener. If the timer<br />
expires when there are no listeners registered, the event is discarded.<br />
If the event you've been waiting for happens before the time interval is up,<br />
you can stop the timer using its stop method:<br />
public void stopO;<br />
A stopped timer doesn't generate any more events, but it isn't completely<br />
useless—you can start it again using the start method and it will start timing<br />
from that point. Alternatively, if you want to cancel the timer and start it<br />
again in a single operation, you can use the restart method:<br />
public void restart();<br />
In fact, you can stop a timer and start it again just by invoking start,<br />
which works even when the timer is running and resets the interval until the<br />
timer expires. The difference between using start and restart is that<br />
restart cancels any pending timer expiry events that haven't yet been delivered,<br />
whereas start does not.<br />
Repeating Timers and the Initial Timer Delay<br />
By default, timers don't stop once they've delivered their expiry event—they<br />
continue to deliver timer expiry events separated by the delay value passed<br />
to the constructor, until you explicitly stop them with the stop method. It is<br />
also possible to arrange for the first event delivered by the timer to have a different<br />
delay from all of the other ones by using the setlnitialDelay<br />
method:<br />
public void setlnitialDelay(int initialDelay);
970 Chapter 8 Creating Custom Dialogs<br />
Suppose you create and start a timer like this:<br />
Timer tm = new Timer(500, 1); // Half second<br />
tm.start ();<br />
where 1 is assumed to be an ActionListener declared earlier. Assuming it<br />
never gets stopped, this timer will deliver an ActionEvent after 500 milliseconds<br />
and every 500 milliseconds thereafter. If instead you do this:<br />
Timer tm = new Timer(500, 1); // Half second<br />
tm.setlnitialDelay(1000) ; // One second<br />
tm.start();<br />
then the first event is delivered after one second, then all of the others occur<br />
at half-second intervals. If you explicitly start or restart a timer while it is running,<br />
the initial delay is used to determine when the next event is delivered<br />
so that, in the above example, restarting the timer with restart or start<br />
will cause the next event to occur after one second, with repeat events every<br />
500 milliseconds after that.<br />
If you don't want this repeating behavior, you can disable it using the set -<br />
Repeats method:<br />
Timer tm = new Timer(500, 1);<br />
tm.setRepeats(false);<br />
This timer will deliver one event after 500 milliseconds and then stop. You<br />
can, if required, restart this timer to arrange for another single event some<br />
time later. The timer in the combo box example in Listing 8—14 is of this single-shot<br />
type, because we only need it to time a single event—once that<br />
event occurs, the user's search is implicitly terminated and we don't need the<br />
tinier any more until the next search begins.<br />
You can change the delay or initial delay associated with a timer when it is<br />
stopped or even when it is running. The repeating delay time can be changed<br />
using the setDelay method:<br />
public void setDelay(int delay);<br />
Calling this method to change the delay when the timer is running takes<br />
effect immediately—the timer is stopped and restarted to expire after the<br />
new delay. Note that the new delay is used even if the timer has never<br />
expired and has a different initial delay. On the other hand, changing the initial<br />
delay while the timer is running has no effect at all until the next time<br />
that the timer is started using start or restart.
Merging Timer Events<br />
Swing Components Often Used in Dialogs 971<br />
Timer events are created internally and are delivered into the system event<br />
queue. When a timer event reaches the head of the queue, it is removed and<br />
the actionPerformed method of any registered listeners is called. Since a<br />
timer repeats by default, if your timer delay is short and the system is busy or<br />
the AWT event thread is blocked for some time, it is possible that several<br />
events for the same timer could be generated before any of them are processed.<br />
You can avoid this situation by allowing timer events to be coalesced,<br />
so that only one event will be outstanding at any given time. If the timer<br />
expires while an earlier event is still in the queue, a new event will not be<br />
generated and the timer will start on its next cycle. You control whether coalescing<br />
is done using the set Coalesce method:<br />
public void setCoalesce(boolean coalesce);<br />
By default, timer events will coalesce, which is appropriate if you don't<br />
need to see every event. It is recommended that you allow coalescing to<br />
occur if possible because it can stop the event queue from being filled up<br />
with timer events that will prevent your application responding to the user,<br />
since AWT events use the same queue.<br />
Conveying Extra Information with a Timer<br />
Event<br />
The timer that was used in Listing 8-14 didn't need to convey any information<br />
to its actionPerformed method—all this method needed to have was a<br />
reference to the MultiKeySelection object, which it got from the this<br />
value. If you need to deliver state information to the event handler, the only<br />
way to do it is to subclass Timer and store the information you need in your<br />
object. Suppose, for example, you need to store a message to be written<br />
when the timer expires. To do this, you would create a subclass to store the<br />
message:<br />
public class MessageTimer extends Timer {<br />
public MessageTimer(int delay, ActionListener 1,<br />
String msg) {<br />
super(delay, 1) ;<br />
this.msg = msg;<br />
}<br />
public String getMessageO {<br />
return msg;
972 Chapter 8 Creating Custom Dialogs<br />
}<br />
protected String msg;<br />
}<br />
Now, instead of creating a Timer, you create a MessageTimer. Because a<br />
MessageTimer is derived from Timer, you can use all of the methods of<br />
Timer with it, including start:<br />
Timer tm = new MessageTimer(500, 1, "Timer expired...");<br />
tm.start();<br />
When the timer expires, you can retrieve the message from the Message-<br />
Timer object. Here's a sample event handler that just prints the message:<br />
ActionListener 1 = new ActionListener() {<br />
public void actionPerformed(ActionEvent evt) {<br />
MessageTimer tm = (MessageTimer)evt.getSource();<br />
System.out.printIn(tm.getMessage());<br />
}<br />
};<br />
This code uses the fact that the source of the ActionEvent delivered<br />
from a timer is the Timer object itself which, in this case, is actually a MessageTimer.<br />
Using this reference, you can retrieve the message using the<br />
getMessage method that we implemented in the MessageTimer class.<br />
Note that you can't make any use of the fact that ActionEvent has a<br />
getActionCommand method, because there is no way to set the action command<br />
when creating the timer. In fact, if you call getActionCommand in the<br />
event handler, it will return null.<br />
I<br />
<strong>Core</strong> Tip<br />
The Timer class has a simple debugging facility built into it—if you call the<br />
static setLogTimers method with argument true, you'll get trace<br />
messages printed to your command window whenever a timer event is<br />
generated. You can turn this off by calling the same method with argument<br />
false. Here's an example of what you might see: Timer ringing:<br />
MessageTimer@lcc73c<br />
The Progress Bar<br />
The Swing JProgressBar is a very simple yet effective control. It is typically<br />
used to give a visual representation of how far a task has progressed in<br />
proportion to the total time that it will take to complete. A progress bar is
Swing Components Often Used in Dialogs 973<br />
basically a rectangle that may or may not have a border and may be drawn<br />
either horizontally or vertically. Initially, the rectangle will usually be empty.<br />
As the application progresses through its operation, it updates the progress<br />
bar, which causes it to fill with color from left to right, or from bottom to top.<br />
Creating and Managing a Progress Bar<br />
Management of the progress bar is entirely the program's responsibility. The<br />
progress bar maintains a single value that represents how far the program has<br />
progressed with an operation. When creating the JProgressBar, the program<br />
must configure a maximum and a minimum value and, when it starts<br />
the operation that the progress bar is tracking, it should use the JProgress-<br />
Bar setvalue method to set the current value to the configured minimum.<br />
As the operation proceeds, set Value should be called with progressively<br />
larger values, working towards the maximum value to indicate the end of the<br />
operation.<br />
For example, suppose the application has a task that involves 50 steps,<br />
which might represent 50 iterations of a program loop or 50 seconds of<br />
elapsed time. To indicate to the user how far it has progressed, it might create<br />
a JProgressBar with a minimum value of 0 and a maximum of 50. At<br />
the start of the operation, it would call setValue(O) to initialize the progress<br />
bar and then, at the end of each step, it would call setvalue again with a<br />
value one larger than that supplied in the previous step. This will cause the<br />
progress bar to fill with color at a uniform rate, assuming that each step takes<br />
an equal amount of time. Apart from calling setvalue, the application<br />
doesn't need to do anything else—the JProgressBar repaints itself when<br />
necessary.<br />
You are not obliged to supply increasing values to setvalue; il the values<br />
go down as well as up, the progress bar will similarly go down and up (or left<br />
and right) as appropriate. It is also possible to arrange for a progress bar to<br />
start at its maximum value and work down to its minimum. This might be<br />
appropriate if the progress bar represents free space on a disk which, in my<br />
experience, is a monotonically decreasing quantity.<br />
To illustrate the steps required, Listing 8-15 is a (somewhat contrived)<br />
example that creates a progress bar and users a timer to increment its value<br />
every second. You ca run this example yourself using the command:<br />
j ava <strong>JFC</strong>Book.Chapter8.ProgressBarExamplel
974 Chapter 8 Creating Custom Dialogs<br />
Figure 8-16 shows what the progress bar looks like when the operation that<br />
it is monitoring is 85 percent complete.<br />
Listing 8-15 A progress bar<br />
package <strong>JFC</strong>Book.Chapter8;<br />
import javax.swing.*;<br />
import j ava.awt.*;<br />
import j ava.awt.event.*;<br />
public class ProgressBarExamplel {<br />
public static void main(String[] args) {<br />
JFrame f = new JFrame("Progress Bar Example 1");<br />
final JProgressBar b = new JProgressBar();<br />
b.setOrientation(JProgressBar.HORIZONTAL);<br />
b.setStringPainted(true) ;<br />
b. setMinimum(O) ;<br />
b.setMaximum(10 0);<br />
b.setValue(0);<br />
b.setForeground(Color.green);<br />
b.setBorderPainted(true);<br />
f.getContentPane().add(b);<br />
f.pack();<br />
f.setVisible(true);<br />
f.addWindowListener(new WindowAdapter() {<br />
public void windowClosing(WindowEvent evt) {<br />
System.exit(0);<br />
}<br />
});<br />
J<br />
Timer t = new Timer(1000, new ActionListener() {<br />
int progressValue = 0;<br />
public void actionPerformed(ActionEvent evt) {<br />
if (++progressValue
Swing Components Often Used in Dialogs 975<br />
Figure 8-16 Progress bar.<br />
Some of the more important methods of JProgressBar are listed in<br />
Table 8-6.<br />
Table 8-6 JProgressBar Methods<br />
Method<br />
public int getMaximum()<br />
public int getMinimumf)<br />
public int getOrientationI<br />
public int getValue()<br />
public double<br />
getPercentComplete()<br />
public String getString(<br />
public boolean<br />
isBorderPainted()<br />
Description<br />
Returns the maximum value. By default,<br />
this is set to 100.<br />
Gets the minimum value, 0 by default.<br />
Gets the progress bar's orientation, one<br />
ofJProgressBar.HORIZONTALand<br />
JProgressBar.VERTICAL. Horizontal<br />
by default.<br />
Returns the current value. Initially<br />
returns 0.<br />
Returns a value that indicates the operation<br />
j^rogress as a proportion of its total<br />
extent. This value is calculated as (current<br />
value)/(maximum - minimum) and<br />
so is always in the range 0.0 to 1.0.<br />
(Depsite the method name, this is, of<br />
course, not a percentage value!)<br />
Gets the configured progress string. By<br />
default, this returns null.<br />
This is true by default, which indicates<br />
that a border will be drawn. The default<br />
border is a lowered bevel border. Since<br />
JProgressBar is a JComponent,<br />
you can change the border if you wish<br />
by using setBorder.
'<br />
976 Chapter 8 Creating Custom Dialogs<br />
Table 8-6 JProgressBar Methods (continued)<br />
public boolean<br />
isStringPainted(]<br />
public boolean isOpaqueO<br />
public void<br />
setBorderPainted(boolean)<br />
public void setMaximum(int)<br />
public void setMinimum(int)<br />
public void setOpaque(boolean)<br />
public void<br />
setOrientation(int)<br />
public void setstring(String<br />
str)<br />
public void<br />
setStringPainted(boolean b)<br />
public void setValue(int)<br />
Progress Bar Customisation<br />
Indicates whether a progress string will<br />
be drawn in the progress bar. This is<br />
false by default.<br />
Indicates whether or not the background<br />
will be painted. This is true by<br />
default.<br />
Enables or disables painting of a border.<br />
Sets the maximum value.<br />
Sets the minimum value.<br />
Determines whether or not the background<br />
will be painted. If set to false,<br />
the background of the container in<br />
which the progress bar is mounted will<br />
be visible under the progress markers.<br />
Makes the progress bar horizontal or<br />
vertical.<br />
Sets the string to be painted in the<br />
progress bar if isStringPainted<br />
returns true.<br />
Controls whether a progress string will<br />
be drawn in the progress bar.<br />
Changes the current value of the<br />
progress bar. Causes the progress bar to<br />
repaint itself.<br />
JProgressBar has a number of properties that you can use to customize<br />
its appearance to suit your requirements.<br />
Orientation<br />
The default orientation for JProgressBar is horizontal. However, you<br />
can specify vertical orientation either at construction time or using the setOrientation<br />
method. For example:
JProgressBar b =<br />
Swing Components Often Used in Dialogs 977<br />
new JProgressBar(JProgressBar.VERTICAL);<br />
creates a vertical progress bar, as does the following:<br />
JProgressBar b = new JProgressBar();<br />
b.setOrientation(JProgressBar.VERTICAL);<br />
A vertical progress bar fills from bottom to top and should be placed in a<br />
container managed by a layout manager that will preserve its preferred<br />
aspect ratio. For this reason, it would not be advisable to place a vertical<br />
progress bar in the North or South location of a BorderLayout, for example.<br />
Border<br />
When the Metal look-and-feel is selected, JProgressBar is initially<br />
equipped with a one-pixel wide line border rendered in gray. If you don't like<br />
the default border, you can install your own using the standard JComponent<br />
setBorder method. Alternatively, you can use the setBorderPainted<br />
method to stop the border being drawn if you want a flush effect. An example<br />
of this, together with the use of customized borders, is shown in Figure 8—17.<br />
Foreground and Background Colors<br />
In the Metal look-and-feel, the progress bar is initially drawn with a gray<br />
background and fills with the same blue-gray color used to render text. You<br />
can change both of these attributes by using the setBackground and set-<br />
Foreground methods, which affect the progress bar's background and the<br />
fill color, respectively. By default, JProgressBar is an opaque component,<br />
but if you call setOpaque (false) it will not color its background, allowing<br />
the background color of its parent container to be seen, as is the case with the<br />
left-hand progress bar in Figure 8-17 below.<br />
Progress String<br />
In its default configuration, when you call the setValue method, the<br />
progress bar just fills a proportionate amount of its internal area with a solid<br />
color determined by its foreground color property. You can add to this by<br />
using the following methods to install a progress string, which is placed in the<br />
center of the progress bar:<br />
public void setStringPainted(boolean cond);<br />
public void setString(String str);<br />
To enable the use of a progress string, you call the setStringPainted<br />
method with argument true and pass the string that you want displayed
978 Chapter 8 Creating Custom Dialogs<br />
using the setString method. If you call setString with argument null<br />
(or if you don't call it at all), the progress bar will display a value that shows its<br />
progress as a percentage of the total operation and will update it each time<br />
you call setValue, as shown in Figure 8-16.<br />
The progress string is displayed using the JProgressBar s installed font,<br />
which you can change using the set Font method. The text color depends on<br />
whether any or all of the text occupies the area covered by the progress bar's<br />
filled part. Any part of the string that is not in this area is drawn in the control's<br />
selection foreground color, while the part of the string that is in the<br />
filled area is drawn using the selection background color. Unfortunately,<br />
there is no API that allows you to directly set the foreground and background<br />
selection colors—they are set by the installed look-and-feel.<br />
Component Orientation<br />
In <strong>Java</strong> 2 version 1.3, the component orientation determines the direction in<br />
which a horizontal JProgressBar fills. In the default left-to-right orientation,<br />
the fill color advances from left to right as setValue is called with<br />
increasing values, whereas in the right-to-left locale, the color fills from right<br />
to left. Component orientation has no effect on a vertical progress bar.<br />
Progress Bar Events<br />
It is possible to monitor the state of a progress bar by registering a Change-<br />
Listener with it using the addChangeListener method. Whenever set-<br />
Value is called, a ChangeEvent is posted to all registered listeners. This<br />
event reports only its source, so to get the current value of the progress bar,<br />
you need to use its getValue method. To illustrate the use of this feature,<br />
Figure 8-17 shows a collection of progress bars configured in different ways<br />
and a text field that monitors the value of one of the bars. This text field is<br />
updated using ChangeEvents generated from the horizontal progress bar at<br />
the top of the diagram. Here is the code that arranges for these events to be<br />
generated and handles them when they occur:<br />
northBar.addChangeListener(new ChangeListener() {<br />
public void stateChanged(ChangeEvent evt) {<br />
JProgressBar bar = (JProgressBar)evt.getSource();<br />
tf.setText("Value is " + bar.getValue());<br />
}<br />
});<br />
You can find rest of the code for this example on the CD-ROM and you<br />
can run it with the command:
<strong>Java</strong> <strong>JFC</strong>Book.Chapter8.ProgressBarExample2<br />
Swing Components Often Used in Dialogs 979<br />
The progress bar at the top has a green foreground that dictates the color<br />
of the filler and displays a progress message that has been enabled by calling<br />
setStringPainted (true). Since setString has not been called, the<br />
progress message shows the percentage of the bar that has been filled. This<br />
bar's value starts at 0 and is incremented every second. The bar on the left<br />
has a raised bevel border and is also transparent. As a result, the yellow color<br />
of the subpanel on which it is mounted is visible under the progress marker.<br />
Finally, the bar on the right is opaque but has no border at all. Its value starts<br />
at 100 and decreases; when it reaches zero, it is reset to 100 and the cycle<br />
begins again.<br />
Figure 8-17 Customized progress bars.<br />
Progress Bars and the Event Thread<br />
Ideally, when using a progress bar, application code would simply invoke<br />
the setValue method with the appropriate value and rely on the control to<br />
redraw itself to reflect the progress that has been made. In practice, though,<br />
thing are not so simple. There are two different cases that need to be considered<br />
that depend on whether the operation itself is being performed in the<br />
AWT event thread or in another thread.
980 Chapter 8 Creating Custom Dialogs<br />
Operation Performed in the AWT Event Thread<br />
When the application is performing a long-running operation in the event<br />
thread, normal AWT event processing is blocked, so repaint operations are<br />
prevented from happening. This typically happens when the application<br />
responds to a request from the user interface and carries out its task in an<br />
event handler connected to a button or another GUI component and might<br />
involve a loop calculating prime numbers or making a series of synchronous<br />
calls over the network that leaves the event thread suspended until the<br />
remote system replies. When the application calls the JProgressBar set-<br />
Value method, the progress bar will update its internal state and call<br />
repaint, which will cause an event to be placed in the AWT event queue.<br />
Unfortunately, this event will not be processed until the application s event<br />
handler completes its processing and returns control to the threads event<br />
handling loop.<br />
To clarify exactly what happens, consider the following code extract:<br />
JButton b = new JButton("Calculate");<br />
b.addActionListener(new ActionListener() {<br />
public void actionPerformed(ActionEvent evt) {<br />
System.out.println("Starting calculation");<br />
int progressValue = 0;<br />
while (progressValue
Swing Components Often Used in Dialogs 981<br />
be carrying out a long calcaulation or performing a network operation at this<br />
point, but for simplicity we simply put the thread to sleep for a short while.<br />
This all looks straightforward and you can try it out for yourself using the<br />
command<br />
java <strong>JFC</strong>Book.Chapter8.ProgressBarExample3<br />
When the frame appears, press the "Calculate" button. In the window<br />
from which you started the example, you'll find that a message reflecting the<br />
progress of the event handler through its loop appears once every second,<br />
but the progress bar does not update itself then; after 10 seconds when the<br />
"calculation" is complete, you'll find that the progress bar jumps from 0% to<br />
100%.<br />
The problem here, as described earlier, is that the event handler, which is<br />
running in the AWT event thread, does not return control to the AWT for the<br />
full 10 seconds during which it is doing its job. As a result, although the calls<br />
to setValue cause a repaint event to be posted in the AWT event queue, it<br />
can't be processed during this period. When the calculation loop completes,<br />
the event handler returns and all events on the event queue are dispatched,<br />
causing the progress bar to refresh itself to show that the job is 100% complete.<br />
This behavior is not very useful from the user's point of view. Since we<br />
can't rely on the normal event-driven repaint mechanism to keep the<br />
progress bar up to date, we need to arrange for the progress bar to be<br />
repainted at once as soon as the progress value is changed. Fortunately, we<br />
can do this by calling the JComponent paintlmmediately method, which<br />
has two variants:<br />
public void paintlmmediately(int x, int y,<br />
int width, int height);<br />
public void paintlmmediately(Rectangle rect);<br />
Whichever variant you use, the arguments describe a rectangular area of<br />
the component that should be repainted, where the coordinates are relative<br />
to the component itself. To make use of this method, the event handler<br />
would be modified to look like this, where the changes are shown in bold:<br />
JButton b = new JButton("Calculate");<br />
b.addActionListener(new ActionListener() {<br />
public void actionPerformed(ActionEvent evt) {<br />
System.out.println("Starting calculation");<br />
int progressValue = 0;<br />
Dimension d = bar-getSize0;<br />
Rectangle rect = new Rectangle(0, 0,
982 Chapter 8 Creating Custom Dialogs<br />
d.width, d.height);<br />
while (progressValue
}<br />
Swing Components Often Used in Dialogs 983<br />
final Component comp = (Component)evt.getSource();<br />
if (!comp. isEnabledO ) {<br />
return;<br />
}<br />
comp.setEnabled(false);<br />
Thread t = new Thread() {<br />
public void run() {<br />
System.out.println("Starting calculation");<br />
int progressValue = 0;<br />
while (progressValue
•<br />
984 Chapter 8 Creating Custom Dialogs<br />
disables the button before starting the background thread so that the user<br />
can't press the button again. Since there is technically a window during which<br />
the user could quickly generate two events that press the button before the<br />
event handler is entered, a check is made to ensure that the button is not<br />
already disabled before creating a new thread. This code should almost never<br />
be activated.<br />
The code that is now in the background thread is almost identical to that<br />
used in the previous examples, except that the line that updates the progress<br />
bar value is now wrapped in an invocation of the SwingUtilities invoke-<br />
Later method. This method adds a request to perform the work in the run<br />
method of the Runnable that it is passed to the event queue and the returns,<br />
allowing the calculation thread to continue. A short time later, the Runnable<br />
is removed from the event thread and the setValue method updates the<br />
progress bar, which will then repaint itself, again via an event posted in the<br />
event queue.<br />
When the calculation loop is completed, the background thread will terminate.<br />
However, just before doing so, it must re-enable the "Calculate" button<br />
by calling its setEnabled method. Unfortunately, since this would involve<br />
accessing a Swing component outside the event thread, it cannot directly call<br />
setEnabled, so here again it is necessary to use the SwingUtilities<br />
invokeLater method to schedule the re-enabling of the button on the<br />
event queue. If you run this example using the command<br />
java <strong>JFC</strong>Book.Chapter8.ProgressBarExample5<br />
and press the "Calculate" button, you'll see that it is immediately disabled<br />
and only re-enabled 10 seconds later when the operation completes and that,<br />
while the operation is in progress, the progress bar updates itself once a second.<br />
ProgressMon/tor and<br />
ProgressMonitorlnputStream<br />
Swing includes a couple of useful classes based on JProgressBar that create<br />
and manage their own dialog boxes. Let's look first at ProgressMonitorlnputStream.<br />
This class looks like an ordinary input stream that can be<br />
included in a pipeline with any of the other input streams in the <strong>Java</strong>, io<br />
package. When it's sitting in an input stream, ProgressMonitorlnput-<br />
Stream snoops on the data that's being read and, if it thinks that the process<br />
of reading all of the data is going to take a long time, it pops up a dialog with<br />
a message that you can configure and a progress bar that shows how much of
Swing Components Often Used in Dialogs 985<br />
the input stream has been read. Listing 8-16 shows a program that reads a<br />
file whose name you give it and counts the number of words (defined as<br />
sequences of characters separated by white space) it finds. If this process<br />
takes more than a couple of seconds, a progress monitor appears, as you can<br />
see from Figure 8-18. You can try this example for yourself using the command:<br />
j ava <strong>JFC</strong>Book.Chapter8.WordCounter<br />
You need to give it a large file so that the operation takes long enough for<br />
the progress dialog to appear. If you've got the JDK documentation installed<br />
in the directory c:\jdkl.3, you can find a very large text file at<br />
c:\jdkl.3\docs\api\index-files\index-7.html. This file is more<br />
than one megabyte long and it can take up to a minute for this example to<br />
count the number of words in it on a slow PC.<br />
Listing 8-16 Using ProgressMonitorlnputStream<br />
package <strong>JFC</strong>Book.Chapter8;<br />
import j avax.swing.*;<br />
import j ava.awt.*;<br />
import j ava.awt.event.*;<br />
import java.io.*,import<br />
java.util.*;<br />
public class WordCounter extends JPanel implements ActionListener<br />
{<br />
public WordCounter () {<br />
this.setLayout(new GridBagLayout ());<br />
GridBagConstraints c = new GridBagConstraints();<br />
Insets i = new Insets(3, 3, 3, 3);<br />
c.gridx = 0;<br />
c.gridy = 0;<br />
c.gridwidth = 1;<br />
c.gridheight = 1;<br />
c.insets = i ;<br />
c.anchor = GridBagConstraints.EAST;<br />
C.fill = GridBagConstraints.NONE;<br />
c.weightx = 0.0;<br />
c.weighty = 0.0;
986 Chapter 8 Creating Custom Dialogs<br />
Progress.<br />
p Counting words in<br />
II c: ijdk 1.3 'jdocs\a|)iiJndex-tiles iJridex-7.html<br />
Cancel<br />
Figure 8-18 ProgressMonitorlnputStream monitoring a long process.<br />
Listing 8-16 Using ProgressMonitorlnputStream (continued)<br />
JLabel 1 = new JLabel("File Name: ", JLabel.RIGHT);<br />
this.add(1, c);<br />
c.gridy = 1;<br />
1 = new JLabel("Words Found: ", JLabel.RIGHT);<br />
this.add(l, c);<br />
c.gridx = 1;<br />
c.gridy = 0;<br />
c.fill = GridBagConstraints.HORIZONTAL;<br />
c.weightx = 1.0;<br />
fileName = new JTextPield(40);<br />
this.add(fileName, c);<br />
c.gridy = 1;<br />
wordsFound = new JLabel(" ", JLabel.LEFT);<br />
this.add(wordsFound, c);<br />
fileName.addActionListener(this);<br />
}<br />
public void actionPerformed(ActionEvent evt) {<br />
Thread t = new Thread() {<br />
public void run() {<br />
String name = fileName.getText().trim();<br />
int words = 0;<br />
Buffered<strong>Read</strong>er r = null;<br />
try {<br />
fileName.setEnabled(false);<br />
wordsFound.setText("");<br />
r = new Buffered<strong>Read</strong>er(
Swing Components Often Used in Dialogs 987<br />
Listing 8-16 Using ProgressMonitorlnputStream (continued)<br />
new InputStream<strong>Read</strong>er(<br />
new ProgressMonitorInputStream(<br />
WordCounter.this,<br />
"Counting words in " + name,<br />
new FilelnputStream(name))));<br />
String str;<br />
while ((str = r.readLine()) != null) {<br />
words +=<br />
new StringTokenizer(str).countTokens();<br />
wordsFound.setText("" + words);<br />
}<br />
} catch (FileNotFoundException e) {<br />
JOptionPane.showMessageDialog(WordCounter.this,<br />
"Cannot find " + name,<br />
"File Error",<br />
JOptionPane.ERROR_MESSAGE);<br />
wordsFound.setText ("");<br />
} catch (IOException e) {<br />
JOptionPane.showMessageDialog(WordCounter.this,<br />
"I/O Exception while reading " + name,<br />
"File <strong>Read</strong> Error",<br />
JOptionPane.ERROR_MESSAGE);<br />
wordsFound.setText("");<br />
} finally {<br />
fileName.setEnabled(true) ;<br />
try {<br />
if (r != null) {<br />
r.close();// Always close!<br />
}<br />
} catch (IOException ioe) {<br />
// Nothing to do<br />
} '<br />
}<br />
}<br />
};<br />
t.setPriority(Thread.MIN_PRIORITY);<br />
t .start() ;<br />
}<br />
public static void main(String[] args) {<br />
JFrame f = new JFrameC'Word Counter");
988 Chapter 8 Creating Custom Dialogs<br />
Listing 8-16 Using ProgressMonitorlnputStream (continued)<br />
f.getContentPane().add(new WordCounter());<br />
f.addWindowListener(new WindowAdapter() {<br />
public void windowClosing(WindowEvent evt) {<br />
System.exit(0);<br />
}<br />
});<br />
f.pack();<br />
f.setVisible(true);<br />
}<br />
protected JTextField fileName;<br />
protected JLabel wordsFound;<br />
J Using a ProgressMonitorlnputStream<br />
Most of the implementation is uninteresting. The important piece of code<br />
from the point of view of this section is this:<br />
r = new Buffered<strong>Read</strong>er(<br />
new InputStream<strong>Read</strong>er(<br />
new ProgressMonitorlnputStream(<br />
WordCounter.this,<br />
"Counting words in " + name,<br />
new FilelnputStream(name))));<br />
This seemingly contorted code extract constructs a stack of input streams<br />
and readers to read from a file, in the middle of which there is a Progress-<br />
MonitorlnputStream. The constructor for this class is defined as follows:<br />
public ProgressMonitorlnputStream(Component parent,<br />
Object message,<br />
InputStream in);<br />
The first argument is a component in the frame that will be the parent of<br />
the dialog that gets popped up. In our example, the word counter is implemented<br />
as a JPanel that contains the components necessary to allow the<br />
user to supply the file name and to see the number of words counted as the<br />
operation proceeds; this panel is used as the first argument of the constructor.<br />
The second argument is the message that is displayed in the dialog box<br />
above the progress bar. This argument can be anything that can be supplied<br />
as a message to JOptionPane, including a string (as here), an Icon, a Component,<br />
or an array of these types of objects.
Swing Components Often Used in Dialogs 989<br />
The last argument is the input stream to monitor. As far as the next stream<br />
up in the chain is concerned (in this case InputStream<strong>Read</strong>er, which converts<br />
an InputStream to a <strong>Read</strong>er), the ProgressMonitorlnputStream<br />
is transparent—it just passes the data from the InputStream passed as its<br />
third argument straight through, while keeping the dialog updated as it does<br />
so. When the input stream is closed, the dialog box disappears.<br />
<strong>Core</strong> Note<br />
Actually, ProgressMonitorlnputStream is beginning to show its age<br />
a little. In the early days of <strong>Java</strong>, all input was read through 8-bit input<br />
streams and converted to 16-bit Unicode characters using a conversion<br />
process that didn't work in many locales. In JDK I.I, full support was<br />
provided for converting between various 8-bit encodings and Unicode<br />
through the use of <strong>Read</strong>ers that incorporate a character converter for the<br />
appropriate source character set. Today, a portable program would avoid<br />
direct use of Input Streams at all costs.To read a file, you would use a<br />
File<strong>Read</strong>er instead of a Filelnputstream. For this example,<br />
however, we are forced to make at least some use of an InputStream<br />
because ProgressMonitorlnputStream requires one.This makes<br />
the stack of input classes here much more complicated than it should be.<br />
Ideally, there would be a ProgressMonitor<strong>Read</strong>er as well as a<br />
ProgressMonitorlnputStream and then we would use the following<br />
simpler code to read the file:<br />
Buffered<strong>Read</strong>er r = new Buffered<strong>Read</strong>er(<br />
new ProgressMonitor<strong>Read</strong>er(<br />
new File<strong>Read</strong>er(fileName)<br />
Unfortunately, there currently is no ProgressMonitor<strong>Read</strong>er class.<br />
The dialog box that pops up contains a Cancel button, as you can see in<br />
Figure 8-18. If you press the Cancel button, the next read that's issued<br />
against the input stream will fail with an IOException. This will cause the<br />
reader to stop whatever it's doing and, in our example, it causes an error dialog<br />
to be posted.<br />
Notice a very important point about this example. When the user presses<br />
RETURN in the text field, the actionPerformed method is entered. This<br />
method just creates a new thread, starts it running, and then returns. All of<br />
the work of reading the file and counting words is carried out in this new<br />
thread. Why is this necessary? The actionPerformed method is executed<br />
in the AWT event thread. As you saw in the JProgressBar discussion ear-<br />
,
990 Chapter 8 Creating Custom Dialogs<br />
lier in this chapter, if this thread gets blocked, the user interface stops working,<br />
because this thread handles all repaint requests and all of the other<br />
events that keep the interface up to date. Obviously, reading a long file is<br />
going to tie this thread up for a long time, so this activity is delegated to<br />
another thread instead. If you don't do this, the ProgressMonitorlnput-<br />
Stream dialog box will appear but won't be able to paint itself and the count<br />
of words on the main window also won't update.<br />
The ProgressMonitor Class<br />
We said that the ProgressMonitorlnputStream dialog box appears "after<br />
a while." What exactly did we mean by that and how does it work? The ProgressMonitorlnputStream<br />
is actually based around a simpler class called<br />
ProgressMonitor that supplies both the dialog box and the code that<br />
decides whether it should be displayed or not. Here is its constructor:<br />
public ProgressMonitor(Component parent,<br />
Object message,<br />
String note,<br />
int min,<br />
int max);<br />
The first two arguments are the same ones as those passed to the constructor<br />
of ProgressMonitorlnputStream. The min and max arguments set<br />
the bounds for a set of values that describe the operation in progress. In the<br />
case of the example in Listing 8-16, min would be zero and max would be the<br />
size of the file that is being read. These two values are ultimately used to set<br />
the maximum and minimum values of the JProgressBar. The third argument<br />
is the one of interest in the example that will be shown below. The<br />
string that's supplied here, if it is not null, is placed between the message<br />
and the progress bar. As the operation progresses, you can use the following<br />
two methods to update the dialog:<br />
public void setProgress(int value);<br />
public void setNote(String note);<br />
The setProgress method updates the progress bar with a new value,<br />
which must be between the maximum and minimum values passed to the<br />
constructor. If the value is greater than or equal to the maximum, the operation<br />
is assumed to be completed and the dialog disappears. Similarly, calling<br />
setNote changes the note displayed on the dialog, which allows you to<br />
report more useful status information in addition to showing the extent of<br />
progress through the operation. If you want to use setNote, you must pass a
Swing Components Often Used in Dialogs 991<br />
non-null note argument to the constructor, or the dialog won't allocate space<br />
for the note.<br />
When it is created, the progress monitor doesn't display a dialog. Instead,<br />
it waits for a short time and monitors the progress that is reported to it by<br />
calls to its setProgress method. At the end of this period, it attempts to<br />
work out how long the entire operation will take and, if this predicted time is<br />
longer than a configurable value, it creates and pops up a dialog box showing<br />
the message, the note (if there is one) and the progress bar.<br />
You can control how long ProgressMonitor waits before deciding how<br />
long the operation is likely to take by using the setMillisToDecideTo-<br />
Popup method, and you can set the minimum time that the operation must<br />
be predicted to last before a dialog box will be shown with the setMillis-<br />
ToPopup method:<br />
public void setMillisToDecideToPopup(int delay);<br />
public void setMillisToPopup(int delay);<br />
Both methods require a time interval in milliseconds. Consider this<br />
example:<br />
ProgressMonitor p =<br />
new ProgressMonitor ( ... params not shown ...) ;<br />
p.setMillisToDecideToPopup (250) ;<br />
p.setMillisToPopup (1000) ;<br />
With these values, the progress monitor will wait for 250 milliseconds<br />
before predicting the expected length of the operation. At that time, if it<br />
expects the operation to take longer than 1000 milliseconds, it will create and<br />
show the dialog box. By default, the initial wait time is 500 milliseconds and<br />
the operation must be expected to last two seconds before a dialog will be<br />
shown.<br />
<strong>Core</strong> Note<br />
The progress monitor makes its prediction on the first invocation of<br />
setProgress after the initial time limit has passed. If you don't call<br />
setProgress for a long time, the dialog box will not appear until you do<br />
call it<br />
Once a dialog is shown, it will remain on view until the user dismisses it<br />
using the Cancel button, or until setProgress is called with a value that<br />
exceeds the maximum value given to the constructor. If you programmati-
992 Chapter 8 Creating Custom Dialogs<br />
cally abort the operation that is being monitored for any reason, you must call<br />
the progress monitor's close method to allow it to dismiss the dialog.<br />
It is possible to demonstrate ProgressMonitor by making some changes<br />
to the actionPerf ormed method of the previous example. Instead of having<br />
ProgressMonitorlnputStream create and manage the Progress-<br />
Monitor behind the scenes, the new version will create its own and have it<br />
display not only the current progress but also how long it thinks the operation<br />
will take to complete. To do this, the setNote method will be used to write a<br />
text string with the current time remaining onto the dialog box. Listing 8-17<br />
shows the new actionPerf ormed method.<br />
<strong>Core</strong> Note<br />
If you press the Cancel button on the dialog shown by<br />
ProgressMonitorlnputStream, the I/O operation is terminated with<br />
an exception because the ProgressMonitorlnputStream is handling<br />
the 110. If you use a ProgressMonitor, dismissing it has no effect on<br />
the I/O, because it isn't directly involved in it.<br />
Listing 8-17 Displaying extra information with a<br />
ProgressMonitor<br />
public void actionPerformed(ActionEvent evt) {<br />
wordsFound.setText("");<br />
fileName.setEnabled(false);<br />
final String name = fileName.getText().trim();<br />
final File f = new File(name);<br />
final float size = (float)new File(name).length{)<br />
II Total size of file<br />
monitor = new ProgressMonitor(this,<br />
"Counting words in " + name,<br />
TIME_STRING,<br />
0, (int)size) ;<br />
Thread t = new Thread() {<br />
public void run() {<br />
Buffered<strong>Read</strong>er r = null;<br />
try {<br />
words = 0;
Listing 8-17 Displaying extra information with a<br />
ProgressMonitor (continued)<br />
chars<strong>Read</strong> = 0 ;<br />
guessTime = 0;<br />
Swing Components Often Used in Dialogs 993<br />
r = new Buffered<strong>Read</strong>er(new File<strong>Read</strong>er(f));<br />
long startTime = System.currentTimeMillis();<br />
long lastCheckTime = startTime;<br />
String str;<br />
while ((str = r.readLine()) != null) {<br />
chars<strong>Read</strong> += str.length();<br />
words +=<br />
new StringTokenizer (str) .countTokens () ;<br />
long currentTime = System.currentTimeMillis();<br />
final boolean changeNote =<br />
(currentTime - lastCheckTime ><br />
CHECK_INTERVAL);<br />
if (changeNote) {<br />
lastCheckTime = currentTime;<br />
float chars = (float)chars<strong>Read</strong>;<br />
float sizeLeft = size - chars;<br />
guessTime = (int)Math.ceil(((<br />
(currentTime - startTime)/chars)<br />
* sizeLeft)/1000.0);<br />
}<br />
}<br />
updateGUI();<br />
// Reflect the final state<br />
updateGUI();<br />
} catch (FileNotFoundException e) {<br />
JOptionPane.showMessageDialog(<br />
WordCounterTime.this,<br />
"Cannot find " + name,<br />
"File Error", JOptionPane.ERROR_MESSAGE);<br />
wordsFound.setText("");<br />
} catch (IOException e) {<br />
JOptionPane.showMessageDialog(<br />
WordCounterTime.this,<br />
"I/O Exception while reading " + name,
994 Chapter 8 Creating Custom Dialogs<br />
Listing 8-17 Displaying extra information with a<br />
ProgressMonitor (continued)<br />
}<br />
"File <strong>Read</strong> Error",<br />
JOptionPane.ERROR_MESSAGE);<br />
wordsFound.setText("");<br />
} finally {<br />
fileName.setEnabled(true);<br />
try {<br />
if (r != null) {<br />
r.close ();// Always close!<br />
}<br />
} catch (IOException ioe) {<br />
// Nothing to do<br />
}<br />
}<br />
SwingUtilities.invokeLater(new RunnableO {<br />
public void run() {<br />
monitor.close();// Close the monitor<br />
monitor = null;<br />
}<br />
});<br />
}<br />
};<br />
t.setPriority(Thread.MIN_PRIORITY);<br />
t.start();<br />
protected void updateGUlO {<br />
SwingUtilities.invokeLater(new RunnableO {<br />
public void run() {<br />
wordsFound.setText("" + words);<br />
if (monitor != null) {<br />
monitor.setProgress(chars<strong>Read</strong>) ;<br />
monitor.setNote(TIME_STRING + guessTime +<br />
11 seconds") ;<br />
}<br />
}<br />
});<br />
You can try this example for yourself using the command:<br />
j ava <strong>JFC</strong>Book.Chapter8.WordCounterTime
Swing Components Often Used in Dialogs 995<br />
To get the dialog to appear, you have to give it a file that is large enough to<br />
make the operation take longer than two seconds—the file index- 7 . html<br />
used with the previous example will also work here. Figure 8-19 shows the<br />
dialog that appears while this program is running.<br />
Figure 8-19 Using ProgressMonitor.<br />
In the actionPerformed method, the size of the file is used as the maximum<br />
value for the ProgressMonitor constructor. Since this example is<br />
going to use the note field, it is necessary to pass to the constructor a nonnull<br />
note argument, in this case the string "Time Remaining:" which is the first<br />
part of the message that we will later display there. Once the progress monitor<br />
is created, it isn't necessary to display it—our only duty is to call set-<br />
Progress and setNote to let it do its job.<br />
As the program reads through the file, it keeps track of how many bytes<br />
have been read and how long it has been reading for. Every 500 milliseconds,<br />
an attempt is made to work out how long the entire operation will take by calculating<br />
the average speed at which data has been read so far and multiplying<br />
this value by the number of bytes left to read. This is, of course, a very roughand-ready<br />
mechanism, but it suffices as an estimate. Having calculated the<br />
time left, setNote is used to show the result on the dialog. The set-<br />
Progress method is also called at the same time to cause the progress bar to<br />
be updated and the total number of words read is written to the screen.<br />
Finally, when the operation completes, or aborts for some reason, the<br />
progress monitor is closed.<br />
There is an important point to note about the way in which this code is<br />
structured. As with the previous example, to avoid blocking the AWT event<br />
thread, the process of reading the file content, counting the words, and predicting<br />
how much time the rest of the operation will take is performed in a<br />
background thread. However, it is also necessary to periodically update the<br />
text field that displays the number of words counted and the note and<br />
progress properties of the ProgressMonitor. Since both the text field and
996 Chapter 8 Creating Custom Dialogs<br />
the ProgressMonitor are Swing components, they cannot be directly<br />
updated from the file reading thread—they can only safely be modified from<br />
the AWT event thread. Consequently, the updateGUI method does not<br />
modify the GUI directly—instead, it uses the SwingUtilities invoke-<br />
Later method to schedule the updates into the AWT event thread, where<br />
they can safely change, Swing component state. This means that the screen<br />
updates can take place at the same time as the background thread is reading<br />
the file and changing the instance variables that hold the total number of<br />
characters read and the estimated time to completion. There is no need to<br />
synchronize access to these variables, however, because the updateGUI<br />
method does not make any assumptions about their consistency.<br />
You'll notice also that the text field that displays the number of words read<br />
is only updated every half a second, not each time the file reading thread<br />
modifies this counter. This avoids the costly operation of creating an event<br />
and posting it to the event thread after each line of input. Not only is it<br />
unnecessary to give the user live updates on the number of words read, but it<br />
will also very probably swamp the event thread because the time needed to<br />
update the GUI will almost certainly be longer than that required to read and<br />
process a line of the file, with the result that the background thread would be<br />
adding requests to update the GUI faster than the event thread could service<br />
them.<br />
Finally, when the entire file has been read, the ProgressMonitor must<br />
be closed. Since this is also an operation that changes the state of a Swing<br />
component, it too is performed in the event thread by calling the Swing-<br />
Utilities invokeLater method.<br />
The Slider Control<br />
The slider is a simple control that allows the user to adjust the value of a setting<br />
that takes one of a continuous range of values, where the ends of the<br />
range are fixed. To create a slider, you need to specify its orientation, the<br />
maximum and minimum values that the slider can take, and its initial value:<br />
public JSlider(int orientation, int minimum,<br />
int maximum, int value);<br />
The orientation must be either JSlider.HORIZONTAL or JSlider .VER-<br />
TICAL. There are also constructors that require you to specify only a subset<br />
of the arguments shown above and accept defaults for the others. If you use<br />
the default constructor which takes no arguments, all of the defaults are<br />
used, which results in a horizontal slider with a minimum of 0, maximum 100<br />
and initial value 50. You can, however, change these defaults later using the
Swing Components Often Used in Dialogs 997<br />
setMaximum, setMinimum, and setValue methods and you can even<br />
change the sliders orientation with setOrientation:<br />
public void setMinimum(int min);<br />
public void setMaximum(int max);<br />
public void setValue(int value);<br />
public void setOrientation(int orientation);<br />
If you create a slider and make it visible, you get just a bare track and the<br />
thumbnail that moves along it. If the slider is horizontal, the left side of the<br />
track represents the minimum value; for a vertical slider, the minimum value<br />
is at the bottom. However, in <strong>Java</strong> 2 version 1.3, for a horizontal slider the<br />
minimum values will be on the right and the maximum on the left if you set<br />
its component orientation to be right-to-left. Figure 8-20 shows three horizontal<br />
sliders in a left-to-right locale<br />
Figure 8-20 Three JSIider controls.<br />
The slider at the top of the figure was created with the line:<br />
JSIider slider = new JSIider(JSIider.HORIZONTAL, 0, 100,<br />
50) ;<br />
As you can see, there is no visible marking that shows the range or the current<br />
value of the slider; about all you can tell from the figure is that you are<br />
approximately in the middle of the allowed range. The slider underneath is<br />
slightly more useful because it has tick marks added. There are three methods<br />
that control the display of these marks:<br />
public void setPaintTicks(boolean paint);<br />
public void setMajorTickSpacing(int pixels);<br />
public void setMinorTickSpacing(int pixels);<br />
The first method controls whether the ticks will be shown at all— if you<br />
call it with argument false, you won't get any ticks (which is the default<br />
behavior). Enabling ticks is not, however, enough to make them appear<br />
because, by default, there aren't any to show until you call one or both of the<br />
other two methods, which determine the distance, in slider units, between<br />
successive major ticks and minor ticks. For the two sliders at the bottom of<br />
Figure 8-20, the tick marks were added using the following lines of code:
998 Chapter 8 Creating Custom Dialogs<br />
slider.setPaintTicks(true);<br />
slider.setMajorTickSpacing(20);<br />
slider.setMinorTickSpacing(4);<br />
With these settings, you get the large tick marks at intervals of 20 and the<br />
small ones every four units, which means that there will be five short ticks to<br />
every major one and a total of five major ticks in all, since the total range covered<br />
is 100. Obviously, where a minor tick coincides with a major tick, you<br />
get a major tick. There is no necessary relationship between the distances<br />
between the two types of tick. You could, for example, arrange for them to be<br />
completely out of step with each other, as in this case:<br />
slider.setMajorTickSpacing(2 0);<br />
slider.setMinorTickSpacing(3);<br />
Here, the minor ticks occur eveiy three units, but the major ones are still<br />
20 units apart. As a result, you get either six or seven minor ticks, equally<br />
spaced, between the major ticks, but the result, which you can see by typing<br />
the command<br />
<strong>Java</strong> <strong>JFC</strong>Book.ChapterS.Sliders2<br />
is not very useful (Figure 8-21).<br />
Figure 8-21 JSIider with incompatible major/minor tick values.<br />
Finally the slider at the bottom Figure 8-20 differs from the other two in<br />
that the track is not painted. You can control whether the track is filled in<br />
using the following method:<br />
public void setPaintTracks(boolean cond);<br />
The default behavior is to paint the track in the background color of the<br />
control. Note that if you are using the Metal look-and-feel, you can arrange<br />
to change the color to used to fill the track, as you'll see later. Simply changing<br />
the background color of the component is not sufficient to do this<br />
because the background color affects the whole component, not just the<br />
track.
Changing the Slider Value and Handling<br />
Slider Events<br />
Swing Components Often Used in Dialogs 999<br />
The value associated with a slider is changed by dragging the thumbnail with<br />
the mouse, or by clicking on the track, which causes the thumb to move a<br />
short distance toward the mouse. The exact distance by which the thumbnail<br />
is moved by a mouse click depends on the look-and-feel. With the Windows<br />
look-and-feel, the thumbnail moves by one tenth of the maximum value with<br />
each mouse click. You can also move the thumb using only the keyboard by<br />
pressing the HOME, END, PAGE UP, PAGE DOWN, left arrow, right arrow, left<br />
arrow, or right arrow keys.<br />
As the slider moves, it generates ChangeEvents that you can receive by<br />
registering a ChangeListener with the slider. As you saw in connection<br />
with JProgressBar, this event tells you nothing other than the fact that its<br />
source has changed state in some way—to get the value of the slider, you<br />
have to use its get Value method.<br />
The slider generates a continuous stream of events as it is dragged by the<br />
user, but sometimes you only need to know the value when the slider has<br />
come to rest. So that you can tell when this is the case, the slider provides the<br />
getValuelsAdjusting method, which returns true while the slider is in<br />
motion. Here is a sample event handler that shows the changing slider value<br />
and indicates when the slider comes to rest:<br />
slider.addChangeListener(new ChangeListener() {<br />
public void stateChanged(ChangeEvent evt) {<br />
JSlider source = (JSlider)evt.getSource();<br />
System.out.println("Value is " + source.getValue());<br />
if (source.getValuelsAdjusting() == false) {<br />
System.out.println("Slider stopped at value " +<br />
source.getValue());<br />
}<br />
});<br />
}<br />
If you type the command<br />
<strong>Java</strong> <strong>JFC</strong>Book.Chapter8.Sliders2<br />
and drag the thumb along the slider and then release it, you'll see a continous<br />
stream of messages as the slider value changes, followed by a final one<br />
that announces that the slider has stopped moving:<br />
Value is 22<br />
Value is 23
1000 Chapter 8 Creating Custom Dialogs<br />
Value is 24<br />
Value is 24<br />
Slider stopped at value 24<br />
All of the events delivered in this sequence have the valuelsAdjusting<br />
property set to true, apart from the last one.<br />
<strong>Core</strong> Alert<br />
Unfortunately, JSlider does not behave this way in <strong>Java</strong> 2 version<br />
1.2.2— all of the events that it delivers have valuelsAdjusting set to<br />
true, so you can't tell whether the slider has stopped moving or notThis<br />
problem does not exist in Swing I.I.I or <strong>Java</strong> 2 version 1.3.<br />
There are a couple of other things that you can do to control the movement<br />
of the thumbnail. First, if you want to ensure that it always stops opposite<br />
a tick, you can use the following method:<br />
public void setSnapToTicks(boolean cond);<br />
Invoking this with value true causes the slider to adjust the thumbnail's<br />
position after the user stops dragging it so that it always aligns with a tick.<br />
What this means in terms of the value of the slider is, of course, unclear<br />
unless you have carefully sized your control to guarantee that ticks are on,<br />
say, a boundary that causes increments of five in the value of the slider.<br />
The other thing you can do is temporarily limit the range of the slider by<br />
using the setExtent method:<br />
public void setExtent(int extent);<br />
This method restricts the slider to return a value no more than extent<br />
less than the maximum so that, for example, if your slider has a maximum<br />
value of 99 and an extent of 20, the highest value that will be reported will be<br />
79. If you continue to drag the slider beyond this point, no further events are<br />
generated.<br />
As well as restricting the movement of the slider, you can also change its<br />
direction of movement using the set Inverted method:<br />
public void setlnverted(boolean inverted);<br />
If you call this method with argument true, the minimum value for a horizontal<br />
slider will be on the right and values increase as the thumbnail is<br />
dragged to the left (with the obvious reversal of these senses in a right-to-left<br />
locale in <strong>Java</strong> 2 version 1.3). Similarly, in the case of a vertical slider, the minimum<br />
moves to the top and the value increases as the thumbnail moves
Swing Components Often Used in Dialogs 1001<br />
down. You can experiment with the effects of the setSnapToTicks, setExtent,<br />
and set Inverted methods by running an example in which the first<br />
and last are enabled and the extent is set to 20 on a slider with maximum and<br />
minimum values 0 and 99, respectively, using the command:<br />
<strong>Java</strong> <strong>JFC</strong>Book.Chapter8.Sliders3<br />
The result of running this example is shown in Figure 8-22.<br />
Figure 8-22 An inverted, filled<br />
slider.<br />
The slider shown in Figure 8-22 is slightly different from the ones you saw<br />
in the earlier figures. If you look at Figure 8-20 and Figure 8-21, you'll see<br />
that the track on which the slider runs is all the same color, whereas in Figure<br />
8-22, only the part that the slider has moved over is of the darker track<br />
color—the rest is filled with the same color as the rest of the control. This<br />
effect works for the Metal look-and-feel only and is controlled by the client<br />
property JSlider. isFilled. To get a fill effect like this, the following line<br />
of code is required:<br />
slider.putClientProperty( "JSlider.isFilled"<br />
Boolean.TRUE);<br />
The track shown in the earlier figures is what you get by default, or if you<br />
explicitly specify that it should not be filled as follows:<br />
slider.putClientProperty("JSlider.isFilled",<br />
Boolean.FALSE);<br />
Labels<br />
As well as painting ticks, a slider can also draw labels to represent its possible<br />
values. The simplest way to get labels is to use the setPaintLabels<br />
method:<br />
public void setPaintLabels(boolean paint);<br />
Calling this method with argument true generates a standard set of<br />
labels, provided that you have already called setMajorTickSpacing with a<br />
positive value. A label is generated and placed at the location where each<br />
major tick would be drawn. You don't need to turn on painting of ticks to<br />
allow labels to be drawn, but you may find the result more readable if you do.
1002 Chapter 8 Creating Custom Dialogs<br />
Figure 8-23 shows a slider with the standard labels applied to it and major<br />
tick spacing set to 20. You can run this example with the command:<br />
<strong>Java</strong> <strong>JFC</strong>Book.Chapter8.Sliders4<br />
The labels are actually stored in a Hashtable, each entry of which maps a<br />
slider value encoded as an Integer to the required label, held as a Component.<br />
When the slider is drawn, the labels in the Hashtable are added to it<br />
using the slider value to determine position. The standard label set is generated<br />
by a method called createStandardLabels, which has two variants:<br />
public Hashtable createStandardLabels(int increment);<br />
public Hashtable createStandardLabels(int increment,<br />
int start);<br />
When you call setPaintLabels, unless you have already created a label<br />
table, it calls the first form of createStandardLabels with the major tick<br />
spacing as the increment and an implied start value of 10. In the examples in<br />
this section, the major tick spacing is 20 and the maximum value is 99, so this<br />
would generate labels at values 0, 20, 40, 60, and 80, which is borne out by<br />
Figure 8-23. You can change the standard table by calling either version of<br />
createStandardLabels yourself. The Hashtable that is returned should<br />
be given as the argument to the setLabelTable method:<br />
public void setLabelTable(Dictionary labels);<br />
For example, you can create labels at intervals of 10 units using this line:<br />
slider.setLabelTable(slider.createStandardLabels(10));<br />
or you can create labels that count in 15-unit increments starting at five with<br />
this line of code:<br />
slider.setLabelTable(<br />
slider.createStandardLabels(5, 15)) ;<br />
The standard labels are all JLabel objects with the slider value rendered<br />
on them. You are not required to use the standard labels, however. You can<br />
create your own label table by constructing the appropriate Hashtable and<br />
using setLabelTable to associate with the slider. If you don't need to<br />
Figure 8-23<br />
labels.<br />
A JSlider with default
eplace all of the labels, you can use getLabelTable to retrieve the current<br />
labels and change or add only your new labels:<br />
public Dictionary getLabelTable();<br />
One way to use setLabelTable is to create labels that use icons instead<br />
of or as well as text.<br />
Summary<br />
In this chapter, you have seen how to create your own dialog boxes using the<br />
Swing JDialog class. You've seen the difference between a modal and a<br />
non-modal dialog box and how to write the code to handle both types.<br />
You also saw how you can use and customize further the JOptionPane<br />
and JFileChooser classes introduced in the last chapter and how to use<br />
them as part of more complex dialogs along with many of the controls that<br />
are most frequently used in dialog boxes, including checkboxes, radio buttons,<br />
lists, combo boxes, progress monitors, and sliders. One of the more<br />
powerful ways to create a dialog box is with the JTabbedPane control, which<br />
allows you to have several "pages" of dialog sheets overlaid on top of each<br />
other in such a way that only one is visible at any given time. This control was<br />
used to demonstrate the collection of borders that you can apply to any<br />
Swing control.<br />
There are two more important Swing controls that might be used in dialogs<br />
that you haven't yet seen—JTree and JTable. Both of them are sufficiently<br />
complex that they merit their own chapters in this book. Before that,<br />
however, the next chapter takes a close look at what you might up to now<br />
have considered to be simple components—text controls.<br />
Summary 1003
ADVANCED<br />
TOPICS
You have now seen all of the new mechanisms that Swing provides<br />
to help create more professional-looking applications than was<br />
possible with the Abstract Windows Toolkit. You have also seen<br />
how to build your own dialogs and how to make keyboard operation<br />
faster by providing suitable keyboard accelerators and by carefully controlling<br />
the keyboard focus as the user interacts with your application.<br />
Part 3 builds on the groundwork laid in the first eight chapters of this<br />
book by looking at some of the more complex and powerful Swing components.<br />
First, you'll see the Swing text control which, at first glance,<br />
looks just like the simple input fields that you'll find in any commerical<br />
application. In fact, as you'll soon discover, the lightweight exterior<br />
hides a much more sophisticated framework that can be used to build<br />
more general components such as JTextPane and JEditorPane, which<br />
support documents containing multiple fonts and colors and even let<br />
you view and modify content that is not encoded as plain text. Using the<br />
material presented here, you will be able to build on this framework to<br />
build your own custom editors and file viewers.<br />
Next, you'll see the JTree and JTable controls. These controls provide<br />
two different ways to display bulk data. While being extremely simple<br />
to use for mundane tasks, they are also very easy to customize to<br />
meet more demanding requirements. Chapters 10 and 11 are devoted<br />
to these controls, showing you not only how to handle the simple cases,<br />
but also how to develop your own Tenderers and editors that enable you<br />
to make radical changes to the way these controls appear and how they<br />
react to user input.<br />
Multiple-document applications are very popular on the desktop.<br />
Swing provides a useful framework for building these applications with<br />
the JDesktopPane and JInternalFrame components. In Chapter 12,<br />
you'll see how these components work and how to extend their capabilities<br />
to provide tiling, cascading, and more.<br />
Finally, Chapter 13 lifts the hood on the Swing pluggable look-and-feel<br />
mechanism to help you get the best from the ability of every Swing component<br />
to take on a new appearance without the need to change application<br />
code. Here, you'll see how the pluggable look-and-feel mechanism<br />
works, how to change the appearance of individual components, and what<br />
is involved in creating your own look-and-feel.
,<br />
TEXT<br />
COMPONENTS<br />
•<br />
Topics in This Chapter<br />
• Text Fields.Text Areas, and Password Fields<br />
• Events and Text Selections<br />
• Inside theText Components<br />
• Getting Multiple View of a Document with JSplitPane<br />
• Styled Documents: JTextPane and JEditorPane
The Swing package includes replacements for the AWT Text Fie Id<br />
and TextArea components, which provide all of the functionality of<br />
the originals with a (nearly) compatible interface. These controls are,<br />
however, built on a very rich infrastructure that allows you to do much more<br />
with them than was possible with their predecessors. This chapter looks first<br />
at the features that JTextField and JTextArea provide for applications<br />
that want a simple input field or a simple way of displaying plain text, then<br />
moves on to examine the underlying document infrastructure and the more<br />
complex JTextPane and JEditorPane controls.<br />
Simple Text Controls<br />
Although the text components are built on a complex infrastructure that<br />
you'll see later, it is possible to use some of them in a very straightforward<br />
manner without having to understand what goes on under the hood. The first<br />
half of this chapter looks at the three text components to which this applies,<br />
JTextField, JTextArea, and JPasswordField.<br />
1007
1008 Chapter 9 Text Components<br />
JTextField and JTextArea<br />
The Swing set includes a large amount of support for text processing, much<br />
of which is new. This section looks at the JTextField and JTextArea components,<br />
which are replacements for the AWT TextField and TextArea<br />
controls.<br />
JTextField<br />
JTextField is a single-line text component that is commonly used to obtain<br />
a small amount of input or display a one-line message. You can create ; a<br />
JTextField using one of the following constructors:<br />
public JTextField();<br />
public JTextField(Document doc, String text, int cols);<br />
public JTextField(int cols);<br />
public JTextField(String text);<br />
public JTextField(String text, int cols);<br />
The first form creates an empty text field with no specified size. If you<br />
don't specify the size of text field, it decides for itself how wide it will be and<br />
the result you see on the screen will depend on the layout manager in use<br />
(see Chapter 3, "Managing the User Interface," for a description of the various<br />
layout managers and how they behave).<br />
The second constructor allows you to associate a Document with the text<br />
field; a default implementation of the Document interface that is sufficient<br />
for most purposes is supplied if you use the other constructors. Just as each<br />
Swing component has a separable look-and-feel component that deals with<br />
drawing it onto the screen, the text components have the ability to incorporate<br />
different methods of holding and manipulating the text itself. In terms of<br />
the Model-View-Controller architecture introduced in Chapter 1, "Introduction<br />
to the <strong>Java</strong> <strong>Foundation</strong> <strong>Classes</strong>," the Document represents the model.<br />
Usually, unless you have special requirements, you won't need to deal with<br />
the Document associated with a text component. There is, however, one<br />
common case in which you'll need to work with the Document, which you'll<br />
see shortly. There is an in-depth description of the Document model later in<br />
the second half of this chapter.<br />
The last three constructors are the ones you will use most often. These<br />
allow you to create a text field of a specified (or defaulted) size and with given<br />
initial content (or blank).
Text Size versus JTextField Size<br />
Simple Text Controls 1009<br />
There are a couple of important things to keep in mind when you specify<br />
the size of a text field. Suppose you did this:<br />
JTextField t = new JTextField("Hello, world", 5);<br />
This code creates a five-character wide text field with the text "Hello,<br />
world" in it. Since the text is more than five characters wide, you might<br />
wonder whether all but the first five characters would be discarded. In fact,<br />
no data is lost, because the number of columns passed to the constructor<br />
relates only to the displayed width of the text field, not to how many characters<br />
it can store, which is virtually unbounded. You can see what actually happens<br />
when you create this text field by trying the example shown in Listing 9-<br />
1, the results of which are shown in Figure 9—1.<br />
Listing 9-1 A simple text field<br />
package <strong>JFC</strong>Book.Chapter9;<br />
import j avax.swing.*;<br />
import j ava.awt.*;<br />
import j ava.awt.event.*;<br />
public class TextExamplel {<br />
public static void main(String [] args) {<br />
JFrame f = new JFrame("Text Example 1");<br />
JTextField tf = new JTextField("Hello, world", 5)<br />
f.getContentPane().setLayout(new FlowLayout());<br />
f.getContentPane() .add(tf) ;<br />
f.pack();<br />
f.addWindowListener(new WindowAdapter() {<br />
public void windowClosing(WindowEvent evt) {<br />
System.exit(0);<br />
}<br />
});<br />
f.setVisible(true);<br />
}<br />
J When, as in this case, the text is too wide to fit in the display area, you can<br />
bring the rest of the text into view by scrolling left or right using the mouse or<br />
the keyboard. If you do this, you'll see that the whole string is actually in the
1010 Chapter 9 Text Components<br />
Figure 9-1 A text field with too much text.<br />
text field. You can also use the HOME and END keys to move to the left or right<br />
ends of the text, respectively.<br />
You will also have noticed that you could actually see more than the first<br />
five characters of the text string, despite the fact that a five-character field<br />
was created. This is because the font that is used in the text field is not constant<br />
width, so any given five-character string might or might not exactly fill<br />
the display area. In that case, what exactly do you get when you ask for five<br />
characters? What you get is a field wide enough to display five lower case "m"<br />
characters in the text field's default font. Since 'm' is a wide character, most of<br />
the strings that are displayed in this particular text field will show more than<br />
their leading five characters. You can change the number of columns in the<br />
text field or get the current number of columns using the following two<br />
methods:<br />
public void setColumns(int columns);<br />
public int getColumns();<br />
Using setColumns to change the number of columns won't have any visible<br />
effect on the control unless you force the container that it resides in to lay<br />
itself out again by calling validate on it. Even then, this will have no eflect<br />
unless the container is allowing the text control to adopt its natural size, as<br />
would be the case if it were managed by a FlowLayout manager.<br />
Scrolling and Alignment<br />
When the text is too wide to be displayed in the text field's visible area, you<br />
can control which part of it is displayed using the following methods:<br />
public void setScrollOffset(int offset);<br />
public int getScrollOffset () ;<br />
The setScrollOffset method determines which part of the string<br />
appears against the left-hand boundary of the control. The offset is measured<br />
in pixels, not characters, so you will need to obtain the FontMetrics object<br />
for the text field's font if you want to do character-based positioning. If you<br />
set the scroll offset to zero, the text starts at the left of the visible area. Setting<br />
larger offsets causes some (or all) of the text to be logically drawn to the<br />
left of the visible area, giving the appearance of the text scrolling out of the
Simple Text Controls 1011<br />
text field to the left. Setting a negative scroll offset is the same as setting a<br />
scroll offset of zero. Note that the scroll offset is ignored if the size of the text<br />
field is larger than the text that it needs to display.<br />
Another way to control the placement of text within the text field is to use<br />
the alignment property that is set using the setHorizontalAlignment<br />
method:<br />
public void setHorizontalAlignment(int align);<br />
The align argument takes one of the values JTextField.LEFT (the<br />
default), JTextField. CENTER, or JTextField.RIGHT. Once the alignment<br />
has been set, the text stays aligned that way even if more is added to the<br />
field so that, for example, if the text is right-aligned and the user adds more<br />
to the end of it, the left side of the text moves to the left to make room. Similarly,<br />
center-aligned text remains centered as the user types new text. Note,<br />
however, that the alignment only has any visible effect if the space allocated<br />
to the text field is larger than the width of the text that it contains. This<br />
means, for example, that in the case shown in Figure 9-1, there would be no<br />
visible difference no matter what alignment value had been chosen, unless<br />
you started deleting characters to bring the text size below the field width.<br />
In <strong>Java</strong> 2 version 1.3, JTextField also accepts the values JText-<br />
Field . LEADING and JTextField. TRAILING as legal alignment values and<br />
act on the based on the text field's component orientation. With left-to-right<br />
orientation, LEADING is the same as LEFT and TRAILING is the same as<br />
RIGHT. With right-to-left orientation, these are reversed and the text is<br />
aligned to the right by those constructors that do not accept an alignment<br />
argument.<br />
Getting and Setting the Text Field Contents<br />
Once you have a text field, you can subsequently change or retrieve the text it<br />
contains using the setText and getText methods:<br />
public void setText(String text);<br />
public String getText();<br />
Sometimes, you'll need to retrieve the content of the text field in response<br />
to a user action elsewhere—for example, the user might fill in a complete<br />
form consisting of several text fields and then press a button to have the form<br />
processed. On other occasions, you'll want to process the text when the user<br />
presses the RETURN key and generates an event. You'll see how this is done a<br />
little later.
1012 Chapter 9 Text Components<br />
JTextArea<br />
Similar to JTextField but more powerful is the JTextArea control. This<br />
control is derived from the same parent as JTextField (namely JTextComponent),<br />
but JTextArea can display more than one row of text and is usually<br />
used in conjunction with a JScrollPane to make it possible to show<br />
large amounts of text in a small area. Like JTextField, JTextArea has several<br />
constructors:<br />
public JTextArea ();<br />
public JTextArea(Document doc);<br />
public JTextArea(Document doc, String text, int rows, int<br />
COls);<br />
public JTextArea (int rows, int cols);<br />
public JTextArea(String text);<br />
public JTextArea(String text, int rows, int cols);<br />
Apart from the Document, a JTextArea has three properties that you can<br />
set using these constructors—the initial text and the number of rows and columns<br />
in the text area. If you explicitly set either the row or column value,<br />
then the JTextArea will use the value you supply. If you don't set these values,<br />
then the column count will be calculated to match the longest line of the<br />
initial text string and the row count will equal the number of lines of text you<br />
supply (where lines of text are separated by the newline character \n'). Setting<br />
the row and/or column values to zero in one of the constructors that<br />
allows you to specify them instructs the JTextArea to use defaults calculated<br />
in this way for whichever values are zero.<br />
The JTextArea component, unlike its AWT counterpart TextArea, does<br />
not provide scrollbars of its own if it cannot display all of the text that it contains;<br />
usually, you add scrollbars to a JTextArea by wrapping it in a<br />
JScrollPane, like this:<br />
JTextArea textArea = new JTextArea(20, 3 0);<br />
JScrollPane p = new JScrollPane(textArea);<br />
Figure 9-2 shows a text area to which scrollbars have been added. If the<br />
scrollbars hadn't been added, the text that extends beyond the right of the<br />
visible area would have been inaccessible, because JTextArea doesn't perform<br />
line wrapping by default.<br />
You can make JTextArea perform line wrapping by using the setLine-<br />
Wrap and setWrapStyleWord methods:<br />
public void setLineWrap(boolean wrap);<br />
public boolean getLineWrap();<br />
public void setWrapStyleWord(boolean cond);
public boolean getWrapStyleWord();<br />
Simple Text Controls J 013<br />
To enable line wrapping, you call setLineWrap (true). Once you have<br />
done this, you have two different options for deciding how the text is<br />
wrapped. By default, JTextArea breaks the text when a line is completely<br />
filled. Alternatively, you can request that line breaks take place only in the<br />
white space between word. To do this, you call setWrapStyleWord (true).<br />
You can see the difference that enabling line wrapping makes by comparing<br />
Figure 9-2, which does not have line wrapping enabled, with Figure 9-3,<br />
which does. The right-hand text area in Figure 9-3 has line wrapping at word<br />
boundaries, while the left-hand one does not. The text areas have both been<br />
sized so that the text lines are too long to fit in the horizontal space available,<br />
thus forcing line breaking to be performed. You can clearly see the difference<br />
between two line wrapping styles: the lines of text in the left-hand text area<br />
break at the round boundary of the control, whereas those in the right-hand<br />
control break between words. If you run this example using the command:<br />
<strong>Java</strong> <strong>JFC</strong>Book.Chapter9.TextAreaExample2<br />
and use the mouse to narrow the frame, you'll see that the lines in the<br />
right hand text area continue to break at word boundaries, while those on the<br />
left hand side break in essentially arbitrary locations. As you do this, because<br />
the amount of horizontal space available is being reduced, more vertical<br />
space is needed to render all the text, so eventually a vertical scrollbar will<br />
appear. No matter how narrow you make the frame, however, you will not see<br />
a horizontal scrollbar. By contrast, when line wrapping is not enabled, a horizontal<br />
scrollbar appears as soon as the longest line of text needs more horizontal<br />
space than the width of the text area.<br />
After you've created a JTextArea, you can change the number of rows<br />
and/or columns it contains using the following methods:<br />
public void setRows(int rows);<br />
public void setColumns(int cols);<br />
Unlike JTextField, JTextArea will expand tabs that appear in its input<br />
string. Logically, tab stops appear at constant intervals across the control and<br />
by default, there is a tab stop every eight columns. In pixel terms, the distance<br />
between tab stops is the number of columns you specify multiplied by the maximum<br />
advance of the font in use. When a tab is encountered in the string<br />
being displayed, the display position is advanced to the next tab stop. You can<br />
change the distance between tab stops using the set Tabs ize method:<br />
public void setTabSize(int columns);
1014 Chapter 9 Text Components<br />
In pixel terms, the distance between tab stops is the number of columns you<br />
specify multiplied by the maximum advance of the font in use.<br />
Figure 9-2 A text area with added scrollbars.<br />
The tab size in the example shown in Figure 9-2 has been set to four columns.<br />
If you run this program using the command:<br />
j ava <strong>JFC</strong>Book.Chapter9.TextAreaExamplel<br />
and then press the TAB key, you'll see the cursor jump forward by four columns<br />
each time you do so. If you type two characters and then press TAB, the<br />
cursor jumps forward by a smaller amount that depends on the width of the<br />
characters that you have typed so far.
Figure 9-3 A text area with line wrapping enabled.<br />
Non-Editable Text Controls<br />
Simple Text Controls 1015<br />
Sometimes it will be necessary to use a JTextField or a JTextArea as a<br />
way of displaying information that you don't want the user to be able to<br />
edit. You might, for example, want to show the content of a text file but not<br />
allow the user to update it, or you might be presenting information that is,<br />
by its nature, read-only, such as a directory listing of a Web site. You could<br />
try to make it clear to the user that the content of the text field or text area<br />
cannot be change by disabling it using setEnabled (false), but that<br />
would cause the text to be grayed out and less readable. A better option to<br />
stop the user changing the text is to use the setEditable method, as in<br />
the following example:<br />
JTextField t = new JTextField(<br />
t.setEditable(false);<br />
"This text cannot be edited");
.<br />
1016 Chapter 9 Text Components<br />
When a text control is not editable, the color of text itself is not changed,<br />
but the look-and-feel usually changes the appearance of the control in some<br />
way. The Metal look-and-feel, for example, changes the background color<br />
from the default color (which is white) to the same color as the background<br />
of JPanel and it also replaces the border with a relatively indistinct light<br />
gray one.<br />
You can change the editability of a text component to suit the application<br />
context. Consider another example. Suppose you have a dialog that consists<br />
of several fields, one of which is a search key for a database. When you open<br />
the dialog, there won't be any information in any of the fields, so you should<br />
disable all of the fields apart from the one that represents the key. When the<br />
user supplies the key, you retrieve the required information from the database<br />
and populate the text fields in the dialog. Now, since the information<br />
you have relates to the search key given, you probably want to stop the user<br />
editing that field, so you call setEditable (false) on that field and enable<br />
all of the other fields to make them readable. You might, of course, be prepared<br />
to allow some of the other information to be modified and, if so, you<br />
would call setEditable (true) for those fields (or do nothing, because this<br />
is the default).<br />
Text Fields and the Input Focus<br />
Text fields are often used in form-like dialogs; we have already seen an<br />
example of a form that consisted of a text field for each line of a person's<br />
address and an associated label to show what information is required in<br />
each text field (see, for example, Listing 5-4 and Figure 5-3 in Chapter 5,<br />
"Keyboard Handling, Actions, and Scrolling"). Now suppose that as well as<br />
using this form to enable the user to create new records, you want to allow<br />
it to be used for changing information. Perhaps this form is an interface to a<br />
customer database and you want to be able to retrieve a customer's record<br />
and then change that customer's telephone number. In the implementation<br />
provided in Listing 5-4, to reach the telephone number field, you either<br />
have to move the mouse over the telephone number field and click to move<br />
the focus there, or you could choose to move the focus through all of the<br />
text fields using the TAB key until you reach the last one. If you are not a<br />
mouse user, you might find it annoying to keep having to use the TAB key so<br />
often to reach the field you want to change, so the Swing text components<br />
allow you to associate an accelerator key with every component, in the<br />
same way as you can with buttons. When you press the appropriate accelerator<br />
key together with the ALT key, the keyboard focus will be moved<br />
directly to the associated text componet.
Simple Text Controls 1017<br />
To associate an accelerator with a text field, you need to choose a single<br />
character that will be used to access the field and pass it to the JTextComponent<br />
setFocusAccelerator method. The following code extract creates a<br />
text input field and arranges for the focus to be passed to it when the user<br />
presses ALT+a:<br />
JTextField t = new JTextField(35);<br />
t.setFocusAccelerator('a');<br />
The setFocusAccelerator method treats upper case and lower case<br />
letters as equivalent, so that the following two lines of code have the same<br />
effect:<br />
t.setFocusAccelerator('a');<br />
t.setFocusAccelerator('A');<br />
While this will create an accelerator key for the text field, how will the user<br />
know that it is available? Unlike buttons, text fields do not come with<br />
attached labels, so there won't be an underlined "a" character to alert the<br />
user to the possibility of a shortcut. But most text fields do have labels<br />
attached to them by the programmer, and there is a way to force a single letter<br />
in the label to be underlined for this very purpose. Using the JLabel<br />
method setDisplayedMnemonic, you can give the impression that the<br />
label has an accelerator associated with it. In fact, it is the text field that has<br />
the accelerator, but the label visually represents that accelerator, which<br />
explains the name of the method itself. Here are the definitions of the JLabel<br />
methods that display mnemonics:<br />
public void setDisplayedMnemonic(char c) ;<br />
public void setDisplayedMnemonic(int k);<br />
public int getDisplayedMnemonic();<br />
The first two methods allow you to associate a mnemonic given either as a<br />
character constant (e.g., "A") or as a keycode (e.g., KeyEvent. VK_A). AS<br />
with the setFocusAccelerator method, you can pass either an upper case<br />
or a lower case character to setDisplayedMnemonic. The third method<br />
returns the mnemonic as a keycode. If no mnemonic has been set, it returns<br />
zero.<br />
Listing 9-2 Accelerator keys for text fields<br />
package <strong>JFC</strong>Book.Chapter9;<br />
import j avax.swing.*;
1018 Chapter 9 Text Components<br />
Listing 9-2 Accelerator keys for text fields (continued)<br />
import j ava.awt.*;<br />
import j ava.awt.event.*;<br />
public class TextAcceleratorExample {<br />
public static void main(String [] args) {<br />
JLabel 1;<br />
JTextField t;<br />
JButton b;<br />
JFrame f = new JFrame("Text Accelerator Example");<br />
Container cp = f.getContentPane();<br />
cp.setLayout(new GridBagLayout());<br />
GridBagConstraints c = new GridBagConstraints();<br />
c.gridx = 0;<br />
c.gridy = GridBagConstraints.RELATIVE;<br />
c.gridwidth = 1;<br />
c.gridheight = 1;<br />
c.insets = new Insets(2, 2, 2, 2);<br />
c.anchor = GridBagConstraints.EAST;<br />
cp.add(1 =<br />
new JLabel("Name:", SwingConstants.RIGHT), c);<br />
1.setDisplayedMnemonic('n');<br />
cp.addd =<br />
new JLabel("House/Street:", SwingConstants.RIGHT), c);<br />
1.setDisplayedMnemonic('h' ) ;<br />
cp.add(l =<br />
new JLabel("City:", SwingConstants.RIGHT), c);<br />
1.setDisplayedMnemonic('c');<br />
cp.add(1 =<br />
new JLabel("State/County:", SwingConstants.RIGHT), c);<br />
1.setDisplayedMnemonic('s');<br />
cp.add(l =<br />
new JLabel("Zip/Post code:", SwingConstants.RIGHT), c)<br />
1. setDisplayedMnemonic('z ' ) ;<br />
cp.add(1 =<br />
new JLabel("Telephone:", SwingConstants.RIGHT), c) ;<br />
1. setDisplayedMnemonic('t' ) ;<br />
cp.add(b = new JButton("Clear"), c);<br />
b.setMnemonic ( '1') ;<br />
c.gridx = 1;<br />
c.gridy = 0;
Listing 9-2 Accelerator keys for text fields (continued)<br />
c.weightx = 1.0;<br />
c.fill = GridBagConstraints.HORIZONTAL;<br />
c.anchor = GridBagConstraints.CENTER;<br />
cp.add(t = new JTextField(35), c) ;<br />
t.setFocusAccelerator('n');<br />
final JTextField firstField = t;<br />
c.gridx = 1;<br />
c.gridy = GridBagConstraints.RELATIVE;<br />
cp.add(t = new JTextField(35), c);<br />
t.setFocusAccelerator('h');<br />
cp.add(t = new JTextField(35), c) ;<br />
t.setFocusAccelerator('c');<br />
cp.add(t = new JTextField(35), c) ;<br />
t.setFocusAccelerator('s');<br />
cp.add(t = new JTextField(35), c);<br />
t.setFocusAccelerator(' z ') ;<br />
cp.add(t = new JTextField(35), c);<br />
t.setFocusAccelerator('t');<br />
c.weightx = 0.0;<br />
c.fill = GridBagConstraints.NONE;<br />
cp.add(b = new JButton("OK"), c);<br />
b. setMnemonic Co 1 ) ;<br />
f.pack () ;<br />
f.addWindowListener(new WindowAdapter() {<br />
public void windowOpened(WindowEvent evt) {<br />
firstField.requestFocus () ;<br />
}<br />
public void windowClosing(WindowEvent evt) {<br />
System.exit(0) ;<br />
}<br />
});<br />
Simple Text Controls 1019<br />
f.setVisible(true);<br />
}<br />
2___ This idea can be applied to a form-type layout by including a couple of<br />
lines of code for each input field, as shown in Listing 9-2.<br />
Figure 9-4 shows what the finished form looks like.
1020 Chapter 9 Text Components<br />
Figure 9-4 Input fields with keyboard accelerators.<br />
Notice in this example that accelerator keys have also been assigned to the<br />
OK and Clear buttons using the setMnemonic method that you saw earlier.<br />
If you run this example, you will find that there is a visible shortcut associated<br />
with every field on the form and you should find it possible to navigate anywhere<br />
on the form without having to press more than one key (not counting<br />
the ALT key, of course).<br />
<strong>Core</strong> Note<br />
This example is only a demonstration of the setDisplayedMnemonic<br />
and setFocusAccelerator methods—the OK and Clear keys do not<br />
actually work.<br />
There is, in fact, another way to arrange for the focus to pass to another<br />
component associated with a JLabel. You'll see that in the next section.<br />
Password-like Field Input<br />
Sometimes you want to allow the user to type into an input field but you don't<br />
want what has been typed to be readable by anybody else. A typical example<br />
of this would be when prompting the user for a password. There is a component<br />
called JPasswordField that presents the same interface as a JText-<br />
Field, but instead of the user's keystrokes being echoed, you can arrange for<br />
any character of your choice to appear on the screen instead. JPassword-<br />
Field is a subclass of JTextField with the following extra methods that<br />
allow you to configure the echo character which, by default, is an asterisk:
public boolean echoCharlsSet ();<br />
public char getEchoChar();<br />
public void setEchoChar(char c);<br />
Simple Text Controls 1021<br />
Listing 9-3 shows JPasswordField in use. You can run this program with<br />
the command:<br />
java <strong>JFC</strong>Book.Chapter9.PasswordExamplel<br />
Listing 9-3 The JPasswordField control<br />
package <strong>JFC</strong>Book.Chapter9;<br />
import j avax.swing.*;<br />
import j ava.awt.*;<br />
import j ava.awt.event.*;<br />
public class PasswordExamplel extends JPanel {<br />
public PasswordExamplel() {<br />
JLabel 1;<br />
JButton b;<br />
setLayout(new GridBagLayout());<br />
GridBagConstraints c = new GridBagConstraints();<br />
c.gridx = 0;<br />
c.gridy = GridBagConstraints.RELATIVE;<br />
c.gridwidth = 1;<br />
c.gridheight = 1;<br />
c.insets = new Insets (2, 2, 2, 2);<br />
c.anchor = GridBagConstraints.EAST;<br />
add(l =<br />
new JLabel("User name:", SwingConstants.RIGHT), c)<br />
1.setDisplayedMnemonic('n');<br />
1. setLabelFor(userName) ;<br />
add(l =<br />
new JLabel("Password:", SwingConstants.RIGHT) , c) ;<br />
1.setDisplayedMnemonic('p');<br />
1.setLabelFor(passwordField);<br />
c.gridx = 1;<br />
c.gridy = 0;<br />
c.weightx = 1.0;
1022 Chapter 9 Text Components<br />
Listing 9-3 TheJPasswordField control (continued)<br />
c.fill = GridBagConstraints.HORIZONTAL;<br />
c.anchor = GridBagConstraints.CENTER;<br />
add(userName, c);<br />
c.gridx = 1;<br />
c.gridy = GridBagConstraints.RELATIVE;<br />
add(passwordField, c);<br />
passwordField.setEchoChar('-');<br />
// Add the buttons on their own panel<br />
c.gridx = 0;<br />
c.weighty = 0.0;<br />
c.weightx = 1.0;<br />
c.gridwidth = GridBagConstraints.REMAINDER;<br />
c.fill = GridBagConstraints.HORIZONTAL;<br />
c.anchor = GridBagConstraints.CENTER;<br />
JPanel p = new JPanelO;<br />
add(p, c);<br />
p.add(b = new JButton("OK"), c);<br />
b . setMnemonic Co 1 ) ;<br />
b.addActionListener(new ActionListener() {<br />
public void actionPerformed(ActionEvent evt) {<br />
okPressed();<br />
}<br />
});<br />
p.add(b = new JButton("Clear"), c) ;<br />
b.setMnemonic('c' ) ;<br />
b.addActionListener(new ActionListener() {<br />
public void actionPerformed(ActionEvent evt) {<br />
userName.setText("");<br />
passwordField.setText("");<br />
userName.requestFocus();<br />
}<br />
});<br />
}<br />
public void okPressed() {<br />
// Add code here to handle the "OK" button.<br />
// We just print the contents of the text fields<br />
String user = userName.getText();<br />
System.out.println("User name: ; password: ");
Listing 9-3 The JPasswordField control (continued)<br />
}<br />
}<br />
public static void main(String[] args) {<br />
JFrame f = new JFrame("Password Example");<br />
f.getContentPane().add(new PasswordExamplel());<br />
f .packO ;<br />
f.addWindowListener(new WindowAdapter() {<br />
public void windowClosing(WindowEvent evt) {<br />
System.exit(0);<br />
}<br />
});<br />
f.setvisible(true);<br />
Simple Text Controls 1023<br />
JTextField userName = new JTextField(35);<br />
JPasswordField passwordField = new JPasswordField(35);<br />
Here, an ordinary JTextField is used to get the user name, and a<br />
JPasswordField for the password. The setEchoChar method is used to<br />
make the password field echo a hyphen for each character that the user types<br />
while supplying the password. As noted above, if you don't set an echo character,<br />
the field echoes an asterisk instead. Figure 9-5 shows what the form<br />
looks like when a few characters have been typed into the password field.<br />
Figure 9-5 An input field for passwords.<br />
If you run this example and type some text into both the user name and<br />
password fields and the press the OK button, you'll find that what you typed is<br />
printed in the window from which you started the command. The code that<br />
does this is in the okPressed method, which is called from the ActionListener<br />
attached to the OK button:<br />
public void okPressed() {
1024 Chapter 9 Text Components<br />
}<br />
// Add code here to handle the "OK" button.<br />
// We just print the contents of the text fields<br />
String user = userName.getText0;<br />
String pwd = new String(passwordField.getPassword());<br />
System.out.println("User name: ; password: ");<br />
The interesting point about this code is the fact that the text in the user<br />
name field and that in the password field are obtained using different methods.<br />
The user name field is a JTextField, which provides a getText<br />
method that returns its content in the form of a String and this is how the<br />
user name is obtained. The password, on the other hand, is obtained by calling<br />
the JPasswordField getPassword method, which is defined as follows:<br />
public chart] getPassword();<br />
However, JTextField is a subclass of JTextField and therefore inherits<br />
its getText method, so why not just use getText to get the password?<br />
The simplistic answer to that question is that JPasswordField overrides<br />
getText in order to deprecate it, which indicates that there is a different<br />
and preferred way to get the password. Instead of calling getText, you are<br />
supposed to use getPassword instead. This method returns the password in<br />
the form of an array of characters instead of a String. The reason for this is<br />
rooted in concerns over the secure handling of passwords, which is a concern<br />
in some environments. In such environments, it is accepted practice that<br />
code that handles passwords should use them for as short a time as possible<br />
and then destroy all copies of them that it holds. The idea behind this rule is<br />
that if a program that authenticates a user by reading a user name and password<br />
kept the password in memory, it would be theoretically possible to<br />
force a core dump of that program or attach to it using a debugger and examine<br />
its memory looking for strings that might represent authentication information.<br />
The usual way of dealing with this threat is for trusted code to read<br />
the password, verify it, and then write a meaningless value into the variable<br />
or variables where the password was stored. Unfortunately, since Strings<br />
are immutable, if the password were returned in the form of a String, the<br />
application would not be able to erase it by changing its value—the best it<br />
could hope for would be that the garbage collector would reclaim the memory<br />
allocated to the String and reuse it for something else. Of course, there<br />
is no guarantee that this would happen quickly or even at all. To avoid this<br />
problem, the getPassword method returns an array of characters. The idea
Simple Text Controls 1025<br />
is that the application can verify the password by treating it as an array of<br />
characters and then overwrite each character in the array and clear out the<br />
password field as well, something like this:<br />
chart] password = passwordField.getPassword();<br />
passwordField.setActionCommand("") ;<br />
// Verify password (not shown)<br />
// NOTE: do not convert the password to a String<br />
// when doing this!!!<br />
// Clear password field<br />
passwordField.setText("");<br />
// Clear local copy of the password<br />
for (int i = 0; i < password.length; i++) {<br />
password[i] = x ';<br />
}<br />
Of course, the implementation of the okPressed method shown above<br />
breaks all the rules by converting the password to a String and is therefore<br />
an example of what you should not do when writing secure code! Note that<br />
the second line of this code extract calls the setActionCommand method of<br />
the JPasswordField, passing an empty string. The reason for this call is<br />
that, unless the set the action command for the JPasswordField to a nonnull<br />
value, it will create a copy of its own content in String form each time it<br />
generates an event. If this were allowed to happen, there would be no point<br />
in taking trouble to avoid creating a String from the password field content<br />
when processing it.<br />
Listing 9-3 also shows another way to get the focus into a text component<br />
and, at the same time, give a visual cue that this is possible. As with the previous<br />
example, the visual cue is obtained by setting a mnemonic on each label<br />
using setDisplayedMnemonic. Unlike the last example, however, the set-<br />
FocusAccelerator method is not called on either of the text components,<br />
yet you can use ALT+N and ALT+P to get the focus to these fields. How does<br />
this work?<br />
JLabel has a property called JLabel. label For that you can set using<br />
the following method:<br />
public void setLabelFor(Component c);<br />
If you set this property and you also set a mnemonic then, when the mnemonic<br />
is activated, the label will pass the focus to the component given to it<br />
by setLabelFor. In this case, this method is invoked for both labels, passing
1026 Chapter 9 Text Components<br />
a reference to the text field with which they are associated. Since the label<br />
will direct the focus, there is no need to invoke setFocusAccelerator on<br />
the text components.<br />
<strong>Core</strong> Tip<br />
This facility works for any component—not just text components.<br />
Getting Events from Text Components<br />
If you tried the example shown in Listing 9-3, you probably found it very<br />
unfriendly because it feels like you have to do too much work to fill in all the<br />
fields. A good user interface would do as much as possible to help the user by<br />
taking over the job of moving the keyboard focus around and enabling controls<br />
only when they should be enabled so that the user is persuaded to fill in<br />
all mandatory fields before pressing the OK button. In the context of this<br />
example, there are several useful improvements that you could make. If the<br />
RETURN key is pressed in the User name field, you might want to transfer the<br />
keyboard focus to the Password component and, if it is pressed when the<br />
password has been typed, perhaps you should pass the focus to the User<br />
Name field if it is blank and otherwise you should proceed to verify and process<br />
the form content as if the OK button had been pressed. Another thing<br />
you might want to do is to enable the buttons only when it is meaningful to<br />
do so: The Clear button should be enabled only when one or both of the<br />
input fields is non-empty and the OK button should not be enabled unless<br />
there is some text in both fields. Little touches like this make your application<br />
more professional and easier to use. All of this can be done using events.<br />
Text Field Action Events<br />
When you press RETURN in a JTextField or a JPasswordField, the text<br />
field generates an ActionEvent with itself as the source. As with JButton,<br />
you can handle this by holding a pointer to the text component and comparing<br />
it with the source of the event, by creating a single listener for each text<br />
component or by associating a command string with each text field using the<br />
setActionCommand method of JTextField, which works in the same way<br />
as it does for JButton. If you don't call the setActionCommand method,<br />
JTextField and JPasswordField supply the text that they contain as the<br />
action command (which, as noted earlier, is a potential problem in the case of
Simple Text Controls 1027<br />
JPasswordField). Here is some code that could be added to that in Listing<br />
9-3 to process the RETURN key in the User name field:<br />
userName.addActionListener(new ActionListener() {<br />
public void actionPerformed(ActionEvent evt) {<br />
// Pass focus to the password field<br />
passwordField.requestFocus();<br />
}<br />
});<br />
As you can see, using an inner class makes it almost trivial to write event<br />
handlers. In this case, the new statement creates an anonymous class and,<br />
since ActionListener is an interface, this creates an anonymous class that<br />
implements the ActionListener interface. Such a class is required to<br />
implement all of the methods of this interface, of which there is only—<br />
namely, actionPerformed. The actionPerformed method is entered<br />
only when the RETURN key is pressed in the User name text field. This implementation<br />
simply passes the keyboard focus to the password field.<br />
Having seen this code, you won't be surprised at how the ActionListener<br />
for the password field is implemented:<br />
passwordField.addActionListener(new ActionListener() {<br />
public void actionPerformed(ActionEvent evt) {<br />
if (userName.getText().equals("")) {<br />
userName.requestFocus();<br />
} else if (IpasswordField.getText().equals("")) {<br />
okPressed();<br />
}<br />
}<br />
});<br />
The only difference here is that the contents of the password field is<br />
retrieved by invoking getText to decide what to do next.<br />
Monitoring Changes in Text Component<br />
Content<br />
Handling the RETURN key, then, is almost the same as handling button<br />
presses. The other desirable improvement is to arrange for the buttons to be<br />
enabled only when it is appropriate to do so. Lets consider the OK button<br />
first. This should be enabled only when both the user name and password<br />
fields are nonempty. Initialy, since both text fields are empty, the OK button<br />
should be disabled. Suppose that the user types a user name and then moves<br />
the focus to the password field. As soon as one character has been typed in
1028 Chapter 9 Text Components<br />
the password field, the user could press OK and expect the program to process<br />
the user name and password. This means that the OK button should now<br />
be enabled. But, how does the program know that a character has been<br />
typed? So far, you have only seen how to get an event when the user presses<br />
RETURN in the password field, by which time it is too late to enable the OK<br />
button!<br />
Fortunately, the text components generate a Document Event when their<br />
content is changed in any way. This event is delivered to a DocumentListener<br />
that you can register with any text component. The methods of this<br />
interface are as follows:<br />
public interface DocumentListener {<br />
public void changedUpdate(DocumentEvent evt);<br />
public void insertUpdate(DocumentEvent evt);<br />
public void removeUpdate(DocumentEvent evt);<br />
}<br />
As you saw earlier, the Swing text components are always associated with a<br />
Document. This is not necessarily an actual document on disk, but a logical<br />
document made up of one or more elements. Each element can have content<br />
and attributes. For our purposes, it is necessary to track text insertion and<br />
removal, which are reported by the insertUpdate and removeUpdate<br />
methods.<br />
In order to make changes to the button states, it is necessary to store persistent<br />
references to them so that they can be accessed in the DocumentLis -<br />
teners. The last state of each button is also stored. Initially, since there will<br />
be no text in either field, the buttons will both be disabled. Here are the declarations<br />
we add to the class shown in Listing 9-3 to define these new fields:<br />
JTextField userName = new JTextField(35);<br />
JPasswordField passwordField = new JPasswordField(35);<br />
JButton okButton;<br />
JButton clearButton;<br />
// Button states<br />
boolean okState = false; // Disabled<br />
boolean clearState = false; // Disabled<br />
The next thing to do is define a DocumentListener that implements the<br />
insertUpdate and removeUpdate methods and a dummy changedUpdate<br />
method. The changedUpdate method reports changes to document<br />
attributes, for which we have no use in this example. This listener is registered<br />
on both text fields:<br />
DocumentListener d = new DocumentListener() {
};<br />
public void changedUpdate(DocumentEvent evt) {<br />
// Nothing to do<br />
}<br />
public void insertUpdate(DocumentEvent evt) {<br />
checkButtons () ;<br />
}<br />
public void removeUpdate(DocumentEvent evt) {<br />
checkButtons();<br />
}<br />
userName.getDocument().addDocumentListener(d);<br />
passwordField.getDocument().addDocumentListener(d);<br />
// Both buttons are disabled at first<br />
okButton.setEnabled(false);<br />
clearButton.setEnabled(false);<br />
Simple Text Controls 1029<br />
Notice that, to register the listeners, the text components getDocument<br />
method was used to get a reference to its underlying Document object. This<br />
is the only part of the component that is actually aware that a change has<br />
been made to the text. Bear in mind that it is possible to change the content<br />
of the text field by directly manipulating the document as well as keyboard<br />
input, so it is not possible for the user interface part of the text component to<br />
keep track of all changes to its content. This is about the only time you will<br />
need to use the Document object directly if you are going to use text components<br />
for simple user interface tasks.<br />
Now, whenever any characters are added to or deleted from either of the<br />
text fields, the checkButtons method will be entered. This method checks<br />
the state of each text field using get Text and determines what the proper<br />
state of each button should be:<br />
OK button: Enabled if both fields are nonempty.<br />
Clear button: Enabled if either field is empty.<br />
To avoid redrawing the screen after each key press, the state of each button<br />
is changed only if it needs to be. To make this possible, the new state is<br />
compared with the state last time it was changed and setEnabled is called<br />
only if these states differ. Here is the implementation of the checkButtons<br />
method:<br />
public void checkButtons() {<br />
// Check whether the buttons should be enabled or not
1030 Chapter 9 Text Components<br />
}<br />
boolean newOkState;<br />
boolean newClearState;<br />
boolean nameClear = userName.getText().equals ("");<br />
boolean passwordClear =<br />
passwordField.getText().equals("");<br />
newOkState =<br />
nameClear == false && passwordClear == false;<br />
newClearState =<br />
nameClear == false || passwordClear == false;<br />
if (newOkState != okState) {<br />
okButton.setEnabled(newOkState);<br />
okState = newOkState;<br />
if (newClearState != clearState) {<br />
clearButton.setEnabled(newClearState) ;<br />
clearState = newClearState;<br />
<strong>Core</strong> Note<br />
Another way to get the enabled state of the buttons is to call the<br />
isEnabled method. Storing the state in local variables is an optimization<br />
to save the overhead of method calls.<br />
You can try out the modified version of the password program by using the<br />
command:<br />
java <strong>JFC</strong>Book.Chapter9.PasswordExample2<br />
Now you'll find that both of the buttons are initially disabled. As soon as<br />
you type anything into either text field, the Clear button is enabled, but if<br />
you delete everything it disables itself again. If you type something into the<br />
User name field and press RETURN, you'll see that the focus passes to the<br />
Password field. Type anything into this field and the OK button will be<br />
enabled. If you clear out either the password field or the user name field, the<br />
OK button will be disabled again. Finally, after typing both the user name and<br />
password, you'll find that you can have them processed either by pressing<br />
RETURN in the Password field or by pressing the OK button.
Text Selection<br />
Simple Text Controls 1031<br />
Both JTextArea and JTextField allow you to highlight text for selection<br />
using the mouse by pressing the left button and dragging it over the text that<br />
you want to select. Alternatively, you can select text from the keyboard by<br />
moving the insertion cursor (known as the caret) left or right using the arrow<br />
keys while holding down the SHIFT key. When this has been done, the program<br />
can get access to the selected text by using the getSelectedText<br />
method, which returns whatever text has been selected as a string. It is also<br />
possible to get the offsets of the start and end of the selection from the start<br />
of the text using the getSelectionStart and getSelectionEnd methods,<br />
which return the offsets as integer values. The simple example in Listing<br />
9—4 shows how text selection works.<br />
Listing 9—4 Selecting a text from a text control<br />
package <strong>JFC</strong>Book.Chapter9;<br />
import javax.swing.*;<br />
import j ava.awt.*;<br />
import j ava.awt.event.*;<br />
public class SelectedTextExamplel extends JTextArea {<br />
public SelectedTextExamplel() {<br />
super(10, 40) ;<br />
setText(<br />
"V'Houston, Tranquility Base here.\nThe Eagle has Landed\"\n" +<br />
"\n\n\"Roger, Tranquility, we copy you on the ground.\n" +<br />
"You got a bunch of guys about to turn blue.\n" +<br />
"We're breathing again. Thanks a lot\"\n");<br />
}<br />
public static void main(String [] args) {<br />
JFrame f = new JFrame("Selected Text 1");<br />
Container cp = f.getContentPane();<br />
cp.add(new JScrollPane(<br />
e = new SelectedTextExamplel()), BorderLayout.CENTER);<br />
JPanel p = new JPanelO ;<br />
JButton b = new JButtonC'<strong>Read</strong> Text");<br />
b.setMnemonic('R');<br />
p.add(b);<br />
cp.add(p, "South");
1032 Chapter 9 Text Components<br />
Listing 9-4 Selecting a text from a text control (continued)<br />
j<br />
f.pack();<br />
f.addWindowListener(new WindowAdapter() {<br />
public void windowClosing(WindowEvent evt) {<br />
System.exit(0);<br />
}<br />
});<br />
b.addActionListener(new ActionListener() {<br />
public void actionPerformed(ActionEvent evt) {<br />
System.out.println("Selected text is:\n\t");<br />
System.out.println("Selection starts at offset: " +<br />
e.getSelectionStart() ) ;<br />
System.out.println("Selection ends at offset: " +<br />
e.getSelectionEnd());<br />
}<br />
});<br />
f.setVisible(true);<br />
}<br />
static SelectedTextExamplel e;<br />
To run this program, use the command:<br />
j ava <strong>JFC</strong>Book.Chapter9.SelectedTextExamplel<br />
When the program starts, a JTextArea, wrapped in a JScrollPane, will<br />
appear with some reasonably well-known text inside it. Underneath the text<br />
is a button labeled <strong>Read</strong> Text. If you highlight some of the text and then<br />
press the button (or use ALT+R), the program will display the text you highlighted<br />
together with its start and end offsets. Note that these offsets are<br />
counted from 0 and that, if you press the button when you don't have any<br />
highlighted text, you get two equal offsets back. The value of the offset in this<br />
case depends on where you last clicked over the text. When you click on the<br />
text, an insertion cursor appears; if you then press the button, the start and<br />
end offsets indicate the position of this cursor. Note that, when there is some<br />
text selected, the end offset is that of the first nonselected character after the<br />
selection. Therefore, if you select the first three characters, the start offset<br />
will be zero and the end offset three. If you type when you have text highlighted,<br />
your typing replaces that text and the resulting text is not marked as<br />
selected.
Programmatically Selecting Text<br />
Simple Text Controls 1033<br />
You can also select text and operate on it from within your application. A<br />
selected region is created by using the following methods:<br />
public void setSelectionStart(int startOffset);<br />
public void setSelectionEnd(int endOffset);<br />
<strong>Core</strong> Alert<br />
Be careful when using the setSelectionEnd method: Its argument is<br />
the offset of the first character after the selection, not of the last character<br />
you want selected.<br />
You can treat a selection created in this way exactly as a selection created<br />
by the user. You can also select all of the text using the select All method.<br />
Apart from just reading the text selection, you can write to it using the<br />
method replaceSelection:<br />
public void replaceSelection(String content);<br />
The text supplied as the content argument replaces whatever is currently<br />
selected. If you call this method and supply an empty replacement string,<br />
then the selected text is deleted. Note, however, that after you replace a<br />
selection, the resulting text is not selected.<br />
To see some of these features in operation, use the following command:<br />
j ava <strong>JFC</strong>Book.Chapter9.SelectedTextExample2<br />
This example is similar to that in Listing 9-4, but with the following code<br />
added to the main method, after the frame has been made visible:<br />
b.setEnabled(false);<br />
try {<br />
System.out.println("Selecting all text....");<br />
e.selectAll();<br />
Thread.sleep(5000) ;<br />
System.out.println("Selecting offsets 10 to 25");<br />
e . setSelectionStart(10) ;<br />
e. setSelectionEnd(26) ;<br />
String text = e.getSelectedText();<br />
System.out.println("Selected text is ");<br />
Thread.sleep(5000);<br />
System.out.println("Replacing selection");<br />
e.replaceSelection("TRANQUILITY BASE");<br />
Thread.sleep(5000);
1034 Chapter 9 Text Components<br />
System.out.printIn("Deleting selection");<br />
e.setSelectionStart(10);<br />
e.setSelectionEnd(26) ;<br />
e.replaceSelection ("");<br />
Thread.sleep(5000);<br />
System.out.println("Restore original text");<br />
e.setSelectionStart(10);<br />
e.setSelectionEnd(10) ;<br />
e.replaceSelection(text);<br />
} catch (InterruptedException e) {<br />
}<br />
b.setEnabled(true);<br />
Here, the whole text area is first selected to demonstrate the selectAll<br />
method. After five seconds, the selection is reduced to two words on the first<br />
line. Note that the selected text is highlighted just as it would be if you had<br />
selected it yourself. Next, the selected text is replaced, using replaceSelection,<br />
with the same text in uppercase. Notice that the new text is not<br />
selected. Therefore, to perform the next operation, namely deleting the<br />
selection, it is necessary to reset the start and end values of the selected<br />
range using setSelectionStart and setSelectionEnd. The last step is<br />
to put the text back again. To do this, an empty selected range is created at<br />
the original start offset and then replaceSelection is used to put back the<br />
original words. The important thing to note about this process is that each<br />
operation first requires you to create a selection. In the case of an insertion,<br />
you create an empty selection at the insertion point.<br />
Everything that has been covered in this section is provided by the JTextComponent<br />
class and so applies equally to both JTextField and JTextArea,<br />
and to all of the other text components in the Swing set. JTextArea<br />
also has three extra convenience methods that you can use to quickly replace,<br />
insert, or append text:<br />
public void replaceRange(String text, int start,<br />
int end);<br />
public void append(String text);<br />
public void insert(String text, int offset);<br />
The append method adds the supplied text at the end of the text in the<br />
JTextArea, while insert places it at the given offset. The replaceRange<br />
method replaces the text between the given start and end offsets with that<br />
supplied. As usual, the end offset is the offset of the character after the last<br />
one affected by the operation. These methods save you having to separately<br />
create the selections that would be required by replaceSelection.
The System Clipboard<br />
Simple Text Controls 1035<br />
Sometimes you need to highlight some text with a view to cutting or copying<br />
it into another application. Most windowing platforms support this by providing<br />
a clipboard onto which data from one application can be copied before<br />
being pasted into another. JTextComponent provides convenience methods<br />
that allow you to copy text between a text component and the system clipboard,<br />
thus allowing you to move text between <strong>Java</strong> applications or even to<br />
exchange text with native applications not running in a <strong>Java</strong> virtual machine.<br />
The three methods in question are defined as follows:<br />
public void copy();<br />
public void cut();<br />
public void paste();<br />
The first two of these take the selected text and place it on the system clipboard;<br />
in the case of cut, the selected text is also removed from the text component.<br />
When there is text on the clipboard, the third method, paste, may<br />
be used to incorporate it into the same, or another, text component. The<br />
paste method replaces any current selection in the text component with the<br />
content of the clipboard. If there is no text selected, the clipboard content is<br />
placed at the insertion point (i.e., where the insertion caret appears on the<br />
screen).<br />
To demonstrate how simple it is to use these methods Listing 9-5 shows a<br />
modified version of the text example in Listing 9—4 in which the <strong>Read</strong> Text<br />
button is replaced with Copy, Cut and Paste buttons.<br />
Listing 9-5 Copy, cut, and paste via the system clipboard<br />
package <strong>JFC</strong>Book.Chapter9;<br />
import javax.swing.*;<br />
import j ava.awt.*;<br />
import j ava.awt.event.*;<br />
public class SelectedTextExample3 extends JTextArea {<br />
public SelectedTextExample3() {<br />
super(10, 40) ;<br />
setText("\"Houston, Tranquility Base here.\rilhe Eagle has Landed\"\n" +<br />
"\n\n\"Roger, Tranquility, we copy you on the ground.\n" +<br />
"You got a bunch of guys about to turn blue.\n" +<br />
"We're breathing again. Thanks a lot\"\n");
1036 Chapter 9 Text Components<br />
Listing 9-5 Copy, cut, and paste via the system clipboard (continued)<br />
public static void main(String[] args) {<br />
JFrame f = new JFrame("Selected Text 3");<br />
Container cp = f.getContentPane () ;<br />
cp.add(new JScrollPane(<br />
e = new SelectedTextExample3()), BorderLayout.CENTER);<br />
JPanel p = new JPanelO ;<br />
}<br />
JButton b = new JButton("Copy");<br />
b.setMnemonic('o');<br />
b.addActionListener(new ActionListener() {<br />
public void actionPerformed(ActionEvent evt) {<br />
e.copy();<br />
});<br />
p.add(b);<br />
b = new JButton("Cut");<br />
b.setMnemonic('u');<br />
b.addActionListener(new ActionListener() {<br />
public void actionPerformed(ActionEvent evt) {<br />
e.cut();<br />
});<br />
p.add(b);<br />
b = new JButton("Paste");<br />
b.setMnemonic('p');<br />
b.addActionListener(new ActionListener() {<br />
public void actionPerformed(ActionEvent evt) {<br />
e.paste();<br />
});<br />
p.add(b);<br />
cp.add(p, "South");<br />
f.pack();<br />
f.addWindowListener(new WindowAdapter() {<br />
public void windowClosing(WindowEvent evt) {<br />
System.exit(0);<br />
}<br />
});<br />
f.setVisible(true);
J<br />
Simple Text Controls 1037<br />
Listing 9-5 Copy, cut, and paste via the system clipboard (continued)<br />
static SelectedTextExample3 e;<br />
To run this example, use the command:<br />
java <strong>JFC</strong>Book.Chapter9.SelectedTextExample3<br />
You can now try cutting, copying, and pasting text within the window. For<br />
example, highlight the words Tranquility Base on the first line and press<br />
the Copy button. Nothing appears to happen, but the text has been copied to<br />
the system clipboard. To prove this, click with the mouse anywhere else in<br />
the text area and then press Paste and you'll find that the text is inserted<br />
there. Now highlight the newly inserted text and press Cut to cause the text<br />
to be removed again. If you have another application running, activate it and<br />
paste the text into it.<br />
<strong>Core</strong> Note<br />
The action required to do this is platform-dependent. On some systems, you
1038 Chapter 9 Text Components<br />
the next field with the mouse. Pressing RETURN to have the field content validated<br />
is relatively unusual, so you cannot rely on the delivery of an Action-<br />
Event from the text field as the trigger to validate its content. Instead, you<br />
can listen for focus events and check the content of a field when it loses the<br />
input focus.<br />
Using Focus Events for Form Validation<br />
Before showing how to validate the content of a form, lets look at a simple<br />
form that does not have any error checking included. If you type the command<br />
java <strong>JFC</strong>Book.Chapter9.VerifylnputExamplel<br />
you'll see a frame that contains two input fields, an OK button and a Cancel<br />
button, as shown in Figure 9-6. This looks very much like the password example<br />
you saw earlier except that the input fields are now labeled "Part Number"<br />
and "Quantity" and the Clear button has been changed to a Cancel<br />
button. The source code is very similar to that shown in Listing 9-3 so, to<br />
save space, we don't show it here. If you want to look at it, you'll find it<br />
amongst the example source code on the CD-ROM, in the file <strong>JFC</strong>-<br />
Book\Chapter9\VerifylnputExamplel.<br />
Figure 9-6 Verifying Text Field Content.<br />
This example is intended to represent part of a larger form that allows a<br />
user to supply details of an order by specifying the part number required and<br />
the quantity to be supplied. Both of these values are integers, so both fields<br />
should contain valid integers representing positive numbers. As it stands, this<br />
example does not validate the field content at all, so you'll find that you can<br />
type anything at all into either field. In order to add validation, we need to do<br />
the following:
1. Add FocusListeners to both of the input fields to verify their<br />
content when they lose the focus. If a problem is detected, pop<br />
up an error dialog and force the focus back to the appropriate<br />
input field when the user dismisses the dialog.<br />
2. Add code to the method that is entered when the form is complete<br />
to convert the content of the input fields to integers.<br />
Simple Text Controls 1039<br />
Although this sounds simple, there are a couple of tricky points that need<br />
to be dealt with to get a solution that works properly. Before we examine the<br />
code that was added, let's try out the amended version of this example using<br />
the command<br />
<strong>Java</strong> <strong>JFC</strong>Book.Chapter9.VerifyInputExample2<br />
First try typing positive integers into both fields and pressing the OK key.<br />
You'll find that a message appears in the window from which you started the<br />
example showing the part number and quantity values:<br />
Part number: 12 3, quantity: 2<br />
So far, so good. Now go back to the "Part number" field and type something<br />
non-numberic, such as "abc" and then press the TAB key to move the<br />
focus to the "Quantity" field, as a user would when completing a form. When<br />
you do this, a modal dialog appears informing you that the content of the part<br />
number field is invalid, as shown in Figure 9-7. When you press the OK button<br />
to dismiss the dialog, the focus returns to the "Part number" field so that<br />
you can correct its content.<br />
Figure 9-7 Responding to invalid input.<br />
The same thing happens if you type a legal value into the "Part number"<br />
field and an illegal one into the "Quantity" field and then press the TAB key to
1040 Chapter 9 Text Components<br />
move to the OK button. For both text fields, the content is considered to be<br />
illegal if it does not parse correctly as an integer or it is zero or negative.<br />
The code that implements the value checking is all in the FocusListener<br />
methods, shown below.<br />
public void focusLost(FocusEvent evt) {<br />
if (ignoreFocusLoss) {<br />
}<br />
}<br />
return;<br />
JTextField textField = (JTextField)evt.getSource() ;<br />
boolean invalid = false;<br />
try {<br />
if (Integer.parselnt(textField.getText())
Simple Text Controls 1041<br />
integer be positive. Depending on the outcome of these two tests, we either<br />
do nothing or post an error message using the JOptionPane showMessageDialog<br />
method and then use requestFocus to pass the focus back to<br />
the same text field. To help the user, the error message contains the name of<br />
the field containing the error. Since the same FocusListener is attached to<br />
both fields, we can't hardcode the field name into it—instead, the field name<br />
is stored in the text field using the setName method and the event handler<br />
retrieves it using getName:<br />
partNumber.setName("part number");<br />
quantity.setName("quantity");<br />
Unfortunately, things are not quite as simple as the description above and,<br />
as you can see, there is some extra code in the f ocusLost method that we<br />
have not yet mentioned, along with code in the f ocusGained method that<br />
did not form part of the explanation just given. The problem that this code<br />
addresses is the following:<br />
1. When the user tabs out of the field, a FOCUS_LOST event is<br />
delivered to the listener.<br />
2. On checking the field content, if there is an error, a dialog box is<br />
posted.<br />
3. When the dialog is posted, it grabs the input focus. This causes<br />
another FOCUS_LOST event to be delivered to the text field.<br />
4. The text field again validates its content, finds an error, and<br />
posts an error dialog.<br />
The effect that you see is that as soon as you dismiss the error dialog,<br />
another one appears. To stop this happening, we have to ignore focus loss<br />
events until the text field regains the focus after the first dialog has been<br />
closed. To do this, we use two variables:<br />
ignoreFocusLoss a boolean variable that causes the f ocusLost<br />
method to ignore events.<br />
f ocusLossComponent a reference to a Component.<br />
When a dialog is about to be posted, ignoreFocusLoss is set to true<br />
and focusLossComponent is set to point to the text field in error. While<br />
ignoreFocusLoss is true, the focusLost method does nothing. This<br />
allows it to ignore the event generated when the dialog appears.
1042 Chapter 9 Text Components<br />
When either of the text fields gains the focus, the focusGained method<br />
checks the focusLossComponent variable. If it refers to the component<br />
gaining the focus, then ignoreFocusLoss is set to false and focus-<br />
LossComponent is set to null, allowing FOCUS_LOST events to be processed<br />
again.<br />
Details like this make live validation of field input slightly more difficult<br />
than it would appear at first sight. The problem in this case is caused by the<br />
fact that we post a dialog to display an error message to the user, which interferes<br />
with the focus handling of the form. There is, however, another problem<br />
with this approach that is not connected with the dialog. To see what this<br />
is, suppose the user had typed an invalid value into one of the fields and<br />
wanted to cancel the form instead of continuing. If you type a non-numeric<br />
or negative value into either of the text fields and then press Cancel, you'll<br />
see the problem—an error dialog appears for a very short time before the<br />
frame itself is closed! This is not appropriate, because the user doesn't care<br />
that the field value is in error when pressing the Cancel button. To avoid<br />
this, you have to know not only which component lost the focus—you need to<br />
know which component now has the focus as well, so that you can suppress<br />
the error checking in the case of the Cancel button. This obviously creates a<br />
lot of coupling between logic that handles field validation and the form itself.<br />
Unfortunately, there is no real alternative if you are using Swing 1.1.1 or <strong>Java</strong><br />
2 version 1.2.2. However, <strong>Java</strong> 2 version 1.3 introduces a feature that allows<br />
you to perform input validation without having to use the tricks that you have<br />
seen in this section.<br />
The <strong>Java</strong> 2 Version 1.3 InputVerifier Mechanism<br />
In <strong>Java</strong> 2 version 1.3, every JComponent has an InputVerifier attribute<br />
that can be set or queried using the following methods:<br />
public void setlnputVerifier(InputVerifier verifier);<br />
public InputVerifier getlnputVerifier();<br />
By default, no InputVerifier is associated with a JComponent when it<br />
is created. If you want to perform validation of the contents of a JComponent,<br />
you implement a subclass of the abstract class InputVerifier and<br />
call the setlnputVerif ier method of the JComponent whose content you<br />
want to verify. InputVerifier has the following public methods:<br />
public abstract class InputVerifier {<br />
public abstract boolean verify(JComponent input);<br />
public boolean shouldYieldFocus(JComponent input)<br />
}
Simple Text Controls 1043<br />
To create an InputVerif ier, you are obliged to implement the abstract<br />
verify method. You may also override the shouldYieldFocus method,<br />
but this would be unusual—its default behavior is just to call the verify<br />
method, which should be adequate for most purposes.<br />
The verify method is given a reference to the component whose content<br />
is to be validated. It should return true if the content is valid and false if it<br />
is not. Since a component reference is passed to this method, you can create<br />
an InputVerif ier for, say, integer fields, and associate a single instance of<br />
that verifier with all integer fields in the application.<br />
Using this mechanism, it is very simple to rework our earlier example to<br />
use an InputVerif ier to ensure that the content of each field is a positive<br />
integer—all we need to do is implement an appropriate InputVerif ier<br />
and connect it to the two text fields using their setlnputVerif ier method.<br />
When a component is about to lose the input focus, Swing checks to see if it<br />
has an InputVerif ier and, if so, calls its shouldYieldFocus method,<br />
which in turn calls the verify method. If this method returns true, the focus<br />
transfer is allowed to proceed but if it returns false, the original component<br />
retains the input focus. Because the details are handled internally by<br />
JComponent, we don't need to add FocusListeners as we did in our earlier<br />
attempt to implement validatity checking.<br />
Implementing the InputVerif ier for our input fields is very simple:<br />
class IntegerVerifier extends InputVerifier {<br />
public boolean verify(JComponent source) {<br />
JTextField textField = (JTextField)source;<br />
boolean valid = true;<br />
try {<br />
if (Integer.parselnt(textField.getText())
1044 Chapter 9 Text Components<br />
The code in the verify method is almost the same as the code that was<br />
used in the f ocusLost method of our previous example, except that we no<br />
longer need to be concerned about focus loss interactions with the error dialog.<br />
As a result, the implementation is much cleaner and addresses only the<br />
issue of testing for the validity of the input field. In order to activate this<br />
code, we simply have to call the setlnputVerif ier methods of the two<br />
text fields when they are created:<br />
verifier = new IntegerVerifier();<br />
partNumber.setlnputVerifier(verifier);<br />
quantity.setlnputVerifier(verifier);<br />
If you want to look at the complete source for this example, you'll find it on<br />
the CD-ROM in the file:<br />
<strong>JFC</strong>Book\Chapter9\jdkl3\VerifyInputExample3.<strong>Java</strong>.<br />
You can try out this code using the command<br />
<strong>Java</strong> <strong>JFC</strong>Book.Chapter9.jdkl3.VerifyInputExample3<br />
If you type an illegal value into the "Part number" field and try to TAB out,<br />
you'll find that the error dialog appears and, when you dismiss it, the focus<br />
remains in the "Part number" field. This happens despite the fact that the<br />
verify method did not call requestFocus, because Swing does not allow the<br />
transfer of focus to the next component to happen when an InputVerif ier<br />
vetoes it. You'll find that the same happens when you type an illegal value<br />
into the "Quantity" field.<br />
Unfortunately, this is not the end of the story because the OK button and<br />
the Cancel button both cause problems. Type a legal value (for example,<br />
1234) into the "Part number" field, TAB to the "Quantity" field and type<br />
something invalid (such as -1). If you now press the TAB key, intending to<br />
move the focus to the OK button, you'll see the usual error dialog and the<br />
focus will remain in the "Quantity" field, as it should. However, you are not<br />
bound to press the TAB key to get to the OK button - you could, instead, click<br />
it with the mouse. When you do this, you'll find that the error dialog appears.<br />
If you look in the window from which you started the command, you may<br />
also see a message indicating that the button was pressed and its Action-<br />
Listener was entered. This is not good news—the ActionListener will<br />
probably assume that the form content is valid and act upon it, before the<br />
InputVerif ier has verified the last field. To avoid this problem, you need<br />
to explicitly verify the field content when the OK button has been pressed.<br />
Fortunately, you can use the InputVerif ier to does this:<br />
public void okPressedO {
}<br />
if (verifier.verify(partNumber) &&<br />
verifier.verify(quantity)) {<br />
System.out.println("Fields are OK");<br />
} else {<br />
}<br />
Simple Text Controls 1045<br />
System.out.println("Error converting input fields");<br />
The advantage of using the input verifier here is that it requires you to<br />
write the verification code only once. This method can easily be generalized<br />
to cater for forms that have more than one verifier—for example, you could<br />
write<br />
partNumber.getlnputVerifier().verify(partNumber)<br />
There is still a problem with this approach, however. If there is an error in<br />
the "Quantity" field, the okPressed method will discover it and the<br />
InputVerifier will post an error dialog. The same error will also be<br />
detected by the same InputVerif ier when the "Quantity" field loses the<br />
focus—so the user will see two error dialogs for the same error! Clearly, we<br />
need to suppress one of the validation operations.<br />
There is also a problem with the Cancel button. If you type the value<br />
"1234" into the "Part number" field and -2 into the "Quantity" field and then<br />
click the Cancel button with the mouse, the frame will vanish, but you will,<br />
for a very short time, see an error dialog appear, just as we did when we tried<br />
to use FocusListeners to validate the content of this form. The error dialog<br />
appears because the content of the "Part number" field is verified when it<br />
loses the focus. Again, in this case, we need to suppress the verification process.<br />
Fortunately, there is a way to solve both problems. The JComponent class<br />
has a method that allows you to request that input verification should not<br />
take place when it is receiving the focus:<br />
public void setVerifylnputWhenFocusTarget(boolean cond)<br />
Normally, when a component is about to receive the focus, the<br />
InputVerif ier of the component that is losing the focus is called to verify<br />
its content—if it returns false, the target component does not receive the<br />
focus. Thus, for example, when you type -2 into the "Quantity" field and<br />
press TAB, the OK button tries to get the focus (as it is next in the TAB order).<br />
Code in the JComponent class for the OK button looks to see which component<br />
last had the focus (in this case the "Quantity" field), sees that it has an<br />
InputVerifier, and invokes it. Therefore, input verification takes place
1046 Chapter 9 Text Components<br />
under the control of the component receiving the input focus, not the component<br />
losing the focus.<br />
When you call setVerifylnputWhenFocusTarget (false) on a<br />
JComponent, it does not perform input verification of the component that is<br />
losing the focus. This immediately solves the problem of then Cancel button—when<br />
you pass the keyboard focus to it, it should not bother when verifying<br />
the content of the previous field because the user is about to cancel the<br />
form. As a general rule, therefore, you should call setVerifylnputWhen-<br />
FocusTarget (false) for any JComponent whose action should be unconditional,<br />
such as a Cancel button.<br />
This same mechanism also solves our problem with the OK button. If you<br />
call setVerifylnputWhenFocusTarget (false) on the OK button, the last<br />
field to lose focus will not verify its content. In this case, you need to have the<br />
content checked because the user wants the form content to be actioned, but<br />
we already know that we need to include verification code in the OK button<br />
handler and, since this code uses the InputVerifiers for the form, the appropriate<br />
error dialogs will be posted if necessary, but we avoid posting an extra<br />
dialog due to the transfer of focus. You can try a version of the example program<br />
with the following two lines of code added:<br />
okButton.setVerifylnputWhenFocusTarget(false);<br />
cancelButton.setVerifylnputWhenFocusTarget(false) ;<br />
by typing the command<br />
<strong>Java</strong> <strong>JFC</strong>Book.Chapter9.jdkl3.VerifyInputExample4<br />
Type a legal value into the "Part number" field and -2 into the "Quantity"<br />
field, then click the OK button. You will see only one error dialog. Now click<br />
the Cancel button and the frame will disappear, without flashing up an error<br />
dialog.<br />
Text Components: Under the Hood<br />
During our discussion of the text field and text area components, there have<br />
been strong hints that there is something complex lurking behind them. This<br />
section opens the hood and shows exactly how these simple controls are<br />
implemented and also looks at their more powerful cousins, JTextPane and<br />
JEditorPane.<br />
When you use a text field, you see a rectangular area of the screen into<br />
which you can type some text. If you make a mistake while typing, you can
Simple Text Controls 1047<br />
erase and correct the mistakes. You can press RETURN to have the application<br />
process what you have typed and you can cut and paste text to and from the<br />
text field. You might think that the source code for JTextField must be<br />
very large to provide all of this, but you would be wrong: In fact, it's around<br />
800 lines, including comments. Actually, most of the functionality you can<br />
access through JTextField and, for that matter through JTextArea as<br />
well, is not provided by either of these classes. Instead, a variety of software<br />
components work together to give the view of a single unit that provides all of<br />
these features. The text controls are, in fact, a very good example of the<br />
Swing Model-View-Controller architecture.<br />
Text Component Architecture<br />
Figure 9-8 shows some of the pieces that go together to make the Swing text<br />
components. The complete picture is actually more complex than this—it<br />
isn't possible to put everything into one diagram and still make it readable.<br />
At the top of the diagram are the familiar JPasswordField, JText-<br />
Field, and JTextArea controls, together with the more complex JText-<br />
Pane and JEdi tor Pane. These are the components that actually end up on<br />
the screen and are often referred to as editors. At the other end of the diagram<br />
is a class called AbstractDocument, which is part of the MVC model<br />
for the text components. In between are the various MVC view components<br />
and JText component which, among other things, plays part of the role of<br />
the MVC controller by responding to key events. There is also another piece<br />
of the controller, the Caret, that handles mouse and focus events. The caret<br />
is not shown in Figure 9—8 for the sake of clarity. Before taking a closer look<br />
at each of these areas, let's examine briefly the role that each of these pieces<br />
plays.<br />
Let's suppose you have typed some characters into a JTextField. These<br />
characters will actually be stored in the model, which is realized, in the case<br />
of both JTextField and JTextArea, by the PlainDocument class.<br />
PlainDocument organizes the data into lines, separated by line breaks that<br />
are generated when you press RETURN; in the simple case of JTextField,<br />
there is only one line in the model and the RETURN key is not stored: Instead,<br />
it generates an event.<br />
The keystrokes themselves don't get directly into the model via the text<br />
components themselves. Instead keyboard events are trapped by JTextComponent.<br />
As keys are pressed, JText Component looks at each of them and<br />
decides whether they represent a special action, such as a backspace, HOME,<br />
or the RETURN key. If the key is not special (you'll see later how a key gets to<br />
> •
1048 Chapter 9 Text Components<br />
Figure 9-8 Text component architecture.<br />
be considered special) and it has a valid character code, it is passed, by<br />
default, to the model for storage.<br />
All special keys have associated actions that are registered with JTextComponent<br />
; the particular set of special keys depends on the text component itself<br />
or, more accurately, on its plugged-in look-and-feel implementation. When<br />
one of these keys is found, the corresponding action is performed. One of the<br />
jobs of JTextComponent is to map the special keys to the registered actions,<br />
but the set of available actions depends entirely on the component involved.<br />
Keyboard actions are usually implemented by what is loosely referred to as<br />
the "editor." In fact, the editor functionality is provided by another class
Simple Text Controls 1049<br />
derived from EditorKit. Simple text components, like JTextField and<br />
JTextArea, use a basic subclass of EditorKit called DefaultEditorKit,<br />
which provides code to handle common actions like moving the cursor,<br />
inserting and deleting text, and so on. JTextComponent maps look-and-feel,<br />
dependent key sequences to these editor-dependent actions. As you'll see<br />
later, the JTextPane control uses a more complex editor called StyledEditorKit,<br />
while JEditorPane can use one of several editor kits that can be<br />
plugged in dynamically. Over and above the actions supplied by its editor kit,<br />
a text component can add some of its own. These are, of course, useful only if<br />
the corresponding look-and-feel class adds a key mapping to activate the<br />
action. As an example of this, JTextField defines an action that sends an<br />
ActionEvent containing the action command registered with it using set-<br />
ActionCommand, or its text content if this method has not been called. The<br />
default UI class for JTextField, BasicTextFieldUI, adds a key mapping<br />
that activates this action when the RETURN key is pressed. This is, in fact, how<br />
a JTextField generates an ActionEvent when you press RETURN. If you<br />
need to, you can use the same interfaces as the text components themselves<br />
use to add new actions or new key mappings.<br />
<strong>Core</strong> Note<br />
Be very careful to distinguish keys from actions. Actions are things that<br />
editors can do—they are services that the editor advertises using a wellknown<br />
name (such as "page-up"), while the special keys are the way in<br />
which the user can activate those actions. In a reasonable look-and-feel<br />
implementation, the text component UI class would register with<br />
JTextComponent a mapping of the PAGE UP key to the editor's<br />
"page-up"action.Also, do not confuse the editor actions that are<br />
discussed in this chapter with the Action interface that was described in<br />
Chapter 5—they are not the same thing at all.<br />
<strong>Core</strong> Tip<br />
As just noted, keys that are not mapped to editor actions are given to the<br />
text component to be added to the data model, which is how data gets into<br />
the text components. In fact, it is possible to override this and do something<br />
completely different with keystrokes that do not correspond to editor<br />
actions, because they are actually passed to a default editor action that<br />
deals with unmapped keystrokes. By replacing this action, you can receive<br />
all of these characters and handle them differently if you wish.
1050 Chapter 9 Text Components<br />
Mouse and focus events are monitored by the caret, which is also responsible<br />
for drawing the insertion cursor on the screen. Where text components<br />
are concerned, the mouse has two uses. First, you can click with the mouse to<br />
move the text insertion point. This position is usually marked with a thin cursor<br />
that is drawn by, and often referred to as, the caret. Clicking the mouse<br />
moves the caret to the mouses current location. Secondly, with the mouse<br />
button pressed, you can drag the mouse to highlight text. The caret is responsible<br />
for tracking mouse movement as text is selected and arranging for the<br />
text to be highlighted. The caret itself is represented by an object that implements<br />
the Caret interface. By default, the caret is an instance of the<br />
DefaultCaret class. Highlighting of selected text is controlled by<br />
Def aultCaret using an instance of the class Def aultHighlighter, which<br />
implements another interface called Highlighter. The caret also monitors<br />
focus events, so that it can make the cursor appear when its text component<br />
has the focus and switch it off when it does not.<br />
<strong>Core</strong> Note<br />
The text components JTextField, JTextArea, JPasswordField ,<br />
JTextPane, and JEditorPane are in the j avax. swing package. All<br />
of the other classes that are discussed in this section, including<br />
JTextComponent, reside in j avax. swing. text. The only exceptions<br />
to this are some of the classes used by JEditorPane which are in the<br />
j avax.swing.text.html and javax.swing.text.rtf<br />
packages.<br />
What about displaying the content of the model on the screen? This job<br />
falls to view classes that depend on the text component that is in use and on<br />
the selected editor kit. The view uses information stored in the model to<br />
place the appropriate text on the screen. As you'll see, JTextPane and JEditorPane<br />
allow you to display more than just text. For documents that contain<br />
images and other nontext items, it is necessary to create a view that can<br />
render objects of these types. The view is also responsible for keeping the<br />
screen up to date as the content of the model changes, as when the user types<br />
into the control, for example.<br />
<strong>Core</strong> Note<br />
View classes have exclusive control over the way in which the content of a<br />
text component is rendered on the screen.A detailed discussion of view is,<br />
however, beyond the scope of this book. If you want to know more about
Simple Text Controls 1051<br />
views and what you can do with them, refer to <strong>Core</strong> Swing:Advanced<br />
Programming published by Prentice Hall, which devotes an entire chapter<br />
to them.<br />
The Document<br />
The most primitive part of a text component is the Document that underlies<br />
it. Earlier in this chapter, you saw that it is possible to associate a Document<br />
with a JTextField using one of its constructors:<br />
public JTextField(Document doc, String text,<br />
int columns);<br />
If you don't supply a Document of your own, a suitable default (in this case<br />
PlainDocument, a class that will be described later) is used instead. Document<br />
is actually an interface, not a class. Its function is to provide a very basic<br />
way to access and manage the data in the control, without determining how<br />
the data is actually stored. Here are the methods that make up the Document<br />
interface.<br />
public String getText(int offset, int length) throws<br />
BadLocationException<br />
public void getText(int offset, int length, Segment txt)<br />
throws BadLocationException<br />
public int getLengthO<br />
public void insertString(int offset, String str,<br />
AttributeSet a) throws BadLocationException<br />
public void remove(int offset, int len) throws<br />
BadLocationException<br />
public void render(Runnable r);<br />
public Position getStartPosition()<br />
public Position getEndPosition()<br />
public Position createPosition(int offset) throws<br />
BadLocationException<br />
public Object getProperty(Object key)<br />
public void putProperty(Object key, Object value)<br />
public Element[] getRootElements()<br />
public Element getDefaultRootElement()<br />
public void addDocumentListener(DocumentListener 1)<br />
public void removeDocumentListener(DocumentListener 1)<br />
public void addUndoableEditListener(UndoableEditListener<br />
1)<br />
public void removeUndoableEditListener(UndoableEditListener<br />
1)
1052 Chapter 9 Text Components<br />
These methods are described in the following sections.<br />
Data Manipulation Methods<br />
The first three methods allow you to get information out of the model. The<br />
model logically represents the document as a contiguous sequence of characters,<br />
addressable by an integral offset, where the first character has offset 0.<br />
The getText method can return a piece of the document as a String or in<br />
a Segment object, which holds the document data in the form of an array of<br />
characters. This is often more useful than a String if you want to process<br />
the individual characters efficiently. Here is its definition:<br />
public class Segment {<br />
}<br />
public Segment()<br />
public Segment(char[] array, int offset, int count)<br />
public String toStringO<br />
public char [] array;<br />
public int offset;<br />
public int count;<br />
Whenever you use a method like getText that supplies an initial offset<br />
and a length, the entire range must be within the bounds of the document's<br />
data. If it isn't, a BadLocationException is thrown. Only insertstring<br />
is an exception to this rule, because it is allowed to add text that increases the<br />
size of the document, provided that the initial offset is no greater than the<br />
document size. For example, if the document is 80 bytes long, an insert-<br />
String of any length may be done starting at any offset up to and including<br />
(but not beyond) 80. This is the only way to increase the size of the document.<br />
As well as data, the insertstring method allows you to provide<br />
attributes that qualify the data. Although the Document interface provides<br />
the means to specify attributes, it doesn't apply any meaning to them, nor<br />
does it specify what they actually look like, other then requiring them to be<br />
described by a class that implements the AttributeSet interface that you'll<br />
see later. A document's attributes are not considered to be part of its data and<br />
they are stored separately from it in the document model.<br />
The getLength method returns the current size of the document, in<br />
characters.
<strong>Core</strong> Note<br />
Here and elsewhere in this chapter the unit of storage inside a document<br />
will be referred to as a character, by which is meant a <strong>Java</strong> char type (a<br />
16-bit Unicode character). This is just convenient shorthand, however.<br />
Simple Text Controls 1053<br />
While the Document interface is framed in terms of char and String,<br />
no constraint is placed on how the data is actually stored within the<br />
document, much less on how it is held within the original source of the<br />
data.The storage mechanism itself will be examined later in this chapter.<br />
Data can be removed from the document using the remove method,<br />
which specifies a range of characters to delete. The entire range must actually<br />
exist in the document at the time that this method is invoked, or a Bad-<br />
LocationException is thrown. Removing data from the middle of the<br />
document does not leave a hole: Anything that lies beyond the removed<br />
range is (at least logically) moved up to fill the space. For example, if a document<br />
is initially 80 bytes long and a removal of 6 bytes from offset 40 is performed,<br />
the data at offsets 46 through 79 move up to occupy offsets 40<br />
through 73, thus reducing the total size of the model by 6 bytes.<br />
Concurrency<br />
Since <strong>Java</strong> provides support for multithreaded applications, the Document<br />
interface (informally) requires that its implementations provide a storage<br />
mechanism that can be made safe in the presence of multiple threads that<br />
want to concurrently read and write the data content. To make this possible,<br />
implementations might be expected to implement internal locking such that<br />
any operation that modifies the data is atomic with respect to read operations<br />
on the data and with respect to other write operations. In simple terms, the<br />
model would be expected to allow multiple threads to read the document at<br />
the same time, but to allow only one writer at any given time and only at a<br />
time when there are no readers.<br />
In fact, though, this is not the way it is actually implemented. The model<br />
ensures that write operations do not collide by automatically taking a write<br />
lock before any write operation starts and releasing it when it ends. In this<br />
context, writing means changing data content, removing data from the model<br />
or adding it at the end. Code that wants to read the content of the model<br />
without modifying it is required to take a read lock for the duration of the<br />
operation. The rules regarding these locks are as follows:
1054 Chapter 9 Text Components<br />
• Only one thread may have a write lock at any given time. If<br />
another thread has the write lock or there are any read locks<br />
outstanding, the thread that wants the write lock is blocked<br />
until there are no locks on the model.<br />
• Any number of read locks may be active at any time. However, a<br />
read lock cannot be placed while the model is locked for<br />
writing. If a thread tries to acquire a read lock while there is a<br />
write lock active, it is blocked until the write lock is released. A<br />
thread may acquire a read lock while another thread has a read<br />
lock.<br />
For convenience, code that must read data in an environment that could<br />
involve writers in a separate thread can use the render method. This<br />
method is given a Runnable as its only argument. Before executing the run<br />
method of this Runnable, the document will be locked so that no writers can<br />
modify its content. If a writer is currently active, the thread that called render<br />
waits until the writer releases its write lock. Once the run method of the<br />
Runnable has been entered, it can assume that the document will not be<br />
modified. The read lock is released when the run method ends. It is possible<br />
for more than one thread to use the render method at any time, because<br />
simultaneous read access is not harmful.<br />
Unless you are going to be implementing your own low-level access to the<br />
Document model, you won't need to be concerned with the details of the<br />
render method or any of the locking activity, because they are handled<br />
transparently by the text component UI classes, the Document class implementations,<br />
and the view classes.<br />
Position<br />
The getStartPosition and getEndPosition methods return Positions<br />
that represent the start and end of the document, respectively. Position<br />
is an interface that has a single method:<br />
public interface Position {<br />
public int getOffset();<br />
}<br />
When an object that implements the Position interface is created, it<br />
represents a given location within the document, specified by its offset at that<br />
time. If data is added to or removed from anywhere in the document before<br />
the location represented by the Position, the offset of that location relative<br />
to the start of the document would change, rendering the offset previously<br />
obtained useless as a means of fixing a particular point in a document. A
Simple Text Controls 1055<br />
Position, however, remains bound to the location that it originally represented<br />
no matter what happens to the document. The offset that the Position<br />
returns from its getOf f set method will always be the current offset of<br />
the original place in the document The Positions returned by getstart-<br />
Position and getEndPosition always indicate the start and end of the<br />
document, respectively.<br />
Using the createPosition method, you can obtain a Position that<br />
tracks any arbitrary point in the document. As an example, suppose you have<br />
a document that consists of several paragraphs and you obtain a Position<br />
object that represents the start of the second paragraph. If you call getoffset<br />
at this point, you'll get the current offset of that paragraph. If, subsequently,<br />
some text is added to or removed from the first paragraph, the offset<br />
you obtained earlier will no longer represent the start of the second paragraph.<br />
However, if you invoke getOf f set on your Position object, you'll<br />
get the new offset of the start of that paragraph.<br />
<strong>Core</strong> Note<br />
The coordinate system used in the model actually refers not to the<br />
characters, but to the positions between characters. Thus, descriptions like<br />
the "offset of a paragraph" are to be read something like "the offset of the<br />
point before the first character in the paragraph."The shorthand version is<br />
less of a mouthful than the whole truth. Bear this in mind when reading the<br />
rest of this chapter.<br />
What happens if the data corresponding to a Position is removed? If this<br />
happens, the offset is changed so that the Position points just before the<br />
data that was removed. For example, if you create a Position that tracks<br />
original offset 40 and then remove the characters at offset 30 through 45,<br />
your Position will now track offset 30.<br />
Document Properties<br />
The getProperty and putProperty methods allow you to associate arbitrary<br />
values with a document. There are no rules regarding what you can use<br />
these values for. You might, for example, hold such information as the<br />
author's name. Internally, properties are used by the text components to store<br />
such things as the number of space characters represented by the tab character.<br />
Bear in mind when using these properties that, like the document data<br />
itself, they are not persistent unless you provide some means for them to be<br />
permanently stored somewhere.
1056 Chapter 9 Text Components<br />
The Document interface specifies two property names that can be used by<br />
all implementations:<br />
public static final String TitleProperty;<br />
public static final String StreamDescriptionProperty;<br />
The first of these is intended to allow a document title to be stored under a<br />
common key. It is used by the HTML document implementation to store the<br />
document title extracted from an HTML TITLE tag. You can retrieve the<br />
document title, if it exists, from a text component as follows:<br />
JTextComponent t;// Any text component (JTextField etc.)<br />
String title =<br />
t.getDocument().getProperty(Document.TitleProperty);<br />
If no title has been set, null will be returned.<br />
The StreamDescriptionProperty is more abstract. In fact, no concrete<br />
meaning is assigned to it. The HTML document implementation uses it<br />
to store the URL of the document that it belongs to, but the scope of this<br />
meaning is, of course, limited to the j avax. swing. text. html package.<br />
Document Elements<br />
The getRootElements and getDefaultRootElement methods provide<br />
access to the mechanism that allows a document to contain more than just<br />
character data. Even simple documents have some form of basic structure in<br />
the form of lines and paragraphs. The simple character storage mechanism<br />
used by the Document interface and all of its implementations in the Swing<br />
text package only presents a sequence of characters. The paragraph structure<br />
and other features such as mixed fonts and color are held separately in a hierarchy<br />
of elements. The getDefaultRootElement provides access to the<br />
element at the base of the tree structure, from which the entire document<br />
structure is linked. All of the document types in the Swing package have a<br />
default root element, but it is possible to create separate hierarchies that<br />
simultaneously place a different structure on the same document content. To<br />
do this, it is necessary to have separate root elements. The getRootElements<br />
method returns an array containing all of the root elements associated<br />
with a document. There is no guarantee, however, that a particular document<br />
type (i.e., a given implementation of Document) will allow the existence of<br />
more than one root element. The document types underlying the Swing text<br />
components support the default root element, which they create as each document<br />
is built, and another hierarchy that it used when bidirectional text<br />
support is enabled. The getRootElements method for these document<br />
types therefore returns an array of two entries, containing the elements
Simple Text Controls 1057<br />
returned by getDef aultRootElement and getBidiRootElement methods.<br />
There is a more detailed description of the Element interface later in<br />
this chapter.<br />
<strong>Core</strong> Note<br />
Bidirectional text is used in locales where some or all of the character set is<br />
read from right to left, such as Hebrew, and is beyond the scope of this<br />
book.You'll find a complete discussion of bidirectional text in <strong>Core</strong> Swing:<br />
Advanced Programming, Prentice Hall, 1999.<br />
Event Listeners<br />
The last four methods allow the registration and removal of listeners for document<br />
and undoable edit events. All changes to the document content or its<br />
structure result in the generation of document events, a fact that has already<br />
been exploited in this chapter to control buttons based on the content of a<br />
text field and to react to changes in the text field as they happen. You'll find<br />
out more about document events later on. Undoable edit events are used to<br />
indicate changes to the document that could be reversed at a later date. The<br />
event contains all the information needed to reverse the change that was<br />
made.<br />
<strong>Core</strong> Note<br />
Undoable edits are supported by the Swing undo package, which is covered<br />
in <strong>Core</strong> Swing:Advanced Programming, Prentice Hall, 1999.<br />
Content<br />
The discussion of the Document interface skirted around the issue of where<br />
and how the data in the document is actually stored. To the user of the Document<br />
interface, the details of the storage mechanism are not actually important.<br />
In fact, the minimum requirements of an object that can provide this<br />
mechanism are described by an interface that is declared inside the<br />
AbstractDocument class. AbstractDocument is the prototypical implementation<br />
of the Document interface—it provides enough functionality to<br />
develop real document types, without itself being tied to any particular type<br />
or style of document. Since AbstractDocument is a real class, (albeit still an<br />
abstract one), it needs to deal with real data and hence must have a way to<br />
associate itself with actual document content. To create an AbstractDocu-
1058 Chapter 9 Text Components<br />
ment, you must supply its constructor with an object that implements the<br />
AbstractDocument. Content interface. This object contains, or will contain,<br />
the real data that the text control will manipulate.<br />
The AbstractDocument. Content interface (which we'll refer to simply<br />
as the Content interface for brevity) is a very simple one:<br />
public interface Content {<br />
public Position createPosition(int offset)<br />
throws BadLocationException;<br />
public int length();<br />
public UndoableEdit insertString(int where, String str)<br />
throws BadLocationException;<br />
public UndoableEdit remove(int where, int nitems)<br />
throws BadLocationException;<br />
public String getString(int where, int len)<br />
throws BadLocationException;<br />
public void getChars(int where, int len, Segment txt)<br />
throws BadLocationException;<br />
}<br />
You'll notice that some of these methods have exact parallels in the Document<br />
interface and, in fact, some of them are called more or less directly by<br />
AbstractDocument. By default, Swing uses an implementation of the Content<br />
interface called GapContent that holds the text in a character array. To<br />
account for deletions while minimizing the number of times data has to be<br />
copied, GapContent keeps track of a "gap" in the array which is not mapped<br />
by characters in the storage array, hence, its name.<br />
Elements, Attributes, and Styles<br />
So far, you've only seen how the actual document data is stored. Using the<br />
GapContent class and an appropriate implementation of the Document<br />
interface (such as the PlainDocument class that you'll see later), you have<br />
the basis for a simple component like JTextField in which the text has one<br />
font and one color. To create more interesting documents, you need to be<br />
able to store information about document structure, fonts, colors, and other<br />
attributes.<br />
Elements<br />
Within a document, structure is provided by Elements. An Element has<br />
three functions. First, it allows a set of attributes to be associated with a portion<br />
of a document. Because of this, it is possible to create documents with
Simple Text Controls 1059<br />
multiple fonts and colors. Second, it allows structures such as paragraphs to<br />
be established, by providing the means to mark the boundaries of paragraphs<br />
or other, arbitrary structures that your particular type of document might<br />
want. Finally, because Elements can be arranged in a hierarchical fashion, it<br />
is possible to nest Elements inside other Elements to allow, for example,<br />
font changes within a paragraph, while preserving the ability to treat the<br />
paragraph itself as a logical whole, represented by its own Element, when<br />
this is necessary.<br />
Like Document and Content, Element is an interface. Here is its definition:<br />
public interface Element {<br />
public AttributeSet getAttributes();<br />
public Document getDocument();<br />
public String getNameO;<br />
public int getStartOffset();<br />
public int getEndOffset();<br />
public Element getParentElement();<br />
public int getElementCount ();<br />
public Element getElement(int index);<br />
public int getElementlndex(int offset);<br />
public boolean isLeafO;<br />
}<br />
The getAttributes and getDocument methods are trivial: the former<br />
returns the set of attributes associated with the Element and the latter<br />
returns a reference to the document of which it is a part. Every element has<br />
exactly one set of attributes associated with it, which may be empty. The<br />
AttributeSet interface and attributes in general are discussed later in this<br />
section. Note that the getAttributes method never returns null, even<br />
though you can create an element without specifying any attributes; in this<br />
case, getAttributes returns a reference to an empty set of attributes.<br />
getName returns an element's name. In theory, you can give an element<br />
any name you choose when you create it. The name is actually stored as one<br />
of the attributes associated with the element. All of the Swing classes use the<br />
name attribute to indicate the type of the element, of which there are three<br />
commonly-used types—content, paragraph, and section. These element<br />
types and the way in which they are used are discussed below.<br />
<strong>Core</strong> Note<br />
These three are not the only element types used in the Swing text controls<br />
and, in fact, new document model implementations are free to add their<br />
own types.The document type used for jTextPane, for example, adds
1060 Chapter 9 Text Components<br />
element types for icons and components, while the HTML support has<br />
types for inline images and horizontal rules.<br />
An element represents a contiguous chunk of a document that has identical<br />
attributes. When an element is created, it has an associated range of document<br />
offsets that you can obtain using the getstartoffset and<br />
getEndOffset methods, both of which return integers. You might think<br />
that offsets are unreliable things to have when the document is able to<br />
change its size as a result of new content being added or because of content<br />
removal. This issue applies as much to elements as it does to the data itself.<br />
To deal with keeping track of data offsets within documents, the Position<br />
interface, which makes it possible to "tag" part of a documents content so<br />
that its actual offset can be obtained whenever necessary, is used. In the case<br />
of elements, the element itself keeps track of its own position in the document,<br />
so that the getstartoffset and getEndOffset methods always<br />
return current values.<br />
<strong>Core</strong> Note<br />
The responsibility for maintaining the start and end offsets of elements belongs<br />
to the Document implementation, which creates new elements or merges<br />
adjacent elements as necessary to reflect the changing content of a document.<br />
The last five methods deal with traversing element hierarchies. The Element<br />
interface does not include methods that allow hierarchies to be created<br />
or destroyed; these matters are dealt with by the AbstractDocument class<br />
and its subclasses which work together to maintain the structure of a document.<br />
AbstractDocument defines an abstract inner class called Abstract-<br />
Element that implements the Element interface and provides the framework<br />
for real elements in real documents. From this class, two real element classes<br />
are derived—BranchElement and LeafElement. As its name suggests, a<br />
Leaf Element is the lowest level in the structure hierarchy: It cannot have any<br />
child elements. BranchElement represents all of the other items in the hierarchy.<br />
It can have both parents and children. The differences between these<br />
two element types are clearly shown by their constructors:<br />
public LeafElement(Element parent, AttributeSet a,<br />
int offsO, int offsl)<br />
public BranchElement(Element parent, AttributeSet a)
Simple Text Controls 1061<br />
Notice that both element types have associated attributes in the form of an<br />
AttributeSet. You'll see shortly what it means for a nonleaf element to<br />
have associated attributes. The most fundamental distinction between these<br />
two classes is that only leaf elements can directly describe content—notice<br />
that a branch element does not have an associated range of offsets that mark<br />
out the part of the document that it covers. The range of a branch element is<br />
implicitly the range covered by all of its children, be they leaf elements or<br />
other branch elements.<br />
Every leaf element in a document has a parent within the document. In a<br />
fiat document (such as JTextField), there is only one level of structure—<br />
the root element is the only branch element and the document content is<br />
completely described by a set of leaf elements of which the root element is<br />
the parent. The other text components have a more complex document<br />
structure.<br />
The getParentElement method returns the branch element that is the<br />
direct parent of the element (branch or leaf) to which it is applied. Applying<br />
this method to the root element results in null being returned, get-<br />
ElementCount returns the number of elements to which the given element<br />
is parent. This method returns zero if applied to a leaf element.<br />
The getElement and getElementlndex methods allow you to locate<br />
elements given one of two pieces of information. getElement returns an<br />
element given its index within its parent branch. Branch elements hold their<br />
children in ascending offset order, numbering the first entry 0. This method<br />
is useful if you want to step through all of the elements of a branch, which is<br />
typically what a rendering component (the view) does to display a paragraph<br />
on the screen. The getElementlndex method returns the index of an element<br />
given an offset into the document. This is typically used, in conjunction<br />
with the previous method, to find the element that holds the attributes for a<br />
particular location in the document. Note, however, that what this method<br />
returns is the index of one of its direct children that is nearest to the specified<br />
offset, even if that child does not contain the offset itself. Thus, for example,<br />
if a branch element covers offset 80 to 100 in a document and it has<br />
three children covering offsets 80-90, 91-95, and 96-100, it would return<br />
index 0 in response to any offset less than or equal to 90 and index 2 to any<br />
offset 96 and higher, even though these elements don't necessarily cover the<br />
actual offset given. It is expected that you would first use the getstartof f -<br />
set and getEndOf f set methods to determine whether the offset you need<br />
is within the bounds of the element before using getElementlndex.<br />
Finally, the isLeaf method returns true for a leaf element and false<br />
for a branch, even if the branch has no children. This method is used to
1062 Chapter 9 Text Components<br />
check whether an element could contain children, not whether it actually has<br />
any.<br />
Attributes and Attribute Sets<br />
An attribute is simply a property that has both a name, expressed as an<br />
Obj ect, and a value, which can also be an Obj ect of any kind. Attributes are<br />
always grouped together into attribute sets and then associated with<br />
elements to control the rendering of a document by a view. There are two<br />
interfaces that deal with attributes—AttributeSet and Mutable-<br />
AttributeSet. The first of these represents a read-only view of a collection<br />
of attributes and is implemented by the inner class SmallAttributeSet of<br />
the StyleContext class that you'll see later. This class is used to quickly<br />
compare whether two attribute sets are equal—two SmallAttributeSets<br />
are equal if and only if they are the same set. There is also another class that<br />
handles attributes. By contrast, the SimpleAttributeSet class implements<br />
MutableAttributeSet, which is an extension of AttributeSet that<br />
allows the attributes to be changed.<br />
Theoretically, since attributes are simply named objects, you can invent<br />
attributes of your own and store them within a document. This is, of course,<br />
only useful if you intend to write a customized view that can make use of<br />
these extended attributes. The views built into the Swing package recognize<br />
a set of attributes, whose names should be considered to be reserved. A partial<br />
list of attributes and the type and meaning of the associated values is<br />
shown in Table 9-1. These attributes are all declared as instances of four<br />
static inner classes of the StyleConstants class that will be described<br />
below—ParagraphConstants, CharacterConstants, ColorConstants<br />
and FontConstants —and then assigned to static variables of the<br />
StyleConstants class, which is how they are normally used. To reference<br />
one of these attributes, you would prefix the name in Table 9-1 by style-<br />
Constants—for example:<br />
StyleConstants.Alignment<br />
Table 9-1 Attributes Recognized by Swing Components (continued)<br />
Name Data Type Associated Value<br />
Alignment Integer This attribute specifies the alignment<br />
of the paragraph with which it is associated.<br />
There are four possible values:
Simple Text Controls 1063<br />
Table 9-1 Attributes Recognized by Swing Components (continued)<br />
Name Data Type Associated Value<br />
Background<br />
BidiLevel<br />
Bold<br />
ComponentAttribute<br />
Color<br />
Integer<br />
Boolean<br />
Component<br />
ALIGN_CENTER: Each line in the<br />
paragraph is horizontally centered,<br />
with extra space distributed equally to<br />
the left and right<br />
ALIGN_JUSTIFIED: Each line<br />
starts at the left margin and ends at<br />
the right margin. If the line is not<br />
long enough, after word wrapping, to<br />
fill the entire line, extra spaces are<br />
distributed between words to make<br />
the last word end at the right margin.<br />
ALIGN LEFT: Each line starts at the<br />
left margin. No attempt is made to<br />
align the end of the line.<br />
ALIGN_RIGHT: Each line ends at<br />
the right margin. This usually produces<br />
a ragged effect on the left-hand<br />
side of the document.<br />
The background color for the associated<br />
element.<br />
Represents the bidirectional nesting<br />
level of the characters in the associated<br />
element. Refer to <strong>Core</strong> Swing:<br />
Advanced Programming for a<br />
detailed discussion of bidirectional<br />
text.<br />
If Boolean. TRUE, indicates that<br />
the text associated with this element<br />
should be rendered in a bold font.<br />
Stores a Component to be rendered<br />
at the location corresponding to this<br />
element.
1064 Chapter 9 Text Components<br />
Table 9-1 Attributes Recognized by Swing Components (continued)<br />
Name Data Type Associated Value<br />
ComposedTextAt- Attributedtribute<br />
String<br />
FirstLinelndent Float<br />
FontFamily<br />
FontSize<br />
Foreground<br />
IconAttribute<br />
Italic<br />
Leftlndent<br />
String<br />
Integer<br />
Color<br />
Icon<br />
Boolean<br />
Float<br />
Supplies an AttributedString<br />
that contains the data and attributes<br />
used to render the portion of the document<br />
corresponding to this element.<br />
AttributedString is part of the<br />
<strong>Java</strong> 2D API and allows the specification<br />
of font and color changes within<br />
a String.<br />
Gives the amount, in points, by which<br />
the first line of a paragraph is<br />
indented in addition to the Leftlndent<br />
attribute. If this attribute is<br />
positive, the first line of a paragraph<br />
has extra lead-in space. If it is negative,<br />
the first line juts out to the left of<br />
the rest of the paragraph.<br />
Gives the name of the font family to<br />
use when rendering this element. A<br />
typical example might be ' Sans -<br />
Serif'.<br />
The size of the font for this element,<br />
in points.<br />
The color to be used for rendering<br />
foreground items (typically text) in<br />
this element.<br />
Supplies an icon to be rendered at the<br />
location occupied by this element.<br />
Specifies that the text should be rendered<br />
in italics, if Boolean. TRUE.<br />
The indentation to be used for the<br />
left side of a paragraph, in points.
Simple Text Controls 1065<br />
Table 9-1 Attributes Recognized by Swing Components (continued)<br />
Name<br />
LineSpacing<br />
Rightlndent<br />
SpaceAbove<br />
SpaceBelow<br />
StrikeThrough<br />
Subscript<br />
Data Type Associated Value<br />
Float The number of points to be left<br />
between one line and the line below<br />
it. This value is added to the usual distance<br />
between the font baselines<br />
when rendering text.<br />
Float The number of points to be left<br />
between the right-hand side of a<br />
paragraph and the right side of the<br />
view.<br />
Float The number of points to be left above<br />
the paragraph described by this element.<br />
Float The number of points to be left below<br />
the paragraph described by this element.<br />
If SpaceBelow is specified<br />
for a paragraph and SpaceAbove is<br />
specified for the paragraph below it,<br />
the distance between these two paragraphs<br />
will be the sum of the two values.<br />
Boolean Specifies that the corresponding text<br />
should be rendered with strike<br />
through (that is, appear to be crossedout)<br />
if Boolean. TRUE .<br />
Boolean If this attribute has value Boolean<br />
. TRUE, the associated content is<br />
rendered as a subscript, which generally<br />
means that its baseline is lowered<br />
and a smaller font is used.
1066 Chapter 9 Text Components<br />
Table 9-1 Attributes Recognized by Swing Components (continued)<br />
Name<br />
Superscript<br />
TabSet<br />
Underline<br />
Data Type<br />
Boolean<br />
TabSet<br />
Boole<br />
Attribute Set Hierarchies<br />
Associated Value<br />
If this attribute has value Boolean<br />
. TRUE, the associated content is<br />
rendered as a superscript, which generally<br />
means that its baseline is raised<br />
and a smaller font is used.<br />
Specifies the positions of tab stops<br />
within the paragraph with which this<br />
attribute is associated. See the Tab-<br />
Set and Tab Stop classes for details.<br />
If true, causes the text associated<br />
with the element to be underlined<br />
when rendered.<br />
As you know, an element can have a single set of attributes associated with it.<br />
Typically, an attribute set might describe the font and colors used to render<br />
some text. Now suppose that you wanted to create an attribute set that is like<br />
one you already have, but differs in a minor way. For example, you might<br />
have an attribute set that defines the way in which an entire document is rendered<br />
and want to be able to change the font to bold for a few characters,<br />
then return to the usual typeface. One way to do this is to create the modified<br />
attribute set by duplicating the original set and adding the attribute Style-<br />
Constants .Bold with value Boolean. TRUE. This is, of course, inefficient<br />
in terms of memory consumption. To avoid this, it is possible to arrange<br />
attributes in a hierarchy, in the sense that any attribute set can be given a<br />
resolving parent. When looking for an attribute in an attribute set, if the<br />
attribute set itself does not declare a value for that attribute, its resolving parent<br />
is queried for a value and so on, until either the attribute is found or an<br />
attribute set without a resolving parent is reached.<br />
Using this mechanism, you can create an attribute set just like the normal<br />
one but with a bold font by building one with just the bold attribute (defined<br />
as Boolean.TRUE) and setting its resolving parent to the style used elsewhere<br />
in the document. This approach is, of course, resilient to changes in<br />
the base attribute set: If somebody decides that all documents should be ren-
Simple Text Controls 1067<br />
dered in a 14-point font instead of a 12-point font, your modified attributes<br />
will continue to work and the bold text will now be in 14-point font as well.<br />
Be careful to distinguish this logical arrangement of attribute sets, which is<br />
independent of document contents, from the hierarchy of character and<br />
paragraph attributes that you can create in a document. This topic will be discussed<br />
further later on in connection with styled documents.<br />
The AttributeSet and MutableAttributeSet<br />
Interfaces<br />
Now that you've seen how attribute sets are intended to be used, let's look at<br />
the AttributeSet and MutableAttributeSet interfaces. Note that there<br />
is no concept of an individual attribute object: Attributes only exist within<br />
attribute sets.<br />
The AttributeSet Interface<br />
The AttributeSet interface describes a set of attributes that must be considered<br />
read-only because it does not define any methods to change the content<br />
of the attribute set. Here is its definition.<br />
public interface AttributeSet {<br />
public Object getAttribute(Object attrName);<br />
public int getAttributeCount();<br />
public boolean isEqual(AttributeSet attr);<br />
public AttributeSet getResolveParent();<br />
public AttributeSet copyAttributes();<br />
public boolean containsAttribute(<br />
Object name, Object value);<br />
public boolean containsAttributes (<br />
AttributeSet attributes);<br />
public Enumeration getAttributeNames();<br />
public boolean isDefined(Object attrName);<br />
}<br />
When using these methods, an important point to bear in mind is whether<br />
or not the operation includes the attribute set's resolving parent if it has one.<br />
The descriptions that follow indicate which operations take account of the<br />
content of resolving parent attribute sets.<br />
The getAttribute method is used to get the value of a named attribute.<br />
It is first looked for in the attribute set itself and, if it is found there, its value<br />
is returned. Otherwise, if there is a resolving parent, the request is passed to<br />
it for resolution. Obviously, this process repeats itself if until either an ancestor<br />
of the original attribute set contains the attribute, or an attribute set with<br />
'
1068 Chapter 9 Text Components<br />
no resolving parent is found. This method effectively flattens the hierarchy of<br />
attribute sets, allowing values in child attribute sets to take precedence over<br />
values in their ancestors.<br />
The methods isEmpty and getAttributeCount indicate whether the<br />
attribute set is empty and return the number of attributes in the set, respectively.<br />
The results do not take account of any attributes that may be found<br />
through a resolving parent.<br />
isEqual compares the attribute set on which it operates with the content<br />
of another one. They are considered to be equal if they have the same number<br />
of attributes and every attribute in one set is present in the other and<br />
each individual attribute in one set has the same value as its counteq^art in<br />
the other set. This operation does not involve the parent attribute set, if there<br />
is one.<br />
getResolveParent returns the resolving parent of the attribute set, or<br />
null if it doesn't have one.<br />
copy-Attributes makes a duplicate copy of the attributes set on which it<br />
operates by cloning it. The returned object has a separate copy of all of the<br />
attributes that were in the original set, so that changing them would not<br />
affect the values seen through the original attribute set. It also clones the reference<br />
to the resolving parent, if there is one, so the new attribute set shares<br />
the same resolving parent. It does not, however, clone the resolving parent,<br />
so values in that parent are actually shared between the two attribute sets<br />
(and any modification would be visible in both).<br />
The containsAttribute and containsAttributes methods look for<br />
either one attribute given by name or for a set of attributes, in another<br />
attribute set. For each attribute, a check is made that it is present in the<br />
attribute set against which the method has been invoked and, if it is, whether<br />
it has the same value as that passed as an argument or in the second attribute<br />
set. If no attributes are missing and all of the values match, then true is<br />
returned. Note that the resolving parent of the attribute set against which the<br />
method has been invoked is consulted to locate values, if necessary, but the<br />
resolving parent of the attribute set passed as argument to containsAttributes<br />
is not consulted when creating the list of attributes to compare.<br />
getAttributeNames gets an Enumeration of the names of all of the<br />
attributes in the set. It does not include attributes in the resolving parent.<br />
Finally, isDefined checks whether the name attribute exists in the<br />
attribute set. It does not consult the resolving parent, so the attribute is considered<br />
not defined if it is not in the attribute set itself, even if the resolving<br />
parent can locate a definition for it.
The MutableAttributeSet Interface<br />
Simple Text Controls 1069<br />
If you want to be able to modify a set of attributes, you need a MutableAttributeSet.<br />
The MutableAttributeSet interface is implemented by the<br />
Swing class SimpleAttributeSet. Here is the definition of MutableAttributeSet:<br />
public interface MutableAttributeSet<br />
extends AttributeSet {<br />
}<br />
public void addAttribute(Object name, Object value);<br />
public void addAttributes(AttributeSet attrs);<br />
public void removeAttribute(Object name);<br />
public void removeAttributes(Enumeration names);<br />
public void removeAttributes(AttributeSet attrs);<br />
public void setResolveParent(AttributeSet parent);<br />
addAttribute adds the given attribute with the supplied value to the<br />
current attribute set. addAttributes adds all of the attributes from the<br />
supplied attribute set to the current attribute set. The set of attributes added<br />
does not include those in the resolving parent of the source set. If any of the<br />
attributes to be added are already present in the target set, they are replaced<br />
with the new value. If such an attribute is in the resolving parent of the target<br />
attribute set, the resolving parents attribute is unchanged, but is value is<br />
masked by the new attribute installed in the target attribute set itself.<br />
removeAttribute deletes the named attribute from the attribute set, if<br />
it is present. Only the attribute set itself is affected—the contents of the set's<br />
resolving parent, if any, are not changed. This has the following results:<br />
• If the attribute was not defined in either the attribute set or its<br />
resolving parent, there is no change and the attribute will<br />
remain undefined.<br />
• If the attribute was defined in the attribute set but not in its<br />
resolving parent, it will be removed and the attribute will now<br />
be undefined.<br />
• If the attribute was defined in the resolving parent but not in<br />
the attribute set itself, no change will be made. As a result,<br />
calling getAttribute will continue to return the attribute<br />
from the resolving parent.<br />
• If the attribute was defined in both the attribute set and its<br />
resolving parent, the value in the attribute set will be removed<br />
but the resolving parent will be unaffected. Therefore, a call to
1070 Chapter 9 Text Components<br />
getAttribute will now return the value stored in the<br />
resolving parent, which may be different from the original.<br />
Likewise, the two forms of removeAttributes delete attributes given in<br />
the form of an Enumeration or another attribute set. If an attribute set is<br />
given, attributes present in the resolving parent that are not present in the<br />
attribute set itself are not copied. Also note that the same cautions regarding<br />
the result of the operation apply to each individual attribute affected by this<br />
operation as apply when removeAttribute is used.<br />
You set the resolving parent of a MutableAttributeSet using the set-<br />
ResolveParent method. Note that the resolving parent of an attribute set is<br />
actually stored within the attribute set itself as an attribute called AttributeSet<br />
. ResolveAttribute. The value of this attribute is a reference to the<br />
resolving parent itself. If you remove this attribute the connection between<br />
the attribute set and its parent will be lost. Also, as was noted during the discussion<br />
of the AttributeSet interface, cloning an attribute set using copy-<br />
Attributes causes the resolving parent to be inherited, because the<br />
attribute that defines it is copied to the new attribute set.<br />
<strong>Core</strong> Note<br />
In future versions of Swing, it is possible that the resolving parent of an<br />
attribute set may not be stored this way, so it is best not to rely on this<br />
implementation detail. Instead, use the getResolveParent method to<br />
get the resolving parent of an attribute set.<br />
Styles<br />
So far, you've seen the various attributes that are defined by the Swing text<br />
package, but you haven't yet learned how to create an attribute set. Neither<br />
the AttributeSet nor the MutableAttributeSet interfaces include<br />
methods that allow you to do this. In fact, there are two ways to obtain an<br />
attribute set.<br />
SimpleAttributeSet<br />
The most obvious way to create a MutableAttributeSet is to use the SimpleAttributeSet<br />
class, which is an implementation of MutableAttributeSet<br />
that stores attributes in a Hashtable, using the attribute name as the<br />
key. This class has two constructors:
public SimpleAttributeSet();<br />
public SimpleAttributeSet(AttributeSet source);<br />
Simple Text Controls 1071<br />
The first constructor creates an empty set to which you can add attributes<br />
using the addAttribute or addAttributes methods, while the second<br />
initializes itself from an existing attribute set.<br />
Styles and Style Contexts<br />
The other way to create a MutableAttributeSet is to use the StyleContext<br />
class. This class is intended to allow a set of styles to be created and<br />
stored together, so that they can be used as the basis of a styled document.<br />
Storing styles in a StyleContext also allows the same pool of styles to be<br />
shared between documents. But what is a style?<br />
A style is actually little more than an attribute set. Formally, style is yet<br />
another interface, defined as follows:<br />
public interface Style extends MutableAttributeSet {<br />
public void addChangeListener(ChangeListener 1);<br />
public void removeChangeListener(ChangeListener 1);<br />
public String getName();<br />
}<br />
A style gives you the ability to register a listener for changes to its<br />
attributes and to have a name by which you can refer to it. It does not, however,<br />
provide a method to set the name. For that, yon have to use StyleContext.<br />
Unless you intend to implement your own style class,<br />
StyleContext is the only way to create a style and it is also the only way to<br />
get an attribute set that has a name associated with it. If you create a style in<br />
a StyleContext and associate a name with it, you can use that name to<br />
refer to the style without having to save a private reference to the original<br />
object. Styles are usually given names that are meaningful to the user, such as<br />
"Heading 1," which might store the attributes for top-level headings in your<br />
document. Another advantage of naming styles is that it is easier to extend a<br />
style by asking for the base style by name and then creating a new one with<br />
the recjuired differences and linking it to the original style via the resolving<br />
parent mechanism.<br />
<strong>Core</strong> Note<br />
Remember that a Style is just a MutableAttributeSet, so anything<br />
you can do with an attribute set you can do with a style as well.<br />
Here is the definition of the StyleContext class:
1072 Chapter 9 Text Components<br />
public class StyleContext implements Serializable,<br />
AbstractDocument.AttributeContext {<br />
public StyleContext();<br />
public static final StyleContext<br />
getDefaultStyleContext()<br />
public void addChangeListener(ChangeListener 1);<br />
public void removeChangeListener(ChangeListener 1) ;<br />
public Style addStyle(String name, Style parent);<br />
public void removeStyle(String name);<br />
public Enumeration getStyleNames();<br />
public Style getStyle(String name);<br />
public Color getBackground(AttributeSet attr);<br />
public Color getForeground(AttributeSet attr);<br />
public Font getFont(AttributeSet attr);<br />
public Font getFont(String family, int style,<br />
int size);<br />
public FontMetrics getFontMetrics(Font font);<br />
public synchronized AttributeSet addAttribute(<br />
AttributeSet old, Object name, Object value);<br />
public synchronized AttributeSet addAttributes(<br />
AttributeSet old, AttributeSet attrs);<br />
public synchronized AttributeSet removeAttribute(<br />
AttributeSet old, Object name);<br />
public synchronized AttributeSet removeAttributes(<br />
AttributeSet old, Enumeration names);<br />
public synchronized AttributeSet removeAttributes(<br />
AttributeSet old, AttributeSet attrs);<br />
public AttributeSet getEmptySet();<br />
public synchronized void reclaim(AttributeSet attrs);<br />
public static void writeAttributeSet(<br />
ObjectOutputStream out, AttributeSet attrs);<br />
public void writeAttributes(ObjectOutputStream out,<br />
AttributeSet attrs);<br />
public static void readAttributeSet (<br />
ObjectInputStream in, MutableAttributeSet attrs);<br />
public void readAttributes(<br />
ObjectInputStream in, MutableAttributeSet attrs) ;<br />
public static Object getStaticAttribute(Object key);<br />
public static Object getStaticAttributeKey(Object key)<br />
public static void registerStaticAttributeKey(<br />
Object key);<br />
}
Simple Text Controls 1073<br />
You'll notice that these methods fall naturally into several different groups.<br />
The first eight (up to and including getstyle) deal with the management of<br />
styles and the style context itself. The next two methods provide a convenient<br />
way to get the values of the attributes defining foreground and background<br />
colors from an AttributeSet, while the following three provide fast font<br />
handling by providing a layer of caching within the StyleContext and the<br />
rest deal with handling AttributeSets. The next seven methods (from<br />
addAttribute to reclaim) define an interface called AbstractDocument.<br />
AttributeContext that you'll see later in connection with the<br />
DefaultStyledDocument class. The last set of methods (from writeAttributeSet<br />
to registerStaticAttributeKey) is not of particular interest<br />
unless you are adding to the text component framework, so they won't be<br />
discussed any further here.<br />
The constructor creates a StyleContext with a single style called<br />
default. This style initially has no associated attributes and no resolving<br />
parent. To create a new style, you first call the addStyle method, giving the<br />
name that you want to associate with the style and the style's resolving parent,<br />
if it needs one. The name must be unique within the StyleContext<br />
object—if you reuse an existing name, the original style will be lost. Having<br />
created the style, you can use the methods of MutableAttributeSet to set<br />
its attributes. For example, the following code extract creates a StyleContext<br />
and adds to it a style called Basic Style, which uses a 12-point Sans-<br />
Serif font:<br />
StyleContext sc = new StyleContext();<br />
Style basicStyle = sc.addStyle("Basic Style", null);<br />
basicStyle.addAttribute(StyleConstants.FontFamily,<br />
"SansSerif");<br />
basicStyle.addAttribute(StyleConstants.FontSize,<br />
new Integer(12));<br />
Now suppose that you wanted to create a style for chapter headings that<br />
will be used in the same document as Basic Style. The chapter heading<br />
style will use the same font family as Basic Style, but will be bold, underlined,<br />
followed by 12 points of vertical space and use a 16-point font. You<br />
could define this style from scratch by setting all of its attributes explicitly,<br />
but it is preferable to inherit the font family from the document's basic font<br />
by setting the resolving parent attribute to point to Basic style:<br />
Style chapterHeading = sc.addStyle("Chapter Heading",<br />
basicStyle);<br />
chapterHeading.addAttribute(StyleConstants.FontSize ,<br />
new Integer(16));
1074 Chapter 9 Text Components<br />
chapter-Heading.addAttribute(StyleConstants.Bold,<br />
Boolean.TRUE);<br />
chapterHeading.addAttribute(StyleConstants.SpaceBelow,<br />
new Float(12.0));<br />
The addstyle method in this extract makes Basic Style the resolving<br />
parent of Chapter Heading. As a result, if you ask for the FontFamily<br />
attribute of the Chapter Heading style, it will return "SansSerif even<br />
though an explicit font family isn't defined for Chapter Heading, because<br />
the getAttribute method looks for missing attributes in the resolving parent.<br />
On the other hand, the FontSize attribute of this style is 16, which<br />
overrides the original 12 points of the basic style.<br />
Once you've defined a style and given it a name, you can use the get-<br />
Style method to get a reference to the style given the name. Similarly, get-<br />
StyleNames returns an Enumeration of all of the styles in the context.<br />
A style can be removed from the style context using removeStyle, which<br />
needs the name of the style as its only argument. Removing a style does not<br />
delete it: It can still be used through its original reference. For example, if<br />
the document's basic style were removed like this:<br />
sc.removeStyle("Basic Style");<br />
it would still be possible to use this style via the variable basicStyle that<br />
was initialized earlier. Furthermore, style resolution from the Chapter<br />
Heading style continues to work, because of the way in which style names<br />
and the resolving parent identity are stored.<br />
When you create a style within a style context and give it a name, an<br />
attribute is added to the style contexts default style; the name of this<br />
attribute is the name of the style itself and its value is the created style. For<br />
example, when Basic Style was created, the following attribute and value<br />
were placed in the style context's default style:<br />
("Basic Style", basicStyle)<br />
When removeStyle is called, this attribute is removed from the default<br />
attribute set of the context, but nothing else changes. As we discovered earlier,<br />
the resolving parent is an attribute of the child's attribute set, whose<br />
value is a reference to the parent. As a result, any existing references to the<br />
style itself remain valid and the AttributeSet .ResolveAttribute<br />
attribute in the child style is unaffected, because it stores a reference to the<br />
parent style, not its name.
AbstractDocument and PlainDocument<br />
Simple Text Controls 1075<br />
All of the text components in the Swing packages are based around the<br />
AbstractDocument class, which provides a basic implementation of the<br />
Document interface. You can't, however, directly create an instance of<br />
AbstractDocument because it is an abstract class and its constructors are<br />
protected. Instead, you would usually create a PlainDocument or a<br />
Def aultStyledDocument, or perhaps develop a document implementation<br />
of your own, derived from AbstractDocument.<br />
The public methods of this class are simply implementations of those<br />
required to comply with the Document interface. The document content can<br />
be held in any object that implements the AbstractDocument. Content<br />
interface, which must be passed to the constructors:<br />
protected AbstractDocument(<br />
AbstractDocument.Content content);<br />
protected AbstractDocument(Content data,<br />
AttributeContext context)<br />
Both PlainDocument and DefaultStyledDocument use the GapContent<br />
class that you've already seen to manage the data content.<br />
The Structure of a Plain Document<br />
JTextField and JTextArea use PlainDocument to implement their document<br />
model. Both of these components display only text and can support a<br />
single font and a single foreground color. Such a basic component doesn't<br />
require much more than the simple implementation provided by Abstract-<br />
Document; in fact, apart from its constructors, PlainDocument only has<br />
four declared methods:<br />
public Element getDefaultRootElement();<br />
public Element getParagraphElement(int pos) ;<br />
protected AbstractDocument.AbstractElement<br />
createDefaultRootElement();<br />
protected void insertUpdate(DefaultDocumentEvent chng,<br />
AttributeSet attr);<br />
protected void removeUpdate(DefaultDocumentEvent chng);<br />
The getDef aultRootElement method simply returns the root element<br />
originally created by createDef aultRootElement, which is called from<br />
the constructor of AbstractDocument. Each document type is allowed to<br />
have its own root element; the only requirement is that it should implement<br />
the Element interface. As you saw earlier, AbstractDocument provides
1076 Chapter 9 Text Components<br />
two element types, BranchElement and Leaf Element, for use by its subclasses.<br />
PlainDocument creates a BranchElement to act as the root of its<br />
internal structure, while Def aultStyledDocument uses a rather trivial subclass<br />
of BranchElement called SectionElement. However, not all branch<br />
elements are used in the same way, as you'll see later when we look at styled<br />
documents. To provide a way to distinguish between them, they are given different<br />
names. Since the ability to get an elements name is provided by the<br />
Element interface, leaf elements can also be given a name. Three common<br />
element names are defined by AbstractDocument:<br />
AbstractDocument.ContentElementName: "content"<br />
AbstractDocument.ParagraphElementName: "paragraph"<br />
AbstractDocument.SectionElementName: "section"<br />
A Class That Formats Element Structures<br />
In a plain document, all of the branch elements are paragraphs, so the root<br />
element is a paragraph. PlainDocument provides a method, getParagraphElement,<br />
that returns the paragraph element enclosing a given document<br />
offset. In fact, the structure of a plain document is extremely simple.<br />
The term paragraph, in the context of a word processor, usually means a<br />
sequence of characters (in sentences) terminated by a newline character.<br />
This is not, however, what a paragraph is in the context of a PlainDocument.<br />
To see what a paragraph represents in this context, let's look at the internal<br />
structures created when we use both a JTextField and a JTextArea. To<br />
look at these, it is necessary to write a fairly simple program to get the Document<br />
from a text control, then extract the elements in that document and format<br />
them. Since this functionality will be needed again when looking at<br />
JTextPane, the formatting code is implemented in a class of its own and an<br />
interface is wrapped around it to allow you to manipulate a text field and a<br />
text area to see how the internal structure is affected. Listing 9-6 shows the<br />
class that will be used to display a document's content and its elements.<br />
Listing 9-6 A class that formats document structures<br />
package <strong>JFC</strong>Book.Chapter9;<br />
import javax.swing.*;<br />
import javax.swing.text.*;<br />
import j ava.io.*;<br />
import java.util.*;
Simple Text Controls 1077<br />
Listing 9-6 A class that formats document structures (continued)<br />
public class ModelDisplay {<br />
public static String showModel(Document doc) {<br />
StringWriter sw = new StringWriter();<br />
BufferedWriter w = new BufferedWriter(sw);<br />
try {<br />
w.write("Document contains " + doc.getLength() +<br />
" characters\n");<br />
}<br />
// Get the root element and display it.<br />
// We also display any elements that this<br />
// element contains<br />
Element root = doc.getDefaultRootElement()<br />
showElement(root, w, 0);<br />
w.flush();<br />
return sw.toString () ;<br />
} catch (IOException e) {<br />
return "I/O Exception";<br />
} catch (BadLocationException e) {<br />
return "Bad location exception";<br />
}<br />
protected static void showElement(Element e, Writer w,<br />
int indent) throws IOException, BadLocationException {<br />
// Show the element name first<br />
String name = e.getName();<br />
int startOffset = e .getStartOf f set () ,int<br />
endOffset = e.getEndOffset();<br />
dolndent(w, indent);<br />
w.write("[ " + name + " ], start offset: " +<br />
startOffset + ", end: " + endOffset + "\n");<br />
// Display the attributes, if there are any...<br />
AttributeSet a = e.getAttributes() ;<br />
int attrs = a.getAttributeCount();<br />
if (attrs == 0) {<br />
dolndent(w, indent + 2);<br />
w.write("{ No attributes }\n");<br />
} else {<br />
Enumeration enum = a.getAttributeNames();
1078 Chapter 9 Text Components<br />
Listing 9-6 A class that formats document structures (continued)<br />
}<br />
while (enum.hasMoreElements()) {<br />
Object o = enum.nextElement();<br />
String ename = o.toString();<br />
dolndent(w, indent + 2);<br />
w.write("{ " + ename + " = ");<br />
String value = a.getAttribute(o).toString();<br />
w.write(value + " }\n");<br />
}<br />
// If it is content, show some of the data<br />
if (name.equals(AbstractDocument.ContentElementName)) {<br />
// Display no more than CONTENT_COLUMNS characters<br />
int length = endOffset - startOffset;<br />
if (length > CONTENT_COLUMNS) {<br />
length = CONTENT_COLUMNS;<br />
}<br />
}<br />
if (length > 0) {<br />
Segment s = new Segment();<br />
e.getDocument().getText(startOffset, length, s);<br />
dolndent(w, indent + 8);<br />
for (int i = 0; i < length; i++) {<br />
char c = s.arrayfi + s.offset];<br />
if (C == '\n') {<br />
w.write(" \\n ");<br />
} else if (c == '\r') {<br />
}<br />
w.write(" \\r ");<br />
} else {<br />
w.write(s.array[i + s.offset]);<br />
}<br />
}<br />
w.write("\n");<br />
// Now traverse the children of this element<br />
int children = e.getElementCount0;<br />
for (int i = 0; i < children; i++) {<br />
showElement(e.getElement(i), w, indent + 4);<br />
}<br />
}
Simple Text Controls 1079<br />
Listing 9-6 A class that formats document structures (continued)<br />
}<br />
// Indent by the given amount<br />
protected static void dolndent(Writer w, int n)<br />
throws IOException {<br />
for (int i = 0; i < n; i++) {<br />
w.write (" "} ;<br />
}<br />
}<br />
public static final int CONTENT^COLUMNS = 40;<br />
This class only has a single public method, showModel, which takes a<br />
Document as its argument and returns a String containing an analysis of the<br />
documents content and structure. In the program that will be used to look at<br />
the internals of text components, this string will be displayed in a text area.<br />
The implementation of this class uses java. io. StringWriter, which is a<br />
Writer that places everything you write into it in a String. When you've<br />
finished writing, you just flush the output and then use the toString<br />
method to get back everything that you wrote to it. This is a more general and<br />
more useful solution than writing the results to the program s output stream.<br />
The core of the ModelDisplay class is the static showElement method,<br />
which takes as arguments an element, the Writer to which it will send its<br />
output and the number of spaces by which each line of output should be<br />
indented. This method first prints information about the element it has been<br />
given, then invokes itself recursively for each child element, increasing the<br />
indent by four spaces so that the hierarchy can be clearly seen. Since every<br />
element is descended from the document's root element, to see every element<br />
getDefaultRootElement is used to get a starting point and then<br />
showElement is called with an initial indentation of zero.<br />
For each element, the element name and its start and end offsets are<br />
printed, then the getAttributes method is used to see whether it has any<br />
associated attributes. If it does, each attribute is printed by using getAttributeNames<br />
to get an enumeration of the attribute names, then getting<br />
each attributes associated value from the getAttribute method. Because<br />
an attribute can be an object of any kind, we use its toString method to<br />
produce a readable representation and the attributes are also indented<br />
slightly from the element description.<br />
Having printed the attributes, the element name is examined. If it's a content<br />
element (i.e., its name is returned by getName is AbstractDocu-
1080 Chapter 9 Text Components<br />
ment. ContentElementName), then the next thing to do is to display some<br />
of the data so that you can see which part of the document the element represents.<br />
From the element itself, the start and end offsets have already been<br />
obtained and these are used to get the actual data using the getText method<br />
of Document. The showElement method wasn't given the Document as an<br />
argument, but a reference to it can be obtained using Element's getDocument<br />
method. Because there could potentially be a lot of data associated<br />
with a content element, it isn't reasonable to display it all. Instead, no more<br />
than 40 characters will be printed. It is also not desirable to actually print any<br />
newline characters that are in the data—instead, a readable representation is<br />
printed so that it is obvious that a newline was present, without ruining the<br />
formatting. Both of these requirements make it more efficient to extract the<br />
document content as an array of characters rather than a String, so the variant<br />
of getText that returns a Segment object is used. The Segment class<br />
was described at the beginning of this section. It has three public members<br />
that describe the returned data:<br />
public char[] array;<br />
public int offset;<br />
public int count;<br />
The caller of getText doesn't supply the array into which the data is copied<br />
and the returned array should be considered read-only. The count field<br />
indicates how many elements of the array are valid and offset is the index<br />
of the character in the array that resides at the offset specified in the get-<br />
Text call.<br />
Having formatted both the type, data content, and attributes of an element,<br />
the last task is to handle any child elements. The number of child elements<br />
that each element has can be obtained by using the<br />
getElementCount method. If this returns a positive value, getElement is<br />
called for each child element and showElement is recursively invoked with a<br />
larger indentation.<br />
The Internal Structure of Simple Text Components<br />
Having seen the implementation, let's look at how it works in practice. Figure<br />
9-9 shows a simple application that uses the ModelDisplay class. On the<br />
left, there is a text field and a text area. If you type something into these components<br />
and then press one of the buttons at the bottom right, the content of<br />
the selected text component's model will be shown in the text area above the<br />
buttons.<br />
To run this program for yourself, use the command:
<strong>Java</strong> <strong>JFC</strong>Book.Chapter9.PlainTextModel<br />
Simple Text Controls 1081<br />
First, lets look at the text field. Into this control, the following text was<br />
typed:<br />
That' s one small step for man...<br />
and then the Dump Text Field button was pressed. This produced the following<br />
result:<br />
Document contains 32 characters<br />
[ paragraph ], start offset: 0, end: 33<br />
{ No attributes }<br />
[ content ], start offset: 0, end: 33<br />
{ No attributes }<br />
That's one small step for man...\n<br />
As you can see, the getLength method returns the correct size for the<br />
document, i.e., 32 characters.<br />
Structurally, the first element (which is the root element) is a paragraph,<br />
covering offsets 0 to 32. The end offset is, as this example shows, the first offset<br />
after the end of the document. This paragraph has no associated<br />
attributes, but it does have a child element, which is a content element.<br />
This element covers the same range of offsets as the root element and, similarly,<br />
it has no attributes. The data associated with this element is the text<br />
typed into the control. Notice that the text ends with a newline character,<br />
even though one was not typed into the text field and it doesn't get counted<br />
in the size of the document.<br />
This is all there ever is in a JTextField. By definition, there is only one<br />
line in a text field and there is no way to assign any attributes to it. The font<br />
and the foreground color are held not in the document model, but in the<br />
JTextComponent (actually in the Component). When the text field is drawn<br />
onto the screen, the font and the foreground color are obtained using the<br />
getFont and getForeground methods, as usual.<br />
<strong>Core</strong> Note<br />
It is not quite true to say that this is all there ever is in a JTextField. In<br />
certain cases, there might also be another element hierarchy that handles<br />
bidirectional text. As we said earlier in this chapter, bidirectional text is<br />
beyond the scope of this book, so we won't mention the bidirectional<br />
element hierarchy when discussing the element structure of any of the text
1082 Chapter 9 Text Components<br />
Figure 9-9 The structure of a plain document.<br />
components. If you want to read about this aspect of Swing text handling,<br />
refer to <strong>Core</strong> Swing:Advanced Programming.<br />
Now let's look at the text area. This time, as you can see from Figure 9-10,<br />
there is a bit more text, broken up into two separate paragraphs of input.<br />
Here is exactly what was typed, with the correct line and paragraph breaks:<br />
Houston, Tranquility Base here.<br />
The Eagle has landed.<br />
Roger, Tranquility, we copy you on the<br />
ground.<br />
You got a bunch of guys about to turn<br />
blue. We're breathing again.<br />
Thanks a lot.<br />
Pressing the "Dump Text Area" button results in this output:
Figure 9-10 The internal structure of a text area.<br />
Document contains 182 characters<br />
[ paragraph ], start offset: 0, end: 183<br />
{ No attributes }<br />
Simple Text Controls 1083<br />
[ content ], start offset: 0, end: 32<br />
{ No attributes }<br />
Houston, Tranquility Base here. \n<br />
[ content ], start offset: 32, end: 54<br />
{ No attributes }<br />
The Eagle has landed. \n<br />
[ content ], start offset: 54, end: 55<br />
{ No attributes }<br />
\n<br />
[ content ], start offset: 55, end: 94<br />
{ No attributes }<br />
Roger, Tranquility, we copy you on the \n<br />
[ content ], start offset: 94, end: 102
1084 Chapter 9 Text Components<br />
{ No attributes }<br />
ground.\n<br />
[ content ], start offset: 102, end: 140<br />
{ No attributes }<br />
You got a bunch of guys about to turn\n<br />
[ content ], start offset: 140, end: 169<br />
{ No attributes }<br />
blue. We're breathing again.\n<br />
[ content ], start offset: 169, end: 183<br />
{ No attributes }<br />
Thanks a lot.\n<br />
Even though the text that was typed contains two paragraphs, the JTextAreas<br />
model only contains one paragraph element. This element contains<br />
all of the documents content, just as it did in the case of the JTextField.<br />
Here you can see that the paragraph element as used by JTextField and<br />
JTextArea doesn't really bear any relationship to an actual paragraph in a<br />
real document: Both of these controls use a single paragraph element as the<br />
root element and place all of the data in content elements. In terms of the<br />
logical structure, the root element is the only BranchElement and it has one<br />
Leaf Element for each item of content. Notice also that, again, there are no<br />
attributes associated with any of these elements.<br />
Turning to the content elements, you can see that each of them corresponds<br />
to one line of text and is terminated with a newline character. The last<br />
element has a newline even though one wasn't typed at the end of the text,<br />
but as with the JTextField it is not part of the document because it isn't<br />
included in the total count of characters. In a JTextArea, elements always<br />
span a complete line. As text is entered, it is split at newline boundaries and<br />
an element is added for each line. Since there is no way to apply any formatting<br />
to the content, there is no reason to create an element shorter than one<br />
line. The paragraph break between the second and third lines of the text<br />
appears as two consecutive newline characters, one of which is in an element<br />
of its own at offset 54. The presence of two consecutive newlines in the document<br />
is the nearest you get to the representation of a "paragraph" in human<br />
terms.<br />
Now suppose that you were to go back and change the text a little. If the<br />
text were broken after "about to turn blue" so that the sentence "We're<br />
breathing again" appeared as a line on its own and the model contents were<br />
dumped again, you would see that the extra newline has caused a new element<br />
to be generated:<br />
[ content ], start offset: 102, end: 140<br />
{ No attributes }
You got a bunch of guys about to turn\n<br />
[ content ], start offset: 140, end: 147<br />
{ No attributes }<br />
blue.\n<br />
[ content ], start offset: 147, end: 170<br />
{ No attributes }<br />
We're breathing again.\n<br />
Simple Text Controls 1085<br />
The original element that covered all of this text has been deleted and two<br />
new ones added. There is only one leaf element covering any part of a document<br />
even though elements are arranged hierarchically, because content elements<br />
are always leaves, and as such cannot be nested one inside the other.<br />
This remains true even for the more complex JTextPane and JEditorPane<br />
controls.<br />
Document Edits and Events<br />
Returning to the methods of PlainDocument, there are two that haven't yet<br />
been mentioned—insertUpdate and removeUpdate. These methods are<br />
invoked when some content is inserted into the document or removed from<br />
it. In more complex document types (such as DefaultStyledDocument),<br />
insertUpdate can be called as a result of an attribute change, even if no<br />
new content is added. Each of these methods is given a DefaultDocument-<br />
Event as its first argument. Earlier in this chapter, you saw how a user of a<br />
text component could be notified when its content is changed by registering a<br />
DocumentListener, which receives DocumentEvents. Unlike other events,<br />
DocumentEvent is not a class, but an interface, defined as follows:<br />
public interface DocumentEvent {<br />
public int getOffsetO ;<br />
public int getLength();<br />
public Document getDocument();<br />
public EventType getType();<br />
public ElementChange getChange(Element elem);<br />
}<br />
Def aultDocumentEvent is a class that implements the DocumentEvent<br />
interface. When we looked at monitoring and reacting to document changes<br />
earlier in this chapter, the events that we received were actually Default-<br />
DocumentEvents.<br />
As you know, the only way to change a Document is to call either the<br />
insertString or remove methods of AbstractDocument. These methods<br />
invoke the insertString or remove methods of GapContent to<br />
change the data, but they also create a Def aultDocumentEvent, which is
1086 Chapter 9 Text Components<br />
initialized with the offset and length of the area affected by the change. This<br />
object is then passed to either the Document's insertUpdate or its<br />
removeUpdate method. AbstractDocument doesn't provide meaningful<br />
implementions of either of these—they are overridden and reimplemented<br />
by PlainDocument and Def aultStyledDocument. Different processing is<br />
needed for these two document types, because the structure of a styled document<br />
is more complex than that of a plain document.<br />
The job of both insertUpdate and removeUpdate is twofold. First,<br />
each of them needs to modify the element structure of the document to<br />
reflect the data being inserted or removed. In the case of plain documents,<br />
inserting text means possibly adding new elements if the new text has newlines<br />
in it, or extending the range of an element if more data is being added<br />
within a line. In the case of data removal, it may be possible to remove elements<br />
and possibly merge adjacent elements into one. The second task that<br />
these methods need to perform is to update the Def aultDocumentEvent<br />
with change records that can be used by other components to update their<br />
view of the model without having to process all of the document data from<br />
scratch. These records can also be used to allow the change to be reversed or<br />
to be reapplied later if it is subsequently removed.<br />
JTextComponent, Keymaps, and the Caret<br />
So far, you've seen how the simple text components store their data and how<br />
it is possible to associate attributes with parts of the document. Later in this<br />
chapter, you'll see text components that make more extensive use of the<br />
underlying infrastructure. Meanwhile, having seen the text components'<br />
model implementation, let's now examine the controller. In the MVC architecture,<br />
the controller handles user input and directs it to either the model or<br />
the view, as appropriate. For the text components, the controller is implemented<br />
partly by JTextComponent and partly by the Def aultCaret class.<br />
The keyboard handling functions of the MVC controller are handled by<br />
JTextComponent. Its job is to map special keys to the appropriate actions.<br />
For example, in a JTextField, pressing the RETURN key doesn't generate a<br />
newline in the model. Instead, it causes an ActionEvent to be created. This is<br />
not, however, true for JTextArea. To handle special key processing, which is<br />
component-specific, JTextComponent supports the notion of a keyrnap,<br />
which determines which keys are special and what should be done with them.<br />
Mouse- and focus-handling are controlled by an object that implements<br />
the Caret interface. By default, all text components use the Def aultCaret<br />
class to provide this functionality, but it is possible to install a custom Caret
Simple Text Controls 1087<br />
implementation using the JTextComponent setCaret method. As well as<br />
responding to events, the Caret implementation is also responsible for<br />
drawing the cursor (also called the caret, with a lowercase "c") and for highlighting<br />
selected text.<br />
Focus Management<br />
DefaultCaret implements the FocusListener interface so that it can<br />
receive events when the associated text component gains and loses the focus.<br />
Text components display a caret at the point at which text would be inserted,<br />
either from the keyboard or by using the replaceSelection method. The<br />
caret is a separate unit that appears to be a part of a text component and, by<br />
default, it is rendered as a thin line to the left of the insertion point. The caret<br />
should be visible only when the component has the keyboard focus. To implement<br />
this, DefaultCaret implementation switches the caret on when it<br />
receives a focus-gained event and switches it off when the focus has been lost.<br />
JTextComponent also has some focus-handling logic in it. A static inner<br />
class of JTextComponent called MutableCaretEvent registers to receive<br />
focus events from its associated component and records the text component<br />
that currently has the focus in the static JTextComponent member<br />
f ocusedComponent. As you'll see later, this information is used by the actions<br />
that are associated with the component's editor to allow them to be implemented<br />
without prior knowledge of the component on which they will operate.<br />
Mouse Handling and the Caret<br />
When the user clicks a mouse button in a text component that is both<br />
enabled and editable, the Caret for that text component grabs the keyboard<br />
focus using the Component requestFocus method. As was noted in the<br />
previous section, receipt of the focus will cause the caret to be turned on to<br />
show the current insertion point. The caret both marks the current insertion<br />
point and allows the user to create a selection. It is provided by a class called<br />
DefaultCaret, which implements the Caret interface:<br />
public interface Caret {<br />
public void install(JTextComponent comp);<br />
public void deinstall(JTextComponent comp);<br />
public void paint(Graphics g) ;<br />
public void addChangeListener(ChangeListener 1);<br />
public void removeChangeListener(ChangeListener 1);<br />
public boolean isVisible();<br />
public void setvisible(boolean cond);
1088 Chapter 9 Text Components<br />
}<br />
public boolean isSelectionVisible();<br />
public void setSelectionVisible(boolean cond);<br />
public void setMagicCaretPosition(Point pt);<br />
public Point getMagicCaretPosition();<br />
public int getBlinkRate();<br />
public void setBlinkRate(int rate);<br />
public int getDotO;<br />
public int getMark();<br />
public void setDot(int pos);<br />
public void moveDot(int pos);<br />
The way in which many of these methods are used should be obvious from<br />
their names. The setBlinkRate method controls the interval over which<br />
the caret flashes; its argument is specified in milliseconds. DefaultCaret<br />
implements this by setting a timer (using the Timer class that was described<br />
in Chapter 8, "Creating Custom Dialogs") that causes an ActionEvent to be<br />
fired when it is time to change the caret's appearance. If the flash interval is<br />
specified as zero, the caret does not blink and the visibility of the caret, which<br />
is maintained as a simple boolean, can be directly controlled using the set-<br />
Visible method. If the caret is set to blink, its visibility is toggled when the<br />
timer that controls the caret blink fires, and the paint method will then be<br />
invoked to draw the caret, if it is visible.<br />
The most interesting methods in the Caret interface are the last four,<br />
which handle the mark and the dot. The dot marks the current position of the<br />
caret, while the mark is the position at which the mouse was last pressed.<br />
When the user presses a mouse button, DefaultCaret invokes its own<br />
setDot method, which moves the dot and the mark to the location in the<br />
document represented by the current position of the mouse. The setDot<br />
method requires a document offset as its argument, but a mouse event has<br />
the mouse coordinates. Translation from mouse coordinates to a document<br />
offset is performed by using the viewToModel method of JTextComponent,<br />
which returns an offset given a Point.<br />
If the user drags the mouse across the text component, each event from<br />
the mouse as it is moved causes the Caret moveDot method to be invoked.<br />
Like setDot, this method requires a document offset. The dot is moved to<br />
the offset in the document corresponding to the mouse position, leaving the<br />
mark behind. The part of the document between the mark and the dot is<br />
considered to be selected. Operations such as cut, copy and paste, as you<br />
have already seen, operate on selected text and, if you create a selection and<br />
then type some new text, it overwrites the selection. You'll see later that the<br />
selection is also used to indicate the portion of a document that is affected
Simple Text Controls 1089<br />
when new attributes are assigned. To highlight the selection, setDot uses<br />
the text component's associated Highlighter. The setSelectionVisible<br />
method switches the display of selected text on and off. This method is<br />
used to show the selected text only when the component has the focus.<br />
<strong>Core</strong> Tip<br />
The color of the caret can be set or retrieved using the following<br />
JTextComponent methods:<br />
public Color getCaretColor();<br />
public void setCaretColor(Color color);<br />
The Highlighter<br />
Highlighter is another interface in the Swing text package, which allows<br />
one or more regions of a document to be highlighted at any given time and to<br />
provide the appropriate appearance when these regions are visible on the<br />
screen. Each highlight can have a different background color. There is an<br />
implementation of the Highlighter interface called DefaultHighlighter<br />
that is used by all of the standard text components. The caret manages<br />
the highlighting of the selection, but it is possible to separately highlight<br />
other regions of text under program control by making direct use of the highlighter.<br />
For example, consider the example code shown in Listing 9-7, which<br />
creates a text field with a small amount of (by now familiar) text in it. If you<br />
run this example using the command:<br />
<strong>Java</strong> <strong>JFC</strong>Book.Chapter9.MouseHighlightExample<br />
and then move the mouse over the text, you'll find that a green highlight<br />
appears over the character that is directly under the mouse and follows it as it<br />
moves.<br />
Listing 9-7 Using the highlighter<br />
package <strong>JFC</strong>Book.Chapter9;<br />
import j avax.swing.*;<br />
import javax.swing.text.*;<br />
import j ava.awt.*;<br />
import j ava.awt.event.*;
1090 Chapter 9 Text Components<br />
Listing 9-7 Using the highlighter (continued)<br />
public class MouseHighlightExample {<br />
public static void main(String[] args) {<br />
JFrame f = new JFrame("Mouse Highlight Example");<br />
JTextArea textArea = new JTextArea(10, 30);<br />
JScrollPane pane = new JScrollPane(textArea);<br />
f.getContentPane().add(pane);<br />
f.pack();<br />
f.addWindowListener(new WindowAdapter() {<br />
public void windowClosing(WindowEvent evt) {<br />
System.exit(0);<br />
}<br />
});<br />
textArea.setText(<br />
"Houston, Tranquility Base here.\nThe Eagle has landed.\n\n" +<br />
"Roger Tranquility, we copy you on the ground.\n" +<br />
"You got a bunch of guys about to turn blue.\n" +<br />
"We're breathing again. Thanks a lot\n");<br />
}<br />
f.setVisible(true);<br />
// Register a mouse highlighter on the text area<br />
textArea.addMouseMotionListener(<br />
new MouseHighlighter(textArea));<br />
// A simple highlighter that follows the mouse<br />
protected static class MouseHighlighter<br />
extends MouseMotionAdapter {<br />
protected MouseHighlighter(JTextArea textArea) {<br />
p = new DefaultHighlighter.DefaultHighlightPainter(<br />
Color.green);<br />
h = textArea.getHighlighter();<br />
this.textArea = textArea;<br />
}<br />
// Mouse motion methods<br />
public void mouseMoved(MouseEvent evt) {<br />
int offset = textArea.viewToModel(evt.getPoint());<br />
if (lastHighlight != null) {<br />
h.removeHighlight(lastHighlight);<br />
}<br />
try {
Listing 9-7 Using the highlighter (continued)<br />
}<br />
lastHighlight = h.addHighlight(offset,<br />
offset + 1, p);<br />
} catch (BadLocationException e) {<br />
lastHighlight = null;<br />
}<br />
}<br />
DefaultHighlighter.DefaultHighlightPainter p;<br />
Highlighter h;<br />
JTextArea textArea;<br />
Object lastHighlight;<br />
}<br />
Simple Text Controls 1091<br />
The code is pretty straightforward. A custom highlighter is an implementation<br />
of the Highlighter .HighlightPainter interface. The Default-<br />
Highlighter class provides an inner class called<br />
DefaultHighlighter. Def aultHighlightPainter that implements this<br />
interface and paints a highlight in the form of a rectangle filled with a solid<br />
color that is given to its constructor. In this example, the highlighter used is<br />
green, so that it can be distinguished from the one used to show selections.<br />
To implement a highlighter that follows the mouse, you need to register a<br />
mouse listener on the text component, then use the JText Component<br />
viewToModel method to get the offset in the document that corresponds to<br />
the location of the mouse. In Listing 9-7, the mouse listener is implemented<br />
as an inner class that creates its own highlight painter and saves a reference<br />
to the JTextArea that it will be associated with, then registers itself as a listener<br />
on that component. When the mouse is over the component, mouse<br />
events are received. The mouse location, extracted from the mouse motion<br />
event using get Point, is translated to a position within the document and<br />
then used to set the highlight position by using the Highlighter addHighlight<br />
method, which supplies the start and end offset of the area covered by<br />
the highlight and the painter to be used. Each time the highlight is moved,<br />
care is taken to remove the last instance of it.<br />
If the mouse moves outside the bounds of the text in the document, which<br />
it does, for example, as it leaves the text area window, the viewToModel<br />
method returns a location that is not valid and the addHighlight method<br />
throws a BadLocationException. When this happens, the last highlight
1092 Chapter 9 Text Components<br />
location, stored for the purpose of clearing the previous highlight, is clear<br />
because it is guaranteed at this point that there is no highlight on the screen.<br />
<strong>Core</strong> Note<br />
This is actually a fairly simplified discussion of highlighters that covers<br />
enough ground to let you add your own highlighting behavior to text<br />
components. For more complete coverage of this topic, refer to <strong>Core</strong><br />
Swing:Advanced Programming<br />
Keyboard Handling and Keymaps in Swing<br />
I.I.I and <strong>Java</strong> 2 version 1.2.2<br />
JTextComponent receives all key events for a text component. There are<br />
two things that can happen when a keystroke is received—either it is treated<br />
as a special action, by virtue of being in the text components keymap, or it is<br />
considered to be part of the document content. Key strokes that are not recognized<br />
by the keymap are assumed to be characters for insertion into the<br />
document, and are handled by passing them to the replaceSelection<br />
method. If there is an active selection, it is first removed and then the new<br />
character is inserted into the document. If there is no selection, the character<br />
is inserted at the location of the caret. As you'll see, though, this behavior can<br />
be overridden if necessary.<br />
<strong>Core</strong> Note<br />
Actually, characters that are typed into a JTextComponent do not get<br />
processed as described here straight away. Instead, they are first offered to<br />
the focus manager, then to any KeyListeners registered on the<br />
component. If the key event is not consumed by this time, it is then passed<br />
to the JTextComponent logic that is described in this section. If<br />
JTextComponent does not consume the key event, it would then be<br />
checked to see if it represented a keyboard accelerator, as described in<br />
Chapter 5, "Keyboard Handling, Actions, and Scrolling."<br />
The details of keyboard handling and Keymaps differ greatly depending on<br />
whether you are using <strong>Java</strong> 2 version 1.3 or not. This section describes the<br />
implementation for Swing 1.1.1 and <strong>Java</strong> 2 version 1.2.2. Later, well show<br />
you how the <strong>Java</strong> 2 version 1.3 implementation differs from what you will see<br />
here.
Editor Actions and the Default Keymap<br />
Simple Text Controls 1093<br />
To determine whether a key represents an action, it is looked up in the text<br />
component's keymap, which is managed by JTextComponent. A keymap<br />
maps Keystrokes to Actions. For any given text component, there is a set<br />
of actions that its editor can perform and a set of keys that map to those<br />
actions. However, these two are not tightly coupled to each other at compile<br />
time; instead, they are connected when the text component is created.<br />
The set of operations that an editor can perform is fixed and is determined<br />
by the editor itself. The Swing text package provides an interface called EditorKit<br />
that allows an editor implementation to specify the set of actions that<br />
it provides. There is also an editor implementation called DefaultEditor-<br />
Kit that provides a large selection of actions that are applicable to all of the<br />
text components. All of the editor kits that are supplied by the Swing text package<br />
are derived from Def aultEditorKit and hence include this basic set of<br />
actions. The actions that an editor provides can be determined by calling its<br />
get Act ions method, which returns an array of objects that implement the<br />
Action interface. In the case of Def aultEditorKit, these objects are all<br />
instances of TextAction, which provides some methods that make it possible<br />
to write editor actions in such a way that they are independent of the component<br />
on which they operate, as youll see below.<br />
By contrast, the mapping of keystrokes to actions depends on the lookand-feel<br />
in use, so it is not built into the editors. Instead, each text component's<br />
look-and-feel implementation provides a set of bindings that map keystrokes<br />
(specified as Keystroke objects) to the action names declared by the<br />
editor. JTextComponent takes the bindings for a particular component and<br />
the actions from its editor and maps the keystrokes from one to the actions in<br />
the other, using the action name to connect them, thus creating a keymap.<br />
In practice, the set of actions available in a given text component comes<br />
from more than one source. JTextComponent gets the list of actions that it<br />
has available to it by calling its editor's get Act ions method.<br />
<strong>Core</strong> Note<br />
Remember that the editor is the text component itself-—JTextArea,<br />
JTextPane, etc.<br />
The editor will typically have a set of actions of its own and will add to<br />
those a set supplied by its superclass. For example, JTextField has an<br />
action called notify-field-accept that, in the default look-and-feel,<br />
should be invoked when the user presses the RETURN key. JTextField ere-
1094 Chapter 9 Text Components<br />
ates a TextAction whose name is notify-f ield-accept and then calls<br />
the getActions method of JTextComponent to get its list of supported<br />
actions, which returns the action list supplied by Def aultEditorKit. These<br />
two sets of actions are merged into one by the TextAction method augment<br />
List and returned as the complete set of actions for the editor. Since<br />
the actions for an editor are contained in classes such as Def aultEditor-<br />
Kit, JTextField, and JTextComponent, they are platform-independent<br />
and so do not depend on the look-and-feel installed.<br />
The key mappings that connect keystrokes to the actions are, as we have<br />
said, dependent on the look-and-feel in use, but some of them are likely to be<br />
the same in most implementations. The most common key mappings are<br />
actually supplied by JTextComponent itself and are installed in the default<br />
keymap. As noted in the previous paragraph, JTextComponent gets a list of<br />
all of the actions that its associated editor can support by calling its editors<br />
getActions method. It then creates a keymap that connects a default set of<br />
keys to these actions. The key mappings that this establishes constitute the<br />
default keymap for the component. The exact content of this map depends<br />
on the editor in use; its maximum content is shown in Table 9-2. The maximum<br />
keymap will be active if the editor supplies all of the actions in the<br />
Action column.<br />
Table 9-2 The Default Keymap<br />
Key<br />
BACKSPACE<br />
DELETE<br />
RIGHT<br />
LEFT<br />
Editor Keymaps<br />
Action<br />
delete-previous<br />
delete-next<br />
caret-forward<br />
caret-backward<br />
Keymaps, like styles, are hierarchical. The default keymap is at the top of the<br />
hierarchy and provides fallback mappings that can be overridden. After the<br />
default keymap has been created, the text component's look-and-feel class<br />
will usually add mappings of its own. Here's a typical sequence of code that<br />
might be found in a look-and-feel class.<br />
Keymap parent = JTextComponent.getKeymap(<br />
JTextComponent.DEFAULT_KEYMAP);
Simple Text Controls 1095<br />
Keymap myKeymap = JTextComponent.addKeymap("New Keymap",<br />
parent);<br />
JTextComponent.loadKeymap(myKeymap, bindings,<br />
editor.getActions());<br />
setKeymap(myKeymap);<br />
First, the default key mapping created by JTextComponent is obtained<br />
and then a new keymap (myKeymap in this example), initially empty, is added<br />
with the default keymap as its parent. The addKeymap method is analogous<br />
to the addStyle method that you saw earlier in this chapter—it creates a<br />
new keymap with the keymap passed in its second argument as its parent,<br />
and associates the new keymap with the name given by the first argument.<br />
This new keymap is empty. Its content is created by the loadKeymap<br />
method of JTextComponent, which requires three arguments—the keymap<br />
to be loaded, a list of key bindings, and a set of actions. The set of actions is,<br />
again, usually obtained from the editor by calling its getActions method.<br />
These actions are not yet accessible from the keyboard because, in creating<br />
the default keymap, JTextComponent only mapped a limited set of keys to<br />
the editors actions (in fact, in <strong>Java</strong> 2 version 1.3, only the default mapping,<br />
which adds the key to the document, is installed). Usually, the look-and-feel<br />
class will supply a much larger range of keys (in the bindings argument)<br />
than JTextComponent, so the new keymap will be larger then the default<br />
one. The set of keys and the actions to which they should be mapped are<br />
passed by the look-and-feel class as the second argument of loadKeymap.<br />
The content of the keymap is created by matching action names from the<br />
list of bindings to the names associated with the actions in the action list. As<br />
you know, an Action can have several text strings associated with it but, by<br />
convention, the name of the Action is stored under a key given by the constant<br />
value Action. NAME. Each action name in the list of bindings passed to<br />
loadKeymap is compared to the names of the Actions in the action list. If a<br />
match is found, an entry is made in the keymap that connects the Key-<br />
Stroke in the binding to the Action. It follows that no keymap entry will be<br />
made for an action that an editor offers unless there is a key binding entry in<br />
the bindings argument for it and, conversely, a key-to-action binding will<br />
be ignored if the editor in vise does not support the action.<br />
JTextComponent provides a convenient static inner class that is used to<br />
specify bindings to the loadKeymap method. Here is its definition:<br />
public static class KeyBinding {<br />
public KeyBinding(Keystroke key, String actionName);<br />
public Keystroke key;<br />
public String actionName;<br />
}
1096 Chapter 9 Text Components<br />
A text component creates a set of bindings by compiling in (or maybe generating<br />
at run time) an array of KeyBinding objects. Editors that provide<br />
actions usually export the action names as public variables that can be used<br />
when creating the bindings. Here's a typical declaration that binds keystrokes<br />
to actions provided by Def aultEditorKit:<br />
static final KeyBinding[] bindings = {<br />
new KeyBinding(Keystroke.getKeyStroke(<br />
KeyEvent.VK_G, KeyEvent.CTRL_MASK),<br />
DefaultEditorKit.beepAction),<br />
new KeyBinding(Keystroke.getKeyStroke(<br />
KeyEvent. VK_R, KeyEvent. ALT__MASK) ,<br />
DefaultEditorKit.readOnlyAction),<br />
new KeyBinding(Keystroke.getKeyStroke(<br />
KeyEvent.VK_W, KeyEvent.ALT_MASK),<br />
DefaultEditorKit.writableAction)<br />
};<br />
<strong>Core</strong> Note<br />
Since the key bindings are look-and-feel specific, they are actually declared<br />
in code that is provided separately by each look-and-feel. When a text<br />
component is created, it gets the bindings it needs from the selected lookand-feel.The<br />
mechanisms used to do this (the uiDefaults and<br />
UIManager classes) are covered in Chapter 13.<br />
If these bindings were used with the loadKeymap call in the code extract<br />
shown above, then, in addition to the default mappings, the key sequence<br />
CTRL+G would cause a beep, ALT+R would switch the editor into read-only<br />
mode, and ALT+W would switch it back to read-write mode, assuming that the<br />
editor supports these operations—which is to say that these actions appear in<br />
the set returned by the editor's get Act ions method. These key mappings<br />
would be effective with any editor using DefaultEditorKit, which<br />
includes all of the standard text components. For reference, the complete set<br />
of actions provided by DefaultEditorKit is shown in Table 9-3.<br />
Table 9-3 Actions Implemented by DefaultEditorKit (continued)<br />
Name Action<br />
beep Causes a "beep"
Simple Text Controls 1097<br />
Table 9-3 Actions Implemented by DefaultEditorKit (continued)<br />
Name<br />
caret-backward<br />
caret-begin<br />
caret-begin-line<br />
Action<br />
Moves the caret backward one character<br />
Moves the caret to the start of the document<br />
Moves the caret to the start of the current line<br />
caret-begin-paragraph Moves the caret to the start of the current para-<br />
graph<br />
caret-begin-word Moves the caret to the start of the current word<br />
caret-down<br />
Moves the caret down a line<br />
caret-end<br />
Moves the caret to the end of the document<br />
caret-end-line<br />
Moves the caret to the end of the current line<br />
caret-end-paragraph Moves the caret to the end of the current paragraph<br />
caret-end-word<br />
caret-forward<br />
caret-next-word<br />
caret-previous-word<br />
caret-up<br />
copy-to-clipboard<br />
cut-to-clipboard<br />
default-typed<br />
delete-next<br />
delete-previous<br />
insert-break<br />
Moves the caret to the end of the current word<br />
Moves the caret forward one character<br />
Moves the caret to the start of the next word<br />
Moves the caret to the start of the previous word<br />
Moves the caret up by one line<br />
Copies the currently selected text onto the system<br />
clipboard<br />
Deletes the text that is currently selected and<br />
places it on the system clipboard<br />
Inserts the last key typed in the document model<br />
Deletes the character that immediately follows<br />
the caret<br />
Deletes the character immediately before the<br />
caret<br />
Inserts a newline into the document
1098 Chapter 9 Text Components<br />
Table 9-3 Actions Implemented by DefaultEditorKit (continued)<br />
Name<br />
insert-content<br />
insert-tab<br />
page-down<br />
page-up<br />
paste-from-clipboard<br />
select-all<br />
select-line<br />
select-paragraph<br />
select-word<br />
selection-backward<br />
selection-begin<br />
selection-begin-line<br />
selection-begin-paragraph<br />
selection-begin-word<br />
selection-down<br />
selection-end<br />
selection-end-line<br />
Action<br />
Places the keystroke that caused this action into<br />
the document<br />
Inserts a tab in the document<br />
Moves the caret down one page<br />
Moves the caret up one page<br />
Pastes the content of the system clipboard into<br />
the document immediately before the current<br />
caret position, deleting anything currently<br />
selected<br />
Selects the entire document<br />
Makes the current line into the selection<br />
Makes the current paragraph into the selection<br />
Makes the current word into the selection<br />
Moves the caret backwards one position, extending<br />
the current selection<br />
Extends the selection to the start of the document<br />
Extends the selection to the start of the current<br />
line<br />
Extends the selection to the start of the current<br />
paragraph<br />
Extends the selection to the start of the current<br />
work<br />
Moves the caret down one line and moves the<br />
selection with it<br />
Extends the selection to the end of the document<br />
Extends the selection to the end of the current<br />
line
Simple Text Controls 1099<br />
Table 9-3 Actions Implemented by DefaultEditorKit (continued)<br />
Name<br />
selection-end-paragraph<br />
selection-end-word<br />
selection-forward<br />
selection-next-word<br />
selection-page-down<br />
selection-page-left<br />
selection-page-right<br />
selection-page-up<br />
selection-previous-word<br />
selection-up<br />
set-read-only<br />
set-writable<br />
Action<br />
Extends the selection to the end of the current<br />
paragraph<br />
Extends the selection to the end of the current<br />
word<br />
Moves the caret forward one position, extending<br />
the current selection<br />
Extends the selection to the start of the next word<br />
Scrolls down a page and extends the selection<br />
Scrolls left a page and extends the selection<br />
Scrolls right a page and extends the selection<br />
Scrolls up a page and extends the selection<br />
Extends the selection to the start of the previous<br />
word<br />
Moves the caret up one line and moves the selection<br />
with it<br />
Makes the editor read-only<br />
Switches the editor into read-write mode<br />
The last step is to connect the keymap to the text component using set-<br />
Keymap, which is actually implemented by JTextComponent. This method<br />
causes the new keymap to replace the default keymap as the component's<br />
active map.<br />
When a key event is received from the keyboard, JTextComponent converts<br />
it to a Keystroke object using the Keystroke getKeyStrokeFor-<br />
Event method that you saw in Chapter 5 and then uses this to search the<br />
components keymap using the getAction method of the Keymap interface.<br />
Keymap is an interface for which JTextComponent provides an implementation<br />
in the form of an inner class called Def aultKeymap. Def aultKeymap is<br />
actually the class that handles all keymap-related operations for JTextComponent.<br />
The default key mapping is held in a Def aultKeymap and the
1100 Chapter 9 Text Components<br />
object that is returned to the look-and-feel class when it calls addKeymap is<br />
also a newly created Def aultKeymap.<br />
Def aultKeymap holds the mapping between keystrokes and actions in a<br />
Hashtable, so the process of looking for an action corresponding to a given<br />
keystroke just involves presenting the Keystroke object to the Hashtable.<br />
If this finds a match, the corresponding Action is returned. If it doesn't and<br />
the Def aultKeymap has a parent, the search is delegated to the parent. As a<br />
result, keystrokes that are defined in the default keymap and are not overridden<br />
by the look-and-feel class can be found and returned as if they were in<br />
the text component's own keymap.<br />
Handling Unmapped Keys<br />
If a keystroke has no corresponding entry in the keymap, JText Component<br />
uses the keymap's default action instead. When the default keymap for a text<br />
component is created, this action is initialized to the DefaultKeyTypedAction<br />
supplied by Def aultEditorKit, which inserts the key just received<br />
into the document as content.<br />
You can set the default action for a Keymap using its setDef aultAction<br />
method and retrieve it using getDef aultAction:<br />
public void setDefaultAction(Action a);<br />
public Action getDefaultAction();<br />
As you know, most keymaps are a hierarchy of at least two levels—the<br />
mapping established by a particular text component, which take precedence<br />
over the default mappings set up by JText Component itself. The keymap<br />
reference stored by the JTextComponent and returned by getKeymap<br />
refers to the component's own keymap, which has the JTextComponent<br />
keymap as its parent. When JTextComponent calls getDef aultAction on<br />
the component's keymap, it will normally be returned the Def aultKey-<br />
TypedAction installed by JTextComponent in the initial keymap, because<br />
the action associated with a keymap by default (and therefore the action associated<br />
with the keymap installed by the text component itself) is null and<br />
getDef aultAction searches up the keymap hierarchy until is finds a nonnull<br />
default action. You can, however, use setDef aultAction to install<br />
your own action on the component's keymap and override the default action<br />
of placing unmapped keys into the document as content. One possible use of<br />
this mechanism would be to convert alphabetic characters to uppercase or to<br />
ignore characters that your component doesn't consider legal, such as alphabetic<br />
characters in a numeric input field.
A Keymap Example<br />
Simple Text Controls 1101<br />
Now let's look at the keymaps that are associated with real text components.<br />
The code in Listing 9-8 allows us to demonstrate how simple it is to modify<br />
the keymap of an existing component and also allows us to look at the key-<br />
map that comes with each of the text components in the Swing package.<br />
Listing 9-8 Manipulating keymaps<br />
package <strong>JFC</strong>Book.Chapter9;<br />
import j avax.swing.*;<br />
import javax.swing.text.*;<br />
import j ava.awt.*;<br />
import j ava.awt.event.*;<br />
public class SetKeymap extends JTextArea {<br />
public SetKeymap(int rows, int cols) {<br />
super(rows, cols);<br />
// Set the new keymap<br />
Keytnap parent = JTextComponent .getKeymap (<br />
JTextComponent.DEFAULT_KEYMAP);<br />
Keymap myKeymap = JTextComponent.addKeymap("New Keymap", parent);<br />
JTextComponent.loadKeymap(myKeymap, bindings, this.getActions() ) ;<br />
setKeymap(myKeymap);<br />
}<br />
public static void main(String[] args) {<br />
JTextComponent t;<br />
JFrame f = new JFrame("Modified keymap");<br />
f.getContentPaneO .add(new JScrollPane(t = new SetKeymap(15, 40)));<br />
f.pack();<br />
f.addWindowListener(new WindowAdapter() {<br />
public void windowClosing(WindowEvent evt) {<br />
System.exit(0);<br />
}<br />
});<br />
f.setvisible(true);<br />
// If an argument was given, try to create an object<br />
// and get its keymap<br />
if (args.length == 1) {<br />
try {<br />
Class cl = Class.forName(args [0]);
1102 Chapter 9 Text Components<br />
Listing 9-8 Manipulating keymaps (continued)<br />
Object o = cl.newlnstance();<br />
if (o instanceof JTextComponent) {<br />
t = (JTextComponent)o;<br />
} else {<br />
System.out.printIn("Class " + args[0] +<br />
" is not a JTextComponent");<br />
t = null;<br />
}<br />
} catch (Throwable e) {<br />
System.out.println("Failed to create an instance of " +<br />
args [0]);<br />
t = null;<br />
}<br />
}<br />
}<br />
if (t != null) {<br />
// Get the keymap and print it, including its parent<br />
Keymap map = t.getKeymap();<br />
printKeymap(map, 0);<br />
}<br />
}<br />
// Static method to print a keymap, with recursion<br />
protected static void printKeymap(Keymap m, int indent) {<br />
Keystroke [] k = m.getBoundKeyStrokes() ;<br />
for (int i = 0; i < k.length; i++) {<br />
for (int j = 0 ; j < indent ; j++) {<br />
System.out.print(" ");<br />
}<br />
System.out.print("Keystroke ");<br />
Action a = m.getAction(k[i]);<br />
System.out.println((String)a.getValue(Action.NAME));<br />
}<br />
// If this keymap has a parent, print that as well<br />
m = m.getResolveParent0 ;<br />
if (m != null) {<br />
printKeymap(m, indent +2);<br />
}<br />
// New key bindings
Listing 9-8 Manipulating keymaps (continued)<br />
};<br />
Simple Text Controls 1103<br />
static final JTextComponent.KeyBinding[] bindings = {<br />
new JTextComponent.KeyBinding(<br />
Keystroke.getKeystroke(KeyEvent.VK_G,<br />
KeyEvent.CTRL_MASK),<br />
DefaultEditorKit.beepAction),<br />
new JTextComponent.KeyBinding(<br />
Keystroke.getKeyStroke(KeyEvent.VK_R,<br />
KeyEvent.ALT_MASK), DefaultEditorKit.readOnlyAction),<br />
new JTextComponent.KeyBinding(<br />
Keystroke.getKeyStroke(KeyEvent.VK_W,<br />
KeyEvent.ALTJVIASK), DefaultEditorKit.writableAction)<br />
The code in the SetKeymap constructor is almost identical to an extract<br />
that was shown earlier and, in conjunction with the static data shown at the<br />
end of the listing, replaces any key mappings that JTextArea added over<br />
and above the default mappings and replaces them with mappings for the<br />
CTRL+G, ALT+R and ALT+W key sequences. Strictly speaking, though, when<br />
adding keys to a component's keymap from outside its UI class, you should<br />
use the component's getKeymap method to get the current keymap rather<br />
than manipulating the default keymap, because other mappings may have<br />
been added since the default keymap was created. The code above would<br />
lose those mappings if it were not in a class derived directly from JTextArea.<br />
You'll see an example of the alternative method in Listing 9-14.<br />
When you run this example using the command:<br />
<strong>Java</strong> <strong>JFC</strong>Book.Chapter9.SetKeymap<br />
you'll see a frame with a text area. Start typing in the text area, then press<br />
CTRL+G and you'll hear a short beep. Press ALT+R and try to type some<br />
more—you'll find that you can't, because the control is now read-only. The<br />
only way to reverse this is to type ALT+W which makes it writable again. You<br />
can use code like this to add entries to the keymap of any text component<br />
and, because keymaps are hierarchical, yovi can redefine existing behavior by<br />
adding a keymap entry that matches a keystroke defined by the control itself<br />
to do something else.<br />
This program also does something else. In the window from which you<br />
launched this program, you'll see the complete keymap for the text area<br />
including our modification to it. Here is what you should see:<br />
Keystroke set-read-only
1104 Chapter 9 Text Components<br />
Keystroke set-writable<br />
Keystroke beep<br />
Keystroke < 39> caret-forward<br />
Keystroke < 37> caret-backward<br />
Keystroke < 127> delete-next<br />
Keystroke < 8> delete-previous<br />
The first three entries are the ones that were added in Listing 9-8; the<br />
remainder belong to the text area itself. The number in the angled brackets is<br />
the keycode for the key that triggers the action. The keymap stores Key-<br />
Stroke objects, which can be created using either keycodes or Unicode<br />
characters. If you create the Keystroke with a keycode, the character field<br />
is not initialized and stays zero. Similarly, creating a Keystroke with a Unicode<br />
character leaves the keycode field zero. Most of the keymap is created<br />
using keycodes, which is why you see numeric codes (and not Unicode characters)<br />
in the list above.<br />
The code that prints the keymap takes an instance of a text component and<br />
calls getKeymap to obtain its keymap; this method is declared by JText-<br />
Component, so it works for JTextArea and all the other text controls. From<br />
a Keymap, it is possible to get all of the registered keystrokes using the get-<br />
BoundKeystrokes method, which returns an array of Keystroke objects.<br />
To find the Action to which a keystroke is bound, the Keymap getAction<br />
method is used, passing it a Keystroke.<br />
By default, this program shows the keymap for our modified JTextArea,<br />
which consists of the default keymap plus some extra key mappings that we<br />
added for demonstration purposes. You can also supply on the command line<br />
the name of any class derived from JTextComponent to see its keymap. For<br />
example, if you use the following command line:<br />
<strong>Java</strong> <strong>JFC</strong>Book.Chapter9.SetKeymap javax.swing.JTextArea<br />
you'll get the real keymap for JTextArea:<br />
Keystroke selection-down Keystroke selection-begin<br />
Keystroke select-all Keystroke selection-up<br />
Keystroke selection- Keystroke < 40> caret-down<br />
end<br />
Keystroke < 38 > caret-up Keystroke < 36 > caret-begin-line<br />
Keystroke < 35 > caret-end-line Keystroke < 34 > page-down<br />
Keystroke < 33 > page-up Keystroke < Shift 40 > selection-down
Keystroke < Shift 39 > selection-for- Keystroke < Shift 38 > selection-up<br />
ward<br />
Keystroke caret-next-word Keystroke unselect<br />
Simple Text Controls 1105<br />
Keystroke selection-back- Keystroke caret-previous-word<br />
ward<br />
Keystroke < 225 > caret-down Keystroke < Shift 36 > selection-begin-line<br />
Keystroke < 224 > caret-up Keystroke < Shift 35 > selection-end-line<br />
Keystroke caret-next-word Keystroke cut-to-clipboard<br />
Keystroke caret-previous- Keystroke < 10> insert-break<br />
word<br />
Keystroke caret-begin Keystroke < 9> insert-tab<br />
Keystroke < Ctrl+Shift 39 > selection- Keystroke paste-from-clipboard<br />
next-word<br />
Keystroke caret-end Keystroke selection-next-word<br />
Keystroke copy-to-clipboard Keystroke selection-forward<br />
Keystroke selection- Keystroke selection-backward<br />
previous-word<br />
Keystroke selection- Keystroke < 39> caret-forward<br />
previous-word<br />
Keystroke < 37> caret-backward Keystroke < 127> delete-next<br />
Keystroke < 8> delete-previous<br />
Here, the character actually defined to map to "insert-break" is the newline.<br />
In this context, "break" means a line break. In terms of the document<br />
model, this becomes a place where one Element ends and another begins.<br />
The keymap for the JTextField component is very similar to that of<br />
JTextArea:<br />
Keystroke select-all Keystroke < 36> caret-begin-line<br />
Keystroke < 35 > caret-end-line Keystroke < Shift 39 > selection-forward<br />
Keystroke caret-next-word Keystroke selection-backward
1106 Chapter 9 Text Components<br />
Keystroke caret-previous- Keystroke selection-begin-line<br />
word<br />
Keystroke selection-end-line Keystroke caret-next-word<br />
Keystroke cut-to-clipboard Keystroke caret-previous-word<br />
Keystroke < 10> notify-field-accept Keystroke selection-next-word<br />
Keystroke paste-from-clip- Keystroke selection-next-word<br />
board<br />
Keystroke copy-to-clipboard Keystroke selection-forward<br />
Keystroke selection-pre- Keystroke selection-backward<br />
vious-word<br />
Keystroke selection- Keystroke < 39> caret-forward<br />
previous-word<br />
Keystroke < 37> caret-backward Keystroke < 127> delete-next<br />
Keystroke < 8> delete-previous<br />
Here, the insert -break action has gone and the key that was mapped to<br />
it in the JTextArea is now mapped to the notify-field-accept action.<br />
This key is actually RETURN and the notify-field-accept action maps to<br />
a TextAction that generates the ActionEvent that JTextField provides<br />
when the user has finished entering text. The way in which this behavior is<br />
triggered, then, is not wired into JTextField; in fact, its look-and-feel class<br />
installs it.<br />
Keyboard Handling and Keymaps in <strong>Java</strong> 2<br />
version 1.3<br />
In <strong>Java</strong> 2 version 1.3, the way in which key bindings are implemented is different<br />
from earlier releases, although the methods described above that<br />
manipulate Keymaps still work, for reasons of compatibility. The basic difference<br />
between <strong>Java</strong> 2 version 1.3 and previous releases is that the key bindings<br />
that the components themselves supply are not held in the components<br />
Keymap—instead, they are implemented using the generic JComponent<br />
InputMap and ActionMap scheme described in Chapter 5. Lets start with a<br />
straight comparison of how key bindings are managed in these two different<br />
cases:
Swing 1,1.1 and <strong>Java</strong> 2 version<br />
1.2.2<br />
<strong>Java</strong> 2 version 1.3<br />
Simple Text Controls 1107<br />
The editor kit and the component itself supply a set<br />
of named actions (such as caret - forward etc.)<br />
that they support and the classes that implement<br />
these actions. The selected look-and-feel supplies<br />
bindings that map key sequences to the action<br />
names. When the text component is created, a Keymap<br />
is created by matching the defined key<br />
sequences to the action implementations, so that the<br />
Keymap is a set of (key sequence, Action reference)<br />
pairs.<br />
The editor kit and the component itself still supply a<br />
set of named actions (such as caret-forward)<br />
that they support and the classes that implement<br />
these actions, exactly as in earlier releases. However,<br />
these are now used to populate the component's UIlevel<br />
ActionMap (see Chapter 5). The selected<br />
look-and-feel supplies bindings that map key<br />
sequences to action names, as before. However,<br />
these bindings are used to build the Ul-level<br />
InputMap that is used when the component has<br />
the focus (see Chapter 5). These mappings are not<br />
added to the Keymap.<br />
In Swing 1.1.1 and <strong>Java</strong> 2 version 1.2.2, then, all keyboard bindings are in<br />
the component's Keymap. In <strong>Java</strong> 2 version 1.3, almost all of the keyboard<br />
bindings are created as entries in the InputMap and the ActionMap. A small<br />
number of the keyboard bindings that were present in earlier releases are<br />
also installed in the component's Keymap for backward compatibility. However,<br />
as we'll see, those entries also appear to be in the InputMap and<br />
ActionMap.<br />
Text Component Input Maps, Action Maps, and the<br />
Keymap<br />
You can inspect the ActionMap, InputMap, and Keymap of a text component<br />
using the following command:<br />
java <strong>JFC</strong>Book.Chapter9.jdkl3.DisplayKeymaps<br />
j avax.swing.JTextArea<br />
You can supply the name of any text component class in place of JTextArea.<br />
The output from this command is quite long, so you might want to
1108 Chapter 9 Text Components<br />
redirect it into a file for more convenient browsing. An abbreviated extract is<br />
shown below:<br />
Action map:<br />
Name: , action: javax.swing.text.DefaultEditor-<br />
Ki t $ PageUpAct ion<br />
Name: , action: javax.swing.text.DefaultEditorKit$NextVisualPositionAction<br />
Name: , action: javax.swing.text.DefaultEditorKit$NextVisualPositionAction<br />
Name: , action:<br />
javax.swing.text.DefaultEditorKit$NextWordAction<br />
Name: , action: javax.swing.text.DefaultEditorKit$NextVisualPositionAction<br />
Name: , action: javax.swing.text.DefaultEd-<br />
itorKit$CutAction<br />
[OUTPUT OMITTED]<br />
Input map used when focused:<br />
Key: , action name: selectionpage<br />
-right<br />
Key: , action name: caret-forward<br />
Key: , action name: caret-backward<br />
Key: , action name:<br />
javax.swing.text.DefaultEditorKit$PageUpAction@2effdf<br />
[OUTPUT OMITTED]<br />
Component keymap<br />
Keystroke < 40> caret-down<br />
Keystroke < 34> page-down<br />
Keystroke < 33> page-up<br />
Keystroke < 38> caret-up<br />
Keystroke < 10> insert-break<br />
Keystroke < 9> insert-tab<br />
You should recognize that content of the ActionMap as a set of pairs<br />
where the name of each entry is the name of an action provided by the text<br />
component or its editor kit (as listed in Table 9-3 and Table 9-7) and the<br />
other member of the pair is the object that implements the action. These are<br />
exactly the same object references that would have appeared in the Keymap<br />
in earlier releases. Similarly, the focused InputMap contains pairs that map<br />
Keystrokes to the action names from the ActionMap. You'll also see that
Simple Text Controls 1109<br />
the JTextArea Keymap also has a small number of entries. The entries in<br />
the Keymap also appear in the ActionMap and the InputMap as you can see<br />
from the output shown above, where the page-up entry in the Keymap is visible<br />
both in the ActionMap and in the InputMap, where a Keystroke for<br />
the PAGE UP key appears.<br />
Compatible Support for Keymaps<br />
Using the <strong>Java</strong> 2 version 1.3 InputMap and ActionMap framework as a<br />
replacement for the Keymap mechanism in earlier releases has the benefit of<br />
unifying key handling over all of the Swing components and makes it possible<br />
for component and application developers to change the keyboard mappings<br />
for the text components in the same way as they can for any other component.<br />
All of the techniques that you saw in Chapter 5 for changing the<br />
InputMaps apply equally to text components. However, what about existing<br />
code that manipulates Keymaps? On the face of it, it looks like code that<br />
modified a text components Keymap to add a new key binding or change an<br />
existing one will no longer work, because these bindings are now held elsewhere.<br />
In fact, though, this is not the case—through clever use of the<br />
InputMap and ActionMap framework, the Swing developers managed to<br />
preserve compatibility with the Keymap mechanism so that code written with<br />
knowledge of Keymaps will continue to work.<br />
To demonstrate this compatibility, consider the following code extract:<br />
JTextField tf = new JTextField("Hello, world", 5);<br />
// Modify the Keymap<br />
Keymap map = JTextComponent.addKeymap(<br />
"Modified map", tf.getKeymap());<br />
map.addActionForKeyStroke(<br />
Keystroke.getKeyStroke("Ctrl C"),<br />
new TextAction("Remapped Ctrl C") {<br />
public void actionPerformed(ActionEvent evt) {<br />
JTextComponent comp = getTextComponent(evt);<br />
if (comp != null) {<br />
comp.selectAll();<br />
}<br />
}<br />
});<br />
tf.setKeymap(map);<br />
If you were working with Swing 1.1.1 or <strong>Java</strong> 2 version 1.2.2, this code will<br />
change the text fields Keymap so that pressing Ctrl+C would select all of
1110 Chapter 9 Text Components<br />
the text instead of copying the selected text to the clipboard. If you type the<br />
following command when using <strong>Java</strong> 2 version 1.3<br />
<strong>Java</strong> <strong>JFC</strong>Book.Chapter9.jdkl3.ChangeKeymap<br />
a frame containing a text field with this modified Keymap will appear and, if<br />
you move the focus to the text field and press Ctrl+c, you'll find that the<br />
whole field content is selected. In other words, this code continues to work<br />
despite the fact that it manipulates the text field's Keymap rather than modifying<br />
its InputMap.<br />
How does this work? In Chapter 5, we explained that both the InputMap<br />
and ActionMap for a Swing component are multilevel objects. Usually, both<br />
maps have a UI level in which the Actions or mappings for the selected lookand-feel<br />
are installed and a second level in which the application can add<br />
entries that replace those of the current look-and-feel. With the text components,<br />
there is an extra layer in each of these hierarchies. A text components<br />
ActionMap looks like this:<br />
• An ActionMap for application entries (highest priority)<br />
• A KeyMapActionMap<br />
• A UI ActionMap (lowest priority)<br />
The UI ActionMap contains the actions provided by the installed editor<br />
kit and the component itself, if it has any. These are all the Actions that<br />
were shown in the output extract shown earlier in this section. Similarly, the<br />
InputMap used when a text component has the input focus looks like this:<br />
• An InputMap for application entries (highest priority)<br />
• A KeyMapWrapper<br />
• A UI InputMap (lowest priority)<br />
This means that, when looking to match a keystroke (such as Ctrl+c)<br />
when the text component has the focus, the first place to look is in the application<br />
part of the InputMap (which is empty by default), followed by the<br />
KeyMapWrapper, followed by the UI InputMap. The UI InputMap is where<br />
the default key bindings are installed. The action name from the matched<br />
entry (which will be copy-to-clipboard with the normal key bindings<br />
installed) is then extracted and used to search the text component's Action-<br />
Map, starting at the application level (which is again empty by default), followed<br />
by the KeyMapActionMap and finally the UI level ActionMap, where<br />
it will usually find the name copy-to-clipboard mapped to a suitable<br />
TextAction. So what are the KeyMapActionMap and KeyMapWrapper
Simple Text Controls 1111<br />
classes? These classes are, respectively, subclasses of ActionMap and<br />
InputMap. However, they don't store any mappings internally. Instead, Key-<br />
MapWrapper and KeyMapActionMap delegate to the text component's<br />
installed Keymap. In other words, if the text component asks a KeyMapWrapper<br />
class to find a binding for the keystroke Ctrl + C, it will actually look in<br />
the text component's Keymap for that keystroke. Usually, it will find nothing,<br />
but in the case of the ChangKeymap example that you have just seen, since a<br />
Ctrl + C mapping was added to the Keymap, it will find an entry in the Keymap.<br />
The Keymap entry for Ctrl + C pairs the Keystroke with the target<br />
Action object. However, an InputMap is sxrpposed to return an Object of<br />
some kind that can be used to access the component's ActionMap, which<br />
will then yield the Action object. Therefore, the KeyMapWrapper has to<br />
return something that can be used to access the component's ActionMap<br />
that will locate the Keymap action for Ctrl+C. In fact, it actually returns the<br />
target Action which, in the case of the code extract shown above, will be the<br />
Text Act ion that performs the selection of the entire input field.<br />
Next, the TextAction will be used as the key to the components<br />
ActionMap. No match will be found in the application level of the Action-<br />
Map, so the TextAction will be passed to the KeyMapActionMap. If it is<br />
passed an Action, the get method of KeyMapActionMap actually returns<br />
the same value without performing any kind of search. The result of accessing<br />
the InputMap and ActionMap with the keystroke Ctrl + C, then, is the<br />
TextAction that this keystroke was mapped to in the Keymap. As you can<br />
see, the combination of the KeyMapWrapper in the InputMap and the Key-<br />
MapActionMap in the ActionMap makes it possible to add entries to the<br />
component's Keymap and have them work as expected, because these two<br />
classes create the impression that the appropriate entries for the new mapping<br />
have actually been added to the component's InputMap and Action-<br />
Map.<br />
Views<br />
The last piece of the MVC architecture for text components is the view. The<br />
view is the piece that renders the control's content onto the screen and it is<br />
the part with which you seem to interact the most. In fact, though, the view is<br />
almost entirely passive and is driven entirely by the model and the controller.<br />
Just as the model has many constituent parts, so does the view. There isn't<br />
actually one class that you can point to and identify as being "the view";<br />
instead, there are several classes that are used to render different types of
1112 Chapter 9 Text Components<br />
content. All that these classes have in common is that they are derived from<br />
the abstract class View. The most important view classes are the following:<br />
BoxView<br />
CompositeView<br />
ComponentView<br />
FieldView<br />
IconView<br />
LabelView<br />
ParagraphView<br />
Renders the elements for which it is responsible in a<br />
vertical or horizontal line. Used to arrange paragraphs<br />
in a line from the top to the bottom of a document<br />
that can provide multiple paragraphs, such as<br />
JTextPane.<br />
Compos iteView is an abstract class that provides<br />
the ability to host other views, rather like an AWT<br />
Container. It is the base class for BoxView.<br />
Draws a Component inline with the document.<br />
Components in documents are supported by JTextPane<br />
and JEditorPane.<br />
A view suitable lor rendering a single-line text editor<br />
such as JTextField. This view has little work to<br />
do because it represents a very simple text component.<br />
Its only substantial job is to align the text properly<br />
within the area assigned to it. If that area is too<br />
tall or too short, the text is vertically centered within<br />
the area available (i.e., the characters themselves do<br />
not grow to fit the height of the component). The<br />
horizontal alignment is controlled by the alignment<br />
attribute of the JTextField.<br />
Renders an Icon. This is another feature of JTextPane.<br />
Label View's job is to draw a run of text from<br />
within a paragraph. The text run has a single set of<br />
attributes. This view is vised only by styled documents:<br />
JTextArea uses the simpler PlainView.<br />
Represents a paragraph as a vertical arrangement of<br />
lines. The content of the paragraph may have varied<br />
fonts and colors and need not be restricted to text.<br />
ParagraphView may need other views (such as<br />
LabelView, IconView, etc.) to draw its constituent<br />
parts.
Simple Text Controls 1113<br />
PasswordView Represents a control like JPasswordField by<br />
drawing each character in the model using the echo<br />
character. Distinguishes selected and unselected text<br />
using the appropriate colors.<br />
PlainView A simple view used to render all of a document type<br />
such as JTextArea in which a single font and a single<br />
color are in use. This view assumes that all lines<br />
are of equal height, determined by the font in use by<br />
the component in which it is hosted.<br />
WrappedPlainView The same as PlainView, but does word wrapping.<br />
So far, this chapter has only looked at the relatively simple JTextField<br />
and JTextArea controls, which don't need complicated view support.<br />
JTextField uses FieldView, while JTextArea uses PlainView when<br />
word wrapping is turned off and WrappedPlainView when it is on. These<br />
views render every element of the model identically. Remember that these<br />
components consist of a single paragraph element with one or more (at least<br />
in the case of JTextArea) content elements and no associated attributes.<br />
The PlainView simply maps each element to a single line of the screen. It<br />
doesn't perform word wrapping, but just places line breaks where they were<br />
typed by the user, relying on the program to provide scrollbars if the text is<br />
too wide to fit in the display space. The set of view classes listed above is, in<br />
fact, only a subset of those that are implemented within the Swing text packages.<br />
For a more complete discussion of this topic and more in-depth treatment<br />
of the various different view types, refer to this book's companion<br />
volume <strong>Core</strong> Swing: Advanced Programming, also published by Prentice<br />
Hall.<br />
You saw earlier that when you type text into a text control, it is processed<br />
by the JTextComponent, which delivers any keystrokes that are not mapped<br />
to actions to the default action of the component's keymap, which actually<br />
passes them to the replaceSelection method of JTextComponent for<br />
inclusion in the document model. None of this will yet have been reflected<br />
on the screen, because the text controller does not have direct access to the<br />
display and has no idea how particular keystrokes should affect what is being<br />
shown to the user. Changing the document contents, however, causes a DocumentEvent<br />
to be generated by the Document implementation, as you've<br />
already seen.<br />
DocumentEvents contain information about the changes that have been<br />
made to the model. The various view components are notified when these
1114 Chapter 9 Text Components<br />
events are generated and each view is passed only the events that relate to a<br />
part of the model that it is responsible for rendering the view. A view always<br />
maps a single element to the screen. Therefore, because document events<br />
are always framed in terms of a set of changed elements, it is a relatively simple<br />
matter to discover which views are affected by any given document event.<br />
As a result, it is often possible to effect a change to the display very efficiently,<br />
since only the views responsible for areas of the screen that are<br />
affected by the user's actions receive the DocumentEvents and redraw their<br />
contents.<br />
Getting Multiple Views of a<br />
Document<br />
You've seen that the content of a text component is held in the document<br />
model and that the model notifies the view components when any changes<br />
are made to it, in response to which the text control updates its appearance.<br />
Each text component has an associated Document, but a single Document<br />
can be shared between different text components. Arranging to share one set<br />
of content between two components is simple:<br />
JTextArea firstTextArea = new jTextAreado, 20);<br />
JTextArea secondTextArea = new JTextArea(10, 20);<br />
secondTextArea.setDocument(firstTextArea.getDocument());<br />
Here, the document that is part of the first text area is connected directly<br />
to the second, replacing the model created for it during execution of its constructor.<br />
The document isn't aware that it is connected to more than one<br />
component—in fact, it doesn't have a direct reference to its text component.<br />
Various pieces of the text component, including the views, are connected<br />
(directly or indirectly) as DocumentListeners to the document. In the<br />
example above, changes in the document will cause the model to send the<br />
same DocumentEvent to the views of both components, so they will both<br />
perform the same screen updates and, as a result, their contents will remain<br />
the same.<br />
This feature is useful if you want to implement an application that allows<br />
multiple views of the same file. If, for example, your application allows the<br />
user to look at or edit a large file, it can be very inconvenient if the user has to<br />
page up and down the file to look at pieces of it that are logically related but<br />
not located close together. In many cases, the only way to work effectively is
Simple Text Controls 1115<br />
to see more than one piece of a file at the same time. Creating two text areas<br />
that share the same model solves this problem—just place the two text areas<br />
next to each other and give each of them scrollbars and you can have two<br />
independently controllable, but related, views of the same file. Furthermore,<br />
if you're editing the file, the text areas automatically stay in step if they share<br />
the same Document, which would not be the case if the file were opened<br />
separately in each text area.<br />
<strong>Core</strong> Note<br />
Assuming that this application operates by opening the file and reading it<br />
into memory, the text areas remain consistent with each other because<br />
they are being updated from the same in-memory copy of the file's<br />
contents. Changes to the file itself would then not affect either view,<br />
whether or not they share the same model, because the text area is no<br />
longer looking at the content of the file. A more sophisticated application<br />
might read only a part of the file into memory at any given time, based on<br />
the region of the file currently being operated on. This would, however,<br />
make it more difficult to view two different pieces of the same file and<br />
would require a more sophisticated model than that provided by<br />
GapContent to allow data to be loaded from the file only when it is<br />
needed.<br />
The JSplitPane Control<br />
The Swing set provides a useful container, JSplitPane, that manages two<br />
controls either side by side or one above the other, with a divider between<br />
them. If you place the two text areas in a JSplitPane, you can drag the<br />
divider to change the space allocated to each of them as necessaiy. The code<br />
shown in Listing 9-9 places two empty text areas that share the same document<br />
one above the other on a frame. When the program starts, the text<br />
areas are both empty. If you start typing into one of them, the same text will<br />
appear simultaneously in the other one. Similarly, you can delete or cut text<br />
from one control and the same operation will be performed on its partner.<br />
Figure 9-11 shows what this arrangement looks like.<br />
Listing 9-9 Two views of a JTextArea<br />
package <strong>JFC</strong>Book.Chapter9;
1116 Chapter 9 Text Components<br />
Figure 9-11 Using a JSplitPane to get two views of a document.<br />
Listing 9-9 Two views of a JTextArea (continued)<br />
import j avax.swing.*;<br />
import javax.swing.text.*;<br />
import j ava.awt.*;<br />
import j ava.awt.event.*;<br />
import java.io.*;<br />
import java.net.*;<br />
public class SplitPaneExample extends JSplitPane {<br />
public SplitPaneExample0 {<br />
super(JSplitPane.VERTICAL_SPLIT, true);<br />
setOneTouchExpandable(true);<br />
JTextArea topPane = new JTextArea(5, 40);<br />
JTextArea bottomPane = new JTextArea(5, 40);<br />
bottomPane.setDocument(topPane.getDocument());<br />
setTopComponent(new JScrollPane(topPane));<br />
setBottomComponent(new JScrollPane(bottomPane)
Listing 9-9 Two views of a JTextArea (continued)<br />
}<br />
}<br />
public static void main(String [] args) {<br />
JFrame f = new JFrame("Split Pane example");<br />
}<br />
SplitPaneExample p = new SplitPaneExample();<br />
f.getContentPane().add(p);<br />
f .setSize(300, 300) ;<br />
f.setVisible(true);<br />
f.addWindowListener(new WindowAdapter() {<br />
public void windowClosing(WindowEvent evt) {<br />
System.exit(0);<br />
}<br />
});<br />
Simple Text Controls 1117<br />
Dragging the divider allows you to change the space allocated to each of<br />
the text components. In this example, as you drag the divider, the two components<br />
are continuously adjusted. It is also possible to configure the<br />
JSplitPane so that the divider moves separately when it is dragged, leaving<br />
the text components unchanged until you stop dragging. The choice between<br />
these two options can be made either when the pane is created, or later using<br />
the setContinousLayout method.<br />
Creating a JSplitPane<br />
Here is the full set of JSplitPane constructors:<br />
• public JSplitPane (). Creates a pane with two buttons<br />
arranged to the left and right of a divider that is not<br />
continuously adjusting. This constructor is not useful in real<br />
applications, because you need to remove the two buttons<br />
before adding your own components.<br />
• public JSplitPane(int orientation) . Creates a pane<br />
with the divider horizontal or vertical depending on the<br />
orientation argument, which must be one ol<br />
JSplitPane.VERTICAL^SPLIT or<br />
JSplitPane .HORIZONTAL_SPLIT. The divider does not<br />
continuously adjust and there are no components added.
1118 Chapter 9 Text Components<br />
• public JSplitPane(int orientation, boolean<br />
cont). Creates a pane with the specified orientation. The<br />
second argument determines whether the divider is<br />
continuously adjusting (if true) or not.<br />
• public JSplitPane(int orientation, boolean cont,<br />
Component first, Component second). Creates a pane<br />
with the specified orientation and continuous or noncontinuous<br />
layout adjustment with the supplied components installed on<br />
either side of the divider. Either (or both) of the Component<br />
arguments maybe null, in which case nothing will be installed<br />
in the corresponding part of the split pane.<br />
• public JSplitPane(int orientation, Component<br />
first, Component second). Creates a pane with the<br />
specified orientation and with the supplied components<br />
installed on either side of the divider. The divider does not lay<br />
out continuously.<br />
When the pane has a horizontal split, the components given to the last two<br />
constructors are placed to the left and right side of the divider in that order.<br />
In the case of a vertical split, the first component is placed above the divider<br />
and the second below it. Keep in mind that the orientation specifies the axis<br />
along which the two components are laid out, so that the orientation<br />
VERTICAL_SPLIT places the components above and below a horizontal<br />
divider.<br />
Adding and Removing the Components<br />
The components need not be added to the JSplitPane when it is created.<br />
There are four methods that can be used to add the two children that this<br />
container can manage:<br />
public void setBottomComponent(Component comp);<br />
public void setLeftComponent(Component comp);<br />
public void setRightComponent(Component comp);<br />
public void setTopComponent(Component comp);<br />
These methods both place the component in the appropriate location and<br />
add them to the container: You use them instead of directly adding components<br />
to the container using the add method. If the layout is horizontal, you<br />
should use the setLef tComponent and setRightComponent methods,<br />
but you can also achieve the same effect, if you wish, with setTopComponent<br />
and setBottomComponent, respectively. Although this may seem an
Simple Text Controls 1119<br />
obscure thing to do, it can save a few lines of code if the actual orientation is<br />
not known until runtime. It is also possible to change the orientation at any<br />
time by using the setOrientation method, which takes immediate effect.<br />
You can replace either or both of the child components by invoking the<br />
appropriate setXXXComponent again. Thus, for example, you could remove<br />
the top component before replacing it:<br />
// Case 1: use remove method<br />
JButton one = new JButton("One");<br />
JSplitPane p = new JSplitPane(JSplitPane.VERTICAL_SPLIT);<br />
p.setTopComponent(one);<br />
p.setBottomComponent(new JButton("Two"));<br />
// Remove and replace the top component<br />
p.remove(one);<br />
p.setTopComponent(new JButton("Three"));<br />
or, you could just replace it directly:<br />
// Case 2: no remove<br />
JSplitPane p = new JSplitPane(JSplitPane.VERTICAL_SPLIT);<br />
p.setTopComponent(new JButton("One"));<br />
p.setBottomComponent(new JButton("Two"));<br />
// Replace top component directly<br />
p.setTopComponent(new JButton("Three"));<br />
Another way to remove a component is to pass null to one of the set<br />
methods—for example, setTopComponent (null) removes the top component.<br />
If you intend to replace both components, be careful not to remove<br />
them using the Container removeAll method because the divider is also a<br />
child of the JSplitPane and would be removed by removeAll, rendering<br />
the pane useless.<br />
Controlling the Divider<br />
There are a number of ways to control or find out about the location of the<br />
divider. The following three methods set or return the dividers current location:<br />
public int getDividerLocation();<br />
public void setDividerLocation(int pos) ;<br />
public void setDividerLocation(double location);<br />
The position used by the first two of these methods depends on the orientation<br />
of the JSplitPane. In the case of a horizontal pane with a vertical<br />
divider, the position is the x-coordinate of the left side of the divider while,
1120 Chapter 9 Text Components<br />
for a vertical pane it is the y-component of its upper side. Attempting to set a<br />
negative position moves the divider to the far left or to the top of the pane,<br />
while using a position that is larger than the size of the pane's intei'ior moves<br />
the divider to the far right or the bottom.<br />
The last method uses a multiplier that must be between ().() and 1.0. The<br />
supplied value is multiplied by the current width or height of the split pane<br />
(less the size of the divider) to obtain an absolute position value that is then<br />
used as if the first setDividerLocation method had been called. This<br />
form is useful for placing the divider part of the way across the pane, for<br />
example, using code like this:<br />
pane.setDividerLocation ( (double)0.25) ;<br />
You can use the two methods getMinimumDividerLocation and get-<br />
MaximumDividerLocation to find the leftmost and rightmost allowed<br />
positions of a horizontal divider or the highest and lowest for a vertical<br />
divider. These bounds apply only when the divider is being dragged by the<br />
user—they are ignored by setDividerLocation. The JSplitPane tries to<br />
choose the bounds in such a way that the divider can't be used to resize<br />
either of the components so that they are smaller than their minimum sizes<br />
or larger than their maximum sizes as returned by the JComponent getMinimumSize<br />
and getMaximumSize methods. Of course, it may not be possible<br />
to ensure this if the container is too small to allocate the minimum sizes of<br />
each component, or too large to respect the maximum sizes but it is never<br />
possible to shrink a component below its minimum size by dragging the<br />
divider. There is no way to control these bounds other than by arranging for<br />
the child components to return appropriate maximum and minimum sizes,<br />
because there are no JSplitPane methods to set the minimum or maximum<br />
locations. The resetToPreferredsize method can be used at any<br />
time to reposition the divider so that both children are at their preferred<br />
sizes, if this is possible.<br />
The getDividerSize and setDividerSize methods get and set the<br />
size of the divider. If the divider is horizontal, these methods apply to its vertical<br />
size; the divider always reaches from one side of the container to the<br />
other, so its dimension in this direction cannot be changed. If the divider is<br />
not configured to perform continuous layout, the "ghost" divider that follows<br />
the mouse as you drag it to a new location also takes up the size set by set-<br />
DividerSize.<br />
Each time the divider moves, it stores its previous position. You can<br />
retrieve this value using the getLastDividerLocation method or set a<br />
different value with setLastDividerLocation:
public int getLastDividerLocation();<br />
public void setLastDividerLocation(int pos) ;<br />
Simple Text Controls 1121<br />
The last divider location is important if you make the divider one-touch,<br />
expandable using the setOneTouchExpandable method. When you do this,<br />
two small black arrows appear on the divider, pointing in its two possible<br />
directions of motion, as you can see in Figure 9-11. To see how these arrows<br />
are used, start the example shown in Listing 9-9 and move the divider to a<br />
position near the middle of the pane, then click on the arrow pointing up.<br />
This causes the divider to move right to the top, expanding the lower component<br />
to its full size in one touch (hence the name). Now press the down<br />
arrow. Instead of moving all the way to the bottom, the divider jumps back to<br />
its last location in the middle of the pane. Clicking on the down arrow again<br />
will move the divider right to the bottom, expanding the top component<br />
completely.<br />
The down arrow, then, moves the divider from the top, through the intermediate<br />
"last" location and then to the bottom and the up arrow reverses the<br />
order of traversal. If you interrupt the sequence and drag the divider to a<br />
new location then press one of the arrows again, the divider's position at the<br />
end of the drag becomes its new intermediate position. You can, of course,<br />
use setLastDividerLocation to change this position programmatically.<br />
Space Allocation<br />
Initially, JSplitPane tries to arrange the divider location so that both of the<br />
components are at their preferred sizes. If this is not possible, then it<br />
attempts to place the divider so that both components are assigned at least<br />
their minimum sizes.<br />
Once the initial divider location has been determined, you won't be able to<br />
move it by dragging it in such a way as to give either component less width<br />
(for a horizontal split) or height (for a vertical split) than is required by its<br />
minimum size. If the size of the JSplitPane is such that there is not enough<br />
space to give either of the components its minimum size, then you won't be<br />
able to move the divider at all. The maximum size is disregarded when deciding<br />
whether the divider can be moved, because the total size of the components<br />
and the divider must always add up to the size of the container.<br />
How extra space is distributed between the two components depends on<br />
the version of Swing you are using. In Swing 1.1.1 and <strong>Java</strong> 2 version 1.2.2,<br />
any excess space is allocated to the right (or bottom) component, unless the<br />
other component was below its minimum size and can now be allocated at<br />
least that size, in which case the balance of the excess width (or height) will
1122 Chapter 9 Text Components<br />
be given to the right (bottom) component. This means that when you make<br />
the container that the split pane resides in larger, the divider appears to stay<br />
in place while the right (or bottom) component grows to take up all the extra<br />
space.<br />
In <strong>Java</strong> 2 version 1.3, you can use the following method to change this<br />
behavior:<br />
public void setResizeWeight(double value);<br />
The value of this property must be in the range 0.0 to 1.0 inclusive. It<br />
determines what fraction of the extra space is allocated to the left (or top)<br />
componetn. By default, this property has value 0.0, which leads to behavior<br />
compatible with earlier releases—that is, all extra space goes to the right (or<br />
bottom) component. Setting a resize weight of 1.0 gives all of the extra space<br />
to the left (top) component. Values in between distribute space accordingly<br />
so, for example, a resize weight of 0.25 gives a quarter of the extra space to<br />
the left (top) component and the remaining three quarters to the right (bottom)<br />
component.<br />
Monitoring Divider Location in Swing I.I.I<br />
and <strong>Java</strong> 2 version 1.2.2<br />
In Swing 1.1.1 and <strong>Java</strong> 2 version 1.2.2, there is no direct way to receive an<br />
event when the divider is moved. Also, because the JSplitPane doesn't provide<br />
a method to get a reference to the divider itself, it is not possible to register<br />
a ComponentListener to be notified of COMPONENT_MOVED events for<br />
the divider so that its position could be tracked. Instead, the only way to detect<br />
movement of the divider in Swing 1.1.1 and <strong>Java</strong> 2 version 1.2.2 is by registering<br />
a ComponentListener on either of the child components; when the<br />
divider moves, both components will resize and a COMPONENT_RESIZED event<br />
will be delivered to your listener. This is not, however, a perfect solution<br />
because resizing a JSplitPane will also result in a COMPONENT_RESIZED<br />
event, even if the divider hasn't moved. This happens, for example, if you have<br />
a pane with a vertical split and you stretch it horizontally while leaving the vertical<br />
size unchanged. If you want to take action only when the divider has actually<br />
moved, you should invoke the getDividerLocation method on each<br />
COMPONENT_RESIZED event and store the result. You can then determine<br />
whether the divider has moved by comparing the value returned with the value<br />
that you saved while processing the previous event. Listing 9-10 shows the<br />
code necessary to track divider movement.
Listing 9-10 Monitoring movement of the JSplitPane divider<br />
package <strong>JFC</strong>Book.Chapter9;<br />
import j avax.swing.*;<br />
import j ava.awt.*;<br />
import j ava.awt.event.*;<br />
public class SplitPaneEventsExample {<br />
public static void main(String[] args) {<br />
JFrame f = new JFrame("Split Pane Events Example");<br />
JPanel leftPanel = new JPanelO;<br />
JPanel rightPanel = new JPanelO;<br />
final JSplitPane split =<br />
new JSplitPane(JSplitPane.HORIZONTAL_SPLIT,<br />
false, leftPanel, rightPanel);<br />
split.setOneTouchExpandable(true);<br />
J<br />
}<br />
f.getContentPane().add(split);<br />
f.setSize(300, 200);<br />
f.addWindowListener(new WindowAdapter() {<br />
public void windowClosing(WindowEvent evt) {<br />
System.exit(0) ;<br />
}<br />
});<br />
Simple Text Controls 1123<br />
ComponentListener 1 = new ComponentAdapter() {<br />
public void componentResized(ComponentEvent evt) {<br />
int location = split.getDividerLocation();<br />
if (location != lastLocation) {<br />
System.out.println("Slider moved from " +<br />
lastLocation + " to " + location);<br />
lastLocation = location;<br />
}<br />
}<br />
protected int lastLocation = -1;<br />
// Last slider location<br />
};<br />
leftPanel.addComponentListener(1) ;<br />
f.setVisible(true);
1124 Chapter 9 Text Components<br />
This example creates a frame onto which is mounted a JSplitPane with<br />
two panels to the left and right of the vertical divider. It creates an inner class<br />
that extends ComponentAdapter and registers that class as a ComponentListener<br />
on the left panel. This example takes advantage of the fact<br />
that you can use an inner class to store information by adding a field to store<br />
the previous location of the slider, which is initially set to the impossible<br />
value -1. You'll also notice that the local variable slider is made final so that<br />
its value can be referenced from inside the inner class.<br />
When the frame appears on the screen, the initial position of the slider is<br />
set and the left panel is sized. This causes a COMPONENT_RESIZED event and<br />
the new divider location is reported. You can see this if you run this example<br />
using the command:<br />
<strong>Java</strong> <strong>JFC</strong>Book.Chapter9.SplitPaneEventsExample<br />
If you drag the divider around, you'll see a message appear each time you<br />
let go of it in a new location. In this example, the divider does not perform<br />
continuous layout, so the event only happens when you stop dragging. In the<br />
case of a continuous layout divider, the events would be delivered in a constant<br />
stream as the divider is moved. The divider is one-touch expandable so<br />
that you can experiment with using the arrows to move the divider in each<br />
direction and see the exact x-coordinates of the positions it takes up.<br />
Monitoring Divider Location in <strong>Java</strong> 2<br />
version 1.3<br />
In <strong>Java</strong> 2 version 1.3, it is much simpler to track the location of the divider<br />
because it is a bound property of the JSplitPane, so all you need to do is<br />
register a PropertyChangeListener for a property named JSplit-<br />
Pane . DIVIDER_LOCATION_PROPERTY, the value of which is an integer that<br />
gives the new divider location as the distance from the top or left of the control:<br />
split.addPropertyChangeLidtener(<br />
new PropertyChangeListener() {<br />
public void propertyChange(PropertyChangeEvent evt) {<br />
if (evt.getPropertyName().equals(<br />
JSplitPane.DIVIDER_LOCATION_PROPERTY)) {<br />
System.out.printlnt"Divider moved to " +<br />
((Integer)evt.getNewValue()).intValue());<br />
}<br />
});<br />
}
Simple Text Controls 1125<br />
You can tiy out a modified version of Listing 9-10 that incorporates this code<br />
using the command<br />
<strong>Java</strong> <strong>JFC</strong>Book.Chapter9.jdkl3.SplitPaneEvents<br />
Documents with Nontext Elements:<br />
JTextPane and JEditorPane<br />
As you have seen, the Swing text components have a complex infrastructure<br />
underlying what appears to be a very simple exterior. Strictly speaking, there<br />
is far too much complexity to justify creating only the simple text field, text<br />
area, and password field that you have seen so far. In fact, most of the inner<br />
workings that have been presented so far only come into play in the JText -<br />
Pane and JEditorPane controls that have no counterpart in the AWT.<br />
JTextPane is a powerful component that allows you to display text with<br />
various fonts, colors and styles and to intermix these elements with images<br />
and other components. Working with JTextPane is more complex than<br />
using JTextArea because of the need to specify attributes for each piece of<br />
the text. In this section, you'll see how to do this and how attributes can be<br />
connected to individual characters, paragraphs, and to the entire document.<br />
When you've seen how tedious it is to write the code that assigns these<br />
attributes, you'll be relieved to see that the next section introduces the JEditorPane,<br />
a component that can display text from HTML and RTF documents<br />
that specify attributes alongside the text in the source file.<br />
StyledDocument and DefaultStyledDocument<br />
JTextPane uses a document model based on an extension of Abstract -<br />
Document called StyledDocument and an implementation of this interface<br />
called DefaultStyledDocument. The methods that StyledDocument<br />
adds to those of AbstractDocument are as follows:<br />
public Style addStyle(String name, Style parent);<br />
public Style getStyle(String name);<br />
public void removeStyle(String name);<br />
public Color getBackground(AttributeSet attr);<br />
public Font getFont(AttributeSet attrs);<br />
public Color getForeground(AttributeSet attr);
1126 Chapter 9 Text Components<br />
public Element getCharacterElement(int pos);<br />
public Element getParagraphElement(int pos);<br />
public Style getLogicalStyle(int pos);<br />
public void setLogicalStyle(int pos, Style style);<br />
public void setCharacterAttributes(int offset,<br />
int length, AttributeSet attrs, boolean replace);<br />
public void setParagraphAttributes(int offset,<br />
int length, AttributeSet attrs, boolean replace);<br />
These methods fall into four separate groups. The first group, consisting of<br />
the first three methods, manage the Styles that are used with the document.<br />
A styled document keeps its styles in a StyleContext, which was discussed<br />
earlier in this chapter. Of the three constructors of<br />
Def aultStyledDocument, two allow you to specify your own StyleContext:<br />
public DefaultStyledDocument()<br />
public DefaultStyledDocument(<br />
AbstractDocument.Content content, StyleContext styles);<br />
public DefaultStyledDocument(StyleContext styles);<br />
If you use the first constructor, a StyleContext with a single style called<br />
StyleContext .DEFAULT_STYLE is used. Every StyleContext has this<br />
default style when it is created, so it will also be present when you use the<br />
other two constructor and supply your own collection of styles.<br />
The addStyle, getStyle, and removeStyle methods are simply redirected<br />
directly to the document's StyleContext so you don't need to keep a<br />
separate reference to it once the document has been created.<br />
The next three methods extract certain information from a set of<br />
attributes; they are used when rendering views of the document. The get-<br />
Foreground and getBackground methods return the foreground and<br />
background colors implied by the attributes in the attribute set passed as an<br />
argument, while get Font creates a Font based on the font family, font style<br />
and font size attributes (refer back to Table 9-1 for the standard attributes<br />
that can be found in an AttributeSet).<br />
As you'll see when looking at the element structure of the JTextPane<br />
control, DefaultStyledDocument creates elements that manage individual<br />
characters and paragraphs. These elements are mapped differently to the<br />
leaf and branch element types than they are by PlainDocument. The get-<br />
CharacterElement and getParagraphElement methods get the Element<br />
that contains a specific character at a given offset, or the entire<br />
paragraph that contains an offset.
Simple Text Controls 1127<br />
The last four methods of the StyledDocument interface introduce the<br />
three levels at which attributes can be held within a styled document. When a<br />
styled document is first created, it has a single empty paragraph. A paragraph<br />
may have both paragraph attributes and a logical style, while characters within<br />
a paragraph can have individual character attributes. Character attributes can<br />
also be applied to ranges (or "runs") of characters within the paragraph. Character<br />
attributes, paragraph attributes, and the logical style are arranged in<br />
order such that, to find out the value of a given attribute for a character, this<br />
attribute is first searched for in the character attributes for that character, if it<br />
has any, then in the paragraph attributes for the paragraph that it resides in, if<br />
there are any and, finally, in the paragraph's logical style.<br />
Logical Styles and the Default Style<br />
Logical styles are the lowest level of attribute assignment in a document.<br />
Every paragraph has a logical style that is initially the DEFAULT_STYLE from<br />
the document's StyleContext. You can set attributes that apply to the<br />
whole document simply by modifying the default style. For example, to make<br />
all of the document's text appear in a 16-point font, you would set the font<br />
size attribute of the default style to f6:<br />
Style defaultStyle = doc.getStyle(<br />
StyleContext.DEFAULT_STYLE);<br />
defaultStyle.addAttribute(StyleConstants.Fontsize,<br />
new Integer(16));<br />
This style is automatically applied to every paragraph in the document as it is<br />
created, so these two lines will cause all of the text to be rendered in a 16-point<br />
font. If you change the font size in the default style after the document has<br />
been created, all of the text in the document will take on the new size immediately,<br />
apart from text that has specific attributes that override the default.<br />
While every paragraph has the same logical style when it is created, you<br />
can change the logical style for individual paragraphs using the setLogicalStyle<br />
method. When you do this, any attributes that applied to the paragraph<br />
from the default logical style are lost, unless the style you apply has the<br />
default style as its resolving parent or as a higher-level ancestor. This happens<br />
because the logical style is the last level of style in which attributes are looked<br />
for. If the paragraph has its own specific logical style, the document's logical<br />
style won't be searched for any attributes that aren't found in the paragraph.<br />
To clarify what this means, suppose that the document has a default style that<br />
specifies that all text should be rendered in italics. There are two ways that<br />
you could assign a separate logical style to an individual paragraph in this
1128 Chapter 9 Text Components<br />
document. Suppose you want to be able to create individual paragraphs in<br />
which all of the text is green, but retain the usual formatting for the other<br />
paragraphs. One way to do this would be to create a style that has the foreground<br />
attribute set to green:<br />
Style s = doc.addStyle("GreenText", null);<br />
s.addAttribute(StyleConstants.Foreground, Color.green);<br />
The style called GreenText can now be applied to any paragraph or range<br />
of characters to obtain green text. If you assign this as the logical style for the<br />
first paragraph, which currently has italic text:<br />
doc.setLogicalStyle (0, s) ;<br />
then all of the text in that paragraph will change to green, but it will also<br />
revert to plain font because the style in use only has the foreground attribute<br />
set and setting a new logical style for a paragraph replaces any earlier logical<br />
style assigned to it. Note that setLogicalStyle requires a style and an<br />
offset. The offset is used to identify a paragraph and the style becomes the<br />
logical style for that paragraph. The offset can correspond to any position in<br />
that paragraph. Choosing zero as the offset ensures that the logical style for<br />
the first paragraph in the document is set. If you don't want to lose the italics<br />
in any paragraphs that will use green text, you could, instead, create a style<br />
that inherits whatever is in the default style for the document by changing<br />
the code as follows:<br />
Style s = doc.addStyle("GreenText",<br />
doc.getStyle(StyleContext.DEFAULT_STYLE));<br />
s.addAttribute(StyleConstants.Foreground, Color.green);<br />
doc.setLogicalStyle(0, s);<br />
Now, when the view renders the first paragraph and looks for the italics<br />
attribute, it will find it because it will be searched for first in the paragraph<br />
style itself and then in its resolving parent, the document default style, where<br />
it will be found. As a result, the first paragraph will be rendered with green,<br />
italic text and all of the other paragraphs will be in black italics.<br />
Paragraph Attributes<br />
The next level in the style hierarchy is paragraph formatting, which, like logical<br />
styles, applies to an entire paragraph. Attributes in a paragraph style take<br />
precedence over those in the paragraphs logical style or in the document's<br />
default logical style if the paragraph doesn't have a specific logical style<br />
applied to it. Paragraph styles are applied with the setParagraphAttributes<br />
method:
Simple Text Controls 1129<br />
public void setParagraphAttributes(int offset,<br />
int length, AttributeSet attrs, boolean replace);<br />
The offset and length arguments identify one or more paragraphs to<br />
which the attributes specified by attrs should be applied as paragraph<br />
attributes. Often, you'll supply an offset with a length of 1 to identify only the<br />
paragraph containing a given character, but it is possible to apply the same<br />
attributes to more than one paragraph by supplying a length that covers all of<br />
the paragraphs that should be affected. A typical way in which this would<br />
happen in a word processor implementation would be to allow the user to<br />
create a selection by dragging with the mouse, then getting the start and end<br />
locations of the selection using the getDot and getMark methods of the<br />
document's Caret and using the difference between these two as the length<br />
and the offset corresponding to the mark as the starting point.<br />
The replace argument controls what happens to any existing paragraph<br />
attributes that might be assigned to the paragraph. If this argument is true,<br />
then the new attributes completely replace those that exist. Otherwise, they<br />
are just added to the current paragraph attributes, replacing those that have<br />
the same name but leaving others unchanged. Adding paragraph attributes<br />
does not change any attributes in the paragraph's logical style, but it does<br />
mask them. What this means is the following:<br />
• If you add paragraph attributes with replace = false, then<br />
any attributes in the paragraph's logical style that are not named<br />
in the new attribute set continue to apply to the paragraph.<br />
• If you add paragraph attributes with replace = true, then all<br />
attributes applied from the paragraph's existing paragraph style<br />
are lost, but the attributes in the paragraph's style that are not<br />
overridden by the new paragraph attributes will remain.<br />
Suppose that you want to change all of the text in a paragraph into a bold<br />
font, but you don't want to change the logical style that the paragraph is<br />
based on. Since this change is specific to this paragraph, you would apply a<br />
paragraph style to realize it. Here is what you might try.<br />
Style s = doc.addStyle(null, null);<br />
s.addAttribute(StyleConstants.Bold, Boolean.TRUE);<br />
doc.setParagraphAttributes(0, 1, s, false);<br />
Because this style is not going to be used again, there is no point in giving<br />
it a name and it does not have a resolving parent because it doesn't need to<br />
inherit any other attributes from another style. Now suppose that the paragraph's<br />
logical style specified italic text in black and there are also paragraph
1130 Chapter 9 Text Components<br />
attributes applied to this paragraph that make the text red. When these new<br />
paragraph attributes have been set, you will have red text that is in italics, but<br />
is also bold because the setParagraphAttributes method specified<br />
replace = false. Had replace = true been specified, we would have lost<br />
the existing paragraph attributes (i.e., the red color) but retained the logical<br />
style, giving black, italic, bold text. Since what is wanted is bold, nonitalicized<br />
text with the text color left unchanged (whatever it is), it is necessary to turn<br />
off the italics. The correct code sequence is as follows:<br />
Style s = doc.addStyle(null, null);<br />
s.addAttribute(StyleConstants.Bold, Boolean.TRUE);<br />
s.addAttribute(StyleConstants.Italic, Boolean.FALSE);<br />
doc.setParagraphAttributes(0, 1, s, false);<br />
This works because the new paragraph formatting explicitly turns off italics<br />
and overrides the italic setting in the paragraph's logical style.<br />
Character Formatting<br />
The last level of formatting, and the one that takes highest precedence in the<br />
formatting hierarchy, is character formatting, which is applied with the set-<br />
CharacterAttributes method:<br />
public void setCharacterAttributes(int offset,<br />
int length, AttributeSet attrs, boolean replace);<br />
Although this method has the same arguments as setParagraphAttributes,<br />
it only affects the exact range of characters specified by the offset<br />
and the length. Attributes set using this method override existing paragraph<br />
attributes and the paragraph's logical style. Continuing the example used<br />
above, our paragraph is currently rendered in bold, red text. Suppose that<br />
you wanted to change the second and third characters of that paragraph to<br />
blue. Since this operation affects the attributes of individual characters, character<br />
formatting is used instead of paragraph formatting and a style that has a<br />
blue foreground is created:<br />
s = doc.addStyle(null, null);<br />
s.addAttribute(StyleConstants.Foreground, Color.blue);<br />
This style is going to be applied from offset 1 for two characters, but<br />
should replace be set to true or false? In the case of setCharacterAttributes,<br />
replace affects only character attributes applied to the same<br />
characters, not paragraph attributes. This is different from paragraph formatting,<br />
where setting replace to true loses attributes from the paragraph's<br />
logical style. Since there is currently no character formatting on these charac-
Simple Text Controls 1131<br />
ters, it doesn't matter which value of replace is chosen: the text will be blue<br />
and bold, because the paragraph style specifies bold. Therefore, either of the<br />
following alternatives is acceptable:<br />
doc.setCharacterAttributes(1, 2, s, true);<br />
doc.setCharacterAttributes(1, 2, s, false);<br />
Now suppose you decided to change the font of these same two characters<br />
so that the point size is 16 instead of the default. This time, you want to supplement<br />
the existing attributes, not replace them, so you would use a<br />
replace value of false.<br />
The JTextPane Control<br />
JTextPane is a text control whose model is Def aultStyledDocument, so<br />
you can apply to it the logical styles, paragraph and character formatting that<br />
you saw in the last section. Many of the methods of JTextPane are similar to<br />
those of the model but, in several cases, there is the possibility of confusion<br />
because JTextPane and Def aultStyledDocument use the same method<br />
name but different arguments. The list below shows the methods of JText-<br />
Pane, grouped by function:<br />
public StyledDocument getStyledDocument()<br />
public void setStyledDocument(StyledDocument doc)<br />
public void setDocument(Document doc)<br />
public Style addStyle(String name, Style parent)<br />
public Style getStyle(String name)<br />
public void removeStyle(String name)<br />
public Style getLogicalStyle()<br />
public StyledDocument getStyledDocument()<br />
public void setLogicalStyle(Style style)<br />
public AttributeSet getCharacterAttributes()<br />
public void setCharacterAttributes(AttributeSet attr,<br />
boolean replace)<br />
public AttributeSet getParagraphAttributes()<br />
public void setParagraphAttributes(AttributeSet attr,<br />
boolean replace)<br />
public AttributeSet getlnputAttributes 0<br />
public void replaceSelection(String content)<br />
public void insertComponent(Component c)<br />
public void insertlcon(Icon icon)<br />
public boolean getScrollableTracksViewportWidth()<br />
public String getUIClassID()
1132 Chapter 9 Text Components<br />
The first three methods are concerned with the underlying document. You<br />
must use a StyledDocument with JTextPane, even though there is a set-<br />
Document method as well as a setStyledDocument. If you supply anything<br />
other than a StyledDocument to this method, an<br />
IllegalArgumentException will be thrown. You can also specify, or<br />
default, the document when you create the control. Here are the constructors:<br />
public JTextPane ();<br />
public JTextPane(StyledDocument doc);<br />
The first form uses a StyledDocument with a StyleContext that contains<br />
only an empty, default style. You can manage the styles in the document<br />
using the next three JTextPane methods, addStyle, getStyle and<br />
removeStyle, which just directly call the same methods of the underlying<br />
document.<br />
The next group of methods deals with applying attributes to the document.<br />
You've already seen setLogicalStyle, setParagraphAttributes<br />
and setCharacterAttributes in connection with StyledDocument and<br />
these versions operate in the same way but there is an important difference.<br />
The methods of the model specify an offset, a length, an attribute set and a<br />
replace flag. The JTextPane methods, however only require the last two<br />
arguments—the offset and length are not specified. This is because JText-<br />
Pane uses a different way of specifying the part of the document to which<br />
attribute changes should apply. The setLogicalStyle method is the simplest<br />
of the three—the new logical style is applied to the paragraph at the<br />
current position of the caret. In the case of the other two methods, what happens<br />
depends on whether there is any text selected.<br />
For both character and paragraph attributes, if there is a current selection,<br />
the new attributes are applied to that selection. In the case of character<br />
attributes, this means that they replace or supplement exactly the characters<br />
that are part of the selection, while the paragraph attributes and the logical<br />
style are applied to all of the paragraphs that are part of the selection. This is<br />
really just the same as DefaultStyledDocument, because JTextPane gets<br />
the extent of the selection using the JText Component getSelectionStart<br />
and getSelectionEnd methods (which use the Caret getDot and get-<br />
Mark methods) and uses the difference between the two as the length and the<br />
selection start position as the start offset.<br />
If there isn't a selection, setParagraphAttributes applies to the paragraph<br />
that contains the caret, which is the same as setLogicalStyle. When<br />
there is no selection, character attributes are applied not to the document, but<br />
to a set of input attributes maintained by JTextPane. When the caret is
Simple Text Controls 1133<br />
moved, the input attribute set is initialized to contain the character attributes at<br />
the caret's new location. When there is no selection, the attributes supplied<br />
with setCharacterAttributes are applied instead to the input attributes.<br />
If replace is true, they completely replace the input attribute set, otherwise<br />
they just supplement the input set, in the same way as they would have affected<br />
existing character attributes in the document. These attributes remain in force<br />
until they are changed by another setCharacterAttributes call or the caret<br />
is moved. You can use the getlnputAttributes method to get the current<br />
set of input attributes at any time.<br />
The input attributes are vised when you insert content into the JTextPane<br />
using its replaceSelection method, which looks like this:<br />
public void replaceSelection(String text);<br />
As with the attribute handling methods, the position at which this text will<br />
be inserted is implicit. If there is a current selection, the text in the selection<br />
is first removed, leaving the caret where the selection started, then the new<br />
text is inserted at the caret position. If there was no selection, the text is simply<br />
inserted at the location of the caret. In either case, the input attributes<br />
are applied to the text as character attributes.<br />
When you replace or insert text, the paragraph attributes at the insertion<br />
point are not affected and will apply to whatever you insert. The way in which<br />
character formatting works is a little more complex, because the input<br />
attribute set picks up attributes as the caret is moved. When you move the<br />
caret to the required insertion or replacement point, the input attributes are<br />
replaced by the character attributes under the caret. If you now create a<br />
selection and replace it, or simply insert text without first creating a selection,<br />
your new text will have the character and paragraph attributes (or logical<br />
style) in force at the insertion point. This is, of course, the most logical result,<br />
because you would expect your inserted text to take on the appearance of the<br />
text that surrounds it. If, after moving the caret, you invoke setCharacter-<br />
Attributes, the attributes you supply will supplement (or replace) the<br />
input attributes from the document and these modified input attributes will<br />
be applied by replaceSelection.<br />
Now suppose you create a selection that straddles an area with more than<br />
one set of character formatting. For example, if you start the selection by setting<br />
the caret to a position at which the character attributes specify red text,<br />
then make a selection by moving the caret to an area in which the character<br />
attributes give bold, black text. What are the input attributes applicable to a<br />
replacement of this selection? Should the attributes specify red text (as at the<br />
start of the selection) or bold black text (as at the end)? If the input attributes
1134 Chapter 9 Text Components<br />
are to be used, it will be when replacing or deleting the selected text. Replacing<br />
a selection consists of logically deleting the selected text and then inserting the<br />
new text and deleting the text leaves the caret at the start of the selection, so<br />
the input attributes are those that were in effect at that point—that is, they<br />
specify red text.<br />
<strong>Core</strong> Tip<br />
If you want to insert text and be sure that you don't have any character<br />
formatting inherited from the text under the caret, you can supply<br />
replacement character formatting using the empty attribute set<br />
SimpleAttributeSet.EMPTY:<br />
// Assumes "tp" references a JTextPane<br />
tp.setCharacterAttributes(<br />
SimpleAttributeSet.EMPTY, true);<br />
// NB: true to REPLACE attributes<br />
tp.replaceSelection("No character attributes applied");<br />
The second argument to the setCharacterAttributes method must<br />
be true for this to work.<br />
Text is not the only thing you can insert into a JTextPane—you can also<br />
place icons inline with the text and, to create arbitrary effects and documents<br />
that respond to user input, you can also include any Component. To make<br />
this possible, JTextPane provides the following methods:<br />
public void insertComponent(Component c)<br />
public void insertlcon(Icon icon)<br />
The icon or component is inserted at the current caret position, or<br />
replaces the current selection if there is one. When you insert an icon or a<br />
component into a text flow, the bottom of the icon or component occupies<br />
the baseline of the text. Components and icons are actually inserted as<br />
attributes and their position is taken in the document content by a single<br />
space character with the component or icon attached to it as a character<br />
attribute. If you want to center an icon or a component, you need to place it<br />
in a paragraph of its own and apply your own attributes. There is an example<br />
of this later in this chapter.<br />
<strong>Core</strong> Alert<br />
Both the insertComponent and insertlcon methods clear the input<br />
attribute set when placing the icon or component, so you can't add
Simple Text Controls 1135<br />
additional formatting using the input attributes. Furthermore, any attributes<br />
in the input attribute set will, of course, be lost.<br />
The getScrollableTracksViewportwidth method overrides the<br />
JComponent method of this name and always returns true. This method is<br />
used when the JTextPane is controlled by a JScrollPane and requests that<br />
the JViewport should always change its width to match that of the JScroll-<br />
Pane. Since JTextPane implements wordwrap, this is an appropriate thing to<br />
do. Like JTextArea, no scrollbars are provided when you create a JText-<br />
Pane, so you would normally wrap a JTextPane in a JScrollPane.<br />
The getUIClassID method is used to install the component's pluggable<br />
look-and-feel implementation. You'll see what this method does in Chapter<br />
13, "The Pluggable Look-and-Feel."<br />
JTextPane Examples<br />
You've seen how to create the formatting for a JTextPane, now it is time to<br />
look at a couple of examples. The first example creates a document that contains<br />
some text arranged in several paragraphs with several fonts and different<br />
colors and also includes an image. The second example takes this a step further<br />
by replacing the image with a component that can be used to navigate around<br />
the document. These two examples have a lot of code in common. You'll see<br />
much of the code as you examine the first example, then you'll see how to<br />
change the first example to create the second version.<br />
Using JTextPane to Display Colored Text and an Image<br />
Let's start by looking at what the first example looks like when it is finished.<br />
You can see a screen shot in Figure 9-12 and you can run this example for<br />
yourself using the command:<br />
java <strong>JFC</strong>Book.Chapter9.TextPaneExamplel<br />
This application is a JTextPane wrapped by a JScrollPane to provide<br />
the scrolling capability. All of the text and the attributes are held as data<br />
within the program. As you'll see, this makes the process of using JTextPane<br />
rather tedious. Luckily, however, you don't always have to use JTextPane<br />
directly—in many cases, you can use JEditorPane, which is covered later in<br />
this chapter, instead. JEditorPane accepts HTML or RTF as input, so you<br />
can embed the text and the formatting information in the same file.
1136 Chapter 9 Text Components<br />
Figure 9-12 Styled Text with JTextPane.<br />
The Application's Main Method<br />
Let's first look at the application's main method and the constructor of its<br />
class (Listing 9-11).<br />
Listing 9-1 I JTextPane example (Part I)<br />
package <strong>JFC</strong>Book.Chapter9;<br />
import javax.swing.*;<br />
import javax.swing.text.*;<br />
import j ava.awt.*;<br />
import j ava.awt.event.*;<br />
import java.util.*;<br />
public class TextPaneExamplel extends JTextPane {<br />
public TextPaneExamplel(ParagraphSpec[] paragraphs) {<br />
this.setBackground(Color.black) ;
Listing 9-11 JTextPane example (Part I) (continued)<br />
createStyles(); // Create the text styles<br />
addText(paragraphs); // Add all of the text<br />
setCaretPosition(0);<br />
}<br />
// CODE OMITTED<br />
Simple Text Controls 1137<br />
public static void main(String[] args) {<br />
SwingUtilities.invokeLater(new RunnableO {<br />
public void run() {<br />
JFrame f = new JFrame("Text Pane Example 1");<br />
f.setBackground(Color.black) ;<br />
TextPaneExamplel tp =<br />
new TextPaneExamplel(paragraphs);<br />
JScrollPane sp = new JScrollPane(tp);<br />
f.getContentPane().add(sp);<br />
f.setSize(500, 400);<br />
f.addWindowListener(new WindowAdapter() {<br />
public void windowClosing(WindowEvent evt) {<br />
System.exit(0);<br />
}<br />
});<br />
f.setVisible(true);<br />
}<br />
});<br />
}<br />
// CODE OMITTED<br />
The main method creates an instance of TextPaneExamplel, which is an<br />
extension of JTextPane, and wraps it in a JScrollPane, which is then<br />
mounted in a frame. The constructor of the TextPaneExamplel class initializes<br />
the content of the text pane by giving it a black background, then<br />
denning the styles that will be required by calling the method createStyles<br />
and adding the text and formatting using the addText method.<br />
These two methods make up the majority of this example and you'll see both<br />
of them shortly. First, let's consider how the text should be represented so<br />
that it can be used to create the document that the text pane will display.
1138 Chapter 9 Text Components<br />
<strong>Core</strong> Note<br />
You'll notice that in this example, the code in the main method that<br />
creates the GUI is actually executed on the event thread. As you know,<br />
strictly speaking, Swing components can only be manipulated in the event<br />
thread but usually you can construct a user interface in the main method<br />
(which does not run in the event thread) because it is safe to access Swing<br />
components in a different thread until they have been realized. Here,<br />
however, we are building a document by inserting pieces of text one after<br />
the other and applying stytes.This process relies on the insertion point<br />
moving to the end of whatever we insert so that it is in the correct place for<br />
the next insertion. Unfortunately, this only happens if you insert text in the<br />
event thread—the insertion point would not move if we built the document<br />
in the main method. Bear this point in mind when using the Swing text<br />
components.<br />
Storing the Document Text and Its Attributes<br />
Apart from the image, the document consists of several paragraphs, each<br />
with one or more lines of text. The basic style to be used in most of the paragraphs<br />
will be the same, but some of the text within individual lines will have<br />
special formatting. The page heading and the image need to be handled specially<br />
and there is also a direct quotation at the end of the document, which<br />
should be rendered in a different style from the rest of the document.<br />
There are many ways in which the text and the information needed to<br />
apply the attributes could be stored to obtain the desired result. The method<br />
chosen here is to arrange the text into paragraphs represented by the inner<br />
class ParagraphSpec. This class encapsulates a set of attributes that will set<br />
the overall style of the paragraph together with an array of ContentSpec<br />
classes. The ContentSpec class represents part of a line of text, together<br />
with its associated attributes, which will be applied to the text as character<br />
attributes. As well as the text and its attributes, a "tag" can also be associated<br />
with the text. The tag will be used in the second example.<br />
The ParagraphSpec and ContentSpec inner classes are very simple,<br />
since they just hold data:<br />
protected static class ContentSpec {<br />
protected ContentSpec(String tag, String style,<br />
String text) {<br />
this.tag = tag;<br />
this.style = style;<br />
this.text = text;
}<br />
public String tag;<br />
public String style;<br />
public String text;<br />
}<br />
Simple Text Controls 1139<br />
protected static class ParagraphSpec {<br />
protected ParagraphSpec(String style,<br />
ContentSpec [] contents) {<br />
this.style = style;<br />
this.contents = contents;<br />
}<br />
public String style;<br />
public ContentSpec[] contents;<br />
}<br />
As you can see from the constructors, to create a paragraph, you need to<br />
supply paragraph attributes and an array of contents, while to create contents,<br />
you need a tag, some character attributes, and some text. As you'll see,<br />
not all of these elements are required all of the time, so certain of them can<br />
be defaulted by specifying null.<br />
The idea of the tags is to allow a text string to be associated with the position<br />
within the document of the text that was defined with the tag. To make<br />
this possible, another inner class is defined to hold the tag as a text string<br />
along with the start and end positions of the text that was in the same ContentSpec<br />
as the tag declaration:<br />
protected static class TagEntry {<br />
protected TagEntry(Position startPos,<br />
Position endPos) {<br />
this.startPos = startPos;<br />
this.endPos = endPos;<br />
}<br />
public Position startPos;<br />
public Position endPos;<br />
}<br />
Notice that the start and end values are held as Position objects, not as<br />
offsets. In this example, the document that is displayed won't be editable, but<br />
you might, in a more general case, want to allow this. To make it possible for<br />
the text to change and still retain a meaningful reference to places within it, it<br />
is necessary to store Position objects rather than offsets because, as you<br />
have seen, these change transparently as the position that they refer to moves<br />
within the document. In the discussion of the second example, you'll see that<br />
we extract a document offset from each Position when we need to.
1140 Chapter 9 Text Components<br />
Specifying the Document Styles<br />
Now that you have seen all of the data structures that are needed for this<br />
example, let's look at how to create the documents styles. Several different<br />
styles are needed for various parts of the text. All of the styles are created and<br />
meaningful names assigned to them, in the createStyles method that is<br />
shown in Listing 9—12.<br />
Listing 9-12 JTextPane example—creating styles (continued)<br />
protected void createStyles0 {<br />
StyledDocument doc = getStyledDocument();<br />
// Create the top-level style, with the required font<br />
basicStyle = doc.addStyle(Basic, null);<br />
StyleConstants.setFontFamily(basicStyle, "SansSerif"),<br />
StyleConstants.setFontSize(basicStyle, 14);<br />
StyleConstants.setForeground(basicStyle, Color.white),<br />
StyleConstants.setFirstLinelndent(basicStyle, 50 . Of) ;<br />
StyleConstants.setSpaceAbove(basicStyle, 6);<br />
StyleConstants.setSpaceBelow(basicStyle, 0);<br />
// Heading: centered, bold, larger font<br />
Style s = doc.addStyle(Heading, basicStyle);<br />
StyleConstants.setBold(s, true);<br />
StyleConstants.setFontSize(s, 24);<br />
StyleConstants.setAlignment(s,<br />
StyleConstants.ALIGN_CENTER);<br />
StyleConstants.setSpaceAbove(s, 8);<br />
StyleConstants.setSpaceBelow(s, 12) ;<br />
// BoldText<br />
s = doc.addStyle(BoldText, basicStyle);<br />
StyleConstants.setBold(s, true);<br />
// Cite - a paragraph style for quotations<br />
s = doc.addStyle(Cite, basicStyle);<br />
StyleConstants.setltalic(s, true);<br />
StyleConstants.setFontSize(s, 14) ;<br />
StyleConstants.setAlignment(s,<br />
StyleConstants.ALIGN_CENTER);<br />
StyleConstants.setSpaceAbove(s, 10);<br />
StyleConstants.setSpaceBelow(s, 10) ;<br />
StyleConstants.setForeground(s, Color.yellow);<br />
// RedText
Listing 9-12 JTextPane example—creating styles (continued)<br />
s = doc.addStyle(RedText, basicStyle);<br />
StyleConstants.setForeground(s, Color.red);<br />
Simple Text Controls 1141<br />
// Imagelcon: an image of the Lunar Module<br />
s = doc.addStyle(Imagelcon, basicStyle);<br />
StyleConstants.setlcon(s, new<br />
Imagelcon(getClass().getResource("images/Iem.jpg")));<br />
}<br />
// CODE OMITTED<br />
// Style names<br />
protected static final String Basic = "Basic";<br />
protected static final String Heading = "Heading";<br />
protected static final String BoldText = "BoldText";<br />
protected static final String Cite = "Cite";<br />
protected static final String RedText = "RedText";<br />
protected static final String Imagelcon = "Imagelcon"<br />
// The basic paragraph style<br />
protected Style basicStyle;<br />
This method creates the styles shown in Table 9-4.<br />
Table 9—4 Styles Used in the First JTextPane Example<br />
Style Name Attributes<br />
Basic 14-point, plain, SansSerif font; White text; 6 points above the<br />
paragraph; 0 points below; 50 points extra indent on the first line<br />
of the paragraph<br />
Heading Same as Basic, except 24-point, bold, SansSerif font; centered;<br />
8 points above the paragraph; 12 points below the paragraph<br />
BoldText Same as Basic, except bold font<br />
RedText Same as Basic, except red text<br />
Imagelcon Same as Basic, except displays an image<br />
Cite Same as Basic, except 14-point, italic SansSerif font; centered;<br />
10 points above and below the paragraph; yellow text
1142 Chapter 9 Text Components<br />
Some of these styles are used as paragraph attributes (Basic, Heading,<br />
and Cite), and others for character formatting (BoldText, RedText). It is<br />
important to realize that some attributes, such as alignment, space above and<br />
below, and extra indentation, are only honored when a style is used to format<br />
a paragraph. This is why it is possible for all of the styles to be based on the<br />
Basic style, even though the character styles can't make use of the space<br />
above and below and the 50-point indentation on the first line that the Basic<br />
style passes to Cite and Heading. In fact, though, in this case, neither Cite<br />
nor Heading actually uses many of the attributes that they inherit from the<br />
Basic style. It is, however, usually a good idea to derive styles from a common<br />
base so that shared attributes need be specified only once.<br />
If you examine Listing 9—12 in conjunction with Table 9-4, you should be<br />
able to see how the styles are constructed. Notice that this example uses a<br />
different method of specifying attributes other than the code extracts that<br />
have been shown so far in this chapter. Instead of creating a Style and using<br />
its addAttribute method to associate a value with an attribute name, the<br />
code here makes use of a set of convenience routines provided by the<br />
StyleConstants class. The advantage of these methods, which are all<br />
static, is that they are type-safe—you have to supply an object of the type that<br />
the attribute requires, whereas the addAttribute method accepts an<br />
Obj ect as the value, which results in a ClassCastException at runtime if<br />
you supply the wrong type of object. An error when using StyleConstants<br />
is trapped at compile time instead. The complete set of convenience routines<br />
provided by StyleConstants is shown in Table 9-5.<br />
To display the image that appears at the top of the document, the Image-<br />
Icon style will be used. It is displayed by associating an Icon with an<br />
attribute. In the case of this example, an instance of the class Image I con<br />
that loads and displays an image from a file will be used. The icon is placed in<br />
the text by inserting a space and giving it the Image Icon attribute.<br />
Table 9-5 Attribute Setting Methods Supplied by StyleConstants<br />
Method Purpose<br />
public static void setAlignment Sets paragraph alignment<br />
(MutableAttributeSet, int)<br />
public static void setBackground Sets the background color attributes<br />
(MutableAttributeSet, Color)
Simple Text Controls 1143<br />
Table 9-5 Attribute Setting Methods Supplied by StyleConstants<br />
(continued)<br />
public static void setBidiLevel<br />
(MutableAttributeSet, int)<br />
public static void setBold<br />
(MutableAttributeSet, boolean)<br />
public static void setComponent<br />
(MutableAttributeSet,<br />
Component)<br />
public static void<br />
setFirstLinelndent<br />
(MutableAttributeSet, float)<br />
public static void setFontFamily<br />
(MutableAttributeSet, String)<br />
public static void setFontSize<br />
(MutableAttributeSet, int)<br />
public static void setForeground<br />
(MutableAttributeSet, Color)<br />
public static void setlcon<br />
(MutableAttributeSet, Icon)<br />
public static void setltalic<br />
(MutableAttributeSet, boolean)<br />
public static void setLeftlndent<br />
(MutableAttributeSet, float)<br />
public static void setLineSpacing<br />
(MutableAttributeSet, float)<br />
public static void setRightlndent<br />
(MutableAttributeSet, float)<br />
public static void setSpaceAbove<br />
(MutableAttributeSet, float)<br />
public static void setSpaceBelow<br />
(MutableAttributeSet, float)<br />
public static void<br />
setStrikeThrough<br />
(MutableAttributeSet, boolean)<br />
Sets the bidirectional text nesting<br />
level<br />
Sets the bold attribute<br />
Sets the component attribute<br />
Sets the paragraph first-line indent<br />
Sets the font family attribute<br />
Sets the font size attribute<br />
Sets the foreground color<br />
Sets the icon attribute<br />
Sets the italic attribute<br />
Sets the paragraph left indent<br />
Sets paragraph line spacing<br />
Sets the paragraph right indent<br />
Sets the space above a paragraph<br />
Sets the space below a paragraph<br />
Sets the strike through attribute
1144 Chapter 9 Text Components<br />
Table 9-5 Attribute Setting Methods Supplied by StyleConstants<br />
(continued)<br />
public static void setSubscript Sets the subscript attribute<br />
(MutableAttributeSet, boolean)<br />
public static void setSuperscript Sets the superscript attribute<br />
(MutableAttributeSet, boolean)<br />
public static void setTabSet Store the TabSet for a paragraph<br />
(MutableAttributeSet, TabSet)<br />
public static void setUnderline Sets the underline attribute<br />
(MutableAttributeSet, boolean)<br />
Building the Document<br />
The last method to look at is addText, which inserts the text and its associated<br />
attributes in the document. The data structures that have been chosen<br />
make this method relatively simple to implement. You can see the code in<br />
Listing 9-13.<br />
Listing 9-13 JTextPane example—inserting the text<br />
protected void addText(ParagraphSpec[] paragraphs) {<br />
StyledDocument doc = getStyledDocument();<br />
int count = paragraphs.length;<br />
// Insert each paragraph<br />
for (int i = 0; i < count; i++) {<br />
ParagraphSpec p = paragraphs[i];<br />
int contentCount = p.contents.length;<br />
for (int j =0; j < contentCount; j++) {<br />
// Insert each piece of content for this paragraph,<br />
// with its own tag (optional) and character<br />
// attributes (also optional)<br />
ContentSpec cs = p.contents[j ];<br />
AttributeSet s = cs.style == null ?<br />
SimpleAttributeSet.EMPTY :<br />
doc.getStyle(cs.style);<br />
setCharacterAttributes(s, true);// Apply formatting<br />
int startPoint = doc.getLength();
Listing 9-13 JTextPane example—inserting the text (continued)<br />
}<br />
replaceSelection(cs.text); // Insert text<br />
int endPoint = doc.getLength();<br />
if (cs.tag != null) {<br />
// Insert a tag<br />
try {<br />
tagList.put(cs.tag, new<br />
TagEntry(doc.createPosition(startPoint),<br />
doc.createPosition(endPoint - 1)));<br />
} catch (BadLocationException e) {<br />
System.out.printIn(<br />
"Unexpected bad location exception!");<br />
System.exit(0);<br />
}<br />
}<br />
}<br />
Simple Text Controls 1145<br />
//At the end of the paragraph, apply the style<br />
// and add a newline to terminate it<br />
doc.setLogicalStyle(doc.getLength() - 1,<br />
p.style != null ? doc.getStyle(p.style) : basicStyle);<br />
replaceSelection ( "\n" ) ,•<br />
setEditable(false); // No editing<br />
setCaretColor(Color.black) ;// Hide the caret<br />
}<br />
This method cycles through the paragraphs array, which contains one<br />
entry for each paragraph in the document. To make it easier to understand<br />
the code, here is the start of the declaration of paragraphs:<br />
protected static ParagraphSpec [] paragraphs =<br />
new ParagraphSpec [] {<br />
new ParagraphSpec(Heading, new ContentSpec[] {<br />
new ContentSpec(null, null, "The Apollo Lunar Module")<br />
new ParagraphSpec(Heading, new ContentSpec [] {<br />
new ContentSpec(null, Imagelcon, " ")<br />
}>,<br />
new ParagraphSpec(Basic, new ContentSpec[] {<br />
new ContentSpec(null, null, "The "),
1146 Chapter 9 Text Components<br />
new ContentSpec(null, BoldText, "Apollo Lunar Module"),<br />
new ContentSpec(null, null,<br />
" is the vehicle in which twelve American astronauts" +<br />
" landed on the Moon between 1969 and 1972. " +<br />
" The lunar module consists of two separate pieces." +<br />
11 The lower half is the "),<br />
new ContentSpec("Descent Stage", BoldText,<br />
"descent stage"),<br />
new ContentSpec(null, null,<br />
". Powered by the descent engine, the world's" +<br />
" first throttlable rocket motor, the descent<br />
stage contains" +<br />
" the fuel to bring the lunar module down from an<br />
altitude" +<br />
" of ten miles and a speed of 3,800 miles per hour to<br />
a" +<br />
" safe landing on the lunar surface.")<br />
}>. // CODE OMITTED<br />
}<br />
The outer loop of addText processes one ParagraphSpec object from<br />
the paragraphs array, while the inner loop processes all of the ContentSpec<br />
objects in that paragraph. Recall that a paragraph is delimited by a<br />
newline character, so after placing all of the text for the paragraph, the outer<br />
loop adds a newline and applies the paragraph formatting:<br />
doc.setLogicalStyle(doc.getLength() - 1,<br />
p.style != null ?<br />
doc.getStyle(p.style) : basicStyle);<br />
replaceSelection("\n");<br />
Recall that the logical style must be applied to the paragraph that it relates to.<br />
Here, an offset within that paragraph is obtained by using the length of the<br />
document. This is possible because the document content is being added<br />
sequentially, so an offset obtained in this way is always in the paragraph currently<br />
being formatted. In the data, the name of the style is stored rather<br />
than a reference to the Style object. This makes it possible to optimize the<br />
way in which the styles are held, perhaps by using a static Hashtable so that<br />
each style is created only once, no matter how many times instances of this<br />
data are created. In this example, no such optimization is actually<br />
attempted—the style is obtained by using the getStyle method of<br />
StyledDocument. Another useful facility is the ability to specify the paragraph<br />
style as null, in which case the default formatting of the Basic style is
Simple Text Controls 1147<br />
applied. Having applied the formatting, the paragraph is terminated with a<br />
newline character, created using replaceSelection. This will always<br />
amount to an insertion, because there is no text selected at this stage.<br />
Now let's look at the inner loop. Each ContentSpec specifies a tag,<br />
optional character formatting (specified as a style name), and some text. The<br />
code in the inner loop extracts these three values and converts the style name<br />
to a string. Again, if the style name is given as null, an empty set of<br />
attributes is applied. As a result, text that has a null character format string<br />
will have only the paragraph formatting applied to it. Having applied the<br />
character attributes (with setCharacterAttributes), the text is inserted<br />
using the replaceSelection method. The document length before and<br />
after this is done, so that the start and end offsets of the text just inserted are<br />
known. If the text has an associated tag, a TagEntry with the tag name and<br />
Position objects for the start and end offsets is created and placed in a<br />
Hashtable with the tag string as the key. Text that does not need to be<br />
tagged specifies the tag name as a null string.<br />
Notice the second entry in the paragraphs array.<br />
new ParagraphSpec(Heading, new ContentSpec[] {<br />
new ContentSpec (null, Itnagelcon, " ")<br />
}),<br />
This entry does not have a tag and the text is just a space. The attributes,<br />
however, come from the Imagelcon style, which has an associated Icon.<br />
This is the entry that causes the picture of the Lunar Module to appear<br />
underneath the document heading—the picture itself is a part of the Image-<br />
Icon attribute. This mechanism makes it very easy to place a picture in a<br />
document.<br />
Creating an Active Document with<br />
JTextPane<br />
For our second example, the image used in the first example will be replaced<br />
with the ImageMap that was developed to demonstrate dialogs in Chapter 8.<br />
When the ImageMap was created, it was implemented as a separate class so<br />
that it could easily be reused elsewhere. Since ImageMap is a Component, you<br />
can easily include it in a document by defining a style that has the Component<br />
attribute. Replacing the image with the image map requires the following style<br />
to be defined in place of Imagelcon in the createStyles method:<br />
// Component - an image of the Lunar Module<br />
s = doc.addStyle(ImageMap, basicStyle);<br />
StyleConstants.setComponent(s, mapComponent);
1148 Chapter 9 Text Components<br />
and the ImageMap can be included simply by changing one line of the paragraphs<br />
array:<br />
protected static ParagraphSpec[] paragraphs = new Paragraph-<br />
Spec [] {<br />
new ParagraphSpec(Heading, new ContentSpec [] {<br />
new ContentSpec(null, null,<br />
"The Apollo Lunar Module")<br />
new ParagraphSpec(Heading, new ContentSpec[] {<br />
new ContentSpec(null, ImageMap, " ")// The image map<br />
The only other thing to do is create the ImageMap object and store a reference<br />
to it in the instance variable mapComponent, where the style definition<br />
code shown above expects it to be. This is handled in the constructor before<br />
creating the styles, as you'll see below.<br />
Replacing the image by the image map is the first change to make. The second<br />
part of the change is to make the image map active. You may recall that<br />
Chapter 8 created an image map that would display descriptions of certain<br />
parts of the Apollo Lunar Module as the mouse passed over them and, in<br />
response to a double click, would fire an ActionEvent with the description as<br />
its action command. This example will catch those events and match the<br />
description to the tags that have been stored in a hash list. In the data that was<br />
used to create the JTextPane, each tag has been placed near some text that<br />
describes the corresponding piece of the lunar module; here's an example:<br />
new ParagraphSpec(Basic, new ContentSpec[] {<br />
new ContentSpec(null, null, "Attached to the front "),<br />
new ContentSpec("Landing Leg", BoldText,<br />
"landing leg"),<br />
new ContentSpec(null, null," of the Apollo 11 lunar module "),<br />
new ContentSpec(null, RedText, "Eagle"),<br />
new ContentSpec(null, null, " is a plaque that reads:")<br />
Here, the tag Landing Leg is associated with the text "landing leg,"<br />
which is rendered in bold in the document. On encountering this data, the<br />
addText method creates an entry in the hash list with key Landing Leg;<br />
the information stored with this key in the TagEntry structure is a pair of<br />
Position objects that track the start and end position of the text "landing<br />
leg." Given the text Landing Leg in the action command of an Action-<br />
Event, it is, therefore, possible to find the position of the related text in the<br />
document by presenting the text as the key for the Hashtable. To make this<br />
useful, the text that is located is highlighted and the JTextPane is scrolled so
Simple Text Controls 1149<br />
that the text is visible. This makes the picture of the lunar module behave like<br />
a real image map, with active hyperlinks. It is easy to see how to extend this<br />
idea to add more powerful behavior.<br />
Now let's see how the constructor is changed to add the image map:<br />
public TextPaneExample2(ParagraphSpec[] paragraphs) {<br />
this.setBackground(Color.black);<br />
}<br />
// Create the image map<br />
mapComponent = new ImageMap(<br />
new ImageIcon(getClass().getResource("images/lem.jpg")),<br />
mapSections);<br />
createStyles(); // Create the text styles<br />
addText(paragraphs); // Add all of the text<br />
// Change the highlight color<br />
setSelectionColor(Color.green.darker());<br />
// Process double-clicks from the image map<br />
mapComponent.addActionListener(new ActionListener() {<br />
public void actionPerformed(ActionEvent evt) {<br />
jumpToTag(evt.getActionCommand());<br />
} '<br />
});<br />
The name of the class has been changed to TextPaneExample2, so to run<br />
this example, use the command:<br />
j ava <strong>JFC</strong>Book.Chapter9.TextPaneExample2<br />
The image map is created using the ImageMap constructor in the same<br />
way as was done in Chapter 8. The second argument to this constructor is an<br />
array of MapSection objects that defines the areas of the image that are<br />
active. This array is too large to show in this book, but you can find it in the<br />
source code on the CD-ROM. The JTextComponent method setSelectionColor<br />
is used to change the color used to highlight the text selection<br />
from its default gray to a dark green so that it shows up well against the black<br />
background of the control and contrasts with the white text. Finally, an<br />
ActionListener is attached to the ImageMap. When this listener gets an<br />
ActionEvent, the name of the area that has been double-clicked is<br />
extracted and the j umpToTag method, which is shown below, is invoked with<br />
this name as its argument:<br />
protected void jumpToTag(String tag) {
1150 Chapter 9 Text Components<br />
}<br />
TagEntry ent = (TagEntry)tagList.get(tag);<br />
if (ent != null) {<br />
// Use the selection to highlight the target text<br />
select(ent.startPos.getOffset (),<br />
ent.endPos.getOffset() + 1);<br />
try {<br />
scrollRectToVisible(<br />
modelToView(ent.startPos.getOffset()));<br />
} catch (BadLocationException e) {<br />
// Ignore.<br />
}<br />
}<br />
This method rises the tag that it receives to get the corresponding TagEntry<br />
from the hash list created by addText, then gets the start and end positions<br />
of the associated text and converts them to document offsets using the<br />
getOf f set method of the Position interface. To highlight the text, it is<br />
selected by using the select method of JTextComponent. This method is<br />
an alternative to the setSelectionStart and setSelectionEnd pair that<br />
were used at the start of this chapter. The last thing to do is to force the<br />
JScrollPane to scroll the highlighted area into view. As you saw in Chapter<br />
5, you can force any area of a JComponent to be scrolled into view by using<br />
the scrollRectToVisible method. This method requires a Rectangle<br />
describing the area to be made visible. What you actually have is the offset of<br />
the start of the selected text. This can be converted to screen coordinates by<br />
calling the modelToView method that was mentioned earlier. This method<br />
returns a Rectangle, which can be passed directly to scrollRectToVisible.<br />
Inside the JTextPane<br />
The last two examples have shown how to construct documents with images<br />
and text formatting and how the character and paragraph formatting are used<br />
to determine the attributes of each part of the document. Some of the details<br />
of this can be confusing, unless you understand the way in which the<br />
attributes are held in the underlying element structure of the document<br />
behind the JTextPane. To make this possible, the second example above has<br />
been extended so that it prints the complete element structure after executing<br />
the addText 7Tiethod, by using the ModelDisplay class that was developed<br />
earlier in this chapter. To run this example, use the command:<br />
j ava <strong>JFC</strong>Book.Chapter9.TextPaneExample3
Simple Text Controls 1151<br />
An abbreviated snapshot of the output from this example is shown below.<br />
You can see, first of all, that the top-level element in a StyledDocument is<br />
not a paragraph (as it was for a PlainDocument), but a section. The document<br />
has only one section and it can have associated attributes that affect all<br />
of the document. In our example, there are no attributes at the section level.<br />
Each real paragraph in the document is represented by a paragraph element.<br />
This is again different from PlainDocument, which represents these as content<br />
elements. A paragraph may contain several content elements.<br />
Each paragraph element has an associated style because, in this example,<br />
every paragraph is assigned its own individual logical style. In some documents,<br />
the default logical style associated with the document when it is created<br />
would supply the attributes for most of the paragraphs. Only paragraphs<br />
that needed special formatting, like the quotation near the end of this example,<br />
would have their own paragraph formatting.<br />
[ section ], start offset: 0, end: 1684<br />
{ No attributes }<br />
[ paragraph ], start offset: 0, end: 24<br />
{ resolver = NamedStyle:Heading }<br />
[ content ], start offset: 0, end: 24<br />
{ No attributes }<br />
The Apollo Lunar Module \n<br />
[ paragraph ], start offset: 24, end: 26<br />
{ resolver = NamedStyle:Heading }<br />
[ component ], start offset: 24, end: 25<br />
{ $ename = component }<br />
{ resolver = NamedStyle:Basic }<br />
{ component = <strong>JFC</strong>Book.Chapter8.ImageMap[] }<br />
{ name = ImageMap }<br />
[ content ], start offset: 25, end: 26<br />
{ resolver = NamedStyle:Basic }<br />
{ name = ImageMap }<br />
\n<br />
[ paragraph ], start offset: 26, end: 479<br />
{ resolver = NamedStyle:Basic }<br />
[ content ], start offset: 26, end: 30<br />
{ No attributes }<br />
The<br />
[ content ], start offset: 30, end: 49
1152 Chapter 9 Text Components<br />
{ resolver = NamedStyle:Basic }<br />
{ name = BoldText }<br />
{ bold = true }<br />
Apollo Lunar Module<br />
[ content ], start offset: 49, end: 216<br />
{ No attributes }<br />
is the vehicle in which twelve American<br />
[ content ], start offset: 216, end: 229<br />
{ resolver = NamedStyle:Basic }<br />
{ name = BoldText }<br />
{ bold = true }<br />
descent stage<br />
[ content ], start offset: 229, end: 479<br />
{ No attributes }<br />
. Powered by the descent engine, the wor<br />
Within a paragraph, the individual content elements may have special<br />
attributes, or they may just inherit those of their parent paragraph. Let's look<br />
at some examples. The first paragraph corresponds to the heading, which is<br />
in large, bold font and is centered on the display. Looking at the element<br />
structure, you can see that the paragraph occupies offsets 0 to 23 inclusive<br />
and has the logical style Heading, which is consistent with the data used to<br />
create it, which we saw earlier in this chapter. The content itself reads "The<br />
Apollo Lunar Module" and has no character attributes.<br />
Compare this to the third paragraph, which contains five separate content<br />
elements. The paragraph itself covers offsets 26 to 478 and uses the Basic<br />
style for its paragraph formatting. This means that its text will be in a 14point<br />
SansSerif, plain font and it will be rendered in white. Some of the text<br />
in this paragraph has no special character attributes, so will just use the paragraph<br />
formatting; this applies to the first, third, and fifth content elements.<br />
However, the second and fourth elements have their own character formatting,<br />
both provided by the BoldText style. The output shows that the Bold-<br />
Text style has a value for the attribute called bold (which is the string<br />
defined by the constant value StyleConstants .Bold) and that this<br />
attribute is true. All other attributes should first be looked for in the Basic<br />
style (because this is listed as the resolving parent of the BoldText style). If<br />
you examine the rest of the output, you'll find plenty of similar examples that<br />
show how the attributes that we apply with setCharacterAttributes and<br />
setLogicalStyle are mapped onto the underlying element structure.
Editor Kits and The JEditorPane Control<br />
Simple Text Controls 1153<br />
Powerful though JTextPane is, it can be very time-consuming to create the<br />
effects that you want. Ultimately, for all but the simplest cases, you probably<br />
don't want to hard-code document content and formatting into your application.<br />
It would be much better to be able to place the text and the associated<br />
attributes in a file that is read at runtime and to build a parser that would use<br />
the file contents to build a JTextPane with all of its associated formatting.<br />
This would make it possible to reuse the same class to display many different<br />
documents and reduce development time by cutting down on the number of<br />
compilations required to achieve the desired effect.<br />
Fortunately, it isn't necessary to invent a format for holding text and<br />
markup in the same file, because there are several of them already in existence.<br />
Two commonly-used ones are HTML (Hypertext Markup Language)<br />
and RTF (Rich Text Format). You don't even need to write the parsers for<br />
these file formats because there is another component in the Swing set that<br />
knows how to read, display, and even write files in HTML, RTF and, potentially,<br />
any other document format you like. Before looking in detail at the<br />
powerful JEditorPane component, let's take another, brief look at editor<br />
kits, which JEditorPane relies on to do its job.<br />
Editor Kits<br />
The Swing text components are, as you have seen in this chapter, very complex<br />
pieces of software, yet the code for the controls themselves (jText-<br />
Field, JTextArea, JPasswordField, JTextPane, and JEditorPane) is<br />
not large at all. This is, of course, because most of their functionality resides<br />
in other classes—the component itself is just the facade behind which a<br />
framework is built from pieces that work together to give the desired effect.<br />
You've already seen the Document, the JTextComponent, and the View, but<br />
there is another piece that each text component uses—the editor kit.<br />
The editor kit actually has more than one role to play. Its primary job is to<br />
provide the editing actions that the text control will allow the user to perform,<br />
but it also has a method that allows its text component to create a document of<br />
a type that the editor kit can work with and it is responsible for loading a document<br />
from a file or other external source where it can be stored persistently<br />
and for saving a (possibly modified) version of the document.<br />
Editor Actions<br />
This aspect of the editor kit's job has already been touched on in this chapter.<br />
It is the editor kit that provides the code that actually inserts new content in a
1154 Chapter 9 Text Components<br />
document, deletes characters, moves the cursor around within the document,<br />
allows the user to copy, cut and paste text, and so on. The actions that<br />
the simplest of the editor kits, Def aultEditorKit, provide were listed in<br />
Table 9-3. It is important to realize, however, that the editor kit implementation<br />
for most of these actions is very simple—the editor kit often just acts as a<br />
switching center, directing an action to the correct piece of code in the text<br />
component itself or in the model.<br />
For example, take the case of inserting a new character in a Document.<br />
You'll recall from our earlier discussion that JTextComponent handles each<br />
keystroke it receives by looking through its keymap. If it doesn't find a specific<br />
action bound to the keystroke that it has, then it passes the key to the<br />
installed editor kit's def ault- typed action.<br />
In the case of Def aultEditorKit, this action is implemented in the<br />
actionPerformed method of the inner class DefaultTypedAction. As<br />
you saw earlier, all editor kit actions are implementations of the Action<br />
interface, which allows them to be connected to keystrokes and also to menus<br />
and toolbars. Usually, these action classes, like DefaultTypedAction, are<br />
actually derived from the class TextAction, which is defined as follows:<br />
public abstract class TextAction extends AbstractAction {<br />
public TextAction(String name);<br />
public static final Action[ ] augmentList(<br />
Action [] listl, Action[ ] Iist2) ;<br />
protected final JTextComponent getTextComponent(<br />
ActionEvent e);<br />
protected JTextComponent getFocusedComponent();<br />
}<br />
The name argument passed to the constructor is also the name of the action<br />
that will be implemented by a subclass of TextAction. DefaultTypedAction,<br />
for example, passes the string def ault-typed to this constructor.<br />
The static augmentList method takes two lists of Actions and combines<br />
them into a single list. If the original lists contain Actions with the same<br />
name, the Action from the second list will override them. This method is<br />
used by text components that want to combine Actions of their own with<br />
those provided by their editor kit and is not connected with the processing of<br />
an event that requires the TextAction to be performed. A typical example<br />
of this is JTextField, which, as you know, provides an action called<br />
notify-f ield-accept that generates an ActionEvent when the RETURN<br />
key is pressed. This action is over and above the set provided by Def aultEditorKit,<br />
so to make it appear in the list of supported actions for the component,<br />
which can be obtained by calling getActions on any text
Simple Text Controls 1155<br />
component, it must be added to the set supplied by the editor kit. The augmentList<br />
method is used to do this.<br />
The getTextComponent method returns the text component associated<br />
with the current action. This is always the source of the ActionEvent if it is<br />
a text component, of the component returned by getFocusedComponent if<br />
it is not. The getFocusedComponent method returns a reference to whichever<br />
text component currently has the focus, or null if the focus is not in a<br />
text component. As you'll see in the next example, these last two methods<br />
allow the editor's actions to be written without being tied to any particular<br />
text component.<br />
Adding Actions to a Text Component<br />
As a simple illustration of how easy it is to add functionality to a text component<br />
over and above that provided by its editor kit, the next example adds to<br />
the JTextArea the ability to select all of its content in a single keystroke.<br />
This is often a useful facility, particularly if you want to copy an entire document<br />
or delete all of it in one go. To add an action to a text component, you<br />
need to subclass it in order to override its getActions method.<br />
<strong>Core</strong> Note<br />
Def aultEditorKit actually provides an action to select all of the text<br />
in its associated document, so this example could be implemented by<br />
mapping a key sequence to that action. Instead, for the purposes of<br />
illustration, the selection action will also be implemented here.<br />
Listing 9-14 shows the implementation of an extended JTextArea, called<br />
SelectAllTextArea, that has the new functionality built into it.<br />
Listing 9-14 Adding an action to a text component<br />
package <strong>JFC</strong>Book.Chapter9;<br />
import j avax.swing.*;<br />
import javax.swing.text.*;<br />
import j ava.awt.event.*;<br />
public class SelectAllTextArea extends JTextArea {<br />
public SelectAllTextArea() {
1156 Chapter 9 Text Components<br />
Listing 9-14 Adding an action to a text component (continued)<br />
super();<br />
mapSelectAll();<br />
}<br />
public SelectAllTextArea(Document doc) {<br />
super(doc);<br />
mapSelectAll();<br />
}<br />
public SelectAllTextArea(Document doc, String text,<br />
int rows, int cols) {<br />
super(doc, text, rows, cols);<br />
mapSelectAll();<br />
}<br />
public SelectAllTextArea(int rows, int cols) {<br />
super(rows, cols);<br />
mapSelectAll();<br />
}<br />
public SelectAllTextArea(String text) {<br />
super(text);<br />
mapSelectAll();<br />
}<br />
public SelectAllTextArea(String text, int rows, int COlS)<br />
{<br />
super(text, rows, cols);<br />
mapSelectAll();<br />
}<br />
// The overridden addActions methods provides our<br />
// select-all-text action<br />
public Action [] getActionsO {<br />
return TextAction.augmentList(super.getActions(), localActions);<br />
}<br />
// Implementation of the select-all-text action<br />
public static final String selectAHAction = "select-all-text";<br />
static class SelectAllAction extends TextAction {<br />
SelectAllActionO {<br />
super(selectAllAction);<br />
}<br />
// Method called to perform the action<br />
public void actionPerformed(ActionEvent e) {<br />
JTextComponent target = getTextComponent(e);<br />
if (target instanceof SelectAllTextArea) {
Listing 9-14 Addinbg an action to a text component (continued)<br />
}<br />
Document doc = target.getDocument();<br />
target.setSelectionStart(0);<br />
target.setSelectionEnd(doc.getLength());<br />
}<br />
Simple Text Controls 1157<br />
// Add a key mapping for the select-all-text action<br />
protected void mapSelectAll() {<br />
Keymap parent = getKeymap();// Get current keymap<br />
Keymap myKeymap = JTextComponent.addKeymap(<br />
"SelectAllTextArea Keymap", parent);<br />
JTextComponent.loadKeymap(myKeymap, bindings, this.getActionsO);<br />
setKeymap(myKeymap);<br />
}<br />
// Local actions implemented by this control<br />
protected static final Action [] localActions = new Action[] {<br />
new SelectAllAction()<br />
};<br />
// New key binding: CTRL-A -> select all text<br />
protected static final JTextComponent.KeyBinding[] bindings = {<br />
new JTextComponent.KeyBinding(<br />
Keystroke.getKeystroke(KeyEvent. VK_ A,<br />
KeyEvent.CTRL_MASK), SelectAllAction)<br />
};<br />
public static void main(String[] args) {<br />
JFrame f = new JFrame("SelectAllTextArea");<br />
SelectAllTextArea ta = new SelectAllTextArea(15, 40);<br />
ta.setText(<br />
"V'Houston, Tranquility Base here.\n.The Eagle has Landed\"\n" +<br />
"\n\n\"Roger, Tranquility, we copy you on the ground.\n" +<br />
"You got a bunch of guys about to turn blue.\n" +<br />
"We're breathing again. Thanks a lot\"\n");<br />
f.getContentPane().add(ta);<br />
f.addWindowListener(new WindowAdapter() {<br />
public void windowClosing(WindowEvent evt) {<br />
System.exit(0);<br />
}<br />
});<br />
f.pack();<br />
f.setVisible(true);
1158 Chapter 9 Text Components<br />
Listing 9-14 Adding an action to a text component (continued)<br />
}<br />
}<br />
The constructors all mirror and invoke those of JTextArea. As well as initializing<br />
the text area, they also invoke the local mapSelectAll method,<br />
which will be described below.<br />
In order to add the required functionality, only two steps are required.<br />
First, the new action must be defined and implemented and then added to<br />
the component's list of actions. Secondly, a key binding must be added to<br />
make the action available to the user.<br />
The action itself is, of course, derived from Text Act ion. In this case, it is<br />
implemented in the static inner class Select All Act ion, which has to define<br />
only a name for the action and the actionPerformed method that gets<br />
invoked when the user triggers it. The name that is chosen for the action is<br />
arbitrary, but it must be unique within the component and, of course, it should<br />
describe what the action does. In this case, the name select-all-text is<br />
used.<br />
The action itself is implemented in the actionPerf ormed method. In<br />
principle, what actually needs to be done is very simple: When the action is<br />
triggered, all of the text in the text component needs to be selected—that's all<br />
there is to it. You already know that a selection is created using the setSelectionStart<br />
and setSelectionEnd methods of JTextComponent and,<br />
in this case, the start and end positions are easy to find because they are the<br />
start and end of the document itself. But, there is a problem. Using these<br />
methods requires that you have a reference to the text component. The<br />
actionPerformed method comes with an event source in its Action-<br />
Event, but this need not be the text component, because the action may<br />
have been triggered from a menu, not from a keystroke. Fortunately, JText-<br />
Component keeps track of which text component last had the focus and you<br />
can get a reference to that component using the getTextComponent<br />
method of Text Act ion As you can see from the implementation, a check is<br />
made that the target is a SelectAllTextArea before the action is performed,<br />
in case an attempt is made to invoke the action against a component<br />
that it would not apply to. This can easily happen if the action is invoked from<br />
a menu, of course.<br />
In order for the new action to be useful, it must be mapped to a keystroke<br />
or added to a menu. In either case, this means arranging for it to appear in
Simple Text Controls 1159<br />
the list of actions returned by the get Act ions method. To make this possible,<br />
the JTextArea getActions method is overridden to return a list of<br />
actions created by augmenting the original list from JTextArea with the<br />
select-all-text action using augmentList.<br />
Adding a key mapping is also simple—in fact, you have already seen the<br />
code required to do this in Listing 9-8. In this case, however, no assumption<br />
is made about which keymap is currently installed in the JTextArea as was<br />
done in Listing 9-8 where the default keymap was assumed to be in place. To<br />
avoid this assumption, the getKeymap method of JText Component is used<br />
to extract the current keymap and then a new key binding is added. In this<br />
case, the key sequence CTRL+A is used to activate the select-all-text<br />
action. The mapSelectAll method that adds the mapping is called from all<br />
of our component's constructors so that the key mapping always takes place.<br />
If you were implementing a text component from scratch, you would actually<br />
add the key mapping in the text component's UI class. This example adds the<br />
mapping here to avoid having to subclass the Windows, Motif, and Metal UI<br />
classes for JTextArea to achieve the same effect. As noted earlier, this solution<br />
is acceptable if the key sequence can be the same across all look-and-feel<br />
implementations, or if you only intend to allow your application to use a single<br />
look-and-feel.<br />
If you type the command<br />
j ava <strong>JFC</strong>Book.Chapter9.SelectAllTextArea<br />
you'll see a frame containing the text area appear. Click in this text area<br />
and press Ctrl+Ato activate the newly-implemented select-all-text<br />
action and you'll see that all of the text in the component is selected.<br />
Text Components, Documents, and Editor Kits<br />
Def aultEditorKit is only one of the editor kits in the Swing packages.<br />
Swing includes four editor kits that are used by the different text components.<br />
In most cases, the editor kit associated with a text component is fixed<br />
because of implementation dependencies and cannot be changed at run<br />
time. This is not true, however, for JEditorPane and JTextPane as you'll<br />
see in the next section. The other aspect of a text component that is usually<br />
fixed is the type of document that it uses. The document type is actually connected<br />
to the editor kit, not the component itself, so each editor kit implements<br />
a createDefaultDocument method that returns an empty<br />
Document of the type that it can work with. Thus, with the exception of
1160 Chapter 9 Text Components<br />
JTextPane and JEditorPane, every text component has a fixed editor kit<br />
and a fixed document type associated with it, as shown in Table 9-6.<br />
Table 9-6 Components, Editor Kits, and<br />
Component<br />
JTextField<br />
JPassword-<br />
Field<br />
JTextArea<br />
JTextPane<br />
JEditorPane<br />
Editor Kit<br />
DefaultEditorKit<br />
DefaultEditorKit<br />
DefaultEditorKit<br />
Any editor kit derived from<br />
StyledEditorKit<br />
Varies<br />
Document Types<br />
Document Type<br />
PlainDocument<br />
PlainDocument<br />
PlainDocument<br />
A document type derived from<br />
DefaultStyledDocument<br />
Depends on the editor kit<br />
StyledEditorKit is a subclass of DefaultEditorKit that provides<br />
extra actions to deal with handling document attributes such as font size,<br />
family, and style. The actions that it provides, over and above those of<br />
DefaultEditorKit, are listed in Table 9-7.<br />
Table 9-7 Actions Implemented by StyledEditorKit<br />
Name Action<br />
font-family-SansSerif Select SansSerif font<br />
font-family-Serif Select Serif font<br />
font-family-Monospaced Select Monospaced font<br />
font-size-8 Set font size to 8 points<br />
font-size-10 Set font size to 10 points<br />
f ont-size-12 Set font size to 12 points<br />
font-size-14 Set font size to 14 points<br />
font-size-16 Set font size to 16 points<br />
font-size-18 Set font size to 18 points<br />
f ont-size-24 Set font size to 24 points
Table 9-7 Actions Implemented by StyledEditorKit (continued)<br />
font-size-36 Set font size to 36 points<br />
f ont-size-48 Set font size to 48 points<br />
font -bold Toggle the bold attribute on and off<br />
font-italic Toggle the italic attribute on and off<br />
font-underline Toggles the underline attribute on and off<br />
left-justify Left-justify paragraph(s)<br />
center-justify Center paragraph(s)<br />
right-justify Right-justify paragraph(s)<br />
Simple Text Controls 1161<br />
There are two more editor kits, HTMLEditorKit and RTFEditorKit,<br />
that are used in conjunction with JEditorPane. These editor kits both create<br />
documents derived from Def aultStyledDocument.<br />
Loading and Saving Text Component<br />
Content<br />
JText Component provides methods that allow you to read the content of a<br />
file into a text component, edit it and then save the modified version. Here<br />
are their definitions:<br />
public void read(<strong>Read</strong>er in. Object desc)<br />
throws IOException;<br />
public void write(Writer w) throws IOException;<br />
It is your responsibility to open and close the actual files—JTextComponent<br />
just takes care of moving the data between the file and the text control.<br />
The read method installs a new Document of the correct type for the current<br />
editor kit into which the content is read. These two code extracts show how you<br />
might read the content of a file into a text area and then write it out again:<br />
JTextArea textArea = new JTextArea(10, 40);<br />
try {<br />
<strong>Read</strong>er r = new Buffered<strong>Read</strong>er(<br />
new File<strong>Read</strong>er(fileName));<br />
textArea.read(r, fileName);<br />
r . close() ;<br />
} catch (Throwable t) {
1162 Chapter 9 Text Components<br />
// Handle IOException or FileNotFoundException<br />
}<br />
// This code would normally be in an event handler<br />
try {<br />
Writer w = new BufferedWriter(<br />
new FileWriter("c:\\temp\\XX"));<br />
textArea.write(w);<br />
w.flush();<br />
w.close();<br />
} catch (Throwable t) {<br />
}<br />
// Handle IOException or FileNotFoundException<br />
The desc argument of the read method can be used to supply a description<br />
of the file being read for the benefit of advanced text components that<br />
can make use of this information. It is stored in the Document as a property<br />
called Document. StreamDescriptionProperty. As an example of its use,<br />
JEditorPane, when configured to use HTML, expects the value of this document<br />
property to be the URL of the page that has been read. Usually, of<br />
course, you would let JEditorPane read the file for itself and allow it to set<br />
this property to the URL that was supplied when obtaining the page. There is<br />
more on this in the discussion of JEditorPane shortly.<br />
Loading and Saving Using the Editor Kit<br />
The methods that you have just seen are actually just simple wrappers that<br />
delegate the job of loading and saving the Document to the current editor kit.<br />
The EditorKit class defines the following four methods for this purpose:<br />
public abstract void read(<strong>Read</strong>er in, Document doc,<br />
int pos) throws IOException, BadLocationException<br />
public abstract void write(Writer out, Document doc,<br />
int pos, int len) throws IOException,<br />
BadLocat ionExcept ion<br />
public abstract void read(InputStream in, Document doc,<br />
int pos) throws IOException, BadLocationException<br />
public abstract void write(OutputStream out,<br />
Document doc, int pos, int len) throws IOException,<br />
BadLocationException<br />
As you can see, these methods allow you to specify which Document to<br />
read into or write from and to specify a starting position within the document.<br />
It is important to note that the first two of these methods deal with<br />
Unicode character readers and writers, while the second two use the JDK<br />
1.0-style 8-bit byte-based input and output streams. Usually, you will want to
Simple Text Controls 1163<br />
use the first two methods, because the text components work in terms of<br />
Unicode and the <strong>Java</strong> <strong>Read</strong>er and Writer classes correctly convert between<br />
external encodings and Unicode, taking into account locale-specific file<br />
encodings by using encoders and decoders that can be specifically applied to<br />
a given <strong>Read</strong>er or Writer, or the system default one. By contrast, the second<br />
pair of methods just translates bytes from the file into Unicode using the<br />
platforms default encoding. This may or may not be the desired behavior.<br />
<strong>Core</strong> Note<br />
You can read all about <strong>Read</strong>ers, Writers and converters in <strong>Core</strong> <strong>Java</strong><br />
I.I Volume IkAdvanced Fundamentals,published by Prentice Hall.<br />
If you use the JTextComponent methods, then you are bound to supply a<br />
<strong>Read</strong>er or a Writer, so you will be (indirectly) using the first two methods<br />
above.<br />
Using JEditorPane<br />
JEditorPane is a clever component that uses the full power of the Document<br />
architecture to make it possible for you to view and even edit data that<br />
need not be held in plain text format. Using the editor kits and document<br />
types supplied with Swing, JEditorPane can handle plain text files, HTML<br />
files, and files encoded as RTF. To use JEditorPane, you need to create an<br />
instance of it and then give it some input data in the form of a file or any<br />
other resource that can be referenced using a URL. JEditorPane determines<br />
the type of data it has been given and configures itself appropriately by<br />
selecting the correct editor kit and installing a Document of the right type.<br />
<strong>Core</strong> Note<br />
While this section covers the most useful features of JEditorPane, there<br />
is a lot more that is not included here due to space constraints.You will find<br />
a much more detailed discussion of JEditorPane and the HTML and<br />
RTF document support in this book's companion volume <strong>Core</strong> Swing:<br />
Advanced Programming, published by Prentice Hall.<br />
Creating a JEditorPane<br />
JEditorPane has three constructors:<br />
public JEditorPane();
1164 Chapter 9 Text Components<br />
public JEditorPane(String url) throws IOException;<br />
public JEditorPane(URL url) throws IOException;<br />
The first constructor creates a JEditorPane without anything to display.<br />
When you create a JEditorPane in this way, it installs a DefaultEditor-<br />
Kit and a PlainDocument, which enables it to handle simple text. The<br />
other two constructors initialize the control with the content of a specific<br />
document whose location is supplied using either a URL object or the string<br />
representation of a URL. Using these constructors is equivalent to using the<br />
default constructor followed by the corresponding form of the setPage<br />
method that is described below.<br />
Opening a Document in a JEditorPane Using setPage<br />
There are two different ways to arrange for JEditorPane to display a particular<br />
document. The simplest way is to give it the document's URL and let it<br />
do the rest. You'll see how to do that in this section. In the next section, you'll<br />
see how the process of initializing a JEditorPane actually works. When you<br />
know that, you can take more control of the way in which it loads content.<br />
To get JEditorPane to display something, you need to use one of the<br />
constructors that specifies an initial document to load or one of the following<br />
methods:<br />
public void setPage(String url);<br />
public void setPage (URL url) ,-<br />
Here are two examples that result in the JEditorPane loading an HTML<br />
page from the Web, assuming that your computer is connected to the Internet.<br />
The first example specifies the URL in the well-known string format that<br />
you would supply to your browser:<br />
JEditorPane p =<br />
new JEditorPane("http://www.prenhall.com");<br />
Alternatively, you can pass an instance of the java.net .URL class to the<br />
constructor:<br />
URL url = new URL("http://www.prenhall.com");<br />
JEditorPane p = new JEditorPane(url);<br />
These constructors are equivalent to the following uses of setPage:<br />
JEditorPane p = new JEditorPane();<br />
// Load new page by URL string<br />
p.setPage("http://www.prenhall.com");
Load new page by URL<br />
p.setPage(new URL("http://www.prenhall.com"));<br />
Simple Text Controls 1165<br />
The second form of setPage is the more powerful of the two because you<br />
can give it a URL constructed by any means. This allows you, for example, to<br />
use the Class getResource method to load HTML files (or RTF files) that<br />
are held with your <strong>Java</strong> class files in the same way as you load other resources.<br />
Listing 9-15 shows an example of this approach. This example creates a JEdi<br />
tor Pane and gives it the URL of an HTML page that you supply as a command<br />
line argument. You can see the result of this in Figure 9-13.<br />
Listing 9-15 Using JEditorPane to display a page of HTML<br />
package <strong>JFC</strong>Book.Chapter9;<br />
import j avax.swing.*;<br />
import javax.swing.text.*;<br />
import j ava.awt.* ;<br />
import j ava.awt.event. * ;<br />
import j ava.io.*;<br />
import j ava.net.URL;<br />
public class EditorPaneExamplel extends JEditorPane {<br />
public static void main(String[] args) {<br />
try {<br />
if (args.length != 1) {<br />
System.out.printIn(<br />
"Please supply the URL of an HTML page");<br />
System.exit(1);<br />
}<br />
String url = args [0] ;<br />
JFrame f = new JFrame("Editor Pane Example 1");<br />
JEditorPane ep = new JEditorPane();<br />
ep.setEditable(false);<br />
JScrollPane sp = new JScrollPane(ep);<br />
f.getContentPane().add(sp);<br />
System.out.println("Before loading page:");<br />
showlnfo(ep);<br />
// Have the editor pane load it<br />
ep.setPage(url);
1166 Chapter 9 Text Components<br />
Listing 9-15 Using JEditorPane to display a page of HTML (continued)<br />
}<br />
}<br />
System.out.println("\nAfter loading page:");<br />
showlnfo(ep);<br />
f .setSize(500, 400) ;<br />
f.addWindowListener(new WindowAdapter() {<br />
public void windowClosing(WindowEvent evt) {<br />
System.exit(0);<br />
}<br />
});<br />
f . setvisible (true) ,-<br />
} catch (IOException e) {<br />
}<br />
System.out.println("Failed to read HTML page");<br />
System.exit(0);<br />
public static void showlnfo(JEditorPane ep) {<br />
System.out.println("Document type: " +<br />
ep.getContentType());<br />
System.out.println("Editor kit: " +<br />
ep.getEditorKit().getClass().getName0 ) ;<br />
System.out.println("Document type: " +<br />
ep. getDocument () . getClass () . getName ()) ;<br />
System.out.println("===========================");<br />
}<br />
You can run thus program yourself Using the command:<br />
java <strong>JFC</strong>Book.Chapter9.EditorPaneExamplel url<br />
where url is the URL of the HTML page you want to display. For example,<br />
if you installed the Swing package at C: \Swing-1.1.1, you can view the<br />
top-level package list using the following command:<br />
java <strong>JFC</strong>Book.Chapter9.EditorPaneExamplel<br />
file:///C:/Swing-1.1.1/doc/api/overview-summary.html<br />
The JEditorPane takes care of reading the HTML file and mapping its<br />
contents into text and attributes. Note, however, that HTML is changing very<br />
rapidly and JEditorPane will not be able to properly represent the content<br />
of all HTML pages. In the short term, it is probably best to use this control<br />
only to display HTML pages that you have complete control of and embed it
Simple Text Controls 1167<br />
as part of a larger application using a fixed set of pages, rather than trying to<br />
present it as part of a fully-functional Web browser written in <strong>Java</strong>.<br />
After the JEdi tor Pane is created, the program shows you how it is configured<br />
by default:<br />
Figure 9-13 Viewing HTML with JEditorPane.<br />
Before loading page:<br />
Document type: text/plain<br />
Editor kit: javax.swing.text.DefaultEditorKit<br />
Document type: javax.swing.text.PlainDocument<br />
As noted earlier, a default JEditorPane is initialized to handle plain text<br />
documents. The document type is a MIME specification for the type of document<br />
that the editor can handle. You'll see more about this later. After the<br />
setPage operation, however, you can see that the editor has been reconfigured<br />
to handle HTML:<br />
After loading page:<br />
Document type: text/html
1168 Chapter 9 Text Components<br />
Editor kit: javax.swing.text.html.HTMLEditorKit<br />
Document type: javax.swing.text.html.HTMLDocument<br />
If you load a page with hypertext links and click on one of them, you might<br />
expect JEditorPane to follow the link and load the new page, but it does<br />
not: to follow links, you have to catch HyperlinkEvents and load the new<br />
page yourself, as you'll see later in this chapter.<br />
Configuring JEditorPane for Different<br />
Document Types<br />
When you use setPage to load a document into a JEditorPane, several<br />
things happen:<br />
• The JEditorPane establishes the type of the document it is<br />
about to load.<br />
• Based on the document type, it creates and installs an instance<br />
of the appropriate editor kit.<br />
• The JTextComponent read method is called to create the<br />
correct document type and load the document content.<br />
When you understand how the complete process works, you can change<br />
parts of it to load the control in different ways and from different sources.<br />
This section explains how each of the steps listed above is performed and<br />
then shows you how to load a document from an input stream that is already<br />
open instead of using a URL.<br />
Establishing the Document Content Type<br />
Establishing the content type for the document to be loaded is simple when<br />
the document source is a URL—it is only necessary to open the document<br />
being loaded (via a Web server if the document is being accessed over the<br />
Internet) and then calling the URLConnection getContentType method.<br />
This method returns the MIME type of the object as a String. If the object<br />
is not being fetched from a Web server because, for example, it is in the local<br />
file system or in a JAR file, there will still be a URLConnection and the software<br />
that supports that URLConnection will assign a MIME type to the file<br />
based on some criteria. Usually, the MIME type is based on an examination<br />
of the object name's suffix or by looking at the first few bytes of its content.
Simple Text Controls 1169<br />
However the type is determined, JEditorPane uses it to decide how to configure<br />
itself. Typical values that will be returned for the MIME type are:<br />
text/plain Plain text, no internal structure<br />
text/html An HTML page<br />
text/rtf A document encoded in RTF format<br />
Creating the Editor Kit<br />
When the content type is known, the JEditorPane calls its own setContentType<br />
method:<br />
public void setContentType(String mimeType);<br />
The job of this method is simply to create and install the correct editor kit.<br />
You can see from the MIME type which editor kit might be a good choice for<br />
each content type, but it is not sufficient to hard code a few MIME type to<br />
content editor class mappings into the JEditorPane. Instead, there is a<br />
cache and a registry that hold these mappings.<br />
The registry maps content type name to the name of the class file for the<br />
corresponding editor kit. It is initialized with four entries for the types listed<br />
above:<br />
text/plain j avax. swing . text. Def aultEditorKit<br />
text/html j avax. swing . text. html. HTMLEditorKit<br />
text/rtf j avax. swing. text. rtf . RTFEditorKit<br />
application/rtf j avax. swing . text. rtf . RTFEditorKit<br />
Entries in the registry are created using the following method:<br />
public void registerEditorKitForContentType<br />
(String type, String class);<br />
You can use this method to install new mappings if you create editor kits of<br />
your own.<br />
The cache maps object types to instances of editor kits. This cache is managed<br />
using the following methods:<br />
public void setEditorKitForContentType(String type,<br />
EditorKit kit);<br />
public EditorKit getEditorKitForContentType(String type);
-<br />
1170 Chapter 9 Text Components<br />
The JEditorPane only makes direct use of the cache, not the registry.<br />
Given a MIME type, it calls getEditorKitForContentType to get a new<br />
Editor Kit that it can use. This method first looks to see if it has a suitable<br />
EditorKit in the cache. If it does, it returns it. If the cache does not have an<br />
entry for it, which is always the case when a JEditorPane is first created,<br />
the MIME type is passed to the registry. If the type is recognized there, an<br />
instance of the class that it maps to is created and then installed, along with<br />
the type name, in the cache. Subsequent calls of getEditorKitForContentType<br />
with the same MIME type will now find the editor kit in the<br />
cache. If the MIME type is not recognized, an instance ofDefaultEditor-<br />
Kit is returned. Ultimately, this means that the document will be formatted<br />
as plain text, which may or may not be useful.<br />
Creating the Document and Loading the Document Content<br />
Once the content type is known and the editor kit has been obtained, the hard<br />
part is over because the editor kit can handle the rest. Only two more steps<br />
need to be performed—creating the document and loading the content.<br />
As you already know, every editor kit can create an appropriate Document<br />
object for the type of content that it can handle. All that is necessary is to call<br />
the editor kit's createDef aultDocument method and install the resulting<br />
Document in the JEditorPane using setDocument. The editor kit also<br />
knows how to load the document from an input stream or a reader, as was<br />
shown earlier in this section. Once the Document has been created, the editor<br />
kit read method is called to load the content. In fact, both of these steps are<br />
encapsulated in the JTextComponent read method, which is called by set-<br />
Page after the editor kit has been installed by setContentType.<br />
<strong>Core</strong> Note<br />
In fact, the document is not always loaded directly into the JEditorPane<br />
as described here. In some cases, the JEditorPane installs the correct<br />
editor kit and an empty document of the type that the editor kit requires<br />
and then starts a separate thread that reads the source file into the<br />
JEditorPane asynchronously.This approach allows the user interface to<br />
appear more responsive because the AWT event thread is not blocked<br />
reading a document over what may be a slow network connection.Of the<br />
document types supported directly by Swing, only HTML is loaded<br />
asynchronously.
Simple Text Controls 1171<br />
The example in Listing 9-15 is extremely simple, yet it creates an application<br />
that can view ordinary text files, HTML files, and RTF files. If you want<br />
to see how RTF files are handled, you just need to start the program and give<br />
it the name of an RTF file—here's an example:<br />
java <strong>JFC</strong>Book.Chapter9.EditorPaneExamplel<br />
file:///c:/<strong>Core</strong><strong>JFC</strong>Book/<strong>JFC</strong>Book/Chapter9/rtf/LM.rtf<br />
When you execute this command, the JEditorPane will open the named<br />
file, determine that its content type is text/rtf and configure itself for reading<br />
RTF, as you can see from the output it produces. This file contains approximately<br />
the same data as the page that was constructed in Listing 9-11.<br />
<strong>Core</strong> Alert<br />
If you run this example with any of the current versions of Swing (up to and<br />
including that in <strong>Java</strong> 2 version 1.3), you will see that the document type<br />
will be correctly identified as RTF, but there are several problems with the<br />
rendering, the most obvious being that the image does not appear.The RTF<br />
support, as currently implemented, is not quite perfect.<br />
Loading a Document from an Input Stream<br />
You've seen how simple it is to open documents in a JEditorPane when you<br />
have a URL. Sometimes, however, you won't have a URL. What happens if<br />
you just have an input stream to the source of the data? Ry using what you<br />
have already seen, you can easily arrange to have the JEditorPane configure<br />
itself and load whatever is on the stream for display.<br />
As you know, to load a document you have to establish the content type,<br />
create and install an editor kit, create the correct document type, and then<br />
finally read the data. Most of this is simple—the only problem is in establishing<br />
the content type. If you just have an input stream from the data source, it<br />
is almost impossible to establish the data type for certain. Often, you can<br />
guess the type by reading a few bytes from the stream and looking at them.<br />
There is, in fact, a method of URLConnection that does just that:<br />
public static String guessContentTypeFromStream(<br />
InputStream is) ;<br />
Because this method is static, you don't need to create a URLConnection<br />
object in order to use it. Unfortunately, it only guesses correctly at a small<br />
number of content types that are often returned from Web servers. It does<br />
not identify RTF documents, for example. When it can't identify the type, it<br />
returns null instead of a default guess, which at least allows you to try some
1172 Chapter 9 Text Components<br />
guessing of your own! Of course, one approach is to supply the correct content<br />
type along with the input stream. If this isn't possible, you just have to<br />
hope that guessContentTypeFromStream properly identifies your data.<br />
In the next example, shown in Listing 9-16, you'll see how to load a document<br />
from an input stream. To identify the type, guessContentTypeFrom-<br />
Stream is indeed used and, if this fails, an additional check for RTF is made<br />
by looking at the first few bytes of the file. The code that does this is actually<br />
very much like that in guessContentTypeFromStream itself.<br />
Listing 9-16 Using JEditorPane to read an input stream<br />
package <strong>JFC</strong>Book.Chapter9;<br />
import javax.swing.*;<br />
import javax.swing.text.*;<br />
import j ava.awt.event.*;<br />
import java.io.*;<br />
import <strong>Java</strong>.net.URLConnection;<br />
public class StreamEditorPane extends JEditorPane {<br />
public void setlnputStream(InputStream is)<br />
throws IOException, BadLocationException {<br />
String type = guessContentType(is);<br />
if (type == null) {<br />
// Unknown type - use plain text<br />
type = "text/plain";<br />
}<br />
System.out.println("File content type is " + type);<br />
// Set the new content type<br />
setContentType(type);<br />
// Now create the appropriate document and install it<br />
Document doc = getEditorKit().createDefaultDocument();<br />
setDocument(doc);<br />
// Finally, read the date from the stream<br />
getEditorKit0 .read(is, doc, 0);<br />
} '<br />
// Guess the content type<br />
protected String guessContentType(InputStream is)<br />
throws IOException {<br />
String type =<br />
URLConnection.guessContentTypeFromStream(is);<br />
if (type == null) {
Simple Text Controls 1173<br />
Listing 9-16 Using JEditorPane to read an input stream (continued)<br />
}<br />
}<br />
i s.mark(5) ;<br />
int cl = is. read. ();<br />
int c2 = is.read();<br />
int c3 = is.read();<br />
int c4 = is.read();<br />
int c5 = is.readO;<br />
is.reset () ;<br />
if (cl == '{' && c2 == 'W && c3 == 'r 1 && c4 == 't'<br />
&& c5 == 'f') {<br />
type = "text/rtf";<br />
}<br />
// Add more heuristics here<br />
return type;<br />
public static void main(String[] args) {<br />
if (args.length != 1) {<br />
System.out.printIn(<br />
"Please supply the name of a file to read");<br />
System.exit(1);<br />
}<br />
try {<br />
InputStream is = new BufferedlnputStream(new<br />
FilelnputStream(args [0])) ;<br />
JFrame f = new JFrame("StreamEditorPane Example");<br />
StreamEditorPane ep = new StreamEditorPane();<br />
f.getContentPane() .add(ep) ;<br />
f .setSizeUOO, 400) ;<br />
f.addWindowListener(new WindowAdapter() {<br />
public void windowClosing(WindowEvent evt) {<br />
System.exit(0);<br />
}<br />
});<br />
f.setVisible(true);<br />
// Load the data from the stream<br />
ep.setlnputStream(is);
1174 Chapter 9 Text Components<br />
Listing 9-16 Using JEditorPane to read an input stream (continued)<br />
}<br />
}<br />
} catch (FileNotFoundException e) {<br />
System.out.println("Failed to open file " + args[0]);<br />
System.exit(1);<br />
} catch (IOException e) {<br />
System.out.println("Error while reading file " +<br />
args [0]) ;<br />
System.exit(1);<br />
} catch (Throwable t) {<br />
System.out.println("Unexpected exception: " + t);<br />
System.exit(1);<br />
}<br />
This example creates a control called StreamEditorPane that is derived<br />
from JEditorPane and that can read an input stream for data. The main<br />
method shows this control in use. Having created a StreamEditorPane and<br />
placed it on a JFrame, the setlnputStream method is called to identify the<br />
type of the input stream and to load the data for display. The first thing this<br />
method does is invoke guessContentType. As you can see, this simple<br />
method first tries to identify the input stream type by using URLConnection.<br />
If this fails, it reads the first five bytes of the input stream and checks whether<br />
they contain the signature that identifies an RTF file. Notice that this is done<br />
by using the InputStream mark and reset methods, which allow you to<br />
effectively peek at the content of a stream, while leaving the data in place to<br />
be read again later. If this method cannot guess the type of the stream, it<br />
returns null and the data will be treated as type text/plain. On the other<br />
hand, if it is RTF, the type text/rtf will be returned.<br />
Having identified the type, the rest is easy. The correct editor kit is created<br />
and installed by passing the content type to the setContentType method,<br />
which you've seen before. This method does not, however, create an appropriate<br />
document—to do that, the createDef aultDocument method of the<br />
newly-installed editor kit is called and the Document returned is installed in<br />
the JEditorPane using setDocument. Lastly the data is read from the<br />
stream using the editor kit's read method, which is given the InputStream<br />
to use, the Document and the position within that document to start loading<br />
from.<br />
You can run this example and load an RTF document using the following<br />
command:
java <strong>JFC</strong>Book.Chapter9.StreamEditorPane<br />
Simple Text Controls 1175<br />
C:\<strong>Core</strong><strong>JFC</strong>Book\<strong>JFC</strong>Book\Chapter9\rtf\LM.rtf<br />
You'll notice that the correct content type is identified and that the document<br />
is loaded into the editor pane.<br />
Using JEditorPane to Edit and Save Document Content<br />
The instances of JEditorPane that you have seen so far have been made<br />
read-only using setEditable (false). However, it is possible to make a<br />
JEditorPane editable simply by calling its setEditable method with<br />
argument true, or by doing nothing because the default is for JEditorPane<br />
to be editable. When you do this, you can use it to change the content of the<br />
document and then write the changed content back. This even works for<br />
HTML and RTF, because the packages that support these formats have the<br />
ability to generate new HTML or RTF to reflect changes made by the editor.<br />
<strong>Core</strong> Note<br />
Note, however, that if you make JEditorPane editable,it disables the feature<br />
that you'll see in the next section that allows hypertext links to be followed.<br />
The next example is a simple modification of an earlier one that allows you<br />
to edit the file and then save it. You supply the file name on the command<br />
line, edit it, and then use the Save button to write back the modified content<br />
to file whose name is the one that was read with the suffix ' . new' added. In<br />
the real world, of course, you would encapsulate this functionality in an application<br />
that used dialogs to allow you to choose the file to open and a different<br />
file to write the changes to, if necessary.<br />
Listing 9-17 Using JEditorPane to edit documents<br />
package <strong>JFC</strong>Book.Chapter9;<br />
import javax.swing.*;<br />
import javax.swing.text.*;<br />
import j ava.awt.*;<br />
import j ava.awt.event.*;<br />
import java.io.*;<br />
import java.net.URL;<br />
public class EditorPaneExample2 extends JEditorPane {
1176 Chapter 9 Text Components<br />
Listing 9-17 Using JEditorPane to edit documents (continued)<br />
public static void main(String[] args) {<br />
try {<br />
JFrame f = new JFrame("Editor Pane Example 2");<br />
final JEditorPane ep = new JEditorPane();<br />
JScrollPane sp = new JScrollPane(ep);<br />
f.getContentPane().add(sp, "Center");<br />
JPanel p = new JPanelO ;<br />
JButton bw = new JButton("Save (Writer)");<br />
p.add(bw);<br />
JButton bs = new JButton("Save (Stream)");<br />
p.add(bs);<br />
f.getContentPane().add(p, "South");<br />
System.out.println("Before loading page:");<br />
showlnfo(ep);<br />
if (args.length != 1) {<br />
System.out.println("Please supply a file name");<br />
System.exit(1);<br />
}<br />
fileName = args[0];<br />
bw.addActionListener(new ActionListener() {<br />
public void actionPerformed(ActionEvent evt) {<br />
try {<br />
Writer w = new FileWriter(fileName + ".new");<br />
ep.write(w);<br />
w.close();<br />
System.out.printlnC'Content saved to " +<br />
fileName + ".new");<br />
} catch (Throwable t) {<br />
}<br />
});<br />
}<br />
System.out.println("Error while saving: " + t);<br />
bs.addActionListener(new ActionListener() {<br />
public void actionPerformed(ActionEvent evt) {<br />
try {<br />
OutputStream o = new FileOutputStream(
Listing 9-17 Using JEditorPane to edit documents (continued)<br />
}<br />
});<br />
Simple Text Controls I \ 77<br />
fileName + ".new");<br />
ep.getEditorKit () .write (o, ep.getDocument() , 0,<br />
ep.getDocument().getLength());<br />
o.close();<br />
System.out.println("Content saved to " +<br />
fileName + ".new");<br />
} catch (Throwable t) {<br />
System.out.println("Error while saving: " + t);<br />
}<br />
// Have the editor pane load the document<br />
ep.setPage("file:///" + fileName);<br />
// Make the content editable<br />
ep.setEditable(true);<br />
System.out.println("\nAfter loading page:");<br />
showlnfo(ep);<br />
f .setSize(500, 400) ;<br />
f.addWindowListener(new WindowAdapter() {<br />
public void windowClosing(WindowEvent evt) {<br />
System.exit(0);<br />
}<br />
});<br />
f.setVisible(true);<br />
} catch (IOException e) {<br />
System.out.println("Failed to read HTML page");<br />
System.exit(0);<br />
}<br />
}<br />
public static void showlnfo(JEditorPane ep) {<br />
System.out.println("Document type: " +<br />
ep.getContentType());<br />
System.out.println("Editor kit: " +<br />
ep.getEditorKit().getClass().getName());<br />
System.out.println("Document type:" +<br />
ep.getDocument() .getClass () .getName() ) ;<br />
System.out.println(»===========================");<br />
}
1178 Chapter 9 Text Components<br />
Listing 9-17 Using JEditorPane to edit documents (continued)<br />
}<br />
public static String fileName;<br />
To run this example, use the command:<br />
<strong>Java</strong> <strong>JFC</strong>Book.Chapter9.EditorPaneExample2 filename<br />
where filename is the full path name of the file you want to read, for example:<br />
j ava <strong>JFC</strong>Book.Chapter9.EditorPaneExample2<br />
C:\<strong>Core</strong><strong>JFC</strong>Book\<strong>JFC</strong>Book\Chapter9\rtf\LM.rtf<br />
The setPage method is used to load the file into the editor pane and the<br />
document is made writable using the setEditable method. There are two<br />
Save buttons in this program's user interface: One saves the content using a<br />
Writer, the other using an OutputStream. You can see how this is implemented<br />
by looking at the actionPerf ormed methods connected to the two<br />
buttons. The Writer case is easy, because the JTextComponent write<br />
method does all the work—all that is necessary is to create the file to be written<br />
to. The OutputStream case is a little harder. Because there isn't a JTextComponent<br />
method that writes to OutputStreams, you have to go directly<br />
to the editor kit's write method.<br />
Why are there two Save buttons in this program? You can see the reason if<br />
you try to save an RTF file using the Writer button. Because RTF is an 8-bit<br />
format, it won't allow you to save via a Writer—if you try, you'll get an error<br />
message. To save RTF documents, you have to use an OutputStream and,<br />
as noted earlier, you can't use the JTextComponent write method to do<br />
this.<br />
JEditorPane Events<br />
JEditorPane can generate an event when an attempt is made to change the<br />
displayed page due to the installed editor kit detecting the activation of a<br />
hyperlink in the current document. Theoretically, any editor kit could define<br />
a meaning for this event and provide a means to jump between documents<br />
but currently only the HTML editor kit makes use of it.<br />
If an HTML page with a hypertext link in it is displayed in a JEditor-<br />
Pane, the HTML editor kit generates a HyperlinkEvent when the hypertext<br />
link is activated. As well as the usual source, this event contains a type<br />
field and the URL of the target of the link. You can extract these values using<br />
the following Hyper linkEvent methods:
public EventType getEventType();<br />
public URL getURLO ;<br />
There are three types of event that can be generated:<br />
HyperlinkEvent.EventType.ENTERED<br />
HyperlinkEvent.EventType.ACTIVATED<br />
HyperlinkEvent.EventType.EXITED<br />
Simple Text Controls 1179<br />
The first and third types are generated when the mouse moves over a<br />
hyperlink and when it moves away from one. At the same time, the cursor<br />
changes to provide feedback to the user. EventType .ACTIVATED is generated<br />
at the point that the user clicks on the hypertext link.<br />
Clicking on the link does not, however, change the active page and neither<br />
does JEditorPane register to receive this event to perform the switch. If<br />
you want to follow hypertext links, you have to register a HyperlinkListener<br />
and change to the new page yourself. The HyperlinkListener<br />
interface has only one method:<br />
public interface HyperlinkListener {<br />
public void hyperlinkUpdate(HyperlinkEvent evt);<br />
}<br />
You register to receive these events using the following JEditorPane methods:<br />
public void addHyperlinkListener(HyperlinkListener 1);<br />
public void removeHyperlinkListener(HyperlinkListener 1);<br />
<strong>Core</strong> Alert<br />
Hyperlinks are followed only if the JEditorPane is not editable.<br />
Therefore, you must create your editor pane like this:<br />
JEditorPane pane = new JEditorPane();<br />
pane.setEditable(false);<br />
If you leave out the second line, clicking on hyperlinks will have no effect.<br />
The following code extract demonstrates how you might register to receive<br />
HyperlinkEvents and use the ACTIVATED event to change the active page.<br />
The variables ep and f in this code refer to the JEditorPane and its enclosing<br />
JFrame, respectively.<br />
// Add a Hyperlink listener<br />
ep.addHyperlinkListener(new HyperlinkListener() {<br />
public void hyperlinkUpdate(HyperlinkEvent evt) {
1180 Chapter 9 Text Components<br />
}<br />
}); }<br />
System.out.println("Hyperlink event, source: " +<br />
evt.getSource ());<br />
System.out.printIn("Hyperlink event type: " +<br />
evt.getEventType());<br />
System.out.println("URL: " + evt.getURL());<br />
System.out.println("= === = = === = === = === = ===") •<br />
if (evt.getEventType() ==<br />
HyperlinkEvent.EventType.ACTIVATED) {<br />
if (evt instanceof HTMLFrameHyperlinkEvent) {<br />
HTMLFrameHyperlinkEvent hevt =<br />
(HTMLFrameHyperlinkEvent)evt;<br />
HTMLDocument doc =<br />
(HTMLDocument)ep.getDocument();<br />
doc.processHTMLFrameHyperlinkEvent(hevt);<br />
return;<br />
}<br />
URL thisPage = ep.getPage();<br />
URL newPage = evt.getURL();<br />
}<br />
// Load the new page if it is different<br />
if (!thisPage.equals(newPage)) {<br />
try {<br />
ep.setCursor(busyCursor);<br />
// Switch to the new page<br />
ep.setPage(evt.getURL());<br />
} catch (IOException e) {<br />
System.out.println(<br />
"Page switch failed - revert to old page"<br />
try {<br />
ep.setPage(thisPage);<br />
} catch (IOException ioexc) {<br />
System.out.println(<br />
"Failed to revert to old page");<br />
}<br />
ep.setCursor(defaultCursor) ;<br />
}<br />
}<br />
The code is quite straightforward., but there are a couple of interesting<br />
twists. When a Hyper linkEvent is received, the type is checked. If it is an<br />
ACTIVATED event, the cursor is changed to the WAIT_CURSOR (because the
Simple Text Controls 1181<br />
page switch could take a short time), the target URL is extracted, and set-<br />
Page is used to load the new page. An attempt at error recovery is provided<br />
by saving the original page URL and attempting to restore it if the new page<br />
cannot be loaded for some reason.<br />
You can try this code out for yourself with the following command:<br />
<strong>Java</strong> <strong>JFC</strong>Book.Chapter9.EditorPaneExample3 URL<br />
where URL is the full URL of an HTML page with a hypertext link in it. If<br />
you have the Swing package installed in c:\Swing-l.l.l, then you could<br />
use the following command line:<br />
java <strong>JFC</strong>Book.Chapter9.EditorPaneExample3<br />
file:///C:/swing-1.1.1/doc/api/overview-summary.html<br />
to bring up the documentation index page and then follow the links from<br />
there. Each time you move the mouse over a link or activate one, the program<br />
prints a representation of the event that it gets and, if you are activating<br />
the link, it switches to the new page. Here is some sample output showing<br />
one HyperlinkEvent:<br />
Hyperlink event, source: javax.swing.JEditorPane[,0,0,489x3 70]<br />
Hyperlink event type: ACTIVATED<br />
URL: file:/c:/swing-1.1.1/doc/api/javax/swing/package-summary<br />
. html<br />
Note that the target of a hypertext link need not be an HTML document.<br />
Because setPage can change the style of the JEditorPane to suit the content<br />
type it is given, the target document could be HTML, RTF, or plain text.<br />
Furthermore, since the document switch happens under your control, you<br />
could intervene to prevent the loading of specific documents based on their<br />
content type or some or all of the URL.<br />
Now let's look at a couple of the details of this process that are not quite<br />
self-explanatory. First, you'll notice that when an ACTIVATED event is<br />
detected, the code does not immediately load the page. Instead, it does this:<br />
if (evt instanceof HTMLFrameHyperlinkEvent) {<br />
HTMLFrameHyperlinkEvent hevt =<br />
(HTMLFrameHyperlinkEvent)evt;<br />
HTMLDocument doc =<br />
(HTMLDocument)ep.getDocument();<br />
doc.processHTMLFrameHyperlinkEvent(hevt);<br />
return;<br />
}
1182 Chapter 9 Text Components<br />
There are, in fact, two types of HyperlinkEvent. An ordinary HyperlinkEvent<br />
is received when the user clicks on a link in a document that is<br />
not inside a frame. The correct action in response to such an event is to<br />
replace the whole page, so the set Page method is called. If, however, the<br />
JEditorPane is displaying a document that contains one or more frames<br />
and the user clicks on a link in a document in one of the frames, it would not<br />
be correct to replace the entire frame—only the content of the affected<br />
frame should be changed. In this case, which can only happen when an<br />
HTML document is loaded, a subclass of HyperlinkEvent called HTML-<br />
FrameHyperlinkEvent is delivered. It is much more complex to replace<br />
just the affected frame than it is to load an entire new page, but fortunately<br />
you don't need to concern yourself with the details beacuse the HTMLDocument<br />
class provides a convenience method called processHTMLFrameHyperlinkEvent<br />
that handles this given the HTMLFrameHyperlinkEvent.<br />
This method is, therefore, called whenever an HTMLFrameHyperlinkEvent<br />
is received.<br />
The second interesting point in this code concerns the handling of the cursor.<br />
As you can see, just before the setPage method is called, a busy cursor<br />
is installed so that the user can see that the new page is in the process of<br />
being loaded. However, apart from the case in which the page fails to load,<br />
there is apparently no code to restore the default cursor, which you might<br />
have expected to find after the setPage call. The reason for this is that, as<br />
we said earlier, setPage does not always load the new document synchronously<br />
and, in fact, by default, HTML is loaded in a separate thread. This<br />
means that, when setPage returns, the new page will almost always not be<br />
loaded.<br />
Since the busy cursor needs to remain active until the page has loaded,<br />
how can we detect when the background thread has finished its work? The<br />
answer to this question is simple—when the new page has been loaded, the<br />
JEditorPane generates a PropertyChangeEvent for a bound property<br />
called page, so we can use the receipt of this event to restore the default cursor:<br />
// Monitor the JEditorPane for PropertyChangeEvents<br />
ep.addPropertyChangeListener(<br />
new PropertyChangeListener() {<br />
public void propertyChange(PropertyChangeEvent evt) {<br />
if (evt.getPropertyName().equals("page")) {<br />
ep.setCursor(defaultCursor);<br />
}<br />
});<br />
}
Simple Text Controls I 183<br />
Note, however, that ii the new page is the same as the one currently<br />
loaded, setPage does nothing and no event will be generated. The example<br />
code takes care of this case by comparing the new and old page URLs before<br />
calling setPage, to avoid switching to the busy cursor when there would be<br />
no event to cause the cursor to be switched back.<br />
Summary<br />
This chapter introduced the full range of Swing text controls, from the simple<br />
text input field to the powerful JTextPane and JEditorPane.<br />
The chapter started by looking at JTextField and JTextArea as<br />
replacements for their AWT counterparts then showed a variant of JText-<br />
Field called JPasswordField that doesn't echo the characters typed into<br />
it. This control replaces the passwordlike functionality of the AWT Text-<br />
Field that is not supported by its direct replacement JTextField.<br />
The main theme of the second half of the chapter was an examination of<br />
the internals of the Swing text components, to reveal the underlying structures<br />
that enable the more powerful components to support multiple fonts<br />
and colors at the same time and to embed images and components in documents.<br />
While this material was very detailed, it is essential to have at least<br />
seen it in order to make best use of die JTextPane control. You saw an<br />
impressive use of JTextPane that included an image map that had the ability<br />
to move the reader to another part of the document, much like HTML<br />
hyperlinks. Finally, you looked at JEditorPane, which is capable of rendering<br />
real HTML and Rich Text Format and has the capability to be extended<br />
to support other document encodings via suitable editor kits.
THE TREE<br />
CONTROL<br />
Topics in This Chapter<br />
Creating and Working with Trees<br />
A File System Tree Control<br />
Creating Customized Tree Renderers<br />
Trees and Tooltips<br />
Tree Editing and Customized Editors
This chapter takes an in-depth look at JTree, one of the two complex<br />
Swing components that manage collections of related data. JTree is<br />
intended to represent information that has a hierarchical structure, of<br />
which the prototypical and probably most familiar example might be a file<br />
system. You'll see how simple it is to create a basic JTree and look at the<br />
ways in which the user can interact with the control to expose and hide data<br />
and to have the application operate on the objects that the tree's content represents.<br />
A large part of this chapter is devoted to developing a control that allows<br />
you to display the contents of a file system in the form of a tree. While building<br />
this control, you'll learn how to use many of the tree's powerful features<br />
and, when it's finished, you'll have a component that you can extend or use<br />
directly in your own applications.<br />
Finally, JTree allows you to take over the job of rendering individual display<br />
elements. The second half of this chapter looks at how this can be<br />
achieved and how to allow the user to directly edit the tree's data.<br />
The Tree Control<br />
The JTree component is the first of two controls that you'll meet in this book<br />
that are intended to present views of large amounts of data. The difference<br />
1185
1186 Chapter 10 The Tree Control<br />
between JTree and the other control, JTable, is that the former is wellsuited<br />
to handling data that is hierarchical in nature, while the latter is used<br />
with information that can be organized into rows and columns. The most<br />
familiar example of a tree control is probably the one in the left pane of Windows<br />
Explorer, which shows a directory view of a file system. Later in this<br />
section, you'll see how to implement a <strong>Java</strong> version of this control, which is<br />
pictured in Figure 10-1.<br />
Figure 10-1 A tree showing a file system.<br />
Tree Nodes<br />
All trees start with a root node, which is customarily shown at the top left of the<br />
control. By default, when you create a JTree, the root is visible, together with<br />
the objects in the level immediately below it. Figure 10-1 shows a view of part<br />
of the C: drive of my laptop. In this case, the C: \WINDOWS directory is the root<br />
and the directories that reside within it are shown below and to the right of it.<br />
The Metal, Motif, and Windows look-and-feel classes all represent each node<br />
in the tree using both an icon and a text string. In the case of a file system, the<br />
natural way to use the text string is to display the name of the directory that
The Tree Control 1187<br />
corresponds to the node, while the icon shows either an open or closed folder,<br />
depending on whether the contents of the directory are visible or not.<br />
In <strong>Java</strong> 2 version 1.3, JTree is sensitive to its component orientation so<br />
that, in a right-to-left locale, the root node will appear at the top right instead<br />
of the top left and the tree expands from right to left. Within each node, the<br />
left-to-right order of the expansion handle, the icon and the text is reversed,<br />
producing a complete mirror image.<br />
<strong>Core</strong> Note<br />
The descriptions that are given in this section, unless otherwise qualified,<br />
relate to the appearance of the control when the Metal look-and-feel is<br />
installed. Installing a different look-and-feel can have a radical effect on the<br />
way the tree looks and there can even be variations within a single lookand-feel,<br />
as you'll see.<br />
It is simple and routine to change the text string that describes the node.<br />
Changing the icon is a topic that will be left until the end of the chapter, so<br />
most of the examples will have the usual folder representation, whether or<br />
not they represent a file system.<br />
Tree nodes may or may not have other nodes, known as child nodes, linked<br />
beneath them. Each node that has child nodes can be considered to be the<br />
root of a subtree. For example, in Figure 10-1, the node C: \WINDOWS\SYS-<br />
TEM has several child nodes beneath it and can be thought of as the root of<br />
the subtree composed of itself and those nodes.<br />
Nodes that are at the same level of the tree are displayed in a vertical line<br />
so that, in the case of a file system tree, all of the directories directly below<br />
the root are shown one above the other. As you move further to the right on<br />
the screen, you are moving further down the file system hierarchy, until you<br />
reach a node that doesn't have any nodes attached below it. Such nodes are<br />
often called leaf nodes, because they reside at the very end of a sequence of<br />
branches (otherwise known as branch nodes) that join nodes to each other. In<br />
the case of JTree, however, a node that doesn't have any nodes below it need<br />
not be a leaf node, as you'll see. As far as the tree is concerned, whether or<br />
not a given node is a leaf matters only so far as it affects the icon used to represent<br />
it—depending on the look-and-feel, leaf nodes are typically represented<br />
by a folded sheet of paper instead of the folder used to represent the<br />
other nodes.<br />
The tree may be configured to join its child nodes with lines to make the<br />
hierarchy easier to see. Whether this is possible depends on the look-and-feel
1188 Chapter 10 The Tree Control<br />
in use. When this option is enabled, nodes at the same level are typically connected<br />
to each other by a vertical ine as shown in Figure 10-1; each node at<br />
that level connects to the vertical line with a small horizontal dashed line. If<br />
the node does not have any nodes below it, the horizontal and vertical lines<br />
just meet at a point, as is the case with the node C:\WINDOWS\SYS-<br />
TEM\DTCLOG in Figure 10-1. At the intersection point for a node that does<br />
have other nodes below it in the hierarchy is a small control known as an<br />
expansion handle, which may be rendered differently depending on whether<br />
these nodes are visible. Assuming these nodes are not visible, clicking on the<br />
expansion handle makes the tree expand to the right to show the next level of<br />
nodes, and downward to make room for the nodes that have just become visible<br />
to be stacked vertically. In Figure 10-1, the node C: \WINDOWS\SYSTEM<br />
has been expanded in this way to show its child nodes. Notice that the node<br />
C: \WINDOWS \WEB has moved downward to make room for the children of<br />
C:\WINDOWS\SYSTEM, and that the expansion handle to the left of the<br />
expanded node has been drawn with the "handle" part pointing downwards,<br />
whereas the handle for nodes that have not been expanded points to the<br />
right. Clicking on the expansion handle when the node is already expanded<br />
will cause the child nodes to disappear and the nodes at C: \WINDOWS\WEB<br />
and below to move upward to occupy the free space. There is never more<br />
than one node on any given row.<br />
Tree Appearance<br />
To emphasize how dependent the appearance of a tree and its nodes are on<br />
the selected look-and-feel, lets look at some of the possible variations. Figure<br />
10-1 shows a tree with the Metal look-and-feel selected. The same tree in<br />
the Windows look-and-feel is shown in Figure 10-2, while the Motif version<br />
can be seen in Figure 10—3.<br />
It's pretty evident that there are differences between these figures and<br />
Figure 10-1. As you can see, Windows and Motif use boxes to indicate nodes<br />
that have children. When the children are invisible, the expansion box has a<br />
plus sign to indicate that there is more of the tree to be viewed; when you<br />
open such a node to show its children, the plus sign changes to a minus sign,<br />
as you can see in the case of the C: \WINDOWS\SYSTEM node. The icons are<br />
also subtlly different and the line styles vary between look-and-feel implementations.<br />
It is even possible to have different representations of the same tree within<br />
a single look-and-feel. The tree has a client property called lineStyle that<br />
is used to control the lines drawn between nodes. This property is currently<br />
supported only by the Metal look-and-feel, but there is nothing about the
The Tree Control 1189<br />
mechanism used to implement it that binds it to a single look-and-feel, so you<br />
may find it implemented more widely in the future. The lineStyle property<br />
has three possible values, listed in Table 10-1.<br />
Table 10-1 LineStyle Settings<br />
Setting Effect<br />
None No lines are drawn anywhere on the tree.<br />
Angled Vertical lines between nodes at the same level, horizontal line to<br />
child node.<br />
Horizontal A single horizontal line between nodes immediately attached to<br />
the root node. This is the default setting.<br />
Figure 10-1 shows a tree with the Angled setting, which is the most natural<br />
way to represent a file system and is most like the appearance of Windows<br />
and Motif trees. This configuration can be obtained using code like this:<br />
JTree tree = new JTree () ;<br />
Figure 10-2 A tree as drawn by the Windows look-and-feel.
1190 Chapter 10 The Tree Control<br />
Figure 10-3 A Motif tree.<br />
tree.putClientProperty("JTree.lineStyle", "Angled")•<br />
Similar code is required to obtain the other two possible effects. The same<br />
tree rendered with lineStyle set to None is shown in Figure 10-4 and with<br />
lineStyle set to Horizontal in Figure 10-5. Because None is the default,<br />
all of your trees will look like the one in Figure 10-4 if you don't explicitly<br />
select a lineStyle. Since lineStyle is ignored by look-and-feel implementations<br />
that don't provide it, it is always safe to set a specific value no<br />
matter which look-and-feel is selected.<br />
Tree Node Selection<br />
The mouse can be used to select an item from the tree by clicking on the icon<br />
or the text. Clicking twice on either of these is the same as clicking on the<br />
expansion handle—the node either expands or collapses depending on its<br />
current state. The ability to make a selection is one of the main reasons for<br />
using a tree control. As you'll see, you can attach listeners that receive notification<br />
when a selection is made and you can also arrange to be notified when<br />
part of the tree is expanded or collapsed or is about to do so.
Figure 10-4 A Metal tree with line style "None."<br />
Elements of the Tree<br />
The Tree Control 1191<br />
Now let's turn to how a tree is represented in terms of data structures. The<br />
only elements of any substance in a tree are the nodes themselves—the way<br />
in which these nodes relate to each other is represented by references from<br />
one node to another. The JTree control doesn't directly manage the nodes<br />
themselves, or remember how they are organized. Instead, it delegates this<br />
to its data model.<br />
As with the other Swing components, JTree deals mainly with generic<br />
objects that are represented in <strong>Java</strong> by an interface. For example, any class<br />
can be used as a data model for the tree, so long as it implements the Tree-<br />
Model interface and any class can participate in the model as a node in the<br />
tree so long as it implements the interface TreeNode. This design pattern<br />
has been shown before in connection with JComboBox and JList, which<br />
have data models specified as interfaces and concrete implementations of<br />
those interfaces that are used by default. The JTree (and, to some extent<br />
JTable) is a little different from JComboBox and JList in that it is not<br />
really good enough to just implement the TreeNode and TreeModel inter-
1192 Chapter 10 The Tree Control<br />
Figure JO-5 A Metal tree with line style "Horizontal."<br />
faces. The default implementations of these interfaces in the Swing tree<br />
package provide facilities far beyond those specified by TreeNode and<br />
TreeModel. Furthermore, in many cases, these extra facilities can be<br />
accessed directly through the model or indirectly via the JTree object and<br />
there will be a loss of functionality if classes that only implement the minimal<br />
interface are used instead of the default ones. In practice, tree nodes are<br />
most likely to be instances of the class Def aultMutableTreeNode, while<br />
the model will probably be derived from Def aultTreeModel. For specific,<br />
lightweight uses of the tree where the full functionality of DefaultMutableTreeNode<br />
and Def aultTreeModel are not required, it might be useful<br />
to develop less functional implementations.<br />
JTree is unlike JComboBox and JList in another way. When you create<br />
either of the latter two, you populate the model and then wait for a selection.<br />
The item that is retrieved from the control as the user's selection is of the<br />
same type as the data held within the model itself. For example, a list box<br />
populated with Strings would return a selected item of type String. With<br />
JTree, things are not so simple. The model deals in terms of nodes, but the<br />
user interface to the tree uses a class called TreePath and the immediate
The Tree Control 1193<br />
result of a selection is one or more TreePaths. As you'll see later, there is a<br />
way to map from a TreePath to the corresponding TreeNode, which means<br />
that it is possible, from an event listener, to get back to the original node in<br />
the data model. This node is not, however, of any direct use to the selection<br />
event handler unless some information has been stored with the node that is<br />
of meaning to the user of the tree. Suppose, for example, that you construct a<br />
tree that shows the content of a file system in a file open dialog and the user<br />
double-clicks on an item to have it returned to the tree user as the selected<br />
file. There are two ways that the interface to the user of this tree could be<br />
built—either the name of the selected file would be returned, or alternatively<br />
you could choose to return an object that represents the file that was stored<br />
with the file's node when the tree was created. The second of these alternatives<br />
is obviously more powerful. To make such an implementation possible,<br />
the tree nodes allow you to store a reference to an arbitrary object, called the<br />
user object, with each node. How you use this is up to you—you might just<br />
choose to make it the file's name, or it might be a j ava. io. File object for<br />
the file.<br />
Creating a Tree<br />
JTree has no less than seven constructors, most of which allow you to initialize<br />
the data model with a small quantity of data taken from the more common<br />
data collection classes in the JDK:<br />
public JTree (),•<br />
public JTree(Hashtable value);<br />
public JTree(Vector value);<br />
public JTree(Object[] value);<br />
public JTree(TreeModel model);<br />
public JTree(TreeNode rootNode);<br />
public JTree(TreeNode rootNode,<br />
boolean askAllowsChildre);<br />
The first constructor gives you a tree with a small data model already<br />
installed; this can be useful when you write your first program that uses a tree,<br />
but after that you'll probably never use it again. The next three constructors<br />
initialize the tree from a Hashtable, a Vector, and an array of arbitrary<br />
objects. Since all of these are flat data structures, the resulting tree is also flat,<br />
consisting of a root node and the data from the object passed to the constructor<br />
attached to it, with one node per entry in the table, vector or array. Figure 10-<br />
6 shows a tree created from a Hashtable containing five entries.
1194 Chapter 10 The Tree Control<br />
Figure 10-6 A tree created from a Hashtable.<br />
The code that was used to create this tree is shown in Listing 10-1 and can<br />
be run using the command<br />
<strong>Java</strong> <strong>JFC</strong>Book.Chapter10.HashHandleTree.<br />
Listing 10-1 Creating a Tree with a Hashtable<br />
package <strong>JFC</strong>Book.Chapter10;<br />
import j avax.swing.*;<br />
import javax.swing.tree.*;<br />
import java.util.*;<br />
public class HashHandleTree {<br />
public static void main(String[] args) {<br />
JFrame f = new JFrame("Tree Created From a Hashtable")<br />
Hashtable h = new Hashtable();<br />
h.put("One", "Number one");<br />
h.put("Two", "Number two");<br />
h.put("Three", "Number three");<br />
h.put("Four", "Number four");<br />
h.put("Five", "Number five");<br />
JTree t = new JTree(h);<br />
t.putClientProperty("JTree.lineStyle", "Angled");<br />
J<br />
}<br />
t.setShowsRootHandles(false);<br />
f.getContentPane().add(t);<br />
f.pack();<br />
f.setVisible(true);
The Tree Control 1195<br />
As you can see from Figure 10-6, the tree displays all of the items from<br />
the Hashtable. Each item has been turned into a leaf node and added<br />
directly beneath the root node of the tree. However, since a root node was<br />
not explicitly supplied, the tree doesn't display one. This is a common feature<br />
amongst trees created with the second, third, and fourth constructors. A consequence<br />
of this is that you can't collapse this tree. You can force the root<br />
node to be displayed by using the JTree setRootVisible method:<br />
t.setRootVisible(true);<br />
This would show the root node as an open folder labeled root, with an<br />
expansion icon to the left of it. If you don't want to show the expansion icon,<br />
you can disable it using setShowsRootHandles:<br />
t.setShowsRootHandles(false);<br />
Figure 10-7 shows two trees, both with the root node visible. The lefthand<br />
tree was created with setShowsRootHandles (true) and the right<br />
one with setShowsRootHandles (false) .<br />
Figure 10-7 A tree with the root visible.<br />
You can expand or collapse the tree by double-clicking on the root folder<br />
or its label. You can also use the keyboard to navigate the tree and open or<br />
close nodes. If you select the root node, you can use the down arrow key to<br />
move down the set of child nodes and the up key to move back up again.<br />
When a node that has children is selected and closed, the right arrow key will<br />
open it. Similarly, you can use the left arrow key on an open branch node to<br />
close it.<br />
In cases like this where the root node was created automatically, the arbitrary<br />
label root is assigned to it. You can, if you wish, change this label or<br />
remove it entirely. You'll see how to do this later.<br />
You'll notice that the items in the tree are not ordered in a particularly sensible<br />
way. This happens because Hashtables don't maintain the order of the
1196 Chapter 10 The Tree Control<br />
items that you place into them. The tree is constructed by getting an enumeration<br />
of the items in the Hashtable, which doesn't guarantee any particular<br />
ordering. If you care about the order in which the data is displayed, you<br />
should use a Vector or an array.<br />
Most trees will be created using one of the last three constructors, which<br />
require a complete tree model or at least the root node to have already been<br />
constructed. If you choose to supply a model, you can use the Swing<br />
DefaultTreeModel class, or create your own as long as it implements the<br />
TreeModel interface. For most purposes, DefaultTreeModel is more than<br />
adequate and, as mentioned earlier, it offers useful facilities over and above<br />
the basic interface, many of which will be used in this chapter.<br />
The TreeNode Interface<br />
Whether or not you explicitly supply the model, you will need to create the<br />
root node and attach to it all the data for the tree. All nodes are based on the<br />
TreeNode interface, which has seven methods:<br />
public Enumeration children()<br />
public boolean getAllowsChildren()<br />
public TreeNode getChildAt(int index)<br />
public int getChildCount()<br />
public int getIndex(TreeNode child)<br />
public TreeNode getParentO<br />
public boolean isLeaf()<br />
With the exception of isLeaf, all of these methods are concerned with<br />
the relationship between a node and its parent and children. Every node<br />
(apart from the root node) has exactly one parent and may have any number<br />
of children. If the node is a leaf node, it doesn't have children. It is also possible<br />
to have a type of node that shouldn't be considered to be a leaf when the<br />
tree draws its on-screen representation, but still doesn't allow child nodes to<br />
be connected to it. Nodes with this property return false to the getAllowsChildren,<br />
as should any node that can only be a leaf (such as a node<br />
representing a file in a file system). Child nodes are ordered within their parent,<br />
because the ordering might be important to the data that is being represented.<br />
Because of this property, it is possible to get the TreeNode object for<br />
a child at a given index within the parent's collection (using getChildAt) or<br />
the index for a particular child node (from get Index). The getParent<br />
method returns a node's parent node. In the case of the root node, this<br />
returns null. Finally, getChildCount returns the number of children
The Tree Control 1197<br />
directly connected to a node. This value does not include grandchildren and<br />
more distant descendants.<br />
As you can see, TreeNode is a read-only interface. To make changes to a<br />
node or its position in the tree, you need an instance of MutableTreeNode,<br />
an interface that extends TreeNode. Usually, the nodes that you actually create<br />
will be instances of Def aultMutableTreeNode, which is the Swing class<br />
implementing MutableTreeNode, so that it is usually possible to get a writable<br />
reference to any node even if you're only given a TreeNode reference<br />
by casting this reference to a MutableTreeNode. If you don't have prior<br />
knowledge of the type of node you are dealing with (perhaps because you're<br />
writing code to drive a third-party tree-based component), you should check<br />
that your TreeNode is an instance of MutableTreeNode before doing this.<br />
The MutableTreeNode Interface<br />
The MutableTreeNode interface adds the following methods to TreeNode:<br />
public void insert(MutableTreeNode child, int index)<br />
public void remove(int index)<br />
public void remove(MutableTreeNode node)<br />
public void removeFromParent()<br />
public void setParent(MutableTreeNode parent)<br />
public void setUserObject(Object userObject)<br />
By contrast to TreeNode, these methods are entirely concerned with creating<br />
and changing the parent-child relationships between nodes. The<br />
insert method adds the given node as a child of the node against which it is<br />
invoked, specifying the index that should be used for the child. Def aultMutableTreeNode<br />
provides a more convenient way of adding children that<br />
doesn't require you to keep track of indices, as you'll see shortly. The remove<br />
methods disconnect a node from its parent given either the node reference<br />
or an index. Whichever variant of remove you use, you must invoke this<br />
method against the parent of the node that you want to remove. To remove a<br />
child node without a reference to its parent, invoke removeFromParent<br />
against the node itself.<br />
The setParent method sets the reference from a child to its parent. You<br />
are very unlikely to want to use this method, however, because it doesn't<br />
make the parent itself aware of the child. This method is really intended for<br />
use in the implementation of the other MutableTreeNode methods, such as<br />
insert.<br />
The last method in this interface is setUserObject, which associates an<br />
arbitrary object with the node. This is, in fact, the only way to make a node
1198 Chapter 10 The Tree Control<br />
useful. The other methods of MutableTreeNode deal with the construction<br />
of the tree, but this method allows you to say what the objects in the tree represent.<br />
In the examples shown above, the strings One, Two, Three and so on<br />
were the useful content of the tree (although "useful" might not be the right<br />
word in the case of this trivial example). They are stored in the tree as the<br />
user objects of the nodes that represent them. If you use the DefaultMutableTreeNode<br />
class to create your nodes, you supply the user object to the<br />
constructor, and you can also use the setUserObj ect method to change the<br />
associated object later.<br />
Now let's look at the Def aultMutableTreeNode class which, as has been<br />
said, implements a superset of the MutableTreeNode interface. Unless<br />
you're implementing a very lightweight tree and have special requirements,<br />
it's not worth considering implementing your own MutableTreeNode class.<br />
All of the examples in this chapter will directly use or derive from Def ault-<br />
MutableTreeNode.<br />
<strong>Core</strong> Note<br />
While this section is concerned with tree nodes as part of the JTree<br />
component, it is worth bearing in mind that the tree model can be used on<br />
its own without reference to the tree control.You could, for example, use<br />
Def aultTreeModel to implement a tree to hold information used<br />
internally by your application. If you intend to do this and memory is a<br />
concern, you might consider implementing a lightweight implementation of<br />
MutableTreeNode that suits your specific requirements.<br />
Def aultMutableTreeNode has too many methods to list them all here—<br />
refer to the API specification if you want to see what they all are. Many of<br />
them will be covered here and in the following sections.<br />
The DefaultMutableTreeNode Class<br />
The first thing we're going to do with this class is to show you how to use it to<br />
build a simple tree from scratch. DefaultMutableTreeNode has three constructors:<br />
public DefaultMutableTreeNode()<br />
public DefaultMutableTreeNode(Object userObject)<br />
public DefaultMutableTreeNode(Object userObject,<br />
boolean allowsChildren)
The Tree Control 1199<br />
The first constructor creates a node with no associated user object; you can<br />
associate one with the node later using the setUserObject method. The<br />
other two connect the node to the user object that you supply. The second<br />
constructor creates a node to which you can attach children, while the third<br />
can be used to specify that child nodes cannot be attached by supplying the<br />
third argument as false.<br />
Using Def aultMutableTreeNode, you can create nodes for the root and<br />
for all of the data you want to represent in the tree, but how do you link them<br />
together? You could use the insert method that we saw above, but it is simpler<br />
to use the Def aultMutableTreeNode add method:<br />
public void add(MutableTreeNode child);<br />
This method adds the given node as a child of the node against which it is<br />
invoked and at the end of the parent's list of children. By using this method,<br />
you avoid having to keep track of how many children the parent has. This<br />
method, together with the constructors, gives us all you need to create a<br />
workable tree. To begin to create a tree, you need a root node:<br />
DefaultMutableTreeNode rootNode<br />
= new DefaultMutableTreeNode();<br />
Below the root node, two more nodes are going to be added, one to hold<br />
details of the Apollo lunar flights, the other with information on the manned<br />
Skylab missions. These two nodes will be given meaningful text labels:<br />
DefaultMutableTreeNode apolloNode =<br />
new DefaultMutableTreeNode("Apollo");<br />
DefaultMutableTreeNode skylabNode =<br />
new DefaultMutableTreeNode("Skylab");<br />
The nodes are then added directly beneath the root node:<br />
rootNode.add(apolloNode) ;<br />
rootNode.add(skylabNode);<br />
Under each of these nodes, a further node will be added for each mission<br />
and beneath each of these a leaf node for each crew member. There's an<br />
implementation of this in the example programs that you can run using the<br />
command:<br />
<strong>Java</strong> <strong>JFC</strong>Book.Chapter10.TreeExamplel<br />
The result of running this example is shown in Figure 10-8.<br />
This program shows a root folder with no associated label and nodes<br />
labeled Apollo and Skylab. Clicking on the expansion icons of either of<br />
these opens it to show the numbered missions, and clicking on any of these
1200 Chapter 10 The Tree Control<br />
Figure 10-8 A tree built using DefaultMutableTreeNodes.<br />
shows the crew for that flight. Let's look at an extract from the source of this<br />
example:<br />
import j avax.swing.*;<br />
import javax.swing.tree.*;<br />
public class TreeExamplel extends JTree {<br />
public TreeExamplel() {<br />
DefaultMutableTreeNode rootNode =<br />
new DefaultMutableTreeNode();<br />
DefaultMutableTreeNode apolloNode =<br />
new DefaultMutableTreeNode("Apollo");<br />
rootNode.add(apolloNode);<br />
}<br />
DefaultMutableTreeNode skylabNode =<br />
new DefaultMutableTreeNode("Skylab");<br />
rootNode.add(skylabNode);<br />
// CODE OMITTED<br />
this.setModel(new DefaultTreeModel(rootNode));
}<br />
public static void main(String[] args) {<br />
JFrame f = new JFrame("Tree Example 1");<br />
TreeExamplel t = new TreeExamplel();<br />
t.putClientProperty("JTree.lineStyle", "Angled");<br />
t.expandRow(0);<br />
f.getContentPane().add(new JScrollPane(t));<br />
f.setSize(300, 300);<br />
f.setvisible(true);<br />
}<br />
The Tree Control 1201<br />
This class is defined as an extension of JTree, which allows the creation of<br />
its data to be encapsulated within it. The root node and all of the child nodes<br />
are created and a tree structure is built from the nodes as described earlier.<br />
The JTree needs a data model in order to display anything, so the last step of<br />
the constructor is to install a model that contains the structure that has just<br />
been created:<br />
this.setModel(new DefaultTreeModel(rootNode));<br />
This creates a new DefaultTreeModel and initializes it with our root<br />
node, then uses the JTree setModel method to associate the data model<br />
with the tree. Since our class is derived from JTree, its default constructor<br />
will have been invoiced at the start of our constructor. As noted earlier, this<br />
creates a tree with a model containing dummy data. When setModel is<br />
called at the end of the constructor, this data is overwritten with the real data.<br />
Another way to create a JTree is to directly pass it the root node. If you use<br />
this method, it creates a DefaultTreeModel of its own and wraps it around<br />
the node that you pass to its constructor. Here's a short example of that:<br />
DefaultMutableTreeNode rootNode =<br />
new DefaultMutableTreeNode();<br />
DefaultMutableTreeNode apolloNode =<br />
new DefaultMutableTreeNode("Apollo");<br />
DefaultMutableTreeNode skylabNode =<br />
new DefaultMutableTreeNode("Skylab");<br />
rootNode.add(apolloNode);<br />
rootnode.add(skylabNode);<br />
JTree t = new JTree(rootNode);<br />
If you look at the main method in the code extract shown above, you'll<br />
notice the following line after the tree was created:<br />
t.expandRow(0);
•<br />
1202 Chapter 10 The Tree Control<br />
This line uses the expandRow method to ensure that row 0 of the tree is<br />
expanded to display the children that the node on that row contains. In fact,<br />
this line is redundant in this example because the root node is expanded by<br />
default. You can force a node to be shown in an unexpanded state by calling<br />
the collapseRow method, which also requires the index of the row within<br />
the tree. We'll say more about the methods that can be used to expand and<br />
collapse parts of the tree later in this chapter.<br />
Apart from when you create it, the JTree control doesn't deal with nodes<br />
directly. Instead, you can address items in the tree and obtain information<br />
about them using either their TreePath or their row number. Let's look at<br />
the row number first. The row mimber refers to the number of the row on<br />
the screen at which the node in question appears. There is only one node<br />
ever on any row, so specifying the row identifies a node without any ambiguity.<br />
Furthermore, provided it's actually displayed, row 0 is always occupied by<br />
the root node. The problem with using row numbers is that the row numbers<br />
for all of the nodes apart from the root node change as nodes are opened or<br />
closed. When you start TreeExamplel, the root node is on row 0, the<br />
"Apollo" node on row 1, and the "Skylab" node occupies row 2. However, if<br />
you click on the expansion icon for "Apollo," the "Skylab" node moves downward<br />
and, in this case, becomes row number 9, because the "Apollo" node<br />
opens to show seven child nodes, which will occupy rows 2 through 8.<br />
Because keeping track of row numbers is not very convenient, it is more<br />
usual to address the content of a tree using TreePath objects.<br />
The TreePath Class<br />
If Def aultMutableTreeNode is the physical representation of a node, then<br />
TreePath is its logical representation. Instead of pointing you directly at the<br />
node, it tells you the node's "address" within the tree. So long as the node itself<br />
and its parents are not moved within the tree, its TreePath will remain constant<br />
and can always be used to address it. TreePath has two public constructors:<br />
public TreePath(Object singlePath)<br />
public TreePath(Object[] paths)<br />
A TreePath stores an array of objects that describes the path to a node.<br />
The second constructor sets up this array from its argument, while the first is a<br />
convenience method that creates an array of length 1 and initializes it with the<br />
single object passed as the argument. TreePath has the following methods:<br />
public boolean equals(Object)<br />
public Object getLastPathComponent();
public Object getPathComponent(int index);<br />
public int getPathCount();<br />
public Object [] getPathO;<br />
public TreePath getParentPath();<br />
public TreePath pathByAddingChild(Object child);<br />
public boolean isDescendant(TreePath treePath)<br />
public String toString()<br />
The Tree Control 1203<br />
None of these methods are concerned with what the objects that the<br />
TreePath stores actually are—they just treat them as anonymous objects.<br />
The equals method returns true if the object passed as its argument is<br />
another TreePath with an object array of the same length as its own and for<br />
which the result of comparing each object in its own array with the corresponding<br />
object in the other array (using the equals method the objects<br />
being compared) returns true .<br />
The getPath method returns the array of objects installed by the constructor,<br />
while getLastPathComponent returns the last object in the array.<br />
In the case of a TreePath representing a set of directories from a file system<br />
tree ending in a file, this method would return the object that corresponds to<br />
the file itself. Similarly, getPathCount returns the number of objects in the<br />
path and getPathComponent returns a single component of that path given<br />
its index, where 0 is the component at the root. getParentPath returns a<br />
TreePath object representing the parent of the TreePath against which it<br />
is invoked. pathByAddingChild creates and returns a TreePath object<br />
that represents the results of appending the Object passed as its argument<br />
to the current TreePath. In terms of the file system tree, if you invoked this<br />
method against the TreePath for a node representing directory and passed<br />
it an Object representing a file or subdirectory within that directory, it<br />
would return a TreePath for that file or subdirectory.<br />
The isDescendant method determines whether the TreePath passed as<br />
its argument represents a descendant of the TreePath against which it is<br />
invoked. This will be true if the TreePath passed as the argument has at<br />
least as many objects in its array as the TreePath against which this method<br />
is invoked, and each of the objects in the invoked TreePaths array is equal<br />
to the corresponding object in the array of the proposed descendant. Finally,<br />
the toString method prints a readable representation of the TreePath by<br />
invoking the toString methods of each object in its array and concatenating<br />
them, separated by commas.<br />
The TreePath doesn't care what the objects that it manipulates are, but<br />
you need to know what they are in order to make much use of a TreePath.<br />
The objects that TreePath actually stores are the TreeNodes for each node<br />
of the tree between the root and the object that the TreePath relates to. In
1204 Chapter 10 The Tree Control<br />
most cases (and in all of the examples in this chapter), this object will actually<br />
be a MutableTreeNode. This means that, in an event handler that receives a<br />
TreePath in its event, you can access the information from the data model<br />
that the event relates to, including the user object associated with the node,<br />
simply by getting a reference to the node from the TreePath. You'll see<br />
when looking at the file system tree component that is developed later in this<br />
chapter why this is a useful feature.<br />
Let's look in more detail at what a TreePath is made up of by using an<br />
example. TreeExample2 is a development of the last example in which the<br />
tree is built and then, every 30 seconds, the TreePath object for whatever is<br />
on row 4 of the tree's display is obtained and its content is printed. Here is<br />
the interesting part of this program:<br />
for (;;) {<br />
Thread.sleep(30000);<br />
// Get TreePath for row 4<br />
TreePath p = t.getPathForRow(4);<br />
if (p == null) {<br />
System.out.println("Nothing on row 4!");<br />
continue;<br />
}<br />
// Print the official description of "p"<br />
System.out.println("===================\n" + p) ;<br />
// Now look inside<br />
Object [] o = p.getPathO ;<br />
for (int i = 0; i < o.length; i++) {<br />
System.out.println("Class: " + o[i].getClass() +<br />
"; value: " + o [i]) ;<br />
if (o[i] instanceof DefaultMutableTreeNode) {<br />
Object uo =<br />
( (DefaultMutableTreeNode)o[i]) .getUserObject() ;<br />
if (uo != null) {<br />
System.out.printlnt"\tUser object class: " +<br />
uo.getClass() +"; value: " + uo);<br />
}<br />
}<br />
}<br />
}<br />
The TreePath for whatever is on row 4 is obtained by using the get-<br />
PathForRow method of JTree. If the row is empty, as it will be when you
The Tree Control 1205<br />
start the program, this method returns null, so a message is printed and<br />
nothing further happens for another 30 seconds. Otherwise, the TreePath<br />
tostring method is used to see its own description of itself, then getPath<br />
is called to get its array of component parts. For each object returned in this<br />
array, its <strong>Java</strong> class and its value are printed. Finally, if any object that is<br />
obtained from the array is a DefaultMutableTreeNode, its getUserObject<br />
method is called to get the user object associated with the node and, if<br />
there is one, its class and its value are also printed. You can run this example<br />
yourself by typing:<br />
<strong>Java</strong> <strong>JFC</strong>Book.Chapter10.TreeExample2<br />
Following are the results of three iterations around the loop with three different<br />
directories expanded to place different objects on row 4 of the display.<br />
[null, Skylab, 3]<br />
Class : class j avax. swing. tree. DefaultMutableTreeNode; value: null<br />
Class: class javax.swing.tree.DefaultMutableTreeNode; value: Skylab<br />
User object class: class <strong>Java</strong>.lang.String; value: Skylab<br />
Class: class javax.swing.tree.DefaultMutableTreeNode; value: 3<br />
User object class: class <strong>Java</strong>.lang.String; value: 3<br />
[null, Apollo, 13]<br />
Class: class javax.swing.tree.DefaultMutableTreeNode; value: null<br />
Class: class javax.swing.tree.DefaultMutableTreeNode; value: Apollo<br />
User object class: class java.lang.String; value:<br />
Apollo<br />
Class: class javax.swing.tree.DefaultMutableTreeNode; value: 13<br />
User object class: class <strong>Java</strong>.lang.String; value: 13<br />
[null, Apollo, 12, Pete Conrad]<br />
Class: class javax.swing.tree.DefaultMutableTreeNode; value: null<br />
Class: class javax.swing.tree.DefaultMutableTreeNode; value: Apollo<br />
User object class: class java.lang.String; value:<br />
Apollo<br />
Class: class javax.swing.tree.DefaultMutableTreeNode; value: 12<br />
User object class: class <strong>Java</strong>.lang.String; value: 12<br />
Class: class javax.swing.tree.DefaultMutableTreeNode; value: Pete Conrad<br />
Conrad<br />
User object class: class <strong>Java</strong>.lang.String; value: Pete<br />
The tostring method of TreePath prints the path to the node that was<br />
on row 4. Next, the objects that correspond to the various parts of the path
1206 Chapter 10 The Tree Control<br />
are shown. As you can see, there is one object for each node in the path,<br />
starting at the root and ending with the node that corresponds to the Tree-<br />
Path. As noted above, these objects are actually the nodes that were stored<br />
in the Def aultTreeModel, so they are all instances ofDefaultMutable-<br />
TreeNode and invoking toString on them prints the string that was supplied<br />
to the constructor that created them. Finally, each of these nodes, apart<br />
from the root node, has an associated user object that, as you can see, is the<br />
same string. This is not, however, a surprise, because the DefaultMutable-<br />
TreeNode constructor that was used described its argument as the user<br />
object associated with the node. In fact, the toString method of Def ault-<br />
MutableTreeNode just invokes the toString method of the user object if<br />
there is one and returns an empty string if there isn't. This explains why the<br />
Def aultMutableTreeNode returns the string passed to its constructor.<br />
Incidentally, we now have the information needed to modify one of our<br />
earlier example programs so that the string root doesn't appear next to the<br />
root node on the display, as it did in Figure 10-7. In that example, the root<br />
nodes were not explicitly created by the program: Because each JTree was<br />
built by passing a Hashtable to its constructor, the root nodes were built for<br />
us. The string displayed for the root node is the result of invoking toString<br />
against that node. You now know that, because this node is a DefaultMutableTreeNode,<br />
its toString method will delegate to that of its user<br />
object if there is one and return an empty string otherwise. When the root<br />
nodes in Figure 10—7 were created, the string root was assigned as the user<br />
object, so to make it disappear, you just have to use the setUserObject<br />
method to set the user object to null.<br />
Here is how you would create a tree that shows a root folder without the<br />
root label:<br />
JTree t = new JTree(h);<br />
t.setShowsRootHandles(false);<br />
t.setRootVisible(true) ;<br />
// Remove the 'root' label<br />
Object rootNode = t.getModel().getRoot();<br />
((DefaultMutableTreeNode)rootNode).setUserObject(null);<br />
This code gets a reference to the model from the JTree using the get-<br />
Model method and then gets the root node from the model by using the<br />
TreeModel getRoot method. This method is defined to return an Object,<br />
but you know that the root node is a Def aultMutableTreeNode, so all you<br />
have to do is cast it and use setUserOb j ect to remove the root string. You
The Tree Control 1207<br />
can use the same technique to assign an arbitrary label to the root node. You<br />
can see how this works in practice using the command<br />
<strong>Java</strong> <strong>JFC</strong>Book.ChapterlO.HashHandleTree3<br />
which produces the same result as that shown in Figu?-e 10-7, except that<br />
the root nodes do not have any associated text.<br />
What is a Leaf?<br />
The Metal look-and-feel displays nodes that it considers to be leaves using<br />
what looks like a sheet of paper instead of a folder icon. How does it determine<br />
that the node is a leaf? There are two methods in the TreeNode interface<br />
that determine whether a node is a leaf:<br />
public boolean getAllowsChildren()<br />
public boolean isLeafO<br />
If you think of the tree of Apollo and Skylab missions and their astronauts,<br />
the astronauts are represented as leaf objects. This is correct, because it is<br />
not our intention to add further nodes below those representing the astronauts.<br />
In cases like this, it is acceptable to determine that a node is a leaf simply<br />
because it doesn't actually have any children. Contrast this, however, with<br />
a file system. If a file system were represented by a tree control (an example<br />
of which you'll see later), you would expect files to be leaf objects, but you<br />
would always expect a directoiy to be represented as a folder, whether or not<br />
it contain any files or subdirectories. In this case, it is not sufficient to rely on<br />
the number of children that the node has.<br />
If relying on the count of children is acceptable to determine whether a<br />
node is a leaf, the isLeaf method returns the appropriate answer, because<br />
the default implementation in DefaultMutableTreeNode returns true if<br />
the node that it is applied to does not have children and false if it does. This<br />
explains why the astronauts all appeared as leaf nodes even though nothing<br />
special was done when creating their nodes.<br />
For nodes like directories, a more appropriate check is not whether the<br />
node has any child nodes, but whether it is allowed to have child nodes<br />
attached to it. If it isn't, then it must be a leaf and vice versa. The getAllowsChildren<br />
method is used to allow the node to return this information.<br />
DefaultMutableTreeNode supplies a default implementation that returns<br />
the value of the node's allowsChildren variable, which is initially true,<br />
indicating that the node is not a leaf.<br />
The next problem, given that there are two ways to find out whether a<br />
node is a leaf, is how the tree knows which method is the appropriate one to
1208 Chapter 10 The Tree Control<br />
use. This problem is handled by Def aultTreeModel, which maintains a<br />
boolean instance variable called asksAllowsChildren, initialized to false<br />
by default. Def aultTreeModel has two constructors:<br />
public DefaultTreeModel(TreeNode rootNode);<br />
public DefaultTreeModel(TreeNode rootNode,<br />
boolean asksAllowsChildren)<br />
If the second constructor is used, you can supply true as the second<br />
argument to indicate that all nodes in the model should have their getAllowsChildren<br />
method called to determine whether they should be considered<br />
a leaf. If asksAllowsChildren is false, the node's isLeaf method<br />
is always used. To achieve the correct effect, you need to use the correct tree<br />
model constructor and set this variable appropriately.<br />
The value of this variable is only used in the Def aultTreeModel isLeaf<br />
routine:<br />
public boolean isLeaf(Object node);<br />
This method checks the asksAllowsChildren variable and returns the<br />
value of either isLeaf or getAllowsChildren, having invoked it on the<br />
TreeNode given as the argument. This method, then, returns the correct<br />
value whichever way the tree nodes are used to indicate whether they are leaf<br />
nodes.<br />
<strong>Core</strong> Alert<br />
Despite appearances, the argument supplied to this method must be a<br />
TreeNode, or you'll get a ClassCastException.<br />
If you are using the getAllowsChildren method to determine whether<br />
a node is a leaf, you need to set the node's allowsChildren value properly<br />
when you create it. Alternatively, you can use the setAllowsChildren<br />
method to change it after construction.<br />
Expanding and Collapsing a Tree<br />
Even if you never change the content of a tree after creating it, trees are not<br />
static objects. Once it has been displayed, the user can change a tree's<br />
appearance by expanding and collapsing nonleaf nodes to show or hide different<br />
levels of the tree. This section shows you what possibilities there are<br />
for expanding and traversing a tree and looks at the events that these actions<br />
generate.
Tree Expansion and Traversal<br />
The Tree Control 1209<br />
When a tree is first created, unless you take special action, one level of nodes<br />
is visible. Nodes that have children are rendered with an expansion handle,<br />
which you can use to make their child nodes visible. When you click on the<br />
handle, the next level of nodes is drawn and the icon changes its appearance<br />
to indicate that a second click will reverse the process and collapse the node.<br />
Another way to expand or collapse a subtree is to double-click on the node<br />
itself instead of clicking the expansion box. In <strong>Java</strong> 2 version 1.3, you can<br />
change the number of clicks that are needed to expand or collapse a node by<br />
clicking on the node itself:<br />
public void setToggleClickCount(int clickCount);<br />
It is also possible to navigate the tree using the keyboard. To see how this<br />
works, run the TreeExamplel program that was shown earlier:<br />
<strong>Java</strong> <strong>JFC</strong>Book.ChapterlO.TreeExamplel<br />
When this starts, you'll see the root node and two child nodes labeled<br />
Apollo and Skylab. Provided you don't click the mouse, none of these<br />
items will be highlighted. Now press the right-arrow key on your keyboard<br />
and the root node will be highlighted, indicating that it has been selected.<br />
Pressing the down arrow now moves the selection to the Apollo node and<br />
repeating it carries the selection down to Skylab. Similarly, the up arrow key<br />
moves the selection back up.<br />
Now use the up and down arrow keys to highlight Apollo and then press<br />
the right arrow. This causes the Apollo node to expand and display its child<br />
nodes. With these nodes exposed, the down key now moves you not to Skylab,<br />
but to 11, the first child node of Apollo. In fact, the up and down keys<br />
just move the selection up and down by one row on the screen. If you leave<br />
the selection on 11 and press the right arrow key, this node opens to expose<br />
the names of the crew of Apollo 11. With these nodes visible, press the left<br />
arrow key. This collapses the subtree rooted at 11, but leaves 11 selected. So<br />
it appears that the left and right arrows just expand and collapse a node s subtree.<br />
However, if you press the right arrow with the selection on 11 to expand<br />
its child nodes, then press it again, the selection moves to the first child. In<br />
other words, the left and right arrow keys open and close a subtree if they<br />
can, but if the subtree is already open or closed, these keys behave like the up<br />
and down arrows, respectively.<br />
You can also use the HOME, END, PAGE DOWN and PAGE UP keys to navigate<br />
a tree. The HOME key moves the selection back to the root, or whichever node<br />
is at the top of the tree if the root node is hidden, while END moves it to the
1210 Chapter 10 The Tree Control<br />
last row of the tree. PAGE DOWN and PAGE UP scroll the tree down or up by a<br />
page. To see this, expand the tree completely and, if necessary, resize the<br />
window until the vertical scrollbar appears so that you have more in the viewport<br />
than can be displayed on one page, then press PAGE DOWN.<br />
Expanding and Collapsing Nodes under<br />
Program Control<br />
JTree provides a set of methods that you can use to expand or collapse parts<br />
of the tree and to find out whether a given node is expanded or not. These<br />
methods are listed in Table 10-2.<br />
Table 10-2 Expanding and Collapsing Nodes in a Tree<br />
Method<br />
public void expandRow ( int<br />
row)<br />
public void collapseRow<br />
(int row)<br />
public void expandPath<br />
(TreePath path)<br />
public void collapsePath<br />
(TreePath path)<br />
public boolean isExpanded<br />
(int row)<br />
public boolean<br />
isCollapsed (int row)<br />
public boolean isExpanded<br />
(TreePath path)<br />
public boolean<br />
isCollapsed (TreePath<br />
path)<br />
Description<br />
Expands the node currently on the given row<br />
of the screen.<br />
Collapses the node on the given row.<br />
Expands the node with the given TreePath .<br />
Collapses the node with the given Tree-<br />
Path.<br />
Determines whether the node on the given<br />
row is expanded.<br />
Determines whether the node on the given<br />
row is collapsed.<br />
Determines whether the node with the given<br />
TreePath is expanded.<br />
Determines whether the node with the given<br />
TreePath is collapsed.<br />
The isExpanded and isCollapsed methods just return a boolean that<br />
indicates whether the node is currently expanded or collapsed. You can<br />
address the node either using its screen row (which is rarely likely to be a<br />
useful option), or its TreePath, which is more useful because it is independent<br />
of how much of the tree is expanded at any given time. Notice, however,
The Tree Control 1211<br />
that there is no method that can be used with a TreeNode, because these are<br />
JTree methods and JTree doesn't deal with TreeNodes, except in its constructor.<br />
However, if you have a Def aultMutableTreeNode, you can get the<br />
corresponding TreePath using the following code:<br />
// This only works if "node" is a DefaultMutableTreeNode.<br />
DefaultMutableTreeNode node = // Initialize to point<br />
// to a node in the tree<br />
TreeNode[] pathToRoot = node.getPath();<br />
TreePath path = new TreePath(pathToRoot);<br />
Given a node, the Def aultMutableTreeNode getPath method returns<br />
the ordered set of nodes that lead to it from the root of the tree. For example,<br />
in the case of TreeExamplel, the ordered set of nodes that would be returned<br />
by getPath for the node corresponding to Neil Armstrong would be:<br />
root<br />
Apollo<br />
11<br />
Neil Armstrong<br />
Using a set of nodes, you can create a TreePath by using the constructor<br />
that takes an array of objects—as you saw earlier, the objects that make up a<br />
TreePath are actually just the TreeNodes in the path that it represents.<br />
This is a general method for mapping from a node to a TreePath, but it only<br />
works with a DefaultMutableTreeNode because neither the TreeNode<br />
nor the MutableTreeNode interface requires the implementation of the<br />
getPath method that was used to get the array of nodes.<br />
The collapseRow and collapsePath methods perform the obvious<br />
functions. Again, you must know either a row number or a TreePath to use<br />
these methods. Nothing happens if the node is already collapsed.<br />
To expand a node, you use either expandRow or expandPath. If the node<br />
has any children and it is not already expanded, its immediate children are<br />
displayed. If you want to expand more of the tree, you will need to apply the<br />
expand methods to subsequent levels. If the node that is the target of these<br />
methods is not itself visible when asked to expand, the parts of the tree that<br />
lead to it will first be expanded to make it visible. For example, if the example<br />
tree were completely closed and you asked for the node 11 to be expanded,<br />
the root node would be expanded to show Apollo and Skylab, then<br />
Apollo would be expanded to show all of the mission numbers, including<br />
11, and finally 11 would expand to show Neil Armstrong, Buzz Aldrin,<br />
and Michael Collins. In this case, expanding a node and then collapsing it<br />
does not leave the tree in the same state as it started, because the nodes
1212 Chapter 10 The Tree Control<br />
above 11 would not be collapsed. Note, however, that you can only expand<br />
or collapse a child that is not a leaf node. Therefore, if you want to expand<br />
the tree to show the node for Neil Armstrong, you would have to call<br />
expandPath on the parent of that node, not on the node itself.<br />
When a node is expanded, the tree is automatically scrolled to bring as<br />
many as possible of the node's children into view (assuming, of course, that it<br />
is mounted in a JScrollPane). If you don't want this behavior, you can disable<br />
it using the first of the following JTree methods:<br />
public void setScrollsOnExpand(boolean cond);<br />
public boolean getScrollsOnExpand();<br />
Tree Expansion Events<br />
Every time a node in the tree is expanded or collapsed, a TreeExpansion-<br />
Event is generated. You can receive these events by registering a TreeExpansionListener<br />
on the JTree itself. The TreeExpansionListener<br />
interface has only two methods:<br />
public void treeExpanded(TreeExpansionEvent event)<br />
public void treeCollapsed(TreeExpansionEvent event)<br />
The TreeExpansionEvent contains a source field that corresponds to<br />
the JTree itself and a TreePath that represents the node was expanded or<br />
collapsed. You can obtain the source of the events using the usual get-<br />
Source method and the path using getPath:<br />
public TreePath getPathO;<br />
Sometimes, expanding a path can generate more than one event, because<br />
it may be necessary to expand other nodes to make the target node visible. To<br />
see the events that are generated when this happens, we created a modified<br />
version of TreeExamplel that registers a TreeExpansionListener and<br />
prints the events that it receives. Here is the snippet of code that was added<br />
to implement the listener:<br />
t.addTreeExpansionListener(new TreeExpansionListener() {<br />
public void treeExpanded(TreeExpansionEvent evt) {<br />
System.out.println("Expansion event, path " +<br />
evt.getPathO ) ;<br />
}<br />
public void treeCollapsed(TreeExpansionEvent evt) {<br />
System.out .printlnCCollapse event, path " +<br />
evt.getPathO ) ;<br />
}
});<br />
You can run the modified version of the program using the command:<br />
javac <strong>JFC</strong>Book.ChapterlO.TreeExample3<br />
The Tree Control 1213<br />
The code was also changed so that the tree starts with only the root visible<br />
by adding the line:<br />
t.collapseRow(0);<br />
If you expand and collapse nodes in the tree, you'll see the events that are<br />
generated displayed in the window from which you started the program.<br />
Notice that there is one event generated each time you expand or collapse a<br />
node. This remains true even if you open the whole tree and then collapse it<br />
by double-clicking on the root node. The event that you get contains a Tree-<br />
Path for the root: You don't get events for all of the other nodes that disappeared.<br />
This is actually reasonable, because if you expand the root again,<br />
you'll find that the tree returns to its fully expanded state—in other words,<br />
the other nodes didn't actually collapse. As well as adding a listener, code was<br />
also added to expand the node corresponding to 11, which runs after a 15second<br />
delay. Here is the extra code for this:<br />
Timer timer = new Timer(15000, new ActionListener() {<br />
public void actionPerformed(ActionEvent evt) {<br />
DefaultMutableTreeNode rootNode =<br />
(DefaultMutableTreeNode)t.getModel().getRootO;<br />
DefaultMutableTreeNode apolloNode =<br />
(DefaultMutableTreeNode)rootNode.getFirstChild();<br />
DefaultMutableTreeNode apollollNode =<br />
(DefaultMutableTreeNode)apolloNode.getFirstChild();<br />
// Convert the node to a TreePath<br />
TreeNode[] pathToRoot = apollollNode.getPath();<br />
TreePath path = new TreePath(pathToRoot);<br />
// Expand the node<br />
t.expandPath(path);<br />
}<br />
});<br />
timer.setRepeats(false) ;<br />
timer.start() ;<br />
The first problem is to find the node that needs to be opened. This is<br />
achieved by getting the root node from the tree's model and then using the<br />
getFirstChild method of DefaultMutableTreeNode to walk down<br />
through the various levels until the target is reached. DefaultMutable-
1214 Chapter 10 The Tree Control<br />
TreeNode has several methods that allow you to aeeess related nodes—look<br />
at its API documentation to find out what they are.<br />
Having found the target node, it must be converted to a TreePath, for<br />
which the technique shown earlier is used, then the node can finally be<br />
expanded. If you start the program and do nothing for 15 seconds, you'll find<br />
that the tree opens to show the crew of Apollo 11, and three events are generated,<br />
one for the target node and one for each level above the target that<br />
was expanded automatically to make the target node visible:<br />
Expansion event, path [null]<br />
Expansion event, path [null, Apollo]<br />
Expansion event, path [null, Apollo, 11]<br />
Making Nodes Visible<br />
When you change the state of a tree programmatically, it is sometimes useful<br />
to have the tree scroll so that the user can see the affected area. In the example<br />
that you have just seen, the frame was large enough so that the whole tree<br />
was visible after it was expanded to show the node for Neil Armstrong.<br />
However, if you run the example again and make the window so short that<br />
you can only see the root node, when the tree expands you won't be able to<br />
see what has happened.<br />
If you want to force a particular node to be visible, there arc two JTree<br />
methods that you can use:<br />
public void scrollPathToVisible(TreePath path);<br />
public void scrollRowToVisible(int row);<br />
Naturally, these methods only work if the tree is mounted in a JScroll-<br />
Pane and they have no effect if the node specified is already within the visible<br />
area of the JScrollPane. The following command runs an improved<br />
version of the previous example that forces the node for Neil Armstrong<br />
into view once its parent node has been expanded:<br />
<strong>Java</strong> <strong>JFC</strong>Book.ChapterlO.TreeExample4<br />
The code to do this was added after the expandPath call and looks like<br />
this:<br />
// Make Neil Armstrong node visible<br />
DefaultMutableTreeNode targetNode =<br />
(DefaultMutableTreeNode)apollollNode.getFirstChild();<br />
path = path.pathByAddingChild(targetNode);<br />
t.scrollPathToVisible(path);
The Tree Control 1215<br />
You'll notice that, since we already had a TreePath object for the parent<br />
of the node that we wanted to reach, we were able to use the TreePath<br />
pathByAddingChild method to get a TreePath for the Neil Armstrong<br />
node, once we obtained its DefaultMutableTreeNode. To demonstrate<br />
that this works, when the example starts, resize the window so that it is tall<br />
enough to show only the root node and then wait for the tree to expand itself.<br />
When it does so, you'll see that it also scrolls to bring Neil Armstrong into<br />
view. Incidentally, the scrollPathToVisible method can cause both horizontal<br />
and vertical scrolling, so if the window were also veiy narrow, it would<br />
scroll horizontally to bring the node into view if necessary.<br />
Controlling Node Expansion and Collapse<br />
As you have seen, you can receive notification that a tree node has been<br />
expanded or collapsed by registering a TreeExpansionListener. Sometimes,<br />
it is useful to be notified that a node is going to be expanded or collapsed<br />
before the change is actually made. JTree supports this by first<br />
sending the TreeExpansionEvent for the expansion or collapse to any registered<br />
TreeWillExpandListeners. TreeWillExpandListener is an<br />
interface with two methods:<br />
public interface TreeWillExpandListener<br />
extends EventListener {<br />
public void treeWillCollapse(TreeExpansionEvent evt)<br />
throws ExpandVetoException;<br />
public void treeWillExpand(TreeExpansionEvent evt)<br />
throws ExpandVetoException;<br />
}<br />
This interface is almost the same as TreeExpansionListener, apart from<br />
the fact that the listener methods can throw an ExpandVetoException.<br />
Before any node is expanded or collapsed, the tree creates the appropriate<br />
TreeExpansionEvent and delivers it to each registered TreeWillExpandListener.<br />
If eveiy listener returns without throwing an exception, the<br />
node changes state and the TreeExpansionEvent is then delivered to all<br />
TreeExpansionListeners. However, if any listener throws an ExpandVetoException,<br />
the node will not be expanded or collapsed and no TreeExpansionListeners<br />
will receive the TreeExpansionEvent.<br />
You can use a TreeWillExpandListener to decide whether to allow<br />
part of a tree to be expanded or collapsed based on any criterion you chose.<br />
Suppose, for example, we want to change our ongoing tree example so that,<br />
once the Apollo 11 node has been made visible, the tree cannot be collapsed<br />
in such a way as to hide that node. All we need to do to enforce this is to add
1216 Chapter 10 The Tree Control<br />
a TreeWillExpandListener and perform the appropriate cheeks in the<br />
treeWillCollapse method. You can run a version of the example that has<br />
this feature using the command<br />
j ava <strong>JFC</strong>Book.Chapterl0.TreeExample5<br />
When this example starts, if you wait for 15 seconds, the tree will open to<br />
show the node for Neil Armstrong and you'll see the following events<br />
delivered:<br />
Tree will expand event, path [null]<br />
Expansion event, path [null]<br />
Tree will expand event, path [null, Apollo]<br />
Expansion event, path [null, Apollo]<br />
Tree will expand event, path [null, Apollo, 11]<br />
Expansion event, path [null, Apollo, 11]<br />
As you can see, even though the code only requests that one node be<br />
expanded, because its parent nodes also need to be opened in order to make<br />
the target node visible, the TreeWillExpandListener treeWillExpand<br />
method is invoked before each node is expanded. Since no ExpandVetoExceptions<br />
were thrown, the operation completes normally.<br />
Now click on the 11 node. Under normal circumstances, this would cause<br />
the node to close, but on this occassion, it does not and the following output<br />
appears in the command window:<br />
Tree will collapse event, path [null, Apollo, 11]<br />
Veto collapse of path<br />
In this case, the collapse has been vetoed, so the node stays in its expanded<br />
state. The same thing happens if you click on either the Apollo node or the<br />
root node, because these are all the nodes that could be closed to hide the<br />
node for Neil Armstrong. On the other hand, you can still open and close<br />
the other Apollo nodes and all of the Skylab nodes.<br />
Here is the code that has been added to enforce this policy:<br />
t.addTreeWillExpandListener(new TreeWillExpandListener()<br />
{<br />
public void treeWillExpand(TreeExpansionEvent evt)<br />
throws ExpandVetoException {<br />
System.out.println("Tree will expand event, path " +<br />
evt .getPathO ) ;<br />
}<br />
public void treeWillCollapse(TreeExpansionEvent evt)<br />
throws ExpandVetoException {<br />
System.out.println("Tree will collapse event, path "
}<br />
});<br />
The Tree Control 1217<br />
+ evt.getPath());<br />
DefaultMutableTreeNode rootNode =<br />
(DefaultMutableTreeNode)t.getModel().getRootO;<br />
DefaultMutableTreeNode apolloNode =<br />
(DefaultMutableTreeNode)rootNode.getFirstChild();<br />
DefaultMutableTreeNode apollollNode =<br />
(DefaultMutableTreeNode)apolloNode.getFirstChild();<br />
// Build the path to the Apollo 11 node<br />
TreeNode[] pathToRoot = apollollNode.getPath();<br />
TreePath apollollPath = new TreePath(pathToRoot);<br />
// Don't allow Apollo 11 node or any ancestor<br />
// of it to collapse.<br />
if (evt.getPath().isDescendant(apollollPath)) {<br />
System.out.println("Veto collapse of path");<br />
throw new ExpandVetoException(evt);<br />
}<br />
The treeWillCollapse method contains the code of interest. It first<br />
constructs a TreePath for the 11 node in the normal way. Having done this,<br />
it uses the TreePath isDescendent method to determine whether the 11<br />
node is a descendent of the node whose TreePath is delivered in the Tree-<br />
ExpansionEvent. If it is, then the operation should not be permitted, so an<br />
ExpandVetoException is thrown. Notice that the ExpandVetoException<br />
constructor requires the TreeExpansionEvent that is being vetoed as an<br />
argument.<br />
Selecting Items in a Tree<br />
If you want a tree to be useful for user feedback, you need to be allow the<br />
user to select items and to take action when those selections are made.<br />
JTree, like JList, has a separate selection model that offers several different<br />
selection modes. This section looks at how to control and respond to a<br />
selection within a tree.<br />
Selection and the TreeSelectionModel<br />
JTree delegates management of the selection to a selection model. By<br />
default, an instance of the class DefaultTreeSelectionModel is associated<br />
with the tree when it is created, but you can, if you wish, define your
1218 Chapter 10 The Tree Control<br />
own selection model, as long as it implements the TreeSelectionModel<br />
interface. You can switch in your custom selection model using the setSelectionModel<br />
method. In this section, it is assumed that the default selection<br />
model is in use.<br />
The selection model can be configured to operate in one of three different<br />
modes:<br />
• S INGLE_TREE_J3ELECTION: only one node from the tree can<br />
be selected at any given time.<br />
• CONTIGUOUS_TREE_SELECTION: any number of nodes can be<br />
selected, as long as they occupy adjacent rows.<br />
• DISCONTIGUOUS_TREE_SELECTION: any number of nodes can<br />
be selected, with no restriction on location relative to other<br />
nodes.<br />
The default mode is DISCONTIGUOUS_TREE_SELECTION.<br />
Changes in the selection can be made either under program control or by<br />
the user. No matter how the selection is changed, the selection model<br />
ensures that any changes fit in with the current selection mode. Changes to<br />
the selection also generates an event, as you'll see later.<br />
The user can create or change the selection by using the mouse or the keyboard.<br />
Clicking on a node or pressing SPACE when the node has the focus<br />
will make the selection contain just that single node. Clicking or pressing<br />
SPACE on another node removes the first node from the selection and selects<br />
only the item just clicked on. Selection of a single item in this way is always<br />
possible, unless there is no selection model, in which case no selection is<br />
allowed. You can create this situation with the following lines of code:<br />
JTree t = new JTree()<br />
t.setSelectionModel(null); // No selection allowed<br />
<strong>Core</strong> Warning<br />
If you disable all selection the user will be unable to navigate the tree and<br />
expand or collapse nodes using the keyboard. For this reason, it is usually<br />
better not to completely disallow selection, but instead to change the mode<br />
of the TreeSelectionModel to SINGLE_TREE_SELECTION. If you<br />
don't want the selected node to look selected, you can implement a custom<br />
renderer that will draw the selected node differently, perhaps by drawing a<br />
border around it but not filling the background with the selection color.<br />
Custom renderers are discussed later in this chapter.
The Tree Control 1219<br />
Holding down the CTRL key while clicking on a node (or pressing the<br />
SPACE key) adds that node to the selection, leaving the existing content of<br />
the selection intact. If the node clicked on is already in the selection, it is<br />
removed. However, there are some restrictions on this, depending on the<br />
selection mode:<br />
• If the selection mode is SINGLE_TREE_SELECTION, the CTRL<br />
key is ignored—that is, if there is already a node in the selection<br />
it is de-selected and the new node replaces it.<br />
• Ifthe selection mode is CONTIGUOUS_TREE_SELECTION, the<br />
new node must be adjacent to the row or rows that make up the<br />
current selection. If this is not the case, the selection is cleared<br />
and the new node becomes the only member of the selection.<br />
• Ifthe selection mode is CONTIGUOUS_TREE_SELECTION and<br />
the first or last row in the selection is clicked with CTRL pressed,<br />
that node is removed from the selection leaving the rest of the<br />
nodes selected.<br />
• Ifthe selection mode is CONTIGUOUS_TREE_SELECTION and<br />
the node clicked is one of the selected nodes but is not at the top<br />
or bottom of the selected range, the selection is completely<br />
cleared. The node clicked is not added to the selection.<br />
Holding down the SHIFT key while clicking or navigating the tree with the<br />
arrow keys creates a contiguous selection between two selected nodes. This is<br />
not allowed ifthe selection model is in SINGLE_TREE_SELECTION mode. In<br />
that case, the clicked node would become the selected node.<br />
When a selection is made, the path most recently selected is often the one<br />
of most interest to the application. This path is called the lead selection path<br />
and its TreePath or row number can be specifically requested by the program<br />
using the getLeadSelectionPath or getLeadSelectionRow methods<br />
(see Table 10-3).<br />
<strong>Core</strong> Note<br />
There is one case in which the lead row is not the last row selected—see<br />
the discussion of tree selection events below for details.
1220 Chapter 10 The Tree Control<br />
There are, in fact, several distinguished rows and paths that the tree and/<br />
or the selection model treat as special:<br />
Minimum Selection Row<br />
Maximum Selection Row<br />
The lowest numbered row that is part of the selection.<br />
This is simply the row number of the selected<br />
node nearest the top of the tree.<br />
The highest numbered row that is part of the seletion.<br />
Not surprisingly, this is the row number of the<br />
selected node nearest the bottom of the tree.<br />
Lead Selection Row or Path Usually the last node to be added to the selection.<br />
Anchor Selection Path When only one node is selected, this is the same as<br />
the lead selection. When a row is added to an existing<br />
selection using the CTRL key, that row becomes<br />
both the lead and anchor selection. When a selection<br />
already exists and it is extended by using the SHIFT<br />
key, the anchor selection is the row that was already<br />
selected and which forms the other end of the selection<br />
from the most recently selected row (which is<br />
the lead selection). The concept of the anchor selection<br />
is supported only by JTree and was introduced<br />
in <strong>Java</strong> 2 version 1.3<br />
There is a collection of methods, listed in Table 10-3, that can be used to<br />
query or change the selection. Unless otherwise indicated, all of these methods<br />
are provided by both DefaultTreeSelectionModel and, for convenience,<br />
by JTree. There are also several methods that are only available<br />
from JTree.<br />
The selection can span many rows of a tree; an extreme case would be opening<br />
the whole tree, clicking on the root node, then scrolling to the bottom of<br />
the tree and holding down SHIFT while clicking on the last node which, unless<br />
the tree is in SINGLE_TREE_SELECTION mode, would select every node in the<br />
tree. Keep in mind, however, that only nodes that are visible can be selected<br />
using the mouse: Selecting a node that has child nodes does not select any of<br />
the child nodes (and vice versa). Also, if you select a node or nodes in a subtree<br />
and then collapse that subtree so that those nodes are no longer visible, they<br />
become deselected and the selection passes to the root of the closed subtree,<br />
whether or not it was selected when the node was collapsed.<br />
It is possible to programmatically select nodes that are not visible. What<br />
happens when you do this depends on the version of Swing that you are using.<br />
In Swing 1.1.1 and <strong>Java</strong> 2 version 1.2.2, when you select an invisible node, its
Table 10-3 Methods Used to Manage the Selection<br />
Method<br />
public int getSelectionMode<br />
public void setSelectionMode(int<br />
mode)<br />
public Object<br />
getLastSelectedPathComponent()<br />
public TreePath<br />
getAnchorSelectionPath()<br />
(<strong>Java</strong> 2 version 1.3 only)<br />
public void<br />
setAnchorSelectionPath(TreePath<br />
path)<br />
(<strong>Java</strong> 2 version 1.3 only)<br />
public TreePath<br />
getLeadSelectionPath()<br />
public void setLeadSelectionPath()<br />
(<strong>Java</strong> 2 version 1.3 only)<br />
public int getLeadSelectionRowI<br />
Description<br />
The Tree Control 1221<br />
Returns the current tree selection<br />
mode.<br />
Sets the tree selection mode.<br />
If there is an item selected, returns<br />
its last path component, or null if<br />
there is no selected item. The result<br />
of calling this method when there is<br />
more than one item selected is not<br />
very useful because it does not<br />
always use the most recently<br />
selected item. This method is provided<br />
only by JTree ; it is not supported<br />
by<br />
DefaultTreeSelection-<br />
Model.<br />
Returns the path for the anchor<br />
selection. This method is provided<br />
only by JTree ,• it is not supported<br />
by DefaultTreeSelection-<br />
Model.<br />
Sets the anchor selection path. This<br />
method is provided only by JTree ;<br />
it is not supported by Default—<br />
TreeSelectionModel.<br />
Returns the path for the lead selection.<br />
Sets the path for the lead selection.<br />
This method is provided only by<br />
JTree; it is not supported by<br />
DefaultTreeSelection-<br />
Model.<br />
Returns the row number for the lead<br />
selection.
1222 Chapter 10 The Tree Control<br />
Table 10-3 Methods Used to Manage the Selection (continued)<br />
Method<br />
public int getMaxSelectionRow()<br />
public int getMinSelectionRow()<br />
public int getSelectionCount()<br />
public TreePath getSelectionPath(<br />
public TreePath[]<br />
getSelectionPaths()<br />
public int[] getSelectionRowsi<br />
public boolean isPathSelected<br />
(TreePath path)<br />
public boolean isRowSelected(int<br />
row)<br />
public boolean isSelectionEmpty()<br />
public void clearSelection(<br />
public void<br />
removeSelectionlnterval (int<br />
rowO, int rowl)<br />
public void removeSelectionPath<br />
(TreePath path)<br />
public void removeSelectionPaths<br />
(TreePath[] paths)<br />
public void removeSelectionRow<br />
(int row)<br />
Description<br />
Returns the highest selected row<br />
number.<br />
Returns the lowest selected row<br />
number.<br />
Gets the number of selected items.<br />
Returns the TreePath object for<br />
the first item in the selection.<br />
Returns the TreePath objects for<br />
all of the selected items.<br />
Returns the row numbers of all of<br />
the items in the selection.<br />
Returns true if the given path is<br />
selected, false if not.<br />
Returns true if the given row is<br />
selected, false if not.<br />
Returns true if there are no<br />
selected items.<br />
Removes all items from the selection.<br />
Removes the rows in the given range<br />
from the selection. This method is<br />
provided only by JTree - it is not<br />
supported by Def aultTreeSe -<br />
lectionModel.<br />
Removes one path from the selection.<br />
Removes the listed paths from the<br />
selection.<br />
Removes the given row from the<br />
selection. This method is provided<br />
only by JTree ; it is not supported<br />
byDefaultTreeSelection-<br />
Model.
Table 10-3 Methods Used to Manage the Selection (continued)<br />
Method<br />
public void removeSelectionRows<br />
(int [] rows)<br />
public void addSelectionlnterval<br />
(int rowO, int rowl)<br />
public void addSelectionPath<br />
(TreePath path)<br />
public void addSelectionPaths<br />
(TreePath [] path)<br />
public void addSelectionRow(int<br />
row)<br />
public void addSelectionRows(int[]<br />
row)<br />
public void setSelectionlnterval<br />
(int rowO, int rowl)<br />
public void setSelectionPath<br />
(TreePath path)<br />
public void setSelectionPaths<br />
(TreePath [] path)<br />
public void setSelectionRow(int<br />
row)<br />
public void setSelectionRows(int[]<br />
row)<br />
Description<br />
The Tree Control 1223<br />
Removes the listed rows from the<br />
selection. This method is provided<br />
only by JTree ; it is not supported<br />
by DefaultTreeSelection-<br />
Model.<br />
Adds the rows in the given range to<br />
the current selection.<br />
Adds the given path to the selection.<br />
Adds the given set of paths to the<br />
selection.<br />
Adds the object on the given row to<br />
the selection.<br />
Adds the objects in the given rows to<br />
the selection.<br />
Makes the selection equal to all rows<br />
in the given range. This method is<br />
provided only by JTree ; it is not<br />
supported byDefaultTreeSelectionModel.<br />
Makes the selection be the given<br />
path.<br />
Sets the selection to the given set of<br />
paths.<br />
Sets the selection to the object on<br />
the given row. This method is provided<br />
only by JTree ; it is not supported<br />
by<br />
DefaultTreeSelection-<br />
Model.<br />
Sets the selection to the set of<br />
objects in the given rows. This<br />
method is provided only by JTree ;<br />
it is not supported by Def ault -<br />
TreeSelectionModel.
1224 Chapter 10 The Tree Control<br />
parent and any other collapsed descendents are expanded so that the newly<br />
selected node is visible. In <strong>Java</strong> 2 version 1.3, this is also the default behavior,<br />
but you can call the following method with argument false to disable it:<br />
public void setExpandsSelectedPaths(boolean cond);<br />
Tree Selection Events<br />
A change in the selection is reported using a TreeSelectionEvent. To<br />
receive these events, you must register a TreeSelectionListener using<br />
the addTreeSelectionListener method of your tree's TreeSelection-<br />
Model, or the convenience method of the same name provided by JTree.<br />
The TreeSelectionListener interface has only one method:<br />
public void valueChanged(TreeSelectionEvent evt)<br />
You need to inspect the accompanying event to determine what changes<br />
were made to the selection.<br />
TreeSelectionEvents tell you exactly which paths are involved in the<br />
last change of selection and whether they were added or removed from the<br />
selection. You can also get the leading path and the old leading path from the<br />
event. The important methods supplied by TreeSelectionEvent are<br />
shown in Table 10-4.<br />
Table 10-4 Methods Used with Tree Selection Events<br />
Method Description<br />
public TreePathf] getPathsO Returns the paths for all of the nodes that<br />
were affected by the last selection change.<br />
public boolean isAddedPath Assuming that path represents a node<br />
(TreePath path) affected by this event, this method returns<br />
true if the node was added to the selection<br />
and false if it was removed from<br />
the selection.<br />
public boolean isAddedPath Returns true if the path in entry index<br />
(int index) of the paths delivered by this event was<br />
added to the selection, false if it was<br />
removed from the selection. This method<br />
was added in <strong>Java</strong> 2 version 1.3
Table 10-4 Methods Used with Tree Selection Events (continued)<br />
The Tree Control 1225<br />
public TreePath getPathO Returns the first TreePath in the set that<br />
would be returned by getPaths. This is<br />
a convenience method for the case where<br />
you know there is only one path of interest.<br />
public boolean isAddedPath () Returns true if the path returned by<br />
getPath was added to the selection and<br />
false if it was removed.<br />
public TreePath Returns that path for the node that was<br />
getOldLeadSelection () the lead selection before this event.<br />
public TreePath Gets the path for the node that is now the<br />
getNewLeadSelection () lead selection.<br />
The simplest way to understand how TreeSelectionEvents work is to<br />
see an example. The program <strong>JFC</strong>Book.Chapter 10 .TreeSelection-<br />
Events uses the tree that has been used throughout this chapter, together<br />
with some code to receive and print the contents of selection event:<br />
t.addTreeSelectionListener(new TreeSelectionListener() {<br />
public void valueChanged(TreeSelectionEvent evt) {<br />
System.out.println("=======\nFirst path: " +<br />
evt .getPathO<br />
+ "; added? " + evt.isAddedPath());<br />
System.out.println("Lead path: " +<br />
evt.getNewLeadSelectionPathO);<br />
System.out.println("Old Lead path: " +<br />
evt.getOldLeadSelectionPathO);<br />
}<br />
});<br />
TreePath[] paths = evt.getPaths();<br />
for (int i = 0 ; i < paths.length; i++) {<br />
System.out.println("Path: < " + paths[i] + "; added? " +<br />
evt.isAddedPath(paths[i]));<br />
}<br />
System.out.println("Tree 1 s lead selection path is " +<br />
t.getLeadSelectionPath() ) ;<br />
The listener is added using the addTreeSelectionListener method of<br />
JTree. Another way to do this is to register with the selection model itself:
1226 Chapter 10 The Tree Control<br />
TreeSelectionModel m = t.getSelectionModel();<br />
m.addTreeSelectionModel(new TreeSelectionListener() {<br />
In the event handler, the various paths are extracted and displayed, along<br />
with the flag indicating whether they were added or removed from the selection.<br />
To see some typical events, run the program and open the tree by<br />
expanding the Apollo node, the 11 node, and the 12 node; you should now<br />
have 16 rows on the screen.<br />
First, select Neil Armstrong. Not surprisingly, this generates an event in<br />
which all the entries refer to this node:<br />
First path: [null, Apollo, 11, Neil Armstrong]; added?<br />
true<br />
Lead path: [null, Apollo, 11, Neil Armstrong]<br />
Old Lead path: null<br />
Path: < [null, Apollo, 11, Neil Armstrong]; added? True<br />
Next, click Buzz Aldrin, causing this entry to be selected and the previous<br />
one deselected. This time, the event contains entries for both paths:<br />
First path: [null, Apollo, 11, Buzz Aldrin]; added? True<br />
Lead path: [null, Apollo, 11, Buzz Aldrin]<br />
Old Lead path: [null, Apollo, 11, Neil Armstrong]<br />
Path: < [null, Apollo, 11, Buzz Aldrin]; added? True<br />
Path: < [null, Apollo, 11, Neil Armstrong]; added? false<br />
Here, the first path and the lead path are the one that has just been added,<br />
the old lead path is the lead path from the previous event, and the complete<br />
set of paths affected contains both the selected and the deselected path,<br />
together with booleans that indicate which of the two has just been selected.<br />
As long as you can be sure that only one item is being selected at a time (for<br />
example, if you use single-selection mode), each event will be self-contained<br />
and will tell you all you need to know about the state of the selection, as this<br />
one does. Things aren't always so simple, however. Now that you've got one<br />
path selected, hold down the CTRL key and click on Pete Conrad. This<br />
gives a selection of two individual items, but the event that it generates is not<br />
so obviously informative:<br />
First path: [null, Apollo, 12, Pete Conrad]; added? True<br />
Lead path: [null, Apollo, 12, Pete Conrad}<br />
Old Lead path: [null, Apollo, 11, Buzz Aldrin}<br />
Path: < [null, Apollo, 12, Pete Conrad]; added? True<br />
You can see that Pete Conrad has just been added to the selection and<br />
that Buzz Aldrin must also be in the selection because that entry used to
The Tree Control 1227<br />
be the leading path, but note that the complete set of paths reported doesn't<br />
include Buzz Aldrin. This is because a TreeSelectionEvent only<br />
reports changes to the selection—anything that doesn't change is not mentioned.<br />
To emphasize this further, hold down CTRL and click Alan Bean.<br />
This gives three selected items and the following event:<br />
First path: [null, Apollo, 12, Alan Bean]; added? True<br />
Lead path: [null, Apollo, 12, Alan Bean]<br />
Old Lead path: [null, Apollo, 12, Pete Conrad]<br />
Path: < [null, Apollo, 12, Alan Bean]; added? true<br />
Now, there's no mention of Buzz Aldrin at all and the set of paths still<br />
contains only the one entry. This is, of course, because only one path changed<br />
state.<br />
Using the mouse with no modifiers or with the CTRL key pressed always<br />
generates events with only either one or two entries in the paths list. You can<br />
get events with more entries if you use the SHIFT key to select a range of<br />
items. To see an example, hold down the SHIFT key and click on Apollo.<br />
The SHIFT key selects all items between itself and the anchor of the existing<br />
selection. In this case, the selection will contain the items Apollo, 11, Neil<br />
Armstrong, Buzz Aldrin, Michael Collins, 12, Pete Conrad and<br />
Alan Bean, the last of which was the anchor selection before the selection<br />
changed. Recall that the anchor selection is the same as the lead selection<br />
provided that the SHIFT key has not been used.<br />
Here is the event that is created for this selection:<br />
First path: [null, Apollo]; added? true<br />
Lead path: [null, Apollo]<br />
Old Lead path: [null, Apollo, 12, Alan Bean]<br />
Path: < [null, Apollo]; added? true<br />
Path: < [null, Apollo, 11]; added? true<br />
Path: < [null, Apollo, 11, Neil Armstrong]; added? true<br />
Path: < [null, Apollo, 11, Michael Collins]; added? true<br />
Path: < [null, Apollo, 12]; added? true<br />
Tree's lead selection path is [null, Apollo]<br />
As expected, the node that was clicked on, Apollo, is now the lead path<br />
and is listed as having been added, along with the nodes for Neil Armstrong<br />
and Michael Collins.<br />
So far, the lead path has always been the last path that was selected and<br />
this is usually the case, but there is an exception. Hold down the SHIFT key<br />
again and click on 13, to create another block selection. You might expect<br />
that 13 would now be the lead path, but the event says otherwise:
1228 Chapter 10 The Tree Control<br />
First path: [null, Apollo, 12, Richard Gordon]; added?<br />
true<br />
Lead path: [null, Apollo, 12, Alan Bean]<br />
Old Lead path: [null, Apollo]<br />
Path: < [null, Apollo, 12, Richard Gordon]; added? true<br />
Path: < [null, Apollo, 13]; added? true<br />
Path: < [null, Apollo]; added? false<br />
Path: < [null, Apollo, 11]; added? false<br />
Path: < [null, Apollo, 11, Neil Armstrong]; added? false<br />
Path: < [null, Apollo, 11, Buzz Aldrin]; added? false<br />
Path: < [null, Apollo, 11, Michael Collins]; added? false<br />
Path: < [null, Apollo, 12]; added? false<br />
Path: < [null, Apollo, 12, Pete Conrad]; added? false<br />
Tree's lead selection path is [null, Apollo, 12, Alan<br />
Bean]<br />
The lead path is, in fact, Alan Bean, the path at the top of the block selection.<br />
For block selections, this appears to be the rule because, as you saw in<br />
the previous example, if you click above the selection with SHIFT held down,<br />
the path that was clicked on, which will be at the top of the new block, is the<br />
lead path.<br />
Finally, note that a TreeSelectionEvent is delivered only if the selection<br />
changes. To see this, click on Richard Gordon. This clears the old<br />
block selection and selects just one entry. Now click on Richard Gordon<br />
again. This time, you don't get an event—there is nothing to report because<br />
nothing has changed. To see why this is important, double-click on Apollo.<br />
This delivers just one event. Double-click again and you get no event at all.<br />
Many programs allow the user to pick an object from a list by double-clicking:<br />
This isn't going to be possible if you rely on TreeSelectionEvents to<br />
tell you that this has happened. We'll see below how to handle double-selection<br />
as a means of selecting an entiy in a tree.<br />
If you don't need (or want) to keep track of exactly which paths have been<br />
affected by an event, you can just treat the event as notification that something<br />
has changed and query the tree model for the selected paths, as long as<br />
the model is derived from Def aultTreeModel. The methods that you can<br />
use, which are also implemented by JTree for convenience, were shown earlier<br />
in Table 10-4.
The Tree Control 1229<br />
Converting Between Locations and Tree Paths<br />
or Rows<br />
To make it possible for the user to choose an item from the tree by doubleclicking,<br />
you have to register a listener for mouse events, detect a double<br />
click, and convert the mouse location to a tree path. Fortunately, JTree has a<br />
convenience method that converts coordinates to a path in the tree, from<br />
which, as you know, you can get the node itself if you need it. Here's an example<br />
of the code that you would use to implement this:<br />
// Here, 't' is a JTree. It must be declared as final<br />
// so that we can use it in the event handler -<br />
// final JTree t;<br />
t.addMouseListener(new MouseAdapter() {<br />
public void mouseClicked(MouseEvent evt) {<br />
if (evt.getClickCount() == 2) {<br />
// A double click - get the path<br />
TreePath path =<br />
}<br />
});<br />
}<br />
t.getPathForLocation(evt.getX(), evt.getY());<br />
if (path != null) {<br />
Object comp = path.getLastPathComponent();<br />
if (t.getModel().isLeaf(comp)) {<br />
System.out.println("Selected path is " +<br />
path);<br />
}<br />
}<br />
Once the TreePath has been obtained, you can take any action that you<br />
need to in order to respond to the user's gesture. In this case, the code checks<br />
that the node being clicked on is a leaf node, so as not to confuse the use of<br />
double-clicking on a non-leaf node to open or close it with this use as a selection<br />
mechanism. Note that, before testing whether the chosen object is a<br />
leaf, a check is made that the getPathForLocation method returns a nonnull<br />
TreePath. This is necessary, because the user could click inside the<br />
tree but outside of any area occupied by a tree node.<br />
There are several methods that can be used to map between coordinates<br />
and parts of the tree and vice versa. These methods are summarized in Table<br />
10-5.
1230 Chapter 10 The Tree Control<br />
Table 10-5 Mapping between coordinates and JTree<br />
Method<br />
public TreePath<br />
getClosestPathForLocation(int<br />
x, int y)<br />
public int getClosestRow-<br />
ForLocation(int x, int y)<br />
public Rectangle getPath-<br />
Bounds(TreePath path)<br />
public TreePath getPath-<br />
ForLocation(int x, int y)<br />
public TreePath getPath-<br />
ForRow(int row)<br />
public Rectangle getRow-<br />
Bounds(int row)<br />
public int getRowForLocation(int<br />
x, int y)<br />
Traversing a Tree<br />
Definition<br />
Gets the TreePath object for the node<br />
closest to the given position in the tree.<br />
Gets the row number of the node closest<br />
to the given position in the tree.<br />
Gets a Rectangle describing the area<br />
bounding the node corresponding to the<br />
given TreePath. The coordinates are<br />
relative to the top-left hand corner of the<br />
tree.<br />
Gets the TreePath for the node that<br />
occupies the given coordinates relative to<br />
the top left of the tree. Returns null if<br />
there is no node at the given location.<br />
Converts a row number to the TreePath<br />
for the node at that row.<br />
Gets a Rectangle describing the area<br />
bounding the node at the given row. The<br />
coordinates are relative to the top-left<br />
hand corner of the tree.<br />
Gets the row number for the node that<br />
occupies the given coordinates relative to<br />
the top left of the tree.<br />
Sometimes it is necessary to be able to traverse some or all of a tree, or to be<br />
able to search a subtree. The TreeNode interface allows you to find the parent<br />
of a given node and to get an enumeration of all of a node's children, which is<br />
all you need to implement your own searching mechanism. If all you can be<br />
sure of is that your tree is populated with TreeNodes (which is always a safe<br />
assumption), then you will have to be satisfied with the rather primitive get-<br />
Parent and children methods. On the other hand, if your tree is composed<br />
of DefaultMutableTreeNodes, you can make use of the following more<br />
powerful methods to traverse the tree or a subtree in various different orders:
public Enumeration pathFromAncestorEnumeration(<br />
TreeNode ancestor)<br />
public Enumeration preorderEnumeration()<br />
public Enumeration postorderEnumeration()<br />
public Enumeration breadthFirstEnumeration()<br />
public Enumeration depthFirstEnumeration()<br />
The Tree Control 1231<br />
The pathFromAncestorEnumeration method is a little different from<br />
the other four, so we deal with it separately. This method involves two<br />
nodes—the one against which it is invoked (the target node) and the one<br />
passed as an argument, which must be an ancestor of the first node (if it is<br />
not, an IllegalArgumentException is thrown). Assuming that the ancestor<br />
is valid, this method walks the tree between it and the target node, adding<br />
to the enumeration each node that it encounters on the way. The first entry in<br />
the enumeration is the ancestor given as an argument and the last item is the<br />
target node itself. The other items in the enumeration are returned in the<br />
order in which they were encountered in the tree—in other words, each<br />
node is the parent of the one that follows it in the enumeration.<br />
Of the other four enumerations, depthFirstEnumeration is the same<br />
as postorderEnumeration. To see how the others order the nodes in the<br />
subtree that they cover, Listing 10-2 shows a short program that creates a<br />
small tree and applies preorderEnumeration, postorderEnumeration,<br />
and breadthFirstEnumeration to its root node. You can run this program<br />
for yourself by typing:<br />
<strong>Java</strong> <strong>JFC</strong>Book.Chapter10.TreeEnumerations<br />
Listing 10-2 Various tree traversal enumerations<br />
package <strong>JFC</strong>Book.ChapterlO;<br />
import j avax.swing.*;<br />
import javax.swing.tree.*;<br />
import java.util.*;<br />
public class TreeEnumerations {<br />
public static void main(String[] args) {<br />
JFrame f = new JFrame("Tree Enumerations");<br />
DefaultMutableTreeNode rootNode =<br />
new DefaultMutableTreeNode("Root":<br />
for (int i = 0; i < 2; i++) {
1232 Chapter 10 The Tree Control<br />
Listing 10-2 Various tree traversal enumerations (continued)<br />
DefaultMutableTreeNode a =<br />
new DefaultMutableTreeNode("" + i);<br />
for (int j = 0; j < 2; j++) {<br />
DefaultMutableTreeNode b =<br />
new DefaultMutableTreeNode("" + i + "_" + j);<br />
for (int k = 0; k < 2; k++) {<br />
b.add(new DefaultMutableTreeNode(<br />
}<br />
a.add(b);<br />
}<br />
rootNode.add(a);<br />
}<br />
(mi + I + II_II + j + '•_» + k) ) ;<br />
JTree t = new JTree(rootNode);<br />
f.getContentPane().add(new JScrollPane(t));<br />
f.setSize(300, 300);<br />
f.setVisible(true) ;<br />
// Now show various enumerations<br />
printEnum("Preorder", rootNode.preorderEnumeration());<br />
printEnum("Postorder",<br />
rootNode.postorderEnumeration());<br />
printEnum("Breadth First",<br />
rootNode.breadthFirstEnumeration());<br />
}<br />
public static void printEnum(String title,<br />
Enumeration e) {<br />
System.out.println("===============\n" + title);<br />
while (e.hasMoreElements()) {<br />
System.out.print(e.nextElement() + " ");<br />
}<br />
System.out.println("\n");<br />
}<br />
J _<br />
The tree that this program generates is shown in Figure 10-9; the output<br />
follows. Here is what a preorder enumeration produces:<br />
Preorder
Root 0 0_0 0_0_0 0_0_l 0_l<br />
111<br />
The Tree Control 1233<br />
0 1 0 0 1 1 1 1 0 1 0 0 1 0 1 1 1 1 1 0<br />
As you can see, the preorder enumeration starts at the root and walks<br />
down the tree as far as it can go, adding the nodes that it traverses (0, 0_0,<br />
0_0_0) to the enumeration. Having reached the bottom of the tree, it then<br />
walks across the children of the last node it traversed and adds them (0_0_l).<br />
Next, it moves back up to 0_0 and across to its sibling 0_l, which it adds to<br />
the enumeration and then descends and traverses its children (0_l_0,<br />
0_l_l). This completes the traversal of the 0 subtree. Next, the subtree<br />
rooted at 1 is scanned in the same order.<br />
Figure 10-9 A tree to demonstrate tree traversal enumerations.<br />
The postorder enumeration is very similar, except that it adds the parent<br />
nodes that it traverses as it crosses them on the way up, not on the way down.<br />
In other words, whereas the preorder traverse announced a subtree and then<br />
added its contents, postorder enumeration adds the contents and then adds
1234 Chapter 10 The Tree Control<br />
the root of the subtree. If you think in terms of a file system, this is like processing<br />
all of the files in a directory and then applying the operation to the<br />
directory itself, which is the required order for removing a directory and its<br />
contents (since the directory must be empty to be removed).<br />
Postorder<br />
0_0_0 0_0_l 0_0 0_l_0 0_l_l 0_l 0 l_0_0 l_0_l l_0 l_l__0 1_1_1 1_1<br />
1 Root<br />
Breadth-first enumeration is much simpler to visualize—it just walks across<br />
all the nodes at each level and adds them to the enumeration, then goes down a<br />
level and lists all of the nodes at that level, and so on. In terms of the trees display,<br />
if you open all of the subtrees so that every node in the tree is visible,<br />
you'll see that this enumeration walks vertically down the screen and, when it<br />
reaches the bottom, goes back up and across to the right one level, then back<br />
down the screen again, and so on. The effect is that you see everything at depth<br />
0, then everything at depth 1, followed by depth 2 and so on.<br />
Breadth First<br />
Root 0 1 0_0 0_l l__0 1_1 0_0__0 0_0_1 0 1 0 0 1 1 1 0 0 1 0 1 1 1 0<br />
1_1_1<br />
ChangingTree Content<br />
Some trees will be static once you've created them, but many will not. If you<br />
need to change the content of the tree's data model, there are two ways you can<br />
do it—at the model level and at the node level. You need to handle these two<br />
possibilities slightly differently, so they are described separately in this section.<br />
Making Changes via DefaultTreeModel<br />
The generic TreeModel interface doesn't offer any way to change the content<br />
of the model—it assumes that any changes will be made at the node<br />
level. The problem with just changing the nodes is that the screen display of<br />
the tree won't be updated. It isn't sufficient just to make changes to the<br />
data—the tree's user interface class must also be told about these changes.<br />
If you want to handle changes at the node level, you'll see what you need<br />
to do in the next section. If you don't want to go to that much trouble, however,<br />
there are two convenience methods in the DefaultTreeModel that do<br />
everything for you:
public void insertNodelnto(MutableTreeNode child,<br />
MutableTreeNode parent, int index)<br />
The Tree Control 1235<br />
public void removeNodeFromParent(MutableTreeNode parent)<br />
These methods make the changes that their names imply by manipulating<br />
the node data in the model, then they arrange for the tree's on-screen representation<br />
to be updated by invoking the nodesWerelnserted and<br />
nodesWereRemoved methods of Def aultTreeModel that will be covered<br />
shortly. If you are making a small number of changes to the model, insert-<br />
Nodelnto and removeNodeFromParent are the simplest way to do it.<br />
However, because these methods generate one event for each node you add<br />
or remove, if you are adding and changing more than a few nodes, it can be<br />
more efficient to side-step them and manipulate the nodes directly because,<br />
by doing so, you can generate fewer events.<br />
Making Changes at the Node Level<br />
Def aultMutableTreeNode has six methods that allow you to make changes<br />
to the data model by directly manipulating the nodes themselves:<br />
public void add(MutableTreeNode child)<br />
public void insert(MutableTreeNode child, int index)<br />
public void remove(int index)<br />
public void remove(MutableTreeNode child)<br />
public void removeAllChildren()<br />
public void removeFromParent()<br />
With the exception of the last, all these are invoked against the parent to<br />
be affected by the change; removeFromParent is invoked on the child node<br />
to be removed from its parent. The effect of these methods is obvious from<br />
their names. All that they do, however, is to update the tree's data model and<br />
keep it in a consistent state. They do not inform the tree itself that it may<br />
need to redisplay its contents. After making any changes to the node structure,<br />
you need to invoke one of the following Def aultTreeModel methods<br />
to ensure that the tree's appearance matches its internal data:<br />
public void reload()<br />
public void reload(TreeNode node)<br />
public void nodesWerelnserted(TreeNode node,<br />
int[] childlndices)<br />
public void nodesWereRemoved(TreeNode node,<br />
int[] childlndices, Object[] removedChildren)<br />
public void nodeStructureChanged(TreeNode node)
1236 Chapter 10 The Tree Control<br />
The first of these methods is the most radical solution: It tells the JTree to<br />
discard everything that it has cached about the structure of the tree and to<br />
rebuild its view from scratch. This could be a very slow process and is not<br />
recommended except when you really have replaced the entire data model.<br />
The second form of the reload method gives a node as a limiting point.<br />
When this method is used, the tree assumes that there may have been radical<br />
changes but that they were confined to the subtree rooted at the node given<br />
as the argument. In response, the tree rebuilds its view from that point in the<br />
hierarchy downward. This method is ideal if you make major changes under a<br />
node, such as populating it from scratch or removing all of its children. You<br />
might, for example, use this after calling removeAllChildren and pass the<br />
node whose children were removed as its argument:<br />
// Delete everything below "node" and tell the<br />
//tree about it<br />
node.removeAllChildren();<br />
model.reload(node); // "model" is the DefaultTreeModel<br />
The method nodeStructureChanged is identical to reload.<br />
The other two methods are used for finer control over the mechanism. You<br />
can use these to minimize the impact of any changes by informing the tree<br />
exactly which nodes were added or removed. Both of these methods require<br />
you to accumulate a list, in ascending numerical order, of the indices of all of<br />
the nodes that were added or removed and, in the latter case, a list of all of<br />
the removed nodes themselves. This is obviously more complex than just<br />
using nodeStructureChanged, but it can be more efficient.<br />
These methods have the limitation that they can only inform the tree<br />
about changes in one parent node at a time. If you make changes to more<br />
than one node, for example, to several levels in the hierarchy, you need to<br />
invoke these methods once for each parent node affected, which can increase<br />
the complexity of the task, but this may be justified by the performance gains.<br />
Changing the Attributes of a Node<br />
There is a third type of change to the tree model that hasn't been covered so<br />
far—changes to the contents of the nodes themselves. Suppose that you make<br />
a change to a node that doesn't affect its relationship to its neighbors but<br />
should result in its appearance changing. This might happen if you change the<br />
value of the node s user object, as might be the case if your tree represents a<br />
file system and you allow the user to rename a file or directory. When this happens,<br />
you can use one of the following Def aultTreeModel methods:<br />
public void nodeChanged(TreeNode changedNode);
public void nodesChanged(TreeNode parentNode,<br />
int [] childlndices)<br />
The Tree Control 1237<br />
Notice the important difference between these two methods: When you<br />
change one node, you pass a reference to that node, but if you change several,<br />
then you must pass a reference to their common parent and a set of<br />
indices that identify the affected children. If you make changes that affect<br />
nodes in several parts of the tree, then you must invoke nodesChanged once<br />
for each node that has children that have been changed.<br />
Tree Model Events<br />
All of the methods in the previous sections operate by generating TreeModelEvents<br />
that can be caught by registering a TreeModelListener on the<br />
tree's Def aultTreeModel object. Usually, Swing and AWT events are not<br />
highly specific about exactly what has changed—the listener is expected to<br />
query the source of the event to find out what happened. This is acceptable<br />
for simple controls like lists, combo boxes, text fields, and buttons where only<br />
one thing can have happened. But in the case of a tree, many modifications of<br />
different types can be made. If a single event that said "something has<br />
changed" were posted, it would be necessary to scan the whole tree to try and<br />
detect what happened. This would, of course, be time-consuming and would<br />
require the listener to remember a large amount of state in order to be able<br />
to perform a comparison at all.<br />
Because of this, the TreeModelListener must implement four methods,<br />
each of which receives a TreeModelEvent:<br />
public void treeNodesChanged(TreeModelEvent)<br />
public void treeStructureChanged(TreeModelEvent)<br />
public void treeNodesInserted(TreeModelEvent)<br />
public void treeNodesRemoved(TreeModelEvent)<br />
These listener methods are entered as a result of following Default-<br />
TreeModel methods being called:<br />
treeNodesChanged nodeChanged or nodesChanged was called<br />
treeStructureChanged reload (either variant) or nodeStructureChanged<br />
was called<br />
treeNodesInserted nodesWerelnserted was called<br />
treeNodesRemoved nodesWereRemoved was called
1238 Chapter 10 The Tree Control<br />
Splitting at this level is not sufficient, however, because it doesn't tell the<br />
listener what was added, removed, or changed. This information is contained<br />
in the TreeModelEvent, which has five methods that can be used to extract<br />
details of the change to the model:<br />
public Object getSourceO<br />
public TreePath getTreePath()<br />
public Object [] getPathf)<br />
public Object [] getChildren()<br />
public int [] getChildlndices()<br />
Which of these methods returns meaningful values and what they mean<br />
depends on the type of event. All of the events return a valid value to get-<br />
Source, which is a reference to the affected tree model (i.e., the Default -<br />
TreeModel instance for the affected JTree). The getTreePath and<br />
getPath method both return the node in the tree that is affected by the<br />
change, either in terms of its TreePath or as the array of Objects that<br />
makes up the TreePath.<br />
In the case of an event delivered to treeStructureChanged, only get-<br />
Path and getTreePath return any useful information. These methods return<br />
the node and below which the change occurred. This TreePath corresponds<br />
to the node that was originally passed to reload or nodeStructure-<br />
Changed. The getChildren and getChildlndices methods both return<br />
null.<br />
For treeModesChanged, the values returned by getPath and getTree-<br />
Path again correspond to the node that is the parent of the node or nodes<br />
that were affected. The getChildlndices and getChildren methods<br />
return arrays that contain one entry for each affected child of that node. The<br />
indices in the array returned by getChildlndices are in ascending numerical<br />
order and the array returned by getChildren is sorted so that corresponding<br />
entries in these two arrays match—that is, the index in entry n of<br />
the index array corresponds to the child in entry n of the child array.<br />
Similarly, getPath and getTreePath return the parent of the affected<br />
nodes in both treeNodesRemoved and treeNodesInserted and the get-<br />
Childlndices and getChildren methods retrieve sorted and matching<br />
arrays of the affected children. Note, however, that in the case of treeNodes-<br />
Removed, these children have already been removed from the parent node<br />
and the indices indicate where they used to reside in the parents list of children,<br />
whereas for treeNodesInserted, these indices describe where the children<br />
have been inserted—that is, they describe the final state of the model.<br />
Most applications won't need to handle these events because the JTree<br />
look-and-feel class registers itself as a listener of the tree's model and updates
The Tree Control 1239<br />
the tree's appearance based on the events that it receives. Yon can, however,<br />
register a listener of your own if you want the tree control to cause your<br />
application to react in some special way to changes in its structure. You'll see<br />
examples of this in the rest of this chapter.<br />
A File System Tree Control<br />
The most obvious thing to use a tree control for is to show the content of a<br />
machine's file system, in the same way as the Windows Explorer does in the left<br />
of its two display panes. Since the file system and JTree are both inherently<br />
hierarchical, you might expect it to be a simple matter to create a tree control<br />
that maps a file system but, as you'll see in this section, there are a few interesting<br />
issues to tackle along the way. As the description of the implementation of<br />
this component progresses, you'll see some of the real-world problems that<br />
come up when creating new components, including the need to sometimes<br />
work around problems in the classes that the new control is based on.<br />
Before looking at how to implement a file system control, let's look at what<br />
the finished product looks like. Figure 10—f shows the control mounted in a<br />
frame and running on a Windows platform. If you want to try this out for<br />
yourself, use a command like the following:<br />
<strong>Java</strong> <strong>JFC</strong>Book.Chapter10.FileTreeTest C:\<br />
You can replace the string "C:\" with the name of any directory on your<br />
system—this is the directory that becomes the root of the file tree.<br />
When you run this example, you should see the directory whose name was<br />
supplied on the command line at the top of the display, followed by all of its<br />
subdirectories. Like Windows Explorer, this control only shows directories,<br />
not files. Windows Explorer shows files in its right-hand pane, which is<br />
almost identical to the Swing JFileChooser. Indeed, once you have this<br />
control, you can use it, together with the JFileChooser and the JSplit-<br />
Pane component that you saw in the last chapter to create an application that<br />
looks very much like Windows Explorer itself except, of course, that it also<br />
runs on many versions of UNIX (and other platforms).<br />
If you move the mouse over any directory with an expansion icon to the left<br />
of it and click on the icon or double-click on the directoiy icon or name, it<br />
opens to reveal its subdirectories. If those subdirectories have other subdirectories,<br />
they will also have expansion icons next to them. A directory that doesn't<br />
have any subdirectories (i.e., a directoiy that is empty or contains only files)<br />
cannot be expanded. Again, to see the contents, you would need to connect<br />
this control to a JFileChooser and have it display the directory's contents.
1240 Chapter 10 The Tree Control<br />
<strong>Core</strong> Note<br />
The Swing JTree component doesn't work ideally with respect to displaying<br />
the icon for a node that has no children. If you're using a look-and-feel with<br />
this problem, you'll find that all of the subdirectories seem to have contents<br />
but, when you click on one that actually only has files in it, the icon sign<br />
disappears. All of the standard look-and-feels currently behave this way.<br />
Implementation Plan for the File System<br />
Control<br />
In order to create a tree that shows a file system, a representation of the file<br />
system's direetoiy structure must be loaded into a Def aultTreeModel. On<br />
the face of it, this is a relatively simple proposition: All you need is a recursive<br />
method that is given a directory, reads its contents and, each time it comes<br />
across a subdirectory, adds a node to the tree model, then invokes itself to<br />
process the content of that subdirectory. Using the methods of the<br />
j ava. io. File class, it is easy to get a list of the objects in a direetoiy and to<br />
determine which of these objects are themselves directories. The problem<br />
with this simplistic approach is that it would scan the entire file system when<br />
the control is created. This has two obvious drawbacks—it may take a long<br />
time and it will probably take up a large amount of memory to hold all of the<br />
nodes. Most of this time and memory is probably wasted, because the odds<br />
are that the user will find what he/she is looking for fairly quickly and not<br />
look at most of what has been generated.<br />
The ideal approach would be to start by doing only as much work as necessary<br />
to show the user the content of the directory that the control starts in.<br />
Then, whenever a directory is clicked and opened, the nodes for that directory<br />
should be created and displayed, and so on. If this can be achieved, it<br />
should be possible to create the control with only the relatively short delay<br />
required to read the top-level directory, at the cost of a small delay each time<br />
a new directory is opened. This approach is, however, too simplistic.<br />
To see why this won't work, suppose you have a small file system with a<br />
directory structure that looks like this:<br />
C:\java<br />
C:\java\bin<br />
C:\java\demo<br />
C:\j ava\demo\Animator<br />
C:\j ava\demo\ArcTest<br />
C:\j ava\demo\awt-l.1
C:\j ava\demo\BarChart<br />
C:\java\docs<br />
C:\java\docs\api<br />
C: \java\docs\guide<br />
C:\java\docs\images<br />
C:\j ava\docs\relnotes<br />
C:\j ava\docs\tooldocs<br />
C:\java\include<br />
C:\java\include\win32<br />
C:\java\lib<br />
C: \java\src<br />
C: \java\src\java<br />
C:\j ava\src\j ava\applet<br />
C:\j ava\src\j ava\awt<br />
C:\java\src\java\bean<br />
C:\java\src\java\io<br />
C:\java\src\sun<br />
C:\j ava\src\sunw<br />
The Tree Control 1241<br />
To create a tree that allows the user to navigate the directory c: \ j ava following<br />
the algorithm outlined earlier, the first step would be to build a node<br />
for c: \ j ava itself and then child nodes would be added for the subdirectories<br />
C:\java\bin, C:\java\demo, C:\java\docs, C:\java\include,<br />
C:\java\lib and C:\java\src. If the process stopped here, the tree<br />
would indeed show the top-level directory and all of these subdirectories.<br />
However, you can see that the demo, docs, include, and src directories<br />
themselves have subdirectories, so you would expect the tree to show them<br />
with an expansion icon. But, this icon is only shown if the node that it relates<br />
to has child nodes attached to it. So far, no tree nodes have been added for<br />
these subdirectories, because the idea is to minimize the work that is needed<br />
to get the control created. To get the right effect, this approach will have to<br />
be modified in some way.<br />
The only way to make the expansion icons appear is to add a child node to<br />
each directory that has subdirectories. To do this, it is necessary to scan not<br />
only the directory that the control starts in, but also the directories that are<br />
found in that directory. With this modification, nodes would be added for the<br />
subdirectories Animator, ArcTest, awt-1.1, BarChart, api, guide,<br />
and so on. It isn't necessary to go any lower at this stage, because directories<br />
further down can't influence the appearance of the control when the user is<br />
only looking at the contents of the C: \ j ava directory.<br />
Now suppose the user clicked on the icon for C:\java\src. This would<br />
open up and reveal the nodes representing the j ava, sun and sunw subdirectories,<br />
but now there is the same problem again: The C:\java\src\java
1242 Chapter 10 The Tree Control<br />
subdirectory and (although this hasn't been shown in detail in the file system<br />
map shown above) all the other directories have subdirectories of their own,<br />
but the expansion icons for their nodes don't appear because those directories<br />
haven't been scanned to build their child nodes. Fortunately, as you know, it is<br />
possible to get a TreeExpansionEvent when the user opens a node. This<br />
event can be used to find out which directory the user wants to look at and then<br />
all of its subdirectories can be populated, as was done with the initial directory.<br />
In fact, as you'll see, the same code can be used to handle both cases.<br />
The approach just outlined will work, but there is a small improvement<br />
that can be made to minimize the impact of having to scan for subdirectories.<br />
The only reason to look for directories that are not going to be visible straight<br />
away is to make the expansion icon appear for a directory that will be visible.<br />
All you have to do to make the expansion icon appear is to place one child<br />
under the node for a directory that has subdirectories. In other words, when<br />
scanning for hidden subdirectories, it is possible to stop as soon as we have<br />
found one. This can save a lot of time if the file system has big directories,<br />
because it avoids the overhead of reading through lots of files to find subdirectories<br />
that may not exist, and also minimizes the effect of looking in directories<br />
that the user doesn't end up opening anyway. The flip side of this is, of<br />
course, that if the user does open a directory that has had a single entry<br />
placed in it, it is necessary to get rid of it before fully populating the directory,<br />
or the first entry wold appear in the directory twice.<br />
File System Tree Control Implementation<br />
Having seen the basic idea, let's now examime the implementation, the<br />
code for which appears in Listing 10-3.<br />
Listing 10-3 A custom control to display a file system in a tree<br />
package <strong>JFC</strong>Book.ChapterlO;<br />
import j avax.swing.*;<br />
import javax.swing.tree.*;<br />
import javax.swing.event.*;<br />
import java.io.*;<br />
import java.util.*;<br />
public class FileTree extends JTree {<br />
public FileTree(String path)
Listing 10-3 A custom control to display a file system in a tree<br />
(continued)<br />
The Tree Control 1243<br />
throws FileNotFoundException, SecurityException {<br />
super((TreeModel)null);// Create the JTree itself<br />
// Use horizontal and vertical lines<br />
putClientProperty("JTree.lineStyle", "Angled");<br />
// Create the first node<br />
FileTreeNode rootNode = new FileTreeNode(null, path);<br />
// Populate the root node with its subdirectories<br />
boolean addedNodes = rootNode.populateDirectories(true);<br />
setModel(new DefaultTreeModel(rootNode));<br />
// Listen for Tree Selection Events<br />
addTreeExpansionListener(new TreeExpansionHandler());<br />
}<br />
// Returns the full pathname for a path, or null<br />
// if not a known path<br />
public String getPathName(TreePath path) {<br />
Object o = path.getLastPathComponent();<br />
if (o instanceof FileTreeNode) {<br />
return ((FileTreeNode)o).file.getAbsolutePath();<br />
}<br />
return null;<br />
}<br />
// Returns the File for a path, or null if not a known path<br />
public File getFile(TreePath path) {<br />
Object o = path.getLastPathComponent();<br />
if (o instanceof FileTreeNode) {<br />
return ( (FileTreeNode)o) .file;<br />
}<br />
return null;<br />
}<br />
// Inner class that represents a node in this<br />
// file system tree<br />
protected static class FileTreeNode<br />
extends DefaultMutableTreeNode {<br />
public FileTreeNode(File parent. String name)<br />
throws SecurityException, FileNotFoundException {
1244 Chapter 10 The Tree Control<br />
Listing 10-3 A custom control to display a file system in a tree<br />
(continued)<br />
}<br />
this.name = name;<br />
// See if this node exists and whether it<br />
// is a directory<br />
file = new File(parent, name);<br />
if ("file.exists 0) {<br />
throw new FileNotFoundException("File " + name +<br />
" does not exist");<br />
}<br />
isDir = file.isDirectory();<br />
// Hold the File as the user object.<br />
setUserObject(file);<br />
// Override isLeaf to check whether this is a directory<br />
public boolean isLeaf() {<br />
return !isDir;<br />
}<br />
// Override getAllowsChildren to check whether<br />
// this is a directory<br />
public boolean getAllowsChildren() {<br />
return isDir;<br />
}<br />
// For display purposes, we return our own name<br />
public String toStringO {<br />
return name;<br />
}<br />
// If we are a directory, scan our contents and populate<br />
// with children. In addition, populate those children<br />
// if the "descend" flag is true. We only descend once,<br />
// to avoid recursing the whole subtree.<br />
// Returns true if some nodes were added<br />
boolean populateDirectories(boolean descend) {<br />
boolean addedNodes = false;<br />
// Do this only once
Listing 10-3 A custom control to display a file system in a tree<br />
(continued)<br />
The Tree Control 1245<br />
if (populated == false) {<br />
if (interim == true) {<br />
// We have had a quick look here before:<br />
// remove the dummy node that we added last time<br />
removeAllChildren();<br />
interim = false;<br />
}<br />
String [] names = file.list () ;// Get list of contents<br />
// Process the directories<br />
for (int i = 0; i < names.length; i++) {<br />
String name = names[i];<br />
File d = new File(file, name);<br />
try {<br />
if (d.isDirectory()) {<br />
FileTreeNode node =<br />
new FileTreeNode(file, name);<br />
this.add(node);<br />
if (descend) {<br />
node.populateDirectories(false);<br />
}<br />
addedNodes = true;<br />
if (descend == false) {<br />
// Only add one node if not descending<br />
break;<br />
}<br />
}<br />
} catch (Throwable t) {<br />
// Ignore phantoms or access problems<br />
}<br />
}<br />
// If we were scanning to get all subdirectories,<br />
// or if we found no subdirectories, there is no<br />
// reason to look at this directory again, so<br />
// set populated to true. Otherwise, we set interim<br />
// so that we look again in the future if we need to<br />
if (descend == true |1 addedNodes == false) {<br />
populated = true;<br />
} else {<br />
// Just set interim state
1246 Chapter 10 The Tree Control<br />
Listing 10-3 A custom control to display a file system in a tree<br />
}<br />
(continued)<br />
interim = true;<br />
}<br />
return addedNodes;<br />
}<br />
protected File file;// File object for this node<br />
protected String name;// Name of this node<br />
protected boolean populated;<br />
// true if we have been populated<br />
protected boolean interim;<br />
// true if we are in interim state<br />
protected boolean isDir;// true if this is a directory<br />
}<br />
// Inner class that handles Tree Expansion Events<br />
protected class TreeExpansionHandler<br />
implements TreeExpansionListener {<br />
public void treeExpanded(TreeExpansionEvent evt) {<br />
TreePath path = evt.getPath();// The expanded path<br />
JTree tree = (JTree)evt.getSource();// The tree<br />
// Get the last component of the path and<br />
// arrange to have it fully populated.<br />
FileTreeNode node =<br />
(FileTreeNode)path.getLastPathComponent();<br />
if (node.populateDirectories(true)) {<br />
((DefaultTreeModel)tree.getModel()).<br />
nodeStructureChanged(node);<br />
}<br />
}<br />
public void treeCollapsed(TreeExpansionEvent evt) {<br />
// Nothing to do<br />
} '<br />
}<br />
}______________________. _____<br />
Naturally enough, the control, called FileTree, is derived from JTree. It<br />
is a self-contained component that is given a directory name as its starting<br />
pOint_that's all you need to do to get a hierarchical display of the objects
The Tree Control 1247<br />
below that directory. The component can be placed in a JScrollPane and<br />
used just like any other tree.<br />
Designing the Data Model<br />
The constructor first invokes the JTree constructor, creating a tree with no<br />
data model, then starts building the contents of the control by creating a<br />
Def aultTreeModel that initially contains just a node for the starting directory.<br />
The obvious question that arises is whether to use a Def aultMutable-<br />
TreeNode to represent the directories, or to create a node class of our own.<br />
This turns out to be a pretty simple decision. Suppose we chose to use a<br />
DefaultMutableTreeNode. Along with each node, we need to store something<br />
that connects it to the object in the file system that it represents. The<br />
most natural way to do this is to use the file or directory's File object and<br />
store it as the user object of the DefaultMutableTreeNode. However, simply<br />
populating the model with DefaultMutableTreeNodes set up in this<br />
way would not work, because the tree uses the tostr ing method of a node's<br />
user object to obtain the text to be displayed for that node. In this case, we<br />
need the tree to display the last component of the file name, which is not<br />
what the toString method of File returns.<br />
Instead, we create a private node class to represent each object in the part<br />
of the file system that the tree will display. Because this class is tied to the<br />
design of the tree, it is implemented as an inner class of the tree, called<br />
FileTreeNode and is derived, naturally, from DefaultMutableTreeNode.<br />
This class will store the File object and the node's name relative to its parent,<br />
both of which will be passed as arguments to the constructor. To achieve<br />
the correct display, the toString method will return the latter of these two<br />
values. It turns out that we wouldn't actually need to store the File as the<br />
node's user object, but we choose to do so anyway so that an application that<br />
listens to selection events from the FileTree component can get easy access<br />
to the corresponding File.<br />
Building the Initial Data Model<br />
Construction of the data model begins with the node for the initial directory,<br />
to which other nodes must be added for each of its immediate subdirectories.<br />
This task is delegated to a method of FileTreeNode called populateDirectories,<br />
which you'll see in a moment. When this method returns, a<br />
Def aultTreeModel initialized with the root node is created and the JTree<br />
setModel method is used to attach it to the tree. The model as created by<br />
this method is sufficient for the initial display of the tree and will remain sufficient<br />
until the user (or the application) expands one of the nodes. To handle
1248 Chapter 10 The Tree Control<br />
this (likely) eventuality, the last thing the FileTree constructor has to do is<br />
register a listener for TreeExpansionEvents. The code that will handle<br />
these events is encapsulated in a separate inner class called TreeExpansionHandler,<br />
to avoid cluttering FileTree with methods that aren't part of<br />
its public interface. The constructor for FileTree creates an instance of this<br />
class and registers it to receive the events. At this point, the control is fully<br />
initialized and ready to be displayed.<br />
Apart from its constructor, FileTree only has two methods of its own. The<br />
getPathName method is a convenience method that accepts a TreePath as its<br />
argument and returns the path name of the file that it represents in the tree.<br />
Similarly, the getFile method accepts a TreePath argument and returns the<br />
File object for the file that it represents.<br />
Once the tree model has been created, it is managed entirely by the JTree<br />
class. All that remains for us to do is implement the inner classes FileTreeNode<br />
and TreeExpansionHandler.<br />
Implementing the FileTreeNode Class<br />
The FileTreeNode class is derived from DefaultMutableTreeNode so<br />
that it can be added to a tree. Its constructor has two arguments that give the<br />
File object for the directory that it resides in and name of the object that it<br />
represents relative to that directory. These values are combined to create a<br />
File object for the target file or directory, which is stored in both the<br />
instance variable file and as the user object of the node. For convenience,<br />
the file name passed to the constructor is also stored in the instance variable<br />
name, from which it can be quickly retrieved by the toString method. The<br />
case of the root node (the one that represents the initial directory) is a special<br />
one, because it does not have a parent File object. In this case, the File<br />
argument can be supplied as null.<br />
All that remains for the constructor to do is to determine whether the<br />
node's associated object in the file system is a directory or not. This is easily<br />
done be calling the isDirectory method of the newly constructed File<br />
object. The result of this call is stored in an instance variable called isDir, of<br />
type boolean. Unfortunately, this method returns false if the object is not<br />
a directory or if it doesn't exist. Most of the time, objects will be constructed<br />
using names that have been discovered by reading the file system, which<br />
(subject to possible race conditions) should exist, but the node at the top of<br />
the tree will be built based on information supplied by the user, so it might<br />
not exist. To be safe, the existence of the object is verified by using the<br />
exists method and a FileNotFoundException is thrown if necessary. On<br />
some systems (e.g., UNIX and Windows NT), it may turn out that the user of
The Tree Control 1249<br />
the control doesn't have access to the directory in which the object resides, or<br />
to the object itself. On these systems, the constructor will throw a SecurityException.<br />
If either of these exceptions occurs while the tree is being<br />
built, they are just caught and ignored, with the result that the tree will be<br />
properly constructed but won't contain those objects that it couldn't get<br />
access to. The exception to this is the root node, which is built in the File-<br />
Tree constructor: Any problem creating this is passed as an exception to the<br />
code creating the tree.<br />
<strong>Core</strong> Note<br />
A nice enhancement to this control might be to catch a<br />
SecurityException and represent the object that could not be<br />
accessed in some meaningful way to the user—perhaps with an icon<br />
representing a NO ENTRY sign. YOU shouldn't find it too difficult, as an<br />
exercise, to add this functionality.<br />
FileTreeNode Icon and Text Representation<br />
Before looking in detail at how to handle the population of subdirectories,<br />
there is a small point that needs to be dealt with. JTree has a small selection<br />
of icons that it can display for any given node—a sheet of paper representing<br />
a leaf, a closed folder, and an open folder (in the Metal look-and-feel), both<br />
of which are used for branch nodes. As you know, there are two different<br />
ways to determine whether a node considers itself to be a leaf, only one of<br />
which is usually appropriate for a particular type of node: Either its isLeaf<br />
method or its getAllowsChildren method should be called. In the case of<br />
a file system, directories are never leaves, even if they are empty, so it would<br />
be normal to implement the getAllowsChildren method and have it<br />
return false if the node represents a directory and true otherwise. For<br />
flexibility, the FileTreeNode class also implements the isLeaf method,<br />
which returns the inverse of whatever is returned by getAllowsChildren.<br />
Since both of these return correct answers for any node, there is no need to<br />
tell the Def aultTreeModel which method to use, so the default setting is<br />
used when the data model is created (which means that isLeaf will be<br />
called).<br />
The text that is rendered alongside the icon is obtained by invoking the<br />
toString method of the object that represents the node—that is, the<br />
toString method of FileTreeNode—so, as noted earlier, this method is<br />
overridden to return the name of the component.
1250 Chapter 10 The Tree Control<br />
Populating Directory Nodes<br />
The last important piece of the FileTreeMode class is the populateDirectories<br />
method, which contains the code to create nodes to represent<br />
subdirectories. As noted earlier, sometimes it is necessary to create nodes for<br />
all of a directory's subdirectories and sometimes only one node is needed so<br />
that the directory's icon shows that it can be expanded. In fact, these actions<br />
will always need to be carried out in pairs, one immediately after the other.<br />
To see why this is, consider the file system example that is shown above and<br />
imagine what needs to happen when the root node for the C: \java directory<br />
is created. The first thing to do is to get a list of the directories in the<br />
directory C: \java. Since all of these are going to be shown straight away, it<br />
is necessary to create nodes for each of them immediately and attach them to<br />
the root node. If any of these directories has subdirectories, a single node<br />
must be attached to them, to show that the directory is expandable. So, for<br />
each directory that is created in populateDirectories, there will need a<br />
second scan that creates no more than one node under it. Since both of these<br />
operations involve scanning a directory and creating a node (or nodes) to<br />
attach to the directory's node, the same code can be used for each case.<br />
For this reason, the populateDirectories method takes a boolean<br />
argument called descend. When it is called to populate a directory whose<br />
content is going to be displayed because its node is being expanded, this<br />
parameter is set to true and the entire directory will be scanned and populated.<br />
On the other hand, when it is called to scan a newly-discovered subdirectory<br />
which will be displayed as a collapsed node, descend will be set to<br />
false. If descend is false, the loop that processes each directory will terminate<br />
when it finds a subdirectory. Also, if descend is false, discovering a<br />
subdirectory doesn't cause populateDirectories to descend into it—<br />
which is the reason for the name. If this were not done, populateDirectories<br />
would always recursively descend down to the end of one path on the<br />
file system, instead of scanning only two levels.<br />
Let's see how this works in practice. Refer to the implementation of populateDirectories<br />
in Listing 10-3 as you read this. When this method is<br />
first called, descend is set to true. Ignore, for a moment, the populated<br />
and interim instance variables, which are both initially false—you'll see<br />
how these are used in a moment. The first thing to do is create a File object<br />
for the node and get a list of its contents using the list method.<br />
<strong>Core</strong> Note<br />
Notice that this code is very carefully arranged so that, if it gets a<br />
SecurityException, it returns having done no damage to the tree
structure.This means that the tree will be incomplete, but will reflect those<br />
parts of the file system that the user has access to.<br />
The Tree Control 1251<br />
In the case of the example file system, this will return the following list of<br />
subdirectories:<br />
bin, demo, docs, include, lib, src<br />
It will also return the names of any files in the j ava directory; on my<br />
machine, there are several of these, but I've left them out of this list for clarity.<br />
A FileTreeNode for each of these directories must be added to the node<br />
that represents the directory being scanned. This job is carried out by the<br />
for loop, which makes one pass for each name in the list. Each time round<br />
the loop, it creates a File object for one of the above names (and the files<br />
that I haven't shown) and checks whether it represents a directory. If it<br />
doesn't, it is ignored and the next pass of the loop is started. In the case of a<br />
directory, it creates a FileTreeNode, passing the File object of the parent<br />
(which is the File object of the current node) and the component name<br />
from the list (i.e., bin or demo, etc.), then adds it underneath the node for<br />
the directory that is being scanned. Next comes the interesting part. If<br />
descend is true, which is the case when a directory node is being expanded,<br />
populateDirectories is called again, but this time there are two important<br />
differences:<br />
• The descend argument changes to false.<br />
• The node on which it operates is the new node (i.e., that for<br />
bin, demo etc.), not the top-level node.<br />
This second call does the same things again for the subdirectory that it is<br />
dropping into, but it stops sooner—as soon as any subdirectory is found. This<br />
call is made for each of the directories in the original list (i.e., bin, demo, docs,<br />
include, lib and src). In the case of bin, there are no subdirectories, so it<br />
will complete the for loop without finding anything and just return (what happens<br />
to the populated and interim fields will be discussed below). However,<br />
the second pass of the loop calls populateDirectories for the demo<br />
node, which does have subdirectories. In this case, the list method returns<br />
the following set of names (and possibly some files that will be ignored because<br />
they have no bearing on how the data model is constructed):<br />
Animator, ArcTest, awt-1.1, BarChart<br />
Now the for loop is entered and the code starts handling the subdirectory<br />
Animator. This turns out to be a directory, so a FileTreeNode is built for it
1252 Chapter 10 The Tree Control<br />
and attached under the node for C:\java\demo. However, this time,<br />
descend is false, so populateDirectories is not called again to<br />
descend into this new directory. Instead, the for loop ends, having added<br />
exactly one child to C: \j ava\demo. Control now returns to the for loop of<br />
the first invocation of populateDirectories, where the rest of the original<br />
list of names is processed in the same way but, because here descend is set<br />
to true, the loop runs to completion.<br />
When this loop has been completed, the state of the C: \ j ava node needs<br />
to be changed to reflect that fact that all of its subdirectories have been<br />
located and nodes have been built for them. To indicate this, the populated<br />
field is set to true. When populateDirectories is called for a node with<br />
populated set to true, it knows that there is nothing more to do and just<br />
returns at once. As you'll see, this can happen during tree expansion. On the<br />
other hand, the nodes for the subdirectories demo, docs, include, and src<br />
have all been processed by populateDirectories and each has had one<br />
dummy node added. These directories are not completely processed and it<br />
will be necessary to scan them again later if the user expands them in the<br />
tree, so it would be incorrect to set populated to true. But it is also necessary<br />
to remember that a child has been attached to these nodes so that it can<br />
be discarded later before building a fully populated subtree. To distinguish<br />
this case, the instance variable interim is set to true, because this node is<br />
in an interim state. Note, however, that there is a special case here. If a scan<br />
of a subdirectory finds that it has no subdirectories at all, it is marked as populated,<br />
because there is nothing to be gained from scanning it again later.<br />
At the end of this process, the following node structure will be as follows:<br />
C:\java (populated)<br />
C:\java\bin (populated)<br />
C:\java\demo (interim)<br />
C:\j ava\demo\Animator<br />
C:\java\docs (interim)<br />
C:\java\docs\api<br />
C:\java\include (interim)<br />
C:\<strong>Java</strong>\include\Win3 2<br />
C:\java\lib (populated)<br />
C:\java\src (interim)<br />
C:\java\src\java<br />
Note that the top-level directory is marked as populated, as are the subdirectories<br />
that don't themselves have any further directories (bin and lib).<br />
The others are marked as interim, because only one node has been created<br />
underneath them and more would need to be added before the user could be<br />
allowed to expand, say, C: \ j ava\docs. Notice also that C: \ j ava\include
The Tree Control 1253<br />
is marked as interim despite the fact that it only has one subdirectory and a<br />
node has been created for it. This is because populateDirectories stops<br />
after finding one directory, so it wasn't able to see that there weren't any<br />
more directories to find. The point of this optimization is the assumption that<br />
it is better to stop after finding one directory, on the grounds that if there is<br />
one subdirectory there is probably another and, if there isn't, there may still<br />
be a large number of files to traverse before getting to the end. Sometimes<br />
this guess will be right, other times it won't. In this case, a little more work<br />
than is strictly necessary will be done if the user opens this directory, because<br />
the node tor Win3 2 will be discarded and then put back again.<br />
Handling Expansion of Directories<br />
In terms of the tree as seen by the user, the node structure is now correct and<br />
the tree will display the demo, docs, include, and src directories with an<br />
expansion icon and the others without one. Nothing will change until the user<br />
clicks on one of these icons. Suppose the user clicks on the node for<br />
C: \ j ava\demo. Unless something is done, in response to this click the JTree<br />
will expand the node and show just the entry for C: \ j ava\demo\Animator.<br />
This is, of course, wrong because there are three missing subdirectories. Here<br />
is where the TreeExpansionListener comes into play. When the user<br />
clicks on the node, the treeExpanded method oi the TreeExpansionHandler<br />
inner class will be entered. The TreeExpansionEvent that it receives<br />
tells it the source of the event (i.e., the FileTree instance) and the TreePath<br />
lor the node that was expanded—for instance a TreePath for<br />
C:\java\demo. To give the tree the correct appearance, three new nodes<br />
must be added under the node for C: \ j ava\demo, for which it is necessary to<br />
find the FileTreeNode for that path.<br />
As you saw earlier in this chapter, given a TreePath, you can find the<br />
TreeNode for that path by extracting the path object for the last component<br />
in the TreePath. To get the FileTreeNode for C:\java\demo, then, the<br />
getLastComponent method is invoked on the TreePath from the event.<br />
This returns an Object that is actually the FileTreeNode for the path.<br />
Armed with this, the node for C: \ j ava\demo can be populated by invoking<br />
populateDirectories against it, passing the argument true to have it<br />
process two levels of directory, so that the new directories that get added will<br />
get the right expansion icons.<br />
This time, populateDirectories will start at C:\java\demo, which is<br />
marked as interim, so it starts by discarding all of its children, which causes<br />
the existing node for C:\java\demo\Animator to be removed. Then, it<br />
adds nodes for all four subdirectories of C: \ j ava\demo and marks it as pop-
1254 Chapter 10 The Tree Control<br />
ulated. Along the way, it will have looked to see if there were directories in<br />
any of these four subdirectories and marked the new nodes for the Animator,<br />
ArcTest, awt-1.1, and BarChart directories as interim if they were<br />
or populated if there were not.<br />
Finally, adding new nodes below an existing node is not sufficient to make<br />
the tree show them. To have the tree update its view, the model's node-<br />
StructureChanged method must be called, passing it the node for<br />
C:\java\demo, since this is the parent node beneath which all of the<br />
changes were made. The event handler has a reference to this node, but how<br />
is it possible to get hold of a reference to the model? There are two ways to<br />
do this. First, the TreeExpansionHandler is a nonstatic inner class of<br />
FileTree, which is a JTree, so the model reference can be obtained using<br />
the following expression:<br />
FileTree.this.getModel()<br />
This works because FileTree . this refers, by definition, to the containing<br />
FileTree. A simpler way, though, is to use the fact that a reference to<br />
the JTree is provided as the source of the TreeExpansionEvent, so you<br />
can instead just do this:<br />
JTree tree = (JTree)evt.getSource();<br />
( (DefaultTreeModel)tree.getModel() ) .<br />
nodeStructureChanged(node);<br />
This is the approach taken in the implementation.<br />
Using the File System Tree Control<br />
The file system tree control is intended to be a black box. To use it, you<br />
decide on the starting point in the file system, then create an appropriate<br />
FileTree object.Usually, you will want to know when the user has selected a<br />
file in the tree. Since FileTree is derived from JTree, it supports the same<br />
events, so you can receive notification of user actions by registering a listener<br />
for the TreeSelectionEvent, which, as you know, is generated when any<br />
change is made to the selection. What you really want to know when you get<br />
one of these events is the file name or the File that corresponds to the node<br />
that has been selected, but the event itself only has TreePath objects associated<br />
with it. As you've already seen, you can get the complete set of objects<br />
that make up a TreePath by calling its getPath method. Once you've got<br />
these objects, you can invoke toString on each of them, then join them<br />
with the system file name separator character to get the full path name of the<br />
file. However, this would be a very slow process, so the method getPath-
The Tree Control 1255<br />
Name was added to FileTree. This method takes a TreePath from an event<br />
and returns the full path name that it represents, or null if it isn't a path in<br />
the tree. The implementation of this method, which is repeated fromListing<br />
10-3, is veiy simple:<br />
// Returns the full pathname for a path, or null<br />
// if not a known path<br />
public String getPathName(TreePath path) {<br />
Object o = path.getLastPathComponent();<br />
if (o instanceof FileTreeNode) {<br />
return ((FileTreeNode)o).file.getAbsolutePath();<br />
}<br />
}<br />
return null;<br />
First, the object the represents the last component of the TreePath is<br />
obtained using getLastPathComponent. If this TreePath was really<br />
obtained from an event generated by FileTree, the user object will be the<br />
FileTreeNode for the selected file. Before casting it, however, the code<br />
ensures that this is the case to protect against the application passing erroneous<br />
paths to getPathName. If the path really does correspond to a File-<br />
TreeNode, the full path name of the selected file is obtained from the File<br />
object which was stored in the file field when the node was constructed,<br />
and returned to the caller. If this is not a FileTreeNode, null is returned.<br />
For the case in which the application needs the File object for the selected<br />
node, there is a similar convenience method called getFile that will return<br />
it.<br />
The test program that was used to demonstrate the FileTree control earlier<br />
in this chapter contains some typical code that shows how to handle file<br />
selections in the tree. You can try this code out by running the test program<br />
again using a command like this:<br />
<strong>Java</strong> <strong>JFC</strong>Book.ChapterlO.FileTreeTest C:\<br />
and clicking on file names in the tree. Here is what the relevant piece of code<br />
looks like:<br />
final FileTree ft = new FileTree(args [0]);<br />
ft.addTreeSelectionListener(new TreeSelectionListener() {<br />
public void valueChanged(TreeSelectionEvent evt) {<br />
TreePath path = evt.getPath();<br />
String name = ft .getPathName (path) ,-<br />
File file = ft.getFile(path);<br />
System, out .printlnC File " + name + " has been "
1256 Chapter 10 The Tree Control<br />
}<br />
});<br />
+ (evt.isAddedPathO ? "selected" : "deselected"));<br />
System.out.println("File object is " + file);<br />
Having created the FileTree with its root at the location specified on the<br />
command line, a TreeSelectionListener is added to it. When the event<br />
occurs, the get Path method is used to extract the first path affected by the<br />
event. In this simple example, only one path will be handled—in the general<br />
case, you might need, if you allow it, to handle more than one simultaneous<br />
selection. The getPathName method of FileTree is invoked on the path to<br />
get the full path name of the selected file and the getFile method is called<br />
to demonstrate that the FileTree can also return a File object for the<br />
selected node. This is all you need to know about FileTree to make use of it<br />
for selecting files. Here is some typical output from this program:<br />
File C:\WINDOWS has been selected<br />
File object is C:\WINDOWS<br />
File C:\RECYCLED has been selected<br />
File object is C:\RECYCLED<br />
File C:\Program Files has been selected<br />
File object is C:\Program Files<br />
Custom Tree Rendering and Editing<br />
While the general appearance of the tree control is probably sufficient for<br />
many applications, it is possible to customize several aspects of the way in<br />
which it is rendered using various techniques that will be covered in this section.<br />
Some of these techniques work no matter which look-and-feel is<br />
installed, while others need to be tailored to work differently with different<br />
look-and-feel implementations.<br />
As well as changing a tree's appearance, it is also possible to allow the user<br />
to edit the data represented by individual tree nodes. This topic is also covered<br />
in this section.<br />
Changing the Appearance of a Tree's Contents<br />
There are two ways in which you can change the appearance of the nodes of<br />
a particular tree. The most flexible option is to install your own renderer that<br />
implements the TreeCellRenderer interface. If you do this, you have complete<br />
control over how each node is displayed. If you just want to change the
Custom Tree Rendering and Editing 1257<br />
appearance of the tree slightly, the simplest thing to do is just to customize<br />
the basic look-and-feel implementation. The techniques that will be shown<br />
here can be used if you want to change the appearance of one particular tree<br />
in your application. If you want to make a change that applies to all trees, you<br />
may be able to use the simpler technique that will be described in "Changing<br />
Properties for All Trees."<br />
Customizing the Default Tree Cell Renderer<br />
The default tree cell renderer is provided by the class Def aultTreeCell-<br />
Renderer, which resides in the Swing javax. swing, tree package. You<br />
can get a reference to the renderer that is installed in a tree by using the<br />
JTree getCellRenderer method and you should verify that this returns a<br />
Def aultTreeCellRenderer, then cast it and use the methods shown in<br />
Table 10-5 to change its behavior as required. The method works for all of<br />
the current look-and-feel implementations, because their tree cell Tenderers<br />
are all derived from Def aultTreeCellRenderer.<br />
Table 10-5 Default Tree Cell Renderer Customization Methods<br />
Method<br />
public void<br />
setBackgroundNonSelectionColor(Col<br />
or)<br />
public void<br />
setBackgroundSelectionColor(Color)<br />
public void<br />
setBorderSelectionColor(Color)<br />
public void<br />
setTextNonSelectionColor(Color)<br />
public void<br />
setTextSelectionColor(Color)<br />
public void setFont(Font)<br />
Description<br />
Sets the background color used<br />
when the node is not selected.<br />
Sets the color in which to draw<br />
the background of a selected<br />
node.<br />
Sets the color in which to draw<br />
the border of a selected node.<br />
There is no method to set the<br />
color of the border of a nonselected<br />
node because nonselected<br />
nodes do not have borders.<br />
Determines the color of the text<br />
when the node is not selected.<br />
Determines the color of the text<br />
when the node is selected.<br />
Sets the font used to render the<br />
node's text.
1258 Chapter 10 The Tree Control<br />
Table 10-5 Default Tree Cell Renderer Customization Methods<br />
(continued)<br />
public void setClosedlcon (Icon) Sets the icon displayed when the<br />
node's children are not shown.<br />
public void setOpenlcon (Icon) Sets the icon displayed when the<br />
node's children are shown.<br />
public void setLeaf Icon (Icon) Changes the icon displayed<br />
when the node is a leaf.<br />
Since each tree uses a single renderer to draw every node, changes you<br />
make using these methods are effective for the whole tree. Since a different<br />
instance of the renderer is used for each tree, changes made in this way apply<br />
only to the single tree whose renderer is modified.<br />
For the purposes of illustration, the next example changes the background<br />
of the tree to black and uses green text for nonselected items and white text for<br />
those that are selected. The background color for selected items will also be<br />
changed to gray. The starting point for this tree is TreeExamplel, which was<br />
created earlier. This tree shows the crews of the Skylab space station and the<br />
Apollo lunar landing missions. The code that we added to the main method of<br />
the program, which we renamed Modif yRenderer, is shown in Listing 10-4.<br />
Listing 10-4 Customizing the default tree cell renderer<br />
// Get the tree's cell renderer. If it is a default<br />
// cell renderer, customize it.<br />
TreeCellRenderer cr = t.getCellRenderer();<br />
if (cr instanceof DefaultTreeCellRenderer) {<br />
DefaultTreeCellRenderer dtcr =<br />
(DefaultTreeCellRenderer)cr;<br />
// Set the various colors<br />
dtcr.setBackgroundNonSelectionColor(Color.black);<br />
dtcr.setBackgroundSelectionColor(Color.gray);<br />
dtcr.setTextSelectionColor(Color.white);<br />
dtcr.setTextNonSelectionColor(Color.green) ;<br />
// Finally, set the tree's background color<br />
t.setBackground(Color.black);<br />
J You can run this example for yourself using the command:<br />
java <strong>JFC</strong>Book.ChapterlO.ModifyRenderer
Custom Tree Rendering and Editing 1259<br />
The result, if you partly expand the tree, will look something like Figure<br />
10-10.<br />
Figure 10-10 Customizing the colors of tree nodes.<br />
If you look at the code, you'll see that it gets the tree's Tenderer and cheeks<br />
that it is the renderer from the basic package, or one derived from it. If it is, then<br />
the text and background colors are changed. Once these changes are made, all of<br />
the nodes in the tree will be drawn with the new settings. This is a simple way to<br />
make basic changes to the tree's appearance. To make more radical changes, you<br />
need to customize the renderer that draws each node s representation.<br />
Implementing a Customized Renderer<br />
Like the combo box and list controls, each cell of a tree is drawn by a renderer.<br />
Tree Tenderers implement the TreeCellRenderer interface, which<br />
has only has one method:<br />
public abstract Component getTreeCellRendererComponent(<br />
JTree tree, Object value, boolean selected,<br />
boolean expanded, boolean leaf, int row,<br />
boolean hasFocus)
1260 Chapter 10 The Tree Control<br />
In most eases, the most important argument passed by this method is the<br />
value, which is the object to be formatted. The renderer is responsible for<br />
configuring a Component that represents this value in the tree. In terms of<br />
the Metal look-and-feel, this component will take the place of the folder or<br />
leaf icon and the descriptive text that appears to the right of it. The remaining<br />
arguments may be used to affect the way in which the component is rendered.<br />
For example, if the node is expanded, the Metal look-and-feel shows<br />
an open folder; if it is a leaf, it displays a sheet of paper. Selected rows usually<br />
have a background of a different color, while a row with the focus might be<br />
drawn with a colored line around the border.<br />
You've just seen that you can use public methods supplied by Default-<br />
TreeCellRenderer to customize it to some extent. Another way to change<br />
the way a node is rendered is to subclass the default renderer. The default<br />
renderer is actually a subclass of JLabel that also implements the Tree-<br />
CellRenderer interface. The DefaultTreeCellRenderer just places the<br />
text and icon it is given on the label and, aside from some work that takes<br />
place in the paint method to paint the background and border of the cell,<br />
most of the rendering code is inherited from JLabel. If you subclass<br />
DefaultTreeCellRenderer, you can do such things as changing the color<br />
in which the text is rendered by setting the label's attributes directly. The<br />
advantage of this is that you can vary these attributes for each individual node<br />
if necessary, rather than setting constant values that apply to the whole tree.<br />
The following example illustrates how to make the renderer node-specific<br />
by using a different text color and icon for leaf nodes. This example is actually<br />
an extension of Listing 10-4, which works by creating and installing a subclass<br />
of the default renderer. The code that is changed is highlighted in bold in<br />
Listing 10-5.<br />
Listing 10-5 Installing a customized version of the default tree cell<br />
renderer<br />
TreeCellRenderer cr = t.getCellRenderer () ;<br />
CustomDefaultRenderer dtcr = new CustomDefaultRenderer();<br />
t.setCellRenderer(dtcr);<br />
// Set the various colors<br />
dtcr.setBackgroundNonSelectionColor(Color.black) ;<br />
dtcr.setBackgroundSelectionColor(Color.gray);<br />
dtcr.setTextSelectionColor(Color.white);<br />
dtcr.setTextNonSelectionColor(Color.green);
Custom Tree Rendering and Editing 1261<br />
Listing 10-5 Installing a customized version of the default tree cell<br />
renderer (continued)<br />
// Set the extra attributes for this renderer<br />
dtcr.setLeafForeground(Color.yellow);<br />
dtcr.setLeafIcon(new Imagelcon(<br />
SubClassRenderer.class.getResource(<br />
11 images/earth, gif ") ) ) ;<br />
// Change the row height<br />
t.setRowHeight(0) ;<br />
// Finally, set the tree's background color<br />
t.setBackground(Color.black);<br />
In this example, an instance of the new renderer is instantiated and<br />
installed using the JTree setCellRenderer method. The customizations<br />
that were used in the previous example can still be applied to it because it is<br />
derived from the default renderer, but these changes affect every node in the<br />
tree. One extra attribute of the custom renderer allows the color used for leaf<br />
nodes to be different from that of branch nodes. This attribute is set in the<br />
code shown above using the setLeaf Foreground method which is implemented<br />
by the custom renderer. Note also that the setLeaf Icon method,<br />
inherited from DefaultTreeCellRenderer, is used to install a different<br />
icon that will be used only for leaf nodes. The only other change shown here<br />
is to set the cell row height using the JTree setRowHeight method, which<br />
requires an integer argument. If you supply a positive value, the rows will all<br />
be of that height, whereas a zero or negative value causes the tree look-andfeel<br />
class to query the renderer for the height of each row as it draws it,<br />
which allows variable height rows. This is necessary in this case because the<br />
icon used for leafs nodes is not necessarily the same size as that for branch<br />
nodes, so the height of each row needs to depend on the requirements of the<br />
node that will occupy it.<br />
<strong>Core</strong> Note<br />
The default row height is determined by the selected look-and-feel.The<br />
Metal look-and-feel does not supply a default height, so each row is as high<br />
as its renderer makes itThe Motif look-and-feel sets the default row height<br />
to 18 pixels and Windows uses / 6 pixels as the default.
1262 Chapter 10 The Tree Control<br />
The custom renderer itself is actually very simple—its only job is to<br />
change the way that the JLabel displays its content by manipulating its<br />
properties if the node being rendered is a leaf node. The renderer is implemented<br />
here as an inner class, but you could make it equally well a freestanding<br />
object that can be reused. The code is shown in Listing 10-6.<br />
Listing 10-6 A customized tree cell renderer<br />
// This class is a custom renderer based<br />
// on DefaultTreeCellRenderer<br />
protected static class CustomDefaultRenderer<br />
extends DefaultTreeCellRenderer {<br />
public Component getTreeCellRendererComponent(<br />
JTree tree,<br />
Object value,<br />
boolean selected,<br />
boolean expanded,<br />
boolean leaf,<br />
int row,<br />
boolean hasFocus) {<br />
// Allow the original renderer to set up the label<br />
Component c = super.getTreeCellRendererComponent(<br />
tree, value, selected,<br />
expanded, leaf, row,<br />
hasFocus);<br />
}<br />
if (leaf) {<br />
// Use a different foreground<br />
// color for leaf nodes.<br />
if (leafForeground != null) {<br />
c.setForeground(leafForeground);<br />
}<br />
return c;<br />
public void setLeafForeground(Color color) {<br />
this.leafForeground = color;<br />
}<br />
±_____^^<br />
private Color leafForeground;<br />
Since the intention is just to change the way in which the label created by<br />
the default renderer is configured, the first step in the getTreeCellRen-
Custom Tree Rendering and Editing 1263<br />
dererComponent method is to invoke the corresponding method of the<br />
default renderer superclass and let it set up the label as it would normally<br />
appear. This arranges for the appropriate text and icon to be installed, based<br />
on whether the node is a leaf or not, whether the node is selected, whether it<br />
has the focus, and whether it is expanded. Then, if the node being rendered<br />
is a leaf, the foreground text color is set to that configured by the application.<br />
If this attribute is null, no change is made to the value set by the default<br />
Tenderer. Note that the getTreeCellRendererComponent method determines<br />
whether the node is a leaf by using the leaf argument that is supplied<br />
to it. If specific behavior were required for expanded nodes or nodes that had<br />
the focus, this would also be handled by checking the method argumentnts.<br />
To tiy this version of the example for yourself, use the command:<br />
<strong>Java</strong> <strong>JFC</strong>Book.ChapterlO.SubClassRenderer<br />
Figure 10-11 shows a typical snapshot of this example after some of the leaf<br />
nodes have been exposed. You'll notice that the branch nodes are rendered as<br />
they were in Figure 10—10, but the leaf nodes have an icon that shows the earth<br />
as viewed from the moon and the text is yellow.<br />
One problem with creating a new Tenderer by subclassing Def aultTree-<br />
CellRenderer is that it may only work properly if the Metal or Windows<br />
look-and-feel is installed. Because of the fact that this example uses the original<br />
Tenderer functionality by invoking the getTreeCellRendererComponent<br />
method of its superclass, there might be a problem if it were replacing the<br />
Motif look-and-feel, which has its own cell renderer that is derived from<br />
DefaultTreeCellRenderer, because we wouldn't be using its specific<br />
getTreeCellRendererComponent method. Whether or not this matters<br />
depends entirely on what your customization is. You could, of course, implement<br />
a subclass for each of the look-and-feels and install the correct one at run<br />
time. There is, however, another technique that avoids having to generate<br />
more classes that you'll see in "Rendering and Editing Custom Objects."<br />
If you can't achieve the effects you need by subclassing the default renderer,<br />
you can provide your own by implementing the TreeCel lRenderer interface<br />
yourself. The technique for doing this is identical to the one used when creating<br />
Tenderers for the JList and JComboBox control, so it isn't repeated here.<br />
ToolTips and Renderers<br />
By default, JTree does not supply tooltips, but it does support the provision<br />
of tooltips via its renderer. If you want yonr tree to display tooltips, you have to<br />
do two things:<br />
• Register the tree with the ToolTipManager.
1264 Chapter 10 The Tree Control<br />
Figure 10-11 Changing text and icon positions using a custom tree renderer.<br />
• Arrange for the tree's renderer to return a tooltip as outlined<br />
here.<br />
There are three ways to handle tree tooltips.<br />
Using the Default Renderer<br />
The simplest approach is just to have the tree return a single tooltip that<br />
applies to the entire tree. You can achieve this very easily if the tree uses a<br />
renderer that is actually subclassed from JLabel, which is true of the standard<br />
Tenderers. All you need to do in this case is register the tree with the<br />
tooltip manager and install the tooltip as a property of the renderer itself.<br />
Registering the tree with the ToolTipManager can be done using the following<br />
code, where the variable t is assumed to hold a reference to the tree:<br />
ToolTipManager.sharedlnstance().registerComponent(t);<br />
and setting the tooltip is equally simple:<br />
((JLabel)t.getCellRenderer()).setToolTipText(<br />
"Apollo and Skylab missions");
You can verify that this works by typing the command:<br />
<strong>Java</strong> <strong>JFC</strong>Book.Chapter10.ToolTipExamplel<br />
Custom Tree Rendering and Editing 1265<br />
If you move the mouse over the tree, after a short time the tooltip will<br />
appear.<br />
Subclassing JTree<br />
One problem with the approach just shown is that the tooltip appears only<br />
when the mouse is over a part of the tree drawn by a renderer. If this is not<br />
sufficient, you can subclass the JTree class to return a tooltip whenever the<br />
mouse is over it by overriding the getToolTipText method and using the<br />
JComponent setToolTipText method to store the tooltip that you want to<br />
display. When you take this approach, you don't need to register the tree with<br />
the ToolTipManager because this is done by the setToolTipText<br />
method:<br />
The appropriate implementation of the getToolTipText method is as<br />
follows:<br />
public String getToolTipText(MouseEvent evt) {<br />
return getToolTipText();<br />
}<br />
This code probably looks a little strange! In fact, JComponent has two<br />
overloaded variants of getToolTipText:<br />
public String getToolTipText();<br />
public String getToolTipText(MouseEvent evt);<br />
The first of these two returns whatever string has been stored by the set-<br />
ToolTipText method. The second one allows a component to return a different<br />
tooltip based on the position of the mouse and is the one that is<br />
actually called by the ToolTipManager. The default implementation of this<br />
method in JComponent simply calls the other getToolTipText method,<br />
which is what our implementation does. The reason that we have to supply<br />
this code is that JTree itself overrides the second getToolTipText method<br />
to allow the tree's renderer to supply the tooltip, a fact that we used above<br />
(and will use again below) and, for this solution, we want to suppress JTree's<br />
code and revert to that in JComponent. You can try this code out using the<br />
command<br />
<strong>Java</strong> <strong>JFC</strong>Book.ChapterlO.ToolTipsExample2<br />
This time, you'll find that the tooltip appears when the mouse is over any<br />
part of the tree.
1266 Chapter 10 The Tree Control<br />
Node-specific Tooltips Using a Custom Renderer<br />
A third approach to the problem, and the most powerful, is to implement<br />
tooltip support in the renderer. This makes it possible to return a different<br />
tooltip for each node if necessaiy. As we said in the previous section, JTree<br />
overrides the getToolTipText method to get the tooltip for each node<br />
from that node's renderer. It does this by calling the Tenderer's getTree-<br />
CellRendererComponent method as if it were going to render the node<br />
and then invokes the getToolTipText method of the returned component<br />
to get the tooltip for the node. If you want your nodes to display tooltips, you<br />
simply have to call set Tool TipText on the component that you return<br />
from the Tenderer's getTreeCellRendererComponent method.<br />
To demonstrate the general technique, we'll modify the custom renderer<br />
shown in Listing 10-6 to include a tooltip. For simplicity, we'll make the tooltip<br />
be the same text as would be displayed on the node itself. In a real-world<br />
application, you would probably store the tooltip as part of the node or its<br />
user object and code the renderer to extract it from there. Setting the tooltip<br />
requires only one extra line of code in the renderer's getTreeCellRendererComponent<br />
method:<br />
// By default, use the same value as the<br />
// node text for the tooltip, for leaf nodes only<br />
((JComponent)c).setToolTipText(<br />
leaf ? value.toString() : null);<br />
where the variable c is the component being returned by the renderer. In<br />
this example, we set a tooltip only for leaf nodes.<br />
Having made this change, you just need to register the tree with the Tool-<br />
TipManager, as shown earlier in this section, and your tree will display a different<br />
tooltip for each leaf node. However, as with the first approach we took<br />
to displaying tooltips, a tooltip will only be displayed when the mouse is over<br />
an area that will be drawn by a renderer. To arrange for a tooltip to be displayed<br />
wherever the mouse is, we can combine this approach with the previous<br />
one by subclassing JTree and implementing a cleverer version of<br />
getToolTipText:<br />
public String getToolTipText(MouseEvent evt) {<br />
// Let the renderer supply the tooltip<br />
String tip = super.getToolTipText(evt);<br />
}<br />
// If it did not, return the tree's tip<br />
return tip != null ? tip : getToolTipText();
Custom Tree Rendering and Editing 1267<br />
This code first calls the JTree implementation of getToolTipText,<br />
which allows the renderer to return a tooltip. If it does not supply one, then<br />
the tool tip set using setToolTipText is returned instead. Now, you can set<br />
a global tooltip using the JTree setToolTipText method and it will appear<br />
whenever the mouse is over a part of the tree that is not drawn by a renderer,<br />
or when the renderer itself returns a null tooltip which, in this case, would<br />
be for non-leaf nodes. You can try this out using the command<br />
j ava <strong>JFC</strong>Book.Chapter10.ToolTipsExample3<br />
You'll find that a generic tooltip is displayed when the mouse is not over a<br />
leaf node and that each leaf node displays its own text as a tooltip. If you take<br />
this approach, you must register the tree with the ToolTipManager unless<br />
you invoke setToolTipText, in which case registration is handled for you.<br />
Changing the Basic Look-and-Feel Specific Parts<br />
of a Tree<br />
If your tree uses a look-and-feel that is derived from BasicTreeUI, you can<br />
customize more of its appearance. You can find out at runtime whether this is<br />
the case by getting a reference to its UI class by calling the JComponent<br />
getUI method and checking whether it is an instance of BasicTreeUI. If it<br />
is, as it will be for all of the standard look-and-feel implementations, you can<br />
make use of the methods shown in Table 10-6 to change the way in which the<br />
framework of the tree is drawn.<br />
Table 10-6 Basic Tree Look-and-Feel Customization Methods<br />
Method Description<br />
pub lie void Sets the horizontal distance between the<br />
setLeftChildlndent (int) left side of anode and the expansion<br />
handle for its children.<br />
pub 1 i c vo i d Sets the horizontal distance between the<br />
setRightChildlndent (int) center of a node's expansion handle and<br />
the left side of its rendered cell.<br />
public void Sets the icon used to render the expansetCollapsedlcon<br />
(Icon) sion handle when the node's children<br />
are not shown.
1268 Chapter 10 The Tree Control<br />
Table 10-6 Basic Tree Look-and-Feel Customization Methods<br />
(continued)<br />
public void setExpandedl- Changes the icon used as the expansion<br />
con (I con) icon handle the node's children are on<br />
view.<br />
Figure 10-12 shows the various configurable parts and how they affect the<br />
way in which the tree is rendered.<br />
Figure 10-12 Basic Tree Ul Customizable Items.<br />
These settings are applied everywhere in the tree—you can't have different<br />
settings for different rows. The icons that you supply are used to represent the<br />
expansion handle that appears to the left of a node that has children. Normally,<br />
this icon is a small circle with a "handle" extension or small square with a plus<br />
sign (+) in it when the node is collapsed and a minus sign (-) when it is<br />
expanded. The default icons are all fairly small. If you substitute larger ones,<br />
you will need to change the right or left indent values to space the remaining<br />
elements out horizontally. If your icon is taller than the standard ones, you'll<br />
need to increase the tree's row size, which you can do with the setRowHeight<br />
method of JTree.<br />
The next example adds these customizations to the tree that we have been<br />
using throughout this chapter. New expansion icons have been substituted<br />
and, since they are larger then the standard icons, the right child indentation<br />
and the row height have been increased to allow space for them. You can run<br />
this example for yourself using the command:<br />
java <strong>JFC</strong>Book.Chapter10.CustomTree<br />
The result will look like that shown in Figure 10-13
Custom Tree Rendering and Editing 1269<br />
Here's the code that was added to the main method of the previous example,<br />
immediately after creating the tree, to make these changes. In this code,<br />
t holds a reference to the JTree object:<br />
// Get the tree's UI class. If it is a BasicTreeUI,<br />
// customize the icons<br />
ComponentUI ui = t.getUIO;<br />
if (ui instanceof BasicTreeUI) {<br />
((BasicTreeUI)ui).setRightChildlndent(21);<br />
URL expandedURL = CustcrrfTree.class.getResource(<br />
}<br />
" itmges/closebutton. gif") ;<br />
URL collapsedURL = CustcmTree.class.getResource(<br />
"irrages/openbutton.gif ") ;<br />
( (BasicTreeUI)ui) .setExpandedlcon(<br />
new ImageIcon(expandedURL));<br />
((BasicTreeUI)ui).setCollapsedlcon(<br />
Figure 10-13 A tree with customized expansion icons.<br />
new Imagelcon(collapsedURL));
1270 Chapter 10 The Tree Control<br />
Since these customizations only work for a look-and-feel that bases its tree<br />
UI on BasicTreeUI, the first step is to use getUI to get the UI class. If it<br />
turns out that it is actually a BasicTreeUI, then new icons are loaded using<br />
the familiar Imagelcon class and used to customize the expansion handles.<br />
Note that extra space has been added between the expansion handle and the<br />
node itself to account for the fact that the customized icons for the expansion<br />
handles are larger than the default ones.<br />
Changing Properties for All Trees<br />
If you want to change the color of certain parts of a tree or the icons that it<br />
uses to represent open and closed folders and leaf nodes, and you want this<br />
change to apply to eveiy tree in your application, you don't need to implement<br />
your own renderer or modify an existing one—instead, you can modify<br />
the UIDefaults table for the current look-and-feel, which maps property<br />
names to the values appropriate for the current look-and-feel. The tree has<br />
19 useful properties that you can set in this way. These properties, together<br />
with the types of the associated objects, are listed in Table 10-7. The UIDefaults<br />
table and the associated UIManager class are discussed in detail in<br />
Chapter 13.<br />
Table 10-7 UIDefaults Properties for JTree<br />
Property Name Object Type<br />
Tree.background Color<br />
Tree.closedlcon Icon<br />
Tree.collapsedlcon Icon<br />
Tree.editorBorder Border<br />
Tree.expandedlcon Icon<br />
Tree.font Font<br />
Tree . foreground Color<br />
Tree, hash Color<br />
Tree.leafIcon Icon<br />
Tree.leftChildlndent Integer<br />
Tree.openlcon Icon<br />
Tree.rightChildlndent Integer<br />
Tree.rowHeight Integer
Table 10-7 UIDefaults Properties for JTree (continued)<br />
Tree.scrollsOnExpand Boolean<br />
Tree.selectionBackground Color<br />
Tree.selectionBorderColor Color<br />
Tree.selectionForeground Color<br />
Tree.textForeground Color<br />
Tree.textBackground Color<br />
Custom Tree Rendering and Editing 1271<br />
If you want to change an entry in this table, there are two possible<br />
approaches depending on the effect you want to achieve. If you need the<br />
changes to stay in place if the user dynamically switches the look-and-feel (if<br />
you allow this—see Chapter 13), you should store Color, Font, Integer,<br />
Boolean, Border, or Icon objects in the UIDefaults table. When<br />
a look-and-feel switch occurs, these values will not be changed.<br />
On the other hand, if the attributes you are setting only work with the current<br />
look-and-feel, you need to allow them to be reset to the new look-andfeel's<br />
defaults when a look-and-feel switch occurs. To achieve this, you need<br />
to wrap the attribute you are changing with an instance of BorderUIResource<br />
for a border, FontUIResource for a font, IconUIResource in the<br />
case of an icon, or ColorUlResource for a color. For example, to change<br />
the color of the text for a selected node to yellow only while the current lookand-feel<br />
is selected, you would proceed as follows:<br />
UIDefaults defaults = UIManager.getDefaults();<br />
defaults.put("Tree.selectionForeground",<br />
new ColorUlResource(Color.yellow));<br />
or to change the color of the lines that connect the nodes to white, you might<br />
do this:<br />
UIDefaults defaults = UIManager.getDefaults();<br />
defaults.put("Tree.hash" ,<br />
new ColorUlResource(Color.white));<br />
On the other hand, the following lines makes these changes permanent:<br />
UIDefaults defaults = UIManager.getDefaults();<br />
defaults.put("Tree.selectionForeground", Color.yellow);<br />
defaults.put("Tree.hash", Color.white);<br />
You can find out more about the UIDefaults table in Chapter 13. In general,<br />
it is a good idea to check whether you can carry out customization by<br />
modifying this table before using a more complex approach.
1272 Chapter 10 The Tree Control<br />
Editing a Tree's Nodes<br />
By default, trees are read-only to the user but, if you wish, you can allow the<br />
user to change the value associated with any node in the tree with just one<br />
line of code:<br />
tree.setEditable(true);<br />
If a tree is editable, you can edit the nodes by clicking on a node three<br />
times in quick succession or clicking once to select the node and then clicking<br />
again, having paused for a short time so that the two clicks do not get<br />
merged into a double-click (note that once a node is selected, a single click is<br />
enough to start the editing process), or by selecting a node and pressing the<br />
F2 key. Any of these gestures will causes the node's editor to appear. By<br />
default, the editor is a text field displaying the same text that represents the<br />
node in the tree. To edit the node, you just change the text and press<br />
RETURN. The editor will disappear and the new value will be installed.<br />
To show how editing works, let's look at yet another version of the hardworking<br />
example program that we have used throughout this chapter, this<br />
time called EditableTree. The change to make it editable is just one line of<br />
code but, so that you can see what happened, a TreeModelListener is<br />
attached to the tree. When the editor accepts a change, it applies it to the<br />
tree model, which causes a TreeModelEvent. The code that was added to<br />
display the content of this event is shown below:<br />
t.setEditable(true);<br />
t.getModel().addTreeModelListener(<br />
new TreeModelListener() {<br />
public void treeNodesChanged(TreeModelEvent evt) {<br />
System.out.println("Tree Nodes Changed Event");<br />
Object[] children = evt.getChildren();<br />
int[] childlndices = evt.getChildlndices();<br />
for (int i = 0; i < children.length; i++) {<br />
System.out.println("Index " + childlndices[i] +<br />
", changed value: " + children[0]);<br />
}<br />
}<br />
public void treeStructureChanged(TreeModelEvent evt) {<br />
System.out.println("Tree Structure Changed Event");<br />
public void treeNodesInserted(TreeModelEvent evt) {<br />
System.out.println("Tree Nodes Inserted Event");<br />
}
Custom Tree Rendering and Editing 1273<br />
public void treeNodesRemoved(TreeModelEvent evt) {<br />
System.out.printing"Tree Nodes Removed Event");<br />
}<br />
});<br />
The event that the listener gets will indicate that one node has changed, so<br />
of the listener methods shown above, only treeNodesChanged will ever be<br />
called, bnt you are obliged to provide the others to implement the listener<br />
interface. The event handler extracts the list of changed indices from the<br />
event and the array of changed objects. Code is included to print a set of<br />
these but, in fact, there will only ever be one. The object in the array<br />
returned by getChildren is the Def aultMutableTreeNode for the node<br />
that was edited, so printing it will cause its tostring method to be called<br />
that, as you know, will print the text associated with the node. If you run this<br />
program using the command<br />
<strong>Java</strong> <strong>JFC</strong>Book.ChapterlO.EditableTree<br />
and change the text "Apollo" to "Shuttle," you'll see the following event generated:<br />
Tree Nodes Changed Event<br />
Index 0, changed value: Shuttle<br />
To edit the tree cell, click the mouse over the text of value you want to<br />
change, then pause briefly and click again. If your clicks are too close<br />
together, nothing happens in the case of a leaf node, but if it's a branch node,<br />
you'll end up expanding or collapsing it instead of editing it. If you accidentally<br />
start editing a cell and don't want to continue, click anywhere else in the<br />
control or press the ESCAPE key and the edit will be aborted.<br />
Custom Cell Editors<br />
If you allow your tree to be edited, it is up to you to carry out whatever action<br />
is implied by the change and to check that the new value is legal. One way to<br />
make it easier to get legal input values is to supply a custom editor that only<br />
offers the legal values, such as a JComboBox. A custom editor must implement<br />
the TreeCellEditor interface:<br />
public interface TreeCellEditor extends CellEditor {<br />
public Component getTreeCellEditorConponent(JTree tree,<br />
}<br />
Object value, boolean isSelected, boolean expanded,<br />
boolean leaf, int row);
1274 Chapter 10 The Tree Control<br />
The TreeCellEditor interface extends CellEditor, which contains<br />
methods that are also used to create editable tables, as you'll see later in the<br />
next chapter. The getTreeCellEditorComponent method returns a component<br />
that can edit a value in the tree: the initial value is passed as the second<br />
argument, along with three arguments that specify whether the node being<br />
edited is selected or expanded and whether it is a leaf. The last argument gives<br />
the screen row of the node. There is only one TreeCellEditor for each tree.<br />
As the user edits different nodes, this method is called with different values<br />
and may, if necessary, return a differently configured component. Typically, the<br />
appearance of the returned component depends on the three boolean arguments,<br />
because it occupies the same space in the tree as a cell renderer and<br />
therefore may need to draw an appropriate icon (e.g., an open or closed<br />
folder).<br />
The methods shared with editors and used with JTable (see Chapter 11,<br />
"The Table Control") are as follows:<br />
public interface CellEditor {<br />
public Object getCellEditorValue();<br />
public boolean isCellEditable(EventObject);<br />
public boolean shouldSelectCell(EventObject);<br />
public boolean stopCellEditing();<br />
public void cancelCellEditing();<br />
public void addCellEditorListener(<br />
CellEditorListener);<br />
public void removeCellEditorListener(<br />
CellEditorListener);<br />
}<br />
These methods all deal with the mechanics of setting up an editor and<br />
starting and stopping the editing process. You don't need to implement all<br />
seven of these methods to change the text-based node editor, because most<br />
of the work is done for you in the Def aultCellEditor class that provides a<br />
complete implementation of an editor that can appear as either a text field, a<br />
checkbox, or a combo box. Here are its three constructors:<br />
public DefaultCellEditor(JTextField text);<br />
public DefaultCellEditor(JCheckBox box);<br />
public DefaultCellEditor(JComboBox combo);<br />
To install a custom editor in a tree, you need to first create the editor (usually<br />
by using or subclassing Def aultCellEditor), wrap it in an instance of<br />
the DefaultTreeCellEditor class, and then finally call the JTree set-<br />
CellEditor method. Two classes are used rather than one because<br />
Def aultCellEditor is a generic class that can provide editors suitable for
Custom Tree Rendering and Editing 1275<br />
use with both JTree or JTable, while DefaultTreeCellEditor augments<br />
any CellEditor to provide the semantics appropriate for editing in a<br />
tree.<br />
To add a combo-box editor to a tree requires only a few lines of code. The<br />
ComboTree example, that you can run with the command:<br />
<strong>Java</strong> <strong>JFC</strong>Book.Chapter10.ComboTree<br />
was created by adding the following to the EditableTree program:<br />
t.setEditable(true) ;<br />
final String[] values = { "Mercury", "Gemini", "Apollo",<br />
"Skylab", "Shuttle" };<br />
JComboBox combo = new JComboBox();<br />
for (int i = 0 ; i < values.length; i++) {<br />
combo.addltem(values[i] ) ;<br />
}<br />
DefaultTreeCellEditor editor = new DefaultTreeCellEditor(<br />
t, dtcr, new DefaultCellEditor(combo));<br />
t.setCellEditor(editor);<br />
t.getModel().addTreeModelListener(<br />
new TreeModelListener() {<br />
Because the DefaultCellEditor and DefaultTreeCellEditor<br />
classes do all of the work, all you need to do is populate the combo box that<br />
will appear in the tree and then create the Def aultCellEditor and<br />
Def aultTreeCellEditor classes that will manage it. The default cell editor<br />
is replaced by calling the JTree method setCellEditor. If you run this<br />
example and use one of the standard editing gestures on the Apollo node,<br />
the combo box appears, as shown in Figure 10-14. Click on the arrow and<br />
the list of possible values drops down. When you select one, the drop-down<br />
closes and the editor disappears. As with the text editor, selecting a new value<br />
causes a TreeModelEvent that contains the new value.<br />
The result will be something like that shown in Figure 10-14.<br />
The Def aultTreeCellEditor class has two constructors:<br />
public DefaultTreeCellEditor(JTree tree,<br />
DefaultTreeCellRenderer renderer)<br />
public DefaultTreeCellEditor(JTree tree,<br />
DefaultTreeCellRenderer renderer,<br />
TreeCellEditor editor)<br />
;
1276 Chapter 10 The Tree Control<br />
Figure 10-14 A tree with a Combo Box cell editor.<br />
The first constructor installs a new editor that is based on a text field and is<br />
the one used when the tree installs its own default editor. If you want to use a<br />
custom editor, you will need to use the second constructor and pass your editor<br />
as the third argument, as shown in the code extract above. The second<br />
argument of both constructors is a Def aultTreeCellRenderer—why is<br />
this required when installing a custom editor? When editing starts, the tree<br />
will add the editing component to the tree in place of the tree's node. In most<br />
cases, however, you would not want to lose the node's icon if it has one. To<br />
make sure that the rest of the node is displayed as it is when there is no edit<br />
in progress, you need to pass a reference to the tree's renderer to the constructor.<br />
If you supply null, the editor will still be installed but the icon will<br />
disappear until the edit is completed.<br />
Controlling Which Nodes Can Be Edited<br />
This simple example has a major flaw. As noted earlier, there is one editor<br />
that is shared among all of the nodes in the tree. This being the case, run the<br />
previous example again and open the tree to show the nodes for the crew of,<br />
say, Apollo 11. As you do this, be careful to click only on the expansion icons
Custom Tree Rendering and Editing 1277<br />
and not on the nodes themselves or on the text, to avoid initiating the editor.<br />
Now click once on the name of any crew member and press F2. In response,<br />
you'll get the same combo box offering a choice of spacecraft! This is clearly<br />
not appropriate.<br />
The problem here is that we have made the tree editable by calling setEditable<br />
(true), which allows all of its nodes to be edited. What we need is<br />
to be able to specify editability at a lower level of granularity, so that we can<br />
stop the editor appearing for specific nodes or types of node. There are two<br />
ways to do this, one of which involves subclassing JTree, the other being<br />
implemented in the tree cell editor.<br />
Controlling Editability by Subclassing JTree<br />
When the user makes one of the gestures that initiates editing, the following<br />
JTree method is called:<br />
public boolean isPathEditable(TreePath path);<br />
where the TreePath corresponds to the node to be edited. The default<br />
implementation of this method looks like this:<br />
public boolean isPathEditable(TreePath path) {<br />
}<br />
return isEditable();<br />
As a result of this, any cell can be edited provided that the tree itself is<br />
editable (although the editor can still refuse to allow the edit as you'll see<br />
below). One way to gain control of the editing mechanism is to override this<br />
method and apply your own criterion to determine whether the given cell<br />
should be edited. As an example, to arrange that only leaf nodes can be<br />
edited, you could implement the isPathEditable method as follows:<br />
public boolean isPathEditable(TreePath path) {<br />
if (isEditable()) {<br />
return getModelO . isLeaf (<br />
path.getLastPathComponent());<br />
}<br />
return false;<br />
}<br />
Note that it is necessary to ensure that the tree is editable by calling the<br />
isEditable method before applying a more specific test to the TreePath<br />
itself.<br />
»
1278 Chapter 10 The Tree Control<br />
Controlling Editability in the Tree Cell Editor<br />
Even if the tree is editable and the selected path is editable according to the<br />
isPathEditable method, it is still possible to stop the user editing a node<br />
by overriding the isCellEditable method of the CellEditor implementation.<br />
If this method returns false, no editor will be displayed. The<br />
isCellEditable method is defined as follows:<br />
public boolean isCellEditable(EventObject evt)<br />
The only argument that this method receives is an Eventobj ect. The meaning<br />
of this argument depends on how this method is invoked:<br />
• When the user clicks on the node with the mouse, this<br />
argument is the MouseEvent that was delivered to the tree.<br />
The coordinates of the event correspond to some location<br />
within the rendered area of the node.<br />
• If the user attempts to start an edit using the F2 key or<br />
programmatically (see below), this argument is null.<br />
• If the edit is started because the user clicked in a cell that was<br />
already selected, this argument is again passed as null.<br />
Usually, the isCellEditable method is used to allow or disallow edits<br />
based on the way in which the edit is started—for example, the editor may<br />
allow any edit started via the keyboard (provided the isPathEditable<br />
method has already allowed it), but only allow an edit initiated using the<br />
mouse on a triple click, to determine which it would inspect the MouseEvent.<br />
This method is not usually used to make a decision based on which<br />
node is being edited and it is difficult to do so, because the affected node is<br />
not passed as a method argument. Granted, you can locate the affected node<br />
by calling the JTree getPathForLocation method using the coordinates<br />
in the MouseEvent, but this is only possible in one of the three possible cases<br />
for which this method might be called.<br />
Nevertheless, it is sometimes useful to make node-dependent decisions in<br />
the editor. To do this, you have to store a reference to the node being edited<br />
when the getTreeCellEditorComponent method is called, which happens<br />
just before isCellEditable is invoked. An example implementation<br />
for our tree example is shown below.<br />
DefaultCellEditor comboEditor =<br />
new DefaultCellEditor(combo) ;<br />
DefaultTreeCellEditor editor = new DefaultTreeCellEditor(<br />
t, dtcr, comboEditor) {<br />
private Object lastValue;
Custom Tree Rendering and Editing 1279<br />
public Component getTreeCellEditorComponent(JTree tree,<br />
Object value, boolean isSelected, boolean expanded,<br />
boolean leaf, int row) {<br />
// Store the path<br />
lastValue = value;<br />
}<br />
return super.getTreeCellEditorComponent(tree, value,<br />
isSelected, expanded, leaf, row);<br />
public boolean isCellEditable(EventObject evt) {<br />
if (super.isCellEditable(evt) &&<br />
lastValue instanceof DefaultMutableTreeNode) {<br />
Object userObject =<br />
((DefaultMutableTreeNode)lastValue) .<br />
getUserObj ect() ;<br />
for (int i = 0; i < values.length; i++) {<br />
if (userObject.equals(values[i] )) {<br />
return true;<br />
}<br />
}<br />
}<br />
return false;<br />
}<br />
};<br />
t.setCellEditor(editor);<br />
This example can be run with the command:<br />
<strong>Java</strong> <strong>JFC</strong>Book.ChapterlO.ComboTree2<br />
If you select several nodes in the tree in turn and try to edit them, you'll<br />
find that you are prevented from doing so, unless you select one of the spacecraft<br />
nodes (initially labeled "Apollo" and "Skylab"). The code itself is<br />
straightforward given the discussion that preceded it. The getTreeCellEditorComponent<br />
simply stores the value in the tree that it is given to edit and<br />
then calls the superclass implementation to get the actual editor. The value<br />
argument passed to this method is actually the last component of the Tree-<br />
Path for the node being edited, which will be a DefaultMutableTreeNode<br />
in this case.<br />
The overridden isEditable method first ensures that the tree itself<br />
agrees to the current node being edited by calling the superclass method that<br />
it overrides. Assuming that this is the case, it retrieves the DefaultMutableTreeNode<br />
stored by the getTreeCellEditorComponent method
1280 Chapter 10 The Tree Control<br />
and extracts its user object. The problem is how to determine that the node<br />
that the user wants to edit corresponds to a spacecraft. In this case, the<br />
approach taken is to compare the user object with all of the values stored in<br />
the combo box, which represent all of the legal values that this node could<br />
hold. This will work for this specific example. Another possible approach<br />
would be to define the tree nodes in such a way that they include an attribute<br />
that indicates whether they can be edited, or to implement specific tree node<br />
classes that represent spacecraft and astronauts and perform the check by<br />
inspecting the runtime type of the node.<br />
Programmatic Control of Editors<br />
Most tree editing will be initiated by the user. The user interface gestures<br />
that initiate and end the editing process are detected by the tree's UI delegate<br />
class which listens to mouse events and installs keyboard mappings for<br />
the F2 key and any other keys that a custom look-and-feel might want to use<br />
for editing. The UI class makes use of a relatively small API provided by<br />
JTree that actually initiates and terminates edits. The same API can be used<br />
by application code to start or end an editing session in response to different<br />
user gestures or as a result of some state change in the application. The<br />
methods that you can use are defined in Table 10-8.<br />
Rendering and Editing Custom Objects<br />
The replacement editor developed in the previous section had an implicit<br />
assumption that doesn't hold for some trees. The assumption was that the<br />
user objects associated with the tree's nodes were all strings, which was (conveniently)<br />
true in that particular example. There is no reason for this always<br />
to be true and in general it is useful to be able to associate an arbitrary object<br />
with a node.<br />
When the user object is not a string, the default renderer will display it<br />
properly provided that it provides a suitable toString method because, as<br />
you already know, the renderer applies this method to the node, which will in<br />
turn apply it to the user object. However, editing such an object is not so simple.<br />
Let's return to the combo box editor to see what the issue is. When the<br />
tree was built for this case, all the user objects were strings and the combo<br />
box was populated with all of the possible string values that would be meaningful<br />
for the nodes that could be edited. When the user selects a new value,<br />
the editor applies the value to the tree. Because the editor was derived from<br />
the DefaultTreeCellEditor class, there was no need to supply the code
Table 10-8 Tree Editing Methods<br />
Method<br />
public void startEditingAtPath(TreePath<br />
path)<br />
public boolean stopEditingQ<br />
Custom Tree Rendering and Editing 1281<br />
Description<br />
Initiates an edit of the given path. The<br />
tree is scrolled so that the node corresponding<br />
to path is visible, il necessary<br />
and checks are made to ensure that the<br />
tree and node are both editable, as<br />
described earlier. If these conditions<br />
are not met, or there is no editor<br />
installed in the tree, the edit will not<br />
start. The isEditing method can be<br />
used to determine whether the edit was<br />
started.<br />
This method is used to request a tidy<br />
end to the editing session, in which the<br />
new value supplied by the user, if any,<br />
is applied to the tree. If no edit is in<br />
progress, this method simply returns<br />
true. Otherwise, the editor's stop-<br />
CellEditing method is called. If<br />
the editor returns false, then the edit<br />
will continue and stopEditing itsell<br />
will return false. If the editor returns<br />
true, its getCellEditorValue<br />
method is called to get the value that<br />
the user supplied and this value is<br />
stored in the node being edited using<br />
the TreeModel valueForPath-<br />
Changed method, which will be<br />
described in the next section. Finally,<br />
the editor is removed from the tree and<br />
stopEditing returns true to indicate<br />
success.
1282 Chapter 10 The Tree Control<br />
Table 10-8 Tree Editing Methods (continued)<br />
public void eancelEditingO<br />
public TreePath getEditingPathQ<br />
public boolean isEditingO<br />
public boolean isPathEditable(TreePath<br />
path)<br />
By contrast to stopEditing, this<br />
method requests that the current edit<br />
be forcibly terminated. Its operation is<br />
very similar to that of stopEditing,<br />
with the following differences:<br />
1. The editor is not asked to stop<br />
editing via its stopCellEditing<br />
method; instead, its cancel-<br />
Cell Edit ing method is called.<br />
This requires it to unconditionally<br />
abandon its editing session.<br />
2. The value in the editor is not written<br />
to the tree. Thus, any changes<br />
made by the user in the editor are<br />
lost.<br />
This method is typically called when<br />
the user makes a gesture that signals he<br />
or she does not not want to continue<br />
with the edit, such as pressing the<br />
ESCAPE key or selecting a different<br />
node.<br />
Returns the path that is currently being<br />
edited or null if there is no edit in<br />
progress.<br />
Returns t rue if there is an edit in<br />
progress, false if there is not.<br />
Returns true if the path given by the<br />
argument is editable. The default<br />
implementation of this method returns<br />
true if the tree itself is editable and<br />
false if it is not. JTree subclasses<br />
can override this method to return different<br />
values for different nodes, as<br />
shown earlier in this section.<br />
that carried out this step. What happens is that the editors stopCellEditing<br />
method is called when the edit is finished and this method informs any<br />
registered CellEditorListeners that editing is complete. The trees UI<br />
class registers as a CellEditorListener and, when it receives this event, it
Custom Tree Rendering and Editing 1283<br />
gets the new value from the editor by calling its getCellEditorValue<br />
method, which, in the case of our example, will return the value selected<br />
from the combo box, courtesy of code provided by Def aultTreeCellEditor.<br />
<strong>Core</strong> Note<br />
CellEditorListener is not a very useful interface unless you are<br />
implementing a tree Ul or an editor. It consists of two methods:<br />
public interface CellEditorListener<br />
extends EventListener {<br />
public abstract void editingStopped(ChangeEvent evt);<br />
public abstract void editingCanceled(<br />
ChangeEvent evt);<br />
The editingStopped method is called when editing completes normally,<br />
while editingCanceled is invoked when editing is aborted because, for<br />
example, the user selected a different node on the tree or collapsed the branch<br />
that contained the node being edited.This interface doesn't have an event of its<br />
own—it just supplies a ChangeEvent, an event that has no state, but just<br />
indicates that something about the event source may have changed.<br />
The tree's UI class stores the edited value in the model by invoking the<br />
Def aultTreeModel valueForPathChanged method, which is defined as<br />
follows:<br />
public void valueForPathChanged(TreePath path,<br />
Object value);<br />
The default implementation of this method locates the DefaultMutableTreeNode<br />
for the affected path and stores the new value by invoking<br />
setUserObject (value) . In our earlier example, the combo box returned<br />
a String value, so the type of the value argument to this method will be<br />
String, which means that the user object will be replaced by its own<br />
String representation. Unless the user object in the node that the editor<br />
was editing was originally a string (which, fortunately, it was in our example),<br />
this would be a fatal mistake.<br />
To get around this problem, you can do one of two things:<br />
• Populate the combo box with the user objects themselves<br />
instead of strings. This works as long as the user objects provide<br />
a toString method that returns a String that is meaningful
1284 Chapter 10 The Tree Control<br />
to the user, because the combo box displays the result of<br />
invoking toString on each of its displayed items, but the<br />
selected item would be an instance of the user object type.<br />
Therefore, valueForPathChanged will be passed an object of<br />
the correct type.<br />
• Continue to populate the combo box with strings, but override<br />
the valueForPathChanged method to substitute an<br />
appropriate object for the String when the edit is complete.<br />
The first method is the much simpler of the two and really requires no further<br />
explanation so, for the purposes of illustration, let's look at how to implement<br />
the second method.<br />
Editing Trees with Custom User Objects<br />
Let's start by deciding what the user object that will be associated with a node<br />
might be. Obviously, this depends on how you are going to use the tree, but<br />
one common way to create a tree is to define a user object that contains a<br />
custom icon and a text string that can be used for display purposes, as well as<br />
any other state information that might be of use to the application itself. Storing<br />
both of these attributes in the user object allows you to have a different<br />
icon for each object in the tree instead of using the default icon provided by<br />
the look-and-feel, or using a single substitute that is the same for all nodes (or<br />
at least for all leaf nodes), as you saw when looking at how to create a custom<br />
renderer earlier in this chapter. Here's the plan for this example.<br />
Instead of populating the tree with nodes that use Strings as the user<br />
object, this example will invent an interface that allows an object to return an<br />
icon to be rendered to represent it, then create suitable objects that implement<br />
this interface and associate them with nodes in the tree. To correctly<br />
display these nodes, a custom renderer will be needed. This renderer will get<br />
the text and the icon from the user object instead of using built-in icons or<br />
substitute icons that don't depend on the object being displayed. To edit<br />
these nodes, an editor that offers a combo box interface will be used. To<br />
ensure that the value stored in a node after the edit has completed is an<br />
object of the correct type, it will be necessary to supply our own tree model<br />
in which the valueForPathChanged method is overridden.<br />
Let's start by defining the interface:<br />
// An interface that describes objects with icons<br />
interface NodeWithlcon {<br />
}<br />
public Icon getlconO;
Custom Tree Rendering and Editing 1285<br />
From the point of view of the tree, all that is required of the user objects is<br />
the ability to get an icon and a text description from them. It isn't necessary<br />
to include a method in the interface to get a text description, because the<br />
toString method, which is defined for ever)' Obj ect, can be used for this.<br />
<strong>Core</strong> Note<br />
For simplicity, the implementation of this example is kept in a single source<br />
file. Because there can only be one public class or interface per source file,<br />
the above interface is declared with package scope. If you were developing<br />
a real application using the technique that we are explaining here, you<br />
would extract this interface into its own source file and make it public.<br />
Next, let's define the user objects that will be used to populate the tree for<br />
our example. This example is going to use a custom data model so that a new<br />
valueForPathChanged method that knows how to map from a String to<br />
the appropriate user object that corresponds to that string can be implemented.<br />
In other words, the data model must be aware of the meaning of the<br />
objects that it contains, so the definition of the data objects is tied to the data<br />
model by defining them in terms of an inner class of the data model itself. In<br />
fact, the data model is going to be defined in such a way that its users need<br />
only know that the items that it contains implement the Nodewithicon<br />
interface, which allows us to use other data models in place of the one that<br />
will be shown here.<br />
Listing 10-7 shows the implementation of the tree data model and the<br />
items that will be used as the user objects in the tree.<br />
Listing 10-7 A customized tree model class<br />
// This class represents the data model for this tree<br />
class CustomTreeModel extends DefaultTreeModel {<br />
public CustomTreeModel(TreeNode node) {<br />
super(node);<br />
objects.put("CSM",<br />
new HardwareObject("CSM", "images/csmicon.gif"));<br />
objects.put("LM",<br />
new HardwareObject("LM", "images/lemicon.gif"));<br />
}<br />
public void valueForPathChanged(TreePath path,
1286 Chapter 10 The Tree Control<br />
Listing 10-7 A customized tree model class (continued)<br />
Object newValue) {<br />
DefaultMutableTreeNode node =<br />
DefaultMutableTreeNode)path.getLastPathComponent();<br />
String value = (String)newValue;<br />
// Use the string to locate a suitable HardwareObject.<br />
// If there isn't one, just use the string as the<br />
// user object<br />
HardwareObject object = getObjectForName(value);<br />
if (object != null) {<br />
node.setUserObject(object);<br />
} else {<br />
node.setUserObject(value);<br />
}<br />
nodeChanged(node);<br />
}<br />
// Get the HardwareObject for a given name, or<br />
// null if unknown<br />
public HardwareObject getObjectForName(String name) {<br />
return (HardwareObject)objects.get(name);<br />
}<br />
// Create the set of objects that can populate<br />
// the leaf nodes<br />
protected static class HardwareObject<br />
implements NodeWithlcon {<br />
protected HardwareObject(String text,<br />
String imageName) {<br />
this.text = text;<br />
this.icon = new Imagelcon(getClass().getResource(<br />
imageName));<br />
}<br />
// Return text for display<br />
public String toStringO {<br />
return text;<br />
}<br />
// Return the icon<br />
public Icon getlconO {<br />
return icon;<br />
}<br />
protected String text;<br />
protected Icon icon;
Listing 10-7 A customized tree model class (continued)<br />
}<br />
Custom Tree Rendering and Editing 1287<br />
// Get the possible hardware types in a combo box<br />
public JComboBox getNamesAsCombo() {<br />
DefaultComboBoxModel model =<br />
new DefaultComboBoxModel();<br />
Enumeration e = objects.keys();<br />
while (e.hasMoreElements()) {<br />
model.addElement(e.nextElement());<br />
}<br />
return new JComboBox(model);<br />
}<br />
protected static Hashtable objects = new HashtableO;<br />
_L___________ _____<br />
Let's look first at the user object class, which is called HardwareObject.<br />
This particular example will display two items of space hardware and allow<br />
the user to place either one of them into a particular location in the tree by<br />
offering a combo box with their names when the user clicks to start editing.<br />
To the left of the name, there will be a small picture that shows what the item<br />
actually looks like. To keep this example simple, only leaf items will be customized,<br />
so there is no need to supply extra icons for expanded and collapsed<br />
nodes. The same principles would, of course, be applied if you wanted to<br />
produce a completely general solution.<br />
To create each HardwareNode object, the name of the hardware and the<br />
location of its icon must be supplied. The implementation of the HardwareNode<br />
class is very simple. The constructor stores the hardware name<br />
and uses the Imagelcon class to load the corresponding icon. The<br />
toString method returns the object's name and the get I con method<br />
returns the icon. This method is needed because HardwareNode is required<br />
to implement the NodeWithlcon interface.<br />
Because we don't want anything outside the data model to know how to<br />
create these user objects, two of them are built in the data model's constructor<br />
and placed in a hash table, keyed by their names. To complete the encapsulation,<br />
a method (getObjectForName) is provided to get a copy ol the<br />
object given its name. You'll see why this method is needed later. These<br />
objects are both read-only, so it is only necessary to create one of each. Storing<br />
one copy of each in the hashtable is, therefore, acceptable, no matter how
1288 Chapter 10 The Tree Control<br />
many times it might appear in the tree (and in this example it appears either<br />
once or not at all).<br />
Thinking ahead a bit to the implementation of the cell editor, a combo box<br />
will need to be populated with the names of the possible hardware choices.<br />
Again, it isn't desirable to have the editor know how many possible choices<br />
there are or what relationship the string name that it will store might have to<br />
the objects themselves, so we implement a method within the data model<br />
(getNamesAsCombo) that returns a suitably populated JComboBox that the<br />
editor can use. This combo box is created by obtaining an enumeration of the<br />
items in the data model's internal hash table and adding one combo item per<br />
entry in the enumeration.<br />
The valueForPathChanged Method<br />
The only other method of the data model that still needs to be described is<br />
the one that this section opened with—valueForPathChanged. This<br />
method is called with a TreePath for the node that has been edited and the<br />
new value which will have come from the combo box and which is therefore<br />
known to be a String, because the combo box was created using the get-<br />
Names As Combo method, which populates it with Strings. What value-<br />
ForPathChanged needs to do is find the correct user object corresponding<br />
to the String returned from the editor and install it in the node. Finding the<br />
user object is easy—the data model has a hashtable that maps from the name<br />
to the object itself, so all that is necessary is to invoke the getObjectFor-<br />
Name method, which accesses the hashtable to locate the object. This method<br />
only returns an appropriate answer if the String returned by the combo box<br />
was the key for one of the objects that are in the hashtable. Given the way<br />
that this example has been written, this will always be true, but if you take the<br />
code here and use it in another application which allows the combo box to be<br />
editable (probably a mistake!), the user may type a meaningless value and<br />
you won't find a corresponding object in the hashtable. To defend against this<br />
possibility, if this happens, getObjectForName will return null, and the<br />
exact value that the user typed is stored as the user object. Whether or not<br />
this is of any use depends on the application: It does at least stop the program<br />
getting aNullPointerException.<br />
Having got the correct object from the getObjectForName method, the<br />
next step is to find the node to install it in. You already know how to do this—<br />
you just apply getLastPathComponent to the TreePath passed to valueForPathChanged<br />
to find the node and then call setUserObject to<br />
install the user object. Finally because the content of the model has<br />
changed, the nodeChanged method must be called to have the data model
Custom Tree Rendering and Editing 1289<br />
send events to registered TreeModelListeners. This will cause the tree's<br />
visual state to be updated.<br />
That takes care of the data model. However, this example also needs three<br />
other things:<br />
1. A JTree to display the model.<br />
2. An editor that provides a combo box with the legal hardware<br />
types installed.<br />
3. A renderer that will display the hardware object in each of the<br />
tree's leaf nodes.<br />
We'll cover each of these items separately. For reference, the complete<br />
implementation, apart from the data model, which was covered earlier, is<br />
shown in Listing 10-8.<br />
Listing 10-8 Rendering and editing nodes with custom icons<br />
package <strong>JFC</strong>Book.ChapterlO;<br />
import j avax.swing.*;<br />
import javax.swing.tree.*;<br />
import javax.swing.event.*;<br />
import java.util.*;<br />
import j ava.awt.Component;<br />
import j ava.awt.event.*;<br />
public class Customlcons {<br />
public static void main(String [] args) {<br />
JFrame f = new JFratne ("Custom Icons") ;<br />
// Create the model with just the root node<br />
DefaultMutableTreeNode rootNode =<br />
new DefaultMutableTreeNode("Apollo");<br />
CustomTreeModel m = new CustomTreeModel(rootNode);<br />
JTree t = new JTree(m) {<br />
public boolean isPathEditable(TreePath path) {<br />
// Only allow editing of leaf nodes<br />
return isEditableO &&<br />
getModel().isLeaf(path.getLastPathComponent()<br />
}<br />
};
1290 Chapter 10 The Tree Control<br />
Listing 10-8 Rendering and editing nodes with custom icons<br />
(continued)<br />
{<br />
t.putClientProperty("JTree.lineStyle", "Angled");<br />
t.setEditable(true);<br />
t.setRowHeight(0);// Row height is not fixed<br />
// Define a replacement renderer<br />
final TreeCellRenderer oldRenderer = t.getCellRenderer();<br />
DefaultTreeCellRenderer r = new DefaultTreeCellRenderer()<br />
private Object lastValue;<br />
public Component getTreeCellRendererComponent(<br />
JTree tree, Object value,<br />
boolean selected, boolean expanded,<br />
boolean leaf, int row,<br />
boolean hasFocus) {<br />
// Store the value for getLeaflcon<br />
lastValue = value;<br />
}<br />
// Allow the original renderer to set up the label<br />
Component c =<br />
oldRenderer.getTreeCellRendererComponent(<br />
tree, value, selected,<br />
expanded, leaf, row,<br />
hasFocus);<br />
// Now change the icon if necessary<br />
if (leaf && c instanceof JLabel) {<br />
JLabel 1 = (JLabel)c;<br />
Icon icon = getLeafIcon();<br />
if (icon != null) {<br />
1.setlcon(icon);<br />
}<br />
}<br />
return c;<br />
public Icon getLeafIcon() {<br />
Object o =<br />
((DefaultMutableTreeNode)lastValue).getUserObject();<br />
if (o instanceof NodeWithlcon) {<br />
return ( (NodeWithlcon) o) .getlconO ;
Custom Tree Rendering and Editing 1291<br />
Listing 10-8 Rendering and editing nodes with custom icons<br />
(continued)<br />
} else if (oldRenderer<br />
instanceof DefaultTreeCellRenderer) {<br />
return ((DefaultTreeCellRenderer)oldRenderer).<br />
getLeafIcon();<br />
}<br />
return null;<br />
}<br />
};<br />
t.setCellRenderer(r);<br />
// Define a replacement editor<br />
JComboBox combo = m.getNamesAsCombo();<br />
DefaultCellEditor comboEditor =<br />
new DefaultCellEditor(combo);<br />
DefaultTreeCellEditor editor =<br />
new DefaultTreeCellEditor(t, r, comboEditor);<br />
t.setCellEditor(editor);<br />
// Populate the model with a small amount of data<br />
DefaultMutableTreeNode hardwareNode =<br />
new DefaultMutableTreeNode("Hardware" ) ;<br />
rootNode.add(hardwareNode);<br />
String itemName = (String)combo.getltemAt(0);<br />
DefaultMutableTreeNode itemNode =<br />
new DefaultMutableTreeNode(<br />
m.getObjectForName(itemName));<br />
hardwareNode . add (itemNode) ,-<br />
}<br />
t.expandRow(0);<br />
t.expandRow(1) ;<br />
f.getContentPane().add(new JScrollPane(t));<br />
f .setSize(300, 300) ;<br />
f.setVisible(true);<br />
The Tree Implementation<br />
Since the tree is just going to display the data model and allow its custom<br />
renderer and editor to handle the details of displaying and editing the nodes,
1292 Chapter 10 The Tree Control<br />
almost nothing needs to be done to implement it. The only special task that<br />
the tree needs to perform is to ensure that only leaf nodes can be edited. As<br />
you saw earlier in this chapter, it is possible to check that the node being<br />
edited is a leaf from within the cell editor (refer to "Controlling Editability in<br />
the Tree Cell Editor"), but it is simpler to make this check in the JTree<br />
isPathEditable method. To override this method, you have to subclass<br />
JTree. The code is very simple:<br />
JTree t = new JTree(m) {<br />
public boolean isPathEditable(TreePath path) {<br />
// Only allow editing of leaf nodes<br />
return isEditableO &&<br />
getModel().isLeaf(path.getLastPathComponent());<br />
}<br />
};<br />
This code is general enough that you can use it any time you want to ensure<br />
that only leaf nodes can be edited. Note that it uses the TreeModel isLeaf<br />
method to perform the test instead of the TreeNode isLeaf method,<br />
because the former calls the TreeNode getAllowsChildren method<br />
instead of isLeaf if the TreeModel has been set up to require this.<br />
The Cell Editor<br />
Constructing the cell editor is also a simple matter—all we need is an editor<br />
that displays a combo box containing the list of hardware items that can<br />
appear in the tree. The combo box itself can be created by calling the Tree-<br />
Model's getNamesAsCombo method. Therefore, creating and installing a<br />
suitable editor requires only four lines of code:<br />
// Define a replacement editor<br />
JComboBcx combo = m.getNamesAsCombo();<br />
DefaultCellEditor comboEditor =<br />
new DefaultCellEditor(combo);<br />
DefaultTreeCellEditor editor =<br />
new DefaultTreeCellEditor(t, r, comboEditor);<br />
t.setCellEditor(editor);<br />
The basic editor is created by wrapping the combo with a standard<br />
Def aultCellEditor, which is then wrapped in a DefaultTreeCellEditor<br />
to make it behave suitably within a JTree. In this code extract, the variable<br />
r refers to the custom cell renderer for the tree that will be discussed<br />
next. Even though the editing process requires a certain amount of clever<br />
handling to arrange for the string from the combo box to be converted to
Custom Tree Rendering and Editing 1293<br />
the correct HardwareObject to be installed in the node, none of this complication<br />
is visible to the editor because it is all implemented in the Tree-<br />
Model. Therefore, it is perfectly acceptable to use a standard editor.<br />
The Cell Renderer<br />
Finally, let's look at the cell renderer. This needs to be customized because it<br />
has to display a specific icon for each node that has one and, conversely, it<br />
should display the standard icon if it comes across a node that does not have a<br />
special icon—that is, a node whose user object is not an instance of a class<br />
that implements the NodeWithlcon interface. In an earlier example, you<br />
saw how to change the icons that the tree uses for leaf nodes and for open<br />
and closed branch nodes by setting properties of the tree's Def aultTree-<br />
CellRenderer. However, these changes affect every icon in the tree. In this<br />
example, we need to be able to render a different icon for each leaf node. In<br />
order to do this, you need a custom renderer. Listing 10-6 showed how to<br />
create a renderer that uses a different color for the text of leaf and branch<br />
nodes. By expanding this example a little, it would be simple to have it use a<br />
different icon for each node as well - all that is necessary is to override the<br />
getLeaflcon method to return an icon that is suitable for the node being rendered.<br />
However, the approach taken in Listing 10-6 limits you to look-andfeel<br />
classes whose cell Tenderers are instances of Def aultTreeCellRenderer<br />
or are subclasses of DefaultTreeCellRenderer that don't add any<br />
functionality to it that can't be lost. In many cases, of course, this is an acceptable<br />
constraint, but there is a technique that can be used to avoid being concerned<br />
about how the original renderer is implement. The code shown in<br />
Listing 10-8 shows how to create a renderer that will work in tandem with<br />
any installed renderer, as long as that renderer returns a JLabel from its<br />
getTreeCellRendererComponent method.<br />
The new renderer works by obtaining a reference to the renderer that's<br />
installed in the tree when it is created, installing a reference to itself in its<br />
place and then calling the original Tenderer's getTreeCellRendererComponent<br />
method at the start of its own. This allows the original renderer to<br />
create the component in its usual format, while allowing the new renderer to<br />
add its own customizations. If the component that the original renderer created<br />
is a JLabel and our node has an icon of its own, the only thing left to do<br />
is get the node's icon and install it in the original Tenderer's JLabel. There<br />
is no need to be concerned about how the label is organized, because this is a<br />
simple trade of one icon for another. You'll find the implementation details in<br />
Listing 10-8.
1294 Chapter 10 The Tree Control<br />
There is one small point in this renderer that is worth taking note of. The<br />
getTreeCellRendererComponent method replaces the icon in the JLabel<br />
created by the original renderer like this:<br />
if (leaf && c instanceof JLabel) {<br />
JLabel 1 = (JLabel)c;<br />
Icon icon = getLeafIcon();<br />
if (icon != null) {<br />
1.setlcon(icon);<br />
}<br />
}<br />
in fact, we know that the Icon to be used is readily available to the<br />
getTreeCellRendererComponent method, because it is part of the node<br />
that is being rendered, assuming that the node's user object implements the<br />
NodeWithlcon interface (and if it doesn't, the original icon should be left in<br />
place). However, instead of extracting the icon directly, the task is delegated<br />
to the getLeaf Icon method. The reason for this is actually to do with editing.<br />
As you know, in order to keep the correct icon displayed during an editing<br />
session, the DefaultTreeCellEditor constructor is given a reference<br />
to the trees renderer. When the editor is activated, the Tenderer's getLeaf-<br />
Icon method is called to get the correct icon. For this reason, our renderer is<br />
obliged to supply a getLeaf Icon method that gets the appropriate icon for<br />
whichever node is being edited and, since we had to implement this method,<br />
we chose to use it in the getTreeCellRendererComponent method as<br />
well. Here is how it is implemented:<br />
public Icon getLeafIcon() {<br />
Object o = ((DefaultMutableTreeNode)lastValue).<br />
getUserObj ect() ;<br />
if (o instanceof NodeWithlcon) {<br />
return ((NodeWithlcon)o).getlcon();<br />
} else if (oldRenderer instanceof<br />
DefaultTreeCellRenderer) {<br />
return ( (DefaultTreeCellRenderer)oldRenderer) .<br />
getLeafIcon();<br />
}<br />
return null;<br />
}<br />
There is a small subtlety in this code. The icon has to be obtained from the<br />
node being rendered (or edited in the case of an editing session), but the<br />
Def aultTreeCellRenderer getLeaf Icon method does not receive a reference<br />
to this node. As with our custom editor implementation that was<br />
shown in "Controlling Editability in the Tree Cell Editor, " we solve this
Custom Tree Rendering and Editing 1295<br />
problem by storing a reference to the last node that was rendered in the<br />
getTreeCellRendererComponent method and then use it in getLeaf Icon.<br />
This works both during normal rendering and when an editing session is<br />
in progress.<br />
The rest of the code for this example just creates an instance of the tree<br />
with suitable data and displays it. Figure 10-15 shows what it looks like with<br />
one hardware item selected. If you run this example by typing the command:<br />
<strong>Java</strong> <strong>JFC</strong>Book.Chapter10.Customlcons<br />
Figure 10-15 A tree node with a custom icon.<br />
you can try out editing the leaf node by triple-clicking on it. You'll get a<br />
combo box with two selections in it. Notice how the text and the image both<br />
change when you change the selection. Notice also that the nonleaf nodes are<br />
not editable.
1296 Chapter 10 The Tree Control<br />
Summary<br />
This chapter introduced the Swing tree control, one of two powerful data display<br />
components that you have at your disposal. After seeing the basic components<br />
of a tree, you learned how trees are created and how the user can<br />
manipulate them by expanding and collapsing nodes and making selections.<br />
You also saw how these actions are reflected in the tree itself and how they<br />
can be intercepted by applications and by custom components derived from<br />
the JTree class.<br />
One of the more popular uses for a tree control is to display the content of<br />
a file system. A large portion of this chapter was devoted to creating a subclass<br />
of JTree that can show a file system in hierarchical form. The implementation<br />
of this control reveals much of the inner workings of the trees data<br />
structures.<br />
Finally, you saw several ways in which the tree's appearance can be customized<br />
to suit the needs of particular applications and discovered how to<br />
allow the user to edit the contents of a tree, while still making sure that only<br />
meaningful changes can be made.
THE TABEE<br />
CONTROL<br />
• Tables and Table Headers<br />
Topics in This Chapter<br />
• The Table Data Model and the Column Model<br />
• Table Selection<br />
• Renderers and Editors<br />
• Column- and Class-Based Rendering and Editing
N" ext to JTree, JTable is probably the most complex control in the<br />
Swing component set. This chapter starts by showing how to create<br />
a table with only a few lines of code then, to allow you to exploit<br />
fully the more powerful features of tables, you'll see in detail the parts that<br />
make it up—the data model and the way in which table columns are specified<br />
and managed. You'll also learn how to control and respond to the selection of<br />
cells, rows and columns within the table.<br />
The second part of the chapter introduces table cell Tenderers and editors,<br />
which allow you to customize the table's appearance and shows some examples<br />
that demonstrate several useful techniques you can use as the basis for<br />
your own applications.<br />
An Overview of the Table Control<br />
JTable is a powerful component that provides enough flexibility to enable it<br />
to be used in a very simple way to quickly display information in a rough-andready<br />
manner, while also being capable of being configured and customized<br />
to allow the user, if necessary, to edit or interactively change the way in the<br />
data is ordered on the screen. As with the tree, tables are actually built from<br />
several parts, all of which will be examined closely in this chapter. If you just<br />
1299
1300 Chapter I I The Table Control<br />
want to display a two-dimensional array of numbers, for example, you don't<br />
need to know very much about the table to be able to do so but, on the other<br />
hand, learning the details of each piece of the table allows you to create more<br />
useful tables and to present the same data in different ways depending on the<br />
needs of the user.<br />
A Simple Table<br />
Let's start by looking at an example of a table that was created with only a few<br />
lines of code. Because the aim is to keep this example as simple as possible,<br />
you'll see that the table has some imperfections. It is perfectly possible to<br />
create simple tables that don't have the problems that you'll see in this example,<br />
provided that the data is consistent with the defaults that the table controller<br />
uses but, in this example, several of the table's columns have been<br />
made deliberately difficult for the table to handle. This, of course, gives us<br />
the opportunity to show you what can go wrong and how you can fix it. You<br />
can see the table for yourself by running the program that displays it using<br />
the command:<br />
java <strong>JFC</strong>Book.Chapterll.TableExample<br />
The table that this program creates is shown in Figure 11—1.<br />
Figure II—I A simple table.<br />
The data in this table is a list of the manned Apollo space flights from 1968<br />
to 1972 and includes the flight dates, the crews, the spacecraft names, and<br />
other information, some of which will be used later in this chapter.
An Overview of the Table Control 1301<br />
The first thing to observe is that the table is divided into two parts—the<br />
header and the body. The header occupies the top row of the table and contains<br />
a heading for each of the columns. To make it stand out from the body,<br />
it is colored differently and each column header has a border. Figure 11-1<br />
shows what the table looks like with the Metal look-and-feel, but the other<br />
look-and-feels have a similar distinction between the header and the body. It<br />
wasn't necessary to do anything special to create the header—it was built<br />
automatically when the table was created. However, it is possible to create<br />
your own table headers that contain custom components or have different<br />
colored background or text, as you'll see during the discussion of the table<br />
header and of table Tenderers that, like those used with the tree, control<br />
exactly how the various pieces of a table are represented.<br />
The body of the table is drawn in the form of a grid, with horizontal and<br />
vertical lines bounding every cell in the table. The color of the grid lines is<br />
customizable and it is also possible to suppress them altogether (refer to the<br />
descriptions of the setGridColor, setShowGrid, setShowHorizontalLines,<br />
and setShowVerticalLines methods in the JTable API documentation<br />
for details).<br />
Analyzing the Columns<br />
The next thing to notice about this table is that some of the data is hard to<br />
read. Take, for example, the second column that should contain die name of<br />
the commander of the flight whose name is in the first column. As you can<br />
see, the column header for this column is incomplete—instead of reading<br />
Commander, it says Command..., because the column itself is not wide enough<br />
to contain the text assigned to it. This is also true for almost all of the entries<br />
in that column.<br />
<strong>Core</strong> Note<br />
The size of the window that this program uses depends on the resolution of<br />
your display, so you may see more or less of each column depending on the<br />
settings of your video driver. The screen shot shown here was taken on a<br />
screen displaying 1024 x 768 pixels.<br />
There are several other columns that share this same problem. If you<br />
expand the window, you'll find that all of the columns get proportionately<br />
wider, which may allow you to see more of the information that you might be<br />
looking for, but this is, of course, not ideal. If you want to see exactly what is
1302 Chapter I I The Table Control<br />
in the second column, you'll have to move the mouse until it is over the gap<br />
in the header between the second and third columns. When the mouse is<br />
correctly positioned, the cursor will change to a two-headed arrow (or whatever<br />
the resize cursor is on your platform). At this point, you can drag to the<br />
right with the left mouse button pressed to increase the size of the second<br />
column. As you do this, the other columns in the table body also adjust themselves<br />
to reflect the change made in the header and when you release the<br />
mouse button the table takes up its new configuration. When you've<br />
arranged for all of the second column to be visible, you'll see something like<br />
Figure 11-2.<br />
Figure 11-2 The table after resizing the second column.<br />
While the second column has grown, the others have had to be adjusted to<br />
create the extra space that it needed and now you'll find it harder to read<br />
what is in the other columns. In fact, if you want to read all of the information<br />
in this table, it will take you some time to adjust each column in turn so that<br />
you can see all of it and, each time you do so, you lose information elsewhere.<br />
This is, of course, partly due to the fact that this table was created using the<br />
default settings for JTable and its constituent parts but, in general, it can be<br />
tricky to arrange for all of the information to be visible at the same time. This<br />
issue will crop up again several times in the next few sections.<br />
Next, look at the column headed Launch. This should contain the launch<br />
date of the flight, but instead it contains the start of a string representation of<br />
the GregorianCalendar object that contains the date. Within the table, each<br />
cell has a renderer that is responsible for displaying the data in that cell. The<br />
table initially contains default Tenderers that can display icons, booleans, num-
An Overview of the Table Control 1303<br />
bers, and dates (when held as Date objects - but not GregorianCalendars)<br />
and a catch-all renderer for other objects that just calls the object's toString<br />
method and displays the result, which is what has happened here. To make this<br />
field display properly, you have to provide a custom renderer. You can see a<br />
similar problem in several other columns such as Duration, which currently<br />
shows the flight duration in seconds. Later in this chapter, you'll see how to display<br />
this as days, hours, minutes and seconds. The default Tenderers are, of<br />
course, perfectly adequate if your table consists of strings and numbers that are<br />
meaningful in their raw form (such as sales figures, etc.)—notice, for example,<br />
that the last column contains the number of pounds of moon rock collected,<br />
which displays properly as a floating-point number.<br />
Rearranging Columns<br />
One of the nice features of the table control is that the user is not necessarily<br />
bound to use the column ordering that he or she is initially presented with.<br />
Unless the programmer prevents it, the user can rearrange table columns by<br />
dragging the column headers. As an example, with the example program running,<br />
move the mouse over the header of the LM Pilot column and press and<br />
hold down the left mouse button, then drag the mouse to the right, keeping the<br />
button pressed. As you move the mouse, the column header becomes<br />
detached and follows the mouse, followed by the rest of the LM Pilot column,<br />
as shown in Figure If—3. When the header is about halfway over the CM<br />
Pilot header to its right, the two columns change places, so that the CM<br />
Pilot column moves into the vacant position next to the Commander column.<br />
If you now release the mouse button, the LM Pilot column will drop into its<br />
new location. If you continue dragging, you'll find that each column that you<br />
pass over will jump to the left when you have obscured half of it, leaving its<br />
former position vacant for you to drop your column into.<br />
Selecting Columns, Rows, and Cells<br />
Like many other Swing controls, the table allows some or all of its content to be<br />
selected by the user. Changes in the selection are notified to application code<br />
by events and it is possible to retrieve whatever is currently selected. There are<br />
three different modes in which the table can be configured for selection:<br />
Row Selection Allowed: Clicking in a table cell selects everything in that cell's<br />
row.<br />
Column Selection Allowed: Clicking in a table cell selects the cell's column.<br />
Cell Selection: Clicking in a table cell selects only that cell.<br />
'
1304 Chapter I I The Table Control<br />
Figure 11-3 Dragging a table column to a new location.<br />
By default, when a table is created, row selection is enabled. In Swing<br />
1.1.1 and <strong>Java</strong> 2 version 1.2.2, if you allow both row and column selection,<br />
clicking on a cell selects both the row and the column that run through that<br />
cell. However, the effect is different in <strong>Java</strong> 2 version 1.3—allowing row and<br />
column selection at the same time gives the same effect as enabling column<br />
selection: only one cell is selected. In fact, in <strong>Java</strong> 2 version 1.3, enabling row<br />
and column selection together is indistinguishable from enabling cell selection.<br />
<strong>Core</strong> Alert<br />
Because of this incompatible behavior, if you need to write code that works<br />
predictably with all versions of Swing, do not explicitly allow both row and<br />
column selection.The ability to select rows and columns together has been<br />
removed in <strong>Java</strong> 2 version 1.3, so do not encourage users to make use of<br />
the feature if you are currently restricted to using earlier releases. It is<br />
doubtful that this is a useful in any event, so its removal in <strong>Java</strong> 2 version<br />
1.3 is probably a step in the right direction.<br />
You can try out the four possible modes by typing one of the following<br />
commands:<br />
java <strong>JFC</strong>Book.Chapterll.TableExample<br />
<strong>Java</strong> <strong>JFC</strong>Book.Chapterll.TableExample row<br />
java <strong>JFC</strong>Book.Chapterll.TableExample column<br />
java <strong>JFC</strong>Book.Chapterll.TableExample both
An Overview of the Table Control 1305<br />
The first command enables cell selection, while the other three configure<br />
the table for row or column selection, or for both simultaneously, respectively.<br />
Each of these modes behaves slightly differently, so we'll look at each<br />
them separately.<br />
Rote Selection<br />
If you start the example program with row selection enabled and then click in<br />
any cell, every cell in that row will be selected. If you then click in any other<br />
row, that row is selected and the original row is deselected. You can use the<br />
CTRL and SHIFT keys to create selections containing more than one row or to<br />
deselect rows:<br />
• The CTRL key has the effect of toggling the selection in any row<br />
that you click in while it is pressed so, for example, with any row<br />
selected, press the CTRL key and click in any cell in that row and<br />
the entire row will be deselected. You can also use the CTRL key<br />
to add to an existing selection. Click in any row to select it, then<br />
hold down the CTRL key and click on a different row to add that<br />
row to the selection. Using the same technique, you can add as<br />
many rows as needed to the selection.<br />
• The SHIFT key creates a contiguous selection between the row<br />
in which you click and another row, known as the anchor row.<br />
If, for example, you click in the top row of the table then hold<br />
down the SHIFT key and click in the bottom row, the entire<br />
table will be selected. You'll see later in this chapter how to<br />
determine which row is considered to be the anchor row for the<br />
purposes of this mode of selection.<br />
Finally, you can create a multirow selection without using the SHIFT key<br />
by clicking in the first row you want to select and then dragging the mouse up<br />
or down. Each row that the mouse passes over as you drag it is added to the<br />
selection.<br />
<strong>Core</strong> Note<br />
The descriptions here assume that the table is initialized with its default<br />
selection mode, which allows any combination of rows to be selected. It is<br />
possible to constrain the selection so that only one row can be selected at a<br />
time or so that if multiple rows are selected, they must be adjacent to each
1306 Chapter II The Table Control<br />
other.We'll look at the topic of selection in much greater detail later in this<br />
chapter.<br />
Column Selection<br />
Column selection operates in the same way as row selection, except that<br />
when you click in a cell it is the column that is selected rather than the row.<br />
The CTRL and SHIFT keys behave in the same way with respect to column<br />
selection as they for row selection and you can also create multicolumn selections<br />
by dragging the mouse.<br />
Combined Row and Column Selection<br />
As noted above, this is only available in Swing 1.1.1 and <strong>Java</strong> 2 version 1.2.2<br />
and its use should not be promoted.<br />
Cell Selection<br />
When cell selection is enabled, clicking in a cell selects only that cell. As with<br />
row and column selection, you can modify this behavior by using the CTRL and<br />
SHIFT keys:<br />
• If you click in any cell and then hold down the SHIFT key while<br />
clicking any other cell in the same row, the part of the row that<br />
is bounded by the two cells is selected. This allows you to select<br />
part of a row.<br />
• Similarly, you can create a partial column selection by clicking<br />
in one cell and then holding down SHIFT while clicking in<br />
another cell in that column.<br />
• Either of these types of selection can be extended by holding<br />
down SHIFT and clicking another cell in the same row or<br />
column that is outside the selected range.<br />
• You can also select part of a row or column by clicking in any<br />
cell and then dragging the mouse horizontally across the row or<br />
up or down the column.<br />
• You can create a rectangular selection by clicking a cell and than<br />
dragging the mouse diagonally away from that cell.<br />
• If you create a partial row selection and than click on any cell in<br />
that selection with the CTRL key pressed, the selection is<br />
cleared. The same applies to a partial column selection.<br />
• If you create a rectangular selection and click on one of the cells<br />
in the selection with the CTRL key pressed, the row and column
An Overview of the Table Control 1307<br />
that pass through that cell are deselected, but the rest of the<br />
selection is unaffected. An example of this is shown in Figure<br />
11-4, where a rectangular selection was created by dragging the<br />
mouse diagonally across the table with the SHIFT key pressed<br />
and then a cell in the center of the selection was clicked with<br />
the CTRL key held down. As you can see, this has resulted in the<br />
creation of four selected areas.<br />
Figure 7 7-4 Multiple Cell Selection in a Table.<br />
Scrolling<br />
With the table example program running, use the mouse to reduce the height<br />
of the window so that it can no longer display all of the rows of data that it<br />
contains. When you do this, a vertical scrollbar appears that allows you to<br />
scroll the table content so that you can view eveiy row. You'll notice that the<br />
column headers stay in view at all times, because they reside in the column<br />
header part of a JScrollPane. However, no matter how much you narrow<br />
the window, you won't get a horizontal scrollbar, even though the JScroll-<br />
Pane that the table is wrapped in has such a scrollbar available. You'll see<br />
why the table behaves like this, and how to modify this behavior, later in this<br />
chapter.<br />
The Focus Cell and Table Navigation<br />
The table has the concept of the cell with the focus. When a table is editable,<br />
it is the cell with the focus that is modified when the user enters new data.<br />
The focus cell can be identified by its border, which is thicker than that of the<br />
other table cells. In Figure 11-4, the cell that is at the point at which the four<br />
selected regions meet is the focus cell.
1308 Chapter I I The Table Control<br />
Usually, the focus cell is the last cell that the user clicked in with the<br />
mouse, but the user can use the keyboard to move the focus cell around the<br />
table. As you can see from Figure f 1-4, even though the focus cell may be<br />
determined by a mouse click, it is not always in the selected state. The simplest<br />
way to demonstrate this is to click in a cell with the mouse, thus giving it<br />
the focus and selecting it, and the click it again with the CTRL key held down.<br />
This leaves the cell deselected, but still with the focus.<br />
The table binds several keys so that the user can navigate around or create<br />
and extend a selection without using the mouse. The key bindings, naturally<br />
enough, depend on the selected look-and-feel. In this section, well assume<br />
the Metal look-and-feel is in use and that the table is mounted in a<br />
JScrollPane (so that scrolling is possible). Given these assumptions, the<br />
key bindings are shown in Table 11-1 are active. For simplicity, when the key<br />
affects the selection, the description assumes that cell selection is enabled.<br />
The effects are slightly different when either column or row selection are<br />
turned on instead - you should experiment with the example program to discover<br />
the differences for yourself.<br />
Table 11-I Key Bindings<br />
Keys<br />
ENTER<br />
SHIFT+ENTER<br />
Up Arrow<br />
Down Arrow<br />
Right Arrow<br />
Left Arrow<br />
TAB<br />
SHIFT+TAB<br />
SHIFT+Up Arrow<br />
SHIFT+Down Arrow<br />
SHIFT+Right Arrow<br />
Descriptions<br />
Moves the focus cell down one row.<br />
Moves the focus cell up one row.<br />
Moves the focus cell up one row.<br />
Moves the focus cell down one row.<br />
Moves the focus cell right one column.<br />
Moves the focus cell left one column.<br />
Moves the focus cell right one column.<br />
Moves the focus cell left one column.<br />
Moves the focus cell up one row and extends the selection<br />
to that cell.<br />
Moves the focus cell down one row and extends the<br />
selection to that cell.<br />
Moves the focus cell right one column and extends the<br />
selection to that column.
Table 11-I Key Bindings (continued)<br />
SHIFT+Left Arrow<br />
Page Up<br />
Page Down<br />
Home<br />
End<br />
SHIFT+Page Up<br />
SHIFT+Page Down<br />
SHIFT+Home<br />
SHIFT+End<br />
CTRL+Page Up<br />
CTRL+Page Down<br />
CTRL+Home<br />
CTRL+End<br />
CTRL+SHIFT+Page<br />
up<br />
CTRL+SHIFT+Page<br />
down<br />
An Overview of the Table Control 1309<br />
Moves the focus cell left one column and extends the<br />
selection to that column.<br />
Scrolls up one page and relocates the focus cell into the<br />
visible page.<br />
Scrolls down one page and relocates the focus cell.<br />
Moves the focus cell to the left-hand end of its current<br />
row.<br />
Moves the focus cell to the right-hand end of its current<br />
row.<br />
Extends the selection upward from the focus cell by one<br />
page, but leaves the focus cell where it is. Subsequent<br />
uses of this key extend the selection by additional pages.<br />
The table scrolls to show where the selection now ends.<br />
As SHIFT+Page Up, but the selection is extended<br />
downward.<br />
Selects from the focus cell to the left of its row, leaving<br />
the focus cell unmoved.<br />
Selects from the focus cell to the right of its row, leaving<br />
the focus cell unmoved.<br />
Moves the focus cell one page to the left and scrolls the<br />
table left to keep it in view.<br />
Moves the focus cell one page to the right and scrolls the<br />
table right to keep it in view.<br />
Moves the focus cell to the first row of the table and<br />
selects it.<br />
Moves the focus cell to the last row of the table and<br />
selects it.<br />
Selects all of the cells between the focus cell and the cell<br />
at the start of its row (inclusive) and scrolls to show the<br />
cell at the start of the focus cells row.<br />
Selects all of the cells between the focus cell and the cell<br />
at the end of its row (inclusive) and scrolls to show the<br />
cell at the end of the focus cell's row.
1310 Chapter II The Table Control<br />
Table I l-l Key Bindings (continued)<br />
CTRL+SHIFT+Home Selects all of the cells between the focus cell and the cell<br />
at the top of its column (inclusive) and scrolls show the<br />
first row of the table.<br />
CTRL+SHIFT+End Selects all of the cells between the focus cell and the cell<br />
at the bottom of its column (inclusive) and scrolls show<br />
the last row of the table.<br />
CTRL+A Selects all of the table.<br />
The behavior of some of the keys that move the focus cell without affecting<br />
the selection is subtlely modified when there is an existing selection consisting<br />
of more than one cell. This applies to TAB, SHIFT+TAB, ENTER, and<br />
SHIFT+ENTER. To see how these key sequences behave when there is a seletion,<br />
type the following command:<br />
<strong>Java</strong> <strong>JFC</strong>Book.Chapterll.TableExample<br />
click in the cell in the second row of the column headed "Commander"<br />
(which contains the text "Frank Borman"), then hold down the SHIFT key<br />
and drag the mouse down and to the right to create a selection rectangle 5<br />
columns wide and 3 rows deep, ending in the column headed "Duration" and<br />
on the row for "Apollo 10." When yon do this, the focus cell remains at the<br />
top left of the selected area. If you press the TAB key, the focus cell moves to<br />
the right and continues to do so each time you press TAB. If you press the<br />
TAB key when the focus cell is in the "Duration" column at the far right end<br />
of the selection, instead of moving to the column headed "Landing Site," the<br />
focus rectangle wraps back to the left of the selected area, into the "Commander"<br />
column, and also moves down one row. If you continue to press the<br />
TAB key, when the focus cell reaches the bottom right of the selection, it<br />
wraps back to the top left. The SHIFT+TAB key combination has the same<br />
effect, except that the focus rectangle moves left and upwards instead of right<br />
and down. This gives you the ability to traverse the selection by row, without<br />
ever leaving the selected area.<br />
The behavior for the ENTER key follows a similar pattern. With the focus<br />
cell in the top left of the selection, press the ENTER key. This moves the focus<br />
cell down one row. When it reaches the last selected row, the focus cell wraps<br />
back to the top row but moves one column to the right. SHIFT+ENTER does<br />
the same, except that that focus cell moves up and then to the left. These<br />
keys allow you to traverse the selected area by row.
Cell Editing<br />
An Overview of the Table Control 1311<br />
You can see another useful feature of JTable in the first column of the<br />
example table. If you click in any cell in this column, you'll notice that the<br />
focus cell does not appear to be selected—you only see the focus cell rectangle,<br />
but not the selection highlight. Now if you double click in this cell, a<br />
cursor will appear. In fact, the cell has been replaced by a text field initialized<br />
with its current value and you'll find that you can edit the cell's contents.<br />
When you press RETURN, the cell takes on the new value. In the case<br />
of this table, this is not an especially meaningful thing to do because the<br />
table presents historical information that a user wouldn't normally want to<br />
change and editing has been allowed in the first column only, simply for<br />
illustrative purposes. If you try double-clicking the cells in any of the other<br />
columns, you'll find that you can't edit them. This table has been created in<br />
such a way that only the cells in the first column are editable. When a cell is<br />
editable, the table allows the user to initiate an edit by double-clicking the<br />
cell, pressing the F2 key or by typing directly into it. The table renders an<br />
editable cell without the selection highlight when it has the focus. All of<br />
this behavior is customizable, using rendering and editing techniques that<br />
you'll see later in this chapter.<br />
Table Structure<br />
Like JTree, the table is actually made up of several pieces, each of which<br />
will be examined closely in this chapter. Most obviously, there is JTable<br />
itself, which is derived from JComponent. JTable really only provides a way<br />
to present a view, in this case a tabular view, of some data. It is important to<br />
realize that the view presented by JTable does not include the table header,<br />
which is managed by the related JTableHeader class, as shown in Figure<br />
11-5. However, a JTable can automatically create a suitable JTableHeader<br />
component and, when it is mounted in a JScrollPane, the table builds a<br />
default JTableHeader and places it in the scroll pane's column header view.<br />
The table content (that is, the data itself) is held separately from the<br />
JTable in the table's data model. Any class can be used to supply data to a<br />
table, provided that it implements the javax.swing.table.TableModel<br />
interface, which you'll see in the next section along with the two classes in the<br />
Swing set that implements this interface. The data model is also responsible<br />
for maintaining information about the number of columns the table contains<br />
and the default headers to be used for each column.
1312 Chapter 11 The Table Control<br />
Figure 7 7-5 The internal structure of a table.<br />
<strong>Core</strong> Note<br />
All of the classes and interfaces that make up the table are in the<br />
j avax. swing. table package, with the exception of JTable itself,<br />
which resides in j avax. swing and two events and their corresponding<br />
listener interfaces in the j avax. swing. event package.<br />
Neither JTable nor its associated JTableHeader get all of the information<br />
they need directly from the data model. Interposed between the table<br />
and its data model is the table column model, which is also shown in Figure<br />
11-5. The idea of the table column model is to map the columns in the data<br />
model to their visual representation. The mapping may involve reordering<br />
the table columns, leaving some columns out or even including duplicate columns.<br />
In Figure 11-4, for example, the data model has six columns, but the<br />
JTable itself shows only four of them. As you can see, the TableColumn-<br />
Model selects which of the columns from the model will be displayed and in<br />
which order. In this case, the TableColumnModel selects columns 1, 2, 4<br />
and 5 from the model and displays them in the order 2, 1, 4, 5.
The Table Model 1313<br />
Each column in the TableColumnModel is an object of type TableColumn.<br />
It is actually the TableColumnModel that makes it possible for the user<br />
to reorder the columns shown by the JTable. When a column is dragged to a<br />
new location, the order of TableColumn objects is changed accordingly, but<br />
the order of columns in the data model is not affected—in fact, the model is<br />
unaware of the fact that any reordering is taking place.<br />
<strong>Core</strong> Note<br />
The table model is actually not aware which of its columns are being<br />
displayed at any given time, much less the order in which they are being<br />
viewed.This makes it much easier to provide more than one view of the<br />
same data at the same time—if one view re-orders its columns, this has no<br />
effect on the other view, which will use a different TableColumnModel.<br />
Use will be made of this fact toward the end of this chapter, when you'll see<br />
how to fix a set of columns from a table so that they don't scroll<br />
horizontally along with the rest of it.<br />
The other aspect of the table that will be examined in this chapter, which<br />
isn't shown in Figure 11-5, is its selection model. The selection model<br />
remembers which rows, columns or cells are selected and the overall selection<br />
policy that the table will allow. JTable uses the same selection model,<br />
ListSelectionModel, as the JList component that you saw in Chapter 8,<br />
"Creating Custom Dialogs," so you already know a lot about how it works.<br />
Later in this chapter, you'll see how you can configure the table's selection<br />
policy and act on selection changes.<br />
The Table Model<br />
In order to create a table, you have to supply the data that it will display and<br />
then connect the table to the data. JTable can extract data from any object<br />
that implements the TableModel interface. The first part of this section<br />
shows the TableModel interface and describes what the methods in this<br />
interface are supposed to do. You'll see all of the methods illustrated with<br />
concrete examples when specific implementations of the TableModel interface<br />
are discussed in the following paragraphs.
1314 Chapter II The Table Control<br />
The TableModel Interface<br />
The TableModel interface is defined as follows:<br />
public interface TableModel {<br />
public int getRowCount();<br />
public int getColumnCount();<br />
public String getColumnName(int columnlndex);<br />
public Class getColumnClass(int columnlndex);<br />
public boolean isCellEditable(int rowlndex, int columnlndex);<br />
public Object getValueAt(int rowlndex, int columnlndex);<br />
public void setValueAt(Object aValue, int rowlndex, int columnlndex)<br />
public void addTableModelListener(TableModelListener 1);<br />
public void removeTableModelListener(TableModelListener 1);<br />
}<br />
The data that this model represents is in tabular or grid form. Each item of<br />
data occupies one cell in the grid, whose location is described by the index of<br />
the row and column of the grid at whose intersection the cell resides. The<br />
getRowCount and getColumnCount methods return the total number of<br />
rows and columns in the table. The table is assumed to be fully-populated at<br />
all times, so that if there are 3 rows and 4 columns, there will be 12 valid cells<br />
in the table.<br />
The value of any data item in the table can be obtained using the getVal -<br />
ueAt method, which is given the row and column index of the cell that contains<br />
the data. These indices are both numbered from 0, where row 0 is<br />
(logically) at the top of the grid and column 0 is (logically) on the left, as<br />
shown in Figure 11—6. The value returned from this method is an Obj ect, so<br />
the data model can contain information of any kind. Nothing in the table<br />
component itself cares what the actual type of the data in the model is, apart<br />
from the renderers that display it and the editors that optionally allow the<br />
user to change it. You'll see later how these are configured.<br />
The TableModel interface provides the ability to modify the content of<br />
individual cells. There are two methods that are used to implement this. The<br />
isCellEditable method returns a boolean that indicates whether the content<br />
of a specific cell can be changed given its row and column index. If this<br />
method returns false, no change to the data should be attempted. If it<br />
returns true, the caller can use the setValueAt method to change the cell's<br />
value. This method is given the cell's row and column indices and the new<br />
value to be stored in the cell, as an Obj ect. It is the responsibility of the class<br />
implementing the TableModel interface to ensure that the value being<br />
stored is acceptable—for example, if a cell should contain a positive integer,
Figure 11-6 The table data model.<br />
<strong>Core</strong> Note<br />
The TableModel interface does not specify how an unacceptable value<br />
supplied to setValueAt should be rejected. In particular, there is no<br />
expectation that this method will throw an exception. In fact, the code that<br />
makes the change to the cell content in the JTable class does not catch<br />
any exceptions, so throwing one would be fatal.The only way to reject an<br />
unacceptable value is, therefore, to ignore it,the result of which will be that<br />
the user will be able to supply an illegal value and press RETURN, but will<br />
then see the cell restored to its previous state.<br />
The Table Model 1315<br />
it is the table model's responsibility to ensure that the value supplied is actually<br />
a positive integer.<br />
No change to a cell's content is possible unless the isCellEditable<br />
method returns true and the setValueAt method is implemented to actually<br />
store the new value. It is, therefore, possible to create a read-only data<br />
model by implementing isCellEditable so that it always returns false.<br />
On the other hand, if this method can return true under any circumstances,<br />
you must implement a complementary setValueAt method, or the user will<br />
be allowed to edit the cell on the screen but will then be unable to save the<br />
new value, just as if an illegal value had been supplied.<br />
As well as storing the table data, the model is also responsible for supplying<br />
a name for each column of the table, which can be obtained by invoking
1316 Chapter 11 The Table Control<br />
the getColumnName method with the column index as the only argument. In<br />
many cases, the column name that this method returns, which is always a<br />
string, will be directly usable in the header of the table that displays the<br />
model data, but this need not be so. For example, if you populate a table data<br />
model using a database query, the column name may be the name of a field<br />
within a database record. Since database field names are not always meaningful<br />
to the end user of the database, it is possible to substitute a more useful<br />
column name in the Table Column object that maps the column from the<br />
data model, as you'll see later.<br />
The getColumnClass method returns a Class object that describes the<br />
type of object stored in a given column. The table makes the default assumption<br />
that every row will have an object of the same type in any given column—for<br />
instance, in the example table shown at the start of this chapter,<br />
the first column always contains a String. This assumption is used when<br />
selecting the appropriate renderer or editor for a cell. However, as you'll see,<br />
it is not necessary for the class returned to be more specific than<br />
java. lang.Object, which allows every row to have a different type of<br />
object in the column. In most tables, though, the assumption that all the<br />
objects in any given column are of the same type will be a valid one.<br />
The last two methods in this interface allow the registration and removal<br />
of listeners that will be notified of changes to the table data model, including<br />
adding and removing rows or columns or changing the content of individual<br />
cells. The table supports this through the TableModel Event class and the<br />
TableModelListener interface, both of which will be discussed later.<br />
Despite the fact that it allows listeners to register to receive notification of<br />
these events, the TableModel interface does not provide methods that allow<br />
the number of rows or columns in the data model to be initially defined or to<br />
be changed. These facilities are not in the interface because they are not<br />
needed to implement JTable. Many implementations of this interface will,<br />
of course, supply methods to accomplish these tasks and you'll see examples<br />
in the discussion of the Default TableModel. Given that the table data can<br />
be modified while the table is being displayed, it is necessary for the<br />
TableModel to define the methods by which these changes can be notified<br />
so that JTable and its user interface implementation can receive these<br />
events and update the user's view of the data as it changes.
The AbstractTableModel and<br />
DefaultTableModel <strong>Classes</strong><br />
The Table Model 1317<br />
There are two implementations of the TableModel interface in the Swing<br />
table package—AbstractTableModel and Def aultTableModel, the first<br />
of which is abstract. You have seen examples of this pattern before, where a<br />
core implementation is provided in an abstract class and extended to create a<br />
basic version that is actually used within the Swing packages. In this case,<br />
though, the situation is different—even though AbstractTableModel is<br />
not a complete implementation and the Def aultTableModel is, you are<br />
more likely to use the former to create table models, because it is easier to<br />
work with and is probably more convenient if you get your data from an<br />
external source rather than hard-coding it into your application. This section,<br />
looks at how to use the AbstractTableModel then, in the next section,<br />
you'll see how it differs from Def aultTableModel.<br />
Using AbstractTableModel to Create a Table<br />
The AbstractTableModel class provides default implementations of all of<br />
the methods of the TableModel interface, with the exception of the following<br />
three:<br />
public int getRowCount();<br />
public int getColumnCount();<br />
public Object getValueAt(int rowlndex, int columnlndex);<br />
These methods are the ones that deal directly with the data in the table<br />
which is, naturally enough, one of the things that cannot be built into an<br />
abstract base class. When you use AbstractTableModel, you supply the<br />
table data in some convenient form along with (at least) the three methods<br />
above, which allow the table itself to get access to the data and to determine<br />
how much data there is.<br />
Creating a Basic Table<br />
Using the AbstractTableModel class, you can quickly create a basic<br />
table that shows the current state of orders at a pizza shop, as shown in<br />
Listing 11-1.
1318 Chapter II The Table Control<br />
Listing I l-l Creating a table with AbstractTableModel<br />
package <strong>JFC</strong>Book.Chapterll;<br />
import j avax.swing.*;<br />
import javax.swing.table.*;<br />
import j ava.awt.*;<br />
import j ava.awt.event.*;<br />
public class TableModelExamplel extends JFrame {<br />
public TableModelExamplel(String title) {<br />
super(title);<br />
AbstractTableModel model = new AbstractTableModel() {<br />
// The table data<br />
Object [] [] data = {<br />
{ "Hot & Spicy", "False" },<br />
{ "Cheese", "False" },<br />
{ "Ham", "False" },<br />
{ "New Yorker", "False" },<br />
{ "Vegetarian", "False" }<br />
};<br />
public int getRowCount() {<br />
}<br />
}<br />
};<br />
return data.length;<br />
public int getColumnCount() {<br />
return data[0].length;<br />
}<br />
public Object getValueAt(int row, int col) {<br />
return data[row] [col];<br />
JTable tbl = new JTable(model);<br />
this.getContentPane().addfnew JScrollPane(tbl));<br />
}<br />
public static void main(String [] args) {<br />
JFrame f = new TableModelExamplel(<br />
"AbstractDataModel Example 1");<br />
f.pack () ;<br />
f.setVisible(true);<br />
f.setDefaultCloseOperation(JFrame.DOJtfOTHING_ON_CLOSE);
Listing I l-l Creating a table with AbstractTableModel (continued)<br />
}<br />
}<br />
f.addWindowListener(new WindowAdapter() {<br />
public void windowClosing(WindowEvent evt) {<br />
}<br />
});<br />
The Table Model 1319<br />
In this example, the data model is created as an anonymous class that is<br />
derived from AbstractTableModel, in which the table data is stored as a<br />
two-dimensional array of strings. This class also contains implementations<br />
for the three methods that AbstractTableModel does not provide. It is<br />
important to notice that, because yon have to provide the method that<br />
accesses the data, it is entirely up to you how you represent that data—a twodimensional<br />
array is a convenient and natural way to represent the content of<br />
a table, but you can use any mechanism that works well in the context of the<br />
application, including reading data from a file or a database. AbstractTableModel<br />
does not provide data storage—only default implementations of<br />
methods that manage the table model.<br />
<strong>Core</strong> Note<br />
System.exit(0);<br />
You'd notice that, although you have to provide an implementation for the<br />
getValueAt method,the details of which will naturally depend on the<br />
way in which the table data is held within the model, you are not obliged to<br />
override the AbstractTableModel' s implementation of<br />
setValueAt, which is equally dependent on the form of the underlying<br />
data.The reason for this is that the setValueAt method of<br />
AbstractTableModel does nothing and this is acceptable provided you<br />
only need a read-only model. If this is not the case,then you will also need<br />
to override the setValueAt method and the isCellEditable<br />
method.<br />
Using a two-dimensional array makes it very easy to map the data into the<br />
form required by the TableModel interface—each row of the table corresponds<br />
to a row in the array, so the row index can be mapped directly to the<br />
first index of the array and the column index to the second. If, as in this case,<br />
the data is being hard-coded into the application, this method also allows a<br />
very compact way to declare and lay out the data. For applications that show
1320 Chapter 11 The Table Control<br />
read-only data that rarely changes, this may actually be all that is ever<br />
needed. Later in this chapter, you'll see how to adapt this technique to allow<br />
the user to change the data on the fly.<br />
An array also simplifies the task of returning the row and column counts—<br />
the number of rows can be obtained as the length of the array itself, since a<br />
two-dimensional array is actually an array of arrays, in which each entry is a<br />
reference to a single row. The number of columns is simply the length of any<br />
entry in the array. In this example, the number of columns is obtained from<br />
the number of entries in the first row of the array.<br />
The rest of the example code is concerned with creating the table itself<br />
and the frame that it resides in, most of which should be familiar. As you'll<br />
see later, you can create a table directly from a table model by invoking a constructor<br />
that takes the model as its only argument:<br />
public JTable(TableModel model);<br />
Having created the table, you can then mount it in a JScrollPane and<br />
place it on the frame. Figure 11-7 shows what the table looks like when this<br />
example program is run using the command:<br />
j ava <strong>JFC</strong>Book.Chapterll.TableModelExamplel<br />
Figure 11-7 A table created with AbstractTableModel.<br />
<strong>Core</strong> Note<br />
When you run the examples in this section, you'll find that your tables are<br />
taller than the ones shown in the figures.The figures were shortened to<br />
avoid wasting space.You'll see later in the section titled "Sharing the Data
Model E>etweenTwoViews"why the table leaves so much unused area after<br />
the last row of data and how you can avoid this problem.<br />
Refining the Table<br />
The Table Model 1321<br />
Using remarkably little code, then, it is possible to create a basic table that<br />
shows all of the data that is hard-coded into the program. You'll also find that<br />
rows (but not columns) can be selected, that the headers can be resized and<br />
that you can swap around the two columns, as you saw in the first example in<br />
this chapter.<br />
Nevertheless, this table has some pretty obvious shortcomings. First, the<br />
column headers are not exactly very descriptive. The table gets the column<br />
headers using the model's getColumnName method. The default implementation<br />
of this method provided by AbstractTableModel cannot, of course,<br />
provide meaningful names—instead, it just uses the letters of the alphabet to<br />
label the columns and, if there are more than 26 columns it starts again using<br />
two letters and so on, spreadsheet-style. To provide usable column headers,<br />
you need to override getColumnName.<br />
The second problem with this table is that the second column, which<br />
shows whether there are outstanding orders for the pizza in the first column,<br />
just contains a static string that always reads False. To make the table more<br />
useful, it would be better to have a checkbox here instead. In order to do this,<br />
you need to force the table to use a cell renderer that displays checkboxes<br />
instead of simple strings. The choice of renderer is, in this case, determined<br />
by the class of the object that appears in each cell, which the table determines<br />
by calling the getColumnClass method for each column in the table.<br />
The default implementation of this method provided by AbstractTableModel<br />
simply returns Obj ect. class, which causes the string representation<br />
of the cell's content, obtained by calling its toString method, to be displayed.<br />
To make the table choose a renderer that displays a checkbox, you<br />
need to override getColumnClass to return Boolean.class for the second<br />
column.<br />
<strong>Core</strong> Note<br />
The way in which a renderer is chosen for a cell is actually slightly more<br />
complicated than this, as you'll see in "Customized Table Rendering and<br />
Editing".
1322 Chapter II The Table Control<br />
Listing 11-2 shows a revised table model implementation that incorporates<br />
the changes just described. If you run this version of the program using<br />
the command:<br />
<strong>Java</strong> <strong>JFC</strong>Book.Chapterll.TableModelExample2<br />
the result will look like Figure 11-8.<br />
Listing 11-2 Making the table data model more descriptive of the data<br />
content<br />
AbstractTableModel model = new AbstractTableModel() {<br />
// The table data<br />
Object [] [] data = {<br />
{ "Hot & Spicy", Boolean.FALSE },<br />
{ "Cheese", Boolean.FALSE },<br />
{ "Ham", Boolean.FALSE },<br />
{ "New Yorker", Boolean.FALSE },<br />
{ "Vegetarian", Boolean.FALSE }<br />
};<br />
String [] columnNames = {<br />
"Pizza", "Ordered?"<br />
};<br />
public int getRowCount() {<br />
}<br />
return data.length;<br />
public int getColumnCount() {<br />
return data[0].length;<br />
}<br />
public Object getValueAt(int row, int col) {<br />
return data[row] [col] ;<br />
}<br />
public String getColumnName(int columnlndex) {<br />
}<br />
return columnNames[columnlndex];<br />
public Class getColumnClass(int columnlndex) {<br />
return data[0] [columnlndex] .getClassO ;<br />
}
Figure 17-8 An improved version of the orders table.<br />
The Table Model 1323<br />
The first change was made in the data array itself. Now, instead of supplying<br />
the order status as a String, it is held as a Boolean, which is, of course,<br />
the correct data type to use but, equally important, it makes our implementation<br />
of the getColumnClass method simple—in order to get the class for a<br />
particular column, it just returns the class of whatever object is in that column<br />
in the first row of the table. This approach is simple and clear and it<br />
works for both columns in this particular table. However, there are cases in<br />
which it would not work. Suppose, lor example, that you had a column filled<br />
with geometric shapes, all derived from an abstract base class called (for the<br />
sake of illustration) AbstractShape. The actual entries in the table rows<br />
will, however, be instances of concrete subclasses of AbstractShape (circles,<br />
lines, squares, etc.). If the method shown above was used for a table like<br />
that, it would claim that all of the entries in this column are of whatever type<br />
is in the first row—perhaps a circle or a square, and so on. What it should<br />
return is the AbstractShape . class. For cases like this, you need to hardcode<br />
the correct result or use another array to map the columns to their data<br />
types.<br />
The other change was the addition of an array of strings that provides the<br />
names of the table columns and a corresponding implementation of the get-<br />
ColumnName method that uses it. By keeping the array of names in the same<br />
order as the columns in the table, the name for a given column can be<br />
obtained by simply using the column index argument as the array index.<br />
Note that this always works, even if the user reorders the table columns,<br />
because the order of columns in the table's data model is fixed—it is only the<br />
order of columns in the TableColumn model that changes, as was shown in<br />
Figure 11-5.
1324 Chapter 11 The Table Control<br />
Making a Column Editable<br />
These modifications bring us closer to a usable table but we are still not quite<br />
there—even though a checkbox is displayed in the second column, you'll find<br />
that you can't change its state, because none of the cells in the table is editable.<br />
As noted earlier in this chapter, to make a cell editable you need to<br />
arrange for the isCellEditable method to return true and you must also<br />
implement the setValueAt method to store a modified value in the model.<br />
Neither of these is particularly difficult in this case and the implementation is<br />
shown in Listing 11—3. To run this version of the example, type:<br />
<strong>Java</strong> <strong>JFC</strong>Book.Chapterll.TableModelExample3<br />
The result will look something like Figure 11—9, where orders have been<br />
placed for the Hot and Spicy (my favorite) and New Yorker pizzas, simply by<br />
clicking the appropriate checkboxes.<br />
Listing 11-3 An editable version of the orders table<br />
public boolean isCellEditable(int rowlndex,<br />
int columnlndex) {<br />
return columnlndex == 1;<br />
}<br />
public void setValueAt(Object value, int rowlndex,<br />
int columnlndex) {<br />
if (value instanceof Boolean && columnlndex ==1) {<br />
data[rowlndex] [columnlndex] = value;<br />
fireTableCellUpdated(rowlndex, columnlndex);<br />
}<br />
Since the user should only be able to edit the orders column, the<br />
isCellEditable method returns true only when it is asked about cells in<br />
column one. Even though isCellEditable allows you to specify editability<br />
at the cell level, you will almost always return only a single value for any given<br />
column, as shown here.<br />
To make it possible to save a modified value in the table model, the set-<br />
ValueAt method is implemented. Before the value that the user supplied is<br />
stored, this method checks both that it is being asked to update column f and<br />
that the value it is given is actually a Boolean. If both of these conditions are<br />
met, the table data is updated and then the AbstractTableModel fireTableCellUpdated<br />
method is called. As you saw in the earlier description of
Figure 1 7-9 An editable orders table.<br />
The Table Model 1325<br />
the TableModel interface, it is possible to register for notification of various<br />
changes to the table model, one of which is modifying the content of a table<br />
cell. AbstractTableModel provides several methods that generate the<br />
appropriate TableModelEvents and distribute them to registered listeners,<br />
of which f ireTableCellUpdated is one. You'll see the others in the section<br />
on table-related events later in this chapter. It is the responsibility of the<br />
setValueAt method to call f ireTableCellUpdated when the content of<br />
a table cell is modified. Events like this are used to keep the table's view synchronized<br />
with its data model in the same way as TreeModelEvents are<br />
used by the tree control.<br />
Sharing the Data Model between Two Views<br />
The way in which this event is used can be demonstrated by showing something<br />
that will be used later in this chapter, but in a modified form—constructing<br />
two tables that use the same table model. This example builds two<br />
identical tables that share the same model and places them one above the<br />
other in a frame, as shown in Figure 11-10.<br />
The basic mechanics of this are simple enough—the model is built once<br />
and passed as an argument to two JTable constructors. To make it slightly<br />
more difficult, this example makes the top table editable and the bottom one<br />
read-only. Most of the code required to do this is the same as for the other<br />
examples that you have seen in this section. Listing 11-4 shows only the code<br />
that has been changed—it replaces the construction of a single table in Listing<br />
11-1.<br />
The first table is created in the same way as before, passing the table<br />
model to the constructor and then wrapping it in a scroll pane. As you'll have
1326 Chapter I I The Table Control<br />
Figure 11-10 Two views of one table model.<br />
Listing 11-4 Constructing two views of a single table model<br />
// Create first table<br />
Dimension viewportSize = new Dimension(450, 120);<br />
JTable tbl = new JTable(model);<br />
tbl.setPreferredScrollableViewportSize(viewportSize);<br />
JScrollPane topPane = new JScrollPane(tbl);<br />
// Create a read-only version of the same table<br />
tbl = new JTable(model) {<br />
public boolean isCellEditable(int rowlndex,<br />
int columnlndex) {<br />
return false;<br />
}<br />
};<br />
tbl.setPreferredScrollableViewportSize(viewportSize);<br />
JScrollPane bottomPane = new JScrollPane(tbl);<br />
Container pane = this.getContentPane();<br />
pane.setLayout(new BoxLayout(pane, BoxLayout.Y_AXIS));<br />
pane.add(topPane);
Listing 11—4 Constructing two views of a single table model<br />
(continued)<br />
pane.add(Box.createVerticalStrut(10));<br />
pane.add(bottomPane);<br />
}<br />
The Table Model 1327<br />
noticed when running the earlier examples in this chapter, left to its own<br />
devices the table would leave a lot of blank space in the scrolled area, so this<br />
is minimized by giving it a smaller preferred viewport size so that two views<br />
of the same table can be placed on the screen. The second table is created as<br />
an anonymous subclass of JTable in which the isCellEditable method is<br />
overridden so that it always returns false. So far, you have seen only the<br />
isCellEditable method of TableModel; however, when the table is<br />
deciding whether the user should be able to edit a cell, it calls its own<br />
isCellEditable method that, by default, directly invokes that of its table<br />
model. In this case, because the entire table needs to be read-only, even<br />
though the model allows the second column to be edited, the JTable<br />
isCellEditable<br />
method is overridden to indicate that every cell is read-only, instead of deferring<br />
to the table model. This allows the second table to be read-only while<br />
Still permitting editing in the first table.<br />
Now, if you run this program with the command:<br />
java <strong>JFC</strong>Book.Chapterll.DoubleTable<br />
you'll see two identical tables, one above the other. If you try to edit the cells<br />
in the right-hand column of the lower table, you'll find that you can't. However,<br />
setting and clearing checkboxes in the top table results in the same<br />
operation being performed in the bottom one (see Figure 11—10). This happens<br />
because the f ireTableCellUpdated call in the setValueAt method<br />
creates a TableModelEvent that is caught by the user interface code of the<br />
bottom table, causing that table to be redrawn.<br />
The DefaultTableModel Class<br />
AbstractTableModel allows you to create table models in which you provide<br />
the data storage and the methods by which the data is accessed, but it<br />
doesn't deal with adding and removing rows or columns from the data or<br />
completely redefining the table content, because methods to do these things<br />
are not part of the TableModel interface. If you need these features, you<br />
have to supply the code yourself (as will be shown in the discussion of table
1328 Chapter I I The Table Control<br />
selection later in this chapter). Alternatively, yon may find it easier to use the<br />
DefaultTableModel class. DefaultTableModel is a subclass of<br />
AbstractTableModel, so it inherits all of the behavior you have seen so far,<br />
but it also implements the three methods that are left abstract by Abstract -<br />
TableModel, as well as a set of additional methods that are not part of the<br />
TableModel interface, listed in Table 11-2.<br />
Table 11-2 Methods Defined by DefaultTableModel in Addition to<br />
Method<br />
Those in TableModel<br />
public void addColumn(Object columnldentifier);<br />
public void addColumn(Objectcolumnldentifier,<br />
Object [] columnData) ;<br />
public void addColumn(Object columnldentifier,<br />
Vector columnData);<br />
public void addRow(Object[] rowData);<br />
public void addRow(Vector rowData);<br />
public Vector getDataVector(<br />
public void insertRow(int rowlndex,<br />
Object[] rowData);<br />
public void insertRow(int rowlndex,<br />
Vector rowData);<br />
public void moveRow(int startlndex,<br />
int endlndex, int tolndex);<br />
public void newDataAvailable (TableModelEvent<br />
evt);<br />
public void newRowsAdded (TableModel<br />
Event evt) ;<br />
Purpose<br />
Adds a column at the end of<br />
the model with null data.<br />
Adds a column with the supplied<br />
data.<br />
Adds a column with the supplied<br />
data.<br />
Adds a row at the bottom of the<br />
table.<br />
Adds a row at the bottom of the<br />
table.<br />
Extracts the table data (see<br />
Figure 11-11).<br />
Inserts a row with given data.<br />
Inserts a row with given data.<br />
Moves a row (or rows) to a new<br />
location.<br />
Tells the model that its internal<br />
data has been changed.<br />
Tells the model that new rows<br />
have been added to its internal<br />
data.
Table 11-2 Methods Defined by DefaultTableModel in Addition to<br />
Those inTableModel (continued)<br />
Method<br />
public void removeRow(int rowlndex);<br />
public void rowsRemoved (TableModelEvent<br />
evt);<br />
public void setColumnldentifiers<br />
(Object[] columnldentifiers);<br />
public void setColumnldentifiers (Vector<br />
columnldentifiers) ;<br />
public void setDataVector(Object [] []<br />
dataValues, Object[] columnldentifiers)<br />
;<br />
public void setDataVector(Vector data-<br />
Values, Vector columnldentifiers);<br />
public void setNumRows(int rowcount);<br />
Purpose<br />
Removes a row.<br />
The Table Model 1329<br />
Tells the model that rows have<br />
been removed from its internal<br />
data.<br />
Changes the model's column<br />
identifiers.<br />
Changes the model's column<br />
identifiers.<br />
Replaces the model's data with<br />
new data and new column<br />
identifiers.<br />
Replaces the model's data with<br />
new data and new column<br />
identifiers.<br />
Changes the number of rows in<br />
the table, truncating it with loss<br />
of data if necessary or inserting<br />
an empty row at the end.<br />
DefaultTableModel is able to support the direct manipulation of rows<br />
and columns because it actually contains all of the data that will be used by<br />
the table, stored in the form of a Vector, in which each entry is itself aVector<br />
that represents one row of the table and contains one element for each<br />
table column, as shown in Figure 11-11. The order of elements in the data<br />
Vector is the same as the order of rows in the table and the elements within each<br />
row Vector are in column ordei: Each row Vector must, of course, be of the<br />
same length and supply a value for each column.<br />
Creating a DefaultTableModel<br />
You can construct a DefaultTableModel in a number of different ways,<br />
using any of the following constructors:<br />
public DefaultTableModel();
1330 Chapter I I The Table Control<br />
Figure 11-11 How DefaultTableModel holds the table data.<br />
public DefaultTableModel(int numRows, int numColumns);<br />
public DefaultTableModel(Vector columnlds, int numRows)<br />
public DefaultTableModel(Object[] columnlds,<br />
int numRows);<br />
public DefaultTableModel(Vector data, Vector columnlds)<br />
public DefaultTableModel(Object[][] data,<br />
Object columnlds);<br />
<strong>Core</strong> Note<br />
The "column identifiers" referred to when discussing constructors and the<br />
other methods of DefaultTableModel are the names attached to the<br />
columns and usually interpreted as column headings. In terms of our earlier<br />
example, Pizza and Ordered? are the column identifiers for the Pizza<br />
table. Do not mistake this use of the term "identifier" for the identifier that<br />
can be attached to the TableColumn object that you'll see shortly.<br />
Although the two can have the same value, they need not.<br />
When studying these constructors, remember that the important features<br />
of the table model are the number of rows and columns it has, the content of<br />
each cell in the table, and the values used for the table model's column head-
The Table Model 1331<br />
ers. As you can see, not all of the constructors set all of these attributes in the<br />
table model that they create.<br />
The first constructor creates an empty table model—one that has no rows<br />
and no columns. Before you can use a model created in this way, you will<br />
need to use the methods shown in Table 11-2, such as setDataVector, to<br />
populate it. The second one creates a table with the given number of rows<br />
and columns in which each cell has a null value. If you render a table created<br />
in this way without populating it, each cell will be empty and the column<br />
headers will be the defaults supplied by AbstractTableModel ("A", "B,"<br />
and so on).<br />
The third and fourth constructors supply the column headers in the form<br />
of an array or a vector, and the number of rows of data that the model will<br />
ultimately contain. The number of columns in the table is determined from<br />
the size of the header array or vector and the table is created with the given<br />
number of rows, with all cells initialized to null. Only the last two constructors<br />
create a viable table model in one step, providing the column headers<br />
and the data together. The first of these two supplies the data in the form of a<br />
Vector, which must be created in the same way as Def aultTableModel<br />
would create its own data Vector (that is, as a Vector of column Vectors)<br />
and the column headings in a separate Vector. The second variant uses<br />
arrays instead of Vectors and is very close to the method that was used earlier<br />
in this chapter to store table data in conjunction with AbstractTableModel.<br />
Whichever of these two constructors you use, the number of entries in<br />
the array or Vector of column names must be the same as the number of<br />
columns in the data array or Vector. You can, however, supply the column<br />
identifier argument as null, in which case the default column names supplied<br />
by AbstractTableModel will be used. This is not, however, likely to<br />
be very useful for anything other than a spreadsheet look-alike!<br />
Manipulating a DefaultTableModel<br />
Once you've created your table model, you can use the methods in Table<br />
11-2 to operate on the table data. The addColumn methods place a new<br />
column of data at the end of the existing model. If you provide only the column<br />
identifier, the new column is created with null in all rows, while if<br />
you supply the data as well, the table rows in the new column are filled<br />
from the Vector or array supplied. If there is less data than rows in the<br />
table, the extra rows are filled with null, while if there is more data than<br />
rows, the extra data is ignored. Because the order of data in the displayed<br />
table does not depend on the order in the model, it is not necessary to place<br />
new columns in any particular place in the model. Placing extra columns at
1332 Chapter II The Table Control<br />
the end is, therefore, perfectly acceptable. To have the new column displayed<br />
you do, of course, have to amend the TableColumnModel.<br />
<strong>Core</strong> Note<br />
You don't have to do even this if the table is creating its own<br />
TableColumnModel from its data, as you'll see in "The Table Control."<br />
Similarly, you can add a new row at the bottom of the table with either of<br />
the addRow methods, or in an arbitrary position with insertRow. Unlike columns,<br />
rows are displayed in the same order as they appear in the model, so<br />
you need to place new rows where you want them to be shown in the table. If<br />
you want to remove a row of data, use removeRow and supply the index of<br />
the row to be deleted.<br />
Finally, you can move existing rows with the moveRow method that,<br />
despite its name, can move more than one row at a time. You specify the<br />
range of rows to move with the startlndex and endlndex, arguments that<br />
must both be within the row bounds of the table and the first must not be<br />
greater than the second. To move just one row, sxipply its index as both<br />
startlndex and endlndex. The target location is given as tolndex. If<br />
to index is within the set of rows to be moved, nothing will happen—for<br />
example:<br />
moveRow(1, 3, 2);<br />
is legal, but it has no effect.<br />
The result of the move depends on whether the rows are being moved<br />
towards the top or the bottom of the table. If the move is towards the top,<br />
then the row originally at startlndex will move to row tolndex, the one at<br />
startlndex + 1 to tolndex + 1, and so on. The row at tolndex and all<br />
of the others between that row and the location originally occupied by the<br />
first row affected, all move down the table by endlndex-startIndex + 1<br />
rows. For example, suppose the model has the following initial row order:<br />
Row A<br />
RowB<br />
Row C<br />
RowD<br />
Row E<br />
Row F
The Table Model 1333<br />
and the call moveRow (3,4,1) is executed. This moves rows 3 and 4 ("Row<br />
D" and "Row E") to row index 1 and row index 2, resulting in the following<br />
final arrangement:<br />
Row A<br />
RowD<br />
Row E<br />
Row B<br />
RowC<br />
Row F<br />
If the move is towards the bottom of the table, the result is slightly different<br />
and probably not very useful. To see what happens, suppose, starting<br />
from the original row arrangement above, the move:<br />
moveRow(2, 3, 4);<br />
was executed. This looks like it will move rows 2 and 3 ("Row C" and "Row<br />
D") down two row positions. The first step is to remove "Row C," leaving this<br />
arrangement:<br />
Row A<br />
RowB<br />
Row D<br />
Row E<br />
Row F<br />
The removed row is then placed in row 4, which is not the original row 4:<br />
Row A<br />
RowB<br />
RowD<br />
RowE<br />
Row C<br />
Row F<br />
Next, the row at index 3 is removed. Unfortunately, this is not the row that<br />
was originally in position 3. After it has been removed, the table looks like<br />
this:<br />
Row A<br />
RowB<br />
Row D<br />
Row C<br />
Row F
1334 Chapter II The Table Control<br />
Finally, the row just removed is also placed in row 4, giving the final configuration:<br />
Row A<br />
RowB<br />
Row D<br />
RowC<br />
Row E<br />
Row F<br />
This is probably not at all what was expected! As a result of this behavior, if<br />
you need to move more than one row, it is safer to handle it yourself using a<br />
loop that moves one row at a time.<br />
All of the methods that add, insert, move, or remove rows generate appropriate<br />
events so that the table's displayed view is kept up to date. This is<br />
another chore that you have to perform for yourselves with AbstractTableModel<br />
and that you don't have to worry about with Def aultTableModel.<br />
The setcolumnldentif iers methods let you change all of the column<br />
headings at once. There is no way to change just a single column heading, but<br />
this is not likely to be necessary. If you want to change the heading displayed<br />
in a table by JTable, it is simpler (and more logical) to use the facilities provided<br />
by TableColumn, which don't affect the table model at all. There is<br />
one important point to notice with regard to these methods: If you supply<br />
more or less headers than the table has columns, the number of columns in<br />
the model is changed to reflect the number of headers you supply. In other<br />
words, supplying fewer headers than there are columns results in columns at<br />
the end of the table being inaccessible, while supplying extra headers effectively<br />
creates new columns populated with null entries.<br />
The setNumRows method allows you to change the number of rows in the<br />
table. Supplying a row count smaller than the number of rows in the table discards<br />
the extra rows at the bottom of the table, while increasing the row count<br />
makes the table grow by adding rows at the bottom populated with null values.<br />
To completely repopulate a table, you can use the setDataVector<br />
method. As noted earlier in this section, if you use the form of this method<br />
that supplies the data in the form of a Vector, you must construct that Vector<br />
as shown in Figure 11-11. This method, like all of the other methods of<br />
DefaultTableModel, arranges for the displayed view of the table to be<br />
brought up to date automatically.<br />
Finally, you can use the getDataVector method to get a reference to the<br />
data that the model itself is using and manipulate it directly if you wish,
The Table Model 1335<br />
rather than using the convenience methods of Def aultTableModel. This<br />
might make sense if you are going to make a large number of isolated<br />
changes or change a large number of rows or columns at a time. If you do<br />
these things using, for example, setValueAt (which Def aultTableModel<br />
implements), you will generate an event for each cell that you change and<br />
each of these events may cause the JTable to redraw itself. If you update the<br />
data vector directly, you can avoid all of these events. However, when you<br />
have finished changing the model, you must call one of the methods new-<br />
DataAvailable, newRowsAdded, or rowsRemoved to allow Def aultTableModel<br />
to synchronize its internal data structures and to generate events<br />
to the JTable to have the table view updated. Generating a single event and<br />
repainting the table once is usually much more efficient than updating once<br />
per change. Each of these methods requires you to supply a TableModelEvent<br />
that describes the actual changes made.<br />
Two Views of One Table Using DefaultTableModel<br />
As an illustration of the use of the DefaultTableModel, let's use it to reimplement<br />
the example shown in Figure 11-10 where two views of the same<br />
table were kept in step by generating a TableModelEvent from within the<br />
setValueAt method. When using DefaultTableModel, there is no need<br />
for you to supply this code yourself, but you can't quite get away with using<br />
DefaultTableModel without any modifications. The revised implementation<br />
is shown in Listing 11—5.<br />
Listing 11-5 Using the DefaultTableModel<br />
package <strong>JFC</strong>Book.Chapterll;<br />
import j avax.swing.*;<br />
import javax.swing.table.*;<br />
import j ava.awt.*;<br />
import j ava.awt.event.*;<br />
public class DoubleTableDefault extends JFrame {<br />
public DoubleTableDefault(String title) {<br />
super(title);<br />
DefaultTableModel model = new DefaultTableModel(data,<br />
columriNames) {<br />
public boolean isCellEditable(int rowlndex,
1336 Chapter II The Table Control<br />
Listing 11-5 Using the DefaultTableModel (continued)<br />
int columnlndex) {<br />
return columnlndex == 1;<br />
}<br />
public Class getColumnClass(int columnlndex) {<br />
return<br />
}<br />
};<br />
DoubleTableDefault.this.data[0] [columnlndex].getClassO ;<br />
// Create first table<br />
Dimension viewportSize = new Dimension(450, 120);<br />
JTable tbl = new JTable(model);<br />
tbl.setPreferredScrollableViewportSize(viewportSize);<br />
JScrollPane topPane = new JScrollPane(tbl);<br />
// Create a read-only version of the same table<br />
tbl = new JTable(model) {<br />
public boolean isCellEditable(int rowlndex,<br />
int columnlndex) {<br />
return false;<br />
}<br />
};<br />
tbl.setPreferredScrollableViewportSize(viewportSize);<br />
JScrollPane bottomPane - new JSorollPane(tbl);<br />
Container pane = this.getContentPane();<br />
pane.setLayout(new BoxLayout(pane, BoxLayout.Y_AXIS));<br />
pane.add(topPane);<br />
pane.add(Box.createVerticalStrut(10));<br />
pane.add(bottomPane);<br />
}<br />
public static void main(String[] args) {<br />
JFrame f = new DoubleTableDefault(<br />
"Two Tables - One Model (Default Table Model)");<br />
f .packO ;<br />
f.setvisible(true);<br />
f.setDefaultCloseOperation(JFrame.DOJtfOTHING_ON_CLOSE);<br />
f.addWindowListener(new WindowAdapter() {<br />
public void windowClosing(WindowEvent evt) {<br />
}<br />
}<br />
});<br />
System.exit(0);
Listing 11-5 Using the DefaultTableModel (continued)<br />
// The table data<br />
Object [] [] data = {<br />
{ "Hot & Spicy", Boolean.FALSE },<br />
{ "Cheese", Boolean.FALSE },<br />
{ "Ham", Boolean.FALSE },<br />
{ "New Yorker", Boolean.FALSE },<br />
{ "Vegetarian", Boolean.FALSE }<br />
};<br />
String[] columnNames = {<br />
"Pizza", "Ordered?"<br />
};<br />
}<br />
The Table Model 1337<br />
The data model is created by using the constructor that takes an array of<br />
data and an array of column names. The data itself is unchanged from Listing<br />
11-1, except that its declaration has been moved to the class itself. In the<br />
previous examples, the data and the column names were declared inside an<br />
anonymous subclass of AbstractTableModel, because that is the natural<br />
way to use AbstractTableModel. When you use DefaultTableModel,<br />
however, you are more likely to be encapsulating data obtained from an outside<br />
source rather than using data hard-coded into the application and this<br />
example more closely reflects that.<br />
Notice that, in this example, it is still necessary to override two methods of<br />
DefaultTableModel, so it was not possible to get away without creating a<br />
subclass. If you want some columns of your model to be editable but not others,<br />
you need to implement your own isCellEditable method, because<br />
DefaultTableModel just returns true whatever arguments it is given,<br />
which means that every cell of a DefaultTableModel would be editable by<br />
default (which is the reverse of the case with AbstractTableModel where<br />
nothing is editable). It is also necessary in this case to supply the same implementation<br />
of getColumnClass as was used with AbstractTableModel,<br />
because DefaultTableModel simply returns Object.class for all columns.<br />
Whereas the default implementation of isCellEditable will frequently<br />
be appropriate, you will almost certainly need to override<br />
getColumnClass to match the run time type of the data in your table<br />
model.<br />
Apart from these two methods, you don't need to do anything special to<br />
use DefaultTableModel: Because it contains all of the data, it knows how
1338 Chapter I I The Table Control<br />
many rows and columns there are and it can return the column names. Aside<br />
from the substitution of DefaultTableModel for AbstractTableModel,<br />
the rest of the code is unchanged from the earlier implementation of this<br />
example. If you run this example using the command:<br />
<strong>Java</strong> <strong>JFC</strong>Book.Chapterll.DoubleTableDefault<br />
you'll find that it is equivalent to the previous implementation.<br />
Table Model Events<br />
Changes to a (properly implemented) table model cause a TableModelEvent<br />
to be generated. JTable includes code to handle these events, so you<br />
are not obliged to handle them yourself. However, if you want to receive<br />
them in order to implement some kind of custom behavior, you need to register<br />
a TableModelListener using the addTableModelListener method<br />
of TableModel. The TableModelListener interface has only one<br />
method:<br />
public void tableChanged(TableModelEvent evt);<br />
All of the information about the change that has been made is in the<br />
TableModelEvent that the listener receives as the argument to this<br />
method. This event, like all events, has a source that is always the TableModel<br />
in which the change has occurred and four attributes that describe<br />
exactly what happened. These attributes can be obtained using the following<br />
methods:<br />
public int getTypeO ;<br />
public int getColumnt);<br />
public int getFirstRow();<br />
public int getLastRow();<br />
The event type will be one of TableModelEvent .UPDATE, TableModelEvent.<br />
INSERT, and TableModelEvent .DELETE. UPDATE implies that<br />
some of the data in the table was changed in some way. The affected area can<br />
be deduced from the values returned by the other three methods that specify<br />
a column and a range of rows. Usually, a whole column or a set of complete<br />
rows will be updated. To indicate that all columns in a row were affected,<br />
getColumn returns the special value ALL_COLUMNS. Deleting a row or a set<br />
of rows within the table generates an UPDATE event in which the range of<br />
rows covers the extreme ends of the deletion and that has the column value<br />
ALL COLUMNS.
Table Columns and the Table Column Model 1339<br />
If the tables structure has been fundamentally changed, then getFirstRow<br />
will return the value HEADER_ROW; when this happens, the listener<br />
should discard any assumptions it has about the state of the table and build<br />
new data structures from scratch. This event is generated, for example, when<br />
a new column is added to a model managed by Def aultTableModel.<br />
Row insertion and removal are reported with INSERT and DELETE events in<br />
which the affected rows are returned by the getFirstRow and getLastRow<br />
methods. In the case of an insertion, these give the new row indices while for a<br />
deletion, the row numbers correspond to rows that no longer exist.<br />
Table Columns and the Table<br />
Column Model<br />
Now that you've seen how the table holds its data, it's time to turn to the data<br />
structures that it uses to determine how that data is displayed. The JTable class<br />
itself is only a small part of the whole control—much of what you see and what<br />
J i- J<br />
you can do with the tables representation is controlled by the TableColumn<br />
and the TableColumnModel, both of which are covered in this section.<br />
The TableColumn Class<br />
TableColumn is a class that holds information about how a single column<br />
from the table model will be displayed. When the table needs to render or edit<br />
any of the cells in a column, it looks in that column's TableColumn object to<br />
find out how to do it. The public methods defined for this class are as follows:<br />
public void setModellndex(int modelIndex);<br />
public int getMode1Index();<br />
public void setWidth(int width);<br />
public int getWidthO ,public<br />
void setMinWidth(int minWidth);<br />
public int getMinWidth();<br />
public void setMaxWidth(int maxWidth);<br />
public int getMaxWidth();<br />
public void setPreferredWidth(int prefWidth);<br />
public int getPreferredWidth();<br />
public void setResizable(boolean resizable);<br />
public boolean getResizable();<br />
public void sizeWidthToFit();<br />
'
1340 Chapter 11 The Table Control<br />
public void disableResizedPosting();<br />
public void enableResizedPostingO;<br />
public void setldentifier(Object identifier);<br />
public Object getldentifier();<br />
public void setHeaderValue(Object value);<br />
public Object getHeaderValue();<br />
public void setHeaderRenderer(TableCellRenderer renderer);<br />
public TableCellRenderer getHeaderRenderer();<br />
public void setCellRenderer(TableCellRenderer renderer);<br />
public TableCellRenderer getCellRenderer();<br />
public void setCellEditor(TableCellEditor editor);<br />
public TableCellEditor getCellEditor();<br />
public void addPropertyChangeListener(<br />
PropertyChangeListener 1);<br />
public void removePropertyChangeListener(<br />
PropertyChangeListener 1);<br />
The most fundamental piece of information that a TableColumn object<br />
holds is the index of the column within the data model that it relates to. This<br />
index can be set with the setModelIndex method and read with getModellndex,<br />
or it can be initialized when the object is created. TableColumn<br />
has four constructors:<br />
public TableColumn();<br />
public TableColumn(int modellndex);<br />
public TableColumn(int modellndex, int width);<br />
public TableColumn(int modellndex, int width,<br />
TableCellRenderer renderer, TableCellEditor editor);<br />
The default constructor creates a TableColumn object that corresponds<br />
to column zero of the table model, has width and preferred width of 75 pixels,<br />
and no associated renderer or editor. The other constructors let you specify<br />
the table column, the initial and preferred width, the renderer, and the<br />
editor to be used for this column.<br />
Column Width<br />
The actual width of a column when it is displayed depends on several factors,<br />
but is constrained by the columns minimum and maximum allowed widths.<br />
If you don't use the setMinWidth and setMaxWidth methods to explicitly<br />
change them, the minimum width is 15 pixels and there is no effective maximum<br />
width (it is set to the largest allowed integer value). When a table is displayed,<br />
it tries to make each column the size returned by its<br />
getPref erredwidth method. If the table is not configured to automatically<br />
resize to fit the space available, this is exactly what will happen. On the other
Table Columns and the Table Column Model 1341<br />
hand, if the table is constrained to fit its content within the screen space allocated<br />
to it, it adjusts the size of each column (or possibly just the last column—see<br />
"The Table Control") so that the total column width matches the<br />
width of its available space. In making this adjustment, however, it attempts<br />
to never exceed the configured maximum width or make the column narrower<br />
than its minimum width and, as a result, the table may not actually fit<br />
in the space available, or may not fill that space if all of the columns are too<br />
narrow even at their widest possible settings.<br />
Even after you have set the width of a column, the user may be able to<br />
resize it using the mouse, as was demonstrated earlier in this chapter. You can<br />
disable this by invoking the setResizable method with argument false—<br />
by default, user resizing of all columns is allowed. Doing this does not prevent<br />
the column being resized by calling setwidth or as part of the table's<br />
automatic resizing mechanism if it is enabled.<br />
<strong>Core</strong> Note<br />
The setResizable method determines whether a specific column can<br />
be resized. If you want to stop the user resizing any column in the table,<br />
you need to use the setResizingAllowed method of the table's<br />
JTableHeader. Similarly, you can stop the user rearranging the column<br />
order using the JTableHeader setReorderingAllowed method.<br />
An important feature to note is that the actual size of the column has nothing<br />
whatever to do with its content, unless you explicitly set the column's<br />
width with this in mind. In adjusting the size of a column, the table is only<br />
concerned with meeting its overall width constraint (if it has one) and, as a<br />
result, some columns may become too small for their content to be completely<br />
visible, while others are enlarged to the point that there is extra space.<br />
It is the programmer's job to ensure that the maximum, minimum, and preferred<br />
width of a column are set so that its contents are not lost. In general,<br />
this is not a simple task unless you know in advance the exact data that will be<br />
displayed in the table and the font in which it will be rendered. The task is<br />
made even more difficult by the possibility that a custom renderer may be<br />
used, invalidating any assumptions about the space required to show the column's<br />
data.<br />
One way to deal with this is to compute the column's minimum size by<br />
passing each entry in each row through the renderer that will be used to display<br />
it and getting the width of each rendered cell, then setting the minimum<br />
and preferred width of the column to that value. If you absolutely must have
1342 Chapter II The Table Control<br />
the entire content of a column visible and you want to allow substitution of<br />
arbitrary renderers and fonts, this is probably your only option, but it is<br />
expensive in performance terms, especially if the table contains a lot of data.<br />
A possible compromise that may work in some cases is to set the column s<br />
width using the sizeWidthToFit method, which sets the width to the size<br />
needed to render the header of the column with the data that the header currently<br />
contains. If you can guarantee that the header text is always wider than<br />
the content of any cell in the column, you can use this method to calculate<br />
the widtli and then set the minimum width to the same value. If there is a<br />
possibility that the renderer might be changed, you will need to repeat this<br />
calculation when the change is made. The cell and header Tenderers are both<br />
bound properties of the column, so you can register a listener to be notified<br />
when they change, as you'll see later. If, on the other hand, you have control<br />
over the renderer and the font that will be used, you can minimize the cost of<br />
displaying the table by determining the appropriate widths in advance and<br />
then setting the columns' minimum widths appropriately.<br />
<strong>Core</strong> Warning<br />
The sizeWidthToFit method does its job by rendering the column<br />
header string using the renderer that will be used to draw the header. In<br />
Swing I.I.I and <strong>Java</strong> 2 version 1.2.2, every table column has a default<br />
renderer assigned for its column header. In <strong>Java</strong> 2 version 1.3, the reverse is<br />
true—unless you explicitly set the header renderer for a column, there isn't<br />
one. This is not normally an issue, because the table header will use its own<br />
default renderer for any column that does not supply a renderer of its own.<br />
However, the sizeWidthToFit method will only use the header<br />
renderer installed in the TableColumn which means that it will not work<br />
properly in <strong>Java</strong> 2 version 1.3 unless you explicitly install a header renderer<br />
in the column using the TableColumn setHeaderRenderer method.<br />
See "Column and Cell Renderers" for further information on renderers.<br />
Column Indices and Identifiers<br />
Internally the table always uses integer indices to locate the TableColumn<br />
object for a given column in the TableColumnModel and almost all of the API<br />
calls are constructed in the same way because this is the quickest way to access<br />
the data for a column. You can, however, associate an identifier with each<br />
TableColumn and, subsequently, using TableColumnModel or JTable<br />
methods, search for a column given its identifier. This is, of course, much more<br />
expensive than the direct indexing method. Under some circumstances, you
Table Columns and the Table Column Model 1343<br />
may have no choice but to do this, especially if you allow the user to reorder the<br />
columns in the table's view.<br />
If you don't explicitly set an identifier for a column using set identifier,<br />
it uses its associated header value as a default identifier. The header value<br />
may itself be set using the setHeaderValue method, usually to the column<br />
name as returned by the table model's getColumnName method. If you don't<br />
set the header value, it defaults to null. It is important to realize that nothing<br />
attaches any particular meaning to the column identifier, whether it is<br />
defaulted or specifically set: In searching for a column by name, the object<br />
given as the search key is simply compared with the column's identifier using<br />
the search key's equals method. In particular, it is possible for more than<br />
one column to have the same identifier, in which case the first column matching<br />
the given search key is returned. In general, for performance reasons, we<br />
do not recommend addressing table columns by name unless you have no<br />
alternative but to do so.<br />
Column and Cell Renderers<br />
Each column can have two associated renderers—one for the header and<br />
one for all of the cells in that column.<br />
In Swing 1.1.1 and <strong>Java</strong> 2 version 1.2.2, each TableColumn object is initialized<br />
with a header Tenderer that is a subclass of JLabel with a raised<br />
bevel border and that draws the string representation of the column's header<br />
value (as returned by getHeaderValue) centered on the label. In <strong>Java</strong> 2 version<br />
1.3, there is no header renderer installed in a TableColumn by default.<br />
Instead, the JTableHeader class supplies the default renderer for columns<br />
that do not provide their own. To provide a specific header renderer for a column,<br />
use the TableColumn setHeaderRenderer method.<br />
<strong>Core</strong> Alert<br />
This means that in <strong>Java</strong> 2 version i.3,the TableColumn<br />
getHeaderRenderer method returns null by default, which was not the<br />
case in Swing I.I.I and <strong>Java</strong> 2 version /.2.2.This may cause a<br />
compatibility problem with code written to run on these earlier releases.<br />
The column header should, of course, always be something of meaning to<br />
the user and it is often initialized to the name of the corresponding column in<br />
the table model. If your table model uses obscure names (such as database<br />
field names), you should use a more descriptive name instead and use the<br />
setHeaderValue method to set it.
1344 Chapter II The Table Control<br />
<strong>Core</strong> Note<br />
As you'll see later, you can arrange for JTable to create the<br />
TableColumn objects that it needs to display the data in a table model<br />
directly from the model data. When it does this, it sets the header value in<br />
each TableColumn to the column name from the data model.<br />
The default for cells is no specific renderer at all (so the TableColumn<br />
getCellRenderer method returns null). This results in a renderer suitable<br />
for the type of data held in the column (as returned by the models get-<br />
ColumnClass method) being used for each cell in that column. Similarly,<br />
there is no default editor for a column—instead, a class-based editor is used<br />
unless you configure one via the constructor or using setCellEditor. More<br />
will be said about this in the section titled "Customized Table Rendering and<br />
Editing."<br />
Column Properties<br />
TableColumn lias a number of bound properties that you can be notified of<br />
changes to by registering a property change listener. The complete set of<br />
properties is listed in Table 11-3.<br />
Table I 1-3 TableColumn Bound Properties<br />
Property Description<br />
COLUMN_WIDTH_PROPERTY The width of the column.<br />
CELL__RENDERER_PROPERTY The cell renderer for the column.<br />
HEADER_RENDERER_PROPERTY The column's header renderer.<br />
HEADER_VALUE_PROPERTY The value used in the columns header.<br />
Under normal circumstances, you probably will not need to monitor<br />
changes to these properties. However, as was mentioned earlier, you might<br />
need to monitor changes to the header and cell Tenderers to allow you to<br />
recalculate the minimum width for the column if you are forced to perform<br />
exact calculations.
Table Columns and the Table Column Model 1345<br />
Selecting and Ordering Columns with the<br />
TableColumnModel<br />
A TableColumn object holds information about only one column in a table's<br />
view. The columns that the table actually displays and the order in which it<br />
displays them are determined by its TableColumnModel, which is an<br />
ordered collection of TableColumn objects. Unlike TableColumn, Table-<br />
ColumnModel is an interface, not a class. The Swing table package provides<br />
an implementation of this interface, called Def aultTableColumnModel,<br />
which JTable uses unless you provide a column model of your own.<br />
The Table Column Model<br />
Table 11-4 lists the methods required by the TableColumnModel interface.<br />
Table 11-4 TheTableColumnModellnterface<br />
Method<br />
public void addColumn<br />
(TableColumn column);<br />
public void removeColumn<br />
(TableColumn column);<br />
public void moveColumn<br />
(int columnlndex, int newlndex)<br />
;<br />
public int getColumnCount();<br />
public Enumeration getColumns<br />
() ;<br />
public int getColumnlndex<br />
(Object identifier);<br />
public TableColumn getColumn<br />
(int index);<br />
public int getColumnlndexAtX<br />
(int xPosition);<br />
Purpose<br />
Adds a column to the end of the table.<br />
Removes a column from the table.<br />
Changes the location of a column.<br />
Returns the number of columns in this<br />
view of the table.<br />
Returns the columns in left-to-right<br />
order.<br />
Gets the index for the column with the<br />
given identifier.<br />
Returns the column at the given index.<br />
Gets the column for a given screen location.<br />
public int getColumnMargin () ; Gets the margin between columns.
1346 Chapter 11 The Table Control<br />
Table I 1-4 TheTableColumnModel Interface (continued)<br />
Method<br />
public void setColumnMargin<br />
(int margin);<br />
public int getTotalColumn-<br />
WidthO ;<br />
public void<br />
setColumnSelectionAllowed<br />
(boolean flag);<br />
public boolean<br />
getColumnSelectionAllowed();<br />
public int []<br />
getSelectedColumns();<br />
public int<br />
getSelectedColumnCount () ;<br />
public void setSelectionModel<br />
(ListSelectionModel model);<br />
public ListSelectionModel<br />
getSelectionModel();<br />
public void addColumnModelLis-<br />
tener (TableColumnModelListener<br />
1) ;<br />
public void retnoveColumnModel-<br />
Listener (TableColumnModelListener<br />
1) ;<br />
Purpose<br />
Sets the margin between columns.<br />
Calculates the total width of the columns<br />
including margins.<br />
Controls whether columns can be<br />
selected.<br />
Returns whether columns can be<br />
selected.<br />
Returns the indices of all selected columns.<br />
Returns the number of selected columns.<br />
Installs a new selection model.<br />
Gets the current selection model.<br />
Adds a listener for changes to the column<br />
model.<br />
Removes a column model listener.<br />
Since TableColumnModel is an interface, it doesn't provide a method<br />
that allows you to create a table column model—this facility is provided<br />
instead by the constructor of Def aultTableColumnModel, which creates a<br />
column model with no columns in it. To get a column into the column model,<br />
you have to create the appropriate TableColumn object and then use the<br />
DefaultTableColumnModel addColumn method to add it. This process<br />
must be repeated for each column from the table model that you want a<br />
JTable to actually display (you'll see an example of this at the end of this<br />
section). The addColumn method adds the new column at the end of its
Table Columns and the Table Column Model 1347<br />
internal list, which is important because the order of columns in the Table-<br />
ColumnModel is the order in which they will be displayed by the table itself.<br />
When you first create a table, therefore, you build its table column model by<br />
adding columns in the required display order.<br />
<strong>Core</strong> Note<br />
If you are creating a simple table that displays all of the columns in the<br />
table model in the order in which they appear in that model, you can<br />
simplify your task by setting the JTable<br />
autoCreateColumnsFromModel flag.When this flag is true, which<br />
it is by default, JTable builds a suitable TableColumnModel when it is<br />
first given a TableModel and whenever the TableModel changes.<br />
Note, however, that leaving this flag true after the table column model<br />
has been built can have some unwanted side effects, as will shortly become<br />
apparent<br />
Reordering Table Columns<br />
When the table is displayed, the user can reorder the columns by dragging<br />
them around with the mouse. The reordering of columns is achieved by<br />
changing their order in the TableColumnModel using the moveColumn<br />
method. You can, of course, achieve the same effect programmatically by<br />
calling this method directly. This might be necessary if you want to add a new<br />
column to the table somewhere other than at the end: To do this, you must<br />
call addColumn, which always places it at the end of the column list, then<br />
use moveColumn to relocate it to the desired position. You can also remove a<br />
column from the column model using removeColumn. When you use<br />
DefaultTableColumnModel, adding, moving, or removing a column<br />
causes an event to be generated that JTable uses to update the table display.<br />
It is important to realize that the table model and the table column model<br />
are almost completely independent of each other. In particular, moving columns<br />
within or removing them from the table column model has no effect at<br />
all on the table model itself. Similarly, adding a column to the table model does<br />
not affect the table column model and won't cause the table to display the new<br />
column (but see the <strong>Core</strong> Note below). However, moving columns in the table<br />
model will have an effect on the table display, because the connection between<br />
the columns in the column model and those in the table model is the index of<br />
the column in the table model. If you change the column at a particular index<br />
in the model, you will also change what that column represents in the JTable.<br />
Removing columns from the take model has the same effect. For this reason,
1348 Chapter II The Table Control<br />
as a general rule, you should avoid reordering or deleting columns from the<br />
table model.<br />
<strong>Core</strong> Note<br />
If you enable the JTable autoCreateColumnsFromModel feature,<br />
however, changing the table model will discard and rebuild the table column<br />
model, so that the displayed version of the table will be completely rebuilt<br />
and will reflect any changes made. Any earlier manual reordering and<br />
resizing of columns by the user will also be lost. If you don't want changes<br />
to the table model to affect your table display, make sure that this flag is<br />
set to false after the table column model has been built (i.e., after the<br />
setModel method has been called or when the JTable constructor<br />
finishes if you pass the table model that way).The value of this flag can be<br />
changed using the JTable setAutoCreateColumnsFromModel<br />
method.<br />
Accessing Table Columns<br />
The TableColumnModel interface provides several methods that allow<br />
access to the individual columns. The getColumns method returns an Enumeration<br />
that allows you to visit all of the columns in the model exactly<br />
once. Usually, you are not supposed to make any assumptions about the order<br />
of elements in an Enumeration, but in this case it is safe to assume that the<br />
columns are returned by the next Element method in the order in which<br />
they are intended to be displayed.<br />
The getColumn method returns the TableColumn object with the given<br />
column index, where the index reflects the display order position of the column<br />
so that the left most column as shown by JTable has column index 0<br />
and is returned by getColumn (0), the next to the right has column index 1,<br />
and so on. This is the most efficient way to get the TableColumn object for a<br />
given column, but the index that you need to use to find a particular column<br />
will change if the columns are reordered. If you need to find a particular column<br />
and you don't want to track column order changes using TableColumnModelEvents<br />
(which are discussed later), you can assign each column a<br />
fixed identifier using the TableColumn setldentif ier method that was<br />
described in the previous section, or use the table model's name for the column,<br />
and locate it using the getColumnlndex method that returns the column<br />
index of the first TableColumn with an identifier matching the one<br />
passed as an argument. You can pass the returned index to getColumn to get<br />
the actual TableColumn object.
Mouse Events<br />
Table Columns and the Table Column Model 1349<br />
If you are processing mouse events on a table, you will need to determine<br />
which cell the mouse was over when the event occurred. To determine this,<br />
you'll need the cell's row and column number, arable provides a method<br />
that returns the row number and a convenience method to access the<br />
TableColumnModel getColumnlndexAtX method, which returns the column<br />
as a column index given the mouse's X-coordinate relative to the table.<br />
Note, however, that not every position within a table corresponds to a column<br />
in the table column model. In particular, there is usually some margin space<br />
between the columns of the table; if getColumnlndexAtX is given a coordinate<br />
that corresponds to a margin, it returns -1. The size of the margin<br />
between columns can be set by calling the setColumnMargin method and<br />
passing the desired margin width in pixels. Since this affects the total width<br />
of the table, calling this method (and changing the margin) causes the<br />
Def aultTableColumnModel implementation to generate an event to cause<br />
JTable to redraw the table.<br />
For convenience, you can use the getTotalColumnWidth method to calculate<br />
the horizontal space needed to display all of the columns in the table<br />
model. This value is computed by adding together the current widths of all of<br />
the columns (as returned by the TableColumn getwidth method) and adding<br />
the additional space required for the intercolumn margins (as returned by<br />
getColumnMargin). Assuming that the columns are sized appropriately for<br />
their contents, yovi can think of the value returned by getTotalColumn-<br />
Width as the "preferred" width of the entire table in its current configuration.<br />
The last set of methods in Table 11-4 deal with column selections and<br />
events generated by the table column model, topics that are dealt with after<br />
discussion of JTable itself.<br />
Using DefaultTableColumnModel<br />
Def aultTableColumnModel implements all of the methods of the Table-<br />
ColumnModel interface and also provides the following convenience methods<br />
for use by subclasses:<br />
protected void fireColumnAdded(TableColumnModelEvent evt);<br />
protected void fireColumnRemoved(TableColumnModelEvent evt);<br />
protected void fireColumnMoved(TableColumnModelEvent evt);<br />
protected void fireColumnSelectionChanged(<br />
ListSelectionEvent evt);<br />
protected void fireColumnMarginChanged();
1350 Chapter II The Table Control<br />
As you can see, these are all convenience methods that you might use in a<br />
subclass to create events when the table column model or the set of selected<br />
columns changes. Unless you are intending to create your own customized<br />
column model based on DefaultTableColumnModel, you won't need to<br />
use any of these methods, so they are not discussed any further in this book.<br />
To illustrate how DefaultTableColumnModel works, lets look at a simple<br />
example that uses the Apollo space flight data model that you first saw at<br />
the beginning of this chapter, but displays only a subset of its data. Lets start<br />
by displaying only the flight names, then add the names of the crew one by<br />
one and rearrange the columns under program control to put them in the<br />
correct order. This isn't a veiy spectacular or a veiy useful example, but it<br />
does show how the TableColumnModel works and emphasizes the fact that<br />
it is independent of the underlying table model. The code is shown in Listing<br />
11-6. To run this example, use the command:<br />
<strong>Java</strong> <strong>JFC</strong>Book.Chapterll.TableColumnModelExample<br />
Listing 11-6 The TableColumnModel<br />
package <strong>JFC</strong>Book.Chapterll;<br />
import j avax.swing.*;<br />
import javax.swing.table.*;<br />
import <strong>JFC</strong>Book.Chapterll.TableExampleData;<br />
import j ava.awt.*;<br />
import j ava.awt.event.*;<br />
public class TableColumnModelExample extends JFrame {<br />
public TableColumnModelExample(String title) {<br />
super (title) ;<br />
dataModel = new TableExampleData();<br />
JTable tbl = new JTable();<br />
tbl.setAutoCreateColumnsFromModel(false);<br />
tbl.setAutoResizeMode(JTable.AUTO_RESIZE_OFF);<br />
tbl.setModel(dataModel);<br />
columnModel = new DefaultTableColumnModel();<br />
TableColumn col = new TableColumn(0);// Map column 0<br />
col.setHeaderValue(dataModel.getColumnName(0));<br />
columnModel.addColumn(col);
Listing 11-6 TheTableColumnModel (continued)<br />
}<br />
tbl.setColumnModel(columnModel);<br />
Table Columns and the Table Column Model 1351<br />
this.getContentPane().add(new JScrollPane(tbl));<br />
public static void main (String [] args) {<br />
final TableColumnModelExample f =<br />
new TableColumnModelExample(<br />
"Table Column Model Example");<br />
f.pack();<br />
f.setVisible(true);<br />
f.setDefaultCloseOperation(JFrame.DO_NOTHING_ON_CLOSE);<br />
f.addWindowListener(new WindowAdapter() {<br />
public void windowClosing(WindowEvent evt) {<br />
System.exit(0);<br />
}<br />
});<br />
// Column 0 is already displayed. Now add<br />
// columns 3, 2 and 1<br />
// in that order and move them into place.<br />
// Delay 10 seconds each time.<br />
Timer t = new Timer(10000, new ActionListener() {<br />
private int count = 0;<br />
public void actionPerformed(ActionEvent evt) {<br />
TableColumn col;<br />
switch(count++) {<br />
case 0:// First call<br />
col = new TableColumn(3);<br />
col.setHeaderValue(f.dataModel.getColumnName(3));<br />
f.columnModel.addColumn(col);<br />
break;<br />
case \:11 Second call<br />
col = new TableColumn(2) ,•<br />
col.setHeaderValue(f.dataModel.getColumnName(2));<br />
f.columnModel.addColumn(col);<br />
f.columnModel.moveColumn(2, 1);<br />
break;<br />
case 2:// Third call<br />
col = new TableColumn(1);<br />
col.setHeaderValue(f.dataModel.getColumnName(1));
1352 Chapter 11 The Table Control<br />
Listing 11-6 TheTableColumnModel (continued)<br />
J<br />
}<br />
});<br />
f.columnModel.addColumn(col);<br />
f.columnModel.moveColumn(3, 1);<br />
((Timer)evt.getSource()).stop();<br />
}<br />
t.start();<br />
}<br />
protected DefaultTableColumnModel columnModel;<br />
protected TableModel dataModel;<br />
This example starts by creating an instance of the data model, then builds a<br />
JTable based around it, but this time the table model is not passed to the<br />
JTable constructor. Passing it to the constructor would be a waste of time,<br />
because it would automatically generate a column model mapping all of the<br />
columns in the data model. In this case, only a small subset of the columns are<br />
going to be displayed, so a custom table column model is required. Instead, the<br />
default constructor is used to create a table with an empty model and then<br />
automatic creation of the table model is switched off using the setAutoCreateColumnsFromMode]<br />
method to avoid the same problem when the set-<br />
Model method is called. Automatic table resizing is also switched off so that<br />
the columns remain at their natural size. Finally, the setModel method is<br />
called to connect the table to its table model.<br />
The next step is to build a custom table column model by instantiating a<br />
DefaultTableColumnModel object. When it is created, this model has no<br />
columns, so the first column, which maps to column 0 of the table model, is<br />
created by adding a single Table Column to it. The constructor is given the<br />
index of the target column in the model. As noted above, when you create a<br />
TableColumn object, the associated header value is null, so to make the<br />
correct heading appear in the table, the column header is obtained from the<br />
model and the TableColumn setHeaderValue method is used to configure<br />
the column information. Finally, the column is added to the table column<br />
model using addColumn.<br />
At this point, the table appears with only one column containing the flight<br />
name and number. Ten seconds later, a second column is created, which<br />
maps column 3 of the table model using the same technique as we used for<br />
the first one. When addColumn is used, the new column is placed at the end
Table Columns and the Table Column Model 1353<br />
of the column list, so it displays to the right of the flight name which is, in this<br />
case, where it should be. After another ten seconds, a third column is built<br />
for the LM Pilot name. This one should appear in between the two columns<br />
already on display, but it can't be placed there directly: First, addColumn<br />
puts it at the end of the list (in index position 2) and then moveColumn is<br />
used to relocate it to position 1. Finally, ten seconds later, yet another column<br />
is added and moved to the immediate right of the flight name using the same<br />
mechanism.<br />
<strong>Core</strong> Note<br />
You'll notice that the example code uses a Timer to wait for 10 seconds<br />
before adding each new column and allows this timer to repeat until all of<br />
the required columns have been added, then stops the timer. Like all Swing<br />
controls, JTable and its data and column models can only be safely<br />
updated from the event thread, and this is a convenient way to schedule<br />
the work into the event thread after a short delay. If you need to write code<br />
that updates a table using data from a live feed of some kind, be very<br />
careful to schedule the update in the event thread using the<br />
SwingUtilities invokeLater method, if necessary. It is common<br />
for such data to be delivered over a network in a separate thread and it is<br />
equally common for the developer to simply get a reference to the<br />
TableModel and update it immediately.This will almost always work, but<br />
on occasion the update will conflict with the table as it repaints itself in the<br />
AWT event thread, when the result will be unpredictable.<br />
Table Column Model Events<br />
Adding each column and moving it will cause two TableColumnModelEvents<br />
to be generated for these two changes to the table column model. However,<br />
because the table handles these events by scheduling an event to<br />
redraw itself in a separate thread, you will just see each new column appear<br />
in its target location because, before the repaint operation can begin, the new<br />
column has been both added and moved within the table.<br />
To receive a TableColumnModelEvent, you need to register a Table-<br />
ColumnModelListener. Whereas in the case of the table model the listener<br />
interface was simple and the event itself was more complex, here the reverse<br />
is true the event is simple and the listener interface has five methods to be<br />
implemented:<br />
public void columnAdded(TableColumnModelEvent evt);
1354 Chapter II The Table Control<br />
public void columnRemoved(TableColumnModelEvent evt);<br />
public void columnMoved(TableColumnModelEvent evt);<br />
public void columnMarginChanged(ChangeEvent evt);<br />
public void columnSelectionChanged(ListSelectionEvent<br />
evt) ;<br />
The first three methods are self-describing; the event that each method<br />
receives contains a source object (always the TableColumnModel), a "from"<br />
column index and a "to" column index, both of which are integers and can be<br />
obtained using the getFromlndex and getToIndex methods, respectively.<br />
When a column is added, the "to" index in the event specifies the index at<br />
which the column was added, which is always one less than the number of<br />
columns in the model because columns are always added at the end, while<br />
the "from" index is zero. In the case of column removal, the "to" index is 0<br />
and the "from" index is again one less than the number of columns in the<br />
model (which seems strange, as you might have expected to be the index of<br />
the column that was removed). When a column is moved, the source and<br />
destination of the move are given by "from" and "to" indices, respectively,<br />
and are the values supplied to the moveColumn method.<br />
The last two methods are slightly different from the first three in that they<br />
don't use a TableColumnModelEvent. The columnMarginChanged<br />
method is invoked when the setColumnMargin method is used to change<br />
the gap between columns. The ChangeEvent that is supplied as the only<br />
argument carries no useful information other than the source of the event,<br />
which is the affected TableColumnModel. To get the new column margin, it<br />
is necessary to use the getColumnMargin method of the event source. Usually,<br />
this event will cause the receiver to completely redraw the table.<br />
Finally, any change in the column selection is reported by the columnSelectionChanged<br />
method that is given a ListSelectionEvent from which<br />
the changes can be deduced. Table selection is discussed later in this chapter.<br />
The Table Control<br />
After a long preamble, it's finally time to look at the Swing table control itself. A<br />
lot of ground has had to be covered before a proper description of JTable<br />
could be presented, because much of the functionality you see when you use a<br />
table is not actually provided by the control itself. As you've already seen, the<br />
data is organized into rows and columns by a separate data model, the columns<br />
that you actually see and the order in which you see them is determined by the
The Table Control 1355<br />
table s column model and even the table header itself isn't strictly part of the<br />
table control. In fact, by this point you already know as much as you need to<br />
know in order to create simple tables. In this section, you'll see what the<br />
JTable component itself adds to its component parts, then look at the table<br />
header and at how the table manages row, column, and cell selection.<br />
Creating a Table<br />
JTable has seven constructors:<br />
public JTable ();<br />
public JTable(TableModel dataModel);<br />
public JTable(TableModel dataModel,<br />
TableColumnModel columnModel);<br />
public JTable(TableModel dataModel,<br />
TableColumnModel columnModel,<br />
ListSelectionModel selModel);<br />
public JTable(int numRows, int numColumns);<br />
public JTable(Vector data, Vector columnNames);<br />
public JTable(Object[] [] data, Object [] columnNames);<br />
The first constructor uses defaults for each part of the table—you can see<br />
the table attributes that can be customized and their default values in Table<br />
11—5. Some of these attributes can be set at construction time, while others<br />
can only be changed using specific accessor methods. In the ease of the<br />
default constructor, the table will have a Def aultTableModel with no rows<br />
and no columns, so it isn't very useful until you give it some real data using<br />
the setModel method, as was shown in Listing 11-6. The next three constructors<br />
allow you to specify one, two or all of a data model, a table column<br />
model and a selection model for the table. All of these constructors take the<br />
table size from the model.<br />
The fifth constructor installs the default column and selection models and<br />
creates a table using a Def aultTableModel, of the size specified by its<br />
arguments in which every cell is null. The table headers for this table will be<br />
the defaults provided by Def aultTableModel—"A," "B," and so on. Again,<br />
this is not a very useful table until you populate it with some real data and<br />
(perhaps) assign more meaningful column headers.<br />
The last two constructors let you build a fully-configured table with all of<br />
its data, using Def aultTableModel, Def aultTableColumnModel and the<br />
default list selection model. If you use the Vector variant, you need to construct<br />
the data Vector as shown in Figure 11-11.<br />
Table 11-5 shows all of the attributes of the JTable component, the<br />
method that you can use to change its value, and the default installed when
1356 Chapter II The Table Control<br />
the table is created. In some cases, as you have seen, the defaults can be<br />
directly overridden by choosing an appropriate constructor.<br />
You'll see how these attributes are used and how you can change their values<br />
in the rest of this section and in the sections that follow. Note that there<br />
are other attributes that the table provides and convenience methods for<br />
them that actually belong to other objects, an example of which is the table<br />
selection mode, which properly belongs to the table selection model.<br />
Table Size<br />
One of the more perplexing features of JTable is how to control its size. You<br />
can take two different approaches to this—either you can make the table<br />
adopt its natural size and stay at that size, or you can allow it to adapt its size<br />
to the amount of space that is allocated to it. You make the choice by setting<br />
the autoResizeMode attribute, which has five possible values:<br />
• AUTO_RESIZE_OFF<br />
• AUTO_RESIZE_NEXT_COLUMN<br />
• AUTO_RESIZE_SUBSEQUENT_COLUMNS<br />
• AUTO_RESIZE_LAST_COLUMN<br />
• AUTO_RESIZE_ALL_COLUMNS<br />
Note that auto-resizing works only for the width of the table. Every row in<br />
a table has a fixed height, which can be set using the setRowHeight method<br />
and a fixed row margin controlled by setInterce 11 Spacing. Therefore,<br />
the table's height is fixed for a given number of rows. Row heights are never<br />
changed to suit the space available.<br />
<strong>Core</strong> Note<br />
In Swing I.I.I and <strong>Java</strong> 2 version 1.2.2, there is only one variant of<br />
setRowHeight that sets the common height used by all rows, so that<br />
each row has the same height In <strong>Java</strong> 2 version 1.3, there is a second<br />
variant of this method:<br />
public void setRowHeight(int row, int rowHeight);<br />
Using this method, you can arrange for each row to have a different height.<br />
Rows for which you don't set a specific height using this method all use the<br />
common height set using the one-argument variant of setRowHeight,<br />
which defaults to 16 pixels.
Table 11-5 JTable Attributes and Their Defaults<br />
Attribute Data Type<br />
dataModel TableModel<br />
column Model TableColumn-<br />
Model<br />
selectionModel ListSelection-<br />
Model<br />
selectionMode int<br />
tableHeader JTableHeader<br />
Method<br />
setModel<br />
setColumnModel<br />
setSelection-<br />
Model<br />
setSelection-<br />
Mode<br />
setTableHeader<br />
rowHeight int setRowHeight<br />
columnMarein int setlntercellSpac-<br />
The Table Control 1357<br />
Default Value<br />
DefaultTable-<br />
Model with no rows and<br />
no columns.<br />
DefaultTableColumnModel<br />
derived from the<br />
data model.<br />
DefaultList-<br />
SelectionModel initialized<br />
with<br />
ListSelection-<br />
Model.MULTIPLE_INT<br />
ERVAL_SELECTION.<br />
Controls row selection<br />
only.<br />
Sets the mode lor the row<br />
selection model. Defaults<br />
toListSelection-<br />
Model.MULTIPLE_INT<br />
ERVAL_SELECTION.<br />
A table header derived<br />
from the Def aultTableColumnModel<br />
that<br />
matches the table's data<br />
model.<br />
The height of each row—<br />
16 pixels. In Swing 1.1.1<br />
and <strong>Java</strong> 2 version 1.2.2,<br />
this value applies to all<br />
rows. In <strong>Java</strong> 2 version 1.3,<br />
each row can have a different<br />
height.<br />
The space between columns.<br />
This is really a<br />
TableColumnModel<br />
property that defaults to 1<br />
pixel.
1358 Chapter 11 The Table Control<br />
Table 11-5 JTable Attributes and Their Defaults (continued)<br />
Attribute<br />
rowM argin<br />
gridColor<br />
showGrid<br />
showHorizontalLines<br />
showVerticallines<br />
autoResize-<br />
Mode<br />
autoCreateColumns<br />
From-<br />
Model<br />
Data Type<br />
int<br />
Color<br />
boolean<br />
boolean<br />
boolean<br />
int<br />
boolean<br />
preferredView- Dimension<br />
portSize<br />
rowSelection-<br />
Allowed<br />
columnSelectionAllowed<br />
cellSelection-<br />
Enabled<br />
boolean<br />
boolean<br />
boolean<br />
Method Default Value<br />
setlntercell- Space betweei 1 rows— 1<br />
Spacing or pixel.<br />
setRowMargin<br />
setGridColor<br />
setShowGrid<br />
setShowHorizontalLines<br />
setShowVerticalLines<br />
setAutoResize-<br />
Mode<br />
The color of the grid<br />
lines— a fairly light gray in<br />
the Metal look-and-feel.<br />
true—draws grid lines in<br />
the margins between table<br />
rows and columns.<br />
true—draws grid lines<br />
between rows.<br />
true—draws grid lines<br />
between columns.<br />
Determines whether and<br />
how the table is resized to<br />
fit available space—initially<br />
set to<br />
AUTO_RESIZE_SUBSEQ<br />
UENT COLUMNS.<br />
setAutoCreate - Controls whether the<br />
ColumnsFrom- table builds its own table<br />
Model column model—initially<br />
true .<br />
setPreferred-<br />
Scrollable-<br />
ViewportSize<br />
setRowSelectionAllowed<br />
setColumnSelectionAllowed<br />
setCellSelectionEnabled<br />
The size of the viewport<br />
that the table prefers if it is<br />
wrapped by a JScrol 1 -<br />
Pane—defaults to 450 pixels<br />
wide and 400 pixels<br />
high.<br />
true—allows selection of<br />
rows.<br />
false—selection of columns<br />
is not permitted.<br />
f a 1 s e—selection of<br />
individual cells is not<br />
allowed.
Table 1 1-5<br />
Attribute<br />
selectionForeground<br />
selectionBackground<br />
JTable Attributes and Their Defaults (continued)<br />
Data Type<br />
Color<br />
Color<br />
The AUTOJIESIZEJOFF Mode<br />
Method<br />
setSelection-<br />
Foreground<br />
setSelection-<br />
Background<br />
The Table Control 1359<br />
Default Value<br />
Color of text in a selected<br />
cell. Default value<br />
depends on the look-andfeel.<br />
Color of the background<br />
in a selected cell. Default<br />
value depends on the lookand-feel.<br />
If you select AUTO_RESIZE_OFF, the table determines its minimum, preferred,<br />
and maximum sizes by summing the minimum, preferred, and maximum<br />
size values of all of the columns in its TableColumnModel. No matter<br />
how large or small the table is eventually made, each column will initially be<br />
given its preferred width. This may mean that the entire table is wider than<br />
the space allocated it, in which ease it will be clipped on the right, or narrower,<br />
which result in empty space to the light of the last column. Usually,<br />
however, a table configured with AUTO_RESIZE_OFF is mounted in a<br />
JScrollPane which will supply a horizontal scrollbar if the table is too wide<br />
for the space allocated to it. Resizing the container that the table has been<br />
added to has no effect on the sizes of its columns.<br />
<strong>Core</strong> Alert<br />
In <strong>Java</strong> 2 version 1.3, the width values stored in the TableColumn object<br />
are taken to include the cell margin if there is one. This means that if a<br />
table consists of / 0 columns that each want to be IS pixels wide and is<br />
configured with a I-pixel column margin, then the table's preferred width<br />
will be 750 pixels and each column will actually be made 9 pixels wide to<br />
allow I pixel for the column margin. On the other hand,in Swing I.I.I and<br />
<strong>Java</strong> 2 version 1.2.2, the margin space is not included in the width in the<br />
TableColumn object, so the preferred width of the same table would be<br />
759 pixels and each column would be allocated 10 pixels. Keep this in<br />
mind throughout the rest of this section because, for brevity and to avoid<br />
confusion, we won't explicitly mention the space allocated to the column<br />
margin.
1360 Chapter II The Table Control<br />
When the table is configured with AUTO_RESIZE_OFF and the user tries<br />
to resize a column, all of the columns to the right of that column are simply<br />
moved to the right if the column is being enlarged, or to the left if it is being<br />
made smaller, but they do not change size. As a result, when any column is<br />
resized, the table itself becomes wider or narrower by the same amount.<br />
Whichever resize mode is selected, the user cannot make a column narrower<br />
than the minimum width or wider than the maximum width in its Table-<br />
Column object.<br />
The Other Resize Modes<br />
If you want the table to adapt its size to fit within the space allocated to it<br />
by a layout manager and so avoid the use of a JScrollPane (or at least avoid<br />
showing a horizontal scroll bar if at all possible), you need to use one of the<br />
other four resize modes. When any of these modes is selected, the table<br />
attempts to adjust the width of its columns so that its total width is as close as<br />
possible to, and does not exceed, the space it has allocated to it on the screen.<br />
As you'll see, though, this is not always possible. To understand how these<br />
modes work and how they differ from each other, it is necessary first to look<br />
at how the table calculates the initial size of each column, which is the same<br />
for each of these modes, and then to examine what happens when any of the<br />
columns is resized, which is different for each mode.<br />
<strong>Core</strong> Note<br />
If you choose any of these four resize modes, the table will do its best to fit<br />
into the horizontal width available to it, but there are many situations in<br />
which it cannot do so. If you want the table to be sized so as to conveniently<br />
display all of its columns no matter how wide or narrow the space allocated<br />
to it might be, you should use AUTO_RESIZE_OFF and mount the table in<br />
a JScrollPane instead of one of the modes described in this section.<br />
As with the AUTO_RESIZE_OFF mode, to determine the initial size for<br />
each column, the table first computes its minimum, preferred, and maximum<br />
width by summing the minimum, preferred, and maximum widths of its<br />
TableColumn objects and then retrieves the actual width that it has been
The Table Control 1361<br />
allocated by calling its getSize method. There are then three cases to consider:<br />
The preferred width and the In this case, the table allocates each colactual<br />
width are the same. umn its preferred width. This will make<br />
the table exactly as wide as the space it<br />
needs to occupy.<br />
The preferred width is less The table will allocate each column its<br />
than the width available. preferred width PLUS some amount of<br />
the excess space available. However, no<br />
column will be made larger than its maximum<br />
width.<br />
The preferred width is The table will allocate each column its<br />
greater than the width avail- preferred width MINUS some amount of<br />
able. the space shortfall. However, no column<br />
will be made narrower than its minimum<br />
width.<br />
The first case is trivial, so there is nothing more to say about it. In the<br />
other two cases, either extra space must be added to each column over and<br />
above its preferred size, or some amount of space must be taken away from<br />
it. The point of interest is how this amount is determined for each column.<br />
The algorithm used attempts to distribute the available space or shortfall<br />
over all of the columns with each column being given amount proportionate<br />
to that which it is able to accept, where this depends on the spread between<br />
its preferred size and its maximum size if there is extra space or between its<br />
preferred size and its minimum size if there is a space shortfall. Consider the<br />
case in which there is extra space to allocate. In this case, the size of a given<br />
cell will be given by<br />
preferred width + factor * (maximum width - preferred<br />
width)<br />
where factor is a decimal number in the range 0.0 to 1.0. On the other<br />
hand, if there is a space shortfall, the size will be<br />
minimum width + factor * (preferred width - minimum<br />
width)
1362 Chapter I I The Table Control<br />
Given that factor is always between 0 and 1, you can see that these sizes<br />
will always be no less than the cells minimum width and no more than its<br />
maximum width.<br />
So, what is the value of the term factor? This term potentially varies<br />
from column to column as the width of each column is determined and its<br />
contribution to the total width of the table becomes known, so it is recomputed<br />
before the width of each column is calculated. If there is extra space to<br />
distribute (so the columns need to be made wider), factor is given by:<br />
(available width - preferred width)/<br />
(maximum width - preferred width)<br />
while if there is a space shortfall, the value of factor will be<br />
(available width - minimum width)/<br />
(preferred width - minimum width)<br />
In both cases, the terms available width , preferred width, and<br />
minimum width reflect the values for the entire table, except that available<br />
width is never larger than the table s maximum width. As the width of<br />
each column is determined, available width is reduced by the amount of<br />
space allocated to the column and both minimum width and preferred<br />
width are reduced by the corresponding values for the column that has just<br />
been sized. What this means is that these values always relate to the columns<br />
that have not yet been sized and therefore they all get progressively smaller.<br />
The best way to see how the algorithm works is to consider some examples.<br />
For the purposes of these examples, we will use a table with four columns,<br />
configured as follows:<br />
Column 0 Minimum width: 70<br />
Preferred Width: 75<br />
Maximum width: 120<br />
Column 1 Minumum width: 15<br />
Preferred Width: 75<br />
Maximum width: 120<br />
Column 2 Minumum width: 15<br />
Preferred Width: 75<br />
Maximum width: 120<br />
Column 3 Minumum width: 15<br />
Preferred Width: 75<br />
Maximum width: 120
The Table Control 1363<br />
This table has a preferred width of 300 pixels, a maximum width of 480<br />
pixels and a minimum width of 115 pixels. Suppose first that it is placed in a<br />
container that is 520 pixels wide, which is 40 pixels more than the table could<br />
use at its maximum size. Because of this, the extra 40 pixels will not be taken<br />
into account. Since the table's preferred width is 300 pixels and it has 480 pixels<br />
available to it, we use the formula and factor for distributing extra<br />
space—that is:<br />
and<br />
column width = column preferred width + factor *<br />
(column maximum width - column preferred width)<br />
factor = (available width - preferred width)/<br />
(maximum width - preferred width)<br />
In this case, the initial values for the calculation of factor are:<br />
available width: 480<br />
preferred width: 300<br />
maximum width: 480<br />
For the first (leftmost) column, the value of factor is:<br />
(480 - 3 0 0 ) / ( 4 8 0 - 300) = 1.0<br />
and therefore the width allocated to this column is:<br />
75 + 1.0 * (120 - 75) = 120 pixels<br />
The width allocated to the first column is now subtracted from available<br />
width and the total maximum and preferred widths are also reduced by the<br />
corresponding values for the column just processed, so that the following values<br />
are used for the second column:<br />
available width: 360<br />
preferred width: 225<br />
maximum width: 360<br />
The value of factor for this column is therefore:<br />
( 3 6 0 - 2 2 5 ) / ( 3 6 0 - 2 5 5 ) = 1 . 0
1364 Chapter I I The Table Control<br />
and, not surprisingly, the width of this column will also be 120 pixels. In fact,<br />
because the available width and the maximum width were initially the same,<br />
each column will be allocated its maximum width of 120 pixels, because there<br />
is enough space to give each column its maximum size.<br />
Now suppose that the table were placed in a container 360 pixels wide.<br />
This is wider than the tables preferred width, but is less than its maximum<br />
size. As a result, all of the columns will be wider than their own preferred<br />
widths, but they cannot all be at their maximum size because there is insufficient<br />
space to allow this. If you follow through the same calculations as those<br />
above for this case, you'll find that, once again, the extra space over and<br />
above the total preferred width of the table, 60 pixels, gets distributed evenly<br />
between the four columns, with the result that they will all be 90 pixels wide.<br />
The space is being distributed evenly only because the four columns have<br />
almost identical characteristics—most importantly, the fact that their preferred<br />
and maximum sizes are the same.<br />
When the total width of the table is such that there is not enough space to<br />
give all of the columns their preferred width, you see the reverse effect to<br />
that described above—space is removed from columns in proportion to the<br />
difference between their preferred and minimum sizes. As an example, if the<br />
table were made 292 pixels wide, which is smaller than the preferred width<br />
of 300 pixels, then each column would be around 73 pixels wide (in fact, due<br />
to the rounding inherent in integer calculations, the actual sizes are 75, 72,<br />
73, and 72 pixels). However, when saving space, the table never forces a column<br />
to be narrower than its minimum size. Suppose we narrow our table<br />
down to 260 pixels. Based on earlier discussions, you might expect that each<br />
column would now be around 65 pixels wide and this would normally be the<br />
case, except that the first column has a minimum width of 70 pixels and so<br />
cannot be made any narrower than that. Because of this, the table would<br />
need to save an extra 5 pixels, which it shaves off the remaining 3 columns. In<br />
fact, the final widths for this case would be 74, 62, 62, and 62.<br />
The last case to examine is what happens when the table is so narrow that<br />
there is not enough space to meet even the minimum column widths. In this<br />
case, that happens when the table is less than (70 + 15 + 15 + 15) = 115 pixels<br />
wide. In this case, there is no need to do any calculations, because no column<br />
will ever be forced to be smaller than its minimum width, so the actual<br />
widths will be 70, 15, 15, 15. Since this requires more horizontal space than<br />
the table has allocated to it, the table will be clipped on the right.<br />
All of these four resize modes behave in this same way when they initially<br />
allocate space. The difference between them appears when the user resizes a<br />
column. Making a column wider means that space has to be reclaimed from
The Table Control 1365<br />
some or all of the other columns, while narrowing a column allows space to<br />
be added back elsewhere. The way in which extra space is added to or taken<br />
from the table columns depends on the resize mode, as follows:<br />
AUTO RESIZE NEXT COLUMN<br />
AUTO_RESIZE SUBSEQUENT COLUMNS<br />
AUTO RESIZE LAST COLUMN<br />
AUTO RESIZE ALL COLUMNS<br />
Resetting Column Widths<br />
All of the extra space or shortfall is<br />
added to or taken away from the<br />
column to the right of the column<br />
heing resized.<br />
The total extra space or shortfall is<br />
distributed over all of the columns<br />
to the right of the column being<br />
resized by applying the algorithm<br />
just shown to just those columns.<br />
This is the default mode when the<br />
table is created.<br />
A width change equal in magnitude<br />
but opposite in size is applied<br />
to the rightmost column in the<br />
table. That is, if the user makes a<br />
column 10 pixels wider, the last<br />
column will get 10 pixels narrower.<br />
The extra space or space shortfall<br />
is distributed over all the other<br />
columns in the table, using the<br />
algorithm shown above.<br />
Under some circumstances, you may want to restore the table's columns to<br />
their initial sizes. If you need to do this, you can use the following JTable<br />
method:<br />
public void sizeColumnsToFit(boolean lastColumnOnly);<br />
public void sizeColumnsToFit(int resizingColumn);<br />
The first variant of this method is deprecated and should not be used. The<br />
second method is called with a column number, which determines exactly<br />
how the space available to the table is allocated between its columns. II the<br />
column number is -1, then the column widths are result to the values that are<br />
appropriate given the current resize mode, in effect performing a reset of the<br />
column widths for the entire table. On the other hand, if the argument repre-
1366 Chapter I I The Table Control<br />
sents a legal column in the Table Co lumnModel, the behavior is the same as<br />
if that column had just been resized to its current width—that is, the space<br />
gained or lost is distributed among the other columns according to the resize<br />
mode as described above.<br />
Preferred Viewport Size<br />
When a table is wrapped in a JScrollPane, it is asked for its "preferred<br />
viewport size." This is the size that the JScrollPane will try to allocate to<br />
the table in its scrolling area. There is no obvious way to determine the ideal<br />
size for the table's viewport. Should it be as large as the table itself? This may<br />
sometimes be the best choice but, if the table is very wide, creating a large<br />
viewport will probably distort other parts of the user interface. By default,<br />
the table asks for a viewport that is 450 pixels wide and 400 pixels high, which<br />
is why the tables in the first few examples in this chapter appear in a viewport<br />
that is much too large for their content. You can adjust this by using the set -<br />
Pref erredScrollableViewportSize method, as was done in Listing 11-<br />
4 in order to fit two tables stacked one above the other on one frame. If the<br />
table is short, you might find it useful to reduce the required height of the<br />
viewport like this to avoid wasted space under the last row of the table, an<br />
effect that you can see by running any of the early example programs in this<br />
chapter.<br />
Table Appearance<br />
Aside from its size and the width of its columns, there are some other<br />
attributes of the table that affect its appearance, three of which are briefly<br />
described in this section.<br />
Colors<br />
Color is an issue that is tightly coupled to a component's look-and-feel class.<br />
If you don't like the default colors, you can set both the foreground and the<br />
background colors of the table and its header and they will be rendered using<br />
those colors. For example, we can change the appearance of the table we created<br />
in Listing 11-6 by adding the following lines after the table is created:<br />
tbl.setBackground(Color.black) ;<br />
tbl.setForeground(Color.green) ;<br />
tbl.getTableHeader().setBackground(Color.blue);<br />
tbl.getTableHeader().setForeground(Color.orange);<br />
You can try this modified version of the example using the command:
<strong>Java</strong> <strong>JFC</strong>Book.Chapter11.TableColumnModelExample2<br />
The Table Control 1367<br />
and you'll get a result that looks like a more colorful version of Figure 11-12.<br />
Even though the result is shown here as a gray-scale figure, you can easily see<br />
that the color scheme has changed. Notice in particular that the blue (or at<br />
least veiy dark gray!) background of the table header runs right across the top<br />
of the table, even though there are no table columns on the right of the<br />
frame.<br />
Figure J1-12 A table with customized colors.<br />
Changing colors works as long as you use the default cell and header renderers<br />
in the Swing packages. If you install a different renderer, you may find<br />
that it doesn't honor the table's foreground or background color. Sometimes<br />
you need to use different colors for different columns or even for different<br />
cells within a column and it is the Tenderer's job to implement this as you'll<br />
see when looking at how table rendering is done later in this chapter.<br />
Grid Lines and Intercell Spacing<br />
All of the tables that have been shown so far have had horizontal and vertical<br />
grid lines around the individual cells. These lines are drawn by the table's<br />
look-and-feel class and the only way to make major changes to their appearance,<br />
such as using dashes or dots instead of a solid line, is by implementing<br />
your'own look-and-feel class for the table. Without going to this much trouble,<br />
however, you can turn grid lines on and off or change the grid color using<br />
the following JTable methods:
1368 Chapter I I The Table Control<br />
public void setShowGrid(boolean show);<br />
public void setShowHorizontalLines(boolean show);<br />
public void setShowVerticalLines(boolean show)<br />
public void setGridColor(Color color);<br />
Not surprisingly, the setShowHorizontalLines and setShowVerticalLines<br />
methods give you individual control over the appearance of horizontal<br />
and vertical lines, while the setShowGrid method can be used to<br />
either enable or disable both sets of lines in one call. Figure 11-13 shows the<br />
table from the previous section as it appears without horizontal grid lines and<br />
with red vertical lines. To see the red grid lines, use the command:<br />
<strong>Java</strong> <strong>JFC</strong>Book.Chapterll.TableColumnModelExample3<br />
Figure 11-13 A table with no horizontal grid lines.<br />
The grid lines, which are always one pixel across, run down the middle of<br />
the intercell spacing that consists of the tables row and column margins. You<br />
can change the size of this spacing using the setlntercellSpacing<br />
method, which requires a Dimension object as its argument, in which the<br />
width gives the column margin and the height the row margin. The column<br />
margin actually belongs to the Table Co lumnModel—invoking setlntercellSpacing<br />
causes the table to change the value stored by the TableCol -<br />
umnModel that will, incidentally, cause an event that will make JTable<br />
redraw the whole table. Alternatively, you can use the JTable setRowMargin<br />
and TableColumnModel setColumnMargin methods to set each of<br />
these margins individually.
ToolTips<br />
The Table Control 1369<br />
Since JTable is just a JComponent, it can, in principle, have tool tips. In<br />
fact, both JTable and its header provide support for tool tips supplied by the<br />
cell and header Tenderers that means that you could, at least in theory, provide<br />
a different tool tip for each cell in the table. Even the default Tenderers<br />
can give you either a column-based tool tip or a tool tip based on the class of<br />
the object in the column, which may be shared by several columns in any<br />
given table. In fact, tooltip support in JTable is very similar to that provided<br />
by JTree, which was covered in the last chapter. Further discussion of this<br />
topic is postponed until the section on Tenderers.<br />
Even if you don't want to get involved with configuring or writing your<br />
own Tenderer, you can still use the setToolTipText method that JTable<br />
inherits from JComponent to set a single tip that will be shown whenever the<br />
mouse pointer is anywhere over the table body. JTableHeader supports the<br />
same facility and can have its own tip, separate from that of the table body.<br />
These global tips are displayed if no more specific tips are available from the<br />
Tenderer of whichever cell the mouse pointer is over and whenever the<br />
mouse stops over the margins between cells.<br />
<strong>Core</strong> Note<br />
Note that this is different from JTree, where we had to create a subclass<br />
to arrange for a global tool tip when there was no tool tip available from<br />
the renderer for the part of the tree that the mouse was over.<br />
<strong>Core</strong> Alert<br />
Unlike JTree, both JTable and JTableHeader are automatically<br />
registered with the ToolTipManager when they are created. Because<br />
this incurs a certain amount of overhead each time the mouse moves over<br />
the table or its header, you would be well advised to deregister these<br />
components if you don't need the tool tip support or if you experience<br />
performance problems.<br />
The Table Header<br />
While JTable handles displaying the data in the table, the header part is<br />
managed by a separate JTableHeader object. When you first create a table,<br />
it builds its own JTableHeader based on the table column model that you<br />
give it, or the one that it builds for itself if the autoCreateColumnsFrom-
1370 Chapter II The Table Control<br />
Model flag is true, so in most cases you won't need to concern yourself with<br />
actually creating a header for your table. As you've already seen, the table<br />
header is usually mounted in the column header part of a JScrollPane so<br />
that the column headers remain visible as the table body is scrolled vertically.<br />
To make this work, the table and table header components need to be aware<br />
of each other, so that column movement and resizing, which are controlled<br />
by JTableHeader rather than by the table, result in both parts being<br />
updated consistently. The JTable setTableHeader method can be used to<br />
connect a different header to a table. When you call this method, it also<br />
invokes the JTableHeader setTable method so that the header and the<br />
table have consistent references to each other. It is perfectly possible to create<br />
a table that doesn't have a header—to do this, call setTable-<br />
Header (null) before placing the table in its JScrollPane. Note, however,<br />
that the user cannot resize or reorder the tables columns if it has no header.<br />
Creating a Table Header<br />
It is unlikely that you will create your own table header, but should you wish<br />
to do so, you have a choice of two constructors:<br />
public JTableHeader ();<br />
public JTableHeader(TableColumnModel model);<br />
The first constructor creates a header using a DefaultTableColumn-<br />
Model with no columns, which is not especially useful. The second one constructs<br />
a header based on the table column model that you supply. The<br />
column header text for each column is taken from the header values of the<br />
individual TableColumn objects in the model, as returned by calling getHeaderValue<br />
for each column. As noted in the discussion of TableColumn,<br />
the header value is NOT initialized by default—it is your job to set appropriate<br />
header names, as shown in Listing 11—6, which created custom Table-<br />
Column objects.<br />
If you look back to Listing 11-6, you'll see that it used the JTableHeader<br />
created automatically by the table. However, when new columns were added<br />
to the table column model, nothing was done to update the table header.<br />
Whether you create your own table header or use the one supplied by the<br />
table, you don't need to worry about keeping it current as you add or remove<br />
columns from the column model because it registers itself as a TableColumnModelListener<br />
and adjusts the displayed column headers according to<br />
the changes in the model.
JTableHeader Methods<br />
The most useful public methods of JTableHeader are as follows:<br />
public void setTable(JTable table);<br />
public JTable getTable();<br />
public void setColumnModel(TableColumnModel model);<br />
public TableColumnModel getColumnModel();<br />
public void setResizingAllowed(boolean flag);<br />
public boolean getResizingAllowed();<br />
public void setReorderingAllowed(boolean flag);<br />
public boolean getReorderingAllowed();<br />
public int getDraggedColumn();<br />
public int getDraggedDistance();<br />
public int getResizingColumn();<br />
public void setUpdateTablelnRealTime(boolean flag);<br />
public boolean getUpdateTablelnRealTime();<br />
public int columnAtPoint(Point point);<br />
public String getToolTipText(MouseEvent evt);<br />
The following methods are added in <strong>Java</strong> 2 version 1.3:<br />
public TableCellRenderer getDefaultRenderer();<br />
public void setDefaultRenderer(TableCellRenderer r) ;<br />
The Table Control 1371<br />
The first four of these methods get and set the associated table and column<br />
model. Usually, these are set once and for all when the table header is<br />
created, but you can, if you wish, install a new column model at any time. In<br />
fact, it is not necessary to directly call setColumnModel once the table<br />
header is connected to the table, because JTable invokes it when you<br />
change the column model using its own setColumnModel method.<br />
As well as rendering the table header, JTableHeader is also responsible<br />
for allowing the user to resize or reorder columns. The code that implements<br />
these features is in the header's UI class. Before allowing the user to change<br />
the columns, this code uses the getReorderingAllowed or getResizingAllowed<br />
methods to see whether the operation is permitted. By default,<br />
both resizing and column reordering are allowed. These settings only control<br />
what the user can do via the UI class—they don't prevent automatic column<br />
resizing by JTable should the table's container change size, or changes made<br />
by the application to the column order or column size via the TableColumn-<br />
Model and TableColumn interfaces.<br />
In Swing 1.1.1 and <strong>Java</strong> 2 version 1.2.2, no convenient mechanism is provided<br />
to allow the application to detect when a column is being moved or<br />
resized—notification is only provided when the operation is complete by a<br />
TableColumnModelEvent in the case of a column movement or a Proper-
1372 Chapter II The Table Control<br />
tyChangeEvent for the TableColumn COLUMN_WIDTH_PROPERTY for a column<br />
resize. If you want to know when these changes are taking place, the only<br />
way to do this is to register a MouseMotionListener on the JTableHeader.<br />
As the column itself or its edge is moved, your mouseDragged method will be<br />
called. During this period, you can use the getDraggedColumn method to<br />
find out whether a column drag is in progress and, if so, which column is being<br />
moved. This method returns the index of the column involved, as it was before<br />
the move started, or -1 if there is no column drag in progress. The get-<br />
DraggedDistance method tells you how far (in pixels) the column has<br />
moved. If the mouse is being dragged and there is no column drag in progress,<br />
the other possibility is that a column is being resized. If this is the case, then<br />
the getResizingColumn method will return the index of the column being<br />
resized, or -1 if there isn't one.<br />
In <strong>Java</strong> 2 version 1.3, the situation is slightly better, because the TableColumnModel<br />
calls the columnMoved method of any registered TableColumn-<br />
ModelListener contiuously while a table column is being moved, as well as<br />
when it stops moving. There is still no way to detect changes in column width,<br />
however, except by registering a PropertyChangeListener with each<br />
TableColumn object.<br />
If you're using Swing 1.1.1 or <strong>Java</strong> 1.2.2 and you are resizing or moving<br />
columns in a large table, you may be able to speed the operation up considerably<br />
by using the setUpdateTablelnRealTime method. Calling this<br />
method with argument false causes the table header to resize or move only<br />
the column header itself—by default, the table body is also updated as the<br />
header is modified. When real-time updates are disabled, the table body will<br />
be changed to reflect header change only when the user releases the mouse<br />
at the end of the operation. In <strong>Java</strong> 2 version 1.3, this method still exists but it<br />
has no effect - all header dragging and resizing results in the table body being<br />
updated in real time.<br />
The columnAtPoint method returns the index of the column at a given<br />
location, whose coordinates must be given relative to the table header itself,<br />
or -1 if location does not correspond to any column header (i.e., it is outside<br />
the header or is in the margin between the headers). This method would typically<br />
be used in a mouse-event handler to perform a custom column-based<br />
operation.<br />
The getToolTipText method returns a tool tip for a particular mouse<br />
position. This method can be called directly by application code, but it is, as<br />
you saw in Chapter 8, usually called by the ToolTipManager when necessary.<br />
JTableHeader provides an implementation of this method that allows
The Table Control 1373<br />
you to have a separate tool tip for each column in the header. You'll see how<br />
this is done in the discussion of Tenderers at the end of this chapter.<br />
The last two methods, getDefaultRenderer and setDefaultRenderer,<br />
are present only in <strong>Java</strong> 2 version 1.3. As noted earlier in the discussion<br />
of TableColumn, it is possible to configure a specific renderer for a<br />
column header by calling the TableColumn's setHeaderRenderer<br />
method. In Swing 1.1.1 and <strong>Java</strong> 2 version 1.2.2, a default header renderer is<br />
always installed in every TableColumn object even if the programmer does<br />
not explicitly supply one. In <strong>Java</strong> 2 version 1.3, however, this is not the case.<br />
Instead, the table header has only one default renderer that is shared by all of<br />
the columns. This default renderer can be changed using the JTableHeader<br />
setDef aultRenderer method. You can still override the header renderer<br />
used for individual columns by using the TableColumn setHeaderRenderer<br />
method.<br />
Table Selection<br />
JTable uses the same selection model as the JList component does. Since<br />
the ListSelectionModel has already been covered in some detail in<br />
Chapter 8, including how to detect selection changes, this section just outlines<br />
the features of the table that make selection different than it would be<br />
in a list or a tree. The most important difference between JTable and JList<br />
as far as selection is concerned is that a table is two-dimensional, which gives<br />
you the possibility of selecting either rows or columns. In fact, as you have<br />
already seen, JTable also allows you to select individual cells.<br />
Because you can, at least theoretically, select rows and columns independently<br />
of each other, a table actually has two selection models—one for row<br />
selections and another for column selections. The column selection model is<br />
owned and controlled by the TableColumnModel installed in the table,<br />
while the row selection model belongs to the table itself. Even though these<br />
models are separate, they are not quite independent of each other, because<br />
JTable has access to both of them and coordinates row and column selections<br />
according to certain rules.<br />
There are five attributes that distinguish a particular table's selection policy:<br />
• Row selection enabled. This attribute belongs to the JTable<br />
and can be controlled using its setRowSelectionAllowed<br />
method. If this attribute is false, you cannot select rows from<br />
the user interface.
1374 Chapter II The Table Control<br />
• Column selection enabled. This is an attribute of the<br />
TableColumnModel. JTable provides the<br />
setColumnSelectionAllowed method to allow you to<br />
change it without having to directly access the column model.<br />
• Cell selection enabled. This attribute belongs to JTable. If it is<br />
true, you can't select individual rows and columns—clicking in a<br />
cell selects only that cell. Use the<br />
setCellSelectionEnabled method to control this attribute.<br />
• Row selection mode. This attribute is part of the row selection<br />
model and can take any of the values<br />
ListSelectionModel.MULTIPLE_INTERVAL_SELECTION,<br />
ListSelectionModel.SINGLE_INTERVAL_SELECTION,<br />
and ListSelectionModel.SINGLE_SELECTION.<br />
• Column selection mode. This is the column selection models<br />
version of the row selection mode.<br />
Theoretically, the row and column selection modes could be independently<br />
set. However, if you use the JTable set Select ionMode method, it<br />
applies the same mode to both models. If you want different row and column<br />
modes, you will need to set their modes directly as follows:<br />
JTable tbl = new JTable (...) ;<br />
// Set up table (not shown)<br />
tbl.getSelectionModel().setSelectionMode( );<br />
// set the row selection mode<br />
tbl.getColumnModel().getSelectionModel().<br />
setSelectionMode (...) ;<br />
// set column selection mode<br />
The following list shows all of the JTable methods that are connected<br />
with selection management. Many of these are similar to the methods that<br />
you've already seen in connection with JList and JTree, so they won't all<br />
be discussed in detail here. There are, however, a few subtle points that need<br />
to be mentioned:<br />
public void setCellSelectionEnabled(boolean flag);<br />
public boolean getCellSelectionEnabled();<br />
public void setRowSelectionAllowed(boolean flag);<br />
public boolean getRowSelectionAllowed();<br />
public void setColumnSelectionAllowed(boolean flag);<br />
public boolean getColumnSelectionAllowedO ;<br />
public void setSelectionMode(int mode);<br />
public void clearSelection0;<br />
public void selectAll();
The Table Control 1375<br />
public void setSelectionBackground(Color color);<br />
public void setSelectionForeground(Color color);<br />
public Color getSelectionBackgroundO ;<br />
public Color getSelectionForegroundO ;<br />
public void addColumnSelectionlnterval(int indexO, int indexl);<br />
public void addRowSelectionlnterval(int indexO, int indexl);<br />
public void removeColumnSelectionlnterval(int indexO, int<br />
indexl);<br />
public void removeRowSelectionlnterval(int indexO, int indexl);<br />
public void setColumnSelectionlnterval(int indexO, int indexl);<br />
public void setRowSelectionlnterval(int indexO, int indexl);<br />
public int getSelectedColumn();<br />
public int [] getSelectedColumns();<br />
public int getSelectedColumnCount();<br />
public int getSelectedRow();<br />
public int[] getSelectedRows();<br />
public int getSelectedRowCount();<br />
public boolean isRowSelected(int row);<br />
public boolean isColumnSelected(int col);<br />
public boolean isCellSelected(int row, int col);<br />
The first interesting point concerns cell selection. When cell selection is<br />
enabled, clicking in any cell highlights only that cell. However, if yon interrogate<br />
the selection models, you would find that the row and column that pass<br />
through that cell are actually both selected in the model, but do not appear so<br />
on the screen. This means that you need to interpret the results of the methods<br />
that retrieve the selected rows and columns differently depending on whether<br />
cell selection is enabled. In fact, the table does not record the selection status<br />
of individual cells—it infers that a cell is selected based on the state of its row<br />
and column. A cell is selected if one of the following is true:<br />
• Row selection is enabled AND column selection is disabled<br />
AND the cell's row is selected.<br />
• Column selection is enabled AND row selection is disabled<br />
AND the cell's column is selected.<br />
• Row and column selection are BOTH enabled AND the cell's<br />
row and column are both selected.<br />
You can find out whether a cell is selected using isCellSelected, supplying<br />
the cell's row and column indices as arguments. From the rules above, you<br />
can see that a cell can be considered selected even if cell selection is not<br />
enabled, because the cell selection attribute really controls the ability to select<br />
a single cell, rather than the whole row or column that the cell occupies. When
1376 Chapter I I The Table Control<br />
cell selection is disabled, a cell is selected if it is a selected row or a selected column<br />
(but it cannot, of course be in both under these circumstances).<br />
The second point to make about selection is that JTable, like JList, does<br />
not provide any support for mouse double clicks, which are often used to<br />
select an object (in this case a cell, row, or column) and perform some action<br />
on it. If you need this functionality, you need to implement it yourself by providing<br />
a MouseListener and registering it on the JTable. When you get a<br />
double click, you can either find the selected row and/or column using the<br />
methods in the list you have just seen, or you can determine the cell in which<br />
the mouse was clicked using the following JTable methods:<br />
public int columnAtPoint(Point pt);<br />
public int rowAtPoint(Point pt) ;<br />
To use these methods, pass the mouse location (obtained from the MouseEvent<br />
using its getPoint method) to both of them to get the column and<br />
row indices of the cell. If the mouse was clicked in the margin between columns<br />
or rows, one or both of these methods will return -1.<br />
To demonstrate some of what we have seen in this section, let's look at a simple<br />
program, based on the table that was used in Figure 11-1, that just shows<br />
how cell selection works and also traps mouse double clicks and prints the row<br />
and column of the cell under the mouse using the method outlined above. Listing<br />
11-7 shows the code that implements the detection of mouse clicks, locating<br />
the corresponding cell and printing its position and contents. In this extract,<br />
the variable table is a reference to a JTable created earlier.<br />
Listing I 1-7 Handling mouse selection in a table<br />
table.addMouseListener(new MouseAdapter() {<br />
public void mouseClicked(MouseEvent evt) {<br />
if (evt.getClickCount() ==2) {<br />
Point pt = evt.getPoint();<br />
int rowlndex = table.rowAtPoint(pt);<br />
int columnlndex = table.columnAtPoint(pt);<br />
if (rowlndex == -1 || columnlndex == -1) {<br />
System.out.println("Clicked outside table");<br />
} else {<br />
System.out.println("Clicked in row " + rowlndex +<br />
", column " + columnlndex + ". Data is ");<br />
System.out.println("Data from model is " +<br />
table.getModel().getValueAt(
Listing 11-7 Handling mouse selection in a table (continued)<br />
}<br />
});<br />
}<br />
}<br />
rowlndex, columnlndex));<br />
You can tiy this example for yourself using the command:<br />
<strong>Java</strong> <strong>JFC</strong>Book.Chapter11.CellSelectionExample<br />
The Table Control 1377<br />
If you run this example and click in any cell (but not in the left-most column),<br />
you'll find that, because cell selection is enabled, only that particular<br />
cell highlights itself, instead of the whole row as was the case with the original<br />
version of this program (TableExample) at the start of this chapter,<br />
which had row selection enabled instead. If you click in another cell, the first<br />
cell is deselected as the new one is highlighted. Now double-click in any cell<br />
and you'll find that the cell's coordinates and its content are printed in the<br />
window from which you started the program.<br />
You'll notice that, having determined the row and column indices of the<br />
cell that you double click in, the data is printed using two different methods:<br />
System.out.printing"Clicked in row " + rowlndex +<br />
", column " + columnlndex + ". Data is ");<br />
System.out.println("Data from model is " +<br />
table.getModel().getValueAt(<br />
rowlndex, columnlndex));<br />
The first line of code gets the data using the JTable getValueAt method,<br />
while the second one calls the getValueAt method of the TableModel itself.<br />
You might expect that these would give the same value and, initially, they do.<br />
However, if you drag the second column ("Commander") one position to the<br />
right so that the "LM Pilot" position moves to its left and then double click in<br />
the "LM Pilot" column of the first row of the table, you'll see the following output:<br />
Clicked in row 0, column 1. Data is <br />
Data from model is Walter Schirra<br />
Now the values returned by these two methods are different! The first line<br />
of output is correct and the second is wrong. The reason for this is very simple:<br />
the column index returned by the columnAtPoint method is an index<br />
into the TableColumnModel, not the TableModel. When you click in the
1378 Chapter II The Table Control<br />
<strong>2nd</strong> column, you are always clicking in the TableColumnModel column at<br />
index 1, as the output above shows. When the table is initially created, the<br />
TableColumn at column index 1 maps to the TableModel column with<br />
index 1. However, when the second and third columns were swapped, the<br />
second column in the TableColumnModel became mapped to column 3 of<br />
the TableModel and vice versa. As a result, when you ask the TableModel<br />
for the data in column 1 of row 0, you get the value "Walter Schirra," which is<br />
not what you see in the table.<br />
The JTable getValueAt method takes into account the reordering of<br />
columns by taking the column index that you pass to it and remapping it<br />
through the TableColumnModel to get the correct TableModel column<br />
number, then calls the TableModel getValueAt method. You can perform<br />
the same mapping for yourself using the JTable convertColumnlndexTo-<br />
Model method, which maps a TableColumnModel index to a TableModel<br />
index. The moral of this example is that you should always be clear as to<br />
whether a column number that you are about to use is a TableColumn-<br />
Model index or a TableModel index and invoke the appropriate method to<br />
locate the data. As a general rule, column indices obtained from methods<br />
that deal with the user interface will be relative to the TableColumnModel.<br />
<strong>Core</strong> Alert<br />
The last thing to try with this example is selecting two cells. First, click on<br />
any cell in the table to highlight itThen, move the mouse to another cell in<br />
a different row and column and hold down the CTRL button while clicking.<br />
Now you'll find four cells selected, instead of two! This is, of course, a result<br />
of the fact that the table selects a ceil by selecting the row and column that<br />
it resides in. Selecting two cells in different rows and columns gives two<br />
selected rows and two selected columns, which always intersect in four<br />
places. There is no way to detect which cells the user actually clicked in<br />
(unless you are prepared to monitor mouse events).<br />
Customized Table Rendering and<br />
Editing<br />
Like the tree component, JTable uses Tenderers to draw the content of its<br />
cells and editors to allow the user to change the content the table, where this<br />
is allowed by the underlying table model. In many cases, the default render-
Customized Table Rendering and Editing 1379<br />
ers and editors that the table provides will be sufficient for your needs, but it<br />
is possible to improve the presentation of the table or make it easier for the<br />
user to interact with it if you provide a customized renderer or an editor<br />
designed specifically for the type of data in your particular table. This section<br />
shows you how to do both of these things.<br />
HowTable Renderers and Editors Work<br />
Every cell in a table, including the column headers, is drawn by a renderer of<br />
some sort. When a part of the table needs to be painted or repainted, the<br />
table's UI class works out which renderer to use for each cell that it needs to<br />
draw and calls its getTableCellRendererComponent method to get a<br />
Component that can draw the cell, then arranges for the renderer to paint<br />
into the area that the cell occupies. A renderer must implement the Table-<br />
CellRenderer interface, which simply requires it to have a getTable-<br />
CellRendererComponent method. Similarly, when the user triggers an<br />
editing session, the table finds the correct editor to use and places it in the<br />
table so that it takes over the space belonging to the cell to be edited. Table<br />
editors implement the TableCellEditor interface, which contains, among<br />
others, a method called getTableCellEditorComponent that returns an<br />
editor component for the table to use. You have already seen the details of<br />
the renderers and editors used with JTree and you won't be surprised to<br />
learn that the table works in very much the same way, so some of the basic<br />
details will be omitted in this section to avoid repetition.<br />
Determining the Renderer or Editor to be Used<br />
The way in which, renderer or editor for a cell is chosen depends on whether<br />
the cell is in the header or the table body and how the table has been configured.<br />
Let's first look at renderers. If the cell is in the header, there are two cases,<br />
depending on which version of Swing is being used:<br />
• In Swing 1.1.1 and <strong>Java</strong> 2 version 1.2.2, the header renderer is<br />
obtained from the column's TableColumn object. When a<br />
TableColumn object is created, a default renderer that draws<br />
text on a JLabel with a beveled border is installed. If you want<br />
to change the appearance of your table headers, you can<br />
provide your own header renderer and install it on a percolumn<br />
basis.
1380 Chapter II The Table Control<br />
• In <strong>Java</strong> 2 version 1.3, the table first looks in the TableColumn<br />
for the header renderer, as it does in Swing 1.1.1 and <strong>Java</strong> 2<br />
version 1.2.2. However, in <strong>Java</strong> 2 version 1.3, no renderer is<br />
installed in a TableColumn object when it is created. When no<br />
renderer is found in the TableColumn object, the<br />
JTableHeaders getDef aultRenderer method is called to<br />
supply the renderer. This means that instead of having to install<br />
the same renderer in each TableColumn, you only need to<br />
install it in the table header using the setDef aultRenderer<br />
method. A suitable default is provided when the table header is<br />
created. If you want to change the way in which all headers are<br />
rendered, you can install your own renderer in the header. On<br />
the other hand, if you want to override the rendering for a<br />
specific column, you install your custom renderer in the<br />
TableColumn for that column.<br />
When drawing a cell in the body of the table, the table looks first at the<br />
TableColumn object for the column that the cell is in. If this has been configured<br />
with a cell renderer, then it will use that. If there is no column renderer,<br />
which is the default case, then the table model's getColumnClass<br />
method is used to find out the type of object in the column and a renderer<br />
capable of displaying content of that type is used, if there is one. If no such<br />
renderer exists, a renderer for the type of the objects superclass is searched<br />
for. The process of iterating through superclasses repeats until a suitable renderer<br />
is found or, as a last resort, the default renderer for the Object class<br />
will be used. This renderer is created automatically by the table, along with<br />
renderers for objects of type (or derived from) Number, Date, Imagelcons,<br />
and Boolean. In <strong>Java</strong> 2 version 1.3, additional renderers are also installed for<br />
Icons and for Float and Double types, which are treated separately from<br />
their Number superclass. These renderers are known as class-based renderers<br />
(as opposed to the column-based renderers configured in the TableColumn<br />
objects); you can add class-based renderers of your own or replace existing<br />
ones (including the tables defaults) using the following JTable method:<br />
public void setDefaultRenderer(Class columnClass,<br />
TableCellRenderer renderer);<br />
You'll see this method used later in connection with creating custom renderers<br />
that display dates and times properly.<br />
The same process is used to find the correct editor for a cell, except that<br />
there is no such thing as a column header editor (because column headers<br />
cannot be edited). As with renderers, there is no editor assigned to any col-
Customized Table Rendering and Editing 1381<br />
umn by default, but there are class-based editors for Object, Number, and<br />
Boolean that are used when a column does not have a specific editor<br />
assigned to it. Because these editors exist, if you make a column that contains<br />
a Boolean value editable, you get a checkbox that you can toggle to change<br />
the state of the corresponding item in the table model. For tables containing<br />
any other kind of object, you'll see a JTextField in which the string version<br />
of the object (obtained by calling toString) will be displayed for editing.<br />
This may, of course, not be what you want to happen, in which case you need<br />
to supply your a custom editor, either for each column that needs it using the<br />
TableColumn setCellEditor method or as a class-based editor using the<br />
JTable method setDef aultEditor, which is similar to setDef aultRenderer.<br />
The preceding paragraphs described the table's default algorithm for<br />
locating Tenderers and editors. Usually, the most convenient way to change<br />
the renderer or editor for a column is to install a custom class-based or column-based<br />
one and let the table's default mechanism find it as just described.<br />
You'll see examples of this later in this chapter. An alternative approach is to<br />
subclass JTable and override one or both of the following methods:<br />
public TableCellRenderer getCellRenderer(<br />
int row, int column);<br />
public TableCellEditor getCellEditor(<br />
int row, int column);<br />
Overriding these methods allows you to control the choice ol reuderer or editor<br />
at the row or cell level instead of the default column-centric behavior. An<br />
important point to note about these methods is that the column index is relative<br />
to the TableColumnModel, which means that the index for a column<br />
will change if the user is allowed to drag columns around.<br />
Controlling Whether or Not a Cell Can Be<br />
Edited<br />
As you've already seen, the table model ultimately determines whether or not<br />
the data in the table can be edited. By supplying a suitable isCellEditable<br />
method in your subclass of AbstractTableModel or Def aultTableModel,<br />
you can control whether any individual cell can be edited using the<br />
row and column invdices passed to it. If the model disallows cell editing, it<br />
cannot be overridden. However, the reverse is not true—an editable model<br />
can be presented in such a way that the resulting table is partially or completely<br />
read-only. This is possible because the isCellEditable method of<br />
JTable is called before an editing session is started for any cell in the table.
1382 Chapter I I The Table Control<br />
By default, this just delegates the decision to the table model, but you could<br />
implement a different policy by subclassing JTable and overriding the<br />
isCellEditable method, as was shown in Listing 11-4, which created a<br />
read-only version of a writable table using this mechanism. Intermediate policies<br />
are, of course, possible. You could, for example, make specific columns<br />
editable or even make individual cells read-only.<br />
Configuring Renderers<br />
Any renderer that you want to use has to implement the TableCellRenderer<br />
interface. The Swing package provides a class called DefaultTable-<br />
CellRenderer that implements this interface and provides the same<br />
facilities as a JLabel. DefaultTableCellRenderers are used as the<br />
default class-based renderers installed by the table for Obj ect and Number.<br />
There is also a private renderer that is installed to render Boolean values,<br />
which looks like a JCheckBox. If these standard renderers don't do what you<br />
want, you can create a custom renderer instead.<br />
Standard Renderers<br />
To demonstrate how to use a standard renderer, the next example creates a<br />
simple table using DefaultTableModel, in which the first column should<br />
always be displayed with yellow text on a black background, regardless of the<br />
background color of the table itself. The table will use the same data as the<br />
pizza example that you have already seen in this chapter.<br />
In all of the examples that you have seen up to this point, the renderer<br />
used for each column has been determined by the class of object within that<br />
column. If you look back to Listing 11-5, you'll see that the getColumn-<br />
Class method of the DefaultTableModel used in that example returns<br />
the type of the object on the first row of each column as the overall type for<br />
that column. As a result, the first columns type is returned as String and<br />
the second columns as Boolean. As you know, the table doesn't have a specific<br />
renderer for String, but it has one for Obj ect, which would be used to<br />
render the first column. The second column would be drawn by the installed<br />
renderer for Booleans. To achieve a particular effect for one column only, a<br />
column-specific renderer will be installed in that columns TableColumn<br />
object. When a column has its own renderer, that renderer is used instead of<br />
the class-based one indicated by getColumnClass.<br />
The implementation of this example is shown in Listing 11-8. You can ran<br />
this program using the command:
<strong>Java</strong> <strong>JFC</strong>Book.Chapter11.ColumnRendererExample<br />
Customized Table Rendering and Editing 1383<br />
When you do so, you get the familiar two-column table showing pizzas and<br />
orders.<br />
Listing I 1-8 Using a column Tenderer<br />
package <strong>JFC</strong>Book.Chapterll;<br />
import j avax.swing.*;<br />
import javax.swing.table.*;<br />
import j ava.awt.*;<br />
import j ava.awt.event.*;<br />
public class ColumnRendererExample extends JFrame {<br />
public ColumnRendererExample(String title) {<br />
super(title);<br />
}<br />
DefaultTableModel model = new DefaultTableModel(<br />
data, columnNames); {<br />
public Class getColumnClass(int columnlndex) {<br />
return data[0] [columnlndex] .getClassO ;<br />
}<br />
// Create the table<br />
Dimension viewportSize = new Dimension(450, 120);<br />
JTable tbl = new JTable(model) {<br />
public boolean isCellEditable(int row, int column) {<br />
return false;<br />
}<br />
tbl.setColumnSelectionAllowed(true);<br />
// Create the column renderer for the first column<br />
DefaultTableCellRenderer renderer =<br />
new DefaultTableCellRenderer();<br />
// Configure the renderer as we want it to be<br />
renderer.setBackground(Color.black);<br />
renderer.setForeground(Color.yellow);<br />
renderer.setToolTipText("Pizza Name");<br />
// Attach the renderer to the first column<br />
tbl.getColumnModel0 .getColumn(0).setCellRenderer(<br />
renderer);<br />
tbl.setPreferredScrollableViewportSize(viewportSize);<br />
JScrollPane pane = new JScrollPane(tbl);<br />
this.getContentPane().add(pane);<br />
public static void main(String [] args) {
1384 Chapter II The Table Control<br />
Listing I 1—8 Using a column Tenderer (continued)<br />
JFrame f = new ColumnRendererExample("Using a Column Renderer")•<br />
f.pack();<br />
f . setVisible(true) ;<br />
f.setDefaultCloseOperation(JFrame.DO_NOTHING_ON_CLOSE);<br />
f.addWindowListener(new WindowAdapter() {<br />
public void windowClosing(WindowEvent evt) {<br />
System.exit(0);<br />
});<br />
// The table data<br />
Object [] [] data = {<br />
{ "Hot & Spicy", Boolean.TRUE },<br />
{ "Cheese", Boolean.FALSE },<br />
{ "Ham", Boolean.TRUE },<br />
{ "New Yorker", Boolean.FALSE },<br />
{ "Vegetarian", Boolean.TRUE }<br />
};<br />
String[] columnNames = {<br />
"Pizza", "Ordered?"<br />
};<br />
In this example, the user isn't going to be allowed to change the data in the<br />
table, so the JTable isCellEditable method is overridden to return<br />
false and therefore make the entire table read-only. This is slightly better in<br />
performance terms than leaving the decision to the table model because it<br />
saves the cost of invoking another method (the table model's isCellEditable<br />
is called from the default JTable isCellEditable method).<br />
The major change in this example that is of interest here is the fact that it<br />
creates a column renderer for the first column. Since this column contains<br />
String values, they can be rendered using a simple DefaultTableCell-<br />
Renderer, which is a subclass of JLabel and is therefore well-suited to representing<br />
String values.<br />
As well as implementing the TableCellRenderer interface, Default-<br />
TableCellRenderer also provides the following methods:<br />
public void setBackground(Color background);<br />
public void setForeground(Color foreground);<br />
public void setValue(Object value);<br />
Using these methods, you can supply the colors to be applied to the component<br />
when it is drawn onto the table. These colors are applied to the com-
Customized Table Rendering and Editing 1385<br />
ponent when the getTableCellRendererComponent method is called to<br />
render each individual cell. You can see the results of running this example in<br />
Figure 11-14.<br />
When this example starts, you will see that the renderer for the left column<br />
is using yellow text on a black background, as required. If you click on<br />
one of the cells in the table, the row that its resides in will be selected, with<br />
the result that the cell in the first column of that row will revert to the normal<br />
selection colors for the table. The colors used for selected rows and columns<br />
are attributes of the table, not of the renderer, and are set using the JTable<br />
setSelectionForeground and setSelectionBackground methods.<br />
When you use Def aultTableCellRenderer, you don't need to be concerned<br />
with these extra colors, because they will be used automatically in<br />
place of any specific colors you choose with the Def aultTableCellRenderer<br />
setForeground and setBackground methods if the renderer is<br />
used to draw a cell in a selected column.<br />
Because Def aultTableCellRenderer is really just a JLabel, you can<br />
do anything with it that you can do with a label. For example, you can change<br />
the text alignment, provide an icon, or even associate a tool tip with it, which<br />
will apply to every cell drawn with that renderer. The example above supplies<br />
the tool tip "Pizza Name," which will appear if you let the mouse rest over<br />
any of the cells in the left-hand column of the table. There is an example of<br />
this in Figure 11-14.<br />
Custom Renderers<br />
Now that you know how renderers work, it is finally possible to make significant<br />
improvements to the table that was produced in the example in Figure<br />
11-1. If you remember, there was a problem with the way in which some of<br />
Figure 11-74 A table with a column renderer.
1386 Chapter I I The Table Control<br />
the cell content was represented—specifically, there were two types of columns<br />
that did not seem to have useful information, namely, the one that contained<br />
dates and those containing elapsed times. In this section, you'll see<br />
how to develop a pair of custom Tenderers that can be used to convert from a<br />
GregorianCalendar value to a readable date and from a time interval in<br />
seconds to days, hours, minutes, and seconds, so that the data can be presented<br />
as it was intended to be seen.<br />
The key to implementing a custom Tenderer is the getTableCellRendererComponent<br />
method. This works in the same way as the getTree-<br />
CellRendererComponent method that you saw in the last chapter, except<br />
that it has slightly different arguments:<br />
public Component getTableCellRendererComponent(<br />
JTable table, Object value,<br />
boolean isSelected, boolean isFocused,<br />
int row, int column);<br />
The first two arguments are a reference to the table itself and the value<br />
from the TableModel for cell being rendered. The standard renderer uses<br />
the first argument to get its foreground and background colors from the table<br />
if specific colors have not been set. The isSelected argument is true if the<br />
cell being rendered is selected. DefaultTableCellRenderer uses this to<br />
choose between the ordinary colors or the tables selected foreground and<br />
background colors, which again are obtained directly from the table. The<br />
isFocused argument is provided to allow custom Tenderers to provide<br />
visual feedback for the cell in the table that is considered to have the focus—<br />
the one that was last clicked. DefaultTableCellRenderer uses this argument<br />
to enclose the focused cell with a border. Finally, the row and column<br />
arguments are not used by the defaxilt renderer., but they could be used to<br />
create a custom renderer that used specific attributes for cells determined on<br />
a per-row, per-column, or even per-cell basis. Such a renderer would have to<br />
be created with a reference to the object or objects that hold the attributes<br />
and would use the row and/or column arguments to access the attributes as<br />
each cell is rendered.<br />
<strong>Core</strong> Warning<br />
The column index passed to the getTableCellRendererComponent<br />
method is relative to the TableColumnModel, not the TableModel.<br />
These indices will not match if the user is allowed to rearrange the columns<br />
or if the TableColumnModel does not map all of the TableColumns.
Customized Table Rendering and Editing 1387<br />
If necessary, you can convert this index to a TableModel index using the<br />
JTable convertColumnlndexToModel method.<br />
Three of the columns in the table in our orginal example contain elapsed<br />
times that are measured in seconds and were displayed that way in Figure<br />
11—1. To convert a value held in seconds to something more readable, you<br />
need a custom renderer that knows how to do the conversion. The quickest<br />
way to build this simple renderer is to extend DefaultTableCellRenderer—the<br />
only thing you will have to do to create a suitable renderer is to<br />
provide the code that creates the text to be displayed in each cell by overriding<br />
the getTableCellRendererComponent method. It will still be possible<br />
to change the cell's colors and associate a tool tip with it if necessary,<br />
because those capabilities are inherited from DefaultTableCellRenderer.<br />
Listing 11—9 shows a possible implementation.<br />
Listing I 1-9 A renderer for time intervals<br />
package <strong>JFC</strong>Book.Chapter11;<br />
import j avax.swing.*;<br />
import javax.swing.table.*;<br />
import j ava.awt.* ;<br />
public class IntervalRenderer extends<br />
DefaultTableCellRenderer {<br />
public Component getTableCellRendererComponent(<br />
JTable table,<br />
Object value,<br />
boolean isSelected,<br />
boolean isFocused,<br />
int row, int column) {<br />
Component component = super.getTableCellRendererComponenti<br />
table, value, isSelected,<br />
isFocused, row, column);<br />
if (value != null && value instanceof Integer) {<br />
int interval = ((Integer)value).intValue();<br />
int days = interval/SECS_PER_DAY;<br />
interval -= days * SECS_PER_DAY;<br />
int hours = interval/SECS_PER_HOUR;<br />
interval -= hours * SECS_PER_HOUR;<br />
int minutes = interval/SECS_PER_MIN;
1388 Chapter II The Table Control<br />
J<br />
Listing 11-9 A renderer for time intervals (continued)<br />
}<br />
int seconds = interval - minutes * SECS PER MIN;<br />
((JLabel)component).setText(days + "d " + hours + "h " +<br />
minutes + "m " + seconds + "s");<br />
} else {<br />
((JLabel)component).setText(value == null ?<br />
"" : value. toString ());<br />
}<br />
return component;<br />
protected static final int SECS_PER_MIN = 60;<br />
protected static final int MINS_PER_HOUR = 60;<br />
protected static final int HOURS_PER_DAY = 24;<br />
protected static final int SECS_PER__HOUR =<br />
SECS_PER_MIN * MINS_PER_HOUR;<br />
protected static final int SECS_PER_DAY =<br />
SECS_PER_HOUR * HOURS_PER_DAY;<br />
The getTableCellRendererComponent is very straightforward. First,<br />
the superclass version of this method is invoked to get the actual component<br />
that will do the rendering. This will, of course, be a JLabel. In fact, the component<br />
returned will be the Def aultTableCellRenderer itself—the local<br />
variable component will actually be set to "this." Invoking the superclass<br />
getTableCellRendererComponent allows Def aultTableCellRenderer<br />
to set the correct foreground and background colors depending on<br />
whether the cell being drawn is selected (as indicated by the isSelected<br />
argument).<br />
The value to be converted and displayed in the cell is supplied as one of<br />
the arguments to getTableCellRendererComponent, in the form of an<br />
Integer from the table model. If, indeed, an Integer is passed, it is converted<br />
from seconds to days, hours, minutes, and seconds and a suitable<br />
string showing the results is constructed. If an object of any other form is<br />
provided as the cell s value, the code just uses its toString method to get a<br />
representation of it. Either way, the resulting string is then used as the label's<br />
text field and the label is returned, to be drawn into the table.<br />
The second renderer that we need takes a GregorianCalendar from the<br />
table model and converts it to a date in the appropriate form for the location
Customized Table Rendering and Editing 1389<br />
in which the application is run. The same principles are used here and much<br />
of the code is the same as for the intervalRenderer—only the details of<br />
the getTableCellRendererComponent method differ, as shown in Listing<br />
11-10.<br />
Listing 11 — 10 A Tenderer for dates<br />
package <strong>JFC</strong>Book.Chapter11;<br />
import j avax.swing.*;<br />
import javax.swing.table.*;<br />
import j ava.awt.*;<br />
import j ava.ut i1.*;<br />
import j ava.text.*;<br />
public class GregorianCalendarRenderer<br />
extends DefaultTableCellRenderer {<br />
public Component getTableCellRendererComponent(<br />
JTable table, Object value,<br />
}<br />
boolean isSelected, boolean isFocused,<br />
int row, int column) {<br />
Component component =<br />
super.getTableCellRendererComponent(table, value,<br />
isSelected, isFocused, row, column);<br />
if (value != null && value instanceof GregorianCalendar) {<br />
GregorianCalendar cal = (GregorianCalendar)value;<br />
((Jlabel)component).setText(dateFormatter.format(<br />
cal.getTimeO ) ) ;<br />
} else {<br />
((JLabel)component).setText(value == null ?<br />
"" : value.toString());<br />
}<br />
return component;<br />
protected DateFormat dateFormatter =<br />
DateFormat.getDatelnstance();<br />
±______^^<br />
Again, the first step is to call the Def aultTableCellRenderer getTableCellRendererComponent<br />
method to get the label to be rendered onto.<br />
This time, the renderer expects to get a GregorianCalendar object from
1390 Chapter II The Table Control<br />
the table model and converts it to a date (not including the time). Because<br />
the DateFormat class from the j ava. text package is used, the date will be<br />
represented in a form suitable for the locale of the user running the program.<br />
If the way in which the date is converted is unfamiliar to you, read the chapter<br />
on internationalization from <strong>Core</strong> <strong>Java</strong> 1.1 Volume II: Advanced Features,<br />
published by Prentice Hall.<br />
<strong>Core</strong> Note<br />
JTable supplies a renderer very similar to this one that provides proper<br />
formatting for table columns that contain a Date object. Since Date is a<br />
much more lightweight object than GregorianCalendar, it is much<br />
more likely that you will choose to store dates using a Date than a<br />
GregorianCalendar and,ifso,you can just use the default Date<br />
renderer. GregorianCalendar was used in this example to provide a<br />
convenient excuse for demonstrating a custom renderer!<br />
Having created the necessary Tenderers, it is a simple matter to install<br />
them in the table and see the results, as you can see in Listing 11-11, which<br />
shows only the changes to the original TableExample program that we used<br />
at the beginning of this chapter that are relevent to installing the new renderers.<br />
You can find the complete source code for lliis program on the CD-ROM<br />
and you can run the revised program for yourself with the command:<br />
java <strong>JFC</strong>Book.Chapterll.ExtendedTableExample<br />
The listing actually shows the constructor for the programs main class,<br />
where the table is created; the data is in a separate class that isn't shown<br />
here—you can find it on the CD-ROM. The two Tenderers are actually<br />
installed in different ways. The GregorianCalendarRenderer is obviously<br />
generic—it can be used for any column that contains a GregorianCalendar<br />
value, so it is installed as a class-based renderer using the JTable set-<br />
Def aultRenderer method. Notice that the first parameter supplied to this<br />
method is a class object for the class that this renderer can deal with, while<br />
the second argument is an instance of the renderer. Having installed it in this<br />
way, you can be sure that it will be used for every column that contains a<br />
GregorianCalendar, unless specifically overridden on a per-column basis.<br />
On the other hand, you don't necessarily want to treat all Integer values<br />
as if they were time intervals, so the intervalRenderer is installed separately<br />
on each column that needs it by getting the table's column model,
Listing I I-I I Using custom Tenderers<br />
Customized Table Rendering and Editing 1391<br />
public ExtendedTableExample(String title) {<br />
super(title);<br />
JTable table = new JTable(new TableExampleData());<br />
table.setAutoResizeMode(JTable.AUTO_RESIZE_OFF);<br />
table.getTableHeader().setUpdateTablelnRealTime(false);<br />
this.getContentPane().add(new JScrollPane(table));<br />
// Fix up special Tenderers<br />
// First, a class-based renderer for GregorianCalendar<br />
GregorianCalendarRenderer calendarRenderer =<br />
new GregorianCalendarRenderer();<br />
calendarRenderer.setHorizontalAlignment(JLabel.CENTER);<br />
table.setDefaultRenderer(<strong>Java</strong>.util.GregorianCalendar.class,<br />
calendarRenderer);<br />
// A column-based renderer for time intervals,<br />
// used in various columns<br />
IntervalRenderer interval = new IntervalRenderer () ,interval.setHorizontalAlignment(JLabel.CENTER);<br />
// Fix up special Tenderers<br />
// Attach the interval renderer to the correct columns<br />
TableColumnModel tern = table.getColumnModel();<br />
tcm.getColumn(5).setCellRenderer(interval);<br />
tcm.getColumn(7).setCellRenderer(interval);<br />
tcm.getColumn(8).setCellRenderer(interval);<br />
// Set appropriate column widths<br />
for (int i = 0; i < widths.length; i++) {<br />
TableColumn col = tcm.getColumn(i);<br />
col.setMinWidth(widths[i] ) ;<br />
col.setPreferredwidth(widths[i]);<br />
}<br />
}<br />
which was created automatically, and attaching it to columns 5, 7, and 8 using<br />
the setCellRenderer method.<br />
Note that as each renderer was created, its setHorizontalAlignment<br />
method was called to arrange for the text that it ends up drawing to be centered<br />
in the cell. This method is inherited from JLabel, from which these<br />
Tenderers are descended, via Def aultTableCellRenderer.<br />
A few other important changes were also made to this program to improve<br />
the way the table looks and behaves. First, automatic resizing was turned off
1392 Chapter I I The Table Control<br />
so that the table wouldn't be crammed into whatever space is available; since<br />
it is a wide table, you're unlikely to be able to see all of it without having to<br />
use a horizontal scroll bar unless you have a very high-resolution screen.<br />
Real-time table updates as the columns are dragged or resized were also<br />
turned off, so that the performance of these operations is improved. Of<br />
course, this only works in Swing 1.1.1 and <strong>Java</strong> 2 version 1.2.2. Lastly, at the<br />
end of the constructor the preferred width of each column is explicitly set, so<br />
that all of the data in that column is visible and the minimum width is also set<br />
to the same value. There is nothing magic about the way these values were<br />
determined—they were discovered by trial and error. As explained earlier,<br />
there is no simple way to calculate the correct value for column widths without<br />
incurring a performance penalty at least once by running every value in<br />
the table through its cell Tenderer. For a table like this with fixed data, it isn't<br />
worth the effort. You can see the table as it now looks (or at least part of it) in<br />
Figure 11-15.<br />
Figure 11-15 Custom date and time Tenderers.<br />
<strong>Core</strong> Alert<br />
In <strong>Java</strong> 2 version 1.3, the Def aultTableCellRenderer contains an<br />
optimisation that improves the table rendering speed by not painting the<br />
background of a cell if it would match the color of the table itself. It avoids<br />
painting the background by comparing the renderer's background color<br />
with that of the table and, if they are the same, the component that will be<br />
returned from getTableCellRendererComponent will be<br />
transparent. Usually, this is not an issue, but if you create a custom<br />
renderer with a getTableCellRendererComponent method that<br />
does this:<br />
Component c = super.getTableCellRendererComponent(...<br />
c.setBackground(Color.yellow);
Customized Table Rendering and Editing 1393<br />
then you will not see a yellow background in <strong>Java</strong> 2 version 1.3 unless the<br />
table itself is yellow or the renderer's background color is already different<br />
from that of the table.To get around this problem, you need to force the<br />
renderer component to paint its background by calling<br />
setOpaque(true).<br />
Implementing Fixed Table Columns<br />
Adding customized Tenderers to our original example and setting the right<br />
column widths has greatly improved it, but there is still one minor inconvenience<br />
that can be fairly easily resolved using a technique that you'll probably<br />
find useful if you're going to make use of JTable to show tables with anything<br />
but a small number of columns. The problem is that when you scroll<br />
the table horizontally to see the columns at the right-hand end, you lose sight<br />
of which flight s data you are looking at, because this information is held in<br />
the left most column, which quickly scrolls out of view. What would be useful<br />
would be to "lock" that column in place so that you can always see what data<br />
you are looking at in any particular row. However, JTable does not provide<br />
the ability to lock a column.<br />
The key to solving this problem is in the scroll pane. If you look back to<br />
Chapter 5, "Keyboard Handling, Actions, and Scrolling," you'll see that we<br />
described there how you can provide column and row headers for anything in<br />
a scroll pane. The table itself uses the column header to hold column headers.<br />
In this case, as many columns from the table as need to be locked should<br />
be placed in the scroll pane's rove header. When this has been done, they<br />
remain fixed when you scroll the table horizontally, but still follow vertical<br />
scrolling movement.<br />
The problem is that you can't just break the table into two pieces and display<br />
some of it as a row header. Instead, what you need to do is to create two<br />
different views of the same table model, as two tables, and place the columns<br />
that should be locked as a separate table in the scroll pane's row header. It is<br />
even possible to provide these separate columns with column headers,<br />
because the second table will create a JTableHeader, which can be placed<br />
above the row header part of the scroll pane, in the top left-hand corner component.<br />
This is a very neat solution that is remarkably simple to implement<br />
and also very effective.<br />
To illustrate how it's done, let's lock the flight name and the landing site<br />
and allow the other columns to scroll horizontally. These columns are numbered<br />
0 and 6 in the data model, so it is necessary to create two tables, whose
1394 Chapter II The Table Control<br />
column models contain table columns 0 and 6 for the first table and 1<br />
through 5 plus 7 through 10 for the second table. This could be done by manually<br />
creating two separate TableColumnModel objects and connecting each<br />
to its own jTable, but this example uses a shortcut that also allows us to<br />
show some of the methods of a TableColumnModel in action.<br />
What we're going to do is to create the original table exactly as we did<br />
before. When the table model is connected to the JTable, it will build a<br />
TableColumnModel containing all of the columns in model order. This<br />
model is almost perfect for the main table. All we need to do then is to create<br />
an empty DefaultTableColumnModel, remove the two columns that are<br />
going to be locked in place from the main tables column model, and add<br />
them to the table column of the second table. Doing this avoids having to<br />
create the TableColumn objects for all 11 columns ourselves. Listing 11-12<br />
shows the constructor for the main class of the example program, which is<br />
derived from the code in Listing 11—11.<br />
Listing 11-12 A table with fixed columns<br />
public class FixedColumnsExample extends JFrame {<br />
public FixedColumnsExample(String title) {<br />
super(title);<br />
TableExampleData model = new TableExampleData 0 ,•<br />
JTable table = new JTable(model);<br />
table.setAutoResizeMode(JTable.AUTO_RESIZE_OFF);<br />
table.getTableHeader().setUpdateTablelnRealTime(false);<br />
JScrollPane pane = new JScrollPane(table);<br />
this.getContentPane().add(pane);<br />
// Build a second table containing two columns<br />
// from the original<br />
// and remove those columns from the main table.<br />
// Use the same model for both tables.<br />
JTable table2 = new JTable(model);<br />
table2.setAutoResizeMode(JTable.AUTO_RESIZE_OFF);<br />
table2.getTableHeader().setUpdateTablelnRealTime(false)<br />
TableColumnModel tern = table.getColumnModel();<br />
TableColumnModel tcm2 = new DefaultTableColumnModel();<br />
TableColumn col = tcm.getColumn(O);<br />
tern.removeColumn(col);<br />
tcm2.addColumn(col);
Listing 11-12 A table with fixed columns (continued)<br />
col = tcm.getColumn(5),tern.removeColumn(col);<br />
tcm2.addColumn(col);<br />
Customized Table Rendering and Editing 1395<br />
// Set the widths of the columns for the<br />
// second table before we get its preferred size<br />
for (int i = 0; i < widths2.length; i++) {<br />
col = tcm2.getColumn(i);<br />
col.setMinWidth(widths[i]);<br />
col.setPreferredwidth(widths[i]);<br />
}<br />
table2.setColumnModel(tcm2); // Install new column model<br />
table2.setPreferredScrollableViewportSize(<br />
table2.getPreferredSize());<br />
// Keep row selection in sync<br />
table2.setSelectionModel(table.getSelectionModel());<br />
// Put the second table in the row header<br />
pane.setRowHeaderView(table2);<br />
// Put the header of the second table in<br />
// the top left corner<br />
pane.setCorner(JScrollPane.UPPER_LEFT_CORNER,<br />
table2.getTableHeader() ) ;<br />
// Fix up special Tenderers<br />
// First, a class-based renderer for GregorianCalendar<br />
GregorianCalendarRenderer calendarRenderer =<br />
new GregorianCalendarRenderer();<br />
calendarRenderer.setHorizontalAlignment(JLabel.CENTER);<br />
table.setDefaultRenderer(<br />
j ava.util.GregorianCalendar.class,<br />
calendarRenderer);<br />
// A column-based renderer for time intervals,<br />
// used in various columns<br />
IntervalRenderer interval = new IntervalRenderer();<br />
interval.setHorizontalAlignment(JLabel.CENTER);<br />
// Attach the interval renderer to the correct columns<br />
tern.getColumn(4).setCellRenderer(interval);<br />
tcm.getColumn(5).setCellRenderer(interval);
1396 Chapter 11 The Table Control<br />
Listing 11 — 12 A table with fixed columns (continued)<br />
}<br />
tcm.getColumn(6).setCellRenderer(interval);<br />
// Set appropriate column widths<br />
for (int i = 0; i < widths.length; i++) {<br />
col = tcm.getColumn(i);<br />
col.setMinWidth(widths[i] ) ;<br />
col.setPrefferedWidth(widths[i] );<br />
}<br />
}<br />
The first step is to create the same table as in the previous example and<br />
wrap it in a scroll pane. Then, a second table is created, sharing exactly the<br />
same table model, so that both tables derive their content from the same<br />
data. Next, the JTable getColumnModel method is used to get the column<br />
model of the first table and then an empty replacement column model is created<br />
for the second table. Using the TableColumnModel getColumn,<br />
removeColumn, and addColumn methods, the two columns that are to be<br />
locked are removed from the first table s column model and added into that<br />
of the second table, in the order that they should be displayed. Notice that,<br />
after column 0 has been removed, the second column that needs to be<br />
removed has become column 5, even though it started as column 6.<br />
Removing the columns from the original table causes it to recreate its<br />
table header automatically, so nothing extra needs to be done to keep the<br />
header up to date. The same is true of the second table—when its new column<br />
model is installed using setColumnModel, it too builds an appropriate<br />
table header.<br />
All that needs to be done now is to set the correct column widths and renderers<br />
as was done in Listing 11-11 and then put all the components where<br />
they need to be in the scroll pane. The first table and its header are already in<br />
the main scrolling area and the column header, respectively, so all that<br />
remains is to put the second table in the scroll pane's row header and its table<br />
header (which is obtained from getTableHeader) in the top left-hand corner<br />
component.<br />
Note, however, that there is a subtlety about this. When the second table is<br />
placed in the row header, the row header viewport asks the table how big a<br />
viewport it would like. As you saw earlier in this section, a table always asks<br />
for a view port 450 pixels wide and 400 pixels high by default so, if nothing<br />
were done about this, the result would be a row header with a table on its
Customized Table Rendering and Editing 1397<br />
left-hand side, a large gap to the right, and then the second table. To avoid<br />
this, the second table's preferred size is obtained and set as the preferred<br />
viewport size. This makes the row header just large enough to contain the<br />
table. It is important to set the correct column widths before this is done, of<br />
course.<br />
It is also important to be careful about managing the selection carefully. In<br />
this example, row selection is enabled, because that is the default. To ensure<br />
that when a row is selected in one table it is also selected in the other (and<br />
vice versa), we actually share the same selection model between the two<br />
tables, thus guaranteeing that the same rows are selected in each table, to<br />
give the appearance of a single view. Things are a bit more tricky if you want<br />
to enable column or cell selection, especially if you want to ensure that only<br />
one cell or column is selected throughout the virtual table. You can, of<br />
course, implement with a modest amount of code by listening to selection<br />
changes in each table and keeping the other in step. The code is left as an<br />
exercise for the reader.<br />
To run this example for yourself, use the command:<br />
<strong>Java</strong> <strong>JFC</strong>Book.Chapterll.FixedColumnsExample<br />
You'll find that the table starts off looking as it did in the last example,<br />
except that the horizontal scrollbar doesn't cover all of it, as you can see in<br />
Figure Il-f6. If you scroll horizontally, the left two columns stay in place, as<br />
we wanted them to. Notice also that the table headers are all correctly placed<br />
and the rows all line up neatly. If you make the window vertically smaller so<br />
that a vertical scrollbar appears, you can verify that scrolling the main table<br />
up and down works as expected—the locked columns scroll so that complete<br />
rows stay intact.<br />
Figure 11-16 A table with two locked columns.
1398 Chapter II The Table Control<br />
Using Editors<br />
In many respects, editors are very similar to Tenderers. Editors implement the<br />
TableCellEditor interface, for which there is the default implementation<br />
called DefaultCellEditor that makes it possible to use JTextField,<br />
JCheckBox, or a JComboBox as table editors. The most significant method in<br />
the TableCellEditor interface is getTableCellEditorComponent,<br />
which is almost identical to the corresponding Tenderer method, in that it provides<br />
a component that can be used in a table cell, with the important difference<br />
that the component returned from a Tenderers<br />
getTableCellRendererComponent method is only used to paint onto the<br />
table, whereas the editing component actually becomes part of the table while<br />
editing is in progress.<br />
When you create a table, it installs standard class-based editors so that you<br />
can edit cells whose data is of type Boolean using a JCheckBox, those of<br />
type Number (and subclasses such as Integer, Double, Float) with a<br />
JTextField, and those of all other types with a JTextField in which the<br />
string representation of the object appears. This latter editor is associated<br />
with the Object class. You can, of course, add class-based editors of your<br />
own using the JTable setDef aultEditor method and you can also install<br />
column-based editors with the TableColumn setCellEditor method.<br />
Because using standard editors is very similar to using Tenderers and since,<br />
as you've already seen, you can make tables editable without having to<br />
manipulate editors at all, there aren't any simple editor examples in this<br />
chapter. Instead, you're going to see a complete example that involves building<br />
both a custom Tenderer and a custom editor.<br />
The standard table editors all place the editing component in the cell<br />
occupied by the data being edited. Because the table dictates where the component<br />
will be rendered, editors have no control over this, which can be very<br />
restricting, because the editor is sized to occupy the same amount of space as<br />
the cell that it is temporarily replacing. Often, this is not sufficient to provide<br />
a user-friendly editing interface. If you want to provide the user with a more<br />
complex interface, you need to take control of the editing mechanism yourself<br />
and create a component that resides outside the table.<br />
In this section, we'll create a simple application that displays a table containing<br />
the names of some (fictional) people and their (imaginary) favorite<br />
colors. Because you will by now have become veiy adept at writing Tenderers,<br />
the color value is going to be shown not as text but as a small icon in the second<br />
column of the table, next to each person's name. To do this, it is necessary<br />
to implement another Tenderer that shows a colored icon from a table
Customized Table Rendering and Editing 1399<br />
column that contains the color as a Color object. The interesting part of this<br />
example is what happens when you click in the second column to change the<br />
person's favorite color. One way to implement this would be to use a JComboBox<br />
populated with a set of colors as the editor for this column—when<br />
editing is started, the combo box would appear in the cell and the user would<br />
choose one of the preset colors as the new favorite color. But that would be<br />
too easy and would force the user to select from a very narrow range of colors.<br />
Instead, this example is going to pop up a dialog box with a JColor-<br />
Chooser in it and allow the user to select any color as his or her favorite<br />
directly from the chooser.<br />
To implement this example, three pieces are needed:<br />
• The custom Tenderer for colors that we'll call ColorRenderer<br />
• The custom editor for colors, called ColorEditor<br />
• A table data model and the application itself<br />
These three pieces will be discussed separately, starting with the application<br />
itself, the code for which is shown in Listing 11—13.<br />
Listing 11-13 A table with a custom color editor<br />
package <strong>JFC</strong>Book.Chapterll;<br />
import j avax.swing.*;<br />
import j avax.swing.table.*;<br />
import j ava.awt.*;<br />
import j ava.awt.event.*;<br />
import <strong>JFC</strong>Book.Chapterll.ColorRenderer;<br />
import <strong>JFC</strong>Book.Chapterll.ColorEditor;<br />
public class CustomEditorExample extends JFrame {<br />
public CustomEditorExample(String title) {<br />
super(title);<br />
AbstractTableModel model = new AbstractTableModel()<br />
// The table data<br />
Object [] [] data = {<br />
{ "John Doe", Color.green },<br />
{ "Jane Doe", Color.yellow },<br />
{ "John Smith", Color.blue },<br />
{ "Fred Bloggs", Color.red }
1400 Chapter II The Table Control<br />
Listing 11-13 A table with a custom color editor (continued)<br />
};<br />
String [] columnNames = {<br />
"Name", "Color"<br />
};<br />
public int getRowCount() {<br />
}<br />
return data.length;<br />
public int getColumnCount() {<br />
}<br />
return data[0].length;<br />
public Object getValueAt(int row, int col) {<br />
}<br />
return data [row] [col] ;<br />
public String getColumnName(int columnlndex) {<br />
}<br />
return columnNames[columnlndex];<br />
public Class getColumnClass(int columnlndex) {<br />
return datafo] [columnlndex] .getClassO ;<br />
}<br />
public boolean isCellEditable(int rowlndex,<br />
int columnlndex) {<br />
return true;<br />
}<br />
public void setValueAt(Object value,<br />
int rowlndex, int columnlndex) {<br />
if ((value instanceof Color && columnlndex ==1) ||<br />
(value instanceof String && columnlndex == 0)) {<br />
data[rowlndex][columnlndex] = value;<br />
fireTableCellUpdated(rowlndex, columnlndex);<br />
}<br />
}<br />
};<br />
// Create the table<br />
Dimension viewportSize = new Dimension(45 0, 120);
Customized Table Rendering and Editing 1401<br />
Listing 11-13 A table with a custom color editor (continued)<br />
}<br />
}<br />
JTable tbl = new JTable(model);<br />
// Create the class renderer for colors<br />
ColorRenderer renderer = new ColorRenderer();<br />
renderer.setHorizontalAlignment(JLabel.CENTER);<br />
renderer.setToolTipText(<br />
"This is the person's favorite color");<br />
tbl.setDefaultRenderer(Color.class, renderer);<br />
// Create the class editor for colors<br />
ColorEditor editor = new ColorEditor(new JTextField());<br />
tbl.setDefaultEditor(Color.class, editor);<br />
tbl.setPreferredScrollableViewportSize(viewportSize);<br />
JScrollPane pane = new JScrollPane(tbl);<br />
this.getContentPane().add(pane);<br />
public static void main(String[] args) {<br />
JFrame f = new CustomEditorExample(<br />
"Using a Custom Editor");<br />
f.pack();<br />
f.setVisible(true);<br />
f.setDefaultCloseOperation(JFrame.DO_NOTHING_ON_CLOSE);<br />
f.addWindowListener(new WindowAdapter() {<br />
public void windowClosing(WindowEvent evt) {<br />
}<br />
}<br />
});<br />
System.exit(0);<br />
The Example Application<br />
The first part of this application creates a table model by extending<br />
AbstractTableModel, as has been done many times before. This table has<br />
two columns—the left one containing a persons name as a string and the<br />
right one their favorite color as a Color object. Both of these columns will be<br />
editable, so the isCellEditable method is overridden to return true for<br />
every cell and setValueAt is implemented to allow new values to be stored,<br />
provided they are of the correct type for the column that they are being
1402 Chapter I I The Table Control<br />
stored into. Since no column-based editors or Tenderers are installed, the<br />
getColumnClass method that is used here is critical, because the value it<br />
returns for each column determines which editor and renderer will be used.<br />
The first column, which contains strings, will be rendered and edited by<br />
the class-based renderer and editor for Object—a JLabel and a JText-<br />
Field, respectively. These are sufficient because they both work in terms of<br />
Strings, no matter what type of Object they are actually dealing with. The<br />
second column contains Color objects. There is no standard renderer or editor<br />
for Color, so the table would naturally use a JLabel to render and a<br />
JTextField to edit the result of applying the toString method to the<br />
Color object—which would produce a meaningless result. Here, however,<br />
our ColorRenderer and ColorEditor will be installed as class-based<br />
objects for the Color class so that they are used instead. If you run this<br />
example with the command:<br />
<strong>Java</strong> <strong>JFC</strong>Book.Chapter11.CustomEditorExample<br />
you get a result that looks like Figure 11-17. Although the gray-scale reproduction<br />
of this screen shot is not ideal, you can see that each persons name is<br />
accompanied by a small icon filled with that person s favorite color, or at least<br />
its gray-scale equivalent!<br />
Figure 11-17 A table with a custom renderer for colors.<br />
Implementing a Custom Color Renderer<br />
Next, lets look at the implementation of ColorRenderer. This renderer will<br />
be given a value from the table of type Color and will need to display a small<br />
Icon filled with that color. Like the other Tenderers that you've seen, this one<br />
is derived from Def aultTableCellRenderer and therefore uses a JLabel<br />
as the host component. JLabel is a good choice for this example because, as<br />
you know, it can display an Icon as well as, or instead of, text, so all the ren-
Customized Table Rendering and Editing 1403<br />
derer needs to do to display any given cell's value is to create an icon of the<br />
right color for that cell.<br />
In Chapter 4, you saw a class called ColorFillicon that was used to<br />
draw a colored square and which we can use here to create an Icon of the<br />
right color for any cell. As you know, the same Tenderer instance is used to<br />
draw each cell in a column and, potentially, each of these cells will have a different<br />
Color associated with it. This means that it will be necessary to<br />
change the color associated with the ColorFillicon each time the renderer<br />
is used. Fortunately (in fact, by design!), this class has a setFill-<br />
Color method that makes it possible to change the color that it displays. The<br />
code for this simple renderer is shown in Listing 11-14.<br />
Listing M-14 A renderer that displays a colored icon<br />
package <strong>JFC</strong>Book.Chapterll;<br />
import j avax.swing.*;<br />
import javax.swing.table.*;<br />
import <strong>JFC</strong>Book.Chapter4.ColorFillicon;<br />
import j ava.awt.*;<br />
public class ColorRenderer extends DefaultTableCellRenderer {<br />
public ColorRenderer() {<br />
icon = new ColorFillicon(Color.white, 10, 10, 1);<br />
setlcon(icon);<br />
}<br />
J<br />
public Component getTableCellRendererComponent(<br />
JTable table, Object value,<br />
boolean isSelected, boolean isFocused,<br />
int row, int column) {<br />
Component component =<br />
super.getTableCellRendererComponent(table,<br />
value, isSelected, isFocused, row, column);<br />
if (value instanceof Color) {<br />
icon.setFillColor((Color)value);<br />
((JLabel)component).setText("");<br />
} else {<br />
icon.setFillColor(Color.white);<br />
((JLabel)component).setText(<br />
value == null ? "" : value.toString());<br />
}<br />
return component;<br />
}<br />
protected ColorFillicon icon;
1404 Chapter 11 The Table Control<br />
The constructor is simple—it just creates a ColorFilllcon initialized<br />
arbitrarily to show white, and connects it to the JLabel from which the renderer<br />
is derived. The size of the icon is also fairly arbitrary—in this case, a 10pixels<br />
square icon was chosen because it fits comfortably with the default row<br />
height of 16 pixels. The only other method that needs to provided is getTableCellRendererComponent,<br />
which configures the label when each cell is<br />
being drawn by using the value from the table model to set the fill color of<br />
the icon. If the data from the model is, for some reason, not a Color object,<br />
the icon is made white and the object is displayed in string form as the text<br />
part of the label.<br />
Implementing a Custom Color Editor<br />
All that remains is to implement the custom editor. A custom editor must<br />
implement the TableCellEditor interface, which is defined as follows:<br />
public interface TableCellEditor extends CellEditor {<br />
public Component getTableCellEditorComponent(<br />
JTable table, Object value, boolean isSelected,<br />
int row, int column);<br />
}<br />
You saw the CellEditor interface from which TableCellEditor is<br />
derived during the discussion of JTree in Chapter 10. Since this example<br />
implements it as part of the custom editor, its definition is repeated here for<br />
convenience.<br />
public interface CellEditor {<br />
public Object getCellEditorValue();<br />
public boolean isCellEditable(EventObject);<br />
public boolean shouldSelectCell(EventObject);<br />
public boolean stopCellEditing();<br />
public void cancelCellEditing();<br />
public void addCellEditorListener(<br />
CellEditorListener);<br />
public void removeCellEditorListener(<br />
CellEditorListener);<br />
}<br />
Our custom editor will be derived from the DefaultCellEditor class,<br />
which provides implementations for all of these methods. As you'll see, the editor<br />
will also make use of two additional DefaultCellEditor methods, which<br />
are not part of the CellEditor interface, that provide for firing events when<br />
the editing process ends.
Customized Table Rendering and Editing 1405<br />
Before showing the implementation of the editor, let's step through the way<br />
in which the editing process is performed. The editing process can start for the<br />
following reasons:<br />
• The user clicked with the mouse somewhere in the bounds of<br />
the table<br />
• The user started typing when the table has the input focus<br />
• Application code called the JTable editCellAt method<br />
In all three cases, the JTable editCellAt method is called with the row<br />
and column number of the cell to be edited where, as you might expect by<br />
now, the column number is relative to the table's TableColumnModel. In<br />
the case of a mouse click, this method is also given the MouseEvent, which<br />
will eventually be passed to the target editor.<br />
The first step is to determine whether the cell concerned is actually editable,<br />
a decision that is made as follows:<br />
• The table's isCellEditable (int row, int column)<br />
method is called. The default implementation of this method<br />
maps the column number to the corresponding column index in<br />
the TableModel and calls the TableModel's<br />
isCellEditable method. If this returns false, the edit will<br />
be abandoned. The JTable isCellEditable method is a<br />
convenient override point at which to gain control if you want to<br />
apply some additional criteria before allowing an edit to begin.<br />
• The table's getCellEditor (int row, int column)<br />
method is called to get the appropriate editor. The table's<br />
implementation of this method first looks for a specific editor in<br />
the column's TableColumn object, then for a class-based editor<br />
for objects of the type returned by the TableModel's<br />
getColumnClass method for the column. If these methods<br />
both return null, the edit will be abandoned. As with the<br />
getCellRenderer method, getCellEditor is a useful<br />
override point if you want row-based or cell-based control over<br />
which editor is used.<br />
• The editor's isCellEditable (int row, int columnn,<br />
MouseEvent evt) method is called. If the editing process was<br />
initiated by a mouse click, this method will receive the<br />
corresponding MouseEvent. Otherwise, its argument is null.<br />
The editor may use its argument or any other state it has access<br />
to in order to determine whether to allow the user to edit the
1406 Chapter II The Table Control<br />
cell. The Def aultCellEditor implementation of this method<br />
returns true if its argument is null or if it is passed a<br />
MouseEvent in which the click count is greater than or equal to<br />
the number of clicks required to start editing in the table. For<br />
the standard editors, this is two clicks when the editing<br />
component is a JTextField and one click for any other<br />
component. The click count can be configured using the<br />
DefaultCellEditors setClickCountToStart method,<br />
but note that this method is not part of the CellEditor<br />
interface and therefore does not have to be supported by all<br />
table cell editors.<br />
• Assuming that the editors isCellEditable method returns<br />
true, the tables prepareEditor method is then called. This<br />
method calls the editors getTableCellEditorComponent<br />
method, passing it the appropriate parameters to initialize itself.<br />
• The returned component is sized to match the space allocated<br />
to the cell in the table and added to it (using the Container add<br />
method). The tables set Cell Edit or, setEditingRow ,and<br />
setEditingColumn methods are called to save state that is<br />
required when the editing process ends.<br />
• The table registers a CellEditorListener with the editor<br />
using the CellEditor addCellEditorListener method, so<br />
that it is notified when the editor detects a condition that signals<br />
that the user wants to end the edit. The CellEditorListener<br />
interface was shown in connection with tree editors in Chapter<br />
10.<br />
Assuming that this process results in the edit process being allowed to<br />
start, if it was initiated as a result of a mouse event, the editor's shouldSelectCell<br />
method is now called. If this method returns true, the cell to be<br />
edited is selected and becomes the cell with the input focus. It is not necessary<br />
to call this method if the edit is initiated from the keyboard because the<br />
cell to be edited will already have the input focus. If you want to initiate an<br />
edit programmatically and be sure that the cell has the input focus before you<br />
do so, you can move the focus to the cell concerned using the following<br />
JTable method:<br />
public void changeSelection(int rowlndex,<br />
int columnlndex, boolean toggle,<br />
boolean extend)
Customized Table Rendering and Editing 1407<br />
The first two arguments give the location of the cell, where the column<br />
index is relative to the TableColumnModel. The last two arguments determine<br />
whether the selected status of the cell should be set (if false) or toggled<br />
and whether this is an extension of the existing selection. Unless you<br />
have special requirements, you would normally call this method like this:<br />
table.changeSelection(row, column, false, false)<br />
which will arrange for the cell being edited (and only that cell) to be<br />
selected and to have the input focus.<br />
Once the editing process has started, several things can happen. Normally,<br />
the user will edit the cell's value and the editor will tell the table that editing is<br />
completed by firing an event, which the table registered to receive this event<br />
using the editor's addCellEditorListener method. Another way in which<br />
the edit might terminate is if the user stops editing this cell and starts editing a<br />
different one by clicking elsewhere with the mouse or moving the input focus<br />
using the arrow keys. Any of these gestures causes the editor's stop-<br />
CellEditing method to be called, which means that any changes entered<br />
into the editor will be commited to the table. The user can cancel an edit by<br />
pressing the ESCAPE key, but this does not cause the cancelCellEditing<br />
method to be called—instead, the editor is simply removed from the table as<br />
described below. As a result of this, the editors cancelCellEditing method<br />
is not usually invoked. Since all editors are obliged to provide a cancel-<br />
CellEditing method, our implementation just stops editing whichever<br />
method is used and, in fact, our editor will supply a mechanism to allow the<br />
user to abandon the edit which will result in its cancelCellEditing method<br />
being called.<br />
Unless the edit is cancelled using the ESCAPE key, the editor invokes all of<br />
its registered CellEditorListeners, one of which is the table itself. The<br />
table's listener has the job of completing the edit and resetting the table to its<br />
normal state, which it does as follows:<br />
• If the edit was canceled, the table's removeEditor method is<br />
called (see below).<br />
• If the edit was ended normally, the table calls the editor's<br />
getCellEditorValue method and stores the returned value<br />
in the TableModel using the JTable setValueAt method,<br />
then calls removeEditor.<br />
The table removeEditor method is called whenever the edit process<br />
ends, including the case in which it is canceled using the ESCAPE key. This<br />
method removes the editing component from the table, deregisters the
1408 Chapter II The Table Control<br />
CellEditorListener, calls the setCellEditor method with argument<br />
null and the setEditingRow and setEditingColumn methods with<br />
argument -1 to show that there is no edit in progress and, finally, arranges for<br />
the cell to be repainted by its renderer.<br />
Now let's look at the implementation of our color editor, which is shown in<br />
Listing 11-15. Our intention, when editing starts, is to pop up a dialog box<br />
with a JColorChooser, an OK button and a Cancel button. When the user<br />
has selected a color, the OK button will signal the table that editing is complete.<br />
On the other hand, pressing Cancel or dismissing the dialog window<br />
will tell the table that the edit has been canceled.<br />
Even though the editor will show a dialog outside the table, it must return<br />
a component to be mounted in the table cell being edited. This example provides<br />
a JTextField with editing disabled that displays the text "Editing...."<br />
Since we only need to display a message, ideally, the editing component<br />
would have been a JLabel, but it is impossible to use a JLabel as an editing<br />
component with DefaultCellEditor. Such a restriction may not sound<br />
that unreasonable, but in fact your choice of editing component with<br />
DefaultCellEditor is very limited. This point will be discussed further in<br />
"DefaultCellEditor and AbstractCellEditor" later in this chapter.<br />
Listing 11-15 An editor that creates a dialog box ouside the table<br />
package <strong>JFC</strong>Book.Chapterll;<br />
import j avax.swing.*;<br />
import javax.swing.table.*;<br />
import j avax.swing.event.*;<br />
import java.util.*;<br />
import j ava.awt.*;<br />
import j ava.awt.event.*;<br />
public class ColorEditor extends DefaultCellEditor<br />
implements Runnable {<br />
public ColorEditor(JTextField textField) {<br />
super(textField);<br />
textField.setEditable(false);<br />
createDialog();<br />
}<br />
// These methods implement the TableCellEditor interface
Customized Table Rendering and Editing 1409<br />
Listing 11-15 An editor that creates a dialog box ouside the table<br />
(continued)<br />
public Component getTableCellEditorComponent(JTable table,<br />
Object value,<br />
boolean isSelected,<br />
int row, int column) {<br />
((JTextField)editorComponent).setText("Editing...");<br />
}<br />
if (value instanceof Color) {<br />
currentColor = (Color)value;<br />
colorChooser.setColor(currentColor);<br />
}<br />
return editorComponent;<br />
public Object getCellEditorValue() {<br />
}<br />
return currentColor;<br />
public boolean isCellEditable(EventObject evt) {<br />
if (evt instanceof MouseEvent) {<br />
if (((MouseEvent)evt).getClickCount() >=<br />
getClickCountToStart()) {<br />
return true;<br />
}<br />
return false;<br />
}<br />
return true;// Key events or editCellAt call<br />
}<br />
public boolean shouldSelectCell(EventObject evt) {<br />
}<br />
return true;<br />
public boolean stopCellEditing() {<br />
currentColor = colorChooser.getColor();<br />
dismissDialogO ;<br />
fireEditingStoppedO;<br />
}<br />
return true;<br />
public void cancelCellEditing() {<br />
dismissDialogO ;<br />
fireEditingCanceledO ;
1410 Chapter II The Table Control<br />
Listing 11-15 An editor that creates a dialog box ouside the table<br />
(continued)<br />
}<br />
public void addCellEditorListener(CellEditorListener 1) {<br />
super.addCellEditorListener(1);<br />
}<br />
showDialog();<br />
// These are methods that implement the internals<br />
// of the editor itself,<br />
protected void createDialog() {<br />
if (dialog == null) {<br />
ActionListener okListener = new ActionListener() {<br />
public void actionPerformed(ActionEvent evt) {<br />
showingDialog = false;<br />
ColorEditor.this.stopCellEditing();<br />
}<br />
};<br />
ActionListener cancelListener = new ActionListener() {<br />
public void actionPerformed(ActionEvent evt) {<br />
showingDialog = false;<br />
ColorEditor.this.cancelCellEditing();<br />
}<br />
};<br />
colorChooser = new JColorChooser();<br />
dialog = JColorChooser.createDialog(null,<br />
"Choose a Color",<br />
true, colorChooser,<br />
okListener, cancelListener);<br />
dialog.addWindowListener(new WindowAdapter() {<br />
public void windowClosing(WindowEvent evt) {<br />
showingDialog = false;<br />
ColorEditor.this.cancelCellEditing();<br />
}<br />
});<br />
}<br />
}<br />
protected void showDialog0 {<br />
if (showingDialog == false) {<br />
showingDialog = true;<br />
SwingUtilities.invokeLater(this);<br />
}
Customized Table Rendering and Editing 1411<br />
Listing 11-15 An editor that creates a dialog box ouside the table<br />
(continued)<br />
j<br />
}<br />
protected void dismissDialog() {<br />
if (showingDialog == true) {<br />
showingDialog = false;<br />
dialog.dispose();<br />
}<br />
}<br />
public void run() {<br />
}<br />
dialog.setvisible(true);<br />
protected Color currentColor;<br />
protected JDialog dialog;<br />
protected JColorChooser colorChooser;<br />
protected boolean showingDialog;<br />
The constructor of this editor is supplied with the text field that it will use<br />
as the dummy editing component and just passes it to the Def aultCellEditor<br />
constructor, making sure that editing of the text fields content is disabled.<br />
The other job that the constructor does is to create the dialog that will<br />
appear when the cell is edited.<br />
The Color Editing Dialog<br />
The dialog that will be used to allow the editor to choose a color is created<br />
uising the createDialog method of JColorChooser. Two listeners are<br />
required—one for the case in which the OK button is pressed, the other to<br />
handle the cancelation of the dialog, either as a result of the user pressing the<br />
Cancel button or because the dialog was closed from its caption bar. These<br />
methods are both trivial—they set to false a boolean in the editor class that<br />
indicates whether the dialog is being displayed and then just call the editor's<br />
stopCellEditing and cancelCellEditing methods, respectively. Since<br />
these listeners are only called when the dialog is being closed, there is no<br />
need for them to arrange for the dialog to be dismissed.<br />
In this implementation, a single dialog instance is created when the editor<br />
itself is instantiated for the first time. This results in the best overall response
1412 Chapter II The Table Control<br />
time as perceived by the user, because the overhead of creating the color<br />
chooser is incurred only once. On the other hand, it does complicate the rest<br />
of the editor somewhat compared to the naive approach of just using the<br />
JColorChooser showDialog method whenever a dialog is needed. The<br />
implementation complication is probably worth the performance gain but, in<br />
a real-world application, you would also need to consider whether you want<br />
to tie up the resources required by the color chooser and its dialog for an<br />
indeterminate amount of time (until the editor is garbage collected).<br />
The Color Editor<br />
The bulk of the editor itself is concerned with implementing the methods<br />
of the TableCellEditor interface and arranging for the dialog to be active<br />
at the appropriate times.<br />
The getTableCellEditorComponent method is, as you would expect,<br />
trivial—it puts the "Editing..." text into the text field and returns the text<br />
field to the table. It also stores the current value of the color from the cell<br />
being edited in the instance variable currentColor, which will later be used<br />
to initialize the dialog. This has to be done every time, because successive<br />
edits may relate to different cells, which will have different colors associated<br />
with them. The getCellEditorValue method is also simple—it just<br />
returns the currentColor value that is initially the value that the cell starts<br />
with and is later set from the dialog to the newly-chosen color. This, of<br />
course, is the method that the table uses at the end of the editing process to<br />
write the new value into the TableModel<br />
Next comes isCellEditable, which has a part to play in determining<br />
whether the cell editing process will be allowed to begin. This method works<br />
as follows:<br />
• If the cell editing process is initiated with a mouse click, it<br />
returns true only if the number of clicks is greater than or<br />
equal to the value set with the setClickCountToStart<br />
method inherited from Def aultCellEditor. Since the<br />
editing component in this case is a JTextField, two clicks are<br />
needed to activate the editor.<br />
• If no event is passed in, true is returned. This allows any edit<br />
initiated with the keyboard or programmatically to start<br />
immediately. Users familiar with spreadsheets such as<br />
Microsoft Excel are likely to try to use the F2 key to try to edit a<br />
cell's content and this will work thanks to the policy applied by<br />
this method.
Customized Table Rendering and Editing 1413<br />
The shouldSelectCell method determines whether the cell being<br />
edited should be selected and have the input focus before the edit starts. In<br />
this case, it always returns true. You may not always want this to be the case,<br />
however, so the shouldSelectCell method also gets the event object for<br />
whatever initiated the edit, which allows you to distinguish initiation from the<br />
mouse from any other cause.<br />
<strong>Core</strong> Warning<br />
Unfortunately, neither shouldSelectCell nor isCellEditable can<br />
tell the difference between keyboard activation and programmatic initiation.<br />
This is a shame, because it would often be useful to tell the difference. In<br />
particular, while you would almost always want to select and pass the input<br />
focus to the target cell when the user initiates the edit, this is not<br />
necessarily true for programmatic initiation.<br />
The stopCellEditing method marks the normal end of an edit. It can<br />
be called in two different cases:<br />
• By application code to save the current value and end the edit.<br />
This won't happen in this example, but theoretically it could<br />
happen in a real application.<br />
• When the user presses the OK button of the dialog.<br />
In both cases, it is necessary to get the value from the dialog and store it in<br />
currentColor, from where the table will get it later using the getCellEditorValue<br />
method, and to fire an event to notify the table that the edit has<br />
been completed, which is done here using the f ireEditingStopped<br />
method inherited from Def aultCellEditor. In the first case only, it is necessary<br />
to dismiss the dialog—this is not required in the other case, because<br />
the dialog will close of its own accord when the OK button is pressed. So that<br />
stopCellEditing can distinguish these cases, the editor maintains an<br />
instance variable called showingDialog, which is true when the dialog is<br />
being displayed. When the user pressed the OK button, this variable is set to<br />
false before the stopCellEditing method is called, to indicate that there is<br />
no need to close the dialog.<br />
The cancelCellEditing is almost the same as stopCellEditing—it<br />
can similarly be invoked for two different cases. The logic of these two methods<br />
is identical, except that the cancelCellEditing method does not<br />
extract the Color value from the dialog and it calls the DefaultCellEditor<br />
method f ireEditingCanceled instead of f ireEditingStopped.
1414 Chapter II The Table Control<br />
The DefaultCellEditor class provides an implementation of the add-<br />
CellEditorListener that registers a listener with the editor and, under<br />
normal circumstances, you would not need to override. The reason that we<br />
need to do so here will be discussed after we complete our description of the<br />
implementation of the editors methods.<br />
The rest of the methods in this class are implementation details that are<br />
not part of the TableCellEditor interface—their job is to manage the dialog<br />
box. The createDialog method is called from the constructor to build<br />
the dialog and add ActionListeners for the OK and Cancel buttons. The<br />
details of the dialog box were discussed in "The Color Editing Dialog" above.<br />
The showDialog and dismissDialog methods are helpers that arrange<br />
for the dialog to be displayed and disposed as necessary. They are also partly<br />
responsible for maintaining the state of the showingDialog variable, which<br />
is used to determine whether the dialog needs to be closed when either<br />
stopCellEditing or cancelCellEditing is called. The implementation<br />
of dismissDialog is straightforward, but showDialog is not so simple. You<br />
might have expected it to just call dialog. setVisible (true) but, in fact,<br />
it doesn't do this—instead, it uses the SwingUtilitites invokeLater<br />
method to arrange for this to be done later in the event thread. Why does it<br />
go to this much trouble?<br />
In order to understand what is happening here, remember that the table's<br />
job in this process is to initialize and install the editing component in the<br />
space occupied by the cell being edited. In this case, as far as the table is concerned,<br />
the editing component is the JTextField that was passed to the<br />
editor's constructor, not the color selection dialog. With the code that has<br />
been described so far, the text field will appear in the table, but the dialog<br />
will not be visible. The question is, where should the call to showDialog be<br />
made? If you look again at the sequence of events that happen when an edit<br />
is undertaken, you will notice that there is no explicit method call to the editor<br />
itself that tells it when the editing session has actually begun. In order to<br />
display the dialog, we have to simply choose a point in the editing sequence<br />
at which the editor has control and can display the dialog. This point has to<br />
be sufficiently far advanced in the sequence so that we know that the edit will<br />
go ahead. There are only two points in the sequence that readily suggest<br />
themselves:<br />
• When the getTableCellEditorComponent is called.<br />
• When the shouldSelectCell method is called.<br />
The first of these two is the most obvious choice, but we pass up on it here<br />
because, in previous versions of Swing, it was not always the case that the edit
Customized Table Rendering and Editing 1415<br />
was certain to be carried out after this method was called. Since this has<br />
changed before, it could change again, so we avoid the uncertainty by not<br />
taking this option.<br />
The second one looks slightly better because it happens right at the end of<br />
the sequence, after the editing component has been added to the table. In<br />
earlier versions of Swing (specifically Swing 1.0), this method was always<br />
called, but in all current versions, it is only invoked when the edit is initiated<br />
because of a MouseEvent. Unfortunately, therefore, we cannot rely on using<br />
this method as the trigger to display the dialog either.<br />
Since there is no point that is both ideal and logical, we instead choose one<br />
that is reliable and override the addCellEditorListener method. This is<br />
guaranteed to be called after the editor has been added to the table, so we<br />
can be sure that the dialog will be shown. Our implementation of add-<br />
CellEditorListener invokes its superclass counterpart and then calls the<br />
showDialog method, which brings us back to the question of why this<br />
method defers the actual call that shows the dialog. Now that you know when<br />
this method is called, you should be able to see why this action has to be<br />
deferred: when showDialog is invoked, the table is in the process of adding<br />
the editor to the table. This process must be allowed to complete to ensure<br />
that the table is in a consistent state. However, the color dialog is modal. As a<br />
result, if we just called dialog. setVisible (true) from the addCellEditorListener<br />
method, this method would block until the user dismissed<br />
the dialog, thus stopping the table from completing its setup for editing. To<br />
avoid this, we arrange for it to be done later, when the current table activity<br />
has been completed. Using invokeLater guarantees this, because all of the<br />
activity connected with installing the editor will be taking place in the event<br />
thread and must, therefore, complete before the event thread can act upon<br />
the request to run the code in the Runnable that is passed to invokeLater.<br />
You can verify that this editor works as expected by running the program<br />
using the command<br />
java <strong>JFC</strong>Book.Chapterll.CustomEditorExample<br />
and clicking in one of the cells in the right-hand column. This will cause the<br />
dialog to appear and the colored icon to be replaced with the text "Editing...,"<br />
as shown in Figure 11-18. You should also notice that the color<br />
chooser is initialized with the original color from the cell. If you choose a new<br />
color and press OK, the dialog disappears and the color icon comes back with<br />
the new color.<br />
Now start editing the same cell again or another cell and the dialog will<br />
reappear. Pressing Cancel or closing the dialog using the close button on the
1416 Chapter I I The Table Control<br />
Figure 11-18 A custom table color editor in a separate dialog box.<br />
dialog window makes it vanish and leaves the color in the table cell<br />
unchanged, even if you started changing the color in the chooser itself before<br />
canceling.<br />
DefaultCellEditor and AbstractCellEditor<br />
The custom editor that you have just seen was derived from Default-<br />
CellEditor, the only base class for tree and table editors that Swing 1.1.1<br />
and <strong>Java</strong> 2 version 1.2.2 provides. If you compare the public methods of the<br />
ColorEditor class with those required by the TableCellEditor interface,<br />
you'll see that ColorEditor provides implementations for all of them,<br />
apart from removeCellEditorListener, despite the fact that Default-<br />
CellEditor also implements all of these methods. In fact, about the only
Customized Table Rendering and Editing 1417<br />
things that ColorEditor can reuse from its base class are its support for<br />
delivering events to the CellEditorListener (via the fireEditing-<br />
Stopped, fireEditingCanceled, addCellEditorListener and<br />
removeCellEditorListener methods) and the methods that set and<br />
retrieve the count of clicks needed to start an edit with the mouse. Considering<br />
that the last two of these are not part of the TableCellEditor interface,<br />
this is a remarkably small amount of reuse.<br />
Using DefaultCellEditor as a Base Class for<br />
Custom Editors<br />
All things considered, the design of DefaultCellEditor does not lend<br />
itself well to subclassing for the purpose of creating editors that use different<br />
editing components. There are two fundamental reasons for this:<br />
• DefaultCellEditor has a shortage of useful constructors.<br />
• The methods of DefaultCellEditor are based around a<br />
design that wraps the handling of the target component with a<br />
component-specific delegate. If you don't adhere to this design,<br />
you have to override all of these methods.<br />
DefaultCellEditor provides constructors that allowyou to use a JTextField,<br />
a JComboBox, or a JCheckBox as the actual editing component. If<br />
you want to use a different editor, perhaps a custom component, this presents<br />
a problem. Obviously, if you plan to use DefaultCellEditor as your<br />
base class you have to invoke one of its constructors from your constructor,<br />
but none of them are useful if you don't want one of the components that it<br />
supports as your editor. There isn't even a default constructor or a constructor<br />
that takes a JComponent as its argument.<br />
The other issue is just as bad. The design of DefaultCellEditor is<br />
intended to provide a single class that wraps several target components as the<br />
editor. The problem is that the components that it supports have sufficiently<br />
different APIs that it is not easy to slot them all into one cell editor. To surmount<br />
this problem, DefaultCellEditor has an inner class called EditorDelegate,<br />
which provides a common interface to all of the editing<br />
components and there is a different EditorDelegate implementation for<br />
each of the three supported editor components. Because of this design,<br />
almost all of the public methods of DefaultCellEditor simply delegate to<br />
the EditorDelegate. It follows that if you want to subclass Default-<br />
CellEditor, you either have to create your own EditorDelegate subclass<br />
so that you don't have to reimplement the majority of the methods, or you
1418 Chapter II The Table Control<br />
simply have to provide your own implementation that does not involve the<br />
delegate, as was done for the ColorEditor. As a result of these two issues,<br />
you will probably find that you can't make much use of DefaultCellEditor<br />
as a base class unless you are prepared to use one of the three supported<br />
editor components and do significant work to override most of its methods.<br />
TheAbstractCellEditor Class<br />
Because of the shortcomings of DefaultCellEditor, if you are using<br />
Swing 1.1.1 and <strong>Java</strong> 2 version 1.2.2 and if you want to build a custom editor,<br />
the odds are that you will end up implementing the TableCellEditor<br />
interface from scratch. This is a shame because, even if you have to provide<br />
your own implementations of the methods that interact directly with the<br />
editing component, you can't make use of the addCellEditorListener,<br />
removeCellEditorListener, fireEditingStopped and fireEditingCanceled<br />
method implementations, which don't depend on the component<br />
being used and which therefore should be completely reusable.<br />
In <strong>Java</strong> 2 version 1.3, the Swing team addressed the difficulties involved<br />
with subclassing DefaultCellEditor by creating a new base class called<br />
AbstractCellEditor, from which DefaultCellEditor is itself derived,<br />
that does not have any knowledge of or involvement with the editing component<br />
and is therefore not biased towards any particular component.<br />
AbstractCellEditor is an abstract class that provides implementations<br />
for the following CellEditor methods:<br />
public boolean isCellEditable(EventObject evt);<br />
public boolean shouldSelectCell(EventObject evt);<br />
public boolean stopCellEditing();<br />
public void cancelCellEditing();<br />
public void addCellEditorListener(CellEditorListener 1);<br />
public void removeCellEditorListener(<br />
CellEditorListener 1);<br />
protected void fireEditingStopped();<br />
protected void fireEditingCanceled();<br />
The implementations of the first four AbstractCellEditor methods are<br />
extremely simple:<br />
isCellEditable Returns true, indicating that the cell is editable no<br />
matter how the edit was triggered. You will need to<br />
override this method if you want to make this conditional<br />
on the number of times the user has clicked<br />
with the mouse, because AbstractCellEditor,<br />
unlike DefaultCellEditor, has no support for<br />
this concept.
shouldSelectCell Returns true in all cases.<br />
Customized Table Rendering and Editing 1419<br />
stopCellEditing Callsthe fireEditingStopped method to notify<br />
listeners that the edit is complete and then returns<br />
true. If there are circumstances under which you<br />
need to disallow editing being stopped or if you need<br />
to take some specific action before ediitng terminates,<br />
you will need to override this method.<br />
cancelCellEditing Callsthe fireEditingCanceled method to<br />
notify listeners that the edit has been abandoned.<br />
AbstractCellEditor does not provide any constructors, so it can be<br />
used as a base class for an editor that uses any type of editing component. If<br />
you are going to use AbstractCellEditor as the base class for a custom<br />
table editor, you will be obliged to provide implementations for at least the<br />
getCellEditorValue and getTableCellEditorComponent methods,<br />
both of which are specific to the editing component that you use and for<br />
which there is therefore no implementation at all in the AbstractCellEditor<br />
class. In practice, you may also have to override some of the other methods<br />
to suit your needs, but you will, at bare minimum, be able to use the<br />
support that AbstractCellEditor provides for managing listeners and<br />
events.<br />
If AbstractCellEditor were used as the base class for our ColorBditor,<br />
there would be very few changes, because this editor replaced most of<br />
the Def aultCellEditor implementation anyway. The following changes<br />
would be made to the code shown in Listing 11-15:<br />
1. The implementation of shouldSelectCell would be<br />
removed because the AbstractCellEditor version is the<br />
same.<br />
2. The editing component would be a JLabel instead of a JTextField.<br />
The choice of JTextField is not appropriate because<br />
the text that it displays is constant and not editable. However,<br />
we were obliged to use JTextField because Def ault-<br />
CellEditor does not provide a constructor that accepts a<br />
JLabel as the editing component.<br />
3. Since AbstractCellEditor doesn't directly support the facility<br />
to set the number of clicks with the mouse to start an edit,<br />
this needs to be added. If necessary, you could add a set-<br />
ClickCountToStart method, or use a fixed value.
1420 Chapter II The Table Control<br />
Since there are so few changes, we don't show the revised implementation<br />
here, but if you installed the examples in the directory C:\<strong>Core</strong><strong>JFC</strong>Book,<br />
the source code will be found in the file C:\<strong>Core</strong><strong>JFC</strong>Book\<strong>JFC</strong>-<br />
Book\Chapterll\jdkl3\ColorEditor. java and you can see it in use by<br />
typing the command<br />
java <strong>JFC</strong>Book.Chapterll.jdkl3.CustomEditorExample<br />
If you run this example and click in one of the color cells to start the editor,<br />
you will see that the editing component is now a JLabel instead of a JText-<br />
Field, a fact that is obvious because the default text color for these two components<br />
is different.<br />
Copying and Pasting Data Between JTable and<br />
External Applications<br />
If your application involves tables, there is a very good chance that your users<br />
will want to be able to select some or all of its content and paste it into some<br />
other application for processing, or vice versa. The most obvious (and probably<br />
the most common) example of this in the real world would be a Swing<br />
application as the data source for an Excel spreadsheet, or vice versa. To support<br />
this, you need to be able to copy data from a table onto the system clipboard<br />
in a format in which Excel can import it and you also need to be able to<br />
fetch data from the clipboard and install it in the table. In this section, you'll<br />
see how simple it is to implement such a feature.<br />
Data Transfer between JTable and Microsoft<br />
Excel<br />
In general, the unit of transfer of information between a JTable and<br />
Microsoft Excel will be a rectangular block of table cells of arbitrary size. In<br />
order to move data from application to the other, you need to decide how to<br />
represent each item to be transferred and how to preserve the structure of<br />
the information as it is moved to and from the system clipboard.<br />
<strong>Core</strong> Note<br />
The example in this section makes use of the AWT data transfer feature,<br />
which allows <strong>Java</strong> applications to copy information to and from the system<br />
clipboard. If you are not familiar with this mechanism, I recommend that
Customized Table Rendering and Editing 1421<br />
your read <strong>Core</strong> <strong>Java</strong> 2Volume 2:Advanced Features by Cay Horstmann<br />
and Gary Cornell, which covers this topic in detail.<br />
Of course, unless you happen to be designing or implementing both the<br />
source and target application, you probably don't have much choice as far as<br />
data representation is concerned, because the other application will only be<br />
able to handle a limited range of formats. As far as exchanging data with<br />
Microsoft Excel is concerned, the following factors have to be taken into<br />
account:<br />
1. Whichever way you are moving the data, it will have to go via<br />
the system clipboard. The AWT contains support for moving<br />
information between the system clipboard and a <strong>Java</strong> application.<br />
However, the implementation only allows you to transfer<br />
data encoded as strings. Although you can work around this<br />
restriction to encode more general data (such as images) as<br />
strings for the purposes of exporting them to the clipboard, this<br />
approach only works if the target application understands how<br />
to decode them from this form.<br />
2. Microsoft Excel supports a limited range of formats for data<br />
import from the clipboard. In particular, it will accept a value<br />
encoded as a string and install its content into a worksheet, provided<br />
that the row and column boundaries are properly delimited.<br />
Because of these restrictions, we are only going to be able to take string data<br />
from a JTable and copy it to Microsoft Excel and vice versa. However, this is<br />
not as restrictive as it sounds because quite a lot of non-string data, such as<br />
integers, floating point numbers, and dates, have a natural string representation<br />
that can be used for transfer and which is recognized by Microsoft Excel<br />
and, with a little extra work, you can add code to your table to convert the<br />
strings that you receive back into the original objects. Therefore, although<br />
the primary focus of the example that you'll see here is to establish the basic<br />
mechanism required to transfer strings, we'll build enough flexibility into it<br />
so that you can easily extend it (by subclassing) for more specific needs.<br />
The format used by Microsoft Excel to transfer data in string form is a simple<br />
one:
1422 Chapter II The Table Control<br />
• The values of cells on the same row are separated by TAB<br />
characters.<br />
• Rows of data are separated by newline characters.<br />
Therefore, in order to export data from a JTable in a form suitable for<br />
import into Microsoft Excel, we have to determine which rows and columns<br />
are selected and process each row at a time, separating cells in each row by<br />
TABs and rows by newlines. Similarly, to import data, we have to break the<br />
string stored on the clipboard wherever there is a newline character to give<br />
us the data for each row and then break each row string at each TAB to get<br />
the values for each cell in that row.<br />
Since copy and paste is usually bound to acclerator keys such as Ctrl+C<br />
and Ctrl+V, the most natural way to implement these features is as<br />
Actions, so that they can be quickly and easily connected to the user interface.<br />
The basic Actions that you will see in this section have no special<br />
requirements of the table that is the target of the cut or paste operation, so<br />
they can be implemented as freestanding classes that can be reused in any<br />
application. For the sake of clarity, well treat the implementation of copy<br />
and paste as separate tasks and discuss each in its own section.<br />
Implementing the Copy Action<br />
The puqxtse of the copy action is to work out which table cells form part of<br />
the selection to be exported, encode those cells in a form suitable for later<br />
import into Microsoft Excel and, finally, place the resulting string on the system<br />
clipboard. Since the data transfer format itself is quite simple, most of<br />
the work revolves around determining which cells should be included in the<br />
transfer operation.<br />
To see why this is not as simple as you might at first think, type the following<br />
command:<br />
java <strong>JFC</strong>Book.Chapterll.CopyPasteExample row<br />
This command displays a table containing data that represents numbers,<br />
as shown in Figure 11-19.<br />
When started with argument "row," the table has row selection enabled.<br />
Imagine that you were to select a single row of the table and you wanted to<br />
export those cells to the clipboard. If you select the top row, for example, by<br />
clicking in any cell, the string you would need to place on the clipboard<br />
would be:<br />
I\t2\t3\t4\t5\n
Figure 11-19 Exporting Rows of Table Data.<br />
Customized Table Rendering and Editing 1423<br />
where "\t" and "\n" represent the TAB and newline characters, respectively.<br />
In terms of code, to achieve this, you would call the table getSelectedRow<br />
method to find the index of the row, followed by the getColumnCount<br />
method to find out how many columns there are and, finally, extract the cell<br />
values by calling the table's getValueAt method for each cell in the row.<br />
Obviously, if you had column selection enabled instead of row selection, you<br />
would use a similar algorithm using the getSelectedColumn and getRow-<br />
Count methods.<br />
Things get a little more complex than this, however. If you hold down the<br />
CTRL key and click on the third row, you'll have two (non-adjacent) rows<br />
selected, as shown in Figure 11-19. The string you need to create for the clipboard<br />
in this case is:<br />
I\t2\t3\t4\t5\n<br />
100\t200\t300\t400\t500<br />
Since you have more than one row to deal with, the getSelectedRow<br />
method is insufficient. Instead, you could use getSelectedRows to return<br />
an array of all the selected rows and then process them in a loop. This would<br />
work when you have row selection enabled, but this is not a sufficiently general<br />
approach to handle all cases. To see why, type the following command:<br />
<strong>Java</strong> <strong>JFC</strong>Book.Chapterll.CopyPasteExample cell<br />
This command displays the table with cell selection enabled. Now when<br />
you click in a cell, only that single cell is highlighted. If you clicked the top<br />
left cell and wanted to export that, the appropriate string would be<br />
l\n<br />
This is different from row and column selection—you can't just get the<br />
selected row and export all of the cells in that row. Instead, you have to work<br />
out exactly which cell is selected. In this case, you do this by calling both<br />
getSelectedRow and getSelectedColumn—the selected cell will be at
1424 Chapter 11 The Table Control<br />
the intersection of these two rows. But this is not the end of the problem—<br />
with cell selection, you can create more complex selections. For example,<br />
click in the top left column and drag the mouse two cells to the right. Now<br />
you have selected three cells and the string you need to export is:<br />
I\t2\t3\n<br />
How do you now work out which cells are selected? The simple algorithm<br />
used when one cell was selected won't work here. You can get the information<br />
you need by calling getSelectedRow and getSelectedColumns. This<br />
will return the selected row and three selected columns, so you can again<br />
determine the selected cells. This is still not good enough—if you select the<br />
top left cell and drag the mouse downwards by two cells, you now have a column<br />
of three cells selected and the string you need to create would be<br />
l\nlO\nlOO\n<br />
To find out which cells are selected in this case, you have to call getSelectedRows<br />
to get the three row numbers and getSelectedColumn to<br />
retrieve the column number. Even this is not enough however—click the top<br />
left cell and drag the mouse down two cells and to the right by two cells. Now<br />
you have three selected rows and three selected columns, giving a rectangular<br />
selection of nine cells, as shown in Figure 11-20, requiring to export the<br />
string<br />
l\t2\t3\nl0\t2 0\t3 0\nl0 0\t2 0 0\t3 0 0\n<br />
Figure 11-20 Exporting a Rectangular Selection of Data.<br />
To create this string, you need to call getSelectedRows and getSelected-<br />
Columns and export the cells in the area bounded by the highest and lowest<br />
numbered rows and columns returned by these methods.<br />
All of the cases that you have seen required different algorithms. It is<br />
undesirable to have to use several algorithms for these various cases and, in<br />
fact, it is unworkable because you can't figure out in advance which case you<br />
have anyway! What is needed is a single algorithm that works for all cases.
Customized Table Rendering and Editing 1425<br />
Fortunately, this isn't very hard to achieve. The solution is shown in Listing<br />
11-16.<br />
Listing 11-16 Copying table data to the system clipboard<br />
package <strong>JFC</strong>Book.Chapterll;<br />
import j ava.awt.*;<br />
import java.awt.datatransfer.*;<br />
import j ava.awt.event.*;<br />
import j avax.swing.*;<br />
public class TableCopyAction extends AbstractAction {<br />
protected JTable source;<br />
public TableCopyAction() {<br />
}<br />
public TableCopyAction(JTable tbl) {<br />
}<br />
setSource(tbl);<br />
public void setSource(JTable tbl) {<br />
}<br />
source = tbl;<br />
public JTable getSourceO {<br />
return source;<br />
}<br />
public void actionPerformed(ActionEvent evt) {<br />
JTable tbl = source;<br />
if (tbl == null) {<br />
// Use event source<br />
tbl = (JTable)evt.getSource();<br />
}<br />
int minRow = -1;<br />
int maxRow = -1;<br />
int minCol = -1;<br />
int maxCol = -1;<br />
ListSelectionModel rowModel = tbl.getSelectionModel();<br />
ListSelectionModel colModel =
1426 Chapter II The Table Control<br />
Listing 11-16 Copying table data to the system clipboard (continued)<br />
tbl.getColumnModel().getSelectionModel();<br />
if (tbl.getCellSelectionEnabledO) {<br />
minRow = rowModel.getMinSelectionlndex();<br />
maxRow = rowModel.getMaxSelectionlndex();<br />
minCol = colModel.getMinSelectionlndex();<br />
maxCol = colModel.getMaxSelectionlndex();<br />
} else if (tbl.getRowSelectionAllowed()) {<br />
minRow = rowModel.getMinSelectionlndex();<br />
maxRow = rowModel.getMaxSelectionlndex();<br />
minCol = 0;<br />
maxCol = tbl.getColumnCount() - 1;<br />
} else if (tbl.getColumnSelectionAllowed()) {<br />
minRow = 0;<br />
maxRow = tbl.getRowCount() - 1;<br />
minCol = colModel.getMinSelectionlndex();<br />
}<br />
maxCol = colModel.getMaxSelectionlndex();<br />
if (minRow == -1 || minCol == -1) {<br />
// No selections!<br />
}<br />
return;<br />
boolean isEmpty = true;<br />
StringBuffer sel = new StringBuffer();<br />
for (int row = minRow; row
Customized Table Rendering and Editing 1427<br />
Listing 11-16 Copying table data to the system clipboard (continued)<br />
// Gets the value for a given row and column.<br />
// Subclasses may override this to carry out the<br />
// appropriate conversions for specific TableModels.<br />
protected String getValueAt(JTable tbl, int row, int col) {<br />
}<br />
}<br />
return tbl.getValueAt(row, col).toString();<br />
The listing shows the complete implementation of the Action that<br />
exports table data to the system clipboard. The constructors allow you to create<br />
an Action associated with a given table, passed by reference, or one that<br />
is not connected to any table. If you don't associate the Action with a table,<br />
it assumes that the source of the ActionEvent delivered to its actionPerf<br />
ormed method is the table that it should get its data from. You would probably<br />
use the default constructor when installing this Action as a shortcut<br />
from the table itself, using code like this:<br />
tbl.registerKeyboardAction(new TableCopyAction(),<br />
Keystroke.getKeyStroke("Ctrl C"),<br />
JComponent.WHEN_FOCUSED);<br />
because here the table will be source of the ActionEvent. The advantage<br />
of using the default constructor is that the Action is not tied to any given<br />
table, so you can associate the same instance with any number of tables to<br />
conserve memory. On the other hand, you would need to use the constructor<br />
that references the table if you add the Action to a menu, because the<br />
source of an ActionEvent delivered from a menu is the menu itself, not the<br />
table that the user wants to copy data from! A third alternative is to dynamically<br />
associate a table with the Action using the setSource method.<br />
The job of determining the cells to be exported and of exporting them is<br />
handled by the act ionPerf ormed method. As you can see, it works by figuring<br />
out the smallest rectangular area that bounds the set of cells to be<br />
exported. In order to do this, it has to take into account the type of selection<br />
that the table is using:<br />
If row selection is enabled, the rectangle spans the width of the<br />
table and is bounded above by the lowest numbered selected<br />
row and below by the highest numbered selected row.<br />
Similarly, if column selection is enabled, the rectangle spans the<br />
height of the table. It is bounded on the left by the lowest
1428 Chapter II The Table Control<br />
numbered selected column and on the right by the highest<br />
numbered selected column.<br />
• If cell selection is enabled, the rectangle is bounded above by<br />
the lowest numbered selected row, below by the highest<br />
numbered selected row, on the left by the lowest numbered<br />
selected column, and on the right by the highest numbered<br />
selected column.<br />
Having worked out the bounds of the selected rectangle, the code then<br />
loops from the top row to the bottom, working along each row from left to<br />
right, bounded by the selected columns, extracting the appropriate values<br />
from the table. For each value, it needs to create the corresponding string<br />
value to add to the string to be exported to the clipboard. How you do this<br />
depends on the content of each cell, which is dependent on your table. In the<br />
simplest case, you would just call the toString method of the object<br />
returned from the table's getValueAt method, but this is not always sufficient.<br />
In order to make it easy for you to subclass this Action to handle more<br />
complex tables, the job of converting a row and column index pair to the<br />
appropriate string is delegated to a protected method called getValueAt.<br />
The basic implementation just gets the value from the table and returns the<br />
result of calling its toString method. Note that if you override this method<br />
and you need to treat individual columns in different ways, the column number<br />
passed to this method is relative to the TableColumnModel, not the<br />
TableModel, and therefore would change if the user rearranged the table<br />
columns. To convert this index to a fixed TableColumn index, use the<br />
JTable convertColumnlndexToModel method.<br />
If you examine the nested loops in Listing 11-16 that extract the cell values,<br />
you'll notice that not every cell in the selection's bounding rectangle has<br />
its value written to the exported string. In fact, for each cell in the rectangle,<br />
the JTable isCellSelected method is called to make sure that it is actually<br />
selected. This is necessary to cater for cases like that shown in Figure 11-<br />
20 where there is a discontiguous selection. In this case, the selection rectangle<br />
is bounded by columns 0 and 4 and by rows 0 and 2. However, although<br />
row 1 is included in this set, none of its cells are actually selected. To exclude<br />
these cells, it is necessary to call the isCellSelected method.<br />
Having built the appropriate string including the necessary delimiters, the<br />
last step is to export it to the system clipboard. The code to do this is shown at<br />
the end of the actionPerformed method - it is as simple as creating a<br />
StringSelection and passing it to the setContent method of the object<br />
that represents the system clipboard. If you don't understand how this works,
Customized Table Rendering and Editing 1429<br />
you should refer to the discussion of copy and paste via the system clipboard<br />
in <strong>Core</strong> <strong>Java</strong> 2 Volume 2: Advanced Features by Cay Horstmann and Gary<br />
Cornell<br />
You can try out this code by typing the command<br />
<strong>Java</strong> <strong>JFC</strong>Book.Chapterll.CopyPasteExample cell<br />
and also starting up a copy of Microsoft Excel. If you select a range of cells<br />
from the table in the <strong>Java</strong> application and press Ctrl + C, the cells will be<br />
exported to the system clipboard in the form of a string. You can look at this<br />
cell by pasting it into any text editor (such as Notepad, Wordpad or even<br />
Microsoft Word). If you click in any cell in the Excel worksheet and press<br />
Ctrl+V, you'll find that the cells that were selected in the <strong>Java</strong> application are<br />
imported into the spreadsheet, with the cell that you clicked in as the top left<br />
corner of the affected area, as shown in Figure 11-21.<br />
Figure 17-27 Pasting Data into Microsoft Excel.<br />
Note that if you select discontiguous rows, as was the case in Figure 11-19,<br />
and copy them into Excel, they end up being adjacent to each other because<br />
the intervening rows are not exported and there is no information to convey
1430 Chapter II The Table Control<br />
the fact that rows were omitted. This behavior is consistent with Excels own<br />
behavior when you copy and pste discontiguous rows. The same applies to<br />
discontiguous column selections.<br />
Implementing the Paste Action<br />
Having implemented the code necessary to export data from the table, the<br />
final step is to do the reverse: import table data from the system clipboard.<br />
On the face of it, this is a simpler operation because the other application<br />
determines which cells are being exported and builds the string that gets<br />
written to the clipboard. All we have to do is to break the string apart at its<br />
delimiters and write the data to the correct part of the table. But what is the<br />
correct part of the table? The implementation shown in Listing 11—17 works<br />
like this:<br />
• If only one cell is selected, then as much of the data from the<br />
clipboard as will fit into the table is pasted.<br />
• If a range of cells is selected, then the selection acts as a mask to<br />
select a subset of the data available from the clipboard so that<br />
only those cells that are selcted have their content overwritten.<br />
Listing 11-17 Pasting table data from the system clipboard<br />
package <strong>JFC</strong>Book.Chapterll;<br />
import j ava.awt.*;<br />
import <strong>Java</strong>.util.*;<br />
import java.awt.datatransfer.*;<br />
import j ava.awt.event.*;<br />
import j avax.swing.*;<br />
public class TablePasteAction extends AbstractAction {<br />
protected JTable target;<br />
public TablePasteAction() {<br />
}<br />
public TablePasteAction(JTable tbl) {<br />
}<br />
setTarget(tbl);<br />
public void setTarget(JTable tbl) {<br />
target = tbl;
Customized Table Rendering and Editing 1431<br />
Listing 11-17 Pasting table data from the system clipboard<br />
}<br />
(continued)<br />
public JTable getTarget () {<br />
}<br />
return target;<br />
public void actionPerformed(ActionEvent evt) {<br />
JTable tbl = target;<br />
if (tbl == null) {<br />
}<br />
tbl = (JTable)evt.getSource();<br />
Transferable t =<br />
tbl.getToolkit().getSystemClipboardO .getContents(null);<br />
if (t == null) {<br />
//No usable content<br />
return;<br />
}<br />
try {<br />
String sel = (String)t.getTransferData(<br />
DataFlavor.stringFlavor);<br />
// Break the selection into rows and then into columns.<br />
StringTokenizer rowTokenizer =<br />
new StringTokenizer(sel, "\n");<br />
int rowCount = rowTokenizer.countTokens();<br />
String [] [] data = new String [rowCount] [] ;<br />
// One pass of this loop for each row<br />
for (int i = 0; i < rowCount; i++) {<br />
String row = rowTokenizer.nextToken();<br />
StringTokenizer colTokenizer =<br />
new StringTokenizer(row, "\t");<br />
int colCount = colTokenizer.countTokens();<br />
String[] cols = new String[colCount];<br />
data[i] = cols;<br />
// One pass of this loop for each column<br />
for (int j = 0; j < colCount; j++) {<br />
cols[j] = colTokenizer.nextToken();<br />
}
1432 Chapter II The Table Control<br />
Listing I 1-17 Pasting table data from the system clipboard<br />
(continued)<br />
}<br />
}<br />
// Install the data in the table<br />
applySelection(tbl, data);<br />
} catch (Exception ex) {<br />
// Happens when clipboard content is not a string<br />
}<br />
// Handles the entire selection as a two-dimensional array.<br />
// Subclasses may override this to provide custom processing,<br />
protected void applySelection(JTable tbl, String[] [] data) {<br />
int row = tbl.getSelectedRow();<br />
int col = tbl.getSelectedColumnO;<br />
int selRows = tbl.getSelectedRowCount();<br />
int selCols = tbl.getSelectedColumnCount();<br />
int dataRows = data.length;<br />
int dataCols = (dataRows > 0 ? data[0].length : 0);<br />
// If only one cell is selected, allow the paste<br />
//to operate on the part of the table at and<br />
// below and to the right of that cell. Otherwise,<br />
// bound the paste to the selected area<br />
if (selRows == 1 && selCols == 1) {<br />
selRows = tbl.getRowCount() - row;<br />
selCols = tbl.getColumnCount() - col;<br />
}<br />
// Limit the paste operation to the selection,<br />
// or to the table, whichever is the smaller.<br />
if (dataRows > selRows) {<br />
dataRows = selRows;<br />
}<br />
if (dataCols > selCols) {<br />
}<br />
dataCols = selCols;<br />
// Apply each item in turn<br />
for (int i = 0; i < dataRows; i++) {<br />
for (int j = 0; j < dataCols; j++) {<br />
setValueAt(tbl, row + i, col + j, data[i][j]);<br />
}<br />
}
Customized Table Rendering and Editing 1433<br />
Listing 11-17 Pasting table data from the system clipboard<br />
(continued)<br />
}<br />
// Sets the value for a given row and column.<br />
// Subclasses may override this to carry out the<br />
// appropriate conversions for specific TableModels.<br />
protected void setValueAt(JTable tbl, int row, int column,<br />
String value) {<br />
tbl.setValueAt(value, row, column);<br />
}<br />
}<br />
To see exactly how this works, run the example program again using the<br />
command<br />
java <strong>JFC</strong>Book.Chapterll.CopyPasteExample cell<br />
then select the cells that contain the values 1, 2, 3, 10, 20, 30, 100, 200, 300 as<br />
shown in Figure 11-21 and copy them to the clipboard by pressing Ctrl+C.<br />
This gives you a rectangular selection consisting of three rows and three columns<br />
available to paste. Now click in the cell containing the value 20 so that<br />
only this cell is selected and then press Ctrl+V to perform the paste operation.<br />
Since only one cell is selected, the entire content of the clipboard is<br />
considered to be available for import, with the result that the copied values<br />
all appear in the table in the rectangular area whose top left-hand corner is in<br />
the cell that you selected—see Figure 11-22, where the pasted cells have<br />
been highlighted for clarity.<br />
Figure 11-22 Pasting Data into a JTable.<br />
Now click in the top cell of column 'B' (containing value '2') and select that<br />
cell plus the one to its right, creating a single-row selection with two columns,<br />
and press Ctrl+V again. This time, instead of pasting all nine cells from the
1434 Chapter I I The Table Control<br />
clipboard, only the two cells that are selected are overwritten, as shown in<br />
Figure 11-23.<br />
Figure 11-23 A Partial Paste Operation.<br />
Finally, click in the top row under column 'D' and select all of the rightmost<br />
two columns, then press Ctrl+V. This time, although there are three<br />
columns worth of data on the clipboard, the selection is only two columns<br />
wide. As a result, two columns are pasted. As you can see from Figure 11-24,<br />
all three rows are affected but the bottom row of the table is unchanged,<br />
even though it was selected, because there was no data on the clipboard to<br />
paste into those cells.<br />
Figure 11-24 Another Partial Paste Operation.<br />
If you examine the code in Listing 11-17 carefully, you'll see that, when<br />
the clipboard data has been broken apart into cells, it isn't written straight<br />
into the table. Instead, it is formed into a two-dimensional array and passed<br />
to the applySelection method, which is free to apply its own rules to<br />
determine how the data should be imported into the table. The implementation<br />
shown here follows the conventions that you have just seen, but you<br />
could easily subclass the TablePasteAction class and override this method<br />
to do something different. Notice also that the operation that stores each cell<br />
value is also not performed directly—instead, the cell's coordinates and value<br />
are passed to the setValueAt method, which could be overridden to convert<br />
the String to a more natural type for the underlying TableModel if<br />
required.
Summary<br />
This chapter took an in-depth look at the Swing table component. You will<br />
probably have realized that there are many similarities between JTable and<br />
JTree and that, in particular, the techniques used to customize them using<br />
standard Tenderers and editors or by developing ones of your own are almost<br />
identical, which means that once you've understood one of these components,<br />
it is much easier to come to grips with the other ones.<br />
During this survey of tables, you saw both simple and complex examples<br />
that demonstrate both how quickly you can create some kind of tabular representation<br />
of some data and how much you can do to refine that view if you<br />
are prepared to spend a little more time and invest a bit more effort. Some of<br />
the examples that were shown at the end of the chapter can be used to solve<br />
real-world table problems like locking down columns, providing complex editors,<br />
and exchanging table content with spreadsheets like Microsoft Excel,<br />
the solutions to which might not be obvious at first sight.<br />
Summary 1435
MULTIPLE-<br />
DOCUMENT<br />
APPLICATIONS<br />
Topics in This Chapter<br />
• Internal Frames and Layered Panes<br />
• The Desktop Manager, Desktop Panes, and Icons<br />
• Cascading and Tiling on the Desktop Pane<br />
• Customization of Internal Frames and the Desktop<br />
Manager
Using the Swing components that you have seen so far, you can create<br />
a user interface that consists of a main work area and some controls,<br />
such as a menu bar and a toolbar, that allow the user to work with<br />
and manipulate whatever is in the application frame. While this model works<br />
well for some applications, it is very limiting for programs like word processors<br />
and spreadsheets where the user may want to work with more than one<br />
file a time. In a simple application, the only way to work with multiple documents<br />
is to run more than one copy of the program, but this can quickly use<br />
up memory resources and makes it more difficult to move information<br />
between the documents. In this chapter, we'll examine the facilities that<br />
Swing provides to allow you to create multiple-document applications—<br />
internal frames, layered panes, and the desktop manager.<br />
Internal Frames<br />
Internal frames are miniature versions of an application's top-level window.<br />
Like the main window, they have a set of optional decorations, such as maximize,<br />
minimize, and close buttons, and a caption bar that allows the user to<br />
move the frame around by clicking on it and dragging it with the mouse.<br />
Internal frames are mounted not on the user's desktop like frames, but inside<br />
1437
1438 Chapter 12 Multiple-Document Applications<br />
the application main window and are, therefore, always clipped by its boundaries.<br />
Figure 12-1 shows four internal frames, each of them an instance of<br />
the Swing class JInternalFrame. You can run the example from which Figure<br />
12-1 was generated by using the command:<br />
java <strong>JFC</strong>Book.Chapterl2.InternalFramesExamplel<br />
Try running this example and following through the next few paragraphs to<br />
see how internal frames behave.<br />
Figure 12-1 Four internal frames in an application window (Metal look-and-feel).<br />
What Internal Frames Look Like<br />
The first thing you'll notice is the neat, cascaded layout of the frames within<br />
the application's working area. As you know, omponents usually are placed<br />
and sized by a layout manager but in this case, unfortunately, you would have<br />
to do the work of creating this type of arrangement for yourself—there is no<br />
standard layout manager that would create such a nice setup for you! Nevertheless,<br />
this is such a common way to place internal frames that you'll see
Internal Frames 1439<br />
later how to write something that will create arrangements like this automatically.<br />
You'll also notice that the frames overlap. This is also relatively<br />
unusual—layout managers (apart, of course, from OverlayLayout) generally<br />
keep components apart and avoid overlaps. The overlap is possible<br />
because the container that these internal frames are mounted in doesn't actually<br />
have a layout manager at all. As you'll see, this has both advantages and<br />
disadvantages.<br />
If you move your mouse to the caption of the frame entitled "Frame 3"<br />
and click once anywhere over the title (and not on any of the title bar decorations),<br />
the caption bar will change color, as ordinary frames do when they are<br />
selected. Like all components, the appearance of an internal frame depends<br />
on the selected look-and-feel. Figure 12-1 shows the Metal look-and-feel; in<br />
Figure 12-2 and Figure 12-3, you can see how internal frames are drawn by<br />
the Windows and Motif look-and-feel look-and-feel, respectively.<br />
In the Metal look-and-feel, the caption bar of a selected window is light<br />
blue, for Windows it is dark blue, and with Motif it is a kind of pinky-red.<br />
Figure 12-2 Internal frames in the Windows look-and-feel.
1440 Chapter 12 Multiple-Document Applications<br />
Figure 12-3 Internal frames in the Motif look-and-feel.<br />
To the right of the title there are some buttons. Exactly how many there<br />
are depends, again, on the look-and-feel. As you can see, the Motif look-andfeel<br />
provides two, while the others have three. In all three cases, the leftmost<br />
control is the minimize button, which causes the frame to become an icon<br />
when you press it, and the next along is the maximize button, which makes<br />
the frame expand to fill its container's window. Unless you're using Motif,<br />
you'll have a third button marked with a capital X that allows you to close the<br />
frame. Don't close the frame yet or you won't be able to follow the rest of this<br />
example!<br />
<strong>Core</strong> Note<br />
In <strong>Java</strong> 2 version 1.3, the order of items on the title bar is reversed if you<br />
set the component orientation of the Jlnternal Frame to be right-toleft.<br />
Moving to the left of the title bar, what you see again depends on the lookand-feel.<br />
In the case of Motif, you see a rectangular area with a bar on it,
Internal Frames 1441<br />
looking rather like a Motif option menu, while with Windows there is the<br />
usual frame icon. Pressing this gives you a drop-down menu of options that<br />
we show in Figure 12-4. The items on this menu are equivalent to the buttons<br />
on the frame, except, of course, that there is also a Close item, which is<br />
the only way for the user to close a Motif frame. Three other items are also<br />
present, but are currently disabled. The same is true of the Windows lookand-feel.<br />
If you use the Metal look-and-feel, the space to the left of the title is<br />
occupied by an icon that looks like a window, but there is no drop-down<br />
menu.<br />
Figure 12-4 The window menu in the Motif look-and-feel.<br />
Move the mouse back to the title on the caption bar of frame 3, press it<br />
and hold it down, and then drag the mouse sideways. You'll find that this<br />
causes the frame to move with the mouse until you release the button, at<br />
which point the frame takes up its new position. The frame continues to display<br />
its contents as it moves; in some windowing environments, windows that<br />
are being moved or resized become transparent or show just an outline until<br />
the move or resize operation is complete. Although this behavior is not provided<br />
by default, you'll see later how you can enable it to save the overhead<br />
of repainting the entire window as it moves or changes size and thereby make<br />
your application look more responsive.<br />
Now move the mouse over any edge of frame 3. As you reach the edge of<br />
the frame, the cursor changes to indicate that resizing is possible. If you place<br />
the mouse over the right or left side of the frame, you'll see a cursor that<br />
enables you to resize the frame horizontally, while moving the mouse near<br />
one of the corners gives a diagonal cursor that allows a resize in two direc-
1442 Chapter 12 Multiple-Document Applications<br />
tions at once. To resize the frame, press the left mouse button and drag while<br />
the mouse is over the edge of the frame. When the frame is at the required<br />
size, release the mouse button. Again, the frame's contents are on display<br />
throughout by default, which slows the operation down somewhat. However,<br />
it is possible to arrange for drag and resize operations to be performed using<br />
an outline frame instead of the frame itself, which improves performance.<br />
The details are covered in "Extending the Desktop Manager" later in this<br />
chapter.<br />
Finally, move the mouse over the title and double-click and you'll find that<br />
the window maximizes itself. If you repeat this when the frame is at its maximum<br />
size, it returns to its previous size.<br />
Stacking Internal Frames<br />
At this point, you should have three of the original frames together on the left<br />
of the application window and the fourth wherever you left it after moving and<br />
resizing it. One thing you may have noticed as you dragged frame 3 around was<br />
that it always stayed in front of all the other frames. In fact, no matter how<br />
much you try, you won't be able to make it do anything other than stay on top,<br />
as long as you only move frame 3. If you drag the frame back so that it overlaps<br />
frame 4, the frame that was originally to the right and below it, and then click<br />
anywhere inside frame 4, you'll see that it jumps to the front, covering up the<br />
part of frame 3 that it overlaps. At the same time, its caption bar becomes highlighted,<br />
while that of frame 3 reverts to its nonhighlighted state. You can<br />
restore the original situation by clicking on frame 3 to move it to the top.<br />
Perhaps you can do this with all of the frames? Try clicking frame 1 at the<br />
top left of the window. This time, its caption bar highlights as you might<br />
expect, but it doesn't move to the front—in fact, it stays exactly where it was.<br />
Not only that, but the other frame's caption bar remains highlighted as well.<br />
You can try the same thing with frame 2 and get the identical effect. In fact,<br />
you can end up with three highlighted caption bars, but only frames 3 and 4<br />
will exchange places with each other.<br />
There's more to it than this though: Move the mouse over the caption bar<br />
of frame 1 or frame 2 and drag it around the screen. As it moves, you'll see<br />
that it always remains under both frame 3 and frame 4. You'll get the same<br />
effect if you resize either of these windows—the corner or edge that you're<br />
dragging stays under these frames even when you're resizing the frame.<br />
Finally, press the maximize button on either of these frames and it will<br />
expand to take up the entire window—leaving at least two frames in front of
Layered Panes 1443<br />
it; if you expand frame 2, it will obscure frame 1, but frame 1 will expand and<br />
leave all of the others suspended in front of it.<br />
This behavior is, of course, extremely useful if you want to offer the user the<br />
ability to open several documents and work with more than one at the same<br />
time; to bring the ones of interest to the front, it is only necessary to click on<br />
their caption bars. This functionality is provided not by the internal frames, but<br />
by the container that they are placed on—in this example, JLayeredPane.<br />
Layered Panes<br />
The Swing JLayeredPane control is a container that manages its children<br />
in such a way as to create the illusion of multiple overlapping layers. The<br />
layers all cover the entire surface of the pane, but they are ordered vertically<br />
so that components in one layer appear to be permanently in front of<br />
or behind those in another. Every component in the pane is assigned to a<br />
single layer, identified by an integer value, with the property that components<br />
in layers with higher numbers have precedence in the stacking order<br />
over those with lower numbers so that, for example, components in layer<br />
200 always appear to be in front of those in layer 100, but behind those in<br />
layer 400. Although the absolute layer numbers are basically arbitrary,<br />
JLayeredPane defines a small set of layer numbers as named constants<br />
that can be used for certain standard purposes. These constants are listed<br />
below, in decreasing order of precedence. Note that they are all of type<br />
Integer, not the primitive type int.<br />
JLayeredPane.DRAG_LAYER value 400<br />
JLayeredPane.POPUP_LAYER value 300<br />
JLayeredPane.MODAL_LAYER value 200<br />
JLayeredPane.PALETTE_LAYER value 100<br />
JLayeredPane.DEFAULT_LAYER value 0<br />
JLayeredPane.FRAME j:ONTENT_LAYER value -30000<br />
Later in this chapter, you'll see an example that creates a component in<br />
the drag layer, which will appear in front of any other components assigned<br />
one of the standard numbers. Although the range of layers is limited only<br />
by the number of possible integer values (positive and negative), it is recommended<br />
that you tiy to use only the values shown previously, so that you<br />
don't get unexpected results when using third-party controls that expect
1444 Chapter 12 Multiple-Document Applications<br />
certain behavior, such as the fact that the drag layer is above any other component<br />
in the pane.<br />
In the example shown in Figure 12-1, four internal frames were placed on<br />
a layered pane, assigned to layers as follows:<br />
Frame 1<br />
Frame2<br />
Frame 3<br />
Frame 4<br />
DEFAULT_LAYER<br />
PALETTE LAYER<br />
POPUP_LAYER<br />
POPUP LAYER<br />
This layer assignment explains why frame 1 was always behind frame 2 and<br />
why both of these stayed behind frames 3 and 4. However, frames 3 and 4<br />
occupy the same layer, so which of them should be in front? As you saw earlier,<br />
you can arrange for either of them to be on top of the other just by clicking<br />
on its caption bar. This is because the layered pane actually has two ways<br />
to order its contents—by layer and by position within the layer. Every component<br />
in a layered pane has both a layer and a position, even if you don't<br />
explicitly assign either. Within a layer, a components position is, like its layer<br />
number, an integer. The ordering of position values is the reverse of that for<br />
layers however—lower position numbers have greater precedence. Therefore,<br />
position number 0 designates the component drawn at the front, position<br />
1 the one next behind it, and so on. Also, position numbers are not<br />
arbitrary—they always range from 0 to (n - 1), where n is the number of<br />
components in the layer. The most recently added component always occupies<br />
the lowest-numbered position in its layer and therefore always appears<br />
in front of any others in that same layer. This explains why frame 3 appears<br />
behind frame 4 when our example program is started—frame 4 is added after<br />
frame 3.<br />
Adding Components and Controlling Layer and<br />
Position<br />
In many respects, JLayeredPane is just an ordinary container, so you can<br />
just place internal frames and other components on it by using a simple add<br />
call. When you do this, your component is placed at the back of the<br />
DEFAULT_LAYER:<br />
JLayeredPane pane = new JLayeredPane();<br />
JInternalFrame frame =<br />
new JInternalFrame("Default settings");<br />
pane.add(frame); // Frame goes to DEFAULT_LAYER
Layered Panes 1445<br />
If you only want to use one layer, which is a common requirement, you can<br />
just use this simple mechanism and continue to add other components without<br />
worrying about layer and position at all. As you'll see shortly, there are<br />
methods that allow you to control the position of a component within its layer<br />
after it has been added and these are all that you will need for a simple application.<br />
Note also that, despite the fact that our examples use internal frames,<br />
you can place any AWT or Swing component on a layered pane—the layering<br />
is handled by the container, not by the component, so no special support<br />
from JComponent is required (although there is an optimization that makes<br />
handling of JComponents slighter faster than other components).<br />
<strong>Core</strong> Alert<br />
Mixing Swing and AWT components in a JLayeredPane, however, is not<br />
a good idea. Because AWT components are heavyweight, they always<br />
appear in front of lightweight Swing components, which spoils the layering<br />
effect. It is, however, possible to use AWT components in a<br />
JLayeredPane that doesn't contain any Swing components.<br />
<strong>Core</strong> Alert<br />
In Swing I.I.I and <strong>Java</strong> 2 version 1.2.2, a JlnternalFrame is visible by<br />
default, so if you create one and add it to a JLayeredPane, you will be<br />
able to see it (provided you give it a non-zero size). However, in <strong>Java</strong> 2<br />
version 1.3, the reverse is the case—JlnternalFrame is initially invisible<br />
and you have to call setvisible (true) to make it appear.<br />
If your application needs to use more than one layer, you have two ways to<br />
control the initial layer of a component. The simplest way is to specify it as a<br />
constraint when you add the component to the layered pane. You'll remember<br />
from Chapter 2, "Frames, Labels, and Buttons," that there is variant of<br />
the add method that looks like this:<br />
public void add(Component comp, Object constraint);<br />
JLayeredPane supports this variant if you provide your component's initial<br />
layer as an Integer. This is usually convenient, because the constants<br />
that define the standard layer numbers are, as you have seen, all of type<br />
Integer. Therefore, you could create and add a couple of frames as follows:<br />
JLayeredPane pane = new JLayeredPane();<br />
JlnternalFrame framel =
1446 Chapter 12 Multiple-Document Applications<br />
new JInternalFrame("In default layer");<br />
JInternalFrame frame2 =<br />
new JInternalFrame("In palette layer");<br />
pane.add(framel, JLayeredPane.DEFAULT_LAYER);<br />
pane.add(frame2, JLayeredPane.PALETTE_LAYER);<br />
If you insist on using nonstandard layer numbers, you can use the same<br />
method, provided that you remember to quote the layer number as an<br />
Integer:<br />
JInternalFrame frame3 =<br />
new JInternalFrame("In layer 124");<br />
pane.add(frame3, new Integer(124));<br />
If you intend to do this, be aware of the fact that, if you supply your layer<br />
number as an int instead of as an Integer, you will not get a compilation<br />
error, because there is a variant of the add method that takes a Component<br />
as its first argument and an int as its second. The int gives the index in the<br />
container's child list at which the component is to be added. This mistake will<br />
have strange effects on the way in which your components behave—they will<br />
probably appear to be in the wrong layer. If you want to set both the layer<br />
and position at the same time, you can use a third variant of the add method:<br />
public void add(Component comp, Object constraint,<br />
int pos);<br />
and supply the position within the layer using the third argument.<br />
The other way to control a components layer is to use the set Layer<br />
method. Both JLayeredPane and JInternalFrame have methods of this<br />
name that set the target object's layer. However, they have different signatures.<br />
The JInternalFrame versions are the simpler of the two types:<br />
public void setLayer(Integer layer);<br />
public void setLayer(int layer);<br />
Note that the second of these methods was introduced in <strong>Java</strong> 2 version 1.3.<br />
The JLayeredPane method is more general, because it can be used with<br />
any component that you want to place on it:<br />
public void setLayer(Component comp, int layer);<br />
// JLayeredPane method<br />
Notice that, in this case, confusingly, the layer number is always given as<br />
an int, not an Integer! If you want to use either of these two methods, they<br />
should be called before you add the component:<br />
JInternalFrame frame4 =<br />
new JInternalFrame("In popup layer");
frame4.setLayer(JLayeredPane.POPUP_LAYER);<br />
pane.add(frame4);<br />
JInternalFrame frame5 =<br />
new JInternalFrame("Also in popup layer");<br />
pane.setLayer(frame5, JLayeredPane.POPUP_LAYER);<br />
pane.add(frame5) ;<br />
Layered Panes 1447<br />
After a component has been added to a JLayeredPane, you can read or<br />
change its layer and/or position using one of the following JLayeredPane<br />
methods:<br />
public int getLayer(Component c);<br />
public int getPosition(Component c);<br />
public void setLayer(Component comp, int layer);<br />
public void setLayer(Component comp, int layer,<br />
int position);<br />
public void setPosition(Component comp, int position);<br />
public void moveToFront(Component c);<br />
public void moveToBack(Component c);<br />
Obviously, the first two of these methods return the component's layer<br />
number and position numbers, again as an int, not an Integer. The third<br />
method you have already seen. The fourth method is a variant on the third<br />
that also supplies a position value—use this method to change a component's<br />
layer and its position within a layer at the same time. The special value -l,<br />
when used as the position argument, moves the component to the back of its<br />
layer, while position 0 brings it to the front. If you just want to change a component's<br />
position within its layer while leaving the layer number unchanged,<br />
use the set Position method, which also recognizes the special value -1.<br />
Finally, the moveToFront and moveToBack methods make your intentions<br />
clearer than, but they are otherwise equivalent to, setPosition(O) and<br />
setPosition (-1) , respectively. Incidentally, you can use the form of set-<br />
Layer that specifies both a layer and a position before you add a component<br />
to the layered pane, but there would be no point in doing so because the<br />
position will be ignored.<br />
Let's look at some examples that show how these methods can be used and<br />
how the layer and position of a component can be changed. Suppose you created<br />
four internal frames, f l, f 2, f 3 , and f 4 and mounted them all, in the<br />
default layer, on a JLayeredPane, as follows:<br />
JLayeredPane p = new JLayeredPane();<br />
p.setLayer(f1, JLayeredPane.DEFAULT^LAYER);<br />
// Must do this before adding<br />
p.add(fl);
1448 Chapter 12 Multiple-Document Applications<br />
f1.setvisible(true);<br />
p.setLayer(f2, JLayeredPane.DEFAULTJLAYER);<br />
p.add(f2);<br />
f2.setvisible(true);<br />
p.setLayer(f3, JLayeredPane.DEFAULT_LAYER);<br />
p.add(f3);<br />
f3.setvisible(true) ;<br />
p.setLayer(f4, JLayeredPane.DEFAULTJLAYER);<br />
p.add(f4);<br />
f4.setvisible(true);<br />
At this point, since the initial positions are determined by the order in<br />
which the components are added, f 4 is in position 0, f 3 is in position 1, f 2 is<br />
in position 2, and f 1 in position 3. Now suppose you wanted to bring f l to<br />
the top of the stacking order, but not change its layer number. This can be<br />
done using any of the following lines of code:<br />
p.setLayer(f1, JLayeredPane.DEFAULTJLAYER, 0);<br />
p. setPosition(f1, 0);<br />
p.moveToFront(f1); // Recommended<br />
Doing this pushes all of the other components down in the stacking order<br />
and changes their position values accordingly, so that f 1 would now be at<br />
position 0, f 4 in position 1, f 3 in position 2, and f 2 in position 3. Similarly, a<br />
component can be moved to the back of its layer using any of the following:<br />
p.setLayer(fl, JLayeredPane.DEFAULT_LAYER, 3)<br />
p.setLayer(fl, JLayeredPane.DEFAULT_LAYER, 24);<br />
p.setLayer(f3, JLayeredPane.DEFAULTJLAYER, -1);<br />
p.setPosition(fl, 3);<br />
p.setPosition(f3, 24);<br />
p . setPosition(f3, -1);<br />
p.moveToBack(f3); // Recommended<br />
In general, it is better not to use setLayer if you only want to change<br />
position within a layer, because it makes your intentions less clear. Nevertheless,<br />
for completeness, three ways to use it for this purpose are included in<br />
the list you have just seen. The first method moves the component directly to<br />
position 3 within the layer. This, of course, requires you to know how many<br />
components are in the layer. The second variant is even uglier—it moves the<br />
component to position 24, which, if there are less than 24 components in the<br />
layer, actually moves the component to the back (and sets the position to a<br />
legal value—in this case to 3). Only the last alternative, where -1 is quoted as<br />
the position, is at all palatable.
Layered Panes 1449<br />
The next three cases are exactly the same, but use setPosition instead<br />
of setLayer and so omit the layer number. Again, only the last of these<br />
should be seriously considered. Undoubtedly the best way to perform this<br />
operation is by using the moveToBack method, which is elearer and works no<br />
matter how many other components are in the same layer.<br />
JLayeredPane provides a set of methods that allow you to get information<br />
about the various layers that are currently active. To discover the highest<br />
and lowest active layers, use the methods highestLayer and lowest-<br />
Layer; to find out how many components are in a given layer, use getComponentCountlnLayer;<br />
to get a list of all the components in a layer, use<br />
getComponentslnLayer. These methods have the following definitions:<br />
public int highestLayer();<br />
public int lowestLayer();<br />
public int getComponentCountlnLayer(int layer);<br />
public Component[] getComponentslnLayer(int layer);<br />
How JLayeredPane Works<br />
JLayeredPane creates the layered effect by drawing its child components in<br />
the order implied by their layer and position numbers—the one at the back is<br />
drawn first and the one at the front is drawn last. This, of course, allows the<br />
components to obscure each other naturally, since a component that overlaps<br />
another one that should appear behind it will be drawn after that component<br />
and will render itself on top of the part of the other component (or components)<br />
that it overlaps. Internally, however, JLayeredPane has to use the<br />
mechanism provided by Container to manage children.<br />
As you saw in Chapter 2, Container keeps an internal list of child components.<br />
You can control the position of a child component within this list by<br />
setting its index. In order to make the layering work properly, JLayered-<br />
Pane has to map the layer and position to an appropriate index, which is the<br />
same as ordering the components as they should be drawn. Container<br />
draws its child components in order from the end of the list—that is, from<br />
the component with the highest index, to the front—that is, the component<br />
with index 0. Therefore, JLayeredPane holds the components that need to<br />
appear at the front before (that is, with lower index numbers) those that are<br />
at the back.<br />
You know that layers with lower numbers need to appear to be behind<br />
those with higher numbers, so all of the components in a given layer will be<br />
grouped together in the JLayeredPane's child list; the order of these groups<br />
will be the reverse of the order in which the layers should be drawn—the
1450 Chapter 12 Multiple-Document Applications<br />
members of the lowest numbered layer group will have higher Container<br />
indices than those in the highest numbered layer. Within each layer group,<br />
components with high position numbers must be drawn before those with<br />
lower numbers. Therefore, those with higher position numbers have higher<br />
indices than those with lower position numbers. Let's look at example to<br />
show how this works in practice.<br />
Let's suppose a JLayeredPane has five JInternalFrames mounted on<br />
it, with the layer and position attributes shown here:<br />
Frame 1 POPUP_LAYER Position 0 Index 0<br />
Frame 2 POPUP LAYER Position 1 Index 1<br />
Frame 3 PALETTE_LAYER Position 0 Index 2<br />
Frame 4 DEFAULT_LAYER Position 0 Index 3<br />
Frame 5 DEFAULT_LAYER Position 1 Index 4<br />
If you look at the column that shows the layers, you will see that the list<br />
has been sorted so that the layers that appear at the front occur earlier than<br />
those that will be at the back: POPUP_LAYER has higher precedence than<br />
PALETTEJLAYER, which in turn appears in front of DEFAULT_LAYER.<br />
Within the layers, the ordering is such that higher position numbers appear<br />
after lower ones. The order shown above is actually how they will be held<br />
within the JLayeredPane, with frame 1 at the head of the child list at<br />
index 0 and frame 5 at the back with index 4. Container draws from the<br />
back of this list, so it will draw frame 5 first, followed by frame 4, and so on.<br />
It should be clear that if you read down from the top of the list and draw<br />
the components in the order that you meet them, you'll get the correct<br />
stacking effects.<br />
If a component's layer or position is changed by calling the JLayered-<br />
Pane setLayer, setPosition, moveToFront, or moveToBack methods,<br />
this list must be reorganized accordingly and, of course, the component<br />
indices will change. Suppose, for example, that frame 2 is moved to the<br />
front of its layer by calling moveToFront. This causes the first two components<br />
to change places:<br />
Frame 2<br />
Frame 1<br />
POPUP, _LAYER<br />
POPUP<br />
LAYER<br />
Position (1<br />
Position 1<br />
Index 0<br />
Index 1
Frame 3 PALETTE_LAYER Position 0<br />
Frame 4 DEFAULT_LAYER Position 0<br />
Frame 5 DEFAULT LAYER Position 1<br />
Index 2<br />
Index 3<br />
Index 4<br />
Layered Panes 1451<br />
On the other hand, if moveToFront were called for frame 5, it moves to<br />
the front of its layer, but not to the front of the pane. As a result, it is promoted<br />
by only one position and is still potentially obscured by frames 1<br />
through 3:<br />
Frame 2<br />
Frame 1<br />
Frame 3<br />
Frame 5<br />
Frame 4<br />
POPUP_LAYER<br />
POPUP^LAYER<br />
PALETTELAYER<br />
DEFAULT_LAYER<br />
DEFAULT LAYER<br />
Position 0<br />
Position 1<br />
Position 0<br />
Position 0<br />
Position 1<br />
Index 0<br />
Index 1<br />
Index 2<br />
Index 3<br />
Index 4<br />
Moving frame 1 from the back of the popup layer to position 1 in the<br />
default layer causes slightly more changes:<br />
Frame 2 POPUP_LAYER Position 0<br />
Frame 3 PALETTE_LAYER Position 0<br />
Frame 5 DEFAULT_LAYER Position 0<br />
Frame 1 DEFAULT_LAYER Position 1<br />
Frame 4 DEFAULT LAYER Position 2<br />
Index 0<br />
Index 1<br />
Index 2<br />
Index 3<br />
Index 4<br />
You can obtain the index of any particular component in a layered pane<br />
using the JLayeredPane getlndexOf method:<br />
public int getlndexOf(Component c);<br />
In practice, you are unlikely to want to call this method because multipledocument<br />
applications don't usually need to be concerned about such lowlevel<br />
details. It is, however, useful if you want to subclass JLayeredPane to<br />
produce some customized behavior that involves the order in which components<br />
are drawn or managed, or if you just want to write test programs to test<br />
your understanding of how the layered pane works. To summarize the use of
1452 Chapter 12 Multiple-Document Applications<br />
layers and position with a layer, Figure 12-5 shows how the frames in the<br />
final list above would appear on the internal list of the JLayeredPane container,<br />
together with the associated layer, position, and index numbers.<br />
Figure 12-5 How JLayeredPane manages its child components.<br />
Removing a component from the container frees up its position within the<br />
layer and its index, since position numbers and indices are always allocated<br />
without gaps. For example, if in the example above, frame 1 were removed,<br />
then frame 4 would be promoted to position 2 within the default layer and its<br />
index would change to 3.
JLayeredPane and Layout Managers<br />
Layered Panes 1453<br />
By default, JLayeredPane is created with no layout manager at all. This is<br />
almost certainly exactly what you want, because all of the standard layout<br />
managers place child components within the container according to strict<br />
rules, almost always without overlaps, whereas usually you want to have the<br />
children of a layered pane placed in overlapping configurations and you also<br />
want to be able to move them around at will.<br />
Using no layout manager does, of course, have some consequences that it<br />
is worth reminding you of here. First, without a layout manager, you are<br />
responsible for placing and sizing all of the components that you place on the<br />
container. Placement is usually a matter of application policy: A common<br />
scheme is to cascade successive frames from top left to bottom right, and<br />
you'll see how to implement this later in this chapter. Sizing, by contrast, is<br />
usually dependent on each component. Generally, you would give each component<br />
its preferred size using a construction something like this:<br />
// 'comp' is the component that we are adding<br />
// to the layered pane 'pane'<br />
comp.setSize(comp.getPreferredSize());<br />
pane.add(comp, JLayeredPane.DEFAULT_LAYER);<br />
// DEFAULT_LAYER for illustration only<br />
Second, with no layout manager, the layered pane won't be able to size<br />
itself to a convenient size for its contents. Therefore, doing something like<br />
this won't work at all:<br />
JLayeredPane pane = new JLayeredPane();<br />
// Add children - not shown<br />
JFrame f = new JFrame("Layered Pane");<br />
f.getContentPane().add(pane);<br />
f .packO ;<br />
f.setVisible(true);<br />
The pack method results in the layered pane being asked for its preferred<br />
size. This request is normally handled by the layout manager but, when there<br />
isn't one, the answer you get won't be particularly useful and it's unlikely to<br />
suit the layout of components you add to the container. Usually, multipledocument<br />
applications control the size of the layered pane by explicitly sizing<br />
the application's JFrame instead of using pack, which will cause the content<br />
pane's BorderLayout manager to allocate all of the space in the content<br />
pane to the layered pane. An alternative, if you can determine a "best" size<br />
for the layered pane, is to use the setMinimumSize, setMaximumSize, and<br />
setPref erredSize methods of JComponent to set any of these constraints
1454 Chapter 12 Multiple-Document Applications<br />
that are applicable. If you use setPref erredsize, you can then use pack<br />
as usual to size the frame, as shown above.<br />
II you wish, you can associate a layout manager with a layered pane. This<br />
will have no effect at all on the way in which it behaves—it will still recognize<br />
layers and positions and will continue to order its child components to reflect<br />
these attributes. However, if you use a layout manager that tiles its components<br />
or ensures that they at least don't overlap (as all the standard ones apart<br />
from OverlayLayout do), you won't get any benefit from using a layered<br />
pane because there won't be any overlap and so the stacking behavior won't<br />
be apparent. Once the container has been laid out, yovi will be able to drag<br />
the frames around, but if the container is resized, the layout manager will<br />
move them all back to their original locations. In general, unless you are<br />
going to write a custom layout manager that works well with the layered<br />
pane, it is best to leave it with no layout manager at all.<br />
<strong>Core</strong> Note<br />
The root pane that is the principal component of JFrarae, JWindow,<br />
JDialog, and JApplet actually uses a JLayeredPane so that it can<br />
arrange for the glass pane to appear to be over the content pane when it is<br />
visible.You can take advantage of this, even without using the glass pane, to<br />
place objects on top of the main window, without adding them to the<br />
content pane.This technique is used to place popup menus over the main<br />
window, for example.To do this, add the component to the component<br />
returned by the JRootPane getLayeredPane method, giving it any<br />
non-negative layer number.<br />
Working with Internal Frames<br />
Internal frames are the part of a multiple-document application that the user<br />
is most aware of. This section examines the pieces that make up an internal<br />
frame and the events that internal frames can generate.<br />
The Structure of an Internal Frame<br />
An internal frame is, as near as possible, a miniature replica of a JFrame. The<br />
similarity extends even to the internal structure: like JFrame, Jinternal-<br />
Frame has a JRootPane and therefore a content pane, a menu bar, and a glass<br />
pane. In fact, as noted above, the main area of a JRootPane is actually a
«...:••<br />
Working with Internal Frames 1455<br />
JLayeredPane: The job of this particular layered pane is to hold the content<br />
pane and the menu bar in a layer that resides below the glass pane, so that the<br />
latter is always in front when it is visible. Now that you are familiar with JLayeredPane,<br />
you can, if you need to, use the JFrame method getLayered-<br />
Pane to get a reference to it and add your own layers.<br />
Because the internal frame is identical to a frame in structure, you need to<br />
use its content pane to create the internal frame's working area. As with<br />
JFrame, this is a JPanel by default but, of course, you can change it. Later in<br />
this chapter, you'll see an example application in which the working area is a<br />
JTextArea wrapped with a JScrollPane. You can also add a menu bar to<br />
give you a separate menu for each internal frame, in addition to the menu on<br />
the frame's caption bar and any menu bar that the application itself might have.<br />
Constructing an Internal Frame<br />
JInternalFrame has six constructors:<br />
public JInternalFrame();<br />
public JInternalFrame(String title);<br />
public JInternalFrame(String title, boolean resizable);<br />
public JInternalFrame(String title, boolean resizable,<br />
boolean closable);<br />
public JInternalFrame(String title, boolean resizable,<br />
boolean closable, boolean maximizable);<br />
public JInternalFrame(String title, boolean resizable,<br />
boolean closable, boolean maximizable,<br />
boolean iconifiable)<br />
The various constructors allow you to set explicit values or accept defaults<br />
for the five main properties of the frame. All of the boolean values are set to<br />
false by default, while using the first constructor gives you a frame with no<br />
title. The boolean properties control both what you can subsequently do with<br />
the frame and what appears on its caption bar: Note that some of these properties<br />
also affect the internal frame's system menu, which is activated from<br />
the left side of the caption bar. This menu is, however, not present in the<br />
Metal look-and-feel.<br />
• Resizable. If this property is true, you can use the mouse to<br />
resize the frame by dragging on its outline. In some look-andfeels,<br />
there may be some visual indication that this is the case by<br />
the presence of resizing handles on the frame. For example,<br />
Figure 12-6 shows the difference between an internal frame<br />
with this property set to true (on the left) and one with it set to
1456 Chapter 12 Multiple-Document Applications<br />
false in the Motiflook-and-feel, which indicates the resizing<br />
handles by the presence of notches on the frame outline. All of<br />
the look-and-feel implementations change the cursor when the<br />
mouse moves over the frame outline if the frame is resizable.<br />
Closable. This property must be set to true for it to be<br />
possible for the user to close an internal frame using the mouse.<br />
In the Metal and Windows look-and-feels, it causes a close<br />
button to appear on the frame—you can see this button on the<br />
right of Figure 12-1 and Figure 12-2. It also creates a Close<br />
item on the frame's system menu, which resides on the left side<br />
of the caption bar.<br />
Maximizable. When true, it causes a maximize button to<br />
appear on the caption bar and a corresponding item on the<br />
frame's system menu. Activating either of these makes the<br />
frame occupy the full area of its parent's window and may<br />
obscure other frames, depending on their layer numbers. When<br />
the frame has been maximized, the same button changes its<br />
appearance to allow the frame to be restored to its previous<br />
size. On the frames menu, the Maximize item is disabled when<br />
the frame is at full size and the Restore item is enabled<br />
instead. Note that it is possible to maximize a frame without<br />
being able to resize it—these two properties are independent of<br />
each other.<br />
Figure 12-6 Motif internal frames with and without resizing handles.<br />
• Iconif iable. Similar to the Maximizable property, except<br />
that it results in a minimize button on the frame and a<br />
Minimize item on the system menu. Activating either causes<br />
the frame to be reduced to an icon (in fact, to a JDesktoplcon<br />
as you'll see later). This icon displays content that is similar to<br />
the frame's caption bar, except that the minimize button is
Working with Internal Frames 1457<br />
replaced by a restore button and the system menu is affected in<br />
the same way as it is with the maximize button. This property<br />
and the resizable property are independent of each other.<br />
Changing Internal Frame Properties<br />
All of the properties that can be set using the constructors also have the usual<br />
methods that you can use to get their current values, or to change them after<br />
the frame has been constructed, ft is very unlikely, for example, that you<br />
would want to use the default constructor for JInternalFrame unless you<br />
wanted to conditionally assign attributes using the following methods:<br />
public void setClosable(boolean closable);<br />
public boolean isClosable();<br />
public void setResizable(boolean resizable);<br />
public boolean isResizable();<br />
public void setlconifiable(boolean iconifiable);<br />
public boolean islconifiable();<br />
public void setMaximizable(boolean maximizable);<br />
public boolean isMaximizable();<br />
public void setTitle(String title);<br />
public String getTitleO;<br />
Changing any of these attributes (other than the title) once the frame has<br />
been made visible for the first time is not advisable. What happens is that the<br />
property change becomes effective, but the frame's visual appearance and its<br />
menu don't reflect it. For example, if you create a frame that can be closed,<br />
the menu (if it exists) will contain a Close item and (unless you are using the<br />
Motif look-and-feel) a close button will appear on the frame. If you then<br />
invoke setClosable (false), the menu item and the close button remain,<br />
but all attempts to close the frame using either of them will be ineffective.<br />
Setting an Internal Frame's Caption-Bar Icon<br />
Like JFrame, an internal frame can have an icon that is displayed at the left<br />
of the title bar. Unlike the JFrame icon which is actually an Image, the icon<br />
for an internal frame can be anything that implements the Icon interface, of<br />
which Imagelcon is one particular example. If you want to supply an icon,<br />
best results are obtained with one that is 16 pixels high and wide. To associate<br />
the icon with the frame, use the following method:<br />
public void setFramelcon(Icon icon);
1458 Chapter 12 Multiple-Document Applications<br />
Here's an example that puts a small letter J on the top left of the caption<br />
bar by using an image loaded as an Image I con:<br />
JlnternalFrame frame = new JInternalFrame(<br />
"Frame 1", true, true, true, true);<br />
frame.setBounds(10, 10, 250, 200);<br />
Icon icon = new Imagelcon(<br />
FrameWithlcon.class.getResource("images/j.gif"));<br />
frame.setFramelcon(icon);<br />
This mechanism of creating an Image I con from an image should be<br />
familiar by now. In this extract, the image is located by reference to the location<br />
of the class FrameWithlcon, of which this code is a part. You can run<br />
this example for yourself with the command<br />
java <strong>JFC</strong>Book.Chapterl2.FrameWithlcon<br />
Figure 12-7 shows what the internal frame looks like with the Metal lookand-feel<br />
installed.<br />
Figure 12-7 An internal frame with a custom frame icon.<br />
Internal Frame State<br />
JlnternalFrame has several methods that you can use to get or change its<br />
current state:<br />
public void setClosed(boolean closed);
public void setlcon(boolean islcon);<br />
public void setMaximum(boolean maximize);<br />
public void setSelected(boolean selected);<br />
public boolean isClosedO;<br />
public boolean islcon();<br />
public boolean isMaximum();<br />
public boolean isSelected();<br />
Working with Internal Frames 1459<br />
The setClosed method makes the frame close and removes it from its<br />
container. When this method has been called, you should not attempt to use<br />
the frame again, setlcon makes the frame minimize to an icon which might<br />
look like its caption bar. The exact appearance and location of the icon<br />
depends on the look-and-feel in use and on another object called the desktop<br />
manager, which will be discussed later in this chapter. If you call this method<br />
with argument false when the frame is iconified, it will return to its original<br />
location and size. Invoking setMaximum with argument true makes the<br />
frame expand to fill its container. When you use this method, the frame's<br />
original size is saved and used to restore the frame when you setMaximum is<br />
later called with argument false.<br />
Finally, setSelected controls whether the frame is the selected frame<br />
within its layer. When a frame is selected, it usually highlights its caption bar.<br />
Only one frame in each layer can be selected at any given time, so when this<br />
method is called for a frame, the frame that was originally selected becomes<br />
deselected automatically.<br />
You can call these methods from your application to control your internal<br />
frames. They are also invoked by the look-and-feel code associated with the<br />
internal frame when the user clicks on buttons on the caption bar to iconify,<br />
maximize, restore, or close a frame or to bring a frame to the front.<br />
<strong>Core</strong> Note<br />
Actually, none of these methods directly performs the task it advertises—<br />
for example, the setClosed method does not actually close the frame<br />
itself. Instead, they start a chain of events that will usually cause the<br />
requested state change to happen. Ultimately, the state of a frame is under<br />
the control of the desktop manager, which will be described later. By<br />
default, however, all of these methods behave as described above. The<br />
default behavior will only be modified if you install your own desktop<br />
manager that does different things.<br />
All of the changes in the frame's state caused by using these methods,<br />
whether within the application itself or as a result of user action, can be mon-
1460 Chapter 12 Multiple-Document Applications<br />
itored and, if necessary, in some eases attempts to change the state can be<br />
prevented. The frame associates the attributes controlled by these methods<br />
with a property and generates a PropertyChangeEvent when a request is<br />
made to change any of them; to receive notification of these events, you can<br />
register a listener on the internal frame by using the addPropertyChange-<br />
Listener method. As you've already seen, a PropertyChangeEvent contains<br />
the name of the affected property together with the property's old and<br />
new values. Table 12—1 lists the properties whose changes can be monitored,<br />
the data type of the old and new values and the name of the Jlnternal-<br />
Frame method that changes the property.<br />
Table 12-1 Internal Frame Properties<br />
Property<br />
CONTENT_PANE_PROPERTY<br />
GLASS_PANE_PROPERTY<br />
LAYERED_PANE_PROPERTY<br />
MENU_BAR__PROPERTY<br />
ROOT_PANE_PROPERTY<br />
TITLE_PROPERTY<br />
IS_SELECTED_PROPERTY<br />
IS_CLOSED_PROPERTY<br />
IS_MAXIMUM_PROPERTY<br />
IS ICON PROPERTY<br />
Value Type<br />
Container<br />
Component<br />
JLayeredPane<br />
JMenuBar<br />
JRootPane<br />
String<br />
Boolean<br />
Boolean<br />
Boolean<br />
Boolean<br />
Method<br />
setContentPane<br />
setGlassPane<br />
setLayeredPane<br />
setJMenuBar<br />
setRootPane<br />
setTitle<br />
setSelected<br />
setClosed<br />
setMaximum<br />
setlcon<br />
Changing any of the first six properties generates a PropertyChangeEvent<br />
to all registered PropertyChangeListeners. Other than the<br />
frame title, it is rare to change any of these items—usually, this will happen<br />
only when the frame is created. The consequences of changing the fraxne's<br />
root pane are, of course, very far-reaching because it changes almost everything<br />
in the frame.<br />
Changing any of the last four properties generates two PropertyChangeEvents:<br />
the first is sent to any registered VetoableChangeListeners;<br />
if any of these listeners throws a PropertyVetoException, the requested<br />
change does not take place. If no exception is thrown, the change is then
Working with Internal Frames 1461<br />
notified to all PropertyChangeListeners with an identical Property-<br />
ChangeEvent. This mechanism allows you to reject any of these changes to<br />
the state of the internal frame.<br />
These events are, of course, generated both when the methods listed in the<br />
Table 12-1 are invoked and when the user attempts to make the same state<br />
change using the controls on the frame itself. For example, if the user clicks the<br />
title bar to bring a frame that is not in the foreground into the foreground, a<br />
PropertyChangeEvent with property name IS_SELECTED_PROPERTY, old<br />
value Boolean. FALSE and new value Boolean. TRUE is sent to each VetoableChangeListener.<br />
If it is acceptable for this frame to move to the foreground,<br />
no exception would be thrown and the change would be made. The<br />
same event would then be broadcast to all PropertyChangeListeners.<br />
Registering a PropertyChangeListener allows a program to respond to<br />
an event that has already happened. For example, in a word processor, when<br />
a frame has closed, it might be appropriate to close the file whose content<br />
was displayed in it.<br />
By contrast, programs that want to react to an event before it happens and,<br />
if necessary, abort it would register a VetoableChangeListener. Using the<br />
example of the word processor again, if the user clicked the Close button on<br />
a frame that was displaying data that hadn't been written back to the file, it<br />
would be useful to be able to display a dialog box asking the user to confirm<br />
that the frame should be closed and whether changes to the file should be<br />
written back to it. To achieve this, the word processor would register a VetoableChangeListener<br />
on each of its internal frames. When it received an<br />
event for IS_CLOSED_PROPERTY with the new value true, it would post the<br />
dialog box. If the user elected to continue with the close, the file would be<br />
saved and the event handler would return normally. On the other hand, if the<br />
user decided to cancel the close operation, a PropertyVetoException<br />
would be thrown and the close would be abandoned. You'll see this mechanism<br />
in action as part of the implementation of an example multiple-document<br />
application at the end of this chapter.<br />
Internal Frame Events<br />
Internal frames generate internalFrameEvents to report certain state<br />
changes. These events are delivered to InternalFrameListeners registered<br />
with the frame by calling the first of the following two methods:<br />
public void addlnternalFrameListener(<br />
InternalFrameListener 1);<br />
public void removelnternalFrameListener(
1462 Chapter 12 Multiple-Document Applications<br />
InternalFrameListener 1);<br />
InternalFrameEvents are the internal frame equivalent of the Window-<br />
Events available from JFrame and the other top-level windows. There is an<br />
InternalFrameEvent type corresponding to each WindowEvent type and<br />
thus an InternalFrameListener method for each method of WindowListener.<br />
Table 12-2 summarizes the listener methods and the event types<br />
and describes when the events are generated. Each listener method has a signature<br />
similar to this one:<br />
public void internalFrameActivated(<br />
Table 12-2 Internal Frame Events<br />
Method<br />
internalFrameActivated<br />
internalFrameClosed<br />
internalFrameDeactivated<br />
internalFrameDeiconified<br />
internal Frame I conified<br />
internalFrameOpened<br />
InternalFrameEvent evt);<br />
Event<br />
INTERNAL_FRAME_ACTIVATE<br />
D<br />
INTERNAL FRAME CLOSED<br />
internalFrameClosing INTERNAL_FRAME_CLOSING<br />
When generated<br />
When an internal frame<br />
becomes the selected<br />
frame in its layer<br />
When an internal frame<br />
has completely closed<br />
At the start of an internal<br />
frame's close<br />
sequence. See the text<br />
for further information<br />
INTERNAL_FRAME_DEACTIVAT When an internal frame<br />
ED is no longer the<br />
selected frame in its<br />
layer<br />
INTERNAL_FRAME_DEICONIF<br />
IED<br />
When an internal frame<br />
has been restored to<br />
the state prior to being<br />
iconified<br />
INTERNAL__FRAME_ICONIFIE When an internal frame<br />
D has been minimized<br />
into an icon<br />
INTERNAL FRAME OPENED When the internal<br />
frame is opened for the<br />
first time
Icons, the Desktop Pane, and the Desktop Manager 1463<br />
As you can see, most of these events are generated under the same circumstances<br />
as the corresponding WindowEvents and can be treated in the same<br />
way. As you know from the previous section, attempts to change the state of an<br />
internal frame can be vetoed by application code. These events are only generated<br />
when the state change is taking place—in other words, a veto has not<br />
occurred. The only tricky cases are the INTERNAL_FRAME_CLOSING and<br />
INTERNAL_FRAME_CLOSED events. The way in which these events are used is<br />
described in "Closing Internal Frames" later in this chapter.<br />
<strong>Core</strong> Alert<br />
The INTERNAL_FRAME_OPENED event is not generated in Swing I.I.I<br />
and <strong>Java</strong> 2 version l.2.2.This event is, however, delivered if you use <strong>Java</strong> 2<br />
version 1.3.<br />
Icons, the Desktop Pane, and the<br />
Desktop Manager<br />
So far, you've seen JLayeredPane and JInternalFrame, but there are<br />
three other classes that you need to know about in order to write professional<br />
multiple-document applications: JDesktopIcon, JDesktopPane and<br />
Def aultDesktopManager. Of these, the first is the simplest to deal with—it<br />
is the object that you see when you iconify an internal frame. If you go back<br />
to the first example in this chapter and minimize all of the frames, you'll get<br />
four icons at the bottom of the window, as shown in Figure 12-8. In the standard<br />
look-and-feel implementations, the icon for an internal frame is similar<br />
to its caption bar and includes buttons that allow you to close, maximize, or<br />
restore it, provided that the frame is configured to allow these things to happen.<br />
If you don't like the default desktop icon, you can, of course, change it<br />
by introducing your own look-and-feel implementation.<br />
JDesktopIcon is a static inner class of JInternalFrame. Each JDesktopIcon<br />
is associated with, at most, one internal frame at any given time.<br />
The icon will be created automatically when the frame is iconified for the<br />
first time, but if you wish you can create your own, possibly customized icon<br />
at any time and connect it to the frame using the following JInternal-<br />
Frame method:<br />
public void setDesktopIcon(JDesktopIcon d);
1464 Chapter 12 Multiple-Document Applications<br />
Figure 12-8 Four desktop icons.<br />
When you create the icon, you pass to its constructor a reference to the<br />
frame that it will represent:<br />
public JDesktopIcon(JInternalFrame f);<br />
An internal frame and its icon are never visible at the same time. When<br />
the frame is iconified, it is removed from its container and the icon is added<br />
instead, then sized and placed appropriately. Similarly, when the frame is<br />
deiconifled, the icon is removed from the container and the frame replaced<br />
at its original location and with its previous size.<br />
The other two classes are veiy closely related to each other. In our earlier<br />
examples, the internal frames have been placed in a JLayeredPane to get<br />
the benefit of being able to overlay them and move them around at will.<br />
JDesktopPane is a subclass of JLayeredPane that has an associated desktop<br />
manager, represented by an instance of the class Def aultDesktopManager.<br />
The desktop pane can do everything that the layered pane can do and<br />
it also provides the following additional methods:<br />
public JInternalFrame[] getAllFrames();<br />
public JInternalFrame[] getAl1FramesInLayer(int layer);<br />
public DesktopManager getDesktopManager();<br />
public void setDesktopManager(DesktopManager manager);
Icons, the Desktop Pane, and the Desktop Manager 1465<br />
public void setSelectedFrame(JInternalFrame f);<br />
public JInternalFrame getSelectedFrame();<br />
The first two methods just return arrays of all of the frames on the desktop<br />
and all of the frames in a given layer of the desktop. It is the ability of the<br />
desktop pane to host a desktop manager, controlled by the next two methods,<br />
that is the important thing about it and which will be discussed in the next<br />
section.<br />
The last two methods are available only as of <strong>Java</strong> 2 version 1.3. As you<br />
know, each layer in a JLayeredPane or JDesktopPane may have a single<br />
frame that is considered to be selected. In addition to this, JDesktopPane<br />
has the concept of a single distinguished frame that is considered to be "the"<br />
selected pane. The default policy is to make the last frame activated the desktop<br />
selected frame, which means that it is the last frame that the user<br />
selected in any layer. You can use the getSelectedFrame method to find<br />
out which is the currently selected frame. Typically, you would use this to<br />
provide the context within which to apply an action from a menu that could<br />
apply to any of the internal frames.<br />
<strong>Core</strong> Note<br />
It would be even more useful to have a bound property that would fire a<br />
PropertyChangeEvent when the selected frame changes, so that you<br />
could, for example, enable and disable actions depending on which frame is<br />
active. Unfortunately, no such property exists at the time of this writing.<br />
Closing Internal Frames<br />
You would think that closing an internal frame would be a routine and simple<br />
matter. Unfortunately, this is not so. There has been much confusion over<br />
this topic in past versions of Swing, including Swing 1.1.1 and <strong>Java</strong> 2 version<br />
1.2.2, although the situation has at last been improved in <strong>Java</strong> 2 version 1.3.<br />
Because the details vary so much between the various Swing releases, in<br />
order to keep the discussion clear, there are separate sections that describe<br />
the implementation for <strong>Java</strong> 2 version 1.3 and that used in earlier releases.<br />
The only thing that is common between these two cases is that there are<br />
three different ways to close an internal frame:<br />
1. From the user interface when the user clicks the close button<br />
on the caption bar or the "Close" item on the system menu,<br />
when it is available.
1466 Chapter 12 Multiple-Document Applications<br />
2. By calling the JInternalFrame setClosed method with<br />
argument true.<br />
3. By calling the JInternalFrame dispose method.<br />
In the rest of this section, we describe how each of these cases is handled.<br />
Closing Internal Frames in Swing I.I.I and<br />
<strong>Java</strong> 2 Version 1.2.2<br />
There is no doubt that the process of closing frames in Swing 1.1.1 and <strong>Java</strong> 2<br />
version 1.2.2 is fraught with danger. The implementation suffers from a number<br />
of shortcomings that lead to undesirable effects if the developer does not<br />
do exactly the right thing. Unfortunately, a developer who understands the<br />
mechanism for closing JFrames is very likely to do the wrong thing when<br />
closing an internal frame.<br />
To see what the issues are, we'll examine the three close cases separately.<br />
Closing Internal Frames from the User Interface<br />
When the user wants to close an internal frame, the request is handled by the<br />
look-and-feel specific UI class for the internal frame (actually, the class that<br />
handles the title bar). If the internal frame is not marked as closable, then the<br />
request is ignored. Otherwise, the UI class calls the JInternalFrame set-<br />
Closed method with argument true, just as if the developer had programmatically<br />
closed the frame.<br />
Closing Internal Frames Using the setClosed Method<br />
When the setClosed (true) method is called, the following steps are<br />
taken, in this order:<br />
1. A PropertyChangeEvent for the property<br />
IS_CLOSED_PROPERTY is delievered to all VetoableChange-<br />
Listeners. If a veto occurs, the operation is abandoned and<br />
the following steps are not performed.<br />
2. The internal frame is marked as closed.<br />
3. An INTERNAL_FRAME__CLOSING event is broadcast to all<br />
InternalFrameListeners.<br />
4. The frame's default close operation is performed (see below).<br />
5. An INTERNAL_FRAME_CLOSED event is broadcast to all Internal<br />
FrameListeners.
Icons, the Desktop Pane, and the Desktop Manager 1467<br />
6. A PropertyChangeEvent for the property<br />
IS_CLOSED_PROPERTY is delivered to all PropertyChange-<br />
Listeners. This event is received bythe DesktopManager,<br />
which then removes the internal frame from the desktop pane.<br />
All of the above seems reasonable on the face of it—all of the appropriate<br />
events are generated and the frame is removed from the desktop. The problems<br />
are actually hidden in the details.<br />
Notice that at step 4, the frame's default close operation is performed.<br />
Like all of the top level windows, an internal frame can have a default close<br />
operation that is set using the setDefaultCloseOperation method. The<br />
action that is taken depends on which mode is selected:<br />
DO NOTHING ON CLOSE<br />
HIDE ON CLOSE<br />
EXIT ON CLOSE<br />
DISPOSE ON CLOSE<br />
This is used with top-level windows to allow listeners<br />
to determine whether the frame will elose, will be<br />
hidden, or just left visible. With the current implementation,<br />
events that indicate that the window is<br />
about to close will be sent out, followed by events for<br />
the actual closure of the window. In other words, this<br />
action does not "do nothing"—the frame will still<br />
close!<br />
This is the default action. You would probably expect<br />
this to just hide the window, but in fact it calls the<br />
dispose method! The behavior is already inconsisent,<br />
because events that indicate that the window is<br />
closed will be generated even if<br />
setvisible (false) were called here instead of<br />
dispose.<br />
The application will exit, as the operation name suggests.<br />
This operation works as it should, calling the dispose<br />
method.<br />
Aside from the fact that some of these operations do not behave in the<br />
same way as they do with top-level windows, the biggest problem with this is<br />
the fact that the default close operation is performed at all in this method.<br />
This is part of the confusion of this implementation of setClosed—it does<br />
not necessarily close the internal frame and whether it does so depends on<br />
the default close operation. In fact, setClosed (true) should always close
1468 Chapter 12 Multiple-Document Applications<br />
the internal frame and the default close operation should be considered only<br />
when the user tries to close the frame, before setclosed is called. This<br />
would lead to behavior that is consistent with that of top-level windows.<br />
Closing Internal Frames Using the dispose Method<br />
By analogy to top level windows, you might be tempted to close an internal<br />
frame by calling its dispose method. If you do that, here is what happens:<br />
1. The frame is made invisible and not selected.<br />
2. If the frame has not been closed by calling setClose (false)<br />
3. An INTERNAL_FRAME_CLOSED event is broadcast to all internalFrameListeners.<br />
This falls well short of completely closing the internal frame. In particular,<br />
because it doesn't generate a PropertyChangeEvent from the<br />
IS_CLOSED_PROPERTY, the internal frame is not actually removed from the<br />
desktop, so although it is invisible, it is still among the components on the<br />
desktop.<br />
Summary<br />
In reality, to programmatically close an internal frame in Swing 1.1.1 and<br />
<strong>Java</strong> 2 version 1.2.2, you have to do the following:<br />
frame . setclosed. (true) ,frame.dispose();<br />
If you just call the first method, you don't get the<br />
INTERNAL_FRAME_CLOSED event that your listeners might require, while<br />
just calling dispose is much worse, as described above.<br />
Closing Internal Frames in <strong>Java</strong> 2 Version 1.3<br />
In <strong>Java</strong> 2 version 1.3, the strange and inconsistent behavior exhibited by earlier<br />
releases has been fixed. The following sections describe what happens in<br />
all three cases.<br />
Closing Internal Frames from the User Interface<br />
When the user tries to close an internal frame from the user interface,<br />
assuming that the frame is closable, an INTERNAL__FRAME_CLOSED event is<br />
generated so that InternalFratneListeners can take any necessary action<br />
and then the JInternalFrame doDef aultCloseAction method is called.<br />
This is already an improvement over earlier releases as this code is being
Icons, the Desktop Pane, and the Desktop Manager 1469<br />
called from the correct place. The doDef aultcloseAction method may or<br />
may not close the internal frame, depending what the default close action is:<br />
DO_NOTHING_ON_CLOSE Does exactly that—nothing! The frame will not close<br />
and no events will be broadcast. This is completely<br />
different from earlier releases, where the frame<br />
would close no matter what the default close operation<br />
happened to be.<br />
HIDE_ON_CLOSE Makes the frame invisible and ensures that it is not<br />
selected. No close operations take place and no close<br />
events are generated.<br />
6<br />
EXIT_ON_CLOSE This mode is ignored—it behaves just like<br />
DO_NOTHING_ON_CLOSE.<br />
DI SPOSE_ON_CLOSE This mode closes the frame using the same sequence<br />
of calls as the setClosed method described in the<br />
next section. The only difference is that separate<br />
code is used because the default close operation has<br />
to be considered before proceeding with the close.<br />
DISPOSE_ON_CLOSE is the default action in <strong>Java</strong> 2<br />
version 1.3.<br />
Closing Internal Frames Using the setClosed Method<br />
This method now performs an unconditional close (unless the operation is<br />
vetoed), unaffected by the default close operation. The exact sequence of<br />
events is as follows:<br />
1. An INTERNAL_FRAME_CLOSING event is broadcast to all<br />
InternalFrameListeners.<br />
2. A PropertyChangeEvent for the property<br />
IS CLOSED_PROPERTY is delievered to all VetoableChange-<br />
Listeners. If a veto occurs, the operation is abandoned and<br />
the following steps are not performed.<br />
3. The internal frame is marked as closed.<br />
4. A PropertyChangeEvent for the property<br />
IS_CLOSED_PROPERTY is delivered to all PropertyChange-<br />
Listeners. This event is received by the DesktopManager,<br />
which then removes the internal frame from the desktop pane.
1470 Chapter 12 Multiple-Document Applications<br />
5. The dispose method is called to complete the close operation.<br />
This generates the INTERNAL_FRAME_CLOSED event for<br />
InternalFrameListeners.<br />
As a result of this, setClosed is a vetoable version of dispose that also<br />
generates slightly more events than dispose. Since it winds up by calling<br />
dispose, you don't need to do that yourself.<br />
Closing Internal Frames Using the dispose Method<br />
Unlike its counterpart in earlier releases, the dispose method no longer<br />
leaves the internal frame in the list of frames on the desktop. The dispose<br />
method should be used when you don't need to be able to veto the frame<br />
close action from application code. Here's what it does:<br />
1. Makes the frame invisible and ensures that it is not selected.<br />
2. If the frame is not already closed, a PropertyChangeEvent<br />
for the property IS_CLOSED_PROPERTY is delivered to all<br />
PropertyChangeListeners. This event is received bythe<br />
DesktopManager, which then removes the internal frame from<br />
the desktop pane.<br />
3. An INTERNAL_FRAME_CLOSED event is delivered to all InternalFrameListeners.<br />
Summary<br />
In <strong>Java</strong> 2 version 1.3, if you want to programmatically close a frame, you can<br />
call either setClosed (false) or dispose. The choice depends on<br />
whether you want application code to be able to veto the operation; if you do,<br />
you should call setClosed.<br />
If you call both methods, as you would in Swing 1.1.1 and <strong>Java</strong> 2 version<br />
1.2.2:<br />
setClosed(true);<br />
dispose();<br />
then there are no harmful side effects. You will, however, find that two<br />
INTERNAL_FRAME_CLOSED events will be delivered.<br />
A Desktop Pane with Cascade andTUe Support<br />
A common requirement with multiple-document applications is to be able to<br />
arrange the document windows in an orderly fashion. Most commercial appli-
,-•.<br />
Icons, the Desktop Pane, and the Desktop Manager 1471<br />
cations allow you to create new windows that cascade down from the top left to<br />
the bottom right. As well as this, it is usual to be able, at any time, to tidy up the<br />
desktop by having all of the document windows rearranged and resized so that<br />
they cascade or to arrange for them to be tiled to cover all or almost all of the<br />
desktop. These features are not provided by JDesktopPane, but it is easy to<br />
add them, as you'll see in this section. Figure 12-9 shows how a desktop would<br />
look with five internal frames arranged in a tiled pattern, while Figure 12-10<br />
shows the same frames when they are cascaded.<br />
Figure 12-9 A tiled desktop.<br />
The first question to ask is where to put the code that implements the cascading<br />
and tiled layout. You might think that this should be in the desktop<br />
manager, since it seems to be the place to put desktop policy, but this doesn't<br />
work out very well. The fact of the matter is, it might be necessary to be able<br />
to provide the user with the ability to create new frames that are automatically<br />
cascaded, but the desktop manager doesn't get control when a new<br />
frame is created and so can't influence its position or size. It is also advantageous<br />
to be able to change the layout of all of the internal frames and put<br />
them into a tiled or cascaded configuration at any time. Again, this doesn't fit
1472 Chapter 12 Multiple-Document Applications<br />
with the desktop manager interface—there is nothing in this interface that<br />
asks for the layout to be changed. The only reasonable place to put this functionality<br />
is in the desktop pane itself. In the example in this section, it will be<br />
implemented as three new methods in a subclass of JDesktopPane called<br />
ExtendedDesktopPane.<br />
Figure 12-10 A cascaded desktop.<br />
The implementation of this subclass is actually pretty simple, but some of<br />
the details make it look more complex than it actually is. The code is presented<br />
in Listing 12-1.<br />
Listing 12-1 A tiling and cascade desktop pane<br />
package <strong>JFC</strong>Book.Chapterl2;<br />
import j avax.swing.*;<br />
import j ava.awt.*;
Icons, the Desktop Pane, and the Desktop Manager 1473<br />
Listing 12-1 A tiling and cascade desktop pane (continued)<br />
/**<br />
* A desktop pane that supports tiling and cascading<br />
*/<br />
public class ExtendedDesktopPane extends JDesktopPane {<br />
// This method allows child frames to<br />
// be added with automatic cascading<br />
public void addCascaded(Component comp, Integer layer) {<br />
// First add the component in the correct layer<br />
this.add(comp, layer);<br />
// Now do the cascading<br />
if (comp instanceof JInternalFrame) {<br />
this.cascade(comp);<br />
}<br />
// Move it to the front<br />
this.moveToFront(comp);<br />
}<br />
// Layout all of the children of this container<br />
// so that they are cascaded.<br />
public void cascadeAll() {<br />
Component[] comps = getComponents();<br />
int count = comps.length;<br />
nextX = 0;<br />
nextY = 0;<br />
}<br />
for (int i = count - 1; i >= 0; i--) {<br />
Component comp = comps[i];<br />
if (comp instanceof JInternalFrame &&<br />
comp.isVisible()) {<br />
cascade(comp);<br />
}<br />
}<br />
// Layout all of the children of this container<br />
// so that they are tiled,<br />
public void tileAHO {<br />
DesktopManager manager = getDesktopManager();<br />
if (manager == null) {
1474 Chapter 12 Multiple-Document Applications<br />
Listing 12-1 A tiling and cascade desktop pane (continued)<br />
//No desktop manager - do nothing<br />
return;<br />
}<br />
Component[] comps = getComponents();<br />
Component comp;<br />
int count = 0;<br />
// Count and handle only the internal frames<br />
for (int i = 0; i < comps.length; i++) {<br />
comp = comps[i];<br />
if (comp instanceof JInternalFrame &&<br />
comp.isVisible()) {<br />
count++;<br />
}<br />
}<br />
if (count != 0) {<br />
double root = Math.sqrt((double)count);<br />
int rows = (int)root;<br />
int columns = count/rows;<br />
int spares = count - (columns * rows);<br />
Dimension paneSize = getSizeO ;<br />
int columnWidth = paneSize.width/columns;<br />
//We leave some space at the bottom that<br />
// doesn't get covered<br />
int availableHeight = paneSize.height -<br />
UNUSED__HEIGHT ;<br />
int mainHeight = availableHeight/rows;<br />
int smallerHeight = availableHeight/(rows + 1);<br />
int rowHeight = mainHeight;<br />
int x = 0;<br />
int y = 0;<br />
int thisRow = rows;<br />
int normalColumns = columns - spares;<br />
for (int i = comps.length - 1; i >= 0; i - ) {<br />
comp = comps[i];<br />
if (comp instanceof JInternalFrame &&<br />
comp.isVisible() ) {<br />
manager.setBoundsForFrame((JComponent)comp, x, y,<br />
columnWidth, rowHeight);
Icons, the Desktop Pane, and the Desktop Manager 1475<br />
Listing 12-1 A tiling and cascade desktop pane (continued)<br />
}<br />
}<br />
}<br />
}<br />
y += rowHeight;<br />
if (--thisRow == 0) {<br />
// Filled the row<br />
y = 0;<br />
x += columnWidth;<br />
// Switch to smaller rows if necessary<br />
if ( - normalColumns
1476 Chapter 12 Multiple-Document Applications<br />
Listing 12-1 A tiling and cascade desktop pane (continued)<br />
if (nextX + targetWidth > paneSize.width ||<br />
nextY + targetHeight > paneSize.height) {<br />
nextX = 0;<br />
nextY = 0;<br />
}<br />
manager.setBoundsForFrame((JComponent)comp,<br />
nextX, nextY, targetWidth, targetHeight);<br />
nextX += offsetX;<br />
nextY += offsetY;<br />
}<br />
protected int nextX;// Next X position<br />
protected int nextY;// Next Y position<br />
protected int offsetX = DEFAULT JOFFSETX;<br />
protected int offsetY = DEFAULT J3FFSETY;<br />
protected static final int DEFAULTJDFFSETX = 24;<br />
protected static final int DEFAULT_OFFSETY = 24;<br />
protected static final int UNUSED_HEIGHT = 48;<br />
_}<br />
Cascading on Internal Frame Creation<br />
The first extension provides the ability to add successive frames so that they<br />
cascade down the desktop from left to right and top to bottom, as shown in<br />
Figure 12-10. This is done by adding a method called addCascaded,<br />
defined as follows:<br />
public void addCascaded(Component comp, Integer layer);<br />
This method will add the component comp to the desktop in the given<br />
layer and automatically determine its initial size and location relative to the<br />
last component that was added using this method. This is a simple thing to<br />
do—the first component is placed at the top left of the pane, while subsequent<br />
ones are each placed at a fixed horizontal and vertical offset from the<br />
one before. In this example, the offsets that used are instance variables of<br />
ExtendedDesktopPane (offsetX and offsetY) which are both set initially<br />
to 24 pixels. To allow this to be customized, there is also a method<br />
called setCascadeOf f sets that changes both offsets to new values given<br />
the new offsets either as separate integers or in a Point structure. There is
Icons, the Desktop Pane, and the Desktop Manager 1477<br />
also another method, called getCascadeOf f sets, that lets you read the<br />
current offsets as a Point.<br />
The next location for a cascaded window is held in the instance variables<br />
nextX and nextY, which are both initially 0. After each window has been<br />
placed, the appropriate offset is added to each of these variables to generate<br />
the correct position for the next window. Eventually, however, we will reach a<br />
stage where a new window would be clipped by the bottom or right-hand<br />
side of the container. When this happens, both nextX and nextY reset to 0<br />
so that subsequent frames are again cascaded from the top left. This behavior<br />
is consistent with the cascading scheme used by Windows applications. As far<br />
as the size of the component goes, this example always make it three-quarters<br />
of the width and height of the entire container. If this isn't appropriate, the<br />
component can be explicitly resized after it has been added.<br />
Finally, when the component has to be added, it is brought to the front of<br />
its layer by calling moveToFront.<br />
Cascading Existing Internal Frames<br />
The second extension that this example provides is a method that will take<br />
all of the frames on the desktop and cascade them. This facility is implemented<br />
by the cascadeAll method, which implicitly acts on all of the<br />
components in the container and so doesn't need any arguments. To implement<br />
this, it is necessary to walk through all of the components in the container<br />
and move each one to the location it would have had if it were being<br />
added with the addCascaded method. It does not, however, need to be<br />
added to the container, because it has already been added, and its position<br />
in the stacking order must not be changed. The rest of the cascading code<br />
can, however, be shared with the addCascaded method. For this reason,<br />
the bulk of the cascading logic is in the cascade method, which does<br />
everything apart from adding the component to the container and moving<br />
it to the front of its layer.<br />
Walking through the list of child components is fairly simple—the list is<br />
obtained by using the getComponents method of Container, which<br />
returns an array in ascending order of index—that is, the items that appear at<br />
the front of the desktop are at the front of this list. When moving everything,<br />
it is important to be careful about the order in which it is done, because<br />
everything that is moved will be repainted as it moves. If the array were processed<br />
from the front to the back (i.e., from index 0 upwards), the original<br />
stacking order would be reversed, because the item that should be at the<br />
front first would be drawn first, followed by the second which would then
1478 Chapter 12 Multiple-Document Applications<br />
appear on top of the first and so on. For this reason, it is necessary to work<br />
from the end of the list toward the front.<br />
There is one other catch to look out for. Most of the layered pane and<br />
desktop pane methods allow you to manipulate arbitrary components, but<br />
this doesn't work very well for some operations. For example, you can't iconify<br />
arbitrary components because there is no way for the desktop pane to<br />
know that you want to do this and no way to associate an arbitrary component<br />
with its icon; JInternalFrame and JDesktopIcon, if you recall, keep references<br />
to each other so that the desktop manager can easily find the icon for<br />
a frame and vice versa. Because of this, it is best to use only internal frames<br />
with the desktop pane and refrain from using other components unless you<br />
are aware of the restrictions.<br />
Similarly, our cascading code only works for internal frames on the desktop.<br />
The reason for this is that the desktop contains other items that you<br />
wouldn't want to cascade, the most obvious example being the desktop<br />
icons themselves. Therefore, the loop in cascadeAll that processes the<br />
desktop panes child components looks specifically for internal frames and<br />
only processes those that are actually visible.<br />
Tiling the Desktop<br />
The third extension is the ability to tile the container. Again, this operation is<br />
restricted to visible internal frames only and the basic mechanism used by<br />
the tileAll method is the same as that used by cascadeAll—walking<br />
along the list of child components and placing and sizing them appropriately.<br />
The interesting problem is deciding where to place all of the windows. The<br />
mechanism used in this example makes it behave like Windows applications.<br />
First, some unused space is left at the bottom of the container so that you can<br />
still access at least some of the icons that might be there. Our implementation<br />
fixes this at 48 pixels, but it is a trivial extension to make this customizable.<br />
The rest of the space will be filled by placing the internal frames in<br />
columns, working from top to bottom in each column and from left to right<br />
across the desktop pane.<br />
The number of rows is determined using a very simple algorithm—just<br />
take the integer square root of the number of components that need to be<br />
tiled. To get the number of columns, divide the number of components by<br />
the number of rows. Because this example works in integer arithmetic, dividing<br />
the number of components by its integer square root does not always give<br />
you its square root—it gives you something greater than or equal to its square<br />
root. If the number of components is a perfect square, this results in a regular<br />
layout. For example, with four components, you would have 2 columns
Icons, the Desktop Pane, and the Desktop Manager 1479<br />
with 2 rows in each and with nine components there would 3 columns each<br />
with 3 rows. For other values, you get more interesting results.<br />
Suppose you have five components to tile. The integer square root of 5 is<br />
2, so the number of rows would be 2 and the number of columns 5/2, which<br />
is 2, working in integer arithmetic. Two columns and two rows gives a total of<br />
four tiles, leaving one component that can't be placed. When this happens,<br />
the cells in the last column are made shorter and the spare component is<br />
placed in that column. Here, there is one spare component, so the last column<br />
has 3 rows and the first column has 2.<br />
If there were six components, the solution would be somewhat simpler—<br />
the square root is again 2, but 6 divides evenly by 2 to give 3, so there would<br />
be 3 columns each with 2 rows. This pattern works well until there are 11<br />
components. The integer square root of 11 is 3, so there would be 3 rows<br />
with 11/3 = 3 columns. This provides 9 slots—now there are 2 components<br />
unaccounted for. When there was one spare component, it was placed in the<br />
last column. This time, one spare component will be placed in each of the<br />
last two columns. This is, in fact, the algorithm that is used throughout—calculate<br />
the number of spare components and allocate one each to the last columns.<br />
Figure 12-11 shows the result obtained with 11 frames.<br />
With this explanation, the code for the cascadeAll method should be<br />
easy to lollow. It starts by counting the number of components to tile by getting<br />
the array of components in the container and walking down it, counting<br />
only those that are both visible and instances of J Internal Frame. It then<br />
calculates the number of columns and rows and, from that, works out the<br />
number of spares:<br />
double root = Math.sqrt((double)count);<br />
int rows = (int)root;<br />
int columns = count/rows;<br />
int spares = count - (columns * rows);<br />
Because this code is using integer arithmetic, the integer value of the<br />
square root is always smaller than (or the same as) the exact answer, so the<br />
number of columns obtained is always larger (or the same as) the number<br />
of rows. This code could equally have used the integer part of the square<br />
root as the number of columns directly and then there would have been<br />
more rows than columns. Next, the width of each column is calculated by<br />
dividing the width of the container by the number or columns and the<br />
height of each row is obtained by dividing the container height by the row<br />
count. However, the last few columns may have more rows than the first<br />
ones, so it is necessary to calculate a second row height based on one more<br />
*
1480 Chapter 12 Multiple-Document Applications<br />
row. These two row heights are placed in the variables mainHeight and<br />
smallerHeight, respectively.<br />
Figure 72-1 J A tiled desktop with 11 components.<br />
The cascadeAll method then walks down the list of components placing<br />
visible internal frames, working from the top left of the container down each<br />
column and making each row mainHeight pixels high until it fills a column,<br />
then moves to the next column. When it reaches the point at which it needs<br />
to place one more row in each column, it simply starts using the smaller row<br />
height smallerHeight. The number of normal columns (i.e., those without<br />
extra rows) is given by the expression columns—spares, which simply<br />
expresses the fact that one spare is placed in each of the last columns. This<br />
value is placed in a variable (normalColumns) at the start of the loop. Each<br />
time a column is filled, normalColumns is decremented and when it reaches<br />
zero we switch to using the smaller height and packing one more row to each<br />
of the remaining columns.<br />
Notice the way in which each frame is placed and sized:
Icons, the Desktop Pane, and the Desktop Manager 1481<br />
manager.setBoundsForFrame((JComponent)comp, x, y,<br />
columnWidth, rowHeight);<br />
The variable manager holds a reference to the pane's desktop manager.<br />
Rather than explicitly place and size the frame using setBounds, this task is<br />
delegated to the desktop manager so that it can do whatever it needs to do<br />
when a frame is moved or resized. This make it possible to install a desktop<br />
manager that disallows any movement of components, for example, without<br />
changing the desktop pane implementation. This same method is also used<br />
when cascading in the cascade method.<br />
You can try out the extended desktop pane using an example program<br />
from the CD-ROM that uses it. To run this program, use the command<br />
java <strong>JFC</strong>Book.Chapterl2.DesktopPaneExample<br />
This brings up an empty desktop with a File menu, on which there are<br />
options that allow you to create new frames. The New Frame menu item creates<br />
a new frame in the middle of the desktop, while New Cascaded Frame<br />
uses the addCascaded method to add the frame. The Tile and Cascade<br />
menu items exercise the tileAll and cascadeAll methods, respectively.<br />
Try creating various numbers of frames and then tiling them to see how many<br />
rows and columns are created and how spares are distributed over the last<br />
columns. You'll notice a couple of things about tiling that might, at first, surprise<br />
you:<br />
• If you tile the container and resize it, the tiled components<br />
don't retile themselves to take up the extra space in the<br />
container or shrink if you make the container smaller—they just<br />
stay where they are.<br />
• Tiling a container doesn't stop you dragging the components<br />
around—but you can put them back later by retiling from the<br />
menu.<br />
This behavior is consistent with the way that Windows applications<br />
behave. If you want to change this behavior, you can, of course, do so by<br />
extending this example desktop pane. You could, for example, make the components<br />
tile themselves again when the container resizes by overriding the<br />
setsize and setBounds methods and invoking tileAll after allowing the<br />
superclass to do the resizing—for example, if you always want to tile, you<br />
could implement the setBounds method like this<br />
public void setBounds(Rectangle rect) {<br />
super.setBounds(rect) ;<br />
}<br />
tileAll();
1482 Chapter 12 Multiple-Document Applications<br />
Note that there are two variants of setBounds and also two forms of set-<br />
Size. To make this scheme work consistently, you have to override all of<br />
them. You must, of course, allow the superclass to do its work first, or the<br />
tileAll method will get the wrong container size to work with.<br />
The Role of the Desktop Manager<br />
Earlier in this chapter, you saw that internal frames can be dragged,<br />
resized, and iconified when they are placed in a layered pane and, of<br />
course, this continues to be true when we place them in a desktop pane,<br />
which is, in fact, what you would usually do. In fact, as was hinted in the<br />
descriptions of the setClosed method and the other methods like it,<br />
there is slightly more going on behind the scenes than has been shown so<br />
far. The missing piece that you haven't yet seen is the role played by the<br />
desktop manager. In this section, we'll look at what the desktop manager<br />
does.<br />
The Desktop Manager Interface<br />
It is the job of the desktop manager to fulfill part of the function of closing<br />
internal frames. This is only one of its functions because, in fact, the desktop<br />
manager plays a role in every operation on a frame that might be requested<br />
by user action (or by the programmatic equivalent). The things that a desktop<br />
manager must be able to do are specified in the DesktopManager interface,<br />
of which Def aultDesktopManager is an implementation. Here are the<br />
methods that DesktopManager defines, grouped according to their function:<br />
public void openFrame(JInternalFrame f);<br />
public void closeFrame(JInternalFrame f);<br />
public void maximizeFrame(JInternalFrame f);<br />
public void minimizeFrame(JInternalFrame f);<br />
public void iconifyFrame(JInternalFrame f);<br />
public void deiconifyFrame(JInternalFrame f) ;<br />
public void activateFrame(JInternalFrame f);<br />
public void deactivateFrame(JInternalFrame f);<br />
public void beginDraggingFrame(JComponent republic<br />
void dragFrame(JComponent f, int newX, int newY);<br />
public void endDraggingFrame(JComponent republic<br />
void beginResizingFrame(JComponent f,<br />
int direction);<br />
public void resizeFrame(JComponent f, int newX, int newY,<br />
int newWidth, int newHeight);
Icons, the Desktop Pane, and the Desktop Manager 1483<br />
public void endResizingFrame(JComponent f);<br />
public void setBoundsForFrame(JComponent f, int newX,<br />
int newY, int newWidth, int newHeight);<br />
The first method in this list, openFrame, is not actually called because the<br />
application that owns the JDesktopPane is in control of creating and placing<br />
frames. It would, however, be useful to have this method invoked when an<br />
internal frame is created because it would give the desktop manager an<br />
opportunity to enforce a placement policy (such as tiling or cascading) that<br />
the application itself did not provide. Instead, if you want to implement some<br />
kind of placement policy, you have to implement it in either the application<br />
or in the desktop pane. An example of this will be shown later. The close-<br />
Frame method removes the internal frame from the desktop. The intent of<br />
the next four methods should be evident from their names.<br />
The activateFrame method is called when a frame becomes selected—<br />
that is, when it moves to the front of its layer. In the standard look-and-feel<br />
implementations, this happens whenever you click anywhere on the frame.<br />
Def aultDesktopManagers implementation of this method makes sure that<br />
every other frame in the same layer is not selected and moves the selected<br />
frame to the front. By contrast, deactivateFrame is called when the<br />
selected frame is being deselected. There is little for Def aultDesktopManager<br />
to do in this case, because the caption bar's Ul class will repaint itself so<br />
that it is not highlighted. In <strong>Java</strong> 2 version 1.3, the activateFrame and<br />
deactivateFrame methods keep track of which frame was last activated so<br />
that the JDesktopPane's getSelectedFrame method works properly.<br />
The next six methods are two sets of three that are invoked when the user<br />
is moving or resizing a frame. These methods have total control over whether<br />
the user is allowed to drag or resize a frame, because they perform the actual<br />
change in frame size or location. If these methods were overridden to do<br />
nothing, for example, then it would not be possible to perform either of these<br />
operations. If you want to impose restrictions on the extent to which frames<br />
can be moved or resized, this is the place to do it. Finally, setBoundsFor-<br />
Frame is used to have the desktop manager make the frame occupy a particular<br />
location and be a specific size. This is currently only used when the user<br />
is dragging a frame's desktop icon.<br />
The important thing to realize about these methods is that it is entirely up<br />
to the desktop manager what it does when they are invoked. Def aultDesktopManager<br />
does the obvious thing in each case and complies with everything<br />
asked of it. As noted above, you could, of course, create a customized<br />
desktop manager that refused to allow frames to be resized, by implementing
1484 Chapter 12 Multiple-Document Applications<br />
beginResizingFrame, resizeFrame, and endResizingFrame as empty<br />
methods.<br />
The Shared Desktop Manager<br />
Given that desktop managers do so many critical things and that they are<br />
attached to desktop panes, how was it possible to iconify and close frames in<br />
our original example (Figure 12-1), in which there was no JDesktopPane<br />
and hence, apparently, no DesktopManager? When the internal frame's UI<br />
class is looking for its container's desktop manager, it finds the internal<br />
frame's desktop pane by calling its getDesktopPane method. If the internal<br />
frame is mounted in a JLayeredPane instead of a JDesktopPane, this<br />
method returns null. Since this means that the frame doesn't have an associated<br />
desktop manager, it is then assigned to a shared desktop manager that is<br />
created the first time that it is needed. It is this desktop manager, an instance<br />
of Def aultDesktopManager, that controls all internal frames that aren't on<br />
a desktop. This desktop manager was responsible for closing and iconifying<br />
the internal frames in our first example.<br />
Extending the Desktop Manager<br />
If the standard desktop manager is not suitable for your application you can,<br />
of course, develop your own and install it in the desktop panes that your<br />
application will create. You've already seen the methods that a desktop manager<br />
must implement—they are defined by the DesktopManager interface.<br />
In this section, we'll show how to create a custom desktop manager by subclassing<br />
the standard one and, at the same time, we'll explain in more detail<br />
how the Def aultDesktopManager itself works.<br />
Displaying Outlines When Dragging or<br />
Resizing Internal Frames<br />
The intent of the custom desktop manager that you'll see in this section is to<br />
change what happens when you drag or resize a frame. As noted in this chapter,<br />
these operations are actually performed by the desktop manager, not by<br />
the desktop pane or by the frames themselves, and the default implementation<br />
redraws the frame as it resizes or moves it so that its content is always<br />
visible. This, of course, has a certain performance penalty associated with it,<br />
in terms of the speed at which the frame moves or is resized. The effects of<br />
this can be reduced by drawing only an outline of the frame as its size or posi-
Icons, the Desktop Pane, and the Desktop Manager 1485<br />
tion changes, so that only the cost of drawing the outline is incurred, instead<br />
of the whole of the frame and its content. Before proceeding with our own<br />
implementation, however, you should note that there is a way to make the<br />
Standard Def aultDesktopManager perform outline dragging. In fact, there<br />
are two ways to do this, depending on whether you are using <strong>Java</strong> 2 version 3<br />
or not.<br />
In Swing 1.1.1 and <strong>Java</strong> 2 version 1.2.2, you can change the way in which<br />
frame dragging is performed by setting a client property of the JDesktop-<br />
Pane called JDesktopPane . dragMode. This property has two distinguished<br />
String values:<br />
out 1 ine performs outline dragging and resizing of all internal<br />
frames<br />
faster uses a faster algorithm that continues to display the<br />
frame content during a drag or resize operation.<br />
To enable outline dragging, for example, you would do this:<br />
JDesktopPane desktop = new JDesktopPane();<br />
pane.putClientProperty("JDesktopPane.dragMode" ,<br />
"outline");<br />
If you don't set this property, or you use an unrecognized value, then the<br />
default (slow) dragging and resize code is used.<br />
In <strong>Java</strong> 2 version 1.3, this mechanism continues to work, but there is now a<br />
more formal way to do the same thing using the JDesktopPane setDrag-<br />
Mode method:<br />
public void setDragMode(int mode);<br />
where the mode parameter takes one of the following values:<br />
JDesktopPane . OUTLINE_DRAG_MODE performs outline dragging and<br />
resizing of all internal frames<br />
JDesktopPane . LIVE_DRAG_MODE uses a faster algorithm that<br />
continues to display the frame<br />
content during a drag or resize<br />
operation<br />
To set outline mode, therefore, you would use the following code:<br />
JDesktopPane desktop = new JDesktopPane (),-
1486 Chapter 12 Multiple-Document Applications<br />
desktop.setDragMode(<br />
JDesktopPane.OUTLINEJDRAGJMODE);<br />
You can try out the various drag modes by running a modified version of<br />
our last example:<br />
<strong>Java</strong> <strong>JFC</strong>Book.Chapterl2.DesktopPaneExample2 mode<br />
where mode is one of outline, faster, or default. If you start this example<br />
with mode outline and then create a frame using the actions provided on<br />
the File menu, you'll see that when you resize or drag the frame, it remains<br />
in place with its content displayed, but a thin wire frame version of the frame<br />
appears and it is this frame that is moved or resized.<br />
Given that this feature already exists, why bother to implement an alternative<br />
version? The rationale behind including an alternative implementation<br />
here is to give a practical and useful demonstration of how to extend a desktop<br />
manager and to show how its various methods work. As a bonus, the outline<br />
dragging and resize operation provided by this desktop manager is<br />
slightly different from the standard one, because the target frame disappears<br />
while the operation is in progress.<br />
How Frames are Moved and Resized<br />
Because only the drag and resize behavior of the desktop manager is going to<br />
be changed, only the methods that deal with those features need to be overridden.<br />
When a frame is dragged, the beginDraggingFrame method is<br />
called to start the operation, then each time the frame needs to move the<br />
dragFrame method is entered and, finally, when the frame has reached its<br />
final resting point, the endDraggingFrame method is called. Similarly, a<br />
frame resize begins with a call to beginResizingFrame followed by a series<br />
of invocations of resizeFrame and ends in endResizingFrame. All of<br />
these methods receive a reference to the JComponent being operated on.<br />
The resizeFrame method is told what the frame's new bounds should be<br />
and the dragFrame method is given the frame's new position. As a result,<br />
these methods need to get very little state from elsewhere. However, because<br />
there can be only one drag or resize operation in progress on a desktop pane<br />
at any time, it is safe to save state between these methods, provided you realize<br />
that the state becomes invalid after endDraggingFrame or endResizingFrame<br />
has been called.
Icons, the Desktop Pane, and the Desktop Manager 1487<br />
Using an Outline Instead of the Real Frame<br />
In order to provide outline resizing and dragging, what we need to do is to<br />
move around an outline of the frame, not the frame itself. Here is the implementation<br />
plan:<br />
• In beginDraggingFrame or beginResizingFrame, the<br />
actual frame will be made invisible and a transparent panel with<br />
a thin border will be substituted. This border will act as the<br />
outline of the frame.<br />
• In dragFrame or resizeFrame, the transparent panel will be<br />
moved or resized instead of the original frame. This makes the<br />
outline appear to follow the mouse.<br />
• In endDraggingFrame or endResizingFrame, the outline is<br />
removed and the original frame will be resized or moved using<br />
setBoundsForFrame and made visible again.<br />
With the basic idea in place, lets look at the details, which are shown in<br />
Listing 12-2.<br />
Listing 12-2 A desktop manager that shows outlines when dragging<br />
and resizing frames<br />
package <strong>JFC</strong>Book.Chapterl2;<br />
import j avax.swing.*;<br />
import <strong>Java</strong>.awt.Color;<br />
import <strong>Java</strong>.awt.Cursor;<br />
import <strong>Java</strong>.awt.Rectangle;<br />
public class ExtendedDesktopManager<br />
extends DefaultDesktopManager {<br />
public ExtendedDesktopManager(JDesktopPane targetPane) {<br />
ghostPanel = new JPanel();<br />
ghostPanel.setOpaque(false) ;<br />
ghostPanel.setBorder(BorderFactory.createLineBorder(<br />
BORDER_COLOR, BORDERJTHICKNESS));<br />
this.targetPane = targetPane;<br />
}<br />
public void beginDraggingFrame(JComponent f) {<br />
Rectangle r = f.getBounds();
1488 Chapter 12 Multiple-Document Applications<br />
Listing 12-2 A desktop manager that shows outlines when dragging<br />
and resizing frames (continued)<br />
}<br />
ghostPanel.setBounds(r);<br />
f.setVisible(false);<br />
targetPane.add(ghostPanel);<br />
targetPane.setLayer(ghostPanel,<br />
JLayeredPane.DRAG^L&YER.intValue());<br />
targetPane.setVisible(true);<br />
public void dragFrame(JComponent f, int newX, int newY) {<br />
setBoundsForFrame(ghostPanel, newX, newY,<br />
ghostPanel.getWidth(), ghostPanel.getHeight());<br />
}<br />
public void endDraggingFrame(JComponent f) {<br />
Rectangle r = ghostPanel.getBounds();<br />
targetPane.remove(ghostPanel);<br />
f.setVisible(true);<br />
f.setBounds(r);<br />
}<br />
public void beginResizingFrame(JComponent f,<br />
int direction) {<br />
oldCursor = f.getCursor();<br />
super.beginResizingFrame(f, direction);<br />
Cursor cursor = f.getCursor();<br />
Rectangle r = f.getBounds();<br />
ghostPanel.setBounds(r);<br />
f.setVisible(false) ;<br />
targetPane.add(ghostPanel) ;<br />
targetPane.setLayer(ghostPanel,<br />
JLayeredPane. DRAGJAYER. intValue ()) ;<br />
ghostPanel.setCursor(cursor);<br />
targetPane.setVisible(true);<br />
}<br />
public void resizeFrame(JComponent f, int newX, int newY,<br />
int newWidth, int newHeight) {<br />
setBoundsForFrame(ghostPanel, newX, newY,<br />
newWidth, newHeight);<br />
}
j<br />
Icons, the Desktop Pane, and the Desktop Manager 1489<br />
Listing 12-2 A desktop manager that shows outlines when dragging<br />
and resizing frames (continued)<br />
public void endResizingFrame(JComponent f) {<br />
Rectangle r = ghostPanel.getBounds();<br />
ghostPanel.setCursor(oldCursor);<br />
targetPane.remove(ghostPanel);<br />
f.setvisible(true);<br />
f.setBounds(r);<br />
}<br />
protected JPanel ghostPanel;<br />
protected JComponent targetComponent;<br />
protected JDesktopPane targetPane;<br />
protected Cursor oldCursor;<br />
protected static final Color BORDER_COLOR = Color.black;<br />
protected static final int BORDER_THICKNESS = 2;<br />
The constructor creates the panel that will represent the frame as it is<br />
dragged or resized. This panel is just a JPanel that is made transparent by<br />
calling setOpaque (false) and given a line border around its outside. In<br />
our case, the border is black and is 2 pixels wide. You could, of course, easily<br />
enhance this to make the border color and width configurable or make it sensitive<br />
to the selected look-and-feel using techniques that you'll see in Chapter<br />
13. A reference to the panel is held in the instance variable ghostPanel<br />
for later use. A reference to the desktop pane is also saved, so that the panel<br />
can be added to it when necessary.<br />
<strong>Core</strong> Note<br />
In this example a reference to the desktop pane is passed to the<br />
constructor, but it is possible to avoid that and find the desktop pane only<br />
when dragging or resizing begins. If we restricted ourselves to handling only<br />
JInternalFrames, then the JIntermalFrame getDesktopPane<br />
method could be used to find the desktop pane. However, the desktop<br />
manager methods that are being overridden are passed a JComponent,<br />
so they may, theoretically, be asked to operate on a more general object. If<br />
you wanted to support that, you could locate the desktop pane by looking<br />
at the ancestors of the object being dragged until you find a<br />
JDesktopPane.As an exercise, you might want to change this example
1490 Chapter 12 Multiple-Document Applications<br />
so that its constructor doesn't take the desktop pane as an argument One<br />
benefit of this would be to make it possible to construct only one instance<br />
that could be shared by an arbitrary number of panes.<br />
Implementing the Drag Operation<br />
The implementations for drag and resize are similar, but different enough to<br />
justify being discussed separately. The easier case is dragging the frame. In the<br />
beginDraggingFrame method, the ghost panel is substituted for the frame<br />
that the user wants to drag, setting its initial size and position from that of the<br />
frame and then making the frame invisible. The dragFrame method is very<br />
simple—it just calls setBoundsForFrame and passes through the arguments<br />
that it was given, except that it uses a reference to the ghost panel instead of<br />
the frame itself. Finally, the endDraggingFrame method is the reverse of<br />
beginDraggingFrame—the original frame is placed at the current location<br />
of the ghost panel, the ghost panel is removed, and the original frame made visible<br />
again.<br />
Implementing Resize<br />
Frame resizing is, in principle, identical to dragging and you'll notice that<br />
much of the code is the same. There is, however, one subtle difference. When<br />
you move the mouse over the edge of a frame, the cursor changes to reflect the<br />
direction in which the frame would be resized by dragging on that edge or corner.<br />
This cursor is, of course, associated with the frame itself and it should be<br />
preserved when showing the outline ghost panel. To do this, when resizing is<br />
started, the frame's cursor is captured and applied to the ghost panel. The previous<br />
cursor for the ghost panel is saved and restored later when resizing stops.<br />
When either a drag or a resize operation is in progress, the user should be<br />
able to see the outline at all times. If the outline were placed in the same<br />
layer as the frame it replaces, you could lose sight of it behind other objects,<br />
so it is placed instead in the DRAG_LAYER. This is not necessarily the highest<br />
layer in the container, but it is the appropriate one to use—anything in a<br />
higher layer is probably there for a very good reason.<br />
You can try out the new desktop manager using the command:<br />
java <strong>JFC</strong>Book.Chapterl2.ExtendedDesktopManagerExample<br />
If you use the file menu to create several internal frames, you'll find that<br />
when you drag or resize any of them, the original frame is replaced by a black<br />
border for the duration of the operation, as shown in Figure 12-12. When<br />
you release the mouse, the border is removed and the original frame reap-
An Example Multiple-Document Application 1491<br />
pears. If you compare this to the original desktop manager with its default<br />
drag mode, you should find that outline dragging and resizing is slightly<br />
faster. There is little, if any, difference in responsiveness between the default<br />
desktop manager's built-in outline mode and the one provided by our custom<br />
desktop manager.<br />
Figure 12-12 Resizing a frame with the extended desktop manager.<br />
An Example Multiple-Document<br />
Application<br />
To conclude this chapter, we're going to create a relatively simple, but representative,<br />
multidocument application that makes use of most of what you<br />
have seen in this chapter. The finished product will be a simple multiple-document<br />
editor that will allow you to open files, change their contents, and<br />
write them back. Because this example uses internal frames, you will be able<br />
to open several documents at once and, using the built-in facilities of the<br />
Swing text components, you will be able to cut-and-paste between them.
1492 Chapter 12 Multiple-Document Applications<br />
You'll also see how to create menu bars for internal frames and how to use<br />
dialogs in a multidocument application.<br />
Figure 12-13 shows the completed application with three open files. This<br />
example makes use of both the extended desktop pane and extended desktop<br />
manager that have been developed in this chapter, so it is possible, as in this<br />
screen shot, to tile the windows, or to cascade them as appropriate. You'll<br />
notice that the main application window has a menu bar and so does each<br />
internal frame. The main menu bar is used to perform global tasks like cascading,<br />
tiling, and closing the application, while the individual frame menu<br />
bars allow you to save the content of the file in that frame or to close the<br />
frame.<br />
Figure 12-13 An example multiple-document application.<br />
The caption bar of each frame contains the name of the file that it is displaying.<br />
If you make changes to the window content, the title bar changes to<br />
show that you need to save the file before closing it, by adding an asterisk<br />
after the file name. This asterisk is removed when the data has been written<br />
back to the file. The name of the currently-active file—that is, the file in the<br />
currently-selected frame—also appears in the main window caption bar.<br />
You can try this application yourself using the command<br />
java <strong>JFC</strong>Book.Chapterl2.SimpleEditor<br />
When the program starts, you get an empty window with a text field at the<br />
bottom. As you type file names into here, new frames are opened that allow
An Example Multiple-Document Application 1493<br />
you to edit the files. If you type the same file name twice, you only get one<br />
irame, however. You'll find that the frames are cascaded as they open but, of<br />
course, you can use the File menu to tile them, or you can drag or resize<br />
them as required. Because the extended desktop manager has been installed,<br />
you'll notice that the frame turns to an outline as you drag or resize it.<br />
If you try closing the application while there are still open frames, you'll<br />
see a dialog box that asks you to close all of your windows before closing the<br />
application. This dialog box is created using the JOptionPane class that you<br />
saw in Chapter 7, "Using Standard Dialogs." If you edit the data in a window<br />
and then try to close the window without saving the data, you'll get another<br />
dialog box asking if you want to discard the changes, save them, or cancel the<br />
close operation. Although it looks very much like the dialogs you saw in<br />
Chapter 8, this one is subtly different because it is housed in an internal<br />
irame and is not actually a JDialog. You'll see how to create dialogs that are<br />
internal frames later in this section.<br />
The code for this application will be shown piece-by-piece so that you can<br />
see more easily what each piece is doing. Because this is quite a long example<br />
a complete source listing isn't reproduced here, but you can find it on the<br />
CD-ROM that accompanies this book.<br />
Creating the Main Frame<br />
The Simple Editor application is based around a JFrame, to which are added<br />
a menu bar, a desktop pane, a label, and a text field into which the user types<br />
file names. This application also uses the extended desktop pane and the<br />
extended desktop manager that were built earlier in this chapter to get the<br />
benefits of automatic cascading and tiling and the fast frame resize and dragging<br />
given by the extended desktop manager. Creating the main window is a<br />
simple matter of plugging these components together and using the appropriate<br />
layout managers.<br />
The menu bar has its own slot in the frame's JRootPane, so there is no<br />
need to worry about assigning its position and making sure it resizes properly.<br />
As for the rest of the window, the desktop pane should take as much<br />
space as it can and the text field and the associated label (see Figure 12-<br />
13) should stay at the bottom and grow only horizontally. To make the<br />
desktop pane occupy as much space as possible, it should be placed in the<br />
Center position of a BorderLayout manager. If the label and text field<br />
were then placed in the South position, they would grow horizontally but<br />
not vertically. Because they can't both be placed in the South position,<br />
they are placed instead on a JPanel that is placed in the South position.
1494 Chapter 12 Multiple-Document Applications<br />
JPanel has a FlowLayout manager as the default, which would mean that<br />
the label and text field would huddle together in the middle of the strip at<br />
the bottom of the frame. What is actually required is for the label to be<br />
over to the left, with the text field taking up the rest of the space, so the<br />
JPanel is given a BorderLayout manager with the label and text field<br />
assigned to the West and Center, respectively. This completes the layout<br />
of the content pane.<br />
As you know, the desktop pane has no layout manager at all, so it is necessary<br />
to either explicitly size it or decide on a size for the main window and let<br />
that determine the desktop pane's size. In this case, the width and height of<br />
the desktop pane are passed to the SimpleEditor constructor. Just calling<br />
setSize on the desktop pane won't work—when the frame is laid out, it will<br />
be asked for its preferred size, not its current size. Therefore, the JComponent<br />
setPref erredSize method is used to register the values passed to<br />
the constructor, which will ensure that the desktop pane is properly sized.<br />
You can see the details of this in Listing 12-3.<br />
Listing 12-3 Creating the Simple Editor main window<br />
package <strong>JFC</strong>Book.Chapterl2;<br />
import j avax.swing.*;<br />
import javax.swing.text.*;<br />
import j avax.swing.event.*;<br />
import <strong>JFC</strong>Book.Chapterl2.ExtendedDesktopPane;<br />
import <strong>JFC</strong>Book.Chapterl2.ExtendedDesktopManager;<br />
import j ava.awt.*;<br />
import j ava.awt.event.*;<br />
import <strong>Java</strong>.beans.*;<br />
import java.io.*;<br />
import java.util.*;<br />
public class SimpleEditor extends JFrame<br />
implements ActionListener, VetoableChangeListener,<br />
PropertyChangeListener {<br />
public SimpleEditor(String caption, int width, int height)<br />
{<br />
super(caption);<br />
this.caption = caption;<br />
Container p = this.getContentPane();<br />
p.setLayout(new BorderLayout());
An Example Multiple-Document Application 1495<br />
Listing 12-3 Creating the Simple Editor main window (continued)<br />
// Create the working area<br />
e = new ExtendedDesktopPane();<br />
e.setPreferredSize(new Dimension(width, height));<br />
p.add(e, BorderLayout.CENTER) ;<br />
e.setDesktopManager(new ExtendedDesktopManager(e) ) ;<br />
// Create the label and file name input fields<br />
JPanel lp = new JPanelO;<br />
lp.setLayout(new BorderLayout() ) ;<br />
JLabel 1 = new JLabel("File Name: ",<br />
SwingConstants.RIGHT);<br />
1.setFont(new Font("Dialog", Font.BOLD, 12));<br />
lp.addd, BorderLayout .WEST) ;<br />
fileNameField = new JTextField(35);<br />
fileNameField.addActionListener(this);<br />
lp.add(fileNameField, BorderLayout.CENTER);<br />
p.add(lp, BorderLayout.SOUTH);<br />
// Create and add the main window menu<br />
JMenuBar menuBar = new JMenuBar();<br />
this.setJMenuBar(menuBar);<br />
JMenu fileMenu = new JMenu("File");<br />
menuBar.add(fileMenu);<br />
// Action to tile the pane<br />
Action tileAction = new AbstractAction("Tile") {<br />
public void actionPerformed(ActionEvent evt) {<br />
e.tileAlK) ;<br />
}<br />
};<br />
fileMenu.add(tileAction);<br />
// Action to cascade the pane<br />
Action cascadeAction = new AbstractAction("Cascade" ) {<br />
public void actionPerformed(ActionEvent evt) {<br />
e.cascadeAll();<br />
}<br />
};<br />
fileMenu.add(cascadeAction);<br />
fileMenu.addSeparator();<br />
fileMenu.add(new AbstractAction("Exit") {
1496 Chapter 12 Multiple-Document Applications<br />
Listing 12-3 Creating the Simple Editor main window (continued)<br />
}<br />
});<br />
public void actionPerformed(ActionEvent evt) {<br />
SimpleEditor.this.doExitCheck();<br />
// Catch the window close event<br />
this.addWindowListener(new WindowAdapter() {<br />
public void windowClosing(WindowEvent evt) {<br />
SimpleEditor.this.doExitCheck();<br />
}<br />
public void windowClosed(WindowEvent evt) {<br />
System.exit(0);<br />
}<br />
});<br />
this.setDefaultCloseOperation(<br />
JFrame.DO_NOTHING_ON_CLOSE);<br />
}<br />
// Code omitted here<br />
public static void main(String[] args) {<br />
Dimension d =<br />
Toolkit.getDefaultToolkit().getScreenSize();<br />
SimpleEditor f = new SimpleEditor("Simple Editor",<br />
3 * d.width/ 4,3* d.height/4);<br />
f.pack();<br />
f.setvisible(true);<br />
}<br />
// The working area<br />
protected ExtendedDesktopPane e;<br />
// Text field<br />
protected JTextField fileNameField;<br />
// This hashtable manages the open windows.<br />
// It is keyed by file name<br />
protected Hashtable fileTable = new Hashtable() ;<br />
// This hashtable is keyed by frame reference<br />
protected Hashtable windowTable = new Hashtable0 ;<br />
// Caption string<br />
protected String caption;
The Main Menu Bar<br />
An Example Multiple-Document Application 1497<br />
The main frame's menu bar is, of course, an instance of JMenuBar. There's<br />
only going to be one menu—the File menu—on this menu bar, to which<br />
menu items to close the main window, tile all of the frames on the desktop or<br />
cascade them all will be added. As you saw in Chapter 5, the most powerful<br />
way to add items to menus is by creating an Action that performs the function<br />
of the menu item and place that directly on the menu, so that the same<br />
code can be attached to more than one user interface element. In this application,<br />
there is no real need to use the same Action in more than one place,<br />
but nevertheless Actions are used here because they make it much easier to<br />
associate code with the objects that it manipulates and because they make<br />
future enhancement (perhaps by adding a tool bar) easier.<br />
The Cascade and Tile actions are very trivial—as you can see in Listing<br />
12-3, they just need to call the appropriate methods exposed by the extended<br />
desktop pane. These Actions are implemented as inner classes derived from<br />
Abstract Act ion—all that needs to be added is the label for the menu item<br />
(and an icon as well if it were required) and an actionPerf ormed method<br />
that does the actual work.<br />
Closing the main frame is slightly more complex for two reasons. First, the<br />
frame can be closed either from the menu or by clicking the frame close button<br />
(or, equivalently, the Close item on the caption bar menu) and the same code<br />
should be used to handle both cases. Secondly, it isn't a good idea to allow the<br />
user to close the frame at any arbitrary time, because there may be windows<br />
open that have unsaved data. To prevent possible data loss, this example will<br />
require that the user closes all of the open windows before the main window<br />
itself will close. As an exercise, you might like to change this so that the main<br />
window will close with internal frames open provided that there is no unsaved<br />
data in any of them. When you've seen the data structures that are used to<br />
manage the internal frames, you should see that this is a fairly simple change to<br />
make.<br />
To make it possible to share the frame close code, a method in the SimpleEditor<br />
class called doExitCheck contains all the code necessaiy to initiate<br />
the close. An Action labeled Exit is attached to the File menu that<br />
will just invoke this method. To handle the frame close button, a windowListener<br />
is registered on the main frame. As you know, clicking the frame<br />
close button causes the listener's windowClosing method to be entered. In<br />
this method, you can either hide or dispose the frame to allow the close to<br />
take place, or you can do nothing, in which case the close request is ignored.<br />
In fact, windowClosing just calls the doExitCheck method and lets it
1498 Chapter 12 Multiple-Document Applications<br />
make the decision. The implementation of this method is shown in Listing<br />
12-4.<br />
<strong>Core</strong> Note<br />
The description above assumes that the main frame is operating with<br />
DO_NOTHING_ON_CLOSE selected, os described in Chapter 2,"Frames,<br />
Labels, and Buttons." Since this is not the default close mode, it is explicitly<br />
selected at the end of the constructor.<br />
Listing 12-4 Handling frame close requests<br />
protected void doExitCheck() {<br />
if (windowTable. isEmptyO == false) {<br />
JOptionPane.showMessageDialog(SimpleEditor.this,<br />
"Close all files before closing the main window",<br />
"Error", JOptionPane.ERROR_MESSAGE);<br />
} else {<br />
SimpleEditor.this.dispose () ;<br />
}<br />
}<br />
As you'll see later, this example has an object that keeps a record of all<br />
open internal frames. The doEx it Check method first checks whether this<br />
object is empty and, if it is, it disposes of the frame. No matter how this code<br />
was entered, this will cause the windowClosed method of the WindowListener<br />
to be entered and, as you can see from Listing 12-3, this just exits.<br />
However, if there is an open internal frame, the main window should not be<br />
closed. Instead, the JOptionPane class that you saw in Chapter 7 is used to<br />
create a modal dialog that tells the user why the frame cannot be closed and<br />
waits for the OK button to be pressed.<br />
Opening a New Internal Frame<br />
When the user types a file name into the text field and presses return, it generates<br />
an ActionEvent, to receive which an ActionListener is registered.<br />
The job of the actionPerf ormed method of this listener is to create a new<br />
internal frame and read the content of the named file into it, then place the<br />
frame on the main window. However, if the file is already open, a second<br />
frame for the same file should not be created—instead, it should just be<br />
brought to the front. To make this possible, it is necessary to keep a mapping
An Example Multiple-Document Application 1499<br />
from file names to internal frames, for which purpose a class that holds information<br />
about an internal frame and the file that it is editing is required. A<br />
hash table then maps from the file name to the appropriate instance of this<br />
class. Listing 12-5 shows the definition of this class. A Hashtable called<br />
f ileTable is used to map from file name to the FileHolder for a file.<br />
Listing 12-5 Keeping track of open files<br />
//<br />
// Helper class.<br />
// This class is used to associate internal frames and<br />
// files. A reference to the class is stored in a Hashtable<br />
// keyed by the name of the file<br />
//<br />
class FileHolder implements DocumentListener {<br />
FileHolder(String n, JInternalFrame i, JTextArea t) {<br />
this.fileName = n;<br />
this.jif = i;<br />
this.textArea = t;<br />
}<br />
void setChanged(boolean changed) {<br />
if (changed == true && hasChanged == false) {<br />
jif.setTitle(fileName + "*");<br />
} else if (changed. == false && hasChanged == true) {<br />
jif.setTitle(fileName);<br />
} '<br />
this.hasChanged = changed;<br />
}<br />
boolean isChangedO {<br />
return hasChanged;<br />
}<br />
String getFileName() {<br />
return f i1eName;<br />
}<br />
void saveFileO throws IOException,<br />
FileNotFoundException {<br />
try {<br />
FileWriter fw = new FileWriter(fileName);<br />
textArea.write(fw) ;<br />
fw.close() ;
1500 Chapter 12 Multiple-Document Applications<br />
Listing 12-5 Keeping track of open files (continued)<br />
hasChanged = false;<br />
} catch (FileNotFoundException e) {<br />
JOptionPane.showInternalMessageDialog(j if,<br />
"Failed to open \"" + fileName +<br />
"\" for writing.",<br />
"Error", JOptionPane.ERROR_MESSAGE);<br />
Toolkit .getDef aultToolkit () .beepO ;<br />
throw e;<br />
} catch (IOException e) {<br />
JOptionPane.showInternalMessageDialog(j if,<br />
"Failed to write to \"" + fileName + "\".",<br />
"Error", JOptionPane.ERROR_MESSAGE) ,-<br />
Toolkit .getDef aultToolkit () .beepO ;<br />
throw e;<br />
}<br />
}<br />
public void changedUpdate(DocumentEvent evt) {<br />
setChanged(true);<br />
}<br />
public void insertUpdate(DocumentEvent evt) {<br />
setChanged(true);<br />
}<br />
public void removeUpdate(DocumentEvent evt) {<br />
setChanged(true);<br />
}<br />
String fileName; // The file name<br />
JInternalFrame jif; // The Internal Frame<br />
JTextArea textArea; // The text area<br />
boolean hasChanged; // true if content changed<br />
} _ _ _<br />
This object is responsible for quite a lot of bookkeeping for the file and<br />
internal frame that it represents. To create an instance, you pass the file name,<br />
the internal frame that will display the file, and the text area that will actually<br />
hold the file content. In addition to this, the FileHolder class records<br />
whether the window content has been changed in its hasChanged instance<br />
variable, which is initially false. It provides a setChanged method that
An Example Multiple-Document Application 1501<br />
allows the state of this variable to be modified and an is Changed method to<br />
allow it to be read. You'll see later exactly how these methods are used.<br />
It turns out that it is also useful to be able to map from an internal frame to<br />
the file that it contains. To do this, a second hash table that uses an internal<br />
frame reference as its key and the FileHolder object as the associated value<br />
is maintained. A reference to this Hashtable is held in the member variable<br />
windowTable. This is also the hash table that the doExitCheck method<br />
looks at to determine if there are any open internal frames—if this hash table<br />
is empty, there are none open.<br />
Let's now look at the actionPerformed method (Listing 12-6) to see<br />
how the various pieces that you've seen so far fit together. The first step is to<br />
get the new file name from the text field and remove leading and trailing<br />
white space, then look for a file of this name in the f ileTable hash table. If<br />
it is found there, the FileHolder that corresponds to it is extracted from the<br />
hash table. From here, the corresponding internal frame is found and<br />
brought to the front of the desktop by using its setSelected method. As<br />
you'll see in Listing 12-6, this generates several events, one of which will<br />
cause the name of this file to become the main window's caption bar title.<br />
Note also that we are obliged to catch a possible PropertyVetoException<br />
that might occur during the execution of setSelected. In this application,<br />
this veto will never actually happen, but the compiler forces us to<br />
catch the exception anyway. It is simply ignored.<br />
Listing 12-6 Opening a new internal frame<br />
// Act on a new file name in the input area<br />
public void actionPerformed(ActionEvent evt) {<br />
String fileName = fileNameField.getText().trim();<br />
// File name<br />
if (fileTable.containsKey(fileName)) {<br />
// The file is already open in a window<br />
// Get the file holder object, then<br />
// make its window the primary view.<br />
FileHolder h = (FileHolder)fileTable.get(fileName)<br />
try {<br />
h.jif.setSelected(true);<br />
} catch (PropertyVetoException e) {<br />
// Nothing sensible to do<br />
}<br />
} else {
1502 Chapter 12 Multiple-Document Applications<br />
Listing 12-6 Opening a new internal frame (continued)<br />
// Not yet open: create a new one<br />
SimpleEditor.this.setCursor(Cursor.getPredefinedCursor<br />
(Cursor.WAIT_CURSOR));<br />
File f = new File(fileName);<br />
try {<br />
fileNameField.setEnabled(false) ;<br />
JTextArea ta = new JTextAreaO ;<br />
ta.setEditable(f.canWrite());<br />
ta.read(new File<strong>Read</strong>er(f), null);<br />
JInternalFrame jif = new JInternalFrame(fileName,<br />
true, true, true, true);<br />
j if.setContentPane(new JScrollPane(ta)) ;<br />
//<br />
// Enter the window holder and file name<br />
// in the hash tables to detect duplicate opens<br />
// and for use at window close time<br />
//<br />
FileHolder h = new FileHolder(fileName, jif, ta);<br />
fileTable.put(fileName, h);<br />
windowTable.put(jif, h);<br />
JMenuBar menuBar = new JMenuBar();<br />
JMenu fileMenu = new JMenu("File");<br />
menuBar.add(fileMenu);<br />
Action saveAction = new SaveAction(jif, h);<br />
fileMenu.add(saveAction);<br />
saveAction.setEnabled(f.canWrite() ) ;<br />
Action closeAction = new CloseAction(jif);<br />
fileMenu.add(closeAction);<br />
j if.setJMenuBar(menuBar) ;<br />
e.addCascaded(j if, JLayeredPane.DEFAULT_LAYER) ;<br />
j if.addPropertyChangeListener(this) ;<br />
jif.addVetoableChangeListener(this);<br />
// Add a document listener to detect content changes<br />
ta.getDocument().addDocumentListener(h);<br />
try {<br />
jif.setSelected(true);
An Example Multiple-Document Application 1503<br />
Listing 12-6 Opening a new internal frame (continued)<br />
}<br />
}<br />
} catch (PropertyVetoException e) {<br />
// Nothing sensible to do here<br />
}<br />
fileNameField.setText(""); // Clear file name<br />
} catch (IOException e) {<br />
JOptionPane.showMessageDialog (<br />
(Component)evt.getSource(),<br />
"Failed to read \"" + fileName + "\".",<br />
"File <strong>Read</strong> Error", JOptionPane.ERROR_MESSAGE);<br />
this.getToolkit().beep();<br />
return;<br />
} catch (Exception e) {<br />
JOptionPane.showMessageDialog(<br />
(Component)evt.getSource () ,<br />
"Failed to open \"" + fileName + "\".",<br />
"File <strong>Read</strong> Error", JOptionPane.ERROR_MESSAGE);<br />
this .getToolkit () .beepO ;<br />
return;<br />
} finally {<br />
fileNameField.setEnabled(true);<br />
SimpleEditor.this.setCursor<br />
(Cursor.getPredefinedCursor(Cursor.DEFAULT_CURSOR));<br />
}<br />
If this file is not currently open, a new internal frame is created for it,<br />
using the file name as its title, and the file content is read directly into a text<br />
area using the read method provided by its JTextComponent superclass.<br />
Note that if an error occurs while trying to read the file, an internal frame is<br />
not created and an error message is posted in a dialog box, which the user<br />
must acknowledge. Assuming that the file content is read successfully, the<br />
text area, which we make editable if the file itself is writable, is wrapped in a<br />
JScrollPane and placed in the internal frame's content pane.<br />
Having constructed the main part of the internal frame, the File-<br />
Holder instance for it is created, followed by the mappings from the file<br />
name and from the internal frame by making entries in the f ileTable and<br />
windowTable hash tables. Next, we need to build the internal frame's<br />
menu bar. This menu bar, like that on the main frame, has only a File<br />
entry, which allows the file data to be saved or the frame to be closed. As
1504 Chapter 12 Multiple-Document Applications<br />
with the main menu, these are implemented as Actions and added<br />
directly to the File menu. The menu bar is then mounted on the internal<br />
frame using its set JMenuBar method.<br />
With the internal frame complete, it is added to the desktop pane using<br />
the addCascaded method. All file frames will be held in the default layer.<br />
Next, the SimpleEditor class is registered as both a property listener and a<br />
vetoable change listener on the internal frame, for reasons that you'll see<br />
later. Then, we register the FileHolder as a document listener to receive<br />
notification of changes made to the window content.<br />
Finally, the setSelected method is used to move this new frame to the<br />
foreground and make its name appear on the application title bar. The text<br />
field is then cleared to invite the user to type a new file name. This completes<br />
the processing for a newly-opened file. Everything else that happens is notified<br />
as an event and processed by event handlers.<br />
Changes in the Document<br />
When the user changes the text displayed in an internal frame, we want to<br />
note that this has happened so that we can prompt the user to save the modifications<br />
to the file before the frame is closed. As you know from Chapter 9,<br />
changes in a text area can be detected by attaching a DocumentListener to<br />
its data model. When the internal frame containing the text area was created,<br />
the FileHolder object was registered as the listener, so when modifications<br />
are made, its changedUpdate, insertUpdate, or removeUpdate method<br />
will be called. All three of these just call setChanged which sets the<br />
changed flag to true and also does one other thing: if this flag was false, in<br />
other words the text field is being modified for the first time (or the first time<br />
since it was saved to the file, as you'll see), it adds an asterisk to the internal<br />
frame's caption bar as a reminder to the user that the content of the frame<br />
does not match that in the file.<br />
Moving an Internal Frame to the Foreground<br />
The viser can move a frame to the foreground by clicking in it. When this happens,<br />
the frames setSelected method is called with argument true and twoo<br />
property change events are sent for IS_SELECTED_PROPERTY—one to vetoable<br />
change listeners and one to property change listeners. This application is<br />
not interested in preventing a frame from becoming selected, so it ignores the<br />
vetoable change event. There is, however, a property change listener registered<br />
on the internal frame. Listing 12-7 shows the implementation of the proper
An Example Multiple-Document Application 1505<br />
tyChange method of SimpleEditor. In this section we are interested only in<br />
the second part of this method. When the IS_SELECTED_PROPERTY changes<br />
to true (and only in this case), the file name of the file in the selected window<br />
should be put on the main frame's caption bar to indicate which file the user is<br />
currently working with.<br />
Listing 12-7 Handling property change events<br />
public void propertyChange(PropertyChangeEvent evt) {<br />
JInternalFrame jif = (JInternalFrame)evt.getSource()<br />
String name = evt.getPropertyName();<br />
Object value = evt.getNewValue();<br />
if (name.equals(JInternalFrame.IS_CLOSED_PROPERTY)<br />
&& (Boolean)value == Boolean.TRUE) {<br />
// Remove it from the hash tables<br />
FileHolder h = (FileHolder)windowTable.get(jif);<br />
windowTable.remove(jif);<br />
fileTable.remove(h.fileName);<br />
} else if (name.equals(<br />
JInternalFrame.IS_SELECTED_PROPERTY)<br />
&& (Boolean)value == Boolean.TRUE) {<br />
// When a frame moves to the foreground,<br />
// puts its file name on our title bar<br />
FileHolder h = (FileHolder)windowTable.get (jif);<br />
setTitle(caption + " - " + h.getFileName());<br />
}<br />
j<br />
This method receives the internal frame that has been selected as the<br />
source of the event, but what it really needs is the name of the file being<br />
edited in the frame. One way to get this is directly from the caption bar of the<br />
internal frame, since it happens that the file name is displayed there. But<br />
coupling between different parts of the application is reduced if this assumption<br />
can be avoided. This will also leave us free to change what is in the internal<br />
frame caption bar at a later date without having to re-code this event<br />
handler. Another problem with using the internal frame's caption bar title is<br />
that it may also have an asterisk on it that shows that the file has been modified.<br />
The asterisk could be removed with some boring and time-consuming<br />
string manipulation, or you could decide to reflect it on the main frame's title<br />
bar. If that were done, though, the main title bar would have to be updated<br />
whenever the title bar of the internal frame is changed.<br />
Instead of getting involved in these unnecessary complications, it is simpler<br />
to use the internal frame reference as the key to the windowTable hash
1506 Chapter 12 Multiple-Document Applications<br />
table to find the FileHolder object and then use its getFileName method<br />
to retrieve the unadorned file name and write that to the frame's caption bar.<br />
Saving Window Contents to the File<br />
When the user uses the Save menu item of the internal frame's file menu,<br />
the actionPerf ormed method of the SaveAction that was associated with<br />
it is invoked. Listing 12-8 shows how this Action was defined.<br />
Listing 12-8 The SaveAction<br />
class SaveAction extends AbstractAction {<br />
SaveAction(FileHolder h) {<br />
super("Save");<br />
this.fileHolder = h;<br />
}<br />
}<br />
public void actionPerformed(ActionEvent evt) {<br />
try {<br />
fileHolder.saveFile();<br />
} catch (Throwable t) {<br />
}<br />
}<br />
FileHolder fileHolder;<br />
As you can see, this is trivial. When the Action is created, its saves a reference<br />
to the internal frame's FileHolder object so that when the menu item<br />
is activated the FileHolder's saveFile method can be invoked directly. If<br />
you look back to the creation of this Action in Listing 12-6, you'll see that<br />
we enabled it only if the file was writable at the time that the internal frame's<br />
menu was created, so the menu item itself will be disabled if the file was<br />
read-only at that time. Nevertheless, it is possible for a writable file to<br />
become read-only later, so it is necessary to cater for this possibility.<br />
<strong>Core</strong> Note<br />
This example doesn't concern itself with the possibility that a read-only file<br />
could become writable after it has been opened.With the current<br />
implementation, you won't be able to write to the file (or even change the<br />
content of the text area) until you close its window and reopen it.
An Example Multiple-Document Application 1507<br />
The code for the saveFile method was shown along with the rest of the<br />
FileHolder class in Listing 12-5, but it hasn't yet been looked at in detail.<br />
In principle, it is a simple method—it just uses the write method that<br />
JTextArea inherits from JTextComponent to save its content into the original<br />
file, overwriting whatever was in the file before. The interesting aspect of<br />
this method is what happens if the file cannot be opened for writing<br />
(because, as noted above, it has now been made read-only to us) or if, for<br />
some reason, an error occurs while writing after the file has been successfully<br />
opened. Both of these cases are notified as IOExceptions. To preserve the<br />
simplicity of this example, no attempt is made at complicated error recovery<br />
(for example, to be safe you would probably write the new data to a separate<br />
file first and then switch the two files around, removing the original data only<br />
when you knew you had a safe copy under the new name). The point of interest<br />
here is how to notify the user of the problem.<br />
Previously in this application, when there has been a problem, JOption-<br />
Pane has been used to create a dialog and display it over the main window.<br />
Those problems were not related to one particular internal frame. In a case<br />
like this where the error concerns just one frame, you can use one of a set of<br />
JOptionPane methods that creates a modal dialog as an internal frame<br />
instead of as a separate dialog and places it in the modal layer of the layered<br />
pane or desktop. Here are the JOptionPane methods that create internal<br />
frames:<br />
public static void showInternalMessageDialog(<br />
Component parentComponent, Object message);<br />
public static void showInternalMessageDialog(<br />
Component parentComponent,<br />
Object message, String title,<br />
int messageType);<br />
public static void showInternalMessageDialog(<br />
Component parentComponent,<br />
Object message, String title,<br />
int messageType, Icon icon);<br />
public static int showInternalConfirmDialog(<br />
Component parentComponent,<br />
Object message);<br />
public static int showInternalConfirmDialog(<br />
Component parentComponent,<br />
Object message, String title,
1508 Chapter 12 Multiple-Document Applications<br />
int optionType);<br />
public static int showInternalConfirmDialog(<br />
Component parentComponent,<br />
Object message, String title, int optionType,<br />
int messageType);<br />
public static int showInternalConfirmDialog(<br />
Component parentComponent,<br />
Object message, String title, int optionType,<br />
int messageType, Icon icon);<br />
public static int showInternalOptionDialog(<br />
Component parentComponent,<br />
Object message, String title, int optionType,<br />
int messageType, Icon icon, Object options[],<br />
Object initialValue);<br />
public static String showInternallnputDialog(<br />
Component parentComponent,<br />
Object message);<br />
public static String showInternallnputDialog(<br />
Component parentComponent,<br />
Object message, String title,<br />
int messageType);<br />
public static Object showInternallnputDialog(<br />
Component parentComponent,<br />
Object message, String title, int messageType,<br />
Icon icon, Object selectionValues[],<br />
Object initialSelectionValue);<br />
Apart from the fact that they create internal frames instead of dialogs,<br />
these methods are the same as the similarly-named ones that we saw in<br />
Chapter 7. In the saveFile method, these methods are used to create and<br />
show two internal message dialogs to display error messages.<br />
Closing an Internal Frame<br />
There are two ways to close an internal frame in this application—using the<br />
close button (or system menu) on the caption bar, or using the close item of<br />
the File menu on the menu bar. The menu item has an Action associated<br />
with it, whose definition is shown in Listing 12-9.
Listing 12-9 The Close action<br />
class CloseAction extends AbstractAction {<br />
CloseAction(JInternalFrame jif) {<br />
super("Close Window");<br />
this.jif = jif;<br />
}<br />
An Example Multiple-Document Application 1509<br />
public void actionPerformed(ActionEvent evt) {<br />
try {<br />
jif.setClosed(true);<br />
} catch (Throwable t) {<br />
}<br />
}<br />
JInternalFrame jif;<br />
At the time that the action is created, a reference to the internal frame is<br />
saved. When the action is triggered from the menu, this reference is used to<br />
call the internal frame's setClosed method with argument true. Similarly,<br />
as you know, if the user tries to close the frame using the caption bar, the caption<br />
bar's UI class will take the appropriate action to close the internal frame.<br />
What follows applies equally to both cases.<br />
As you saw earlier, attempting to close an internal frame generates a vetoable<br />
change event for IS_CLOSED_PROPERTY. If this doesn't cause a PropertyVetoException,<br />
the close is going to be allowed to proceed and a<br />
property change event for the same property will be broadcast and caught by<br />
the internal frame's UI class, which arranges for the desktop manager to<br />
remove the frame from the desktop. However, the frame must not be directly<br />
closed if the text field content has been modified and its content has not been<br />
written back to the file. One way to stop this from happening is to register a<br />
vetoable change listener, as was done during the creation of the internal<br />
frame (see Listing 12-6 again). The implementation of the listener method is<br />
shown in Listing 12-10.<br />
<strong>Core</strong> Note<br />
As you have already seen, internal frames also generate<br />
internalFrameEvents when they close. Using those events would be<br />
another way to handle frame closure.
1510 Chapter 12 Multiple-Document Applications<br />
Listing 12-10 Handling attempted closure of internal frames<br />
public void vetoableChange(PropertyChangeEvent evt)<br />
throws PropertyVetoException {<br />
JInternalFrame jif = (JInternalFrame)evt.getSource();<br />
String name = evt.getPropertyName();<br />
Object value = evt.getNewValue();<br />
if (name.equals(JInternalFrame.IS_CLOSED_PROPERTY)<br />
&& (Boolean)value == Boolean.TRUE) {<br />
FileHolder h = (FileHolder)windowTable.get(jif);<br />
if (h.isChanged() == true) {<br />
int result =<br />
JOptionPane.showInternalConfirmDialog(jif,<br />
"Do you want to save changes to " + h.fileName + "?") ;<br />
if (result == JOptionPane.CANCEL_OPTION) {<br />
throw new PropertyVetoException(<br />
"Cancelled by user", evt);<br />
}<br />
}<br />
}<br />
try {<br />
h.saveFile () ;<br />
} catch (Throwable t) {<br />
result = JOptionPane.showInternalConfirmDialog (jif,<br />
"Save failed - close anyway?" + h.fileName);<br />
if (result != JOptionPane.YESJDPTION) {<br />
throw new PropertyVetoException(<br />
"Cancelled by user", evt);<br />
}<br />
}<br />
}<br />
The first step is to verify that an internal frame is being closed by checking<br />
the property name and the proposed new valne. If this is the case, then<br />
the internal frame's reference is obtained from the event source and the<br />
windowTable hash table is used to locate the FileHolder for the file in<br />
that frame. As you saw earlier, this object records whether the data in the<br />
text area has been changed—recall that it has a "changed" state that is set<br />
when a DocumentEvent occurs. If the text field has been changed, an<br />
internal frame dialog is posted that allows the user to decide whether to<br />
save the changes, abandon the changes, or cancel the close. Figure 12-14<br />
shows what this looks like.
An Example Multiple-Document Application 1511<br />
If the user presses the Cancel button, the close should be aborted, so a<br />
PropertyVetoException is thrown with the original event and a message<br />
indicating why the close has been canceled (this message is not used in this<br />
example, but you are obliged to supply one). If the user presses OK, the data<br />
should be saved before closing, so the saveFile method of the File-<br />
Holder object is invoked to do this. Here, of course, there is the chance that<br />
the write might fail, so exceptions from this method are caught and, if one is<br />
received, another dialog is posted, offering the user the option of closing anyway.<br />
If the user wants to abort the close and sort out the problem, another<br />
PropertyVetoException is thrown.<br />
Figure 12-14 Prompting the user to confirm or abandon a close when there is<br />
unsaved data.<br />
If the save works, or the user opts to abandon a failed save or not to save<br />
the data at all, the event handler will return and the close will proceed. The<br />
next thing that will happen is a property change event for<br />
IS_CLOSED_PROPERTY. You saw the code that handled this in Listing 12-10.<br />
At this point, the frame is going to close and the data has been safely written<br />
away (or abandoned). The last thing to do is remove the FileHolder entry<br />
from the file and window hash tables.
1512 Chapter 12 Multiple-Document Applications<br />
Summary<br />
This chapter looked at the support that Swing provides for multiple-document<br />
applications in the form of internal frames, layered panes, desktop<br />
panes, icons, and desktop managers.<br />
You first saw the elements of an internal frame and how similar they are to<br />
fully-fledged top level frames, then discovered that they can be closed, iconified,<br />
resized, maximized, and restored to their previous size just like real<br />
frames can and that, with the help of the layered pane container, they can be<br />
used to create applications that allow windows to overlap and whose relative<br />
position can be changed in all three dimensions.<br />
After looking at JLayeredPane, we moved on to examine the more powerful<br />
JDesktopPane which incorporates the idea of a desktop manager that<br />
lets you introduce desktop-specific behavior, such as ieonifying internal<br />
frames, and can be extended to provide customized effects, such as the<br />
extended desktop manager that shows frame outlines when they are moved<br />
or resized.<br />
Finally, you saw a practical example that demonstrated how multiple-document<br />
applications are constructed by building a simple multiple-window<br />
editor, in which all of the events and mechanisms that surround internal<br />
frames and the desktop manager were shown working together.
THE PEUGGABEE<br />
EOOK-AND-FEEE<br />
'<br />
• The LookandFeel Class<br />
Topics in This Chapter<br />
• UIManager and Look-and-Feel Management<br />
• A Customized Button Interface<br />
Selecting and Changing the Look-and-Feel<br />
Implementing a New Look-and-Feel
In the first chapter of this book, you were introduced to the Swing pluggable-look-and-feel<br />
mechanism and the Model-View-Controller architecture<br />
that enables it, but you only saw enough to allow you to select<br />
from the look-and-feels available and to understand how some of the more<br />
complex components, such as the text components, trees, and tables, separate<br />
their data from their visual representation. In this chapter, you'll get a<br />
more in-depth look at the classes that manage the look-and-feel of the application.<br />
In reality, you have been making use of the classes that are presented in<br />
this chapter all through this book, but most of what you're going to see here<br />
is so well-hidden that, unless you are going to create highly-customized components<br />
or a whole new look-and-feel, you don't need to know that much<br />
about it, because the default behavior is good enough in most cases.<br />
This chapter starts by looking at the three basic pieces of the pluggable<br />
look-and-feel mechanism—the UIManager, UIDefaults, and LookAnd-<br />
Feel classes, and shows how they are used to create the complete look-andfeel<br />
implementations that are supplied with Swing. We then move on to show<br />
you how to adapt an existing look-and-feel to suit special needs and demonstrate<br />
the techniques available by implementing and using a new user interface<br />
for buttons. Finally, you'll see what you must provide in order to build a<br />
complete new look-and-feel package and how to leverage an existing lookand-feel<br />
to minimize your development work.<br />
1515
1516 Chapter 13 The Pluggable Look-Arid-Feel<br />
The Look-and-Feel and the<br />
UI Manager<br />
This book shows screen shots of applications that use several of the standard<br />
Swing look-and-feel packages. In Chapter 1, "Introduction to <strong>Java</strong> <strong>Foundation</strong><br />
<strong>Classes</strong>," you saw how to use the swing.properties file to select the<br />
appropriate look-and-feel for an application and how changing this setting<br />
affects the appearance of the components in the user interface. But what<br />
exactly makes up a look-and-feel and how does selecting a particular one<br />
cause the application's appearance to change? To answer these questions,<br />
we'll look first at what is in a particular look-and-feel, then at how these<br />
pieces are used by the UIManager class to select the correct appearance for a<br />
component.<br />
What Is a Look-and-Feel?<br />
In Swing, a look-and-feel is supplied as a package. Usually, a look-and-feel<br />
package will contain a UI class for every Swing component that needs one<br />
together with a class derived from LookAndFeel that provides global information<br />
for its particular look-and-feel. Given the number of Swing components,<br />
it might seem that this means that a lot of work is required to create a<br />
new look-and-feel and, if you really want to fundamentally change the<br />
appearance of all of the Swing components, you would be right. However, if<br />
you are happy to use a standard look-and-feel but you want to make changes<br />
to a particular component or a small number of components, it is possible to<br />
make use of the other classes in the look-and-feel that you are modifying and<br />
avoid rewriting them all.<br />
Extending an existing look-and-feel is, of course, much simpler than creating<br />
a completely new one, so much so that Swing provides a basic look-andfeel<br />
(javax. swing.plaf .basic) that has fully-functioning implementations<br />
of a UI class for every component. This look-and-feel is not used<br />
directly in applications (and, in fact, it can't be because its LookAndFeel<br />
class, BasicLookAndFeel, is abstract), but it is used as the basis for all of<br />
the other standard Swing look-and-feel packages and use will be made of it to<br />
generate our own UI classes in this chapter. The classes that make up the<br />
basic look-and-feel package are shown in Table 13-1.<br />
As you can see, almost every class begins with the name of the look-andfeel<br />
itself (in this case Basic) and many of them end with UI. This is actually<br />
just a naming convention—the specifics of this are not enforced anywhere, so
Table 13-1 The Basic Look-and-Feel Package<br />
BasicArrowButton<br />
BasicButtonUI<br />
BasicBorders<br />
The Look-and-Feel and the UIManager 1517<br />
Basic Che ckBoxMenu-<br />
ItemUI<br />
BasicColorChooserUI BasicComboBoxEditor<br />
BasicComboBoxUI<br />
BasicDesktopPaneUI<br />
BasicFileChooserUI<br />
BasicIconFactory<br />
BasicLabelUI<br />
BasicMenuBarUI<br />
BasicPasswordFieldUI<br />
BasicProgressBarUI<br />
BasicRootPaneUI<br />
BasicSeparatorUI<br />
BasicSplitPaneUI<br />
BasicTableUI<br />
BasicTextPaneUI<br />
BasicToolBarSeparatorUI<br />
BasicTreeUI<br />
ComboPopup<br />
BasicComboPopup<br />
BasicDirectoryModel<br />
BasicGraphicUtils<br />
BasicInternalFrame-<br />
TitlePane<br />
BasicListUI<br />
BasicMenuItemUI<br />
BasicPopupMenuSeparatorUI<br />
BasicRadioButton-<br />
MenuItemUI<br />
BasicScrollBarUI<br />
BasicSliderUi<br />
BasicTabbedPaneUI<br />
BasicTextAreaUI<br />
BasicTextUI<br />
BasicToolBarUI<br />
BasicViewportUI<br />
De faultMenuLayout<br />
BasicButtonListener<br />
BasicCheckBoxUI<br />
BasicComboBoxRenderer<br />
BasicDesktopIconUI<br />
BasicEditorPaneUI<br />
BasicHTML<br />
BasicInternalFrameUI<br />
BasicLookAndFeel<br />
BasicOptionPaneUI<br />
BasicPopupMenuUI<br />
BasicRadioButtonUI<br />
BasicScrollPaneUI<br />
BasicSplitPaneDivider<br />
BasicTableHeaderUI<br />
BasicTextFieldUI<br />
BasicToggleButtonUI<br />
BasicToolTipUI<br />
CenterLayout<br />
if you create your own look-and-feel package you are not bound to do the<br />
same. But it is recommended that you do, for the sake of clarity.<br />
The classes that end in UI are the ones that provide the user interfaces for<br />
the Swing components. The methods that must be provided by these classes<br />
are, of course, well-defined. You'll see later how to decide what you need to<br />
implement to create a UI class for a given component user interface. Some<br />
look-and-feel packages also include utility classes that are used within the UI
1518 Chapter 13 The Pluggable Look-And-Feel<br />
implementations. The basic look-and-feel, for example, has several helper<br />
classes that are available for use by all look-and-feels.<br />
Real look-and-feel packages are created by extending the basic look-andfeel.<br />
In many cases, a UI class from the basic look-and-feel will be used directly<br />
within another look-and-feel. So that you can see the scope of a typical lookand-feel,<br />
Table 13-2 lists the UI classes (excluding helper classes) that make up<br />
the Metal look-and-feel package, j avax. swing. plaf . metal.<br />
Table 13-2 UI classes in the Metal Look-and-Feel<br />
MetalButtonUI MetalCheckBoxUI<br />
MetalDesktopIconUI MetalFileChooserUI<br />
MetalLabelUI<br />
MetalRadioButtonUI<br />
MetalSeparatorUI<br />
MetalTabbedPaneUI<br />
MetalToolBarUI<br />
MetalPopupMenuSeparatorUI<br />
MetalScrollBarUI<br />
MetalSliderUI<br />
MetalTextFieldUI<br />
MetalToolTipUI<br />
MetalComboBoxUI<br />
Metallnternal-<br />
FrameUI<br />
MetalProgressBarUI<br />
MetalScrollPaneUI<br />
MetalSplitPaneUI<br />
MetalToggleButtonUI<br />
MetalTreeUI<br />
All of the look-and-feel packages have a class derived from the abstract<br />
class LookAndFeel. In fact, all of the Swing look-and-feel packages base<br />
theirs on BasicLookAndFeel, which is itself an abstract subclass of LookAndFeel.<br />
This class allows the UlManager to use the look-and-feel in such<br />
a way that neither it, nor any of the Swing components, need to know specific<br />
details of its implementation. Before looking at what the look-and-feel class<br />
provides, you need to understand the job of UlManager.<br />
The UlManager Class<br />
At any time, an application will have only one look-and-feel selected. Whenever<br />
a new component is created, it must install the corresponding UI class<br />
as implemented by the selected look-and-feel and it will need to initialize<br />
itself with the color scheme, fonts, and so on that are appropriate to that<br />
look-and-feel. Because it is undesirable to make the components themselves<br />
directly aware of which look-and-feel packages are available, it is not a good<br />
idea to hard-code the UI class names or color information into them, even on
The Look-and-Feel and the UIManager 1519<br />
a per look-and-feel basis. Instead, Swing uses the javax. swing.UIManager<br />
class, whose job is to know which look-and-feel is currently selected<br />
and to provide the means for components to get look-and-feel-dependent<br />
information in a look-and-feel-independent way. UIManager acts like a gateway<br />
to whichever look-and-feel is currently elected. The public methods of<br />
the UIManager class are listed here; you'll find descriptions of most of these<br />
methods throughout this chapter.<br />
public static LookAndFeel getLookAndFeel();<br />
public static void setLookAndFeel(LookAndFeel lnf);<br />
public static void setLookAndFeel(String className);<br />
public static ComponentUI getUI(JComponent comp);<br />
public static LookAndFeel[] getAuxiliaryLookAndFeels();<br />
public static UIDefaults getDefaults();<br />
public static Font getFont(Object key);<br />
public static Color getColor(Object key);<br />
public static Icon getlcon(Object key);<br />
public static Border getBorder(Object key);<br />
public static Dimension getDimension(Object key);<br />
public static Insets getlnsets(Object key);<br />
public static int getlnt(Object key);<br />
public static String getString(Object key);<br />
public static Object get (Object key);<br />
public static Object put(Object key, Object value);<br />
public static Strin.3<br />
getCrossPlatformLookAndFeelClassName();<br />
public static UIManager.LookAndFeellnfo[]<br />
getlnstalledLookAndFeels();<br />
public static void addAuxiliaryLookAndFeel<br />
(LookAndFeel laf);<br />
publlic static boolean removeAuxiliaryLookAndFeel(<br />
(LookAndFeel laf);<br />
public static UIDefaults getLookAndFeelDefaults();<br />
public static String getSystemLookAndFeelClassName();<br />
public static void installLookAndFeel(String name,<br />
String className);<br />
public static void installLookAndFeel(<br />
UIManager.LookAndFeellnfo info);<br />
public static void setlnstalledLookAndFeels(<br />
UIManager.LookAndFeellnfo[] infos)<br />
throws SecurityException;<br />
public static synchronized void addPropertyChangeListener (<br />
PropertyChangeListener 1);<br />
public static synchronized void<br />
removePropertyChangeListener(
1520 Chapter 13 The Pluggable Look-And-Feel<br />
PropertyChangeListener 1);<br />
When the first Swing component is created, it will call one of the UlManager<br />
"get" methods that access resources from the current look-and-feel.<br />
Almost certainly, the first UlManager method to be called will be getUI,<br />
which locates the UI class for a given component. If this is called when there<br />
is no current look-and-feel, it causes UlManager to initialize itself by reading<br />
the swing.properties file. In Chapter 1, you saw the format of this file<br />
and some of the lines that it can contain. As noted then, this file just holds<br />
properties that are loaded into a Properties object. Each line, with the<br />
exception of comments, has the form:<br />
propertyNatne = propertyValue<br />
The set of property names is actually very small and, because of the implementation<br />
of UlManager, the mechanism is unfortunately not extensible—<br />
you can't add properties of your own. The most important property names<br />
and their meanings are shown in Table 13-3.<br />
Table 13-3 The swing.properties File<br />
Property Name Description<br />
swing . def aultlaf Class name of the look-and-feel to be<br />
installed when the application starts.<br />
swing. installedlaf s A comma-separated list of install look-andfeels.<br />
swing . auxiliarylaf A comma-separated list of look-and-feels<br />
that can be used with the Multiplexing lookand-feel.<br />
swing.plaf .multiplexinglaf The class name of the multiplexing lookand-feel.<br />
Defaults to<br />
javax.swing.plaf.multi.MultiLookAndFeel.<br />
The swing, auxiliarylaf and swing .plaf .multiplexinglaf properties<br />
are used only in conjunction with the multiplexing look-and-feel, which<br />
you'll see later in this chapter. The swing. def aultlaf property is the one<br />
that determines which look-and-feel will be installed when the application<br />
starts. The value of this property must be the name of a class that is derived<br />
from LookAndFeel. To use the Metal look-and-feel, this would be
The Look-and-Feel and the UIManager 1521<br />
javax. swing.plaf .metal .MetalLookAndFeel, for Windows it would<br />
be com.sun.java.swing.plaf.windows.WindowsLookAndFeel, and<br />
for Motif it would be com. sun. java. swing.plaf .motif .MotifLookAndFeel.<br />
If you don't have a swing.properties file, or the file doesn't<br />
contain a valid definition of swing.defaultlaf, then UIManager makes<br />
the Metal look-and-feel the default look-and-feel for the application.<br />
No matter how the initial look-and-feel class is determined, it is made the<br />
current look-and-feel by calling the setLookAndFeel method. As you can<br />
see from the list of UIManager methods shown earlier, there are actually two<br />
variants of this method—you can supply either a Class object or a class<br />
name in the form of a String. If you choose the latter, the class name is first<br />
converted to a Class object using the Class . forName () method, which<br />
may result in an exception if the class can't be found or if it isn't derived from<br />
LookAndFeel. If, for example, you want your application to use the native<br />
platform look-and-feel instead of the Metal look-and-feel, you should use the<br />
following code sequence before creating any Swing components or calling<br />
any other UIManager methods:<br />
try {<br />
UIManager.setLookAndFeel(<br />
UIManager.getSystemLookAndFeelClassName());<br />
} catch (UnsupportedLookAndFeelException e) {<br />
// Not allowed on this platform<br />
} catch (ClassNotFouncLException e) {<br />
// Can't find the class<br />
} catch (InstantiationException e) {<br />
// Unable to instantiate the class<br />
} catch (IllegalAccessException e) {<br />
}<br />
// Class not accessible<br />
UIManager provides the getCrossPlatformLookAndFeelClassName<br />
and getSystemLookAndFeelClassName methods to allow you to get the<br />
names of the default look-and-feel and the native look-and-feel for your platform.<br />
The first method always returns the class name of the Metal look-andfeel.<br />
The second, which is used in the code extract above, returns the Windows<br />
look-and-feel on a Windows system, the Motif look-and-feel on Solaris, the<br />
Mac look-and-feel on the Apple Macintosh, and the Metal look-and-feel on<br />
any other platform.<br />
The current look-and-feel is actually a bound property of the UIManager<br />
class, so when it is changed a PropertyChangeEvent for property name<br />
"lookAndFeel" is sent to all registered PropertyChangeListeners. You<br />
can register a listener for these events using the addPropertyChangeLis-
1522 Chapter 13 The Pluggable Look-And-Feel<br />
tener method and later in this chapter you'll see how to make use of this<br />
event to ensure that minor changes that affect the look-and-feel continue to<br />
apply even if the look-and-feel is switched while the application is running.<br />
Note that, primarily for licensing reasons, there are restrictions that prevent<br />
some look-and-feel implementations being used outside of their native<br />
platforms. This means that, for example, the Windows look-and-feel cannot<br />
be used on the Solaris or Macintosh platforms. The UlManager uses a lookand-feel's<br />
isSupportedLookAndFeel method (see the description of the<br />
LookAndFeel class below) to determine whether it can be used on the current<br />
platform. If this method returns false, setLookAndFeel throws an<br />
UnsupportedLookAndFeelException.<br />
When a look-and-feel class becomes the currently-selected look-and-feel,<br />
its initialize method is called to give it the opportunity to perform any<br />
necessary setup. If there is already a look-and-feel installed which is being<br />
replaced, its uninitialize method will be called before this happens.<br />
Because these methods are called whenever a change of look-and-feel<br />
occurs, the initialize method can be called more than once for a particular<br />
look-and-feel class. If you are going to create your own look-and-feel<br />
implementation and your initialize method contains code that should<br />
only be executed once, you must provide your own means of ensuring this.<br />
Also note that calling setLookAndFeel to reinstall the currently selected<br />
look-and-feel is not treated specially—the uninitialize method will still<br />
be called, followed by the initialize method. This makes it possible for a<br />
look-and-feel class to be reselected with different defaults, provided that it<br />
can obtain those defaults from somewhere outside the application, of course.<br />
None of the standard look-and-feels supports this.<br />
Apart from organizing the initial selection of the look-and-feel and controlling<br />
subsequent changes of it, the major role played by UlManager is as a<br />
convenient way to access information relating to the current look-and-feel.<br />
Components (and other software) can conveniently access font, color, border<br />
and other settings from the look-and-teel by using the UlManager get<br />
methods, most of which extract information from the current UIDefaults<br />
object. The exceptions to this are getUI and getAuxiliaryLookAnd-<br />
Feels, both of which you'll see later in this chapter.<br />
Installed Look-and-Feels<br />
As you'll see later in this chapter, it is sometimes useful for an application to<br />
know exactly which look-and-feels are installed on the system that it is running<br />
on. UlManager provides a simple API to make this information available<br />
in the form of the static getlnstalledLookAndFeels method and an
The Look-and-Feel and the UIManager 1523<br />
inner class called UIManager .LookAndFeelInf o. The LookAndFeelInf o<br />
class has the following definition:<br />
public static class LookAndFeelInfo {<br />
public LookAndFeelInfo(String name, String className);<br />
public String getNameO;<br />
public String getClassName();<br />
public String toStringO;<br />
}<br />
When you call getlnstalledLookAndFeels, you get back an array of<br />
LookAndFeellnfo objects, one for each look-and-feel that is available on<br />
the system. A look-and-feel is considered to be available if, and only if, it has<br />
an entry in the form of a swing, installedlaf s key in the swing.properties<br />
file. In order to create the list of installed look-and-feels, when<br />
UIManager initializes itself, it reads the swing, installedlaf s key from<br />
swing .properties and attempts to build a LookAndFeellnfo object for<br />
each look-and-feel class listed in this key. To do this, however, it needs to be<br />
able to find two other keys for each look-and-feel that give the official name<br />
of the look-and-feel and its LookAndFeel class name. The names of these<br />
keys begin with the string swing. installedlaf, followed by the name of<br />
the look-and-feel as given in swing. installedlaf s, followed by the string<br />
name or class. For example, if your system has Metal, Motif, and Windows<br />
look-and-feels installed, you should have the following entries in your<br />
swing .properties file:<br />
swing.installedlafs=metal,motif,windows<br />
swing.installedlaf.metal.name=Metal<br />
swing.installedlaf.metal.class=<br />
j avax.swing.plaf.metal.MetalLookAndFeel<br />
swing.installedlaf.motif.name=CDE/Motif<br />
swing.installedlaf.motif.class=<br />
com.sun.j ava.swing.plaf.motif.MotifLookAndFeel<br />
swing.installedlaf.windows.name=Windows<br />
swing.installedlaf.windows.class=<br />
com.sun.<strong>Java</strong>.swing.plaf.windows.WindowsLookAndFeel<br />
You can see the information that is returned by getlnstalledLookAnd-<br />
Feels by using the command:<br />
j ava <strong>JFC</strong>Book.Chapterl3.InstalledLAFExample<br />
The code for this example is extremely simple and is shown in Listing 13-1.
1524 Chapter 13 The Pluggable Look-And-Feel<br />
Listing 13-1 Getting information about the installed look-and-feels<br />
package <strong>JFC</strong>Book.Chapterl3;<br />
import javax.swing.*;<br />
public class InstalledLAFExample {<br />
public static void main(String [] args) {<br />
UIManager.LookAndFeellnfo[] IfInfo =<br />
UIManager.getlnstalledLookAndFeels() ;<br />
}<br />
}<br />
System.out.println("Installed look-and-feels are:");<br />
for (int i = 0; i < IfInfo.length; i++) {<br />
System.out.println("\tName: " + IfInfo [i] .getName(;<br />
", Class: " + IfInfo [i] .getClassName()) ;<br />
}<br />
System.exit(0);<br />
The output from this on my system is:<br />
Installed look-and-feels are:<br />
Name: Metal, Class: javax.swing.plaf.metal.MetalLookAndFeel<br />
Name: CDE/Motif, Class: com.sun.java.swing.plaf.motif-MotifLookAndFeel<br />
Name: Windows, Class: com.sun.<strong>Java</strong>.swing.plaf.windows.WindowsLookAndFeel<br />
If you don't get any output, or if some entries are missing, then your<br />
swing.properties file has some missing or incorrectly formatted entries.<br />
Swing does not create a swing.properties file when it is installed—it is<br />
your responsibility to do this. Try adding the entries shown earlier in this section<br />
and rerunning this example. You will need a properly constructed<br />
swing .properties file to run some of the examples that you'll see towards<br />
the end of this chapter.<br />
<strong>Core</strong> Note<br />
If you don't have a swing. installedlaf s key in your swing.<br />
properties file,you will still get the output just shown, because<br />
UIManager has hard
The Look-and-Feel and the UIManager 1525<br />
UlManager maintains an array of installed look-and-feels, which is used to<br />
provide the information returned by getlnstalledLookAndFeels. You<br />
can make a new entry in this array using one of the the two variants of<br />
installLookAndFeel. If you provide a look-and-feel name and a class<br />
name, a suitable LookAndFeellnf o object is created and added to the lookand-feel<br />
list. Alternatively, you can create your own LookAndFeellnfo<br />
object and supply that. You can also replace the entire array of installed lookand-feels<br />
with your own by using the setlnstalledLookAndFeels<br />
method. This option, however, is not for the faint of heart!<br />
The UIDefaults Class<br />
There is a great deal of information that components need that cannot be<br />
hard-coded because of its look-and-feel dependent nature. Obvious examples<br />
of this are:<br />
• The UI class to use for each component.<br />
• The font used to display text in various components.<br />
• Components' foreground and background colors.<br />
• Colors used for standard parts of the user interface (caption<br />
bars, etc).<br />
Some of this information could be built directly into component UI classes<br />
rather than into the components themselves, but even that is not possible for<br />
some things—the most obvious of them being the name of the UI class itself.<br />
What is needed is a repository in which all of this information can be stored<br />
so that it can be retrieved when necessary. This repository is provided by the<br />
UIDefaults class.<br />
UIDefaults is a subclass of Hashtable to which convenience methods<br />
have been added to provide type-safe access to certain types of information.<br />
Since the content of the UIDefaults table depends on the look-and-feel,<br />
there is one copy of it for each look-and-feel. The UIManager requests a particular<br />
look-and-feel's version of the UIDefaults table by calling its getDefaults<br />
method just after its initialize method has been invoked.<br />
UIManager saves this reference and uses it whenever its own callers request<br />
information that must be obtained from the current look-and-feel. You can<br />
get a reference to the current UIDefaults table using the UIManager get-<br />
Defaults method. However, because UIManager provides convenience<br />
methods to access information for the current look-and-feel, you don't usually<br />
need to directly access the look-and-feel class itself or even call the
1526 Chapter 13 The Pluggable Look-And-Feel<br />
UIManager getDef aults method. Instead of getting the default font for<br />
the text displayed by buttons like this:<br />
UIManager.getDefaults().getFont("Button.font");<br />
you can use the more succinct<br />
UIManager.getFont("Button.font" ) ;<br />
<strong>Core</strong> Note<br />
Another way to get the button font would be to do this:<br />
UIManager.getLookAndFeel().getDefaults().getFont(<br />
"Button.font");<br />
However.you should avoid directly accessing the uiDef aults table of the<br />
currently selected look-and-feel in this way because, as you'll see later,<br />
direct access does not always produce the same result as requesting the<br />
property via the UIManager.<br />
The following list shows the methods provided by UIDef aults in addition<br />
to those of its Hashtable superclass.<br />
public synchronized Object get(Object key);<br />
public synchronized put(Object key, Object value);<br />
public synchronized void putDefaults(Object [] keyValues) ;<br />
public Border getBorder(Object key);<br />
public Color getColor(Object key);<br />
public Dimension getDimension(Object key);<br />
public Font getFont(Object key);<br />
public Icon getlcon(Object key);<br />
public Insets getlnsets(Object key);<br />
public int getlnt(Object key);<br />
public String getString(Object key);<br />
public ComponentUI getUI(JComponent comp);<br />
public Class getUIClass(String uiClassID);<br />
public Class getUIClass(String uiClassID, ClassLoader );<br />
public void addPropertyChangeListener(<br />
PropertyChangeListener 1);<br />
public void removePropertyChangeListener(<br />
PropertyChangeListener 1);<br />
Since UIDef aults is a Hashtable, it can store arbitrary objects under<br />
arbitrary keys. In practice, all of the keys are strings and they are, of course,<br />
all values like "Button, font" that are descriptive of the meaning of the<br />
information that they store. Because of this, you can access the table using
The Look-and-Feel and the UIManager 1527<br />
the usual get and put methods. If you use get, you must cast the returned<br />
object to the required type before you use it, for example:<br />
UIDefaults defaults = UIManager.getDefaults();<br />
Font buttonFont = (Font)defaults.get("Button.font");<br />
The Hashtable put method is overloaded by UIDefaults to generate a<br />
PropertyChangeEvent with the key as the property name after the new<br />
value has been stored in the table. As usual, you can register to receive these<br />
events using the addPropertyChangeListener method. This can be useful<br />
if you want to react to a change in the value of some property as soon as<br />
that change happens. Components are not automatically informed of changes<br />
to properties that they are using so, for example, if a new value were installed<br />
for the Button, font property, existing buttons would not change their<br />
appearance, but newly-created ones would use the new font. Supplying null<br />
as the value of a property removes it from the UIDefaults table and generates<br />
a PropertyChangeEvent in which the new value is null.<br />
The putDefaults method allows you to install or change several entries<br />
in the table without generating an event for each of them. Instead, a single<br />
PropertyChangeEvent with property name "UIDefaults" and old and<br />
new values both set to null is broadcast to all PropertyChangeListeners.<br />
The argument supplied to putDefaults is an array in which the key and<br />
value entries alternate. For example, to change the default button font and<br />
the default menu bar font together, you would do this:<br />
UIDefaults defaults = UIManager.getDefaults();<br />
Object [] newDefaults = new Object [] {<br />
"Button.font",<br />
new FontUIResource("Dialog", Font.BOLD, 12),<br />
"MenuBar.font",<br />
new FontUIResource("Dialog", Font.BOLD, 12)<br />
};<br />
defaults.putDefaults(newDefaults);<br />
Notice that this example doesn't create Font objects—instead, it uses a<br />
class called FontUIResource. FontUIResource and the other similar<br />
classes used by UIDefaults will be described, along the reason for their<br />
existence, later in this chapter.<br />
The getBorder, getColor, getDimension, getFont, getlcon, get-<br />
Insets, and getString methods are all wrappers around the get method<br />
that use the supplied key to access information from the table. If the object<br />
returned is of the type requested, it is cast to that type and returned to the<br />
caller. If the information does not exist or is of the wrong type, then null is<br />
returned. This enables you to access the UIDefaults table in a more type-
1528 Chapter 13 The Pluggable Look-And-Feel<br />
safe manner and treat an error of type in the same way as if the entry did not<br />
exist, without having to write the code to catch a ClassCastException.<br />
This usually makes your code easier to write, because the error recovery for<br />
both cases is usually going to be the same—either write an error message or<br />
substitute a hard-coded default. All of these uiDef aults methods have corresponding<br />
convenience methods in UIManager that make them very simple<br />
to use, as you saw earlier.<br />
Finally, the getui method provides the mechanism for a component to<br />
find its UI class, as implemented by the active look-and-feel. Although it is<br />
probably the most important method in the UIDef aults class, further discussion<br />
of it and the related getui Class methods will be postponed until<br />
we look more closely at how to create a new UI class in the section titled<br />
"Changing Component Look-and-Feel."<br />
Contents of the UI Defaults Table<br />
Now that you've seen the methods of the UIDef aults class, let's look at<br />
some of the information that the look-and-feel keeps in it. Since it is only a<br />
Hashtable (with, as you'll see, a few special properties), you can find all the<br />
entries by getting an enumeration of its keys and asking for all of the associated<br />
values. If you did this, you would get rather a long list—there are typically<br />
over 500 entries! To make it easier to examine this table, there is a<br />
simple program on the CD-ROM that allows you to scan for information by<br />
giving the first part of the key or by specifying the type of the information<br />
that you're looking for. To run this program, use one of the following two<br />
commands:<br />
<strong>Java</strong> ShowDefaults prefix prefixString<br />
<strong>Java</strong> ShowDefaults type typeName<br />
Use the first form to look for keys which begin with prefixString; case<br />
is ignored when comparing the value to the key. If you want to find all<br />
resources connected with buttons, for example, you would use the command:<br />
<strong>Java</strong> <strong>JFC</strong>Book.Chapterl3.ShowDefaults prefix button<br />
You get the following results from this command if you are using the Metal look-andfeel,<br />
where the strings j avax. swing .plaf and j avax. swing . plaf . metal<br />
been omitted in some entries tor brevity:<br />
Button.margin : InsetsUIResource[top=2,left=14,bottom=2,right=14]<br />
Button.background : ColorUIResource[r=204,g=204,b=204]<br />
Button.focus : ColorUIResource[r=153,g=153,b=204]
The Look-and-Feel and the UIManager 1529<br />
ButtonUI : MetalButtonUI<br />
Button.font : FontUIResource[<br />
family=dialog.bold,name=Dialog,style=bold,size=12]<br />
Button.border :<br />
BorderUIResource$CompoundBorderUIResource@2f835 8<br />
Button.select : ColorUIResource[r=153,g=153,b=153]<br />
Button.disabledText : ColorUIResource[r=153,g=153,b=153]<br />
Button.textShiftOffset : 0<br />
Button.focusInputMap : InputMapUIResource@77f540<br />
Button.foreground : ColorUIResource[r=0,g=0,b=0]<br />
Button.textlconGap : 4<br />
<strong>Core</strong> Note<br />
This output was generated using <strong>Java</strong> 2 version U.There are minor<br />
differences between different Swing releases, so the output that you see<br />
when you run this command may be slightly different.<br />
To examine the uiDef aults for a particular look-and-feel, make it the<br />
default in the swing.properties file and run the ShowDefaults command<br />
again.<br />
The second form of this command allows you to look for resources of certain<br />
types, identified by the typeName parameter, which must be one of font,<br />
color, insets, dimension, border, nd icon, where case is important. The<br />
following command finds all border resources in the UIDe faults table:<br />
java <strong>JFC</strong>Book.Chapterl3.ShowDefaults type border<br />
<strong>Core</strong> Note<br />
The ability to search for entries of specific types is provided just as a<br />
convenience. Nothing in Swing ever searches the UIDe faults table in<br />
this way—components always look for defaults using the key field.<br />
The following is an extract from the output of this command:<br />
ToolBar.border : MetalBorders$ToolBarBorder@7471eO<br />
RadioButtonMenuItem.border :<br />
MetalBorders$MenuItemBorder@26e85f<br />
ScrollPane.border : MetalBorders$ScrollPaneBorder@361fdl<br />
Button.border :<br />
orderUIResource$CompoundBorderUIResource@6 2dae9<br />
OptionPane.border :<br />
BorderUIResource$EmptyBorderUIResource@12 0 9ea
1530 Chapter 13 The Pluggable Look-And-Feel<br />
PopupMenu.border : MetalBorders$PopupMenuBorder@6f9157<br />
TitledBorder.border :<br />
BorderUIResource$LineBorderUIResource@lf2eel<br />
MenuBar.border : MetalBorders$MenuBarBorder@499159<br />
OptionPane.messageAreaBorder :<br />
BorderUIResource$EmptyBorderUIResource@2 61164<br />
PasswordField.border :<br />
BorderUIResource$CompoundBorderUIResource@lla775<br />
TextField.border :<br />
BorderUIResource$CompoundBorderUIResource@4a63d8<br />
ProgressBar.border :<br />
BorderUIResource$LineBorderUIResource@6Off2f<br />
When showing entries of a particular type, the name of each property<br />
appears first, followed by the value of the object that it is associated with,<br />
although this doesn't really show you much more than the name of the class<br />
of the object. In the case just shown, you can see many of the borders have a<br />
value that is an instance of the class BorderUIRe source, whereas you might<br />
have expected it to be of type Border. In fact, all of the border resources are<br />
of type BorderUIResource—the ones that don't appear to be are actually<br />
subclasses of BorderUIResource. If you were to ask for all color resources,<br />
you would get a similar result, of which the following is an extract:<br />
Slider.foreground : ColorUIResource[r=153,g=153,b=204]<br />
ToolBar.dockingForeground :<br />
ColorUIResource[r=102,g=lO2,b=153]<br />
RadioButton.focus : ColorUIResource[r=153,g=153,b=204]<br />
Table.selectionBackground :<br />
ColorUIResource[r=2 04,g=2 04,b=2 55]<br />
ScrollBar.trackHighlight :<br />
ColorUIResource [r=102,g=102,b=102]<br />
Label.background : ColorUIResource [r=204,g=204,b=204]<br />
TabbedPane.focus : ColorUIResource [r=102,g=102,b=153]<br />
RadioButtonMenuItem.selectionBackground :<br />
ColorUIResource[r=153,g=153,b=204]<br />
Instead of seeing Color objects, you get objects of type ColorUIResource.<br />
There are several of these special resource classes:<br />
BorderUIResource<br />
ColorUIResource<br />
ComponentInputMapUIResource (<strong>Java</strong> 2 version 1.3)<br />
DimensionUIResource<br />
FontUIResource<br />
IconUIResource<br />
InputMapUIResource (<strong>Java</strong> 2 version 1.3)
InsetsUIResource<br />
Each of these classes has two things in common:<br />
The Look-and-Feel and the UIManager 1531<br />
• They all implement the UlResource interface.<br />
• Each of them extends the class or implements the interface<br />
with which they are associated. For example,<br />
ColorUIResource is a subclass of Color and<br />
BorderUlResource implements the Border interface.<br />
UlResource is actually just a marker interface—it doesn't contain any<br />
methods. The reason for using objects that implement UlResource is to<br />
make it easy for the code that installs component resources to decide<br />
whether or not the programmer has overridden the default and installed a<br />
specific value that should not subsequently be replaced. To see how this<br />
works, consider what happens when a button is created. When the button's<br />
UI object is installed, it initializes the button with default foreground and<br />
background colors stored in the UIDefaults table under the keys "Button,<br />
foreground" and "Button.background, " respectively. These colors<br />
will be objects of type ColorUIResource, which extends Color, so they can<br />
be passed directly to the Component setForeground and setBackground<br />
methods:<br />
comp.setForeground(<br />
UIManager.getColor("Button.foreground"));<br />
comp.setBackground(<br />
UIManager.getColor("Button.background"));<br />
Now suppose that your application were to allow the user to switch the<br />
look-and-feel while the application is running. As part of this switch, the UI<br />
object of every user interface component would be removed and replaced by<br />
one from the new look-and-feel. The new look-and-feel would have its own<br />
default foreground and background colors for buttons, which would get<br />
installed automatically by the same means as the initial button colors. But<br />
suppose that the program has explicitly set its own colors for the button's<br />
foreground and/or background before the look-and-feel switch. While it is<br />
acceptable to change one default color for another, it probably would not be<br />
good to replace colors specifically installed by the application with defaults,<br />
because this could destroy the application's carefully chosen color scheme.<br />
To avoid this, all that the new look-and-feel needs to do is check whether<br />
the foreground and background colors installed in a component are instances<br />
of ColorUIResource (or even just of type UlResource) and, if they are, it<br />
knows that they were installed by the previous look-and-feel and can be
1532 Chapter 13 The Pluggable Look-And-Feel<br />
replaced by new defaults. If the user has installed replacement colors, they<br />
will be of type Color (not ColorUIResource) and so will not be replaced.<br />
This same mechanism is used to protect specifically-installed fonts, borders,<br />
icons, insets, and dimensions and, in <strong>Java</strong> 2 version 1.3, component input<br />
maps. As you'll see later, the task of installing some of these resources can be<br />
delegated to convenience methods of the LookAndFeel class that implement<br />
the mechanism that has just been discussed. You'll see an example of<br />
this when we implement our own UI class for buttons.<br />
More on UIManager and UIDefaults<br />
Up to this point, the description of UIDefaults and UIManager and how<br />
they are related has been simplified to make the basic points clear. Each<br />
look-and-feel creates its own UIDefaults table when it becomes the<br />
selected look-and-feel, and you can gain access to it via the UIManager get -<br />
Defaults method. So far, it has been implied that the getDefaults<br />
method returns you a reference to the actual UIDefaults table of the<br />
selected look-and-feel. Actually, this is not the case—in fact, it gives you a<br />
reference to a different UIDefaults object of a type called MultiUIDef<br />
aults. This class is derived from UIDefaults, so it looks and behaves just<br />
like a UIDefaults table, but it also holds references to two other UIDefaults<br />
tables—one for the current look-and-feel and the other containing<br />
system defaults that don't change when a look-and-feel switch occurs. This<br />
latter table only contains an entry that maps the key FocusManagerClass-<br />
Name to the class name javax. swing.Def aultFocusManager, which is<br />
the default Swing focus manager.<br />
If you use the UIManager getDefaults method or the UIManager get<br />
and put methods, you will operate on the MultiulDef aults object, not on<br />
the UIDefaults table of the current look-and-feel. If, for example, you use<br />
the get method to look up the value from its key, MultiulDef aults first<br />
looks to see if it has a local value for that key and returns it if it does. If it<br />
doesn't, it looks for the value in the UIDefaults table of the current lookand-feel<br />
and then in the system table, returning whatever it finds (or null if<br />
it finds nothing).<br />
Now suppose you want to change a default value for the current look-andfeel<br />
and you call the UIManager put method to do it:<br />
UIManager.put("Button.font",<br />
new FontUIResource("Dialog", Font.BOLD, 12));<br />
What this actually does is to change the value of this key in the Multi-<br />
UIDefaults table—it does not change the current look-and-feel table.
The Look-and-Feel and the UIManager 1533<br />
When this property is later retrieved using the UIManager get method, Mul -<br />
tiuiDef aults will find its own copy and will not go to the look-and-feel for<br />
it. This means, of course, that this change is persistent over a change of lookand-feel.<br />
Compare this with the following code:<br />
UIDefaults defaults =<br />
UIManager.getLookAndFeel().getDefaults();<br />
defaults.put("Button.font",<br />
new FontUIResource("Dialog", Font.BOLD, 12));<br />
This causes the current look-and-feel to create a new copy of its UIDefaults<br />
table and changes one of its values. This is, of course, a redundant<br />
operation because nothing is using this particular copy of the UIDefaults<br />
table. Similarly, you can try to read look-and-feel defaults using code like this:<br />
UIDefaults defaults =<br />
UIManager.getLookAndFeel().getDefaults();<br />
FontUIResource buttonFont =<br />
(FontUIResource)defaults.get("Button.font");<br />
However, this is expensive, because a new UIDefaults table is created<br />
and then discarded. It also will not return the font currently being used for<br />
buttons if this has been changed using the UIManager put method. The<br />
appropriate way to read property settings is to use the UIManager get<br />
method or one of its convenience methods (getlcon etc.).<br />
If you want to get the actual UIDefaults table for the selected look-andfeel,<br />
you can do so using the following UIManager method:<br />
public UIDefaults getLookAndFeelDefaults();<br />
This allows you to see the original property settings, whereas the UIDefaults<br />
object returned from the UIManager getDef aults object includes<br />
any local changes that have been applied as overrides via the UIManager put<br />
method. For example, suppose the select look-and-feel uses gray as the background<br />
color for buttons. If you do this:<br />
UIManager.put("Button.background", Color.yellow);<br />
then all buttons subsequently created will have a yellow background, no<br />
matter which look-and-feel is selected (and even if the look-and-feel is<br />
changed). The result of the following line of code:<br />
Color color = UIManager.getColor("Button.background");<br />
will be Color .yellow. You'll get the same result from<br />
Color color = UIManager.getDefaults().getColor(<br />
"Button.background");
1534 Chapter 13 The Pluggable Look-And-Feel<br />
because the getDefaults methods returns a reference to the Multi-<br />
UIDef aults object, which actually contains the color override for the button<br />
background. However, the following line:<br />
Color color = UIManager.getLookAndFeelDefaults().<br />
getColor("Button.background" ) ;<br />
returns the look-and-feel's value for this property—Color.gray in this<br />
case. To change the look-and-feel's default color, you can do this:<br />
UIManager.getLookAndFeelDefaults().put(<br />
"Button.background", Color.yellow);<br />
but this is no more useful than simply setting a color override using the<br />
UIManager put method, because the look-and-feel will reinitialize its properties<br />
each time it becomes the selected look-and-feel, so your change will be<br />
lost.<br />
The LookAndFeel and BasicLookAndFeel<br />
<strong>Classes</strong><br />
Eveiy look-and-feel package contains a class derived from the Swing class<br />
LookAndFeel. As you know, this class is used as the anchor-point for the<br />
entire package—you present it to the UIManager when making the lookand-feel<br />
active and the UIManager uses it to get the UIDefaults table,<br />
which is later used by all of the components to access the rest of the classes<br />
and other resources of the current look-and-feel.<br />
The LookAndFeel Class<br />
Despite its importance, LookAndFeel is a very simple class. Its methods are<br />
shown below.<br />
public abstract String getNameO;<br />
public abstract String getlDO<br />
public abstract String getDescription()<br />
public abstract boolean isNativeLookAndFeel();<br />
public abstract boolean isSupportedLookAndFeel();<br />
public void initialize!);<br />
public void uninitialize();<br />
public UIDefaults getDefaults();<br />
public static void installColors<br />
(JComponent c. String bgName, String fgName);<br />
public static void installColorsAndFont(JComponent c,<br />
String bgName, String fgName, String fontName);
The Look-and-Feel and the UIManager 1535<br />
public static void installBorder(JComponent c,<br />
String borderName);<br />
public static void uninstallBorder(JComponent c);<br />
public static Object makelcon(Class baseClass,<br />
String fileName);<br />
public static JTextComponent.KeyBinding[]<br />
makeKeyBindings(Object[] keyBindingList);<br />
In <strong>Java</strong> 2 version 1.3, the following methods have been added:<br />
public static void loadKeyBindings(InputMap map,<br />
Object [] keys) ;<br />
public static InputMap makelnputMap(Object[] keys);<br />
public static ComponentInputMap<br />
makeComponentInputMap(JComponent c, Object[] keys);<br />
As you can see, several of the methods are abstract, because they can only<br />
be implemented in a real look-and-feel package. The strings returned by the<br />
getName and getDescription methods are short and long descriptions of<br />
the look-and-feel. The string used by getName would typically be used on a<br />
menu, as you'll see later in this chapter. In the case of Metal, these return<br />
"Metal Look-And-Feel" and "The Metal Look-and-Feel," respectively. The<br />
get ID method also returns a short description of the look-and-feel. The<br />
intention is that, if a look-and-feel is created from an existing one by changing<br />
the appearance of a few components, the getName field should return a<br />
unique name to identify the derived look-and-feel, while get ID should<br />
return the name of the core look-and-feel upon which it was based. The<br />
Metal look-and-feel returns the string "Metal" in response to the get ID call.<br />
You'll see an example of this at the end of the chapter when we look at how to<br />
develop a new look-and-feel based on an existing one.<br />
The isNativeLookAndFeel method returns true if this is the natural<br />
look-and-feel for the platform on which the application is running. The<br />
isSupportedLookAndFeel method indicates whether the look-and-feel<br />
can be used on the current platform and allows licensing restrictions to be<br />
implemented. The Windows look-and-feel implements this method by<br />
returning the same value as its isNativeLookAndFeel, which means that<br />
the UIManager will only install it as the active look-and-feel on a Windows<br />
platform. The Motif and Metal look-and-feels, on the other hand, always<br />
return true.<br />
The initialize and uninitialize methods have already been discussed<br />
in connection with UIManager, and you already know what the get-<br />
De faults method is used for. Although none of these methods are marked<br />
as abstract, they don't have useful implementations in the LookAndFeel
1536 Chapter 13 The Pluggable Look-And-Feel<br />
class itself: The first two do nothing and getDefaults returns null. In<br />
practice, a real look-and-feel package will override getDefaults and may<br />
implement one or both of the other two, although the Swing look-and-feel<br />
packages do not. A more useful implementation of the getDefaults<br />
method is provided in the BasicLookAndFeel class, as you'll see shortly.<br />
The installColors, installColorsAndFont, and installBorder<br />
methods are all static convenience functions that use the XJlDefaults table<br />
to look for the foreground and background colors, font, and border for a<br />
component and install them using the appropriate Component or JComponent<br />
methods (setForeground, setBorder etc). The programmer supplies<br />
the name or names of the properties to look for in the defaults table and<br />
the component whose properties are to be set. For a button, for example, the<br />
foreground and background colors would be retrieved using the names<br />
"Button. foreground" and "Button, background" and the font using<br />
"Button, font," so a typical use of one of these methods would be the following,<br />
where it is assumed that b is a JButton:<br />
LookAndFeel.installColorsAndFont(b, "Button.foreground",<br />
"Button.background", "Button.font");<br />
As you can see, there is no explicit mention of the particular look-and-feel<br />
to be used to supply the defaults—this method works by using the currently<br />
selected look-and-feel, so it can be used in code that needs to be independent<br />
of the look-and-feel. It is most frequently used in component UI<br />
classes—you'll see an example of this later in this chapter. These methods all<br />
check before installing any resources that what they are about to replace is<br />
either null or a UIResource, to avoid replacing an explicit color, font, or<br />
border selection with a default. Because of the need to make this check, the<br />
uninstallBorder method is not quite as trivial as you might have<br />
thought—instead of simply being a shorthand for setBorder (null), it first<br />
checks whether the installed border is a UIResource before replacing it<br />
with null.<br />
The makeKeyBindings method creates keyboard bindings used by the<br />
Swing text components. It is given an array of objects in which the odd-numbered<br />
entries are the names of text component actions (such as Def aultEditorKit<br />
.upAction), while the even-numbered items are keystrokes that<br />
map to the action that follows them. The keystrokes may be given as Keystroke<br />
objects or as strings from which a Keystroke object can be constructed<br />
(such as "ctrl C").<br />
The last three methods exist only in <strong>Java</strong> 2 version 1.3 and deal with the<br />
task of creating the input maps that are required by the new key handling<br />
mechanism described in Chapter 5. The core method of these three is load-
The Look-and-Feel and the UIManager 1537<br />
KeyBindings, which takes an array of objects in which the even-numbered<br />
entries describe a Keystroke and the odd-numbered items are action<br />
names. For each pair, a mapping from the given Keystroke to the given<br />
action is created and added to the inputMap passed as the first argument.<br />
Thus, for example, the line<br />
InputMap map = ; // Create map<br />
Object [] mappings = new Object [] {<br />
"Ctrl C", "Copy",<br />
"Ctrl V", "Paste",<br />
"Ctrl X", "Cut"<br />
};<br />
LookAndFeel.loadKeyBindings(map, mappings);<br />
will create an InputMap that binds the given key strokes to the named<br />
actions, which are assumed to exist in the ActionMap of the components to<br />
which this map is eventually applied. The make InputMap method is a wrapper<br />
that creates an InputMapUIResource and uses loadKeyBindings to<br />
install the bindings passed to it in the map and then returns the map. Similarly,<br />
the makeComponent InputMap method creates a Component Input-<br />
MapUIResource associated with the given component and installs the<br />
supplied key bindings into it.<br />
<strong>Core</strong> Note<br />
A Component InputMap is an InputMap subclass that is used only to<br />
hold input mappings for bindings that have the associated condition<br />
WHEN IN FOCUSED WINDOW.<br />
Lazy Values<br />
The remaining LookAndFeel method, makelcon, is an interesting one and<br />
to understand its purpose you need to know more about the ulDefaults<br />
table. So far, you know that this table is based around a Hashtable and contains<br />
mappings from keys to the default values associated with those keys.<br />
Because of the nature of a Hashtable, both the key and the associated value<br />
have to be stored in the table before they can be retrieved. While this is not<br />
an issue for simple objects like colors and strings, it is not so convenient for<br />
things like icons that take up a lot of memory and are time-consuming to<br />
load. In the UlDefaults table for the Windows look-and-feel, there are<br />
many resources that have icons associated with them. If it were necessary to<br />
load all of these icons when the Windows look-and-feel is used for the first<br />
time, there would be not only a significant waste of memory for those icons
1538 Chapter 13 The Pluggable Look-And-Feel<br />
that are not going be used by a particular application but also a performance<br />
cost due to the time taken to load them.<br />
Instead of loading the resource name and an Icon object into the UIDef<br />
aults table, a UIDef aults.LazyValue object is created and placed in the<br />
table along with the resource name in place of the icon itself. ulDef<br />
aults . LazyValue is an interface with only one method:<br />
public interface LazyValue {<br />
Object createValue(UIDefaults table);<br />
}<br />
The job of the createValue method is to use information from the<br />
UIDef aults table that it is associated with and any information stored with<br />
the class that it is part of to construct an object of the type that it represents.<br />
This mechanism can be used to store a shorthand form of any kind of object<br />
in the defaults table, but it is most commonly used for icons and the LookAndFeel<br />
makelcon method allows you to create an object that implements<br />
the LazyValue interface that can construct an Imagelcon on demand,<br />
given a file name. To see how this works in practice and to demonstrate how<br />
to create your own LazyValue shorthand classes for other types of object,<br />
lets look at a simple example. Listing 13-2 shows a very basic program that<br />
just puts two buttons, each with icons, onto a frame and shows the result. The<br />
result of running this program using the command:<br />
java <strong>JFC</strong>Book.Chapterl3.LazyValueExample<br />
is shown in Figure 13—1.<br />
The first part of the example shows what a look-and-feel class might do to<br />
install icon resources.<br />
// Put an image icon in the UIDefaults table<br />
UIManager.put("Button.oklcon",<br />
LookAndFeel.makelcon(LazyValueExanple.class,<br />
"images/ok.gif"));<br />
Here the makelcon method is used to get an object that implements the<br />
LazyValue interface and which can create an Imagelcon on demand. You<br />
don't need to worry about how the class implementing the LazyValue interface<br />
is actually implemented—you can just take it on faith that it can create<br />
the required Icon when its createValue method is called. For this to be<br />
possible, you have to give makelcon enough information so that the image<br />
can be located. Since image files used with components are usually stored<br />
near to the class files for the components, makelcon requires you to specify<br />
the image location using a pathname relative to the location of a class. It<br />
doesn't actually matter which class this is, as long as the class can be located
The Look-and-Feel and the UIManager 1539<br />
Figure 13-1 Icons stored as<br />
lazy values.<br />
Listing 13-2 Using LazyValue objects in the UIDefaults table<br />
package <strong>JFC</strong>Book.Chapterl3;<br />
import j avax.swing.*;<br />
import <strong>Java</strong>.awt.FlowLayout;<br />
import <strong>Java</strong>.awt.Color;<br />
import <strong>JFC</strong>Book.Chapter13.LazyColorlcon;<br />
public class LazyValueExample {<br />
public static void main(String[] args) {<br />
// Put an image icon in the UIDefaults table<br />
UIManager.put("Button.oklcon",<br />
LookAndFeel.makelcon(LazyValueExample.class, "images/<br />
ok.gif"));<br />
// Put a LazyColorlcon in the UIDefaults table<br />
UIManager.put("Button.redlcon",<br />
new LazyColorlcon(Color.red, 16, 16, 2));<br />
JFrame f = new JFrame("Lazy Value Example");<br />
f.getContentPane().setLayout(new FlowLayout());<br />
JButton button = new JButtonC'Red icon");<br />
button.setIcon(UIManager.getlcon("Button.redlcon"))<br />
f.getContentPane().add(button);<br />
button = new JButton("OK");<br />
button.setIcon(UIManager.getIcon("Button.oklcon"));<br />
f.getContentPane().add(button);<br />
f .packO ;<br />
f.setVisible(true);<br />
}<br />
}<br />
when the application is running. In this example, we use the class of the<br />
example program itself, which is located at <strong>JFC</strong>Book/Chapterl3/Lazy-
1540 Chapter 13 The Pluggable Look-And-Feel<br />
ValueExample. class, relative to some entry in your CLASSPATH. The<br />
parameters given to the make I con call in this example require the image to<br />
be found at <strong>JFC</strong>Book/Chapterl3/images/ok.gif. When you create a<br />
button that needs this icon, all you need to do is invoke the UIManager get -<br />
Icon method giving the property name under which the LazyValue was<br />
installed in the defaults table, in this case "Button.oklcon," and treat the<br />
result as a real Icon, which is exactly what it is. As far as the code implementing<br />
the user interface is concerned, the ulDef aults table might as well have<br />
stored an Icon under the this key and, in fact, there is no way for it to tell<br />
that this is not the case.<br />
The key to all of this is the UlDef aults get method, which is used by the<br />
getlcon convenience method to access the UlDef aults table. When this<br />
method is called to retrieve a value, as it is in the example above to get the<br />
button's icon, it presents the key it is given to the Hashtable (remember<br />
that UlDef aults is derived from Hashtable) and looks at the object that it<br />
gets back. If this object implements the LazyValue interface, it invokes its<br />
createValue method and returns the result of this to its caller in place of<br />
the object in the Hashtable and also replaces the LazyValue object in the<br />
UlDef aults table with the object that it created, for future use. This means<br />
that, once the value associated with a LazyValue has been obtained from<br />
the UlDef aults table once, future calls return the same value because the<br />
LazyValue object will have been overwritten.<br />
The other button also has an icon on it, but this time it is a red colored<br />
square with a thin black border around it. You can see that this icon was<br />
retrieved from the UlDef aults table using the same getlcon method used<br />
to get the image on the first button. However, this red square is not an<br />
image—it is, in fact, an instance of the ColorFilllcon class that was developed<br />
back in Chapter 4. Furthermore, this icon was not stored directly in the<br />
UlDef aults table: Instead, it was installed using the following line of code:<br />
UIManager.put("Button.redlcon",<br />
new LazyColorlcon(Color.red, 16, 16, 2));<br />
LazyColorlcon is, not surprisingly, a class that implements the Lazy-<br />
Value interface. When it is created, it stores its arguments, which specify the<br />
color of the icon, its width, height, and the width of the black surrounding<br />
border. It also, of course, has a createValue method that manufactures a<br />
ColorFilllcon using these stored values. You can see how this class is<br />
implemented in Listing 13-3. The advantage of storing the icon in this way,<br />
including its color and size, is that the code that uses the icon does not need<br />
to know how to get these values and apply them.
The Look-and-Feel and the UIManager 1541<br />
Listing 13-3 A LazyValue object to store a ColorFilllcon in the<br />
UIDefaults table<br />
package <strong>JFC</strong>Book.Chapterl3;<br />
import j avax.swing.*;<br />
import java.awt.Color;<br />
import <strong>JFC</strong>Book.Chapter4.ColorFilllcon;<br />
public class LazyColorlcon implements UIDefaults.LazyValue {<br />
public LazyColorlcon(Color color, int width, int height, int border-<br />
Size) {<br />
this.color = color;<br />
this.width = width;<br />
this.height = height;<br />
this.borderSize = borderSize;<br />
}<br />
// LazyValue interface implementation<br />
public Object createValue(UIDefaults defaults) {<br />
return new ColorFilllcon(color, width, height, border-<br />
Size) ;<br />
}<br />
protected Color color; // Fill color<br />
protected int width; // Icon width<br />
protected int height; // Icon height<br />
protected int borderSize; // Border size<br />
}<br />
<strong>Java</strong> 2 version 1.3 includes an implementation of LazyValue called Lazy-<br />
InputMap that creates an InputMap given a list of key bindings as required<br />
by the make InputMap method described earlier. An entiy in the UIDefaults<br />
table of type LazylnputMap defers the creation of the map until<br />
such time as a component that requires it is loaded and also ensures that only<br />
one instance of the map is created to be shared between all such components.<br />
Active Values<br />
The LazyValue interface, then, allows the programmer of a look-and-feel to<br />
store a shorthand in the UIDefaults table that defers creation of an actual<br />
object until it is required. There is another type of entry called<br />
ActiveValue that is similar to LazyValue, in that it has a createValue
1542 Chapter 13 The Pluggable Look-And-Feel<br />
method to generate an object on demand. However, whereas the object<br />
returned by LazyValue is then stored in the UlDef aults table overwriting<br />
the LazyValue object, this doesn't happen with an ActiveValue—its createValue<br />
method is invoked each time an attempt is made to get its value.<br />
This means, of course, that it can potentially return a different object every<br />
time it is called. An example of a case in which ActiveValue could used<br />
would be if you wanted to return a new instance of an object on each occasion.<br />
For example, you could create a class that implements this interface<br />
that looks like this:<br />
class ButtonFactory implements UIDefaults.ActiveValue {<br />
public Object createValue(UIDefaults defaults) {<br />
return new JButton("" + count++);<br />
}<br />
static int count = 1;<br />
}<br />
Now, you can create an entry for this class in the UIDef aults table under<br />
the key "Button. factory."<br />
UIManager.put("Button.factory", new ButtonFactory());<br />
This entry will create a new button object each time its value is retrieved<br />
from the UIDef aults table. For example,<br />
jButton buttonl = (JButton)UIManager.get(<br />
"Button.factory");<br />
JButton button2 = (JButton)UIManager.get(<br />
"Button.factory");<br />
creates two JButton objects with the labels "1" and "2," respectively.<br />
Active values are used just like this by the Swing look-and-feel packages.<br />
Suppose you wanted to get a renderer for a JList. You could just create a<br />
Def aultListCellRenderer and use that, but if you want to obtain the<br />
actual renderer used by the current look-and-feel, you can use code like that<br />
shown in the previous example, with the key "List .cellRenderer." This<br />
accesses an ActiveValue that creates a new instance of whichever class is<br />
the default list cell renderer for the selected look-and-feel:<br />
ListCellRenderer renderer =<br />
(ListCellRenderer)UIManager.get(<br />
"List.cellRenderer");<br />
The ProxyLazyValue Class<br />
The LazyValue interface is a good idea for reducing overhead when initializing<br />
a look-and-feel by deferring the cost of loading some resources until it is
The Look-and-Feel and the UIManager 1543<br />
known that they are required. However, there is still a cost associated with<br />
installing a LazyValue in the UIDef aults table. Consider the following<br />
typical piece of code that installs the LazyValue that will load the border for<br />
aJInternalFrame:<br />
Object internalFrameBorder = new UIDefaults.LazyValue() {<br />
public Object createValue(UIDefaults table) {<br />
return<br />
new BorderUIResource.CompoundBorderUIResource(<br />
new BevelBorder(BevelBorder.RAISED,<br />
table.getColor("controlHighlight"),<br />
table.getColor("controlLtHighlight"),<br />
table.getColor("controlDkShadow"),<br />
table.getColor("controlShadow")),<br />
BorderFactory.createLineBorder(<br />
table.getColor("control"), 1));<br />
}<br />
};<br />
During the execution of this code, not only will an anonymous class implementing<br />
the LazyValue interface be loaded, but, depending on the <strong>Java</strong> VM<br />
implementation, it may also be necessary to load the BorderUIResource,<br />
BevelBorder, and BorderFactory classes, which increases the initialization<br />
time and the initial memory requirements. At the very least, one class<br />
(the anonymous inner class) has to be loaded for each instance of this code<br />
and that class will only be used once. There is a lot of code like this in the initialization<br />
of each look-and-feel and the result is that Swing applications take<br />
a noticable time to start up, much of it spent installing entries in the UIDef<br />
aults table.<br />
In <strong>Java</strong> 2 version 1.3, the LazyValue interface in no longer used in this<br />
way. Instead, there is a new class called ProxyLazyValue that implements<br />
LazyValue and makes it possible to install a look-and-feel much more<br />
quickly:<br />
public static class ProxyLazyValue implements LazyValue {<br />
public ProxyLazyValue(String c);<br />
public ProxyLazyValue(String c, String m) ;<br />
public ProxyLazyValue(String c, Object[] o);<br />
public ProxyLazyValue(String c, String m, ObjectU o);<br />
public Object createValue(UIDefaults table);<br />
}<br />
The idea of this class is that, instead of creating and loading an anonymous<br />
class that contains the code to build the required value later and thereby<br />
incur the expense of loading the classes referenced by that code, it is quicker
1544 Chapter 13 The Pluggable Look-And-Feel<br />
to simply instantiate an instance of a single class and store the information<br />
needed to build the required value. An immediate advantage of this scheme<br />
is that, because it no longer relies on anonymous inner classes, only one class<br />
is loaded to satisfy all the LazyValue initializations in the entire application.<br />
This reduces load time and memory usage and results in Swing applications<br />
appearing to be much more responsive when they are started.<br />
So how does this class work? There are three possible constructors, which<br />
take some combination of the following arguments:<br />
c The name of the class from which the resource value<br />
can be obtained.<br />
m The method of the class to be called to get the<br />
resource value.<br />
o An array of arguments to pass to the given method.<br />
The basic idea is that when the resource is required, the ProxyValue<br />
createValue method will call the method m of the class called c, passing it<br />
the arguments in the array o. Whatever this method returns is taken as the<br />
value to be installed in the UIDef aults table. Here is the <strong>Java</strong> 2 version 1.3<br />
code that creates the LazyValue for the border of JlnternalFrame:<br />
Object internalFrameBorder =<br />
new UIDefaults.ProxyLazyValue(<br />
"j avax.swing.plaf.basic.BasicBorders",<br />
"getlnternalFrameBorder");<br />
When the border resource is needed, the getlnternalFrameBorder<br />
method of class j avax. swing, plaf .basic. BasicBorders will be called<br />
with no arguments. This is a static method that takes no arguments and<br />
returns a BorderUIResource, which will be stored in the ulDefaults<br />
table.<br />
The details that make this work are in the ProxyValue createValue<br />
method. The basic idea is to use <strong>Java</strong> reflection to load the given class, find<br />
the named method, and invoke it with any arguments stored in the Proxy-<br />
Value object. By using reflection, it is possible to avoid direct references to<br />
the classes themselves during setup and thereby remove the need to load
The Look-and-Feel and the UI Manager 1545<br />
those classes. There are four different ways to use this class, distinguished by<br />
which constructor is used:<br />
ProxyLazyValue(String c)<br />
ProxyLazyValue(String c,<br />
Object [] o)<br />
ProxyLazyValue(String c,<br />
String m)<br />
ProxyLazyValue(String c,<br />
String m, Object [] o)<br />
The BasicLookAndFeel Class<br />
The named class must have a no-argument<br />
constructor. An instance of the class is created<br />
using the constructor and it becomes<br />
the value to be stored in the UIDef aults<br />
table.<br />
This is the same as the previous case, except<br />
that the array o contains arguments that are<br />
passed to a constructor with a compatible signature.<br />
The class c must have a static method m that<br />
takes no arguments. This method is invoked<br />
and the value returned is stored in the<br />
UIDef aults table.<br />
The class c must have a static method m that<br />
requires arguments whose types match those<br />
in the array o. This method is invoked with<br />
the supplied arguments and the value<br />
returned is stored in the UIDef aults<br />
table.<br />
LookAndFeel is the abstract base class from which all look-and-feel classes<br />
must be derived. BasicLookAndFeel is a slightly more complete, but still<br />
abstract class in the j avax. swing.plaf .basic package that contains code<br />
common to all of the Swing look-and-feels. When creating a new look-andfeel,<br />
you are not obliged to subclass BasicLookAndFeel, but you will save a<br />
lot of effort by doing so. BasicLookAndFeel implements the abstract get-<br />
Defaults required by LookAndFeel and adds the following additional<br />
methods:<br />
protected void initClassDefaults(UIDefaults defaults);<br />
protected void initComponentDefaults(<br />
UIDefaults defaults);<br />
protected void initSystemColorDefaults(<br />
UIDefaults defaults);<br />
protected void loadSystemColors(UIDefaults defaults,<br />
String [] systetnColors , boolean useNative) ;
1546 Chapter 13 The Pluggable Look-And-Feel<br />
You will notice that these methods are all protected—they are intended to<br />
be accessed only by BasicLookAndFeel itself and by the real look-and-feel<br />
derived from it. Complete implementations of all of these methods are provided<br />
in this class. Each method is given a UIDefaults table as its argument.<br />
The idea is to load information into this UIDefaults table and, in<br />
fact, three of these methods are invoked by the BasicLookAndFeel implementation<br />
of getDefaults, which creates an empty UIDefaults object<br />
and then calls them in the following order to populate it-.<br />
initClassDefaults<br />
initSystemColorDefaults<br />
initComponentDefaults<br />
The initClassDefaults method installs mappings from the UI class<br />
identifier to the corresponding UI class name for every component supported<br />
by the look-and-feel. For example, buttons always look for their UI<br />
class using the key ButtonUl and the Metal look-and-feel initclassDef<br />
aults method would install an entry mapping the key ButtonUl to the<br />
value javax. swing.plaf .metal .MetalButtonUl, which is the name of<br />
the class implementing the UI for buttons in the Metal style. The exact<br />
method used by a component to find and install its UI class will be described<br />
in "Changing Component Look and Feel" later in this chapter.<br />
The initSystemColorDef aults method has the job of installing appropriate<br />
values for the system colors that are described by the j ava. awt. Sys -<br />
temColor class. Each color is stored under a key which is the name of the<br />
system color from that class, such as "text," "desktop," "activeCaption,"<br />
and so on. The colors that are stored depend, naturally enough, on the lookand-feel.<br />
There are two different approaches used by the look-and-feel<br />
implementations supplied with Swing 1.1.1 and the <strong>Java</strong> 2 platform.<br />
In the case of the Windows look-and-feel, the actual value stored for each<br />
color depends on whether the look-and-feel is running on its native platform.<br />
If it is, it uses the actual native colors for the platform as currently configured<br />
by using the j ava. awt. SystemColor class to obtain them and installs them<br />
in the UIDefaults table. If this is not the look-and-feel's natural platform, it<br />
installs a hard-coded set of default colors that represent a particular desktop<br />
color scheme from that platform. The choice of which color set to use (i.e.,<br />
the actual system colors or the default set) is made by the loadSystemColors<br />
method, which is called by initSystemColorDef aults and passed<br />
the default color set as its second argument and a third argument indicating<br />
whether the call is being made for the platforms native look-and-feel. The<br />
effect of this is that, if you use the Windows look-and-feel on the Windows
Changing Component Look-and-Feel 1547<br />
platform and you have a themed desktop, then your Swing application will<br />
use the same color scheme as all of your native applications.<br />
The same policy is used by the Motif look-and-feel and by the default<br />
implementation in the BasicLookandFeel class, which would therefore be<br />
the behavior you would inherit if you use this as the base class for a new lookand-feel.<br />
Because the process of loading the actual colors is separate from<br />
the code that supplies the defaults, you can override loadSystemColors to<br />
implement a different policy, perhaps choosing to always install the look-andfeel's<br />
own colors as supplied by initSystemColorDefaults, instead of<br />
using the platform's own colors. At the very minimum, a new look-and-feel<br />
would almost certainly override initSystemColorDef aults to supply its<br />
own color defaults for the case when it is not the native look-and-feel, and<br />
call loadSystemColors to install them when necessary.<br />
The Metal look-and-feel does not use this policy, however. Instead of providing<br />
a set of colors that can be overridden by those of the native platform, it<br />
always supplies its own colors and ignores the platform preferences.<br />
Finally, the initComponentDef aults method is responsible for installing<br />
all of the component-specific information, other than the names of the UI<br />
classes, in the UIDefaults table. This includes font, color, and border<br />
resources, default renderers, icons, and much more. Since there are so many<br />
of these resources, there isn't enough room to describe them here. If you are<br />
planning to implement your own look-and-feel, you should look at the source<br />
code of the BasicLookAndFeel method to get a complete list of these<br />
resources.<br />
Changing Component Look-and-Feel<br />
You have now seen all of the classes that are involved in managing the pluggable<br />
look-and-feel mechanism. Up to this point, the discussion has been<br />
somewhat academic because there has been quite a bit of introductory material<br />
to cover. In this section, it is time to start getting practical and look at how<br />
you can use what you've seen to change the user interface of a program in<br />
various ways, from writing and installing a completely new look-and-feel at<br />
one extreme to changing the way that one instance of a particular component<br />
looks at the other. To give you something to work with, our first task will be<br />
to create a modified user interface for the familiar JButton component, in<br />
the course of which you'll see in more detail how a UI class interacts with its
1548 Chapter 13 The Pluggable Look-And-Feel<br />
component and how the uiDef aults mechanism is used to control the component's<br />
default appearance.<br />
A New Button User Interface<br />
The first step in implementing a new UI class is, of course, to decide what<br />
you want it to do. Buttons are simple objects—about all you can do is press or<br />
disable them. Swing manages to make them slightly more interesting than<br />
AWT buttons by including icons and a degree of responsiveness to the mouse<br />
by allowing you to display a different icon when the mouse is over the button<br />
(the "rollover" icon that you saw in Chapter 2) or when the button is disabled<br />
and supporting multiline text in more than one font. You might think that<br />
there is little else you could do to change the way a button looks.<br />
Apart from the text and the icon, a button also has a border and that is where<br />
this user interface for our button will be different from the standard one. Usually,<br />
the button's border is visible, so that the label appears, in the Metal lookand-feel,<br />
with an etched border and level with its surroundings until you press<br />
it, when it looks lower than the surrounding area. The user interface that you'll<br />
see in this section will make the button look flat and with no etched border, just<br />
like a label, under normal circumstances. When the mouse moves over the button<br />
or when the button has the focus, the border will appear. The behavior<br />
when the button is pressed will be the same as it always is—it will look as if it<br />
has been pushed in. When the button is disabled, it won't have a border and it<br />
won't respond to the mouse or the focus.<br />
Figure 13—2 shows three buttons using the new interface. The button in<br />
the center is in the normal state—since it doesn't have the focus and the<br />
mouse is not over it, the border is not visible and it looks just like a label.<br />
When the button is under the mouse or has the focus, the usual border<br />
appears, as is the case with the left button. In this state, it is impossible to tell<br />
this user interface apart from the Metal one.<br />
Figure 13-2 Three buttons with a new user interface.
Changing Component Look-and-Feel 1549<br />
Finally, the right-hand button is disabled and so it also has no border. You<br />
can also probably just tell from the gray-scale reproduction that the text and<br />
the icon have been grayed-out. In this respect, the new user interface is the<br />
same as all of the others in common use. If you want to try this example out<br />
for yourself, use the command<br />
java <strong>JFC</strong>Book.Chapterl3.C<strong>JFC</strong>ButtonTest<br />
When this example starts running, all three buttons are enabled. The<br />
right-hand button is periodically disabled for a while and then enabled, to<br />
allow you to experiment with the behavior of disabled buttons<br />
Before reading the rest of this section, familiarize yourself with the way in<br />
which the new interface works by moving the mouse around and shifting the<br />
focus by using the TAB key. Note that it is possible to have two buttons with<br />
visible borders by moving the mouse over one of them while another has the<br />
focus, but if you click on a button, it grabs the focus causing the other button<br />
to lose its border. Also notice that a disabled button doesn't show its border<br />
under any circumstances.<br />
The <strong>Core</strong> <strong>JFC</strong> Look-and-Feel:The First Step<br />
If you're going to create a new look-and-feel for a component, you might as<br />
well use a completely new package for it, so that you can add new user interfaces<br />
for other components later if you want to. Of course, as you'll see, you<br />
don't need to build an entirely new look-and-feel package or even invent a<br />
LookAndFeel subclass to just substitute the user interface for one component<br />
and, to show you that this is so, the examples in this section will just<br />
change the way that individual buttons look without affecting the rest of the<br />
user interface. Later in the chapter, you'll see how to add to this and develop<br />
a fully-featured look-and-feel if that is what you want to do. For want of a<br />
better title, the new look-and-feel will be called the "<strong>Core</strong> <strong>JFC</strong>" look-andfeel<br />
and it will reside in the <strong>JFC</strong>Book. C j f c package.<br />
The <strong>Core</strong> <strong>JFC</strong> Button User Interface <strong>Classes</strong><br />
As you saw back in Chapter 1, a button is actually made up of several parts,<br />
some of which are generic, while others depend on the selected look-andfeel.<br />
The most familiar piece of a button is, of course, the JButton class,<br />
which your application actually deals directly with and which is the same<br />
whichever look-and-feel is in use. There are also at least two other pieces—<br />
the model and the UI class and, depending on the look-and-feel, there may<br />
be others.
1550 Chapter 13 The Pluggable Look-And-Feel<br />
The model implements the j avax. swing. ButtonModel interface and is<br />
usually an instance of Def aultButtonModel, an implementation of that<br />
interface which is supplied by the javax. swing package. The model is initially<br />
installed by JButton itself and may be changed by the application program.<br />
The look-and-feel does not make any assumptions about which model<br />
is installed—all it can assume is that it implements ButtonModel.<br />
The UI class that is used is, of course, completely under the control of the<br />
installed look-and-feel. It is possible to create a button user interface that is<br />
wrapped into a single class, but the standard look-and-feels don't do it that<br />
way. Instead, they all use an additional three pieces to implement the user<br />
interface:<br />
• The UI class that is responsible for drawing the button and<br />
managing the other pieces.<br />
• An implementation of Border that draws the button's border.<br />
• A class that reacts to user interaction with the button by<br />
monitoring keyboard, mouse, and focus activity.<br />
For the Metal look-and-feel, these three pieces are realized by the<br />
classes MetalButtonUI, ButtonBorder, and BasicButtonListener,<br />
respectively.<br />
As discussed in Chapter 1, the interfaces between the UI classes and the<br />
corresponding component classes are all defined in the<br />
j avax. swing. plaf package. To provide a new button interface, you have<br />
to create a class that implements all of the methods of the abstract class<br />
javax. swing .plaf .ButtonUI, which is defined as follows:<br />
public abstract class ButtonUI extends ComponentUI {<br />
}<br />
In other words, ButtonUI has no methods in addition to those of ComponentUI,<br />
which is the common piece of every user interface class. Its definition<br />
was shown in Chapter 1 and is repeated here for convenience:<br />
public abstract class ComponentUI() {<br />
public static ComponentUI createUI(JComponent c);<br />
public void installUI(JComponent c);<br />
public void uninstallUI(JComponent c);<br />
public void update(Graphics g, JComponent c);<br />
public void paint(Graphics g, JComponent c);<br />
public Dimension getPreferredSize(JComponent c) ;<br />
public Dimension getMinimumSize(JComponent c);<br />
public Dimension getMaximumSize(JComponent c);<br />
public boolean contains(JComponent c, int x, int y);
Changing Component Look-and-Feel 1551<br />
public int getAccessibleChildrenCount(JComponent c);<br />
public Accessible getAccessibleChild(<br />
JComponent c, int i);<br />
At the very least, a button user interface class must implement these<br />
eleven methods. The BasicButtonUI class in the<br />
javax. swing.plaf .basic package contains implementations of all of<br />
them and, by deriving a new interface class from it, you can make use of that<br />
code to minimize the amount of work you have to do. The major problem, of<br />
course, is to determine which methods can be used unchanged and which<br />
need to be overridden. To determine this, you need to refer to the source<br />
code for the BasicButtonUI class and to understand what the new class will<br />
do that is different. Since the source of the BasicButtonUI class can't be<br />
reproduced here, you'll need to refer to the source code that comes with the<br />
Swing package to see exactly what each of its methods does. During the<br />
implementation of the new user interface, you'll see which methods of<br />
BasicButtonUI are being used unchanged and which are being overridden.<br />
As well as the UI class itself, there is also the border to consider. Buttons<br />
don't use just any border—they install the border specified in the UIDefaults<br />
table. The Metal look-and-feel, for example, uses the ButtonBorder<br />
class, which is a static inner class of javax.swing.plaf.metal.Metal-<br />
Borders, as its border. Button borders are all derived from AbstractBorder,<br />
but they all have special code that enables them to change their<br />
appearance based on the state of the button itself: When the button is<br />
pressed, for example, the UI class has to arrange for the border to change its<br />
state to help give the illusion of the button being pressed in. This is, as you'll<br />
see, a trivial matter because the border has access to the button's model,<br />
which defines its state and hence determines exactly how the border should<br />
appear. Our new button user interface actually has three border states—normal,<br />
lowered, and no border at all. There is no border class that can provide<br />
all of these states, so it appears that it will be necessary to implement one but,<br />
in fact, you can simulate this behavior by installing an empty border when the<br />
border should not appear and the usual border when it should. This has the<br />
advantage of requiring no new border-drawing code and makes it possible to<br />
exploit the ability of the existing button borders to draw themselves according<br />
to the button's state. It also means that the button's border is consistent with<br />
that of the current look-and-feel (because it is the exact same border), which<br />
allows us to mix our button with components from any look-and-feel and still<br />
have the correct border.<br />
The last piece to look at is the controller in model-view-controller (MVC)<br />
terms. This piece listens to mouse, keyboard, and focus events and updates
1552 Chapter 13 The Pluggable Look-And-Feel<br />
the button model state appropriately. To see whether the standard<br />
BasicButtonListener can be used in conjunction with our new user interlace,<br />
let's consider exactly what it does and compare this to what our button<br />
needs to do. First, let's look at mouse handling. Ordinary buttons react to the<br />
mouse as follows:<br />
• When the mouse moves over the button, the "rollover" icon is<br />
installed if there is one and rollover is activated (see Chapter 2,<br />
"Frames, Labels, and Buttons," for a discussion of button icons).<br />
• When the mouse moves away from the button, the rollover icon<br />
is replaced by the standard icon and, if the button appears<br />
pressed-in because of a mouse press, it is redrawn in its<br />
unpressed state.<br />
• When a mouse button is pressed, the button redraws itself to<br />
appear pressed in.<br />
• When the mouse button is released with the mouse still over<br />
the button, it is redrawn in its normal state and an<br />
ActionEvent is generated.<br />
All of this behavior needs to be preserved by our user interface, but a few<br />
extra things must be added:<br />
• When the mouse moves over the component, it must be<br />
redrawn with a border (unless it is disabled).<br />
• When the mouse moves away from the button, it must be<br />
drawn with no border, unless it has the focus, in which case the<br />
raised border will be left.<br />
• When the button loses the focus, it must be drawn with no<br />
border.<br />
Clearlv, this extra behavior requires new code to be written, so it will be<br />
necessary to subclass BasicButtonListener to fit our pin-poses and it will<br />
be necessary to override some of the mouse-handling code in that class.<br />
What about keyboard handling? The BasicButtonListener doesn't<br />
actually listen to keyboard events at all—instead it registers keyboard actions<br />
against the JButton that the user interface class is connected to using the<br />
keyboard registiy in Swing 1.1.1 and <strong>Java</strong> 2 version 1.2.2, or the InputMap<br />
and ActionMap in <strong>Java</strong> 2 version 1.3. These actions ensure that the button<br />
acts as if it had been pressed when it has the focus and the user presses and<br />
releases the space key or RETURN, or activates the accelerator key on the button's<br />
label. They achieve this by modifying the state of the button model just
Changing Component Look-and-Feel 1553<br />
as if mouse buttons had been used to achieve the same effect. This behavior<br />
is still appropriate with the new interface and nothing extra is needed, so the<br />
methods of BasicButtonListener that implement it can be used<br />
unchanged.<br />
Last, there is the focus handling. Buttons usually redraw themselves when<br />
they gain and lose the focus because they typically provide some visual feedback<br />
to the user in the form of a hatched rectangle drawn around the text<br />
and/or the icon, depending on the look-and-feel installed. With the new<br />
interface, gaining or losing the focus will cause the button to draw or remove<br />
its border, so no hatched rectangle should be drawn on the buttons surface.<br />
It is, therefore, necessary to override the focus-handling methods of<br />
BasicButtonListener.<br />
Although some extra functionality is required, it seems that there is nothing<br />
in BasicButtonListener that prevents it from being used as the basis<br />
of the controller for the new interface. We conclude, therefore, that the new<br />
interface can be created by using the border class unchanged and implementing<br />
a view and controller by subclassing BasicButtonUI and<br />
BasicButtonListener. These classes will be part of the <strong>Core</strong> <strong>JFC</strong> lookand-feel<br />
in the <strong>JFC</strong>Book.Cjfc package, and will be called C<strong>JFC</strong>ButtonUl<br />
and C<strong>JFC</strong>ButtonListener, respectively.<br />
<strong>Core</strong> Note<br />
Initially, you'll see how to implement the new button interface.This new<br />
interface can, as you'll see later, be used with any existing look-and-feel and<br />
it will use the button border associated with that look-and-feel by retrieving<br />
it from the uiDef aults table. Later, this same button will be part of a<br />
new look-and-feel and, without changing any of its code, will use the button<br />
border specified for that look-and-feel.<br />
A Quick Review of the Button Model<br />
You can't write a UI class without access to the state of the object that you're<br />
trying to represent. In Swing, the state is always held in a model that is separate<br />
from both the component itself and from the various views that can represent<br />
it. In the case of buttons, the facilities required of a model are<br />
specified by the ButtonModel interface, of which Def aultButtonModel is<br />
an implementation. To understand how the C<strong>JFC</strong> button UI classes work, it<br />
is necessary to know what the model contains and what each piece of its state<br />
means.
I5S4 Chapter 13 The Pluggable Look-And-Feel<br />
There are five basic attributes that the button model maintains, listed in<br />
Table 13-4. These attributes all affect the appearance of the button, so you'll<br />
often see the UI class implementation querying the model for their values.<br />
<strong>Core</strong> Note<br />
ButtonModel supports other attributes but, since they don't affect the<br />
button's visual representation, they are not listed here. Refer to the API<br />
specifications for ButtonModel and Def aultButtonModel to find<br />
out about the other attributes.<br />
Table 13-4 ButtonModel Attributes<br />
Attribute Meaning<br />
Enabled This is the most obvious of the five attributes and corresponds<br />
exactly to the JComponent "enabled" state. When the button's<br />
JComponent is enabled, so will the model be. If the model is<br />
disabled, it ignores any further state changes it is asked to make,<br />
other than a request to enable itself again.<br />
Pressed This attribute is true when the button is in the pressed state.<br />
The button's controller determines when user action results in a<br />
button being "pressed" and when it should be considered<br />
released. This attribute can also be changed by the Abstract-<br />
Button doClick method.<br />
Selected The selected attribute is only meaningful for buttons like toggle<br />
buttons, checkboxes, and radio buttons that have a persistent<br />
state that is toggled by being clicked with the mouse. For other<br />
buttons, a mouse click causes the pressed attribute to go from<br />
false to true and then back to false, with no persistent<br />
change in the model.<br />
Rollover The rollover attribute is true when the button has rollover<br />
enabled and the mouse is positioned over the button itself. The<br />
button's controller class is responsible for determining when this<br />
is the case and for changing this attribute as necessary.<br />
Armed When the button is armed, it is able to generate events, typically<br />
an ActionEvent caused by the button being pressed. A button<br />
arms itself when the mouse moves over it and disarms itself when<br />
the mouse moves away. We used this property when building a<br />
simple status bar in Chapter 6.
Changing Component Look-and-Feel 1555<br />
Each of these attributes is a boolean and has methods that allow its state to<br />
be retrieved or to be changed—for example, the setRollover method is<br />
used to change the state of the Rollover attribute and isRollover returns<br />
its current value. Changes to any of the attributes cause a ChangeEvent to<br />
be generated. Typically, the button's UI class or the controller class will register<br />
as a ChangeListener and adjust the appearance of the button to reflect<br />
the current state of the model.<br />
The C<strong>JFC</strong>ButtonListener Class<br />
Because of its relative simplicity, the first part of the button implementation<br />
that you're going to see is the controller part that will directly handle mouse<br />
and focus events, which affect whether the main UI object will display the button's<br />
border. The class extends BasicButtonListener to inherit its keyboard<br />
handling, so you won't see any key-related code in<br />
C<strong>JFC</strong>ButtonListener itself. In fact, there is very little code in BasicButtonListener<br />
itself. Because it uses keyboard actions, it doesn't need to catch<br />
KeyEvents—it allows the button's JComponent to do that and to invoke the<br />
action processing methods registered in the keystroke registiy (or the Action-<br />
Map) when necessary. If you want to look at the details, refer to the source code<br />
for BasicButtonListener. The code for C<strong>JFC</strong>ButtonListener itself is<br />
shown in Listing 13-4.<br />
Listing 13—4 The controller for a button user interface<br />
package <strong>JFC</strong>Book.Cjfc;<br />
import javax.swing.*;<br />
import javax.swing.plaf.basic.*;<br />
import javax.swing.plaf.*;<br />
import j ava.awt.*;<br />
import j ava.awt.event.*;<br />
public class C<strong>JFC</strong>ButtonListener<br />
extends BasicButtonListener {<br />
public C<strong>JFC</strong>ButtonListener(AbstractButton b)<br />
super(b);<br />
this.b = b;<br />
}
1556 Chapter 13 The Pluggable Look-And-Feel<br />
Listing 13-4 The controller for a button user interface (continued)<br />
}<br />
public void focusGained(FocusEvent evt) {<br />
ButtonUI ui = b.getUlO;<br />
if (ui instanceof C<strong>JFC</strong>ButtonUI) {<br />
((C<strong>JFC</strong>ButtonUI)ui).focusChanged(b);<br />
}<br />
super.focusGained(evt);<br />
}<br />
public void focusLost(FocusEvent evt) {<br />
ButtonUI ui = b.getUK);<br />
if (ui instanceof C<strong>JFC</strong>ButtonUI) {<br />
((C<strong>JFC</strong>ButtonUI)ui).focusChanged(b);<br />
}<br />
super.focusLost(evt);<br />
}<br />
protected AbstractButton b;<br />
When a button is created and the UI component is installed, it will create<br />
an instance of C<strong>JFC</strong>ButtonListener. This object will be dedicated to the<br />
UI component that creates it and its constructor is passed the button itself in<br />
the form of a reference to an AbstractButton, which is the superclass of all<br />
Swing button types. Using this reference, it can easily locate the button itself<br />
or find its UI object using the JComponent getUI method, as you can see<br />
from Listing 13-4.<br />
As explained earlier, the job of this class is simply to extend the behavior of<br />
BasicButtonListener so that mouse and focus events are handled appropriately<br />
for our user interface. For this reason, there is very little code. In<br />
fact, all this class does is to trap focus events—when the button gains or loses<br />
the focus, the C<strong>JFC</strong>ButtonUI focusChanged method is called to let it<br />
know. In this case, as you'll see, there is no need to pass an argument indicating<br />
which focus event occurred, because a JComponent can tell whether or<br />
not it has the focus at any given time.<br />
You may be surprised to see that there is no explicit mouse-handling code<br />
in the C<strong>JFC</strong>ButtonListener class, although we know that it is necessaiy to<br />
change the border state when the mouse moves onto or out of the button and<br />
that this behavior is in addition to the mouse handling provided by<br />
BasicButtonListener. In fact, there is no need to explicitly trap mouse<br />
events here, because the mouse event handling in BasicButtonListener
Changing Component Look-and-Feel 1557<br />
causes the ButtonModel to be armed when the mouse moves over the button<br />
and disarmed when it moves away. Hence, the C<strong>JFC</strong>ButtonUl class can<br />
just monitor the ButtonModel to determine where the mouse is.<br />
Notice that the focus event handling methods both invoke the superclass<br />
event handling code as well, to allow it to do anything it needs to do when a<br />
focus event occurs. Table 13-5 shows what BasicButtonListener does<br />
with both focus and mouse events.<br />
Table 13-5 Handling Mouse and Focus Events for a Button<br />
Event Response<br />
mouseEntered If rollover is enabled (see Chapter 2), changes the button model<br />
state to show that the button is in rollover mode and arms the<br />
model.<br />
mouseExited If rollover is enabled, turns off rollover mode in the button<br />
model. Also turns off the armed state in the model.<br />
f ocusGained Calls repaint to have the UI class redraw the component<br />
with the appropriate visual cue to show the focus.<br />
f ocusLost Calls repaint to remove the visual cue for the focus.<br />
Incidentally, you'll note from Table 13-5 that although the listener<br />
arranges for a repaint when a focus event occurs, mouse enter and exit<br />
events just cause the state of the button model to be changed—there is no<br />
call to repaint to have the button redrawn with the correct icon if rollover is<br />
enabled, so how is the repaint triggered in this case? As always in the MVC<br />
architecture, changes in the model cause an event which makes the view<br />
update itself. In this case, the model generates a ChangeEvent when any of<br />
its state is modified. This event is caught by BasicButtonListener, which<br />
schedules a repaint. This might seem a little circular in this case, because the<br />
original event was originally notified to BasicButtonListener (via<br />
C<strong>JFC</strong>ButtonListener), which went to the trouble of updating the model<br />
and allowing the model to tell it to redraw the button. This is, of course, a<br />
special case and there are other state changes that do not go through the controller—such<br />
as those resulting from the application changing the state of the<br />
button via the AbstractButton API, like doClick, which programmatically<br />
presses and releases the button or set Enabled which will almost certainly<br />
require the button to redraw itself.
1558 Chapter 13 The Pluggable Look-And-Feel<br />
The C<strong>JFC</strong>ButtonUI Class<br />
The C<strong>JFC</strong>ButtonUI class is the real button Ul class, whose job it is to<br />
implement our specific button look-and-feel. At the very least, it must provide<br />
(or inherit) the 10 methods defined by the abstract<br />
j avax. swing . plaf . ButtonUI class that were listed earlier in this chapter.<br />
Some of them can ,of course, be inherited from the BasicButtonUI class<br />
and some must be overridden to provide customized behavior. The implementation<br />
of the C<strong>JFC</strong>ButtonUI class is shown in Listing 13-5.<br />
Listing 13-5 The <strong>Core</strong> <strong>JFC</strong> look-and-feel button Ul class<br />
package <strong>JFC</strong>Book.Cjfc;<br />
import j avax.swing.*;<br />
import javax.swing.border.*;<br />
import j avax.swing.event.*;<br />
import javax.swing.plaf.*;<br />
import javax.swing.plaf.basic.*;<br />
import <strong>JFC</strong>Book.Cj fc.C<strong>JFC</strong>ButtonListener;<br />
import <strong>Java</strong>.beans.*;<br />
import j ava.awt.*;<br />
public class C<strong>JFC</strong>ButtonUI extends BasicButtonUI<br />
implements ChangeListener, PropertyChangeListener {<br />
// ComponentUI implementation<br />
public static ComponentUI createUI(JComponent c) {<br />
return new C<strong>JFC</strong>ButtonUI();<br />
}<br />
public void installUI(JComponent c) {<br />
installDefaults((AbstractButton) c) ;<br />
buttonListener = createListener((AbstractButton)c);<br />
// Connect to listener for mouse and focus events<br />
c.addMouseListener(buttonListener);<br />
c.addMouseMotionListener(buttonListener);<br />
c.addFocusListener(buttonListener) ;<br />
// Register to receive notification of model changes<br />
((AbstractButton)c).addChangeListener(this);<br />
// Superclass must also listen for change events
Listing 13-5 The <strong>Core</strong> <strong>JFC</strong> look-and-feel button Ul class<br />
(continued)<br />
Changing Component Look-and-Feel 1559<br />
// from the model<br />
((AbstractButton)c) .addChangeListener(buttonListener) ;<br />
// Set up keyboard actions<br />
buttonListener.installKeyboardActions(<br />
(AbstractButton)c);<br />
// Use convenience methods to install our<br />
// default colors, fonts and border<br />
LookAndFeel.installColorsAndFont(c, "Button.background",<br />
"Button.foreground",<br />
"Button.font");<br />
LookAndFeel.installBorder(c, "Button.border");<br />
// Now replace the border with an empty one<br />
originalBorder = c.getBorder();<br />
if (originalBorder != null) {<br />
createEmptyBorder(originalBorder, c);<br />
}<br />
c.setBorder(emptyBorder);<br />
// Register to receive notification of<br />
// future border changes<br />
c.addPropertyChangeListener(this);<br />
}<br />
public void uninstallUI(JComponent c) {<br />
// Remove listeners<br />
c.removeMouseLi stener(buttonListener) ;<br />
c.removeMouseMotionListener(buttonListener);<br />
c.removeFocusListener(buttonListener);<br />
c.removePropertyChangeListener(this) ;<br />
((AbstractButton)c).removeChangeListener(<br />
buttonListener);<br />
((AbstractButton)c).removeChangeListener(this)<br />
// Remove keyboard actions<br />
c.resetKeyboardActions();<br />
// Restore the original border<br />
c . setBorder(originalBorder) ;<br />
}
1560 Chapter 13 The Pluggable Look-And-Feel<br />
Listing 13-5 The <strong>Core</strong> <strong>JFC</strong> look-and-feel button Ul class<br />
(continued)<br />
public void paint(Graphics g, JComponent c) {<br />
AbstractButton b = (AbstractButton)c;<br />
// First install the appropriate border<br />
changeBorderState(b);<br />
ButtonModel model = b.getModel();<br />
Dimension buttonSize = b.getsize () ;<br />
FontMetrics fontMetrics = g.getFontMetrics();<br />
Insets insets = c .getlnsets () ;<br />
Rectangle drawArea = new Rectangle(buttonSize);<br />
Rectangle textArea = new Rectangle();<br />
Rectangle iconArea = new Rectangle();<br />
drawArea.x += insets.left;<br />
drawArea.y += insets.top;<br />
drawArea.width -= insets.right + insets.left;<br />
drawArea.height -= insets.top + insets.bottom;<br />
String label = b.getTextO;<br />
int textlconGap = TEXT_ICON_GAP;<br />
if (label == null || label.equals("")) {<br />
textlconGap = 0;<br />
}<br />
label = SwingUtilities.layoutCompoundLabel(fontMetrics,<br />
b.getText(), b.getlcon(),<br />
b.getVerticalAlignment(),<br />
b.getHorizontalAlignment(),<br />
b.getVerticalTextPosition() ,<br />
b.getHorizontalTextPositionO,<br />
drawArea, iconArea, textArea, textlconGap);<br />
boolean buttonPressed = model.isArmed() &&<br />
model. isPressedO ;<br />
boolean isEnabled = model.isEnabled0;<br />
// Start by painting the background, but only<br />
// if the button is opaque<br />
if (b.isOpaque0 == true) {<br />
g.setColor(b.getBackground() ) ;<br />
g.fillRect(0, 0, buttonSize.width, buttonSize.height);
Listing 13-5 The <strong>Core</strong> <strong>JFC</strong> look-and-feel button Ul class<br />
(continued)<br />
}<br />
Changing Component Look-and-Feel 1561<br />
// Set up text and icon offsets<br />
int offsetX = buttonPressed ? PRESSED_SHIFT_X : 0;<br />
int offsetY = buttonPressed ? PRESSED_SHIFT_Y : 0;<br />
// Next, select the correct icon and draw that<br />
if (b.getlconO != null) {<br />
Icon icon = null;<br />
if (isEnabled == false) {<br />
icon = b.getDisabledlcon () ;<br />
} else if (buttonPressed == true) {<br />
icon = b.getlconO ;<br />
} else if (b.isRolloverEnabled() == true &&<br />
model.isRollover() == true) {<br />
icon = b.getRolloverlcon();<br />
}<br />
}<br />
// If we still don't have an icon, use the default<br />
if (icon == null) {<br />
icon = b.getlconO;<br />
}<br />
icon.paintlcon(c, g, iconArea.x + offsetX,<br />
iconArea.y + offsetY);<br />
// Finally, render the text<br />
if (label != null && label.equals("") == false) {<br />
int accelerator = model.getMnemonic();<br />
int ascent = fontMetrics.getAscent();<br />
if (isEnabled == true) {<br />
g.setColor(b.getForeground());<br />
BasicGraphicsUtils.drawstring(g, label, accelerator,<br />
textArea.x + offsetX,<br />
textArea.y + ascent + offsetY);<br />
} else {<br />
g.setColor(b.getBackground().brighter());<br />
BasicGraphicsUtils.drawstring(g, label, accelerator,<br />
textArea.x, textArea.y + ascent);<br />
g.setColor(b.getBackground().darker());<br />
BasicGraphicsUtils.drawstring(g, label, accelerator,
1562 Chapter 13 The Pluggable Look-And-Feel<br />
Listing 13-5 The <strong>Core</strong> <strong>JFC</strong> look-and-feel button Ul class<br />
(continued)<br />
}<br />
}<br />
}<br />
textArea.x - 1,<br />
textArea.y + ascent - 1) ;<br />
// ChangeListener interface<br />
public void stateChanged(ChangeEvent evt) {<br />
checkBorderState((AbstractButton)evt.getSource());<br />
}<br />
// PropertyChangeListener interface<br />
public void propertyChange(PropertyChangeEvent evt) {<br />
if (evt.getPropertyName().equals("border")) {<br />
JComponent c = (JComponent)evt.getSource();<br />
Border newBorder = (Border)evt.getNewValue();<br />
// Don't do anything if this is our<br />
// border being installed<br />
if (newBorder != emptyBorder) {<br />
if ((emptyBorder == null && newBorder != null) |<br />
(emptyBorder != null && newBorder != null &&<br />
emptyBorder.getBorderInsets(c) !=<br />
newBorder.getBorderlnsets(c))) {<br />
createEmptyBorder(newBorder, c);<br />
}<br />
originalBorder = newBorder;<br />
// Put back the empty border if we need to<br />
if (borderShown == false) {<br />
c.setBorder(emptyBorder) ;<br />
}<br />
}<br />
} else if (evt.getPropertyName().equals("margin")) {<br />
AbstractButton b = (AbstractButton)evt.getSource();<br />
if (emptyBorder 1= null) {<br />
emptyBorder = null;<br />
createEmptyBorder(originalBorder, b);<br />
// Install the new empty border if we need to<br />
if (borderShown == false) {<br />
b.setBorder(emptyBorder) ;<br />
}
Listing 13-5 The <strong>Core</strong> <strong>JFC</strong> look-and-feel button Ul class<br />
(continued)<br />
}<br />
}<br />
}<br />
Changing Component Look-and-Feel 1563<br />
// Create button listener - can be overridden<br />
protected BasicButtonListener createListener(AbstractButton<br />
b) {<br />
return new C<strong>JFC</strong>ButtonListener(b);<br />
}<br />
// Change of focus<br />
public void focusChanged(AbstractButton b) {<br />
boolean gotFocus = b.hasFocus();<br />
checkBorderState (b) ;<br />
}<br />
// Schedule repaint if we need to change border<br />
protected void checkBorderState(AbstractButton b) {<br />
boolean needBorder = b.isEnabled() &&<br />
(b.getModel () . isArmedO || b.hasFocus());<br />
}<br />
if (needBorder != borderShown) {<br />
b.repaint();<br />
}<br />
// Install the correct border for the current state<br />
protected void changeBorderState(AbstractButton b) {<br />
boolean needBorder = b.isEnabled() &&<br />
(b.getModel0 .isArmed() || b.hasFocus());<br />
if (needBorder != borderShown) {<br />
borderShown = needBorder;<br />
b.setBorder(needBorder ? originalBorder : emptyBorder);<br />
}<br />
}<br />
// Create the empty border that this component will use<br />
protected void createEmptyBorder(Border b, Component c) {<br />
if (emptyBorder == null) {<br />
Insets insets = b.getBorderlnsets(c);<br />
if (singleEmptyBorder == null) {<br />
singleEmptyBorder = BorderFactory.createEmptyBorder(<br />
insets.top, insets.left,
1564 Chapter 13 The Pluggable Look-And-Feel<br />
j<br />
Listing 13-5 The <strong>Core</strong> <strong>JFC</strong> look-and-feel button Ul class<br />
(continued)<br />
insets.bottom, insets.right);<br />
emptyBorder = singleEmptyBorder;<br />
} else if (insets.equals(<br />
singleEmptyBorder.getBorderlnsets(c))) {<br />
emptyBorder = singleEmptyBorder;<br />
} else {<br />
emptyBorder = BorderFactory.createEmptyBorder(<br />
insets.top, insets.left,<br />
insets.bottom, insets.right);<br />
}<br />
)<br />
}<br />
// Instance variables<br />
protected Border originalBorder;// The programmer's border<br />
protected boolean borderShown;<br />
// true when the border is visible<br />
protected Border emptyBorder;// Our empty border<br />
protected BasicButtonListener buttonListener;<br />
// Static members<br />
protected static Border SingleEmptyBorder;<br />
protected static final int BORDER_SIZE = 4;<br />
protected static final int TEXT_ICON_GAP = 4;<br />
protected static final int PRESSED_SHIFT_X = 1;<br />
protected static final int PRESSED_SHIFT_Y = 1;<br />
If you scan through the listing, you'll find implementations for only four of<br />
the ten required ButtonUI methods. The other six (update, getPreferredSize,<br />
getMinimumSize, getMaximumSize, contains and get-<br />
DefaultMargin) are inherited directly from BasicButtonUI because<br />
nothing needs to be added to them for our user interface. The code consists<br />
of several distinct pieces, which deal with separate aspects of managing the<br />
button's user interface, listed in Table 13-6.<br />
Table 13-6 Aspects of the C<strong>JFC</strong>ButtonUI Class<br />
Function Description
Changing Component Look-and-Feel 1565<br />
Table 13-6 Aspects of the C<strong>JFC</strong>ButtonUI Class (continued)<br />
Management of the UI class<br />
Drawing the button<br />
The createUI, installUI, and uninstal-<br />
1UI methods allow the UIManager to install this<br />
UI class for buttons that need it and to remove it if<br />
necessary. The createListener method is a<br />
helper method that creates the C<strong>JFC</strong>Button-<br />
Listener object for a button.<br />
The paint method is responsible for rendering<br />
the button's user interface.<br />
Maintaining the border state Ensuring that the border is displayed only when it<br />
should be is the most important leature of this user<br />
interface class, which is why it has six methods associated<br />
with it—propertyChange, state-<br />
Changed, focusChanged,<br />
checkBorderState, changeBorderState,<br />
and createEmptyBorder.<br />
Managing the UI Class<br />
Management of the UI class involves creating new instances as necessary,<br />
installing them into buttons, and removing them when the look-and-feel is<br />
changed. The UI class does not, of course, coordinate these activities itself—<br />
that job belongs to UIManager, using methods denned by JComponent and<br />
the UI class itself. To understand what the createUI, installUI, and<br />
uninstallUI methods do, it is necessary to know how a component<br />
acquires its UI class. Following is the sequence of events that occurs when a<br />
new JButton is created; this exact sequence applies to every Swing component<br />
except that the component and UI class names will be different.<br />
1. When a new JButton is created, a method called from its constructor<br />
calls the updateUl method that must be implemented<br />
by every JComponent. The JButton implementation of this<br />
method is a typical one:<br />
public void updateUlO {<br />
setUI((ButtonUI)UIManager.getUI(this));<br />
}<br />
2. The UIManager getUI method is passed as its argument the<br />
JComponent for which the UI class is required. The first thing<br />
that this method does is to call that component's getUlClasslD
1566 Chapter 13 The Pluggable Look-And-Feel<br />
method, which returns a string that gives the name of the type of<br />
UI class that it needs. For every Swing component, the name that<br />
must be returned by this method is fixed and in the case of<br />
JButton, this string will always be ButtonUI, which you may<br />
recognize from our discussion of BasicLookAndFeel earlier in<br />
this chapter as a key to the UIDe faults table.<br />
3. UIManager uses the UIDef aults table of the current lookand-feel<br />
to look up the value associated with the key ButtonUI.<br />
While the key is constant, the value returned by this operation<br />
will depend on the look-and-feel installed. The value is actually<br />
a string which contains the name of the UI class that should be<br />
used. If the <strong>Core</strong> <strong>JFC</strong> look-and-feel is installed, the string <strong>JFC</strong>-<br />
Book. Cj f c . C<strong>JFC</strong>ButtonUI would be returned, whereas the<br />
Motil look-and-ieel would return<br />
com.sun.<strong>Java</strong>.swing.plaf.motif.MotifButtonUI.<br />
4. Given the name of the class, UIManager invokes the UIDe -<br />
faults getuiciass method. This uses the class name to get<br />
the corresponding Class object and then uses the <strong>Java</strong> reflection<br />
mechanism in conjunction with this Class object to invoke the<br />
UI class's static createUI method, passing the JButton object<br />
as its argument. This createUI method is the one shown in Listing<br />
13-5; its job is to return an instance of the button UI class that<br />
can be connected to the JButton passed as the argument. In<br />
some cases, a single UI object can be shared between all objects<br />
of the type that it supports, so the createUI method would create<br />
one UI object the first time it is called, then return the same<br />
object on each subsequent call. This is possible il the UI class<br />
doesn't need to store any persistent state for each instance of the<br />
component. A JButton, as managed by the Windows look-andfeel,<br />
satisfies this criterion, so the createUI method for JButton<br />
in the Windows look-and-feel creates only one Windows -<br />
ButtonUI object. This is not, however, possible for the <strong>Core</strong><br />
<strong>JFC</strong> look-and-feel because, as you'll see, there are several pieces<br />
of state information that must be held for each button. Therefore,<br />
the C<strong>JFC</strong>ButtonUI createUI method creates a new<br />
C<strong>JFC</strong>ButtonUI each time it is called. This completes the<br />
UIManager getUI call shown in the updateUI method above.<br />
5. The bvitton UI class returned by UIManager is passed to the<br />
JComponent setUI method of the JButton whose user interface<br />
is being installed. This method first looks to see if there is
Changing Component Look-and-Feel 1567<br />
already a UI class installed and, if there is, calls its uninstallUI<br />
method. Then, it calls the new UI objects installUI method<br />
with a reference to the JButton as its argument. When this<br />
method returns, the UI object has been fully initialized. This<br />
completes the process of connecting a UI object to the button.<br />
The installUI and uninstallUI methods<br />
These methods are called when the UI class is being installed into the JButton<br />
and when it is being removed and replaced by another UI object. Since<br />
they are almost mirror images of each other, only the installUI method<br />
will be described in any detail here—uninstallUI just reverses everything<br />
that installUI does.<br />
When installUI is called, one of its first jobs is to create the C<strong>JFC</strong>ButtonListener<br />
object that will be connected to the button. You'll notice if<br />
you look at the code in Listing 13-5 that the listener is actually created not in<br />
the installUI method itself, but in a separate, protected method called<br />
createListener. This is a common theme that you'll find if you look at the<br />
source code for the Swing components—instead of creating helper objects<br />
directly, they delegate this job to another method that can be overridden in a<br />
derived class. This makes it much easier for a programmer to extend the<br />
functionality of a UI class without having to completely rewrite it. Suppose<br />
that you want to slightly change what the C<strong>JFC</strong>ButtonListener does. To do<br />
this, you build a new class, say MyC<strong>JFC</strong>ButtonListener, which is derived<br />
from C<strong>JFC</strong>ButtonListener. To make use of it, you have to arrange for<br />
C<strong>JFC</strong>ButtonUl to use your class instead of C<strong>JFC</strong>ButtonListener. Because<br />
the listener is created in createListener, all you have to do is override it:<br />
public class MyC<strong>JFC</strong>ButtonUI extends C<strong>JFC</strong>ButtonUl {<br />
public C<strong>JFC</strong>ButtonListener createListener(<br />
AbstractButton b) {<br />
return new MyC<strong>JFC</strong>ButtonListener(b);<br />
}<br />
}<br />
This is much easier than rewriting the entire installUI method, which is<br />
the only thing you could have done if the C<strong>JFC</strong>ButtonListener had been<br />
created directly by installUI.<br />
<strong>Core</strong> Tip<br />
As you write new component UI classes, and indeed other classes, keep this<br />
technique in mind and use it wherever possible.
1568 Chapter 13 The Pluggable Look-And-Feel<br />
Having created the C<strong>JFC</strong>ButtonListener, installUI registers it to<br />
receive focus, mouse, and mouse motion events from the button itself and to<br />
receive ChangeEvents from the button's model. If you look back to the<br />
implementation of C<strong>JFC</strong>ButtonListener in Listing 13-4, you'll see that it<br />
doesn't do anything with these ChangeEvents and doesn't even claim to<br />
implement the ChangeListener interface. It is, in fact, its superclass<br />
BasicButtonListener that needs to receive these events, so we have to<br />
register the controller to receive them on its behalf. However, C<strong>JFC</strong>ButtonUI<br />
itself handles ChangeEvents in order to monitor the armed property<br />
of its ButtonModel, so it registers itself as a listener for ChangeEvents from<br />
the AbstractButton that it is connected to. You'll see later how these<br />
events are handled.<br />
<strong>Core</strong> Note<br />
While reading through this section, it would be a good idea to have the<br />
source code for the BasicButtonUI and BasicButtonListener<br />
classes available for reference so that you can see which code has been<br />
overridden by our user interface implementation and also see code that is<br />
being inherited by itThe source code is part of the Swing package that you<br />
can download from the <strong>Java</strong>SoftWeb site.<br />
The controller also handles keyboard actions, but there is no need for it to<br />
receive keyboard events to make this possible. As described earlier, the<br />
JComponent keyboard handling mechanism is used to connect keys to the<br />
actions that the controller will perform when they are pressed. Because all of<br />
this keyboard handling is implemented by BasicButtonListener, all that<br />
is necessary is to call that class's installKeyboardActions method to have<br />
the appropriate keystrokes registered.<br />
Next, installUI sets the button's foreground and background colors and<br />
its font. Here, you can see a typical use of the LookAndFeel installed -<br />
orsAndFont method that you saw earlier in this chapter. Rather than using<br />
hard-coded colors and fonts, this method gets the appropriate values from<br />
the UIDef aults table. Using this method also avoids overwriting explicit<br />
settings that the programmer might have made. Similarly, it is necessary to<br />
install the correct border, but this is not so simple.<br />
The border is what this user interface is all about. Unless the mouse is over<br />
the button or it has the focus, there should be no visible border. However, it<br />
is still necessary to find out which border is appropriate, because it will have<br />
to be installed when it should be visible, so installUI invokes the Loo-
Changing Component Look-and-Feel 1569<br />
kAndFeel method installBorder to fetch and install the correct lookand-feel<br />
dependent border. Having done this, it saves a reference to the border<br />
in the instance variable originalBorder, then installs a suitable empty<br />
border instead. The process of creating the empty border is also not quite<br />
trivial, as you'll see in the implementation of the createEmptyBorder<br />
method.<br />
There is one further problem concerning borders that needs to be solved.<br />
Suppose that the programmer decides to change the buttons border at some<br />
time after it has been created and calls setBorder to do so. Unless something<br />
is done about this unlikely, but possible, event, it will cause a border to be drawn<br />
around the button. However, if the button doesn't have the focus and doesn't<br />
have the mouse over it, it shouldn't show any border at all. You'll see how this<br />
problem is solved in "Maintaining Border State" below. Part of the solution is to<br />
have the UI class receive PropertyChangeEvents from the button, so the last<br />
thing instaliui does is register the UI class to receive them.<br />
Drawing the Button<br />
The button is drawn by the UI class paint method. This method is required<br />
to render everything on the button apart from the border, which is drawn by<br />
the paintBorder method of the border itself (recall that paintBorder is<br />
one of the methods of the Border interface, which every border must implement).<br />
paintBorder is called by the paint method of JComponent after<br />
the UI class paint method has finished. This has two implications for our UI<br />
class implementation.<br />
On the positive side, there is no need to worry about drawing over the border<br />
when rendering the rest of the button. Therefore, it is possible to fill the<br />
whole component with its background color if the button is opaque. This<br />
makes the code a little simpler and won't cost anything worth worrying about<br />
in performance terms.<br />
On the negative side, it isn't possible to have the border be drawn or not<br />
drawn by implementing appropriate code in the UI class paint method. To<br />
stop the button drawing the border, it is necessary to convince JComponent<br />
that there is no border to draw—which requires us to actually install an<br />
empty border. If the border had been drawn in the UI class paint method,<br />
the real border could have remained installed in the JComponent and just<br />
not drawn when it shouldn't be seen.<br />
Actually, the only real difference between our button user interface and<br />
the standard one is the fact that ours doesn't always show the border. But if<br />
the paint method doesn't have anything to do with the border, why can't the<br />
paint method of BasicButtonUl be used unchanged? Why do we need to
1570 Chapter 13 The Pluggable Look-And-Feel<br />
override it? One reason is that, as noted above, BasicButtonUI draws a<br />
rectangle on the button face when it has the focus, whereas this is not necessary<br />
for our user interface, because the presence of the border indicates that<br />
the button has the focus. However, you don't need to override paint to stop<br />
this happening, because the rectangle is actually drawn not by paint itself,<br />
but by the BasicButtonUI paintFocus method, which is called from<br />
paint. This is done deliberately so that derived classes can override it and<br />
provide different behavior—just as our UI class has a separate createListener<br />
method. The real reason that C<strong>JFC</strong>ButtonUI has its own paint<br />
method is so that you can see how a typical UI class paint method is written.<br />
If you wanted to, you could delete this paint method and implement an<br />
einpty paintFocus method to achieve exactly the same user interface.<br />
Despite the fact that you've just read that paint has nothing to do with<br />
drawing the border, the first thing it does is this:<br />
// First install the appropriate border<br />
changeBorderState(b);<br />
You'll see later exactly why this is necessary. For now, just note that it is<br />
safe to install a new border at the start of the paint method, because JComponent<br />
doesn't paint the border until this method has completed, and for<br />
this reason, paint is a convenient place to switch the border.<br />
When you forget the border and the focus rectangle, all there is left to a<br />
button is the text and the icon, either of which may be absent. To draw the<br />
button properly, it is necessary to work out which of these is actually present,<br />
then decide where they should go, based on the relative icon and text position<br />
and the alignment configured in the JButton itself using the methods<br />
that you saw back in Chapter 2 (setVerticalTextPosition, setVerticalAlignment,<br />
etc.). Before this decision can be made, it is necessary to<br />
work out how much space is available for them. This is achieved by getting<br />
the size of the button (using getSize from JComponent) and subtracting<br />
the button's insets. Since the insets are actually the space occupied by the<br />
border, you can see that it is very important that the get Insets method<br />
retrieves the size of the actual border that was originally installed in the button,<br />
even if it is not currently displayed. The getlnsets method works by<br />
asking the installed border how much space it occupies, but the original border,<br />
as you know, is not always going to be the target of this request. It follows<br />
that the empty border that is svibstituted when necessary must report the<br />
same insets as the original border.<br />
Once the available space on the button has been worked out, the job of<br />
allocating that space to the text and the icon is actually carried out by the<br />
static method layoutCompoundLabel in the SwingUtilities class.
Changing Component Look-and-Feel 1571<br />
SwingUtilities, as its name suggests, is a class that contains methods that<br />
are not specific to any one component in the Swing package. Instead, it has<br />
facilities, like layoutCompoundLabel, that are of more general use. Think<br />
of it as a kind of class-based subroutine library.<br />
The layoutCompoundLabel method is defined as follows:<br />
public static String layoutCompoundLabel(FontMetrics fm,<br />
String text, Icon icon, int verticalAlignment,<br />
int horizontalAlignment,<br />
int verticalTextPosition,<br />
Gap) ;<br />
int horizontalTextPosition, Rectangle viewR,<br />
Rectangle iconR, Rectangle textR, int textlcon-<br />
The first eight arguments and the last one are all supplied by the caller.<br />
The FontMetrics object provides font information used to work out the<br />
size of the text given as the second argument, if there is any. The viewR argument<br />
describes the rectangular area of the button within which the text and<br />
icon must be placed and textlconGap is the distance required between the<br />
text and the icon. This is actually a constant of the look-and-feel, which is<br />
four pixels in our case. The iconR and textR arguments are supplied by the<br />
paint method but are not initialized. Instead, the location and size of the<br />
rectangles allocated to the icon and text are returned in these objects. Notice<br />
that layoutCompoundLabel returns a String value. What it actually<br />
returns is the text to be drawn on the button. This will usually be the same as<br />
the text argument, but if there is not enough space to take all of the label as<br />
supplied, it is truncated so that three dots appear to the right, along with as<br />
many leading characters of the original label as will fit; for example, the label<br />
"Press Me" might be replaced by "Pres..." if space is at a premium.<br />
When layoutCompoundLabel returns, the job of actually painting the<br />
component starts. First, if the button is opaque, the space that it occupies is<br />
filled with its background color as retrieved from the button itself. Next, the<br />
appropriate icon to use is chosen. Usually, the standard icon returned by the<br />
button's get I con method is used. However, if the button has rollover<br />
enabled and there is a rollover icon, this icon will be used if the button is in<br />
rollover state. If the button is disabled, the disabled icon is used, if there is<br />
one. The UI class determines the button's state by querying the Button-<br />
Model—recall from Table 13-4 that all of this information is available as<br />
attributes of the DefaultButtonModel. Having determined the correct<br />
icon, its paintlcon method is called to draw it in the rectangular space<br />
returned by layoutCompoundLabel. Of course, nothing is drawn if the button<br />
doesn't have an icon.
1572 Chapter 13 The Pluggable Look-And-Feel<br />
You may have noticed what appears to be a flaw in the painting logic while<br />
reading the last few paragraphs—first layoutCompoundLabel is called to<br />
determine where to place the text and the icon, then the paint method<br />
works out which is the correct icon to use. How can it know that the space<br />
returned is large enough for the icon? What if the various icons that the button<br />
can use are not all of the same size? Well, the logic here, which is functionally<br />
the same as the logic used by BasicButtonUI, only works if the<br />
icons are all of the same size, which would normally be the case. It would, of<br />
course, be simple to rearrange the code so that the correct icon is selected<br />
before layoutCompoundLabel is called, but this might have the undesirable<br />
effect of moving the text and icon around as the icon changes—you may<br />
not want your text to jump around as the mouse moves over the button as<br />
would happen if the rollover icon were not the same size as the ordinary icon.<br />
If you don't agree, feel free to create your own button user interface—that's<br />
one of the most useful features of Swing!<br />
The last task is to draw the text. This is a simple job. The only tricky part is<br />
simulating grayed-out text when the button is disabled—you saw the details<br />
of this back in Chapter 4 and the same technique is used here. A little embellishment<br />
that this UI class copies from BasicButtonUI is that the text is offset<br />
slightly when the button is pressed so that it appears to move down and to<br />
the right, helping the illusion that the button has been pressed into the<br />
screen. Again, the ButtonModel state is used to determine whether the button<br />
is pressed and to decide whether the text should be offset or not.<br />
Maintaining Border State<br />
A button has only one border, but this one really needs to have two of them.<br />
When the button has the focus or the mouse is over it, it needs to have the<br />
border that was initially assigned to it, or one explicitly assigned by the programmer,<br />
and at other times it needs to appear to have no border at all. The<br />
UI class is responsible for making sure that the correct border is displayed.<br />
You may recall from the description of the installUI method that a reference<br />
to the real border is held in the originalBorder variable and a suitable<br />
empty border is created to replace it. A button, like all JComponents,<br />
can have its own border but is not obliged to do so—one way to remove its<br />
border to just use setBorder (null). While this would be much simpler<br />
than the scheme used in this example, it wouldn't work and the reason why<br />
should be clear now that you've seen the paint method. In the paint<br />
method, the insets of the button were obtained from its border and the space<br />
available for the text and the icon were determined by subtracting these<br />
insets from the overall size of the button. If you take away the border coin-
Changing Component Look-and-Feel 1573<br />
pletely, there will be no insets and the text and icon will have more space to<br />
occupy. As a result, they will move around as the border is added or removed.<br />
To avoid this, the button insets must remain the same at all times, which<br />
means that the border size must always be the same size. The most obvious<br />
way to achieve this is not to completely remove the border, but to substitute<br />
an empty border with exactly the same insets as the real one.<br />
When the button is given its initial border by installUI, the create-<br />
EmptyBorder method is called. In principle, this method has a trivial task to<br />
perform—get the insets of the border that it is passed and create an empty<br />
border with the same insets. It could have been implemented that way and<br />
the button would have behaved exactly according to its specification. However,<br />
there is a small optimization that is probably worth doing to save memory.<br />
Although every button can have its own individual border, in practice all<br />
of the buttons in a given application are likely to have exactly the same border<br />
(probably the default border of the look-and-feel). Instead of creating a<br />
new empty border each time a button is created, the UI class keeps the first<br />
empty border that it creates in a static member variable (singleEmptyBorder).<br />
Each time createEmptyBorder is called, it checks whether the insets<br />
of the border it is given match those of singleEmptyBorder and, if they do,<br />
it returns singleEmptyBorder as the border to use. In most applications,<br />
this will mean that the same empty border is used for all <strong>Core</strong> <strong>JFC</strong> buttons. If<br />
the new border doesn't match the old one, then a new empty border is created.<br />
Because the BorderFactory createEmptyBorder method is used to<br />
do this, there is still a chance that this empty border will be shared with other<br />
buttons or components that need an empty border with the same insets.<br />
Once installUI has completed, the button has its original border stored<br />
in the originalBorder variable and a suitable empty border in the instance<br />
variable emptyBorder and installed in the component itself. The remaining<br />
problem is to arrange for the correct border to be installed in the component<br />
at all times. The border may need to be changed at the following times:<br />
• When the mouse moves over the button<br />
• When the mouse leaves the button<br />
• When the button gains the focus<br />
• When the button loses the focus<br />
• When the button is disabled<br />
• When the button is enabled after being disabled<br />
The first two of these events aren't detected directly by any of the classes<br />
that make up our button—instead, we rely on the fact that the button's model<br />
is armed when the mouse moves over it and disarmed when the mouse
1574 Chapter 13 The Pluggable Look-And-Feel<br />
moves away. To detect this, the C<strong>JFC</strong>ButtonUI class registers itself to<br />
receive ChangeEvents from the button, which are generated in response to<br />
its model's ChangeEvents. When the model changes state, the C<strong>JFC</strong>ButtonUI<br />
stateChanged method calls the checkBorderState method to<br />
determine whether a border change should be made.<br />
The next two events are caught by C<strong>JFC</strong>ButtonListener and result in<br />
the C<strong>JFC</strong>ButtonUI focusChanged method being called. This method<br />
changes the gotFocus instance variable in the UI class to reflect the current<br />
state of the focus and then it too calls the checkBorderState method.<br />
Notice that there is no need to pass the current focus state to focusChanged<br />
because a JComponent always knows whether it has the focus and you can<br />
use the hasFocus method to retrieve this information.<br />
Enabling or disabling a button is done using the setEnabled method of<br />
Component. This method is overridden by AbstractButton, which enables<br />
or disables the button at the component level and also invokes the Button-<br />
Model setEnabled method to change the button model's Enabled<br />
attribute. If this attribute is actually changing, the ButtonModel will generate<br />
a ChangeEvent that will be delivered to the button's C<strong>JFC</strong>ButtonListener.<br />
The stateChanged method of this class is actually provided by<br />
BasicButtonListener, which causes the button to be repainted. Therefore,<br />
a change in button state can be detected by the paint method.<br />
<strong>Core</strong> Note<br />
This is actually the only way to detect this state change.The setEnabled<br />
call is visible in the JButton and AbstractButton classes, but is not<br />
directly seen by the UI class.When you're writing a Ul class, the last thing you<br />
want to do is require the programmer to subclass the component itself in<br />
order to invoke some special functionality in your custom look-and-feel class.<br />
Because the UI object gets direct notification of the first four events, it is<br />
possible to check whether they reqviire the border to be changed. This check<br />
is contained in the checkBorderState method, which is called from stateChanged<br />
and focusChanged. This method is shown again here for convenience:<br />
// Schedule repaint if we need to change border<br />
protected void checkBorderState(AbstractButton b) {<br />
boolean needBorder = b.isEnabled() &&<br />
(b.getModel () . isArmedO || b .hasFocus ());
}<br />
if (needBorder != borderShown) {<br />
b.repaint() ;<br />
}<br />
Changing Component Look-and-Feel 1575<br />
The first line determines whether or not the border should be shown—it<br />
really just restates the criterion that was given earlier: show the border if the<br />
component is enabled and either the mouse is over it or it has the focus. As<br />
you can see, the enabled state and the state of the focus are obtained directly<br />
from the button itself, while the location of the mouse comes from the armed<br />
state of the ButtonModel. If the event doesn't require a change in border<br />
state, there is no need to do anything. This might happen if the mouse moves<br />
over the button while it is disabled: the fact that the button is not enabled<br />
stops the border being shown. So that a change in state can be detected, the<br />
current border state is kept in the borderShown member. If a real change is<br />
needed, the repaint method is called to have the component repainted.<br />
Notice that the border itself wasn't changed by checkBorderState—<br />
that job is done by the changeBorderState method invoked at the beginning<br />
of paint. The border change is done there to allow it to work when the<br />
button is enabled or disabled, because those events just cause the paint<br />
method to be invoked without any other change in the button state.<br />
// Install the correct border for the current state<br />
protected void changeBorderState(AbstractButton b) {<br />
boolean needBorder = b.isEnabled() &&<br />
(b.getModel().isArmed() b.hasFocus());<br />
if (needBorder != borderShown) {<br />
borderShown = needBorder;<br />
b . setBorder(needBorder ?<br />
originalBorder : emptyBorder);<br />
}<br />
}<br />
As you can see, much of this method is the same as checkBorderState.<br />
This is necessary, because paint can be invoked for reasons unrelated to<br />
border changes and it is a good idea to avoid calling setBorder when there<br />
is no need to do so. Having changed the border, the new state is stored in<br />
borderShown for use when the next event that might cause a border change<br />
occurs.<br />
That just about covers border management, apart from a couple of minor<br />
problems. To make the button user interface function properly, the UI class<br />
has to be in full control of when the border is visible. However, the programmer<br />
can set a new border with setBorder at any time. Since setBorder is a
1576 Chapter 13 The Pluggable Look-And-Feel<br />
JComponent method, it can't be overridden by a look-and-feel class. Setting<br />
a new border should make the component draw it next time the button<br />
should be visible, but shouldn't have any effect if the button is disabled or if<br />
it doesn't have either the focus or the mouse over it.<br />
Since the UI class can't interfere with setBorder, it has to find other ways<br />
to detect the change of border. Fortunately, the border is a bound property<br />
of JComponent—changing the border generates a PropertyChangeEvent.<br />
This is why the installUI method registered the UI object as a Property-<br />
ChangeListener of the button. When the border is changed, the propertyChange<br />
method is called.<br />
The other problem is that buttons allow you to define extra space between<br />
the border and the text and icon, using the setMargin method, which takes<br />
an insets argument. The extra space is provided by creating the button's<br />
border as a CompoundBorder, of which the outer part is the border type<br />
used by the look-and-feel (e.g., MetalBorders .ButtonBorder) and the<br />
inner part a BasicBorders.MarginBorder. BasicBorders.MarginBorder<br />
gets its insets by calling the getMargin method of the button with<br />
which it is associated. As a result, if the programmer changes the margin of a<br />
button, the effective size of the border changes accordingly. But, of course,<br />
our empty border must always be the same size as the real border or the button<br />
itself will not be of the correct size. A possible solution to this would be to<br />
implement our own border as a compound, with the empty border on the<br />
outside and a BasicBorders .MarginBorder inside. This would work,<br />
until the programmer calls setBorder and replaces the standard border<br />
with one that is not a compound border (which would, incidentally, stop the<br />
margins from appearing). It is, of course, possible to work around even this<br />
problem by checking each new border to see whether it is a compound border<br />
and trying to mimic what the user is installing. Fortunately, however,<br />
there is a simpler solution.<br />
Like the border, the button margin is an attribute of the button itself, not<br />
of the UI class. It is also a bound property of the button, so when it is<br />
changed a PropertyChangeEvent is generated and this can be used to<br />
arrange for the margin change to be reflected in the empty border by detecting<br />
it in the propertyChange method:<br />
// PropertyChangeListener interface<br />
public void propertyChange(PropertyChangeEvent evt) {<br />
if (evt.getPropertyName().equals("border")) {<br />
JComponent c = (JComponent)evt.getSource();<br />
Border newBorder = (Border)evt.getNewValue();<br />
// Don't do anything if this is our border
}<br />
Changing Component Look-and-Feel 1577<br />
// being installed<br />
if (newBorder != emptyBorder) {<br />
if ((emptyBorder == null && newBorder != null) ||<br />
(emptyBorder != null && newBorder != null &&<br />
emptyBorder.getBorderInsets(c) !=<br />
newBorder.getBorderlnsets(c))) {<br />
createEmptyBorder(newBorder, c);<br />
}<br />
originalBorder = newBorder;<br />
// Put back the empty border if we need to<br />
if (borderShown == false) {<br />
c.setBorder(emptyBorder);<br />
}<br />
}<br />
} else if (evt.getPropertyName().equals("margin")) {<br />
AbstractButton b = (AbstractButton)evt.getSource();<br />
if (emptyBorder != null) {<br />
emptyBorder = null;<br />
createEmptyBorder(originalBorder, b);<br />
}<br />
// Install the new empty border if we need to<br />
if (borderShown == false) {<br />
b.setBorder(emptyBorder);<br />
}<br />
}<br />
The first part of this method is concerned with handling border changes<br />
made by setBorder. The first thing this method does is to get the border<br />
just installed and check whether it is our empty border—if it is, there is nothing<br />
to do. This will happen regularly, because the UI class uses the same<br />
setBorder method that the programmer would use to change the border<br />
and will get the same PropertyChangeEvent. Assuming that this is a new<br />
programmer-installed border, it is important to generate an empty border for<br />
it if there isn't one already. There are two cases in which this can happen:<br />
• The button might have been initialized with no border. This can<br />
be achieved by setting the Button. border property in the<br />
UIDefaults table to null.<br />
• The button has a border and the new border has different<br />
insets.
1578 Chapter 13 The Pluggable Look-And-Feel<br />
As has already been said, it is essential that the empty border matches<br />
exactly the buttons real border, so a change of border insets must be dealt<br />
with by creating a new empty border. When the matter of creating this border<br />
has been dealt with, the correct border must be reinstalled in the component.<br />
If the border should not be shown because of the button's current state,<br />
the empty one is put back using setBorder; otherwise, there is no need to<br />
do anything, because the current setting is correct.<br />
The second part of property-Change handles a change in the button margin,<br />
notified as a change of the margin property. When this happens, a new<br />
empty border that matches the size of the original border must be created;<br />
the size of the original border will include the margin space if it is the default<br />
compound border for the button. To create the correct border, you only need<br />
to call createEmptyBorder again, passing it the border that it has to match.<br />
Because this method will only create a new border if is doesn't already have<br />
one, emptyBorder is set to null first to torce a new border to be created.<br />
Note that this method works whether or not the programmer has installed a<br />
nonstandard border that does not take account of the margin, because it creates<br />
a border that exactly matches the original border, no matter how its size<br />
is calculated.<br />
Changing Component User Interfaces<br />
You've now seen the complete implementation of the <strong>Core</strong> <strong>JFC</strong> Button user<br />
interface. At this stage, you would undoubtedly want to try it out to see how it<br />
works, which brings us to the problem of changing component user interfaces.<br />
There are several ways in which you can change the user interface, depending<br />
on what changes you want to make and how wide the scope of those changes<br />
should be. This section shows all of the techniques available to you.<br />
Changing the User Interface for One<br />
Instance of a Component<br />
At this point, what you have is a UI class for a single component and you'd like<br />
to try it out. Because you don't have a complete look-and-feel package, you<br />
can't just switch in the <strong>Core</strong> <strong>JFC</strong> look-and-feel and create a button—that step<br />
comes later in this chapter. What you need to be able to do is create a few buttons<br />
that have your UI class installed in them. Fortunately, this is very simple.<br />
As you saw earlier, the UI class for a component is installed by calling its<br />
updateUI method, the default implementation of which locates the UI class<br />
from the UIDefaults table and passes it to the JComponent setUI
Changing Component Look-and-Feel 1579<br />
method. All you need to do to force your own UI class to be used is to override<br />
the updateUI method, as shown in Listing 13-6.<br />
Listing 13-6 Installing a specific UI class in a component<br />
JButton b = new JButton("Press...") {<br />
public void updateUI() {<br />
setUI(C<strong>JFC</strong>ButtonUI.createUI(this));<br />
}<br />
};<br />
This code creates a subclass of JButton with an overridden updateUI<br />
method. Instead of using the UIDefaults table via UIManager, a new<br />
C<strong>JFC</strong>ButtonUI object is created by calling its createUI method and<br />
installed directly. This technique works for any component as long as you<br />
have a replacement UI class available and it was used in the C<strong>JFC</strong>Button-<br />
Test example that you saw in Figure 13-2.<br />
When you install the UI this way, the updateUI method is permanently<br />
overridden. This means that if you allow the user to change the look-and-feel<br />
of an application that has a button created like this, the button will keep the<br />
same UI class even when all of the other components change, because the UI<br />
class selected no longer depends on the current look-and-feel. In this case,<br />
when the look-and-feel is changed, the C<strong>JFC</strong>ButtonUI uninstallUI<br />
method will be called to detach the UI object from the button, followed<br />
immediately by its installUl method.<br />
Changing the User Interface for One<br />
Component Throughout the Application<br />
If you create a completely new UI class from scratch or you just modify the<br />
UI class of an existing look-and-feel to make it behave slightly differently, you<br />
may want to arrange for the new UI class to apply to every component of that<br />
type in an application. Using the method shown in the previous section<br />
would be very tedious in this case and it might be impractical, because it<br />
requires you to find all of the code that creates components of the type that<br />
you want to behave differently and change the creation code. If you're using<br />
third-party software, or you're modifying something like JButton which is<br />
used internally by Swing (for example in JOptionPane), then you won't be<br />
able to change this code.<br />
To change the UI class for all instances of a component, you need to go<br />
back to the place that the UI class comes from—the UIDefaults table. The
1580 Chapter 13 The Pluggable Look-And-Feel<br />
simplest way to change the component-to-UI-class mapping is to overwrite<br />
the appropriate entry in this table, so that when, say, JButton calls the<br />
UIManager getUI method for ButtonUI, it is returned the name <strong>JFC</strong>-<br />
Book.Cjfc.C<strong>JFC</strong>ButtonUI. This will result in the new UI class being<br />
installed in every JButton.<br />
An example of this technique is shown in Listing 13-7. This program creates<br />
a frame onto which places one button. Every 10 seconds, it adds another<br />
button and resizes the frame, if necessary, so that all of the buttons can be<br />
seen. A GridLayout manager is used to place the buttons in a grid with four<br />
columns. As you can see, the buttons are all created in the usual way, with no<br />
subclassing or special code attached.<br />
Listing 13-7 Installing a specific UI class in a component<br />
package <strong>JFC</strong>Book.Chapterl3;<br />
import javax.swing.*;<br />
import j ava.awt.*;<br />
import j ava.awt.event.*;<br />
public class AllButtonTest {<br />
public static void main(String[] args) {<br />
final JFrame f = new JFrame("Change UI of All Buttons";<br />
f.getContentPane().setLayout(new GridLayout(0, 4));<br />
// Change the UIDefaults settings<br />
updateUIDefaults();<br />
final Icon oklcon = new Imagelcon(<br />
C<strong>JFC</strong>ButtonTest.class.getResource(<br />
"images/ok.gif") ) ;<br />
JButton b = new JButton("1");<br />
b.setlcon(oklcon);<br />
f.getContentPane0 .add(b);<br />
f .packO ;<br />
f.setVisible(true);<br />
Timer t = new Timer(10000, new ActionListener() {<br />
int count = 2;<br />
public void actionPerformed(ActionEvent evt) (<br />
JButton button = new JButton("" + count++);
J<br />
Changing Component Look-and-Feel 1581<br />
Listing 13-7 Installing a specific Ul class in a component (continued)<br />
}<br />
}<br />
}>;<br />
button.setlcon(oklcon) ,•<br />
f.getContentPane().add(button);<br />
f .pack() ;<br />
t.start();<br />
protected static void updateUIDefaults() {<br />
UIManager.put("ButtonUI", "<strong>JFC</strong>Book.Cjfc.C<strong>JFC</strong>ButtonUI");<br />
}<br />
The significant part of this example is the updateUIDef aults method,<br />
which is called before the first button is created. This simple function just<br />
uses the UIManager put method to associate a new UI class with any component<br />
that asks for a UI called ButtonUI. This is all you need to do to<br />
change the user interface of every JButton in the application. You can run<br />
this example for yourself using the command:<br />
<strong>Java</strong> <strong>JFC</strong>Book.Chapter13.AllButtonTest<br />
Customizing Properties of All Instances of<br />
One Component<br />
The technique that you saw in the last section can also be used to change any<br />
attribute of a component that comes from the UlDef aults table. As you<br />
know, buttons get several attributes, including their default font and background<br />
color, from UIDefaults. By changing these defaults, you can<br />
arrange for every button to have a non-standard value for these attributes.<br />
For example, the code in Listing 13-8 sets the default font for all buttons to a<br />
16-point, bold dialog font and the background color to whatever the selected<br />
look-and-feel declares as its "desktop" color. Notice that the value of the<br />
"desktop" color is itself obtained from the UIDefaults table and that the<br />
new font is given not as a Font, but as a FontUIResource.<br />
Listing 13-8 Customizing button attributes<br />
protected static void updateUIDefaults() {
1582 Chapter 13 The Pluggable Look-And-Feel<br />
Listing 13-8 Customizing button attributes (continued) 1<br />
UIManager.put("ButtonUI", "<strong>JFC</strong>Book.Cjfc.C<strong>JFC</strong>ButtonUI");<br />
UIManager.put("Button.font", new FontUIResource("Dialog",<br />
Font.BOLD, 16)) ;<br />
UIManager.put("Button.background",<br />
UIManager.get("desktop"));<br />
J You can run this example with the command:<br />
java <strong>JFC</strong>Book.Chapterl3.CustomizeButtonTest<br />
Switching the Look-and-Feel<br />
Switching the look-and-feel of an application is a simple thing to do, but<br />
there are a couple of trick)' points that you need to be aware of. In this section,<br />
you'll see how to create a menu that allows the user to switch the lookand-feel<br />
from the application's menu bar and you'll see more clearly the difference<br />
between the uiDef aults table of a particular look-and-feel and the<br />
one that you can access via UIManager.<br />
To demonstrate the technique for switching look-and-feel, let's build this<br />
capability into the graphics program that was first created in Chapter 4,<br />
"Graphics, Text Handling, and Printing," and then extended with menus and<br />
toolbars in Chapter 6. The aim is to make it use the <strong>Core</strong> <strong>JFC</strong> button user<br />
interface for all of its buttons and to give it the capability of switching to any<br />
of the available look-and-feels via a menu that will be added to its File<br />
menu. You've already seen how to make all of the buttons in an application<br />
be <strong>Core</strong> <strong>JFC</strong> buttons, and this code will be incorporated into the modified<br />
graphics program. The only piece that you haven't seen yet is exactly how to<br />
switch look-and-feel.<br />
Because the ability to change look-and-feel is likely to be useful in other<br />
programs, this example creates a new class that provides a method that will<br />
create and return a menu listing the available look-and-feels and the code to<br />
handle a switch to any of them. To incorporate this into an existing application,<br />
all you have to do is add a call to create the menu and then place the<br />
menu somewhere in your application's menu set. The simplest way to explain<br />
how this works is to look at the code, which is shown in Listing 13-9.
Listing 13-9 Building a menu that allows a look-and-feel<br />
switch<br />
package <strong>JFC</strong>Book.Chapterl3;<br />
import j avax.swing.*;<br />
import j ava.awt.event.*;<br />
Changing Component Look-and-Feel 1583<br />
public class SwitchLF {<br />
public static JMenu createSwitchLFMenu(String label,<br />
JFrame f, boolean verify) {<br />
// Create a menu entry for each L&F we manage to load<br />
LookAndFeel If;<br />
JMenu menu = new JMenu(label);<br />
int menuCount = 0;<br />
UIManager.LookAndFeellnfo [] If Info =<br />
UIManager.getlnstalledLookAndFeels();<br />
for (int i = 0; i < IfInfo.length; i++) {<br />
try {<br />
String className = IfInfo [i] .getClassName() ;<br />
if (verify) {<br />
Class cl = Class.forName(className);<br />
If = (LookAndFeel)cl.newlnstance();<br />
if (!If.isSupportedLookAndFeel()) {<br />
className = null;<br />
}<br />
}<br />
if (className != null) {<br />
LFSwitchAction switchAction =<br />
new LFSwitchAction (If Inf o[i] , f) ;<br />
JMenuItem mi = menu.add(switchAction);<br />
mi.setToolTipText(IfInfo[i].getName());<br />
menuCount++;<br />
}<br />
} catch (Throwable t) {<br />
// Ignore all exceptions - don't add to menu<br />
System.out.println("Failed loading " +<br />
IfInfo [i] .getClassName() + ":\n" + t);<br />
}<br />
}<br />
return menuCount == 0 ? null : menu;
1584 Chapter 13 The Pluggable Look-And-Feel<br />
Listing 13-9 Building a menu that allows a look-and-feel<br />
switch (continued)<br />
}<br />
// Action handler for switching L&F<br />
protected static class LFSwitchAction<br />
extends AbstractAction {<br />
public LFSwitchAction(UIManager.LookAndFeellnfo lfi,<br />
JFrame f) {<br />
super(Ifi.getName());<br />
this.lfi = lfi;<br />
this.f = f;<br />
}<br />
public void actionPerformed(ActionEvent evt) {<br />
LookAndFeel oldLF = UIManager.getLookAndFeel();<br />
try {<br />
UIManager.setLookAndFeel(Ifi.getClassName() ) ;<br />
// Switch all component UI's<br />
SwingUtilities.updateComponentTreeUI(f);<br />
f.invalidate 0 ;<br />
f.validate();<br />
f.repaint();<br />
} catch (Throwable t) {<br />
// Ignore all exceptions<br />
System.out.println("Failed to install " +<br />
Ifi.getName() + " L&F\n" + t);<br />
try {<br />
UIManager.setLookAndFeel(oldLF) ;<br />
) catch (Throwable e) {<br />
System.out.println("Failed to restore old L&F");<br />
System.exit(0);<br />
}<br />
)<br />
}<br />
protected UIManager.LookAndFeellnfo lfi;<br />
protected JFrame f;<br />
}
Changing Component Look-and-Feel 1585<br />
An application only has to add the following lines of code to make use of<br />
this class:<br />
JMenu switchMenu =<br />
SwitchLF.createSwitchLFMenu(<br />
"Switch Look-and-Feel...", f, false);<br />
if (switchMenu != null) {<br />
fileMenu.add(switchMenu);<br />
}<br />
The arguments passed to the createSwitchLFMenu method are the label<br />
to appear on the menu item that the user will see, a reference to the application's<br />
top-level frame, and a boolean. You'll see why the last two arguments<br />
are needed shortly.<br />
The first thing that createSwitchLFMenu does is create an empty JMenu<br />
with the label given as its first argument. It then needs to find out which lookand-feel<br />
classes are available and add an entry for each of them to this menu.<br />
For this, it uses the UIManager getlnstalledLookAndFeels method that<br />
you saw earlier in this chapter. This method returns an array of LookAnd-<br />
Feellnf o objects, one for each look-and-feel installed on the system.<br />
Given this array, one possible approach is to just add each entry in it to a<br />
menu. If you call this method with its third argument (called verify) set to<br />
false, this is exactly what happens. However, you might want want to check<br />
that all of the look-and-feels listed in swing .properties are actually available.<br />
If you set the verify argument to true, two checks are performed for<br />
each look-and-feel.<br />
First, the f orName method of j ava . lang . Class is used to get a Class<br />
object given the look-and-feel class name. If the look-and-feel is not<br />
installed, this will throw an exception. Given that the class is present, the next<br />
thing to do is to use the Class newlnstance method to instantiate it and, at<br />
the same time, cast it to a reference of type LookAndFeel. If this does not<br />
throw an exception, then the class must represent a valid look-and-feel.<br />
Lastly, the isSupportedLookAndFeel method of the class is called. If this<br />
returns true, then this look-and-feel can be used.<br />
At this point, it is time to add a menu entry for the look-and-feel. As you<br />
saw earlier, a LookAndFeel Info class has a getName method that returns a<br />
string that describes the look-and-feel and this strings is used both as the<br />
label of the menu item and to create a tooltip that appears if the mouse hovers<br />
over the menu for a short time. The LookAndFeel class has a more<br />
descriptive text string available from its getDescription method, but this<br />
class will not have been loaded if this method is being called with verify set<br />
to false. The reason for allowing verify to be set to false is to make it
1586 Chapter 13 The Pluggable Look-And-Feel<br />
possible to avoid the overhead of loading classes for look-and-feels that are<br />
never going to be used, so it would not be a good idea to access the LookAndFeel<br />
class for each installed look-and-feel to get the full description.<br />
The menu item is created by adding an Action to the menu that this<br />
method is building. The Action is implemented in a static inner class called<br />
LFSwitchAction, which is derived from the Swing class AbstractAction<br />
(refer back to Chapter 6 for a full discussion of AbstractAction). A single<br />
instance of this class will be attached to each menu item that is generated and<br />
it will store a reference to the target look-and-feel class in the form of its class<br />
name and the reference to the application's top-level frame passed as an<br />
argument to createSwitchLFMenu. When the menu item is activated, the<br />
actionPerf ormed method will be called to make the switch.<br />
Switching look-and-feel is actually a two-step process. The first is obvious—you<br />
need to call the UIManager setLookAndFeel method and give it<br />
the class name that was stored when the menu item was created. This will<br />
make the new look-and-feel current and will install its UIDef aults table.<br />
However, it does not change the appearance of the application at all because<br />
the UI classes of all of the user interface objects that have been created so far<br />
are not changed by this method. To make the interface change, you need to<br />
call the SwingUtilities method updateComponentTreeUI, passing it<br />
the top-level frame of the application. This method starts from the component<br />
it is given and recursively processes it and all of its children, switching<br />
their UI classes by calling their updateUl method. When this method has<br />
completed, the user interface is redrawn by forcing the frame to resize and<br />
repaint itself.<br />
Now let's add this menu item to the graphics program from Chapter 6. At<br />
the same time, the UIDef aults table will be changed to make the application<br />
use the <strong>Core</strong> <strong>JFC</strong> user interface for all of its buttons. The code that is<br />
going to be modified was presented in Listing 6-8 in Chapter 6.<br />
The new version is shown in Listing 13-10, with the code added highlighted<br />
in bold. Note that the class name has also been changed from GraphicsMenuDemo<br />
to GraphicsDemol, to avoid confusion; this change is not<br />
highlighted.<br />
Listing 13-10 Adding look-and-feel switch capability to an<br />
applicaiton<br />
package <strong>JFC</strong>Book.Chapterl3;
Listing 13-10 Adding look-and-feel switch capability to an<br />
applicaiton (continued)<br />
import j avax.swing.*;<br />
import javax.swing.border.*;<br />
import j ava.awt.*;<br />
import j ava.awt.event.*;<br />
import <strong>JFC</strong>Book.Chapter4.GraphicsBorderedCanvas;<br />
import <strong>JFC</strong>Book.Chapter4.EdgedBorder;<br />
import <strong>JFC</strong>Book.Chapter6.GraphicsMenuDemoPane;<br />
import <strong>JFC</strong>Book.Chapterl3.SwitchLF;<br />
public class GraphicsDemol extends JFrame {<br />
public GraphicsDemol(String title) {<br />
super(title);<br />
// Create the canvas in which the<br />
// drawing will be done.<br />
GraphicsBorderedCanvas c =<br />
new GraphicsBorderedCanvas();<br />
Changing Component Look-and-Feel 1587<br />
// Create the border and associate it with the canvas<br />
Border bd = new EdgedBorder(c.getBackground());<br />
c.setBackground(Color.white);<br />
c . setBorder (bd) ,-<br />
// Create the pane that holds the user interface<br />
// including the toolbars<br />
// Connect panel to canvas so that<br />
// it can enable/disable buttons<br />
c.addPropertyChangeListener(gp);<br />
// Connect the canvas to the panel<br />
// so that it can action button presses<br />
gp.setDrawingArea(c);<br />
// Select the initial color and shape<br />
// from the button panel,<br />
gp.selectTools();<br />
// Create the menu bar<br />
JMenuBar mb = new JMenuBar();<br />
this.setJMenuBar(mb);
1588 Chapter 13 The Pluggable Look-And-Feel<br />
Listing 13-10 Adding look-and-feel switch capability to an<br />
application (continued)<br />
// Build the File menu<br />
JMenu fileMenu = new JMenu("File");<br />
mb .add(fileMenu) ;<br />
fileMenu . setMnetnonic ('F') ;<br />
gp.buildFileMenu(fileMenu);<br />
JMenu switchMenu = SwitchLF.createSwitchLFMenu(<br />
"Switch Look-and-Feel...", this, false);<br />
if (switchMenu != null) {<br />
fileMenu.addSeparator() ;<br />
fileMenu.add(switchMenu);<br />
}<br />
fileMenu.addSeparator();<br />
JMenuItem mi = new JMenuItem("Exit", 'x');<br />
mi.addActionListener(new ActionListener() {<br />
public void actionPerformed(ActionEvent evt) {<br />
System.exit(0);<br />
}<br />
});<br />
fileMenu.add(mi);<br />
// Add GraphicsDemolPanel menus to the menu bar<br />
gp.addToMenuBar(mb);<br />
GraphicsMenuDemoPane gp = new GraphicsMenuDemoPane(c);<br />
gp.setBackground(U<br />
this.getContentPane().add(gp);<br />
}<br />
public static void updateUIDefaults() {<br />
UIManager.putC'ButtonUI", "<strong>JFC</strong>Book.Cjfc.C<strong>JFC</strong>ButtonUI");<br />
}<br />
public static void main(String[] args) {<br />
// Change defaults to use our button UI<br />
updateUIDefaults();<br />
GraphicsDemol f = new GraphicsDemol ("Graphics Demo I 11 );<br />
Dimension d = f.getPreferredSize();<br />
f.setSize(d.width, 500);<br />
f.addWindowListener(new WindowAdapter() {<br />
public void windowClosing(WindowEvent evt) {
Listing 13-10 Adding look-and-feel switch capability to an<br />
applicaiton (continued)<br />
}<br />
}<br />
System.exit(0);<br />
}<br />
});<br />
f.setVisible(true);<br />
Changing Component Look-and-Feel 1589<br />
Notice how simple it is to add the ability to switch look-and-feel when our<br />
SwitchLF class is used. The UIDefaults change is also straightforward and<br />
doesn't show anything that you haven't seen before. It is also a temporary measure—in<br />
the next section, you'll see how to create a new look-and-feel that incorporates<br />
the <strong>Core</strong> <strong>JFC</strong> button. You can run this application using the command:<br />
j ava <strong>JFC</strong>Book.Chapterl3.GraphicsDemol<br />
With the Windows look-and-feel, you get an application that looks like<br />
Figure 13—3. You can see that only one of the toolbar buttons has a border,<br />
indicating that our button user interface is being used here.<br />
Figure 13-3 An application using the <strong>Core</strong> <strong>JFC</strong> button with the Windows<br />
look-and-feel.
1590 Chapter 13 The Pluggable Look-And-Feel<br />
Now if you pull down the File menu, you'll find a menu item labeled<br />
Switch Look-and-Feel...; if you activate this menu item, you get a dropdown<br />
menu that shows the available look-and-feel classes that the SwitchLF<br />
class found and, if you move the mouse over one of them and let it rest there<br />
for a short time, a tool tip will appear, as shown in Figure 13-4.<br />
Figure J3-4 The switch look-and-feel menu.<br />
Now select an alternative look-and-feel from the menu. After a short<br />
delay, the application will be redrawn with the new look-and-feel in place.<br />
Figure 13-5 shows the application after the Motif look-and-feel has been<br />
selected. As you'll see, there isn't much difference between them, but the<br />
menu bar shows you that they are using different look-and-feel classes.<br />
As you can see, despite the fact that the look-and-feel has changed, the<br />
buttons still have the <strong>Core</strong> <strong>JFC</strong> user interface installed in them. You might<br />
think that, since the use of this UI class was enforced by changing the UIDefaults<br />
table while the Windows look-and-feel was selected, the change<br />
would be lost and a normal Motif UI class would be used. This is, however,<br />
not the case—as you saw earlier in this chapter, changes made via the<br />
UlManager put method are persistent because they are held by the Multi-<br />
UIDefaults object which does not change when the look-and-feel is
Changing Component Look-and-Feel 1591<br />
switched. The same applies to custom colors, fonts, and other changes you<br />
might have made to the uiDef aults table.<br />
The SwitchLF class is fine for switching the user interface of an application<br />
that has a single top-level frame and all of its components attached to it,<br />
but it doesn't work if your application has some hidden components or more<br />
than one window, because the updateComponentTreeUI method doesn't<br />
update the UI of anything not attached to the top-level frame that it is given<br />
in the actionPerf ormed method of the menu. For a more complex application,<br />
you could extend the SwitchLF class to incorporate your extra requirements,<br />
but another possibility is to do the extra work in an event handler.<br />
The current look-and-feel is actually a bound property of the UIManager<br />
class, so you can register a PropertyChangeListener to receive notification<br />
of changes to it. The event handler will be called after the look-and-feel<br />
has been installed, but before the call to setLookAndFeel returns. You can<br />
use the event handler to perform any extra user interface updates that you<br />
need, including calling updateComponentTreeUI for frames in addition to<br />
the main one or components (such as dialogs) that the application keeps hidden<br />
until they are required.<br />
To demonstrate how this is done, Listing 13-11 shows how to add a lookand-feel<br />
switch handler to the graphics demo application; only the added<br />
lines and a few adjacent lines are shown in this listing.<br />
Figure 13-5 The graphics application after switching to the Motif look-and-feel.
1592 Chapter 13 The Pluggable Look-And-Feel<br />
Listing 13-11 Handling look-and-feel switch using events<br />
// Add GraphicsMenuDemoPanel menus to the menu bar<br />
gp.addToMenuBar(mb);<br />
this.getContentPane().add(gp);<br />
// Register for notification of look-and-feel changes<br />
UIManager.addPropertyChangeListener(new PropertyChangeListenerO<br />
{<br />
public void propertyChange(PropertyChangeEvent evt) {<br />
if (evt.getPropertyName().equals("lookAndFeel")) {<br />
LookAndFeel If = UIManager.getLookAndFeel();<br />
System.out.println("Look-and-feel changed to " +<br />
If.getName()<br />
+ " (" + If.getDescription() + ")");<br />
}<br />
}<br />
});<br />
You can run this example using the command:<br />
<strong>Java</strong> <strong>JFC</strong>Book.Chapterl3.GraphicsDemo2<br />
When you switch the look-and-feel, the event handler will print the name<br />
and description of the new look-and-feel in the window from which the<br />
application was started. In a real application, of course, you would add code<br />
to make whatever extra user interface changes you needed in this method.<br />
The Multiplexing Look-and-Feel<br />
The multiplexing look-and-feel allows every component in the application to<br />
have more than one look-and-feel associated with it at the same time. This<br />
feature is useful in connection with <strong>Java</strong> Accessibility, because it makes it<br />
possible to connect, for example, a text field to the usual visual UI classes and<br />
to a separate look-and-feel that can turn the text into sounds. Look-and-feel<br />
classes suitable for this type of work are not part of the Swing package and<br />
Accessibility is not covered in this volume, so this section will just give you a<br />
very brief introduction to the multiplexing look-and-feel so that you can see<br />
how it fits with the other look-and-feels.<br />
The multiplexing look-and-feel is a complete package—you can find it in<br />
javax. swing.plaf-multi. It has a UI class for every Swing component,
Changing Component Look-and-Feel 1593<br />
but they don't contain any component-related code. Instead, they delegate<br />
work to all of the loaded look-and-feels.<br />
To enable the multiplexing look-and-feel, you have to add a swing. auxiliarylaf<br />
line to your swing.properties file and list the extra look-andfeels<br />
that should be used, separated by commas. You do not include here any<br />
of the standard look-and-feels, which we will refer to as the primary lookand-feels.<br />
As an example, suppose you have two extra look-and-feels called<br />
SoundLF and BrailleLF installed on your system and you want to make<br />
them available to all applications. To do this, you add the following to<br />
swing.properties:<br />
swing.auxiliarylaf=extraLF.soundLF.SoundLFLookAndFeel,<br />
extraLF.brailleLF.BrailleLFLookAndFeel<br />
where it is assumed that the full package names are extraLF. soundLF<br />
and extraLF.brailleLF, respectively. When UlManager finds this line,<br />
it loads all of the look-and-feel classes specified and then loads the<br />
multiplexing look-and-feel manager which resides in<br />
javax. swing.plaf .multi .MultiLookAndFeel. You can, if you wish,<br />
customize the multiplexing look-and-feel using another line in<br />
swing.properties:<br />
swing.plaf.multiplexinglaf=myMult.MyMultiLookAndFeel<br />
You are not obliged to have a swing.plaf .multiplexinglaf line in<br />
swing.properties to use this facility, because the default one will be<br />
loaded if there is a swing. auxiliarylaf line. You can get a list of all of the<br />
installed auxiliary look-and-feels using the getAuxiliaryLookAndFeels<br />
method of UlManager.<br />
When the multiplexing look-and-feel is in use, all UlManager methods<br />
that would normally access the default look-and-feel are directed instead to<br />
multiplexing look-and-feel, which invokes them on the current default lookand-feel<br />
and on all of the auxiliary look-and-feels. Also, the UI classes<br />
installed in every component belong not to the current primary UI, but to the<br />
multiplexing look-and-feel. As a result, a paint request for a button, for<br />
example, is directed to the paint method of MultiButtonUI, which then<br />
sends it to the paint method of (say) C<strong>JFC</strong>ButtonUI if the <strong>Core</strong> <strong>JFC</strong> is the<br />
default primary UI, followed by the paint methods of SoundLFButtonUI<br />
and BrailleLFButtonUI, which will do whatever is appropriate.<br />
If you are writing a look-and-feel package, you don't need to be aware of<br />
the multiplexing look-and-feel because it is completely transparent. Switching<br />
look-and-feels when it is in use affects only the primary look-and-feel; any<br />
auxiliary look-and-feels are left untouched.
1594 Chapter 13 The Pluggable Look-And-Feel<br />
Creating a New Look-and-Feel<br />
Creating a completely new look-and-feel is as much an artistic exercise as a<br />
technical one and this book is not even going to attempt to cover the issues of<br />
user interface ergonomics. Instead, in this section you'll see how to start<br />
developing a new look-and-feel by putting in place a skeleton that you can<br />
use as the basis for your new interface style. If you don't want to build a completely<br />
new look-and-feel but just want to modify some irksome feature of an<br />
existing one, you'll see how to do that in this chapter as well.<br />
The <strong>Core</strong><strong>JFC</strong> Look-and-Feel<br />
It would be nice to be able to find the time to build a completely new lookand-feel,<br />
but I, in common with many software developers, have neither the<br />
skill nor the artistic temperament to complete the task in a reasonable space<br />
of time. Instead, I settled for implementing a new user interface for buttons<br />
(and even that is not an original concept, although the code is) and up to now,<br />
it has been necessaiy to modify the application in some way to use it.<br />
To build a complete look-and-feel, you have to supply a LookAndFeel<br />
class and a user interface component for all of the Swing components. As you<br />
can see from Table 13-1, which shows the content of the Basic look-and-feel<br />
package, this is no small undertaking. In practice, even if you do intend to<br />
implement all of these classes, you won't be able to develop them all at once<br />
and start testing when the implementation is done—I've never yet met a<br />
project manager who would be willing to let me take several months to<br />
develop something without being able to demonstrate anything at all for a<br />
long period. It is much more acceptable (for the developer and the manager)<br />
to start with a working skeleton and then add to it. Given that you're going to<br />
do it like this, there are two ways that you can go about the task of building a<br />
new look-and-feel package.<br />
• You can create a complete LookAndFeel class and a dummy<br />
UI class for each component.<br />
• You can derive your look-and-feel from another one, create a<br />
skeleton LookAndFeel class and as many UI classes as you<br />
have implemented so far, adding others as you complete them.<br />
If you take the first approach, you'll end up creating around 40 files for the<br />
UI classes that you'll eventually implement. Each of these files will contain a<br />
skeleton UI class that extends the corresponding one in<br />
javax. swing.plaf. You'll also have to provide a dummy implementation
Changing Component Look-and-Feel 1595<br />
for any methods in the superclass that are declared abstract. For example, if<br />
the <strong>Core</strong> <strong>JFC</strong> look-and-feel were implemented this way, the file I would first<br />
create for the UI class for JOptionPane would look something like the one<br />
shown in Listing 13-12.<br />
Listing 13-12 A dummy UI class for JOptionPane<br />
package <strong>JFC</strong>Book.Cjfc;<br />
import javax.swing.*;<br />
import javax.swing.plaf.*;<br />
public class C<strong>JFC</strong>OptionPaneUI extends OptionPaneUI {<br />
public void selectlnitialValue(JOptionPane op) {<br />
}<br />
public boolean containsCustomComponents(JOptionPane op) {<br />
return false;<br />
}<br />
j _____^^<br />
Of course, these files are useful in the long run, because every one of them<br />
will get filled in with new code. You'll also have to create a LookAndFeel<br />
class that links the UI class name to the UI classes themselves and add all of<br />
your classes into it.<br />
While this is a completely workable approach, there is another one that<br />
gets you started quicker and allows you to start implementing new UI classes<br />
as you need them. It also allows you to create a new UI as a modification of<br />
an existing one, which is something that is probably going to be as common as<br />
creating a complete new look-and-feel. Let's illustrate the technique by<br />
showing how the <strong>Core</strong> <strong>JFC</strong> look-and-feel is implemented.<br />
In truth, as I hinted above, the <strong>Core</strong> <strong>JFC</strong>] look-and-feel has only one new<br />
UI class—the button UI that you've seen in this chapter. The rest of its<br />
implementation is borrowed from the Metal look-and-feel.<br />
The <strong>Core</strong> <strong>JFC</strong> look-and-feel is held in the <strong>JFC</strong>Book. Cjfc package. The<br />
source code for this package has only three files:<br />
C<strong>JFC</strong>ButtonUI.j ava<br />
C<strong>JFC</strong>ButtonListener.j ava<br />
C<strong>JFC</strong>LookAndFeel.j ava<br />
You've already seen the first two of these. The third file is, of course, the<br />
one that pulls the look-and-feel together and it is the one that creates the
1596 Chapter 13 The Pluggable Look-And-Feel<br />
class file needed by the UlManager. You can see the content of this file in<br />
Listing 13-13. In fact, you can create a new look-and-feel class with only the<br />
last of these files, since you don't need to add a new component UI class at<br />
the beginning: as you'll see, you can just create a skeleton that is identical to<br />
the look-and-feel that you are basing the new one on, or just change some<br />
colors and so on.<br />
Listing 13-13 The CFJCLookAndFeel class<br />
package <strong>JFC</strong>Book.Cjfc;<br />
import javax.swing.*;<br />
import javax.swing.plaf.*;<br />
import j avax.swing.plaf.metal.*;<br />
import j ava.awt.Font;<br />
public class C<strong>JFC</strong>LookAndFeel extends MetalLookAndFeel {<br />
public String getNameO {<br />
return "<strong>Core</strong> <strong>JFC</strong> Look and Feel";<br />
}<br />
public String getDescription() {<br />
return "The <strong>Core</strong> <strong>Java</strong> <strong>Foundation</strong> <strong>Classes</strong> Look-and-Feel";<br />
}<br />
public String getID() {<br />
return "Metal";<br />
}<br />
public boolean isNativeLookAndFeel() {<br />
return false;<br />
}<br />
public boolean isSupportedLookAndFeel() {<br />
return super.isSupportedLookAndFeel0 ;<br />
}<br />
protected void initSystemColorDefaults(UIDefaults table) {<br />
super.initSystemColorDefaults(table);<br />
// In this array, add any colors that you<br />
// want to override.<br />
// As an example, we show how to override the color<br />
// for "desktop".
Listing 13-13 The CFJCLookAndFeel class (continued)<br />
Changing Component Look-and-Feel 1597<br />
// The value must be in an appropriate form for<br />
// Color.decode()<br />
String[] systemColors = {<br />
"desktop", "#005C5C",<br />
/* Color of the desktop background */<br />
// Add extra overrides here<br />
};<br />
// Add override colors<br />
loadSystemColors(table, systemColors,<br />
isNativeLookAndFeel());<br />
}<br />
//<br />
// Add to this table the UI classes that override those<br />
// of the look-and-feel being extended,<br />
protected void initClassDefaults(UIDefaults table) {<br />
super.initClassDefaults(table);<br />
String cjfcPackageName = "<strong>JFC</strong>Book.Cjfc.";<br />
Object [] uiDefaults = {<br />
"ButtonUI", cjfcPackageName + "C<strong>JFC</strong>ButtonUI",<br />
"TreeUI",cjfcPackageName + "C<strong>JFC</strong>TreeUI",<br />
// Add extra classes here<br />
};<br />
table.putDefaults(uiDefaults);<br />
}<br />
// Add here any component defaults to override or<br />
// extend the base look-and-feel<br />
//<br />
protected void initComponentDefaults(UIDefaults table) {<br />
super.initComponentDefaults(table);<br />
FontUIResource dialogBoldl4 =<br />
new FontUIResource("Dialog", Font.BOLD, 14);<br />
Object[] defaults = {<br />
"Label.font", dialogBoldl4, // Label font.<br />
};
1598 Chapter 13 The Pluggable Look-And-Feel<br />
Listing 13-13 The CFJCLookAndFeel class (continued)<br />
J<br />
}<br />
table.putDefaults(defaults) ;<br />
Most of what is in this file should be familiar from the discussion ofBasicLookAndFeel<br />
earlier in this chapter. Notice first that this class extends<br />
MetalLookAndFeel, which makes it possible to use the code that installs<br />
defaults for Metal and just code the additions that are needed for each class<br />
as you go along.<br />
The getName and getDescription methods just return short and long<br />
descriptions for the look-and-feel, while the get ID method supplies the<br />
name of the look-and-feel on which this one is based, When you run the<br />
final version of the graphics program that has been used in this chapter,<br />
you'll see that these names appear in the menus. The isNativeLookAnd-<br />
Feel method obviously should always return false (unless you work for a<br />
platform vendor and are implementing their look-and-feel...), while the<br />
isSupportedLookAndFeel always returns true, because the Metal lookand-feel<br />
from which it is derived is available on all Swing platforms, but<br />
actually obtains its returned value by invoking its superclass isSupportedLookAndFeel<br />
method in case there is a change of policy at some future<br />
time.<br />
The remaining three methods, initSystemColorDefaults, init-<br />
ClassDefaults, and initComponentDefaults are really what characterize<br />
your look-and-feel. Here, you install specific values for system colors,<br />
UI name to UI class name mappings, and component defaults that distinguish<br />
your look-and-feel; these methods have already been covered in our<br />
discussion of the BasicLookAndFeel class. Since this look-and-feel is just<br />
extending an existing look-and-feel, each of these methods just invokes the<br />
superclass version. Doing this installs almost everything you need—all you<br />
have to do is add anything extra or modify what is already there. Because all<br />
of these methods are updating a Hashtable, you can replace entries by<br />
just adding them again with the same key, as has been done here.<br />
All that is actually needed to build the <strong>Core</strong> <strong>JFC</strong> look-and-feel is to change<br />
the mapping for the key ButtonUI in the UIDef aults table. Since this key is<br />
set up in the initClassDefaults method, you can see that code has been<br />
added there to make the change. The code creates a new array of" entries, in a<br />
form acceptable to putDefaults (which you saw earlier), and uses that
Changing Component Look-and-Feel 1599<br />
method to install it directly into the Hashtable, overwriting the mapping set<br />
np by the Metal look-and-feel. Note that the table generated here is the one<br />
for the <strong>Core</strong> <strong>JFC</strong> look-and-feel only—this is not the same as using the UIManager<br />
put method. As you create more UI classes, yon should add them in<br />
here, progressively replacing the entries installed by Metal. As you can see,<br />
there is also an entry for the UI class of the JTree component. This is required<br />
for an example that you'll see later in this chapter.<br />
For illustration, code is also included in initComponentDefaults<br />
which changes the font for labels. Again, this method creates an array of<br />
replacement entries and calls putDef aults to overwrite the Metal values.<br />
If you want to see a good selection of typical component defaults, look at<br />
the source file for the BasicLookAndFeel class. Similarly, there is code in<br />
the initSystemColorDefaults method that adds to the set of default<br />
system colors for this look-and-feel. In this case, the same color mapping is<br />
actually installed as would be installed by Metal—this is just a placeholder<br />
that shows the format that you should use if you want to actually change<br />
any of the system colors.<br />
As you develop your look-and-feel, you will add more and more entries in<br />
these three methods until, when you are finished, you won't need to use the<br />
superclass methods any more. At this point, you should remove the invocations<br />
of the superclass methods and re-parent the class so that it extends<br />
BasicLookAndFeel.<br />
Once this class has been compiled, you can use the name <strong>JFC</strong>-<br />
Book. Cj f c . C<strong>JFC</strong>LookAndFeel in swing .properties to use it as your<br />
default look-and-feel, or you can use it in conjunction with the example program<br />
GraphicsDemo3, which you can run using the command:<br />
j ava <strong>JFC</strong>Book.Chapterl3.GraphicsDemo3<br />
Before running this program, however, you need to make another change<br />
to your swing. properties file. If you don't know where this file is located<br />
on your system, refer to "Selecting the Look-and-Feel" in Chapter I. First,<br />
you need to add corejfc to the list of installed look-and-feels, then you<br />
need to add properties for the <strong>Core</strong> <strong>JFC</strong> look-and-feel and for the standard<br />
look-and-feels. Here are some suitable lines:<br />
swing.installedlafs=metal,motif,windows,corej fc<br />
swing.installedlaf.metal.name=Metal<br />
swing.installedlaf.metal.class=javax.swing.plaf.metal.MetalLookAndFeel<br />
swing.installedlaf.motif.name=CDE/Motif<br />
swing.installedlaf<br />
.motif.class=com.sun.<strong>Java</strong>.swing.plaf.motif.MotifLookAndFeel<br />
swing.installedlaf.windows.name=Windows
1600 Chapter 13 The Pluggable Look-And-Feel<br />
swing.installedlaf.windows.class=com.sun.<strong>Java</strong>.swing.piaf.windows<br />
.WindowsLookAndFeel<br />
swing.installedlaf.corej fc.name = <strong>Core</strong> <strong>JFC</strong><br />
swing.installedlaf.corej fc.class=<strong>JFC</strong>Book.Cj fc.C<strong>JFC</strong>LookAndFeel<br />
<strong>Core</strong> Warning<br />
As long as you don't set the swing, installedlaf s property, the<br />
default set of look-and-feels will be assumed to be available. However, if<br />
you define swing. installedlaf s in order to add a new look-and-feel,<br />
you also have to add definitions for the name and class files of all the other<br />
look-and-feels installed, or they won't be returned by the UIManager<br />
getlnstalledLookAndFeels method. If you don't see the expected<br />
set of look-and-feels on the Switch Look and Feel menus ofthe<br />
examples in this chapter, you will need to edit the swing.properties file as<br />
shown above.<br />
Figure 13-6 The <strong>Core</strong> <strong>JFC</strong> look-and-feel on the application look-and-feel menu.<br />
GraphicsDemo3 is a modified version of the one shown in Listing 13-10,<br />
in which the UIDe faults table is no longer changed at the start of the main<br />
method and the updateUlDef aults method has been deleted. As a result,<br />
when you start it, it will take on your default look-and-feel and have the button<br />
style appropriate to that look-and-feel. If you now pull down the file
Changing Component Look-and-Feel 1601<br />
menu and activate the Switch Look-and-Feel... entry, you should see a<br />
menu item with "<strong>Core</strong> <strong>JFC</strong>" on it (see Figure 13-6).<br />
Finally, activate the menu item and the application will change to look like<br />
a Metal program, apart from the buttons which have the <strong>Core</strong> <strong>JFC</strong> style, and<br />
the text of the labels at the bottom of the window, which is now in a 14-point,<br />
bold font.<br />
Using a New Look-and-Feel to Modify<br />
Existing Behavior<br />
In Chapter 10, "The Tree Control," you saw how to develop a file system<br />
tree control using the JTree component. The final version of that control<br />
had a small flaw, however—it initially showed expansion icons for every<br />
directory in the file system, whether or not that directory had any subdirectories.<br />
This happens because the UI classes for JTree supplied by the standard<br />
look-and-feels do not take into account whether the tree nodes have<br />
nodes beneath them when they first draw those nodes—in fact, they always<br />
provide an expansion box for a node which is not a leaf until you expand the<br />
node, whether or not it actually has any child nodes. Now that you know<br />
how to create your own look-and-feel, you can change the behavior of the<br />
tree so that it only provides expansion boxes when you would expect them.<br />
The key to obtaining the proper behavior is to extend the trees UI implementation<br />
so that it draws expansion boxes only for those nodes that actually<br />
have child nodes. Here, you'll see how to extend the <strong>Core</strong> <strong>JFC</strong> look-and-feel<br />
so that its JTree controls exhibit this behavior. To find out where the UI class<br />
determines whether to draw expansion boxes, you need to look through the<br />
source code for the tree UI class. The <strong>Core</strong> <strong>JFC</strong> look-and-feel is derived from<br />
Metal, so the first place to look is in the Metal implementation of TreeUI. The<br />
Swing package supplied by <strong>Java</strong>Soft includes a ZIP file with the Swing source<br />
code. The same is true of the <strong>Java</strong> 2 platform. If you unzip this file, you'll find<br />
the source code for the Metal TreeUI class in<br />
src\javax\swing\plaf \metal\MetalTreeUI. <strong>Java</strong>. If you look through<br />
this file, you won't see anything that influences whether expansion boxes are<br />
drawn. You will notice, however, that MetalTreeUI is derived from Basic-<br />
TreeUl, so the next file to look at is<br />
src\javax\swing\plaf\basic\BasicTreeUI .<strong>Java</strong>. This file contains<br />
the following method, which is the one you are looking for:<br />
protected boolean shouldPaintExpandControl(<br />
TreePath path, int row,<br />
boolean isExpanded,
1602 Chapter 13 The Pluggable Look-And-Feel<br />
boolean hasBeenExpanded,<br />
boolean isLeaf)<strong>Core</strong> Note<br />
Working out what to change to modify the behavior of a look-and-feel<br />
always involves looking through the source code because Sun didn't provide<br />
j avadoc documentation for the look-and-feel packages.This case is<br />
particularly simple because the method name helps you to find the code<br />
whose behavior needs to change. In general, though, you would probably<br />
need to spend some time working out how the UI class works to find the<br />
right place to make a modification.<br />
To arrange for expansion controls to be used only when appropriate for the<br />
file system tree, yon need to override the shouldPaintExandControl<br />
method in the <strong>Core</strong> <strong>JFC</strong> look-and-feel by implementing a <strong>Core</strong> <strong>JFC</strong> UI class<br />
for the tree control.<br />
Creating the <strong>Core</strong> <strong>JFC</strong> Tree UI<br />
Once you know what to change, it is a relatively simple matter to make the<br />
change itself. Here, you need to create a modified TreeUI class that has different<br />
behavior for the shouldPaintExandControl method. The <strong>Core</strong><br />
<strong>JFC</strong> look-and-feel is derived from Metal, so the new TreeUI class should be<br />
derived from MetalTreeUI. To do this, create a new file called C<strong>JFC</strong>-<br />
TreeUI. j ava in the C j f c directory of the example code installed from the<br />
CD-ROM. This file should contain the code shown in Listing 13-14.<br />
This code is very much simpler than the implementation of C<strong>JFC</strong>Buttonui<br />
that you saw in Listing 13-5, because it is only making a minor<br />
change to an existing UI class. The static createUl method must be implemented<br />
so that the correct TreeUI class is installed. If you didn't implement<br />
this method, a MetalTreeUI object would be used instead. The rest<br />
of this class is the modified shouldPaintExpandControl method. The<br />
implementation of shouldPaintExpandControl in Listing 13-14 first<br />
calls the MetalTreeUI implementation of shouldPaintExpandControl.<br />
If this method returns false, there is no need to change the result, since<br />
the only case that should be trapped is the one in which child nodes are<br />
being shown when they shouldn't be. If it returns true, the code checks the<br />
child count of the node in the model to see if it has any children and, if it<br />
does not, the method returns false so that no expansion handle will be<br />
drawn.
Listing 13-14 The <strong>Core</strong> <strong>JFC</strong>TreeUI class<br />
package <strong>JFC</strong>Book.cjfc;<br />
import j avax.swing.*;<br />
import javax.swing.plaf.*;<br />
import j avax.swing.plaf.basic.*;<br />
import j avax.swing.plaf.metal.*;<br />
_}<br />
Changing Component Look-and-Feel 1603<br />
public class C<strong>JFC</strong>TreeUI extends MetalTreeUI {<br />
// ComponentUI implementation<br />
public static ComponentUI createUI(JComponent c) {<br />
return new C<strong>JFC</strong>TreeUI();<br />
}<br />
// Paint an expand control only if the node has children,<br />
protected boolean shouldPaintExpandControl(<br />
TreePath path, int row,<br />
boolean isExpanded,<br />
boolean hasBeenExpanded,<br />
boolean isLeaf) {<br />
boolean result = super.shouldPaintExpandControl(<br />
path, row, isExpanded, hasBeenExpanded, isLeaf);<br />
if (result == true) {<br />
result = treeModel.getChildCount(<br />
path.getLastPathComponent()) != 0;<br />
}<br />
return result;<br />
}<br />
Adding the Tree XJ1 to the <strong>Core</strong> <strong>JFC</strong> Look-and-Feel<br />
Creating a new UI class is the first half of the process. To vise the new lookand-feel<br />
class, you need to arrange for it to be returned from the uiDefaults<br />
table of the look-and-feel when a new JTree object is being created.<br />
In the case of the <strong>Core</strong> <strong>JFC</strong> look-and-feel, this is done in the<br />
initClassDefaults method in the C<strong>JFC</strong>LookAndFeel. <strong>Java</strong> file, as<br />
shown in Listing 13-15.<br />
Listing 13-15 Enabling the <strong>Core</strong> <strong>JFC</strong>TreeUI class<br />
protected void initClassDefaults(UIDefaults table) {
1604 Chapter 13 The Pluggable Look-And-Feel<br />
Listing 13-15 Enabling the <strong>Core</strong><strong>JFC</strong>TreeUI class (continued)<br />
super.initClassDefaults(table);<br />
String cjfcPackageName = "<strong>JFC</strong>Book.Cjfc.";<br />
Object [] uiDefaults = {<br />
"ButtonUI", cjfcPackageName + "C<strong>JFC</strong>ButtonUI",<br />
"TreeUI'VcjfcPackageName + "C<strong>JFC</strong>TreeUI",<br />
// Add extra classes here<br />
};<br />
table.putDefaults(uiDefaults) ; ;<br />
} _ _<br />
Testing the <strong>Core</strong> <strong>JFC</strong> Tree UI<br />
If you now compile both the C<strong>JFC</strong>TreeUI.<strong>Java</strong> and C<strong>JFC</strong>LookAndFeel.java<br />
files, you'll have a <strong>Core</strong> <strong>JFC</strong> look-and-feel that incorporates the new behavior<br />
for the tree. To see that it works, you need to change your default look-andfeel<br />
to <strong>Core</strong> <strong>JFC</strong> and then try the FileTreeTest program that was developed<br />
in Chapter 10. Changing the default look-and-feel is a matter of modifying<br />
the swing.properties file—just change the swing.defaultlaf<br />
property as shown here:<br />
swing.defaultla£=<strong>JFC</strong>Book.Cj fc.C<strong>JFC</strong>LookAndFeel<br />
Now run the FileTreeTest program:<br />
<strong>Java</strong> <strong>JFC</strong>Book.ChapterlO.FileTreeTest C:\<br />
When you do this, you'll find that directories that do not have subdirectories<br />
don't have expansion controls. You may need to navigate around the file<br />
system a little to find such a subdirectory. Finally, you have a tree that provides<br />
the appropriate behavior for a file system tree control.<br />
Summary<br />
This chapter took an in-depth look at the Swing pluggable look-and-feel<br />
mechanism. First, you saw the UIManager class and saw how it interacts<br />
with the application to install a default look-and-feel. Next, the UiDefaults<br />
table was introduced. This table holds the defaults for individual look-andfeel<br />
classes. Using these defaults, the look-and-feel independent parts of the
Summary 1605<br />
Swing components are able to install the correct UI classes for the current<br />
look-and-feel and those classes can correctly set colors, fonts, and other<br />
attributes. The description of UIDefaults was followed by a discussion of<br />
the two classes that underpin all of the Swing look-and-feel packages—LookAndFeel<br />
and BasicLookAndFeel.<br />
In the second part of the chapter, you had a detailed look at a UI class that<br />
implements a different user interface for a button and saw how to install and<br />
test this in a existing application. Finally, the last part of the chapter showed<br />
you how to go about creating a skeleton look-and-feel package of your own,<br />
beginning with a single source file, and described how to incrementally<br />
expand it to produce a complete look-and-feel of your own.<br />
Using the techniques you've seen in this chapter you can do anything from<br />
changing the font of an individual component to replacing the complete lookand-feel<br />
of an application, without changing a single line of the applications<br />
code, proving just how powerful and open-ended the Swing component set is.
APPENDIX A<br />
SWING AND<br />
APPLETS<br />
With one exception, the examples that you have seen in this book have been<br />
small <strong>Java</strong> applications. Apart from a few minor considerations, there is no<br />
difference between using Swing controls in applets and in applications and,<br />
for this reason, we haven't singled out applets for special consideration so far.<br />
However, the minor considerations can be daunting problems if you are not<br />
familiar with the differences between the applet and application environment,<br />
and a survey of the Internet newsgroups suggests that this is an area<br />
that regularly challenges those who are new to <strong>Java</strong> and/or Swing. In this<br />
appendix, we identify the major issues involved in creating a Swing-based<br />
<strong>Java</strong> applet and either show the solutions or give you pointers to other<br />
resources that discuss the relevant areas in more detail.<br />
Swing, Applets and Browsers<br />
The first problem that usually confronts would-be Swing applet developers is<br />
how to get access to the Swing classes from within the applet. This issue<br />
arises for the following reasons:<br />
• At the time of writing, the <strong>Java</strong> support in the most popular and<br />
widely-distributed commercial browsers is based on JDK 1.1.<br />
Swing is not part of the core product in JDK 1.1, so end-users<br />
will almost certainly not have the Swing classes installed on<br />
1607
1608 Appendix A Swing and Applets<br />
their systems. Developers targeting JDK 1.1 VM s therefore<br />
need to arrange to have the Swing JAR file downloaded to the<br />
browser along with their applet.<br />
• An alternative to using the browser's VM is to install the <strong>Java</strong><br />
Plug-in, which replaces the browser's VM with one from<br />
<strong>Java</strong>Soft. The downside of this arrangement is that it requires a<br />
one-off download of a large file from Sun's Web site, which will<br />
cause significant startup delay if the user is connected to the<br />
Internet using a slow link.<br />
In this section, we'll examine the differences between using the native VM<br />
and the <strong>Java</strong> Plug-in. Note that some of what is discussed here applies to<br />
applets in general, whether they use Swing or not. Where this is the case and<br />
there is a good description of the topic to be found elsewhere, we'll give you<br />
a reference to that description and then cover any part of that topic that<br />
applies specifically to Swing.<br />
Using the <strong>Java</strong> Plug-in<br />
The most obvious way to resolve the browser issue is simply to insist that the<br />
user installs the <strong>Java</strong> Plug-in. By ensuring that the user has the latest Plug-in<br />
version (currently <strong>Java</strong> 2 version 1.3), you gain the following benefits:<br />
1. The availability of Swing as part of the core <strong>Java</strong> platform.<br />
2. The ability to use <strong>Java</strong> 2 platform APIs such as the Collection<br />
classes and the client hotspot <strong>Java</strong> VM.<br />
3. The performance improvements and memory footprint reduction<br />
included as part of the Swing package in <strong>Java</strong> 2 version 1.3.<br />
4. The ability to cache applets on the user's machine, thus removing<br />
the need for the user to download your applet each time it is<br />
to be used. This is a persistent cache that is independent of the<br />
browser's own cache, so your applet will remain installed even<br />
when the user or the browser cleans up old cached files.<br />
Since these are all clear advantages, you might wonder why eveiybody<br />
doesn't take this approach and make their lives a lot simpler. The principal<br />
reason for staying with the native browser VM is the fact that the initial<br />
download of the <strong>Java</strong> Plug-in may takes a long time. If your applet is being<br />
deployed on a company intranet or to a captive audience who are obliged to<br />
use it, this is less of a problem because you can install a copy of the Plug-in on
Using the <strong>Java</strong> Plug-in 1609<br />
a local web server where it can be accessed quickly. However, if your applet is<br />
accessed over the internet by casual users, you might find that it is more reasonable<br />
to use the installed VM and impose the lesser cost of downloading<br />
Swing instead of the Plug-in. We'll cover what that involves in the next section.<br />
Configuring Your Web Page to Use the Plugin<br />
Assuming that you decide to use the <strong>Java</strong> Plug-in, you'll need to arrange for<br />
your web page to detect whether the user already has it installed and, if not,<br />
to fetch it from a web server and install it on the user's machine. When you<br />
use the Plug-in, you don't use an APPLET tag any more. In fact, the HTML<br />
that you need depends on the which browser is in use and it is, to put it<br />
mildly, rather opaque (unless you happen to be an HTML and/or <strong>Java</strong>Script<br />
guru). Fortunately, you don't really need to understand the code to be able to<br />
use it—all you have to do is slot the right parameters in the right places. Here<br />
is a typical web page that uses the <strong>Java</strong> Plug-in:<br />
<br />
<br />
An Applet Using Swing<br />
<br />
<br />
<br />
<br />
<br />
<br />
PARAM NAME="type"<br />
VALUE="application/x-<strong>Java</strong>-applet;version=l.3"><br />
<br />
<br />
<br />
<br />
1610 Appendix A Swing and Applets<br />
< ! --<br />
<br />
<br />
— ><br />
<br />
<br />
<br />
This page was not created by hand—it was generated from a much simpler<br />
version with an APPLET tag by running a conversion tool called HTMLConverter<br />
supplied by Sun. The <strong>Java</strong> Plug-in is a standard part of the <strong>Java</strong> 2<br />
version 1.3 JDK or JRE for the Windows platform, so if you install either of<br />
these on your system, you will already have the Plug-in ready to use. However,<br />
the conversion program must be downloaded separately from the Plugin<br />
home page at<br />
http://<strong>Java</strong>.sun.com/products/plugin<br />
If you are using any platform other than Windows, you will also need to<br />
download and install the Plug-in itself from this site before you can run the<br />
example code in this Appendix.<br />
<strong>Core</strong> Note<br />
The <strong>Java</strong> Plug-in pages on the <strong>Java</strong>Soft web site are an excellent source of<br />
up-to-date information on the Plug-in. A good starting point on this site is:<br />
http://<strong>Java</strong>.sun.com/products/plugin/1.3/docs/index.docs.html<br />
which is an index that points to the most useful documentation on the site,<br />
including a set of FAQ documents that address the most commonly-asked<br />
questions about the converter and the Plug-in itself.<br />
The converter can be used to process one or more HTML pages with<br />
APPLET tags to produce pages ready for the Plug-in. Here is the original page<br />
from which the one shown above was generated:<br />
<br />
<br />
An Applet Using Swing<br />
<br />
<br />
<br />
<br />
Using the <strong>Java</strong> Plug-in 1611<br />
So what does all the extra complication in the converted page achieve? If<br />
you look at the converter output carefully, you'll notice that it apparently has<br />
two references to the applet. The first of these, wrapped in an OBJECT tag, is<br />
visible only to Microsoft Internet Explorer, while the other, which is part of<br />
an EMBED tag, is used by Netscape Navigator. Instead of loading the applet<br />
into the browser's native VM, these tags make use of browsers' own Plug-in<br />
mechanisms to arrange for the <strong>Java</strong> Plug-in to be loaded instead—in fact, the<br />
browser is not aware that there is a <strong>Java</strong> applet on this page. The reference to<br />
the applet class file is not visible to the browser—it is simply a parameter that<br />
is passed to the Plug-in itself.<br />
If yo have installed the book's example code in the directory C:\<strong>Core</strong>-<br />
<strong>JFC</strong>Book, you'll find the applet source code and the converted HTML page<br />
in the following directory:<br />
c:\Cor<strong>JFC</strong>Book\<strong>JFC</strong>Book\AppendixA\PlugIn<br />
To run the applet, start up Internet Explorer or Netscape Navigator (version<br />
4.0 or later) and type the following URL into the address bar:<br />
file: ///C: /<strong>Core</strong><strong>JFC</strong>Book/ <strong>JFC</strong>Book/AppendixA/Plugln/SwingApplet .html<br />
Assuming you have the Plug-in installed on your system, there will be a<br />
short delay and then the applet will load and display the <strong>Java</strong> version number<br />
and vendor, as shown in Figure A-l.<br />
Downloading the Plug-in on End-User<br />
Systems<br />
The example that you have just seen was just about the simplest possible use<br />
of the Plug-in—because it was already installed on your machine, the overhead<br />
of loading it into the browser in place of the browsers native VM was<br />
minimal. Real users, however, are not likely to have the the Plug-in preinstalled<br />
on their systems! In a controlled environment such as a corporate<br />
intranet, it may be possible to arrange for the <strong>Java</strong> 2 version .1.3 JRE, the<br />
Windows version of which includes the Plug-in, to be preinstalled on each<br />
system on which your applet will be used. If this is the case, then you have no<br />
more work to do. In the event that this is not the case, though, the web page<br />
that the HTML converter produces contains everything necessary to initiate
1612 Appendix A Swing and Applets<br />
Figure A-1 An Applet Loaded Using the <strong>Java</strong> Plug-in.<br />
the download of the Plug-in the first time an applet that needs it is loaded.<br />
What actually happens depends on which browser is being used.<br />
Installing the Plug-in with Internet Explorer<br />
If the user has Internet Explorer 4.0 or later, the browser will interpret the<br />
following HTML to display the applet, from the page shown earlier:<br />
<br />
<br />
PARAM NAME="type"<br />
VALUE="application/x-<strong>Java</strong>-applet;version=l.3"><br />
<br />
<br />
The classid attribute of the OBJECT tag identifies the <strong>Java</strong> Plug-in. II a<br />
Plug-in with this classid has already been installed, it is loaded and the<br />
applet will run inside it. If no such PPlug-inlug-in exists, Internet Explorer<br />
uses the codebase attribute as the source of the Plug-in. In this case, a CAB
Using the <strong>Java</strong> Plug-in 1613<br />
file (the Microsoft equivalent of a JAR file) will be downloaded from the <strong>Java</strong>Soft<br />
Web site. This file does not actually contain the <strong>Java</strong> Plug-in - it actually<br />
contains a much smaller object that will automatically fetch and install a copy<br />
of the <strong>Java</strong> 2 version 1.3 JRE on the user's machine. Since the CAB is signed,<br />
the user will first be asked if he/she wants to install it. If the user agrees, the<br />
much larger JRE file (just short of 5 megabytes) will be fetched and then the<br />
user will see the normal installation process for the JRE, a side-effect of<br />
which is to install the <strong>Java</strong> Plug-in, and register it for use by Internet<br />
Explorer. When the install is complete, the Plug-in is available for use. The<br />
entire process is automatic and requires minimal intervention by the user.<br />
Installing the Plug-in with Netscape Navigator<br />
As far as loading the applet is concerned, Netscape Navigator sees the following<br />
part of the HTML page:<br />
<br />
The type parameter tells the browser that the object to be embedded in<br />
the web page has the MIME type "application/x- java-applet; version=l.3".<br />
If the browser has a Plug-in for this type, it will load it. If not,<br />
then it will display a "Missing Plug-in" dialog box offering to fetch the Plugin.<br />
If the user agrees, Netscape Navigator goes to the URL given by the pluginspage<br />
attribute.<br />
At this point, the process diverges somewhat from that presented by Internet<br />
Explorer. Instead of the Plug-in being installed automatically, the user is<br />
redirected to the page on the <strong>Java</strong>Soft web site that allows developers to<br />
download the JRE, which can be somewhat confusing for a technically naive<br />
user. From here, the user must choose the correct version of the JRE for<br />
their platform and download it.<br />
<strong>Core</strong> Note<br />
At the time of writing, some versions ofthejRE are only available to<br />
developers who have registered with the <strong>Java</strong> Developer Connection, so the<br />
user will be prompted for a JDC password and will have to sign up to the<br />
JDC to get access to the Plug-in.This will, of course, change as each<br />
platform's JRE is released for general use.
1614 Appendix A Swing and Applets<br />
The process of installing the JRE is not performed within the browser -<br />
the file containing the JRE will be downloaded to the users machine, then<br />
the user must perform the installation process in the normal way, which<br />
means running the downloaded executable. Once this process is complete,<br />
the user has to restart Netscape Navigator and return to the original HTML<br />
page to start the applet.<br />
<strong>Core</strong> Alert<br />
In fact, it seems that it is necessary to restart Netscape Navigator more<br />
than once before the <strong>Java</strong> Plug-in is recognized.<br />
Obviously, this process is not as clean as it is when the user has Internet<br />
Explorer and it can be confusing for the user to have to navigate the <strong>Java</strong>Soft<br />
Web site (and possibly the JDC) to get the correct version of the JRE.<br />
Installing the Plug-in From an Intranet Web<br />
Server<br />
If your users are located on a company intranet, you can reduce the time<br />
needed to install the Plug-in by placing a copy on a local Web server and<br />
changing the converted HTML to point there instead of to the <strong>Java</strong>Soft Web<br />
site. If you create your HTML pages using the HTMLConverter application,<br />
you can do this as part of the conversion process by changing the values of<br />
the following properties in the converter's converter .props file:<br />
converter.plugin.file.loc=http://java.sun.com/products/plugin/1.3/<br />
plugin-install.html<br />
converter.cab.file.loc=http://<strong>Java</strong>.sun.com/products/plugin/1.3/jinstall<br />
-13-Win32.cab#Version=l,3,0,0<br />
The steps you need to follow depend on which browsers and platforms you<br />
need to serve.<br />
Installation for Internet Explorer<br />
Using Internet Explorer on the Windows platform, you can achieve automatic<br />
installation by downloading the JRE installation file from the <strong>Java</strong>Soft<br />
web site and installing it on your Intranet web server. The HTML files that<br />
use the Plug-in should then be changed to refer to this file instead of the one<br />
on the <strong>Java</strong>Soft Web site. For example, if you download the JRE installation
Using the <strong>Java</strong> Plug-in 1615<br />
binary onto a Web server called www.mycorp.com, the OBJECT tag would be<br />
changed to look like this:<br />
<br />
<br />
PARAM NAME="type"<br />
VALUE="application/x-<strong>Java</strong>-applet;version=l.3"><br />
<br />
<br />
where the JRE has been placed in the directory plugin/l. 3 relative to the<br />
server's document root. If you are using the HTML converter to generate<br />
your Web pages, you would use the following setting in the converter.props<br />
file to have this URL appear in all of the pages you convert:<br />
converter, cab. file . loc = http: //www.mycorp. com/plugin/1. 3/<br />
j2rel 3 0-win.exe<br />
Notice that although the original HTML used a CAB file, this version uses a<br />
. exe file. This is because the job of the CAB file was to locate and load the<br />
correct Plug-in file, which is not necessary when the JRE is already installed<br />
on your intranet Web server.<br />
Installation for Netscape Navigator<br />
Making the Plug-in available from an internal Web server for Netscape<br />
Navigator users is slightly more difficult because you have to provide an<br />
intermediate Web page from which the correct version of the Plug-in can be<br />
chosen. This is necessary both because Netscape Navigator cannot directly<br />
install from the JRE executable and because you may need to allow your<br />
users to choose between a Windows or UNIX version of the <strong>Java</strong> Plug-in. To<br />
set up an intranet Web server for use by Netscape Navigator, you need to do<br />
the following:<br />
1. Download the appropriate versions of the JRE from the <strong>Java</strong>-<br />
Soft Web site and place them on the web server. Note that you<br />
need different versions of the JRE for Windows, Linux, Solaris,<br />
etc.<br />
2. Create a Web page that allows your users to choose the appropriate<br />
JRE file and downloads it to their machine.
1616 Appendix A Swing and Applets<br />
3. Change the original HTML page to refer to the download page<br />
on the Web server.<br />
Note that, as we saw earlier, users will need to save the JRE installation file<br />
that they download onto their machines and then perform a manual installation<br />
process before restarting Netscape Navigator. Since the process is not<br />
simple, you should include sufficient guidance on the download Web page.<br />
Here is an example skeleton download page (that does not contain user guidance!)<br />
that you can use as a starting point:<br />
<br />
<strong>Java</strong> Plug-in Download Page<br />
<br />
Please select the appropriate Plug-in for your system:<br />
<br />
<br />
Microsoft Windows<br />
<br />
Solaris (SPARC)<br />
<br />
Assuming that this page is placed in a file called download.html in the<br />
directory plugin/l.3 relative to the servers document root, along with the<br />
[RE files themselves, your applets HTML page should be changed so that<br />
the EMBED tag looks like this:<br />
<br />
If you are using the HTML converter to generate your web pages, you would<br />
use the following setting in the converter .props file to have this URL<br />
appear in all of the pages you convert:<br />
converter.plugin.file.loc=http://www.mycorp.com/plugin/1.3/download,<br />
html<br />
Applet Signing With the <strong>Java</strong> Plug-in<br />
Applets can be signed so that the end user can verify that they came from the<br />
supplier that they claim to have come from and to ensure that they have not<br />
been tampered with in transit. Signing is also required if you want your<br />
applet to have additional privileges to allow it to work outside the usual<br />
"sandbox" environment.
Using the <strong>Java</strong> Plug-in 1617<br />
Applet Signing involves using certificates that identify software suppliers<br />
and cryptography, which is used in conjunction with certificates to ensure the<br />
integrity of the downloaded file. We're not going to discuss the details of certificates<br />
and applet signing in this book because they are not directly related<br />
to Swing. However, if you intend to sign your applet (which is likely to be<br />
mandatory in commercial use), then you will find good coverage of this topic<br />
in <strong>Core</strong> <strong>Java</strong> 2 Volume II: Advanced Features by Cay Horstmann and Gary<br />
Cornell and in <strong>Java</strong> 2 Network Security (Second Edition), both published by<br />
Prentice Hall.<br />
As you'll see shortly, if you use the native VM, you have to carry out the<br />
applet signing process twice because Internet Explorer and Netscape Navigator<br />
use different signing technology. If you use the <strong>Java</strong> Plug-in, however,<br />
you only need to create one signed copy of your applet, because the Plug-in<br />
recognizes applets signed using Netscape signing tools.<br />
Applet Caching With the <strong>Java</strong> Plug-in<br />
One advantage of using the Plug-in over the native VM is that the <strong>Java</strong> 2 version<br />
1.3 JRE will be installed on the user's machine, so there is no need to<br />
download the Swing JAR file from your Web server. However, it is still necessary<br />
to fetch the applet itself. The cost of downloading the applet code can be<br />
dramatically reduced by packaging your applet as a JAR file so that only one<br />
file has to be retrieved when the applet is loaded. Before the introduction of<br />
JAR files in JDK 1.1, it was necessary to fetch each class file individually from<br />
the web server, at great cost in time.<br />
As of <strong>Java</strong> 2 version 1.3, the Plug-in provides the ability to cache your<br />
applet on the client machine. Caching is controlled using three parameters<br />
that can be included in the applet's HTML page. We'll look first at how these<br />
parameters are encoded for Internet Explorer and then move on to Netscape<br />
Navigator.<br />
<strong>Core</strong> Tip<br />
The <strong>Java</strong> Plug-in stores cached applets in a directory called<br />
j ava_plugin_AppletStore under your home directory. For Windows<br />
users, a user named "Fred" would typically find applets held in the folder<br />
c:\Windows\Profiles\Fred\j ava_plugin_AppletStore<br />
When diagnosing caching problems, it is useful to watch the modification<br />
times of the files in this folder change, so that you can see when a new<br />
copy is being fetched from the Web server.
1618 Appendix A Swing and Applets<br />
Applet Caching with Internet Explorer<br />
Usually, an applet is stored on a Web server and downloaded in the form of<br />
one or more JAR files which are specified using an ARCHIVE parameter<br />
within the OBJECT tag. For example, if your applet is packaged in a single<br />
JAR file call my Applet .jar, you would supply a tag like this:<br />
<br />
On its own, this simply results in the JAR file being treated as the source of<br />
the applet's class files instead of the Web sei-ver itself. The JAR file is<br />
expected to be on the Web server, of course, and the name you supply should<br />
be relative to the page in which the tag appears, or a URL that is relative to<br />
the servers document root (such as "/myAppletDirectory/myApplet.<br />
jar").<br />
The <strong>Java</strong> 2 version 1.3 Plug-in caching feature is controlled using three<br />
extra parameters—cache_option, cache_archive, and cache_version:<br />
<br />
<br />
The cacheoption parameter determines whether caching occurs at all.<br />
The VALUE attribute has three possible values:<br />
No No caching of any kind is used. The applet code is always downloaded<br />
from the Web server. Unless there are strong reasons to do<br />
otherwise, this value should never be used.<br />
Browser The applet's archives may be stored within the cache that the<br />
browser uses to store other content that it retrieves from the Web.<br />
This is, in fact, the default even if you don't explicitly code any of<br />
the cache management parameters. This option will result in your<br />
applet being located in the browser s cache if it is present. However,<br />
the browser (or the user) may remove items from the cache<br />
at any time, at which point the applet will have to be reloaded<br />
from the Web site. Prior to <strong>Java</strong> 2 version 1.3, this was the only<br />
caching mechanism supported by the Plug-in.<br />
Plugin This value works in the same way as Browser, except that the<br />
archives are stored in an area that is private to the Plug-in and<br />
hence will not be affected by the browser's cache management.<br />
Archives downloaded with this option are effectively persistent<br />
until a new version is installed on the Web server (see below).
Using the <strong>Java</strong> Plug-in 1619<br />
The cache_option parameter is applied not to the JAR files listed in the<br />
archive parameter, but to the set of JARs named in the cache_archive<br />
parameter. For example,<br />
<br />
<br />
<br />
Here, the applet consists of two archives. Plug-in caching will be applied<br />
to myApplet. jar because it is listed in the cache_archive parameter.<br />
However, the archive extras, jar will not be treated in the same way—<br />
instead, it will be stored in the browsers cache.<br />
<strong>Core</strong> Alert<br />
If you want to cache a JAR file in the Plug-in cache, you must:<br />
• Includes its name in the cache_archive list<br />
• Make sure its name is NOT in the archive list<br />
JARs named in the archive list are not held in the Plug-in cache even if<br />
they appear in the cache_archive parameter.They may, however, be<br />
cached in the browser's own cache.<br />
Once the user has downloaded the parts of your applet that are configured<br />
for Plug-in caching, the Plug-in doesn't need to go back to the Web server to<br />
get a fresh copy. This can make the loading of the applet virtually immediate,<br />
but it also introduces a different type of problem—what happens if you<br />
install a new version of the JAR on the web server? Before using a stored<br />
archive, the Plug-in gets the time at which each archive on the server was last<br />
modified and its file size and compares these with the modification date and<br />
file size of the archive that it stored in the cache. If these values don't match,<br />
a new copy of the archive is loaded and installed. This simple approach has<br />
two flaws:<br />
• The Plug-in has to send extra HTTP requests to the server to<br />
get the last modification time and size of each archive. This<br />
overhead is incured each time the applet is loaded and will<br />
usually be wasted because the archive will not have changed.<br />
• The last modification time on the server may change, due to a<br />
reload of the files from an archived copy for example, even<br />
though the files themselves are identical.
1620 Appendix A Swing and Applets<br />
To avoid these problems, you can include the cache_version parameter,<br />
which requires that each archive listed in the cache_archive parameter be<br />
given a version number of the form A. B . C. D where each of A, B, C and D is a<br />
single hexadecimal digit. The association between the archive name and its<br />
version number is made using the cache_version parameter:<br />
<br />
<br />
<br />
This set of tags associates the version number 1.1.0.0 with myApplet. j ar<br />
and 1.2.0.0 with extras, jar (note that we moved extras, jar to the<br />
cache_archive parameter for this example so that it can be cached by the<br />
Plug-in). When each file is installed in the Plug-in cache, the version number<br />
assigned to it is also stored. When the Web page is next loaded, instead of<br />
sending requests to the server for the modification time and file size for each<br />
cached archive, the Plug-in simply compares the version number assigned to<br />
each archive in the web page with the ones stored in the Plug-in cache. As<br />
long as they match, the Plug-in knows that it has the latest copies of the<br />
archives.<br />
Now suppose you make some changes to your applet and create version<br />
1.1.1.0 of myApplet. j ar. To have this version distributed to users, you simply<br />
install the new JAR on the Web server and change the HTML page as follows:<br />
<br />
<br />
<br />
When a user next loads the Web page, the Plug-in will see that the version<br />
number of myApplet. jar does not match the version number that it has<br />
stored in its cache and will fetch a new copy and install it, replacing the old<br />
one. Note that, since the version number of extras . j ar was not changed,<br />
the Plug-in will not need to reload that archive from the Web server.<br />
If we wanted to arrange for the Plug-in to cache the simple applet that we<br />
created at the beginning of this Appendix, we would first package it in a JAR<br />
file:<br />
jar cvf SwingApplet.jar SwingApplet.class SwingApplet$l.class<br />
and then change the HTML page to incorporate the caching parameters<br />
in the section that is used by Internet Explorer:
<br />
An Applet Using Swing<br />
<br />
<br />
<br />
<br />
Using the <strong>Java</strong> Plug-in 1621<br />
<br />
<br />
<br />
<br />
<br />
PARAM NAME="type"<br />
VALUE="application/x-<strong>Java</strong>-applet;version=l.3"><br />
<br />
<br />
<br />
<br />
<br />
< ! --<br />
<br />
<br />
— ><br />
< ! - - "END__CONVERTED_APPLET" - - ><br />
<br />
<br />
<strong>Core</strong> Alert<br />
If you use the HTMLConverter to convert a Web page that used an<br />
APPLET tag with the ARCHIVE parameter, remember to remove this<br />
parameter from the converted HTML when you add caching using<br />
cache archive, or your applet JARs will not be installed in the Plug-in<br />
cache.
1622 Appendix A Swing and Applets<br />
Applet Caching with Netscape Navigator<br />
Plug-in applet caching also works with Netscape Navigator. To activate it, you<br />
use the same parameters as you would with Internet explorer, but instead of<br />
including them between the and tags, they appear<br />
withing the tag itself. Therefore, to convert the HTML shown<br />
above so that it uses caching in Netscape Navigator as well as in Internet<br />
Explorer, you would make the changes highlighted below in bold:<br />
<br />
<br />
An Applet Using Swing<br />
<br />
<br />
<br />
<br />
<br />
<br />
<br />
<br />
<br />
PARAM NAME="type"<br />
VALUE="application/x-<strong>Java</strong>-applet;vergion=l.3"><br />
<br />
<br />
<br />
<br />
<br />
Using the Native Browser VM 1623<br />
Notice that, because the syntax of the EMBED is different from that of the<br />
PARAM tag, instead of this:<br />
<br />
Netscape Navigator requries:<br />
<br />
and notice also that case is not significant. As with Internet Explorer, you<br />
must remove any attributes of the form "archive = xxx. j ar" if you want<br />
the JAR files to which they refer to be cached by the Plug-in.<br />
Using the Native Browser VM<br />
If, for whatever reason, you can't use the <strong>Java</strong> Plug-in, then you will have to<br />
restrict yourself to the browser s native <strong>Java</strong> support. At the time of this writing,<br />
neither Internet Explorer nor Netscape Navigator provided built-in support<br />
for the <strong>Java</strong> 2 platform and, in fact, neither of them have the latest<br />
version of JDK 1.1 either. According to the information available from the<br />
System getProperty method, the JDK versions that they provide are:<br />
Internet Explorer JDK 1.1.4<br />
Netscape Navigator JDK 1.1.5<br />
These are relatively old increments of JDK 1.1 that have many more bugs<br />
(some of them being annoying AWT bugs that affect Swing) that are not<br />
present in the current release (JDK 1.1.8). As a result, you may find yourself<br />
having to work around old bugs that you won't see if you use the Plug-in or if<br />
you run your code as an application using the latest version of JDK 1.1.<br />
Using Swing with the Native VM<br />
To use Swing with the browser's native VM, you have to change the<br />
HTML so that it includes an ARCHIVE tag that points to the Swing 1.1.1<br />
swing. j ar file. In practice, most applets are packaged into JAR files, so you<br />
will almost certainly already have an ARCHIVE tag to which you can add the<br />
Swing JAR file.
1624 Appendix A Swing and Applets<br />
You can tiy this out for yourself using some code included on the book's<br />
CD-ROM. Assuming you have installed the source code in the recommended<br />
location, open a command shell and go to the following directory:<br />
c:\<strong>Core</strong><strong>JFC</strong>Book\<strong>JFC</strong>Book\AppendixA<br />
and then type the following commands:<br />
javac SwingApplet.<strong>Java</strong><br />
jar cvf SwingApplet.jar SwingApplet.clas SwingApplet$1.class<br />
This will compile the small example program and package it into a JAR file<br />
called SwingApplet .jar. The HTML page SwingApplet.html in the<br />
same director)' contains the tags necessary to load and run this applet:<br />
<br />
<br />
An Applet Using Swing<br />
<br />
<br />
<br />
<br />
<br />
<br />
To use this HTML file, you will need to copy the swing. j ar file from<br />
your Swing 1.1.1 installation directory into the same directory as the HTML<br />
file and the <strong>Java</strong> class files, which may be on your Web server if you are<br />
intending to run this example over a network. Having done this, when you<br />
load the HTML file in your browser, there will be a delay while the Swing<br />
JAR file is loaded, followed by the SwingApplet. jar file and then the<br />
applet will start. Figure A-l shows what this trivial applet looks like.<br />
Another approach that you can use is to build a single JAR file that contains<br />
both your applet and the contents of the Swing JAR. Taking this<br />
approach is a good idea if you intend to sign your applet so that it can perform<br />
privileged actions or if you want to use one of the browser-dependent<br />
techniques for caching your applet on the client system. Constructing a combined<br />
applet/Swing JAR is very simple:<br />
j ar xvf swing.j ar<br />
jar cvf SwingApplet.jar SwingApplet.class SwingApplet$l.class<br />
javax<br />
Once you have done this, you can remove the swing. j ar entry from the<br />
ARCHIVE parameter of the APPLET tag in the HTML page and you'll find
Using the Native Browser VM 1625<br />
that the applet still loads. The file SwingApplet2 .html in the same directory<br />
contains the appropriate APPLET tag.<br />
Applet Caching and Signing With the Native<br />
VM<br />
Unlike the <strong>Java</strong> Plug-in, when using the browsers' native VM implementations,<br />
you can only cache content that has been signed. Furthermore,<br />
Netscape Navigator and Internet Explorer have different mechanisms both<br />
for signing and caching. Once you have created your JAR file, you have to<br />
take different steps depending on which browser your applet will be loaded<br />
into. If you want to be able to handle both Internet Explorer and Netscape<br />
Navigator, you have to prepare two separate signed files and you also need<br />
browser-specific HTML.<br />
In order to fully understand applet signing, you need to be familiar with<br />
the basics of Public and Private Key Cryptography and with the use of X.509<br />
certificates to authenticate the source of the applet so that the user knows<br />
whether to trust the downloaded code. These topics are well beyond the<br />
scope of this book, so we confine ourselves here to listing the steps that you<br />
need to take in order to sign code for both of the major browsers. Before<br />
attempting to sign an applet yourself, you should read the coverage of this<br />
topic in <strong>Core</strong> <strong>Java</strong> 2 Volume II: Advanced Features by Cay Horstmann and<br />
Gaiy Cornell and in <strong>Java</strong> 2 Network Security (Second Edition), both published<br />
by Prentice Hall.<br />
Caching and Signing Applets For Internet Explorer<br />
To prepare an applet for signing and caching with Internet Explorer, you<br />
need to download the Microsoft SDK for <strong>Java</strong> which is available from<br />
Microsoft's Web site at<br />
http://www.microsoft.com/<strong>Java</strong>/download.htm<br />
Although the Microsoft VM recognizes JAR files, it does not support the<br />
use of signed JAR files. Instead, you need to use tools in the Microsoft SDK<br />
for <strong>Java</strong> to build a signed CAB file. Furthermore, if you want your applet to<br />
be cached by Internet Explorer, you have to create a specific form of CAB<br />
file called a Distribution Unit (DU). The difference between a CAB file and a<br />
DU file is simply the inclusion in the latter of a file that contains version<br />
number information for the file's content.<br />
In summary, the steps that you need to follow to build a cacheable applet<br />
for Internet Explorer are as follows:
1626 Appendix A Swing and Applets<br />
Obtain a signing certificate and a public/private key pair for<br />
signing. You can find information on obtaining a signing<br />
certificate for commercial use from http: //<br />
msdn.microsoft.com/workshop/security/authcode/<br />
certs.asp and http://www.microsoft.com/technet/<br />
security/authtech. asp. You can also use the tools in the<br />
Microsoft SDK to create a self-signed certificate which should<br />
be used for development purposes only.<br />
Assign a version number to the applet. Version numbers follow<br />
the Dewey Decimal number scheme, being of the form<br />
A.B.C.D, where each part is a non-negative integer. The<br />
browser compares the version number stored within a cached<br />
applet's DU file with the version number in the HTML page to<br />
determine whether it has the required version of the applet. As<br />
you change your applet, you should increment one of the fields<br />
of the version number in the HTML page (shown below) to<br />
force the browser to download a newer DU file.<br />
Instead of building a JAR file, use the Microsft SDK dubuild<br />
utility to create a distribution unit. This utility requires a list of<br />
the files to be included and the version number to be assigned.<br />
Create a file to specify the permissions that you want your<br />
applet to have. Recall that unsigned applets operate in a<br />
"sandbox" environment in which they are allowed to do a<br />
restricted number of priviliged things, which includes making a<br />
network connection back to the server from which they were<br />
downloaded and reading certain properties using the System<br />
getProperty method. A signed applet can be given extra<br />
privileges which the user must agree to when the applet is<br />
downloaded. Note, however, that when you assign privileges to<br />
a signed applet, you must also reassign any of the default<br />
privileges that you need because these are not automatically<br />
given to a trusted applet. You can use the Microsoft SDK tool<br />
piniedit to create and maintain a file that specifies the<br />
permissions that the applet requires.<br />
Use your certificate and private key to sign the DU file. This<br />
step is performed using the Microsoft SDK tool signcode<br />
which also requires the version number and the permissions list<br />
generated by piniedit.<br />
Timestamp the DU file using signcode. Timestamping<br />
requires the use of an external network time source such as the
Using the Native Browser VM 1627<br />
one found at http://timestamp.verisign.com/scripts/<br />
timstamp.dll.<br />
As well as building a signed DU file, you also need to create the appropriate<br />
HTML to have the applet downloaded and installed. A signed DU file<br />
requires a modifed APPLET tag with some additional parameters that specify<br />
that caching is required and which version of the applet is the most current.<br />
If your applet is called TestApp, the initial applet class file is called MyApplet<br />
and the most current version is 1.2.3.4, your HTML page should contain<br />
the following tags:<br />
<br />
<br />
<br />
<br />
<br />
In this example, the DU file is assumed to be held in a file called MyApplet.cab<br />
which is in the same directory on the Web server as the HTML file<br />
itself.<br />
You can find further information on DU files, signing, and applet caching<br />
for Internet Explorer at the following URL:<br />
http://www.microsoft.com/java/sdk/4 0/pg/<br />
pg_pkgdist_sgncd.htm<br />
Caching and Signing Applets for Netscape Navigator<br />
To sign an applet for Netscape Navigator, you need to download the<br />
Netscape signing tools, which can be found at<br />
http://developer.netscape.com/software/signedobj/jarpack.html<br />
You will also need a signing certificate suitable for use with Netscape Navigator<br />
although, as with Internet Explorer, you can use the signtool utiltity<br />
from the Netscape signing tools to create a self-signed certificate for development<br />
purposes. Information on obtaining a commercially usable certificate<br />
can be found at<br />
http://developer.netscape.com/software/signedobj/jarpack.html#certificates<br />
A cacheable applet for Netscape Navigator is built in the form of a<br />
Netscape SmartUpdate package. The details of building such a package are<br />
well beyond the scope of this appendix and you should refer to the documentation<br />
at the following URL:
1628 Appendix A Swing and Applets<br />
http://developer.netscape.com/docs/manuals/communicator/<br />
j arman/index.htm<br />
and at<br />
http://developer.netscape.com/docs/manuals/communicator/<br />
j arforcd/index.htm<br />
In outline, as with Internet Explorer, you have to assign your applet a version<br />
number in the same form (for example 1.2.3.4) and then build your<br />
SmartUpdate package, as follows:<br />
• Instead of creating a JAR file using the JDK j ar utility, you<br />
need to build a signed JAR file using the Netscape signtool<br />
utility, which requires your signing certificate. This JAR file<br />
(which will be referred to here as the "inner JAR file") is not<br />
directly delivered to the browser— instead it is wrapped in an<br />
"outer" JAR file.<br />
• The outer JAR file (which is the SmartUpdate package) is also<br />
built using signtool. This JAR file must contain the inner JAR<br />
file and a file of <strong>Java</strong>Script that will be used at the browser to<br />
install the package. This JAR file is signed using your signing<br />
certificate.<br />
Having built the outer JAR file, the final step is to create the HTML that<br />
will fetch it from the Web server, extract the "inner" JAR file, and then install<br />
it. As with Internet Explorer, this process involves comparing the applet version<br />
number in the HTML page with the version number of the applet that<br />
may already be installed on the user's machine. However, whereas this step is<br />
performed automatically by Internet Explorer, with Netscape Navigator you<br />
have to write some <strong>Java</strong>Script that uses SmartUpdate facilities included with<br />
the browser to determine whether a new version needs to be installed. The<br />
details of this process, together with some <strong>Java</strong>Script that can be used as the<br />
basis for your Web page, are shown in the Netscape SmartUpdate developer's<br />
guide, which can be downloaded from<br />
http://developer.netscape.com/docs/manuals/communicator/<br />
j arman/index.htm<br />
Loading Images and Other Resources<br />
One of the most common oversights made when creating applets, particularly<br />
if the applet is converted from an existing application or if the same
Loading Images and Other Resources 1629<br />
code is used as both an applet and an application, relates to the loading of<br />
images and other resources that are stored along with the application class<br />
files. It is quite common to see code that attempts to access image files<br />
directly from filestore, using an absolute or relative pathname. The problem<br />
is that this just won't work in an applet and, in fact, it shouldn't really be<br />
used even in an application, because relative path names make assumptions<br />
about the process' current directory and absolute path names make assumptions<br />
about filestore layout. Here's an example of the type of code I have<br />
in mind:<br />
Imagelcon icon = new Imagelcon("images/lem.gif");<br />
Clearly, this code works only if the process has its current directory in a<br />
place from which the image file can be addressed as "images/lem.gif".<br />
Using this code in an applet obviously won't work—for one thing, this code is<br />
attempting to read the file system, which the sandbox will prevent it from<br />
doing. In any case, whatever the browsers current directory happens to be, it<br />
won't have the necessary file where the code expects it to be!<br />
Properly written applications don't make assumptions about filestore layout.<br />
In the examples in this book, constructs like those shown above are not<br />
used. Instead, we use the Class get Re source method to locate resources.<br />
This works because we keep all of the images used in the code examples in<br />
this book in the same directoiy structure as the class files themselves, so that<br />
we can use code like this:<br />
Imagelcon icon = new Imagelcon(<br />
getClassO .getResource("images/lem.gif"));<br />
The only assumption that this code makes is the location of the image file<br />
relative to the class that contains the code. This is a safe assumption to make,<br />
since the layout of the applications class and resource files is under the control<br />
of the developer. Furthermore, this code works whether the application<br />
is delivered as a directory hierarchy of class and resource files or in a JAR file.<br />
Given what has just been said, you would think that the code shown above<br />
would represent the ideal way for an applet to access resources from the JAR<br />
file that it was downloaded in, or from its Web server if it is stored as a set of<br />
class files. Unfortunately, not all browsers support the getResource<br />
method. In particular, this is true of Netscape Navigator, which returns null<br />
when you call getResource. If you are able to deliver your applet via the<br />
Plug-in, you won't have this problem, but if you are constrained to use the<br />
native VM, you need to find another way to access resources. Fortunately,<br />
this issue was faced some time ago by the Swing developers, because it<br />
affected the ability to load the standard icons that the Swing components
1630 Appendix A Swing and Applets<br />
themselves use. The solution to the problem is to use the Class getResourceAsStream<br />
method instead of getResource. The getResourceAs-<br />
Stream method locates a resource in exactly the same way as getResource,<br />
but it returns an InputStream opened on the resource instead of a URL.<br />
This is not quite as convenient, but it is better than nothing!<br />
You can use getResourceAsStream to access any kind of resource delivered<br />
along with your applet, including property files and other configuration<br />
files. For example, to load a Properties object from a property file held<br />
within your applets JAR file, you can do this:<br />
Properties props = new Properties();<br />
props.load(getClass().getResourceAsStream(<br />
" config/params.props"));<br />
However, images probably represent the resource most frequently<br />
required by applets. The problem is how can data read from an Input -<br />
Stream be converted into an Image or an Imagelcon? The solution to this<br />
problem is actually quite simple:<br />
1. <strong>Read</strong> the image content from the InputStream into an array of<br />
bytes. Since you can't really tell in advance how much data<br />
there will be, you can't preallocate a byte array that is large<br />
enough. Instead, you can use a class like ByteArrayOutput-<br />
Stream that expands its capacity as more data is written into it.<br />
2. Once you have all the data in the form of a byte array (which<br />
you can get from a ByteArrayOutputStream using its<br />
toByteArray method), you can then convert it to an Image-<br />
Icon using the constructor that accepts a byte [] argument. If<br />
you need an Image, you can simply use the Toolkit create-<br />
Image method, which also accepts an array of bytes.<br />
If you just want to load the image in order to use it as an Icon, you don't<br />
need to go to the trouble of writing this code for yourself, because it already<br />
exists in the Swing LookAndFeel class, in the form of the makelcon<br />
method:<br />
public static Object makelcon(Class baseClass,<br />
String file);<br />
The baseClass is a class from which file is an offset that can be used to<br />
locate the required image data. This method does not directly load the image<br />
data. Instead, it creates an object of type UIDef aults .LazyValue which<br />
knows how to load the data on demand. To access the image, you invoke the
Loading Images and Other Resources 1631<br />
createValue method of the UIDef aults. LazyValue object, which<br />
returns an object of type Icon which will draw the image built from the file<br />
content. Listing A-l shows an applet that uses this technique to load an<br />
image and display it on a label.<br />
Listing A-l Getting information about the installed look-and-feels<br />
import javax.swing.*;<br />
public class ImageApplet extends JApplet {<br />
J<br />
public void init() {<br />
SwingUtilities.invokeLater(new RunnableO {<br />
public void run() {<br />
Object o = LookAndFeel.makeIcon(<br />
ImageApplet.this.getClass() ,<br />
"lem.jpg");<br />
UIDefaults.LazyValue v = (UIDefaults.LazyValue)o;<br />
Icon icon = (Icon)v.createValue(null);<br />
getContentPane().add(new JLabel(icon));<br />
validate();<br />
}<br />
});<br />
}<br />
If you have installed the example source code in the recommended location,<br />
you'll find the files for this example in the directory:<br />
c:\<strong>Core</strong><strong>JFC</strong>Book\<strong>JFC</strong>Book\Examples\AppendixA<br />
To try this example out for yourself, open a command shell, make the<br />
above directory your working directory, and type the following commands to<br />
compile the applet and build a JAR file:<br />
javac ImageApplet.<strong>Java</strong><br />
jar cvf ImageApplet.jar ImageApplet.class ImageApplet$l.class lem.jpg<br />
To run the applet, copy the swing. j ar file from your Swing 1.1.1 installation<br />
directory to the same directory as the ImageApplet .jar file and then<br />
open the file ImageApplet.html in your browser. After a short delay, the<br />
applet will load and display the image.
1632 Appendix A Swing and Applets<br />
<strong>Core</strong> Note<br />
An alternative approach, which you will need to adopt if you want the<br />
image in the form of an image object, is simply to adapt the code that<br />
implements the UIDef aults . LazyValue object returned by the<br />
LookAndFeel make I con method.This code is available in the file<br />
javax/swing/LookAndFeel. <strong>Java</strong>, which is part of the source<br />
released with Swing I.I.I and the <strong>Java</strong> 2 platform.<br />
Summary<br />
In this appendix, we have covered the problems that developers often<br />
encounter when trying to run an applet that uses Swing in a browser.<br />
Although browsers have supported applets for as long as <strong>Java</strong> has been commercially<br />
available, most of them still do not provide direct support for<br />
Swing. As you saw in this appendix, the simplest way to deliver a Swing-based<br />
applet is to use the <strong>Java</strong> Plug-in, which supports code written for the <strong>Java</strong> 2<br />
platform and therefore includes Swing. The Plug-in also provides a very simple<br />
way to cache applets on the client machine, so that the user does not have<br />
to incur the overhead of repeated downloads.<br />
This appendix also outlined the ways in which you can use Swing with the<br />
native VM's of the two most popular browsers, including techniques for signing<br />
and caching applets in both these environments. As you saw, if you don't<br />
have the luxury of using the Plug-in, you will almost certainly have to create<br />
browser-dependent HTML pages and, if you want to sign and/or cache your<br />
applet, you will also need to take different steps for each browser environment.
A<br />
Abstract Windows Toolkit<br />
See AWT<br />
AbstraetAction class 507<br />
AbstractDocument 1047,1057,1075,1125<br />
AbstractListModel class 924<br />
AbstractTableModel class 1317<br />
Accelerators<br />
for menu items 650<br />
Access Bridge 27<br />
Accessibility 26, 38<br />
list of packages 30<br />
Accessibility API, 26<br />
Accessibility Utilities 27<br />
Action interface 507<br />
ActionEvent class 116<br />
ActionListener interface 116<br />
ActionMap 1106<br />
and Actions 520<br />
Application Mappings and UI Mappings<br />
531<br />
creating global key mappings 537<br />
ActionMap class 520<br />
actionPerformed method 117<br />
Actions 504<br />
and icons in menus and tool bars 705<br />
and keyboard shortcuts 510<br />
and menus 649, 691<br />
and tool bars 691<br />
enhancements in <strong>Java</strong> 2 version 1.3<br />
724<br />
1633
1634 Index<br />
Active Value interface 1541<br />
Adapters 265<br />
add method<br />
of Container 90<br />
addChoosableFileFilter method 789<br />
addElement method 950<br />
addMouseListener method 111<br />
addMouseMotionListener method 111<br />
addNotify method 97, 98<br />
addPropertyChangeListener method 325<br />
addSelectionlnterval method 926<br />
addSeparator method 622, 633<br />
addTableModelListener method 1314<br />
addVetoableChangeListener method 325<br />
AdjustmentEvent class 594<br />
AdjustmentListener interface 594<br />
adjustmentValueChanged method 594<br />
alpha component of a color 78<br />
ALT key 487<br />
anchor selection 929<br />
append method 1034<br />
Applets<br />
and multi-threading 160<br />
approveSelection method 799<br />
Arcs<br />
drawing 298<br />
ascent of a font 379<br />
assistive technologies 26<br />
Attribute Sets 1062<br />
hierarchies of 1066<br />
AttributedString class 387<br />
Attributes 1062<br />
character 1130<br />
input 1132<br />
paragraph 1128<br />
standard attributes recognized by text<br />
components 1062<br />
AttributeSet 1059, 1067<br />
Autoscrolling 608<br />
AWT 6<br />
painting of components 317<br />
relationship to Swing 10<br />
AWTEvent class 109<br />
B<br />
Background color 73<br />
setting for a component 74<br />
baseline of a font 379<br />
Basic look-and-feel 1516<br />
BasicButtonListener 46<br />
BasicButtonListener interface 1553<br />
BasicLookAndFeel class 1545<br />
BevelBorder class 902<br />
BLOCKJ3ECREMENT 595<br />
BLOCKJNCREMENT 595<br />
Border interface 345<br />
BorderFactory class 898<br />
BorderLayout manager 172<br />
and component orientation 254<br />
Borders 897<br />
and BorderFactory class 898<br />
BevelBorder 902<br />
CompoundBorder 903<br />
definition of the Border interface 898<br />
EmptyBorder 899<br />
EtchedBorder 901<br />
implementing custom 344<br />
LineBorder 900<br />
MatteBorder 907<br />
overview of 16<br />
SoftBevel Border 902<br />
TitledBorder 905<br />
Bound properties 326<br />
Box component 210<br />
and struts 214<br />
creating rigid areas 212<br />
glue 215<br />
BoxLayout 20<br />
BoxLayout manager 210<br />
and component alignment 218<br />
and component sizing 221<br />
and rigid areas 212<br />
creating space with struts 214<br />
example use of 211<br />
filling extra space with glue 215<br />
layout policy 216<br />
BoxView 1112<br />
BranchElement 1060<br />
breadthFirstEnumeration method 1231
ighter method 77, 346<br />
ButtonGroup class 887, 911<br />
ButtonModel 1553<br />
ButtonUI class 1550<br />
bytesWidth method 381<br />
c<br />
cancelEditing method 1282<br />
canDock method 718<br />
CardLayout manager 237<br />
Caret 1050, 1086<br />
and the mouse 1087<br />
CellEditor interface 1404<br />
CellEditorListener 1282<br />
CellEditorListener interface 1406<br />
changeSelection method 1406<br />
Character attributes 1130<br />
CharacterConstants 1062<br />
charsWidth method 381<br />
charWidth method 381<br />
Checkbox menu items 636<br />
Checkboxes 909<br />
See also TCheckBox<br />
children method 1196<br />
client properties of JComponent 339<br />
Clip 287, 349<br />
Clipping rectangle 350<br />
clipRect method 350<br />
collapsePath method 1211<br />
collapseRow method 1202, 1211<br />
Color<br />
and Windows desktop preferences 81<br />
background of a component 73<br />
foreground of a component 73<br />
system colors 80<br />
Color class 76<br />
Color Fills 301<br />
Color Selection dialog 812<br />
ColorConstants 1062<br />
ColorSelectionModel 817<br />
ColorType 418<br />
columnAdded method 1353<br />
columnMarginChanged method 1354<br />
Index 1635<br />
columnMoved method 1354<br />
columnRemoved method 1354<br />
columnSelectionChanged method 1354<br />
com.sun.java.swing package 29<br />
com.sun.java.swing.plaf.motif package 3'<br />
Combo box<br />
See JComboBox<br />
ComboBoxModel 949<br />
Component 14<br />
adding to a container 90<br />
locating focus 481<br />
painting of 317<br />
double-buffered 319<br />
properties of 63<br />
removing from a container 91<br />
See also JComponent<br />
Component Orientation 240<br />
affect on Swing components 250<br />
and BorderLayout 254<br />
and FlowLayout 252<br />
and JCheckBox 910<br />
and JProgressBar 978<br />
and JRadioButton 910<br />
and JTextField 1011<br />
and TTree 1187<br />
and layout managers 252<br />
and the menu system 662<br />
and the user interface 245<br />
Component orientation 137<br />
ComponentEvent class 268<br />
ComponentOrientation class 242<br />
ComponentUI 48<br />
ComponentView 1112<br />
Composite View 1112<br />
CompoundBorder class 903<br />
Confirm dialogs 768<br />
Constrained properties 326<br />
Container 14<br />
and layout managers 89<br />
description of purpose of 90<br />
getting child components of 100<br />
initial focus assignment 457<br />
laying out content of 101<br />
settiing initial size of 100<br />
validate method and layout of 87<br />
Content 1057
1636 Index<br />
Content pane 102<br />
Context-Sensitive Menus 669<br />
convertColumnlndexToModel method<br />
1378<br />
copy method 1035<br />
copyArea method 597<br />
Corners 551, 556<br />
create method 308<br />
createBevelBorder methods 902<br />
createCompoundBorder methods 903<br />
ereateDialog method 845<br />
createEmptyBorder methods 899<br />
createEtchedBorder methods 901<br />
createGlue method 215<br />
createHorizontalGlue method 215<br />
createHorizontalStrnt method 214<br />
createLineBorder methods 900<br />
createLoweredBevelBorder method 902<br />
createMatteBorder methods 907<br />
createRaisedBevelBorder method 902<br />
createBigidArea method 213<br />
createStandardLabels method 1002<br />
createTitledBorder methods 906<br />
createUI method 1565<br />
createVerticalGlue method 215<br />
create Vertical Strut method 214<br />
Creating a new look-and-feel 1594<br />
CTBL key 487<br />
Custom Borders 344<br />
Custom icons 370<br />
cut method 1035<br />
D<br />
darker method 77, 346<br />
DebugGraphics 224<br />
and off-screen drawing 231<br />
logging to a file 229<br />
Default button 917<br />
and text fields 919<br />
DefaultButtonModel 46<br />
DefaultButtonModel class 1553<br />
DefaultCaret 1050, 1086<br />
DefaultCellEditor 1398<br />
DefaultComboBoxModel 949<br />
DefaultDesktopManager class 1482<br />
DefaultDocumentEvent 1085<br />
DefaultEditorKit 1049<br />
DefaultFocusManager class 478<br />
DefaultHighlighter 1050, 1089<br />
DefaultKeyTypedAction 1100<br />
DefaultListModel class 924<br />
DefaultMutableTreeNode 1192, 1198<br />
DefaultSeleetionType 425<br />
DefaultStyledDocument 1073, 1125<br />
DefaultTableCellRenderer class 1382<br />
DefaultTableColumnModel class 1349<br />
DefaultTableModel class 1327<br />
DefaultTreeCellEditor class 1275<br />
DefaultTreeCellRenderer class 1257<br />
DefaultTreeSelectionModel 1217<br />
depthFirstEnumeration method 1231<br />
descent of a font 379<br />
Desktop Manager<br />
See JDesktopPane<br />
Desktop pane<br />
See JDesktopPane<br />
DesktopManager interface 1482<br />
Destination Type 425<br />
Dialogs<br />
application focus and modal dialogs<br />
843<br />
basic message dialogs 762<br />
closing 833<br />
color selection<br />
See JColorChooser<br />
creating custom with JOptionPane 844<br />
custom 829<br />
displaying 832<br />
effect of displaying modal vs nonmodal<br />
832<br />
events delivered on close of 834<br />
file selection<br />
See JFileChooser<br />
getting return value from 845<br />
modal 764<br />
non-modal 831, 876<br />
example of 879<br />
notifying application of state
changes 877<br />
parent window 765<br />
positioning of 840<br />
preventing resizing of 839<br />
setLocationRelativeTo method 842<br />
using the dispose method of 833<br />
DialogType 425<br />
Disabled state 88<br />
Disabled text 387<br />
dispose method 310<br />
Docking a tool bar 712<br />
doClick<br />
method 343<br />
Document 1028, 1051<br />
add attributes 1062<br />
and Elements 1056<br />
and events 1085<br />
and properties 1055<br />
and the Content interface 1057<br />
showing multiple views 1114<br />
DocumentEvent 1085<br />
DocumentEvent class 1028<br />
DocumentListener interface 1028<br />
Double-buffering 319<br />
draw3DRect method 296<br />
drawArc method 298<br />
Drawing<br />
arcs 298<br />
lines 290<br />
ovals 298<br />
polygons 292<br />
polylines 292<br />
rectangles 296<br />
text 376<br />
with disabled appearence 387<br />
with multiple fonts 387<br />
drawLine method 290<br />
drawOval method 298<br />
drawPolygon method 292<br />
drawPolyline method 292<br />
drawRect method 296<br />
drawRoundRect method 296<br />
drawString method 285, 379, 381<br />
£<br />
Index 1637<br />
echoCharlsSet method 1021<br />
Editor Kit 1049, 1153<br />
and editor actions 1153<br />
Elements 1058<br />
EmptyBorder 900<br />
Enabled state 88<br />
ensurelndexIsVisible method 922<br />
Error dialogs 766<br />
EtchedBorder class 901<br />
Event handling<br />
overview 108<br />
using adapter classes 265<br />
Event listeners 108, 110<br />
Event thread 157<br />
EventListener interface 110<br />
EventObject class 109<br />
Events 108<br />
adapters 265<br />
detecting component movement 268<br />
getting the source component 109<br />
registering to receive notification of<br />
111<br />
expandPath method 1211<br />
expandRow method 1202, 1211<br />
ExpandVetoException 1215<br />
F<br />
FieldView 1112<br />
File selection dialogs<br />
See JFileChooser<br />
FileFilter for JFileChooser 788<br />
fill3DRect method 301<br />
fillArc method 301<br />
fillOval method 301<br />
fillPolygon method 302<br />
fillRect method 302<br />
fillRoundRect method 302<br />
findFocusOwner method 481<br />
firePropertyChange method 367<br />
fireVetoableChange method 367<br />
Floating tool bars 712
1638 Index<br />
FlowLayout manager 166<br />
and component orientation 252<br />
Focus 454<br />
and key events 484<br />
and the focus manager 478<br />
assigning to a component 456<br />
events 462<br />
initial assignment in a container 457<br />
changing 461<br />
locating the focused component 481<br />
loss of 463<br />
order of component traversal 467<br />
changing 471<br />
FocusEvent 463<br />
FocusListener interface 463<br />
FocusManager class 478<br />
Font 287<br />
and font metrics 376<br />
ascent 379<br />
associated with a component 81<br />
baseline 379<br />
descent 379<br />
family name 82<br />
height 380<br />
leading 380<br />
size 83<br />
style 83<br />
using mutiple when rendering text 387<br />
Font class 82<br />
Font metrics 376<br />
measurement units 385<br />
FontConstants 1062<br />
FontMetrics class 377<br />
Foreground color 73<br />
setting for a component 74<br />
G<br />
GapContent 1058<br />
getAcceptAUFileFilter method 789<br />
getAction method 744<br />
getActionCommand method 117<br />
getActionMap method 524<br />
getAllowsChildren method 1196, 1207<br />
getAnchorSelectionlndex method 933<br />
getAscent method 380<br />
getBlocklncrement method 568<br />
getBorderlnsets method 345<br />
getBounds method 65, 70<br />
getCellEditor method 1405<br />
getChildAt method 1196<br />
getChildCount method 1196<br />
getChoosableFileFilters method 789<br />
getClientProperty method 339<br />
getColor method 289<br />
getColumnCount method 1314<br />
getColumnName method 1314<br />
getColumns method 1010<br />
getComponentCount method 100<br />
getComponentOrientation method 243<br />
getComponents method 100<br />
getConfigurations method 277<br />
getContentPane method 104<br />
getCopies method 427<br />
getCurrentDirectory method 780<br />
getCurrentManager mehod 479<br />
getDefaultCloseOperation method 262<br />
getDefaultConfiguration method 277<br />
getDefaultRootElement method 1056<br />
getDescent method 380<br />
getDialogTitle method 784<br />
getDisabledlcon method 134, 136<br />
getDisabledSelectedlcon method 134,136<br />
getDisplayedMnemonic method 1017<br />
getDividerLocation method 1119<br />
getDividerSize method 1120<br />
getDockingConstraint method 718<br />
getEchoChar method 1021<br />
getEndPosition method 1054<br />
getFirstVisiblelndex method 922<br />
getFocusOwner method 481<br />
getFont method 81, 289<br />
getFontList method 82<br />
getFontMetrics method 377, 386<br />
getGraphics method 308, 311<br />
overriding 353<br />
getHeight method 378, 381<br />
getlconHeight method 126, 370<br />
getlconWidth method 126, 370<br />
getID method 109
getlndex method 1196<br />
getlnputMap method 524<br />
getlnputValue method 846<br />
getlnputVerifier method 1042<br />
getlnsets method 94<br />
getlnteriorRectangle method 353<br />
getltem method 912<br />
getltemSelectable method 912<br />
getKeyStroke method 492<br />
getLastDividerLocation method 1121<br />
getLastPathComponent method 1202<br />
getLastVisiblelndex method 922<br />
getLeading method 381<br />
getLeadSelectionlndex method 933<br />
getLeadSelectionPath method 1219<br />
getLeadSelectionRow method 1219<br />
getLineWrap method 1012<br />
getListCellRendererComponent method<br />
940<br />
getLocalGraphicsEnvironment method<br />
276<br />
getLocation method 65<br />
getLoeationOnScreen method 65<br />
getLookAndFeel method 1519<br />
getLookAndFeelDefaults method 1533<br />
getMargin method 134<br />
getMaxAdvance method 381<br />
getMaxAscent method 381<br />
getMaxDescent method 381<br />
getMaximumDividerLocation method<br />
1120<br />
getMaxSelectionlndex method 934<br />
getMedia method 419<br />
getMenuComponent method 663<br />
getMenuComponentCount method 663<br />
getMenuComponents method 663<br />
getMinimumDividerLocation method<br />
1120<br />
getMinSelectionlndex method 933<br />
getModifiers method 117, 488<br />
getPageDimension method 397, 423<br />
getPageResolution method 397, 423<br />
getParent method 1196<br />
getParentPath method 1203<br />
Index 1639<br />
getPassword method 1024<br />
getPath method 1203<br />
getPathComponent method 1203<br />
getPathCount method 1203<br />
getPreferredScrollableViewportSize<br />
method 579<br />
getPreferredSize method 95<br />
getPressedlcon method 137<br />
getPrintJob method 393<br />
getProperty method 1055<br />
getResource method 128<br />
getRolloverlcon method 137<br />
getRolloverSelectedlcon method 137<br />
getRootElements method 1056<br />
getRowCount method 1314<br />
getScreenDevices method 276<br />
getScreenSize method 72<br />
getScrollableBlocklncrement method 579<br />
getScrollableTracksViewportHeight<br />
method 579, 587<br />
getSerollableTracksViewportWidth method<br />
579, 587<br />
getScrollableUnitlncrement method 579<br />
getScrollOffset method 1010<br />
getSelectedFile method 785<br />
getSelectedFiles method 786<br />
getSelectedlndex method 933<br />
getSelectedlndices method 933<br />
getSelectedltem method 949<br />
getSelectedText method 1031<br />
getSelectedValue method 933<br />
getSelectedValues method 933<br />
getSelectionEnd method 1031<br />
getSelectionModel method 1226<br />
getSelectionStart method 1031<br />
getSize method 70<br />
getSource method 109<br />
getStartPosition method 1054<br />
getState method 73, 640<br />
getStateChange method 912<br />
getTableCellEditorComponent method<br />
1379, 1406<br />
getTableCellRendererComponent method<br />
1379, 1386
1640 Index<br />
getTitle method 1457<br />
getToolTipText method 858<br />
getTopLevelAncestor method 402<br />
getTreeCellEditorComponent method<br />
1274<br />
getTreeCellRendererComponent method<br />
1259<br />
getUnitlncrement method 568<br />
getValue method 508, 846<br />
getValueAt method 1.314<br />
getValuelsAdjusting method 595, 999<br />
getVisibleRowCount method 922<br />
getWidths method 381<br />
getWrapStyleWord method 1013<br />
GIF images 127<br />
Glass pane 102<br />
Glue 215<br />
glyphs 40<br />
Graphics 285<br />
as a view of a component 307<br />
clip 287<br />
cloning 308<br />
copyArea method 597<br />
disposing of 310<br />
drawing mode 288<br />
exclusive-or drawing mode 355<br />
getting for a component 308<br />
origin 287, 292<br />
setting using the translate method 294<br />
properties of 286<br />
anci component properties 313<br />
Graphics Debugging<br />
overview 16<br />
Graphics2D 38<br />
GraphicsConfiguration class 276<br />
GraphicsDevice class 276<br />
GraphicsEnvironment class 276<br />
GridBagConstraints 189, 337<br />
GridBagLayout manager 186, 337<br />
and GridBagConstraints class 189<br />
controlling cell and component size<br />
199<br />
specifying per-component constraints<br />
189<br />
GridLayout manager 179<br />
H<br />
hasFocus method 481<br />
Highlighter 1050, 1089<br />
implementing custom behavior 1089<br />
HTM LFrameHyperlinkE vent 1182<br />
Hyperl inkE vent 1178<br />
HyperlinkListener 1179<br />
/<br />
Icon interface 126, 370<br />
ICONIFIED state of a frame 73<br />
Iconifying a JFrame 71<br />
Icons 125<br />
implementing custom 370<br />
Icon View 1112<br />
IFC8<br />
compared to AWT 8<br />
Image map<br />
creating using tool tips 850<br />
Imagelcon class 126<br />
Images<br />
and the Imagelcon class 126<br />
context-sensitivity 134<br />
loading from the CLASSPATH 128<br />
on components 125<br />
placement on labels and buttons 129<br />
Information dialogs 766<br />
Initial focus assignment 457<br />
changing 461<br />
input attributes 1132<br />
Input dialogs 774<br />
Input focus<br />
See Focus<br />
Input Maps<br />
Application Mappings and UI Mappings<br />
531<br />
Input Verification method 1037<br />
InputMap 1106<br />
adding a new key mapping 531<br />
creating global key mappings 537<br />
removing an existing mapping 533<br />
InputMap class 520<br />
InputVerifier 1042
insert method 1034, 1197<br />
insertComponent method 1134<br />
insertElementAt method 950<br />
insertlcon method 1134<br />
insertNodelnto method 1235<br />
insertUpdate 1086<br />
installUI method 1565, 1567<br />
Internal frames<br />
See JInternalFrame<br />
InternalFrameEvent class 1461<br />
InternalFrameListener class 1461<br />
Internet <strong>Foundation</strong> <strong>Classes</strong> 8<br />
invokeAndWait method 157<br />
invokeLater method 157<br />
isAcceptAUFileFilterllsed method 789<br />
isActionKey method 488<br />
isAltDown method 488<br />
isBorderOpaque method 345<br />
isBorderPainted method 124<br />
isCellEditable method 1314<br />
isClosable method 1457<br />
isContentAreaFilled method 125<br />
isControlDown method 488<br />
isDescendant method 1203<br />
isEventDispateh Thread method 158<br />
isFoeusManagerEnabled method 480<br />
isFocusPainted method 124<br />
isFocusTraversable method 470<br />
is Horizontal method 243<br />
islconifiable method 1457<br />
isLeaf method 1196,1207<br />
isLeftToRight method 243<br />
isMaximizable method 1457<br />
isMetaDown method 488<br />
isMultiSelectionEnabled method 786<br />
isNativeLookAndFeel method 1535<br />
isPopupTrigger method 670<br />
isResizable method 1457<br />
isSelected method 912<br />
isSelectedlndex method 938<br />
isShiftDown method 488<br />
is Showing method<br />
relationship to isVisible method 86<br />
isVisible method<br />
Index 1641<br />
relationship to is Showing 85<br />
ItemEvent 912, 913<br />
ItemListener interface 913<br />
ItemSelectable 912<br />
I<br />
<strong>Java</strong> 2D<br />
overview 25<br />
package list 38<br />
<strong>Java</strong> <strong>Foundation</strong> <strong>Classes</strong><br />
defined 6<br />
feature overview 13<br />
scope of 9<br />
java.awt.color package 39<br />
java.awt.event package 111<br />
java.awt.font package 40<br />
java.awt.geom package 41<br />
java.awt.image package 39<br />
java.awt.print package 41<br />
javax.awt.swing package 30<br />
javax.swing package 30<br />
overview 31<br />
javax.swing.border package 34<br />
javax.swing.colorchooser package 32<br />
javax.swing.event package 34, 111<br />
javax.swing.filechooser package 32<br />
javax.swing.plaf package 35<br />
javax.swing.plaf.basic package 36<br />
javax.swing.plaf.metal package 37<br />
javax.swing.plaf.multi package 37<br />
javax.swing.table package 33<br />
javax.swing.text package 33<br />
javax.swing.tree package 33<br />
JButton<br />
adding an image 125<br />
adding context-sensitive images 134<br />
and HTML text 142<br />
compared to AWT Button class 20<br />
creating a default button 917<br />
embedding images within the text 146<br />
handling button presses 116<br />
image alignment properties 129<br />
internal architecture overview 43<br />
locale sensitivity of text and icon align-
1642 Index<br />
ment properties 137<br />
margin property 133<br />
multi-line text 142<br />
overview 115<br />
pressing programmatically 343<br />
spacing between text and icon 133<br />
text alignment properties 116, 129<br />
JCheckBox 909<br />
and component orientation 910<br />
and icons 910<br />
and selection 911<br />
selection events 912<br />
JCheckboxMenuItem 639<br />
JColorChooser 812<br />
color swarches 813<br />
creation of 816<br />
customization<br />
implementing a new chooser panel<br />
823<br />
implementing a preview panel 823<br />
removing default preview panels<br />
824<br />
customizing color selection 817<br />
initial color selection 816<br />
monitoring the selected color 820<br />
overview 812<br />
selection using IISB values 813<br />
selection using RGB values 815<br />
JComboBox 948<br />
and ActionEvents 959<br />
and ComboBoxModel 949<br />
and DefaultComboBoxModel 949<br />
and ItemEvents 956<br />
and lightweight kevboard navigation<br />
961<br />
and performance 967<br />
and Tenderers 952<br />
editable 949<br />
selecting an entry by prefix 962<br />
extending to handle multiple keys 962<br />
selection 952<br />
JComponent<br />
and properties 325<br />
client properties 339<br />
notification of property changes 878<br />
painting of 318<br />
and border 345<br />
role of 14<br />
See also Component<br />
JDesktopIcon 1463<br />
JDesktopPane 1463, 1472, 1482<br />
cascading and tiling 1470<br />
role in movement and resizing of internal<br />
frames 1486<br />
setDragMode method 1485<br />
JDialog 14<br />
JDialog class 830<br />
See also Dialogs<br />
JEditorPane 1047, 1153, 1163<br />
and document loading 1170<br />
and events 1178<br />
and hyperlink events 1178<br />
determining editor kit from MIME<br />
type of document 1169<br />
editing and saving document content<br />
llfl<br />
establishing the document content<br />
type 1168<br />
installing different document types<br />
1168<br />
loading content from an input stream<br />
1171<br />
<strong>JFC</strong><br />
See <strong>Java</strong> <strong>Foundation</strong> <strong>Classes</strong><br />
JFileChooser 778<br />
controlling which files are displayed<br />
788<br />
creating 783<br />
creating custom dialogs with 863<br />
customization 804<br />
control buttons 804<br />
controlling how files are displayed 807<br />
controlling whether files or directories<br />
can be selected 806<br />
displaying or hiding files 805<br />
removing control buttons 804<br />
FileView class 807<br />
getting the selected file 784<br />
handling events from 871<br />
implementing a custom file filter 791<br />
limiting file selection 798<br />
overview of 779<br />
selecting multiple files 786<br />
setAccessory method 870
setting the current directory 780<br />
setting the dialog title 784<br />
styles 784<br />
JFrame 14, 58<br />
adding a menu bar 620<br />
handling closing of 262<br />
iconifying 71<br />
making visible 60<br />
maximizing 71<br />
positioning 61<br />
resizing 7l<br />
setting initial size of using pack meth-<br />
setting size 60<br />
structure of 102<br />
use of setResizable method to fix size<br />
71<br />
JInternalFrame<br />
and events 1461<br />
and PropertyChangeEvents 1459<br />
appearance 1438<br />
cascading and tiling 1470<br />
changing properties 1457<br />
closable property 1456<br />
closing 1465, 1508<br />
construction of 1455<br />
detecting change in selected frame<br />
1504 '<br />
frame selected property 1461<br />
iconifiable property 1456<br />
layer numbers 1443<br />
layering of 1442<br />
maximizable property 1456<br />
outline dragging and resizing 1484<br />
overview 1437<br />
preventing frame closure 1509<br />
resizable property 1455<br />
setting caption bar icon 1457<br />
setting layer of 1446<br />
setting state of 1458<br />
structure of 1454<br />
vetoing changes in frame state 1461<br />
JLabel<br />
adding an image 125<br />
adding context-sensitive images 134<br />
and displayed mnemonics 1017<br />
and HTML text 142<br />
Index 1643<br />
associating with another control 1025<br />
compared to AWT Label class 20<br />
embedding images within the text 146<br />
image alignment properties 129<br />
locale sensitivity of text and icon alignment<br />
properties 137<br />
multi-line text 142<br />
spacing between text and icon 133<br />
text alignment properties 106, 129<br />
transparency of 108<br />
JLabel class 105<br />
JLayeredPane<br />
adding components to 1444<br />
and layout managers 1453<br />
layer numbers 1443<br />
layering implementation 1449<br />
layers and positions 1447<br />
overview 1443<br />
JLayeredPane class<br />
as part of JFrame structure 103<br />
JList 919<br />
and DefaultListModel 924<br />
and ListModel 923<br />
and ListSelectionModel 927<br />
and selection events 929<br />
and selection modes 927<br />
controlling the number of visible rows<br />
922<br />
creating 923<br />
creating a custom renderer for 940<br />
determining which rows are visible<br />
922<br />
forcing a row to be visible 922<br />
including icons in list items 940<br />
installing a renderer 940<br />
locationToIndex method 939<br />
modifying content of 926<br />
selecting using mouse double-clicks<br />
938<br />
selection items in 926<br />
setting width of 940<br />
JMenu<br />
See also menu 620<br />
JMenuBar class 620<br />
JMenuItem 620<br />
JobAttributes class 413, 424<br />
JOptionPane
1644 Index<br />
confirm dialogs 768<br />
createDialog method 845<br />
creating multi-line message boxes with<br />
849<br />
determining which buttons are displayed<br />
770, 771<br />
getlnputValue method 846<br />
getValue method 846<br />
input dialogs 774<br />
message dialog customization 766<br />
message dialog types 766<br />
message dialogs / 62<br />
option dialogs 771<br />
return value for option dialog 774<br />
setValue method 848<br />
using a custom icon with 767<br />
using as the basis for custom dialogs<br />
844<br />
JPanel class 284<br />
JPanelPopup 677<br />
JPasswordField 1020<br />
and echo character 1020<br />
detecting every change in content<br />
1027<br />
event handling 1026<br />
extracting the typed password 1024<br />
handling the RETURN key 1026<br />
See also Text components<br />
JPEG images 127<br />
JPopupMenu<br />
and the isPopupTrigger method 670<br />
creating 669<br />
creating lazily 683<br />
dismissing 674<br />
displaying 672<br />
events 683<br />
invooker attribute 680<br />
lightweight, mediumweight and<br />
heavyweight types 678<br />
management of 673<br />
placing on the desktop 680<br />
positioning of 674<br />
JProgressBar<br />
and component orientation 978<br />
creating 973<br />
event handling considerations 979<br />
events from 978<br />
foreground and background colors of<br />
977<br />
orientation of 976<br />
progress string for 977<br />
removing the border of 977<br />
setting value of 973<br />
updating in the event thread 979<br />
JRadioButton 909<br />
and ButtonGroup 887<br />
and component orientation 910<br />
and icons 910<br />
and selection 911<br />
selection events 912<br />
JRootPane<br />
and the default button 917<br />
JRootPane class 102<br />
JScrollBar class 567<br />
extent 567<br />
using to implement custom scrolling<br />
590<br />
view size 567<br />
JScrollPane class 547<br />
adding Horizontal and Vertical Rulers<br />
557<br />
and corners 551<br />
and scrollbar visibility 549<br />
autoscrolling 608<br />
BACKINGSTORE_SCROLL_MOD<br />
E565<br />
BLIT_SCROLL_MODE 565<br />
customization 553<br />
forcing scrolling to expose a given region<br />
562, 577<br />
logical scrolling 562<br />
using Scrollable interface 578<br />
row and column headings 552<br />
SIMPLE_SCROLLJVIODE 565<br />
using the keyboard to scroll 601<br />
JSlider 996<br />
adding labels 1001<br />
and ticks 997<br />
determing when the slider has<br />
stopped moving 999<br />
determining whether the track is<br />
painted 998<br />
handling events from 999<br />
limiting bounds of movement of 1000
eversing direction of movement 1000<br />
setting orientation 996<br />
setting partial fill of the track 1001<br />
setting value and range 996<br />
JSplitPane 1115<br />
adding and removing components<br />
1118<br />
allocation of available space 1121<br />
creation of 1117<br />
divider 1119<br />
monitoring location<br />
before <strong>Java</strong> 2 version 1.3 1122<br />
<strong>Java</strong> 2 version 1.3 and later 1124<br />
one-touch expandable 1121<br />
orientation 1117<br />
JTabbedPane 888<br />
event generated on tab change 893<br />
tab placement 896<br />
JTable<br />
AbstractCellEditor class 1416, 1418<br />
adding columns to the model 1331<br />
adding rows to the data model 1332<br />
and Microsoft Excel 1420<br />
and table header 1369<br />
and TableColumn 1313<br />
and TableCommnModel 1312<br />
and TableModel interface 1313<br />
and the TableColumn class 1339<br />
and tooltips 1369<br />
automatic creation of column model<br />
from data 1347<br />
cell editing 1311<br />
cell renderer selection 1380<br />
cell selection 1306, 1373<br />
changing cell content 1314<br />
changing colors 1366<br />
changing intercell spacing 1367<br />
changing the number of rows in the<br />
data model 1334<br />
class-based Tenderers 1380<br />
column and cell Tenderers 1343<br />
column data types 1316<br />
column identifiers 1342<br />
column model 1312<br />
column names 1315<br />
column ordering 1313, 1345<br />
column properties 1344<br />
Index 1645<br />
column resize mode 1356<br />
column resizing 1341<br />
column selection 1306, 1373<br />
column width 1340<br />
action table resize 1356<br />
computing 1341<br />
column-based Tenderers 1380<br />
construction of 1355<br />
controlling cell colors 1384<br />
converting mouse location to row and<br />
column indices 1349, 1376<br />
copying and pasting data 1420<br />
creating a model using AbstractTableModel<br />
1317<br />
creating a model using DefaultTableModel<br />
1327<br />
customized editing 1404<br />
customized rendering 1378, 1385,<br />
1402<br />
customizing grid lines 1367<br />
data model 1311, 1313<br />
default Tenderers 1380<br />
DefaultCellEditor class 1416<br />
DefaultTableCellRenderer class 1382<br />
editability 1314, 1381, 1405<br />
editing 1398<br />
editing sequence 1405<br />
events from the table column model<br />
1353<br />
events on change of content 1316<br />
focussed cell 1307<br />
getting cell values 1314<br />
getting column information 1348<br />
getting number of rows and columns<br />
1314<br />
header Tenderer 1343<br />
header Tenderer selection 1379<br />
locking columns to prevent scrolling<br />
1393<br />
mapping column model column to<br />
corresponding data model column<br />
1378<br />
modifying content using DefaultTableModel<br />
1331<br />
overview 1299<br />
rearranging columns 1303<br />
rearranging rows 1332<br />
relationship between column model
1646 Index<br />
and data model 1340<br />
row selection 1305, 1373<br />
scrolling 1307<br />
selection 1303, 1373<br />
setting size of scrollpane viewport<br />
1366<br />
sharing data with another table 1325,<br />
1335<br />
standard editors 1398<br />
standard Tenderers 1382<br />
structure of 1311<br />
table header 1311<br />
table model event types 1338<br />
table model events 1338<br />
traversal using the keyboard 1308<br />
use of shouldSelectCell method during<br />
editing sequence 1406, 1414<br />
Jtable customized editing 1378<br />
JTableHeader 1369<br />
JTableHeader class 1311<br />
JTextArea 1012<br />
detecting every change in content<br />
1027<br />
event handling 1026<br />
line and word wrapping 1012<br />
bee also 1 ext components<br />
setting row and column count 1012,<br />
1013<br />
tab expansion 1013<br />
JTextComponent 1012<br />
overview 33<br />
JTextField 1008<br />
and component orientation 1011<br />
detecting every change in content<br />
1027<br />
event handling 1026<br />
getting and setting text 1011<br />
handling the RETURN key 1026<br />
input verification 1037<br />
scrolling of text 1010<br />
See also Text components<br />
text alignment 1011<br />
using focus events for content verification<br />
1038<br />
width of 1009<br />
JTextPane 1047, 1125, 1131<br />
architecture 1150<br />
displaying multi-colored text 1135<br />
document styles 1140<br />
document text 1138<br />
including an image map 1147<br />
inserting icons and components 1134<br />
See also Text components<br />
JToggleButton class 887, 910<br />
JToolBar 684<br />
adding to the application window 687<br />
and Actions 691<br />
and icons 705<br />
and tooltips 709<br />
creating 685<br />
detaching from the user interface 716<br />
docking 712, 717<br />
constraints 718<br />
floating 712, 716<br />
making selectable from the menu system<br />
711<br />
orientation of 688<br />
populating with Actions 697<br />
J Toolbar<br />
docking<br />
prevention of 719<br />
JTree 1185<br />
advanced customization using the<br />
look-and-feel 1267<br />
anchor selection path 1220<br />
and component orientation 1187<br />
and DefaultTreeModel 1192<br />
and getTreeCellRendererComponent<br />
method 1259<br />
and leaf nodes 1207<br />
and the getTreeCellEditorComponent<br />
method 1274<br />
and the TreeCellEditor interface 1273<br />
and the TreeModel interface 1191<br />
and the TreeNode interface 1191,<br />
1196<br />
and the user object 1197<br />
and tooltips 1263<br />
and tree nodes 1186<br />
and TreePath 1192,1202<br />
and TreeSelectionModel 1217<br />
appearance of 1188<br />
branch nodes 1187<br />
cancelEditing method 1282
changing node attributes 1236<br />
changing the expansion handle icon<br />
1267<br />
changing tree content 1234<br />
updating view after 1235<br />
converting coordinates to row number<br />
1229<br />
converting coordinates to TreePath<br />
1229<br />
creating 1193<br />
creating a custom cell editor 1273<br />
creating a custom renderer 1259<br />
creating a simple tree model 1198<br />
custom Tenderers and editors 1256<br />
DefaultTreeSelectionModel class<br />
1217<br />
determining number of clicks to expand<br />
a node 1209<br />
determining whether the root node is<br />
visible 1195<br />
determining which nodes can be ediited<br />
1276<br />
display options 1187<br />
editing custom objects 1280, 1284<br />
editing node content 1272<br />
editor invocation sequence 1274,1280<br />
elements oi: 1191<br />
expanding and collapsing nodes 1201,<br />
1208,1210<br />
expansion events 1212<br />
generated before expansion or collapse<br />
1215<br />
expansion handle 1188<br />
file system control example 1239<br />
global look-and-feel changes 1270<br />
lead selection 1219<br />
leaf nodes 1187<br />
lineStyle property 1188<br />
mapping TreePath to TreeNodes 1203<br />
model events 1237<br />
mouse double-click handling 1229<br />
notification that node is about to be expanded<br />
or collapsed 1215<br />
preventing node expansion or collapse<br />
1215<br />
programmatic control of editing 1280<br />
programmatic traversal of tree model<br />
1230<br />
Index 1647<br />
Tenderers 1257<br />
rendering custom objects 1280<br />
root node 1186<br />
scrolling nodes into view 1214<br />
selecting nodes 1190, 1217<br />
selection events 1224<br />
selection modes 1218<br />
setting node colors 1257<br />
setting node font 1257<br />
setting node icons 1257<br />
setting row height 1261<br />
setting the label of the root node 1206<br />
showing or hiding the expansion handle<br />
for the root node 1195<br />
stopEditing method 1281<br />
traversal of 1209<br />
TreeExpansionEvent 1212<br />
TreeExpansionListener 1212<br />
updating view on content changes<br />
1235<br />
JViewport 547, 550, 553, 556<br />
and backing store 564<br />
JWindow 14<br />
K<br />
Key events 482<br />
and the input focus 484<br />
handling 482<br />
keyChar attribute 485<br />
keyCode attribute 485<br />
KeyBinding 1095<br />
Keyboard 490<br />
Keyboard focus<br />
See Focus<br />
Keyboard shortcuts 490<br />
and ActionMap class 520<br />
and Actions 510<br />
and InputMap class 520<br />
and <strong>Java</strong> 2 version 1.3 514<br />
keyChar attribute of a KeyEvent 485<br />
keyCode attribute of a KeyEvent 485<br />
KeyEvent class 484<br />
KeyListener interface 484<br />
Keymap 1086<br />
KeyMapActionMap 1110
1648 Index<br />
KeyMapWrapper 1110<br />
keyPressed method 484<br />
keyReleased method 484<br />
Keystroke<br />
and <strong>Java</strong> 2 version 1.3 514<br />
Keystrokes 491<br />
keyTyped method 484<br />
L<br />
LabelView 1112<br />
Layout manager<br />
layoutContainer method 101<br />
preferredLayoutSize method 101<br />
Layout Managers<br />
overview 20<br />
Layout managers 89, 93, 165<br />
BorderLayout 172<br />
BoxLayout 210<br />
CardLayout 237<br />
FlowLayout 166<br />
GridBagLayout 186<br />
GridLayout 179<br />
OverlayLayout 232<br />
working without 93<br />
layoutContainer method 101<br />
lead selection 929<br />
LEADING alignment value 137<br />
leading of a font 380<br />
LeafElement 1060<br />
lightweight component 74<br />
transparency 74<br />
Lightweight Components 10<br />
lightweightKeyboardNavigation property<br />
961<br />
LineBorder class 900<br />
LineMetrics class 378, 387<br />
ListCellRenderer interface 940<br />
ListDataEvent class 924<br />
ListDataListener interface 923<br />
Listeners 108<br />
ListModel interface 923<br />
ListSelectionListener interface 930<br />
ListSelectionModel<br />
selection modes 927<br />
ListSelectionModel interface 927<br />
locationToIndex method 939<br />
Logical Scrolling 562, 566<br />
LookAndFeel 1516,1534<br />
changing component look-and-feel<br />
1547<br />
changing component properties 1581<br />
changing component user interfaces<br />
1578<br />
creating a custom, for a button 1548<br />
creating a new 1594<br />
detecting look-and feel change 1591<br />
installed look-and-feels 1522<br />
loading key bindings 1536<br />
multiplexing 1592<br />
switching 1582<br />
switching for one component 1578<br />
Look-and-Feel<br />
and colors 79<br />
global change for a component class<br />
1579<br />
illustrated 52<br />
selection of 50<br />
selection of default 50<br />
LookAndFeellnfo class 1523<br />
M<br />
margin property of JButton 133<br />
MatteBorder class 907<br />
Maximizing a jFrame 71<br />
MDI applications<br />
See JInternalFrame, JLayeredPane<br />
and JDesktopPane<br />
MediaType 418<br />
Menu Bar 620<br />
changing the border 660<br />
menu items 620<br />
adding icons 654<br />
adding to a menu 632<br />
checkboxes 639<br />
and icons 658<br />
enabling and disabling 642<br />
lazily 647<br />
handling events from 623, 632<br />
radio buttons 639
emoving from a menu 634<br />
setting color and font 652<br />
Menu System 619<br />
MenuEvent 648<br />
MenuListener 648<br />
Menus<br />
compared to AWT menus 21<br />
menus 620<br />
adding a separator 633<br />
adding Actions to 649<br />
adding arbitrary components to 633<br />
adding cascading menus 622<br />
adding icons 654<br />
when using Actions 705<br />
adding menu items 620, 632<br />
adding separators 622<br />
adding to a menu bar 620<br />
and component orientation 662<br />
and tooltips 709<br />
creating accelerators 650<br />
creating using Actions 697<br />
customizing 652<br />
getting a list of contained menu items<br />
and components 663<br />
handling MenuEvents from 648<br />
popup 669<br />
See also JPopupMenu<br />
removing all entries from 631<br />
removing items from 634<br />
setting mnemonics 636<br />
using with Actions 649<br />
Message dialogs 762<br />
META key 487<br />
Mnemonics<br />
and Actions 705<br />
and JButton 122<br />
for menus 636<br />
overview 122<br />
modal dialog 764<br />
Model-View-Controller 14, 42, 47<br />
Model-View-Controller Architecture<br />
overview 42<br />
Mouse event types 109<br />
mouseClicked method 110<br />
mouseDragged method 110<br />
mouseEntered method 110<br />
Index 1649<br />
MouseEvent class 109<br />
mouseExited method 110<br />
Mouseless operation 454<br />
MouseListener interface 110<br />
MouseMotionListener interface 110<br />
mouseMoved method 110<br />
mousePressed method 110, 111<br />
mouseReleased method 110<br />
Multi-line text for JLabel and JButton 142<br />
Multiple Monitors 272<br />
and co-ordinates 274<br />
discover)' of 276<br />
MultipleDoeumentHandlingType 425<br />
Multiplexing look-and-feel 1592<br />
Multi-threading<br />
and applets 160<br />
and Swing 149<br />
MutableAttributeSet 1062, 1067, 1069<br />
MutableComboBoxModel 950<br />
MutableTreeNode 1197<br />
MVC<br />
See Model-View-Controller<br />
N<br />
nodesWerelnserted method 1235<br />
nodesWereRemoved method 1235<br />
Non-modal dialogs 876<br />
NORMAL state of a frame 73<br />
o<br />
Option dialogs 771<br />
OrientationRequestedType 418<br />
OriginType 418<br />
Ovals<br />
drawing 298<br />
OverlayLayout 20<br />
OverlayLayout manager 232<br />
P<br />
pack method 101<br />
PageAttributes class 413, 417, 419<br />
paint method 317
1650 Index<br />
paintBorder method 319, 345<br />
paintChildren method 319<br />
paintComponent method 286, 317, 363<br />
387<br />
example implementation 362<br />
paintlcon method 126, 370<br />
Paragraph attributes 1128<br />
ParagraphConstants 1062<br />
ParagraphView 1112<br />
PasswordView 1113<br />
paste method 1035<br />
pathFromAneestorEnumeration method<br />
1231<br />
peer class for a component 96<br />
permanent focus change 463<br />
PlainDocument 1047, 1075<br />
Plain View 1113<br />
Pluggable Look-and-Feel 47<br />
overview 19<br />
Pluggable look-and-feel 14<br />
See LookAndFeel<br />
PNG images 127<br />
Polygon class 292<br />
Popup menus 669<br />
see also JPopupMenu<br />
popupMenuCanceled method 683<br />
PopupMenuEvent class 683<br />
PopupMenuListener interface 683<br />
popupMenuWillBecomelnvisible method<br />
683<br />
popupMenuWillBecomeVisible method<br />
683<br />
Position 1054<br />
determining for a component 65<br />
specification of for a component 64<br />
postorderEnumeration method 1231<br />
preferredLayoutSize method 101<br />
preorderEnumeration method 1231<br />
print method 395<br />
printAll method 395<br />
PrinterResolution 437<br />
PrintGraphics interface 395<br />
Printing 389<br />
enhancements in <strong>Java</strong> 2 version 1.3<br />
413<br />
high resolution 432<br />
of components 390<br />
of text 404<br />
overview 25<br />
properties 394<br />
PrintingQualityType 418<br />
Printjob class 394<br />
Progress bar<br />
see JProgressBar<br />
ProgressMonitor 984, 990<br />
ProgressMonitorlnputStream 984, 988<br />
Properties 325<br />
bound 326<br />
constrained 326<br />
Property Change Events 325<br />
PropertyChangeEvent class 326<br />
PropertyChangeListener interface 326<br />
PropertyVetoException 326<br />
public 649<br />
putClientProperty method 339<br />
putProperty method 1055<br />
putValue method 508<br />
Q<br />
Question dialogs 766<br />
R<br />
Radio button menu items 639<br />
Radio Buttons 909<br />
See also JRadioButton<br />
RadioButtonMenuItem 642<br />
Rectangles<br />
drawing 296<br />
registerKeyboardAction<br />
writing code that works in <strong>Java</strong> 2 version<br />
1.3 and in earlier releases 542<br />
registerKeyboardAction method<br />
491<br />
and <strong>Java</strong> 2 version 1.3 514<br />
remove method 1197<br />
removeChoosableFileFilter method 789<br />
removeElement method 950
emoveElementAt method 950<br />
removeFromParent method 1197<br />
removeNodeFromParent method 1235<br />
removePropertyChangeListener method<br />
325<br />
removeTableModelListener method 1314<br />
removeUpdate 1086<br />
removeVetoableChangeListener method<br />
325<br />
replace Range method 1034<br />
replaceSelection method 1033<br />
requestFocus method 456<br />
resetChoosableFileFilters method 789<br />
resetToPreferredSize method 1120<br />
RGB system 77<br />
right-to-left locale handling 137<br />
Rigid Areas 212<br />
Root node of a tree 1186<br />
Row Heading of a JScrollPane 552<br />
s<br />
Screen<br />
detecting how many are available 276<br />
size of when multiple monitors are<br />
present 279<br />
systems with more than one 272<br />
screen<br />
determining the size of 72<br />
Scrollable Interface 578, 586<br />
Scrolling<br />
overview 18<br />
Scrolling Components 546<br />
scrollPathToVisible method 1214<br />
scrollRowToVisible method 1214<br />
setAccelerator method 650<br />
setAcceptAllFileFilterUsed method 789<br />
setAccessory method 870<br />
setAction method 727<br />
setActionCommand method 117<br />
and internationalization 118<br />
setActionMap method 524<br />
setAlignmentX method 219<br />
setAlignmentY method 219<br />
Index 1651<br />
setApproveButtonMnemonic method 804<br />
setApproveButtonText method 804<br />
setApproveBnttonToolTipText method<br />
804<br />
setAutoscrolls method 614<br />
setBackground method 74<br />
setBackgroundNonSelectionColor method<br />
1257<br />
setBaekgronndSelectionColor method<br />
1257<br />
setBorder method 345<br />
setBorderPainted method 124, 660<br />
setBottomComponent method 1118<br />
setBounds method 62<br />
setCellRenderer method 940, 1391<br />
setCharacterAttributes method 1130<br />
setClip method 350<br />
setClosable method 1457<br />
setColor method 289, 816<br />
setColumnHeader method 553<br />
setColumnHeaderView method 552<br />
setColumnldentifiers method 1334<br />
setColumns method 1010<br />
setComponentOrientation method 243<br />
setContentAreaFilled method 124, 125<br />
setContentType method 1169<br />
setControlButtonsAreShown method 804<br />
setCopies method 427<br />
setCopiesToDefault method 427<br />
setCorner method 551<br />
setCurrentDirectory method 780<br />
setCurrentManager method 479<br />
setDebugGraphicsOptions method 225,<br />
227<br />
setDefaultAction method 1100<br />
setDefaultButton method 917<br />
setDefaultCloseOperation method 262<br />
setDefaultRenderer method 1380<br />
setDesktopIcon method 1463<br />
setDialogTitle method 784<br />
setDisabledlcon method 134, 136<br />
setDisabledSelectedlcon method 134, 136<br />
setDisplayedMnemonic method 1017<br />
setDividerLocation method 1119
1652 Index<br />
setDividerSize method 1120<br />
setDoubleBufferEnabled method 227<br />
setEchoChar method 1021<br />
setEditable method 1015<br />
setEnabled method 88<br />
setExtent method 1000<br />
setFileFilter method 789<br />
setFileHidingEnabled method 805<br />
setFileSeleetionMode method 806<br />
setFileView method 808<br />
setFixedCellHeight method 940<br />
setFixedCellWidth method 940<br />
setFlashColor method 227<br />
setFlashCount method 227<br />
setFlashTime method 227<br />
setFloatable method 713<br />
setFloating method 713, 722<br />
setFloatingLocation method 713<br />
setFocusAccelerator method 1017<br />
setFocusPainted method 124<br />
setFont method 81, 289<br />
setForeground method 74<br />
setFramelcon method 1457<br />
setHeaderRenderer method 1343<br />
setHeaderValue method 1343<br />
setHorizontalAlignment method 106, 116,<br />
129, 1011<br />
setHorizontalScrollBarPolicy method 549<br />
setHorizontalTextPosition method 129<br />
setlconiriable method 1457<br />
setlconTextGap method 133<br />
setlnputMap method 524<br />
setlnputVerifier method 1042<br />
setlnverted method 1000<br />
setlnvoker method 680, 683<br />
setJMenuBar method 620<br />
setLabelFor method 1025<br />
setLabelTable method 1002<br />
setLastDividerLocation method 1121<br />
setLayer method 1446<br />
setLeftComponent method 1118<br />
setLightWeightPopupEnabled method<br />
679<br />
setLineWrap method 1012<br />
setListData method 923<br />
setLocation method 62<br />
setLocationRelativeTo method 842<br />
setLogicalStyle method 1127<br />
setLogStream method 229<br />
setLookAndFeel method 1519<br />
setMajorTickSpacing method 997<br />
setMargin method 134<br />
setMaximizable method 1457<br />
setMedia method 419<br />
setMediaToDefault method 419<br />
setMillisToDecideToPopup method 991<br />
setMillisToPopup method 991<br />
setMinorTickSpacing method 997<br />
setMnemonic method 122, 636, 705<br />
setModal method 832<br />
setMultiSelectionEnabled method 786<br />
setNextFocusableComponent method 475<br />
setNote method 990<br />
setNumRows method 1334<br />
setOneTouchExpandable method 1121<br />
setOpaque method 74<br />
setOrientation method 688, 1119<br />
setOrientationRequested method 419<br />
setPage method 1164<br />
setPaintLabels method 1001<br />
setPaintMode method 363<br />
setPaintTicks method 997<br />
setPaintTracks method 998<br />
setParagraphAttributes method 1128<br />
setParent method 1197<br />
setPosition method 1447<br />
setPressedlcon method 137<br />
setPrinterResolution method 422, 437<br />
setProgress method 990<br />
setPrototypeCellValue method 940<br />
setResizable method 71, 1341, 1457<br />
setResizeWeight method 1122<br />
setRightComponent method 1118<br />
setRolloverlcon method 137<br />
setRolloverSelectedlcon method 137<br />
setRootPane method 105<br />
setRootPaneCheckingEnabled method<br />
105
setRootVisible method 1195<br />
setRowHeader method 553<br />
setRowHeaderView method 552<br />
setRowHeight method 1261<br />
setScrollOffset method 1010<br />
setSelected method 912<br />
setSelectedlndex method 926<br />
setSelectedlndices method 926<br />
setSelectedltem method 949<br />
setSelectedValue method 926<br />
setSelectionEnd method 1033<br />
setSeleetionlnterval method 926<br />
setSelectionMode method 927<br />
setSelectionModel method 1218<br />
setSeleetionStart method 1033<br />
setSelectionVisible method 1089<br />
setShowsRootHandles 1195<br />
setSize method 60<br />
setSnapToTicks method 1000<br />
setState method 73, 640<br />
setTabSize method 1013<br />
setText method 116<br />
setTitle method 1457<br />
setToggleClickCount method 1209<br />
setToolTipText method 17<br />
setTopComponent method 1118<br />
setUpdateTablelnRealTime method 1372<br />
setUserObject method 1197<br />
setValue method 848<br />
setValueAt method 1314<br />
setVerifylnputWhenFocusTarget methid<br />
1045'<br />
setVerticalAlignment method 106, 116,<br />
129<br />
setVerticalScrollBarPolicy method 549<br />
setVerticalTextPosition method 129<br />
setViewport method 553<br />
setViewportView method 549<br />
setViewPosition method 552<br />
setVisible method 60, 85<br />
setVisibleRowCount method 922<br />
setWrapStyleWord method 1012<br />
setXORMode method 355<br />
Shift key 487<br />
Index 1653<br />
Shortcut keys 490<br />
shouldSelectCell method 1406<br />
shouldYieldFocus method 1042<br />
showConfirmDialog method 768<br />
showDialog method 784<br />
showInputDialog method 774<br />
showMessageDialog method 764<br />
showOpen Dialog method 784<br />
showOptionDialog method 772<br />
showSaveDialog method 784<br />
SidesType 425<br />
SimpleAttributeSet 1062, 1070<br />
Size<br />
determining for a component 70<br />
sizeColumnsToFit methoa 1365<br />
sizeWidthToFit method 1342<br />
Slider<br />
See JSlider<br />
SmallAttributeSet 1062<br />
SoftBevelBorder class 902<br />
startEditingAtPath method 1281<br />
Status bar<br />
example implementation of 745<br />
stopEditing method 1281<br />
stringWidth method 378<br />
Struts 214<br />
StyleConstants 1062<br />
StyleContext 1062, 1071, 1126<br />
StyledDocument 1125<br />
StyledEditorKit 1049<br />
Styles 1070, 1071, 1126<br />
default 1127<br />
submenus 622<br />
Swing<br />
and 1FC 8<br />
and multi-threading 149<br />
component painting 317<br />
history of package name 28<br />
list of packages 30<br />
Netscape's role 8<br />
relationship to AWT 10<br />
swing.properties file 50, 83<br />
SwingConstants class<br />
alignment properties 106<br />
SwingUtilities
1654 Index<br />
and multi-threading 157<br />
Switching look-and-feel 1582<br />
System Clipboard 1035<br />
SystemColor class 80<br />
T<br />
Tab key and focus handling 456<br />
Tabbed Panes 888<br />
Tabbing order 467<br />
changing 471<br />
Table control<br />
See JTable<br />
TableCellEditor interface 1379<br />
TableCellRenderer interface 1379, 1382<br />
tableChanged method 1338<br />
TableColumn 1313<br />
TableColumn class 1339<br />
TableColumnModel 1312<br />
TableColumnModelEvent class 1353<br />
TableColumnModelListener interface<br />
1353<br />
TableModel interface 1311<br />
TableModelEvent class 1338<br />
TableModelListener interface 1338<br />
temporary focus change 463<br />
Text<br />
printing of 404<br />
rendering using drawString method<br />
376<br />
rendering with a disabled appearance<br />
387<br />
Text components<br />
adding a new key mapping 1159<br />
adding editor actions to 1155<br />
and document properties 1055<br />
and editor actions 1093<br />
and editor kits 1159<br />
and events 1026, 1085<br />
and input focus 1016, 1087<br />
and keyboard accelerators 1017<br />
and selection 1031<br />
and the clipboard 1035<br />
and the Document interface 1051<br />
architecture of 1046<br />
detecting every change in content<br />
1027<br />
editability 1015<br />
handling unmapped keys 1100<br />
InputMap and ActionMap 1107<br />
internal structure of 1080<br />
key handling 1047, 1086<br />
before <strong>Java</strong> 2 version 1.3 1092<br />
<strong>Java</strong> 2 version 1.3 and later 1106<br />
keymaps 1094, 1101<br />
and <strong>Java</strong> 2 version 1.3 1109<br />
loading and saving content 1161<br />
using the editor kit 1162<br />
loading HTML into 1164<br />
See also Document<br />
See also JTextField and JTextArea<br />
sharing documents 1114<br />
standard editor actions 1099<br />
views 1111<br />
Text Controls<br />
Swing compared to AWT 22<br />
TextAction 1154<br />
TextLayout class 387<br />
Timer 968<br />
conveying information to the event<br />
handler 971<br />
creating 968<br />
debugging 972<br />
event generated by 969<br />
event merging 971<br />
initial delay 969<br />
repeating behavior 969<br />
restarting 969<br />
starting 968<br />
stopping 969<br />
TitledBorder class 905<br />
Tool bars<br />
see JToolBar<br />
Toolkit class 72<br />
and font metrics 377<br />
deprecation of getFontMetrics method<br />
386<br />
ToolTipManager 858<br />
Tooltips 850<br />
overview 17<br />
TRACK 595<br />
TRAILING alignment value 137
translate method 294<br />
Tree control<br />
See JTree<br />
TreeCellEditor interface 1273<br />
TreeCell Renderer interface 1256<br />
TreeExpansionEvent 1212, 1215<br />
TreeExpansionListener 1212, 1215<br />
TreeModel 1191<br />
TreeModelEvent 1237<br />
TreeModelListener 1237<br />
TreeModelListener interface 1272<br />
TreeNode 1191, 1196<br />
TreePath 1192, 1202<br />
content of 1203<br />
TreeSelectionEvent 1224<br />
TreeSelectionListener 1224<br />
TreeSelectionModel 1217<br />
u<br />
UIDefaults<br />
active values 1541<br />
and look-and-feels 1532<br />
changing component properties 1581<br />
detecting changes in property values<br />
1527<br />
lazy loading of property values 1538<br />
Lazy Value interface 1538<br />
listing installed properties and values<br />
1528<br />
ProxyLazyValue class 1542<br />
UIDefaults class 80, 1525<br />
UIManager 1516, 1518<br />
getting the installed look-and-feel list<br />
~ 1522<br />
UIManager class 80<br />
getting component colors 80<br />
UIResource interface 1531<br />
uninstallUI method 1565<br />
UNIT_DECREMENT 595<br />
UNITJNCREMENT 595<br />
unregisterKeyboardAction method 503<br />
update method 317<br />
updateComponentTreeUI method 1586<br />
V<br />
Index 1655<br />
validate method 87<br />
valueForPathChanged method 1283, 1288<br />
verify method 1042<br />
VetoableChangeListener interface 326<br />
Views of text components 1111<br />
virtual fonts 83<br />
Visibility<br />
of a component 85<br />
w<br />
Warning dialogs 766<br />
WHEN_ANCESTOR_OF_FOCUSED_<br />
COMPONENT 497<br />
WHEN^FOCUSED 497<br />
WHEN_IN_FOCUSED_WINDOW 497<br />
Window Closing Events 262<br />
Window events 257<br />
WindowEvent class 257<br />
WindowListener interface 257<br />
WindowPopup 678<br />
Windows<br />
handling state changes 257<br />
WrappedPlainView 1113