
You also want an ePaper? Increase the reach of your titles
YUMPU automatically turns print PDFs into web optimized ePapers that Google loves.
DIM<br />
S-MOD<br />
iPod MENU<br />
VOL<br />
VOL<br />
LOUD<br />
MUTE<br />
ST<br />
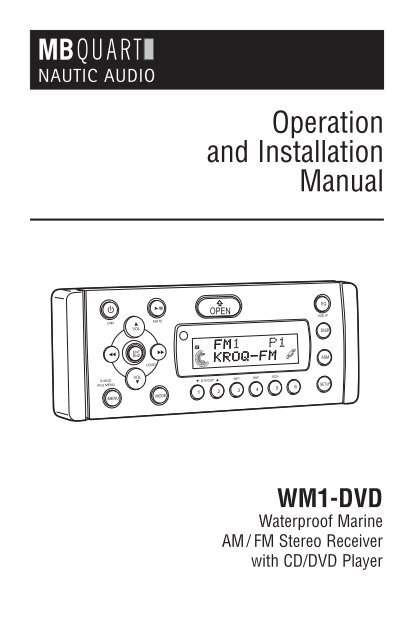
Operation<br />
and Installation<br />
Manual<br />
D R/CAT<br />
OPEN<br />
RPT<br />
SHF<br />
SCN<br />
1 2 3 4 5 6<br />
EQ<br />
SUB. W<br />
DISP<br />
<strong>WM1</strong>-<strong>DVD</strong><br />
Waterproof Marine<br />
AM/ FM Stereo Receiver<br />
with CD/<strong>DVD</strong> Player<br />
ASM
Introduction<br />
Please take the time to read all of the information in this manual. Familiarity with operation and installation<br />
procedures will help you obtain the best possible performance from your new AM/FM Stereo Receiver with<br />
CD/<strong>DVD</strong> Player.<br />
2<br />
Safety Information<br />
CAUTION! THIS MARINE CD/<strong>DVD</strong> PLAYER IS A<br />
CLASS 1 LASER PRODUCT. THIS UNIT USES A<br />
VISIBLE/INVISIBLE LASER BEAM WHICH COULD<br />
CAUSE HAZARDOUS RADIATION IF EXPOSED<br />
DIRECTLY. BE SURE TO OPERATE THE MOBILE CD<br />
PLAYER AS INSTRUCTED.<br />
USE OF CONTROLS OR ADJUSTMENTS OR PER-<br />
FORMANCE OR PROCEDURES OTHER THAN<br />
THOSE SPECIFIED HEREIN MAY RESULT IN HAZ-<br />
ARDOUS RADIATION EXPOSURE.<br />
Index<br />
DO NOT OPEN COVERS AND DO NOT REPAIR BY<br />
YOURSELF. PLEASE REFER SERVICING TO A<br />
QUALIFIED TECHNICIAN.<br />
CHANGES OR MODIFICATIONS TO THIS PRODUCT<br />
NOT APPROVED BY THE MANUFACTURER WILL<br />
VOID THE WARRANTY AND WILL VIOLATE FCC<br />
APPROVAL.<br />
Button Locations and Functions . . . . . . . . . . . . . . . . . . . . . . . . . . . . . . . . . . . . . . . . . . . . . . . . . . . . . 3-4<br />
Remote Control Button Locations and Functions . . . . . . . . . . . . . . . . . . . . . . . . . . . . . . . . . . . . . . . . 5-6<br />
General Operation . . . . . . . . . . . . . . . . . . . . . . . . . . . . . . . . . . . . . . . . . . . . . . . . . . . . . . . . . . . . . . . . 7<br />
AM/FM Radio Operations . . . . . . . . . . . . . . . . . . . . . . . . . . . . . . . . . . . . . . . . . . . . . . . . . . . . . . . . . . 8-9<br />
Sound Controls . . . . . . . . . . . . . . . . . . . . . . . . . . . . . . . . . . . . . . . . . . . . . . . . . . . . . . . . . . . . . . . . . . 10-12<br />
Disc Warnings . . . . . . . . . . . . . . . . . . . . . . . . . . . . . . . . . . . . . . . . . . . . . . . . . . . . . . . . . . . . . . . . . . . 12-13<br />
CD Operation (Compact Disc) . . . . . . . . . . . . . . . . . . . . . . . . . . . . . . . . . . . . . . . . . . . . . . . . . . . . . 13-14<br />
<strong>DVD</strong> Operation . . . . . . . . . . . . . . . . . . . . . . . . . . . . . . . . . . . . . . . . . . . . . . . . . . . . . . . . . . . . . . . . . 15-17<br />
<strong>DVD</strong> Setup Menu . . . . . . . . . . . . . . . . . . . . . . . . . . . . . . . . . . . . . . . . . . . . . . . . . . . . . . . . . . . . . 17<br />
MP3 Disc Operation . . . . . . . . . . . . . . . . . . . . . . . . . . . . . . . . . . . . . . . . . . . . . . . . . . . . . . . . . . . . . 18<br />
CD Changer Operation . . . . . . . . . . . . . . . . . . . . . . . . . . . . . . . . . . . . . . . . . . . . . . . . . . . . . . . . . . . 19-20<br />
Sirius Satellite Radio<br />
Sirius Satellite Radio Setup . . . . . . . . . . . . . . . . . . . . . . . . . . . . . . . . . . . . . . . . . . . . . . . . . . . . . . . 21<br />
Sirius Satellite Radio Operation . . . . . . . . . . . . . . . . . . . . . . . . . . . . . . . . . . . . . . . . . . . . . . . . . . . . 21-24<br />
IPOD Operation . . . . . . . . . . . . . . . . . . . . . . . . . . . . . . . . . . . . . . . . . . . . . . . . . . . . . . . . . . . . . . . . . . 24-26<br />
USB Operation . . . . . . . . . . . . . . . . . . . . . . . . . . . . . . . . . . . . . . . . . . . . . . . . . . . . . . . . . . . . . . . . . . 26-27<br />
Auxiliary Audio Input Operation . . . . . . . . . . . . . . . . . . . . . . . . . . . . . . . . . . . . . . . . . . . . . . . . . . . . . 27<br />
Setup Features . . . . . . . . . . . . . . . . . . . . . . . . . . . . . . . . . . . . . . . . . . . . . . . . . . . . . . . . . . . . . . . . . . 28<br />
Installation . . . . . . . . . . . . . . . . . . . . . . . . . . . . . . . . . . . . . . . . . . . . . . . . . . . . . . . . . . . . . . . . . . . . . 29<br />
Speaker Connections . . . . . . . . . . . . . . . . . . . . . . . . . . . . . . . . . . . . . . . . . . . . . . . . . . . . . . . . . . . . . 30<br />
Auxiliary Connections . . . . . . . . . . . . . . . . . . . . . . . . . . . . . . . . . . . . . . . . . . . . . . . . . . . . . . . . . . . . . 31<br />
Input Connections. . . . . . . . . . . . . . . . . . . . . . . . . . . . . . . . . . . . . . . . . . . . . . . . . . . . . . . . . . . . . . . . 32-33<br />
Replaceable Fuse . . . . . . . . . . . . . . . . . . . . . . . . . . . . . . . . . . . . . . . . . . . . . . . . . . . . . . . . . . . . . . . . 34<br />
Warranty . . . . . . . . . . . . . . . . . . . . . . . . . . . . . . . . . . . . . . . . . . . . . . . . . . . . . . . . . . . . . . . . . . . . . . . 35
Button Locations and Functions<br />
18<br />
DM<br />
S-MOD<br />
iPod MENU<br />
1 2 3 4 5 6 7<br />
8<br />
VOL<br />
VOL<br />
LOUD<br />
MUTE<br />
OPEN<br />
1 2 3 4 5 6<br />
20 2 19 18 17 16 15 14 13 12 11 10 9<br />
21 22 23<br />
1. Power On/Off and Display Dimmer: Press to turn the unit On or Off. Press and hold to dim the display.<br />
Press and hold again to restore display’s illumination.<br />
2. Volume Control: Press the button to increase the volume level, and press the button to<br />
decrease the volume level.<br />
3. Disc Play/Pause and Mute Button:<br />
<strong>DVD</strong>, CD and CD Changer Mode: Press to pause disc play, press again to resume play.<br />
Radio, Sirius Satellite Radio and AV IN Input Modes: Press to mute volume level. Press again to restore.<br />
VOL<br />
ST<br />
DRCAT<br />
4. Enter/Band and Loud Button (ENT BND):<br />
Radio: Press to select AM1, AM2, FM1, FM2 and FM3 radio bands.<br />
Loudness: Press and hold button until “LOUD ON” appears in the display to boost high and low tones<br />
at low volume levels. To deactivate press and hold again until “LOUD OFF” appears in the display.<br />
IPOD Mode: See "IPOD Operation" for more information.<br />
5. Infrared Eye: Receives the signals from the remote control.<br />
6. Open Button: Press to fold down the front panel to access the disc player slot and disc eject button.<br />
7. Display Area: This area displays all function information for the radio, disc player, audio/video input,<br />
IPOD, Sirius and MP3 modes.<br />
8. Equalizer Button (EQ): Press to choose between preset sound equalization settings.<br />
9. Display Button (DISP):<br />
Radio Mode: Press to display radio RBDS (Radio Broadcast Data System) information.<br />
<strong>DVD</strong>, CD and CD Changer Mode: Press to display disc information.<br />
RPT<br />
SHF<br />
SCN<br />
EQ<br />
SUB W<br />
DISP<br />
ASM<br />
VOL<br />
3
4<br />
Button Locations and Functions<br />
10. Setup Button: Press to access Bass, Treble, Balance, Fader and Subwoofer controls. Press and hold<br />
for 10 seconds to access Beep Confirmation, Default Volume and AM/FM Tuning System.<br />
11. Automatic Station Memory (ASM) and Stop Button:<br />
Radio Mode: Press and hold for automatic station memory storing. Press and release for scanning<br />
memorized stations.<br />
<strong>DVD</strong>, CD and CD Changer Mode: Press to stop disc play.<br />
12. Multi-Function Button #6:<br />
Radio Mode: Press and hold until a beep is heard to memorize a radio station into memory #6 (CH6).<br />
Press and release when recalling preset radio station #6.<br />
13. Multi-Function Button #5:<br />
Radio Mode: Press and hold until a beep is heard to memorize a radio station into memory #5 (CH5).<br />
Press and release when recalling preset radio station #5.<br />
CD Mode: Press to preview each track on the CD for 10 seconds. Press again to cancel.<br />
CD Changer Mode: Press to preview each track on the loaded CD for 10 seconds. Press and hold to<br />
preview the first track on every loaded CD for 10 seconds. Press again to cancel.<br />
14. Multi-Function Button #4:<br />
Radio Mode: Press and hold until a beep is heard to memorize a radio station into memory #4 (CH4).<br />
Press and release when recalling preset radio station #4.<br />
CD Mode: Press to play all the tracks on the CD in random order. Press again to cancel.<br />
CD Changer Mode: Press to play all the tracks on the loaded CD in random order. Press and hold to<br />
play all the CDs in random order. Press again to cancel.<br />
15. Multi-Function Button #3:<br />
Radio Mode: Press and hold until a beep is heard to memorize a radio station into memory #3 (CH3).<br />
Press and release when recalling preset radio station #3.<br />
CD Mode: Press to repeat a CD track. Press again to cancel.<br />
CD Changer Mode: Press to repeat the CD track. Press and hold to repeat the entire loaded disc.<br />
Press again to cancel.<br />
16. Multi-Function Button #2:<br />
Radio Mode: Press and hold until a beep is heard to memorize a radio station into memory #2 (CH2).<br />
Press and release when recalling preset radio station #2.<br />
CD Changer Mode: Push to change to a higher number disc in the CD changer.<br />
17. Multi-Function Button #1:<br />
Radio Mode: Press and hold until a beep is heard to memorize a radio station into memory #1 (CH1).<br />
Press and release when recalling preset radio station #1.<br />
CD Changer Mode: Push to change to a lower number disc in the CD changer.<br />
18. Tune/Track/Chapter Buttons:<br />
Radio Mode: Press either button and the tuner will scan to the next strong station and stop. Press<br />
and hold either button until “MANUAL” appears in the display, then release. Again, press either<br />
button until the desired radio station appears in the display.<br />
CD and CD Changer Mode: Press to change the track to a lower or higher track.<br />
<strong>DVD</strong> Mode: Press to change the chapter to a lower or higher chapter.<br />
19. Mode Button:<br />
Press to change the play source: Radio, Disc and Audio/Video input. Depending on what other input sources<br />
are connected (IPOD, Sirius, USB and CD Changer) these play source will also appear in the display.<br />
20. Menu Button:<br />
Sirius Mode: See "Sirius Satellite Radio Operation" for more information.<br />
IPOD Mode: See "IPOD Operation" for more information.<br />
<strong>DVD</strong> Mode: Press to display the <strong>DVD</strong> setup menu.<br />
21. Eject Button ( ): Press to eject the loaded disc.<br />
22. Disc Slot: To play a <strong>DVD</strong>/CD insert a disc into the slot with the label facing up.<br />
23. Power Indicator: Lights up when the unit has power.
Remote Control Button Locations and Functions<br />
20<br />
1<br />
19<br />
18<br />
17<br />
16<br />
12<br />
DM<br />
MODE<br />
S MOD<br />
IPOD MENU<br />
MU E<br />
EN<br />
BND<br />
VOLUME<br />
DIR / CA<br />
RP SHF SCN<br />
1 2 3 4 5<br />
6<br />
<strong>DVD</strong><br />
SE UP<br />
I LE<br />
AUDIO<br />
7<br />
MENU<br />
SUB<br />
OK<br />
<strong>DVD</strong><br />
MENU<br />
8 9 0<br />
3<br />
2<br />
4<br />
18<br />
2<br />
13<br />
14<br />
1. Power On/Off and Display Dimmer: Press to<br />
turn the unit On or Off. Press and hold to dim<br />
the display. Press and hold again to restore.<br />
2. Volume Control: Press the and buttons<br />
to increase and decrease the volume level.<br />
3. <strong>DVD</strong>/CD Play/Pause and Mute Button:<br />
<strong>DVD</strong>, CD and CD Changer Mode: Press to pause<br />
disc play, press again to resume play.<br />
Radio, Sirius Satellite Radio and AV Input<br />
Modes: Press to mute volume level.<br />
4. Enter/Band and Loud Button:<br />
Radio: Press to select AM1, AM2, FM1, FM2<br />
and FM3 radio bands.<br />
Loudness: Press and hold button until “LOUD<br />
ON” appears in the display. To deactivate, press<br />
and hold again until “LOUD OFF” appears.<br />
12. Multi-Function Button #6:<br />
Radio Mode: Press and hold until a beep is<br />
heard to memorize a radio station. Press and<br />
release when recalling preset radio station #6.<br />
13. Multi-Function Button #5:<br />
Radio Mode: Press and hold until a beep is<br />
heard to memorize a radio station. Press and<br />
release when recalling preset radio station #5.<br />
CD Mode: Press to preview each track on the<br />
CD for 10 seconds. Press again to cancel.<br />
CD Changer Mode: Press to preview each<br />
track on the CD for 10 seconds. Press and<br />
hold to preview the first track on every loaded<br />
CD for 10 seconds. Press again to cancel.<br />
15<br />
14. Multi-Function Button #4:<br />
Radio Mode: Press and hold until a beep is<br />
heard to memorize a radio station. Press and<br />
release when recalling preset radio station #4.<br />
CD Mode: Press to play all the tracks on the<br />
CD in random order. Press again to cancel.<br />
CD Changer Mode: Press to play all the tracks<br />
on the CD in random order. Press and hold to<br />
play every loaded CD in random order. Press<br />
again to cancel.<br />
15. Multi-Function Button #3:<br />
Radio Mode: Press and hold until a beep is<br />
heard to memorize a radio station. Press and<br />
release when recalling preset radio station #3.<br />
CD Mode: Press to repeat a CD track. Press<br />
again to cancel.<br />
CD Changer Mode: Press to repeat a CD track.<br />
Press and hold to repeat the entire disc. Press<br />
again to cancel.<br />
16. Multi-Function Button #2:<br />
Radio Mode: Press and hold until a beep is<br />
heard to memorize a radio station. Press and<br />
release when recalling preset radio station #2.<br />
CD Changer Mode: Push to change to a higher<br />
number disc in the CD changer.<br />
17. Multi-Function Button #1:<br />
Radio Mode: Press and hold until a beep is<br />
heard to memorize a radio station. Press and<br />
release when recalling preset radio station #1.<br />
CD Changer Mode: Push to change to a lower<br />
number disc in the CD changer.<br />
18. Tune/Track/Chapter Buttons:<br />
Radio Mode: Press and the tuner will scan to<br />
the next strong station and stop. Press and<br />
hold until “MANUAL” appears in the display<br />
then release. Then press or until the<br />
desired radio station is tuned-in.<br />
CD and CD Changer Mode: Press to change<br />
the track to a lower or higher track.<br />
<strong>DVD</strong> Mode: Press to change the chapter to a<br />
lower or higher chapter.<br />
19. Mode Button:<br />
Press to change the play source: Radio, <strong>DVD</strong><br />
and AV IN. Depending on what other input<br />
sources are connected (IPOD, Sirius, USB and<br />
CD Changer) these play sources will also<br />
appear in the display.<br />
20. Menu Button:<br />
Sirius Mode: See Sirius Satellite Radio<br />
Operation section for more information.<br />
IPOD Mode: See "IPOD Operation" for more<br />
information.<br />
<strong>DVD</strong> Mode: Press to display the <strong>DVD</strong> setup<br />
menu.<br />
5
6<br />
Remote Control Button Locations and Functions (Continued)<br />
<strong>DVD</strong> Operation Section<br />
21<br />
22<br />
23<br />
24<br />
25<br />
26<br />
27<br />
DM<br />
MODE<br />
S MOD<br />
IPOD MENU<br />
MU E<br />
EN<br />
BND<br />
VOLUME<br />
DIR / CA<br />
RP SHF SCN<br />
1 2 3 4 5<br />
6<br />
<strong>DVD</strong><br />
SE UP<br />
I LE<br />
AUDIO<br />
7<br />
MENU<br />
SUB<br />
8 9 0<br />
21. Navigation Buttons:<br />
These buttons serve as navigation button to<br />
select items up and down.<br />
22. Play/Pause Button:<br />
Press to pause disc play, press again to<br />
resume play.<br />
23. <strong>DVD</strong> Setup Button:<br />
Press to display onscreen Setup menu.<br />
24. Chapter Select, Backward Disc Play and<br />
Menu Navigation Button:<br />
Chapter Select: Press to select a lower chapter<br />
on the <strong>DVD</strong>.<br />
Backward Disc Play: Press and hold until<br />
“BACKWARD X 2 �� ” appears in the display<br />
then release the button. Press and hold again<br />
and “BACKWARD X 4 �� ” will appear. X8 and<br />
X20 speeds can also be selected. Press the<br />
button at any time to resume normal play.<br />
Menu Navigation: This button serves as a<br />
navigation button when the <strong>DVD</strong>’s menu is displayed.<br />
OK<br />
<strong>DVD</strong><br />
MENU<br />
28<br />
29<br />
30<br />
31<br />
25. Title Button:<br />
Press this button to display the disc title.<br />
26. Subtitle Button:<br />
Press to access <strong>DVD</strong>’s subtitle languages.<br />
27. Audio Button:<br />
Press to access <strong>DVD</strong>’s audio settings.<br />
28. Stop Button:<br />
Press the button one time to stop the disc. To<br />
resume play, press the button.<br />
Pressing the button two times, then pressing<br />
the button will play the disc from the<br />
beginning.<br />
29. OK Button:<br />
Executes the selected item.<br />
30. Chapter Select, Fast Forward Disc Play and<br />
Menu Navigation Button:<br />
Chapter Select: Press to select a higher chapter<br />
on the <strong>DVD</strong>.<br />
Fast Forward Disc Play: Press and hold until<br />
“FORWARD X 2 �� ” appears in the display<br />
then release the button. Press and hold again<br />
and “FORWARD X 4 �� ” will appear. X8 and<br />
X20 speeds can also be selected. Press the<br />
button at any time to resume normal play.<br />
Menu Navigation: This button serves as a<br />
navigation button when the <strong>DVD</strong>’s menu is displayed.<br />
31. Menu Button:<br />
Press to display the root menu that is stored<br />
on the <strong>DVD</strong> disc.
General Operations<br />
Power On/Off:<br />
Press the button to turn the unit On or Off.<br />
Selecting a Play Source:<br />
To select a play source, press the MODE button<br />
until the desired source appears in the display:<br />
AM1, AM2, FM1, FM2, FM3 or Radio Station<br />
Call Letters (AM and FM Radio),<br />
<strong>DVD</strong> PLAY (Built-in <strong>DVD</strong>/CD Player),<br />
AV IN (Auxiliary Audio/Video Input),<br />
SIRIUS (Satellite Radio Input, if connected),<br />
CD-CH (CD Changer, if connected),<br />
USB (MP3 Player, if connected) and<br />
IPOD (IPOD Input, if connected).<br />
Dimming the Display:<br />
Press and hold the button to dim the brightness<br />
of the display. Press and hold again to<br />
restore the brightness of display.<br />
Display Selection:<br />
Press the DISP button to display the information<br />
according to the mode selected.<br />
Example: Press the DISP button in the Sirius<br />
Radio mode to display SONG-TITLE _ > ARTIST _ ><br />
CATEGORY _ > SONG TITLE . . .<br />
DIM<br />
S MOD<br />
iPod MENU<br />
DIM<br />
S MOD<br />
iPod MENU<br />
DIM<br />
S MOD<br />
P d MENU<br />
DIM<br />
S MOD<br />
P d MENU<br />
VOL<br />
VOL<br />
VOL<br />
VOL<br />
VOL<br />
VOL<br />
VOL<br />
VOL<br />
LOUD<br />
MUTE<br />
LOUD<br />
LOUD<br />
LOUD<br />
MUTE<br />
MUTE<br />
MUTE<br />
ST<br />
ST<br />
ST<br />
DIR CAT<br />
DIR CAT<br />
DRCAT<br />
OPEN<br />
RPT<br />
SHF<br />
SCN<br />
1 2 3 4 5 6<br />
DRCAT<br />
OPEN<br />
1 2 3 4 5 6<br />
OPEN<br />
RPT<br />
SHF<br />
SCN<br />
1 2 3 4 5 6<br />
OPEN<br />
RPT<br />
RPT<br />
SHF<br />
SHF<br />
SCN<br />
ATEGORY S T<br />
SCN<br />
1 2 3 4 5 6<br />
EQ<br />
SUB W<br />
DIS<br />
ASM<br />
EQ<br />
SUB W<br />
DIS<br />
ASM<br />
EQ<br />
SUB W<br />
DS<br />
ASM<br />
EQ<br />
SUB W<br />
DS<br />
ASM<br />
7
8<br />
AM/FM Radio Operation<br />
Power On/Off:<br />
Press the button to turn the unit On.<br />
Selecting the Play Source:<br />
Press the MODE button until “AM1, AM2, FM1,<br />
FM2, FM3 or radio station call letters” appears in<br />
the display.<br />
Selecting the AM or FM Band:<br />
Press the ENT BND button repeatedly and select<br />
from FM1, FM2, FM3, AM1 or AM2.<br />
Note: Radio station call letters may be displayed<br />
instead of the radio band.<br />
Manually Tuning in a Radio Station:<br />
Press and hold either the or button until<br />
“MANUAL” appears in the display then release.<br />
Then press the or until the desired radio<br />
station appears in the display.<br />
Note: The unit will automatically switch from FM<br />
Mono to FM Stereo when the signal strength<br />
increases to a stereo level. If the stereo signal<br />
should become weak, the unit will switch back to<br />
Mono. FM Stereo reception is indicated when the<br />
“ST” appears in the display.<br />
Tuning-In a Radio Station Using Seek:<br />
Press and release either the or button<br />
and the tuner will scan-up to the next strong station,<br />
and stop seeking, then start playing.<br />
Memorizing Radio Stations:<br />
1. Press the ENT BND button to select either the<br />
FM1, FM2, FM3, AM1 or AM2 radio band.<br />
2. Tune-in the desired radio station.<br />
3. To memorize the station press and hold any of<br />
the six radio station recall buttons until you<br />
hear a beep.<br />
DIM<br />
S MOD<br />
iPod MENU<br />
D M<br />
DIM<br />
Lower<br />
Frequency<br />
DIM<br />
Lower<br />
Frequency<br />
DIM<br />
S MOD<br />
iPod MENU<br />
VOL<br />
VOL<br />
VOL<br />
VOL<br />
VOL<br />
VOL<br />
VOL<br />
VOL<br />
VOL<br />
VOL<br />
LOUD<br />
LOUD<br />
OUD<br />
MUTE<br />
ST<br />
DIR C T<br />
OPEN<br />
Higher<br />
Frequency<br />
LOUD<br />
MUTE<br />
MUTE<br />
RPT<br />
SHF<br />
SCN<br />
1 2 3 4 5 6<br />
ST<br />
DRCAT<br />
OPEN<br />
OPEN<br />
Higher<br />
Frequency<br />
OUD<br />
MUTE<br />
MUTE<br />
ST<br />
ST<br />
T<br />
DIR CAT<br />
D R/CAT<br />
RPT<br />
1 2 3 4 5 6<br />
RPT<br />
SHF<br />
SHF<br />
SCN<br />
SCN<br />
1 2 3 4 5 6<br />
DIR C T<br />
OPEN<br />
OPEN<br />
RPT<br />
Memorized Radio Station Indicator<br />
RPT<br />
1 2 3 4 5 6<br />
EQ<br />
EQ<br />
SUB W<br />
DS<br />
SUB W<br />
DIS<br />
ASM<br />
ASM<br />
EQ<br />
SUB W<br />
Radio Station Recall Buttons<br />
SHF<br />
SHF<br />
SCN<br />
1 2 3 4 5 6<br />
SCN<br />
EQ<br />
SUB W<br />
DIS<br />
ASM<br />
DS<br />
ASM<br />
EQ<br />
SUB W<br />
DIS<br />
ASM
AM/FM Radio Operation (Continued)<br />
Recalling Memorized Radio Stations:<br />
1. Press the ENT BND button to select either the<br />
FM1, FM2, FM3, AM1 or AM2 radio band.<br />
2. Press and release one of the six radio station<br />
recall button to select the memorized radio<br />
station.<br />
Automatically Store Radio Stations:<br />
1. Press the ENT BND button to select either the<br />
FM1, FM2, FM3, AM1 or AM2 radio band.<br />
2. Press and hold the ASM button and “SEARCH”<br />
will appear in the display. The tuner will search<br />
for the strongest stations and store them into<br />
memory. The new stations will replace stations<br />
that were previously stored in the current band.<br />
Note: After the new stations are stored into<br />
memory the tuner will start scanning the<br />
newly memorized stations.<br />
3. When a desired station is reached, press the<br />
ASM button to stop scanning.<br />
Scanning Stored Radio Stations:<br />
1. Press the ENT BND button to select either the<br />
FM1, FM2, FM3, AM1 or AM2 radio band.<br />
2. Press the ASM button and the tuner will scan<br />
thru the preset stations stored in the current<br />
band and pause for 5 seconds at each station.<br />
When a desired station is reached, press the<br />
ASM button again to stop scanning.<br />
Scanning for FM Radio Stations According<br />
to Program Type (PTY):<br />
1. Press the ENT BND button to select either the<br />
FM1, FM2 or FM3 radio band.<br />
2. Press the MENU button to display the program<br />
type.<br />
3. Press the or to select the desired program<br />
type (PTY). (Example: News,<br />
Information, Sports, etc.)<br />
4. Press the or button to search a station<br />
with the selected program type (PTY).<br />
VOL<br />
VOL<br />
DM<br />
S-MOD<br />
Pod MENU<br />
DIM<br />
S-MOD<br />
Pod MENU<br />
DIM<br />
S-MOD<br />
Pod MENU<br />
D M<br />
S MOD<br />
iPod MENU<br />
D M<br />
VOL<br />
VOL<br />
VOL<br />
VOL<br />
VOL<br />
VOL<br />
LOUD<br />
LOUD<br />
VOL<br />
VOL<br />
VOL<br />
VOL<br />
MUTE<br />
MUTE<br />
LOUD<br />
LOUD<br />
LOU<br />
MUTE<br />
MUTE<br />
MUTE<br />
T<br />
ST<br />
ST<br />
D R/CAT<br />
DIR/CAT<br />
Lower Higher<br />
OPEN<br />
1 2 3 4 5 6<br />
OPEN<br />
RPT<br />
RPT<br />
SHF<br />
SHF<br />
SCN<br />
SCN<br />
1 2 3 4 5 6<br />
ST<br />
DRCAT<br />
TY<br />
DIR CAT<br />
OPEN<br />
RPT<br />
SHF<br />
SCN<br />
1 2 3 4 5 6<br />
T<br />
PTY<br />
D R/CAT<br />
OPEN<br />
OPEN<br />
RPT<br />
RPT<br />
SHF<br />
SHF<br />
SCN<br />
1 2 3 4 5 6<br />
SCN<br />
1 2 3 4 5 6<br />
EQ<br />
SUB W<br />
DS<br />
ASM<br />
EQ<br />
SUB W<br />
DIS<br />
A<br />
EQ<br />
SUB W<br />
DS<br />
ASM<br />
EQ<br />
SUB W<br />
DIS<br />
ASM<br />
EQ<br />
SUB W<br />
DS<br />
ASM<br />
Hold<br />
9
Sound Controls<br />
Volume:<br />
Increase the volume by pressing the button.<br />
Decrease the volume by pressing the button.<br />
Bass, Treble, Balance, Fader and<br />
Subwoofer Controls<br />
Select the desired sound mode by pressing the<br />
SETUP button. The modes will be displayed in<br />
the following order: Bass, Treble, Balance, Fader,<br />
Subwoofer Line Level Output and Subwoofer<br />
Cutoff Frequency.<br />
Bass:<br />
1. Select the Bass mode (BAS) by pressing the<br />
SETUP button.<br />
2. Increase the Bass by pressing the button.<br />
Decrease the Bass by pressing the button.<br />
3. After 5 seconds control reverts back to volume<br />
control.<br />
Treble:<br />
1. Select the Treble mode (TRB) by pressing the<br />
SETUP button.<br />
2. Increase the Treble by pressing the button.<br />
Decrease the Treble by pressing the button.<br />
3. After 5 seconds control reverts back to volume<br />
control.<br />
Balance:<br />
1. Select the Balance mode (BAL) by pressing the<br />
SETUP button.<br />
2. To adjust the amount of sound output to the<br />
Right speakers press the button.<br />
To adjust the amount of sound output to the<br />
Left speakers press the button.<br />
BAL L=R = Equal sound right and left speakers.<br />
BAL 10R = Right speakers only.<br />
BAL 10L = Left speakers only.<br />
3. After 5 seconds control reverts back to volume<br />
control.<br />
10<br />
VOL<br />
VOL<br />
VOL<br />
VOL<br />
VOL<br />
VOL<br />
VOL<br />
VOL<br />
Increase<br />
Decrease<br />
Increase<br />
Decrease<br />
Increase<br />
Decrease<br />
DIM<br />
S MOD<br />
iPod MENU<br />
Right<br />
Left<br />
VOL<br />
VOL<br />
LOUD<br />
MUTE<br />
VOL<br />
VOL<br />
VOL<br />
VOL<br />
VOL<br />
VOL<br />
ST<br />
LOUD<br />
LOUD<br />
DIR CAT<br />
MUTE<br />
MUTE<br />
OPEN<br />
RPT<br />
ST<br />
ST<br />
SHF<br />
D R/CAT<br />
DIR CAT<br />
OPEN<br />
1 2 3 4 5 6<br />
LOUD<br />
VOL<br />
MUTE<br />
VOL<br />
LOUD<br />
MUTE<br />
RPT<br />
SHF<br />
SCN<br />
1 2 3 4 5 6<br />
SCN<br />
OPEN<br />
RPT<br />
SHF<br />
EQ<br />
SUB W<br />
DIS<br />
ASM<br />
SCN<br />
1 2 3 4 5 6<br />
ST<br />
D R/CAT<br />
OPEN<br />
RPT<br />
SHF<br />
SCN<br />
1 2 3 4 5 6<br />
ST<br />
D R/CAT<br />
OPEN<br />
RPT<br />
SHF<br />
SCN<br />
1 2 3 4 5 6
Sound Controls (Continued)<br />
Fader:<br />
1. Select the Fader mode (FAD) by pressing the<br />
SETUP button.<br />
2. To adjust the amount of sound output to the<br />
Rear speakers press the button.<br />
To adjust the amount of sound output to the<br />
Front speakers press the button.<br />
FAD F=R = Equal sound front and rear speakers.<br />
FAD R10 = Rear speakers only.<br />
FAD F10 = Front speaker only.<br />
3. After 5 seconds control reverts back to volume<br />
control.<br />
Subwoofer Line Level Output (SWG):<br />
1. Select the Subwoofer Line Level Output mode<br />
(SWG) by pressing the SETUP button.<br />
2. To adjust the Subwoofer Line Level Output<br />
higher press the button.<br />
VOL<br />
To adjust the Subwoofer Line Level Output<br />
lower press the button.<br />
SWG 00 = No gain.<br />
SWG -12 = Minimum level.<br />
SWG 12= Maximum level.<br />
3. After 5 seconds control reverts back to volume<br />
control.<br />
Note: If subwoofer output is turned Off, Subwoofer<br />
Line Level Output mode is not accessible. See<br />
Subwoofer Output (page 12) for more information.<br />
VOL<br />
Subwoofer Cutoff Frequency (SWF):<br />
1. Select the Subwoofer Cutoff Frequency mode<br />
(SWF) by pressing the SETUP button.<br />
2. To adjust the Subwoofer Cutoff Frequency<br />
press the or button.<br />
SWF 160 = Low Pass 160Hz<br />
SWF 120 = Low Pass 120Hz<br />
SWF 80 = Low Pass 80Hz<br />
3. After 5 seconds control reverts back to volume<br />
control.<br />
Note: If subwoofer output is turned Off, Subwoofer<br />
Cutoff Frequency mode is not accessible. See<br />
Subwoofer Output (page 12) for more information.<br />
VOL<br />
VOL<br />
Equalizer (EQ):<br />
Press the EQ button to choose between the preset<br />
equalizer settings: FLAT, CLASSICS, POP M,<br />
ROCK M, JAZZ and DSP OFF as indicated in the<br />
display area.<br />
VOL<br />
VOL<br />
Rear<br />
Front<br />
Higher<br />
Lower<br />
Higher<br />
Lower<br />
D M<br />
S MOD<br />
iPod MENU<br />
VOL<br />
VOL<br />
LOUD<br />
MUTE<br />
M<br />
M<br />
ST<br />
VOL<br />
VOL<br />
VOL<br />
VOL<br />
VOL<br />
DIR CAT<br />
VOL<br />
LOUD<br />
LOUD<br />
LOUD<br />
OPEN<br />
MUTE<br />
MUTE<br />
MUTE<br />
RPT<br />
SHF<br />
T<br />
D R/CAT<br />
OPEN<br />
1 2 3 4 5 6<br />
RPT<br />
SHF<br />
SCN<br />
1 2 3 4 5 6<br />
ST<br />
ST<br />
SCN<br />
DIR/CAT<br />
OPEN<br />
RPT<br />
1 2 3 4 5 6<br />
D R/CAT<br />
OPEN<br />
RPT<br />
EQ<br />
SUB W<br />
DIS<br />
ASM<br />
SHF<br />
SHF<br />
SCN<br />
SCN<br />
1 2 3 4 5 6<br />
11
Sound Controls (Continued)<br />
Subwoofer Output:<br />
Press and hold the EQ button to turn subwoofer<br />
output On and Off. “SW” appears in the display<br />
when the subwoofer is On and “SW” does not<br />
appear when the subwoofer output is Off. VOL<br />
Loudness:<br />
To boost high and low tones at low volume levels,<br />
press and hold the ENT BND button until<br />
“LOUD ON” appears in the display. To deselect,<br />
press and hold the ENT BND button again until<br />
“LOUD OFF” appears in the display.<br />
Mute:<br />
Press and release the MUTE button to mute the<br />
volume level. If a disc is playing the MUTE button<br />
will pause the disc. Press the MUTE button<br />
again to restore the volume or resume playing<br />
the disc.<br />
Disc Warnings<br />
Disc Formats Supported by this Player:<br />
12<br />
<strong>DVD</strong><br />
12cm disc<br />
(Single-sided disc only)<br />
CD<br />
12cm disc<br />
MP3<br />
12cm disc<br />
Handling:<br />
• Dirt, dust, scratches and warping disc will cause<br />
non operation.<br />
• Do not place stickers on disc or scratch disc.<br />
• Do not place discs in the following places: Direct<br />
sunlight, Dirty, dusty and damp areas, Near car<br />
heaters, Car seats or dashboard.<br />
Disc Cleaning:<br />
Use a dry soft cloth to wipe disc the surface. If the<br />
disc is quite dirty, use a soft cloth slightly moist with<br />
isopropyl (rubbing) alcohol. Never use solvents<br />
such as benzine, thinner or conventional record<br />
cleaners as they may mar the surface of the disc.<br />
DIM<br />
S MOD<br />
P d MENU<br />
VOL<br />
LOUD<br />
MUTE<br />
ST<br />
W<br />
DRCA<br />
OPEN<br />
RPT<br />
SHF<br />
SCN<br />
1 3 4 5 6<br />
“SW” Subwoofer On Indicator<br />
D M<br />
Hold<br />
D M<br />
S MOD<br />
iPod MENU<br />
VOL<br />
VOL<br />
VOL<br />
VOL<br />
Label side up<br />
Do not touch<br />
the underside<br />
of the disc<br />
Do not bend<br />
LOUD<br />
MUTE<br />
LOUD<br />
MUTE<br />
Wipe the disc from<br />
the center toward<br />
the outside edge<br />
T<br />
D R/CAT<br />
OPEN<br />
RPT<br />
SHF<br />
SCN<br />
1 2 3 4 5 6<br />
ST<br />
DIR CAT<br />
OPEN<br />
RPT<br />
SHF<br />
SCN<br />
1 2 3 4 5 6<br />
EQ<br />
SUB W<br />
DS<br />
ASM<br />
EQ<br />
SUB W<br />
DS<br />
ASM<br />
EQ<br />
SUB W<br />
DIS<br />
ASM<br />
Hold<br />
Note: A disc may become somewhat scratched<br />
(although not enough to make it unusable)<br />
depending on handling and conditions in the usage<br />
environment.
Disc Warnings (Continued)<br />
Preparing New Discs with Rough Spots:<br />
A new disc may have rough edges on its inside and<br />
outside edges. If a disc with rough edges is used,<br />
the proper setting will not be performed and the<br />
player will not play the disc. Therefore, remove the<br />
rough edges in advance by using a ball point pen<br />
or pencil as shown. To do this, press the side of<br />
the pen or pencil against the inside and outside<br />
edges of the disc.<br />
CD Operation<br />
General Operations:<br />
1. Press the button to turn the unit On.<br />
2. Press the OPEN button to fold down the front<br />
panel to access the CD player slot.<br />
3. Gently insert the disc into the slot with the<br />
label side up. The unit will automatically load<br />
the disc.<br />
Note: If a CD does not auto-load, DO NOT<br />
FORCE it into the slot, as you may already have<br />
a CD loaded as indicated by the inserted disc<br />
icon.<br />
CD Track Selection:<br />
Press the button to select a lower track.<br />
Press the button to select a higher track.<br />
The track number will appear in the display.<br />
Pausing a CD:<br />
Press the button to pause the disc, press it<br />
again to resume play.<br />
D M<br />
S MOD<br />
Pod MENU<br />
D M<br />
Lower<br />
Track<br />
DIM<br />
S MOD<br />
Pod MENU<br />
Rough spots on<br />
outside edge<br />
VOL<br />
VOL<br />
VOL<br />
VOL<br />
VOL<br />
VOL<br />
LOUD<br />
LOUD<br />
MUTE<br />
MUTE<br />
T<br />
D R/CAT<br />
OPEN<br />
RPT<br />
SHF<br />
SCN<br />
1 2 3 4 5 6<br />
Label Side Up<br />
Higher<br />
Track<br />
LOUD<br />
MUTE<br />
D R/CAT<br />
OPEN<br />
RPT<br />
EQ<br />
SUB W<br />
DSP<br />
ASM<br />
Inserted Disc Icon<br />
SHF<br />
SCN<br />
1 2 3 4 5 6<br />
DRCAT<br />
OPEN<br />
RPT<br />
Rough spots on<br />
inside edge<br />
SHF<br />
Ball point pen<br />
or pencil<br />
EQ<br />
SUB W<br />
DSP<br />
ASM<br />
Track<br />
Number<br />
SCN<br />
1 2 3 4 5 6<br />
EQ<br />
SUB W<br />
DSP<br />
ASM<br />
13
14<br />
CD Operation (Continued)<br />
Ejecting a CD:<br />
1. Press the OPEN button to fold down the front<br />
panel to access the disc slot.<br />
2. Press the button to eject a disc.<br />
Repeating a CD Track:<br />
The <strong>WM1</strong>-<strong>DVD</strong>’s default setting is to repeat the<br />
disc. So when the CD mode is selected, “RPT”<br />
appears in the display, the disc will play the<br />
entire disc and then continually repeat the disc.<br />
To repeat a CD track press the RPT button two<br />
times. “RPT” on the first press will disappear<br />
then on the second press “RPT” will reappear.<br />
The CD track will now play repeatedly. Press the<br />
RPT button one more time to cancel track repeat.<br />
The repeat feature operates in the following<br />
sequence: Disc Repeat _ > Repeat Off _ > Track<br />
Repeat _ > Disc Repeat . . .<br />
Random CD Track Play Order:<br />
Press the SHF button until “SHF” appears in the<br />
display. The tracks on the disc will play in a random<br />
order. To cancel this feature press the SHF<br />
button again.<br />
DIM<br />
S MOD<br />
iPod MENU<br />
D M<br />
S MOD<br />
iPod MENU<br />
VOL<br />
VOL<br />
VOL<br />
VOL<br />
LOUD<br />
LOUD<br />
MUTE<br />
MUTE<br />
DIR/CAT<br />
OPEN<br />
RPT<br />
SHF<br />
SCN<br />
1 2 3 4 5 6<br />
DIR CAT<br />
OPEN<br />
RPT<br />
SHF<br />
SCN<br />
1 2 3 4 5 6<br />
EQ<br />
SUB W<br />
DISP<br />
ASM<br />
EQ<br />
UB W<br />
DISP<br />
ASM
<strong>DVD</strong> Operation<br />
General Operations:<br />
1. Press the button to turn the unit On.<br />
2. Press the OPEN button to fold down the front<br />
panel to access the <strong>DVD</strong> player slot.<br />
3. Gently insert the disc into the slot with the<br />
label side up. The unit will automatically load<br />
the disc.<br />
Note: If a <strong>DVD</strong> does not auto-load, DO NOT<br />
FORCE it into the slot, as you may already have a<br />
<strong>DVD</strong> loaded as indicated by the inserted disc icon.<br />
Playing a <strong>DVD</strong>:<br />
Press the button to play the disc.<br />
Pausing a <strong>DVD</strong>:<br />
Press the button to pause the disc, press it<br />
again to resume play.<br />
Stopping a <strong>DVD</strong>:<br />
Press the button to stop the disc. To resume<br />
play, press the button.<br />
Pressing the button 2 times. Then pressing<br />
the button and the disc will start playing<br />
from the beginning.<br />
DIM<br />
S MOD<br />
iPod MENU<br />
DIM<br />
S MOD<br />
Pod MENU<br />
DIM<br />
S MOD<br />
P d MENU<br />
D M<br />
S MOD<br />
Pod MENU<br />
VOL<br />
VOL<br />
VOL<br />
VOL<br />
VOL<br />
VOL<br />
VOL<br />
VOL<br />
LOUD<br />
LOUD<br />
MUTE<br />
MUTE<br />
LOUD<br />
ST<br />
DIR CAT<br />
OPEN<br />
RPT<br />
SHF<br />
SCN<br />
1 2 3 4 5 6<br />
Label Side Up<br />
MUTE<br />
LOUD<br />
MUTE<br />
D R/CAT<br />
D R/CAT<br />
OPEN<br />
RPT<br />
EQ<br />
SUB W<br />
DSP<br />
ASM<br />
Inserted Disc Icon<br />
SHF<br />
SCN<br />
1 2 3 4 5 6<br />
DRCAT<br />
OPEN<br />
1 2 3 4 5 6<br />
OPEN<br />
RPT<br />
RPT<br />
SHF<br />
SHF<br />
SCN<br />
SCN<br />
1 2 3 4 5 6<br />
EQ<br />
SUB W<br />
DSP<br />
ASM<br />
EQ<br />
SUB W<br />
DSP<br />
ASM<br />
EQ<br />
SUB W<br />
DSP<br />
ASM<br />
15
<strong>DVD</strong> Operation (Continued)<br />
Ejecting a <strong>DVD</strong>:<br />
1. Press the OPEN button to fold down the front<br />
panel to access the disc slot.<br />
2. Press the button to eject a disc.<br />
<strong>DVD</strong> Chapter Selection:<br />
Press the button to select a lower chapter.<br />
Press the button to select a higher chapter.<br />
The chapter number will appear in the display.<br />
Chapter selection can also be selected by using<br />
the remote control. Press the chapter selection<br />
number button that corresponds to the chapter<br />
you want to play.<br />
For example: If you want to play chapter 8, press<br />
button 8 button.<br />
If you want to play chapter 28, press the 2 button<br />
followed immediately by the 8 button.<br />
Chapter 28 will start playing and “28” will appear<br />
in the display.<br />
Fast Forward / Fast Reverse Disc Play:<br />
Press and hold the (fast forward) or<br />
(fast reverse) button during play. Each time the<br />
button is pressed and held, the speed of fast forward/fast<br />
reverse changes in the following order:<br />
2X, 4X, 8X, 20X<br />
To resume normal play, press the button.<br />
Menu Function:<br />
Press the <strong>DVD</strong> MENU button during disc play<br />
and the main menu will be displayed. Scroll<br />
through the menu with the NAVIGATION BUT-<br />
TONS. Select a feature by pressing the OK button.<br />
Audio Language Menu:<br />
Press the AUDIO button during playback to select<br />
the desired audio/language setup.<br />
16<br />
DIM<br />
Lower<br />
Chapter<br />
D M<br />
VOL<br />
VOL<br />
Fast<br />
Rewind<br />
VOL<br />
LOUD<br />
MUTE<br />
Higher<br />
Chapter<br />
D R / CA<br />
DIR CAT<br />
OPEN<br />
1 2 3 4 5 6<br />
RP SHF SCN<br />
1 2 3 4 5<br />
VOL<br />
6<br />
DIR / CA<br />
LOUD<br />
MUTE<br />
AUD O<br />
7<br />
Fast<br />
Forward<br />
<strong>DVD</strong><br />
SE UP<br />
CA<br />
I LE<br />
AUDIO<br />
I LE<br />
AUDIO<br />
SUB<br />
SUB<br />
8 0<br />
DIR CAT<br />
OPEN<br />
EQ<br />
SUB W<br />
DSP<br />
ASM<br />
Chapter<br />
Number<br />
<strong>DVD</strong><br />
MENU<br />
1 2 3 4 5 6<br />
VOLUME<br />
OK<br />
<strong>DVD</strong><br />
MENU<br />
RP SHF SCN<br />
SUB<br />
OK<br />
<strong>DVD</strong><br />
MENU<br />
RP SHF SCN<br />
2 3 4 5<br />
EQ<br />
SUB W<br />
DISP<br />
ASM<br />
Navigation<br />
Buttons
<strong>DVD</strong> Operation (Continued)<br />
Subtitle Language Menu:<br />
Press the SUB-T button during playback. Each<br />
time the button is pressed, the subtitle language<br />
changes in sequential order.<br />
• Some discs may only contain one subtitle language.<br />
• Depending on the disc, the number of subtitle<br />
languages may be different.<br />
<strong>DVD</strong> Setup Menu<br />
Note: To access the <strong>DVD</strong> Setup Menu a <strong>DVD</strong> disc has to be inserted.<br />
D<br />
RP SHF SCN<br />
1 2 3 4 5<br />
6<br />
I LE<br />
AUDIO<br />
7<br />
SUB<br />
OK<br />
<strong>DVD</strong><br />
MENU<br />
8 9 0<br />
System Setup Language Setup Audio Setup<br />
SYSTEM SETUP<br />
TV SYSTEM<br />
SCREEN SAVER<br />
TV TYPE<br />
PASSWORD<br />
RATING<br />
DEFAULT<br />
EXIT SETUP<br />
Press the <strong>DVD</strong> SETUP button on the remote control<br />
to display the Setup Menu:<br />
System Setup Page:<br />
Use the navigation buttons to scroll between the<br />
menu items. Make a selection by pressing the<br />
OK button.<br />
• TV System: NTSC, PAL, Auto<br />
• Screen Saver: On, Off.<br />
• TV Type: 4:3PS, 4:3LB, 16:9<br />
• Password: _ _ _ _<br />
• Rating: 1 Kid Safe<br />
2 G<br />
3 PG<br />
4 PG13<br />
5 PG-R<br />
6 R<br />
7 NC-17<br />
8 Adult<br />
• Default: Restore<br />
• Exit Setup<br />
Language Setup Page:<br />
Use the navigation buttons to scroll between the<br />
menu items. Make a selection by pressing the OK<br />
button. Language Setup Options:<br />
• OSD Language: English, German, Spanish,<br />
French, Portuguese, Italian, Russian<br />
• Audio Lang: English, German, Spanish,<br />
French, Portuguese, Italian, Russian<br />
• Subtitle Lang: English, German, Spanish,<br />
French, Portuguese, Italian, Russian, Off<br />
• Menu Lang: English, German, Spanish,<br />
French, Portuguese, Italian, Russian, Off<br />
• Exit Setup<br />
Audio Setup Page:<br />
Use the navigation buttons to scroll between the<br />
menu items. Make a selection by pressing the OK<br />
button. Audio Setup Options:<br />
• Key: #, +3, +2, 0, -2, -4, b<br />
• Exit Setup<br />
17
MP3 Disc Operation<br />
General Operations:<br />
1. Press the button to turn the unit On.<br />
2. Press the OPEN button to fold down the front<br />
panel to access the disc player slot.<br />
3. Gently insert the disc into the slot with the<br />
label side up. The unit will automatically load<br />
the disc.<br />
Note: If a disc does not auto-load, DO NOT<br />
FORCE into the slot, as you may already have a<br />
disc loaded.<br />
Disc Track Selection:<br />
Press the button to select a lower track.<br />
Press the button to select higher track. The<br />
track number will appear in the display.<br />
Display Selection:<br />
Press the DISP button to display the elapse time.<br />
Pausing a Disc:<br />
Press the button to pause the disc. Press it<br />
again to resume play.<br />
Ejecting a Disc:<br />
1. Press the OPEN button to fold down the front<br />
panel to access the disc slot.<br />
2. Press the button to eject a disc.<br />
Repeating a Track/<br />
Random Track Play Order/Preview Tracks:<br />
(see "CD Operation" for details)<br />
18<br />
DIM<br />
S MOD<br />
Pod MENU<br />
DIM<br />
Lower<br />
Track<br />
DIM<br />
S MOD<br />
P d MENU<br />
DIM<br />
S MOD<br />
Pod MENU<br />
VOL<br />
VOL<br />
VOL<br />
VOL<br />
VOL<br />
VOL<br />
VOL<br />
VOL<br />
LOUD<br />
LOUD<br />
MUTE<br />
ST<br />
DRCAT<br />
OPEN<br />
RPT<br />
SHF<br />
SCN<br />
1 2 3 4 5 6<br />
Inserted Disc Icon<br />
Label Side Up<br />
MUTE<br />
Higher<br />
Track<br />
LOUD<br />
LOUD<br />
MUTE<br />
MUTE<br />
DRCAT<br />
OPEN<br />
RPT<br />
SHF<br />
SCN<br />
1 2 3 4 5 6<br />
DRCAT<br />
D R/CAT<br />
OPEN<br />
OPEN<br />
RPT<br />
RPT<br />
SHF<br />
1 2 3 4 5 6<br />
SHF<br />
1 2 3 4 5 6<br />
EQ<br />
SUB W<br />
DSP<br />
ASM<br />
EQ<br />
SUB W<br />
DSP<br />
ASM<br />
Track<br />
Number<br />
SCN<br />
SCN<br />
EQ<br />
SUB W<br />
DSP<br />
ASM<br />
EQ<br />
SUB W<br />
DSP<br />
ASM
CD Changer Operation (Option)<br />
Load CDs into Changer:<br />
Insert the CD magazine into the external CD<br />
changer.<br />
Power On/Off:<br />
Press the button to turn the unit On.<br />
Selecting the Play Source:<br />
Press the MODE button until “CD-CH” appears in<br />
the display. VOL<br />
CD Track Selection:<br />
Press the button to select a lower track.<br />
Press the button to select a higher track.<br />
The track number will appear in the display.<br />
CD Disc Selection:<br />
Press the 1 button to select a lower disc in the<br />
CD changer. Press the 2 button to select a higher<br />
disc in the CD changer. The disc number will<br />
appear in the display.<br />
Pausing a CD:<br />
Press the button to pause the disc. Press it<br />
again to resume play.<br />
DIM<br />
S MOD<br />
Pod MENU<br />
DIM<br />
Lower<br />
Track<br />
DIM<br />
S MOD<br />
Pod MENU<br />
DIM<br />
S MOD<br />
iPod MENU<br />
VOL<br />
VOL<br />
VOL<br />
VOL<br />
VOL<br />
VOL<br />
VOL<br />
LOUD<br />
LOUD<br />
LOUD<br />
MUTE<br />
MUTE<br />
Higher<br />
Track<br />
MUTE<br />
LOUD<br />
Lower<br />
Disc<br />
MUTE<br />
D R/CAT<br />
OPEN<br />
RPT<br />
SHF<br />
SCN<br />
1 2 3 4 5 6<br />
D R/CAT<br />
OPEN<br />
RPT<br />
SHF<br />
1 2 3 4 5 6<br />
D R/CAT<br />
OPEN<br />
Track<br />
Number<br />
1 2 3 4 5 6<br />
DIR CAT<br />
RPT<br />
Higher<br />
Disc<br />
OPEN<br />
RPT<br />
SHF<br />
N<br />
SCN<br />
EQ<br />
SUB W<br />
EQ<br />
SUB W<br />
DSP<br />
DSP<br />
ASM<br />
EQ<br />
SUB W<br />
DSP<br />
ASM<br />
Disc<br />
Number<br />
SCN<br />
1 2 3 4 5 6<br />
ASM<br />
EQ<br />
SUB W<br />
DSP<br />
ASM<br />
19
CD Changer Operation (Continued) (Option)<br />
Display Selection:<br />
Press the DISP button to display the elapse time.<br />
After 5 seconds the display will revert back to<br />
track display.<br />
Repeating a CD Track or Disc:<br />
Select the desired track to be repeated. Then press<br />
the RPT button and “RPT” will appear in the display.<br />
This track will play repeatedly.<br />
Press and hold the RPT button. “DRPT” will<br />
appear in the display. The disc will now play<br />
repeatedly.<br />
To cancel either function, press the RPT button<br />
again.<br />
Random CD Track or Disc Play Order:<br />
Press the SHF button and “SHF” will appear in<br />
the display. The tracks on the current disc will<br />
play in random order.<br />
Press and hold the SHF button and “DSHF” will<br />
appear in the display. The tracks on every loaded<br />
disc will play in random order.<br />
To cancel either function, press the SHF button<br />
again.<br />
Preview CD Tracks or Disc:<br />
Press the SCN button and “SCN” will appear in<br />
the display. Each track on the current disc will<br />
play for 10 seconds.<br />
Press and hold the SCN button and “DSCN” will<br />
appear in the display. The first track on every<br />
loaded disc will play for 10 seconds.<br />
To cancel either function, press the SCN button<br />
again.<br />
20<br />
DIM<br />
S MOD<br />
Pod MENU<br />
D M<br />
S MOD<br />
Pod MENU<br />
DIM<br />
S MOD<br />
P d MENU<br />
D M<br />
S MOD<br />
Pod MENU<br />
VOL<br />
VOL<br />
VOL<br />
VOL<br />
VOL<br />
VOL<br />
VOL<br />
VOL<br />
LOUD<br />
MUTE<br />
LOUD<br />
LOUD<br />
LOUD<br />
MUTE<br />
MUTE<br />
MUTE<br />
DRCAT<br />
D R/CAT<br />
OPEN<br />
RPT<br />
SHF<br />
SCN<br />
1 2 3 4 5 6<br />
DRCAT<br />
OPEN<br />
OPEN<br />
RPT<br />
SHF<br />
SCN<br />
1 2 3 4 5 6<br />
DIR/CAT<br />
OPEN<br />
RPT<br />
RPT<br />
SHF<br />
SHF<br />
SCN<br />
1 2 3 4 5 6<br />
SCN<br />
1 2 3 4 5 6<br />
EQ<br />
SUB W<br />
DSP<br />
AS<br />
EQ<br />
SUB W<br />
DSP<br />
ASM<br />
EQ<br />
SUB W<br />
DSP<br />
ASM<br />
EQ<br />
SUB W<br />
DISP<br />
ASM
Sirius Satellite Radio Setup (Option)<br />
Note: If your Sirius tuner is not activated, call 1-888-539-7474 to activate. The Sirius Tuner ID Number<br />
(ESN) is required during the activation process. Following the instructions below to access the Sirius<br />
Tuner ID Number (ESN):<br />
Accessing your Sirius Tuner ID Number (ESN):<br />
1. Press the MODE button until “SIRIUS”<br />
appears in the display area.<br />
2. Press the MENU button until “Direct-T”<br />
appears in the display area.<br />
3. Press the ENT BND button 4 times “SR<br />
CH000..” appears in the display area. The<br />
ESN number will appear in the display in two<br />
different screens.<br />
4. Press the ENT BND button again to exit.<br />
Sirius Satellite Radio Operation (Option)<br />
Please note that satellite radio signal may be blocked by trees, buildings or other obstacles.<br />
Information display during reception:<br />
ANTENNA ERROR: When an antenna issue exists.<br />
ACQUIRING SIGNAL: When a channel is being tuned-in (no signal is yet received).<br />
INVALID CHANNEL: A channel without a broadcast has been selected, or the receiver may not be activated.<br />
CALL 888-539-SIRIUS TO SUBSCRIBE: A channel not covered by your contract or the Sirius tuner is not<br />
activated. Call Sirius Service Center 1-888-539-7474, or visit them online at www.siriusradio.com.<br />
Channel Selection Modes:<br />
Channels are selected by the following methods:<br />
• Manual Tuning: Use the Manual Tuning method to scan thru the channels.<br />
• Direct Tuning: Use the Direct Tuning methods when you know the desired channel.<br />
• Category Tuning: Use the Category Tuning method when you know what category you want to scan<br />
for a channel.<br />
For details, see the following operation descriptions:<br />
DIM<br />
S MOD<br />
iPod MENU<br />
DIM<br />
S MOD<br />
iPod MENU<br />
D M<br />
VOL<br />
VOL<br />
VOL<br />
4 Times<br />
VOL<br />
VOL<br />
VOL<br />
OUD<br />
OUD<br />
MUTE<br />
MUTE<br />
LOUD<br />
MUTE<br />
DIR C T<br />
OPEN<br />
RPT<br />
SHF<br />
SCN<br />
1 2 3 4 5 6<br />
DIR C T<br />
OPEN<br />
1 2 3 4 5 6<br />
D R/CAT<br />
OPEN<br />
RPT<br />
RPT<br />
SHF<br />
SHF<br />
SCN<br />
SCN<br />
1 2 3 4 5 6<br />
SAT<br />
S T<br />
SAT<br />
EQ<br />
SUB W<br />
DISP<br />
ASM<br />
EQ<br />
SUB W<br />
DISP<br />
ASM<br />
EQ<br />
SUB W<br />
DSP<br />
ASM<br />
21
Sirius Satellite Radio Operation (Option) (Continued)<br />
Manual Tuning:<br />
Press the or button until the desired<br />
channel appears in the display.<br />
Direct Tuning:<br />
1. Press the MENU button until “Direct-T”<br />
appears in the display.<br />
22<br />
2. Press the or button to select the first<br />
number of the desired channel.<br />
VOL<br />
VOL<br />
3. Press the button to choose the next<br />
number. Press the or button to<br />
select the second number of the desired<br />
channel. Repeat this procedure for the third<br />
number.<br />
VOL<br />
VOL<br />
4. Press the ENT BND button and the channel<br />
will start playing.<br />
DIM<br />
Lower<br />
Channel<br />
Higher<br />
Number<br />
Lower<br />
Number<br />
DIM<br />
S MOD<br />
iPod MENU<br />
iP<br />
D M<br />
Previous<br />
Number<br />
D M<br />
VOL<br />
VOL<br />
VOL<br />
VOL<br />
VOL<br />
VOL<br />
VOL<br />
VOL<br />
LOUD<br />
MUTE<br />
Higher<br />
Channel<br />
LOUD<br />
LOUD<br />
MUTE<br />
MUTE<br />
VOL<br />
VOL<br />
Next<br />
Number<br />
LOUD<br />
MUTE<br />
DRCAT<br />
OPEN<br />
RPT<br />
SHF<br />
CATEGORY SAT<br />
1 2 3 4 5 6<br />
DIR CAT<br />
OPEN<br />
RPT<br />
SHF<br />
1 2 3 4 5 6<br />
LOUD<br />
MUTE<br />
DIR CAT<br />
OPEN<br />
RPT<br />
DRCAT<br />
N<br />
SCN<br />
OPEN<br />
EQ<br />
SUB W<br />
DSP<br />
ASM<br />
Channel<br />
Number<br />
S T<br />
RPT<br />
1 2 3 4 5 6<br />
D R/CAT<br />
OPEN<br />
RPT<br />
SHF<br />
EQ<br />
SUB W<br />
DISP<br />
ASM<br />
SCN<br />
1 2 3 4 5 6<br />
SHF<br />
SHF<br />
SCN<br />
SCN<br />
1 2 3 4 5 6<br />
SAT<br />
SAT<br />
EQ<br />
SUB W<br />
DISP<br />
ASM<br />
EQ<br />
SUB W<br />
DSP<br />
ASM<br />
AT
Sirius Satellite Radio Operation (Option) (Continued)<br />
Category Tuning:<br />
1. Press the MENU button until “CATEGORY”<br />
appears in the display.<br />
2. Press the 1 or 2 button to select the<br />
desired category.<br />
3. Press the or button to select the<br />
desired channel inside the category.<br />
4. Press the ENT BND button and the channel<br />
will start playing.<br />
DM<br />
S MOD<br />
Pod MENU<br />
Switching the Display:<br />
Press the DISP button to cycle through the following<br />
display modes.<br />
SONG TITLE _ > ARTIST _ > CATEGORY _ > SONG<br />
TITLE… VOL<br />
DM<br />
S MOD<br />
iPod MENU<br />
DM<br />
S MOD<br />
Pod MENU<br />
DIM<br />
DM<br />
VOL<br />
VOL<br />
VOL<br />
LOUD<br />
VOL<br />
VOL<br />
VOL<br />
VOL<br />
VOL<br />
VOL<br />
MUTE<br />
LOUD<br />
LOUD<br />
MUTE<br />
LOUD<br />
LOUD<br />
MUTE<br />
MUTE<br />
MUTE<br />
DIR CAT<br />
DR/CAT<br />
D R/CAT<br />
OPEN<br />
RPT<br />
SHF<br />
SCN<br />
1 2 3 4 5 6<br />
DRCAT<br />
OPEN<br />
RPT<br />
SHF<br />
SCN<br />
1 2 3 4 5 6<br />
DIR/CAT<br />
OPEN<br />
RPT<br />
SHF<br />
SCN<br />
1 2 3 4 5 6<br />
OPEN<br />
OPEN<br />
RPT<br />
1 2 3<br />
RPT<br />
SHF<br />
SHF<br />
CATEGORY<br />
SCN<br />
5<br />
SCN<br />
Display Modes<br />
S T<br />
6<br />
SAT<br />
1 2 3 4 5 6<br />
SAT<br />
AT<br />
SAT<br />
EQ<br />
UB W<br />
DISP<br />
ASM<br />
EQ<br />
SUB W<br />
DSP<br />
ASM<br />
EQ<br />
SUB W<br />
DSP<br />
ASM<br />
EQ<br />
SUB W<br />
DSP<br />
ASM<br />
EQ<br />
SUB W<br />
DISP<br />
ASM<br />
23
Sirius Satellite Radio Operation (Option) (Continued)<br />
Memorizing a Preset Channel:<br />
1. Press the ENT BND button to select either the<br />
SIRIUS 1, SIRIUS 2 or SIRIUS 3 Sirius band.<br />
Each band can memorize 6 channels for a<br />
total of 18 channels.<br />
2. Tune-in the desired Sirius channel.<br />
3. To memorize the channel press and hold anyone<br />
of the six channel recall buttons until you<br />
hear a beep.<br />
Recalling Memorized Sirius Channel:<br />
1. Press the ENT BND button to select either the<br />
SIRIUS 1, SIRIUS 2 or SIRIUS 3 band.<br />
2. Press and release the Sirius channel recall<br />
button 1, 2, 3, 4, 5 or 6 to select the memorized<br />
channel.<br />
IPOD Operation<br />
General Operations:<br />
1. Press the button to turn the unit On.<br />
2. Connect an IPOD to the cable attached to the<br />
<strong>WM1</strong>-<strong>DVD</strong>.<br />
3. The unit will automatically switch to the IPOD<br />
mode and start playing.<br />
Note: The IPOD controls will become inoperable,<br />
and the <strong>WM1</strong>-<strong>DVD</strong> now controls the IPOD.<br />
IPOD Mode Button Location and Functions:<br />
24<br />
3<br />
4<br />
2<br />
DIM<br />
S MOD<br />
iPod MENU<br />
VOL<br />
VOL<br />
LOUD<br />
MUTE<br />
1 2<br />
1. Menu Button: Same operation as the MENU<br />
button on an IPOD.<br />
2. Next and Previous Button: Press these buttons<br />
to scroll through the menu items, which is the<br />
same operation as the IPOD’s Click Wheel.<br />
DRCAT<br />
OPEN<br />
DM<br />
S MOD<br />
iPod MENU<br />
D M<br />
S MOD<br />
Pod MENU<br />
DIM<br />
S MOD<br />
Pod MENU<br />
RPT<br />
VOL<br />
VOL<br />
SHF<br />
VOL<br />
VOL<br />
VOL<br />
VOL<br />
LOUD<br />
LOUD<br />
Sirius Channel Recall Buttons<br />
LOUD<br />
MUTE<br />
MUTE<br />
MUTE<br />
SCN<br />
1 2 3 4 5 6<br />
Preset Channel Indicator<br />
DIR CAT<br />
D R/CAT<br />
OPEN<br />
1 2 3 4 5 6<br />
OPEN<br />
RPT<br />
RPT<br />
SHF<br />
SHF<br />
SCN<br />
SCN<br />
1 2 3 4 5 6<br />
DRCAT<br />
OPEN<br />
RPT<br />
SHF<br />
SCN<br />
1 2 3 4 5 6<br />
EQ<br />
SUB W<br />
3. Play/Pause Button ( ): Same operation as<br />
the button on an IPOD.<br />
4. ENT BND Button: Same operation as the Center<br />
Select button on an IPOD.<br />
DISP<br />
ASM<br />
S T<br />
SAT<br />
EQ<br />
SUB W<br />
DSP<br />
ASM<br />
EQ<br />
UB W<br />
DISP<br />
ASM<br />
EQ<br />
SUB W<br />
DSP<br />
ASM
IPOD Operation (Continued)<br />
Browse for a Song:<br />
1. Press the MENU button and appearing in the<br />
display will be either “PLAYLIST, ARTIST,<br />
ALBUM GENRE, SONG or COMPOSER”.<br />
2. Press the or button to select the<br />
“SONG” menu.<br />
3. Press the ENT BND button to activate the<br />
“SONG” menu.<br />
4. Press the button to select the desired<br />
song from the menu. Once the button has<br />
been used to scrolled into the song list the<br />
button can be used to scroll backwards.<br />
5. Press the ENT BND button to start playing the<br />
selected song.<br />
Pausing a Track:<br />
Press the button to pause the track. Press it<br />
again to resume play.<br />
DM<br />
S MOD<br />
iPod MENU<br />
DIM<br />
D M<br />
MENU<br />
DM<br />
S MOD<br />
Pod MENU<br />
DIM<br />
D M<br />
d MENU<br />
S MOD<br />
iPod MENU<br />
VOL<br />
VOL<br />
VOL<br />
VOL<br />
VOL<br />
VOL<br />
VOL<br />
or<br />
VOL<br />
VOL<br />
VOL<br />
VOL<br />
VOL<br />
LOUD<br />
LOUD<br />
LOUD<br />
LOUD<br />
MUTE<br />
MUTE<br />
LOUD<br />
LOUD<br />
MUTE<br />
MUTE<br />
MUTE<br />
MUTE<br />
DIR CAT<br />
OPEN<br />
RPT<br />
SHF<br />
SCN<br />
1 2 3 4 5 6<br />
D R/CAT<br />
DIR CAT<br />
OPEN<br />
1 2 3 4 5 6<br />
OPEN<br />
RPT<br />
RPT<br />
SHF<br />
SHF<br />
SCN<br />
SCN<br />
1 2 3 4 5 6<br />
DIR/CAT<br />
OPEN<br />
1 2 3 4 5 6<br />
DIR CAT<br />
DIR CAT<br />
OPEN<br />
OPEN<br />
RPT<br />
RPT<br />
RPT<br />
SHF<br />
SHF<br />
SHF<br />
SCN<br />
SCN<br />
SCN<br />
1 2 3 4 5 6<br />
1 2 3 4 5 6<br />
EQ<br />
SUB W<br />
DISP<br />
ASM<br />
EQ<br />
SUB W<br />
DISP<br />
ASM<br />
EQ<br />
EQ<br />
SUB W<br />
UB W<br />
DSP<br />
ASM<br />
DISP<br />
ASM<br />
EQ<br />
SUB W<br />
DISP<br />
EQ<br />
ASM<br />
SUB W<br />
DISP<br />
ASM<br />
25
Preview Tracks:<br />
Press the SCN button until “SCN” appears in the<br />
display. Each track on the IPOD will now play for<br />
10 seconds. To cancel this feature press the SCN<br />
button until “SCN” disappears from the display.<br />
26<br />
IPOD Operation (Continued)<br />
Repeating a Track:<br />
Select the desired track to repeat, then press the<br />
RPT button once and “RPT” appears in the display.<br />
This track will play repeatedly. To cancel<br />
this function press the RPT button one more<br />
time, and “RPT” will disappear from the display.<br />
Random Order Track Play:<br />
Press the SHF button until “SHF” appears in the<br />
display. The tracks on the IPOD will now play in<br />
a random order. To cancel this feature press the<br />
SHF button again.<br />
Display Selection:<br />
Press the DISP button to display the following<br />
track information: Elapse Time, Title, Artist,<br />
Album and Track.<br />
USB Operation<br />
General Operations:<br />
1. Press the button to turn the unit On.<br />
2. Connect a MP3 player to the USB cable coming<br />
from the <strong>WM1</strong>-<strong>DVD</strong>.<br />
3. The unit will automatically switch to the USB<br />
mode and start playing.<br />
Note: The controls on the MP3 player will<br />
become inoperable, and the <strong>WM1</strong>-<strong>DVD</strong> will now<br />
control the MP3 player.<br />
DM<br />
S MOD<br />
iPod MENU<br />
D M<br />
S MOD<br />
iPod MENU<br />
DIM<br />
S MOD<br />
Pod MENU<br />
DM<br />
S MOD<br />
Pod MENU<br />
D M<br />
S MOD<br />
iPod MENU<br />
VOL<br />
VOL<br />
VOL<br />
VOL<br />
VOL<br />
VOL<br />
VOL<br />
VOL<br />
VOL<br />
VOL<br />
LOUD<br />
LOUD<br />
MUTE<br />
LOUD<br />
MUTE<br />
LOUD<br />
LOUD<br />
MUTE<br />
MUTE<br />
MUTE<br />
D R/CAT<br />
D R/CAT<br />
DIR/CAT<br />
DIR CAT<br />
OPEN<br />
1 2 3 4 5 6<br />
OPEN<br />
RPT<br />
RPT<br />
SHF<br />
SHF<br />
SCN<br />
SCN<br />
1 2 3 4 5 6<br />
OPEN<br />
RPT<br />
SHF<br />
SCN<br />
1 2 3 4 5 6<br />
Display Modes<br />
DIR CAT<br />
OPEN<br />
OPEN<br />
RPT<br />
RPT<br />
SHF<br />
SHF<br />
SCN<br />
1 2 3 4 5 6<br />
SCN<br />
1 2 3 4 5 6<br />
EQ<br />
SUB W<br />
DSP<br />
ASM<br />
EQ<br />
SUB W<br />
DISP<br />
EQ<br />
ASM<br />
UB W<br />
EQ<br />
SUB W<br />
DISP<br />
ASM<br />
DISP<br />
ASM<br />
EQ<br />
SUB W<br />
DISP<br />
ASM
USB Operation (Continued)<br />
Track Selection:<br />
Press the button to select a lower track.<br />
Press the button to select a higher track.<br />
The track number will appear in the display.<br />
Display Selection:<br />
Press the DISP button to display the following<br />
MP3 disc information: track and elapse time.<br />
Pausing a Track:<br />
Press the button to pause the track, press it<br />
again to resume play.<br />
Repeating a Track:<br />
Random Track Play Order:<br />
Preview Tracks:<br />
(See CD Operation for details)<br />
Auxiliary Audio/Video Input Operation<br />
Selecting an Audio/Video Play Source:<br />
1. Press the button to turn the unit On.<br />
2. Press the MODE button until “AV IN” appears<br />
in the display.<br />
3. Refer to the audio device’s owners manual for<br />
proper operation.<br />
Note: The <strong>WM1</strong>-<strong>DVD</strong> will not control the auxiliary<br />
source, but can adjust the sound controls.<br />
DIM<br />
Lower<br />
Track<br />
DIM<br />
S MOD<br />
iPod MENU<br />
D M<br />
S MOD<br />
Pod MENU<br />
D M<br />
S MOD<br />
iPod MENU<br />
VOL<br />
VOL<br />
VOL<br />
VOL<br />
LOUD<br />
VOL<br />
VOL<br />
VOL<br />
VOL<br />
MUTE<br />
LOUD<br />
MUTE<br />
Higher<br />
Track<br />
LOUD<br />
LOUD<br />
MUTE<br />
MUTE<br />
DIR CAT<br />
DIR CAT<br />
OPEN<br />
RPT<br />
SHF<br />
SCN<br />
1 2 3 4 5 6<br />
OPEN<br />
1 2 3 4 5 6<br />
D R/CAT<br />
RPT<br />
OPEN<br />
RPT<br />
SHF<br />
SHF<br />
SCN<br />
Display Modes<br />
SCN<br />
1 2 3 4 5 6<br />
DIR CAT<br />
OPEN<br />
RPT<br />
SHF<br />
SCN<br />
1 2 3 4 5 6<br />
EQ<br />
SUB W<br />
DISP<br />
ASM<br />
EQ<br />
SUB W<br />
DISP<br />
ASM<br />
EQ<br />
SUB W<br />
EQ<br />
UB W<br />
DISP<br />
ASM<br />
DSP<br />
ASM<br />
27
Setup Features<br />
Button Beep On and Off Confirmation:<br />
Follow the instructions below to turn On or Off the<br />
button when pressed beep confirmation.<br />
1. Press and hold the SETUP button approximately<br />
10 seconds until “BEEP ON” appears in<br />
the display.<br />
2. Press the button for beep confirmation<br />
Off, and press the button for beep confirmation<br />
On.<br />
3. Wait 5 seconds, and the unit will return to the<br />
last display mode.<br />
28<br />
VOL<br />
VOL<br />
Primary Volume:<br />
Follow the instructions below to adjust the initial<br />
start-up volume level.<br />
1. Press and hold the SETUP button approximately<br />
10 seconds until “BEEP ON” appears in<br />
the display. Press the SETUP button again<br />
until “P-VOL 12” appears in the display.<br />
2. Press the or button to adjust the primary<br />
volume.<br />
3. Wait 5 seconds and the unit will return to last<br />
display mode.<br />
VOL<br />
VOL<br />
Area Radio Frequency Adjustment:<br />
Follow the instructions below to change the area<br />
configuration.<br />
1. Press and hold the SETUP button approximately<br />
10 seconds until “BEEP ON” appears in the<br />
display. Press the SETUP button two more<br />
times until “AREA USA” appears in the display.<br />
2. Press the or button to adjust the<br />
area.<br />
Note: If operating the unit in the USA do not<br />
change the area.<br />
“AREA OCE” = Australia and New Zealand.<br />
“AREA EUR” = Europe.<br />
3. Wait 5 seconds and the unit will return to last<br />
display mode.<br />
VOL<br />
VOL<br />
DM<br />
S MOD<br />
Pod MENU<br />
DIM<br />
S MOD<br />
P d MENU<br />
D M<br />
S MOD<br />
iPod MENU<br />
VOL<br />
VOL<br />
VOL<br />
VOL<br />
VOL<br />
VOL<br />
LOUD<br />
LOUD<br />
LOUD<br />
MUTE<br />
MUTE<br />
MUTE<br />
ST<br />
DIR/CAT<br />
OPEN<br />
RPT<br />
SHF<br />
SCN<br />
1 2 3 4 5 6<br />
ST<br />
ST<br />
DRCAT<br />
OPEN<br />
RPT<br />
SHF<br />
SCN<br />
1 2 3 4 5 6<br />
DIR CAT<br />
OPEN<br />
RPT<br />
SHF<br />
SCN<br />
1 2 3 4 5 6<br />
EQ<br />
SUB W<br />
DISP<br />
ASM<br />
EQ<br />
SUB W<br />
DSP<br />
ASM<br />
EQ<br />
UB W<br />
DISP<br />
ASM
Installation<br />
Sheet<br />
Metal<br />
Screw<br />
Nut<br />
7 1 /2”<br />
Washer<br />
Gasket<br />
Metal<br />
Strap<br />
Snap-On<br />
End Cap<br />
Dashboard<br />
7 1 /16”<br />
Attach Metal<br />
Strap Here<br />
2”<br />
Mounting<br />
Screws<br />
Snap-On<br />
End Cap<br />
29
Speaker Connections<br />
30<br />
Left<br />
Front<br />
Speaker<br />
_<br />
+<br />
Left<br />
Rear<br />
Speaker<br />
_<br />
+<br />
White/Black Wire<br />
White Wire<br />
Green/Black Wire<br />
Green Wire<br />
Powered Subwoofer<br />
(Optional Model: LS-SUB-75)<br />
Gray/Black Wire<br />
Gray Wire<br />
Violet/Black Wire<br />
Violet Wire<br />
_<br />
+<br />
Right<br />
Front<br />
Speaker<br />
_<br />
+<br />
Right<br />
Rear<br />
Speaker<br />
Subwoofer Output (Mono)<br />
Green Cable
Auxiliary Connections<br />
This unit for use only with a 12 Volt DC power source with a negative ground.<br />
Amplifier (Optional)<br />
Red Wire (+) to 12 Volt Ignition<br />
Yellow Wire (+) to 12 Volt Constant<br />
Black Wire Ground<br />
2-Channel<br />
Audio Output<br />
Monitor<br />
(Optional)<br />
Rear<br />
Line Out<br />
Gray Cable<br />
Blue Wire Amplifier Control<br />
Front<br />
Line Out<br />
Brown Cable<br />
Amplifier (Optional)<br />
2-Channel<br />
Audio Output<br />
31
Input Connections<br />
32<br />
Sirius<br />
Antenna<br />
(Optional)<br />
MENU<br />
TV with<br />
<strong>DVD</strong> Player<br />
(Optional)<br />
IPOD<br />
(Optional)<br />
MP3 Player<br />
(Optional)<br />
iPod Cable<br />
(Optional)<br />
Audio/Video<br />
Output<br />
MP3 Cable<br />
(Optional)<br />
Sirius<br />
Receiver<br />
(Optional)<br />
RCA Connectors<br />
Audio/Video Input<br />
Yellow Cable
Input Connections<br />
External Automotive<br />
Type Antenna<br />
(Optional)<br />
Infrared Remote Sensor<br />
(Optional)<br />
CD Changer<br />
(Optional)<br />
Wired Remote Controller<br />
(Optional Model: WRC-P1, WRC-S1, WRC-S2)<br />
33
Replaceable Fuse<br />
34<br />
If the fuse should blow, check that the wiring is<br />
correct. If the wiring is correct, replace the fuse<br />
with the same amperage rating as the original<br />
(15 amp).<br />
15 Amp Fuse
Warranty<br />
LIMITED WARRANTY<br />
This warranty will be honored only in U.S.A.<br />
<strong>MB</strong> <strong>Quart</strong> offers to the original purchaser a one (1) year warranty period from date of purchase. Except<br />
as specified below, this warranty covers all defects in material and workmanship in this component.<br />
The following are not covered by the warranty:<br />
1. Any product which is not distributed in the U.S.A. by TriStar Distributing or which is not purchased<br />
in the U.S.A. from an authorized TriStar Distributing dealer.<br />
2. Any product on which the serial has been defaced, modified or removed,<br />
3. Damage, deterioration or malfunction resulting from:<br />
a. Any shipping damage (claims must be presented to the carrier).<br />
b. Installation or removal of the product.<br />
c. Accident, acts of nature, misuse, abuse, neglect, unauthorized product modification or failure<br />
to follow instructions supplied with the product.<br />
d. Repair or attempted repair by anyone not authorized by TriStar Distributing.<br />
e. Any other cause that does not relate to a product defect.<br />
If within the one-year warranty period your <strong>MB</strong> <strong>Quart</strong> marine product should fail, please contact the<br />
dealer where the product was purchased to obtain authorization for warranty service. You must include<br />
a copy of the original dated sales receipt as proof of warranty coverage. All warranty service returns<br />
must be shipped freight prepaid. We will pay the return shipping charges, if repairs are covered by the<br />
warranty and we are shipping within the United States.<br />
After the warranty period if your <strong>MB</strong> <strong>Quart</strong> Marine Product ever needs service, please call 1-800-621-2278<br />
and ask for the service department, to determine if the repairs are feasible.<br />
LIMITATION OF IMPLIED WARRANTIES<br />
ALL IMPLIED WARRANTIES, INCLUDING WARRANTIES OF MERCHANTABILITY AND FITNESS FOR A<br />
PARTICULAR PURPOSE, ARE LIMITED IN DURATION TO THE LENGTH OF THIS WARRANTY.<br />
EXCLUSION OF DAMAGES<br />
TriStar Distributing liability for any defective product is limited to the repair or replacement of the product<br />
at our discretion. TriStar Distributing shall not be liable for:<br />
1. Installation or removal, damage to other property caused by any defects in components, damages<br />
based upon inconvenience, loss of use of the product; or any other damages, whether incidental,<br />
consequential or otherwise.<br />
2. Some states do not allow limitations on how long an implied warranty lasts and/or do not<br />
allow the exclusion or limitation of incidental or consequential damages, so the above limitations<br />
and exclusions may not apply to you.<br />
This warranty gives you specific rights, and you may have other rights, which may vary from state to<br />
state.<br />
If a problem develops during or after the Limited Warranty Period; or if you have any questions regarding<br />
the operation of the product, you should contact TriStar Distributing warranty department.<br />
TriStar Distributing<br />
58263 Charlotte Avenue<br />
Elkhart, Indiana 46517<br />
800-621-2278<br />
35
© Copyright 2007<br />
<strong>MB</strong> <strong>Quart</strong><br />
<strong>WM1</strong>-<strong>DVD</strong>-UM Rev. A<br />
1-25-08