Kombisensor Funk
Kombisensor Funk
Kombisensor Funk

Sie wollen auch ein ePaper? Erhöhen Sie die Reichweite Ihrer Titel.
YUMPU macht aus Druck-PDFs automatisch weboptimierte ePaper, die Google liebt.
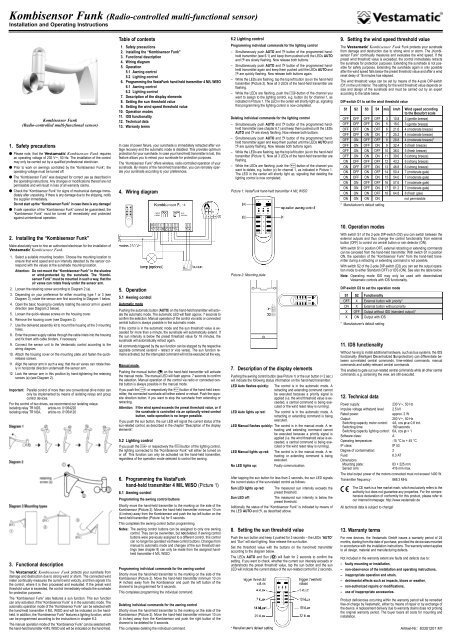
<strong>Kombisensor</strong> <strong>Funk</strong> (Radio-controlled multi-functional sensor)<br />
Installation and Operating Instructions<br />
<strong>Kombisensor</strong> <strong>Funk</strong><br />
(Radio-controlled multi-functional sensor)<br />
1. Safety precautions<br />
· Please note, that the Vestamatic <strong>Kombisensor</strong> <strong>Funk</strong> requires<br />
an operating voltage of 230 VW, 50 Hz. The installation of the control<br />
may only be carried out by a qualified professional electrician.<br />
· Prior to work on awnings controlled by the “<strong>Kombisensor</strong> <strong>Funk</strong>”, the<br />
operating voltage must be turned off.<br />
· The “<strong>Kombisensor</strong> <strong>Funk</strong>” was designed for correct use as described in<br />
the operating instructions. Any changes or modifications thereof are not<br />
permissible and will result in loss of all warranty claims.<br />
· Check the “<strong>Kombisensor</strong> <strong>Funk</strong>” for signs of mechanical damage immediately<br />
after unpacking. If there is any damage due to the shipping, notify<br />
the supplier immediately.<br />
Do not start up the “<strong>Kombisensor</strong> <strong>Funk</strong>” in case there is any damage!<br />
· If safe operation of the “<strong>Kombisensor</strong> <strong>Funk</strong>” cannot be guaranteed, the<br />
“<strong>Kombisensor</strong> <strong>Funk</strong>” must be turned off immediately and protected<br />
against unintentional operation.<br />
2. Installing the “<strong>Kombisensor</strong> <strong>Funk</strong>”<br />
Make absolutely sure to hire an authorized electrician for the installation of<br />
Vestamatic <strong>Kombisensor</strong> <strong>Funk</strong>.<br />
1. Select a suitable mounting location. Choose the mounting location to<br />
ensure that wind speed and sun intensity detected by the sensor correspond<br />
with the values at the sunshade mounting location.<br />
Attention: Do not mount the “<strong>Kombisensor</strong> <strong>Funk</strong>” in the shadow<br />
or wind-protected by the sunshade. The “<strong>Kombisensor</strong><br />
<strong>Funk</strong>” must be mounted in such a way, that the<br />
air vanes can rotate freely under the sensor arm.<br />
2. Loosen the retaining screw according to Diagram 2 (a).<br />
3. Depending on your preference for either mounting type 1 or 3 (see<br />
Diagram 3), rotate the sensor arm first according to Diagram 1 below.<br />
4. Open the basic housing by carefully rotating the sensor arm in upward<br />
direction (see Diagram 2 below).<br />
5. Loosen the quick-release screws on the housing cover.<br />
6. Remove the housing cover (see Diagram 2).<br />
7. Use the delivered assembly kit to mount the housing at the 3 mounting<br />
holes.<br />
8. Enter the power supply cables through the cable inlets into the housing<br />
and fix them with cable binders, if necessary.<br />
9. Connect the sensor unit to the Vestamatic control according to the<br />
wiring diagram.<br />
10. Attach the housing cover on the mounting plate und fasten the quickrelease<br />
screws.<br />
11. Align the sensor arm in such a way, that the air vanes can rotate freely<br />
in horizontal direction underneath the sensor arm.<br />
12. Lock the sensor arm in this position by hand-tightening the retaining<br />
screws (a) (see Diagram 2).<br />
Important: Parallel control of more than one conventional drive motor can<br />
only be implemented by means of isolating relays and group<br />
control devices.<br />
For the control of two drives, we recommend our isolating relays:<br />
Isolating relay TR N2S, article-no. 01054220<br />
Isolating relay TR N2A, article-no. 01054120<br />
3. Functional description<br />
The Vestamatic <strong>Kombisensor</strong> <strong>Funk</strong> protects your sunshade from<br />
damage and destruction due to strong wind or storm. The connected wind<br />
meter continually measures the current wind velocity, and then signals it to<br />
the control, where it is then processed and evaluated. If the preset wind<br />
threshold value is exceeded, the control immediately retracts the sunshade<br />
for protection purposes.<br />
The “<strong>Kombisensor</strong> <strong>Funk</strong>” also features a sun function. This sun function<br />
can only activated, if the “<strong>Kombisensor</strong> <strong>Funk</strong>” is in the automatic mode. The<br />
automatic operation mode of the “<strong>Kombisensor</strong> <strong>Funk</strong>” can be selected with<br />
the hand-held transmitter 4 M/L WISO and will be indicated on the handheld.<br />
In addition, the “<strong>Kombisensor</strong> <strong>Funk</strong>” features a lighting function, which<br />
can be programmed according to the instructions in chapter 6.2.<br />
The manual operation mode of the “<strong>Kombisensor</strong> <strong>Funk</strong>” can be selected with<br />
the hand-held transmitter 4 M/L WISO and will be indicated on the hand-held.<br />
Table of contents<br />
1. Safety precautions<br />
2. Installing the “<strong>Kombisensor</strong> <strong>Funk</strong>”<br />
3. Functional description<br />
4. Wiring diagram<br />
5. Operation<br />
5.1 Awning control<br />
5.2 Lighting control<br />
6. Programming the Vesta<strong>Funk</strong> hand-held transmitter 4 M/L WISO<br />
6.1 Awning control<br />
6.2 Lighting control<br />
7. Description of the display elements<br />
8. Setting the sun threshold value<br />
9. Setting the wind speed threshold value<br />
10. Operation modes<br />
11. IDS functionality<br />
12. Technical data<br />
13. Warranty terms<br />
In case of power failure, your sunshade is immediately retracted after voltage<br />
recovery and the automatic mode is disabled. This provides optimum<br />
protection for your sunshade. In case your hand-held transmitter is lost, this<br />
feature allows you to retract your sunshade for protection purposes.<br />
The “<strong>Kombisensor</strong> <strong>Funk</strong>” offers wireless, radio-controlled operation of your<br />
sunshade. By means of the hand-held transmitter, you can remotely operate<br />
your sunshade according to your preferences.<br />
6.2 Lighting control<br />
Programming individual commands for the lighting control<br />
– Simultaneously push AUTO and H button of the programmed handheld<br />
transmitter (see 6.1) and keep them pushed until the LEDs AUTO<br />
and H are slowly flashing. Now release both buttons.<br />
– Simultaneously push AUTO and H button of the programmed handheld<br />
transmitter again and keep them pushed until the LEDs AUTO and<br />
H are quickly flashing. Now release both buttons again.<br />
– While the LEDs are flashing, tap the top left button (a) on the hand-held<br />
transmitter (Picture 2). Now all 3 LEDs of the hand-held transmitter are<br />
flashing.<br />
– While the LEDs are flashing, push the O-button of the channel you<br />
want to assign to the lighting control, e.g. button (b) for channel 1, as<br />
indicated in Picture 1. The LED in the center will shortly light up, signaling<br />
that programming the lighting control is now completed.<br />
Deleting individual commands for the lighting control<br />
– Simultaneously push AUTO and H button of the programmed handheld<br />
transmitter (see chapter 6.1) and keep them pushed until the LEDs<br />
AUTO and H are slowly flashing. Now release both buttons.<br />
– Simultaneously push AUTO and H button of the programmed handheld<br />
transmitter again and keep them pushed until the LEDs AUTO and<br />
H are quickly flashing. Now release both buttons again.<br />
– While the LEDs are flashing, tap the top left button (a) on the hand-held<br />
transmitter (Picture 1). Now all 3 LEDs of the hand-held transmitter are<br />
flashing.<br />
– While the LEDs are flashing, push the o-button of the channel you<br />
want to delete, e.g. button (c) for channel 1, as indicated in Picture 1.<br />
The LED in the center will shortly light up, signaling that deleting the<br />
lighting control is now completed.<br />
4. Wiring diagram Picture 1: Vesta<strong>Funk</strong> hand-held transmitter 4 M/L WISO<br />
5. Operation<br />
5.1 Awning control<br />
Automatic mode<br />
Pushing the automatic button (AUTO) on the hand-held transmitter will activate<br />
the automatic mode. The automatic LED will flash approx. 7 seconds to<br />
confirm the selection. Manual operation of the control via radio or connected<br />
central button is always possible in the automatic mode.<br />
If the control is in the automatic mode and the sun threshold value is exceeded<br />
for more than a minute, the sunshade will automatically extend. If<br />
the sun intensity is below the preset threshold value for 16 minutes, the<br />
sunshade will automatically retract again.<br />
All commands triggered by the sun function can be stopped by the respective<br />
opposite command (extend – retract or vice versa). The sun function remains<br />
activated, but the interrupted command will not be executed all the way.<br />
Manual mode<br />
Pushing the manual button (H) on the hand-held transmitter will activate<br />
the manual mode. The manual LED will flash approx. 7 seconds to confirm<br />
the selection. Manual operation of the control via radio or connected central<br />
button is always possible in the manual mode.<br />
If you push the O- or respectively the o-button of the hand-held transmitter,<br />
the connected sunshade will either extend or retract. Push the opposite<br />
direction button, if you want to stop the sunshade from extending or<br />
retracting.<br />
Attention: If the wind speed exceeds the preset threshold value, or if<br />
the sunshade is controlled via an optionally wired central<br />
button, radio operation is no longer possible.<br />
If you push the sun button, the sun LED will signal the current status of the<br />
sun-related control, as described in the chapter “Description of the display<br />
elements”.<br />
5.2 Lighting control<br />
If you push the O- or respectively the o-button of the lighting control,<br />
the lighting connected to the “<strong>Kombisensor</strong> <strong>Funk</strong>” will either be turned on<br />
or off. This function can only be activated via the hand-held transmitter,<br />
regardless of the operation mode selected to control the awning.<br />
6. Programming the Vesta<strong>Funk</strong><br />
hand-held transmitter 4 M/L WISO (Picture 1)<br />
6.1 Awning control<br />
Programming the awning control buttons<br />
Shortly move the hand-held transmitter to the marking on the side of the<br />
<strong>Kombisensor</strong> (Picture 2). Move the hand-held transmitter minimum 10 cm<br />
(4 inches) away from the <strong>Kombisensor</strong> and push the top left button on the<br />
hand-held transmitter (Picture 1a) for 5 seconds.<br />
This completes the awning control button programming.<br />
Notes: The awning control buttons can be assigned to only one awning<br />
control. They can be overwritten, but not deleted. If awning control<br />
buttons were previously assigned to a different control, this control<br />
can no longer be operated via these control buttons. Changes from<br />
manual to automatic mode and changes of the sun threshold settings<br />
(see chapter 8) can only be made from the assigned handheld<br />
transmitter 4 M/L WISO.<br />
Programming individual commands for the awning control<br />
Shortly move the hand-held transmitter to the marking on the side of the<br />
<strong>Kombisensor</strong> (Picture 2). Move the hand-held transmitter minimum 10 cm<br />
(4 inches) away from the <strong>Kombisensor</strong> and push the left button of the<br />
channel to be programmed for 5 seconds.<br />
This completes programming the individual command.<br />
Deleting individual commands for the awning control<br />
Shortly move the hand-held transmitter to the marking on the side of the<br />
<strong>Kombisensor</strong> (Picture 2). Move the hand-held transmitter minimum 10 cm<br />
(4 inches) away from the <strong>Kombisensor</strong> and push the right button of the<br />
channel to be deleted for 5 seconds.<br />
This completes deleting the individual command.<br />
Picture 2: Mounting plate<br />
7. Description of the display elements<br />
Pushing the awning control button (see Picture 1) or the sun button (< 2 sec.)<br />
will indicate the following status information on the hand-held transmitter:<br />
LED Auto flashes quickly:<br />
The control is in the automatic mode. A<br />
retracting and extending command cannot<br />
be executed because a priority signal is<br />
applied (i.e. the wind threshold value is exceeded,<br />
a central command is being executed<br />
or the wind reset relay is running).<br />
LED Auto lights up red: The control is in the automatic mode. A<br />
retracting or extending command is being<br />
executed.<br />
LED Manual flashes quickly: The control is in the manual mode. A retracting<br />
and extending command cannot<br />
be executed because a priority signal is<br />
applied (i.e. the wind threshold value is exceeded,<br />
a central command is being executed<br />
or the wind reset relay is running).<br />
LED Manual lights up red:<br />
No LED lights up:<br />
The control is in the manual mode. A retracting<br />
or extending command is being<br />
executed.<br />
Faulty communication.<br />
After tapping the sun button for less than 2 seconds, the sun LED signals<br />
the current status of the sun-related control as follows:<br />
Sun LED lights up red: The measured sun intensity exceeds the<br />
preset threshold.<br />
Sun LED off:<br />
The measured sun intensity is below the<br />
preset threshold.<br />
Aditionally the status of the “<strong>Kombisensor</strong> <strong>Funk</strong>” is indicated by means of<br />
the LED AUTO and H, as described above.<br />
8. Setting the sun threshold value<br />
Push the sun button and keep it pushed for 3 seconds – the LEDs “AUTO”<br />
and “Sun” will start lighting. Now release the sun button.<br />
Set the threshold value with the buttons on the hand-held transmitter<br />
according to the diagram below.<br />
The LEDs AUTO and Sun (S) will flash for 2 seconds to confirm the<br />
setting. If you want to check, whether the current sun intensity exceeds or<br />
undershoots the preset threshold value, tap the sun button and the sun<br />
LED will indicate the current status of the sun-related control for 2 seconds.<br />
9. Setting the wind speed threshold value<br />
The Vestamatic <strong>Kombisensor</strong> <strong>Funk</strong> <strong>Funk</strong> protects your sunshade<br />
from damage and destruction due to strong wind or storm. The „<strong>Kombisensor</strong><br />
<strong>Funk</strong>“ continually measures and evaluates the wind speed. If the<br />
preset wind threshold value is exceeded, the control immediately retracts<br />
the sunshade for protection purposes. Extending the sunshade is not possible<br />
for safety purposes. Extending the sunshade again is only possible<br />
after the wind speed falls below the preset threshold value and after a wind<br />
reset delay of 16 minutes has elapsed.<br />
The wind threshold value can be set by means of the 4-pole DIP-switch<br />
(D1) in the unit interior. The setting for the wind threshold value depends on<br />
size and design of the sunshade and must be carried out by an expert<br />
according to the table below.<br />
DIP-switch D1 to set the wind threshold value<br />
S1 S2 S3 S4 m/s km/h Wind speed according<br />
to the Beaufort scale<br />
OFF OFF OFF OFF 3 10.8 3 (gentle breeze)<br />
OFF OFF OFF ON 5 18.0 3 (gentle breeze)<br />
OFF OFF ON OFF 6 21.6 4 (moderate breeze)<br />
OFF OFF ON ON 7 25.2 4 (moderate breeze)<br />
OFF ON OFF OFF 8 28.8 4 (moderate breeze)*<br />
OFF ON OFF ON 9 32.4 5 (fresh breeze)<br />
OFF ON ON OFF 10 36.0 5 (fresh breeze)<br />
OFF ON ON ON 11 39.6 6 (strong breeze)<br />
ON OFF OFF OFF 12 43.2 6 (strong breeze)<br />
ON OFF OFF ON 13 46.8 6 (strong breeze)<br />
ON OFF ON OFF 14 50.4 7 (moderate gale)<br />
ON OFF ON ON 15 54.0 7 (moderate gale)<br />
ON ON OFF OFF 16 57.6 7 (moderate gale)<br />
ON ON OFF ON 17 61.2 7 (moderate gale)<br />
ON ON ON OFF 18 64.8 8 (fresh gale)<br />
ON ON ON ON not permissible<br />
* Manufacturer’s default setting<br />
10. Operation modes<br />
With switch S1 of the 2-pole DIP-switch (D2) you can switch between the<br />
external outputs and thus change the control functionality from external<br />
button (OFF) to control via central button or rain detector (ON).<br />
With switch S1 in position OFF, external retracting or extending commands<br />
can be canceled from the hand-held transmitter. With switch S1 in position<br />
ON, the operation of the “<strong>Kombisensor</strong> <strong>Funk</strong>” from the hand-held transmitter<br />
during a retracting or extending command is not possible.<br />
With switch S2 of the 2-pole DIP-switch (D2) you can set the output operation<br />
mode to either Standard (OFF) or IDS (ON). See also the table below.<br />
Note: Operating mode IDS may only be used with decentralized<br />
Vestamatic controls with IDS functionality.<br />
DIP-switch D2 to set the operation mode<br />
S1 S2 Functionality<br />
OFF<br />
ON<br />
X<br />
X<br />
External button with priority*<br />
External button without priority<br />
X OFF Output without IDS (standard output)*<br />
X ON Output with IDS<br />
* Manufacturer’s default setting<br />
11. IDS functionality<br />
Without having to install additional hardware, such as bus systems, the IDS<br />
functionality (Intelligent Decentralized Sunprotection) can differentiate between<br />
sun-related central commands, time-related commands, manual<br />
commands and safety-relevant central commands.<br />
This enables to gate out sun-related central commands while all other central<br />
commands, e.g. screening the view, are still executed.<br />
12. Technical data<br />
Power supply:<br />
230 VW, 50 Hz<br />
Impulse voltage withstand level: 2.5 kV<br />
Rated power:<br />
approx. 2 W<br />
Output:<br />
250 VW, 50 Hz<br />
Switching capacity motor control: 4A, cos f > 0.8 ind.<br />
Switching time:<br />
180 seconds<br />
Switching capacity lighting control: 6A, cos f = 1<br />
Software class:<br />
A<br />
Operating temperature: -15 °C to + 45 °C<br />
IP class: IP 53<br />
Degree of contamination: 2<br />
Fuse:<br />
6.3 AT<br />
Dimensions<br />
Mounting plate:<br />
83 × 225 mm<br />
Sensor arm:<br />
416 mm max.<br />
The total output power of the motors connected must not exceed 1400 W.<br />
Transmitter frequency :<br />
868.3 MHz<br />
p<br />
The CE mark is a free market mark, which exclusively refers to the<br />
authority but does not guarantee any properties. For the comprehensive<br />
declaration of conformity for this product, please refer to<br />
our Internet homepage: http://www.vestamatic.de<br />
All technical data is subject to change!<br />
13. Warranty terms<br />
For new devices, the Vestamatic GmbH issues a warranty period of 24<br />
months, starting from the date of purchase, provided the device was mounted<br />
in accordance with the installation instructions. The warranty extent applies<br />
to all design, material and manufacturing defects.<br />
Not included in the warranty extent are faults and defects due to:<br />
– faulty mounting or installation,<br />
– non-observance of the installation and operating instructions,<br />
– inappropriate operation and strain,<br />
– detrimental effects such as impacts, blows or weather,<br />
– non-authorized repairs or modifications,<br />
– use of inappropriate accessories.<br />
Product deficiencies occurring within the warranty period will be remedied<br />
free-of-charge by Vestamatic, either by means of repair or by exchange of<br />
the device. A replacement delivery due to warranty claims does not prolong<br />
the original warranty period. The buyer bears all costs for mounting and<br />
installation.<br />
Artikel-Nr.: 83301201 M1