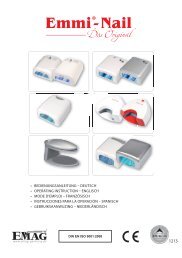
Ultraschallgeräte Bedienungsanleitung / Operating Instruction

Sie wollen auch ein ePaper? Erhöhen Sie die Reichweite Ihrer Titel.
YUMPU macht aus Druck-PDFs automatisch weboptimierte ePaper, die Google liebt.
Setting the Temperature (optional at HC-Series, D-Series and H-Series)<br />
When power is on, LED actual fluid temperature display window lamp flashes and displays fluid’s actual<br />
temperature. To set related gears, rotate heating knob. In order to heat the cleaning fluid during cleaning,<br />
so long as the heating switch is rotated clockwise, then it will enter into the heating state.<br />
The heating temperature can be selected and set freely according to the indication at the edge of rotary<br />
switch on the panel. Once the green heating working indicator lamp is on, the heating band PTC will also<br />
start working and heating the fluid. When the temperature reaches the set temperature, the green heating<br />
working indicator lamp will go off and the heating band PTC will stop working. When the fluid temperature<br />
is lower than the set temoerature, the heating band PTC will also start working and heating the fluid. Then,<br />
the temperature of the fluid will be automatically controlled at the set temperature.<br />
To stop heating, please rotate heating switch back to the „OFF“ position anticlockwise.<br />
Important: Heating function is not restriced by the ultrasonic cleaning timing but can work for a long time (however,it<br />
is necessary to make sure there is enough water inside the slot).<br />
Setting the timer<br />
When power is on, rotate timing knob to set relevant gears. At this time, once „ON/OFF“ button is pressed,<br />
the ultrasonic cleaning function will start imediatley. Then the LED window lamp flashes and displays the<br />
remaining time. When cleaning time is due, ultrasonic will stop and LED remaining time display window<br />
flashes and resumes to flash in the position before setting. At this time, as long as „ON/OFF“ button is pressed,<br />
cleaning will start again. This is the so-called “memory function“. It is convenient to use.<br />
Ultrasonic function<br />
After pressing „ON/OFF“ button each time, the machine will initiate Ultrasonic function and the ultrasonic<br />
will stop outputting. Press the button again to operate continuously after observing the cleaning effect.<br />
Degasing function (optional at D-Series)<br />
At the normal working state, once degas button is pressed, the machine will start degasing function and<br />
degas button indicator lamp will be on. Once degas button is pressed again, degassing function will stop<br />
and degasing Button indcatorl lamp will be off.<br />
Sweep function (optional at D-Series)<br />
At the normal work state, sweep function will start and sweep button indicator lamp will be on once sweep<br />
button is pressed. If sweep button is pressed again, the machin will stop sweep function and sweep button<br />
Indicator lamp will be off.<br />
Important: Sweep and degasing function do not work at once!<br />
Emptying the tank<br />
Remove waste Iiquids to empty the tank after no more need to use. Some models feature drain tap located<br />
on the side of the unit, using it can make the removal of the waste liquids effortless and safe. Always ensure<br />
the drain tap is “Closed“ when filling the tank with water.<br />
9