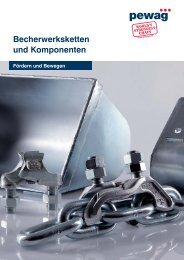
Installation manual pewag traction chains
Installation manual pewag traction chains
Installation manual pewag traction chains
Erfolgreiche ePaper selbst erstellen
Machen Sie aus Ihren PDF Publikationen ein blätterbares Flipbook mit unserer einzigartigen Google optimierten e-Paper Software.
<strong>Installation</strong> <strong>manual</strong><br />
<strong>pewag</strong> <strong>traction</strong> <strong>chains</strong><br />
<strong>pewag</strong> compact cross<br />
Traktionsketten<br />
1
2 Traktionsketten
Content<br />
<strong>Installation</strong> <strong>manual</strong><br />
<strong>pewag</strong> <strong>traction</strong> <strong>chains</strong><br />
<strong>pewag</strong> <strong>traction</strong> <strong>chains</strong><br />
can be used on a great variety<br />
of machines for seasonal<br />
application on ice and snow<br />
as well as for continuous<br />
use on slippery and<br />
muddy ground.<br />
Content 3<br />
English<br />
Components 4-5<br />
<strong>Installation</strong><br />
Adjusting, Maintenance, Repair,<br />
6-8<br />
Removal and storing 9<br />
Spare parts, Mounting tools 10-11<br />
Warnings and instructions for use 12-13<br />
Deutsch<br />
Bestandteile 14-15<br />
Montage<br />
Anpassen, Wartung, Reparatur,<br />
16-18<br />
Demontage und Lagerung 19<br />
Ersatzteile, Montagewerkzeuge 20-21<br />
Warn- und Gebrauchshinweise 22-23<br />
Traction <strong>chains</strong><br />
3
Components<br />
<strong>pewag</strong> compact cross <strong>chains</strong> 12 and 14 mm No. Designation<br />
7<br />
4<br />
8<br />
9<br />
10<br />
11<br />
5<br />
4 Traction <strong>chains</strong><br />
12 13 14<br />
6<br />
2<br />
1<br />
3<br />
1 Tread chain ring<br />
2 Tread chain link<br />
3 Inside chain<br />
4 Outside chain<br />
5 Tension chain<br />
6 Tag chain<br />
7 Tension chain ring<br />
8 Tension chain connector<br />
9 Locking plate<br />
10 Tension chain ring oval<br />
11 End shackle<br />
12 End hook<br />
13 End hook with securing device<br />
14 End ring oval flattened
<strong>pewag</strong> compact cross <strong>chains</strong> 16, 18 and 21 mm No. Designation<br />
7<br />
4<br />
8<br />
9<br />
10<br />
11 12<br />
5<br />
6<br />
2<br />
1<br />
3<br />
1 Tread chain ring<br />
2 Tread chain link<br />
3 Inside chain<br />
4 Outside chain<br />
5 Tension chain<br />
6 Tag chain<br />
7 Tension chain ring<br />
8 Tension chain connector<br />
9 Locking plate<br />
10 Tension chain ring oval<br />
11 End shackle<br />
12 Pin lock<br />
Traction <strong>chains</strong><br />
5
<strong>Installation</strong><br />
1<br />
2<br />
3<br />
Spread out the chain behind the wheel with the wear side<br />
upwards and the tension chain on the outer side of the wheel.<br />
Put the mounting chain over the tire and fix the chain with the<br />
S-hooks.<br />
Slowly drive a full turn of the wheel.<br />
Stop in this wheel position, open the mounting chain, unhook<br />
the S-hooks, remove the mounting chain.<br />
2 3<br />
6 Traction <strong>chains</strong><br />
1
4<br />
5<br />
Single chain:<br />
Close the inside and outside chain and the center tread with<br />
hooks (for 16, 18 and 21 mm with pin locks). In case of hooks<br />
with securing device, rotate oval end ring by 90°, thread it up<br />
at the ring flattening and rotate it back. Please take notice of<br />
the colour markings!<br />
Tighten the tension chain until the chain closely fits on the<br />
tire. Secure the tension chain with the locking plate. Fasten<br />
the tension chain end with a shackle. The chain is correctly<br />
tensioned if the tension chain can still be pulled approx.<br />
10 cm off the tire.<br />
End hook with securing device End hook without securing device<br />
Pin lock<br />
4<br />
5<br />
Traction <strong>chains</strong><br />
7
4a<br />
5a<br />
Twin chain:<br />
Close the inside and outside chain as well as the center tread<br />
with hooks (for 16, 18 and 21 mm <strong>chains</strong> with pin locks). In<br />
case of hooks with securing device, rotate oval end ring by<br />
90°, thread it up at the ring flattening and rotate it back. Close<br />
the middle chain by hooking it into the coupling connector<br />
and fasten the chain end with a shackle.<br />
Correct chain tensioning: Position middle chain between<br />
tires by tensioning (not too low in case of new tires: 7 cm<br />
maximum distance between middle chain ring and the tire<br />
surface). In case of worn tire or chain, adjust the chain fit by<br />
shortening the inside chain and by slight tensioning of the<br />
middle chain (lower position).<br />
8 Traction <strong>chains</strong><br />
4a<br />
5a
Adjusting<br />
The fit of the <strong>pewag</strong> compact cross <strong>chains</strong> is designed for standard<br />
dimension tires. If the tires are worn, the fit of the chain can<br />
be improved by shortening the inside chain. Sections of the inside<br />
chain are shortened with a pin lock. If required, the free links can<br />
be removed by means of autogenous cutting. Pay attention to<br />
symmetrical division starting with long sections.<br />
Maintenance<br />
Check chain fit and tension regularly.<br />
After a certain period of operation when the chain<br />
becomes loose it is necessary to retension it.<br />
Repair<br />
a) Pin lock, part no. 37/39<br />
b) connecting/repair ring, part no. 31<br />
Removal and storing<br />
• The tire should be positioned in such a way that the closing line<br />
is on the lower side of the tire.<br />
• Open the shackle at the end of the tension chain.<br />
• Pull back the end of the tension chain.<br />
• Open the locking plate, loosen the tension chain.<br />
• Open the outside chain, center section and inside chain.<br />
• Drive slowly forward or backward until the chain falls off the tire.<br />
• The <strong>chains</strong> should be washed and dried before storing.<br />
Traction <strong>chains</strong><br />
9
Spare parts<br />
No. 31/31 RS* Set Connecting-/repair ring<br />
consisting of:<br />
Ring, Locking piece, Heavy pin<br />
No. 37/39 Set Pin lock (replaces link)<br />
consisting of:<br />
Lock, Spiral pin<br />
10 Traction <strong>chains</strong><br />
Dimensions<br />
[mm]<br />
12 14 16 18 21<br />
part no. 31 d 31 e 31 f 31 g 31 h<br />
Components Single components available on request!<br />
Dimensions<br />
[mm]<br />
12 14 16 18 21<br />
part no. 39 d 37 e 37 f 37 f 37 h<br />
Components Single components available on request!
No. 24 End shackle part no. working load [kg] for tension chain Ø [mm]<br />
Mounting tools<br />
To install <strong>pewag</strong> compact cross <strong>chains</strong> you need pliers and hammer as<br />
well a lever hoist for tensioning.<br />
No. 49 Lever hoist<br />
24 d 400 8/10<br />
24 e 630 10/13<br />
24 f 1000 13/16<br />
24 g 1600 16<br />
Traction <strong>chains</strong><br />
11
Warnings and instructions for use<br />
Non-compliance with these warnings and instructions for use may<br />
lead to serious accidents and substantial damage to persons and<br />
property!<br />
No liability will be assumed for damages if caused by non-compliance<br />
or only partial compliance with these instructions.<br />
By using these anti-skid <strong>chains</strong> you declare that you have fully<br />
noted and accepted the warnings as well as the consequences of<br />
their non-observance. In the case of non-observance you will waive<br />
any claims against manufacturer, importer or distributor.<br />
1. The driving performance and handling characteristics of the<br />
motor vehicle may be influenced by the use of anti-skid <strong>chains</strong><br />
(see also owner’s <strong>manual</strong> of the vehicle).<br />
2. Anti-skid <strong>chains</strong> may only be used if the vehicle and its tires including<br />
rim have been approved for the use of anti-skid <strong>chains</strong><br />
by the respective manufacturer.<br />
3. Anti-skid <strong>chains</strong> may only be used for mounting on tires and<br />
driving on suitable ground; they may not be used for towing,<br />
lifting or any other improper purposes.<br />
4. The mounting instructions must be exactly observed in both<br />
mounting and removing of the <strong>chains</strong>.<br />
5. Used <strong>chains</strong> must be subjected to visual inspection before they<br />
are mounted. Do not use the chain if it is damaged or broken.<br />
In particular, do not mount the anti-skid chain if more than half<br />
of the wire thickness has worn off on even the smallest area.<br />
12 Traction <strong>chains</strong><br />
6. For mounting the <strong>chains</strong>, the vehicle must stand on level<br />
ground and be secured as instructed in the owner’s <strong>manual</strong>.<br />
Always used a pair of <strong>chains</strong> for each axle.<br />
7. Beware of the high weight that anti-skid <strong>chains</strong> may have.<br />
Improper handling may lead to injuries.<br />
8. Mount anti-skid <strong>chains</strong> only on tires of a size listed on the<br />
dimensions label on the chain packaging. Mount <strong>chains</strong> only<br />
on new tires; with retreaded tires, the fit of the <strong>chains</strong> must be<br />
checked by a qualified expert. Do not use <strong>chains</strong> of insufficient<br />
fit. Observe the tire inflation pressure indicated by the vehicle<br />
manufacturer. Do not reduce the tire inflation pressure before or<br />
after mounting, as this may cause damage.<br />
9. Check the proper mounting of the <strong>chains</strong> before starting the<br />
vehicle.<br />
10. After mounting make sure that no part of the chain brushes<br />
against or touches any vehicle part – even at full steer angle<br />
and in all extreme positions.<br />
11. After having driven a short distance (approx. 50-100 m), the<br />
<strong>chains</strong> must be checked as to their perfect and centric fit. Retighten<br />
chain if required.<br />
12. Tires fitted with <strong>chains</strong> must not spin through.<br />
13. Repair of damaged <strong>chains</strong> or conversion to other sizes may<br />
only be carried out by qualified personnel. Use only original<br />
spare parts for repairs and conversion.<br />
14. Keep anti-skid <strong>chains</strong> in a dry place and protect them from<br />
chemical influences.
Specific Warnings Tire Protection Chains<br />
1. Tire protection <strong>chains</strong> must be fitted closely on the tire and<br />
may only be tightened with a ratchet pulley. Other modes of<br />
tightening, such as by means of a loading shovel or crane, are<br />
explicitly forbidden as the chain may break, thereby injuring<br />
personnel working on the automobile or causing other damage.<br />
2. Make sure after mounting that no part of the chain touches the<br />
vehicle or brushes against it – also when the shovel is lowered<br />
or in case of full floating axles.<br />
3. Do not drive faster than 30 km/h with tire protection <strong>chains</strong><br />
mounted.<br />
4. Check mounting and wear of the anti-skid <strong>chains</strong> after 200 operating<br />
hours, after emergency braking and/or similar incidents.<br />
Traction <strong>chains</strong><br />
13
Bestandteile<br />
<strong>pewag</strong> compact cross Kette 12 und 14 mm Nr. Bezeichnung<br />
7<br />
4<br />
8<br />
9<br />
10<br />
11<br />
5<br />
14 Traktionsketten<br />
12 13 14<br />
6<br />
2<br />
1<br />
3<br />
1 Laufkettenring<br />
2 Laufkettenglied<br />
3 Innenkette<br />
4 Außenkette<br />
5 Spannkette<br />
6 Schulterkette<br />
7 Spannkettenring<br />
8 Spannkettenanschlussstück<br />
9 Schließplatte<br />
10 Spannkettenring oval<br />
11 Endschäkel<br />
12 Endhaken<br />
13 Endhaken mit Sicherung<br />
14 Endring oval geplättet
<strong>pewag</strong> compact cross Kette 16, 18 und 21 mm Nr. Bezeichnung<br />
7<br />
4<br />
8<br />
9<br />
10<br />
11 12<br />
5<br />
6<br />
2<br />
1<br />
3<br />
1 Laufkettenring<br />
2 Laufkettenglied<br />
3 Innenkette<br />
4 Außenkette<br />
5 Spannkette<br />
6 Schulterkette<br />
7 Spannkettenring<br />
8 Spannkettenanschlussstück<br />
9 Schließplatte<br />
10 Spannkettenring oval<br />
11 Endschäkel<br />
12 Stiftschloss<br />
Traktionsketten<br />
15
Montage<br />
1<br />
2<br />
3<br />
Die Kette hinter dem Rad auslegen, die Verschleißseite nach<br />
oben, die Spannkette an der Außenseite des Rades. Die<br />
Montagekette um den Reifen legen, die Kette mit S-Haken<br />
einhängen.<br />
Langsam eine Radumdrehung fahren<br />
Stopp bei dieser Radstellung, die Montagekette öffnen, die<br />
S-Haken aushängen und die Montagekette entfernen.<br />
2 3<br />
16 Traktionsketten<br />
1
4<br />
5<br />
Einfachkette:<br />
Die Innenkette, die Außenkette und das Laufnetz mit Haken<br />
(bei 16, 18 und 21 mm mit Stiftschlössern) schließen. Bei<br />
Haken mit Sicherung den ovalen Endring um 90° drehen,<br />
an der Plättung einfädeln und wieder zurückdrehen. Auf die<br />
Farbmarkierung achten!<br />
Die Spannkette anziehen, bis die Kette dicht am Reifen<br />
anliegt. Die Spannkette mit der Schließplatte sichern. Das<br />
Spannkettenende mit dem Schäkel fixieren.<br />
Korrekte Spannung überprüfen: Die Spannkette muss sich ca.<br />
10 cm vom Reifen wegziehen lassen.<br />
Endhaken mit Sicherung Endhaken ohne Sicherung<br />
Stiftschloss<br />
4<br />
5<br />
Traktionsketten<br />
17
4a<br />
5a<br />
Zwillingskette:<br />
Die Innenkette, die Außenkette und das Laufnetz mit Haken<br />
(bei 16, 18 und 21 mm mit Stiftschlössern) schließen. Bei<br />
Haken mit Sicherung den ovalen Endring um 90° drehen, an<br />
der Plättung einfädeln und wieder zurückdrehen. Auf die Farbmarkierung<br />
achten! Die Mittelkette durch Einhängen in den<br />
Kuppelverbinder schließen und das Ende mit dem Schäkel<br />
fixieren.<br />
Korrekte Kettenspannung: Die Mittelkette bei neuen Reifen<br />
nicht zu tief zwischen die Reifen spannen (Mittelkettenring<br />
max. 7 cm unter der Reifenlauffläche). Bei wachsender Kette<br />
oder abgefahrenen Reifen kann die Passform durch Kürzen<br />
der Innenkette und leichtes Nachspannen der Mittelkette<br />
(tieferer Sitz) angepasst werden.<br />
18 Traktionsketten<br />
4a<br />
5a
Anpassen<br />
Die Passform der <strong>pewag</strong> compact cross Ketten ist für Reifen mit<br />
Norm-Maßen ausgelegt. Bei abgefahrenen Reifen kann durch Kürzen<br />
der Innenkette die Passform der Kette verbessert werden: Innenkettensegmente<br />
mit je einem Stiftschloss verkürzen, beginnend<br />
mit langen Segmenten. Freie Glieder können bei Bedarf autogen<br />
herausgetrennt werden. Achtung auf symmetrische Aufteilung!<br />
Wartung<br />
Sitz und Spannung der Kette regelmäßig überprüfen.<br />
Nach einer gewissen Einsatzzeit wird die Kette locker; in diesem<br />
Fall muss sie nachgespannt werden.<br />
Reparatur<br />
a) Stiftschloss, Teil Nr. 37/39<br />
b) Schließ-/Reparaturring, Teil Nr. 31<br />
Demontage und Lagerung<br />
• Den Reifen so in Position bringen, dass sich die Verschlussstelle<br />
am unteren Teil des Reifens befindet.<br />
• Den Schäkel am Ende der Spannkette öffnen.<br />
• Das Spannkettenende zurückziehen.<br />
• Die Schließplatte öffnen und die Spannkette lockern.<br />
• Die Außenkette, das Laufnetz und die Innenkette öffnen<br />
• Langsam vor- oder zurückfahren, bis die Kette vom Reifen fällt.<br />
• Vor dem Einlagern die Ketten waschen und trocknen.<br />
Traktionsketten<br />
19
Ersatzteile<br />
Nr. 31/31 RS* Set Schließ-/Reparaturring<br />
bestehend aus:<br />
Ring, Verschlussteil, Schwerspannstift<br />
Nr. 37/39 Set Stiftschloss (ersetzt Glied)<br />
bestehend aus:<br />
Schlossteil, Spiralspannstift<br />
20 Traktionsketten<br />
Dimensionen<br />
[mm]<br />
12 14 16 18 21<br />
Teil-Nr. 31 d 31 e 31 f 31 g 31 h<br />
Einzelteile Einzelkomponenten auf Anfrage erhältlich<br />
Dimensionen<br />
[mm]<br />
12 14 16 18 21<br />
Teil-Nr. 39 d 37 e 37 f 37 f 37 h<br />
Einzelteile Einzelkomponenten auf Anfrage erhältlich
Nr. 24 Endschäkel Teil-Nr. Nutzlast [kg] für Spannkette Ø [mm]<br />
Montagewerkzeuge<br />
Für die Montage der <strong>pewag</strong> compact cross Ketten werden Zange und<br />
Hammer sowie ein Ratschenzug zum Spannen benötigt.<br />
Nr. 49 Ratschenzug<br />
24 d 400 8/10<br />
24 e 630 10/13<br />
24 f 1000 13/16<br />
24 g 1600 16<br />
Traktionsketten<br />
21
Warn- und Gebrauchshinweise<br />
Die Nichteinhaltung dieser Warn- und Gebrauchshinweise kann zu<br />
schwerwiegenden Unfällen sowie beträchtlichen Personen- und<br />
Sachschäden führen!<br />
Es kann keine Haftung für Schäden übernommen werden, wenn<br />
diese Hinweise nicht vollständig befolgt und eingehalten werden.<br />
Durch Ingebrauchnahme der Gleitschutzketten erklären Sie, dass<br />
Sie diese Warnhinweise und die Folgen der Nichteinhaltung vollinhaltlich<br />
zur Kenntnis genommen und anerkannt haben. Im Falle<br />
der Nichteinhaltung verzichten Sie auf jeglichen Anspruch gegen<br />
Hersteller, Importeur und Händler.<br />
1. Das Fahrverhalten des Kraftfahrzeuges kann beim Gebrauch<br />
von Gleitschutzketten beeinflusst werden (siehe auch Betriebsanleitung<br />
des Kraftfahrzeuges).<br />
2. Gleitschutzketten dürfen nur verwendet werden, wenn das<br />
Fahrzeug und die Bereifung samt Felge vom jeweiligen Hersteller<br />
für die Benutzung von Gleitschutzketten freigegeben ist.<br />
3. Gleitschutzketten dürfen nur zum ordnungsgemäßen Montieren<br />
und Fahren auf geeignetem Untergrund, nicht aber zum<br />
Ziehen, Heben oder sonst zweckentfremdet verwendet werden.<br />
4. Die Montageanleitung ist sowohl bei Montage als auch bei<br />
Demontage zur Gänze genau einzuhalten.<br />
5. Bereits gebrauchte Ketten sind vor jeder Montage visuell zu<br />
prüfen. Bei Beschädigungen oder Bruchstellen darf die Kette<br />
keinesfalls benutzt werden. Insbesondere darf die Gleitschutz-<br />
22 Traktionsketten<br />
kette nicht mehr montiert werden, wenn an irgendeiner noch so<br />
kleinen Stelle mehr als die Hälfte der Drahtstärke abgenützt ist.<br />
6. Die Montage hat auf ebenem Gelände am stehenden und<br />
entsprechend der Betriebsanleitung gesicherten Kraftfahrzeug<br />
zu erfolgen. Die Ketten müssen pro Achse immer paarweise<br />
montiert werden.<br />
7. Achtung auf das unter Umständen erhebliche Eigengewicht<br />
der Gleitschutzkette. Unsachgemäße Handhabung kann zu<br />
Verletzungen führen.<br />
8. Gleitschutzketten dürfen nur auf Reifen montiert werden, deren<br />
Größe auf der Dimensionsetikette an der Kettenverpackung<br />
angeführt sind. Es dürfen nur Neureifen verwendet werden, bei<br />
runderneuerten Reifen muss die Kettenpassform von einer qualifizierten<br />
Fachkraft überprüft werden. Ketten mit ungeeigneter<br />
Passform sind nicht zu verwenden. Der vom Fahrzeughersteller<br />
vorgegebene Reifenluftdruck ist einzuhalten. Es ist nicht gestattet,<br />
den Reifenluftdruck vor der Montage zu reduzieren und nach<br />
der Montage zu erhöhen, da dies zu Schäden führen kann.<br />
9. Vor Inbetriebnahme des Fahrzeuges ist die ordnungsgemäße<br />
Montage der Ketten zu überprüfen.<br />
10. Nach der Montage ist sicherzustellen, dass auch bei vollem<br />
Lenkeinschlag und in allen Extremstellungen kein Teil der Kette<br />
an Fahrzeugteilen streift oder diese sonst berührt.<br />
11. Nach der ersten kurzen Fahrstrecke (ca. 50-100 m) sind die<br />
Ketten auf einwandfreien zentrischen Sitz zu prüfen und, falls<br />
notwendig, nachzuspannen.
12. Die mit Ketten versehenen Räder dürfen nicht durchdrehen.<br />
13. Reparaturen von Schäden an der Kette oder Umbau auf eine<br />
andere Größe dürfen nur von qualifiziertem Fachpersonal<br />
durchgeführt werden. Für Reparaturen und Umbau dürfen nur<br />
Original-Ersatzteile verwendet werden.<br />
14. Die Gleitschutzketten dürfen nicht feucht gelagert werden und<br />
sind vor chemischen Einflüssen zu schützen.<br />
Spezielle Warnhinweise für Reifenschutzketten<br />
1. Reifenschutzketten müssen dicht am Reifen anliegen und<br />
dürfen nur mit einem Ratschenzug gespannt werden. Andere<br />
Spannarten, wie mit Hilfe von Laderschaufel oder Kran, sind<br />
ausdrücklich verboten, da die Kette brechen und dadurch das<br />
Montagepersonal verletzen oder andere Schäden hervorrufen<br />
kann.<br />
2. Nach der Montage ist auch sicherzustellen, dass zB bei gesenkter<br />
Schaufel oder wegen allfälliger Pendelachsen kein Teil<br />
der Kette an Fahrzeugteilen streift oder diese sonst berührt.<br />
3. Mit montierten Reifenschutzketten darf nicht schneller als 30<br />
km/h gefahren werden.<br />
4. Nach mindestens jeweils 200 Betriebsstunden, nach einer<br />
Notbremsung oder ähnlichem muss der Montagezustand und<br />
Verschleiß der Gleitschutzketten geprüft werden.<br />
Traktionsketten<br />
23
<strong>pewag</strong> austria GmbH<br />
A-8020 Graz, Bahnhofgürtel 59, Phone: +43 (0) 316 / 60 70-0, Fax: +43 (0) 316 / 60 70-259<br />
saleinfo@<strong>pewag</strong>.com, www.<strong>pewag</strong>.com MA/00486<br />
24 Traktionsketten


