Bauanleitung
Bauanleitung
Bauanleitung

Erfolgreiche ePaper selbst erstellen
Machen Sie aus Ihren PDF Publikationen ein blätterbares Flipbook mit unserer einzigartigen Google optimierten e-Paper Software.
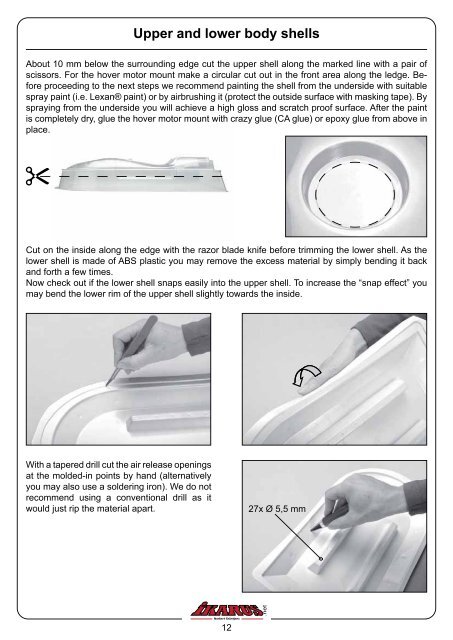
Upper and lower body shellsAbout 10 mm below the surrounding edge cut the upper shell along the marked line with a pair ofscissors. For the hover motor mount make a circular cut out in the front area along the ledge. Beforeproceeding to the next steps we recommend painting the shell from the underside with suitablespray paint (i.e. Lexan® paint) or by airbrushing it (protect the outside surface with masking tape). Byspraying from the underside you will achieve a high gloss and scratch proof surface. After the paintis completely dry, glue the hover motor mount with crazy glue (CA glue) or epoxy glue from above inplace.Cut on the inside along the edge with the razor blade knife before trimming the lower shell. As thelower shell is made of ABS plastic you may remove the excess material by simply bending it backand forth a few times.Now check out if the lower shell snaps easily into the upper shell. To increase the “snap effect” youmay bend the lower rim of the upper shell slightly towards the inside.With a tapered drill cut the air release openingsat the molded-in points by hand (alternativelyyou may also use a soldering iron). We do notrecommend using a conventional drill as itwould just rip the material apart.27x Ø 5,5 mm12